2. Configuration
2.1 Quotation Template
Before creating a new
subscription, you can use the
Subscription module to create
suitable quotation templates
for your customers. New
subscriptions are created
using the Odoo 18
subscription plans as a
model. Customers can easily
add new subscriptions with
these plans. To build
templates for subscriptions,
select the Quotation Template
option from the Configuration
menu.
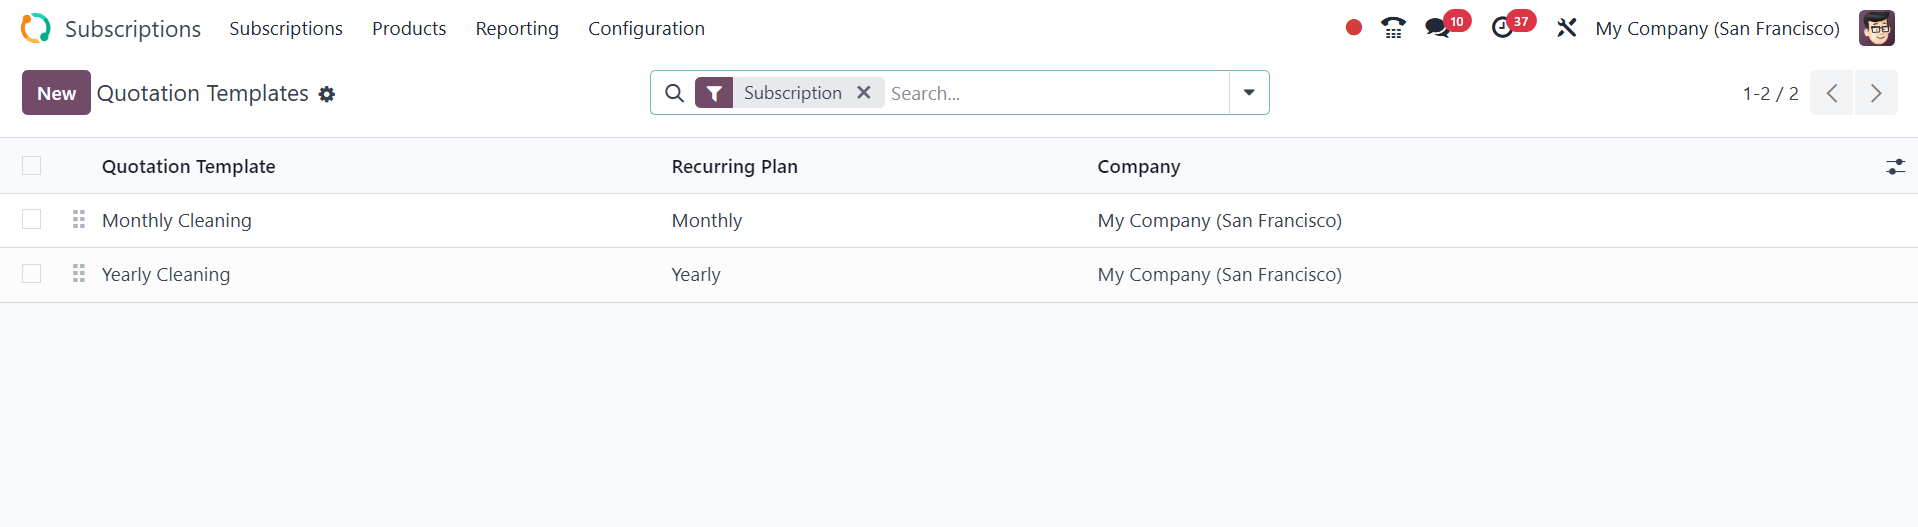
The platform will show a few
predefined templates, as
shown below. The list view
includes the Company,
Recurrence, and Quotation
Template. Click the New
button to create a new
quotation template.
You can use the supplied area to
enter a suitable title for
the Quotation Template. The
user can enter the number of
days to be used in
determining the quotation's
validity date in the
Quotation Expires After area.
As a result, Odoo18 will
automatically set the
expiration date of the
quotations created using this
plan.
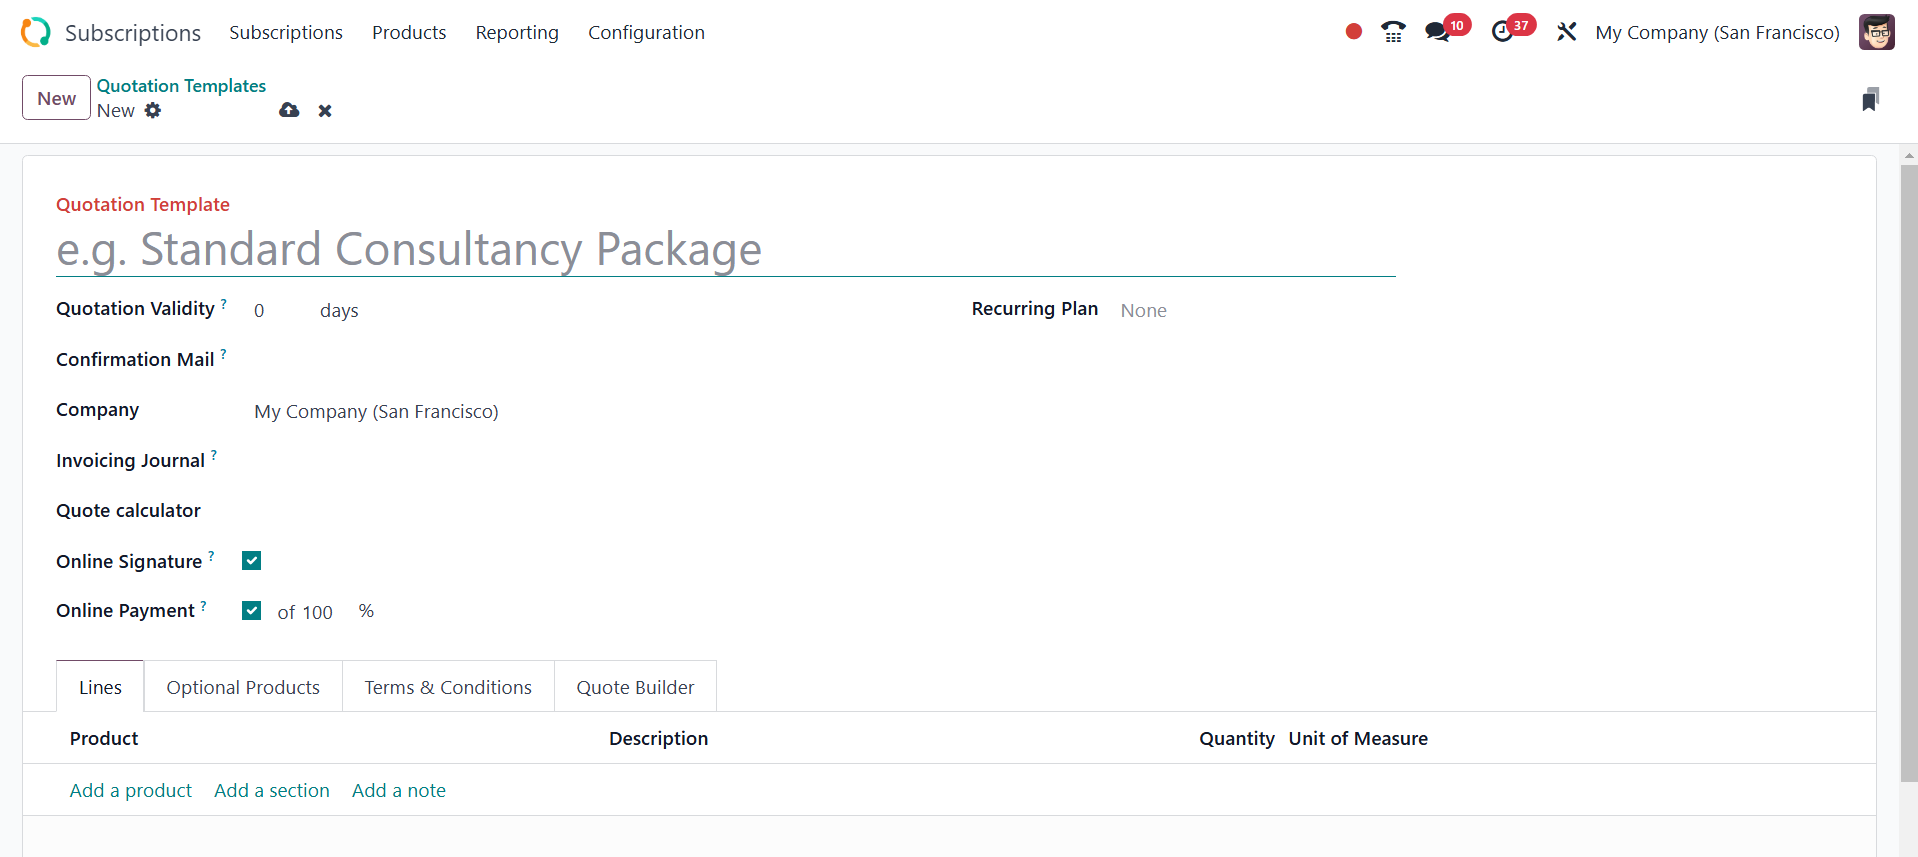
By turning on the Signature and
Payment options from the
Online Confirmation field,
Odoo allows you to ask the
customer to sign and pay
online so that the purchase
is automatically confirmed.
You can add an email template
under the Confirmation Mail
section. This email will be
sent to the customer once
their order has been
confirmed. The Prepayment
Amount is the portion of the
total that needs to be paid
in order to validate the
quotation. You can enter the
company's name in the
relevant field.
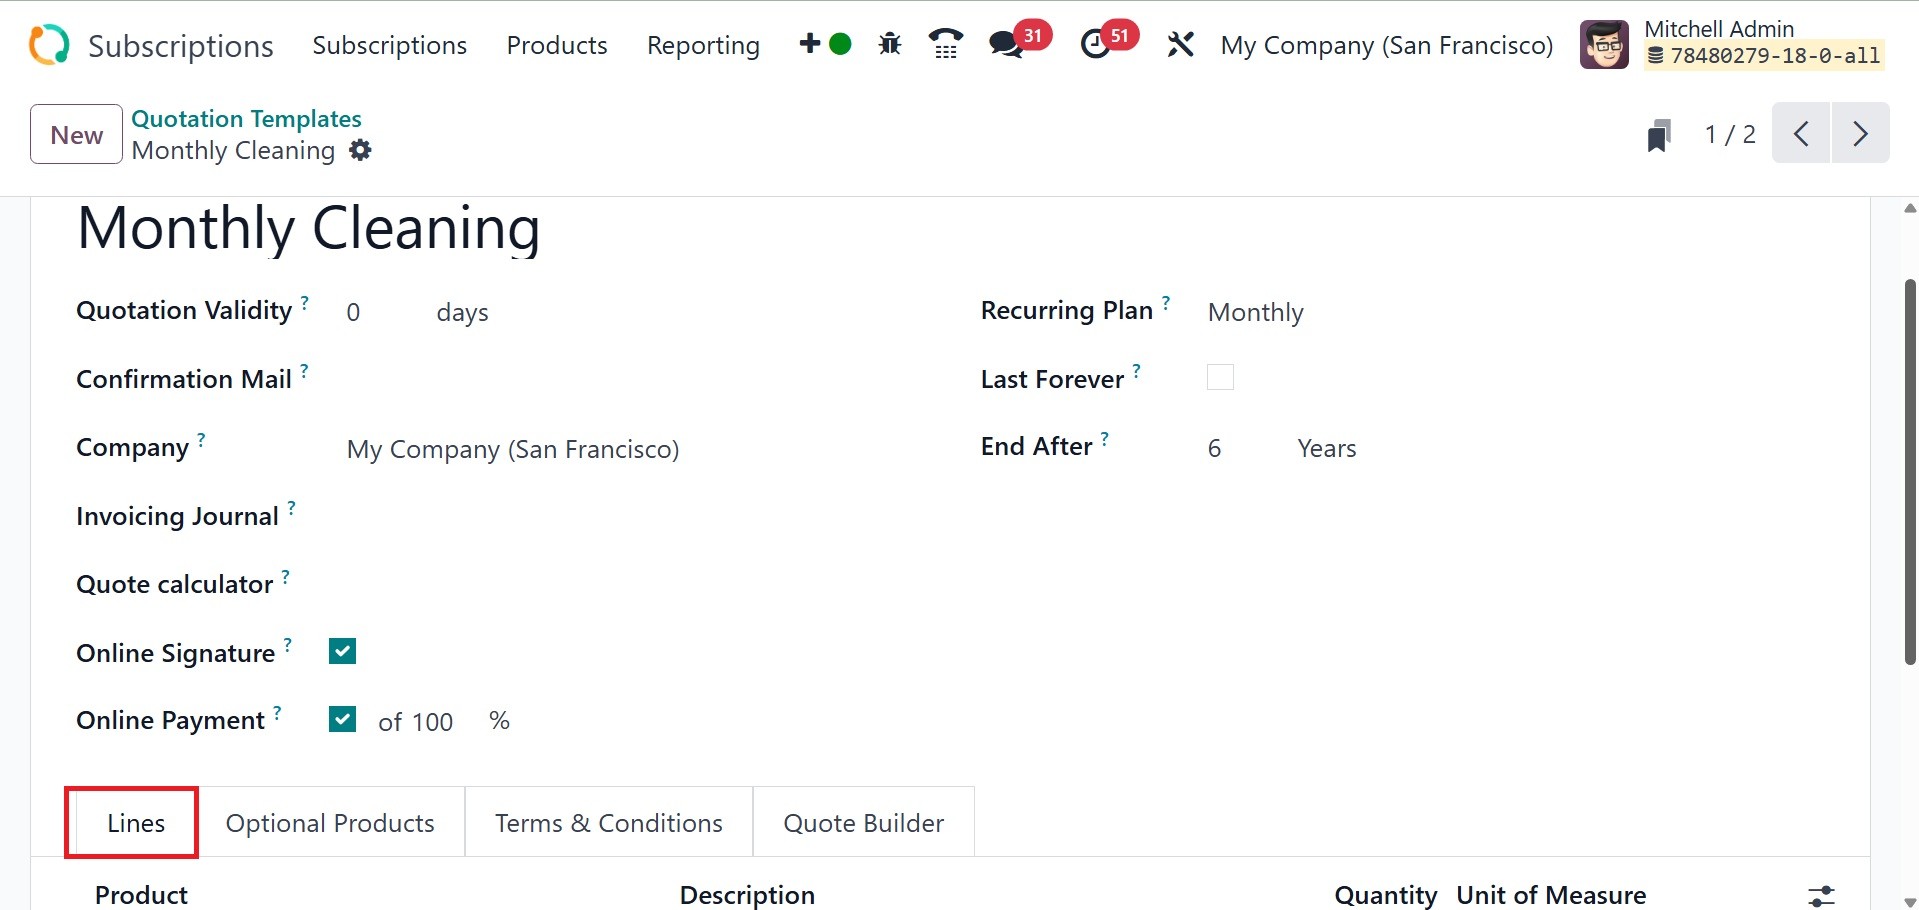
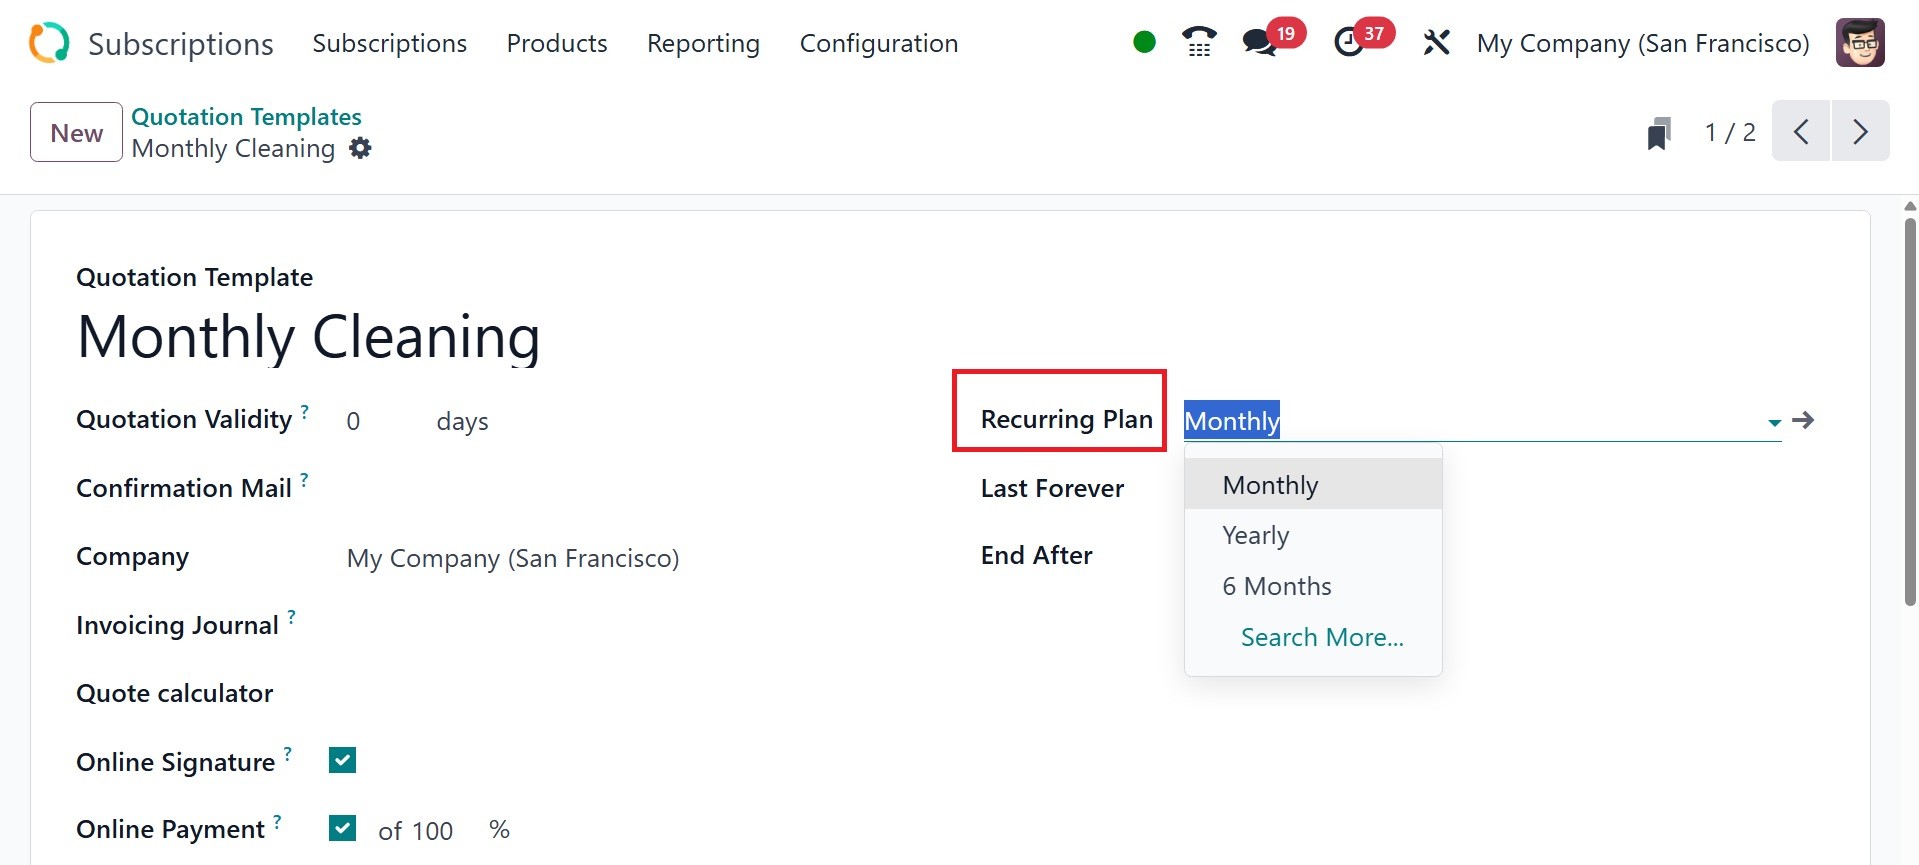
Make the right decision regarding
the recurrence strategies.
You will be presented with
more fields after choosing
the Recurring Plan. The plan
is infinite because Last
Forever is the choice for the
duration setting. Adding a
Recurring Plan to a quotation
template will change it to a
subscription template.
You can talk about each
subscription product
separately by using the Add a
Product option beneath the
Lines tab. These will be
added to the Order Line when
you select this subscription
plan in a quotation.
By adding a section using Add
Section, the products can be
recognized as separate
sections.
The Recurring Plan option in the
Quotation Template's
Recurring Plan field
associates the template with
a particular subscription
plan that is specified in the
Subscriptions module. This
establishes the time frame
for recurrence (monthly,
yearly, etc.)
After that, you can use the Add
Notes function to add extra
notes.

The Optional Products page allows
you to add additional items
that are covered by the
subscription plan.
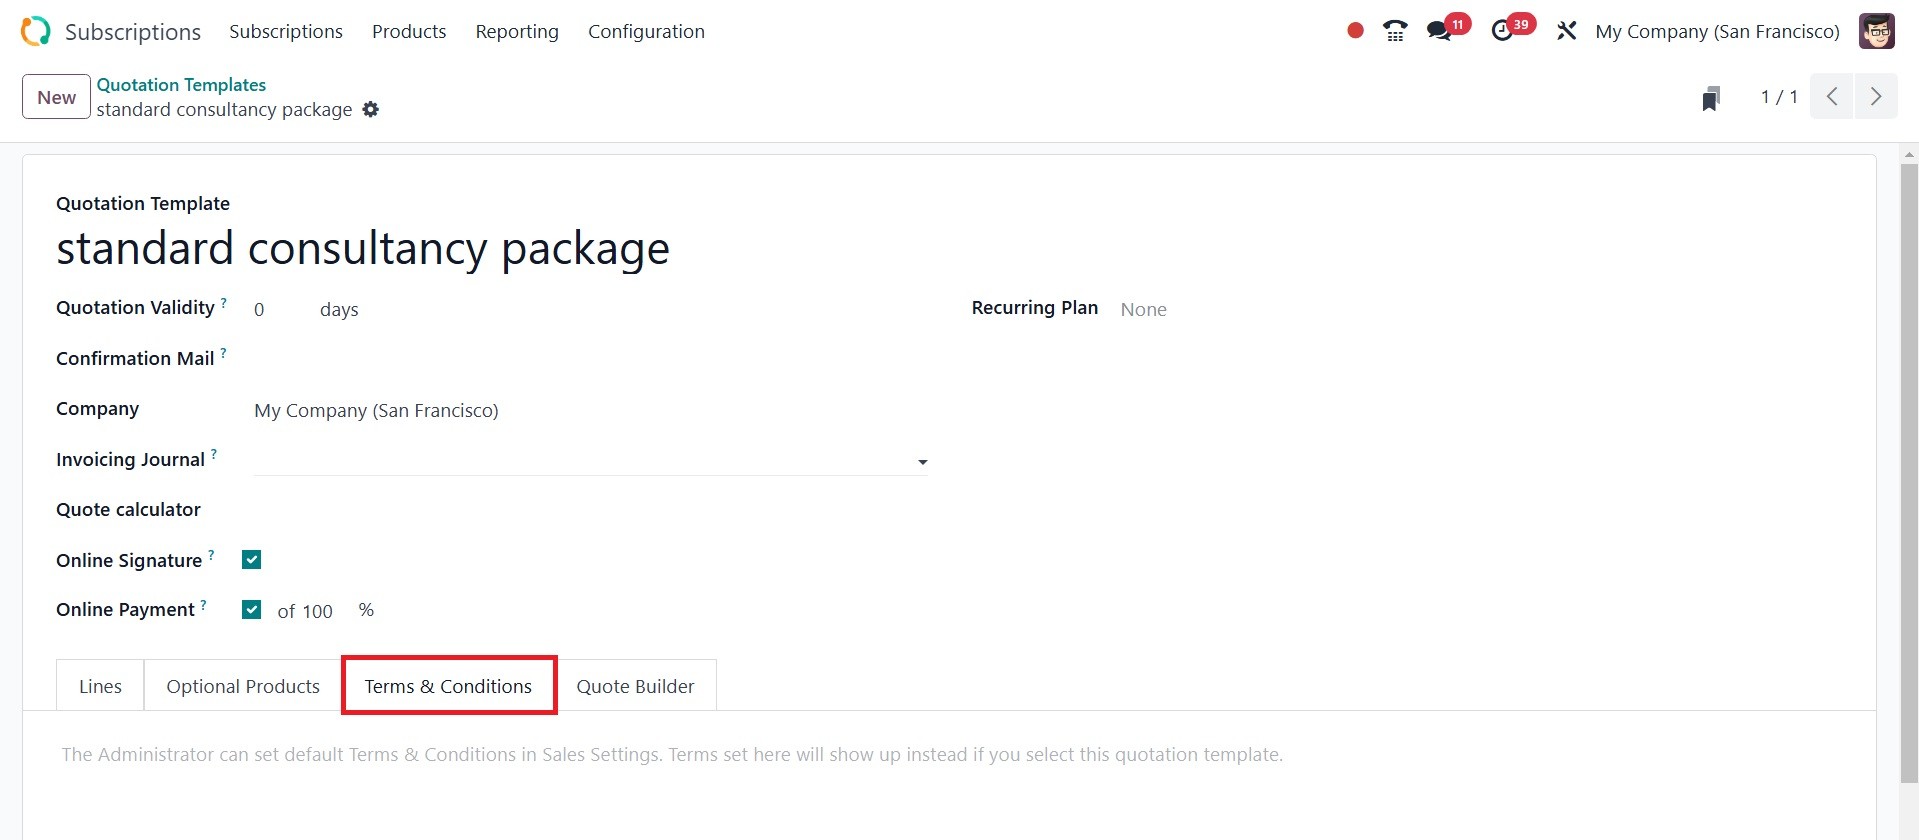
You can select the Terms &
Conditions for the
subscription plan from the
tab shown in the screenshot
above.
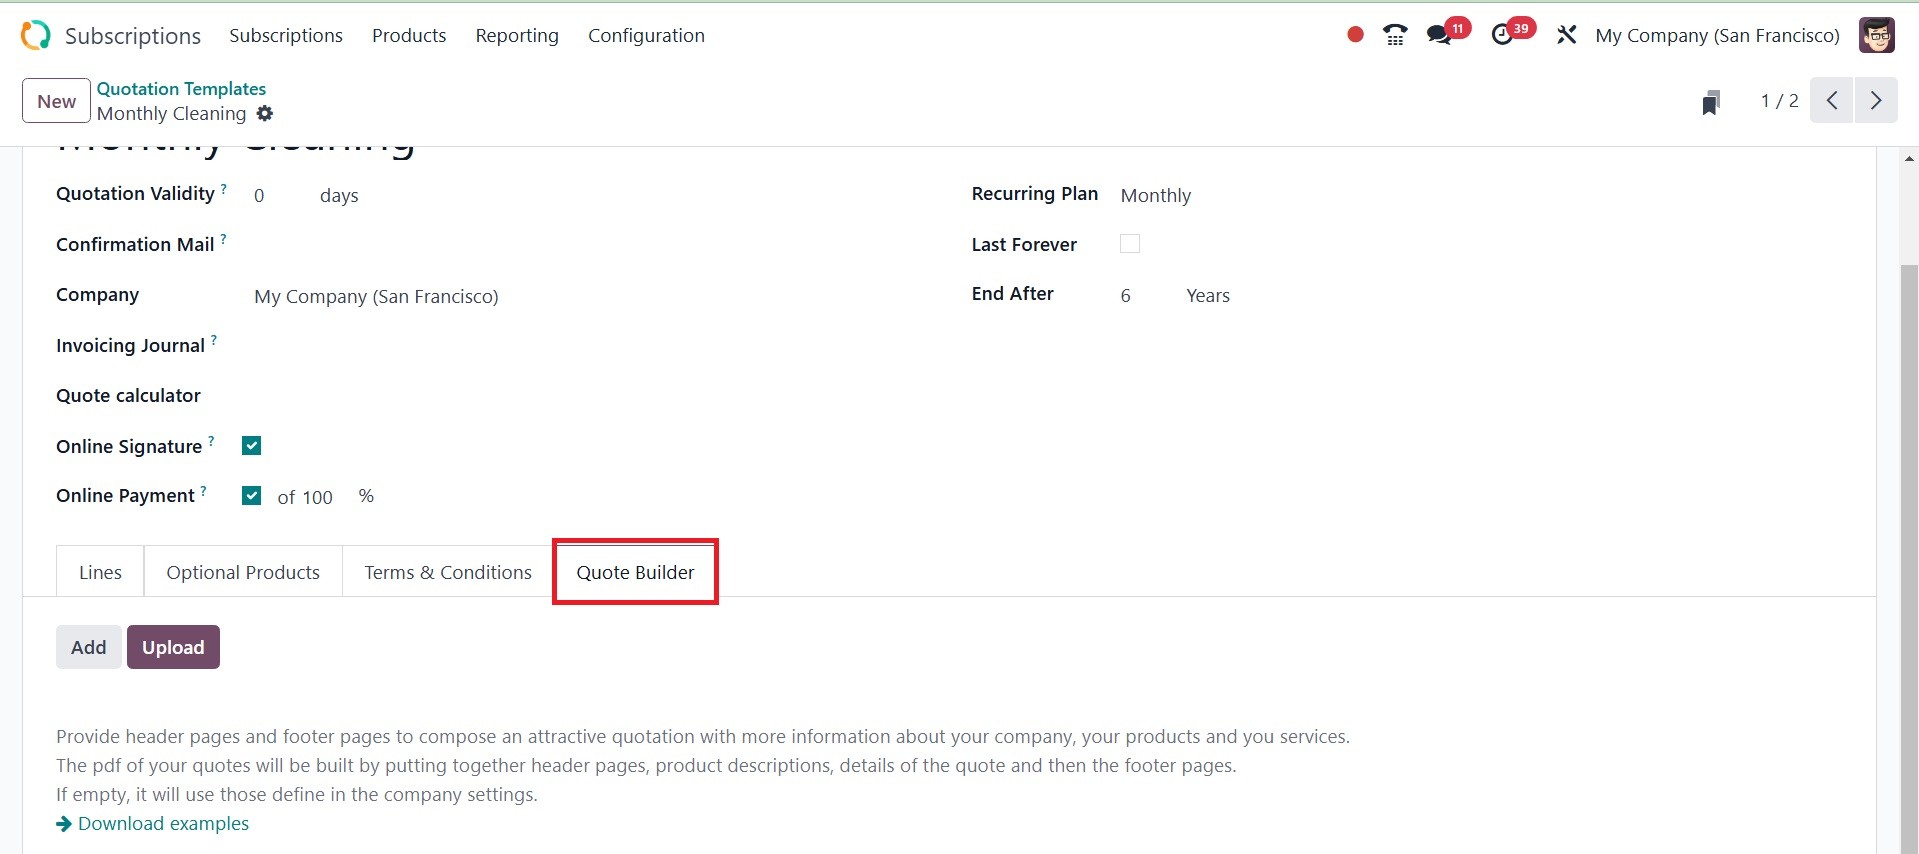
The quote builder tab is designed
to streamline and customize
the quoting process for
subscription-based services
or products.
2.2 Recurring Plan
You can configure the
subscription's recurrence
plans from the module's
Configuration menu. A pop-up
like the one below shows up
when the Recurrence Periods
option is chosen.
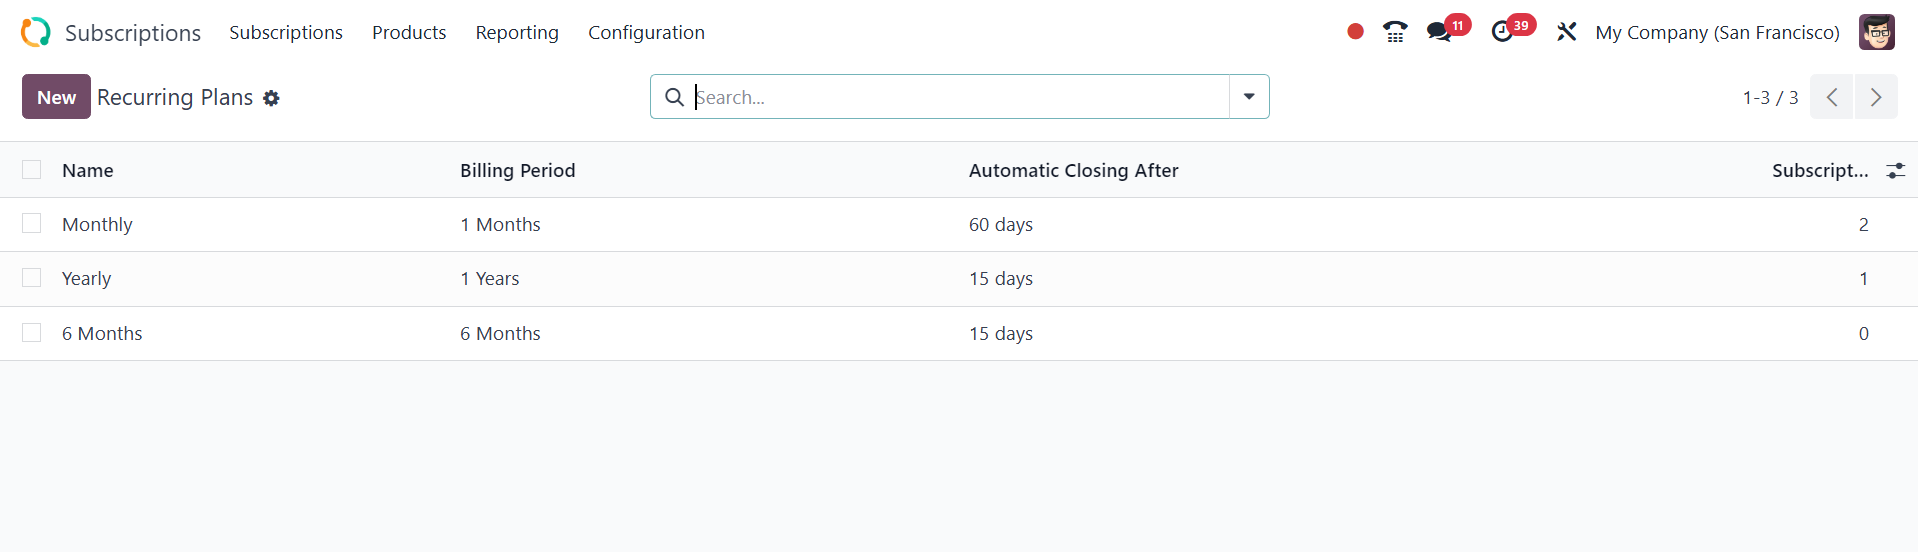
This is the list of available
recurrence periods from the
database. A new recurrence
period can be established by
clicking the New button.
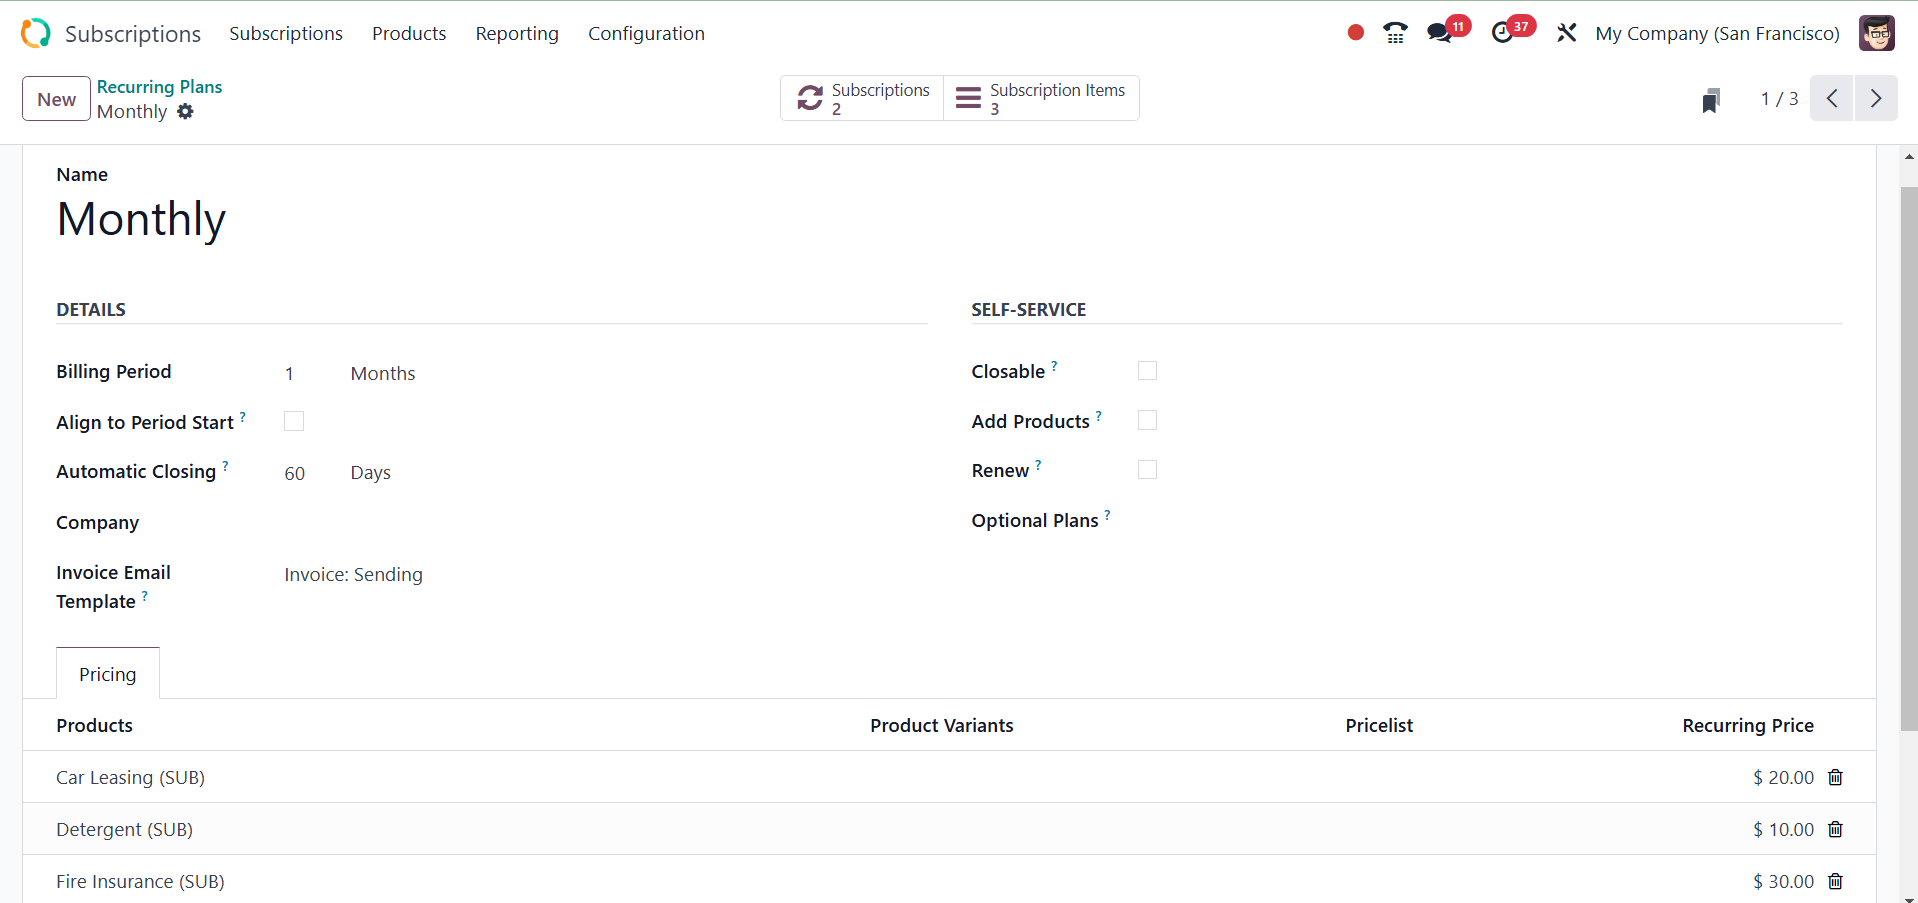
Details such as Billing Period,
Automatic Closing, Company,
and Invoice Email Template
are displayed in the
designated section.
For subscriptions that use a
recurring plan, the Billing
Period regulates the amount
of time that passes between
each periodic invoice.
Instead of starting from the
subscription date, the "Align
to Period Start" checkbox
establishes whether the
invoicing period should be
synchronized with a specific
calendar period (such as the
first of the month).
Upgrade your subscription to
include Automatic Closing
Days. Any unpaid memberships
that are past due by the
designated number of days
will be automatically closed
by the subscription
expiration scheduled action.
One can use the Invoice Email
Template to automatically
send invoice emails.
If the consumer wants to
terminate the subscription,
turn on Closable. That is, a
recurring plan's "Closable"
option establishes whether a
user or customer can manually
terminate a subscription
under that plan. Customers
will have the ability to
close through the customer
portal.
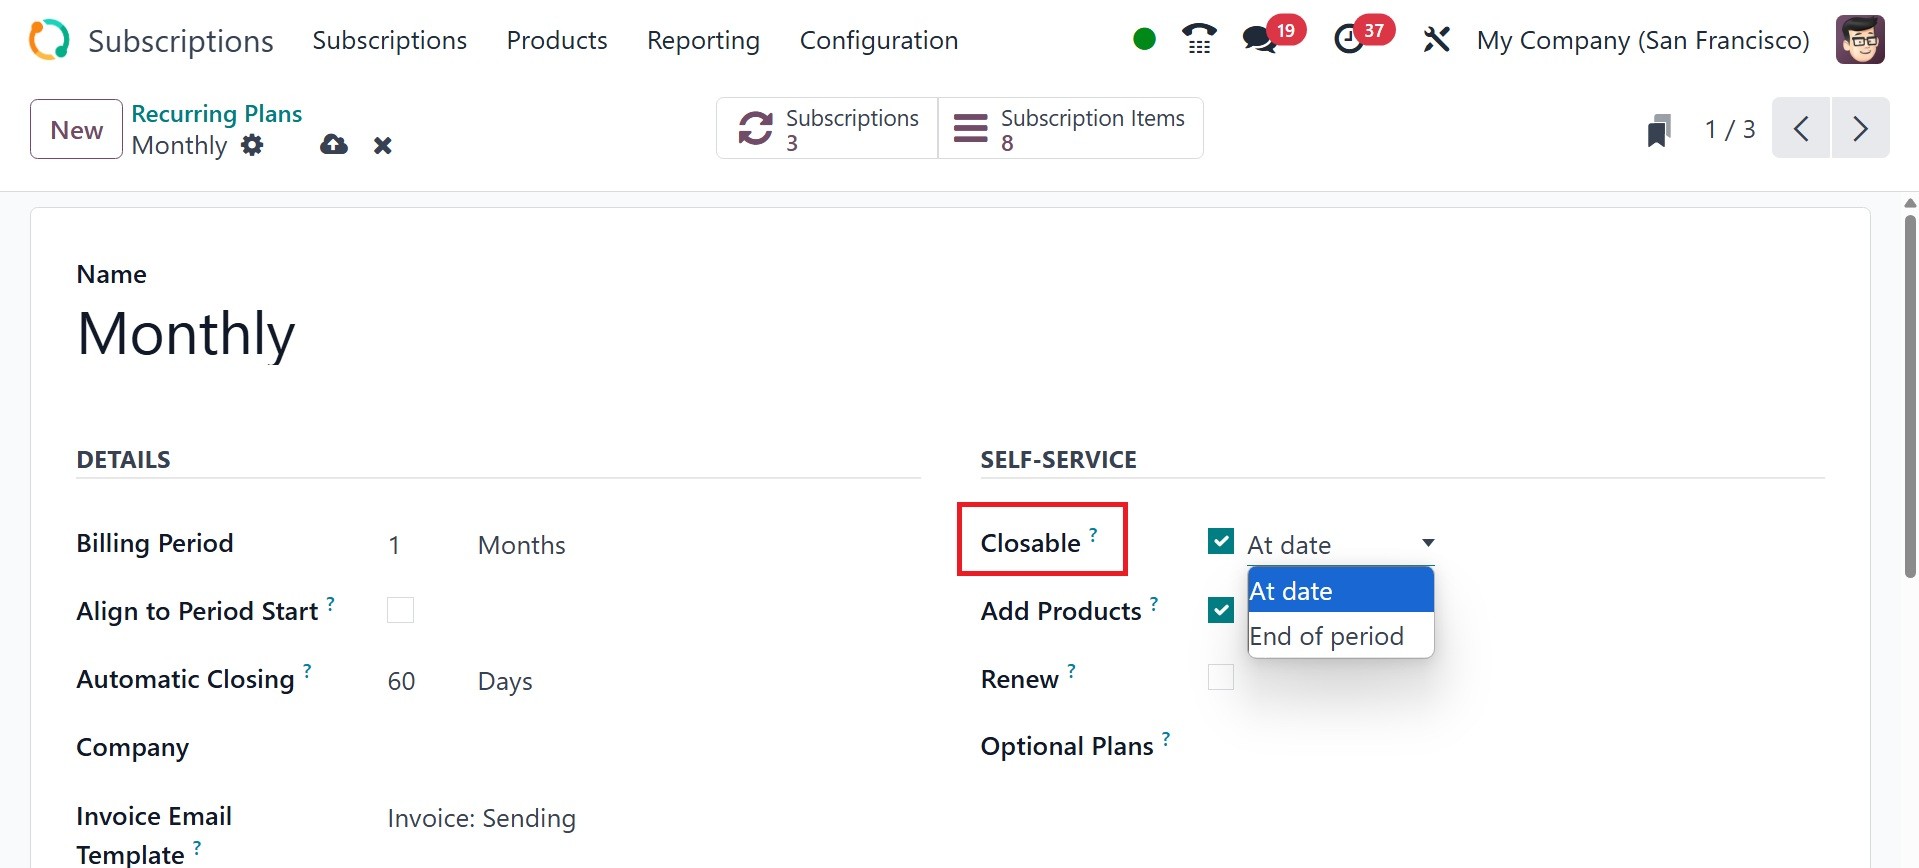
It can be closed on the date or
at the end of the period
accordingly.
Customers can alter the number of
products included in their
subscription by customizing
an upsell quotation using Add
Products. You can also use
the items indicated as
optional to alter the quotes.
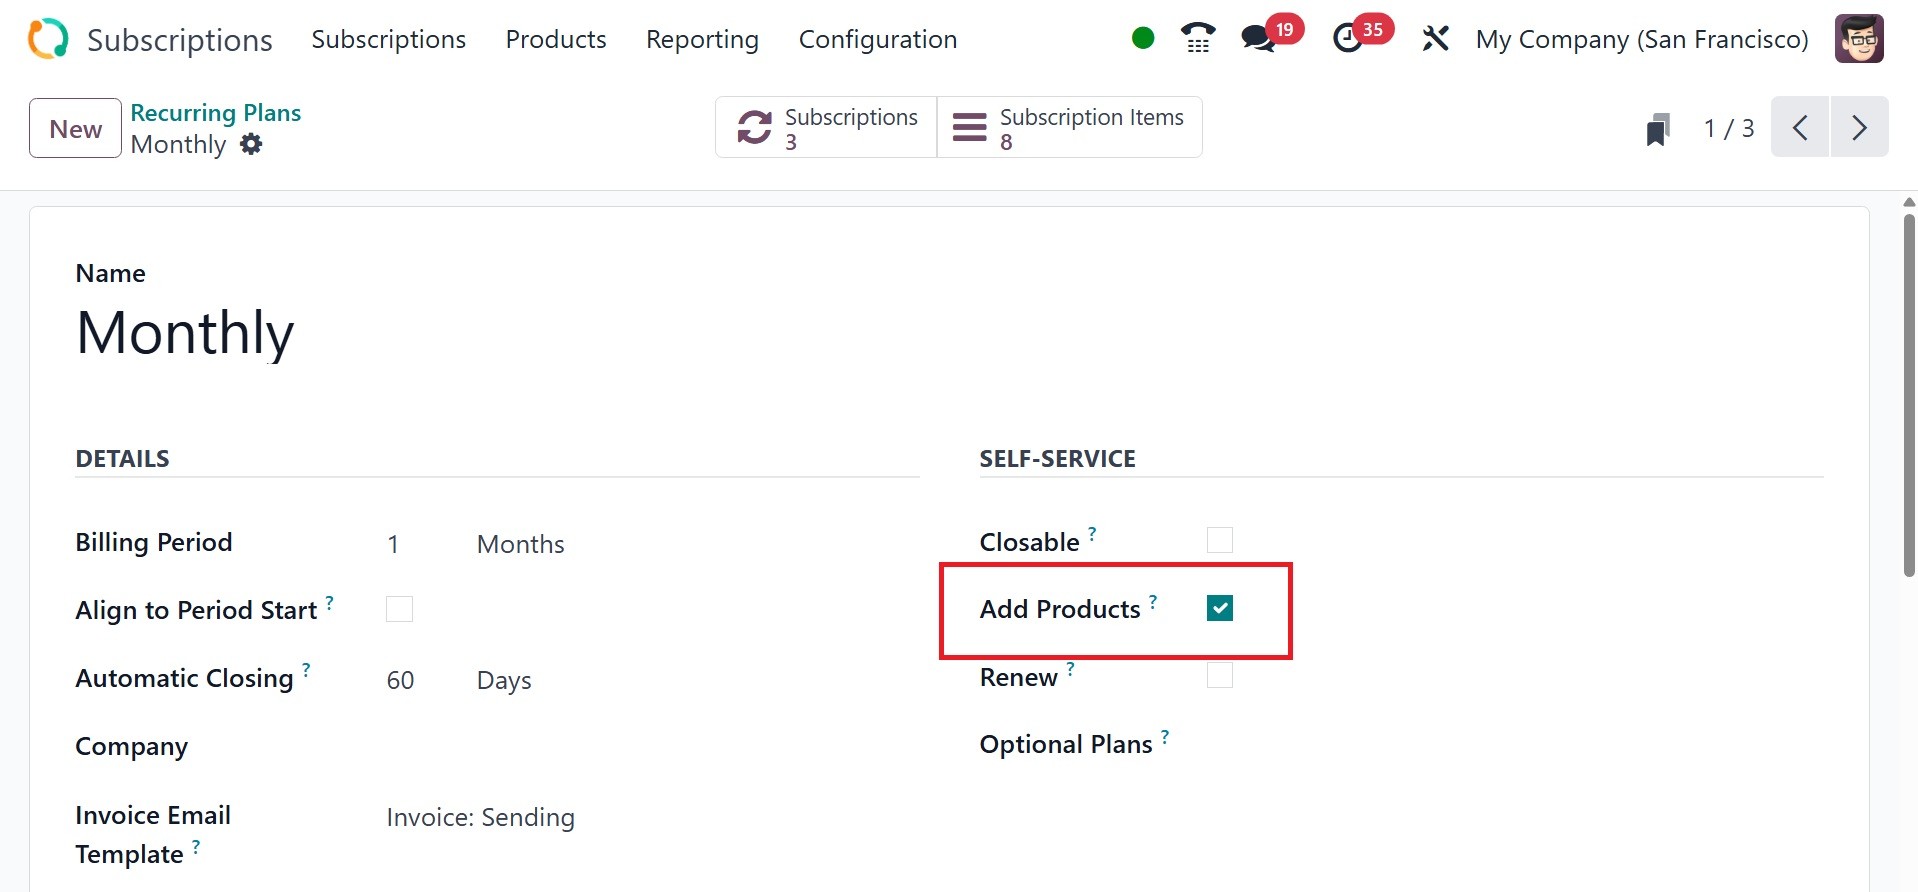
The Renew option allows customers
to create a renewal quote for
their subscription.
When customers use Optional Plans
to seek a new subscription or
renewal, they can select from
a variety of plans.
The Price tab allows you to add
price rules. The product,
product variations,
pricelist, and recurring
prices are all shown on the
pricing tab.
2.3 Automated Rules
With Odoo 18, you can use the
Automated Rules functionality
to remind your customers to
purchase from you. This
feature in the Subscription
module allows you to alert
clients when a payment is
past due or when their
subscriptions are about to
expire. From the
Configuration menu, choose
Automated Rules.
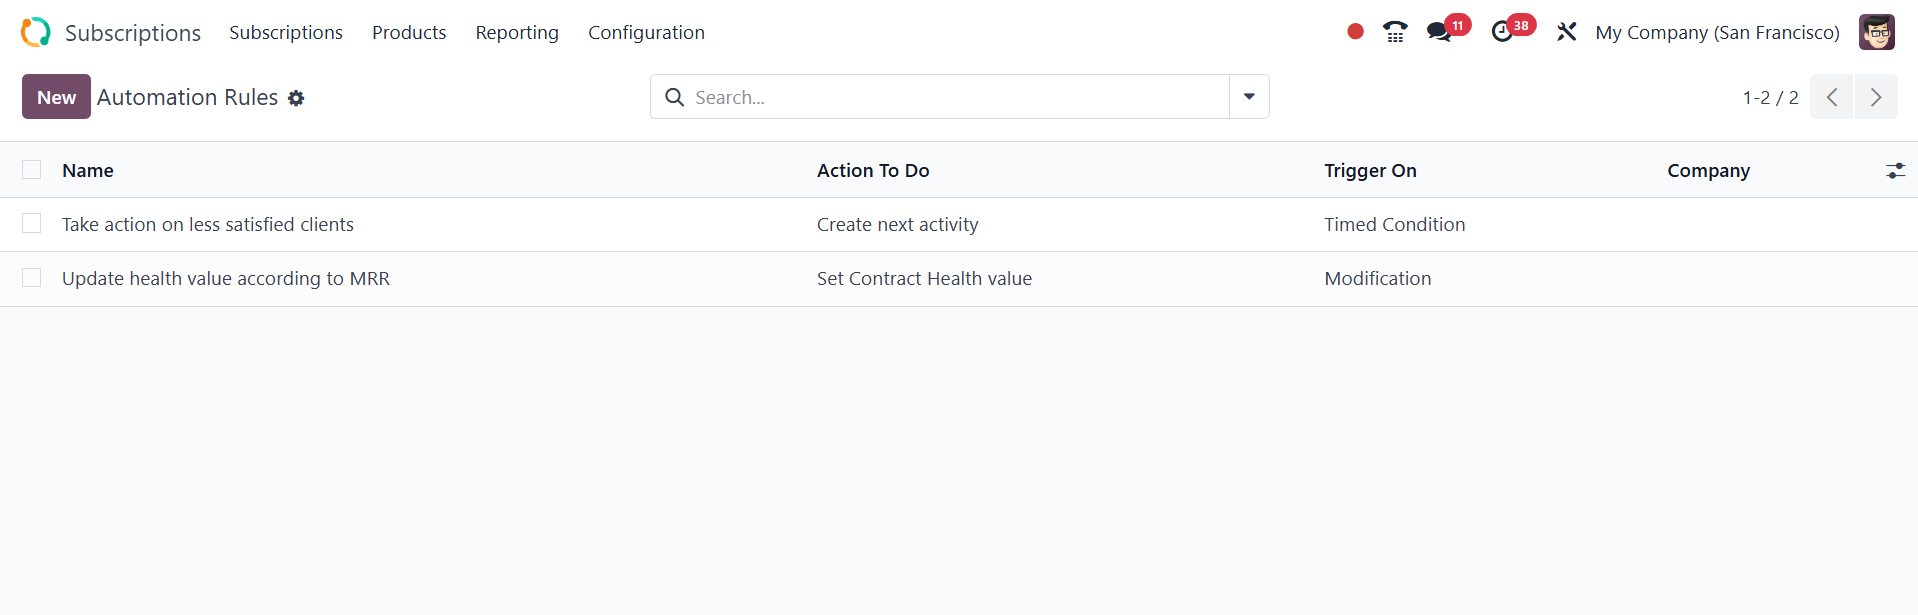
As seen below, Odoo18 will open a
new window where you can see
the list of previously
configured Automated Rules.
The list preview includes the
name, action to take, trigger
on, and company. Click the
New button to create a new
alert.
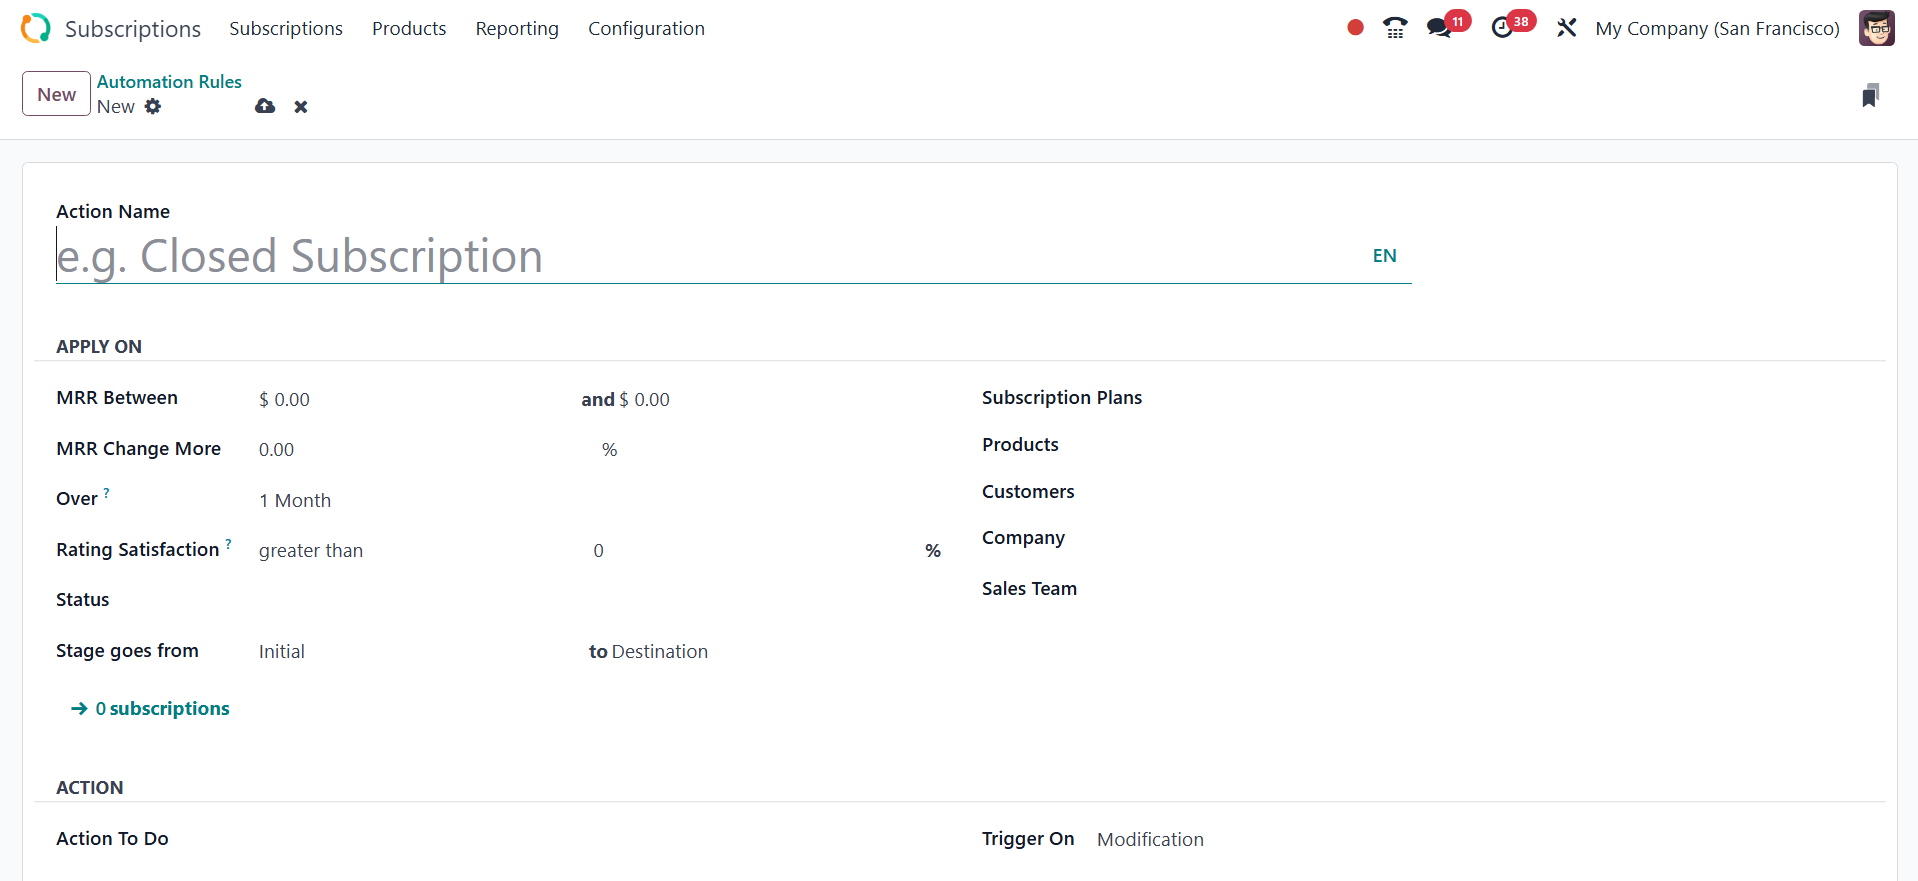
The Action Name field in the form
view is where you may name
the action. The Apply On tab
allows you to define action
criteria. Conditions can be
put on the MRR Between, MRR
Change More, and Period Over
that are used to calculate
the KPI. Alarms might be
triggered by the Rating
Satisfaction. Regulations may
exceed or fall short of the
designated proportion.
Likewise, when a stage
changes, notifications can be
triggered. The right stages
can be chosen thanks to the
field's stages.
If you want to set up an alert
for a specific Subscription
Plan, Product, Customer,
Company, or Sales Team, you
may enter information in the
appropriate fields.
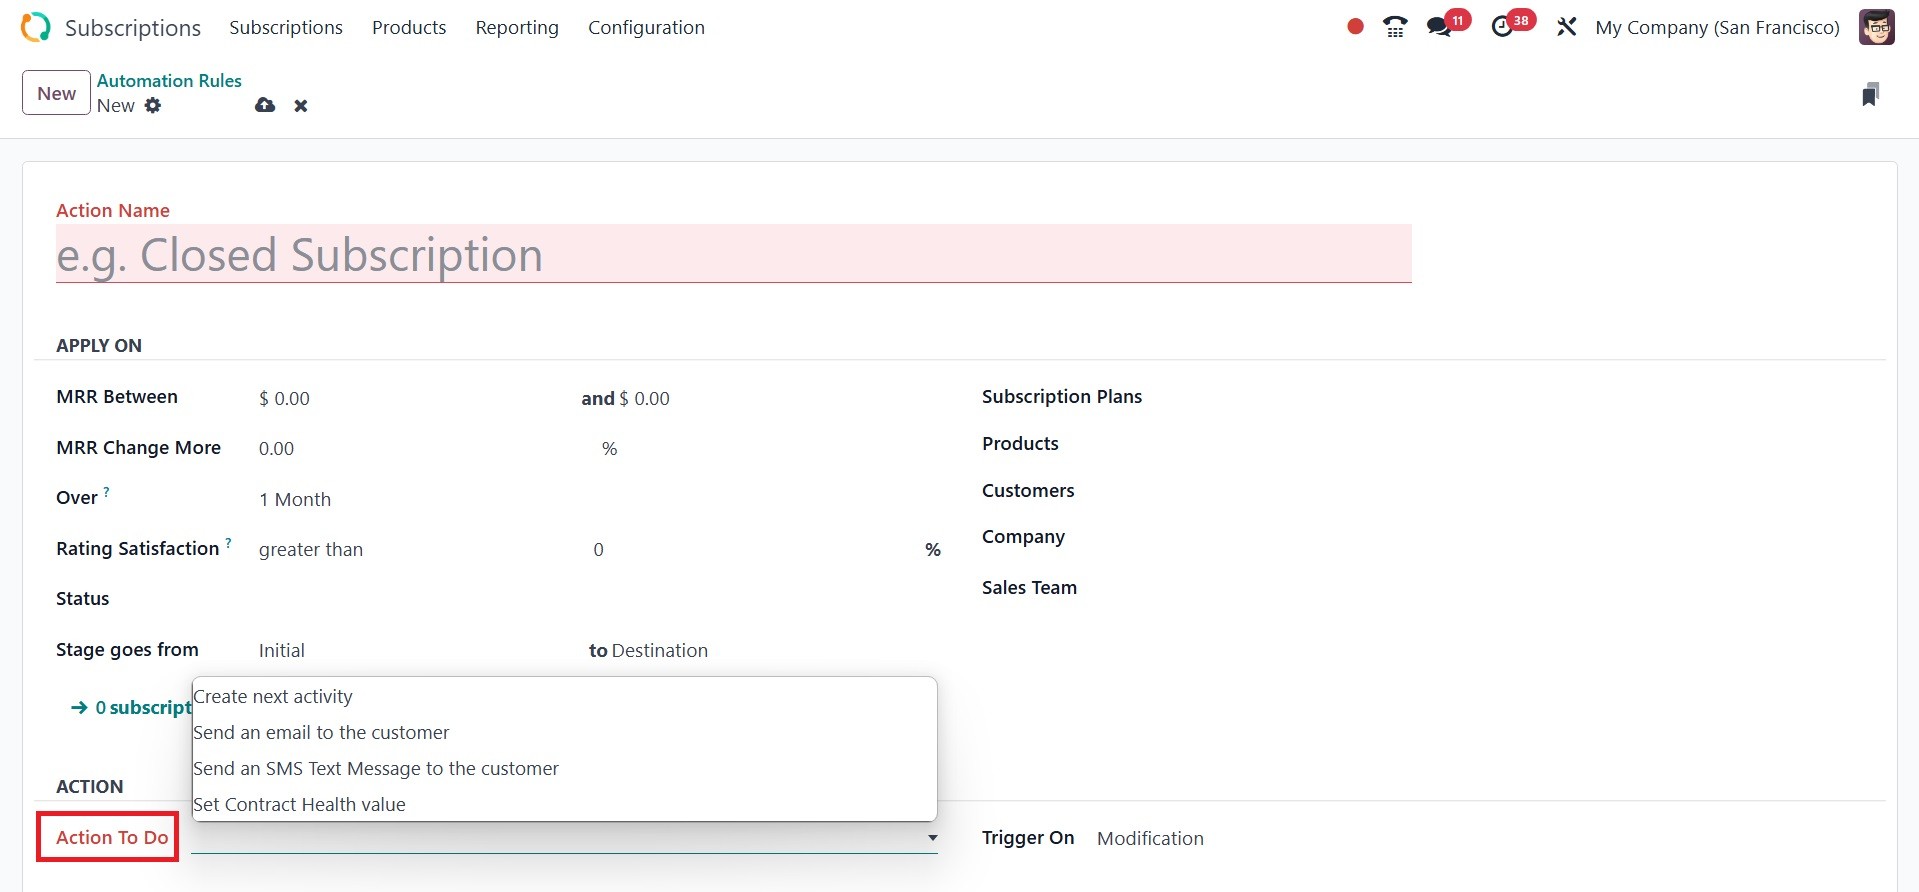
Now, you can use the Actions tab
to specify an action for this
alert. In a phase of the
subscription, the next action
can be created, and there are
more options. Decide to
renew, send the customer an
email, or an SMS text
message.
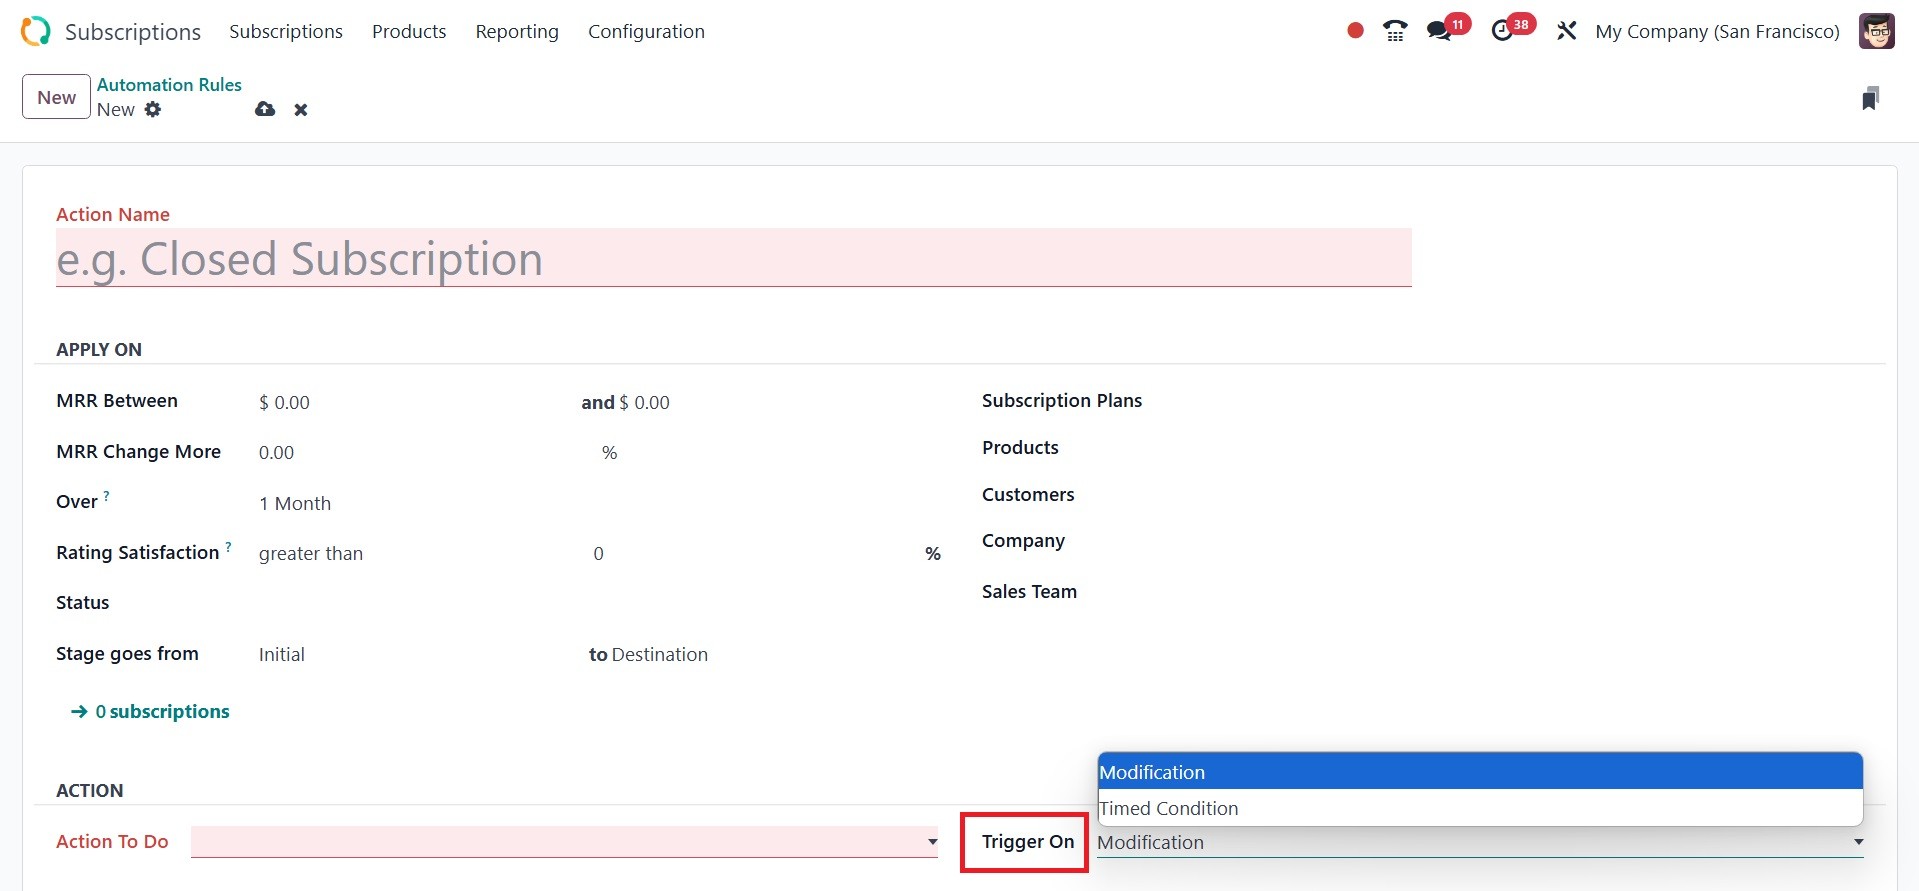
A timed condition or a modified
condition can initiate this
activity. In the Note area,
you can include internal
comments regarding this
warning.
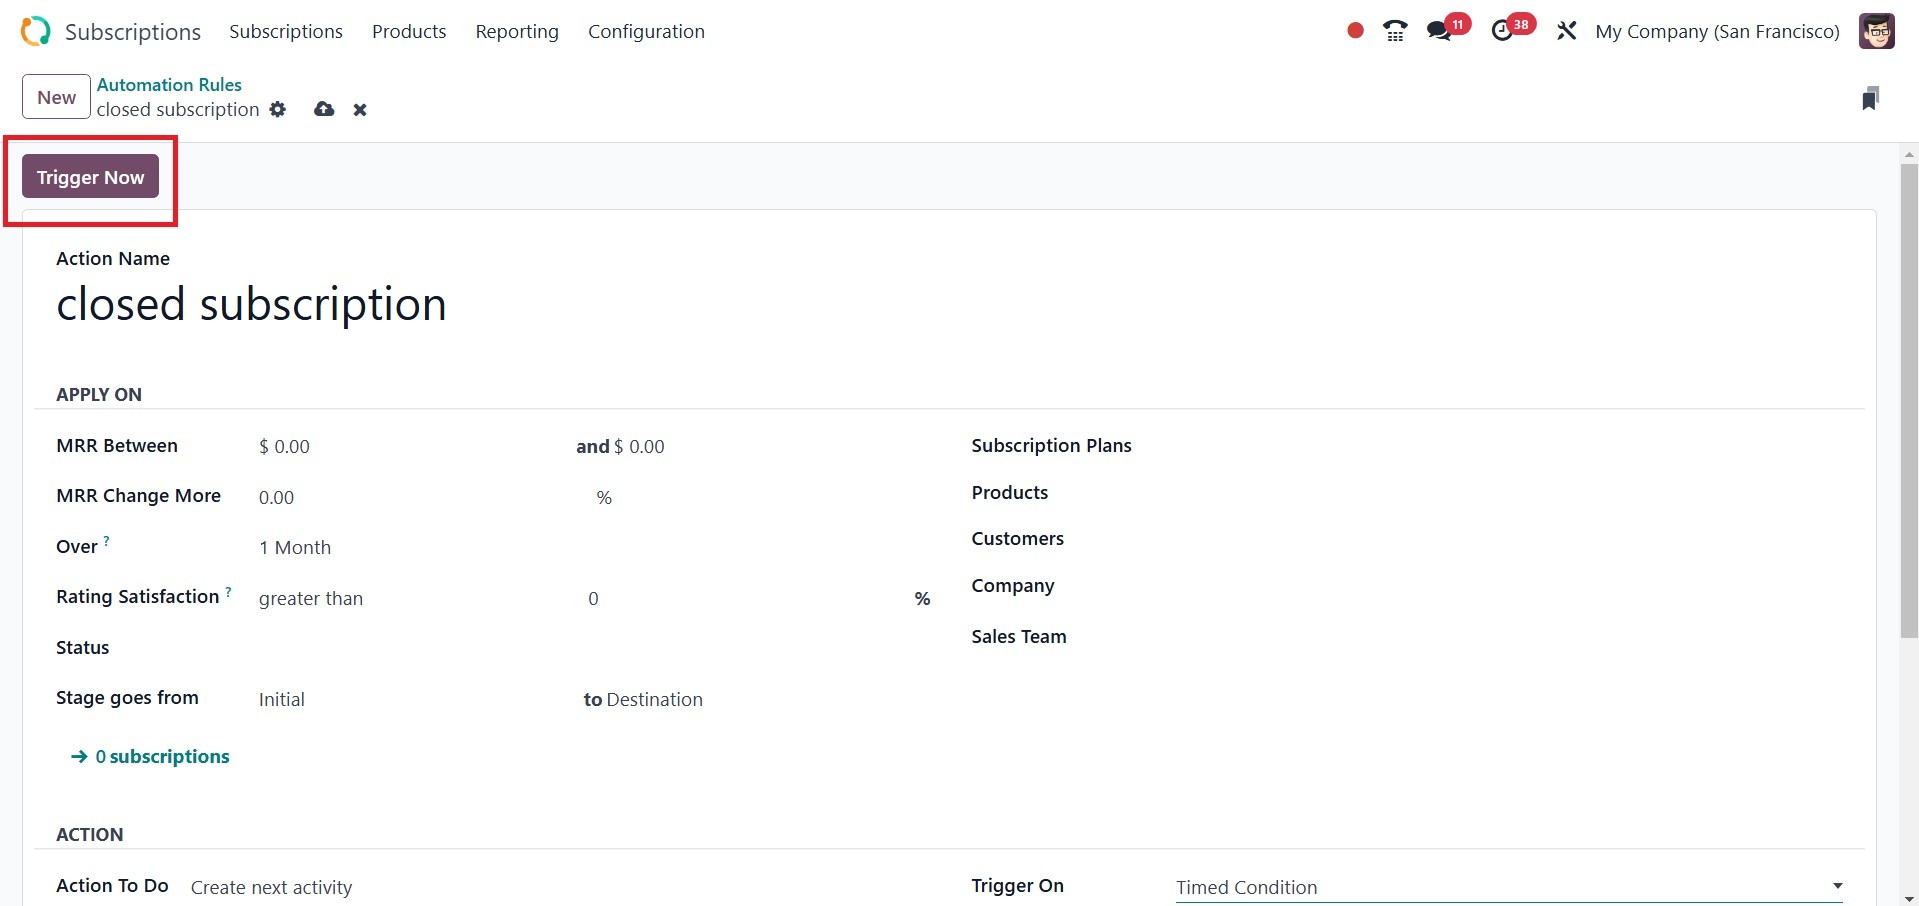
The ‘Trigger Now’ button in Odoo
can also be used to initiate
the alert.
2.4 Close Reasons
In certain situations, it could
be essential to terminate the
subscription prior to its
expiration date. It's
important to clarify the
circumstances in these cases
before terminating the
membership. The
subscription's form view
contains the Close button,
which may be used to
terminate a subscription.
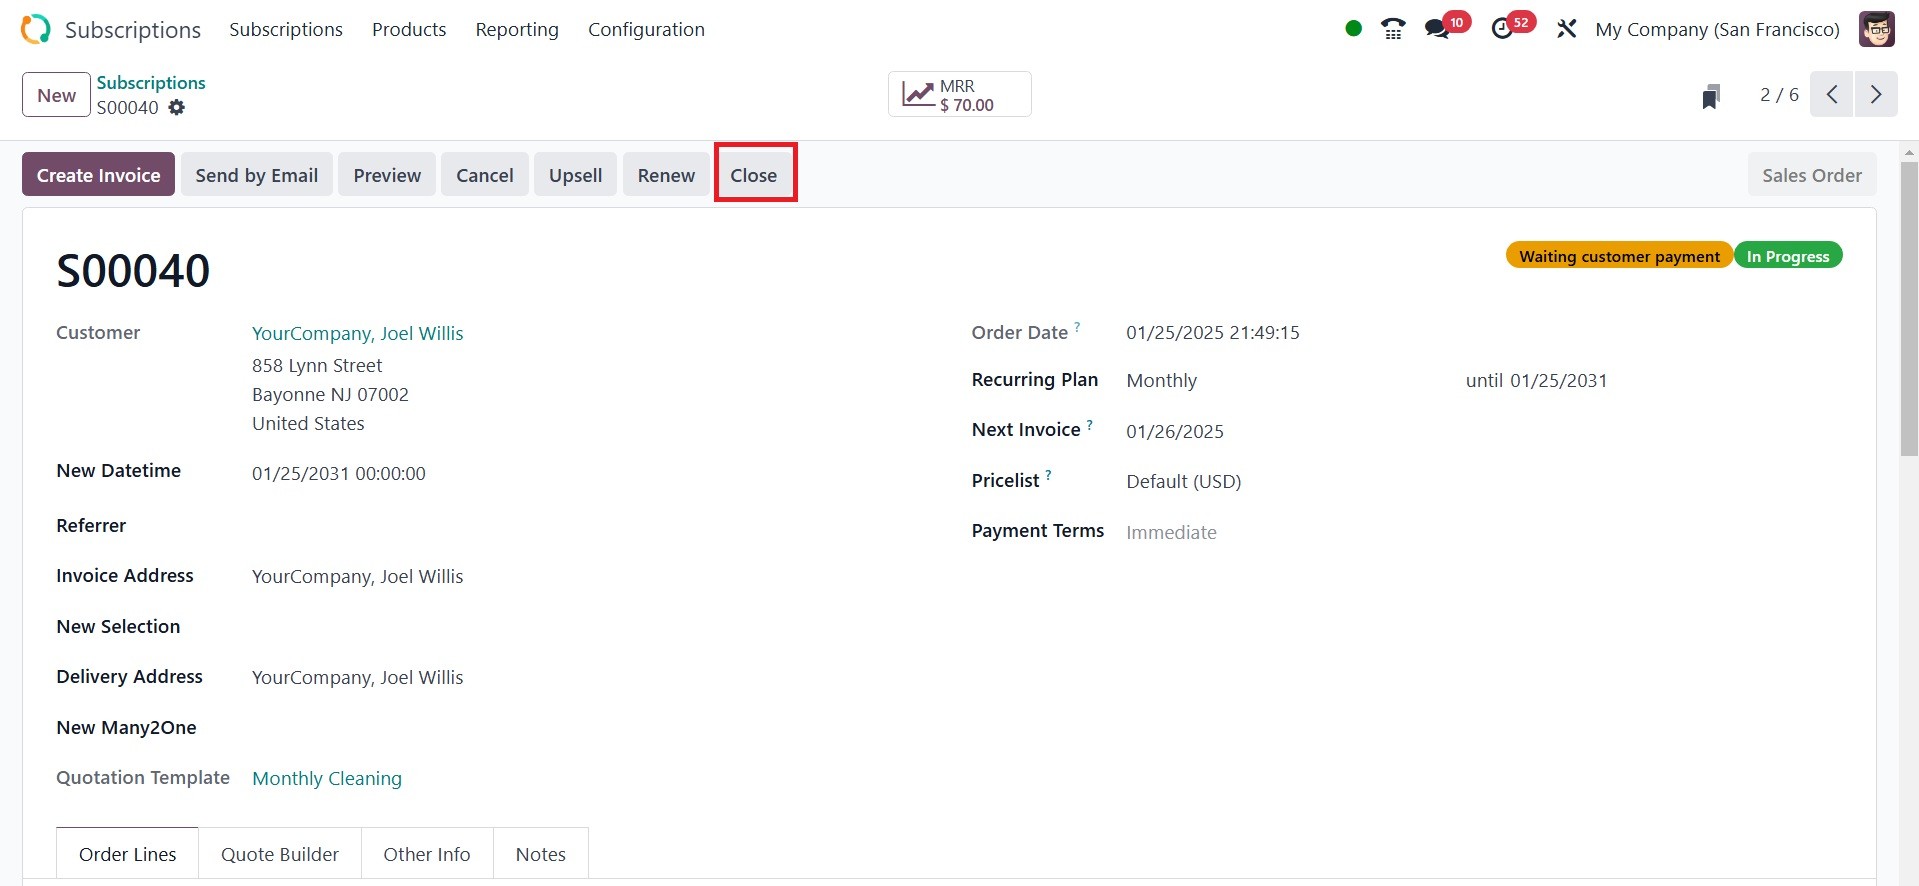
As shown in the screenshot below,
a new pop-up window will open
when you click on this
button.
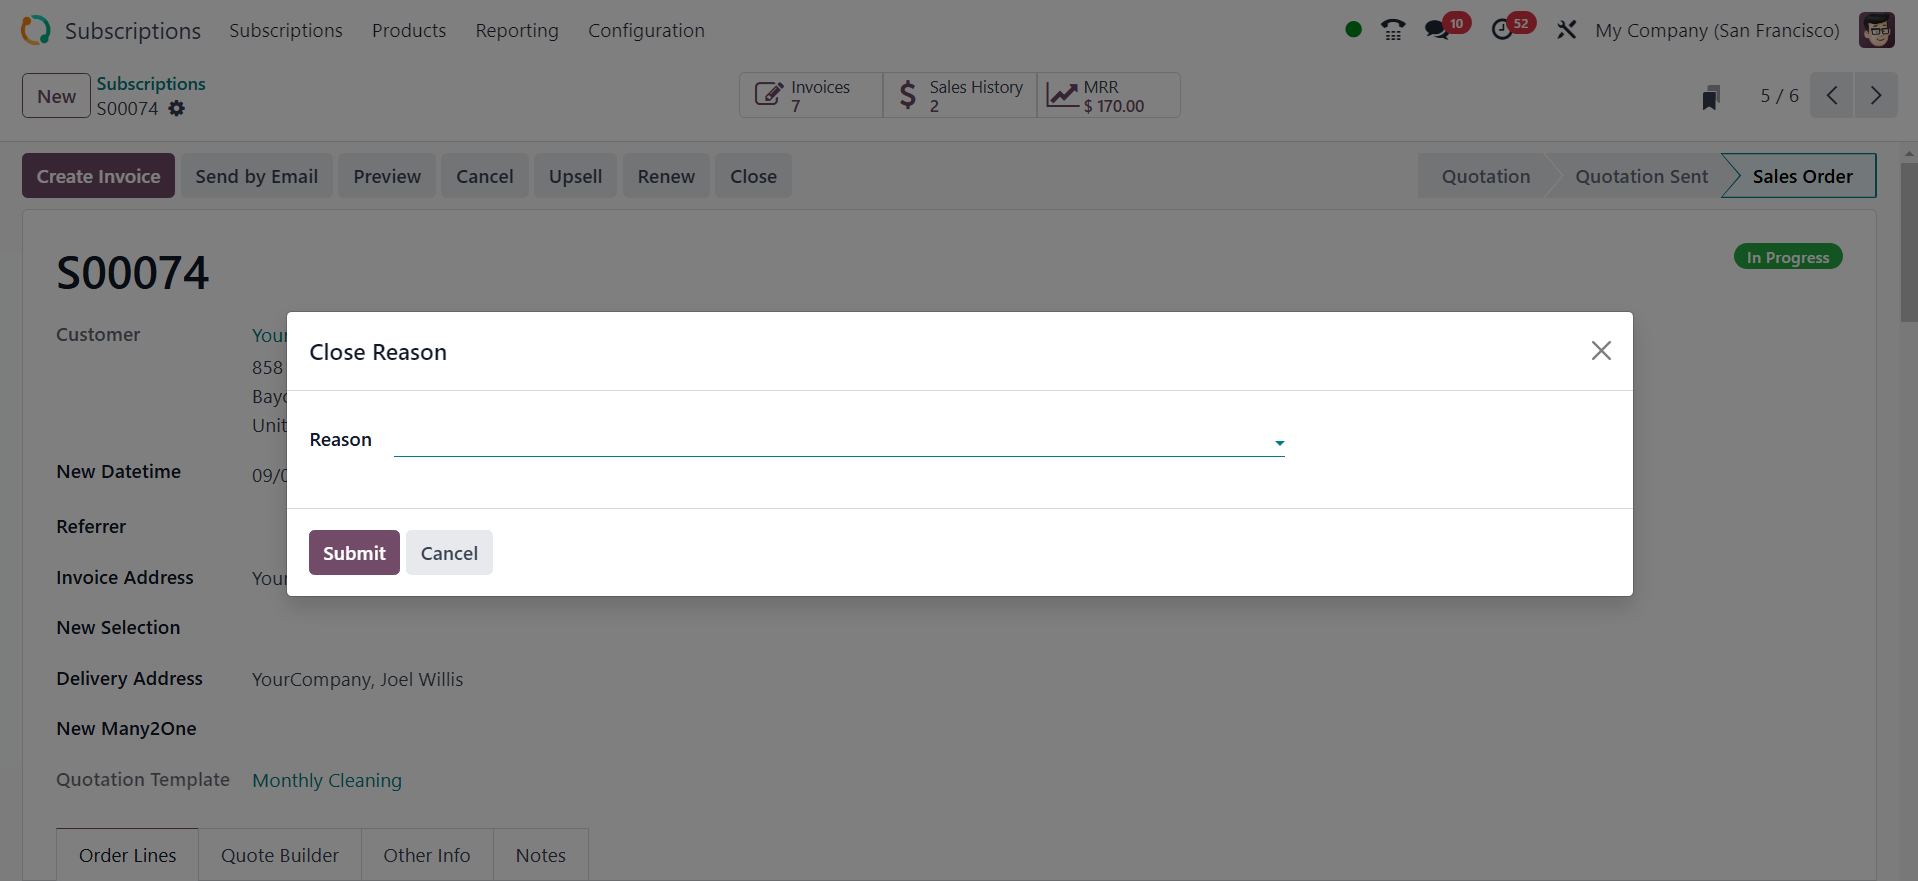
Here, you can select from the
list the most appropriate
reason for terminating the
membership. The subscription
can then be terminated by
clicking the Submit button.
For these reasons, you can make a
list using the Odoo18
Subscription module. To
accomplish this, use the
Configuration menu's Close
Reasons option.
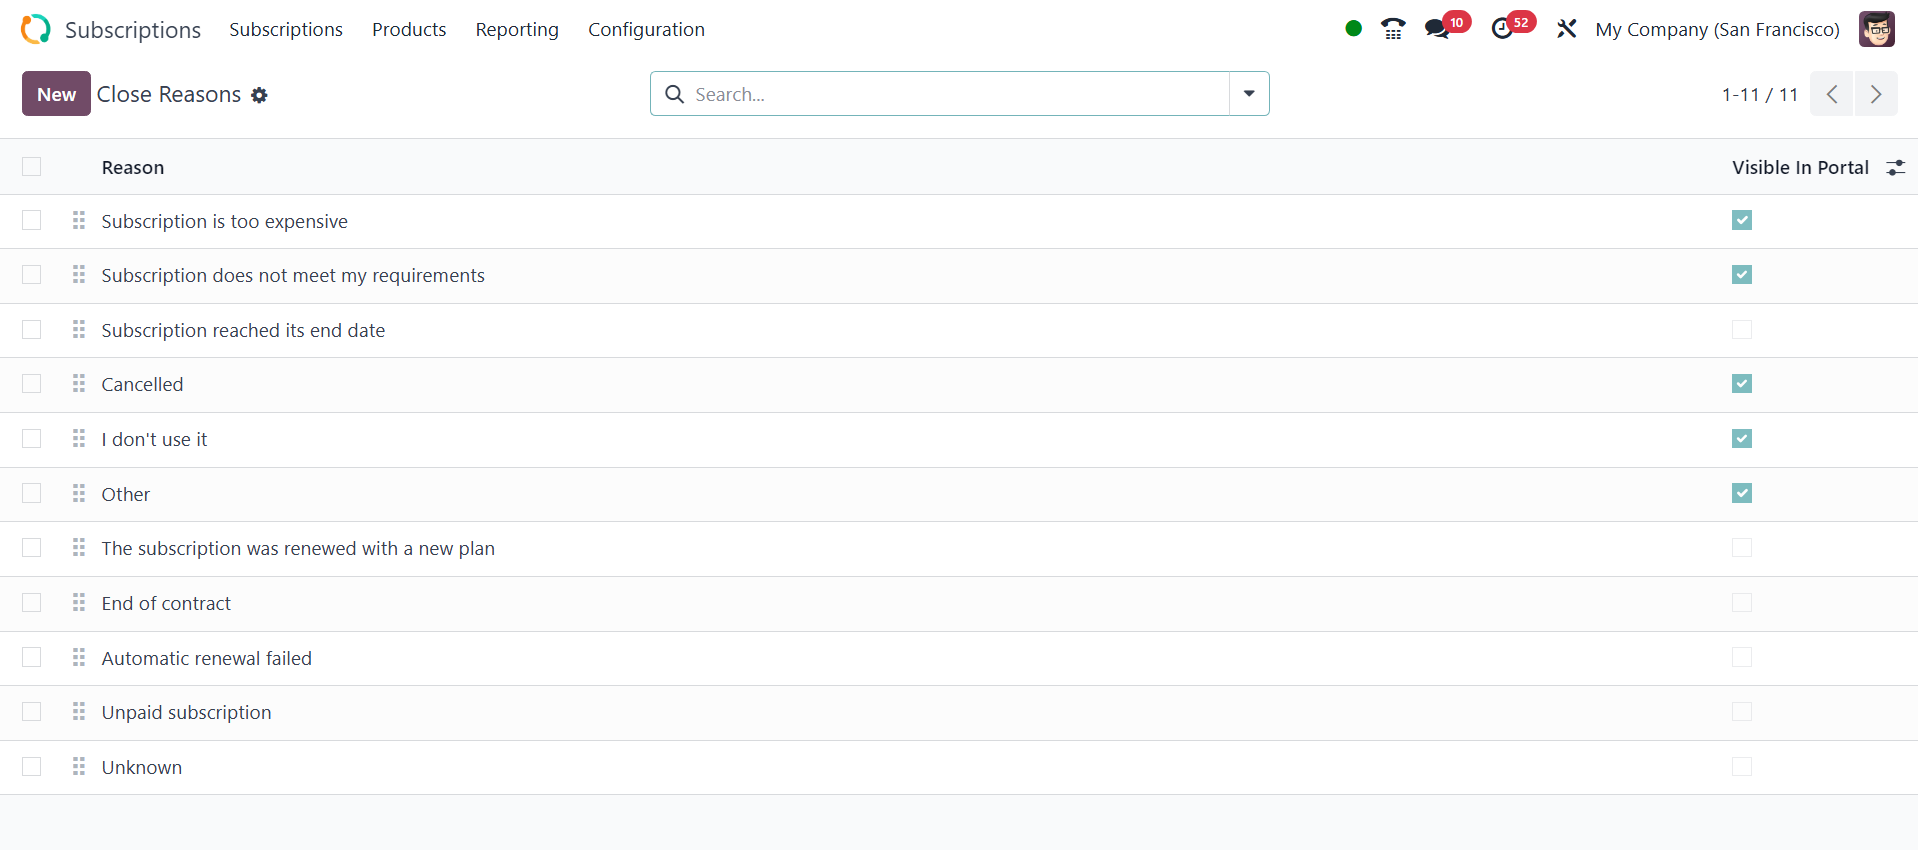
The previously developed close
reasons can be seen here. You
can begin a new one by
clicking the New button.
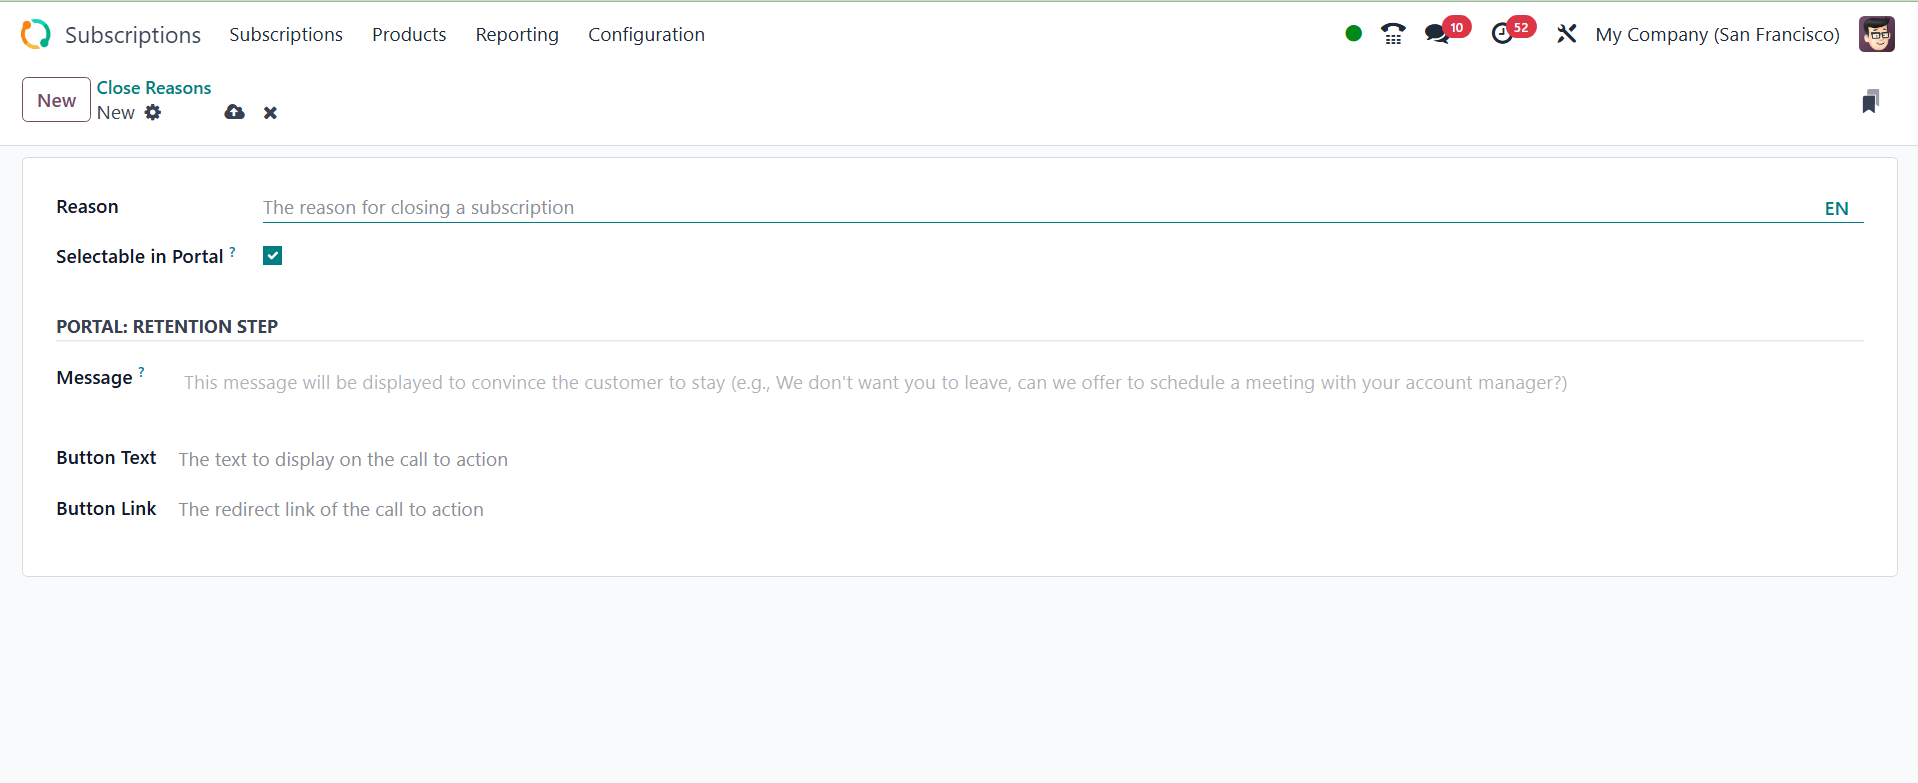
You will be able to add your
justification by creating a
new line beneath the existing
list.
When a customer cancels a
subscription using the portal
interface, the "Selectable in
Portal" checkbox determines
whether a specific close
reason is displayed as an
option.
Click the Save option to use this
explanation the next time you
wish to terminate a
subscription.
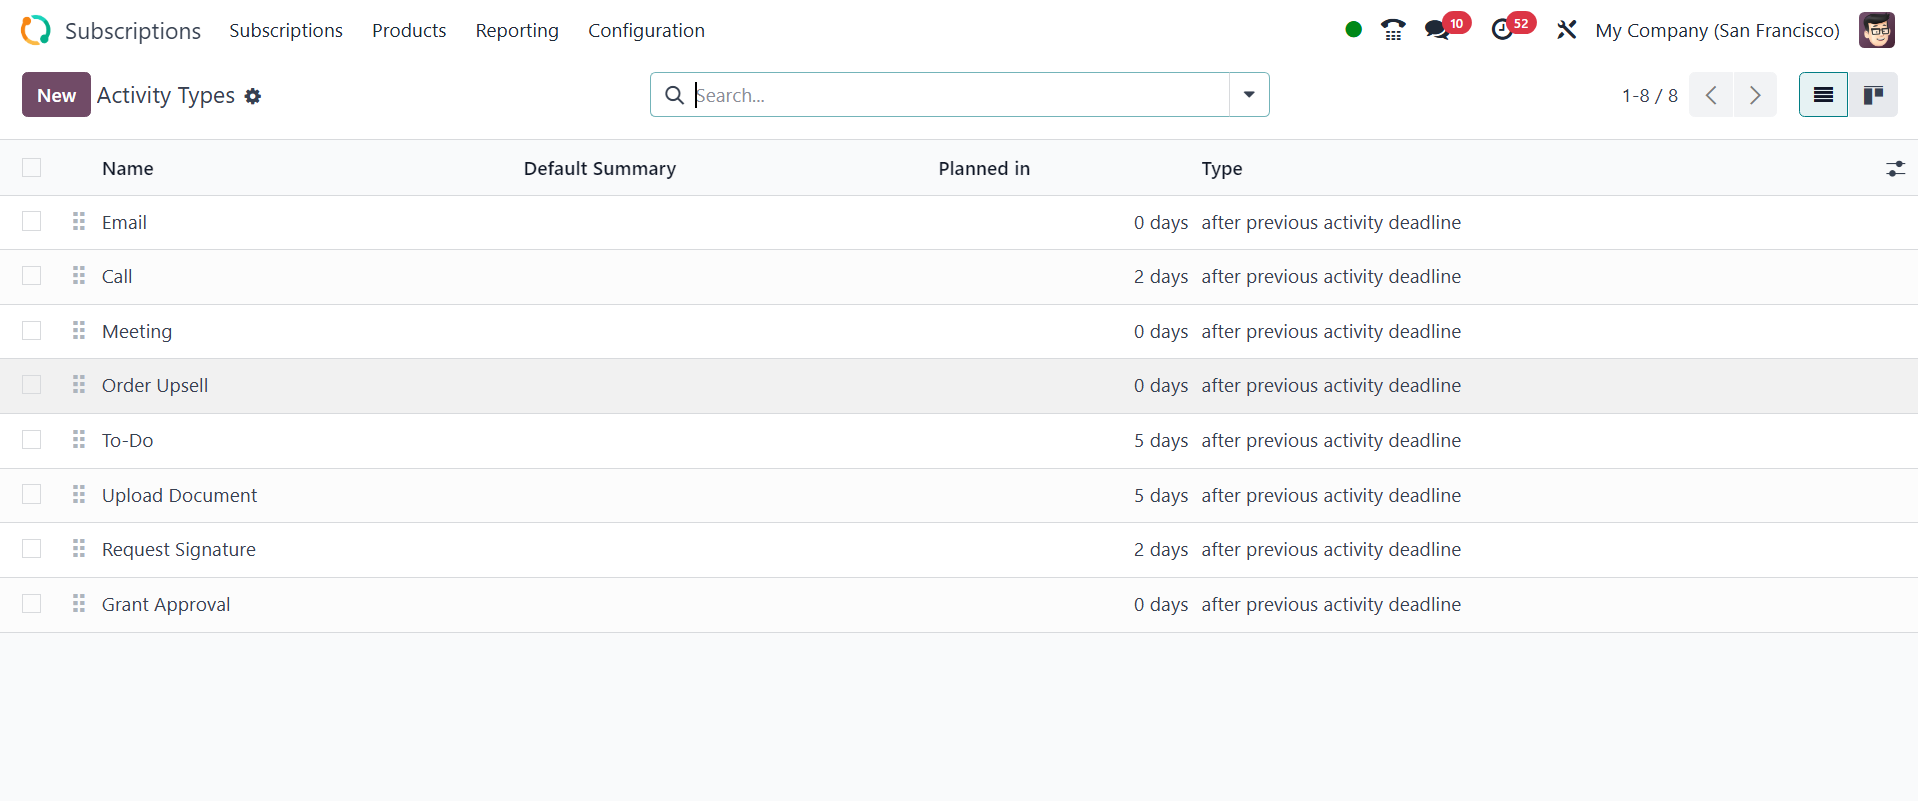
2.5 Activity Type
It is possible to add additional
types of activities to the
Odoo 18 Subscription module.
Use the Activity Types option
from the Configuration menu
to accomplish that. The list
view shows all of the current
activity kinds, including
Name, Default Summary,
Planned in, Type, Model, and
Icon, along with their
associated data.
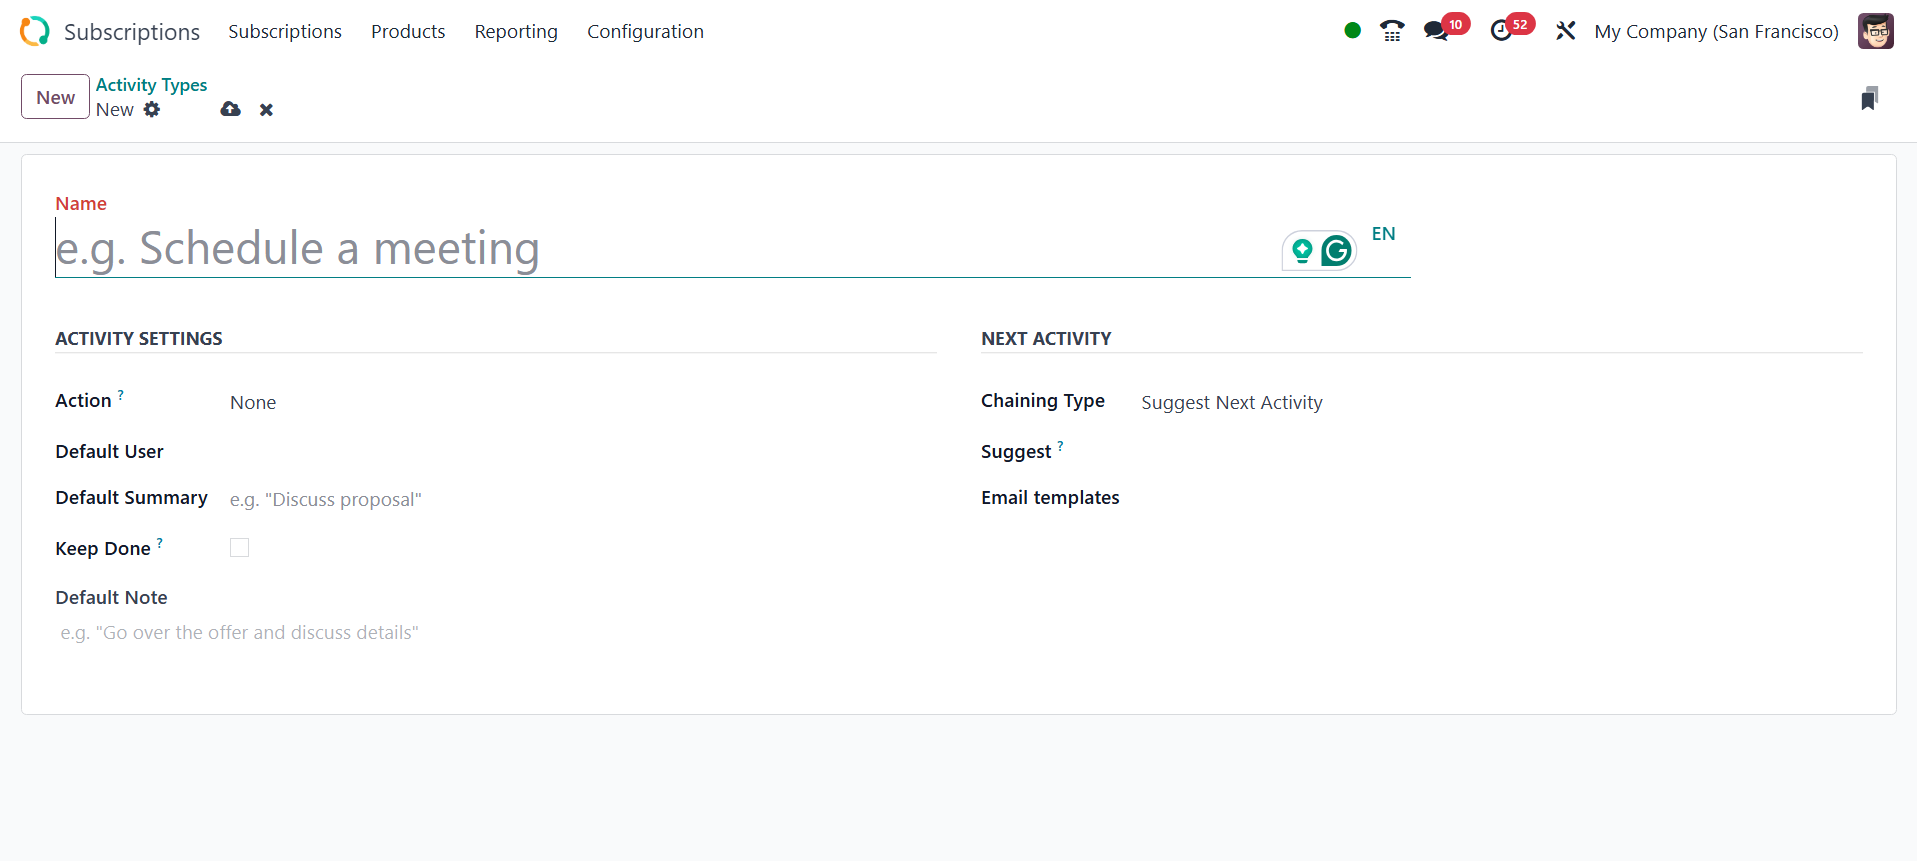
Use the New button to add
another. The form view for
the activity type will show
up. Enter the activity's name
in the designated field.
Next, choose from the
ACTIVITY SETTINGS the model
and the activity to be
carried out. Discuss the
Default User, Default
Summary, and Icon. can change
the background color of
associated activities of this
kind, such as the Decoration
kind. If you would like the
activity to stay listed as
finished in the activity
view, turn on the Keep Done
option. Add any Default Notes
if necessary.
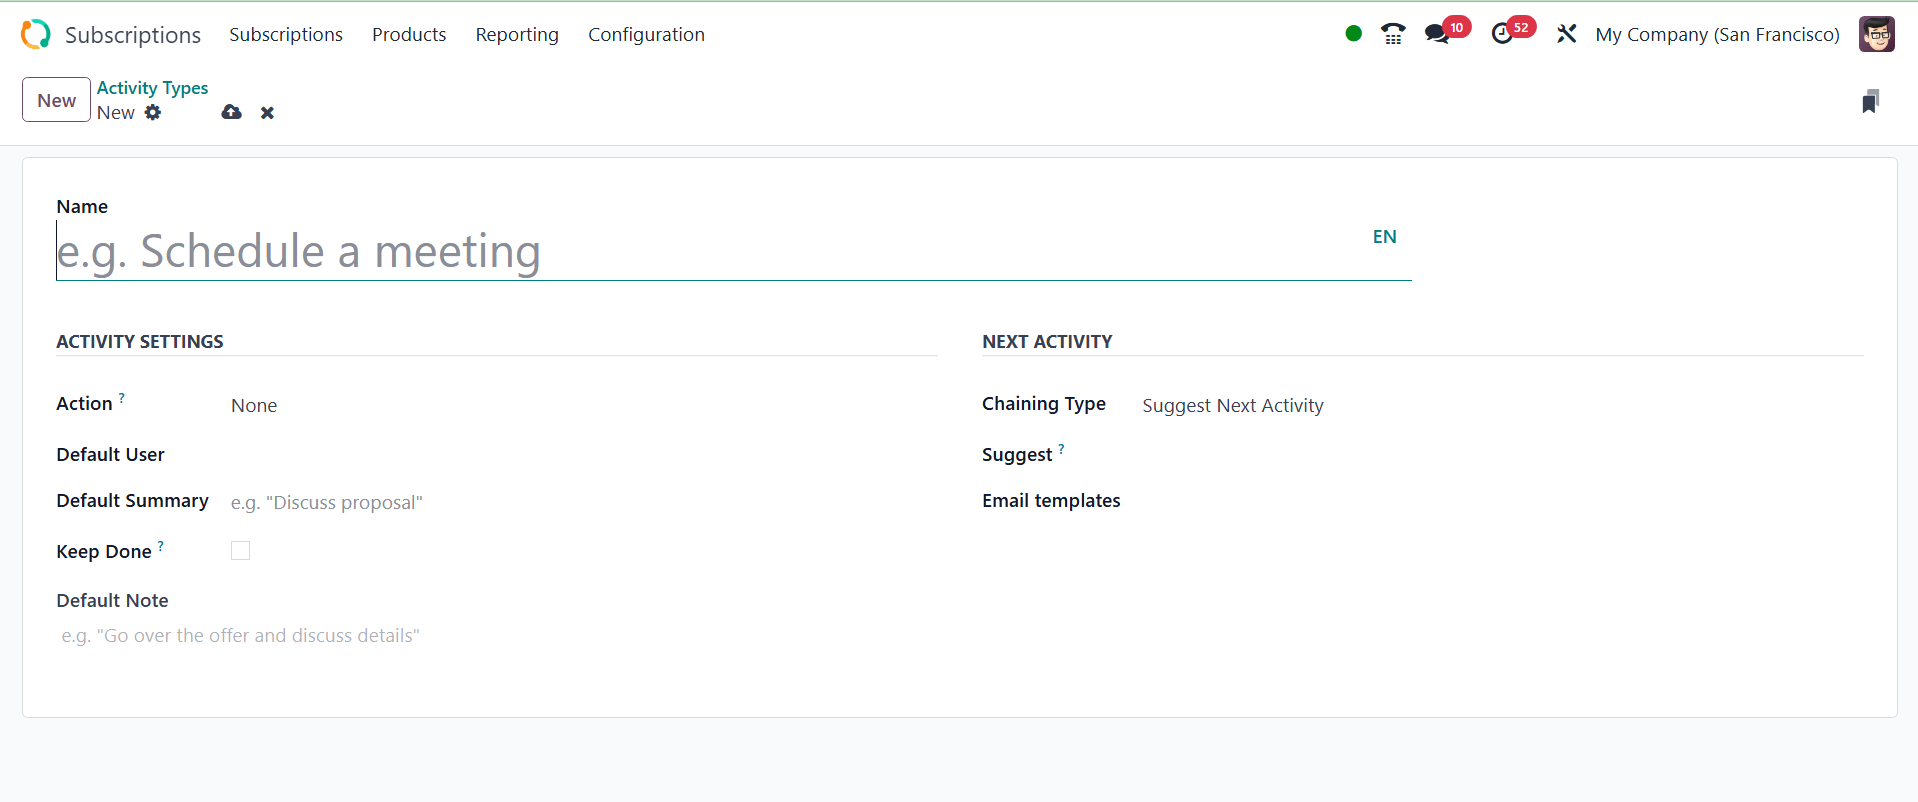
Chaining types can be added by
users from the NEXT ACTIVITY
section. Choose the type of
chaining: Either trigger the
next activity or suggest it.
Enter an email template. The
Schedule option allows us to
plan the action deadline. The
generated Activity Type is
then saved.
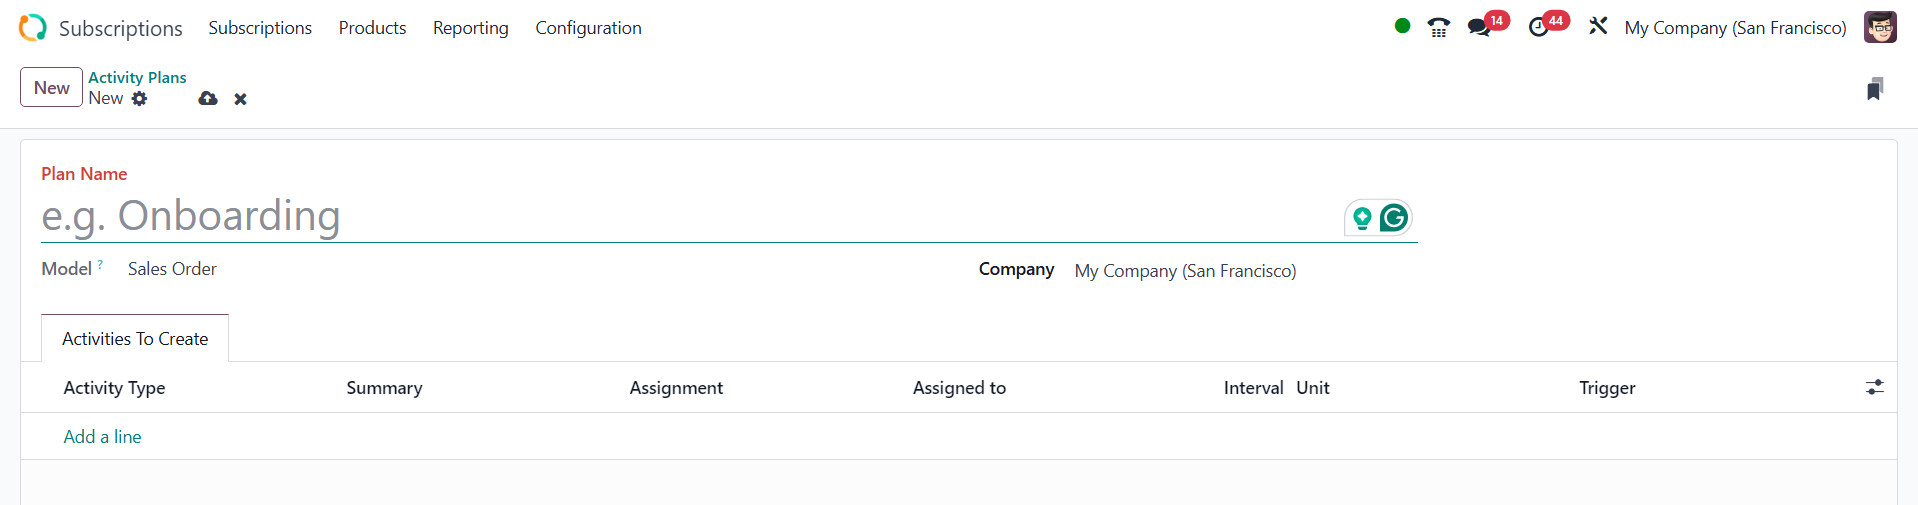
2.6 Activity Plan
The final option in the setup
menu is Activity Plan. From
the Configuration, select the
Activity Plan. You can add a
new Activity Plan by clicking
the New button.
Put the names of the company and
the plan in front. After
that, you can create new
Activities by using the
Activities To Generate tab's
Add a line option.