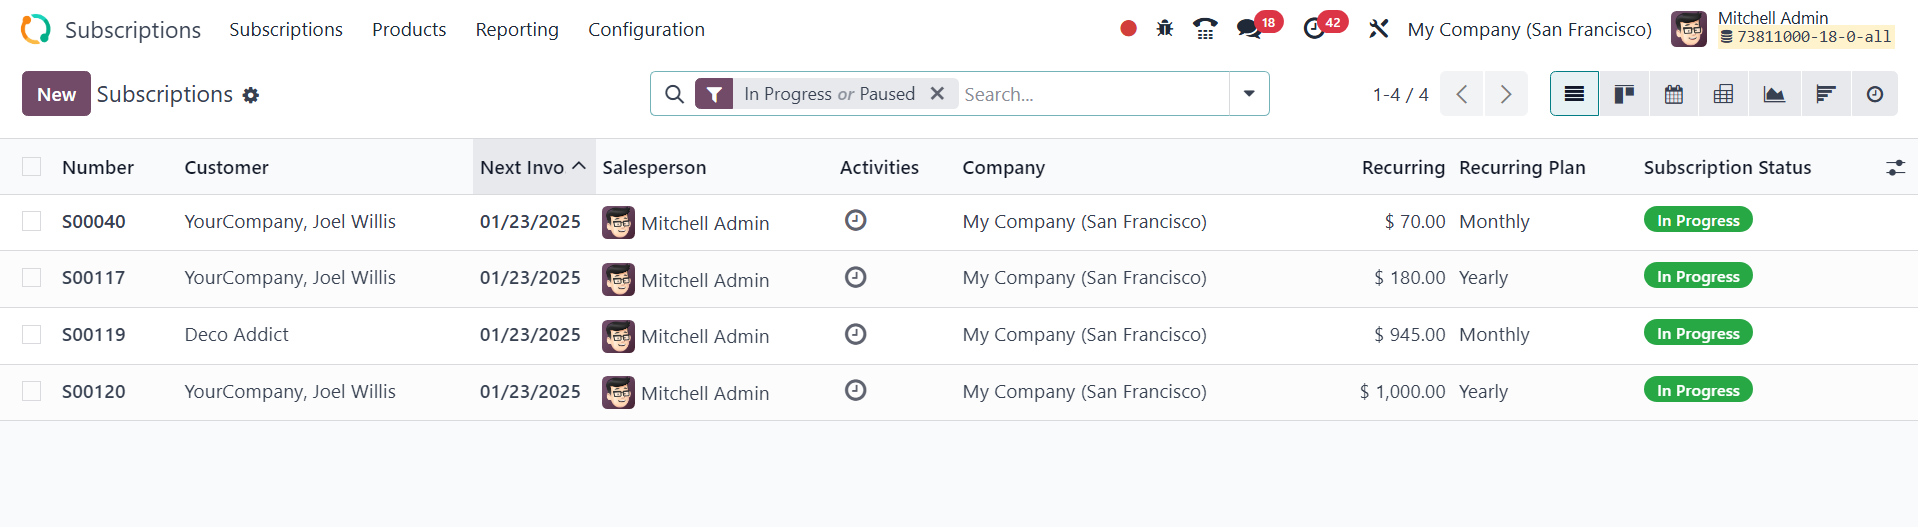
1. Subscription
Management
A dedicated module of the
open-source Odoo18 software
allows users to manage
subscriptions and related
services. The subscription
module will handle all
matters related to
participants in the many
programs that the
organization provides. The
subscription status of every
customer will be shown on
this module's enhanced
dashboard. Once installed
from the Odoo 18 App Store,
the Subscription module icon
will show up on the Odoo 18
main dashboard. As seen
below, clicking the
Subscription symbol will take
you to the module's main
dashboard.
The Kanban view on this platform
allows you to look at
different clients'
subscriptions at different
levels. Use the +Stage button
that appears on the screen to
add more stages. Use the +
icon next to the title of
each step if you wish to
establish a new subscription
under that stage.
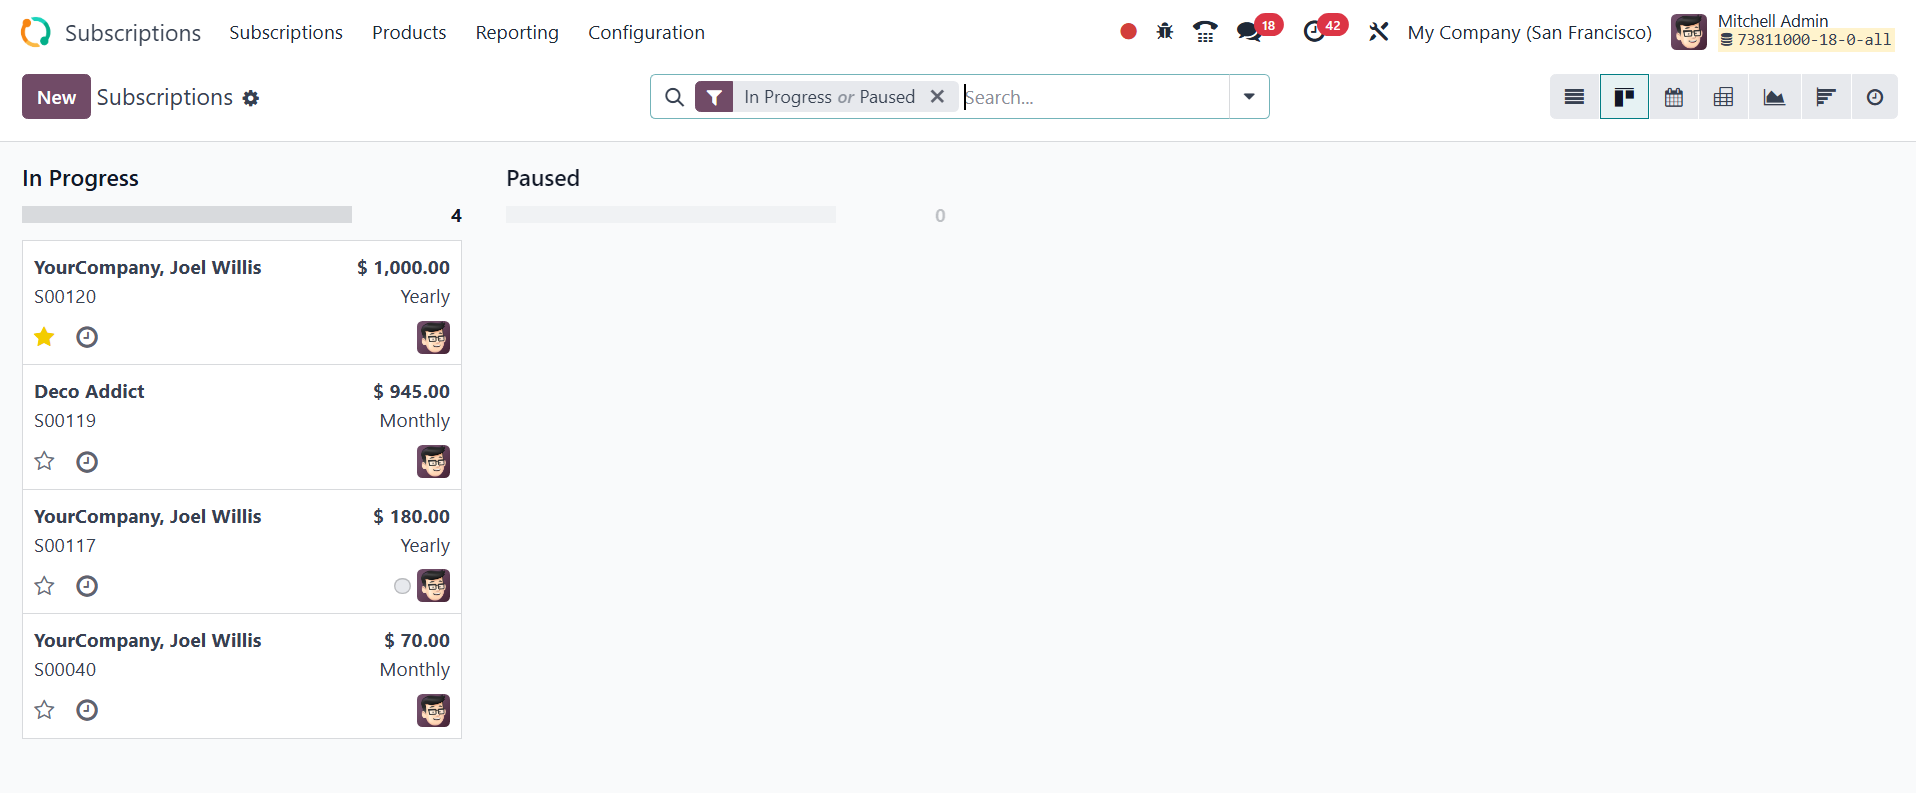
Each subscription comes with a
clock symbol that you can use
to schedule different chores
for the subscriber. There are
several filters available,
including My subscription,
Unassigned, quotations, in
progress, paused, churned, to
invoice, automatic payments,
and manual payment, which
allows you to organize the
available subscriptions.
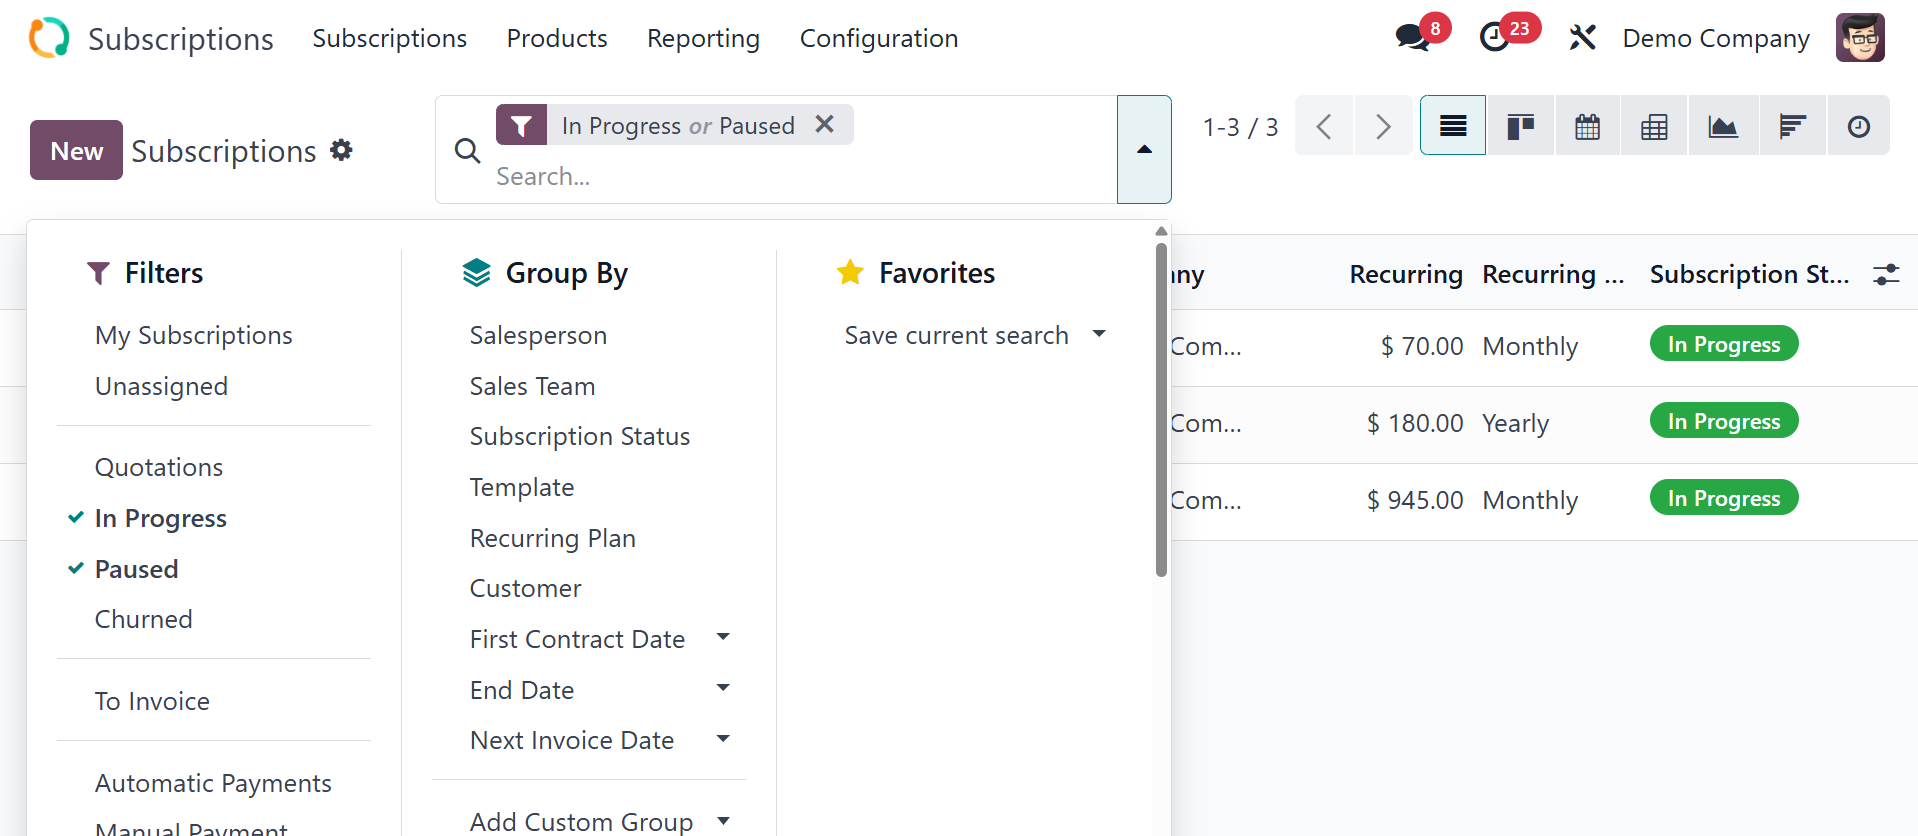
In addition to the Kanban view,
you may also switch it to a
List, Pivot, Graph, Cohort,
or Activity view. Now let's
begin a new subscription by
clicking the New button.
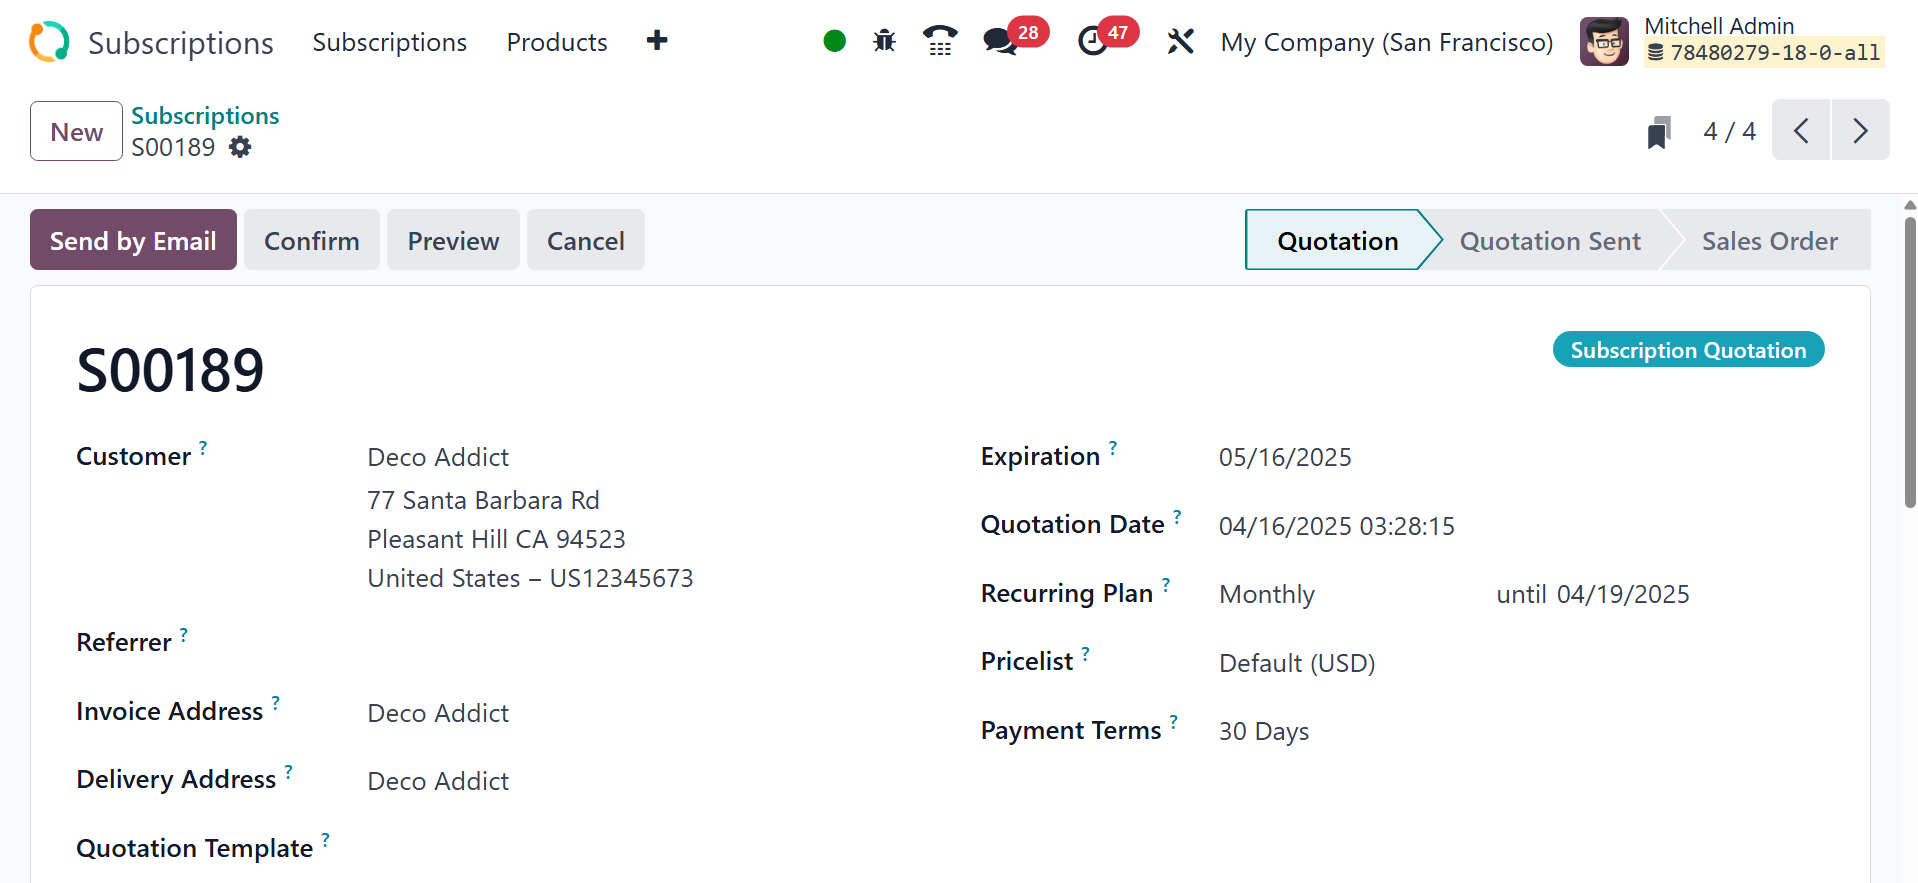
The view of the subscription form
will appear after you click
the New button. Before
creating a new subscription
for clients, you can create a
new subscription plan and
related product in the
module. After that, the
product and plan can be set
up for the new subscription.
Additionally, the sales
module's subscription product
can be used to generate
quotes. Once the sales order
has been confirmed, Odoo18
will promptly enter the
relevant subscription in the
Subscription module.
You may include the customer's
name in the designated space.
The Referrer whose advice
prompted the customer to buy
this subscription can be
mentioned in the appropriate
field. In the appropriate
fields, you can input the
delivery address, invoice
address, and quotation
template details.
The quotation template is a
subscription template that
contains details regarding
the invoicing process and the
subscription's conditions of
payment. The subscription
will end on the day indicated
in the Expiration column.
If the customer wishes to renew
the subscription on a regular
basis, you can bring up the
Recurrence plan. You can
include the pricelist, terms
of payment, and any
additional multiline material
related to the subscription
in the relevant fields.
Each subscription product can be
listed separately using the
Order Lines tab. To add a
line for this, click the Add
a Line option. This tab shows
the product details,
description, quantity, UoM,
unit price, taxes, discount,
and subtotal.

The Optional items page allows
you to add the optional items
that are included in the
subscription plan.
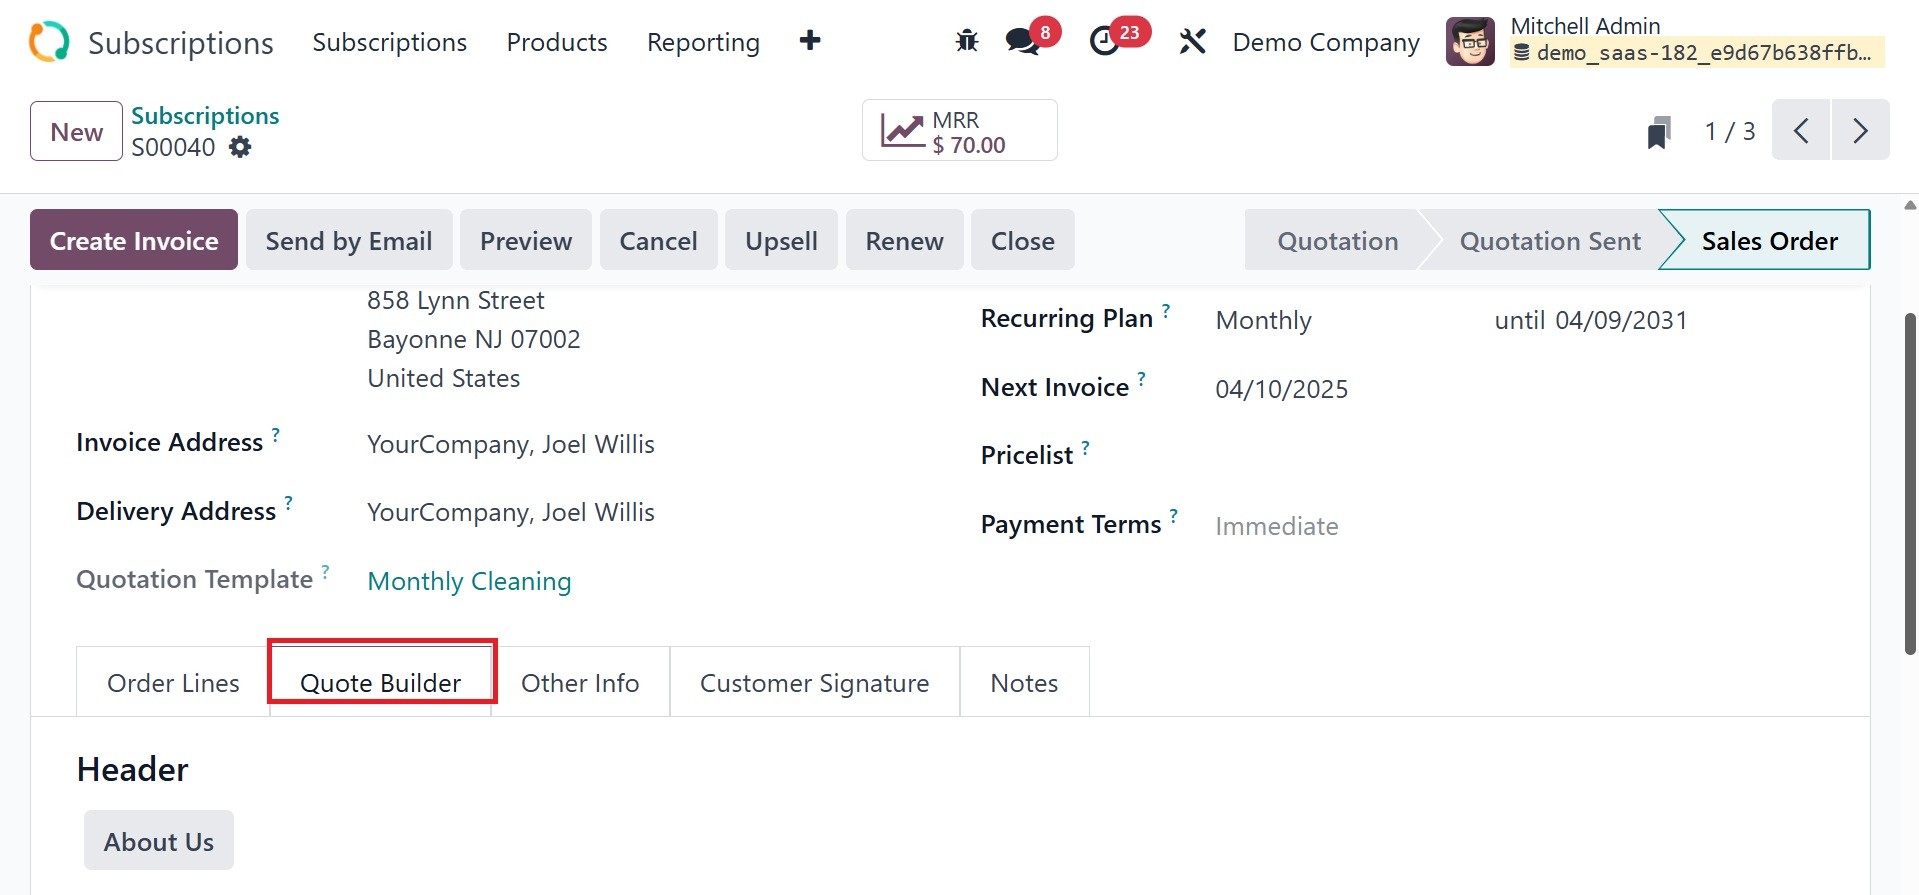
A feature called the Quote
Builder was created to make
it easier for clients to
create customized
subscription quotes. It
enables you to produce
expert, thorough estimates
that are customized to meet
the demands of particular
clients for
subscription-based services
or goods.
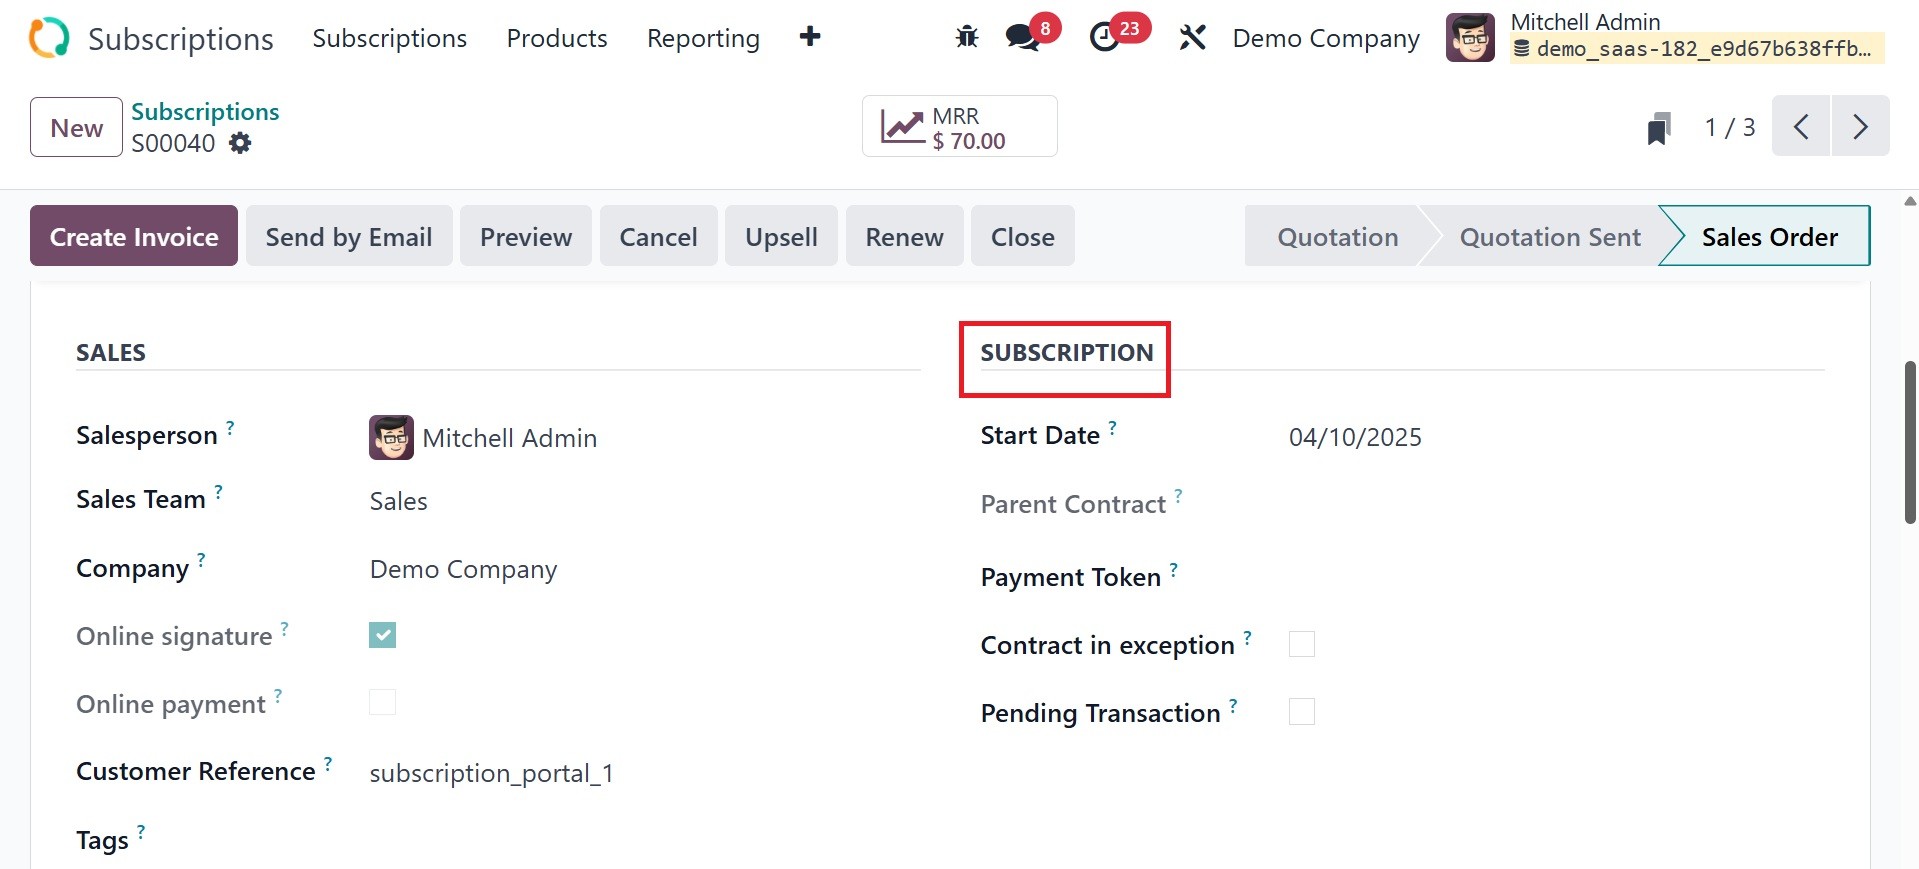
The Other Info tab is where you
can enter data pertaining to
sales, delivery, tracking,
invoicing, and payments.
Under the sales session, you
can assign a salesperson and
sales team to manage this
subscription. The company
name will be included in the
pertinent field. If you want
to let the customer sign and
complete payment online, you
can turn on the Signature and
Payment option from the
Online Confirmation box. You
can choose which tags are
suitable for this particular
subscription under the Tags
section. The day you select
in the Start Day section will
mark the beginning of the
subscription period.
Under this subscription tab, you
have options like start date,
payment token, contract in
exception, and pending
transaction, as in the
screenshot below.
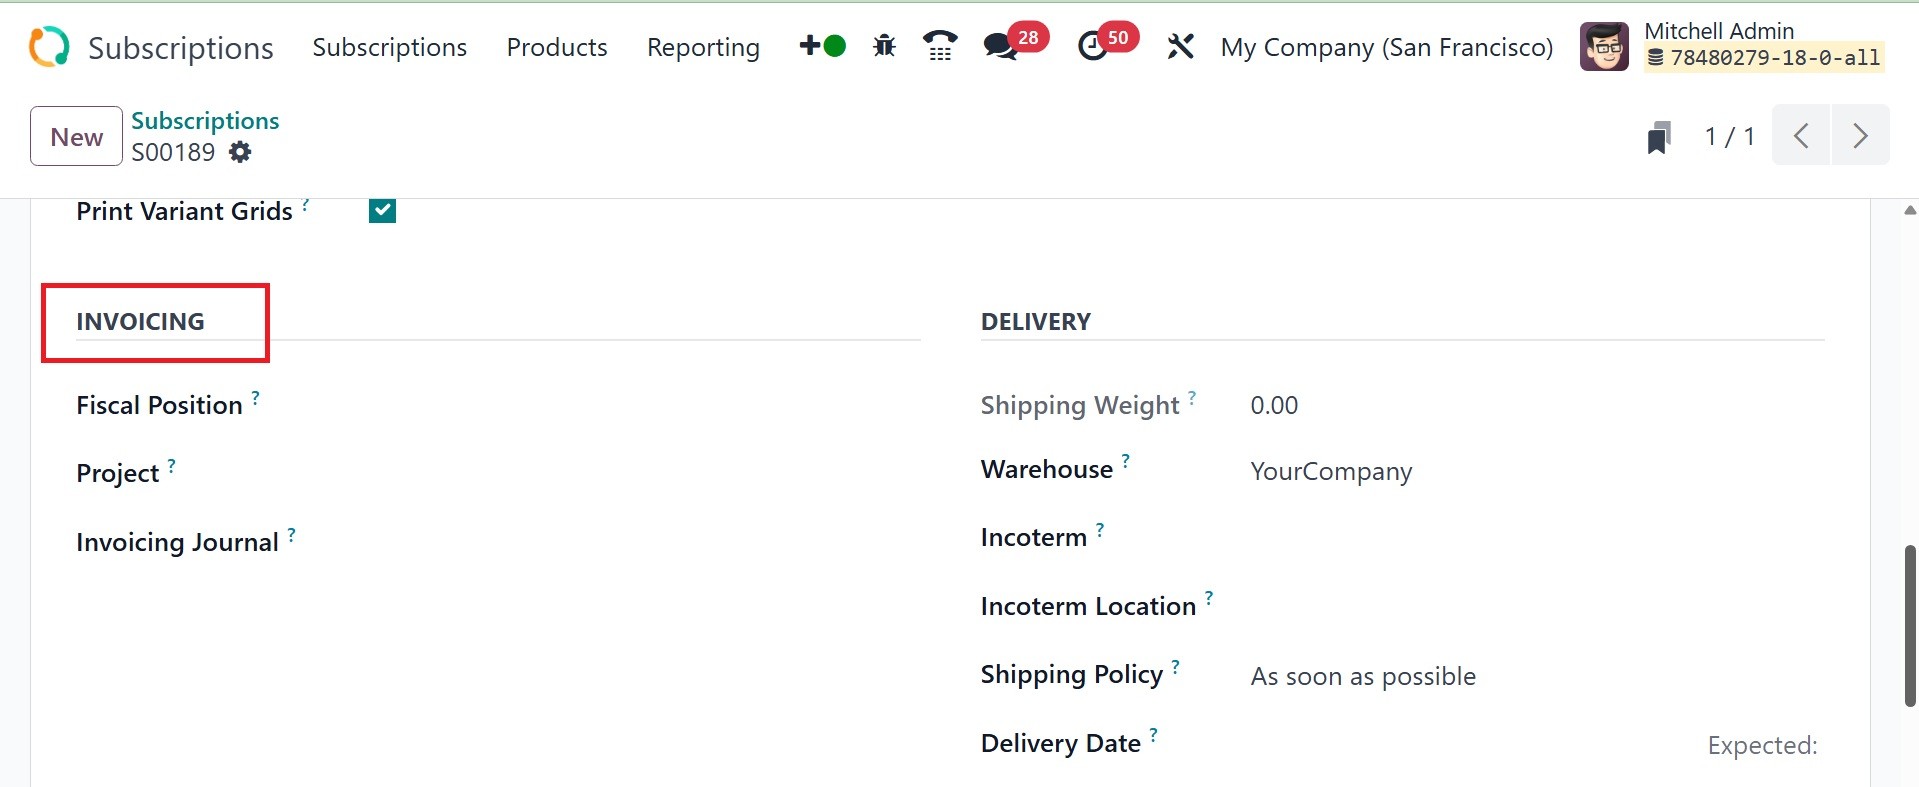
The Fiscal Position and Analytic
Account can be entered in the
corresponding box to manage
the billing and payments for
this subscription under the
Invoicing tab as well.
One effective and safe way to
complete subscription
agreements is with the
Customer Signature function.
It expedites the approval
process by enabling clients
to directly sign quotes or
subscription contracts
electronically.
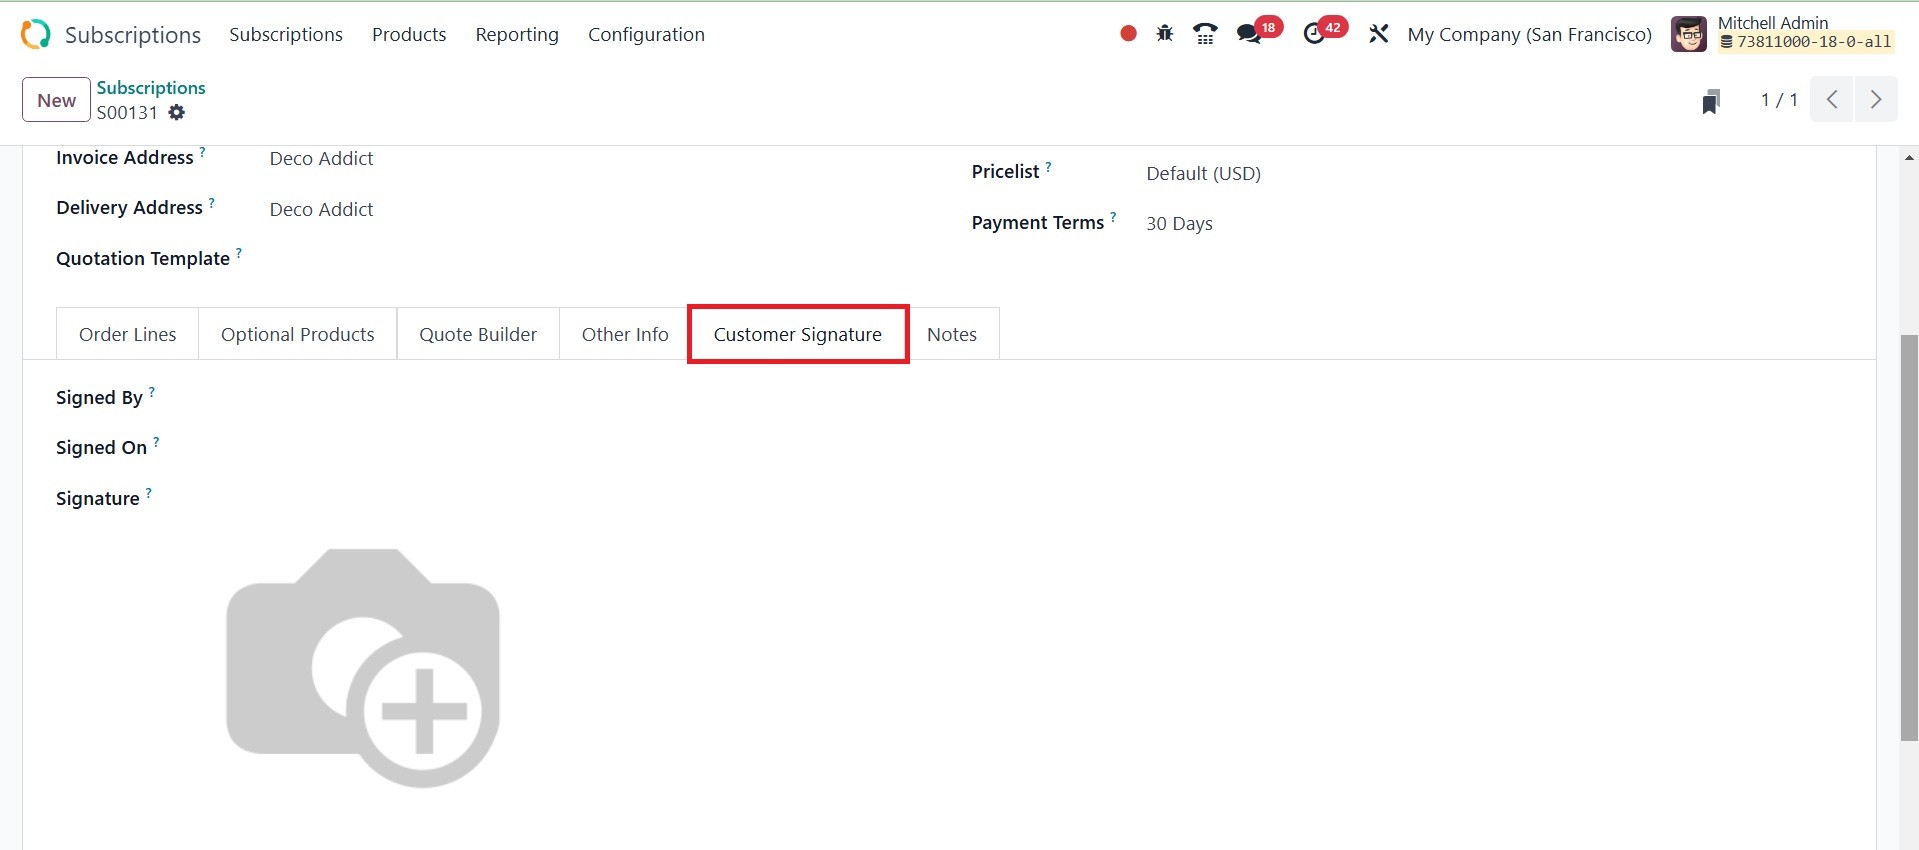
The signed by option records the
name of the customer or
representative who signed the
subscription agreement.
The signed on option captures the
date and time when the
signature was provided.The
signature option is the
actual electronic signature
provided by the customer.
Any internal comments about the
subscription can be entered
in the remarks section.
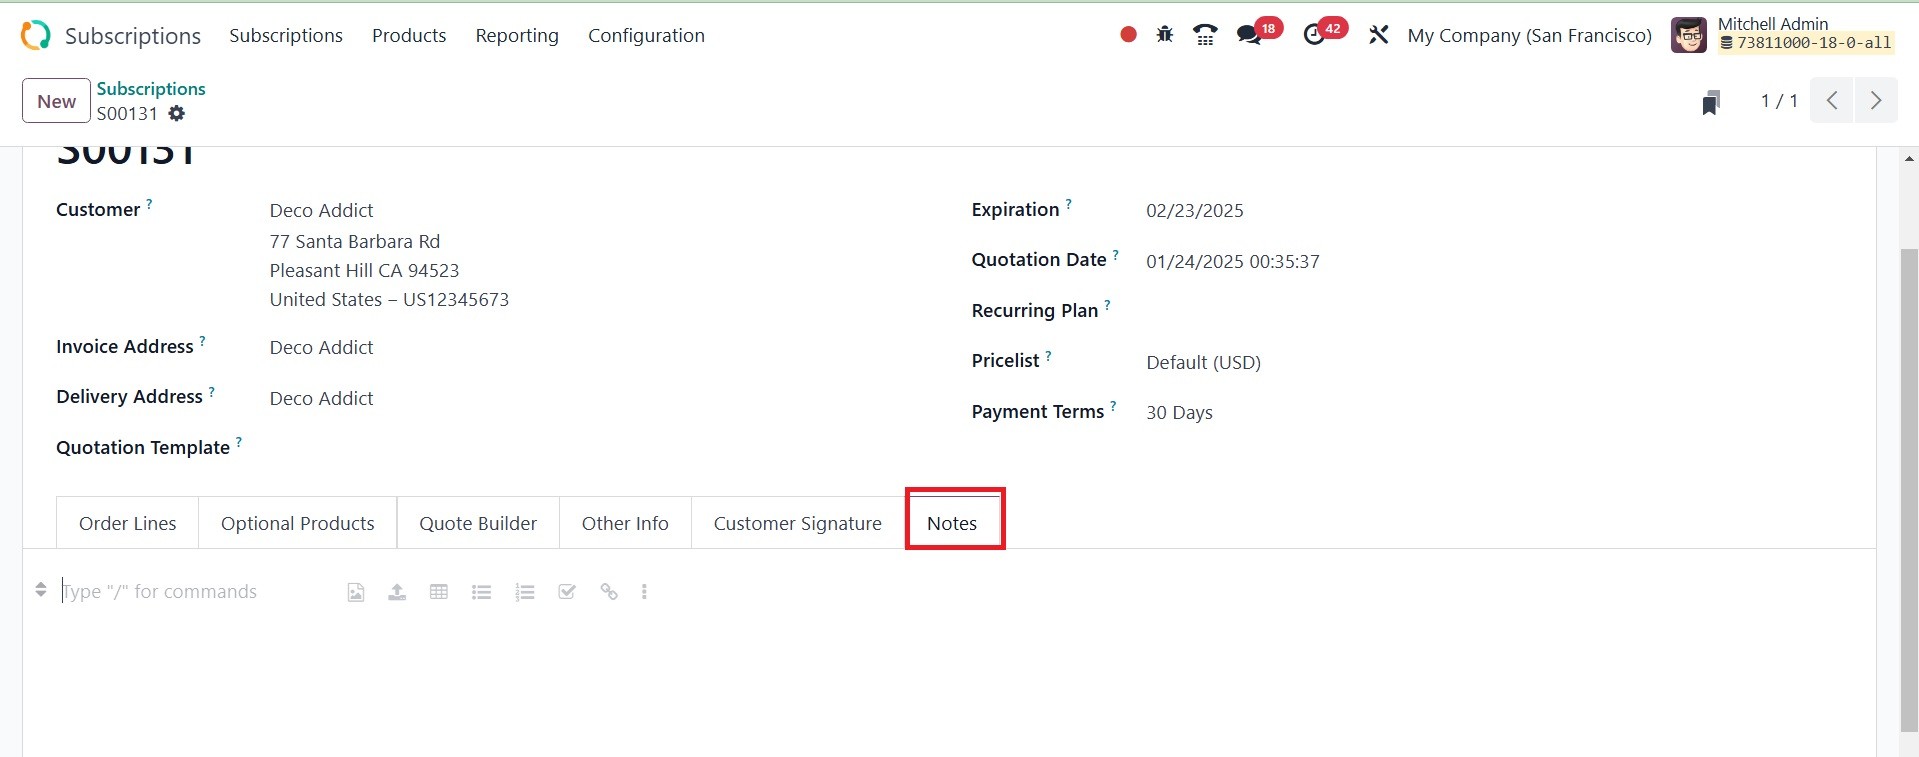
Once all the required information
has been entered, you can
click the Confirm button to
validate the subscription
quote.
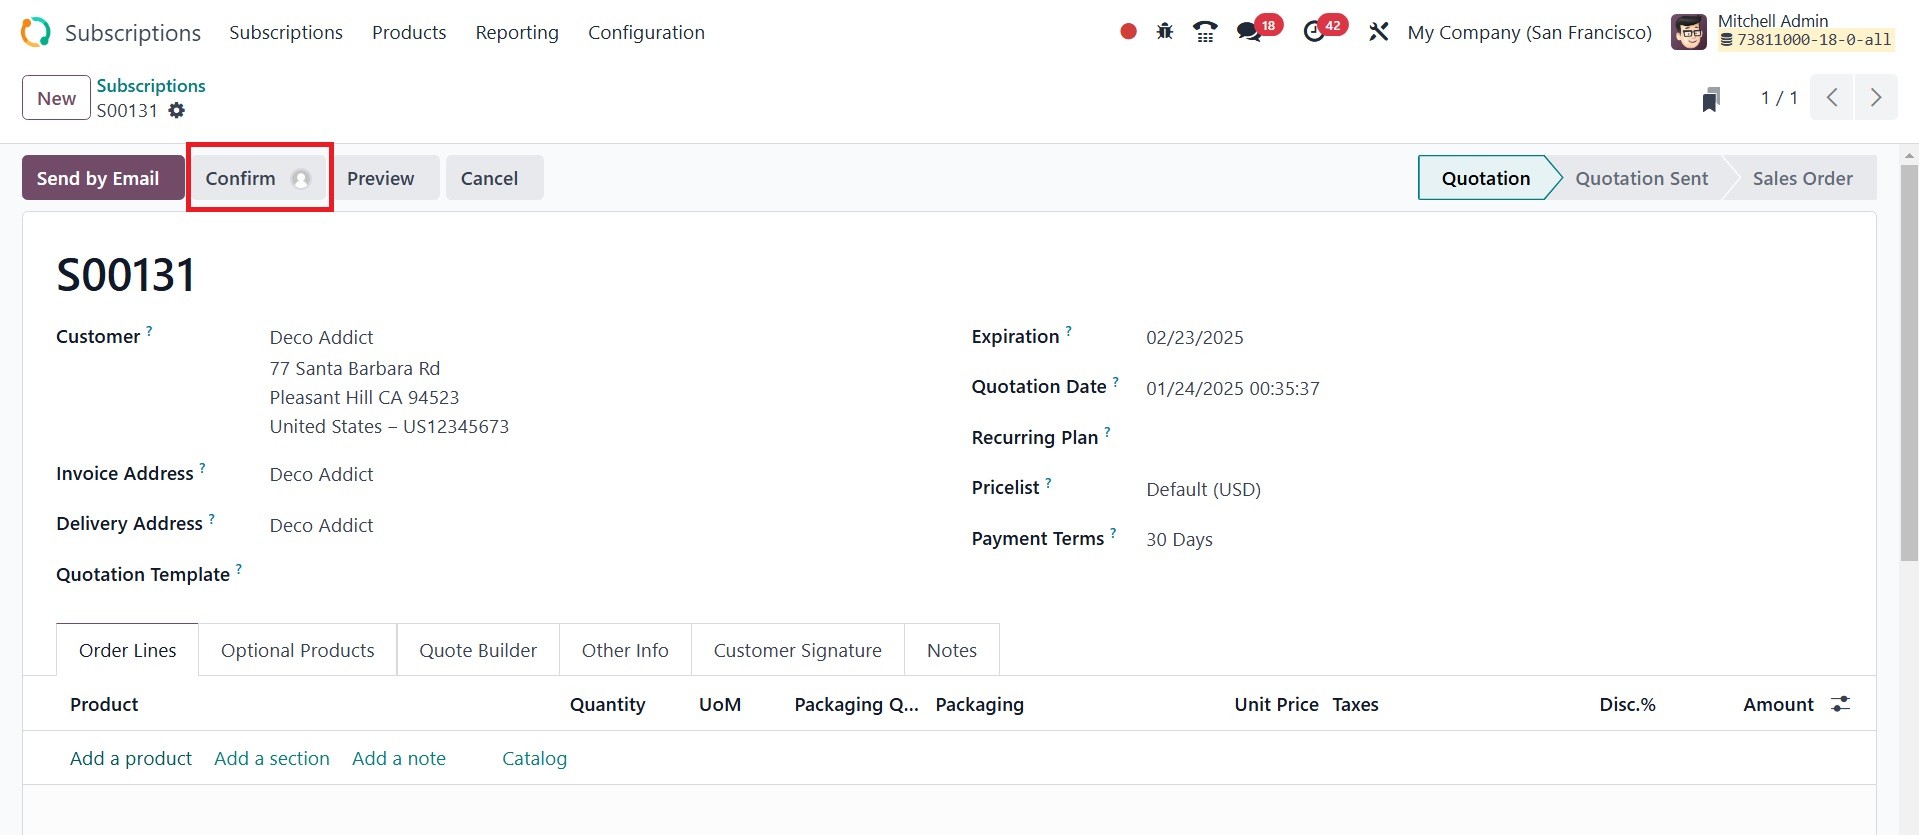
The Send By Email option will
transmit this quotation to
the customer who has been
selected. Click the Customer
‘Preview’ button to see a
customer's preview of the
quote. If the customer is
satisfied with the quote,
they can sign it and complete
the online payment process
using the customer preview
box.
Clicking the Confirm button will
finalize the sales order. You
can now generate an invoice
for the sales order by
clicking the Create Invoice
button.
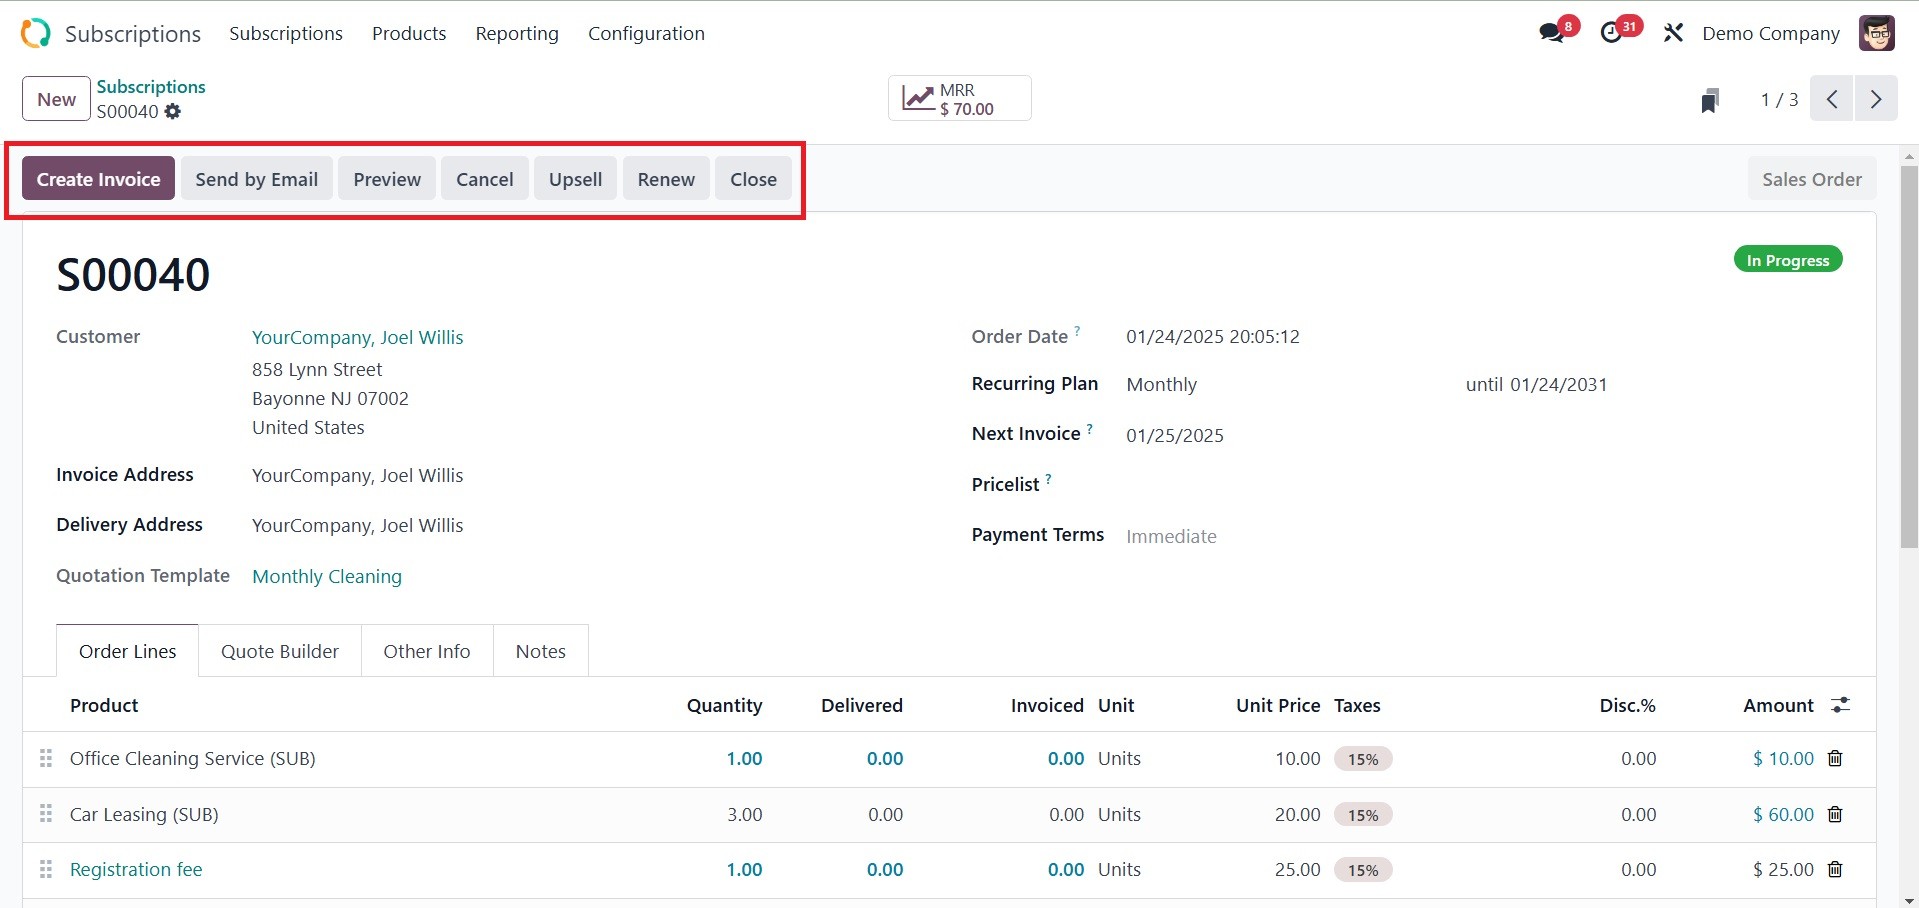
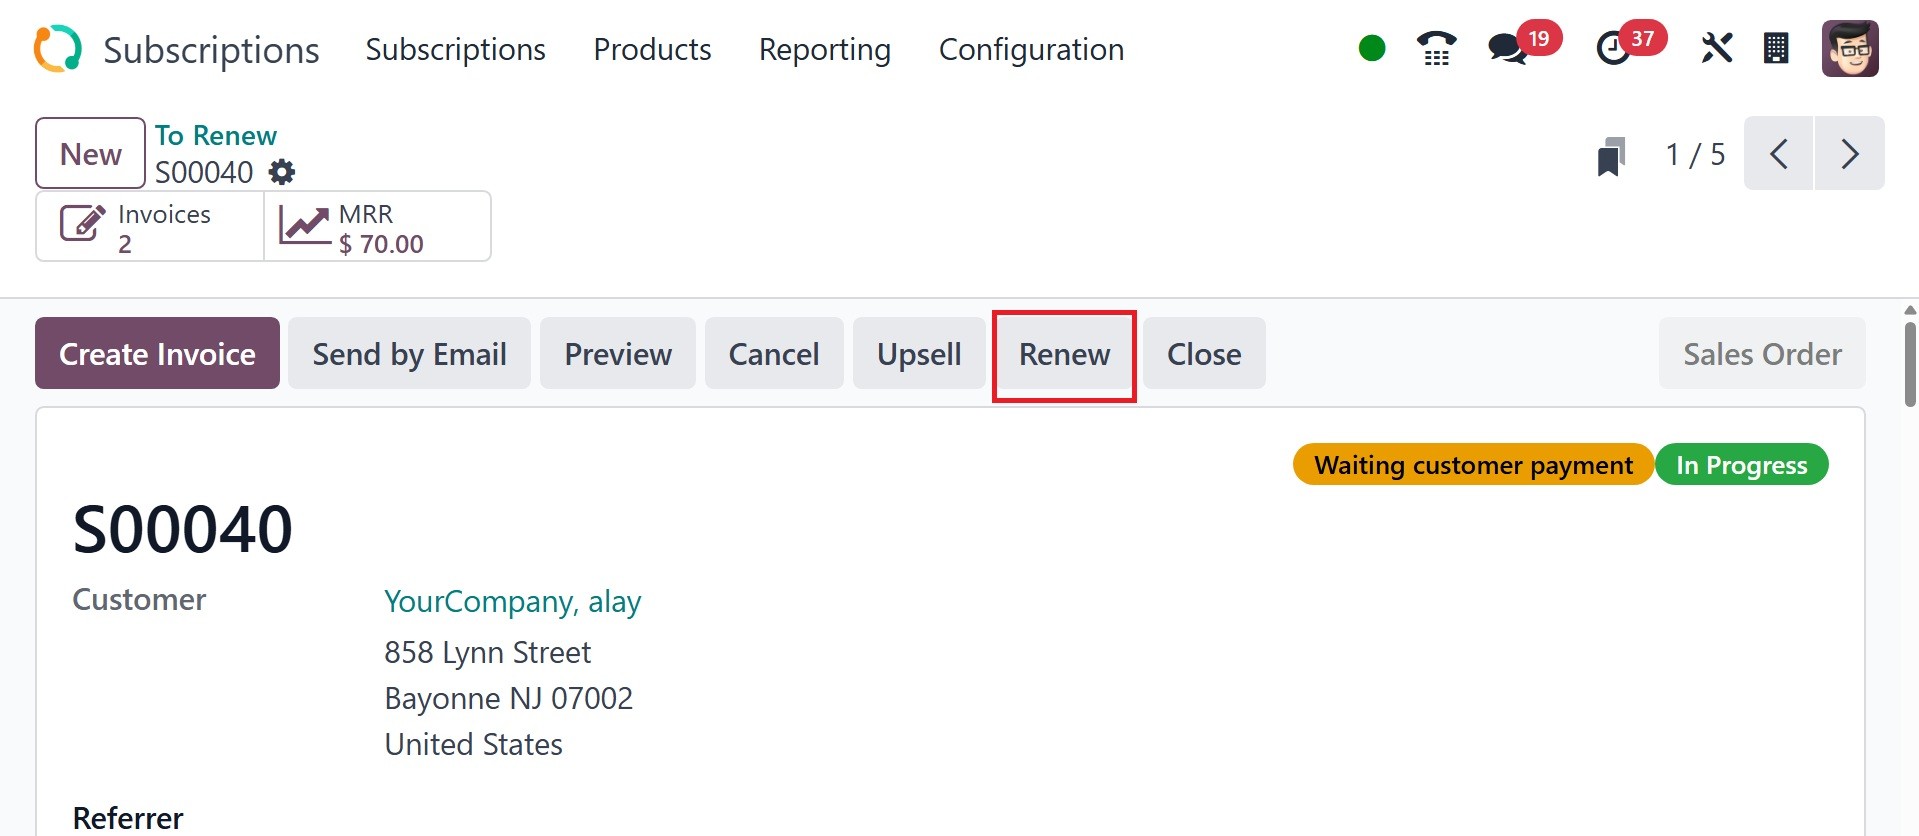
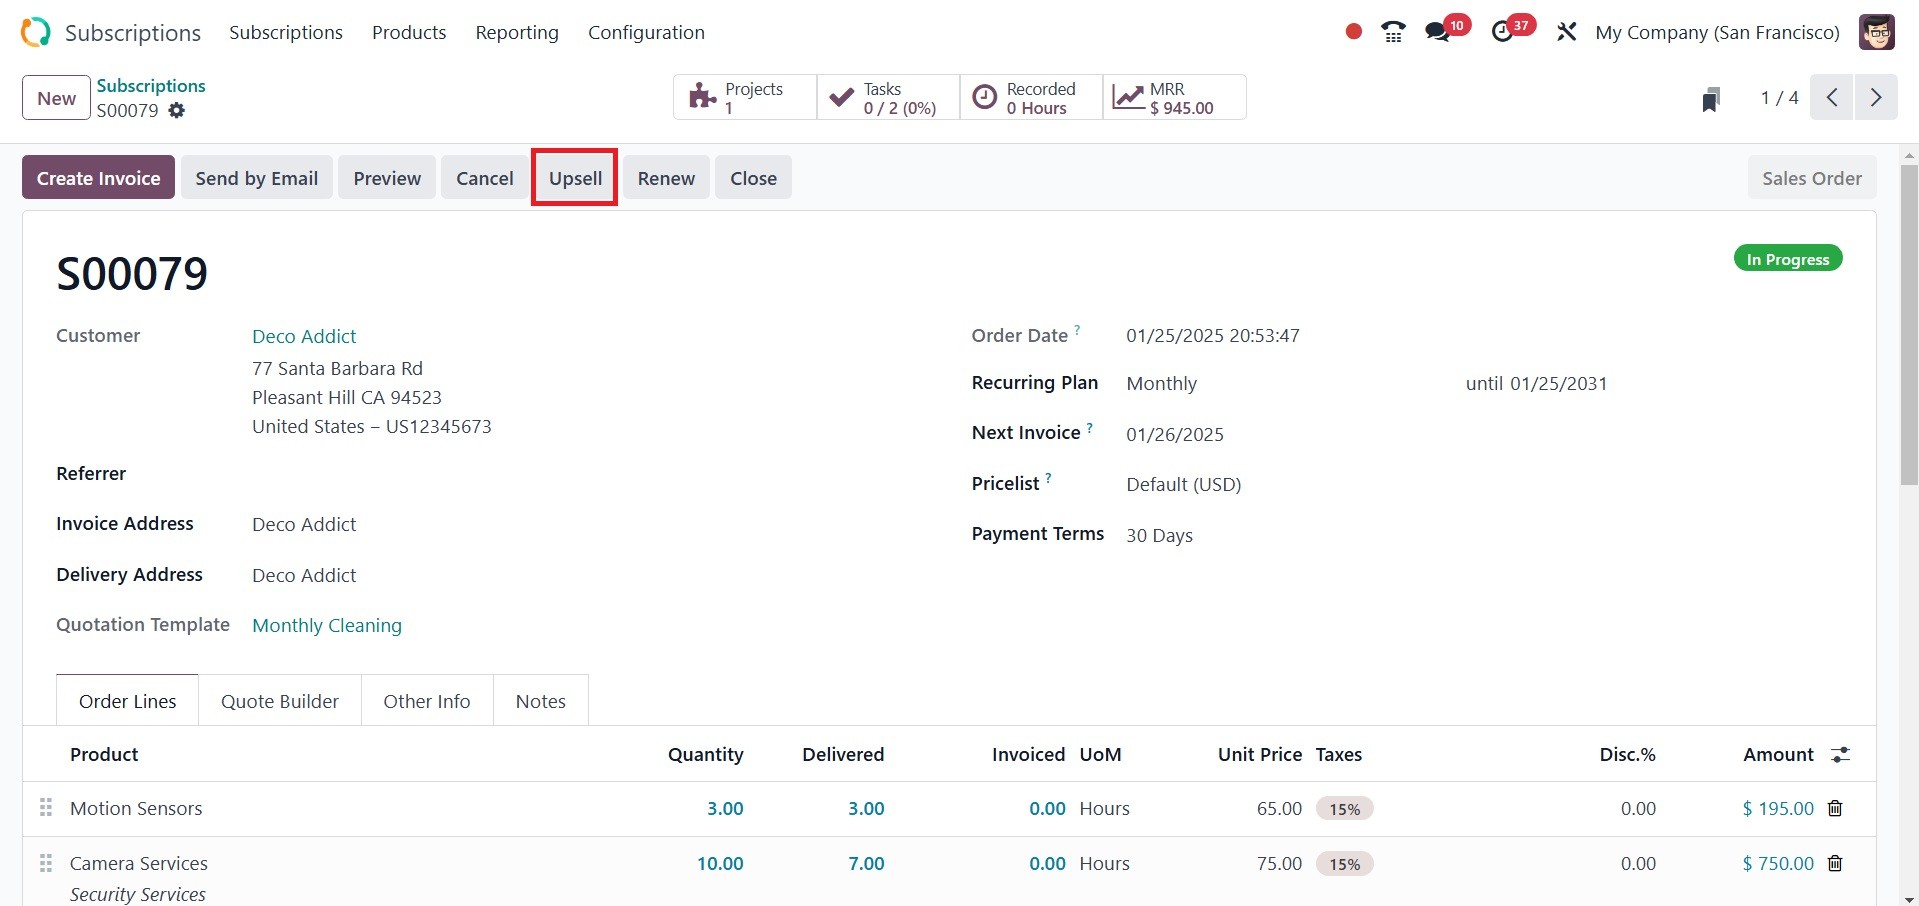
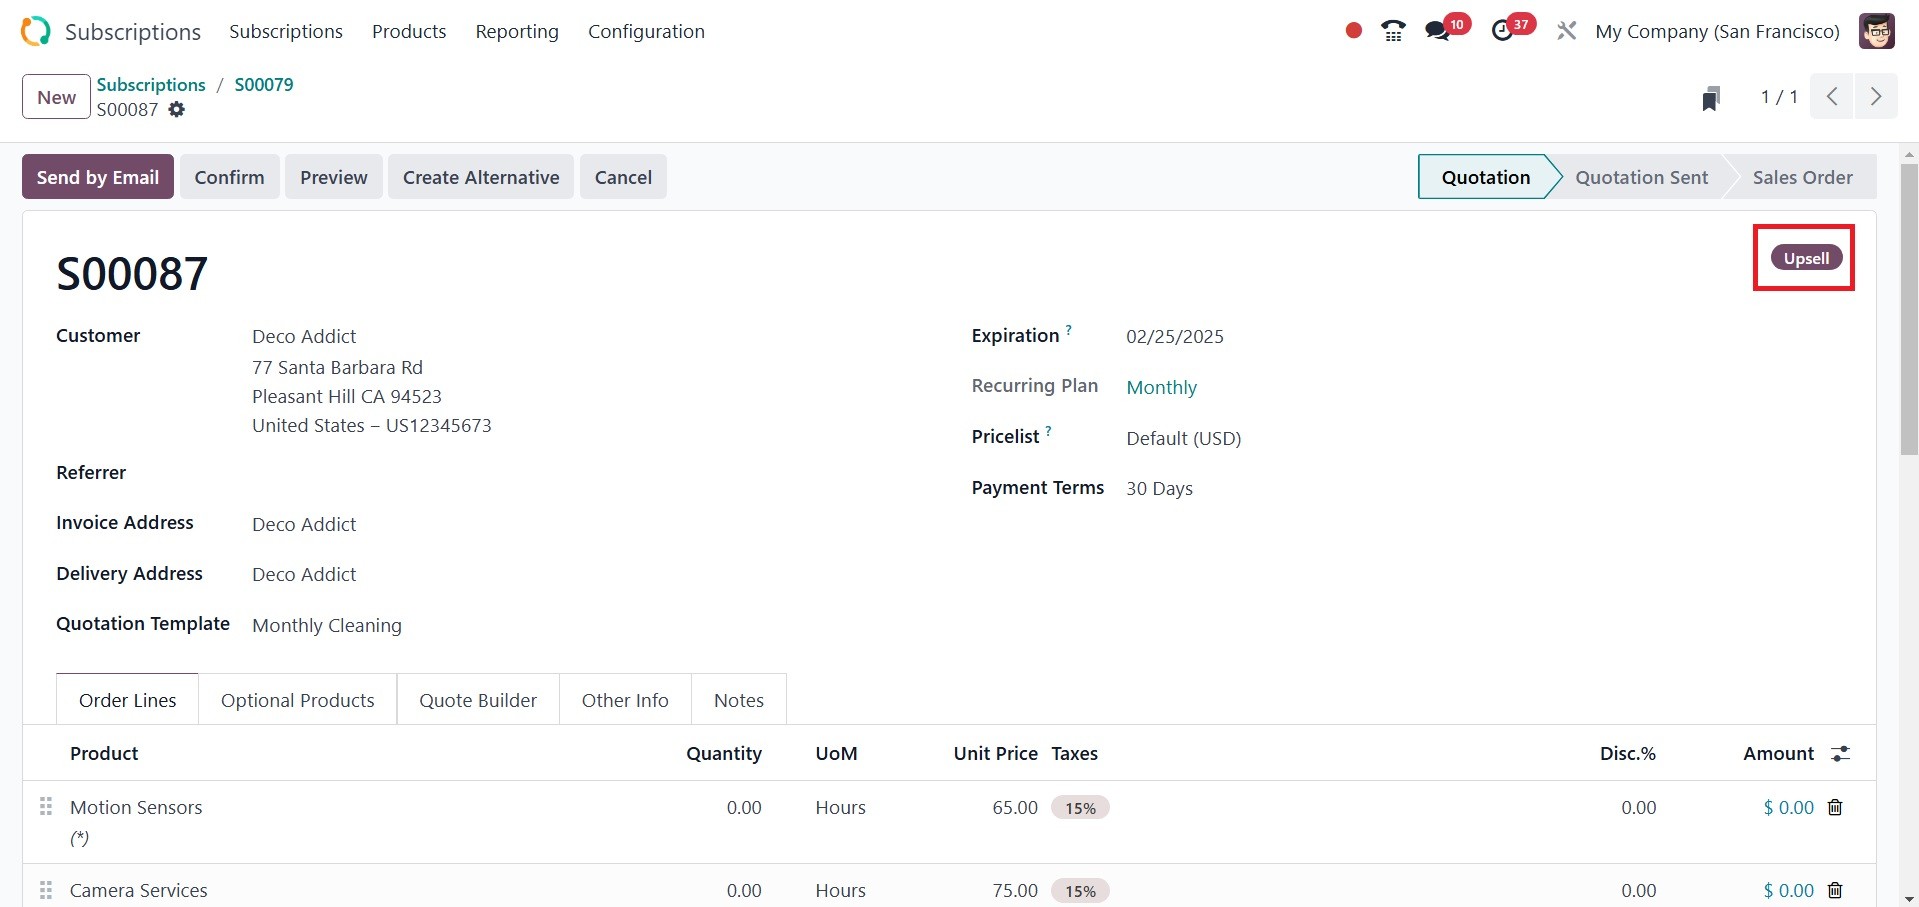
By selecting the Renew button,
you can extend your
subscription. Use the Upsell
button to manage customer
retention by adding
additional products or
discounts to customer.
1.1 Subscriptions to renew
When the subscription's term is
up, the user can renew it in
the Odoo18 Subscription
module. Renew your
subscription if you want to
keep enjoying the benefits
after the expiration date.
Odoo18 provides a unique
framework for managing
subscription renewals within
the module. The module's
Subscription menu has the
option for the subscriptions
‘To Renew’.
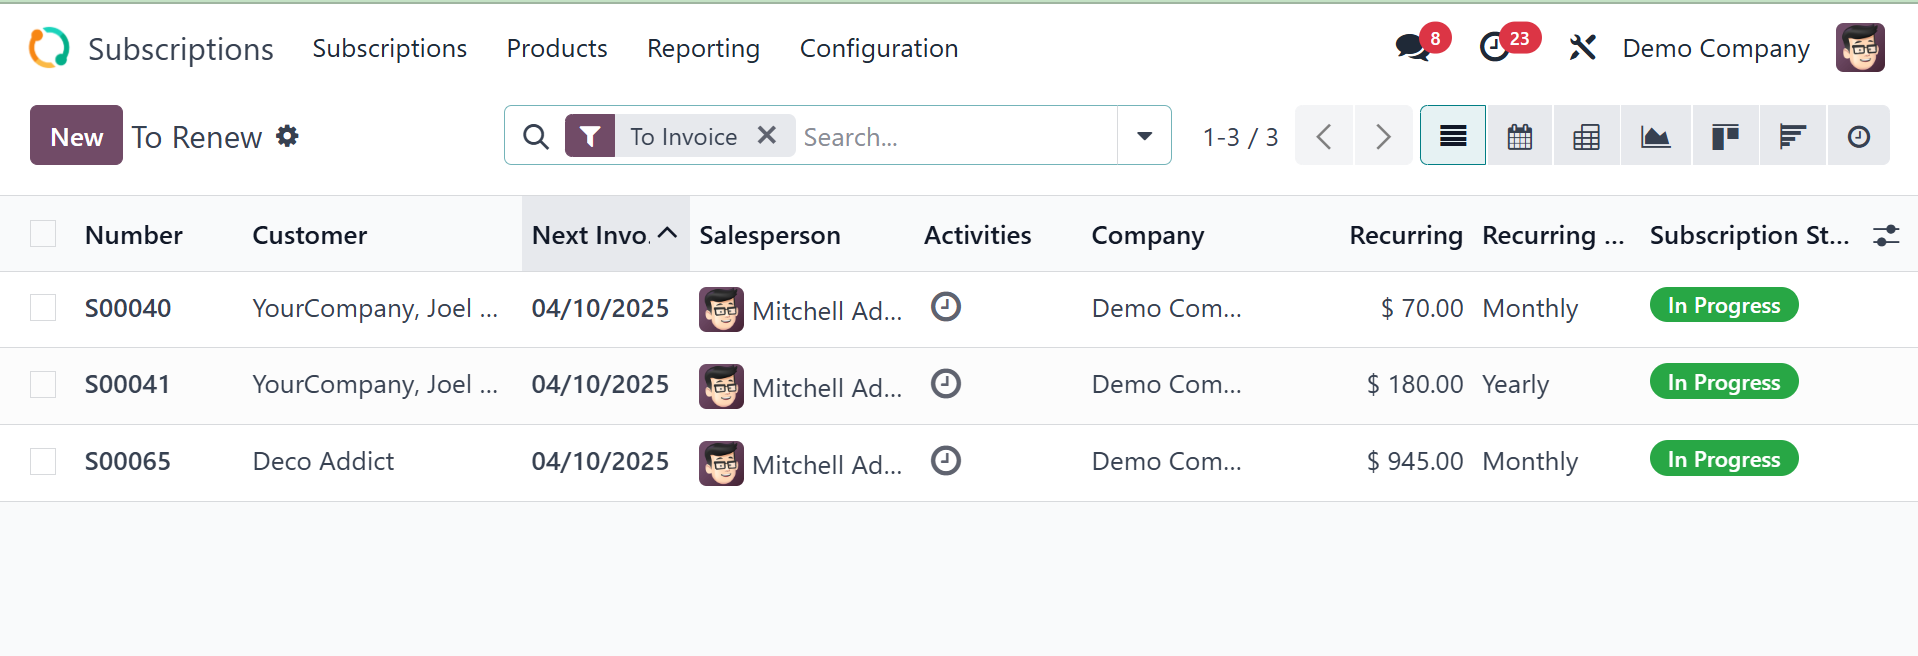
All of the expired subscriptions
will be shown on this site.
The list view shows the
number, order date, website,
salesperson, client,
activity, company, total,
invoice, and status. To
manage the renewal of a
subscription, you can select
one from the window.
The renewal window's form view
will appear, as seen in the
screenshot. The status of the
subscription is as you can
see here. You can utilize the
Renew button to carry out the
renewal transaction.
This will produce the
subscription renewal sales
order that is displayed
below.
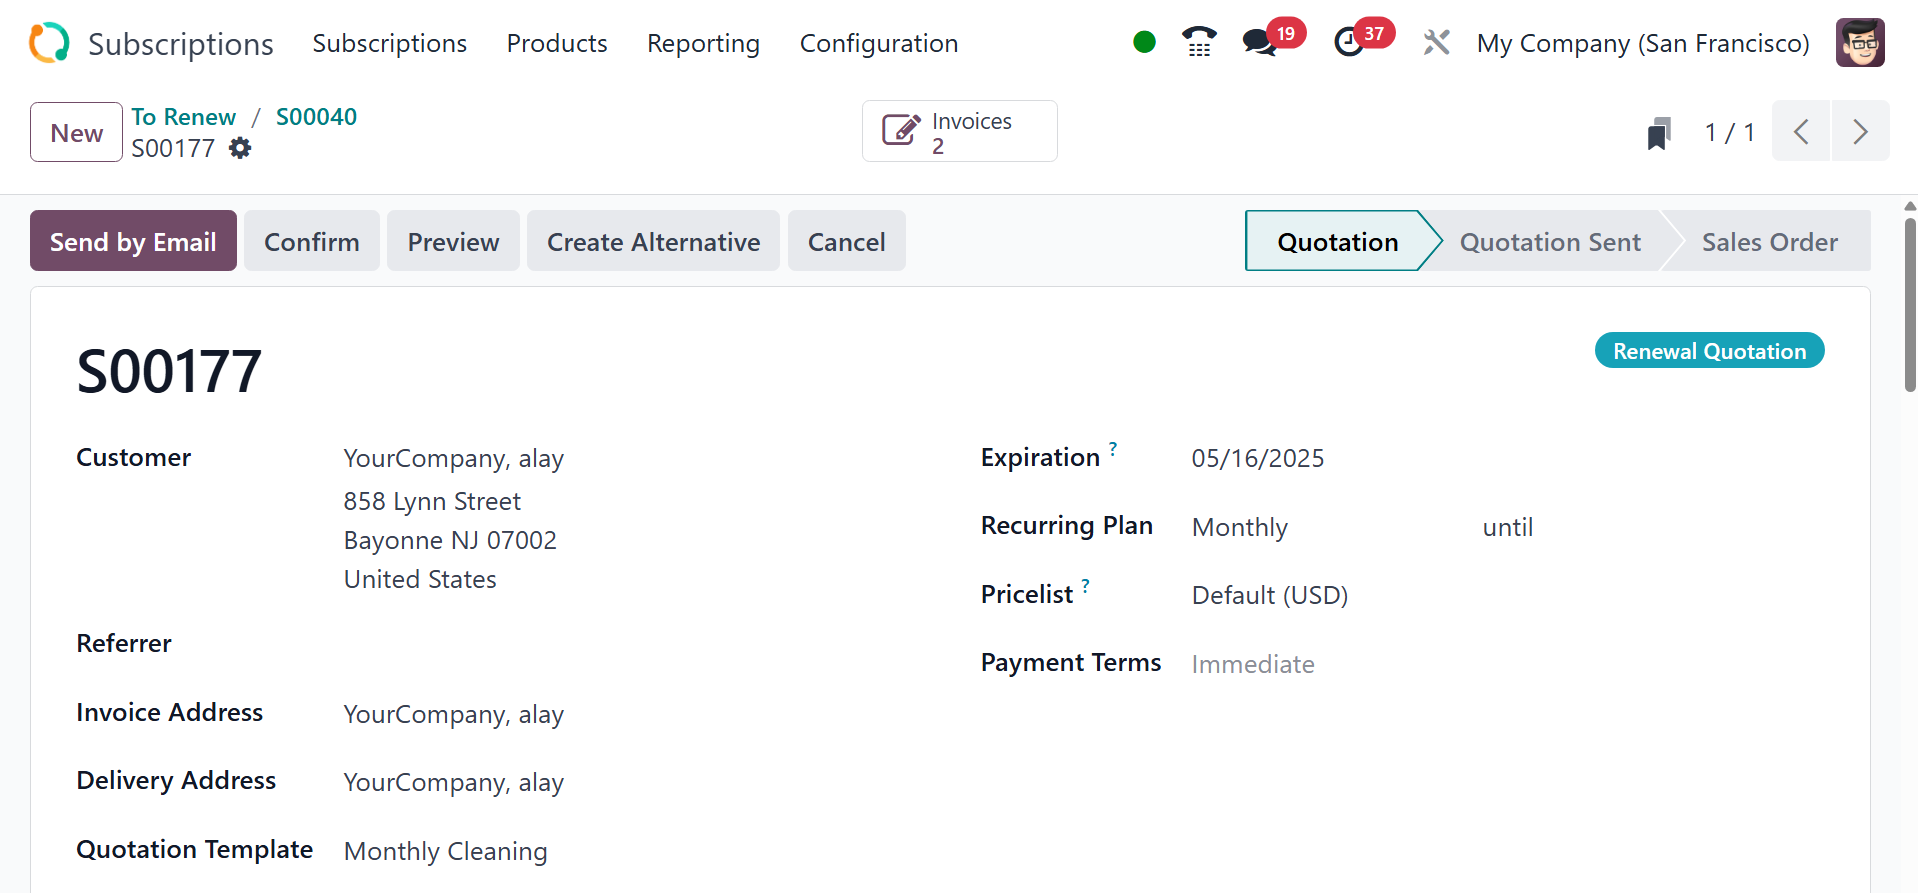
This is the sales order for the
subscription renewal.
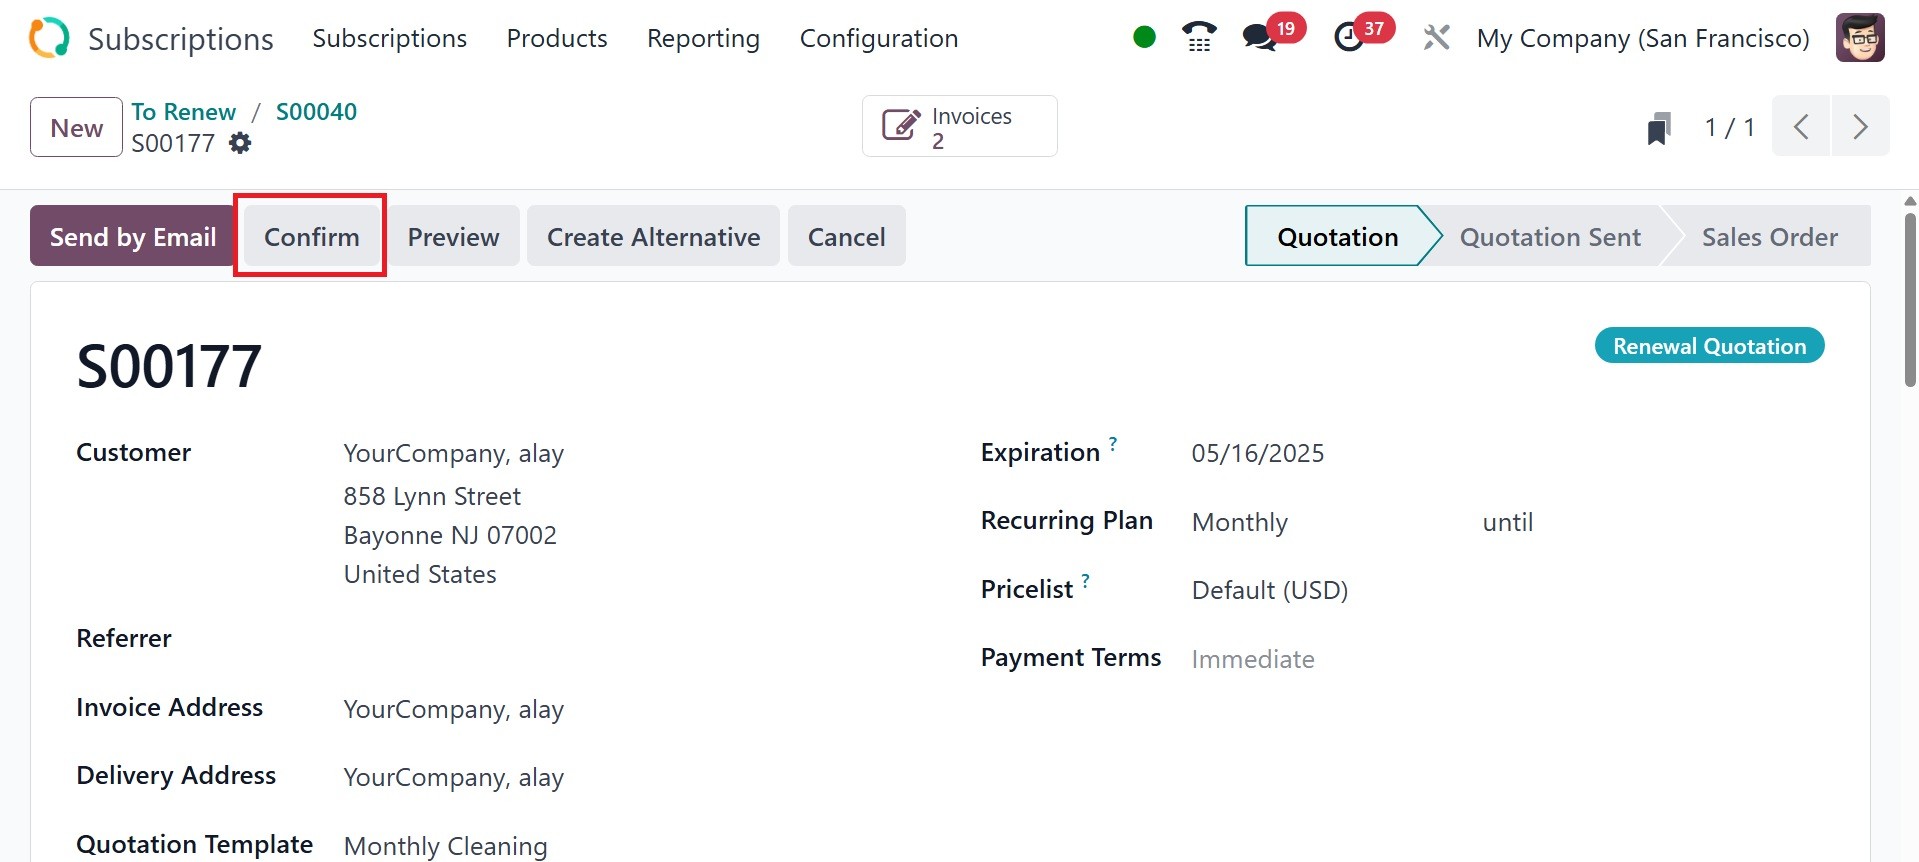
Click Confirm to finish the order
and generate an invoice.
After you send in your order
confirmation, your
subscription will be renewed.
The status of the prior
subscription is Renewed. You
will be able to renew your
subscription through this
approach.
1.2 To upsell
An effective marketing strategy
for increasing sales of a
company's products is the
upsell. You can upsell
current subscribers to new
ones by incorporating
additional offers and
subscription items. You can
use this to provide your
clients with more useful and
practical products. The
Subscription menu of the
module has the Upsells
option. This platform will
show the list of sales orders
generated for upselling
items.
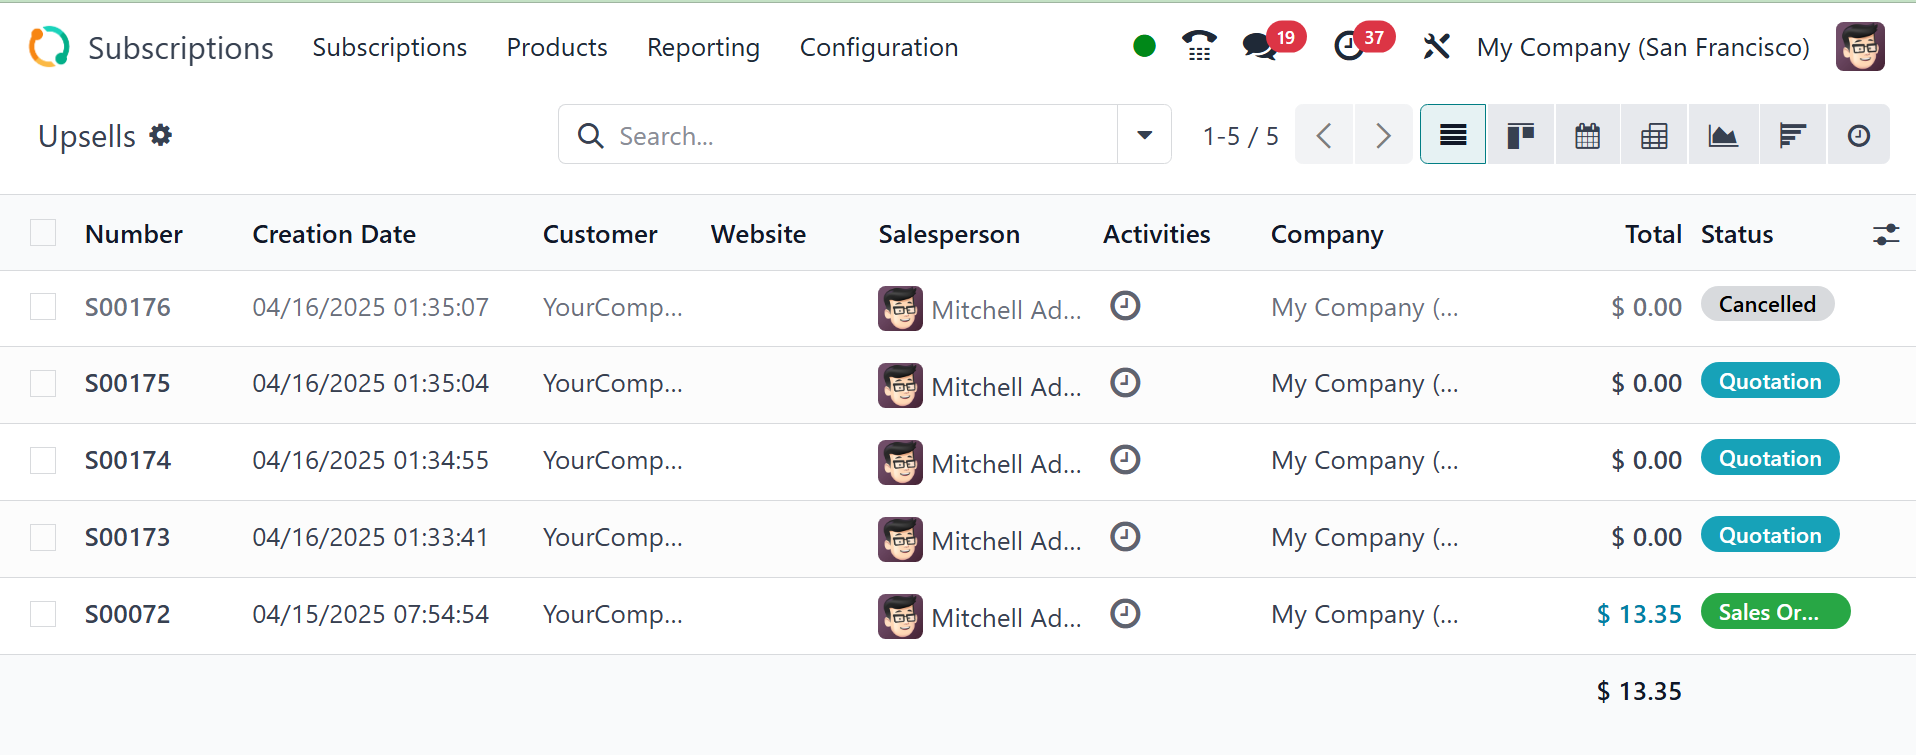
The pane shows the number, order
date, website, customer,
salesperson, activity,
business, total, invoice, and
status.
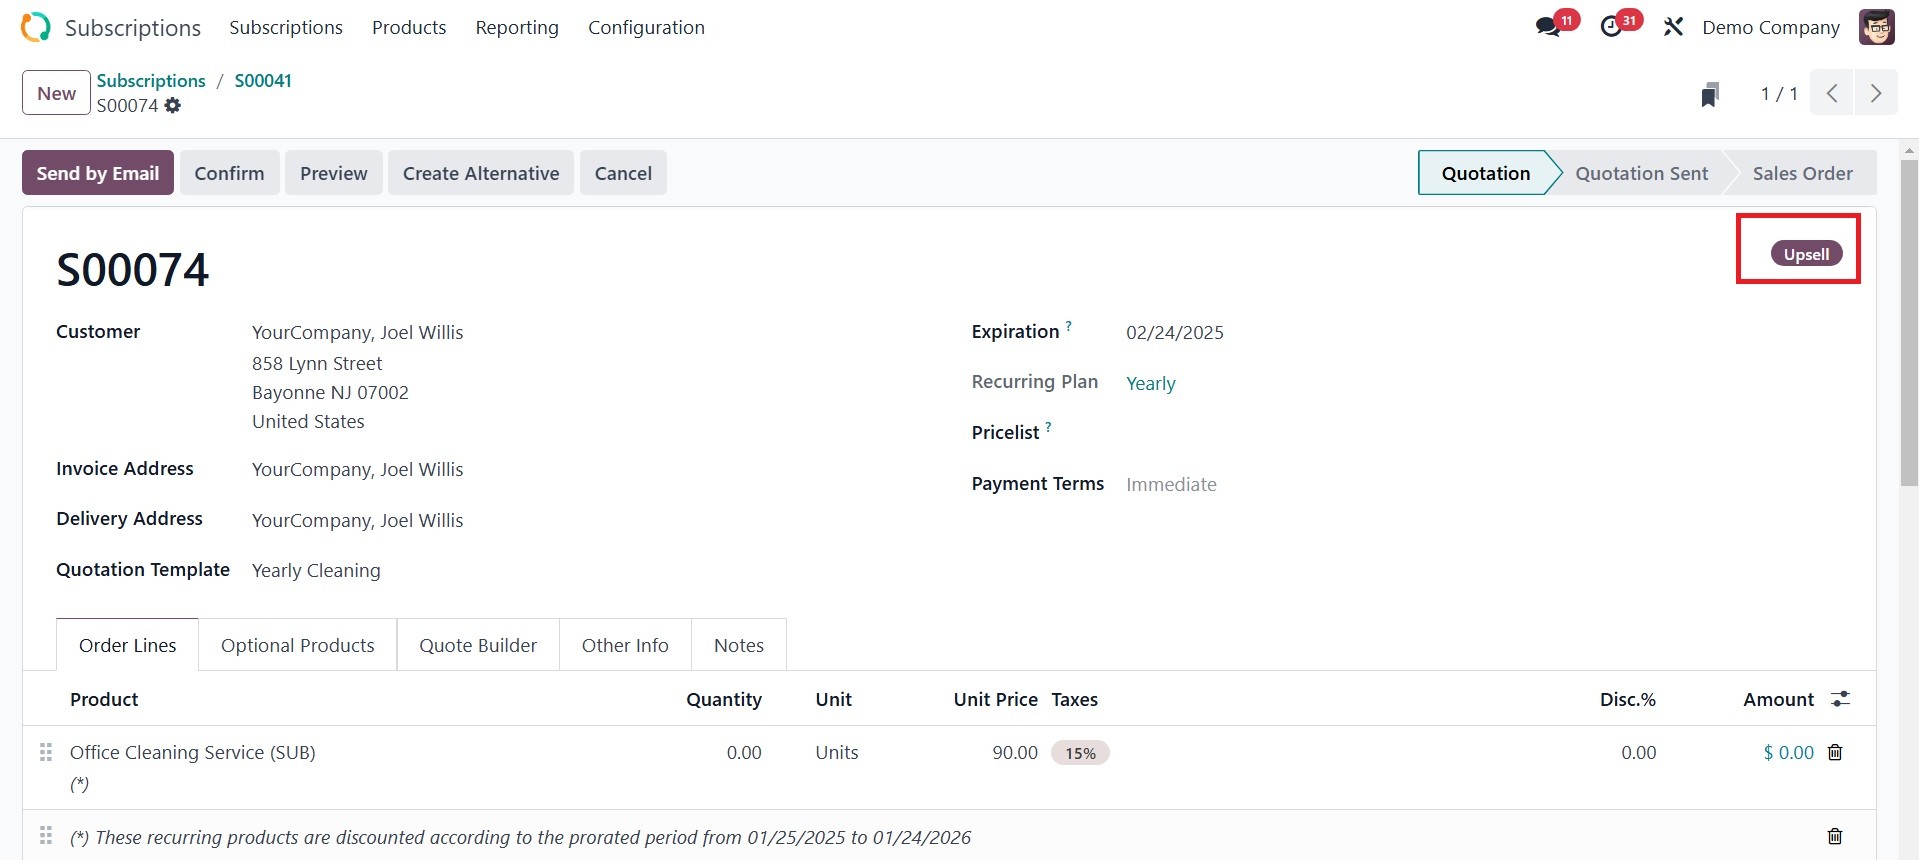
The upsell status may be noticed
on the sales orders, as shown
in the screenshot above.
Odoo 18 has a new feature
called the Create Alternative
button that makes it easier
to create alternative
quotations. The Odoo
Subscription module's "Create
Alternative" button enables
users to produce extra sales
order quotes for situations
involving renewals or
upsells. When a customer's
subscription is about to
expire and you wish to offer
them a variety of renewal
alternatives or upsell them
on more products, this
functionality is quite
helpful.
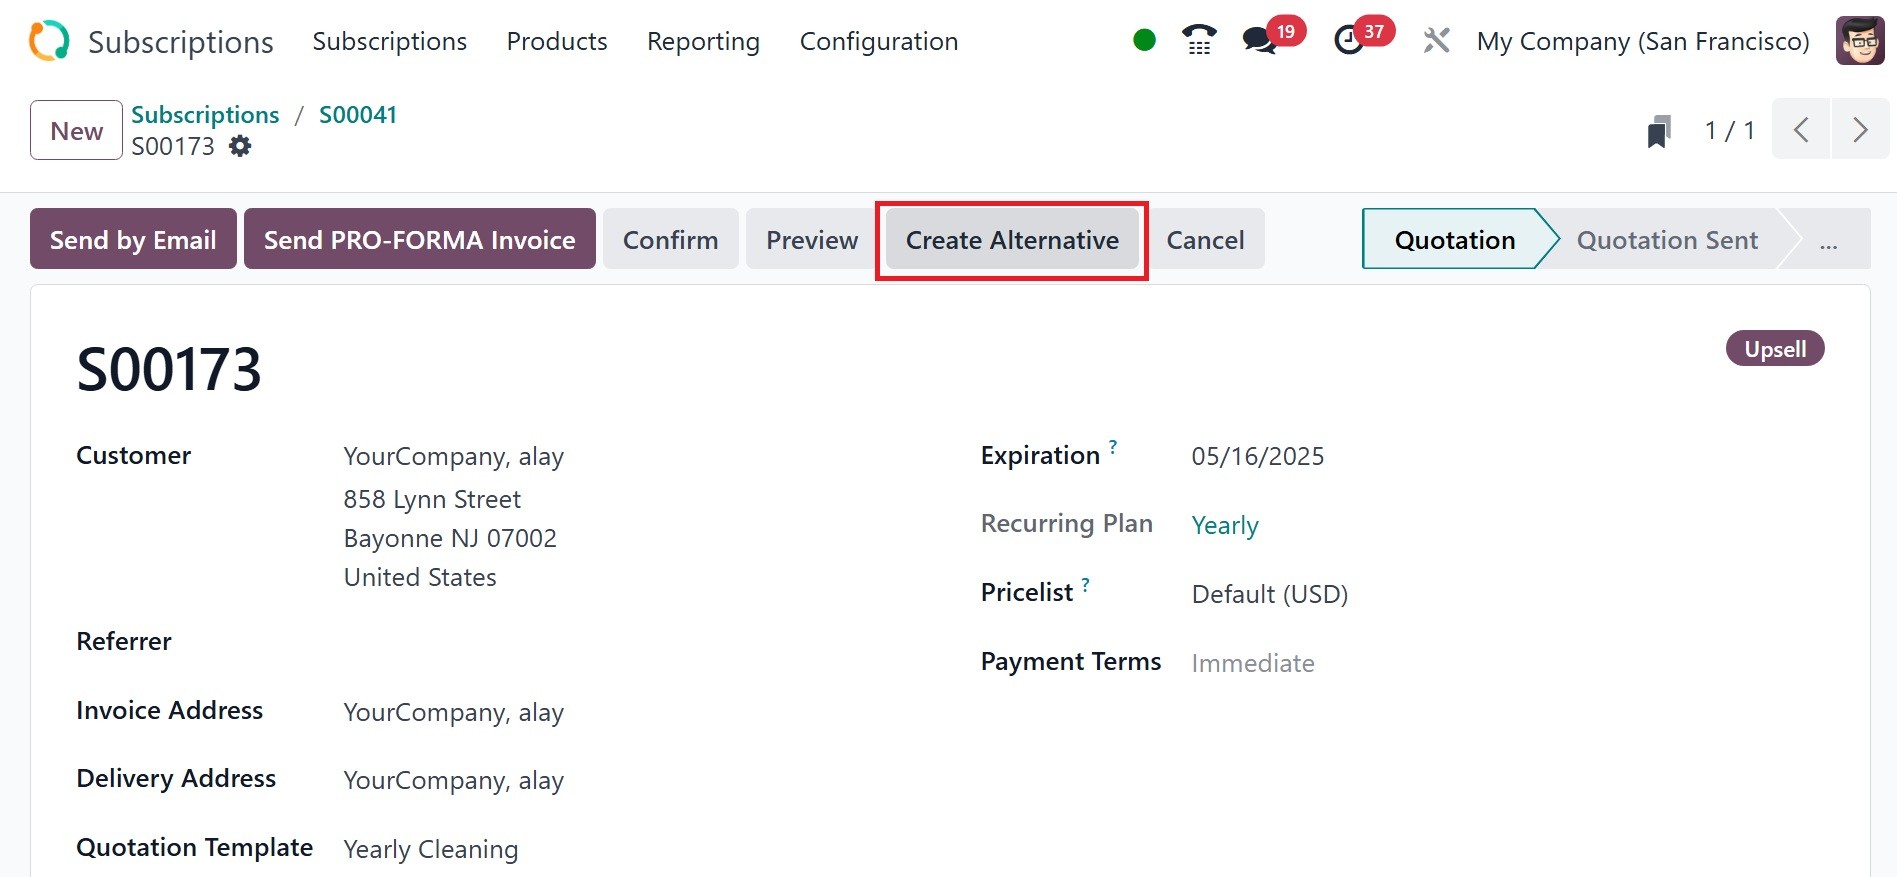
On selecting the create
alternative option, a new
quotation can be created, as
in the image below.
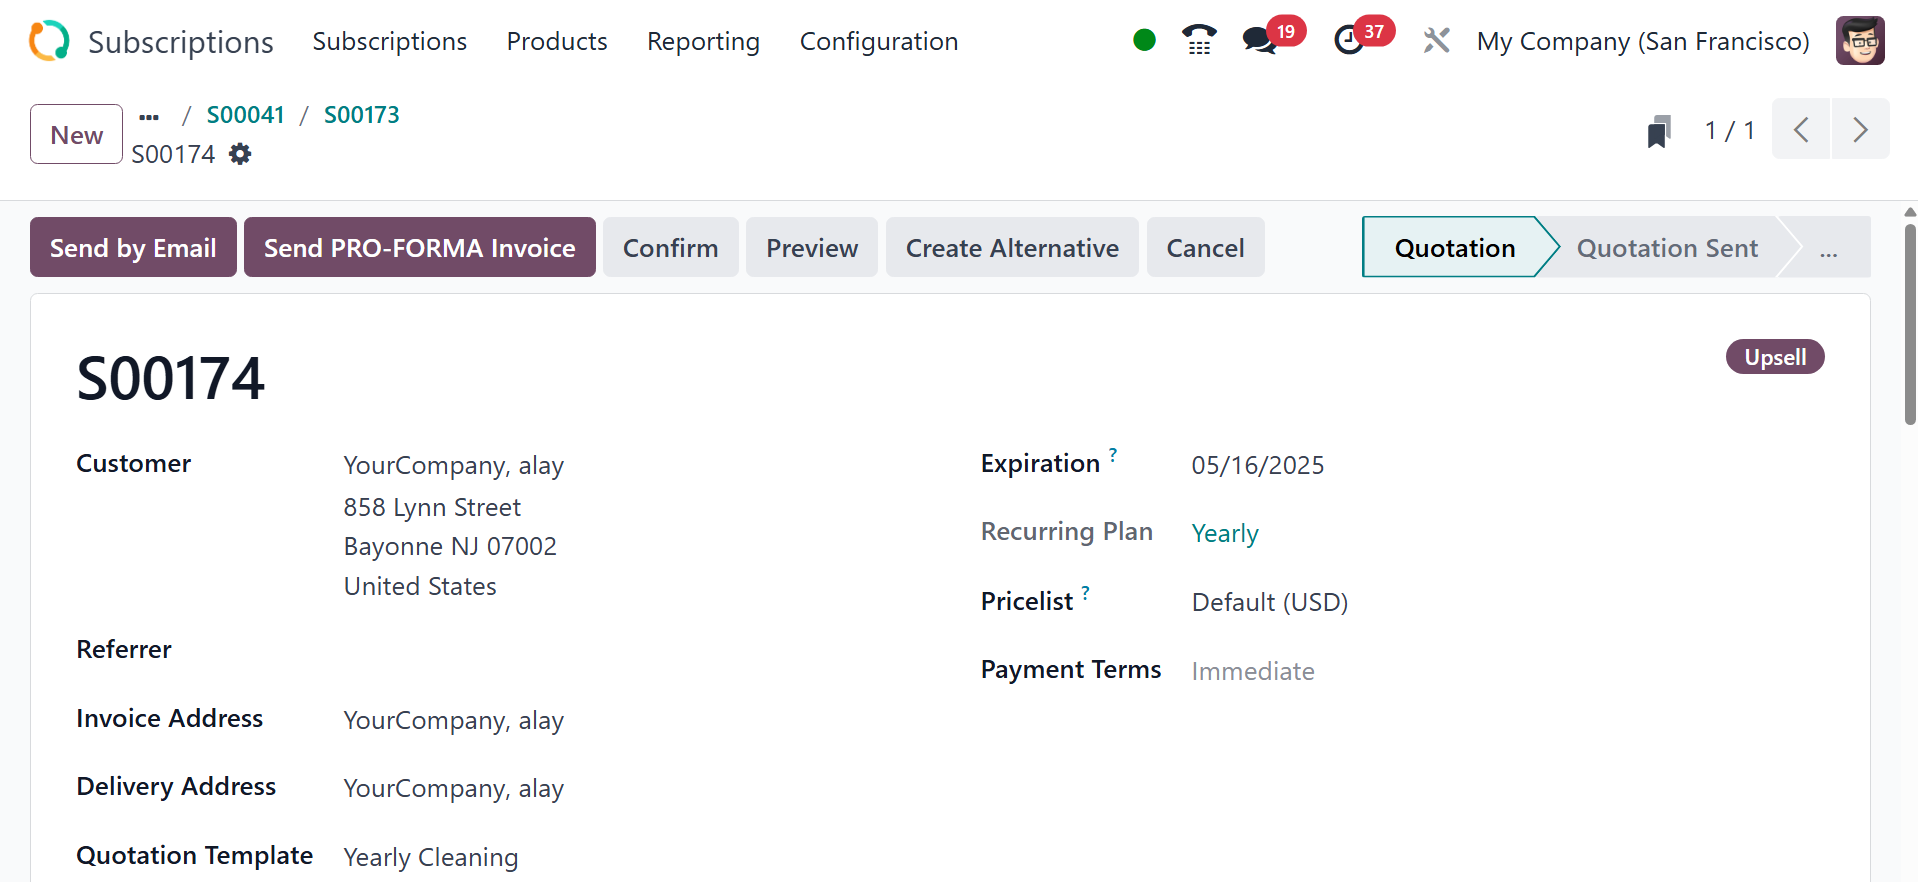
To add upsell products to an
existing subscription, you
may now select a subscription
from the module's main
dashboard.
As can be seen in the image
above, the Upsell button is
situated in the form view. An
upsell product quotation will
appear when you click this
button. It is possible to add
new products to this
quotation. The quotation for
the new products can be
submitted to the appropriate
customer for approval.
Once the client has given their
permission, you can convert
the quotation into a sales
order by clicking the Confirm
button. The new upsell goods
will be added to the
subscription as soon as you
confirm the order.
1.3 Subscriptions Products
The product configuration that we
outlined in modules such as
Sales and Inventory is
identical to the subscription
product configuration. You
can configure things in the
Subscription module under the
items menu.
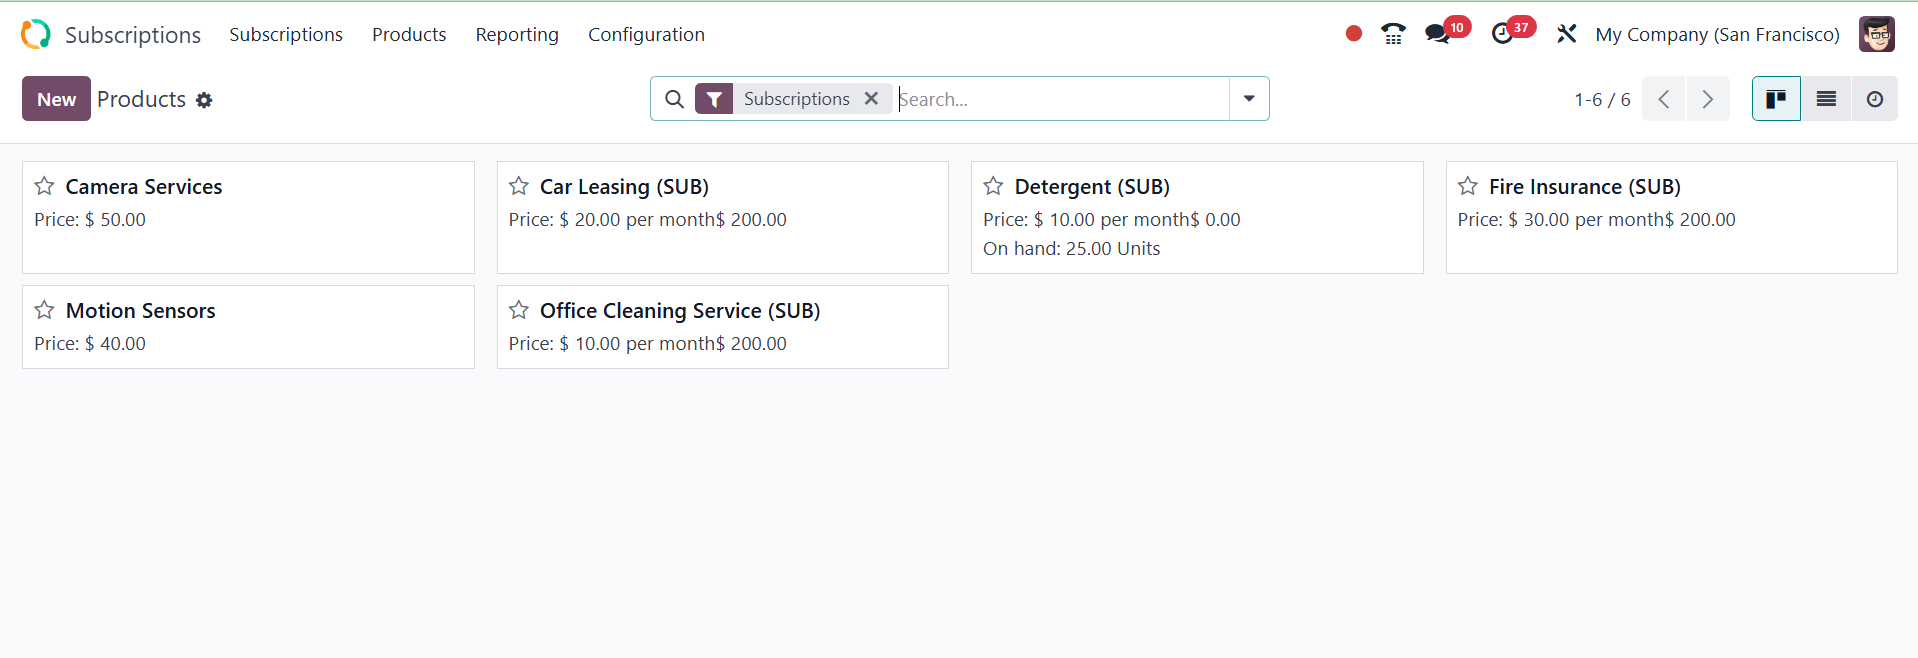
You can learn more about the
recurring products on your
screen by using this filter.

To inform Odoo which products are
subscription-based, the
boolean "Subscription" field
in the Products menu of the
Odoo Subscription module is
essential. On activating the
subscription option, you will
be provided with a recurring
price option.
So, when creating a subscription
product, remember to use the
Recurring option from the
form view. This will cause
Odoo to automatically create
a subscription for this
product each time you use it
to confirm a sales order.
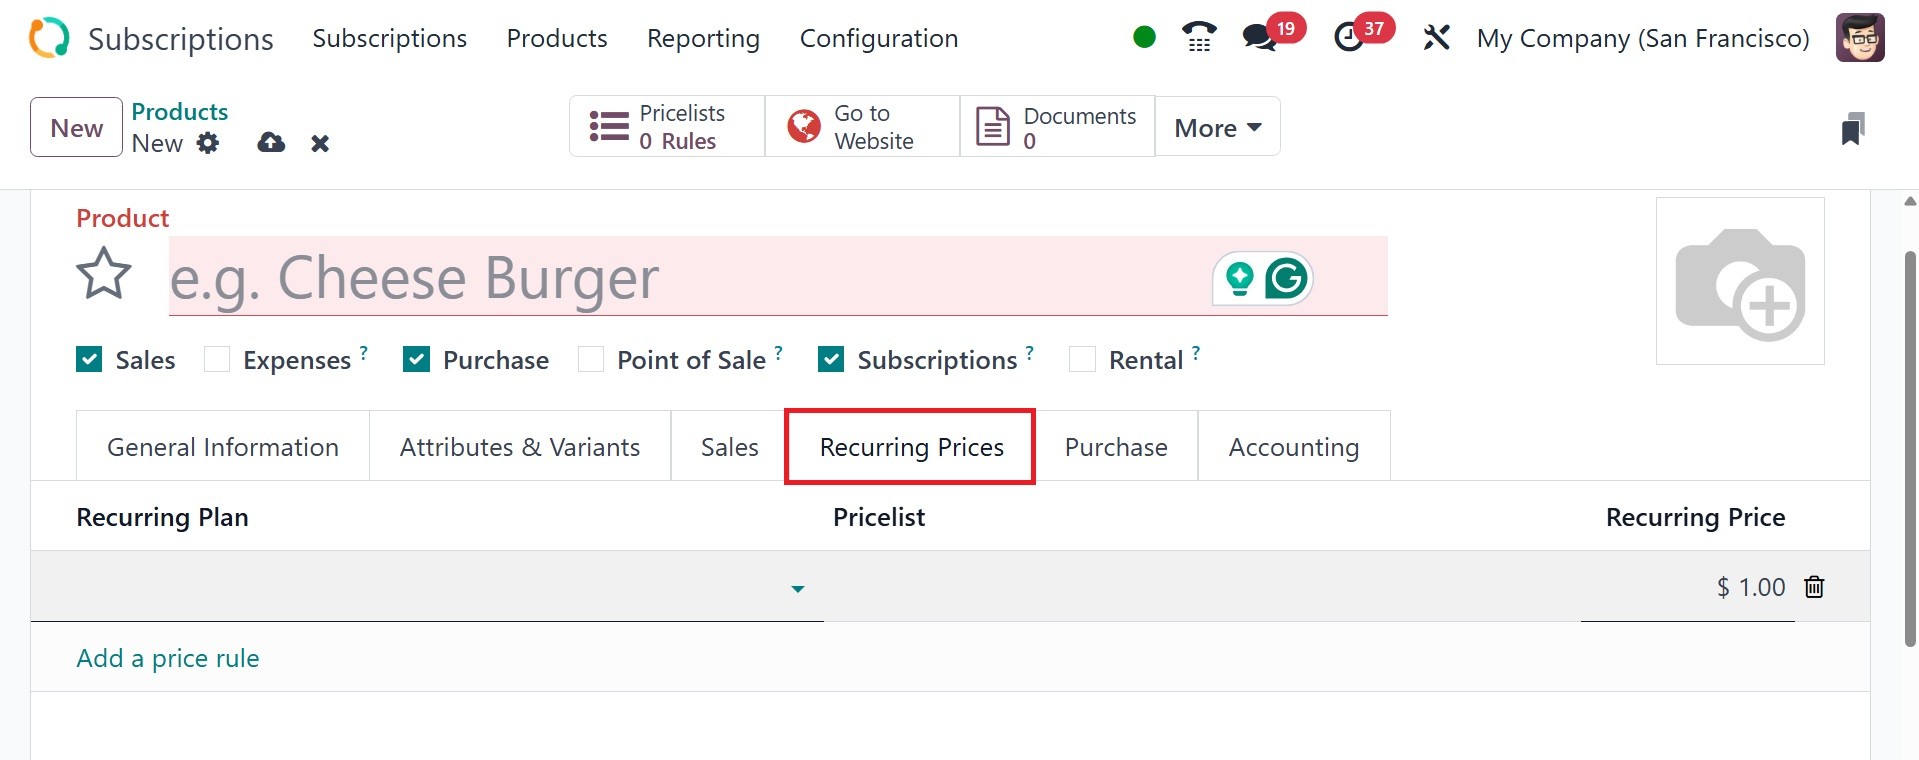
You can specify how much and how
frequently a consumer will be
charged for a subscription
product under the "Recurring
Prices" area. You can add a
recurring plan for the
subscription product by using
add a price rule option.
Numerous new features were
incorporated in Odoo 18. The
ability to generate storable
products as subscriptions is
one of them.