2.Timesheets Menu
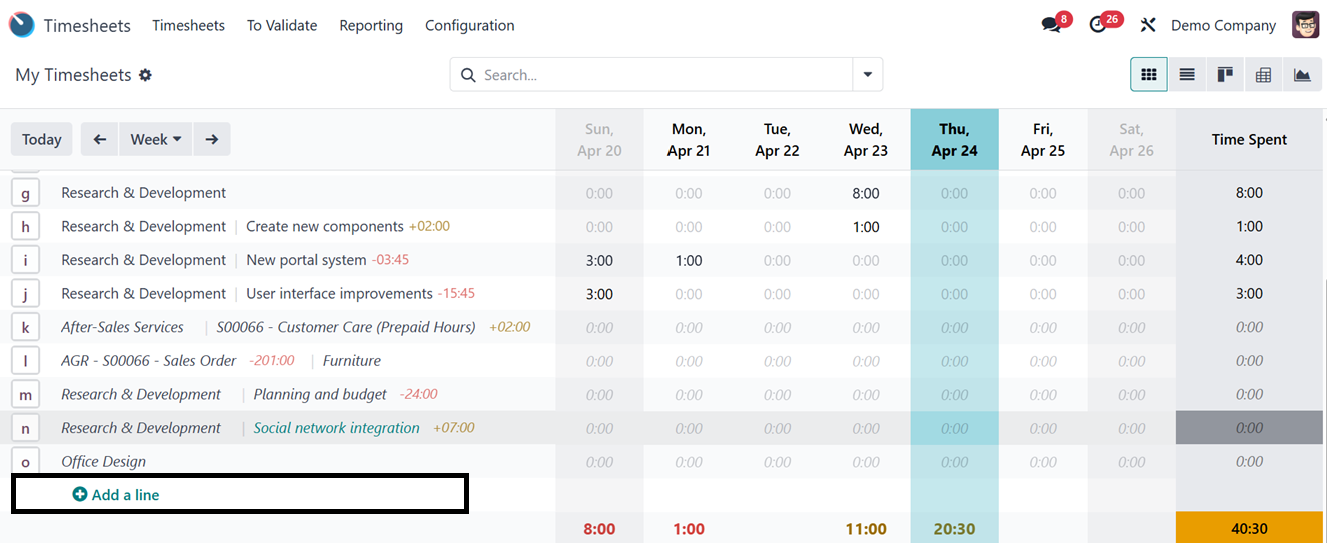
Upon accessing the Timesheet module, users are presented with a grid view displaying
all recorded timesheets in a “My Timesheet” window. This interface showcases the
titles of various completed activities, including projects, tasks, and meetings,
alongside the corresponding tracked time.
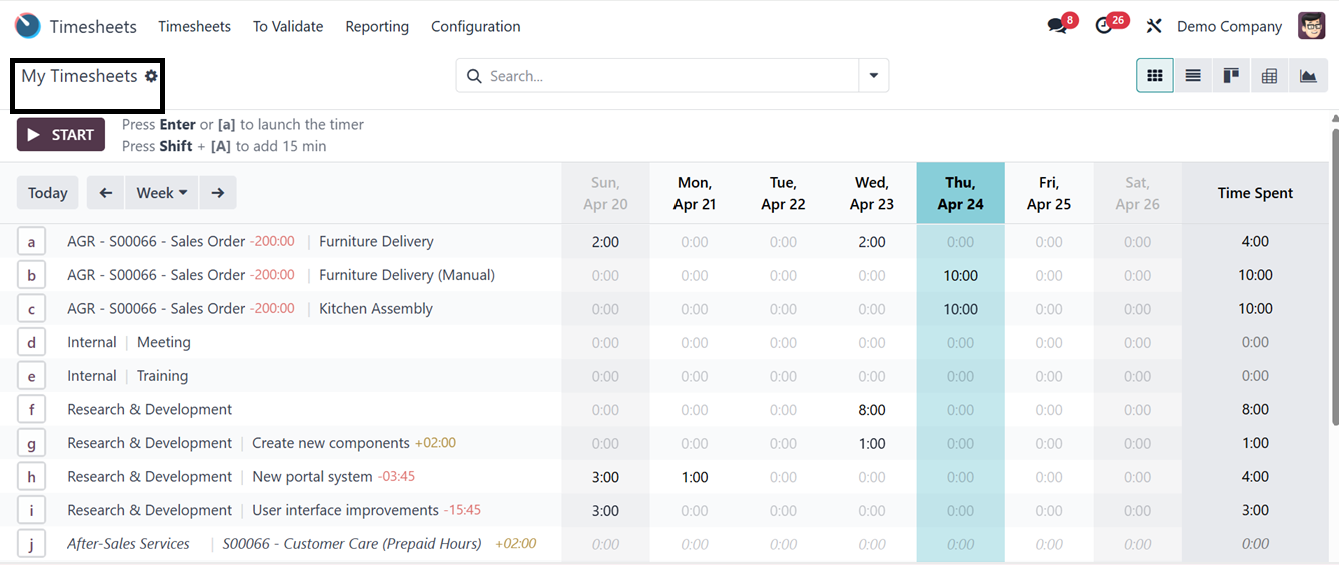
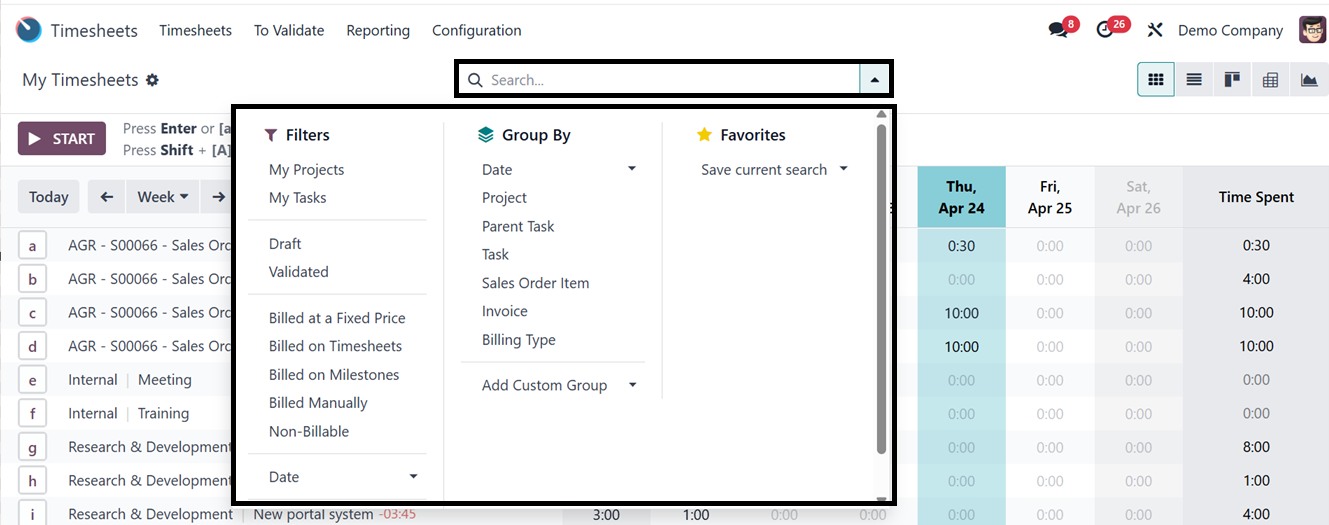
To analyze the time expended on different organizational operations within a specific
week or month, users can select the desired time frame. The module provides multiple
view options, including Kanban, List, Pivot, and Graphical views. Additionally,
both predefined and custom Filters and Group By options can be utilized for efficient
data management from the advanced search bar area.
Initiating time tracking for a specific project or task is achieved by clicking
the 'Start' button. Upon activation, additional fields become available for detailing
the assignment, project, and activity. The timer automatically records the time
spent on the designated task, which can be halted using the 'Stop' buttons, as depicted
in the screenshot below.
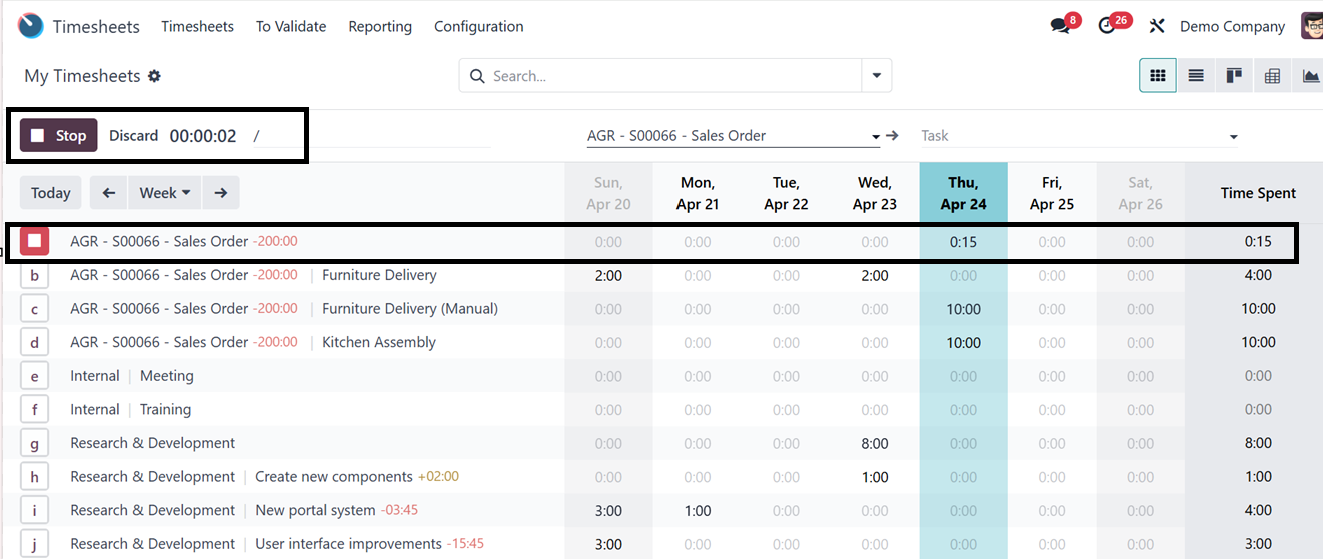
You can also manually edit the time spent on a particular activity just by clicking
on the time hour entry. Clicking on a particular timesheet data column will open
its task form with the details of that particular activity.
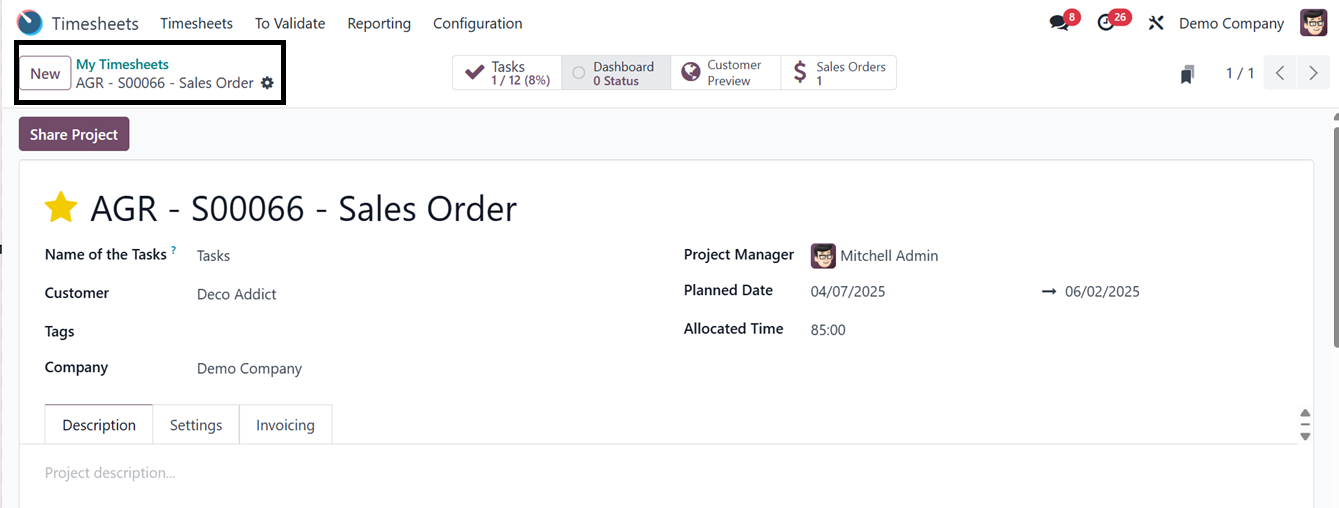
A new window displays detailed information, including Date, Project, Task, Description,
and Hours Spent.
Adding new timesheets
New timesheets can be created by selecting 'Add a line' from the module’s main dashboard.
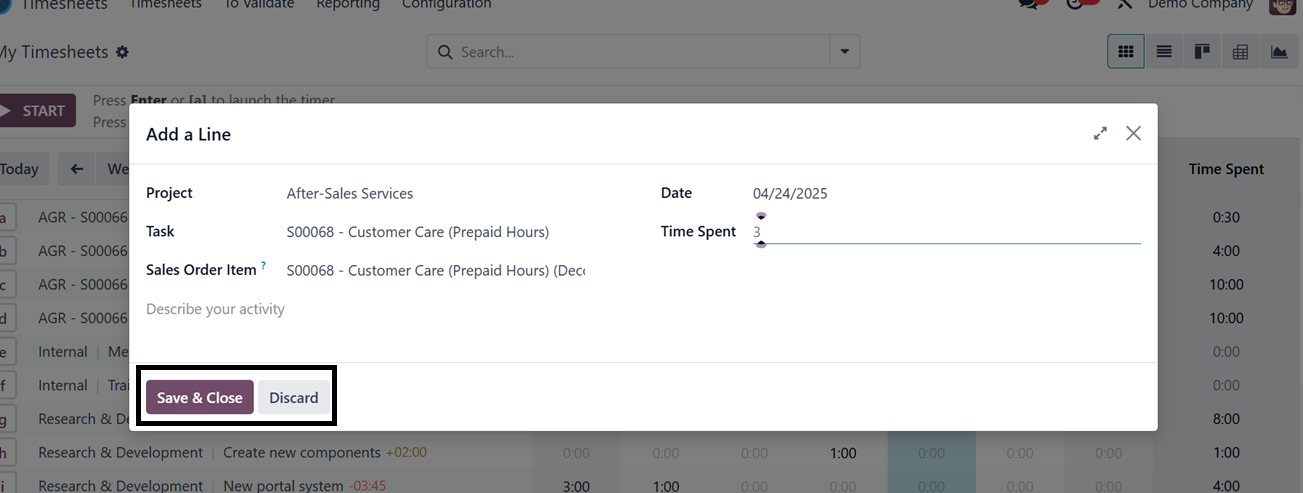
The “Add a line’ button will pop up a window, allowing users to input details such
as the associated Project, Task, Sales Order Item, Date, and Time Spent on the timesheet,
as depicted in the screenshot below. This functionality facilitates streamlined
billing based on timesheets.
After adding the new timesheet details, you can save the data and open the timesheet
column to edit more timesheet information, as depicted in the screenshot below.
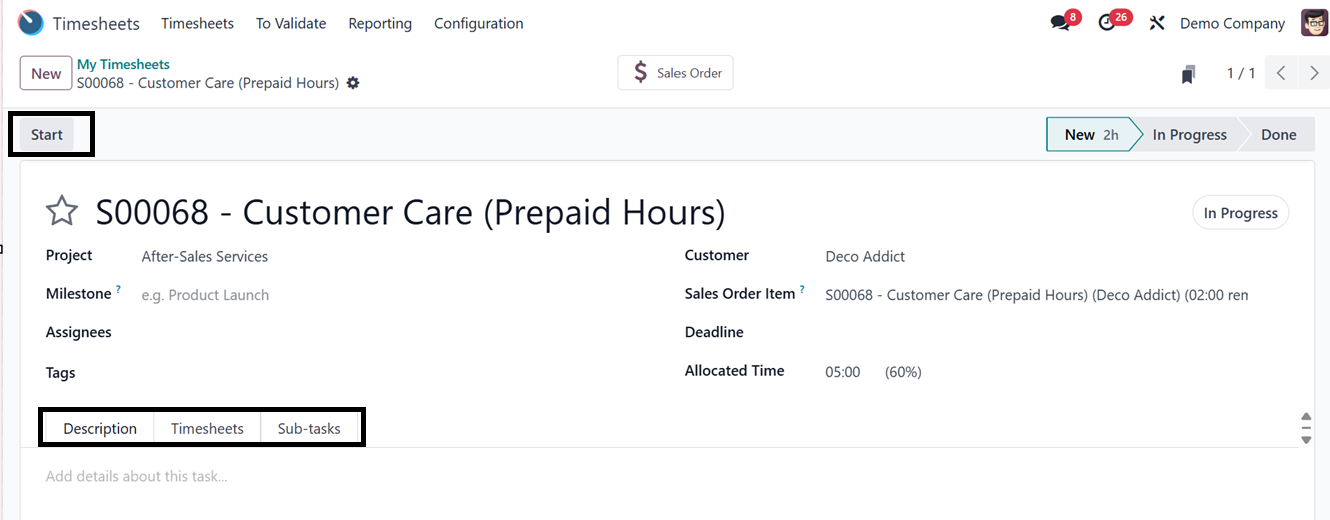
You can edit the timesheet name, Project, Milestone, Assignees, Tags, Customer,
Sales Order Item, Deadline, and Allocated Time as per the timesheet activity.
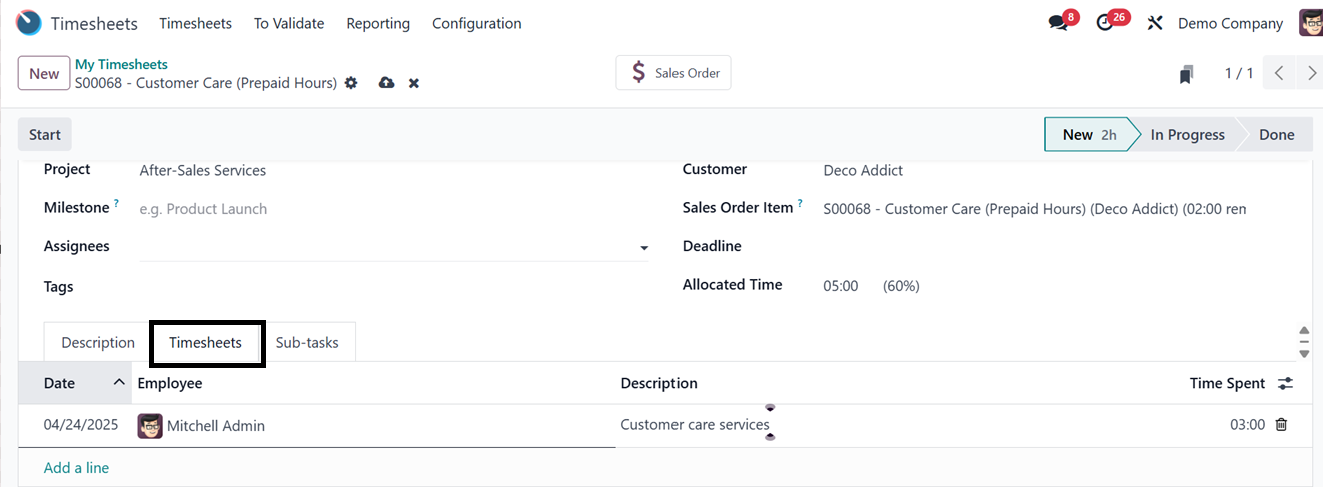
In the ‘Description’ tab, edit any notes regarding the timesheet or task. The ‘Timesheets’
tab can be used to edit the timesheet details, including the Date, Employee, Description,
and Time Spent using the ‘Add a line’ button, as shown in the screenshot below.
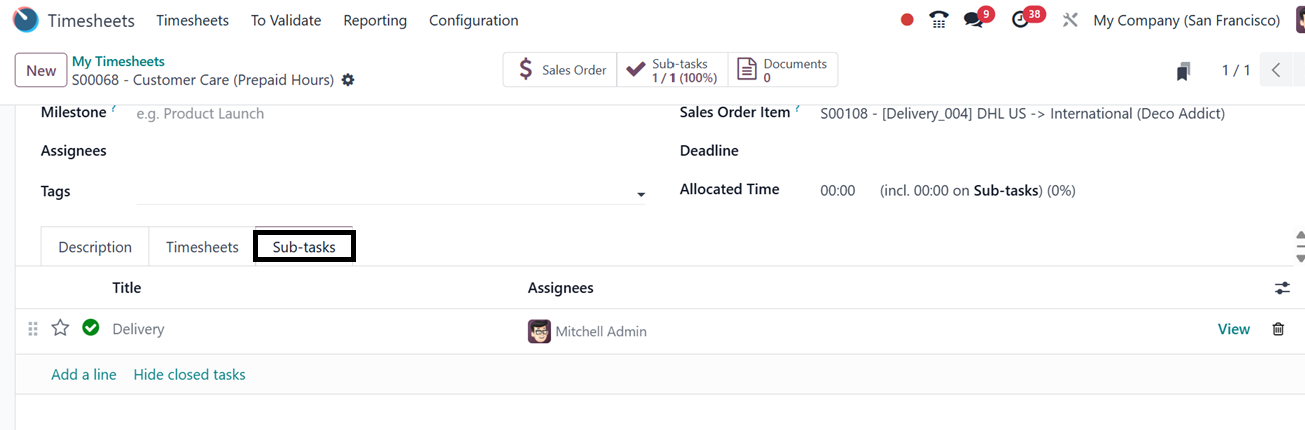
You can add any subtask related to the timesheet in the ‘Sub-tasks’ tab using the
‘Add a line’ button with the task Title and Assignees, as shown below.
Once all the required data has been entered, save the data and click the "Start"
button in the upper left corner of the form to get started. Alternatively, if you
want, you may manually input the amount of time spent on the assignment. You can
choose to halt or pause time tracking as necessary while working on the activity.
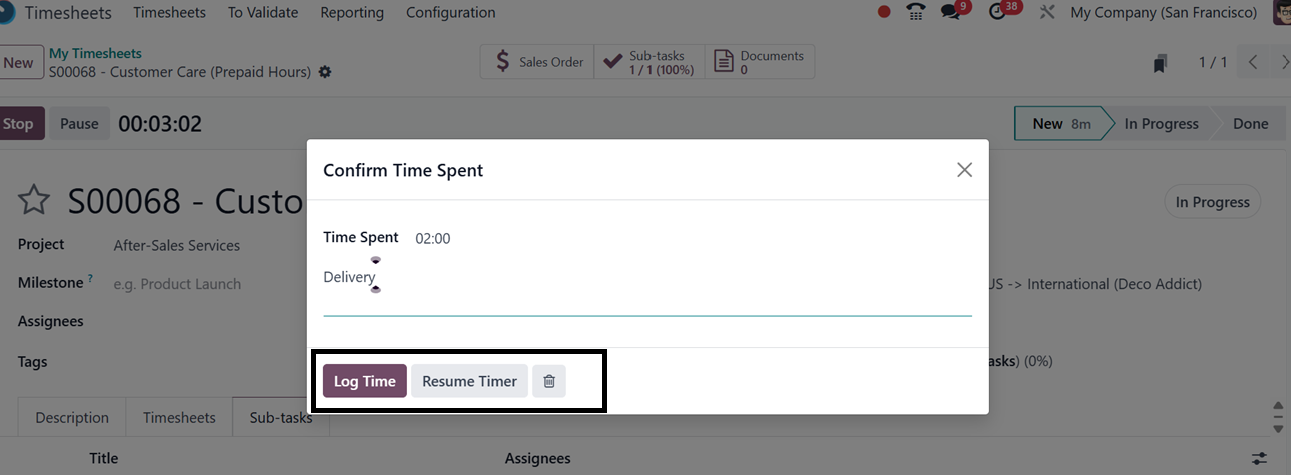
As seen in the picture below, a pop-up box will come up when you click the "Stop"
button after finishing the activity, enabling you to either continue the timer or
report the time spent.
The newly entered timesheet information will show up in the configuration form's
Timesheet tab. Then, the "Sales Order" smart button allows you to examine the goods
or services from the sales order that are connected to the timesheet for this work.
The "Sub-tasks" smart button offers a comprehensive dashboard of all the timesheet's
subtasks, and the "Documents" section shows all of the papers and attachments related
to it.
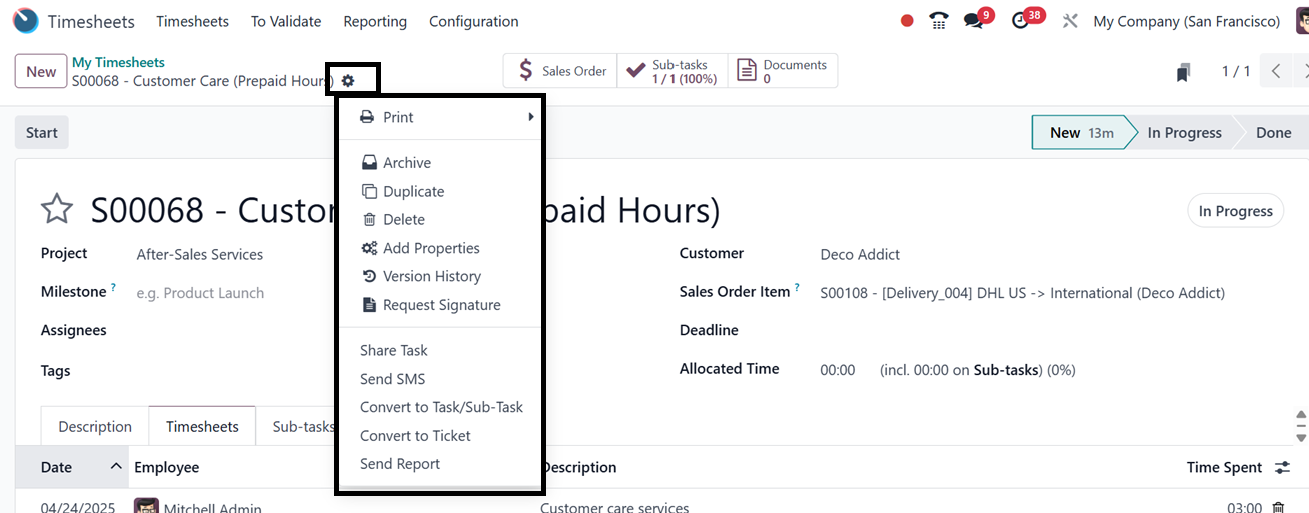
The ‘Action’ button placed on the upper left side of the form can be used to Print,
Archive, Duplicate, Delete, Share Task, Send SMS, Convert to Task/Sub-Task, Convert
to Ticket, Send Report, Request Signature, Check Version History and Add Properties
to the form using the respective icons highlighted in the screenshot below.
- Print: Create a printed copy of the assignment or any associated files.
- Archive: Transfer the work to an archived state without erasing it, preserving the
records for later use.
- Duplicate: When establishing recurring or comparable jobs, it is useful to make
a copy of the present task.
- Delete: Get rid of the task from the system forever.
- Share Task: Create a link that can be shared, allowing collaborators or other users
to access the task.
- Send SMS: Send designated users or clients a direct SMS with task updates or reminders.
- Convert to Task/Sub-Task: Depending on how you choose to set up your workflow, turn
the current record into a main task or a sub-task. To check this feature, you can
click on the ‘Convert to Task/Sub-Task’ button provided at the top of the form view
of any task. So, this will open a pop-up window asking for the parent task, as depicted
in the screenshot below.

After choosing the parent task, click on the ‘Convert Task’ button to proceed. This
will make a task or a subtask.
Convert to Ticket: If the work requires customer support management, move it into
a helpdesk ticket. To check the feature, click on the ‘Convert to Ticket’ button
from the task form. This will open another pop-up window asking for a Team and Stage.
You can choose any stage according to the current status of the task, such as New,
In Progress, On Hold, Solved, and Cancelled, as illustrated below.
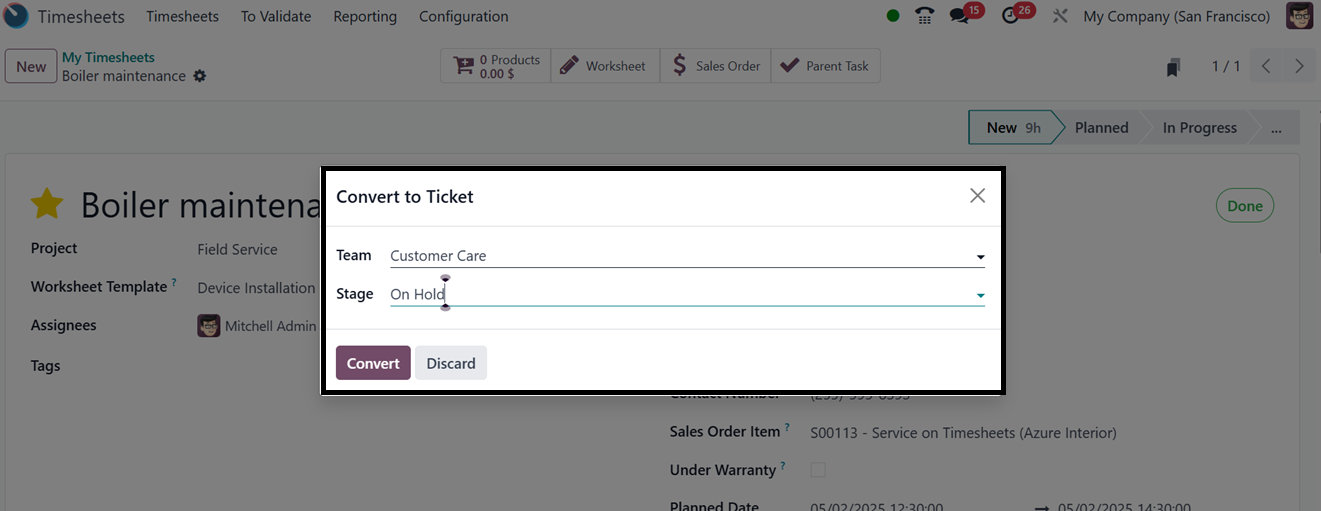
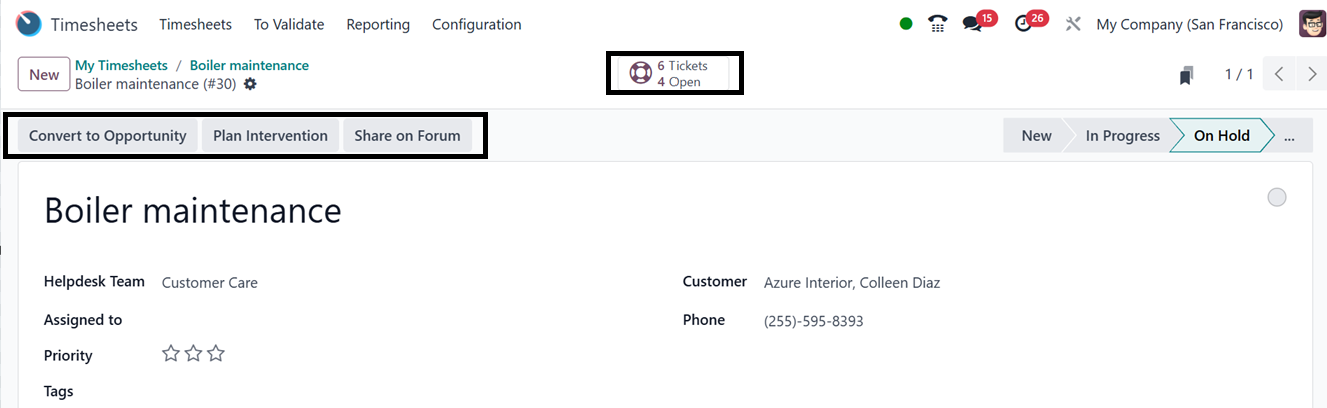
Then, click on the ‘Convert’ button to turn the task into a ticket. After converting,
you can see the open and available tickets in the ‘Tickets’ smart button. Then,
you can manage the converted tickets from the tickets dashboard. Also, you can make
the ticket into an opportunity, Check Plan Intervention, and Share on Forum using
the relevant buttons, as depicted in the screenshot below.
- Send Report: Send a report or task summary via email to the appropriate parties.
- Request Signature: To get approvals or task confirmation, start a digital signature
request.
- Version History: Examine the task's past modifications for audit or review reasons.
After clicking on the ‘Version History’ button, you can check the modifications
or edits added to this particular task in a ‘Task Description History’ pop-up window
as shown below.
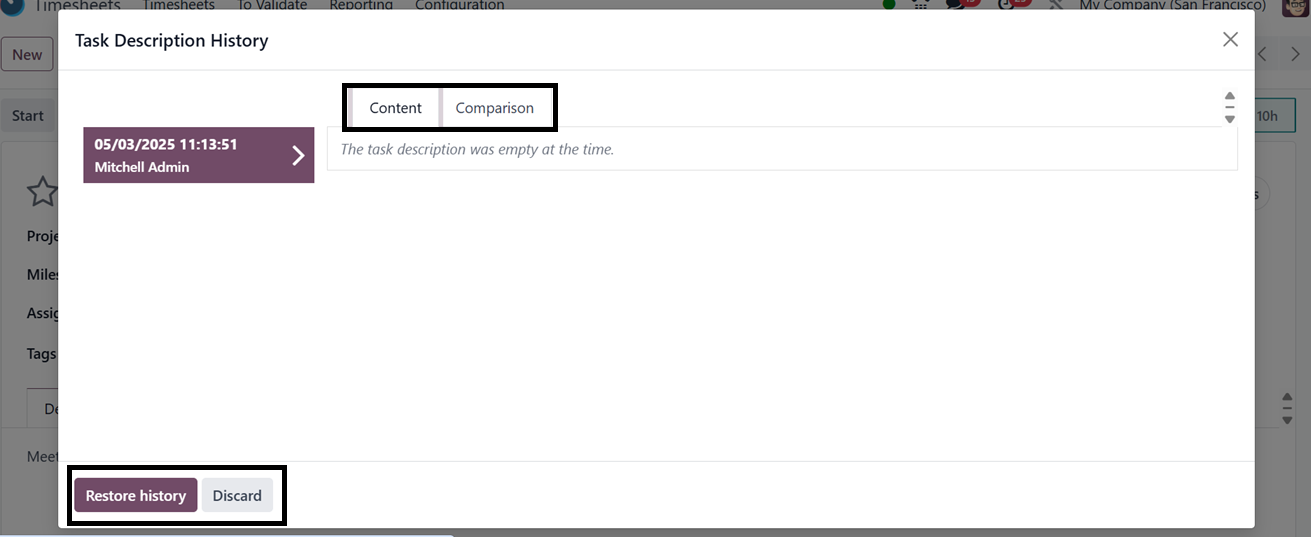
This window allows users to track changes over time, providing a detailed log for
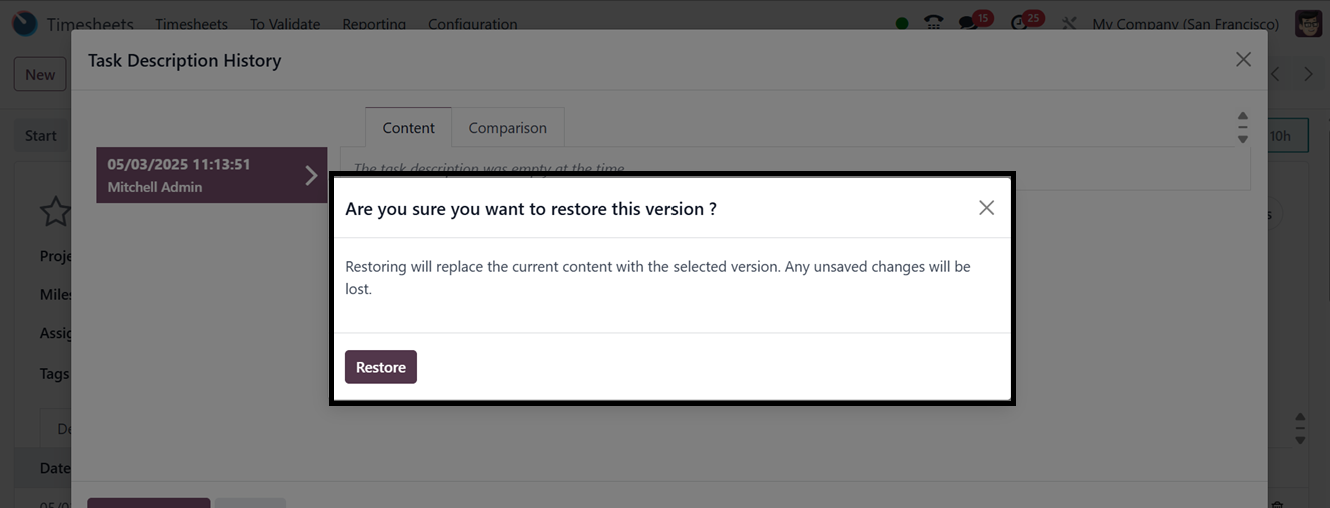
administrators to audit and troubleshoot issues. Then, press the ‘Restore history’
button and confirm the restoration of the history using the ‘Restore’ button.
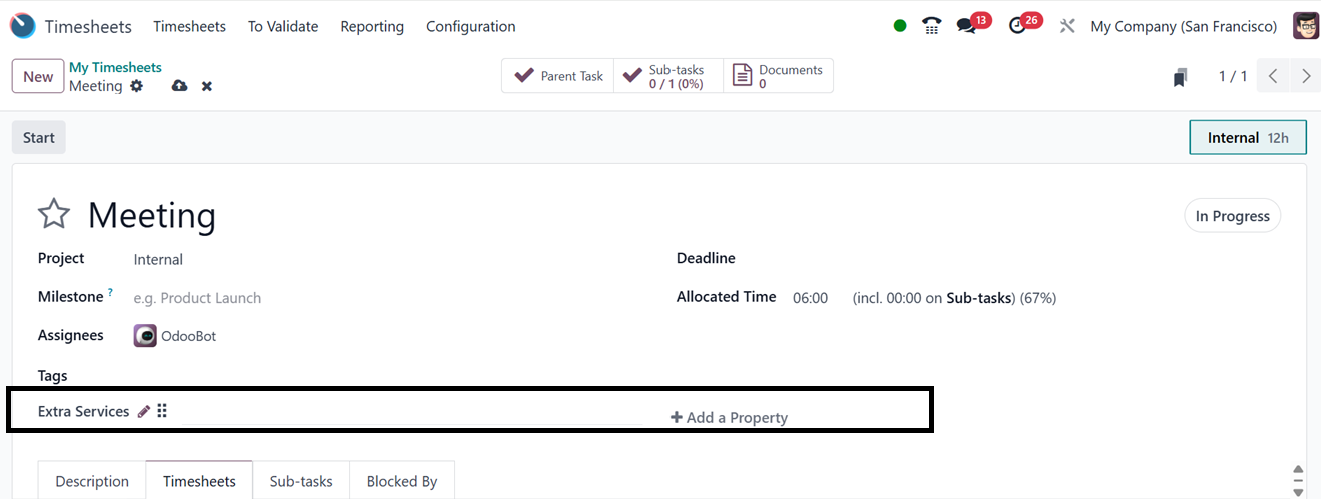
Add Properties: The function of the ‘Add Properties’ button has unique features
that enable users to add additional form data fields according to their requirements.
While clicking on this particular button inside a form, Odoo will open a pop-up
card with editing properties, as shown below.
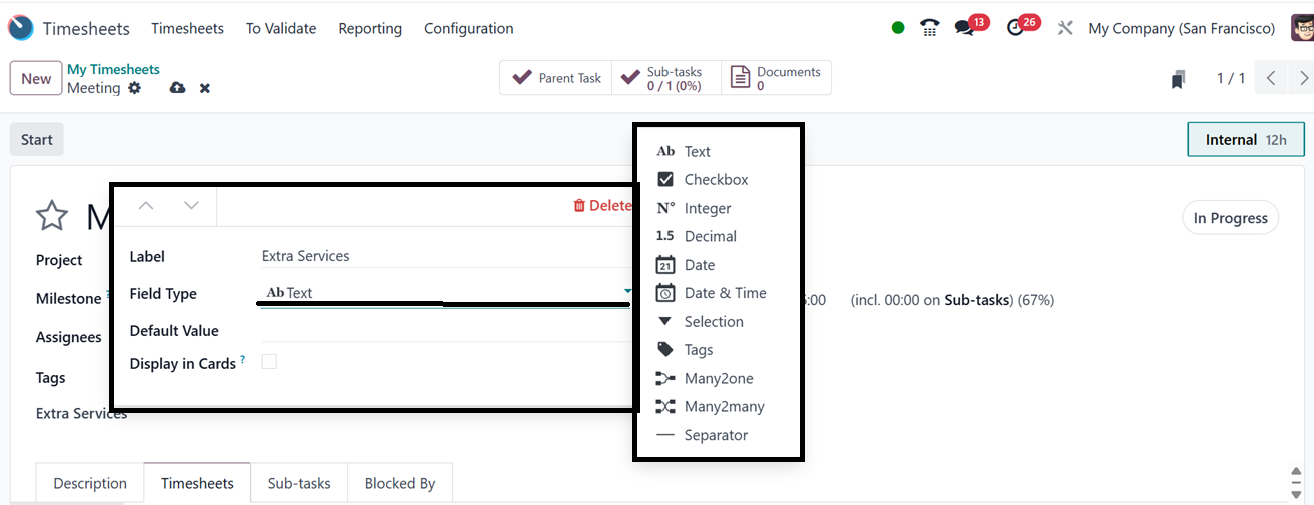
Inside the property editing window, you can add the field name in the ‘Label’ field
and choose the Field Type, Default Value, and Display in Cards options, as depicted
in the above screenshot.
According to what type of information you want to include in the field, choose it
from the ‘Field Type’ area, which contains multiple options including Text box,
Multiple Text Line, Calendar, Date, Selection, Tags, etc.. After saving the data,
the new field will be added to the form. Then you can re-edit the field or add another
field using the same method.
This feature enhances business flexibility by allowing businesses to incorporate
additional, customized information beyond the default fields.
2.1 All Timesheets
Under the 'All Timesheets' option, the company manager gains access to every timesheet
logged within the module. The system displays employees' timesheet histories, including
the names of the respective projects or tasks as similar to the ‘My Timesheets’
window that we have previously discussed.
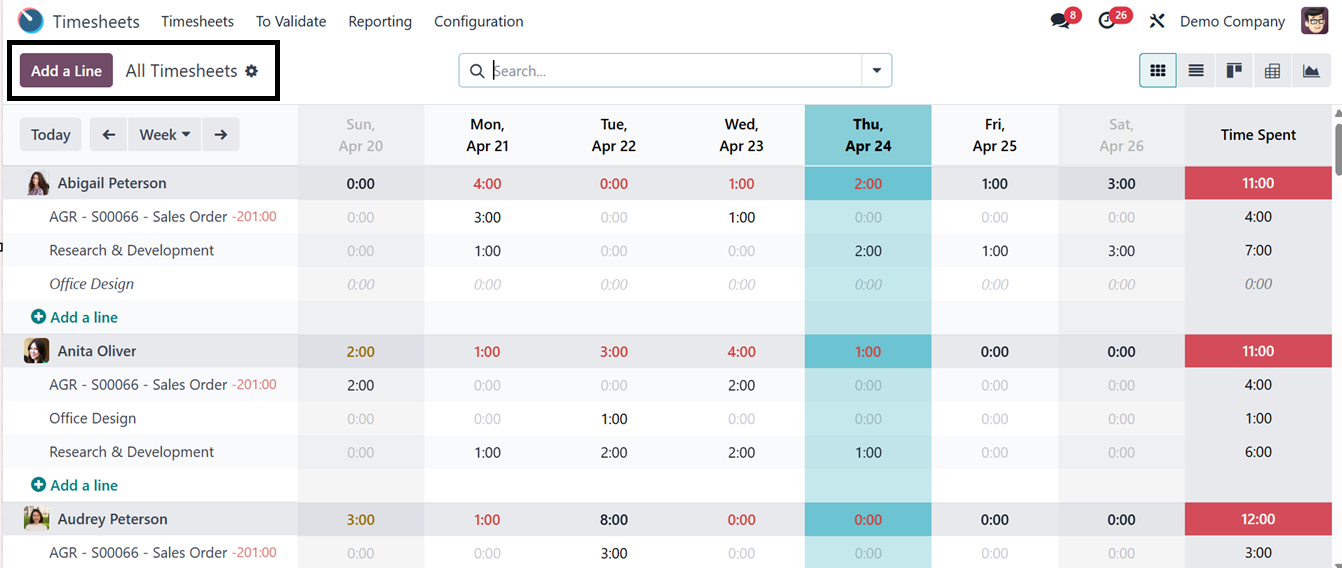
You can utilize the ‘Add a Line’ button to add new timesheet entries into the existing
dashboard as we have discussed in the previous section.