2. My Time Menu
The Time Off module is readily accessible from the main dashboard of
Odoo 18. Upon opening the module, users are directed to the My Time
Off section, which provides a clear overview of their leave records.
This application platform contains various menu options, including
the Time Off dashboard, My Time, Overview, Management, Reporting,
and Configuration.
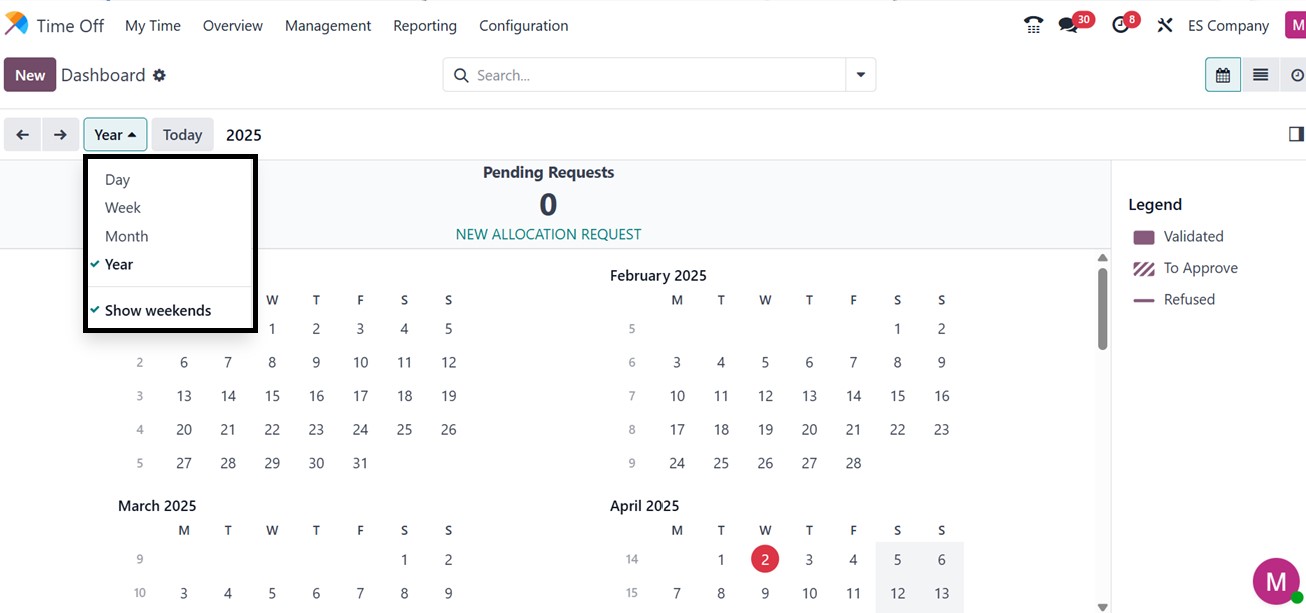
The Odoo 18 Time Off module offers a comprehensive dashboard that
provides a daily, weekly, monthly, or annual view of employee leave
schedules, as illustrated in the screenshot. In this instance, the
dashboard displays a year-long vacation schedule, where employee
time off is color-coded based on the type of leave. The left side of
the dashboard lists the available leave types, while the right side
shows patterns for each type of leave. These patterns dynamically
change depending on whether a leave request is validated, approved,
or rejected. Additionally, the dashboard provides an overview of the
employee’s available Sick Time Off and Compensatory Days across
their entire work term.
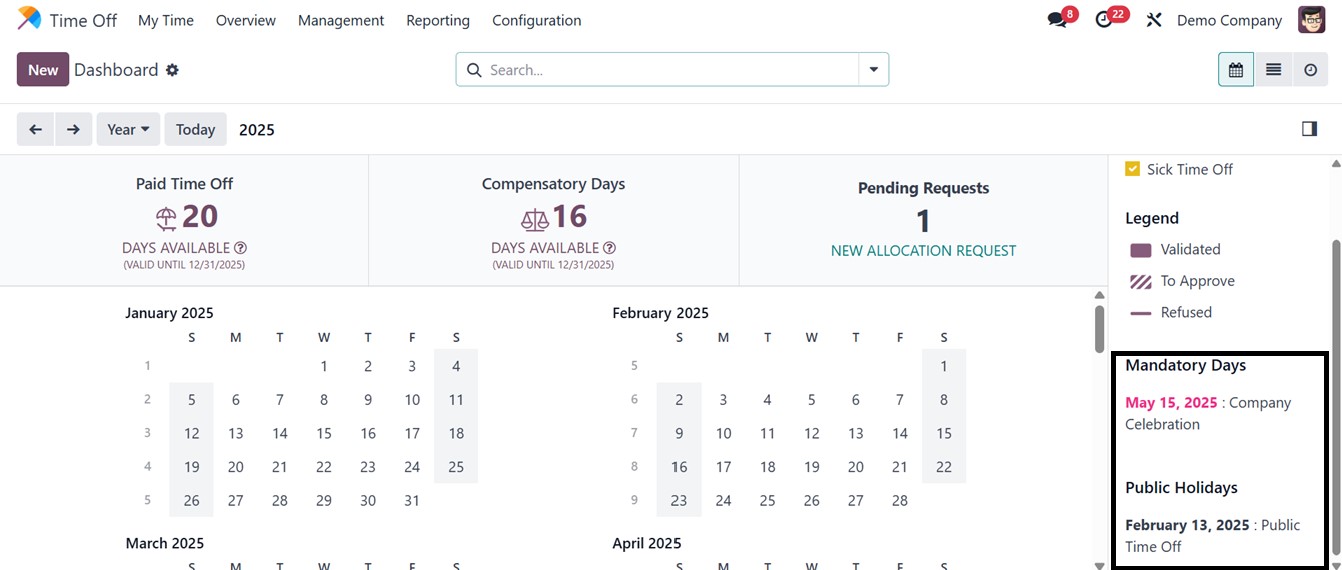
Odoo also displays the Mandatory Days and Public Holidays fields on
the right side of the dashboard to highlight important company
dates, as depicted in the screenshot below.
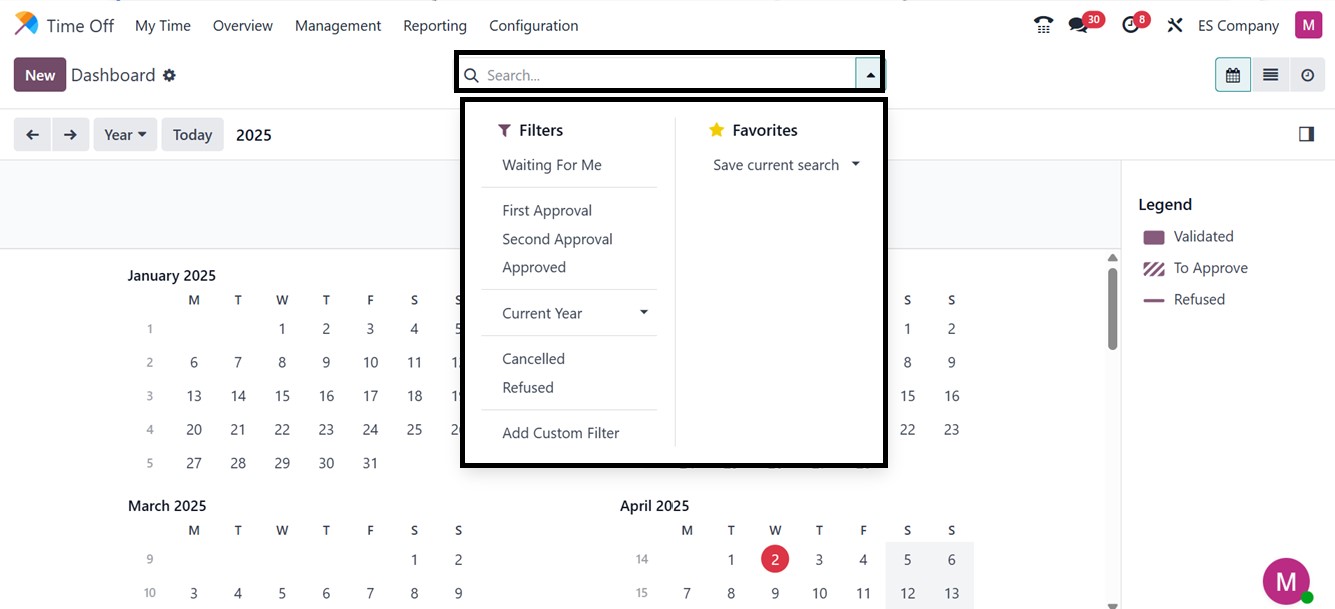
The module allows various filters in its advanced search bar area,
such as Waiting For Me, First Approval, Second Approval, Approved,
Current Year, Canceled, and Refused, to streamline leave management.
We can also create more customized filters using the ‘Add Custom
Filter’ button.
Apart from the Calendar view, you can also view the time-off
dashboard in List and Activity views. You can check the list view to
get a clear view of your time off requests with their Time Off Type,
Description, Start and End Date, Duration, and current Status, as
depicted in the screenshot below.

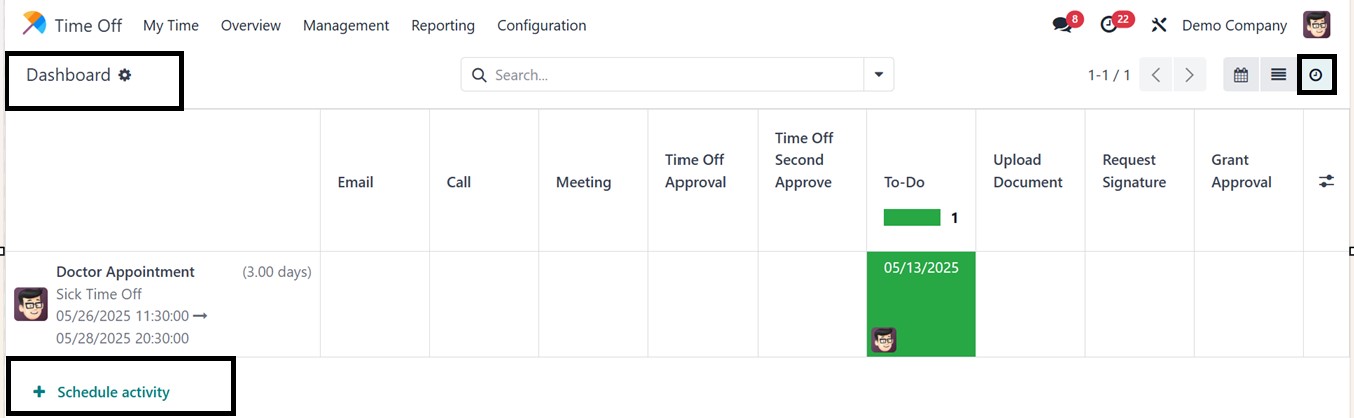
The ‘Activity’ view of the dashboard makes it easy to manage and
schedule any activities related to a Time-Off request. Using the
‘Schedule activity’ button, you can easily create any action or task
regarding the time off, as depicted in the screenshot below.
With the ‘NEW ALLOCATION REQUEST' button option, you can create new
requests for allocation. Pressing on the ‘NEW ALLOCATION REQUEST’
button will open a pop-up window where you can add the ‘Time-Off
Type’ to mention whether it is a Paid Time Off, Sick Time Off,
Casual Leave, or any other from the provided dropdown menu. In the
‘Allocation’ field, mention the timings in days or hours, and also
add any short description about the allocations as illustrated
below.
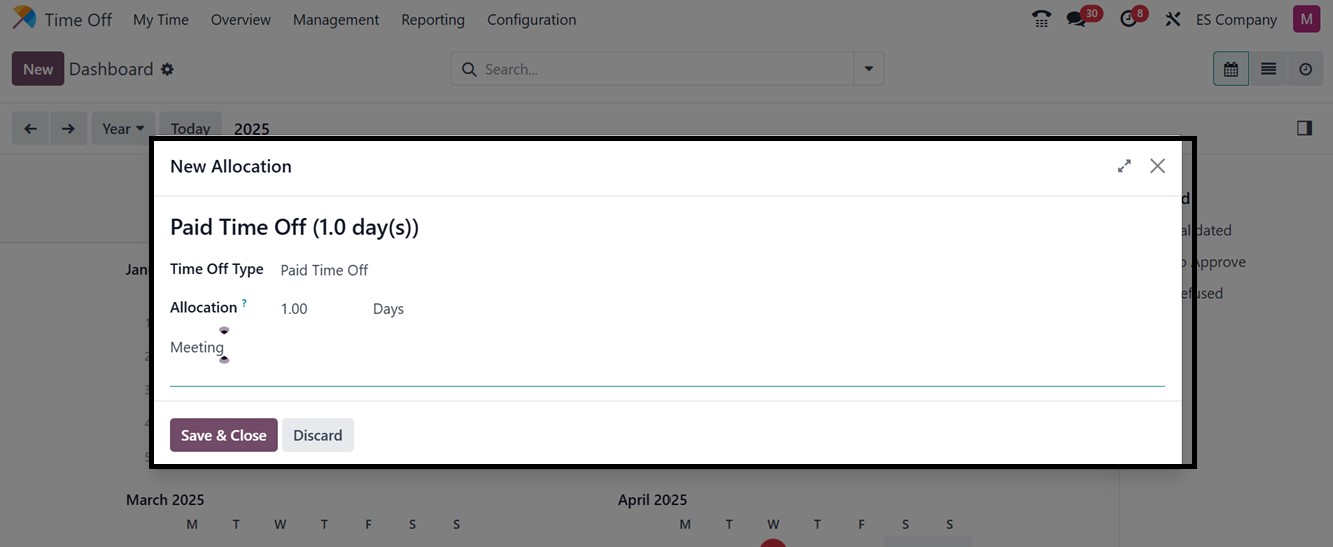
After editing, save it using the ‘Save & Close’ button so that the
new allocation request will be added to the Time-Off database.
2.1 Requesting a New Time-Off
Users can request new leave through the ‘New’ button provided at the
top of the Time-Off dashboard or by selecting specific dates for
leave. When a new time off is requested, a pop-up window appears,
where users can specify the Time Off Type from a drop-down menu,
select the leave dates, and provide a description.
The system automatically calculates the duration of the leave based
on selected dates. We can also attach any relevant documents in the
Supporting Document area to provide. Once submitted using the Save &
Close option, the request is forwarded to the relevant manager for
approval.
Now, this newly created Time-Off request will be shown inside the
calendar view of the Time-Off dashboard or inside the My Time-Off
menu.
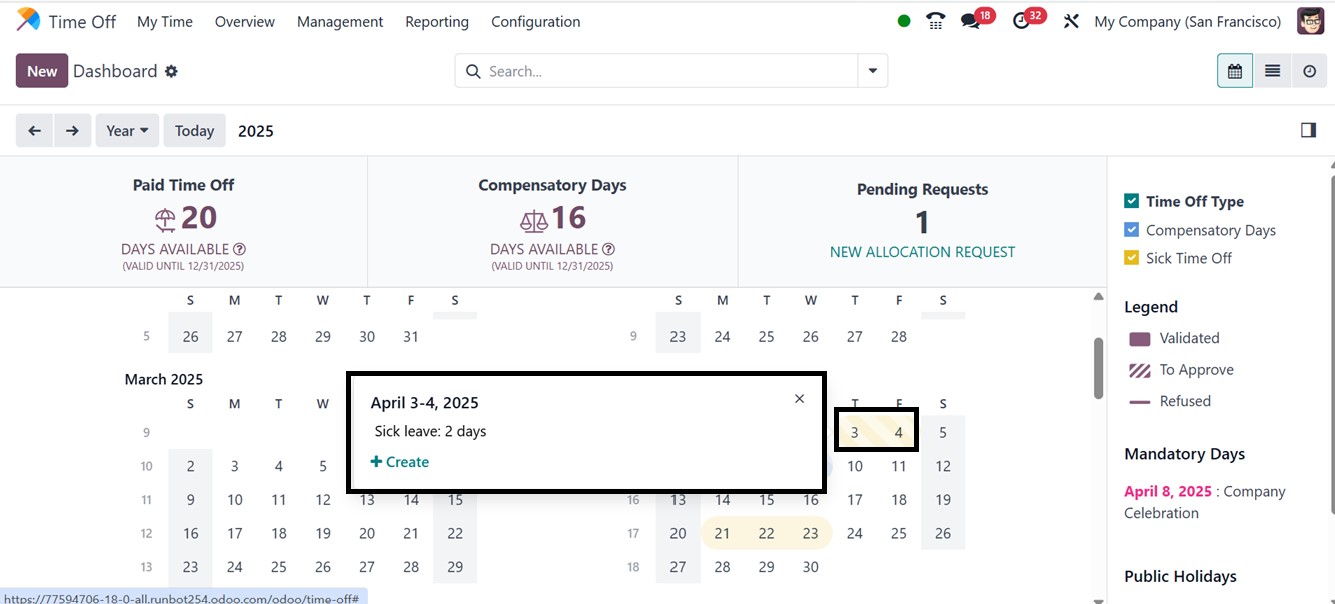
Managers may quickly accept, reject, and manage the new time-off
request by clicking on the date columns of the calendar view or by
sorting by the Time-Off type filters provided on the right side of
the screen, as shown in the picture above. So, its card view will
open as indicated below.
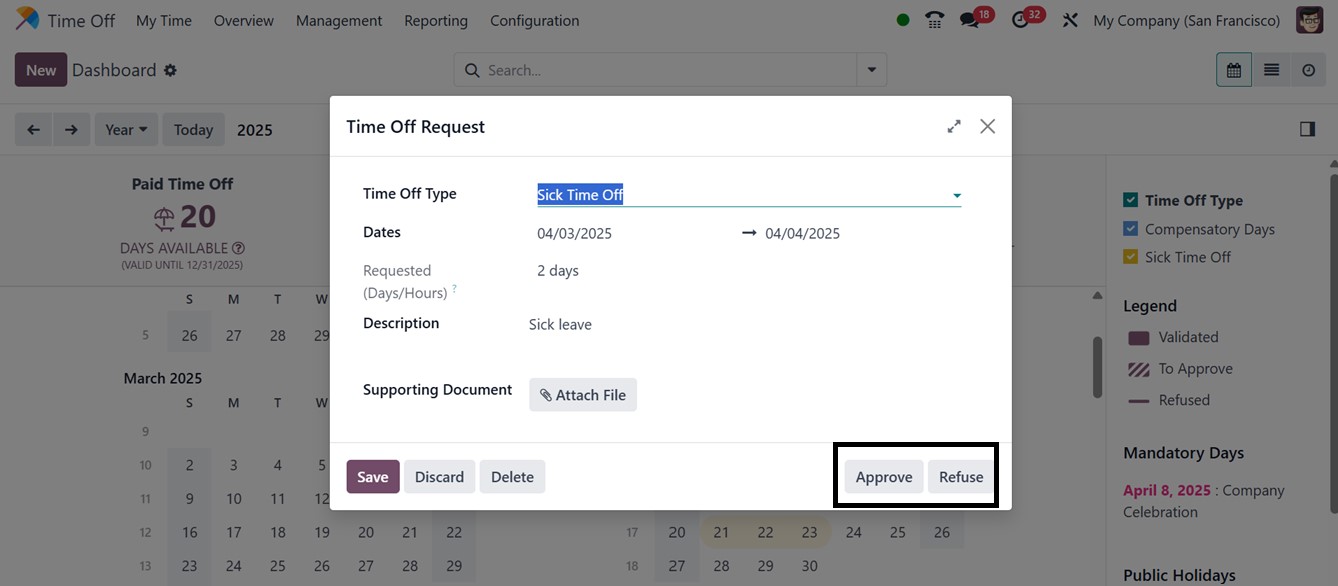
By pressing the ‘Approve’ or ‘Refuse’ button, the respected person
can approve or refuse the leave request. So, here, we can approve
this leave using the ‘Approve’ button.
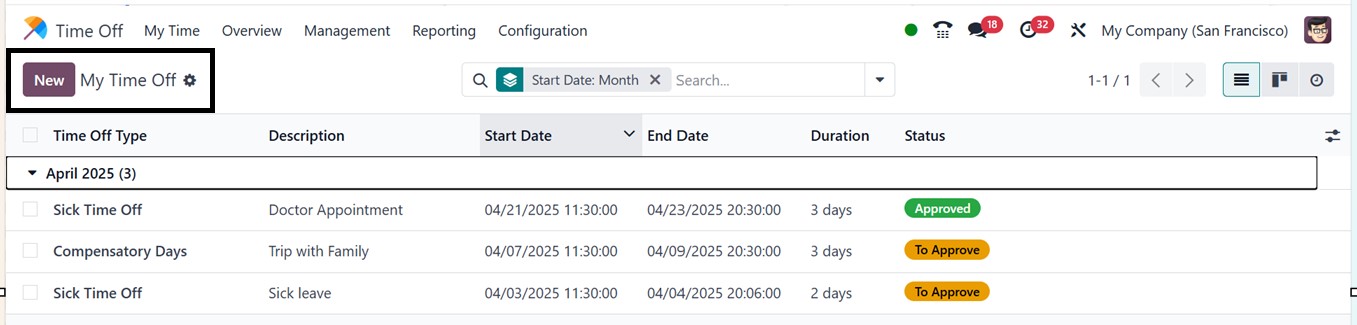
2.2 My Time-Off
Using the ‘My Time Off’ menu, employees can view all their created
time off records, including the Time Off Type, Description, Start
and End Dates, Duration, and Status. Here, you can see the
previously approved leave request as shown in the screenshot below.
Employees can also create new requests using the New button. The
leave creation form allows them to specify the Time Off Type,
duration, and applicable dates, add a description, and submit the
request for approval or rejection by the manager. This procedure is
the same as the above process of creating a new Time-Off Request.
2.3 My Allocation
The process of giving an employee a predetermined amount of leave
days or hours for a particular type of time off, including vacation,
sick leave, or compensatory time, is known as Time Off Allocation.
The HR managers of a company can allocate leave quotas, specify the
kind of leave, select the length, and determine if permission is
necessary in accordance with business policy using the ‘Time Off
Allocation’ option. As time off is requested and authorized, this
guarantees that each employee has a monitored leave balance that is
updated automatically.
The ‘My Allocation’ submenu under the “My Time” menu enables users to
view and manage their leave allocations. Details such as Time Off
Type, Amount, Allocation Type, and Status are displayed here.
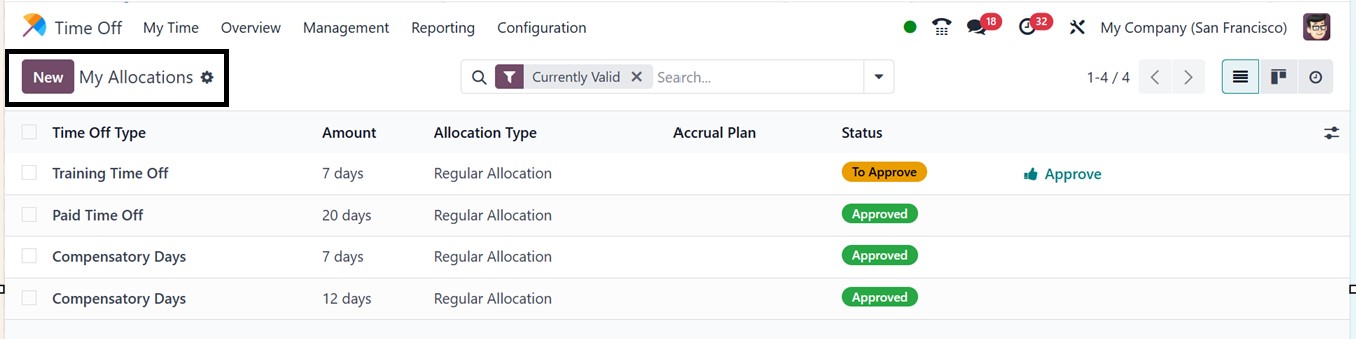
The managers or the responsible person can quickly approve the leave
using the quick ‘Approve’ button provided inside the Time Off
Allocation column. Employees can add new allocations for themselves
by clicking the New button, entering allocation details, selecting a
Time Off Type, Validity Period, and specifying the additional number
of days needed in the Allocation field.
Once completed, the system automatically calculates the duration of
the leave, and the request is sent to the designated manager for
approval. All details are saved in the centralized database,
ensuring accurate record-keeping. Additionally, you may add any
description for the allocation request in the relevant space. Then,
hit the ‘Save’ icon, as in the screenshot below.
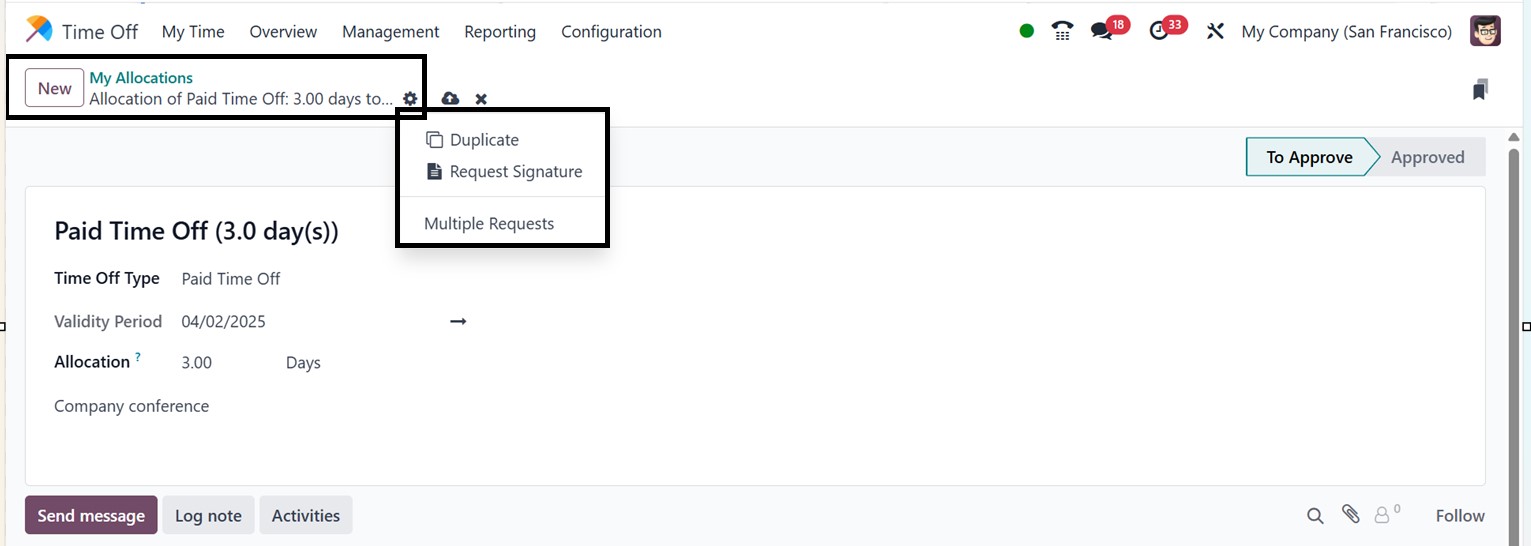
So, automatically, the status will change to the “To Approve" stage.
Thus, using the “Approved“ tab, the firm administration can accept
or deny the leave request. For Accrual Allocations, initial
allocation amounts based on prior start dates are automatically
populated and can be adjusted manually. Employees can also submit
allocation requests if they require extra leave days beyond the
allotted amount.