Configuring Invoicing
A company should use reputable tools and solutions to conduct invoicing and invoice administration with the highest care and precision. Every organization's financial and accounting departments are responsible for the creation and administration of invoices. The Odoo18 Accounting module supports the invoicing and invoicing administration processes with the use of a supporting Invoicing module that is connected with the Odoo18 platform's Accounting module. The Invoicing module also installs itself automatically when the Accounting module does.
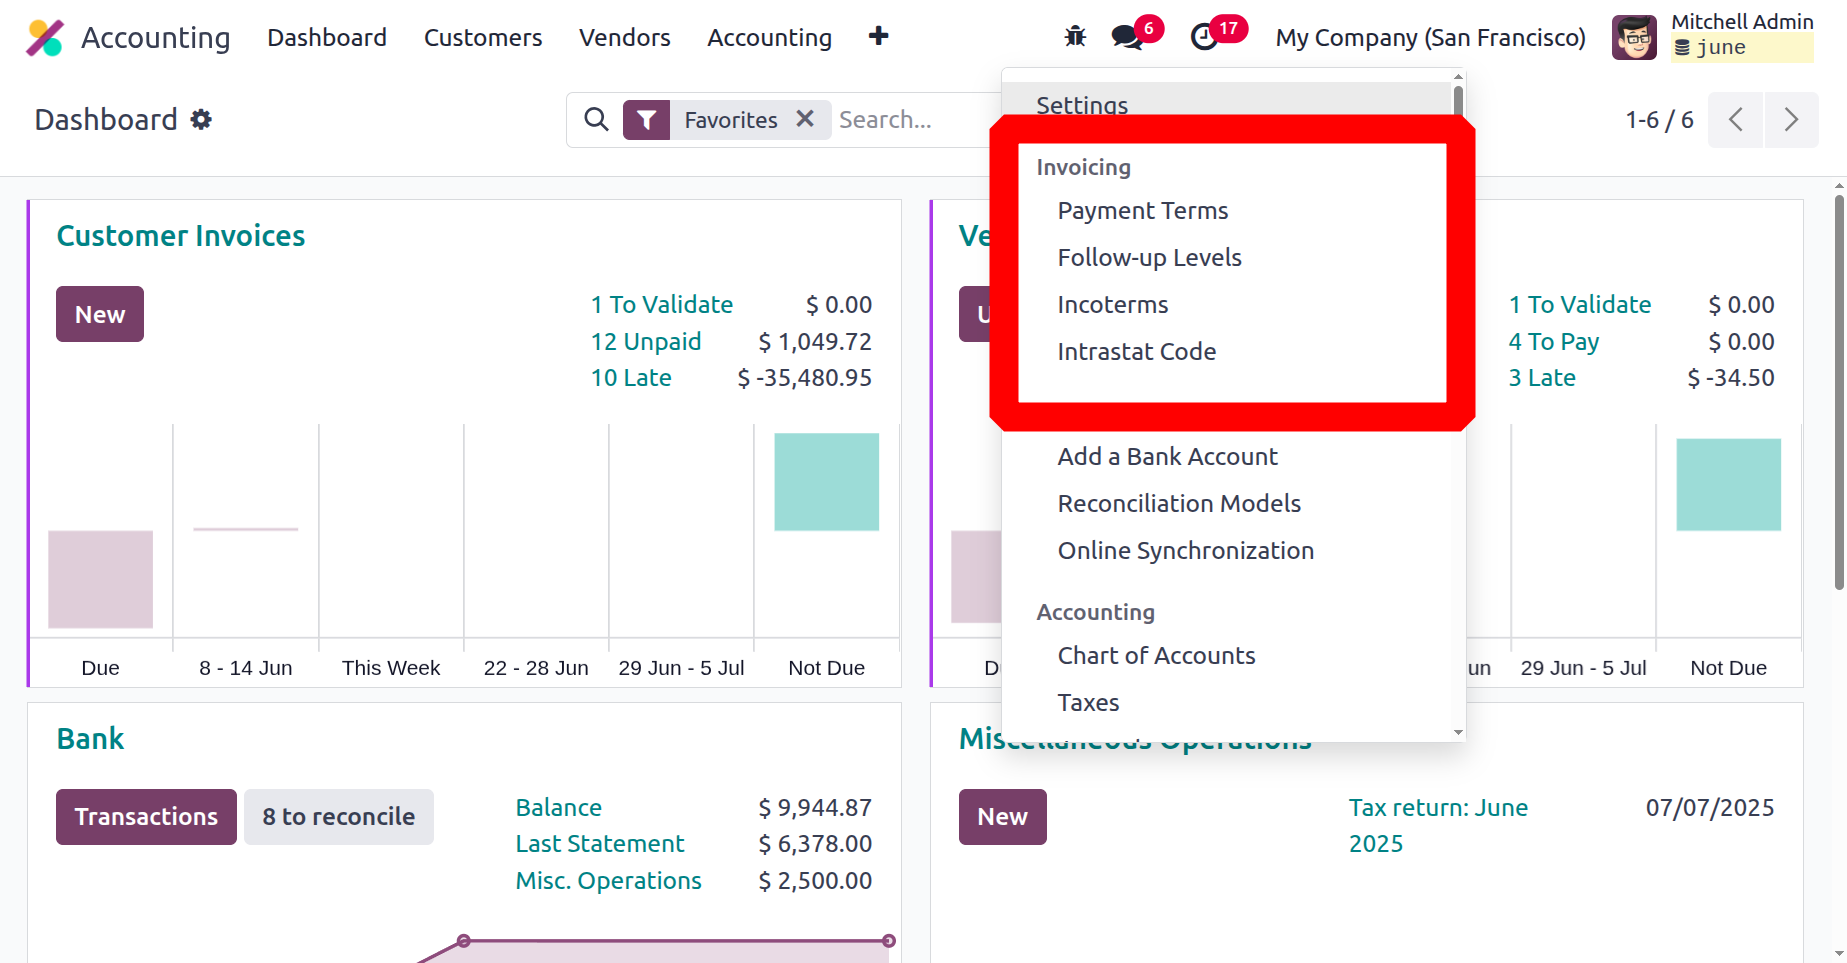
Odoo18's Accounting module provides several options to enable activities in addition to the Invoicing module. The Accounting module's Configuration tab provides access to these configurations. The Configuration tab offers a variety of menu settings that assist the invoicing components. Let's move on and examine each element of the invoicing configuration separately.
Payment Terms and Early Payment Discounts
The Odoo 18 Accounting module's Payment Terms functionality allows you to control your terms and conditions for payments. This tool will be useful to businesses who need to keep an eye on and manage their terms and conditions for payments. You can use this tool to search for a certain payment term, add a new payment term, change an existing one, delete a payment term, and browse a list of all payment terms. Establishing the terms under which they will collect money from their customers can be very beneficial to businesses. This tool can help businesses better manage their cash flow by outlining when they will receive payments and giving them a clear record of which payments have been made.
The Payment Terms menu is located in the Invoicing part of the Configuration page for the Accounting module. As shown in the screenshot below, you can use the menu to open the Payment Terms window. The Payment Terms window will include all of the configuration-specific data in addition to the pre-set and user-configurable options.
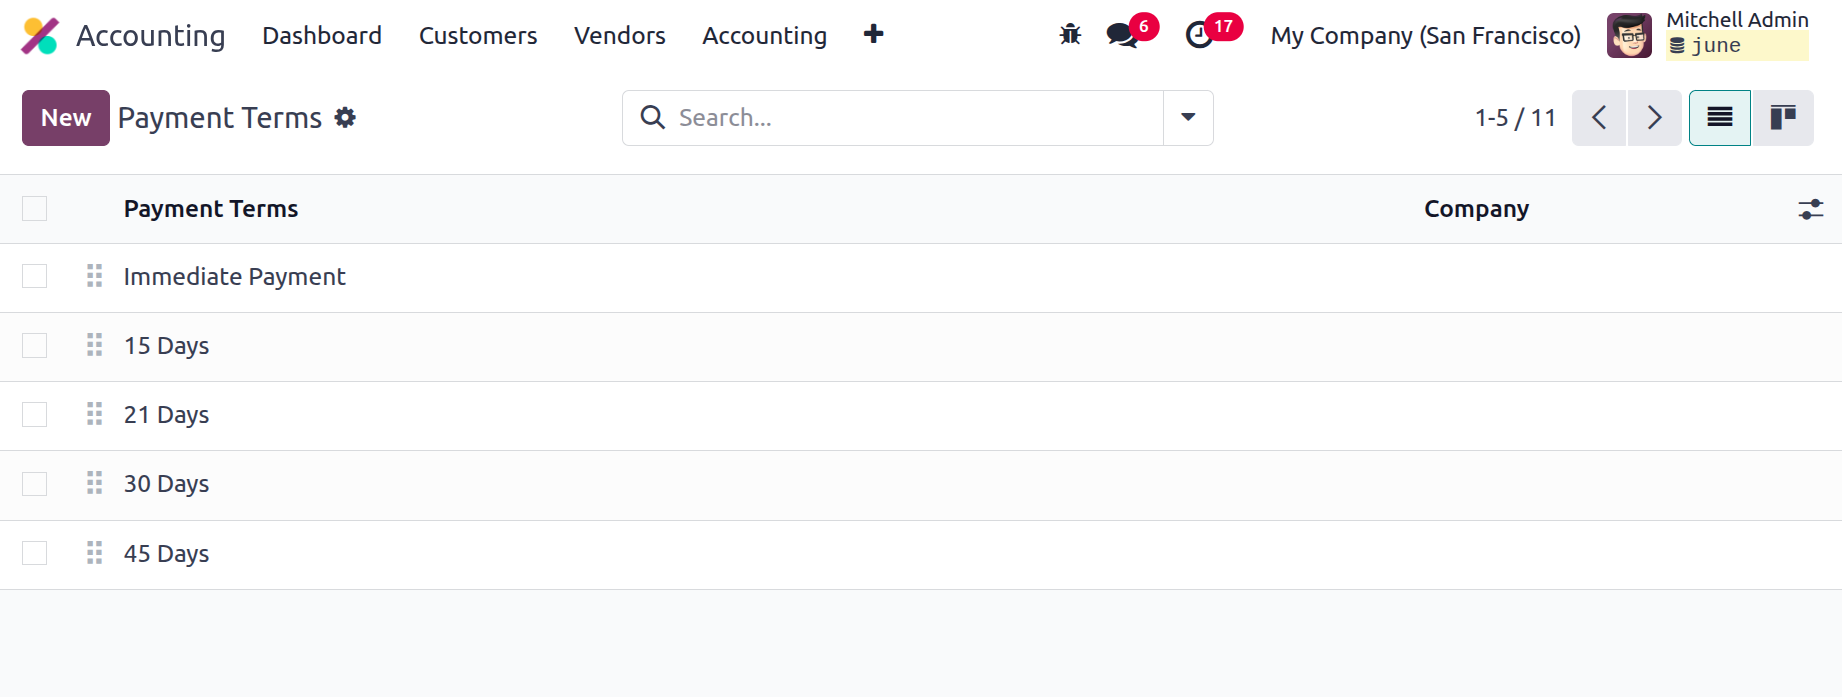
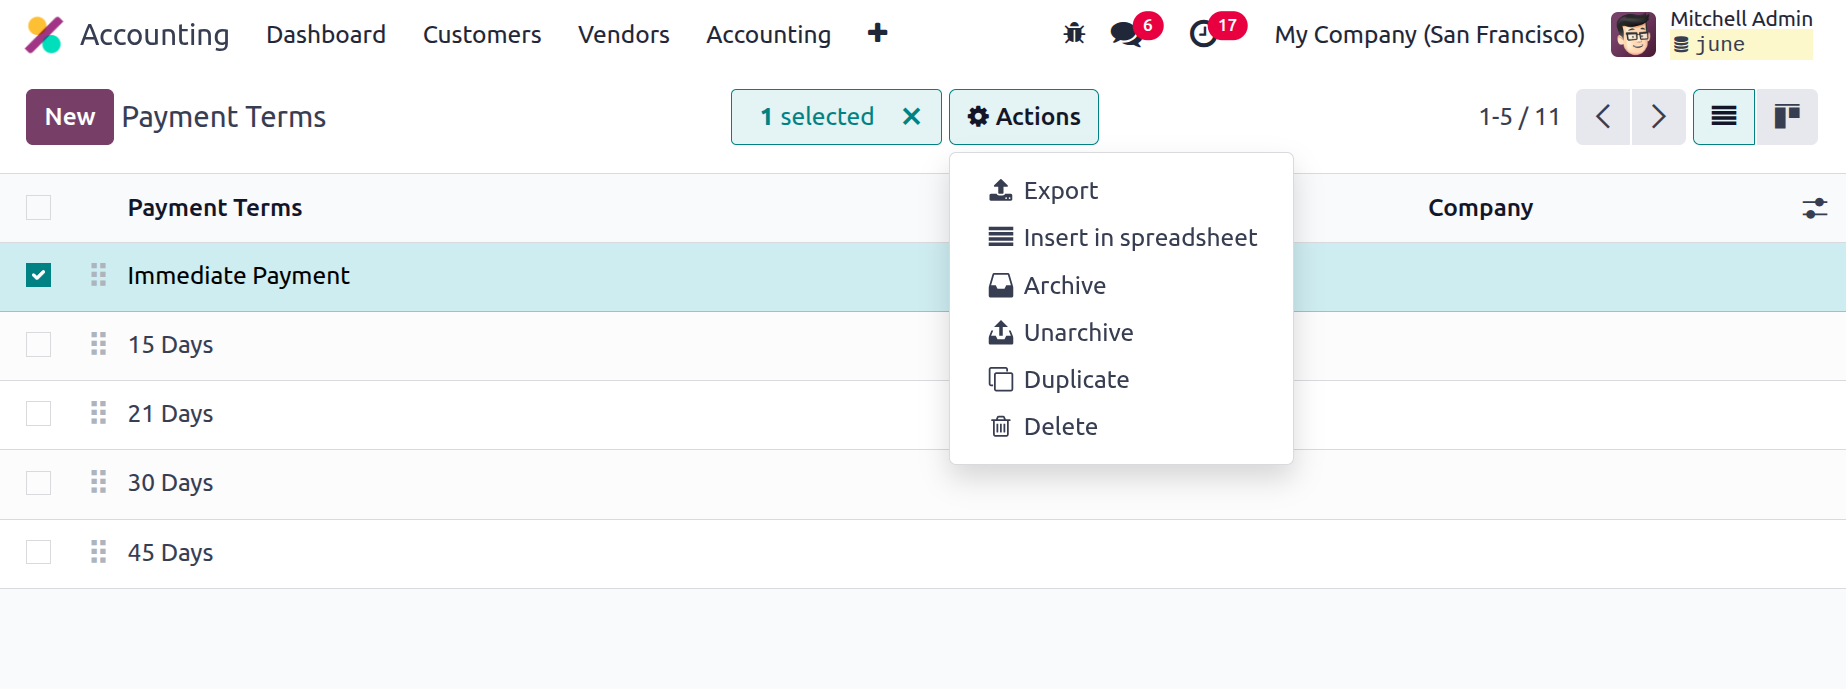
For every payment month, a list of the required tools will be provided. Any of these specified terms of payment are available for you to select and read more about. If you would like, you can also alter it. The sequencing feature of the window allows you to drag and drop the conditions of payment in whatever order you like. Additionally, each payment terms record has a checkbox on the far left that can be checked to take further action. As seen in the screenshot, the Action button with menus for Export, Archive, Unarchive, and Delete will appear when the box is checked.
Additionally, by using a range of preset and customisable criteria, the criterion option streamlines the search process and improves search results. The Group By option allows you to construct a range of fully customisable groups of payment conditions to streamline data processing. The Favourites menu offers a plethora of other options, such as Import Records, Link Menu in Spreadsheet, Insert List in Spreadsheet, and Save Current Search.
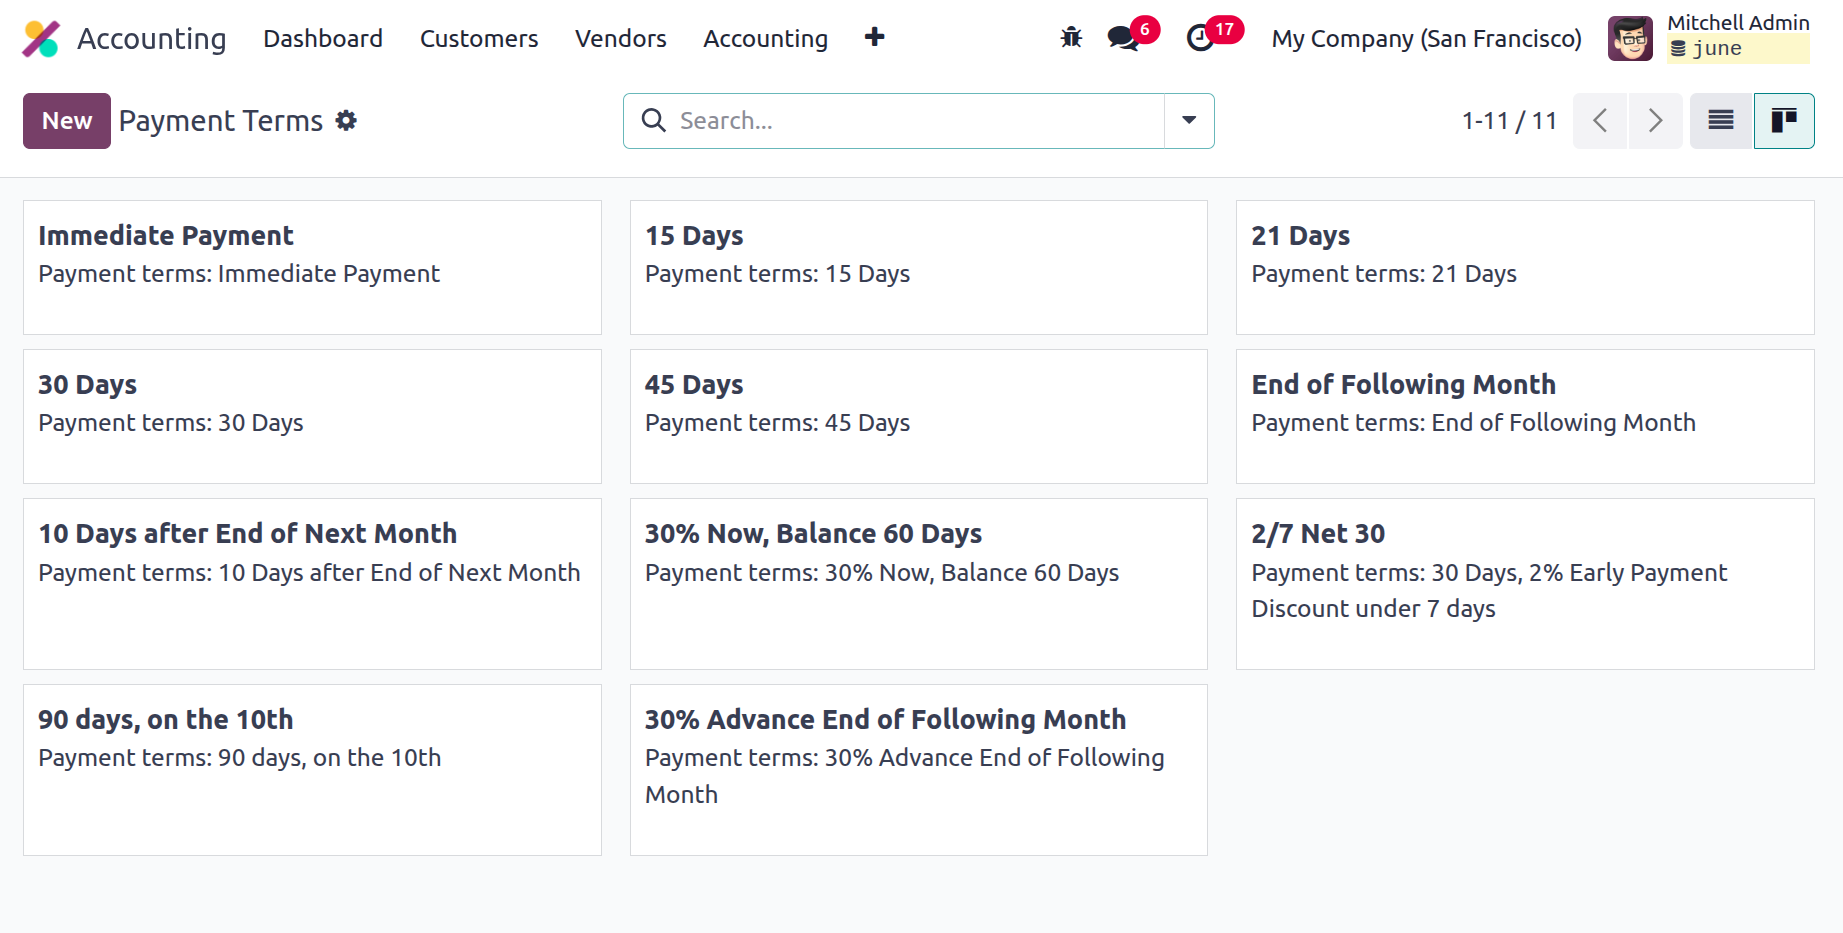
Additionally, you can access the window in Kanban format by utilising the Kanban menu icon located in the upper right corner, as shown in the photo below.
The time range that the company allows its customers to pay for the related goods or services is known as the payment terms. If the customer fails to meet the payment date, the associated payment will be listed as due. Additionally, the relevant payment will be displayed in the aged reports, which means in the aged payable or aged receivable, depending on the sales payment term or the buy payment term according to the due date. When you wish to establish new Payment Terms, you can click the NEW button to bring up the creation form, as seen in the screenshot below.
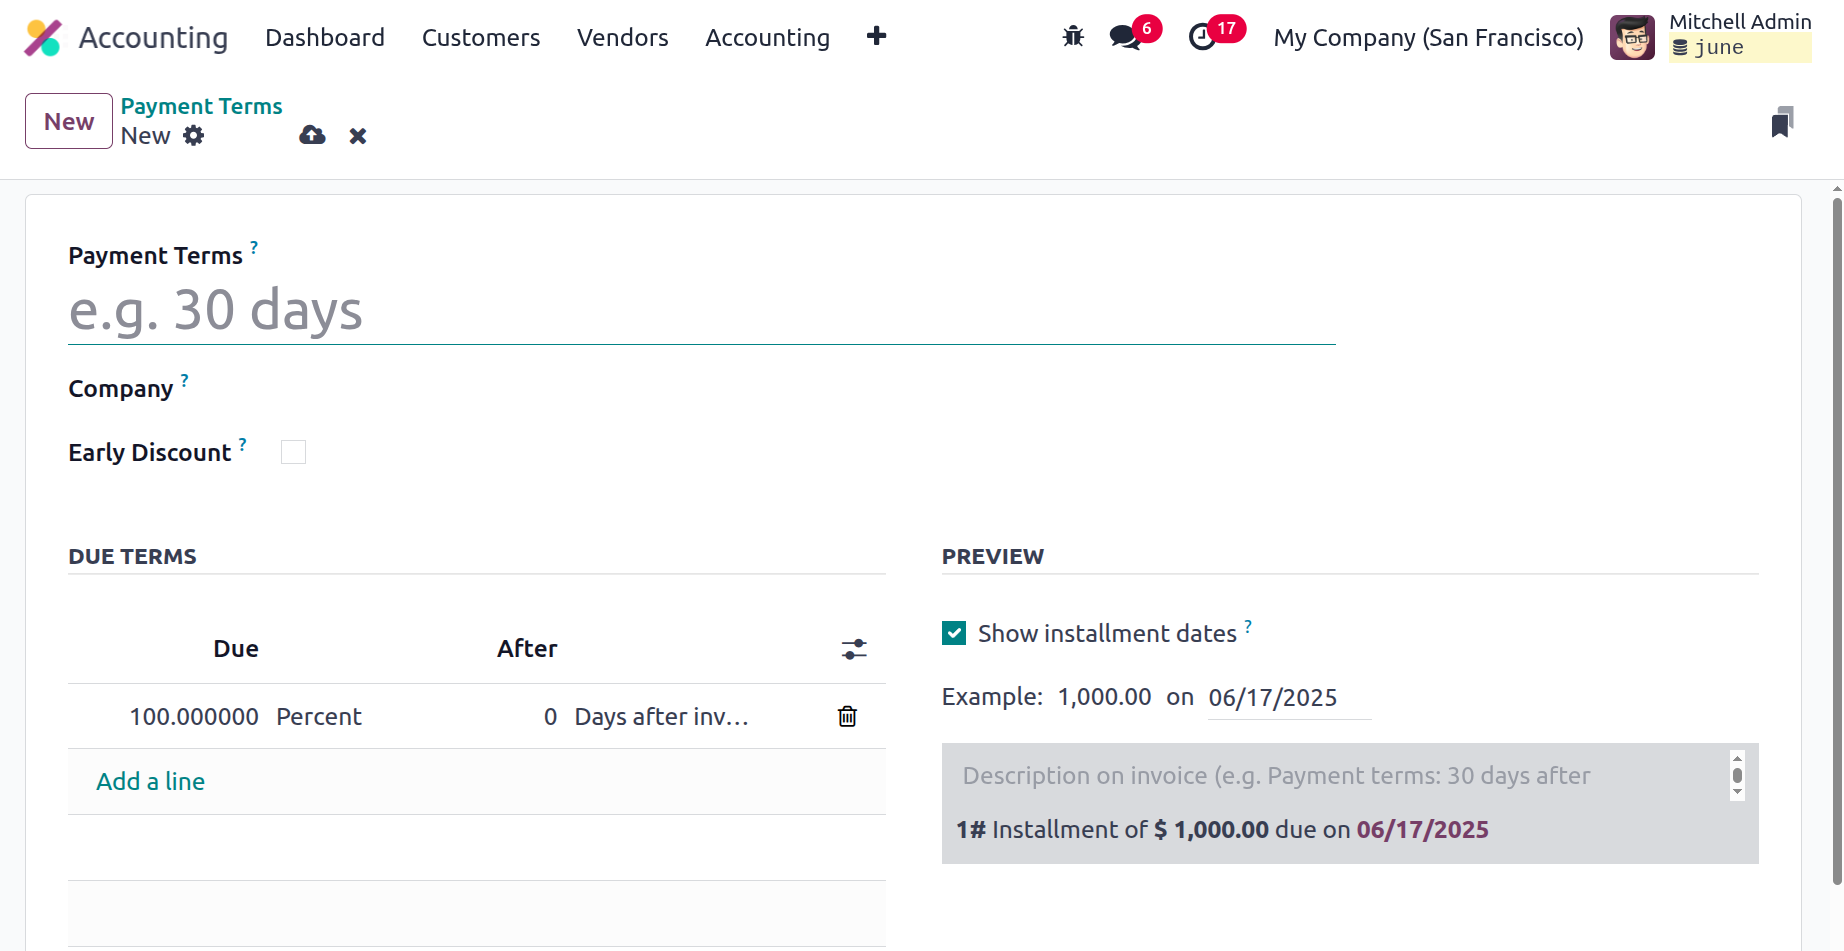
You can first input the name of the payment terms in the form view's Payment Terms section. Additionally, the user can put the name of the company and the early discount. After that, there is a section on the due date that contains the amount owed as well as the kind, such as fixed amount and percentage. By providing the pertinent variables on a date and the computation details, it is also feasible to create the Due Date Computation Details of the Terms. Odoo 18 introduced field discounts and discount days in the due lines along with the ability to provide early discounts. On field discount days, you may specify both the discount and the duration of its validity.
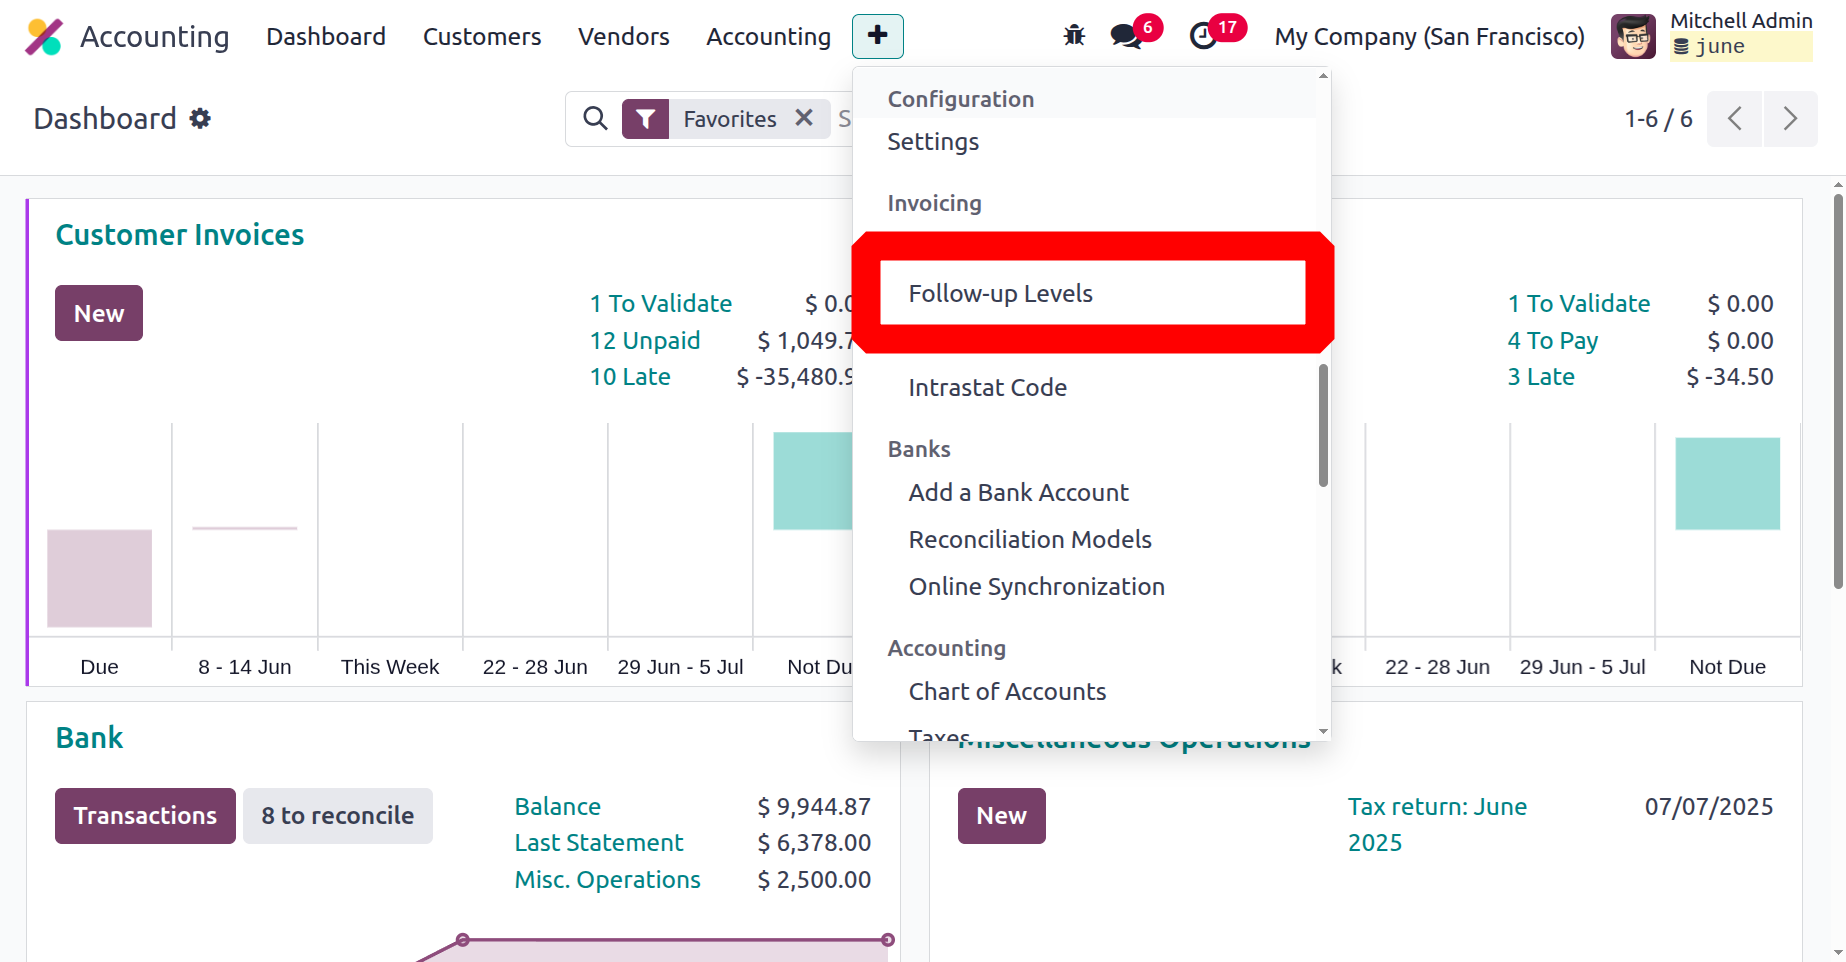
These payment expressions can be used in invoices and bills once they have been specified. You can choose and modify the required Payment Terms that you have established using the Odoo18 platform. The following section will cover the Follow-Up Levels management function, which is accessible within the Invoicing management area of the Configuration tab, now that the payment terms configuration in Odoo18 has been made clear.
Follow-Up Levels
The Follow-Up Levels feature in the Odoo18 Accounting module allows you to set up and control the follow-up levels for customer invoices. The menu is located in the Configuration tab of the Invoicing section of the Accounting module.
It is an excellent solution for tracking and categorising customer invoices. Businesses who want to monitor which invoices are past due and customers who want to get a breakdown of their invoices by follow-up levels may find this useful. This feature also allows you to examine which clients are on which level and choose the level for each customer. It can also help you set up automated follow-up SMS and emails.
You may manage and configure the follow-up levels for your company by using the Follow-up Levels menu, which is accessible through the Accounting module's Configuration tab. To specify the Payment Follow-up for the Accounting activity, we can choose the relevant option. In the next scenario, you will draw the Payment Follow-up window, as seen below.
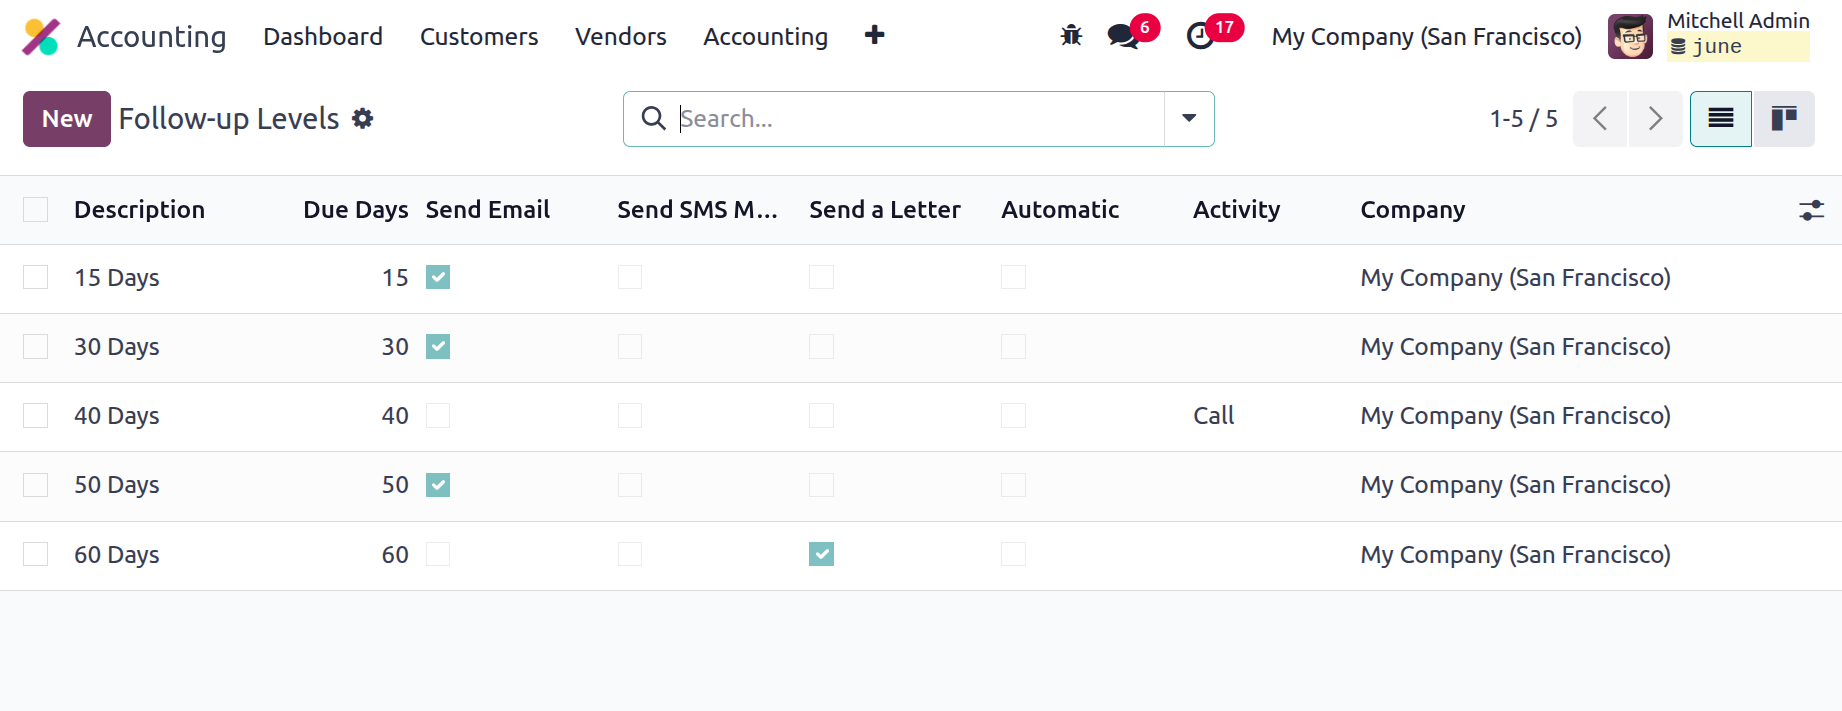
By using this feature, you can ensure that you have the necessary tools to keep an eye on any overdue client invoices. A polished preview of each previously established Follow-up Level, along with crucial information such as Description, Due Dates, Send Emails, Send SMS Messages, Send Letter, Automatic, Activity, and Company, will be displayed in the Follow-up Levels window. The follow-up actions on the Send Emails, Send SMS Message, Send a Letter, and Automatic buttons can be enabled or disabled based on the user's choices. The other common Odoo window options, such as the Filters, Group By, Favourite, Search, Kanban view icon, and Export All icons, are also accessible here.
The creation form for configuring new Follow up Levels can be opened by gently clicking the NEW button. A screenshot of the creation window can be found below.
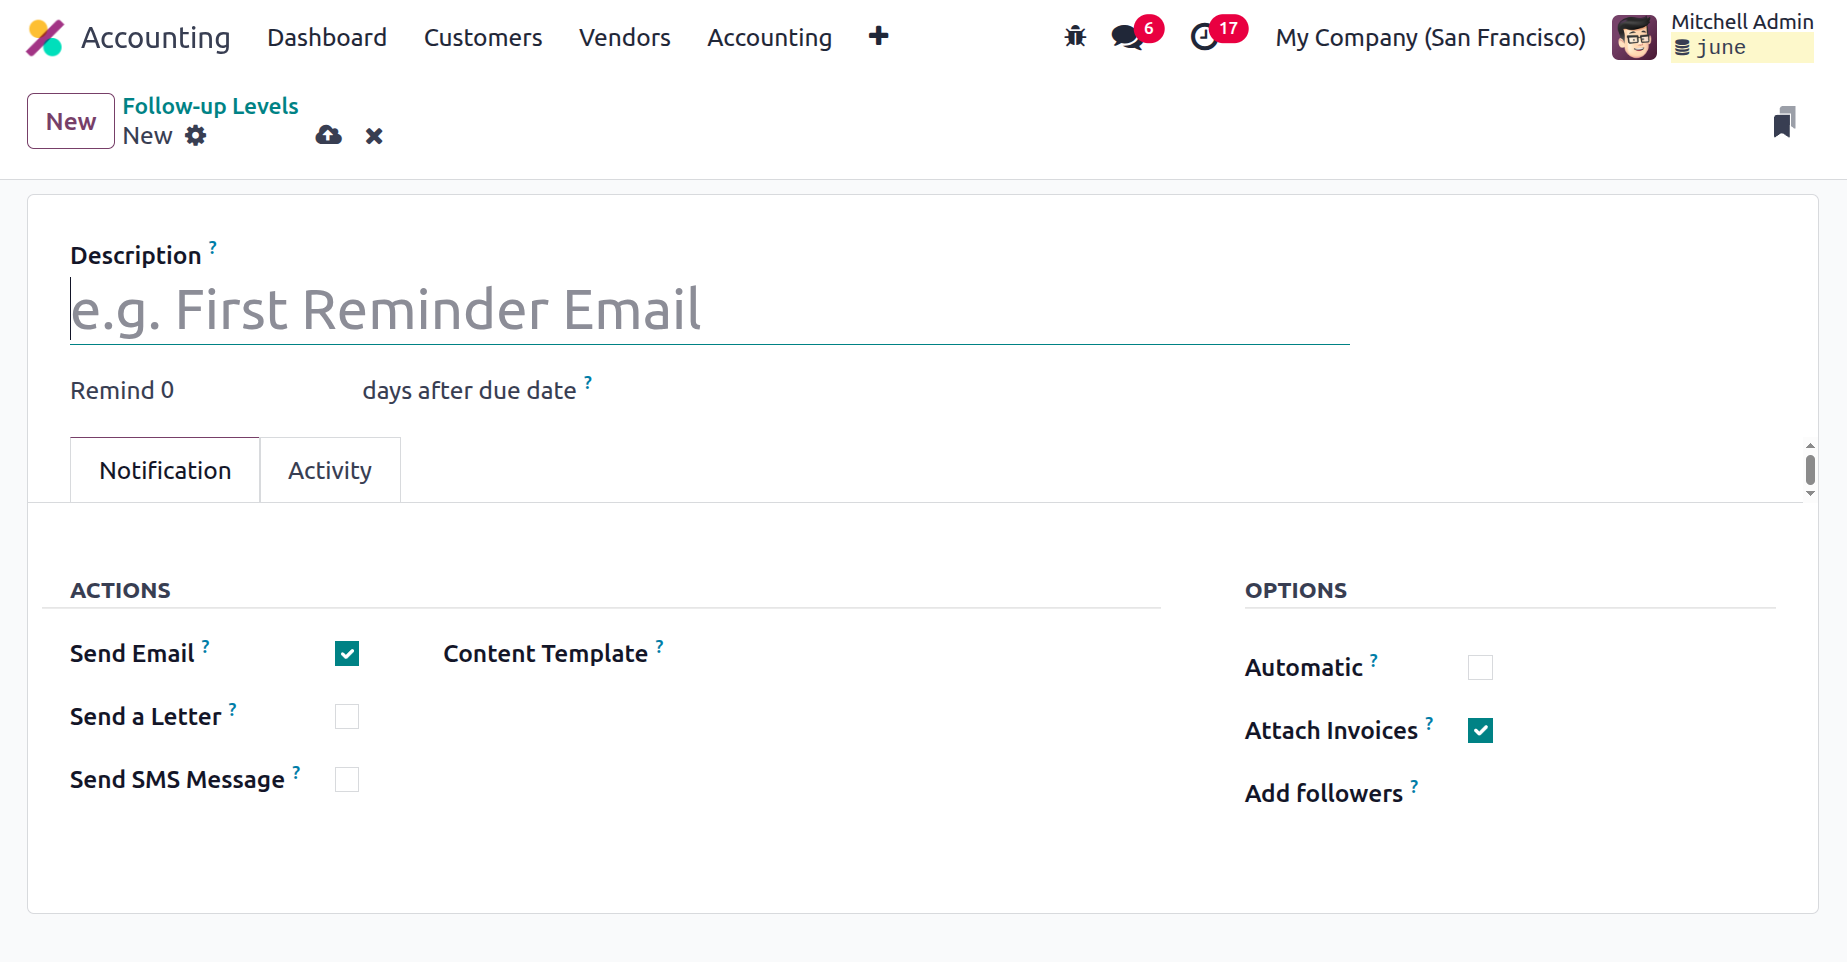
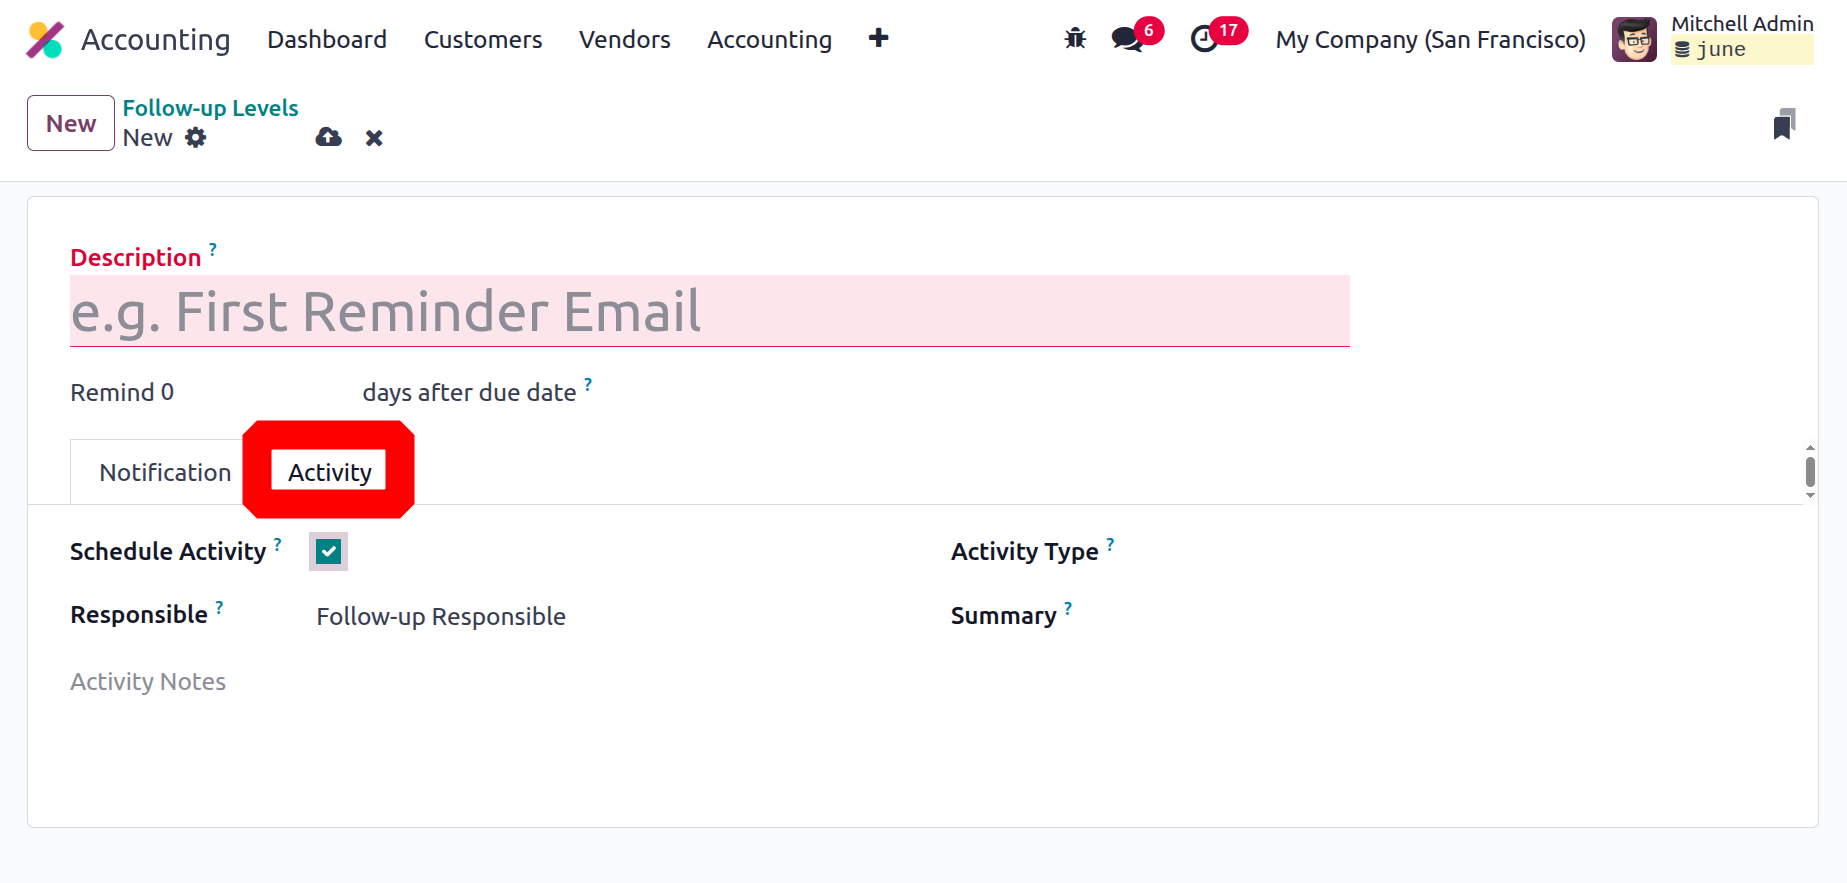
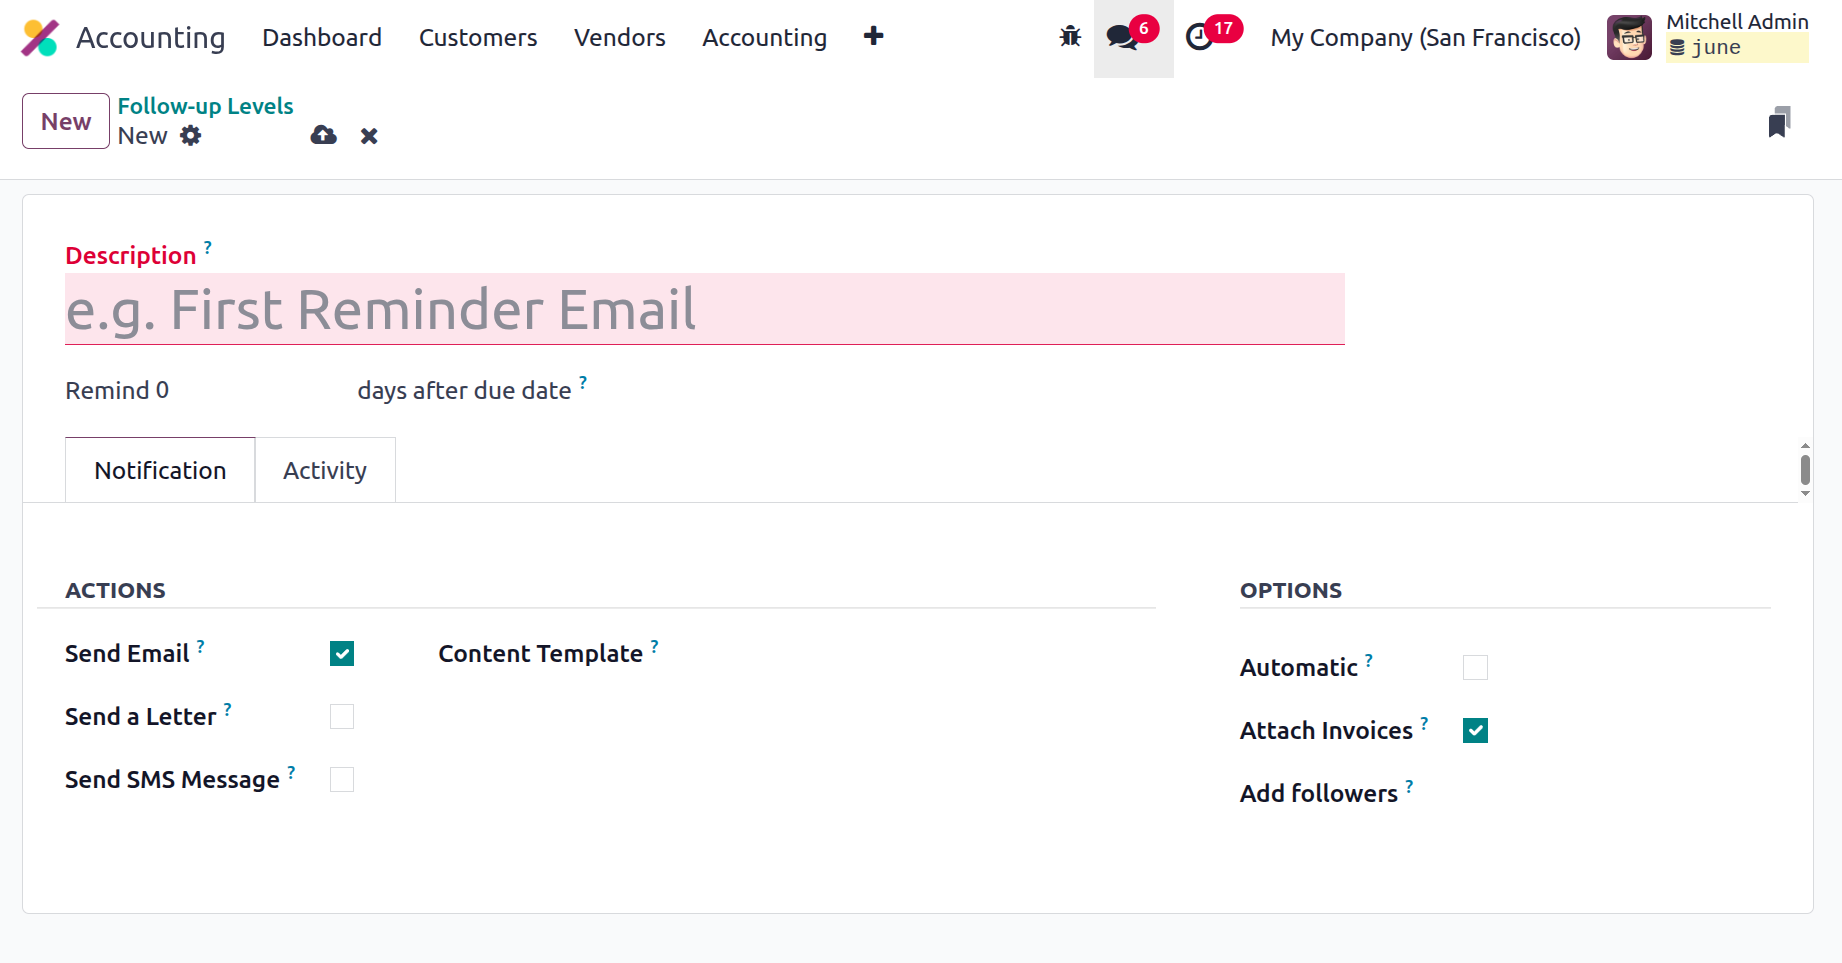
First, you can enter the follow-up action's name in the Description area and its due date in the designated space. It is the amount of time that must elapse after the invoice's due date in order for a reminder to be sent. You can set this value to negative if you wish to send the reminder before the invoice's due date. For every follow-up, you can activate the activities, like sending a letter, an SMS, an email, etc. Under the "Activity" tab, where manual action options are available, you can select "schedule activity" and assign the sign activity to the assigned person.
Additionally, the Payment Follow-ups Options, such as Automatic and Attach Invoices, can be enabled or disabled depending on the circumstances. Furthermore, the message in response to the Payment Follow-ups will be displayed by the 'Payment Reminder' content template. A follow-up report is produced as invoices are due, taking into account the levels that have been established.
You may track customer invoices with the aid of this useful tool and ensure that they are paid on time because it is evident that the Follow-up Levels function is adequate for controlling and customising the follow-up levels for customer bills.
Activities inside follow-up levels can be scheduled using the Schedule Activity boolean. In the Responsible field, specify who is responsible for the task. Then, choose the Activity Type and add the Summary.
The section that explains the Incoterms settings menu will now be discussed.
Incoterms
The responsibilities of buyers and sellers with respect to product delivery are outlined in the Incoterms, or international commercial agreements. They are used to determine who is responsible for paying the freight and other transportation expenses, as well as when the buyer acquires title to the goods from the seller. Odoo 18 Accounting uses Incoterms to automatically fill in shipping-related information, like the shipping address and Incoterms, on the Sales Order and Purchase Order forms. Products are also utilised to make the appropriate accounting entries when they are sent.
Above all, it is important to remember that Incoterms should only be used for shipments that are being shipped abroad. Because the terms and conditions are often different, Incoterms should not be used for domestic shipments. You can navigate the Incoterms window as shown below by lightly pressing the Incoterms menu, which is located in the Configuration tab's Invoicing section.
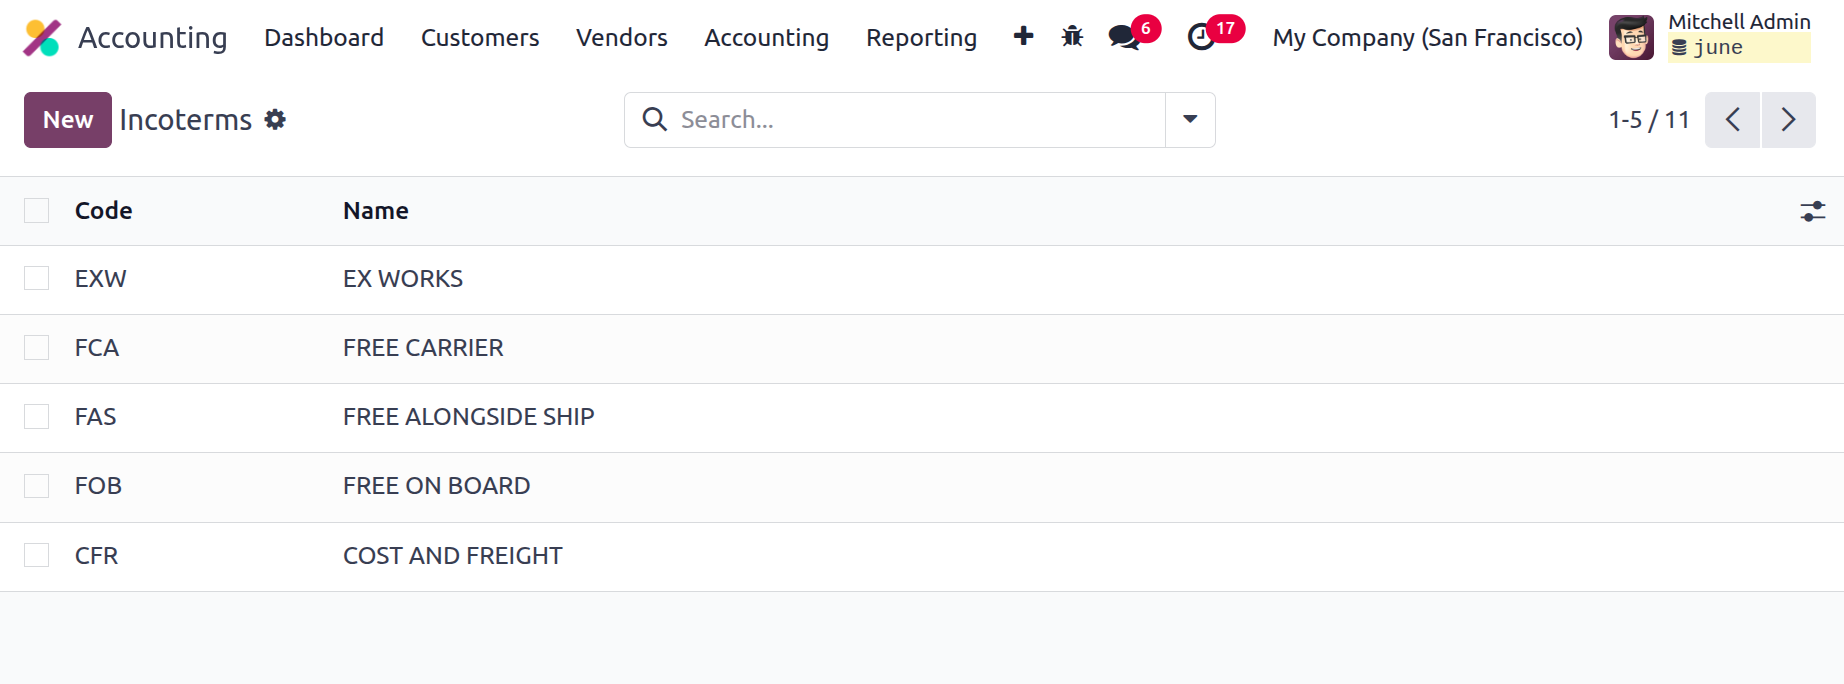
This window will display every facet of the Incoterms activities that were previously displayed on the platform. As can be seen in the screenshot, the platform anticipates the need for sorting capabilities and offers all conventional and resizable sorting along with additional useful menus like Filters, Group By, Favourites, Search, and Export All. Construction of new Incoterms is made easy with the NEW button. In the same box where the new Incoterm can be set, a new creation line appears when you click the NEW button.
In the accounting configuration settings area dedicated to customer invoices, incoterms can be applied to invoices and even configured as defaults. The relevant Incoterm will also be included on the invoice.
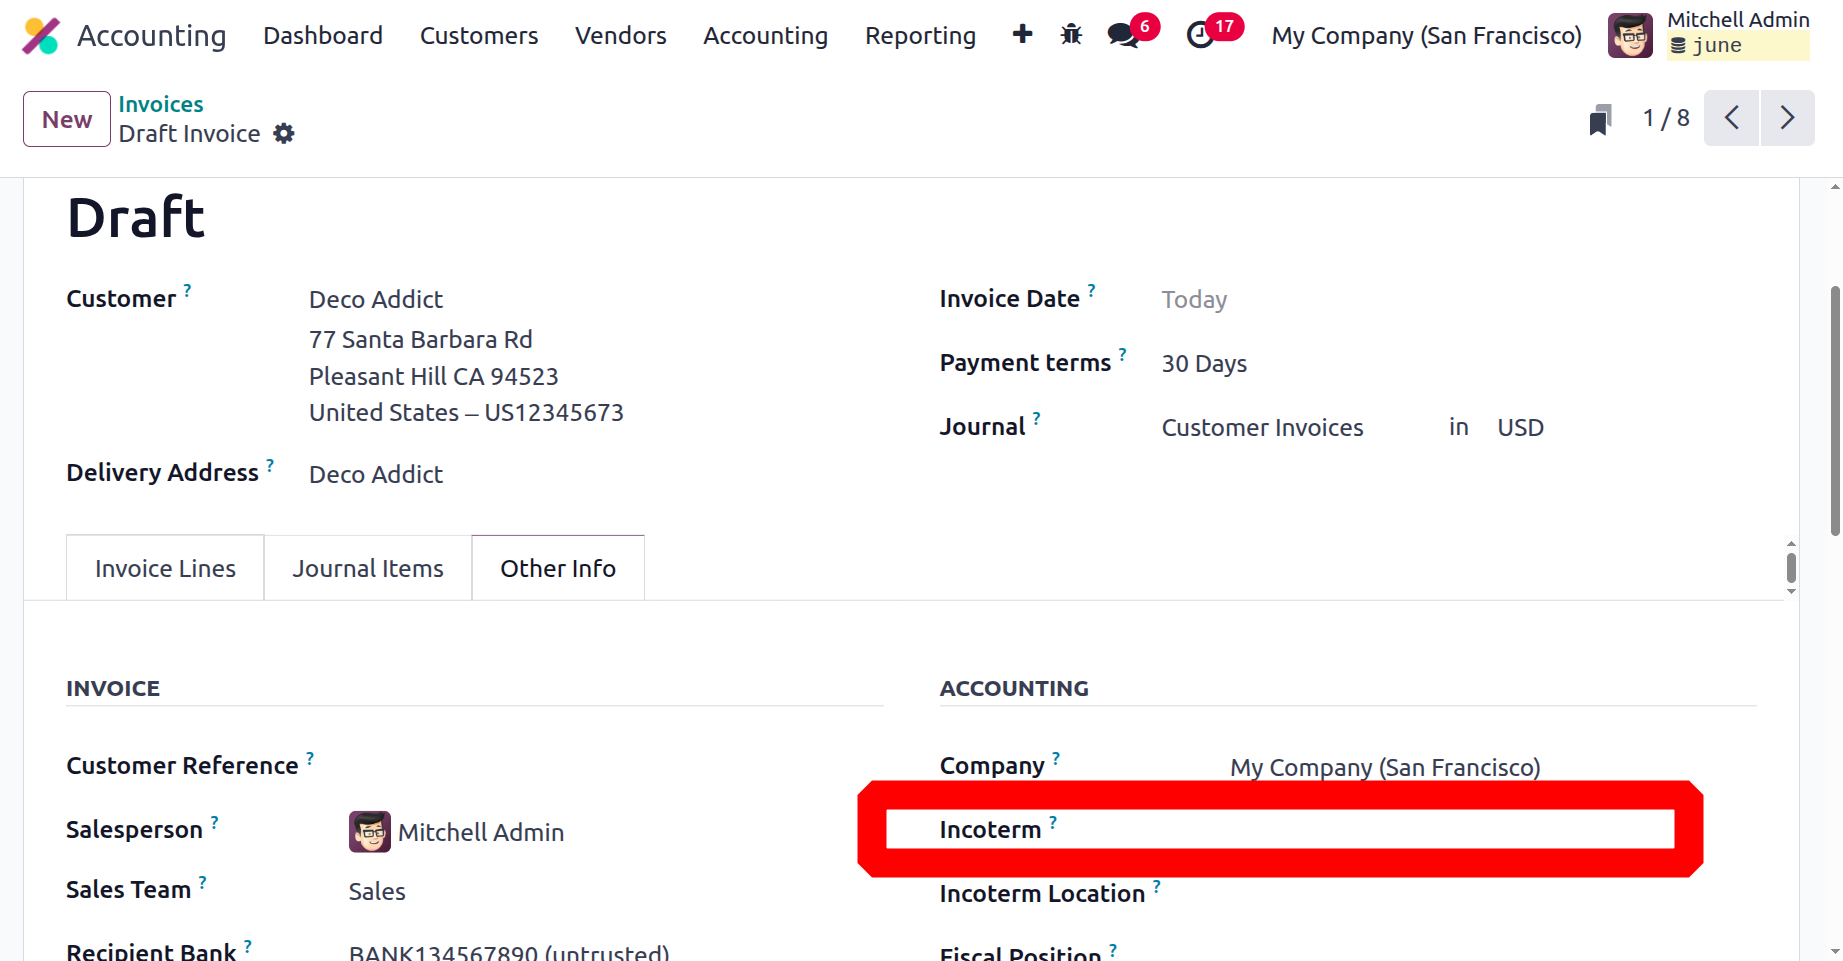
After discussing the management of Incoterms in the Odoo18 Accounting module, let's move on to the platform's Intrastat Code setting. Each incoterm specifies a specific location at the origin or destination to protect the buyer and seller. These specifications ought to be as specific as is practical.
Intrastat Code
An identifier known as the Intrastat identifier is used to identify goods that are transported between EU countries. This code is used to track the movement of commodities and determine which taxes and tariffs apply to them. The Intrastat code is also used to calculate the value of international commerce in goods. It acts as the identification code for tracking the movement of goods between different countries. This code is used by customs officers to record the value of goods that are imported and exported.
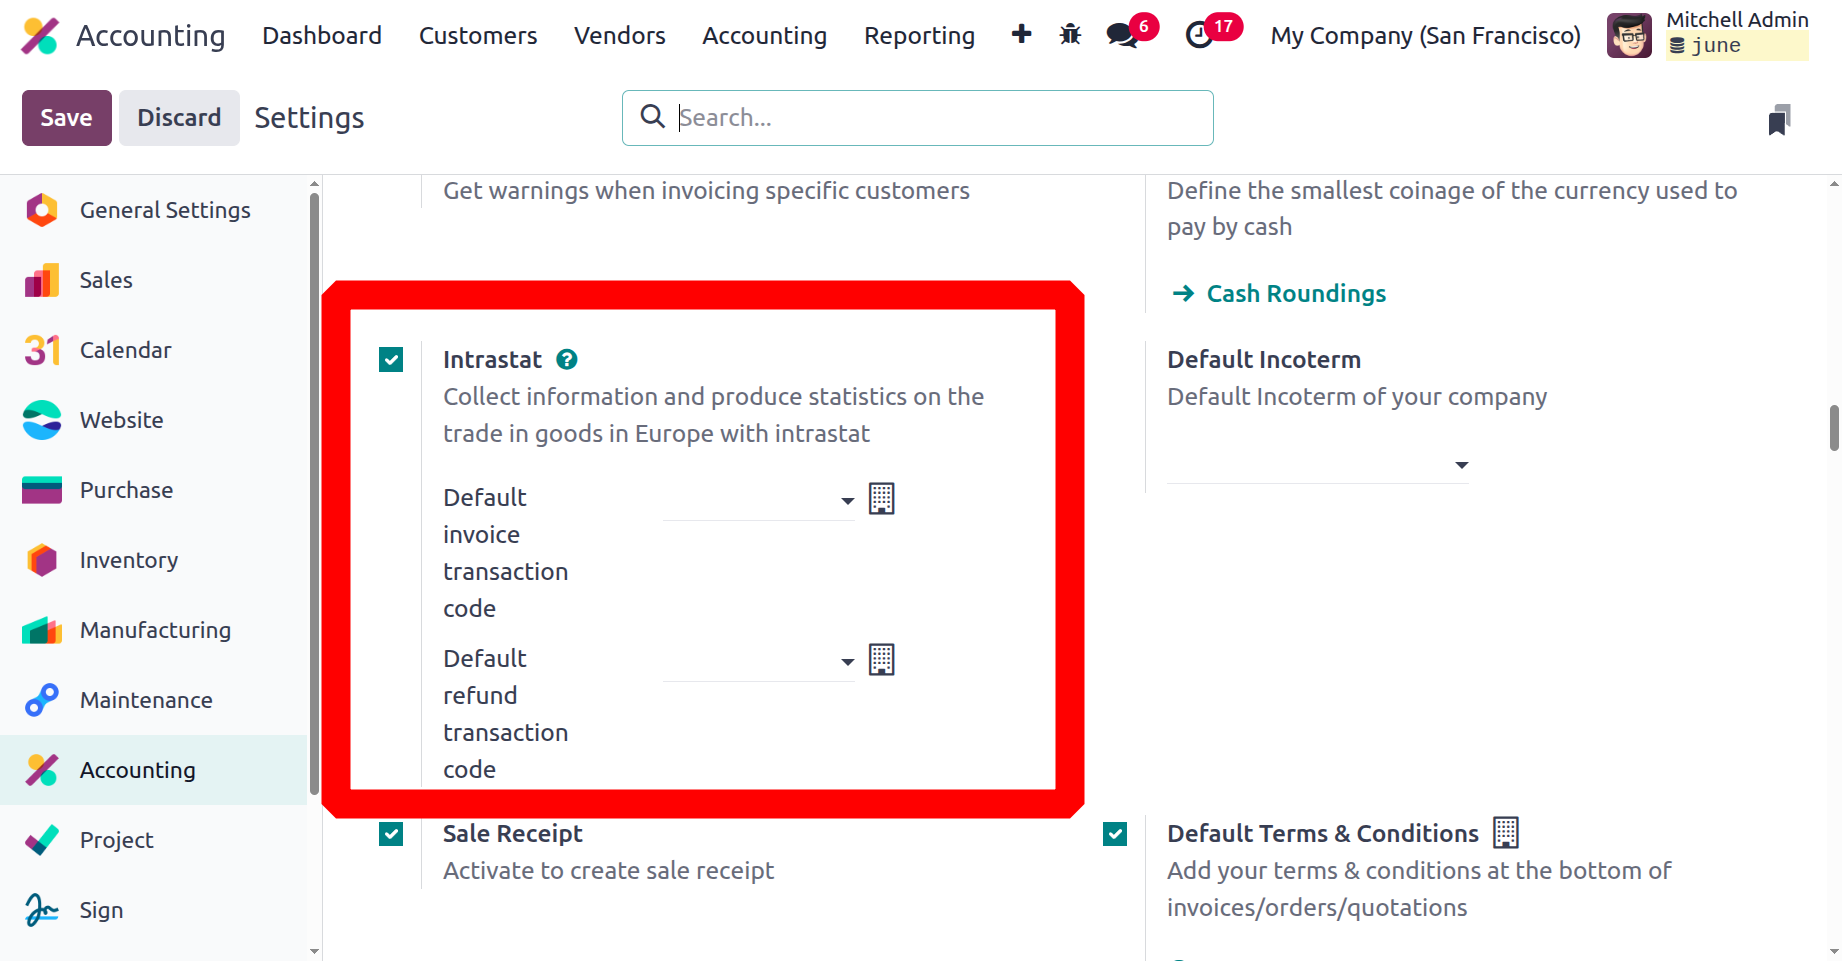
It is necessary to enable the Intrastat Code in Odoo18 through the Configuration Settings. From there, you can also enter the default transaction codes for invoices and refunds.
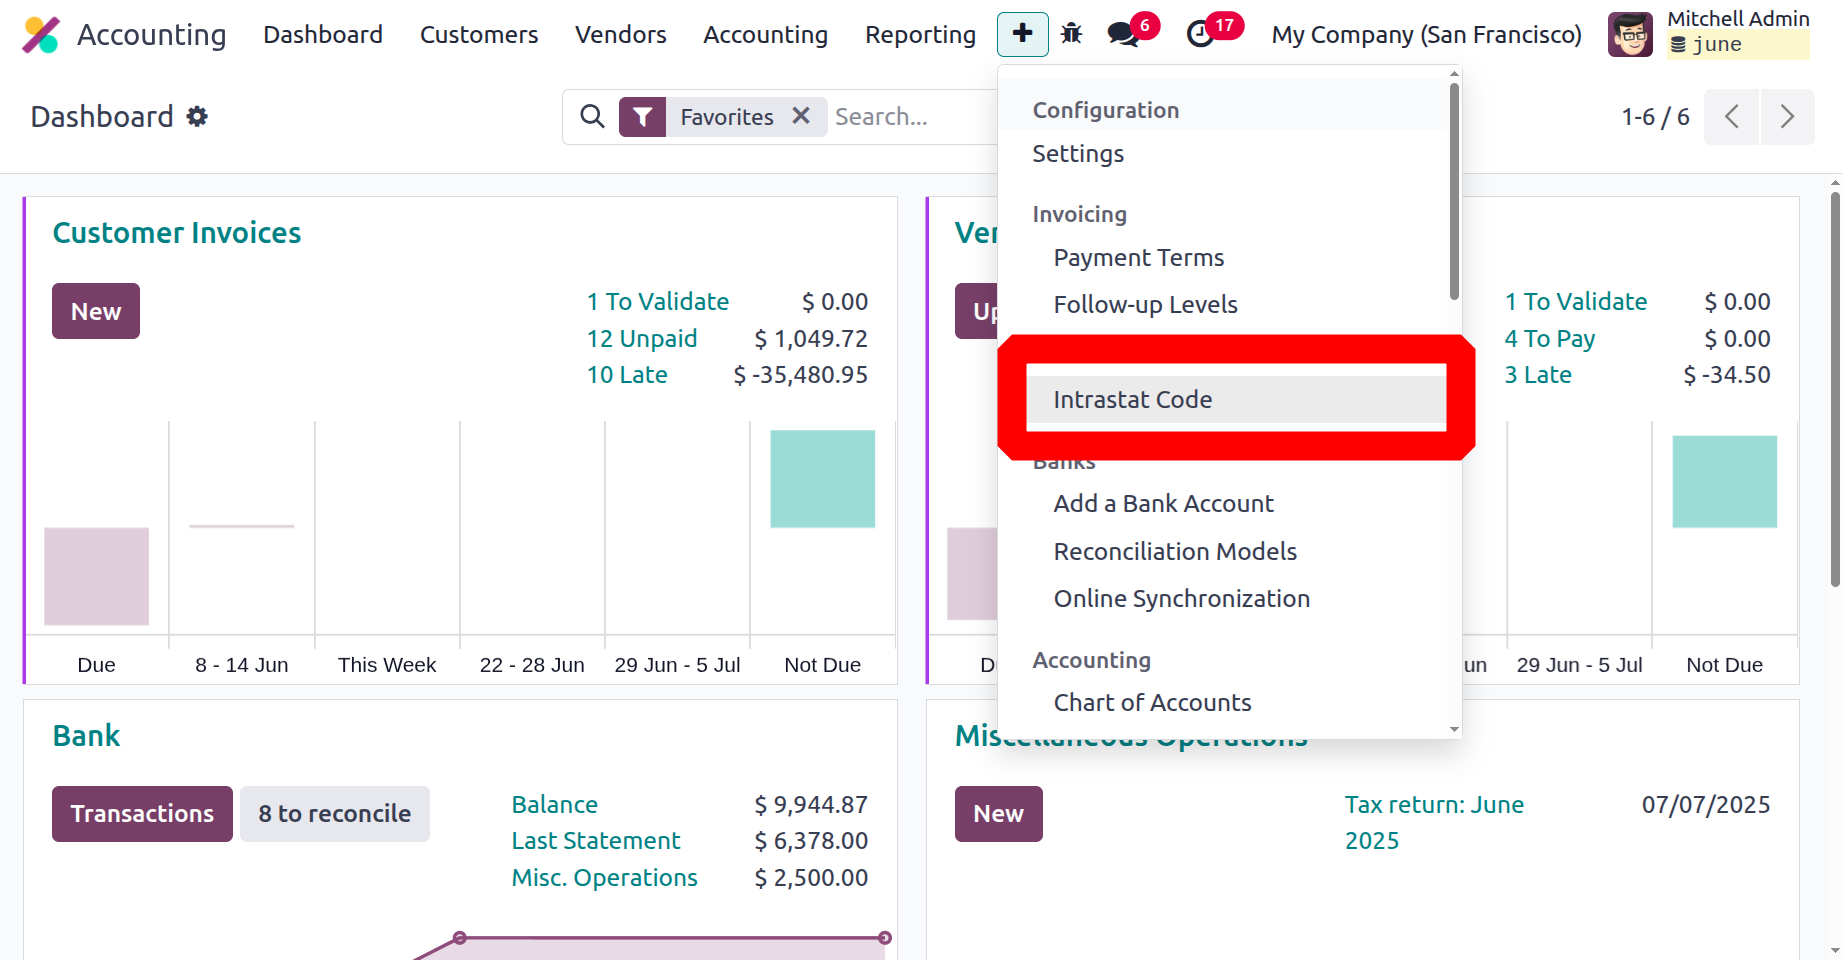
A product is given an eight-digit designation known as the Intrastat designation by the European Commission. The code serves as the product's identification for statistics purposes. The Intrastat Code menu is located in the Invoicing section of the Configuration tab. The moment you click on this menu, the Intrastat Code window will open, looking like the screenshot below.
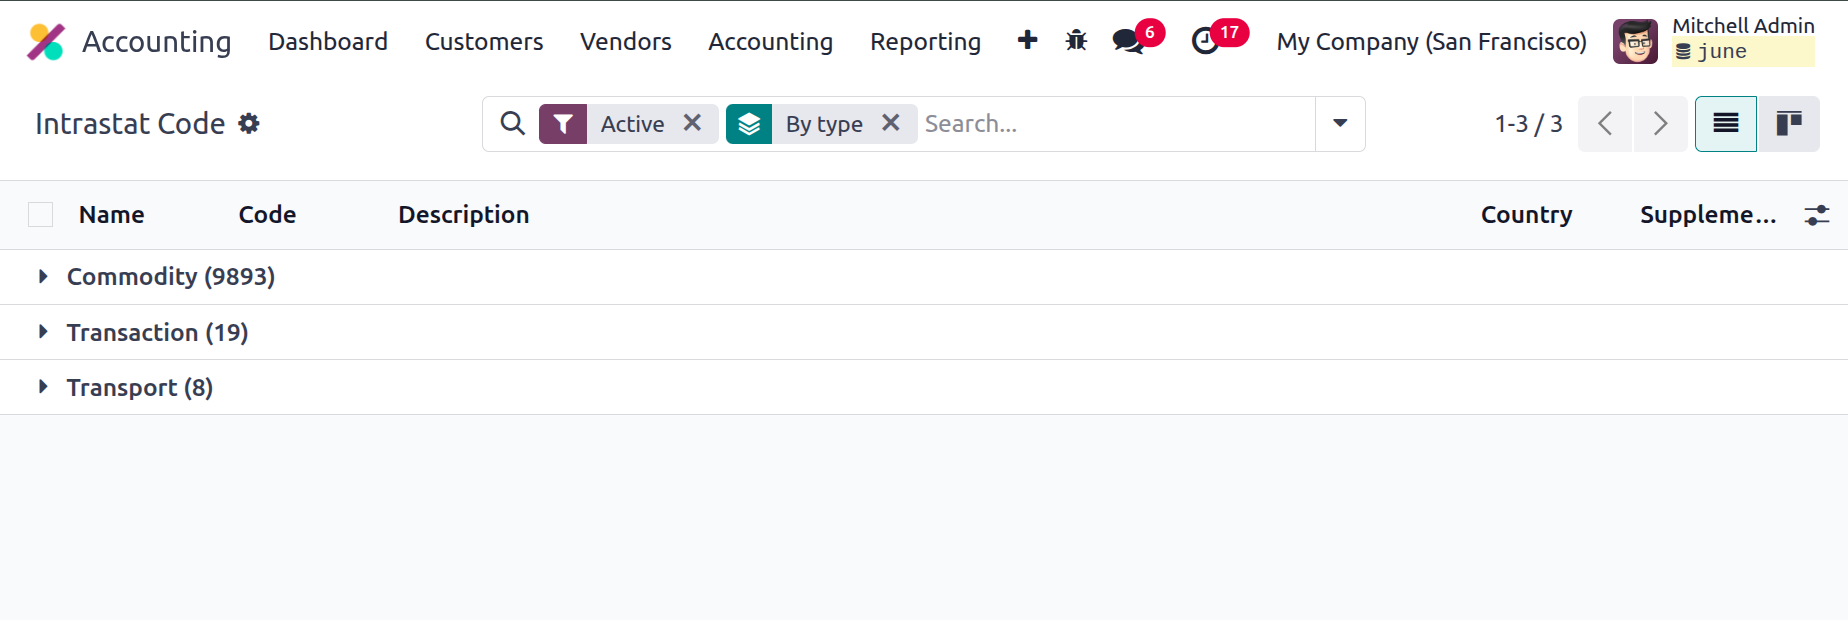
All of the platform-specific features of the Intrastat Code will be displayed in the Intrastat Code menu. Each code defined in the sample itself has a general description that you can read. To learn more about one of these defined Intrastat Codes, choose it.
As seen in the screenshot above, the extension form has the following information: Name, Code, Type, Supplementary Unit, Use Start Date, Expiry Date, and Description.
Up until now, we have examined the configuration choices included in the Invoicing part of the Odoo18 Accounting module. Next up is the platform's last management feature for Odoo18 Accounting: Configuring Bank Payments.