Efficient Customer Financial Handling in Odoo 18
Effective customer management is essential to a company's smooth functioning because, without it, you run the risk of losing control over procedures like product delivery and payment collection, among many others. In order to manage the financial aspects of client operations, you will need specific operational tools. In Odoo 18, you may handle client financial management procedures by using a particular tab of the menus.
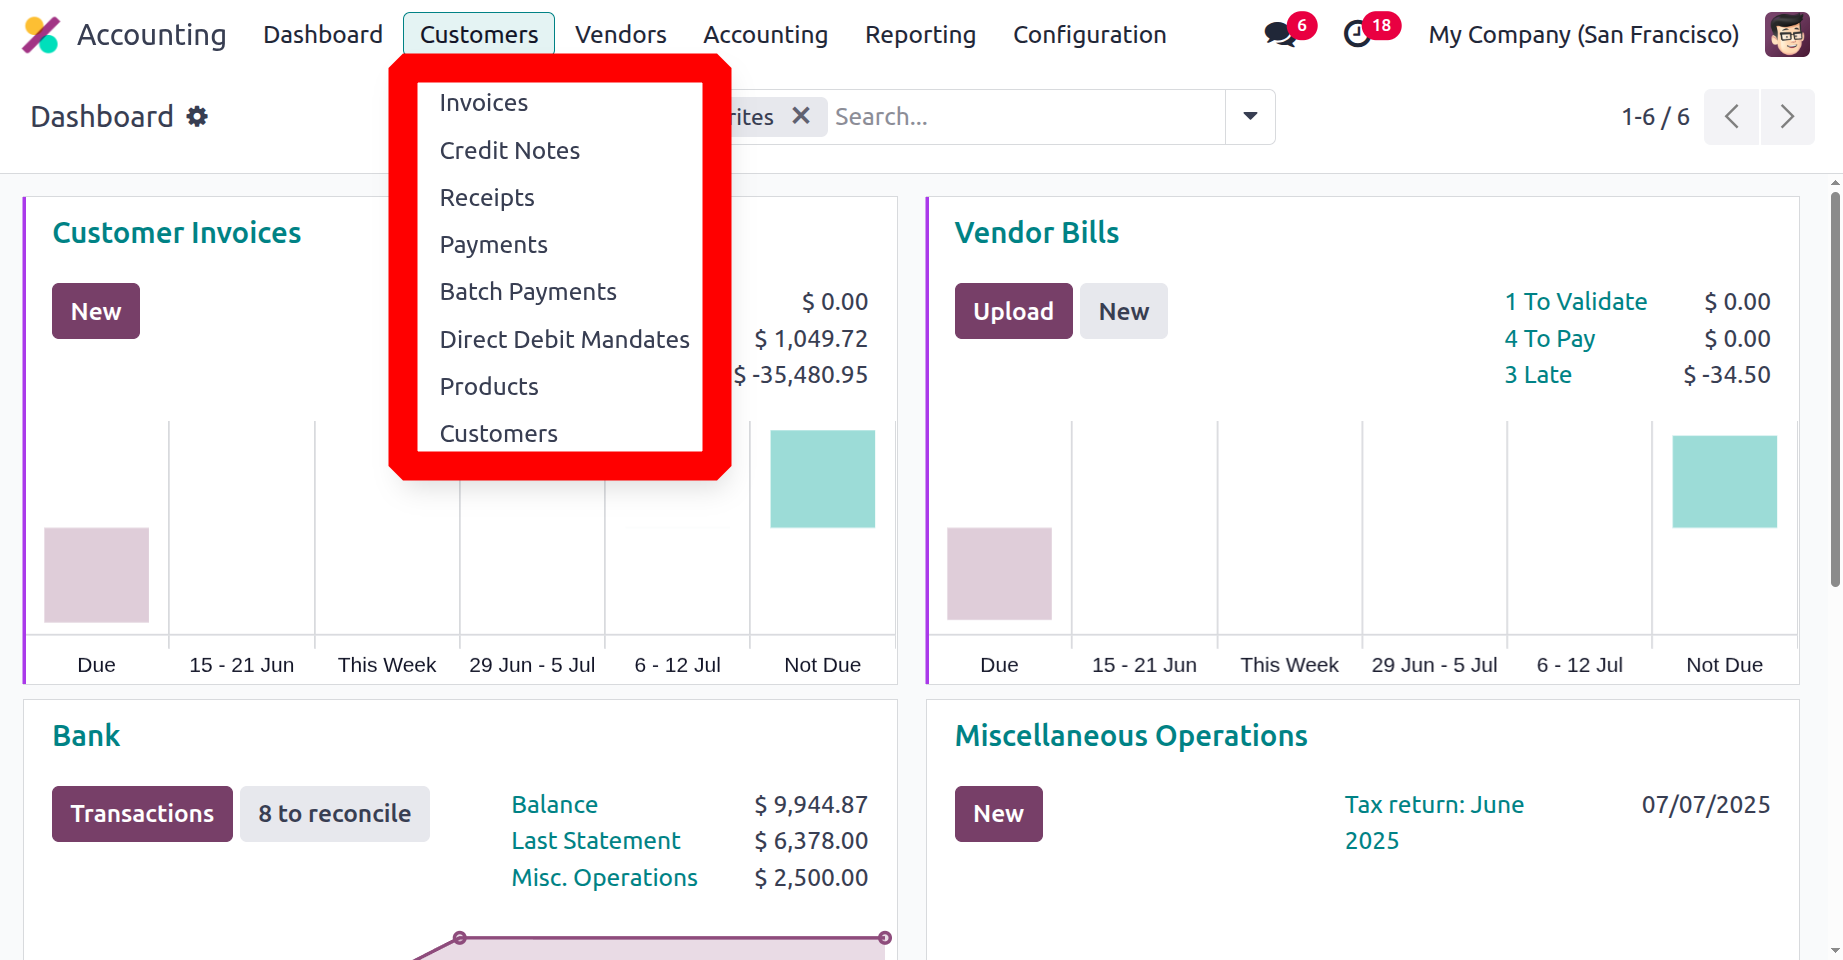
Invoices, Credit Notes, Receipts, Payments, Batch Payments, Direct Debit Mandates, Products, and Customers are just a few of the possibilities available to you through the Customer tabs on the dashboard of the Accounting module. Each of these options will be used to calculate the financial management parameters associated with client activities towards the firm. After going over each setup option in detail, let's go on to the part about client money management.
Creating Customer Invoices
Invoices from customers must be processed promptly, meticulously, and extremely carefully. For this, you ought to have specialised programs. By selecting the Customers menu in the accounting module, users can access the invoice management menu in the Odoo accounting module. As seen in the screenshot below, all business invoices owing to clients are displayed in the Accounting module's Invoices menu. Invoice number, client information, Invoice date, due date, tax data, invoice amount and invoice status are all displayed. The colours in the following screenshots correlate to the due date and status.
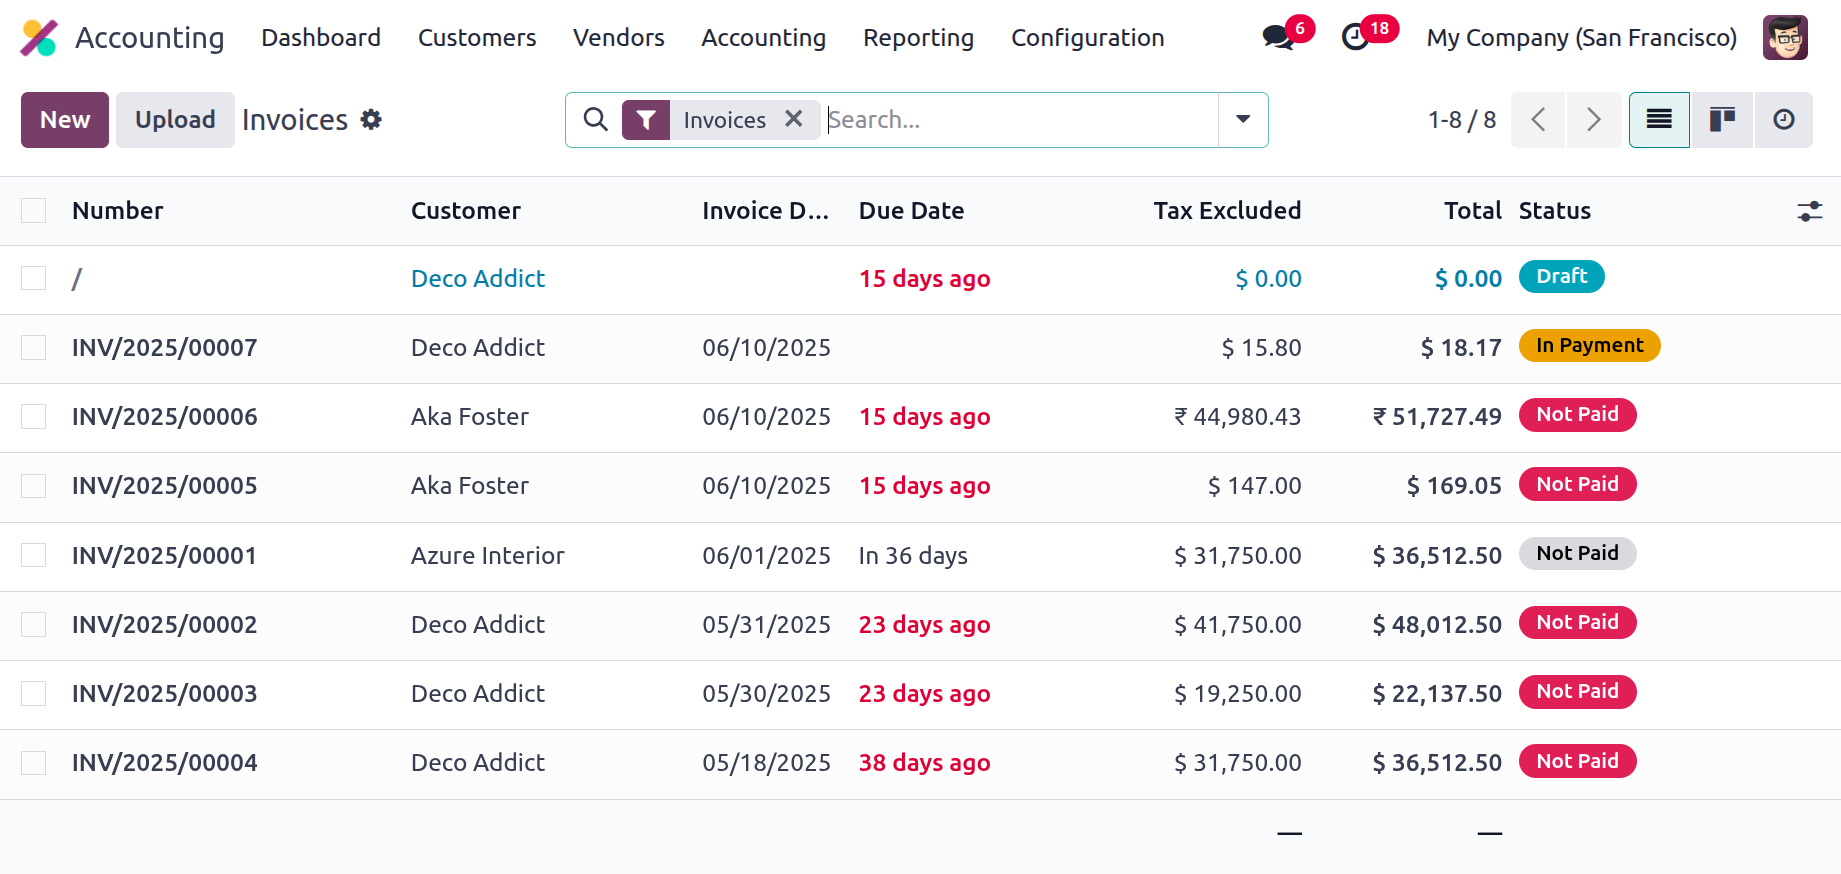
This intricate Odoo feature allows you to classify and identify scheduled events. A yellow colour indicates that the deadline is today; a red colour indicates that the deadline has past or is now due. The payment status indicates if the invoice has been paid, and the invoice status indicates whether it has been posted.
You have the option to change the existing invoice data if necessary, but only authorised individuals may do so to prevent security disruptions. By choosing the New option from the Invoices menu, you may also generate new invoices. Along with the shortcode INV, which is linked to journal activities and is modifiable, the customer invoice number will also be shown in the invoice production menu, as seen in the image below. INV serves as the prefix for invoices. You can also choose which journal the entries should be defined in, as well as the customer, payment reference, invoice date, and due date.

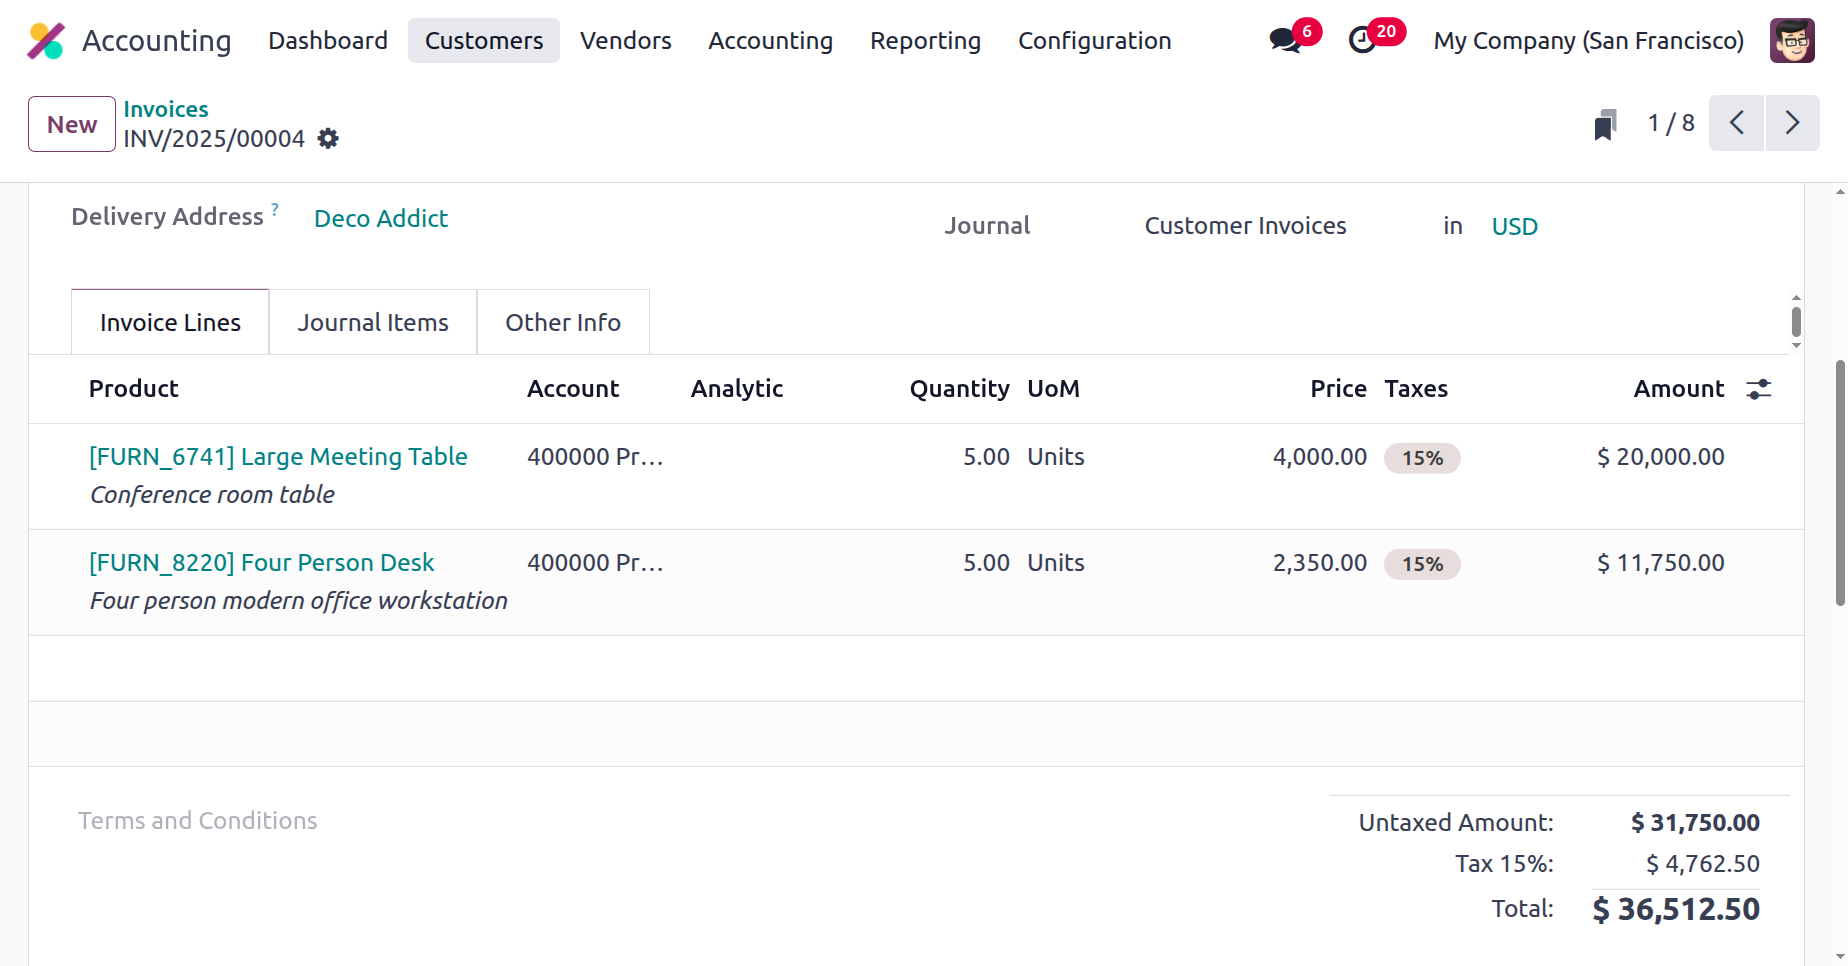
The Invoice Lines tab allows you to specify the Sales Product. You can use the Add a line or Add a section options here to add items or extra sections to the invoice lines. You may also include a note to the client directly on the invoice by using the "Add a note" option. The product, label, account, analytical account, analytical tag, intrastat, quantity, price, taxes, and subtotal of the defined products are among the additional fields that can be added. The terms and conditions pertaining to the specific invoice might also be included. Together with the Tax, its proportion, and the Total Amount, the Untaxed Amount will be explained.
Based on the items and additional information provided in the invoice, the menu will provide the journal items for the relevant invoice. The relevant ledgers will be included in the journal entries as soon as the products are added to the invoice.
Under the Journal Items, it includes the Receivable Account, Tax Account, and Income Accounts. There will be definitions for the Debit, Credit, Label, Analytical Tags, and Tax Grids. As demonstrated in the figure below, you will also be able to see the applicable account's Cut-Off.
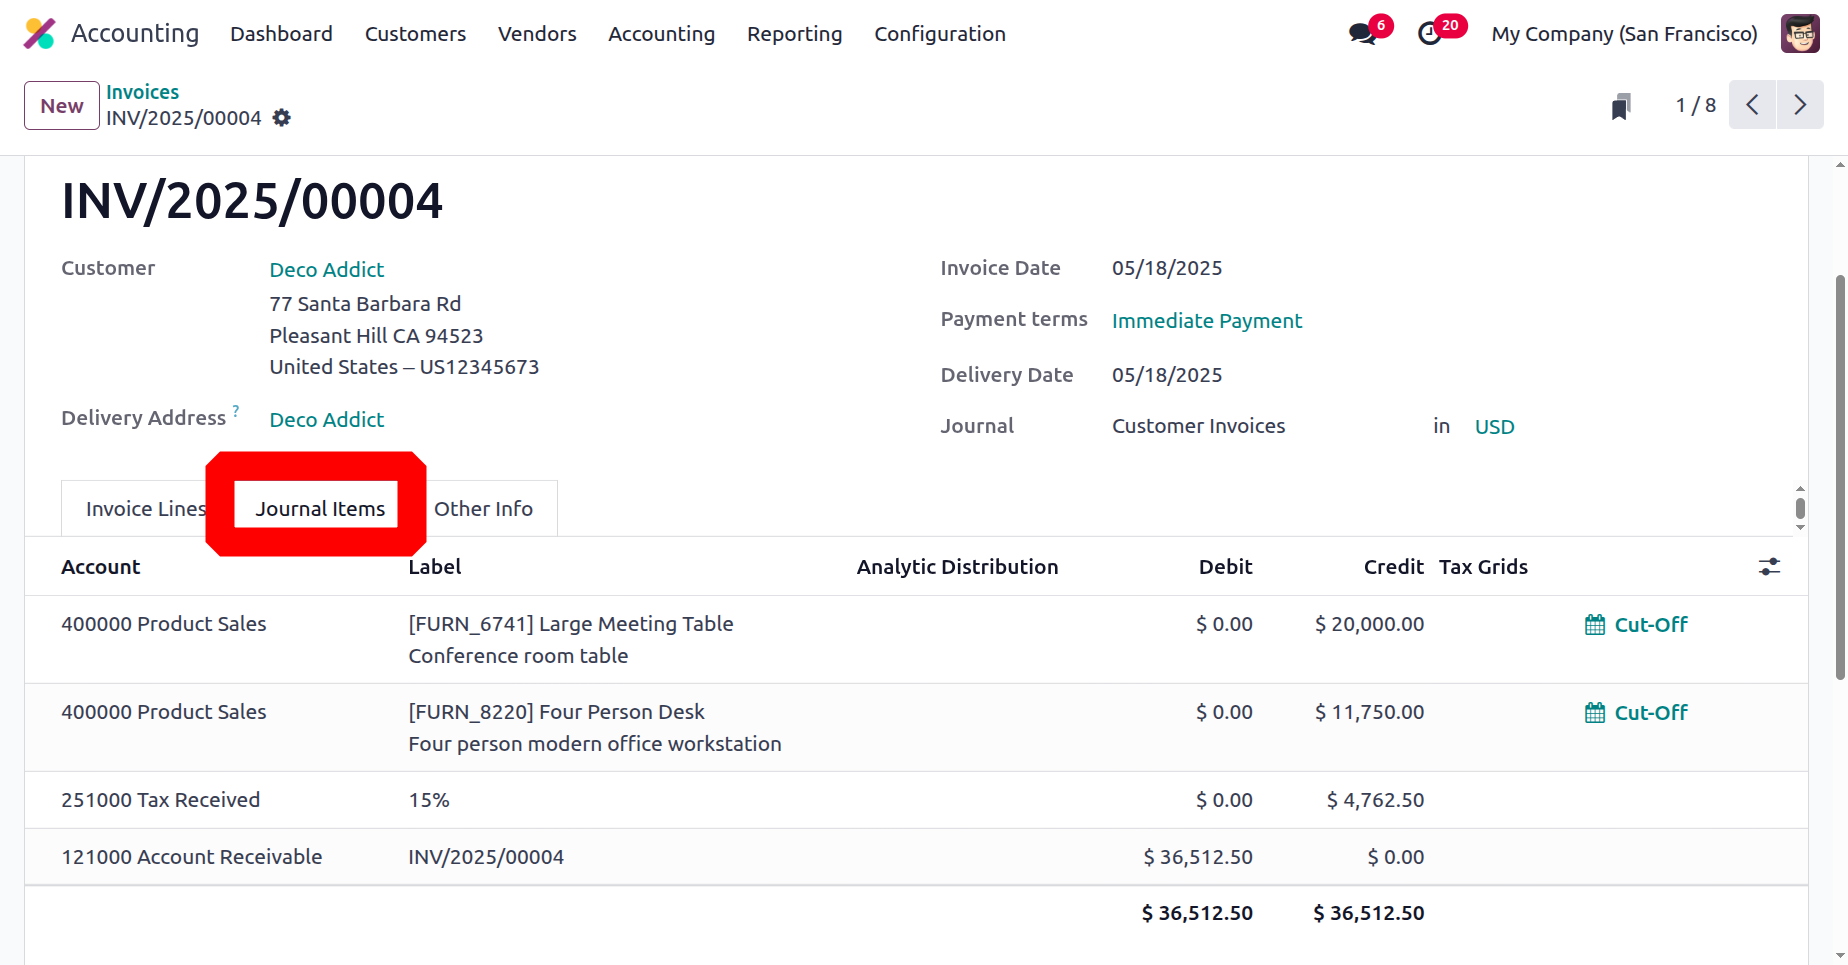
In its general ledger entry processes, Odoo employs both Continental and Anglo-Saxon accounting, making both completely understandable. When an invoice is generated in Continental Accounting, the Income Account is credited and the Account Receivable is debited. As the value of the assets rises, the amount owed is deducted as the account receivable by nature a "Asset." As income increases, the Income Account is credited as well, since income is by nature "Income." Considering that the tax account is credited when liabilities rise, it is a "Liability" by nature.
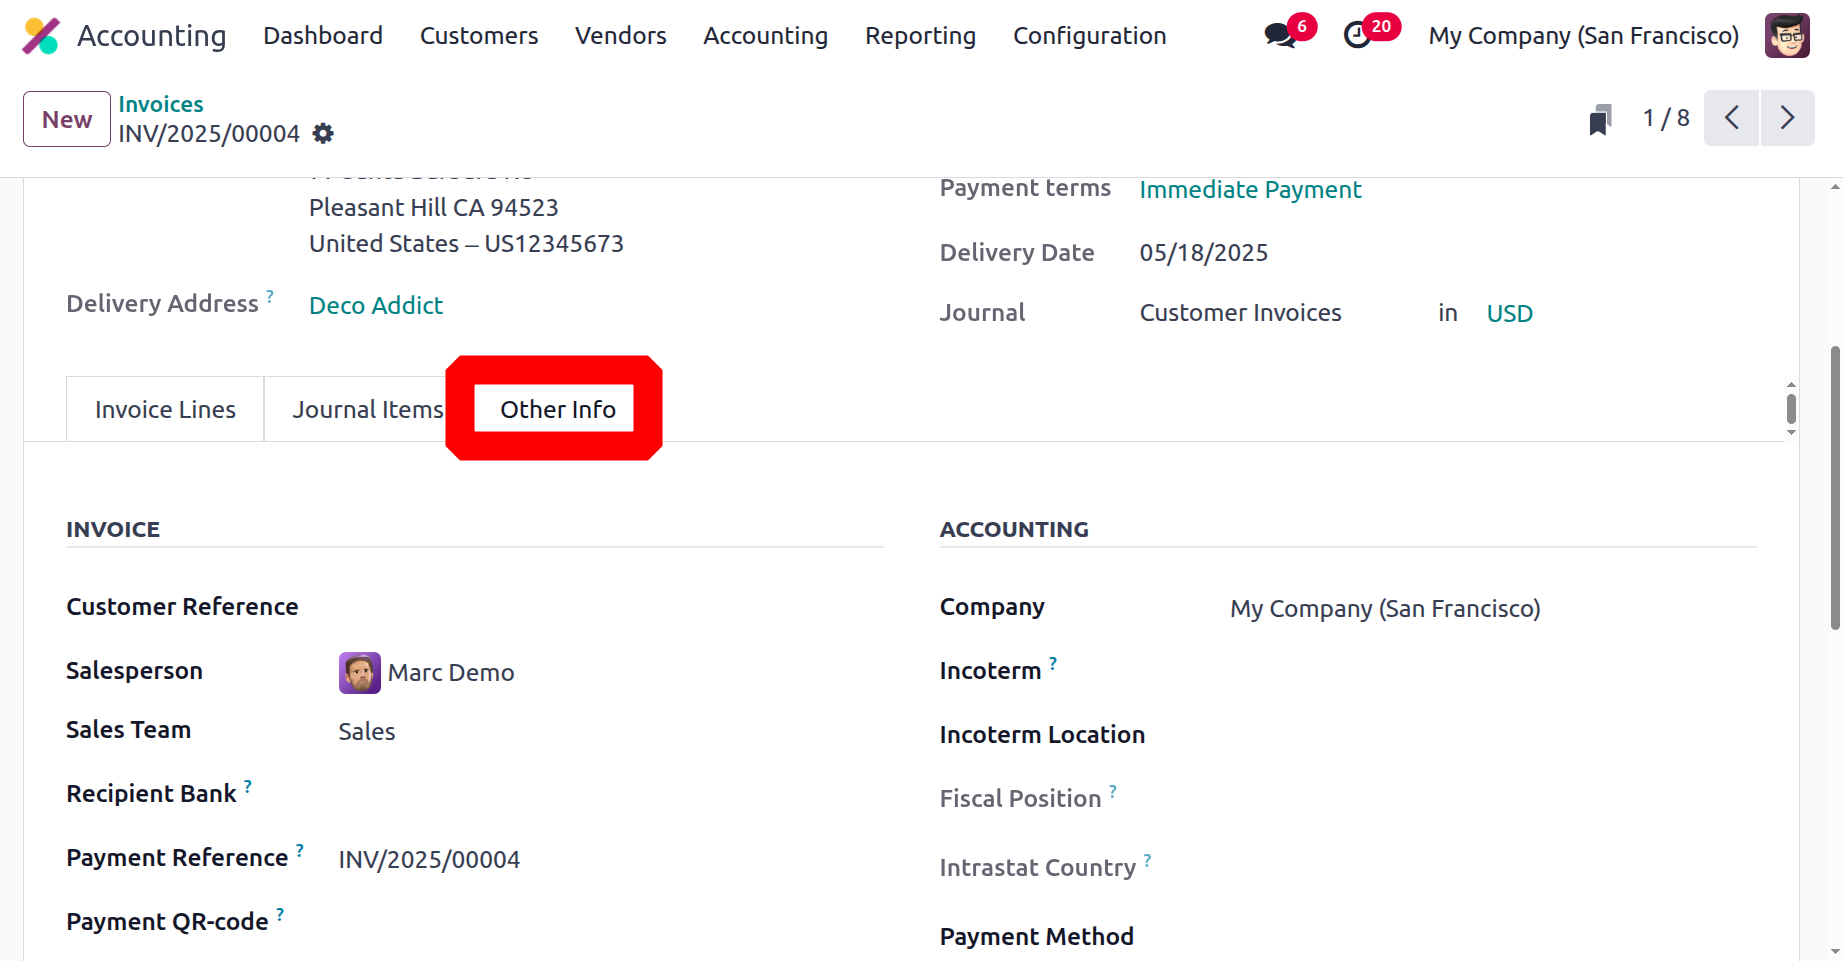
You can alter several of the generated invoice's elements on the Other Info tab, which also provides you with more information. You can include customer references, salespeople, sales teams, receipt banks, and more in the Other Info tab of the invoice menu. Additional concepts covered in the definitions of accounting, other information tabs are Fiscal Position, Incoterms, Intrastat Country, and Cost Rounding Method.
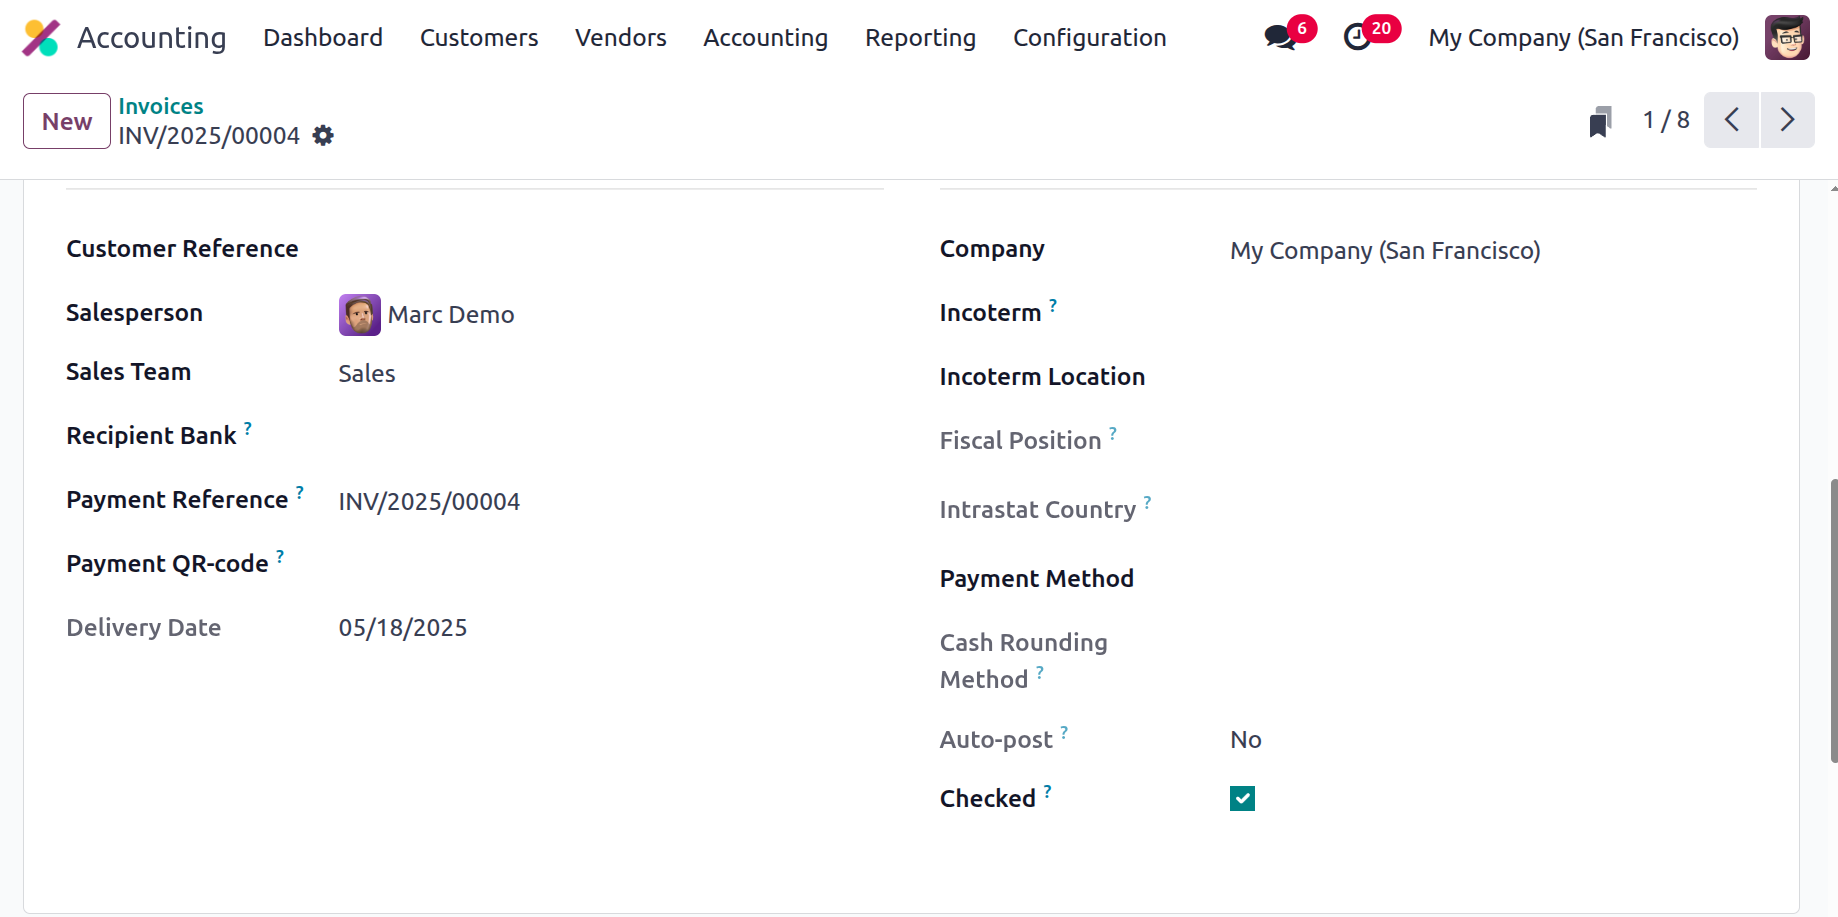
To choose whether this item will be posted on the designated accounting date and any associated recurring invoices, you can also enable or disable the "Auto Post" option. You can choose "No," "At Date," monthly, quarterly, or annual invoice auto-posting. 'At day' invoices are those that are posted on the designated day; 'No' invoices are those that are not automatically posted but can be uploaded manually; and 'Monthly, Quarterly, and Yearly defined invoices are those that are posted regularly, quarterly, or annually. The To Check choices can also be chosen to signal that the relevant document needs to be checked in case you or another Odoo billing user is unsure of how they work.
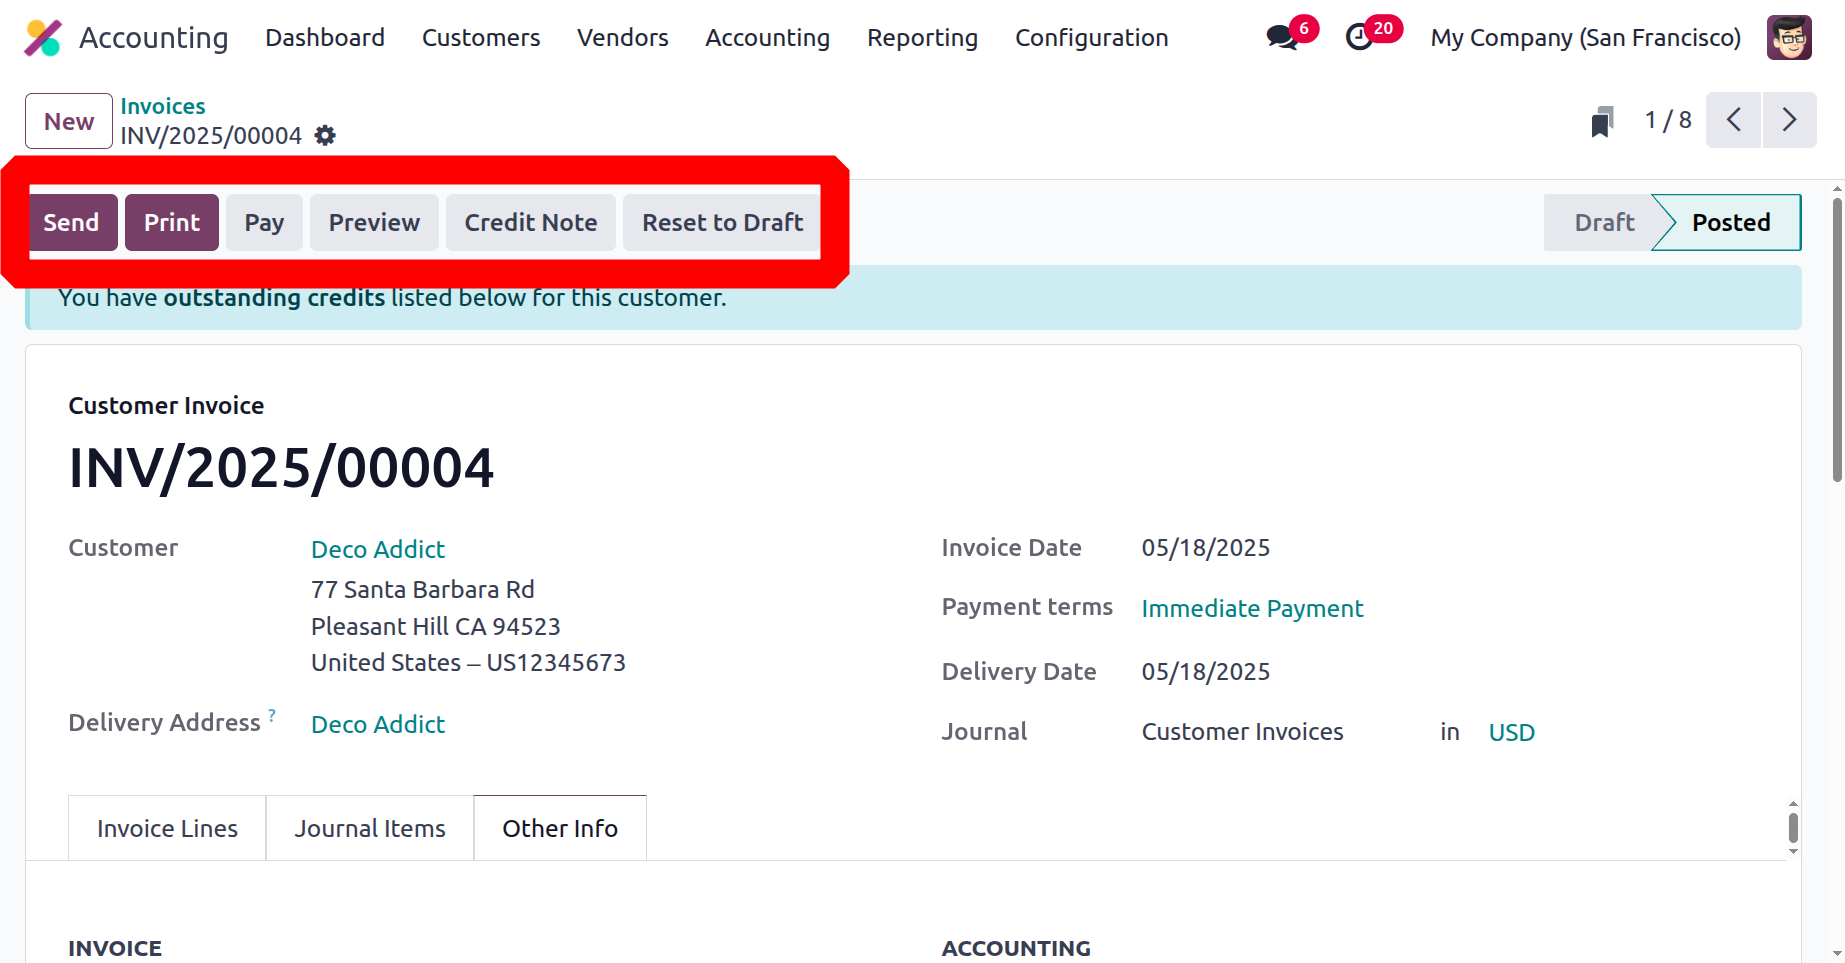
Once the customer has finished setting up their invoice, you can choose the Send and Print buttons to email the invoice to them and, if you have a printer attached to the system, print a copy for yourself. The printed version of the invoice can be sent to the customer together with a customised note or handled in person. You can use the Preview option to see how the invoice that will be delivered to the client will appear before sending it.
The following screenshot shows the invoice as it would seem to the client; all data specified during the invoice creation process will be shown here, with the exception of data pertaining to the company's internal business processes. Furthermore, details such as the Journal and Chart of Accounts will not be displayed.
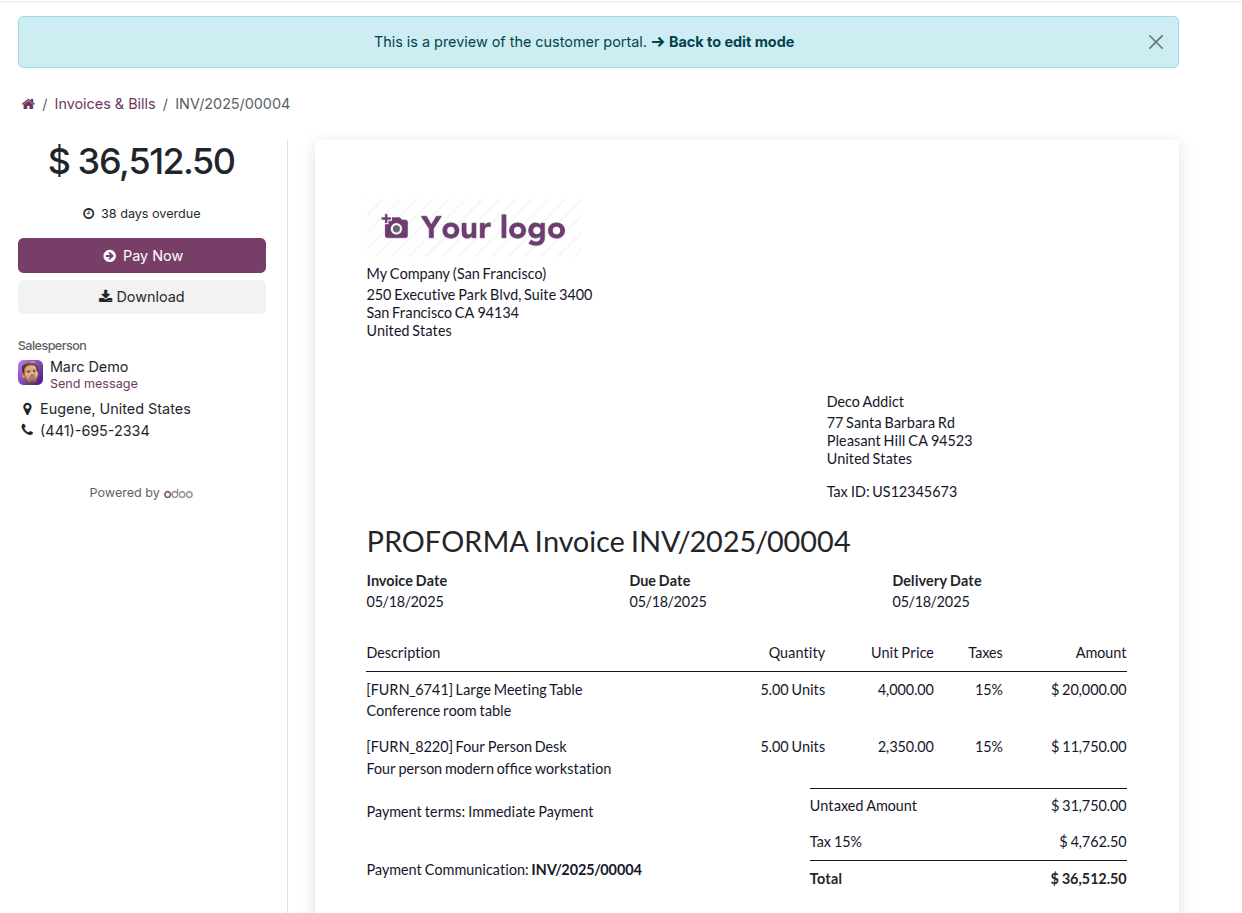
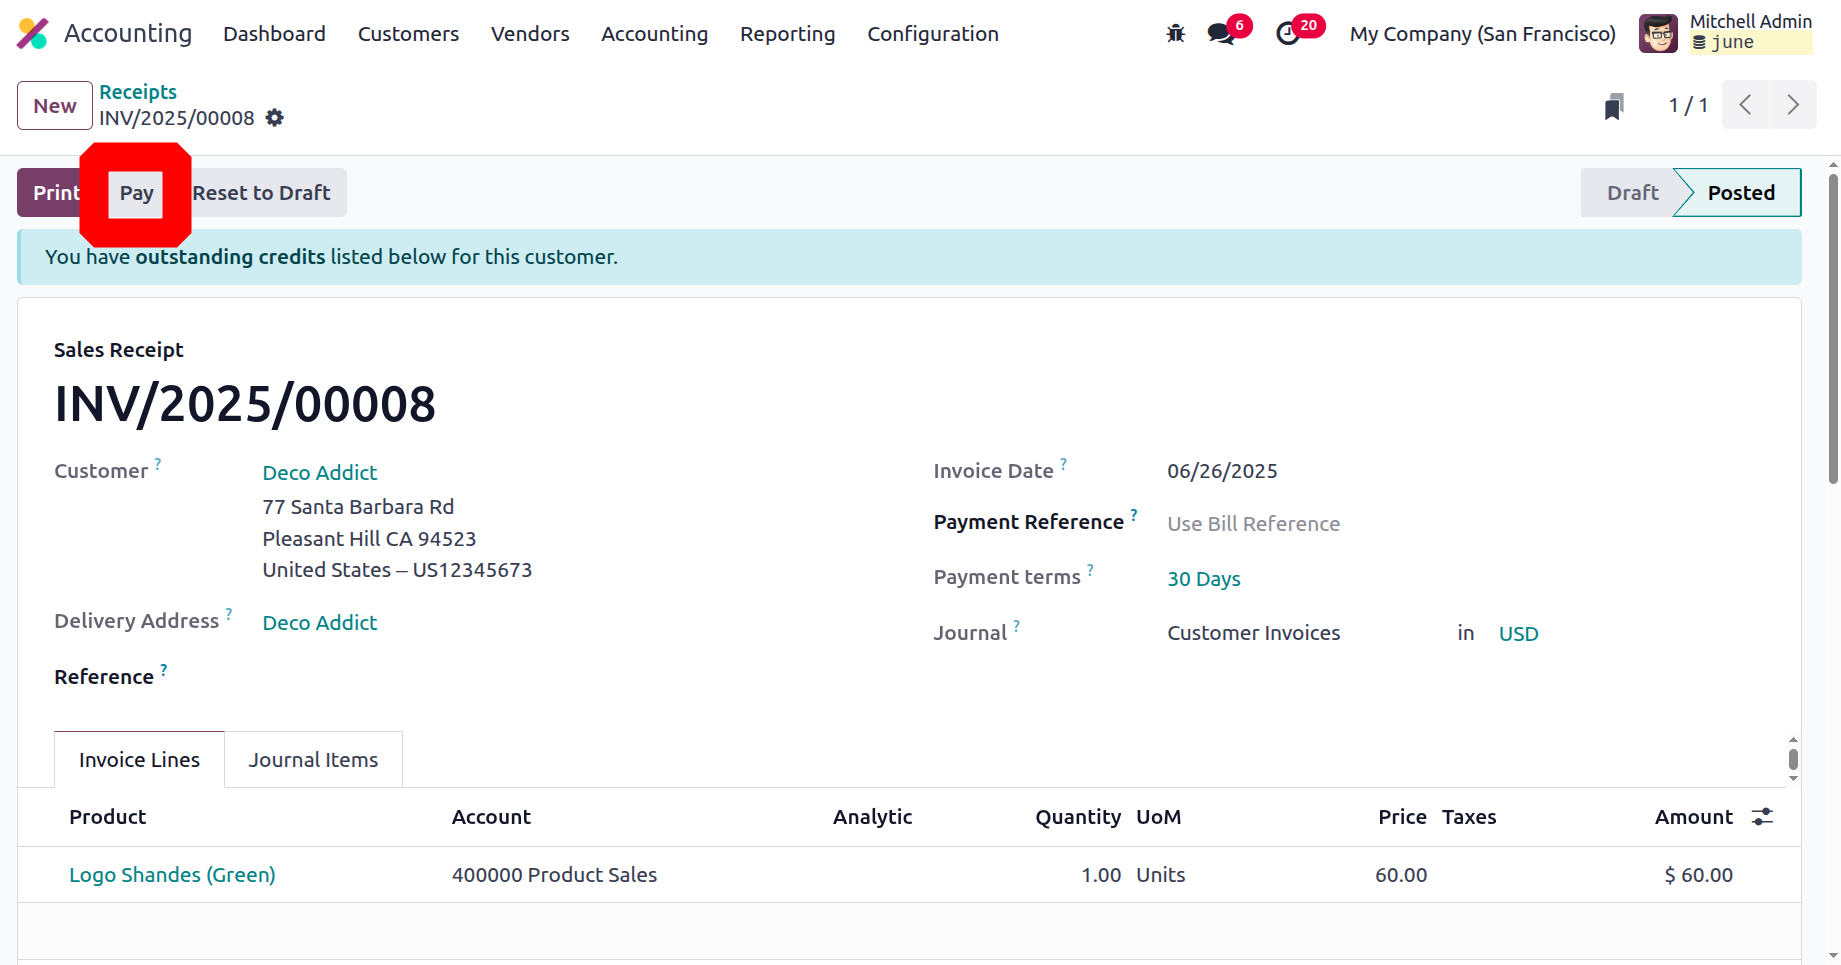
After invoices are sent, you can choose to send them to the customer and make any necessary changes. Depending on the circumstances, the buyer will get the invoice via postal service or mail. As soon as the client pays for the issued invoice, you may use the Register Payments option in the relevant invoice box to keep track of the money owed to you.
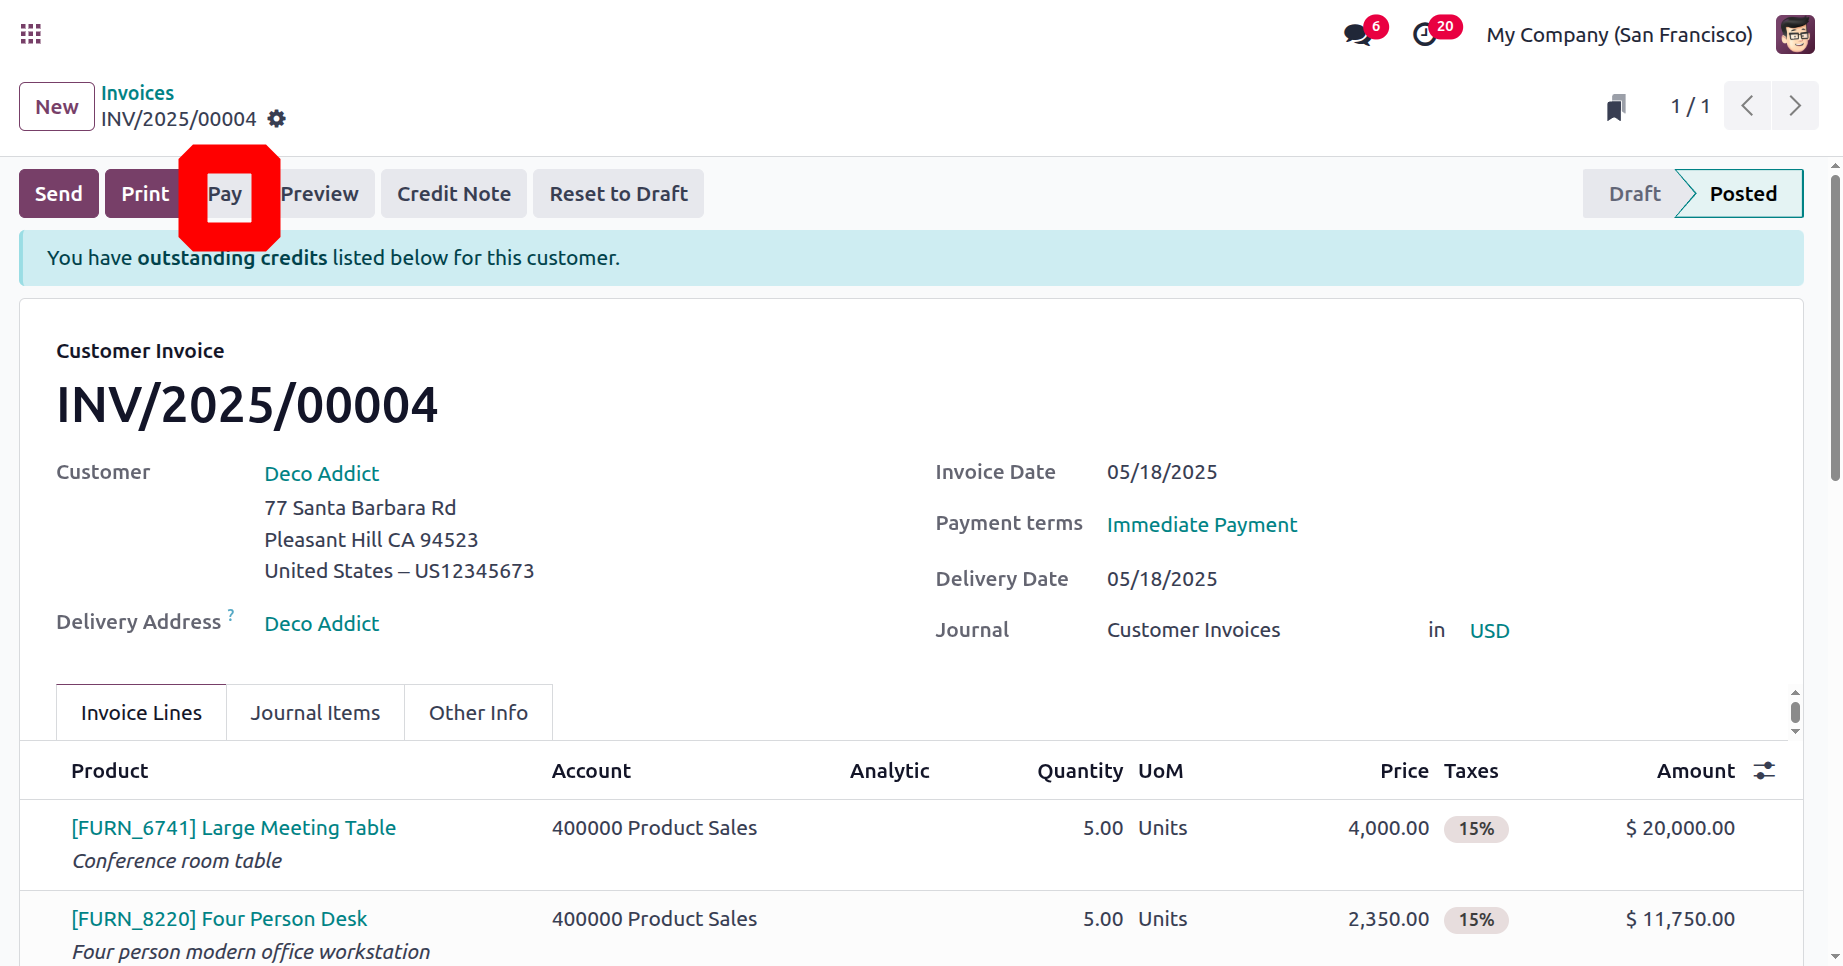
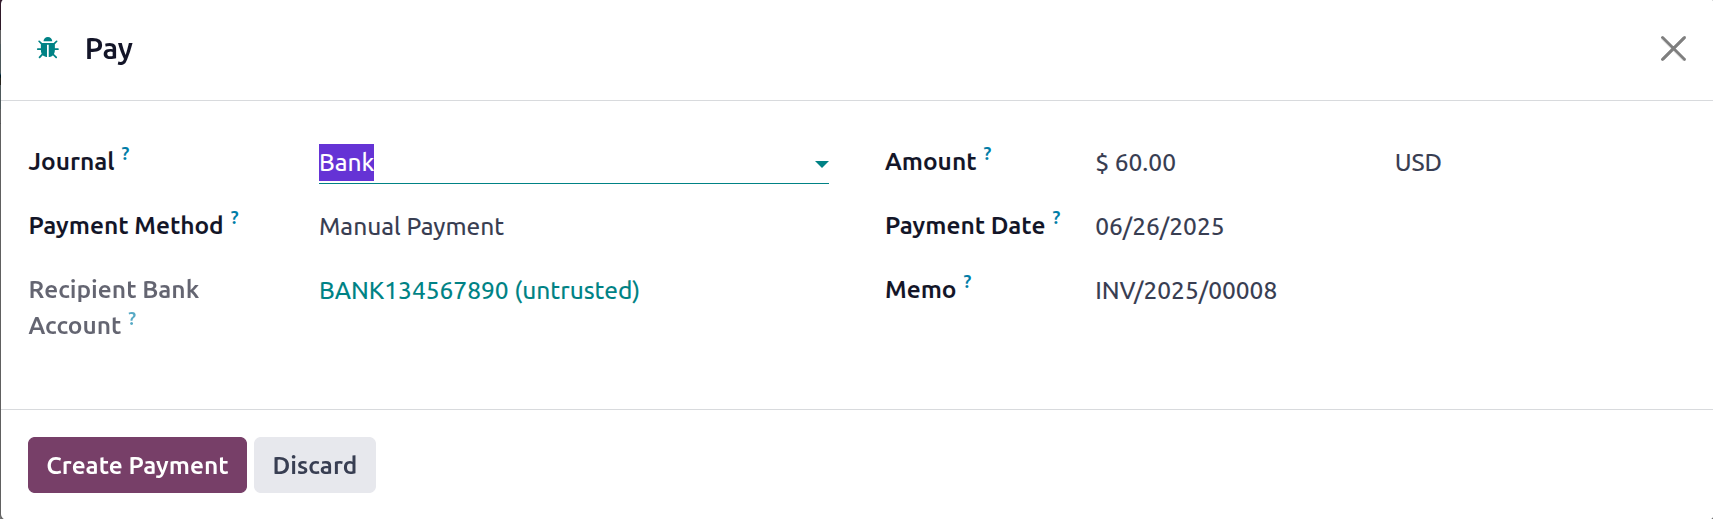
You can select the Journal Payment Method from Manual, Branch Deposit, or SEPA Direct Debit in the pop-up window that appears when you decide to register the payments. Along with the Amount and Currency, you can also include the details of the Receipt Bank Account. It is possible to define both the memo and the payment date. Lastly, select the Create Payment option to register the payment on the Odoo platform.
Understanding the differences between the payment revive methods of Anglo-Saxon and Continental accounting will make it possible to manage the company's accounting operations. Let's examine their operational characteristics. The Continental accounting system debits the Outstanding Receipts Account and credits the Account Receivable upon receipt of a payment. Only the Outstanding Receipts Account is credited following bank statement reconciliation, while the bank account is deducted. All incoming payment entries resulting from invoices and reimbursements will be stored in an Outstanding Receipt Account. They are displayed in blue in the widget and are compared to the relevant transaction during reconciliation instead of Account Receivable. The ribbon PAID will appear on the invoice instead of IN PAYMENT. When the invoice is posted, the expense account in Anglo-Saxon accounting likewise changes. Following the validation of the sales process, the Anglo-Saxon accounting expenses are impacted. Consequently, the expense account is debited and the stock output account is credited.
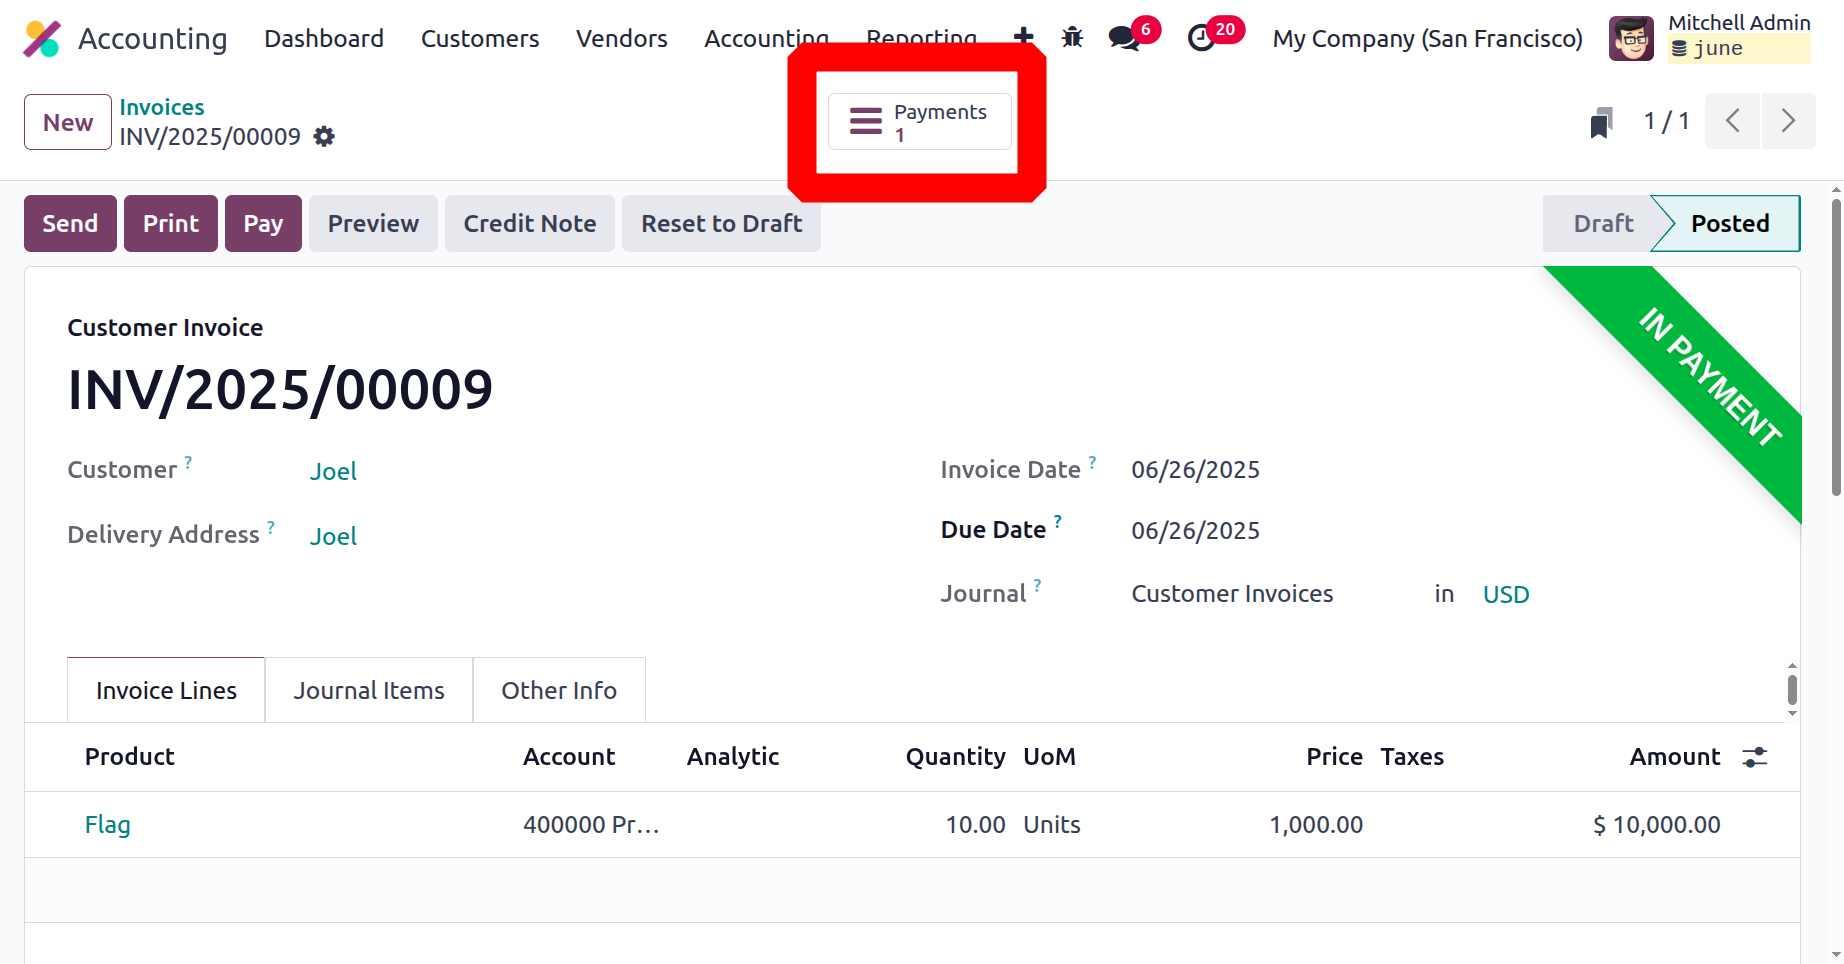
After the payment has been received, the related invoice menu will display an In Payment label, as shown in the example below. The associated invoice's status will be displayed as Paid if the whole amount has been PAID.

Credit Note Management on the Customer Invoices
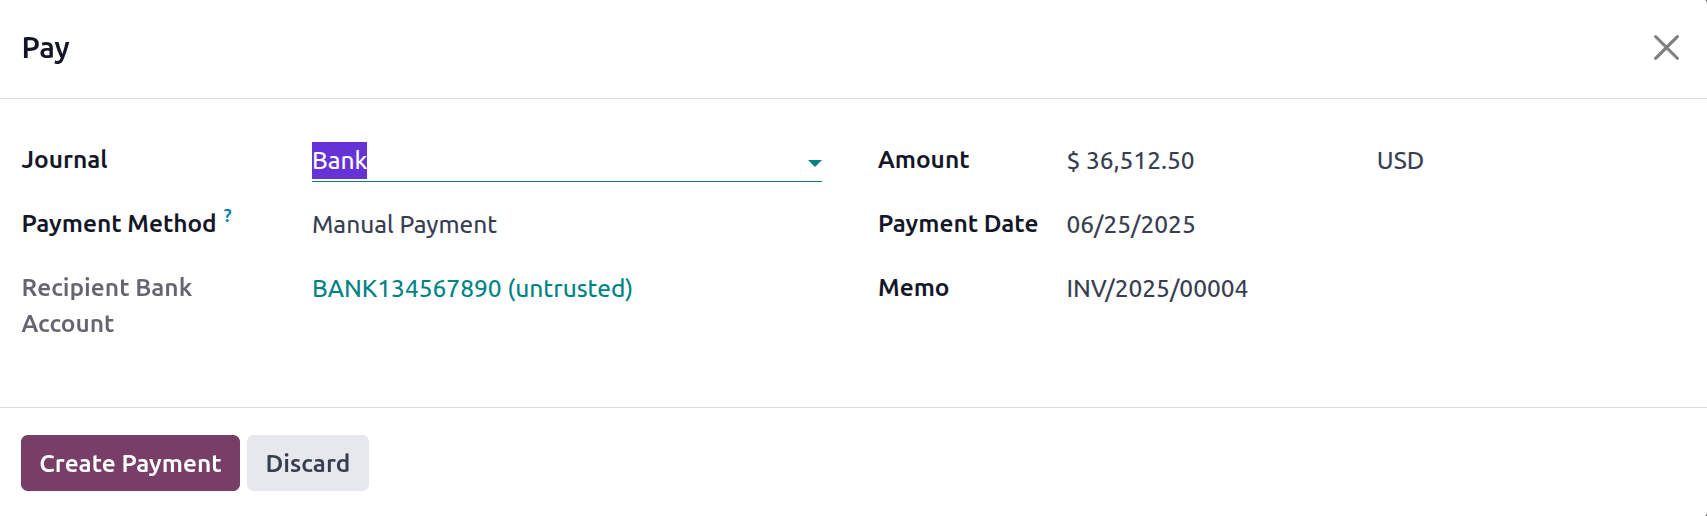
You may already be aware of the features of credit note activities that will enable you to reimburse the invoice amounts in the previous section. Odoo has a specific menu to make managing all credit note activities easier because credit note operations will likely need to be described in a real-time business context. The number, customer information, invoice date, due date, next scheduled action, tax excluded, total, status, and payment status are all included in the description of each credit note in the Credit Notes menu, which may be accessed from the Customer page. You can use both the default and custom Filter and Group by options to obtain the necessary Credit Notes.
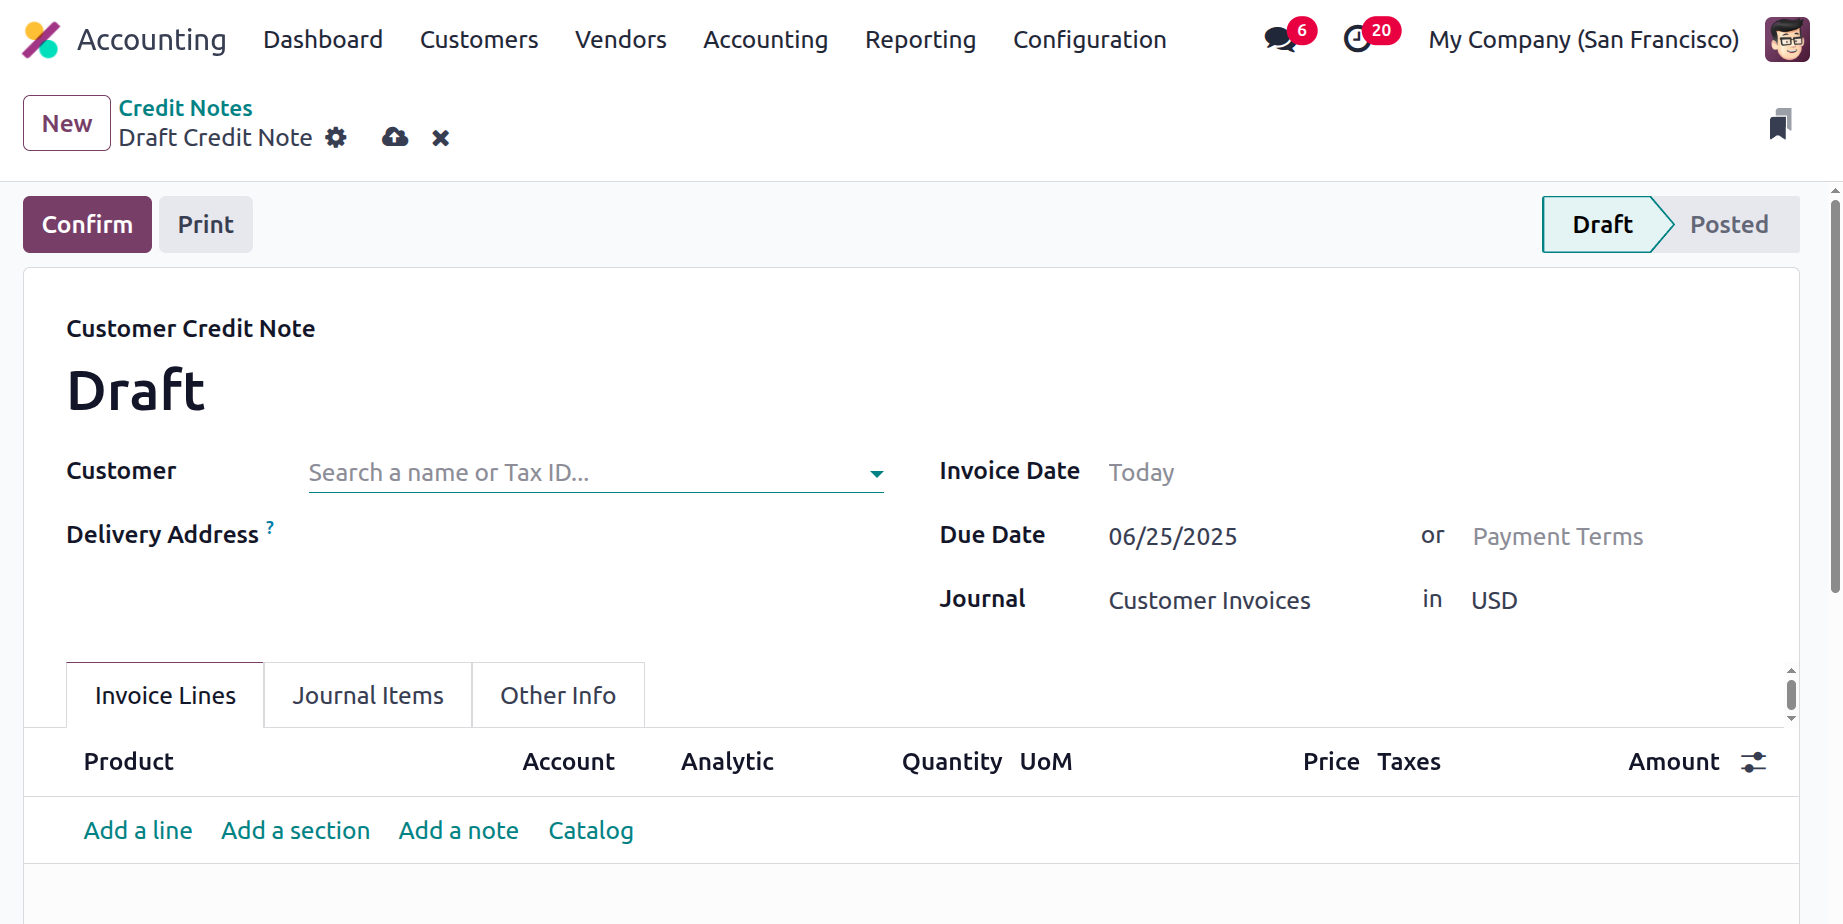
Aside from creating Credit Notes, you can also create new ones by selecting New. As you can see, when the Credit Note number is defined in the Creation menu, it begins with the RINV label, which stands for the reverse invoice. However, the letter RINV will appear at the start of the invoice number. It is possible to define the Payment Reference Details and the Customer Details. Additionally included are the Journal, Due Date, Invoice Date, and Electronic Invoice for the Credit Note.
The Add a line option can also be used to set the invoice lines. You may also add a section to the invoice by selecting the Add a section option, and you can add a note by selecting the Add an available note option.
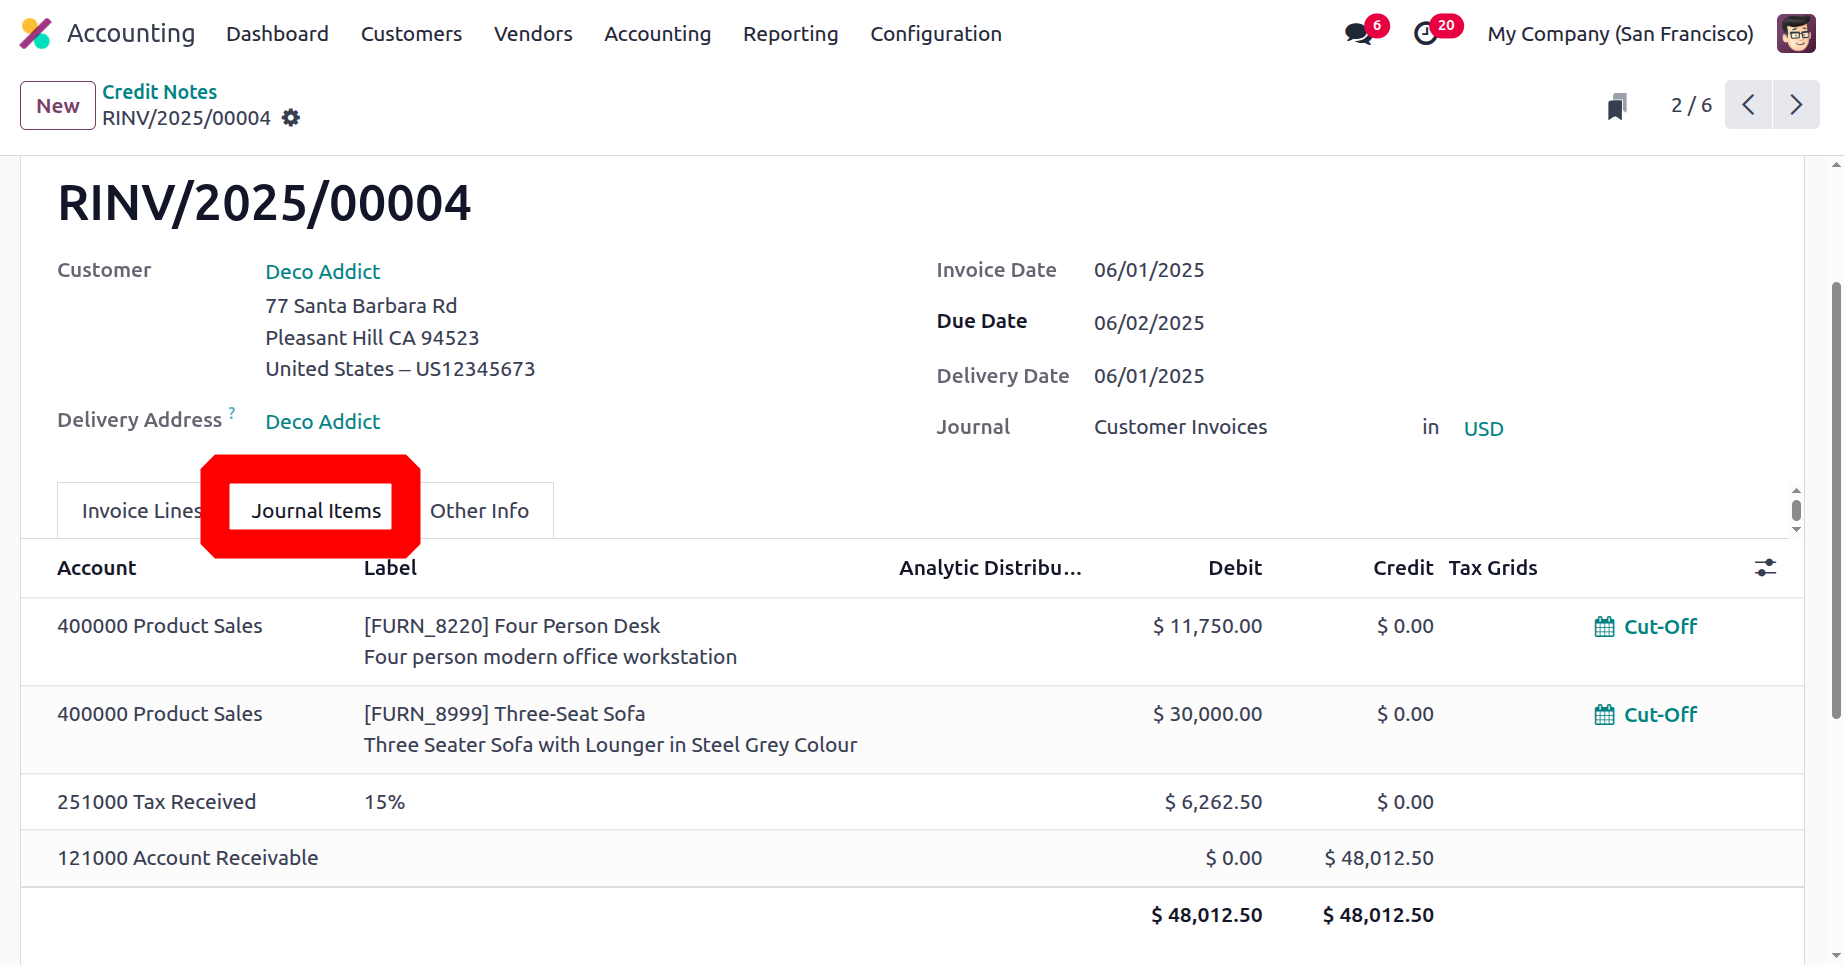
The Account data, Label, Analytic, Debit, Credit, and Tax Grid information will all be updated by the Journal Items. The affected accounts will appear on the Journals items page after the product has been added to the reverse invoice itself. During this process, the Income Account and Tax Account are debited, while the Account Receivable is credited. This demonstrates that while income declines and is debited when an invoice is reversed, accounts receivable, which are by nature an asset, decrease and are credited.
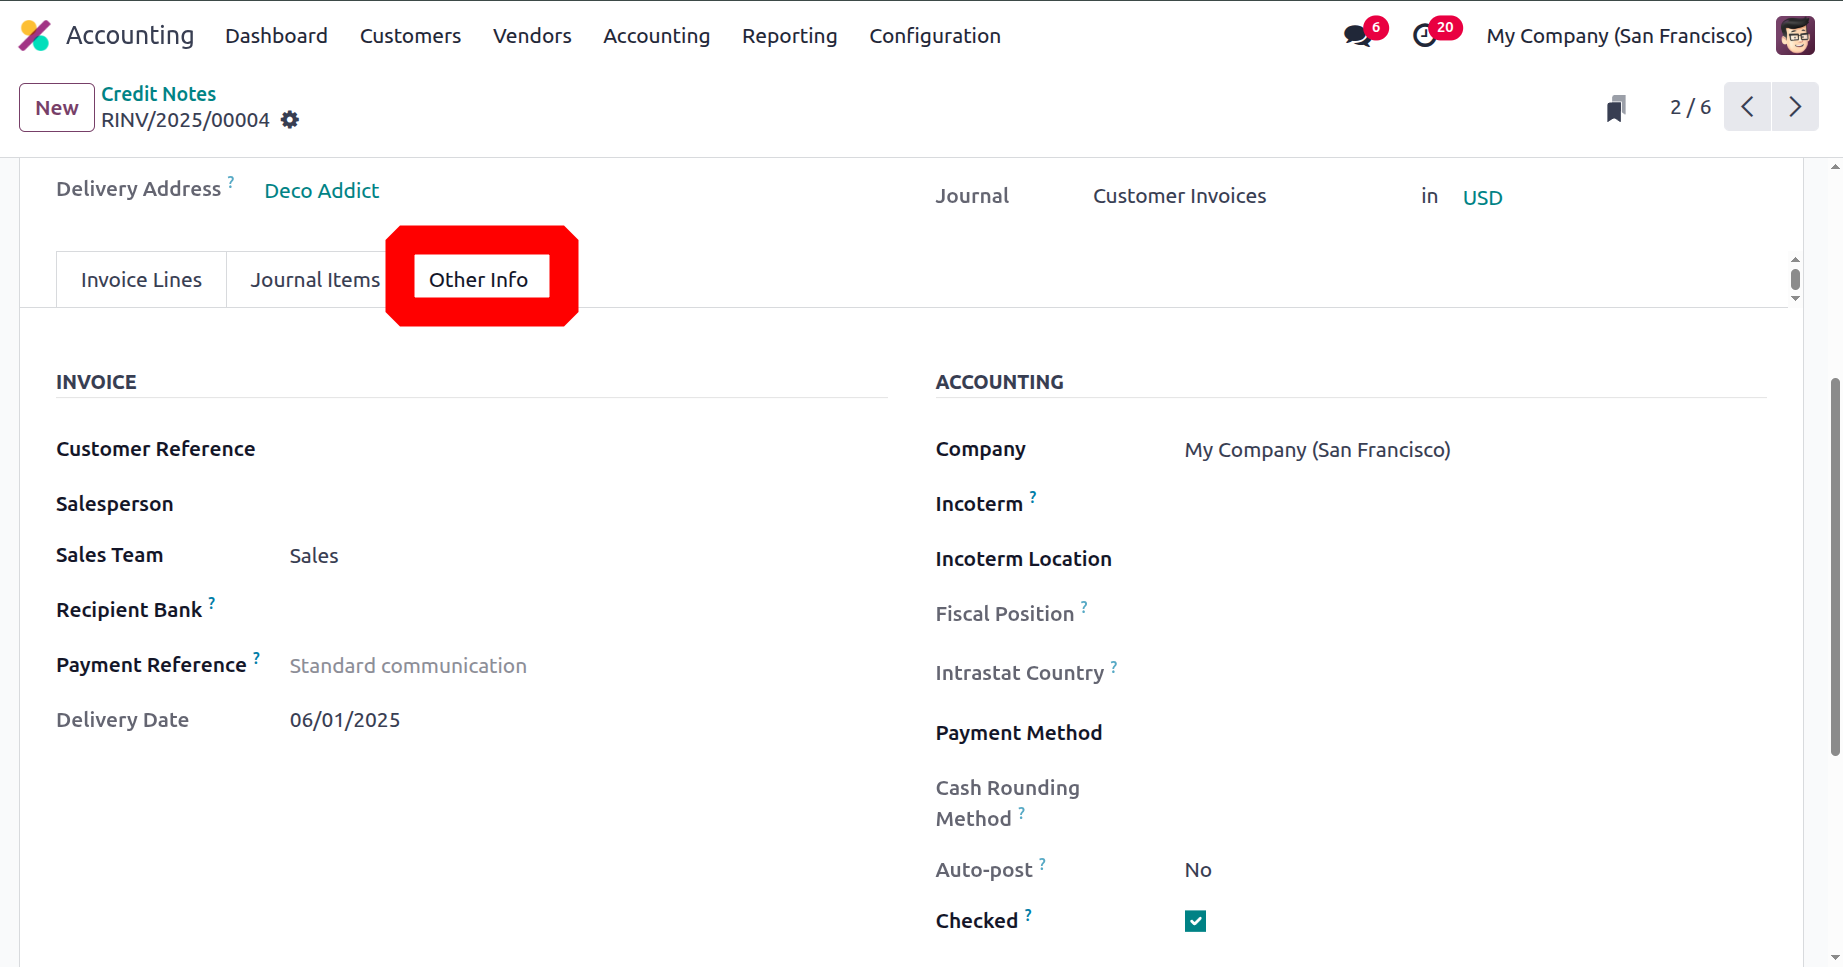
The Other Info option allows you to specify both the accounting and invoice data. It is possible to define invoice data, including the destination bank, salesperson details, customer reference, and payment QR code. Depending on the needs of the business, the Incoterms, Fiscal Position, Intrastat Country, Cash rounding Method, Post Automatically, and To Check can be added.
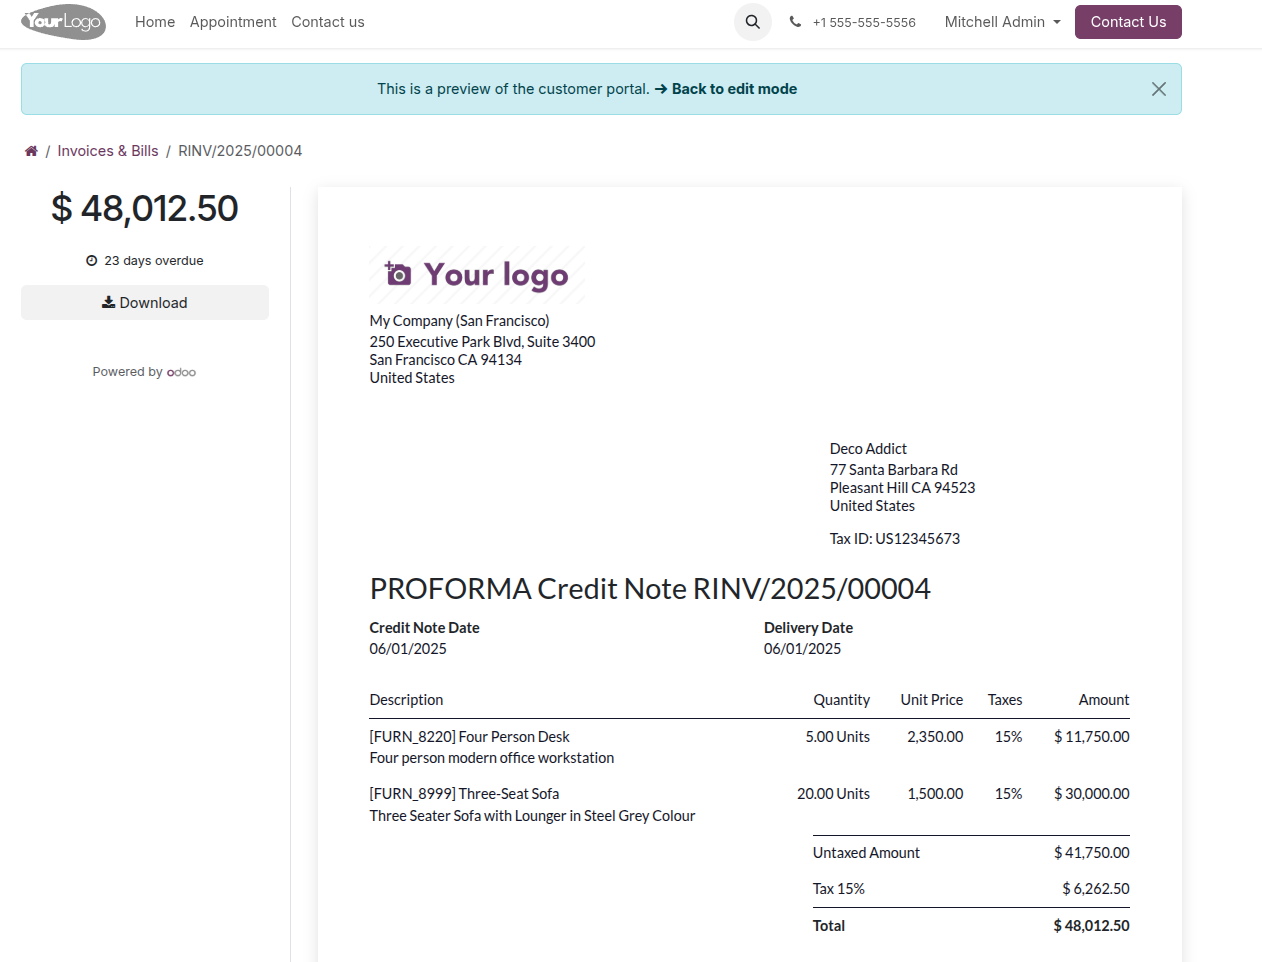
By choosing the Preview option from the relevant Credit Note menu, you can obtain a preview of the reverse invoice for a Credit Note. The customer must receive a reverse invoice. The reverse invoice that will be delivered to the customer is displayed in the screenshots that follow. The terminology used in the credit note you sent us will be used to describe all of the information below.
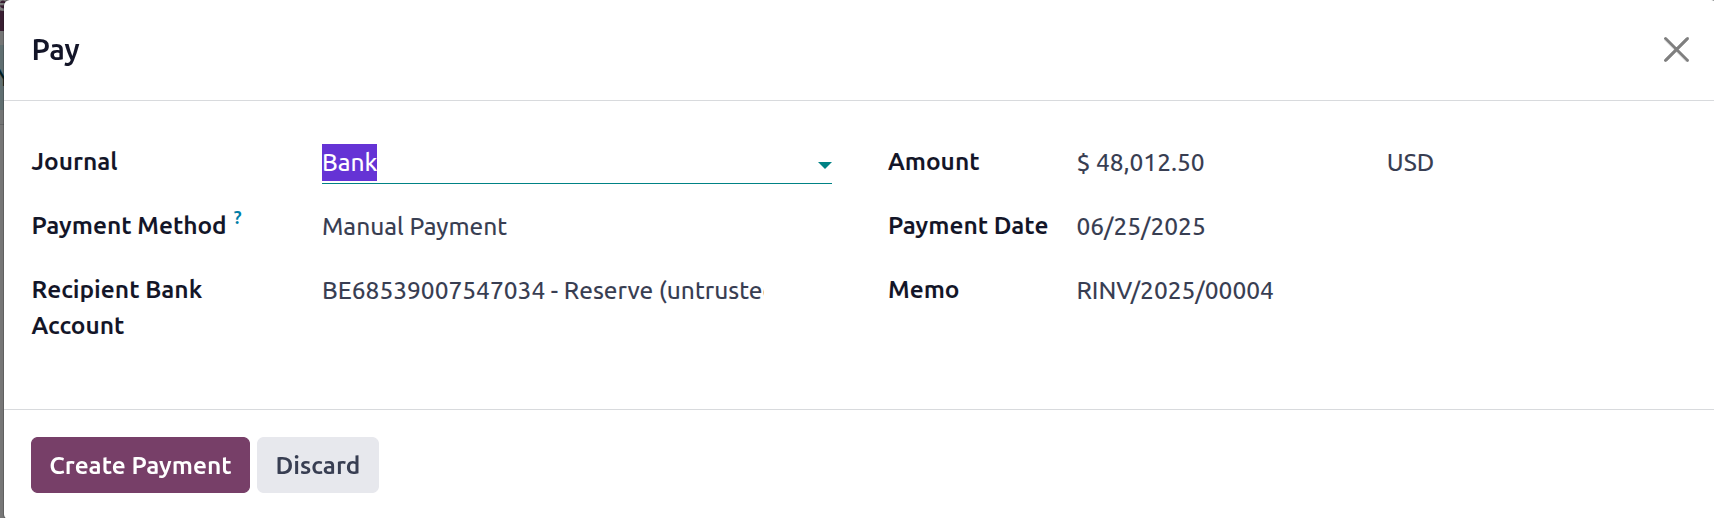
The customer may get the Credit Notes in person or via email if the descriptions are accurate. The customer may receive credit notes and reverse payments. Once the payment has been made, it needs to be entered into the appropriate client payment journals for the platform's financial operations. A pop-up box allowing you to enter the payment register's information will appear when you choose the Register Payment option. Journals, payment methods that are manual or dependent on checks, and additional elements. The recipient's bank account information might also be mentioned.
Additionally, you can define the Memo, the Payment Date, the Amount, and the currency in which the payment must be made. You can choose the Create Payment option after entering the data.
When a payment is made but not yet approved or finished, it will be marked as In Payment on the credit note to show that it has been received.
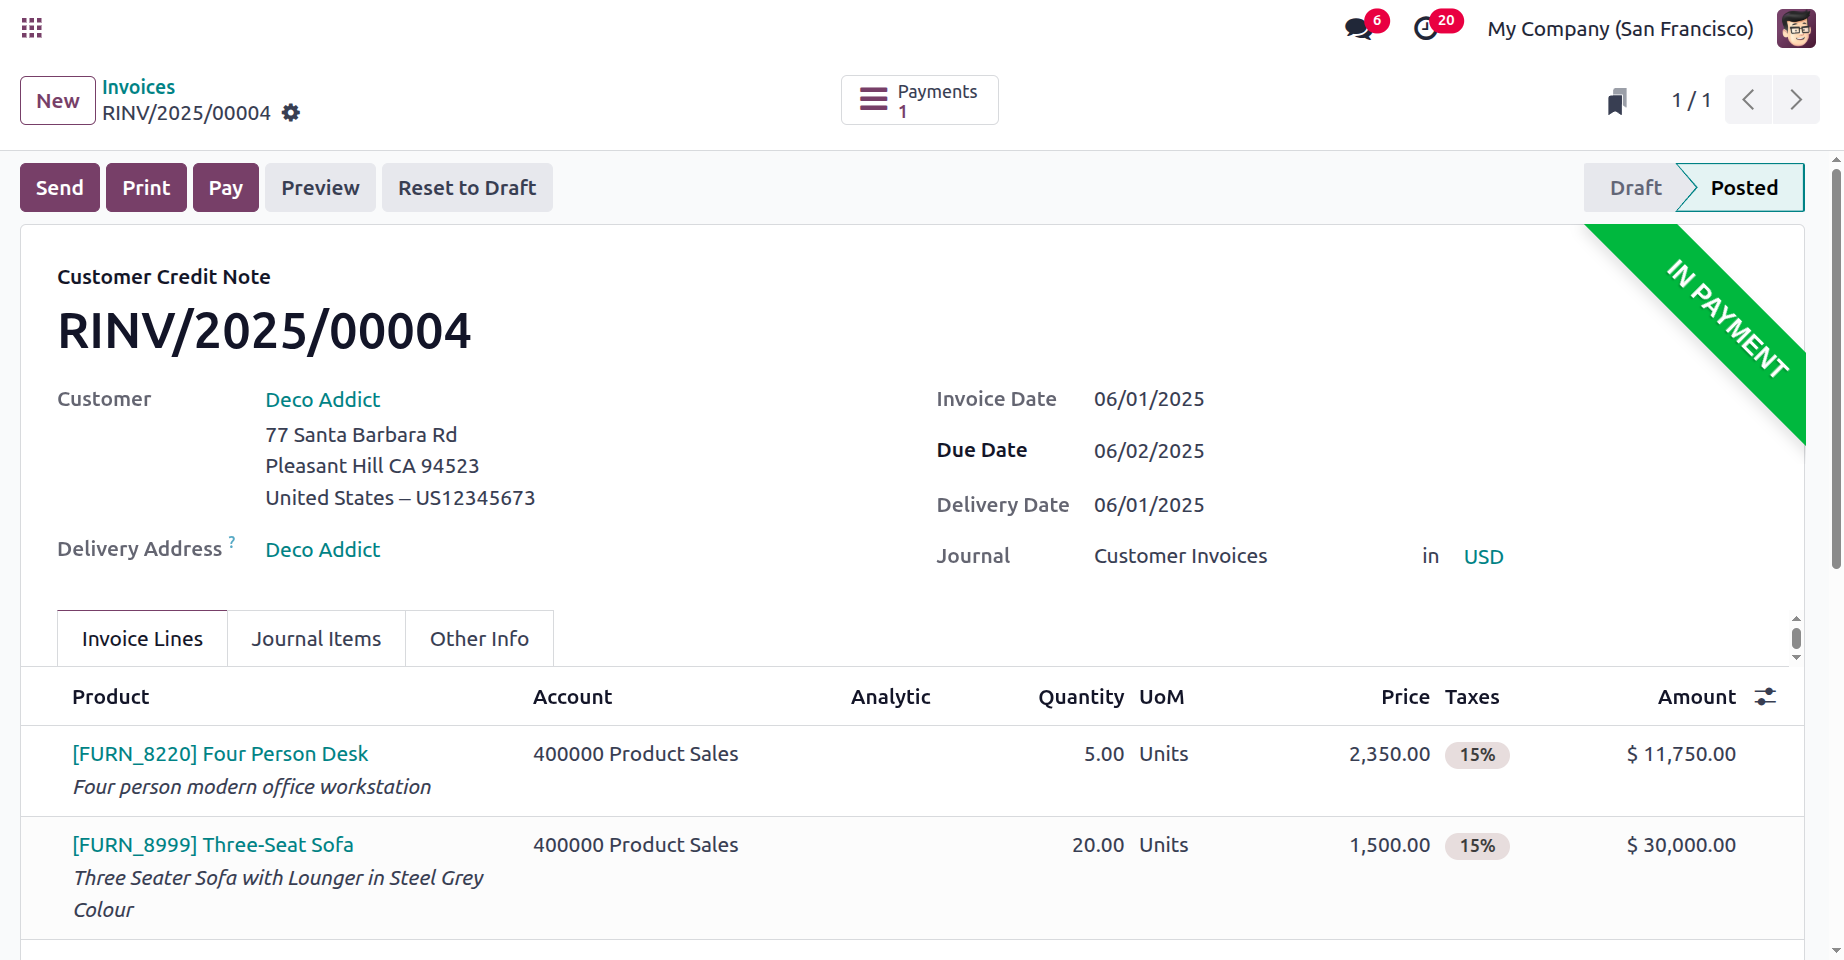
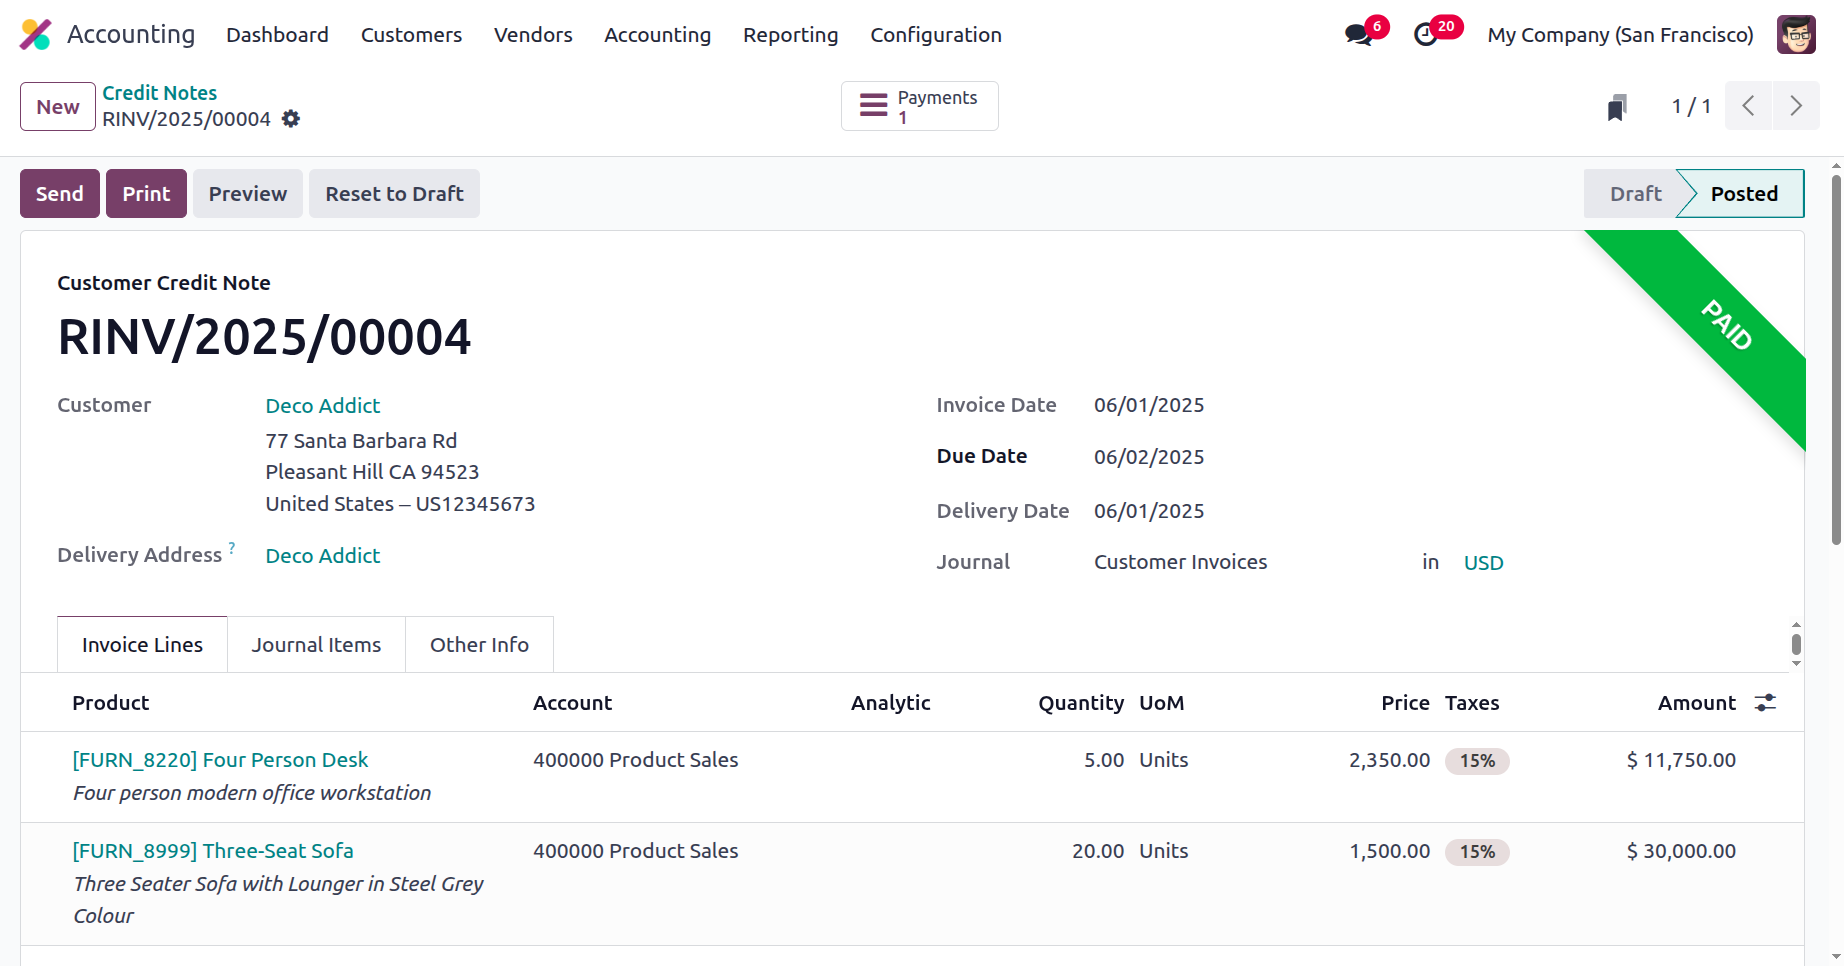
Following reconciliation, if the transaction is successfully credited to the bank or cash account, the label will say "Paid."
From the invoice, users can directly make a credit note. By choosing the credit note smart invoice option, you can add a credit note on the appropriate invoice.
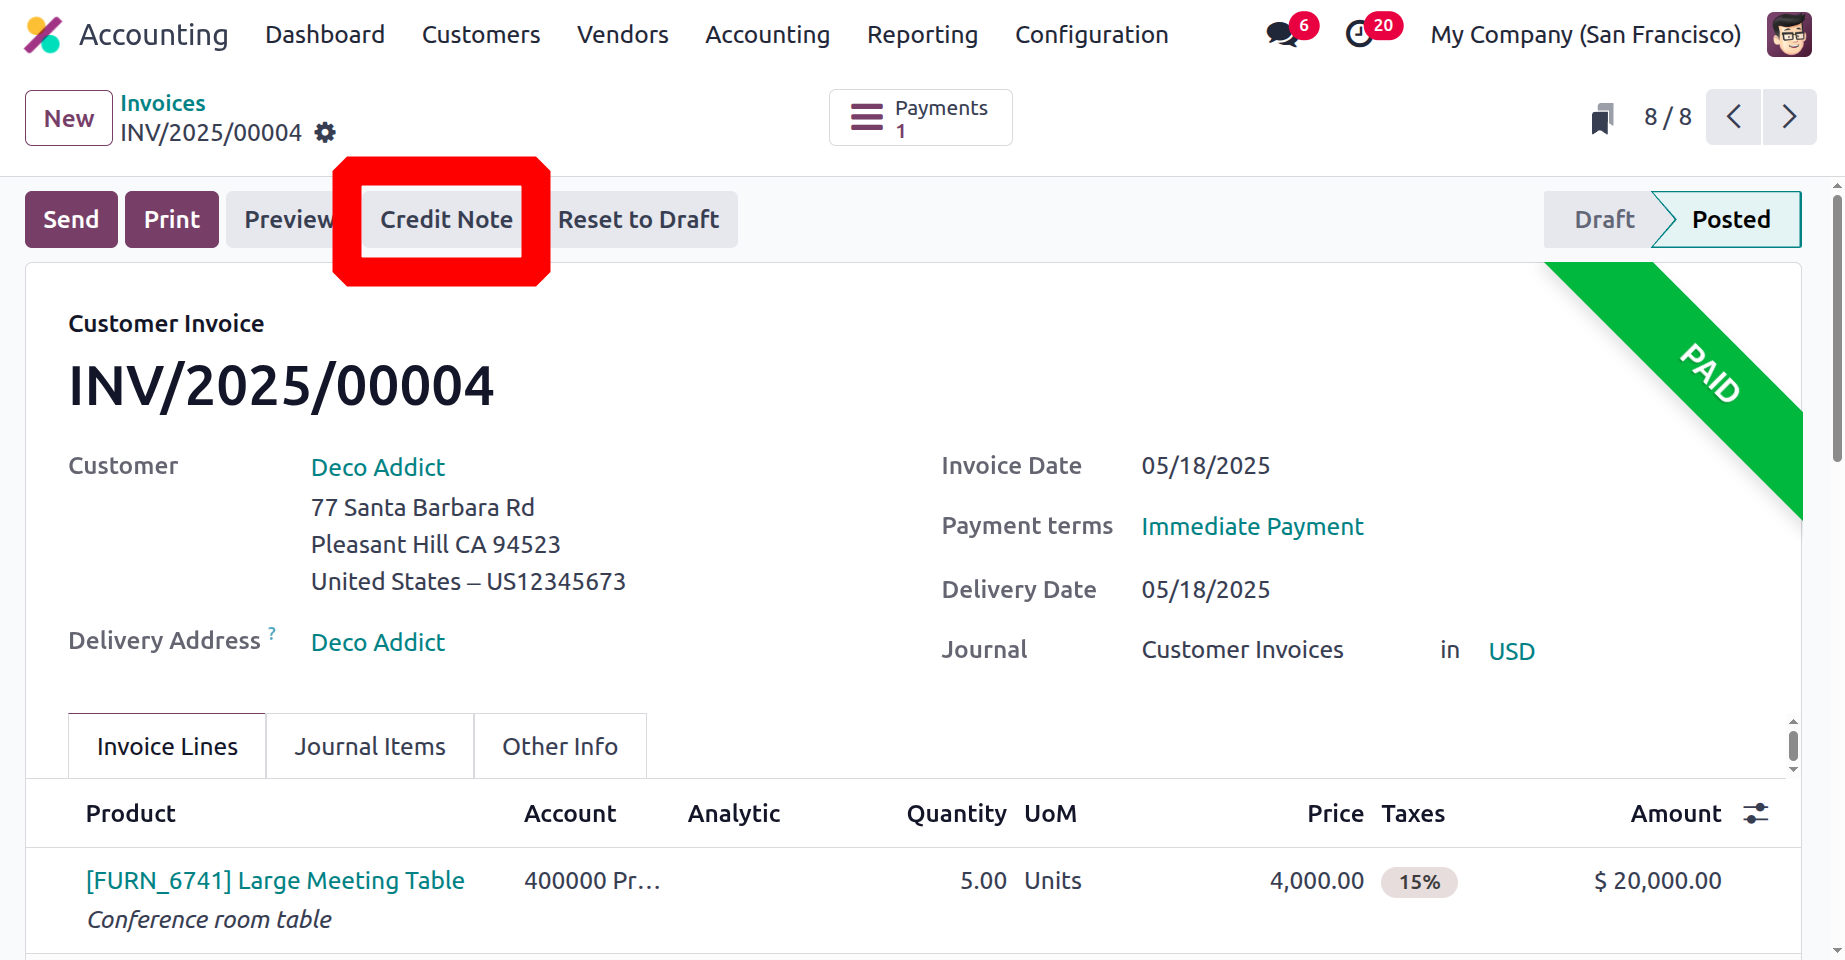
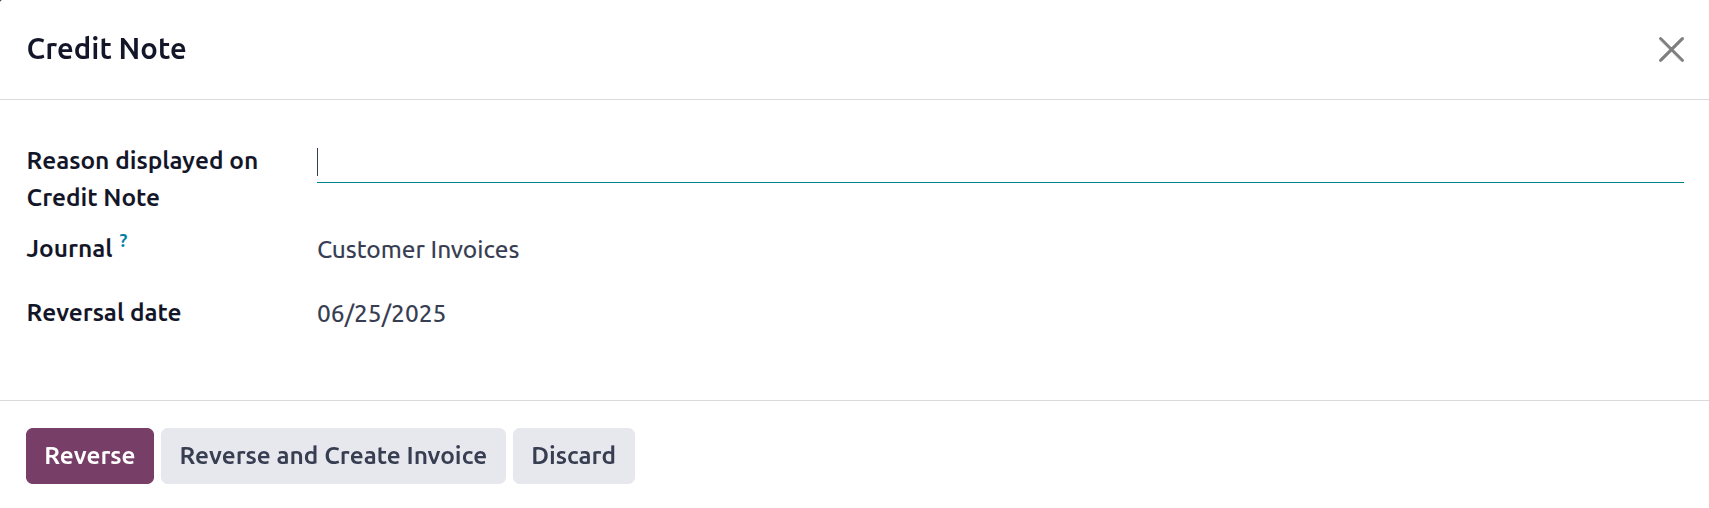
You can provide the details of the credit note, including the credit method, the reason for the refund, and the reverse date (which may be a specific day or a journal entry date), using the menu that appears. You can also alter the Refund Date and Use Specific Journal information to fit your requirements. If you wish to alter the amount that will be given back to the consumer, choose Reverse; if not, choose Discard. The user can reverse the invoice by clicking on the Reverse button. To reverse the existing invoice and create a new invoice in draft state, click on the Reverse and Create Invoice.
You will already be familiar with the Credit Notes' management components, operations, and workings. We'll go into greater detail regarding how the Odoo Accounting module handles customer receipts in the section that follows.
Customer Receipts Management
A crucial component of making sure that payments are paid to the invoice record is having receipts. The processes for creating receipts are completed both before and after payments are received in the actual world of many firms. This is solely the result of corporate actions. A specific tool for processing receipts provided by the Odoo platform will support the business's operations for client sales receipts.
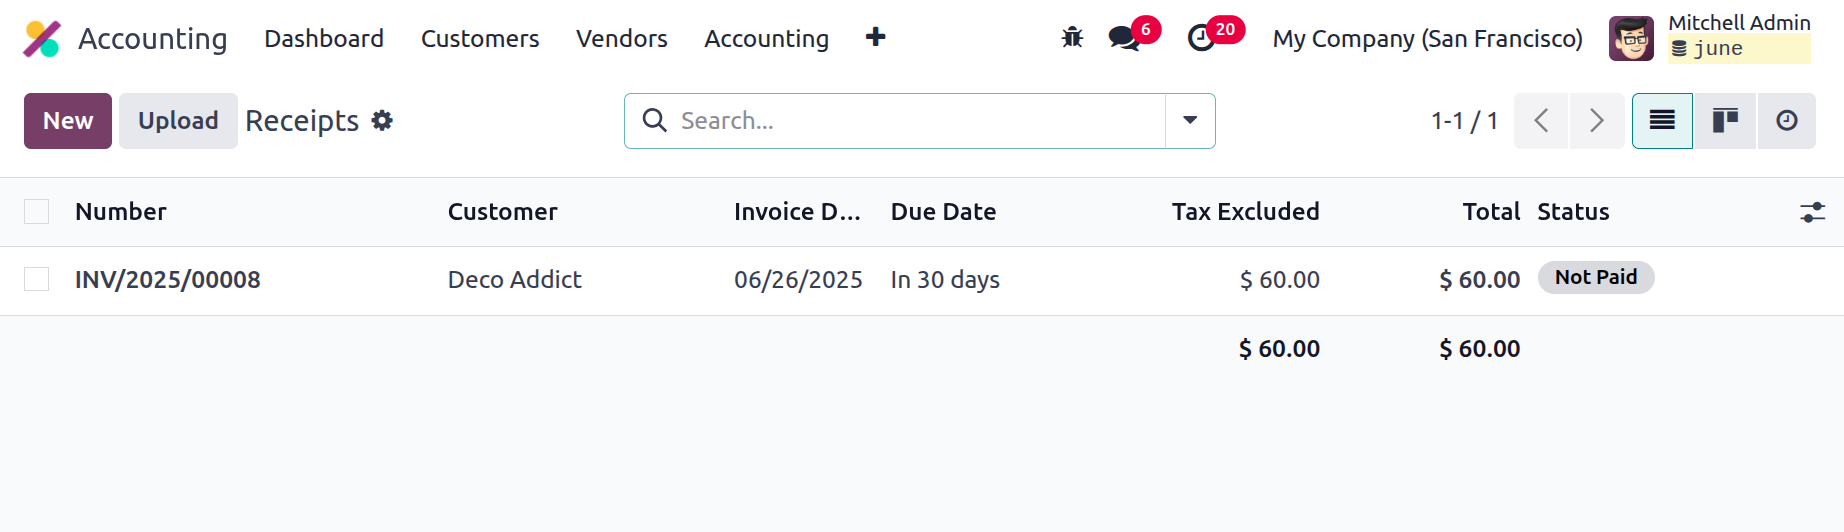
The Odoo 18 Accounting module's Customers tabs can be used to access the Receipts menu. All operation receipts will be defined by the menu. The following information will be displayed: Number, Customer, Invoice Date, Due Date, Tax Excluded, Total, and Status. Because the Status area of the menu is shown in colour, the activities will have a basis, and comprehension of it will be clear.
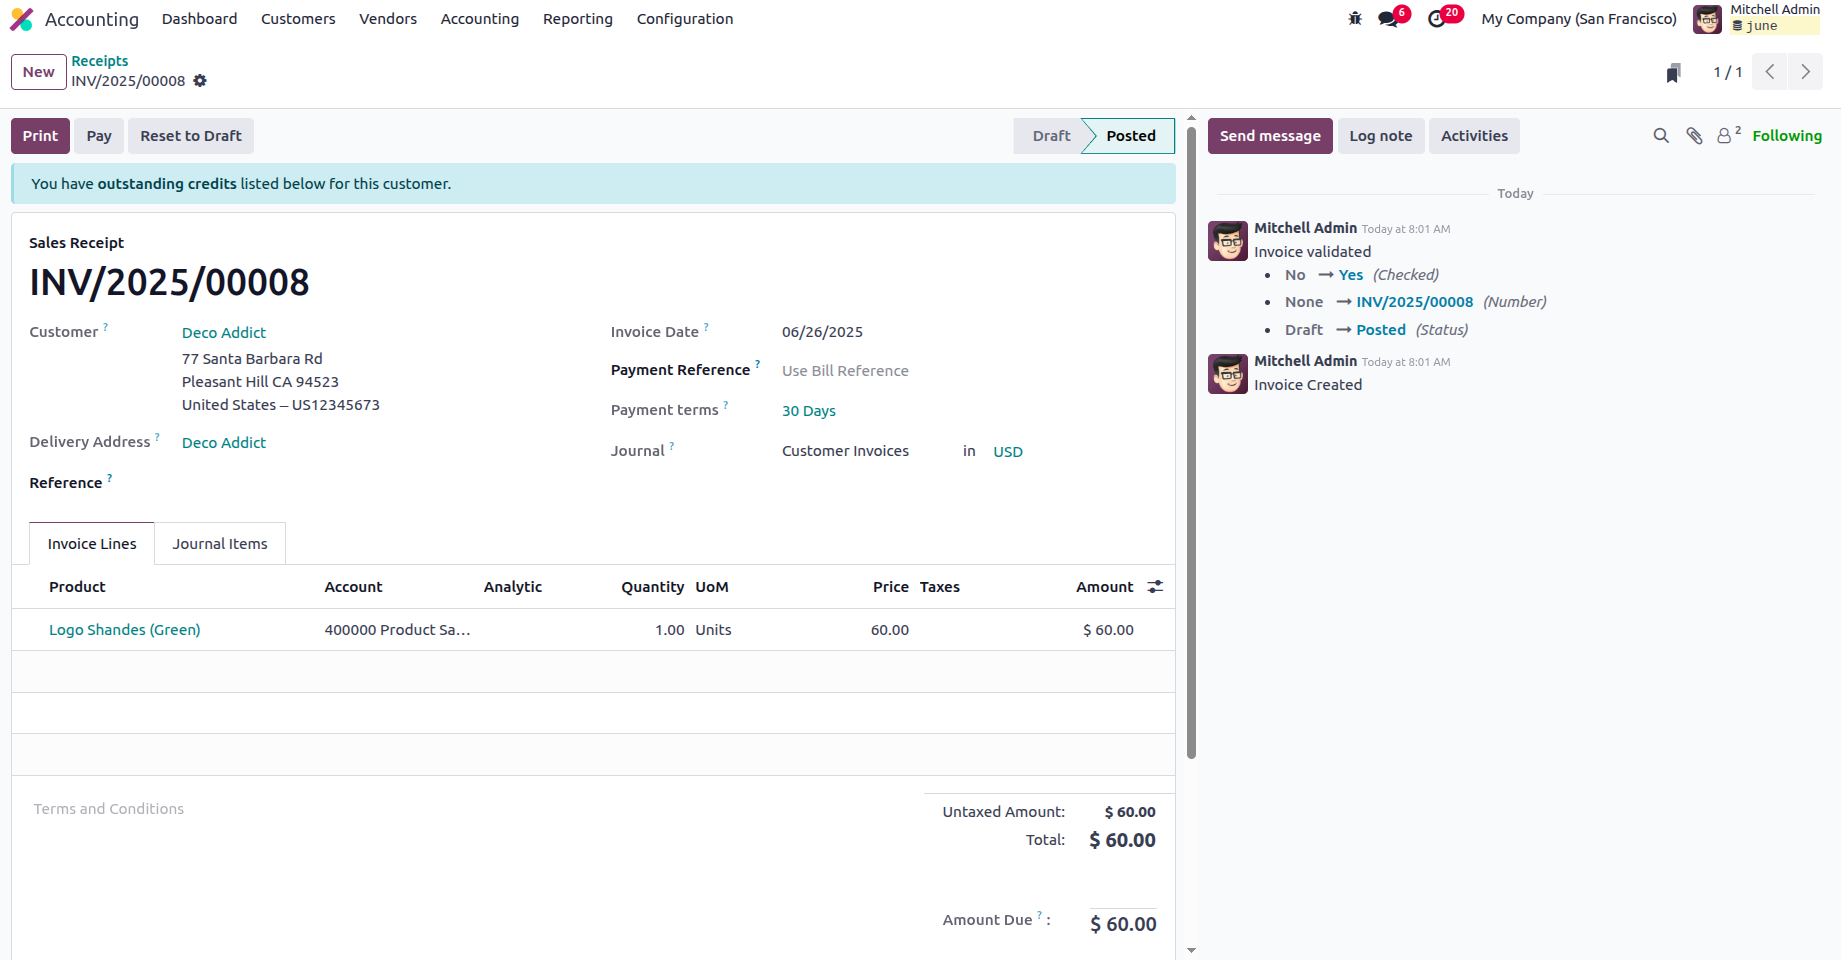
You can modify the receipts that are defined in the menu, and you can also use the available New option to create new ones. The customer's name, reference, payment reference, invoice date, due date, journal description, and currency utilised will all be provided via the option to generate receipts. Product information, label, account information, analytical accounting information, analytics tags, intrastate, quantity, price, taxes, and subtotal are also given on the invoice.
It can be defined by deciding to add a line. By choosing the Add a section option, you may also include a new section on the invoice. By selecting the Add a note option, you may add comments to the customers. The sections, product lines, and comments that are being provided can be removed or changed. The appropriate invoice window at the bottom of the page will display the invoice amount and tax details.
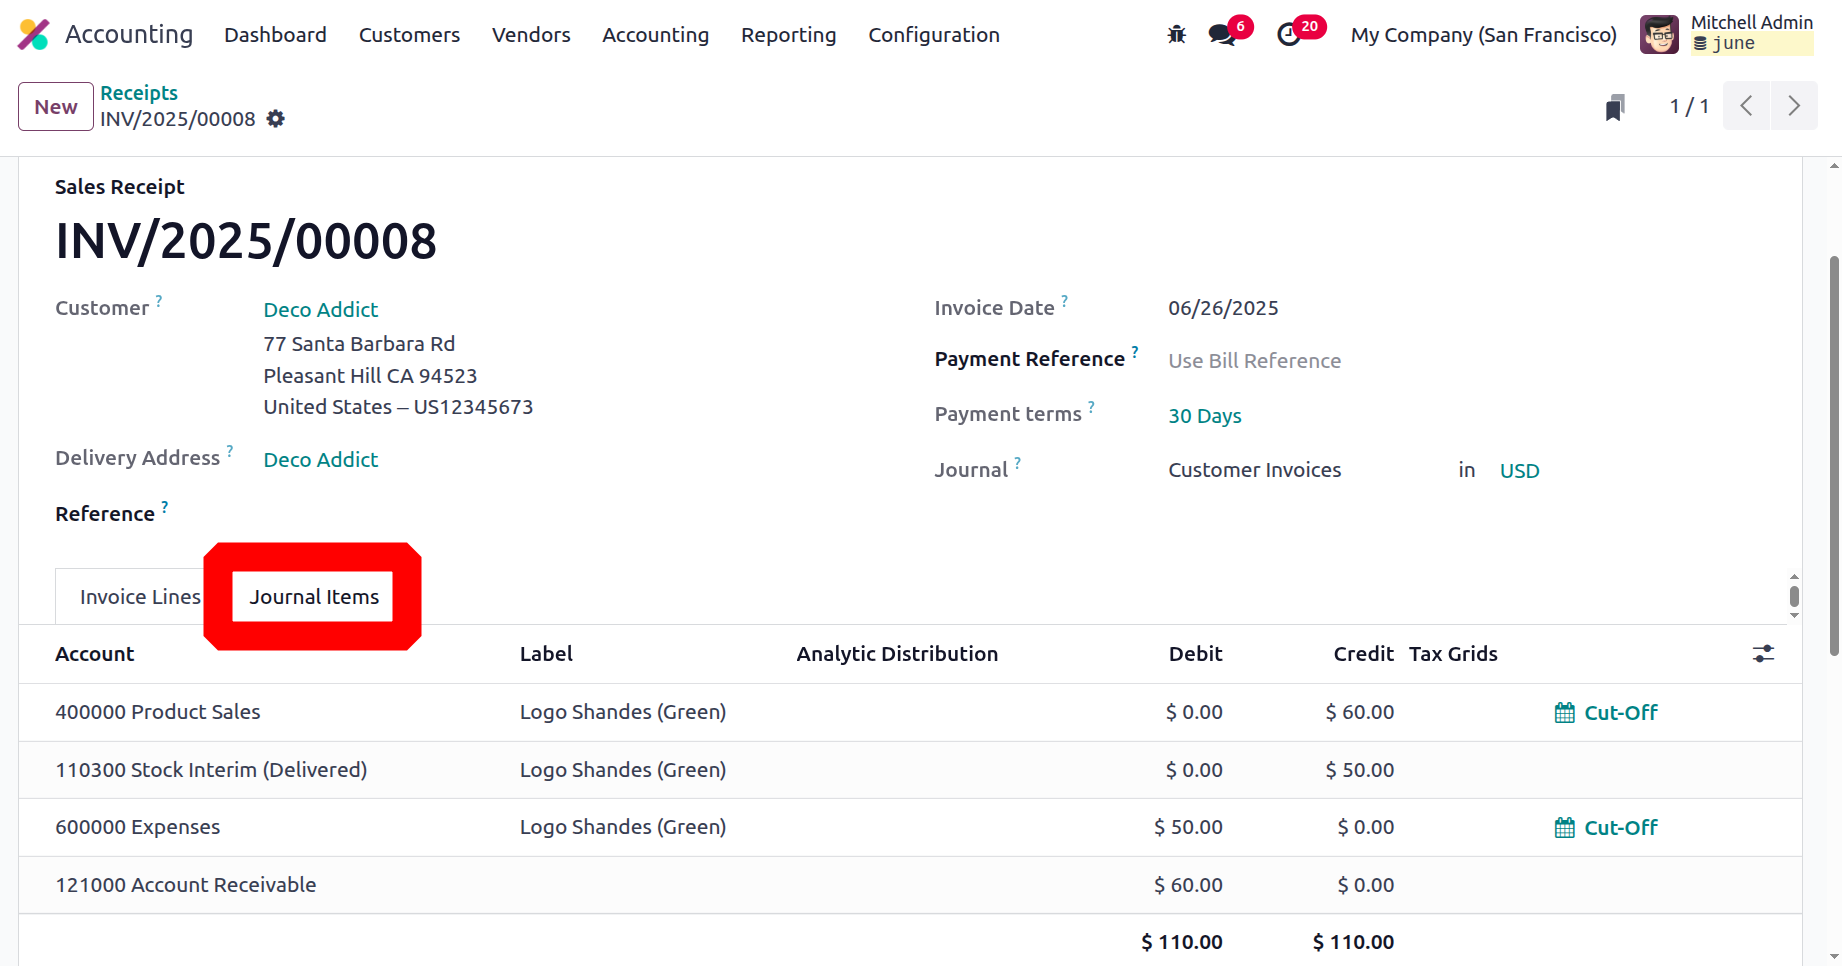
Additionally, every journal entry detail for the relevant invoice will be provided by the Journal Entries option. The Account, Label, Analytical Tags, Debit, Credit, and Tax Grids will all have comprehensive information.
After the reverse invoices are set up, you may register the payment by choosing the appropriate option. A pop-up window that looks like the one in the image below will then appear. Here, you have to decide if you want to pay by SEPA direct debit, batch, or manual. The recipient's bank account, payment amount, payment date, and payment note must then be supplied. The last step is to choose the Create Payment option.
A label stating that the relevant invoice is in payment will appear after the payment has been recorded once again in the relevant Receipts menu. Otherwise, if the payment is successful, the label will show as Paid.
Furthermore, you can change the platform-defined receipts as necessary, but only authorised Odoo platform users, those who might be recognised during platform setup, can do so. After learning the fundamentals, let's discuss how customer receipts are handled by the Odoo Accounting module. The components of client payment management that are covered in the Odoo 18 Accounting module will be covered in greater detail in the following section.
Customer Payments
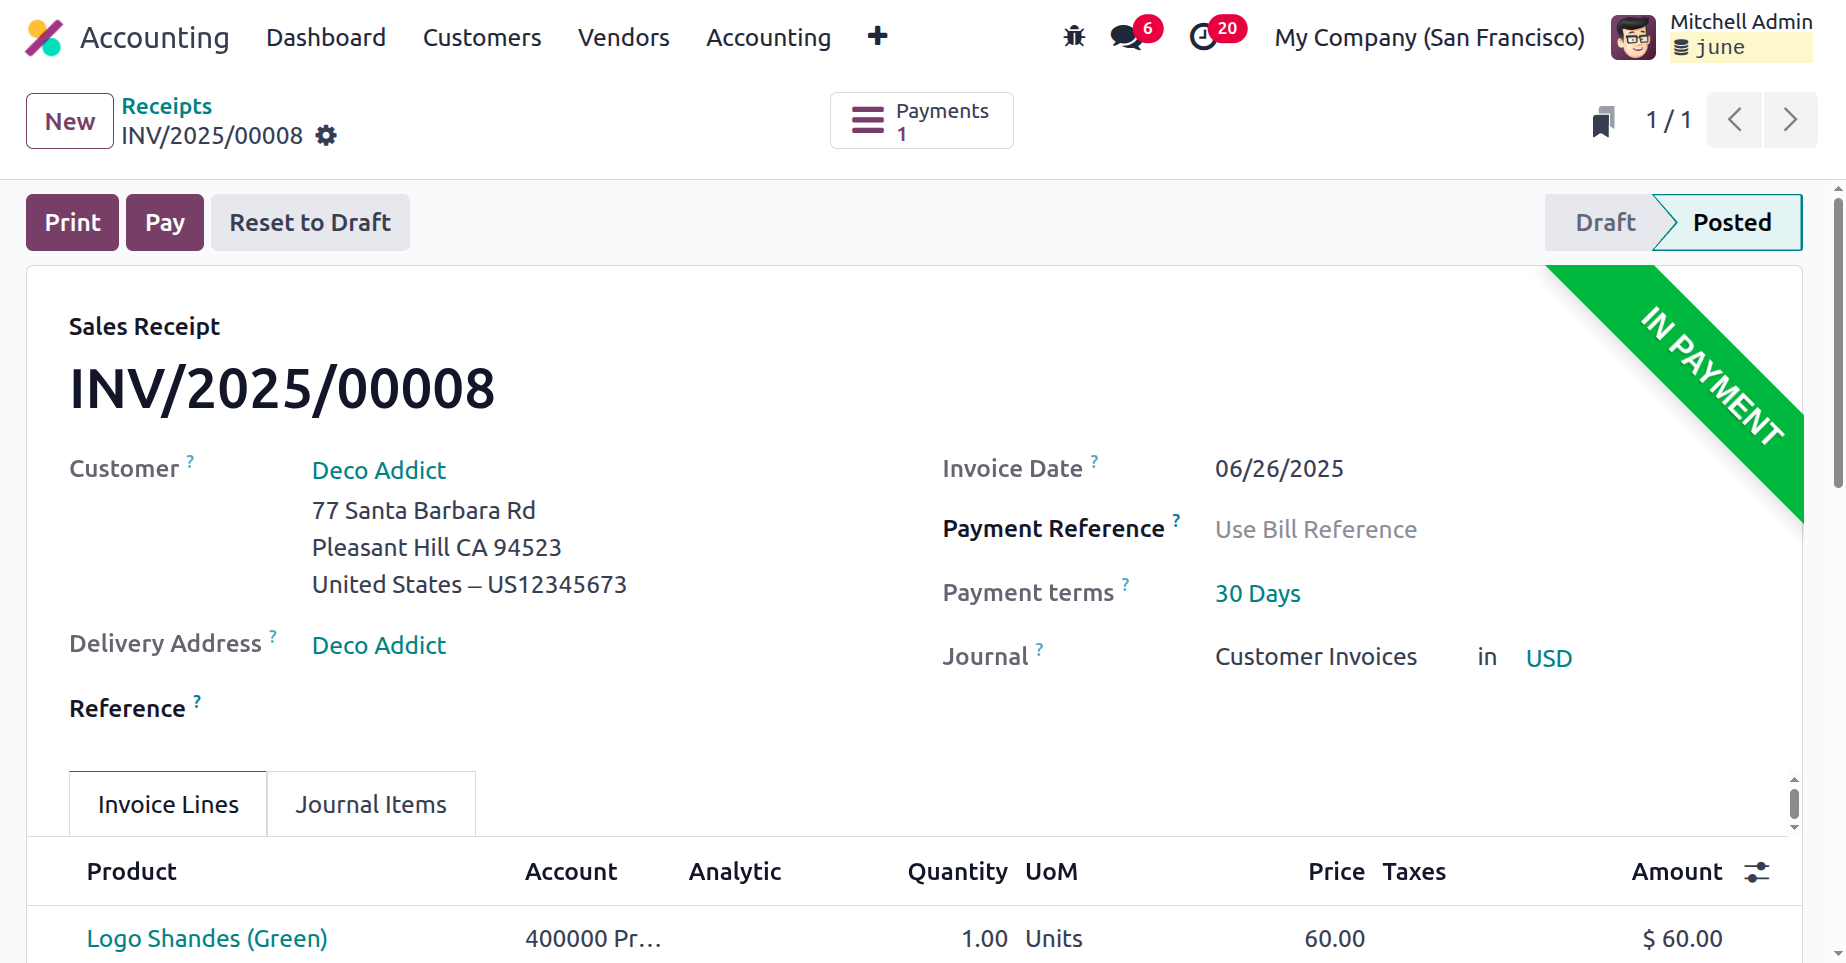
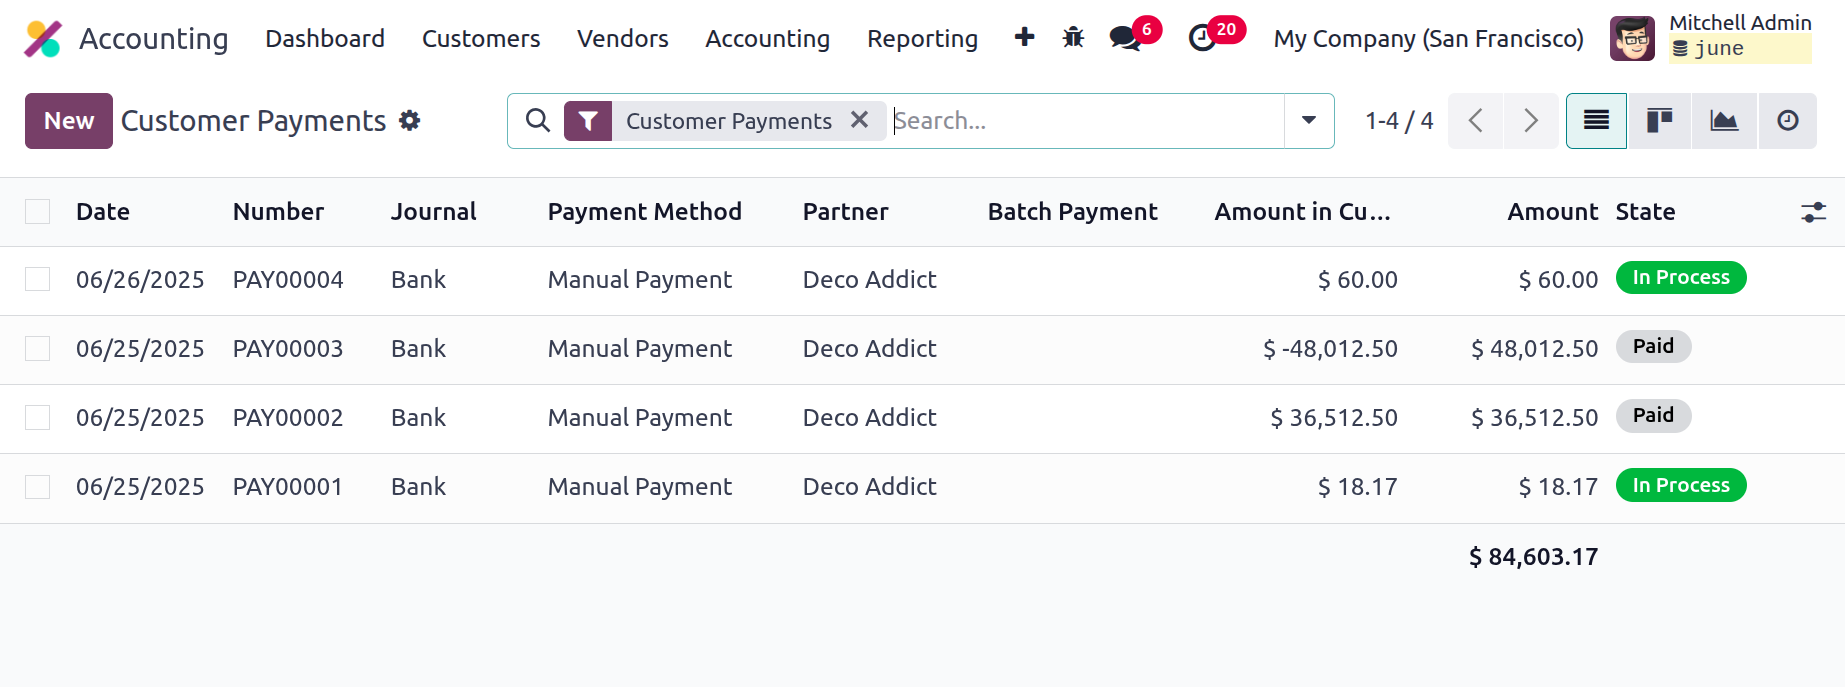
Client payments for invoices issued for specific purchases can be efficiently managed with the Odoo platform's dedicated Payments management menu, which is available in the Odoo Accounting module. As shown in the accompanying screenshot, the Payments menu will display every payment activity that has been established for the business's operation. The Amount, Status, SDD Scheme, Currency, Payment, Date, Number, Journal, Payment Method, Customer, and, if applicable, a description of a batch payment will all be specified. The colour indicator that shows the operational state of the relevant customer payments will be used to determine the state.
By choosing the New option, you may add new Customer Payments and change the information pertaining to the specific Customer Payments that have been set.
Selecting to create payments for new clients will open the window seen in the screenshot below. You can choose to send or receive money using this payment option. Along with the destination account, further information could be provided, like the Partner Type and vendor or customer details. The Partner Type Customer is the recipient of the Receive Money, whereas the Partner Type Vendor is the recipient of the Send Money.
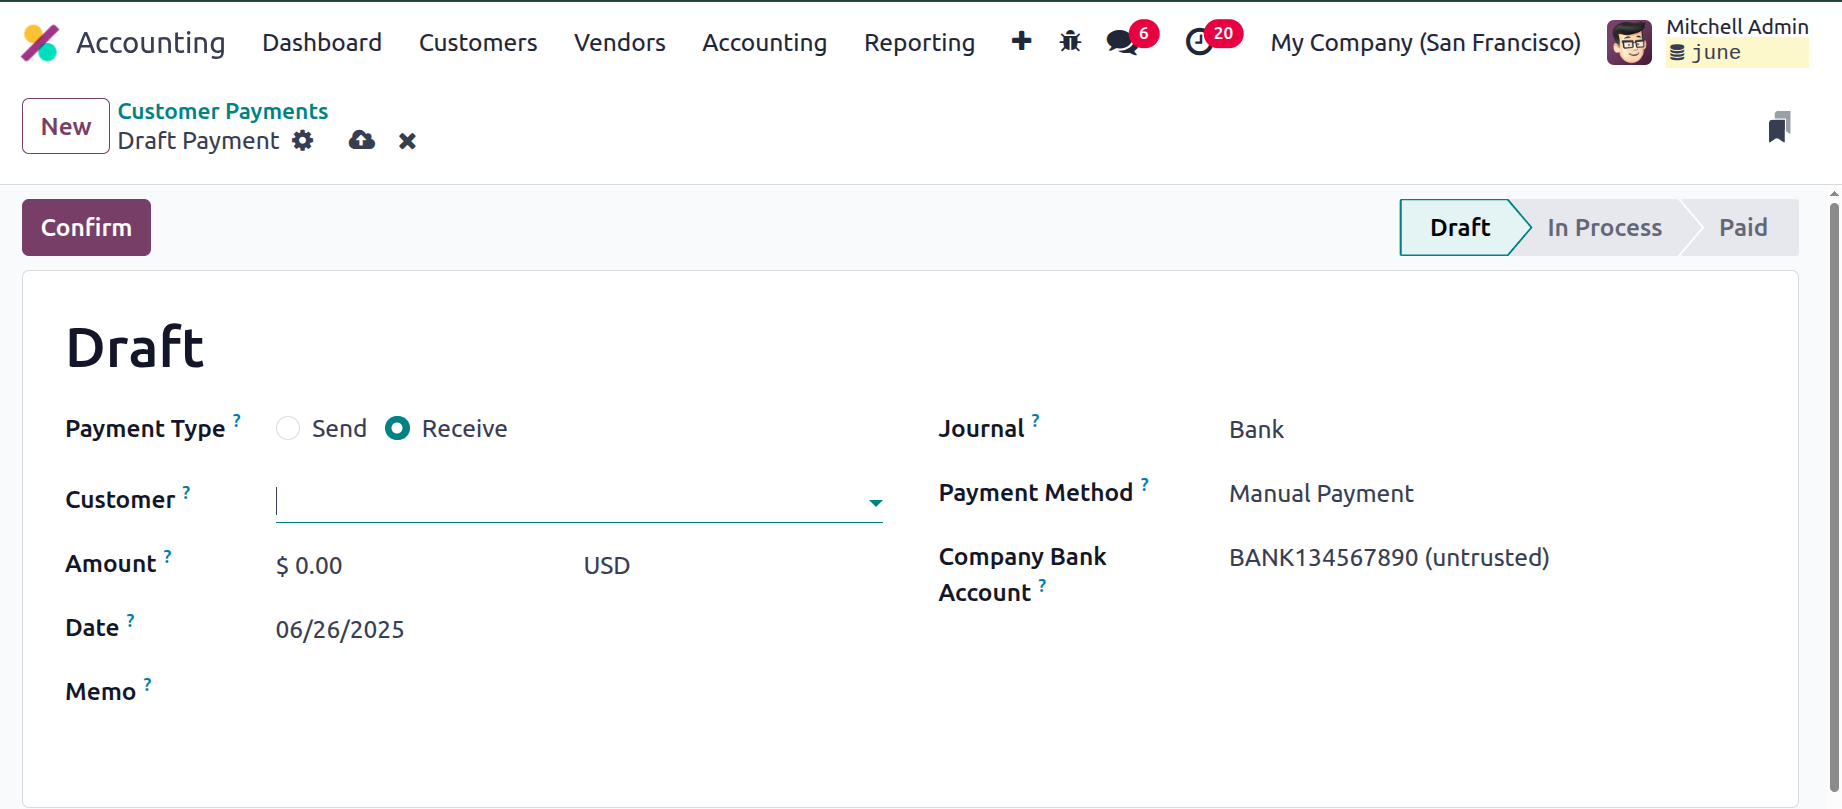
Additionally, after selecting Customer as the Partner Type and Receive Money as the Payment Type, the Customer's destination Account will be automatically shown under the Account Receivable. This feature will also be helpful for monitoring customer accounts and collecting payments for amounts that have been billed. You can specify the Amount, Currency, Date, and Memo in addition to the Journal and Payment Method (Manual, Batch Deposit, or SEPA Direct Debit). For the pertinent customer payments, the recipient bank account can also be provided.
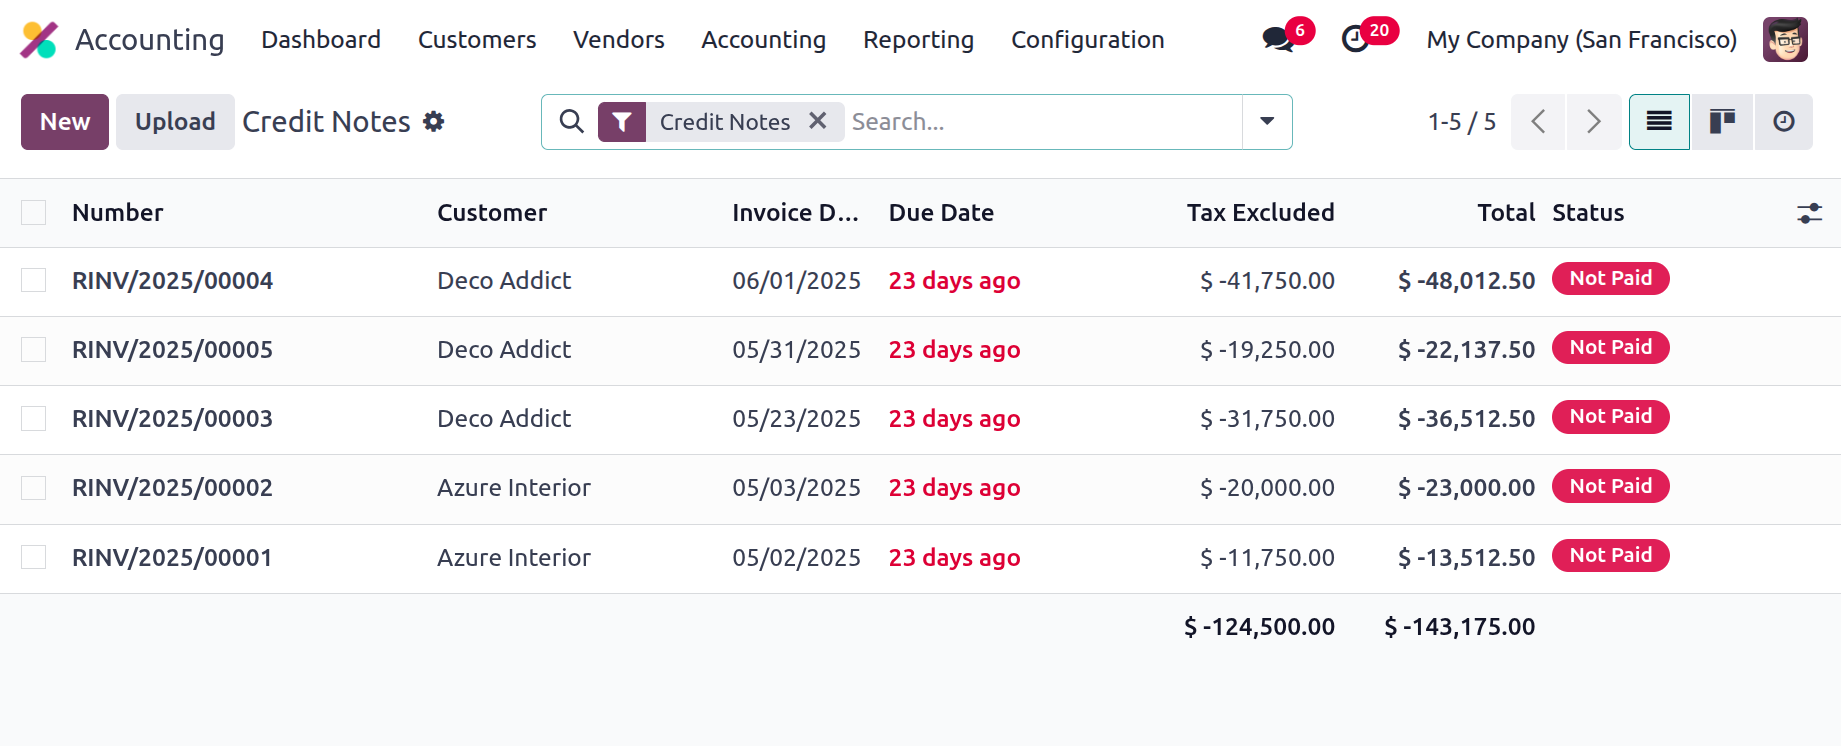
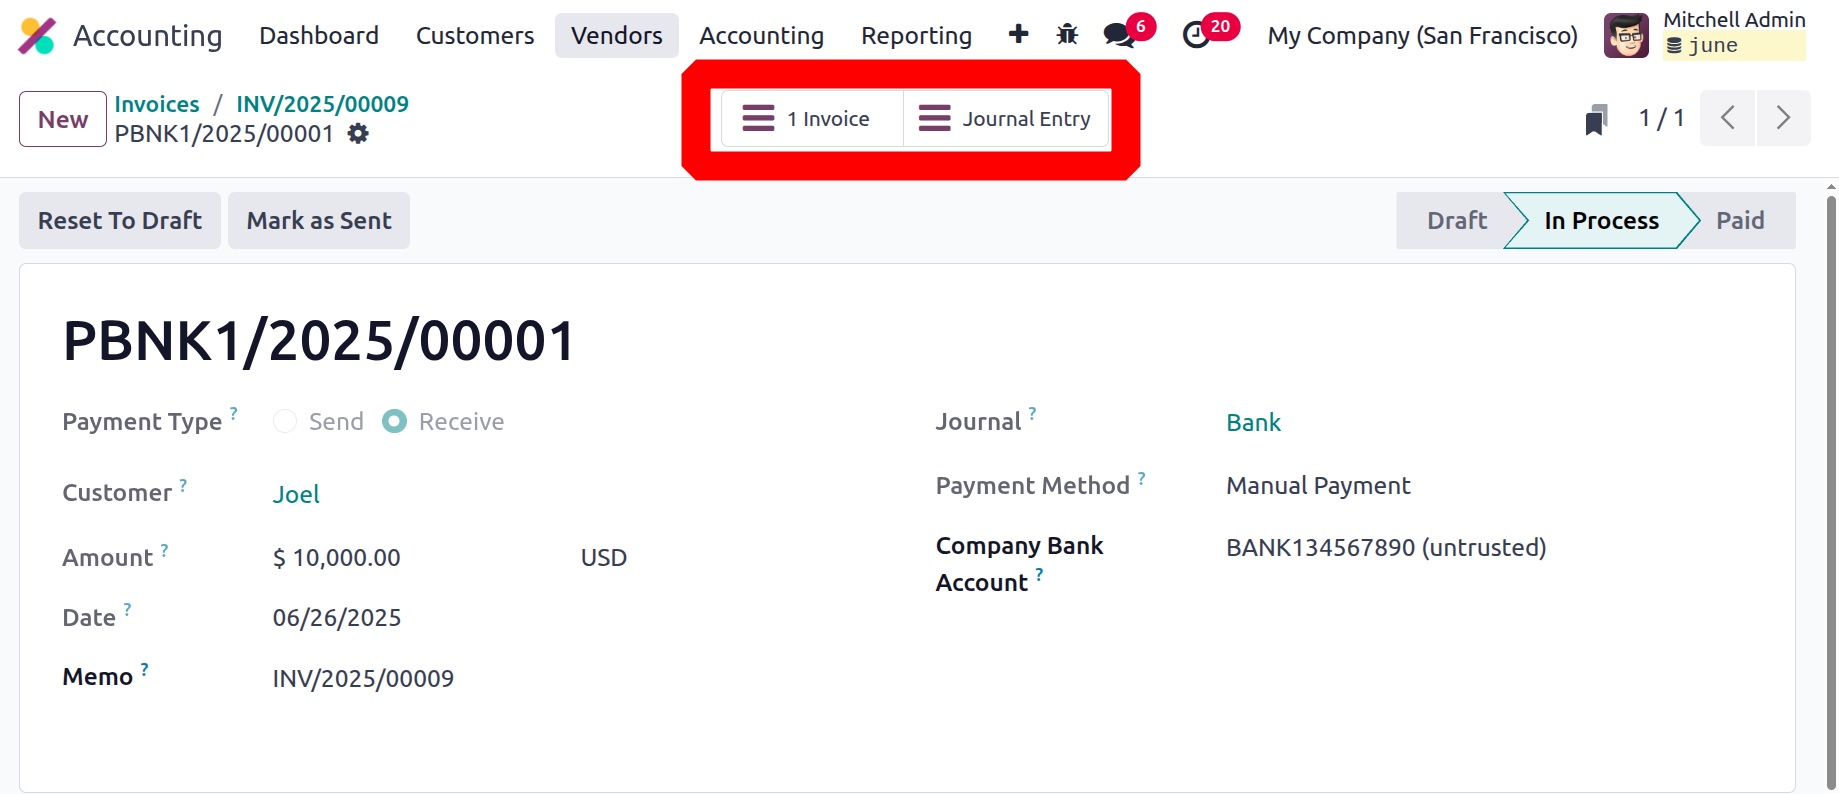
Customer payment can be viewed from the Invoice as shown in the screenshot below.
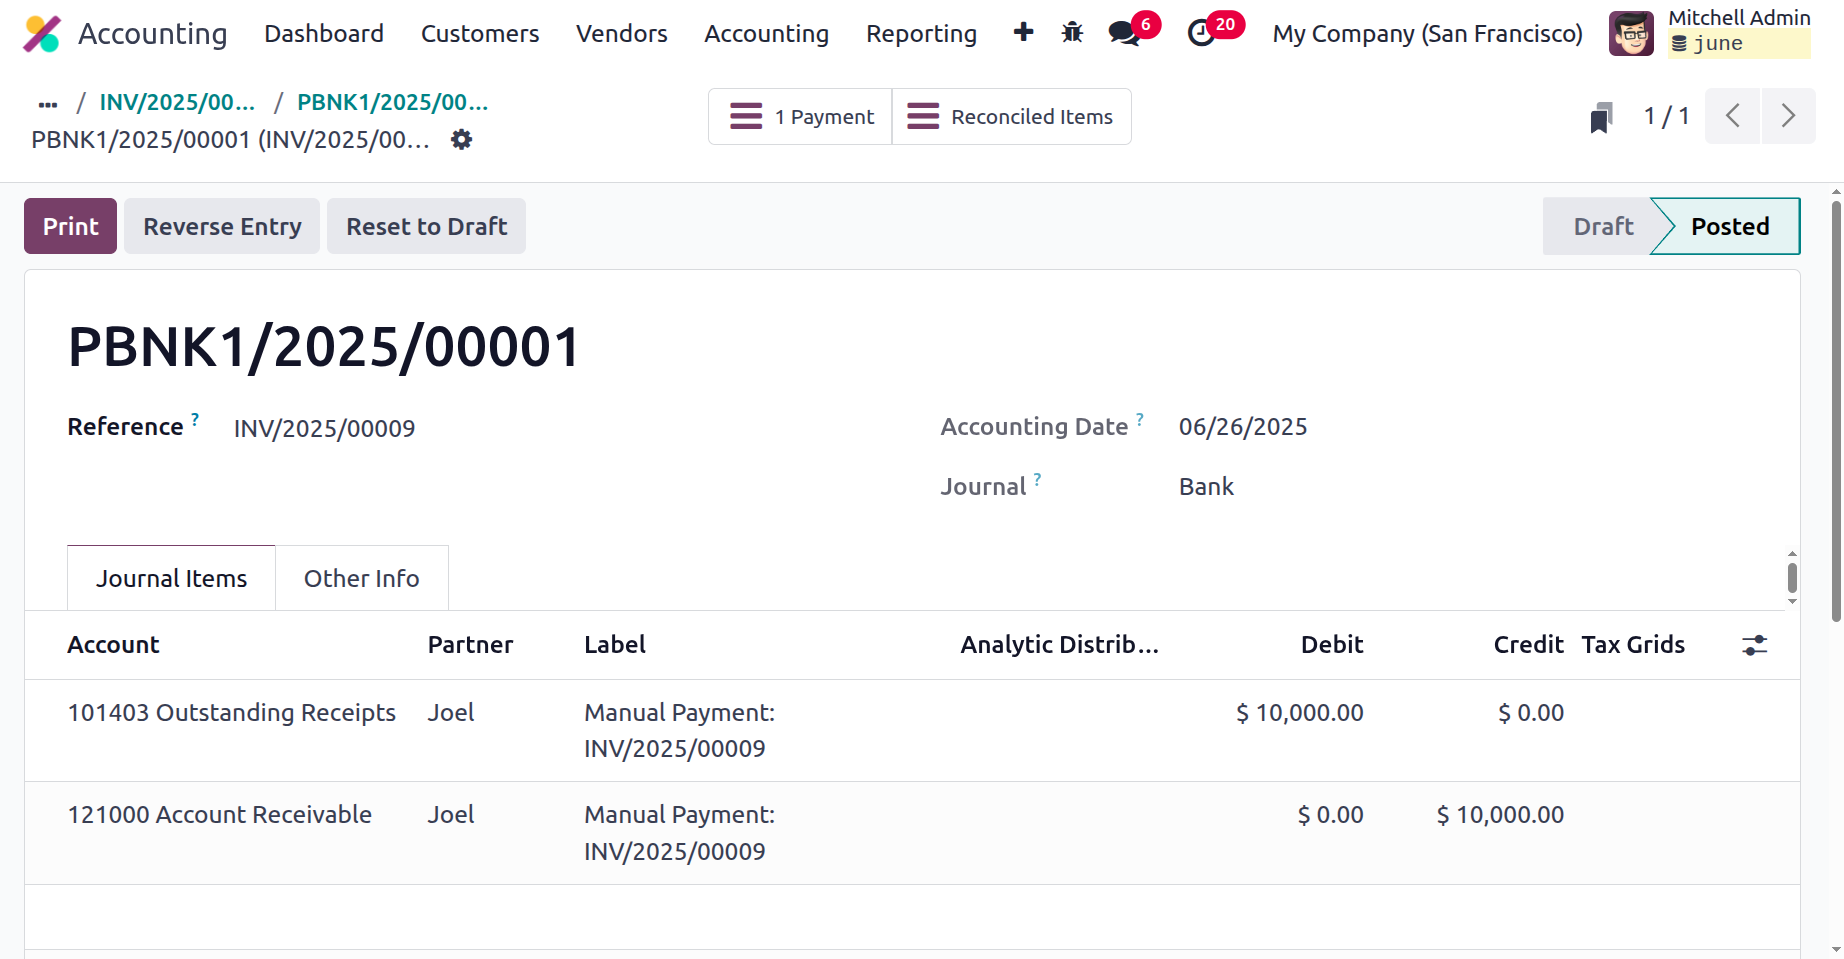
The Payment shows the Invoice and Journal entries.
The Account Receivable and the Outstanding Receipt Account are likewise affected after the payments are finished. The bank account must be debited and the unpaid receipts must be credited once the account and the bank statement have been reconciled.
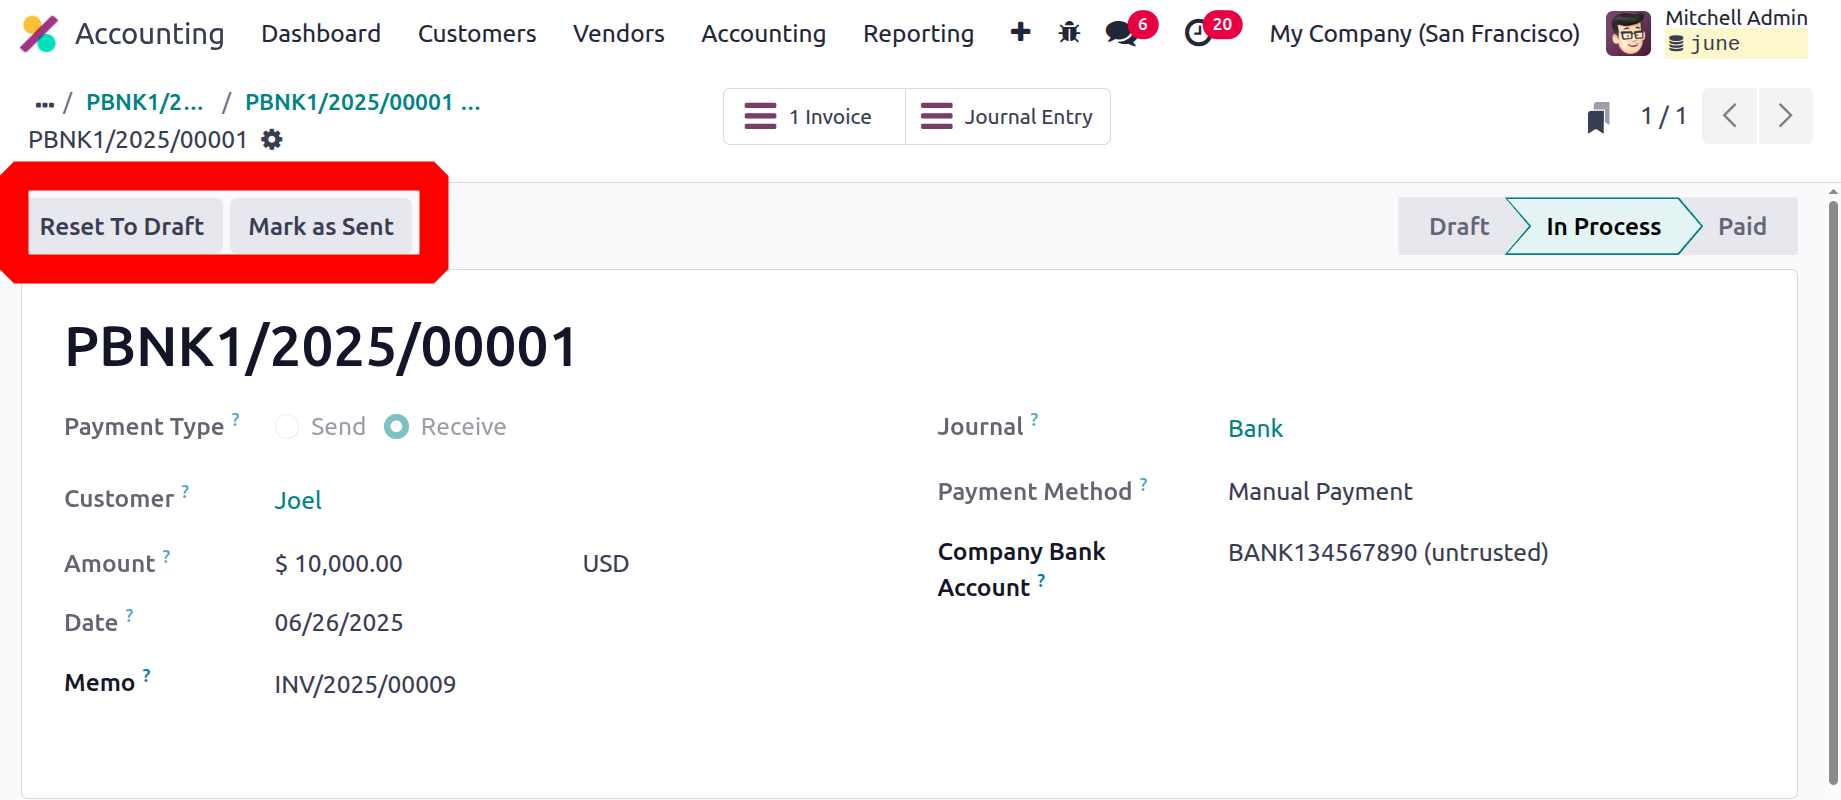
To change the Payment's setup, you may also select Mark As Sent and Reset To Draft. To ensure that configuration operations are securely kept to the appropriate managers and executives of the company, these settings will only be accessible to authorised Odoo platform users.
You can utilize the Odoo Accounting module efficiently now that you understand how it handles client payments. We'll go over how to set up batch payments in Odoo Accounting in greater detail in the following section.
Batch payment configuration
You will have the confidence to trust each other in both personal and professional concerns because your company will have a large number of regular clientele who are reliable and whom you personally know. Both large, international corporations and small and medium-sized businesses may engage in these kinds of exchanges. The payment clause, which requires the client to pay the invoices in full at the end of a term as well as in advance, is one example of a trust-related provision.
Batch payment features on the Odoo 18 platform enable the business to post payments in bulk and support more effective operations. You can modify the batch payment setup on the Customers page of the Odoo Accounting module. All of the specified batch payments will be shown to you when you select a menu item. There are clear options for Filtering and Grouping, just like with all other Odoo menus.
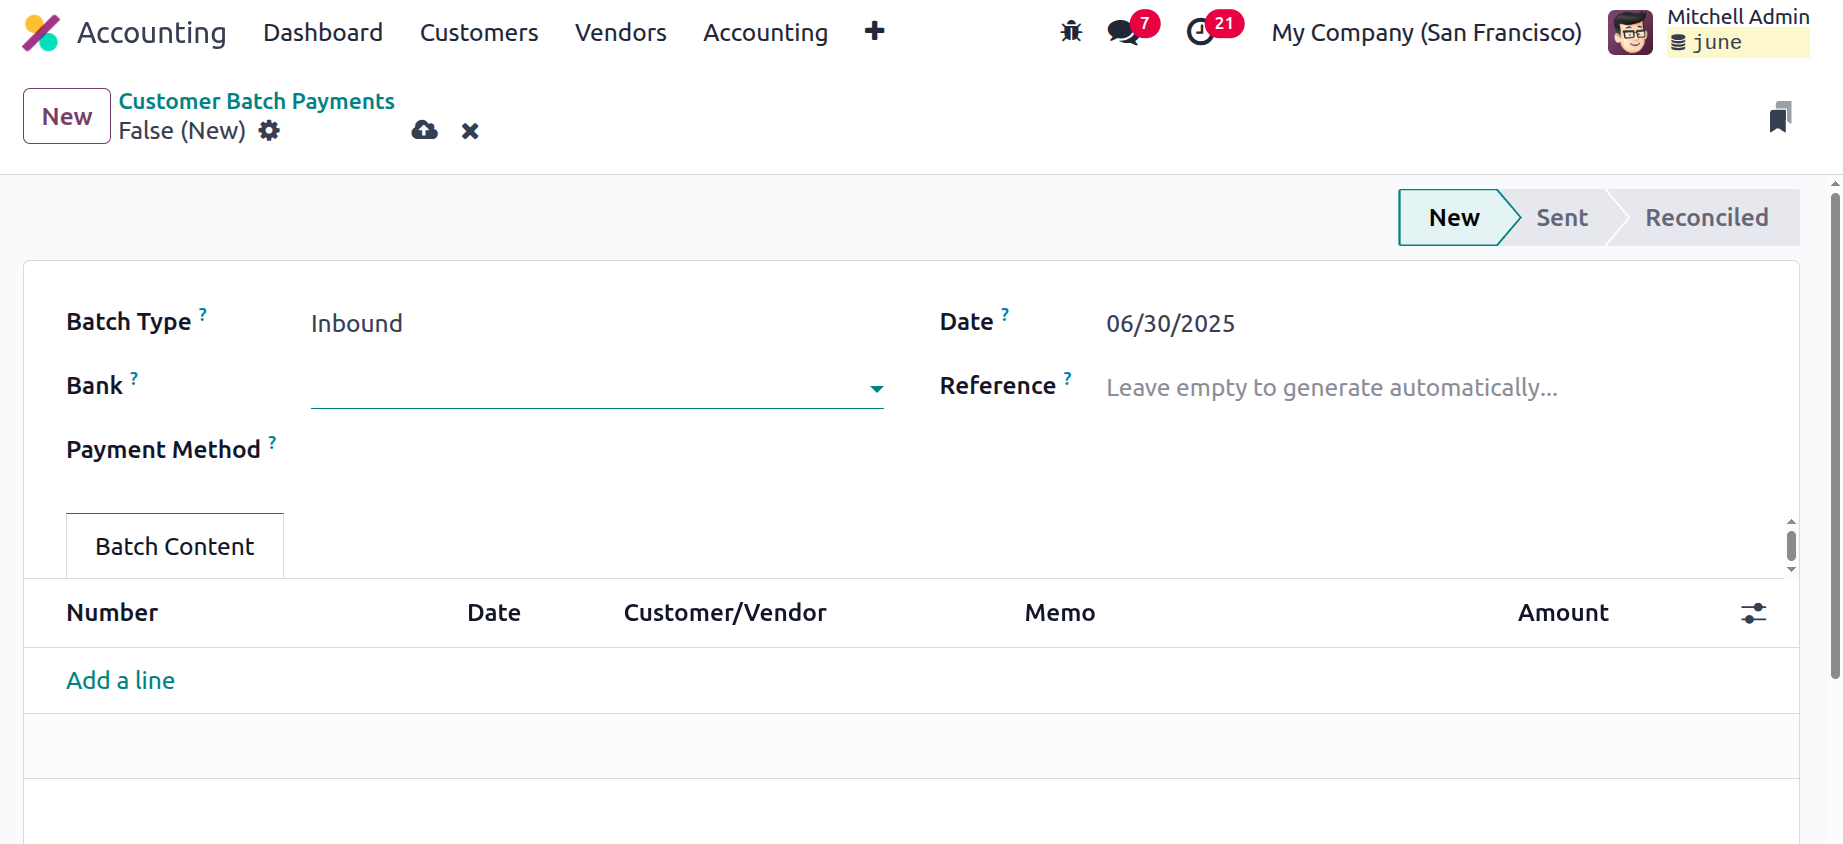
You can choose the New option to display the window depicted in the following image whenever you want to create a new batch payment. Before you can create new batch payment configuration elements, you must first determine the Batch Type, Bank details, Payment Method, Date, and Reference of the pertinent batch payment.
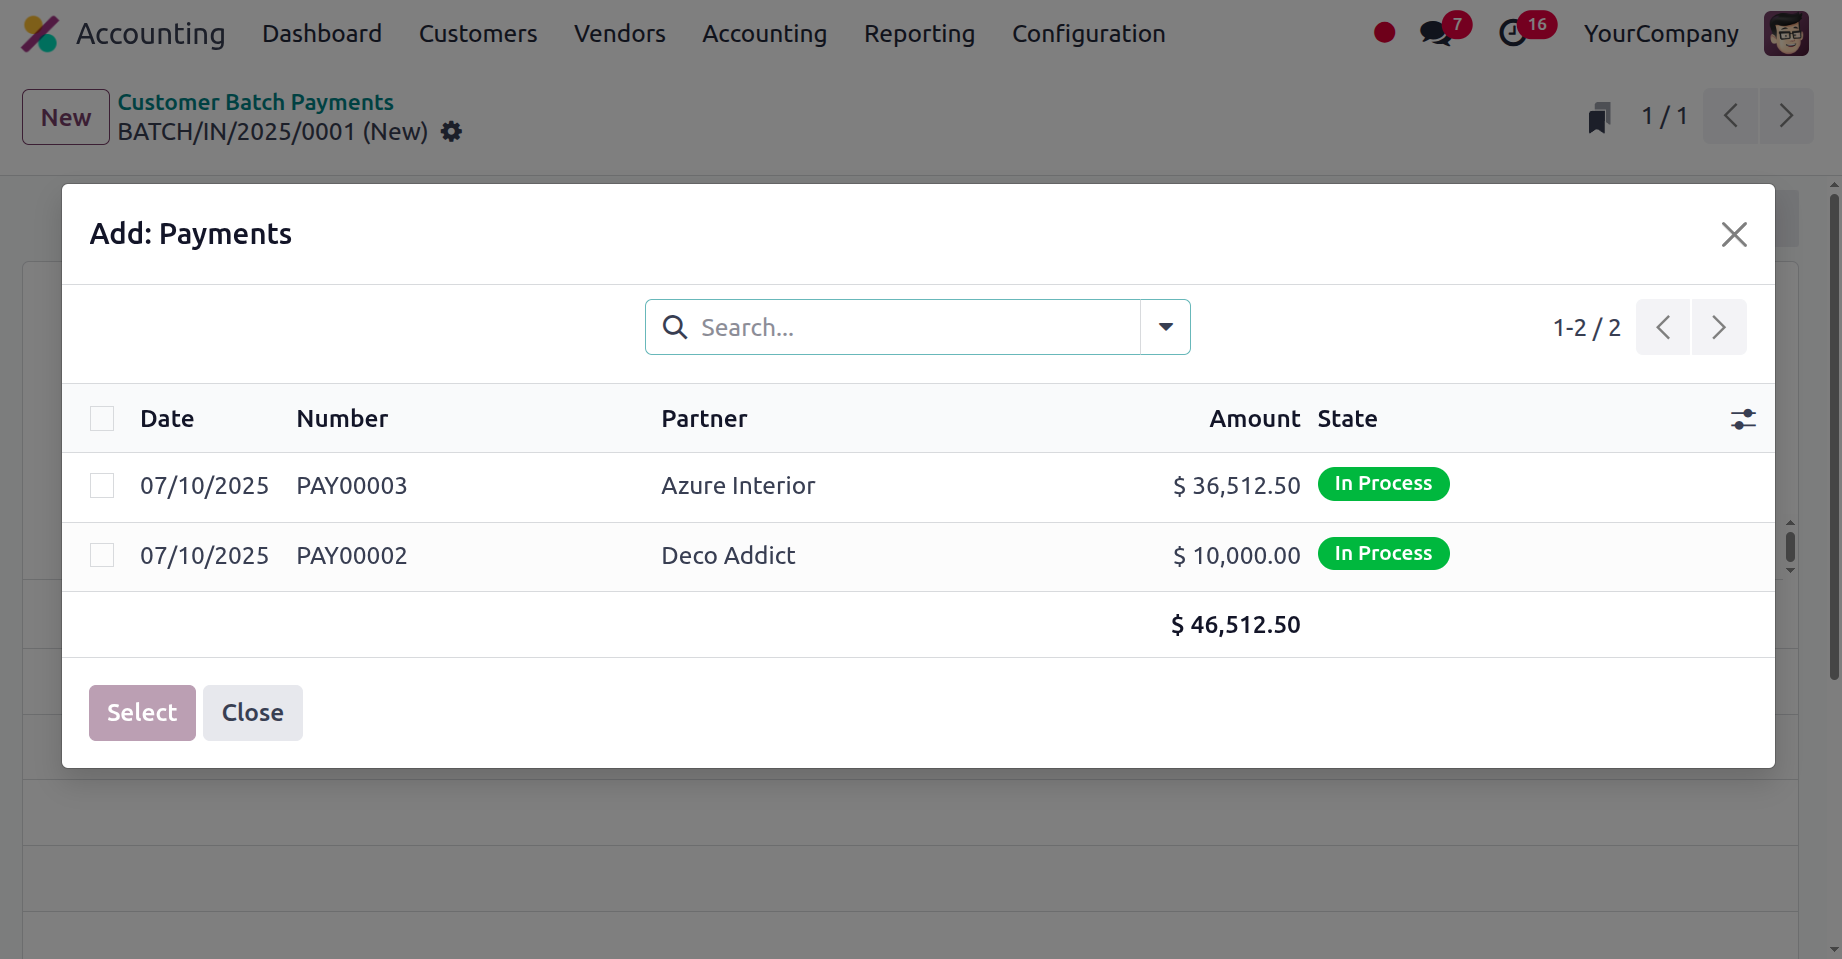
You can add the invoices for the batch payment by choosing the Add a Line option from a separate menu that is also used to specify the batch content. Every payment that needs to be made will be shown in a pop-up box that appears when you choose the Add a Line option, as seen in the image below. Depending on the batch type that has been set up for the batch payment, the payment will be shown. If the transaction is inbound, all of the payments that the client is expected to make to the business will be shown. All of the payments that the business needs to make to the vendor will be shown if the transaction is outbound. Additionally, specific payments can be excluded from the Batch payment that needs to be configured by using the Filters and Group By options under the Add: Payments menu. The next chapter will go into greater detail about the batch payment setup option available for Odoo's vendor operations.
You can confirm the choice once each payment has been selected for inclusion in the batch payment.
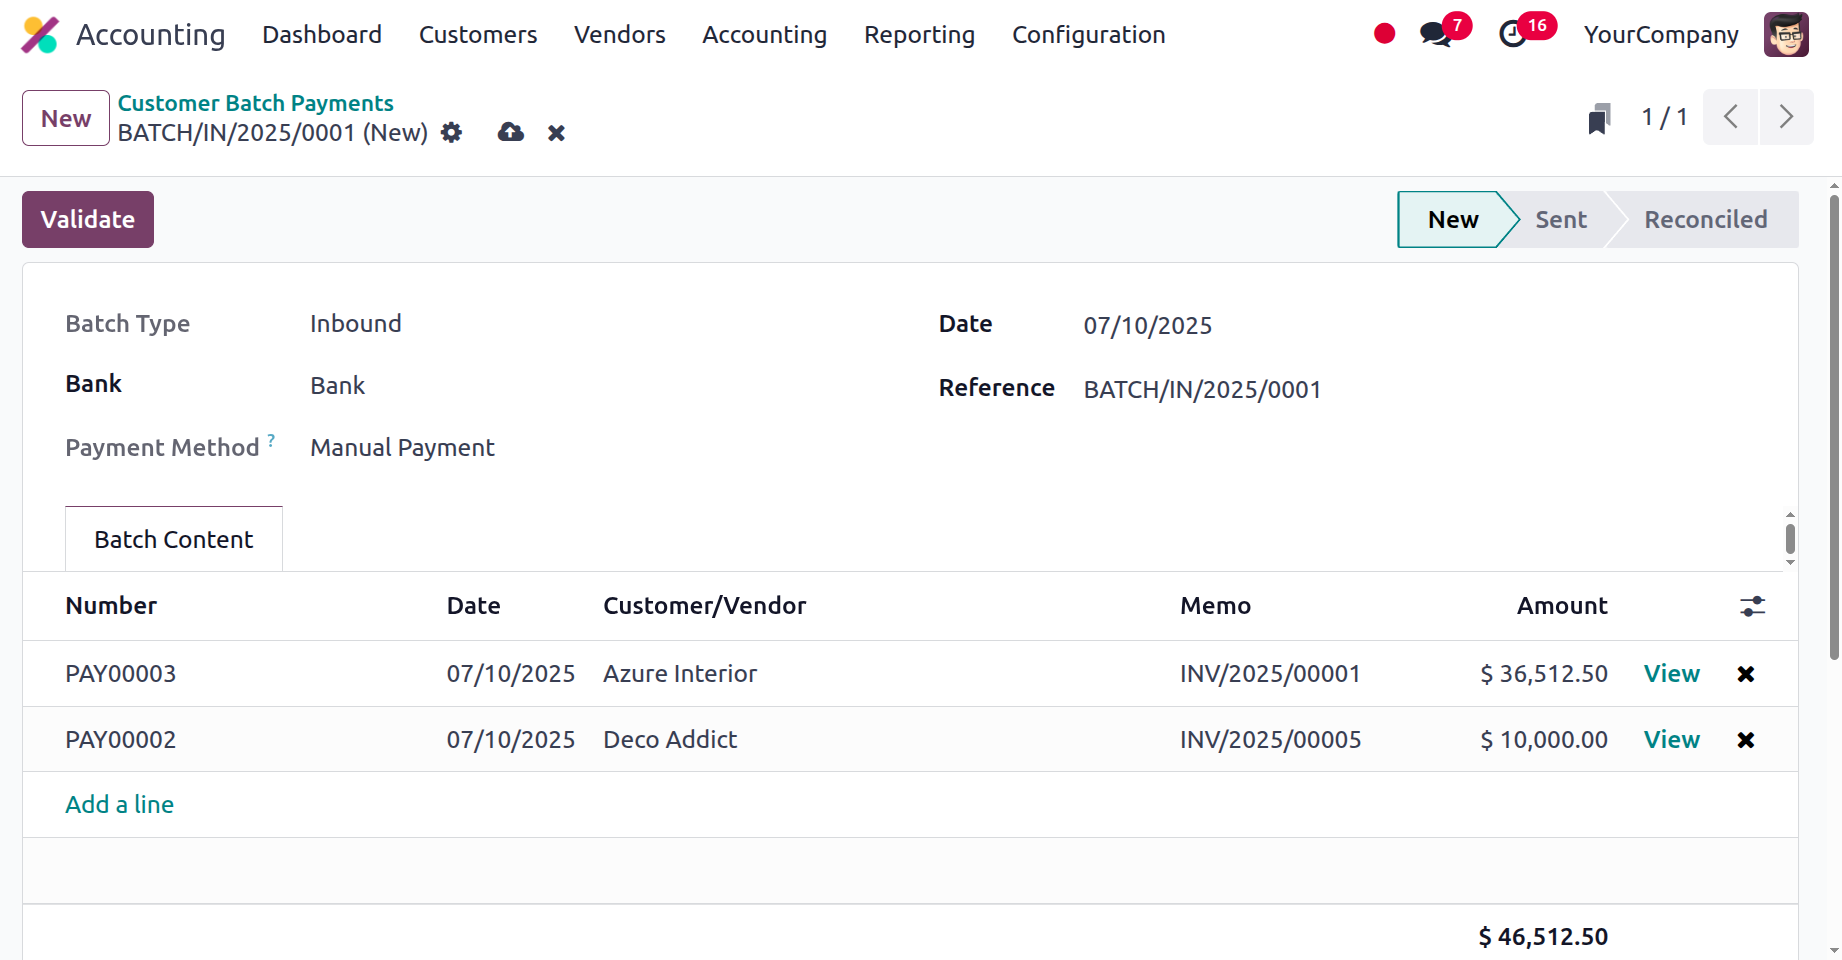
Furthermore, all of the payments in the batch have been marked as sent after the batch payments have been confirmed.
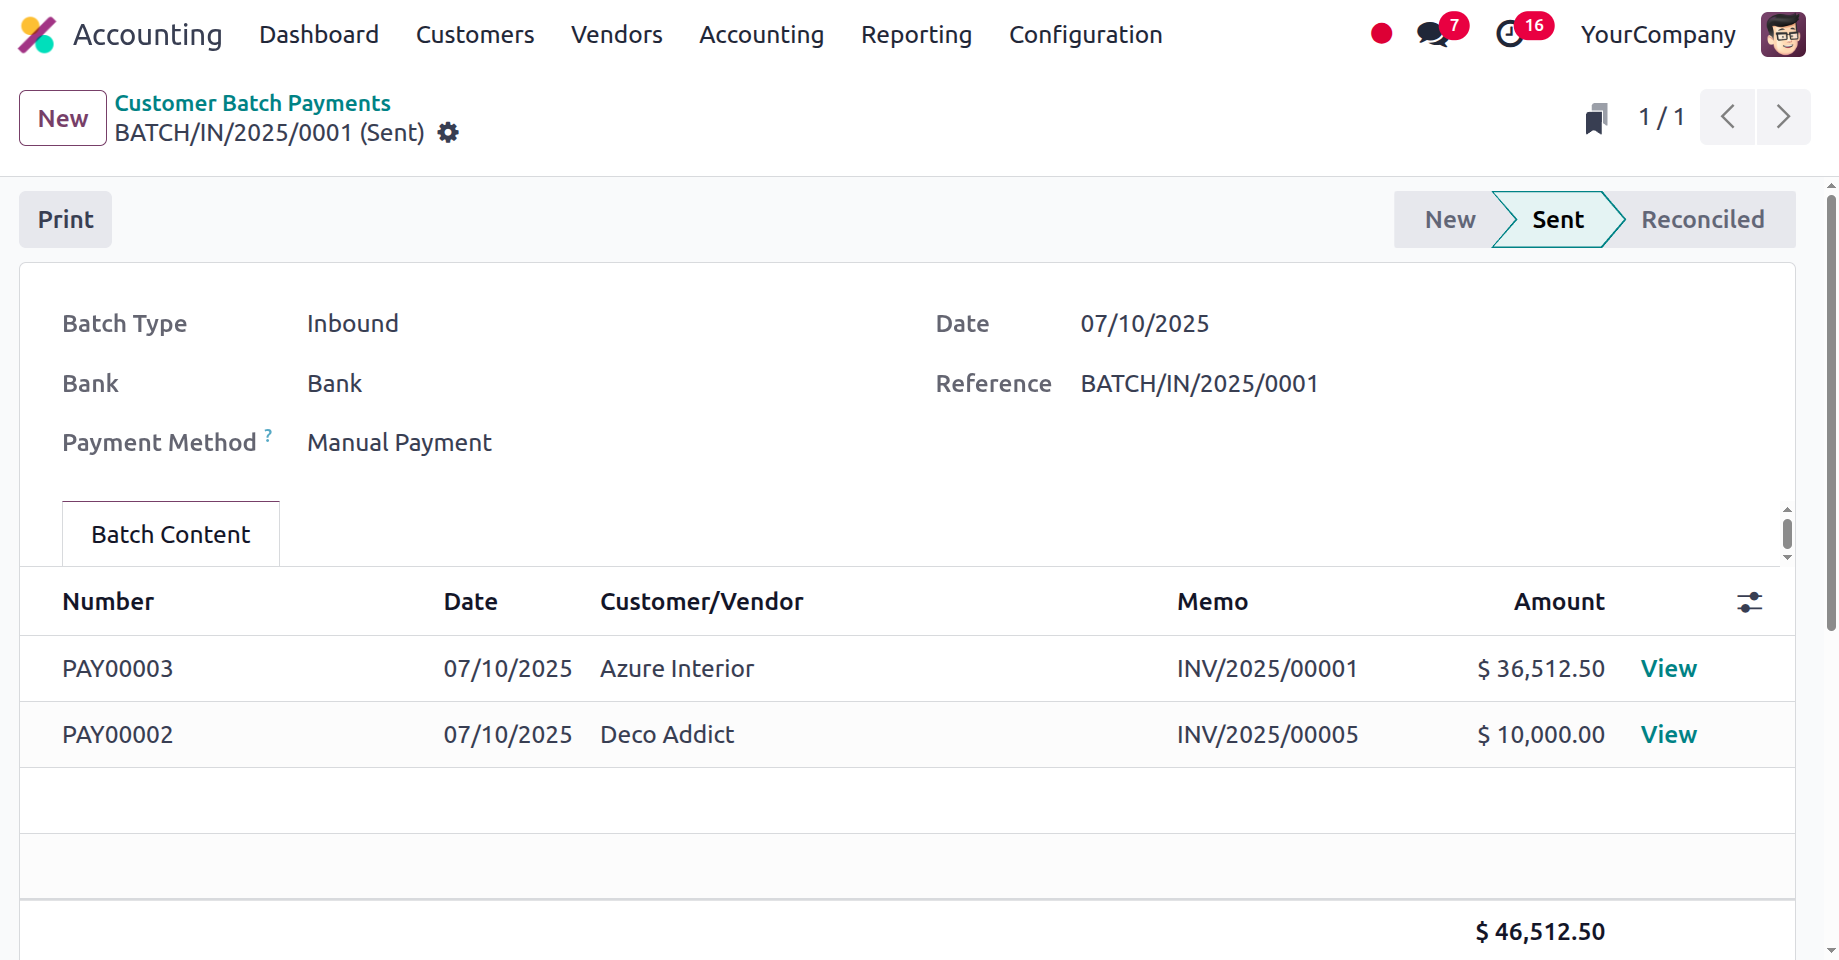
Once this validated batch has been reconciled, the stage will be updated to "Reconciled". Thanks to the batch payment procedures, the company will be able to give the client full payment of the invoices at the end of a term or depending on the client's financial circumstances. Now that the batch payment setup component is clear, let's move on to the section that creates the Odoo Direct Debit Mandates.
Direct Debit Mandates
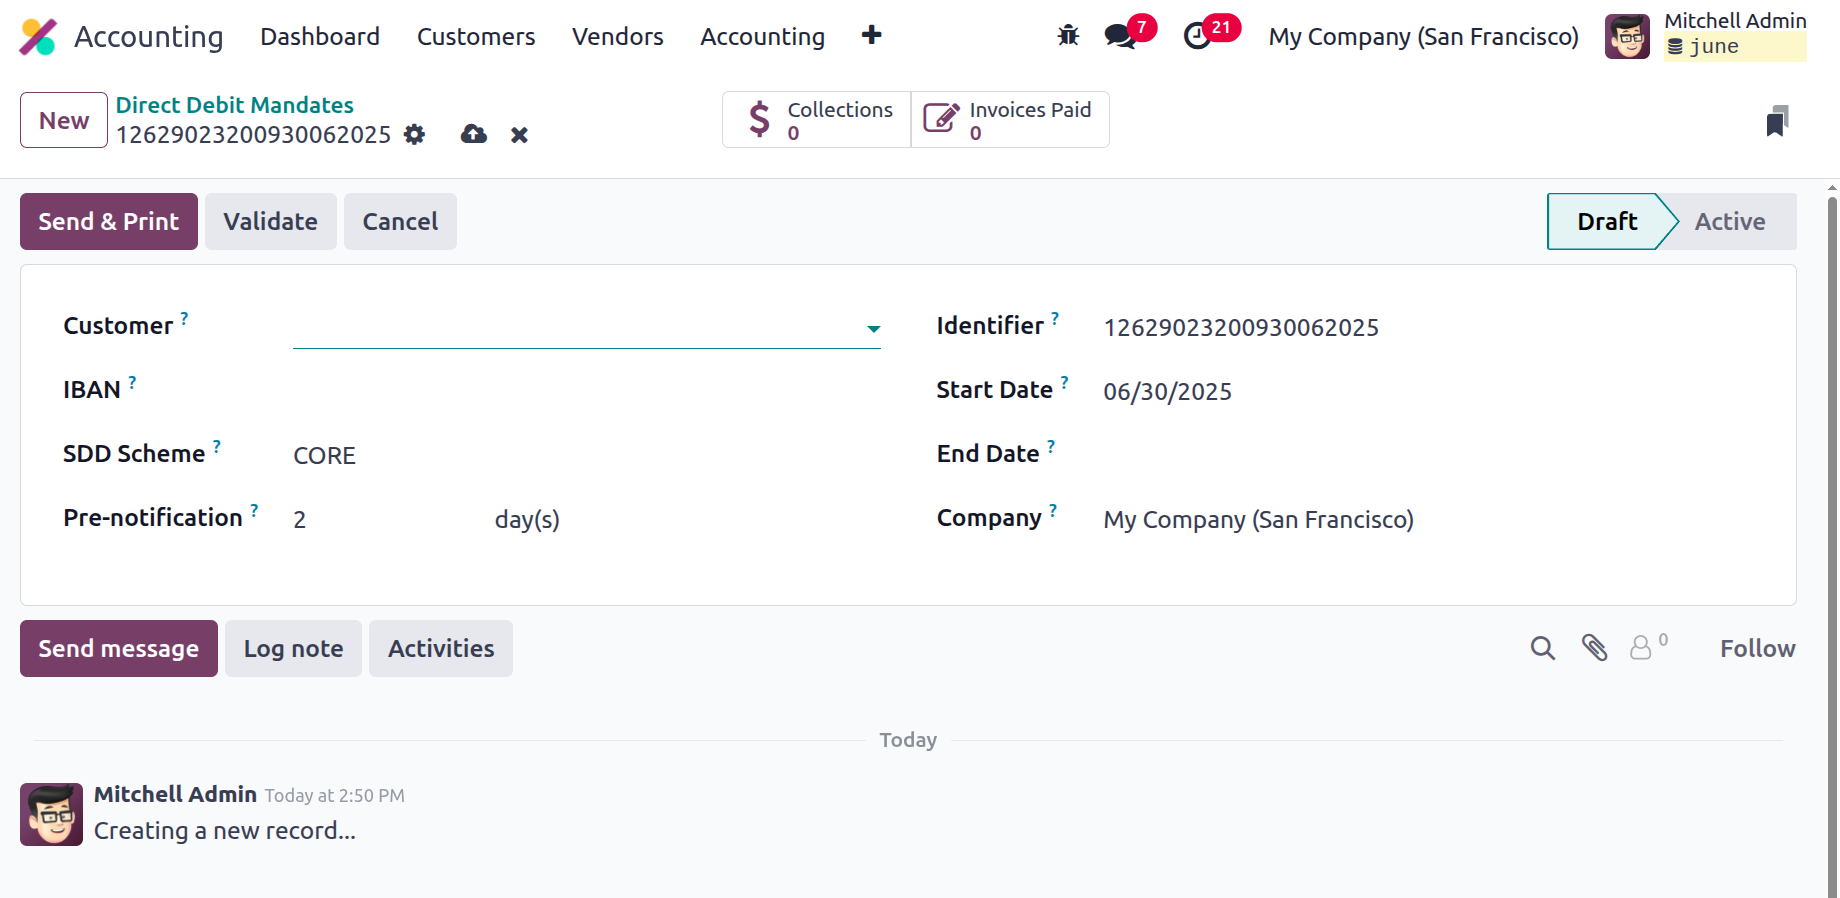
One of the most intricate tools and regulations utilised in business operations is the Direct Debit Mandate. You can be certain that the client has given your company permission to collect money for any upcoming business operations by using the Direct Debit Mandates. A contract or trust that has been developed between the business and its customers regarding the aspects of running the business is what creates the direct debit mandates.
To make managing Direct Debit Mandates easier, the Odoo platform uses a suitable menu that appears on the Customers tab of the Odoo Accounting module. The menu allows you to set up new Direct Debit Mandates for Odoo platform operations. The creation box allows you to enter the customer's name, journal, SDD Scheme details, identifier, start date, end date, and IBAN (international bank account number). The operative period for each of the qualified Direct Debit Mandates is established based on the Start Date and the End Date.
Product Management
A product-focused company's business operations heavily rely on product management. You will have total control over the items being described if you have the features of a specialised management tool. Odoo product management allows you to list all of the goods and services your business offers. All of the items specified in the operations of your company are shown in the items menu of the Accounting module, which is accessible via the Customer menu.
To help you locate the product from the list of ones detailed there, you'll find filtering and grouping options under the Products menu. List, Kanban, and Activity views are available for the Products menu; the latter is particularly useful because it includes an image and a list of tasks.
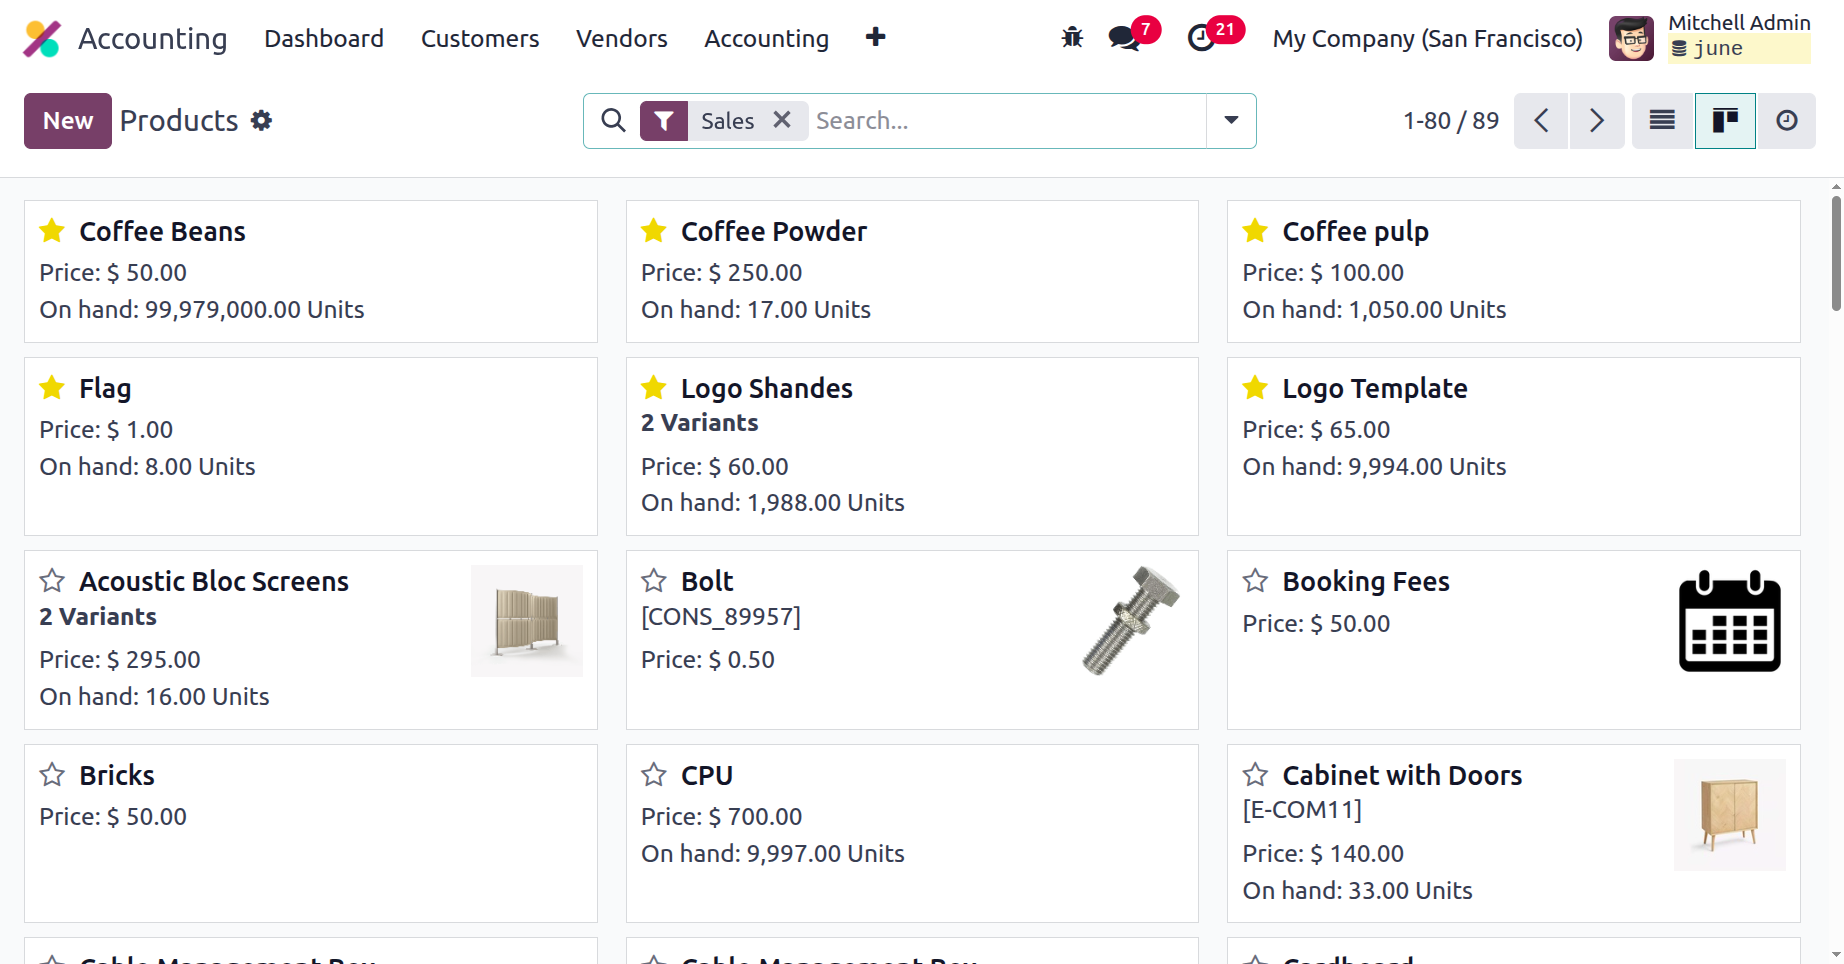
By choosing the New option from the menu, you may add new product details and edit the ones that are supplied under each product. A window requesting information, including the product's name and whether it can be sold or bought, will appear when you choose to create a new product. By choosing a picture from your computer and the image icon, you may also explain how the product looks. After outlining the product's key features, let's proceed to the next phase of product configurations, where we will talk about the components that could be defined in operation.
The general information sections must be set up first. Here, you can indicate if the product type is a service, consumable, or storable good, and if the platform's internal inventory management module should handle the inventory. Food and other perishables with a short shelf life are examples of consumables, which are goods that can be eaten or that are perishable quickly.
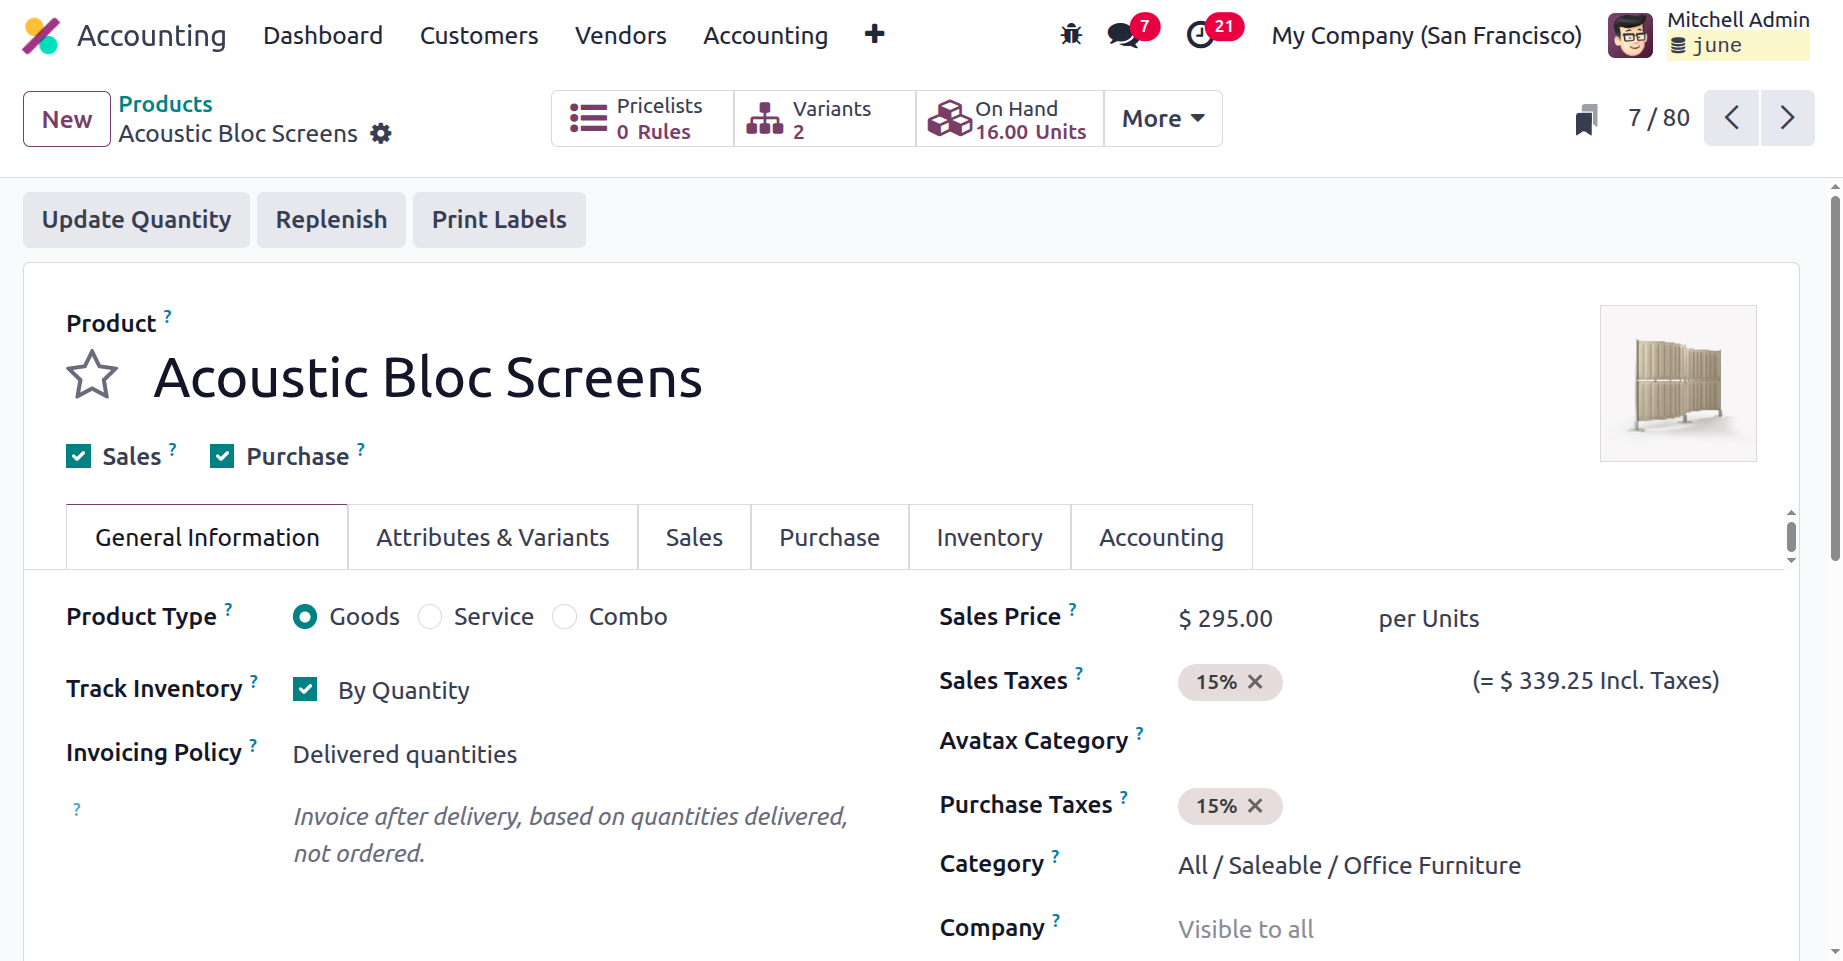
Storage-friendly products are less likely to be damaged and have a longer shelf life. This category also includes all non-consumable goods. Items that are not physically present but may be offered to the customer as a service in accordance with their needs are referred to as service-based items. Inventory can be specified if the product is merely consumable. A drop-down menu is another way to specify and choose the product category. You can specify the additional prices once we've decided on the goods' sales price. Additionally, you can choose the TaxCloud Category and the Customer Taxes from the dropdown menu. Any internal notes that are required for the specific product can also be supplied.
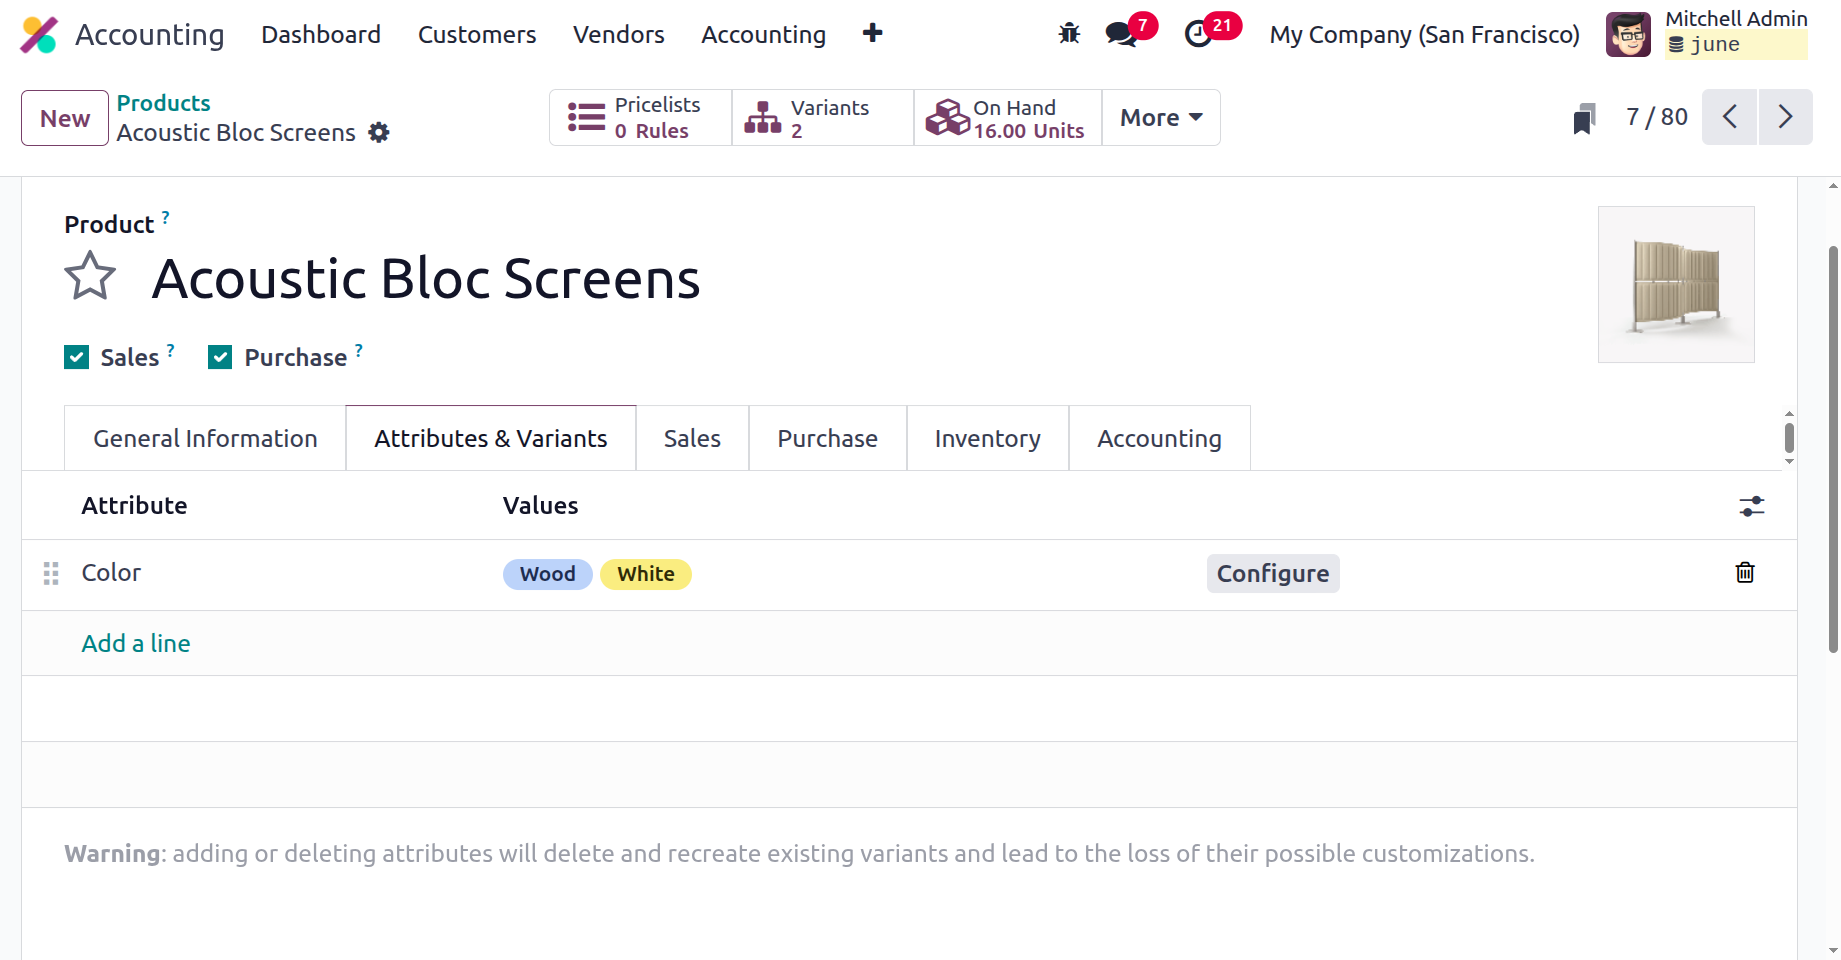
All product variations utilised in business operations can also be listed under the variants page. You can enter the values and attributes of the variant using the "Add a line" option. As can be seen in the screenshot that goes with this line, a smart button will display the amount of options. For a single product, you can add as many versions as you like, and they will all appear under the same product description.
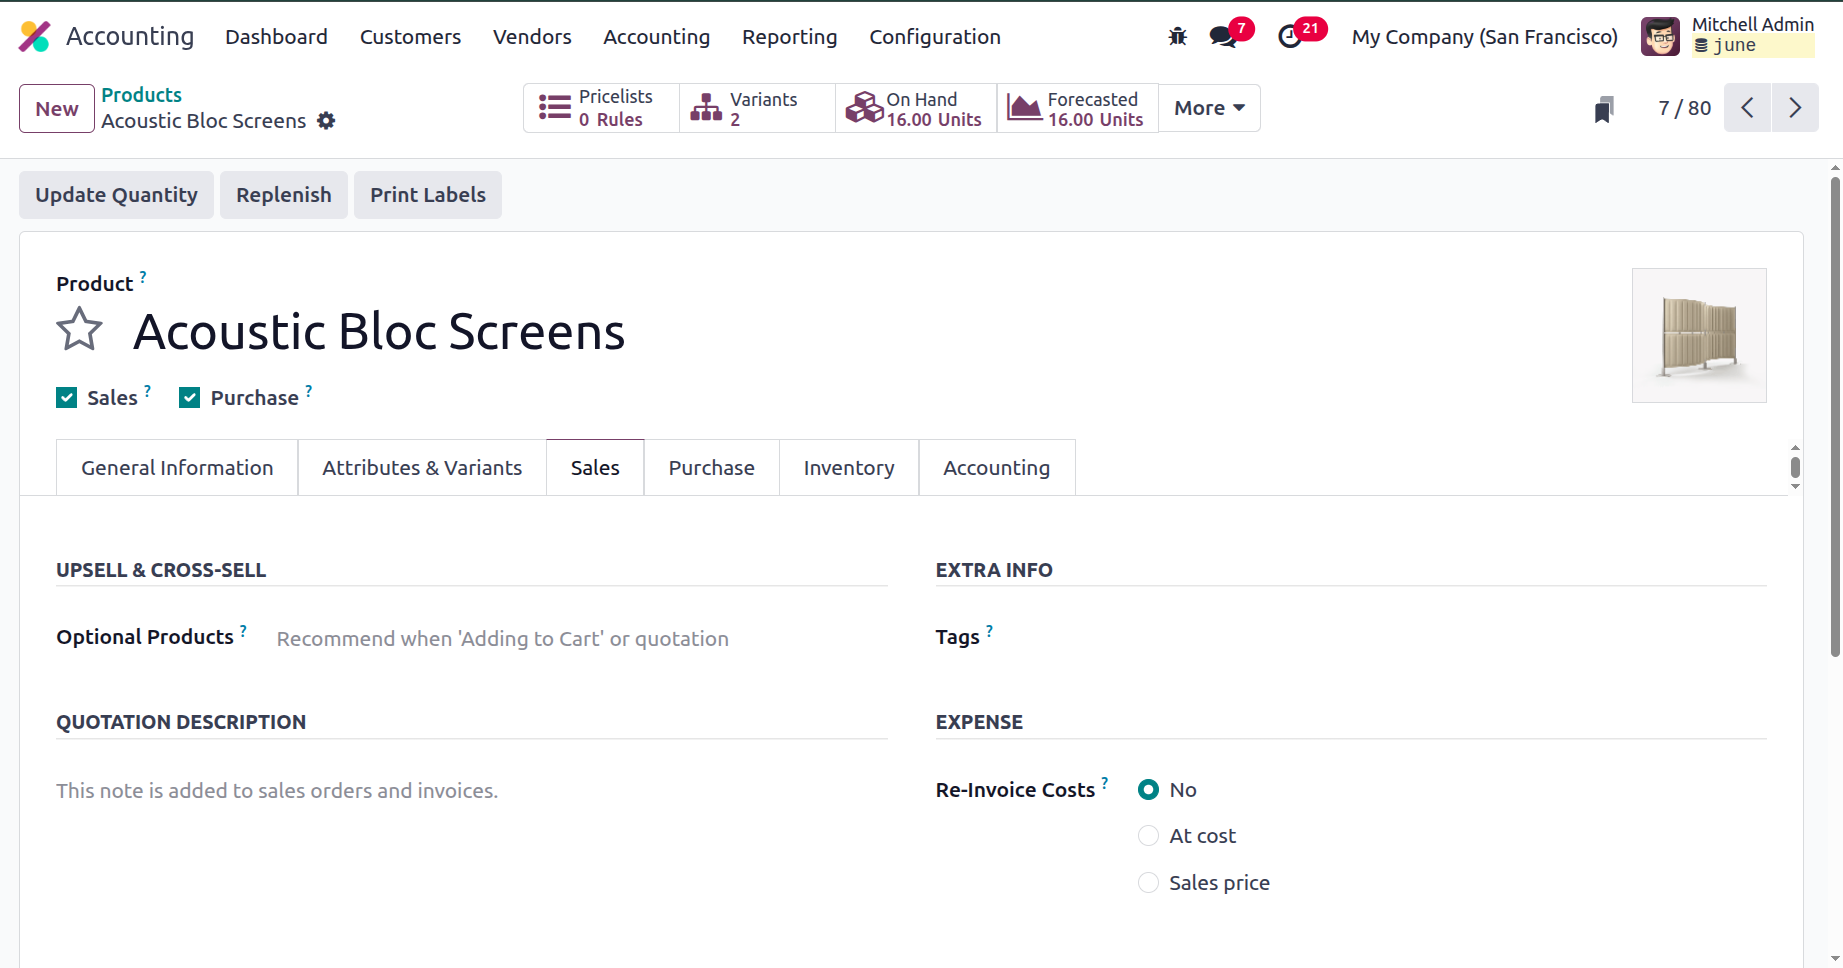
The Sales tab contains the details of sales like Upsell & Cross-selling details, Quotation description, tags, and the Re-Invoce Cost.
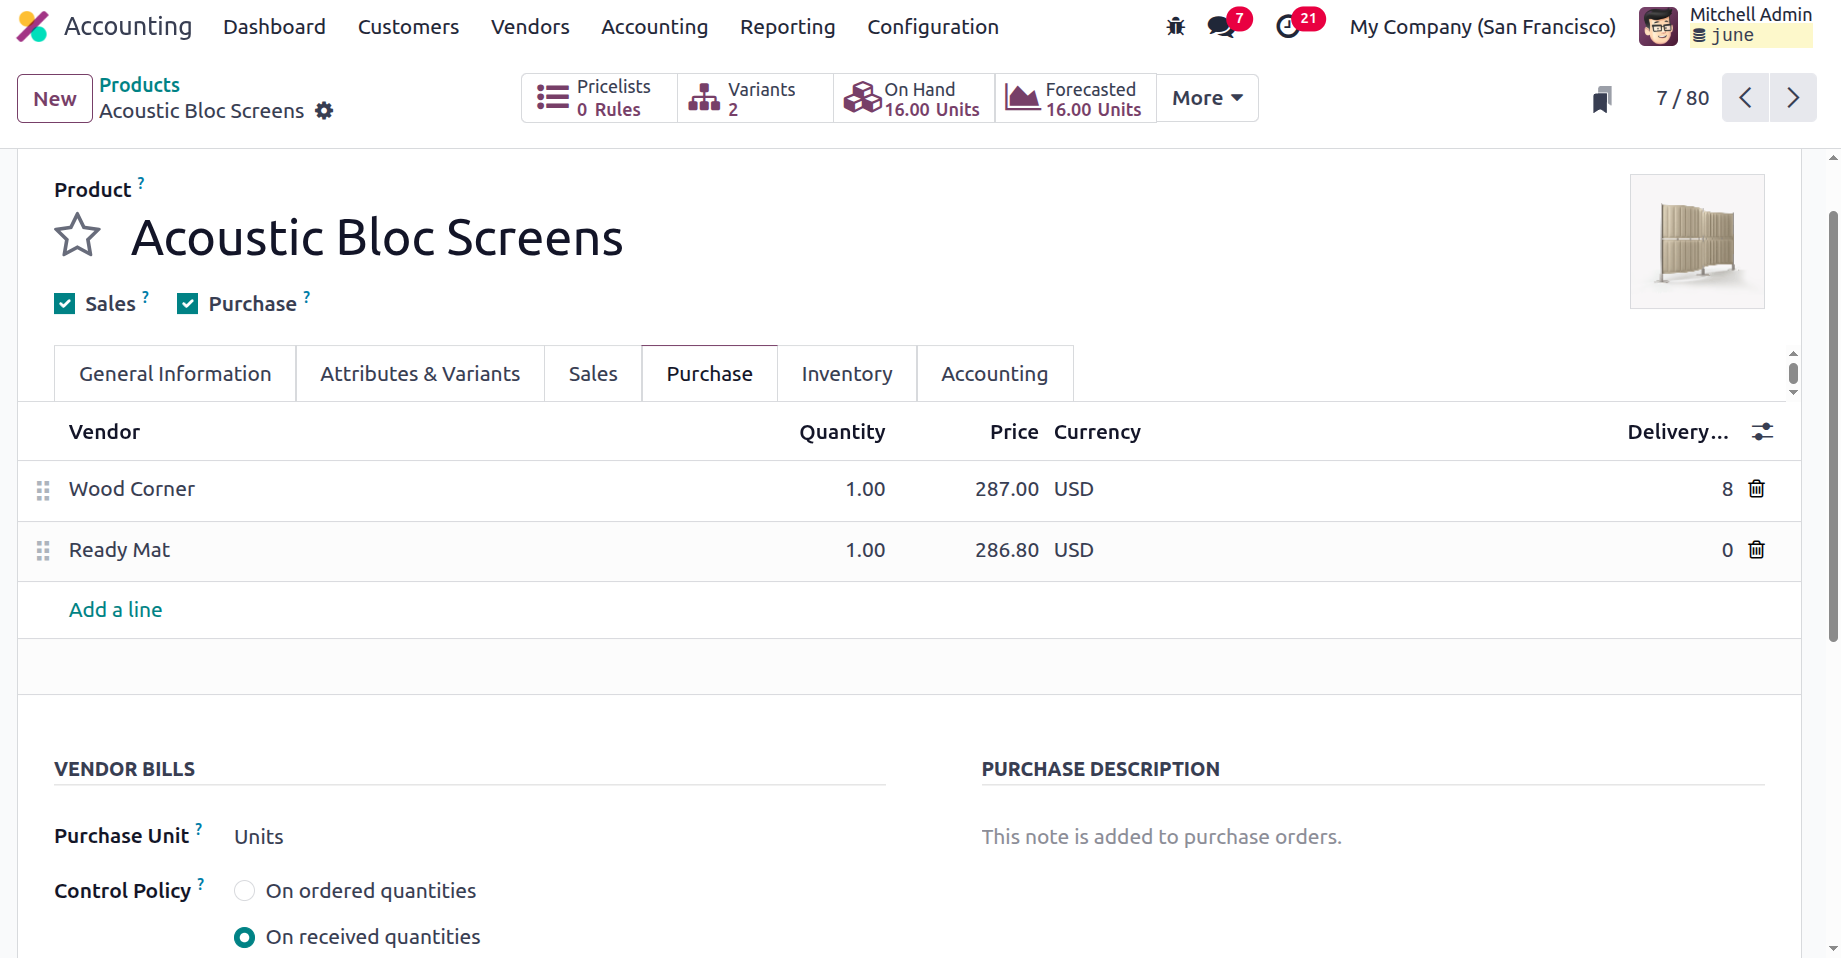
The Purchase tab in the product description menu allows you to modify components of the purchase information, including vendor bill management. Here are the defined vendor taxes that are associated with the goods and that the vendor has specified. Different taxes on operations for a specific period can be specified in this section.
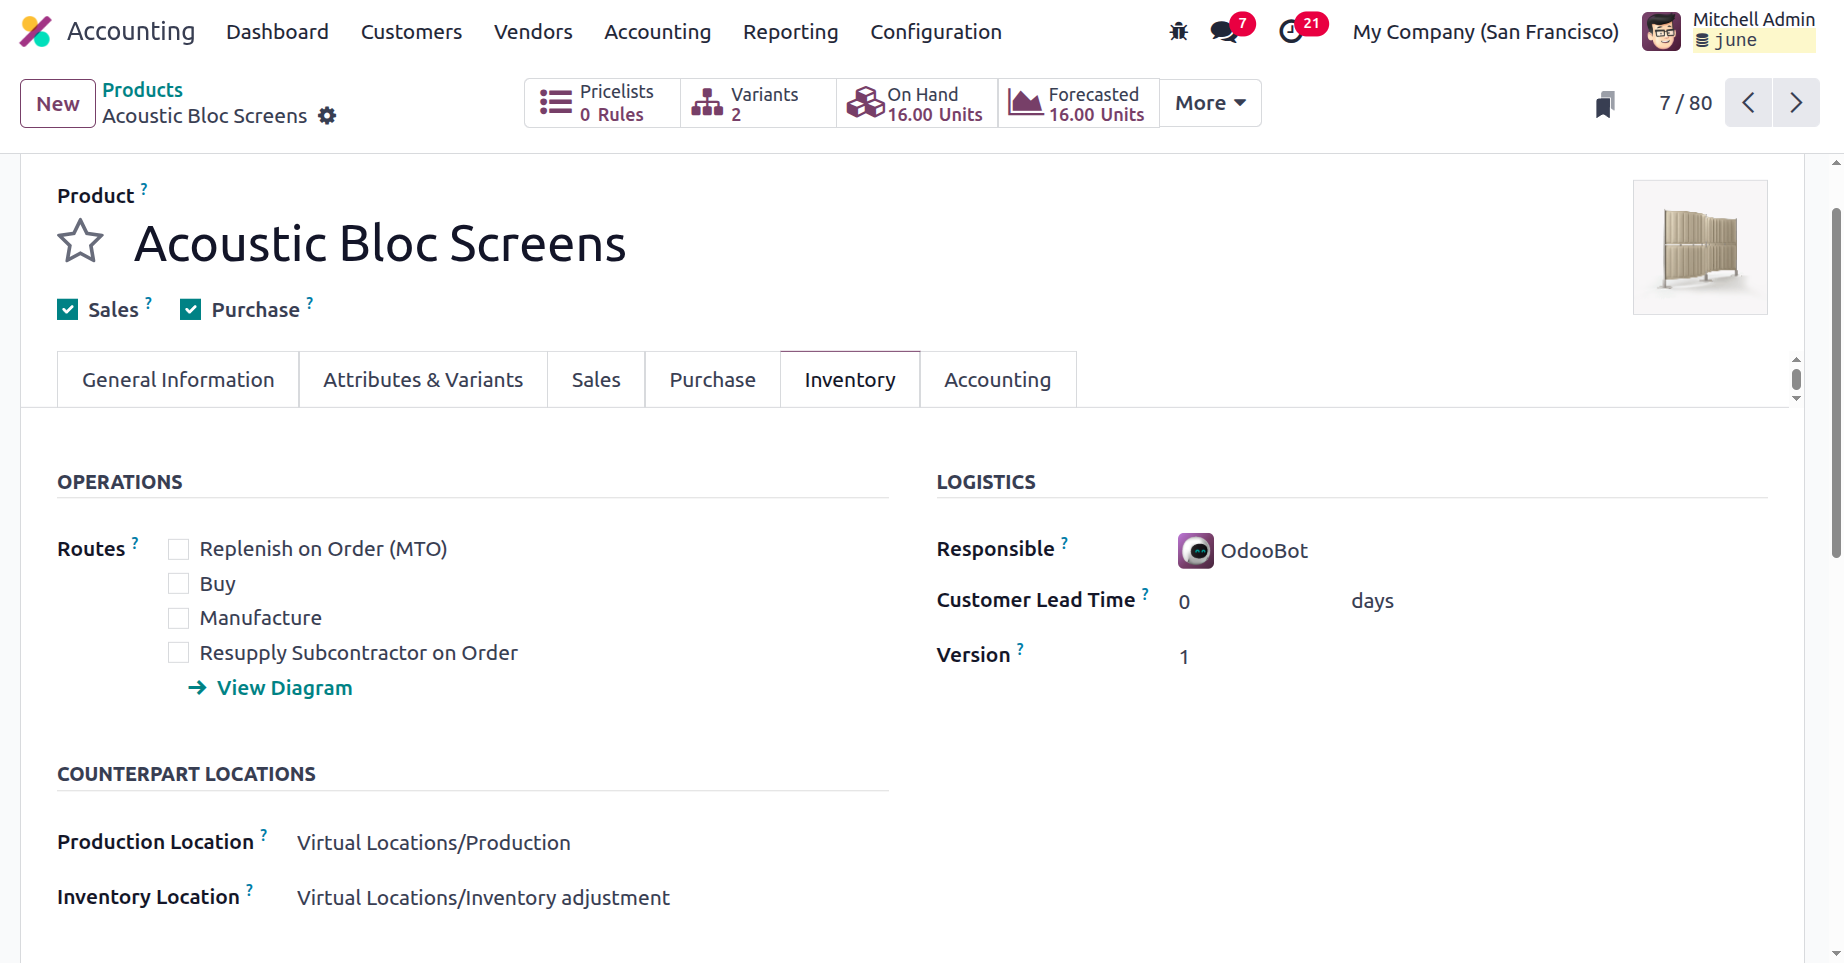
The Inventory tab of the Product contains the details like routes, counterpart locations like production and Inventory locations, then the Responsible person, Customer leadtime, Version, and the users can set the descriptions for receipts, delivery orders, and internal transfers inside the Inventory tab.
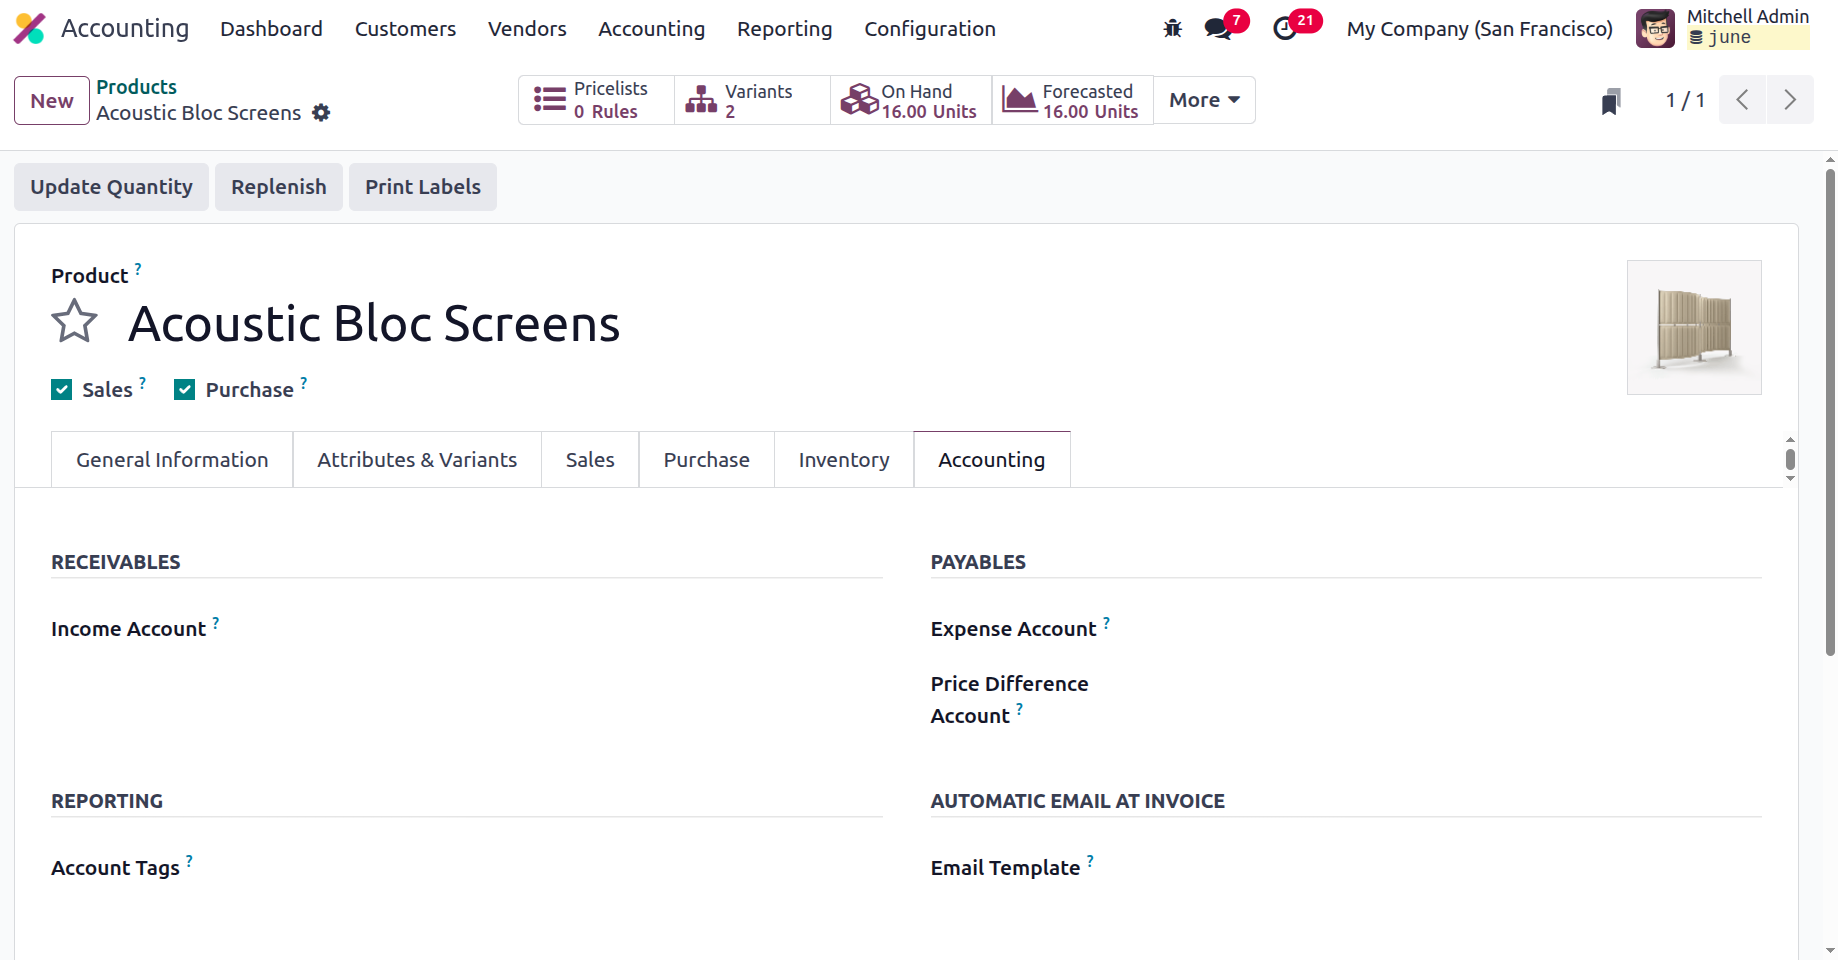
You can specify the product's accounting information under the Accounting tab of the product description window. You can choose one of the receivable components?in this case, the Income Account?using the drop-down box. The definition of the Expense Account might be similar to that of the Payable components. The revenue received from the sale of an item to a consumer is kept in the income account, while the expenses incurred when purchasing that item from a vendor are kept in the expense account.
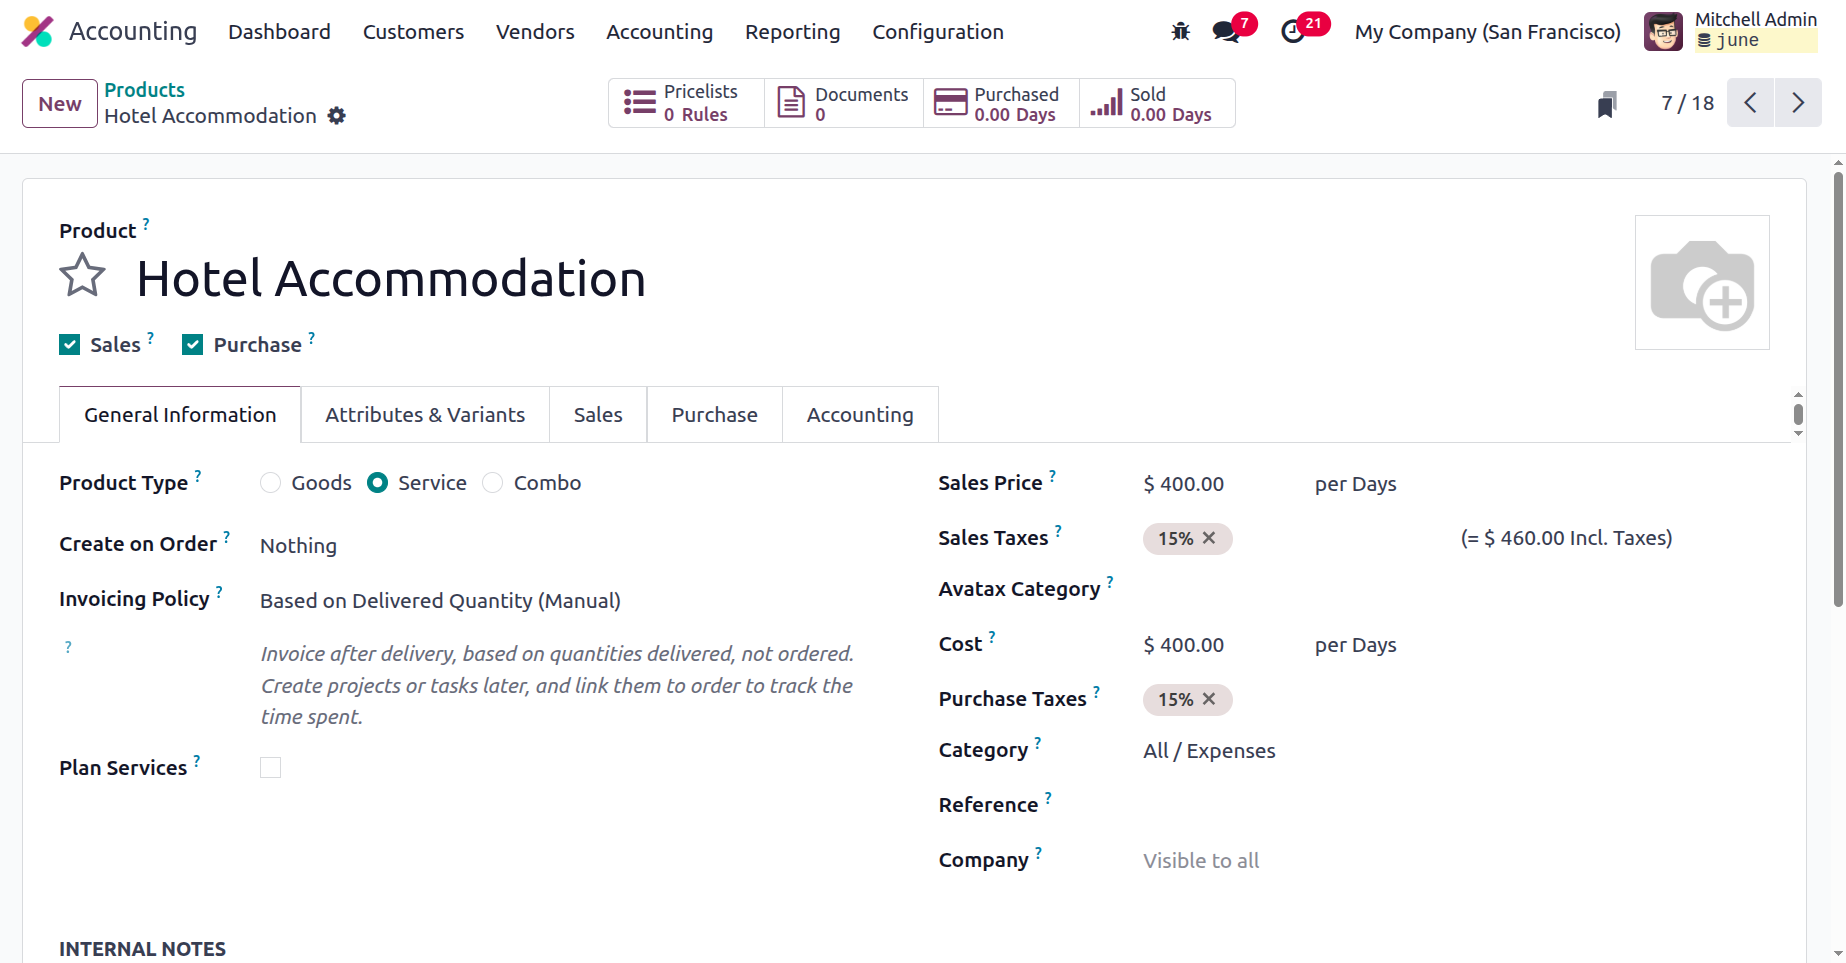
Furthermore, as previously mentioned, you can define items that are also services using the items tab. For instance, lodging is categorised as a product and is one of the services offered by the hotel. You can designate each product as a distinct product or a variant of it if your hotel offers distinct rooms and packages for each product catalogue. The product type is further specified as a service in order for it to operate as a service-based product. A service-based product has all the other features with a consumable-based product.
The product management features of the Odoo 18 Accounting module will be built upon the financial management components of the product. You will be able to regulate the operation according to your organization's requirements with the help of the dedicated Product management menu. The next section will discuss the client management facets of Odoo's accounting processes.
Customer Management
Although managing consumers will be the primary goal of operating a variety of firms, most of them will not have specialised management that would make chores easier to complete. Effective business management is made possible for the entire organisation by the well-defined Odoo ERP solution. Additionally, there are specific business management skills available that cover every facet of corporate operations, including client management.
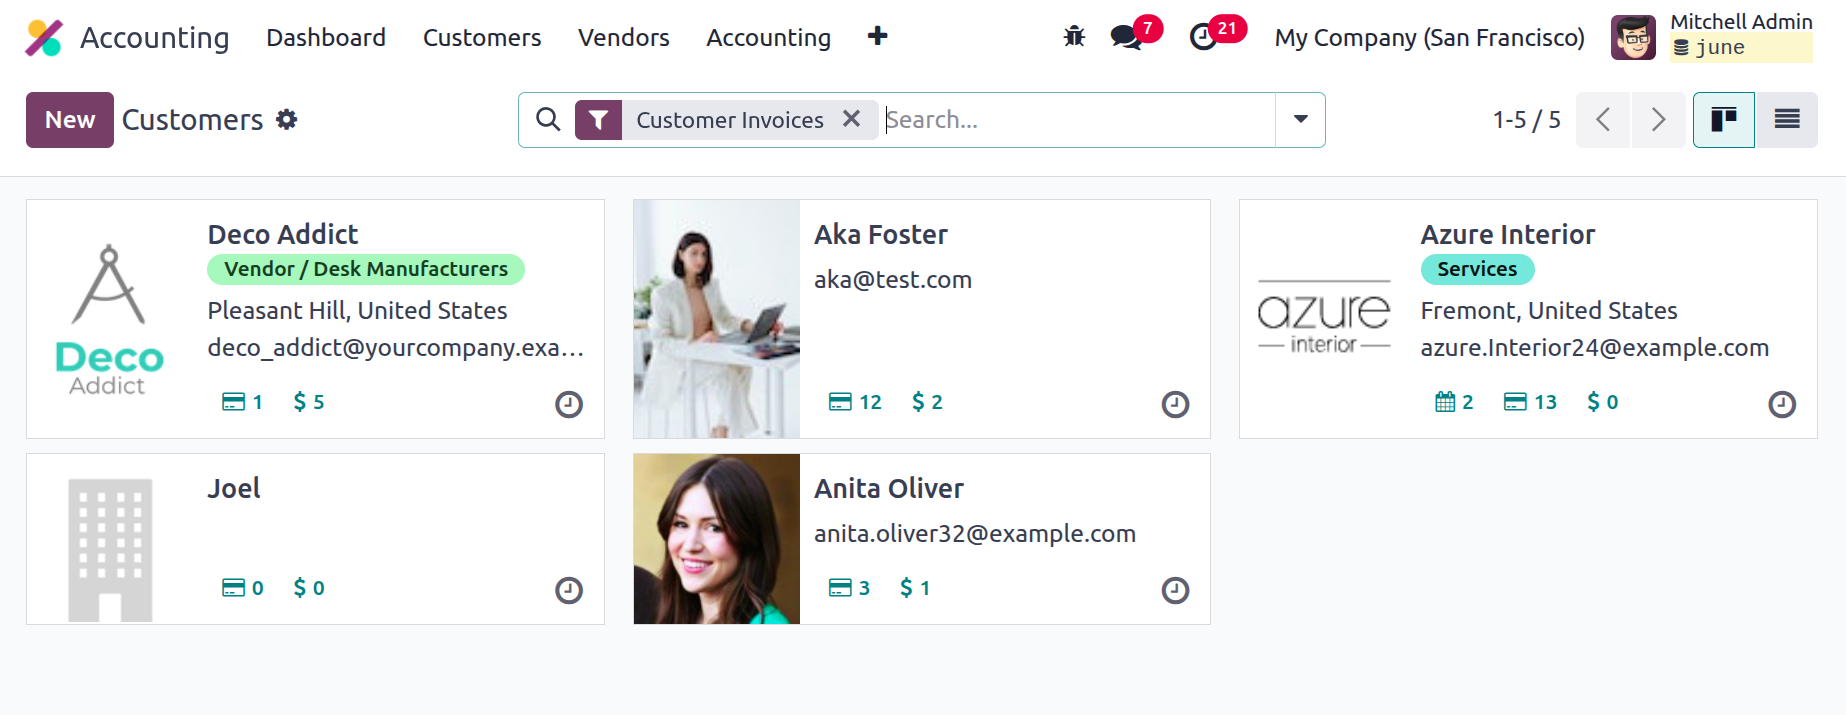
All operations related to customer management activities in the Accounting components have a specific customer management section menu in the Accounting component of Odoo-based business operations. By choosing the Customers option from the Customers page of the Accounting module dashboard, you may see a representation of all of your company's clients, including both private individuals and corporations, as seen in the accompanying image. As seen in the image below, the Customers menu, which is visible in List and Kanban views, will provide users with access to all of the data. Additionally, you may use the available Group by and Filter options to filter data.
You can add a new client by clicking the New button, and you can change the customer's information at any moment by choosing it from the list. You must first choose in the client creation box if the client is an individual or a business before you can enter the name. The business's address, operational location, and zip code must also be included. The operational financial components also require the Tax ID.
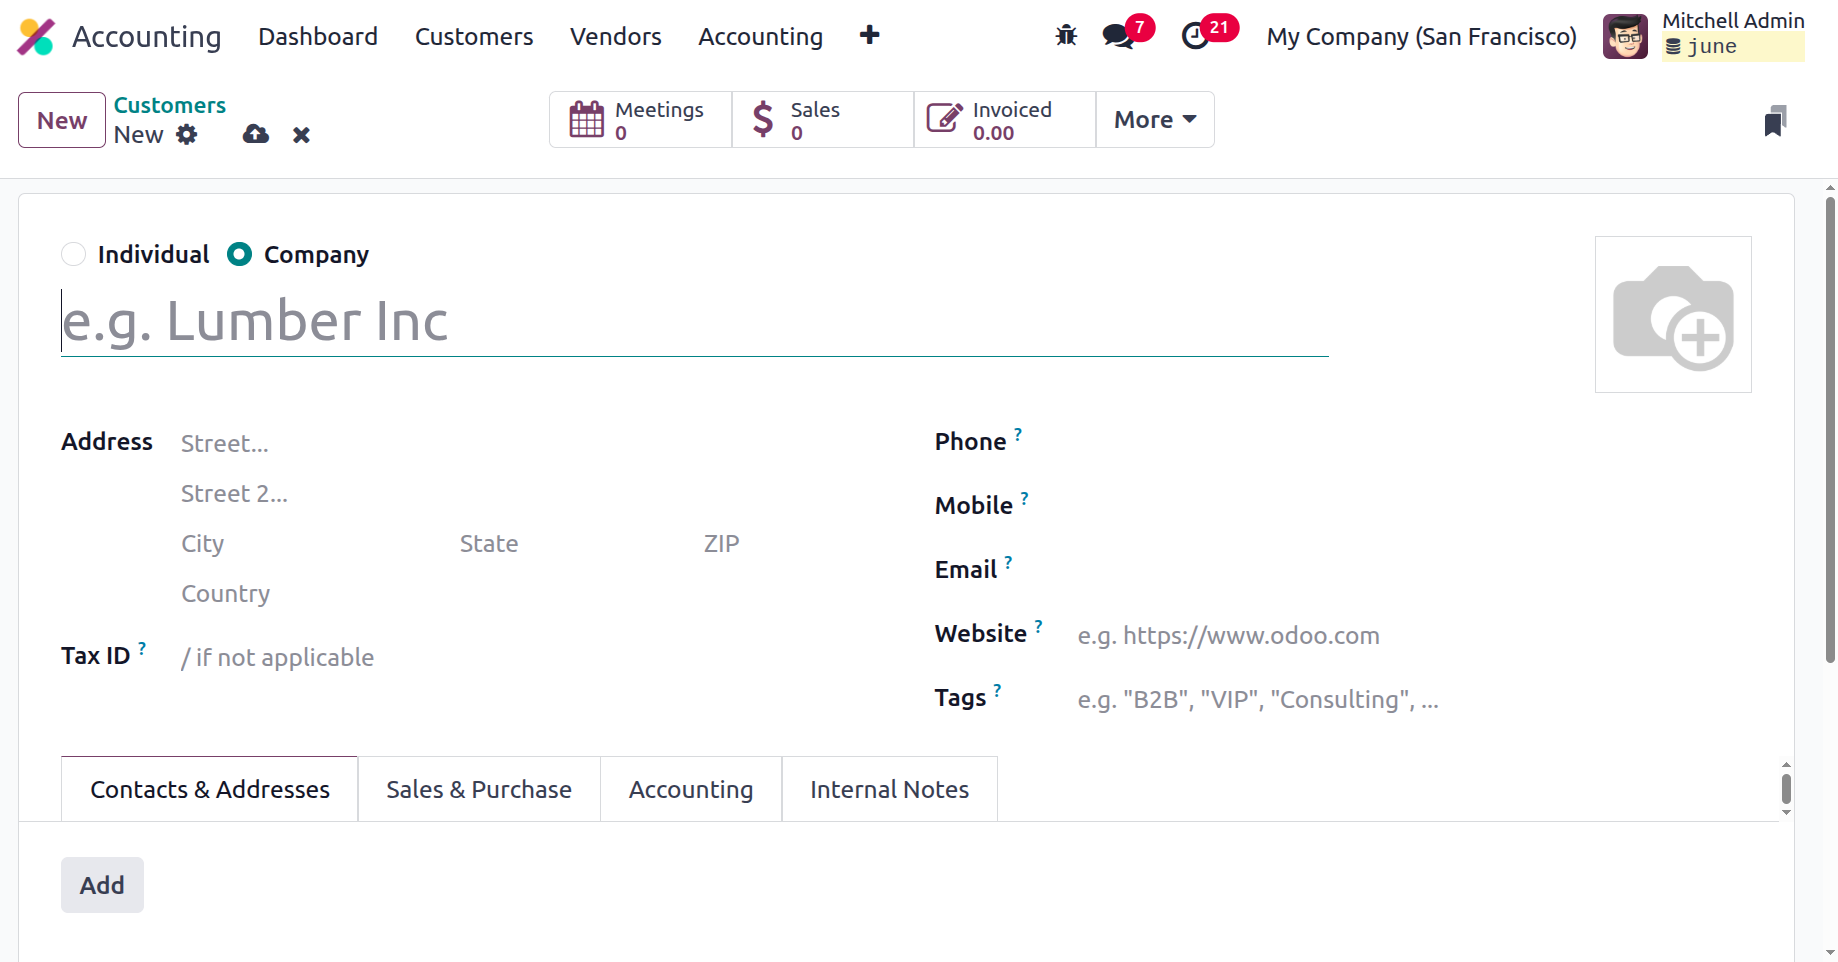
Contact information such as a phone number, email address, mobile number, and website link should also be included. It is also possible to assign the platform's designated Customer Tags, which are set in the Customer administration part of the Odoo platform. Furthermore, you will be able to create new Tags straight from this menu. The necessary customer's contacts and addresses must then be defined using the ADD option that is available in the separate "Contacts & Addresses" page. Numerous addresses can be specified for a certain company's or person's operations.
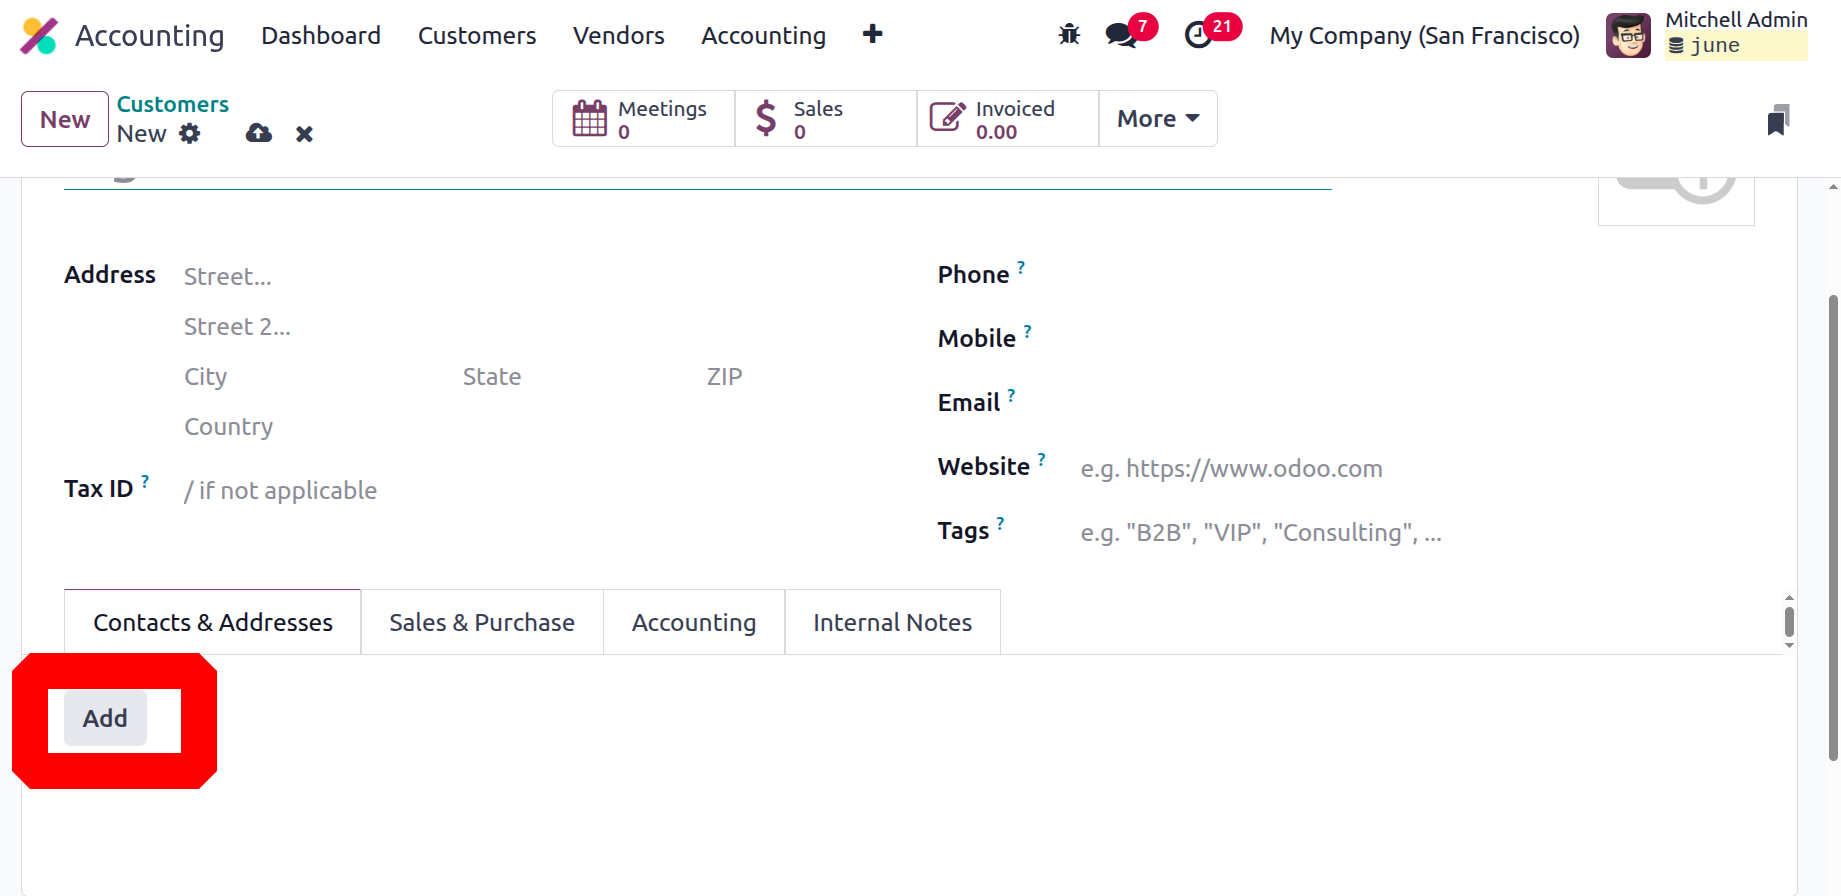
You can specify the contact in the pop-up window that appears if you choose Add contacts and addresses. In this instance, the first step is to ascertain which address is assigned. Examples of contact information type options include billing address, shipping address, additional addresses, private address, and tracking address. The address to which tracking reports are received is known as the tracking address.
The address type must now be supplied, followed by the contact details. The contact person's name, address, postal code, and nation must be specified. You can include all of the remarks regarding the specific address in addition to the phone number, email address, and cell number. For a certain client, you can provide various contact data. Either Save and New or Save and Close can be used to do this.

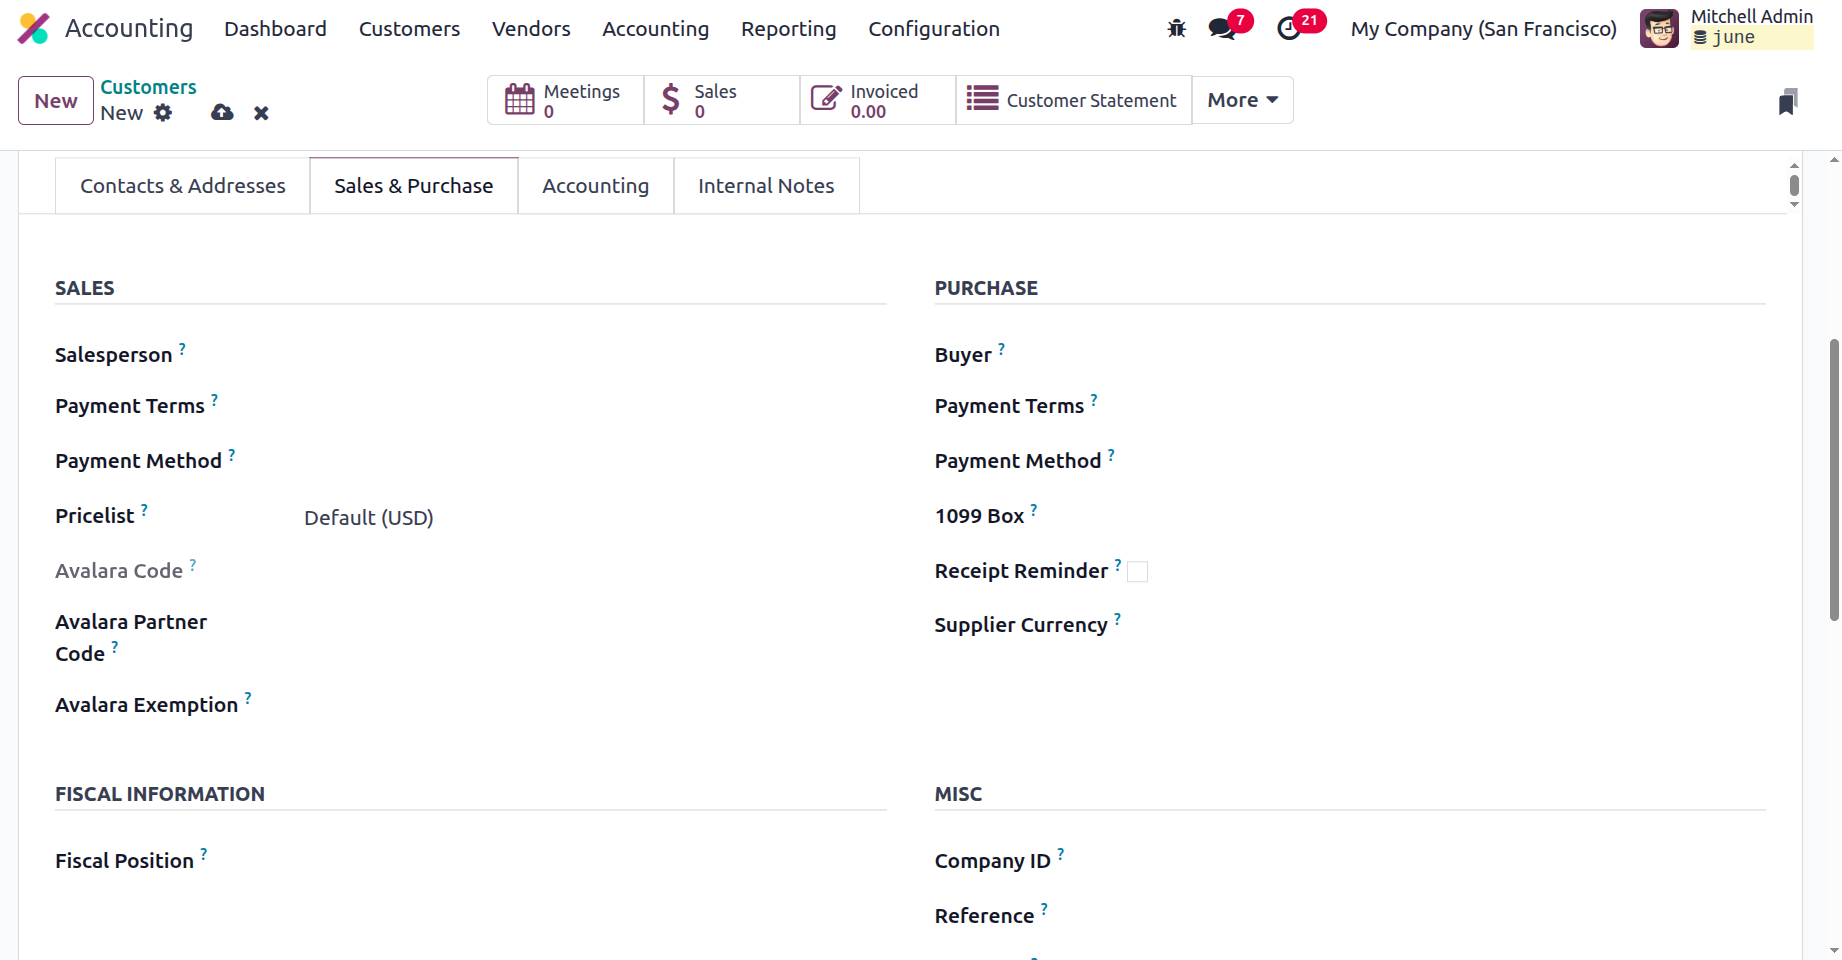
All of the addresses listed for a particular customer are shown on the Contacts & Addresses page for that customer. The next step is to fill out the customer's purchase and sales settings. The Sales page needs to include the seller's information, terms of payment, and pricing list. You can also specify the terms and manner of payment under the Purchase tab. The Fiscal Position is defined under the Financial Information tab. Additional considerations were also made, including the industry or sector and the customer reference obtained.
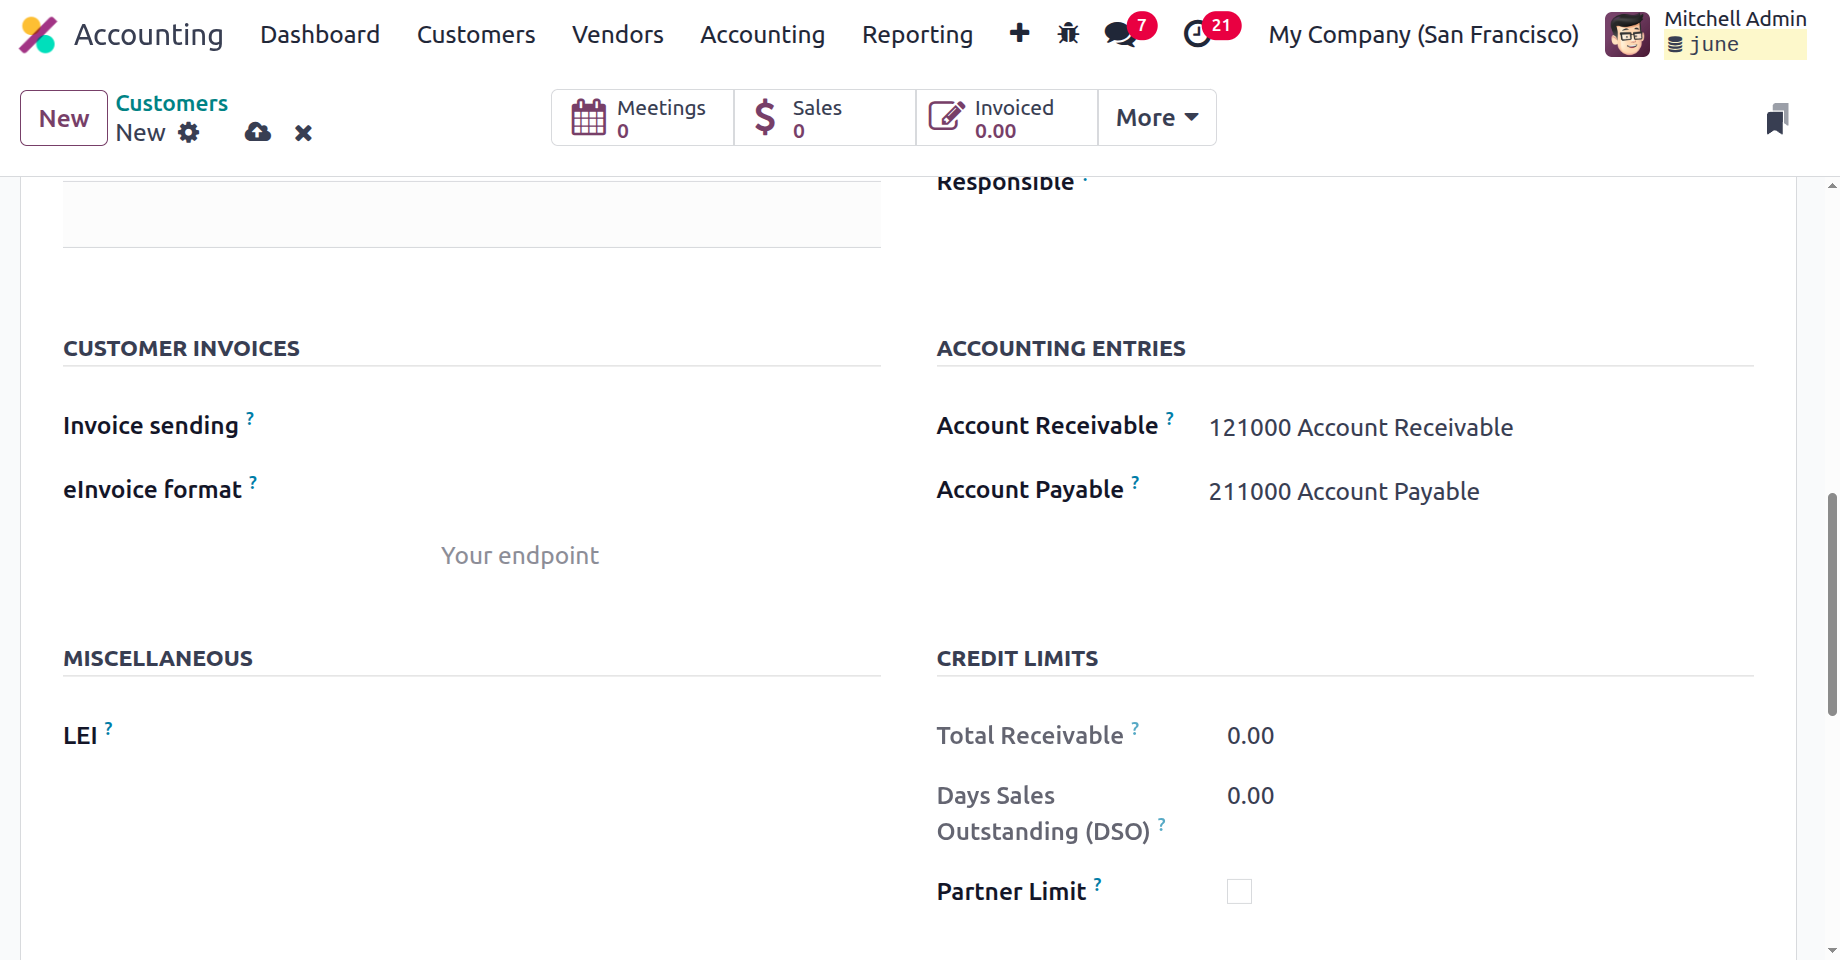
Additionally, the Customer's Accounting element can be specified using the provided Accounting tab. The available drop-down menu options should be used to establish the accounting entry components for accounts receivable and payable. If you need to create numerous accounts, you can use the input Line option to input the company's bank account details. To see a summary of your account details, select the "Accounting" page. When you choose the Add Row option, the menu displayed in the screenshot below is displayed. The account number and bank information can be described here.
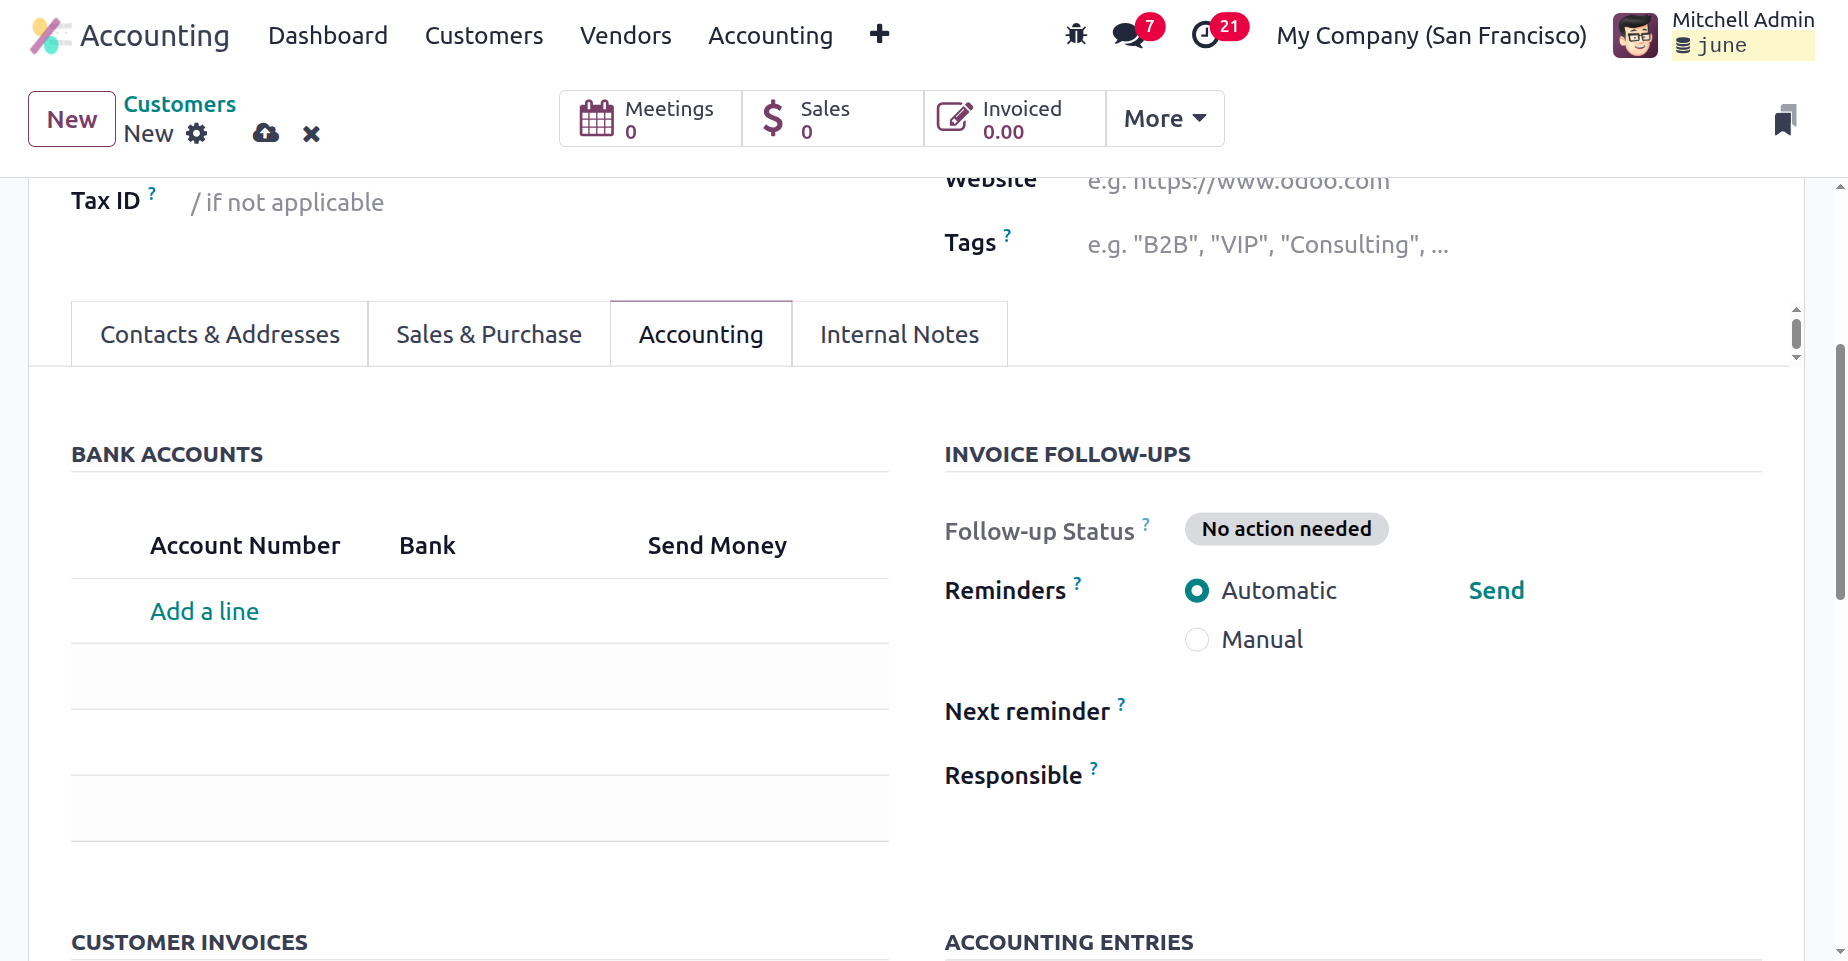
Accounts payable and receivable can be added to the appropriate fields to maintain the accounting entries. You can set the partner's credit limit and the entire amount the customer owes you?which we consider to be the total claim, in the credit limit section.
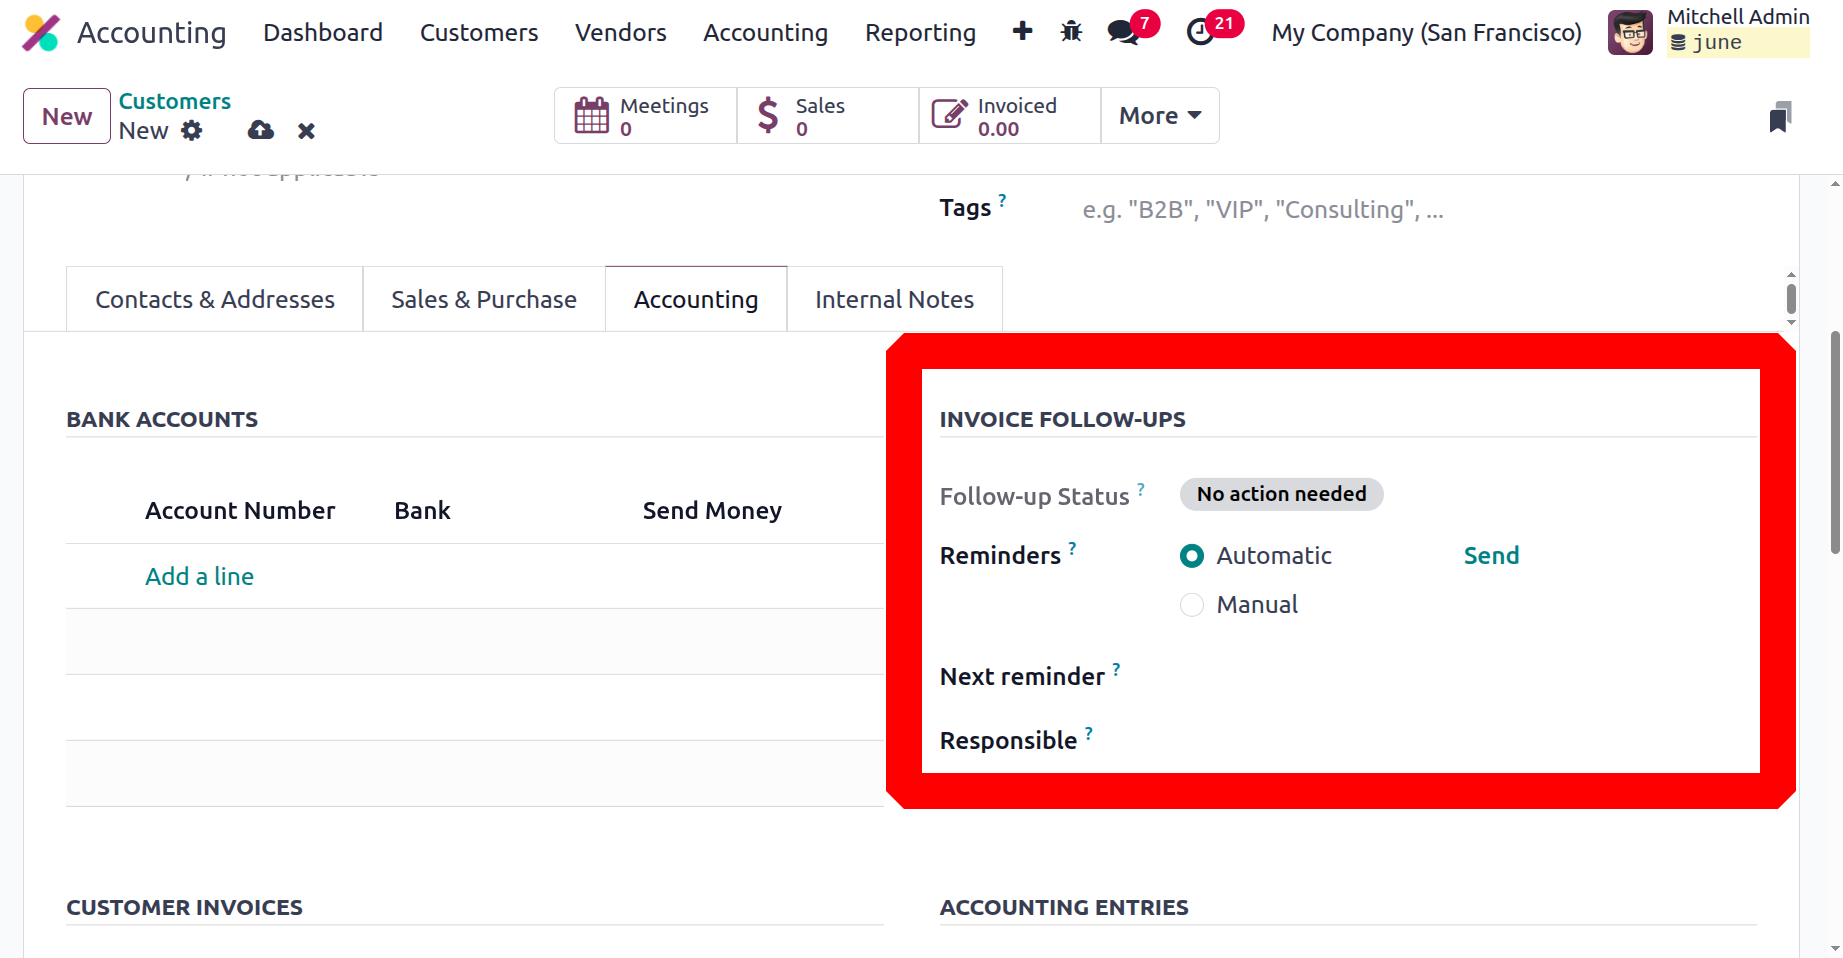
Inside the Invoice Sending, the user can choose the default method for sending the invoice as Download, By Email or as By Post. Then, inside the e-invoice format choose the format for sending electronic invoices.
In Odoo 18, invoice follow-up refers to the procedure of reminding clients about outstanding invoices in order to guarantee prompt payments and enhance cash flow. The Invoice Follow-up Levels contain the Follow-up status Reminders, Next Reminder, and Responsible person, etc.
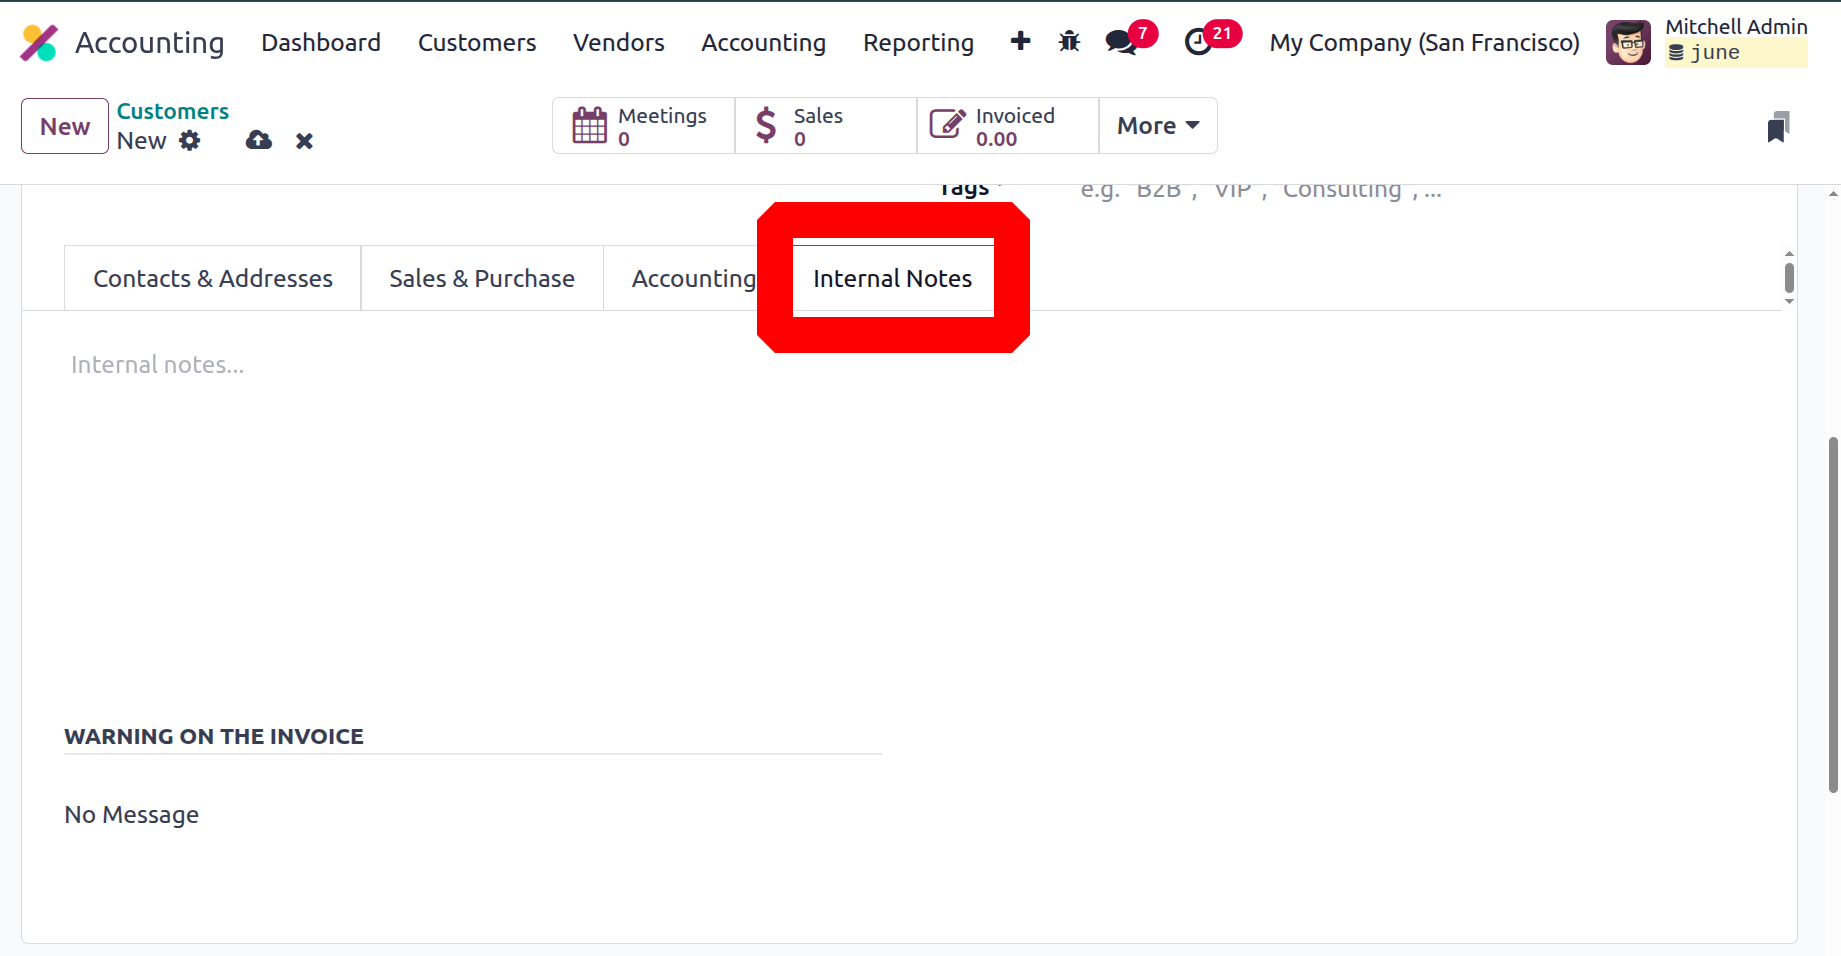
The Internal Notes tab provides an explanation of all the system's internal operations. In this instance, the information can be given along with the invoice caution, which, depending on the circumstances, may also be a notification. Alerts and notifications can be set up independently based on the action's attributes.
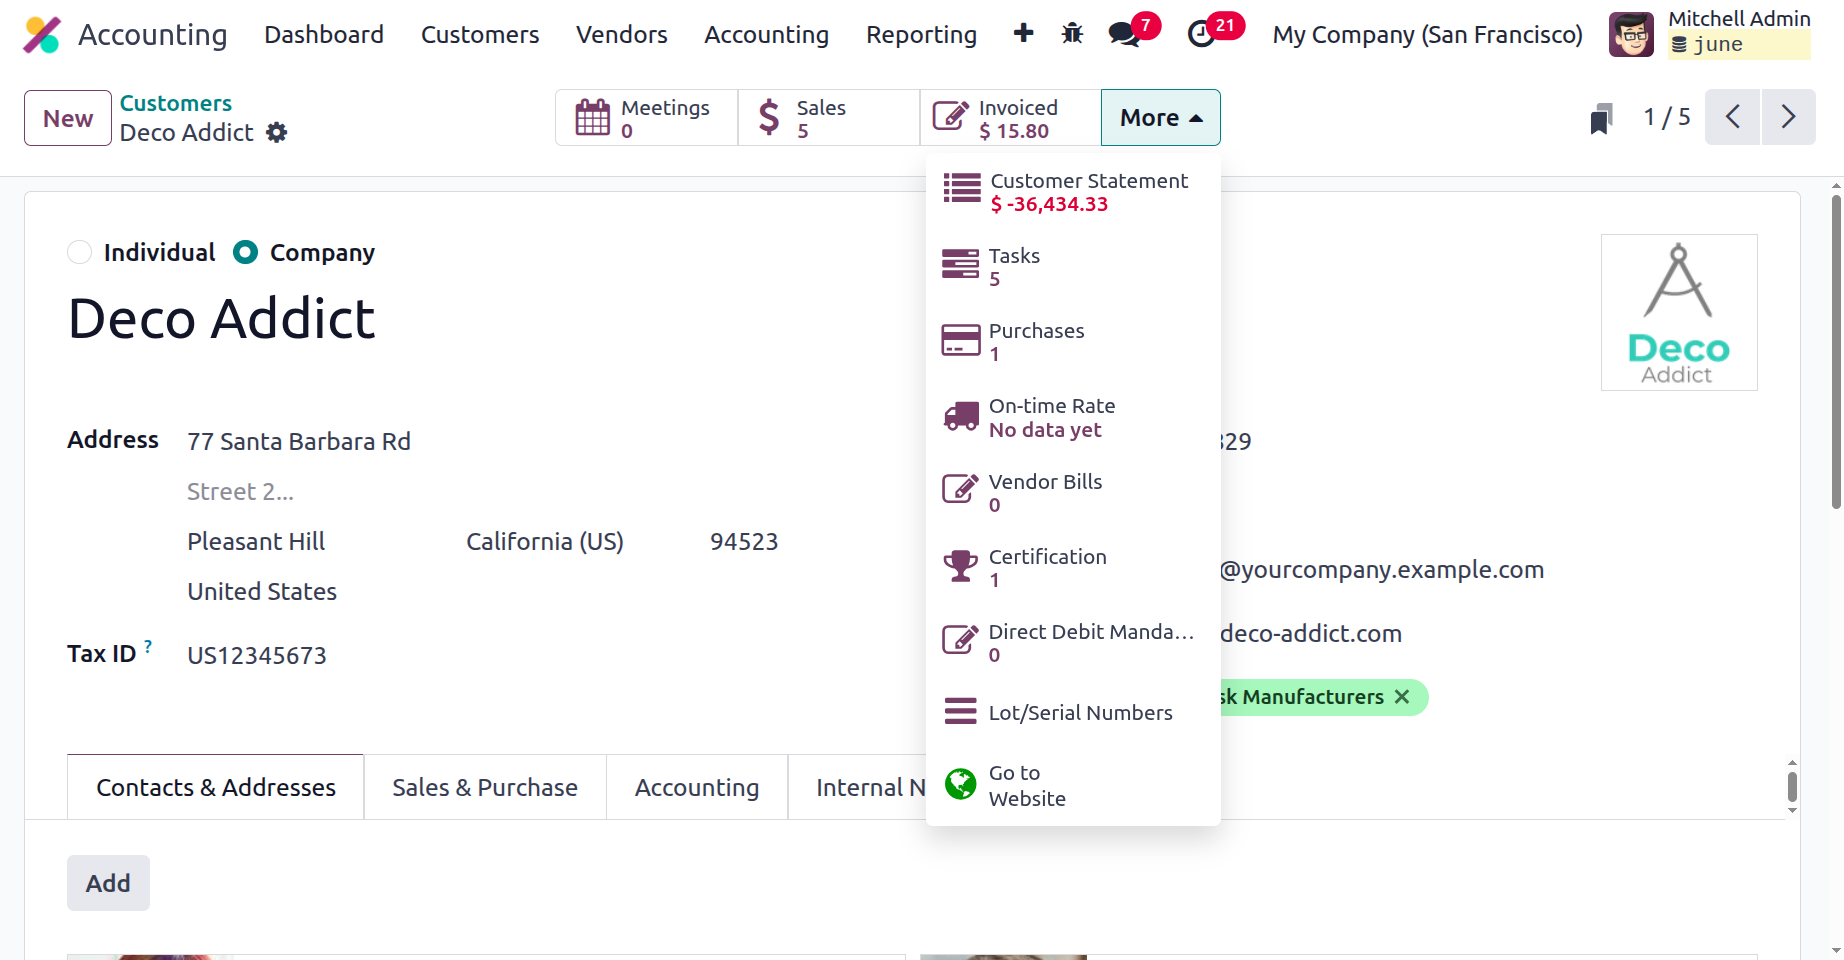
The partner's scheduled meetings, finished sales and purchases, partner invoices and totals, supplier invoices, and the partner book?which contains the partner's debts and claims?are all visible on the partner form's smart tabs.
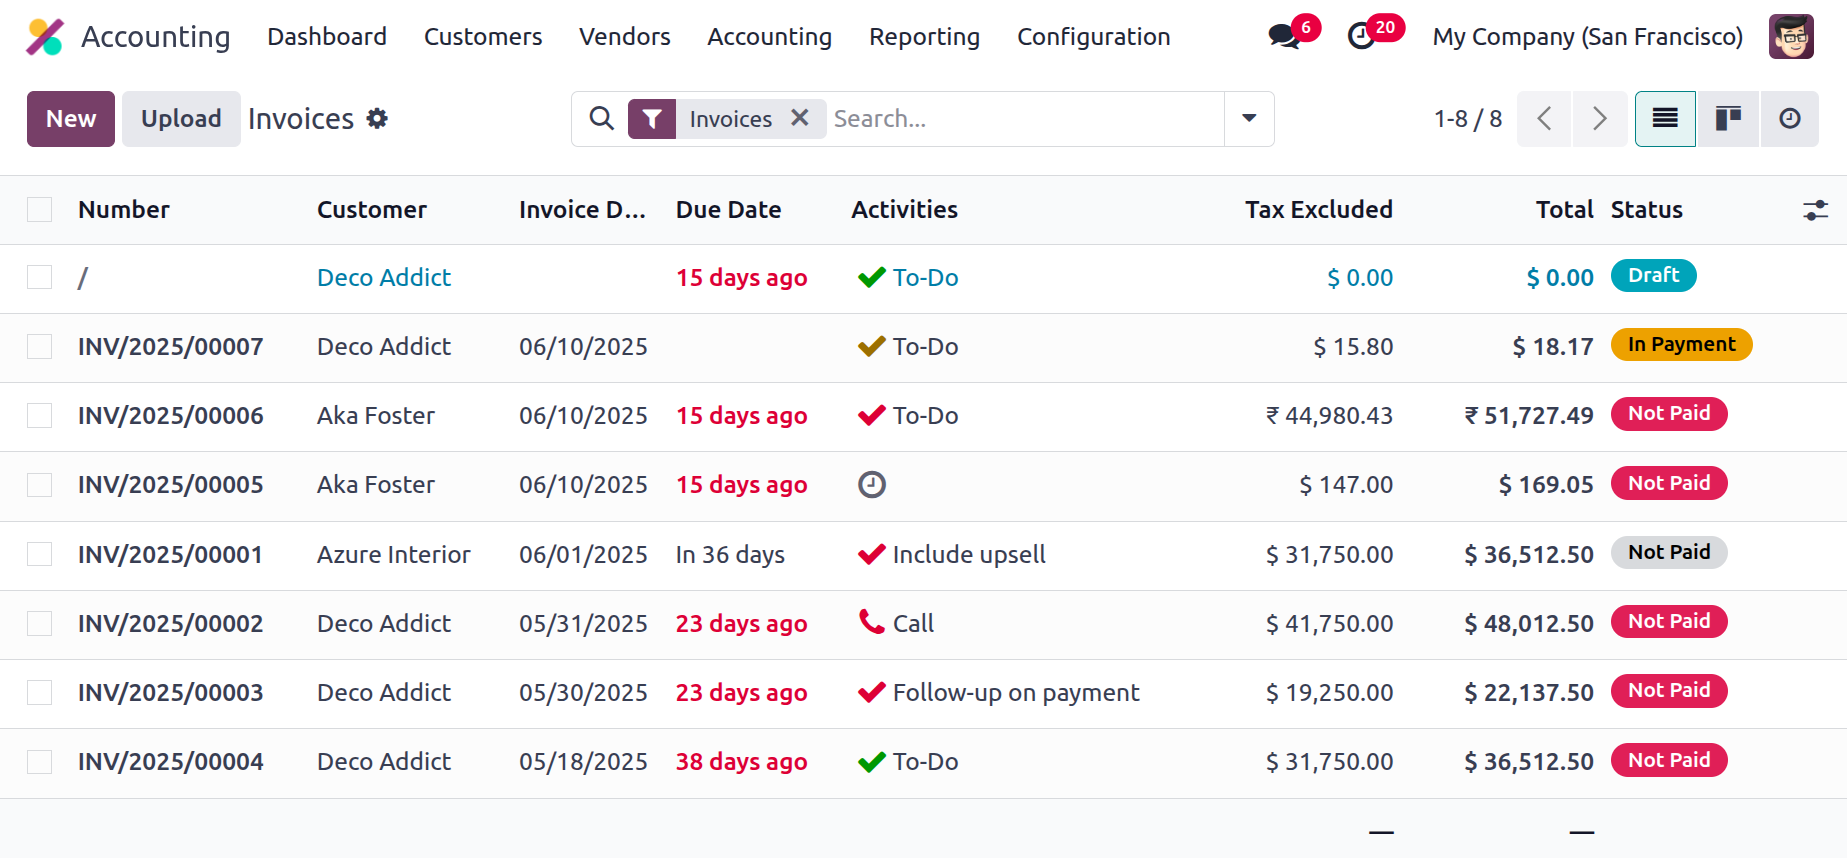
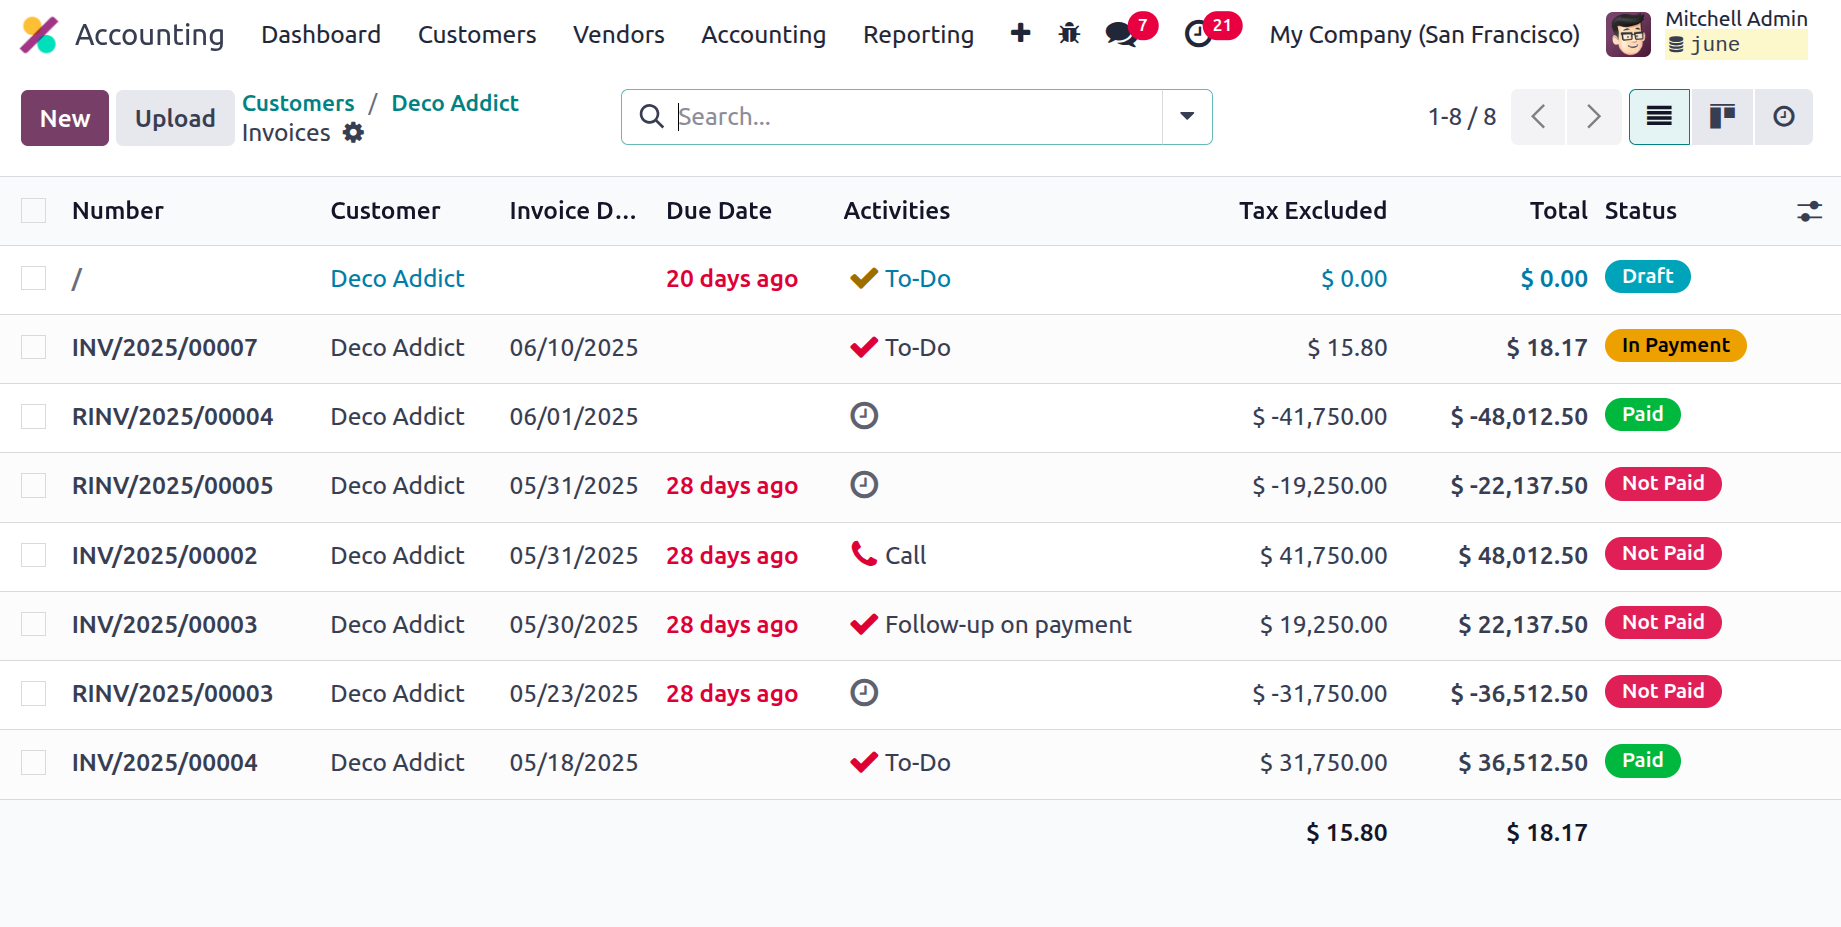
You can also choose the Invoice tab to examine all of the invoices linked to the specific customer, which provides detailed information, as seen in the image below. Customer information, invoice number, Invoice Due Date, Activities, total amount, Tax Excluded amount, and status.
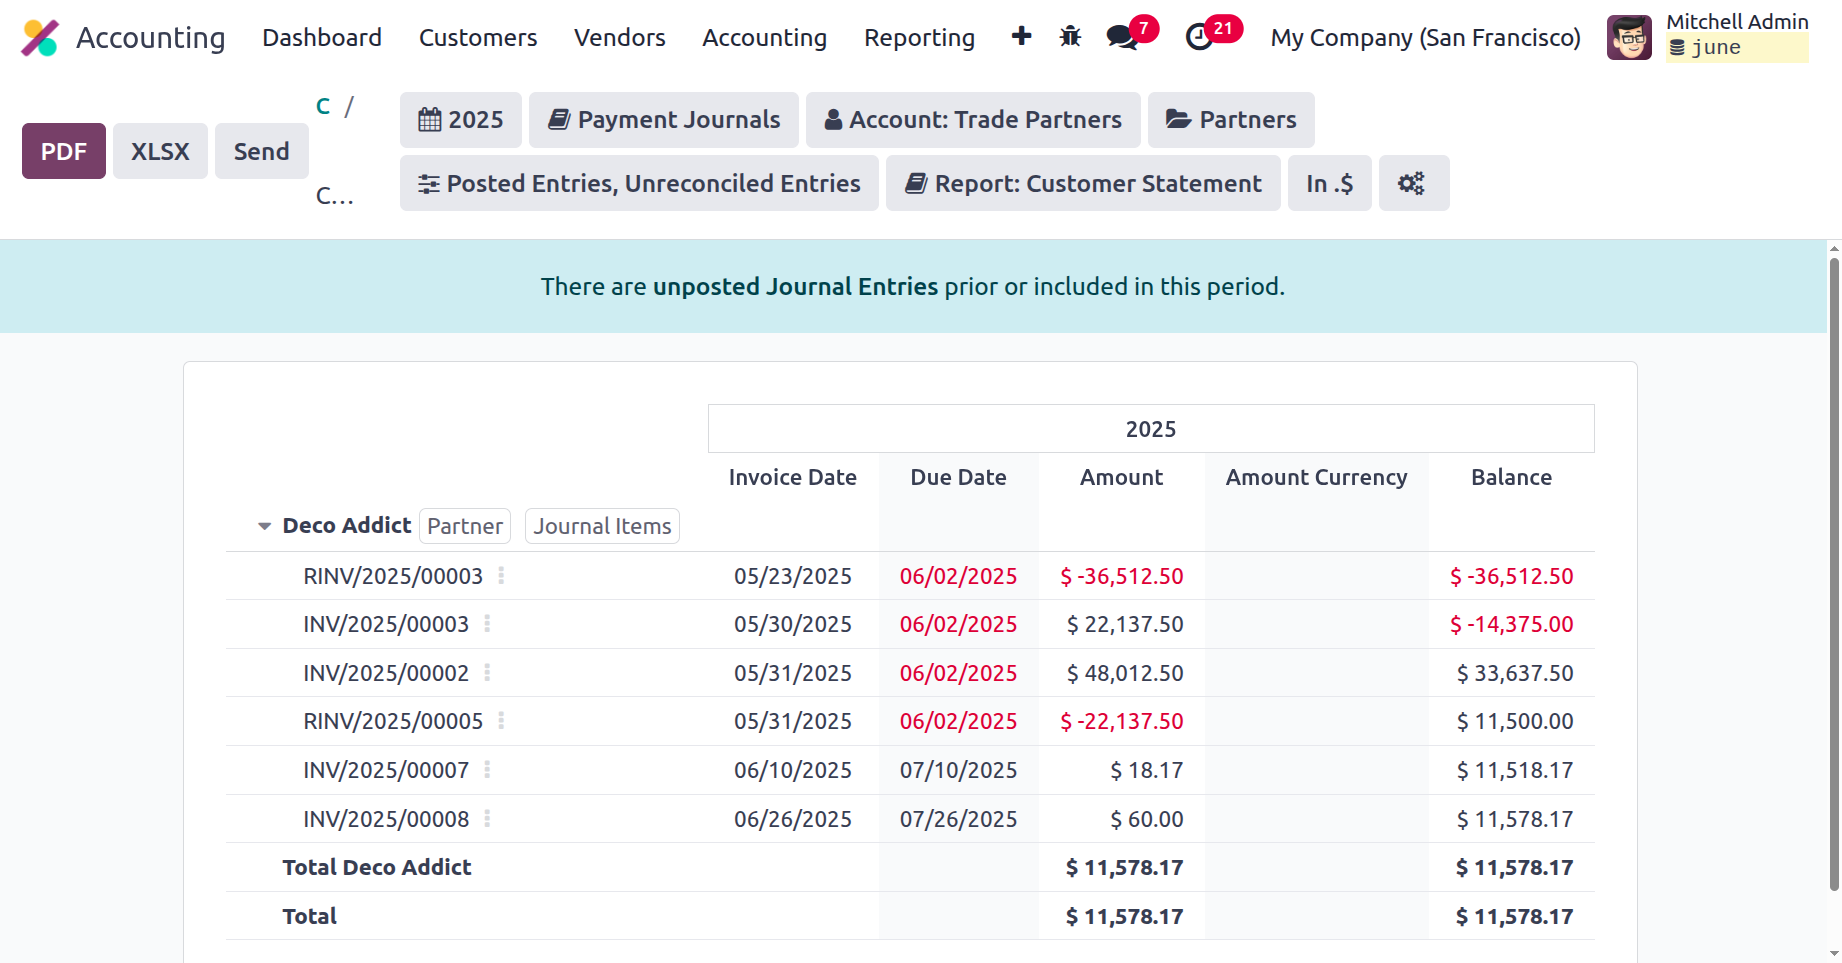
A Partner Ledger will also be created if the client is also a business partner, and it can be accessed by choosing one of the smart tabs named "Customer Statement" in the customer creation menu. Each invoice's description and details, such as its number, journal entries, account details, references, due date, matching number, starting balance, debit amount, and credit amount, will be included in the Partner Ledger.
Following the establishment of each client component, the client may be saved for use in subsequent processes. By selecting the client from the list and then selecting the "modify" option, you may also change the customer data whenever you'd like.
Let's move on to the next section of the chapter, where we'll examine the vendor management features and the various Odoo alternatives, after discussing the various customer management features offered by the Odoo 18 Accounting module.