Translation Settings
For multinational corporations, a business program's Translation Settings feature is an essential tool. It makes it easy for businesses to translate their content into a variety of languages, expanding their audience. Businesses can improve the user experience by utilising this functionality to target their operations and messaging to clients in foreign countries while also taking local rules and regulations into consideration. Furthermore, it could help organisations better understand how their business operations operate and communicate complex information.
In the modern corporate world, every organisation functions both internationally and across multiple countries. Workers are also recruited from other countries. Since the company's corporate website or eCommerce website is viewed internationally, the management team needs to be on the lookout for the need to set up many languages. The system must be able to translate its operations into multiple languages since it is essential to give business management the flexibility to operate in a multilingual setting. Users can choose their preferred operating language, and it has the capacity to be localised thanks to the Odoo platform.
The language and regional settings of an Odoo instance can be altered using the Translation Settings in Odoo 18. Translation options can be used to localise the Odoo interface and content for a specific language, country, or region. This makes it simpler to create an interface that satisfies each user's unique needs in a particular setting. Clients can also customize reports and other materials to their desired language and location using the translation settings.
You can change the language settings and create a multilingual Odoo instance using the Translation Settings in Odoo 18. This feature, which also lets you import and export translations in other languages, lets you manage languages, personalise translations, and more. Odoo 18's Translation Settings are essential since they offer multilingual capabilities, increasing the number of users who may use their Odoo instance. It also helps to guarantee that the content provided to different users is in the language in which they are most comfortable. This feature allows users to access the content in their local language. Odoo allows you to conduct business internationally and offers descriptions in almost every language. Depending on your demands, you can also download the languages you require. We may take a closer look at the Odoo platform's Language configuration tool in the next section.
Language Configuration
Users can install additional languages, set up language preferences, select a default language, and alter language-specific settings using Odoo's Language Configuration feature. The Language configuration menu is located in the Translation tab of the Odoo Settings module.
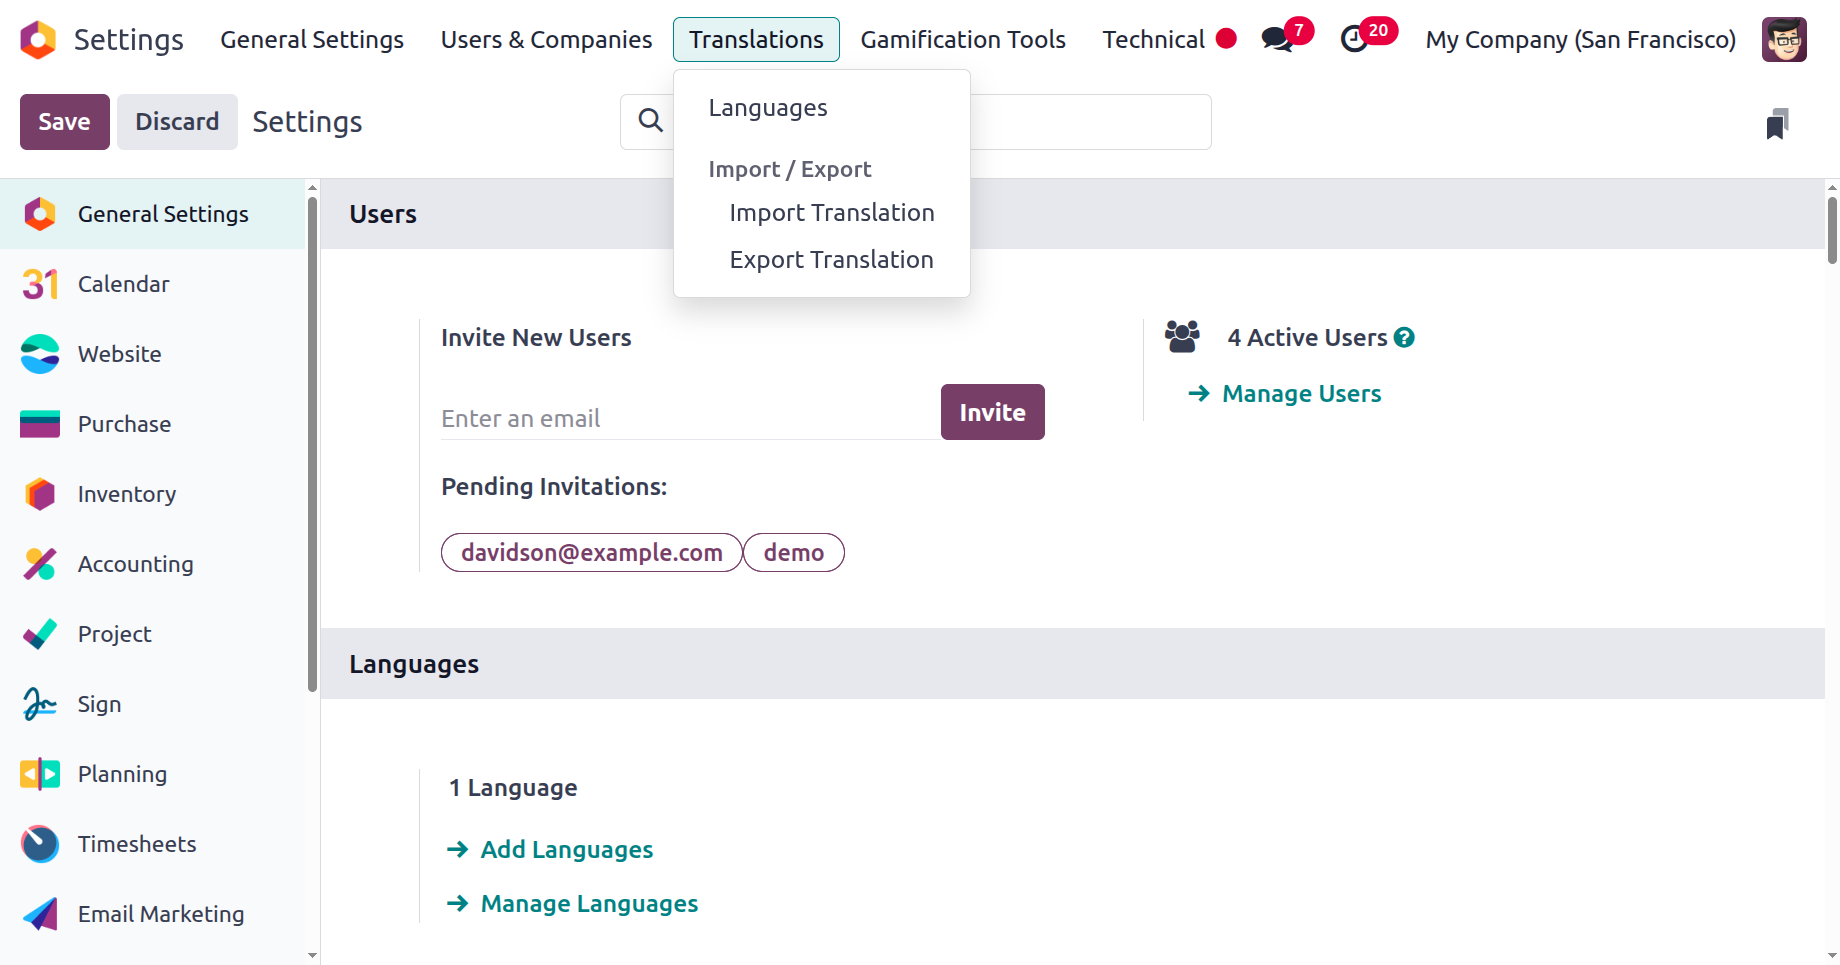
Otherwise, you can find it under the Languages section of the Settings page.
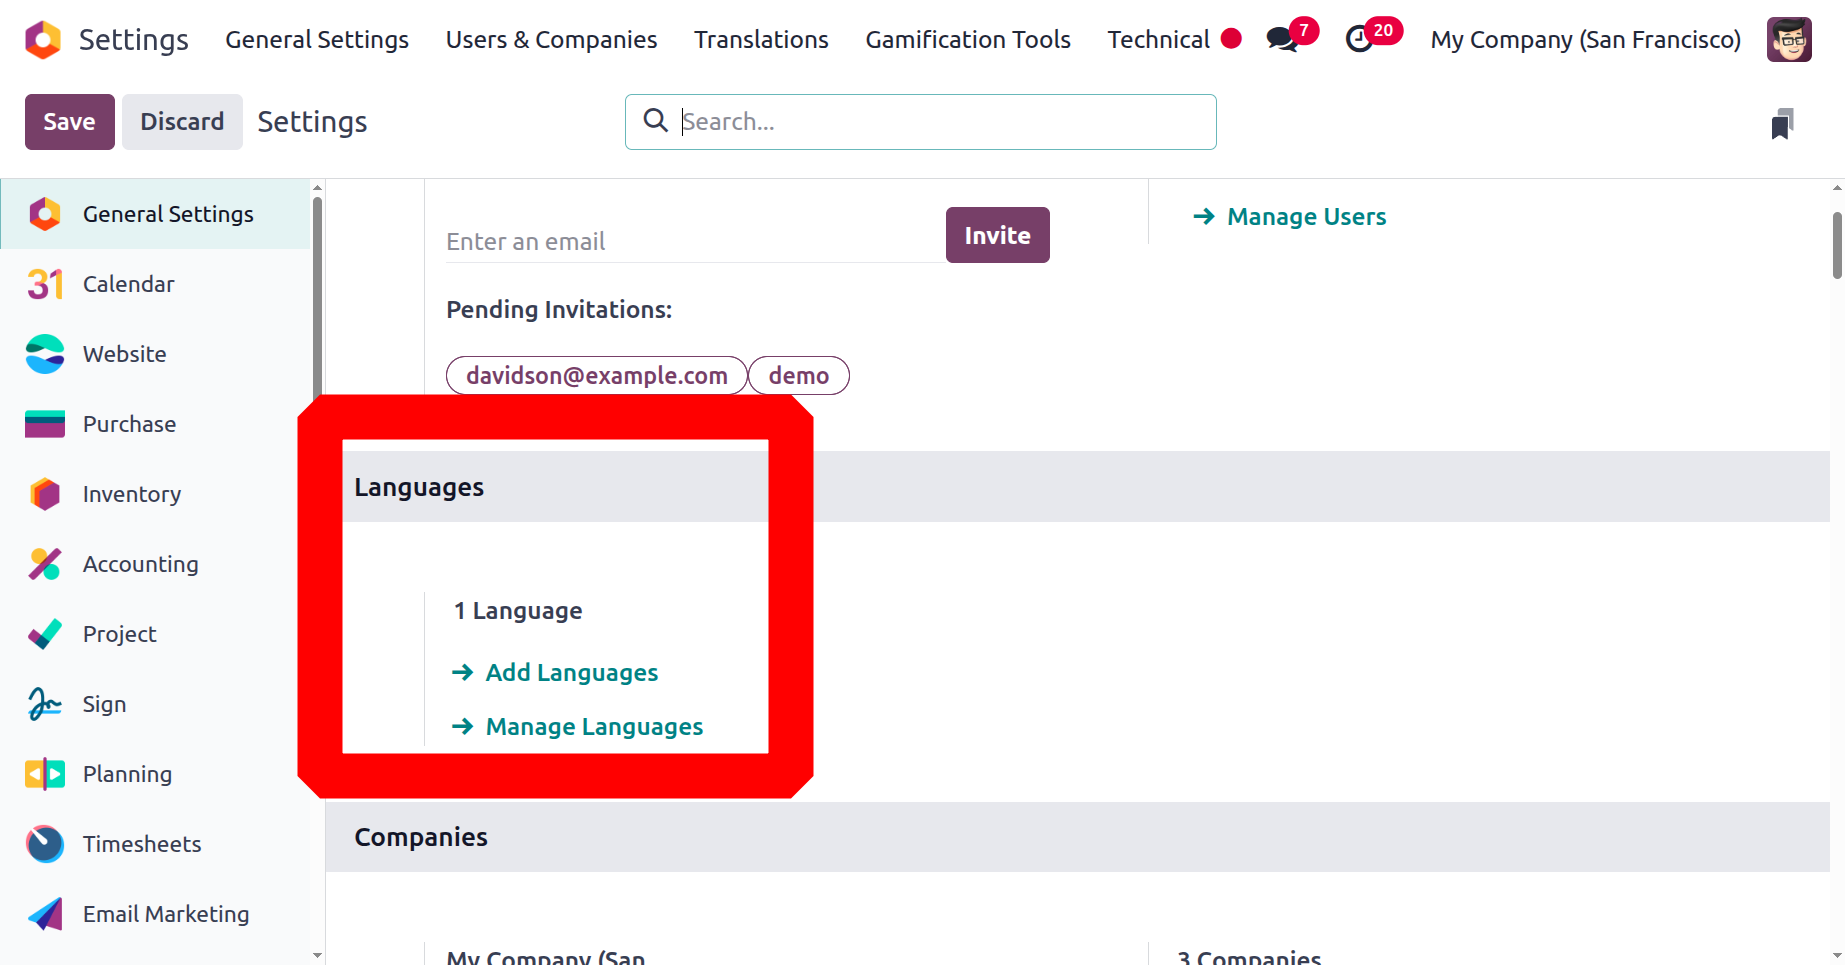
The Add Languages and Manage Languages choices are visible here, and they will assist you in carrying out the necessary operations. It will show up in the Languages window snapshot below.
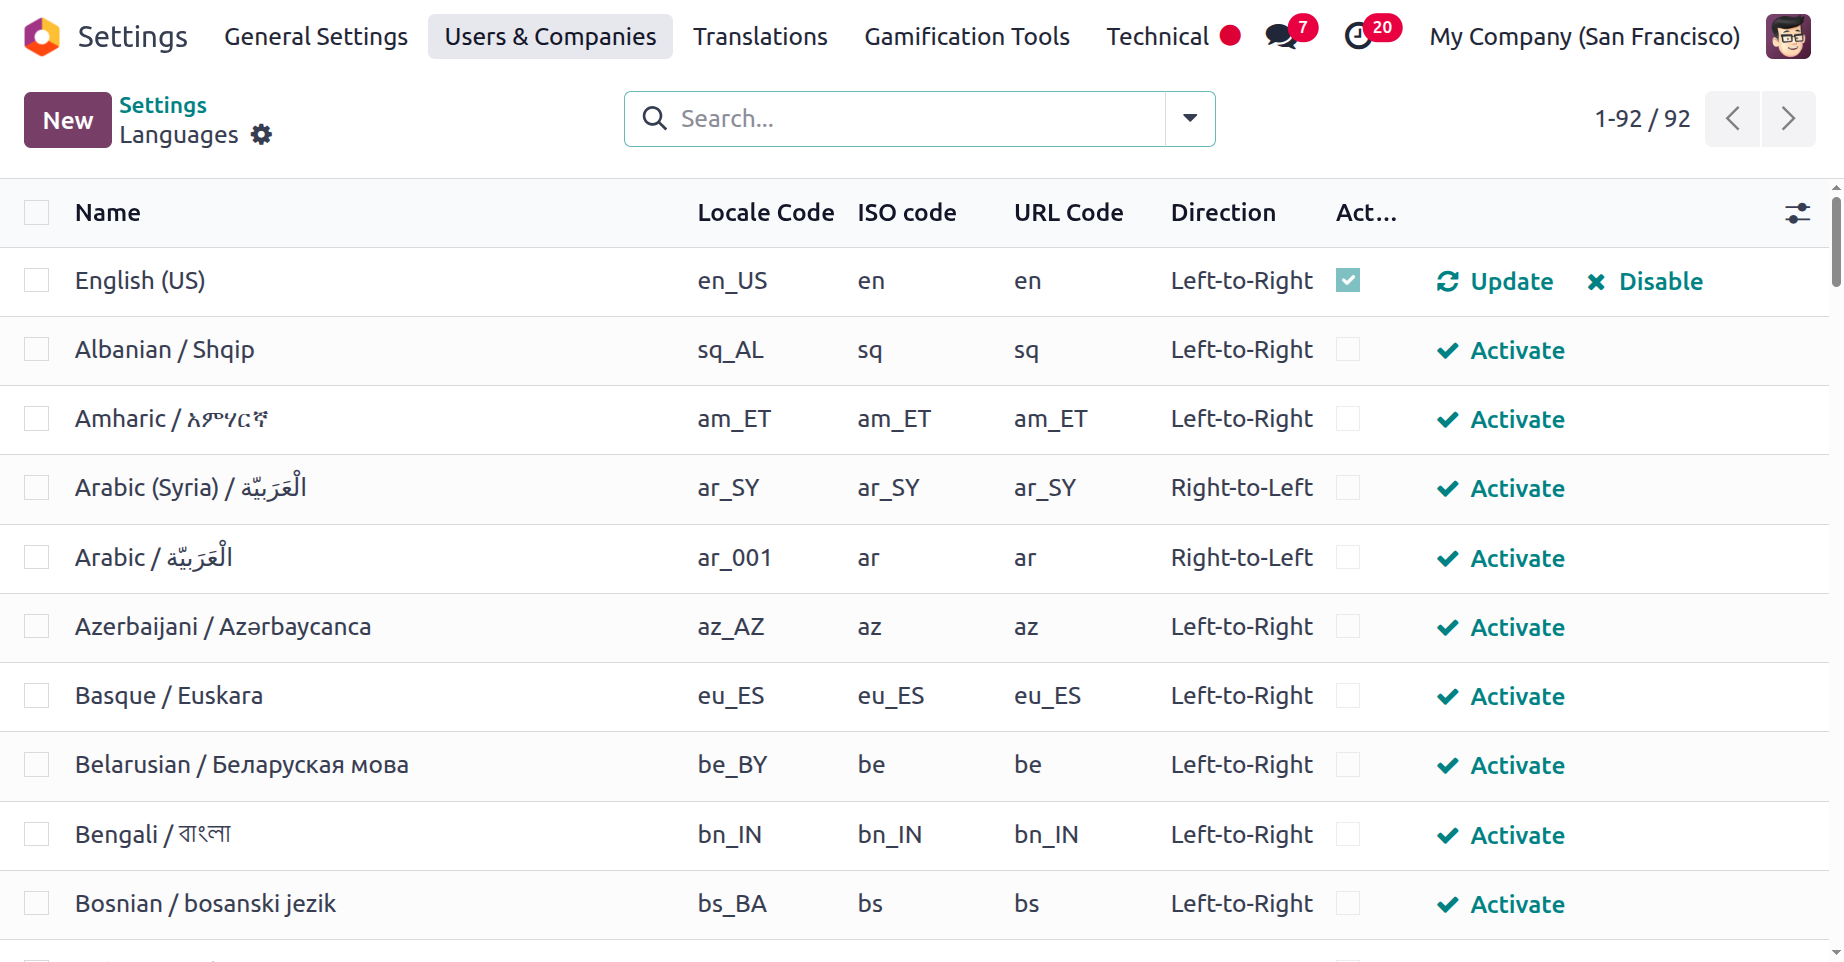
All of the previously entered language information will be shown in a list manner in the Language window. By navigating this window itself, you can see the Locale Code, ISO Code, URL Code, Direction, and a boolean field to see if each language should be active. You can also look through the Update, Disable, and Activate options according to the languages that are active and inactive. You can check the boolean column to enable that particular language.
Likewise, this window contains the Filters, Group By, Search, and Favourites tabs that are found in almost every Odoo platform window. The list of languages can be sorted and categorised using a variety of filters and grouping choices based on your business needs and functions. As seen below, the Save Current Search option is located on the Favourites tab. For future use, the personalised one can be saved and added to the favourites list.
Furthermore, every language record displayed in the menu can be selected, thoroughly examined, and given the opportunity to modify some aspects if needed. If you need to set up a new language for your business, you can utilize the establish button, which is in the window's upper left corner. The creation form that the system will now display is seen in the screenshot below.
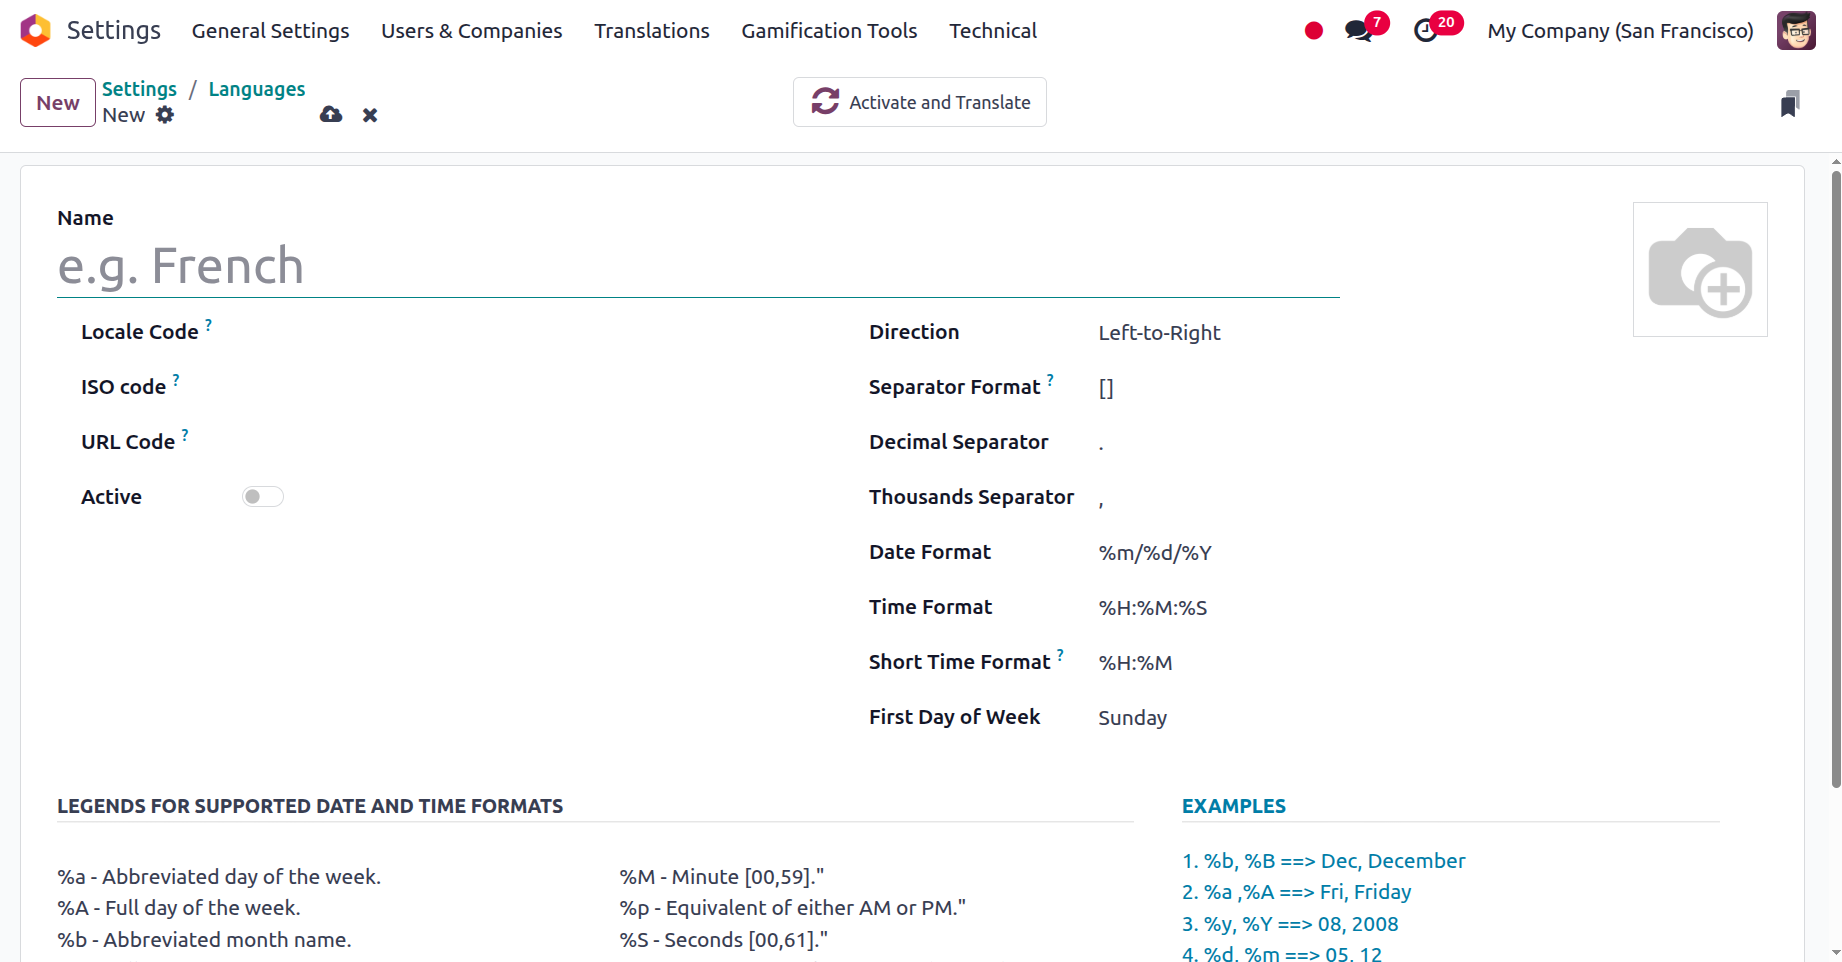
You can enter the language's name in the Name field, which is the first thing you need to configure in the Language configuration box. The next step is to type the locale code for the language in the appropriate box. The ISO Code, where you can choose the names of the PO files to be used for translations, must then be provided. It is therefore possible to describe the URL Code, which is the language code that appears in the URL. This element is followed by the Active field, a boolean field that can be used to activate the language.
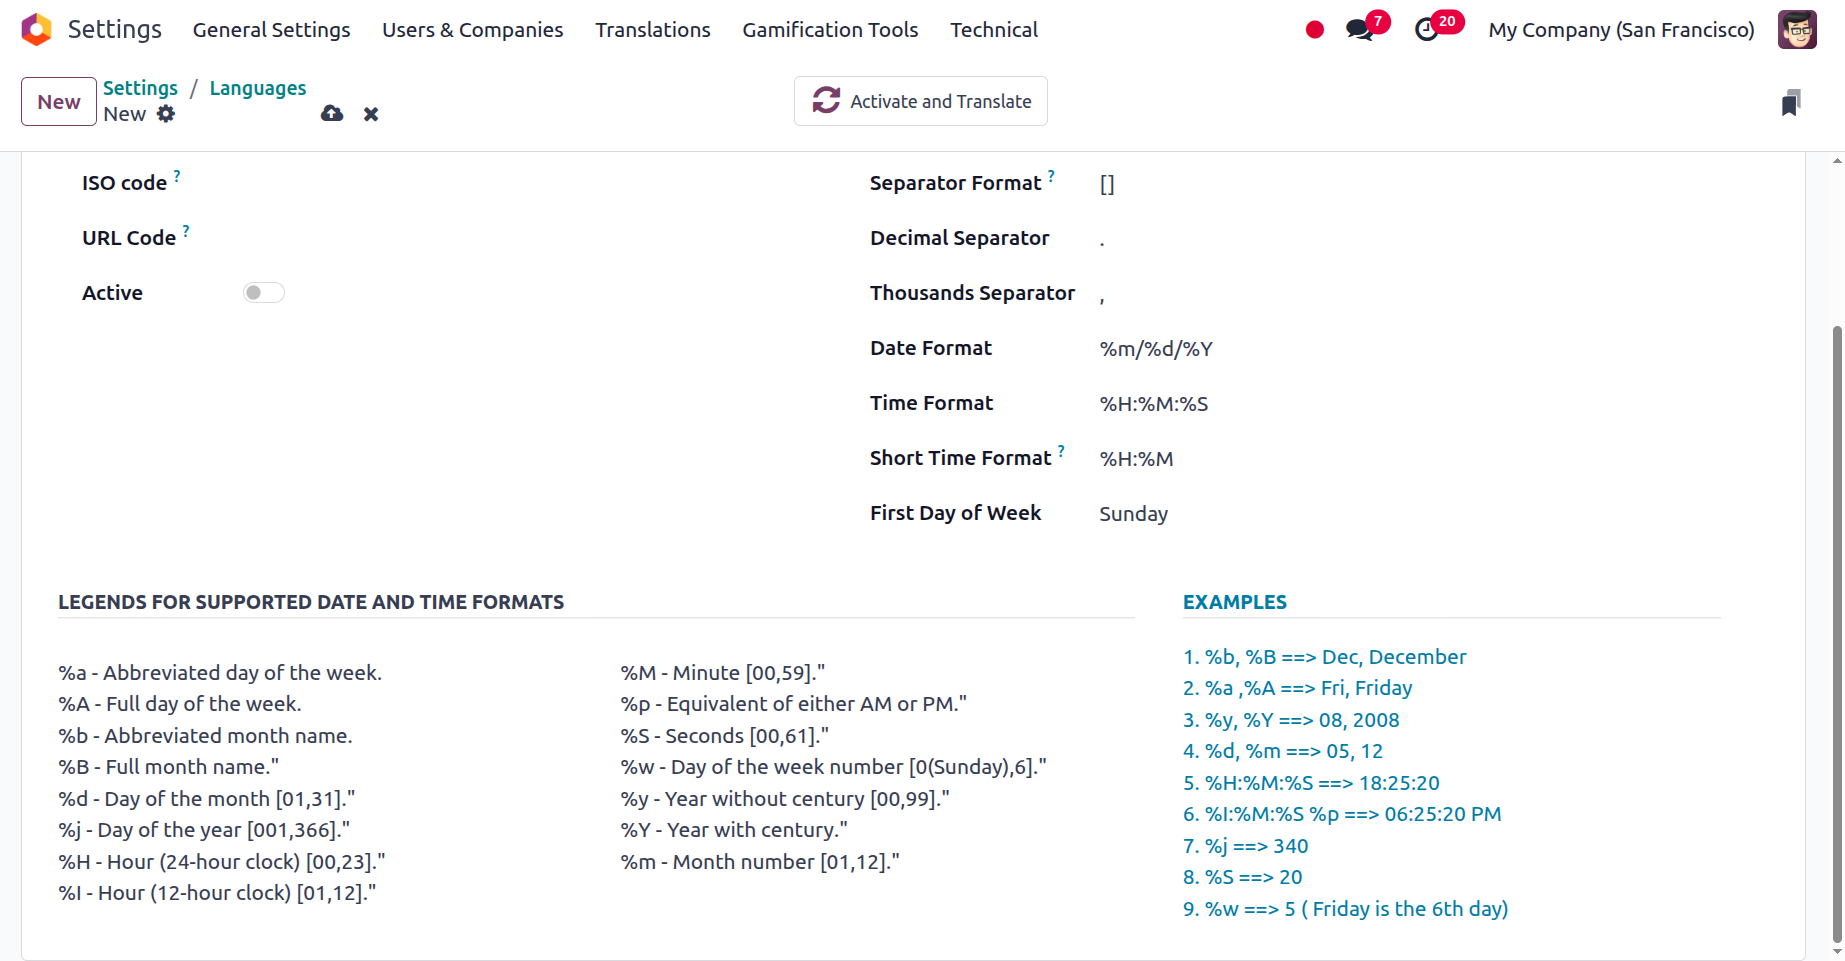
Additionally visible is the Direction box, where you may choose between two possible directions: left-to-right and right-to-left. The Separator Format can then be brought up. You can also choose a suitable option to complete the sections for Decimal Separator and Thousands Separator. Next, in the designated space, the Date Format can be provided. The field can also be assigned the Time Format and the First Day of the Week. With the use of the Edit option, you may submit an image related to the language to the photo upload area located in the upper right corner of the window.
Along with all of these options, the window also has a separate section where you can look at Legends for the many forms of dates and times as well as examples related to the operations, which will help you learn how the language works.
Besides these choices, there is a clever button called 'Activate And Translate,' which is located in the top right corner, as seen in the picture below.
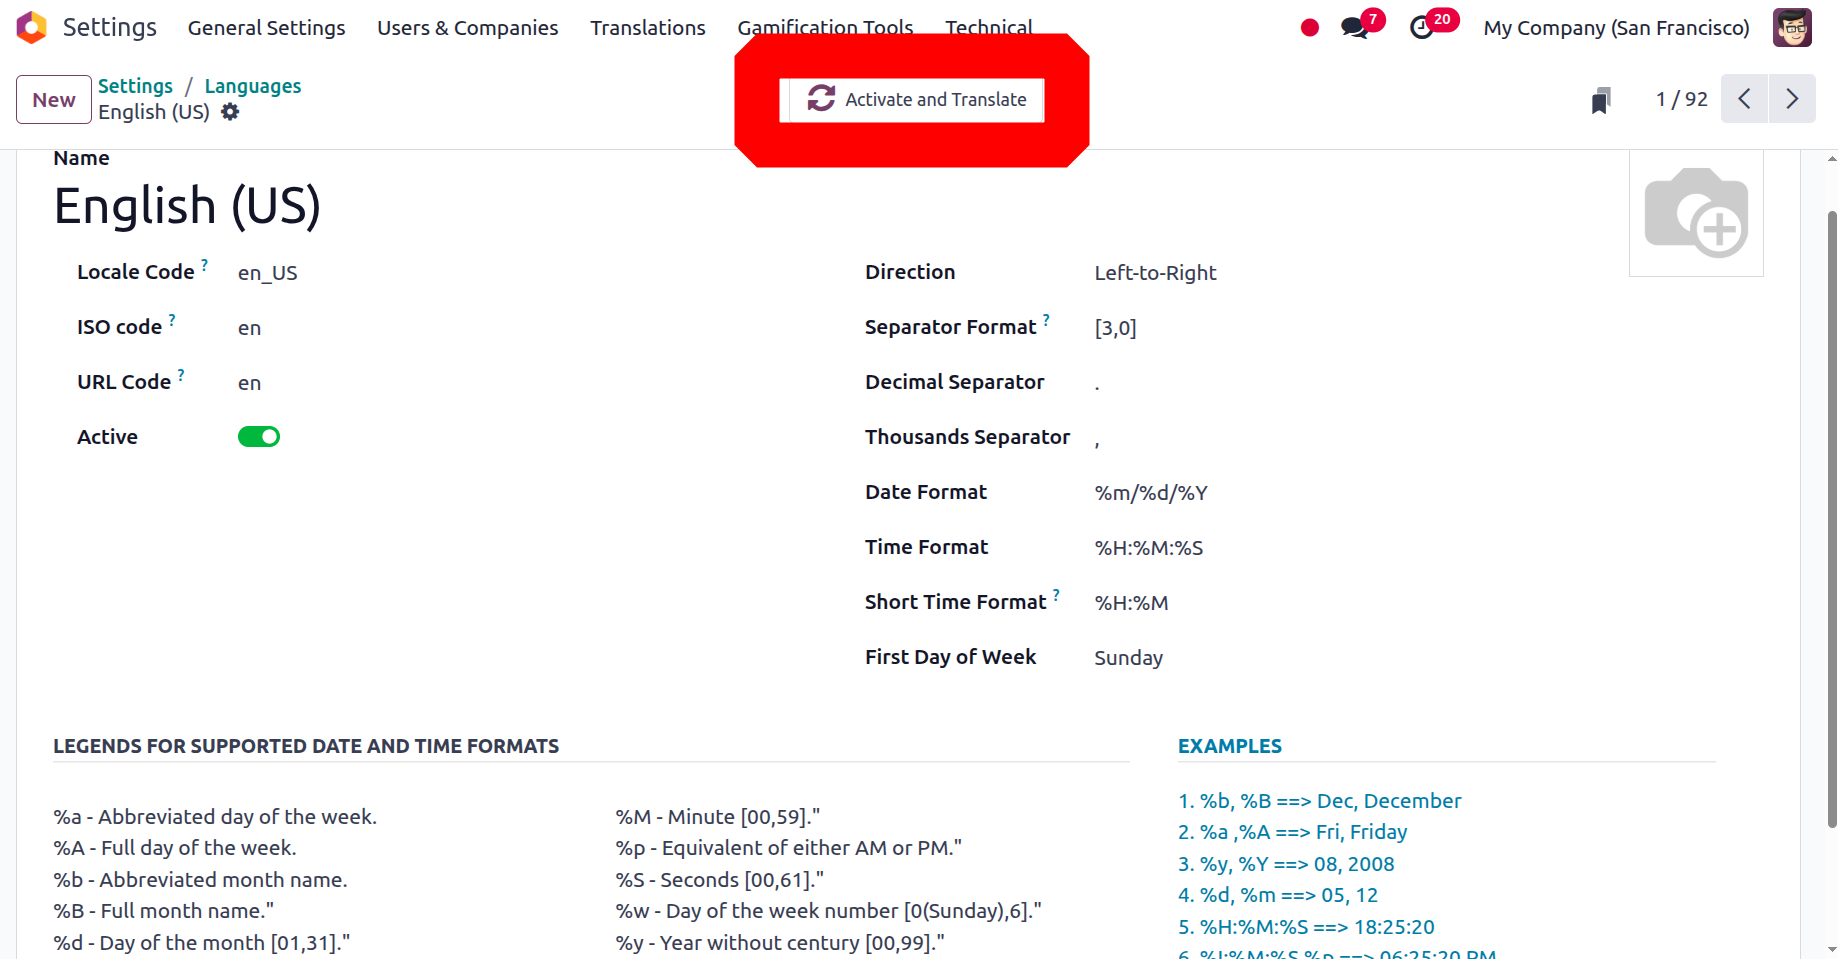
You may quickly activate and translate a language by pressing this clever button. With the help of this, you can then start translating the data and using language. It allows you to switch between languages quickly. As can be seen below, the system opens a new pop-up window with several fields when you click the button.

You may quickly activate and translate into a language and its associated documents in the system by using this window to add a language. You can therefore choose the languages you wish to add using the dropdown menu. Next is the Overwrite Existing Terms box. This field can be checked or left unchecked based on the user's selections. You can override words that are already present in the languages they are translating after you activate this option. If a user wants to update existing translations or add new ones, this option is useful. This means that your personalised translations will be superseded by the official ones. You may then choose which websites you want to translate by pressing the button.
The selected language and all of its translations for all of the system's documents will now be downloaded and installed by the Odoo system immediately. Users can choose their chosen language from their options. This makes language switching easier and faster in a multilingual environment.
We have already covered the Odoo platform's language configuration features. In the following section, we may examine the Sequence Number Modification features of the platform in relation to accounting activities.
Sequence Number Modification Operations
In a commercial setting, sequence numbers are used to track and arrange data. Purchases, invoicing, shipments, inventories, and client orders are just a few of the many uses for them. They also aid in guaranteeing data entry consistency and accuracy. Because sequence numbers can be used to individually identify data or transactions, they are also utilized to assist in enforcing security measures. In order to maintain data integrity, it also assists organisations in identifying data that has been added or modified.
Sequence number operations are encouraged by the Odoo ERP, which will improve the management of all important documents used in business operations. In addition to offering information on the kind of document activities in which the sequence numbers are described, these numbers are crucial for day-to-day business processes. This will serve as a tool for identification, which is highly beneficial for cooperative corporate operations.
As previously stated, the Odoo Accounting module's Sequence Number Modification feature is an automated procedure that aids in changing the system's pre-existing sequence numbers. For a variety of documents, including purchase orders, invoices, sales orders, journal entries, and other documents, Odoo automatically generates the sequence numbers. In order to keep the accounting data organised, these sequence numbers are crucial.
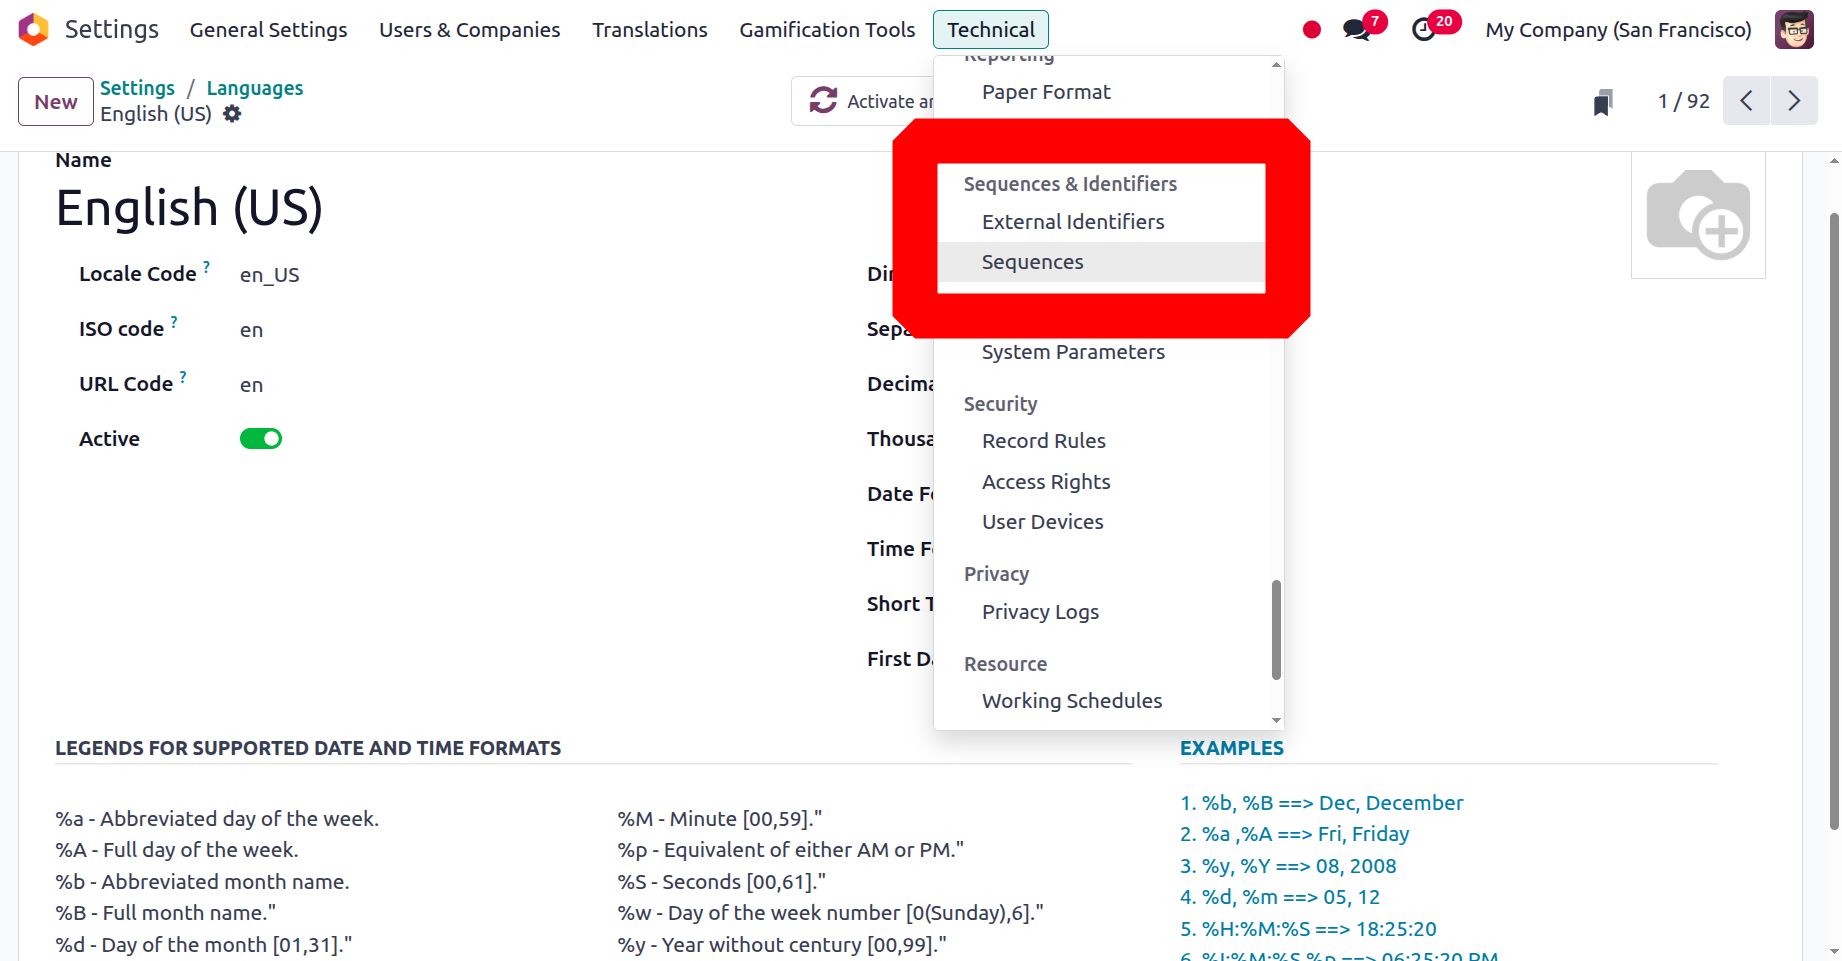
Sequence number operations can be readily adjusted to meet the functional needs of your company's operations. Only after you enable the Odoo system's developer mode will you be able to modify the Sequence Number. You can accomplish this by navigating to the General Settings tab and selecting the Activate developer mode option by scrolling down.
You will have access to more options and tools for more complex operations after you activate the Odoo platform's Developer mode. As shown in the screenshot below, the Sequences menu is located in the Sequences & Identifiers part of the Settings module, under the Technical tab.
As seen below, a clever menu click will bring up the Sequences panel, where you may control the sequences.
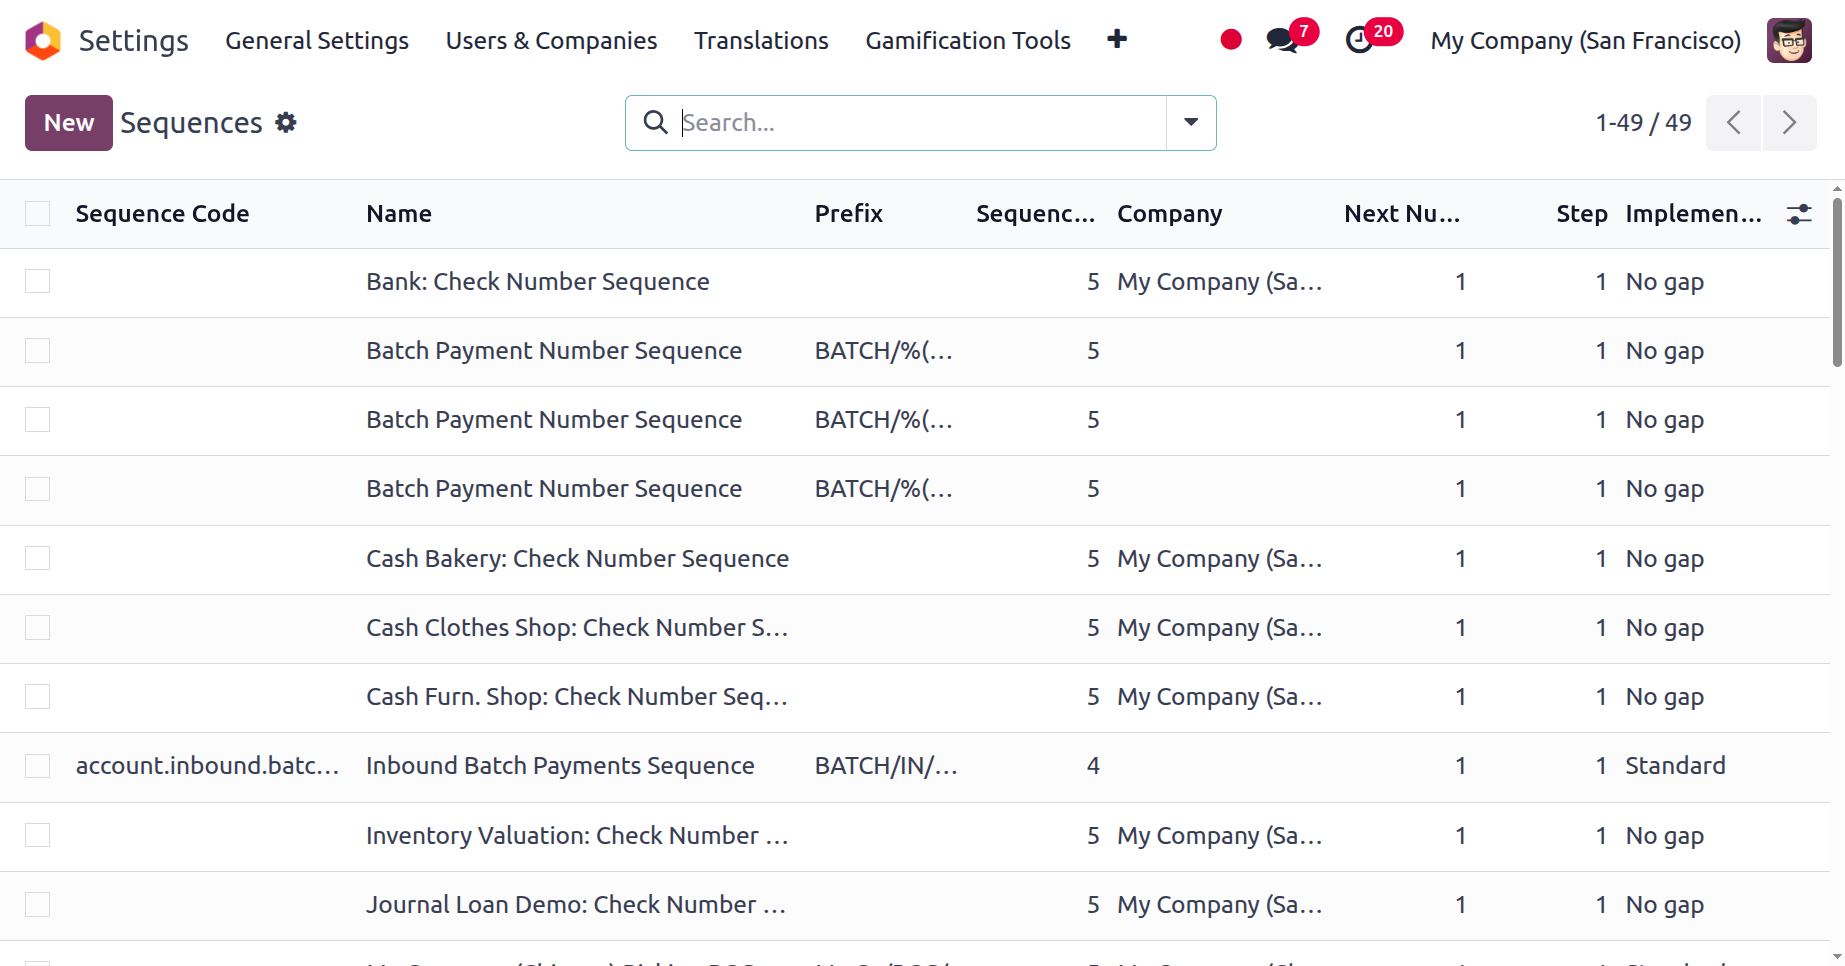
All previously defined sequences will be shown in preview form in the Sequences window, along with the following details: Sequence Code, Name, Prefix, Sequence Size, Company, Next Number, Step, and Implementation. As we can see in any Odoo platform window, this window also offers a variety of sorting features. It is easy to remove the necessary sequences from the entire list using the default and customisable filtering options found under the Filters tab. Additionally, you can use the sort By option to classify and sort the sequences according to different purposes.
When you click on the Favourites button, a dropdown menu will appear with the options to Save current search, Import records, Link menu in spreadsheet, and Link list in spreadsheet. Similarly, by selecting the "Export All" button, you can export every detail in the window to an Excel file. You may quickly look up the necessary sequences that you specified in the platform by using the Search box.
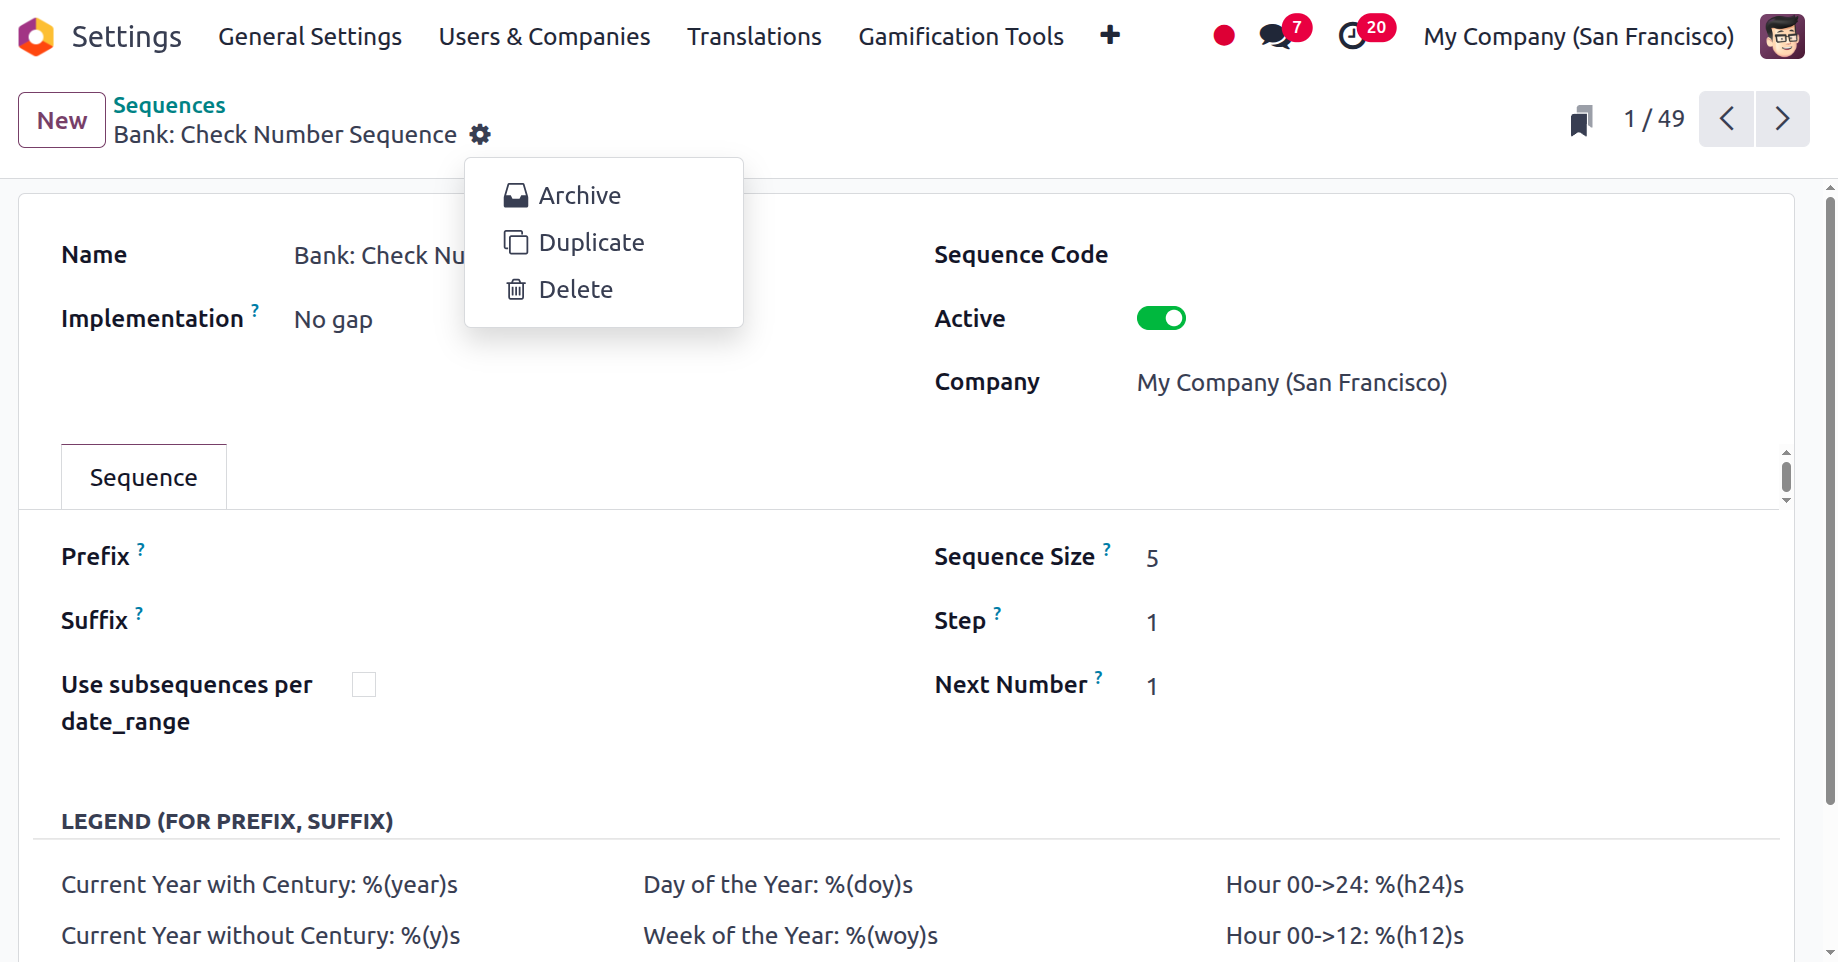
It is possible to pick and view each and every record that is already set up in the platform. Additionally, you can make changes to the sequence's current details and use the Action button to carry out other activities. The Archive, Duplicate, and Delete buttons are part of the Action button located on the upper right corner. These buttons can be used to execute the relevant actions.
To create a new sequence, click the New button located in the upper left corner of the Sequences pane. The image below shows how the new creation window will appear.
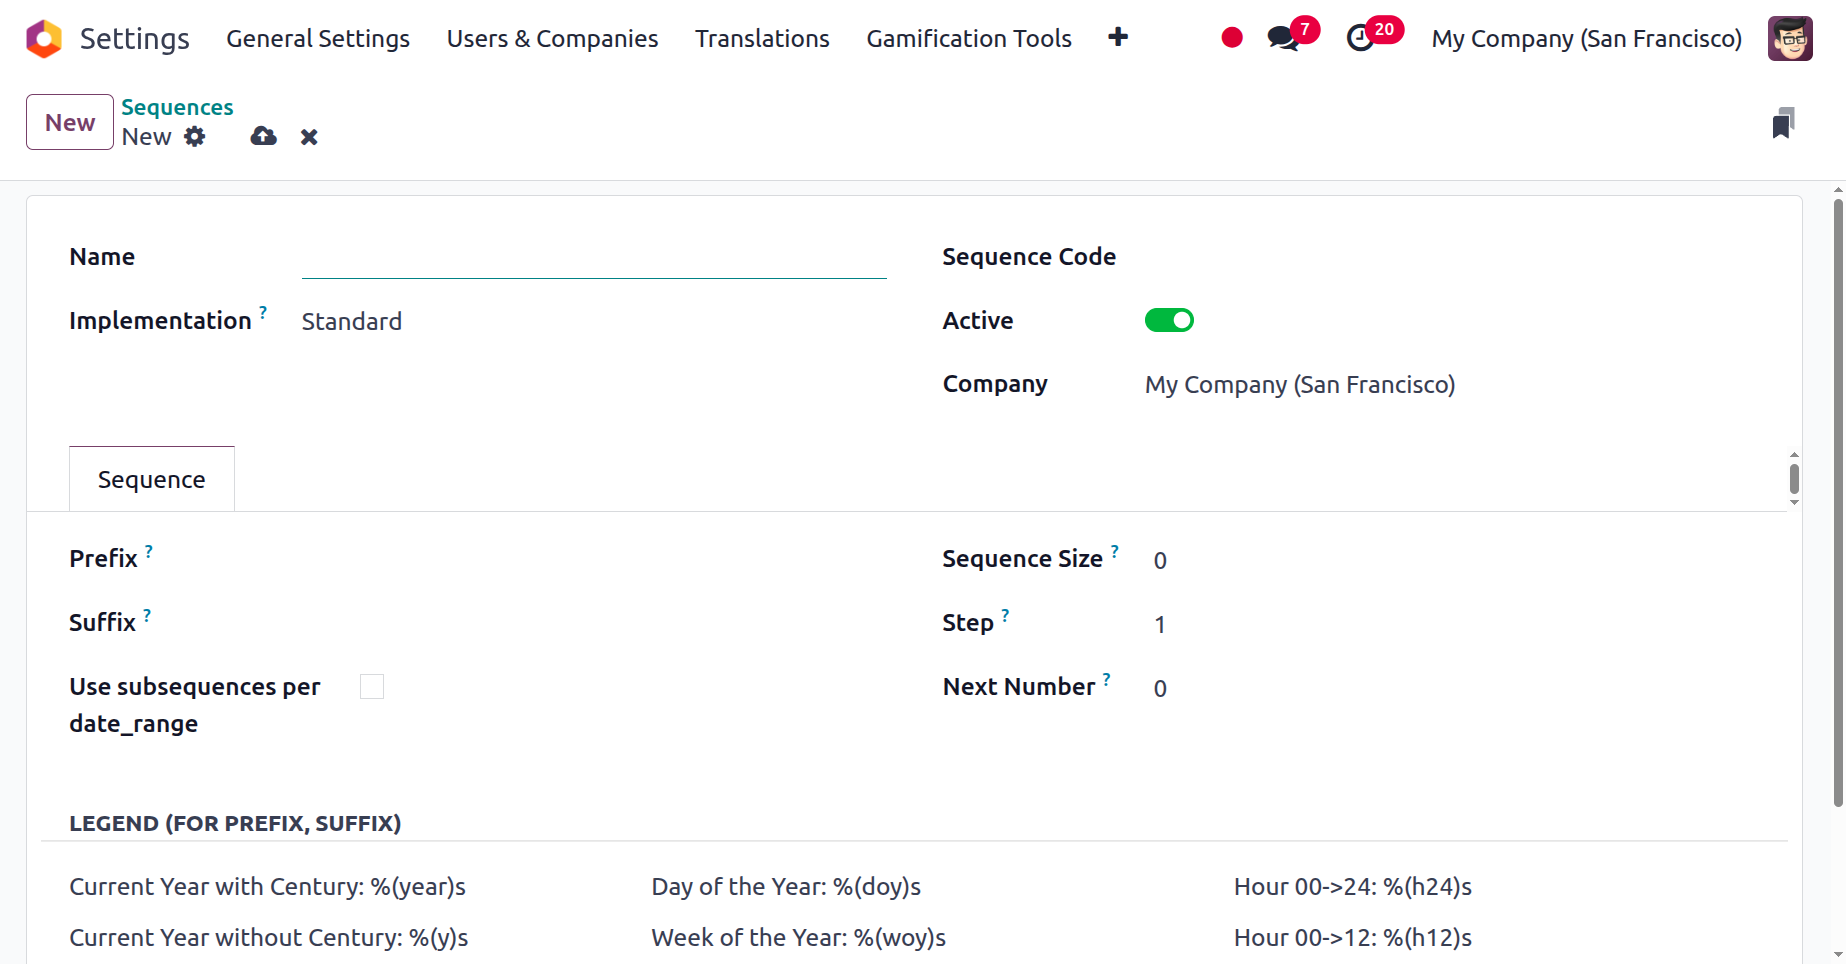
Initially, the Sequence's name can be assigned in the Name column. Then, using the dropdown menu, you can select "Standard" or "No gap" for the implementation detail. When choosing whether or not to leave a space between the numbers of two successive sequence numbers, these alternatives are helpful. The "No Gap" sequence implementation makes sure that every prior sequence number has been assigned before allocating a sequence number to a record. There may still be gaps in the sequence if records are removed, even though this sequence implementation will not skip any sequence numbers upon assignment. Compared to the normal version, the "No gap" implementation is slower.
The Sequence Code can be set after this field has been defined. Depending on your preferences, you can either enable or disable the Active field. You can activate this boolean field to make the corresponding sequence active. The Company field, which is particularly helpful for managing numerous firms of operation, will automatically display the company related to this operation.
You can provide the sequence configuration elements under the Sequence tab, where you can configure the record's prefix value for the sequence using the Prefix field. Likewise, the suffix value of the record for the corresponding sequence can be entered into the Suffix field. Additionally, the Sequence Size will be set to zero automatically, allowing Odoo to automatically append "zero" to the left of the "Next Number" in order to obtain the necessary padding size. Additionally, the corresponding field allows you to specify the Step of the operation according to your preferences. Consequently, this number will be added to the sequence's subsequent number.
The "Use subsequences per date_range" field is then displayed; it can be used to configure the specifics of the subsequence operation. As you can see in the screenshot below, when you enable this option, you will draw additional lines to add the details.
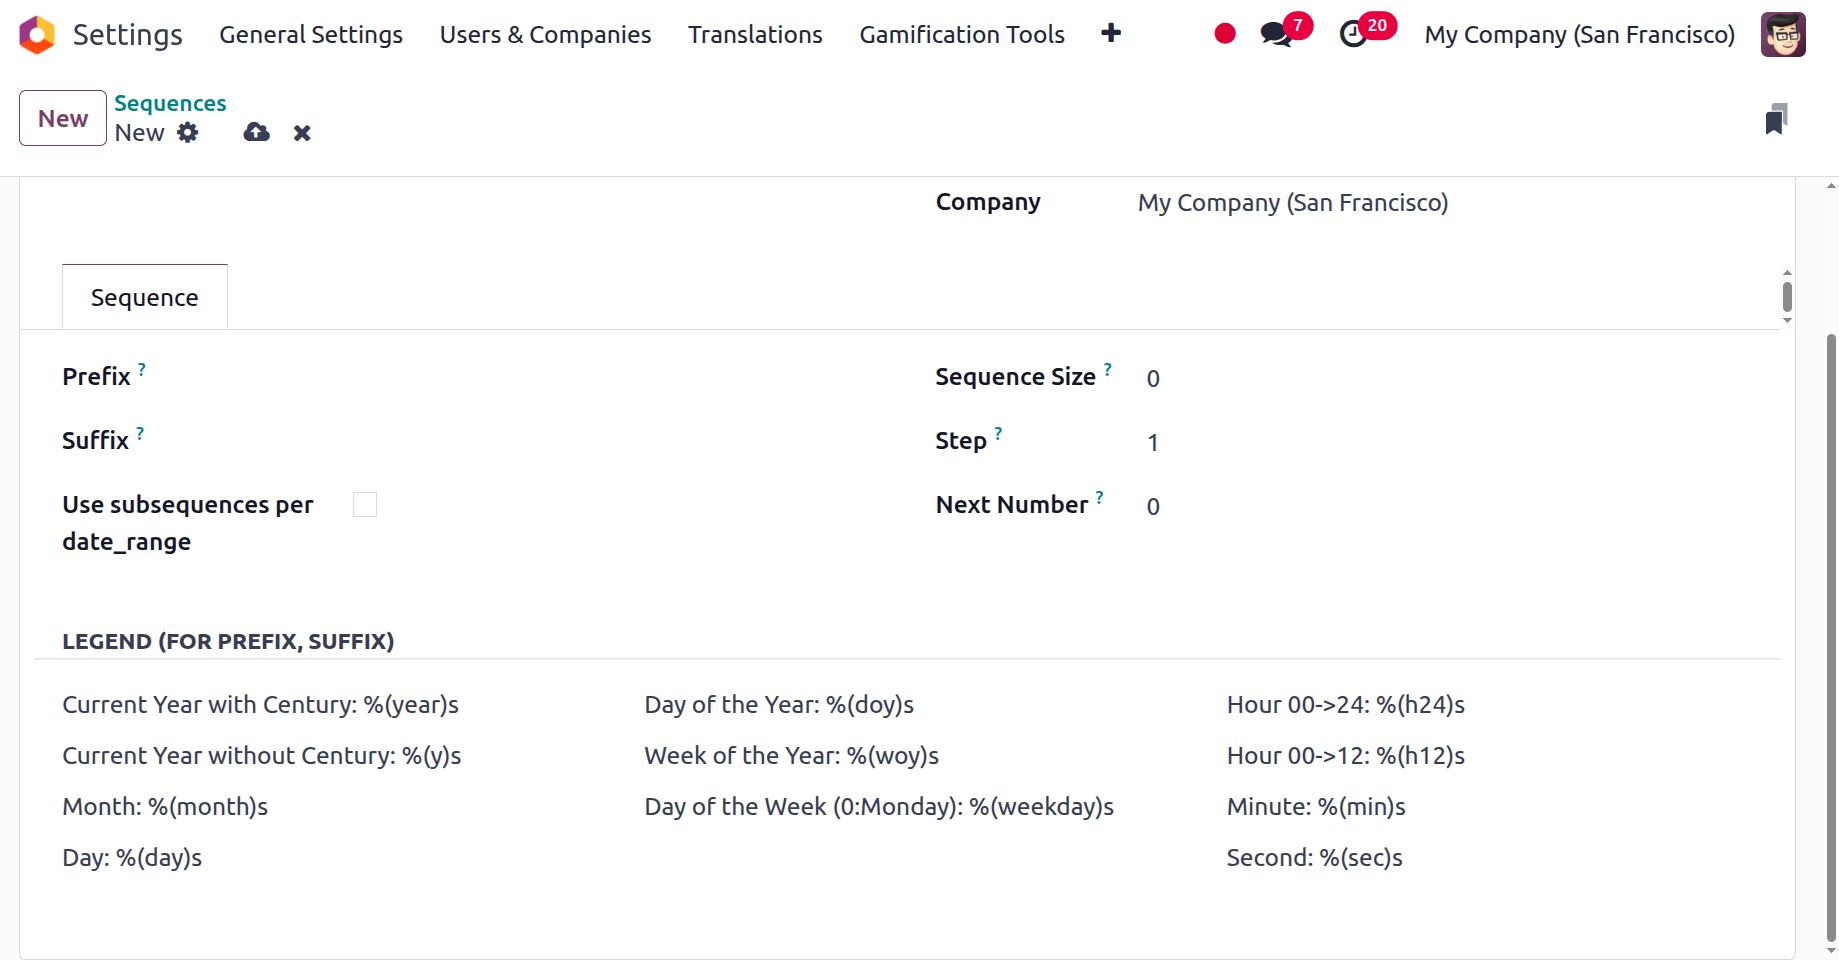
You can add the details by selecting the Add a line option. The system will display the calendar pop-up in the "From" and "To" columns for inputting the details. By specifying the From and To dates as well as the Next Number of the sequence, the dates of the sequence operation may be easily set using this calendar pop-up. You can see the delete option in each line, which you can utilize to eliminate the corresponding sequence operation if necessary. As seen in the screenshot below, the LEGEND(FOR PREFIX, SUFFIX) part contains the operational features of the prefix and the suffix.
The sequence procedures related to the operation of the many papers and businesses in your organisation can be systematised with the aid of this Odoo feature. With this specific menu, Odoo permits the necessary changes to the way the firm operates.
You will have a thorough understanding of the Admin Settings setups utilising the Odoo platform and its advantages by consulting this chapter. A significantly enhanced version of Odoo, Odoo 18, assists you in configuring the platform to meet your company's needs. We thoroughly examined the Odoo instance's User Settings, Company Settings, Translation Settings, and other features.
An exclusive look at Storno Accounting, a new accounting feature added to the Odoo 18 platform, will be provided in the upcoming chapter. This feature enables you to correct financial transactions that are incorrect by reversing the original transactions and recording a new, corrected one. By doing this, you can make sure your book stays current and correct. Additionally, Storno Accounting streamlines the process of correcting inaccurate transactions and reconciling your finances. The Accounting Firms mode, which was added in Odoo version 18, is also examined in this chapter.