Reconciliation Models
When it comes to reconciling account transfers in the Odoo18 Accounting module, a Reconciliation Models tool is really useful. This tool allows you to pick and reconcile many move lines simultaneously. This tool is crucial in Odoo18 Accounting to ensure that the books of accounts and the real transactions are in sync. This is achieved by comparing the transactions recorded in the books of account with the actual transactions, then adjusting the entries as needed. This process ensures the accuracy of the financial statements and protects against financial irregularities.
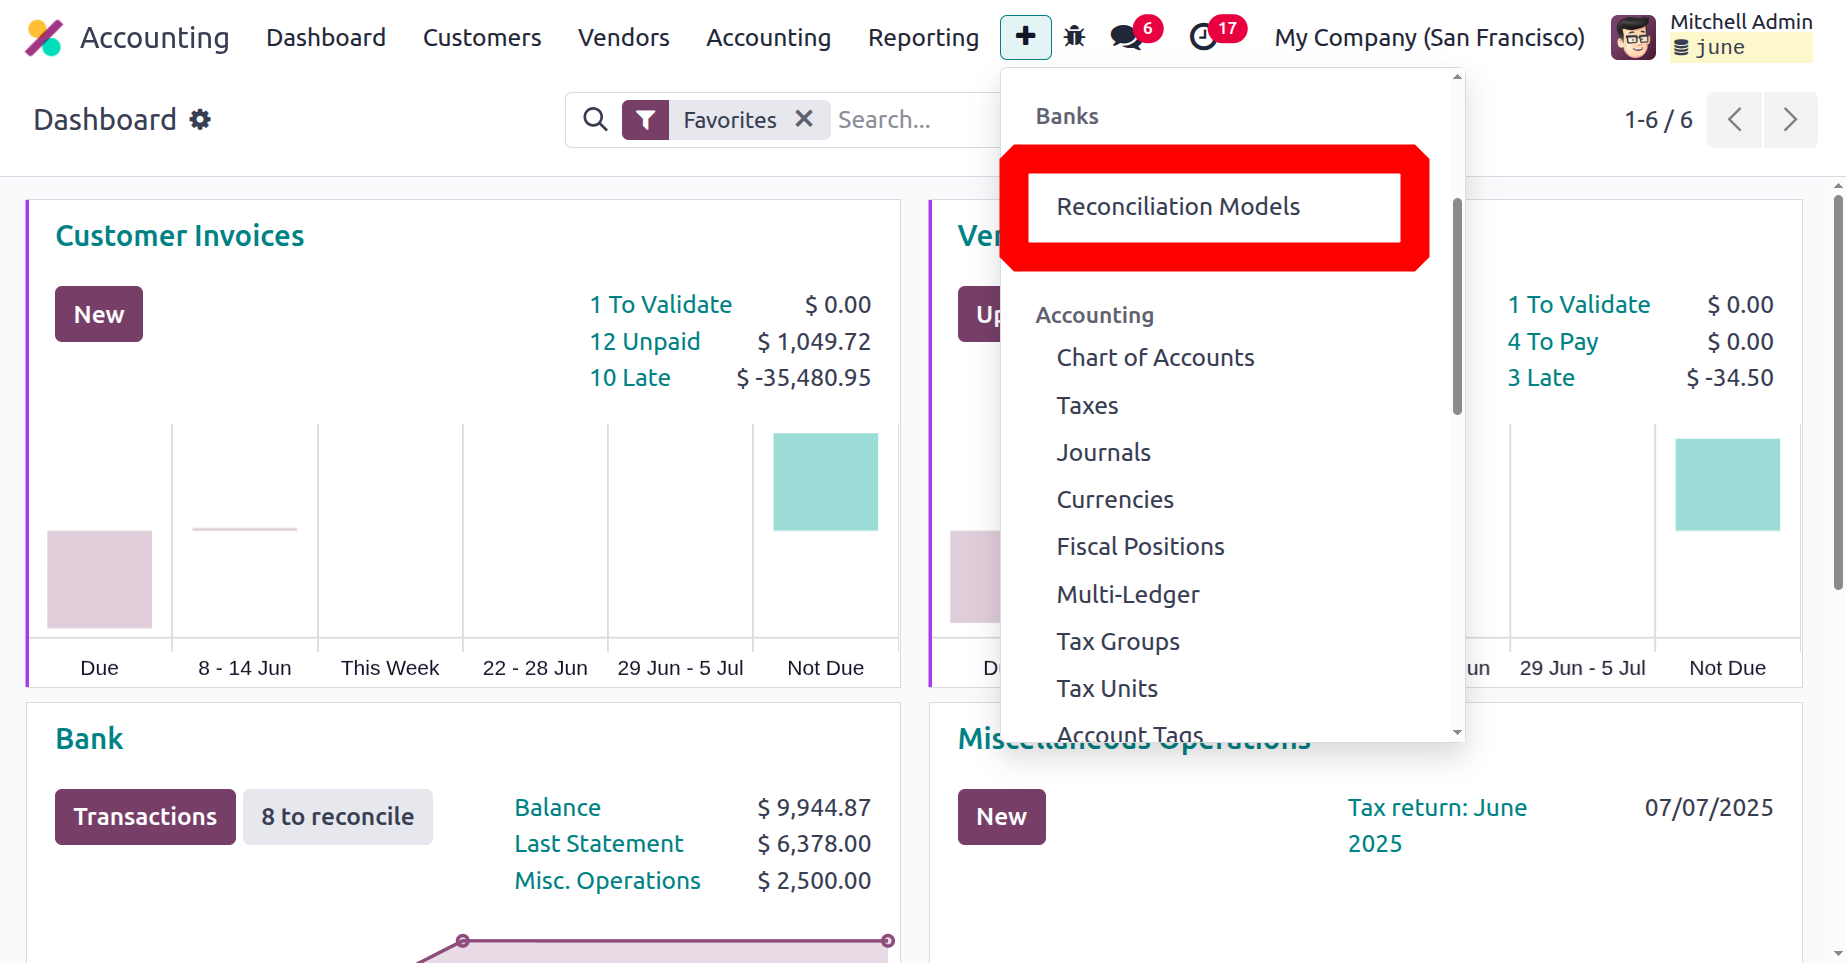
The system's Reconciliation menu is mentioned in the Configuration Bank section. One mouse button is enough to access the window, as seen in the screenshot below.
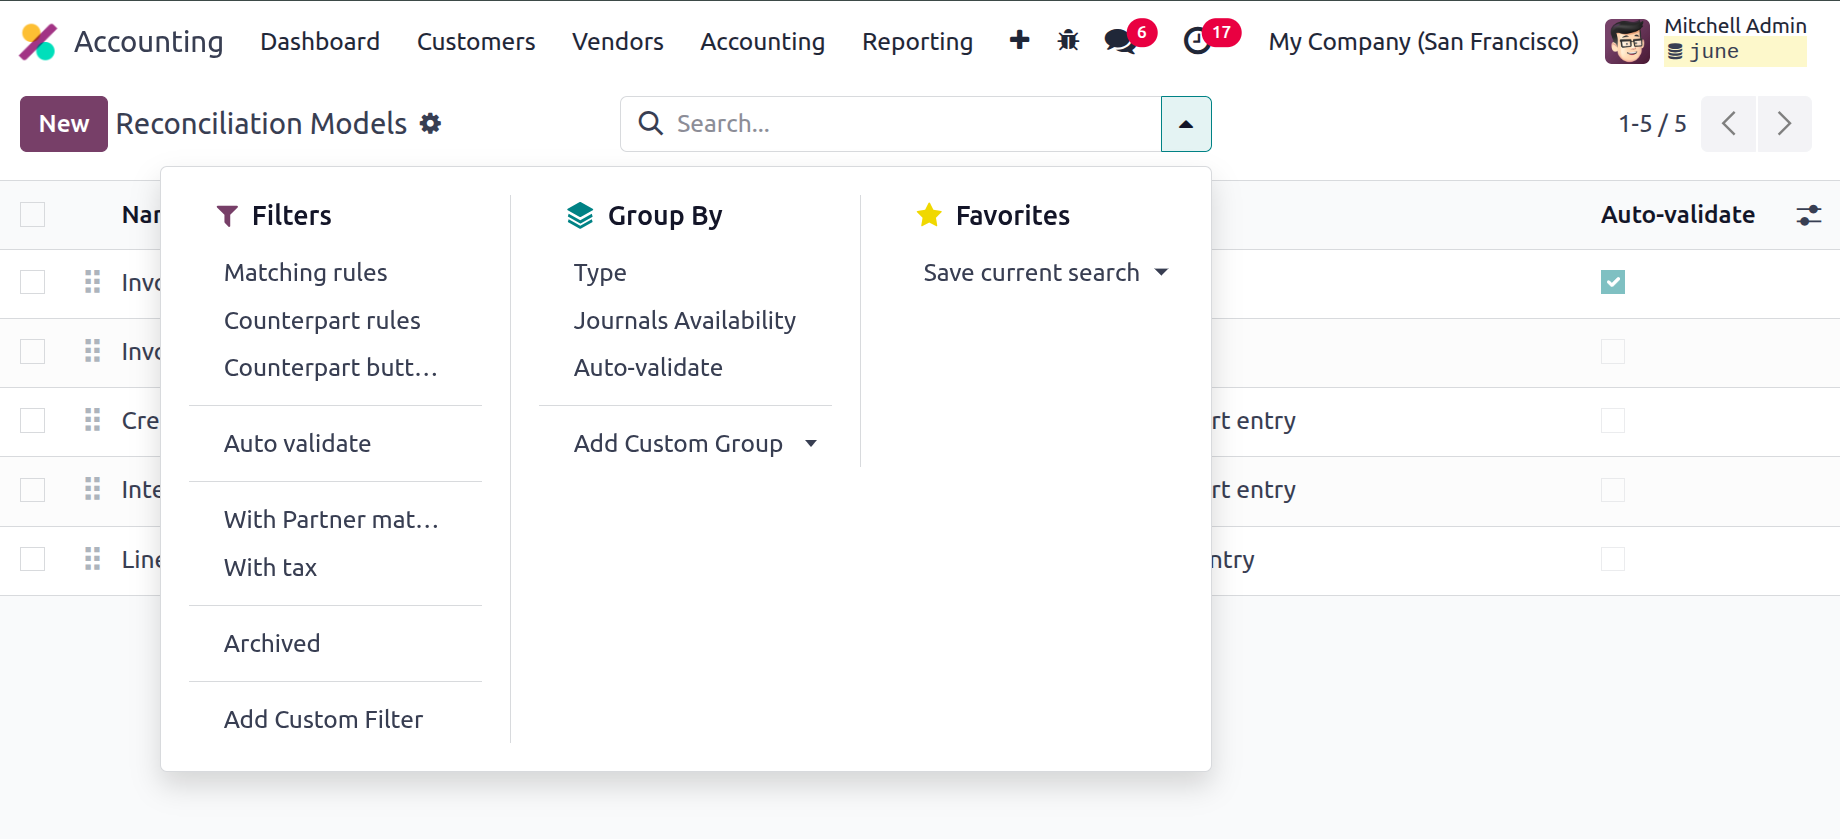
The Reconciliation Model window shown in the screenshot will keep track of all the previously specified Reconciliation Models for effective operations in Odoo18. The preview contains the Name of each Reconciliation, Type, and Auto-validate field to provide you a broad perspective without requiring you to open and thoroughly examine each record. Additionally, the default and custom Filters and organise By features make it very easy to filter out and organise the essential reconciliation models. The Save Current Search, Import Records, Link menu in Spreadsheet, and Insert list in Spreadsheet menus are located on the Favourites tab, as shown in the screenshot below.
You can specify Reconciliation models in one of three categories by default on the Odoo18 platform. Those are
- Button to generate counterpart entry
- Rule to suggest counterpart entry
- Rule to match invoices/bills
Button to generate counterpart entry
The button reconciliation concept, where a counterparty entry is generated by creating a button on one or more journal items. This button offers a counterpart based on the chosen journal article and does the reconciliation immediately when you click it. On the other hand, you can create a set of guidelines for "Rules to suggest counterpart entry." These rules are applied when you click the "suggest" button, which automatically generates the reconciliation and suggests a counterpart depending on the journal entry you have chosen. It will attest that the only equivalent values that require verification are those that are immediately adjacent. Furthermore, this model will guarantee that the automation occurs in compliance with the principles established by the Reconciliation model.
"Rule to match bills/invoices" Accurate vendor and customer invoices that match the payment amount can be automatically posted using the reconciliation model. If the entries are verified, the reconciliation processes are finished automatically. Furthermore, every reconciliation is performed in compliance with the rules set forth in this mode at configuration.
It is easy to create a new Reconciliation Model in Odoo18 Accounting. Just have a look at the Reconciliation Models window's NEW button. When you click the NEW button, the creation window displayed in the frame below will open.
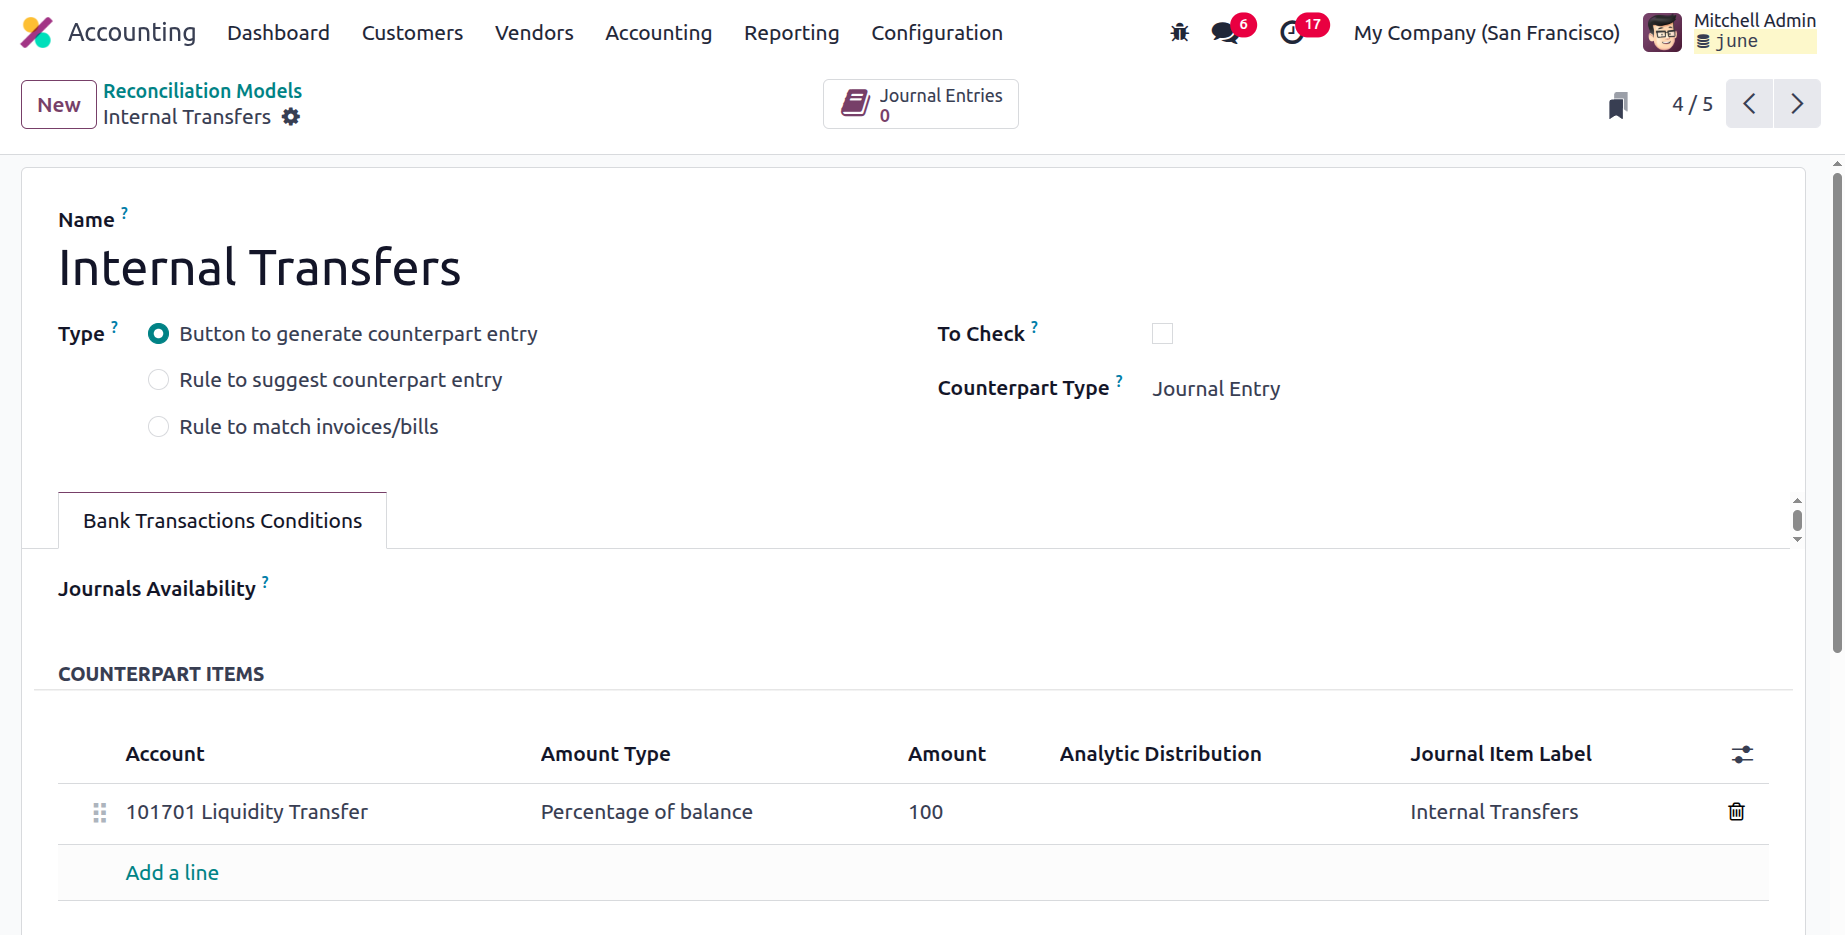
You can start by naming the Reconciliation model in the Name column. The Type must then be defined by choosing one of the alternatives for establishing a counterpart entry that were discussed earlier. The three categories are Rule for matching invoices and bills, Rule for suggesting counterparty entries, and Button for generating counterparty entries. Depending on the type, the other fields that are available will be displayed. Accordingly, if you click on the "Button to generate a counterpart entry," a "To Check" section will show up, which you may either activate or deactivate based on your needs.
When this option is selected, the matching rule is applied in situations where the user does not know all of the counterpart's details. Additionally, under the Bank Transactions Conditions tab, you can enter information about the Journals Availability using the selection menu. The COUNTERPART ITEMS can then be allocated using the Add a Line option. After choosing Add a Line, a new line with a drop-down menu will show up. From there, you may choose the Account to get a list of all the processes that are available.
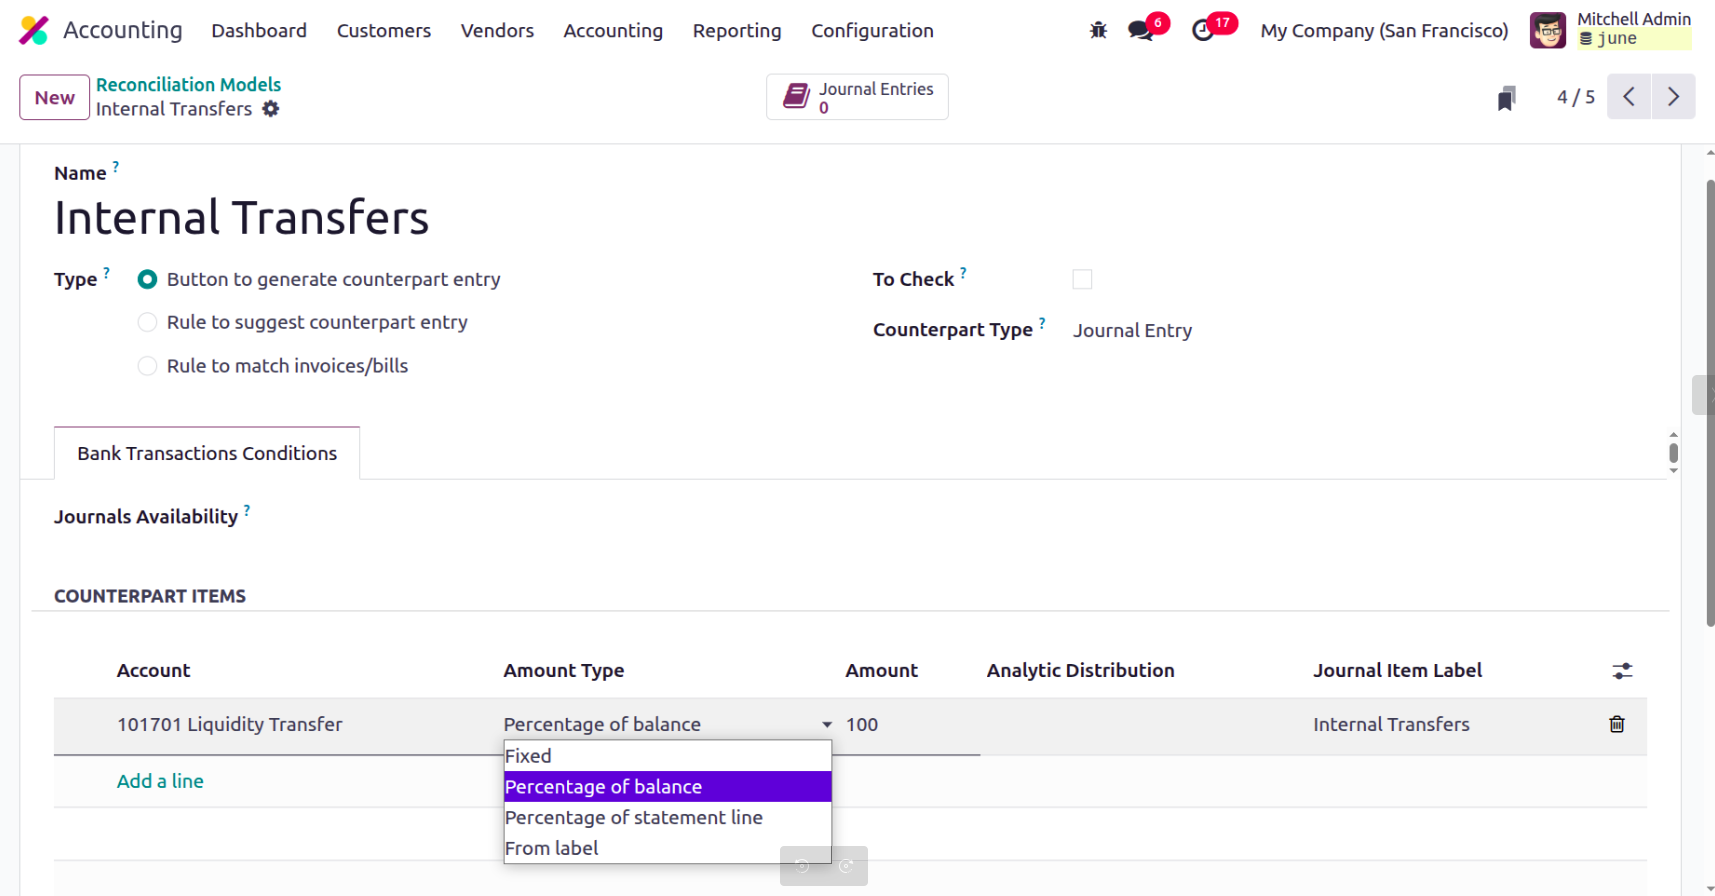
You will then get a drop-down menu with choices for Fixed, Percentage of Balance, Percentage of Statement Line, and From label types when you select the Amount Type option.
Along with the Amount, Analytic, and Journal Item Label, you can also choose to have it display other fields in the counterpart entries. To accomplish that, click the symbol on the right end, as seen in the screenshot below.
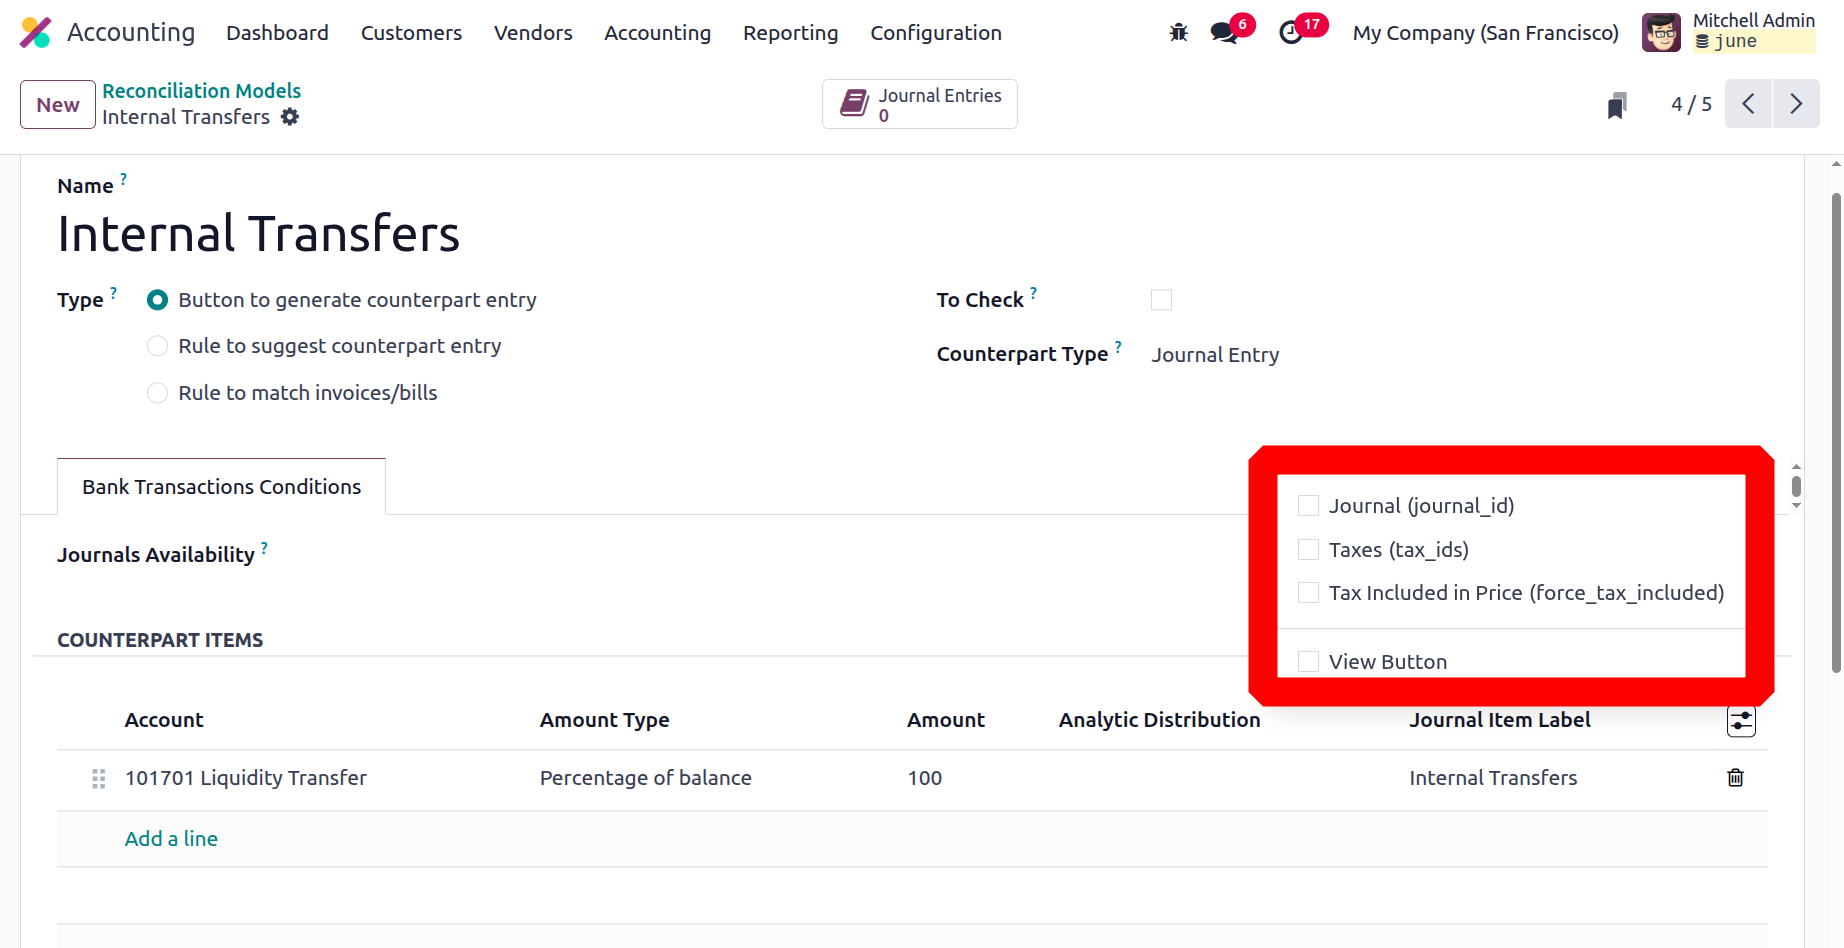
If you enable the Journal, Taxes, and Tax Included in Price fields, it will be added to the line. The Delete option, which appears at the right end of each line, can likewise be used to eliminate the equivalent items. After the Button has been configured to create a counterpart item, the reconciliation model will be used.
Rule to suggest counterpart entry
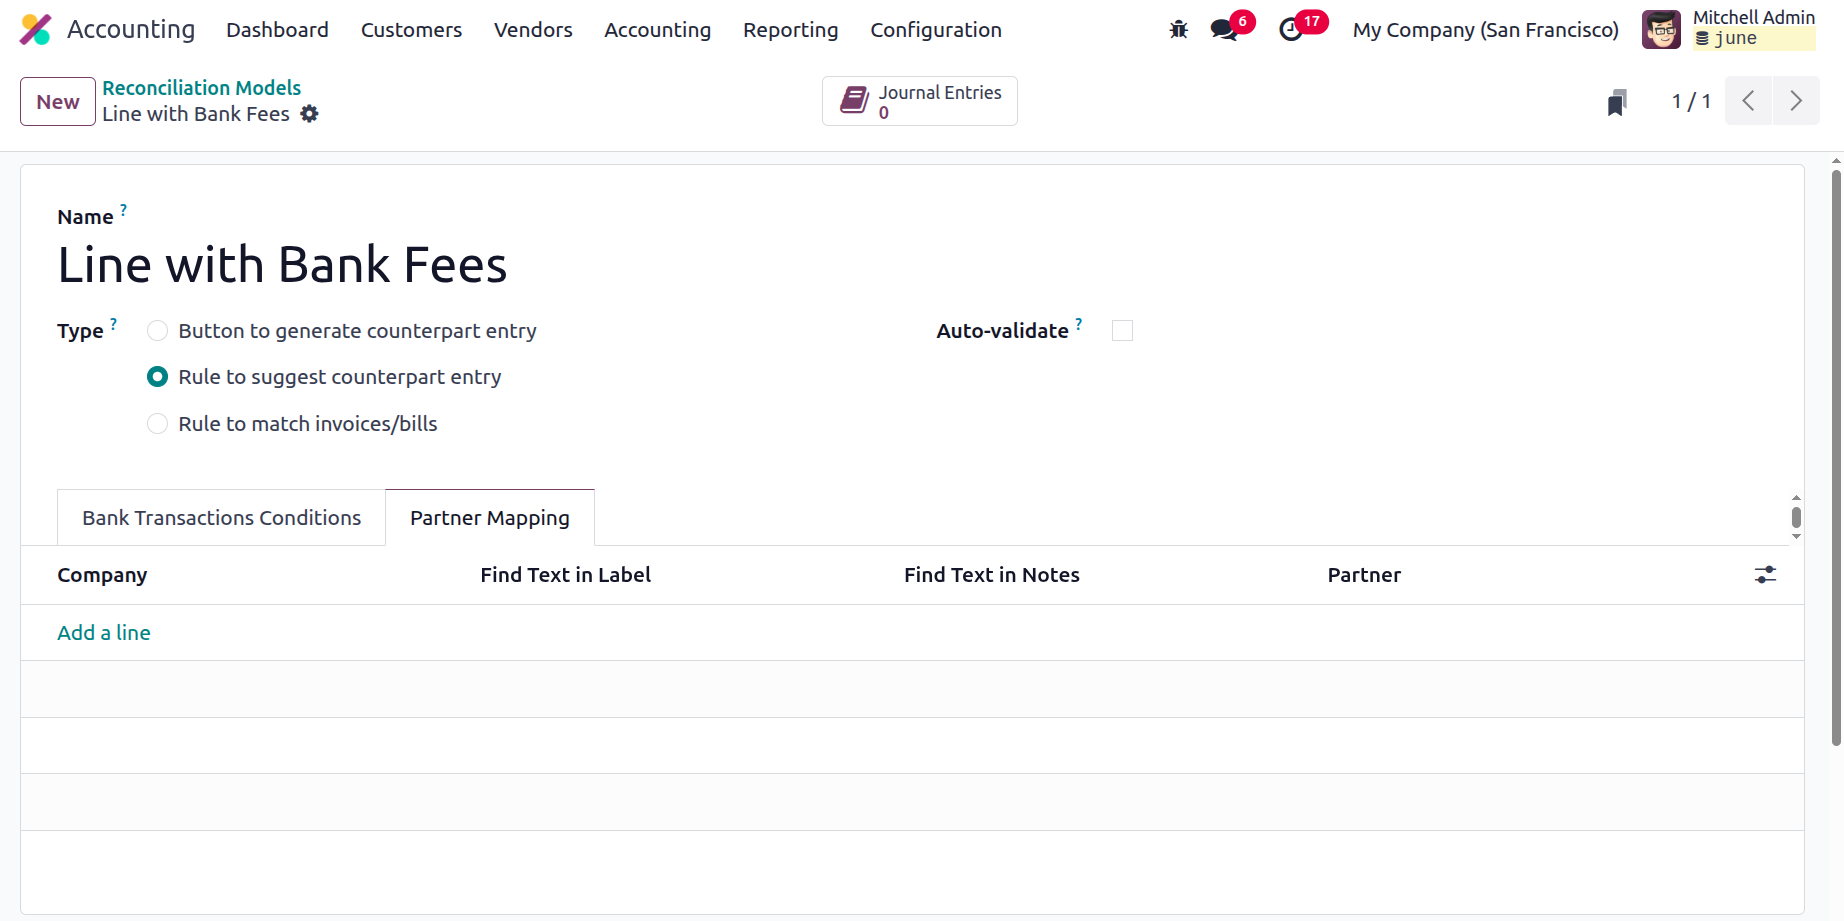
Additional fields and tabs will be added if the 'Rule to suggest counterpart entry' is selected as the Reconciliation model type, as shown in the screenshot below. More customisations are available with this kind, as the screenshot illustrates.
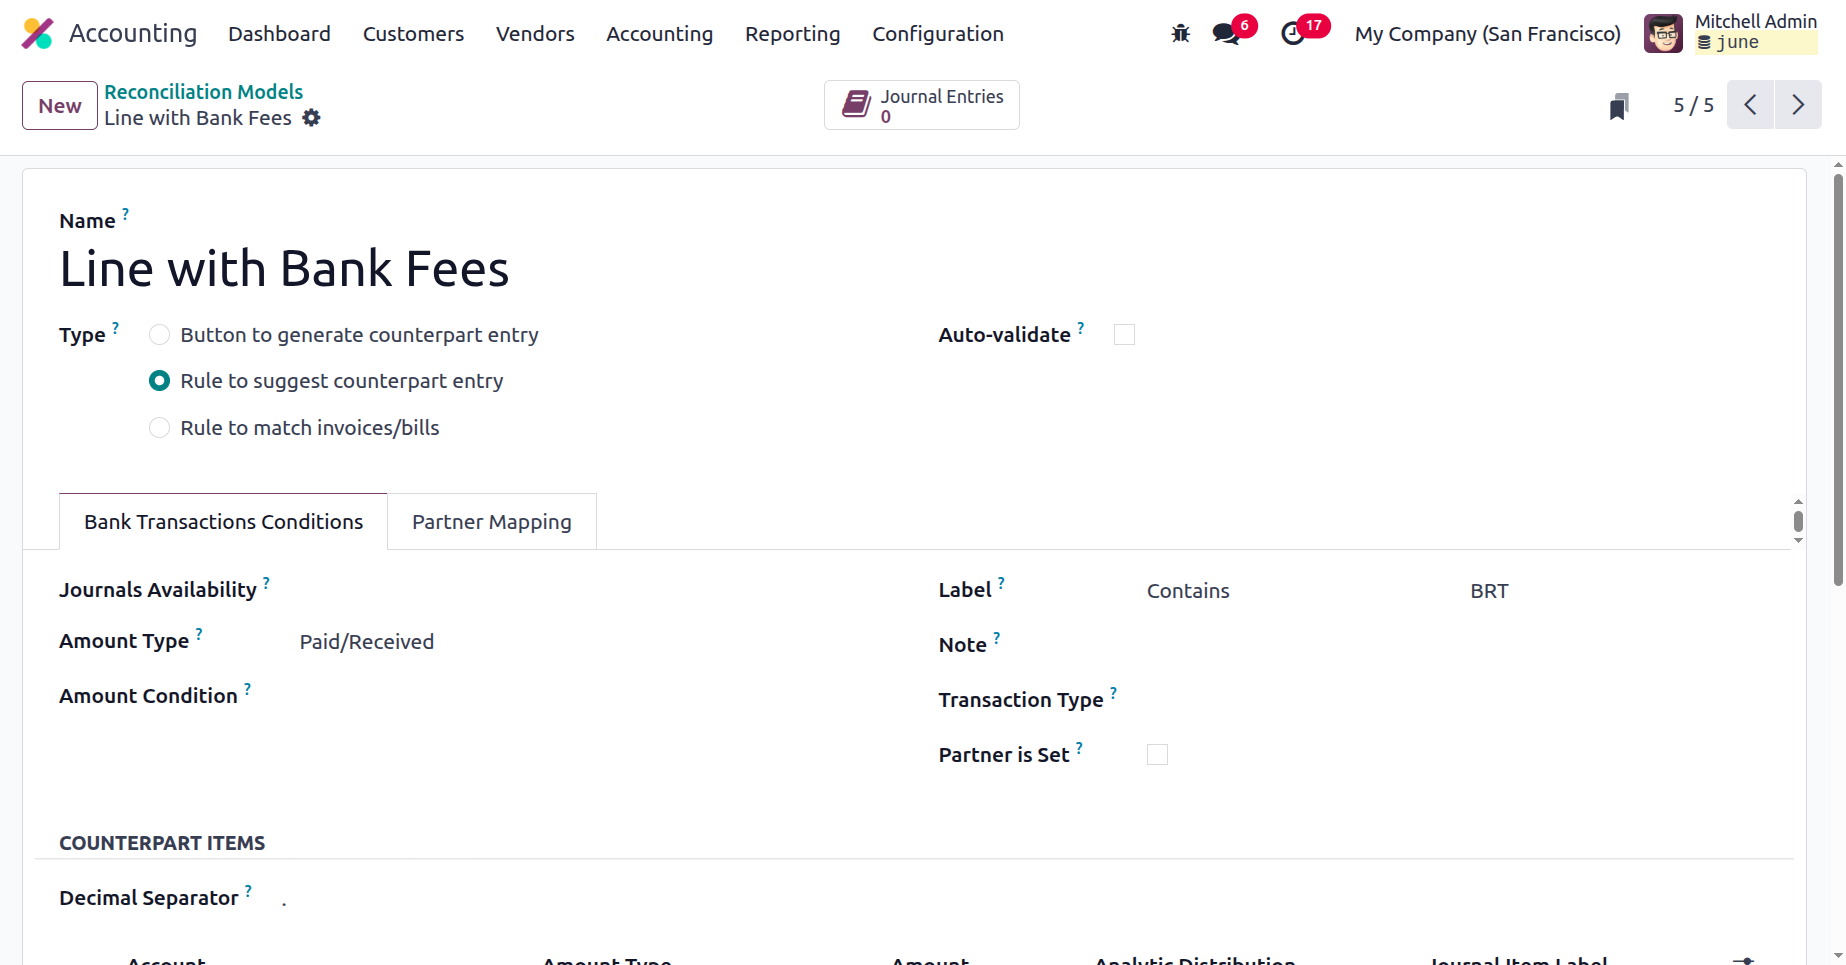
Whether to auto-validate the statement line first is up to you. Then, under the appropriate tab, the Bank Transaction Conditions can be configured. To make the reconciliation model available in a certain journal, you can define it under the Journals Availability option. After that, the quantity type can be assigned to the appropriate field. From the drop-down option, you can choose whether it is Paid, Received, or Paid/Received. in order for the reconciliation model to only be applied to the selected transaction type. The "Received" option is only used when money is received. Only after paying may you use the Paid option to apply. The third one, "Paid/Received," will be applied in both cases. Next, we can look at the Amount Condition. A dropdown menu with options like Is Lower Than, Is Greater Than, and Is Between will also be displayed.
On the right side of the tab, you may now fill in the partner, transaction type, remark, and label sections. The Label field contains the dropdown menu with choices such as.
- Contains: If this option is chosen, the reconciliation model will only be applied if the supplied string is in the preposition label.
- Not Contains: "Contains" is the opposite of "Not Contains."
- >Match Regex : Make your own regular expression.
You can assign the note in a similar way because the reconciliation model will only be used when the note meets the condition. You may also configure the partners using the Player Should be set option, which will provide you further options for selecting the partners as indicated below. The Transaction Type is another option available to you. The Partner Set field can also be enabled or disabled. Only when a customer or vendor is set and the field is active will the selected reconciliation model be used. Other areas such as "Matching partners" and "Matching categories" will become accessible by activating this option. as shown in the screenshot that follows.
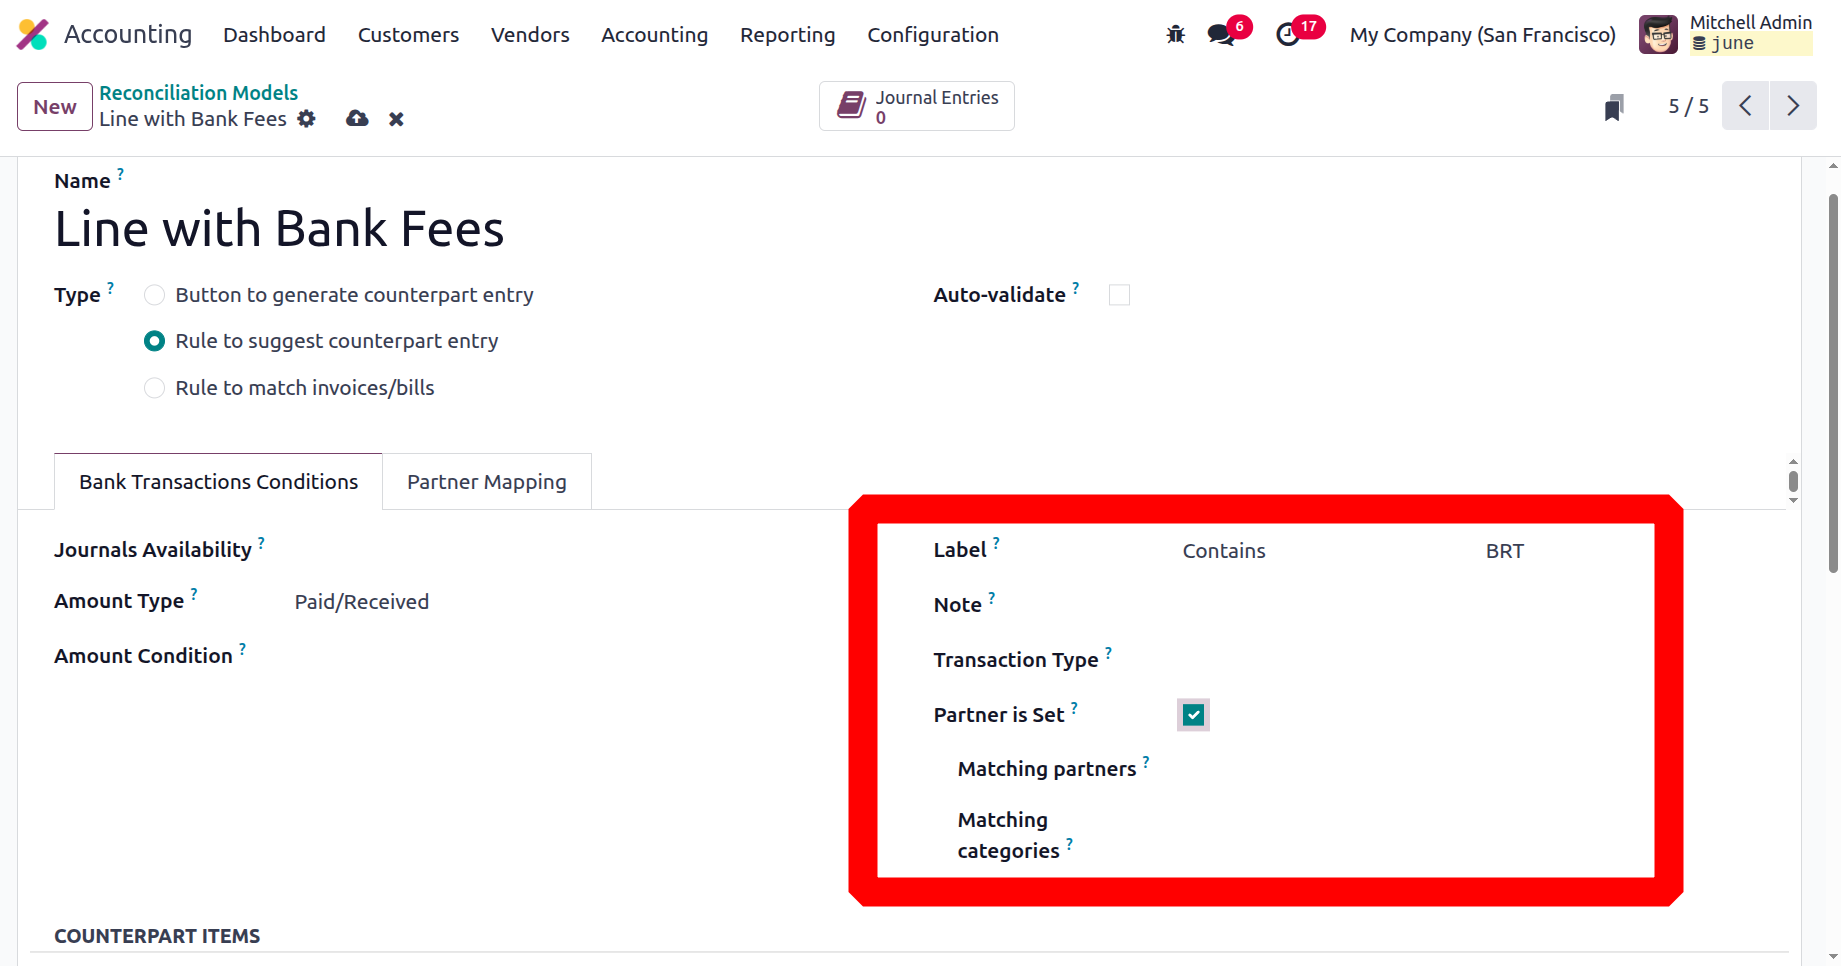
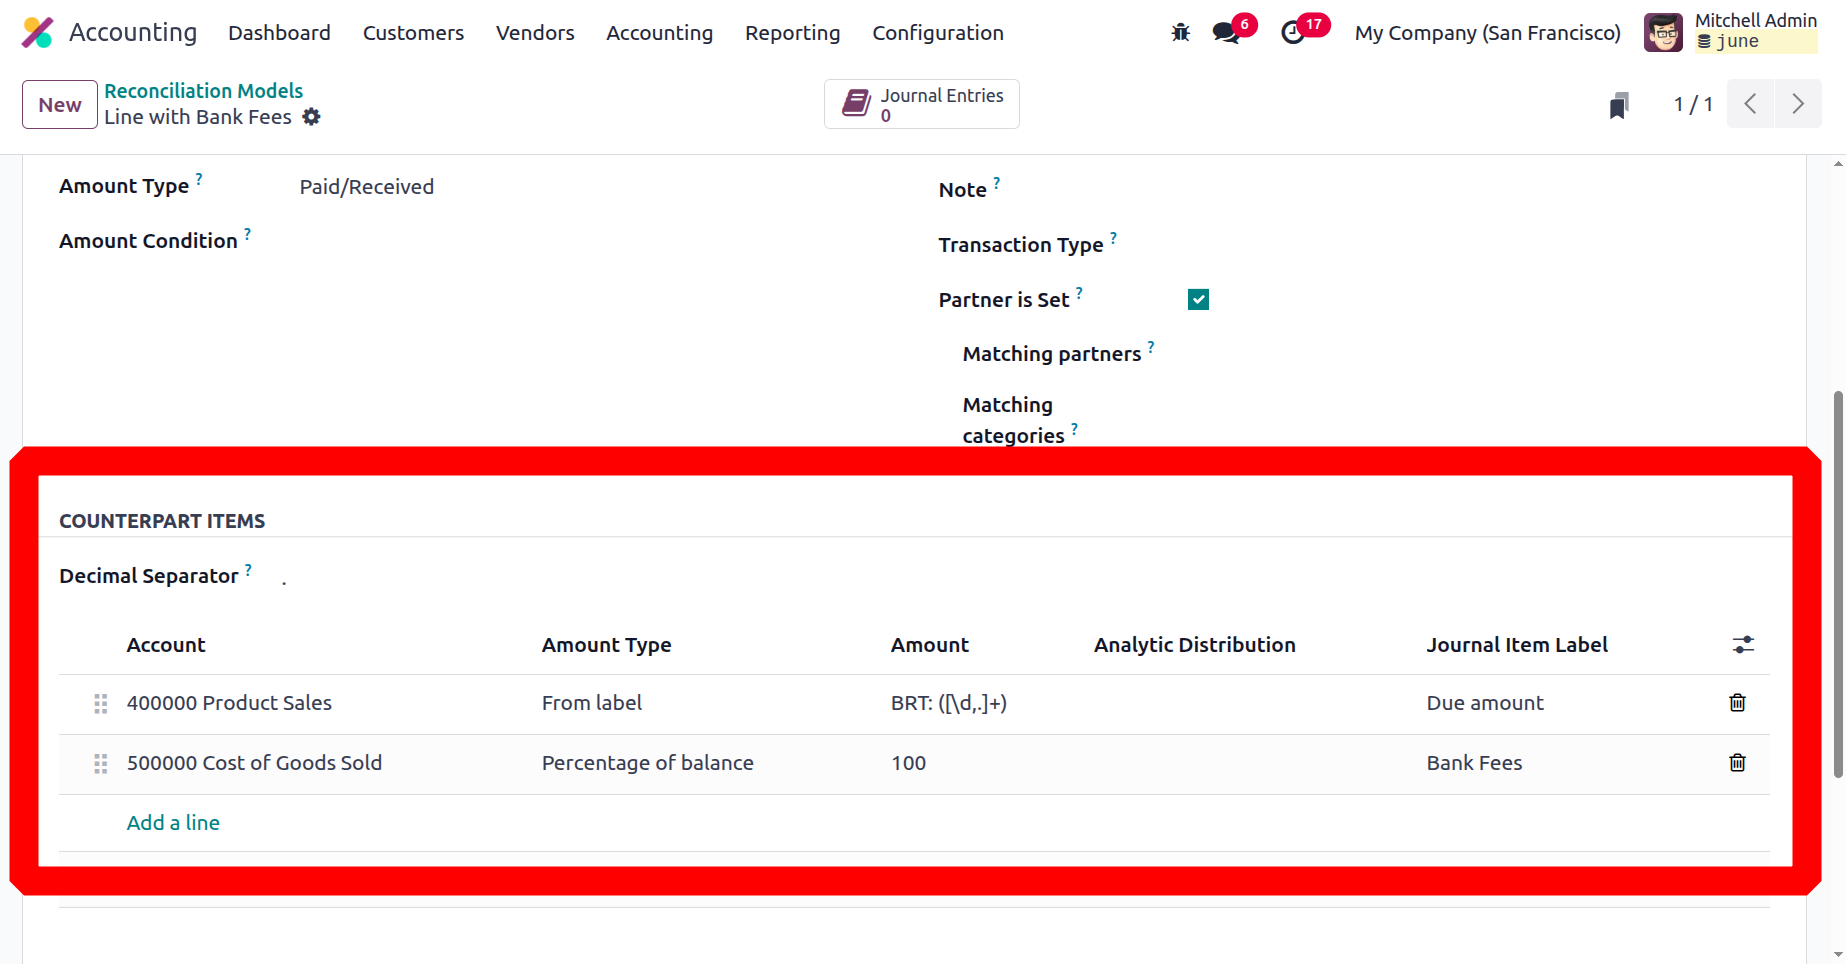
You can choose the partners and categories that match by turning on this feature, which will display a dropdown menu with a list of predefined partners and categories. The COUNTERPART ITEMS column is where you can add entries.
To begin the configuration, assign the Find Text in Label and Find Text in Note fields and choose the relevant partner from the dropdown menu under Partner, under the next tab, "Partner Mapping."
Once all required data has been entered, the newly constructed reconciliation model will be immediately saved into the system. If not, you can use the icon at the top to manually save the record, as seen in the screenshot above.
Rule to Match Invoices/bills
The final type of reconciliation is called "rule to match invoices/bills." To set up the reconciliation using this (Rule to match invoices/bills), you need to fill out the additional fields that we will discuss below.
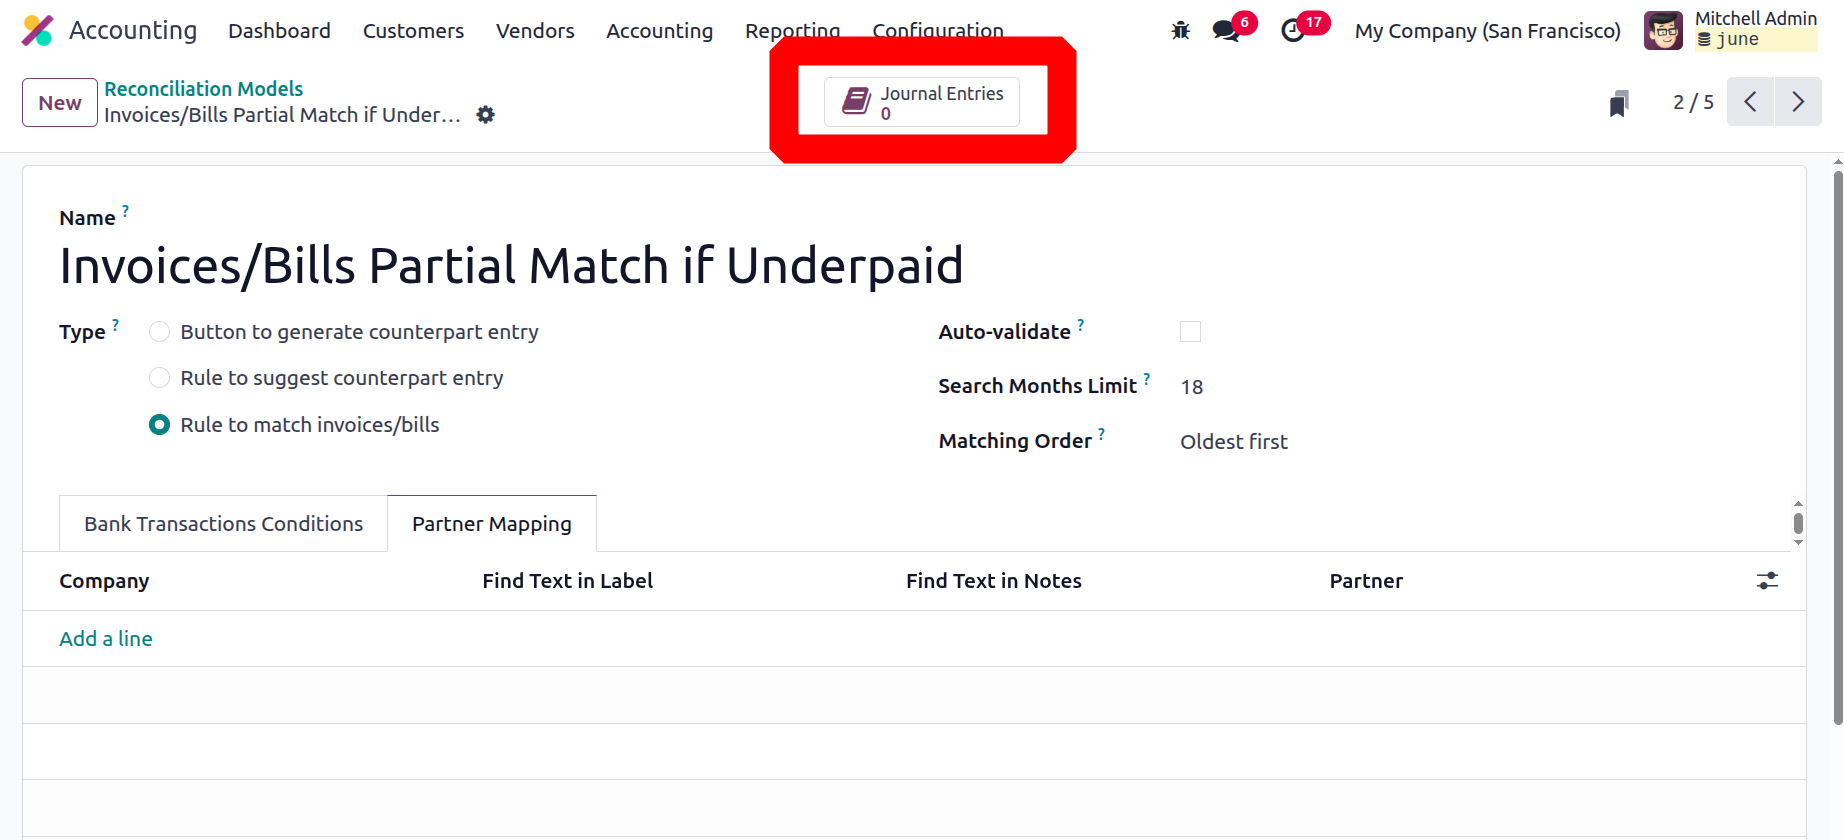
Once you have specified the Name, Type, and Auto validate, you must enter the 'Search Months Limit' section, which allows you to specify the number of months to be used for the reconciliation process. This can be used, for instance, to limit the application of the reconciliation process to transactions that occurred during the last three months or something comparable. You can also use the dropdown option to enter the Oldest First or Newest First order when filling out the Matching Order field. This parameter allows you to sort the reconciliations by significance.
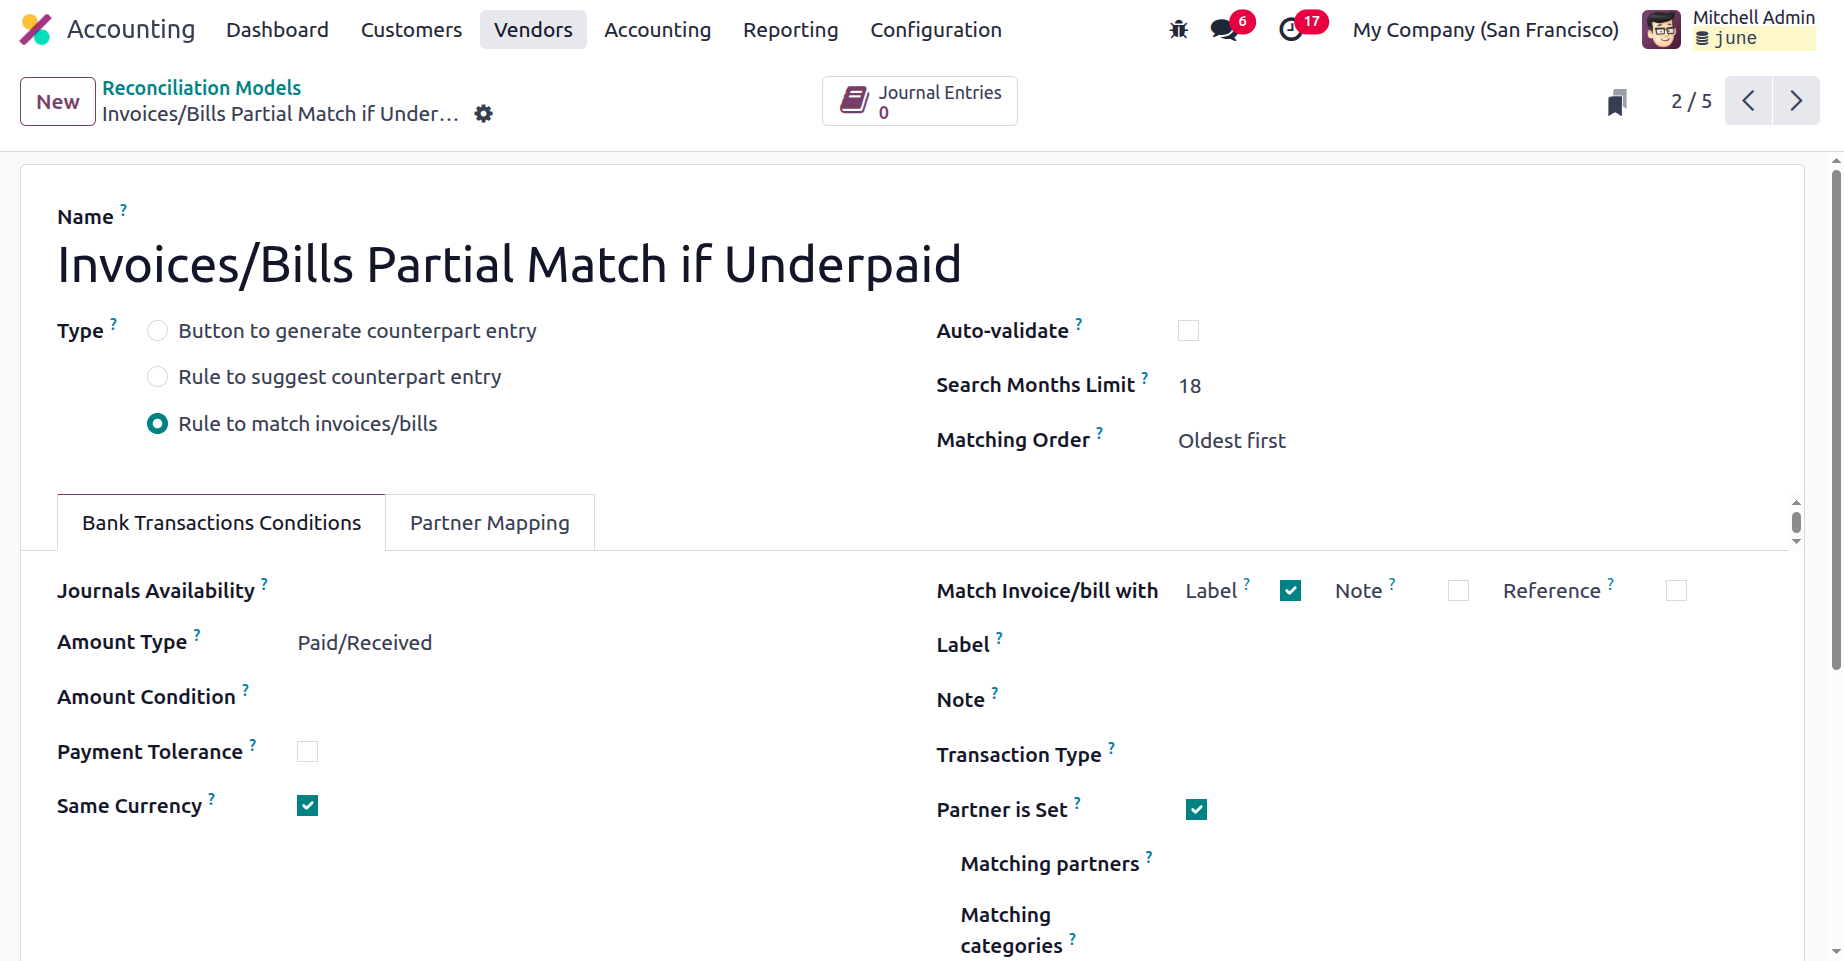
The condition on the bank statement can then be specified under the Bank Transactions Conditions tab. To ensure that the reconciliation model is only available from the specified journals, you must first ascertain the Journal Availability. The Amount Type can then be adjusted to Paid, Received, or Paid/Received, as previously mentioned. You can then define the Amount Condition by choosing the relevant option from the dropdown. Furthermore, the Payment Tolerance function can be used to accept the payment discrepancy in the event of an underpayment. It can be set up in percentages. Similarly, the boolean parameter Same Currency is activated to indicate whether or not the reconciliation process should use the same currency for all sums included in the reconciliation.
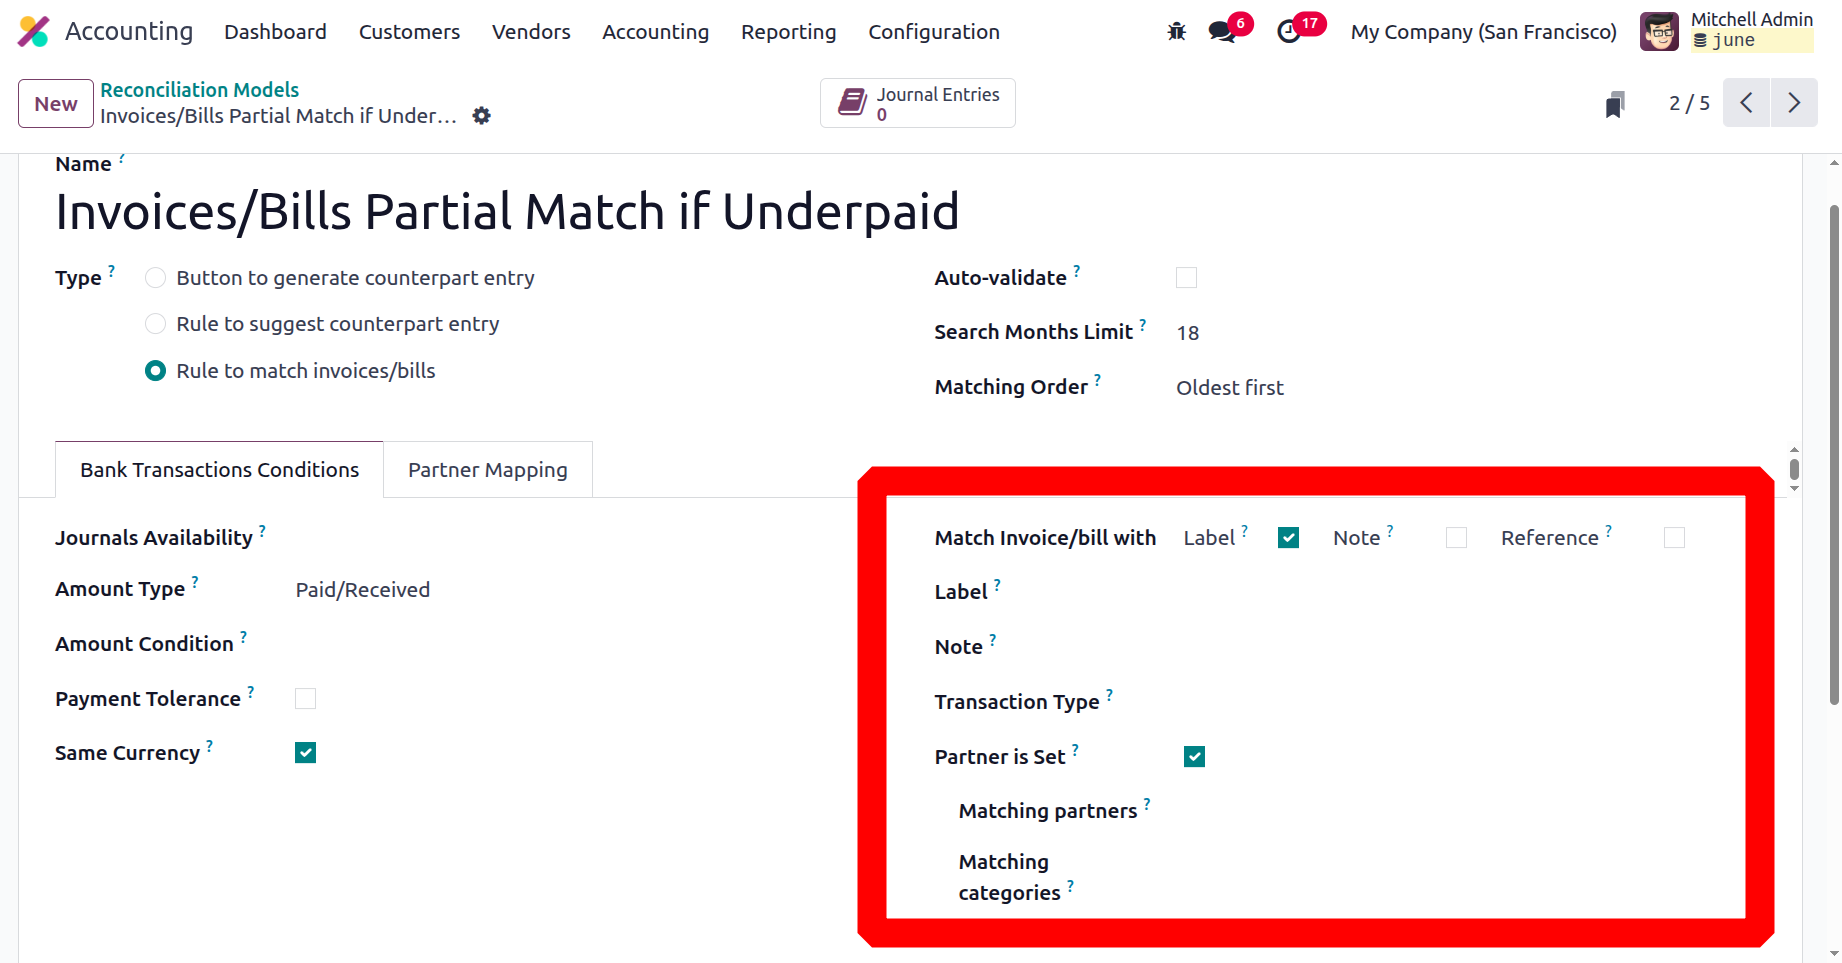
The 'Match Invoice/bills with' option on the right side of the tab can also be adjusted to Label, Note, or Reference. You may then describe the Label, Note, and Transaction Type fields by selecting the relevant options from the dropdown. These parameters can be used to filter the bank statements. You can activate the Partner is Set field to indicate the Matching Partners and the Matching Categories.
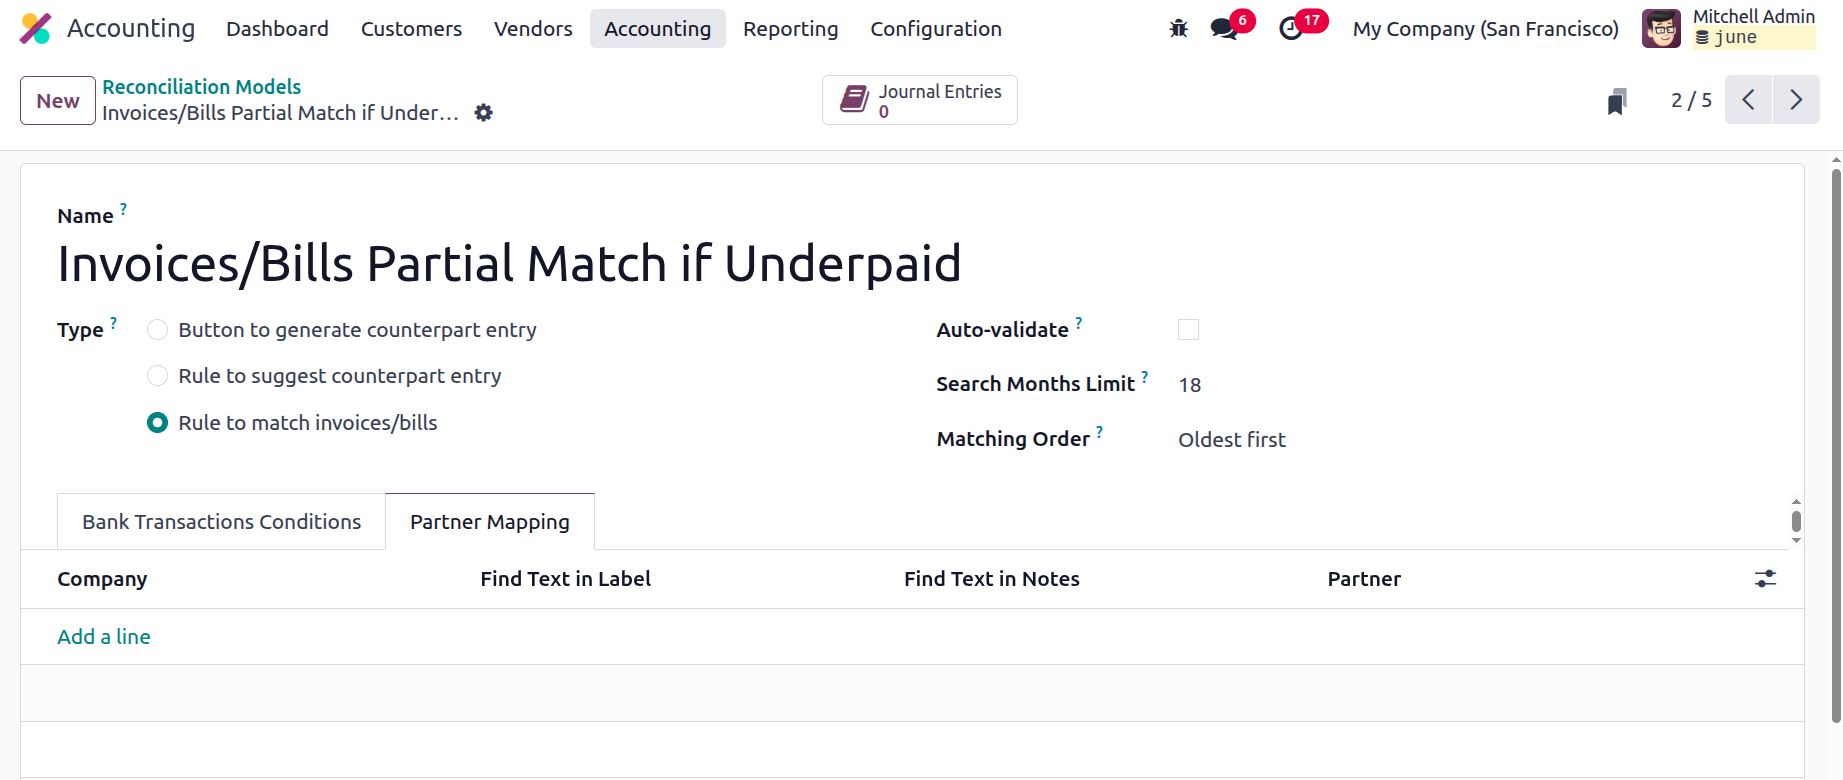
Use the Add a Line button to add Partner information, Field Test in Label, and Find Text in Notes to finish the Partner Mapping page. This page allows you to automatically link accounting entries to different partners. It makes it easy to reconcile transactions and allows you to quickly identify any inconsistencies or discrepancies in the accounting. The Partner Mapping tab is very useful for reducing data entry errors and enhancing decision-making.
The following are the configuration steps for the different types of reconciliation models.
The screenshot below highlights the Journal Entries smart button, which is also visible on the Reconciliation Model Creation Form. You can view all of the Journal Entries linked to the previously established Reconciliation Model by clicking this button.
The 'NEW' button in Odoo18's form view now enables the production of bank statements.
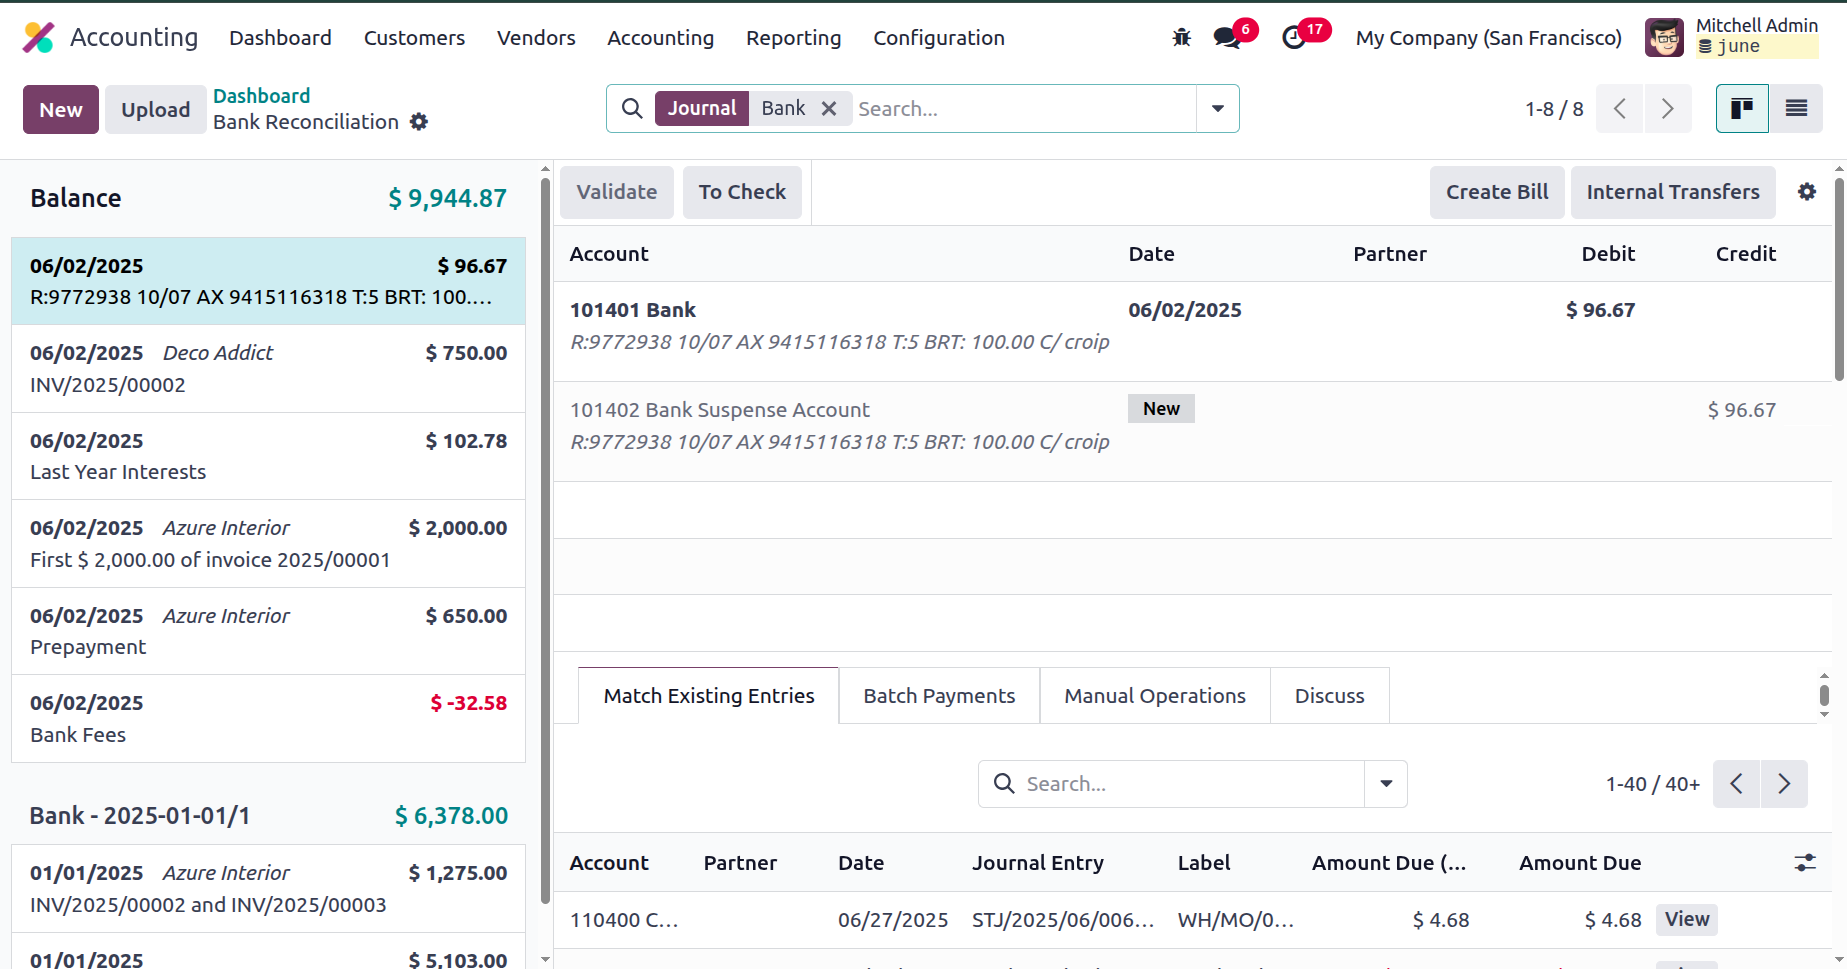
Choose the line that matches the statement to reconcile the related invoices or bills. Alternatively, entries are automatically reconciled using the defined reconciliation model and rules.
Using the Reconciliation model, a crucial step in the accounting process, you may automatically match bank and other financial transactions to the appropriate accounts in their Odoo18 Accounting system. This eliminates the need for human data entry and guarantees accurate and timely accounting since transactions are automatically linked to the proper accounts. Additionally, it helps eliminate errors and conflicts because transactions are immediately reconciled. This facilitates ensuring the accuracy and timeliness of the financial data entered into the system.