Configuring Invoicing
To handle invoicing and invoice administration with the utmost care and accuracy, a business should employ reliable tools and solutions. Invoices are created and managed by the accounting and finance departments of any organization. Through the employment of a supporting invoicing module that is linked to the Odoo19 platform's accounting module, the Odoo19 Accounting module facilitates the invoicing and invoicing administration procedures. When the Accounting module installs, the Invoicing module does the same automatically.
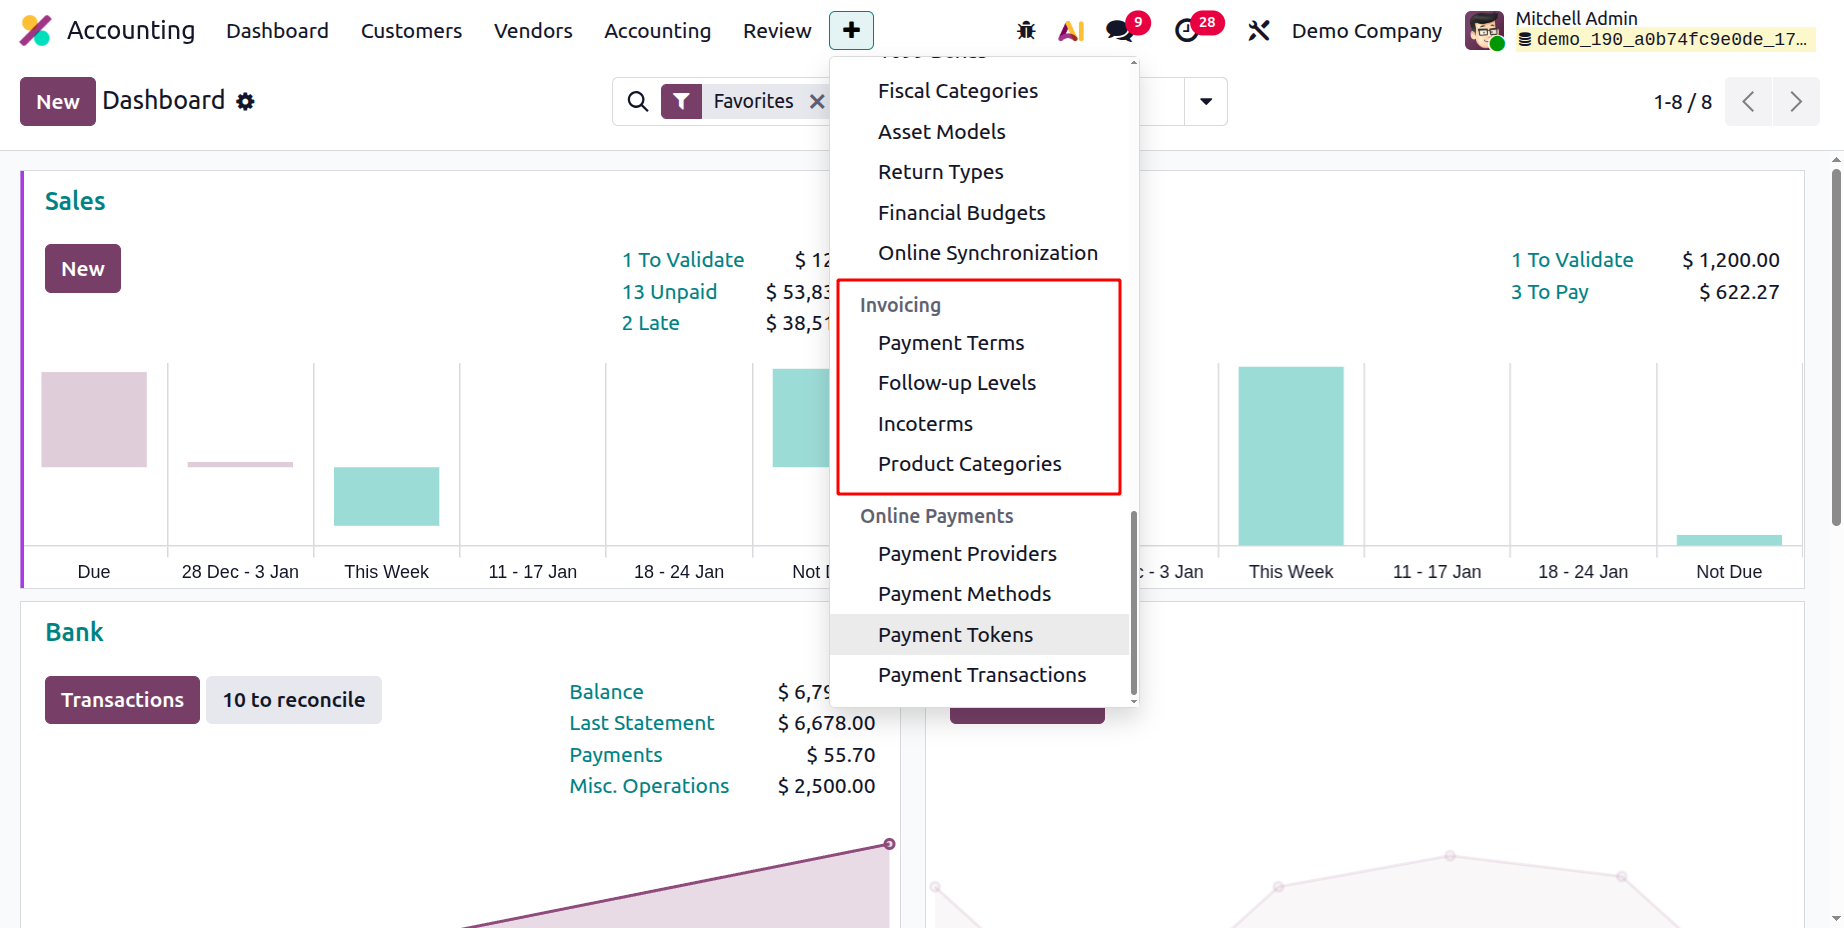
Along with the Invoicing module, Odoo19's Accounting module offers a number of choices to enable actions. These configurations are accessible through the Configuration tab of the Accounting module. Numerous menu settings that support the invoicing components are available on the Configuration tab. Now let's look at each component of the invoicing configuration independently.
Payment Terms and Early Payment Discounts
You may manage your terms and conditions for payments with the Payment Terms feature of the Odoo 19 Accounting module. Businesses who need to monitor and control their terms and conditions for payments will find this tool helpful. This tool allows you to search for a certain payment term, add a new one, modify an existing one, remove a payment term, and view a list of all payment terms. Businesses can benefit greatly from defining the conditions under which they will collect money from their clients. By indicating when they will receive payments and providing a clear record of which payments have been received, this tool can assist firms in better managing their cash flow.
The Invoicing section of the Accounting module's Configuration page has the Payment Terms menu. The Payment Terms window can be accessed via the menu, as seen in the screenshot below. In addition to the pre-set and user-configurable settings, the Payment Terms window will contain all of the configuration-specific data.
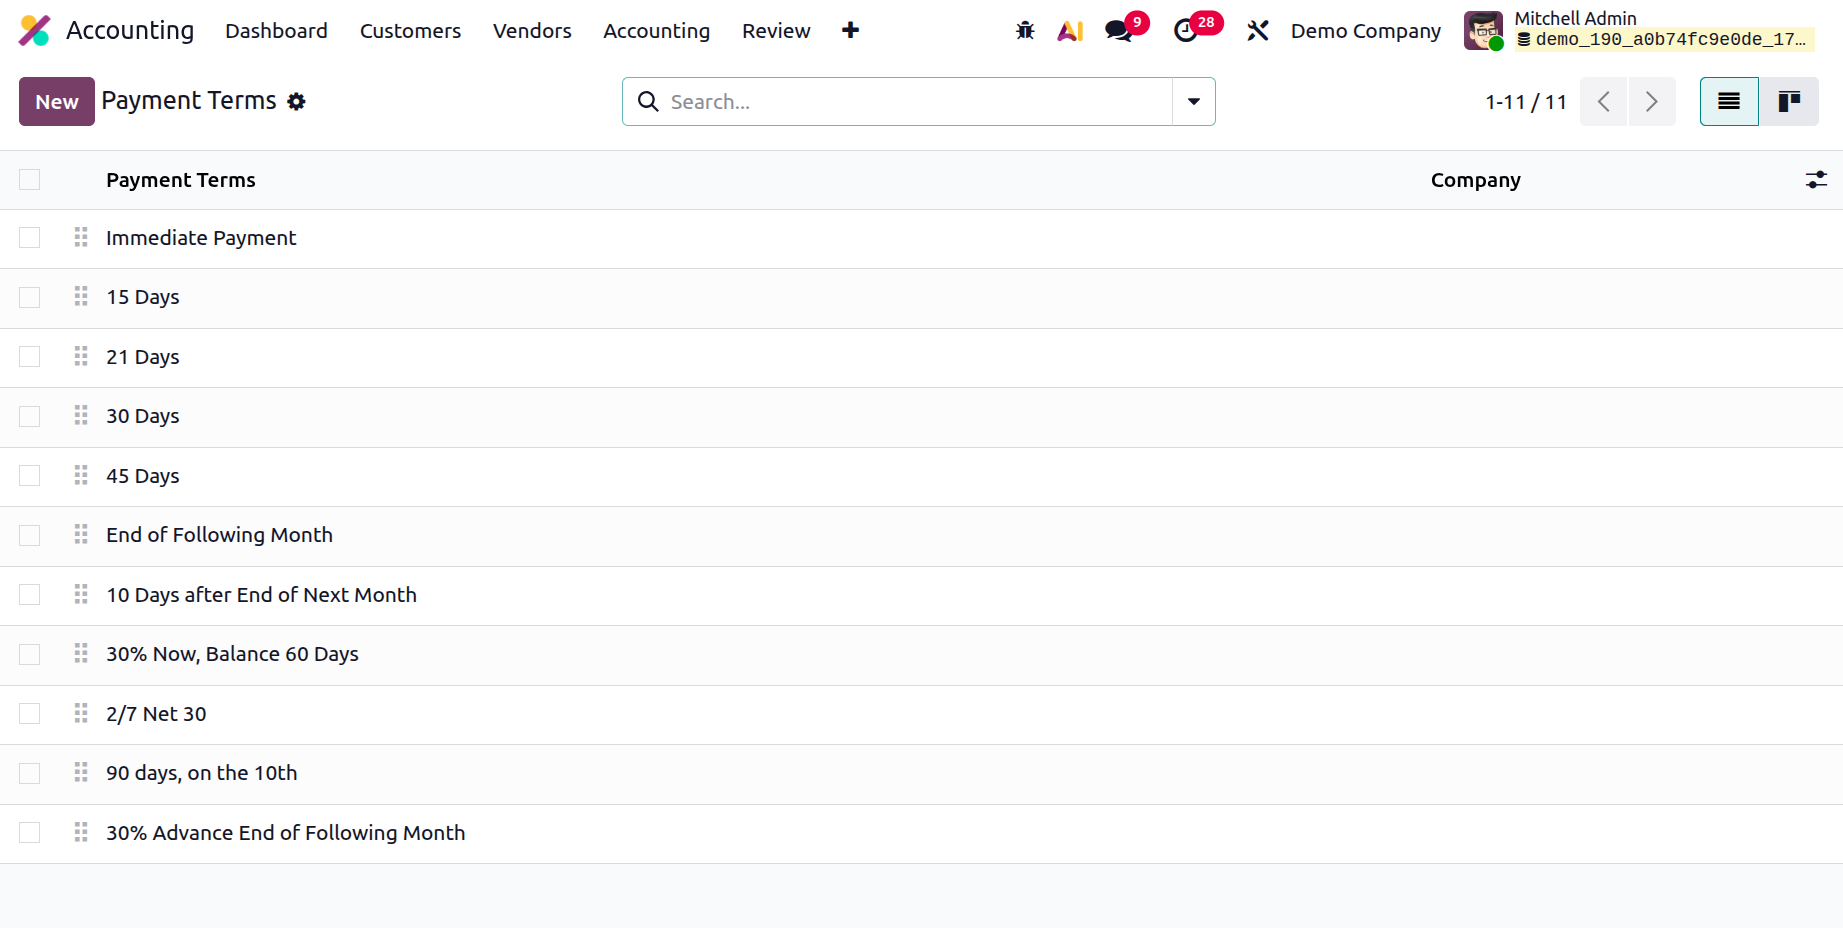
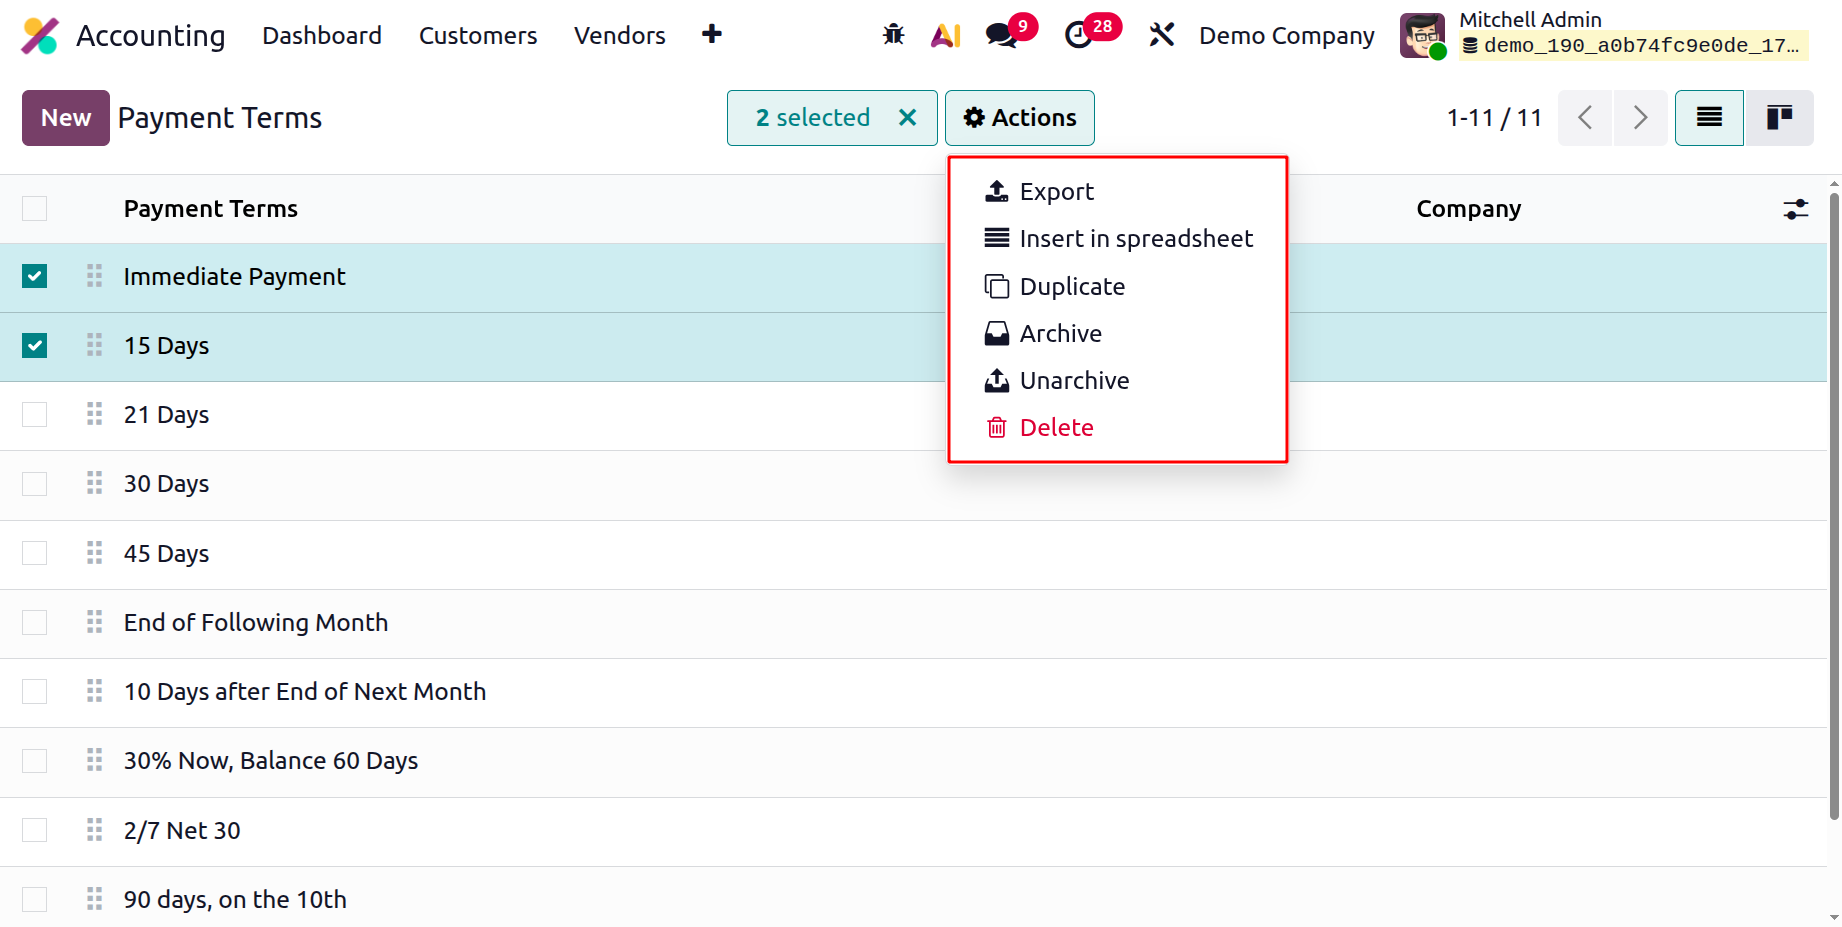
A list of the necessary tools will be given for each payment month. You can choose and learn more about any of these listed terms of payment. You can also change it if you'd like. You can drag and drop the terms of payment in any order you choose thanks to the window's sequencing capability. Additionally, there is a checkbox on the far left of every payment terms entry that can be ticked to initiate additional action. When the box is ticked, the Action button with menus for Export, Insert in spreadsheet, Duplicate, Archive, Unarchive, and Delete will show up, as shown in the screenshot.
Additionally, the criterion option optimizes search results and expedites the process by utilizing a variety of preset and customized criteria. To expedite data processing, you can create a variety of fully configurable groupings of payment circumstances using the Group By option. Numerous other choices, like Import Records, Link Menu in Spreadsheet, Insert List in Spreadsheet, and Save Current Search, are available through the Favorites menu.
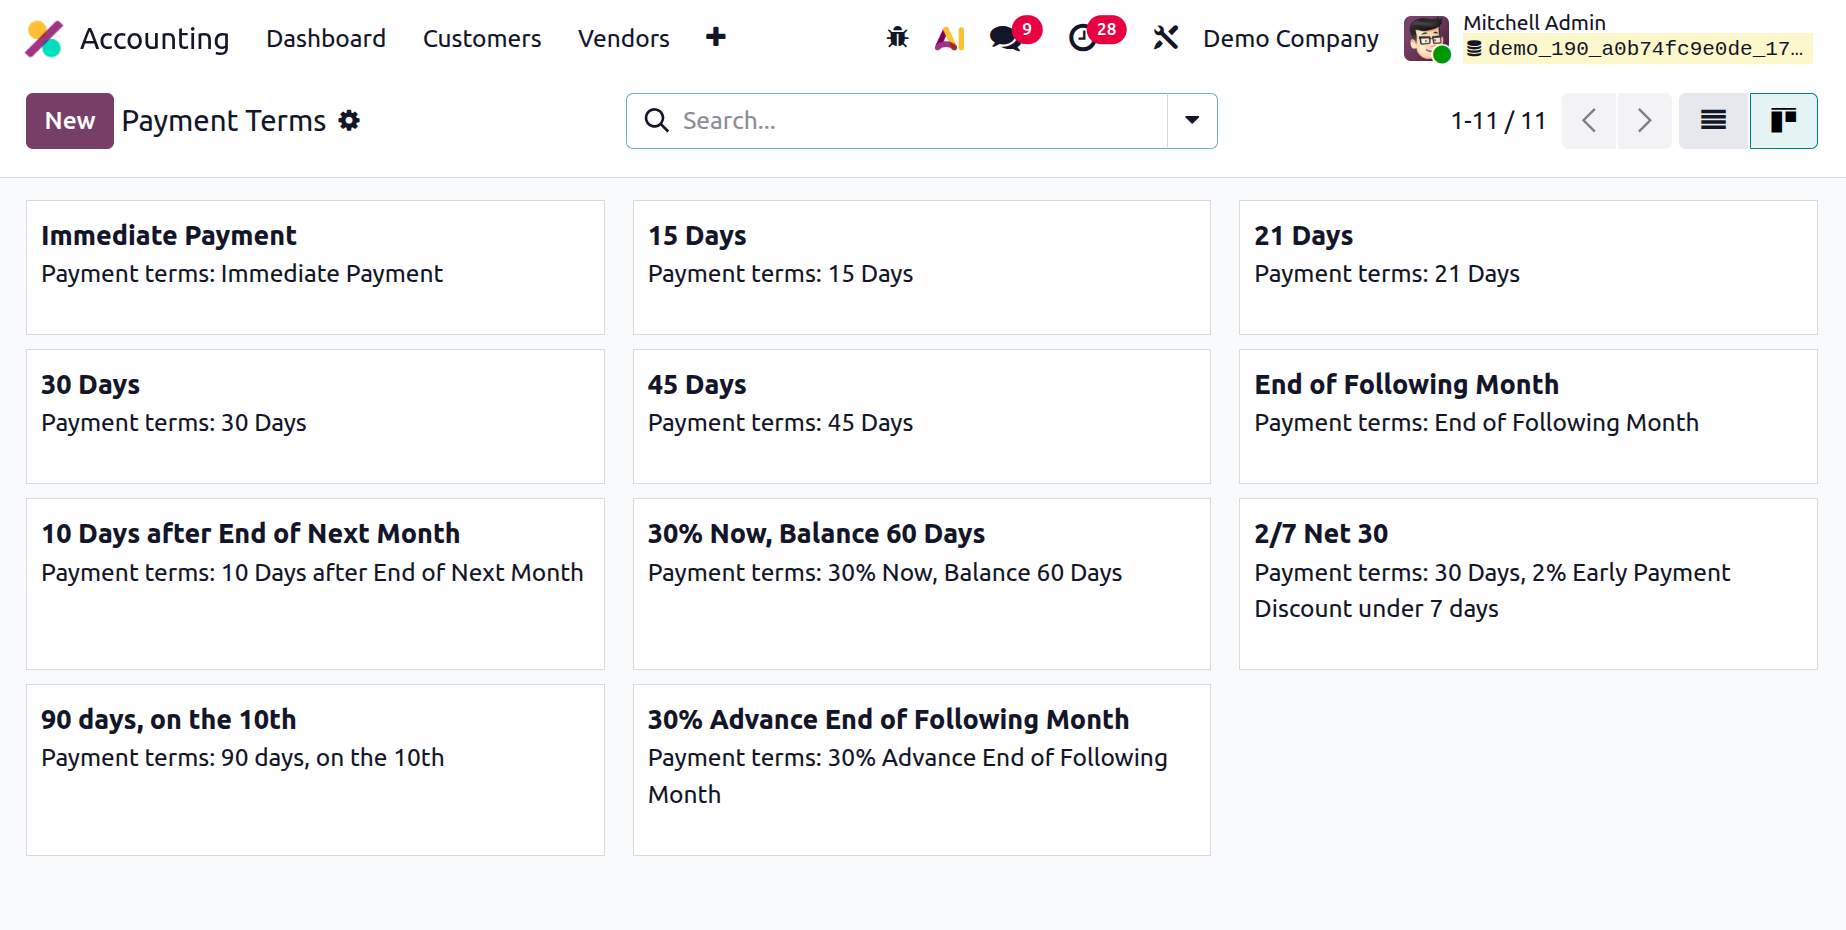
Additionally, as seen in the image below, you can use the Kanban menu icon in the upper right corner to access the window in Kanban format.
The payment terms are the window of time within which the business permits its clients to pay for the associated goods or services. The related payment will be shown as due if the customer misses the deadline. Furthermore, depending on the sales payment term or the buy payment term based on the due date, the pertinent payment will be shown in the aged reports, either in the aged payable or aged receivable. As seen in the screenshot below, you can click the New button to open the creation form when you want to set up new Payment Terms.
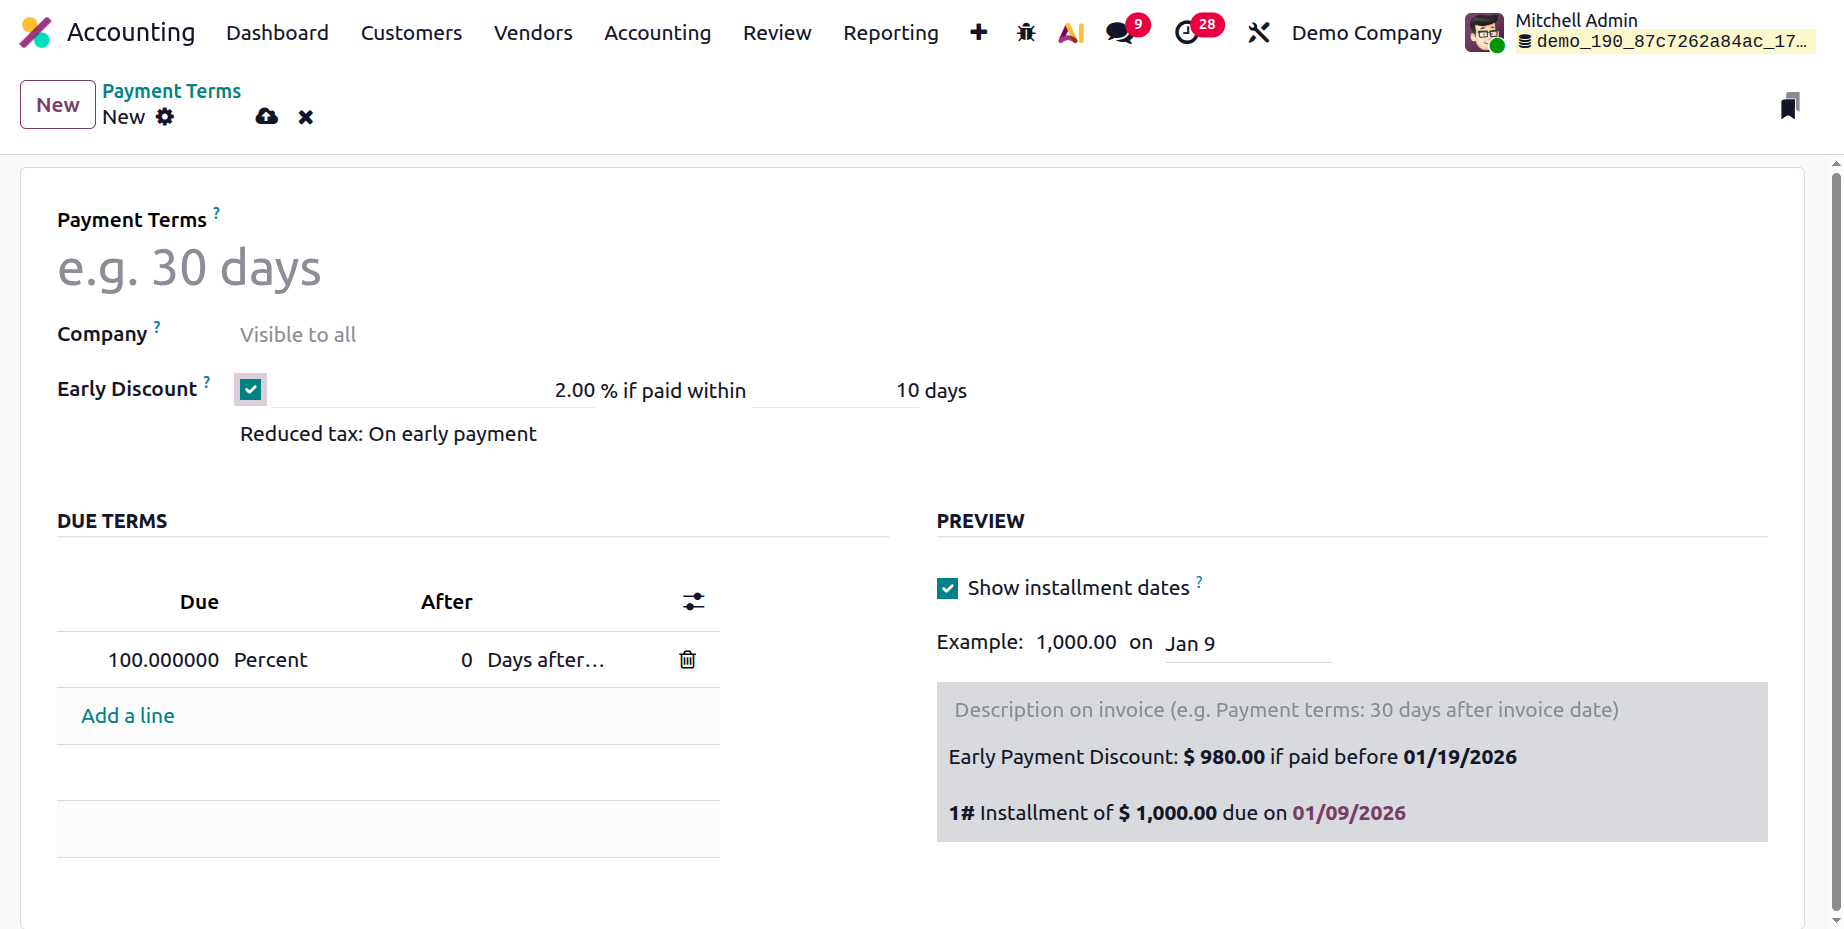
First, you can enter the payment conditions' names in the Payment conditions area of the form view. The user can also enter the firm name and the early discount. The amount owed and its type, such as a fixed amount or %, are then listed in a section on the due date. It is also possible to create the Due Date Computation Details of the Terms by supplying the relevant variables on a date and the computation details. In addition to the ability to offer early discounts, Odoo 19 included field discounts and discount days in the due lines. On field discount days, you may indicate the amount of the discount as well as how long it will last.
Once set, these payment expressions can be used in bills and invoices. Using the Odoo19 platform, you may select and change the necessary Payment Terms. Now that the payment terms setup in Odoo19 have been clarified, the next part will discuss the Follow-Up Levels management function, which is available inside the Invoicing management area of the setup tab.
Follow-Up Levels
You may set up and manage the follow-up levels for client invoices using the Odoo 19 Accounting module's Follow-Up Levels functionality. The menu can be found in the Accounting module's Invoicing section under the Configuration tab.
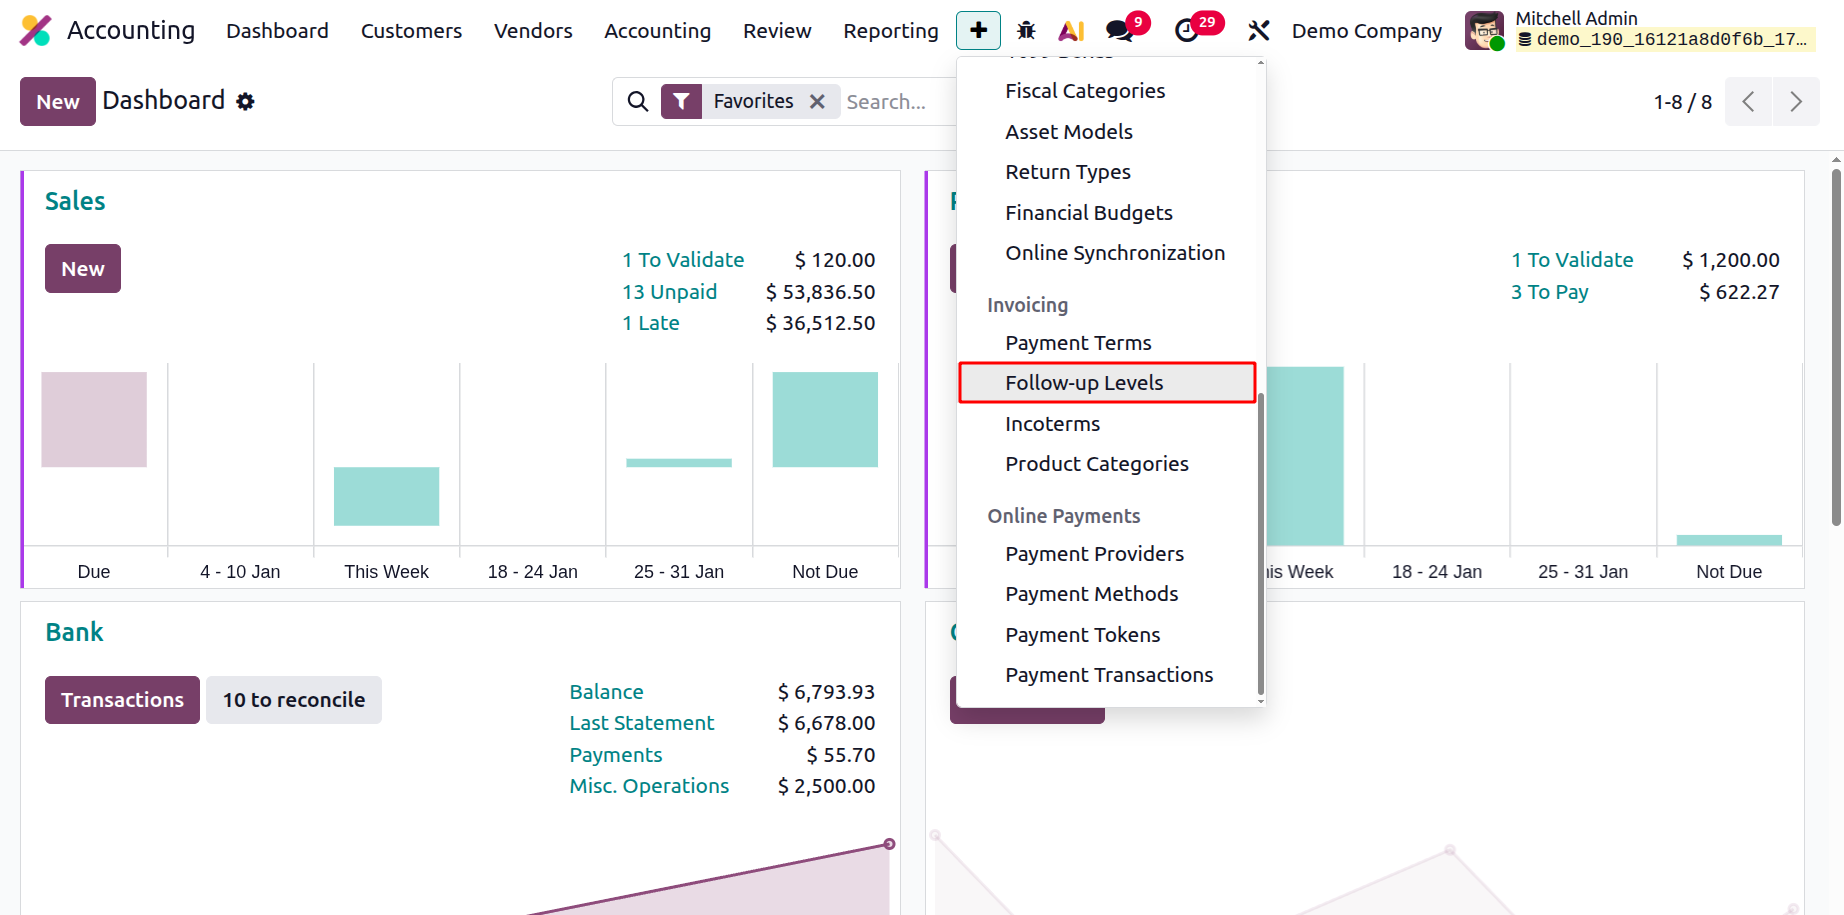
It is a great way to keep track of and organize client bills. Customers who wish to receive a breakdown of their invoices by follow-up levels and businesses who wish to track whose invoices are past due may find this helpful. Additionally, you may select the level for each customer and see which consumers are on which level with this tool. Additionally, it can assist you in setting up automated follow-up emails and SMS.
The Follow-up Levels menu, available via the Configuration tab of the Accounting module, allows you to administer and set up the follow-up levels for your business. We can select the appropriate option to specify the Payment Follow-up for the Accounting activity. You will sketch the Payment Follow-up window in the following scenario, as shown below.
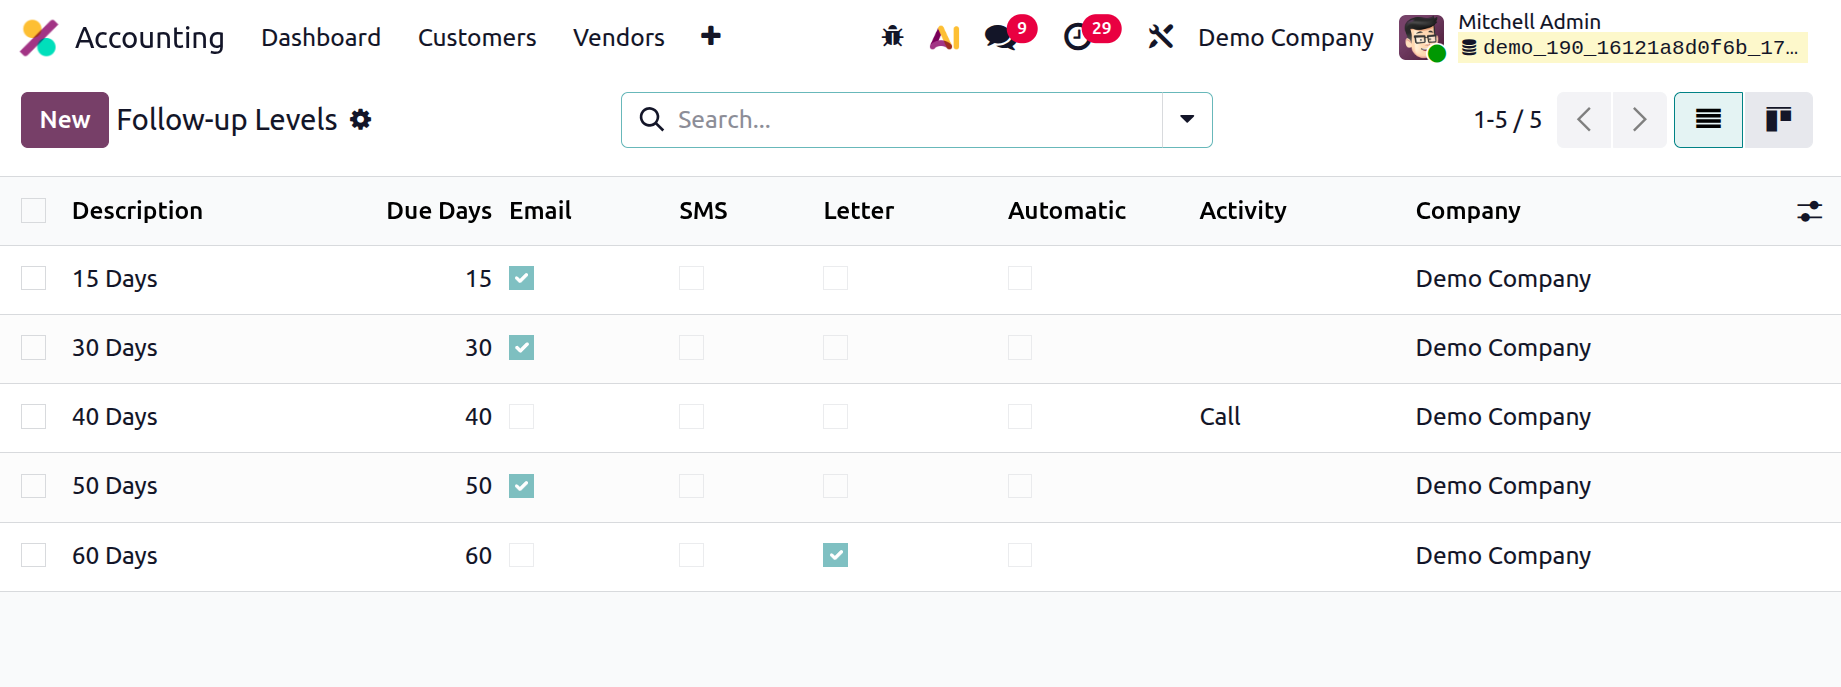
You may make sure you have the resources you need to monitor any past-due client invoices by utilizing this function. A polished preview of each previously generated Follow-up Level, along with crucial information like Description, Due Dates, Send Emails, Send SMS Messages, Send Letter, Automatic, Activity, and Company, will be displayed in the Follow-up Levels box. The follow-up actions on the Send Emails, Send SMS Message, Send a Letter, and Automatic buttons can be enabled or disabled based on the user's choices. The Filters, Group By, Favourite, Search, Kanban view icon, and Export All icons are among the additional typical Odoo window options that can be accessed here.
Gently clicking the New button will open the creation form for setting up new Follow-up Levels. Below is a screenshot of the creation window.
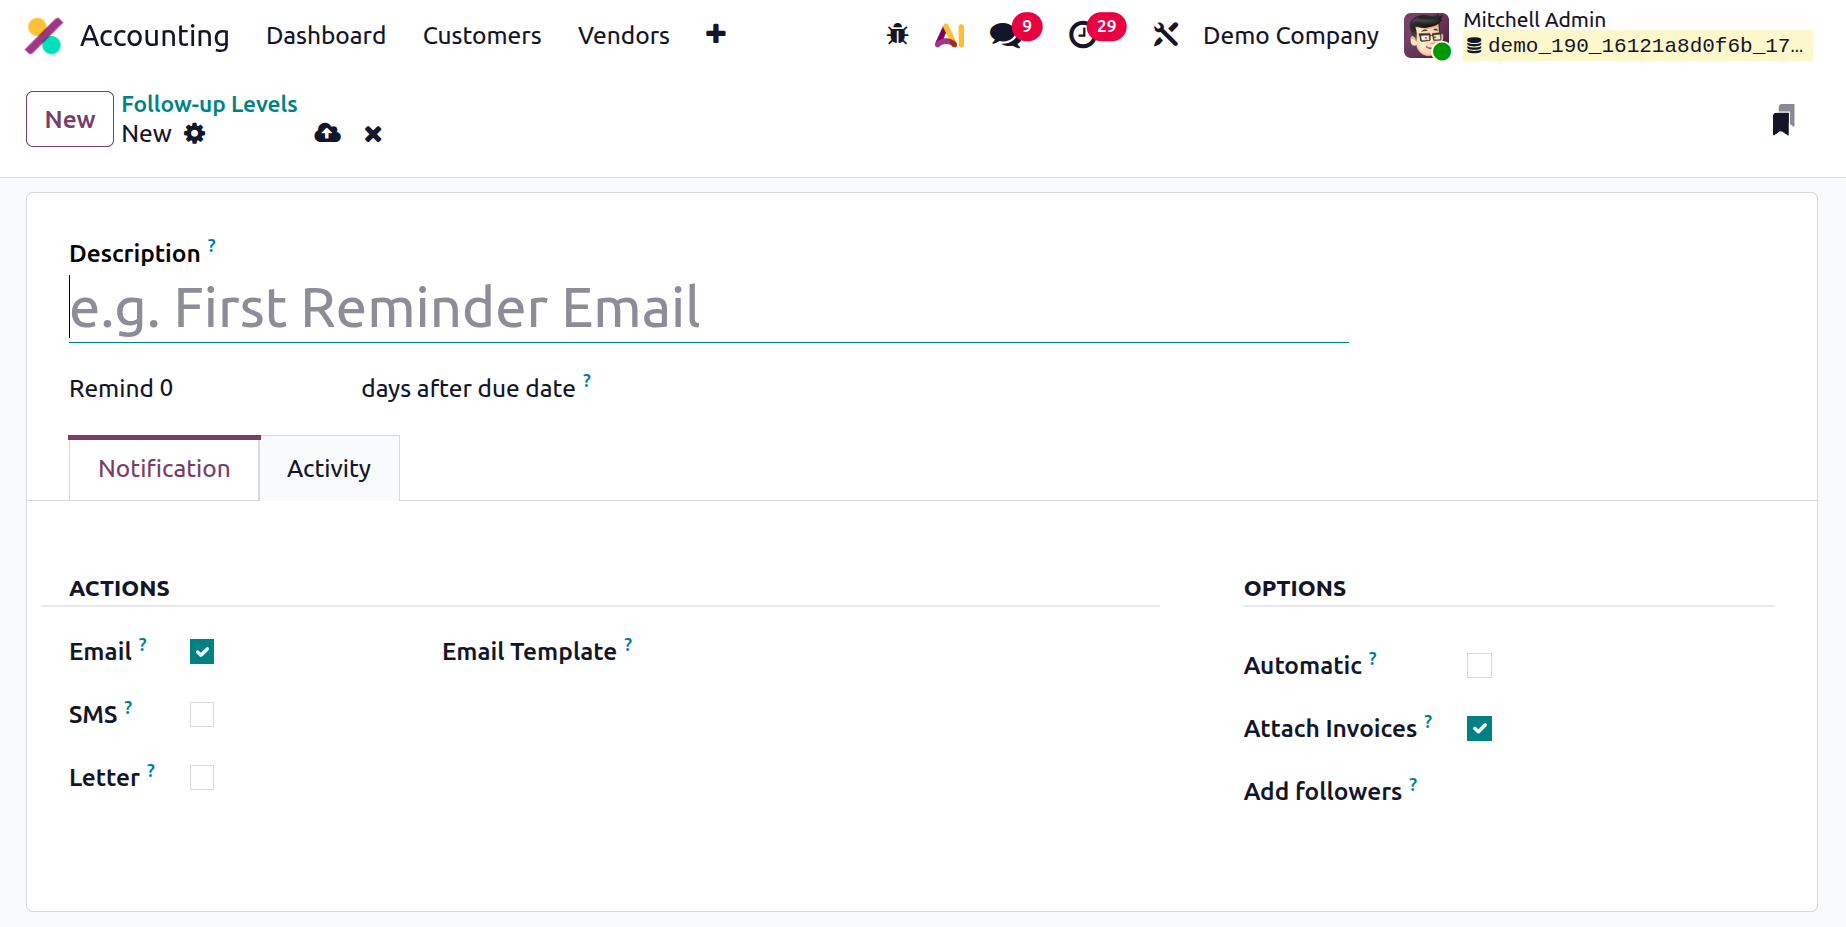
The name of the follow-up action can be entered in the Description section, along with the due date in the corresponding field. It is the period of time that must pass following the due date of the invoice before a reminder is delivered. You can adjust this value to negative if you wish to send the reminder before the invoice's due date. You can initiate the operations, such as sending a letter, SMS, email, etc., for each follow-up.
Additionally, the Payment Follow-ups Options, such as Automatic and Attach Invoices, can be enabled or disabled based on the circumstances. The message in response to the Payment Follow-ups will also be displayed in the Content Template for the payment reminder. A follow-up report that takes the established levels into account is generated as invoices become due.
It is clear that the Follow-up Levels feature is sufficient for managing and customizing the follow-up levels for client bills, so you can use this helpful tool to track customer invoices and make sure they are paid on time.
You can assign the sign activity to the designated individual by choosing "schedule activity" under the "Activity" page, which offers manual action options.
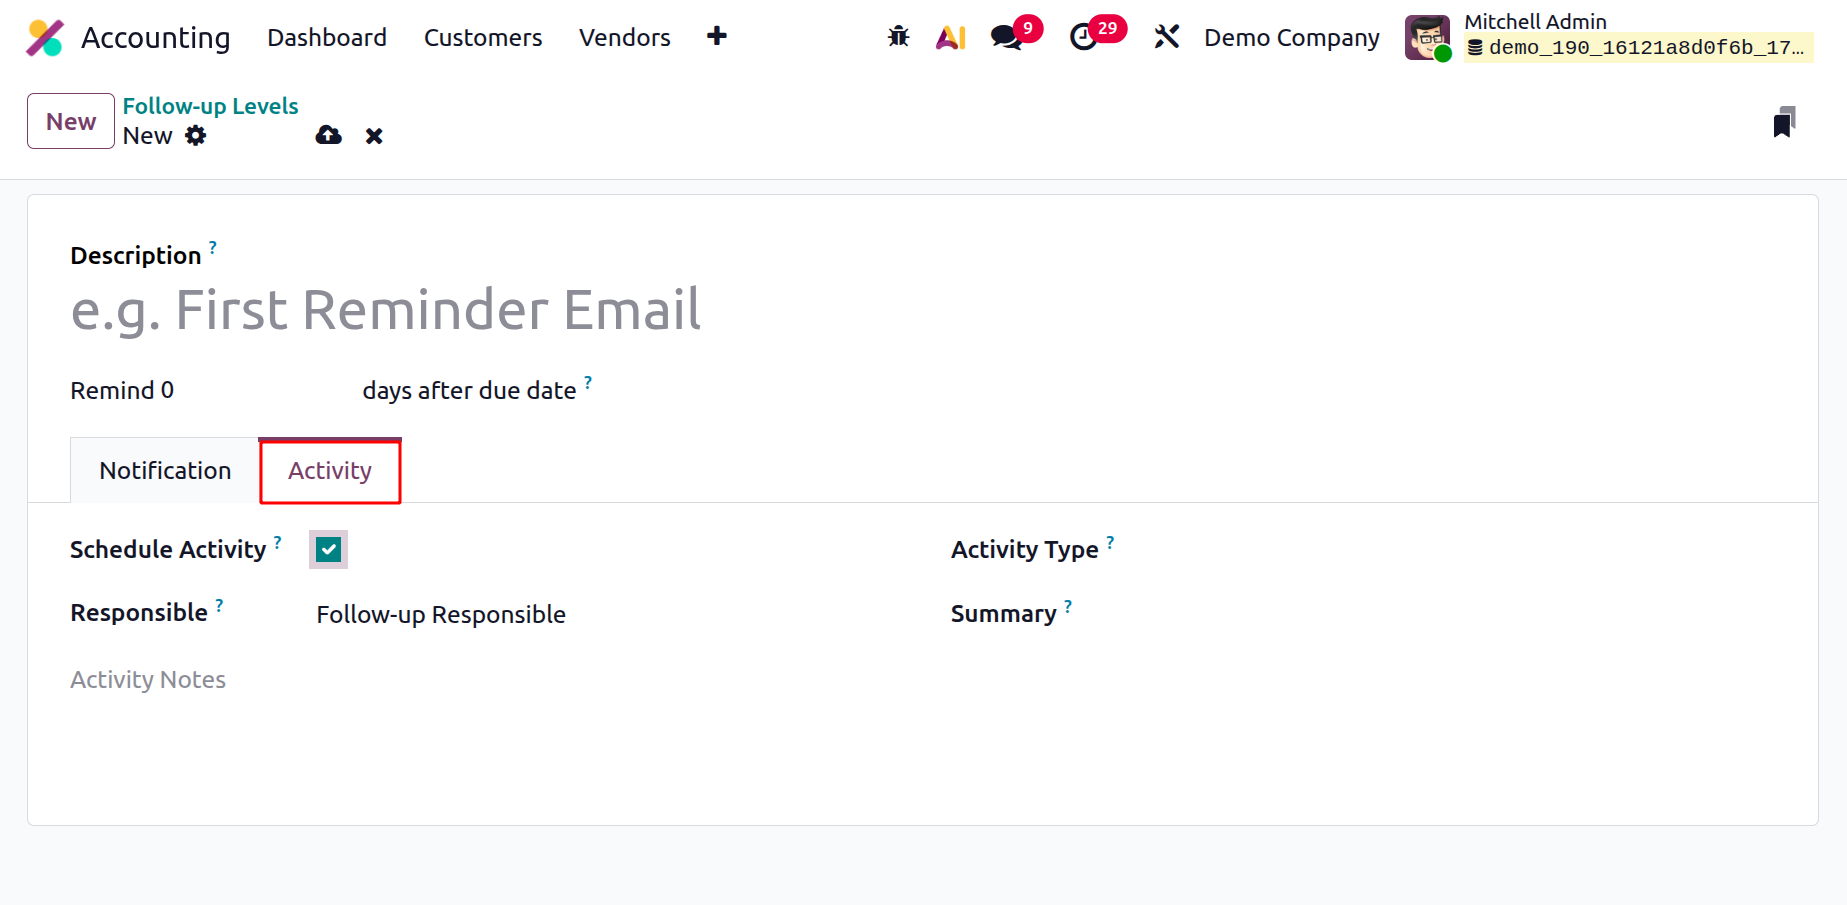
The Schedule Activity boolean can be used to schedule actions inside follow-up levels. Indicate who is in charge of the task in the Responsible field. Next, choose the Activity Type and include the Summary.
We'll now talk about the section that describes the Incoterms settings menu.
Incoterms
The Incoterms, or international commercial agreements, specify the obligations of buyers and sellers with regard to product delivery. They are used to decide when the buyer obtains ownership to the goods from the seller and who is in charge of covering freight and other transportation costs. Odoo 19 Accounting uses Incoterms to automatically fill in shipping-related information, such as the shipping address and Incoterms, on the Sales Order and Purchase Order forms. Products are also utilized to make the appropriate accounting entries when they are sent.
The Incoterms menu, found in the Invoicing portion of the Configuration tab, can be gently pressed to navigate the Incoterms window, as seen below. Because the terms and conditions are often different for local shipments, it is important to remember that Incoterms should only be utilized for items being transported internationally.
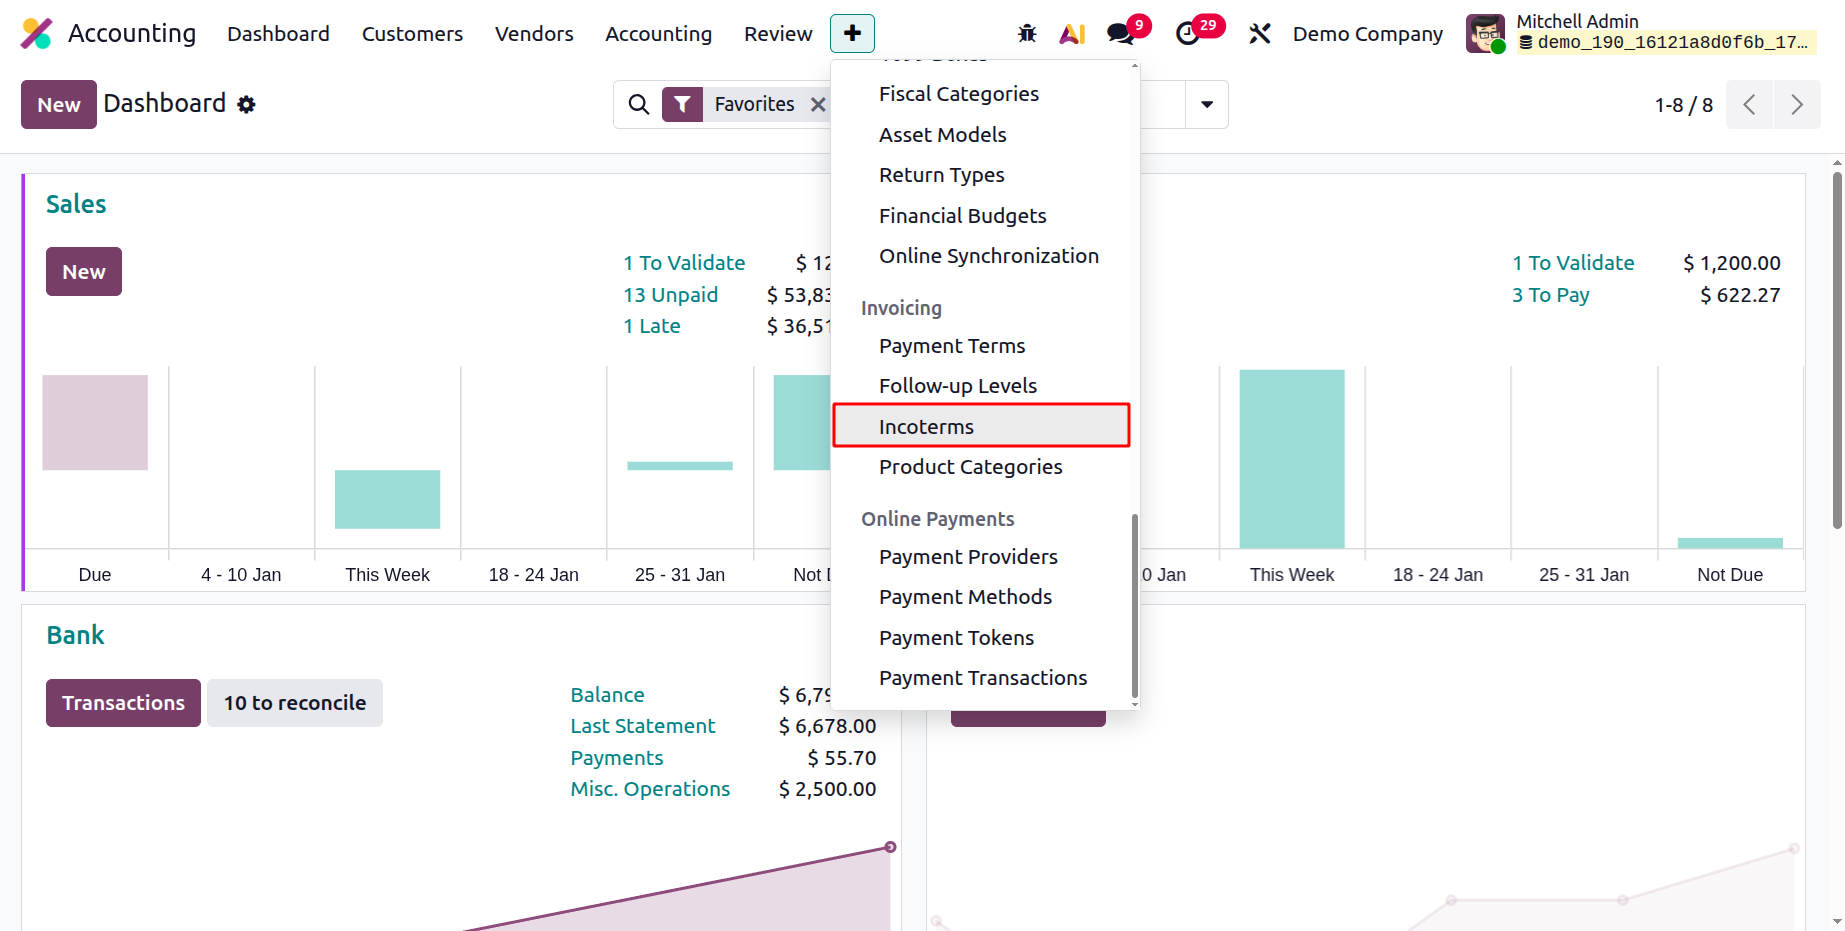
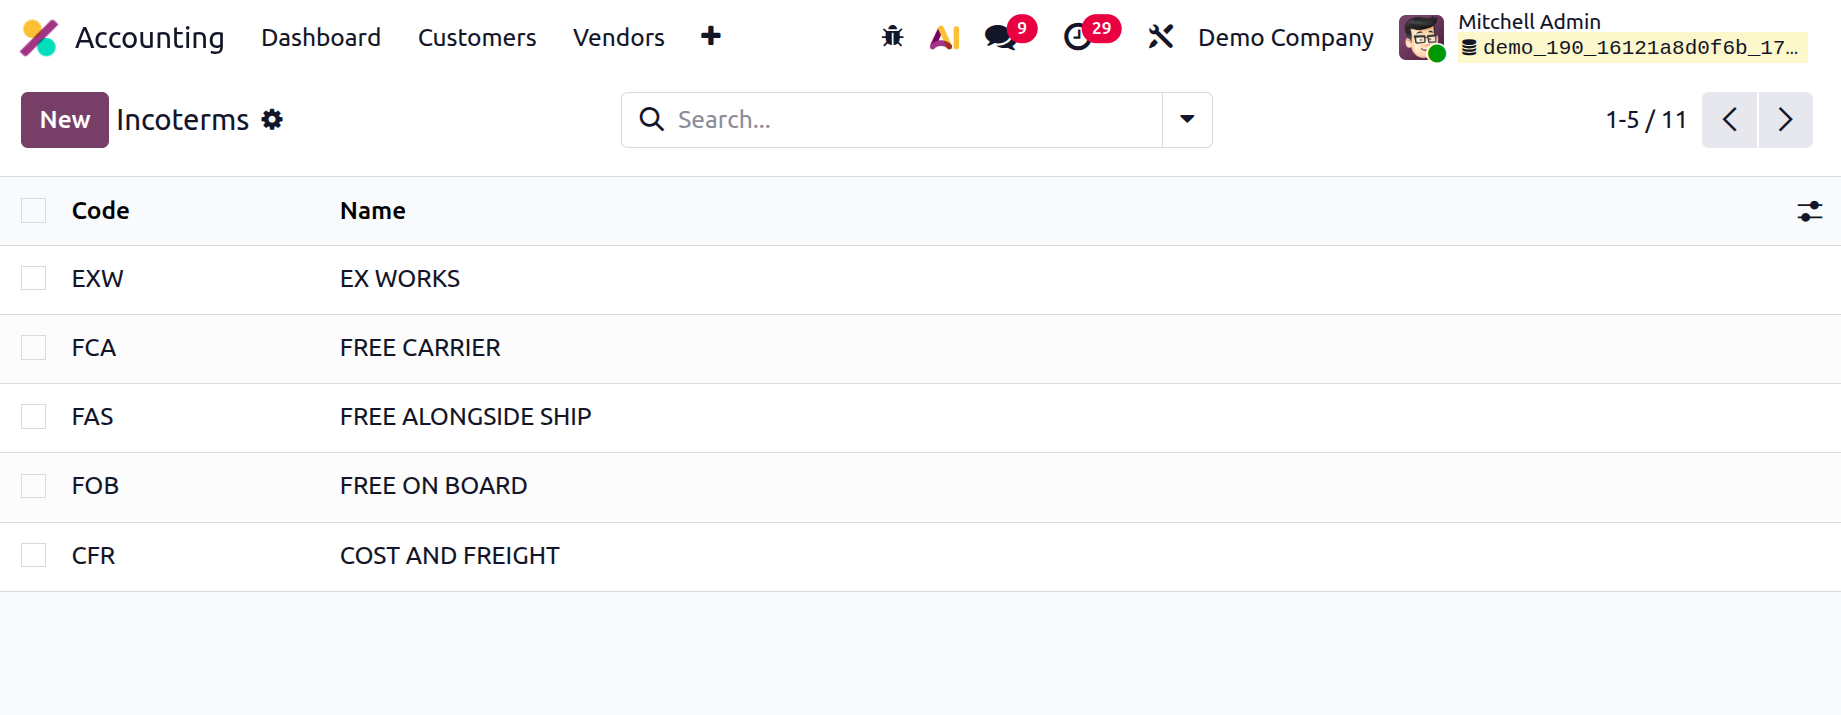
This window will display every facet of the Incoterms activities that were previously displayed on the platform. In addition to other useful tools like Filters, Group By, Favourites, Search, and Export All, the screenshot shows how the platform anticipates the need for sorting functions and offers both conventional and resizable sorting. The New button makes creating new Incoterms simple. Clicking the New button opens a new creation line in the same box where you can set the new Incoterm.
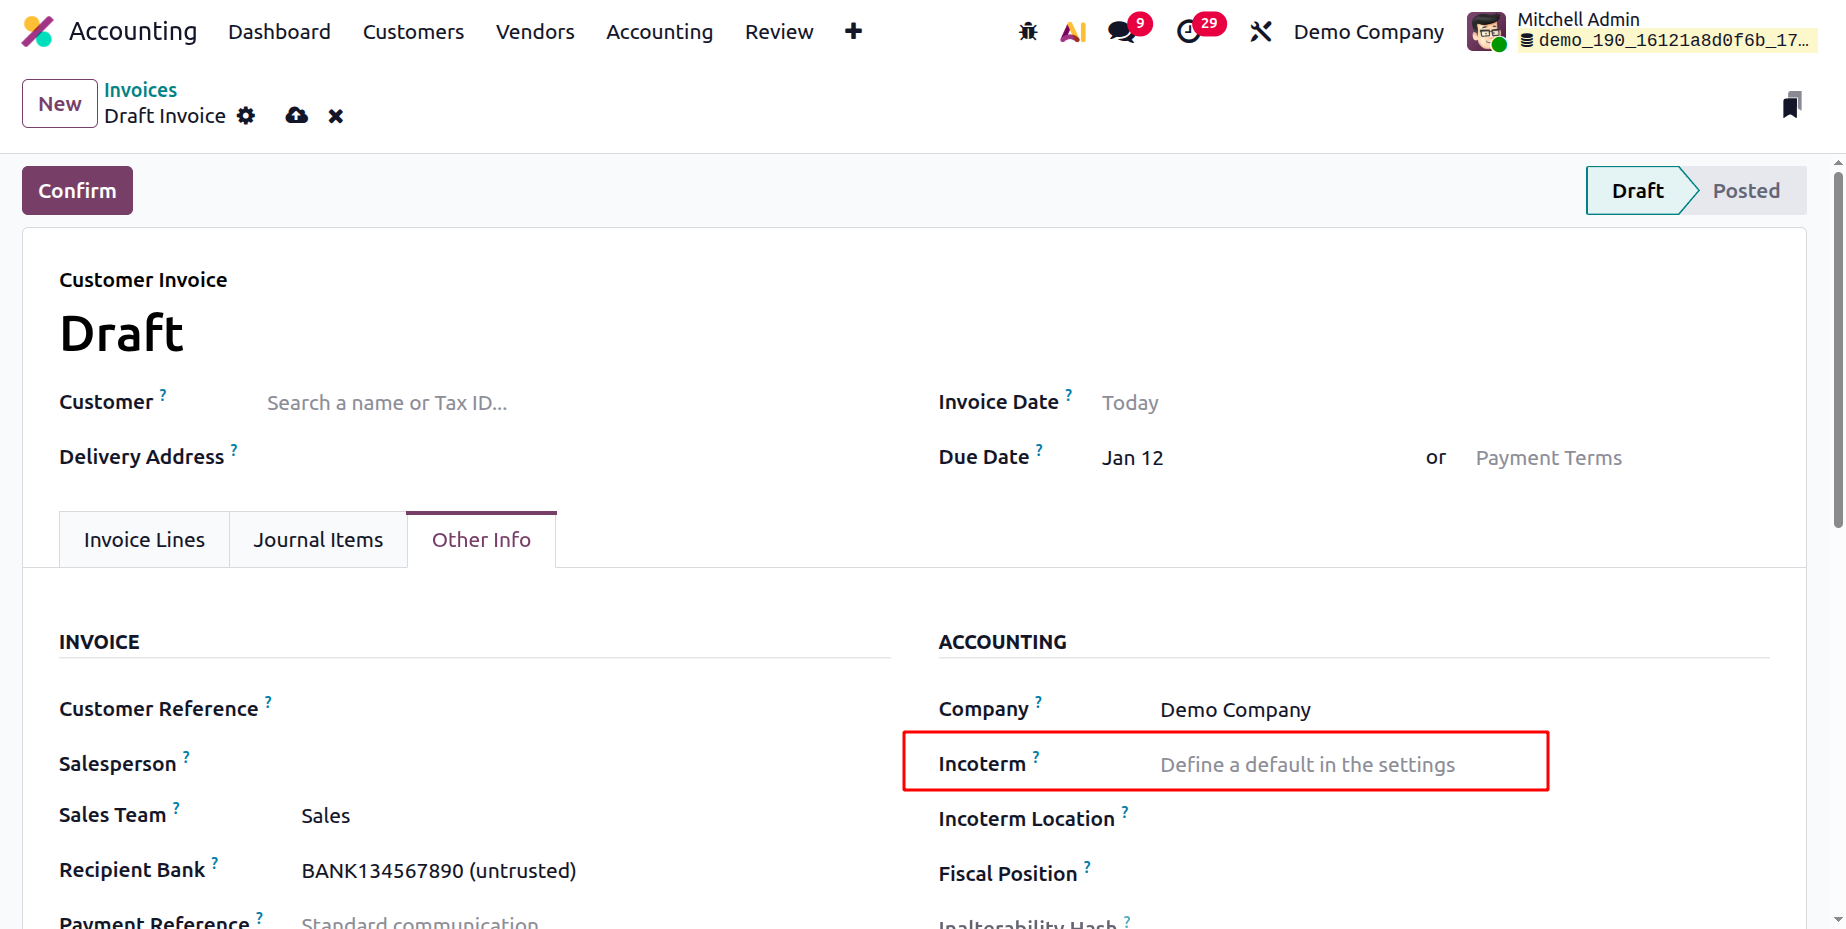
Incoterms can be applied to invoices and even defined as defaults in the accounting configuration settings section devoted to customer invoices. The invoice will additionally contain the pertinent Incoterm.
Let's move on to the platform's Intrastat Code setting after talking about how Incoterms are managed in the Odoo19 Accounting module. To safeguard both the buyer and the seller, each incoterm designates a particular location at the origin or destination. These requirements should be as detailed as is feasible.
Product Categories
Business software's product categories are helpful for arranging and managing massive amounts of inventory. It helps create a productive product tracking system and makes it easier to identify, order, and report products. Maintaining an orderly inventory of goods and commodities can also assist guarantee that clients receive items that are relevant to them. Product categories can also assist companies in identifying patterns in consumer purchasing behaviour. Product Categories is a feature of the Odoo 19 Accounting module that helps users better organize and manage the items in their inventory. Items can be grouped together using product categories, which makes it easier to find them in the inventory.
Setting different prices for different kinds of products is made easier by using Product Categories, which also allow you to create distinct pricing criteria for each category. Reports that provide an overview of products and their sales performance can also be generated using product categories. This tool makes it simple to divide your financial data into several product groups. Grouping your products into various categories and viewing the associated financial data is simple. Additionally, forecasting, budgeting, and assessing each product category's performance in comparison to industry standards can be done using this functionality. Additionally, you may keep an eye on each product category's profitability and examine how pricing tactics affect overall success.
The Products Categories menu is located on the Configuration tab in the Invoicing part of the Odoo 19 Accounting module. You may quickly reach the Product Categories window using this option.
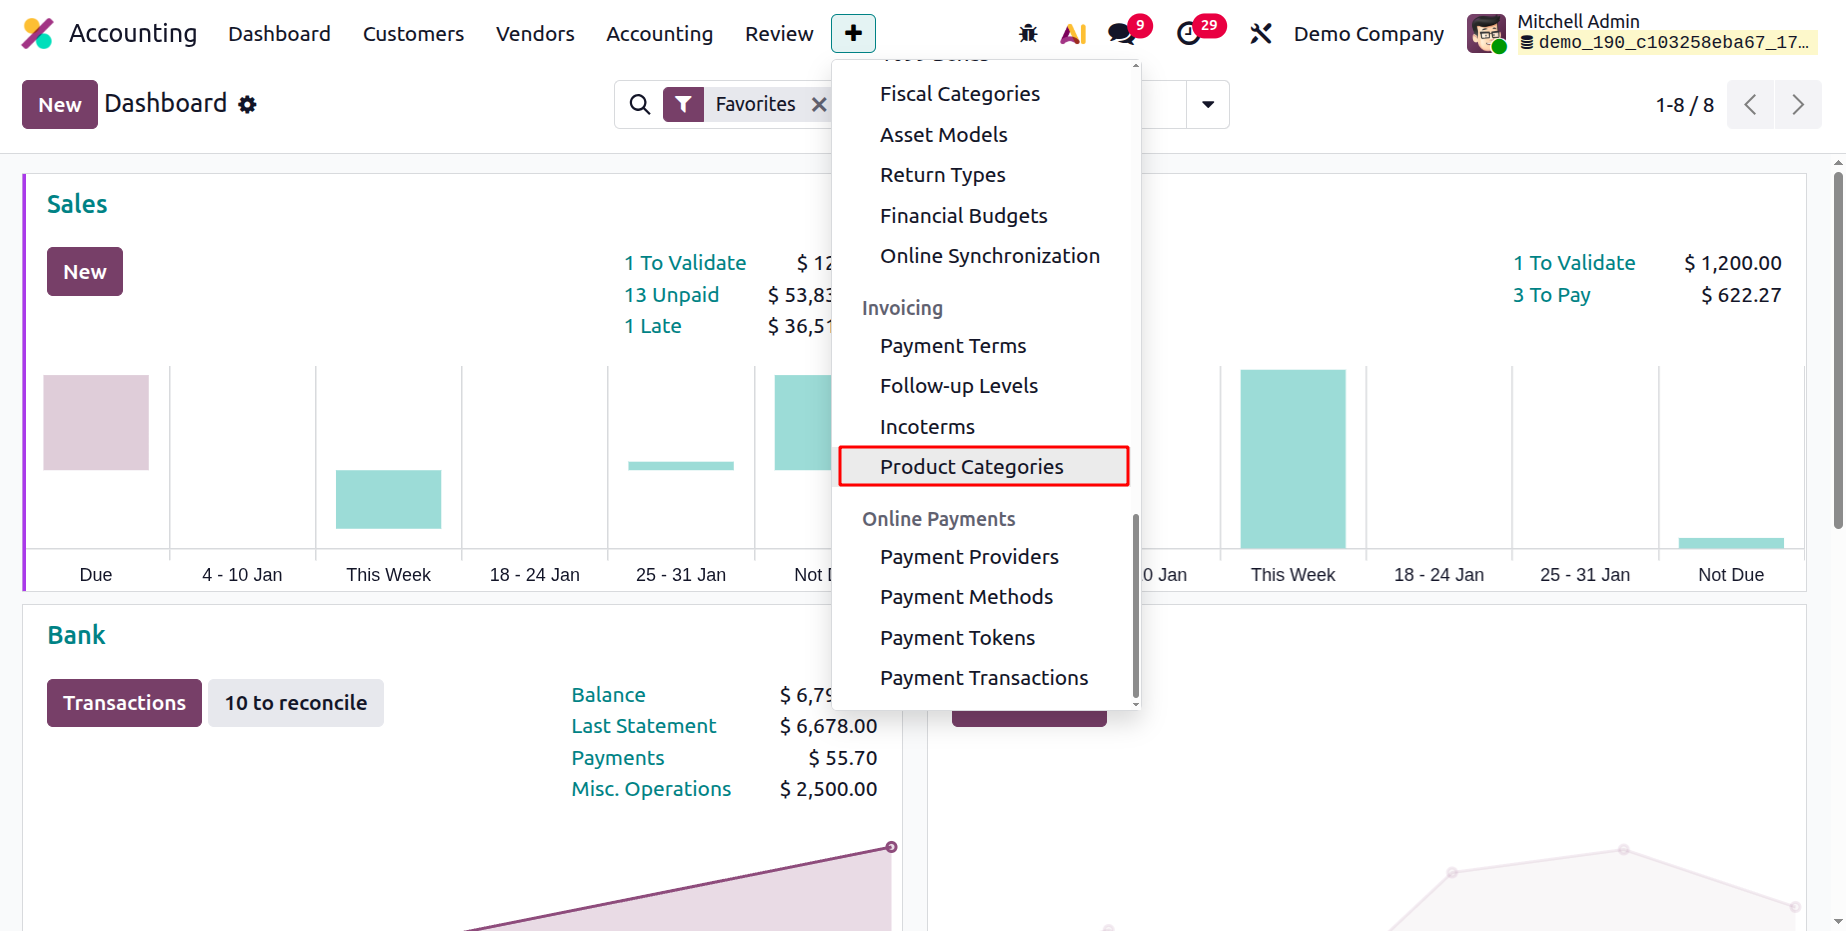
The window will keep track of each entry for previously designated categories, as demonstrated in the example below. You can quickly find and arrange the product category you need by using the Filters and Group By tools. You can choose from any of the pre-established categories, thoroughly review the records, and make any necessary modifications. Additionally, you can use the NEW button to add a new Product category.
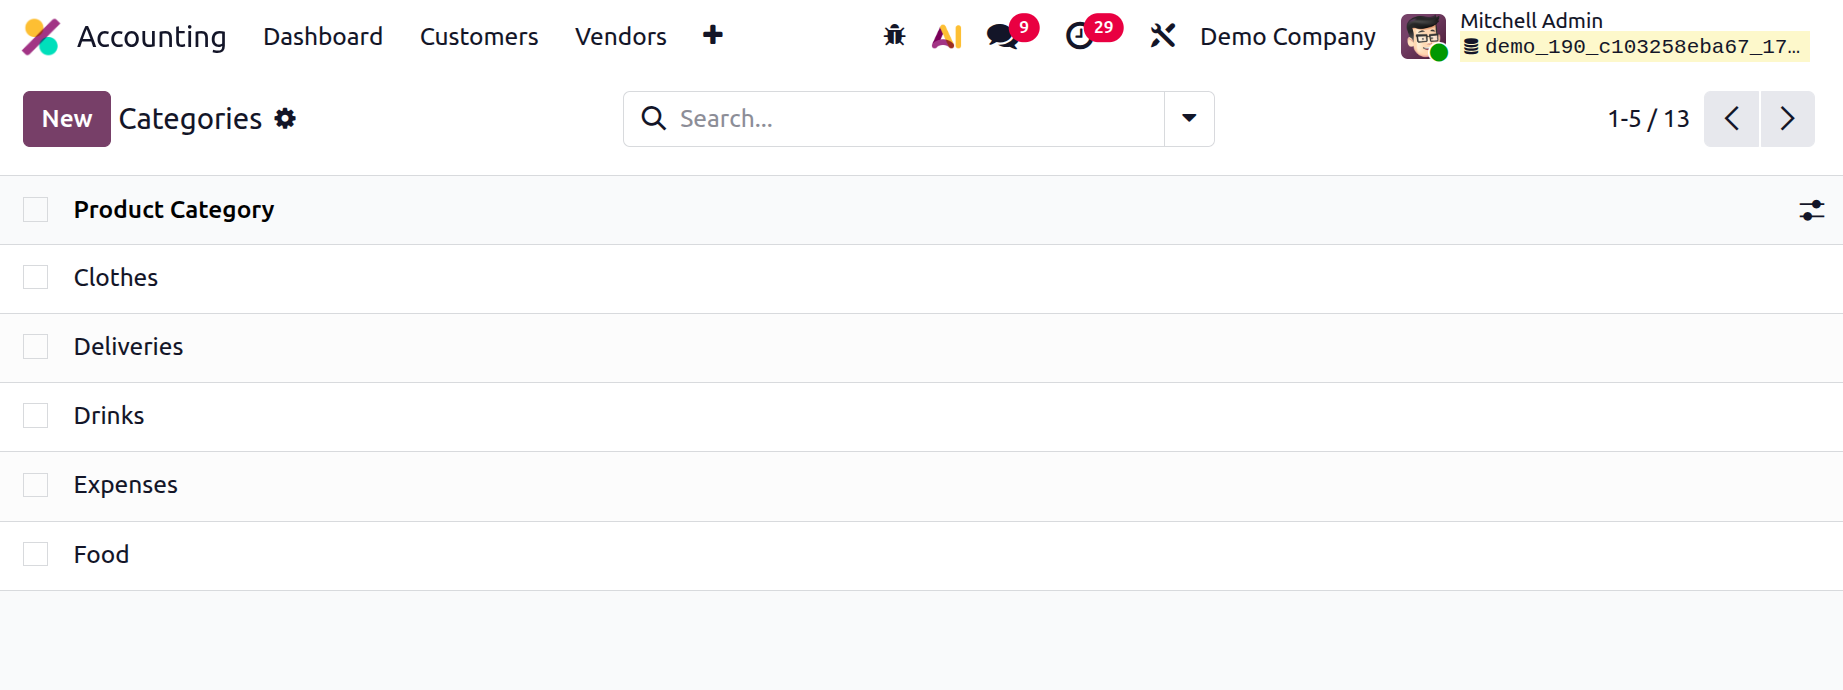
First, you can enter the name of the category in the Category part of the Product Categories creation form. After that, the Parent category and the Ava tax category can be assigned.
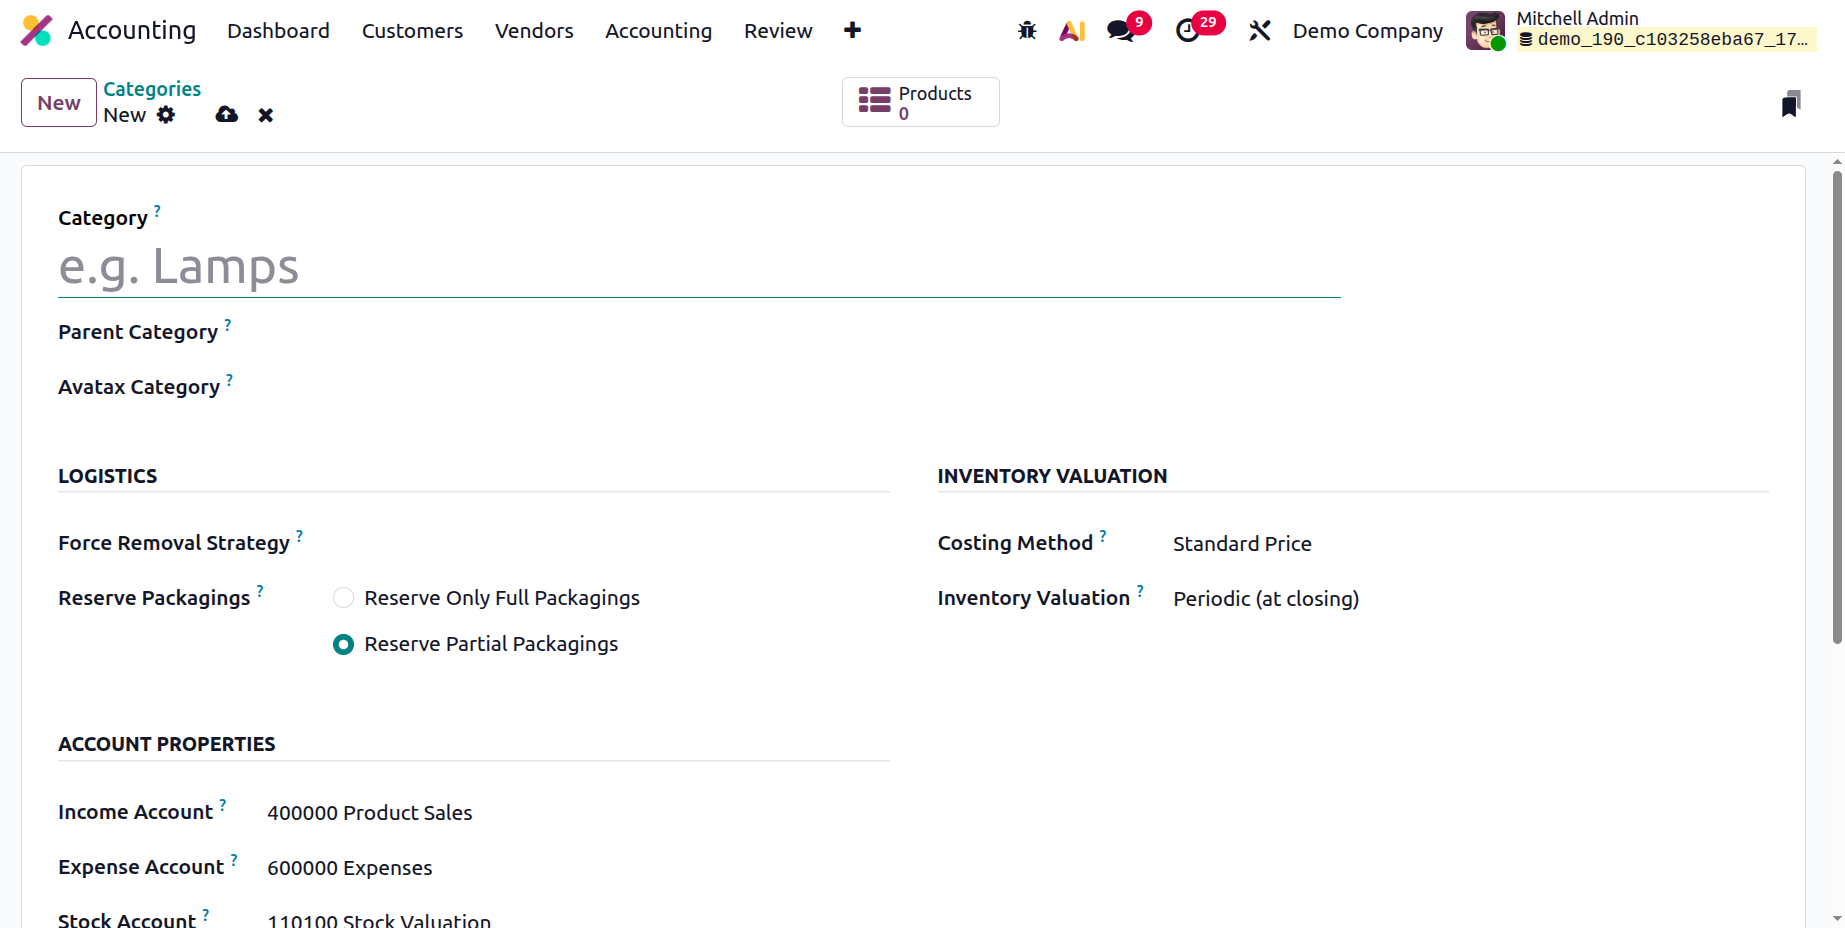
The "Force Removal Strategy" for the Routes and Reserve Packaging can be explored in the LOGISTICS section. The Force Removal method column's dropdown menu allows you to choose a certain removal technique. In that instance, regardless of the source's location, the removal approach will be used for this product category. Odoo 19 recommends a variety of removal techniques, including:
- First In First Out, or FIFO, is a tactic you might use if you want to sell the item that was stocked first. After that, the first batch of items that were stocked would be removed. When products must be utilized or sold in the same order that they were manufactured or purchased, this strategy is employed. Because it guarantees that the oldest item is consumed first, this approach is frequently used to categorize product categories.
- When the last-stocked item needs to be moved into the first slot, the LIFO (Last In Last Out) approach may be used. When items that are created or acquired last are used first, this method—which is the opposite of FIFO—is applied. When prices are rising and taxes must be kept low, this approach is most effective.
- Closest Location: The products must be taken out of the closest storage facility before choosing the closest location option. This is advantageous since it saves time and effort when delivering goods to a customer.
- Least Package: The package with the fewest items added will be taken out of the place first.
- FEFO (First Expiry First Out): This final method is applied when a product has an expiration date. It is crucial to ensure that the products with the earliest expiration date are used up first. This is crucial for products that have a limited shelf life, such food, medicine, and other commodities.
Additionally, the INVENTORY VALUATION section has configuration options for inventory valuation, including Costing Method and Inventory Valuation. Standard Price, First In First Out (FIFO), or Average Cost (AVCO) are the definitions of the costing approach. While FIFO and Average Cost are dynamic approaches that depend on the product's purchase price and the quantity in stock, Standard Price enables you to establish a fixed cost per product. While FIFO uses the price of the oldest stock, average cost uses the purchase price of all available shares.
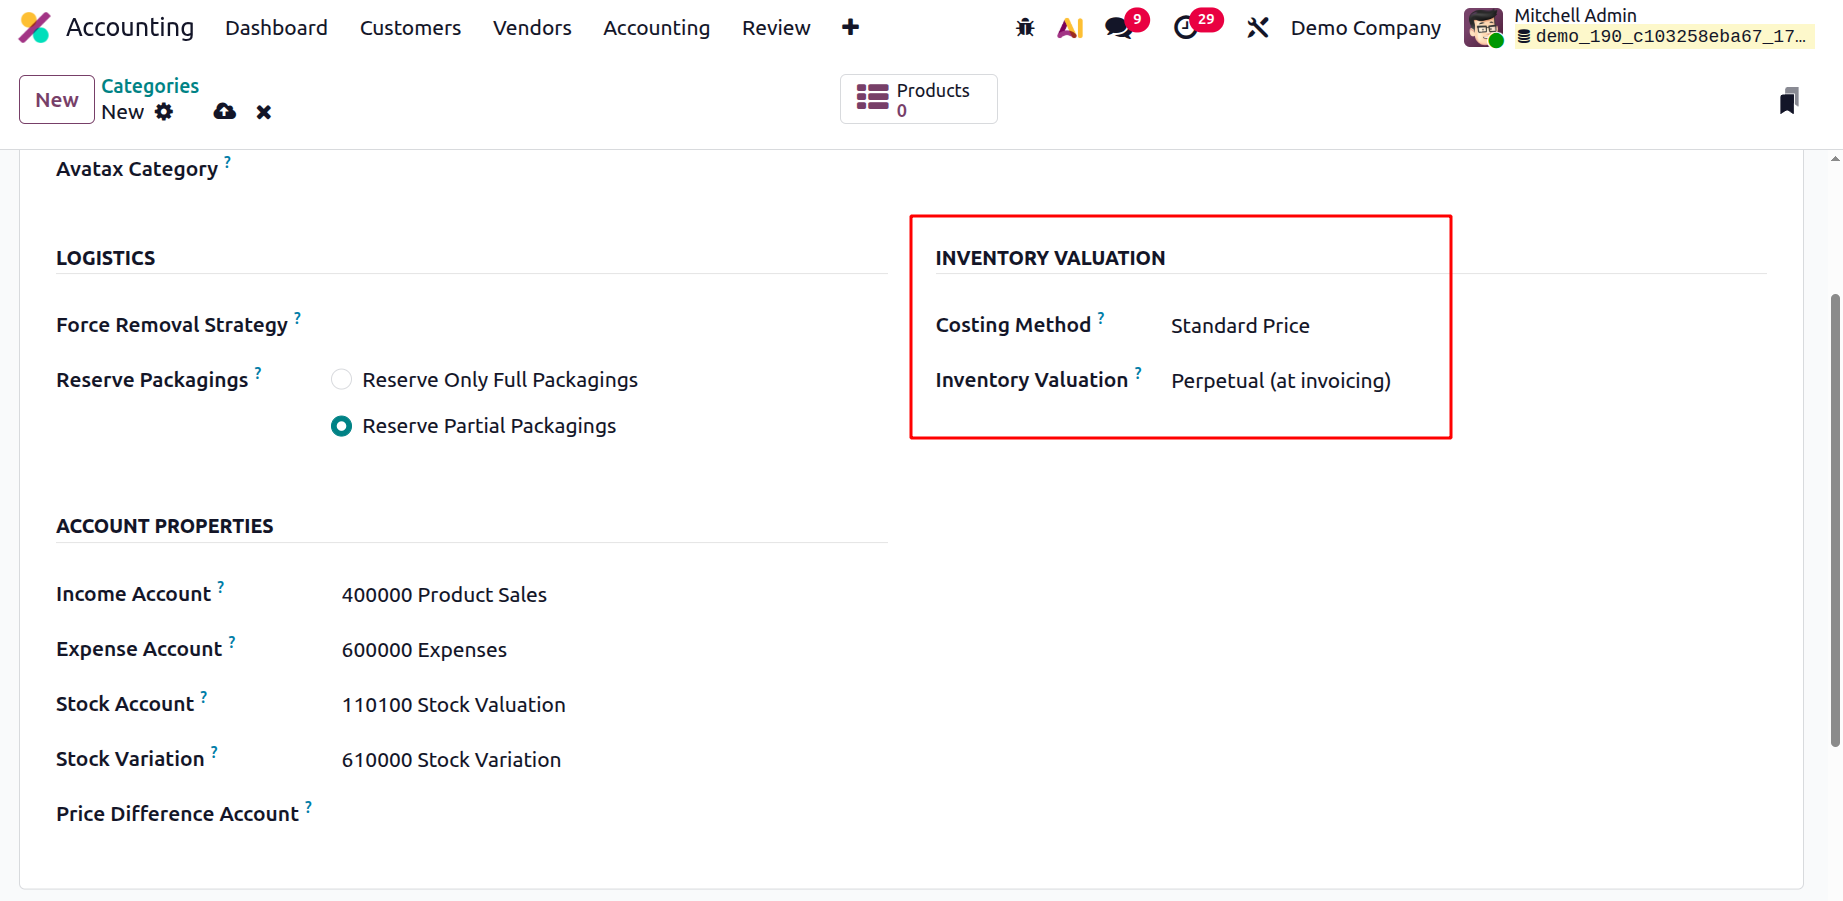
The Inventory Valuation is done to confirm how stock journals should be created for this specific category, and the platform allows you to execute both Periodic (at close) and Perpetual (at invoicing).
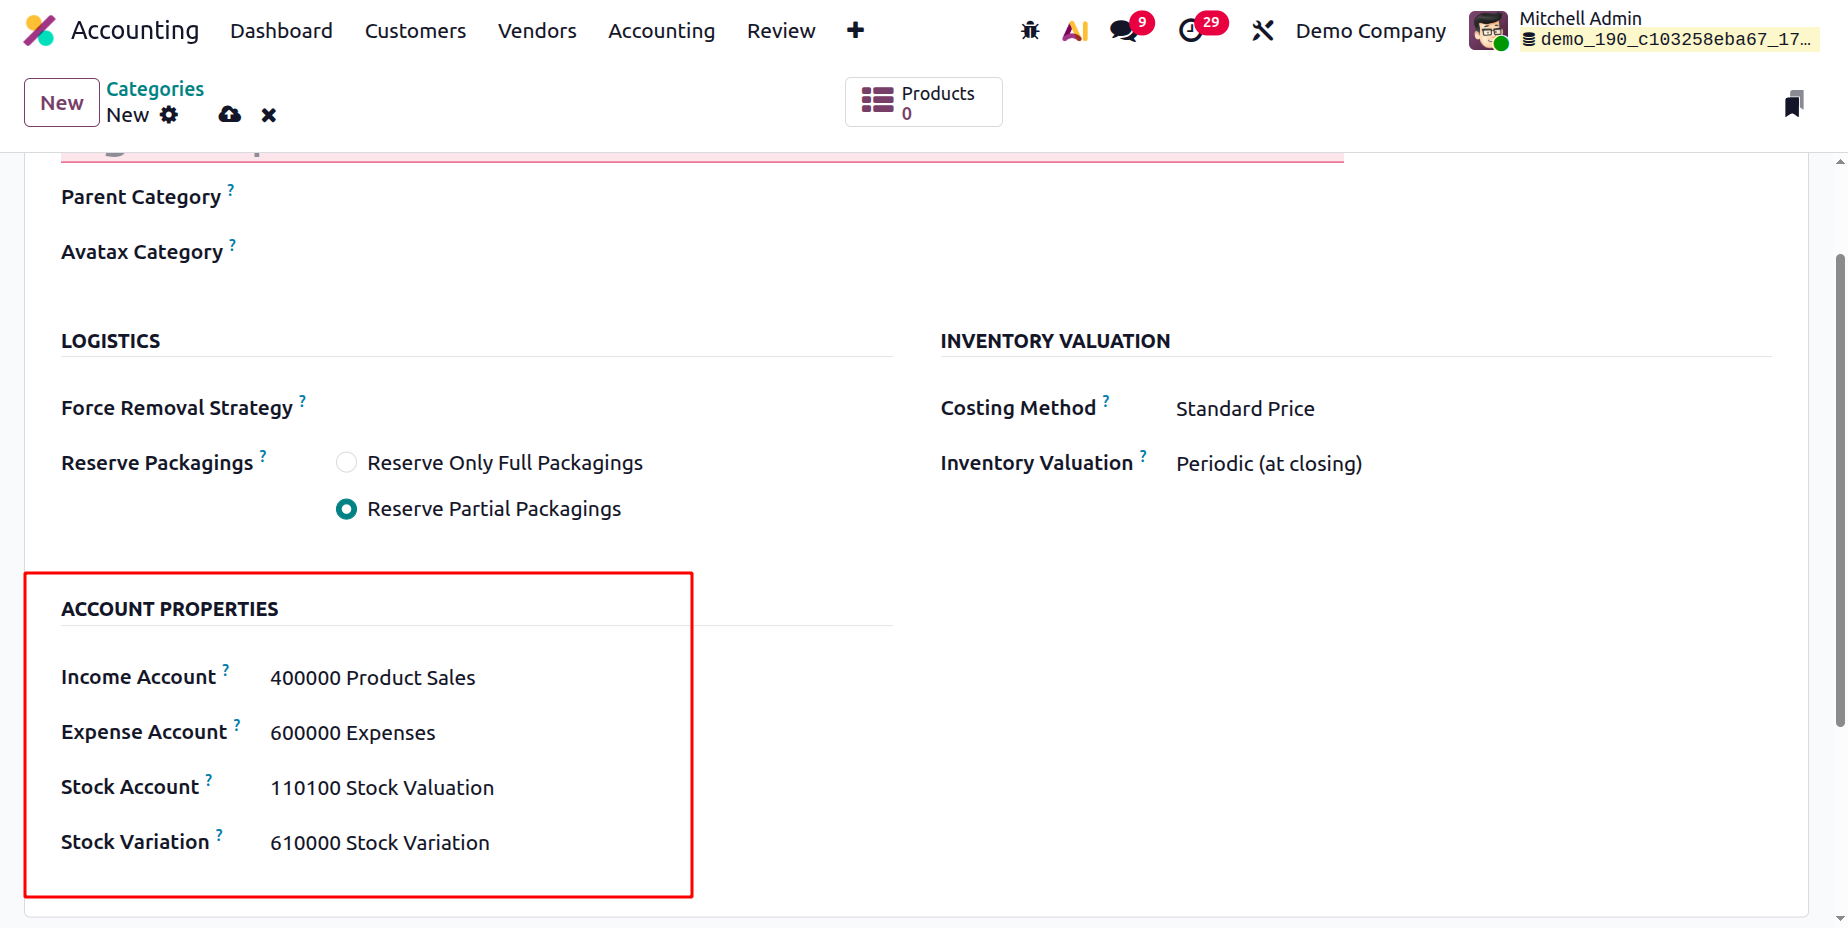
Similarly, by establishing a new field or selecting one from a dropdown menu, you can create fields pertaining to ACCOUNT PROPERTIES, such as the Income Account and the Expense Account. The revenue account will monitor all profits from this product category, while the expense account will monitor all related expenses. The Stock Account and Stock Variation accounts can be mentioned inside the Product Categories.
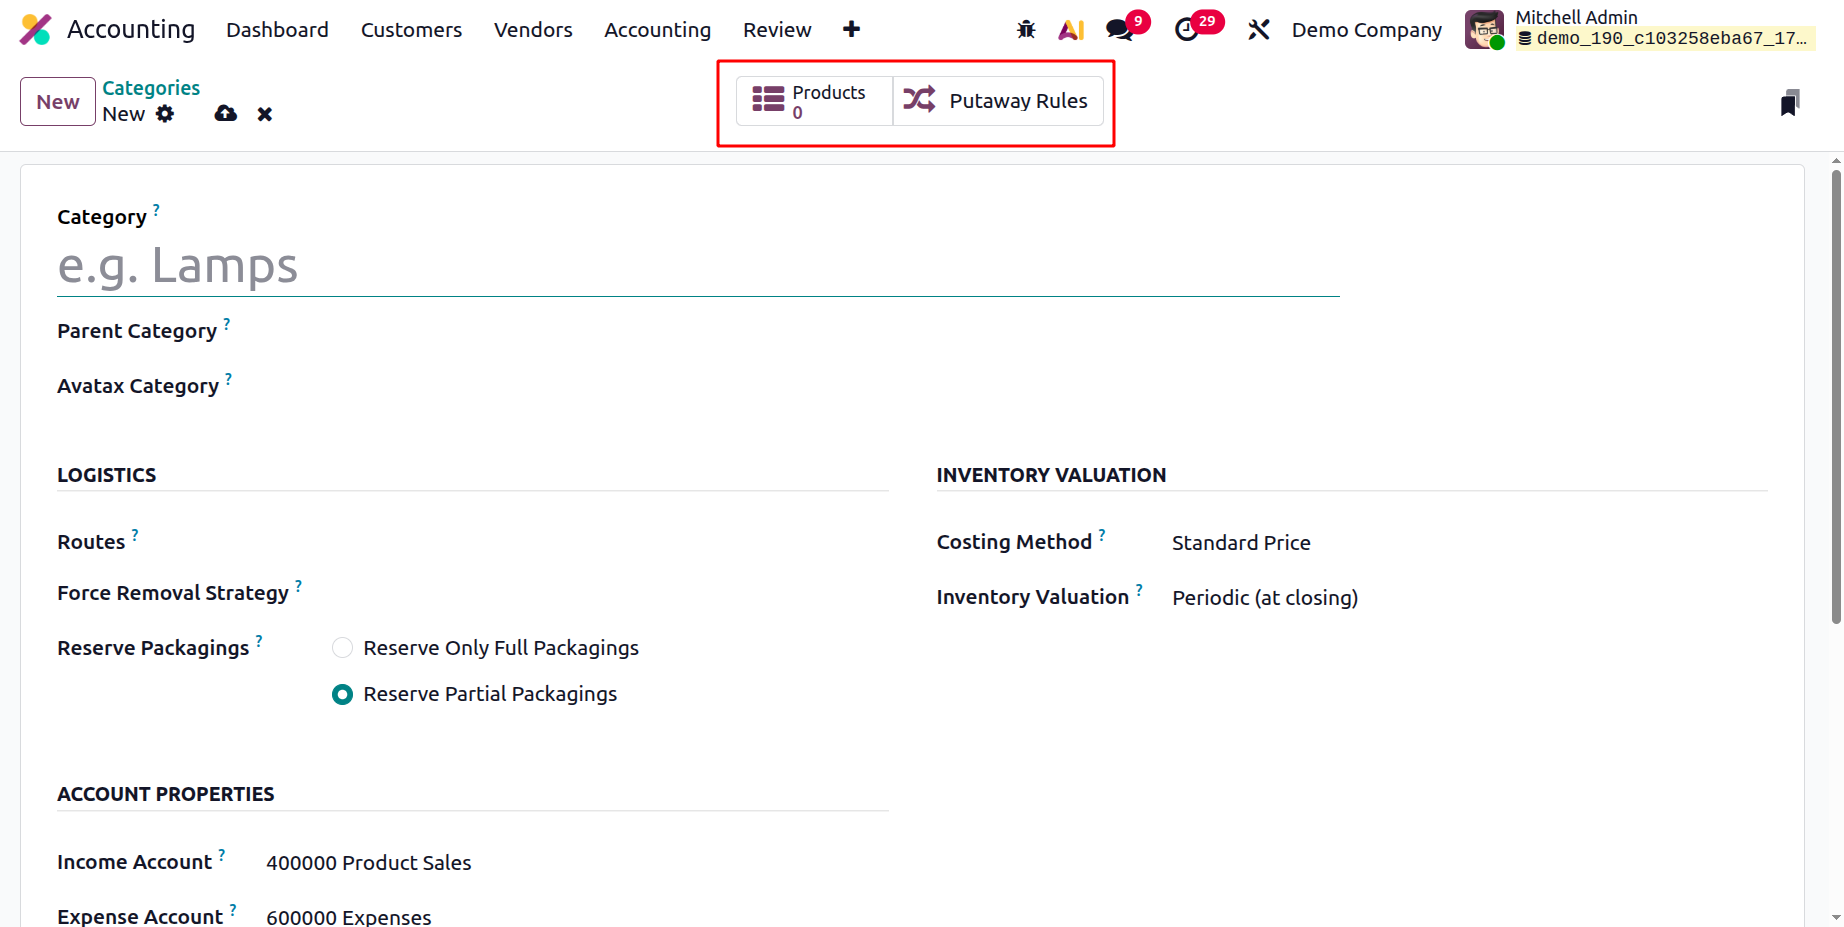
You have successfully set a Product Category if all of these selections have been completed. As seen in the example below, the window will show smart tabs, such the Products and Putaway Rules tabs, in the upper right corner in addition to all of the options.
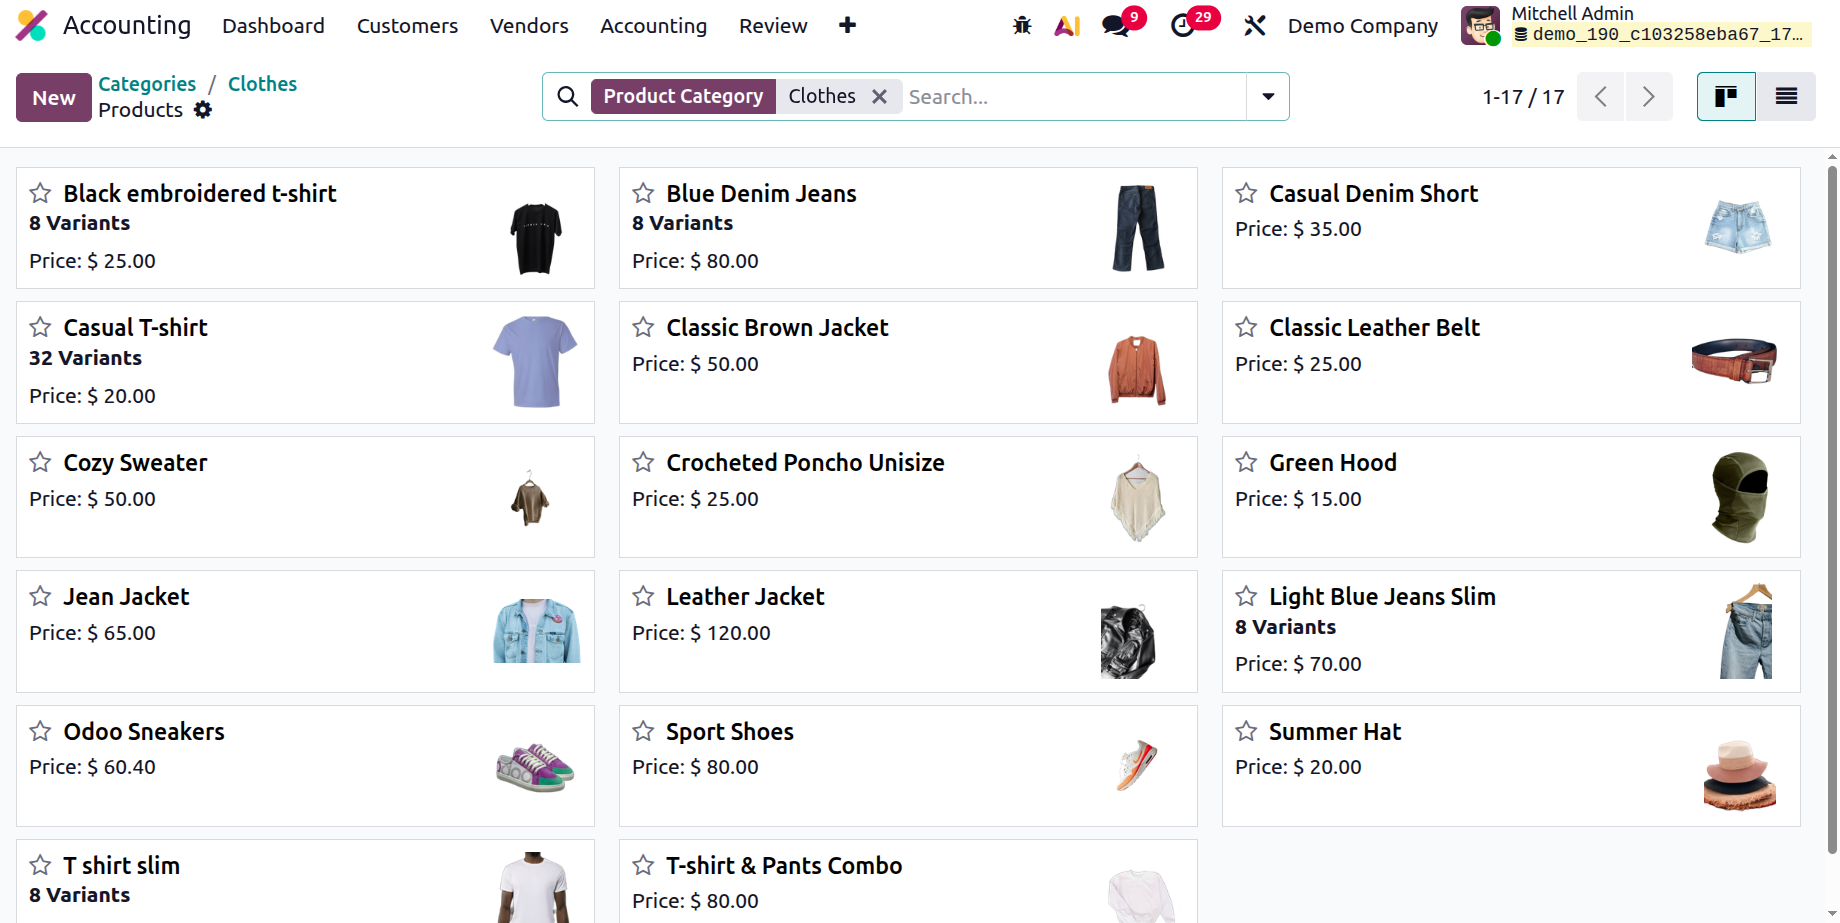
The product details in the product menu will be displayed in accordance with the different stages and the structure of the specific product category. You might be able to see every product being stored if you take off the filters.
All of the putaway rules that have been provided for the product that falls under that specific category are displayed in the category form's smart tab Putaway rule. Define the routes and removal strategy under Logistics to guarantee that all items in this category are removed from the warehouse in accordance with the chosen removal strategy.
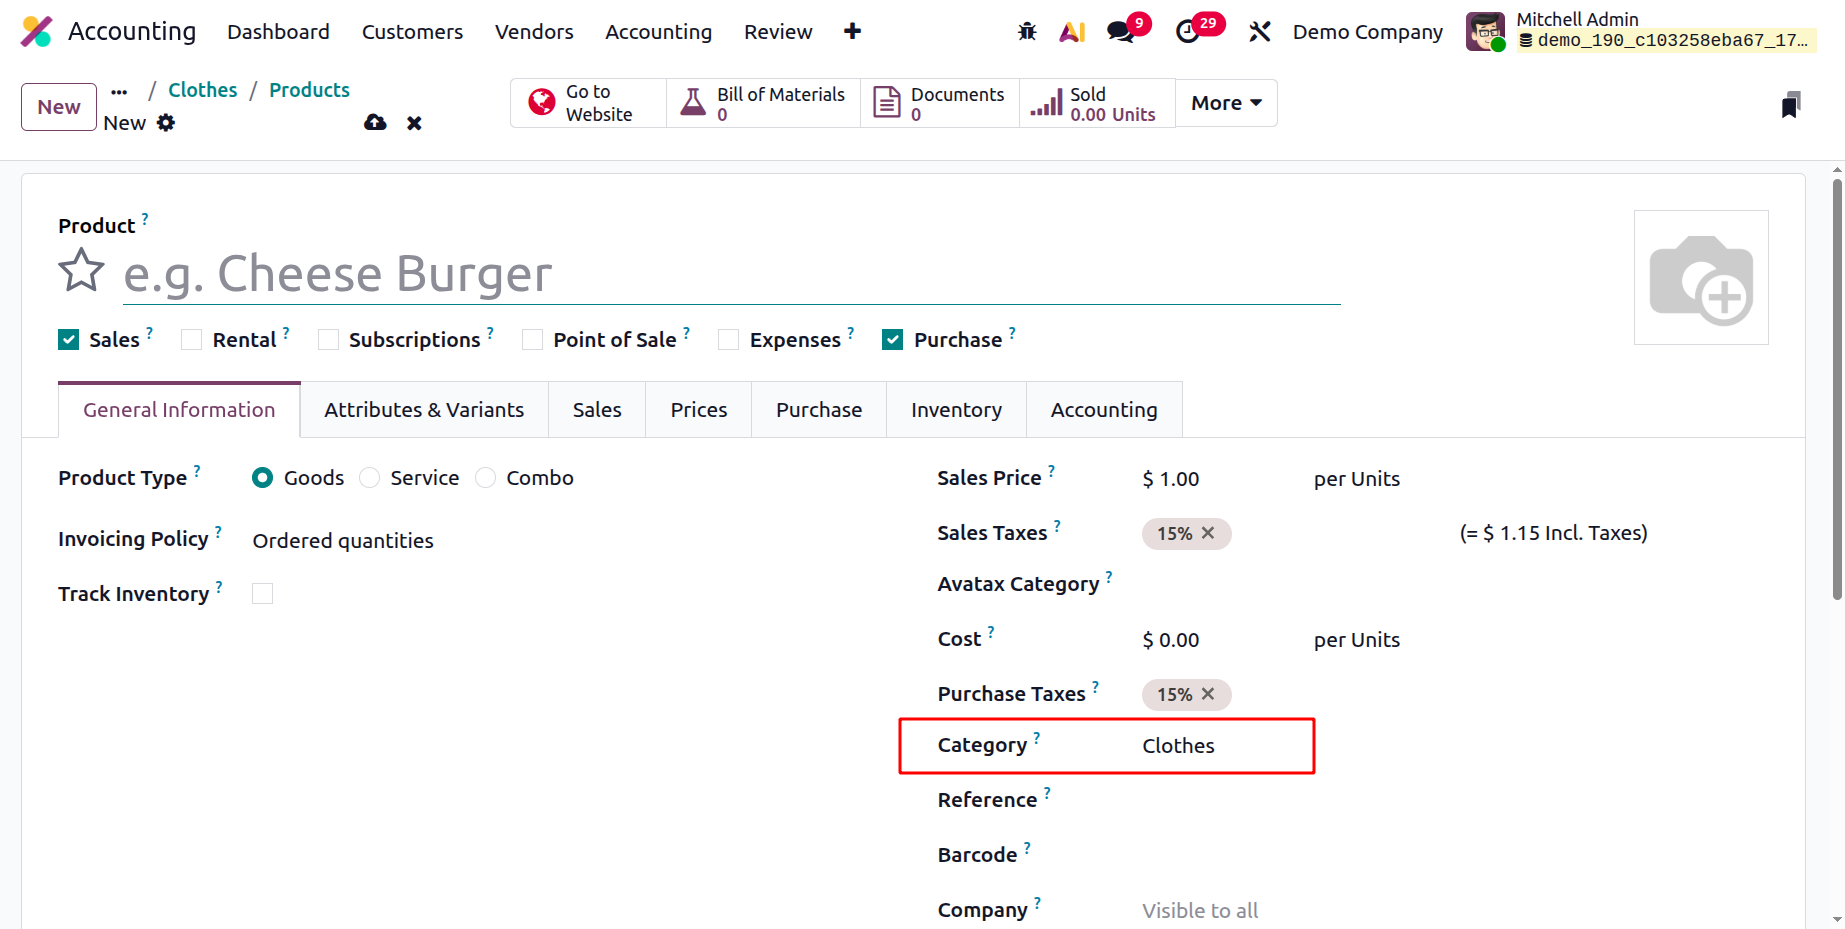
Adding the generated product category to the product is easy.
Let's move on to the following section, which covers Intrastate Code setups, now that we have a firm grasp on how to set up Product Categories in the Odoo19 Accounting module.
Intrastat Code
Goods that are transferred between EU nations are identified using an identifier called the Intrastat identification. This code is used to monitor the flow of goods and identify the tariffs and taxes that are applicable to them. The value of international trade in goods is also determined using the Intrastat code. It serves as an identification code for tracing the flow of products between nations. Customs officers use this code to document the value of imported and exported items.
The European Commission assigns a product an eight-digit designation called the Intrastat designation. For statistical purposes, the code is used to identify the product. The Configuration tab's Invoicing section has the Intrastat Code menu. The Intrastat Code window, which resembles the screenshot below, will appear as soon as you click on this menu.
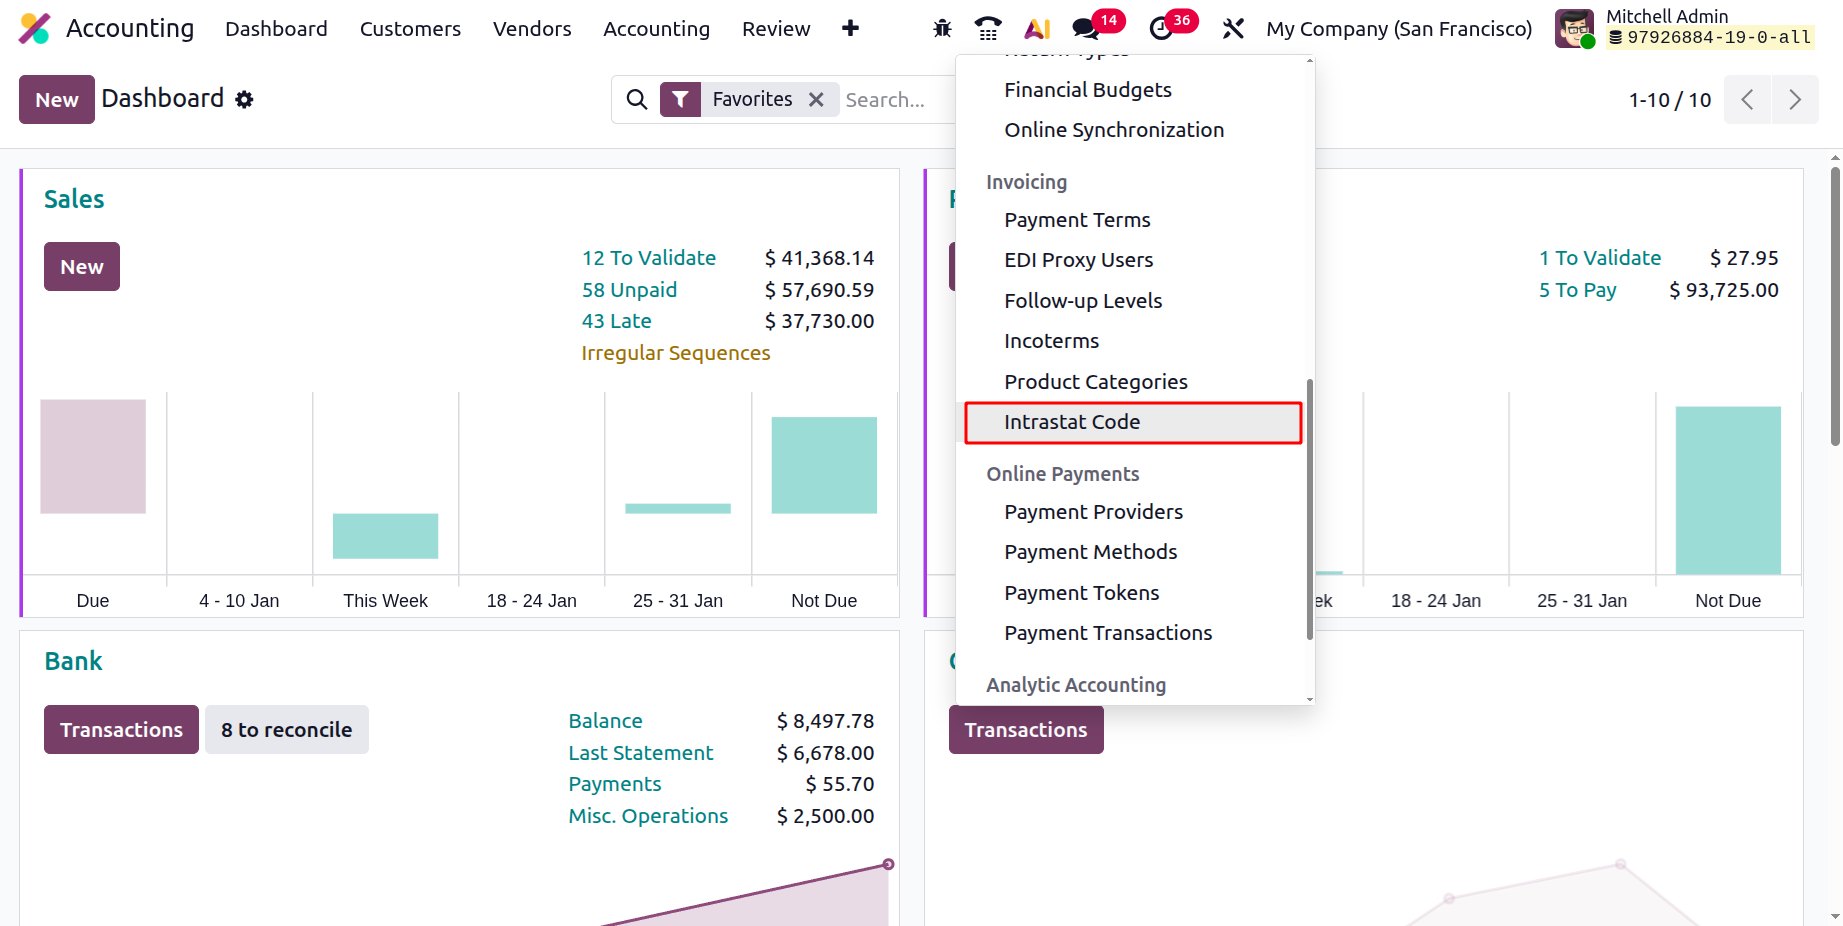
The Intrastat Code menu will show all of the platform-specific functionality. You can read a general description of each code defined in the sample. Select one of these defined Intrastat Codes to find out more about it.
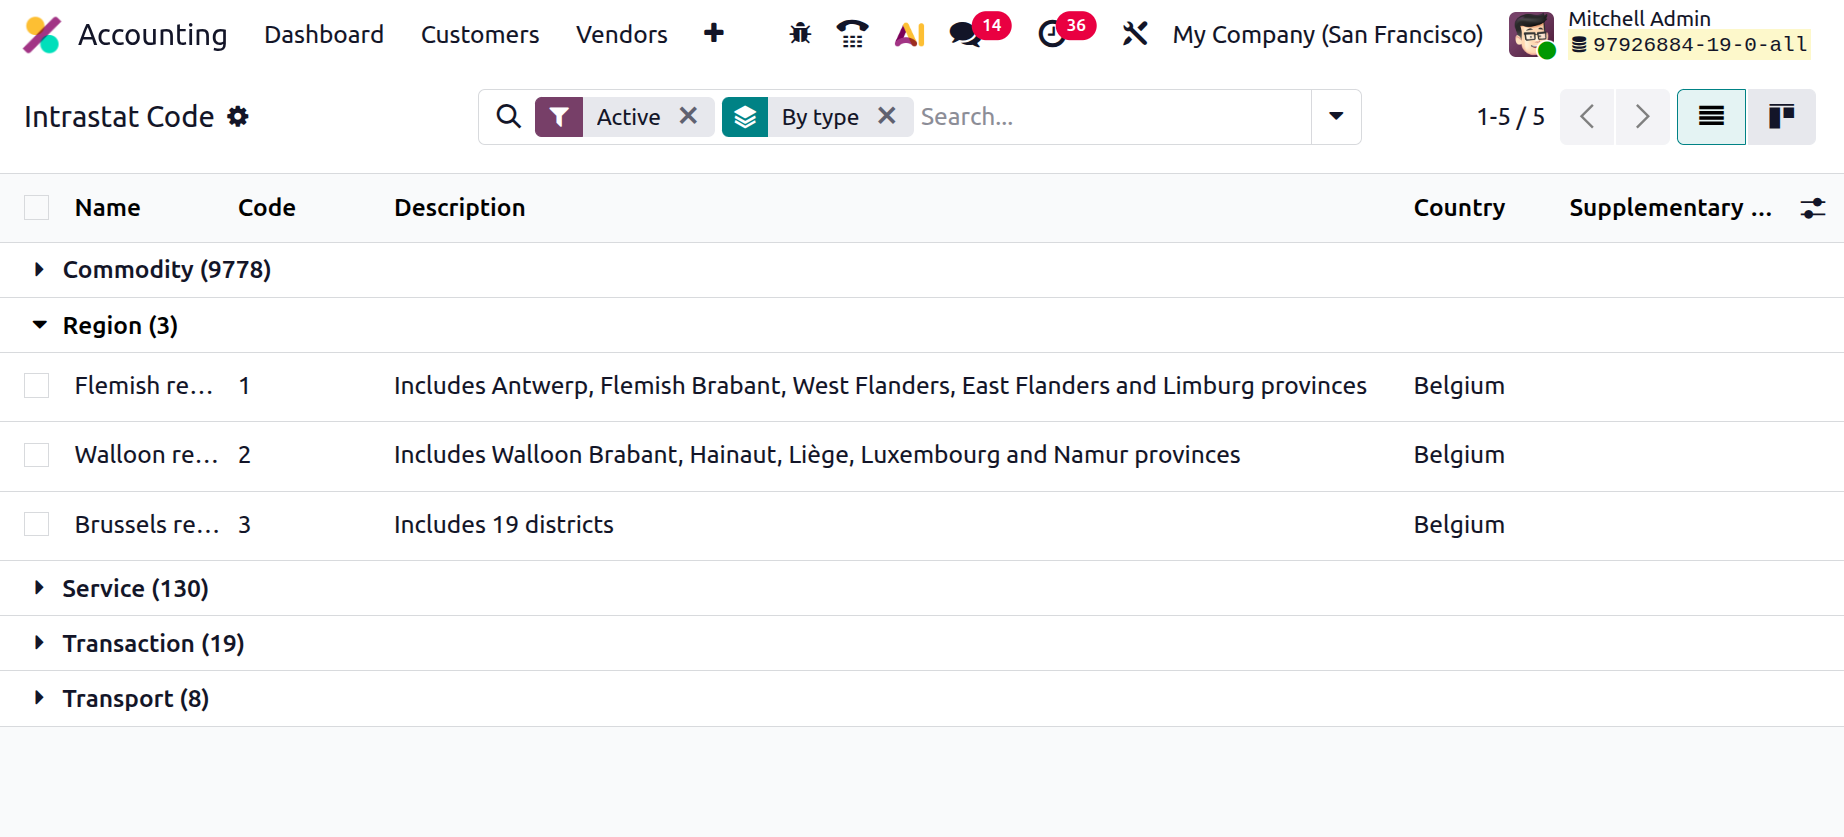
The extension form contains the following data, as shown in the screenshot above: Name, Code, Type, Supplementary Unit, and Description.
Thus far, we have looked at the setup options included in the Odoo19 Accounting module's Invoicing section. The platform's final Odoo19 Accounting management function, Configuring Payments, comes next.