Effective Customer Financial Management in Odoo 19
Efficient customer management is crucial for the smooth operation of a business, as poor management can lead to
difficulties in controlling processes such as product delivery and payment collection. To handle the financial
aspects of customer activities, dedicated operational tools are required. In Odoo 19, customer financial
management processes can be managed through a specific tab available in the menus.
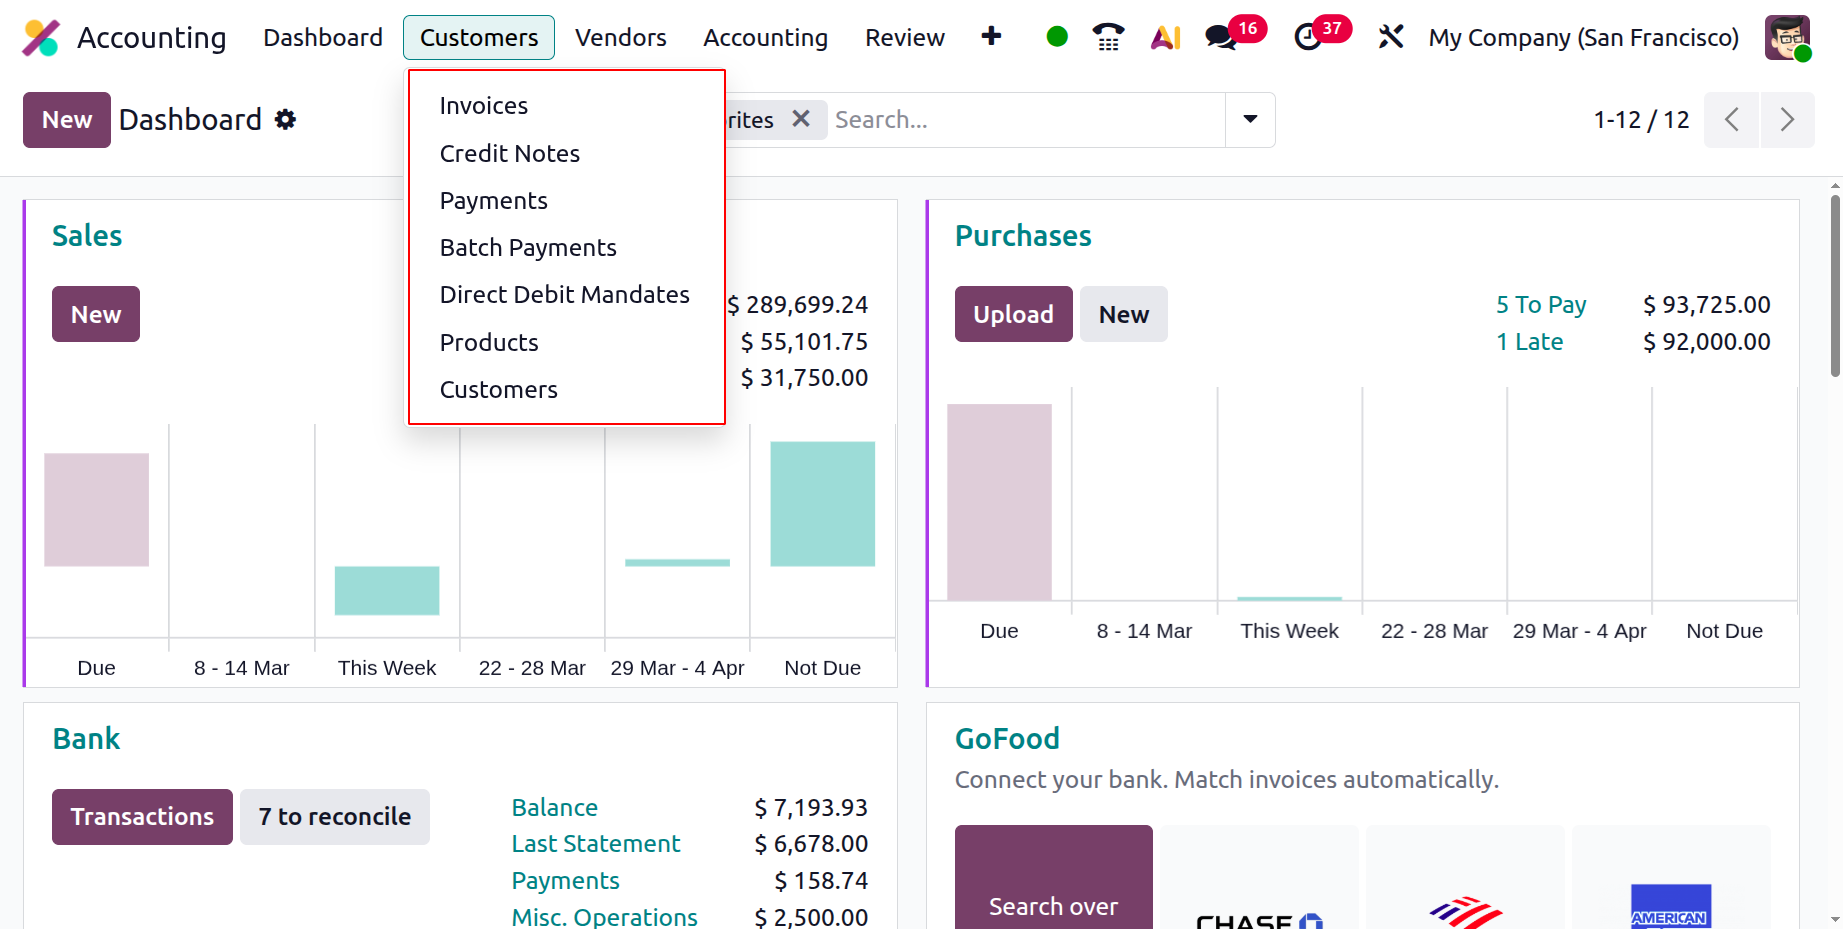
Through the Customer tab on the dashboard of the Accounting module, you can access several options such as
Invoices, Credit Notes, Payments, Batch Payments, Direct Debit Mandates, Products, and Customers. These options
help manage and track the financial aspects related to customer transactions with the company. After reviewing
each configuration option in detail, we can proceed to the section that explains customer financial management.
Customer invoice
Customer invoices need to be handled quickly, accurately, and with great attention to detail. For this purpose,
specialized tools are required. In the Odoo Accounting module, users can access the invoice management menu by
selecting the Customers menu. As shown in the screenshot below, the Invoices menu in the Accounting module
displays all invoices related to customers. It includes details such as the invoice number, customer
information, Invoice date, due date, tax details, invoice amount, and invoice status.
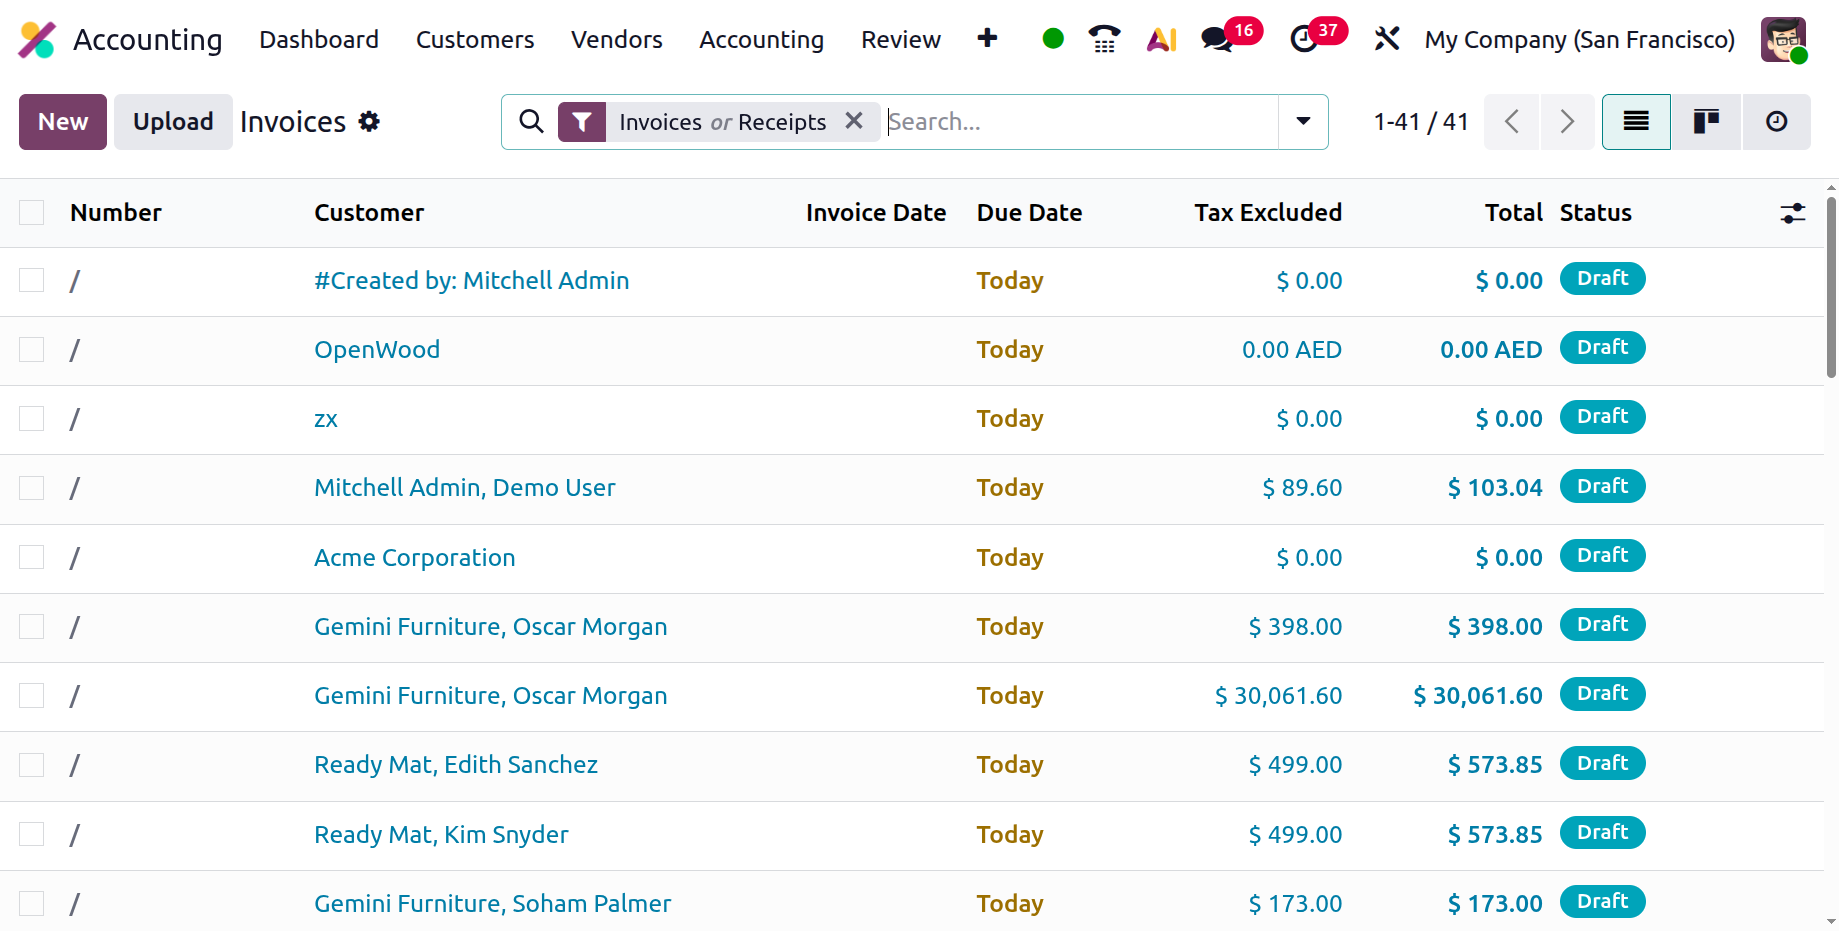
This advanced Odoo feature helps users categorize and identify scheduled activities. A yellow color indicates
that the deadline is today, while a red color shows that the deadline has passed or is currently due. The
invoices have different statuses like not paid, in payment, paid, partial, reversed, blocked, invoicing legacy,
draft, posted, sent, and cancelled. Depending on the condition, the status of the invoice may differ.
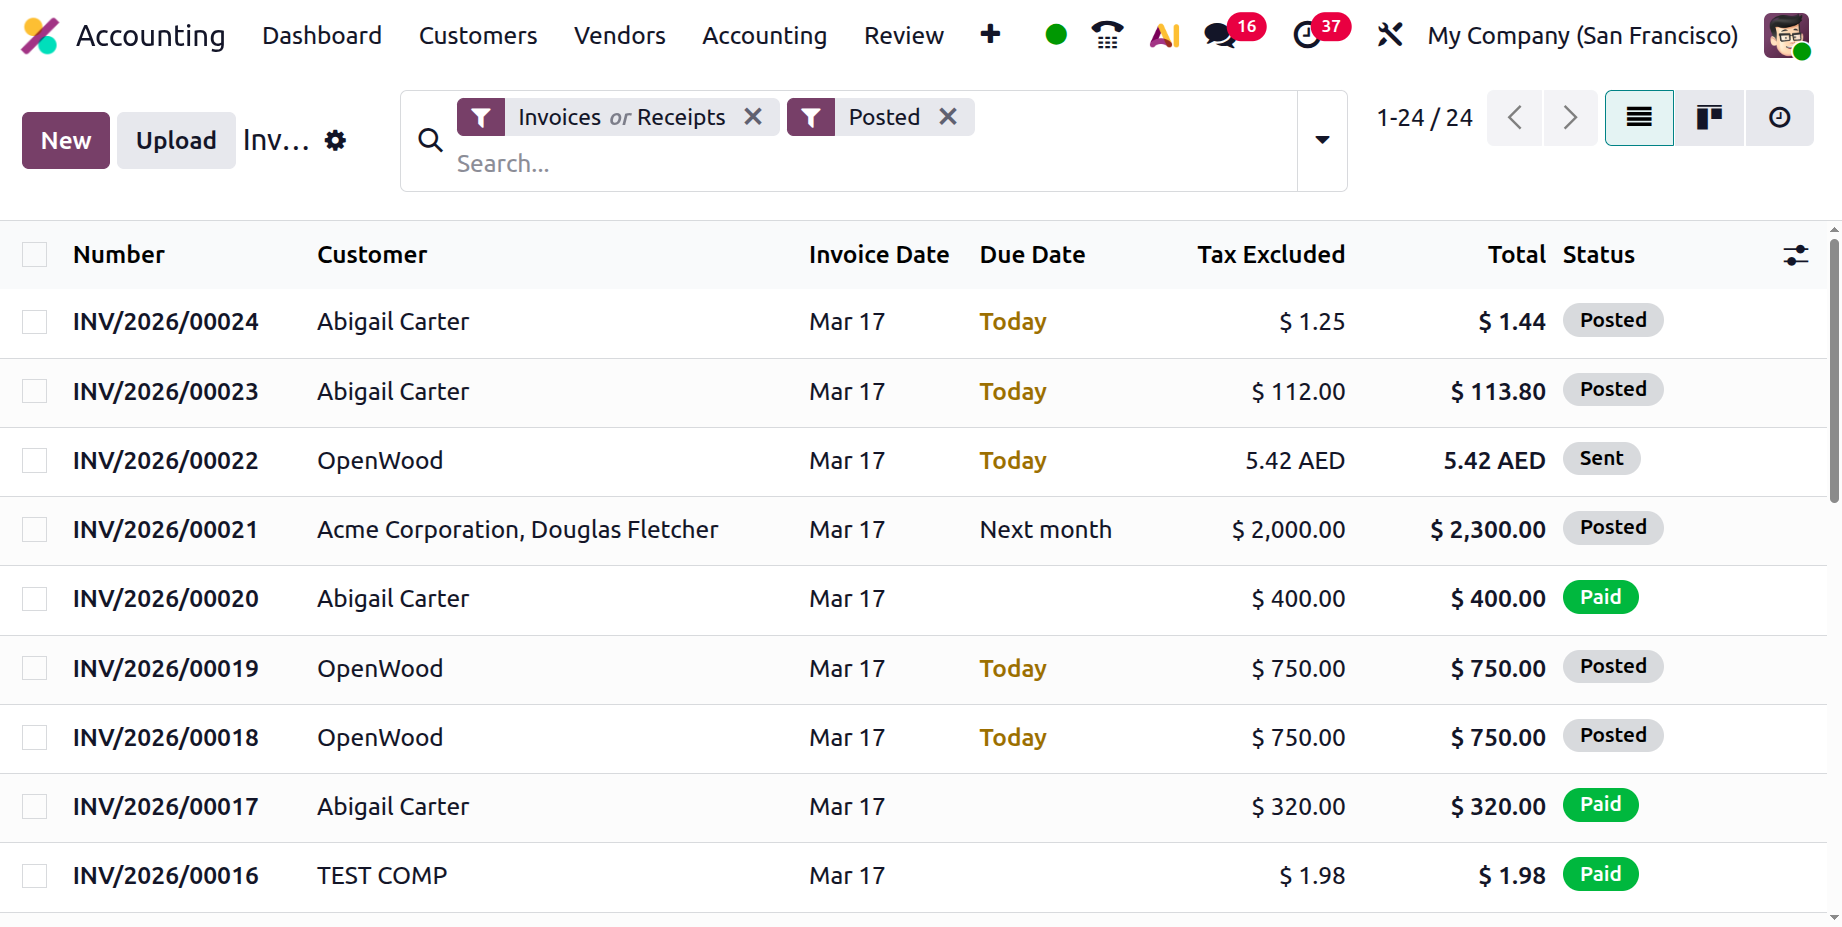
You can modify existing invoice information when necessary, but such changes can only be performed by authorized
users to maintain security. By selecting the New option from the Invoices menu, you can create a new invoice.
Once we click the new option in the form view, there are two boolean fields, Invoice and Receipt. If we need to
create an invoice choose the invoice boolean, and if we need to create a receipt, choose the Receipt boolean.
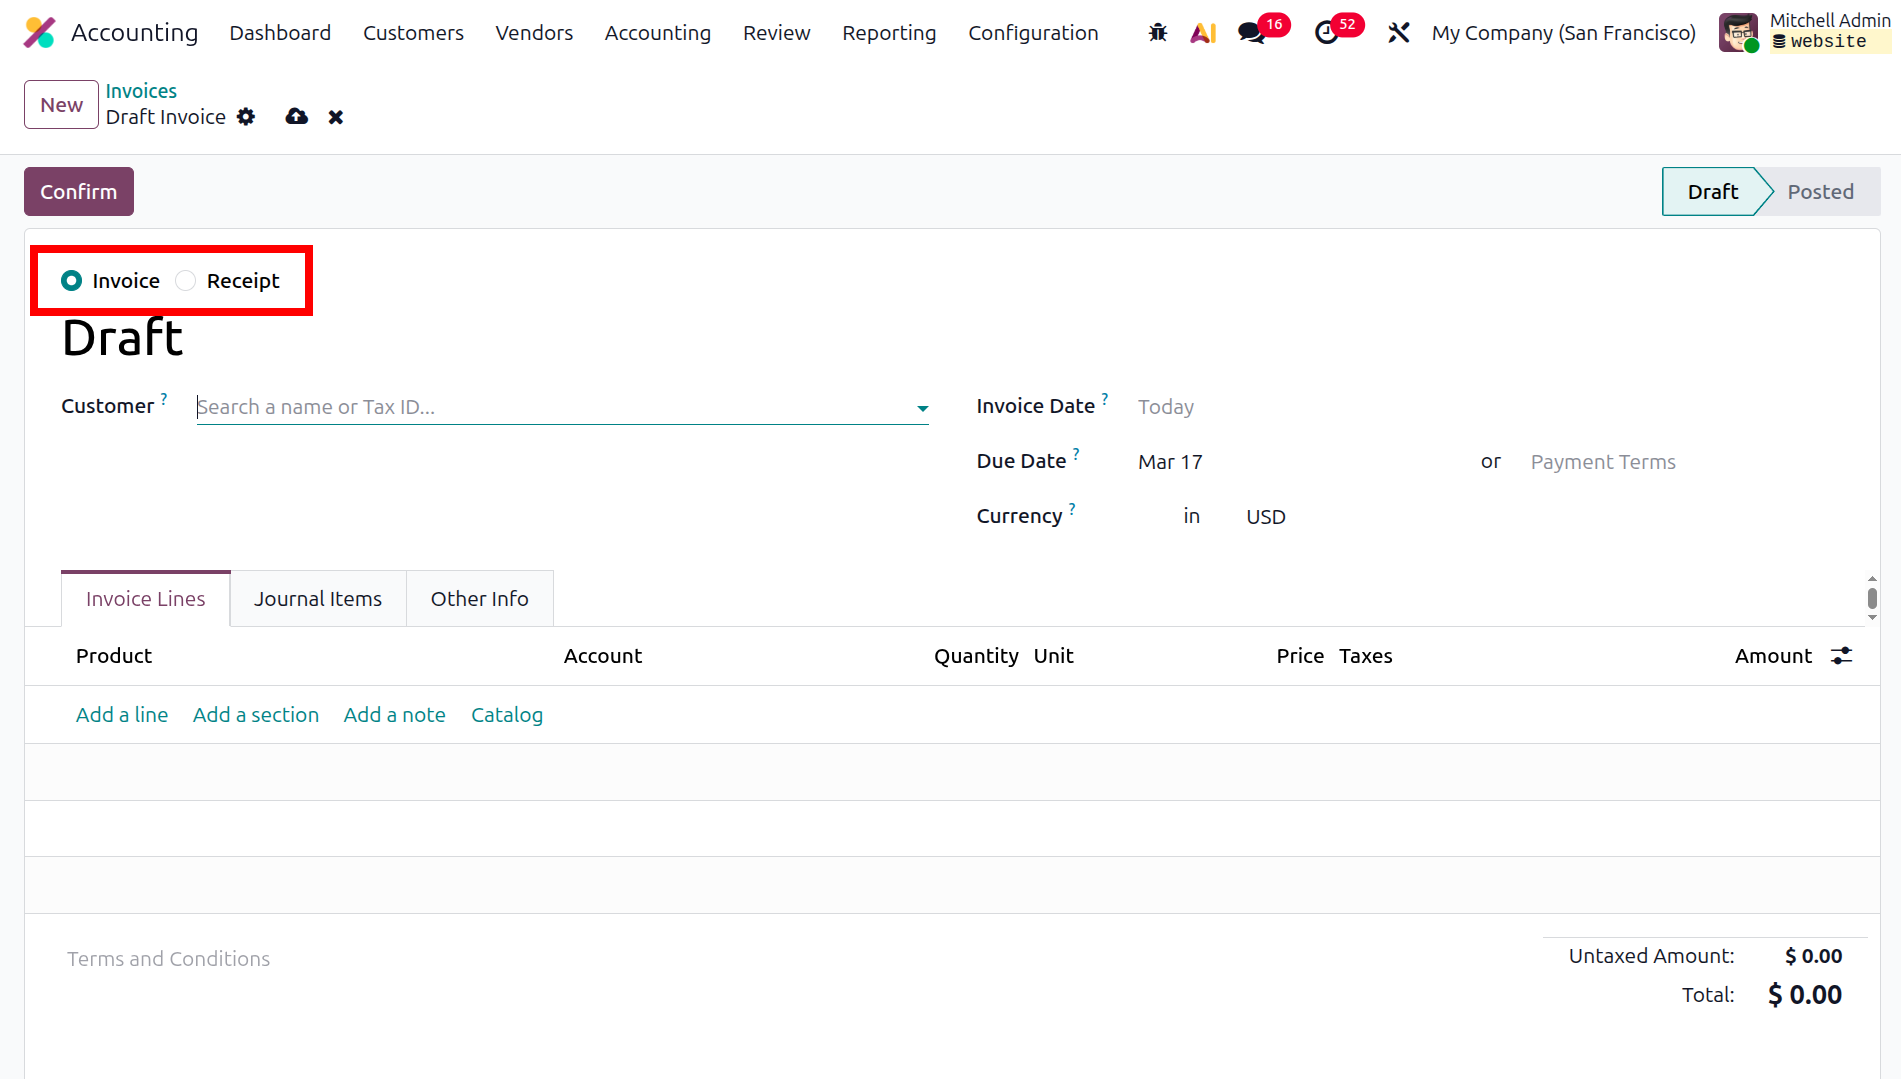
The invoice creation form displays the customer invoice number along with the shortcode INV, which is associated
with journal operations and can be modified. The INV code functions as the prefix for invoices. In this form,
you can also specify the Journal, Customer, Payment Reference, Invoice Date, and Due Date for the invoice entry.
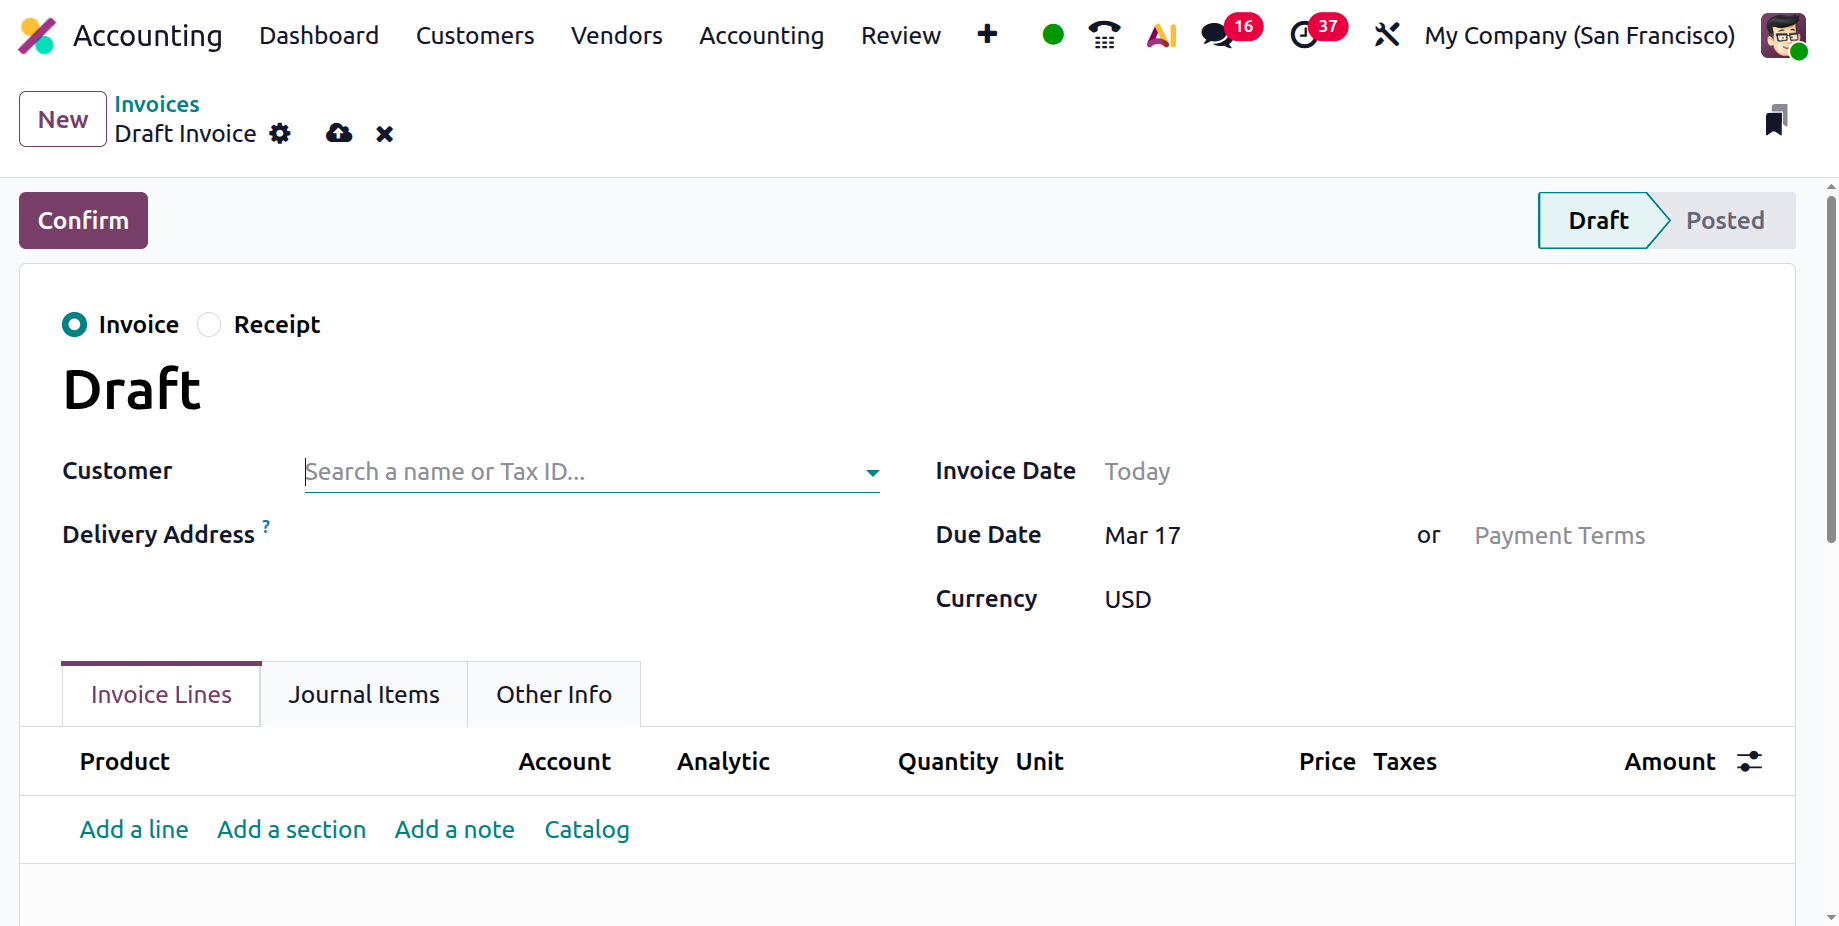
In the Invoice Lines tab, you can define the Sales Product for the invoice. The Add a line and Add a section
options allow you to insert products or organize items into sections within the invoice lines. You can also
communicate additional information to the customer by using the Add a note option. Additional fields such as
Product, Label, Account, Analytic Account, Analytic Tag, Intrastat, Quantity, Price, Taxes, and Subtotal can be
specified for each item. You may also include the Terms and Conditions related to the invoice. The system will
then display the Untaxed Amount, Tax with its percentage, and the Total Amount.
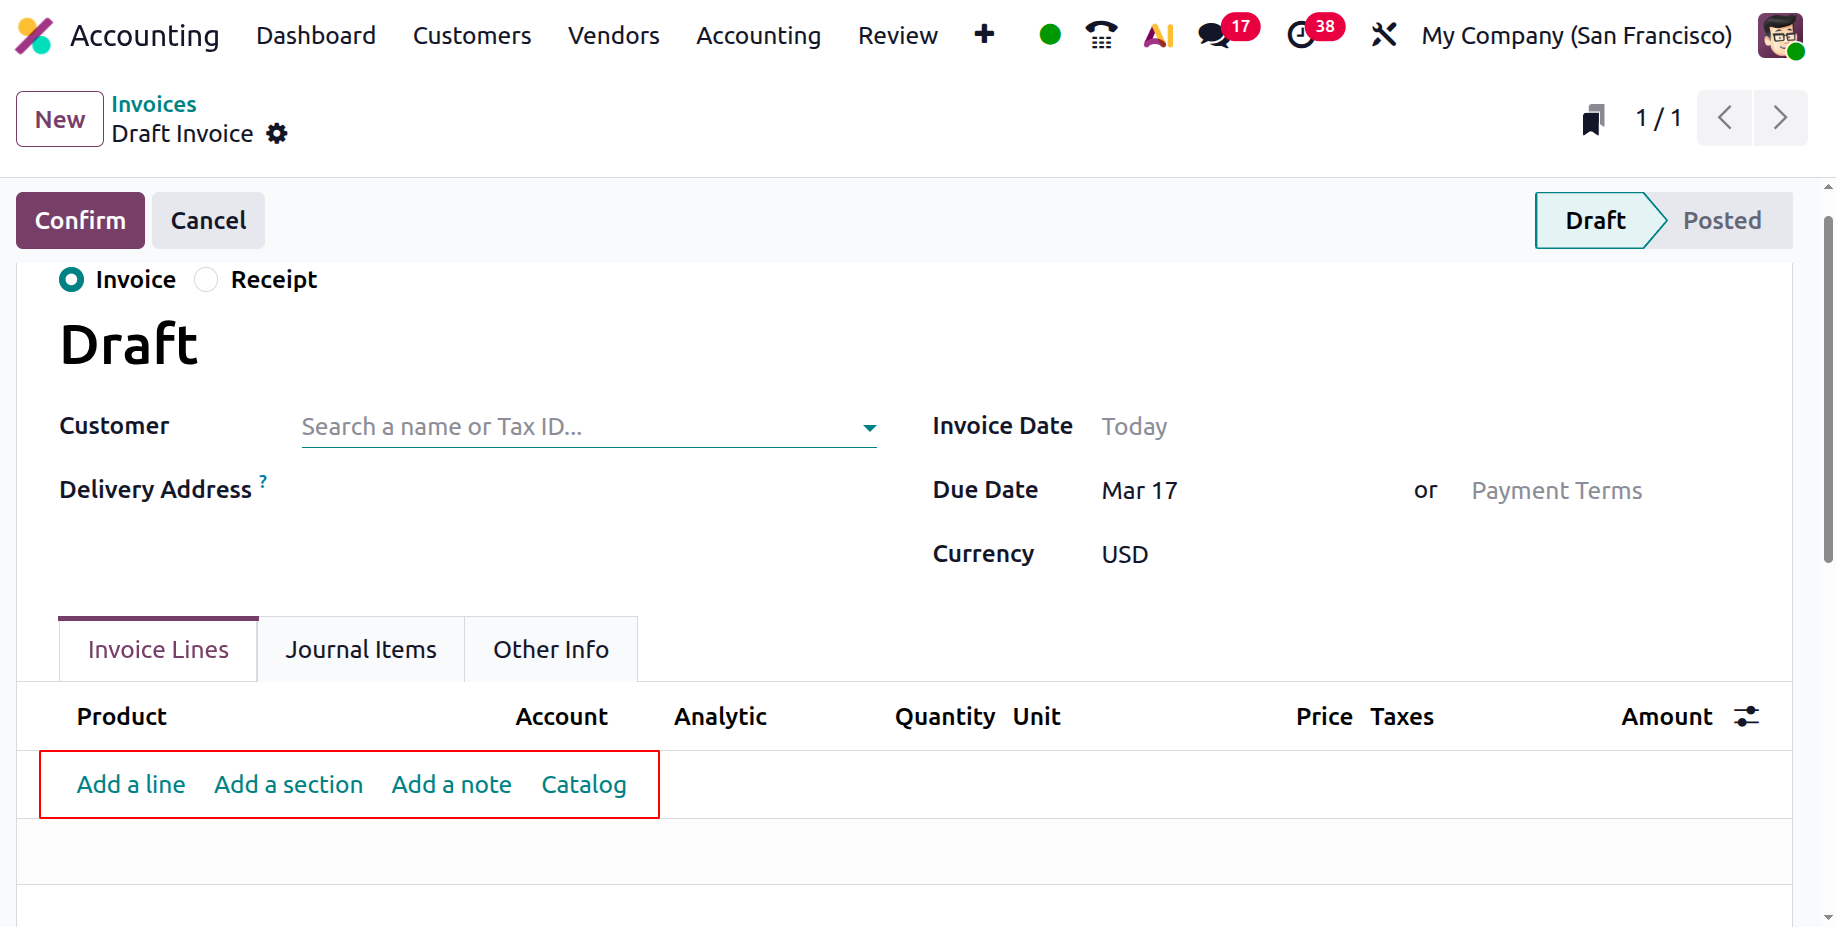
Based on the products and additional details entered in the invoice, the system automatically generates the
corresponding Journal Items for that invoice. When products are added to the invoice, the related ledger
accounts are reflected in the journal entries.
Under the Journal Items tab, you can view accounts such as the Receivable Account, Tax Account, and Income
Accounts. This section also displays information, including Debit, Credit, Label, Analytic Tags, and Tax Grids.
As shown in the figure below, the Cut-Off of the respective account can also be viewed.
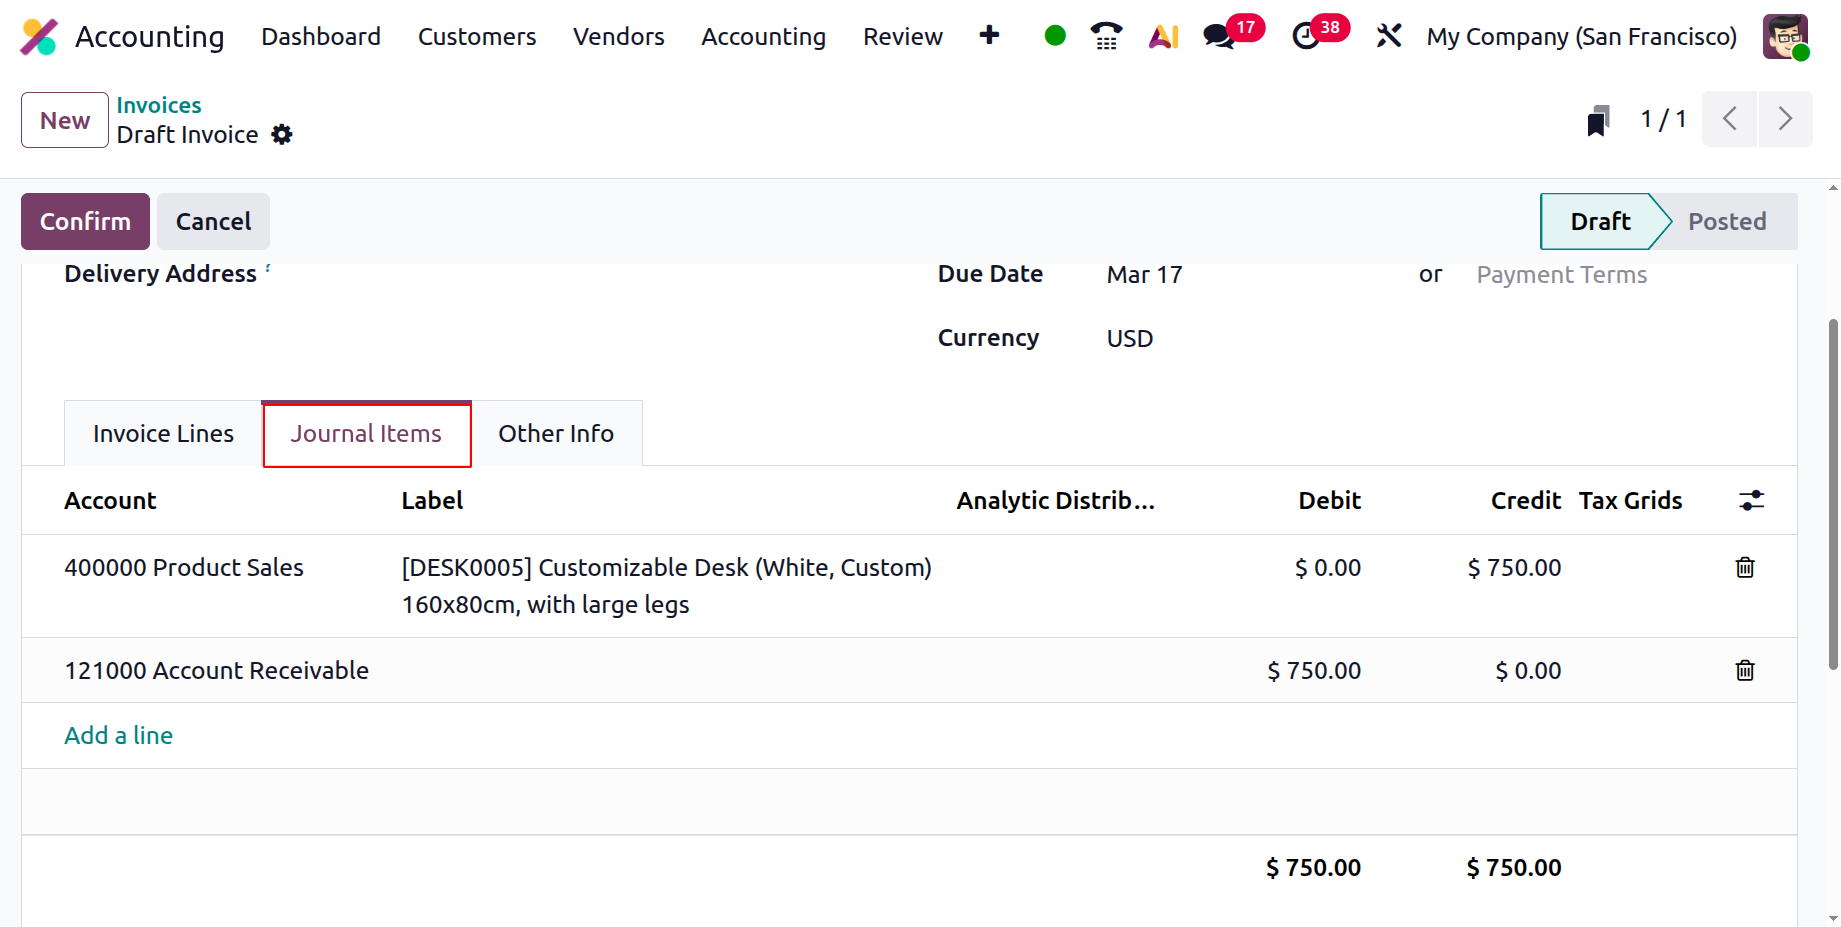
Odoo supports both Continental Accounting and Anglo-Saxon accounting in its general ledger processes, enabling
clear financial management under both methods. In Continental Accounting, when an invoice is created, the Income
Account is credited while the Account Receivable is debited. Since Account Receivable is an Asset, it increases
when the amount owed by customers rises. Similarly, the Income Account is credited because income naturally
belongs to the Income category. The Tax Account is also credited because it represents a Liability, which
increases when taxes are applied.
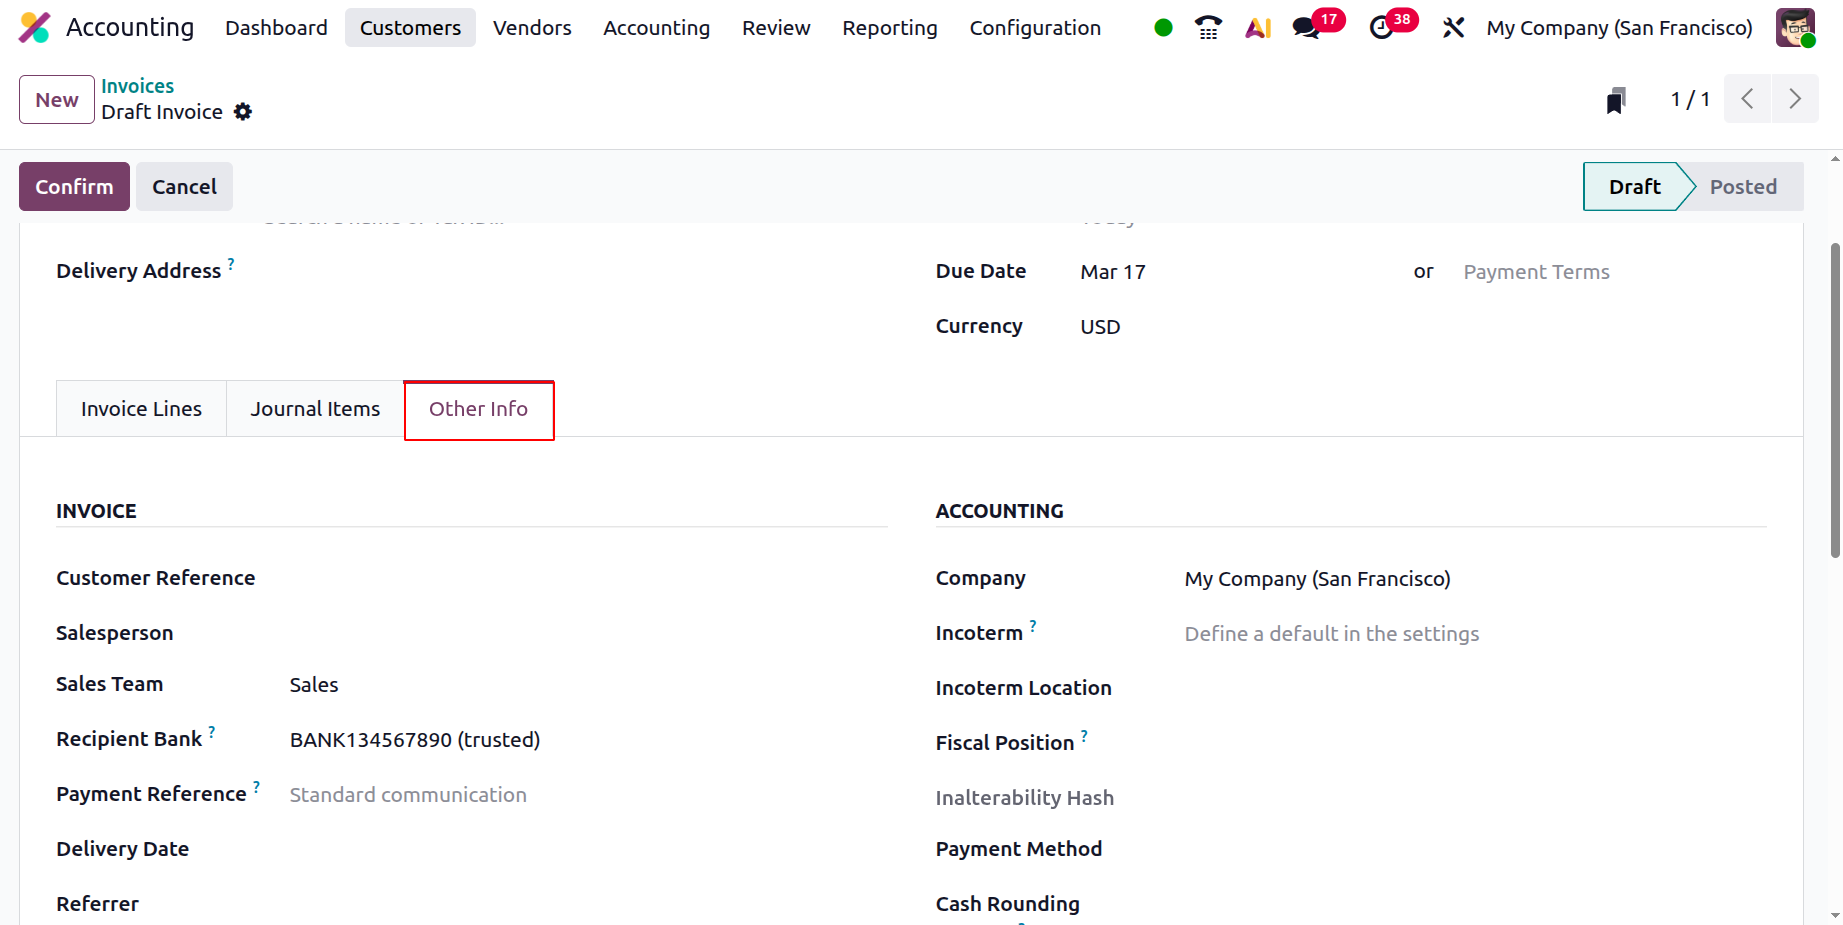
The Other Info tab of the generated invoice provides additional details and allows you to modify certain
elements. In this tab, you can specify information such as Customer Reference, Salesperson, Sales Team,
Recipient Bank, Payment Reference, Delivery Date and Referrer. It also includes several accounting-related
fields such as Fiscal Position, Incoterms, Intrastat Country, and Cash Rounding Method.
You can enable or disable the Auto Post option to determine whether the invoice will be posted automatically on a
specified accounting date or for recurring invoices. The available options include No, At Date, Monthly,
Quarterly, and Yearly. When At Date is selected, the invoice is posted on the specified date. If No is chosen,
the invoice will not be posted automatically and must be posted manually. The Monthly, Quarterly, and Yearly
options allow invoices to be posted automatically at regular intervals based on the selected period. You can
also activate the Reviewed option to indicate that the document needs to be reviewed if there is any uncertainty
regarding its details.
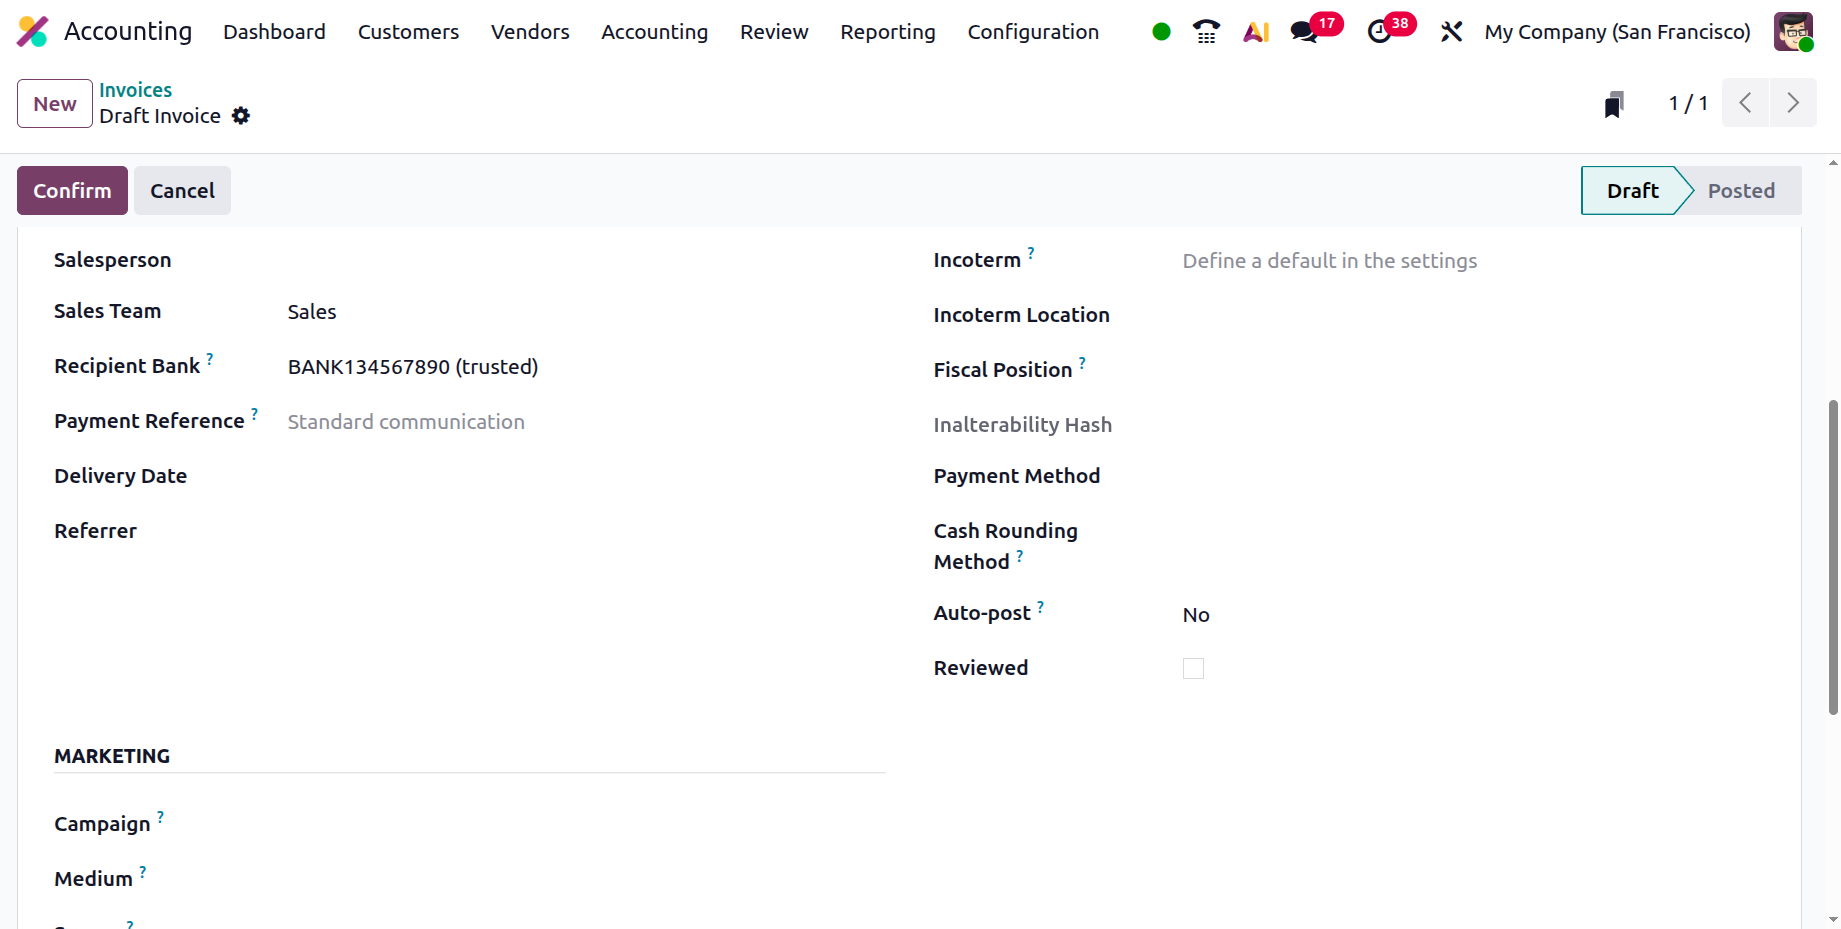
After completing the invoice setup for the customer, you can use the Send and Print button to email the invoice
directly to the customer and print a copy if a printer is connected to the system. The printed invoice can then
be provided to the customer along with a personalized note or delivered in person. Before sending the invoice,
you may use the Preview option to view how the invoice will appear to the customer.
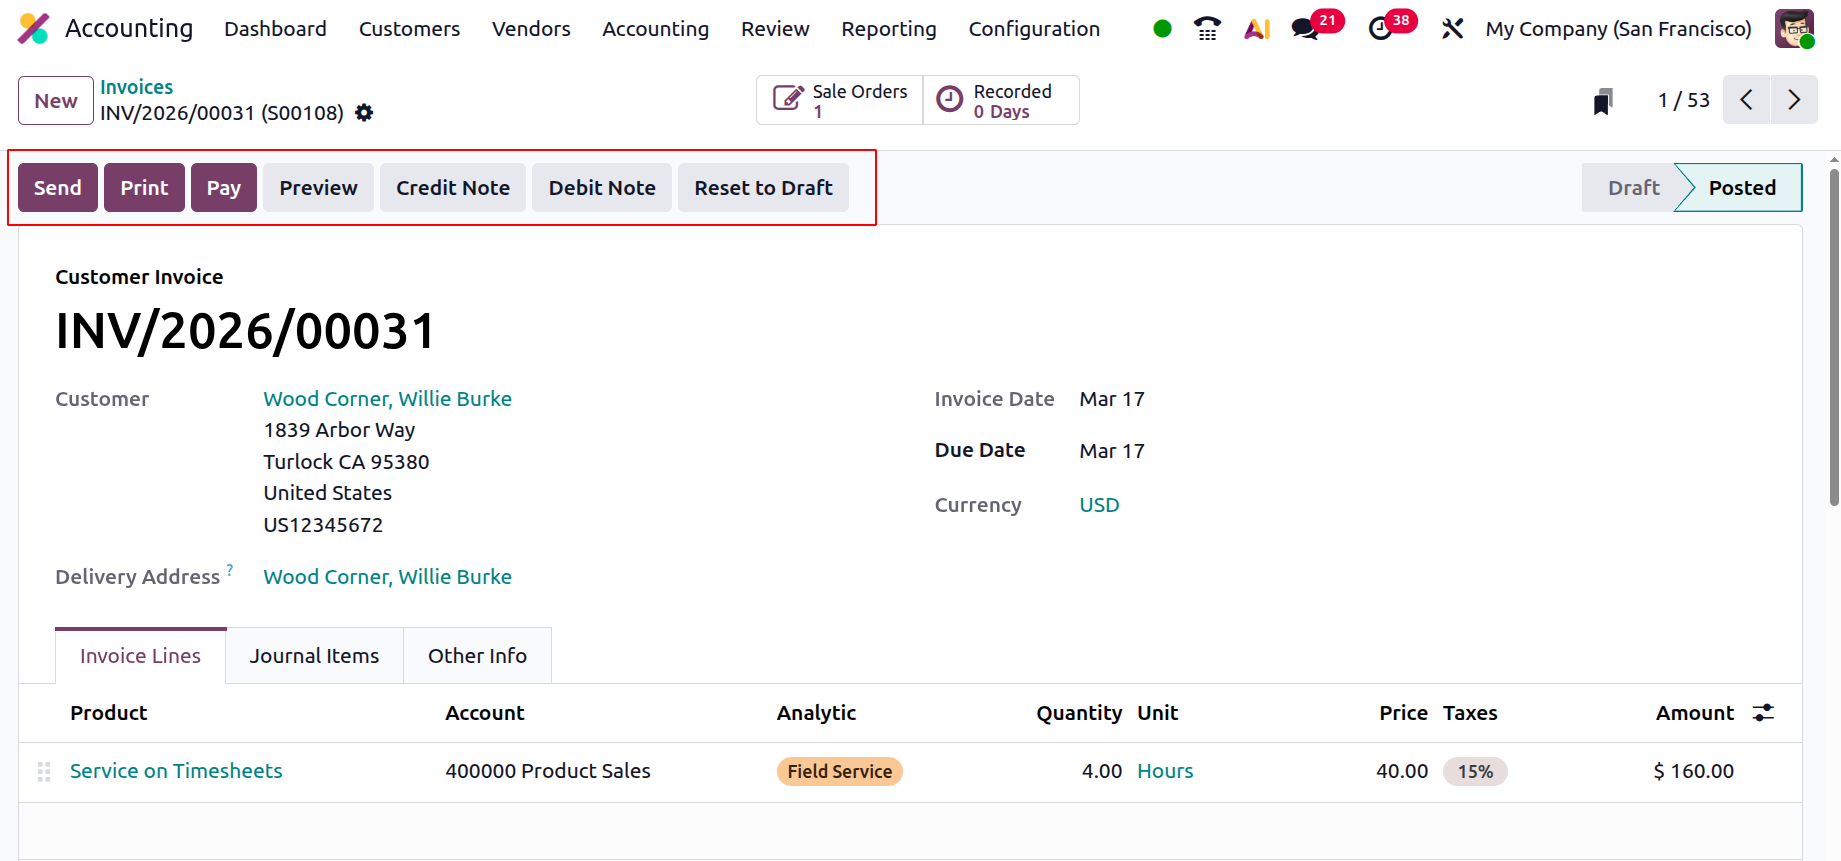
The following screenshot illustrates how the invoice appears to the customer. It displays all the information
entered during the invoice creation process, except for details related to the company’s internal business
operations. Additionally, information such as the Journal and Chart of Accounts will not be visible in the
customer’s view.
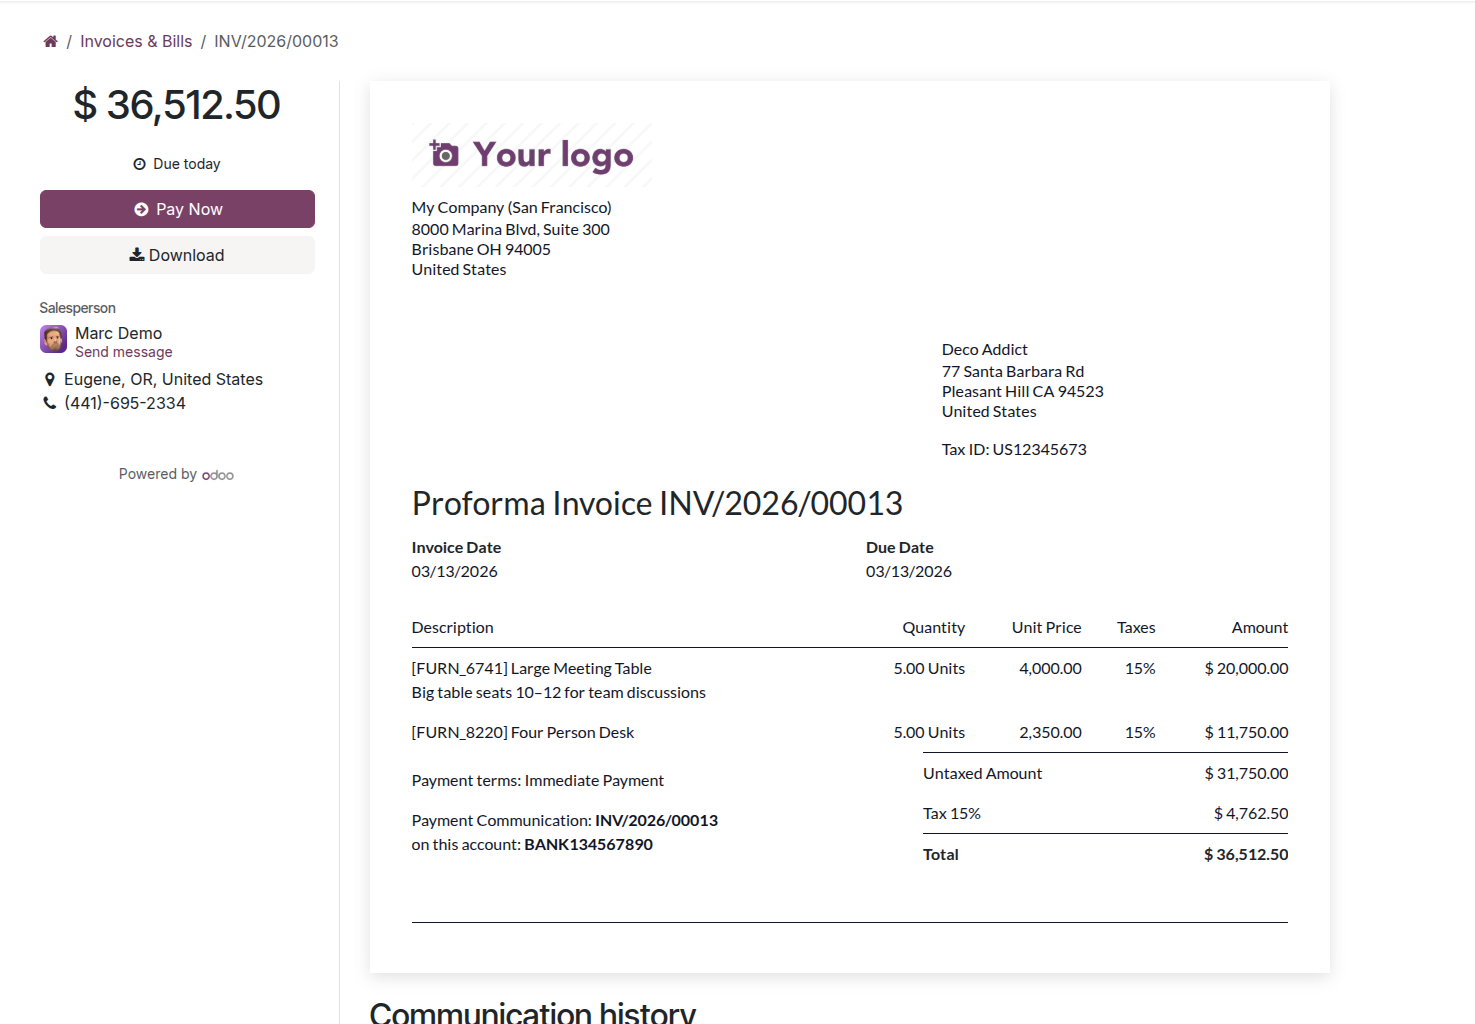
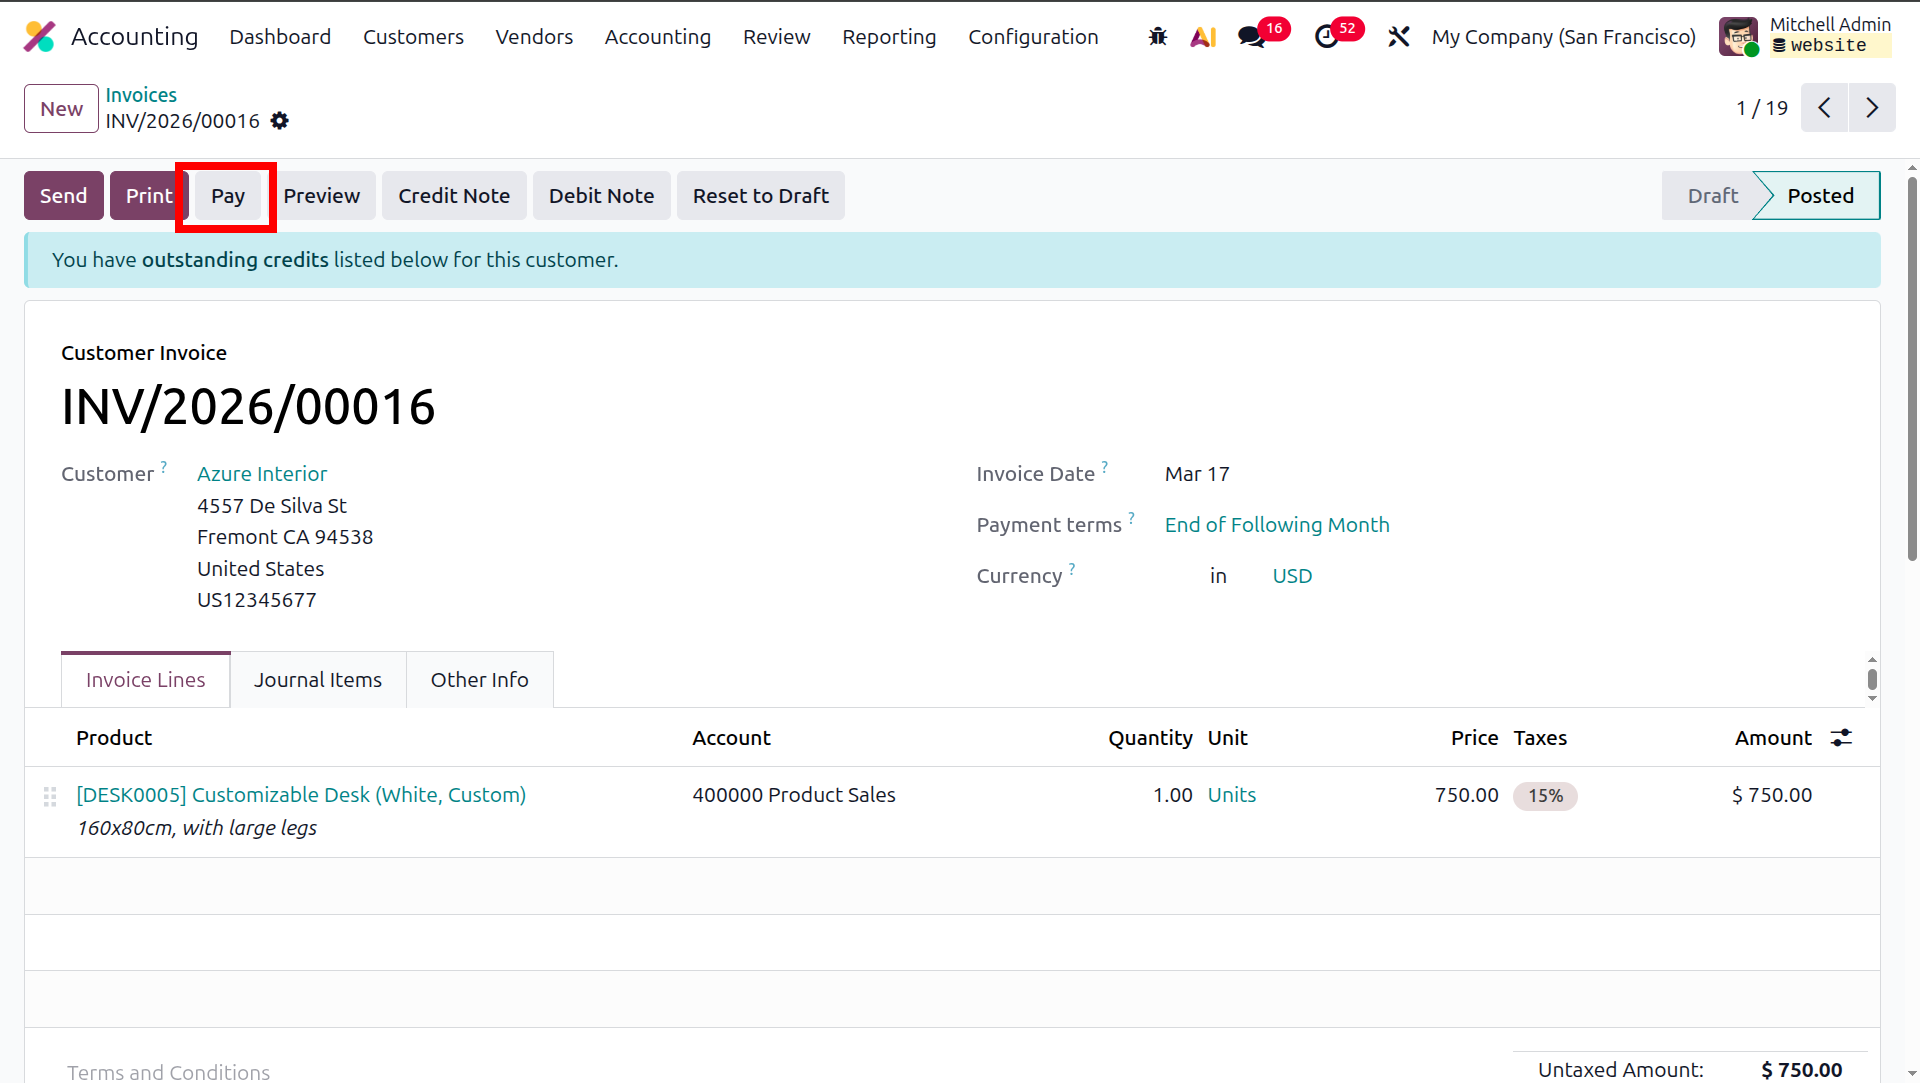
Once the invoice has been issued, it can be sent to the customer and updated if any modifications are required.
Depending on the arrangement, the customer may receive the invoice by post or email. When the customer completes
the payment, you can record it using the Pay option available in the corresponding invoice to track the amount
received.
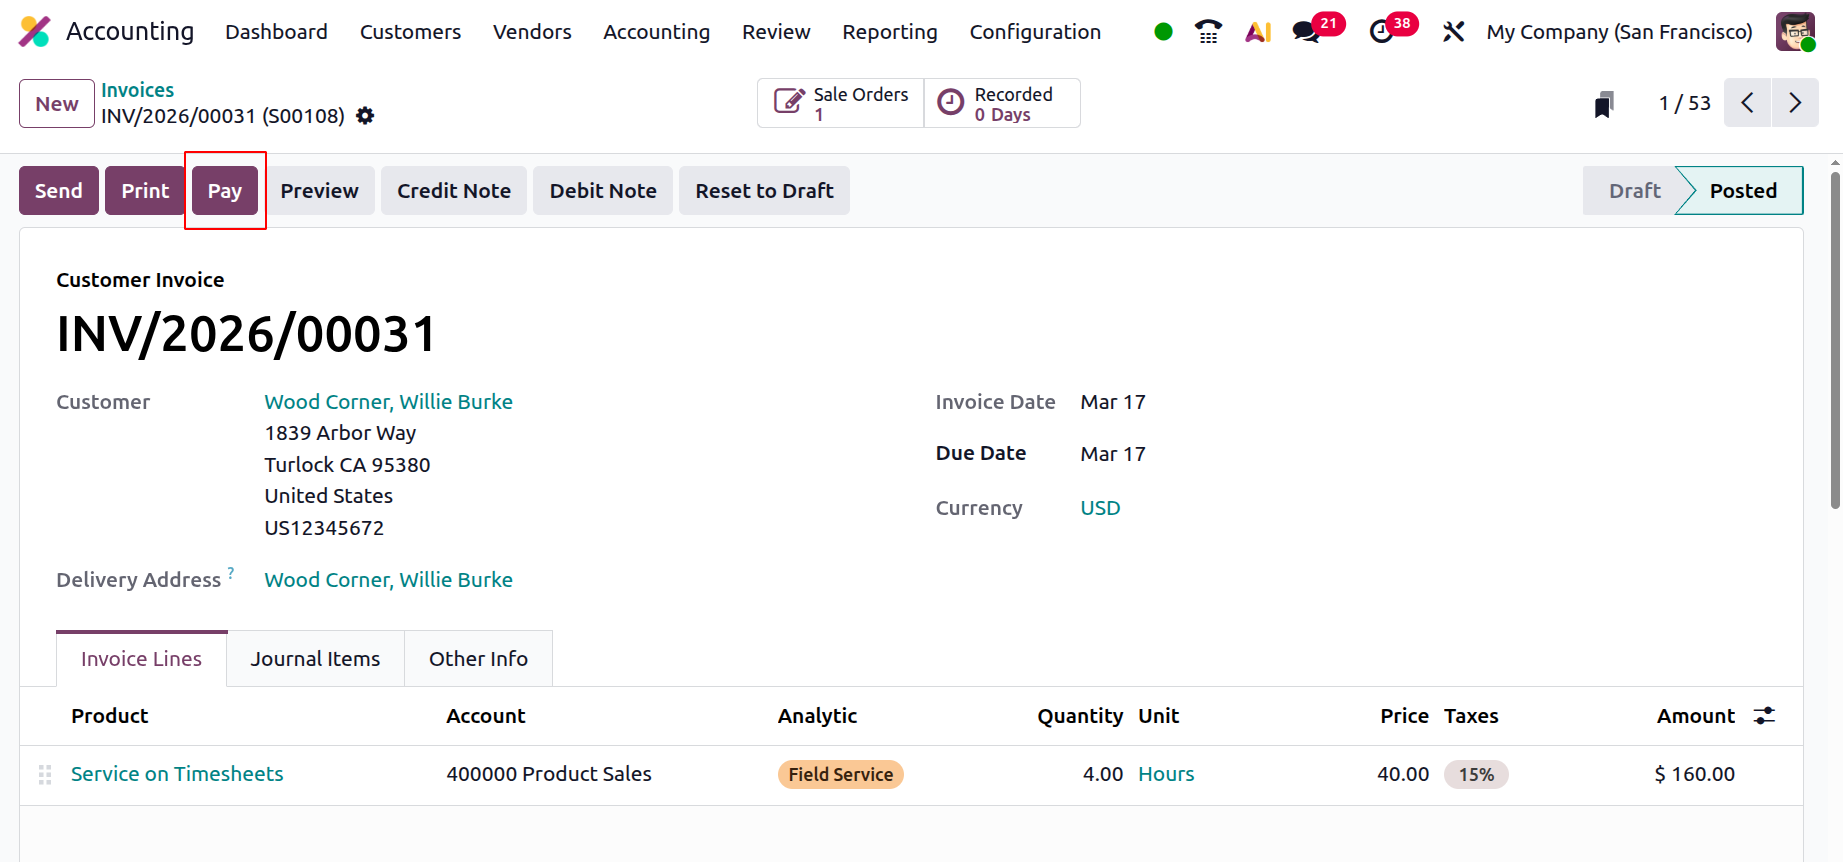
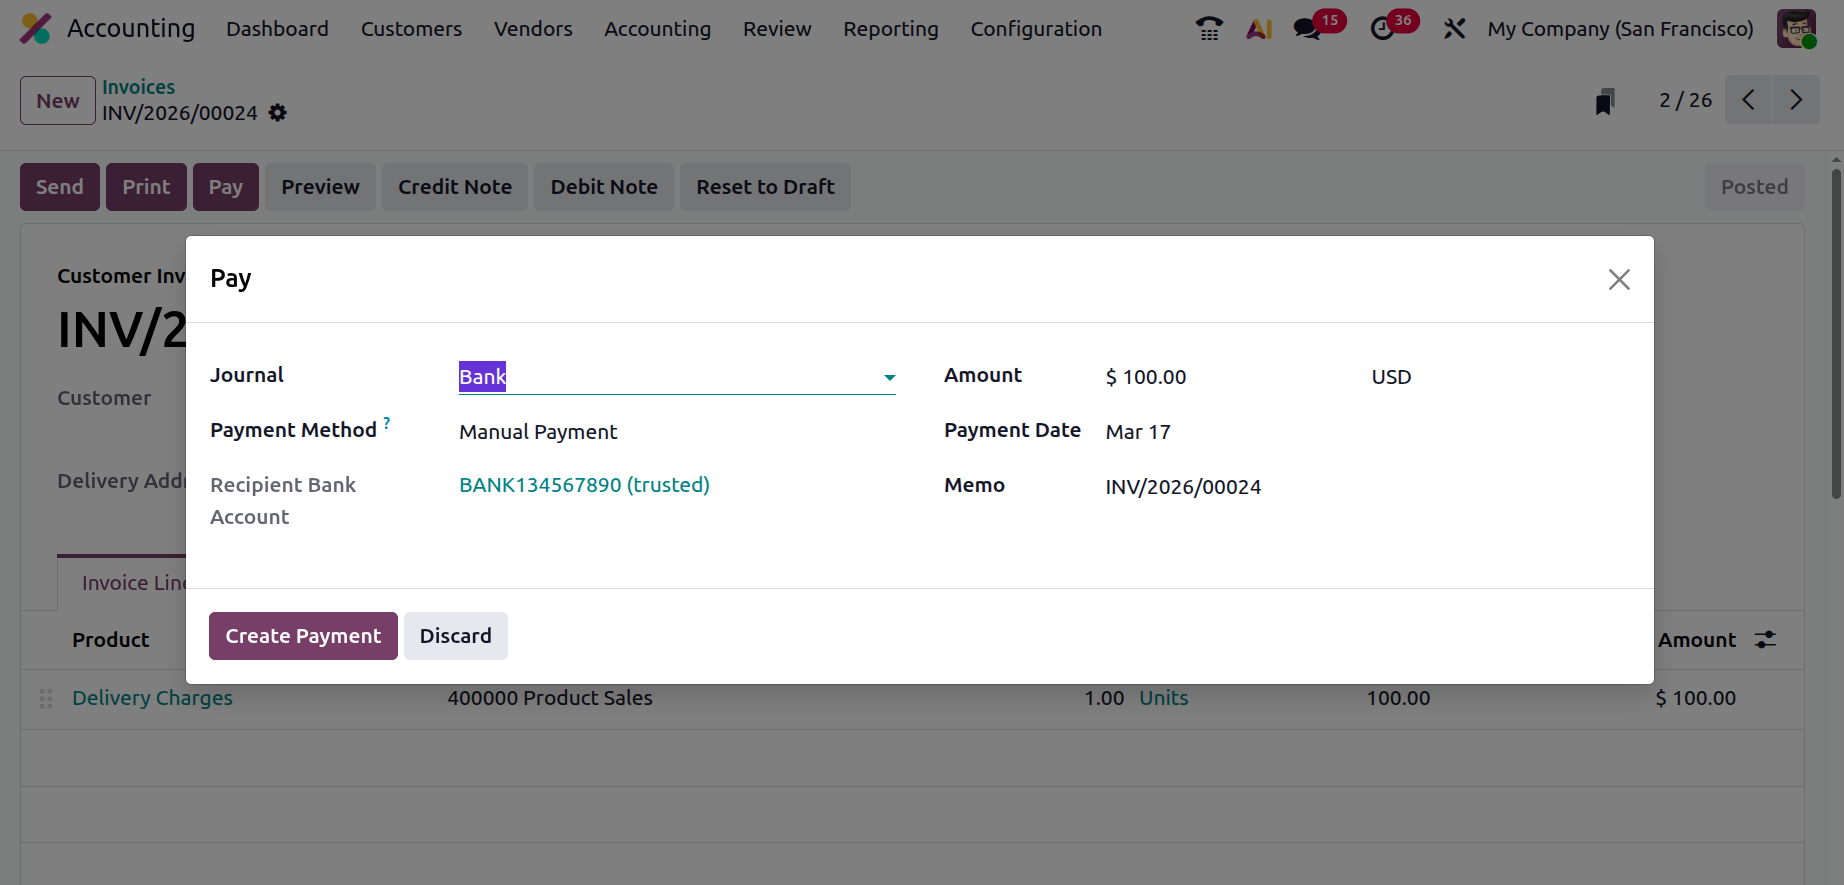
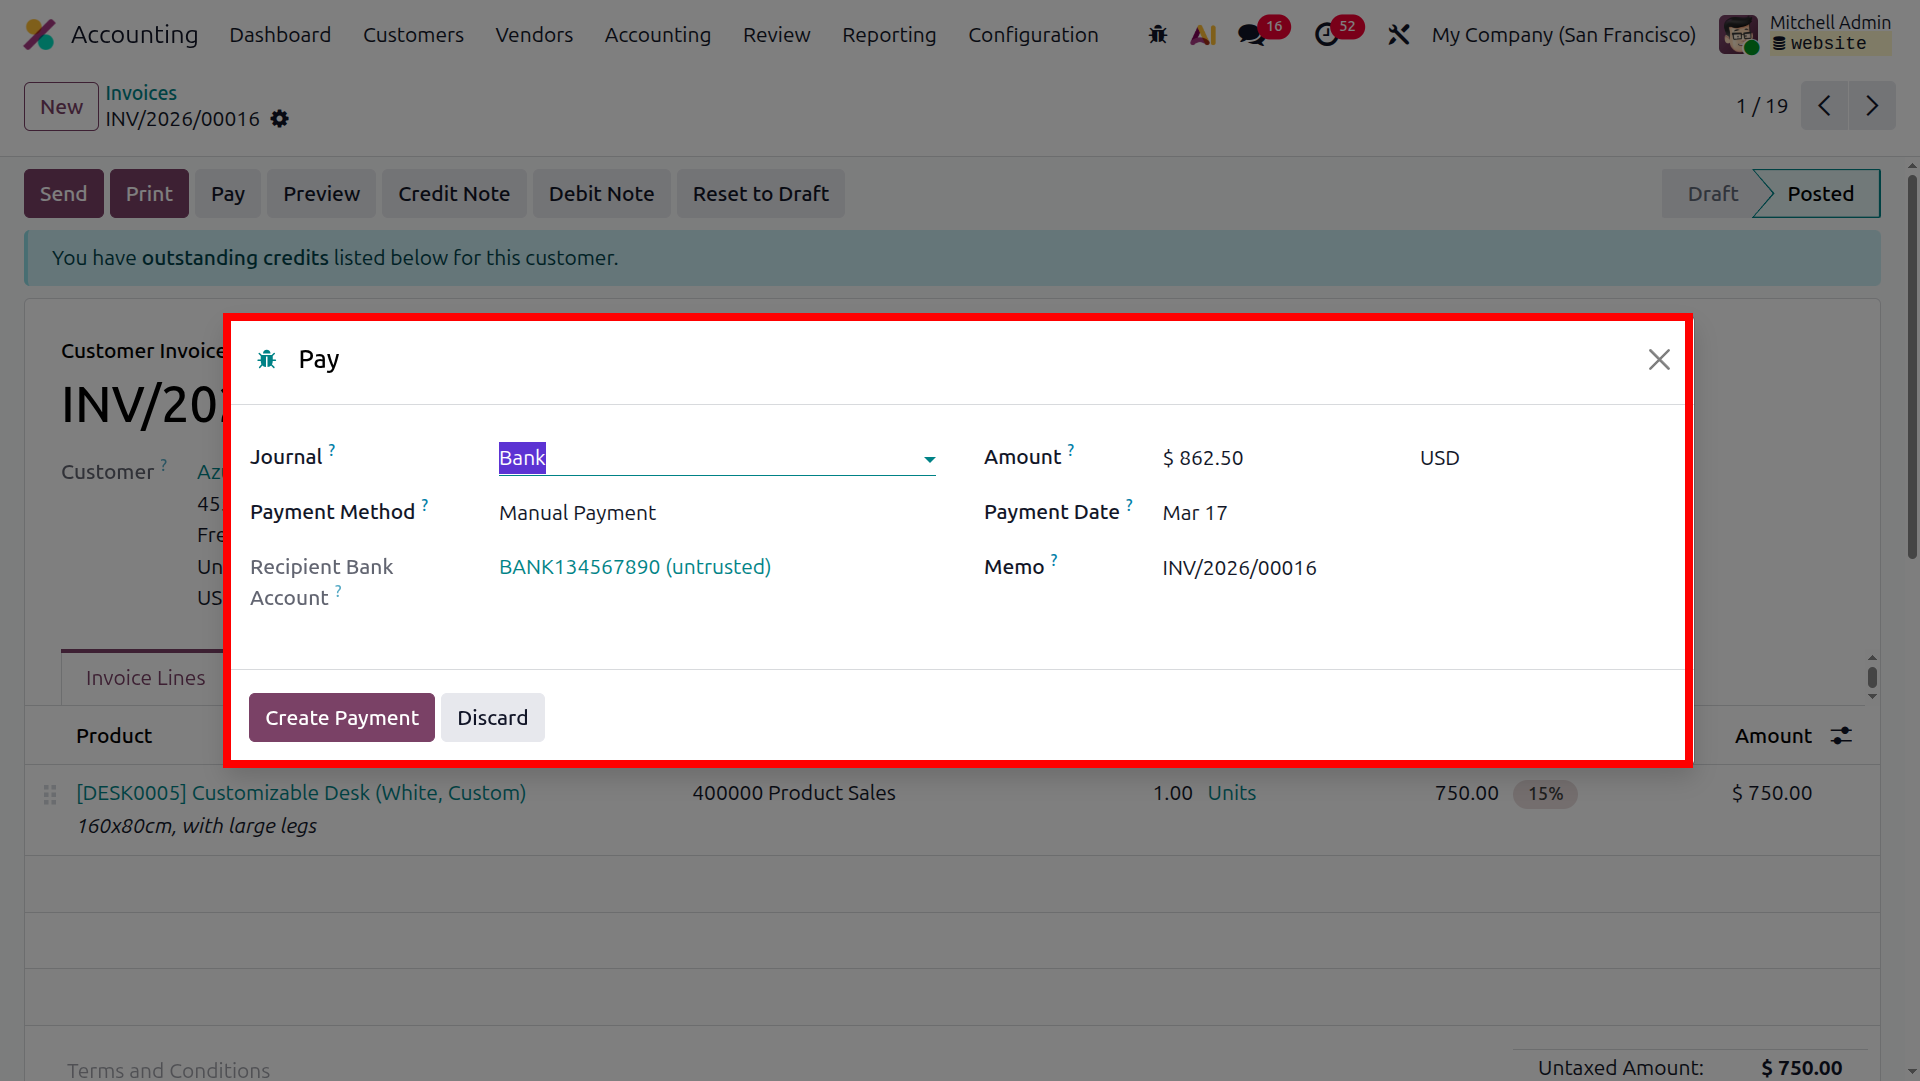
When you choose to Pay, a pop-up window will appear where you can select the Journal Payment Method, such as
Manual, Branch Deposit, or SEPA Direct Debit. In this window, you can also specify the Amount, Currency, and the
Recipient Bank Account details. Additionally, the Memo and Payment Date can be defined. Finally, click the
Create Payment option to record the payment in Odoo.
Understanding the differences between the payment recording methods used in Perpetual and Periodic inventory
valuation systems helps businesses manage their accounting activities effectively. Let us examine how each
method operates in Odoo 19. When a sales invoice is issued, the revenue from the sale is recorded. However, the
cost of the goods sold is not immediately recognized, and the inventory asset account is not reduced at the time
of sale. At the end of the accounting period, a physical inventory count is performed to determine the value of
the remaining inventory. The Cost of Goods Sold for the period is then calculated using the formula: Beginning
Inventory + Purchases - Ending Inventory. Adjusting entries are then made to update the Inventory asset account
and record the COGS for the entire period. Odoo, for instance, supports both periodic and perpetual inventory
valuations, with periodic accounting often involving posting vendor bills.
In perpetual accounting, invoices trigger real-time updates to both inventory records and the cost of goods sold
(COGS). This provides an up-to-the-minute view of stock levels and profitability. When a sales invoice is issued
to a customer, two main accounting entries occur simultaneously. The cost of the specific items sold is
immediately moved from the Inventory asset account to the Cost of Goods Sold expense account. This reduces the
inventory balance and records the expense associated with the sale at the time of the transaction. This
continuous updating means that the inventory account on the balance sheet and the COGS account on the income
statement always reflect the current situation. Odoo, for example, supports perpetual inventory valuation,
generating real-time accounting records from stock purchases and other inventory actions. Since Odoo 19, the
perpetual method impacts the stock valuation account at the invoice level, with a closing entry used to manage
differences between inventory values and accounting ones.
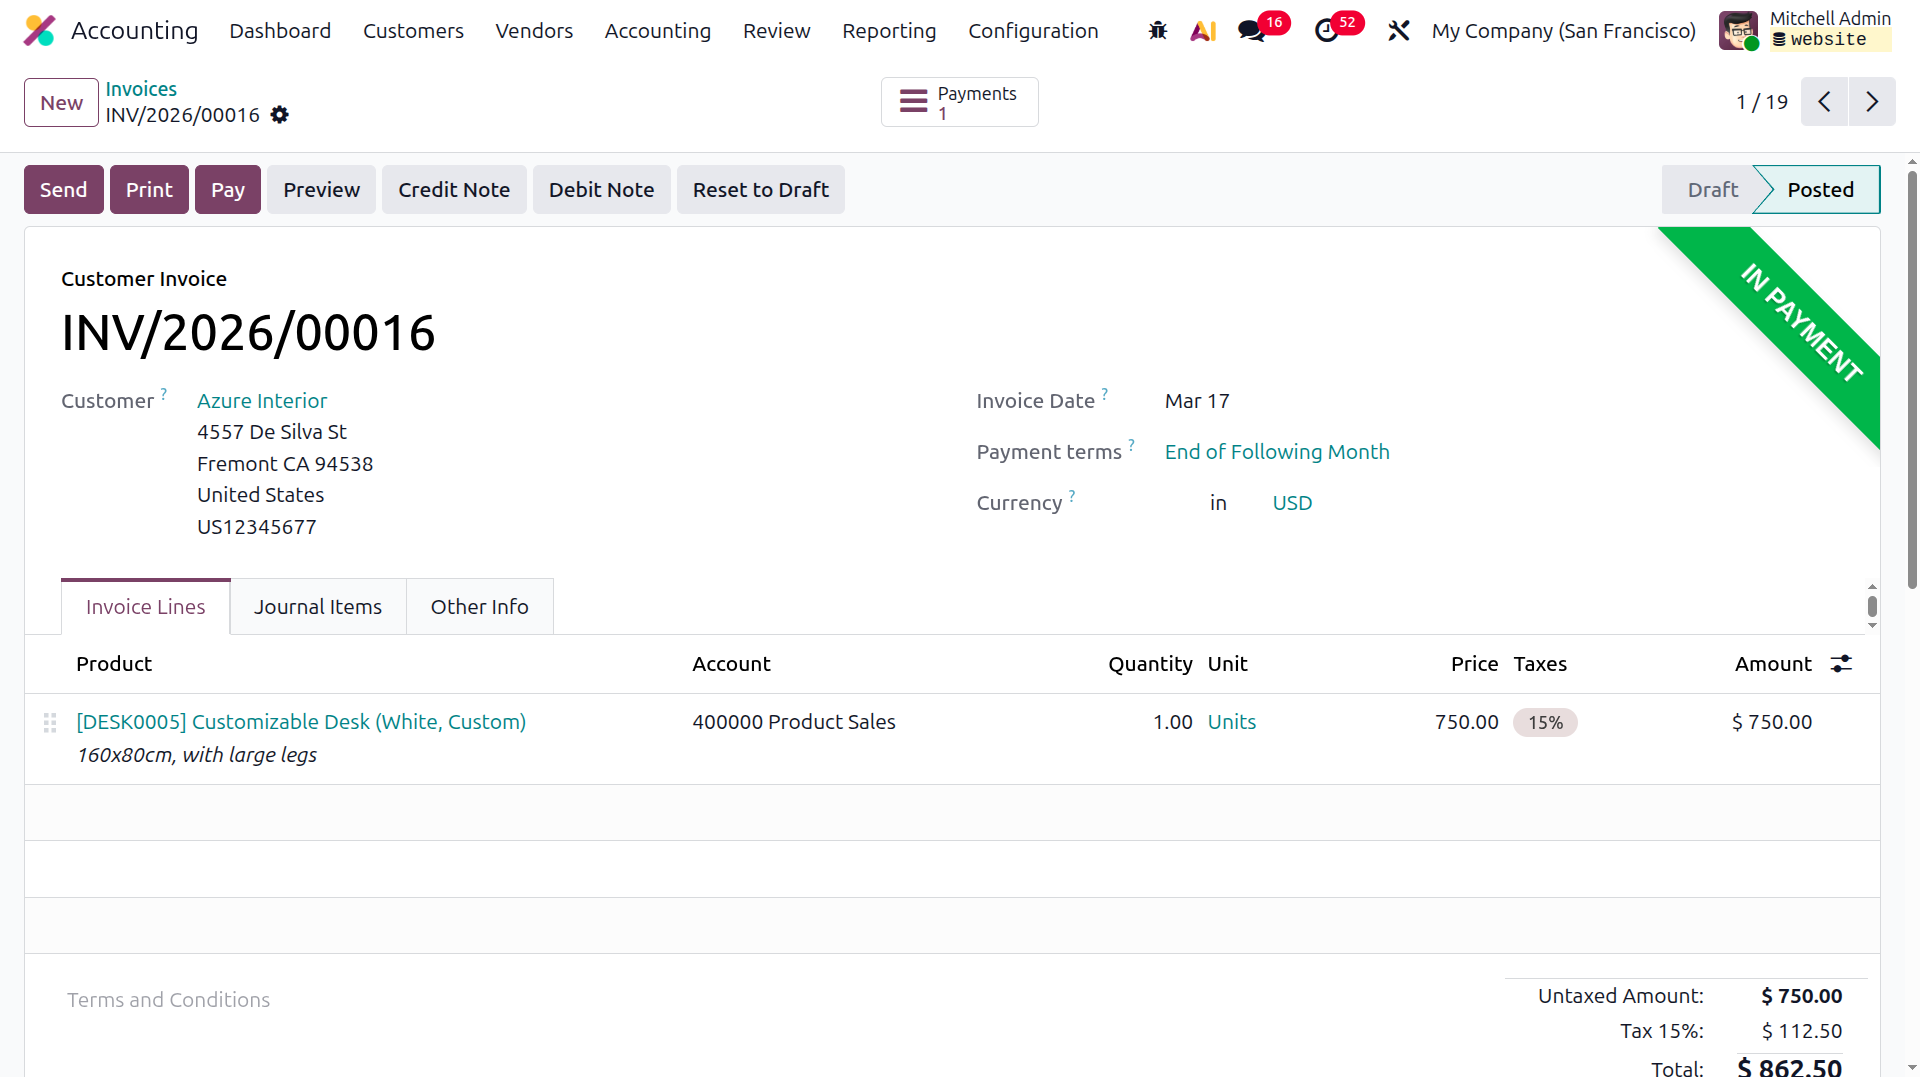
Once we click the create payment button here, the invoice will be in the payment state. There the incoming
payment account will be debited and the receivable account will be credited.
Customer Receipt Management
Receipts play an important role in ensuring that payments are properly recorded against the corresponding
invoice. In many businesses, the process of creating receipts may take place either before or after the payment
is received, depending on the company’s operational practices. To support these activities, the Odoo platform
provides a dedicated feature for managing customer sales receipts.
In the Odoo 19 Accounting module, the Receipts menu can be accessed from the Customers invoice form. Once we open
the customer invoice, there will be two booleans to choose whether we need to create an invoice or a receipt; we
can select it there.
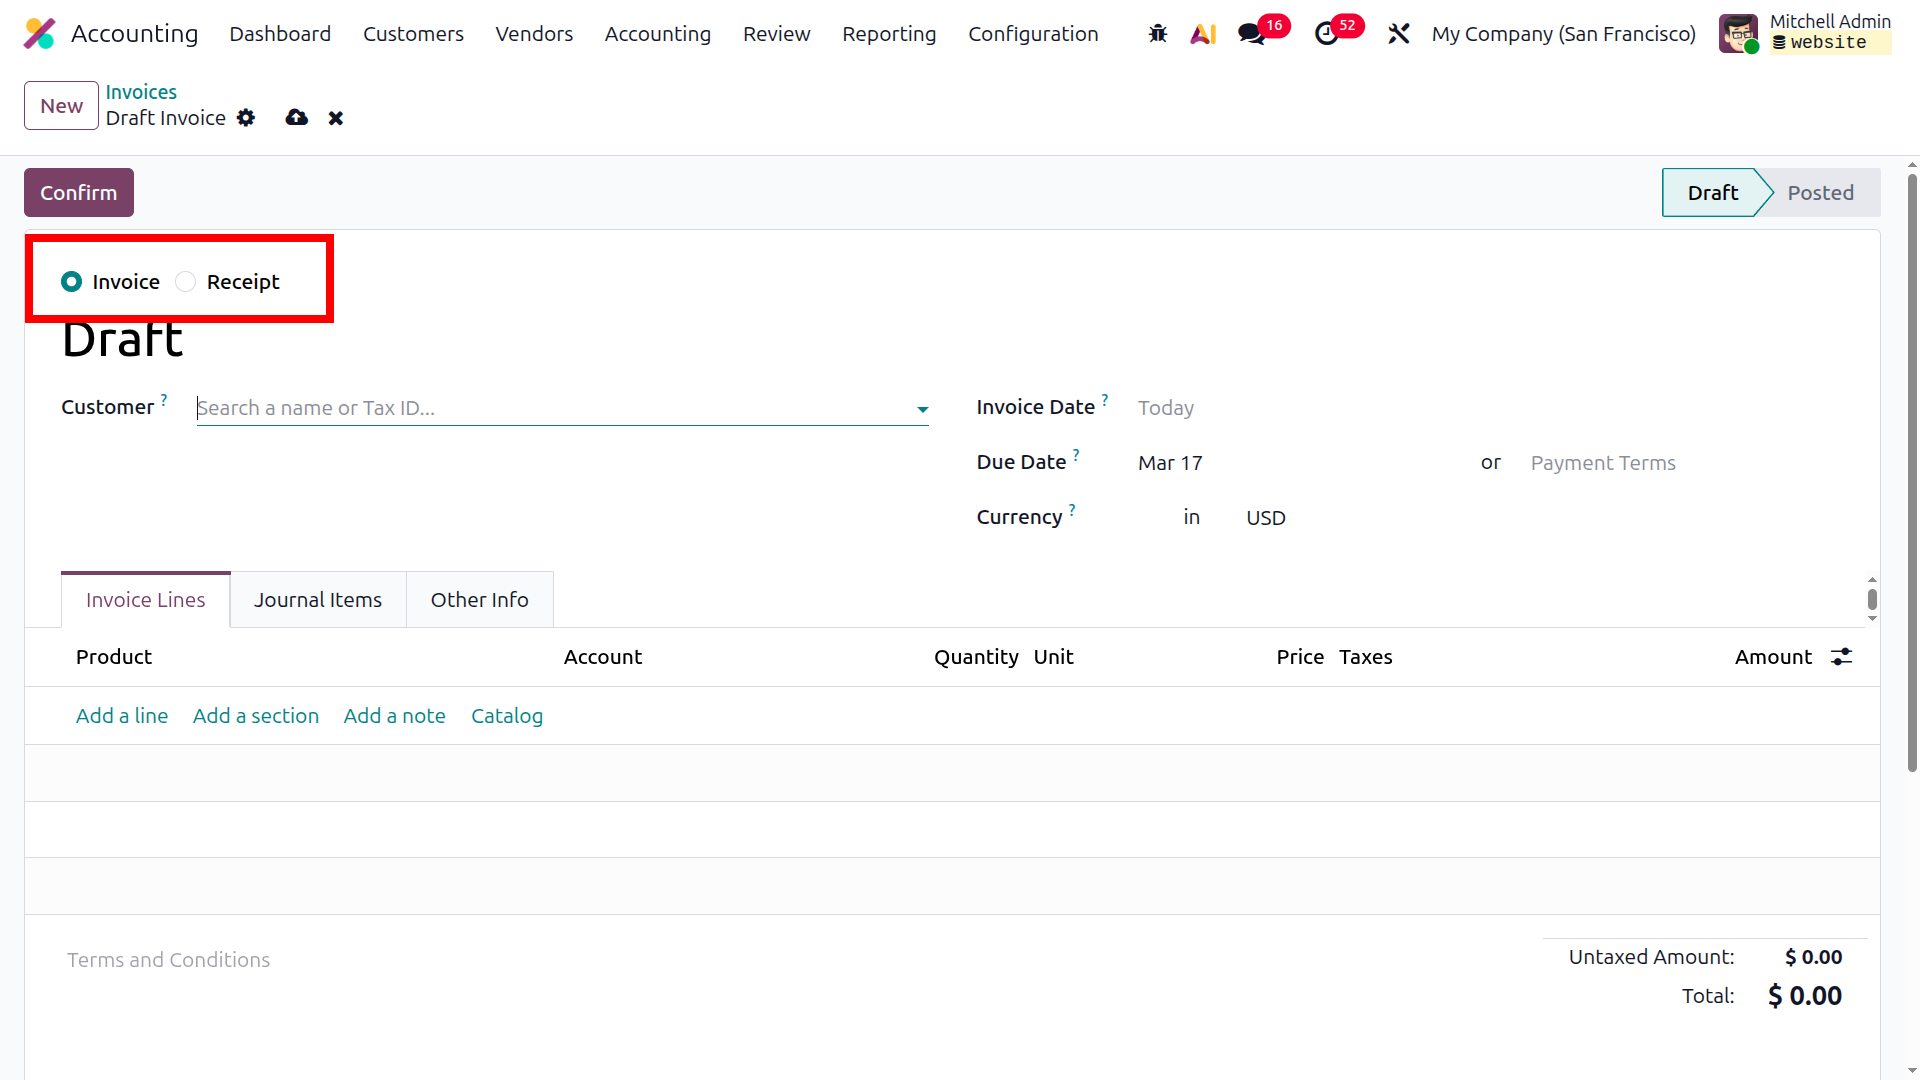
While we create a sales receipt, we can enable that receipt boolean. It lists all receipt-related operations and
displays information such as Number, Customer, Invoice Date, Due Date, Tax Excluded, Total, and Status. The
Status field is shown with color indicators, which helps users easily understand the current stage of each
receipt operation. You can edit the Receipts already listed in the menu, and you can also create new ones by
selecting the New option. While creating a receipt, you can enter details such as the Customer, Reference,
Payment Reference, Invoice Date, Due Date, Journal, and the Currency used for the transaction.
The receipt also includes information related to the invoice lines, such as Product, Label, Account, Analytic
Account, Analytic Tags, Intrastat, Quantity, Price, Taxes, and Subtotal.
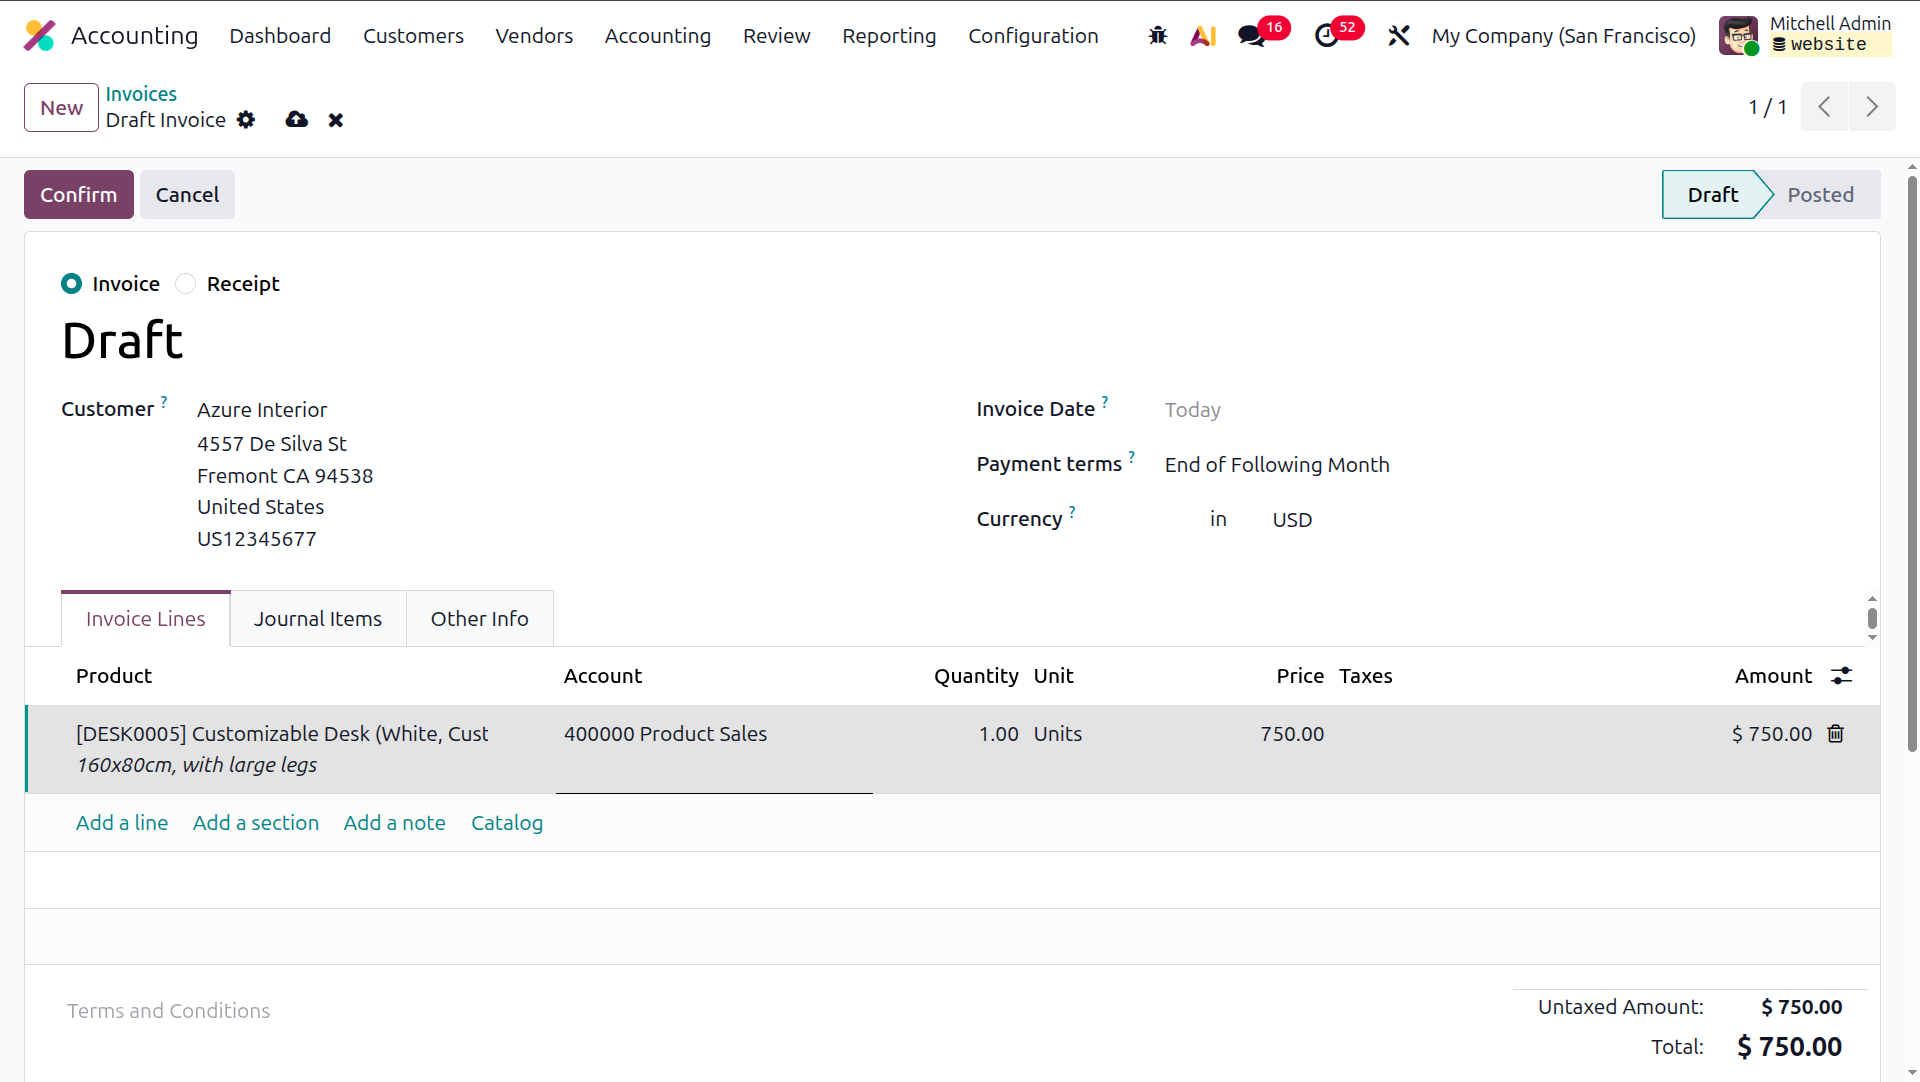
You can define the invoice details by selecting the Add a line option. If needed, a new section can be inserted
in the invoice by choosing Add a section, and additional information for the customer can be included using the
Add a note option. The added sections, product lines, and notes can be modified or removed whenever required.
The Invoice window at the bottom of the page will display the calculated Amount and Tax details.
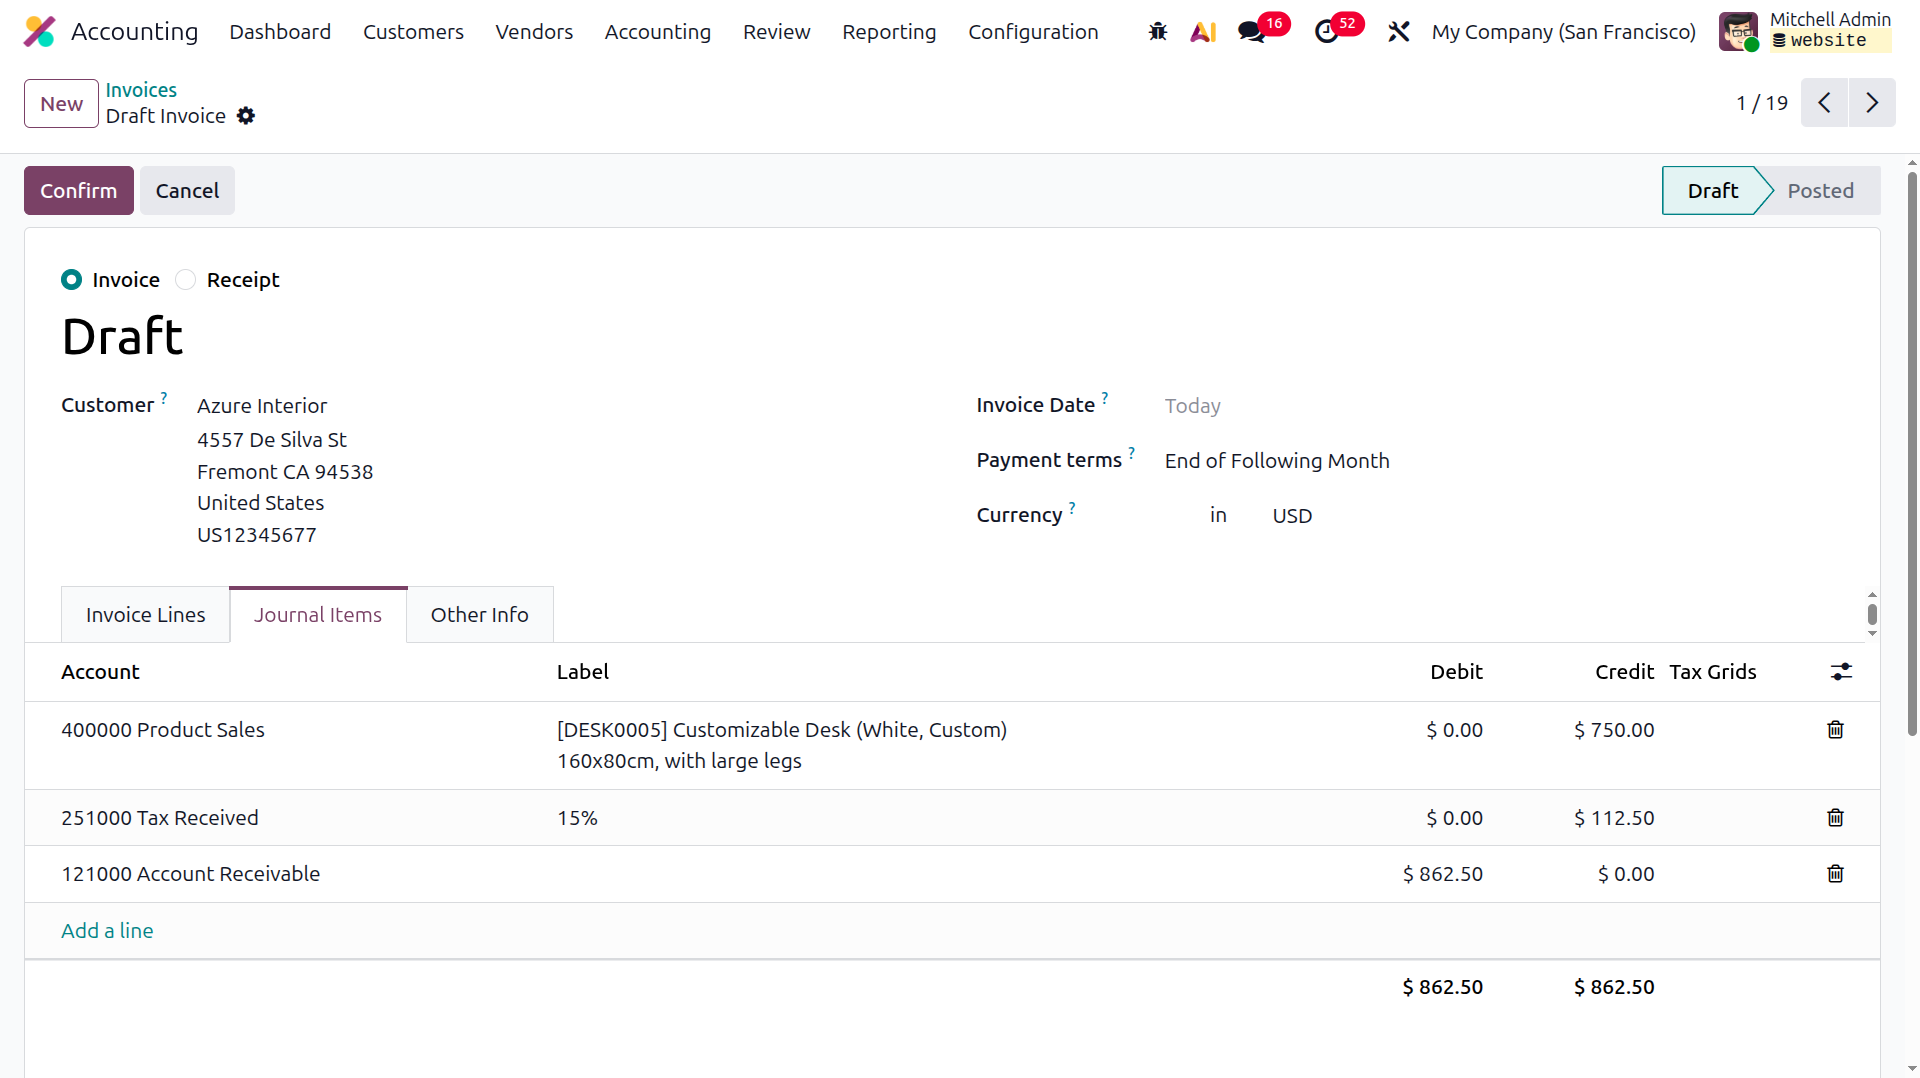
The Journal Entries option provides complete details of the journal items related to the corresponding invoice.
This section displays information such as Account, Label, Analytic Tags, Debit, Credit, and Tax Grids.
After the Reverse Invoice is created, you can record the payment by selecting the Register Payment option. This
action opens a pop-up window similar to the one shown in the image below. In this window, you can choose the
Payment Method, such as SEPA Direct Debit, Batch, or Manual. You will also need to provide details including the
Recipient Bank Account, Payment Amount, Payment Date, and Payment Memo. Finally, click the Create Payment option
to complete the payment registration.
Once the payment has been recorded, the corresponding Receipt in the Receipts menu will display the In Payment
label to indicate that the payment is in progress. If the payment is successfully completed, the status will
change to Paid.
Additionally, the Receipts defined on the platform can be modified when required; however, only authorized Odoo
platform users, who are identified during the platform setup, are permitted to make such changes. After
understanding these basic concepts, we can now examine how customer receipts are managed within the Odoo
Accounting module. The next section will provide a more detailed explanation of the customer payment management
features available in the Odoo 19 Accounting module.
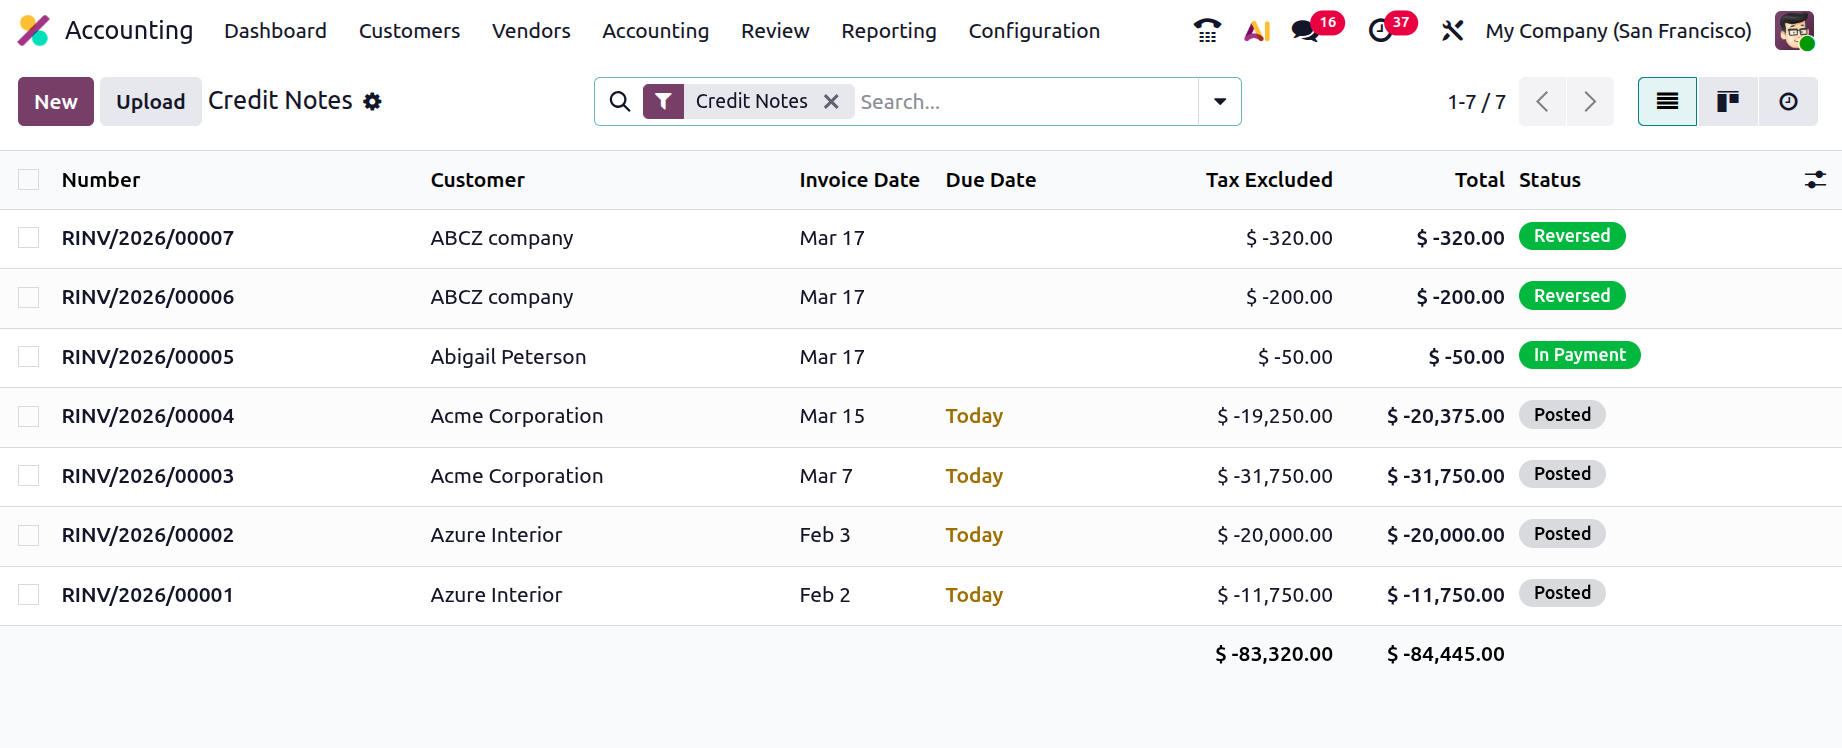
Credit note management on an invoice
You may already be familiar with Credit Note operations that allow you to refund invoice amounts, as discussed in
the previous section. To simplify the management of these activities in real-time business scenarios, Odoo
provides a dedicated Credit Notes menu. This menu, accessible from the Customer page, displays details for each
credit note such as Number, Customer, Invoice Date, Due Date, Next Activity, Tax Excluded, Total, Status, and
Payment Status. Additionally, you can retrieve the required Credit Notes using both the default and custom
Filter and Group By options.
In addition to managing existing Credit Notes, you can create a new one by selecting the New option. In the
creation form, the Credit Note number is automatically generated and begins with the RINV prefix, which
represents a Reverse Invoice, and this prefix appears at the beginning of the document number. In this form, you
can specify details such as the Payment Reference and Customer information. You can also define fields including
the Journal, Invoice Date, Due Date, and Electronic Invoice for the Credit Note.
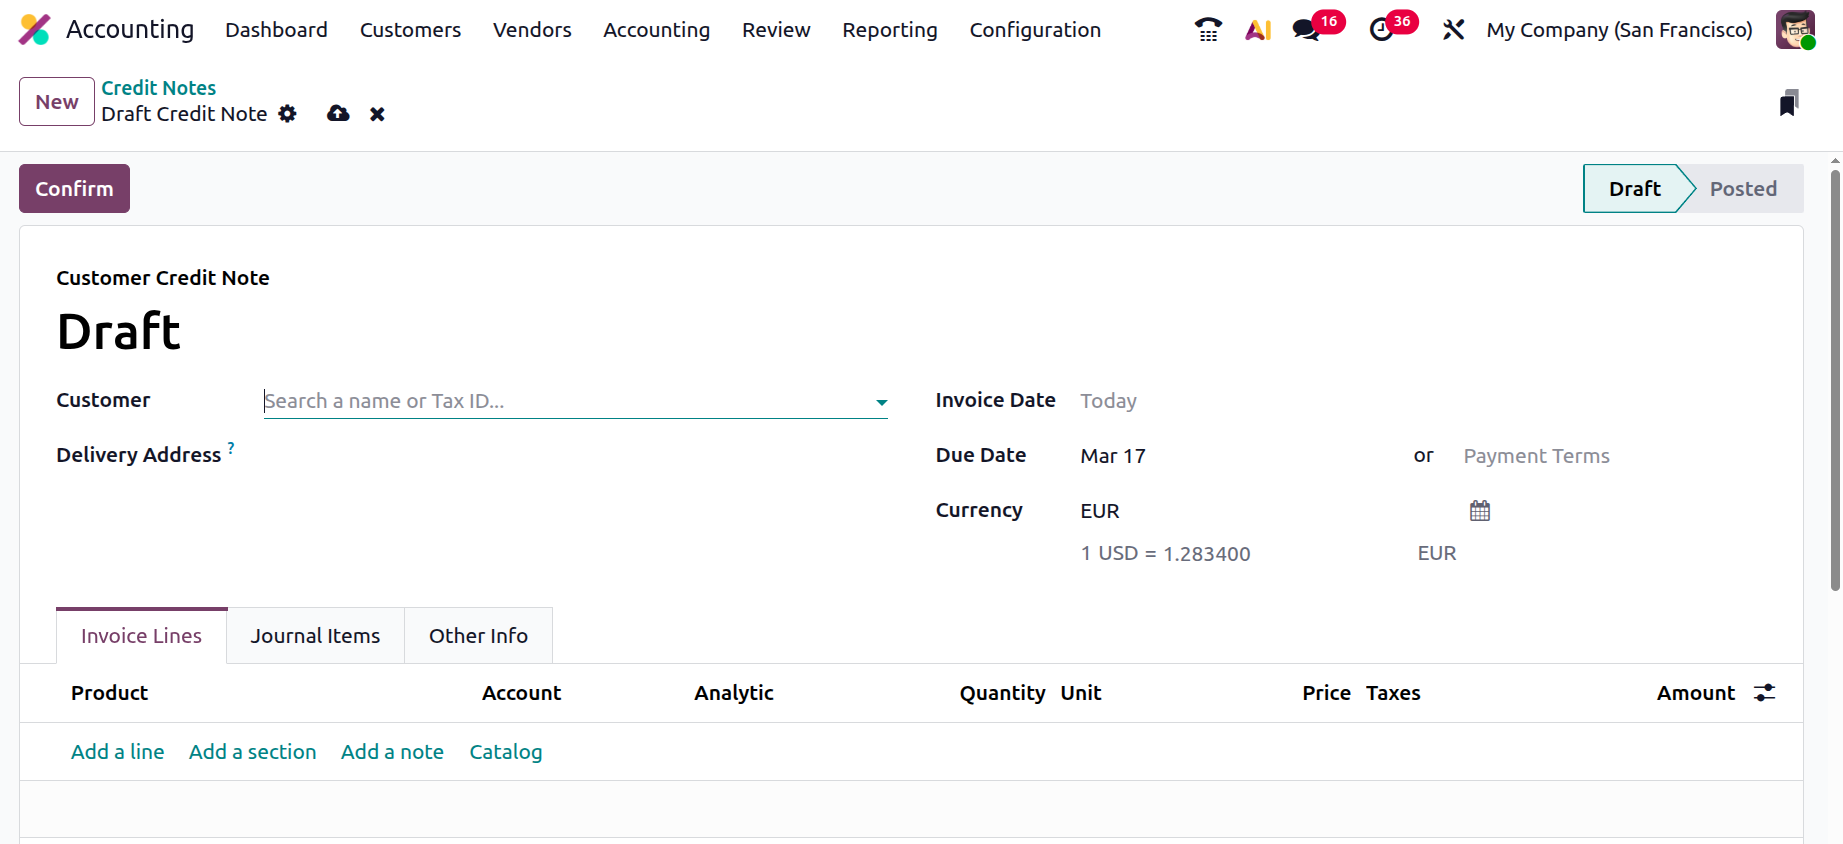
You can define the invoice lines using the Add a line option. If required, you may organize the invoice by
selecting Add a section, or include additional information by choosing the Add a note option.
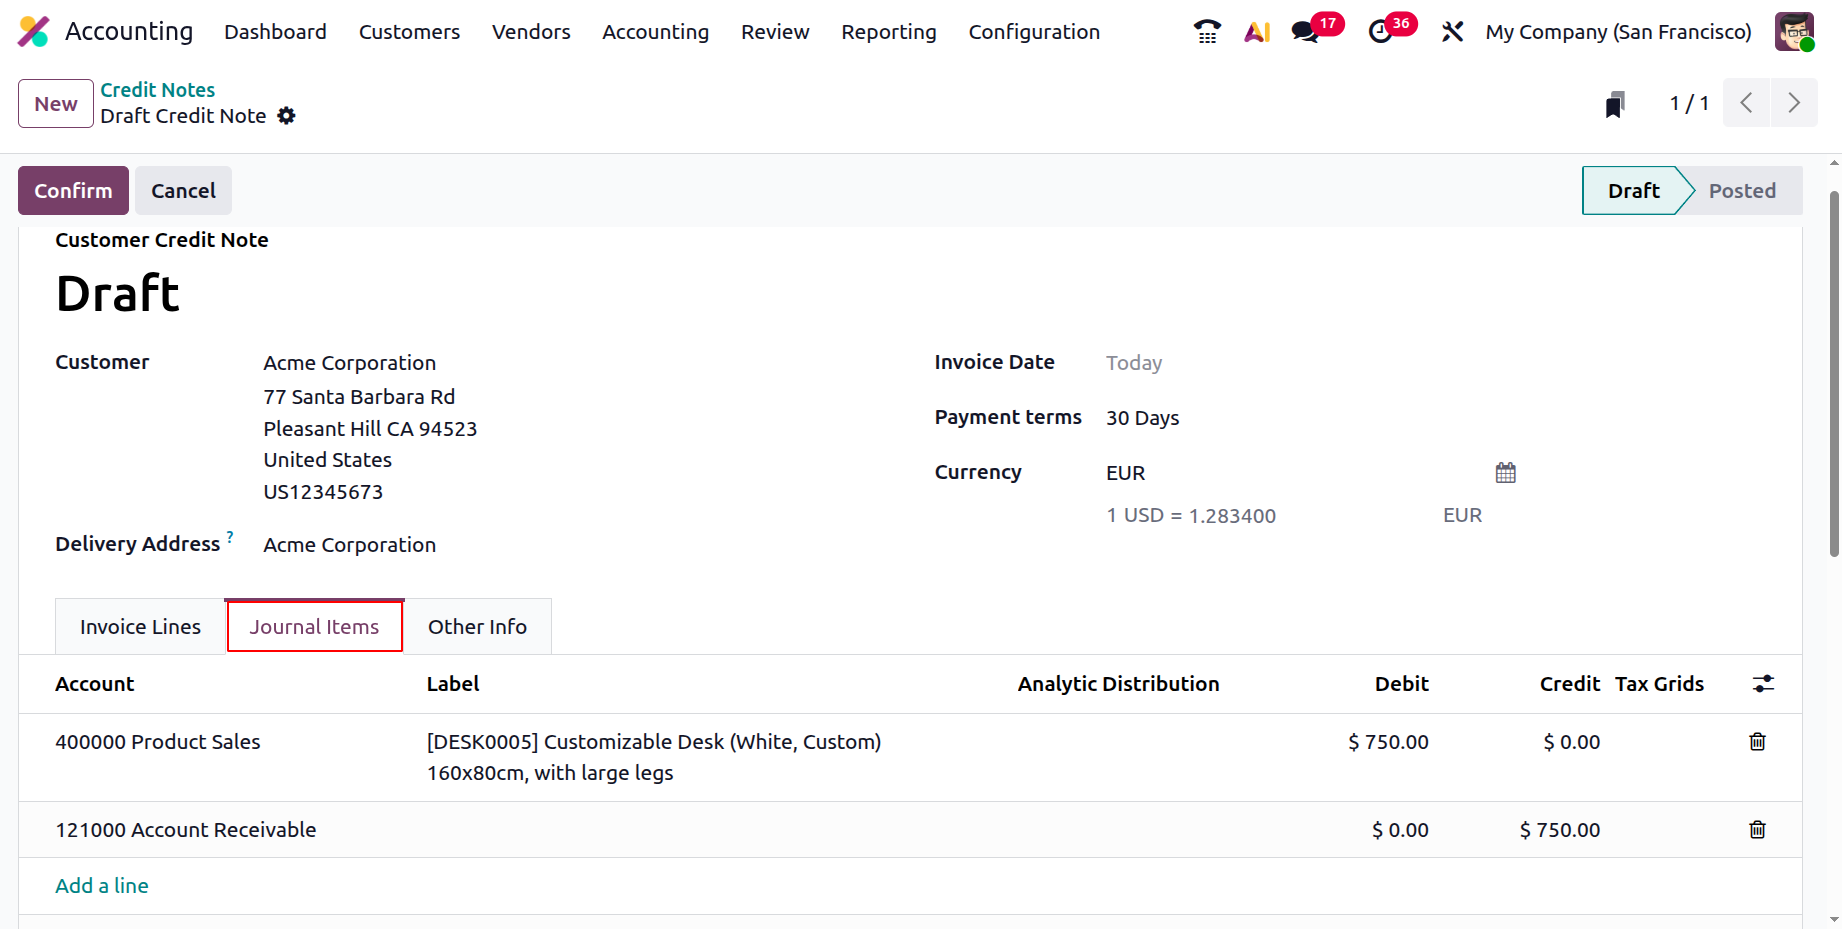
The Journal Items section will display details such as Account, Label, Analytic, Debit, Credit, and Tax Grid.
Once the product is added to the Reverse Invoice, the affected accounts will be reflected in the Journal Items
page. During this process, the Income Account and Tax Account are debited, while the Account Receivable is
credited. This indicates that when an invoice is reversed, the Income Account decreases and is therefore
debited, while the Account Receivable, which is an Asset, decreases and is consequently
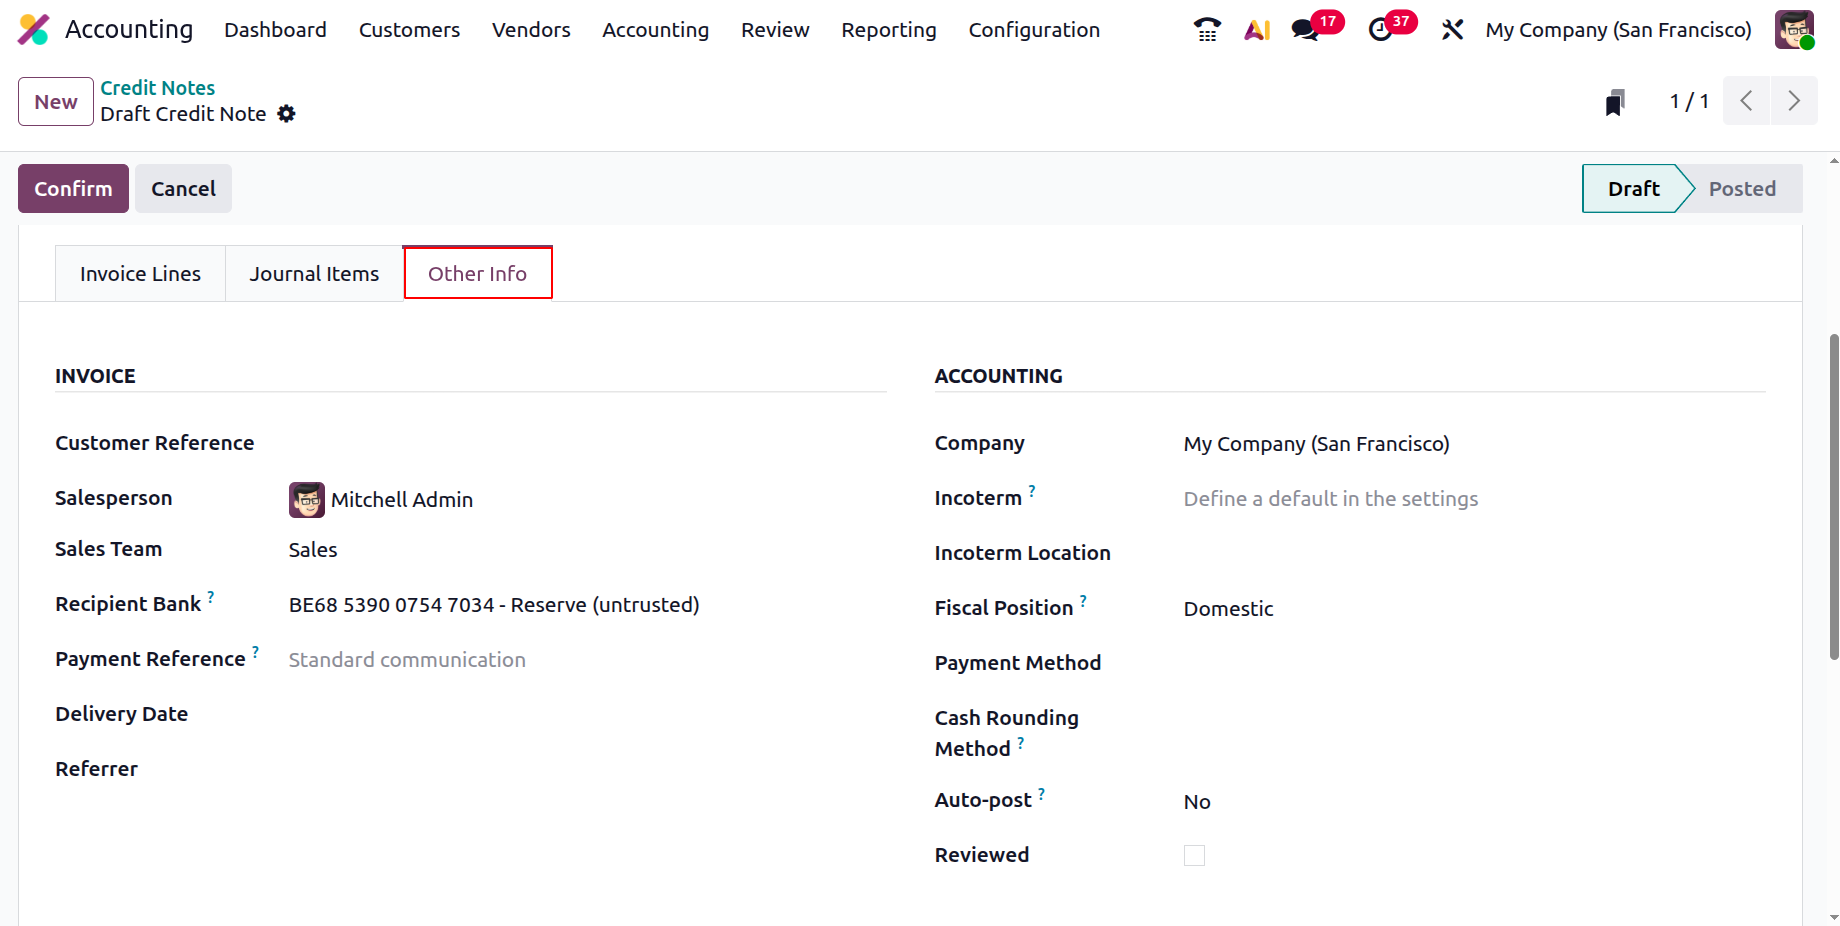
The Other Info tab enables you to enter additional accounting and invoice details. In this section, you can
specify information such as the Destination Bank, Salesperson, Customer Reference, and Payment QR Code. You can
also configure options like Incoterms, Fiscal Position, Intrastat Country, Cash Rounding Method, Post
Automatically, and Reviewed, depending on the company’s requirements.
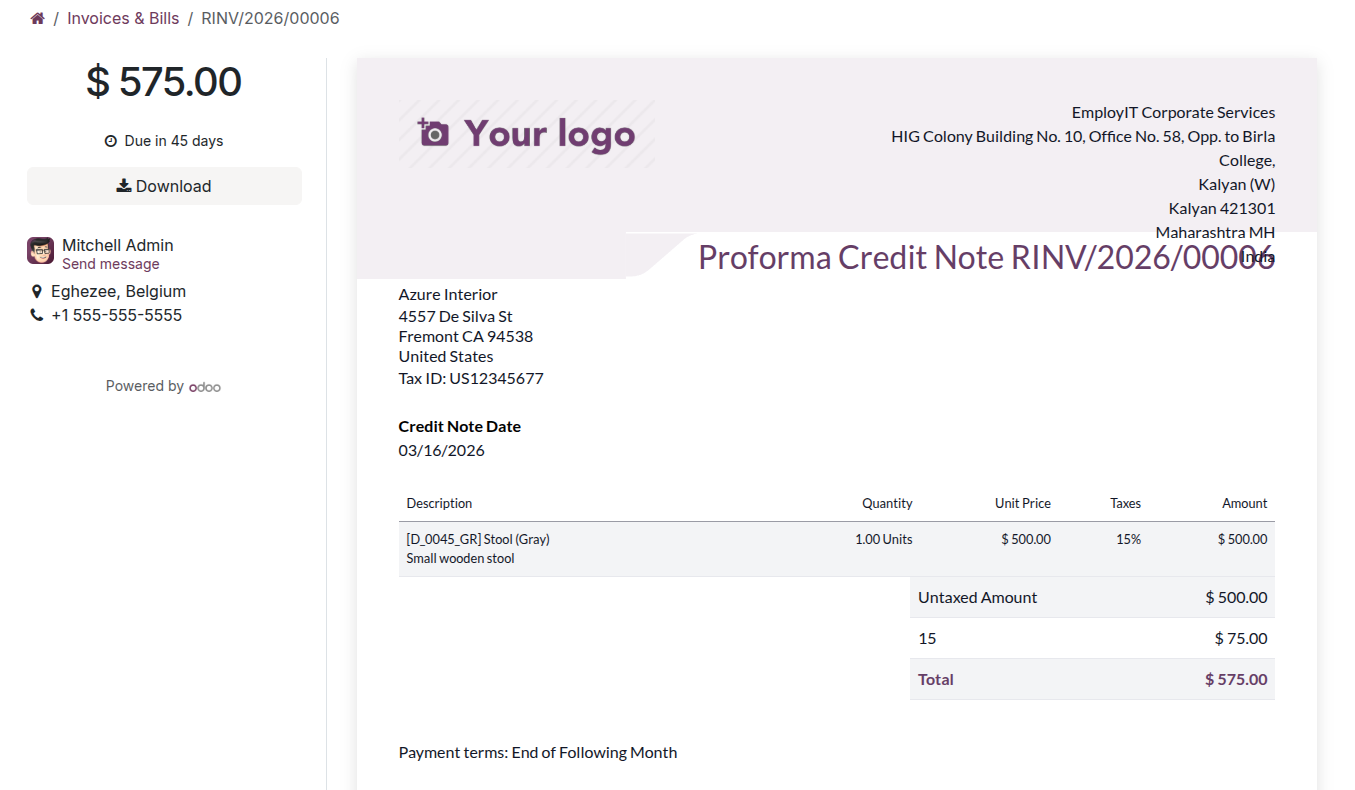
By selecting the Preview option from the corresponding Credit Note menu, you can view a preview of the Reverse
Invoice created for the Credit Note. This Reverse Invoice is the document that will be shared with the customer.
The following screenshots illustrate how the Reverse Invoice appears to the customer, and all the details
displayed are based on the information defined while creating the Credit Note.
If the information is correct, the Credit Note can be sent to the customer either in person or via email. In
certain cases, the customer may receive the Credit Note along with the related refund payment. Once the payment
is made, it must be recorded in the appropriate customer payment Journal to maintain accurate financial records
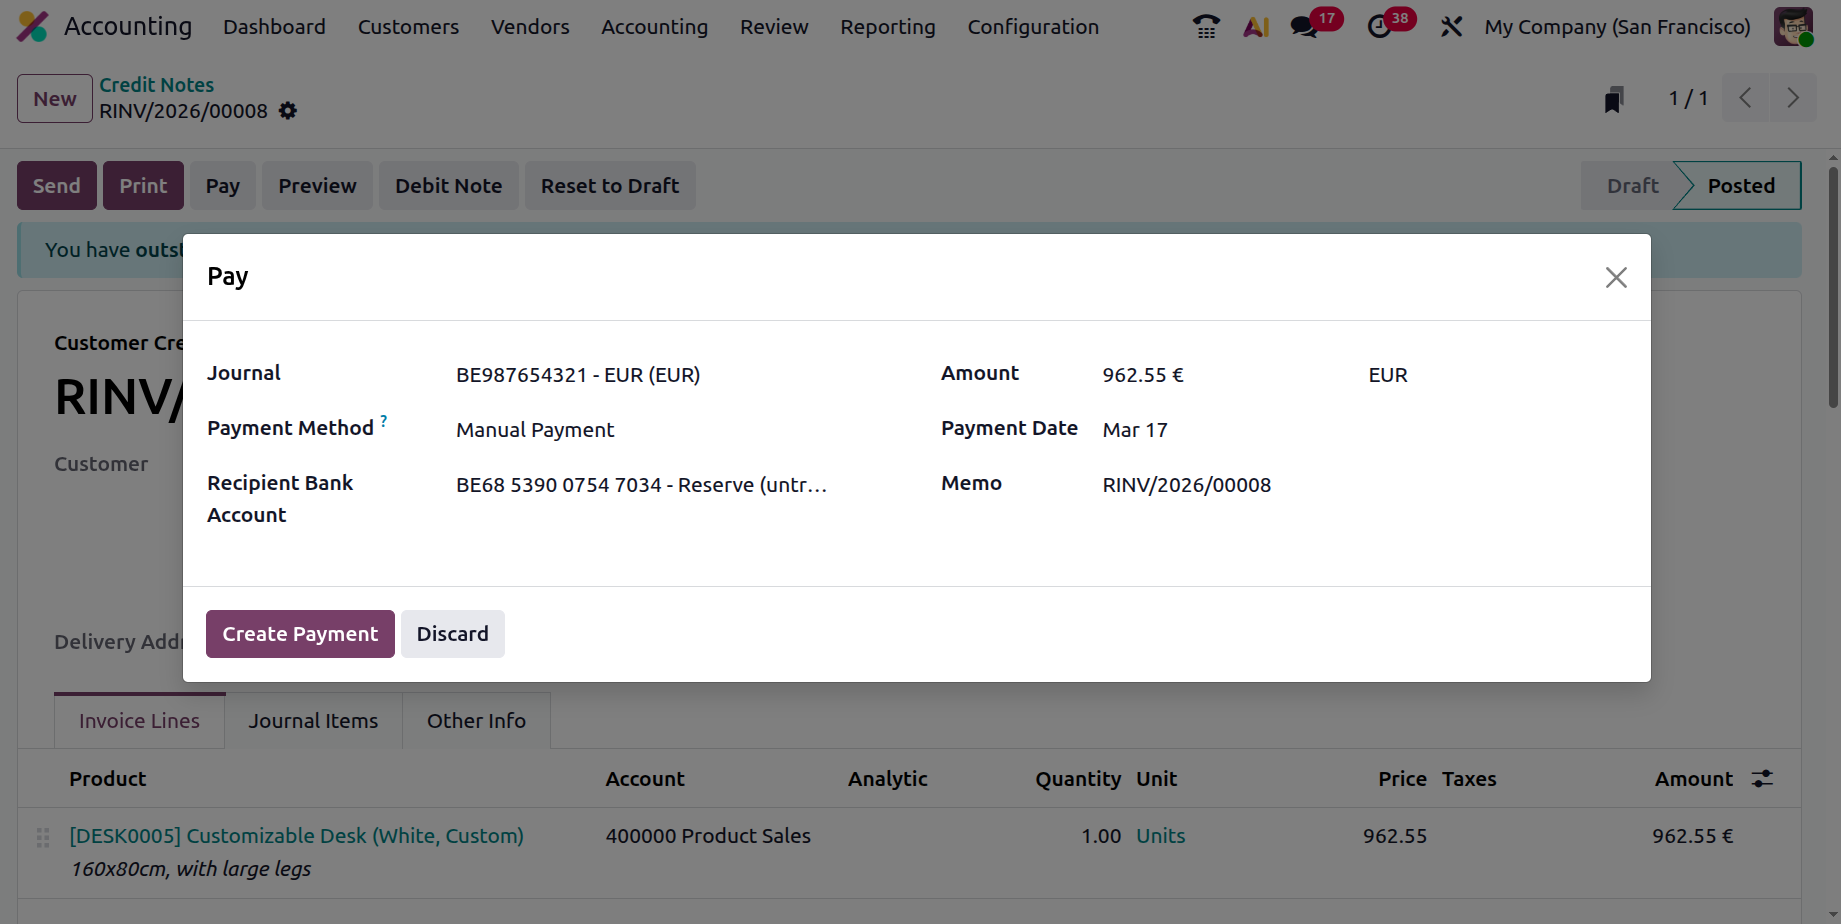
in the system. When you select the Pay option, a pop-up window appears where you can enter the payment details.
In this window, you can define the Journal, choose the Payment Method such as Manual or Check, and specify
additional details, including the Recipient Bank Account.
You can also enter the Memo, Payment Date, Amount, and Currency in which the payment is processed. After
completing the required fields, select the Create Payment option to record the transaction.
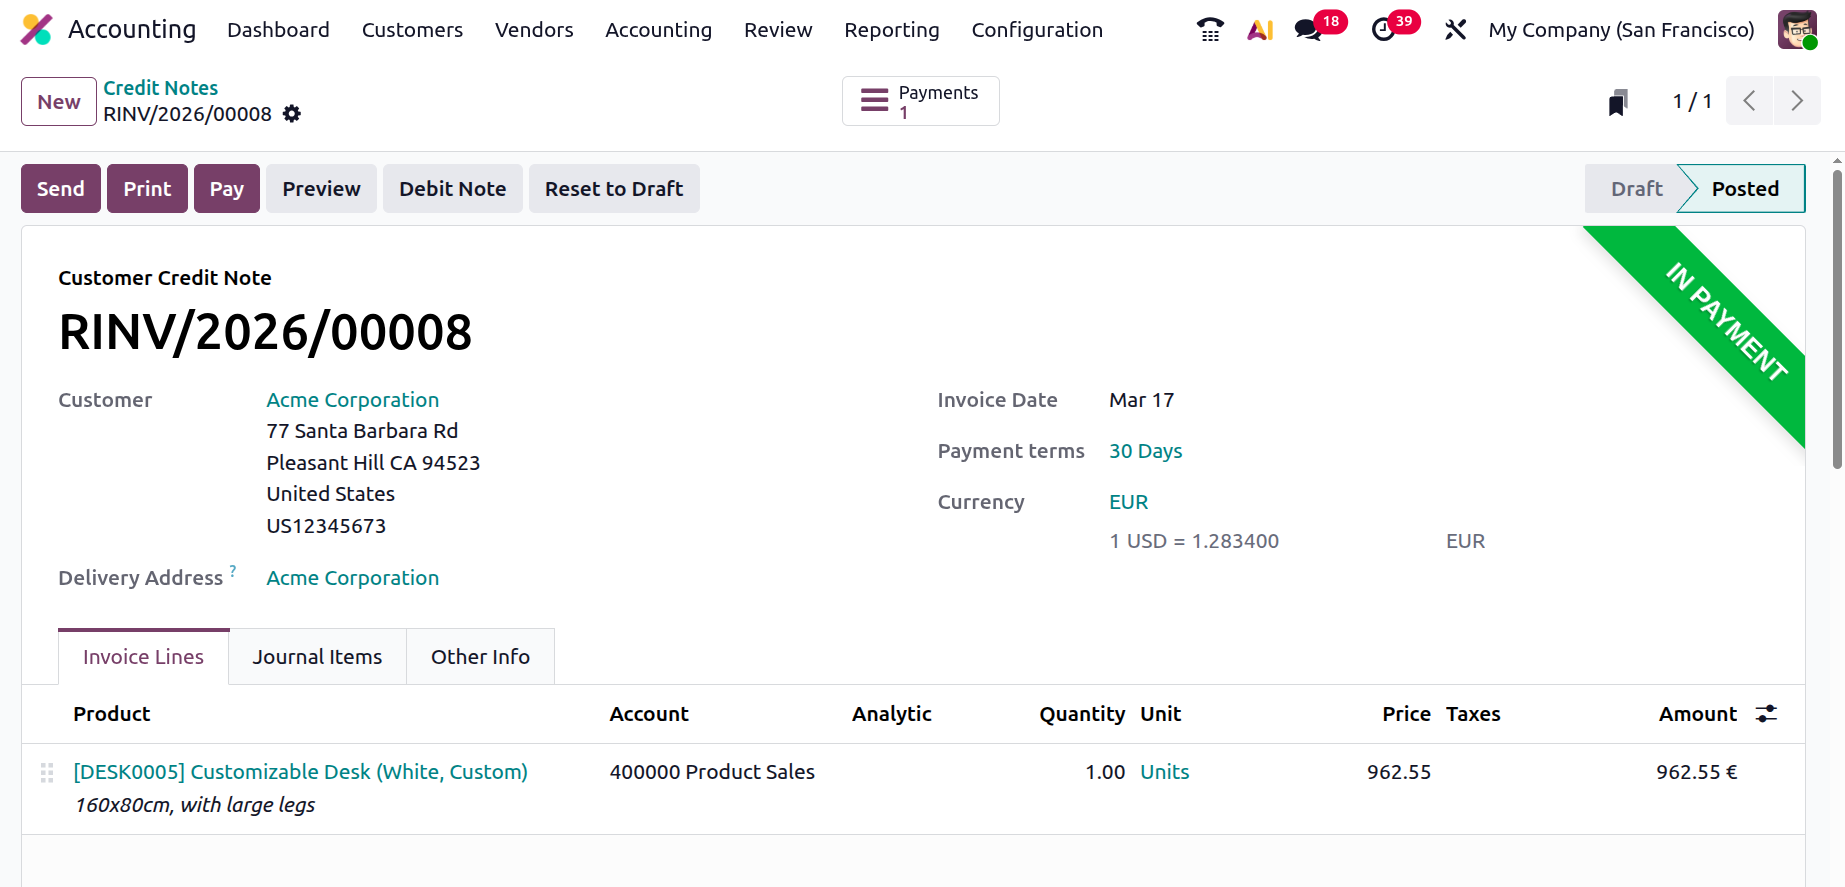
When a payment has been initiated but is not yet completed or confirmed, the Credit Note will display the In
Payment status to indicate that the payment process is ongoing. After the transaction is successfully reconciled
and recorded in the Bank or Cash Account, the status will change to Paid.
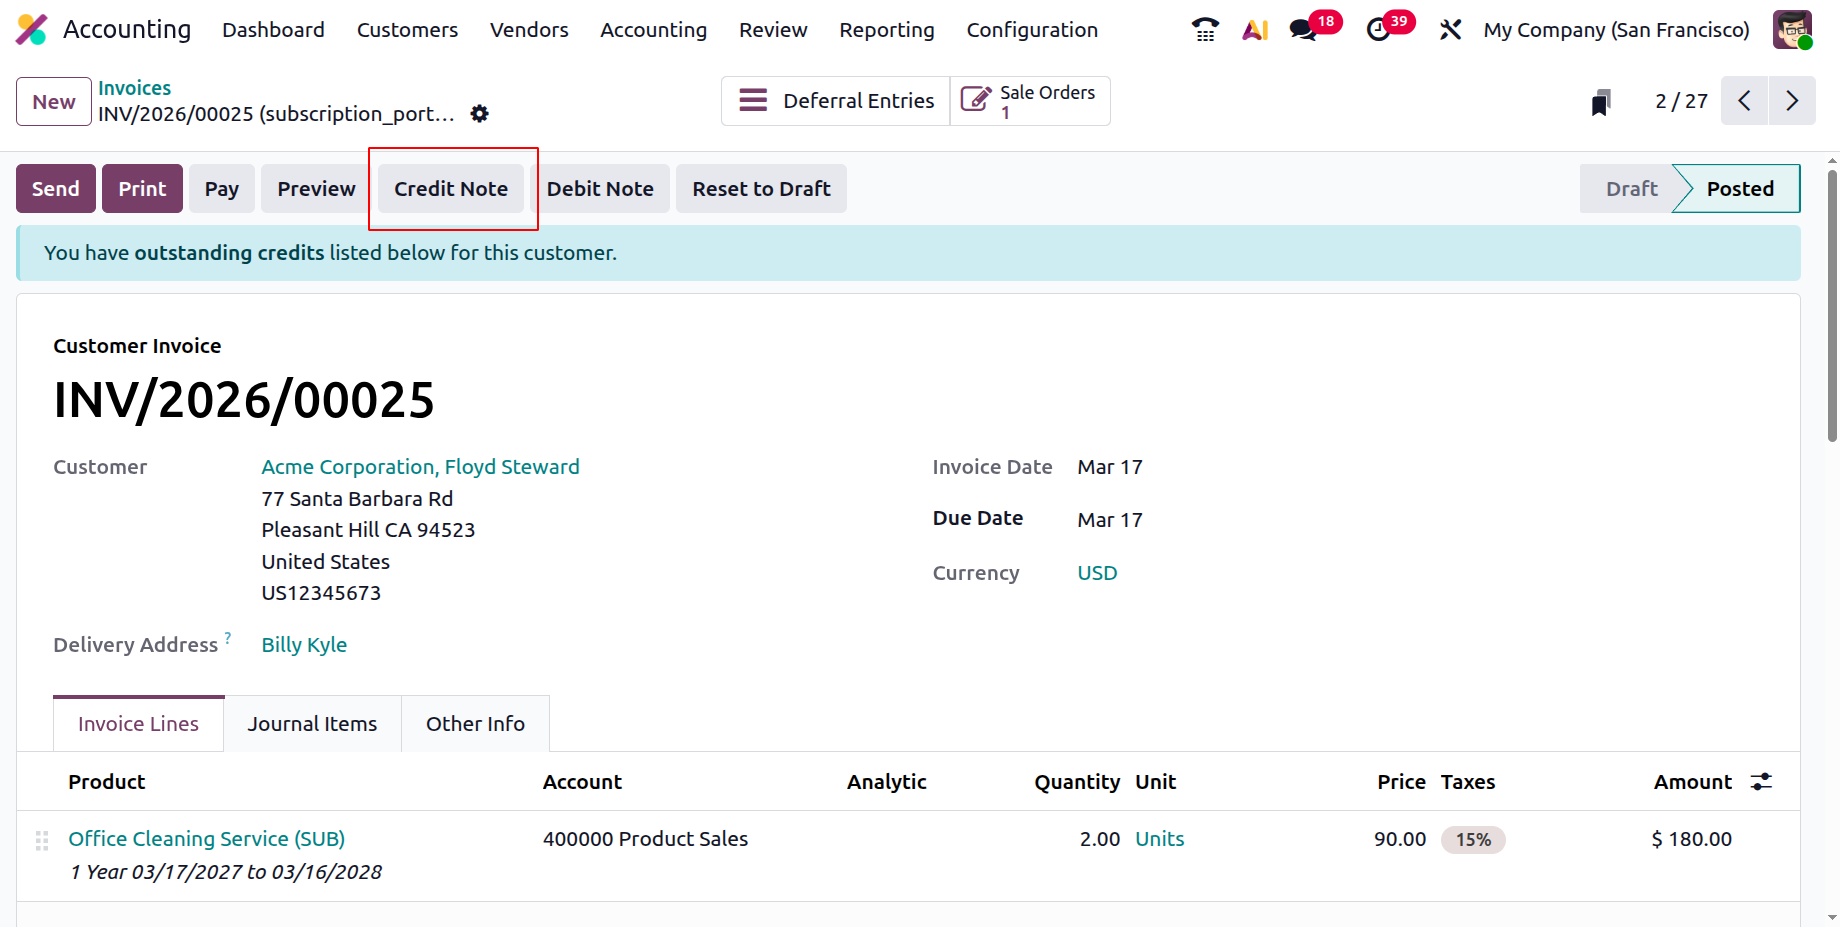
Users can also create a Credit Note directly from the Invoice. By selecting the Credit Note smart button
available on the corresponding Invoice, a new credit note can be generated.
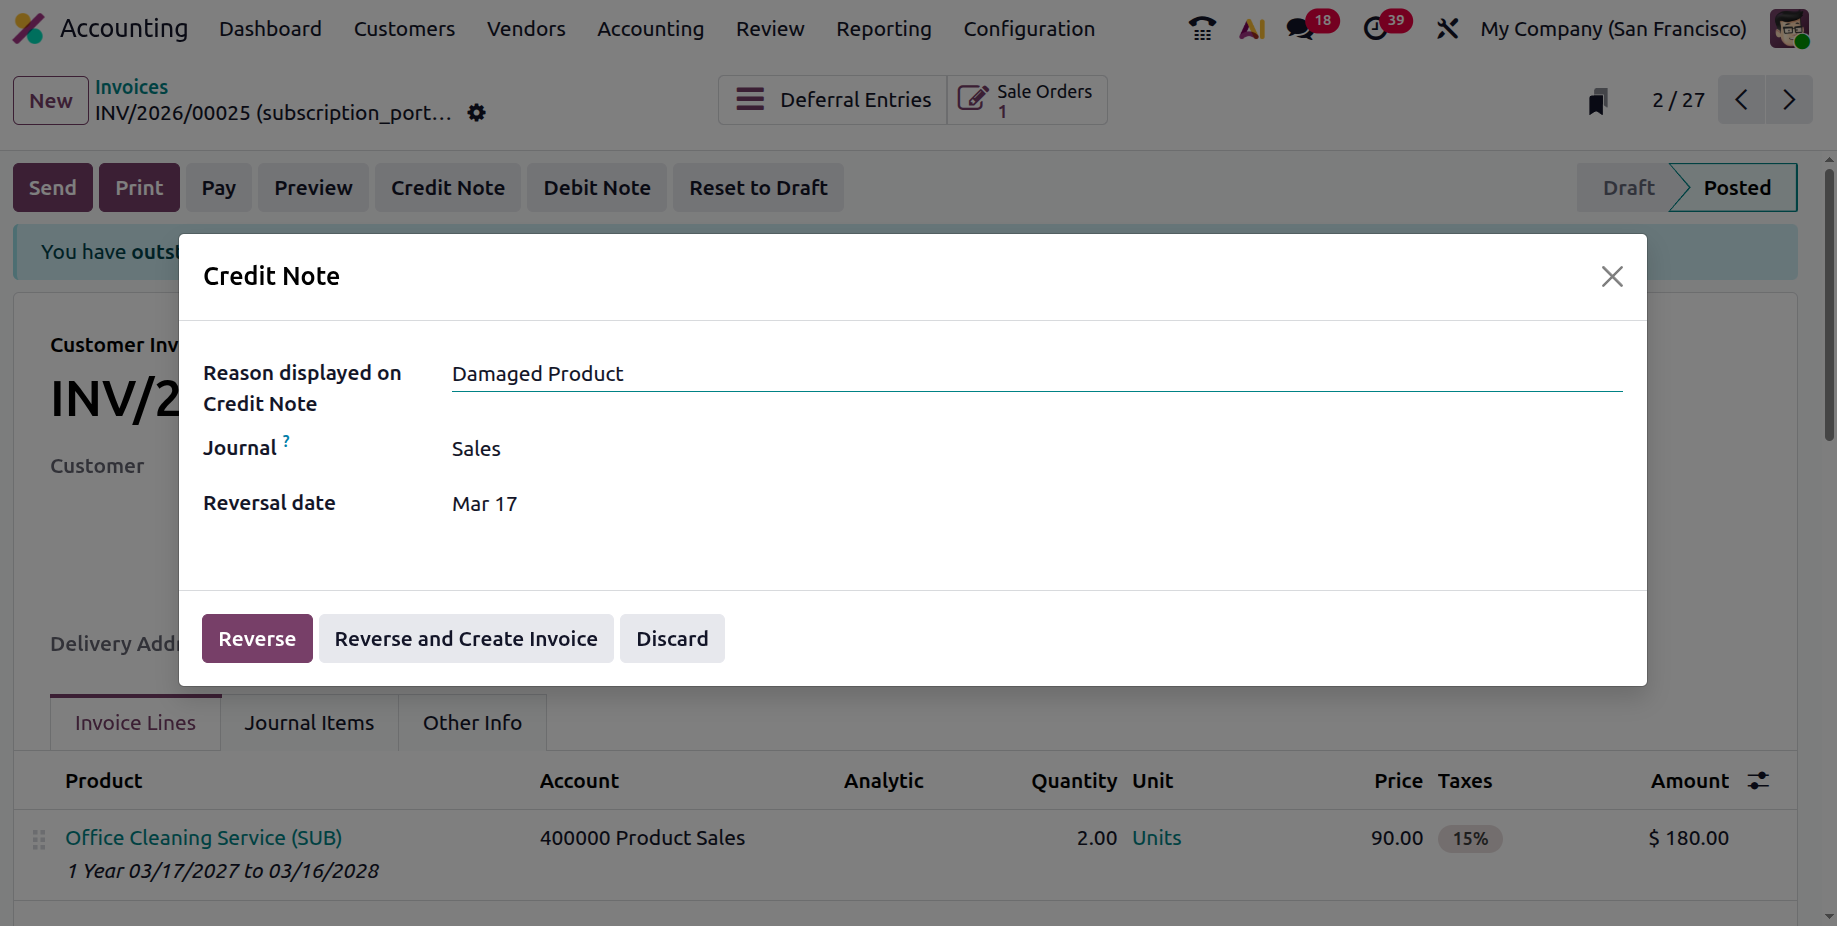
In the window that appears, you can enter details such as the Credit Method, the Reason for the Refund, and the
Reverse Date, which can be set either to a specific date or to the Journal Entry Date. You can also modify the
Refund Date and select a Specific Journal according to your requirements.
If you need to adjust the amount that will be refunded to the customer, choose the Reverse option; otherwise, you
may select Discard. To reverse the invoice, click the Reverse button. If you want to reverse the existing
invoice and simultaneously create a new Invoice in Draft state, select the Reverse and Create Invoice option.
At this stage, you should already be familiar with the management features, operations, and workflow of Credit
Notes. In the following section, we will further explore how the Odoo Accounting module manages Customer
Payments.
Customer Payment
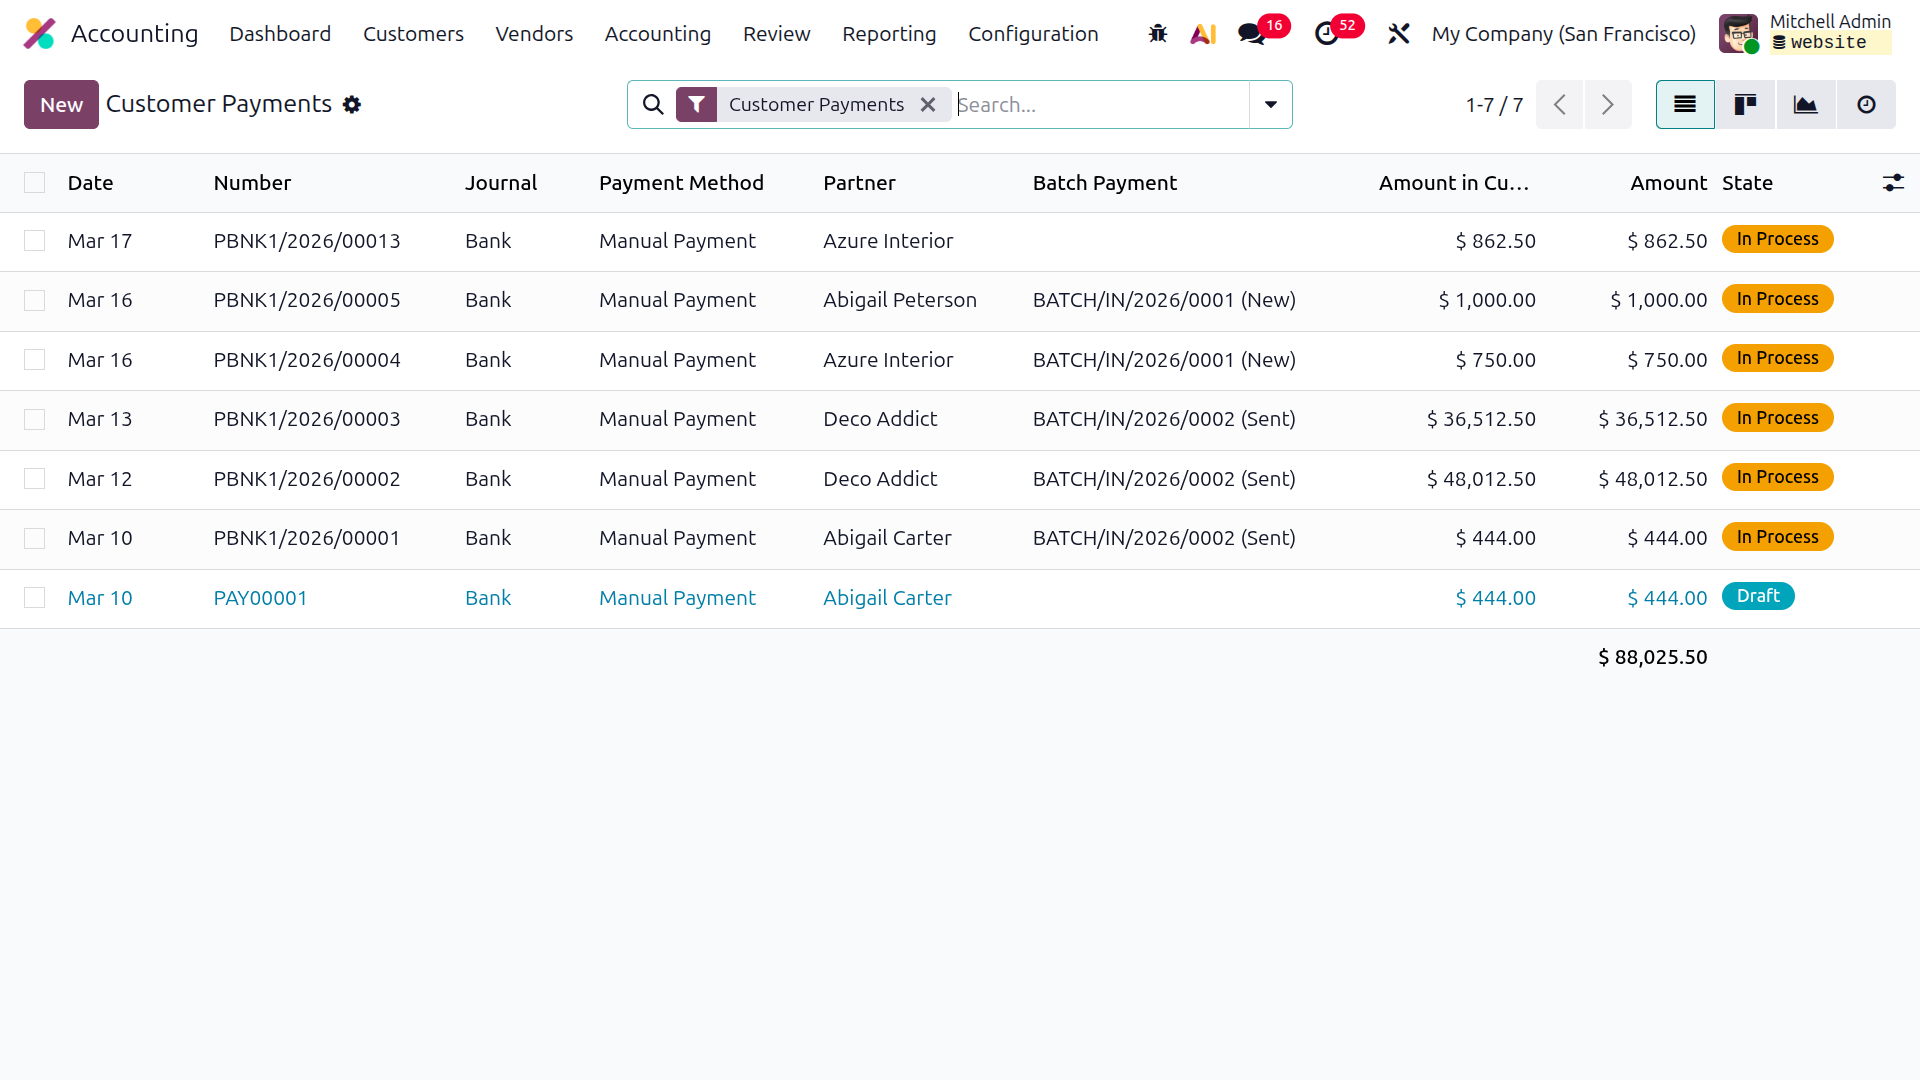
The Payments management menu available in the Odoo Accounting module allows businesses to efficiently handle
customer payments related to issued invoices. As illustrated in the accompanying screenshot, the Payments menu
displays all payment activities created for the company’s operations. It includes details such as Amount,
Status, SDD Scheme, Currency, Payment Date, Number, Journal, Payment Method, Customer, and, when applicable,
information related to Batch Payment. The operational status of each customer payment is indicated using color
indicators for easier identification.
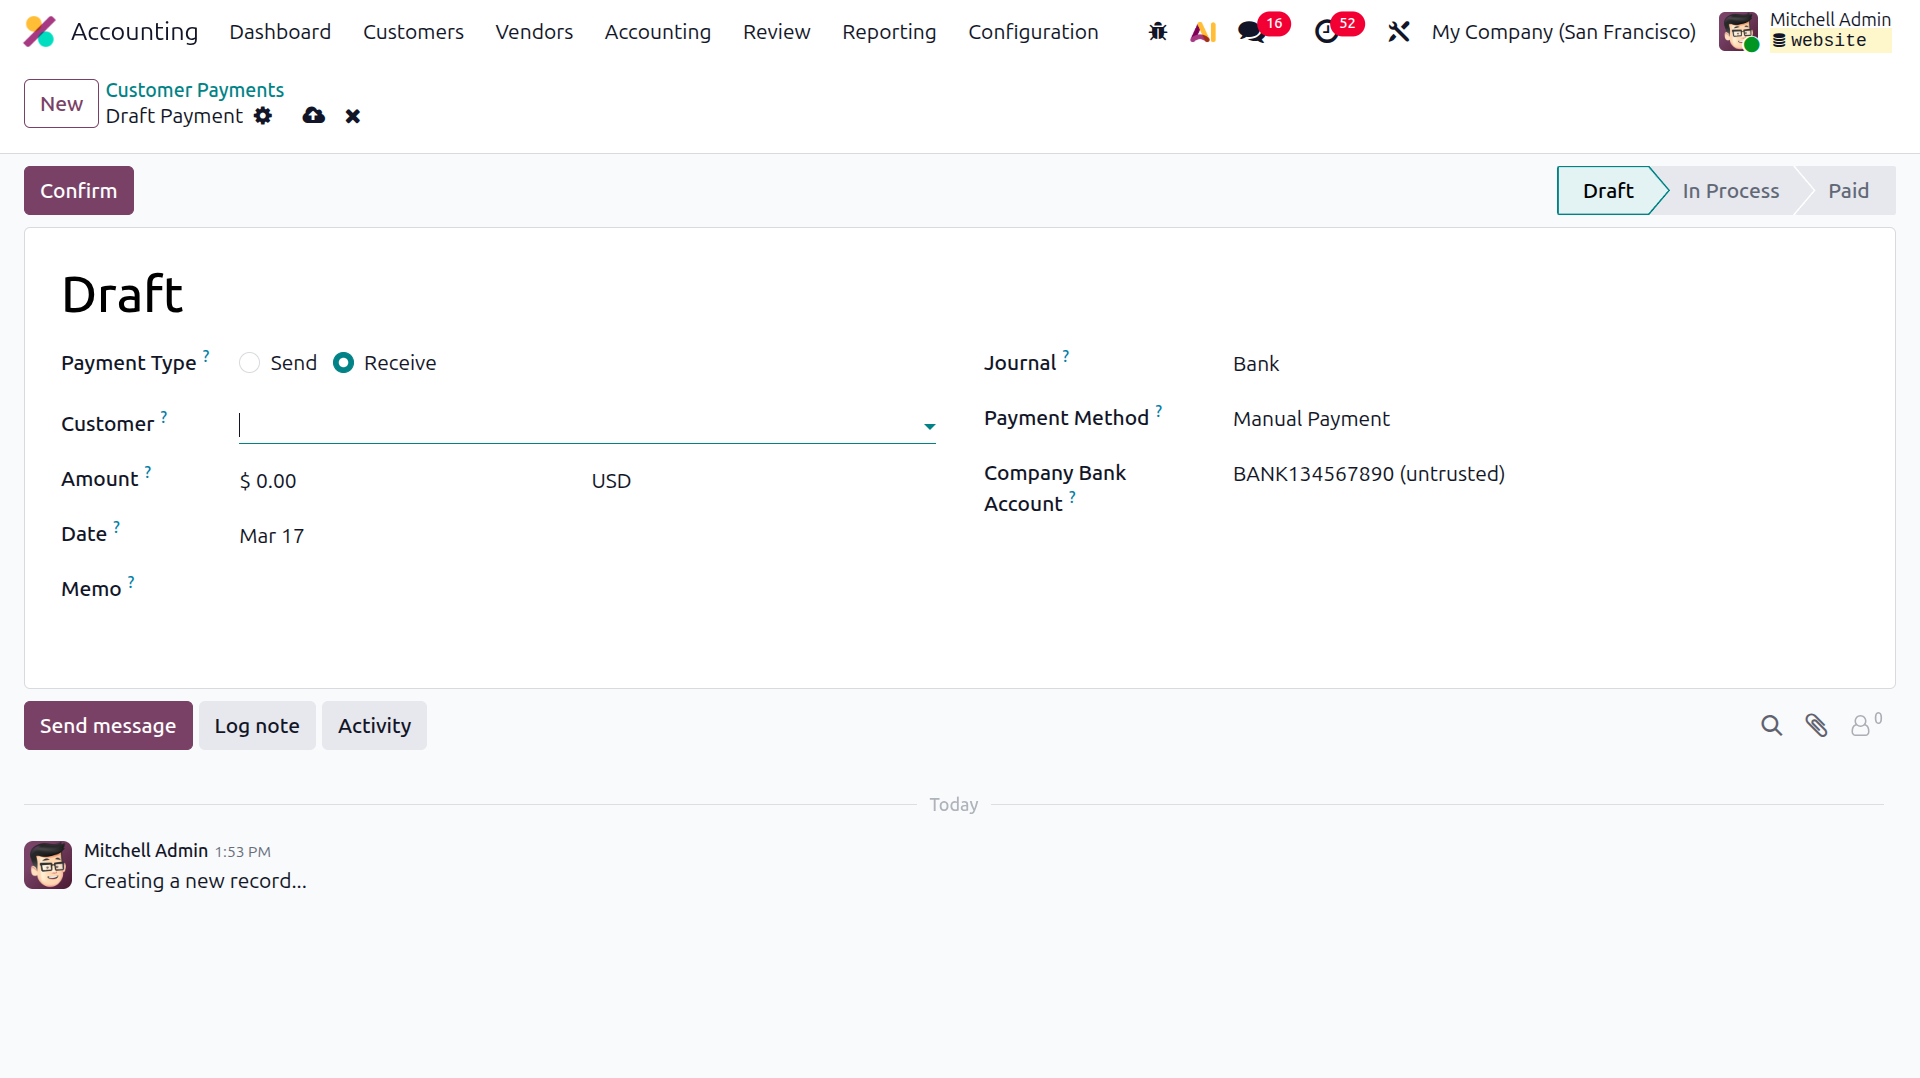
By selecting the New option, you can create new Customer Payments or modify the details of existing ones. Once
the customer payment is opened, by default if we open the customer payment, the payment type will be Receive,
then we can add the name of the customer, amount that the customer is paying, the date of the payment, the
journal that is used to store the transaction, and the payment method used to complete the payment.
We can create a customer payment directly from here, and also, once an invoice is created, we can make a payment
against that invoice, and that payment will also be visible here. Also, we can add the created payment to an
invoice of the same partner.
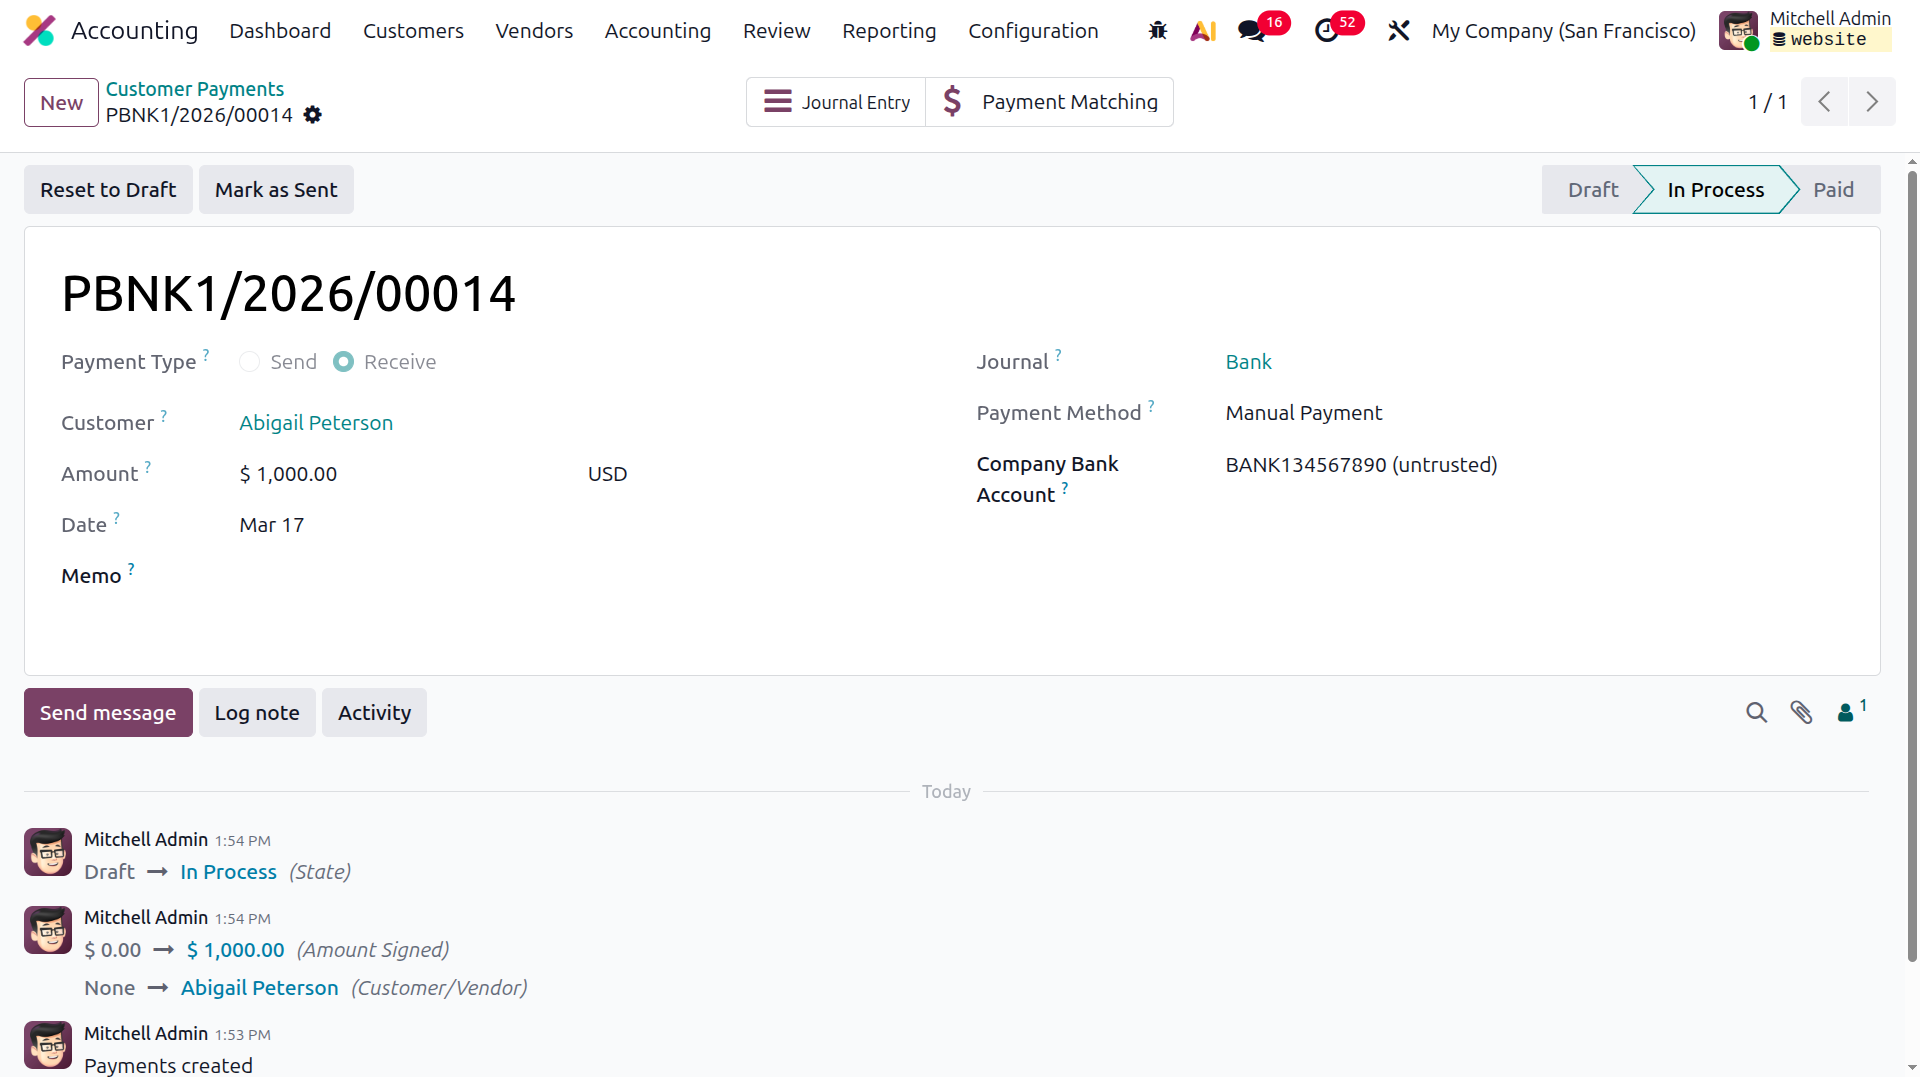
Here we have made a payment for a partner, and then once an invoice for this same partner is created, we can add
this payment to that invoice and clear the due amount of the invoice.
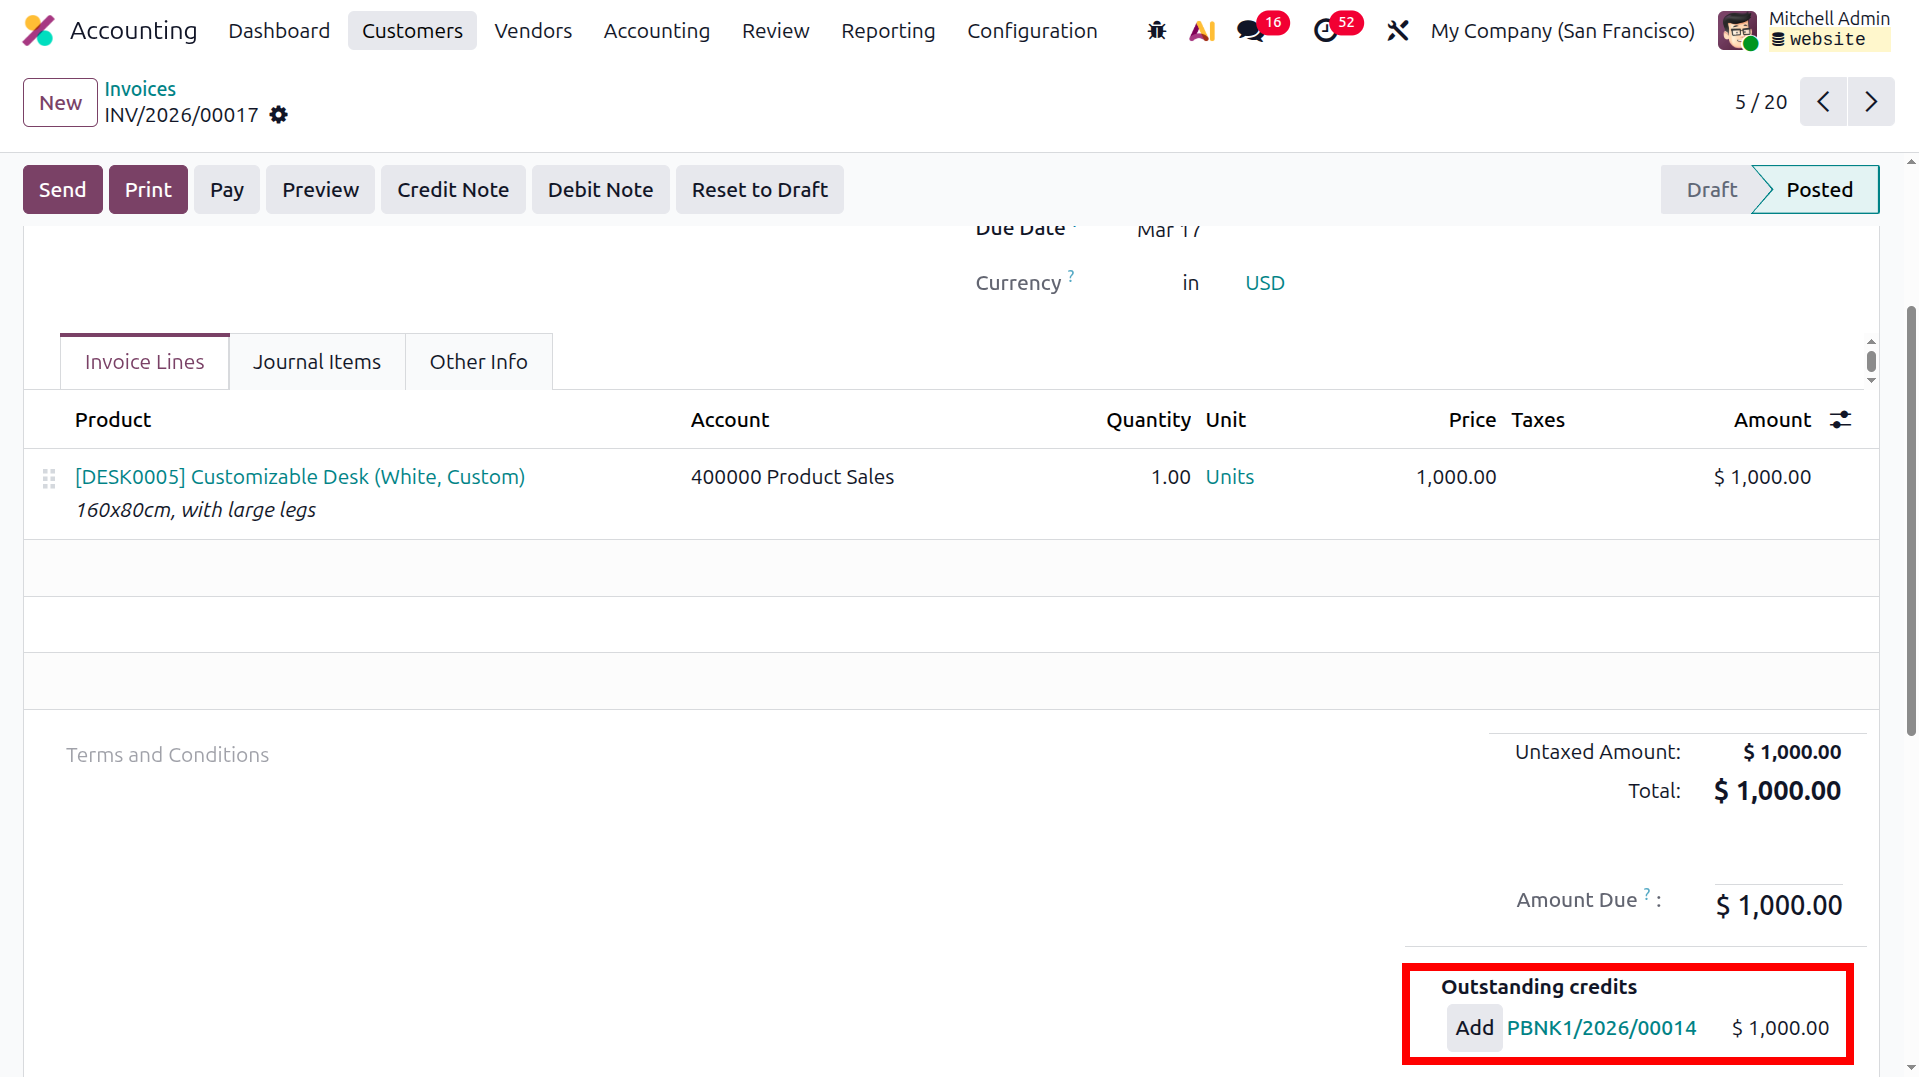
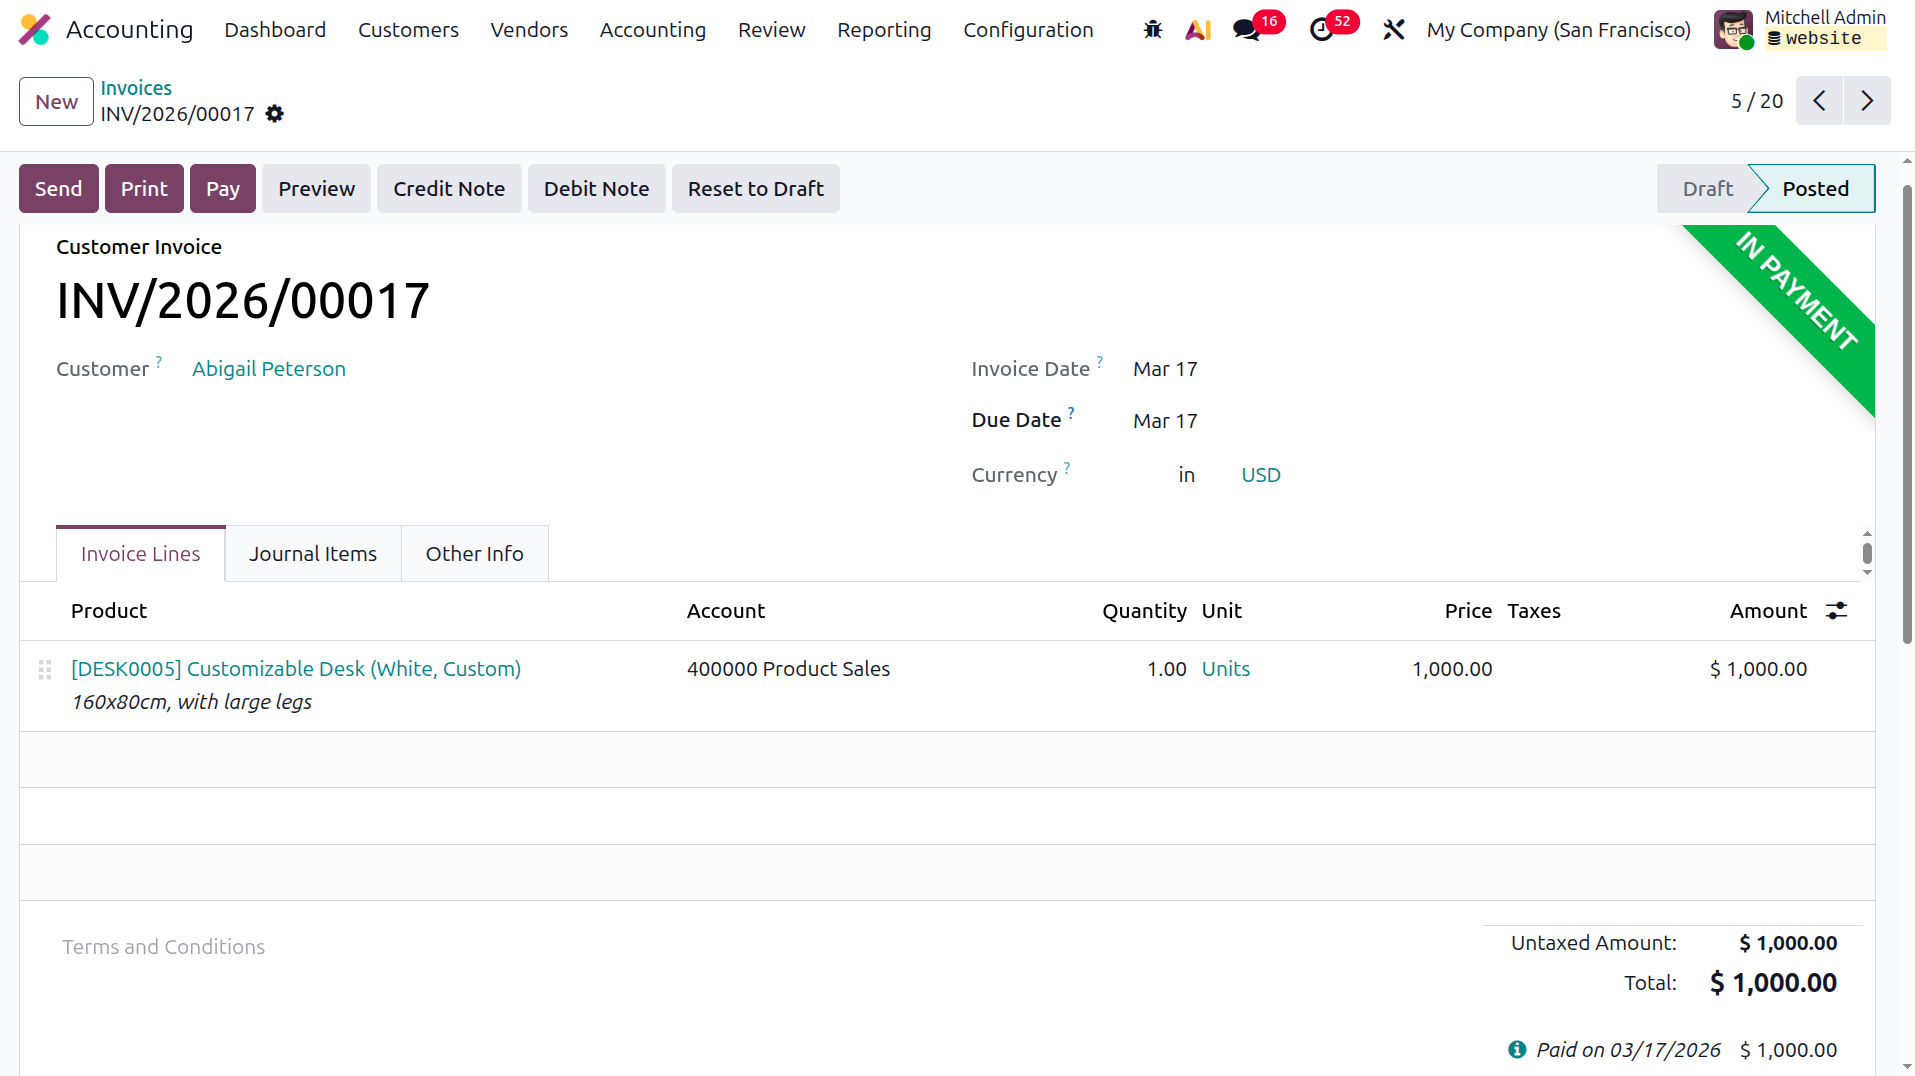
By clicking on the add button, the invoice will be moved to the IN PAYMENT state, and the amount due on the
invoice will become zero.
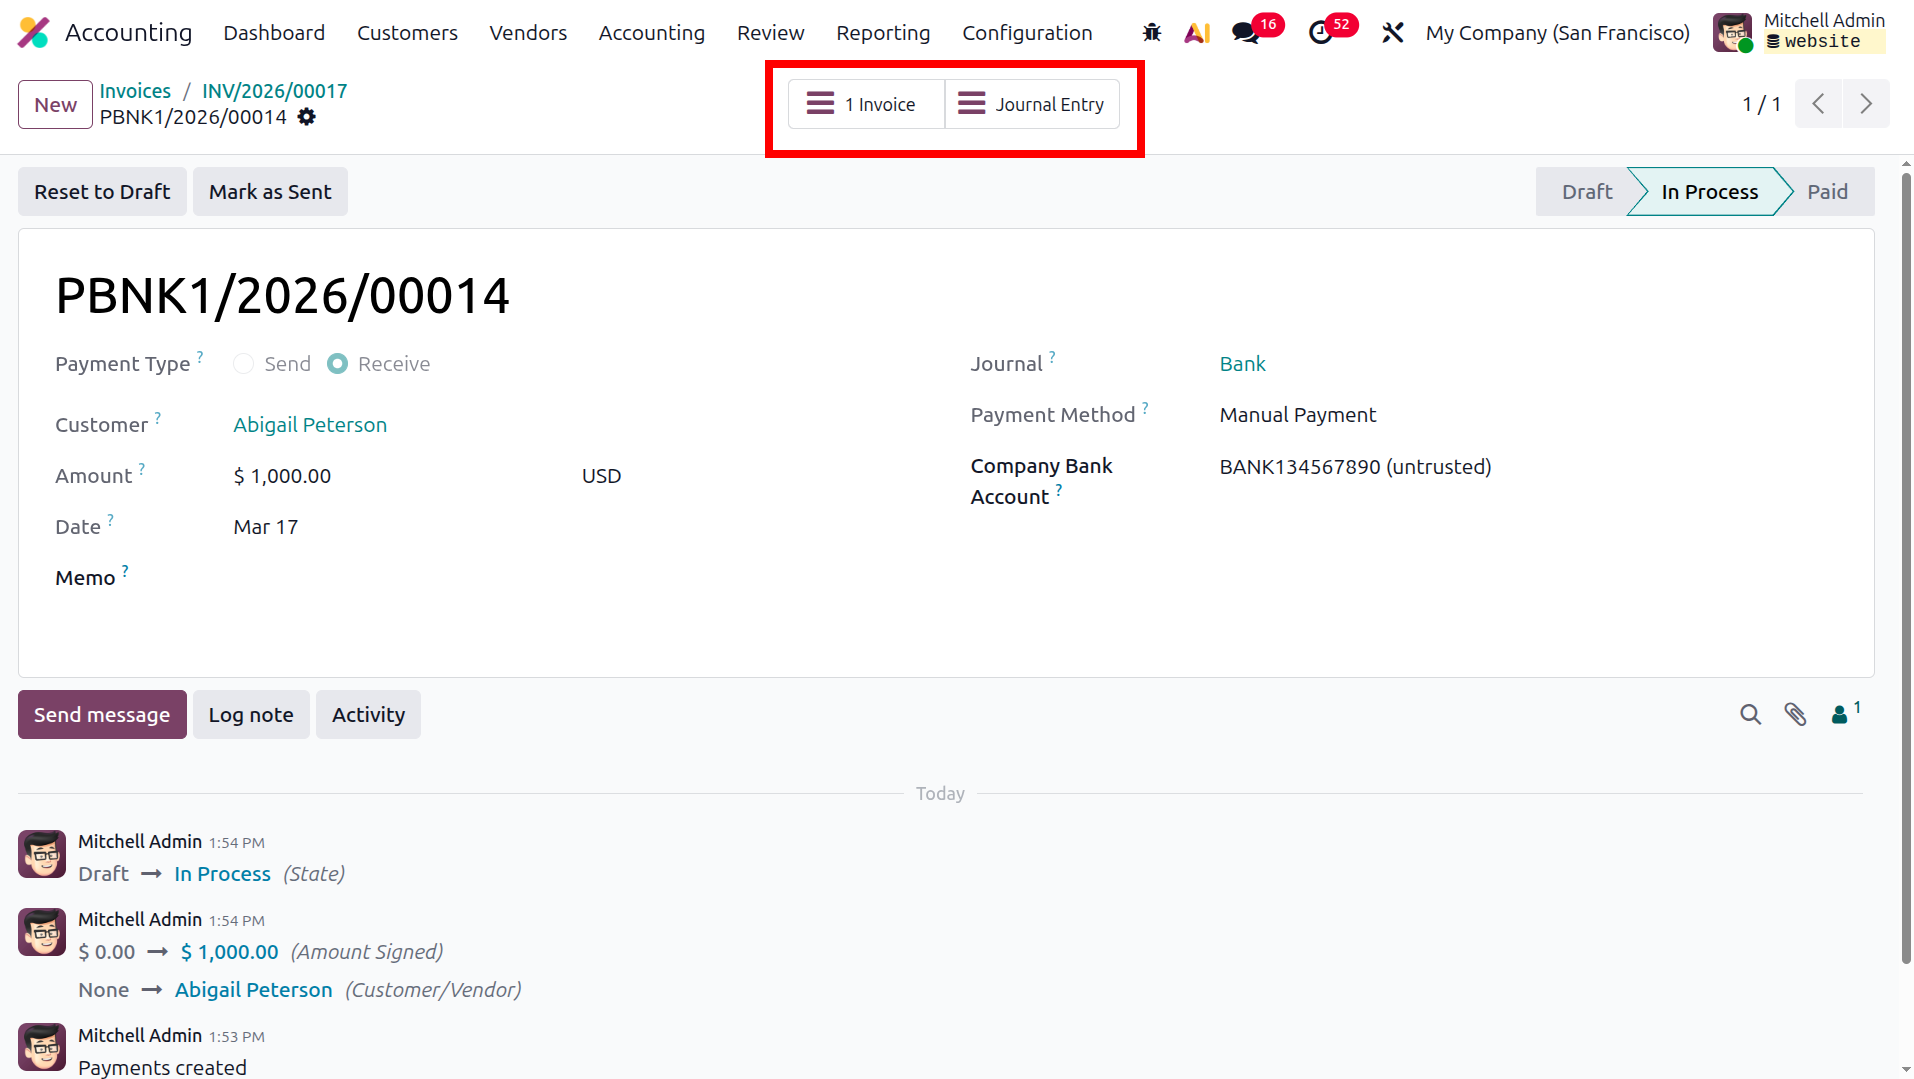
Once we move to the payment, there we can see the invoice and the journal entry of that payment.
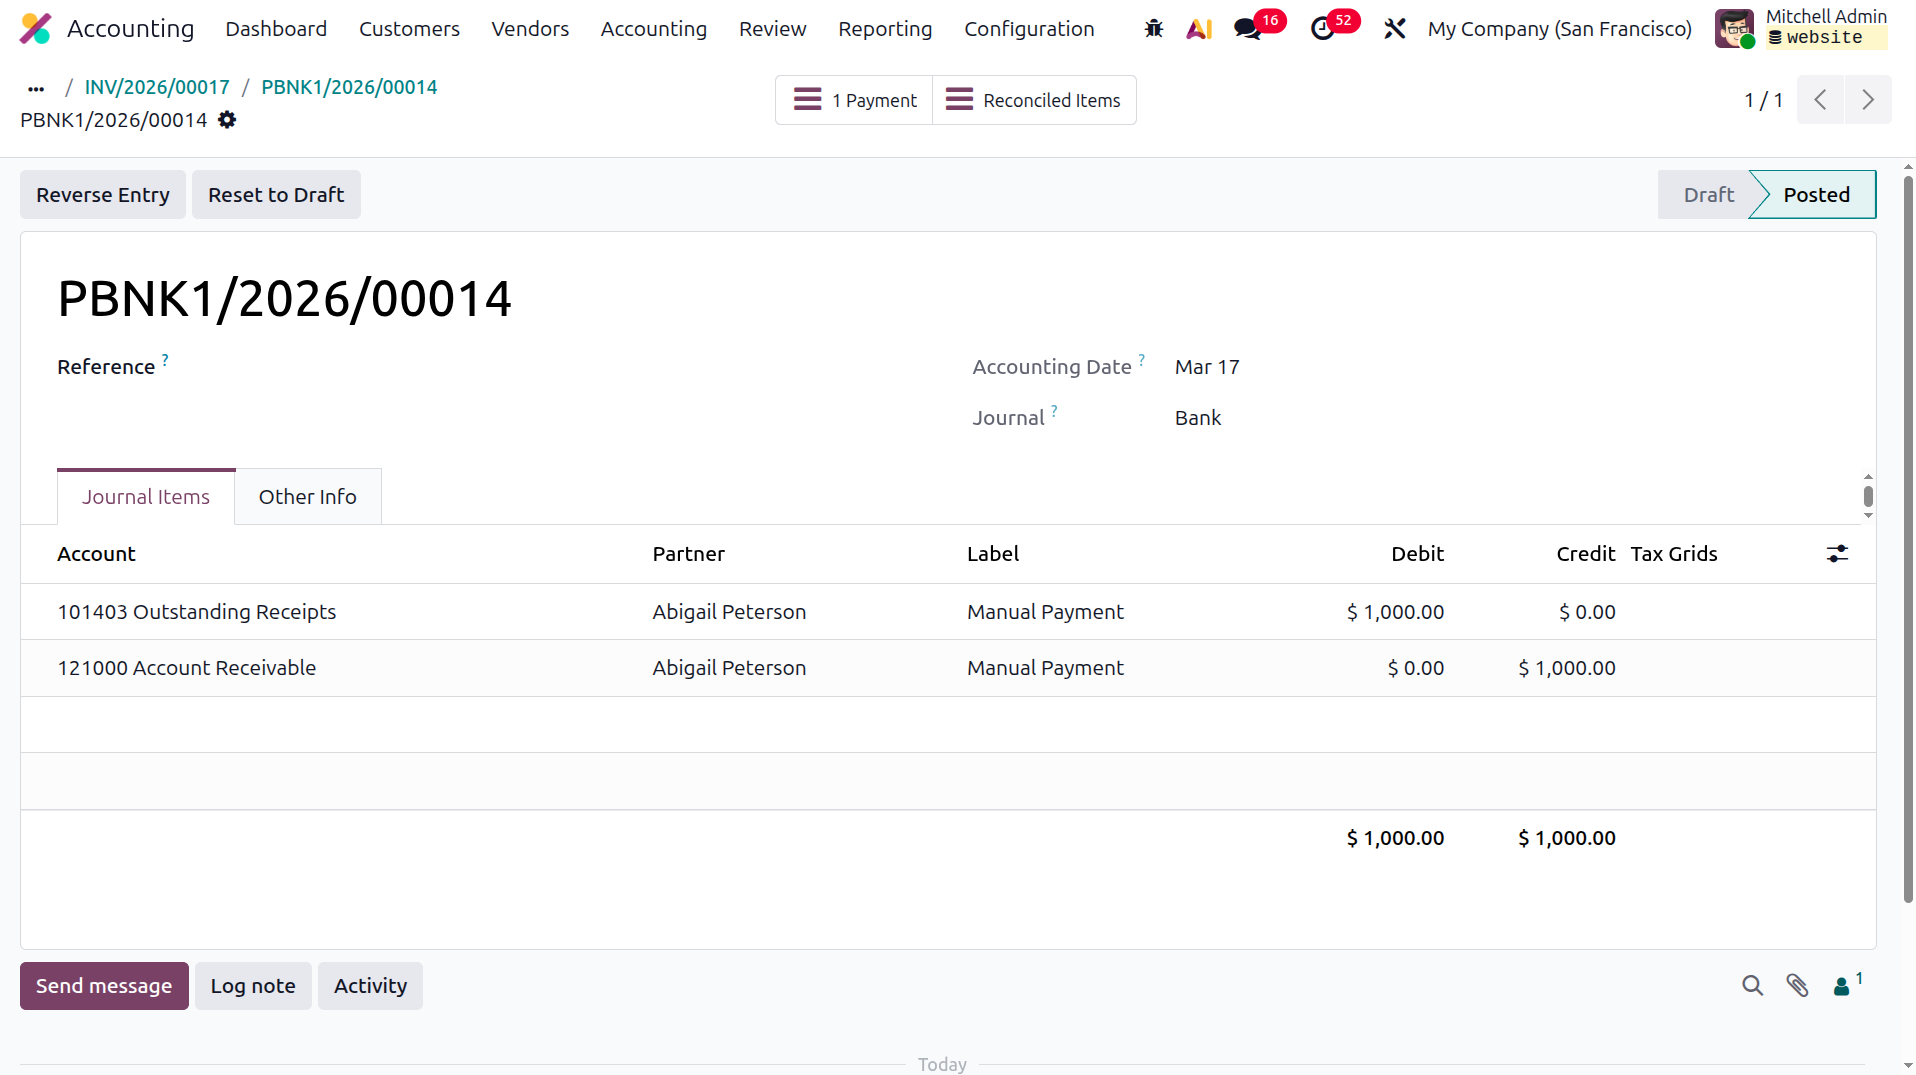
After the payment process is completed, both the Account Receivable and the Outstanding Receipts Account are
affected. Once the Bank Statement is reconciled with the account, the Bank Account is debited and the
Outstanding Receipts Account is credited accordingly.
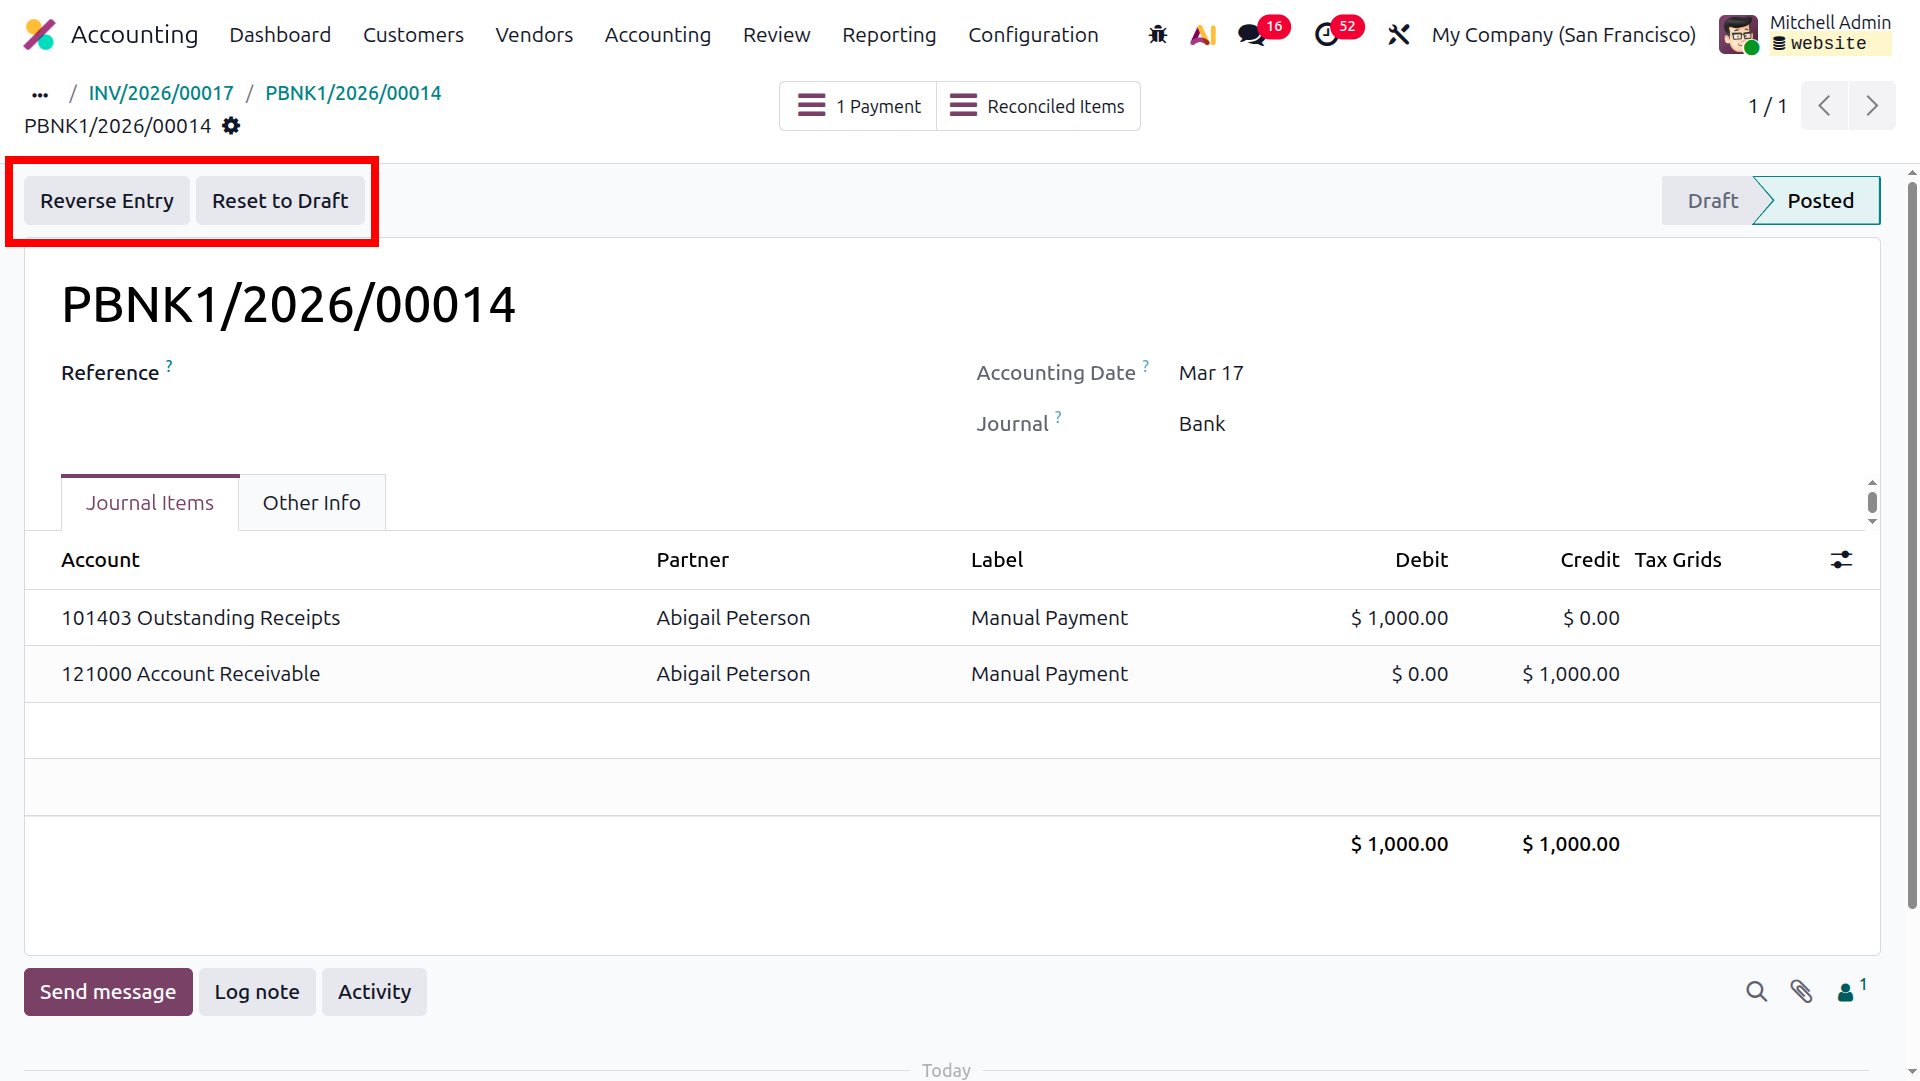
To modify the Payment configuration, you can use the options Mark As Sent and Reset To Draft. These options are
accessible only to authorized Odoo platform users to ensure that important configuration actions remain
restricted to the appropriate managers and executives within the company.
Now that you understand how the Odoo Accounting module manages Customer Payments, you can use the system more
effectively for financial operations. In the next section, we will examine in detail how to configure and manage
Batch Payments in Odoo Accounting.
Batch payment
Businesses often build strong relationships with regular customers whom they trust in both personal and
professional matters. These trusted relationships may exist in organizations of all sizes, including large
international companies as well as small and medium-sized businesses. In such cases, agreements may include
payment conditions where customers settle invoices either in advance or at the end of a specified period based
on mutual trust. Enable Batch payment from the configuration settings of accounting to get batch payment under
the vendor menu
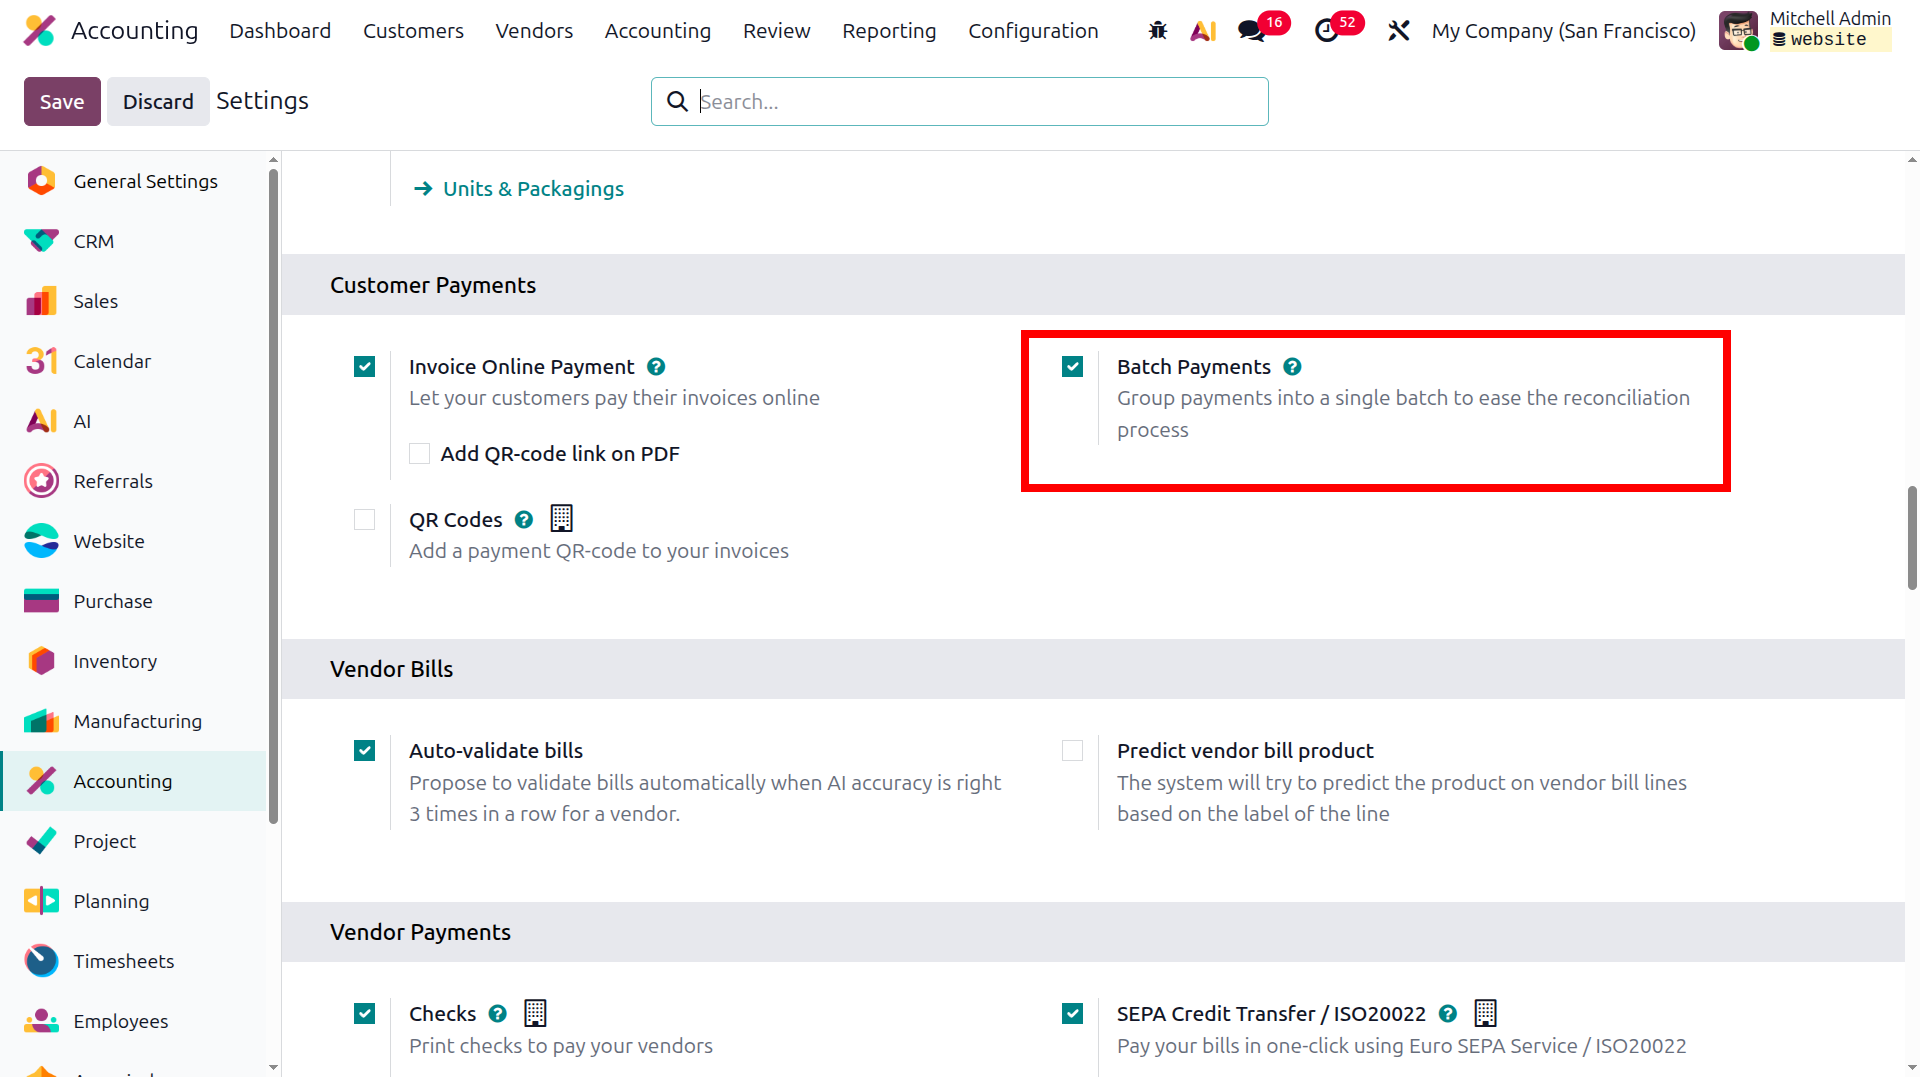
The Batch Payment feature in the Odoo 19 platform allows businesses to process multiple payments together,
helping improve operational efficiency. The configuration of Batch Payments can be accessed from the Customers
page of the Odoo Accounting module. When you open this menu, all defined batch payments will be displayed.
Similar to other Odoo menus, this page also provides Filter and Group By options to easily organize and locate
specific records.
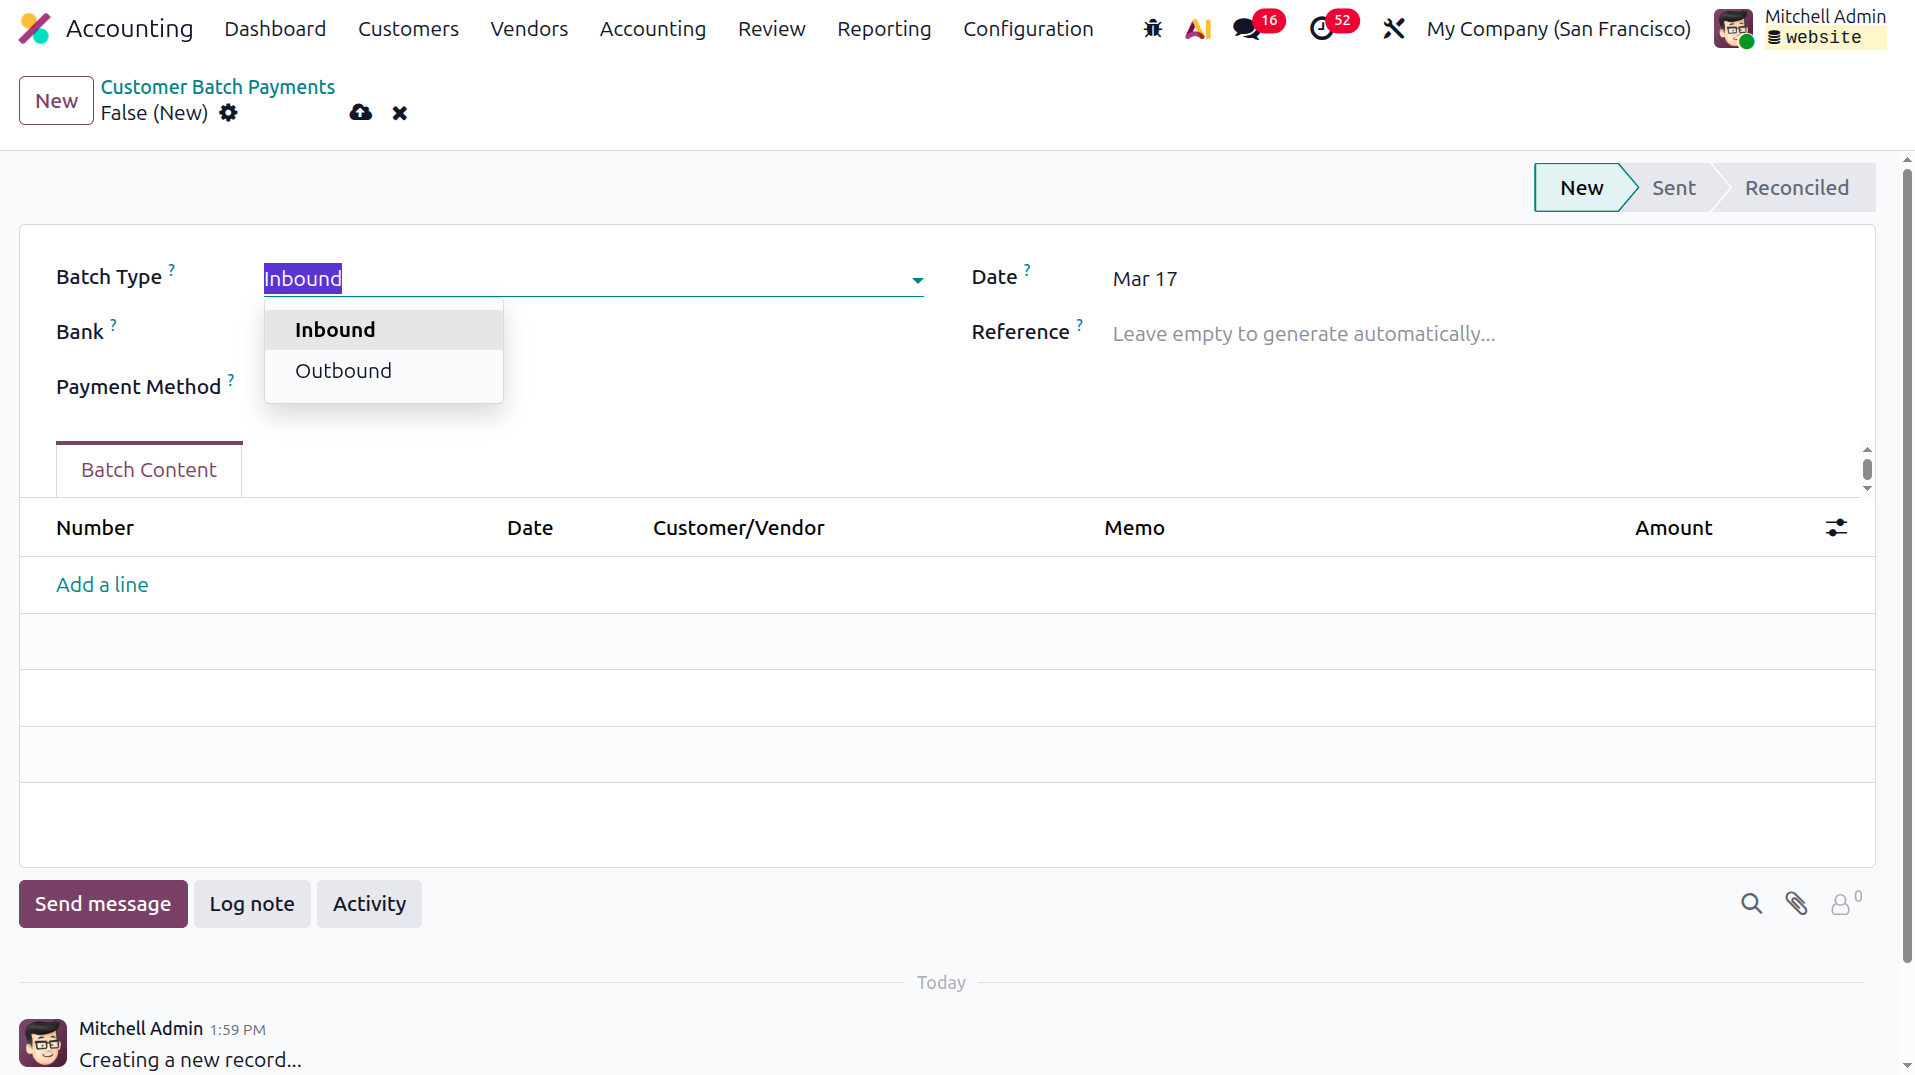
To create a new batch payment, select the New option to open the configuration window, as shown in the following
image. Before creating a batch payment, you must define details such as the Batch Type, Bank, Payment Method,
Date, and Reference for the relevant batch transaction. To create a new batch payment, select the New option to
open the configuration window, as shown in the following image. Before creating a batch payment, you must define
details such as the Batch Type, Bank, Payment Method, Date, and Reference for the relevant batch transaction.
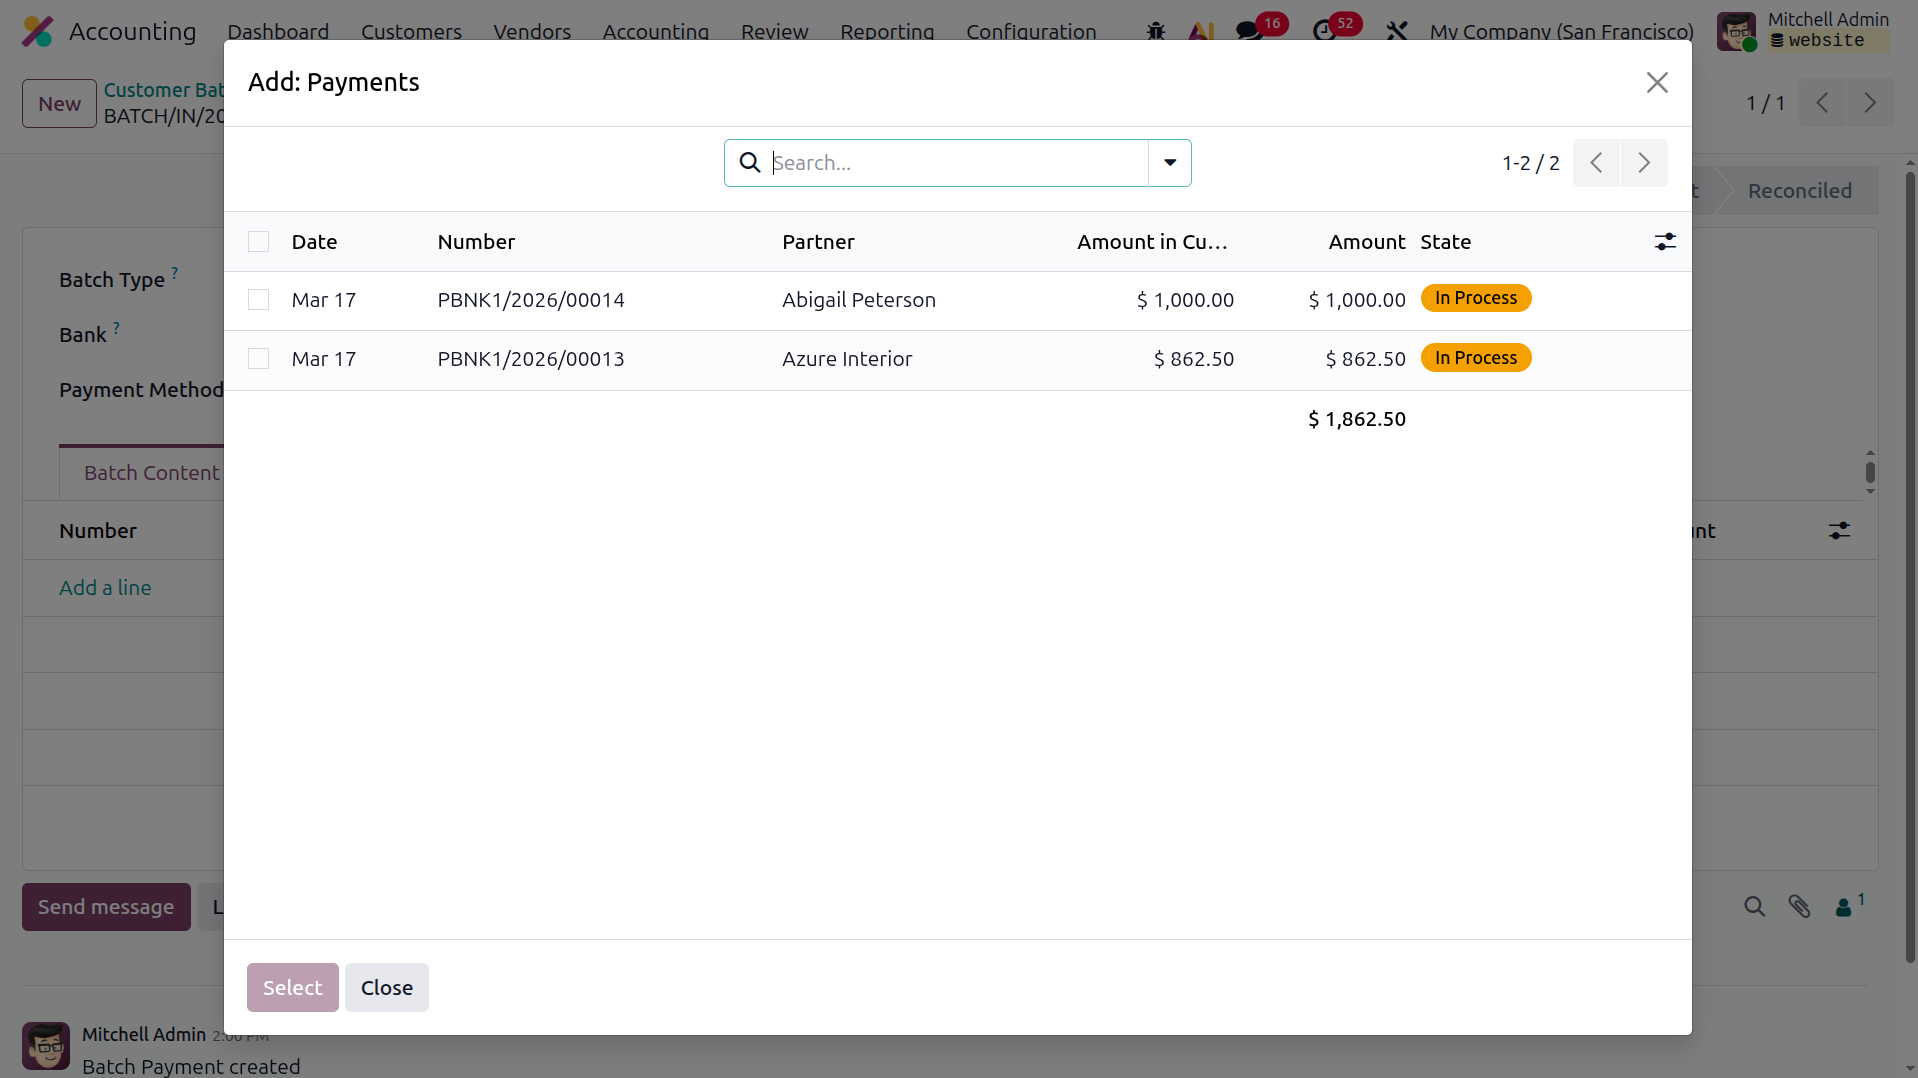
The invoices included in the batch payment can be specified by selecting the Add a line option in the section
used to define the batch content. When you click Add a line, a pop-up window appears listing all available
payments, as illustrated in the image below. The payments displayed depend on the configured Batch Type. If the
batch type is Inbound, all payments expected from customers will be listed. If the batch type is Outbound, the
system will display all payments that the company must make to vendors. The Filter and Group By options in the
Add: Payments menu can also be used to include or exclude specific payments from the batch payment
configuration. The next chapter will explain in more detail the batch payment configuration related to vendor
operations in Odoo.
After selecting the required payments for the batch, you can confirm the selection.
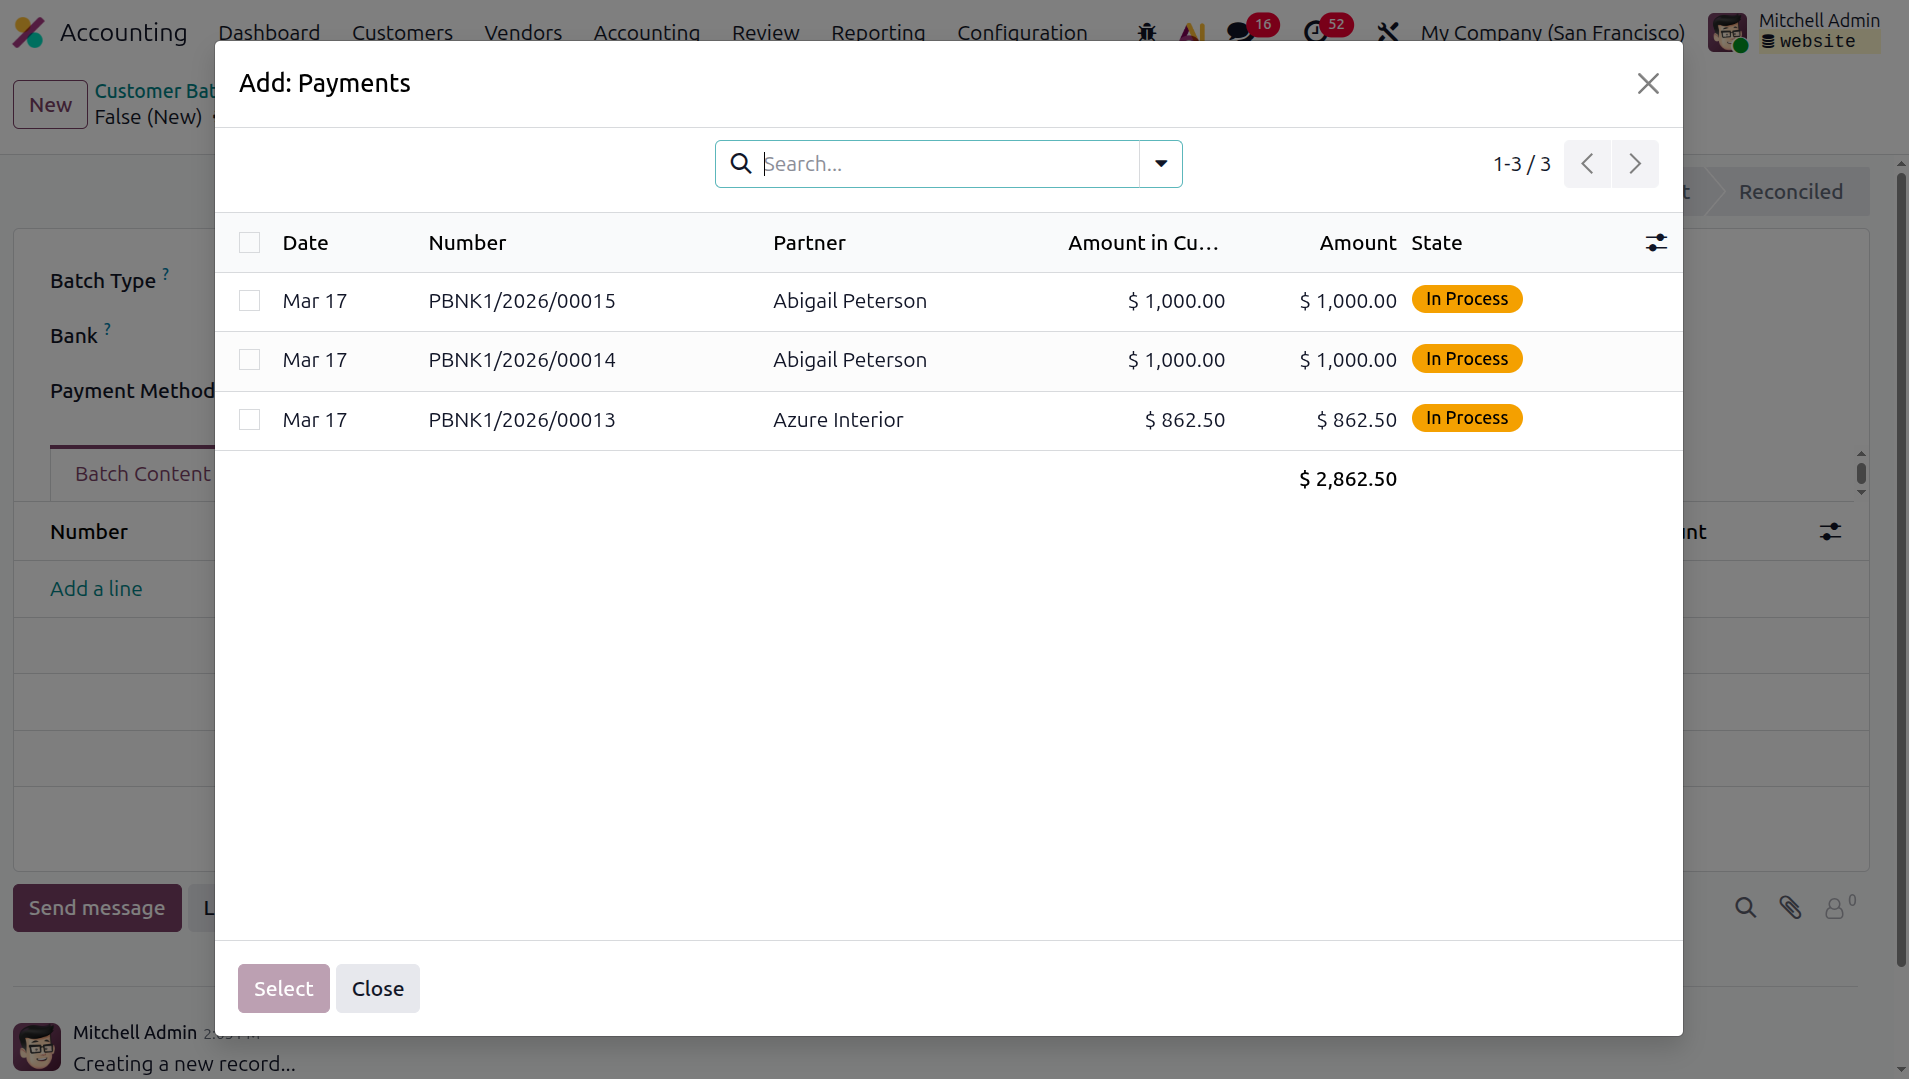
Once the Batch Payment is confirmed, all included payments will be marked as Sent.
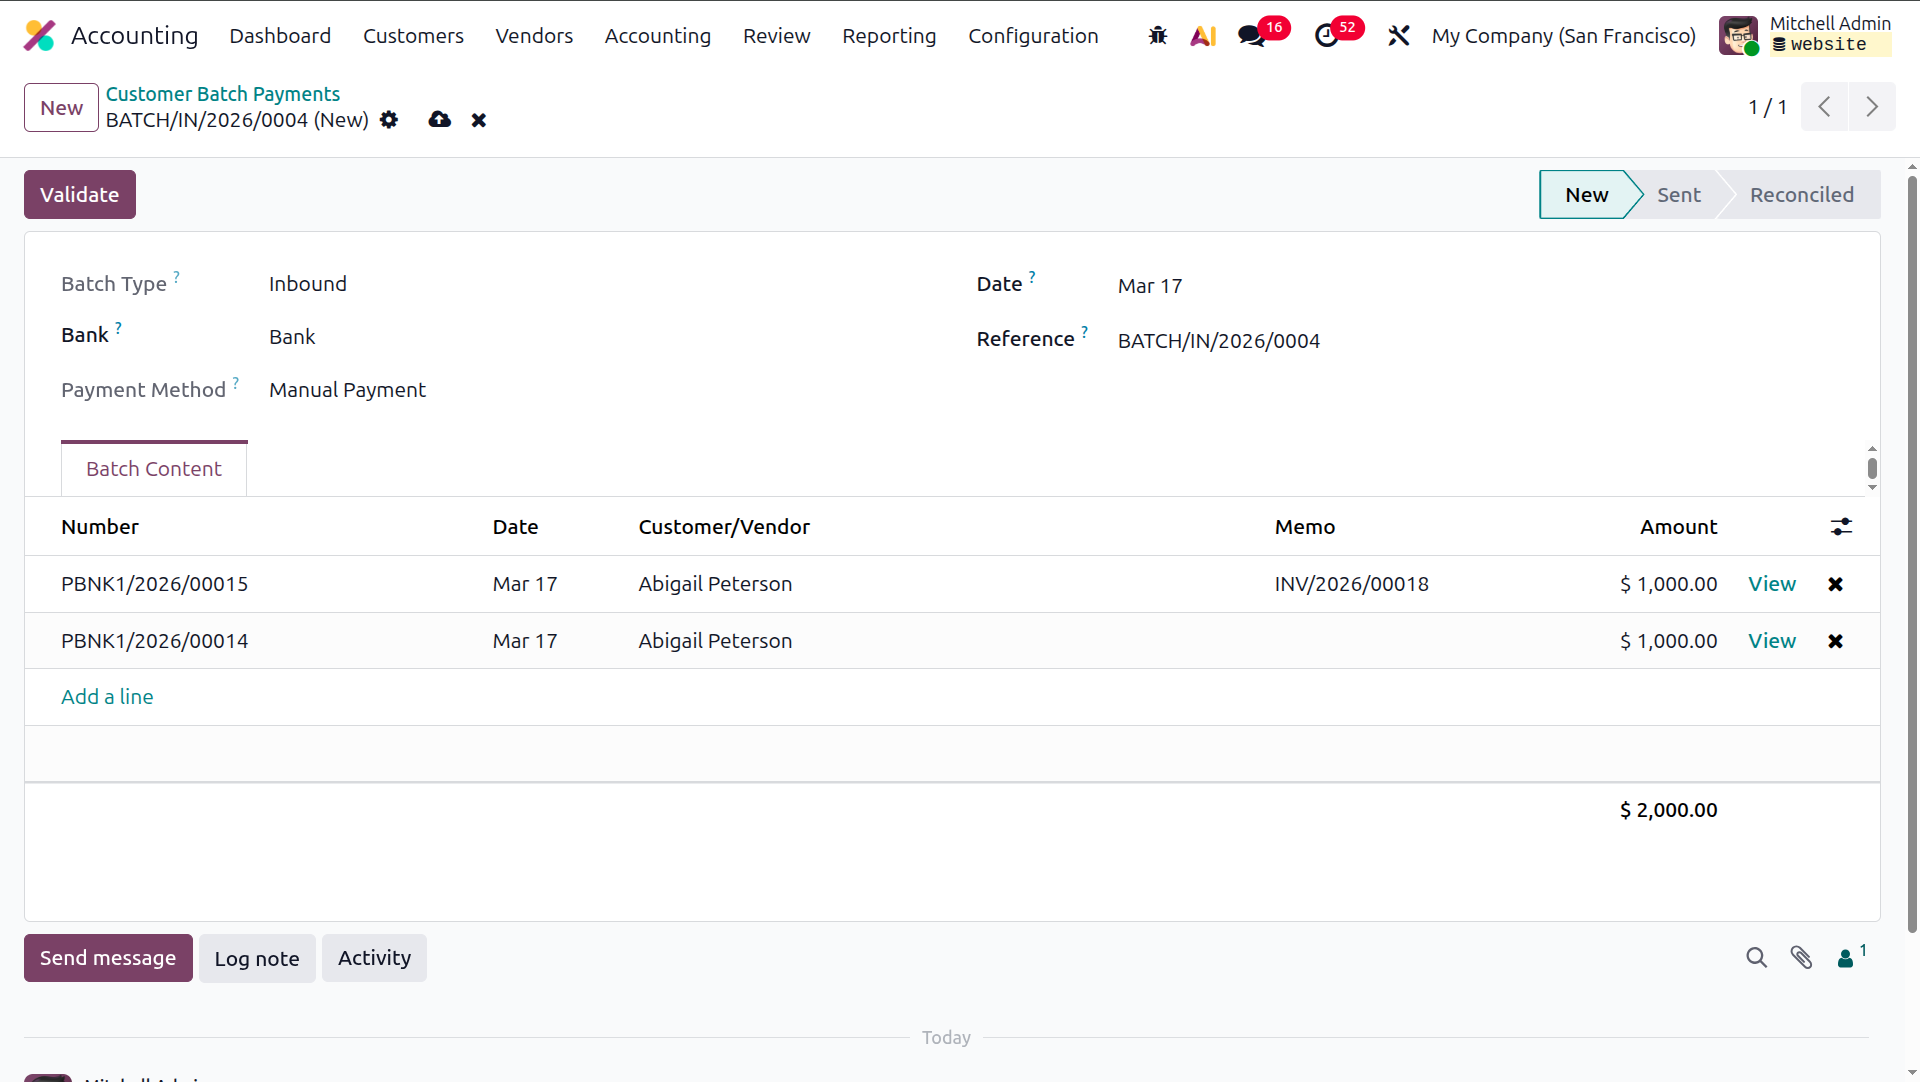
When the validated batch payment is later reconciled, its status will change to Reconciled. Using the Batch
Payment process allows businesses to settle multiple invoices together at the end of a payment term or according
to the financial arrangement with customers. Now that the Batch Payment configuration process is clear, the next
section will explain how to create Odoo Direct Debit Mandates.
Direct Debit mandates
The Direct Debit Mandate is one of the important tools and regulations used in business operations. By using
Direct Debit Mandates, a business can ensure that the customer has authorized the company to collect payments
for future transactions. These mandates are usually established through an agreement or mutual trust between the
business and its customers regarding payment procedures.
To simplify the management of Direct Debit Mandates, the Odoo platform provides a dedicated menu under the
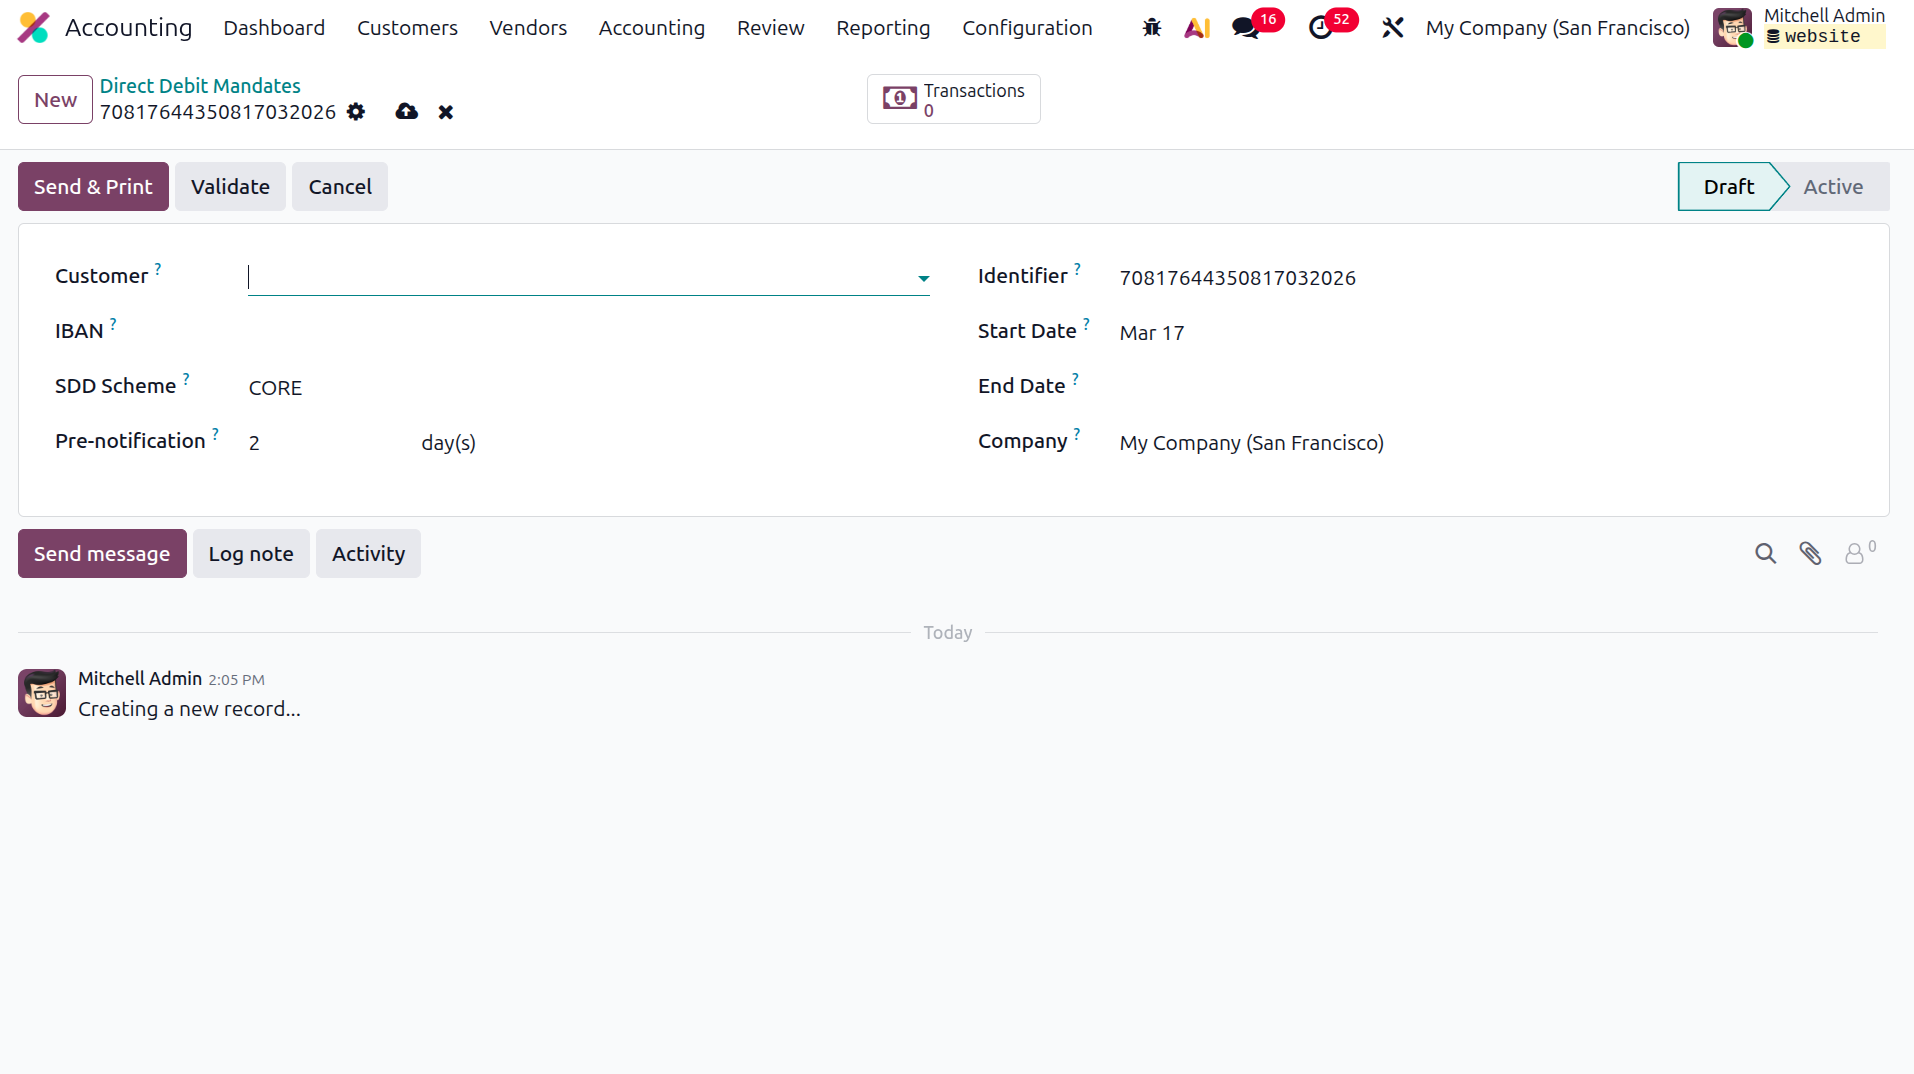
Customers tab in the Odoo Accounting module. This menu enables users to create and manage Direct Debit Mandates
within the platform. In the creation form, you can specify details such as the Customer, Journal, SDD Scheme,
Identifier, Start Date, End Date, and IBAN (International Bank Account Number). The Start Date and End Date
define the valid operating period for each configured Direct Debit Mandate.
Product Management
Product management is a key aspect of operations for businesses that primarily deal with products. With the
support of a specialized management tool, companies can efficiently control and organize the items used in their
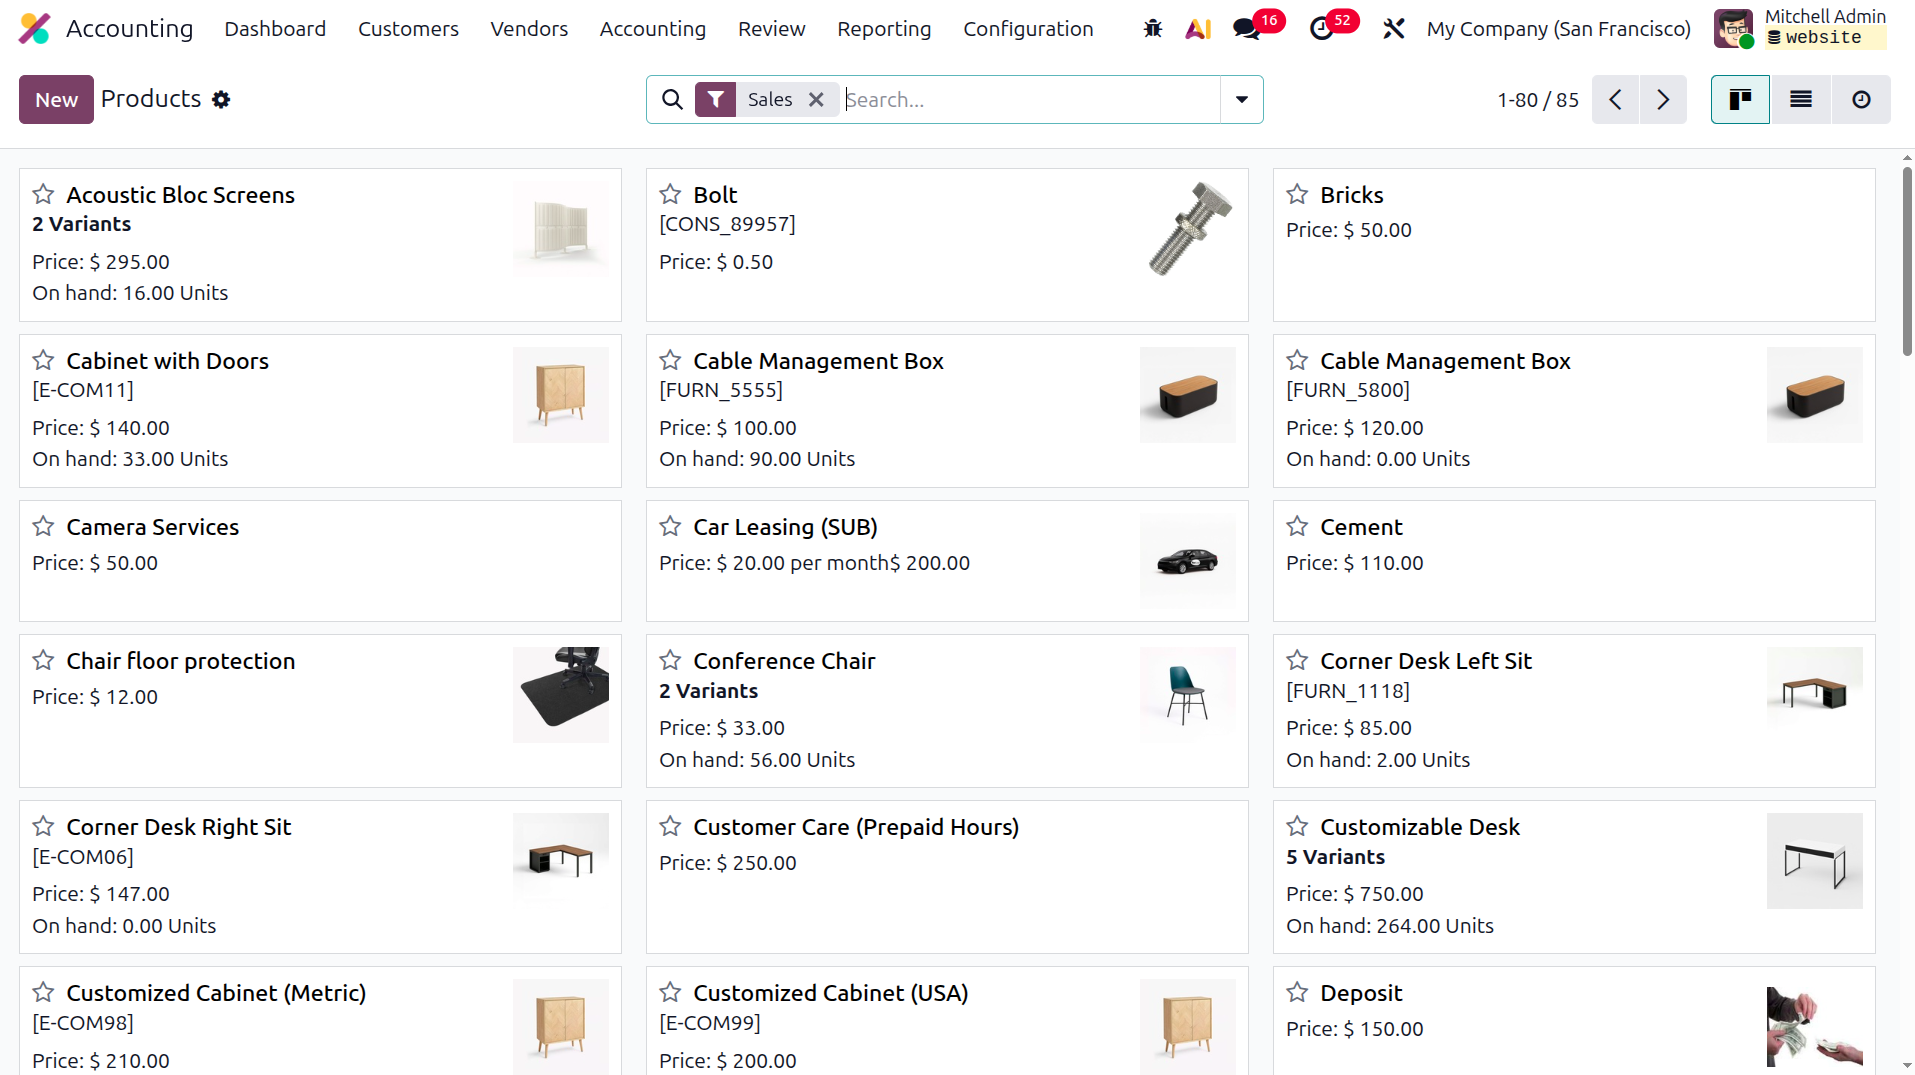
operations. Odoo product management enables businesses to maintain a structured list of all goods and services
they provide. In the Accounting module, the Products menu can be accessed from the Customers menu, where all
products defined for the company’s activities are displayed.
To help users easily locate specific products, the Products menu includes Filter and Group By options. It also
offers different viewing modes such as List, Kanban, and Activity views. The Activity view is particularly
useful because it displays the product image along with related activities.
By selecting the New option in the menu, you can create new product records or modify existing product details.
When creating a new product, a configuration window will appear where you can enter information such as the
Product Name and specify whether the product can be Sold or Purchased. You can also upload a product image by
selecting the image icon and choosing a picture from your computer. After defining the basic product details,
you can proceed to the next stage of configuration to define additional operational components.
The first step is to configure the General Information section. In this section, you can specify whether the
Product Type is a Service, Consumable, or Storable Product, and determine whether the platform’s Inventory
management module should handle stock management. Consumable products are items that are used quickly or have a
short shelf life, such as food and other perishable goods.
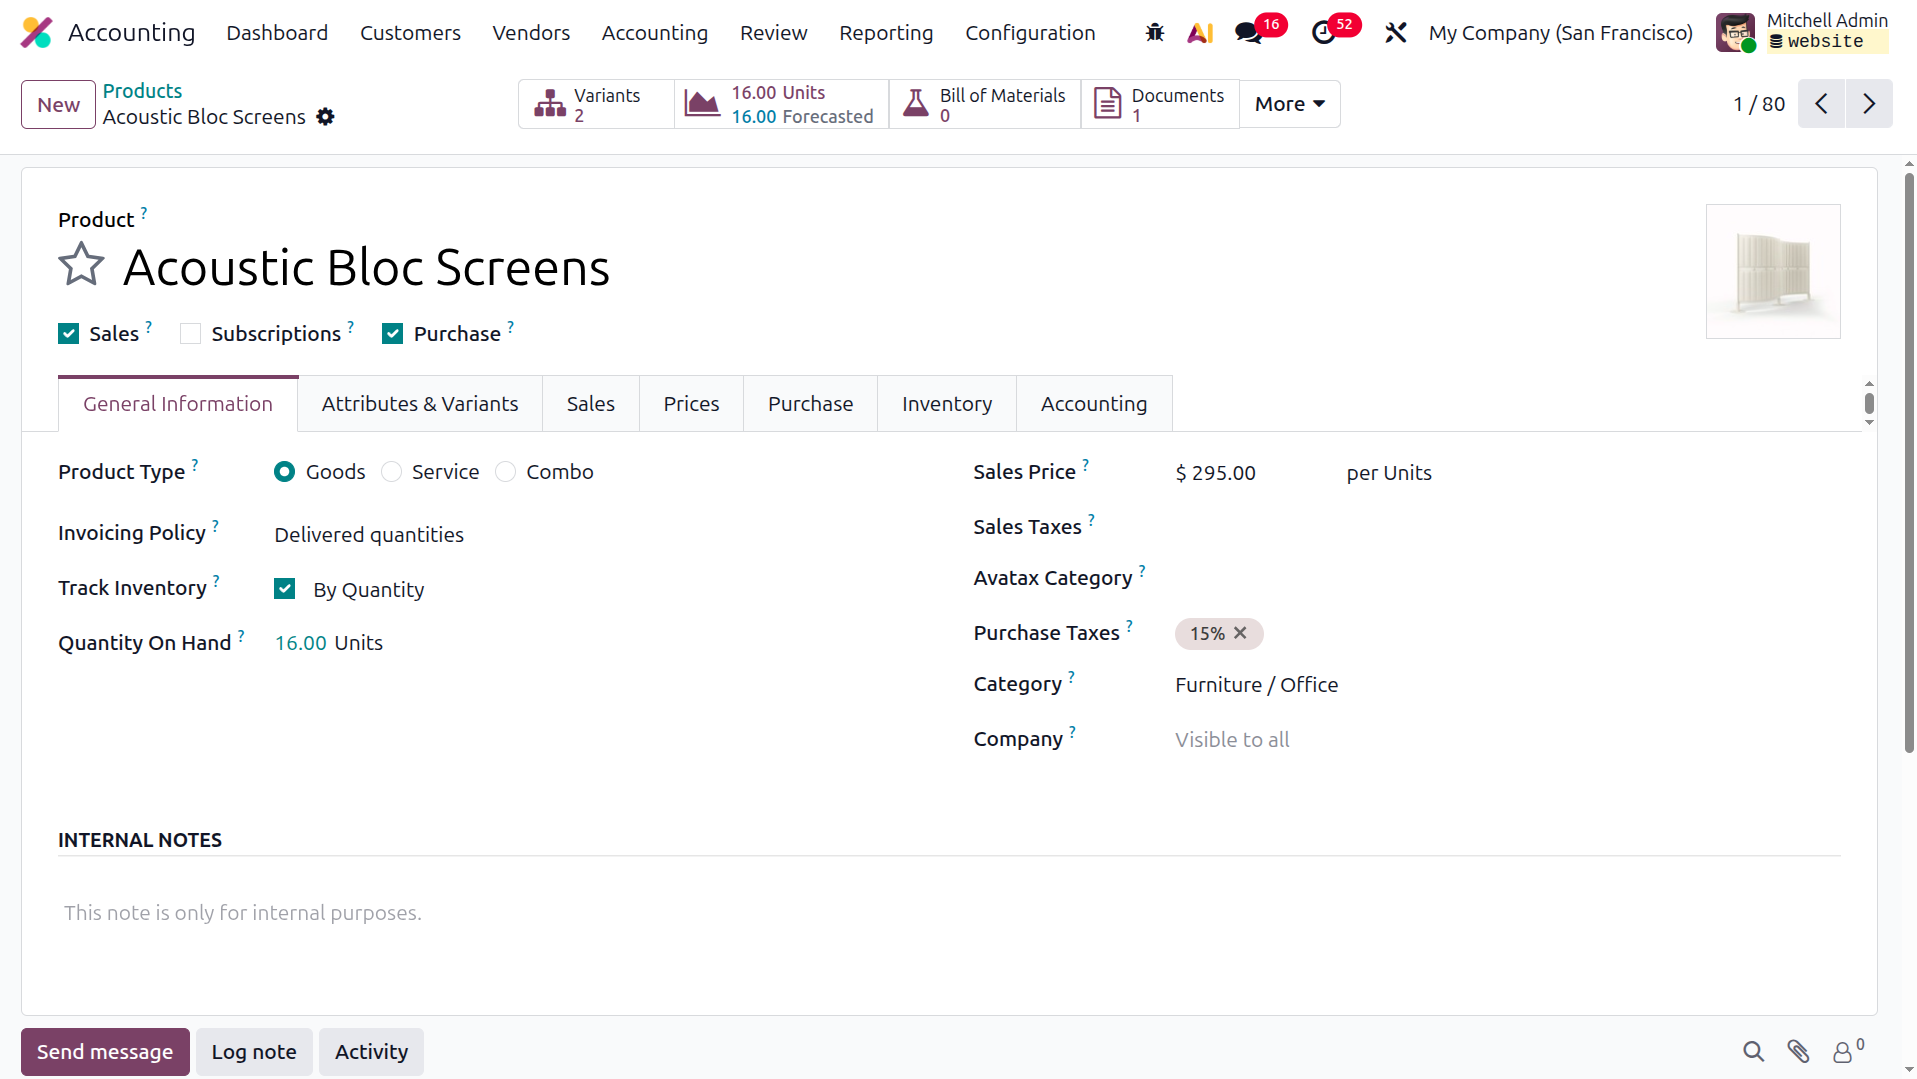
Storable Products are items that can be stored for a longer period and are less likely to be damaged. This
category includes most non-consumable goods. Service-based products refer to items that are not physically
stored but are provided to customers based on their requirements. Inventory tracking can be configured depending
on the product type. The Product Category can also be selected using the available drop-down menu. After
defining the Sales Price, you can specify additional details such as TaxCloud Category and Customer Taxes from
the drop-down options. Any necessary Internal Notes related to the product can also be added in this section.
All product variations used in business operations can be managed under the Variants section. By selecting the
Add a line option, you can define the Attributes and Values for each variant. A smart button will display the
number of variants created. Multiple variants can be configured for a single product, and they will all appear
under the same product description.
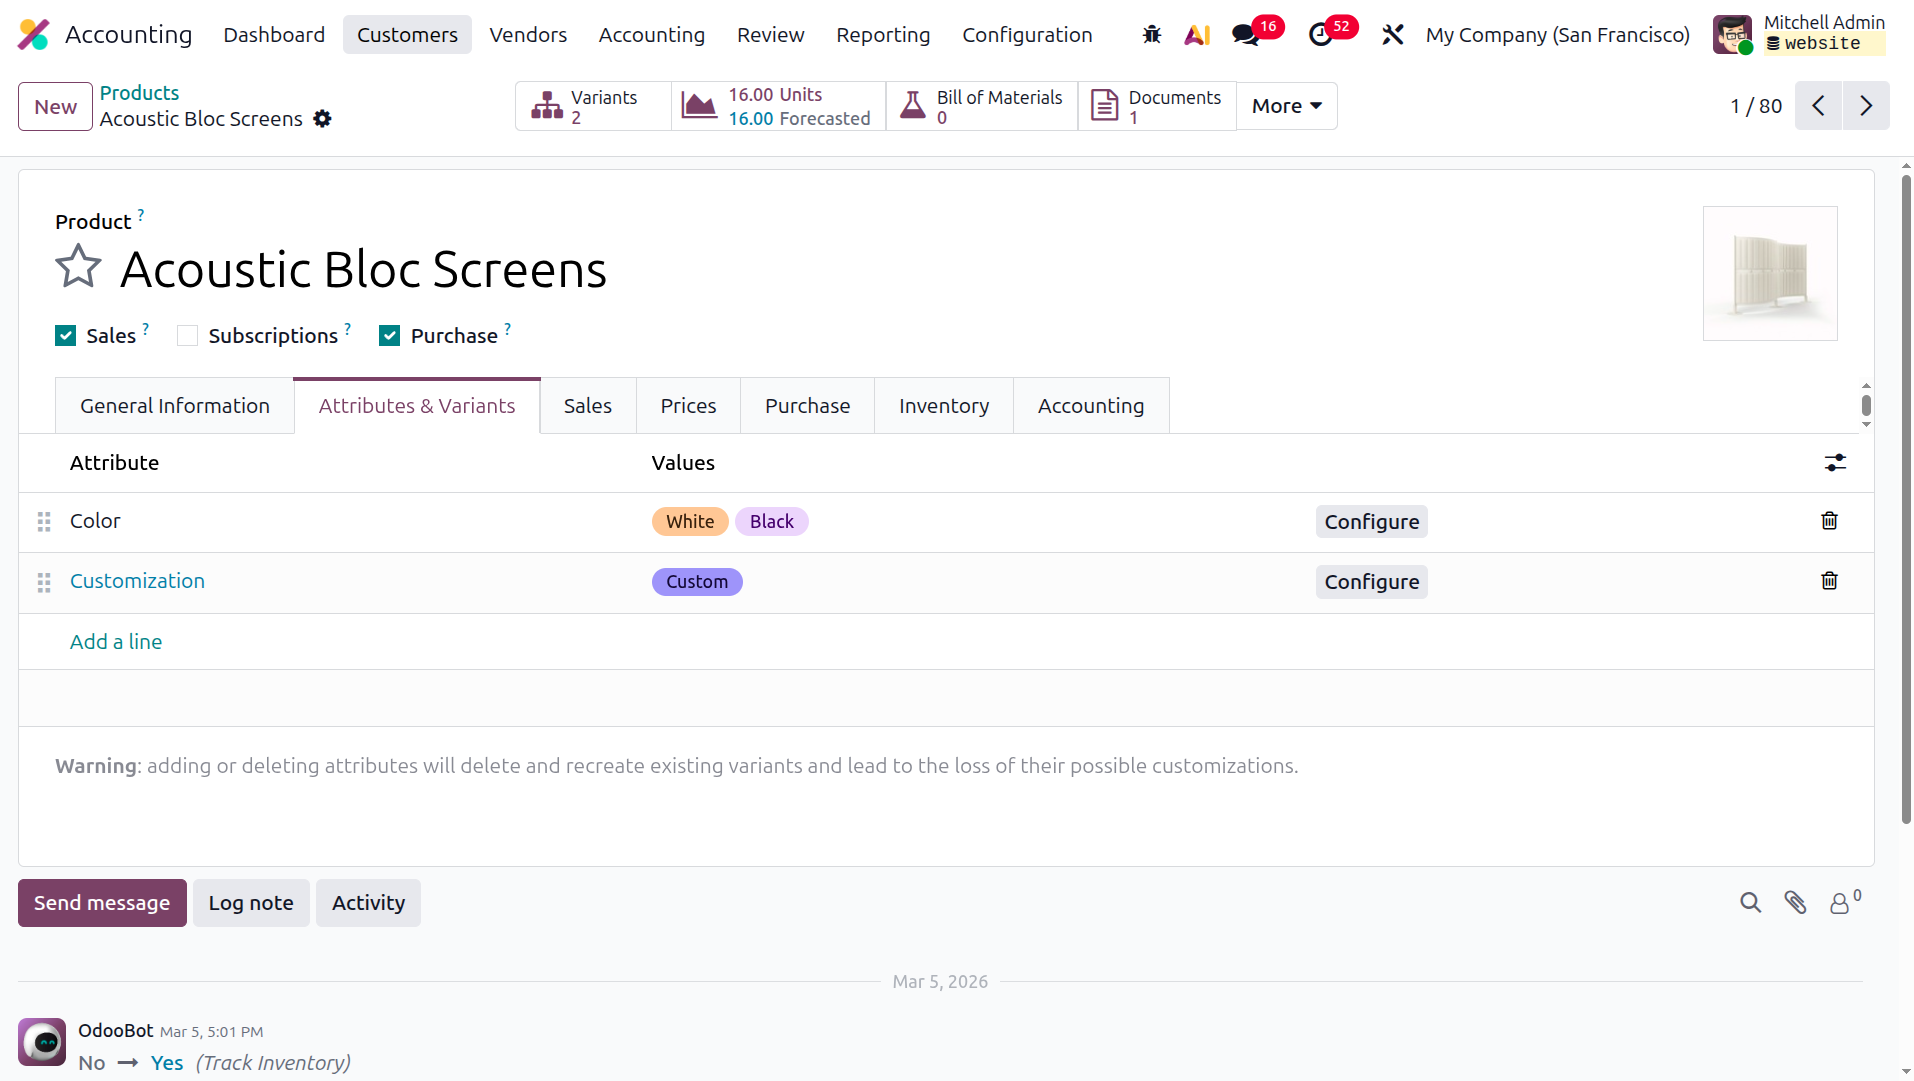
The Sales tab includes sales-related details such as Upsell & Cross-Selling options, Quotation Description, Tags,
and the Re-Invoice Cost configuration.
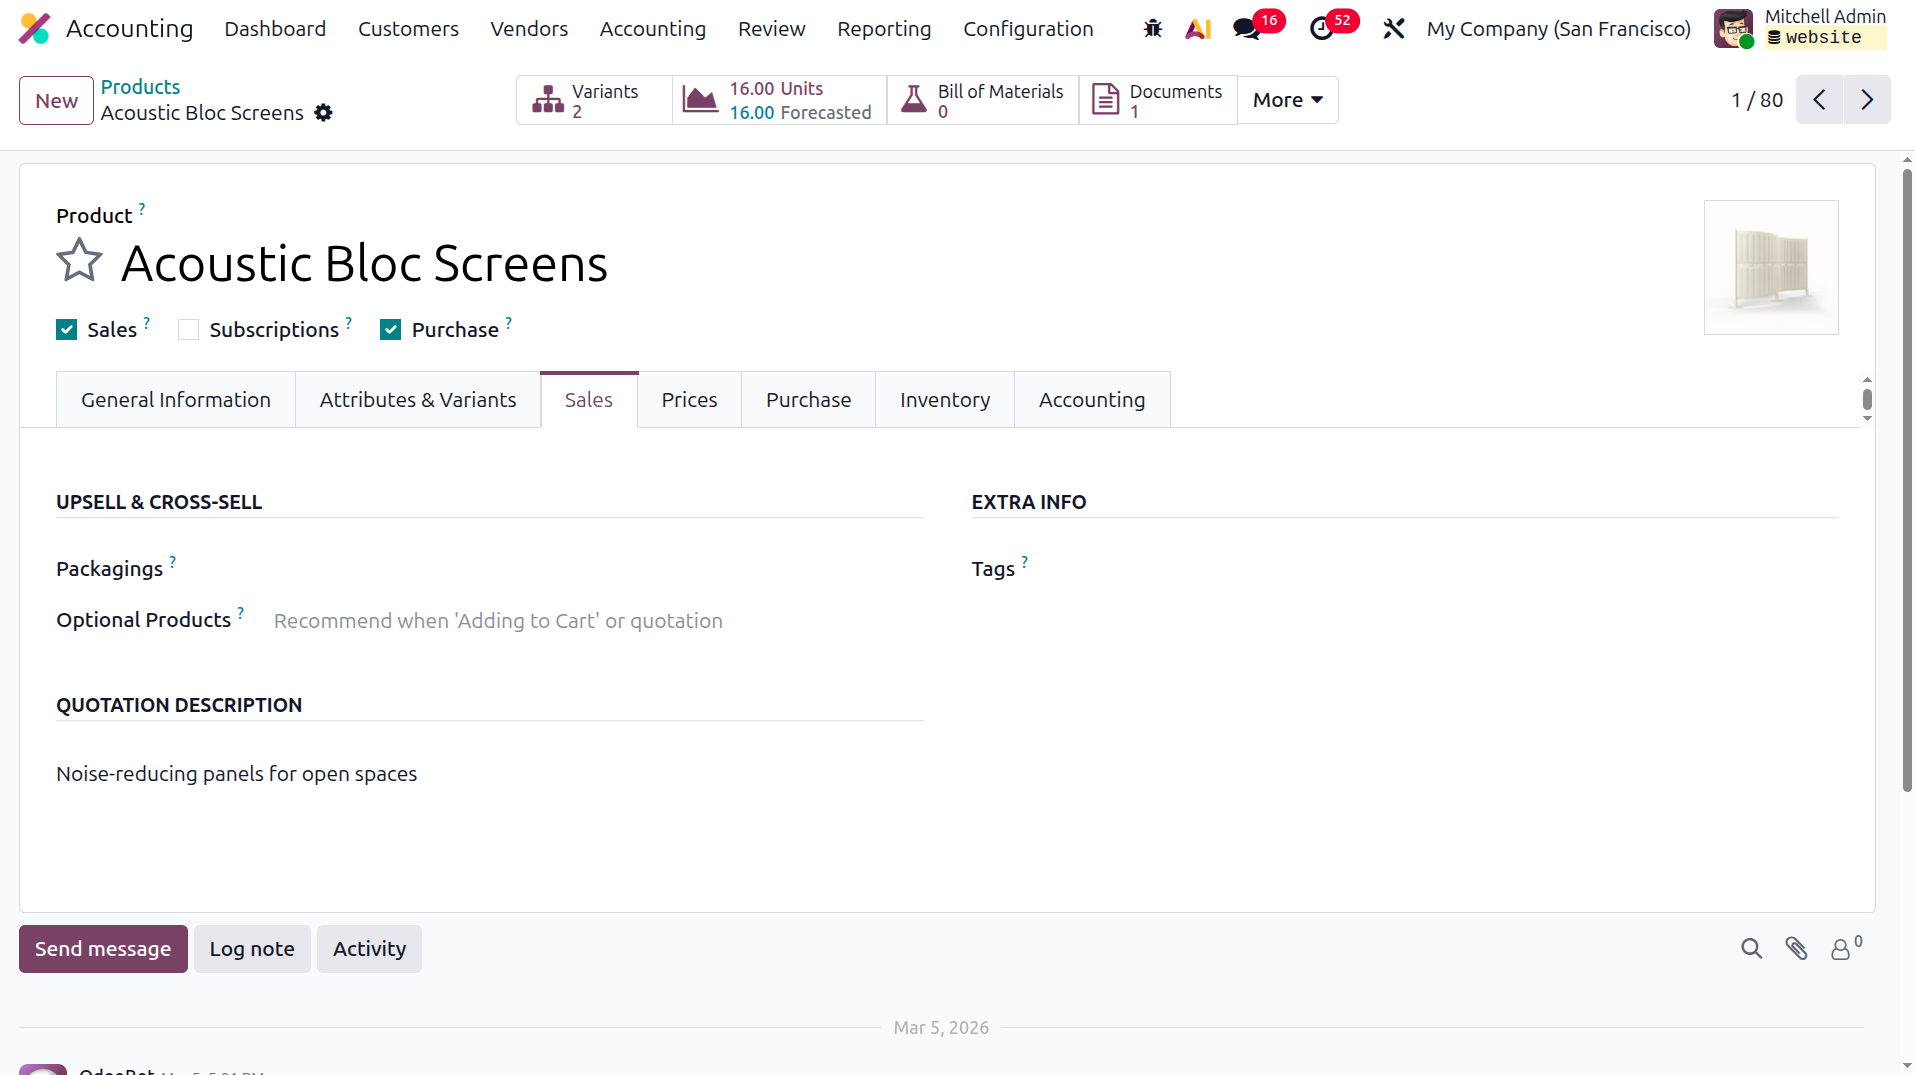
The pricelist corresponding to that specific products will be displayed under the Prices tab, there we can see
the pricelist, if any variant are the for product this variant will be there, and the price in the pricelist and
the minimum quantity in the pricelist will be shown there
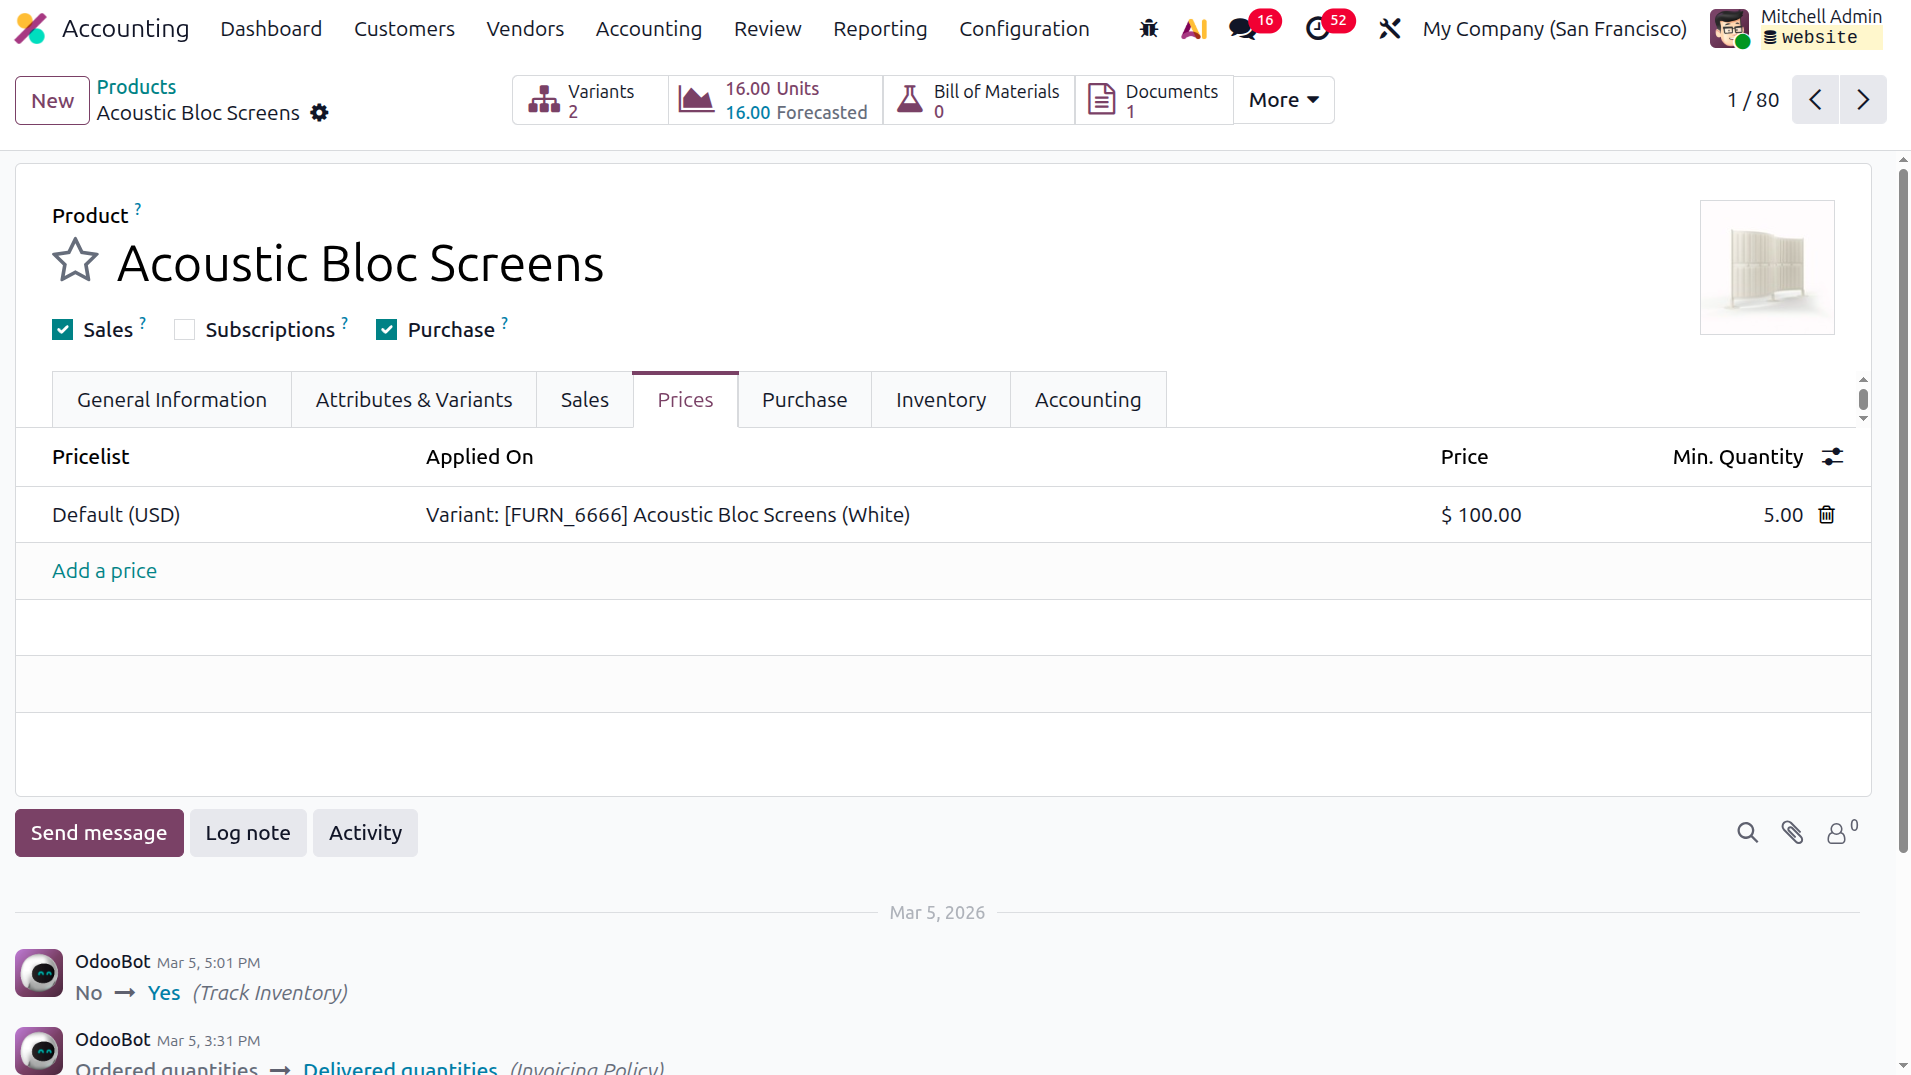
The Purchase tab in the product description menu allows you to configure purchase-related information, including
Vendor Bill management. In this section, you can define the Vendor Taxes associated with the product as
specified by the vendor. It also enables businesses to configure different tax rules that apply to product
purchases during a specific period.
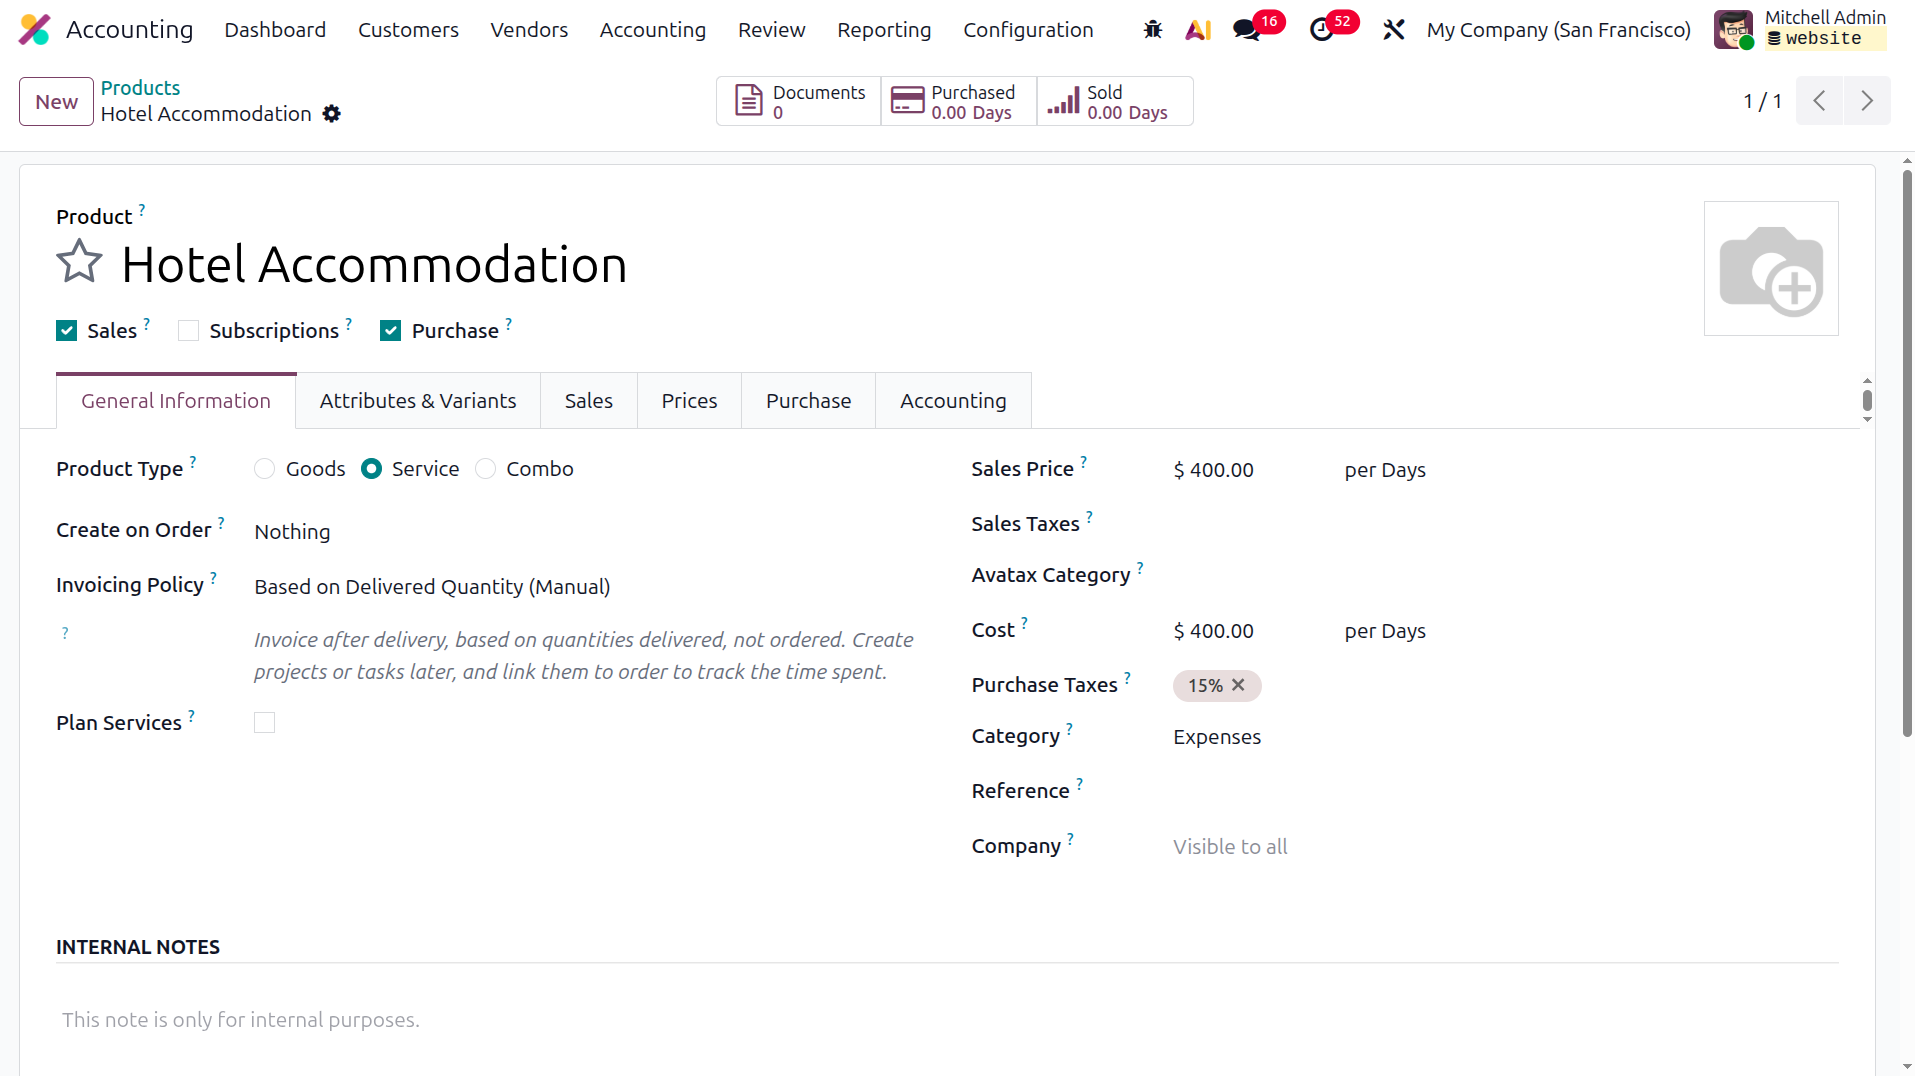
The Inventory tab of the product contains details such as Routes, Counterpart Locations including Production and
Inventory Locations, the Responsible Person, Customer Lead Time, and Version. Users can also define descriptions
for Receipts, Delivery Orders, and Internal Transfers within the Inventory tab.
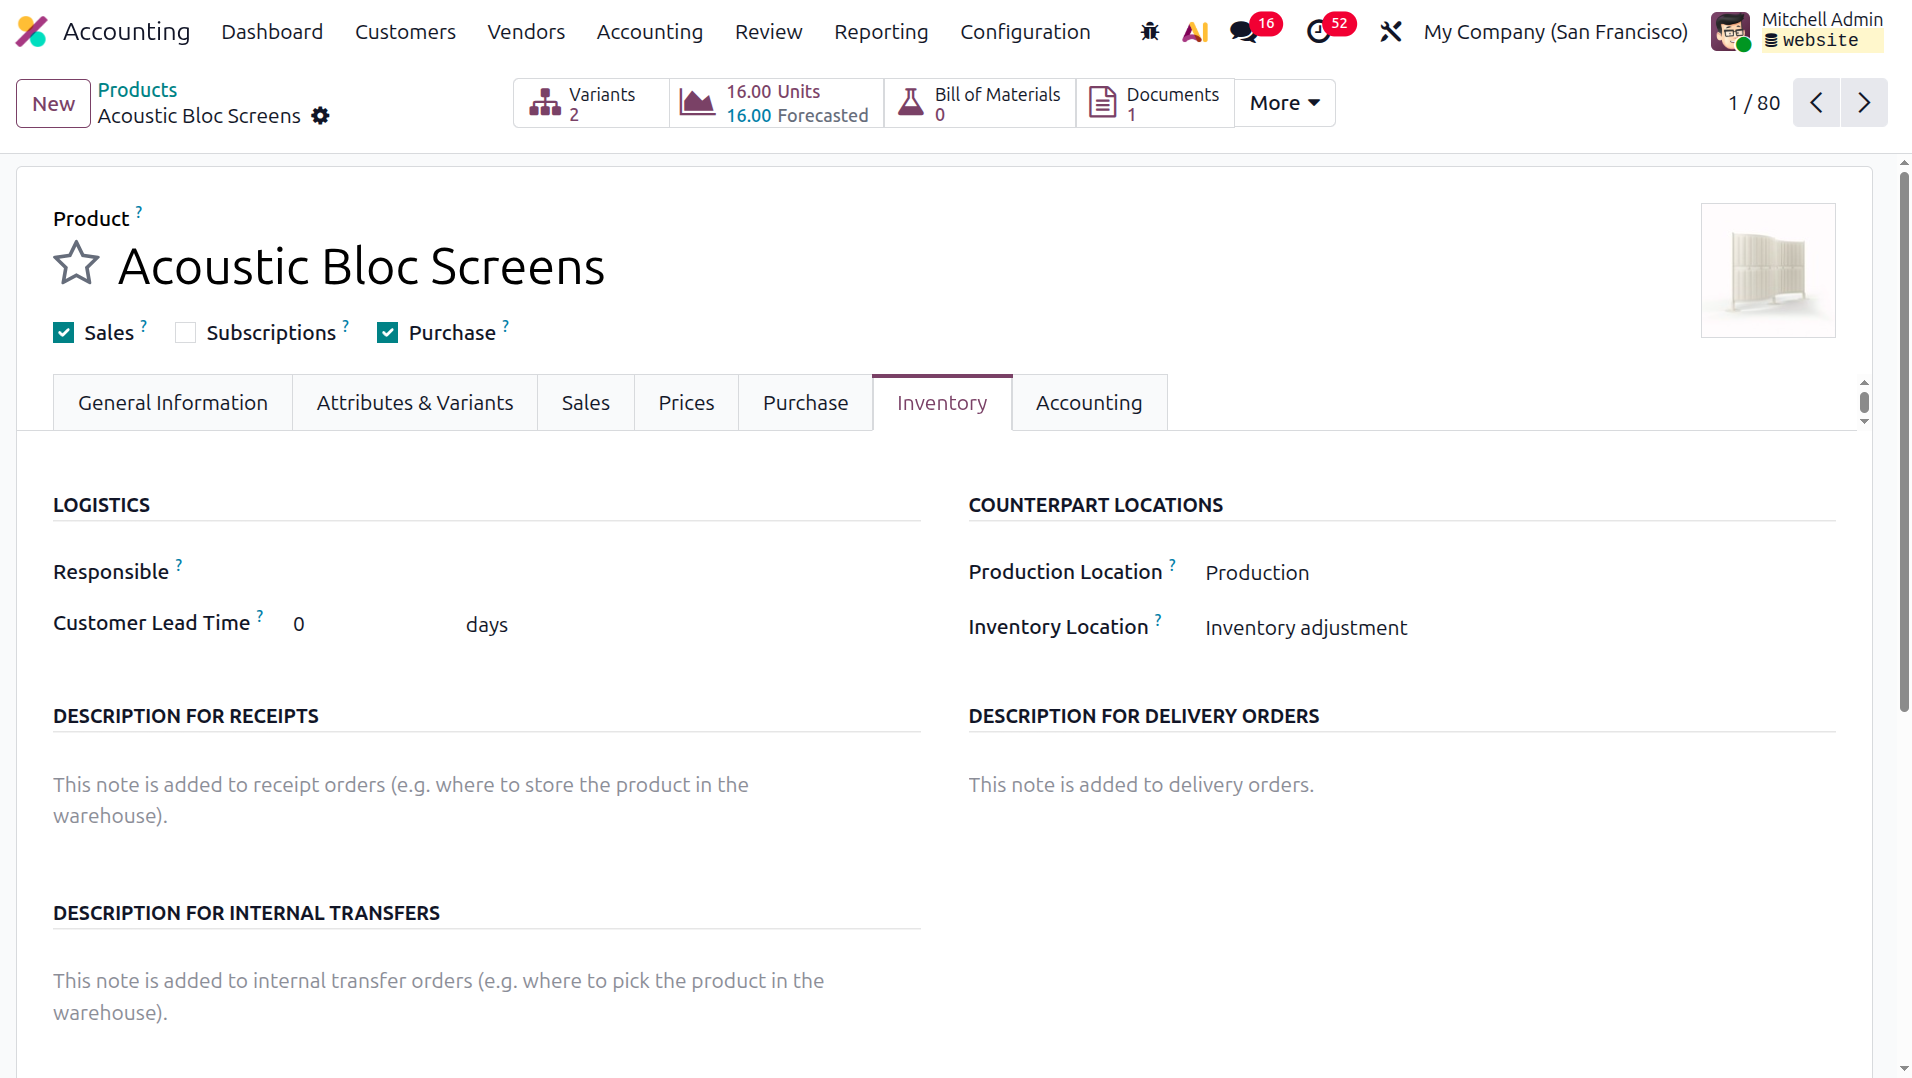
You can configure the product’s accounting details under the Accounting tab of the product configuration window.
Here, you can select the Income Account from the available options using the drop-down menu. In a similar way,
the Expense Account can also be defined. The Income Account records the revenue generated when the product is
sold to a customer, while the Expense Account records the cost incurred when purchasing the product from a
vendor. Email templates are used to share the product specification document to customer once the invoice with
this product is validated
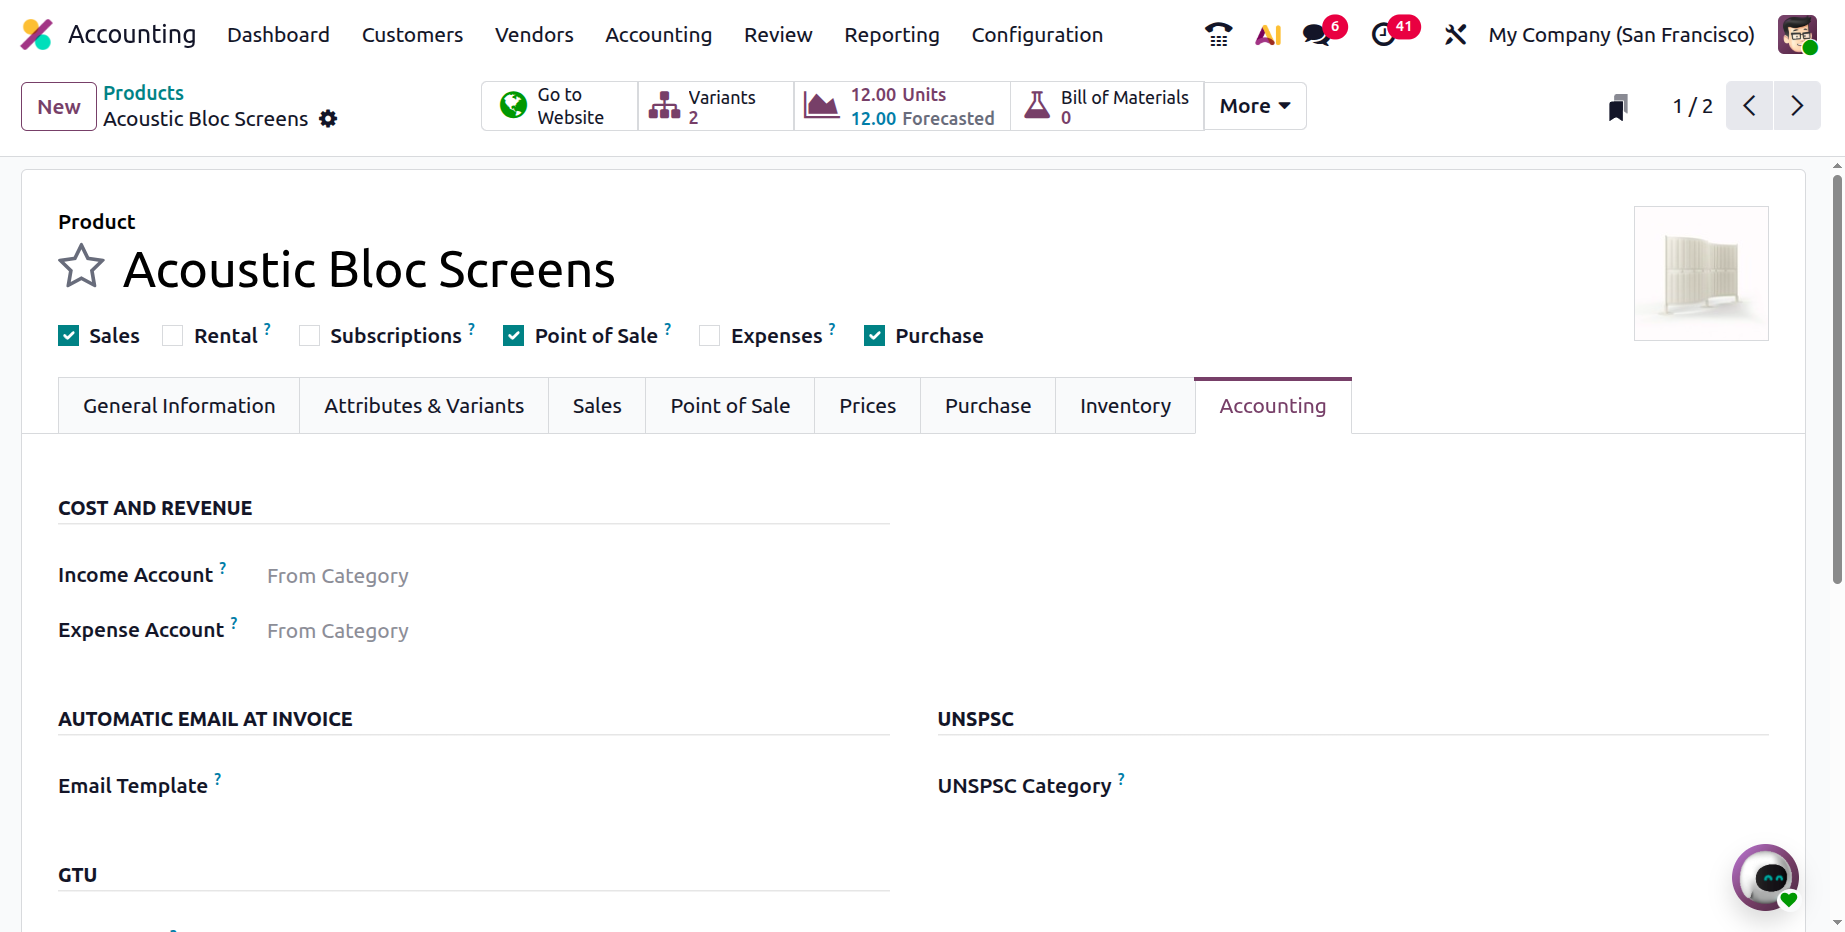
Furthermore, as mentioned earlier, products can also be configured as Services using the Products menu. For
example, in the hospitality industry, lodging can be treated as a product since it represents a service offered
by the hotel. If a hotel provides different types of rooms or packages, each option can be defined either as
separate products or as variants within the product catalog. In such cases, the Product Type should be set to
Service so that it functions as a service-based product. A Service product shares many configuration features
similar to those of a Consumable product.
The product management capabilities available in the Odoo 19 Accounting module are closely connected with the
financial management aspects of products. Using the dedicated Products management menu, businesses can
effectively control and organize product-related operations according to their organizational requirements. In
the next section, we will explore the Customer management features available in the Odoo Accounting module.
Customer management
Managing customers is a primary objective for many businesses, yet several organizations do not have specialized
systems that simplify these tasks. The Odoo ERP solution offers a well-structured platform that enables
efficient business management across the entire organization. It also provides dedicated tools that cover
various aspects of business operations, including Customer management.
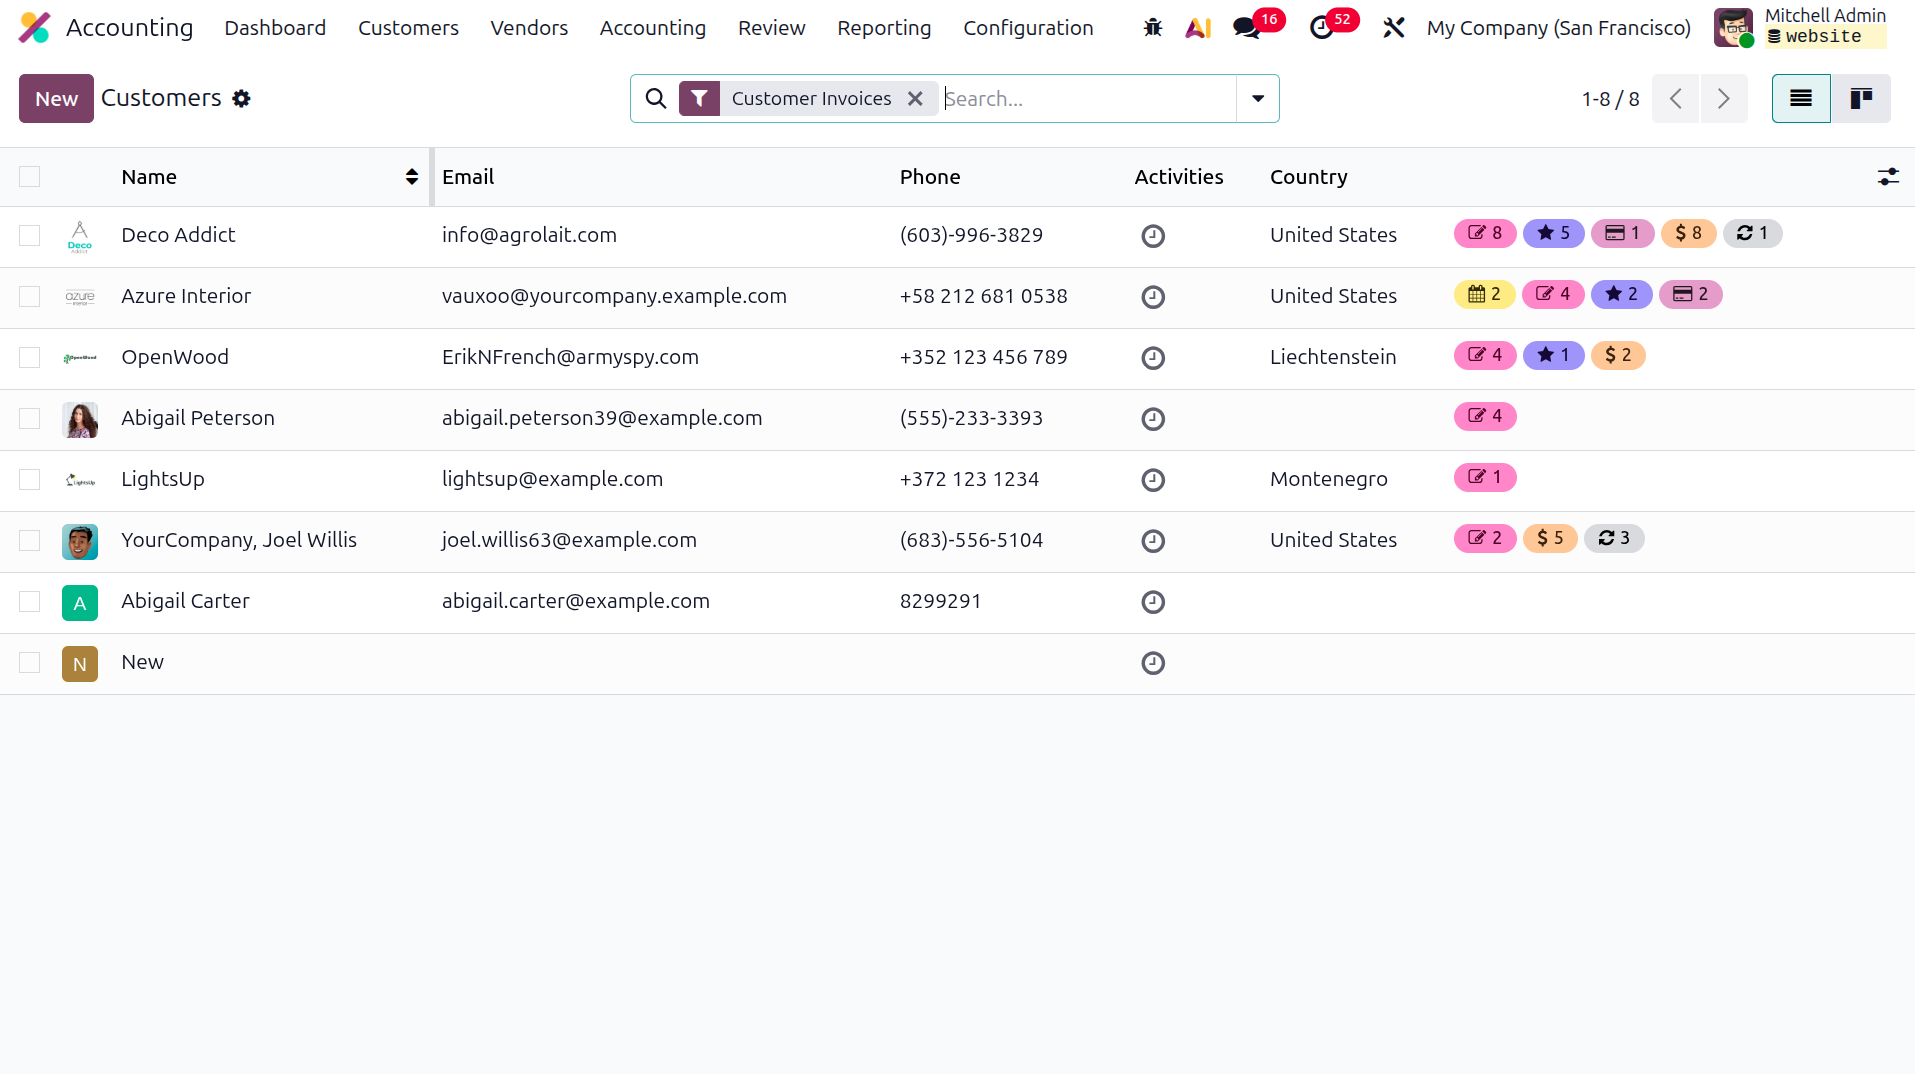
In Odoo-based business operations, customer-related activities within the Accounting component are handled
through a dedicated Customers section. By selecting the Customers option from the Customers page on the
Accounting module dashboard, users can view a list of all customers associated with the company, including both
individuals and businesses, as illustrated in the image. The Customers menu can be displayed in List and Kanban
views, allowing users to easily access customer information. Additionally, the available Filter and Group By
options help users organize and locate data efficiently.
A new customer can be added using the New button, and existing customer details can be edited by selecting the
respective record from the list. When creating a customer, you must first specify whether the customer is an
Individual or a Company, and then enter the name. The company address, operational location, and zip code should
also be provided. For financial operations, the Tax ID is another required detail.
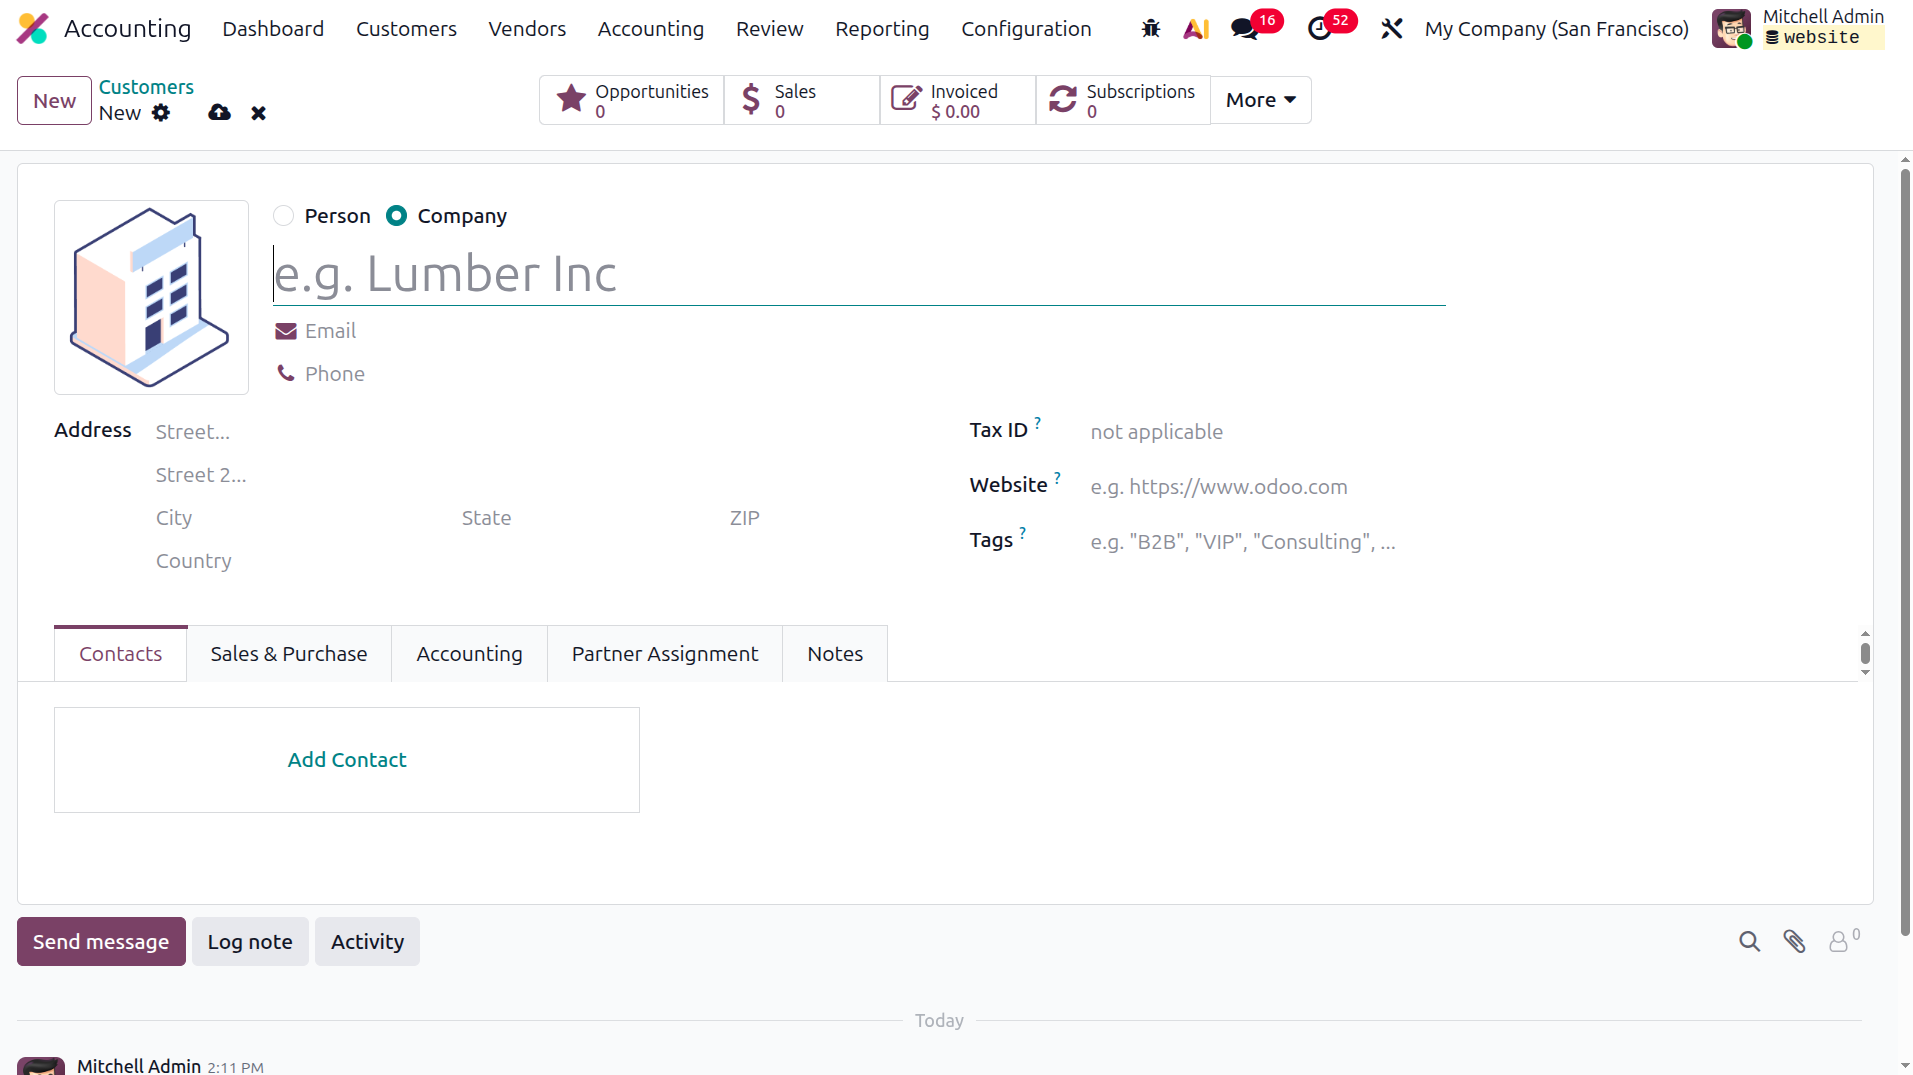
Contact information such as Phone Number, Email Address, Mobile Number, and Website can also be added. In
addition, users can assign predefined Customer Tags, which are configured in the Customer management section of
the Odoo platform. New Tags can also be created directly from this menu. The customer’s additional contacts and
addresses should then be defined using the Add Contact option available under the Contacts & Addresses tab.
Multiple addresses can be configured for a specific company or individual.
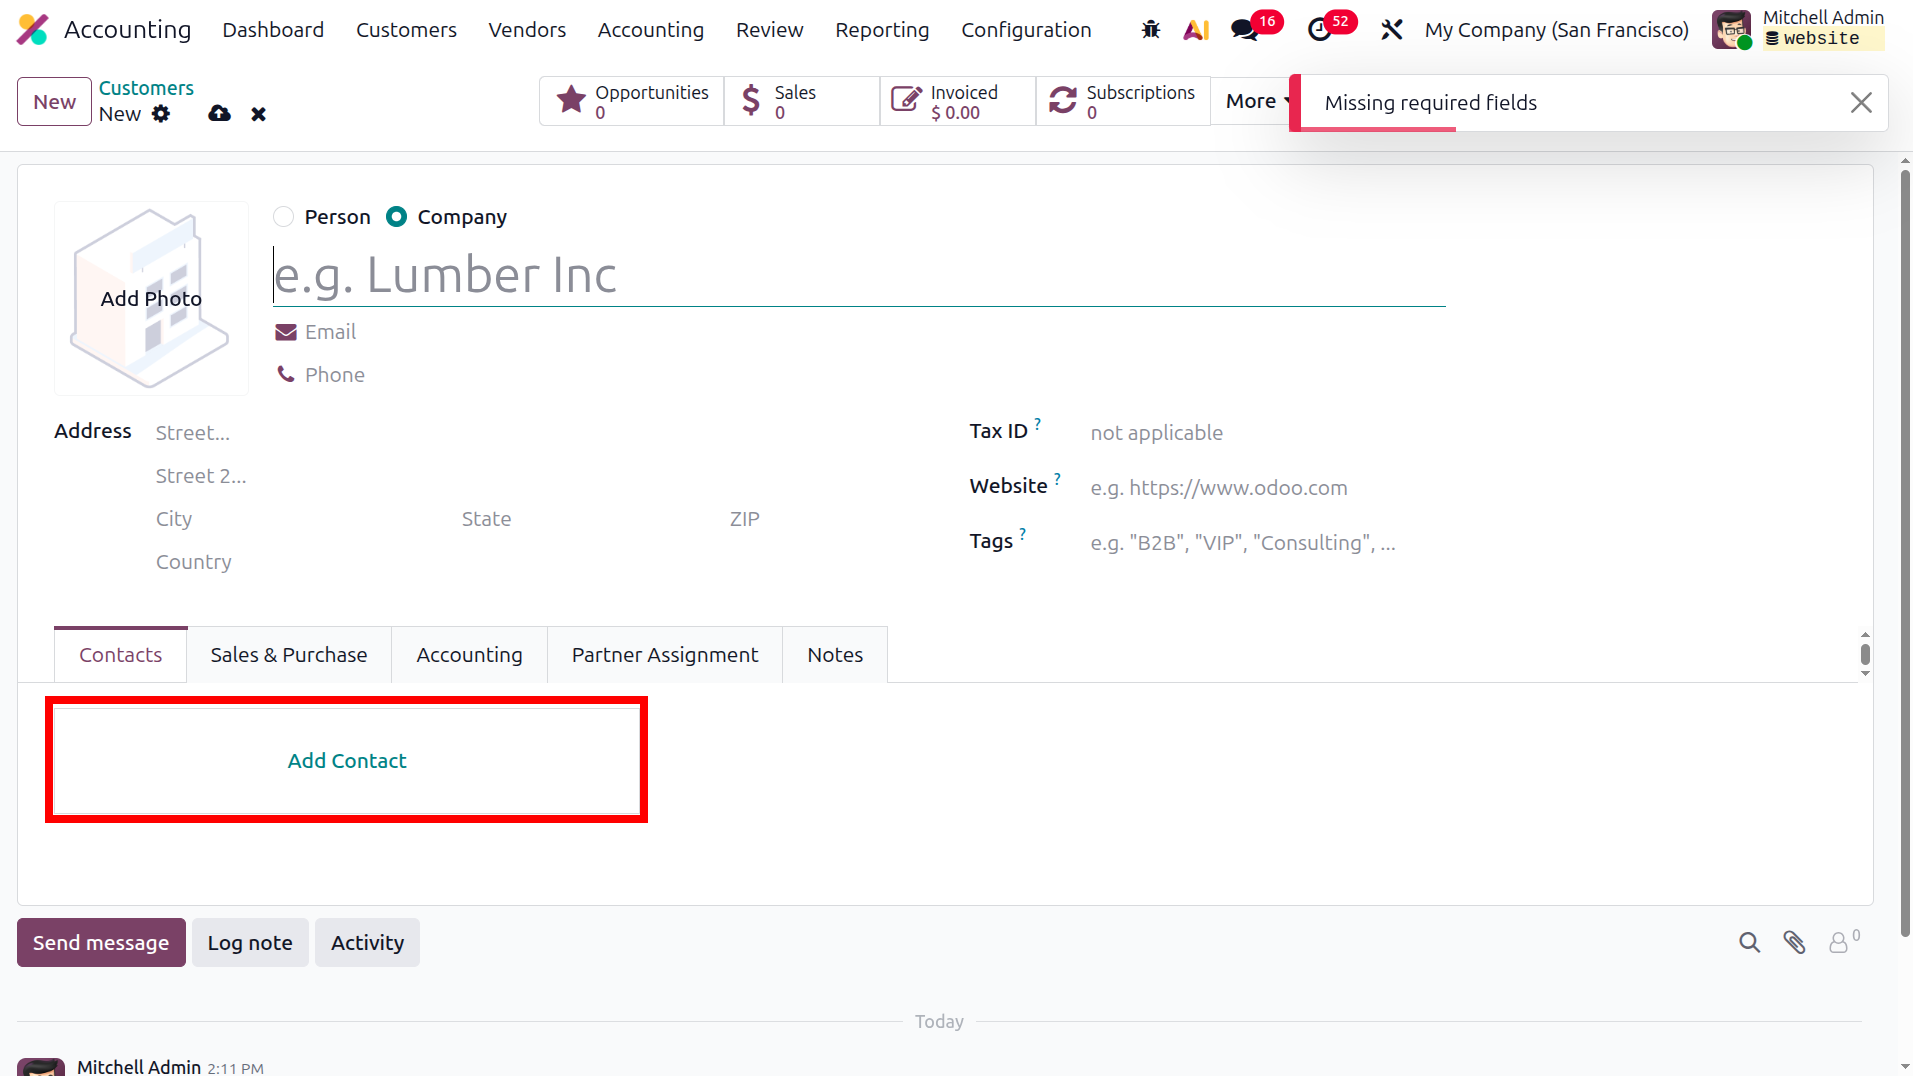
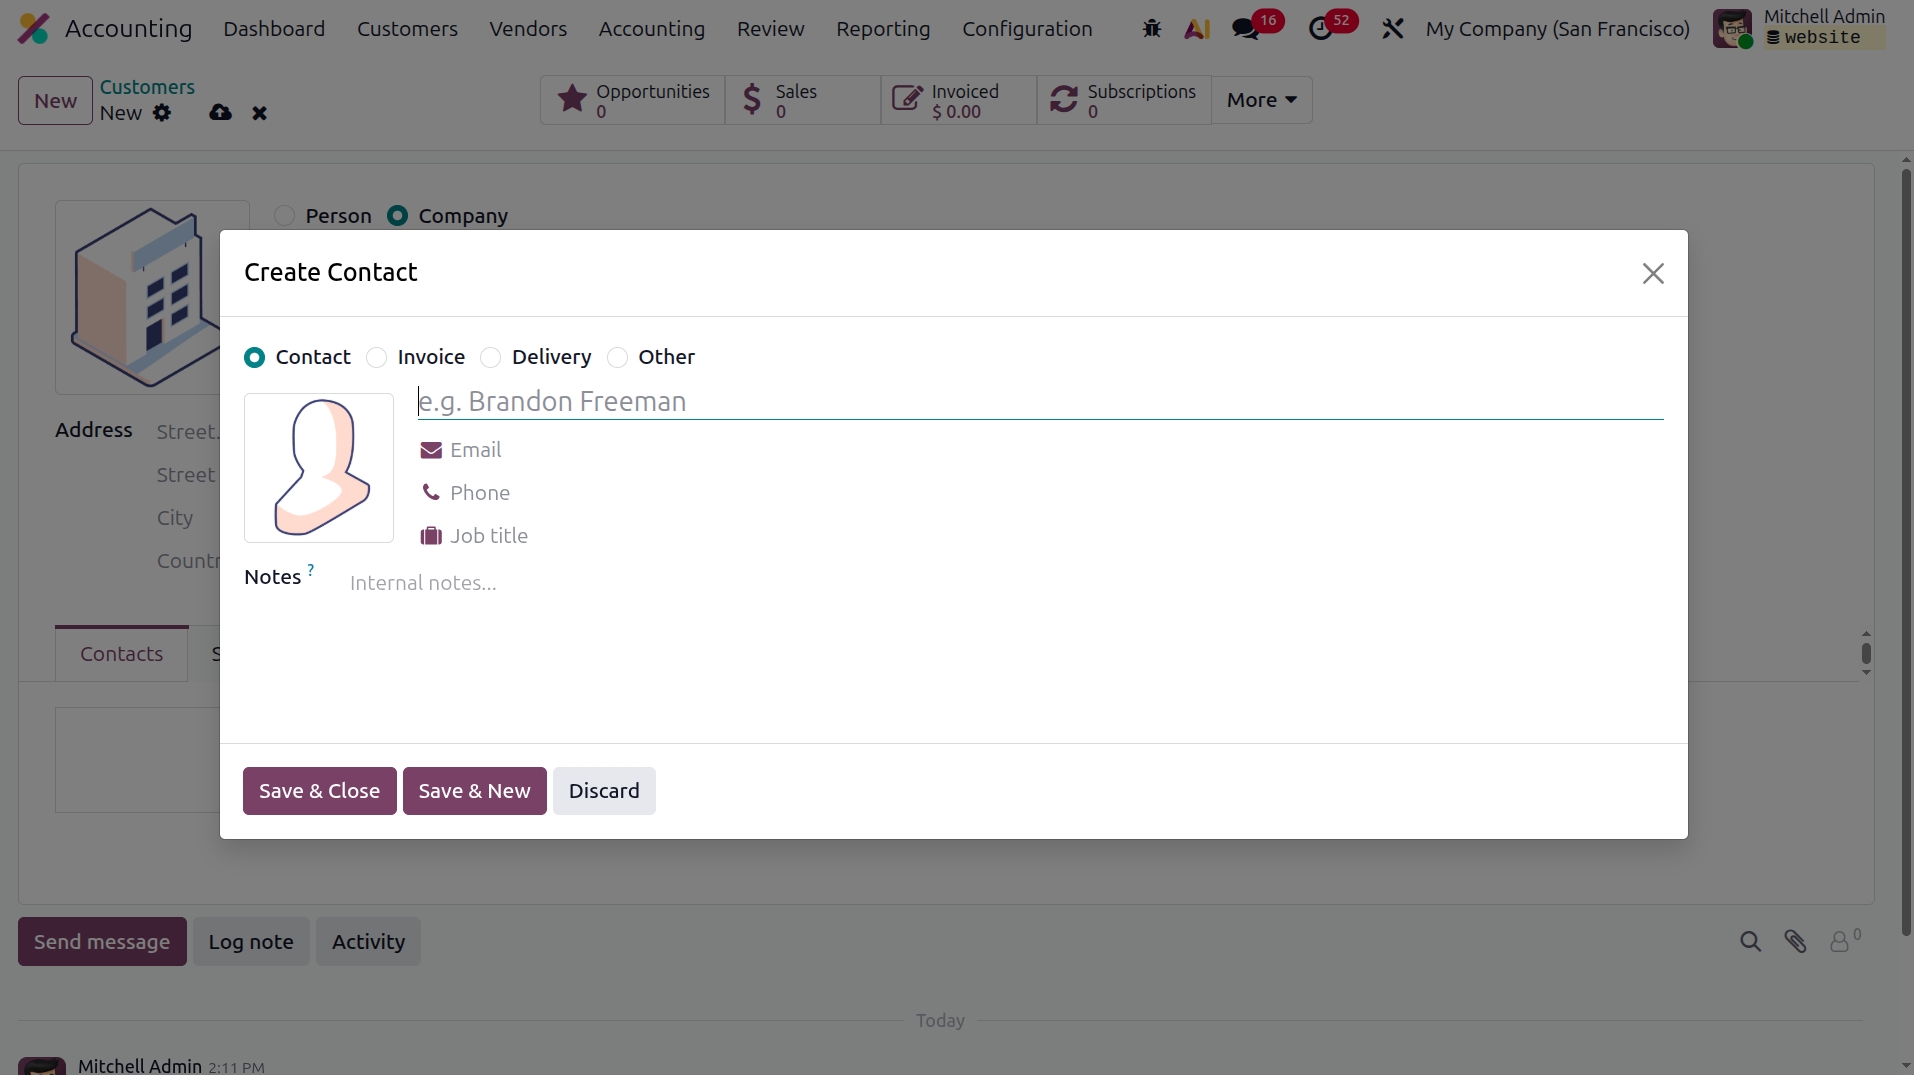
When you select Add Contact under Contacts & Addresses, a pop-up window will appear where you can define the
contact details. The first step is to specify the Address Type, such as Billing Address, Shipping Address,
Additional Address, Private Address, or Tracking Address. The Tracking Address refers to the address where
tracking reports are received. After selecting the address type, the relevant contact details must be entered,
including the Contact Name, Address, Postal Code, and Country. Additional information such as Phone Number,
Email Address, Mobile Number, and remarks related to the address can also be included. Multiple contacts can be
added for a single customer using the Save and New or Save and Close options.
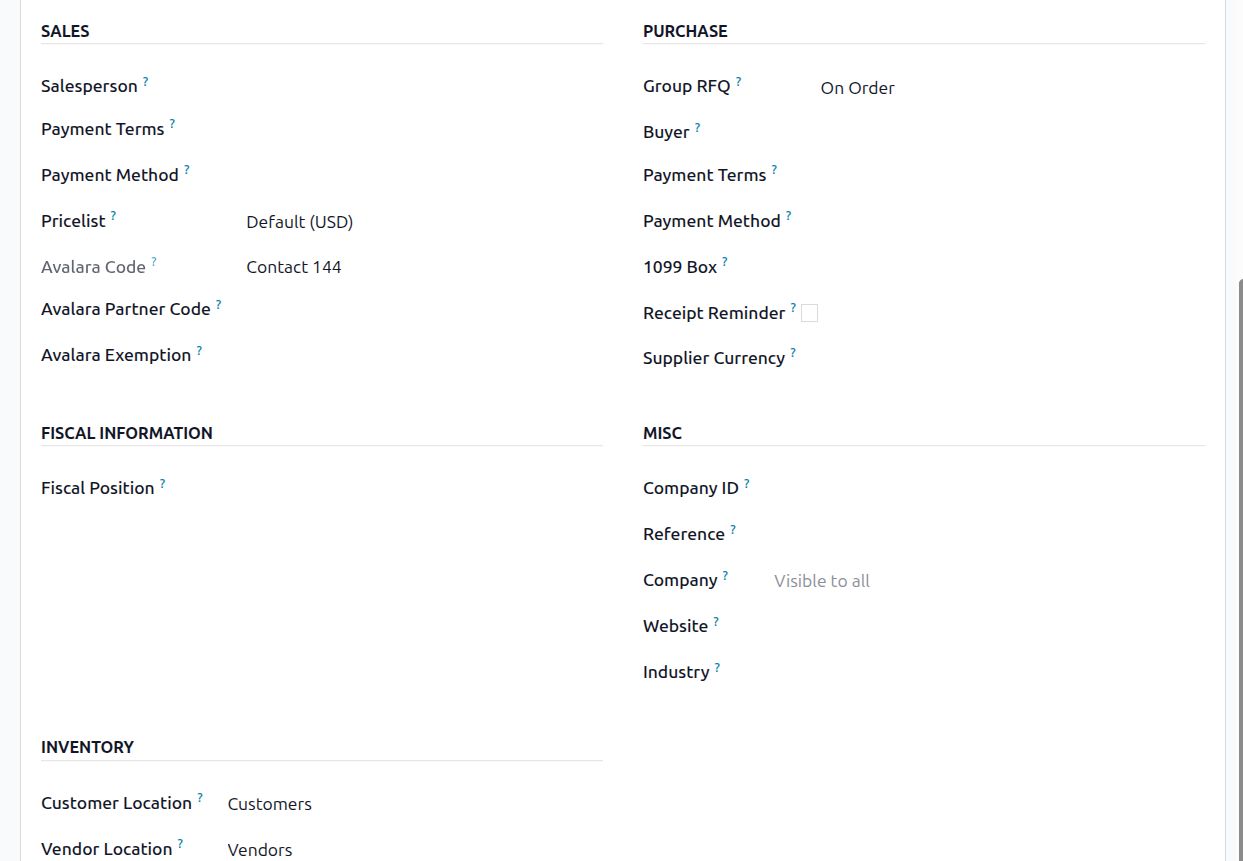
All addresses associated with the customer will appear under the Contacts & Addresses tab. The next step is to
configure the customer’s Sales and Purchase settings. Under the Sales tab, you can define the Salesperson,
Payment Terms, and Pricelist. The Purchase tab allows you to configure purchase-related settings, including
payment terms and payment methods. The Fiscal Position can be defined under the Financial Information tab, along
with other details such as the customer’s Industry or Sector and the Customer Reference.
The customer’s accounting configuration can be managed through the Accounting tab. From the available drop-down
options, you can define the Accounts Receivable and Accounts Payable entries. If the customer has multiple bank
accounts, they can be added using the Add a Line option to include the company’s bank account information. By
selecting the Accounting page, you can view a summary of the account details. When the Add Row option is
selected, a menu appears where the Account Number and Bank Details can be entered.
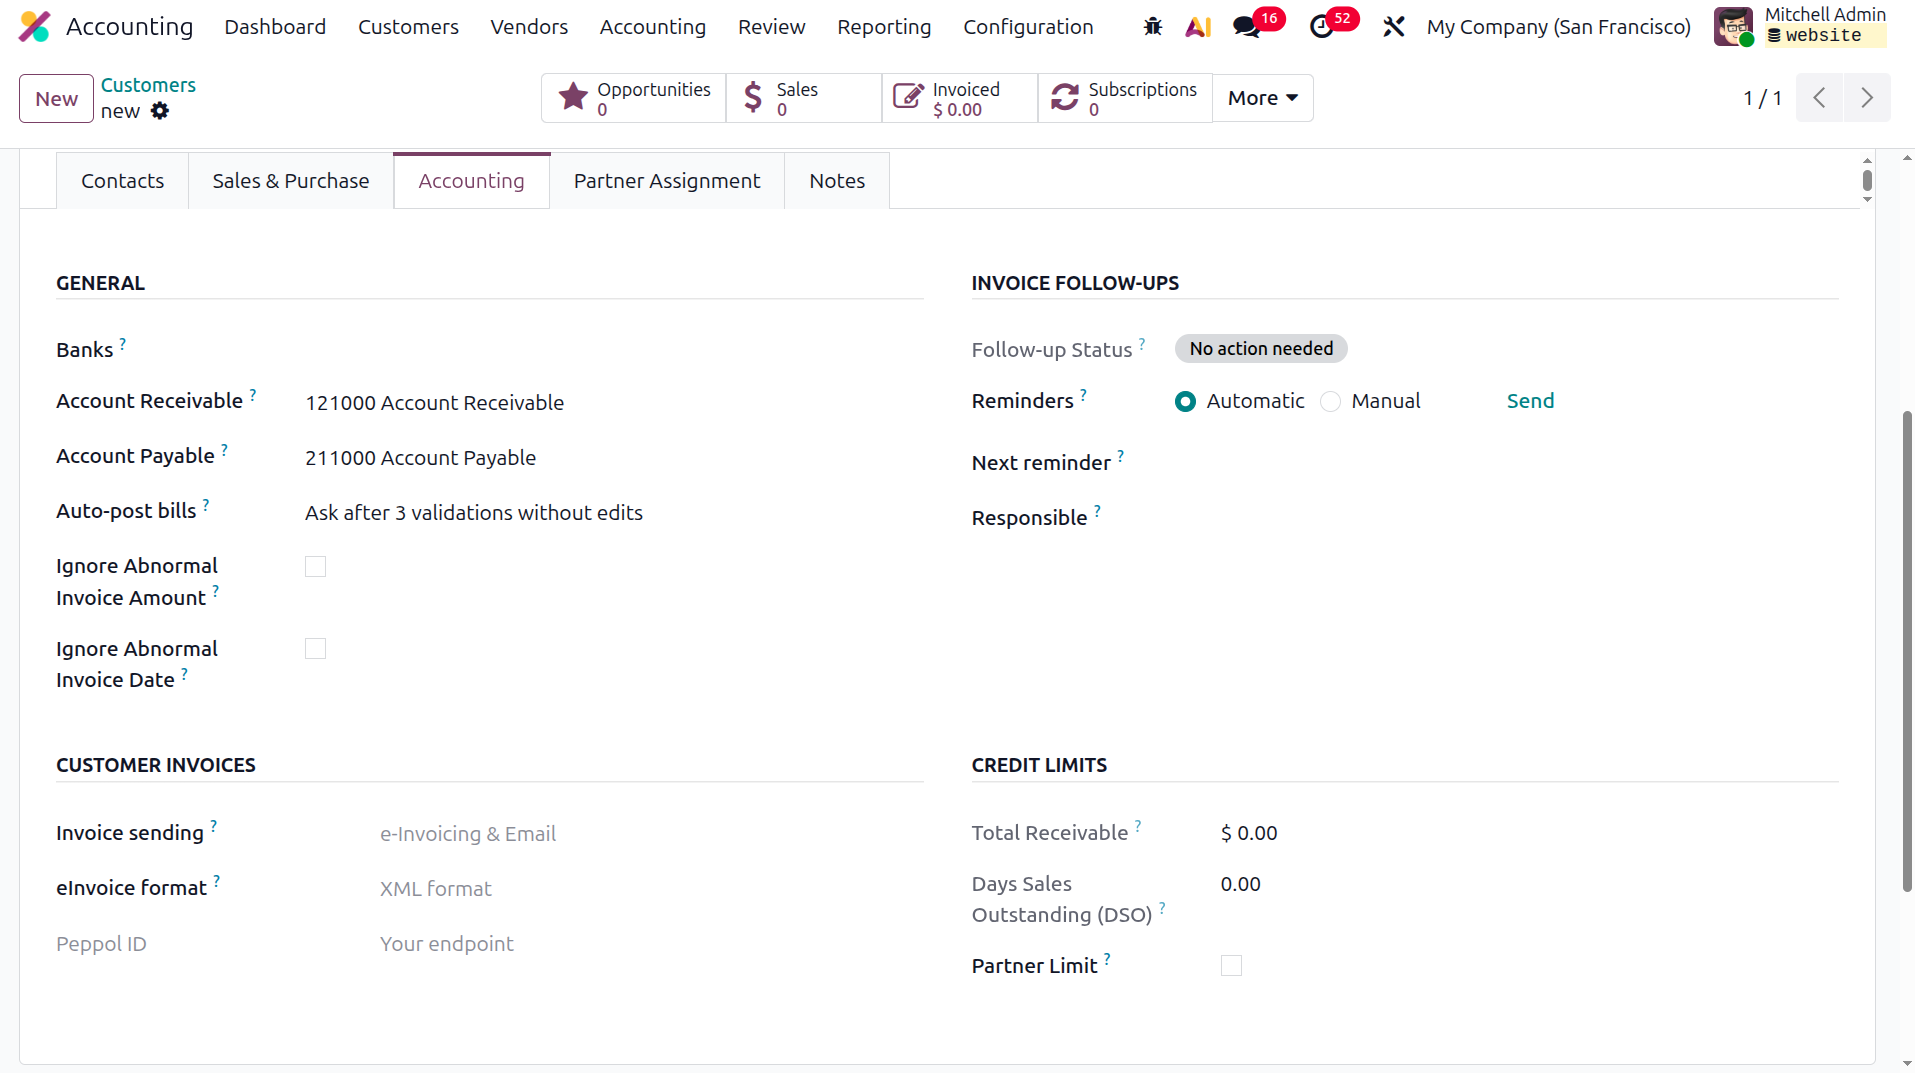
To maintain accurate accounting records, Accounts Receivable and Accounts Payable can be configured in the
appropriate fields. The Accounts Receivable Account is the account used to record the money that customers owe
to the company for products or services sold on credit and the Accounts Payable Account is the account used to
record the money that the company owes to that contact. The Credit Limit section also allows you to define the
partner’s credit limit and the total outstanding amount owed by the customer.
Within the Invoice Sending section, users can select the default method for sending invoices, such as Download,
By Email, or By Post. The e-invoice format can also be selected for sending electronic invoices. In Odoo 19,
Invoice Follow-up refers to the process of reminding customers about unpaid invoices to ensure timely payments
and improve cash flow. The Invoice Follow-up Levels include details such as Follow-up Status, Reminders, Next
Reminder, and the Responsible Person. The other options are the Bank field to provide the bank details of the
customer, Auto-post bill option to automatically post bill of a trusted partner, ignore abnormanl invoice amount
to ignore the abnormality in the invoice amount after a huge number of similar transactions, and the ignore
abnormal invoice date used to allow posting an invoice even if the invoice date is outside the expected
accounting period or sequence range.
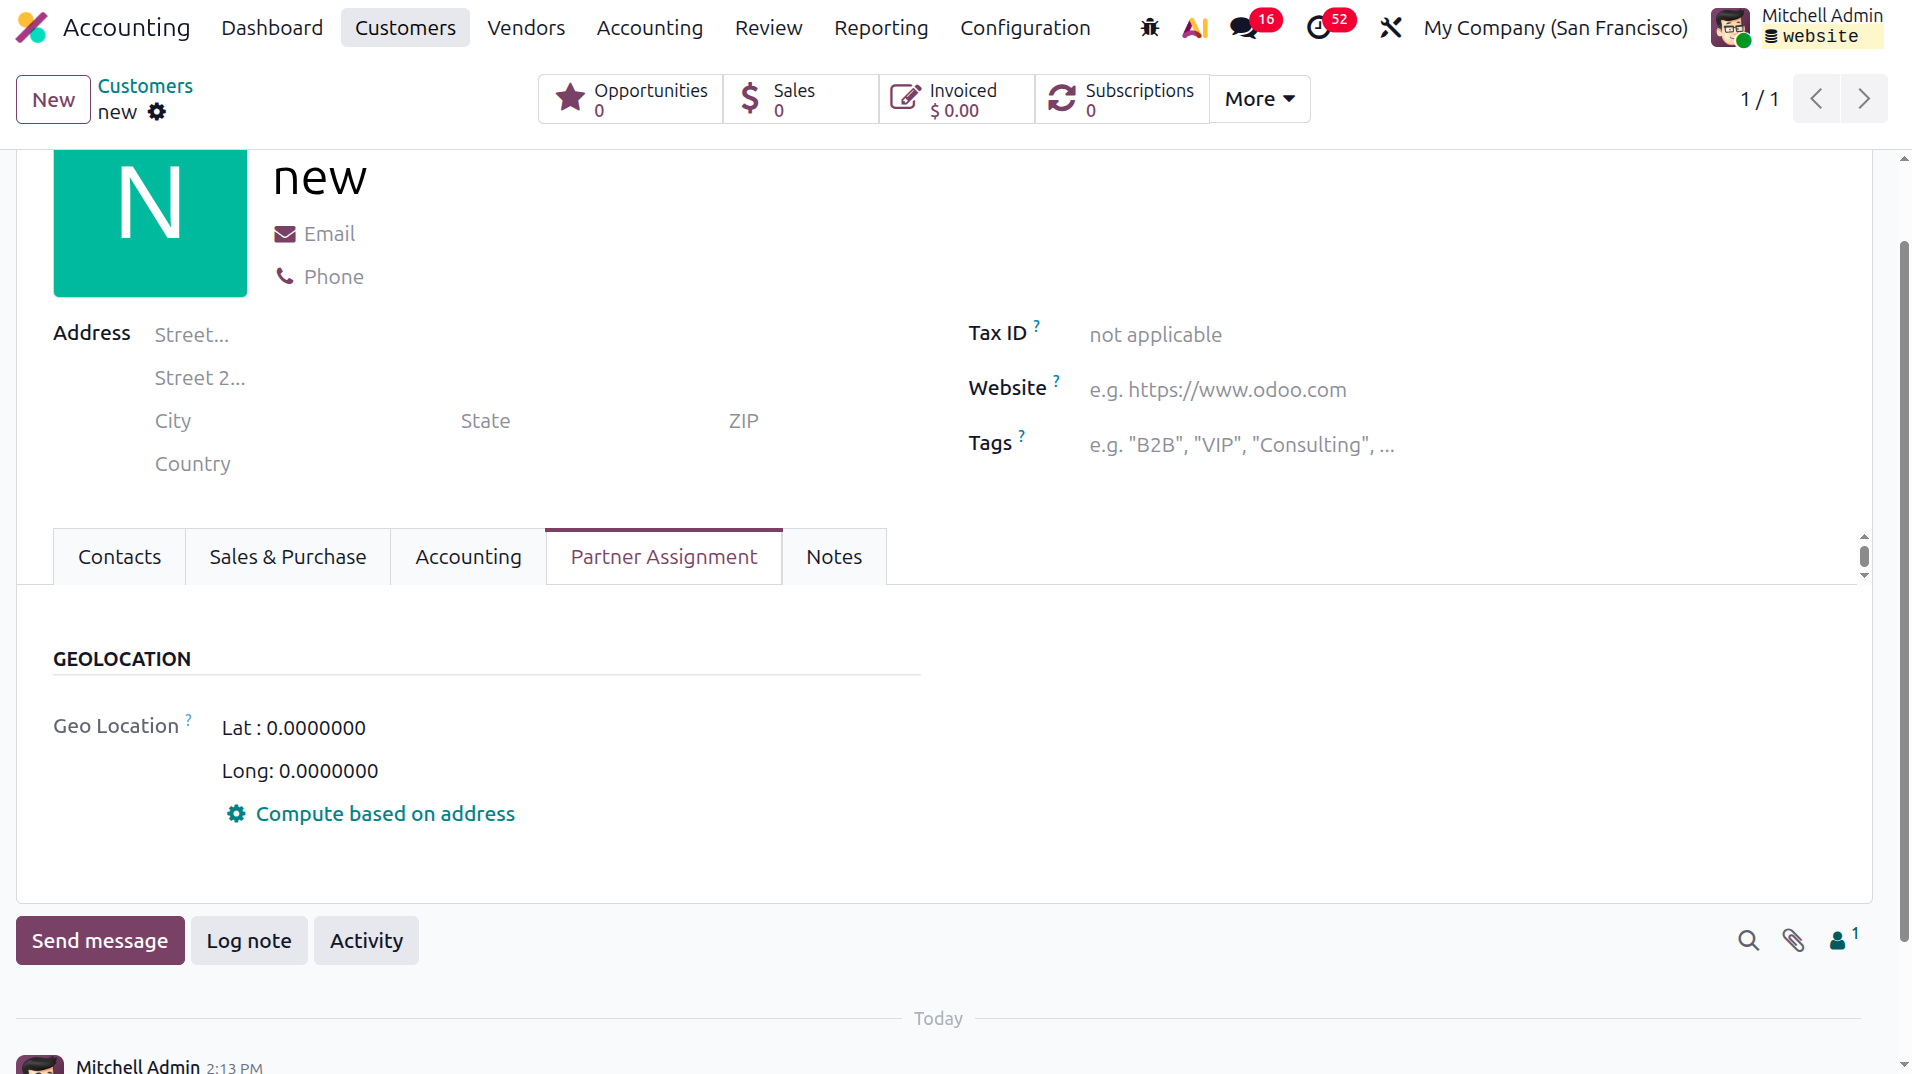
In the partner assignment tab, we can add the geolocation of the partner in which it helps to store the latitude
and longitude of the customer's address. It helps the system identify the exact physical location of the
customer.
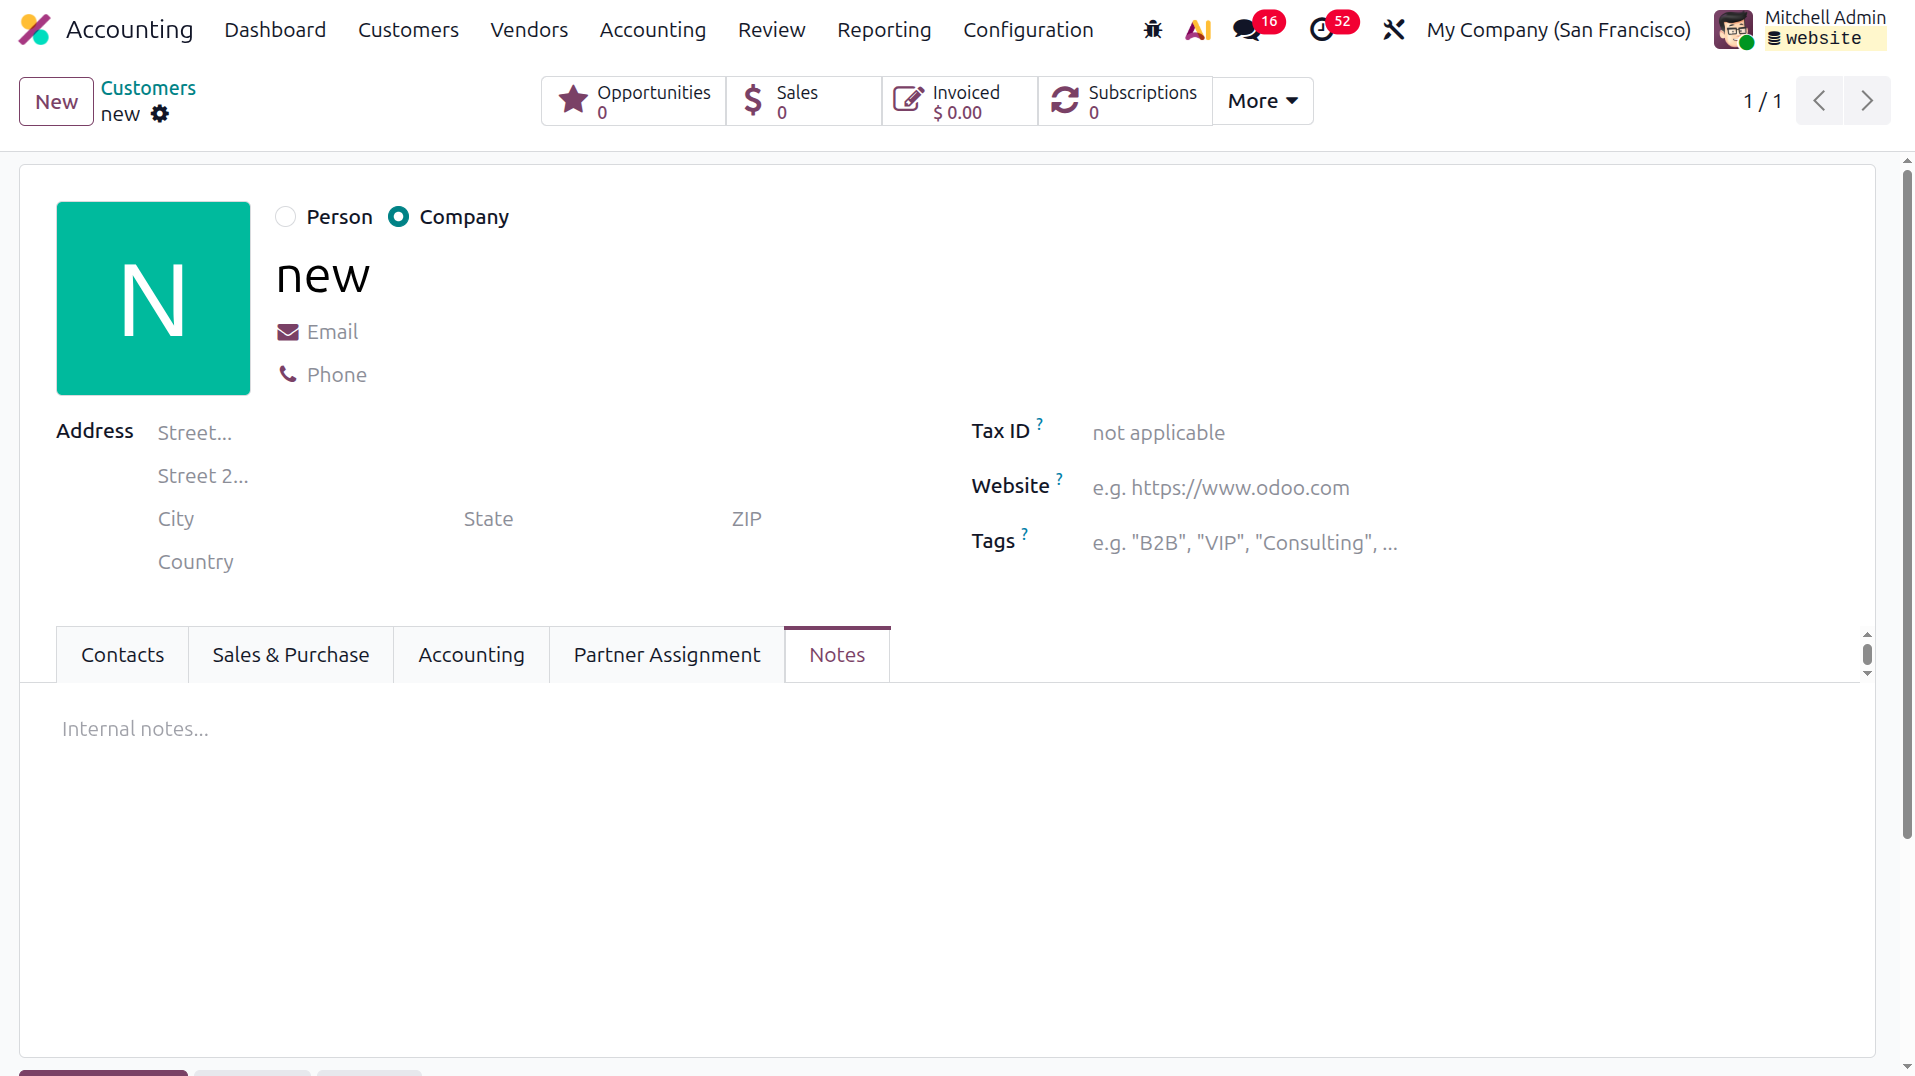
The Internal Notes tab provides space to document internal operational details. Information can be entered along
with Invoice Caution, which may act as a notification depending on the situation. Alerts and notifications can
also be configured based on the operational requirements.
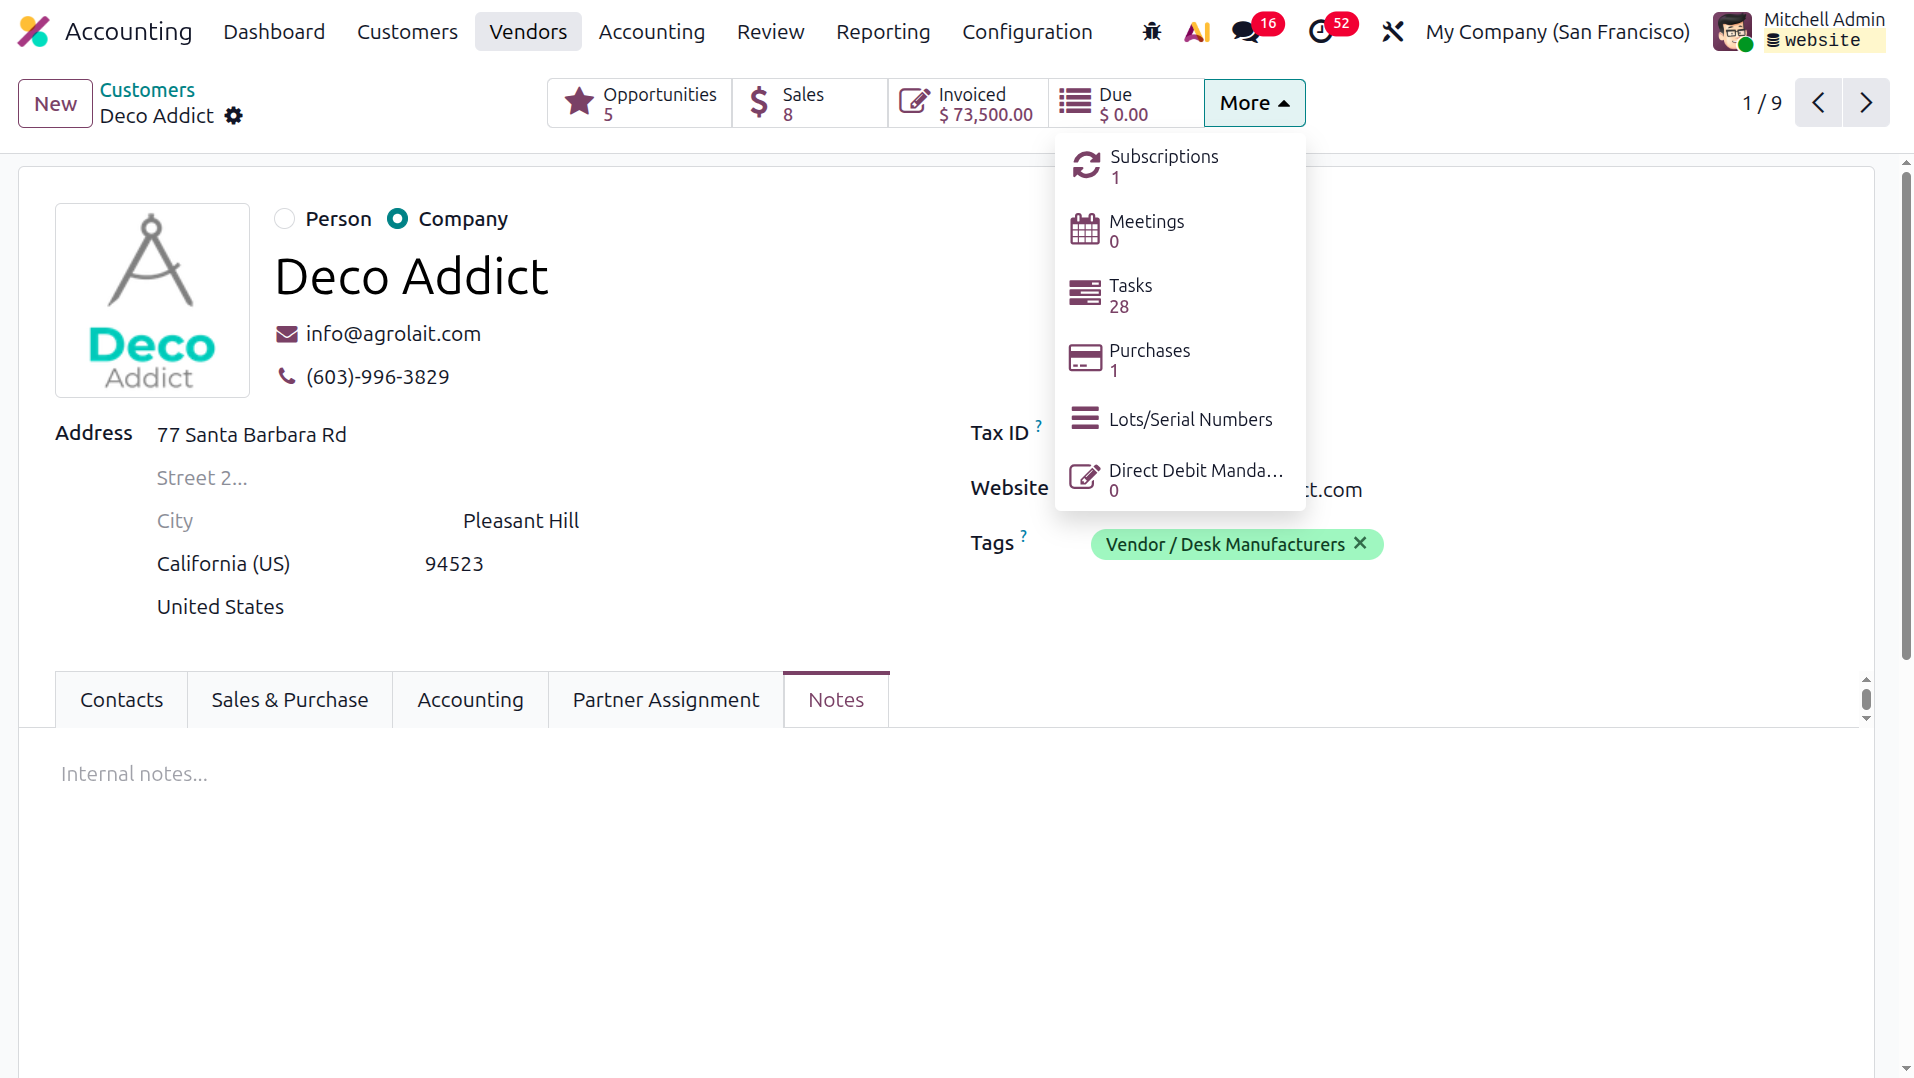
The Smart Tabs available on the partner form allow users to view the partner’s Scheduled Meetings, completed
Sales and Purchases, Partner Invoices, totals, Supplier Invoices, and the Partner Book, which contains the
partner’s outstanding debts and claims.
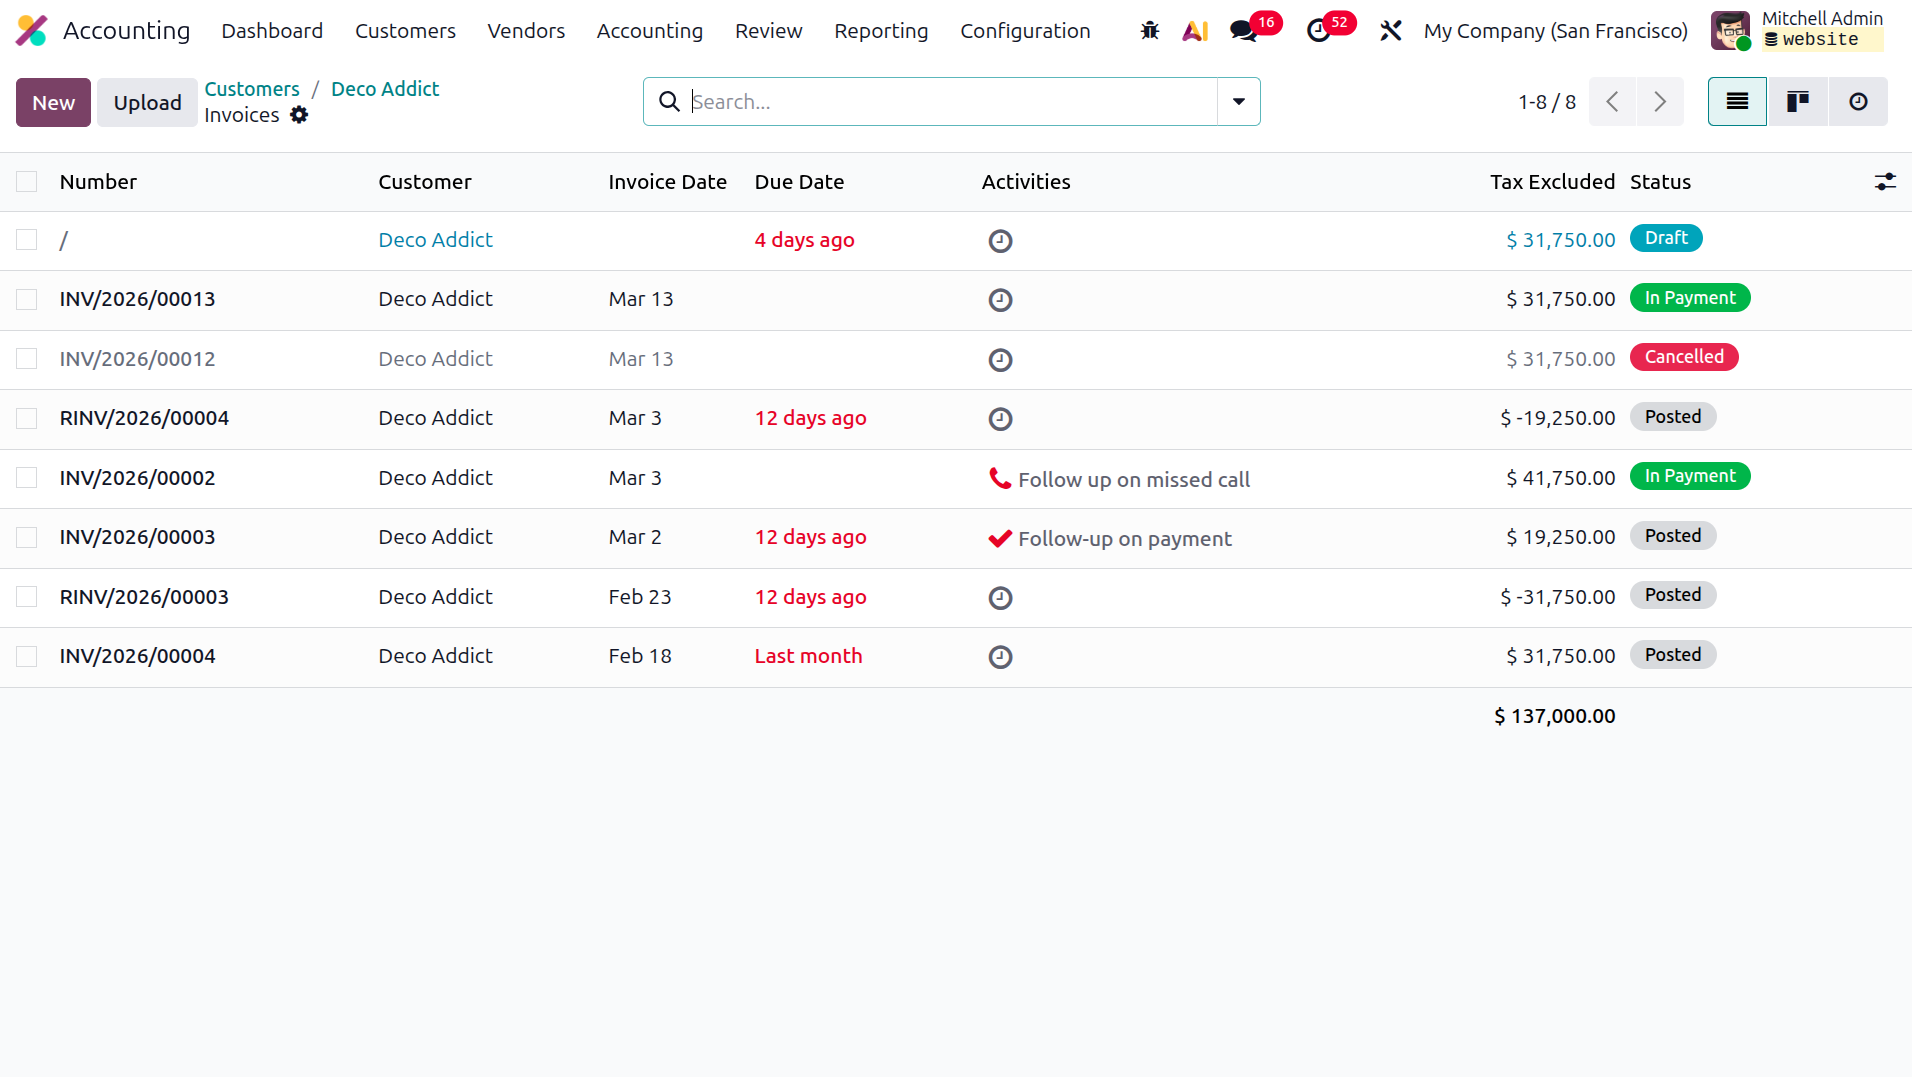
By selecting the Invoices smart tab, users can view all invoices associated with the specific customer. This
section displays detailed information such as the Customer, Invoice Number, Invoice Due Date, Activities, Total
Amount, Tax Excluded Amount, and Status.
After configuring all customer details, the record can be saved for use in future operations. Customer
information can also be updated at any time by selecting the record from the list and choosing the Edit option.
Having covered the various Customer management features available in the Odoo 19 Accounting module, the next
section will explore the Vendor management capabilities and the different options provided by the Odoo platform.