User Settings
There are several ways to customize platform users, their operational potential, and the rights that are available on the Odoo platform. The Odoo system software is thought to be the best business management solution since it makes it possible to systematically arrange individuals based on their permission levels and priorities, which is essential for increasing visibility for the management team of the firm. Furthermore, Odoo provides a feature that enables users to run their businesses with the appropriate level of autonomy, flexibility, and access while carrying out their duties in line with their specific job titles within the company. Giving a lower-level employee total authority and authorisation to oversee every facet of the business in real-time operations is illogical because it would make operational procedures more difficult.
In order to facilitate efficient management, Odoo's engineers and inventors realised this and created a hierarchical authorisation level for users. For the system to function, this platform will support three different user kinds, which are
- Internal User
- Public User
- Portal user
Odoo's internal users are those who work for a company. They may be administrative users having full access to the ERP, or they may be regular employees who work in various departments within the organisation and only have access to certain areas. Department heads who have full access to the operations of their specific department but do not have full access to the organisation are also considered internal users. As a result, this internal user group consists of both employees with limited access and admin users with complete access. In the first scenario, an individual with complete access to the Odoo system is regarded as the system's highest-level user and is able to carry out any task, including creating new users, modifying system settings, allocating privileges, and configuring views and menus. They have authority over all other users due to their superuser account's administrator rights and administrative aptitude. This type of power often includes team leaders and business managers.
Additionally, the Odoo platform can be used by a number of admin users, each of whom is given a special authorisation to fall under this group in compliance with the requirements. This will guarantee safe and secure management control over the team or department for the related admin user. The admin user is the only one with the ability to modify already-existing modules or add new ones. The second category of internal users consists of those who are employed by the company, excluding managers and management teams.
They most likely include the executives and other staff members who answer to the boss. These users are given a unique login and log-out code of operation by the Odoo system, which also gathers information about each employee's performance and operations. The same operational components that are used for clocking in and out can be utilised to record attendance, take time off, and ascertain how an employee's timesheet of operations relates to organisational functioning.
The second category of users consists of website visitors, or public users.
Unlike the other user kinds, portal users are the third type of user and are frequently used to give customers access to the Odoo portal. Odoo's backend is only accessible by portal users. Since they often don't have access to Odoo's back end, they would be able to access public areas like the website, customer portal, and other locations. Portals are regularly used by clients, suppliers, and other outside parties. They make it possible for clients or suppliers to utilise the Odoo platform without having full system access. In addition to accessing documents, this user can place orders, confirm quotes, ascertain whether certain things are in stock, ascertain whether services are accessible, and so on. The appropriate level of access for these portal users can also be determined by the organization's responsible authority.
The three categories that were previously discussed are the three fundamental user kinds that you can manage within Odoo to perform different organisational functions. The Odoo platform's most extensive User configuration options and its user-friendly Management menu make it easy to manage all of these users. Let's examine the User menu and all of its setup options in more detail after talking about users on the Odoo platform.
User Menu
Odoo's User menu lets users add their own preferences and settings to the user interface. It is located in the upper right corner of the interface and provides access to several customisation choices. The Users & Companies page in the Settings module is another way to reach the Users menu.
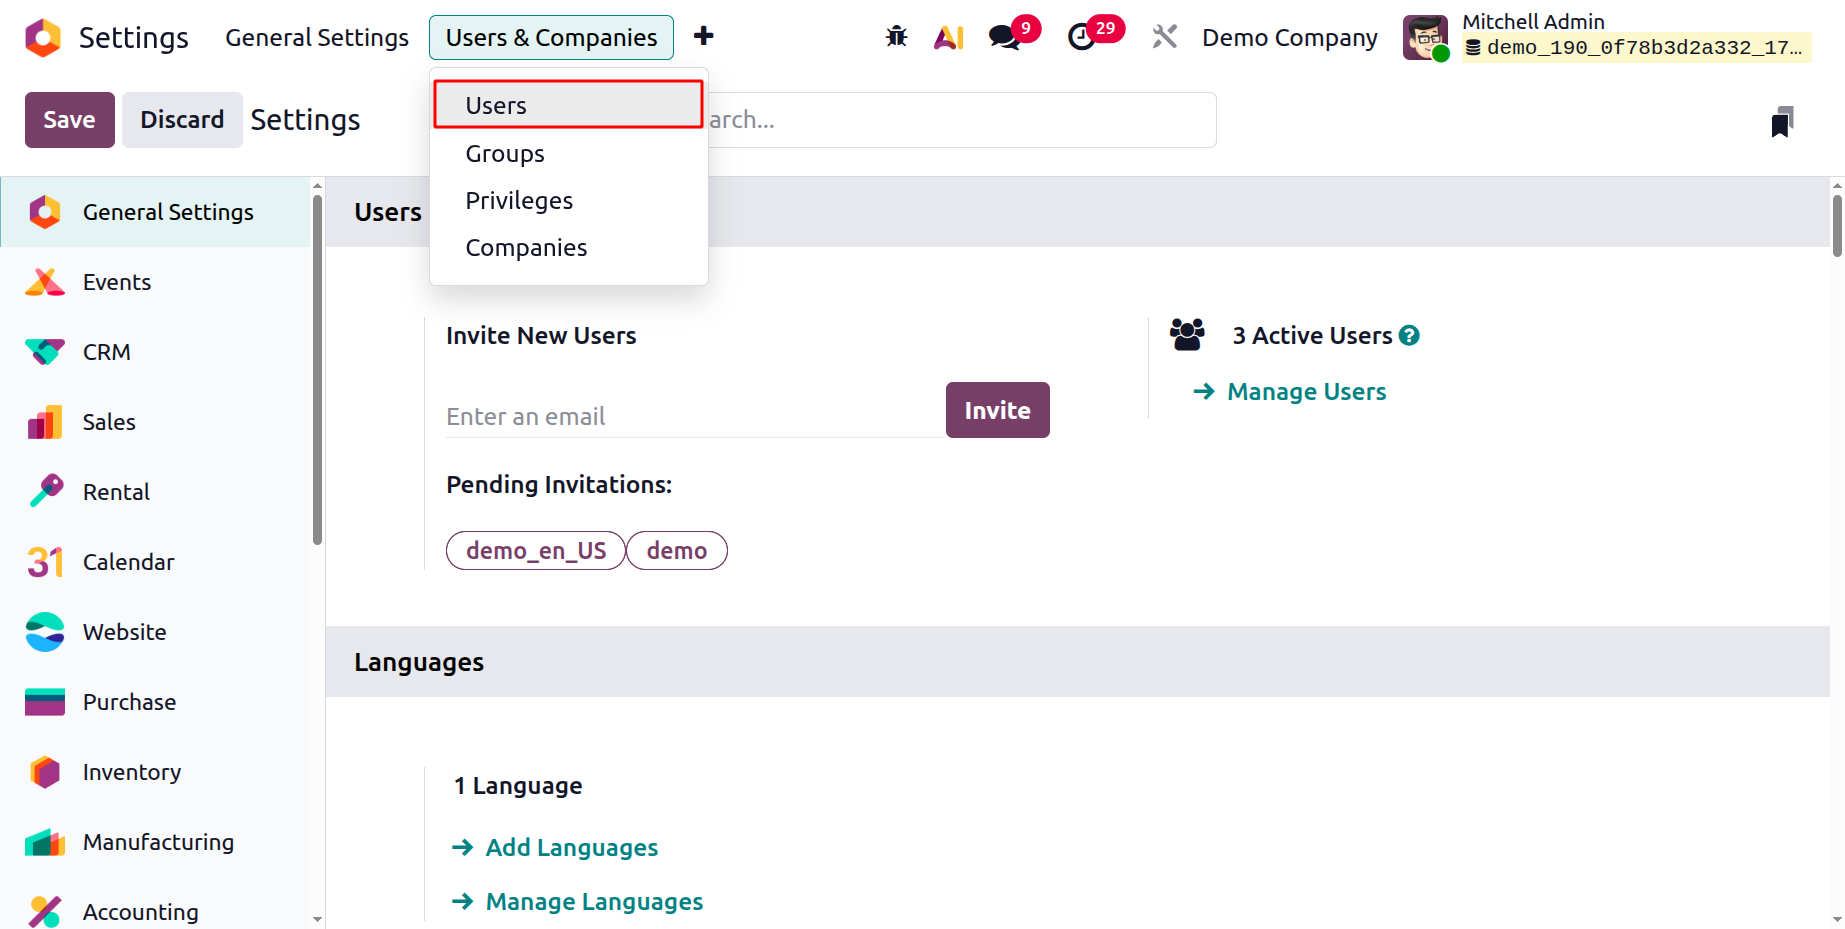
The user can select language, theme, business, notification options, and more. Additionally available are the user's settings, preferences, and profile. The Odoo system's General Settings and Dashboard's Users management menu can be used to generate the Users menu shown in the image above. By activating the Odoo Developer mode from Odoo 19 Settings, you may access more features, functions, and operational aspects in addition to more sophisticated functional tools and capabilities that will be helpful in platform configuration.
You can enter the Developer mode by choosing the General Settings option under the Developer tools, as seen in the image below.
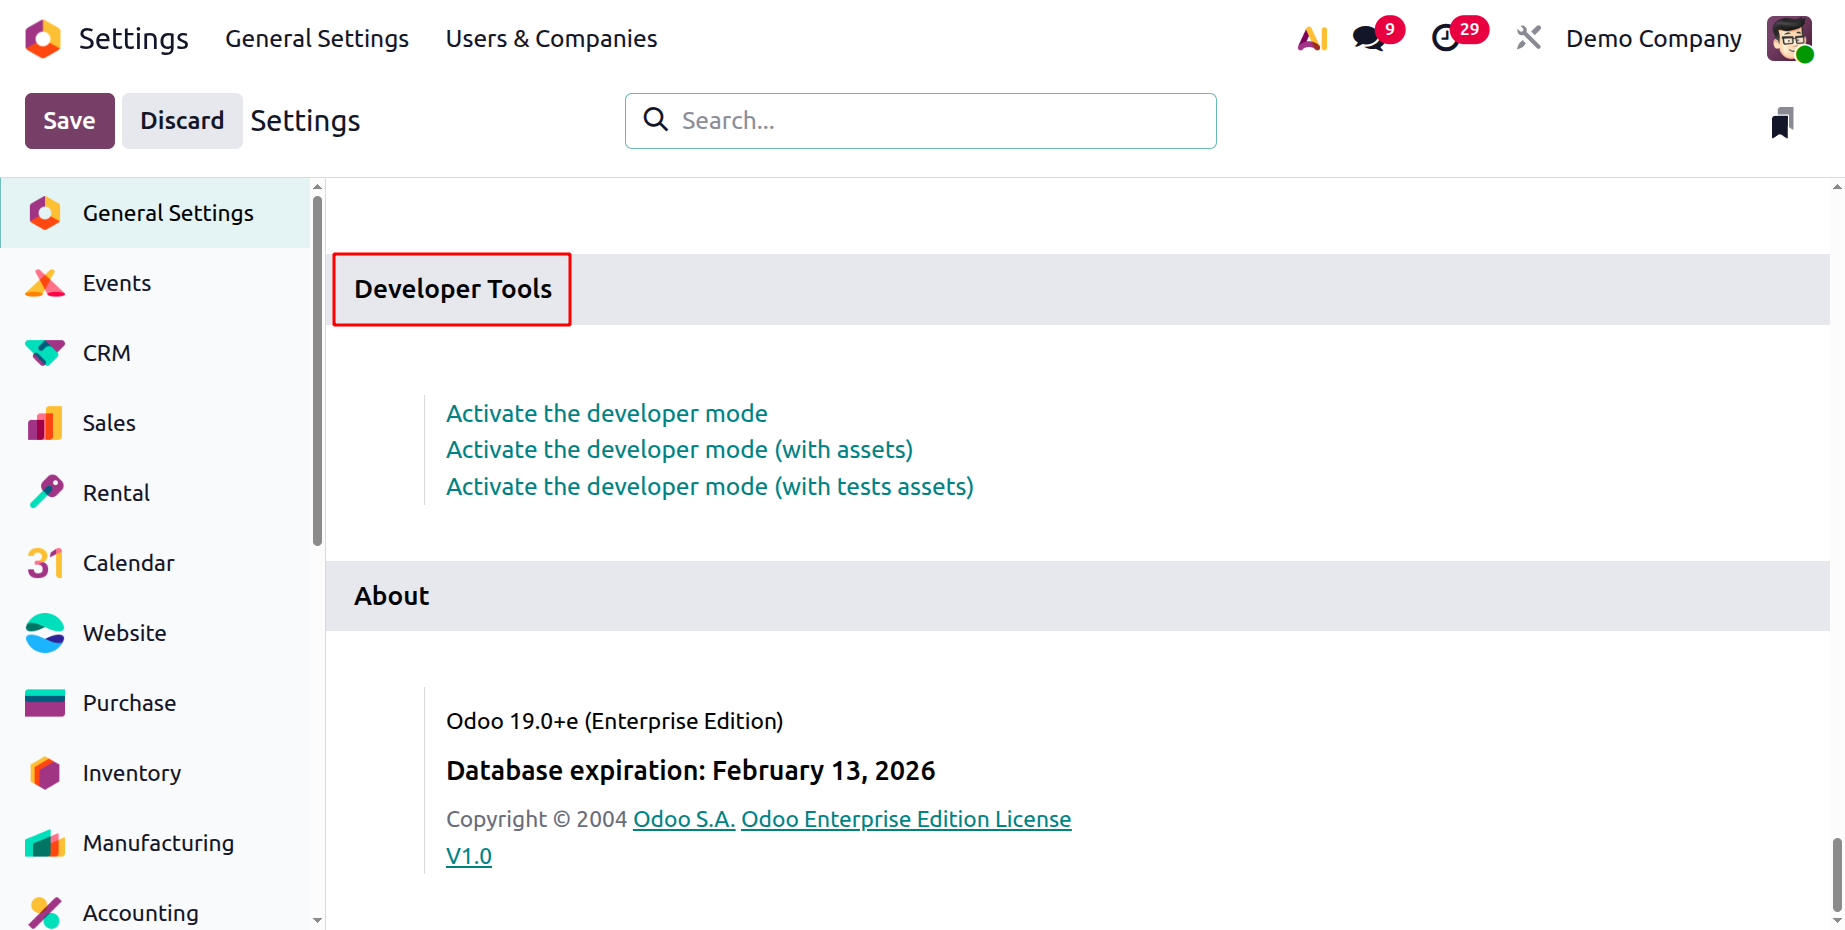
Additionally, there will be a Debugging option on the Odoo platform dashboard that can be chosen to activate developer mode. Similar to this, you may instantly enable or disable the Developer and Debugging modes of the Odoo platform using extensions and other tools for Chrome, Firefox, and other widely used browsers.
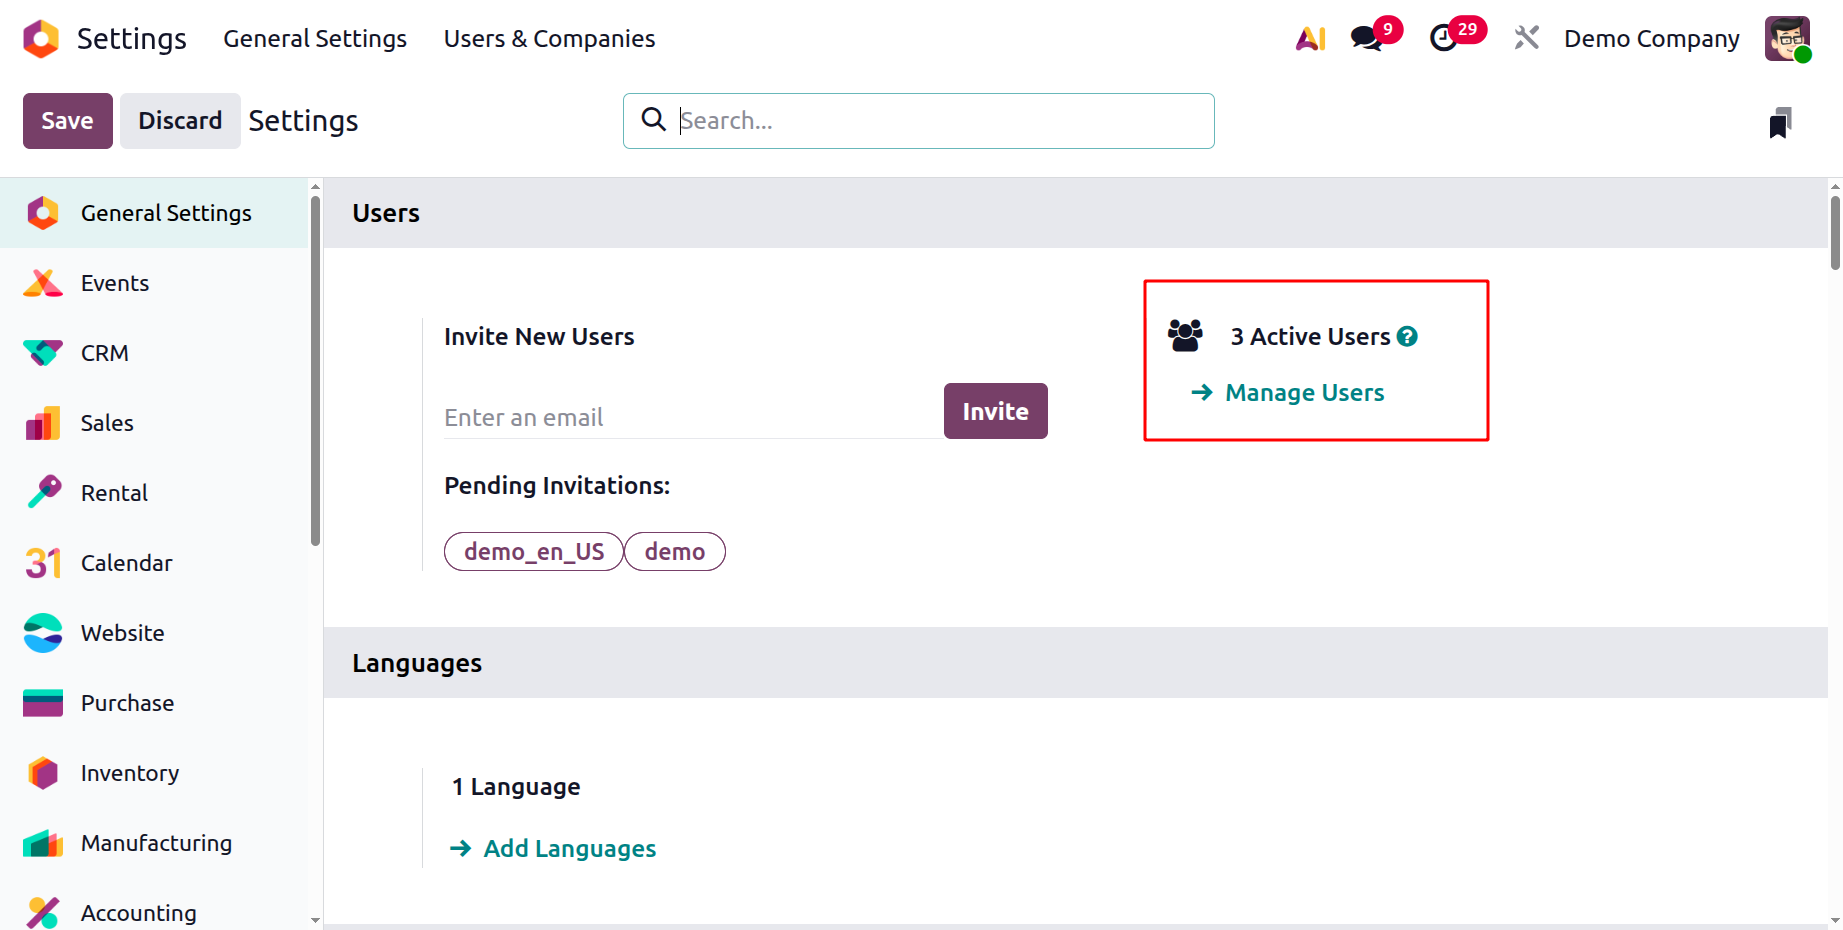
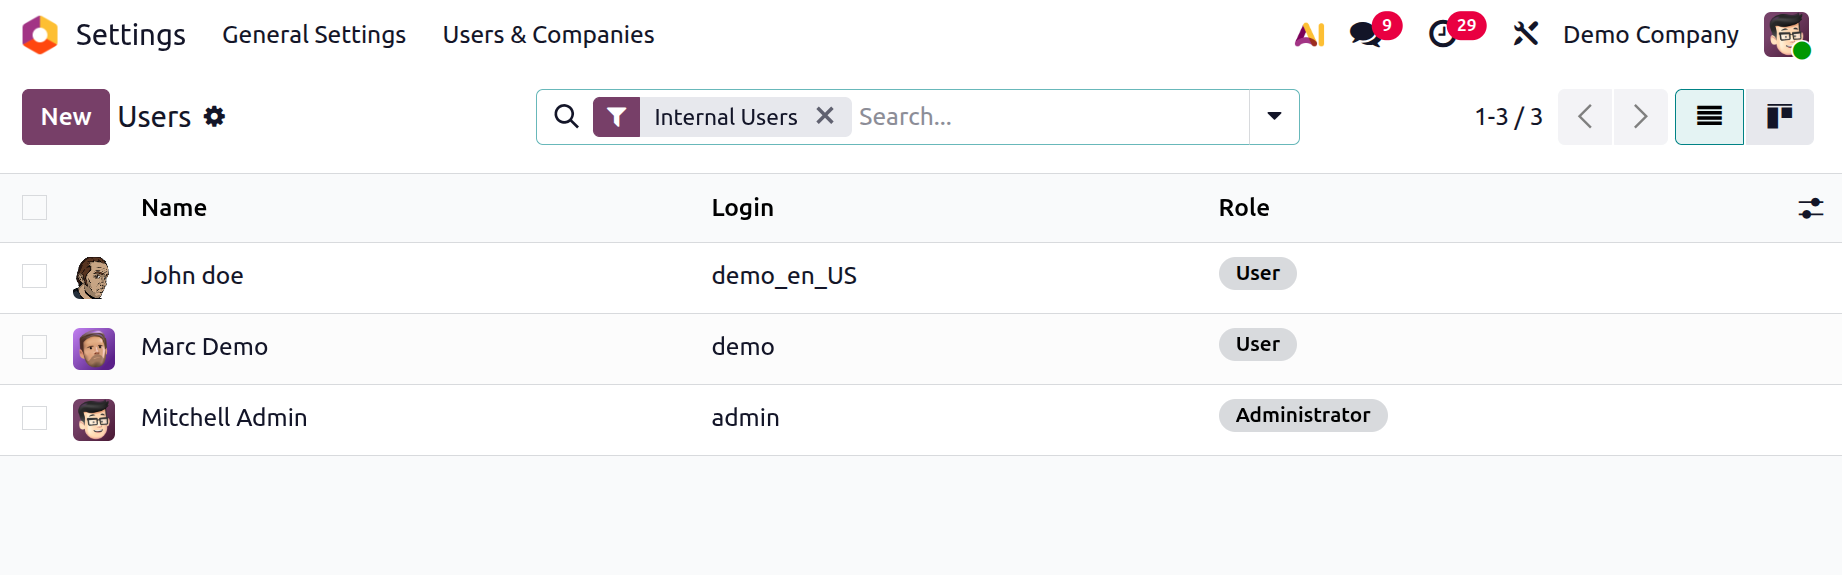
You can view every person who has been identified on the platform by selecting the Manage Users option, which launches a new window. Important user data, including the user name and login ID, the business and operating language, and the most recent authentication details, will be displayed in the window
You can read the Users' information preview in its full and make any necessary changes by clicking on the corresponding line. You can add more users by using the New button in this window.
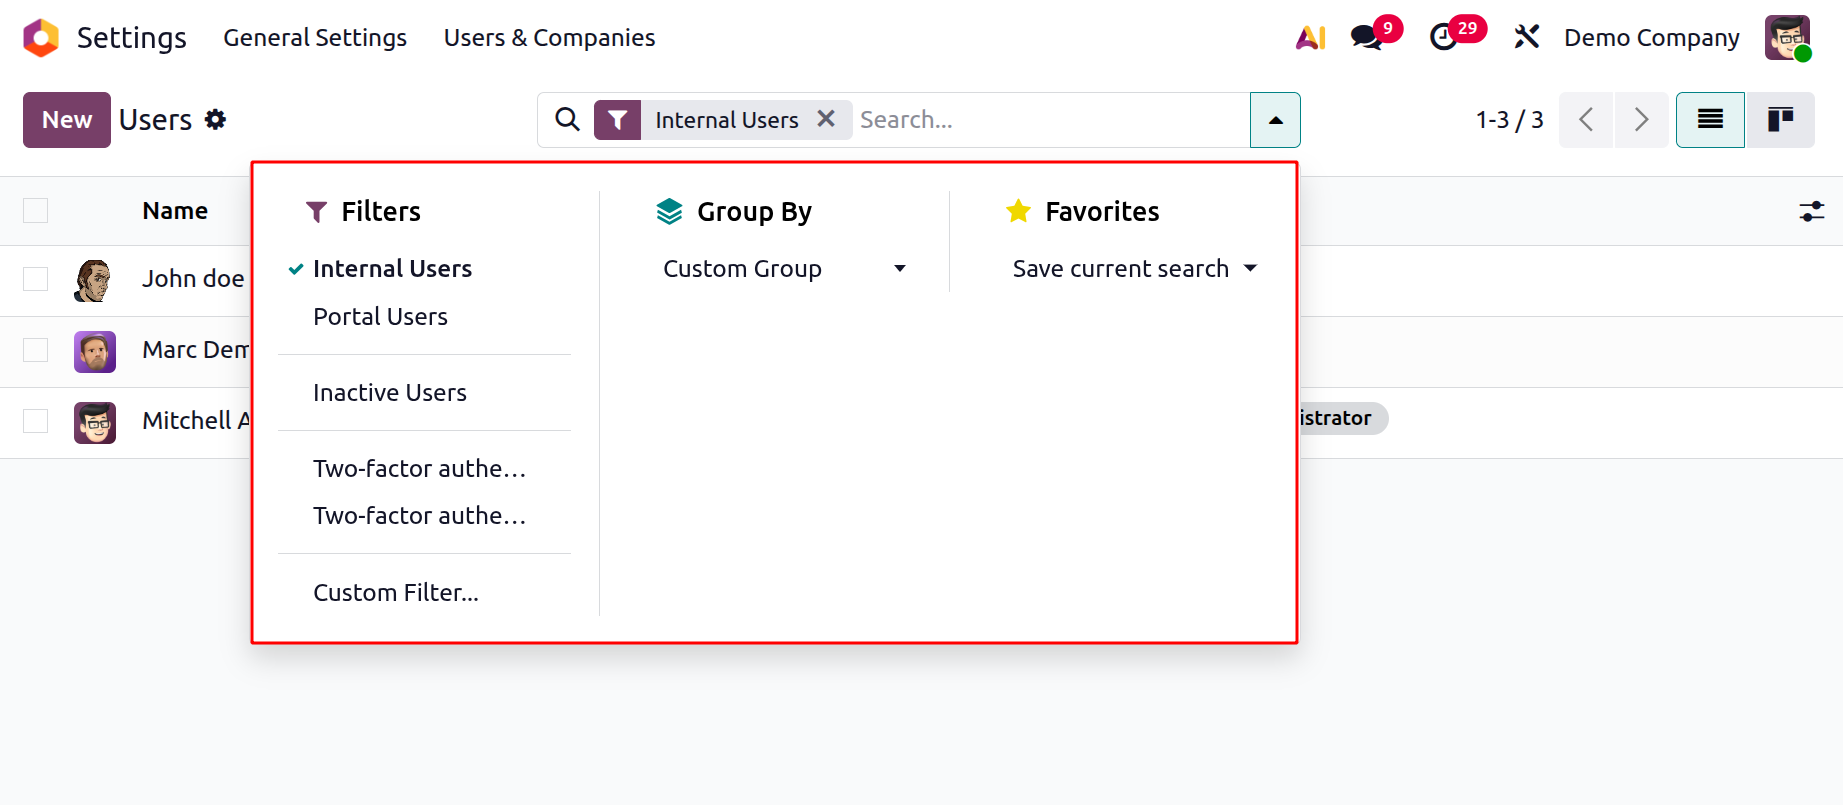
Additionally, grouping, filtering, and locating the information you require will be made much easier by the several sorting choices at the top of the window. The Filters tab provides several preset and customised filtering methods to help you locate your urgent record fast. Internal Users, Portal Users, Inactive Users, two-factor authentication enabled or disabled, and, of course, the Add Custom Filter option are the pre-selected filters that are shown under the Filters tab. The Favourites tab provides options like Save current search, as seen in the figure below. You can create a custom group and sort members by group using the Group By option.
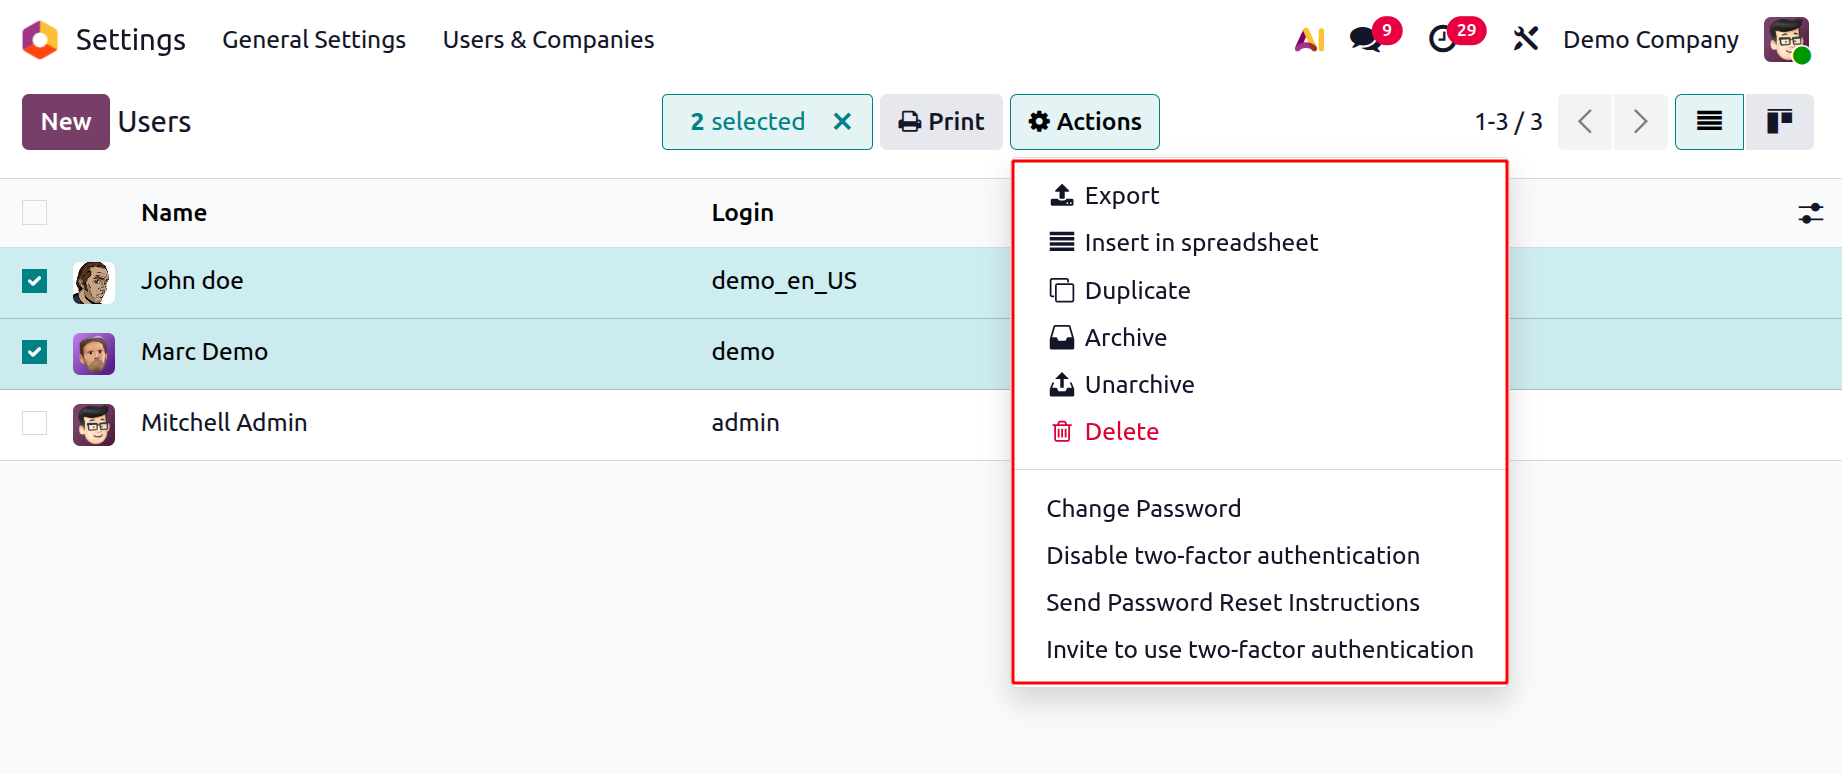
Additionally, you can select a previously established Odoo user by using the checkbox option on each user entry. As shown in the graphic below, when you activate it, the system will control a top Action and Print button. Export, Archive, Unarchive, Delete, Change Password, Insert in Spreadsheet, Disable two-factor authentication, Send Password Reset Instructions, and Invite to use two-factor authentication are all possible with the Action button.
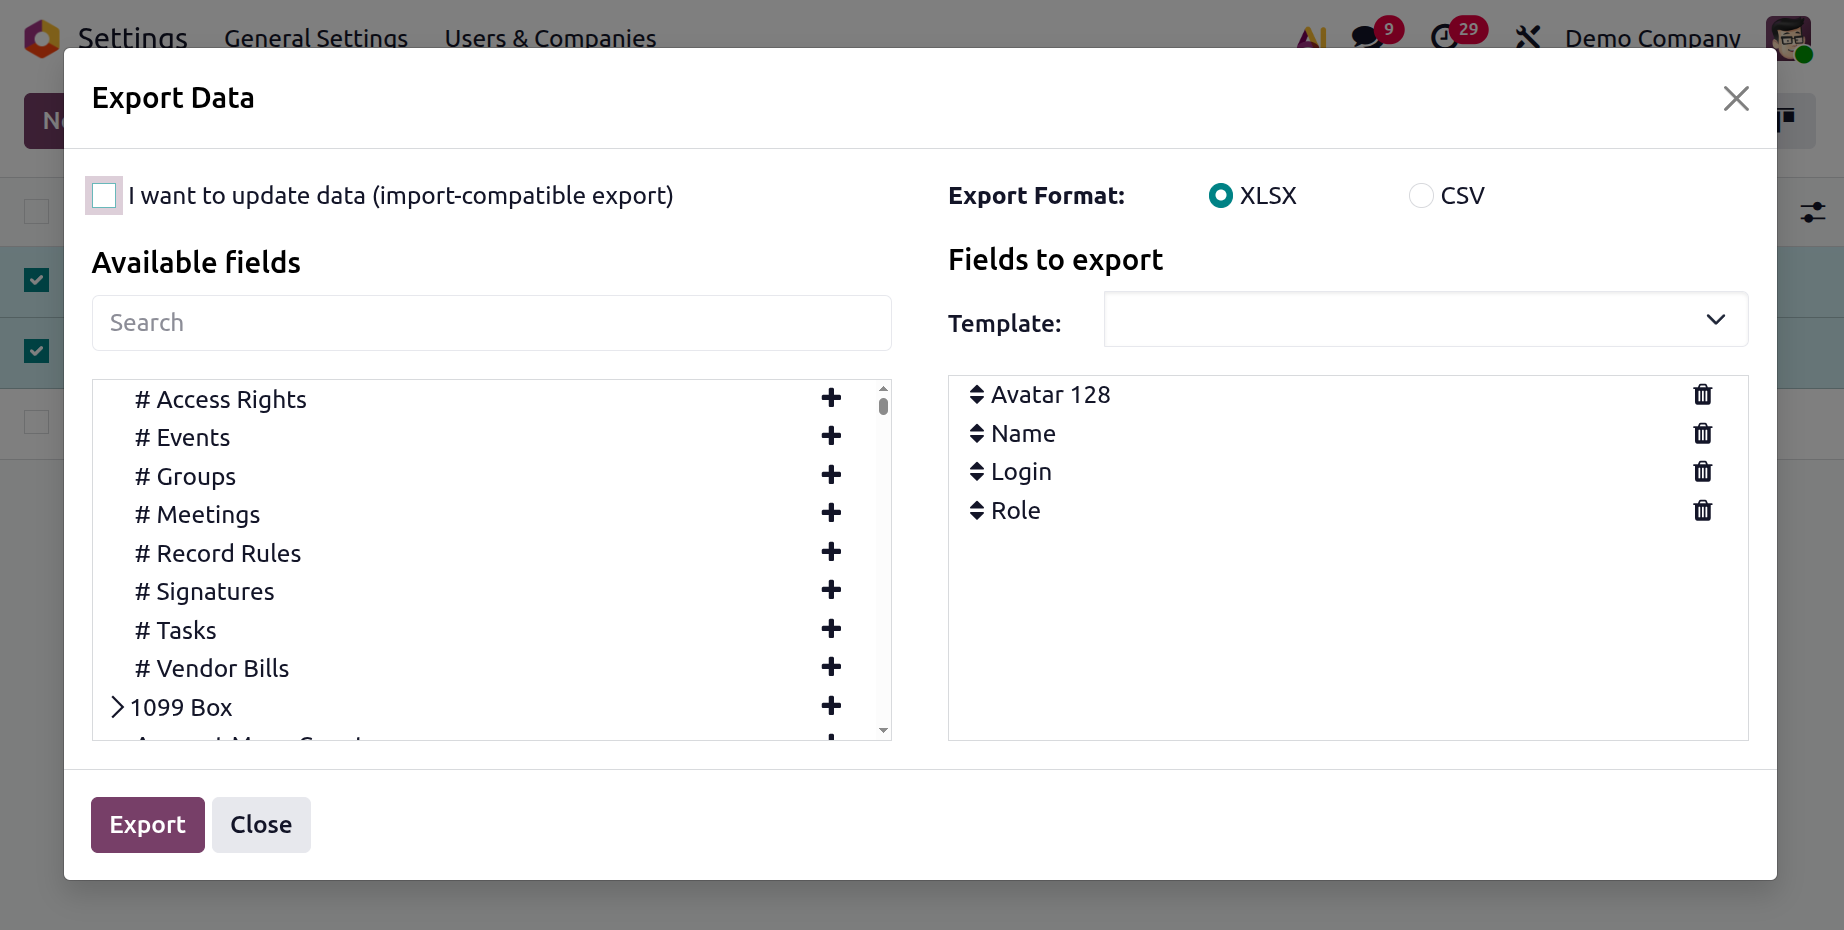
When choosing the Export button, the user can choose to export the fields in either CSV or XLSX format. Before selecting the Export button to begin exporting their data, users can also choose which fields to export.
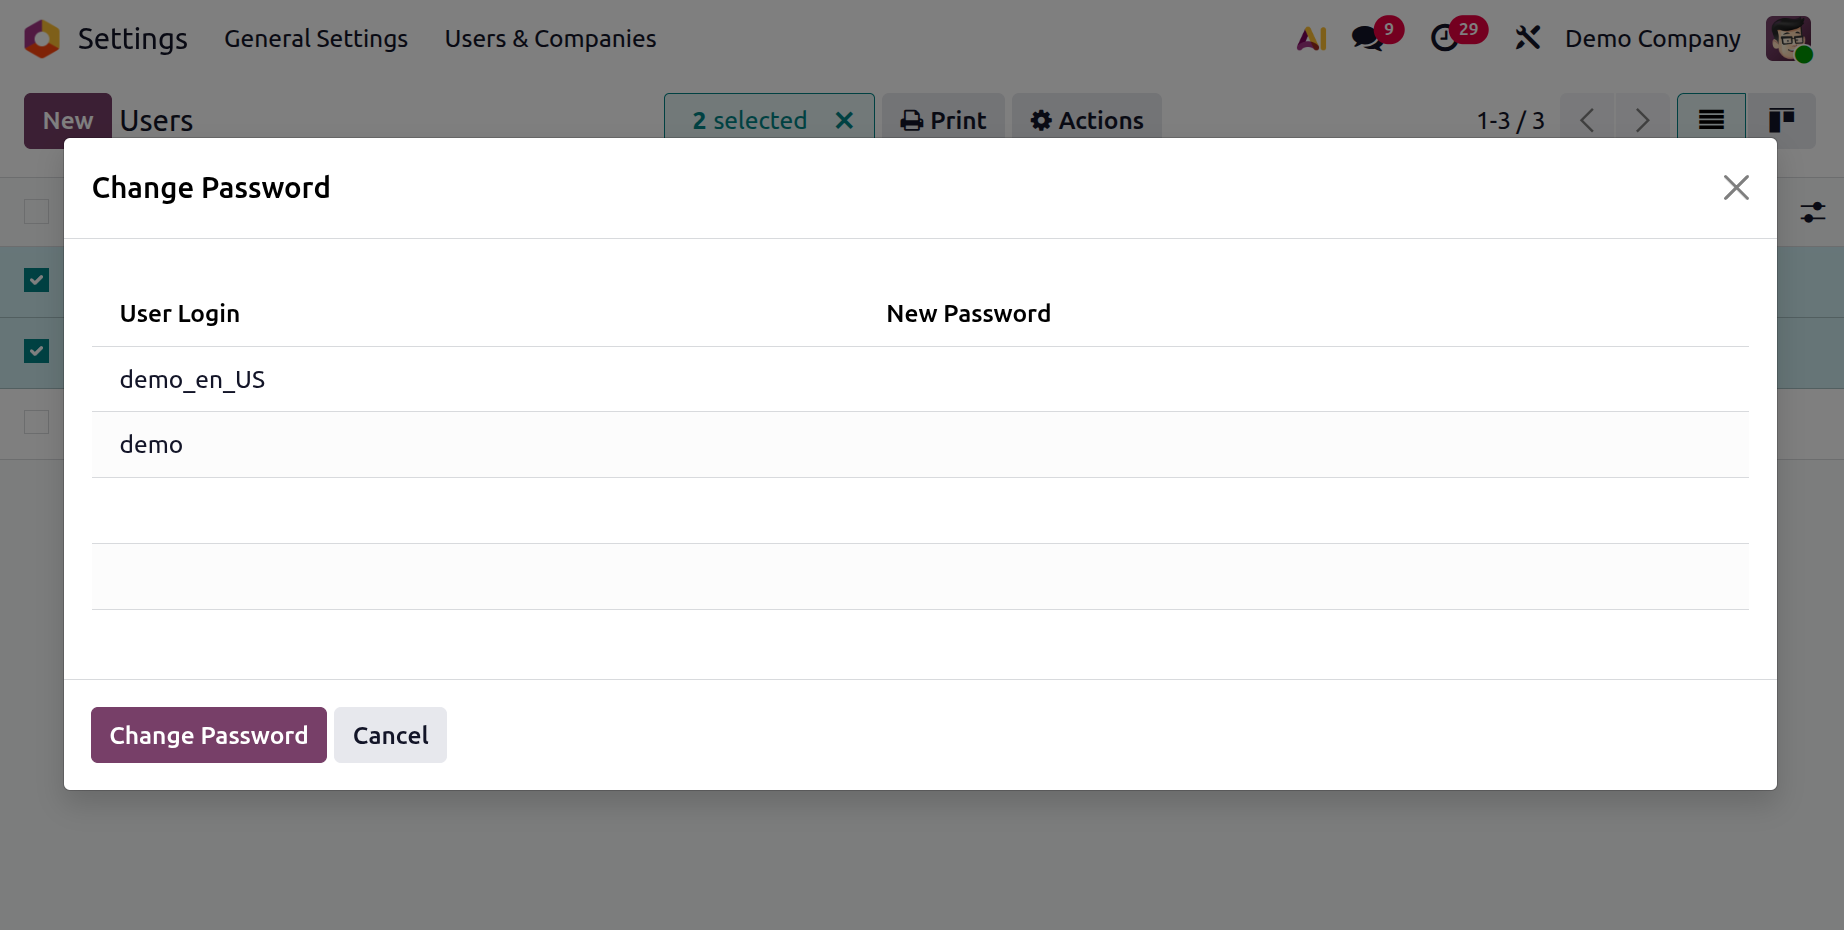
You can archive and unarchive the chosen record using the Archive and Unarchive buttons. Additionally, it can eliminate the selected users by just hitting the Delete button. Choose the Change Password option to modify the user's password. As can be seen below, the Change Password will then show up in a new window.
You can also access the User window in Kanban style by utilising the Kanban view menu option located in the upper right corner. After that, you may see the user's photo and profile details, as seen below.
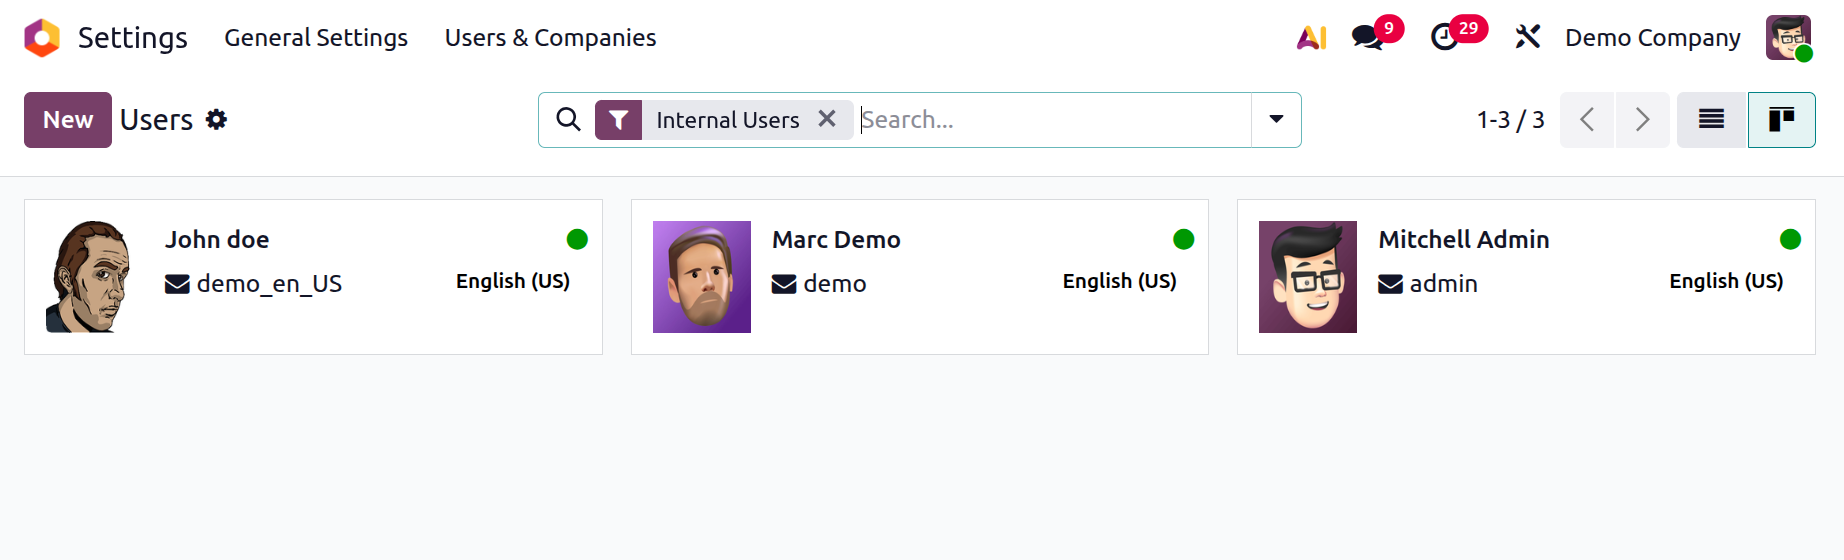
When examining this window, it is clear if a user is online or offline thanks to a green signal in the upper right corner of each user record.
The main administrative features and a comprehensive list of all the users on your Odoo system are provided by the unique User menu of the Odoo platform. Let's move on to the specifics of adding a new user now that we have a solid understanding of the Odoo platform's user management menu.
Creation of a New User
As we discussed in the last part, we can create new users using the New button. One click on the New button opens the creation form, which contains all the data needed to create a new Odoo user. This creation form allows you to set up as many users as you need to manage your business. Examine the creation window first.
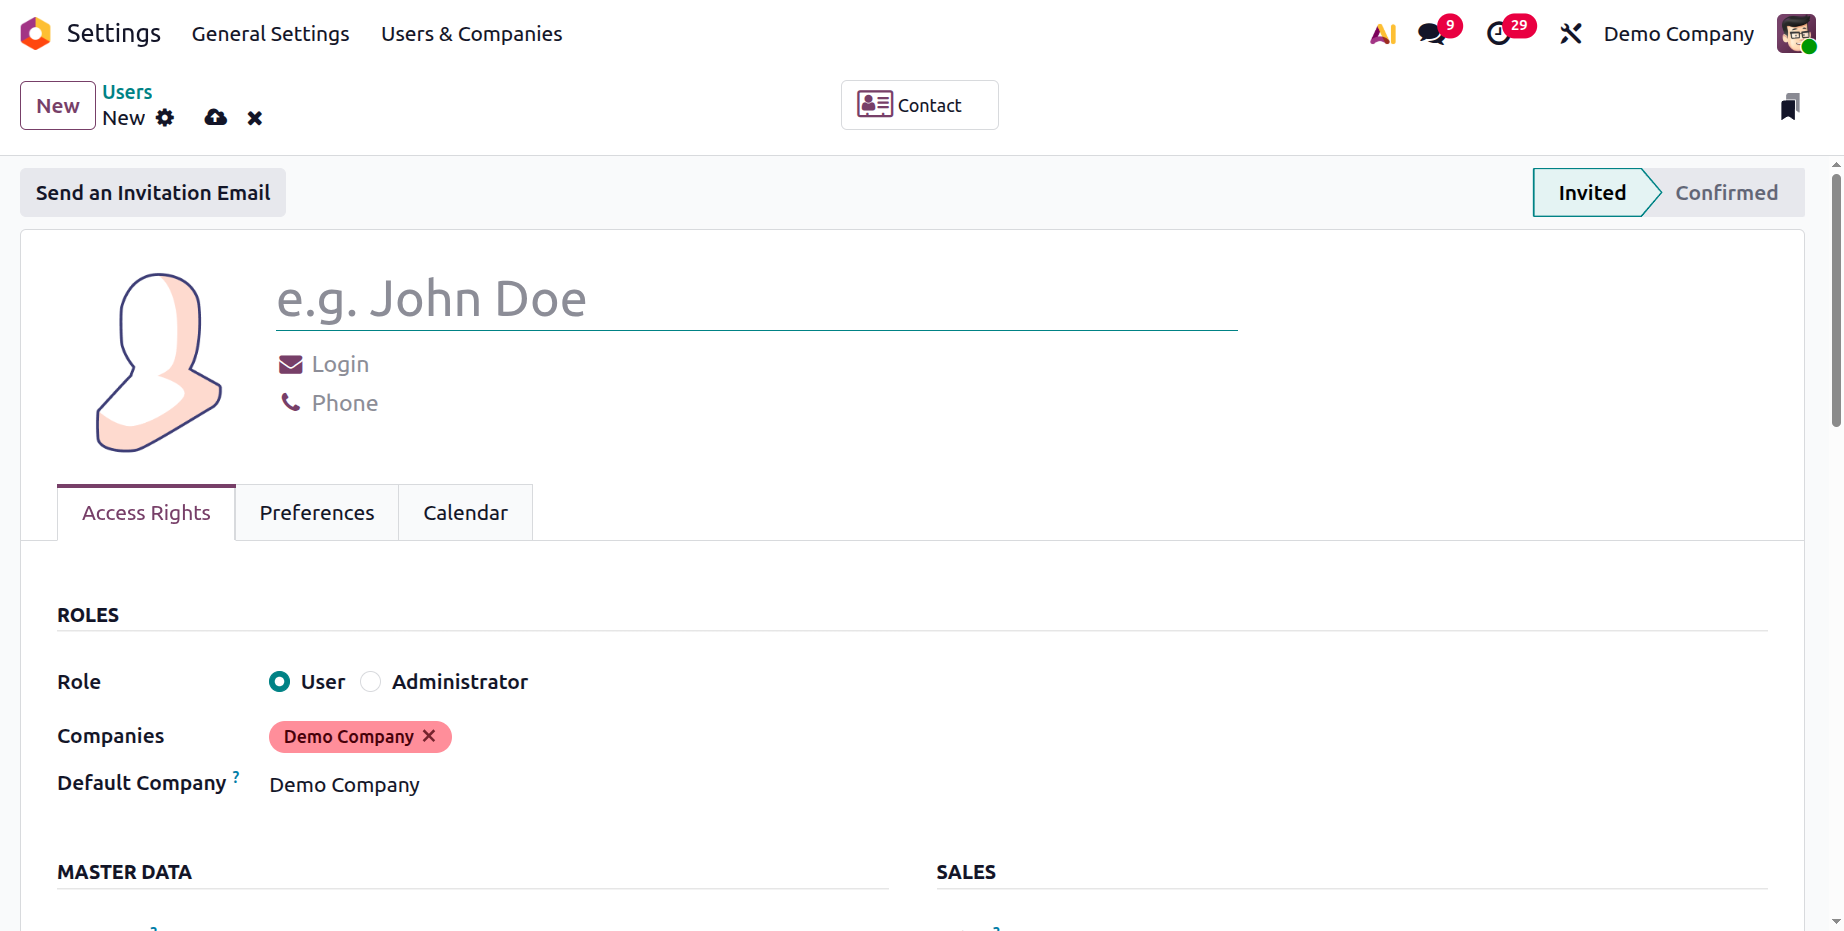
On this User Setup form, you can first enter the user's name in the Name box. The user can then enter their email address in the appropriate field. The user's photo can also be uploaded in the designated area. The generated user's Role, Companies, and Default Company can be configured under ROLES. The Settings are not accessible to the user with Role as User. They are unable to modify either the user or the company settings.
After completing these fundamental configurations, you can modify the user's access permissions and preferences under the Access Permissions and Preferences tabs, respectively. Let's discuss each of the tabs that are provided below.
Access Right Configuration
You can then talk about the user's potential for sales. Three options are available in the Sales area's dropdown menu: Administrator, User: All Documents, and User: Own Documents Only. The user can examine his personal information in the Sales application if you select the first option. In the second scenario, each user's sales application record will be visible to the user. Both statistics information and the sales configuration will be available to the user in the Administrator's scenario. Under Partner Commissions there is access No. Own Documents Only and All Documents. The dropdown menu beneath the Point of Sale box now includes User and Administrator options. With features like automatic pricing list generation, streamlined payment mode encoding, and quick sale encoding, you can optimize your point of sale from the outset.
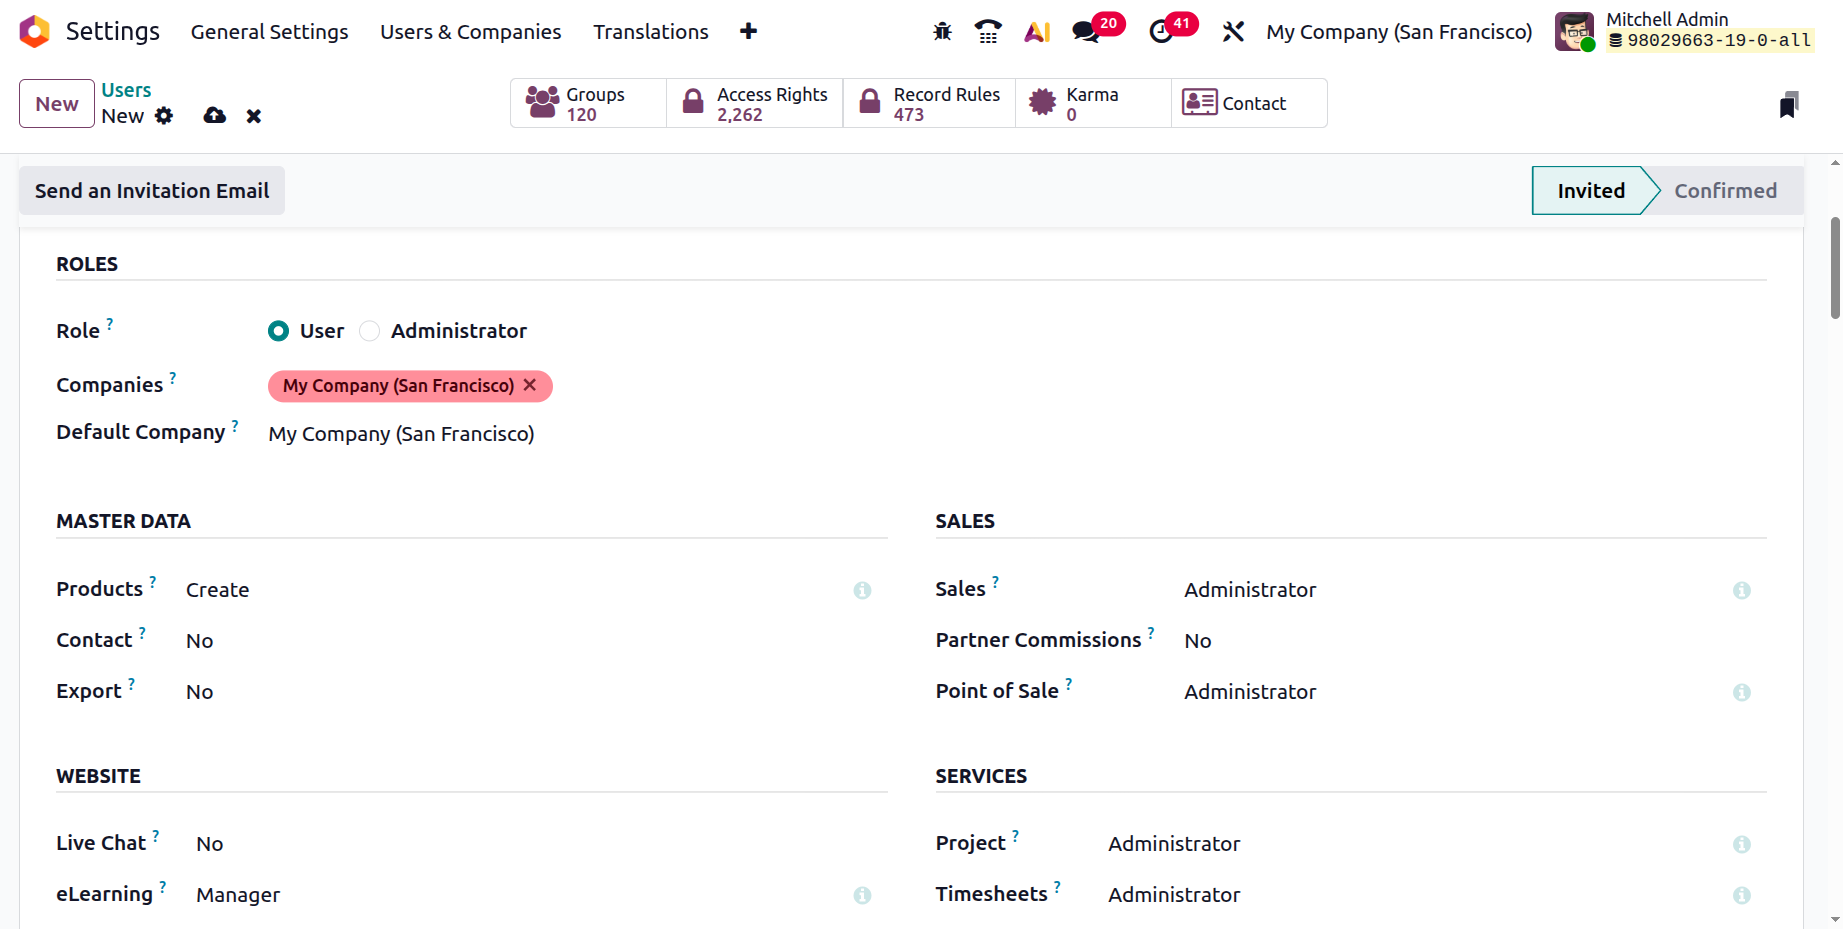
Under Master Data includes Products, Contact and Export. The Products two access rights are Create and View. then in Contacts the rights are No and Creation. The last is Export contains two rights No and Allowed.
The Live Chat, eLearning, and Website fields follow in the Website section. If the Live Chat box is set to Administrator, the user can delete the help channels. If the user is assigned a support channel, they can remove it. Similarly, in the eLearning domain, you may give the user the title of Manager or Officer. 'Editor and Designer' and 'Restricted Editor' are the options available under the Website section.
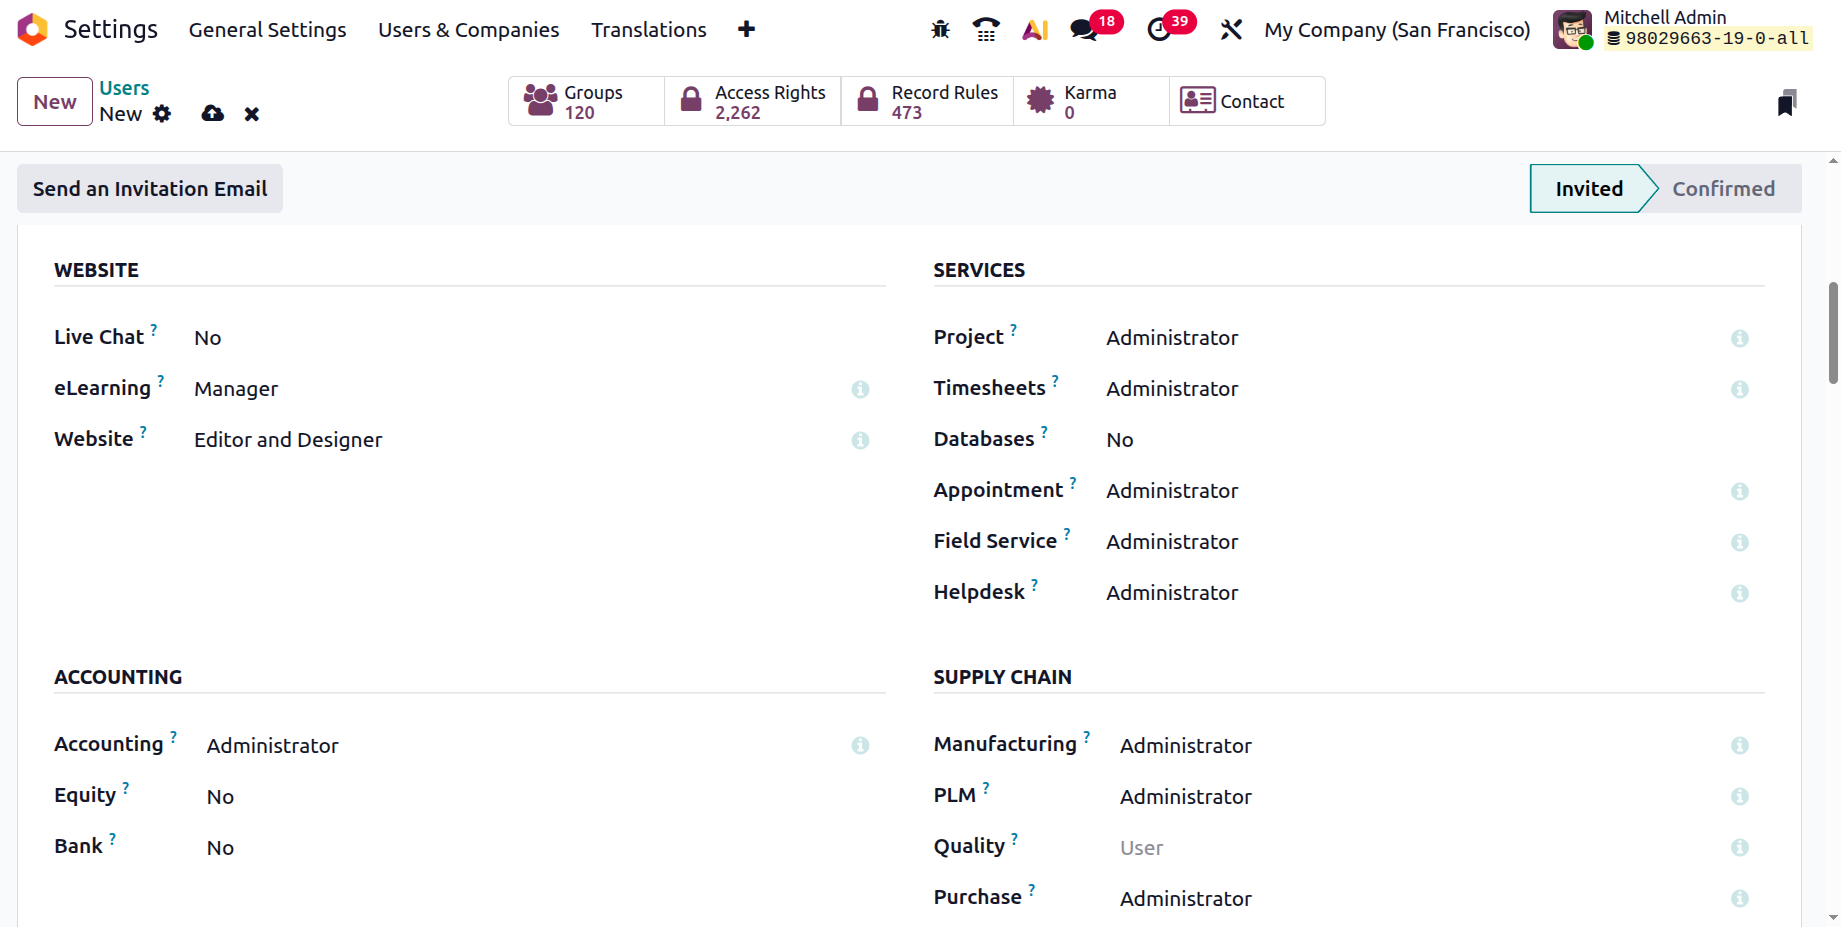
The Project, Timesheet, Databases, Appointment, Field Service and Helpdesk can then be defined in the Services section.
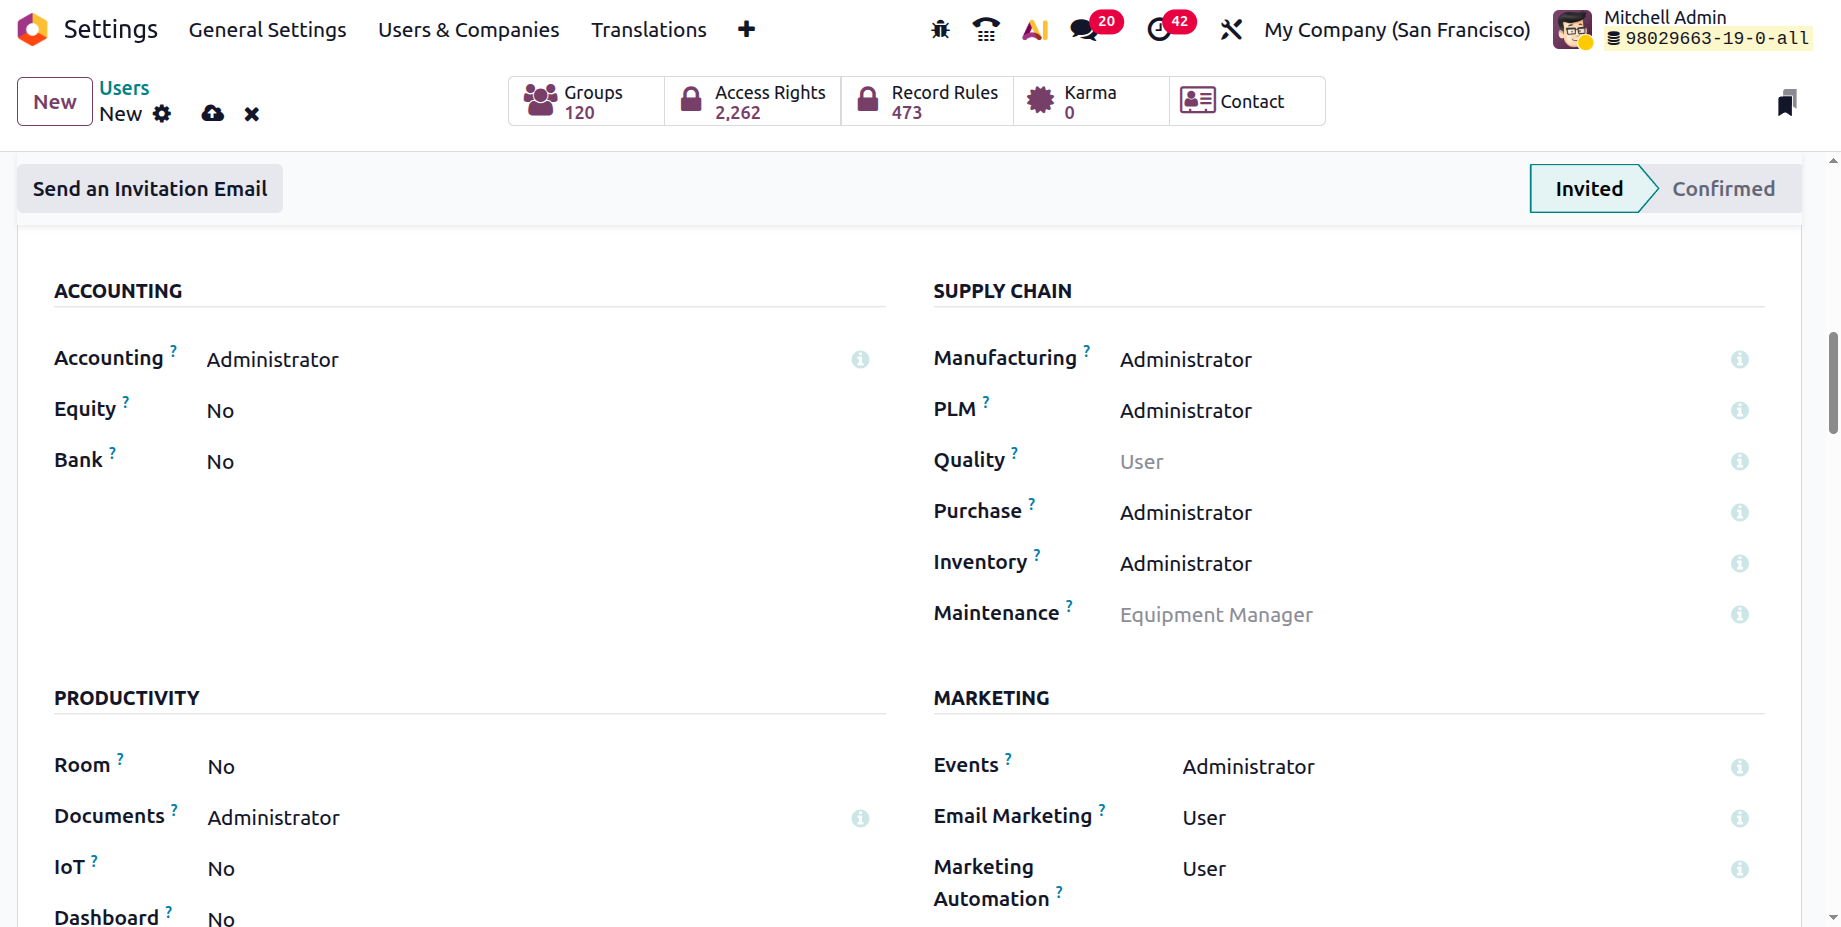
If you describe the accounting-related elements after that, handling accounting requests will be easier. You have several options, including No, Read-Only, Invoicing, Invoicing & Banks, Bookkeeper and Administrator, we will go into more depth about these later. In Equity there are three access rights No, Viewer and Manager. Next is Bank and the rights are No and Validate bank account.
The Supply Chain includes Manufacturing, PLM, Quality, Purchase, Inventory and Maintenance. The manufacturing attributes of the user can also be classified as Administrator or User in the corresponding field. Additionally, you can choose between Administrator and User depending on the particular user in the Inventory and Purchase sections, which are used to handle stock activities and inventory operations.
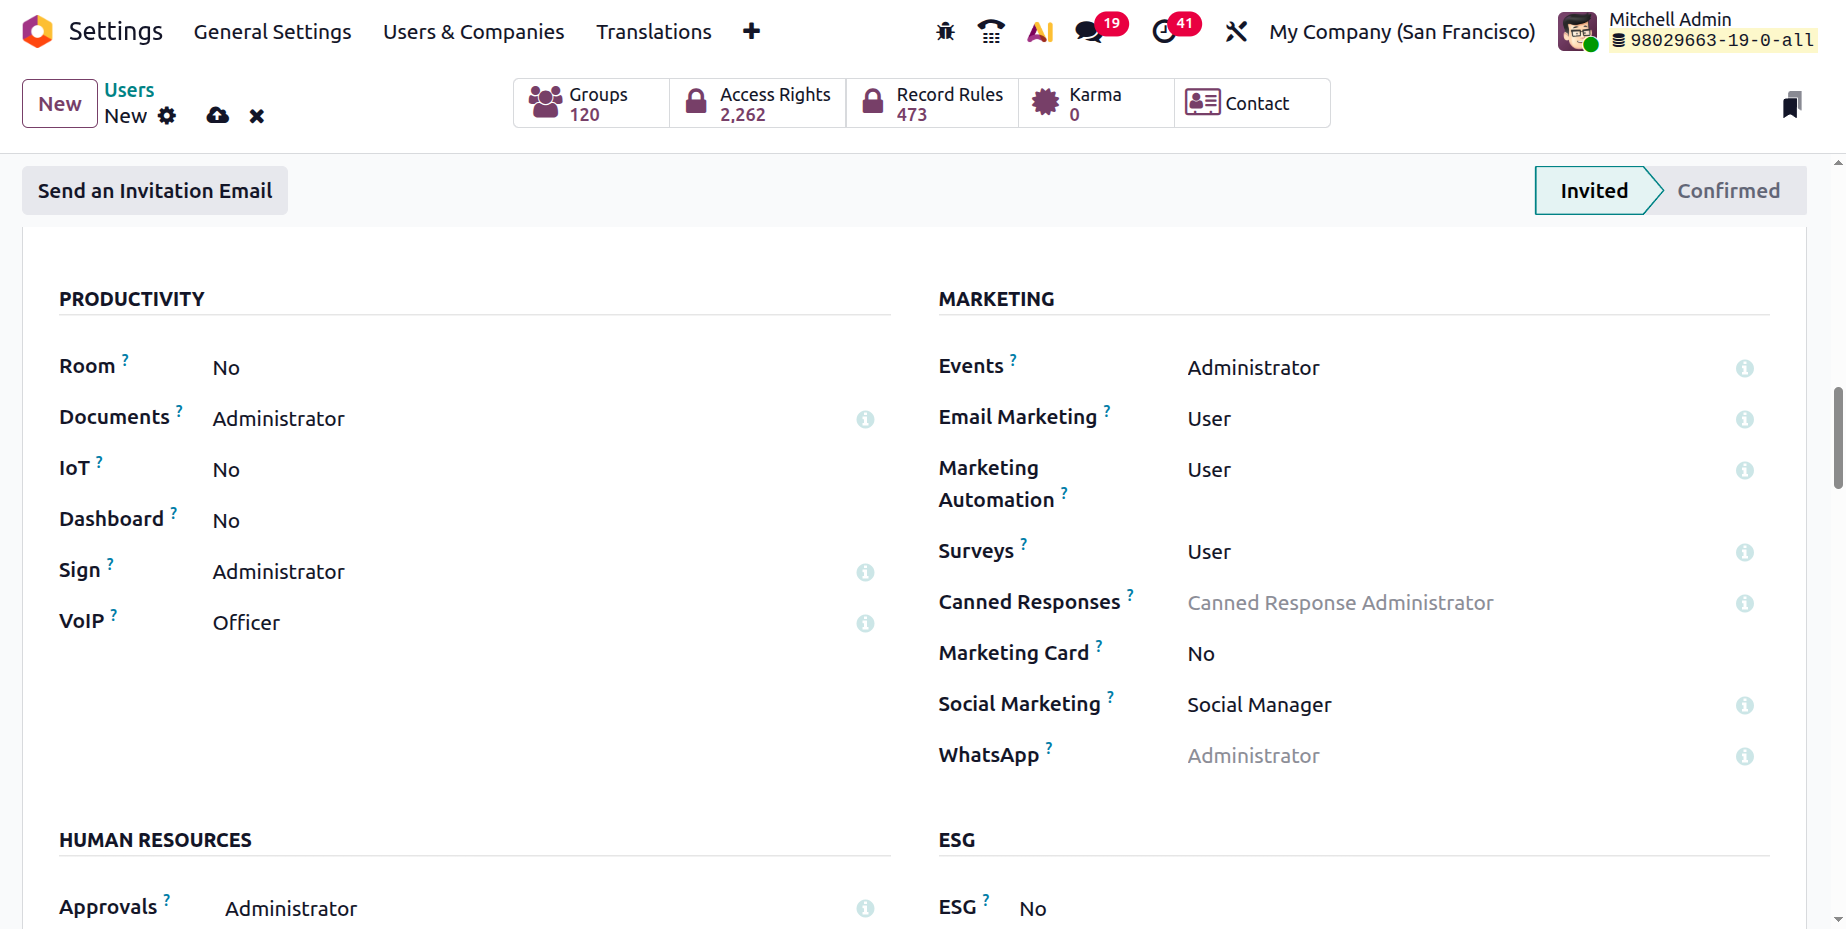
You can define the essential elements of Productivity which include Room, Documents, IoT, Dashboard, Sign and VoIP.
You can also explain the essential elements of the Marketing domain using the sections on Events, Email Marketing, Marketing Automation, Surveys, Canned Responses, Marketing Card, Social Marketing and WhatsApp.
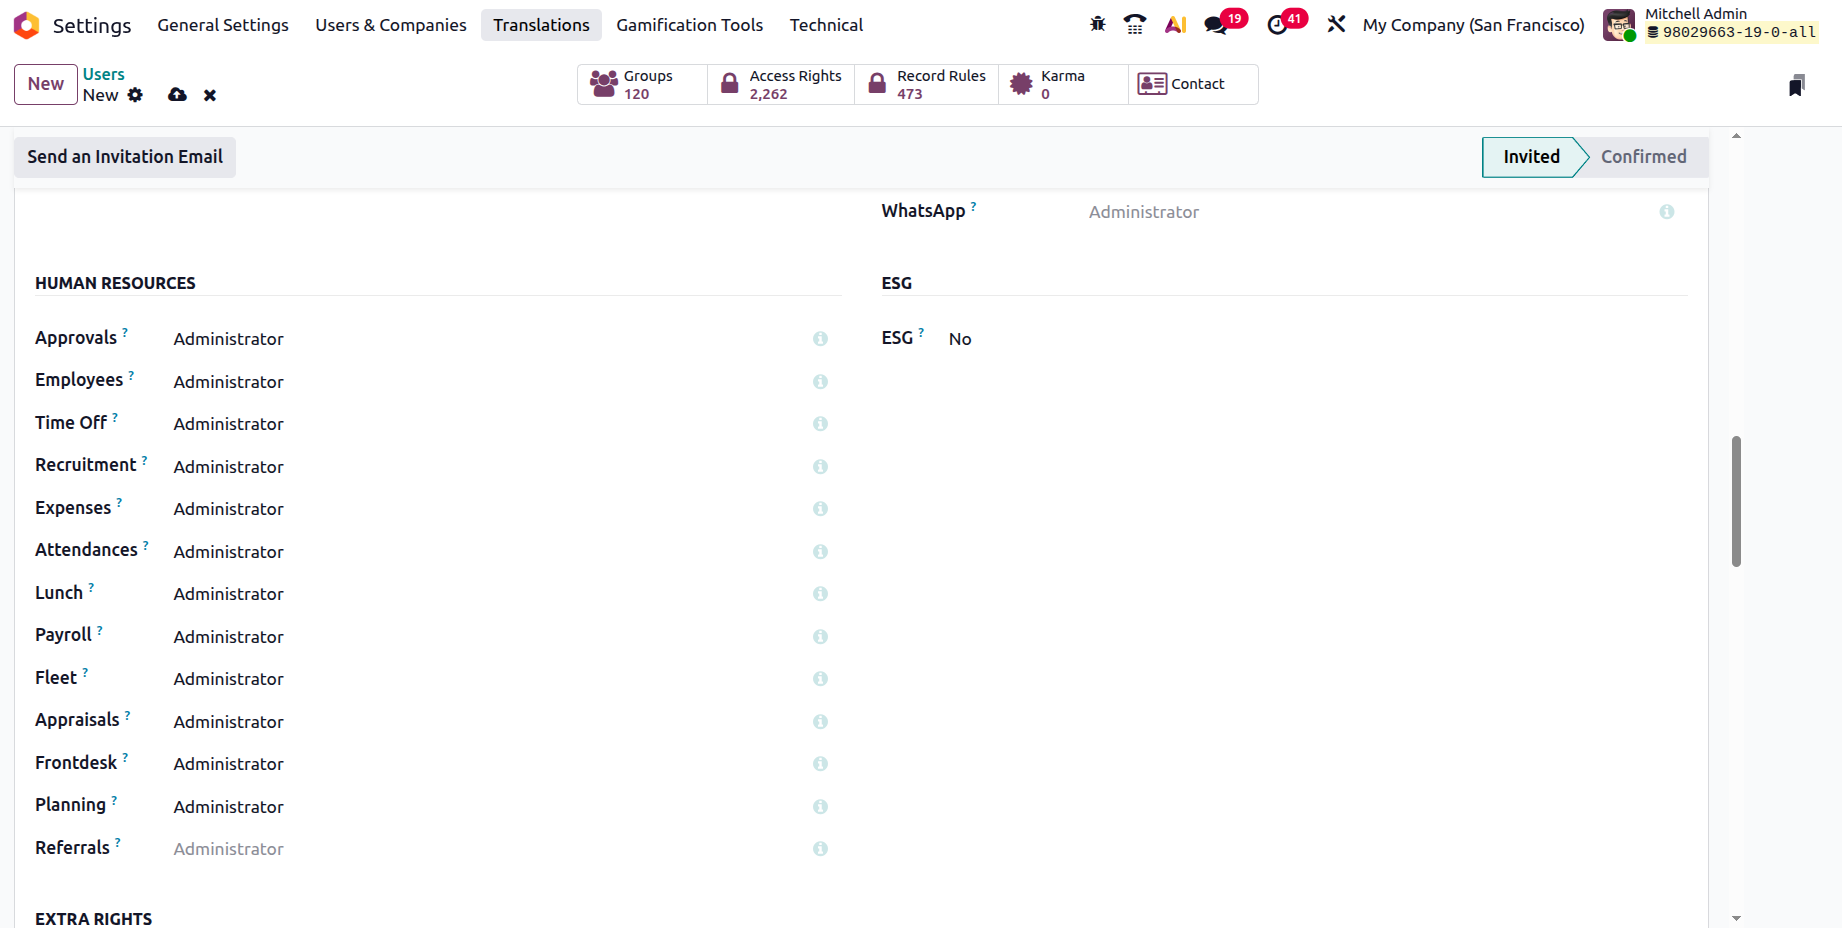
The Human Resources section then displays a number of fields, such as Approvals, Employees, Time Off, Recruitment, Expenses, Attendance, Lunch, Payroll, Fleet, Appraisal, Frontdesk, Planning and Referral. Then the last one is ESG.
Boolean fields are now accessible in the Technical area and can be activated or disabled according to the user. A warning may be issued for a partner (Stock), a product, a customer (Purchase), and several other things. Access to private addresses, up-to-date pricing lists, the ability to define fiscal years that are either longer or less than a year, basic price lists, the ability to instantly generate a new quote based on tasks, the reduction of lines, delivery slips, and the display of lot and serial numbers. On the sales order and any related invoices, display the Incoterms. Manage several units of measurement, restrict template access, lock verified purchases, Oversee several stock owners, bulk sending programs, packages, product variations, and storage classifications. Create quote templates, print GS1 barcodes for lots and serial numbers, grant referrals, and provide purchase receipts to accountable users. Display recurring revenue and customer feedback. B2B tax display, Time Off Responsible, Default Unlocked, and Operation Dependencies are useful features.
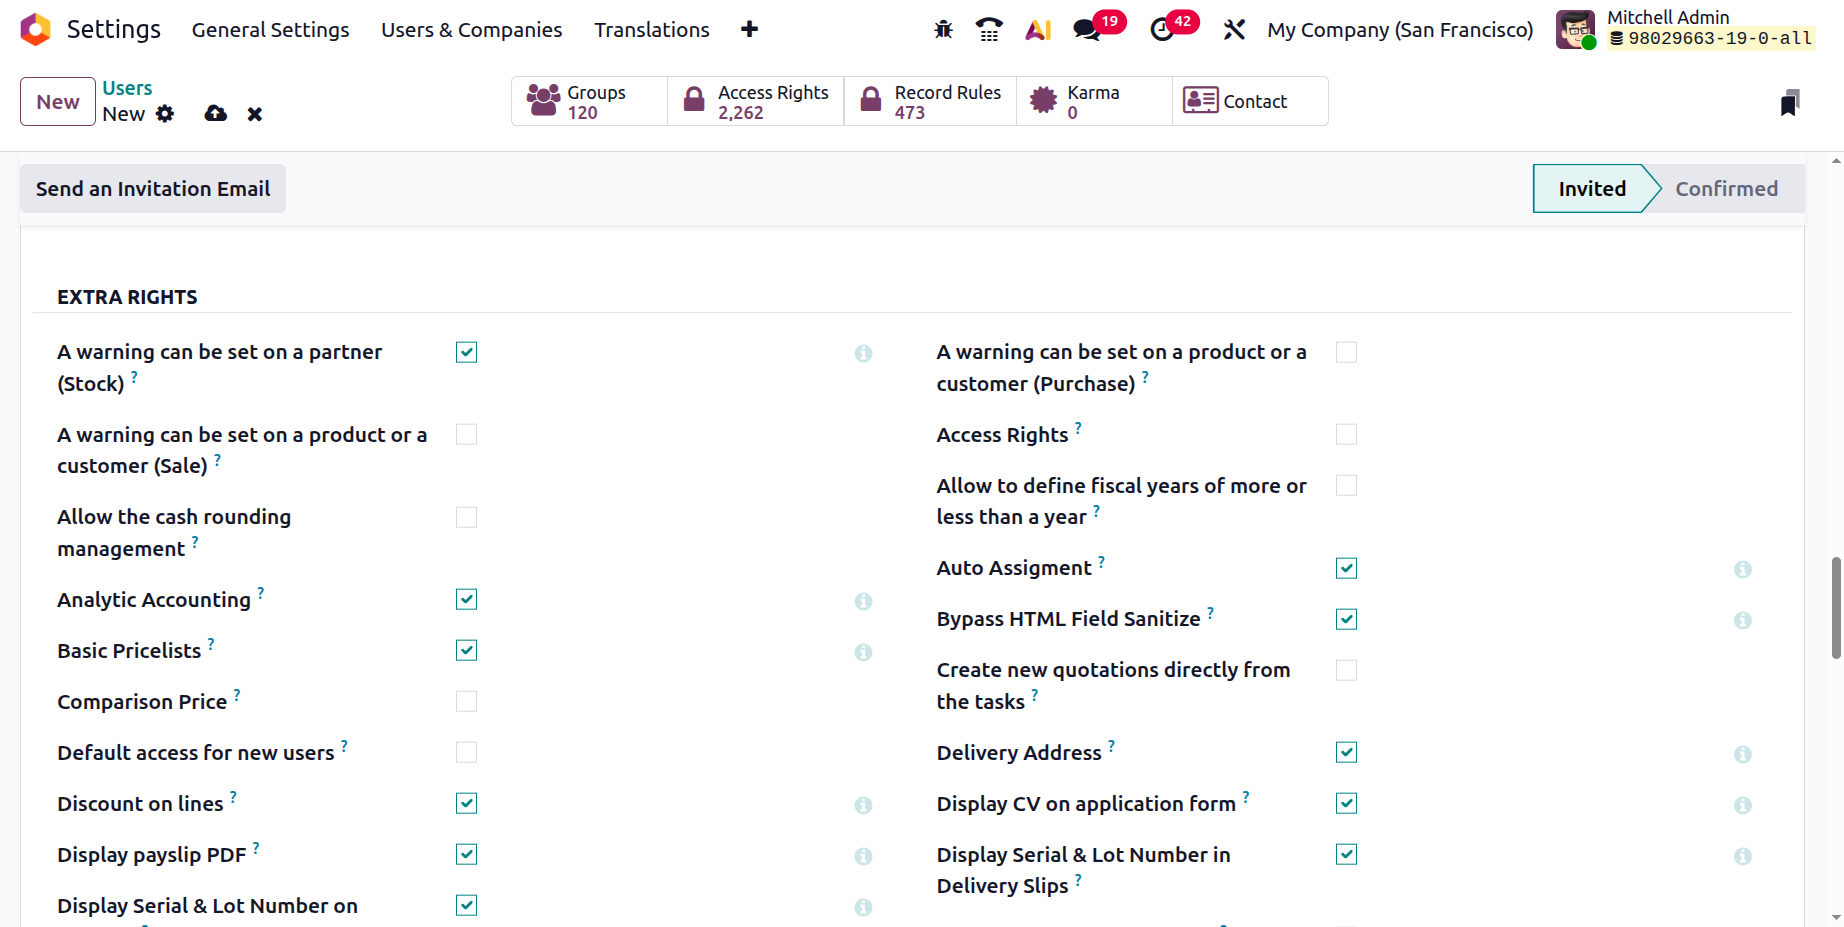
Make use of the repeating tasks, subtasks, and reception report. Utilise time billing A warning could be applied to a partner (stock), a product, or a customer (sell), among other things. availability of the export function Clear serial and lot numbers on invoices, pricing comparison, shipping address, cash management, analytical accounting, and resume display on apps are all made feasible. Activate the signature order editor in Mail Templates.
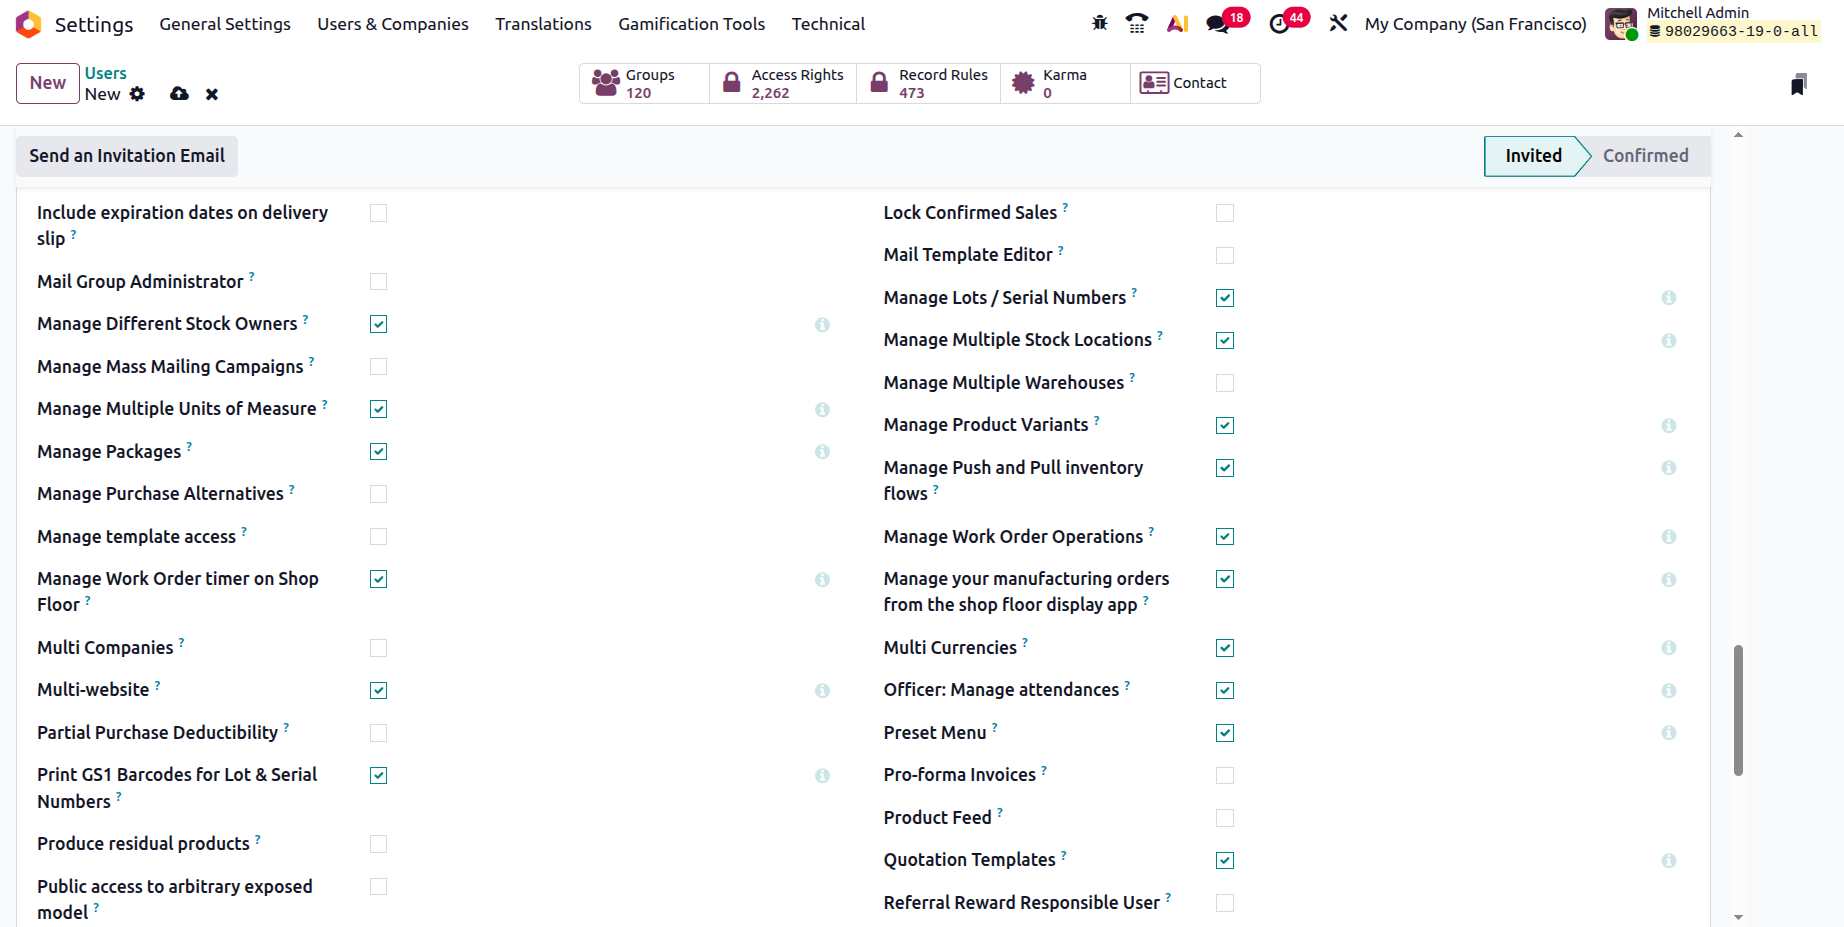
Oversee product packaging, lots/serial numbers, several stock locations, multiple warehouses, push and pull inventory flows, and work order operations. Proforma invoices, several websites, an order receipt, a job interviewer, signature-required delivery orders, Send an automated email reminder to verify delivery. Display the Lead Menu SLA Guidelines; please use the UOM Price Display for B2C and eCommerce; utilise benchmarks for the Tax Display; and apply the project rating. Make use of the Manufacturing Orders, Project Stages, and Reception Report. Utilise wave pickings and task dependencies.
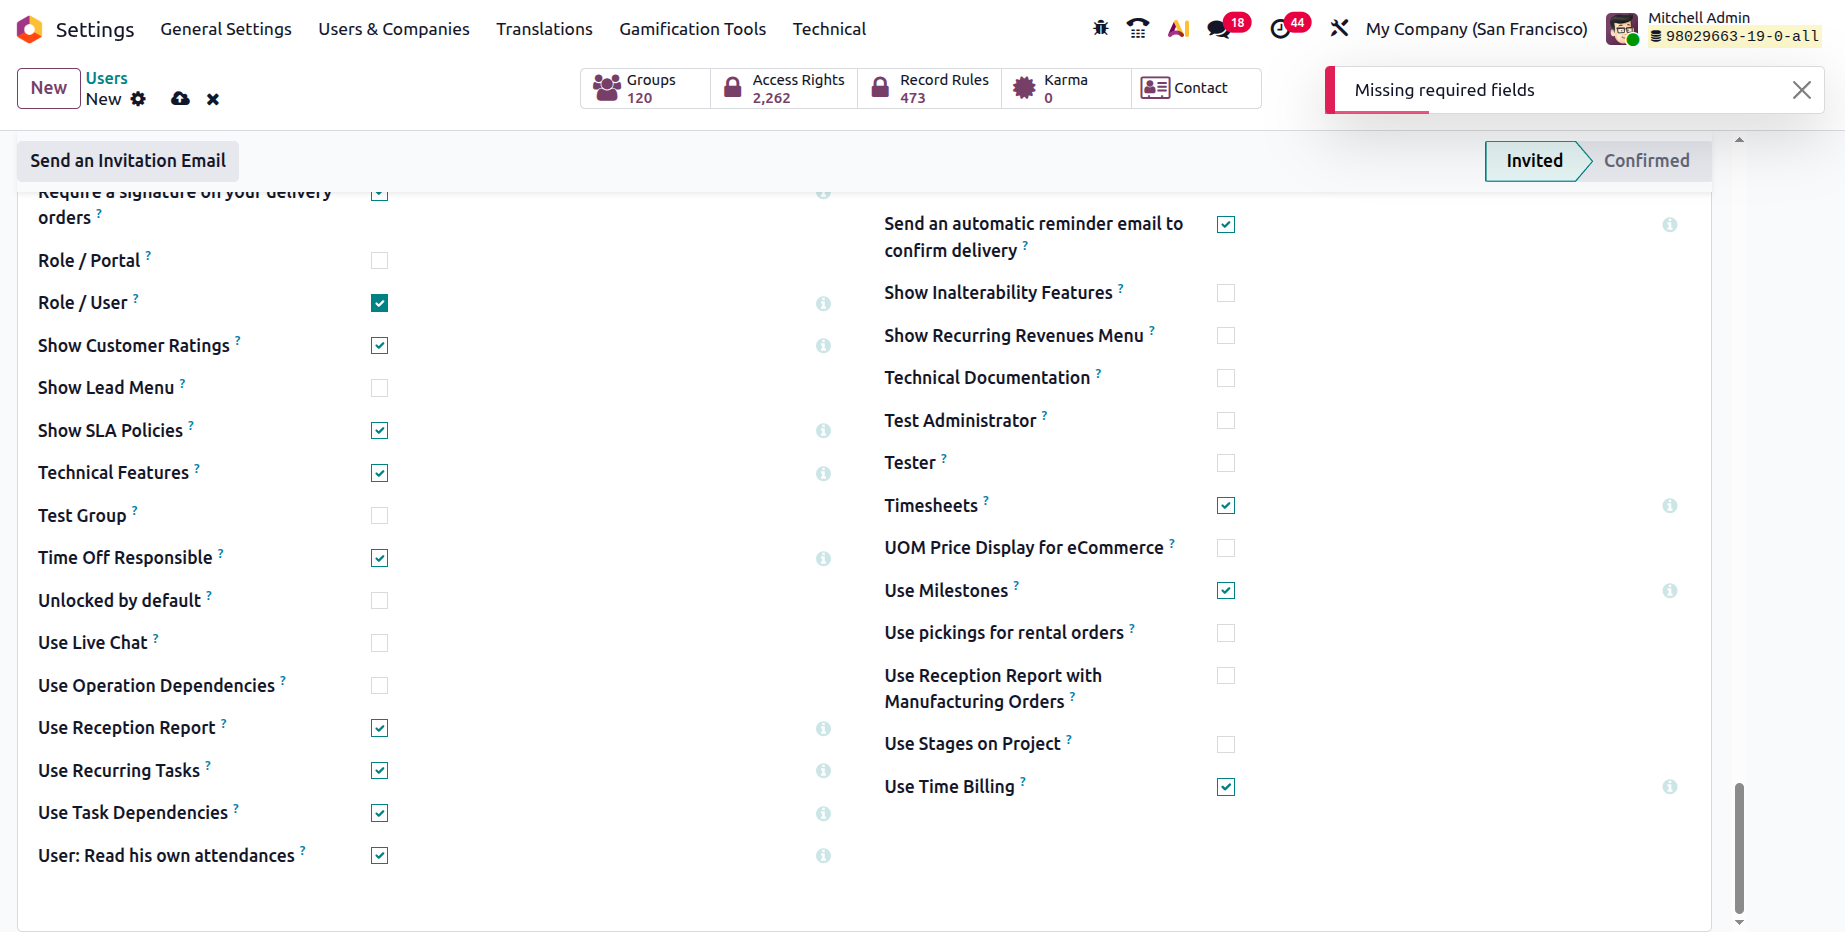
The other permissions categories, such as Contact Creation and Multi-Currencies, can be enabled or deactivated using similar procedures. The relevant user will be able to control all of these actions on your platform if the Technical and Access Rights aspects are set up. Furthermore, just the user's rights on your Odoo platform will be assisted by each of these setup elements.
We can proceed to the next section, which will deal with configuring the preference selections, after discussing how the User's Access Rights description functions and is currently kept.
Preference Options Configuration
Let's move on to the Preferences tab, where you can see the options displayed in the following image, after talking about the options on the Access Rights page of the Users creation window.
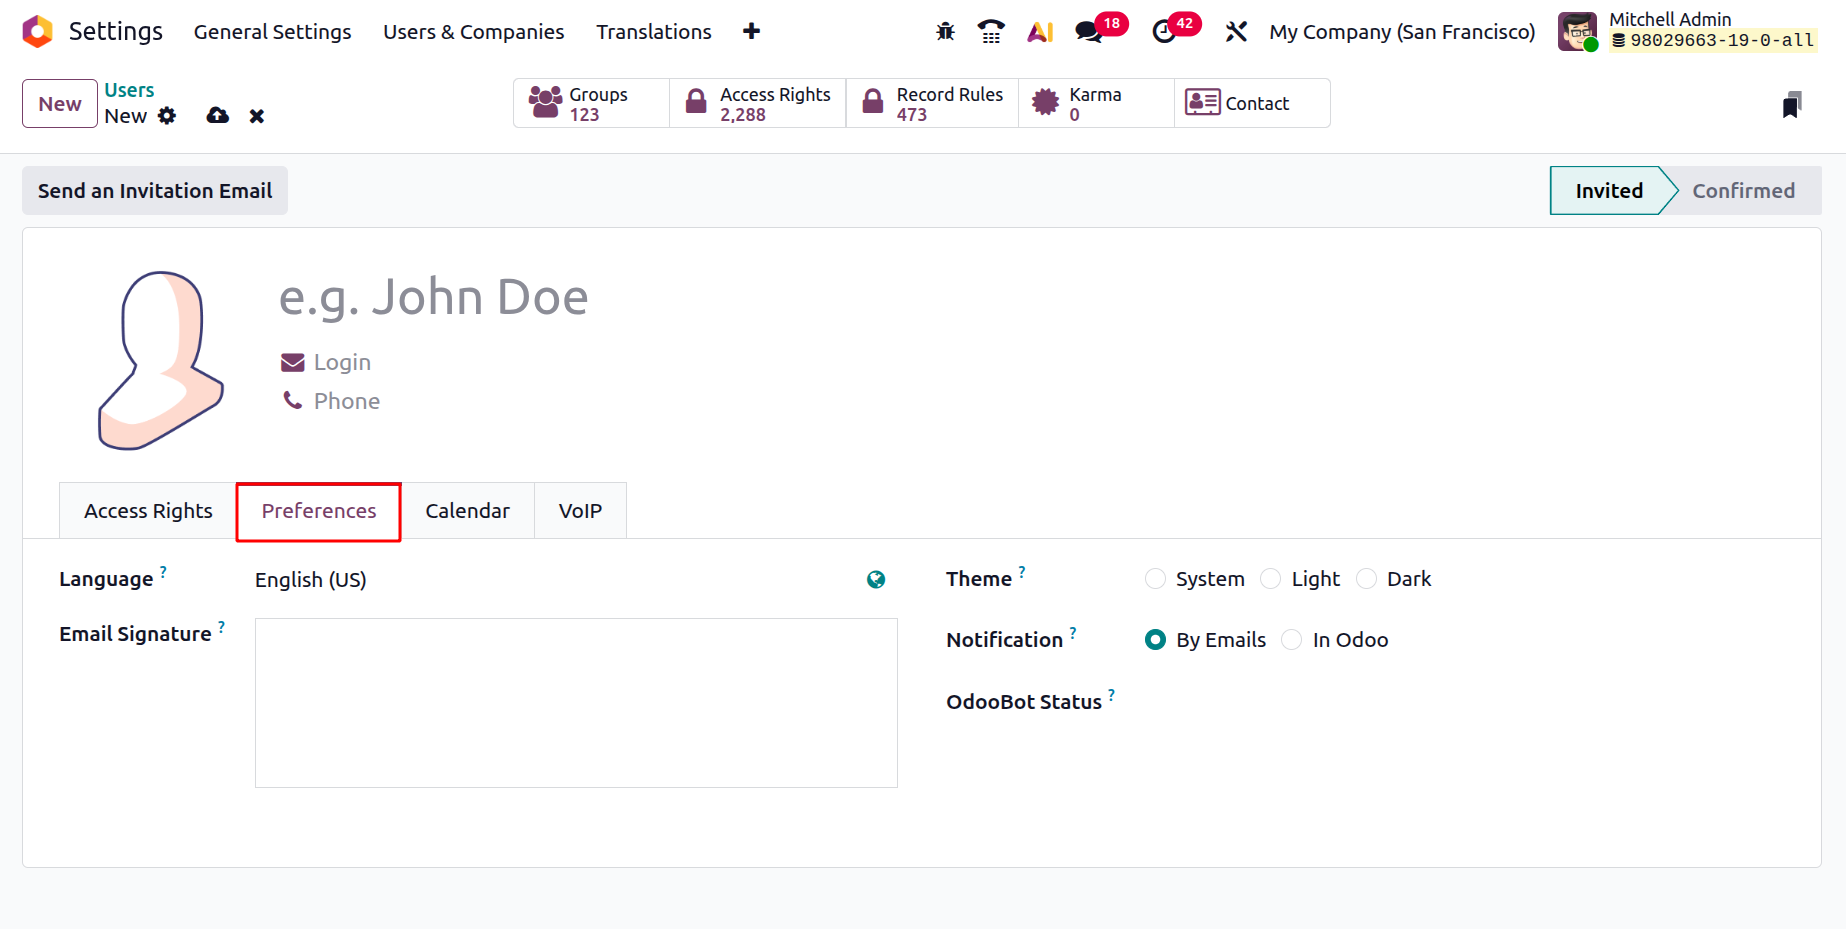
There are several fields on this Preferences tab. You can first choose your favourite language by entering it in the Language area in order to have all emails and documents sent to this contact translated into that language. The methodology for handling Notification is another option. Because of this, user operation notifications can be handled by Emails or In Odoo. Notifications will be sent to your (the user's) email address if you select emails (Handle by Emails). For users who don't use the Odoo platform frequently because they work for a company that doesn't really profit from it, this means that turning on this option will notify the user to the associated email IDs. The notifications will show up in your Odoo mailbox in the second scenario (Handle in Odoo).
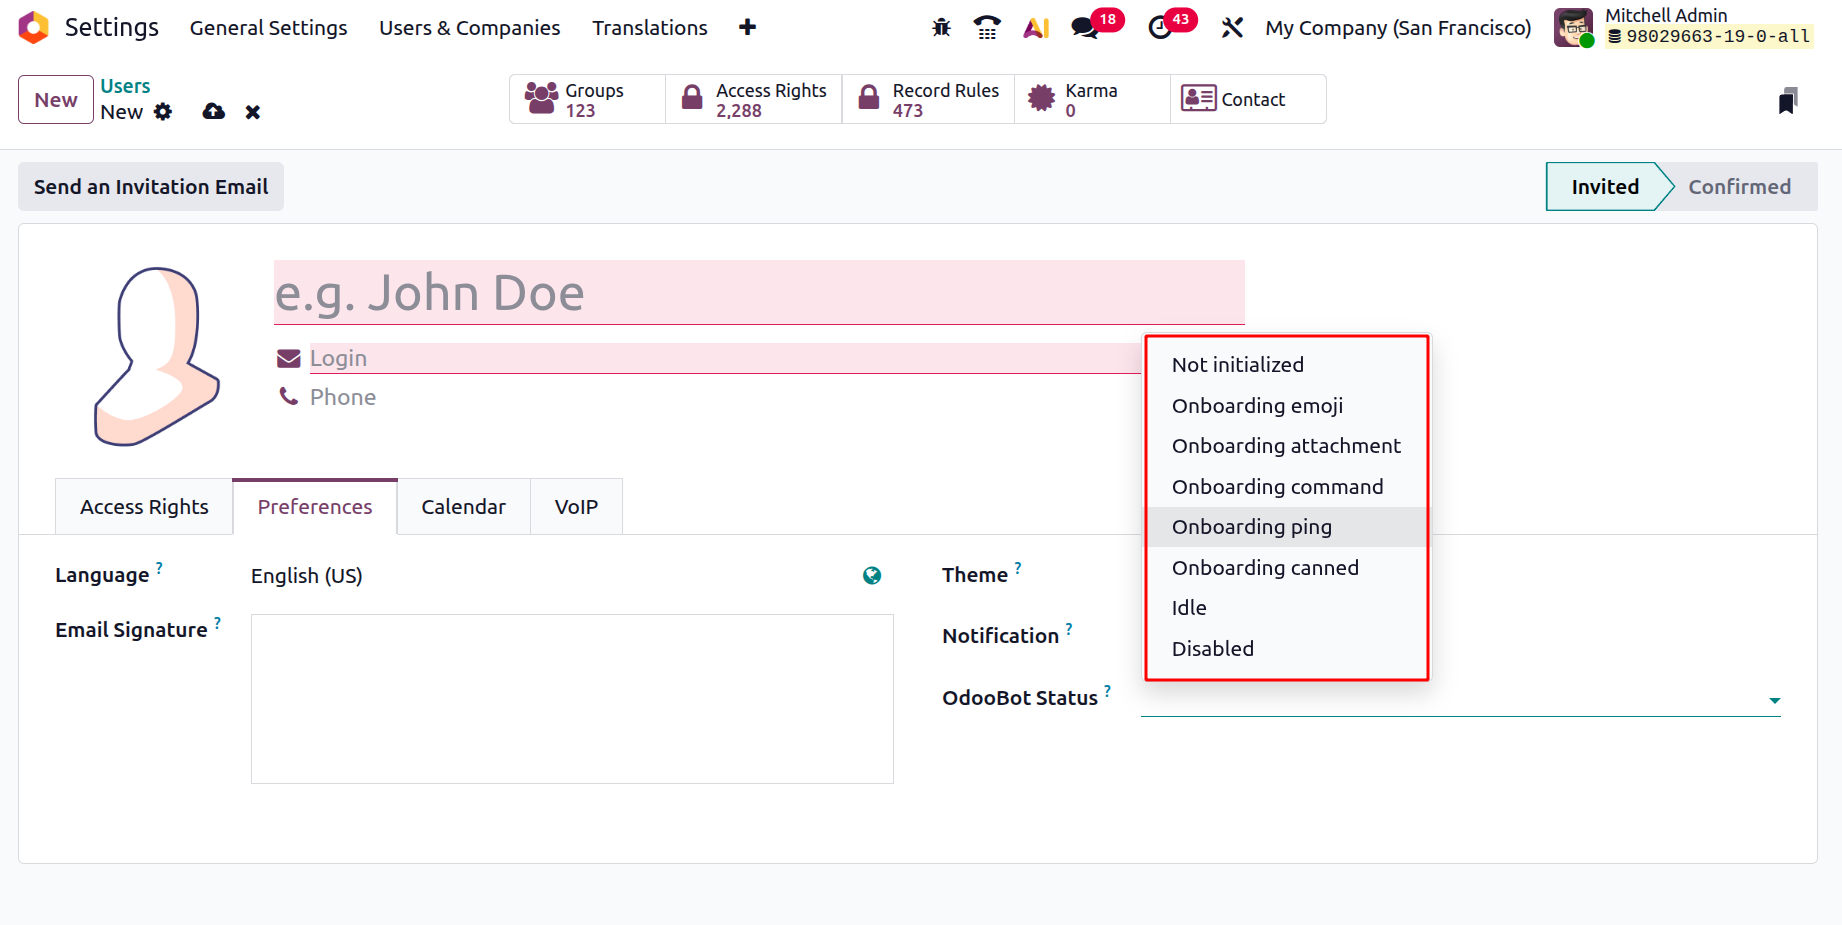
As administrators, you can also provide the OdooBot account status of a specific user. It can be customized in a variety of ways, and the dropdown menu will offer every option.
- Not Initialized
- Onboarding emoji
- Onboarding Attachment
- Onboarding command
- Onboarding ping
- Idle
- Disabled
- Onboarding Canned
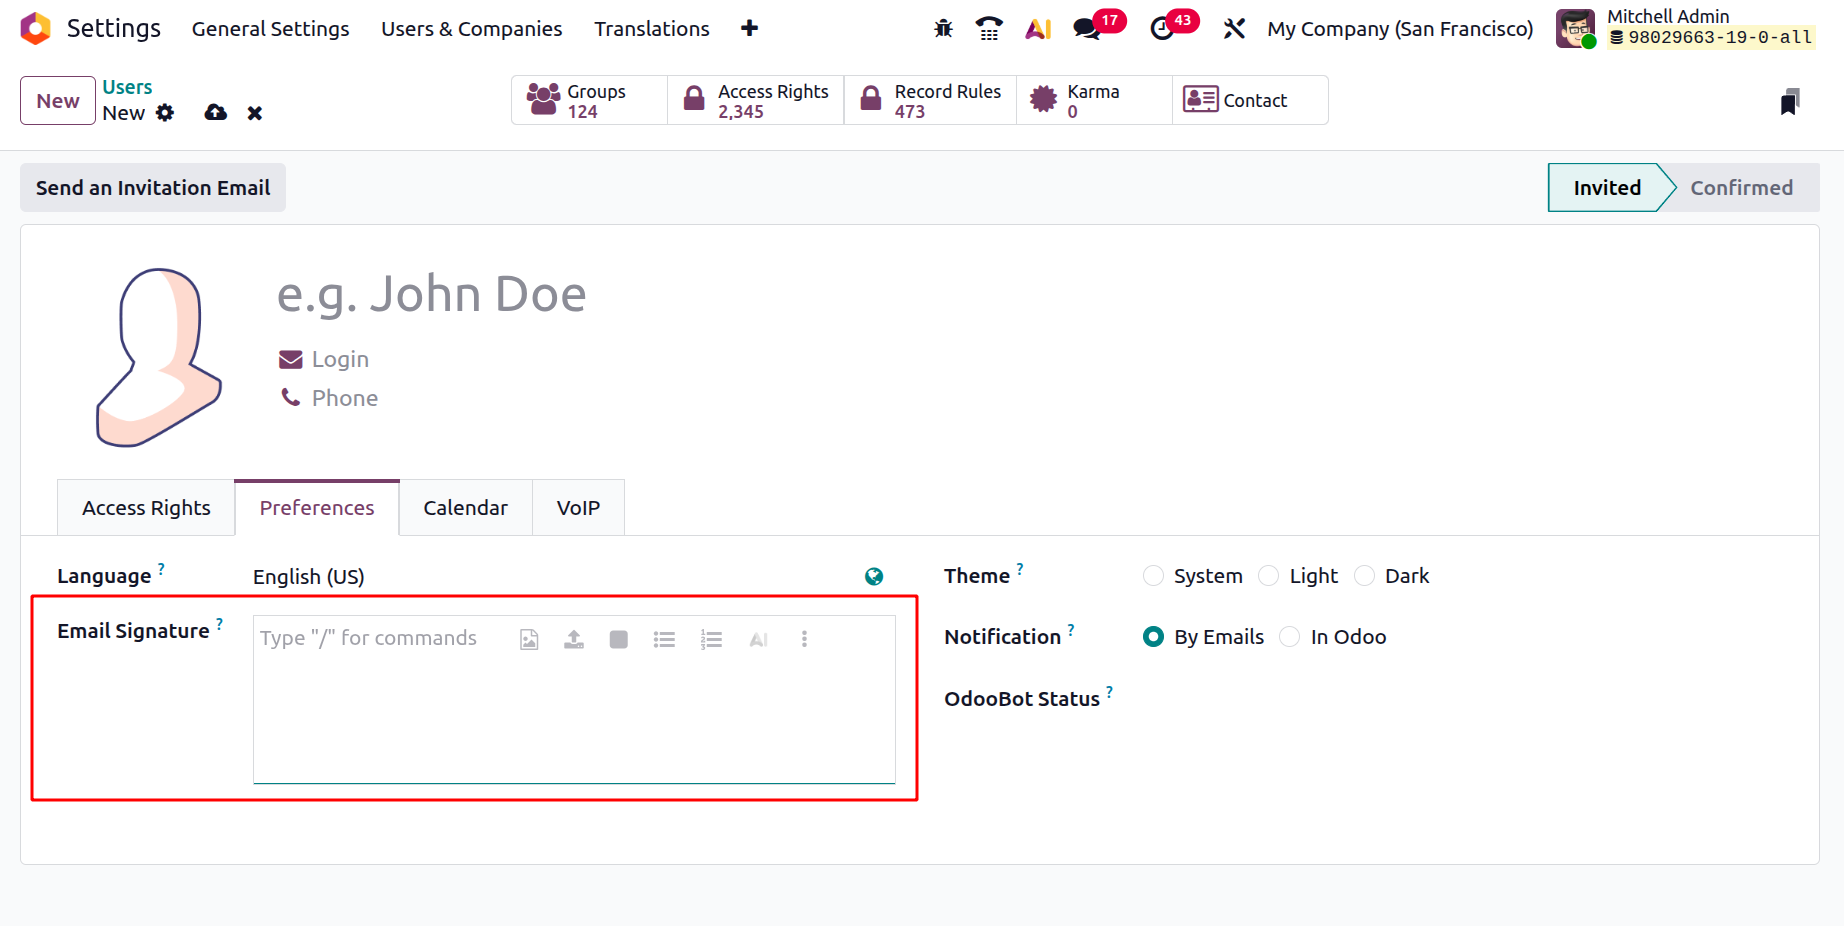
Additionally, you can create an email signature by typing "-" to enter a command in the Email Signature box. The system will then present a drop-down menu from which you can choose from a variety of Structures, Formats, Images, Navigation, Widgets, Basic blocks, and other options. You can add text, pictures, and a number of other components to the email signature using these options.
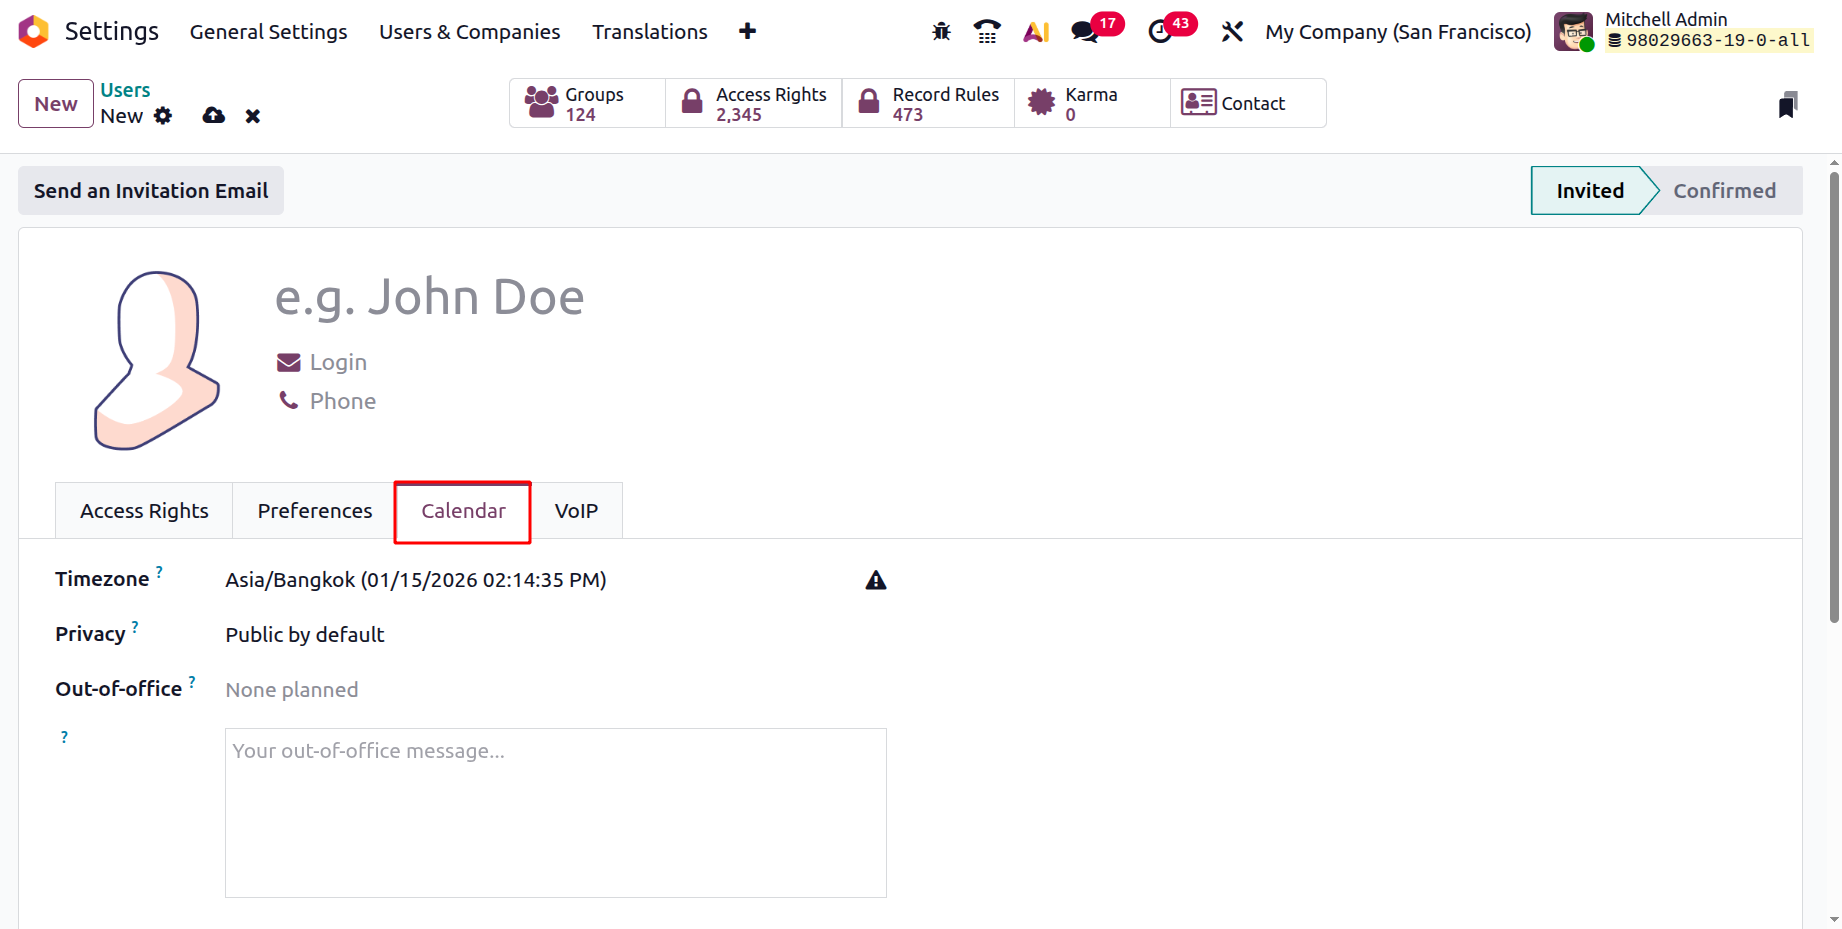
Timezone, Privacy, and Out-of-office choices are accessible under the Calendar tab. The time zone can then be selected using the dropdown menu. There are three options for privacy: public by default, private by default, and internal users only. In the given box the Out-of-office message can be added.
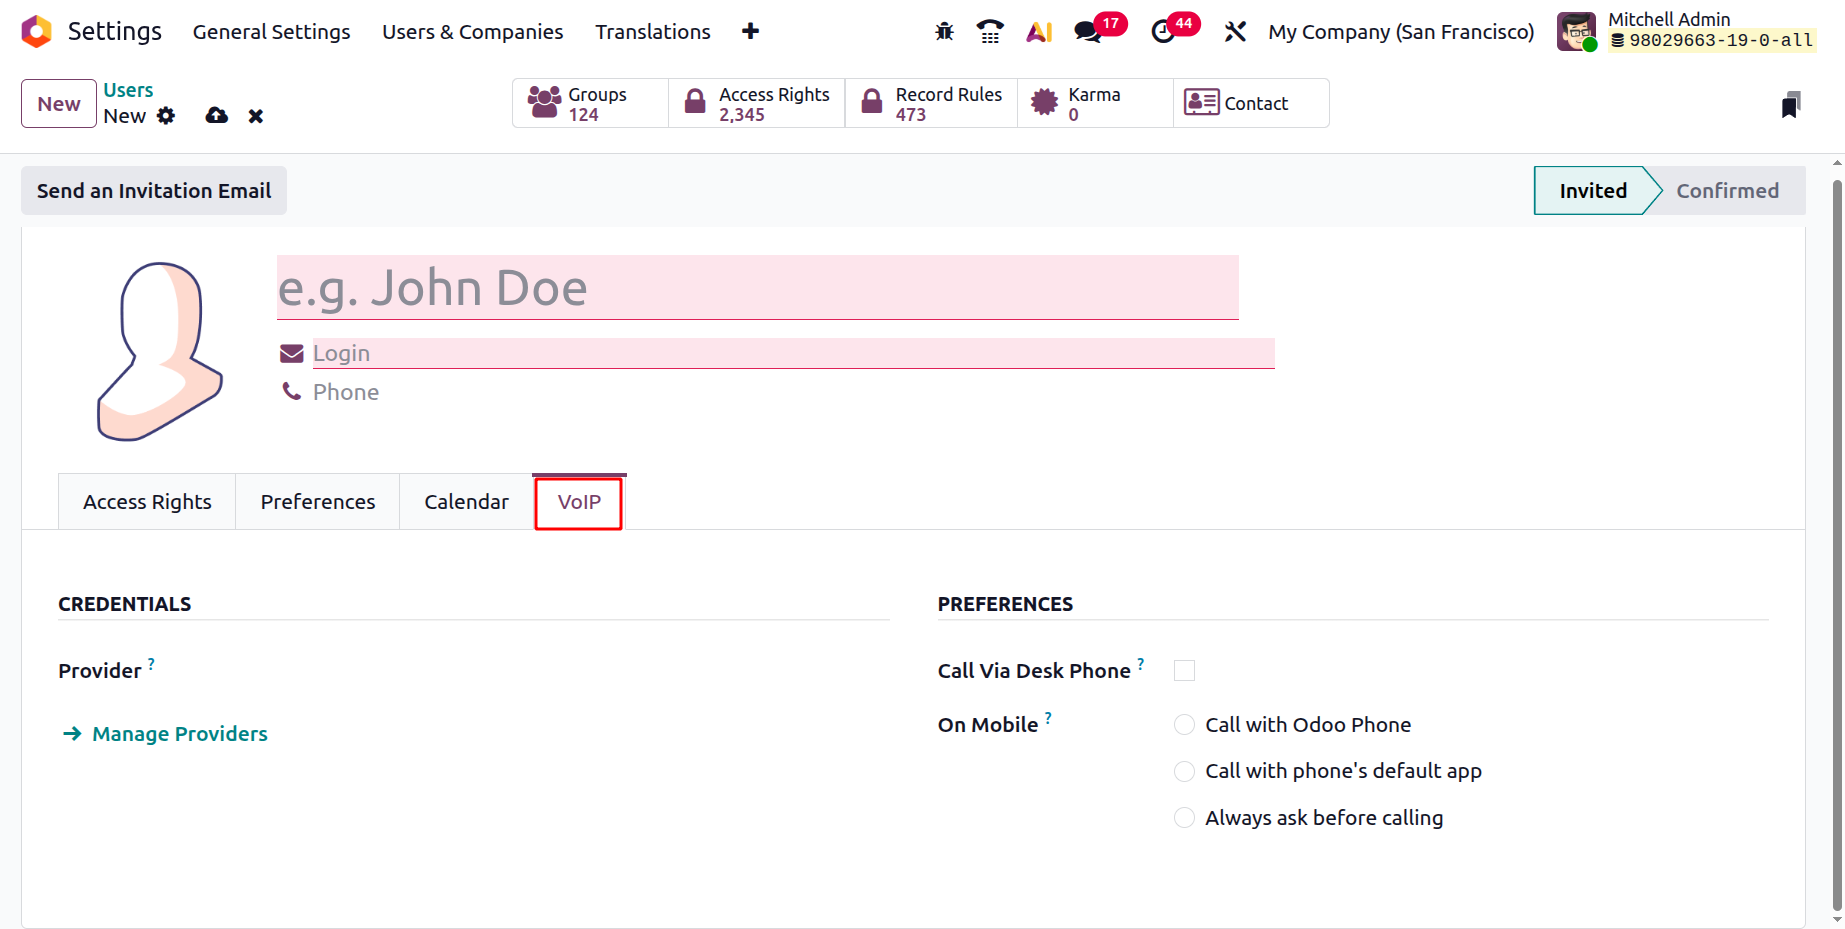
The user credentials and settings can be added on the VoIP tab. Under the credentials, mention the provider. There are three options for On Mobile and a tick box for Call Via Desk Phone under preferences.
- Call with Odoo Phone
- Call with phone's default app
- Always ask before calling
Access Rights for Users in Odoo Accounting
Enabling authorization-based degrees of operation among employees is crucial for the smooth functioning of a business, as well as for safeguarding sensitive data, restricting access to particular system regions, and stopping the unauthorised disclosure of personal information. By guaranteeing that workers only have access to the information they require to perform their jobs, it can also lower the danger of hacking. Furthermore, limiting access to particular regions can ensure that only allowed users can use the system and assist prevent damaging assaults. Similarly, the authorization-based levels of operation will show who has the authority and who is responsible for what aspects of the organization's operations. The advanced Odoo platform makes hierarchical procedures easier by creating default user settings. You can use the default user choices in this feature to specify the authority of the linked user.
When you put up a new user on the Odoo 19 platform, you can classify them as Read-Only, Invoicing, Invoicing & Banks, Bookkeeper, or Administrator based on the business's financial processes. Users are assigned access privileges in Odoo Accounting via access control lists. Users' access permissions may be granted, changed, or removed based on their position within the organisation. The Accounting module's access rights might range from total control to read-only access. It is also used to restrict access to specific financial transactions and data so that only those with authorisation can view and modify financial data.
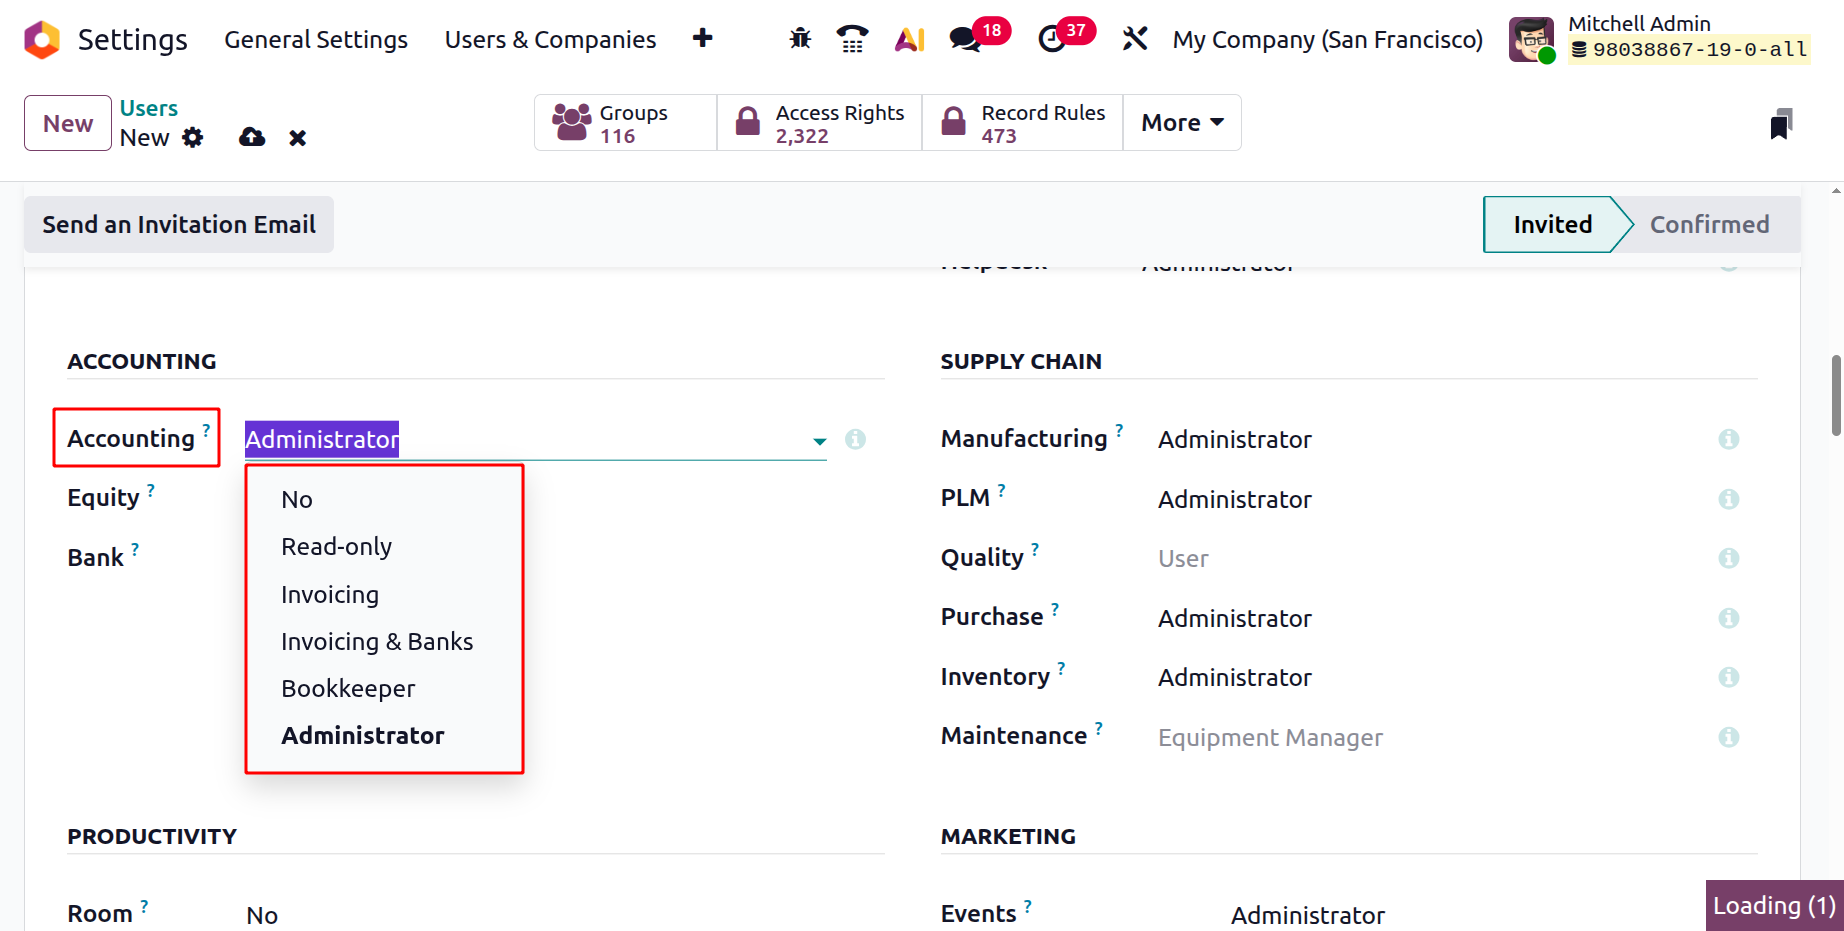
According to the hierarchy, the Administrator will have the highest honour of control over your company's financial management operations. Banks, invoicing, and the bookkeeper come next. Compared to the bookkeeper and Invoicing & Banks, Read-Only employees are at the bottom of the hierarchy and have less access to organisational resources. This is due to the fact that they work in the company's customer-facing division, where their primary responsibilities include dealing with clients, completing transactions, and doing billing desk activities. Invoicing is accessible to the user with the lowest priority.
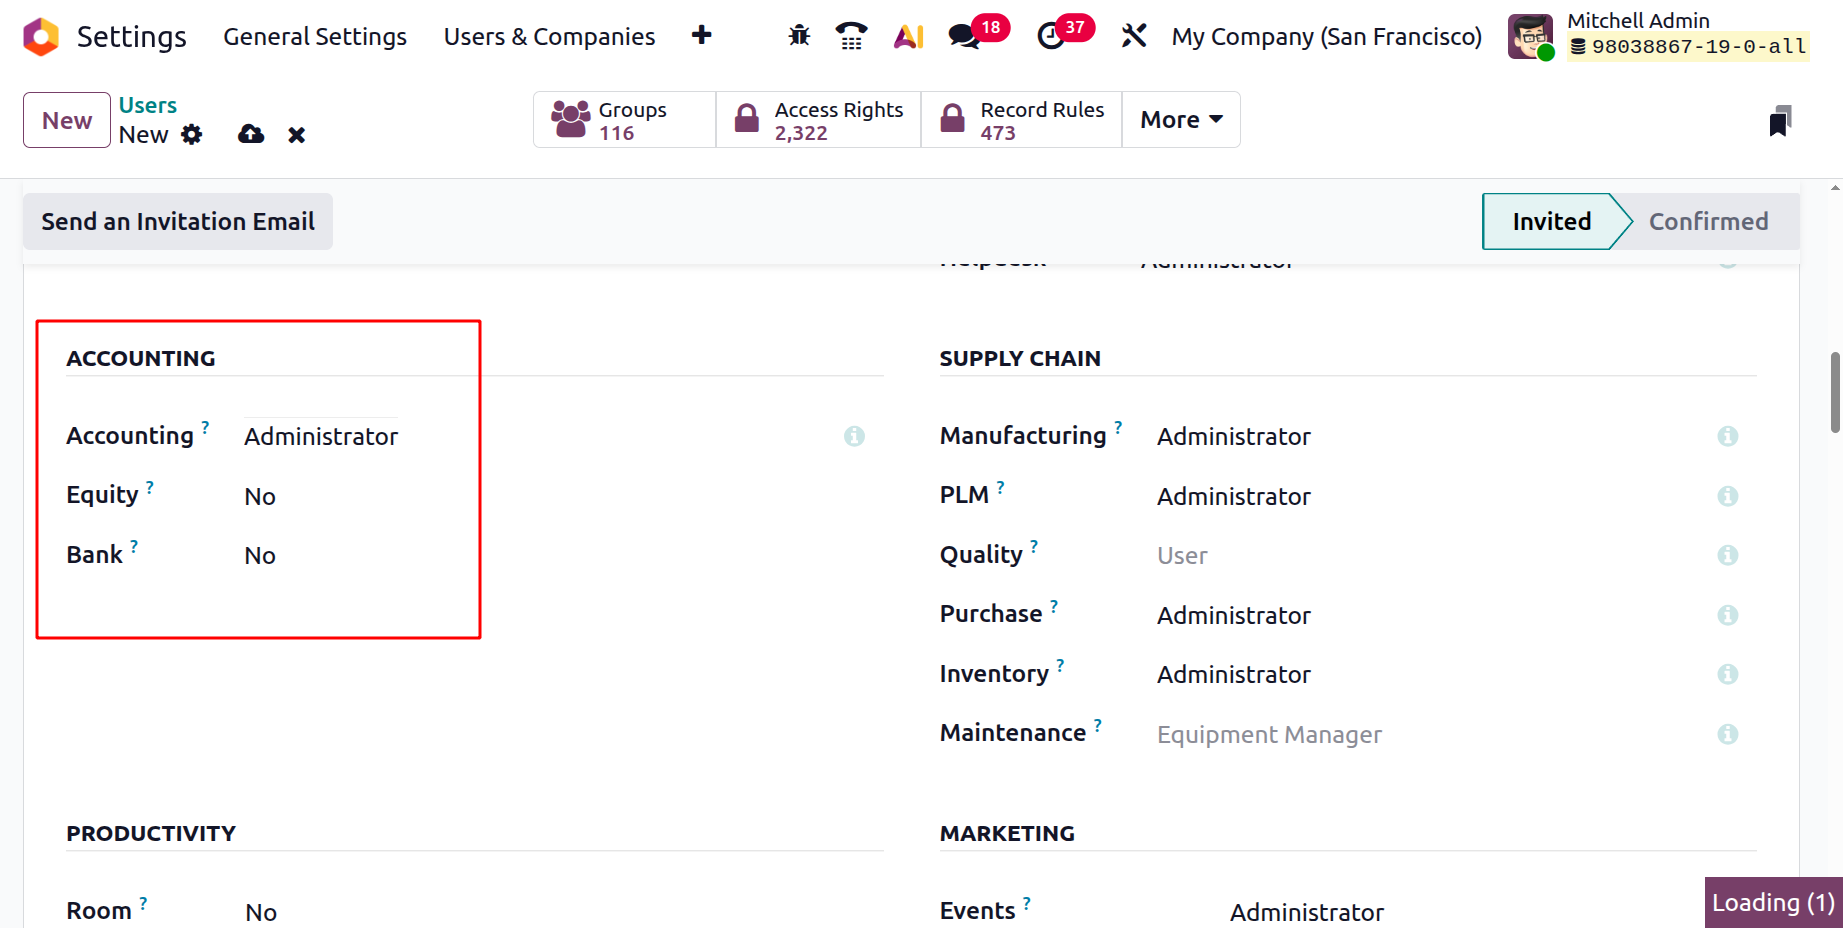
The trusted bank accounts can now only be validated by individuals who have access to them. In the accounting area, you can choose "validate bank account" or leave "Bank" blank. Then the Equity, where the user has access to a Viewer or Manager. Else leave it blank.
The accountant of an organisation is in charge of organising and filing the accounting components in accordance with legal and regulatory standards. The accountant completes each bill and invoice and manages them as needed. Allocating funds in line with the needs and requirements of the business's operation, as well as the purchasing activities that are carried out, will also fall under the purview of an accountant. The accountant in Odoo will be in charge of all facets of the financial operation's management, including the Chart of Accounts, Ledgers, and Journal entries.
The second level of the Odoo user hierarchy controls the bookkeeper's access rights. A user with bookkeeper access credentials will be able to access the accounting dashboard in addition to managing clients and vendors. The reporting components, asset-deferred revenue/expense management tools, and accounting characteristics of journal entry generation.
Holders of access rights Invoicing & Banks will have access to the accounting dashboard, and it will be able to create invoices, bills, and payments as well as some partner and management reports, such as Partner Ledger, Aged Payable and Receivable reports, Tax Reports and Invoice Analysis.
Access-rights holders Invoicing will not have access to the accounting dashboard, but it will be able to produce bills, invoices, and payments as well as various management reports, such as invoice analysis.
The next level of the hierarchy specifies the Read-Only access permission, which allows Odoo users to view the accounting dashboard in read-only mode. It will be able to create partners and upload bills and invoices in addition to having read-only access to all other accounting and review.
The Odoo platform is highly effective for this. To guarantee the smooth functioning of the business, you should provide each employee particular authority and access depending on their credentials, skills, and titles.
Furthermore, the platform's cutting-edge features and capabilities will offer a complete solution for efficient and smooth corporate management. With the program's assistance, you may monitor whether employees are misrepresenting the company's activities and whether they have access to the proper opportunities.
The many user types that Odoo 19 identified with the accounting activity are now clearly visible. It will be highly beneficial and satisfying to give each member the proper amount of authority. Let's now examine the setup components of the Companies and the associated Settings options.