Effective and Complete Invoicing Solutions
You may efficiently and fully manage the invoicing process by adding control components to customer invoices. The default configuration option for the Customer Invoices section must first be set up. One localisation option that enables you to send invoices or payment follow-ups via postal mail is snail mail. You can generate direct customer invoices by activating Snailmail under Customer invoices. You may add a cover page, print in colour, and print on both sides by default using Snail Mail. The platform also has a Buy Credits option in the Settings menu because the service's operation is integrated dependent on the cost of credits. You will be taken to a website where you can buy Odoo Credits for Snail Mail if you choose this option.
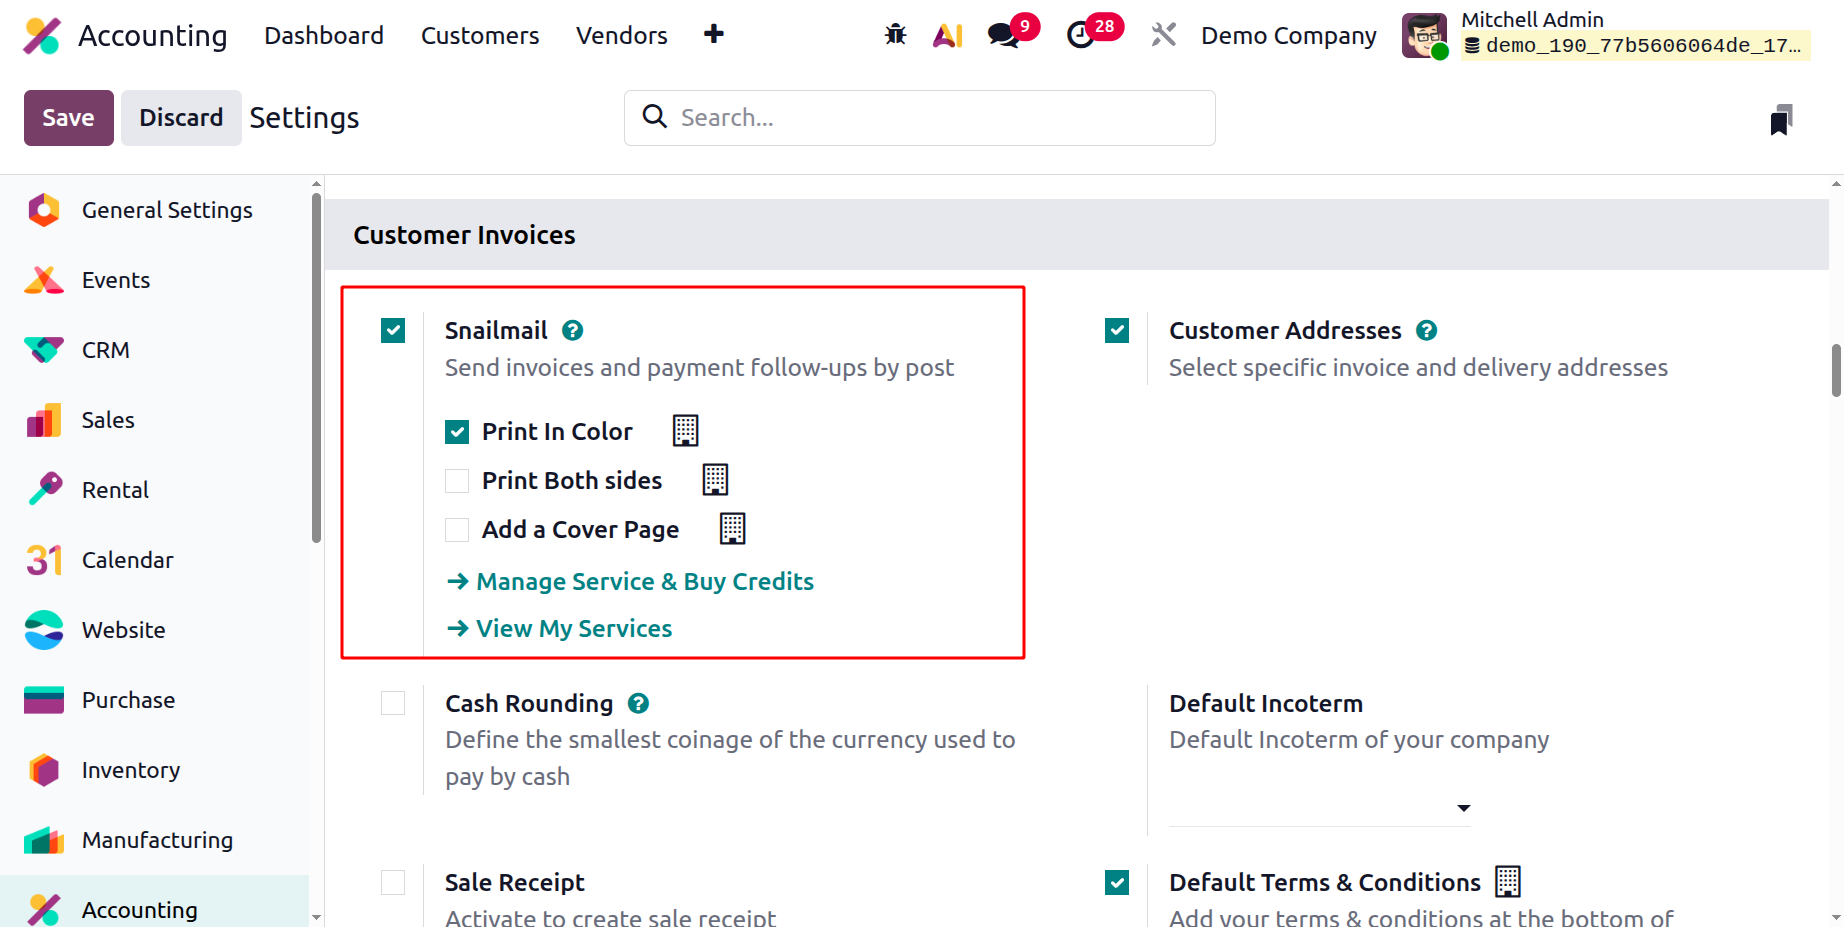
Other options, including the default terms displayed on the invoice, warnings, cash rounding, Intrastat, default incoterm, and sales receipt, can also be enabled or disabled in the Customer invoicing section. Let's take a closer look at these decisions.
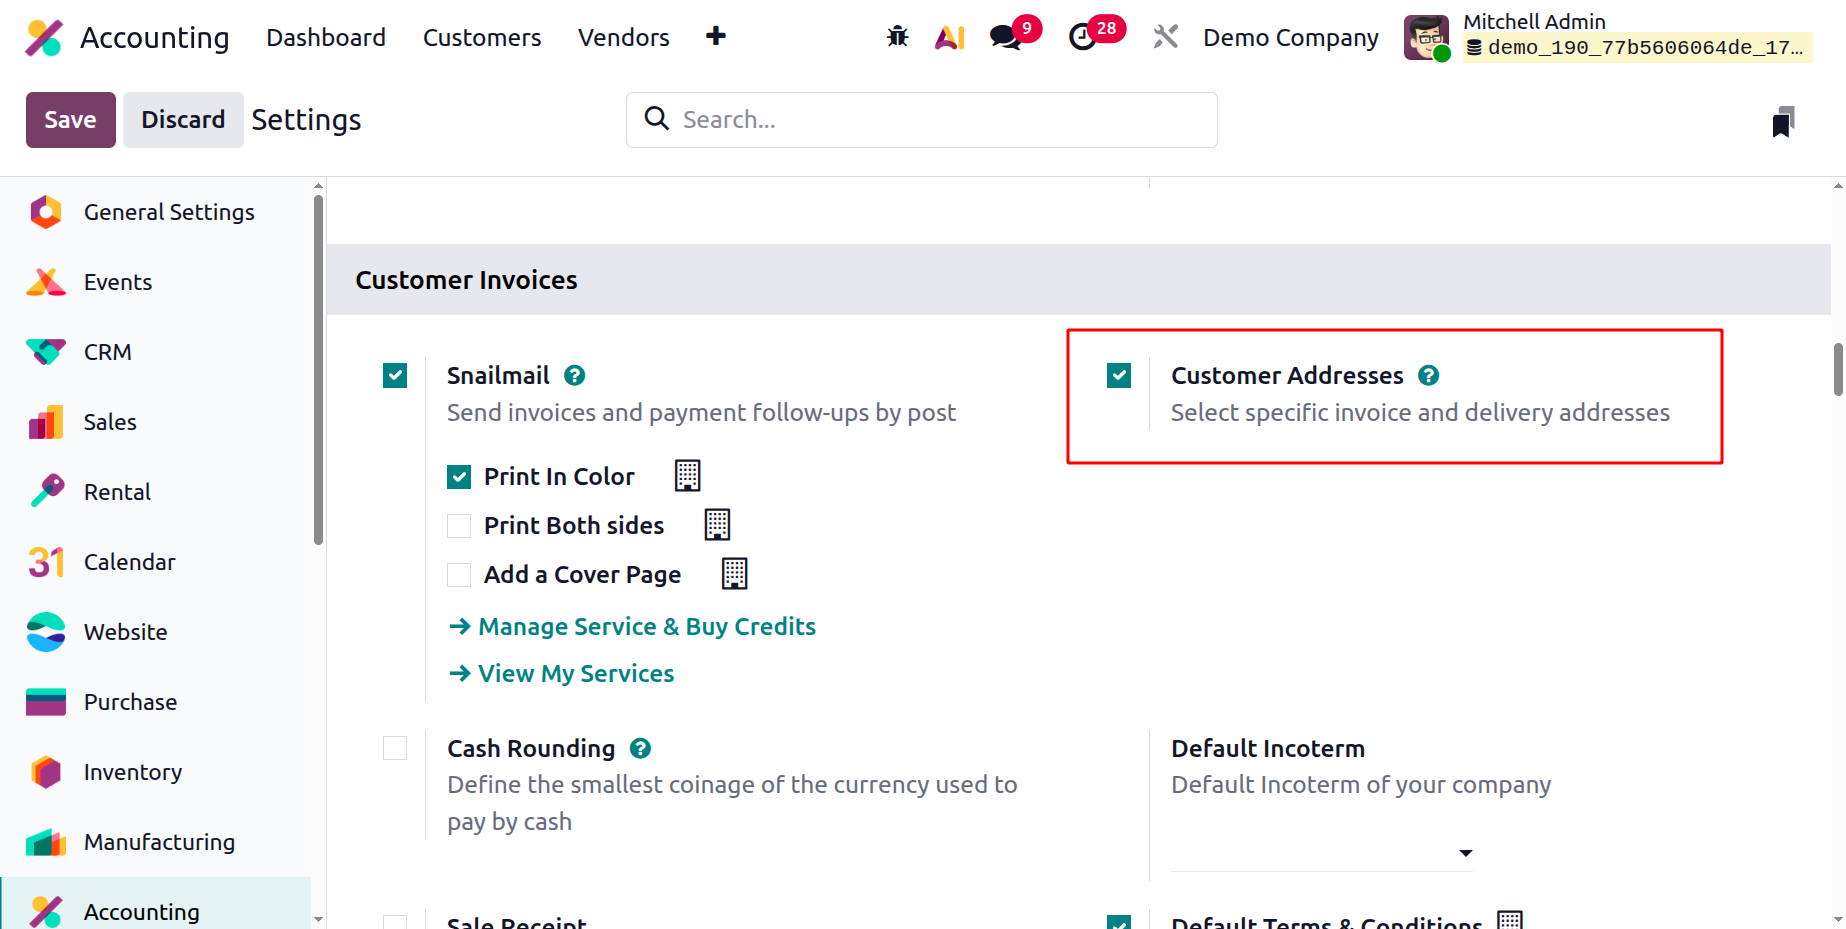
Customer Addresses
Odoo Sales allows you to specify multiple shipping and billing addresses. Having separate shipping and billing addresses is quite beneficial to some customers. The delivery address and the billing address are not always the same. This feature allows customers to update their delivery address in Odoo 19.
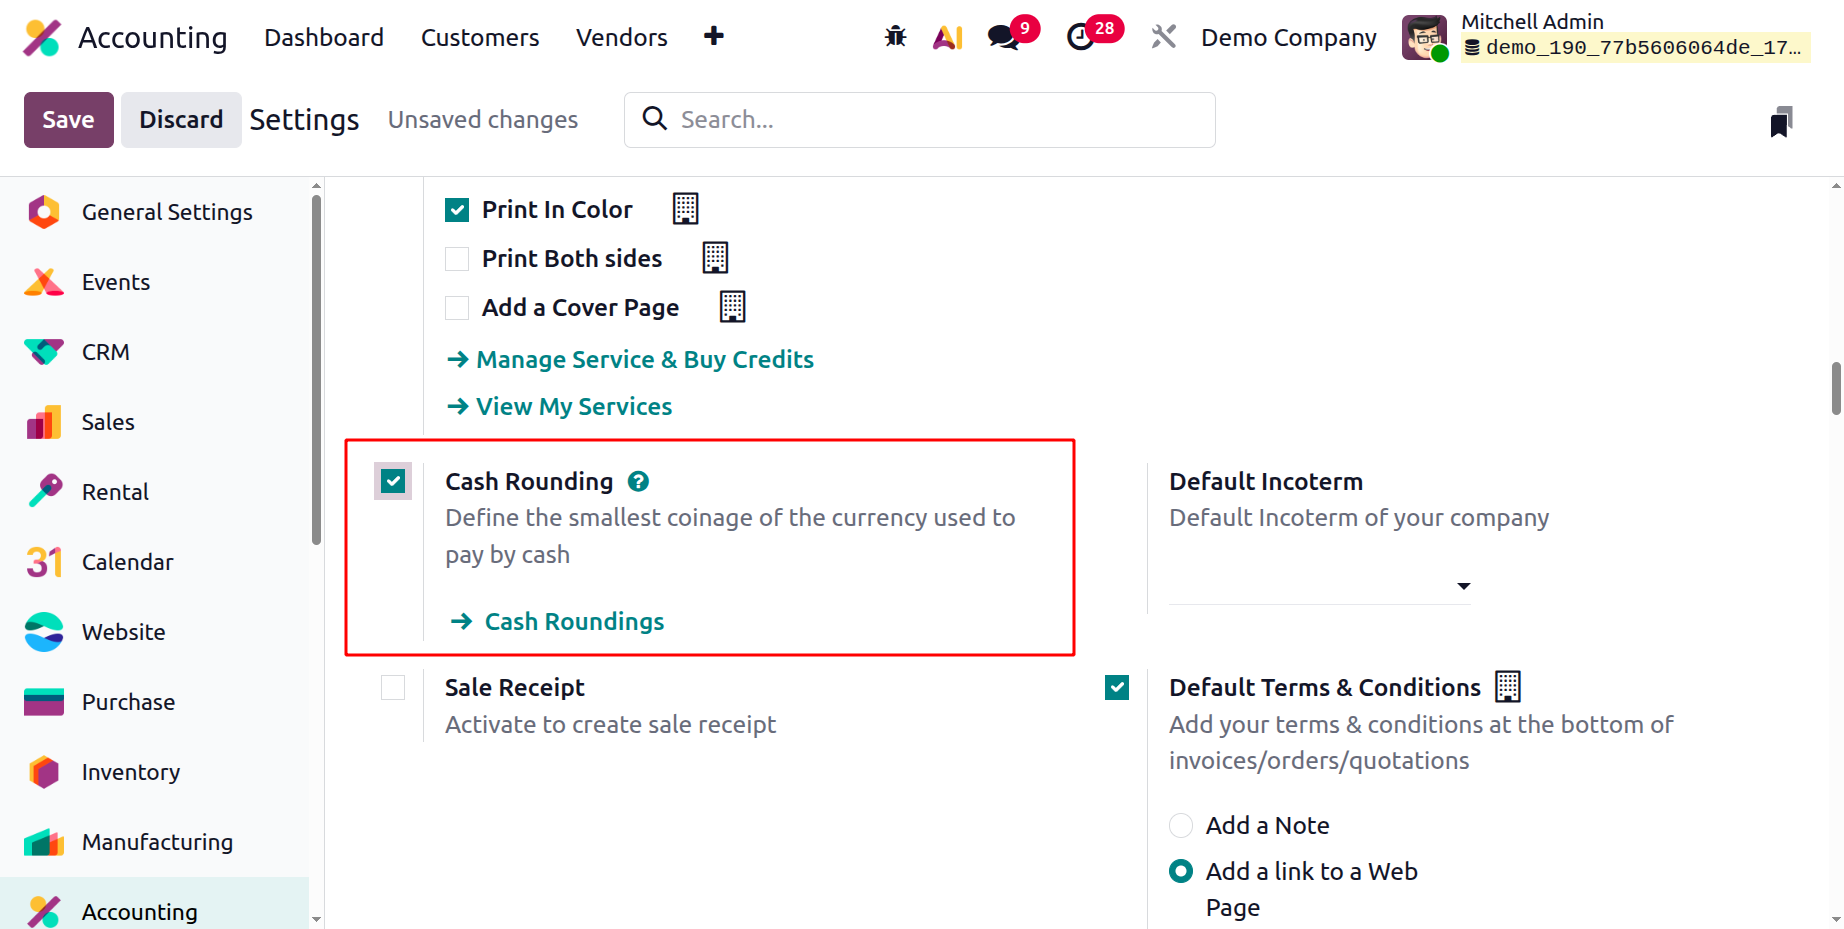
Cash Rounding
The invoice pricing will be changed to the nearest whole number because it is unlikely that a customer will receive exact change or that the counter will have enough coins to finish their transaction during retail hours. You can modify Odoo's Cash Rounding procedure to fit your particular requirements and the currency in use. If you enable the cash rounding option, you can define cash roundings by choosing the cash rounding menu icon.
Default Incoterm
You can both define and change the default incoterm using the Odoo Accounting module settings. When you enable the option, a drop-down choice will appear; select the default icon to be used.
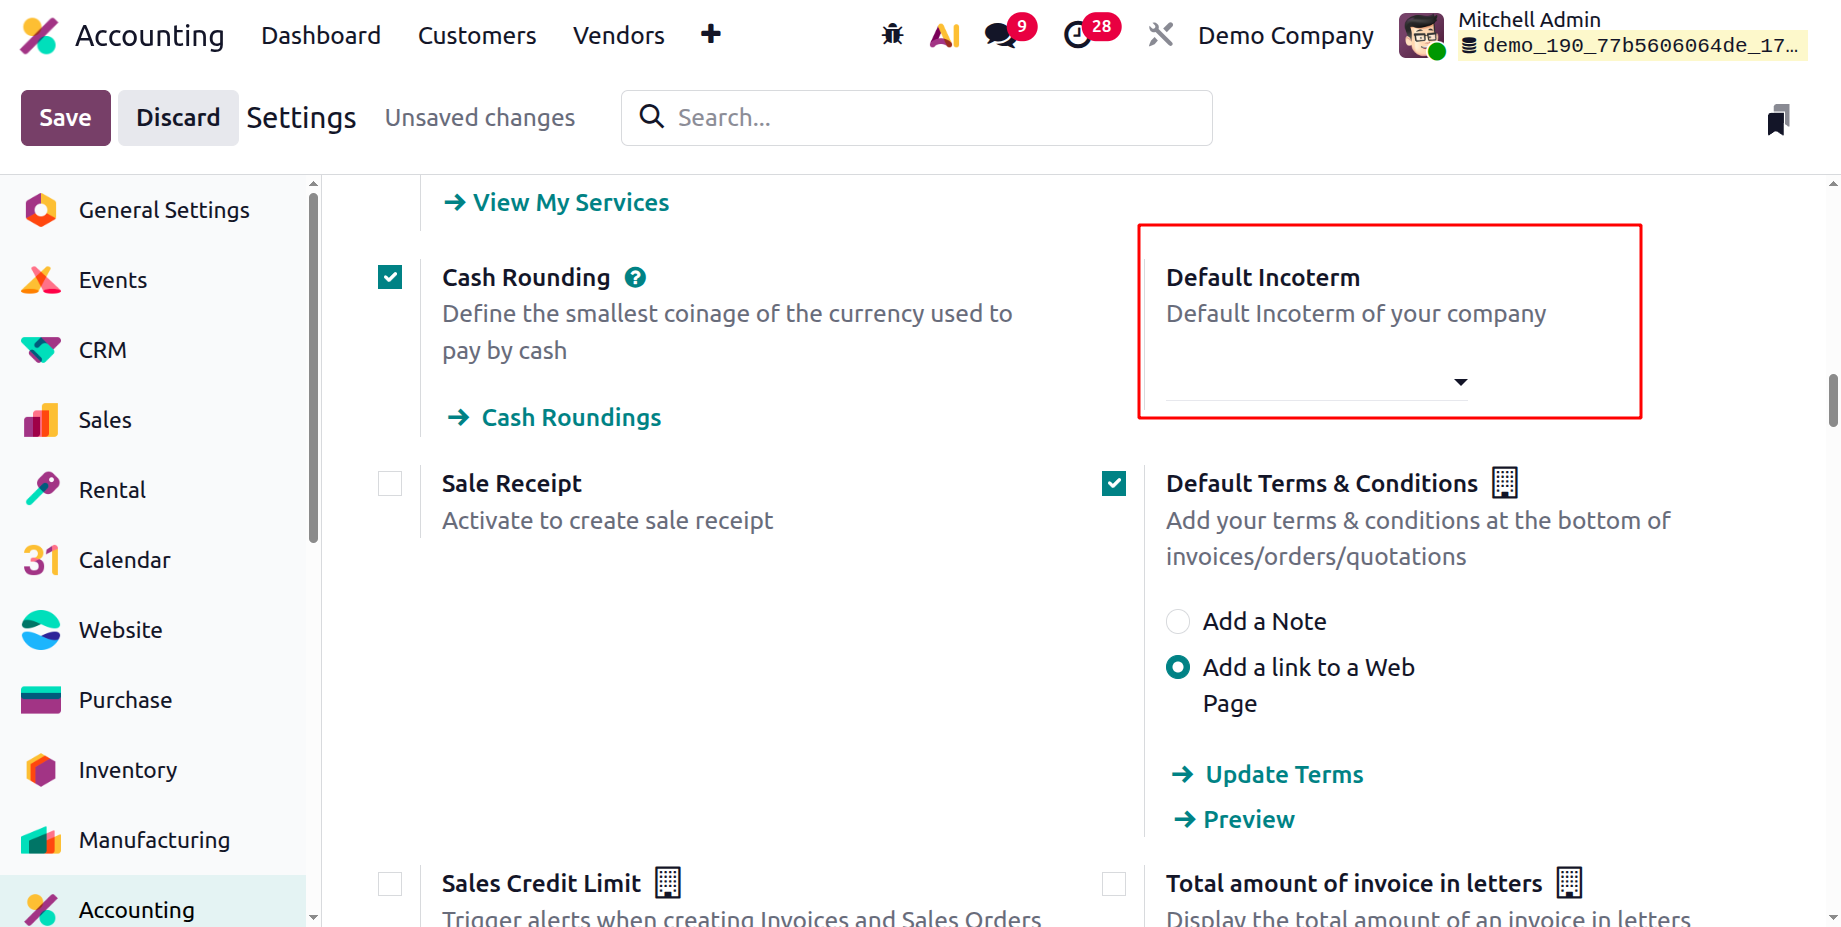
Odoo 19 Accounting's International Commercial Terms (Incoterm) feature describes the responsibilities of buyers and sellers in cross-border transactions, including who is in charge of the costs and risks related to shipping. Additionally, you can use a drop-down box to select the default Incoterms.
Sales Receipt
If the Sales Receipt option is enabled, a receipt for the product sale can be generated after the sale. As a result, the same amount of merchandise is billed, sold, and sent.
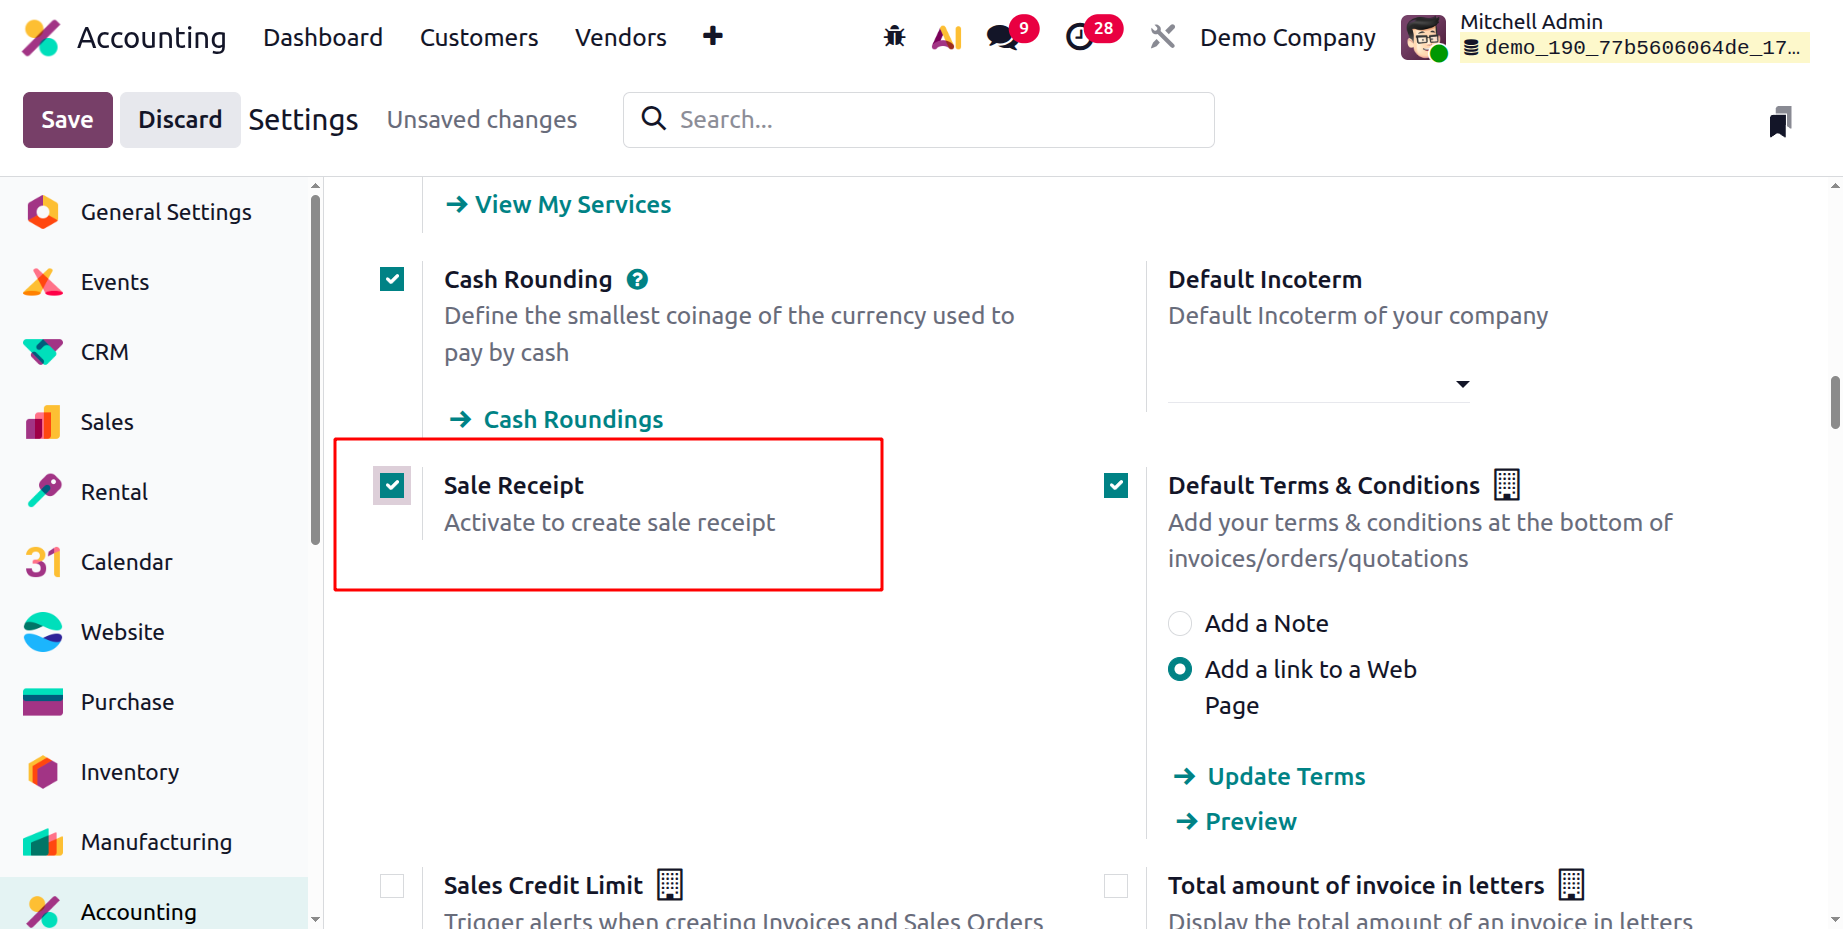
The Sales Receipt option is available inside the Invoices. There is a boolean named Receipt. While choosing the Receipt option the users can add sales receipt.
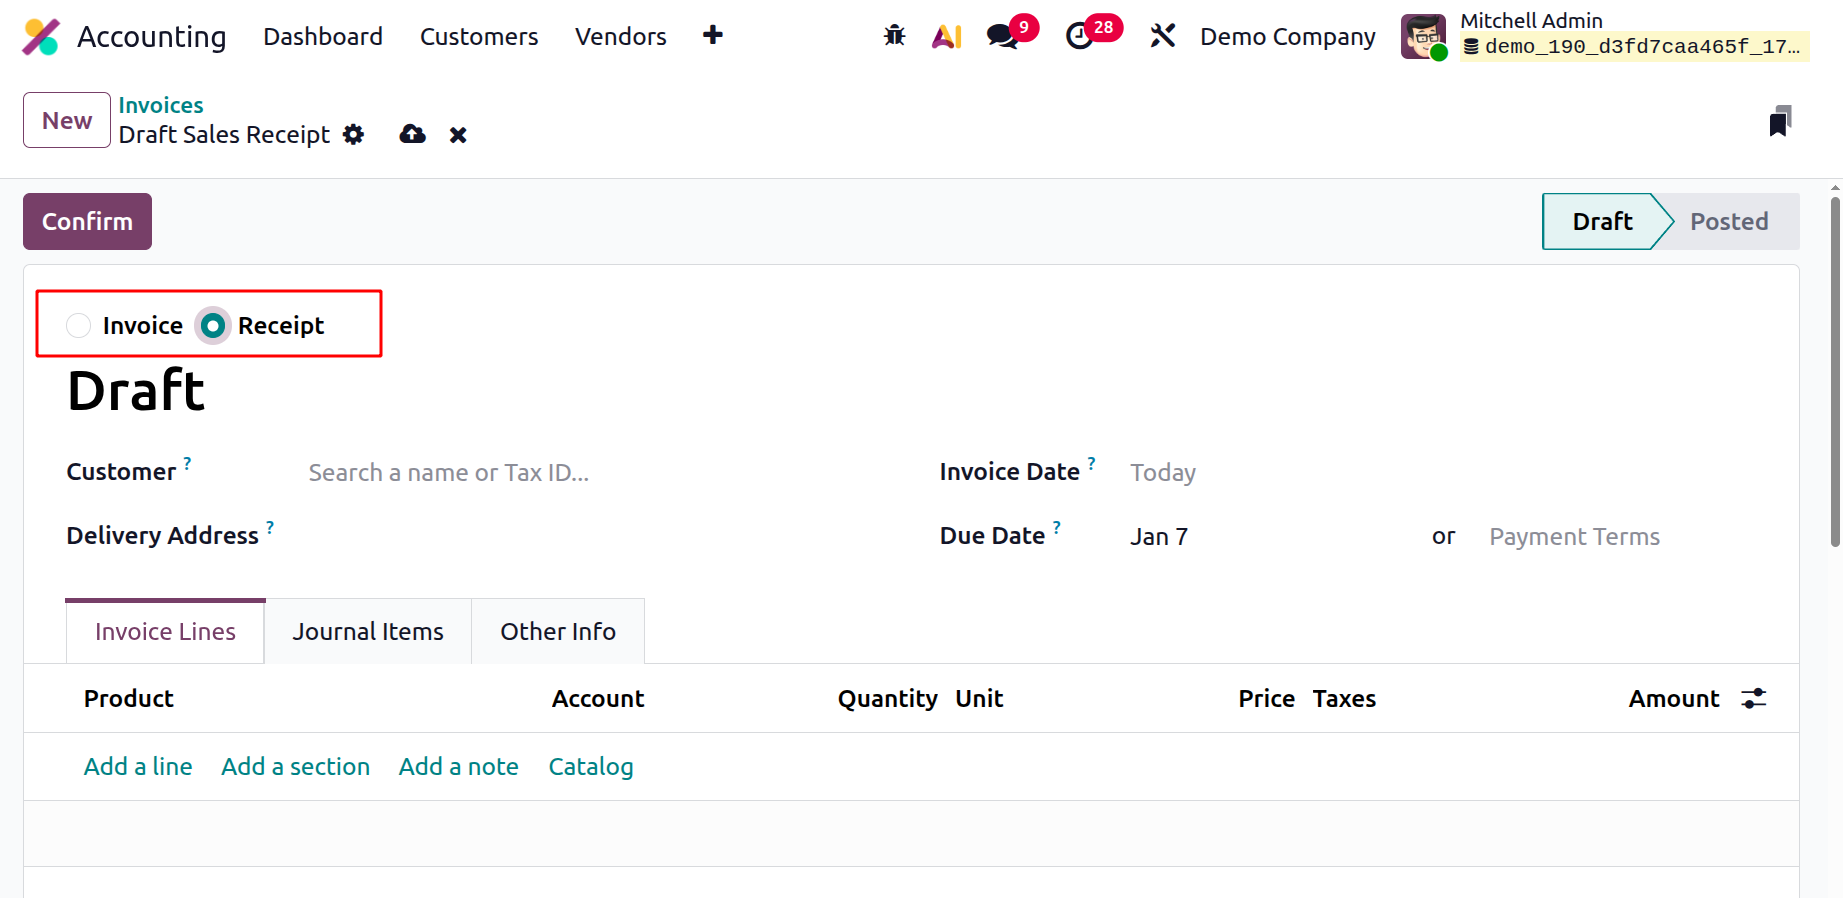
Default Terms & Conditions
Writing thorough and accurate terms and conditions on sales invoices requires a lot of little but crucial details, such as the company's details, a description of the goods or services being sold, and any applicable taxes or discounts. As a result, the default terms and conditions can be added under terms & conditions and will show up as comments or links in the bids, sales orders, and invoices.
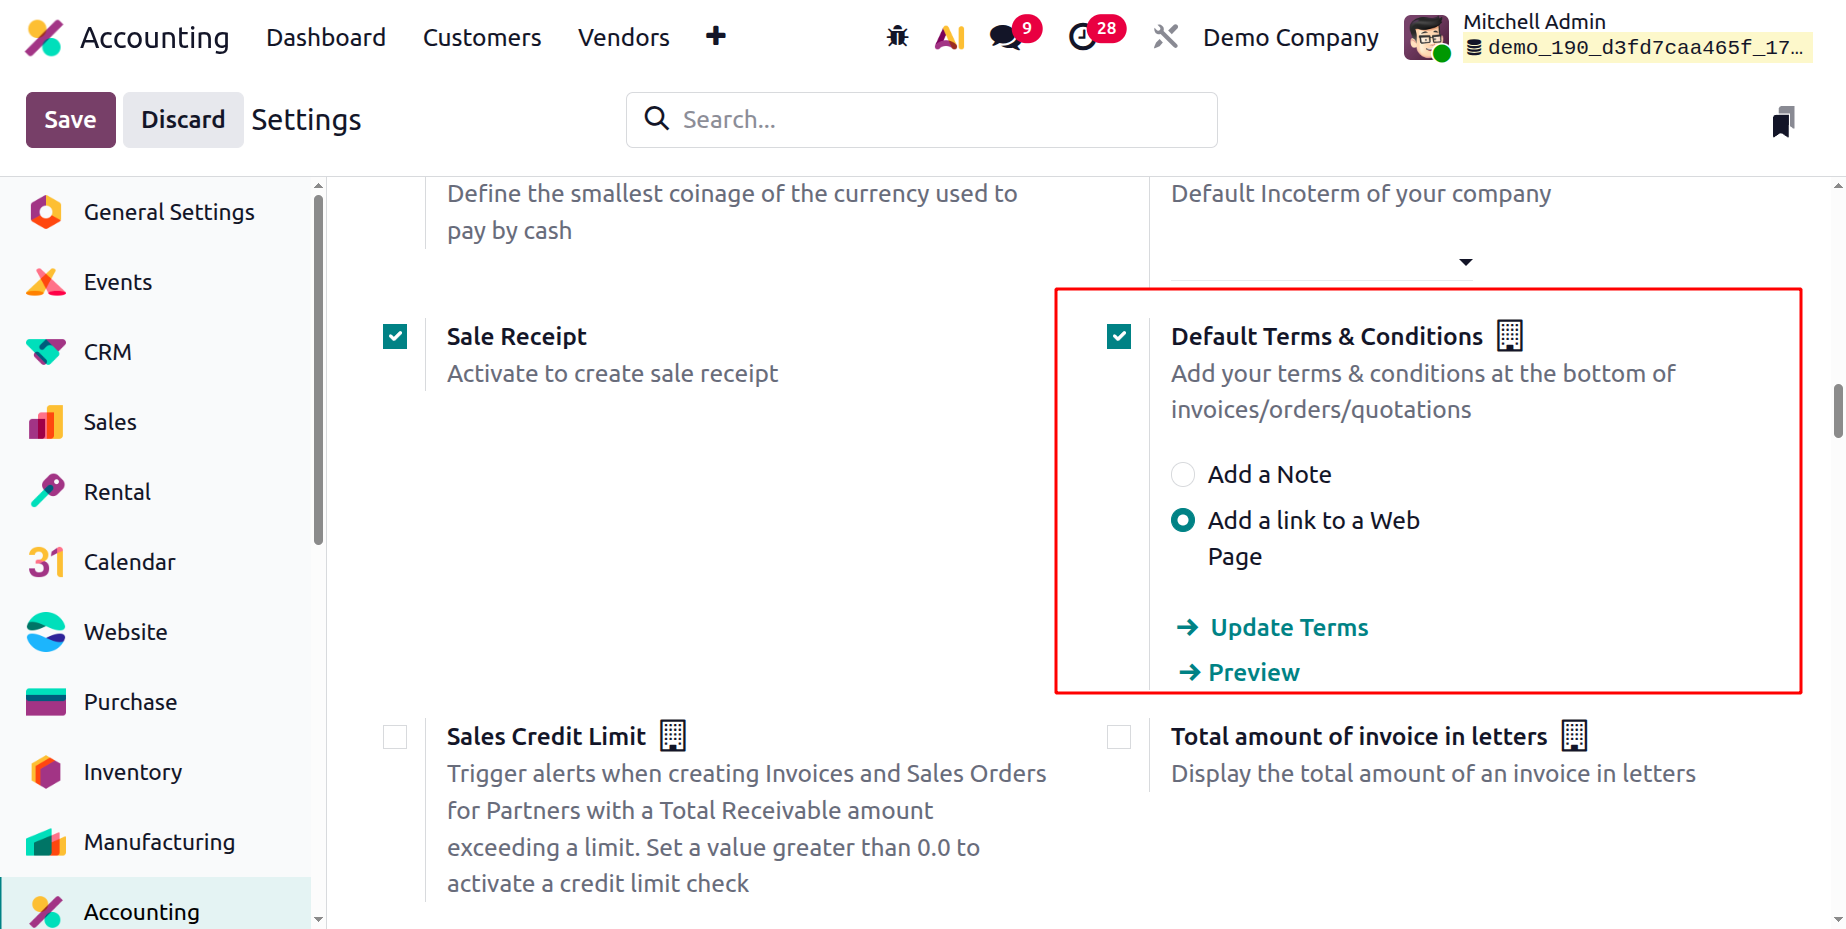
Sales Credit Limit
The maximum amount of credit that a customer can have is known as their credit limit. In the case that the customer refuses to pay, it helps to mitigate the harm done to the company. The amount of the credit limit is decided by the finance department. We can specify a sales credit limit in the accounting settings that applies to each partner as a business policy.
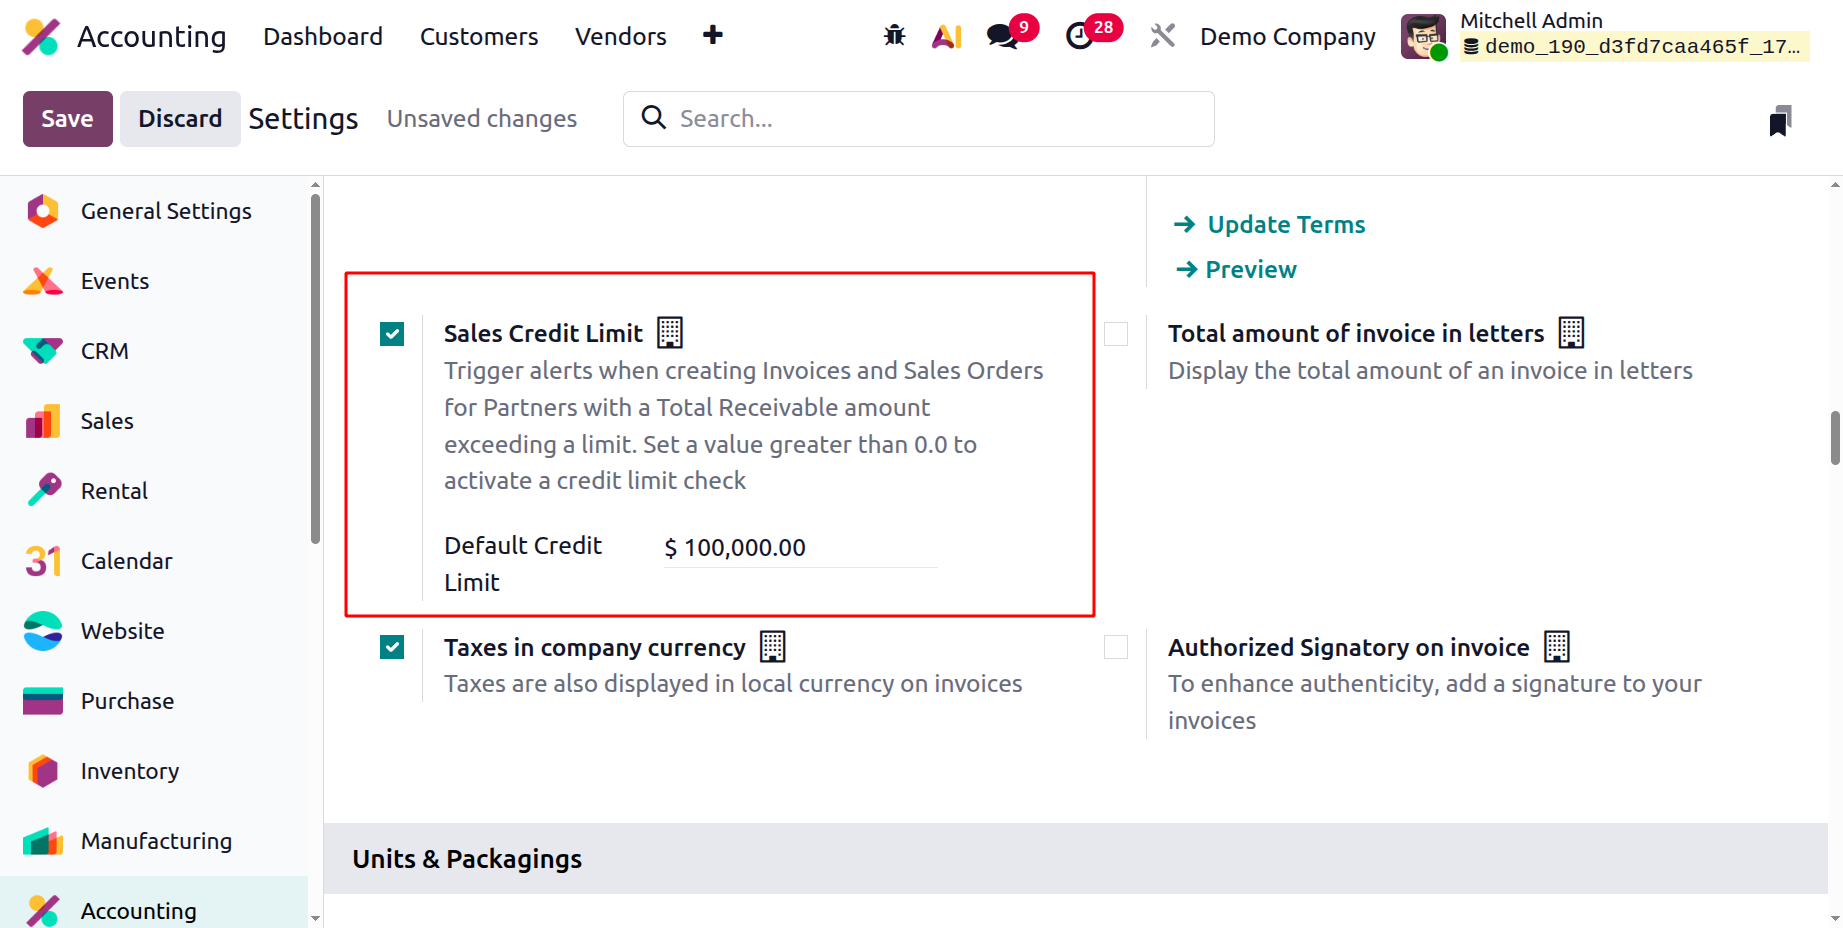
With Odoo 19, you can additionally set a maximum credit limit for particular partners. Therefore, if this functionality is enabled, we may check the partner's requirements and set a credit limit for them using the partner form.
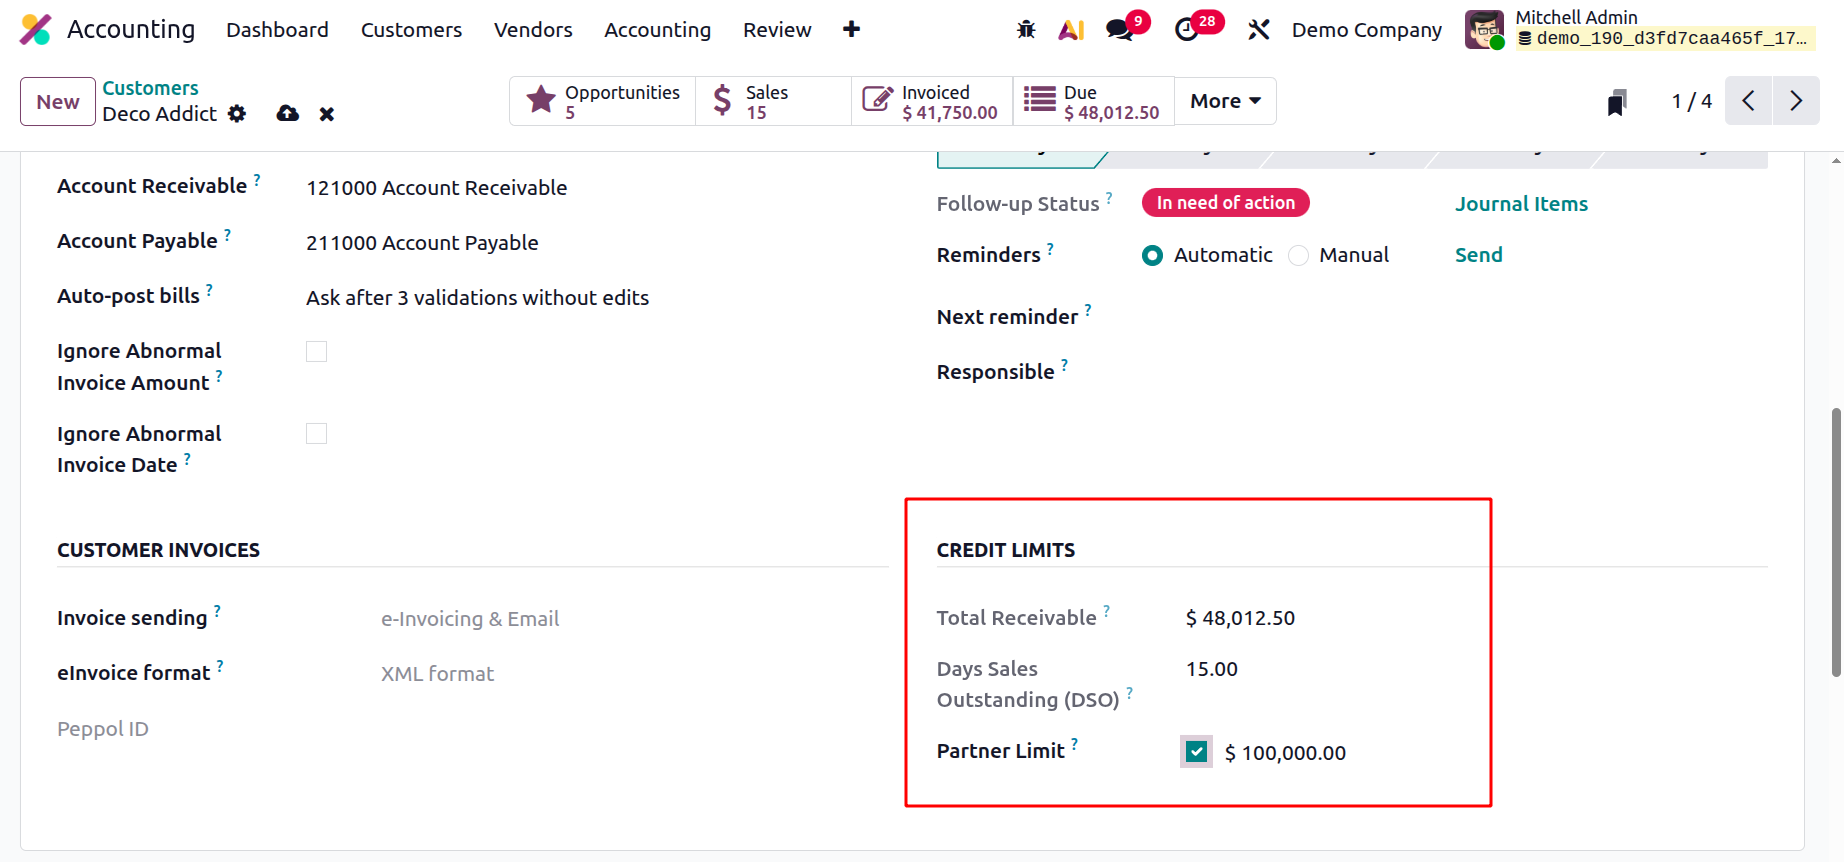
Total Receivable, Days sales Outstanding (DSO) will be shown there. While enabling the Partner Limit, the users can set the credit limit.
In this case, the entire amount that the client owes you is known as the entire Receivable, and the Days Sales Outstanding (DSO) is determined by taking [(Total Receivable/Total Revenue)* Number of Days from the customer's first invoice].
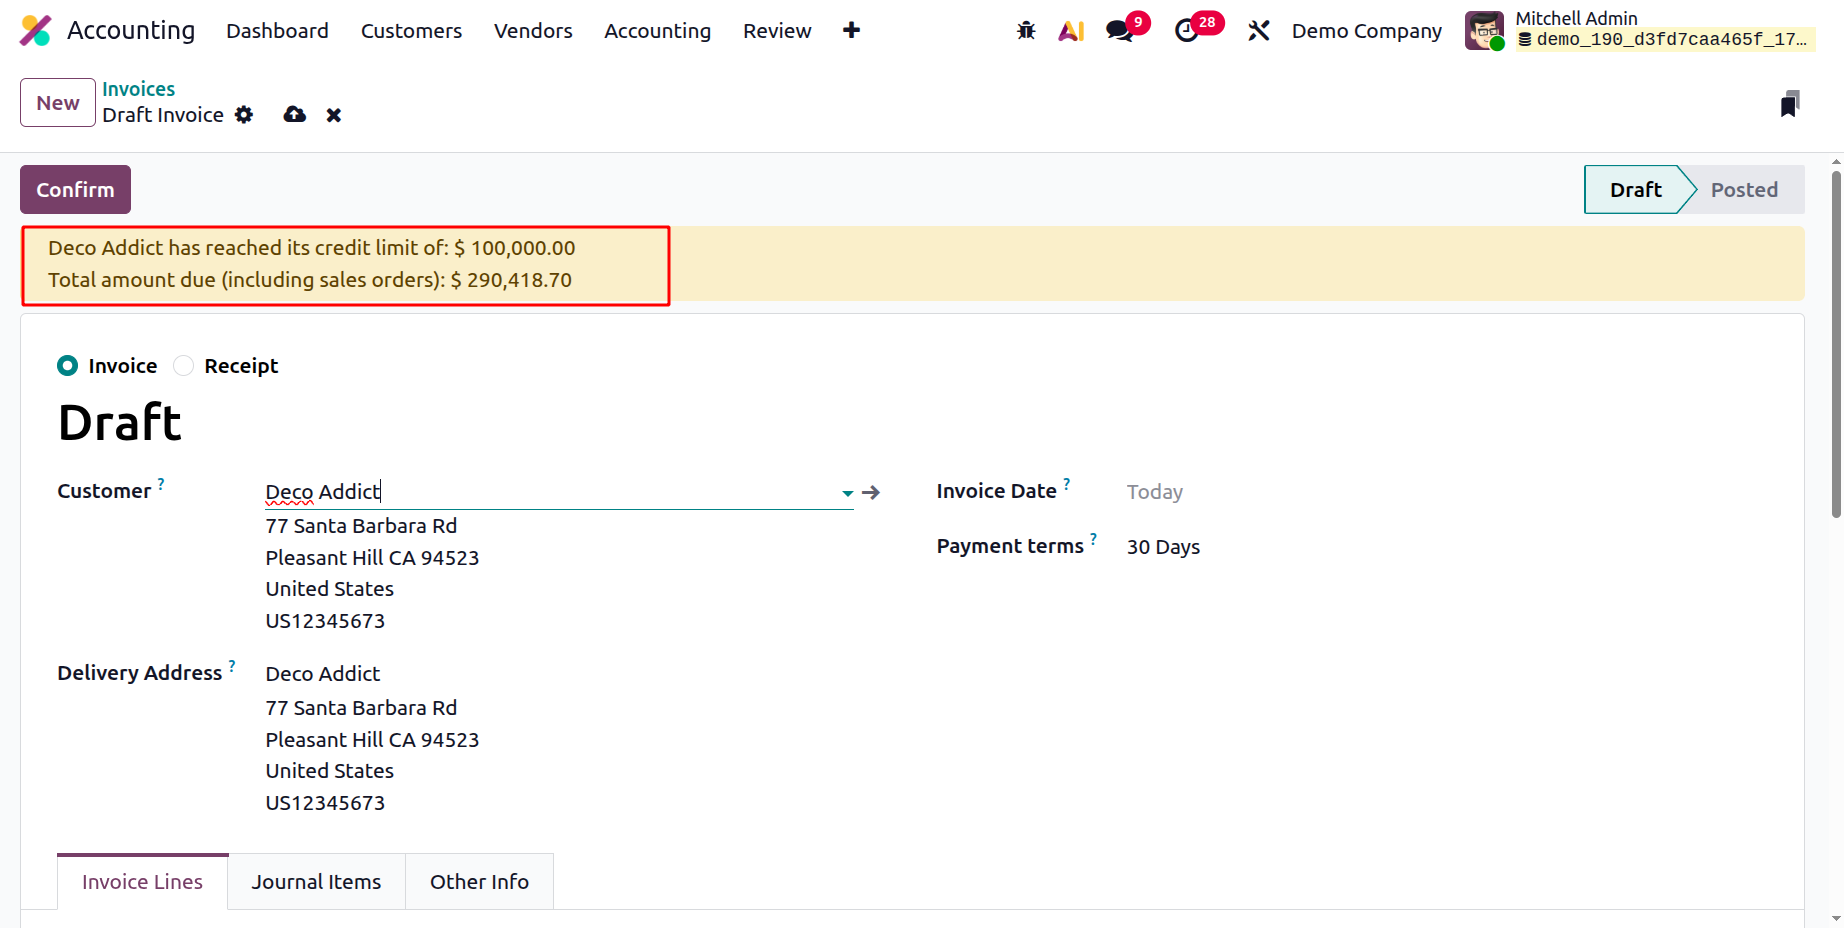
If a partner's receivables exceed their credit limit, future bills will show that they have done so.
Total Amount of Invoice in Letters
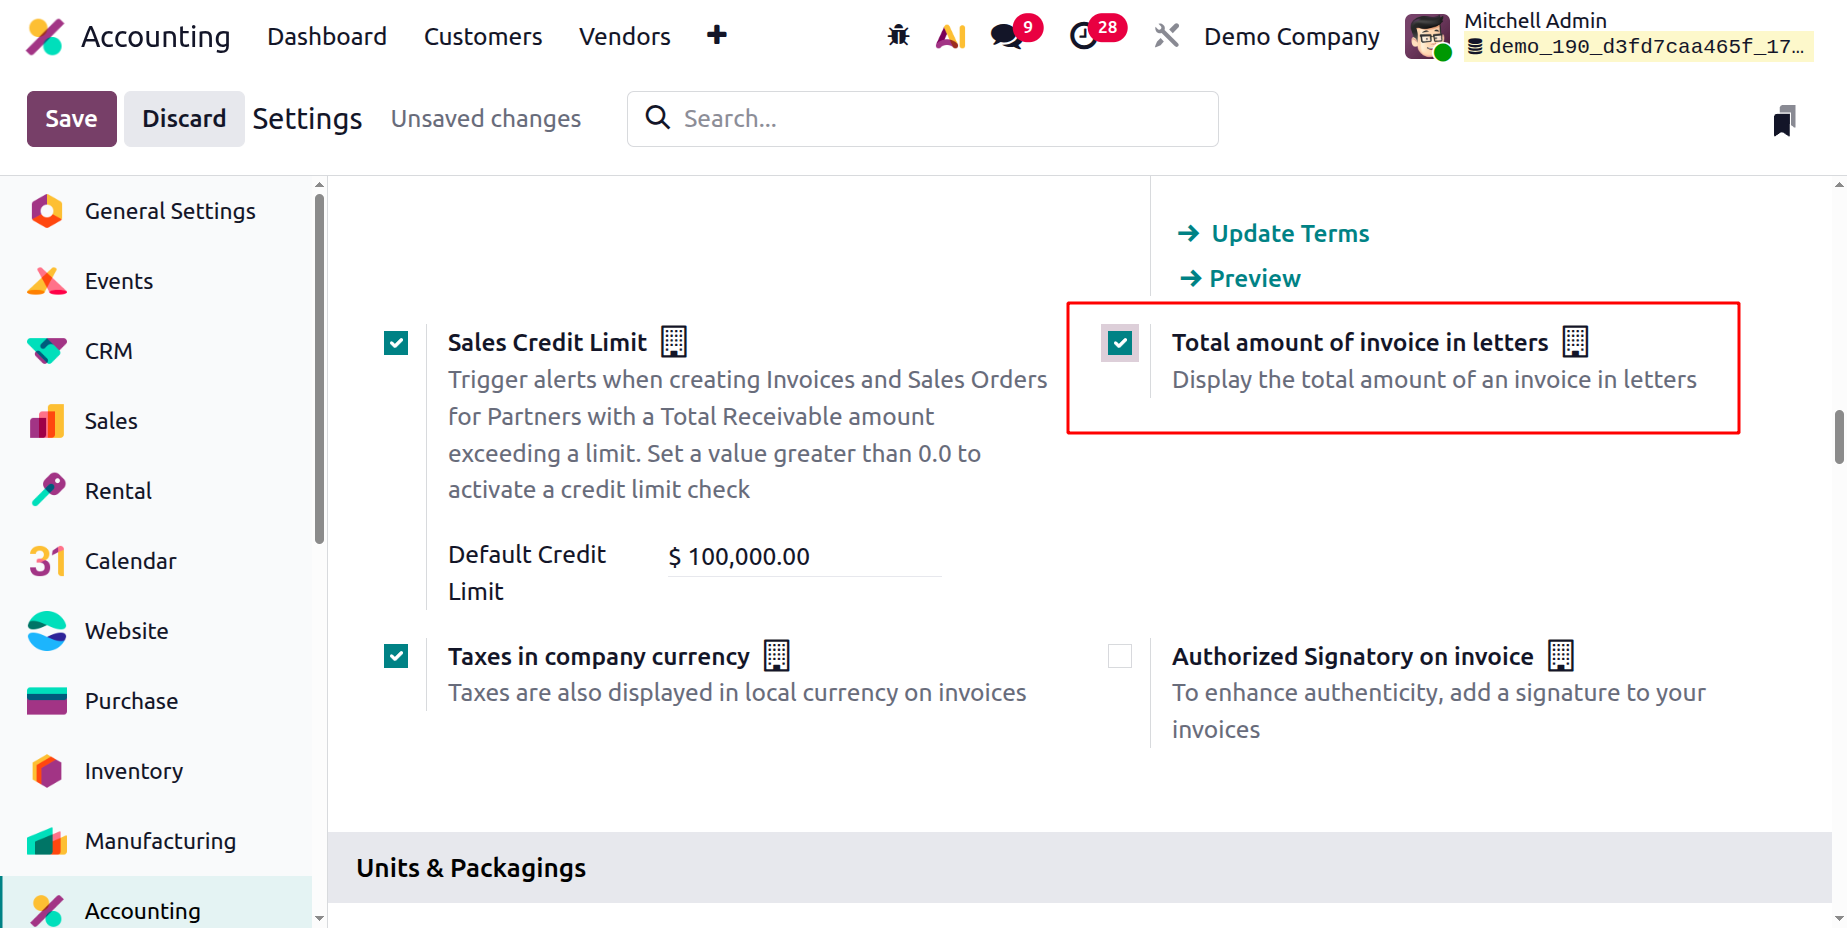
A new feature in the Odoo 19 accounting module allows you to print the total number of invoices in the letter. Enable this from the Customer Invoice part of the Accounting module's settings, as shown below.
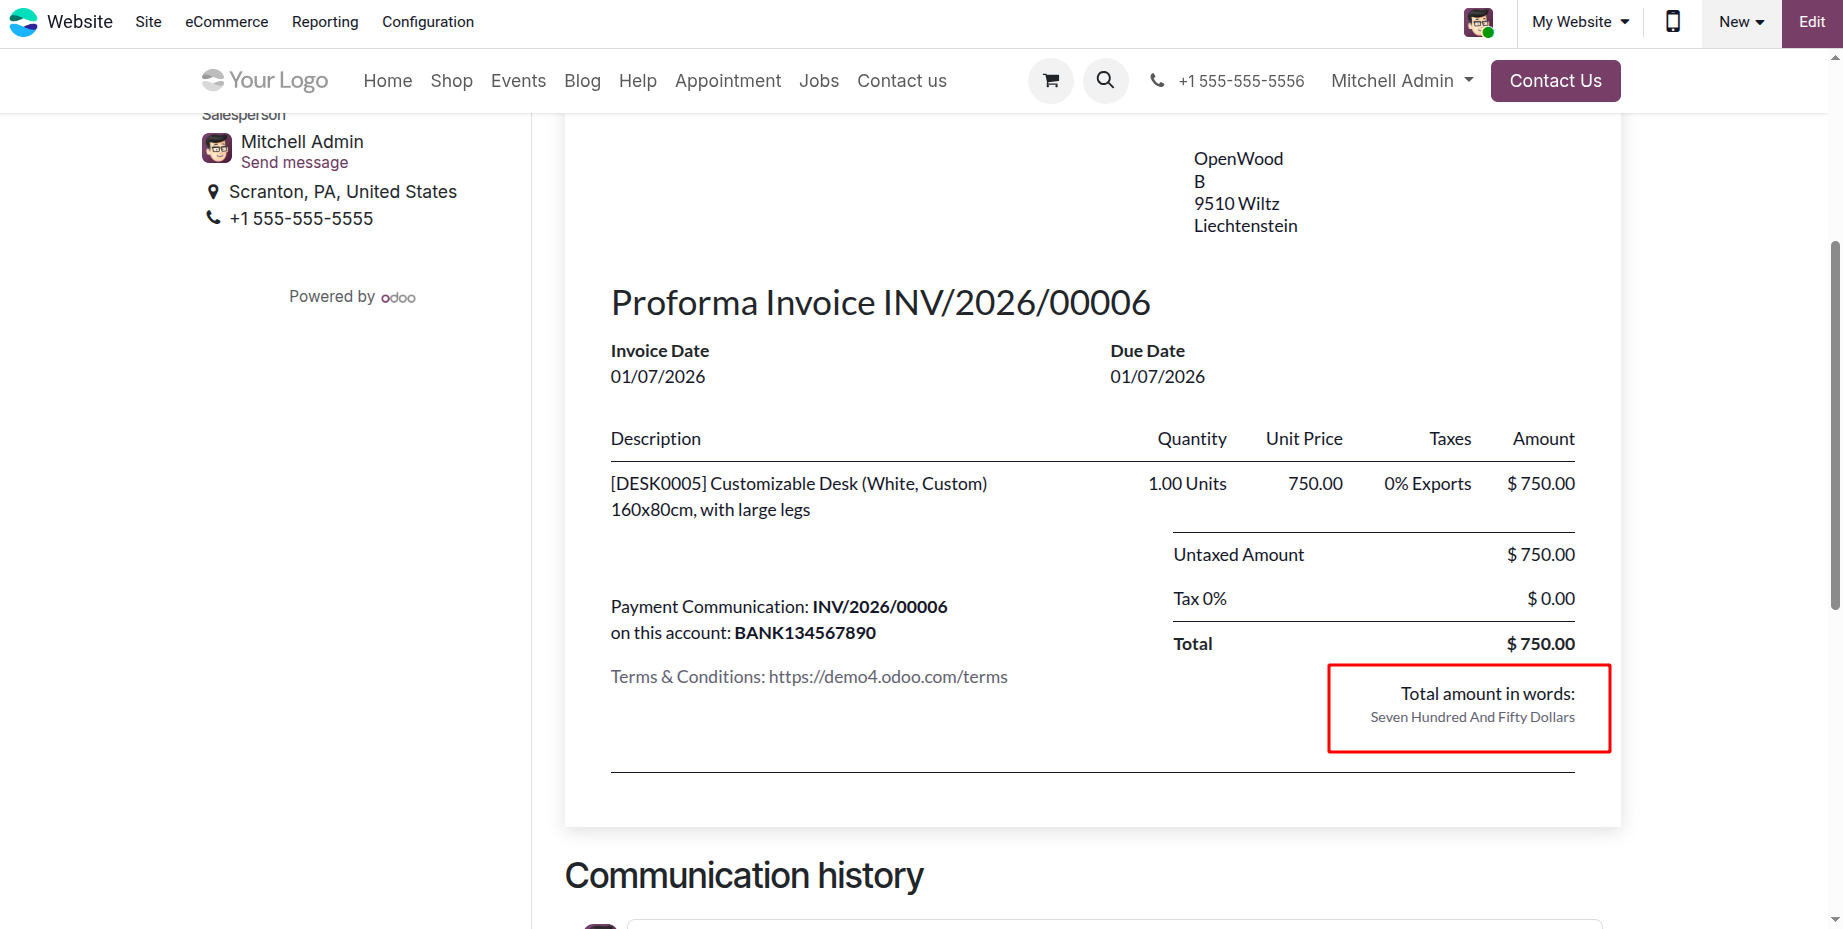
After activating this functionality, let's create and validate an invoice for a client. Print the invoice once it has been verified. The letters that are shown below will show the overall invoice amount.
Taxes in Company Currency
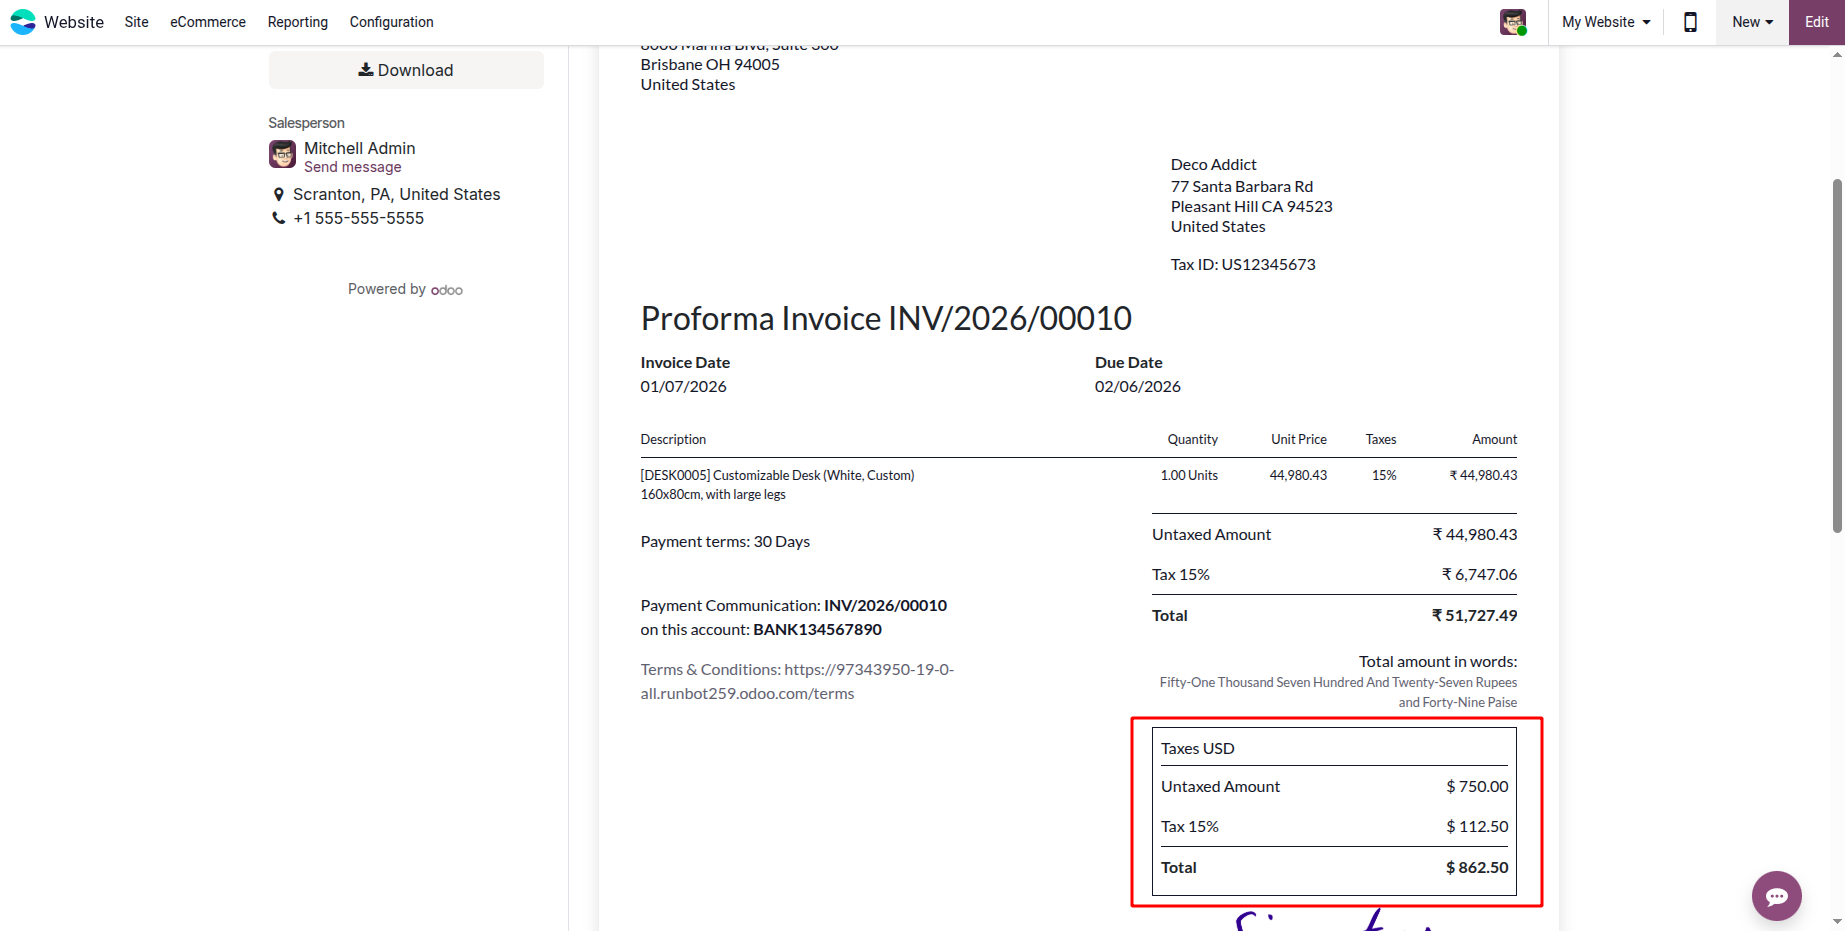
The additional taxes displayed in local currency on invoices can be viewed by choosing the Taxes in company currency option from the settings. Odoo 19 accounting supports several currencies.
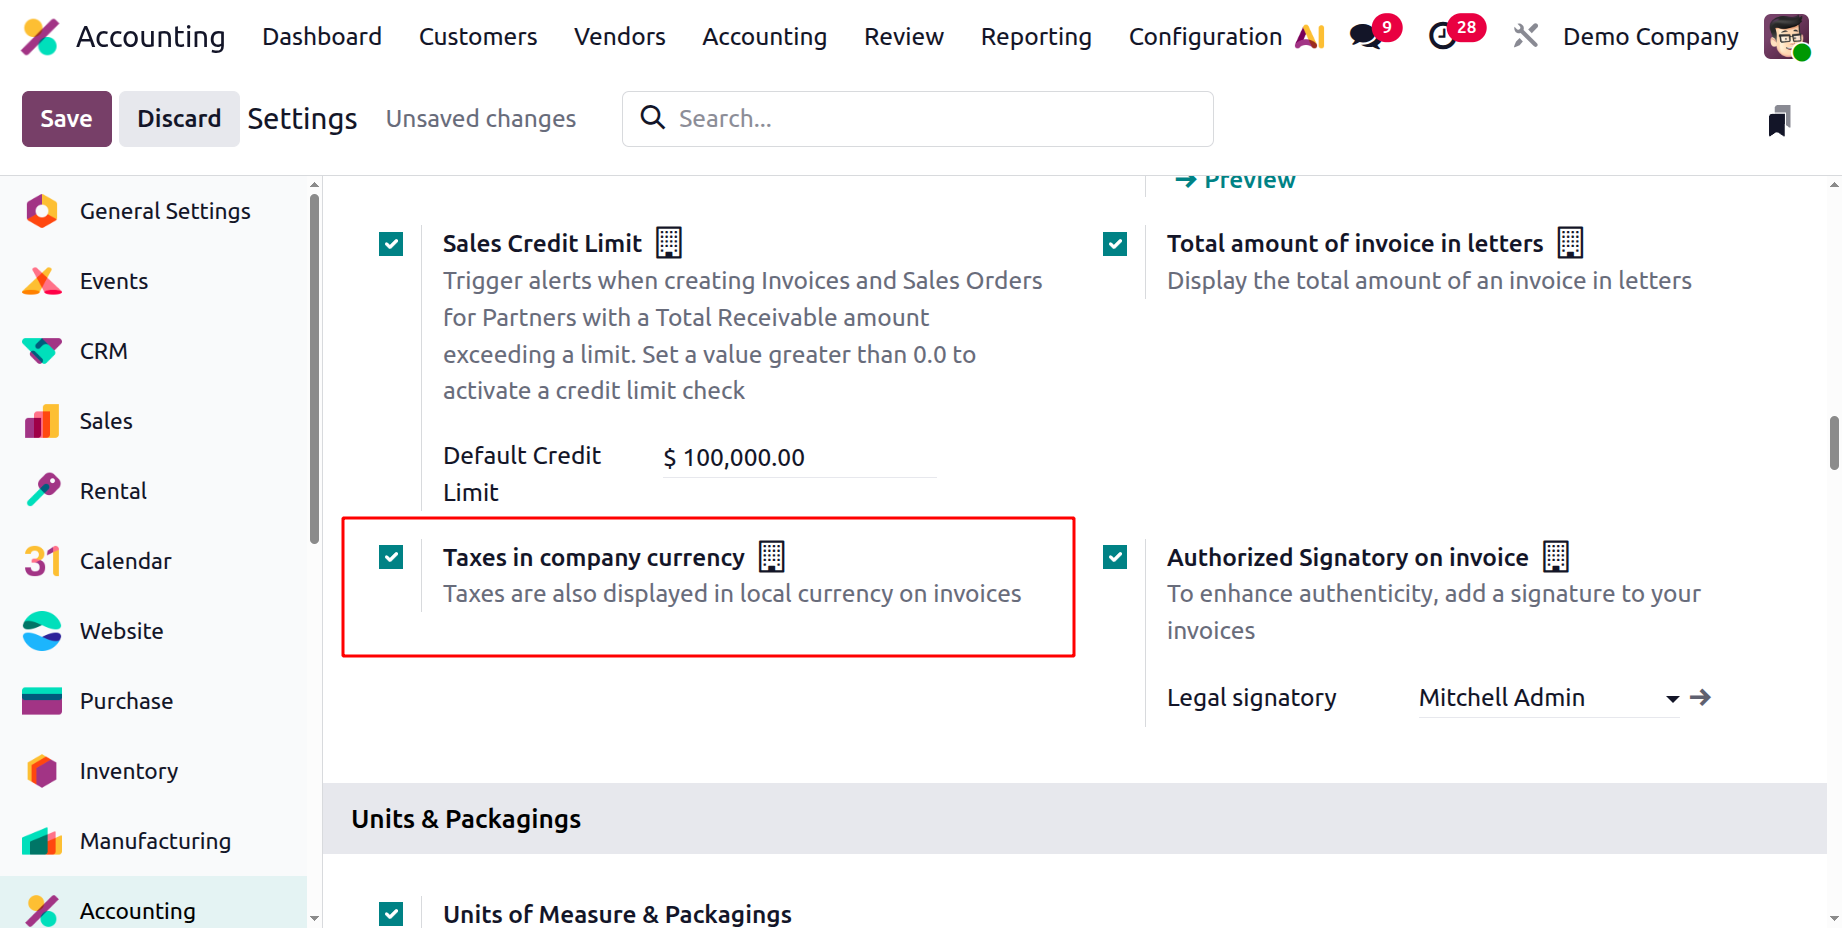
After activating this functionality, let's create and validate an invoice for a client. Proceed to the customer preview after the invoice has been validated. The taxes shown below will be shown in the company currency.
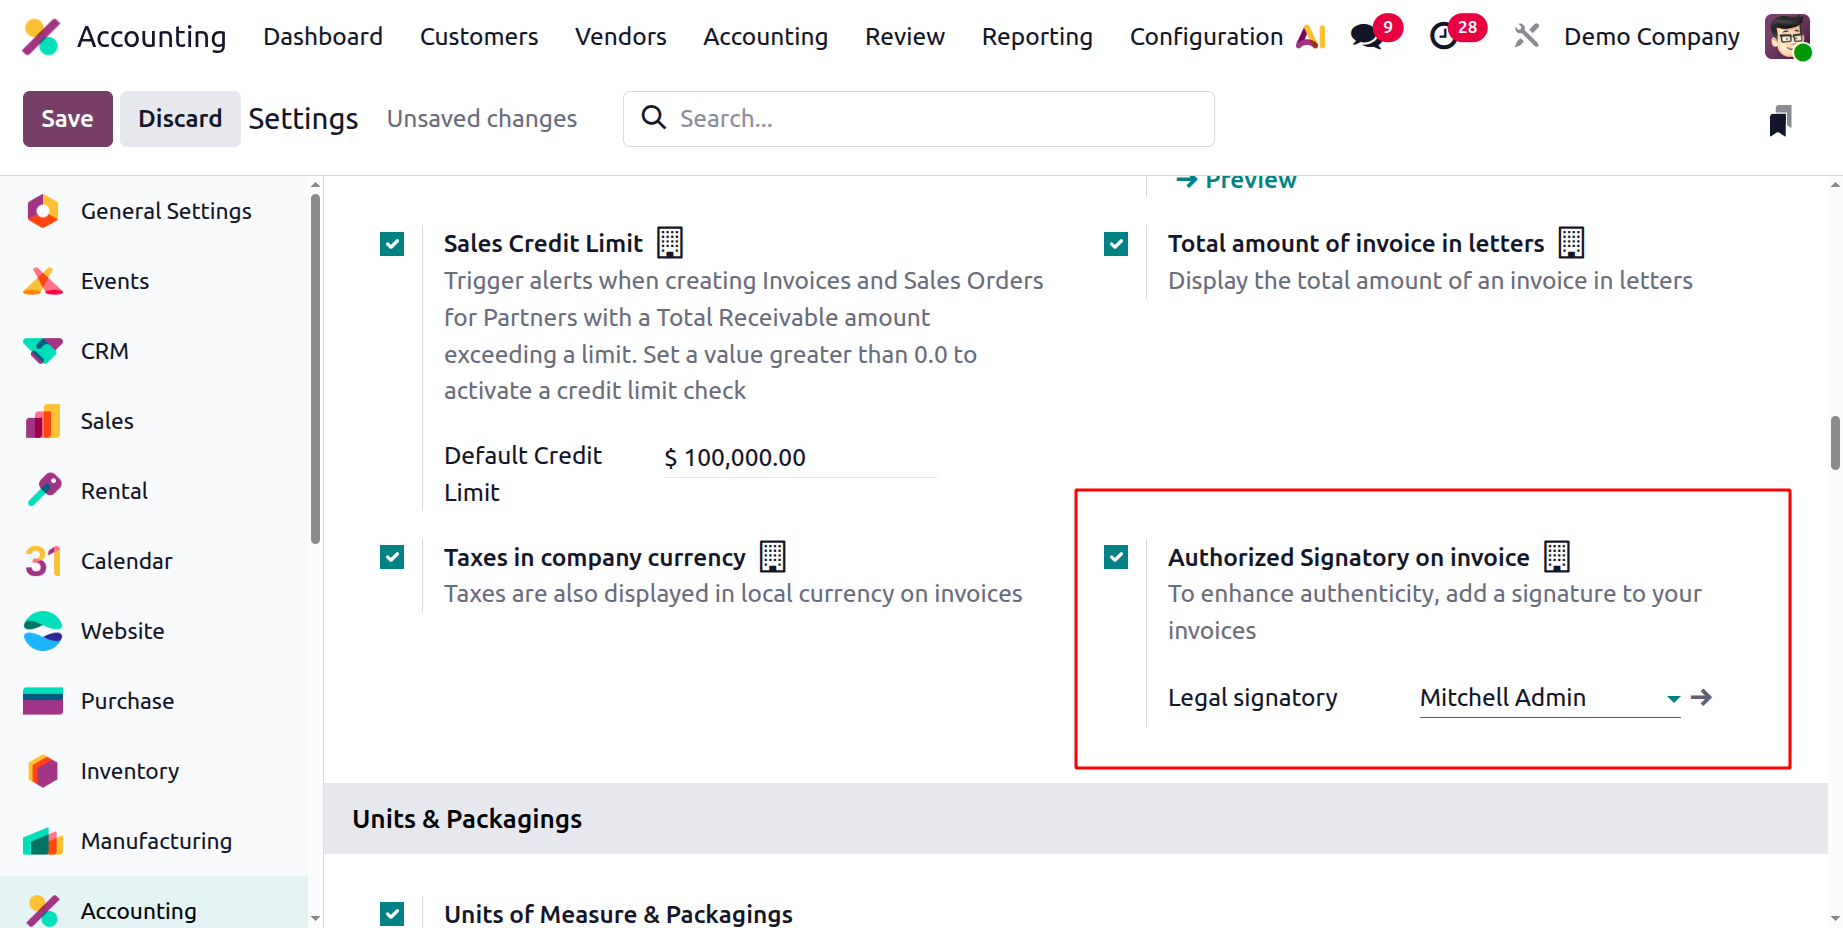
Authorized Signatory on Invoice
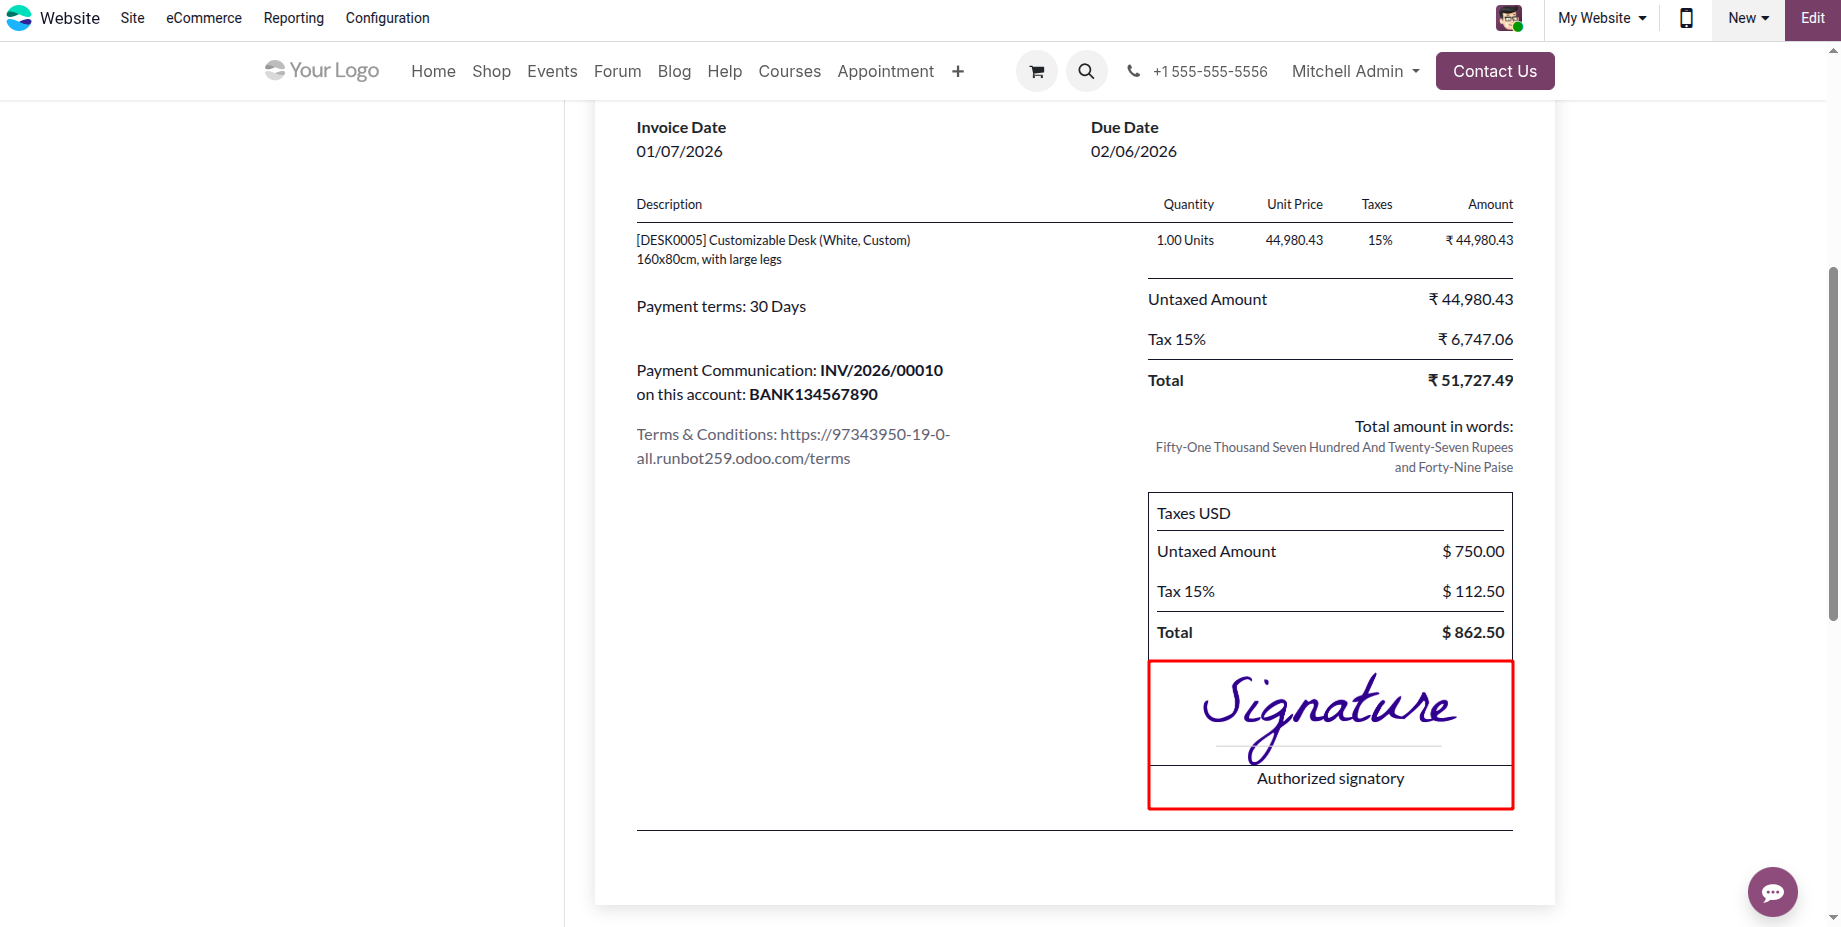
A new feature in Odoo 19 accounting settings called "Authorised Signatory on invoice" enables you to sign your invoices and boost their legitimacy. Before saving the configuration, insert the legal signatory's name after it has been enabled.
Additionally, as seen below, the legal signatory's signature is visible inside the invoice.
Simplify Customer Payments
Customer payment management is crucial to every business's financial operations, and the Odoo accounting module's setup menu offers several choices for this. You can enable clients to pay their invoices online by activating services like Invoice online payments. The user can also choose to pay in installments, which allows them to pay several payments at once. The client payment management options found in the Settings menu of the accounting module are shown in the image below.
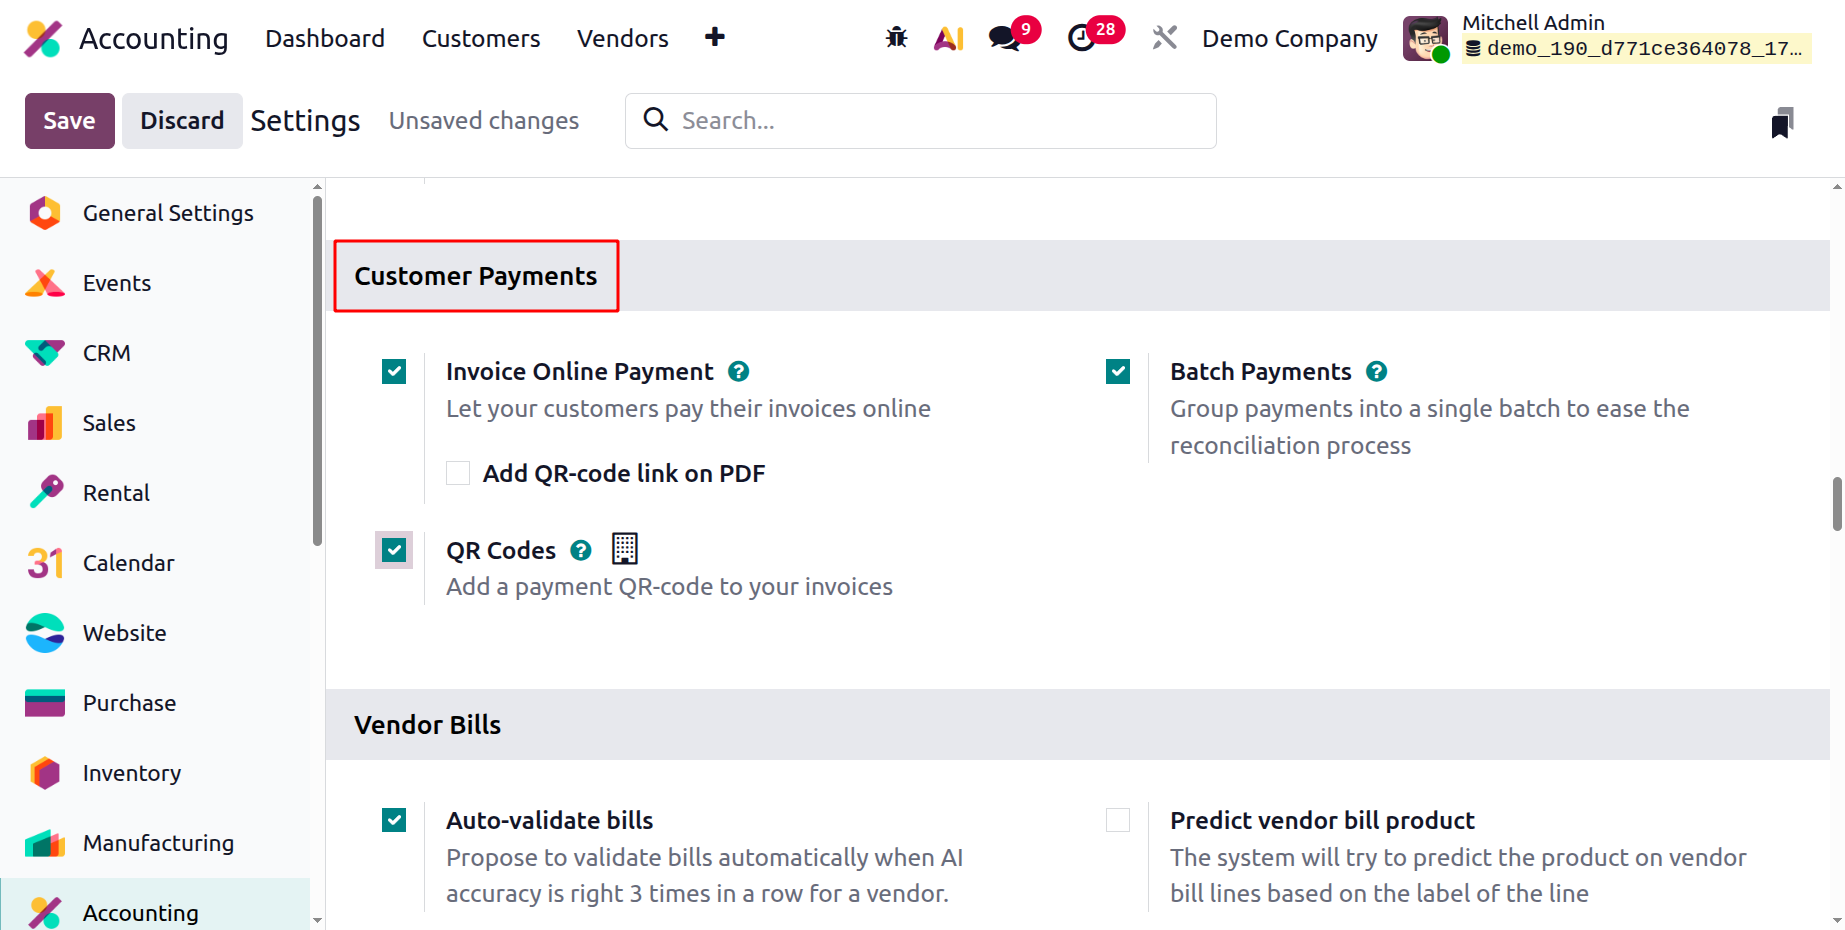
You can effectively manage several payments at once with minimal human labour thanks to Odoo's Batch Payments feature. Businesses can easily prepare and pay numerous bills or invoices in a coordinated and effective way thanks to it.
If you enable them, you can put QR codes on your invoices so that clients can scan them to pay. With all of these options, you may precisely characterise and handle customer payments. So far, we have focused on creating client invoices and managing payments. In the next part, we'll discuss handling vendor bills.
Effective Management and Setup of Vendor Bills
Odoo's accounting module makes it easy to keep track of vendor invoices for purchased goods. To effectively manage vendor invoices, you must choose the proper parameters in the configuration menu of the accounting module. The advanced feature of the Odoo Platform accounting module allows you to proactively understand vendor bills by utilising previous supplier invoices.
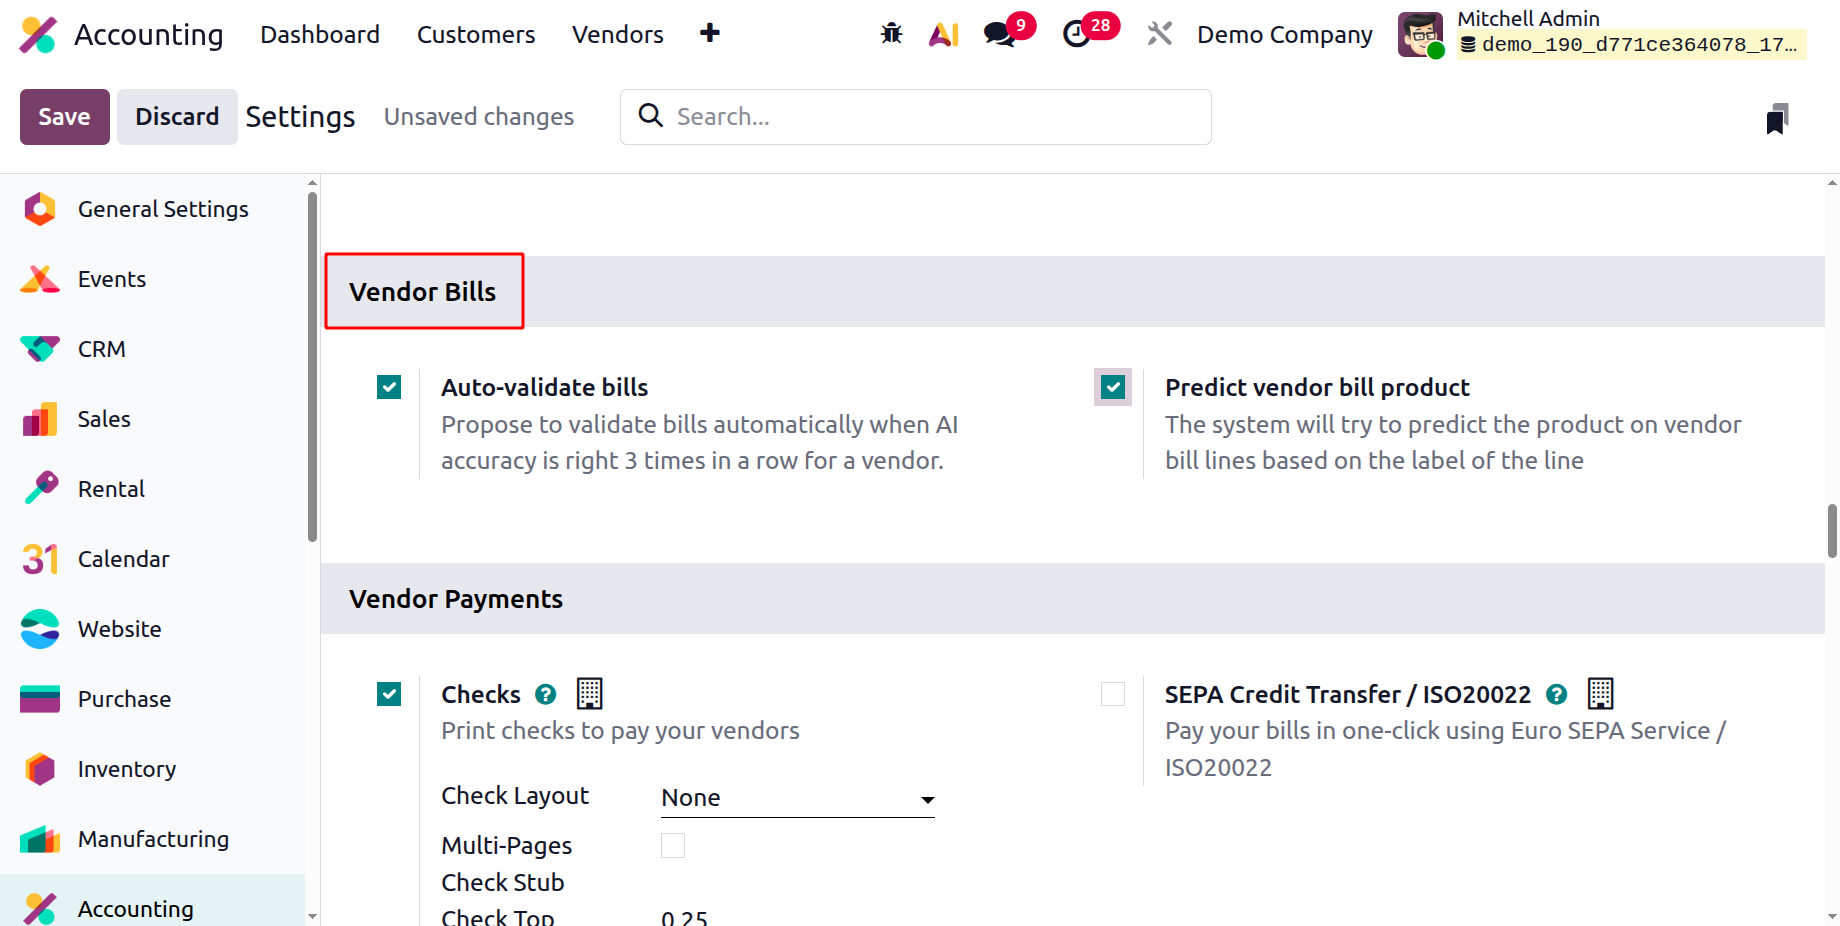
After importing three bills for a vendor without making any changes, Odoo will automatically recommend confirming following bills if the Auto-validate bills option is used. In the vendor's profile, you can always turn this feature on and off. Check the vendors after enabling.
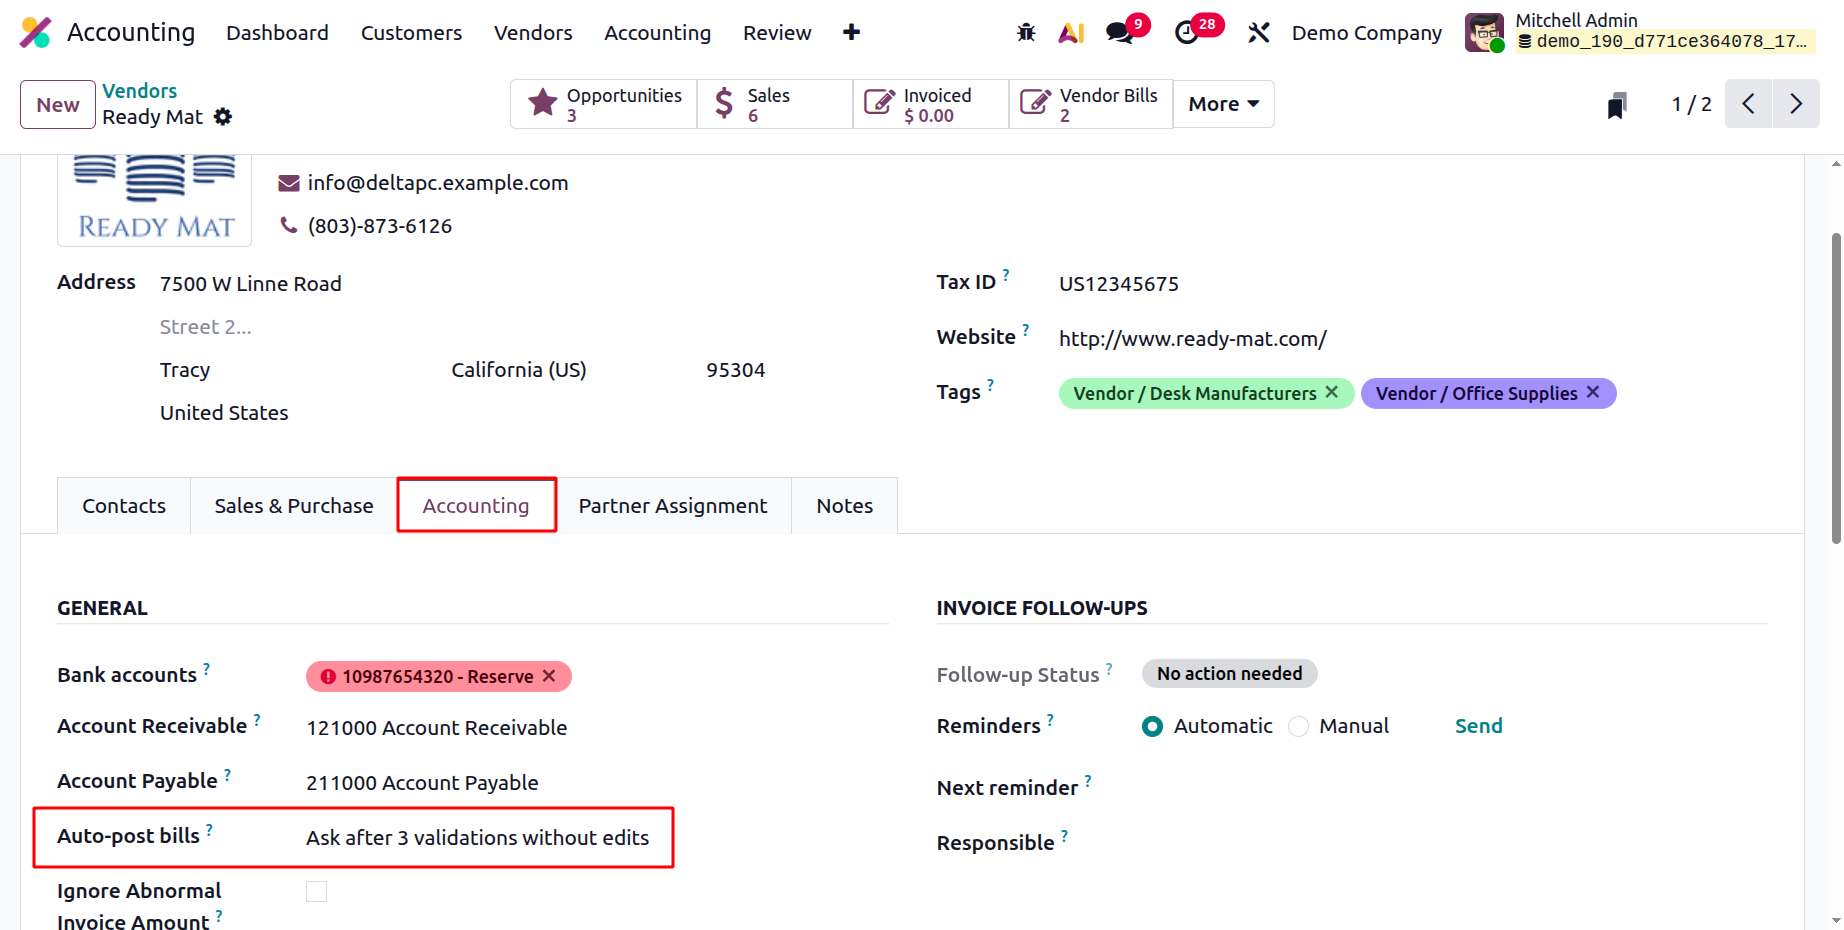
If the anticipated vendor bill product option is selected, the system will try to predict the product on vendor bill lines based on the line label.
When creating a vendor bill using label or description, Odoo 19 Accounting's "Predict Vendor Bill Product" feature leverages historical data and vendor-specific purchase trends to automatically suggest the appropriate product. It reduces manual effort by automatically filling up the product column through machine learning analysis of previous transactions. This increases billing accuracy, ensures consistency in product selection, and speeds up the invoicing process.
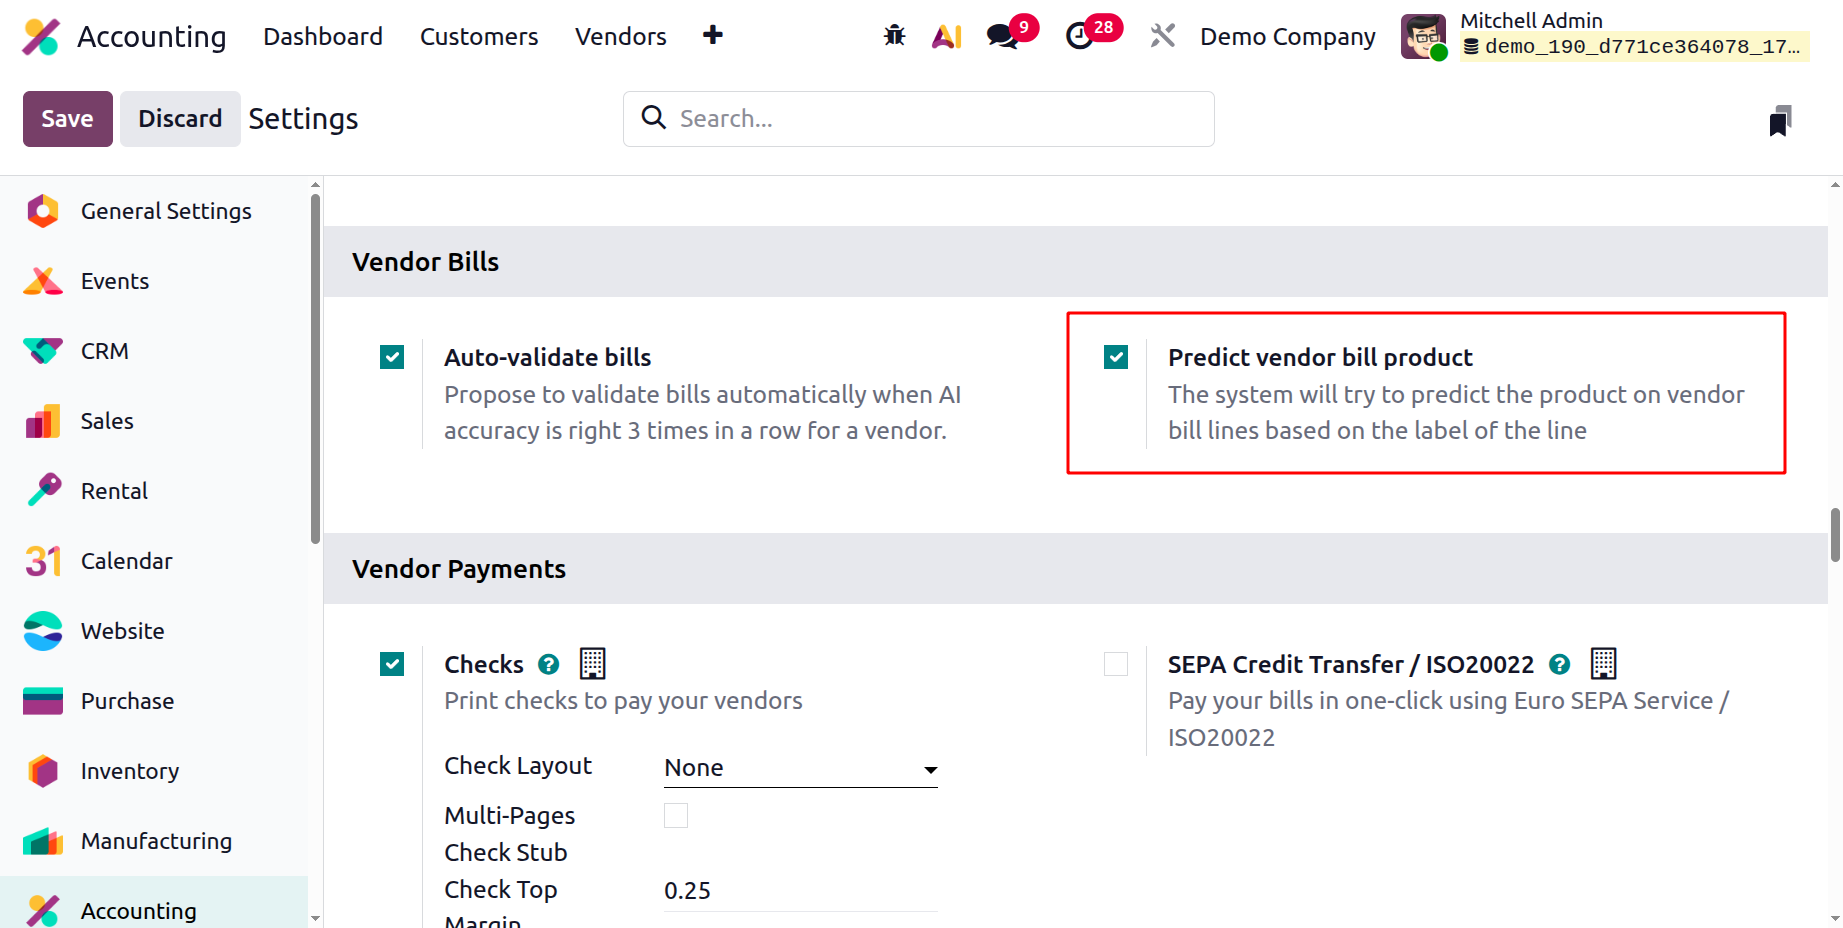
Easy Vendor Payment Management
Odoo's accounting module offers advanced vendor payment management features that enhance the company's financial management skills. This can be changed by activating checks and selecting Check Layout from the drop-down menu. Additionally, you can modify the Control Left Margin and Control Top Margin settings and enable the Multi-Page Control Loop.
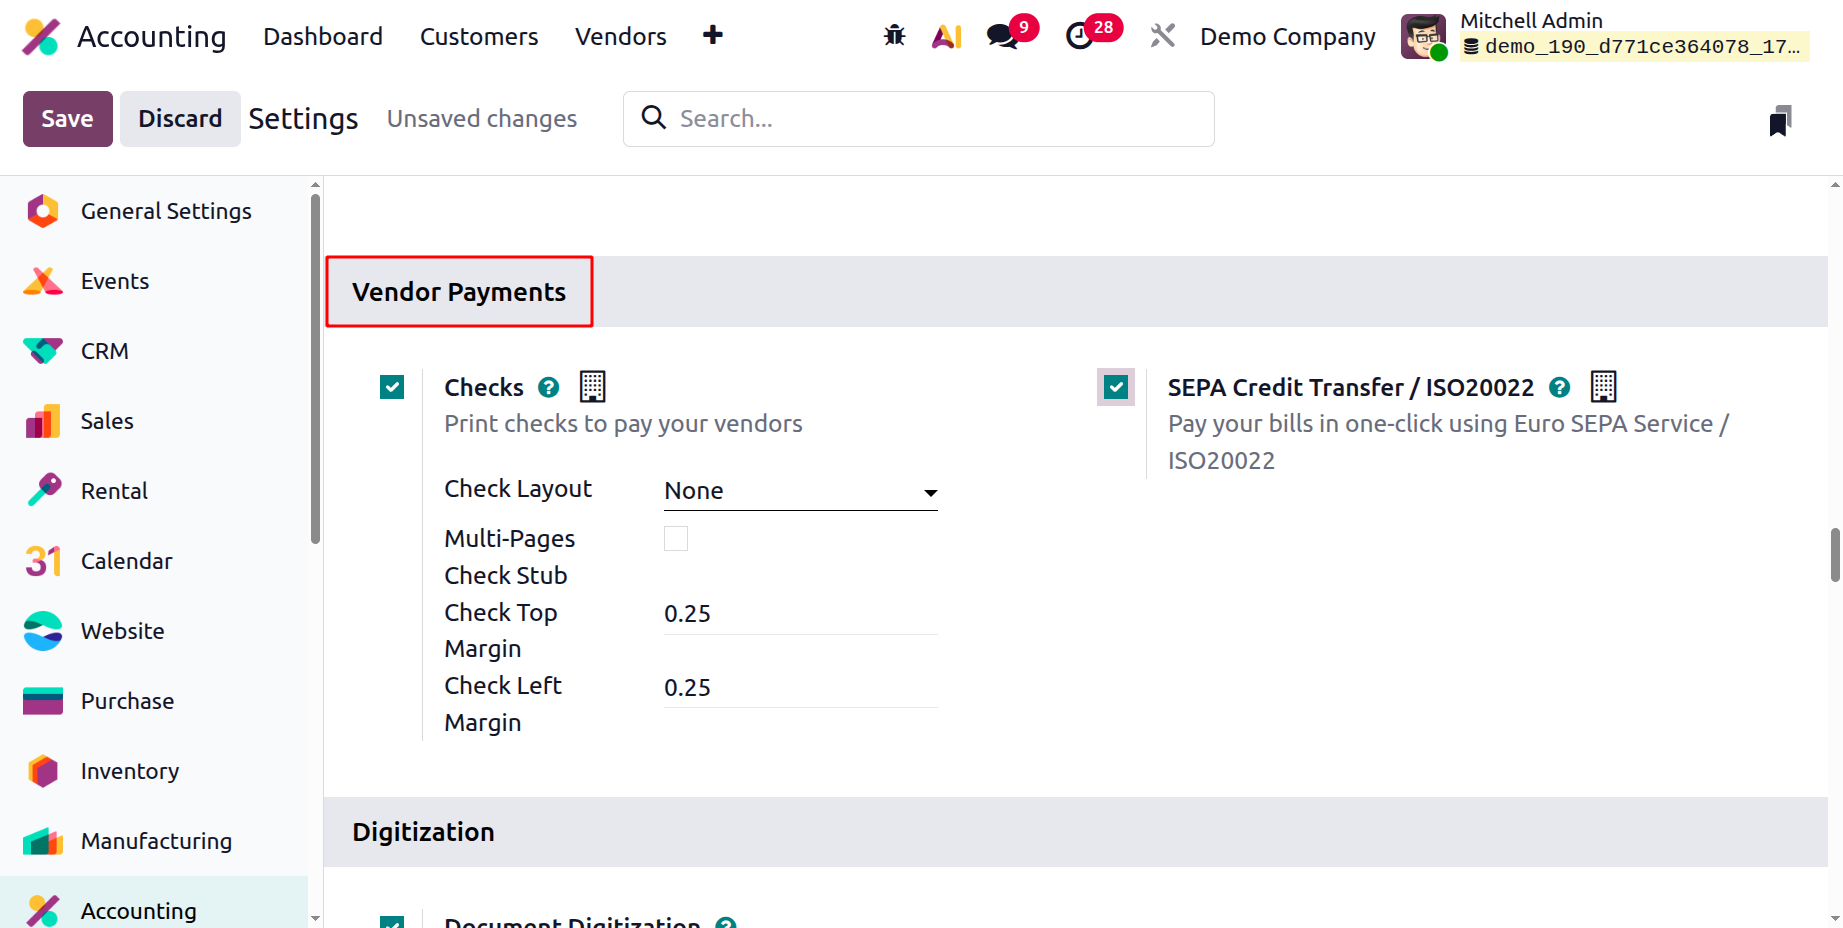
Additionally, companies in European countries can use Euro-SEPA services to pay their invoices with only one click by using SEPA Credit Transfer. To understand more about the banking and cash management choices found in the Odoo accounting module's settings menu, let's move on to the next section.
Digitization
Invoice digitisation in Odoo 19 is the process of automating data entry and invoice processing by using AI and OCR technologies to convert paper or digital invoices into an organised format within the Odoo system. This involves using Odoo's built-in functionality to scan, extract data, and automatically create draft bills.
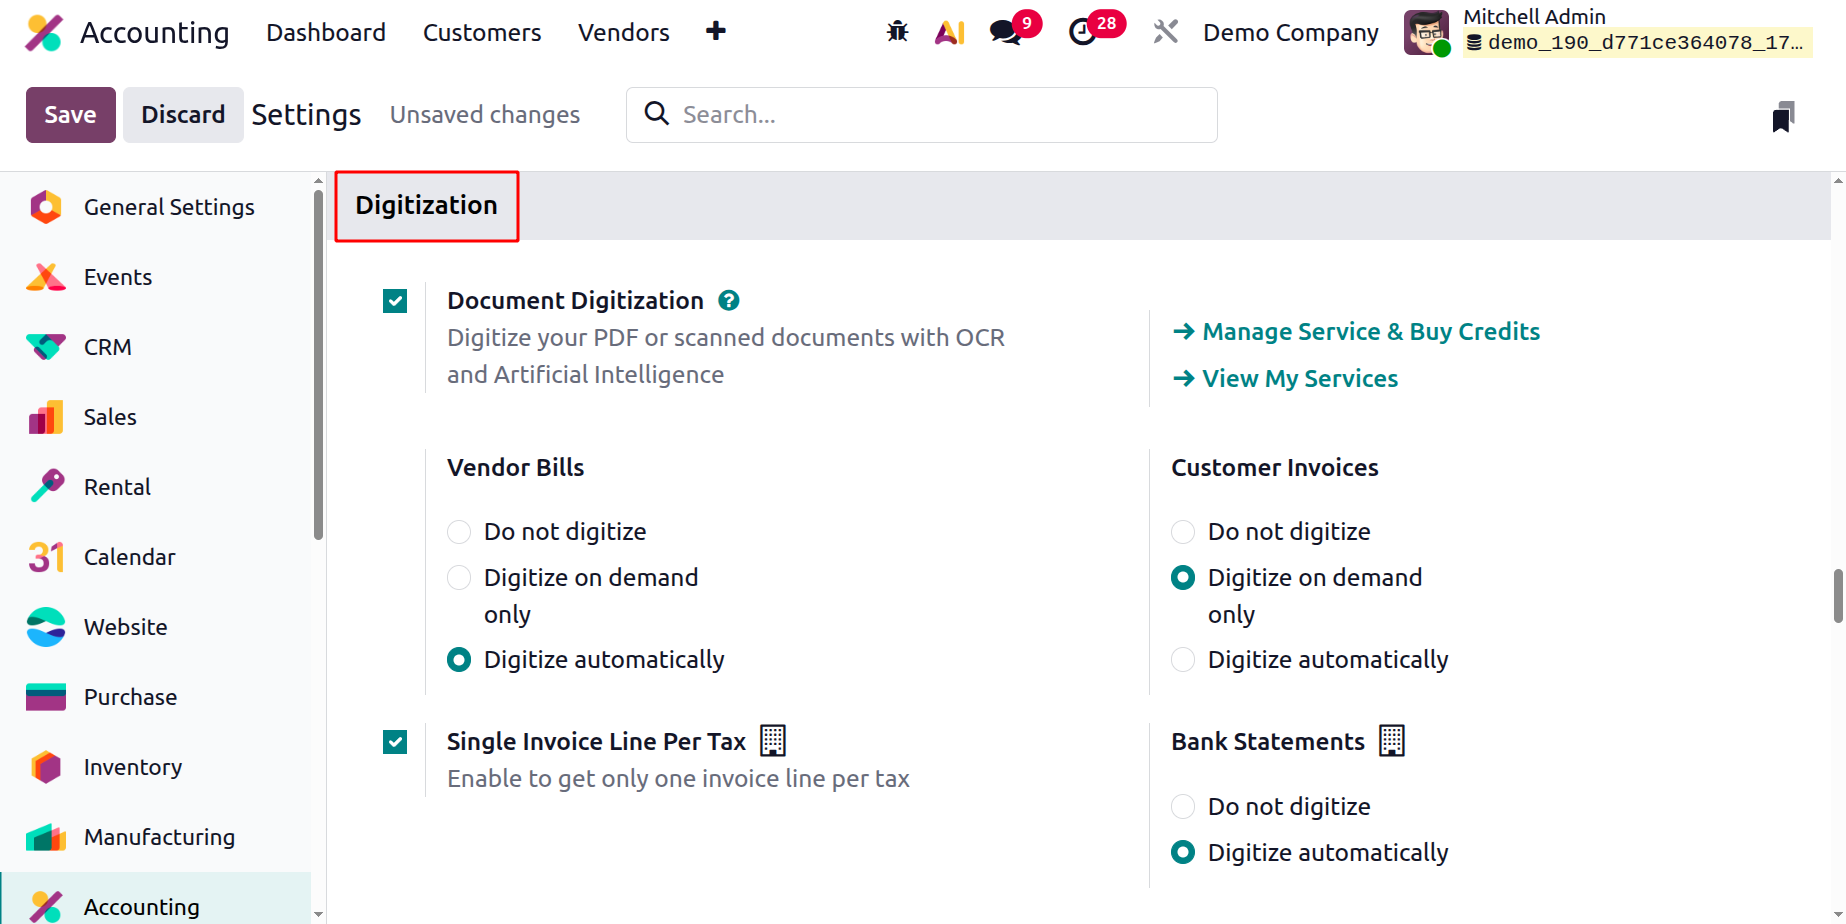
The menu offers three options: Do not digitise, Digitise on demand, and Digitise Automatically. If you need to digitise vendor bills, you can select one of the Purchase Credits options to obtain the necessary credits.
Bank statements and vendor bills can be digitally converted with Odoo 19. You can select the digitisation technique in the settings. There are three ways to digitise vendor bills: do not digitise, digitise just when needed, and digitise automatically. The only options for bank statements are "Do not digitise" and "Digitise automatically."
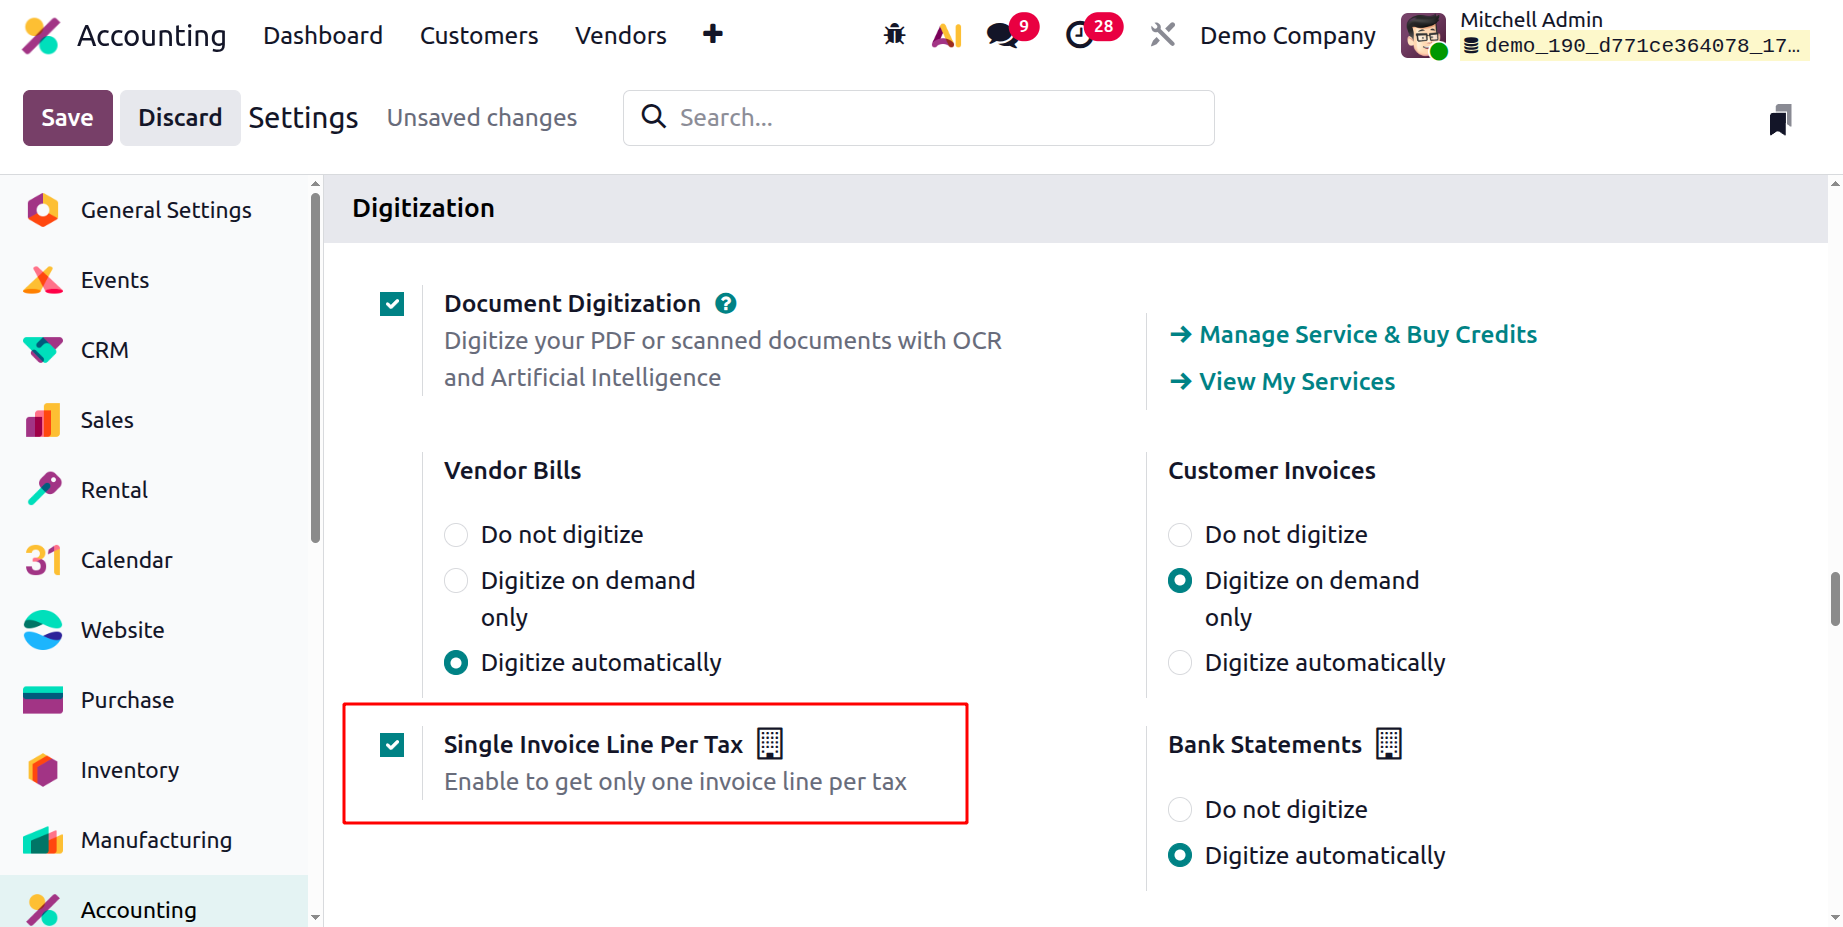
Turn on the Single Invoice Line Per Tax option to obtain only one invoice line per tax.
Setting Default Accounts
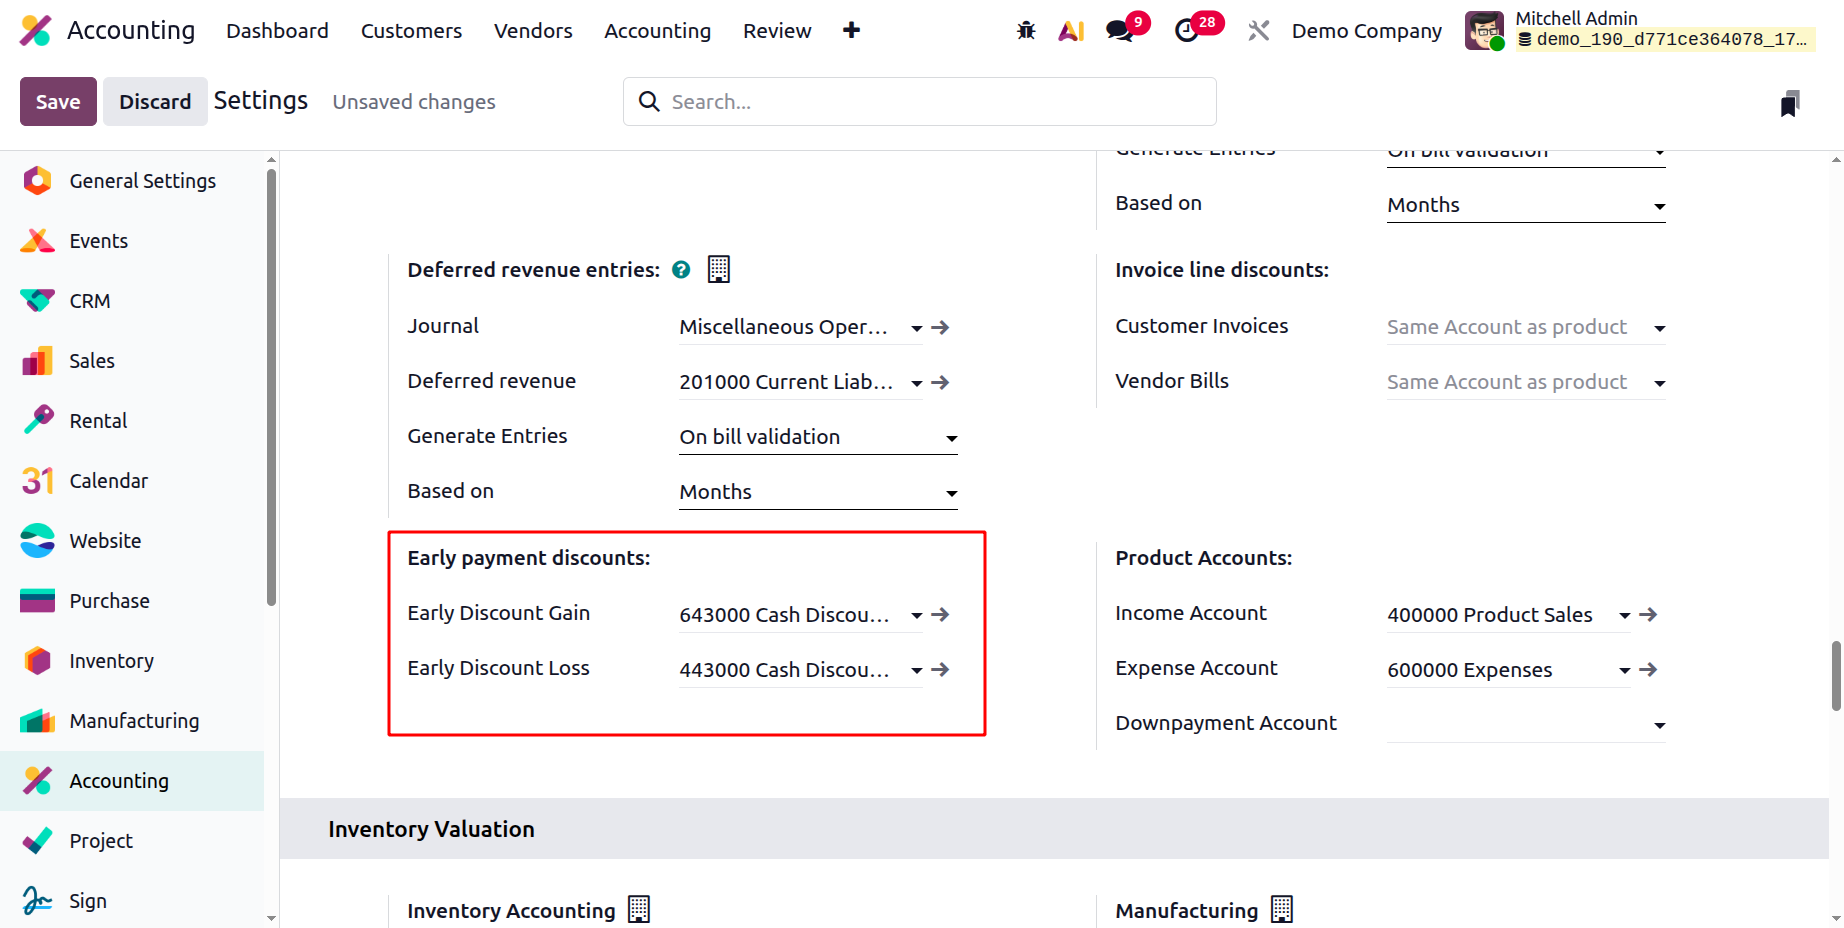
The Default Accounts section defines Profit accounts, Loss accounts, Bank suspense accounts, Outstanding receipts accounts, Outstanding payments accounts, Internal transfer accounts, Cash discount accounts, Cash discount loss accounts, Deferred expenses accounts, Deferred revenue accounts, Income accounts, Expenses accounts, and so forth. Each account serves a certain function.
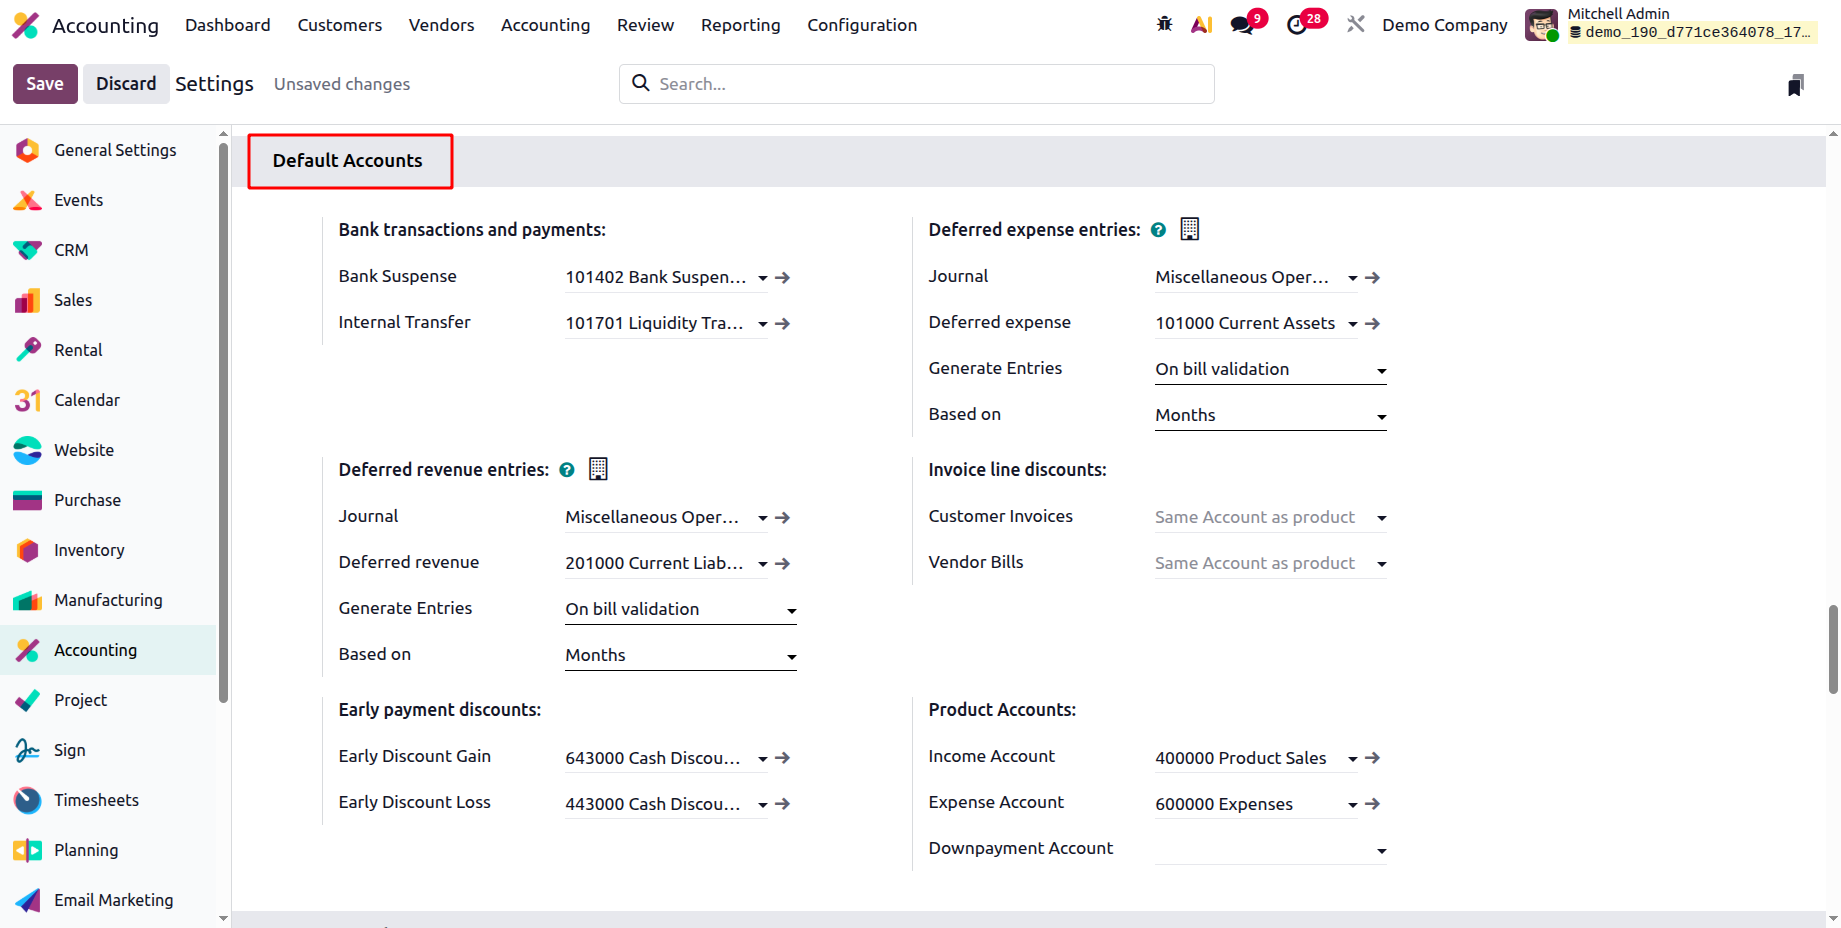
The profit and loss accounts show the difference in currency rates that occurred during the transaction. A change in the exchange rate can result in either a profit or a loss for the company, and the income statement reflects the results. The journal item corresponding to the exchange rate discrepancy is located in the mixed journal displayed in the Journal field.
Odoo users can use a Bank Suspense Account, a temporary account, to pay bank statement transactions when the exact account is unknown. They are basically used to show the amounts on the bank statement until the reconciliation date because the exact match is unknown. Trust transactions can then be routinely monitored and transferred to the proper accounts after being paid or reconciled. An internal transfer account is an intermediary account used for interbank transfers.
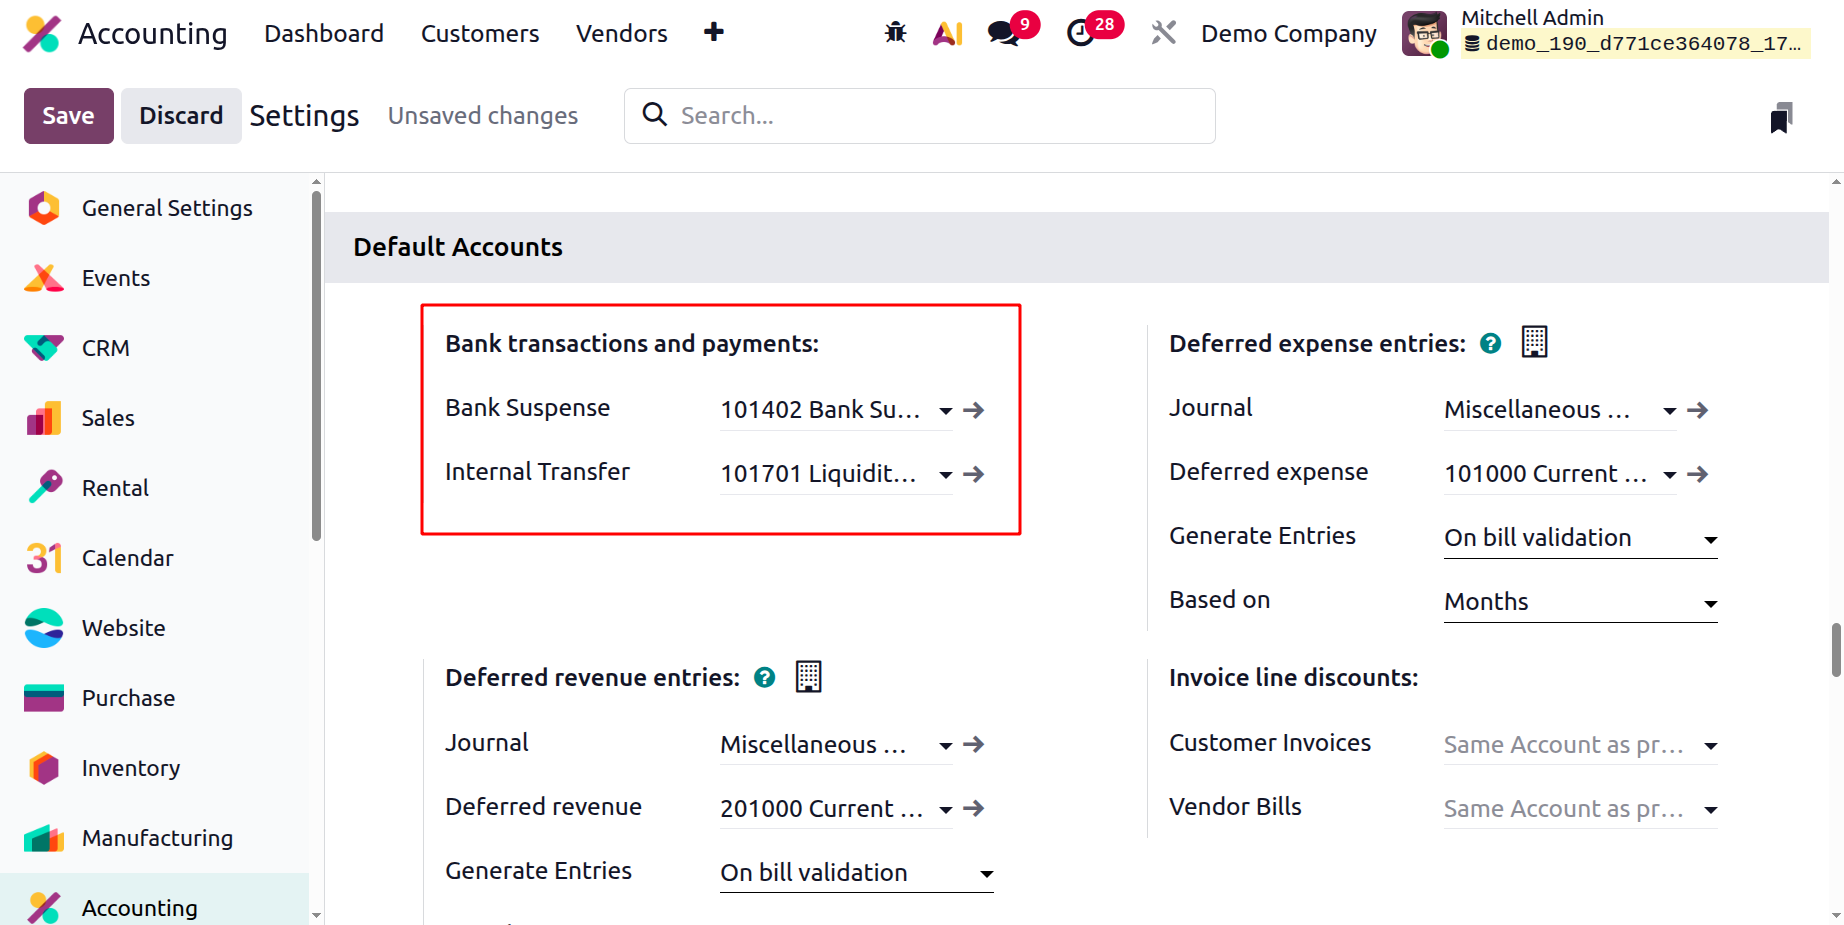
The Cash Discount Loss Account and Cash Discount Gain Account capture the rebates or discounts granted in the accounting transaction, which are subsequently applied to the appropriate accounts. Let's examine the Odoo accounting module's definition of fiscal periods in more detail in the section that follows.
Inventory Valuation
Odoo 19's automatic stock valuation setting has undergone a significant modification, and the "Cost of Production" account has been introduced to a new configuration. From raw material consumption to completed goods stock valuation, this will facilitate transparent stock movement and value as part of the Cost of Production account ledger. To add the account, activate the feature from the Stock Valuation part of the accounting module's settings, as explained below.
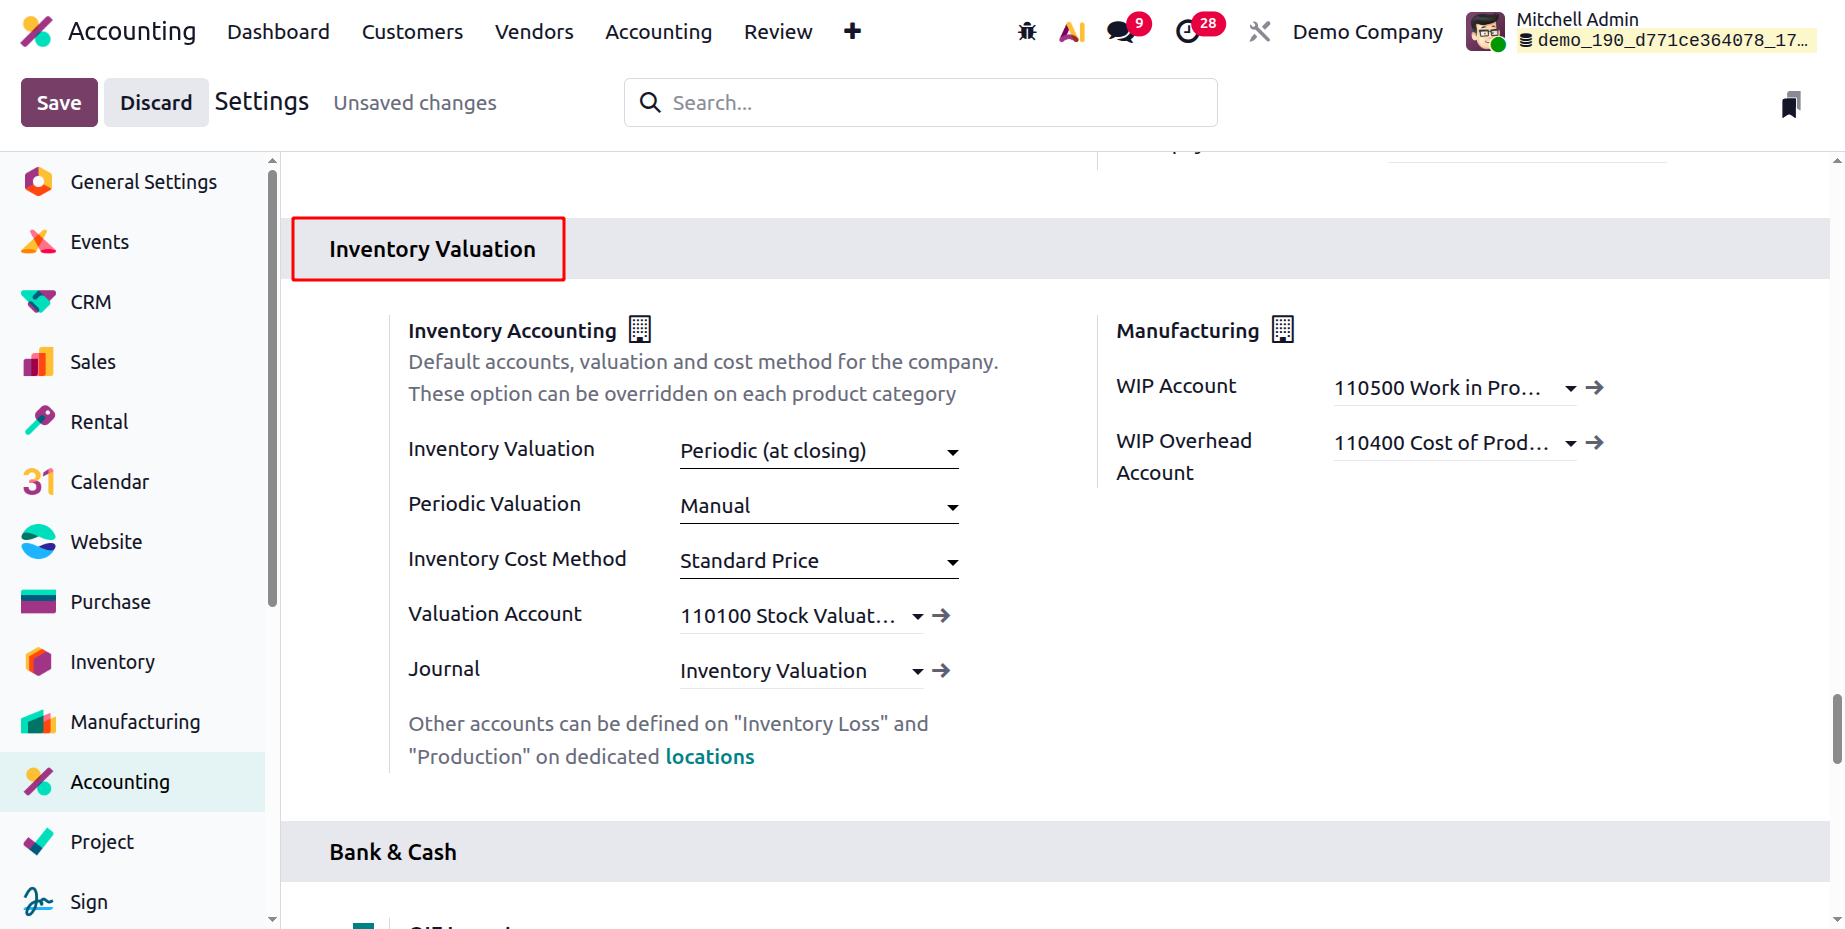
WIP accounts are referred to as Work in Progress accounts. Odoo 19's WIP accounts make it simpler to track continuous expenses like labour and supplies without early revenue recognition. This enables companies to continue adhering to accounting rules and making wise financial choices.
Effective Financial Management through Bank and Cash Management
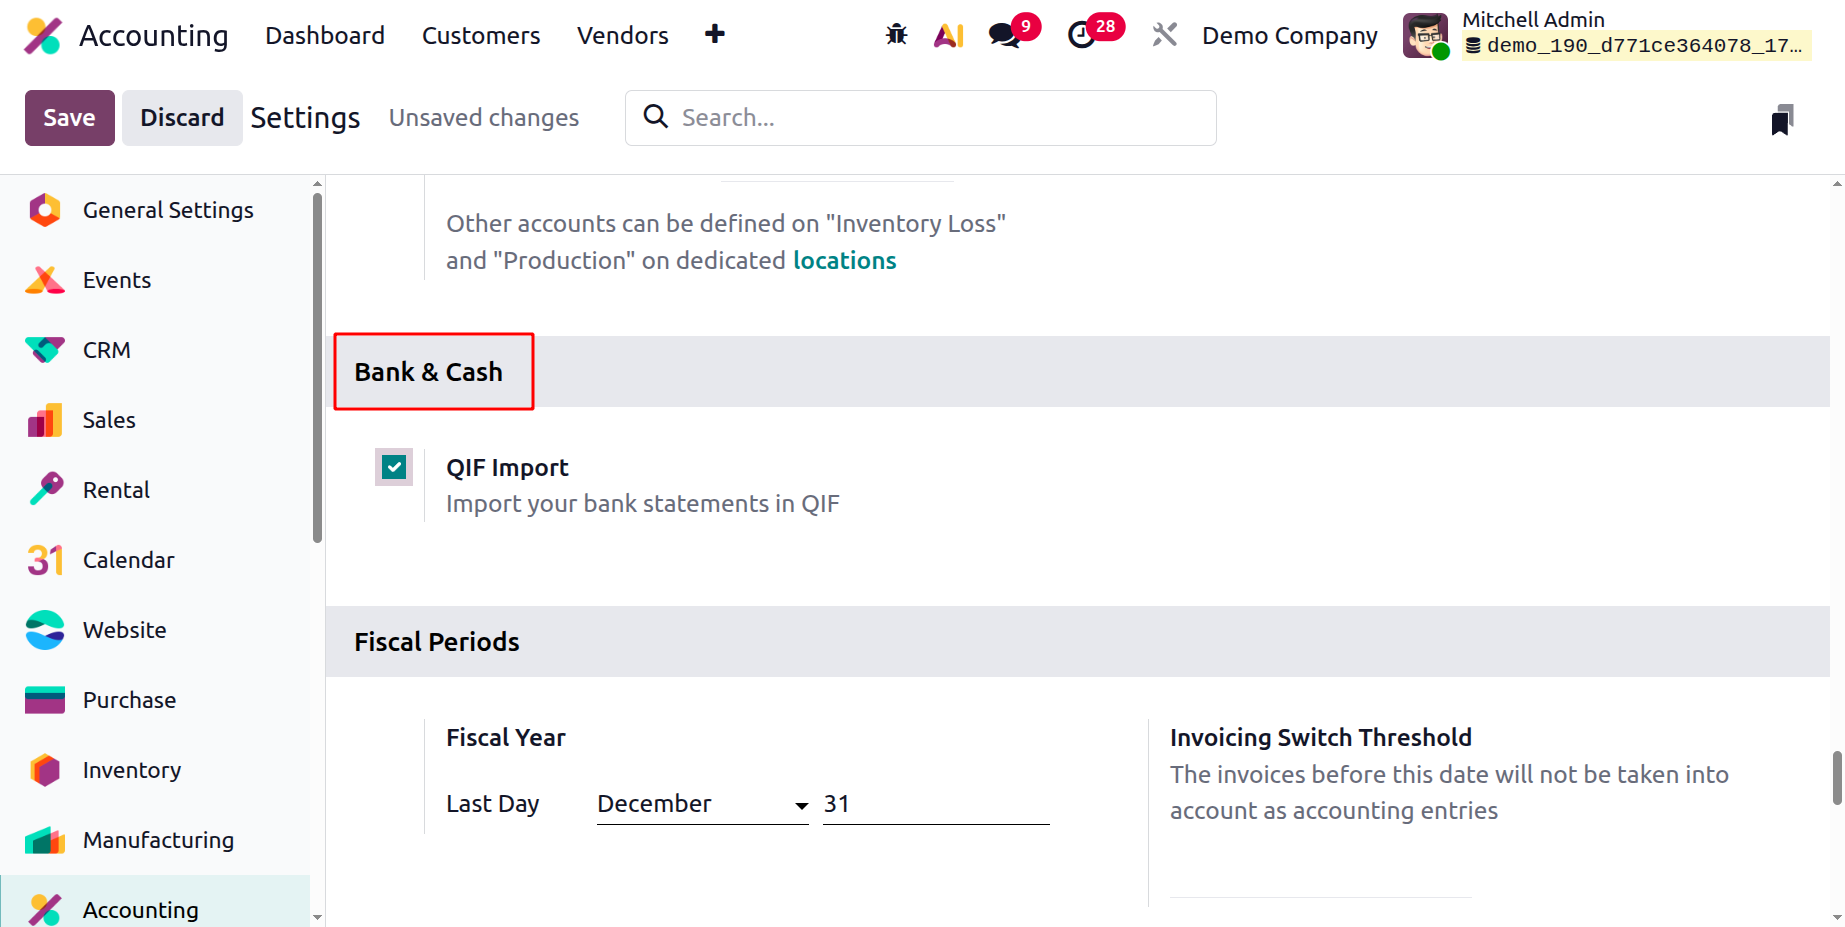
A thorough understanding of operational efficiency is offered by the bank and cash management options in the accounting module's setup section. By describing and utilising the transfer account, you can utilise the option to set up transactions between banks. Additionally, by activating automatic import, bank statements can be imported automatically. By activating the QIF import option, you can import bank statements in QIF format.
Configurable Positions and Fiscal Periods
The Odoo accounting module allows you to choose the accounting period in which your company operates. You can define a fiscal period by choosing the end day and month in the Fiscal Year box. You activate the option if the fiscal actions are carried out in accordance with fiscal years. You can define an invoicing threshold by selecting a date from the calendar when you set the invoicing switch threshold. Every invoice created on any previous date that is entered as the Invoicing Threshold made prior to that date is given the cancelled status. Furthermore, you start the process after eliminating the earning and reporting components.
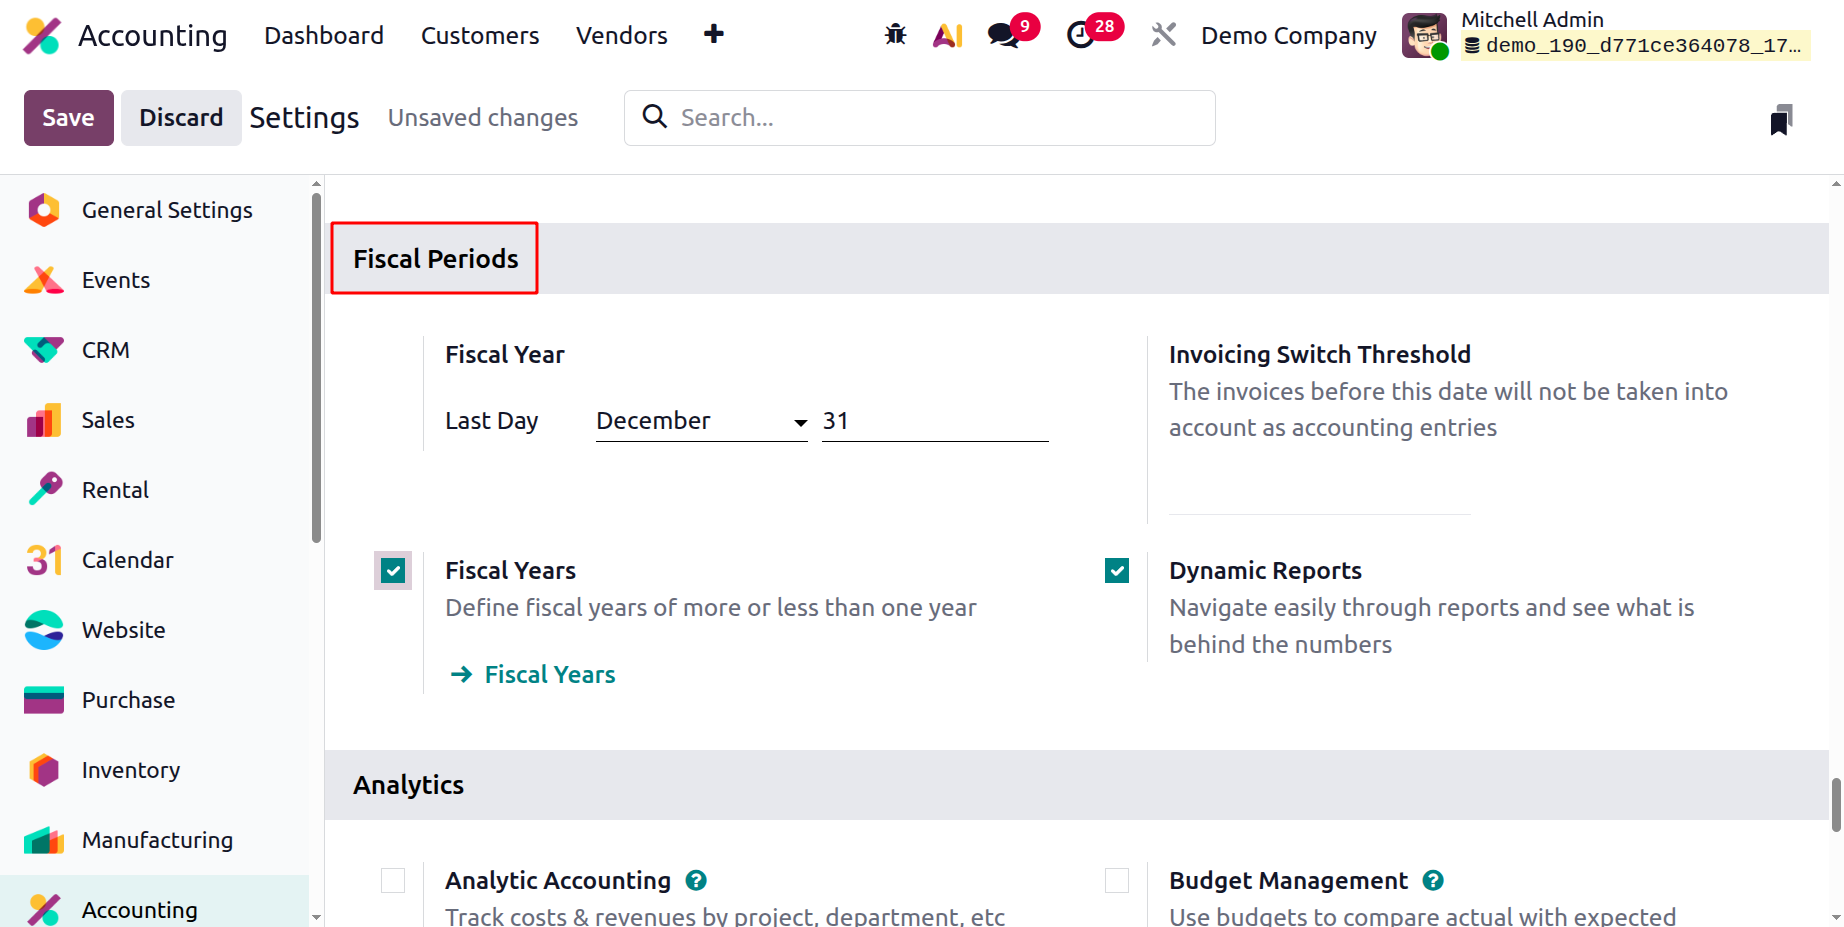
One helpful feature of Odoo during development is the threshold option to eliminate all test data from invoices, vendor bills, and related income. To put it another way, the platform returns to its initial state after the test actions are finished and the threshold is set, guaranteeing that no test actions are carried out.
One element of the Odoo 19 Accounting program is Dynamic Reports. You may swiftly peruse reports and learn the meaning behind the numbers with the aid of this application. Users can specify fiscal years of one year or fewer by turning on the Fiscal Years feature.
The following section will discuss budget management and analytical accounting in the accounting module.
Analytical Accounting and Budget Management
Odoo's analytical accounting features might help you progress in your organization's financial management responsibilities. You can specify any analytical accounting configuration option using the Analytics menu in the Settings tab of the Analytics module. The menu option allows you to turn on and off the analytical accounting component of your company's activities. The ability to apply analysis identifiers in accordance with operational requirements simplifies the classification of analysis accounts and related procedures.
The Budget Management tools also ensure that you have adequate control over the activities related to the company's free cash and financial budget.
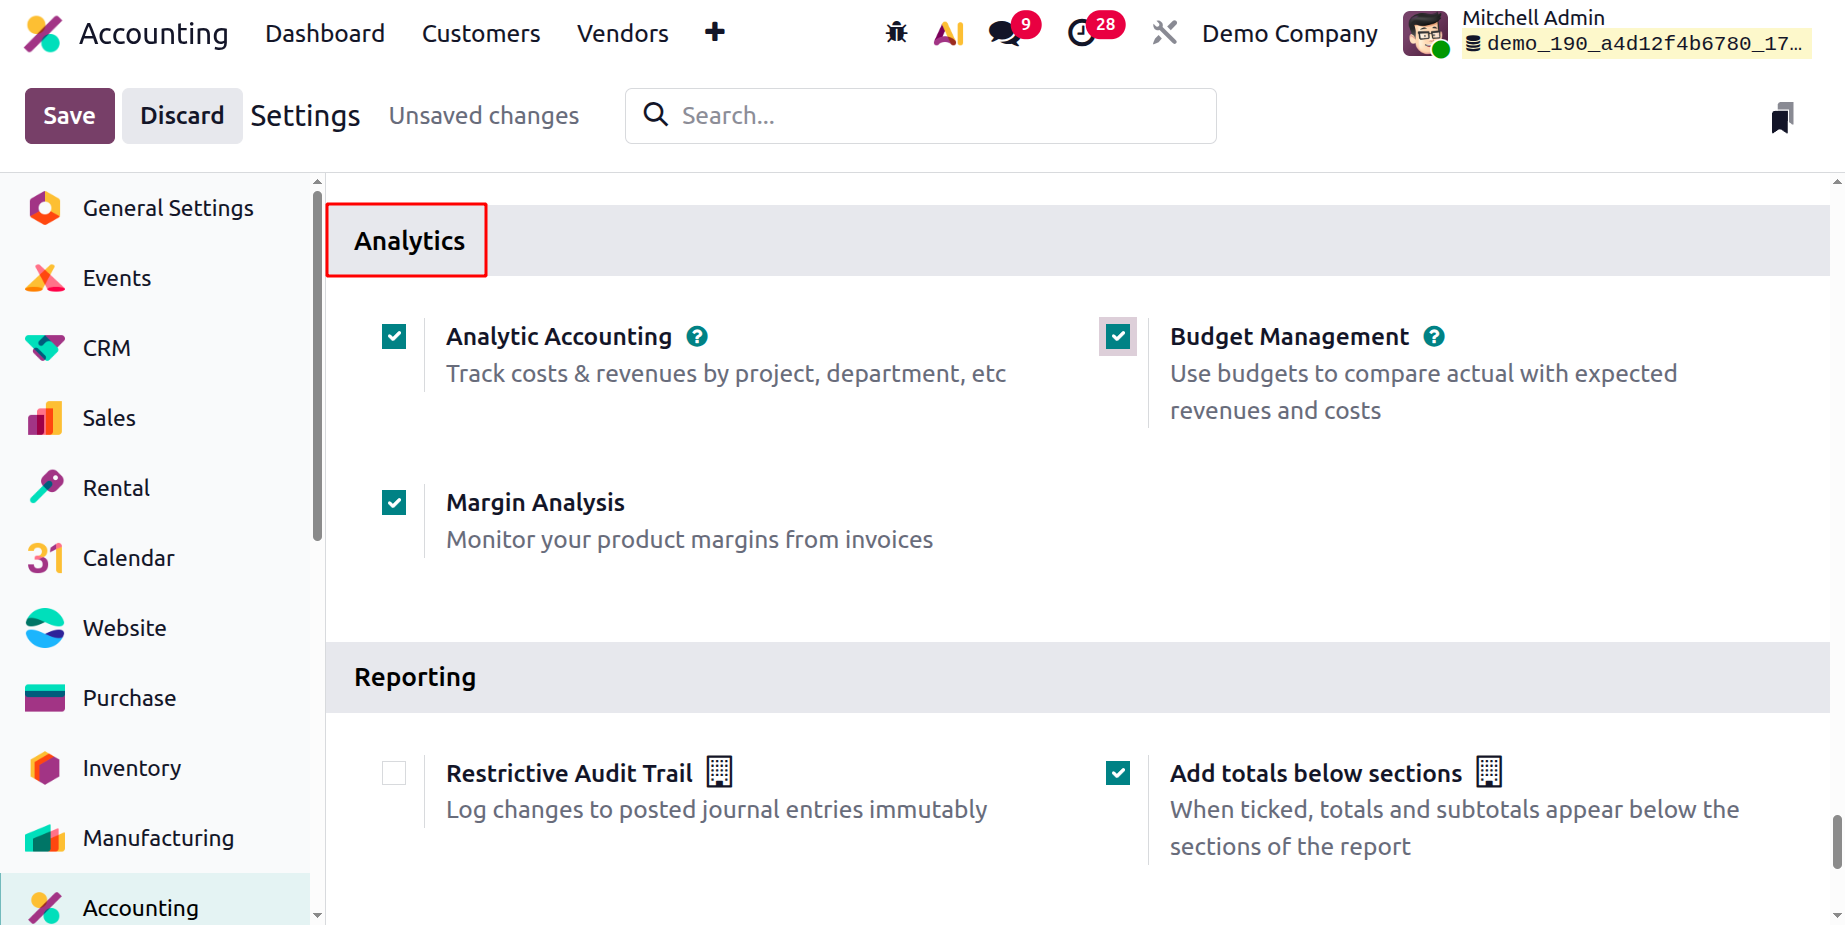
You may also monitor the product margins from invoices by turning on the Margin Analysis option. The Accounting module's Settings menu shows the choices found in the Analytical Accounting settings. As we continue, we will learn more about the setting options for generating analytics reports.
Reporting
The Reporting and Analysis area offers two methods for creating reports. You can first activate the Add Totals function under the sections that describe the total of the report's components. Additionally, by selecting the Download Data Audit Report option from this menu, you can download the report to your computer.
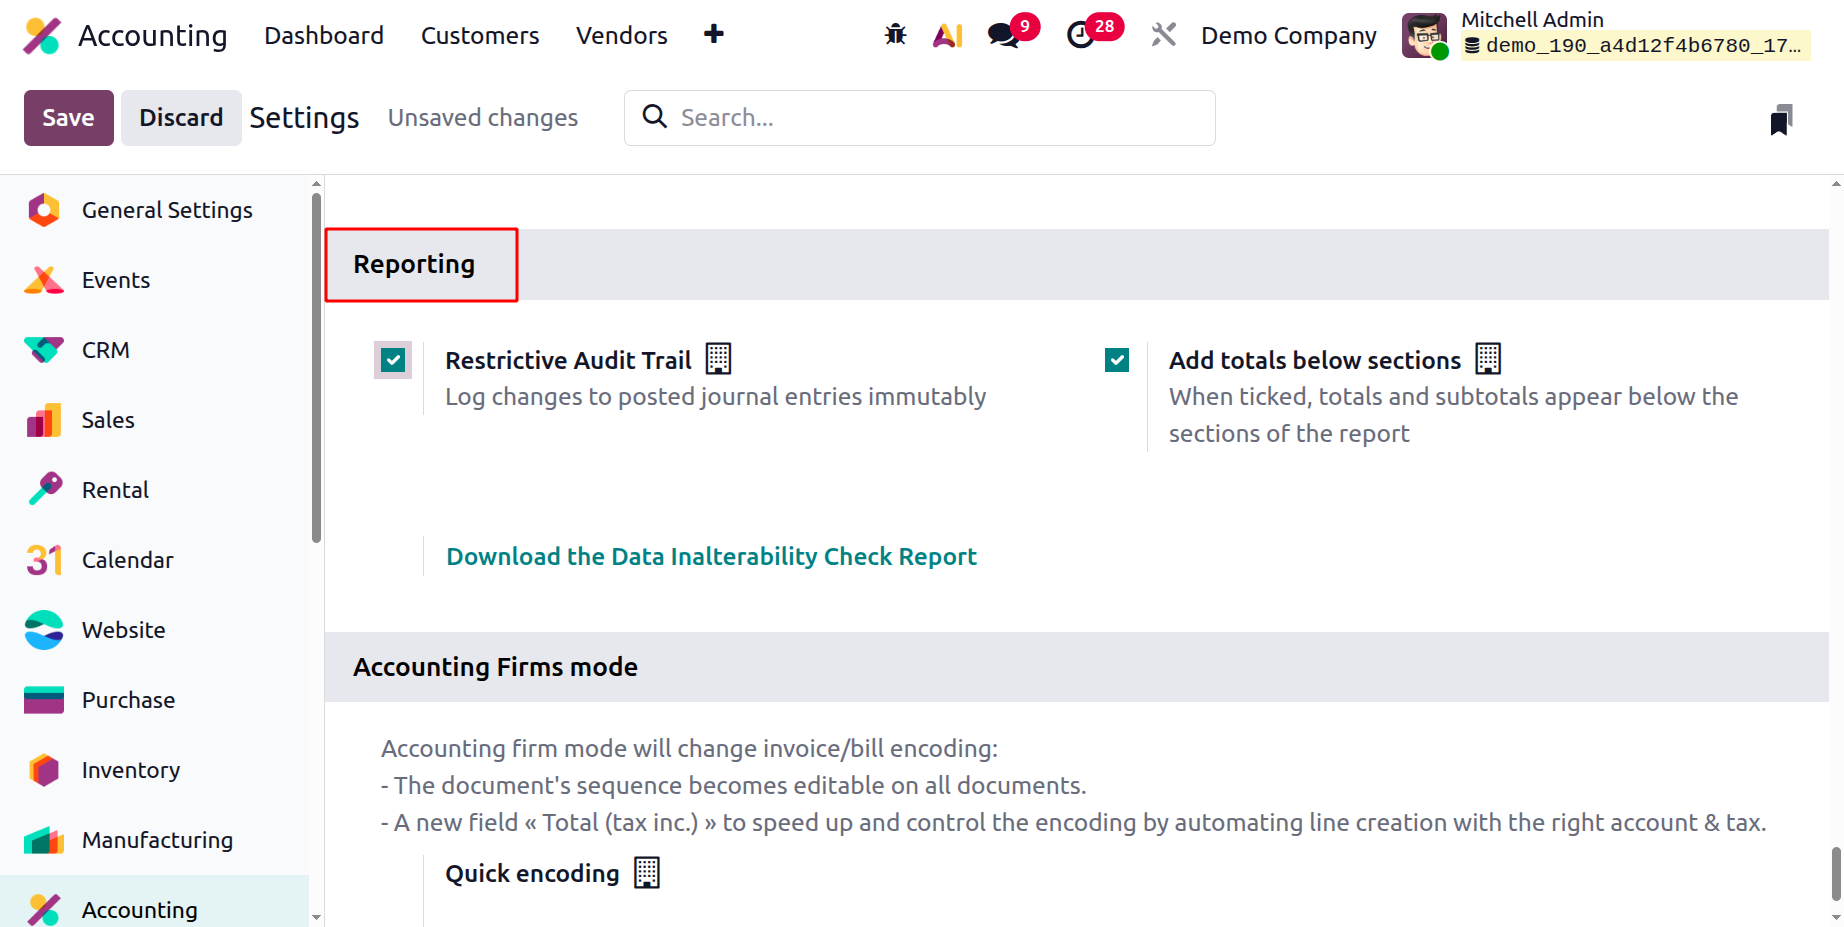
The configuration menu for the accounting module of the Odoo platform provides a variety of adjustable choices depending on usage needs. You can simply change them to have the operational control you need over your company's finances.
At the beginning of this chapter, we covered the basics of Odoo, including how to install and host it. The platform's localisation capabilities are then discussed, followed by the installation features of the Odoo accounting module. All of the options in the accounting module's configuration panel have been examined in this chapter.
The configuration tools for the compute module will be covered in more detail in the next chapter.