Accounting dashboard
Odoo operates using a modular structure, and its dedicated Accounting module provides a variety of menus and
tools to manage a company’s financial operations. Since the previous chapter covered the configuration settings,
we will now explore the Accounting dashboard in Odoo 19, the first screen users see when opening the module.
This dashboard is clearly organised and gives users detailed access to the various functional features available
within the Accounting module.
A Detailed Overview of the Accounting Module Dashboard
Using the Group By option on the dashboard, you can reorganize the displayed data to match your functional needs.
You’ll also see a table that outlines the structure of the accounting module and the company’s financial
activities. From this view, you can understand how all finance-related tasks are properly organized. The image
below shows the accounting dashboard along with its configuration details.
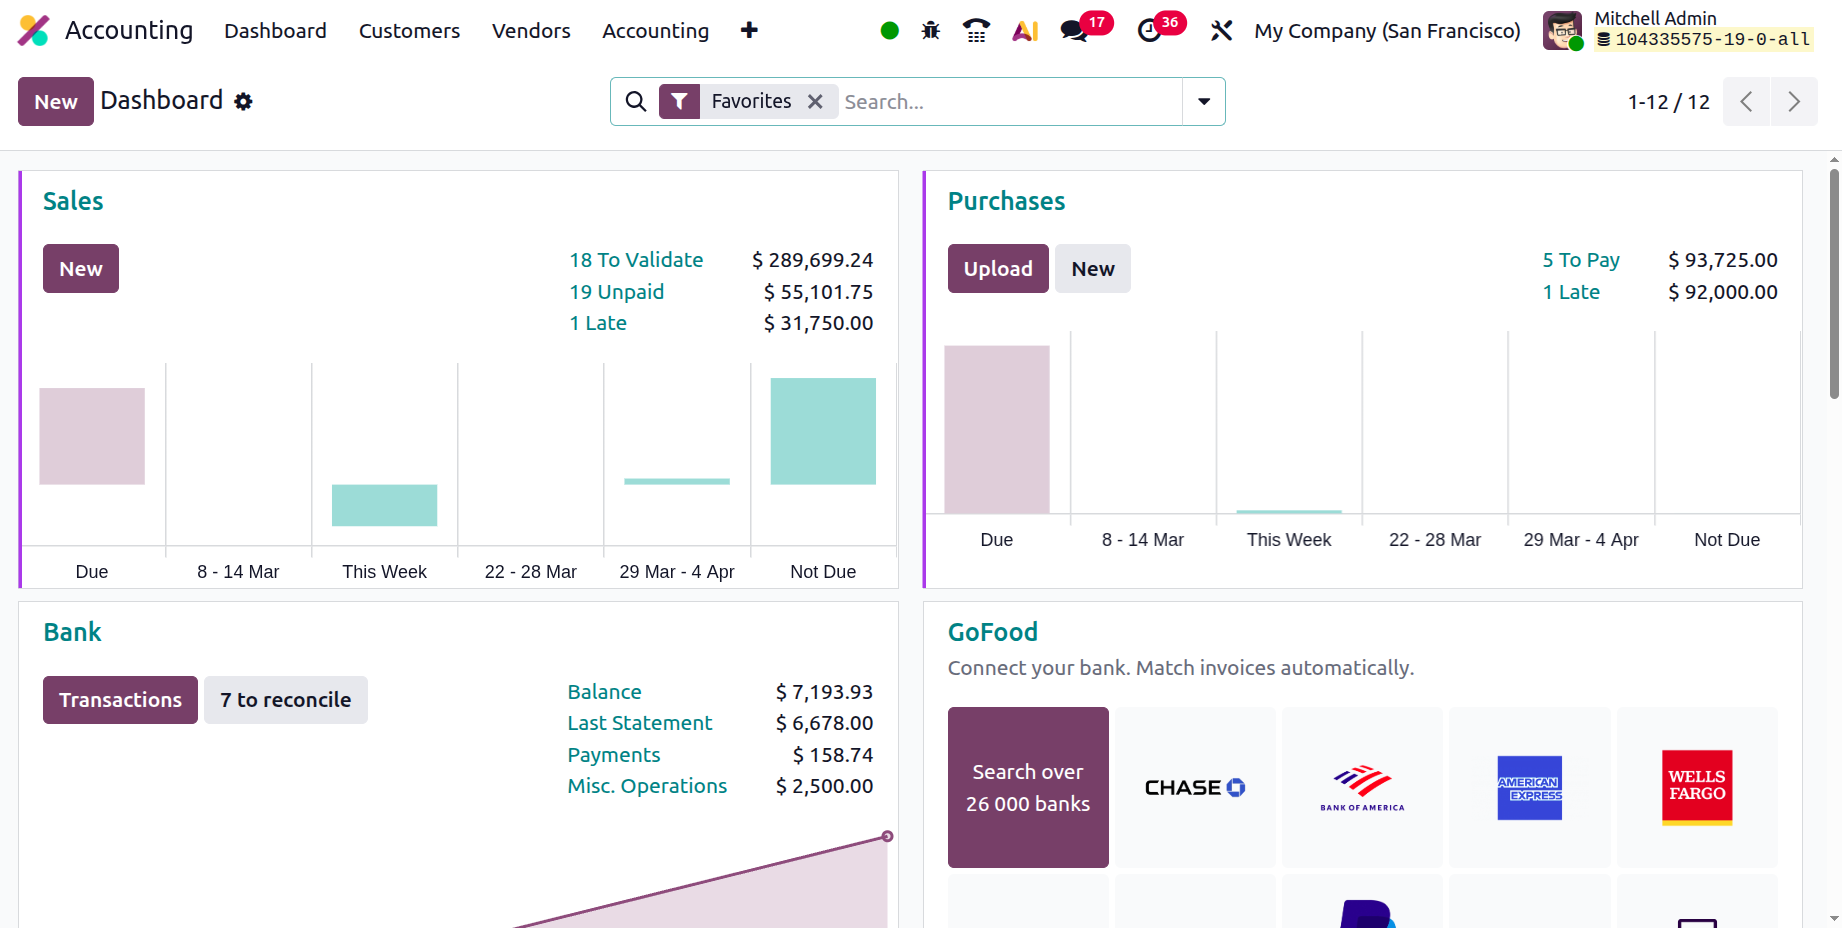
Each tab includes quick links to its related menu, and specific configuration options are provided under every
tab based on its functionality. When there are many tabs, the color configuration feature helps you organize
them more clearly by assigning different colors to each one. Odoo 19 introduced ‘Tax Returns’ to the dashboard.
New journals can also be created directly from the Odoo 19 Accounting dashboard.
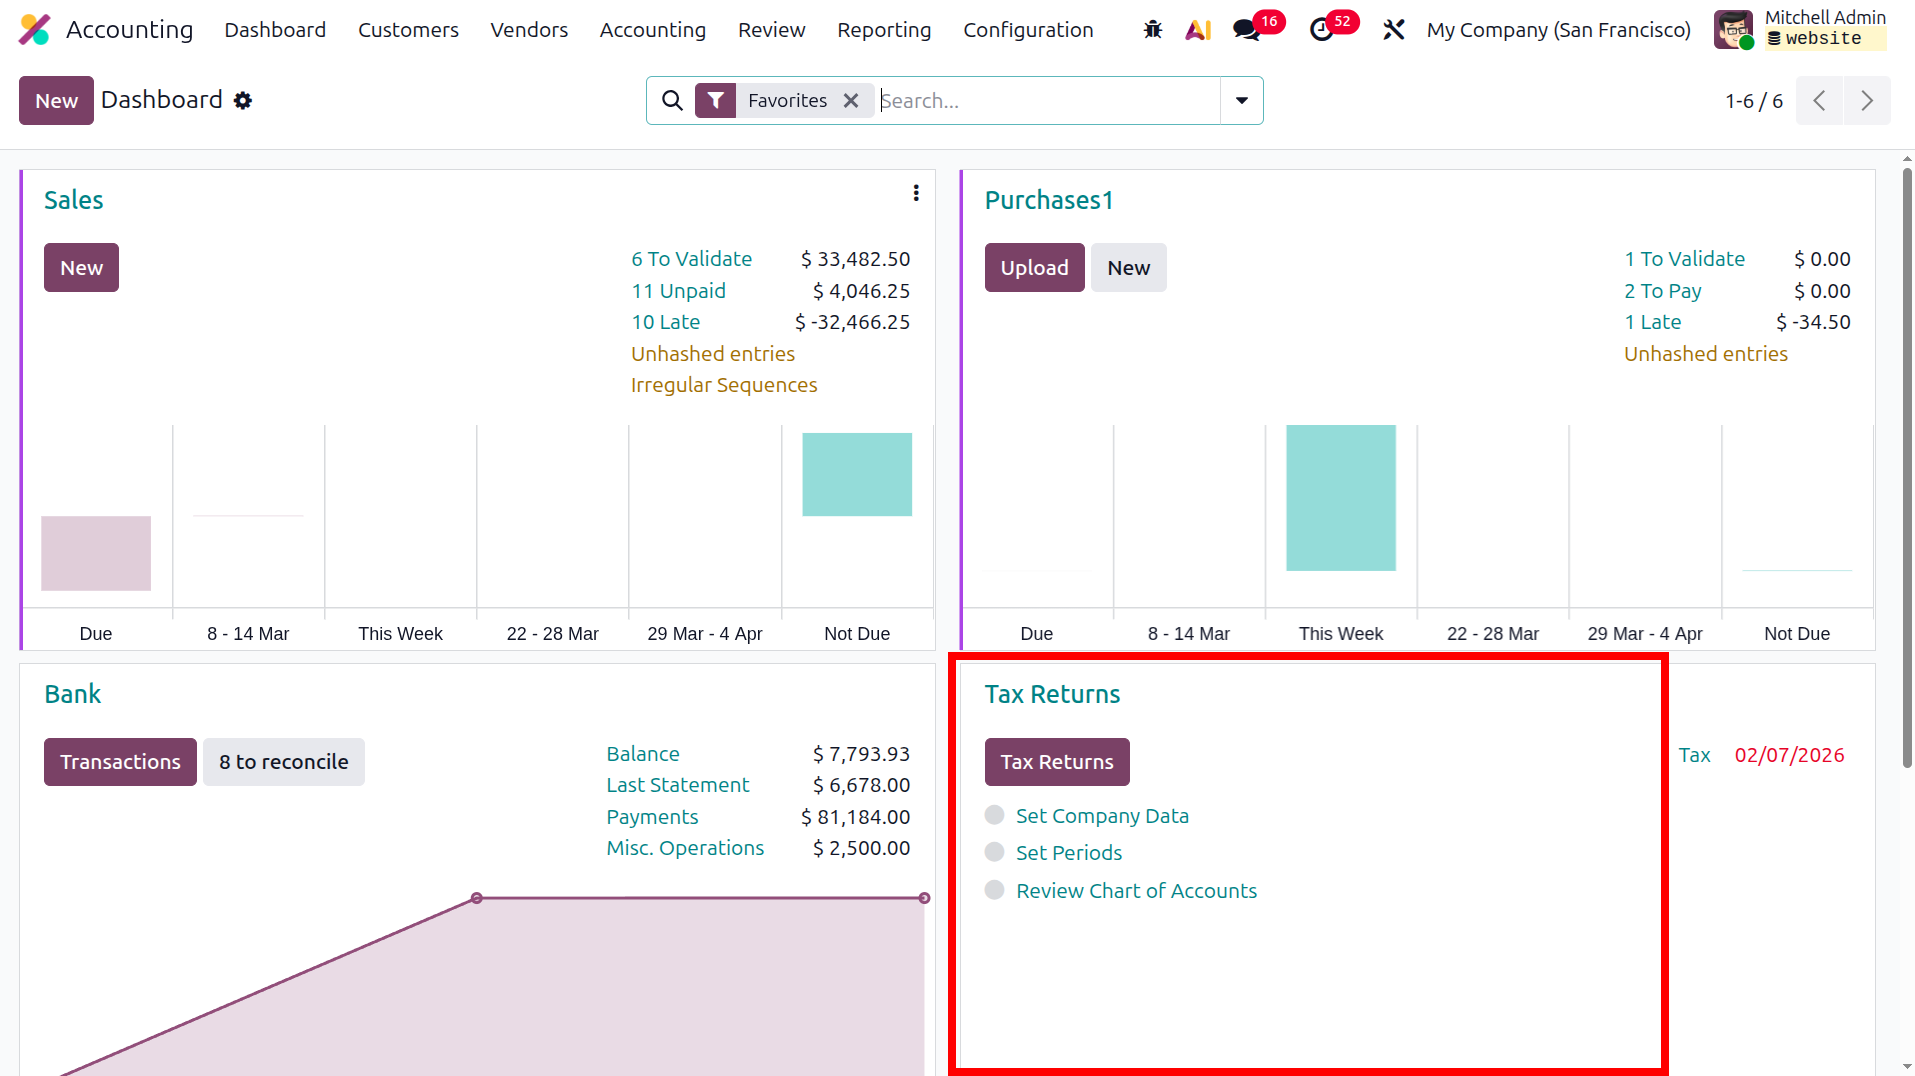
The tax return option in Odoo Accounting is a crucial feature designed to help businesses manage and fulfill
their tax obligations efficiently. It automates the process of calculating, reviewing, and submitting tax
returns based on the financial transactions recorded in Odoo. Odoo computes all accounting transactions for a
specific tax period, aggregating base and tax amounts from invoices and vendor bills. This allows the system to
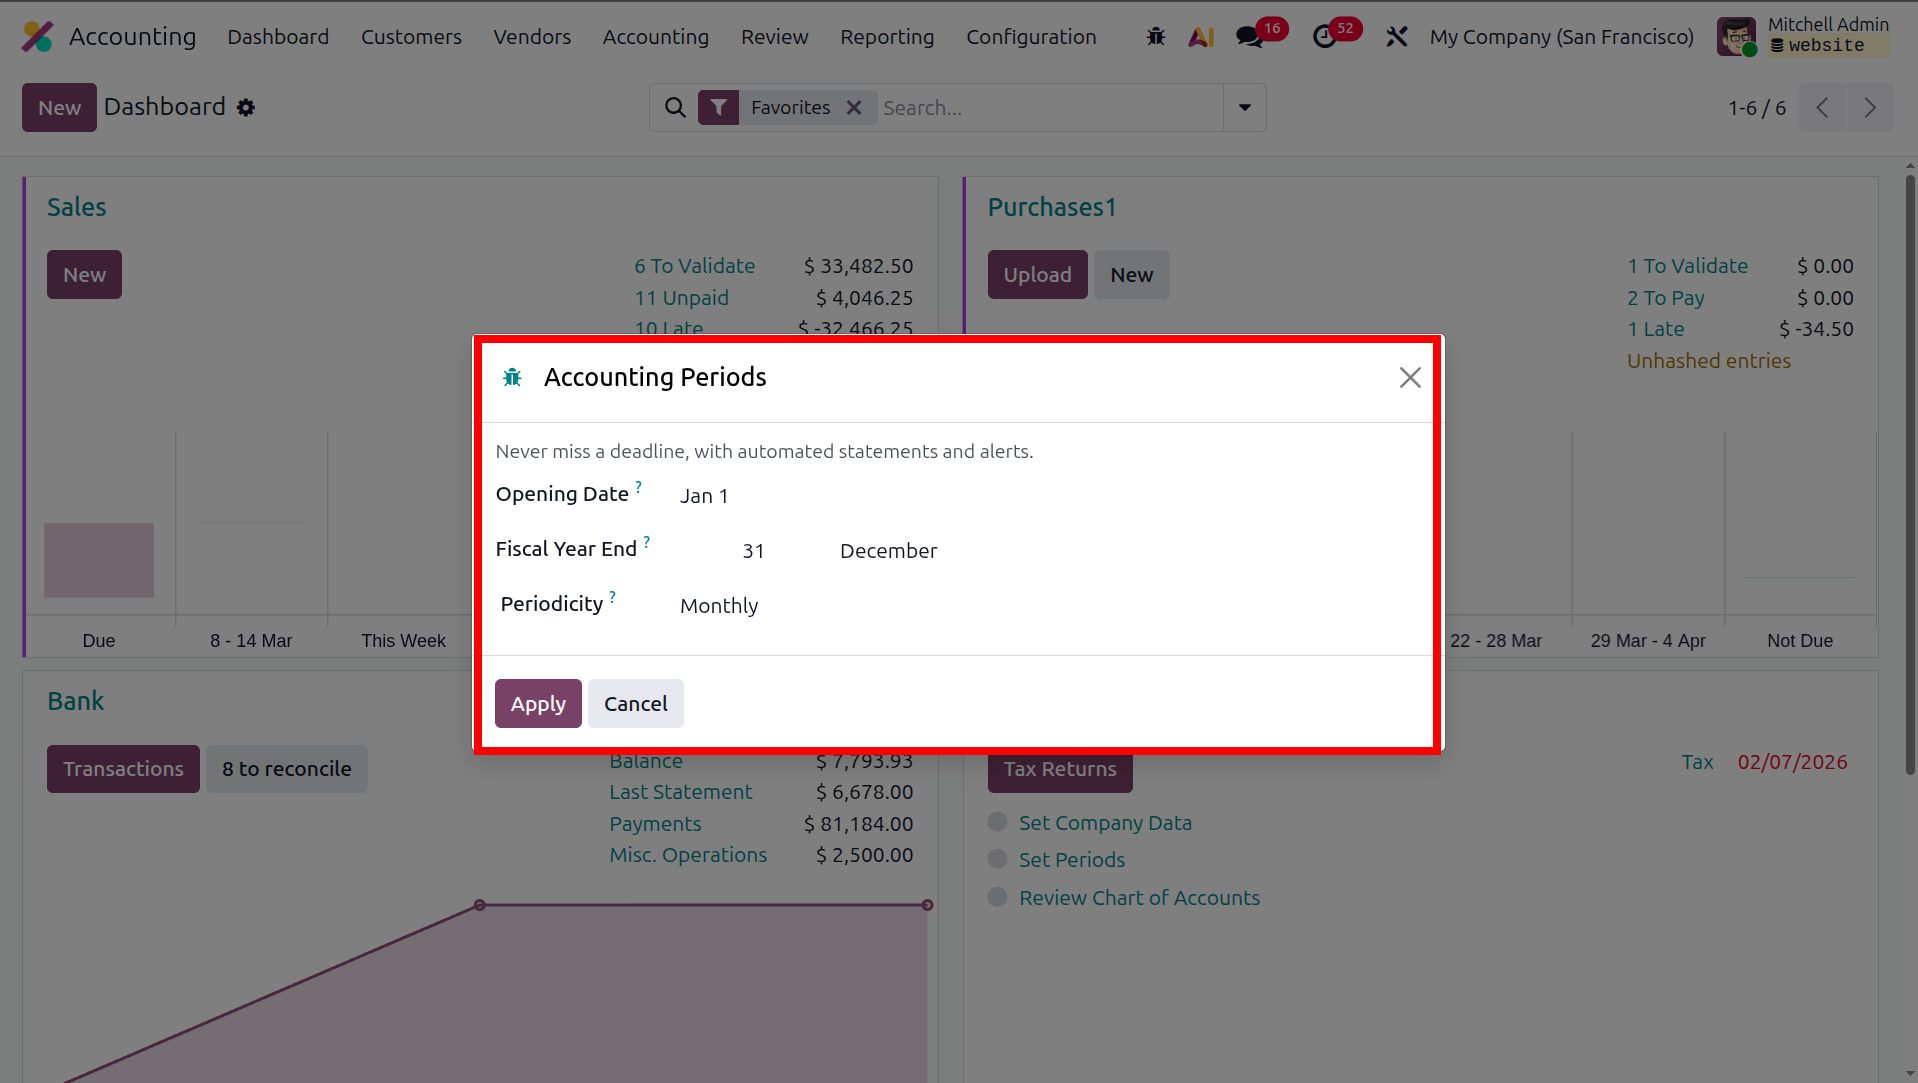
accurately calculate the total tax amount a company must pay or be refunded. On clicking the test period option,
a pop-up will be displayed and there we have the option to add the opening date, the date from which the
accounting is managed in Odoo; it is the date of the opening entry. Then set the fiscal year end and the
periodicity.
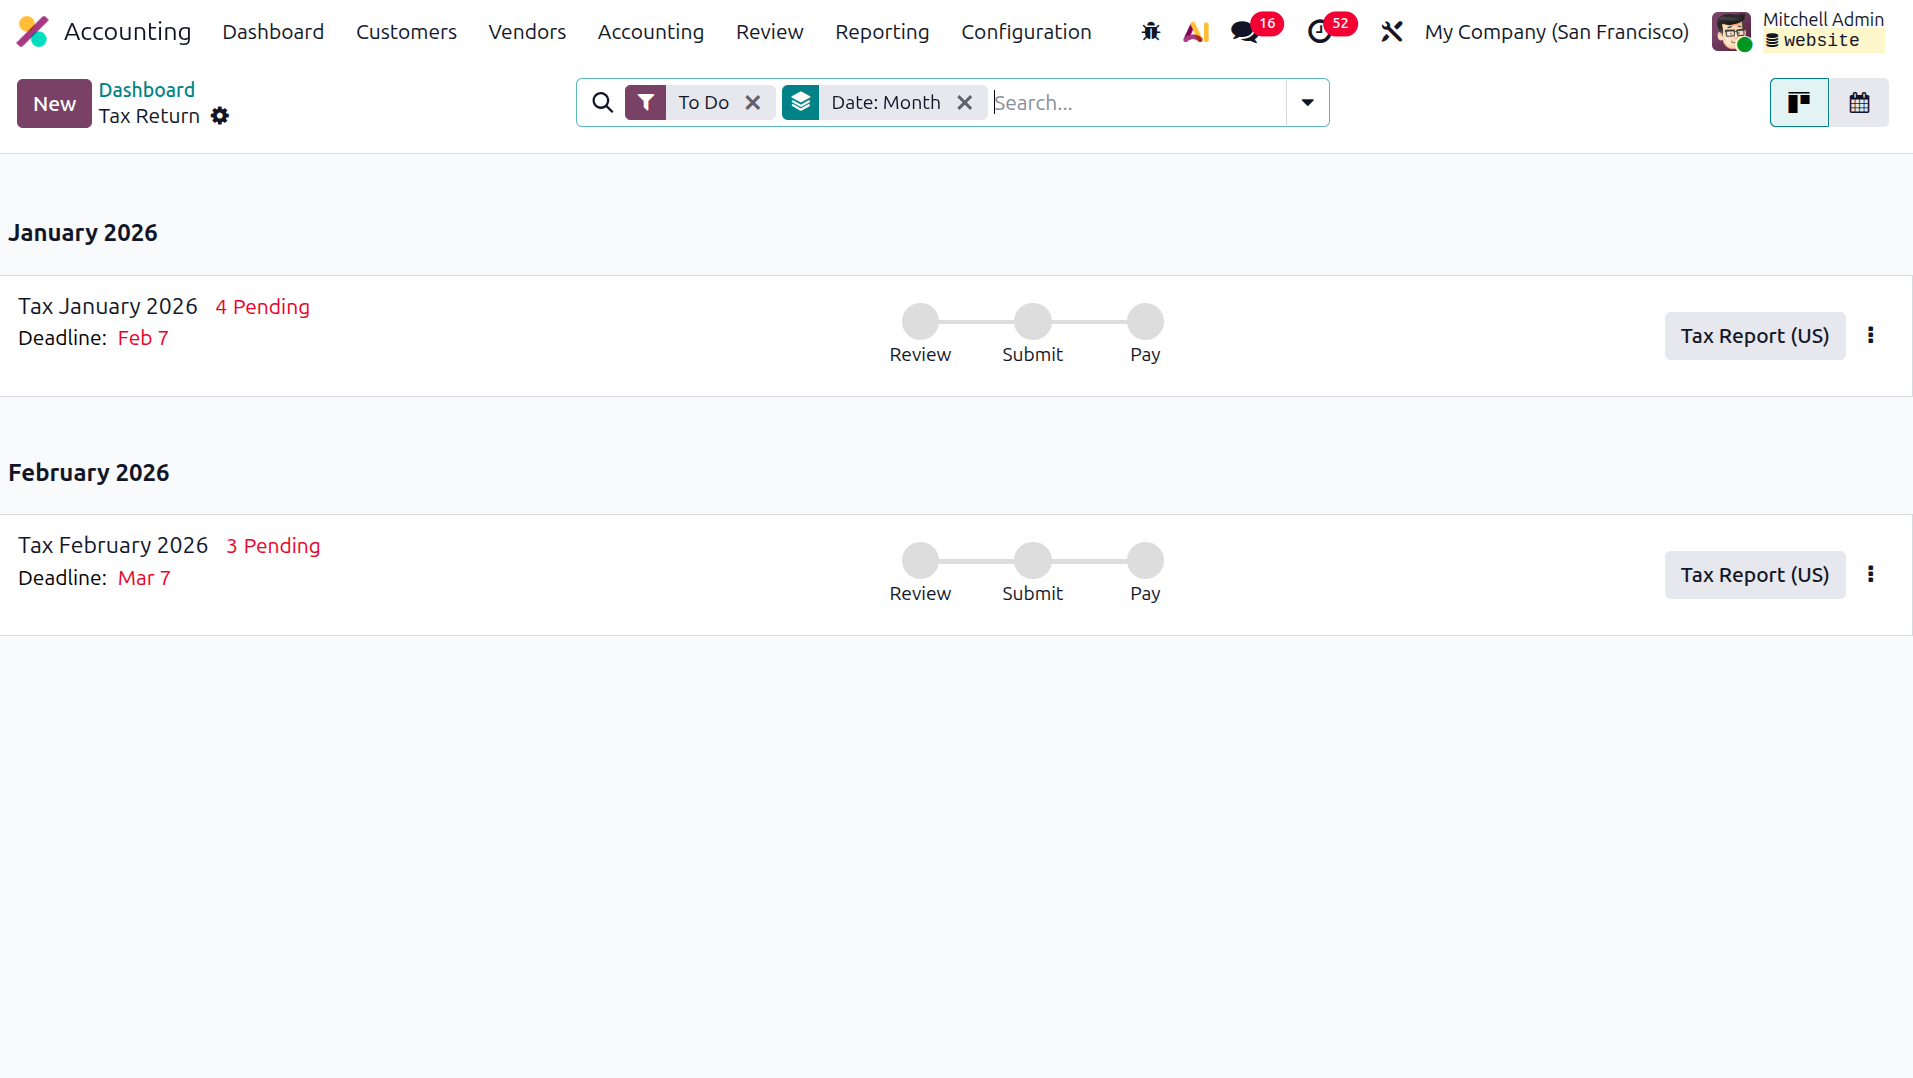
Then we can see all the tax return as per the period we set once we click the Tax Return button
In the previous versions of Odoo, there are reconciliation models, and they are of three types, but in Odoo 19,
the reconciliation modes are updated. We can open the reconciliation model of a bank and cash journals from the
dashboard.
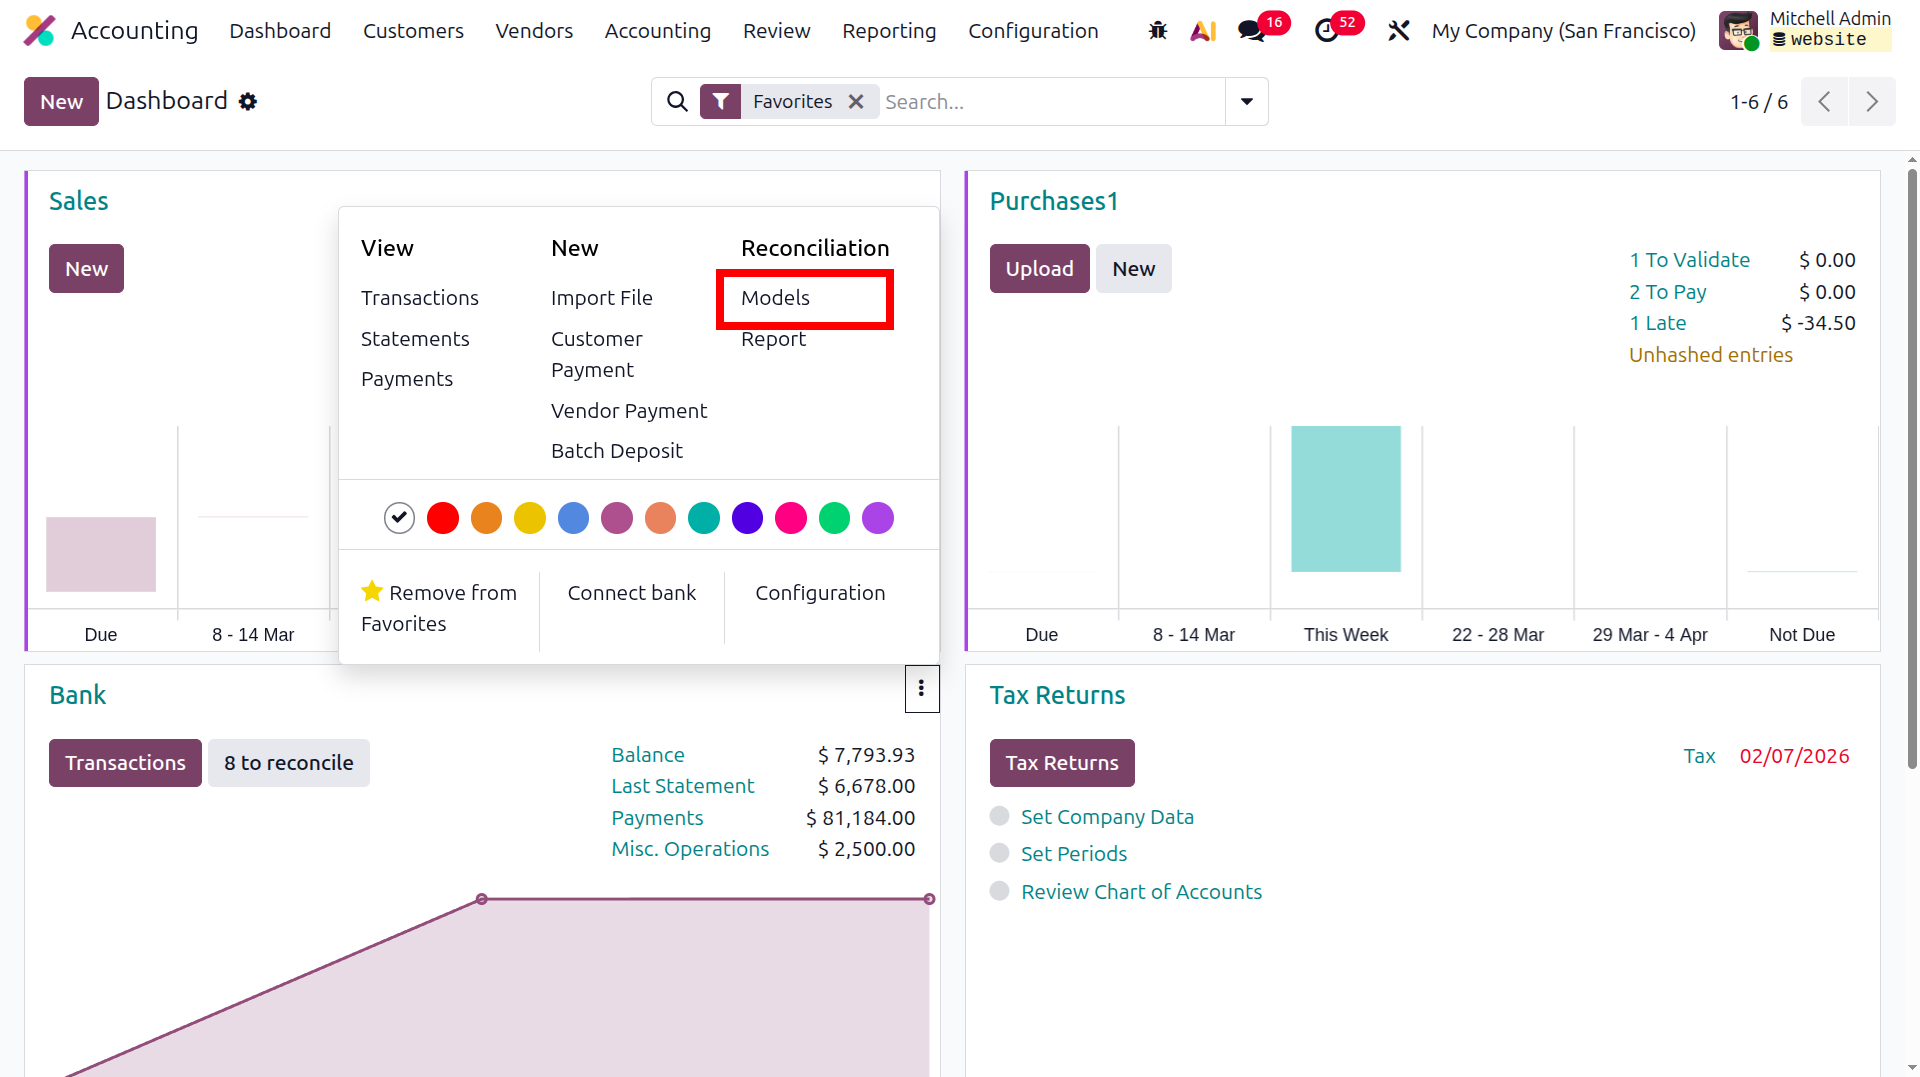
By clicking the settings icon, we can see the models option, and thereby clicking that Models, the reconciliation
models will be shown.
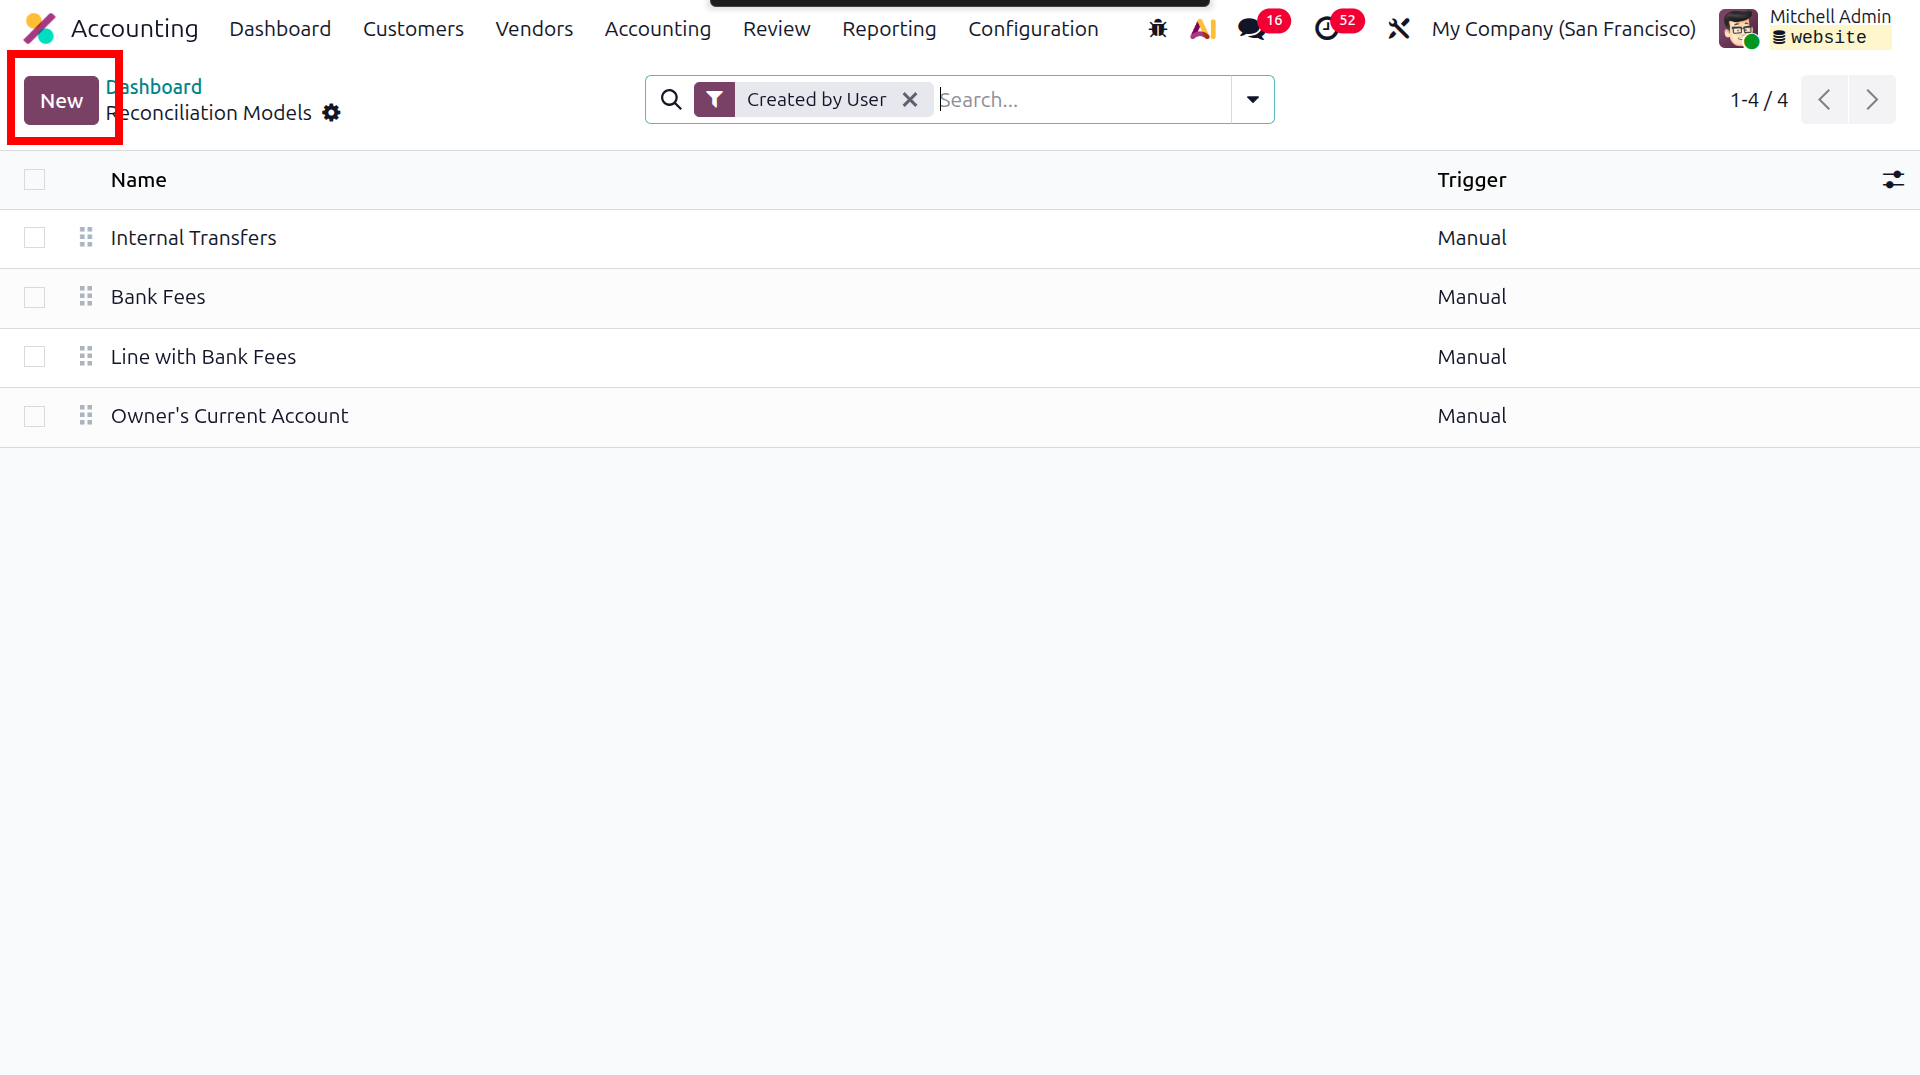
By clicking the new button, we can create a new reconciliation model. In that model, we can provide the
conditions to match a statement and a journal entry.
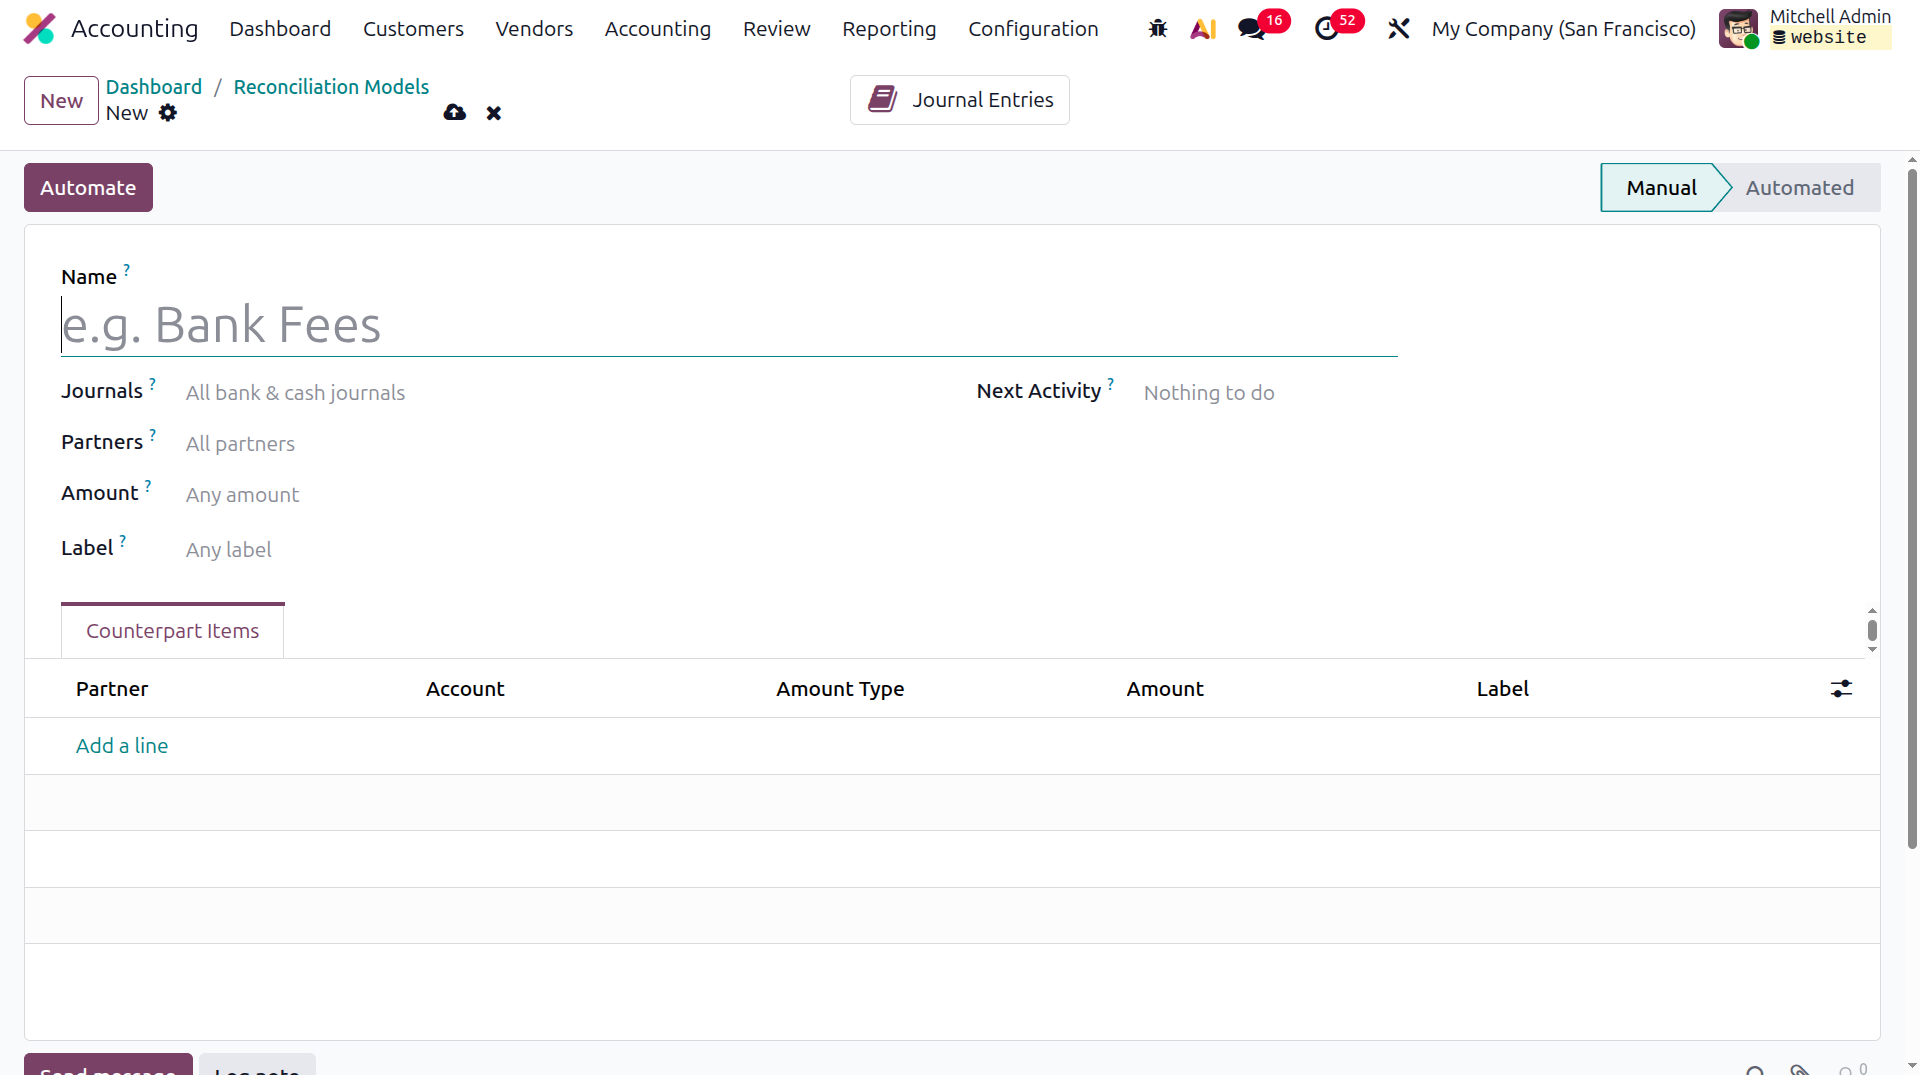
If we need to match the entry and the statement automatically, we can click the Automate button.
If you want to remove a tab from the Accounting dashboard, you can simply unfavorite it. From the overview, you
can also create new documents, access journal-specific reports, and view related entries such as invoices,
bills, and credit or debit notes. Each tab includes a settings option that links directly to its configuration
menu. Since every journal has its own setup, you will typically need to adjust the journal settings for the tab
you are working with.
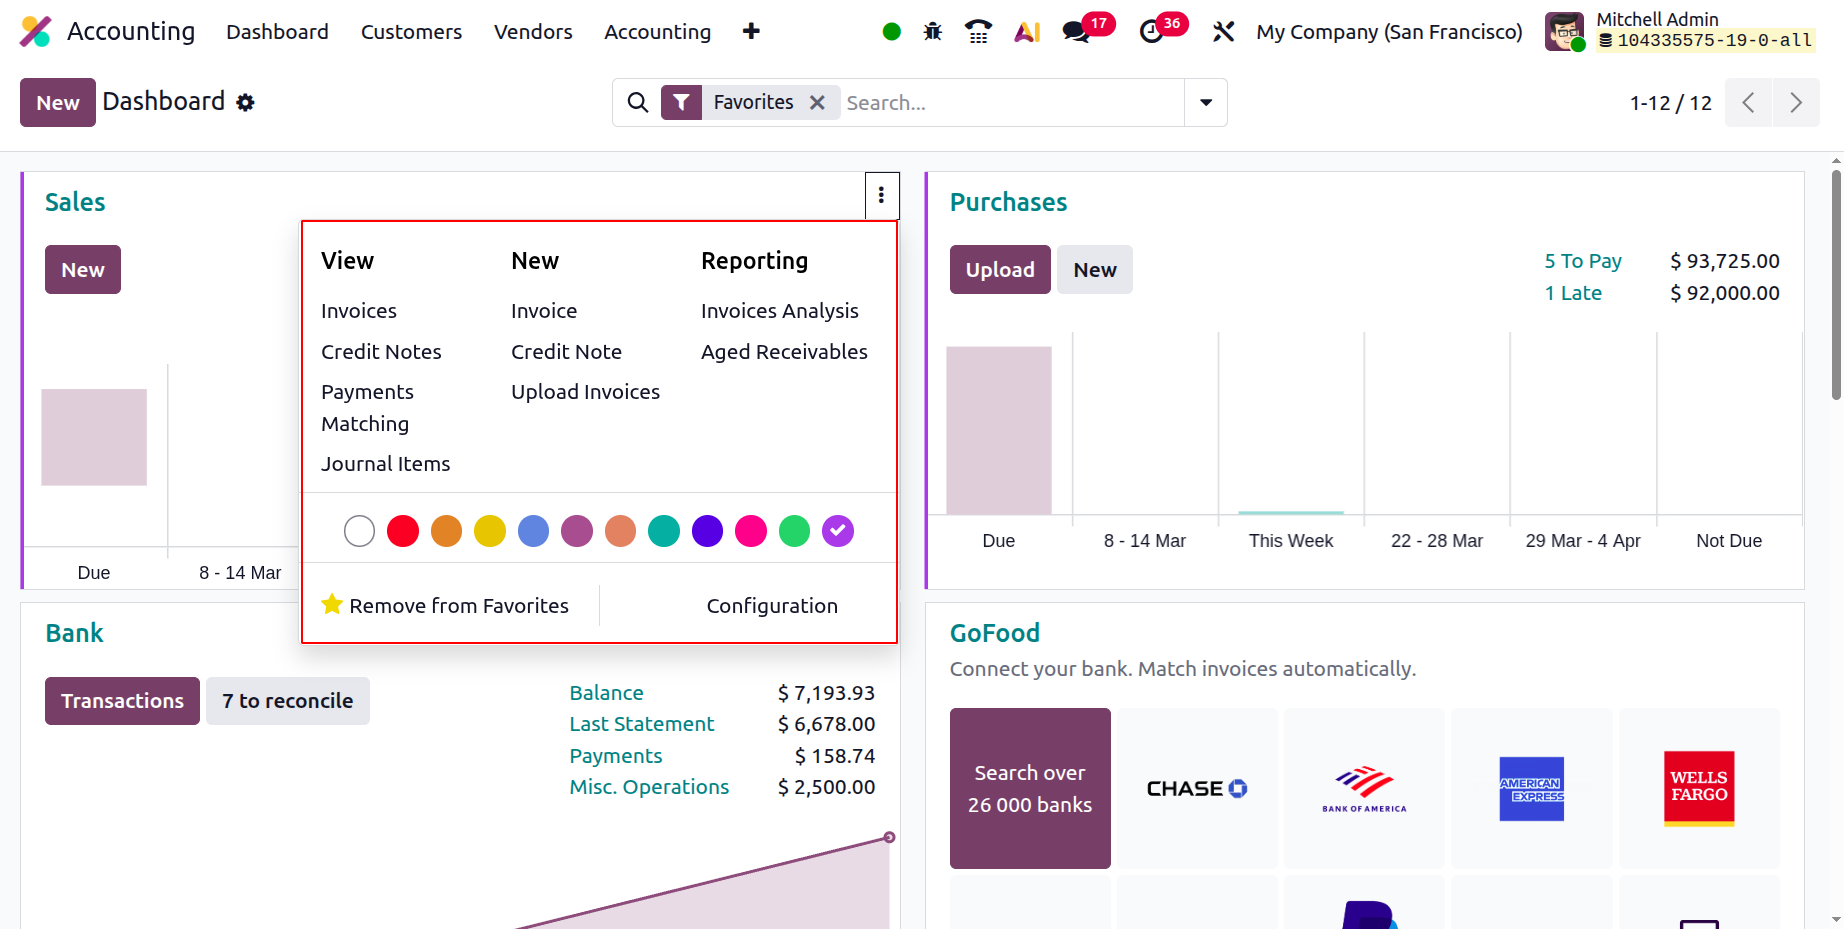
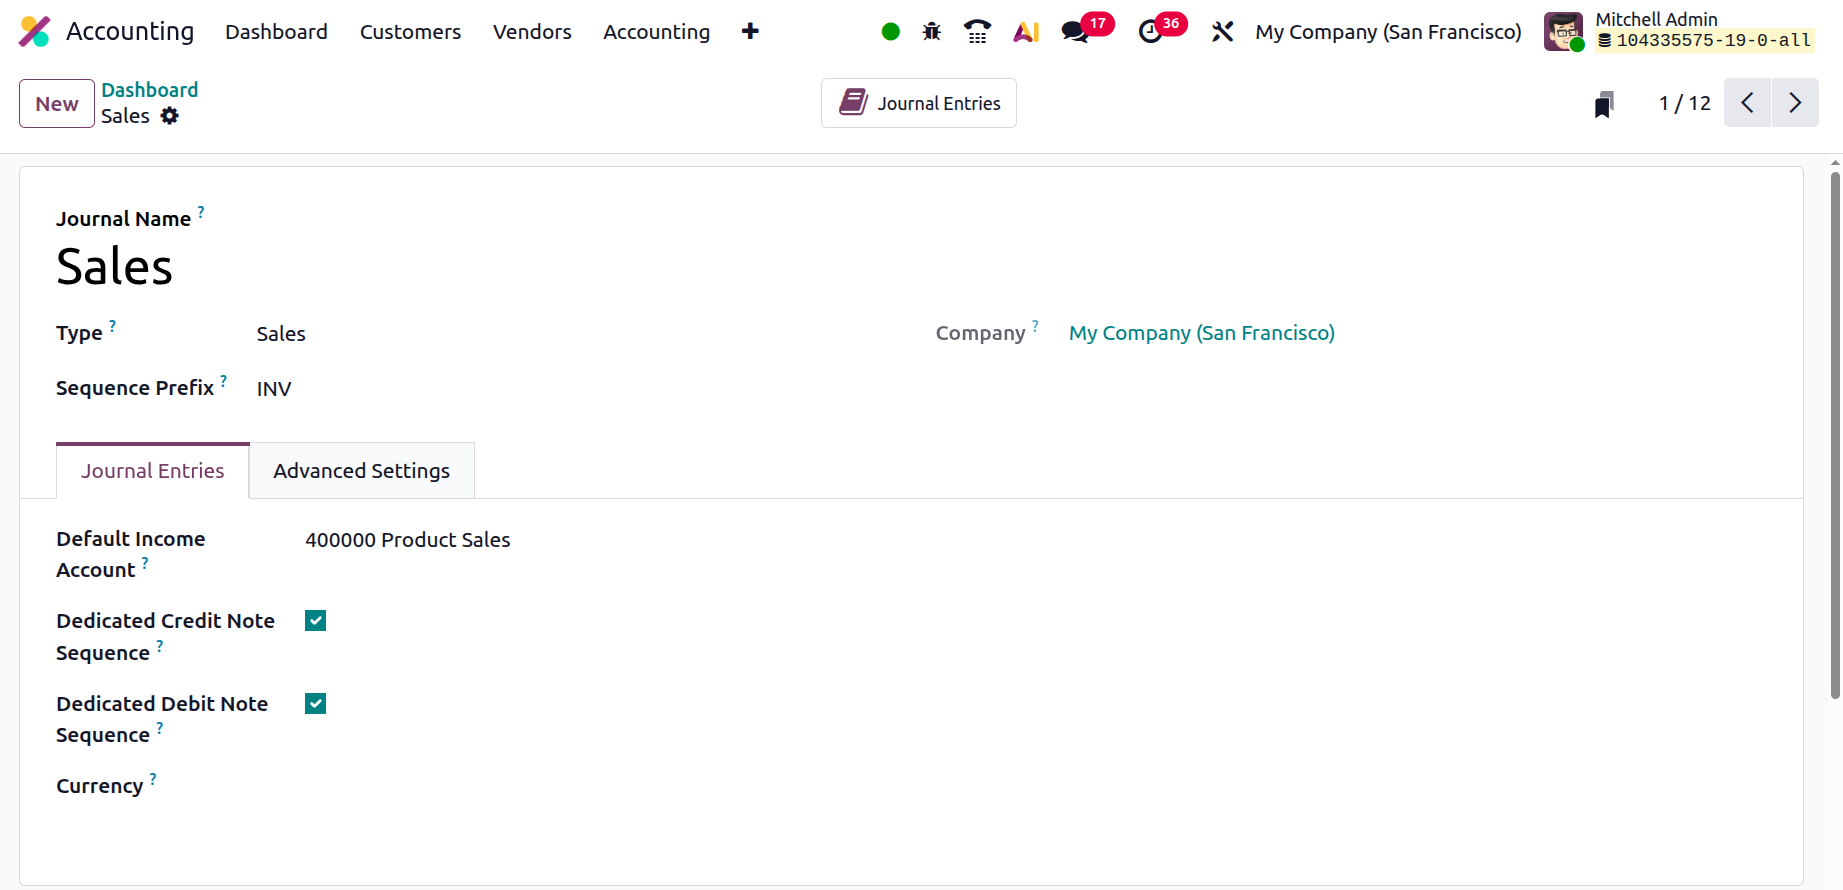
For example, the screenshot shows the Settings menu for the currently selected Sales journal. This page provides
detailed information about each journal, including its type. It also displays key journal configuration fields
such as the short code, currency, dedicated credit note sequence, and default income account. You can update any
of these settings by accessing the Configuration option within the settings window.
You can also adjust the Advanced Settings of the selected journal, allowing you to manage options such as access
controls, permitted account types, and specific allowed accounts. Defining allowed accounts ensures that entries
can only be posted to those designated accounts. Odoo also prevents changes to posted entries when the Lock
Posted Entries setting is activated. Additionally, the Configure Email Servers option lets you send the email
servers used for receiving accounting messages.
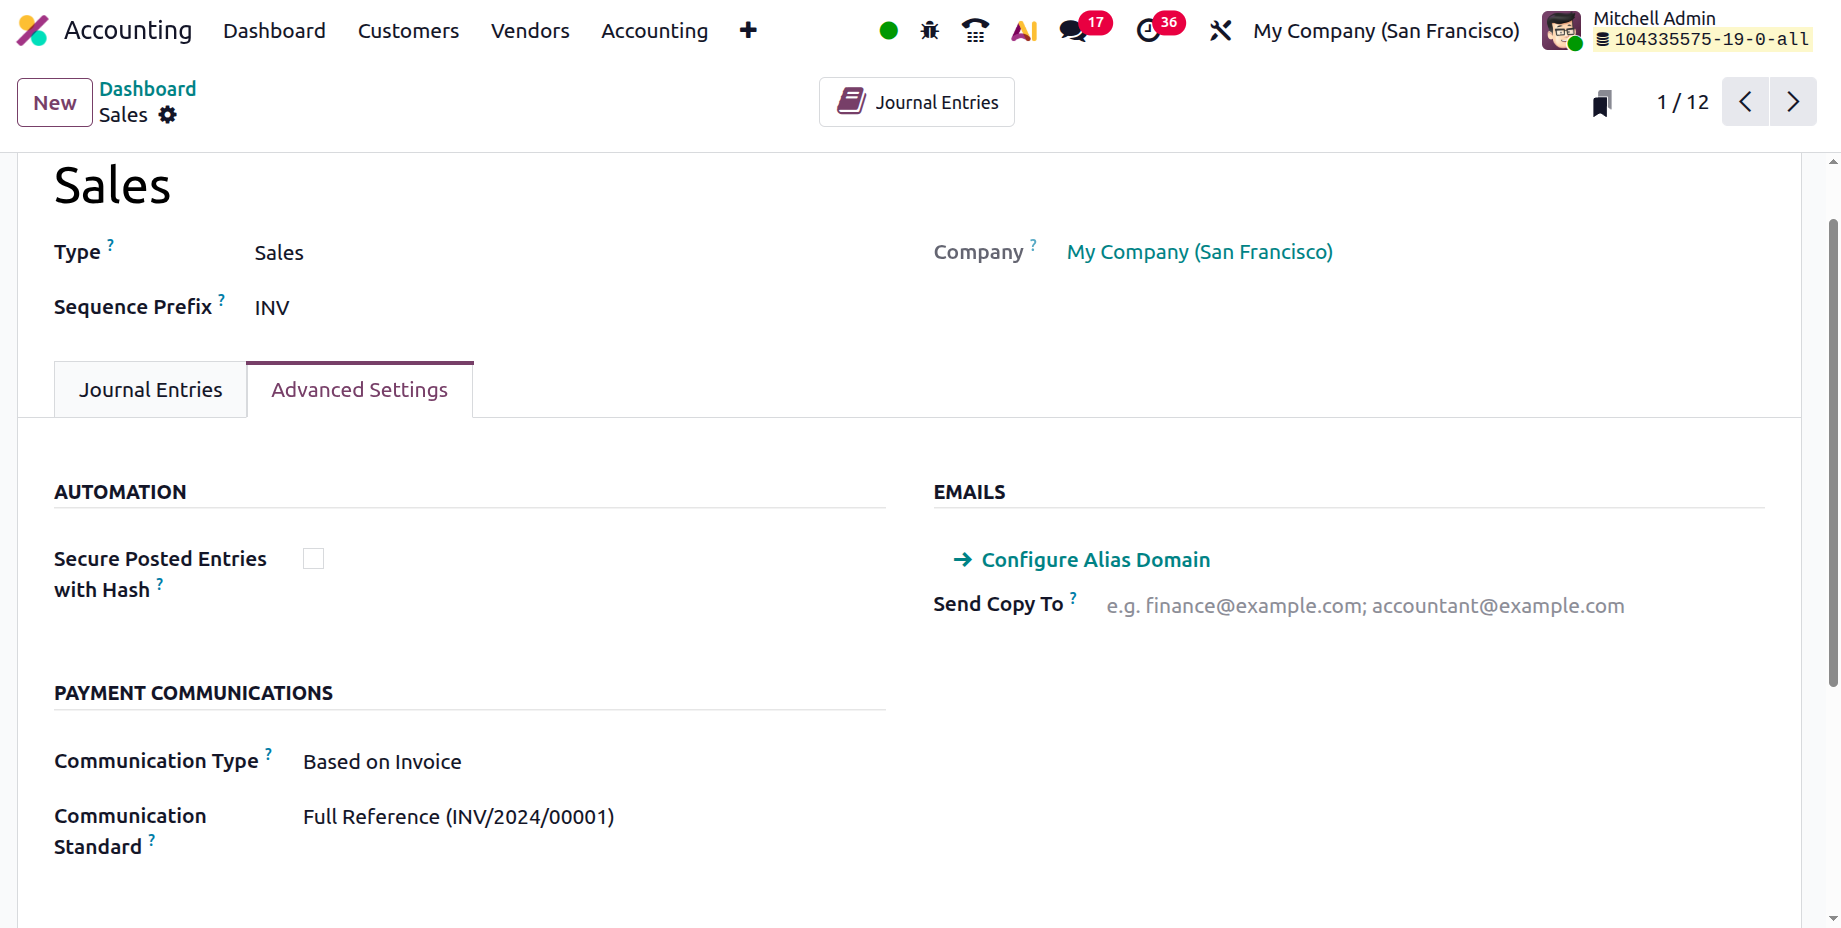
You can also update the Payment Communication settings, such as the Communication Type and Communication
Standard. The Communication Type determines how payment references are generated for an invoice and can be set
to Open, Based on Invoice, or Based on Customer.
How to Set Up an Opening Balance?
In Odoo, opening balance refers to the initial financial values you enter when starting a new accounting period.
To understand how much cash is available in each operational account, you need to set up the Opening Balance for
your business. These opening amounts show the funds the company has when it begins its activities. Now, let’s
look at how to enter the initial balance in Odoo 19.
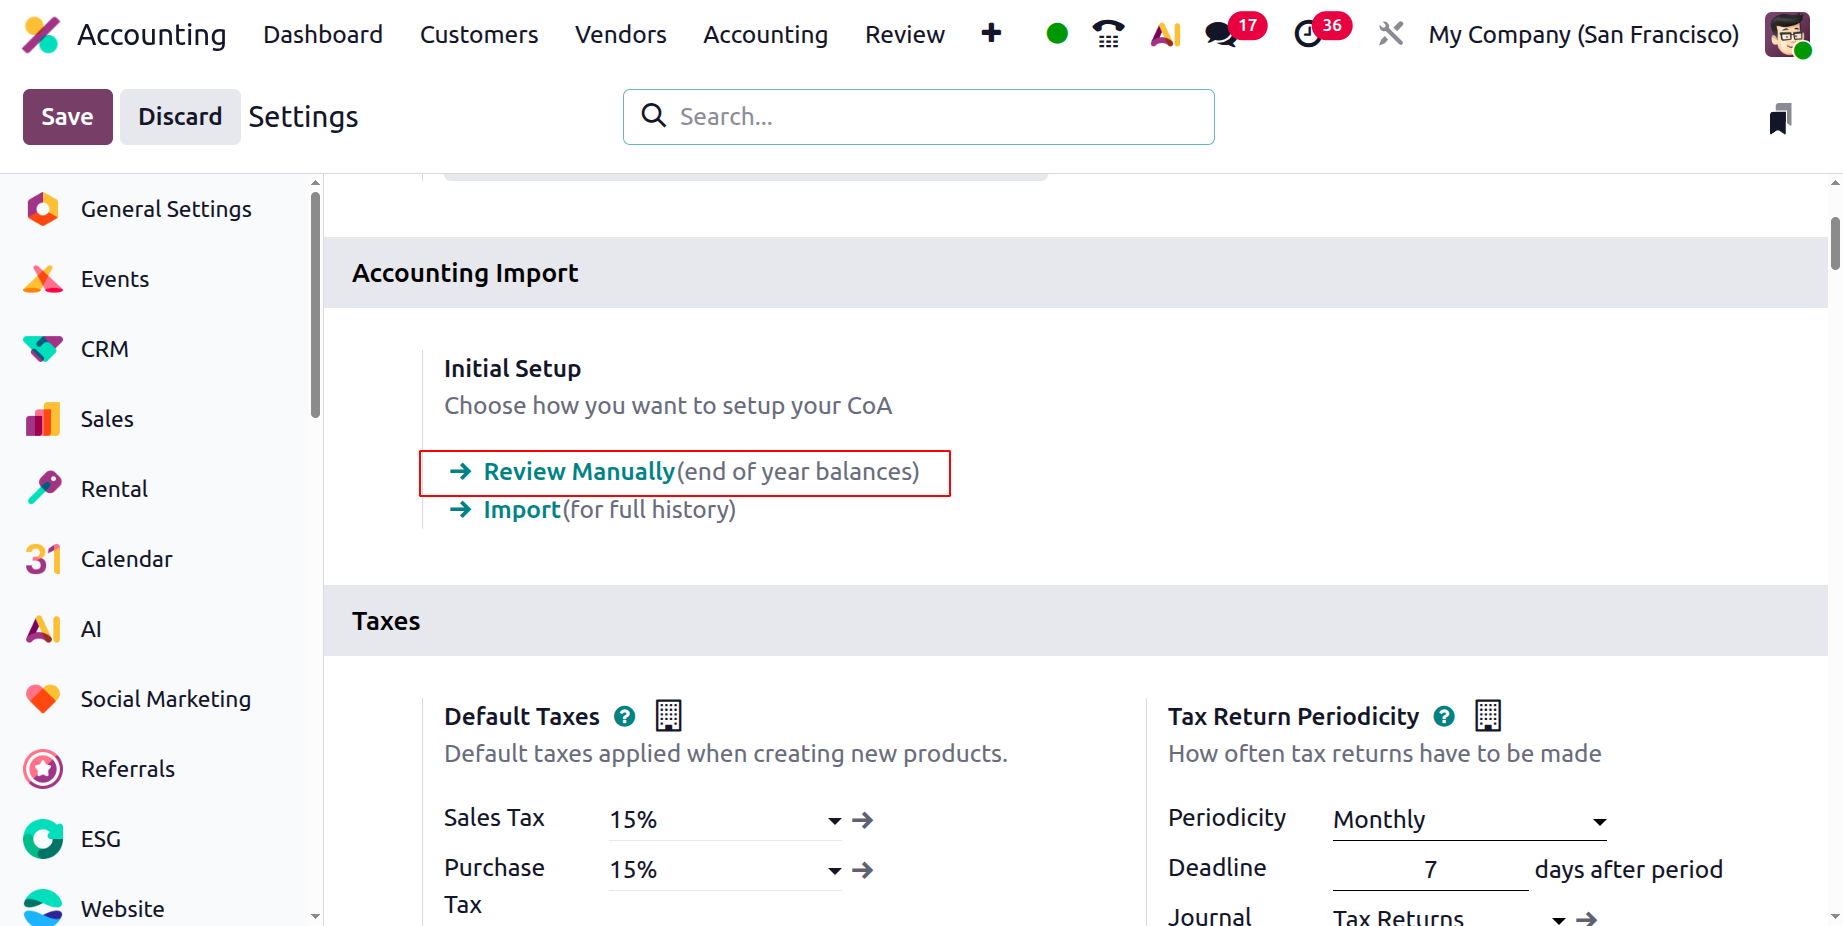
Step 1: In the Accounting module settings, you can view and enter the opening debits and credits for your
chart of accounts. Go to Configuration, Settings, and under Initial Setup, choose Review Manually. This option
opens a screen where you can enter all your opening balances.
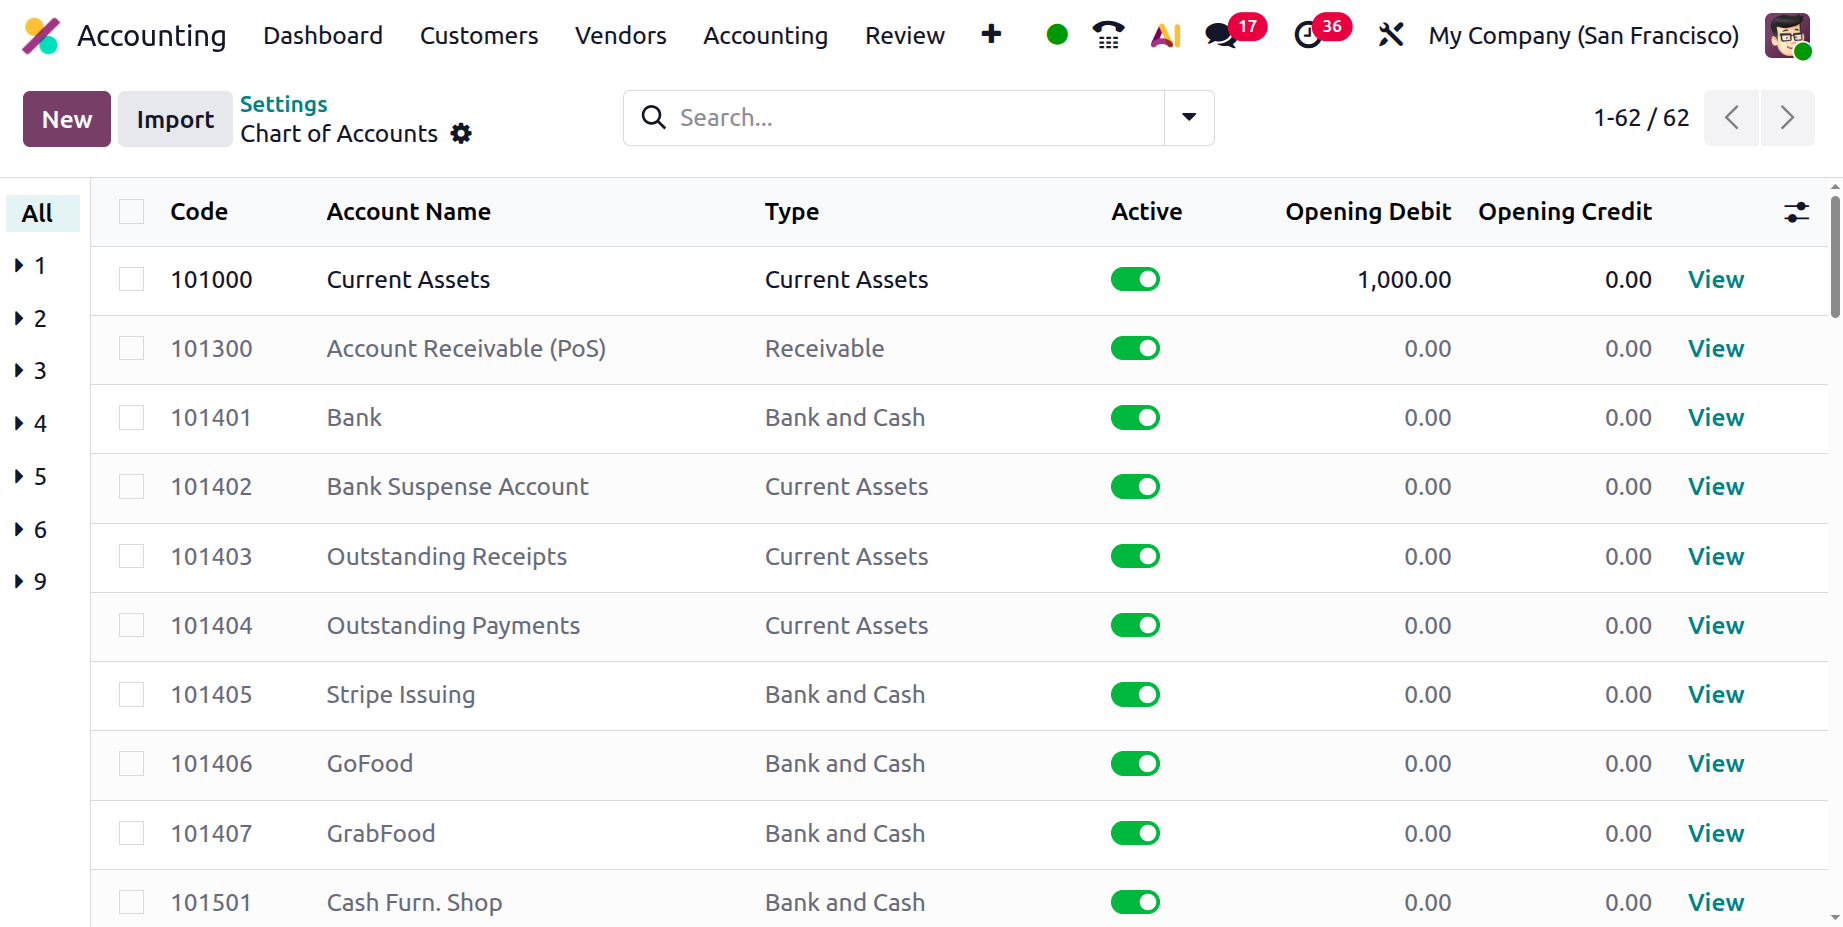
Step 2: You can enter the opening balance by adding the debit or credit amount to each related ledger.
After filling in the amounts for all accounts, save the details.
Step 3: After you save, Odoo automatically creates a new draft journal entry called “Opening Journal
Entry” under Accounting > Journal Entries.
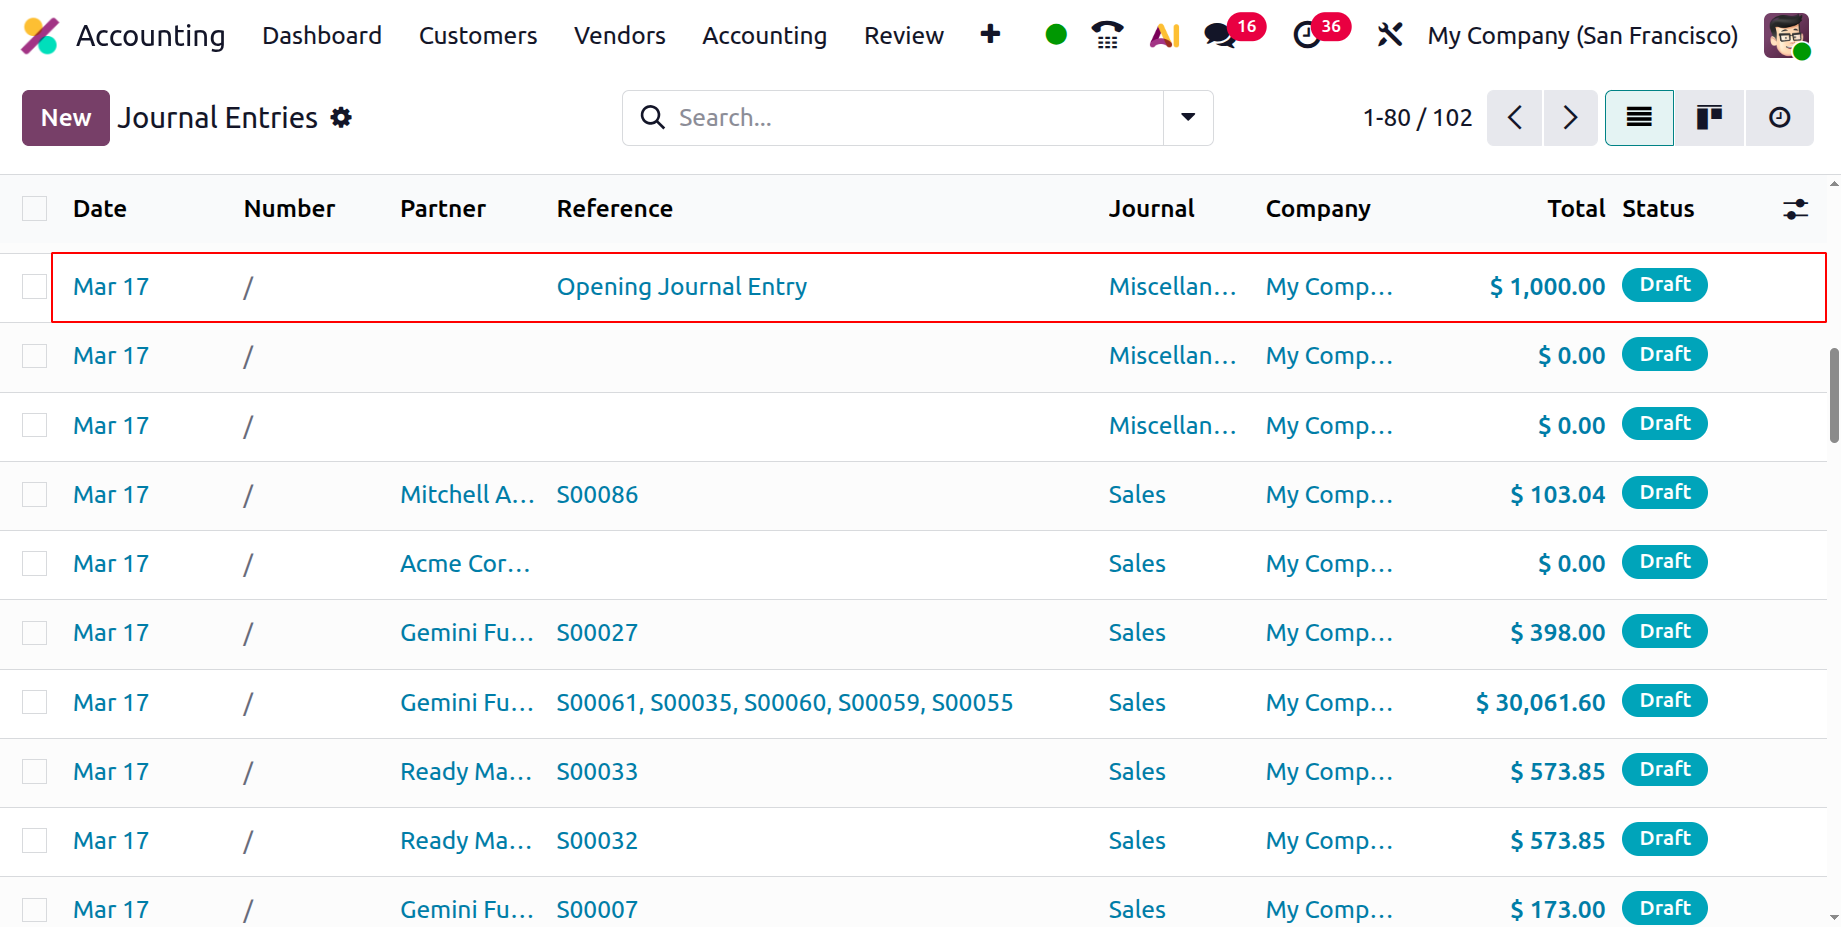
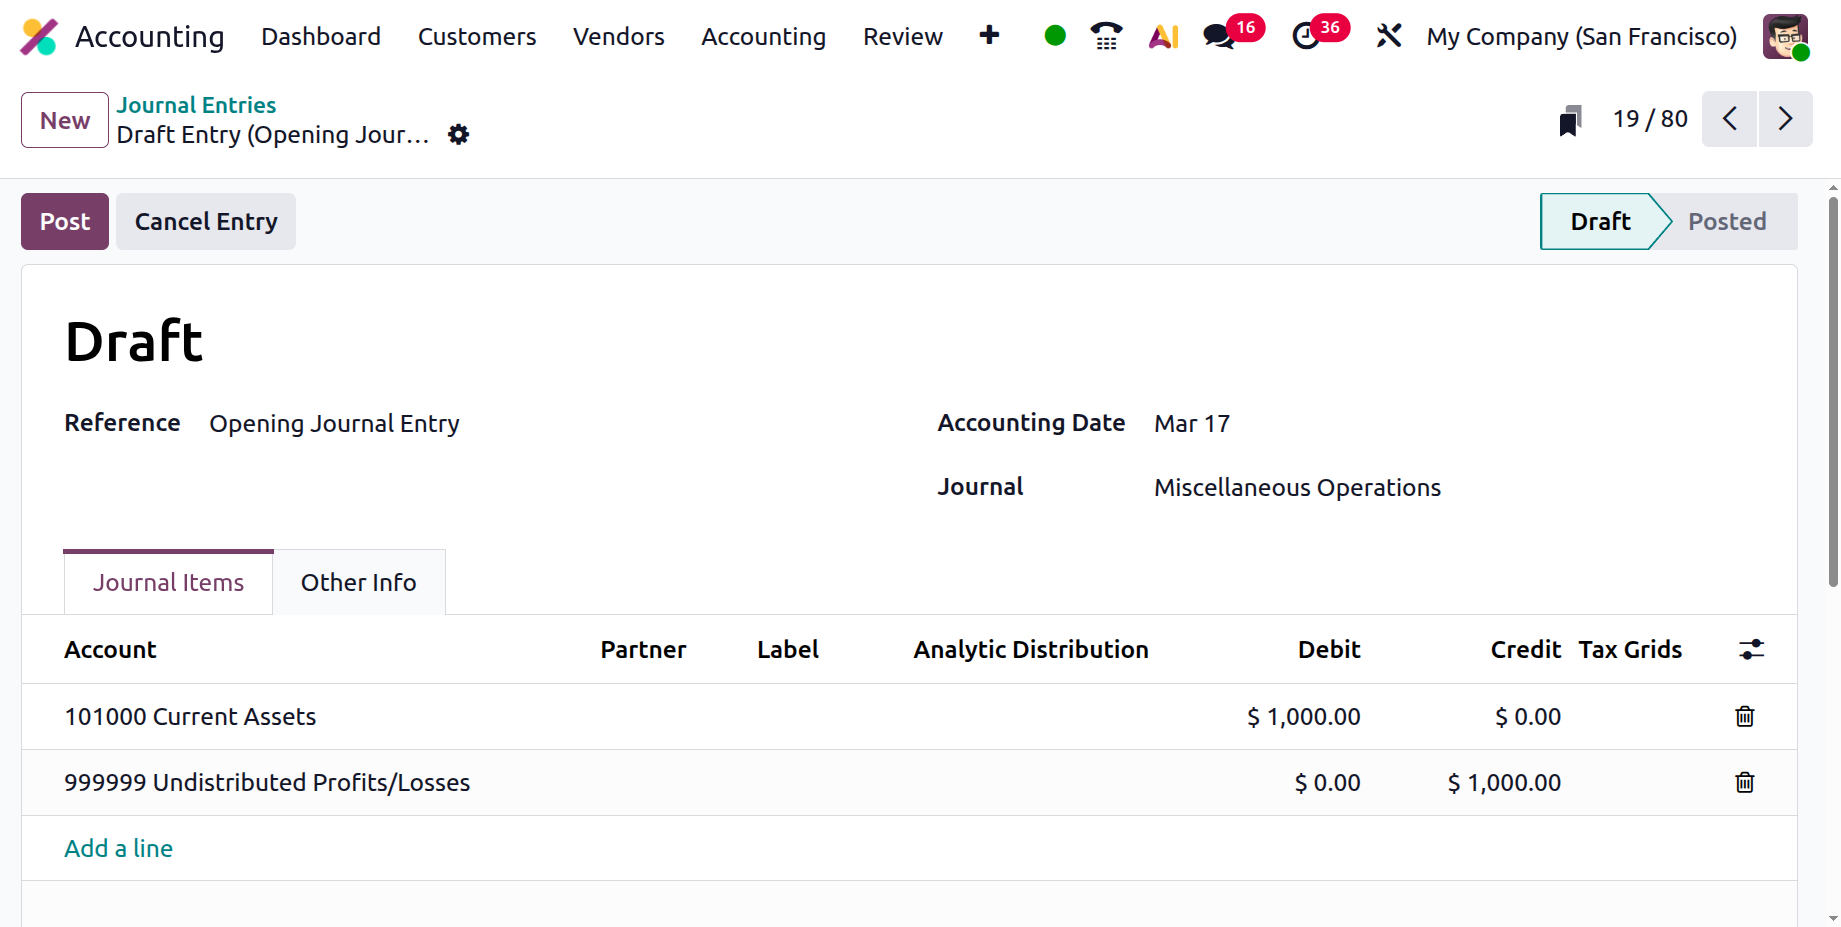
Step 4: If a previously created journal entry does not balance, it can be edited to include an opening
debit or credit for the respective account. By referring to the "Opening Journal Entry," users can review all
the entries recorded in each ledger after opening the draft journal entry. Any difference between the Credit and
Debit amounts is automatically allocated to the '999999 Undistributed Profits/Losses Account,' which Odoo uses
for automatic balancing.
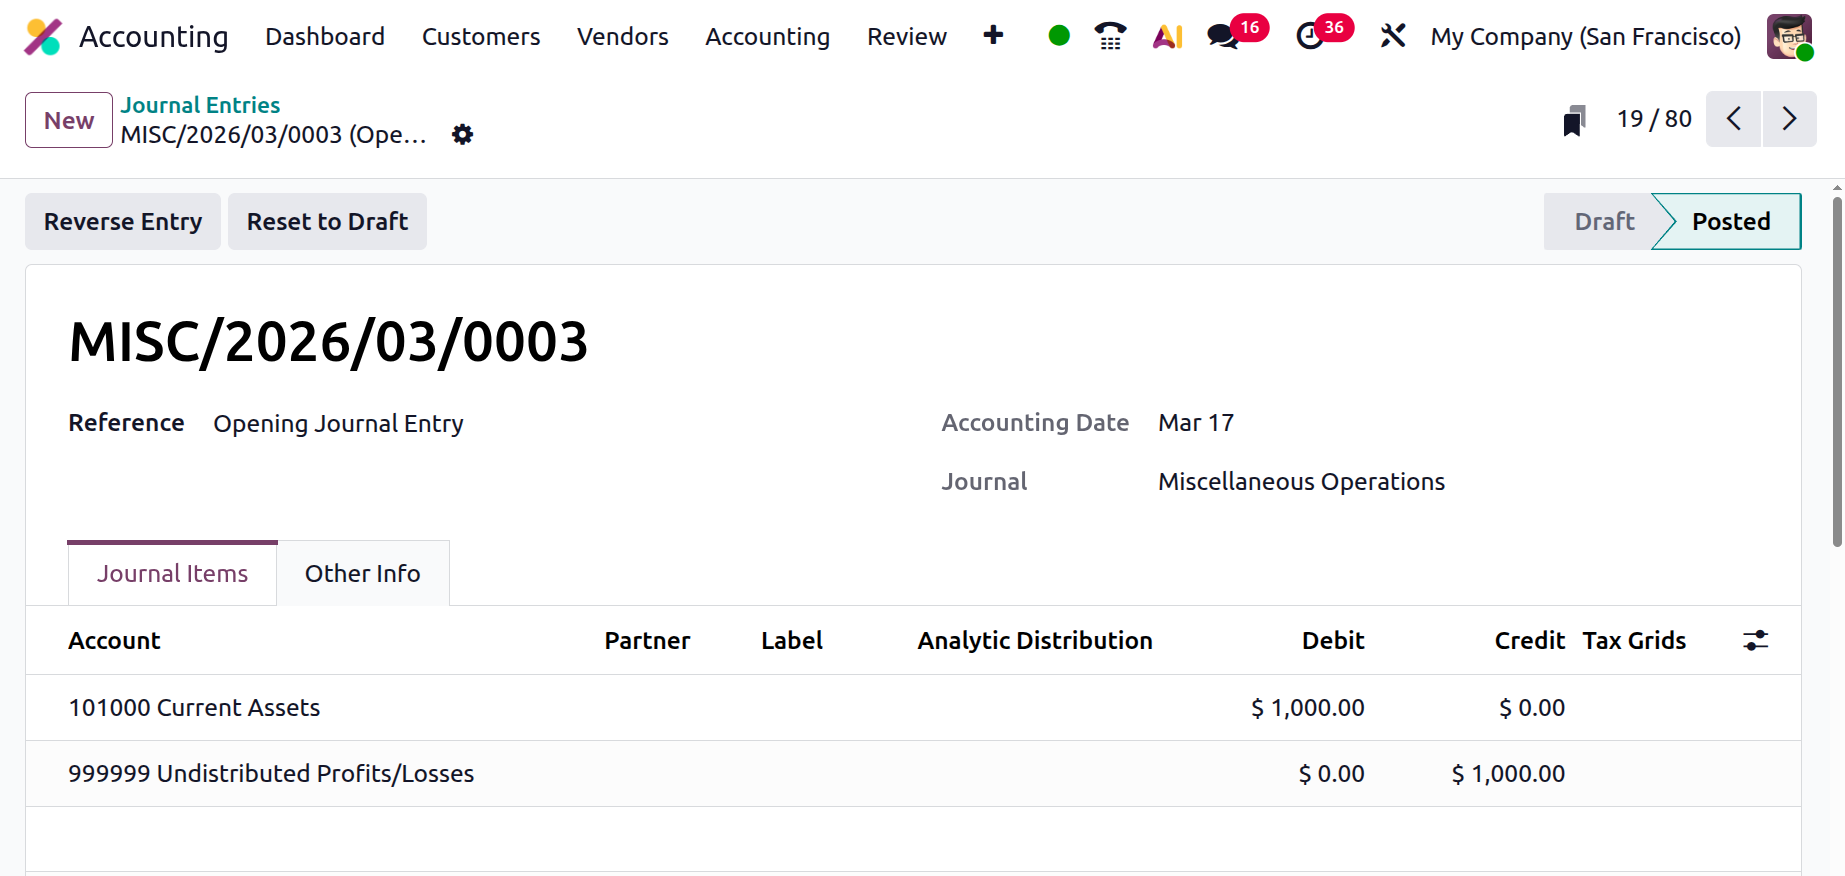
Step 5: You should also update the accounting date to represent the inclusion of the Opening Balance and
its effect on the account ledgers. Once this is done, the journal entry must be posted. After posting the data,
it will be reflected in the balance sheet.
If a specific credit or debit balance was missed while creating the "Opening Journal Entry," the Opening Balance
can be manually recorded through a journal entry using the reference "Opening Journal Entry." This allows the
account ledgers to be updated accordingly. It is important to ensure that the correct accounting date is
provided when posting, and this date should correspond to the date reflected in the balance sheet.
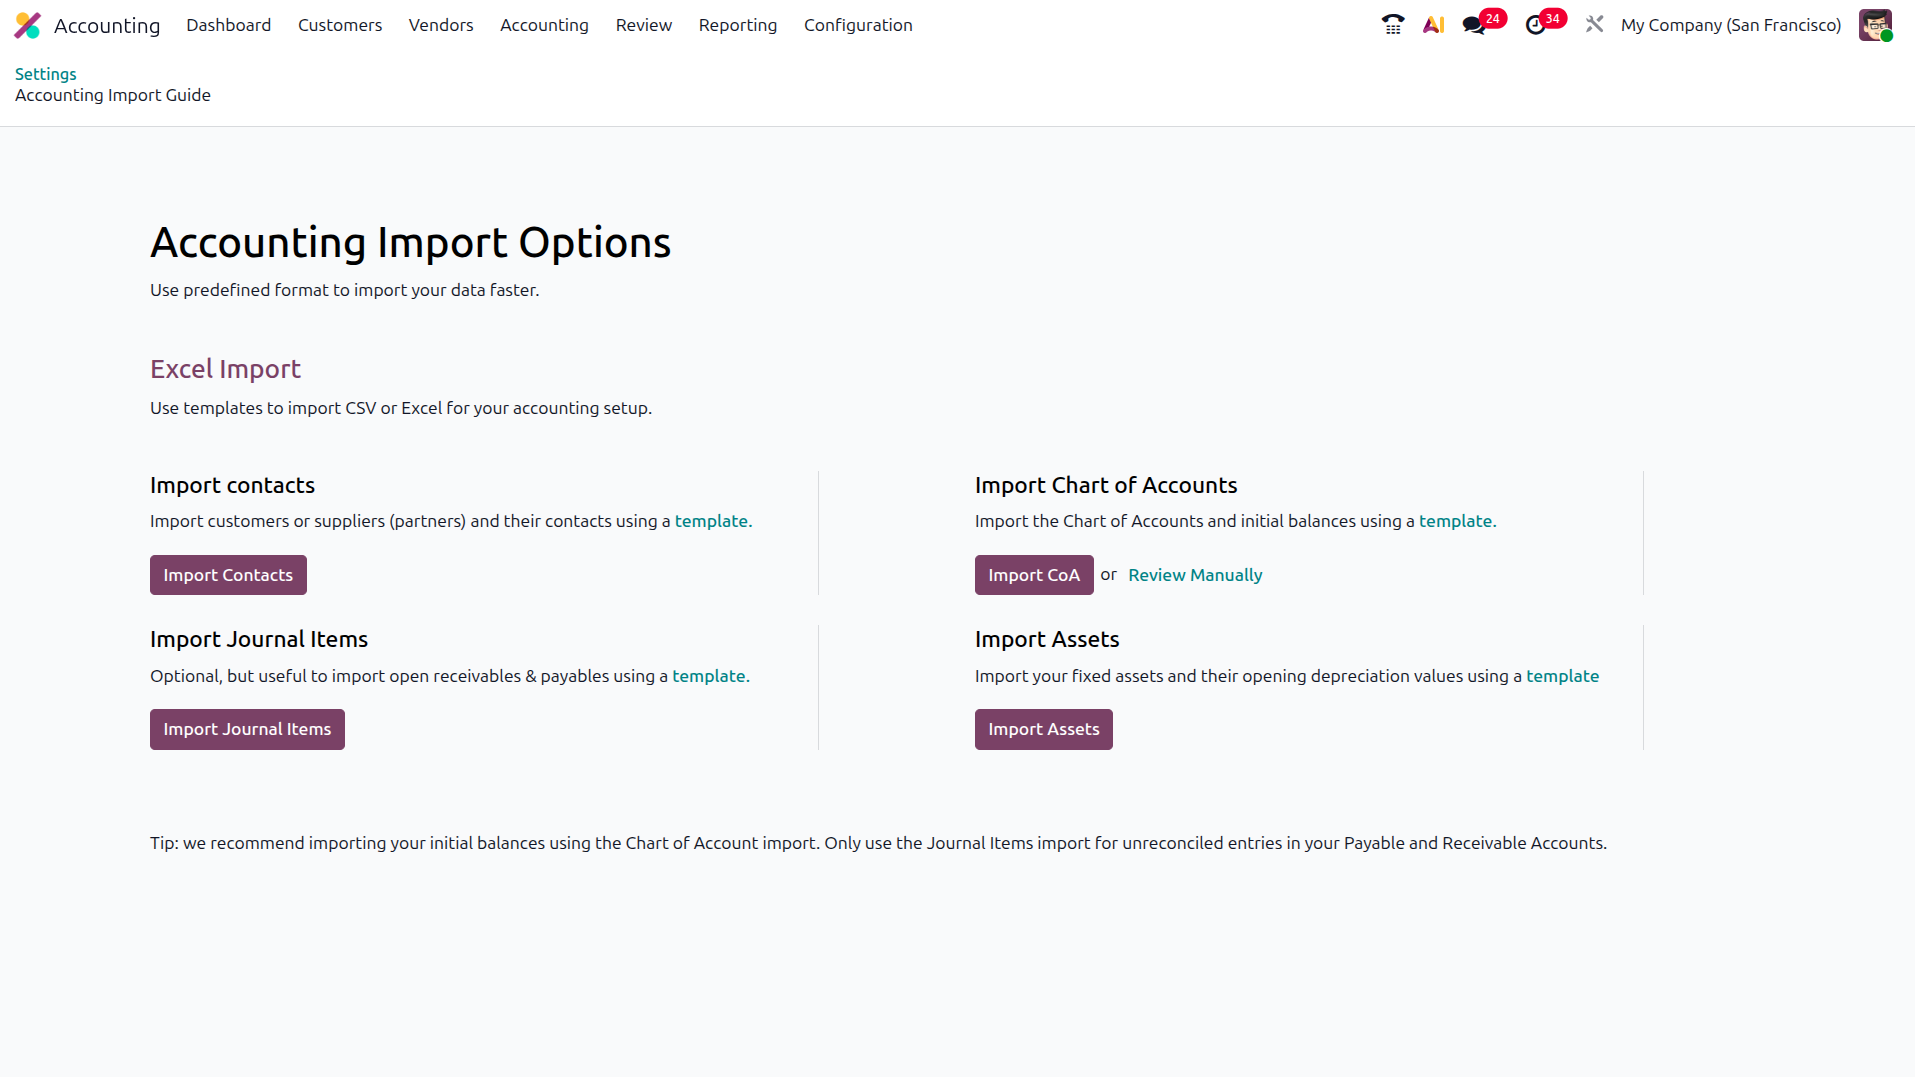
In Odoo 19, data can be reviewed and imported through the configuration settings available in the Accounting
module.
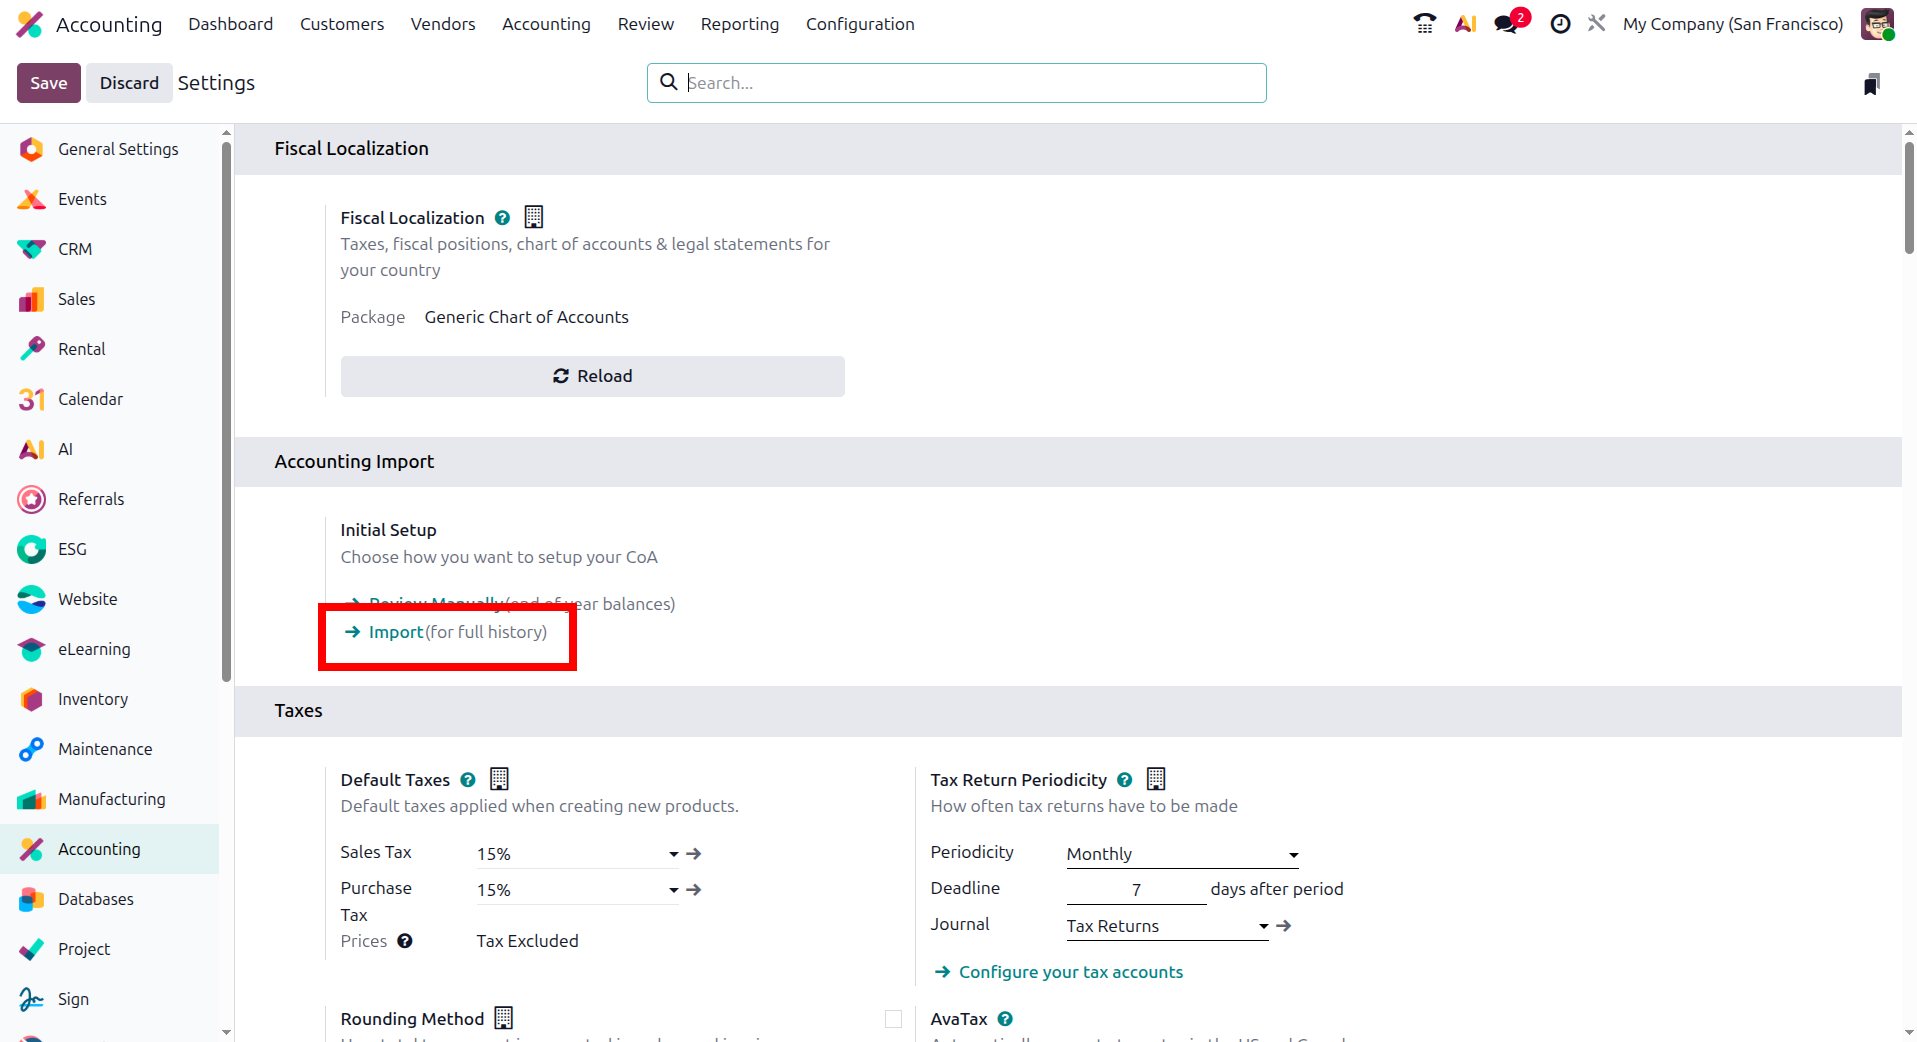
Using the import function in Odoo 19, we can import Contacts, the Chart of Accounts, and journal entries.
The advanced dashboard of the Odoo Accounting module provides a comprehensive overview of all activities related
to the company’s accounting management. After understanding this, we can proceed to the section that explains
the customer financial management component of the Odoo Accounting module.