The Accounting Module's Configurable Options
The Odoo platform's accounting module provides thorough operational administration of the financial aspect of any company's operations. Many parts of accounting and financial administration can be changed because Odoo is a configurable program. Additionally, the Accounting module of the Odoo platform has a configuration menu with several configurable default settings. Through the configuration menu, users can fully customize the functional administration and performance of each Odoo module.
This can be enabled and disabled using the checkbox as part of the available customisable parameters. You may also create an action that lets you select an entity from a drop-down menu. Each of these alternative groups is defined based on a certain functional need. You have the opportunity to add unique features when building the platform, which you may do with the help of knowledgeable Odoo developers. The specified modules have more configurable choices for creating functionalities when they install various third-party Odoo applications from the Odoo application store. You can also change the available default modules using the Studio module. The Odoo Studio module includes configurable options for making custom modules, much like any other basic module.
You can select from a variety of module setting choices under the Settings tab. These settings allow you to clearly define the duties of financial management and accounting. Additionally, these default settings are included in both Odoo's Community and Enterprise editions. Compared to the community version, which has fewer useful features, the commercial versions are much more advanced. As we proceed to the Accounting module settings page, we will continue to learn more about how each option functions in the sections that follow.
Accounting Import
In the accounting import area, you may oversee the initial setup, which includes creating the Chart of Accounts.
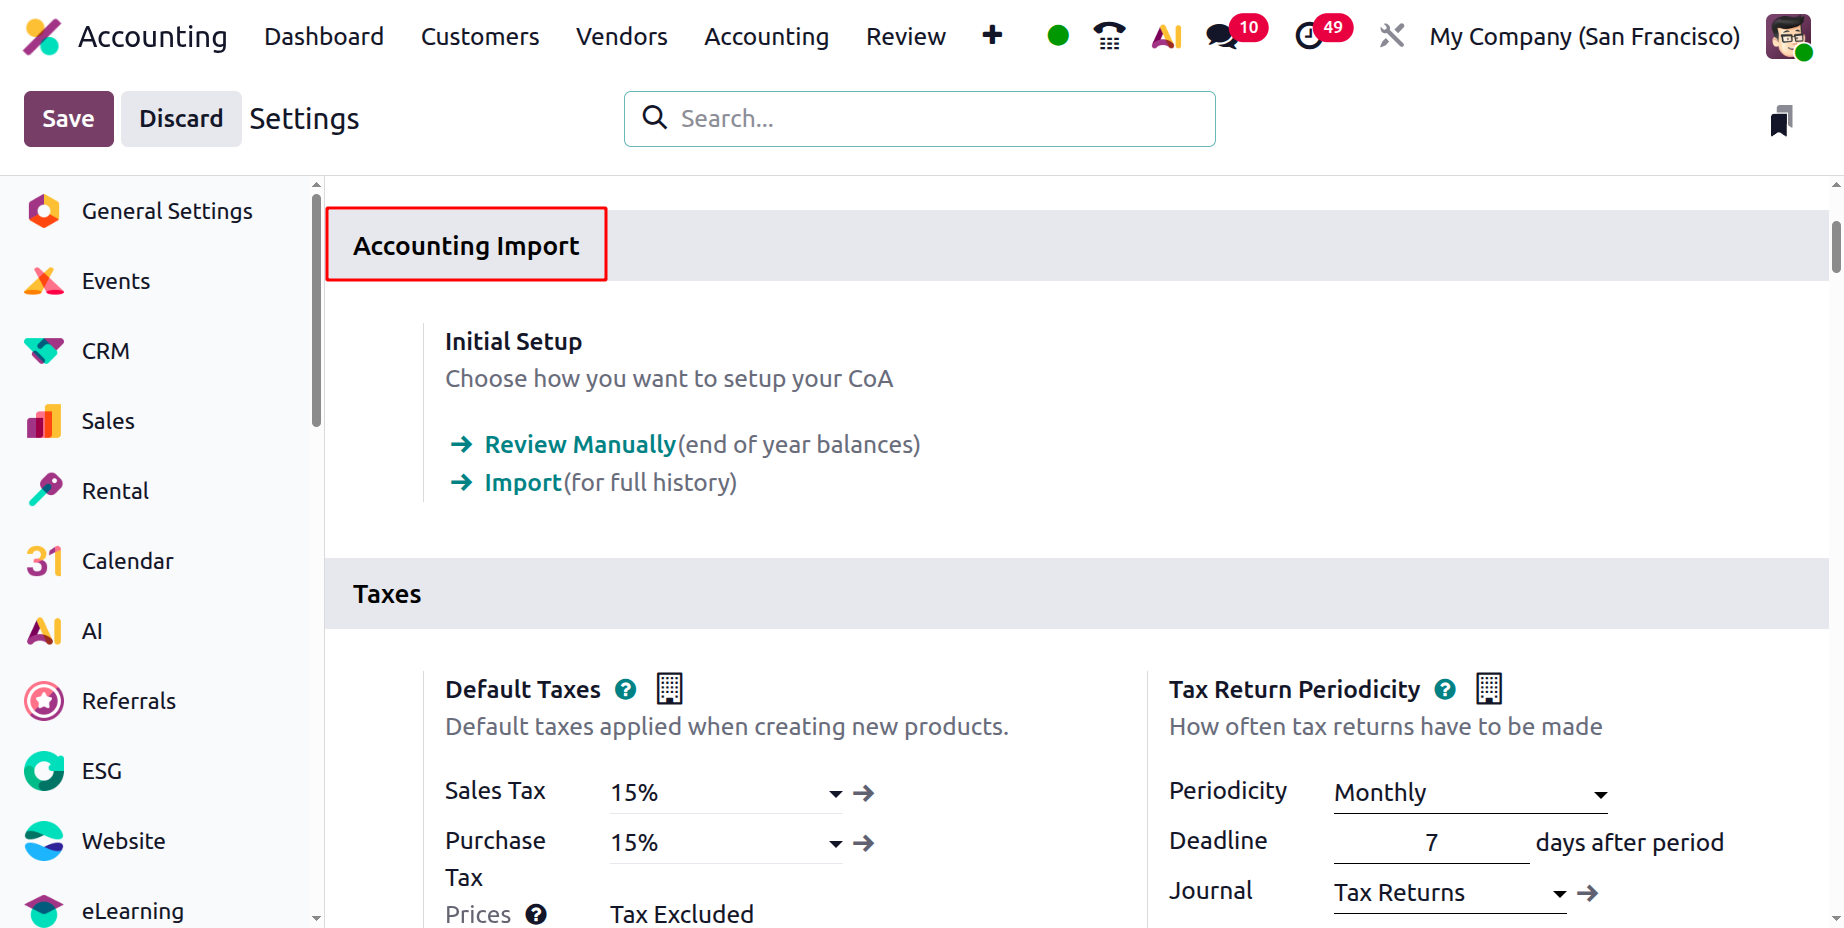
Additionally, you can import journal data, open balances, contact information, and the Chart of Accounts. Essentially, instead of requiring manual entry, it is made to quickly and effectively import the necessary data from an external source into Odoo.
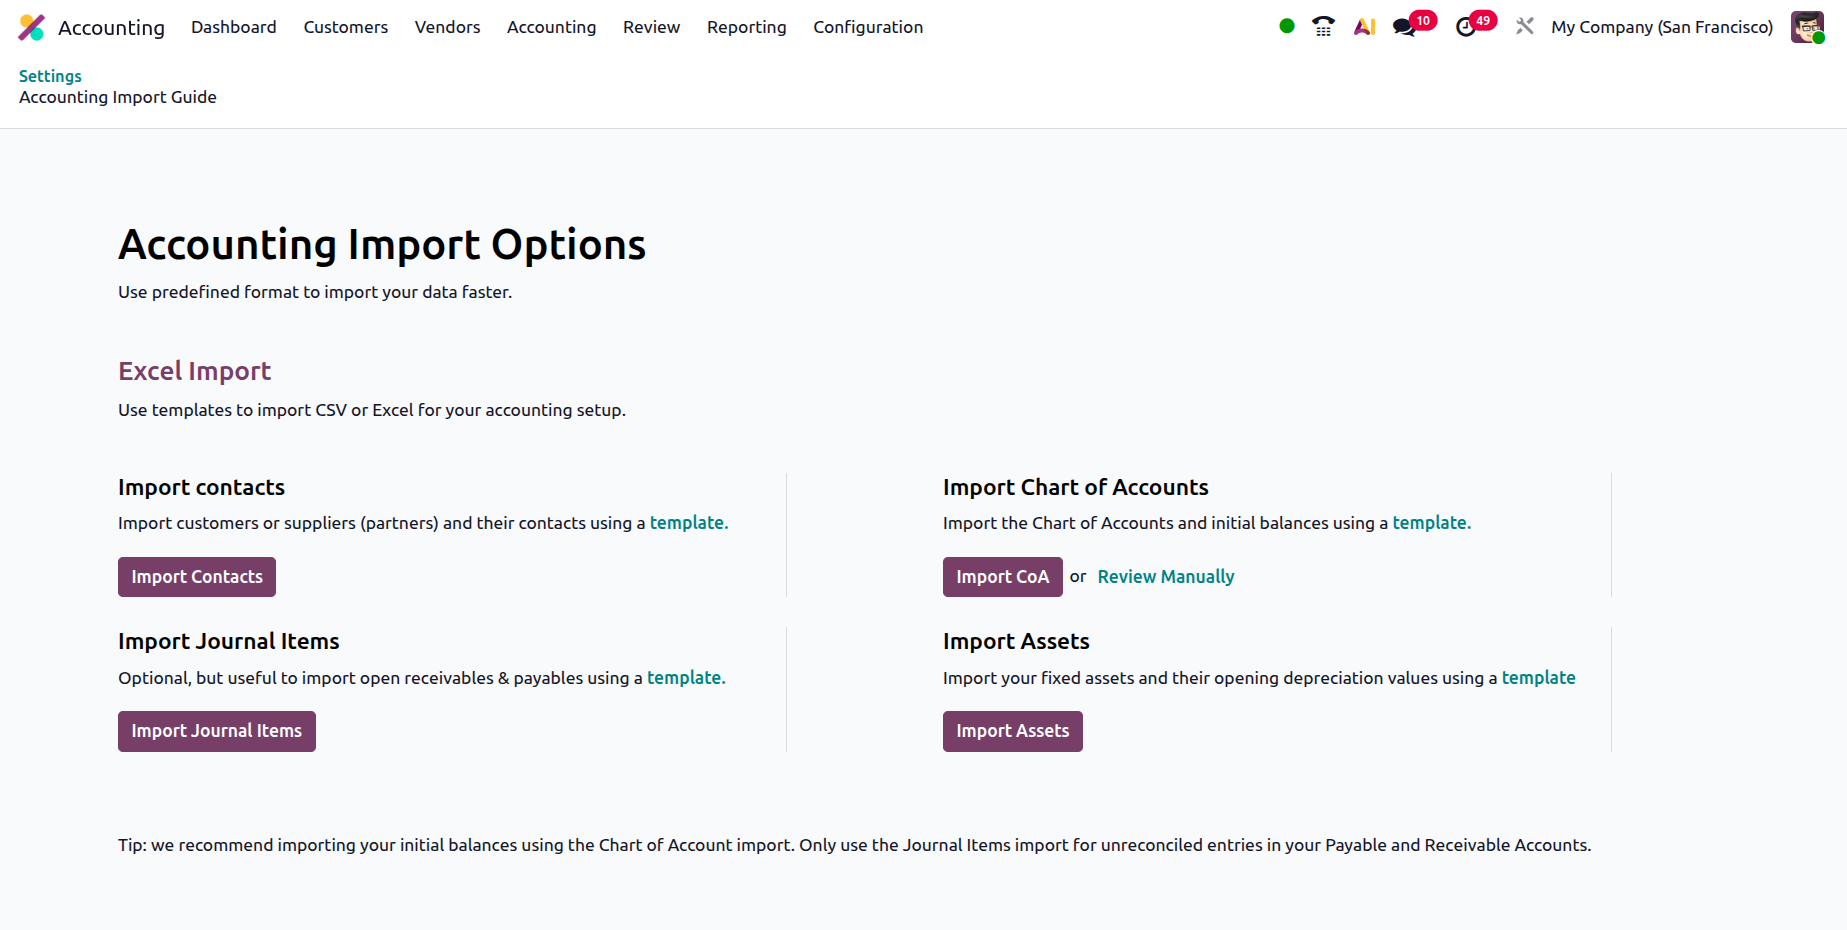
You can import the opening balance from the selected import record choice or set up initial debits and credits by selecting the manual view option, which takes you to the chart of accounts. We can confirm the starting balance here even if it has already been posted.
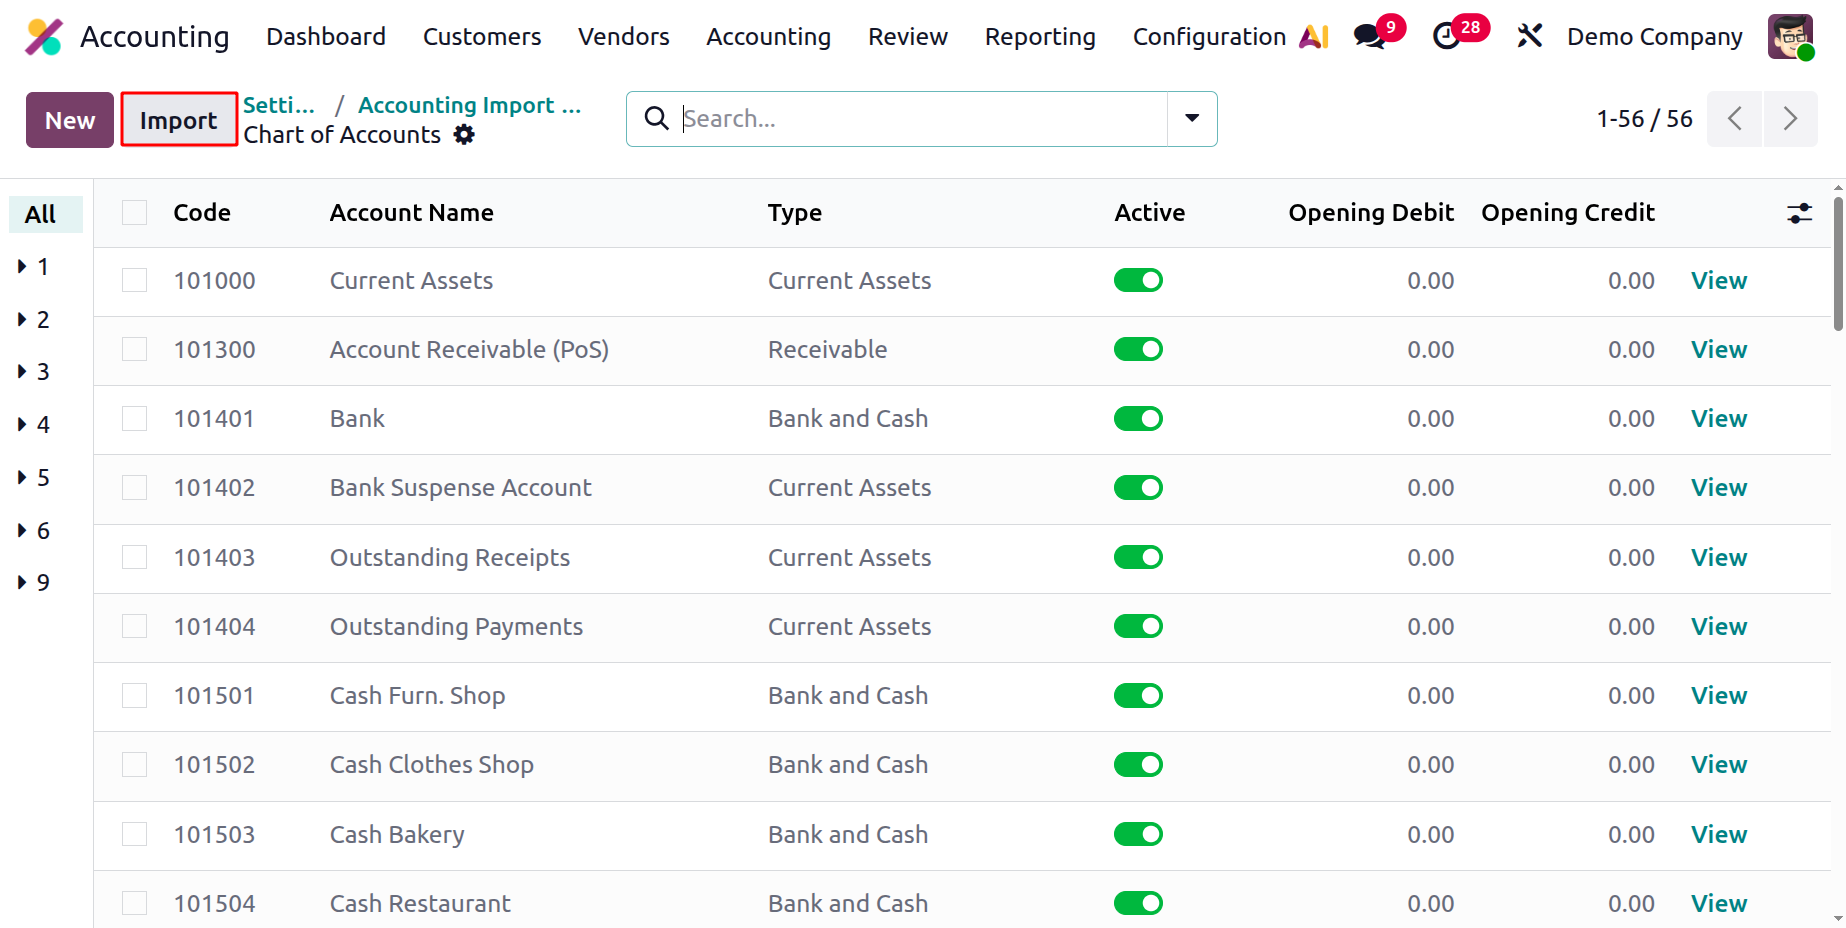
By choosing the next Import option, which takes you to the accounting import tutorial, you can import journals, charts of accounts, and contact details.
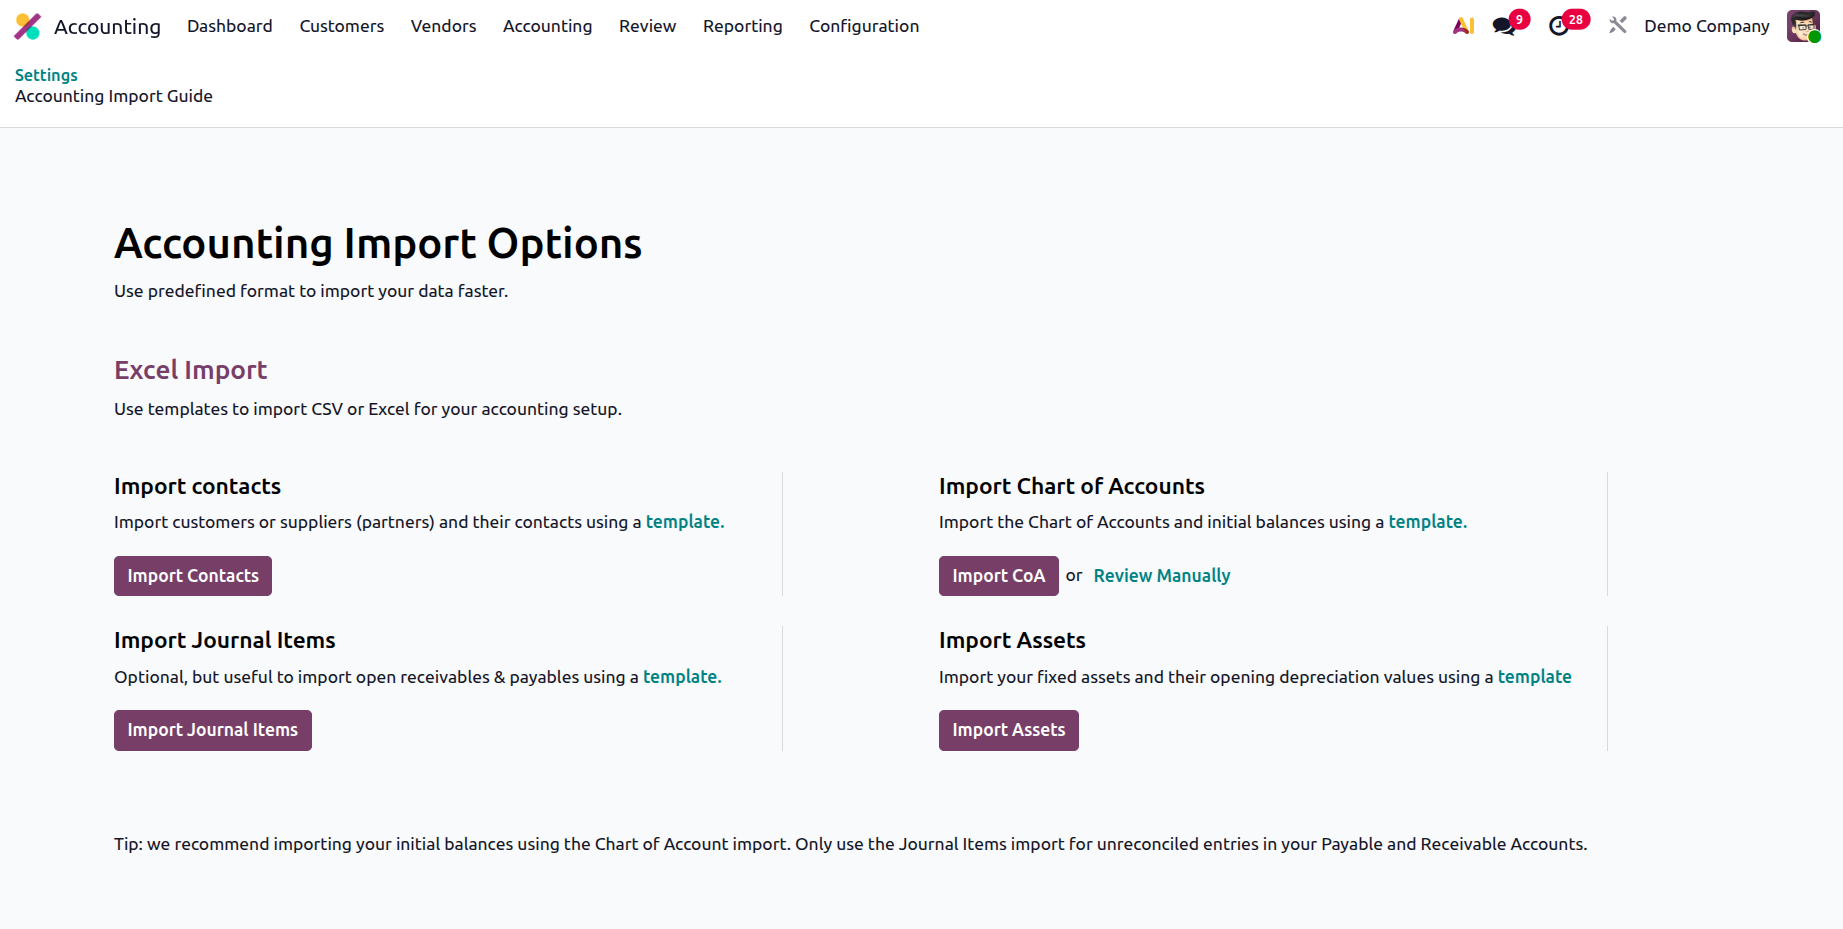
The process of importing data will be accelerated by using a pre-made template. CSV files or Excel templates can be used to import accounting data. By importing contact details, partner information (both supplier and customer) can be imported. It is possible to import the chart of accounts and opening balances. The import journals feature allows you to import journals into Odoo. This is a useful but optional tool when importing payments and open receivables using a template. Odoo advises using the Chart of Accounts Import for your opening balance and the Journal Import only for unreconciled entries in your Payable and Receivable Accounts.
Describe the Region-Based Taxes
In the Settings > Taxes menu, set operational taxes for the business's operational components. The following taxes apply to both purchasing and selling activities and are considered in the activity if the product is not subject to a particular tax. Now let's look at the options in the Tax Setup area of the Accounting module settings menu.
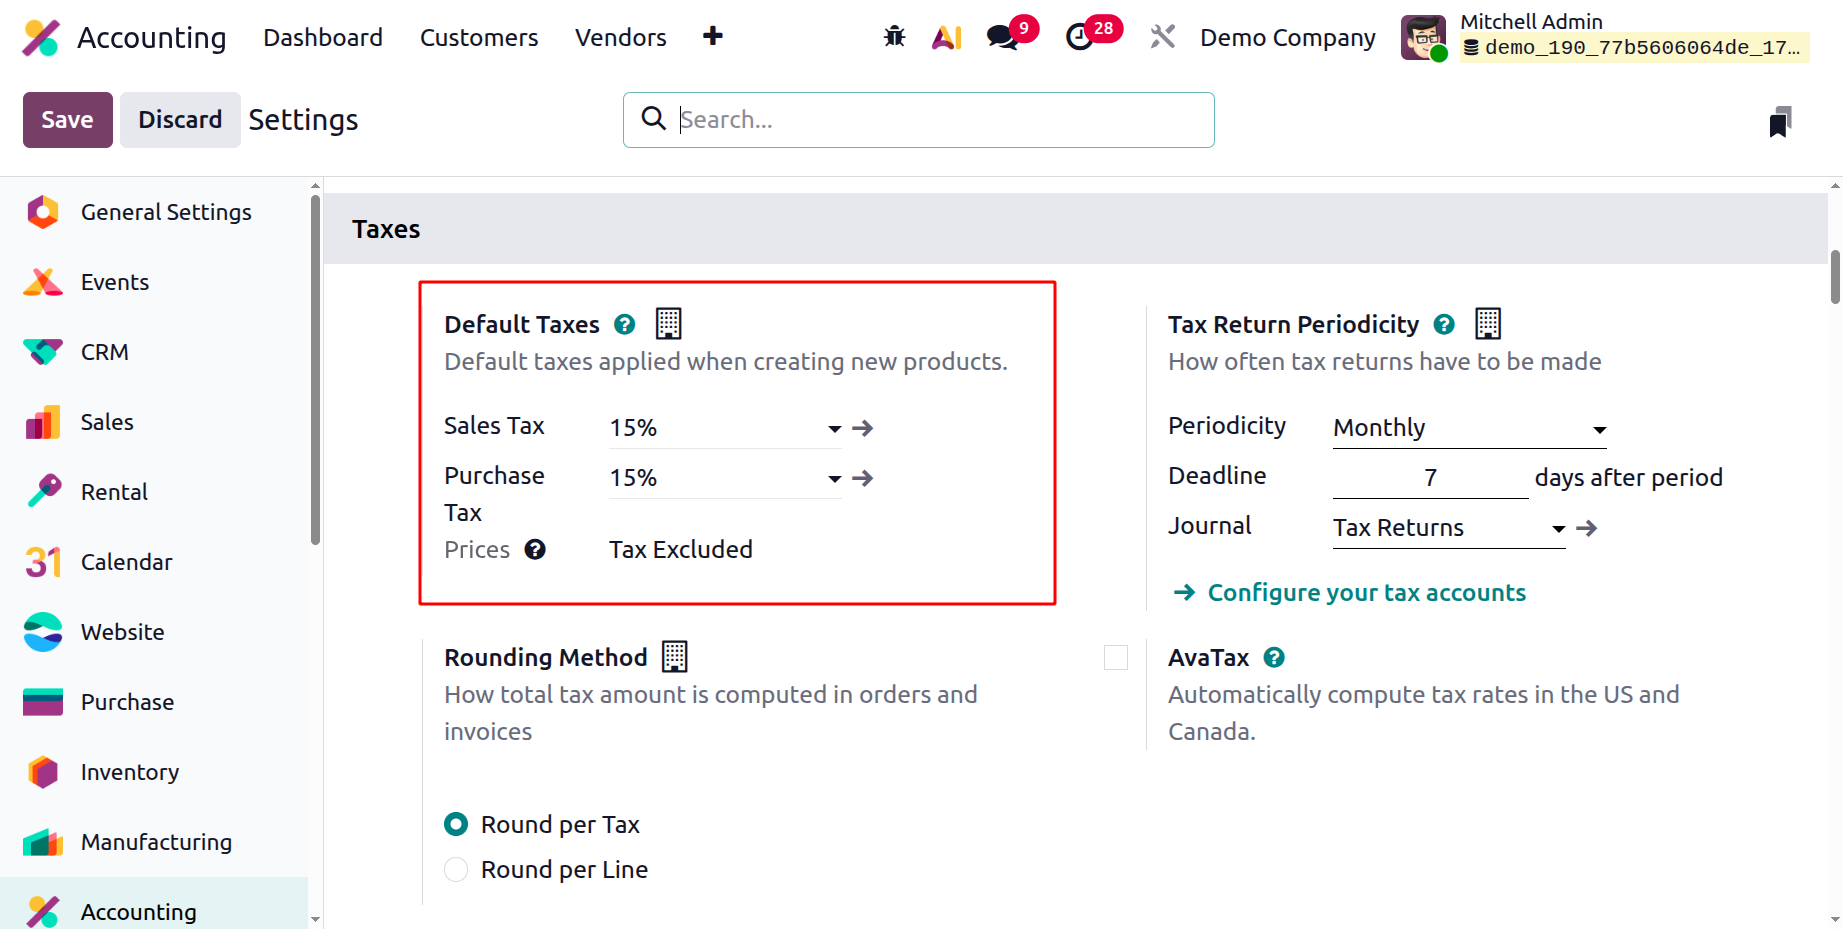
Default Taxes
You can choose default taxes in the Taxes tab to start utilising the software to manage your business. All local transactions that are specified on the platform are subject to these taxes. Here, you can select between the purchase tax and VAT options using the drop-down menu. The Taxes menu item in the Accounting module's Settings menu allows you to create taxes; all you have to do is change the applicable rates to suit your needs. The Default Tax Settings menu in the Accounting module's Settings tab is displayed in the following screenshots.
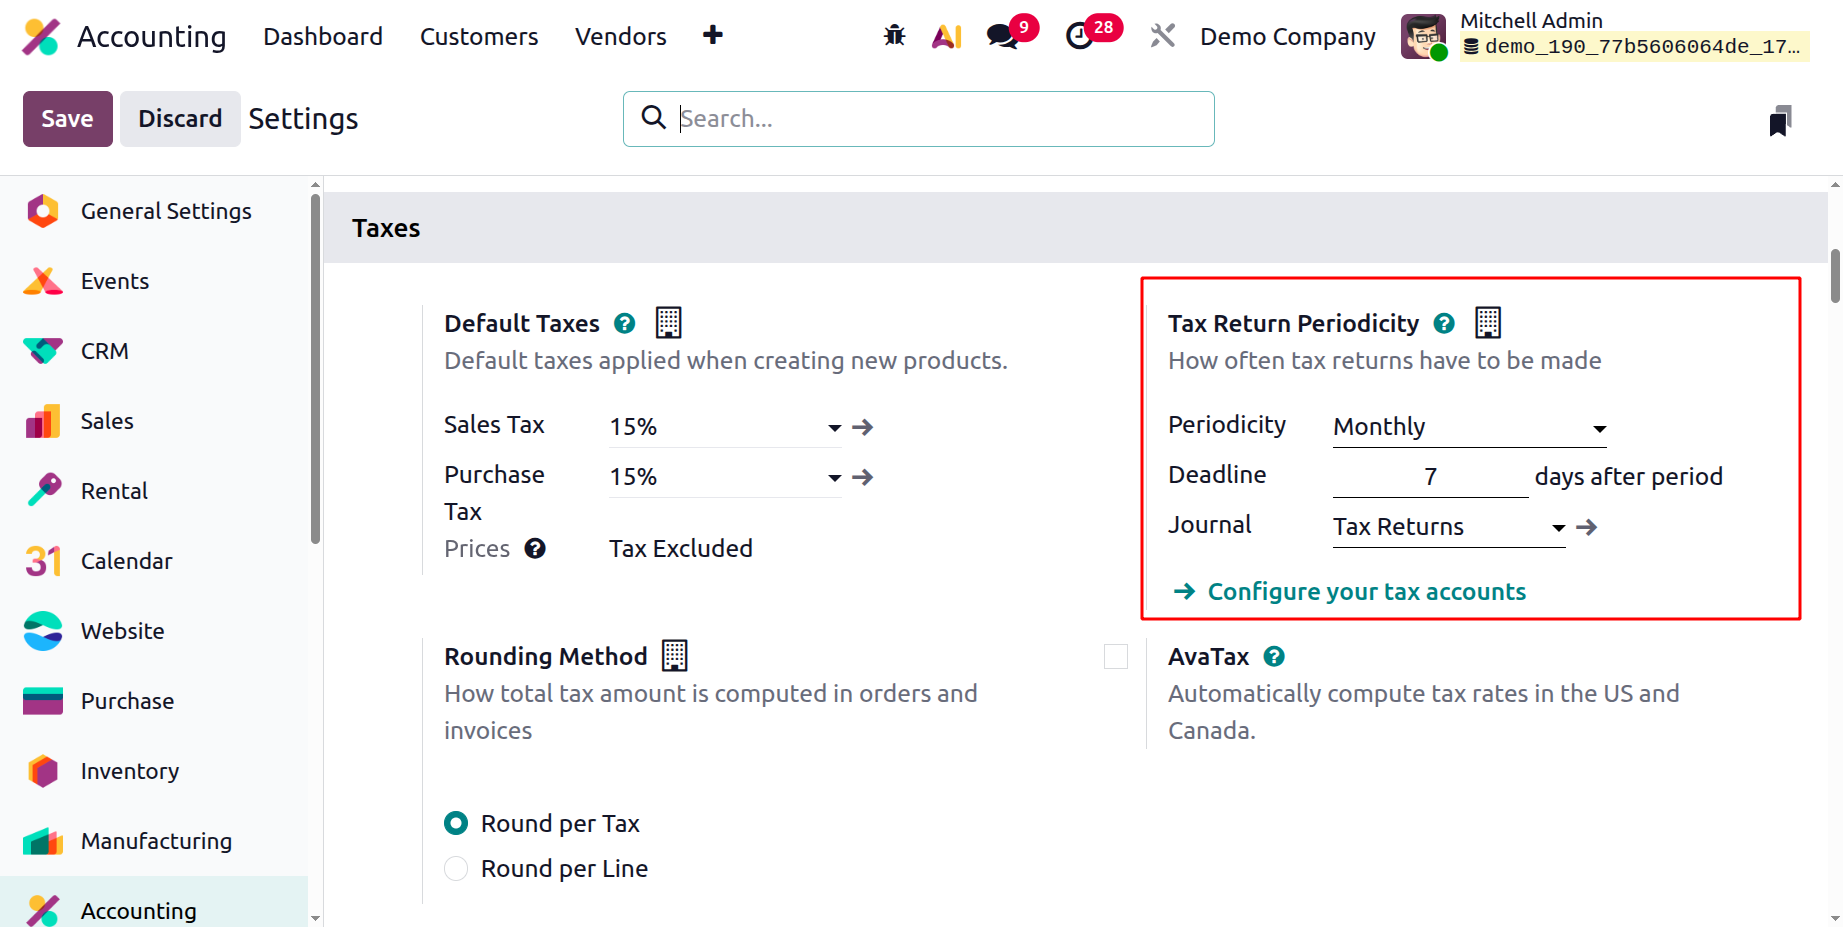
Tax Return Periodicity
The authority must receive the collected tax at prearranged times; the precise time may differ depending on the regulations of the authorities and/or enterprises. Depending on the relevant authorities, returns may be submitted on a monthly, quarterly, yearly, or more frequent basis. The Tax Return Periodicity option allows you to change the return's settings, which determine how often the returns must be delivered. With the settings below, you may choose the cycle to occur annually, semi-annually, every four months, quarterly, every two months, and monthly. You can also schedule a reminder for the days after your period. Additionally, the work platform already contains journals that are defined under the journal and utilised to record taxes earned.
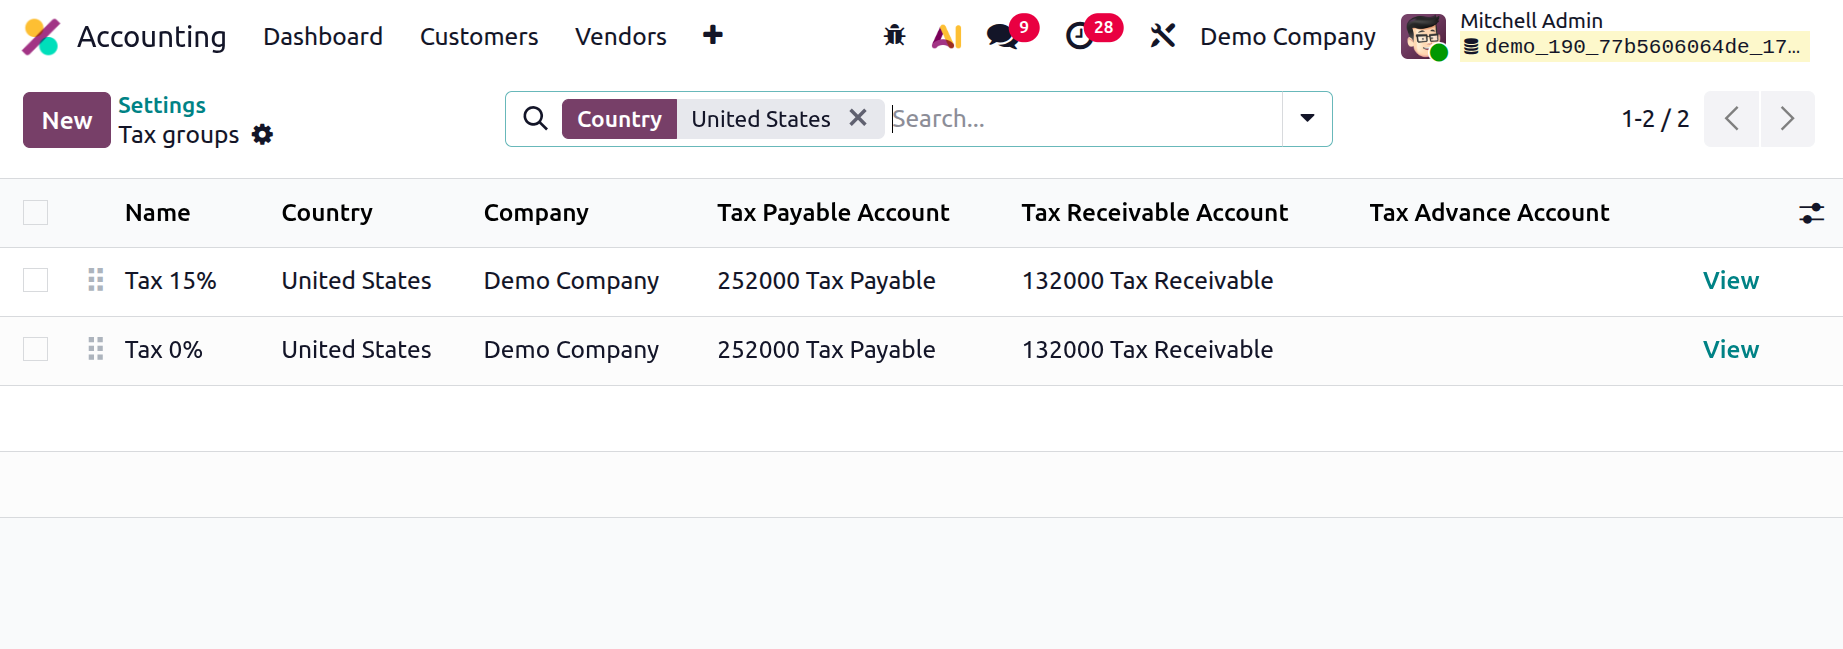
Additionally, by selecting Set Up Tax Accounts, you can establish tax accounts. This will cause the Tax Groups box to open, allowing you to input your tax account information. By selecting one of the defined taxes listed above, you can open a tax account. You can define the Tax Prepayment Account, Tax Utilisation Account (payable), and Tax Utilisation Account (receivable) using the Tax Groups menu, as demonstrated in the example below.
Method
Rounding the taxes received is another feature that can be configured from the Taxes menu. It can be based on either of Odoo's two default values. Round can be used either globally or per line. Generally speaking, you can choose between these two solutions depending on your job requirements.
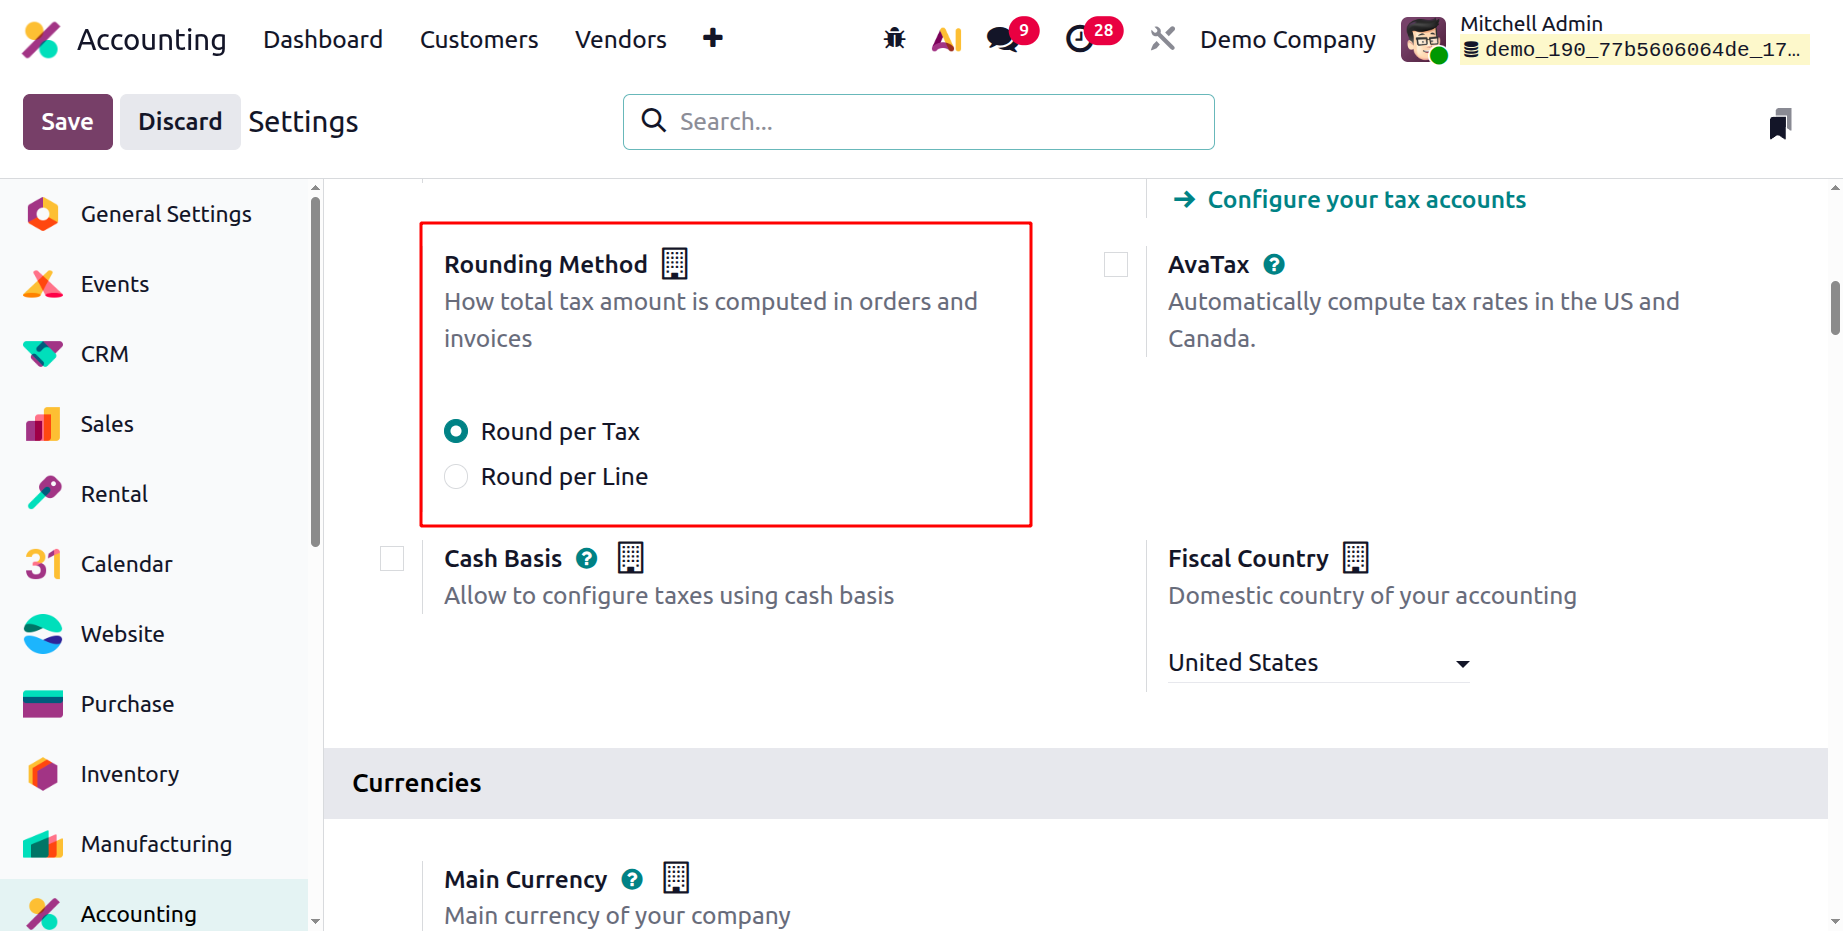
By guaranteeing that rounding is applied independently to each line item, the "Round per Line" option in Odoo accounting enables more precise and focused rounding for specific items or services inside a document. When distinct items in the same document require different rounding, this method may be helpful.
When "Round Globally" is used in Odoo accounting, rounding to the full amount of a document is done regularly, guaranteeing uniformity across all line items. By processing the document as a whole rather than rounding each line item separately, this technique streamlines the rounding process.
AvaTax
Users can map taxes based on locations and tax registrations thanks to Odoo 19's support for AvaTax integration. AvaTax is one tax engine that aids in tax compliance. Avalara AvaTax is an integrated third-party tool that enables companies to determine the sales tax amounts on their invoices according to their customers' locations.
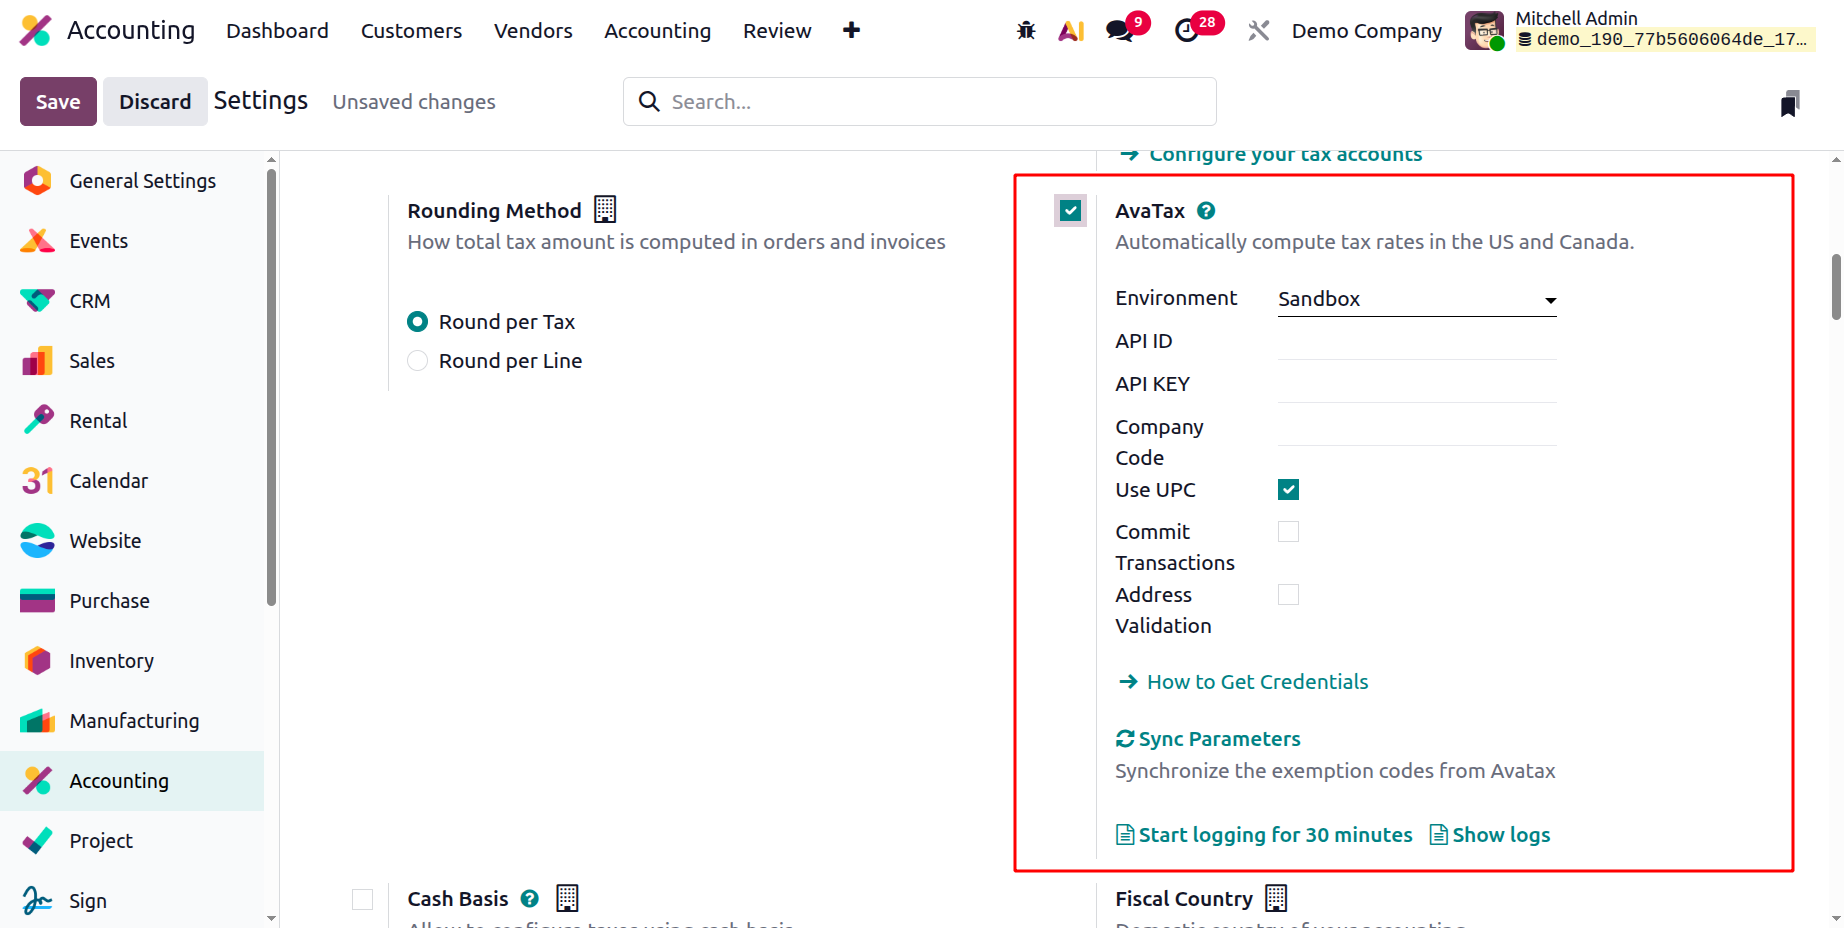
To make tax compliance easier for clients, Avalara provides pre-built connections and custom integrations with popular accounting, ERP, e-commerce, and other business tools.
Cash Basis
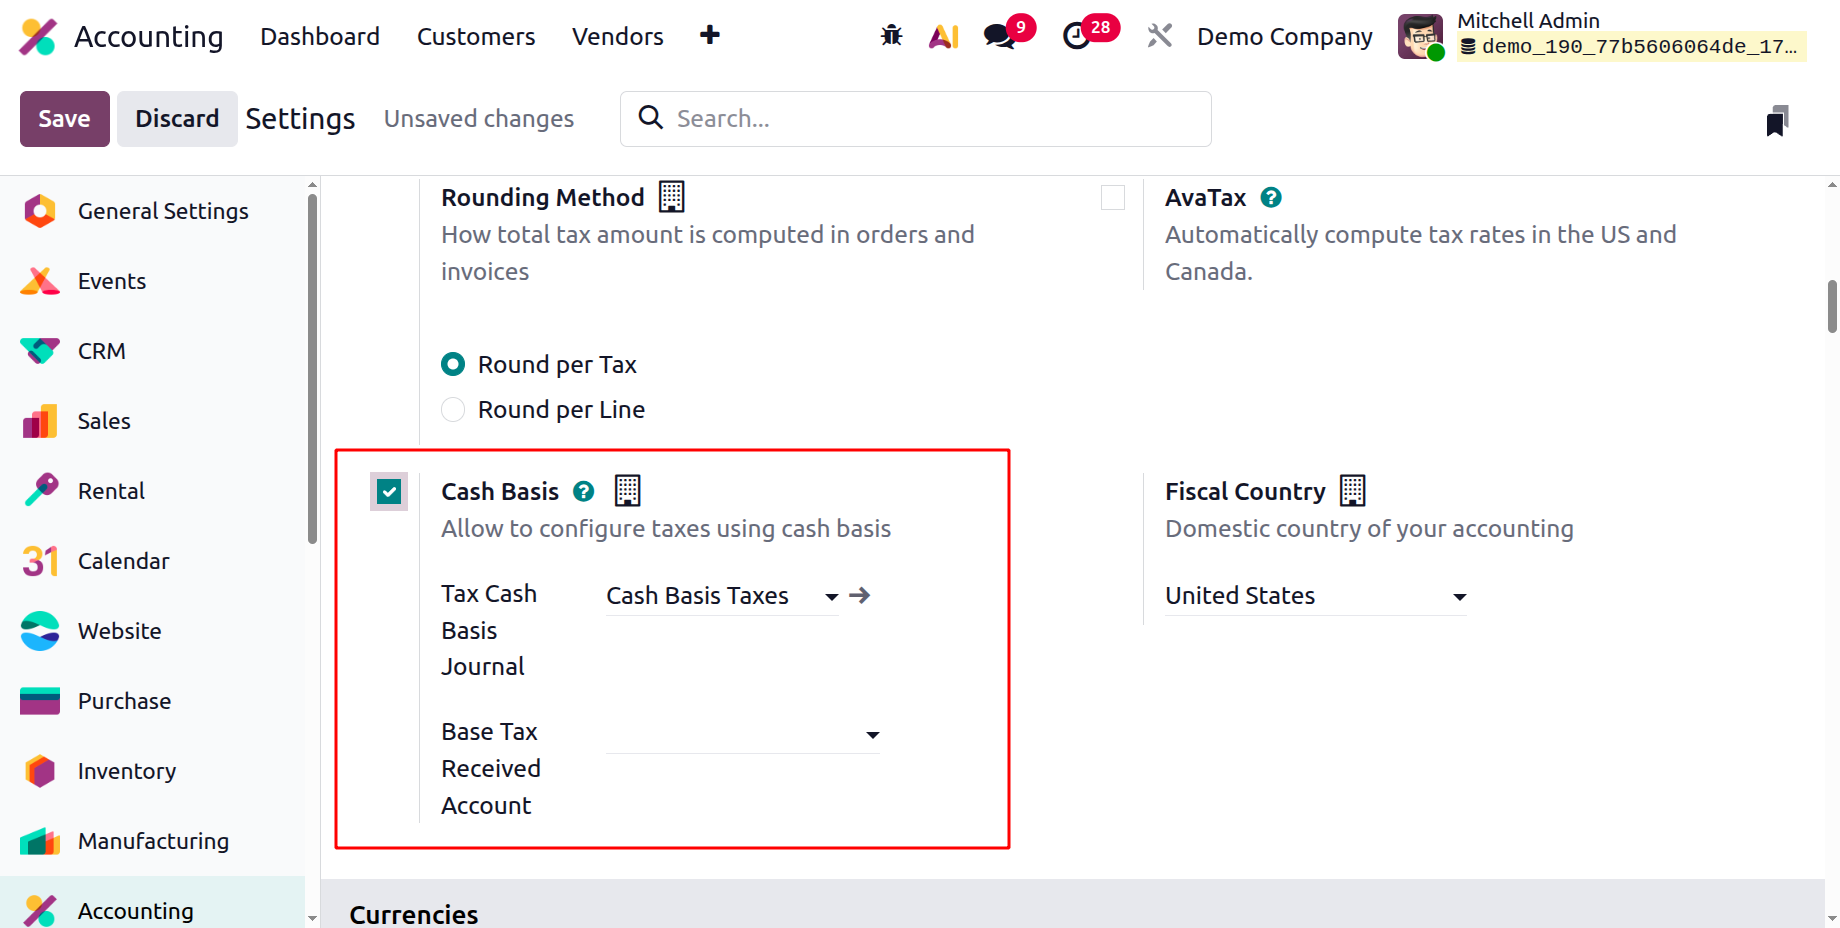
By choosing the Cash Basis option from the Taxes menu, you can control the tax procedures for accepted cash payments. Whether this feature is enabled or deactivated may depend on corporate policy. To grasp the next operating menu, let's move on to the next section of the settings, which deals with currency management.
Fiscal Country
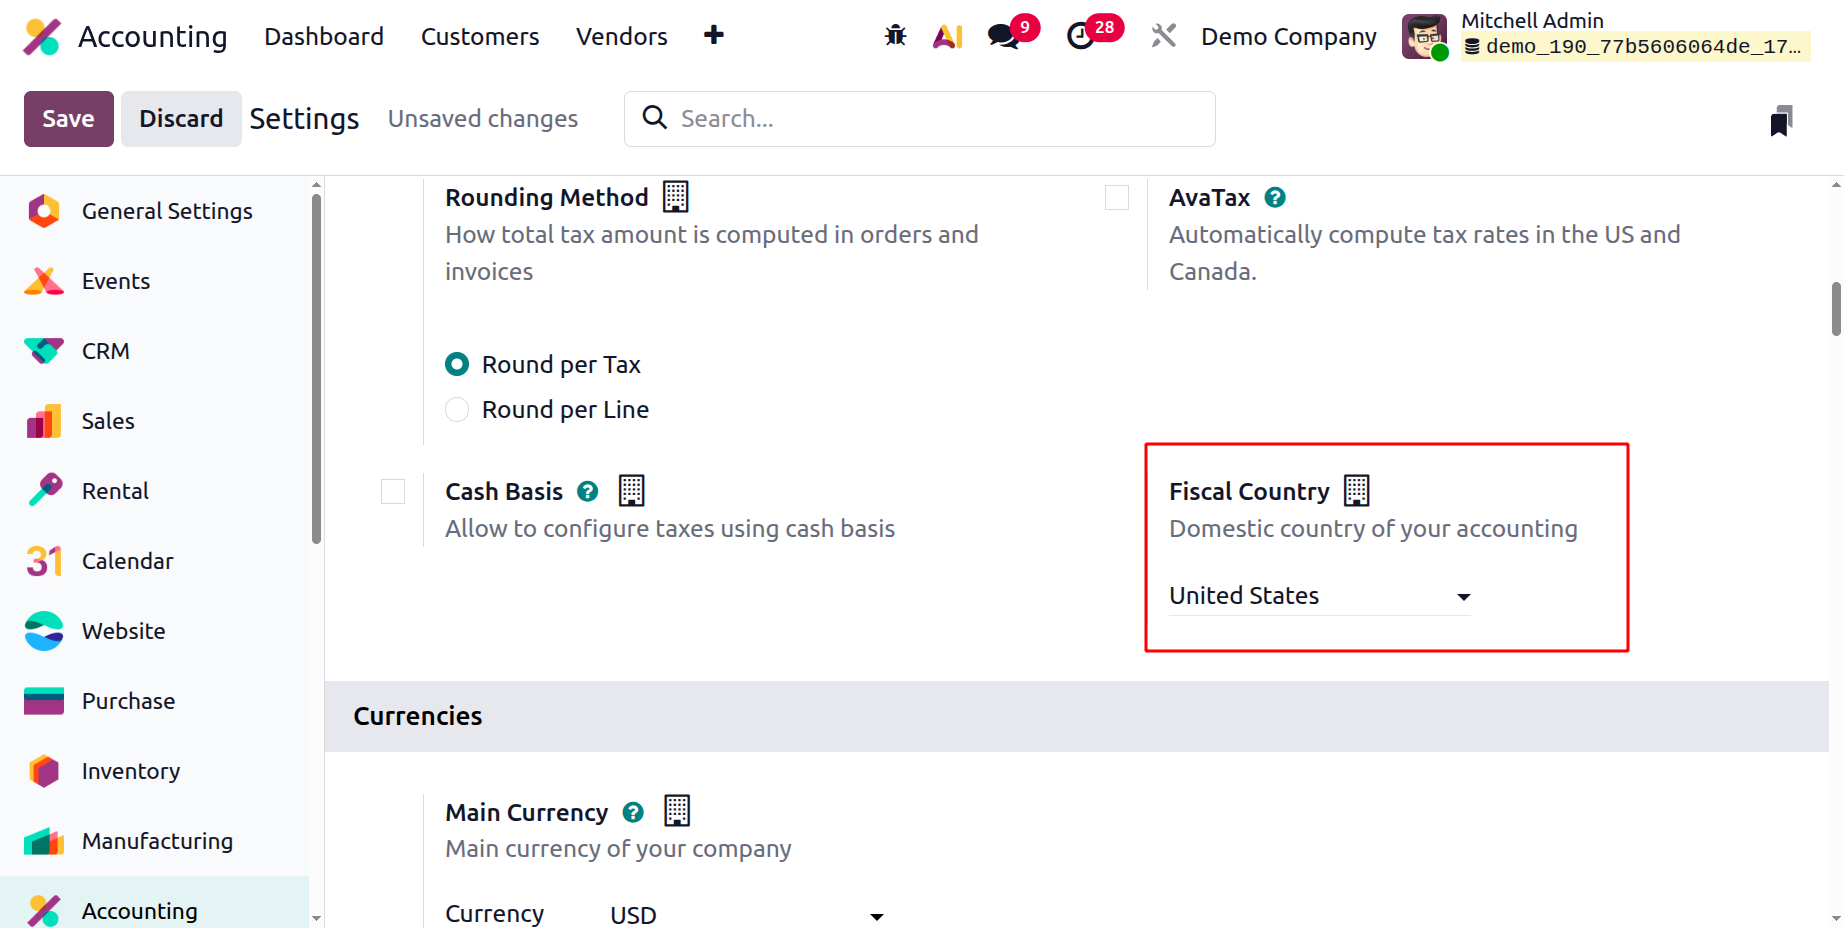
The fiscal country of your business determines its home country, which in turn determines how the tax laws will affect your business. This information is necessary to determine the tax rates and regulations that apply to the financial operations of a business.
Regarding taxes, the chart of accounts, journals, etc., each nation has its unique accounting procedures. We have to specify the country when we first set up our company in Odoo. We make the decision on accounting localisation.
The Fiscal Country in the settings will be your company's home country, such as the United States, and it will instantly alter based on the company nation as soon as you designate it in the company's details currency.
In accordance with this, the company's base currency is instantly adjusted. When starting a new business, a fiscal localisation must be created in the accounting configuration in order to install the accounting package listed in the Fiscal Localisation section for each country.
All default charts of accounts, taxes, journals, tax rates, etc. are immediately added to the database after this package is entered and saved; no additional configuration is required. If you want to add or change the installed localisation package, you can do so, but only before creating any accounting entries.
Currency Management
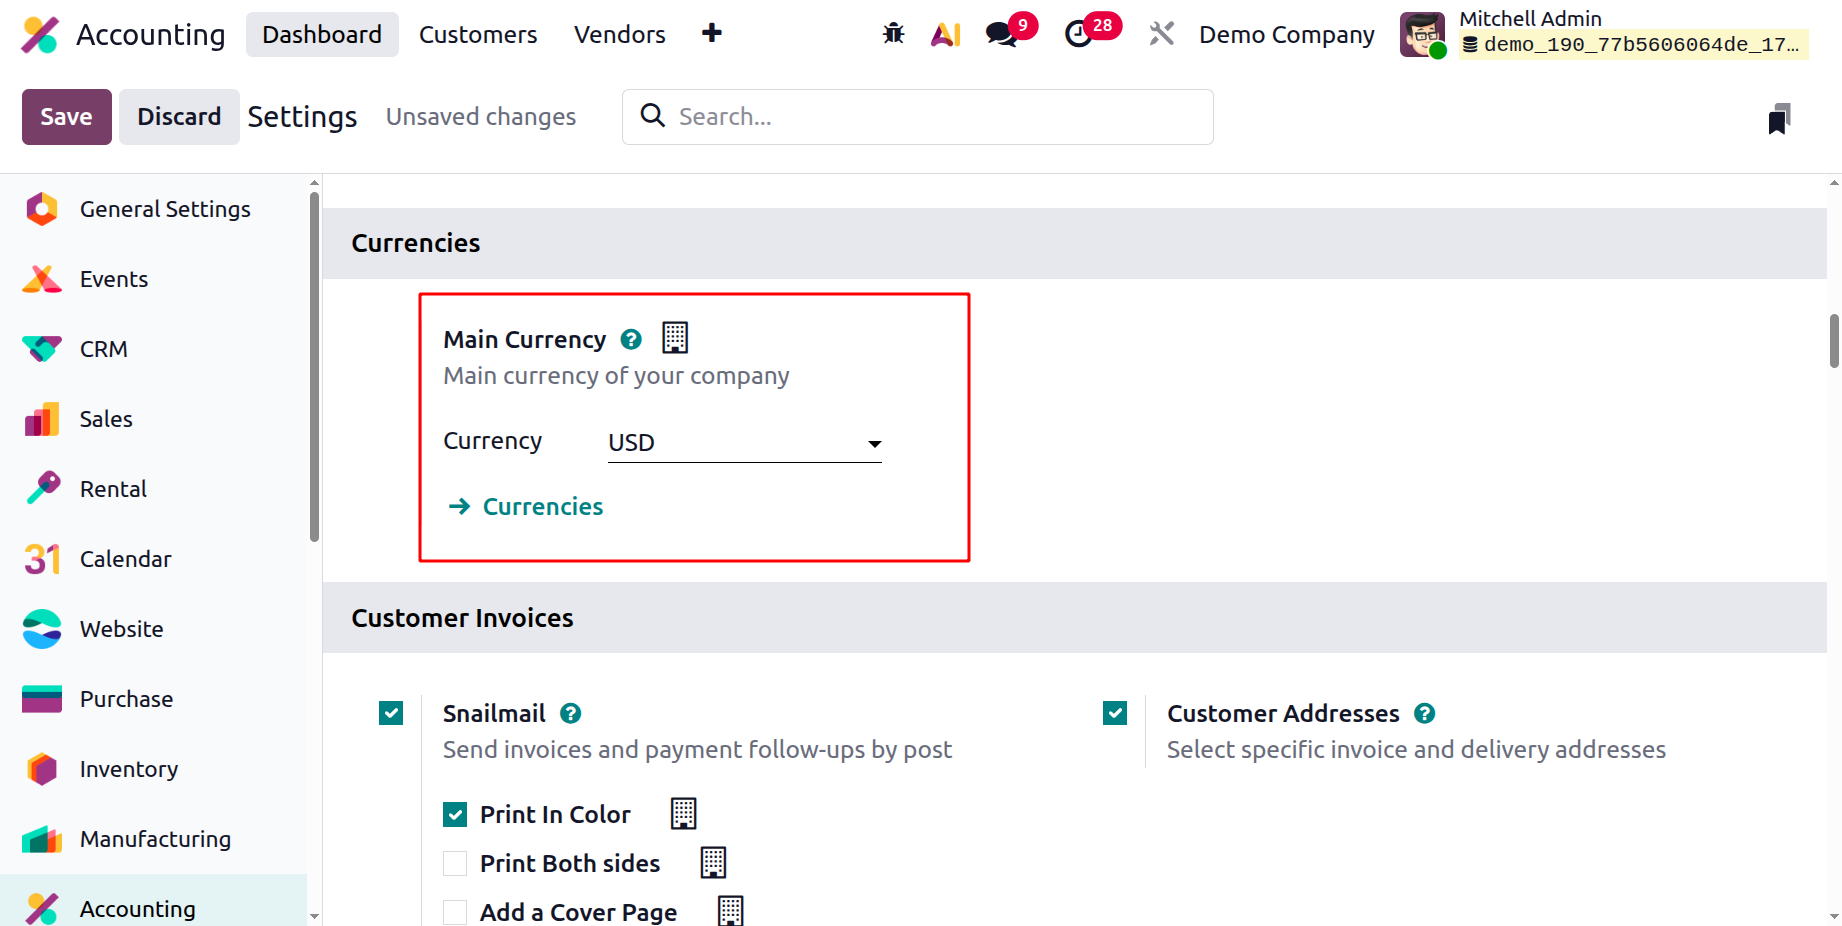
You can configure your company's currency operations using Odoo by selecting the Currencies option in the Accounting module's Settings tab. Under this option, you can select the main currency that the company uses. You can choose the currency using the choice drop-down menu. Every accessible currency is defined in this article. Although you can operate your business using other currencies, the currency in which it is defined also functions as the primary unit of account.
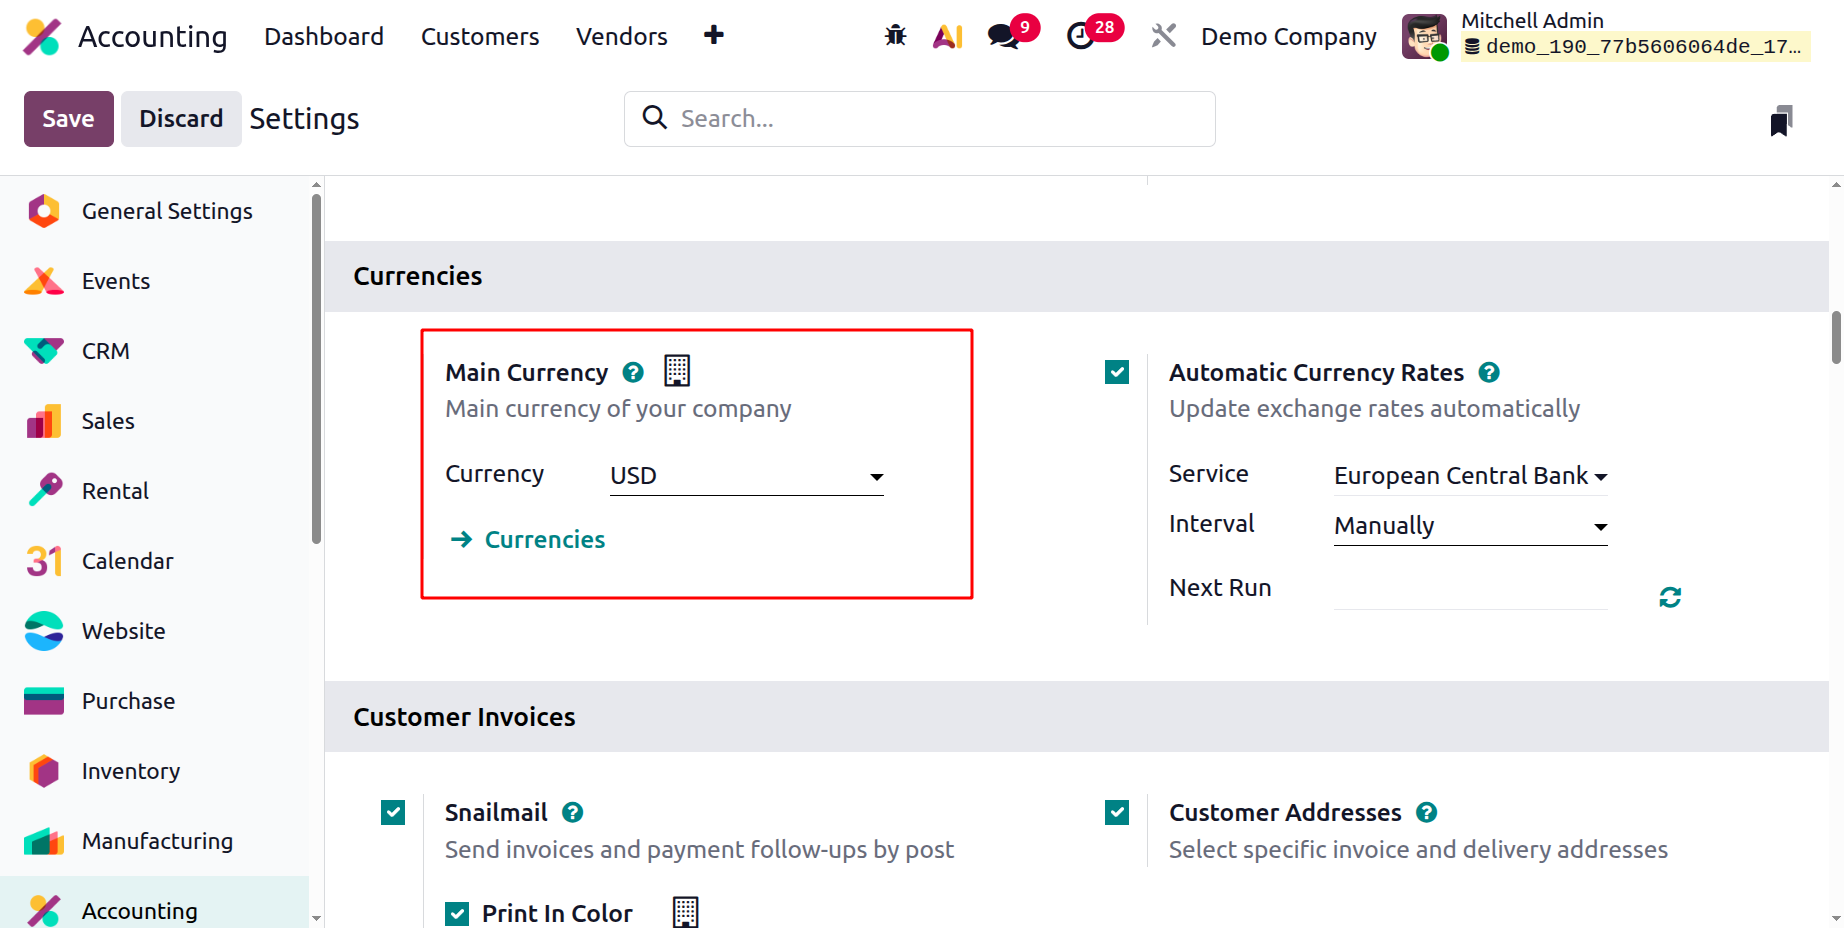
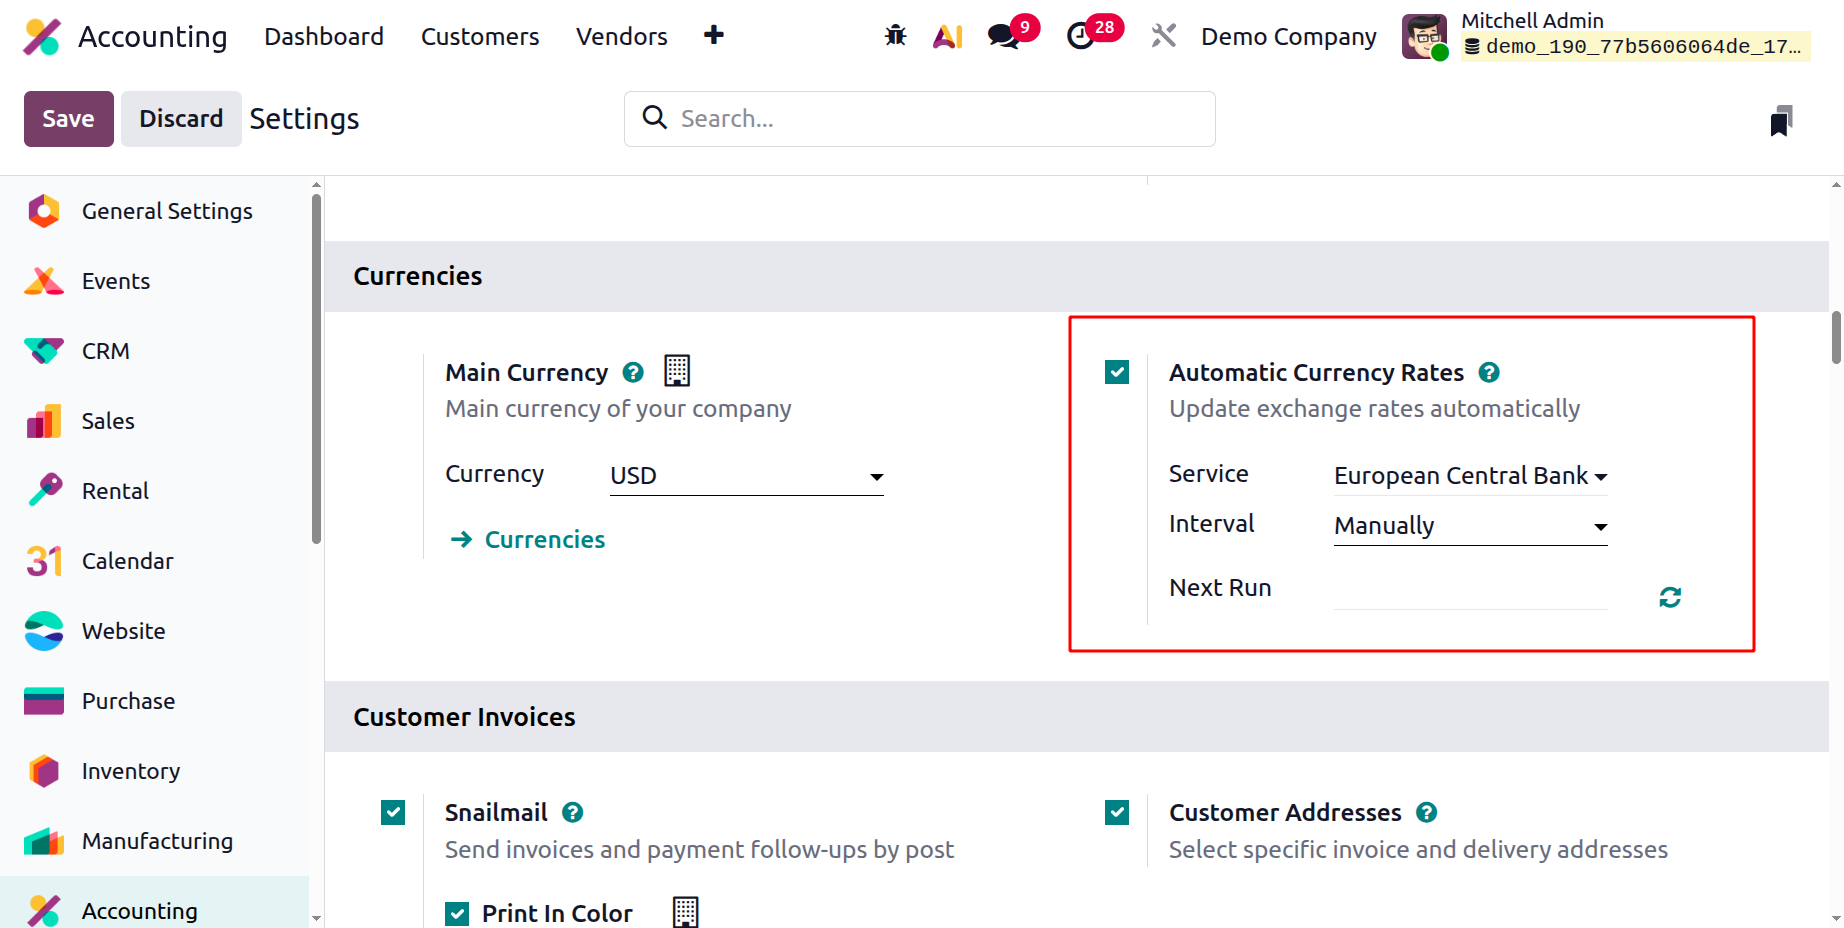
If your country is used as an international tag, you also need to handle the currency in each location properly. This enables you to set up the Odoo platform's Multi-Currency capability, which lets you use any currency and automatically modify exchange rates. To help with automated currency rate updates, select Automatic Currency Rates. At specific times, this might be completed manually on a daily, monthly, or annual basis.
Let's move on to the next area, Invoice Management, which may be accessible through the Settings of the accounting module.