Efficient vendor financial management in Odoo 19
Just as customer management is vital for smooth business operations, supplier management is equally important. In
most companies, each product may have multiple vendors, and businesses often maintain more than one supplier for
the same item. Factors such as pricing, product or service quality, and other operational considerations play a
significant role in deciding the most suitable supplier for the company.
To manage multiple vendors efficiently, organizations require a reliable management system capable of handling
such complexities. The accounting aspect of these operations is particularly important and can be managed
effectively with specialized accounting software. The Odoo Accounting module supports the management of both
single and multiple suppliers within business activities. In addition, the Odoo platform includes a dedicated
Supplier Management tab, designed with powerful tools and menus to improve productivity and simplify
vendor-related processes.
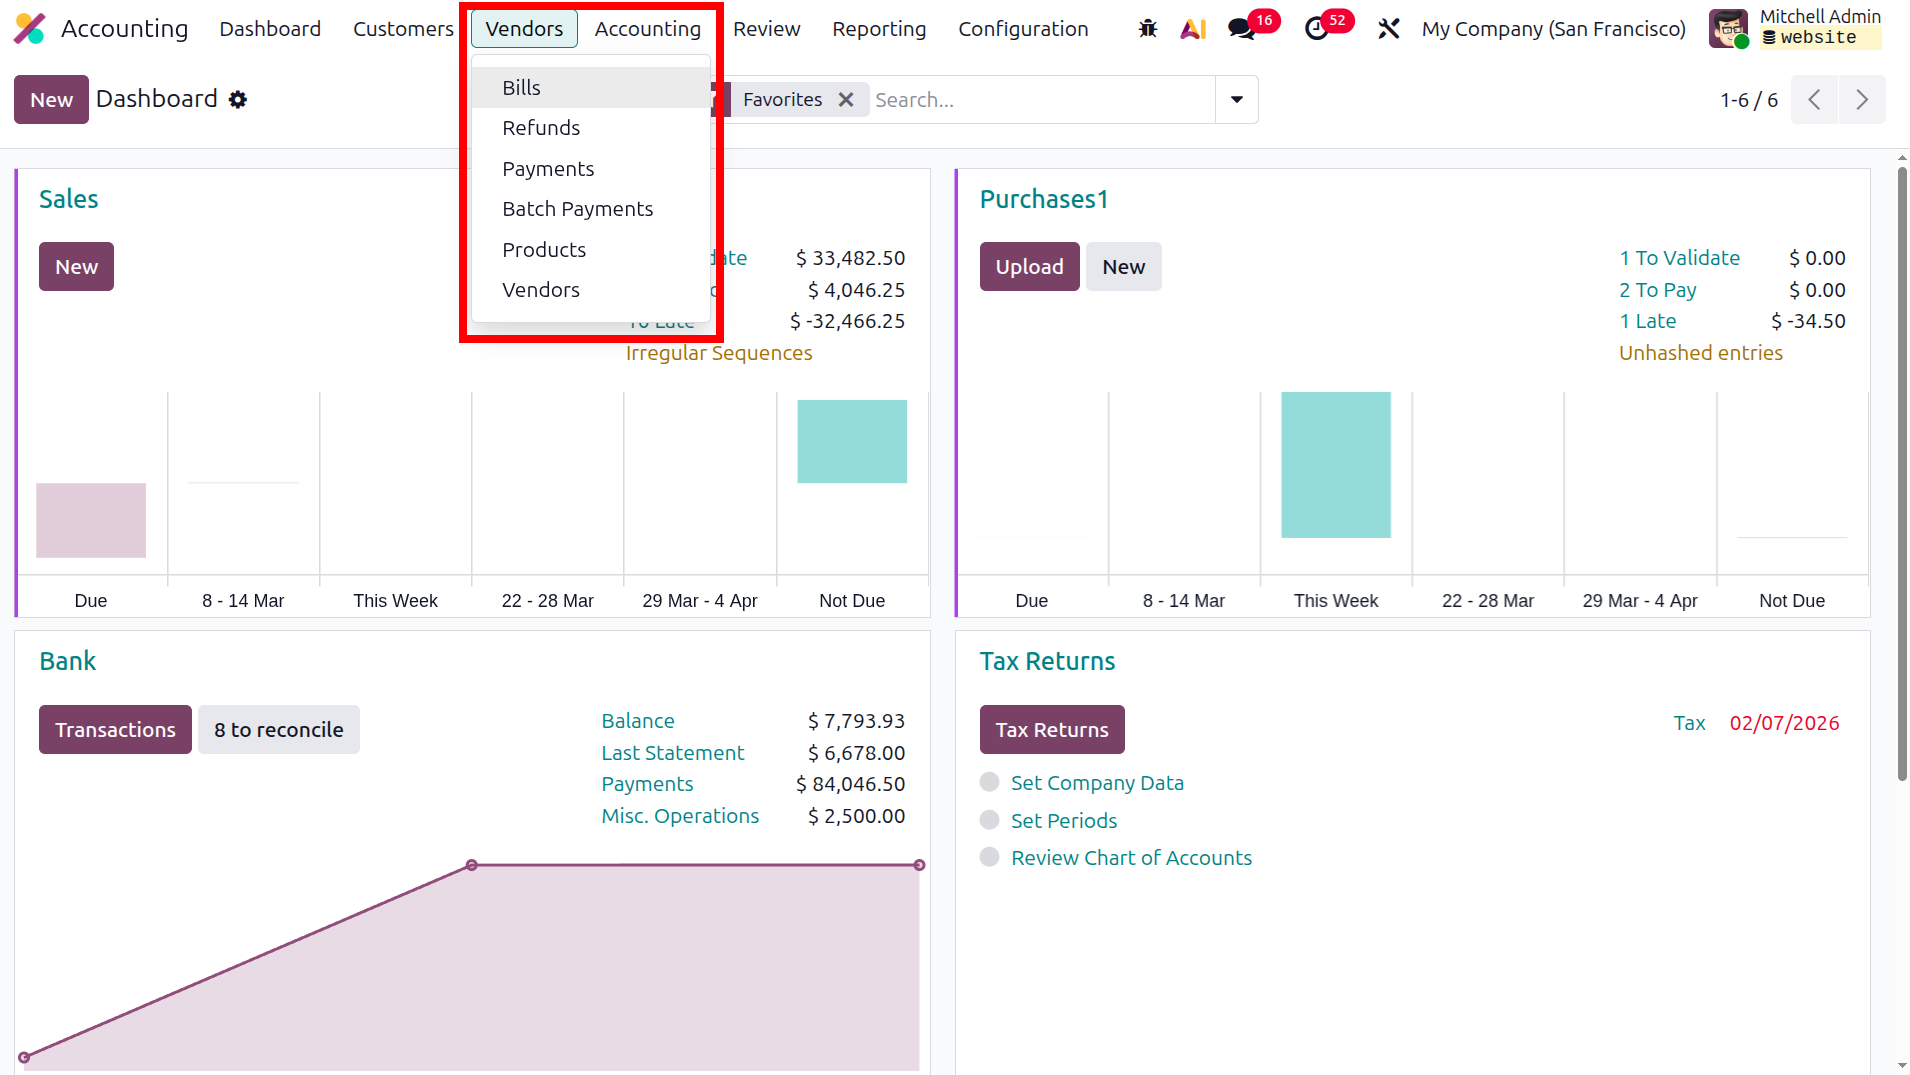
The vendor management page offers several options, including managing vendor bills, refunds, vendor receipts,
bill payments, and batch payments on vendor bills. It also supports items based on vendor descriptions and
provides a dedicated vendor management menu. In the following section, we will explore each of these options and
menus available under the Vendors tab of the Accounting module.
Vendor bill management
Monitoring purchase invoices is an essential part of business operations. These invoices are issued by suppliers
according to the agreed terms regarding the price of the goods and the quantities to be delivered or supplied.
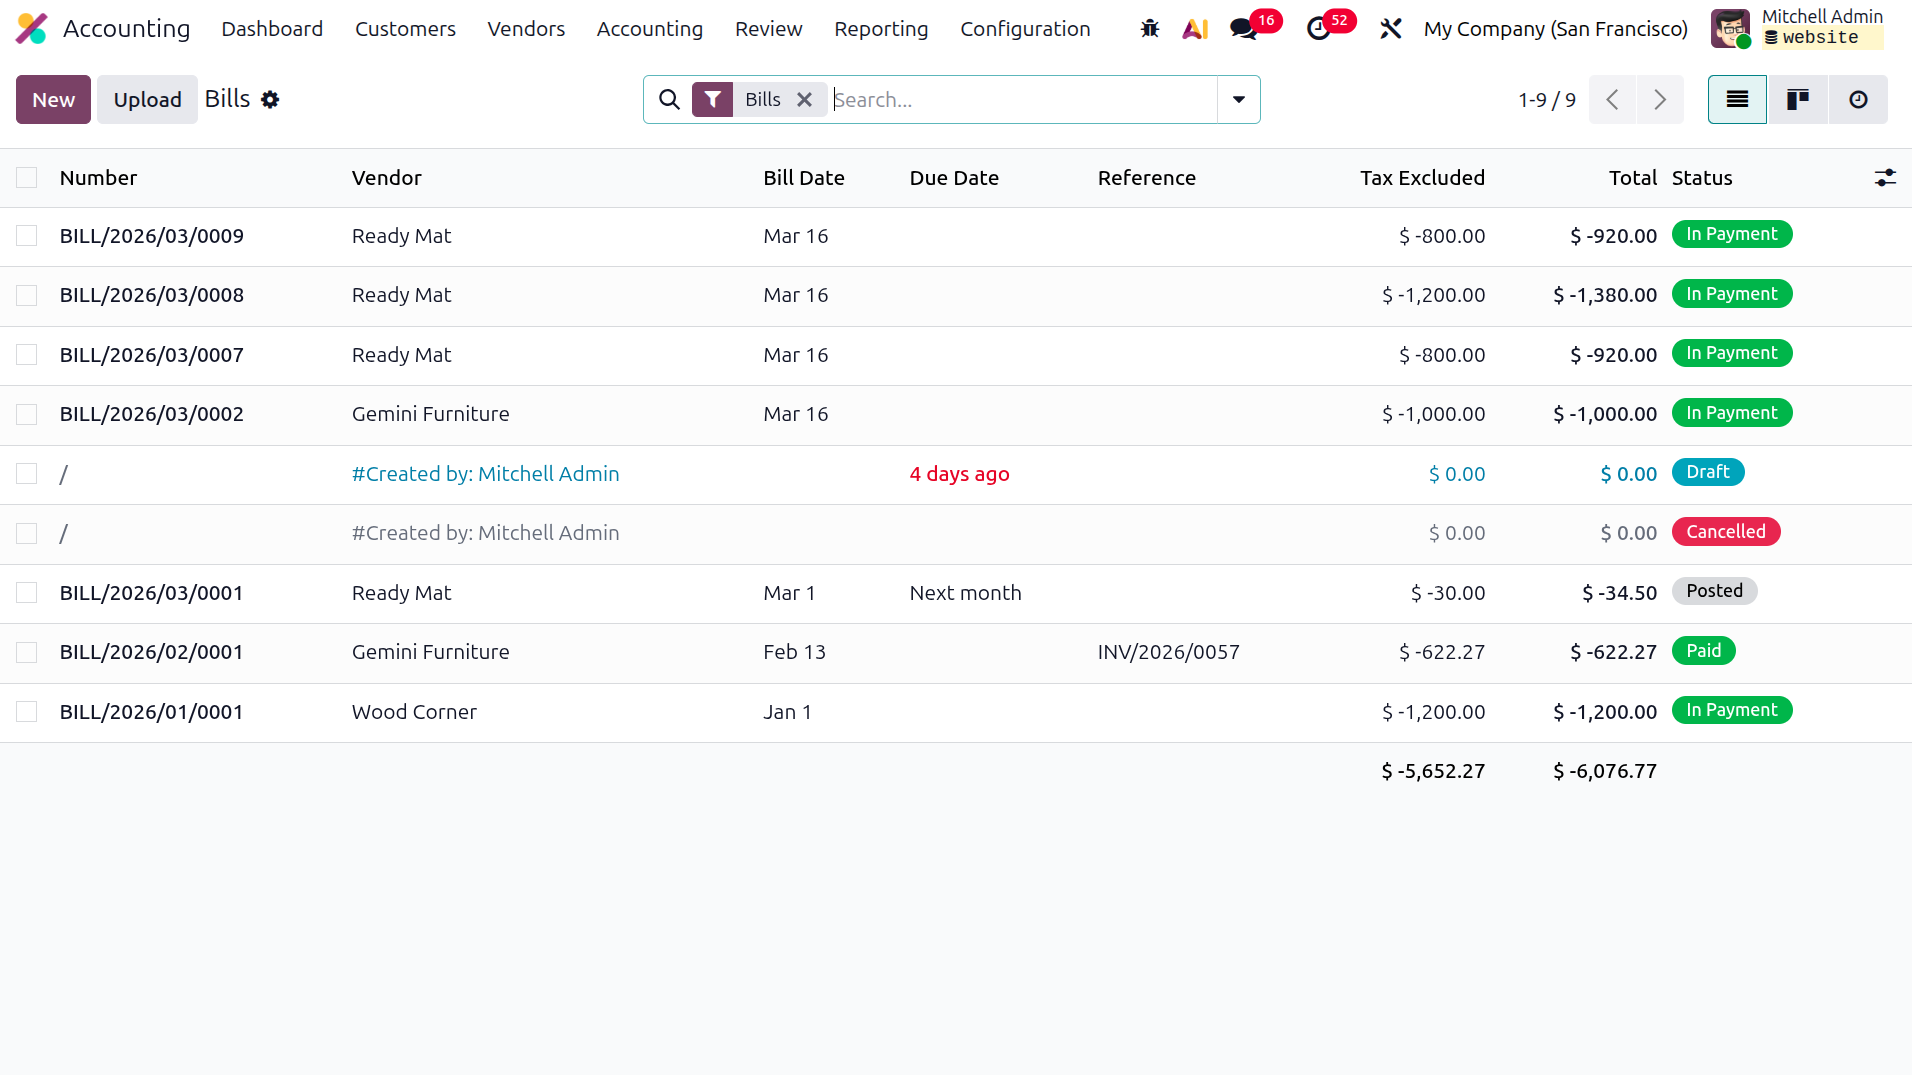
In Odoo, the dedicated Vendor Bill management option can be accessed from the Vendors tab of the Accounting
module. This section displays all the vendor bills that have been created and submitted to the company. It
provides information such as unapplied taxes, total amount due, vendor name, bill number, bill date, due date,
reference, next activity, and status. If any changes are required, you can select the specific invoice and use
the Edit option to modify its details.
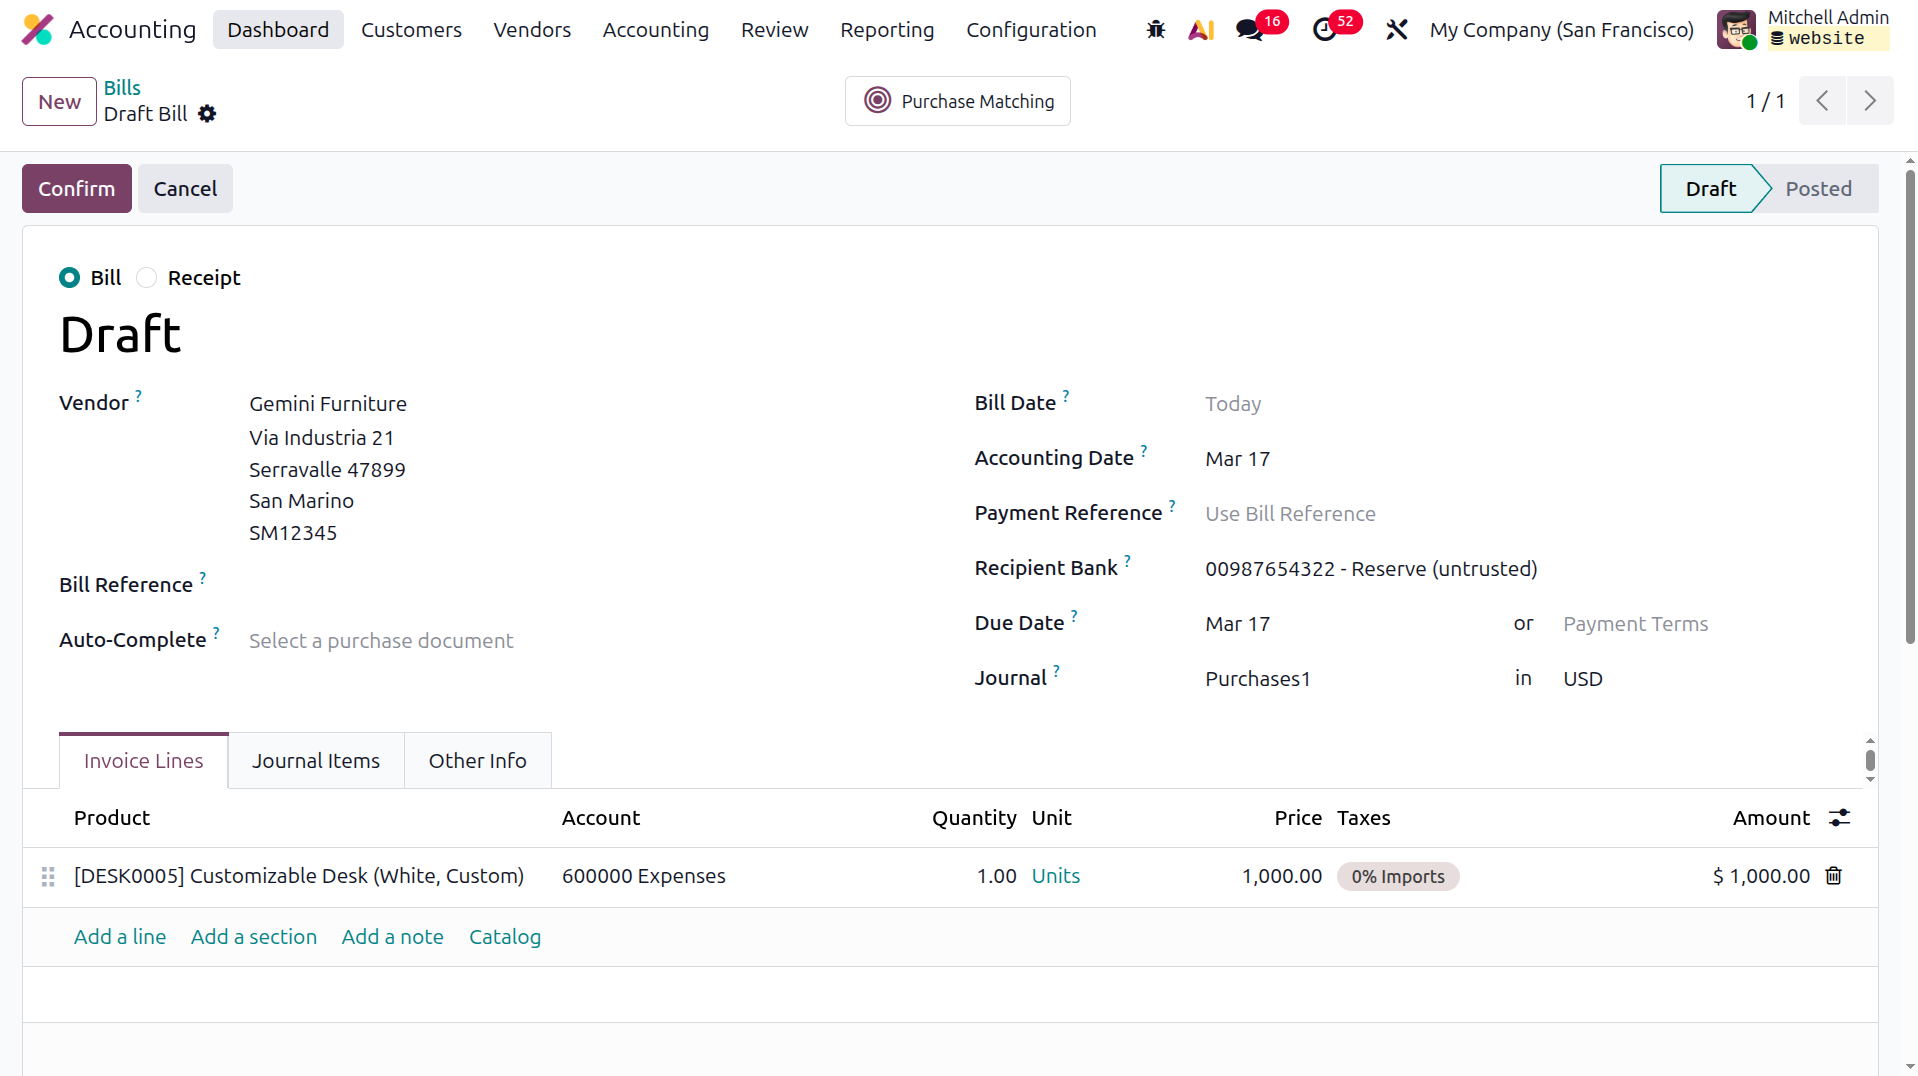
To create a new bill, click the New option, which opens the Bill creation window as shown in the corresponding
screenshot. Although the Vendor Bill number is generated automatically, you must enter the vendor-related
information, including the Bill Reference, Payment Reference, Receipt Bank, and Auto-complete details. You
should also specify important dates such as the Bill Date, Accounting Date for recording entries in the ledger,
Due Date, along with the Journal and the Currency used for the transaction.
Furthermore, you can define the Invoicing Lines for the relevant Vendor Bill by selecting the Add a Line option.
In this section, details such as the Product, Label, Account, Analytical Accounting information, Quantity,
Price, Tax details, and Subtotal are entered. If required, you can include additional information by choosing
the Add a Note option, or organize the invoice content by using the Add a Section option.
The Autocomplete fields allow users to quickly generate bills from Purchase Orders. Instead of manually entering
product details such as quantity, price, and other information line by line in the Order Line, you can select
the Purchase Order through the Autocomplete option. Once selected, all the relevant Purchase Order information
will be automatically populated in the Bill form. If multiple Purchase Orders are added, it is also possible to
create a single Vendor Bill that covers several purchase orders for the same vendor. After saving the entered
details, the Vendor Bill Number is generated automatically. In the List View of the bill, the Source Document
displays the related Purchase Order numbers, separated by commas.
When products are added to the Order Line, the Journal Items page automatically reflects the affected accounts
along with their corresponding debit and credit amounts. This section shows the ledgers involved in creating the
bill. During the bill creation process in Continental Accounting, the Account Payable, Expense Account, and Tax
Account are affected. The Account Payable account is credited because it represents a liability that increases
with the bill. At the same time, the Expense Account is debited as it records the incurred expense, and the Tax
Account is also debited when applicable taxes are applied to the transaction.
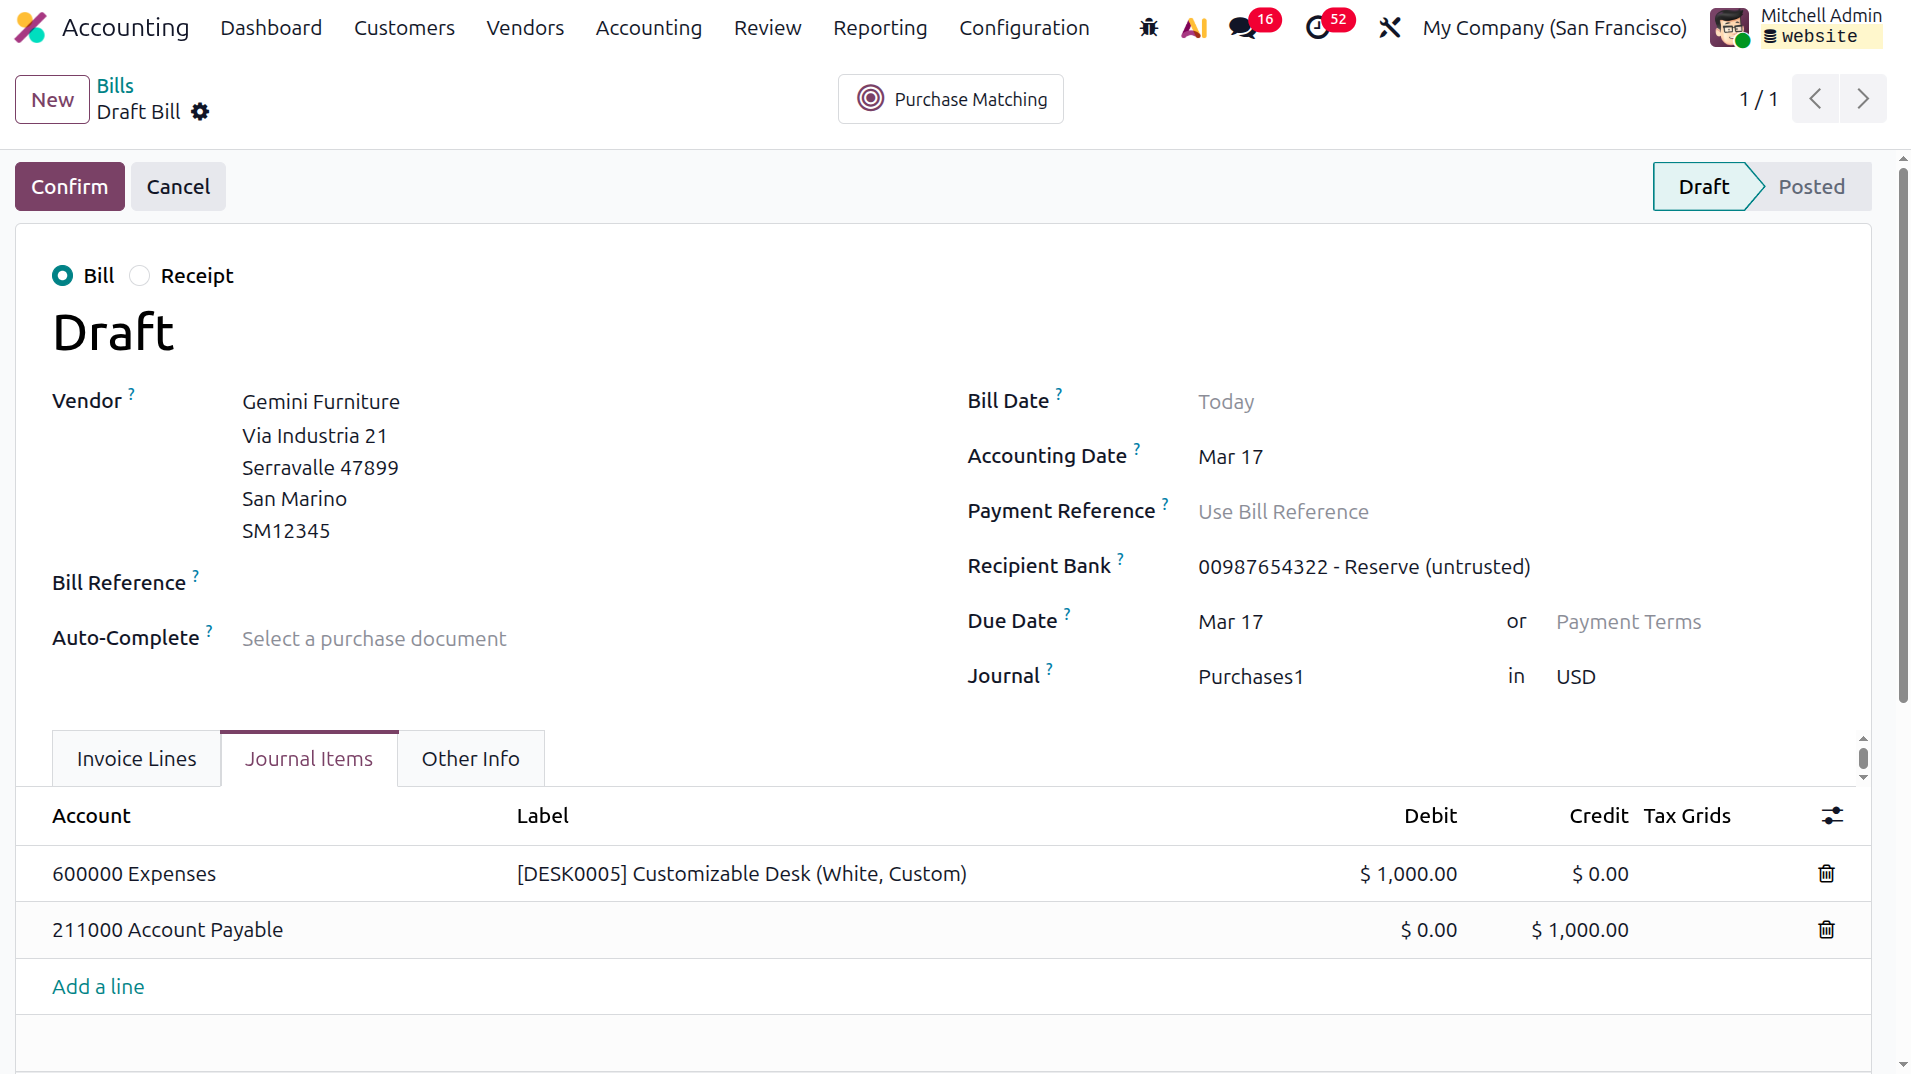
In Odoo, the Journal Items tab of the Vendor Bill shows the accounting entries generated once the bill is posted.
In this case, two accounts are affected: 600000 Expenses and 211000 Account Payable. The Expenses account is
debited by $1,000, which records the cost incurred by the company for purchasing the customizable desk. In
accounting terms, expenses increase with a debit entry. At the same time, the Account Payable account is
credited by $1,000, representing the liability the company now owes to the vendor, Gemini Furniture. This
follows the accounting principle that liabilities increase with credit entries.
From a ledger posting perspective, the Expenses ledger will display a debit entry of $1,000, increasing the total
expenses of the company. Meanwhile, the Account Payable ledger will show a credit entry of $1,000, indicating
the outstanding amount payable to the vendor until the bill is settled through a payment transaction.
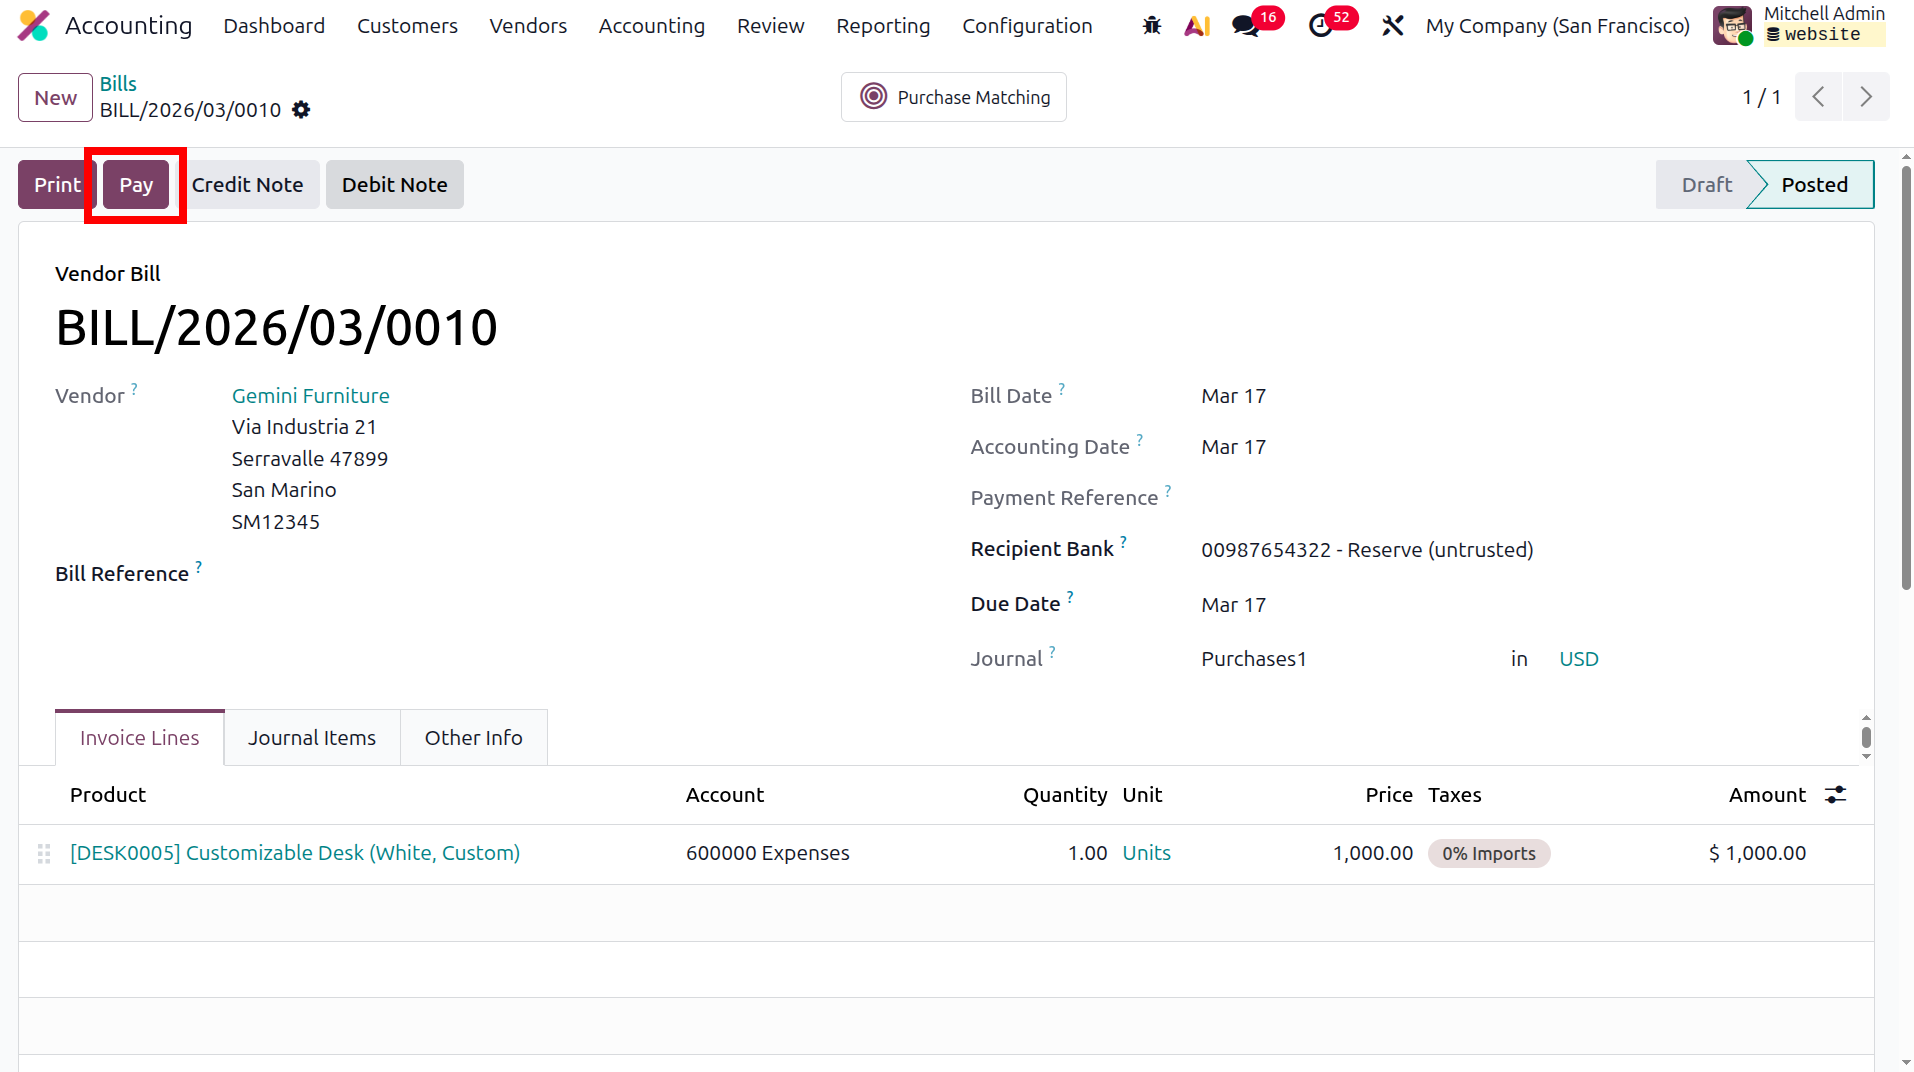
There is a smart tab named Purchase Matching. In Odoo 19 Accounting, purchase matching is the process of
automatically comparing bills with purchase orders and receipts in order to guarantee accuracy and avoid
inconsistencies.
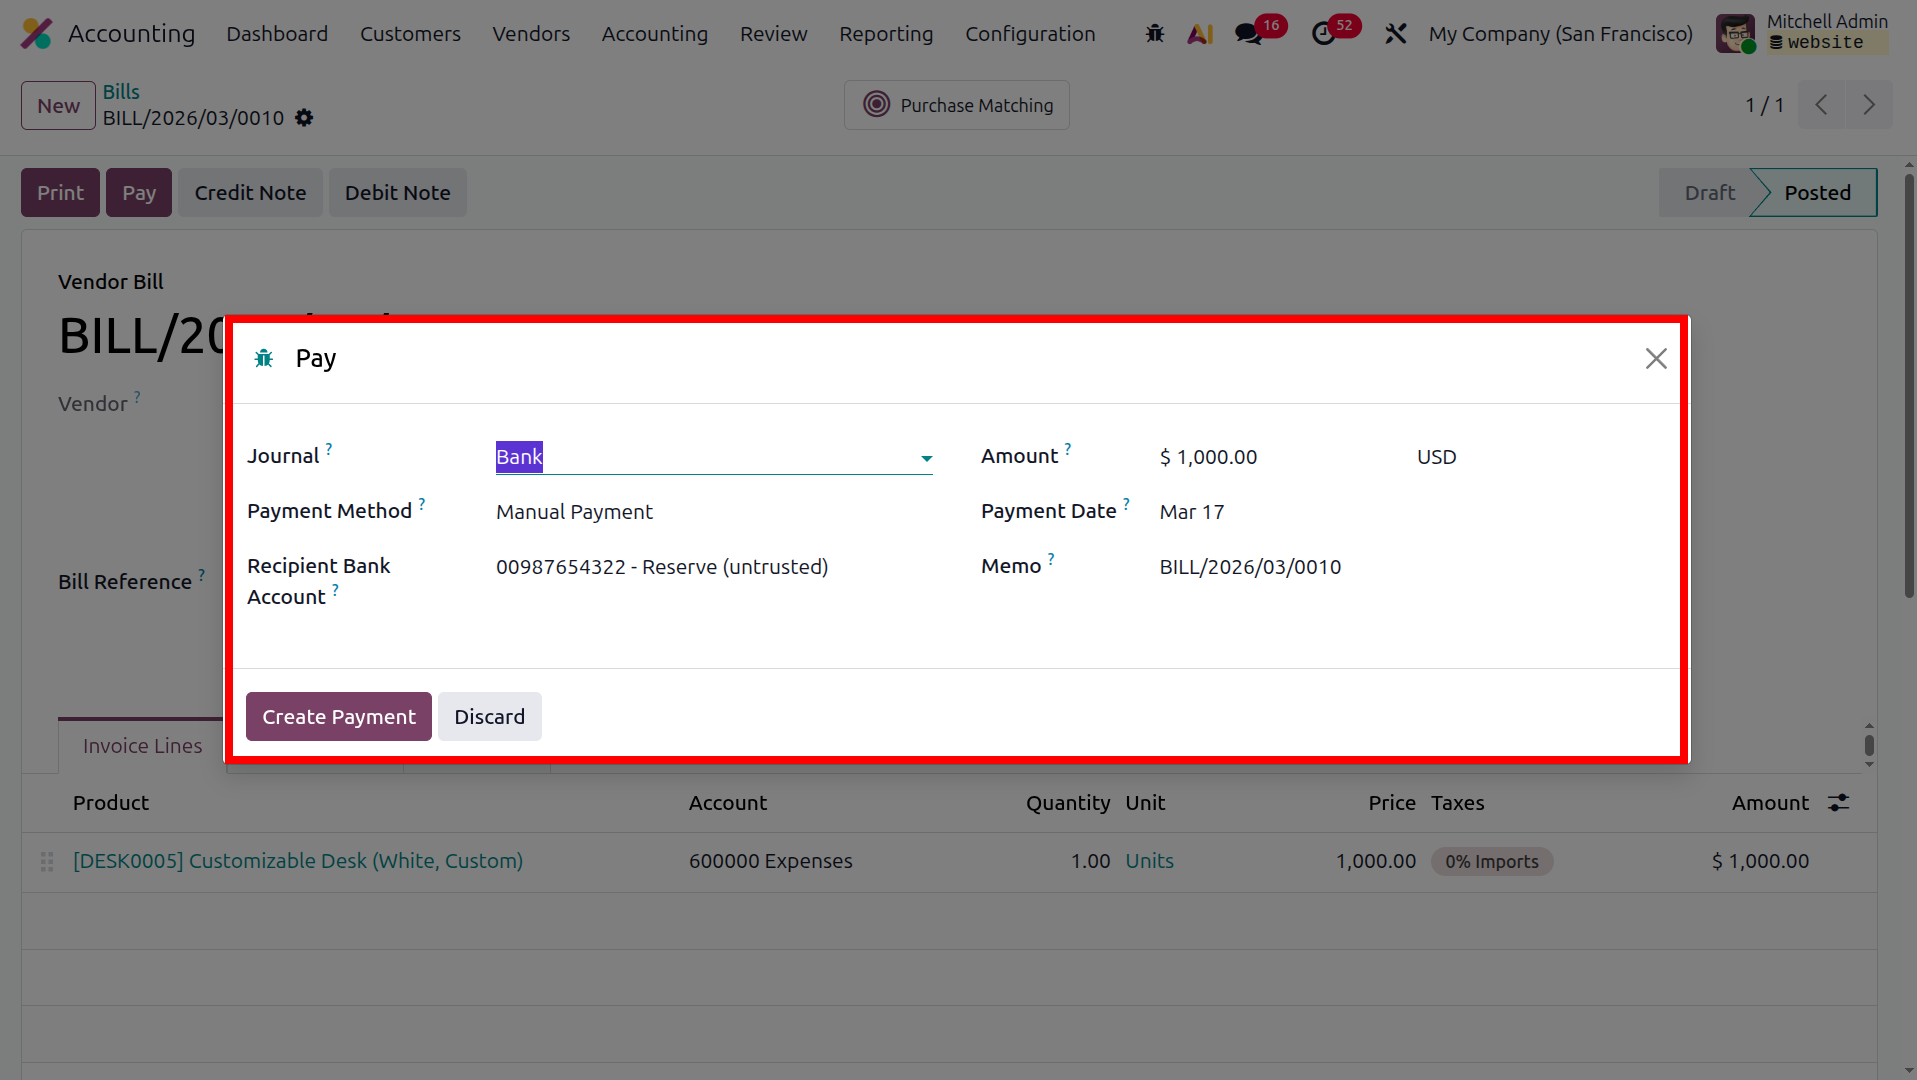
After creating the Vendor Bill, you can confirm the payment by selecting the Pay button. This action opens the
Payment window, as shown in the corresponding screenshot. In this section, different payment methods such as
Checks, SEPA Credit Transfers, or Manual Payment methods can be chosen. You can also specify details including
the Amount, Payment Date, Memo, and the Recipient Bank Account information. Once all the required details are
entered, you can proceed by selecting one of the available Create Payment options to complete the payment
process.
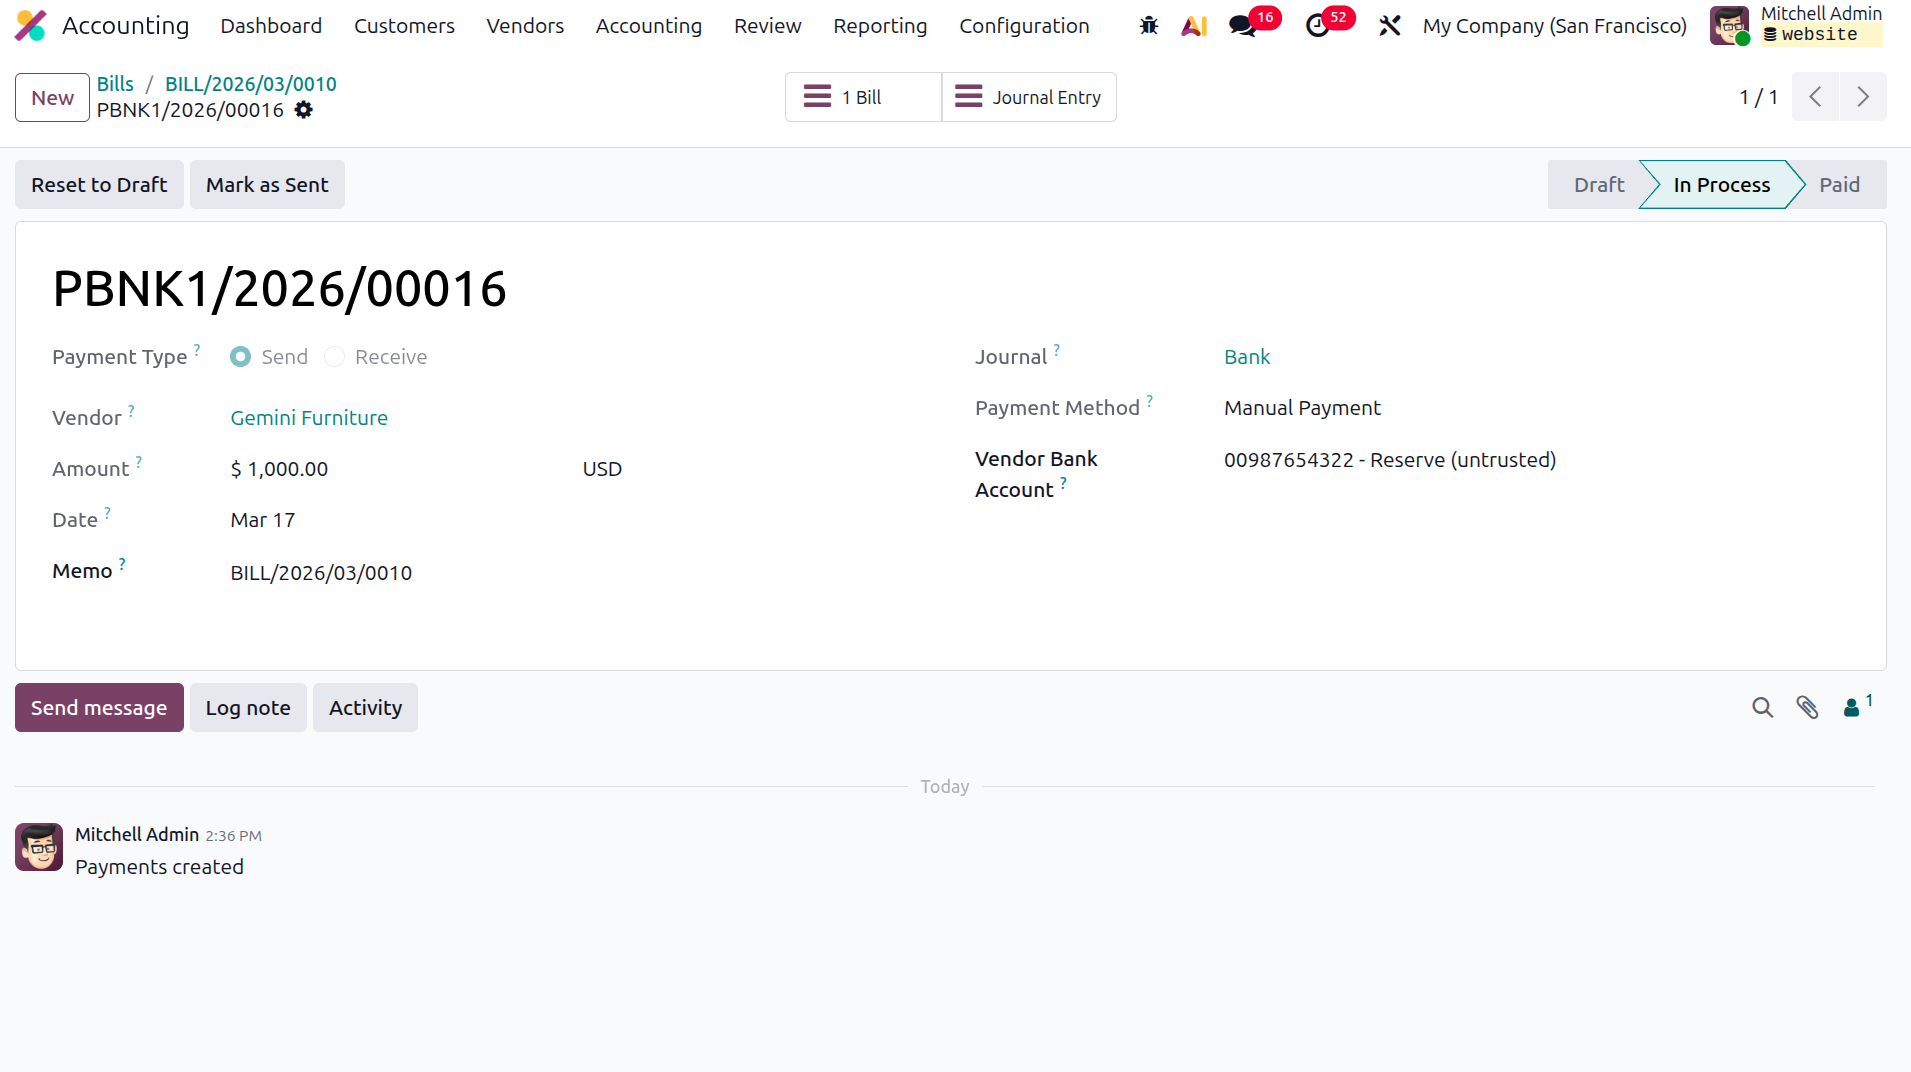
On clicking the journal entry smart tab in the payment, we will be redirected to the journal entry of the payment
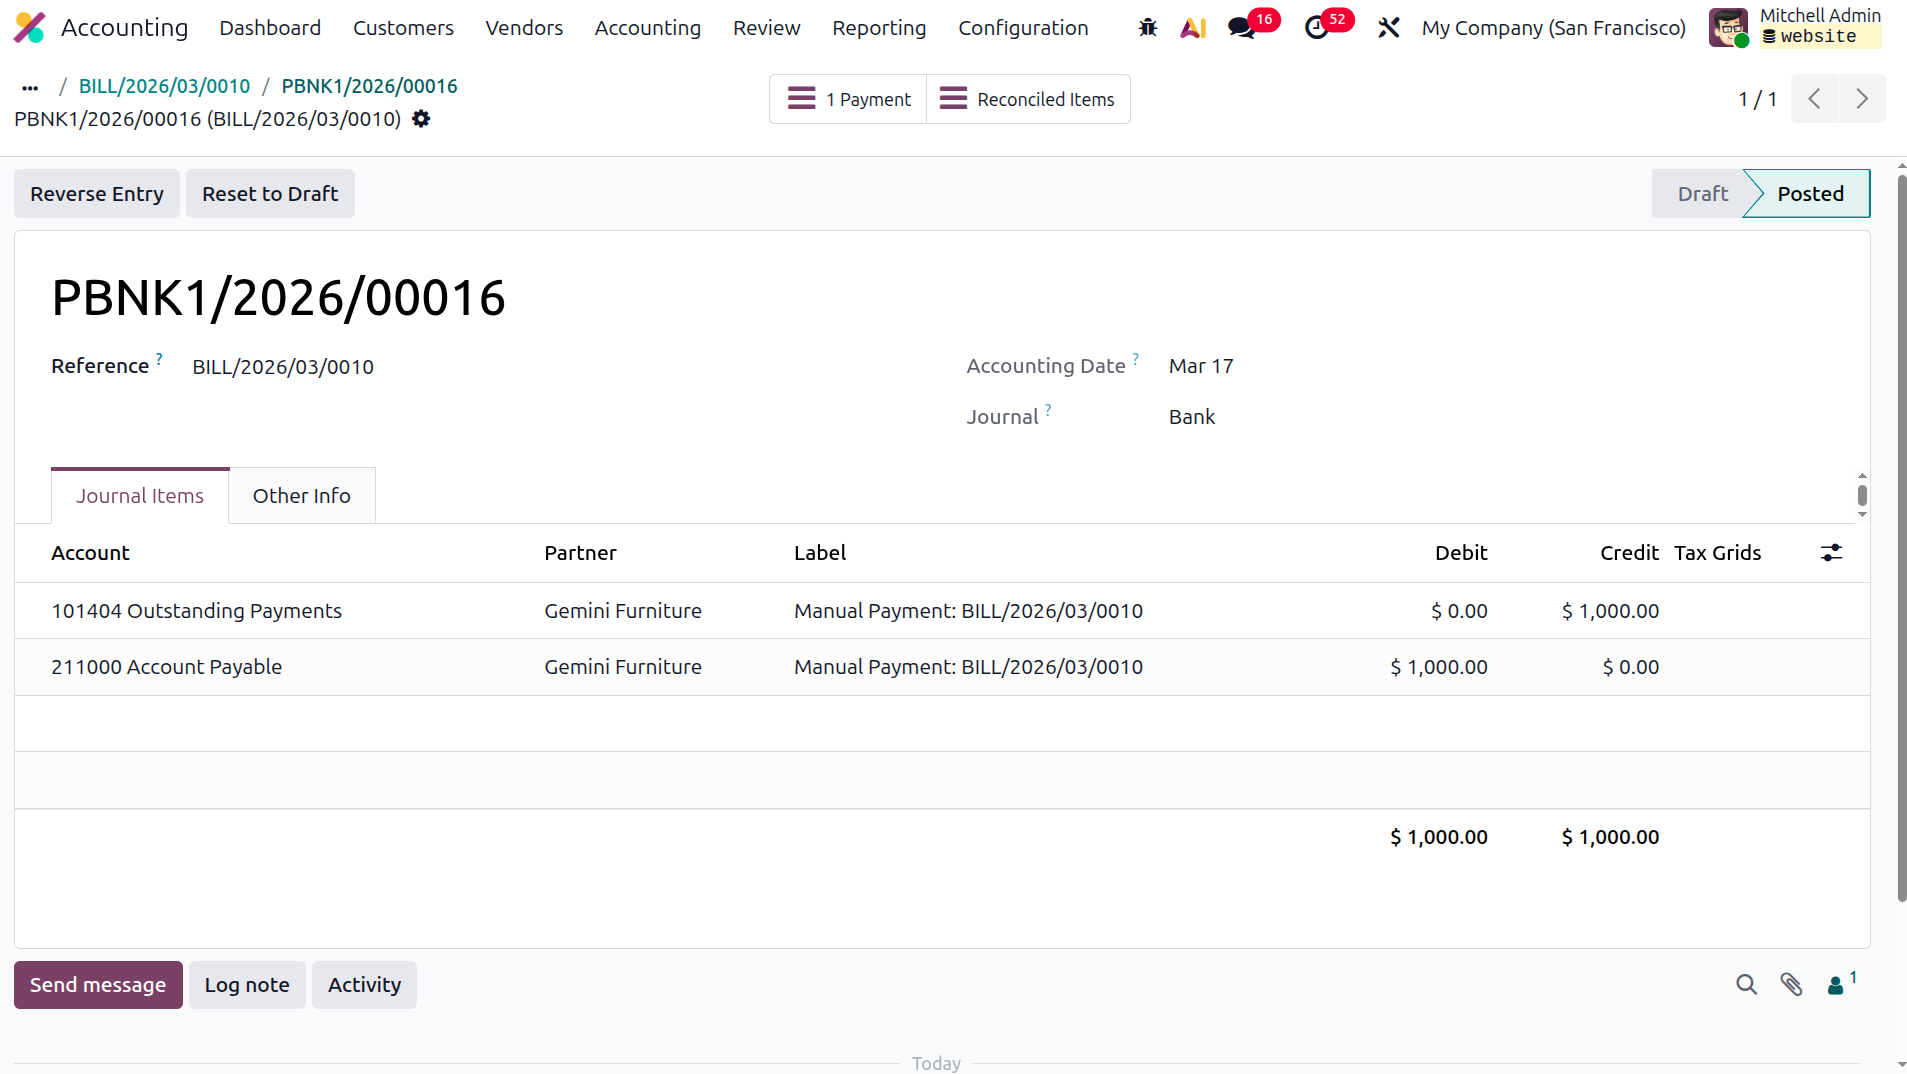
After the payment is processed, the Outstanding Payments Account is credited while the Account Payable is
debited. The amount will be transferred to the bank only after performing a bank statement reconciliation. The
Outstanding Payments Account is configured as part of the Bank or Cash Journal, where payment entries are
temporarily recorded. As a result, reconciliation is carried out using the Outstanding Payments Account rather
than the Account Payable. Once the reconciliation is completed, the Outstanding Payments Account is debited and
the Bank Account is credited. After the payment is registered and finalized, the related Vendor Bill will
display the status In Payment, as illustrated in the screenshot. When the payment process is fully completed,
the status of the bill will change to Paid.
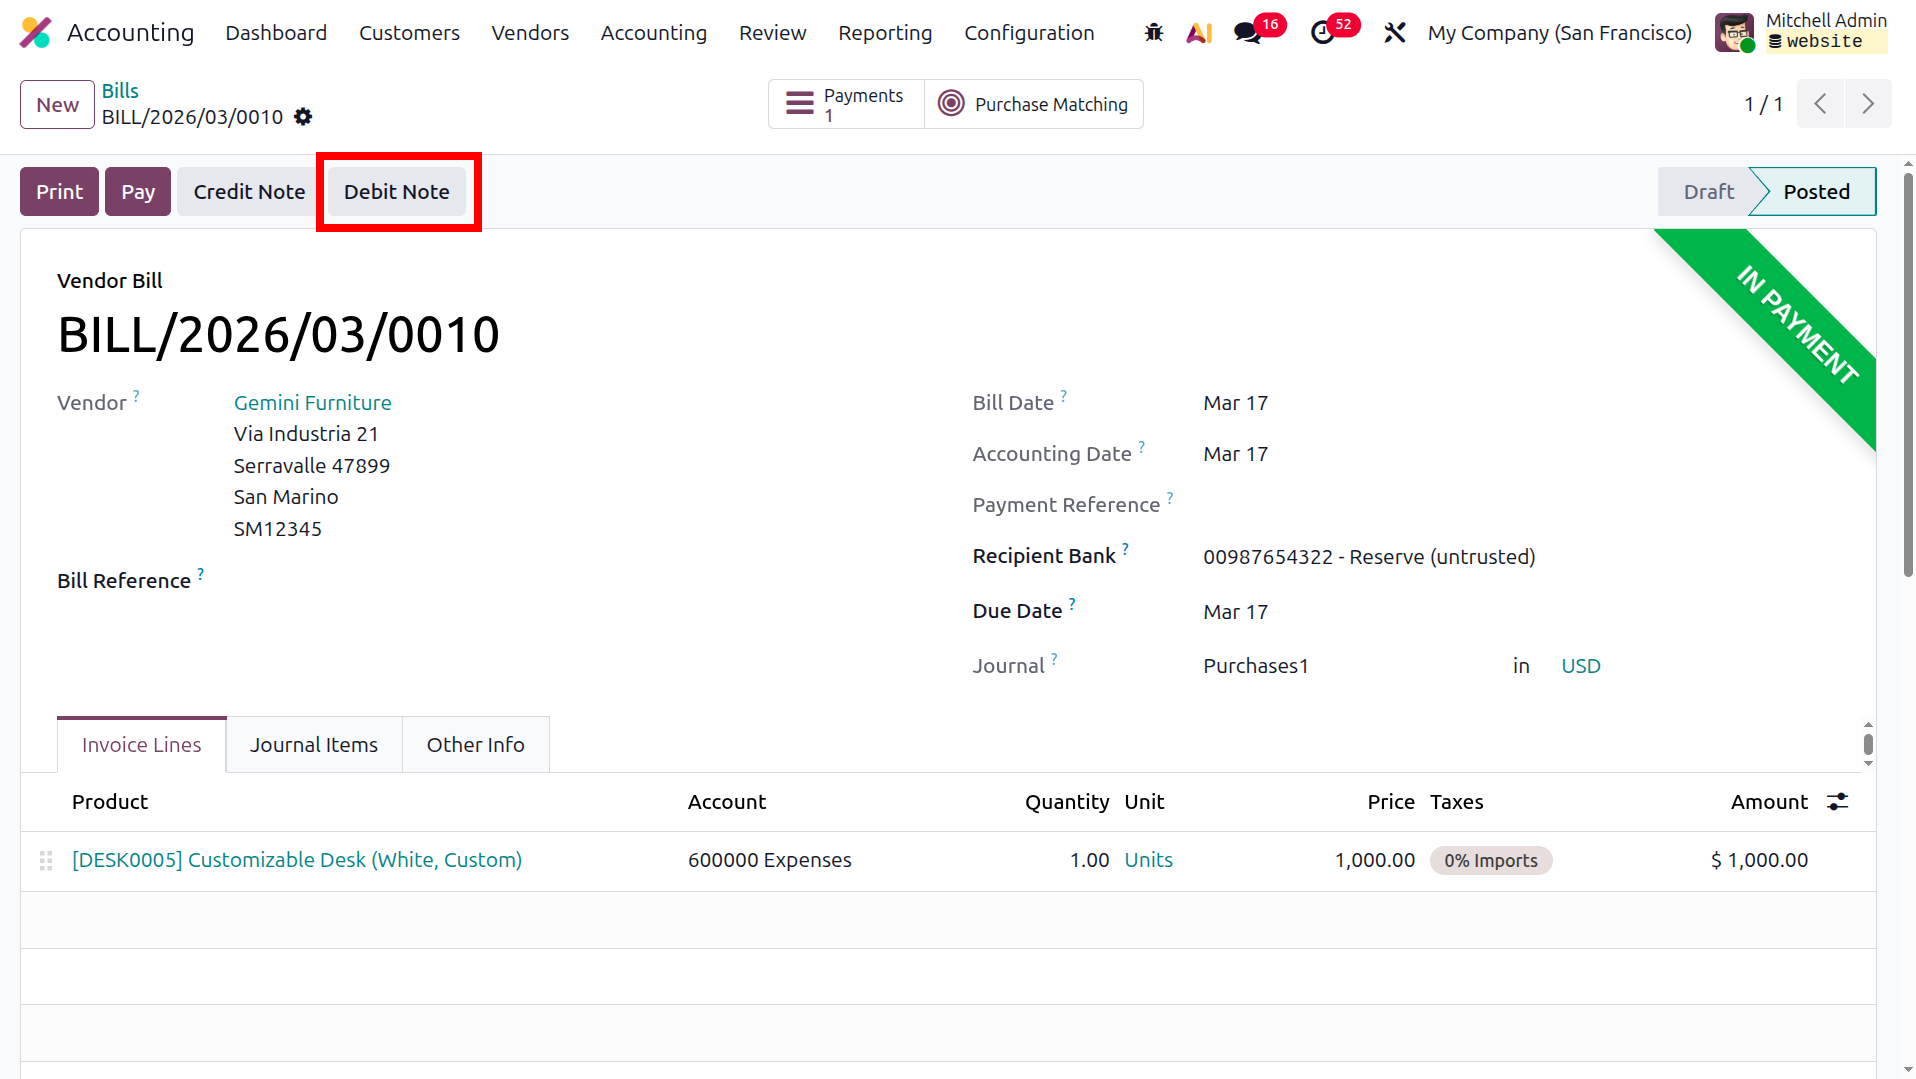
In addition, a Debit Note for the specific Vendor Bill can be created by selecting one of the Debit Note options
available here. In Odoo 19 Accounting, a Debit Note is a document used to increase the balance owed by a
customer, which may occur due to additional services provided, corrections to an undercharged invoice, or other
extra charges. It can also be applied when a vendor supplies more items than originally invoiced, thereby
increasing the amount payable.
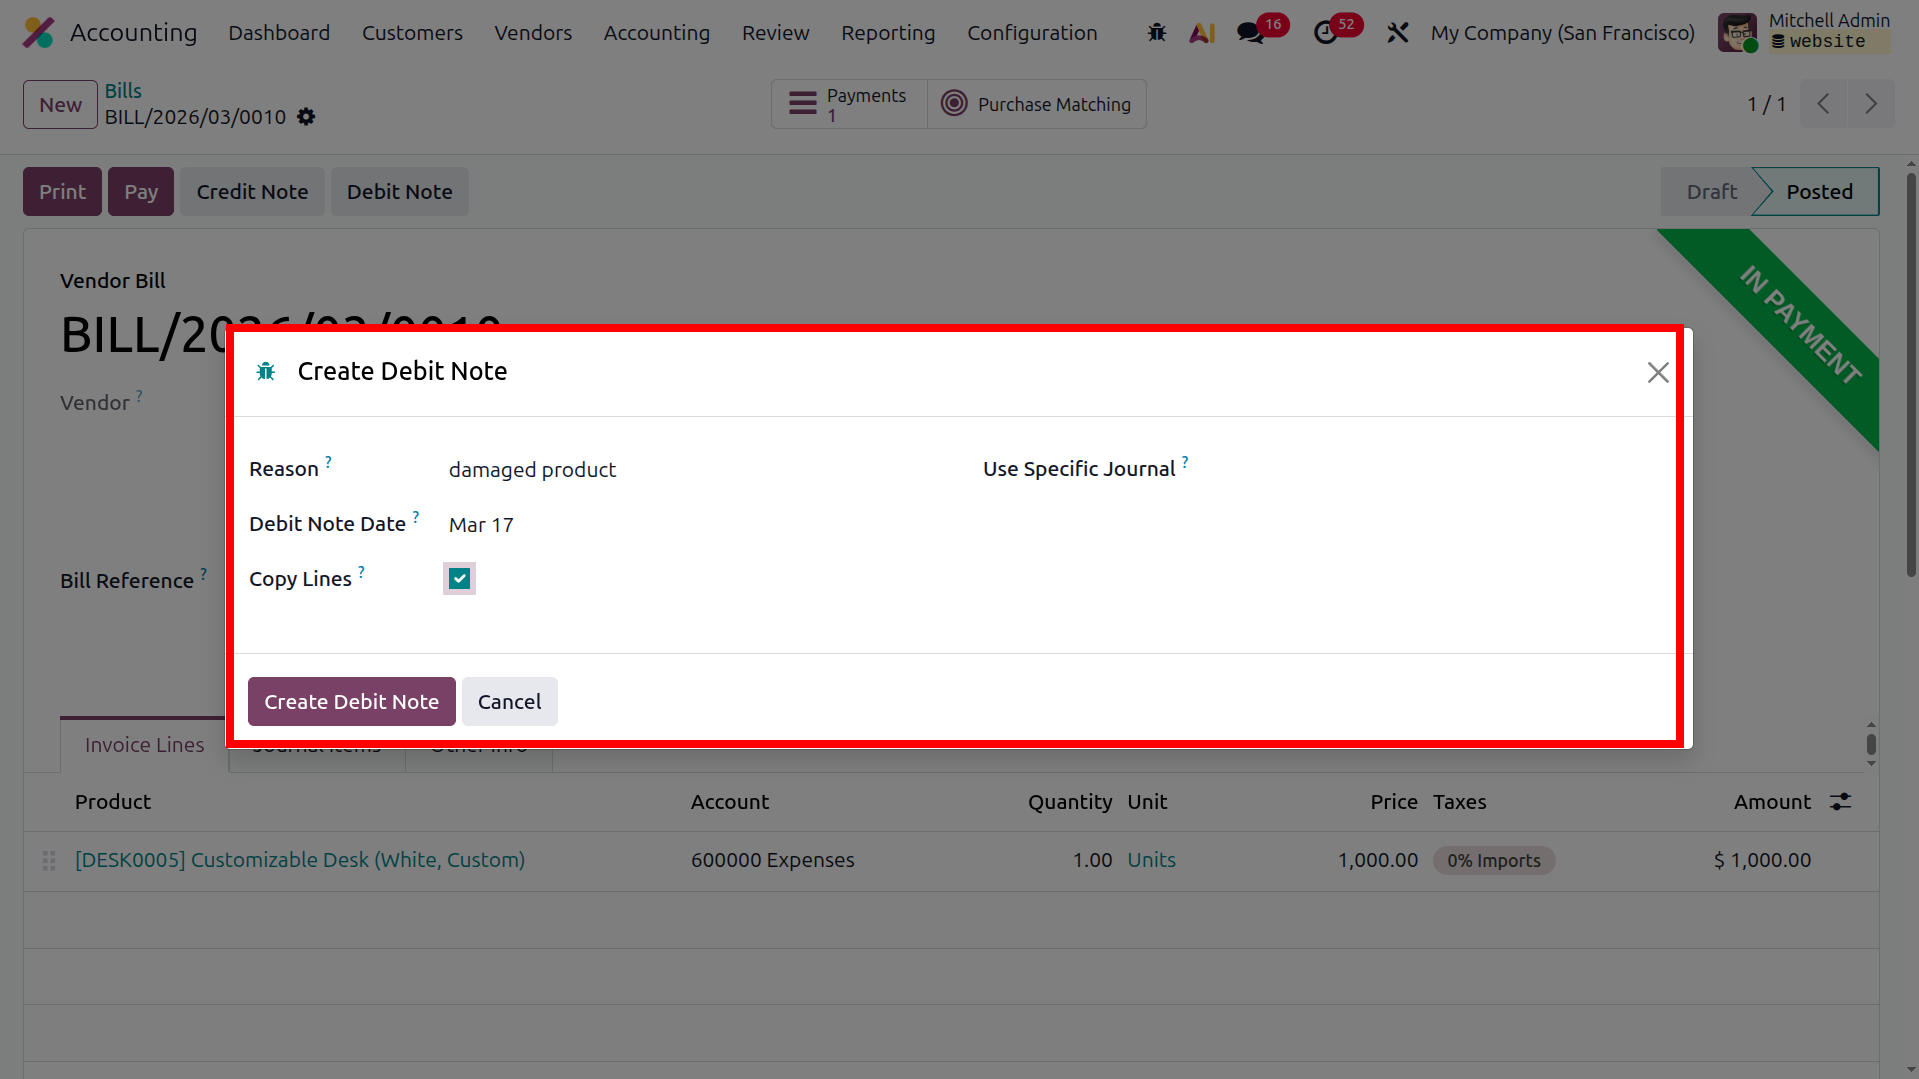
When you choose to create a Debit Note, a pop-up window will appear as shown in the screenshot. In this window,
you can specify the Journal, the Debit Note Date, and the Reason for the Refund under the Use Precise Journal
section. There is also an option to enable Copy Lines, which allows the existing invoice lines to be duplicated
for modification if required.
After completing the Debit Note details, you can select one of the available options to reverse the generated
Vendor Bill payment and send the Credit Note to the corresponding vendor. The Credit Note feature, accessible
from the Vendor menu and also within the Customer configuration, plays an important role in managing accounting
operations related to vendor transactions. The next important option available under Vendor management is
Refunds, which we will explore in the following section.
Purchase Receipt Management
Once the products are received, they must be acknowledged to the suppliers according to the corresponding
purchase orders. The Odoo Accounting module provides options within the Vendors tab to create and manage Vendor
Receipts along with their related financial details. In the Receipt Management menu of the Accounting module,
the Vendor Management section displays a list of all receipts generated as part of business operations. Once we
opened the bills by default there will be a bills filter, we can change the filter to receipts to get the
receipts.
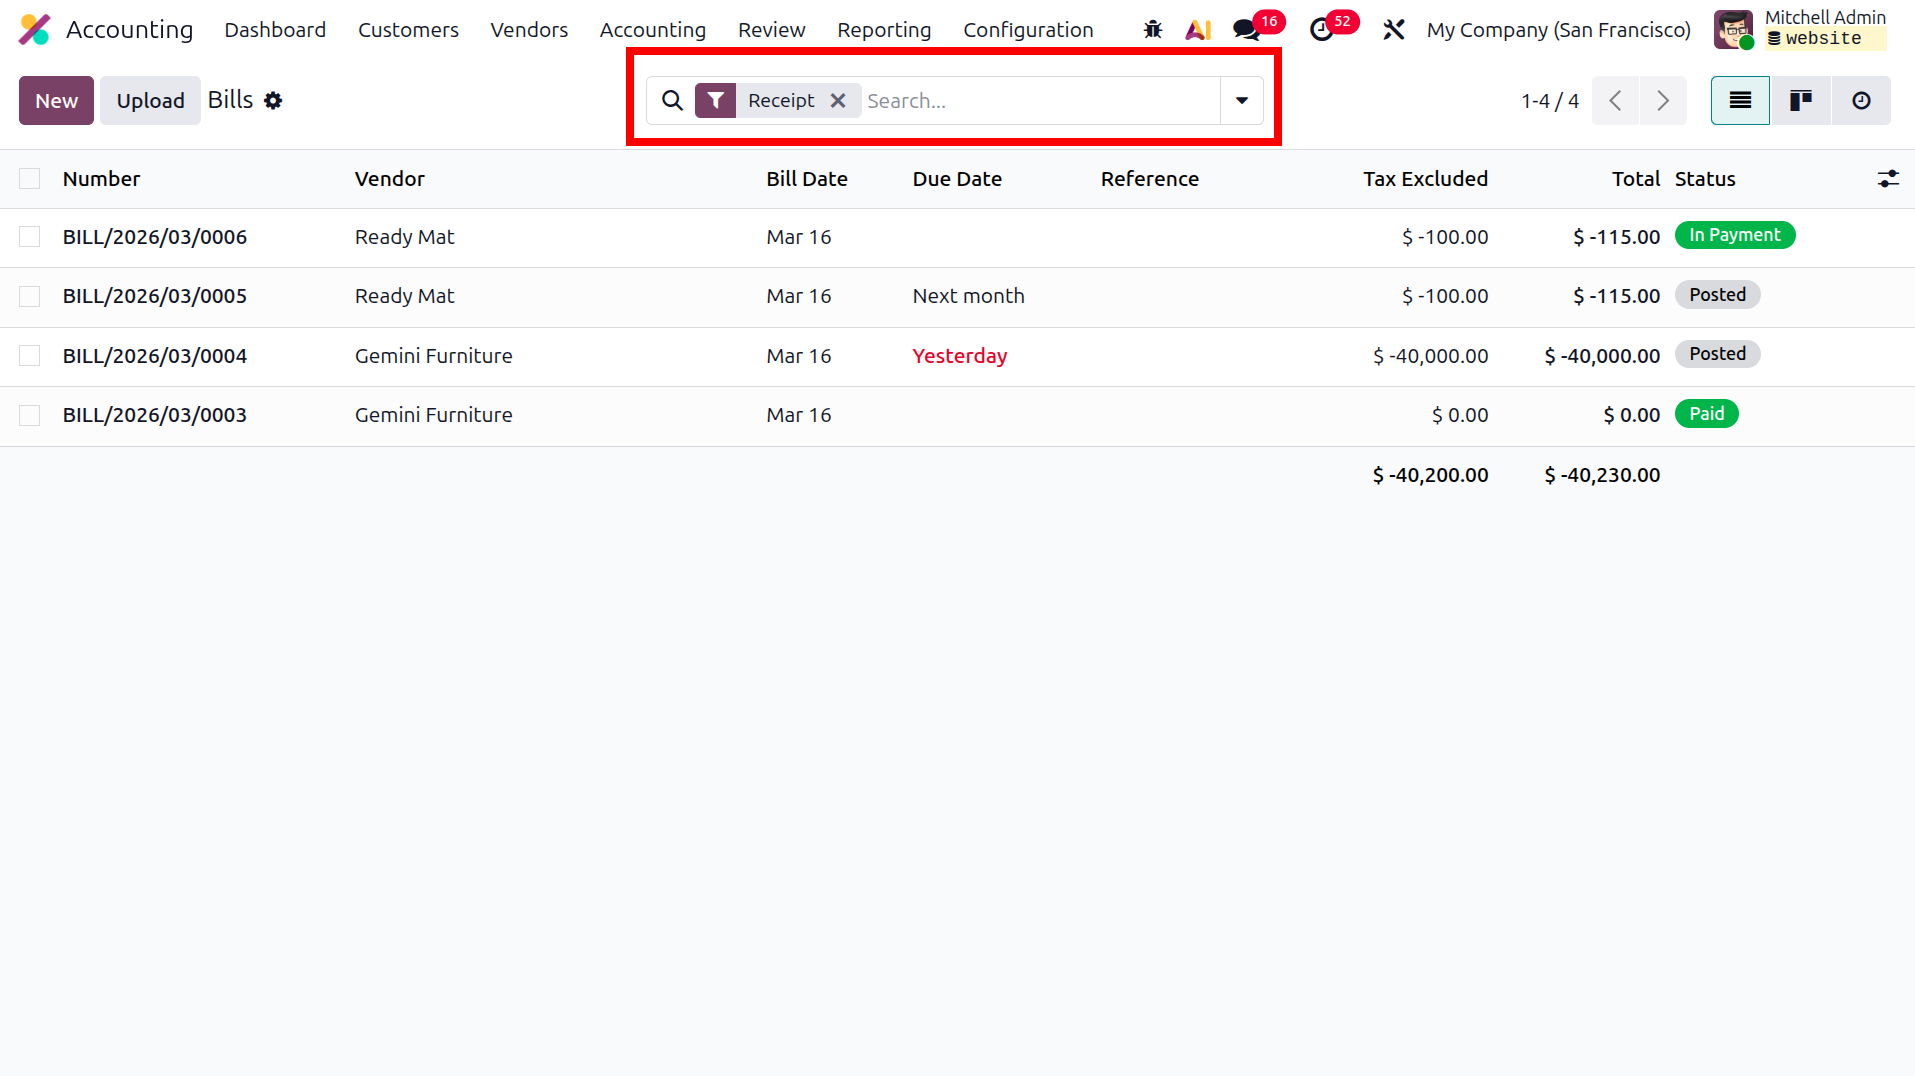
You can modify the details of an existing receipt by selecting the specific receipt from the menu and clicking
the Edit option. To create a new receipt, select the New option, then in the form view we have two booleans
receipts and bills, choose receipts and fill the form to create a receipt.
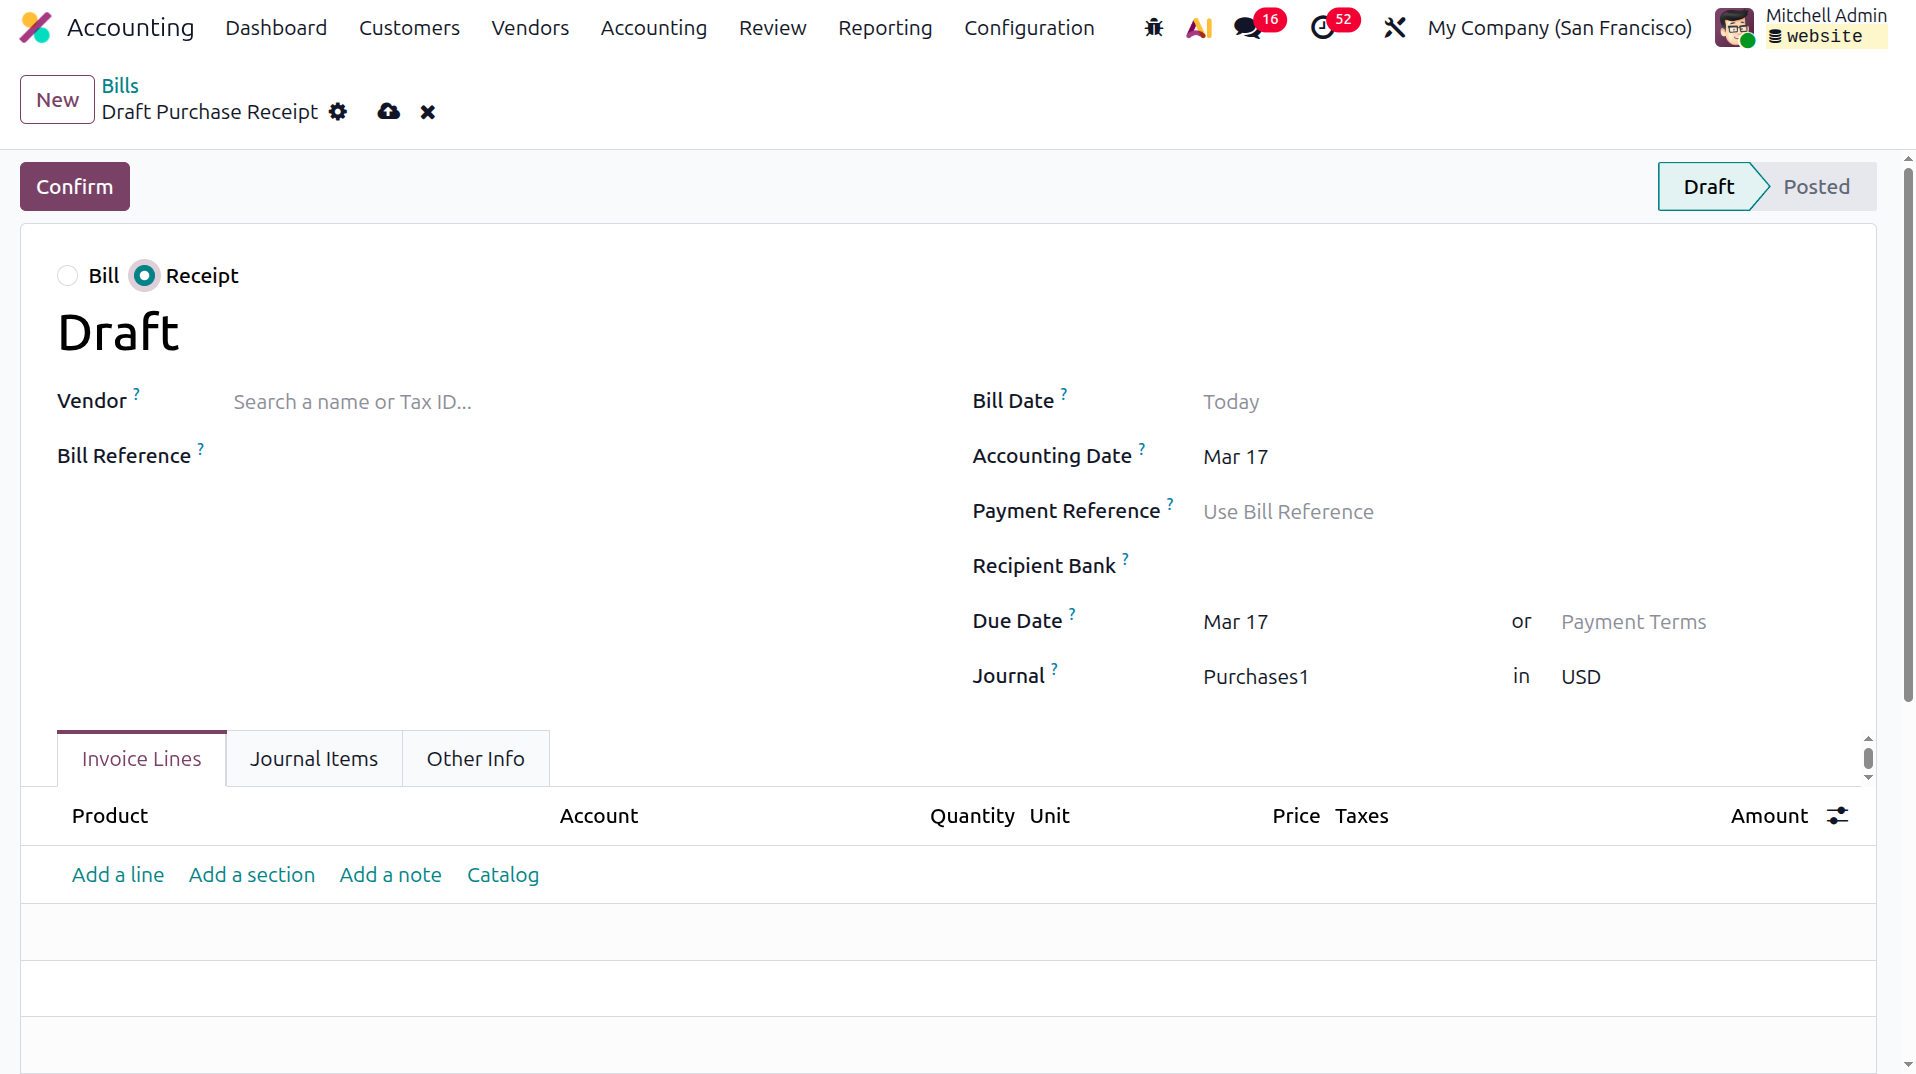
Products can be defined in the Product Lines by selecting the "Add an Available Line" option. You can also
organize the invoice by adding new sections using the Add an Available Section option. Furthermore, the Journal
Entries and Other Information related to the Receipts can be configured through the respective menus, similar to
the process explained earlier in this chapter for Refunds management. After completing the necessary
modifications for the selected receipt, you can proceed to register the payment by choosing the appropriate
option from the menu. This action will open the Payment pop-up window, as illustrated in the image below.
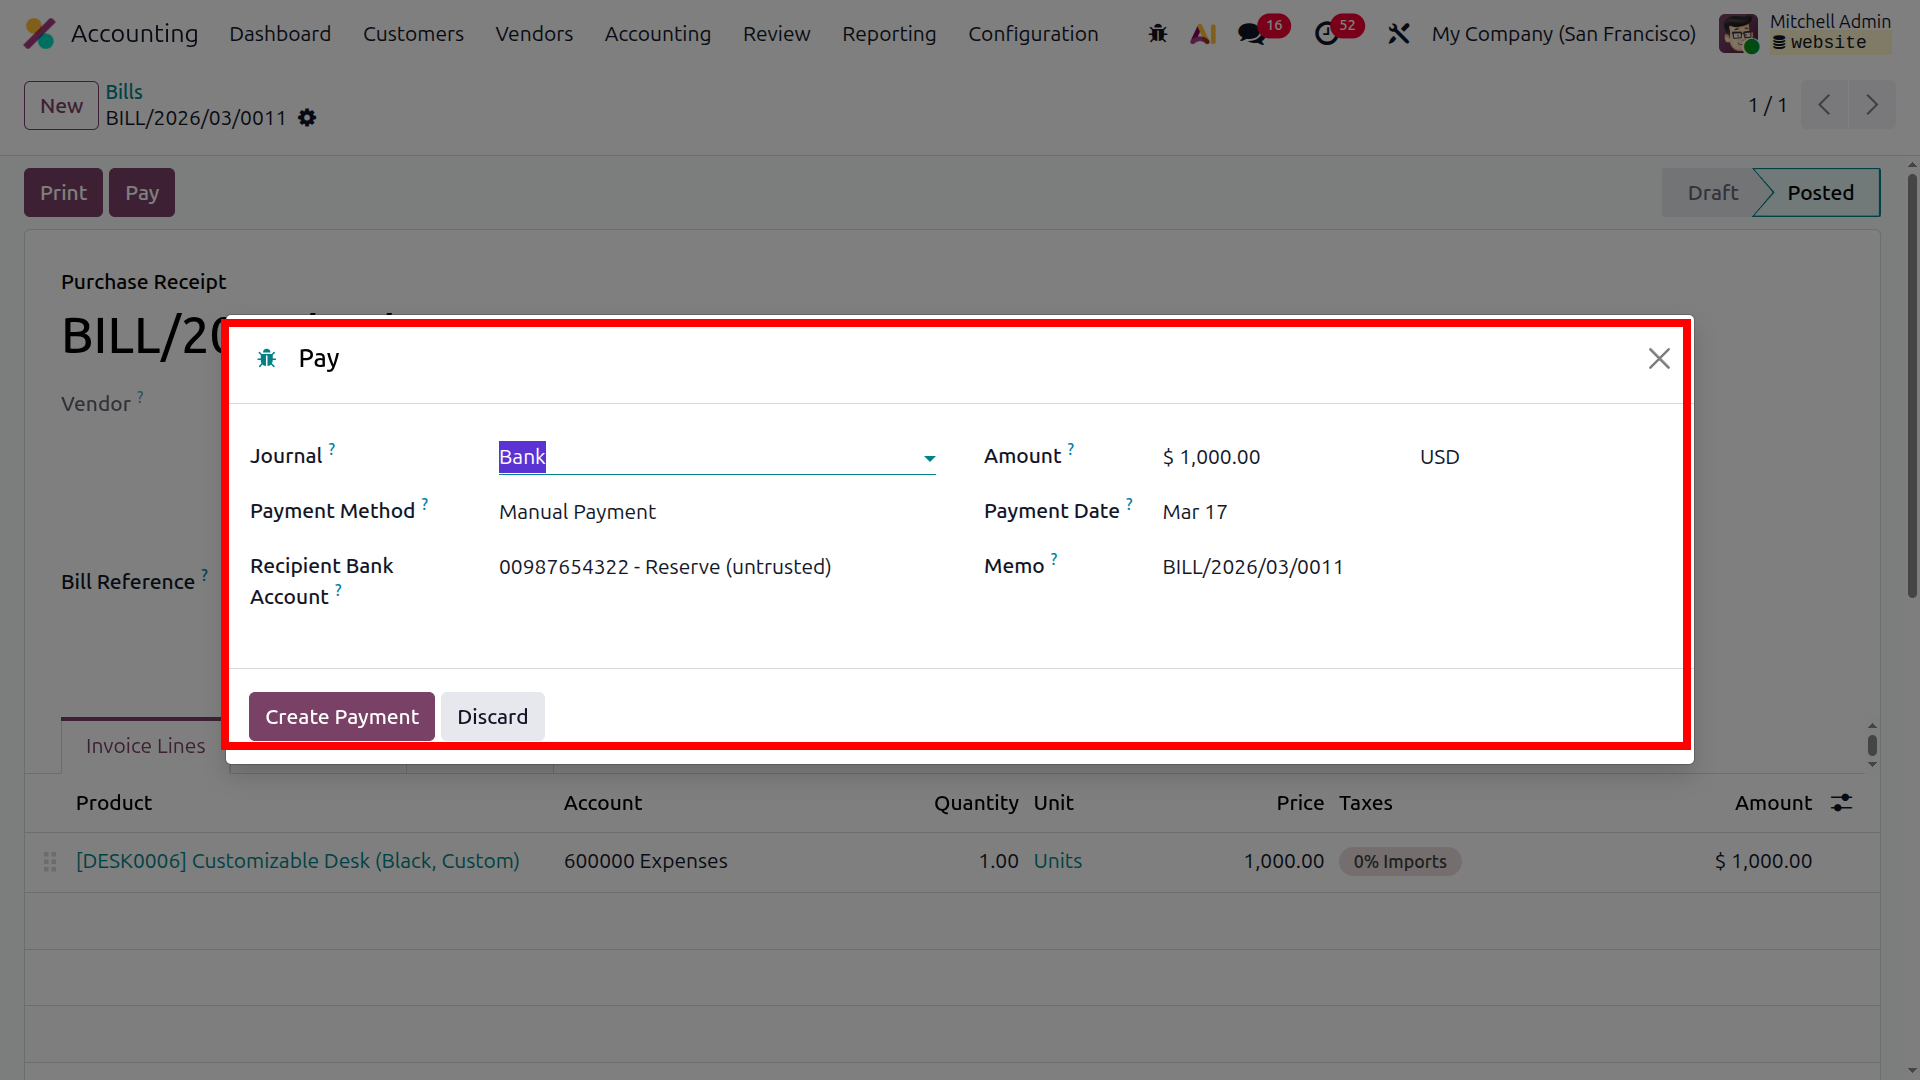
In the Payment window, you can define various payment details by selecting the Journal and choosing the Payment
Method, such as SEPA Credit Transfer, Manual, or Checks. To configure the Recipient Bank Account information,
you may either select an existing account from the drop-down list or create a new one. You can also specify the
Currency and the Amount to be used for the payment. In addition, details such as the Payment Date and the Memo
for the corresponding payment can be entered.
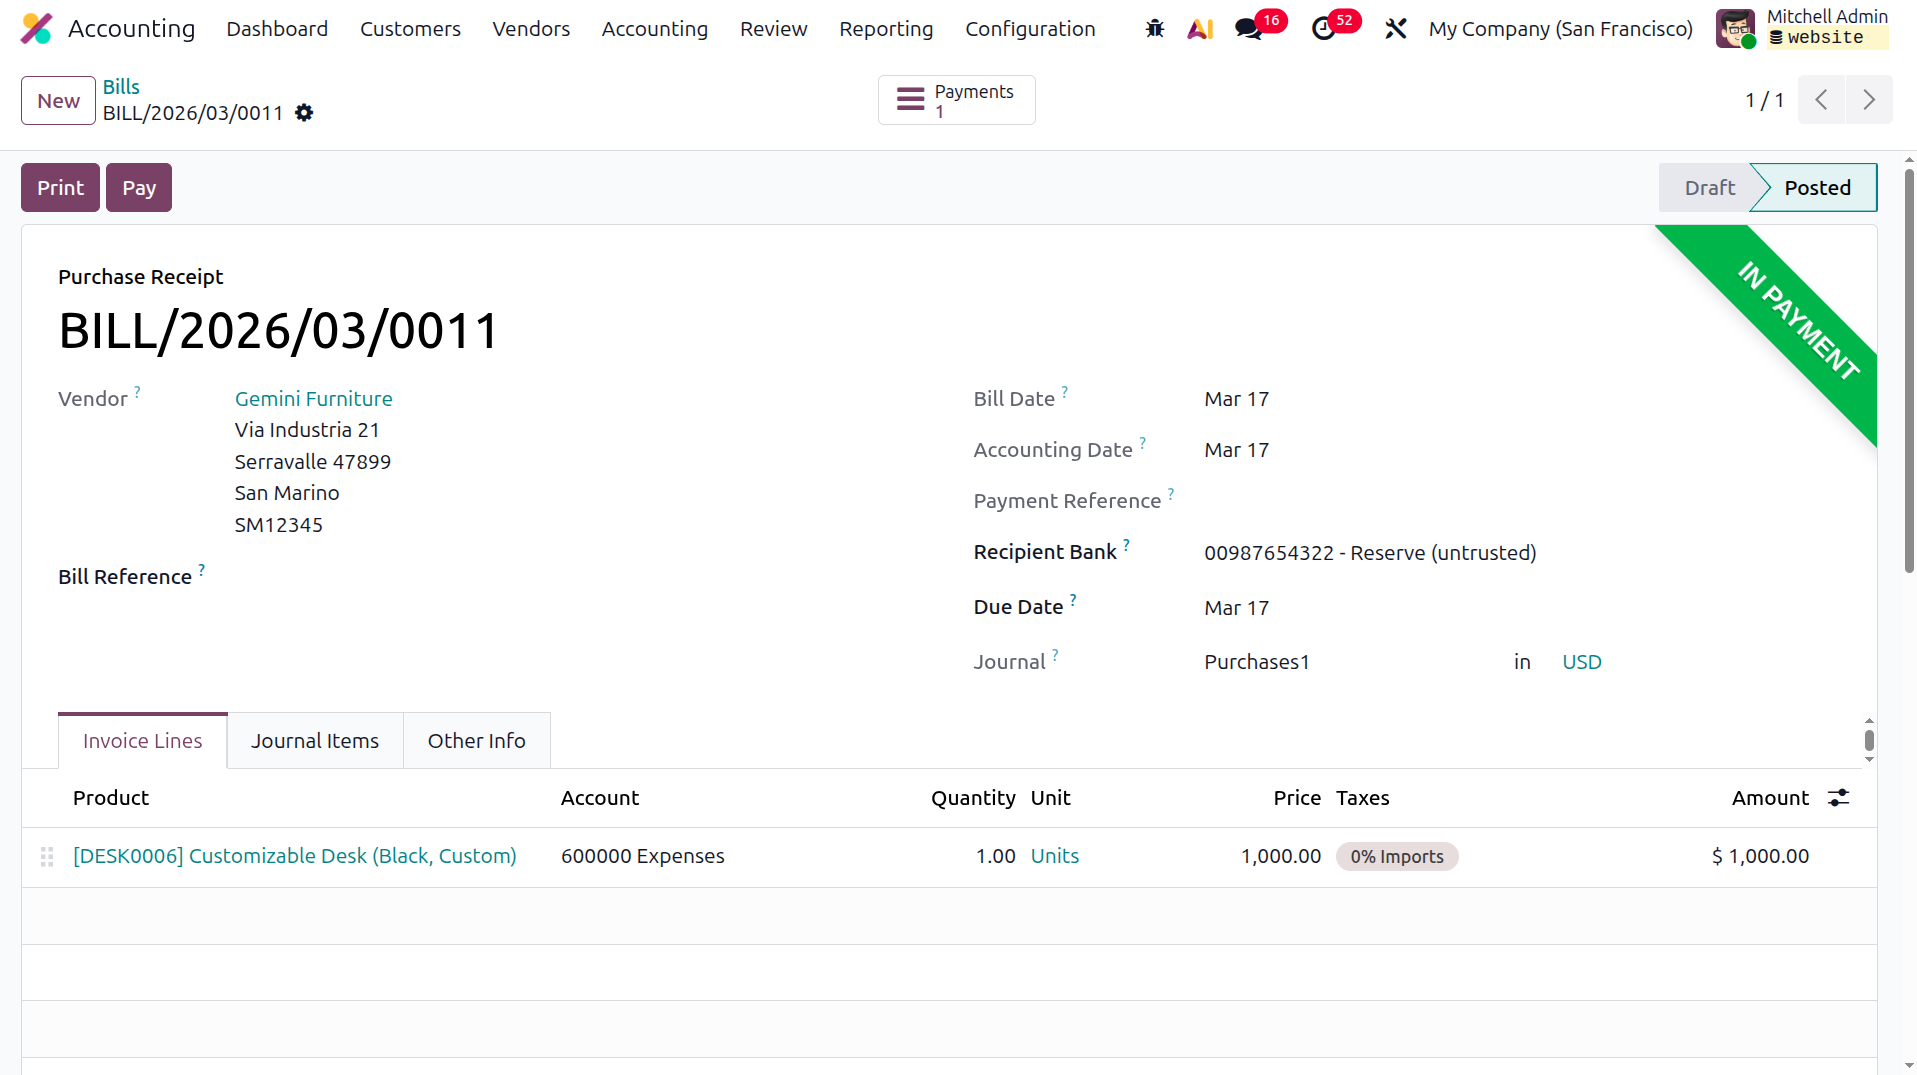
After the payment is registered for the respective Receipts, the status label In Payment will appear on the
receipt, as illustrated in the screenshot. Once the payment process is successfully completed, the status will
be updated accordingly.
When managing the accounting aspects of product delivery that need to be clearly and succinctly explained,
receipts and their administration will be a useful tool. By utilising this Odoo Accounting module capability,
you might enhance your company's financial management abilities. In the section that follows, let's talk about
handling vendor bill payments.
Refund Management
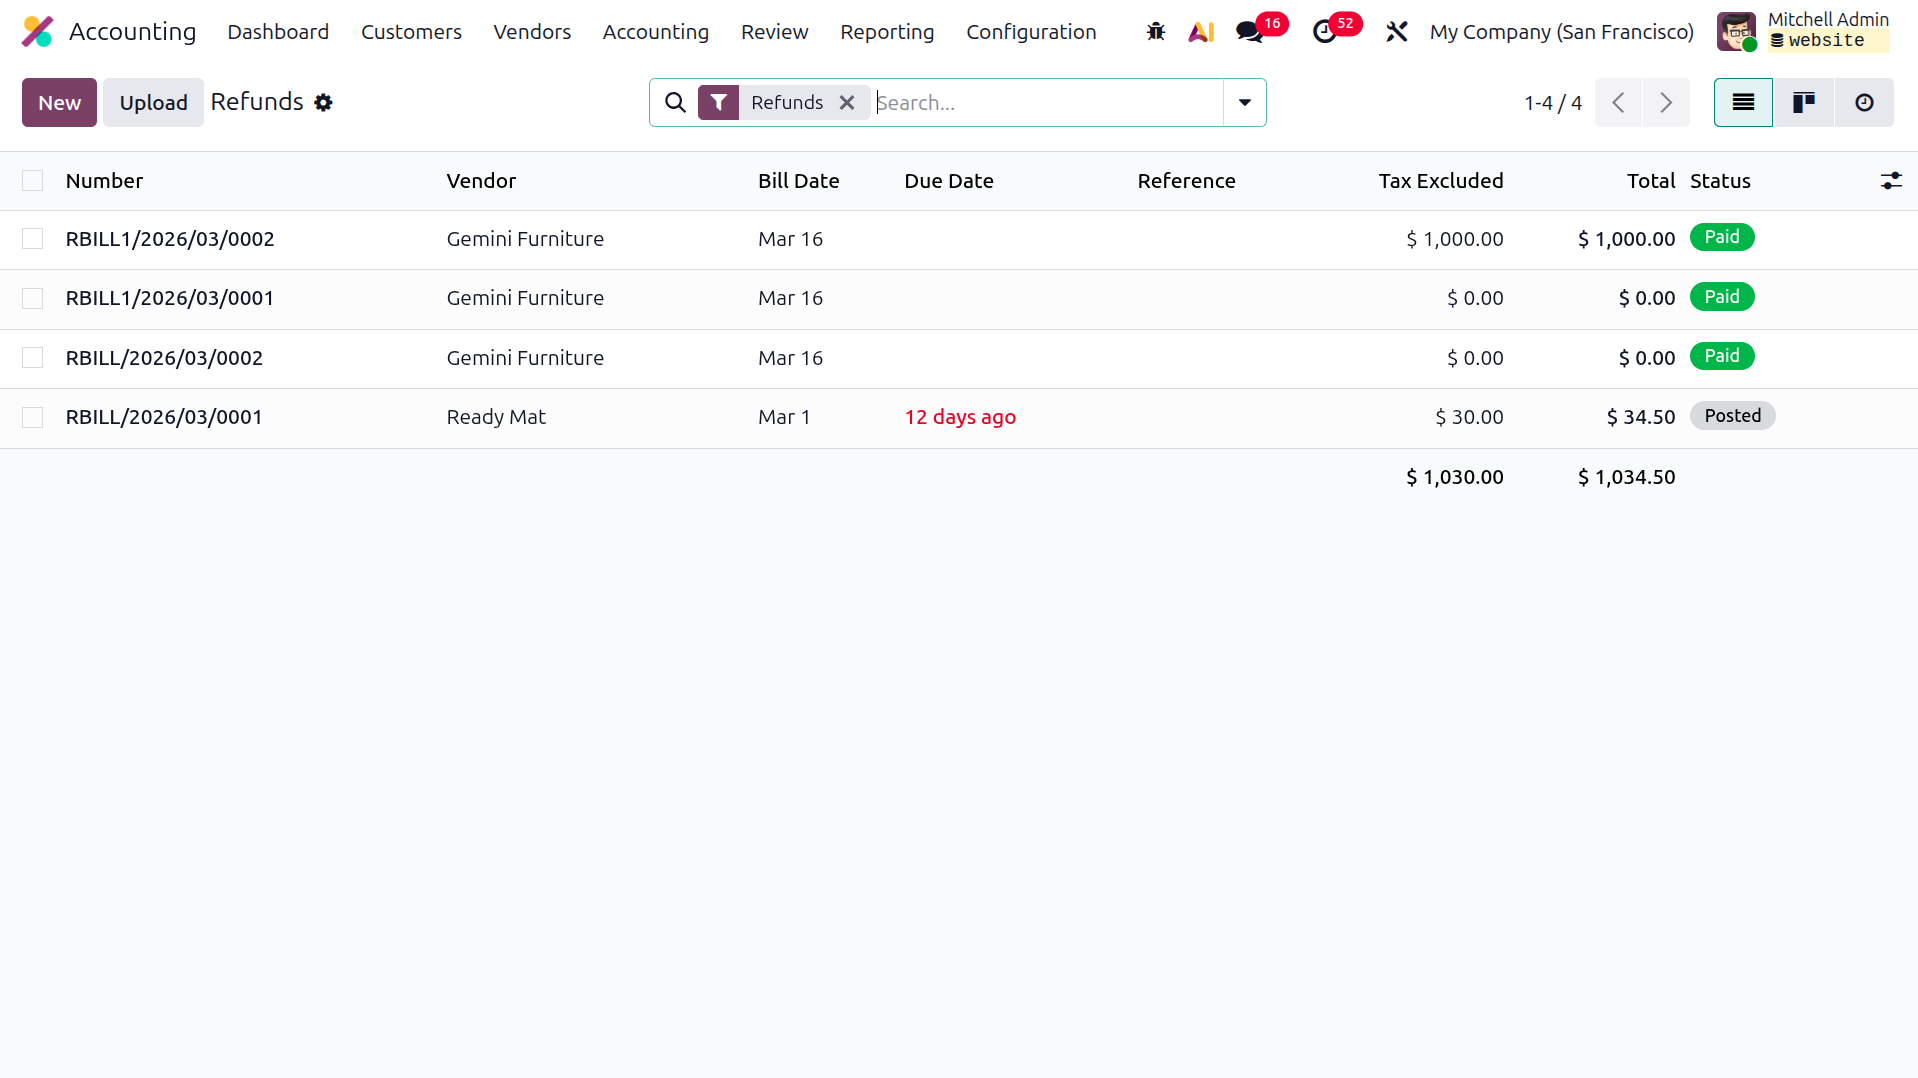
Refund transactions with vendors are a normal part of business activities, just as companies may sometimes need
to issue refunds to vendors based on operational requirements. In Odoo, the Refunds section for vendors is
available through a dedicated menu within the Vendor Management tab of the Accounting module. This section lists
all refund operations, including those that have already been completed as well as those that are currently in
progress. The details displayed for each refund include the Bill Number, Vendor Name, Bill Date, Reference
information, Next Activity scheduled for the refund process, the Tax-Excluded amount along with the Total
Amount, and the Operational Status.
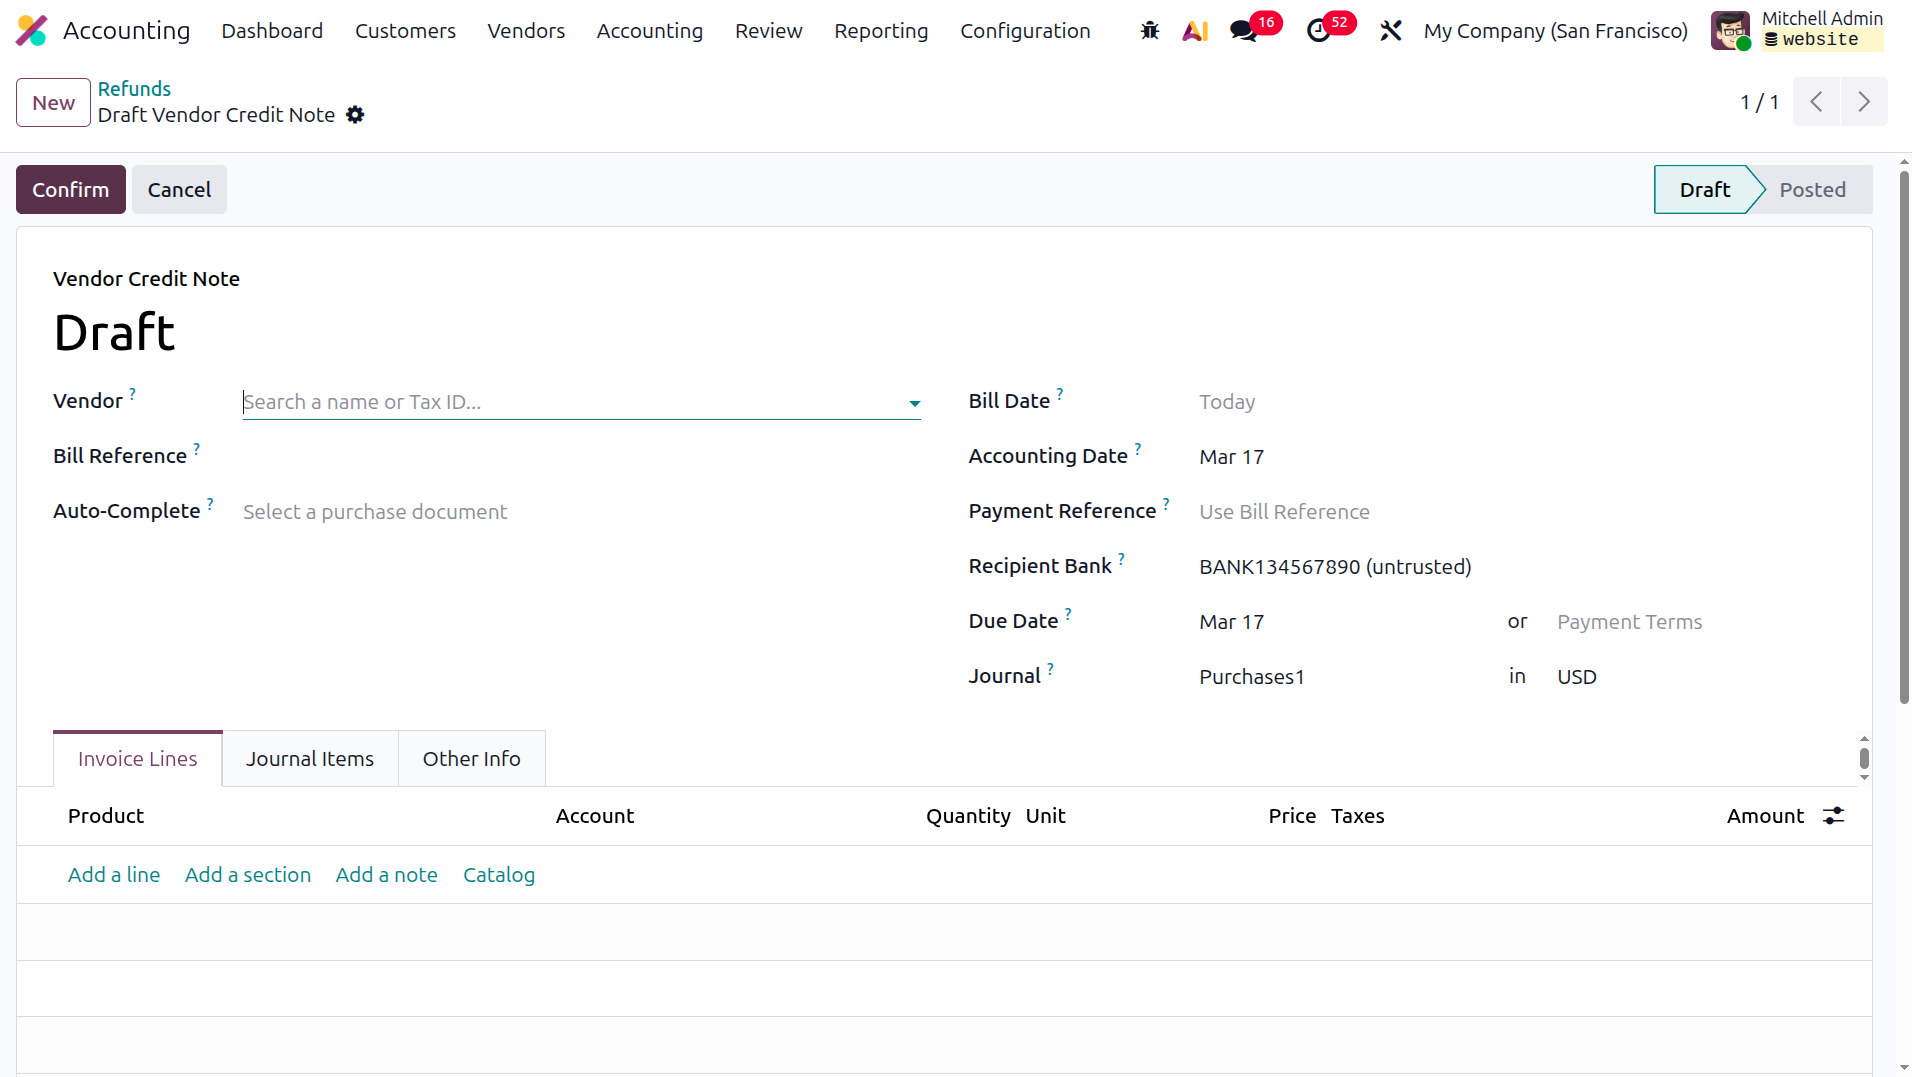
Previously created refund records can be reviewed and edited whenever necessary, as each refund operation is
individually defined. To initiate a new refund transaction, select the New option from the Refund menu, which
will open the refund creation window shown in the accompanying screenshot. In this form, you can enter details
such as the Vendor Name, Bill Reference, Payment Reference, and Recipient Bank. Additionally, fields are
available to specify the Bill Date, Accounting Date, Due Date, Journal Details, and Currency.
Within the Invoicing Lines section, you can define the Product Details, Label, Account Details, and Analytical
Accounting information. The Quantity, Price, Subtotal, and Tax details are also entered in this section.
Products can be added using the Add a Line option, while the Add a Section option allows you to organize the
Product Lines into separate sections. A customized note explaining the refund can also be included. Finally, the
system will display the tax details along with the taxed and untaxed totals of the refund bill.
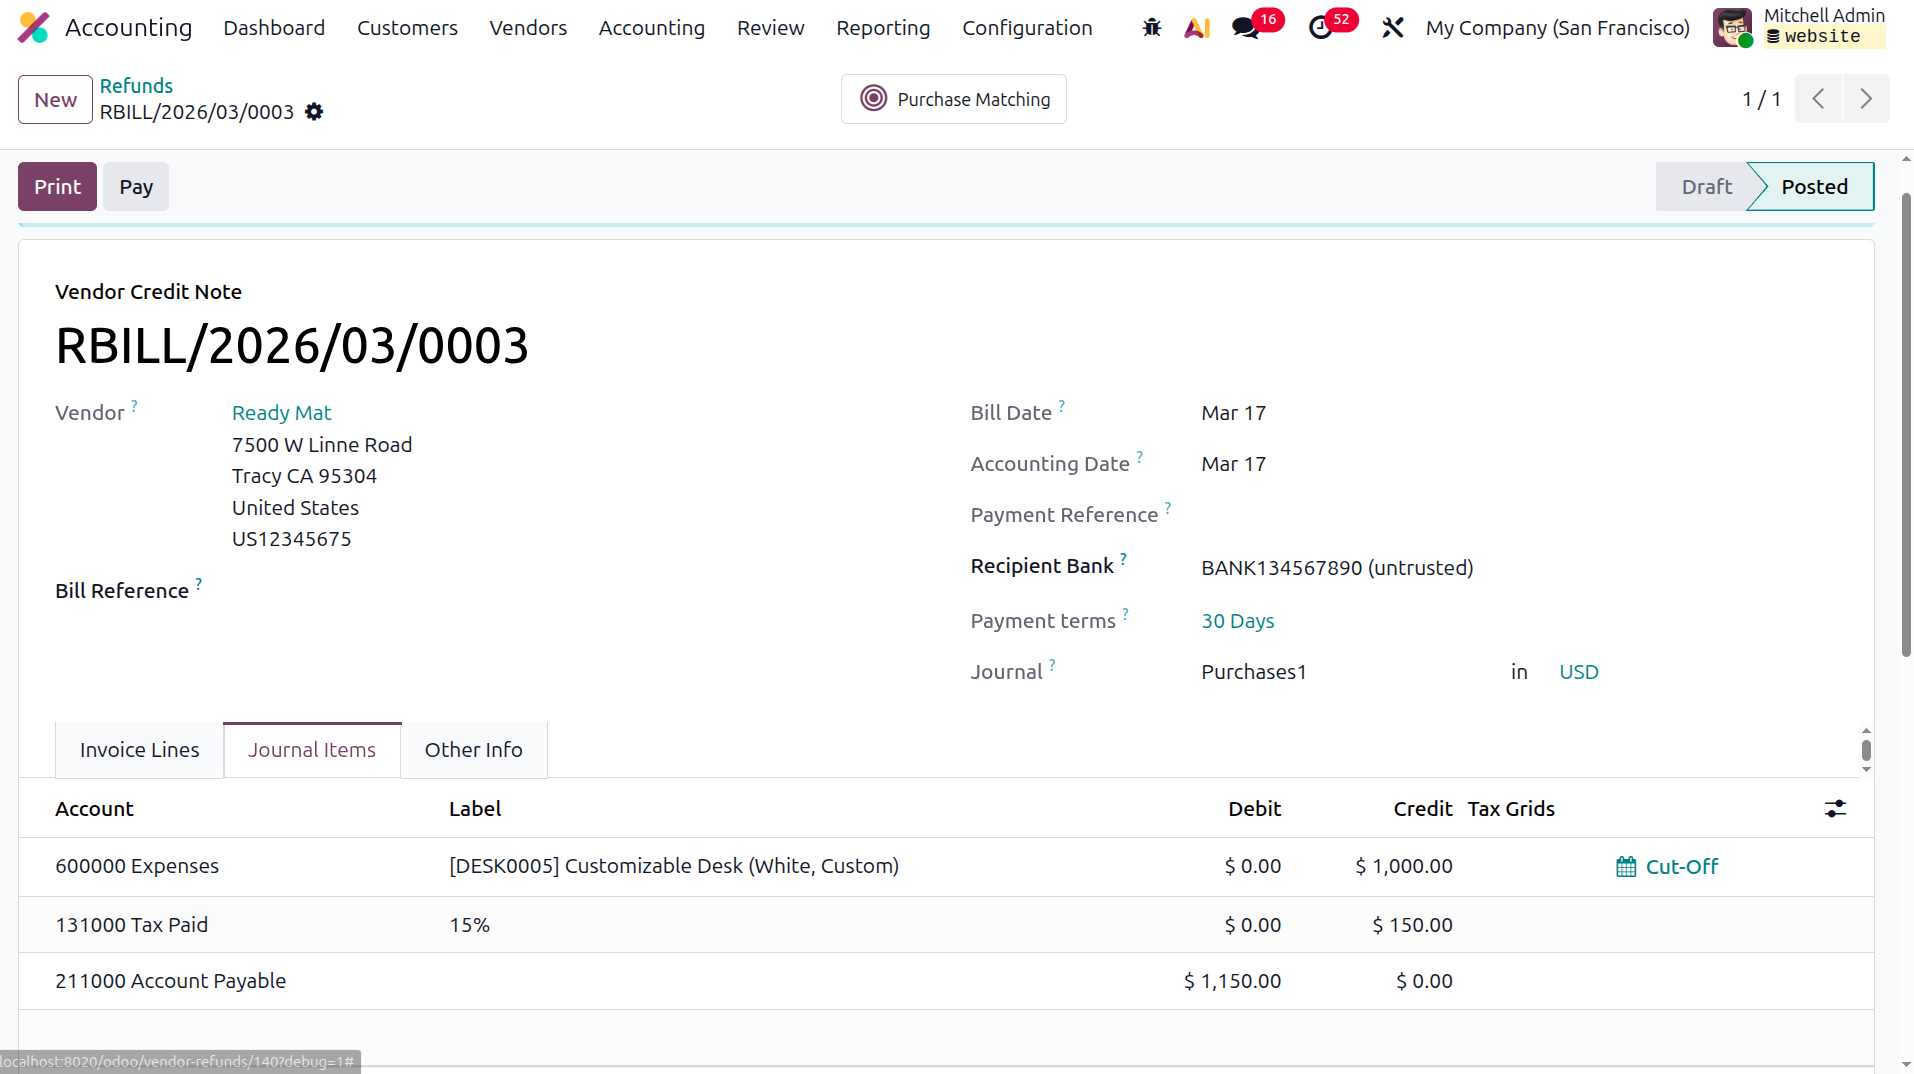
The Journal Items section of the corresponding Refund displays details such as the Journal Account, Label,
Analytical Tags, Debits, Credits, and the Tax Grid. During the Reverse Billing process, the Expense Account is
debited, while the Account Payable is credited, reflecting the accounting impact of the refund transaction.
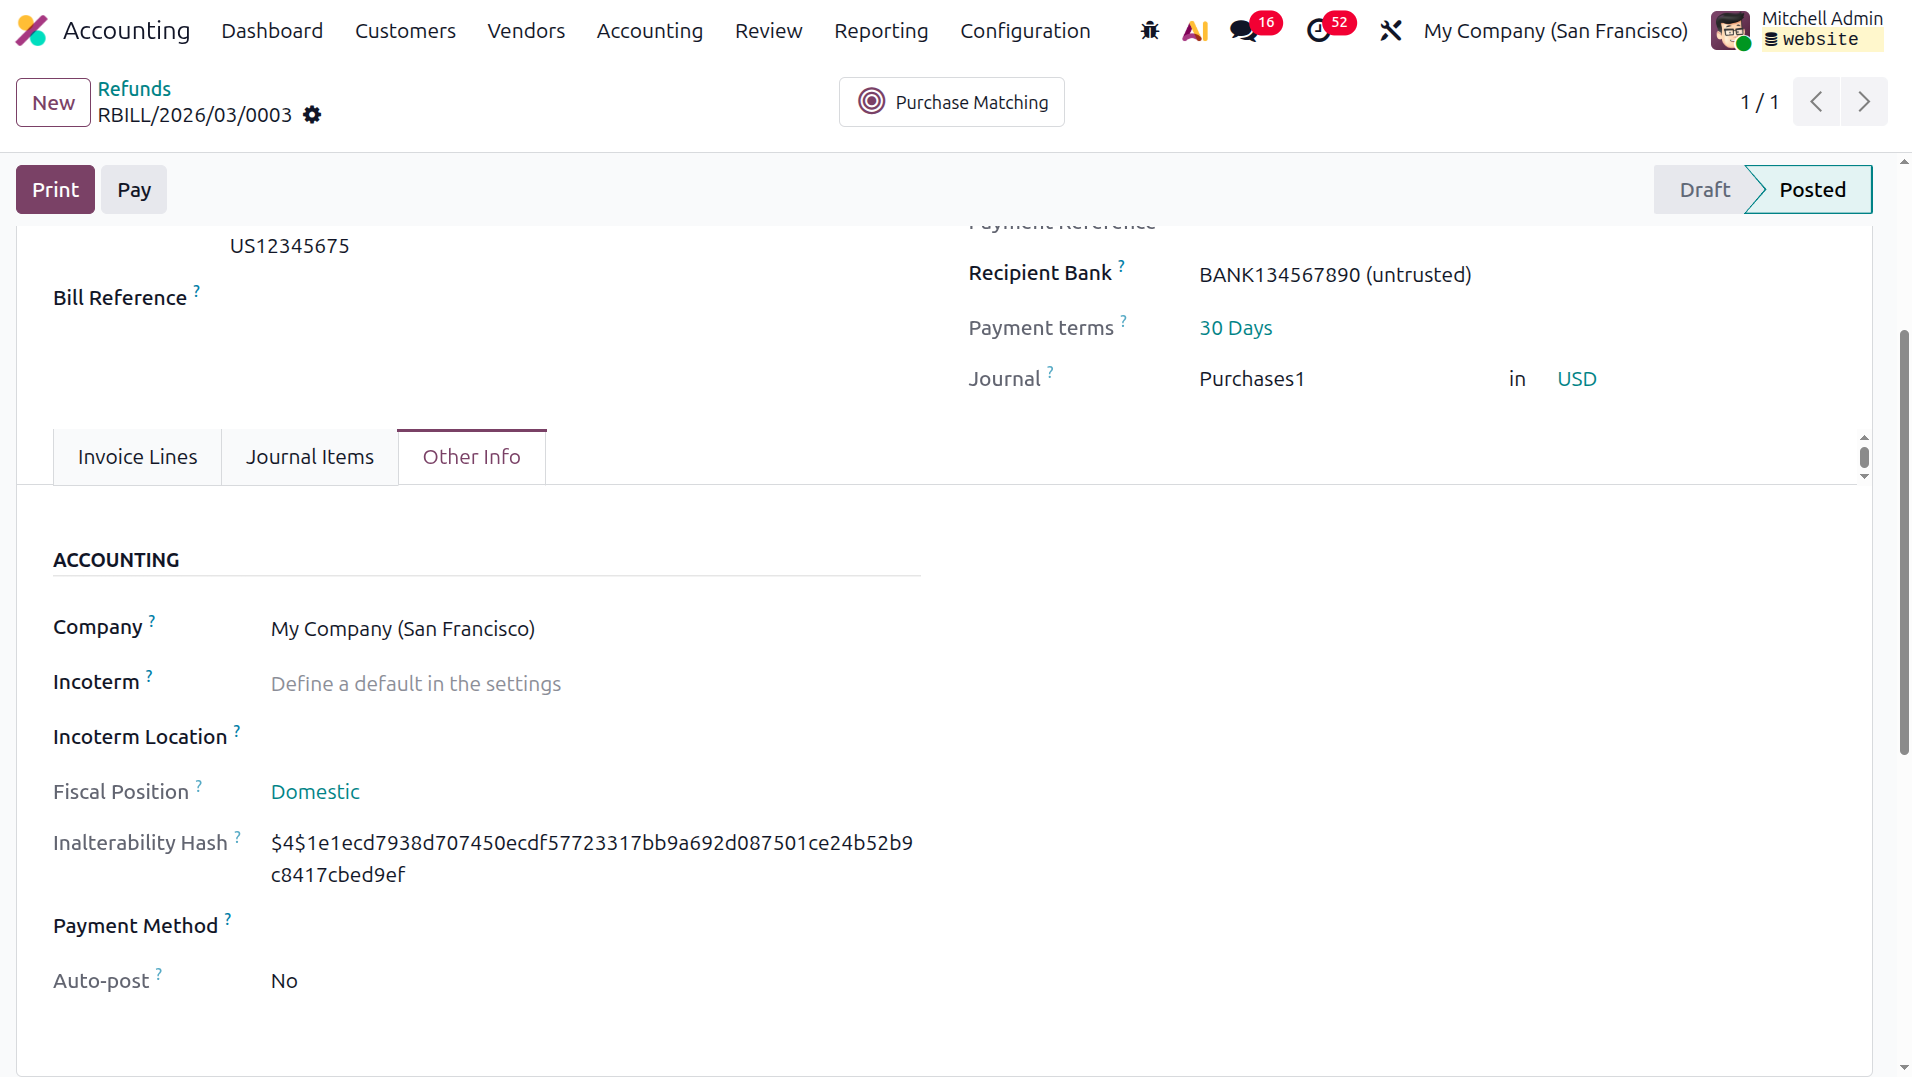
Within the Other Info tab of the related Refunds menu, additional Accounting details can be configured. These
include Incoterms, Fiscal Position, Intrastat Country, Intrastat Transport Technique, and the Cash Rounding
Technique. Options such as Post Automatically are also available to define and apply the required settings for
the specific Refund process.
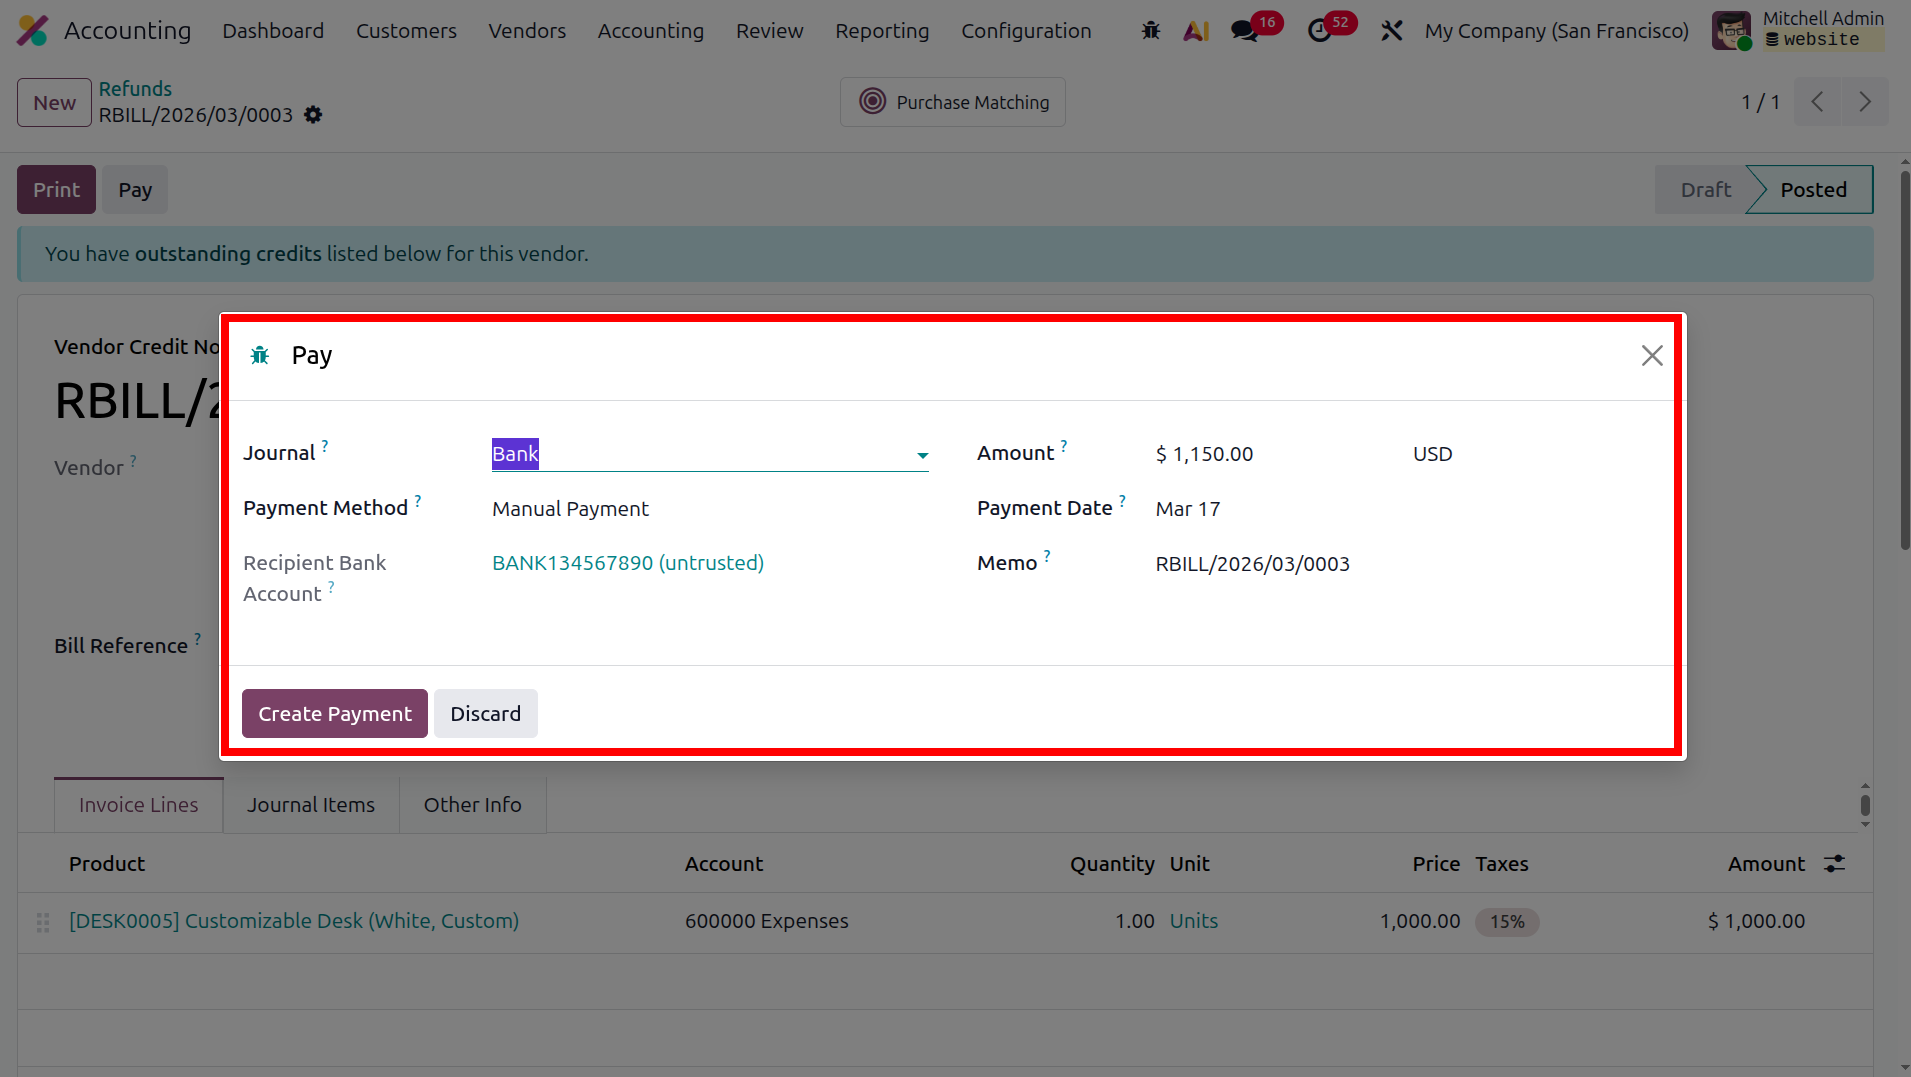
Once all of the Refund's Configurations components have been established, selecting the Pay option will take you
to the Payment window, as seen in the screenshot that goes with it. After that, you may decide whether to
preserve the description. In this instance, the Journal and the Payment Method can be configured to Manual, SEPA
Direct Debit, or Batch Deposit. On each return, you can provide the Amount, Currency, and other specifics of the
reimbursement in addition to the Payment Date and the Memo. After completing the Payment setting parameters, you
may select the Create Payment option.
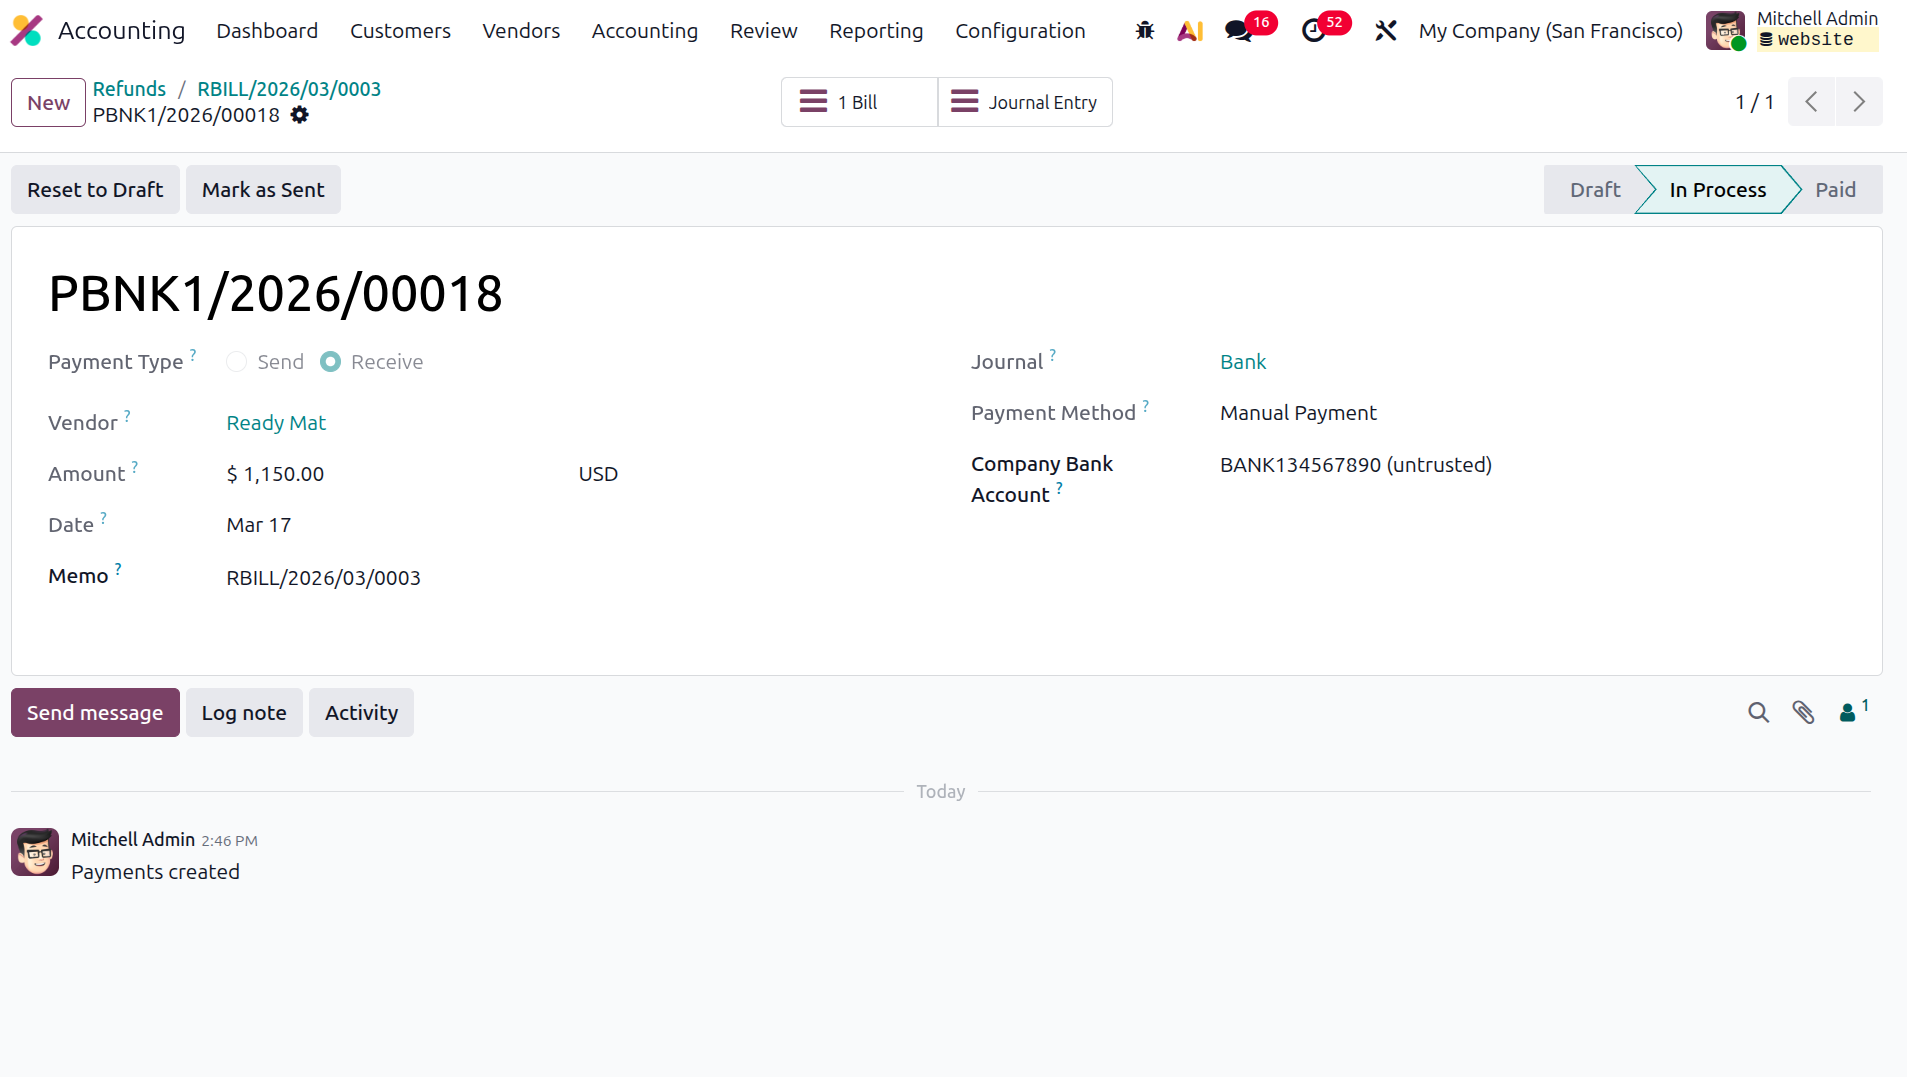
When the payment is registered, the Outstanding Receipt account is debited, and the Account Payable account is
credited.
Once the payment is completed, the status will be updated in the corresponding Refund menu. If the payment has
been successfully reconciled, the refund will be marked as Paid. However, if any changes are required, you can
select the Reset To Draft option on the specified Refund to modify or update the details.
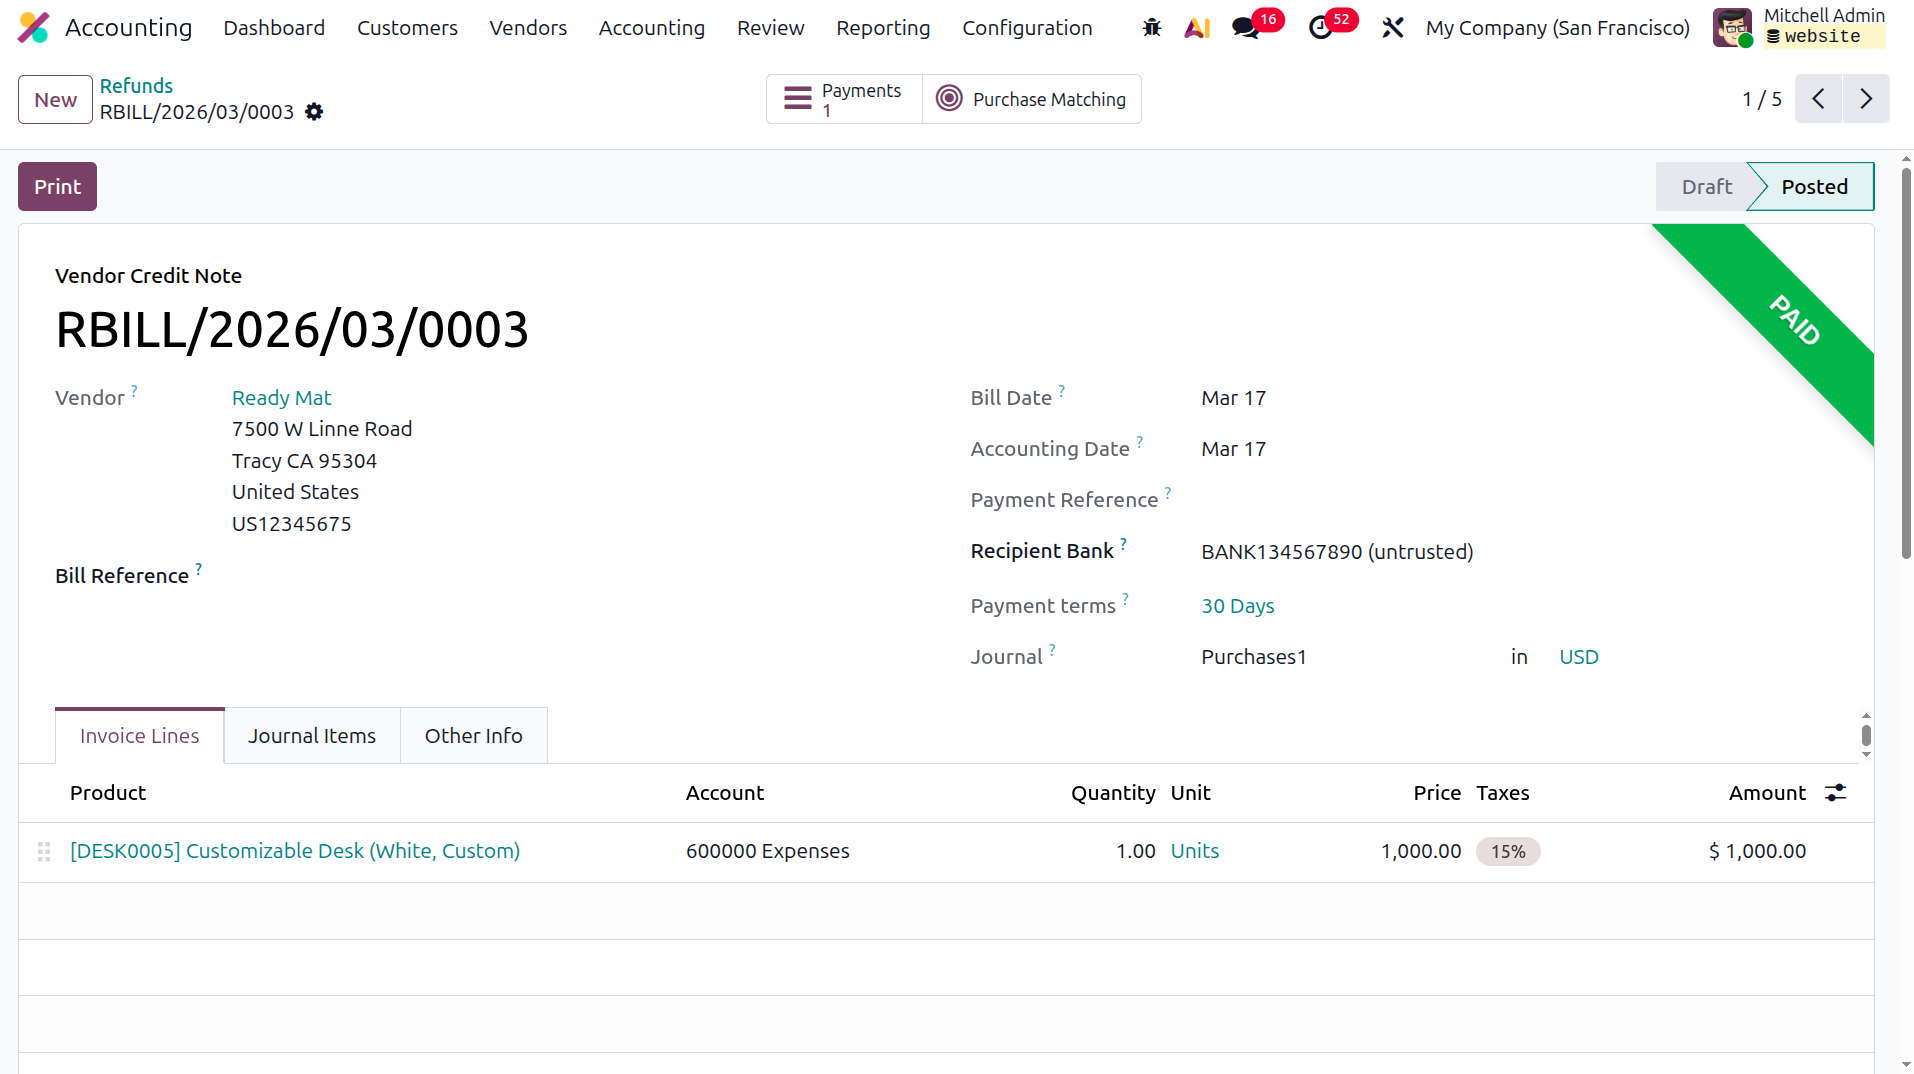
The designated menu allows you to efficiently manage Refunds related to vendor operations. Now that the key
aspects of Refund administration have been explained, we can move on to the next section, which focuses on the
management of Vendor Payment.
Vendor payment management
The Odoo Accounting module provides a dedicated management menu that helps businesses efficiently manage vendor
invoices and the related payments. Handling vendor invoice payments is a major part of a company’s transactions
with its product suppliers, which makes a structured and reliable system essential. With the Accounting module
in Odoo, organizations can clearly define and manage all aspects of supplier invoice payment management in a
systematic manner as part of their business operations.
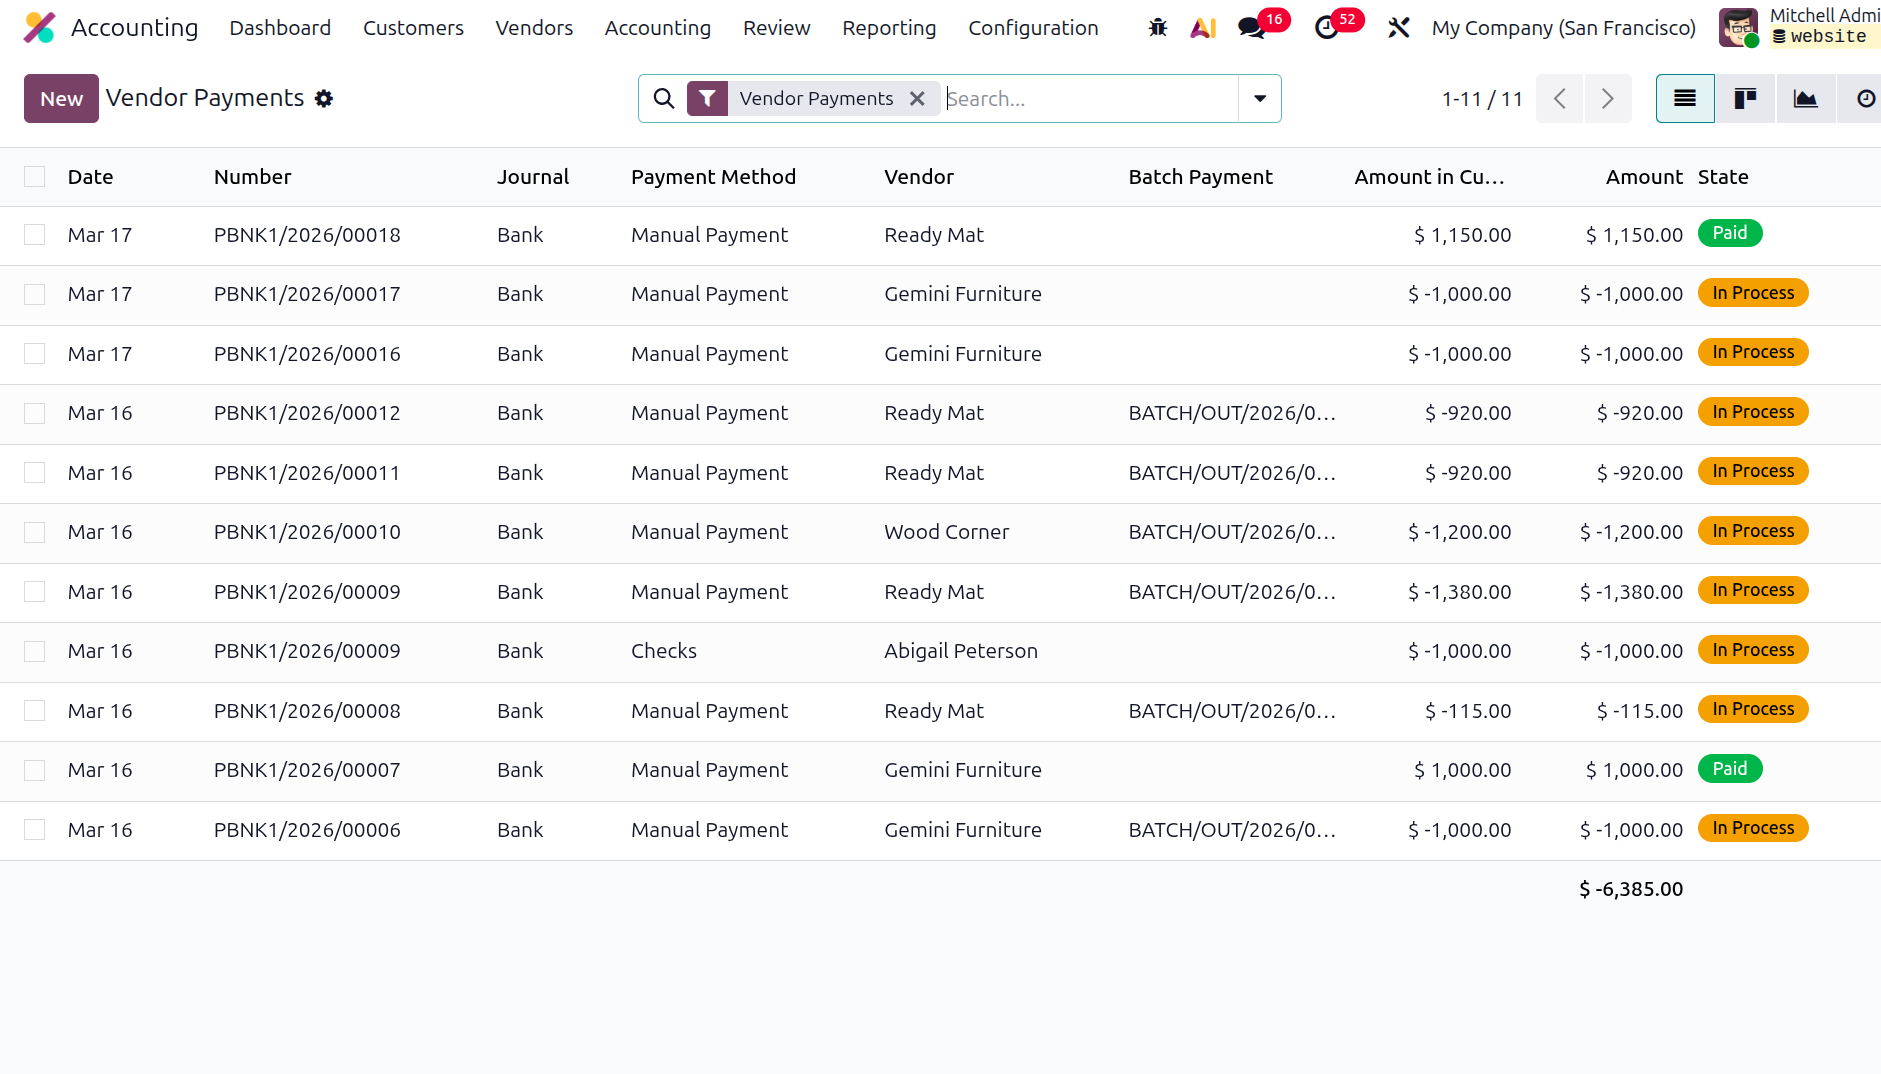
The Vendor Invoice management feature in the Odoo Accounting module, illustrated in the screenshots below,
displays all vendor invoice payments in one place. This section presents important payment details such as the
Invoice Number and Invoice Date. It also includes information related to the SDD system, Journals, Payment
Methods, Suppliers, Batch Payments, payment amounts, Payment Currency, and the Payment Status. Users can easily
organize the required payment information by using the standard Filter and Group By options. Additionally,
customized Filter and Group By settings can be saved for future use based on specific requirements.
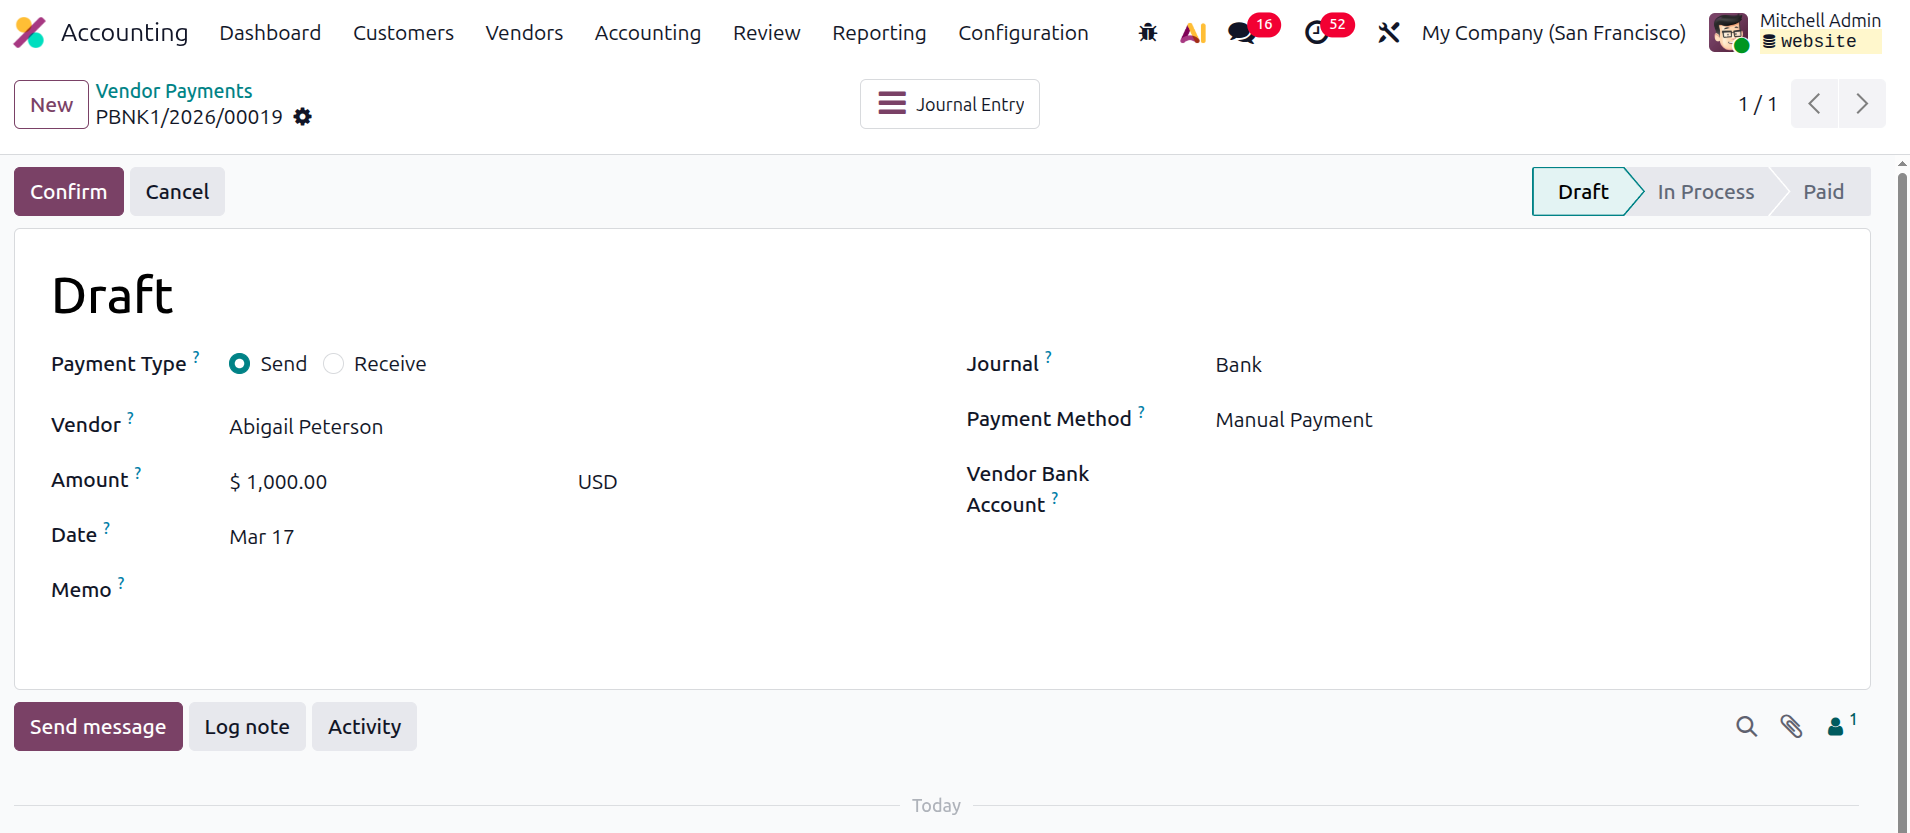
You can create a new payment by selecting the New option, which opens the payment creation window shown below. In
this form, you must first define the Payment Type, indicating whether the transaction is to Send or Receive
Money. After that, you can configure details such as the Partner Type, Supplier/Customer information,
Destination Account, Currency, Amount, Payment Date, and an optional Note. If required, the Whether Internal
Transfer option can be enabled to classify the payment as an Internal Transfer. The Journal can be selected from
the drop-down menu, and the Payment Method can be set to Manual or Cheque. Depending on the situation, the
Recipient’s Account Number can also be specified.
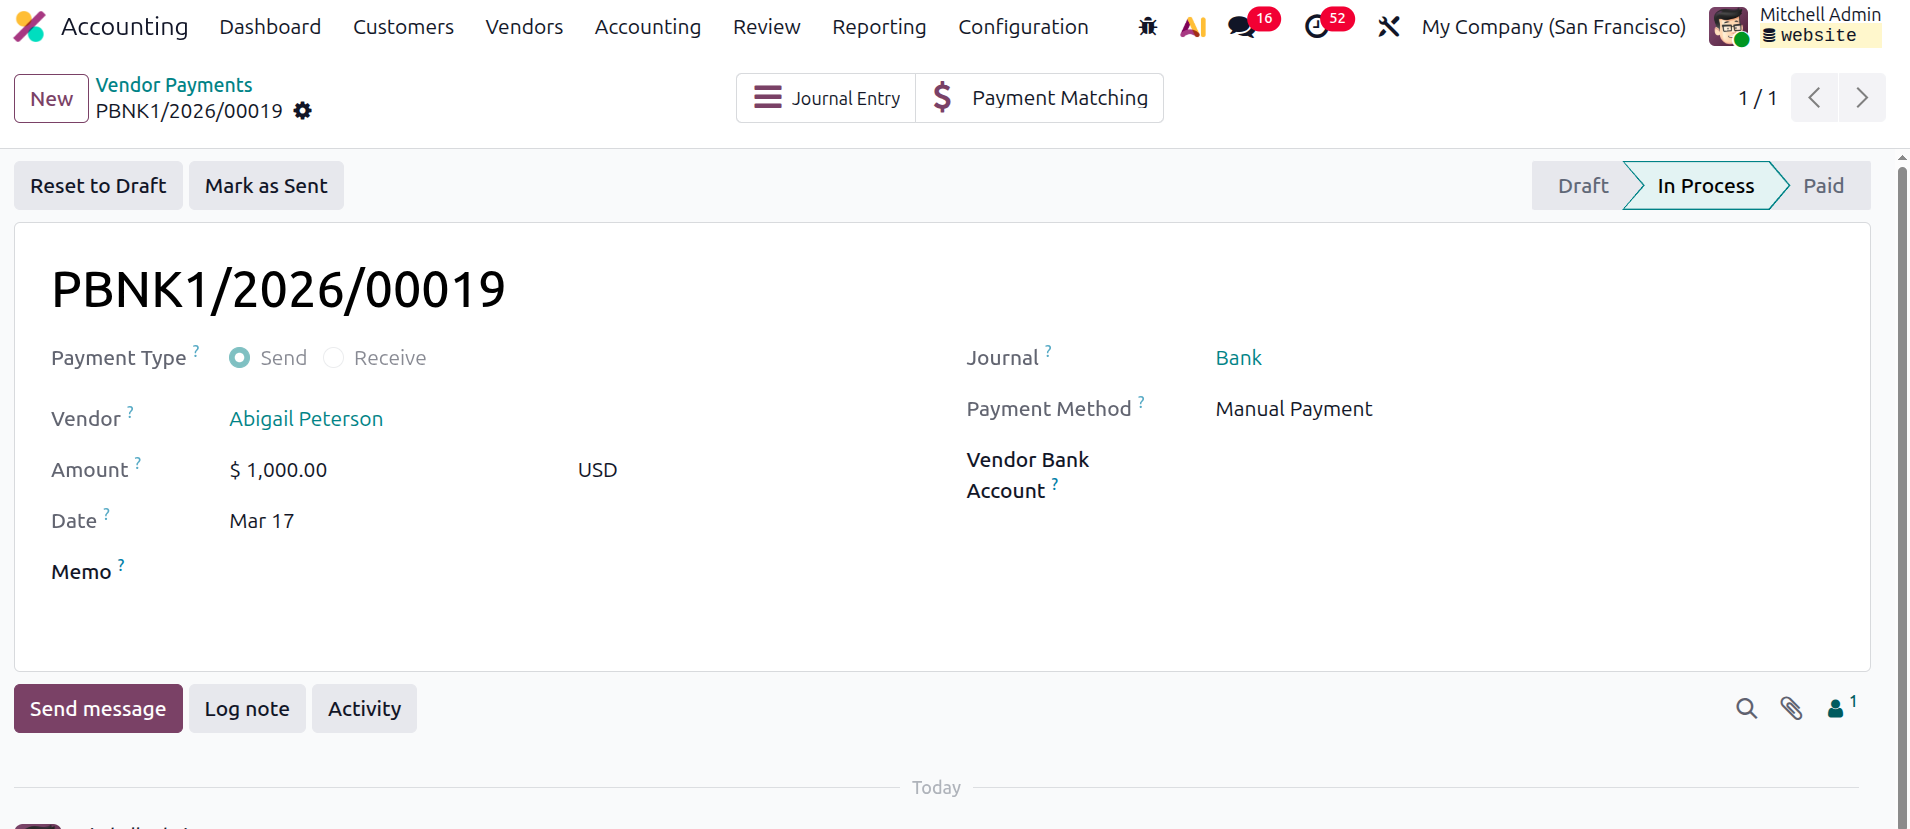
Once the payment configuration is completed, the next step is to confirm the defined payment. After clicking
Confirm, the vendor payment can be linked to the corresponding Vendor Bills. When the payment is confirmed, the
status Send will appear, as illustrated in the screenshot.
If the payment is made using Checks, you must choose the Check Payment option, as shown in the screenshot.
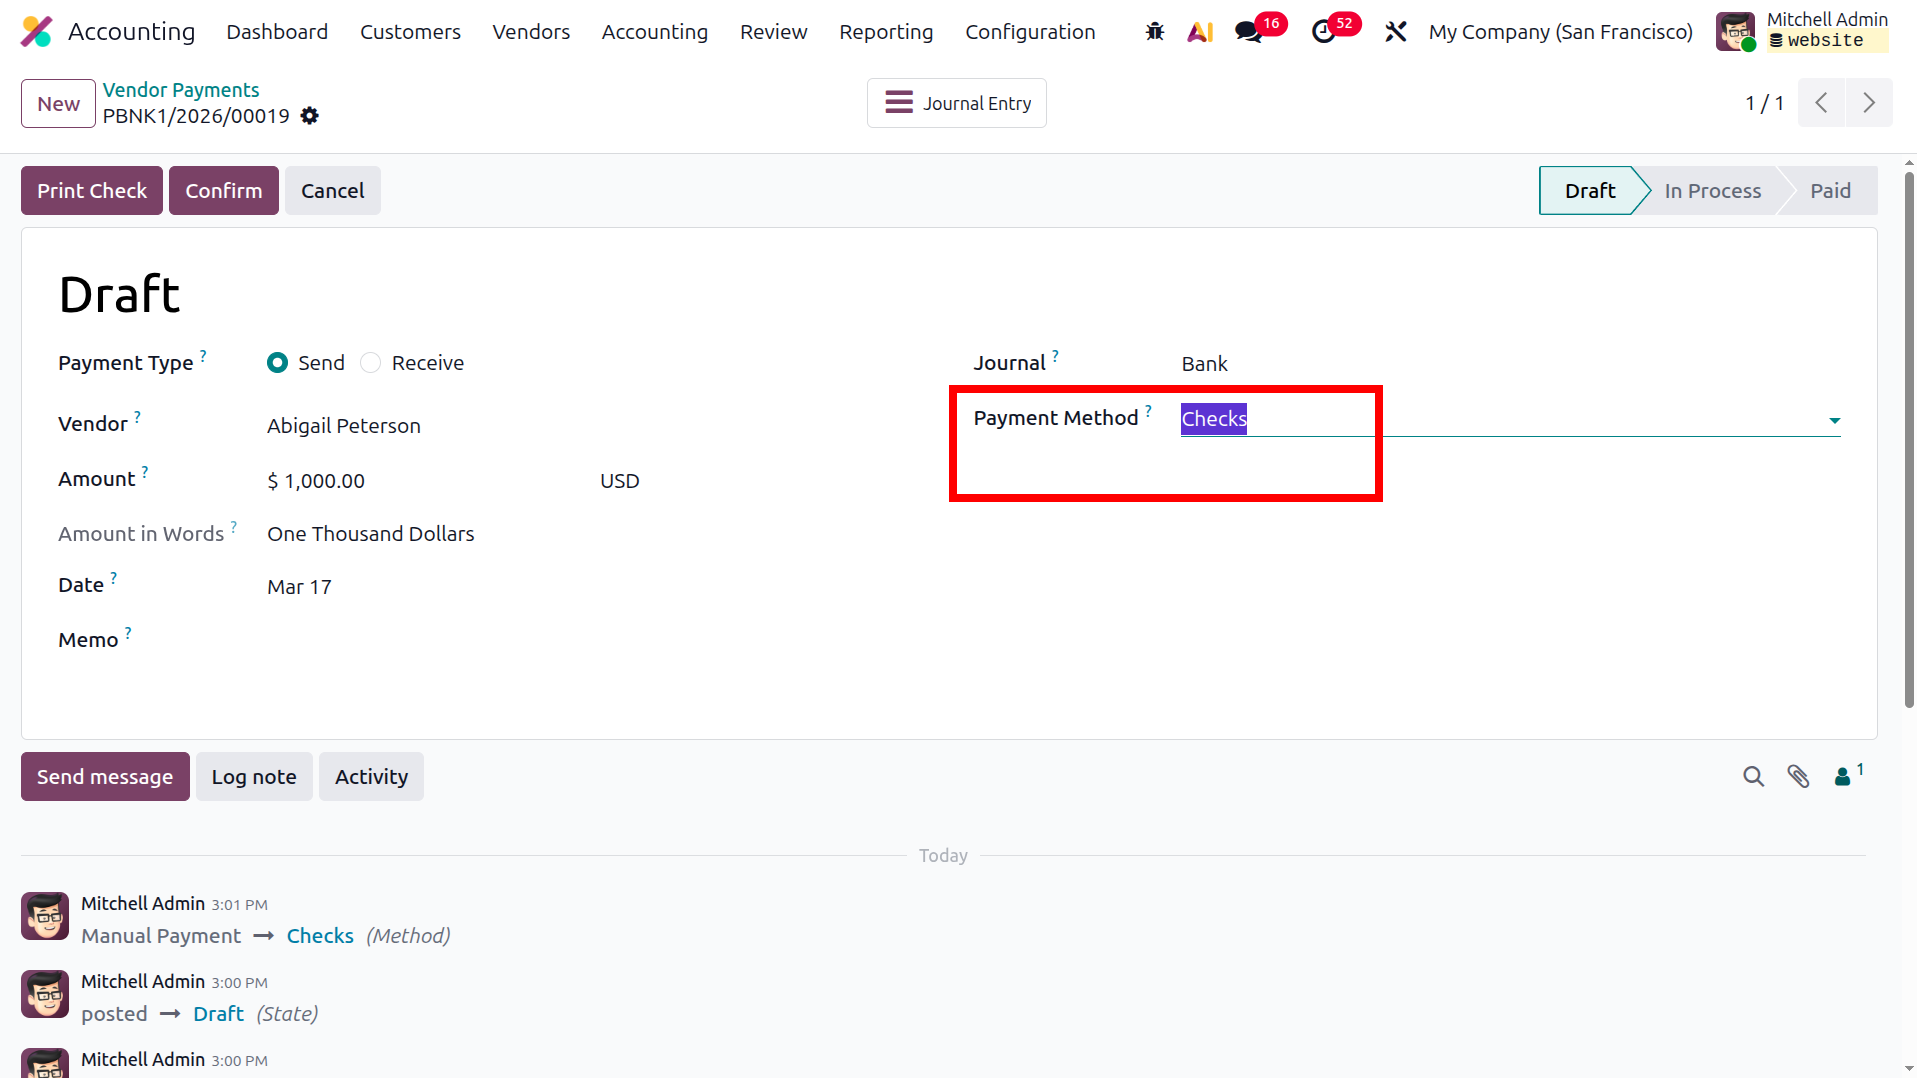
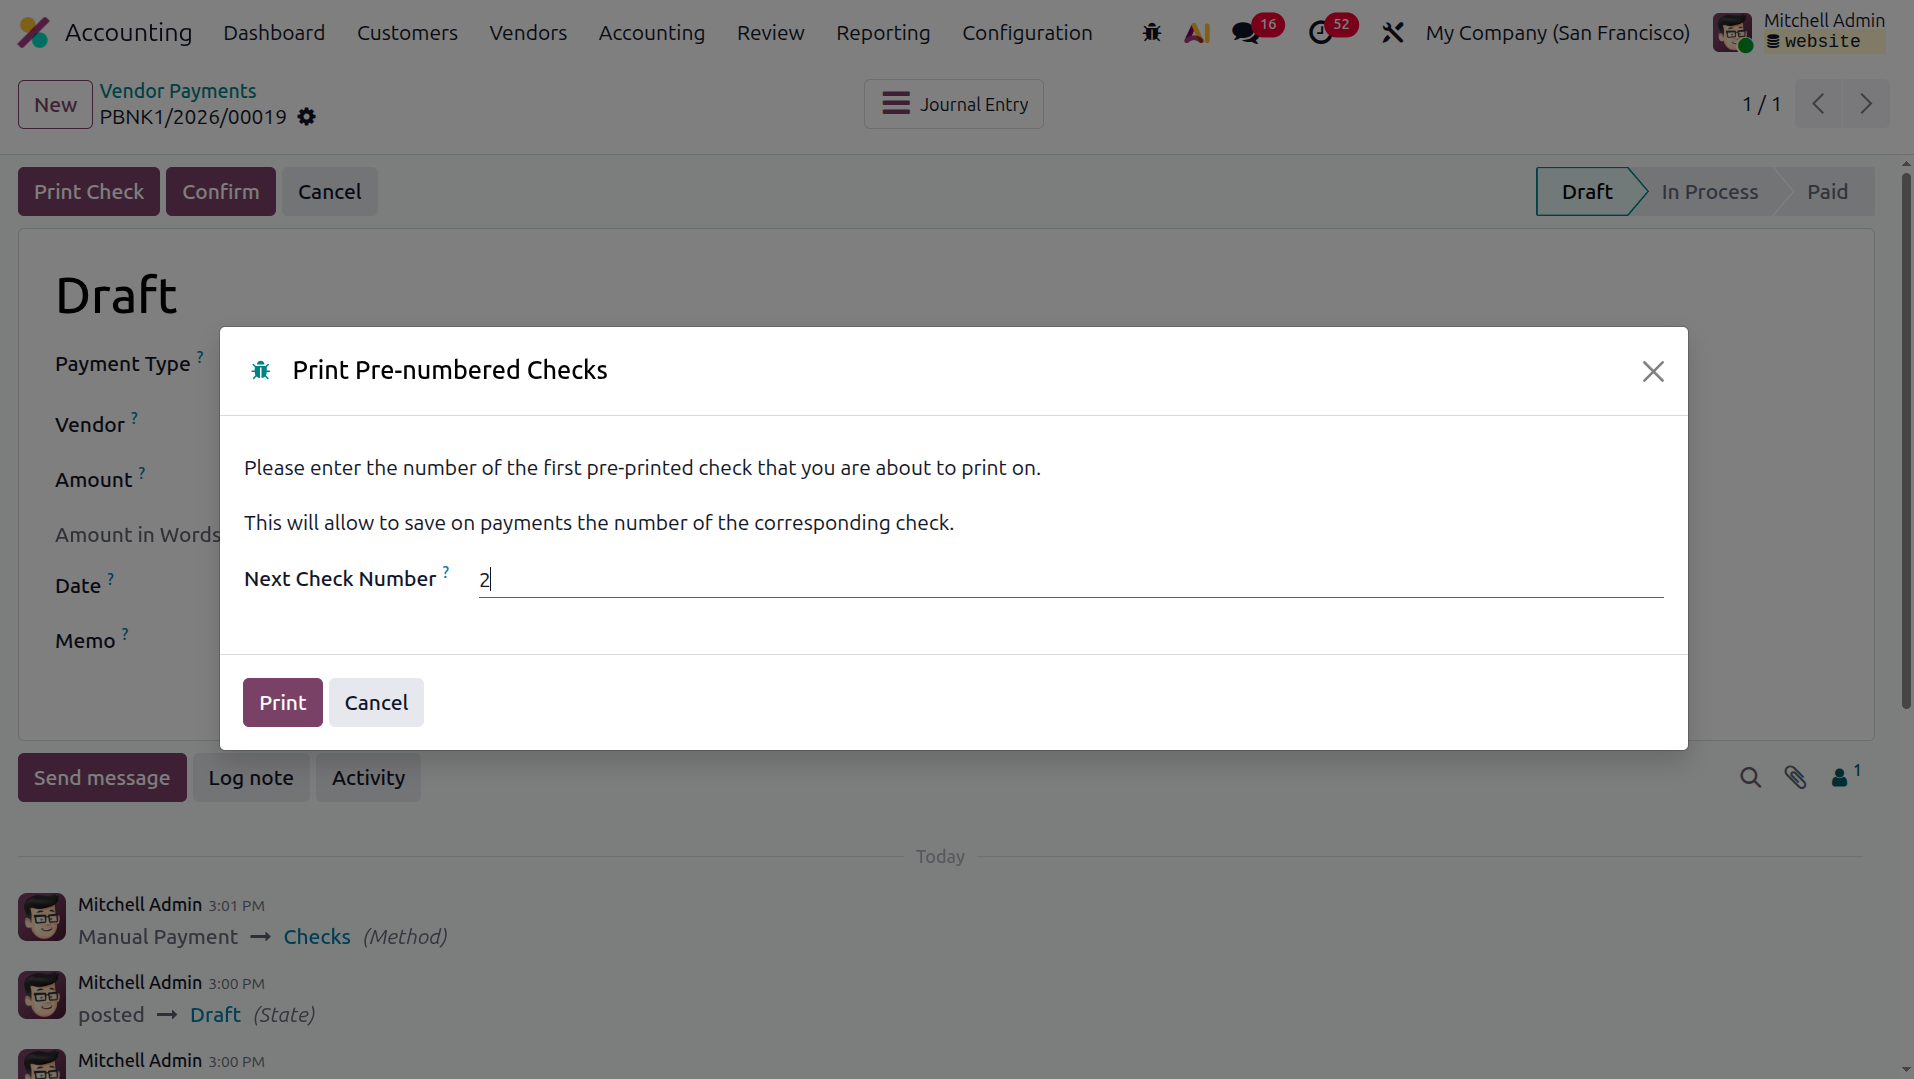
When the payment settings are configured for Checks, selecting Confirm allows you to prepare the next check and
view the Pre-numbered Checks that will be printed. By choosing the Print Pre-numbered Checks option, you can
proceed with the Print function.
These options enable you to create payments for the business or make new payments to suppliers. The greatest tool
for handling the accounting tasks associated with the monetary portion of these payments is Odoo Payment
Management. The components of the vendor bill batch payments are defined in the following section.
Vendor bill batch payments
During regular business operations, a company may make several purchases from the same vendor. Instead of
settling each Vendor Bill individually, businesses often pay multiple bills together according to an agreed
arrangement between both parties. In some cases, this agreement is based on the number of bills or invoices
rather than the total amount due.
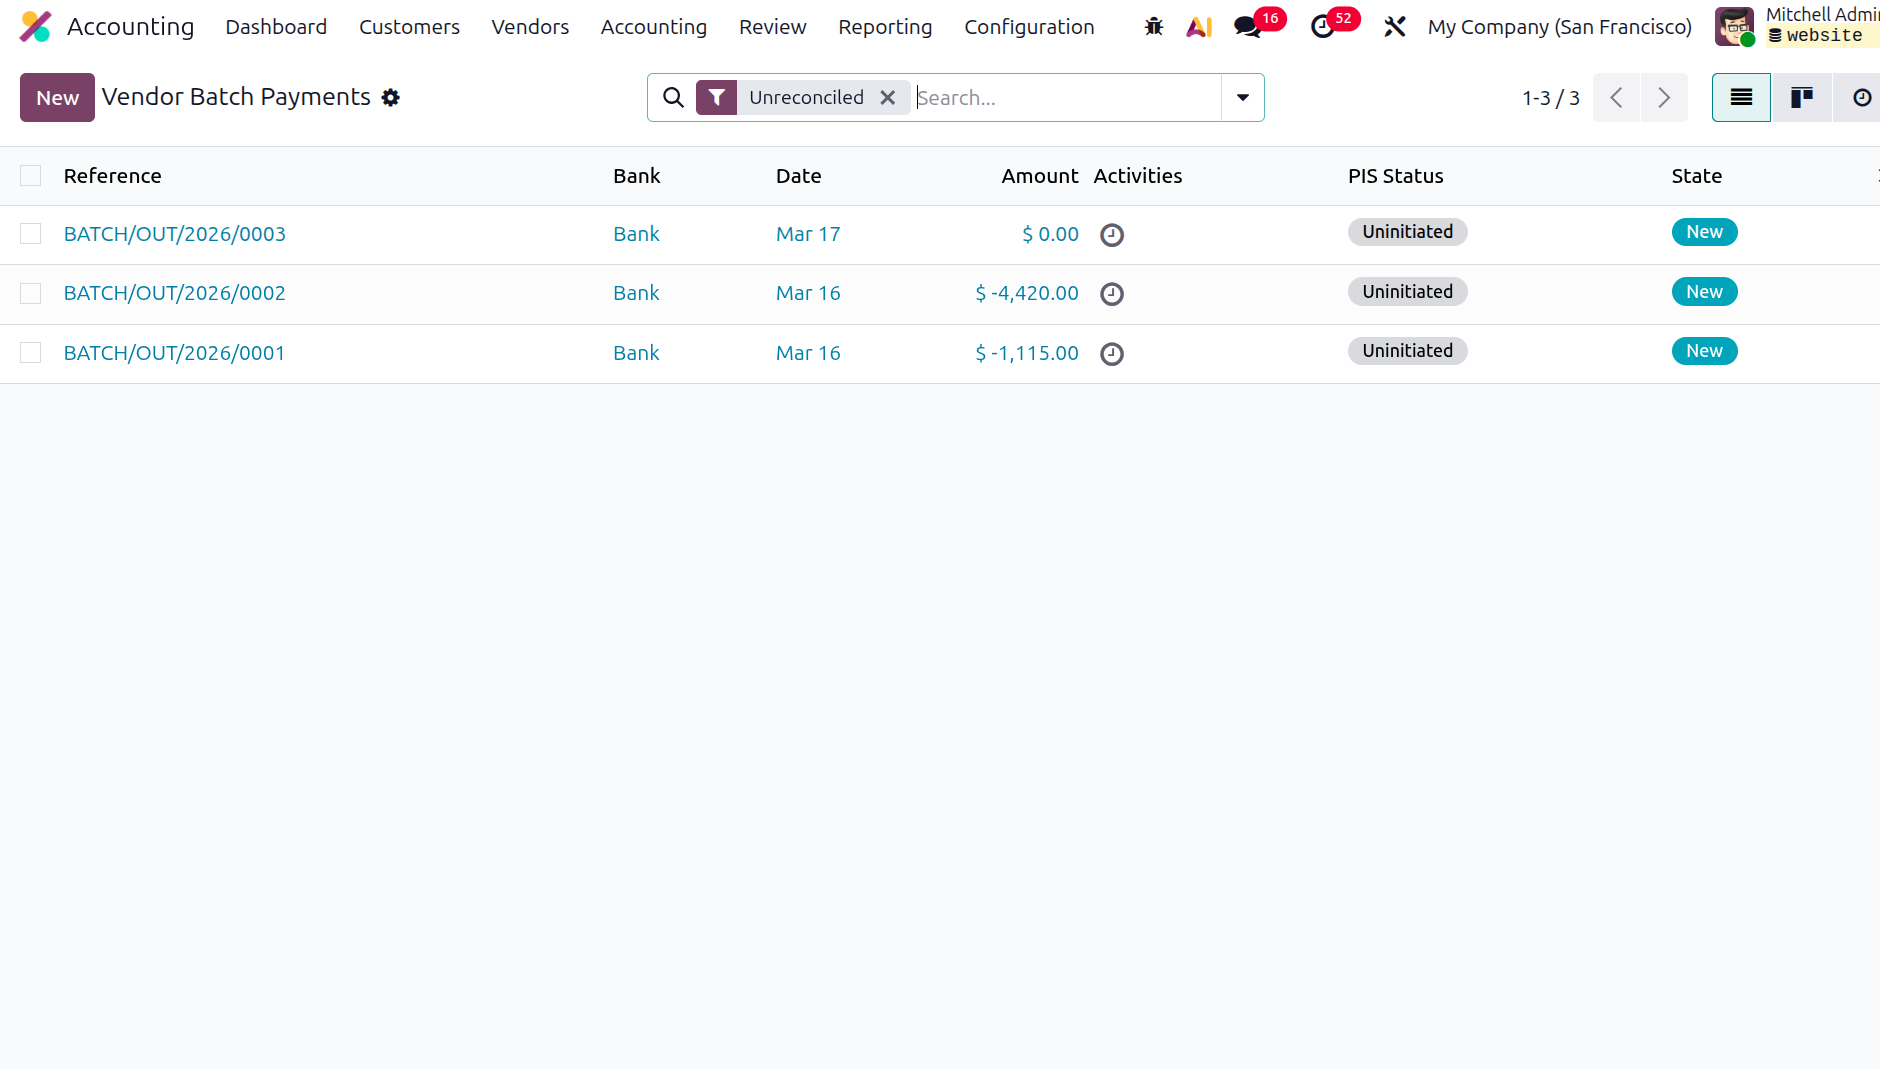
To support this process, the Odoo platform provides a dedicated menu where Vendor Bill Batch Payments can be
configured. This section displays details such as the Reference Number, Bank Information, Batch Payment Date,
Amount, and Status. Similar to other menus in Odoo, the Filter and Group By options can be used to easily
organize and locate specific batch payment records.
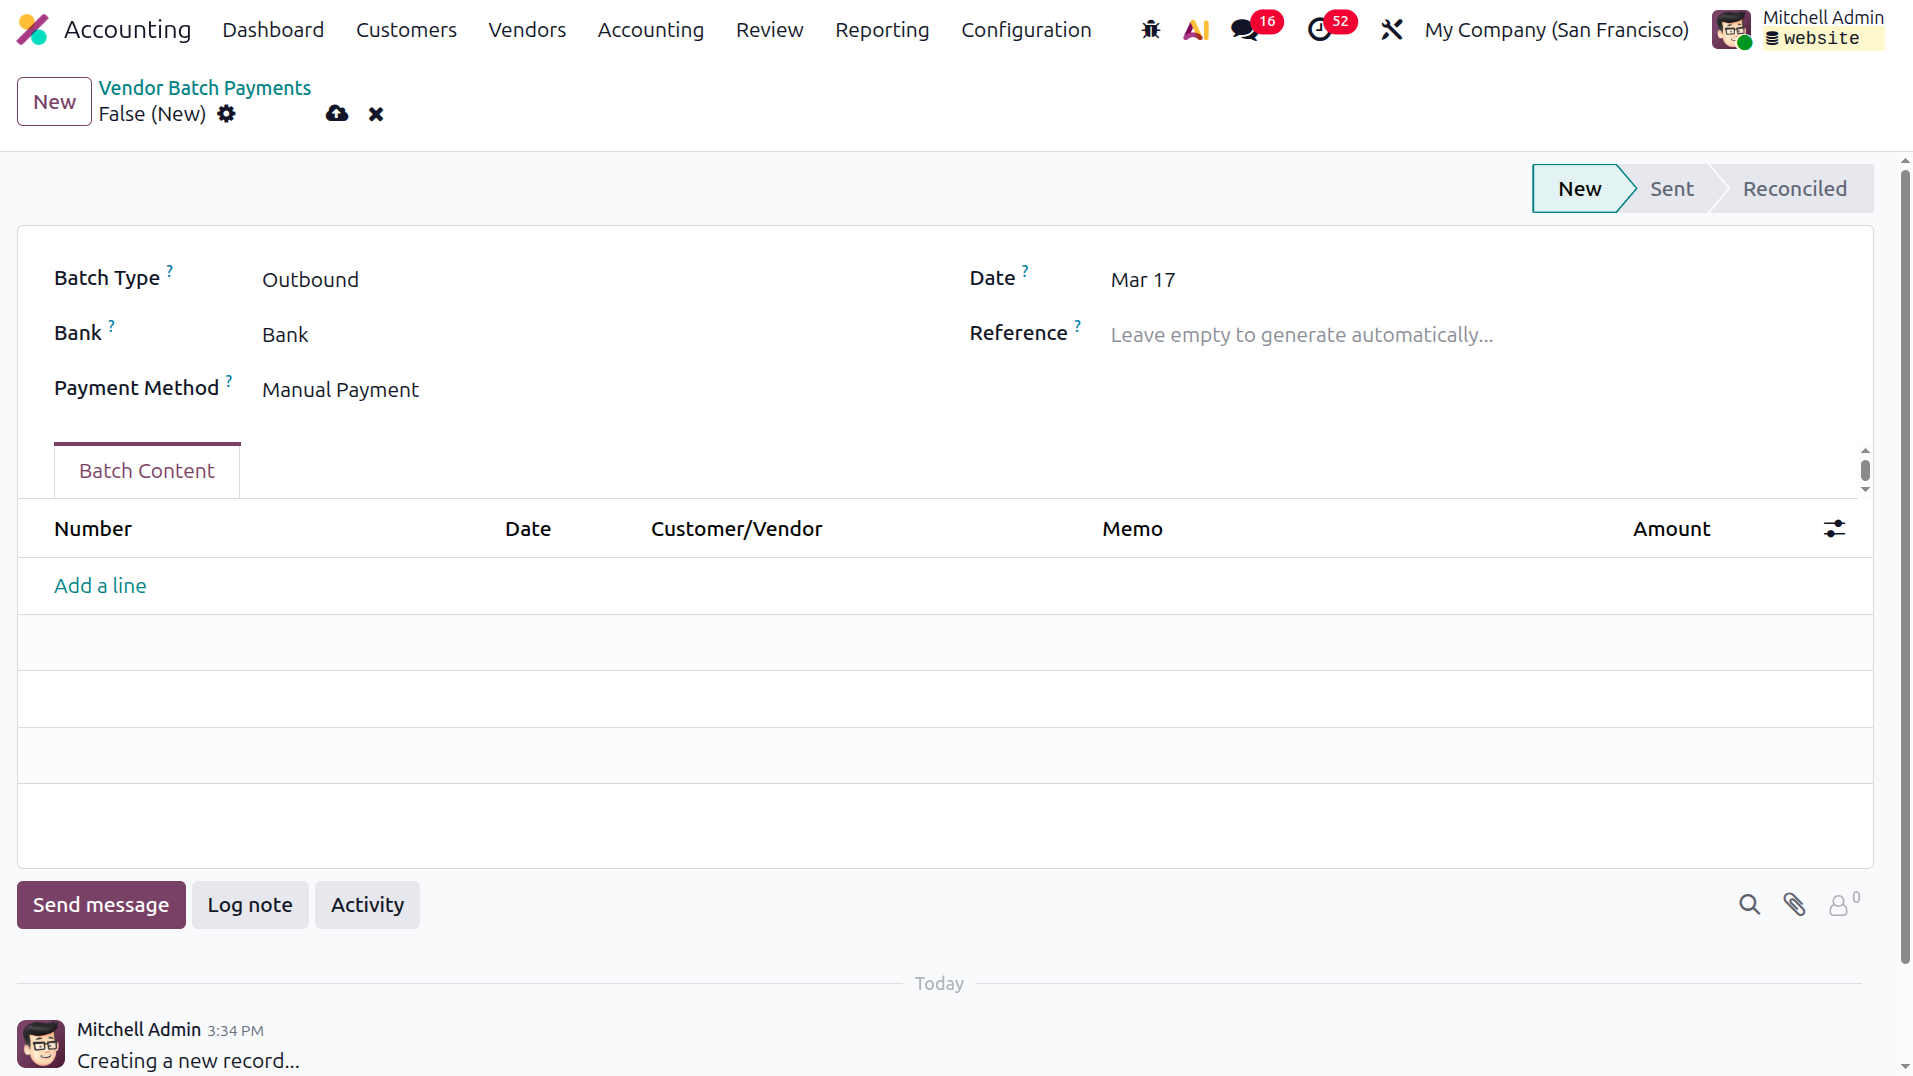
To create a new Batch Payment for vendor invoices, select the New option. This will open the Batch Payment
creation window, as shown in the image. Here, you can select or enter details such as the Bank Type, Bank,
Payment Method, Date, and Reference. The Add a Line option can then be used to define the Batch Content, where
the relevant payments will be grouped together.
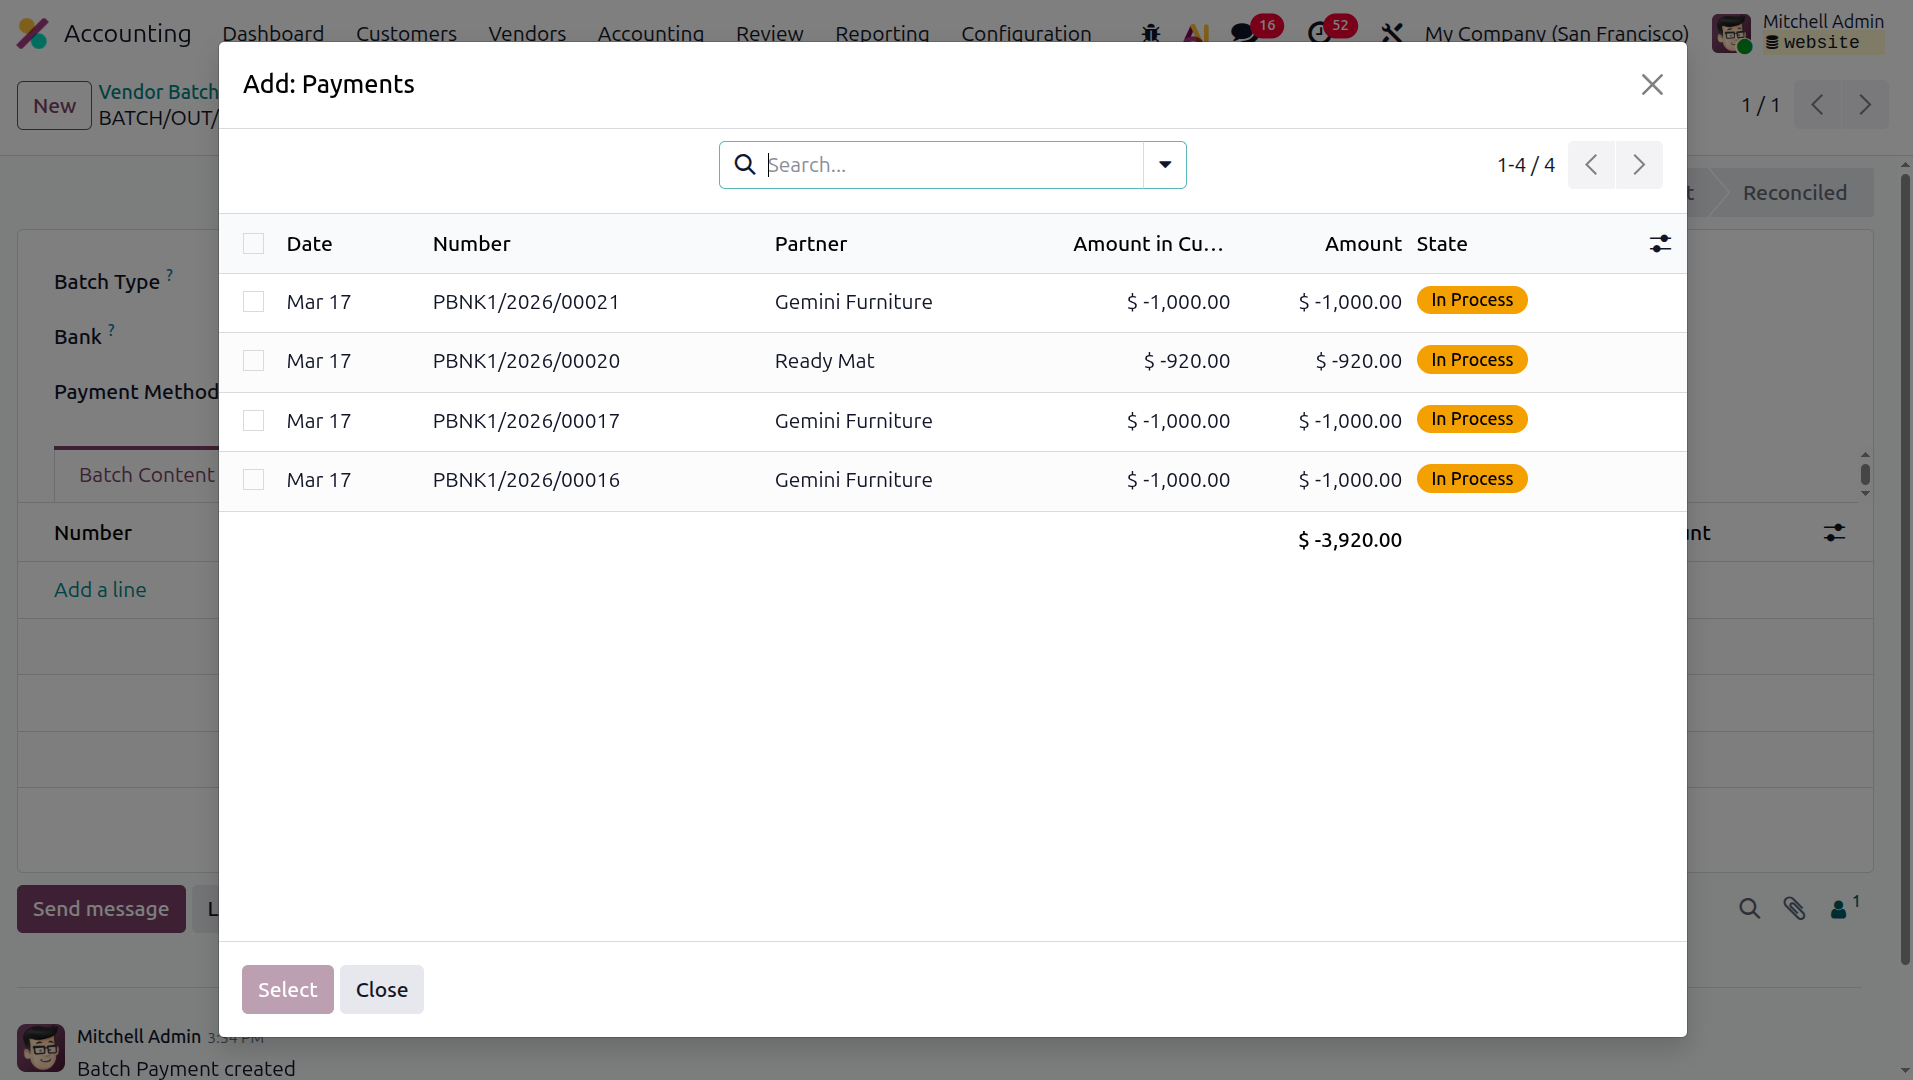
When you choose to add payments to the batch, a pop-up window will appear displaying all the supplier payments
that need to be processed. Using the provided Tick Box, you can select the required payments. This list includes
details such as the Invoice Date, Bill Number, Journal Information, Payment Method, Vendor Information, Amount,
Payment Status, SDD Scheme Details, and Currency. As with other sections in Odoo, the Filter and Group By
options are available to help organize the listed payments.
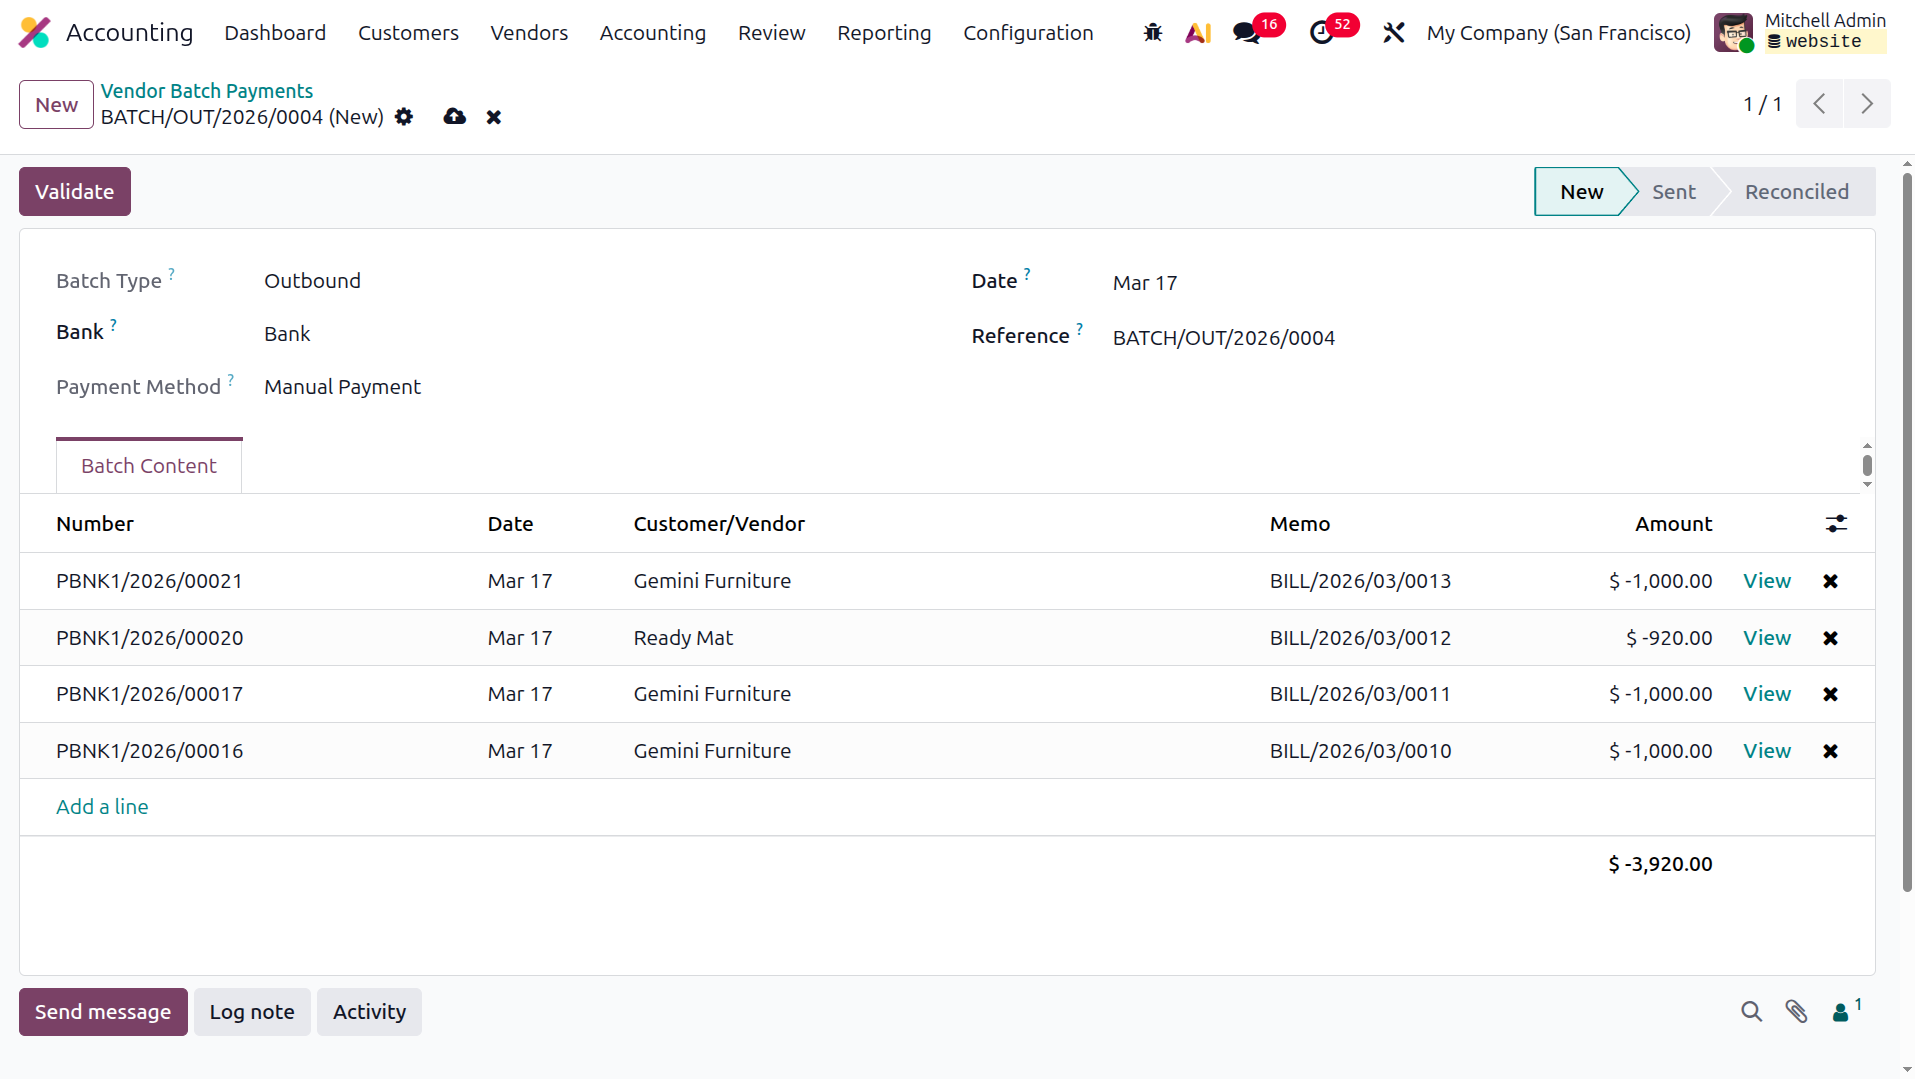
After adding the necessary payments to the batch, you can confirm the transaction and select the Pay option so
that the Batch Payments are applied to the related Vendor Invoices. With the process of managing Vendor Bill
Batch Payments explained, we will now move on to the next section, which focuses on the Products menu based on
Vendor Descriptions.
Similar to the product created from the customer menu we can create a product from the vendor menu too. The next
is the vendor creation. In Odoo, at first odoo will not create a vendor or a customer, Odoo just creates a
partner, so the partner creation is similar if we create it from the vendor menu or from the customer menu. A
partner becomes a vendor in Odoo once we create a vendor bill for that partner. Similarly a partner become a
customer if we create a customer invoice for that partner