To add buttons that trigger specific actions using the Studio module, a slightly different approach is required compared to other Studio features, as it involves working with XML code.
The first step is to activate debug mode. This can be done either from the General Settings or by appending ?debug=1 to the URL after the word "web", as shown below.
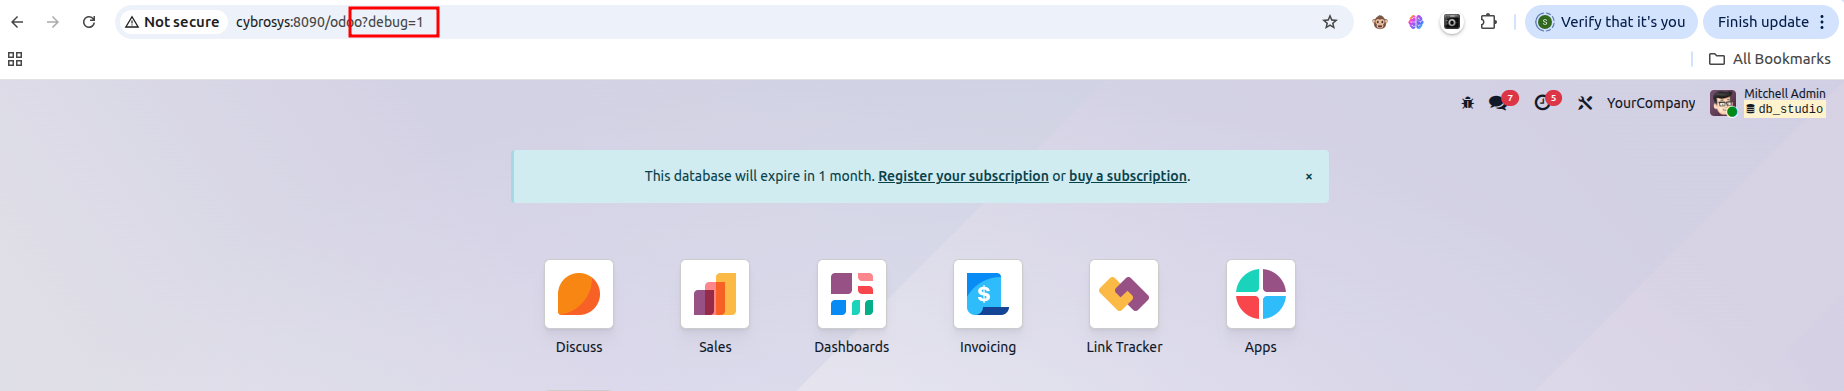
Once debug mode is enabled, the next step is to create a server action that will run a specific function when the newly added button is clicked.
Go to Settings -> Technical -> Server Actions. Keep in mind that this menu becomes available only after activating developer mode.
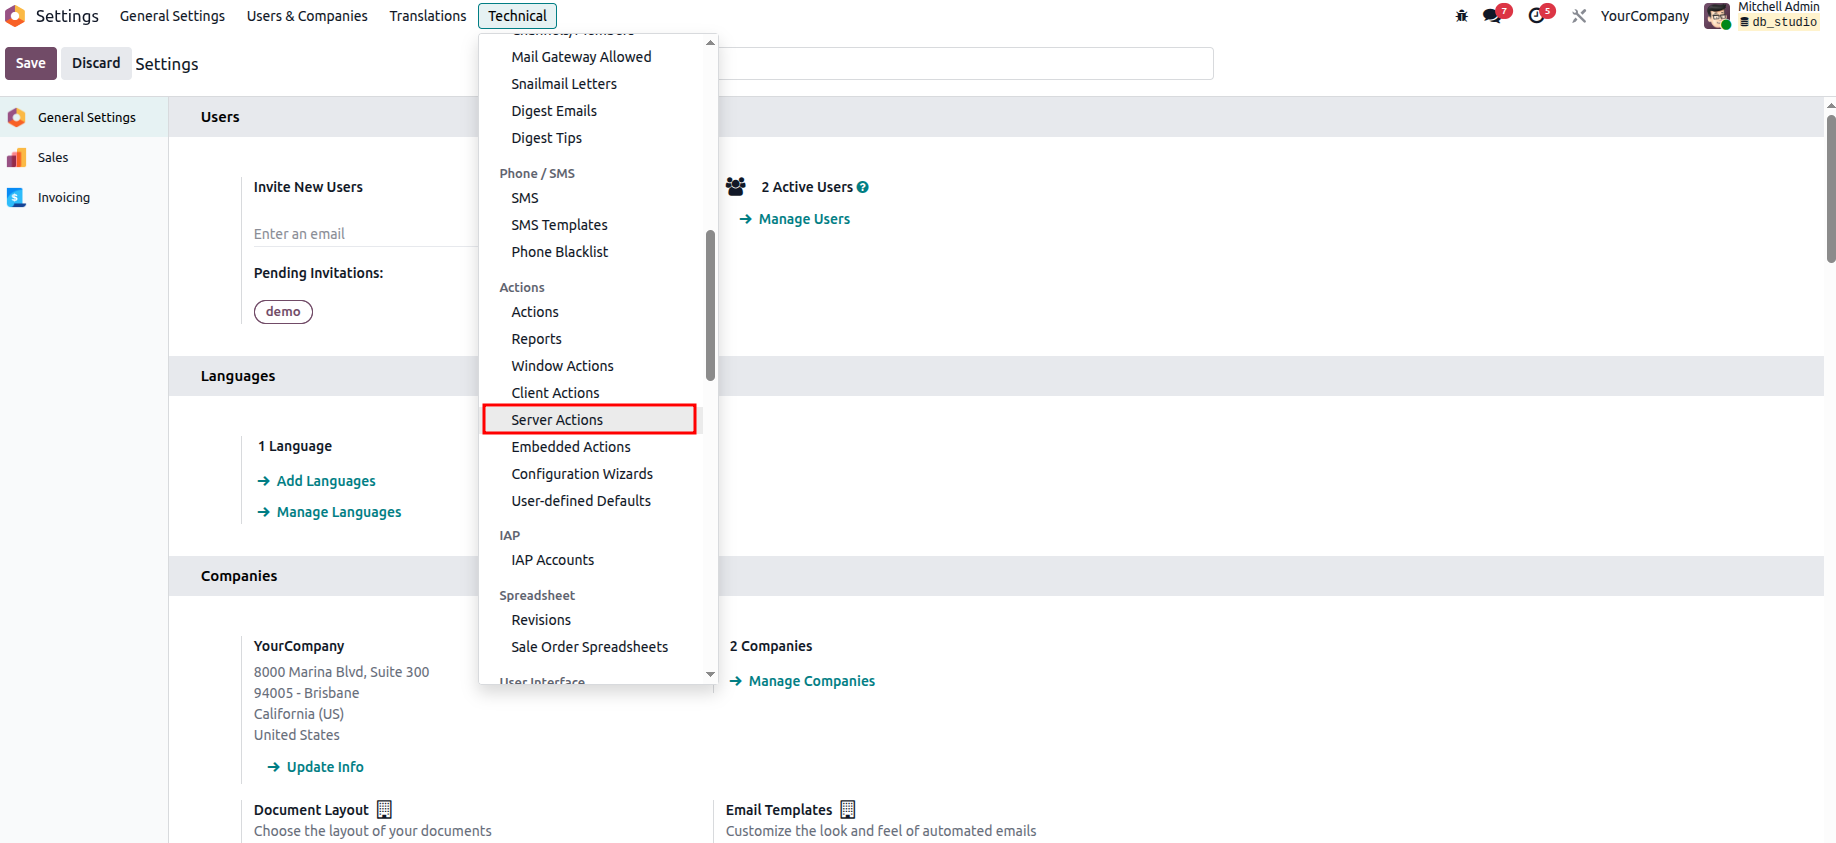
Select the "New" button to start creating a Server Action, then complete the required fields as prompted.
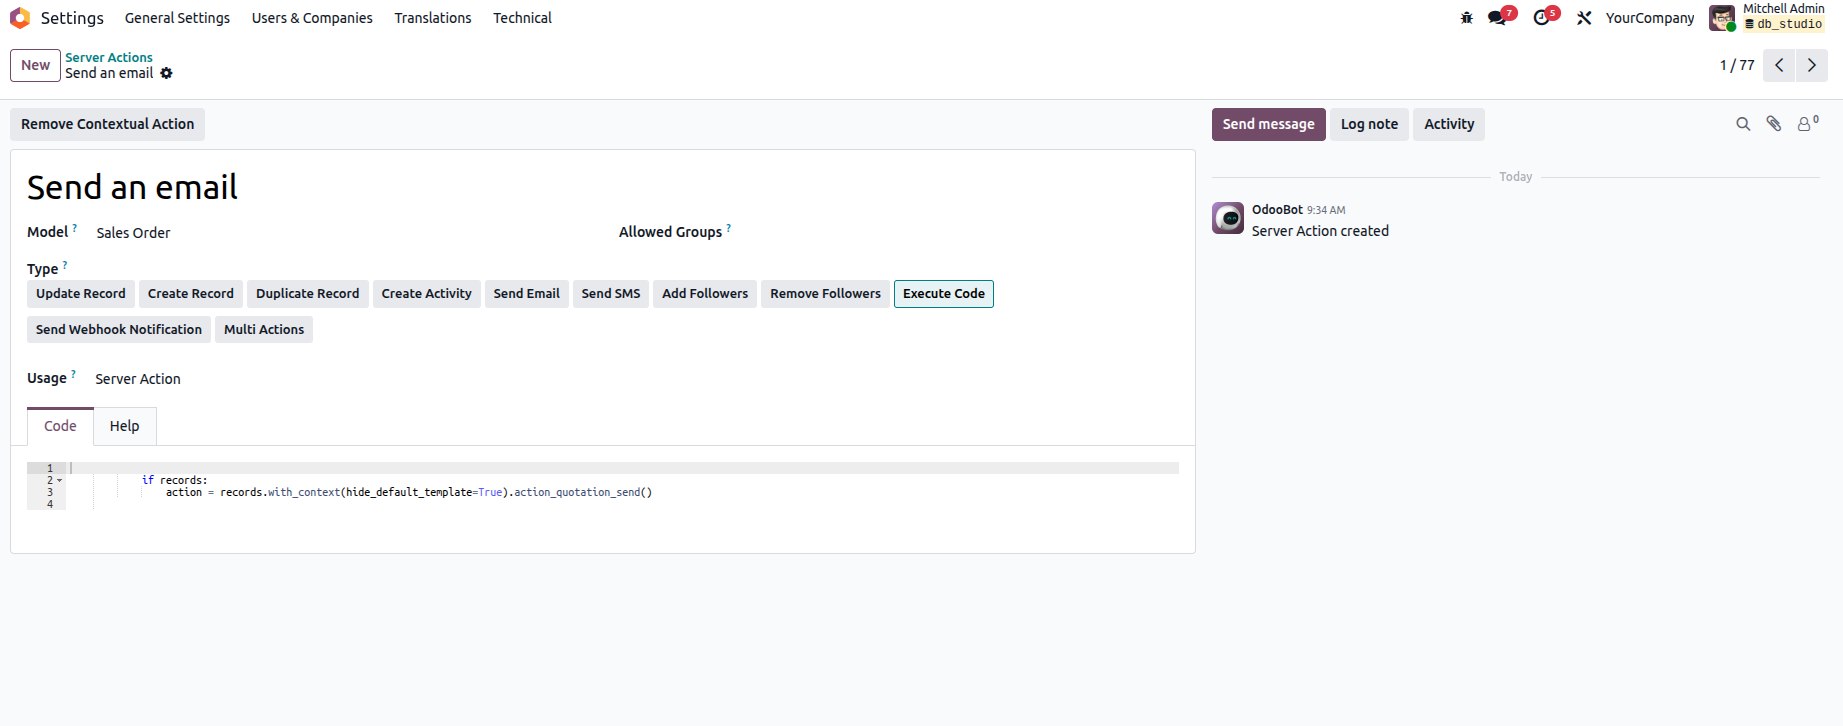
Fields in the Server Action Form
- Action Name: Provide a concise name that clearly describes the purpose of the action.
- Action Type: Defines the type of server action to be performed.
- Update Record: Choose this option if the goal is to modify an existing record, such as updating the value of a field. You must then specify which field should be updated.
- Create Activity: Select this option to create an activity when the button is clicked.
- Send Email: Use this action to send an email upon button click. You must specify the Email Template and the Send Email As option.
- Send SMS: Select this option to send an SMS when the button is pressed. This requires specifying the SMS Template and the Send SMS As option.
- Add Followers: Choose this action to add followers to the selected record. The users to be added must be defined in the Followers to Add field.
- Remove Followers: Select this option to remove followers from the record. The users to be removed must be listed in the Followers to Remove field.
- Create Record: Use this action to generate a new record when the button is clicked. You must define the Model to Create, Record Name, and Link Field.
- Execute Code: Choose this option to perform custom logic, calculations, or advanced operations. You will need to write the Python code that executes the intended functionality.
- Send Webhook Notification: Select this action to trigger an HTTP POST request to an external system (webhook). You must provide the webhook URL and define any required data to be included in the request payload.
- Execute Existing Actions: Use this option to run one or more child server actions together. Specify the server actions to be executed as part of the parent action, allowing multiple operations to run in sequence.
- Model: Select the model on which the button and server action will operate.
- Allowed Groups: Define the user groups permitted to execute this server action. Leave this field empty to allow access for all users.
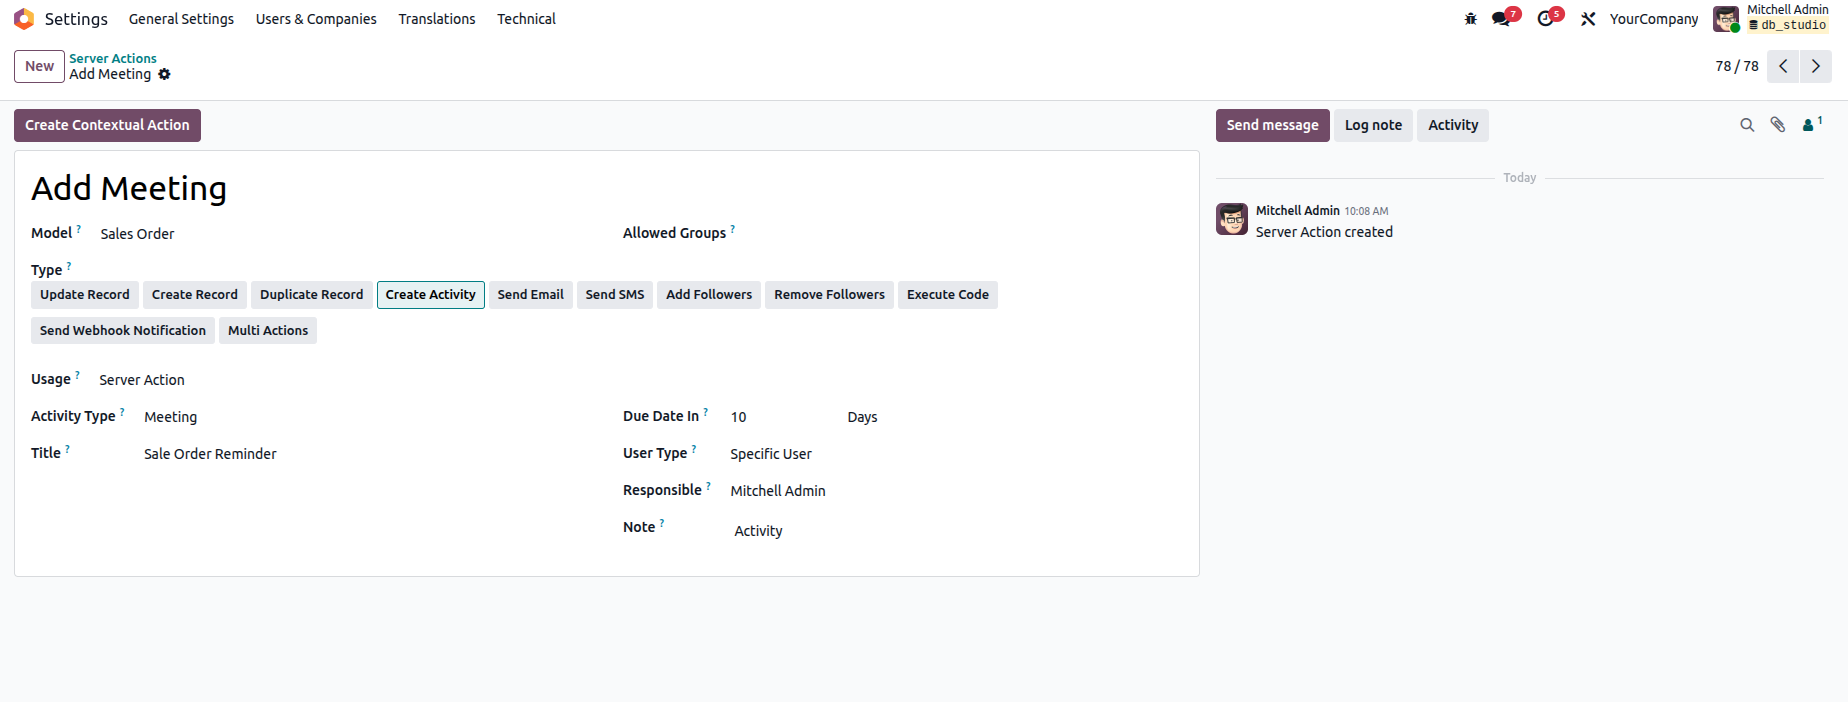
Fill in all the mandatory fields and then save the server action. After saving, the server action ID can be found in the URL, as shown below.
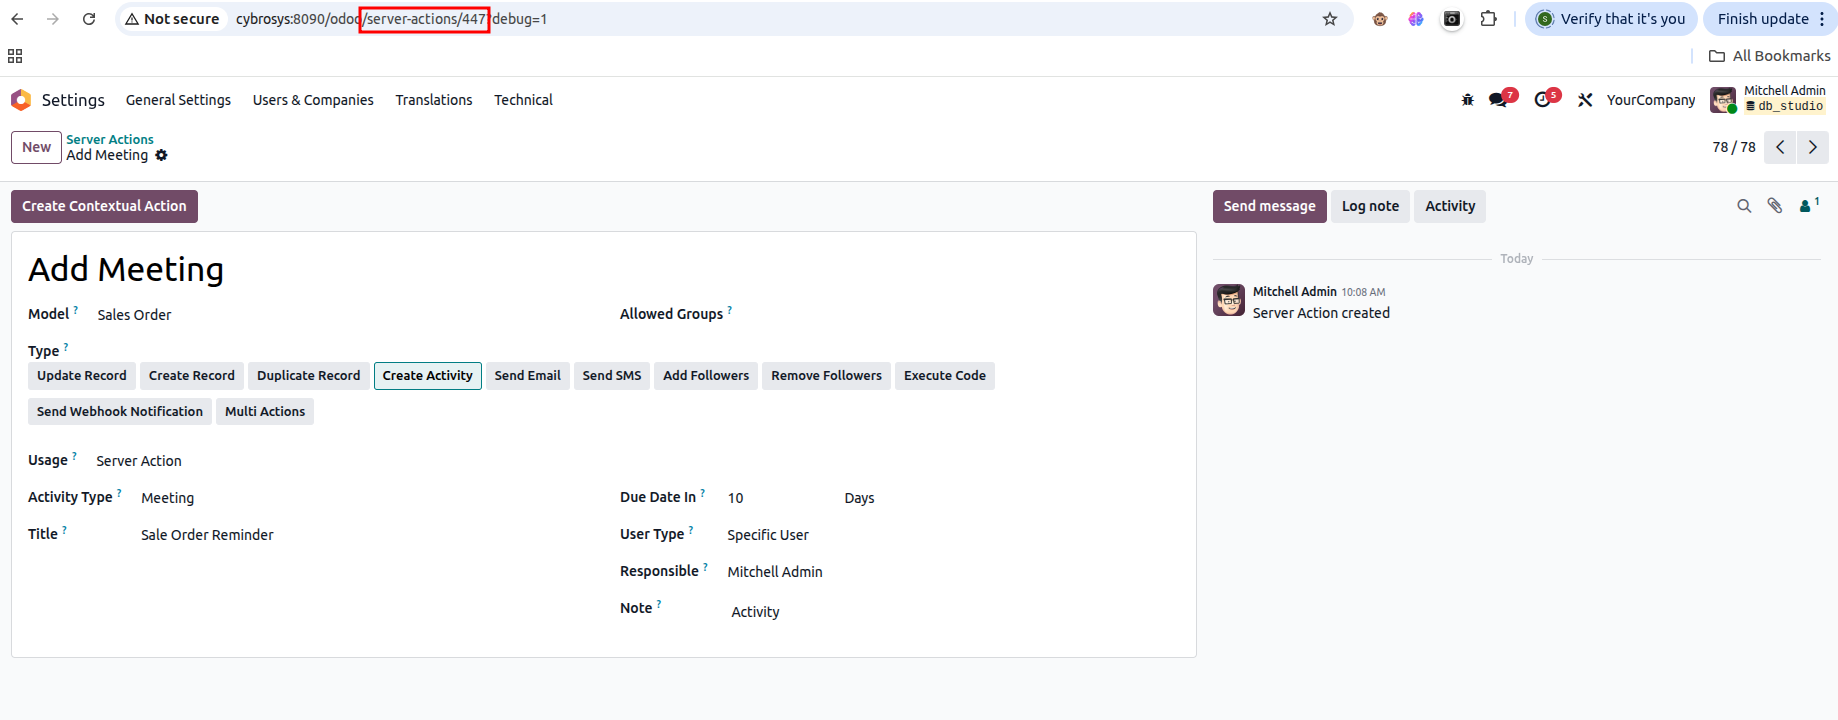
Copy the server action ID. Next, open the view where you want to add the button-for example, the Sales Order form view-and launch Studio.
There are two different methods available for adding buttons to the interface.
Method 1: Using XML Code
In the Studio interface, go to the View menu and then switch to the XML tab to apply advanced customizations, as shown below.
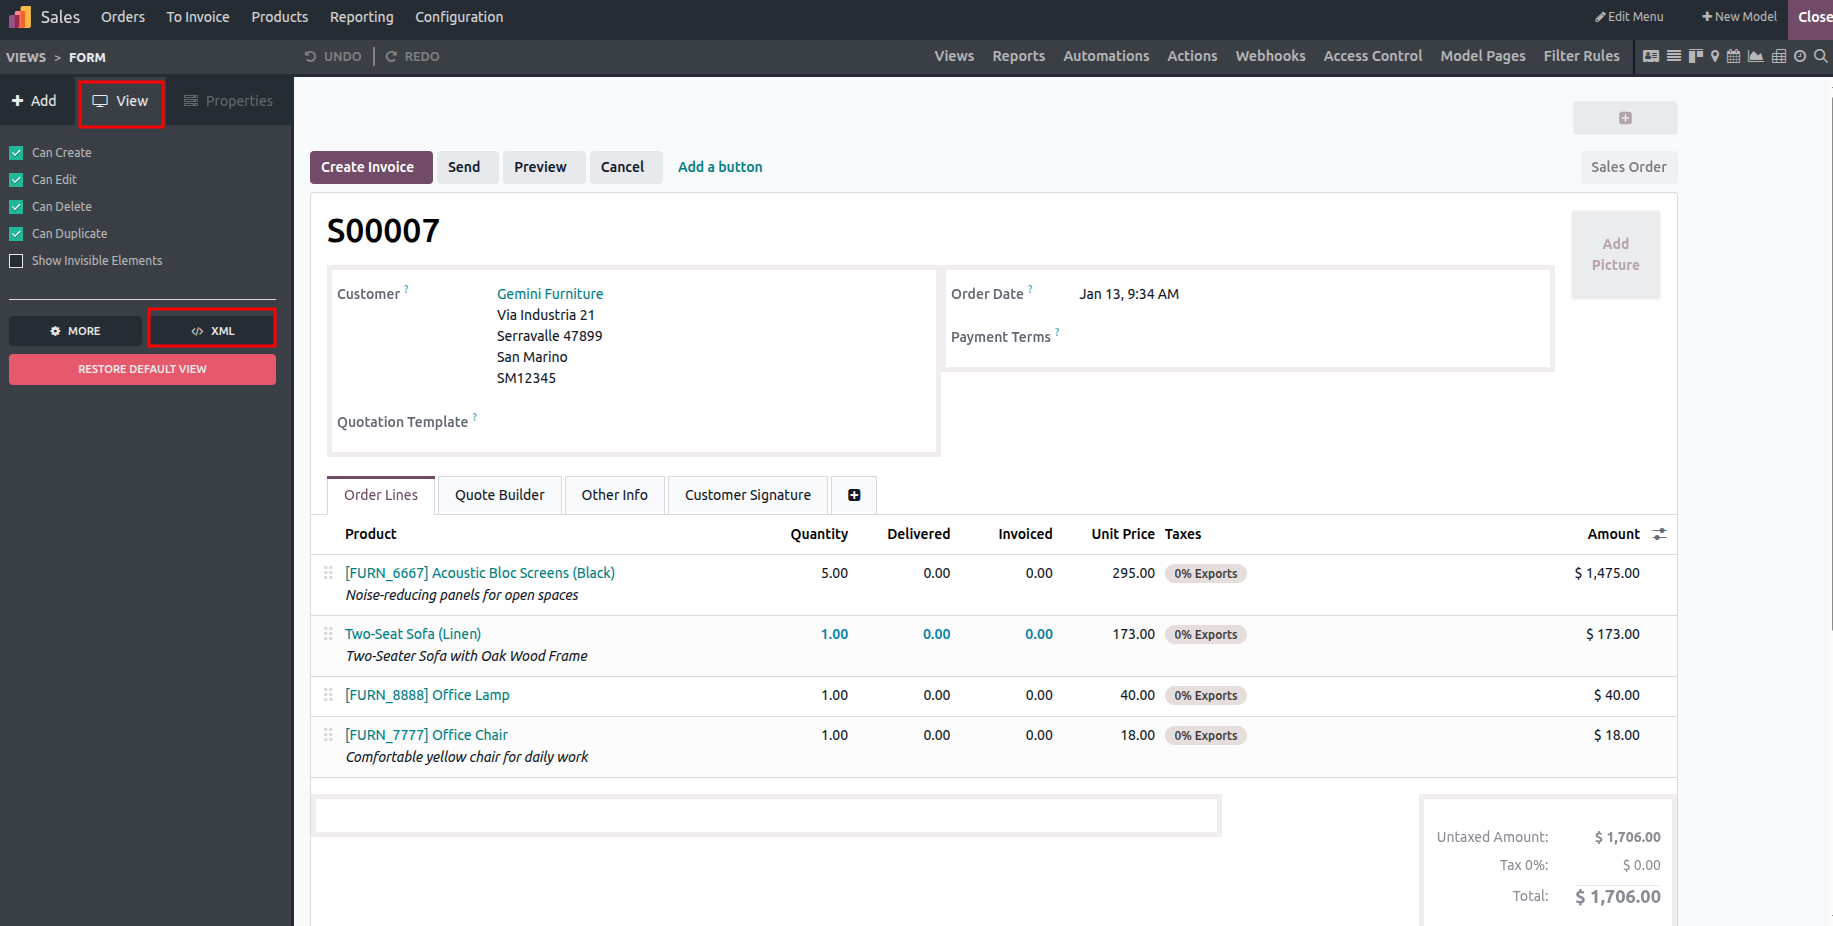
The XML structure of the selected view appears on the left side. Inside the <header> tag, you can locate the existing XML definitions for the buttons already available in that view.
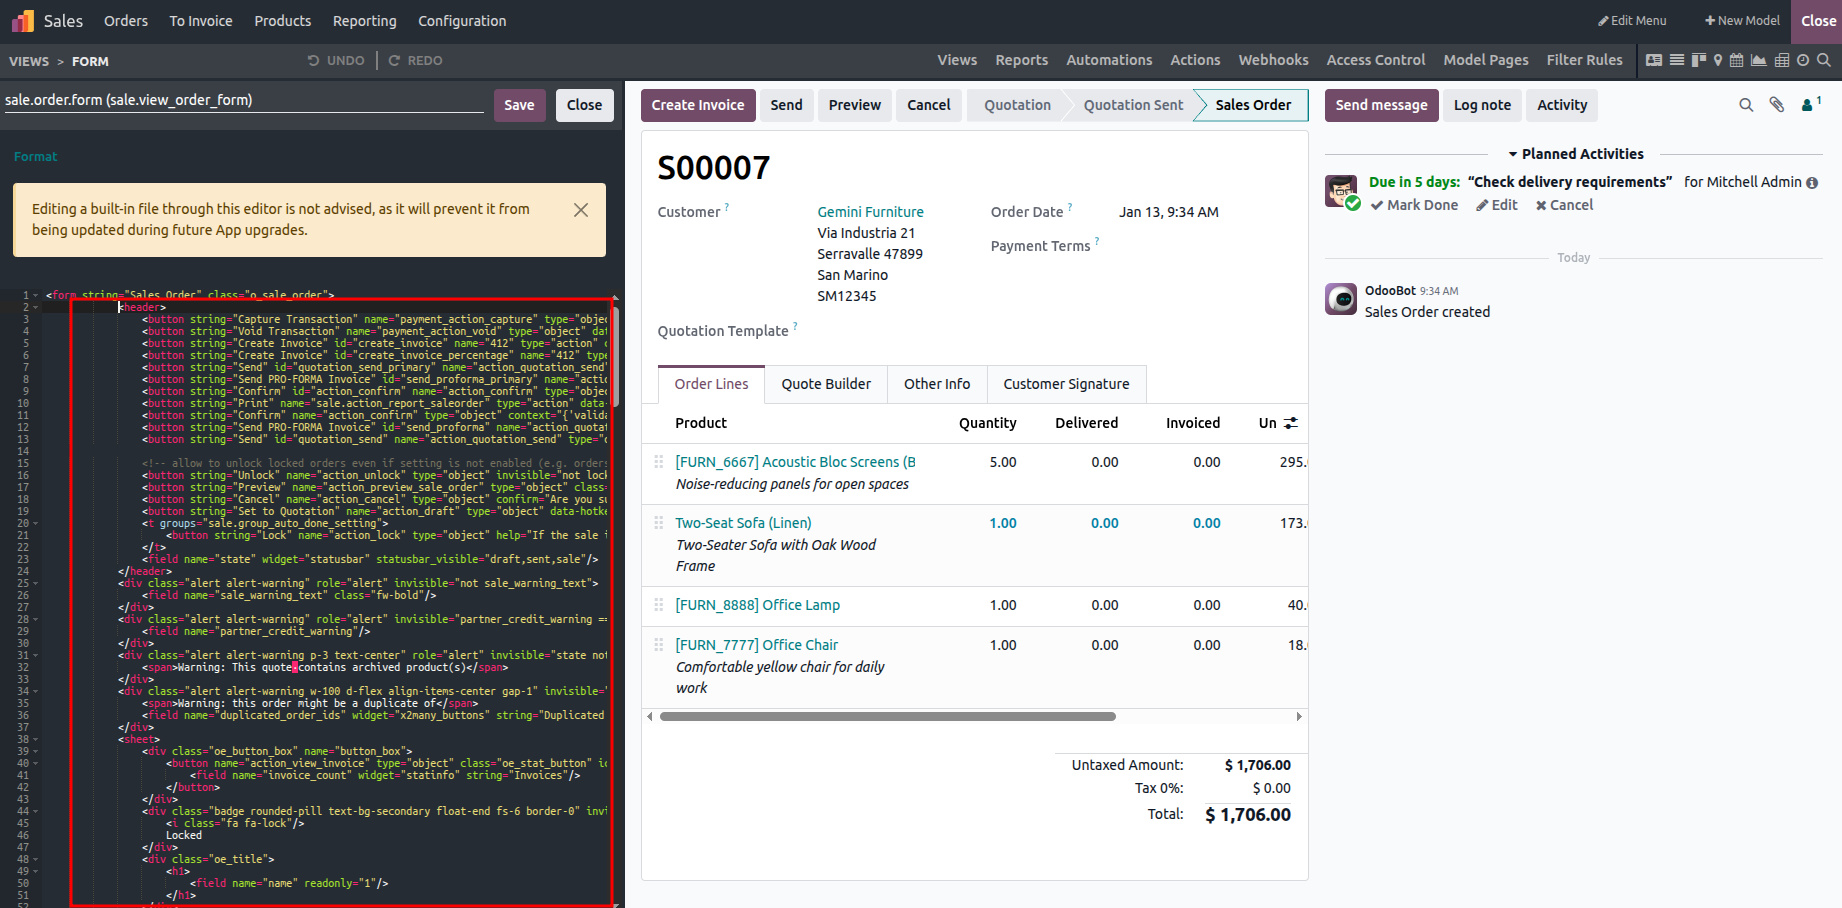
Add the new button inside the <header> section, following the pattern shown in the example below. Make sure to use the ID of the created server action as the value of the button's name attribute.
<button string="Create Meeting" name="447" id="create_meeting" type="action"/>
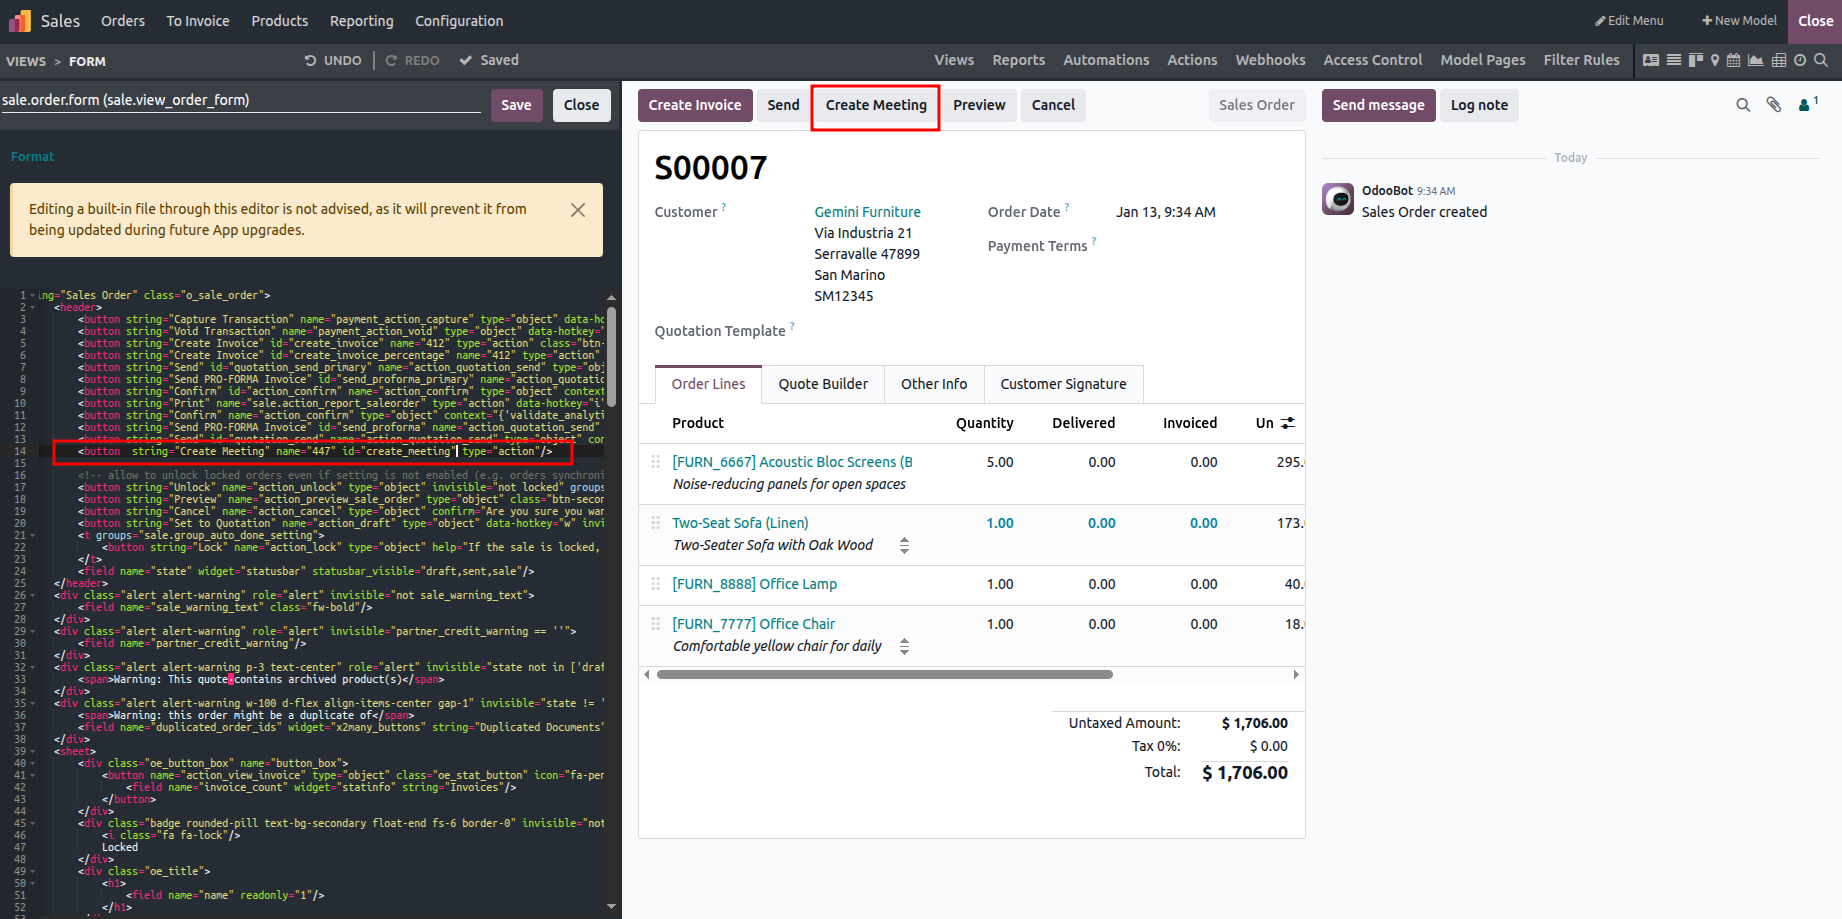
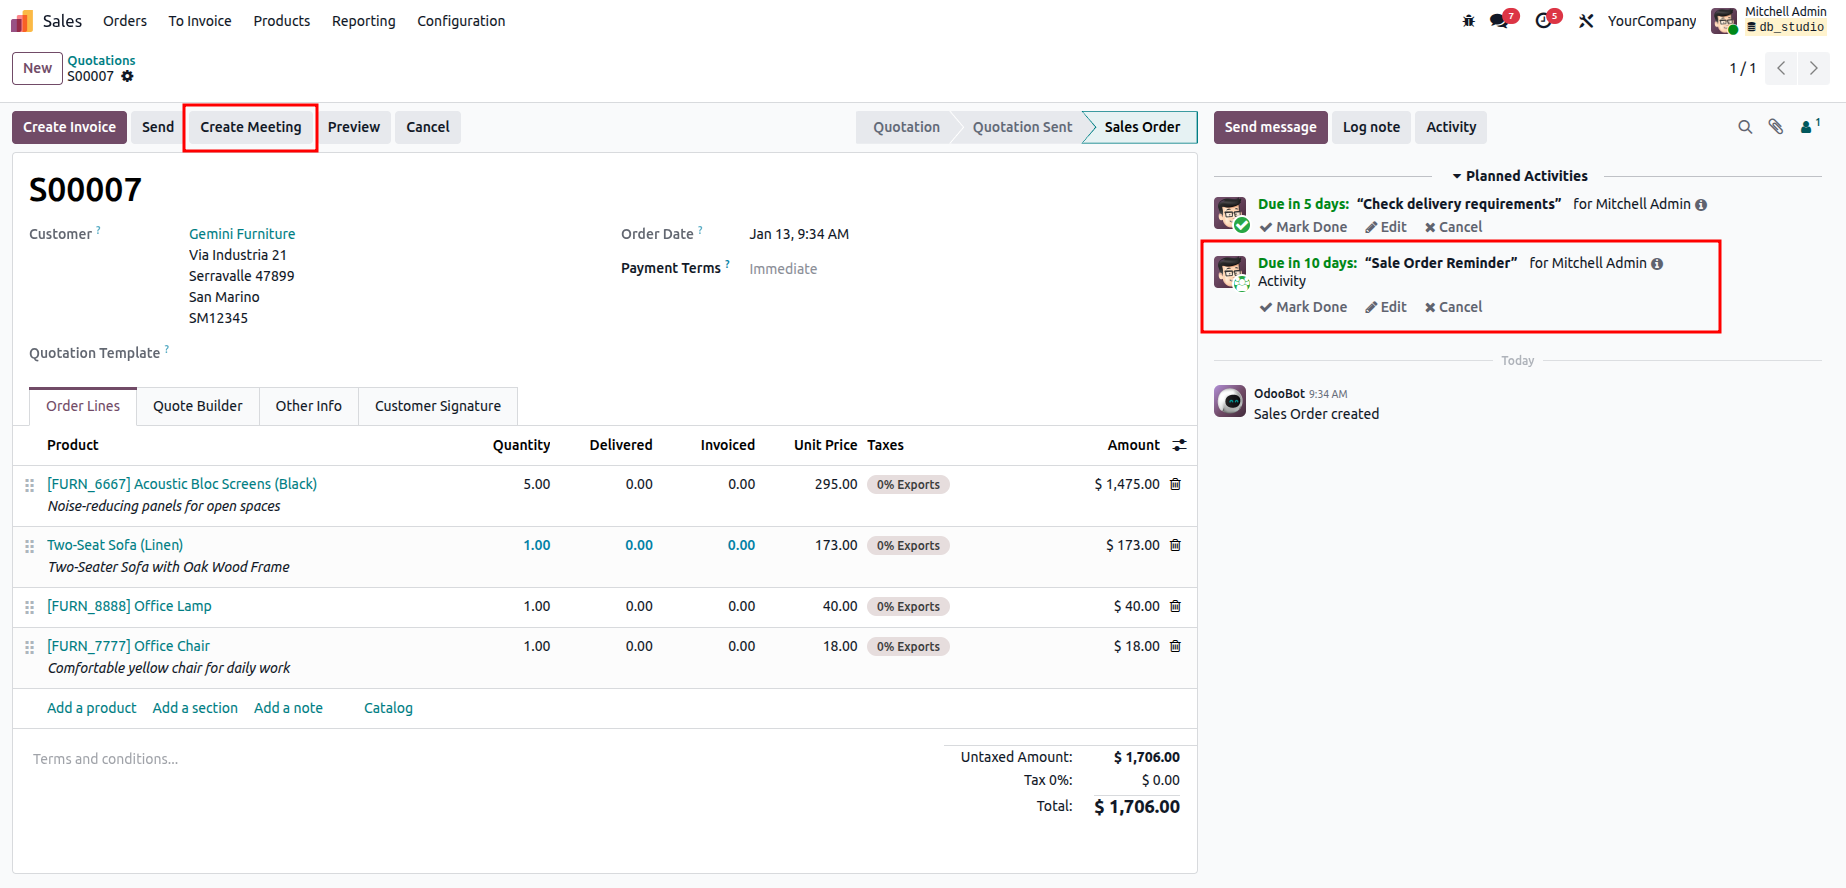
After completing the above steps, the newly created button will appear in the selected view. When the button is clicked, it will execute the configured server action, as illustrated below.
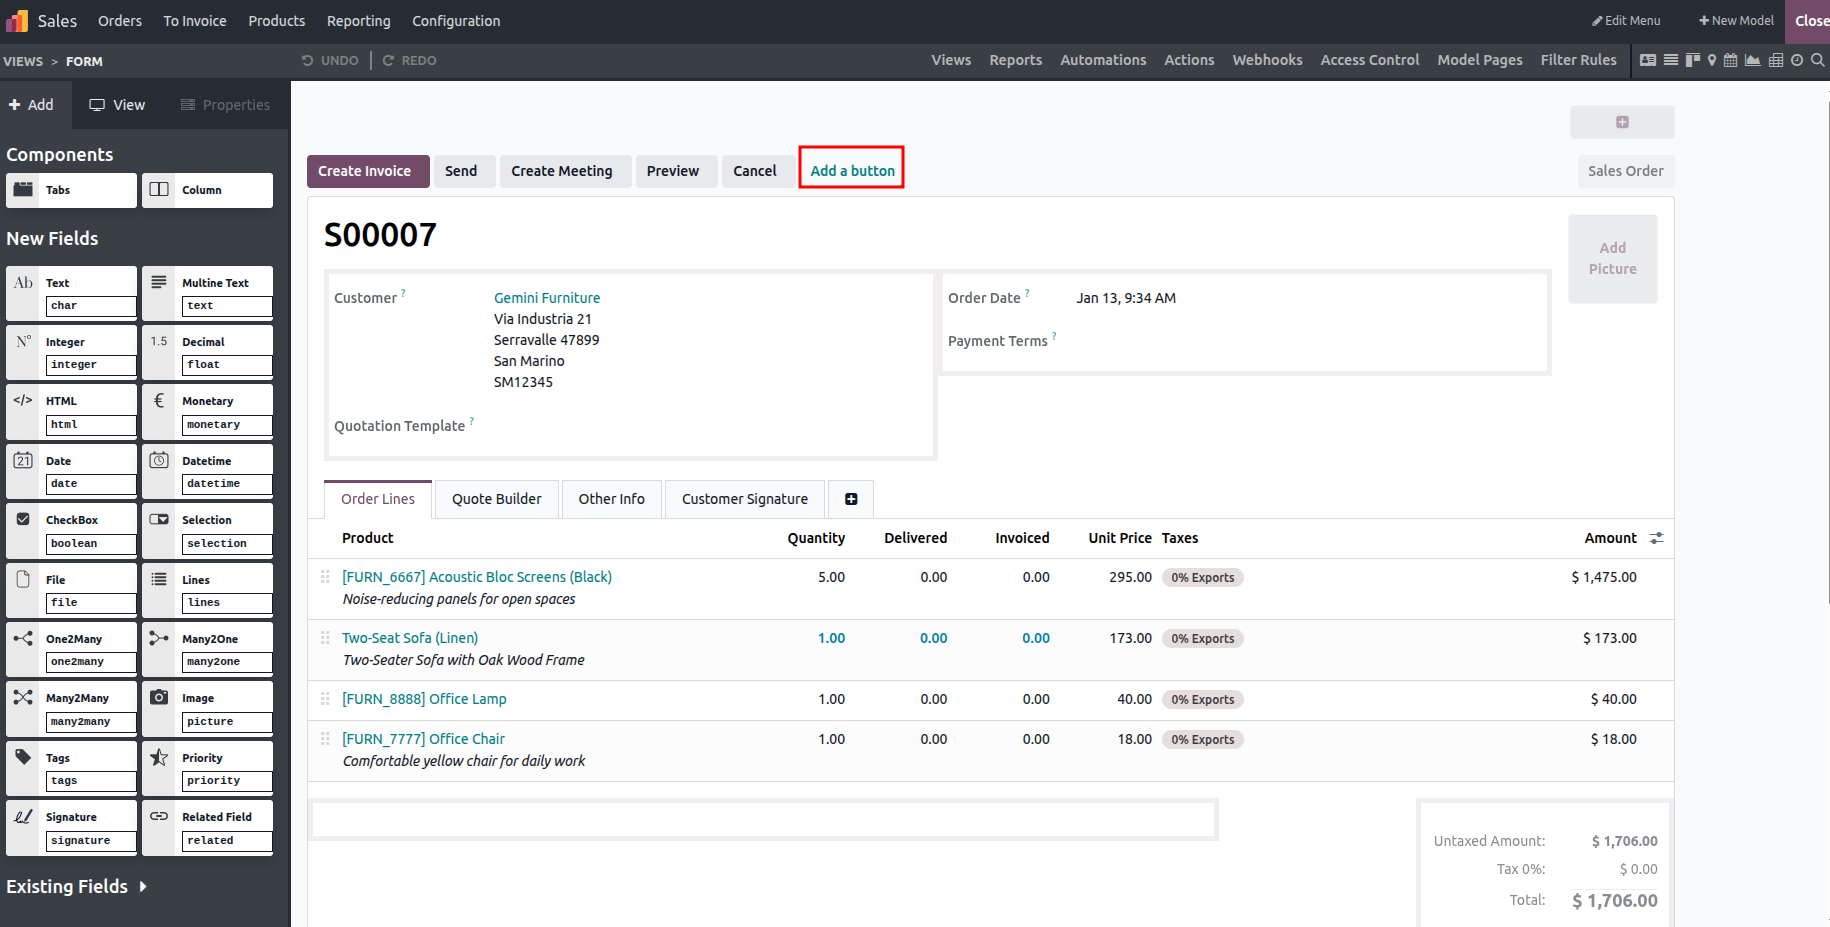
Using Add a Button
Within the Sales Order Studio view, click "Add a Button" to insert a new button.
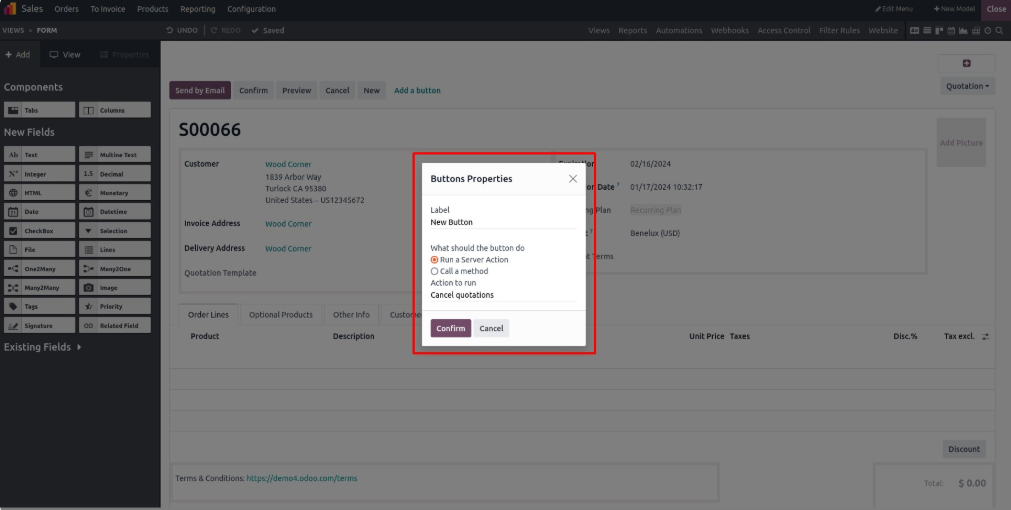
Next, provide a label for the button, choose the action type, and select the action that should be executed.
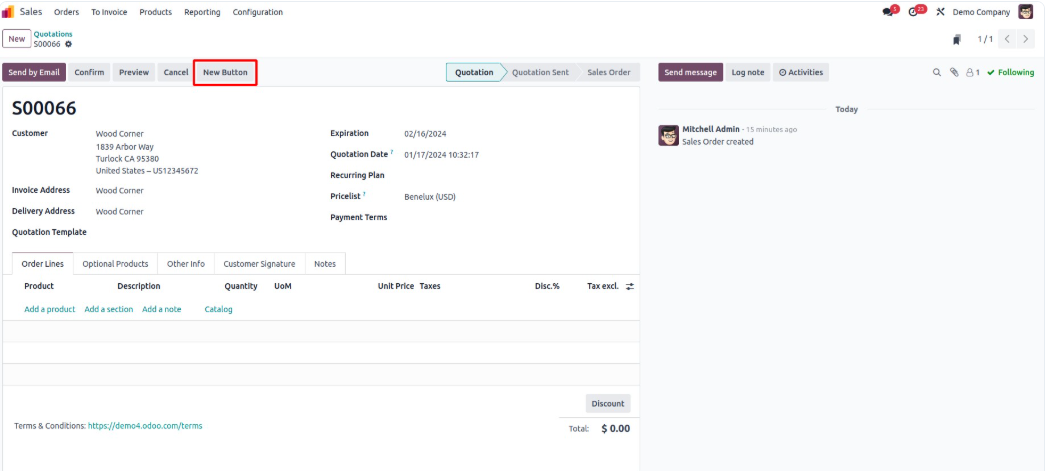
The button has now been added to the view and appears as shown below.
In summary, Studio Book V19 enables users to easily add custom buttons using XML, allowing targeted actions to be executed directly from the interface. This approach improves flexibility and enhances the overall functionality of customized views.