Configuration Panel
To manage the invoices that are available in the module, select the Invoice option. This is where the Configuration Panel is located, where you may set all the details required to manage an invoice.
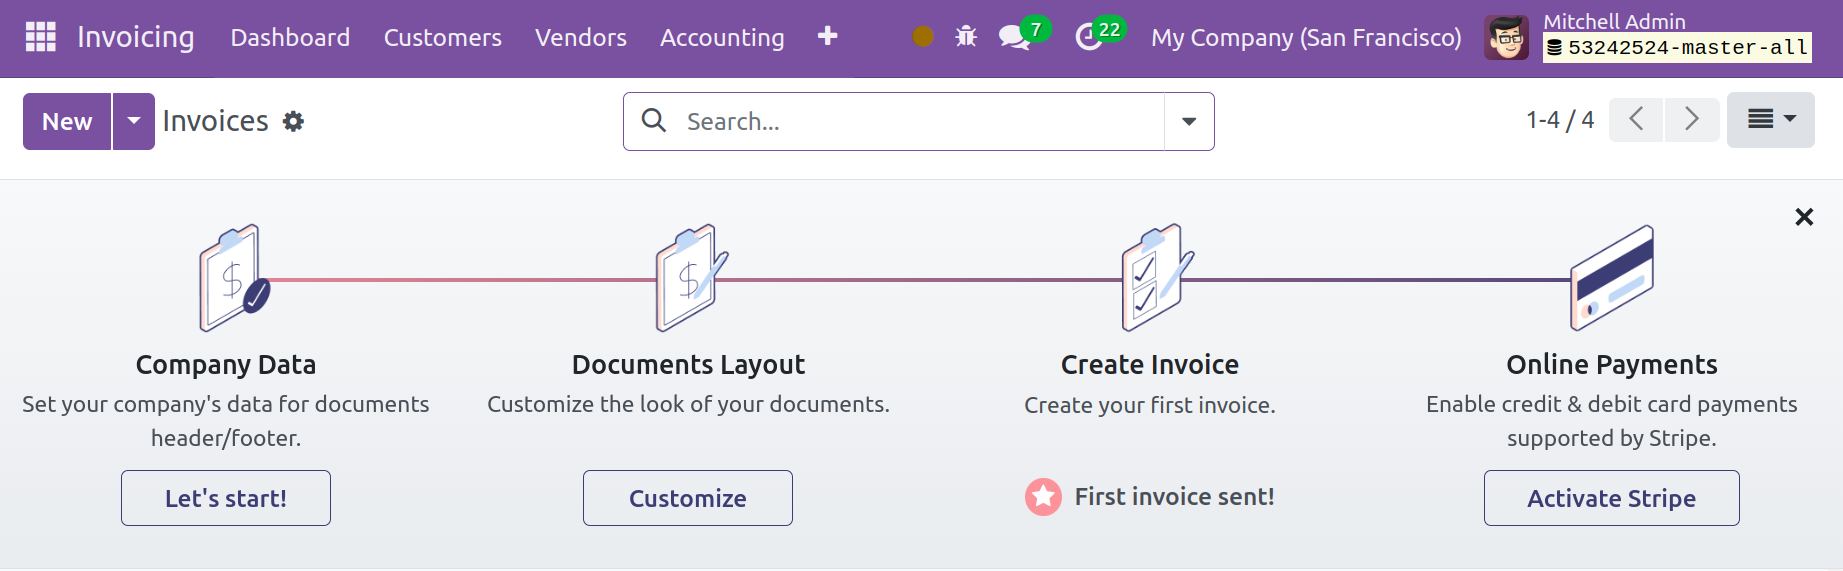
From this panel, you may set the Company Data, Document Layout, Invoice and Online Payment.
To configure the data for your firm, click the "Let's Start" option. The header and footer of the papers you produce in this module will contain this information. You will see a new pop-up window to provide your company's details, as seen in the image below.
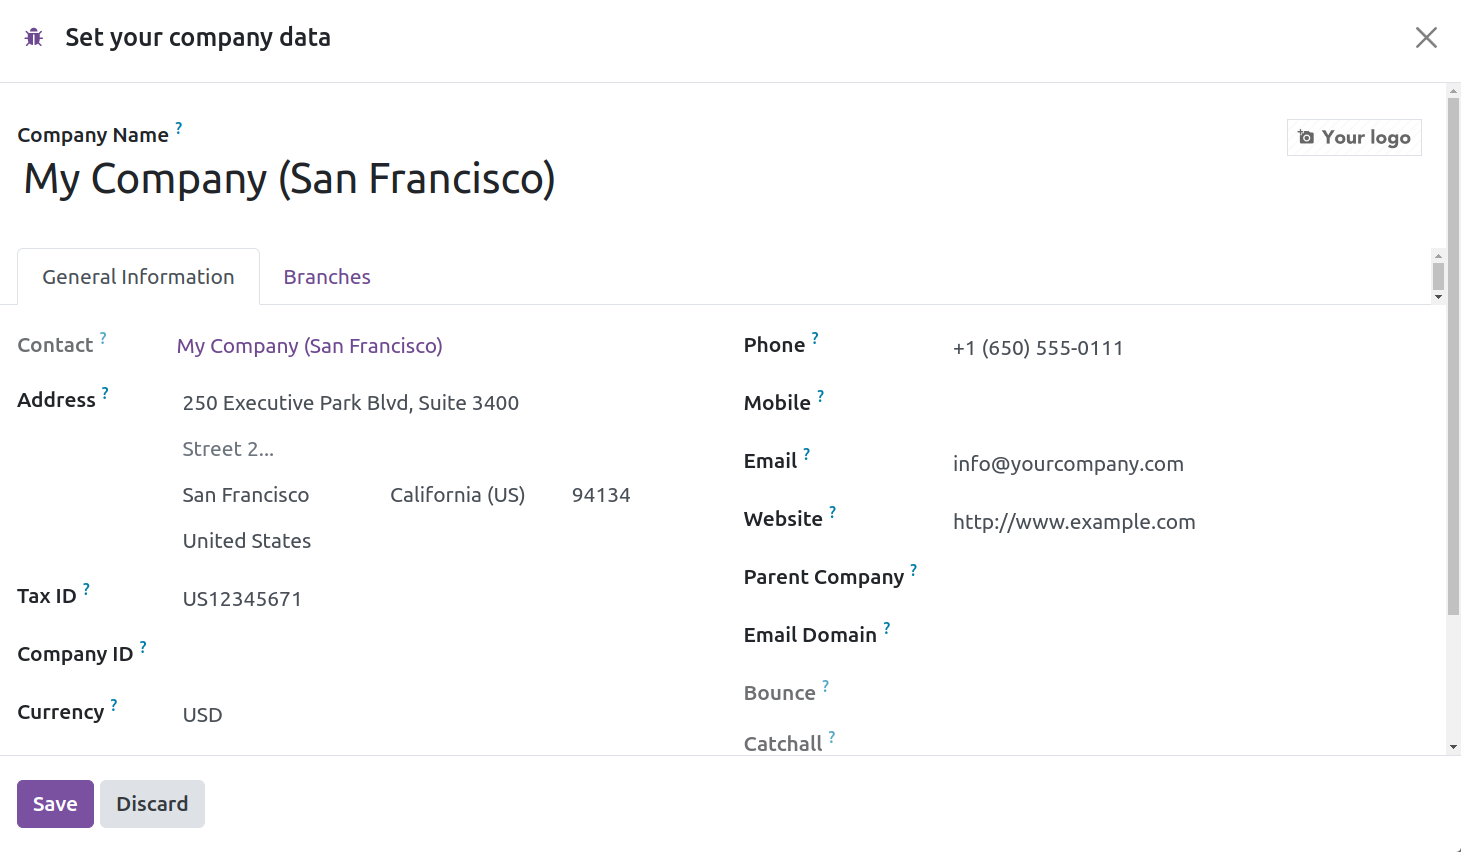
Enter the company name and logo in the designated spaces. You can add Contact, Address, Tax ID, Company ID, Currency, Phone, Mobile, Email, Website, Parent Company, and Company Favicon details under the General Information tab. Once the setup is finished, use the "Save" button. Your system will store these particulars as corporate data.
The Company Data setup is finished. Using the Customize button found in the Invoice Layout session, you can now alter the appearance of your invoices. The pop-up window that appears below allows you to alter the way your invoices are laid up.
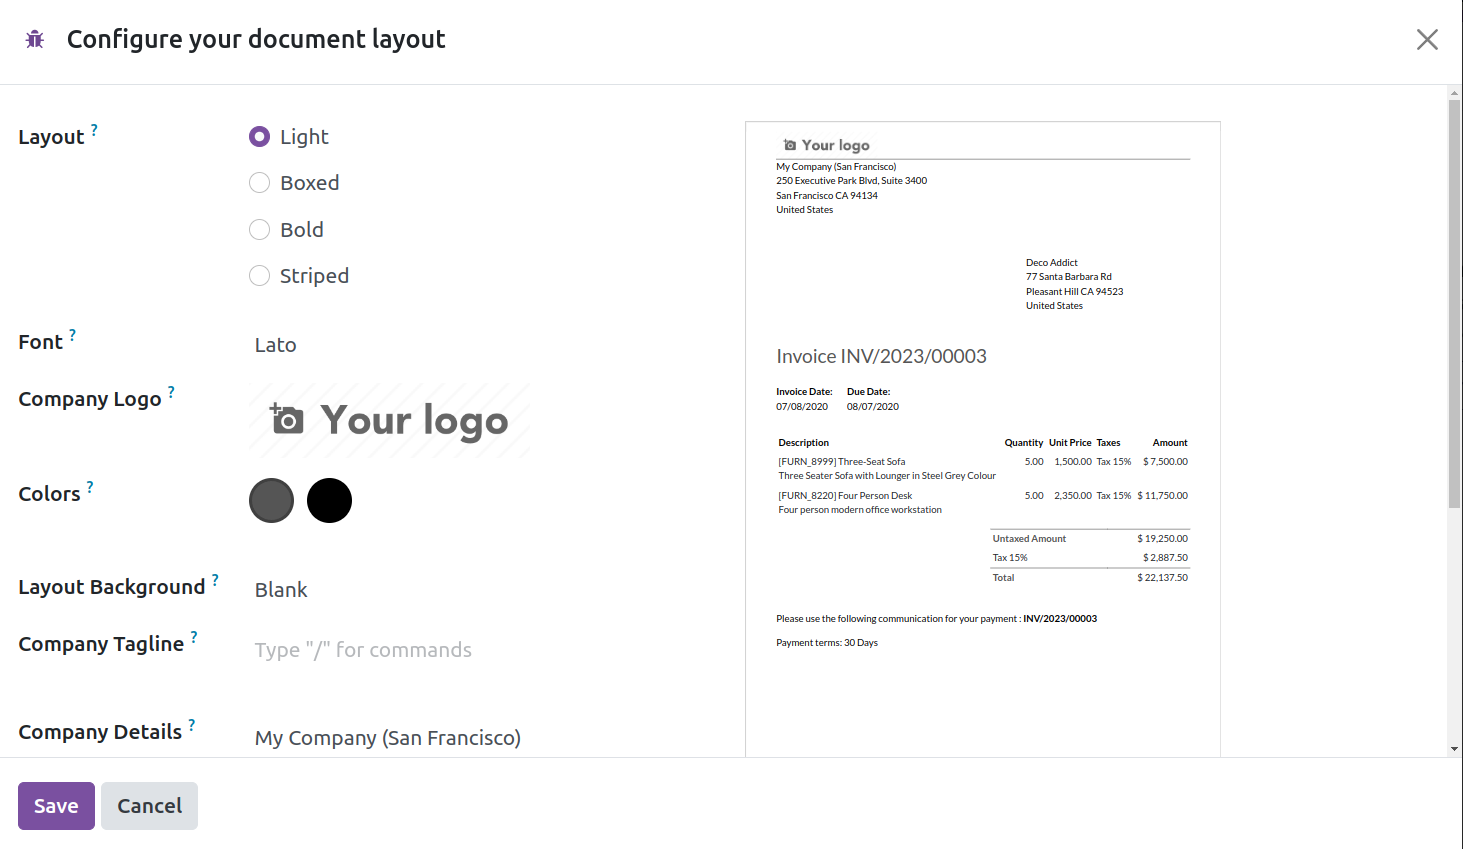
You can choose appropriate Layouts from the available options for your invoices. It might be Bold, Stripped, Light, or Boxed. Define the Font, Company Logo, Colors, Layout Background, Company Tagline, and Company Details in the designated sections. A preview will appear on the right side of the window based on the parameters you choose. Once you have chosen the layout that best suits your needs, you may click the Save option. You can use this platform to create new invoices after the configuration is complete.
Customer Invoices
You will have a dedicated platform to manage all of your invoices in the Odoo 17 Invoicing module. Odoo provides a variety of ways to automate the process of creating invoices based on the operations you oversee and the modules you utilize. For instance, when you approve a sales order, Odoo will automatically generate a draft invoice in the Sales module. Based on the sales order, the draught invoice's available details are automatically filled in. In this instance, manually entering the details is not necessary. Sending the invoice to the relevant customer is all that is required. All such invoices from various modules will be gathered and recorded via the Customer Invoices menu found in the Odoo Invoicing module. This software allows you to handle all of these invoices in one location. Additionally, you can manually create new invoices here.
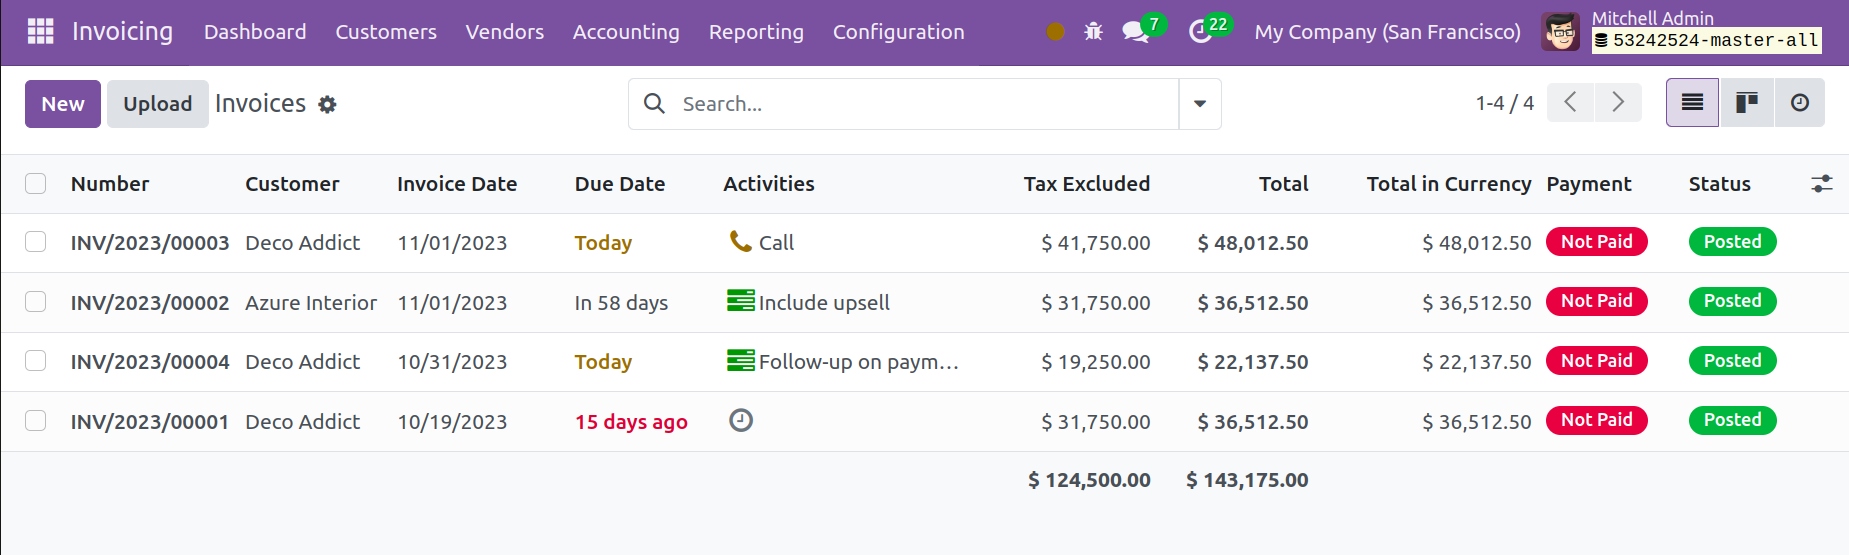
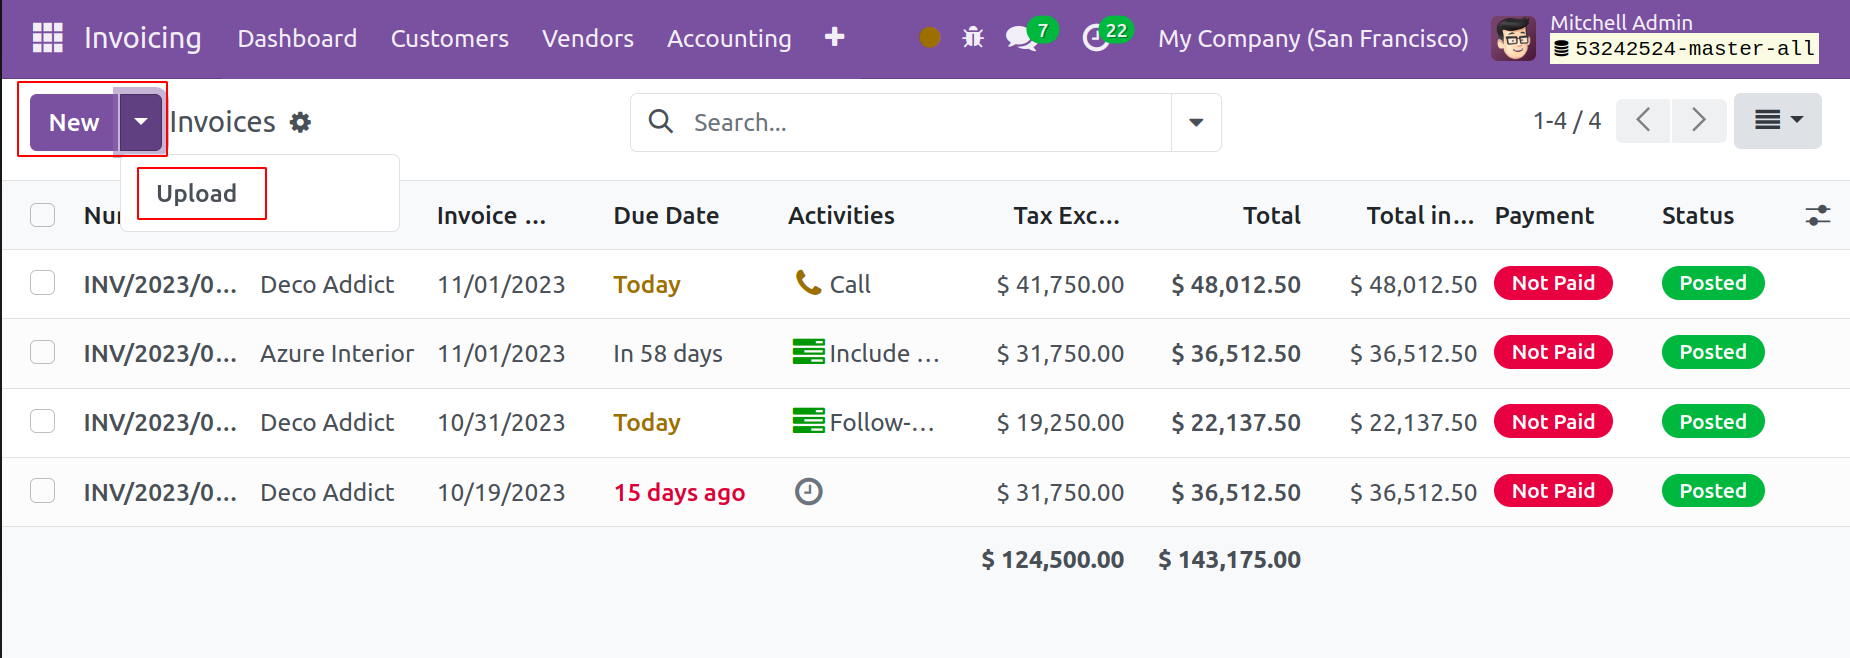
The list view of the invoices that are stored in the module is displayed in the screenshot above. The number, customer, invoice date, due date, activities, tax excluded, total, total in currency, payment status, and status are all previewed in this platform's list view. You may also view this window in Kanban view by clicking on the corresponding icon. You can click on the symbol in the screenshot below if you would want to add extra information to the list view.

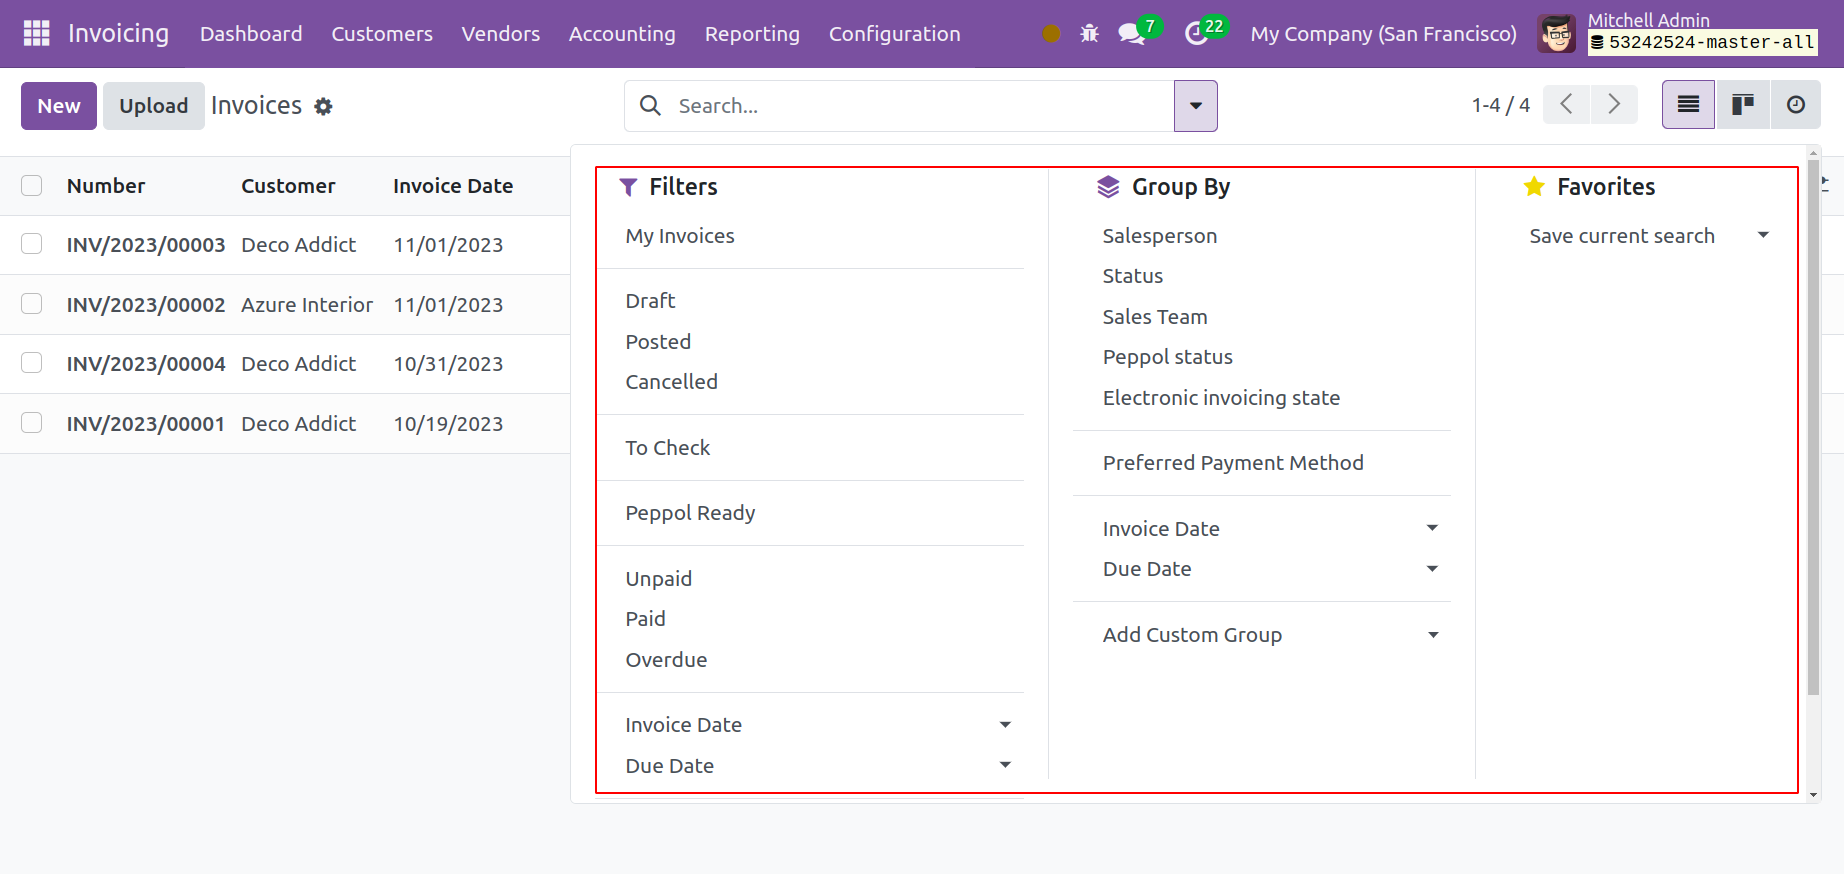
You can select additional choices from this page to include them in the invoices' list view. The following options are available: To Check, Payment Status, Electronic Invoicing, Salesperson, Sales Team, Activities, Company, Tax Excluded, Tax, Total, Total in Currency, Due Date, Salesperson, Sales Team, Reference, Source Document, and Status. Using the default filters, you can refine the invoices according to My Invoices, Draft, Posted, Canceled, To Check, Unpaid, Paid, Overdue, Invoice Date, and Due Date. You can utilize the Add Custom Filter option to create more filters. Using the default Group By settings, you can organize the available invoices by Salesperson, Status, Sales Team, Electronic Invoicing State, Preferred Payment Method, Invoice Date, Due Date, and Referrer. Use the Add Custom Group option to personalize the grouping options.
The total invoiced amount and the tax-excluded amount will also be displayed at the bottom of the list. You can upload the invoice from your system with the help of the Upload button. In the module, a new invoice can be created by clicking the New button.
After selecting the New button, the invoice creation window displays in this form view. Let's use this form to draft an invoice. You can enter the customer's name and delivery address in the corresponding fields. The Invoice Date field allows you to add the invoice date. To set it on the relevant journal items, you can add the Payment Reference in the designated field. As soon as you mention the Customer data, the Payment Terms will show up in the form according to the configuration. If the chosen customer's payment term isn't set up, you can create a Due Date for this specific invoice, which will specify when it must be paid. In the relevant field, mention a good journal to keep the accounting information.
Three tabs pertaining to the Invoice Line, Journal Item, and Other Info will be displayed to the user when viewing the invoice.
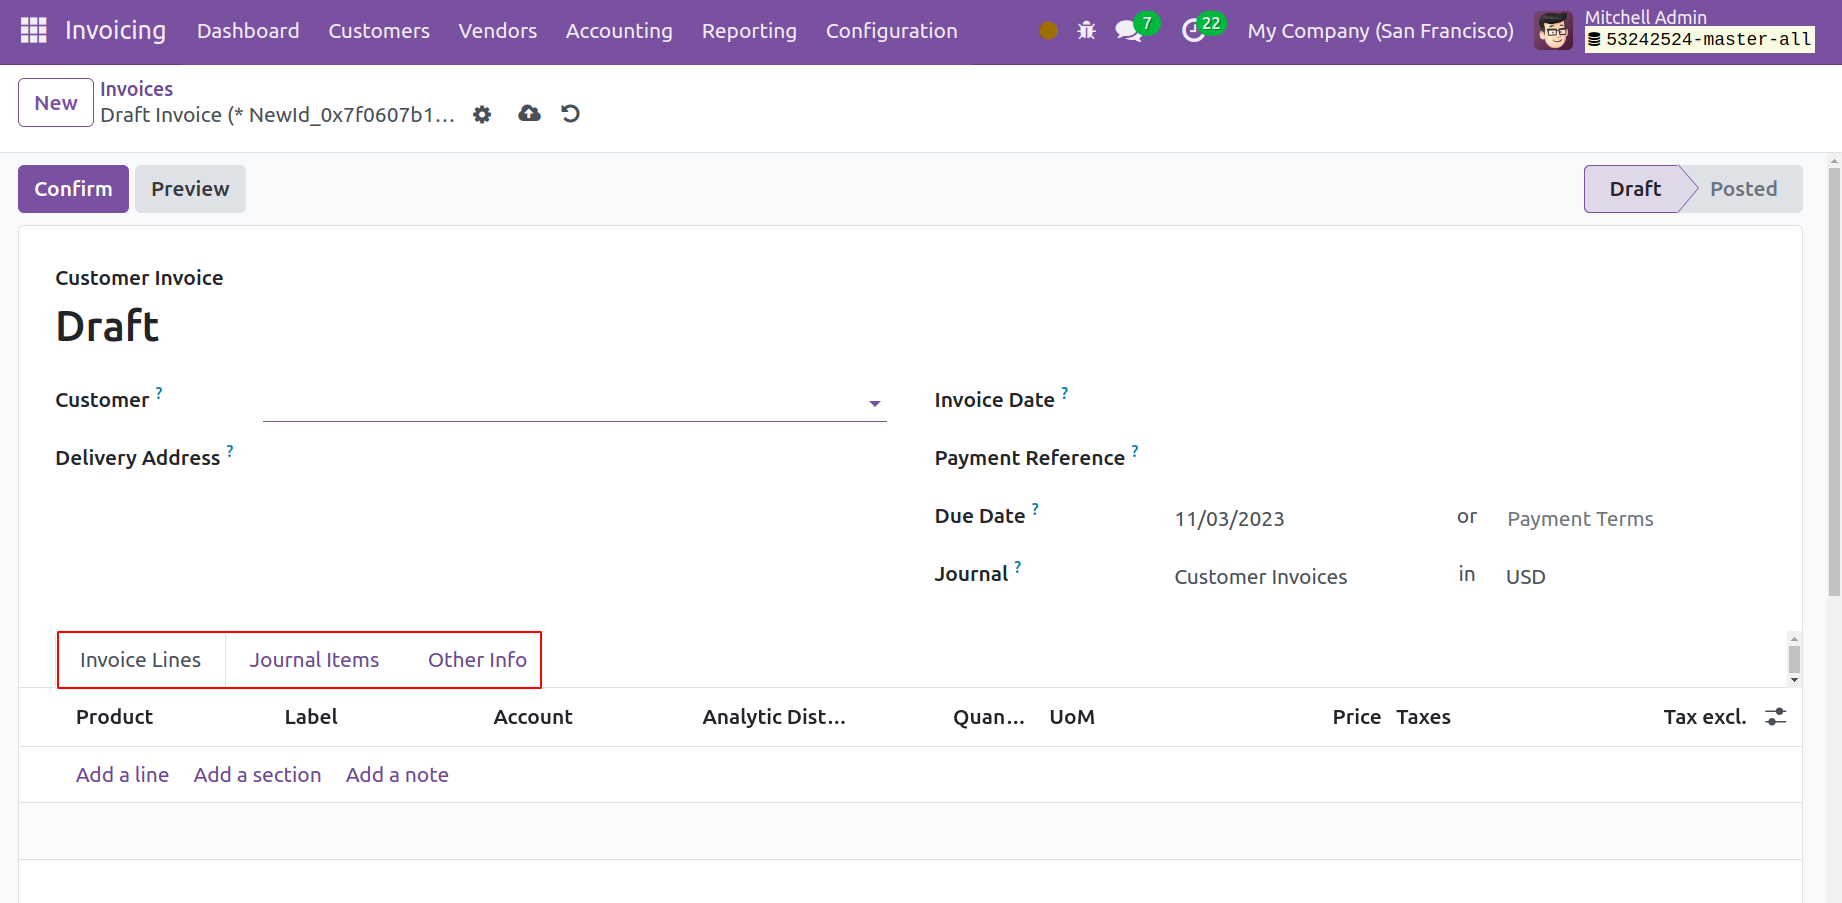
Using the Add a Line option, navigate to the Invoice Lines tab and add the product you wish to invoice. Product, Label, Account, Quantity, UoM, Price, Taxes, and Subtotal are some of the product details. The information of the Untaxed Amount, Taxes, and Total will appear at the bottom of the tab once you have completed the Invoice Line. The Add a Section button allows you to add parts to the invoice line. You can utilize the Add a Note option to add notes to this field. To further describe the terms and conditions applied to this specific invoice, you will also find a Terms & Conditions section in this tab.

The corresponding journal items for the products you specified in the invoice line will be displayed on the Journal Items tab. The journal items set up for the aforementioned products will determine how the fields are automatically filled up.
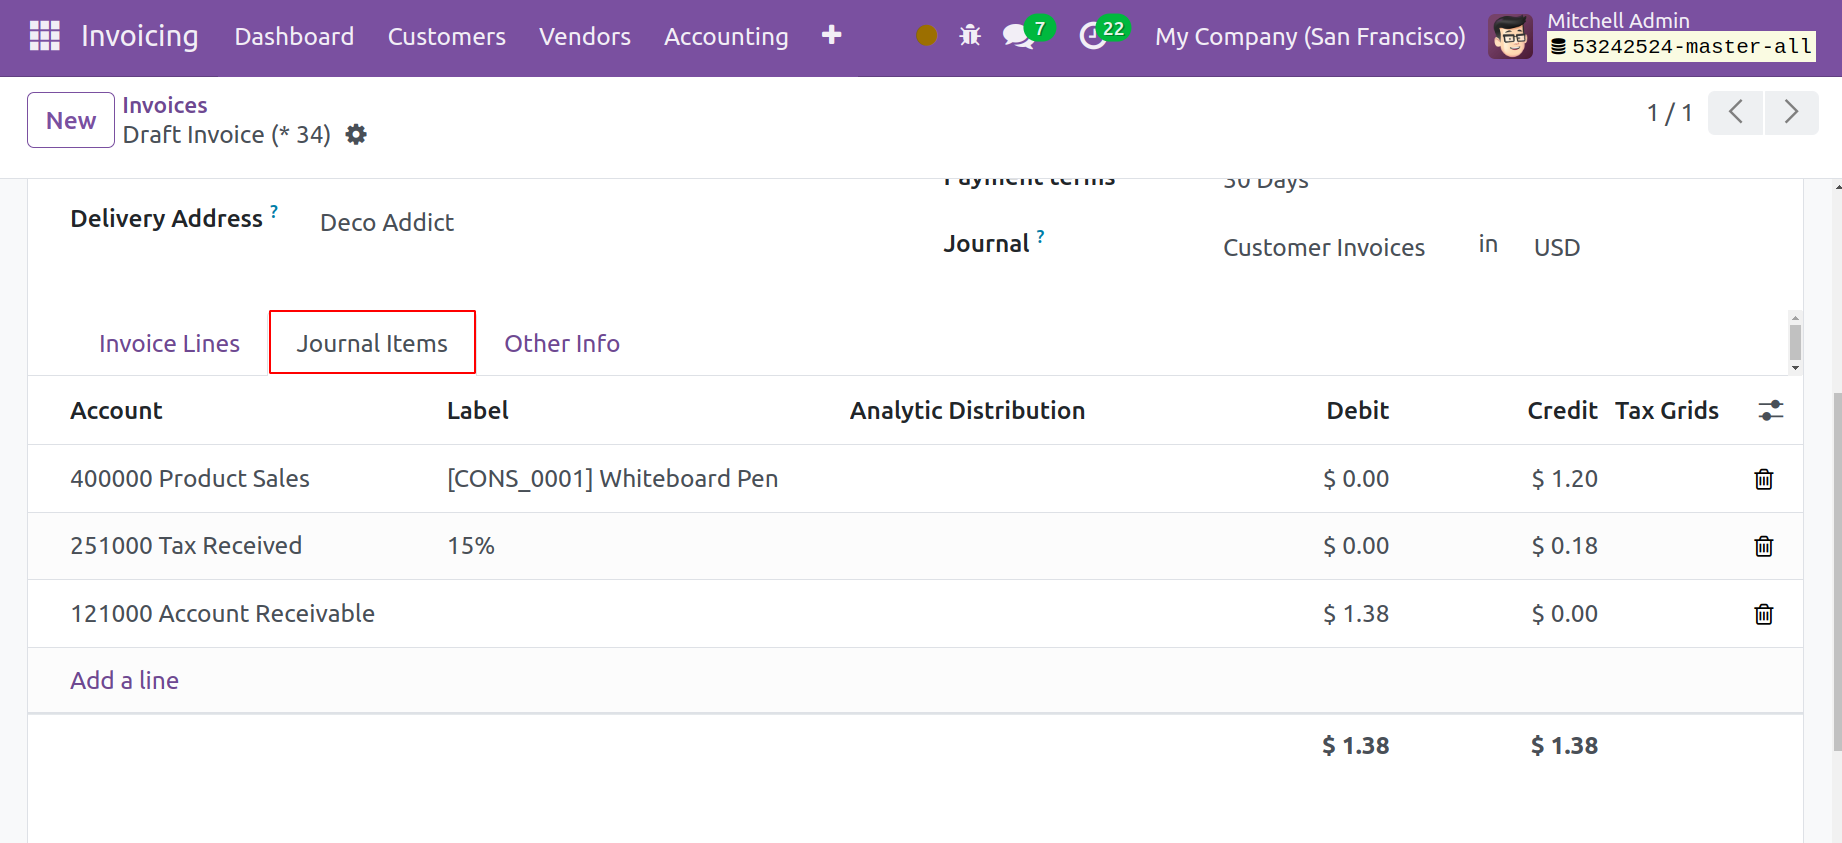
The Account, Label, Debit, Credit, and Tax Grids are among the details. Use the Add a Line button to add more journal items.
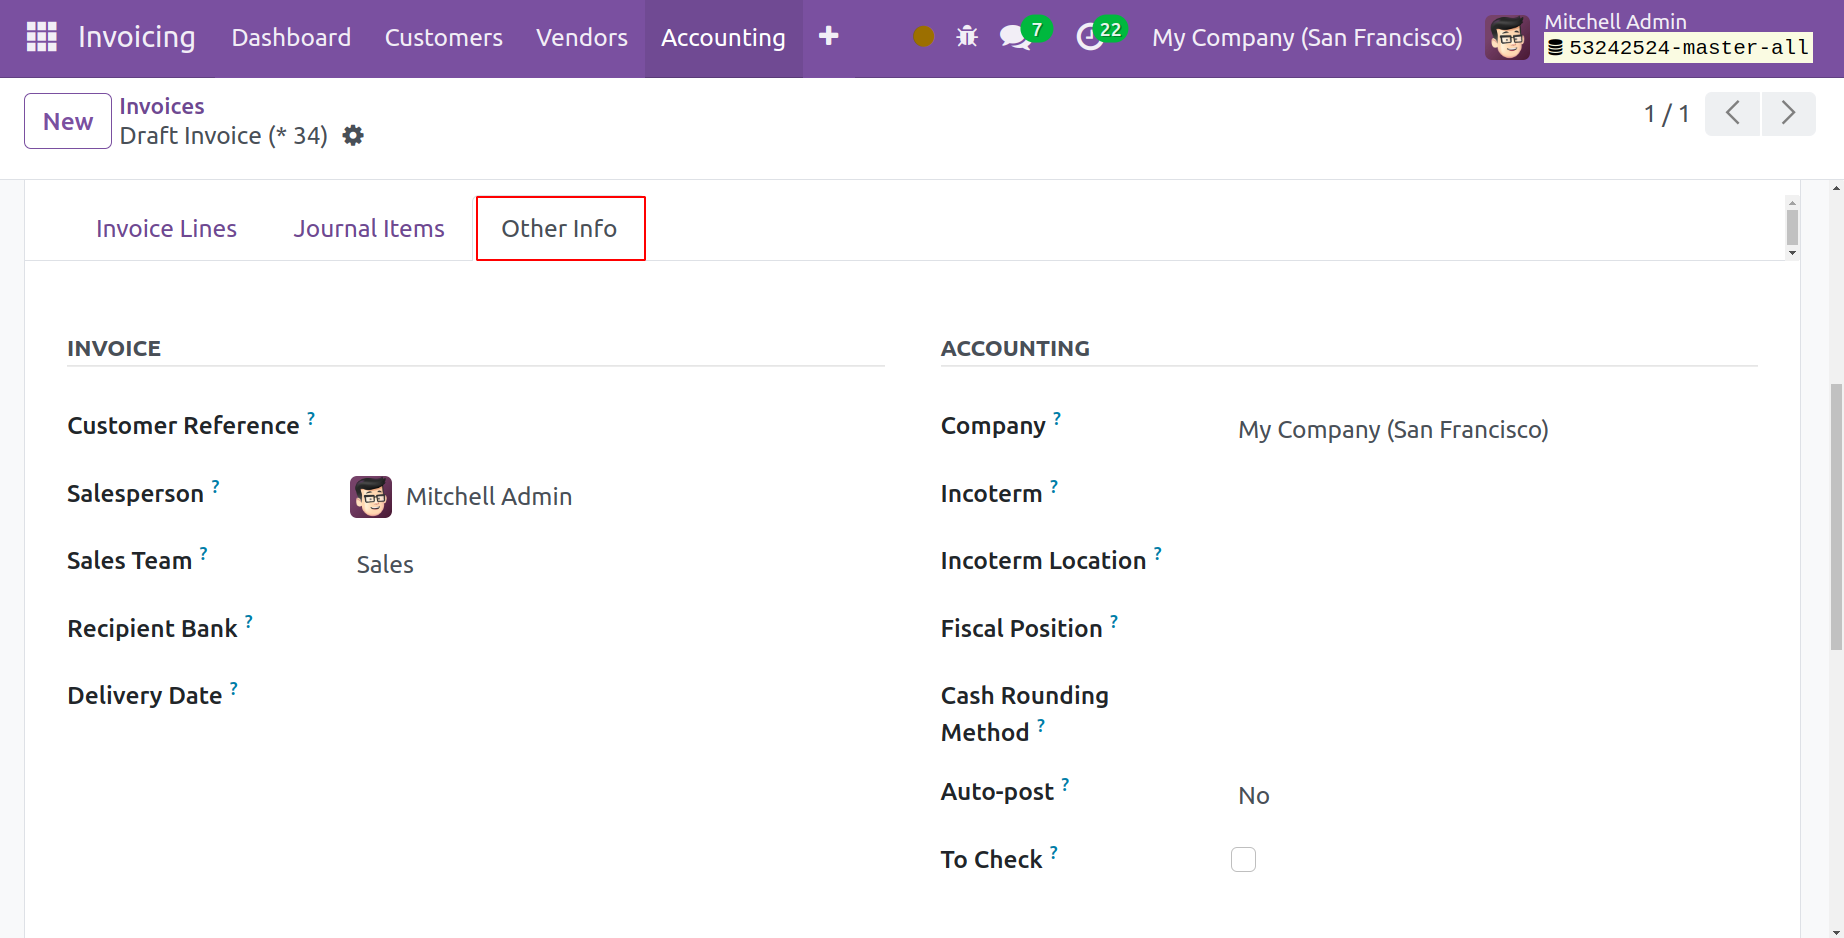
On the Other Info page, you will find areas to fill out for marketing, accounting, and invoices. You can provide the client reference for this specific invoice in the client Reference section. In the corresponding areas, you can designate a Salesperson and Sales Team to handle this invoice. Enter the bank account information to which the invoice money will be credited in the Recipient Bank section.
Under the Accounting section, the corresponding field will reveal the Company details. You can specify in the corresponding sections the Incoterms used for foreign transactions and the Fiscal Position to adjust taxes and accounts for specific clients or sales orders/invoices. By choosing the time frame from the Auto Post area, you may automatically post this entry. You can choose the No option from the Auto Post section if you would rather do it by hand. You can use the To Check section to indicate that you are unsure about the information that was included in the invoice when it was created. If this field is enabled, it means that the move needs to be verified again. The draft invoice has finished being created.
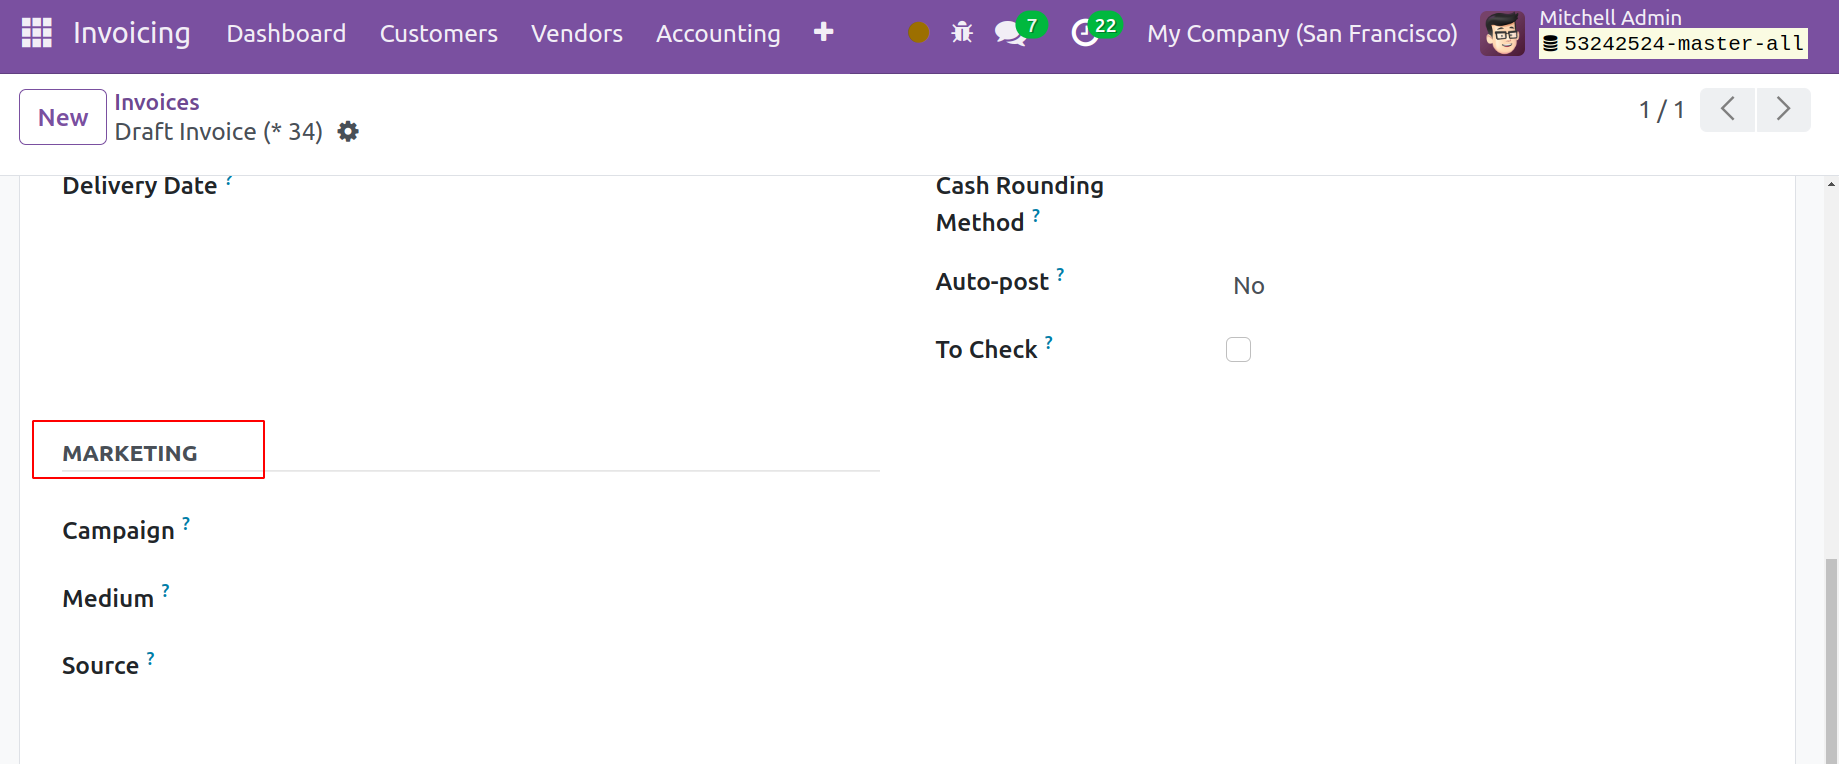
You can specify the Campaign, Medium, and Source of this invoice in the Marketing section.
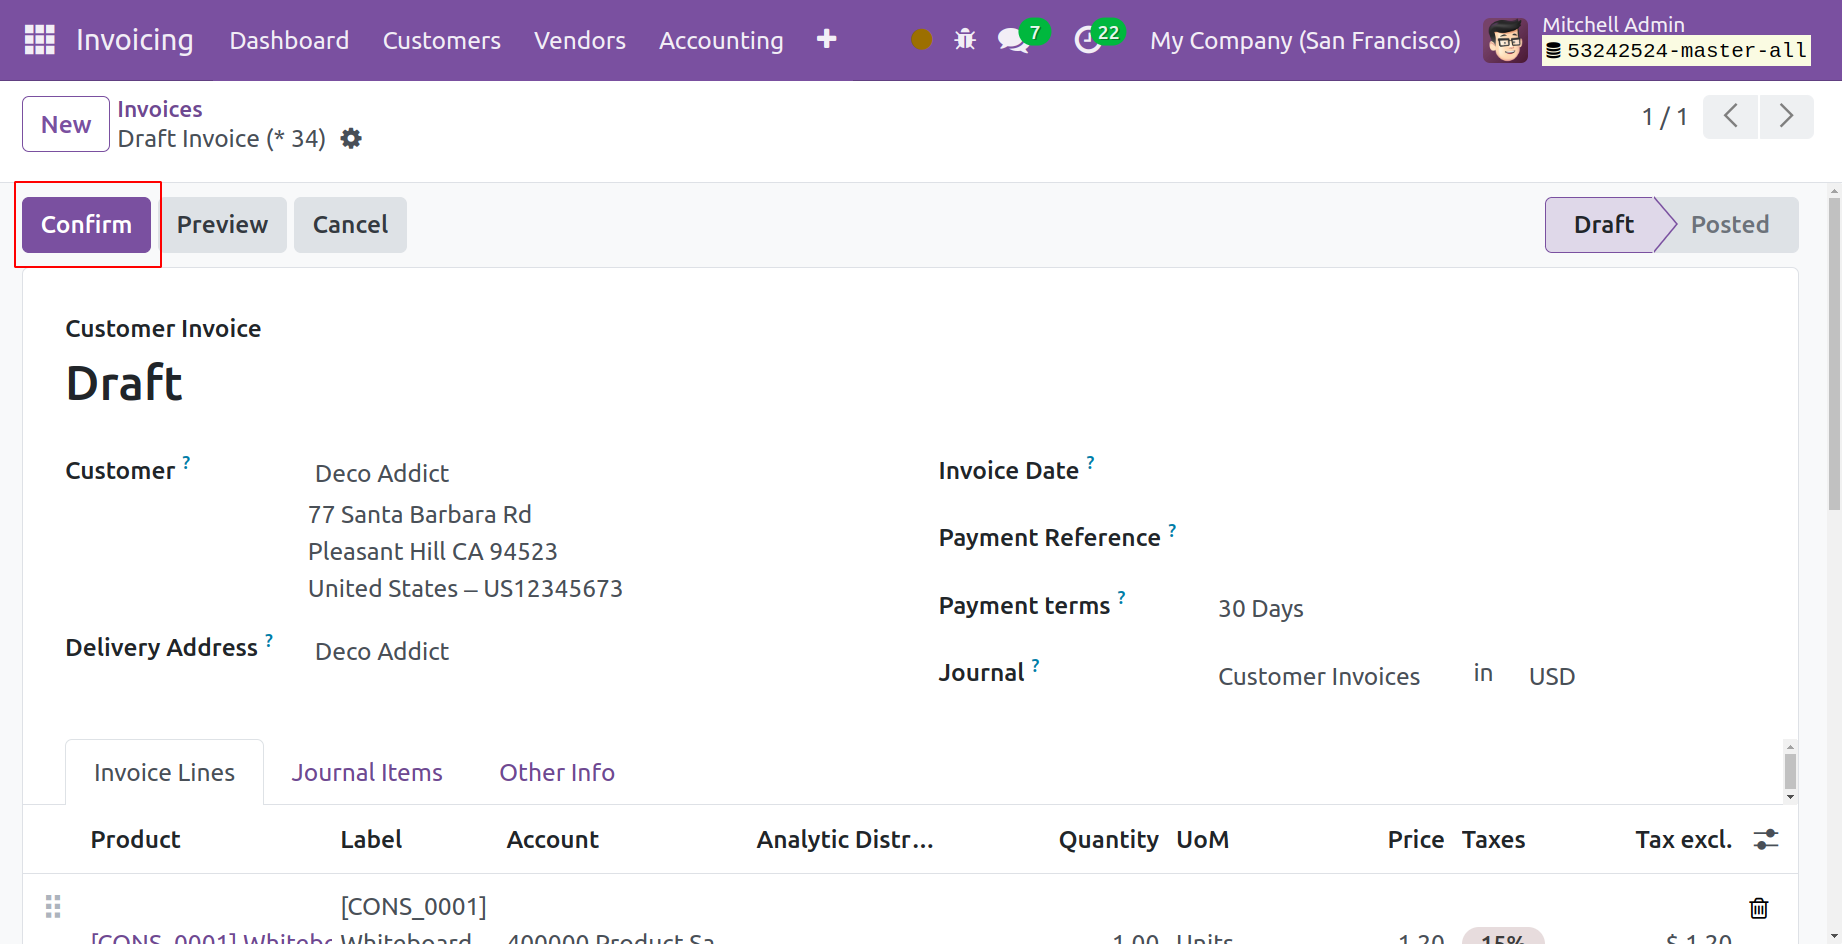
The draft invoice can now be confirmed by clicking the Confirm button. Customers can obtain a preview of the invoice by clicking the preview button. To end the invoice, click the Cancel button.
Sending Invoice
You can forward the invoice to the customer in question once it has been verified. You can utilize the Send & Print button on the form view for this action.
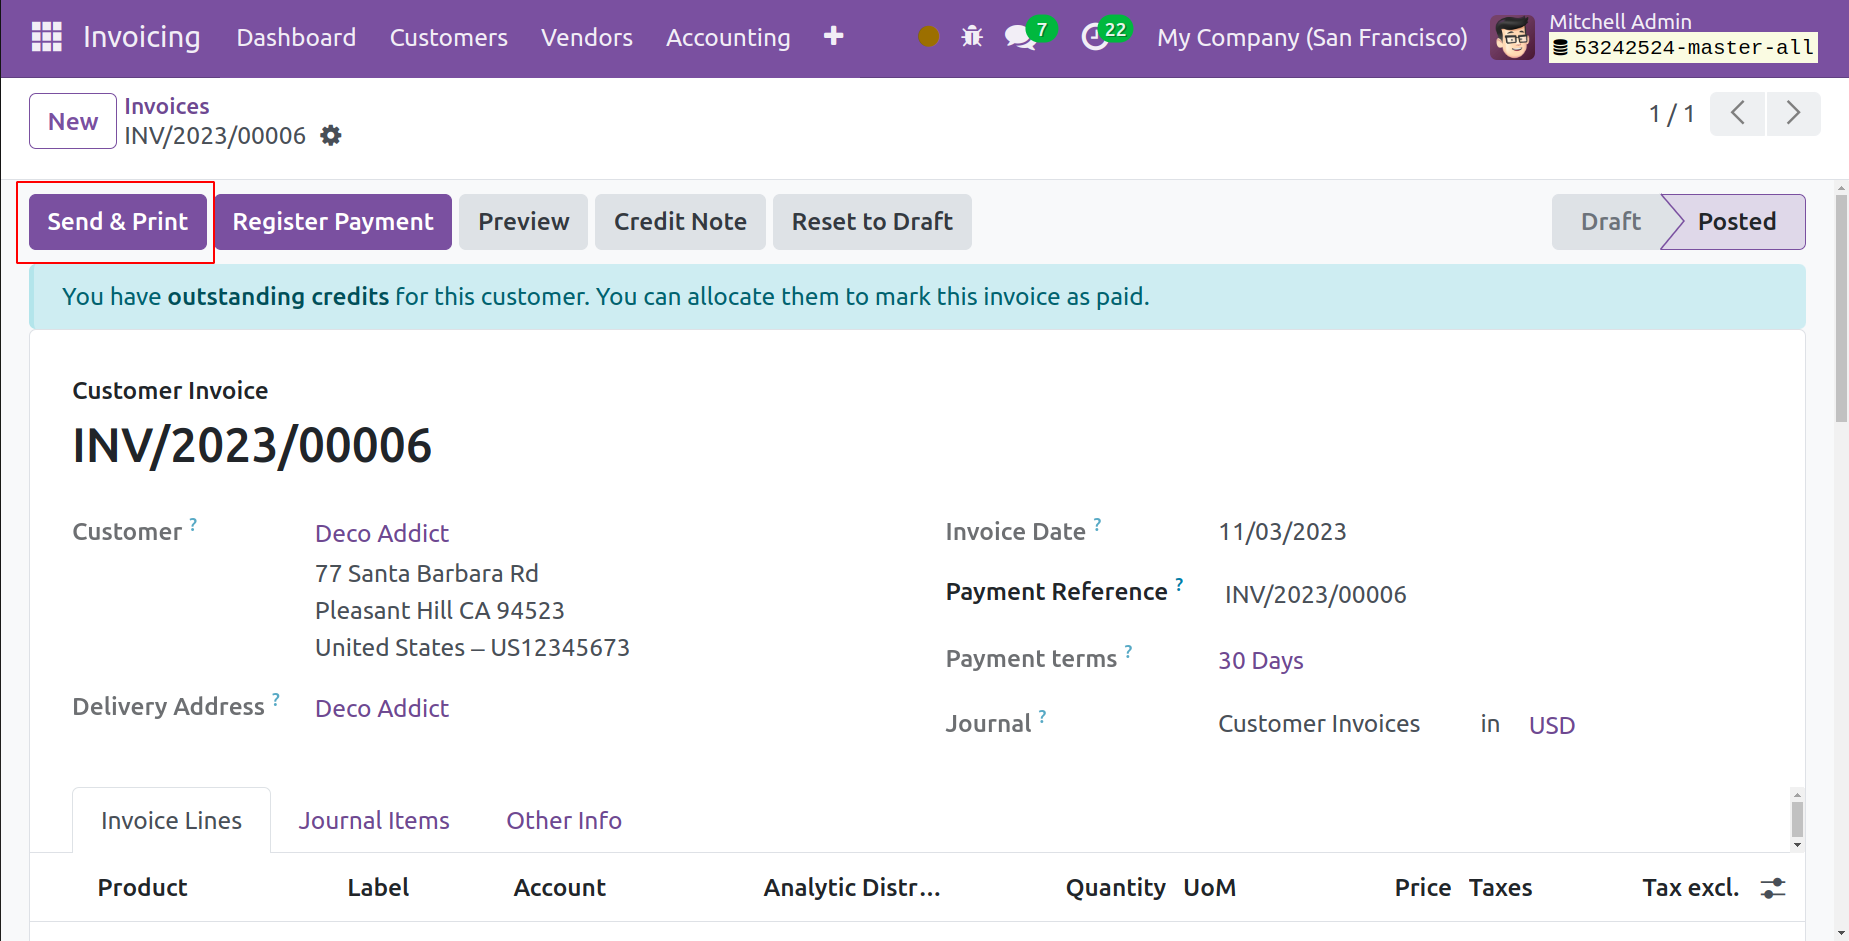
As seen in the screenshot below, clicking this button will cause an automatically created email to open.
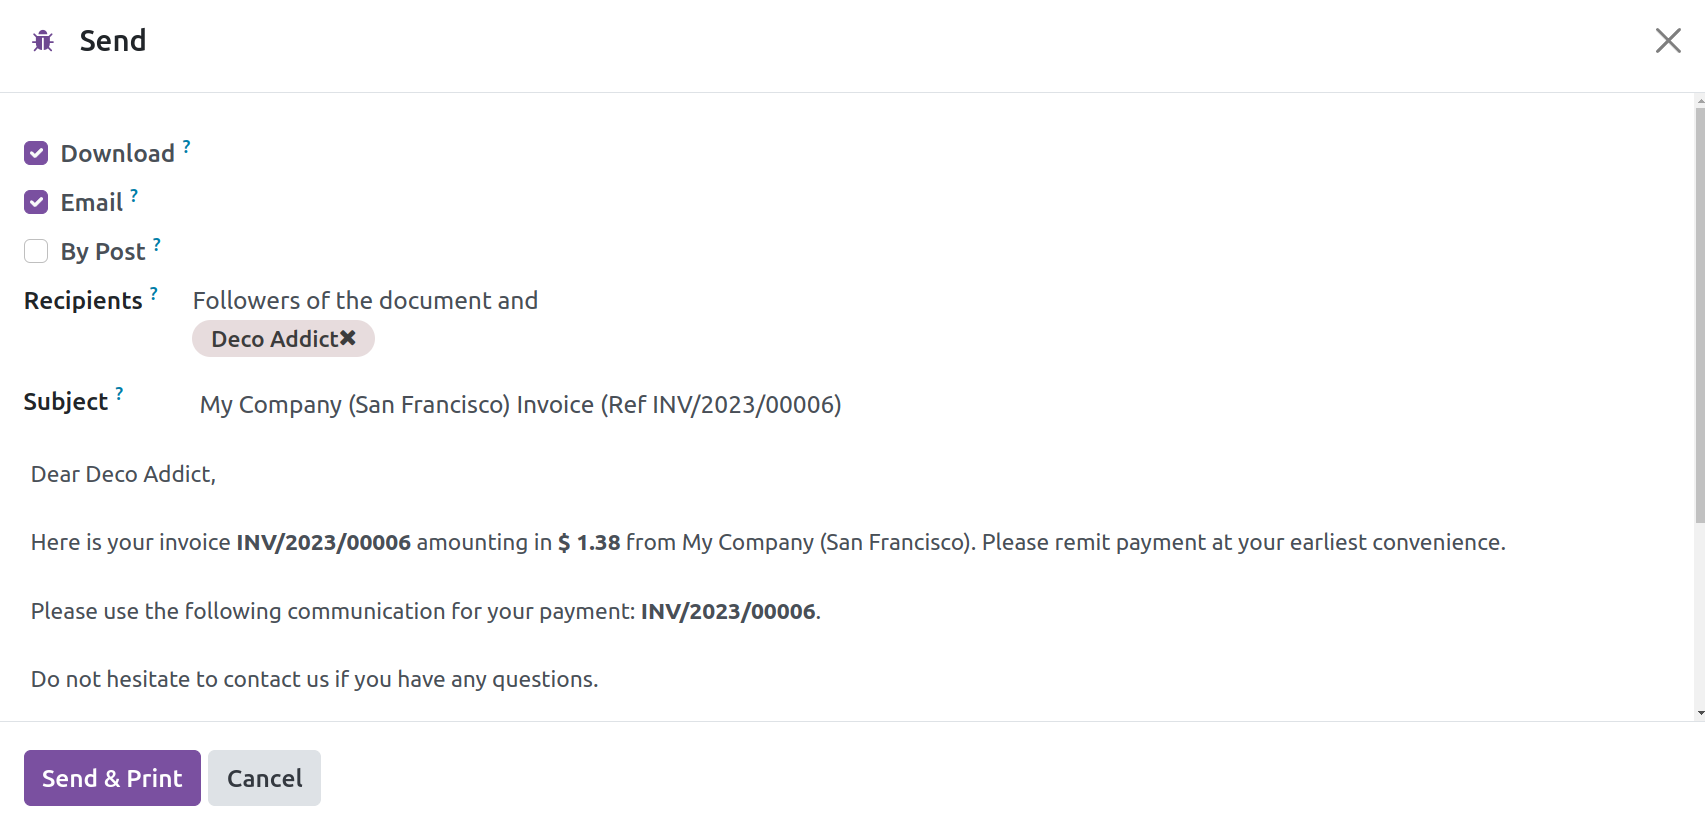
You may find the recipients' details in the corresponding field here. You can review and update the email's content as needed. The newly created invoice will be sent with the letter as an attachment. You can forward this email to the recipients by using the Send & Print option. This will be printed with a copy of the invoice.
Register Payment
The consumer can see the invoice and finish the payment when you send it to the appropriate recipients. In the Odoo 17 Invoicing module, creating an invoice must come before registering payment. Once you confirm the invoice, the option to register the payment will show up on the form view.

As seen below, a new pop-up window will appear when you click the Register Payment button.
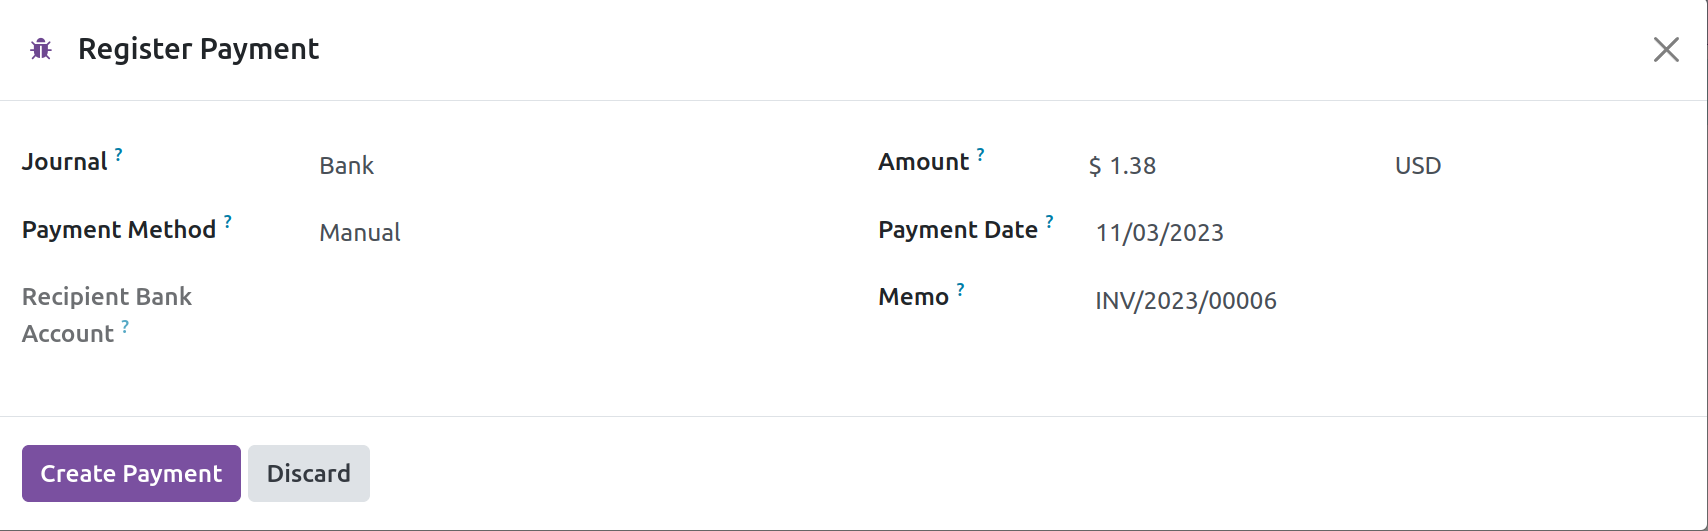
Details about the Journal, Recipient Bank Account, Amount, Payment Date, and Memo will be displayed in the Register Payment window. The journal listed in this window will include the payment record. You can click the "Create Payment" button after reviewing the details.
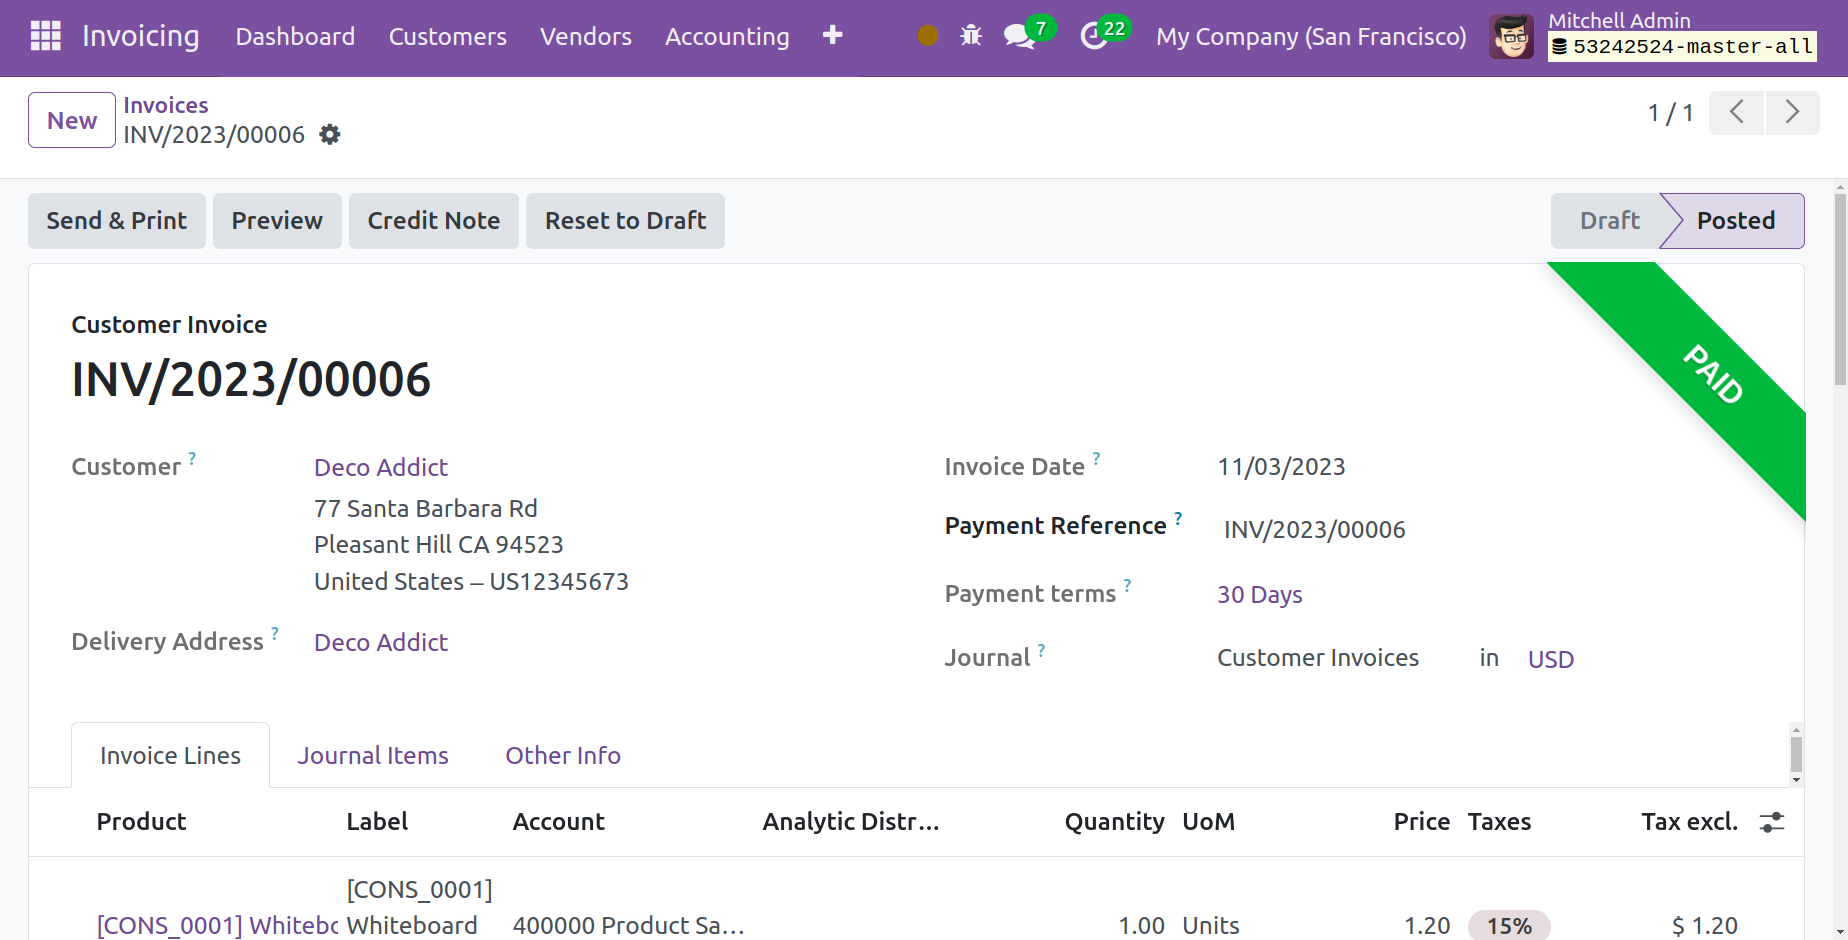
After completing this step, you can view the associated customer invoices' status as paid.
You will have access to a dedicated platform through the Customers menu of the Invoicing module to handle all of these payments. All customer payments will be tracked using this platform in Odoo 17.
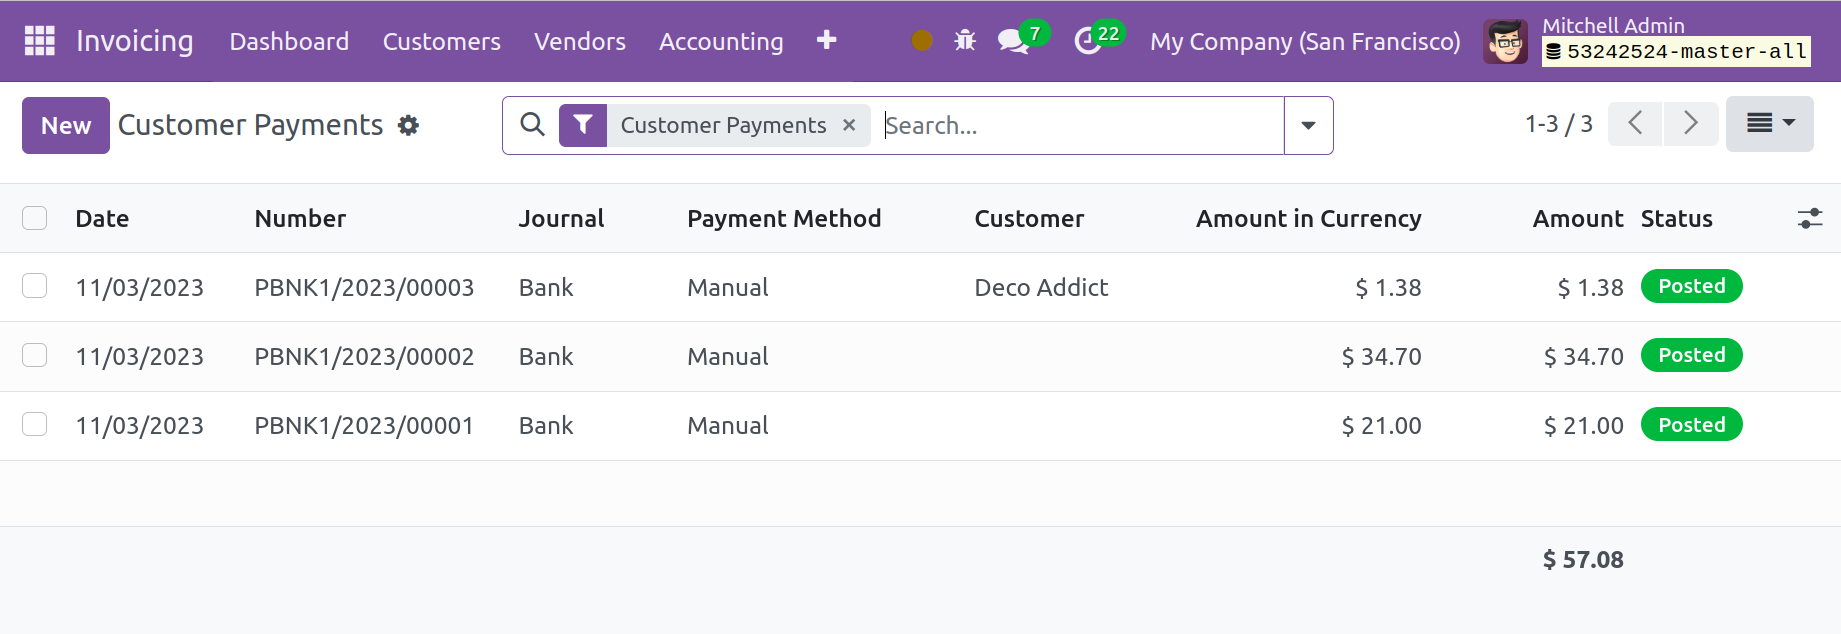
Above is a picture of the Payments list. The date, number, journal, payment method, customer, amount, and status of the payment are all included in the list preview. Additionally, you can switch between the Kanban and Graphical views.
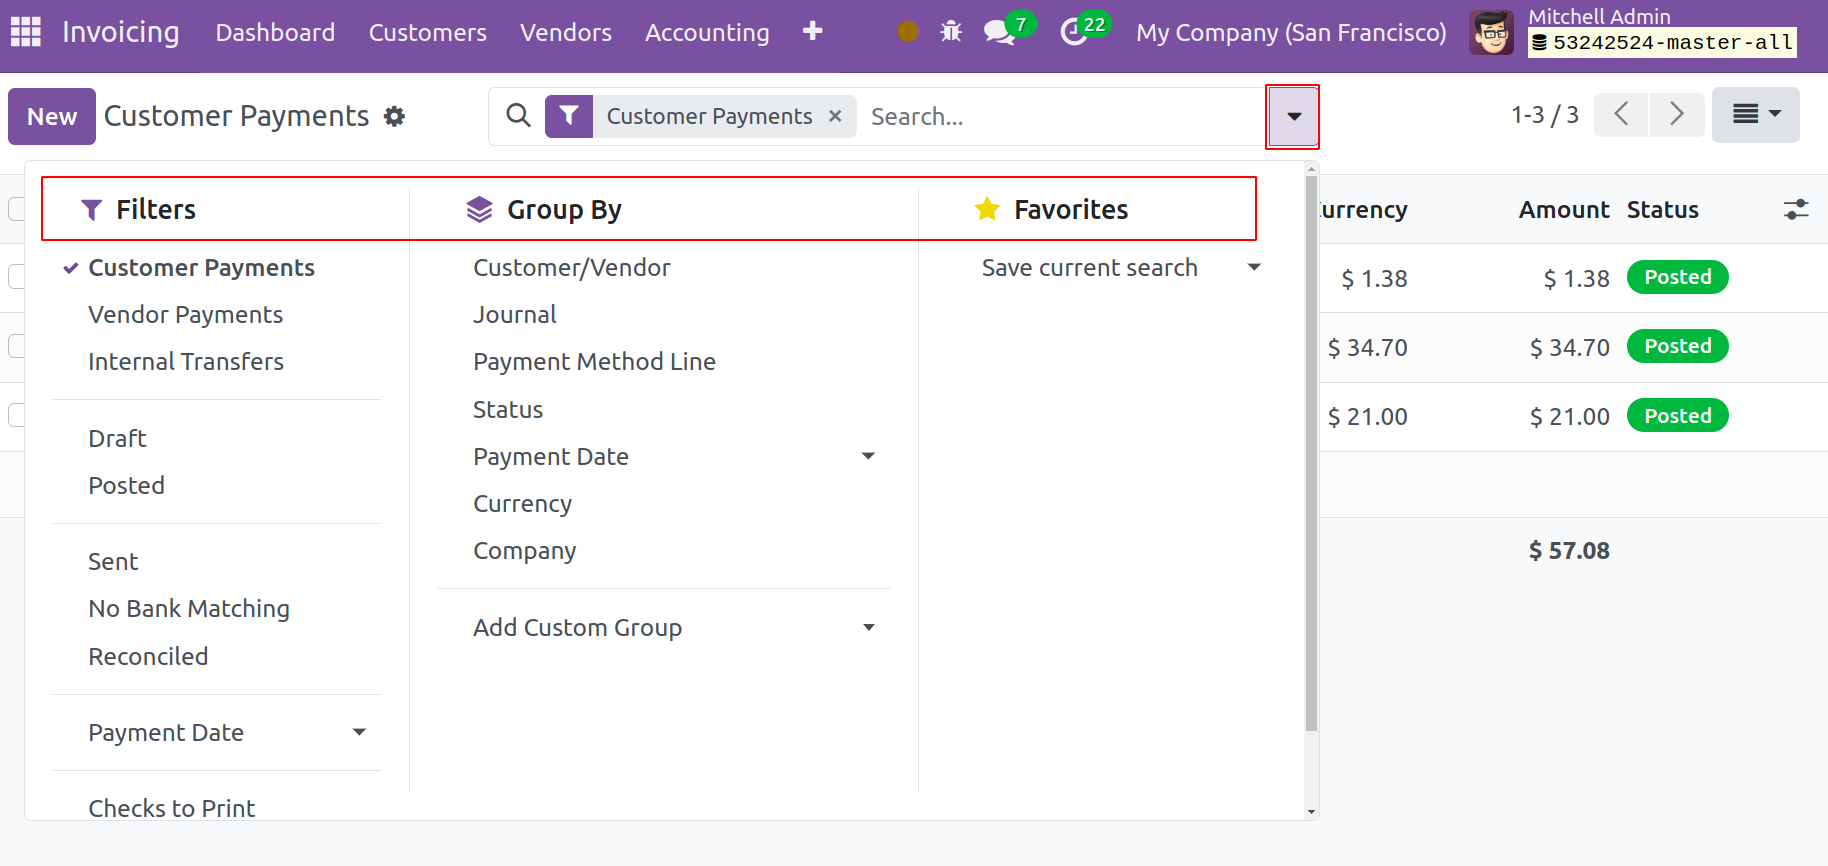
Payment Date, Check to Print, No Bank matching, Draft, Posted, Sent, Internal Transfers, Vendor Payments, Customer Payments, Reconciled, and Payment Date are the default criteria available here. To construct filters based on your needs, use the Add Custom Filter option.
Customer/Vendor, Journal, Payment Method Line, Status, Payment Date, Company, and Currency are displayed when you select the Group By option.
You can now register a new payment from your customer by clicking the New button. You can add payment-related details in the new form view that appears, as seen in the figure below.
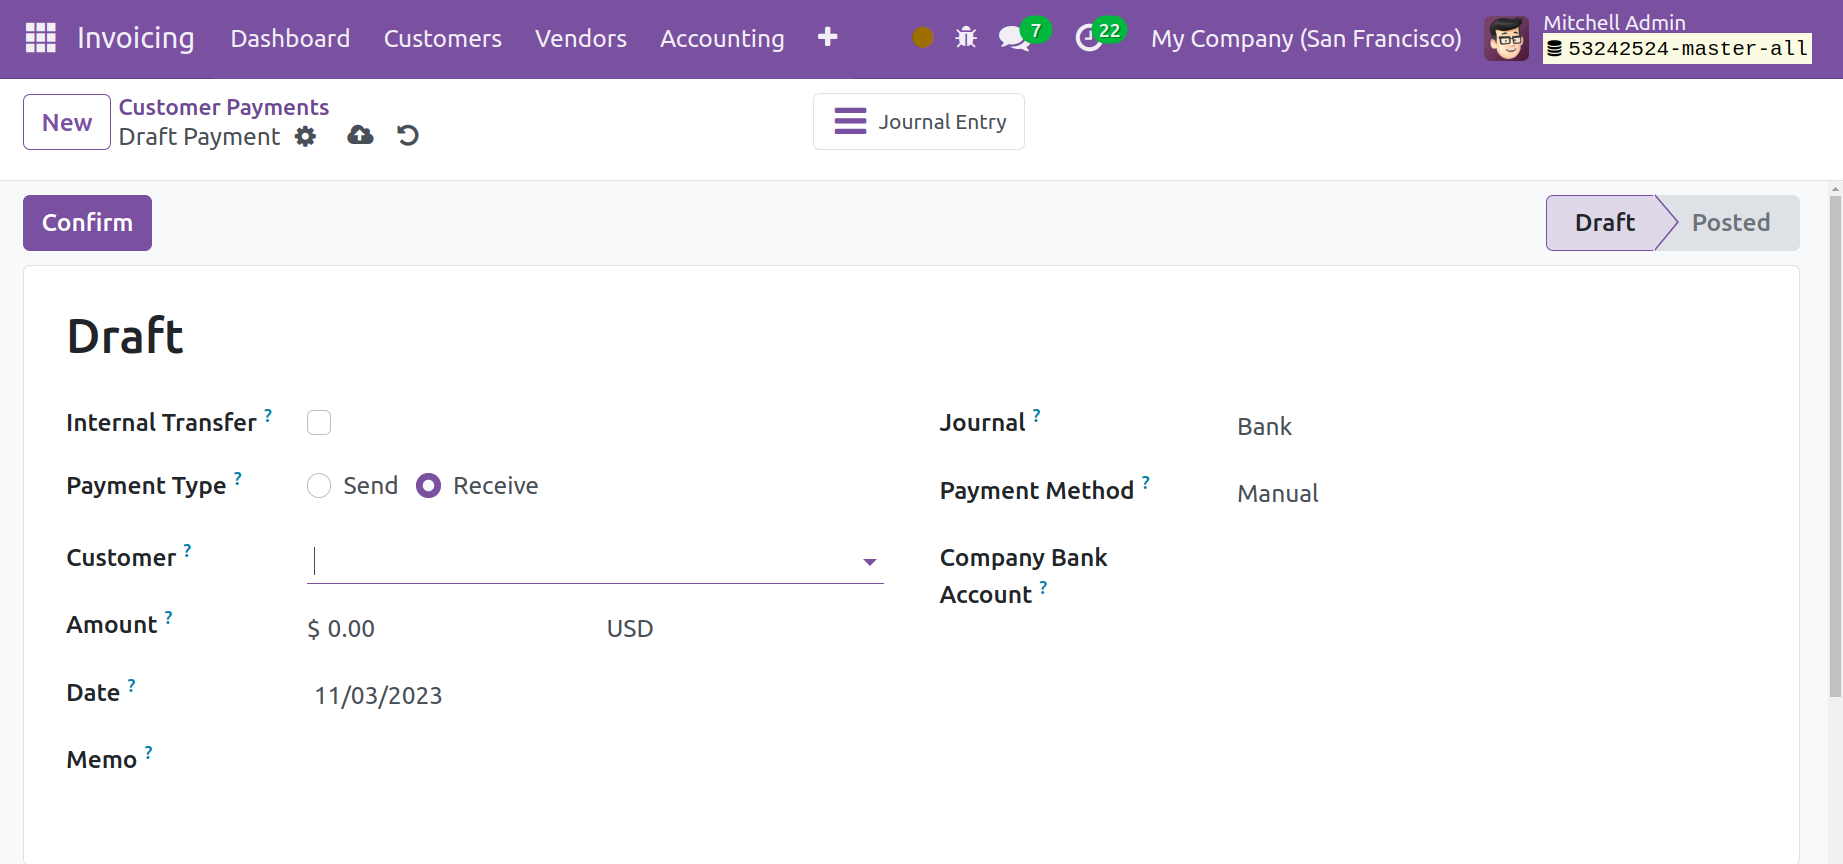
You can select the Internal Transfer option if you are registering this payment for a transaction that takes place inside the organization. The Payment Type will be indicated as Receive for payments made by customers. In the appropriate boxes, you can enter the customer's name, the bill's amount, the date, the memo, the journal in which the transaction will be recorded, the payment method, and the customer's bank account.
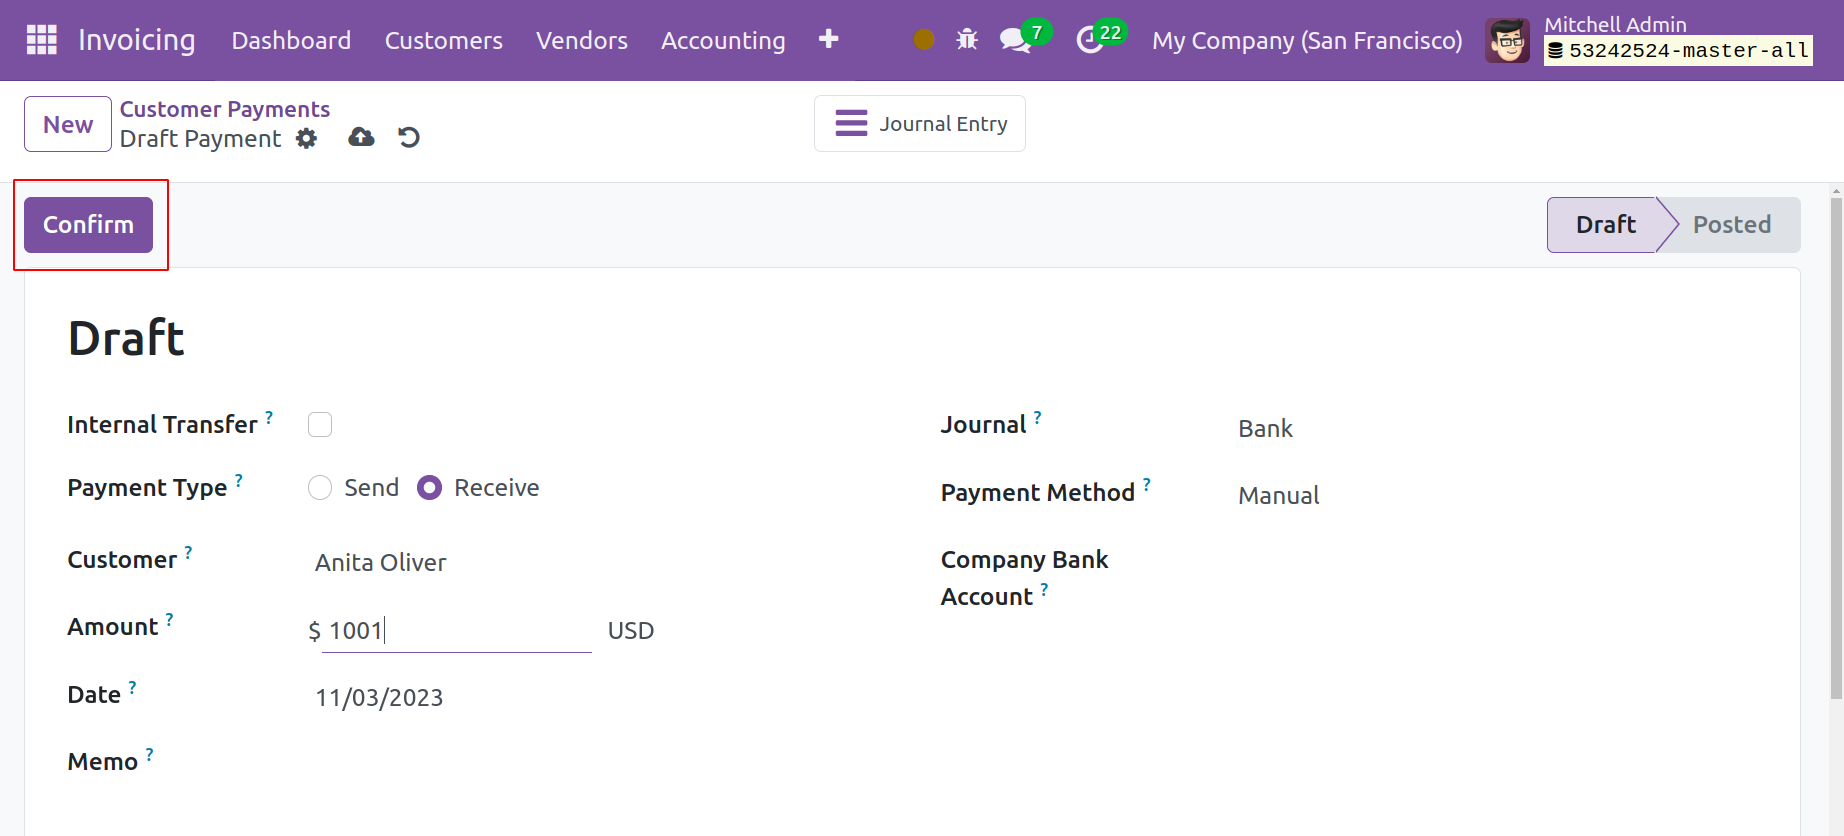
You can use the Confirm button to verify the payment after you've mentioned the necessary information.
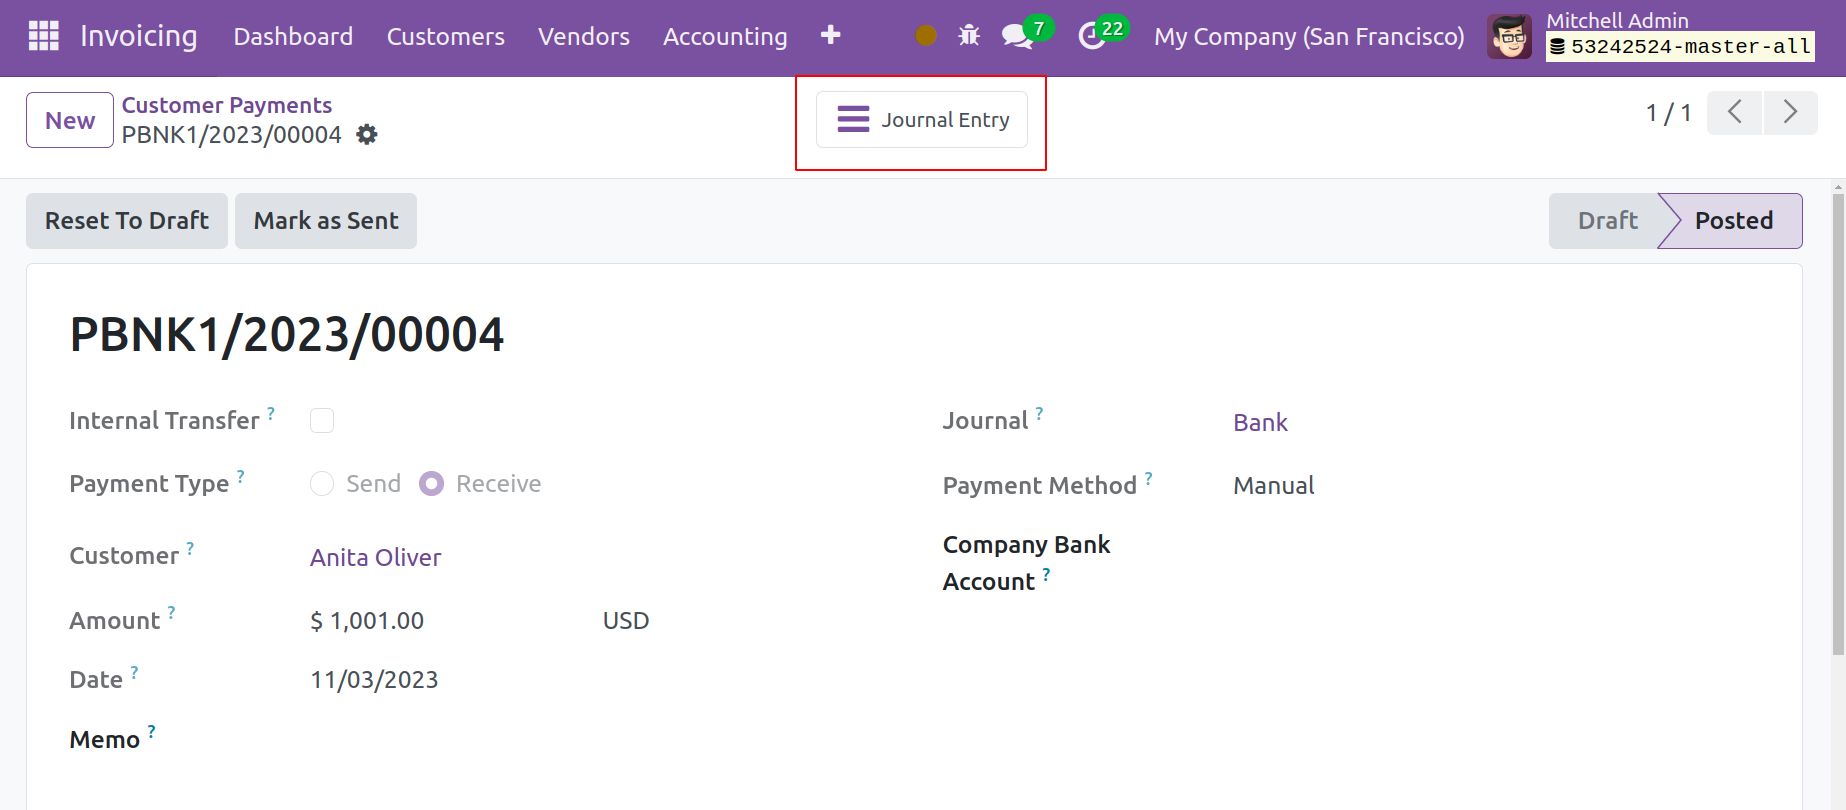
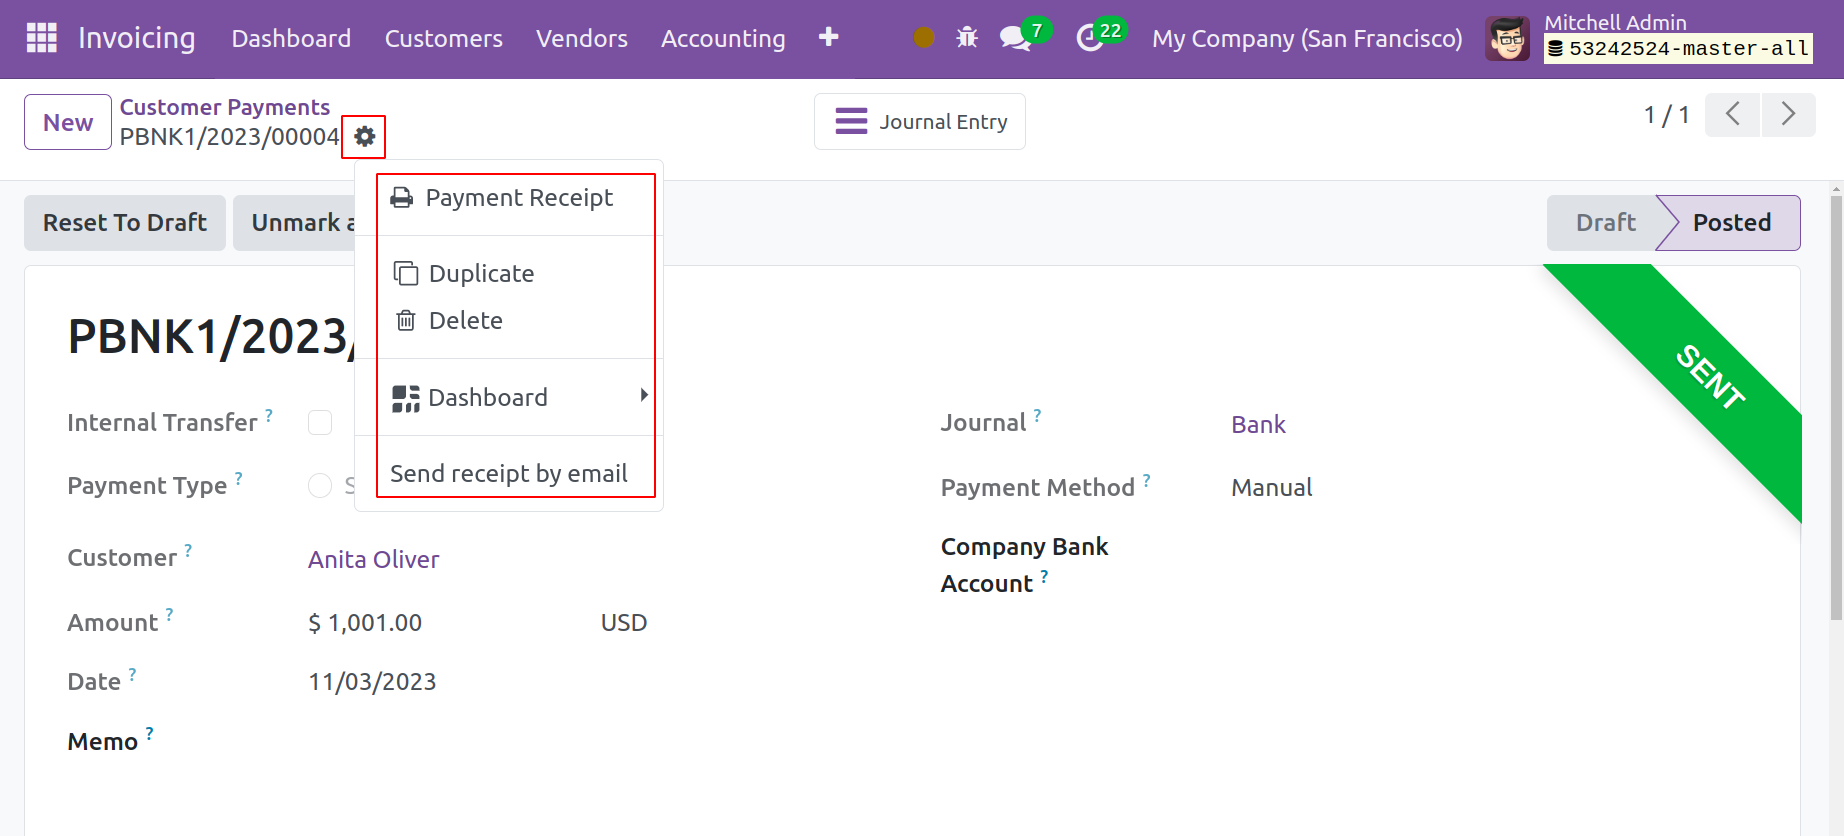
The window displaying the Journal Entry smart button will allow you to view the matching journal entries that Odoo 17 has logged for this specific payment. You can select the Mark as Sent provided button if you have already provided the relevant customer the payment details.
You can email the concerned customer a receipt of the payment by using the Send Receipt By Email option found in the Actions menu.
In Odoo 17, we handle consumer payments in this manner.
You may manage and keep an eye on vendor payments by selecting the Vendor Payment option found under the Vendors menu.
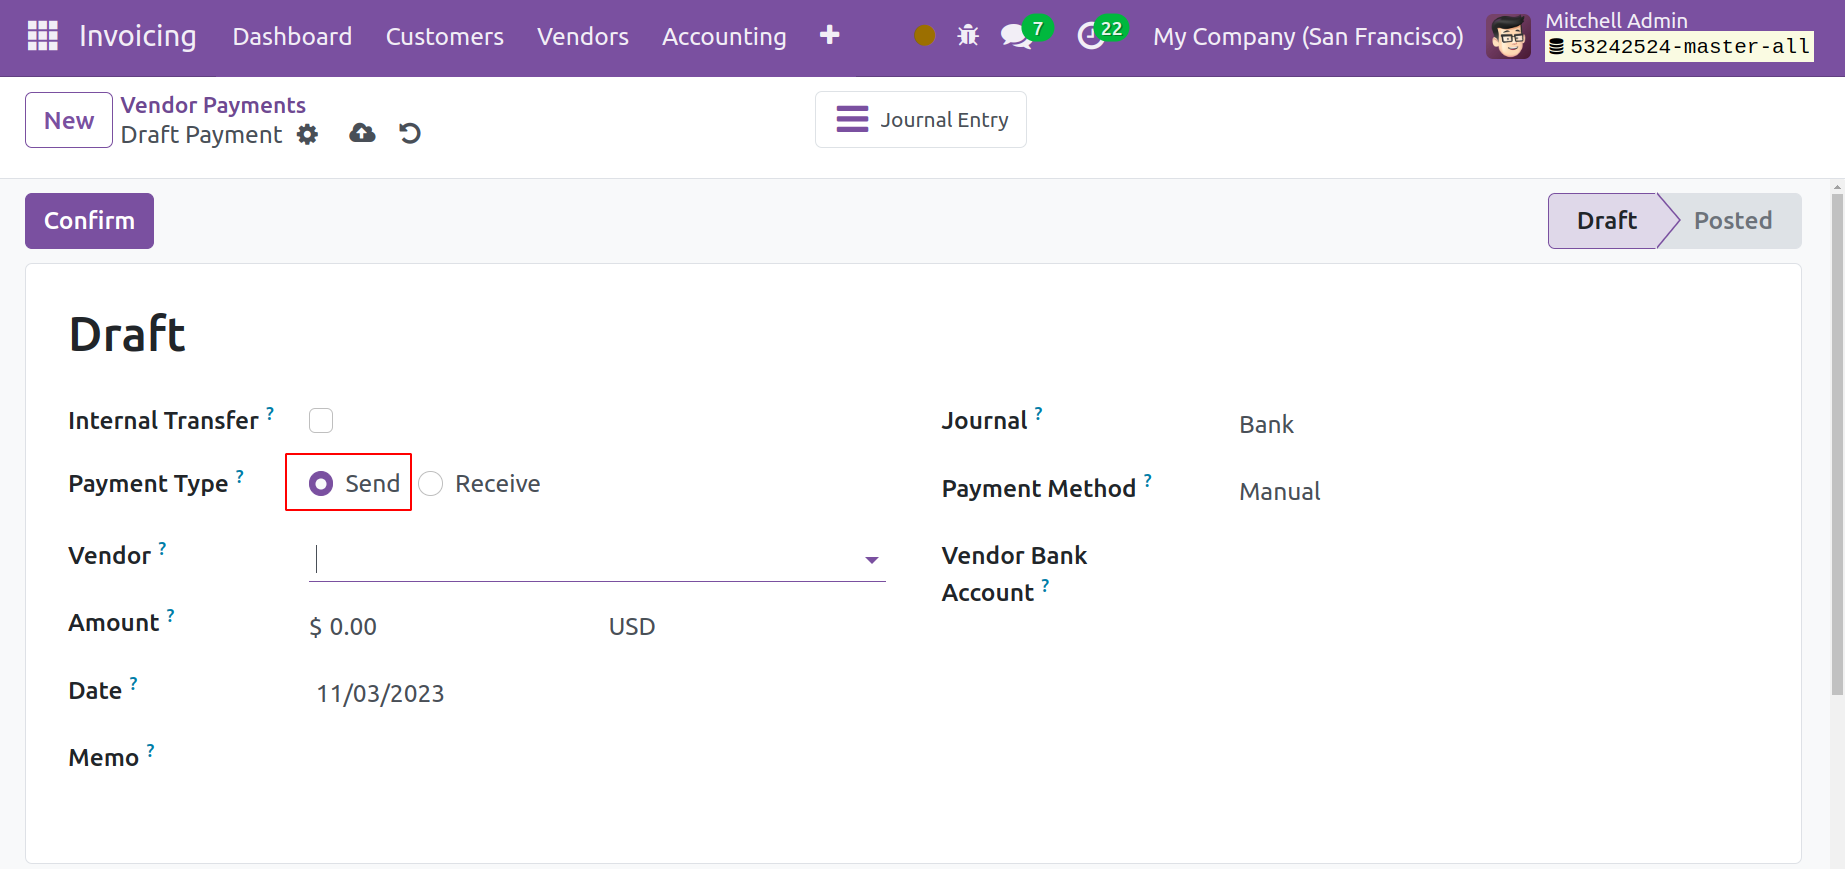
By using the same procedure as the customer payment, you can set up a new vendor payment. Since we are sending the money to the concerned vendor, you can see that the Payment Type is shown as sent here. You can choose between Manual and Checks in the Payment Method section. You can use a check to pay the bill if you choose the checks option.
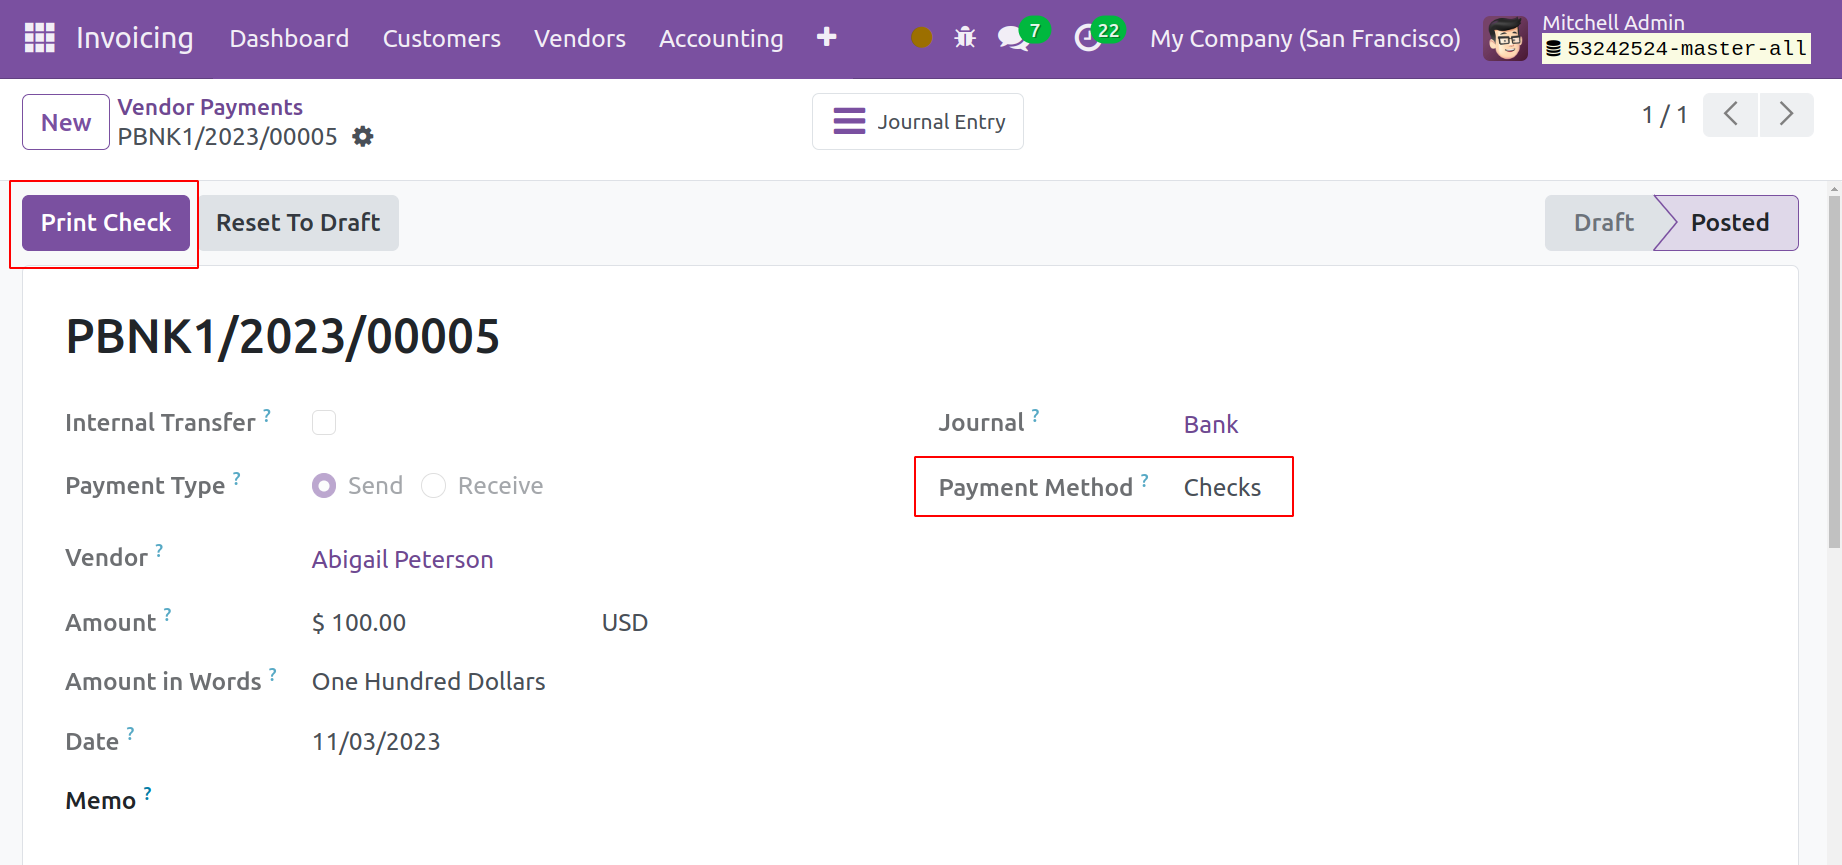
After you complete the payment, the window will display the option to Print Check. To obtain a printout of the cheks, click this button.