Transfers
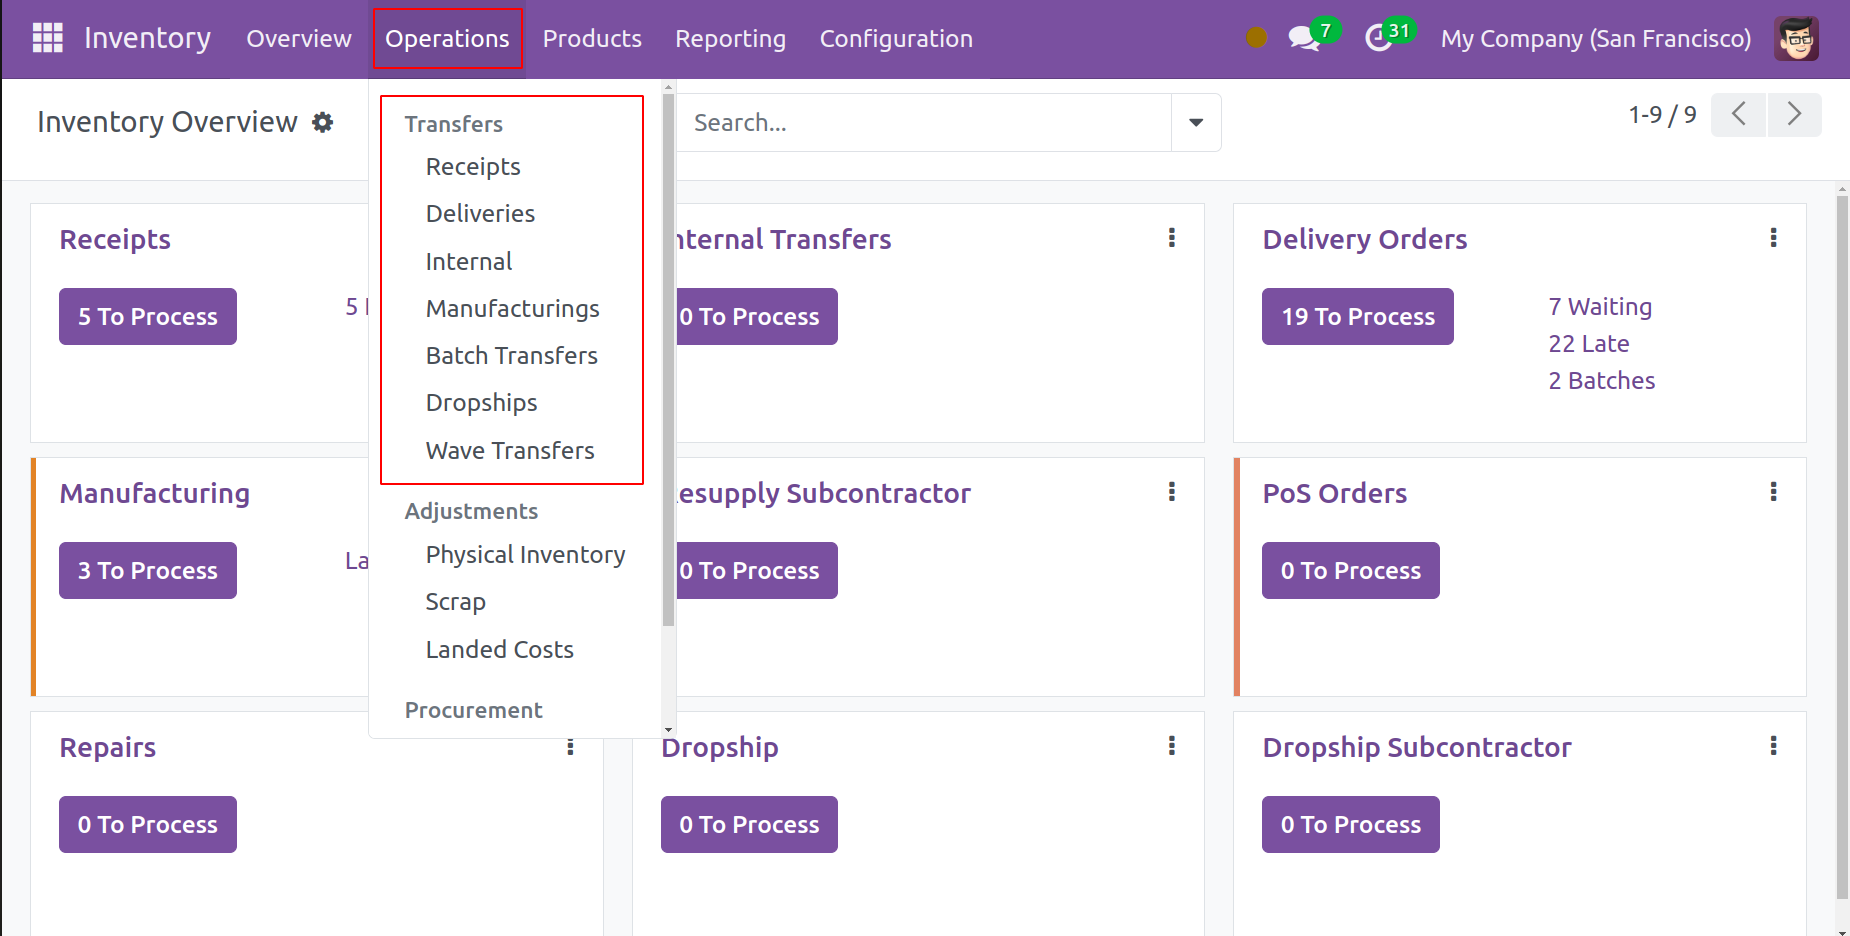
It is crucial to pay attention to the management of product transfer from one site to another if your business has several warehouses for product storage or separate branches at various locations. You can easily manage product transfer with the use of the Odoo Inventory module's Transfers feature. When it comes to inventory management, there are several kinds of transfers that need to be controlled. It covers product transfers inside the organization as well as outside the warehouse and between warehouses. We will go over how to configure each of your company's warehouses later, but first, you will receive the Odoo Inventory module's warehouse management capability. The Transfers option will assist you in defining different product transfers between such configured warehouses and locations once you have finished configuring the warehouses and product locations.
You can monitor and evaluate the flow of products from one location to another with the use of the Transfers pane. Click on "Transfers" from the Operations menu to open this window.
Here is a comprehensive summary of the product transfers made by your company. By default, the window will show these facts in a List view.
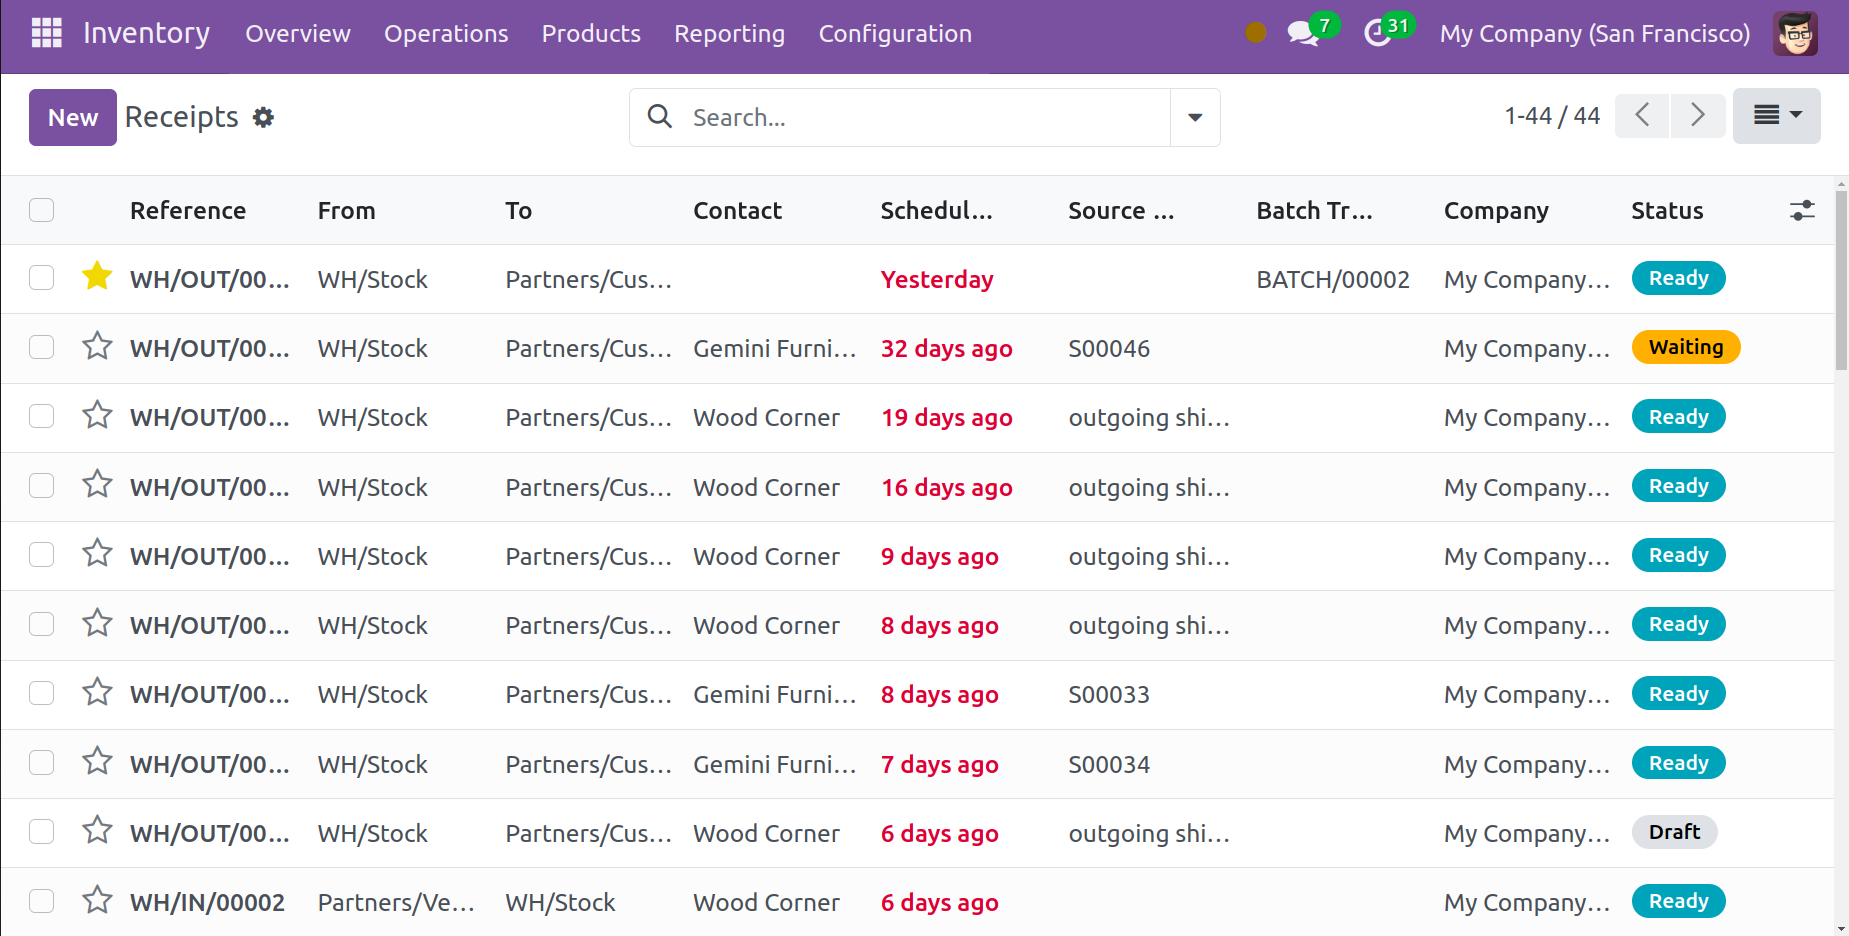
By clicking on the appropriate icons, you can switch between the Kanban and Calendar views in this mode. Your transfer tracking procedure will become more organized thanks to the Filters and Group By features, which locate and identify particular records based on a variety of factors. Using the Favourites feature, you can save these filters or make them the default.
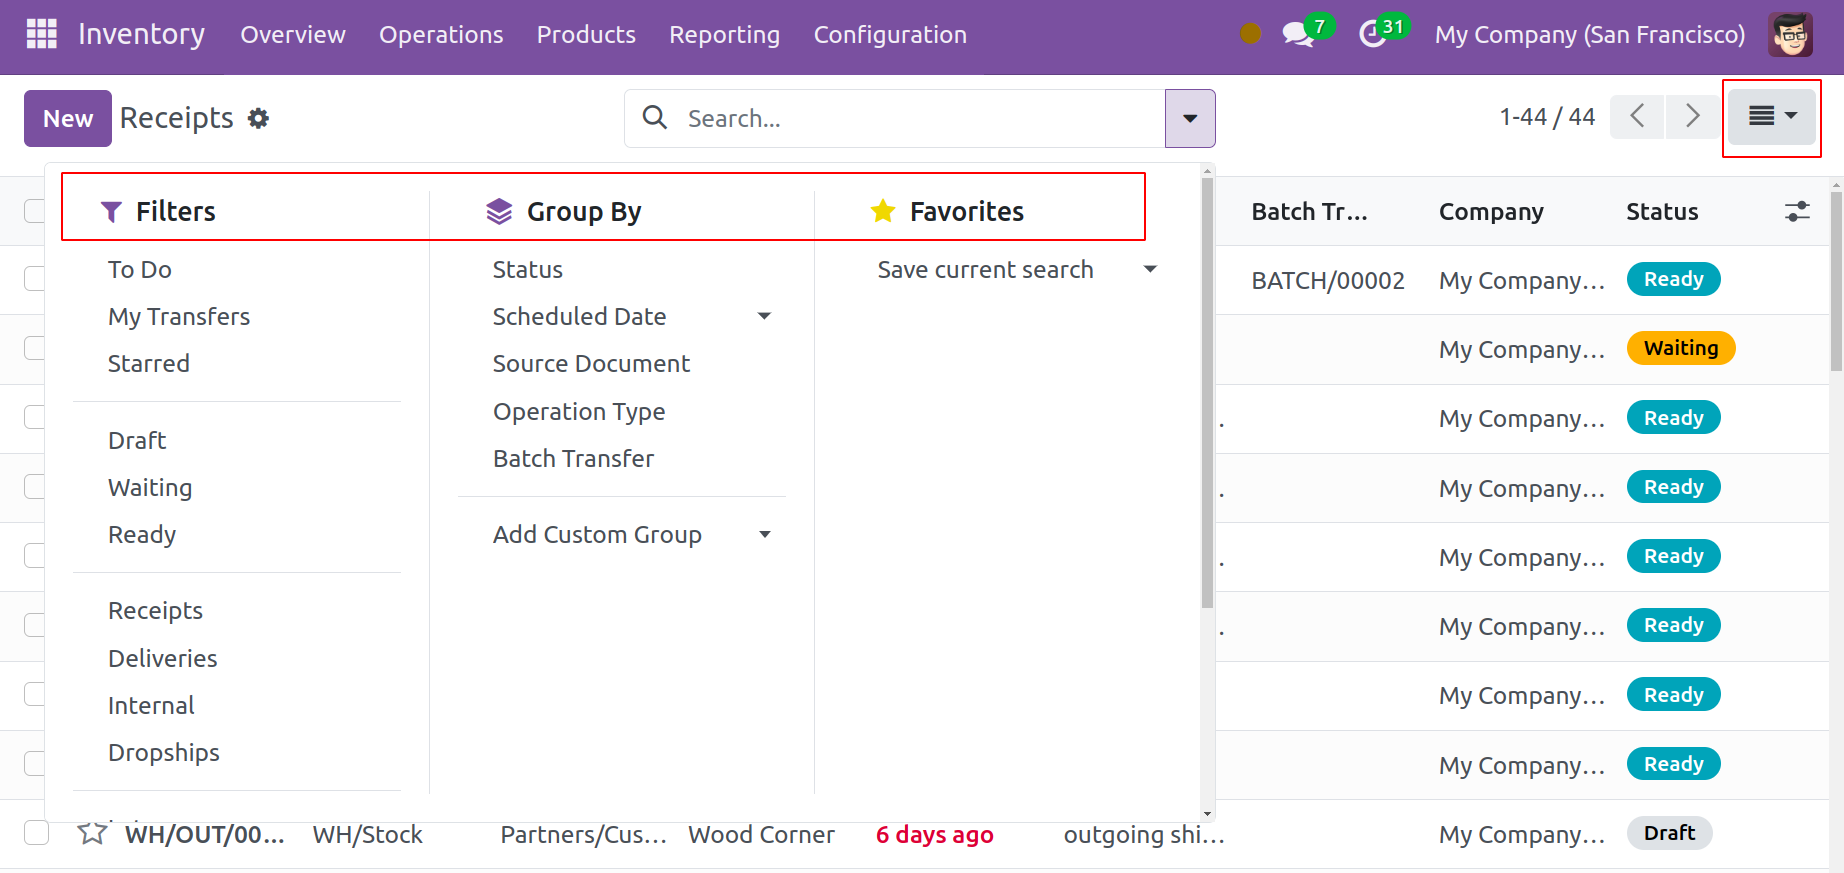
Information such as Batch Transfer, Reference, Contact, Scheduled Date, Source Document, Company, and Status are displayed in the window. Click the button in the upper right corner, as indicated below, to display more information.

If you want to add a new transfer, click the New button.
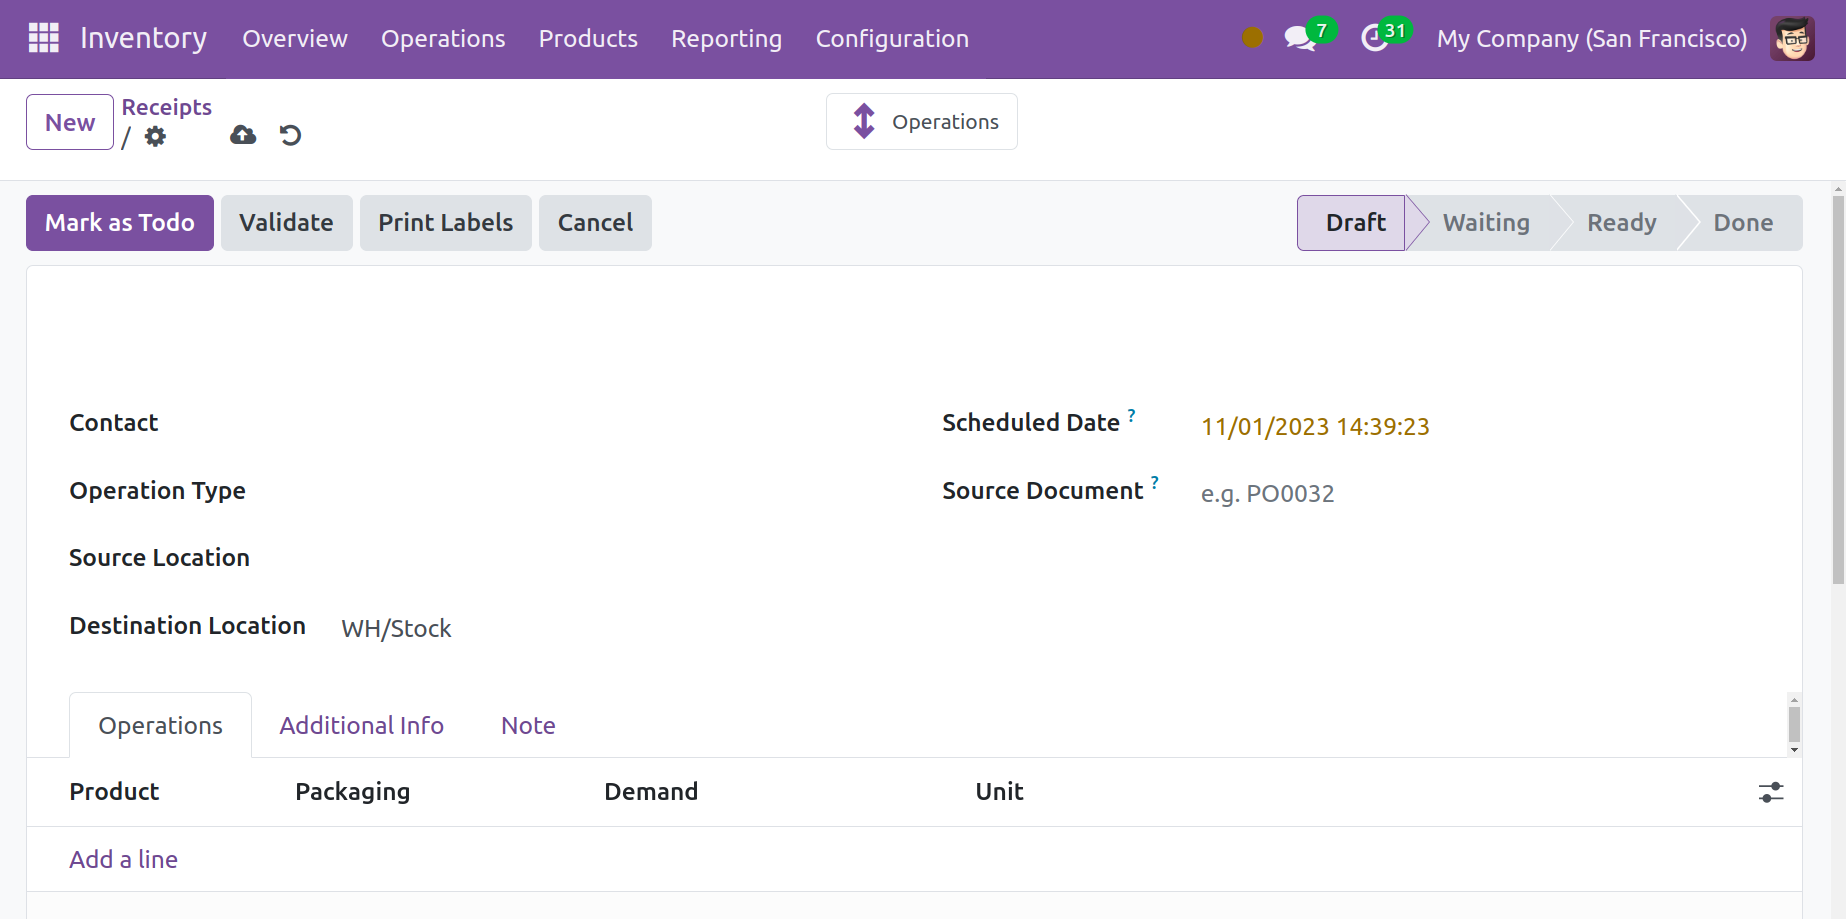
Complete the fields for Contact, First Shipment Scheduled Date, Operation Type, and Source Document. Under the Operations tab, select 'Add a line' to indicate which products are to be transferred.
Under the Additional Info tab, you may add the shipment details.
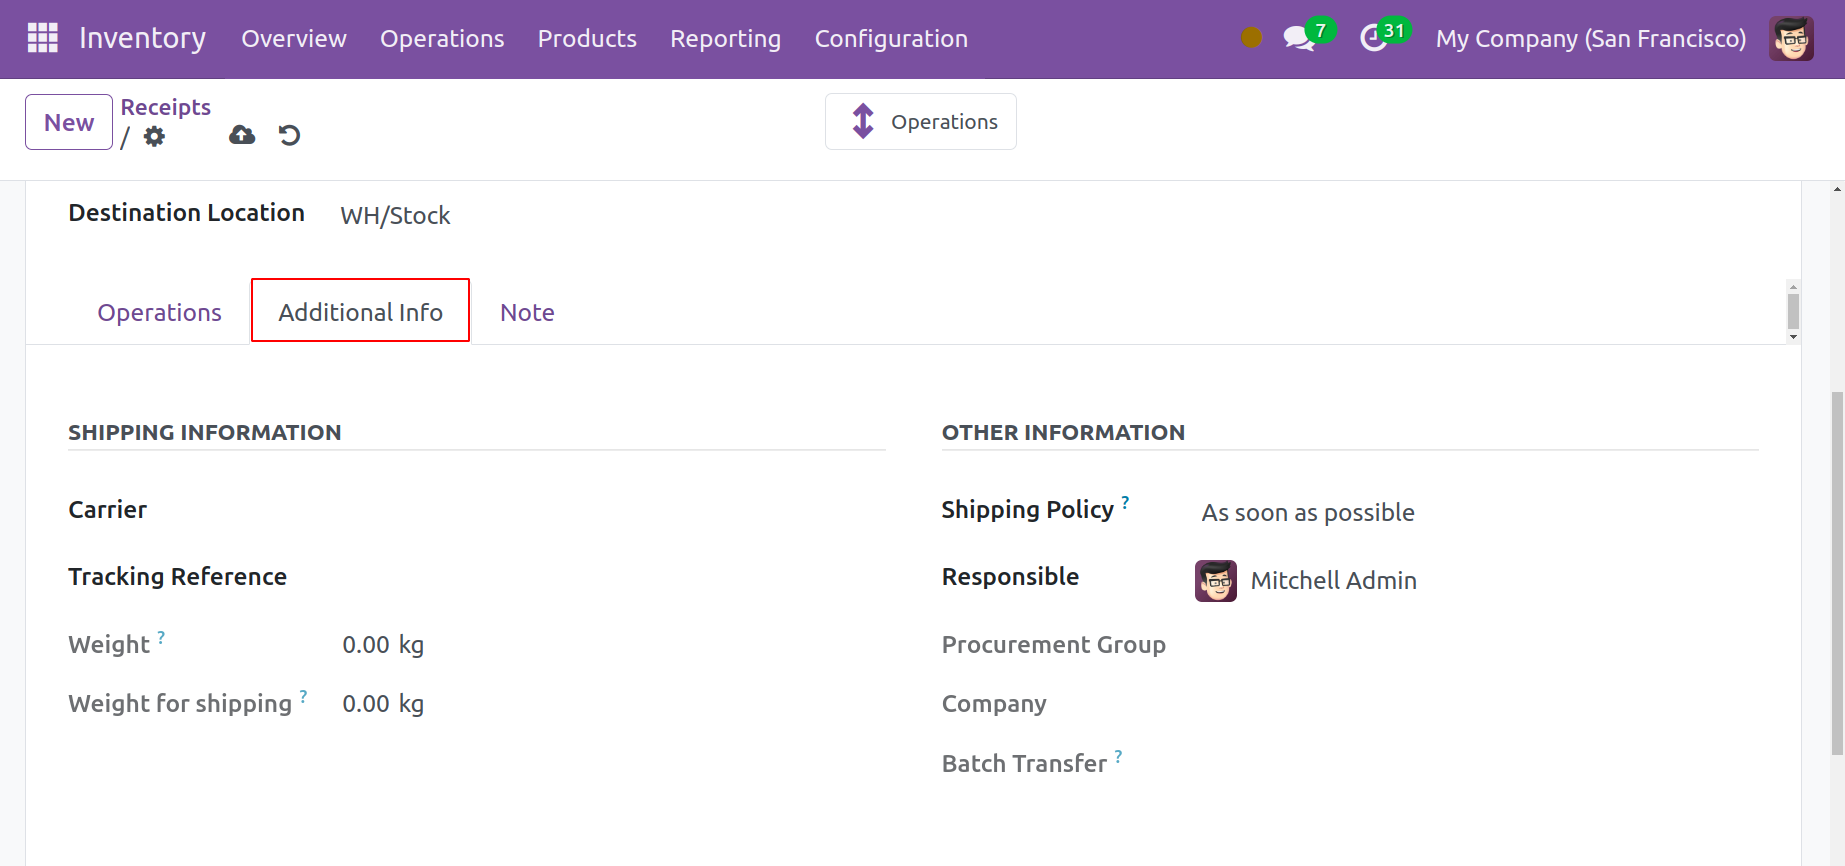
You can enter information for fields like Carrier, Tracking Reference, Weight, and Weight for Shipping in the Shipping Information section. Add details such as the company, procurement group, responsible officer, and shipping policy under "Other Information." 'Shipping Policy' determines if the items are delivered in full or in part. Two options are displayed in the dropdown list for this field: "As soon as possible" and "When all products are ready." If you choose option number one, all of the available products will be shipped out right away, and the remaining products will be shipped as backorders. If you choose the second option, you can ship every product at once. This suggests that the system will wait for them to replenish even if the On Hand Quantity is insufficient.
You can write some internal notes by selecting the Notes tab. The Picking Operations sheet will print these notes.
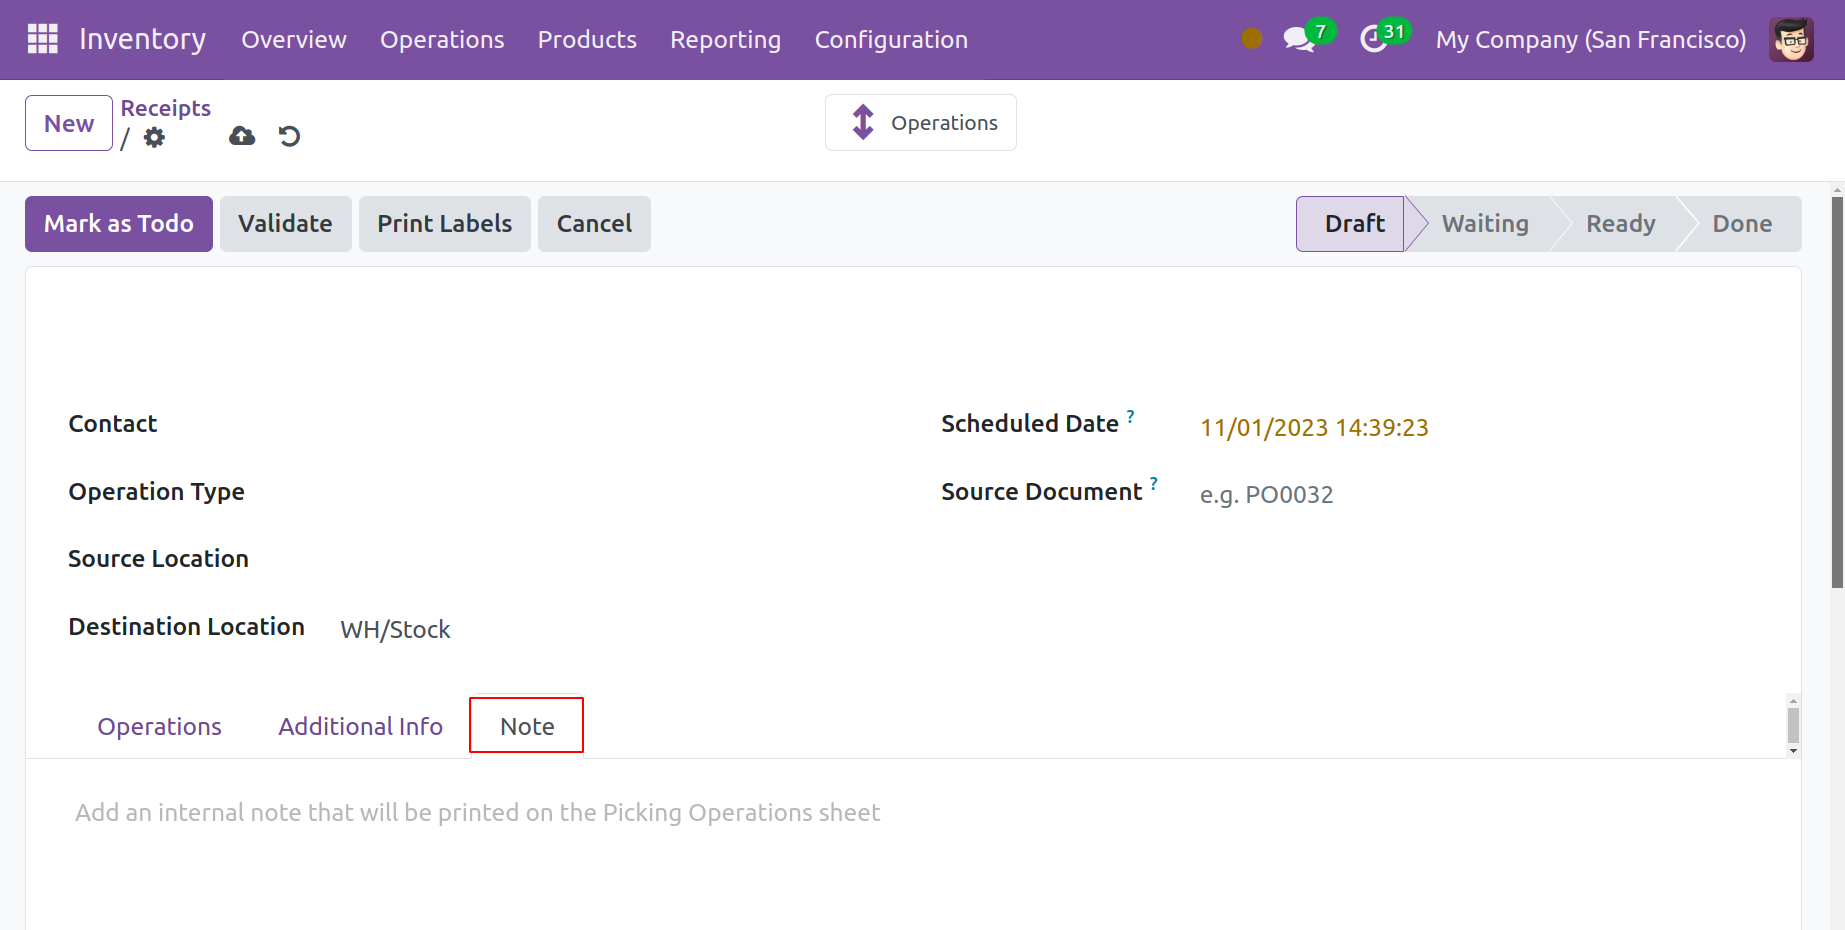
Once you've entered this information, click the Mark as Todo button. Depending on whether the products specified in the transfer are available, the system will shift the stage to "Waiting" or "Ready." The transfer can be advanced to the Ready stage by using the Mark as ToDo button.
Batch Transfer
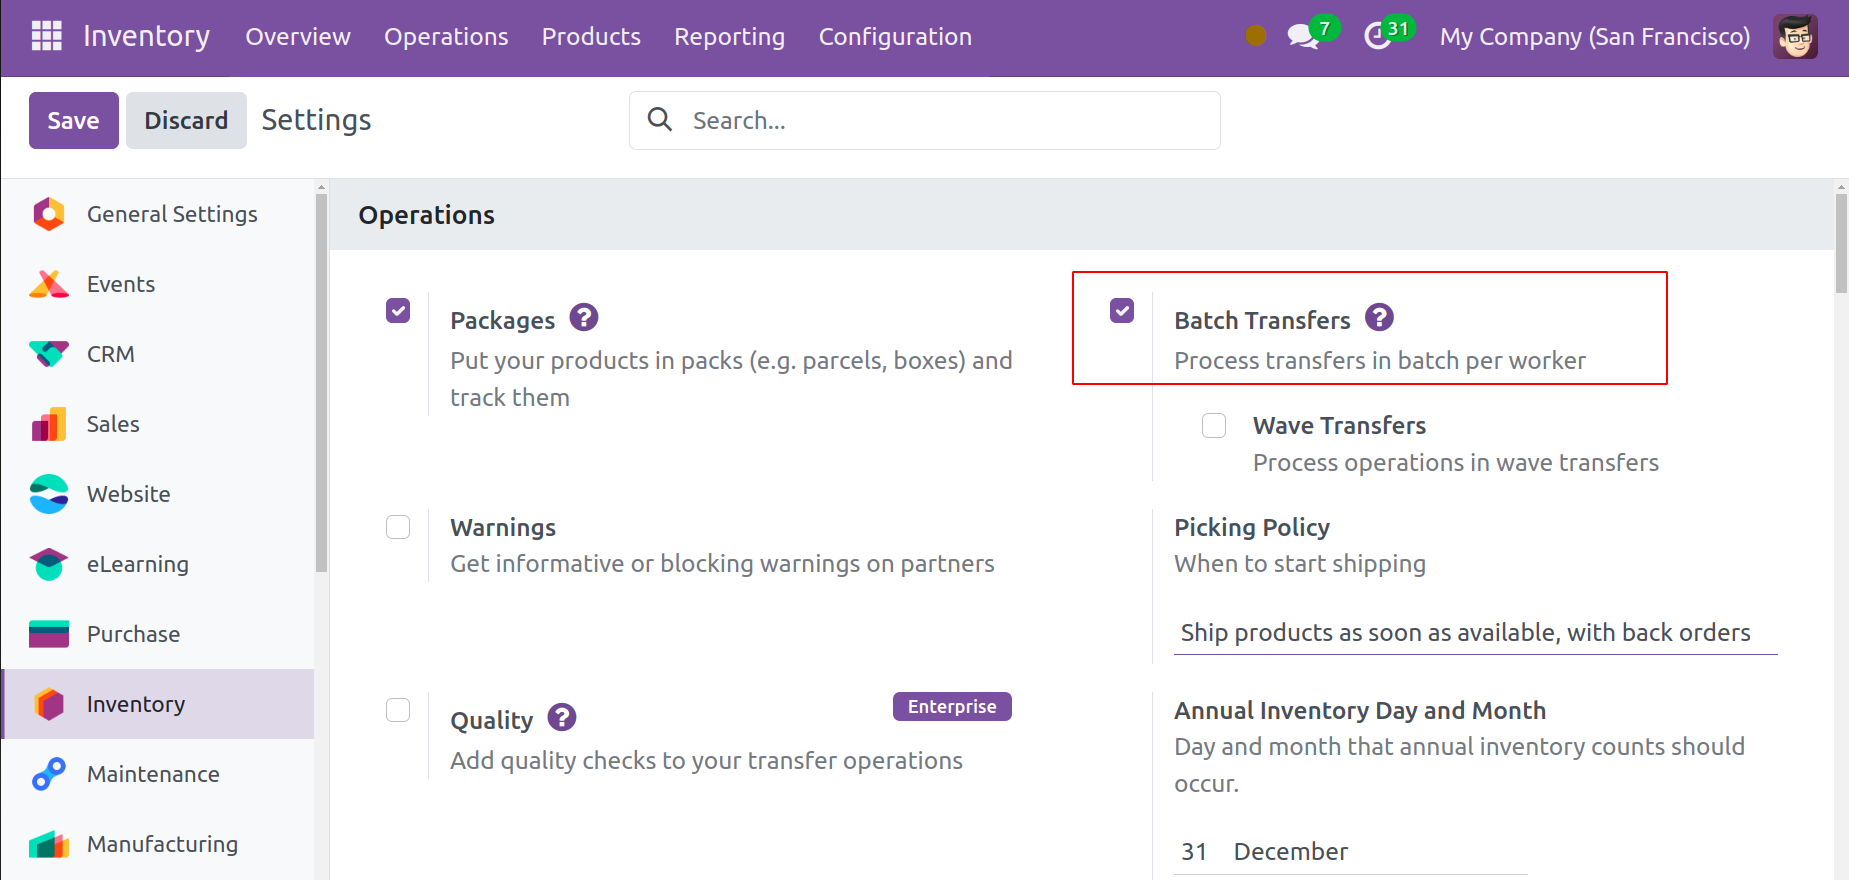
Odoo 17 enables you to transfer several orders at once, which reduces transportation costs and maximizes efficiency. Click on the Configuration tab and choose "Settings" to enable this option. Under "Operations," enable the Batch Transfers option. You can process transfers in a batch by adding them to it using this capability.
Click the Operations tab now, and select "Batch Transfers" from the list of options.

You may view information like the Batch Transfer (reference number), Scheduled Date, Responsible, Operation Type, Company, and Status in the Batch Transfers pane. In order to add a new batch transfer, click the New button.
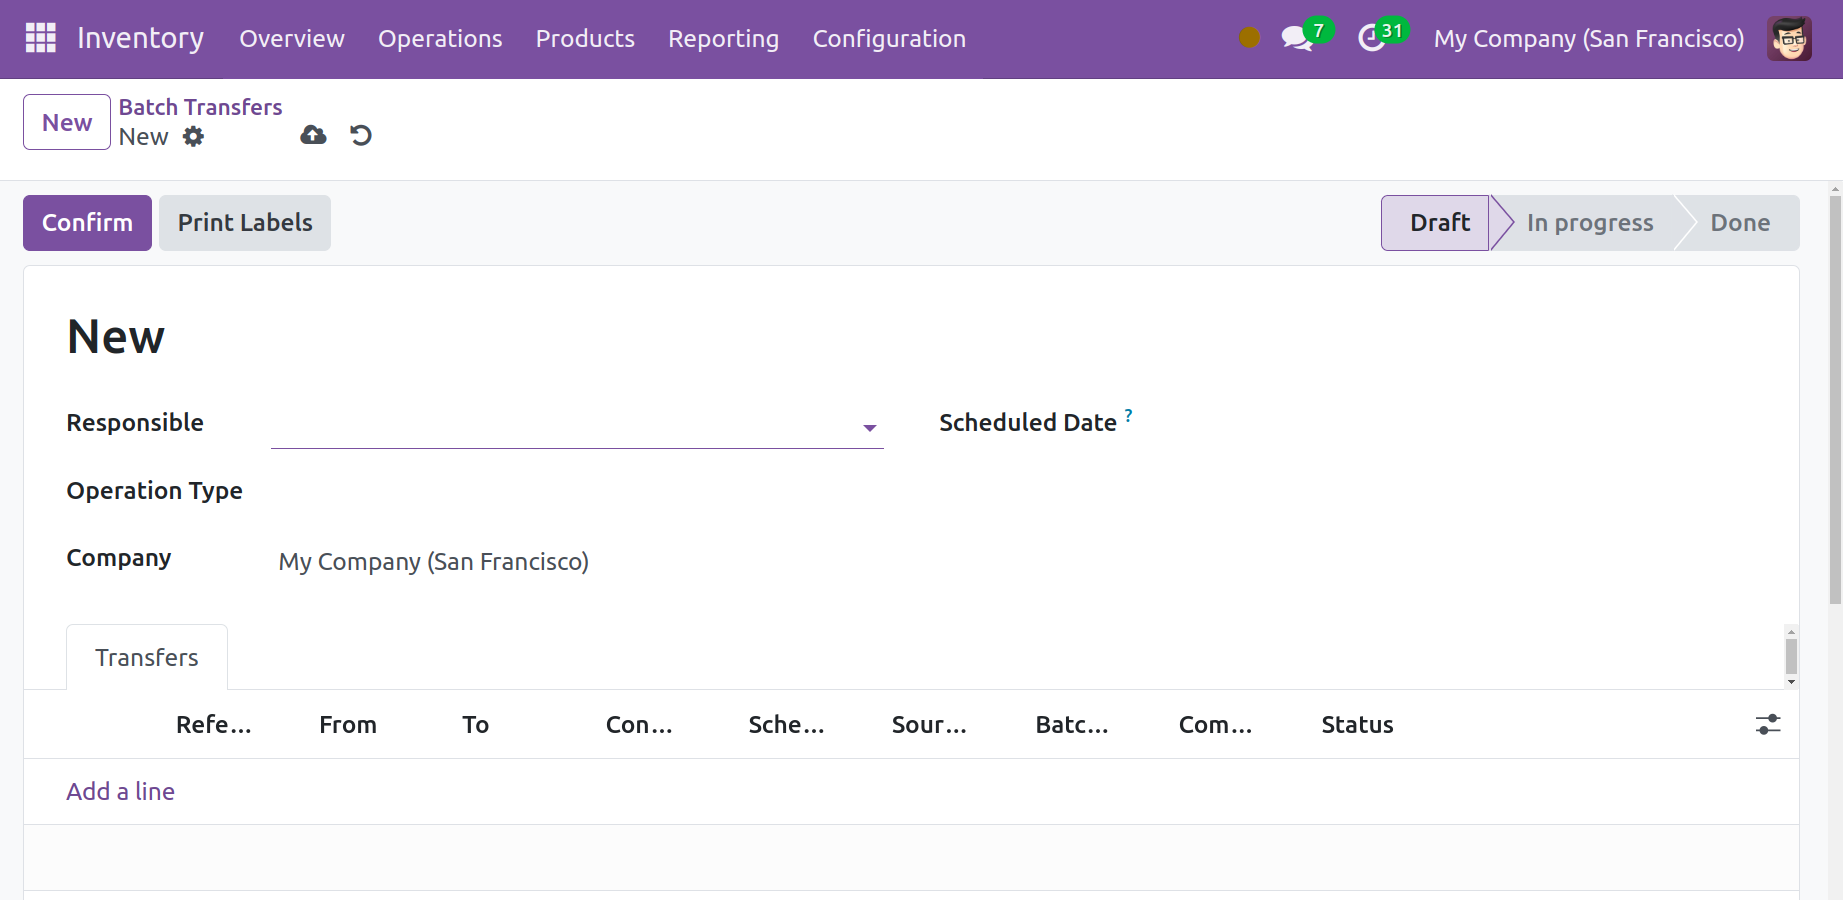
Enter the name of the person allocated to the task in the "Responsible" field. Specify the Company, Operation Type, and Scheduled Date. To provide further details about the transfer, click 'Provide a line' under the Transfers tab. The following pop-up window will show up.
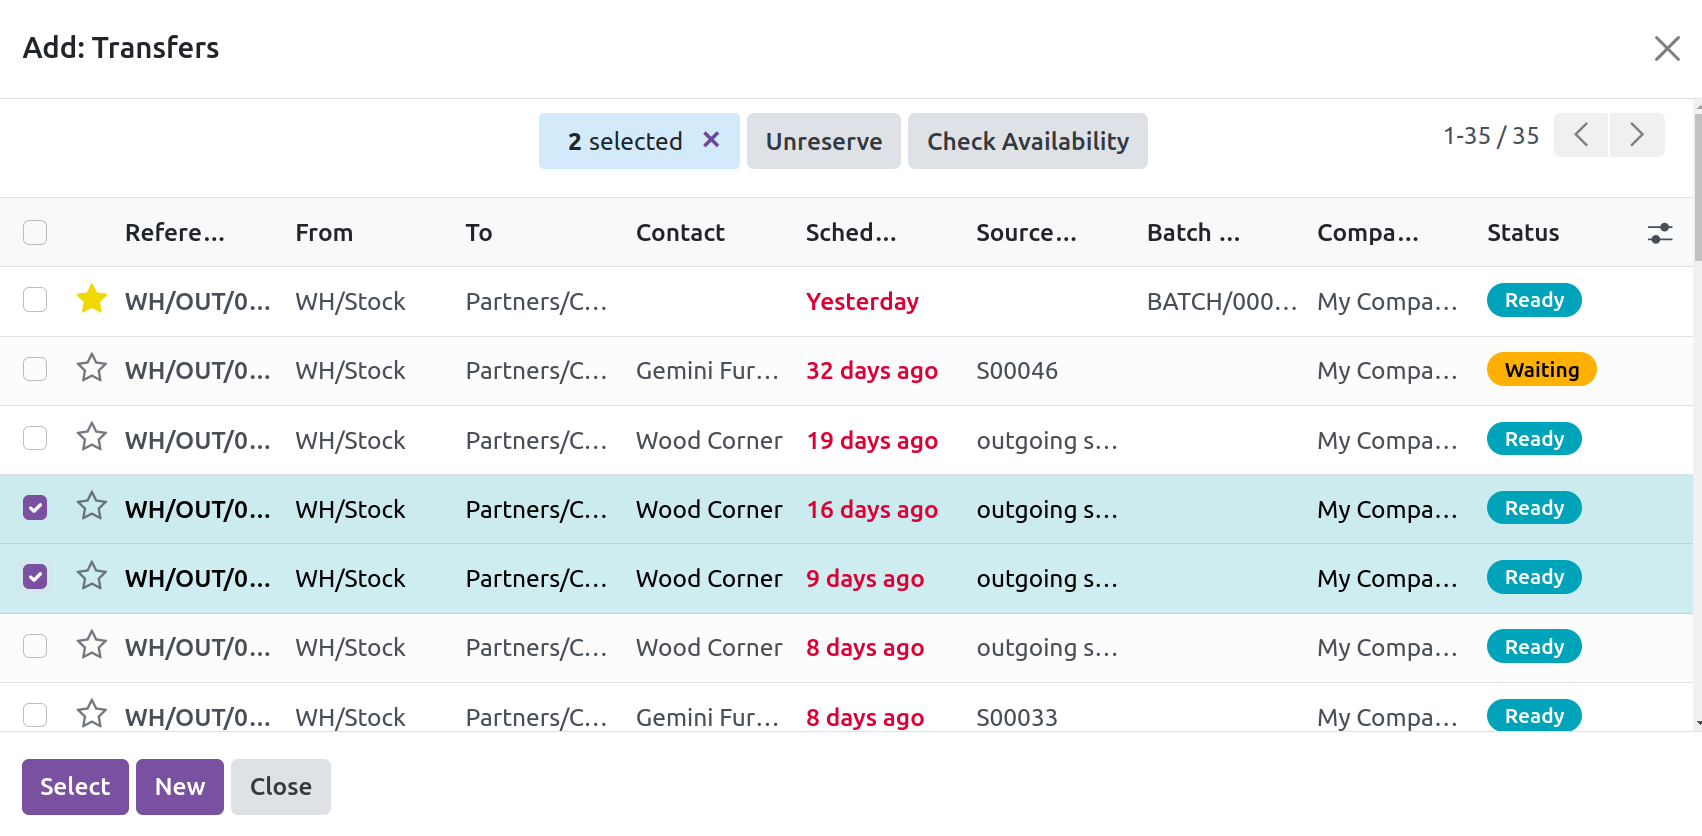
Only choose records that are marked as "Waiting" or "Ready." Transfers in the "Draft" status are not an option since they do not confirm the processes to finish the action. So while transferring one will be able to check the availability of products in the operation type at the time of transfer. If the products are available they can be moved to ready state. Other wise can remove the transfer from the batch and continue the processing.
Click "New" to initiate the process of creating a new transfer from this window.
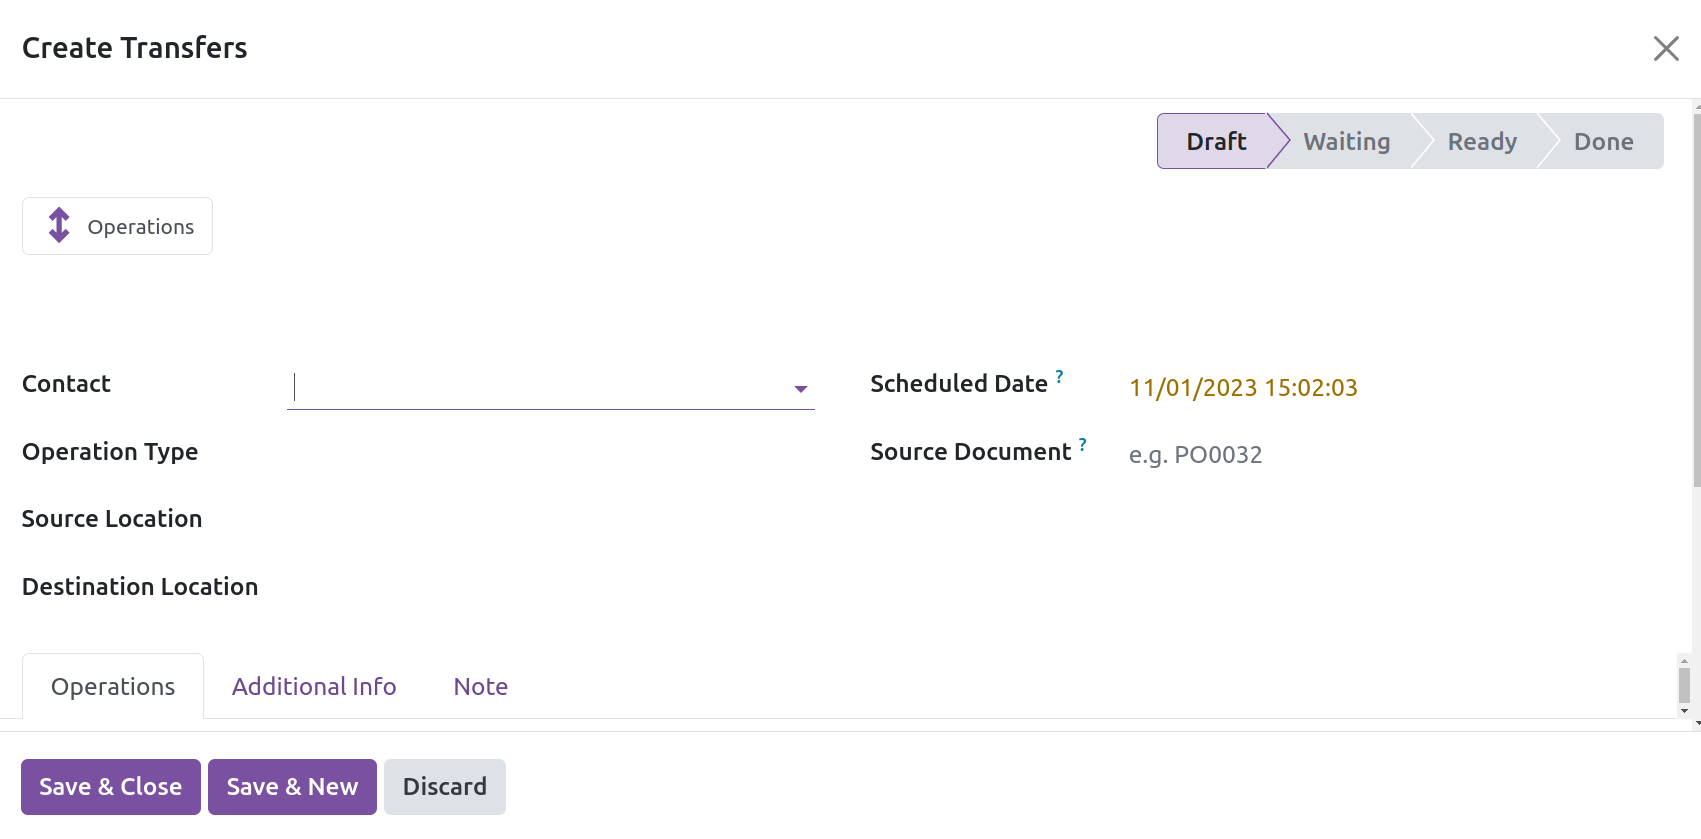
This window looks like the one you see when you add a new transfer (see the preceding topic). After entering all necessary information, select "Save and Close."
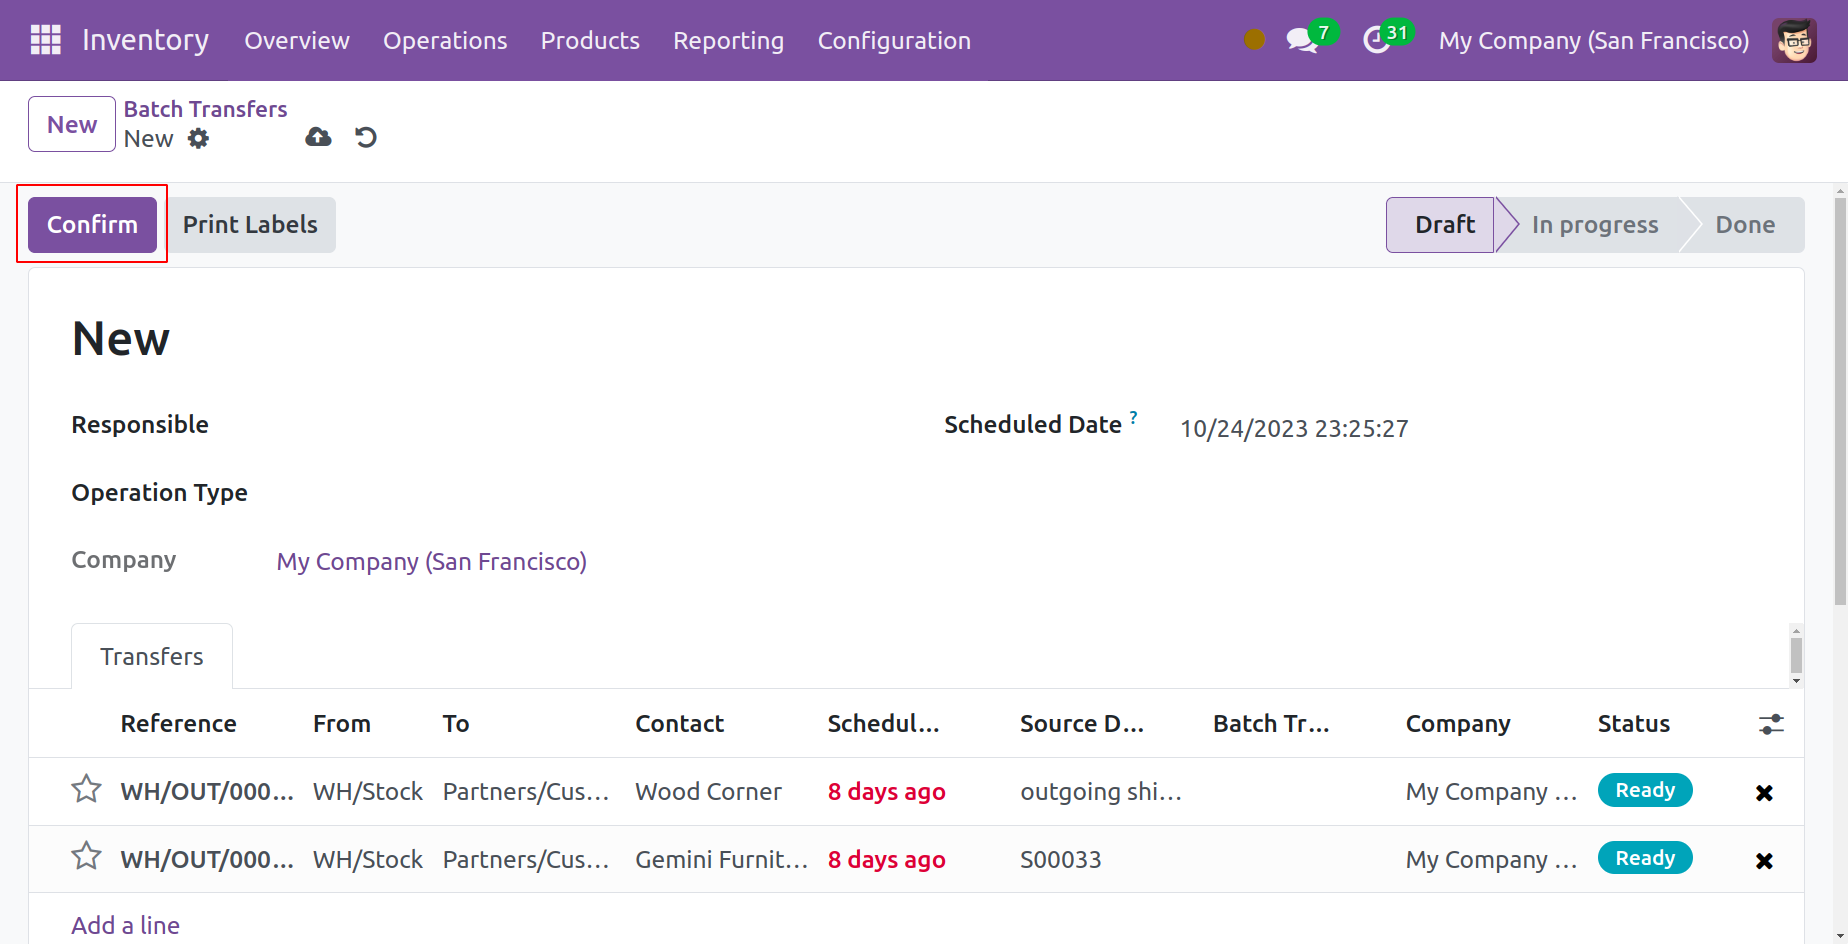
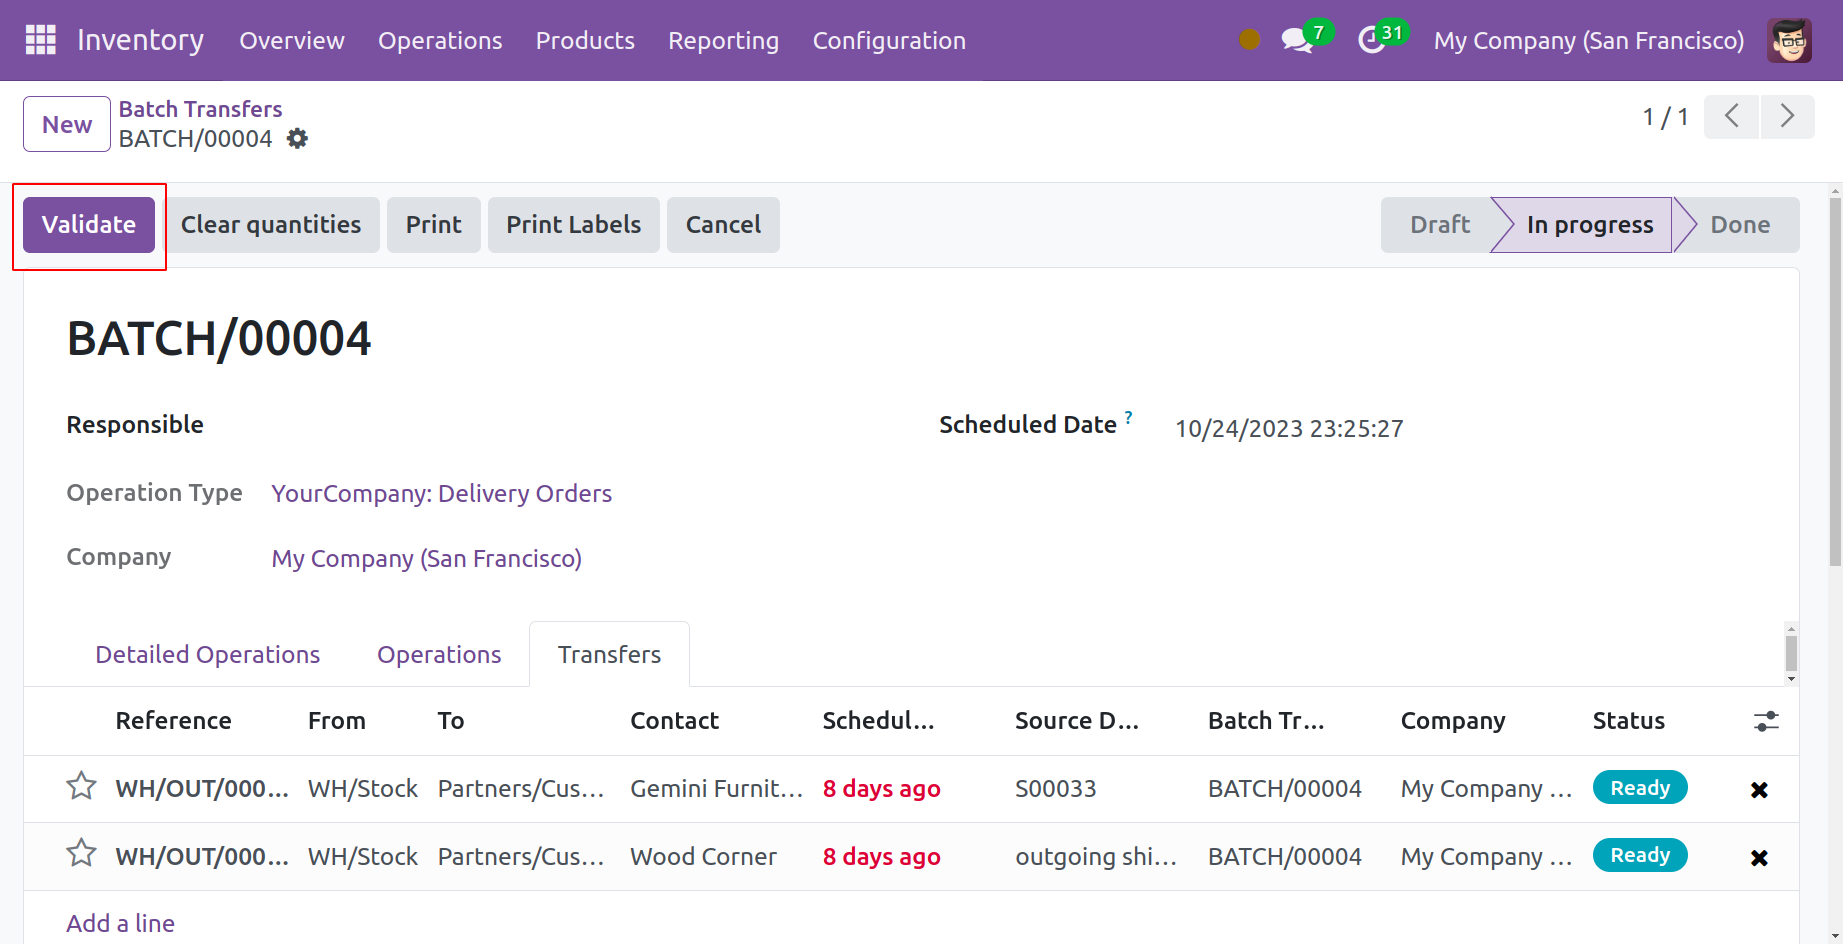
Click "Confirm" now. "In Progress" replaces "Draft" as the current status. To indicate that the state is "Done," click the Validate button. This will finish the batch transfer procedure.
Batch transfers can also be made via the Transfers window. To accomplish this, navigate to the Transfers menu and choose the transfers you wish to include in a batch transfer, as seen in the illustration below. Click the Actions button after choosing transfers from the list.

The Add to Batch option will then be displayed. This button will launch a new pop-up when clicked.
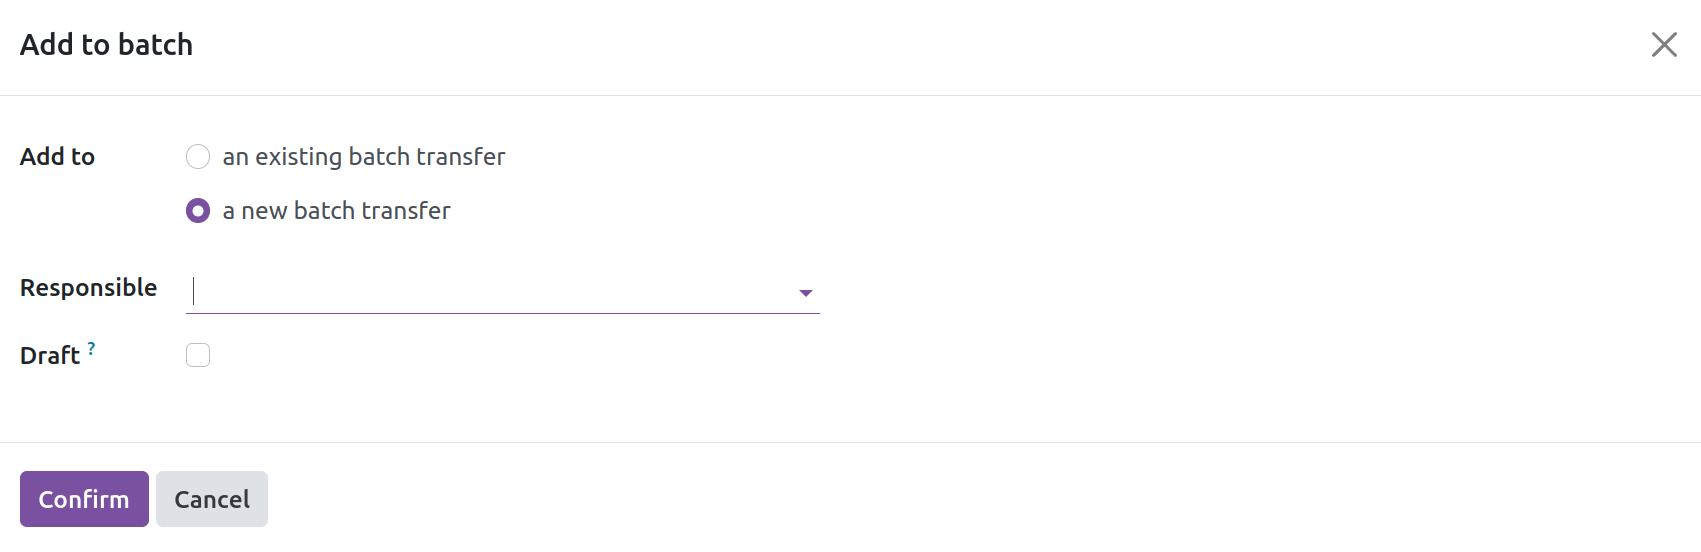
You can choose where to add the chosen transfers from this menu. It can be included in a fresh batch transfer or one that already exists. You can designate an employee in the Responsible section and click the Confirm button after choosing an appropriate option. This will validate the chosen transfers' batch transfer.
Wave Transfers
Wave Transfer helps you bundle a series of product-related actions so that you can process them all at once to increase their efficiency. Click "Settings" from the Configuration tab's dropdown list to utilize this function. Next, as indicated below, enable "Batch Transfers" and "Wave Transfers" in the Operations section.
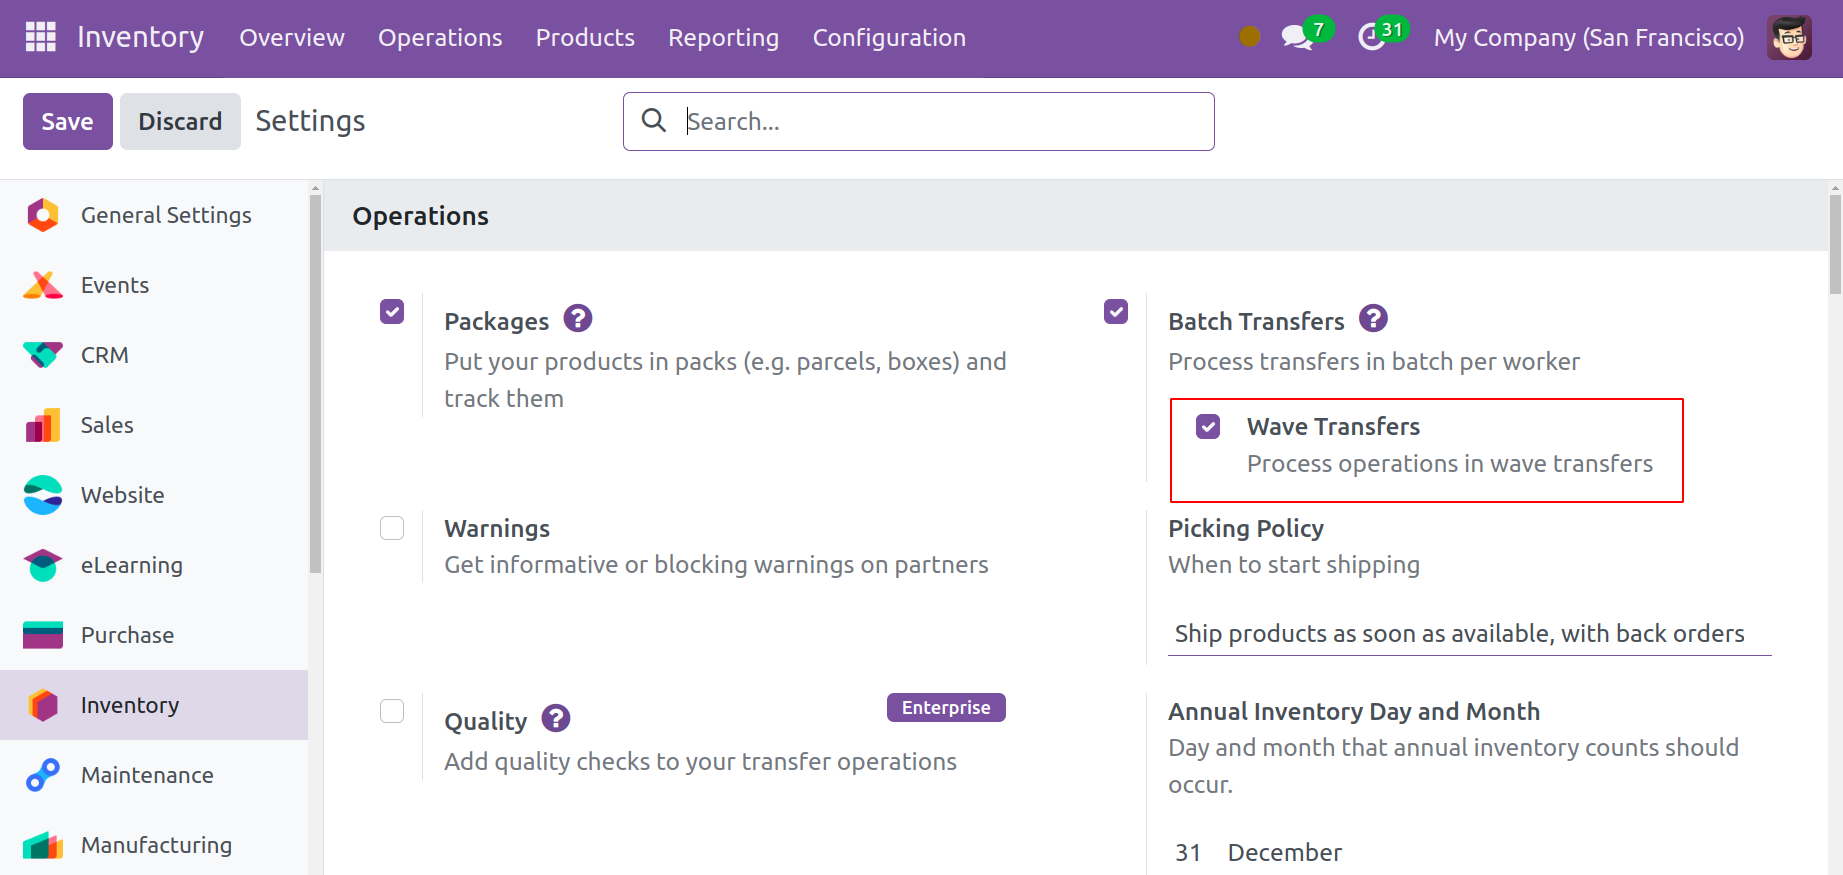
Additionally, "Picking Policy" and "Annual Inventory Day and Month" can be set. In this manner, you can bring together many procedures and make them work as a single unit.
You can transfer a lot of products from one location to another with the aid of the Wave Transfer feature. Once a transfer is added to a wave, it cannot be taken out of the wave. It is seen as being more sophisticated than batch transfers. You may access the Transfers menu after turning on this functionality from the Settings menu.
Choose the transfers you wish to include in a wave transfer from this window. Make sure the transfers you choose have the same status and kind of operation.
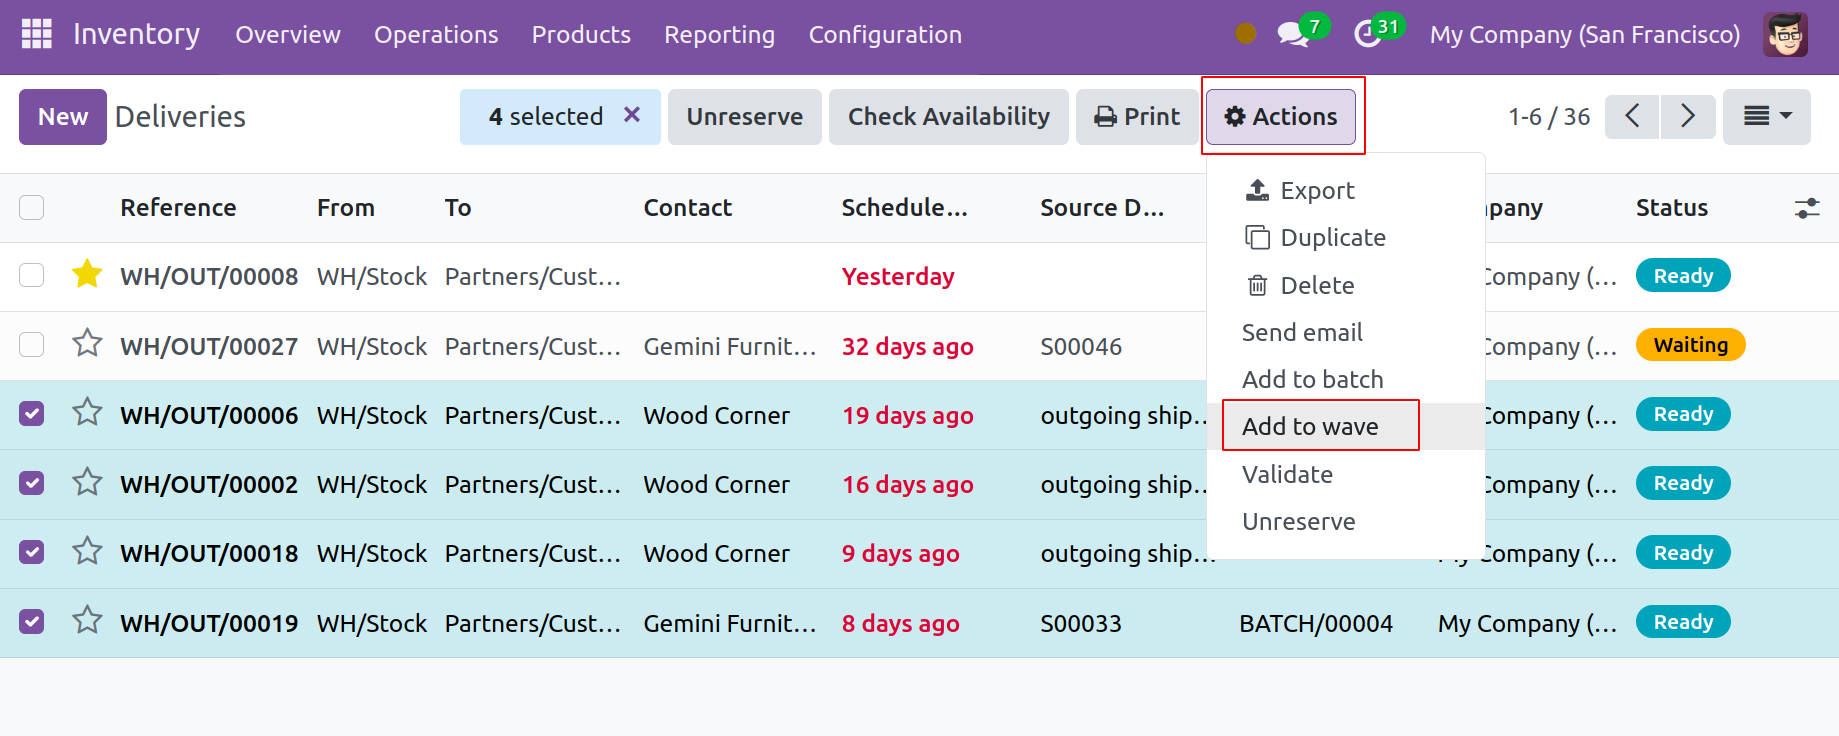
Once the transfers have been chosen, click the Action button to access the Add to Wave option. This option will open in a new pop-up window when clicked.
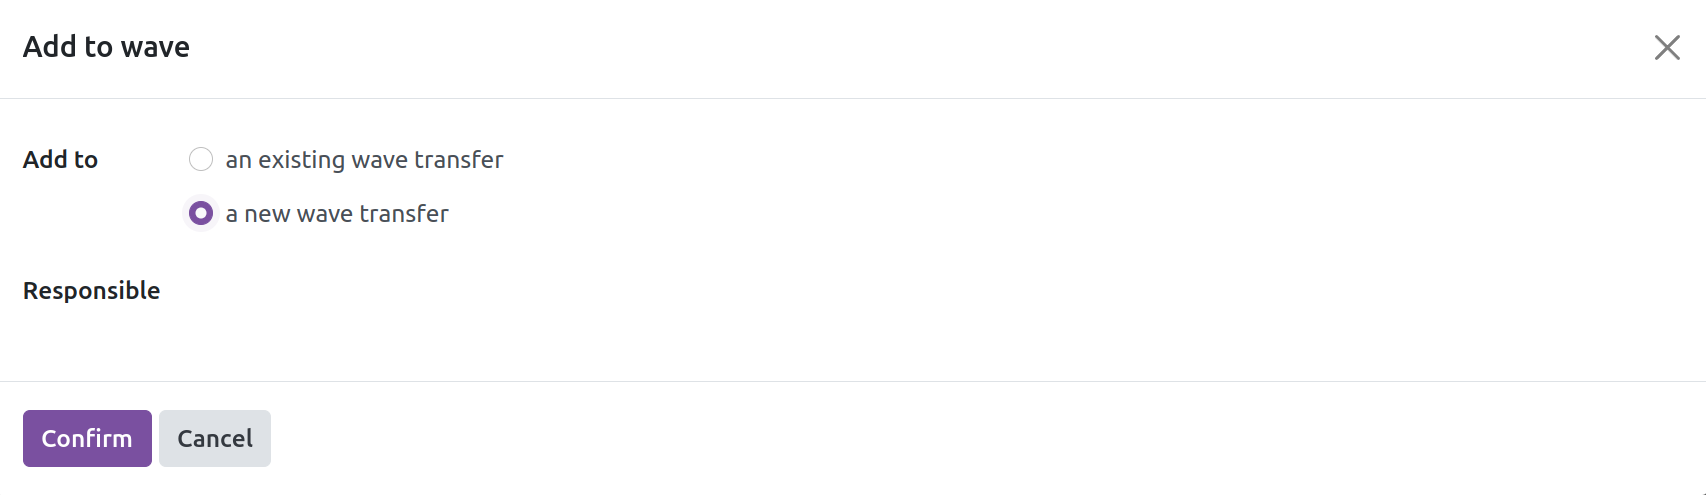
You have the option to make a new wave transfer or add the chosen transfers to an already-existing one. In this case, the Add to field's 'a new wave transfer' option is being chosen. In the Responsible field, you can designate an officer to oversee this transfer. Next, press the Confirm button. This will cause a fresh pop-up window displaying the chosen transfers' list.
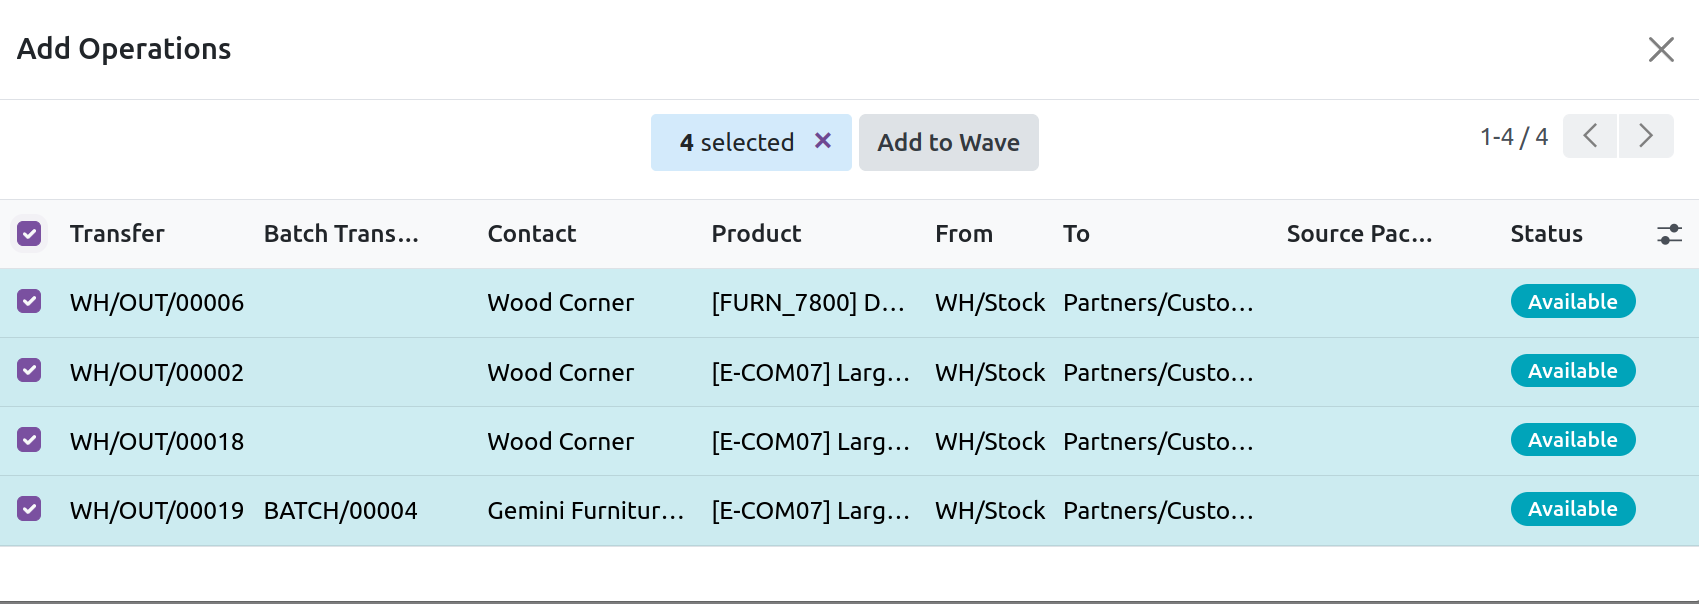
You can click the Add to Wave button after choosing the necessary transfers from this window for the wave transfer. Thus, a new wave transfer will be produced. To control it, navigate to the relevant sub-menu under the Operations menu on the Wave Transfer platform.

The specifics of the Batch Transfer, Scheduled Date, Responsible, Operation Type, Company, and State are displayed in the list, as seen in the screenshot above. From this window, you can click on the newly formed wave transfer.
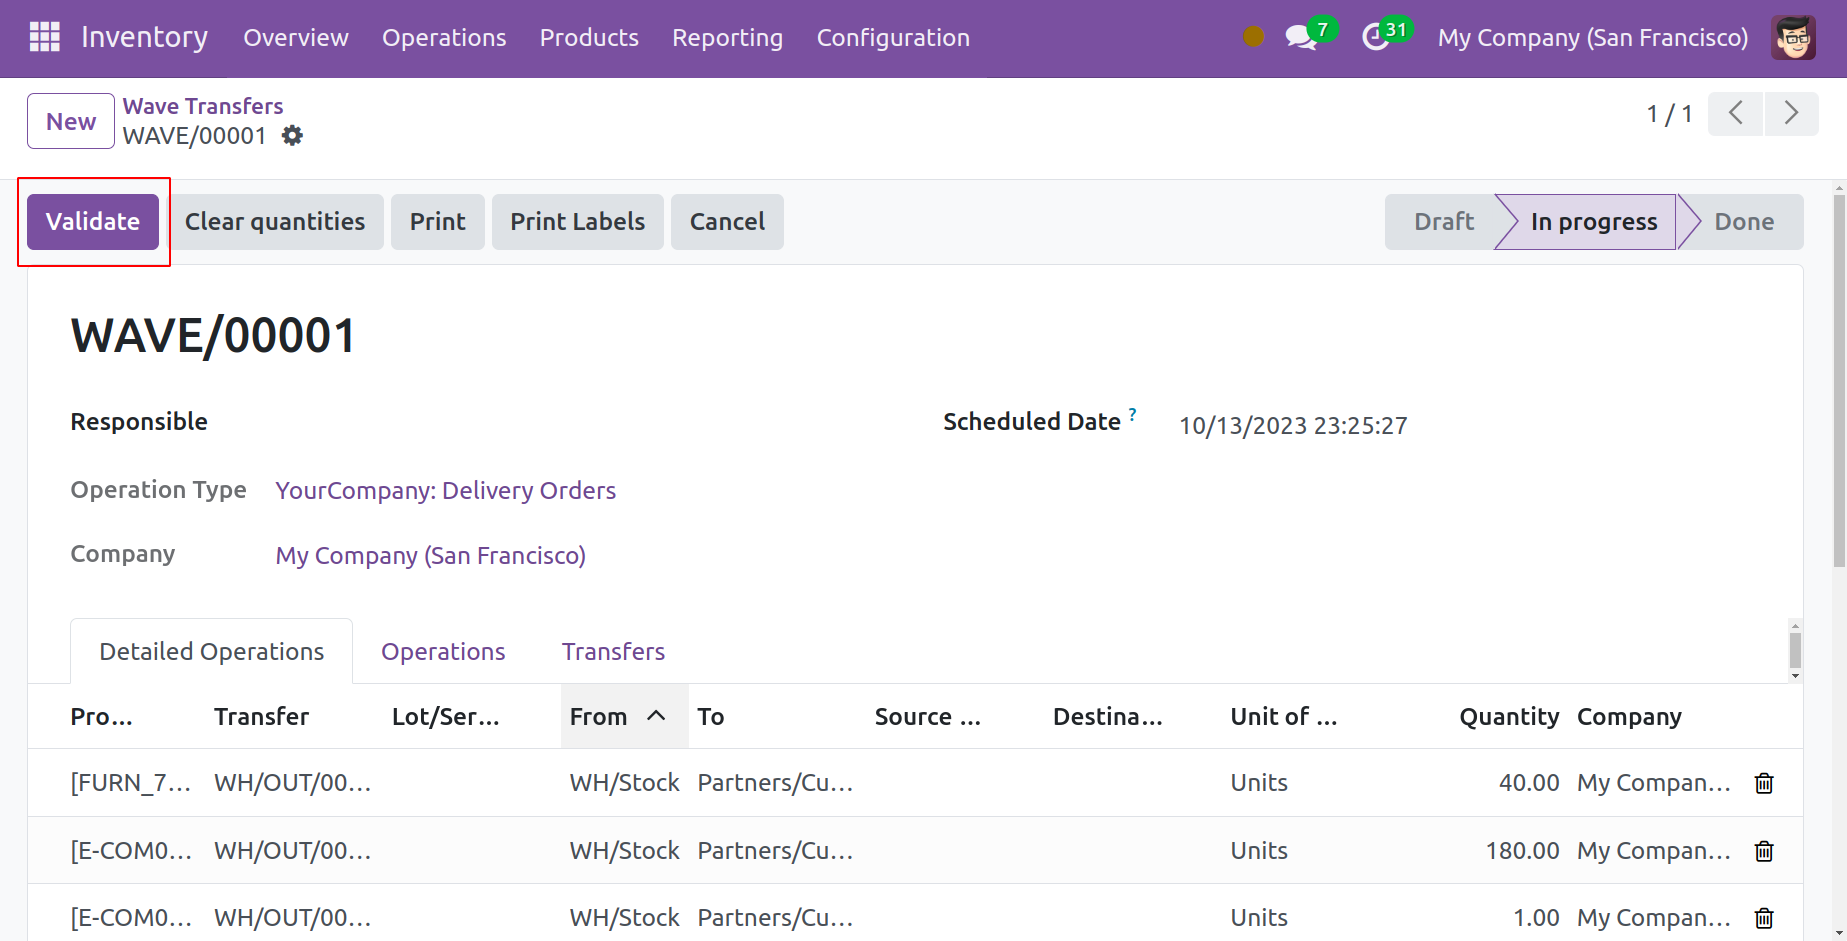
Here, you can finish the wave transfer procedure by using the Validate button.