Customers
Having a dedicated platform for tracking all of your consumers can help you improve your sales. Odoo provides a centralized mechanism for collecting client data. It makes it possible for you to quickly obtain the information you need about your consumers at any time. This platform is located in the Sales module's Orders menu. Below is a screenshot of the platform's Kanban view.
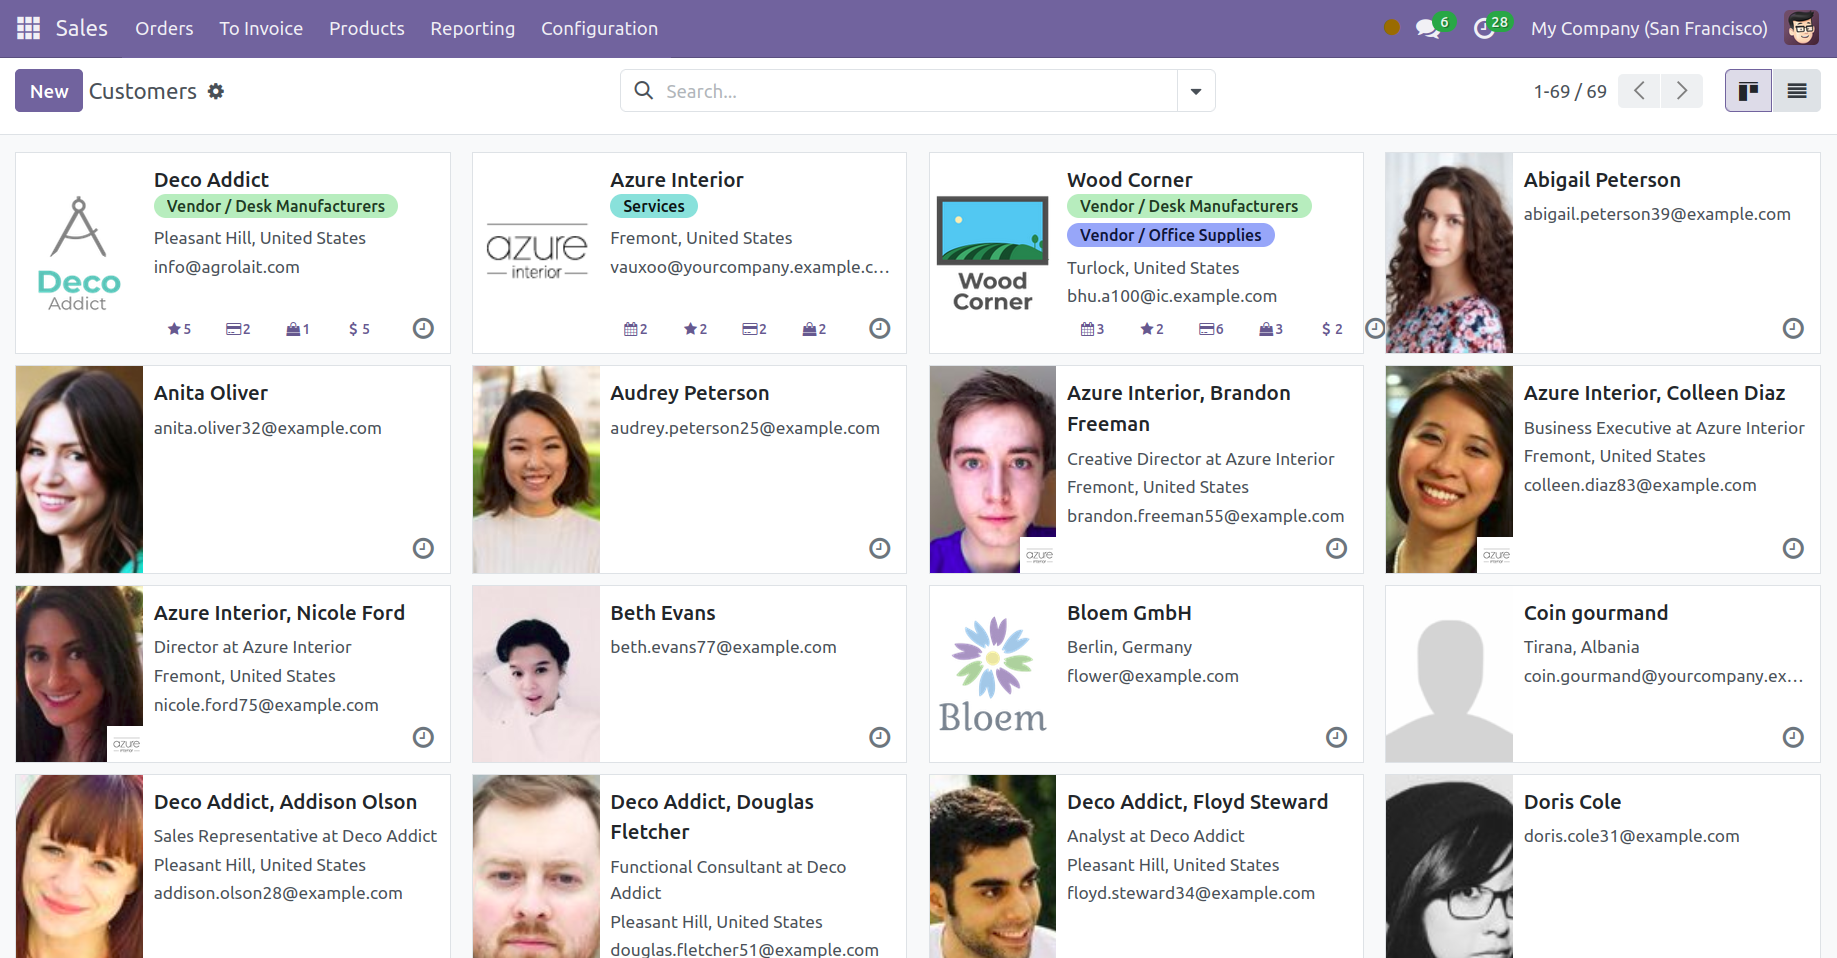
The window displays customer photos and personal information. You may arrange sales-related activities with them by using the little clock icon. They may be filtered by Individual, Companies, Archived, Vendor Bills, Customer Invoices, and Subcontractors. Company, Country, and Salesperson are available under the Group By option. To add a new customer to the Sales module, click the Create button now.
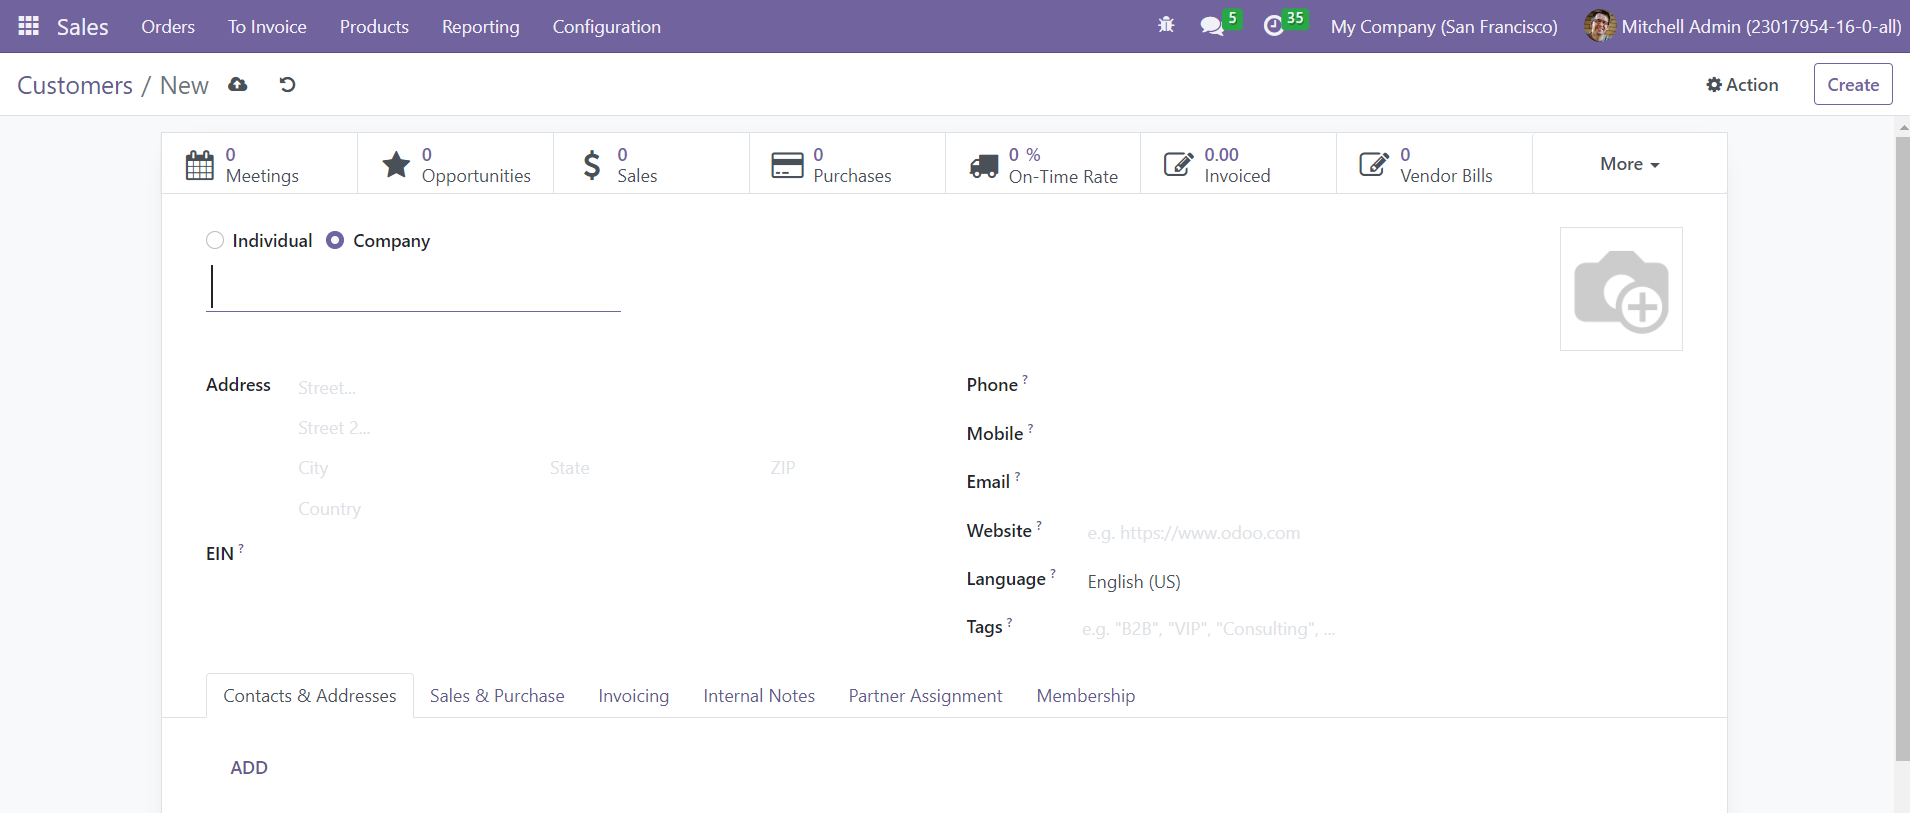
You can create a client record as an Individual or a Company. You can enter the customer's Name, Address, Phone, Email, Website, Language, and Tags in the corresponding areas. Using the Add button, you can add the customer's various addresses and contact information under the Contacts & Addresses page.
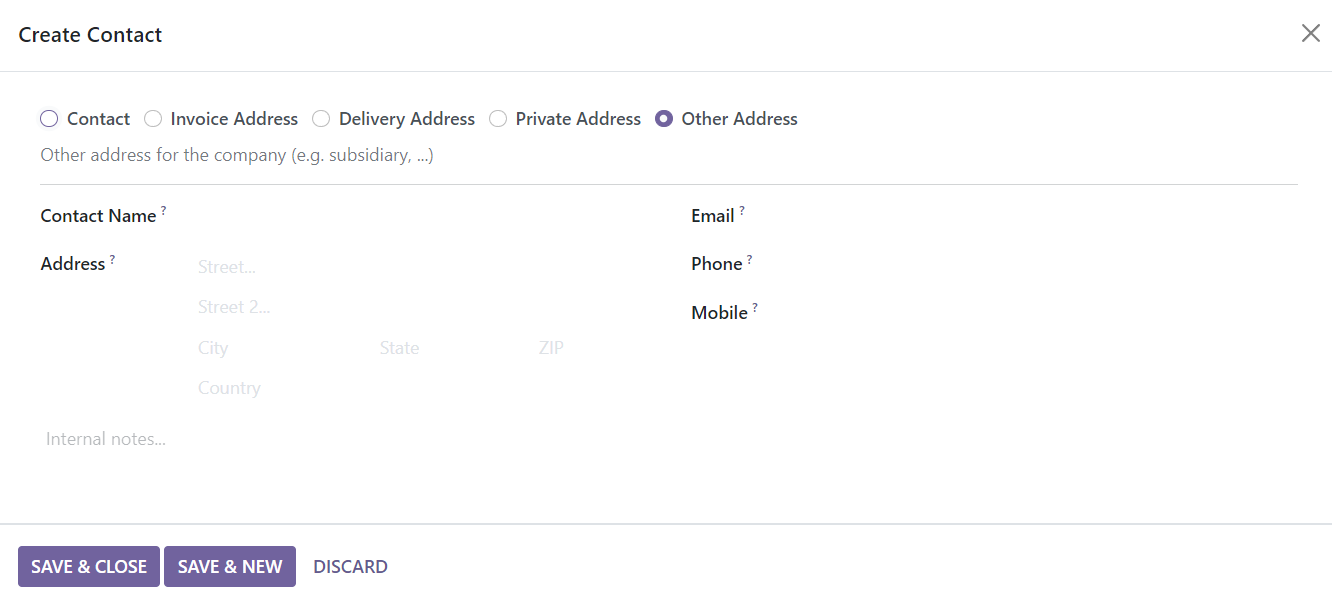
The address might be Contact, Invoice, Delivery, Private, or Other Address. In the pop-up window, you may provide the Contact Name, Address, Email, Phone, and Mobile Number.
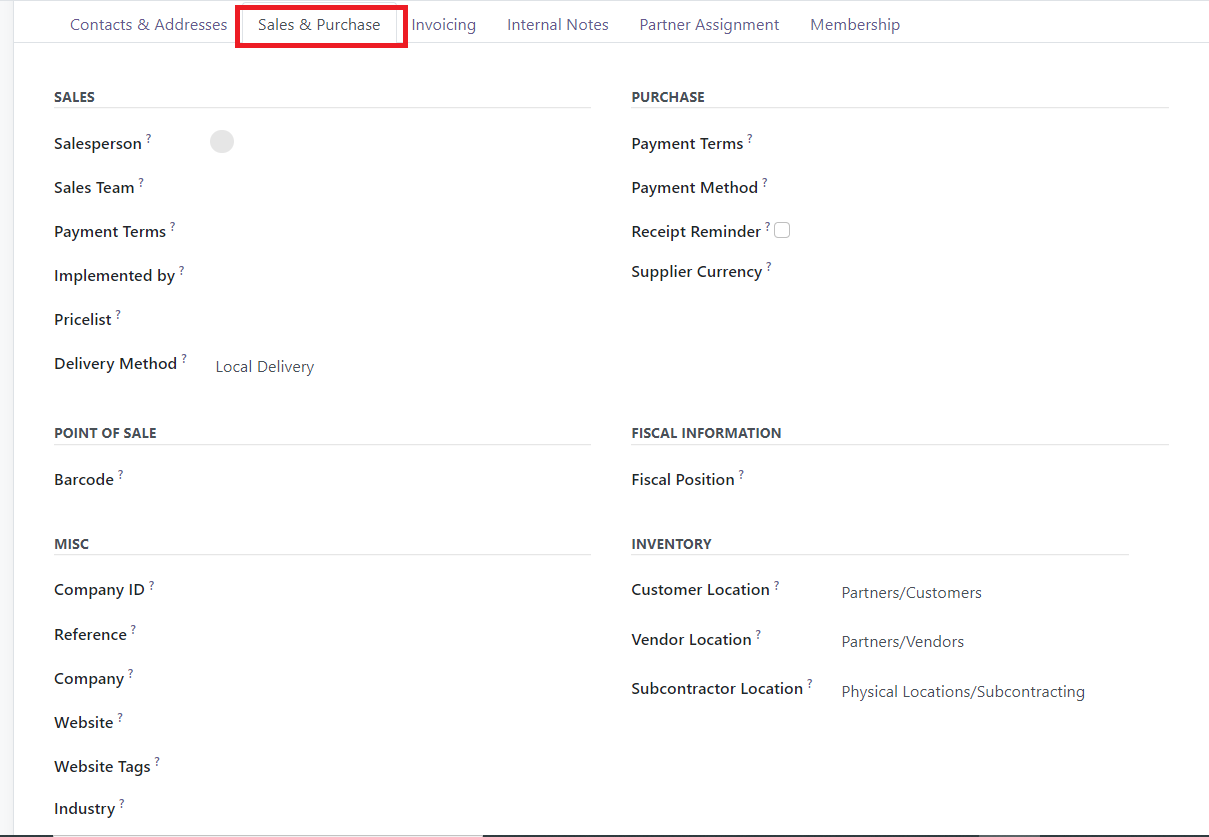
The relevant tab contains the information about Sales and purchases. You can designate a Salesperson and Sales Team for the customer to manage sales activities. Odoo will utilize the specified Pricelist and Payment Terms for client invoices and sales orders rather than the default one when they are stated. Enter the customer's sales order's default delivery method in the Delivery Method field and the associated partner ID in the Implemented By field.
Under the Purchase section, you can mention Payment Terms which will be used instead of the default one in the purchase orders and vendor bills. The preferred Payment Method for paying this customer can be defined in the given space. If you want to send a Receipt Reminder to the customer, you can set them in the respective field. This will send an automated reminder to the customer a particular day before the expected receipt date to confirm the exact receipt date. You can mention the Supplier Currency used for the purchase operations with this customer. Set a Barcode in the given field to identify this customer in the Point of Sale session. The Miscellaneous area is where you may enter the Company ID, Reference, Company, Website, Website Tags, and Industry. To ascertain the taxes or accounts utilized for this contact, mention the Fiscal Position in the Fiscal Information area.
In the Inventory section, you may define the Customer Location, which shows the target stock location when shipping items to this contact. When receiving goods from this contact, the vendor location may include information on the originating location. The stock location utilized for subcontracting operations is indicated by the subcontractor location.
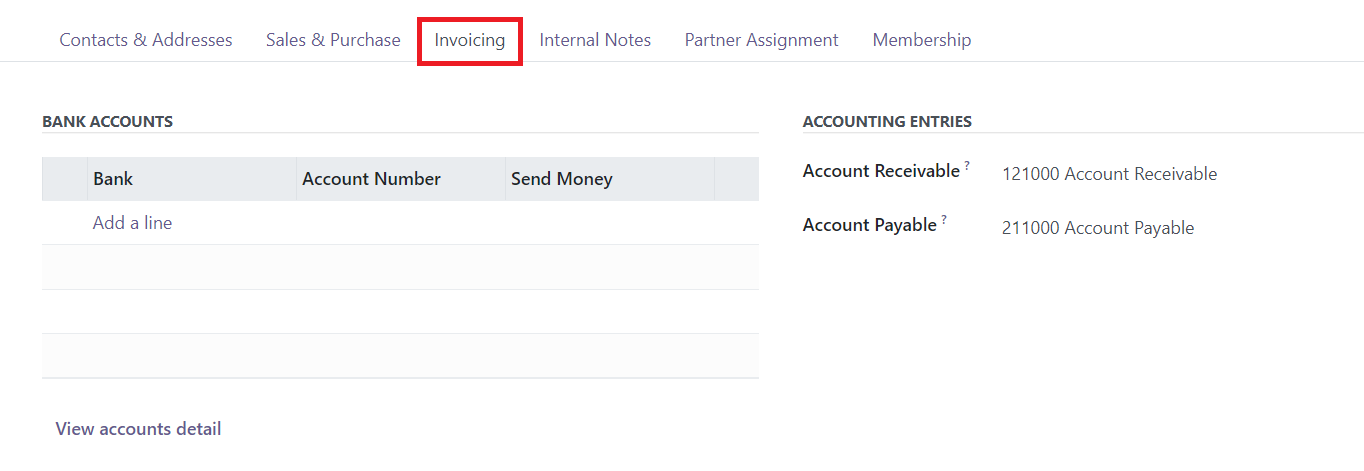
Using the Add a Line button, you can add the bank account details under the Invoicing tab. It includes the details of the Bank, Account Number, and Send Money. The send money toggle allows one to mark whether it is a trusted account or not. In the respective fields, you can mention the Account Receivable and Account Payable. The View Accounts Details button will show a detailed view of the account.
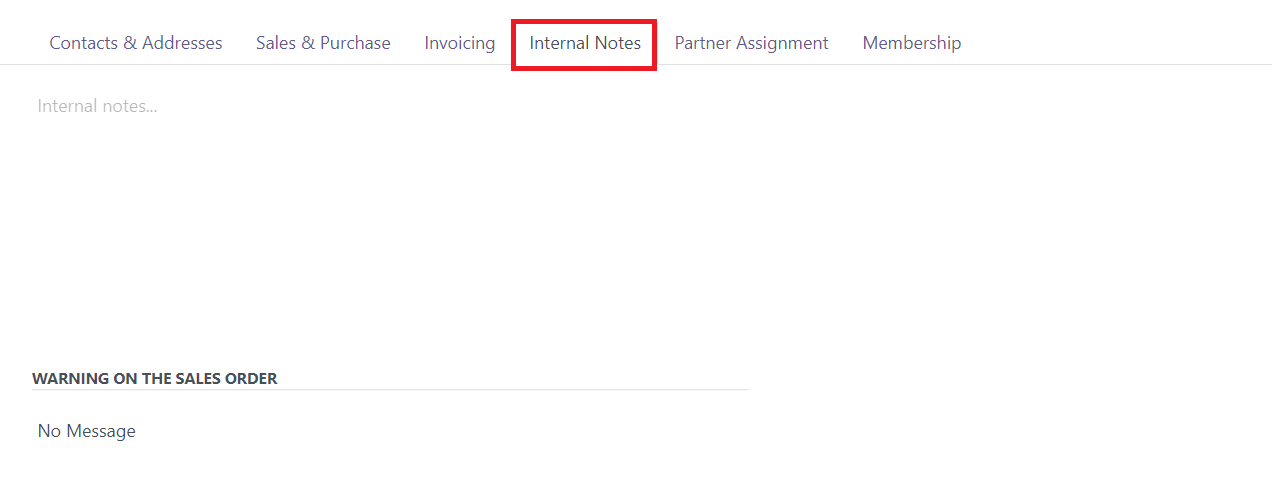
Under the Internal Notes tab, you may enter any internal notes about sales. Every time you make a sales order with this contact, you may put a Warning on the Sales Order after activating the Sales Waring option from the Settings menu.
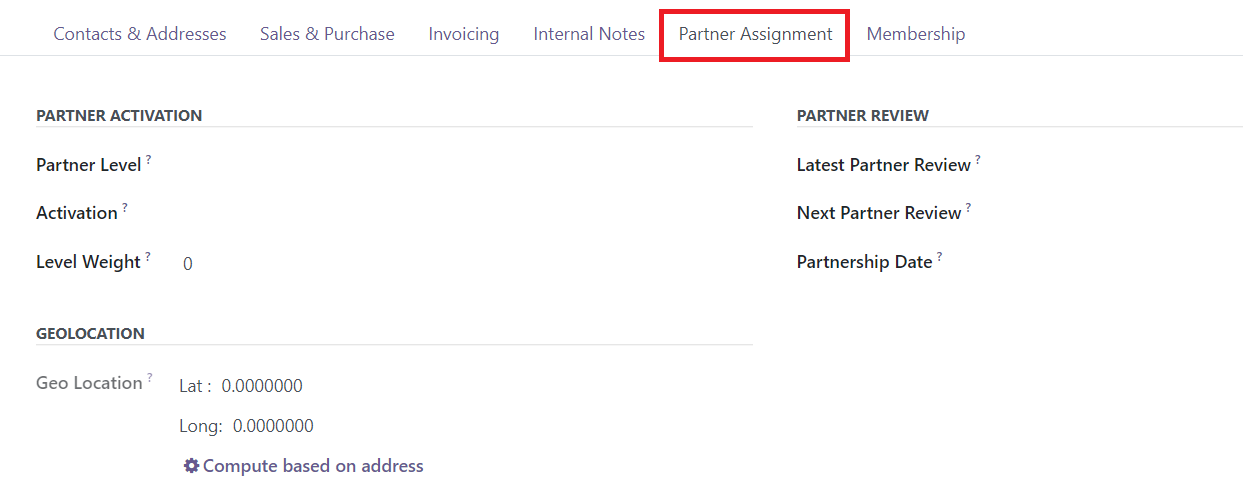
The Partner Assignment page contains information on Partner Activation and Partner Review. In this page, you may set the Partner Level, Activation, Level Weight, Partnership Date, and the Most Recent and Next Partner Reviews. In the designated field, enter the Geo-Location. To obtain geolocation, you have two options: manually enter the address or use the Compute function.
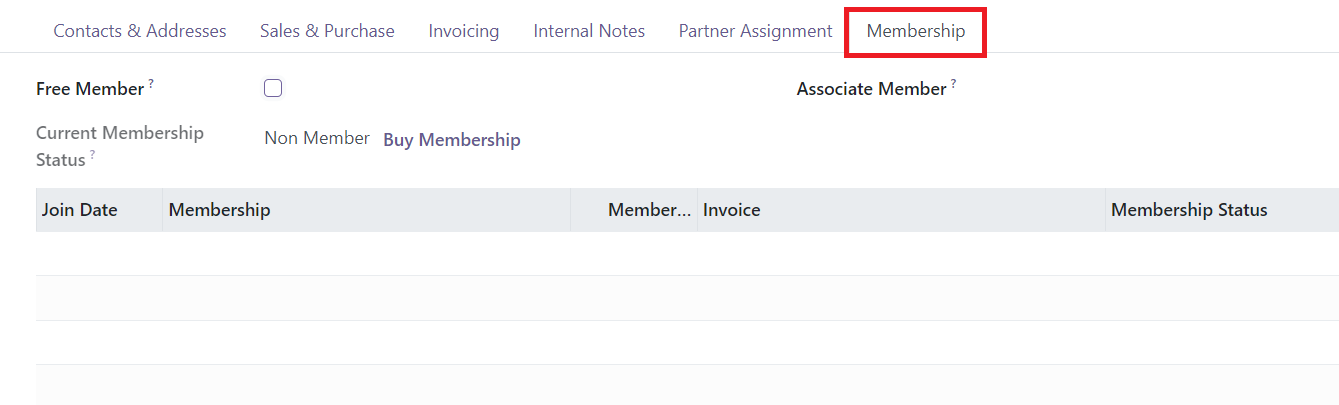
If you wish to provide free membership, go to the Membership tab and choose the Free Member area. This page will provide information on the Join Date, Membership, Membership Price, Invoice, and Membership Status in addition to the Current Membership Status. After the setting is finished, Odoo will automatically save the entries.
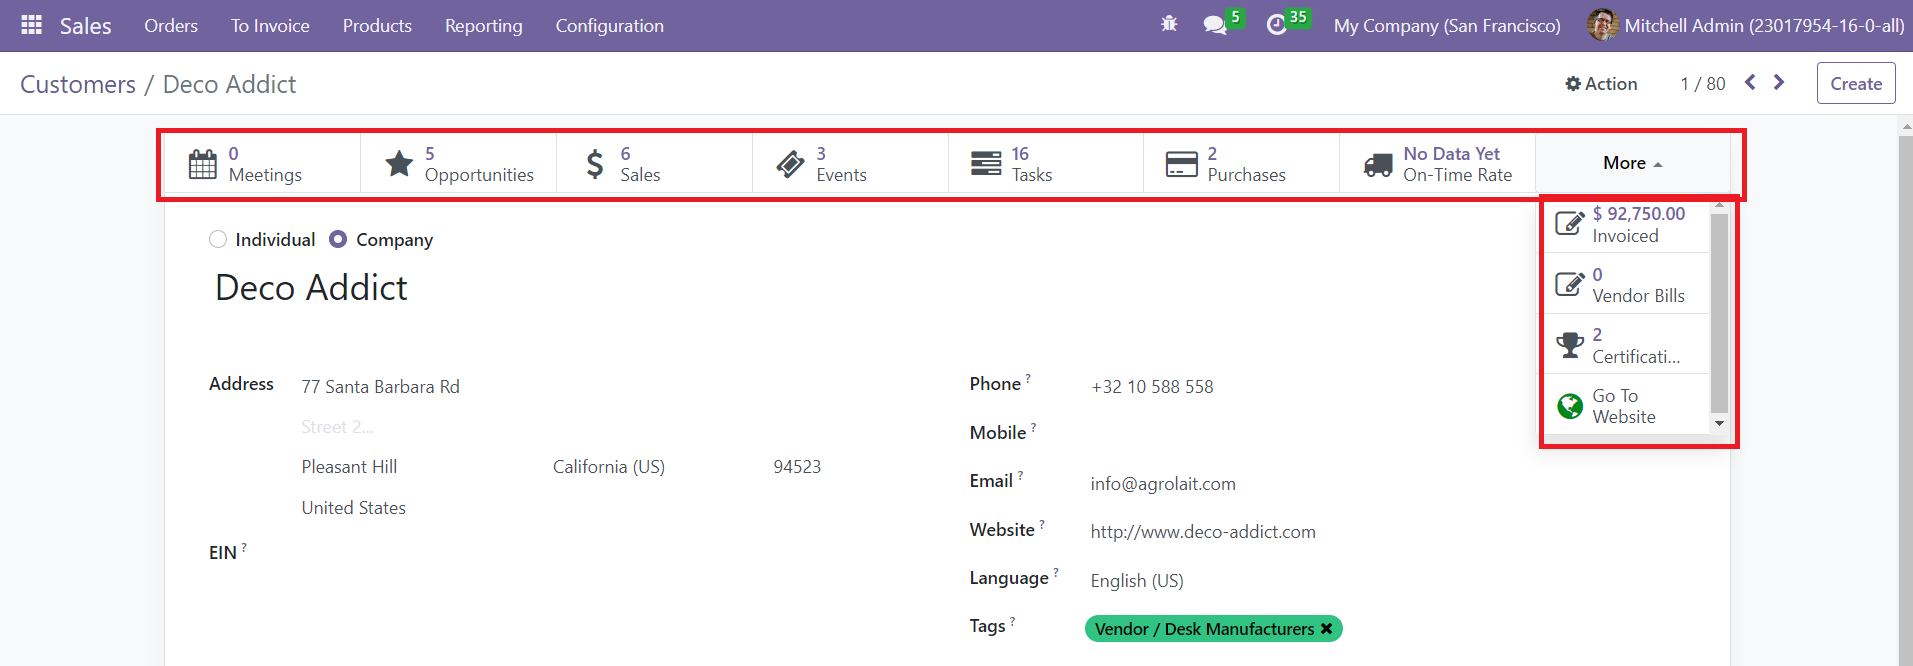
To further monitor the activities with this contact, you will also receive some sophisticated smart buttons. It features buttons to manage tasks, vendor bills, invoices, certifications, sales, meetings, opportunities, purchases, deliveries, and events.