Vendor Bill
To obtain information about the payment made to a vendor after making a transaction, the vendor bills may be generated. You will be able to generate vendor invoices directly from the buy order form view in Odoo 17 when a purchase order has been confirmed. All of these vendor bills will be listed in the Invoicing module's Vendors menu under the Bills option.
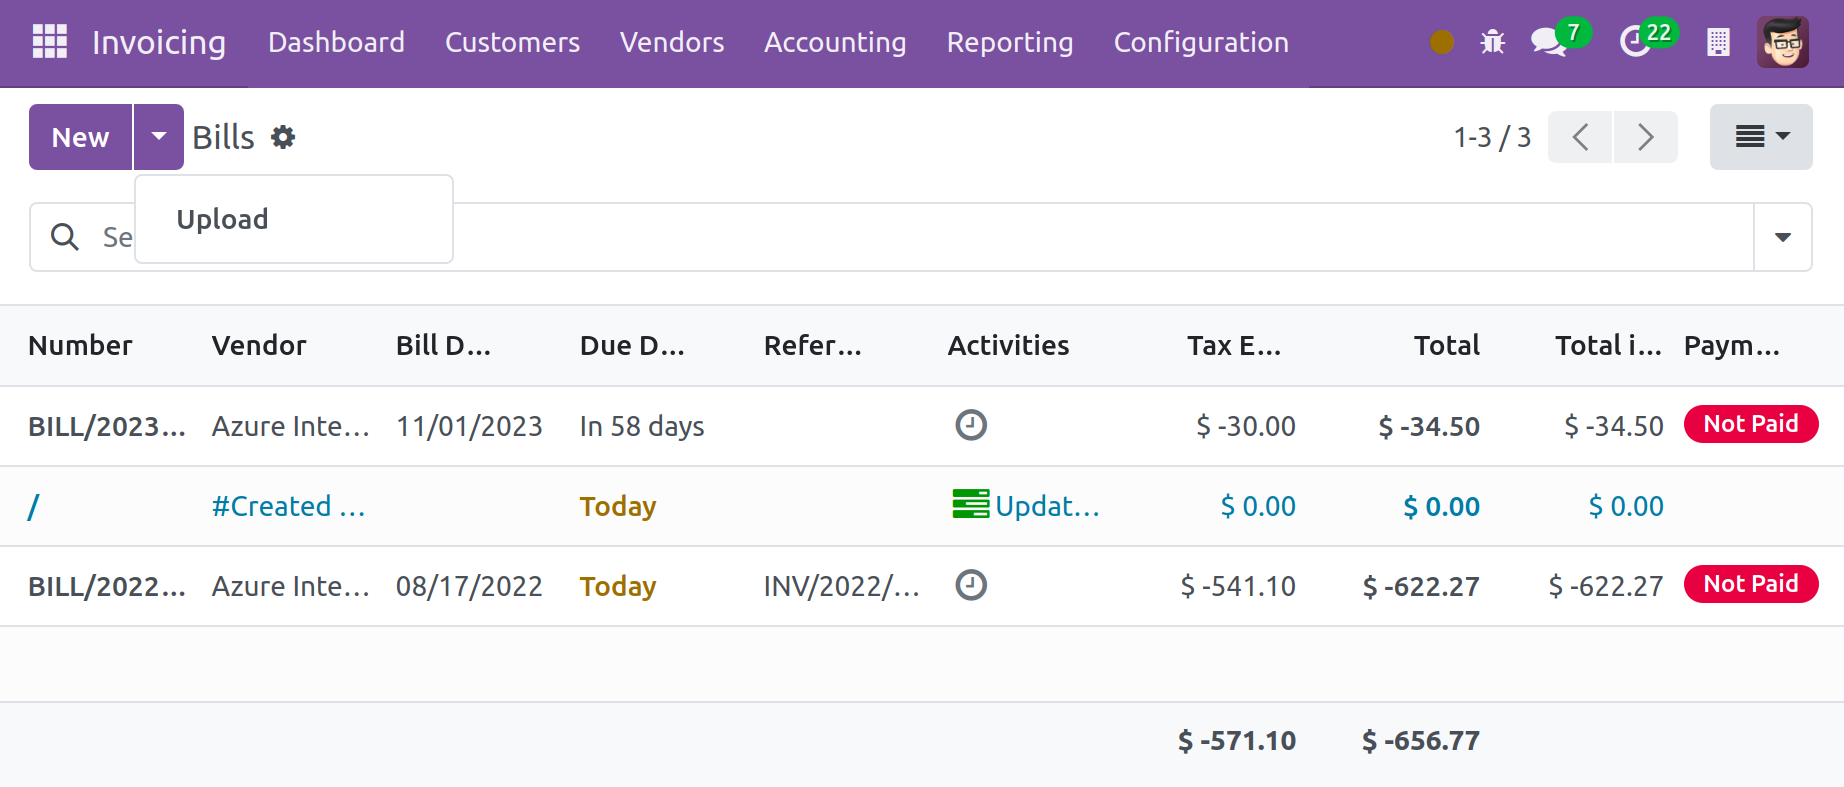
This is the vendor bills' list view. The information displayed includes the number, vendor, bill date, due date, reference, activities, amount excluded from taxes, total amount in currency, payment status, and status. To see the vendor bills in a Kanban format, click the Kanban view icon.
The default filters—My Invoice, Draft, Posted, Canceled, To Check, Unpaid, Paid, Overdue, Invoice Date, Accounting Date, Due Date, and Electronic Invoicing Processing—are displayed under the Filters option. On this platform, the Group By filters include Salesperson, Status, Sales Team, Electronic Invoicing State, Preferred Payment Method, Invoice Date, and Due Date. Customization options for the sorting choices are available in the Filters and Group By sections.
To start creating a new vendor bill in the Odoo 17 Invoicing module, click the New button. To upload a vendor bill from your system, click the Upload button.
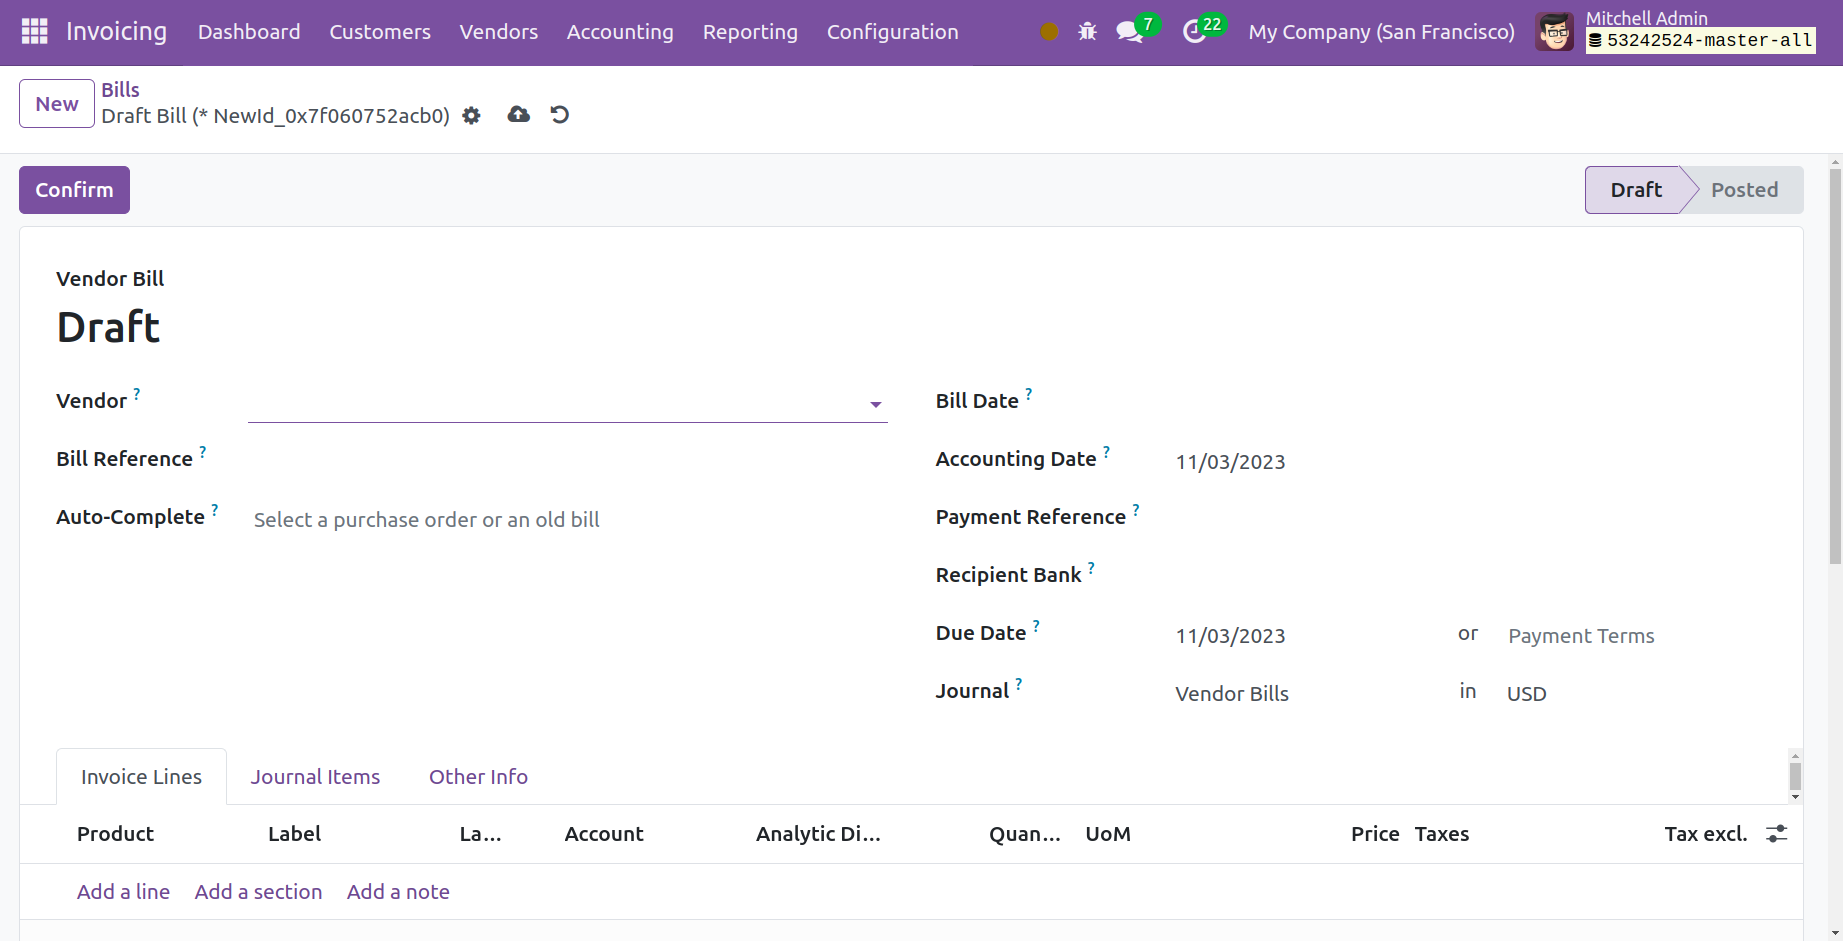
This is the vendor bill creation window's form view. We are going to draft a bill to the vendor. You can choose the vendor's name from the dropdown menu. You can enter any references the bill may have in the Bill Reference box. You can indicate in the Auto-Complete column whether you are constructing this bill based on an earlier Odoo 17 purchase order. By doing this, Odoo will use the information from the purchase order to automatically fill in the required fields. You can enter the desired date in the Bill Date area to have this vendor bill generated. The date that the accounting information pertaining to this specific bill was added to the record is shown by the Accounting Date, which is visible in the form view. You can enter the Payment Reference, Due Date, Journal, and Payment Terms in the relevant boxes.
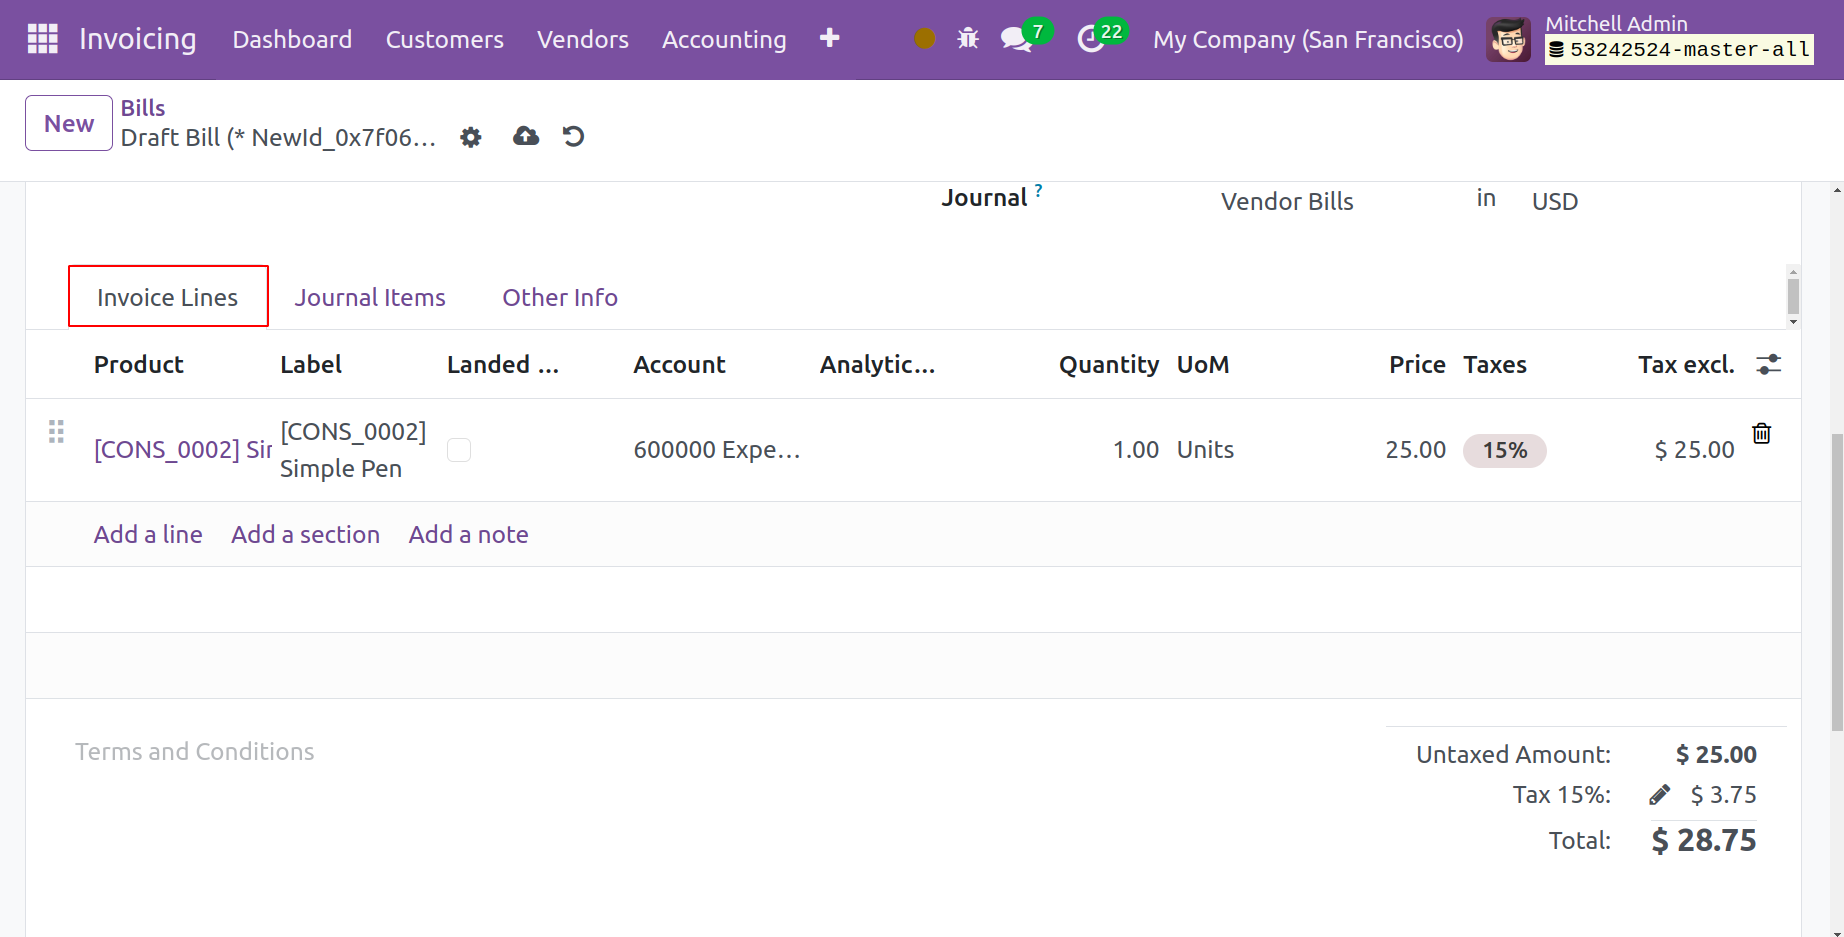
You can add items that you bought from the relevant vendor using the Invoice Lines. To add products one at a time, utilize the Add a Line button. Product, Label, Landed Cost, Quantity, UoM, Price, Taxes, and Subtotal will all be displayed on this tab. The Add a Section button allows you to add parts to the Invoice Line. To add remarks under the invoice line, use the Add a Note button.
The Journal Items tab will display matching journal items based on the product you mentioned in the invoice line. The journal items you set up for products when you created them in Odoo will determine this.
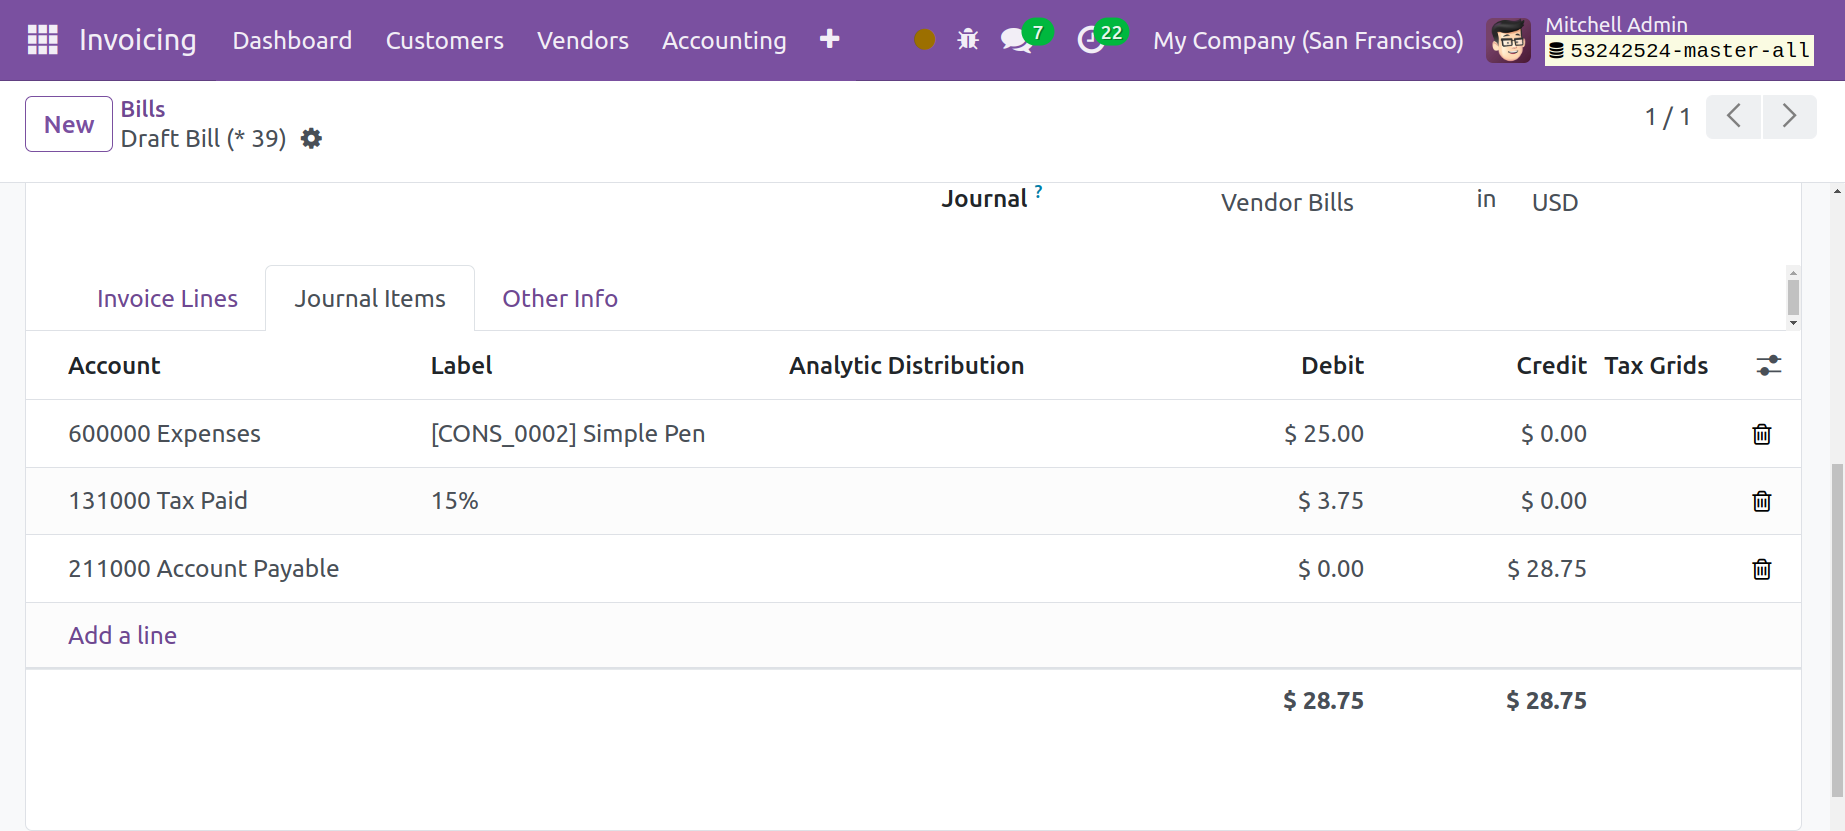
The Journal Items will display the Account, Label, Debit, Credit, and Tax Grids, as seen in the image above. The Add a Line button allows you to add more journal entries to the vendor bill.
Accounting information pertaining to this specific vendor bill can be added using the Other Info tab.
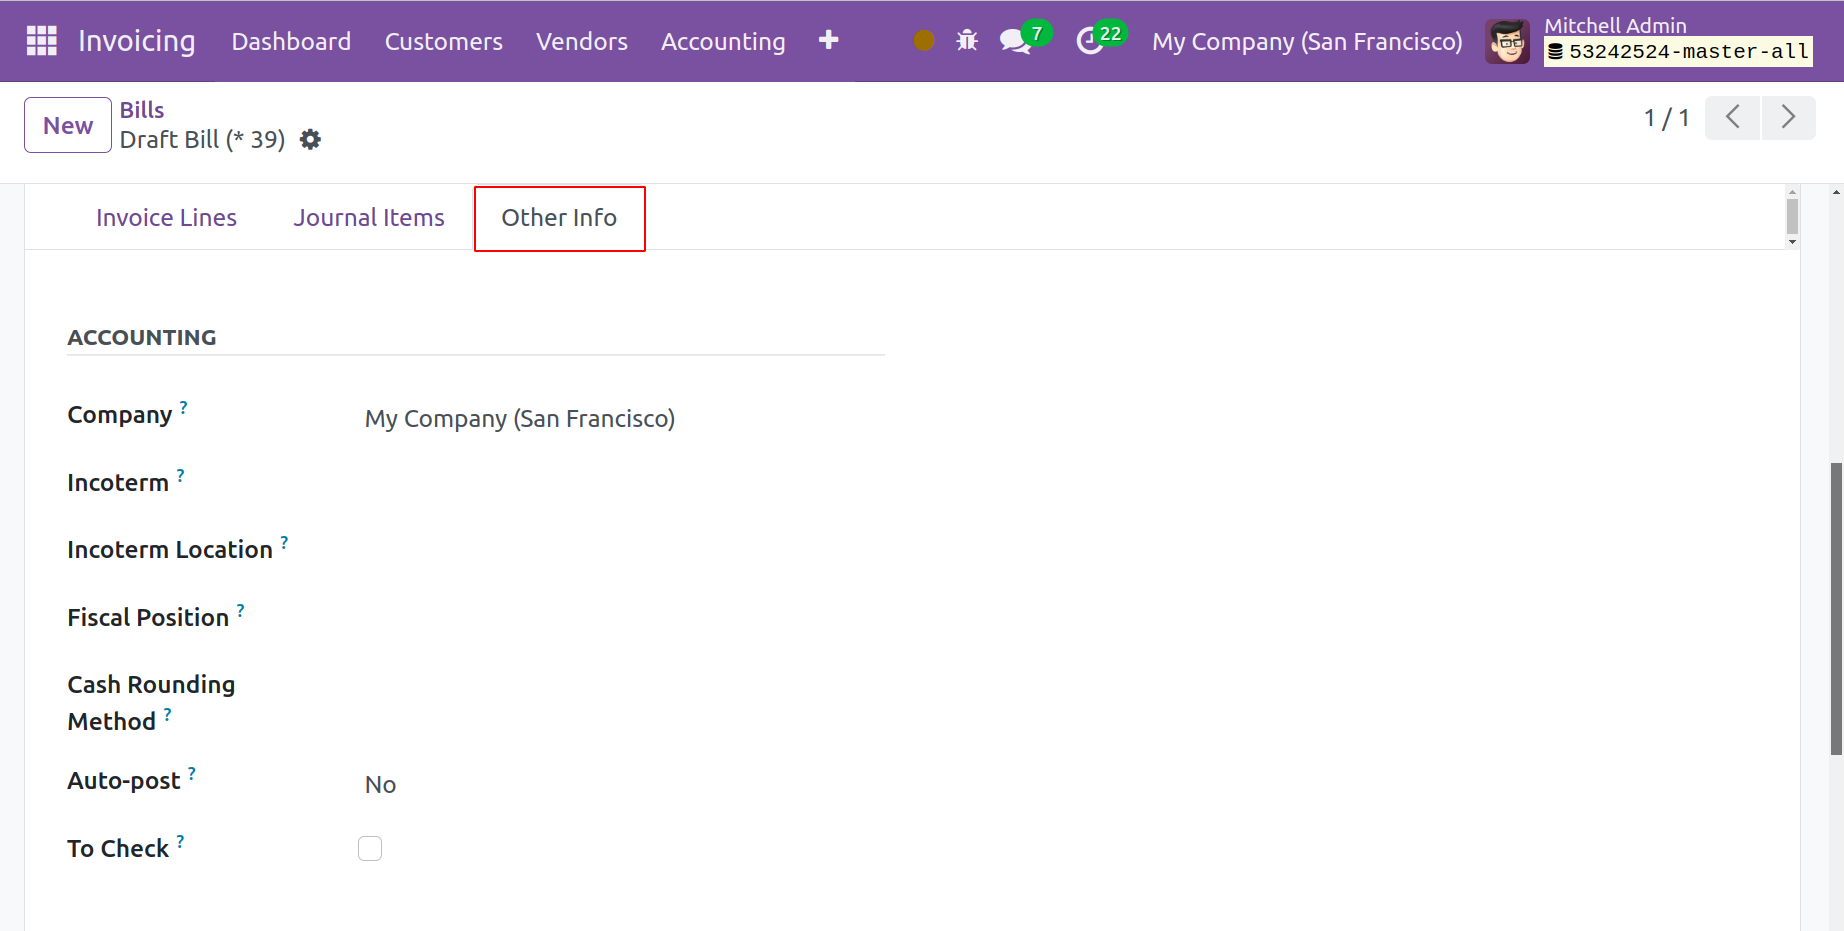
This is where you may find the company's name. You can refer to the Fiscal Positions and Incoterm in the relevant fields. You can select the Post Automatically option to have the entry posted automatically on the specified date in the vendor bill. You can verify the information submitted in the vendor bill by using the To Check option.

To validate the updated vendor bill, click the Confirm button now. The same steps we covered in the section on customer invoices can be used to register payment later.