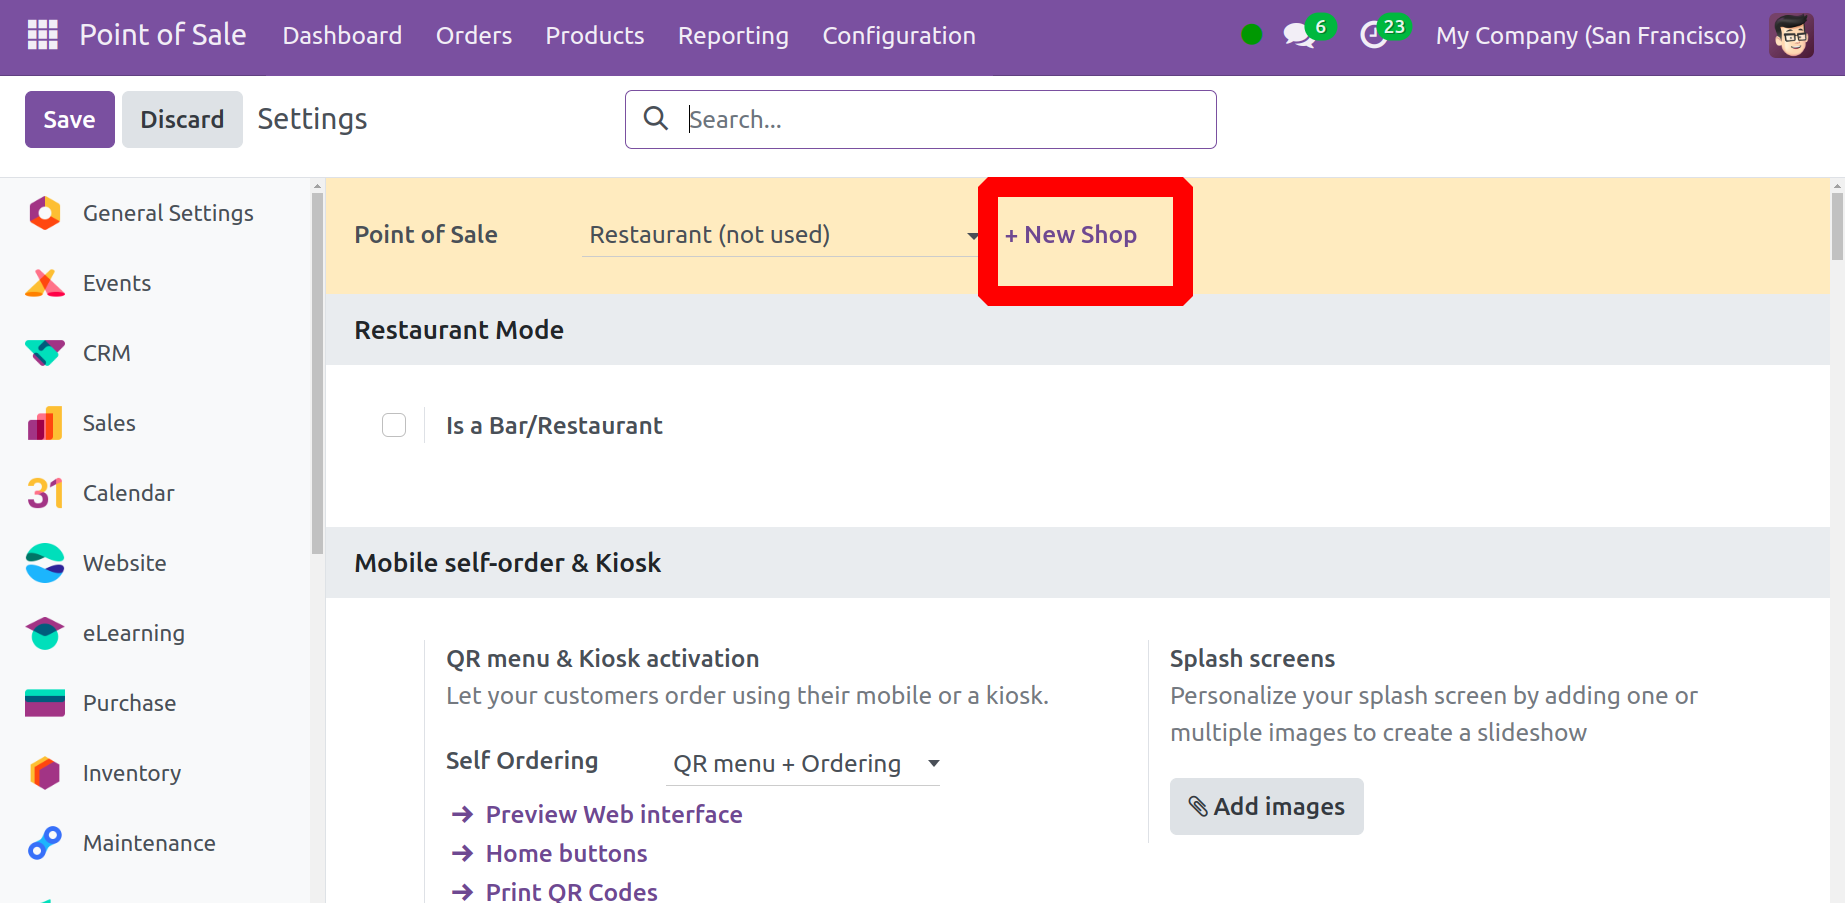
Settings
By clicking on it, you may select the Settings option from the Configuration menu. Via
this window, any PoS's parameters can be changed. Selecting the required PoS in the
Point of Sale field will allow you to accomplish this. To open a new shop, click the
+New Shop button.
Restaurant Mode
You can choose to set up a bar or restaurant. In the Settings menu of the Point of Sale
module, you will find additional choices, including Floors & Table Map, Internal Notes,
Early Receipt Printing, and ‘Allow Bill Splitting’ options. You can choose different
layouts for tables and specific designs for flooring by selecting the Floors & Table Map
option.
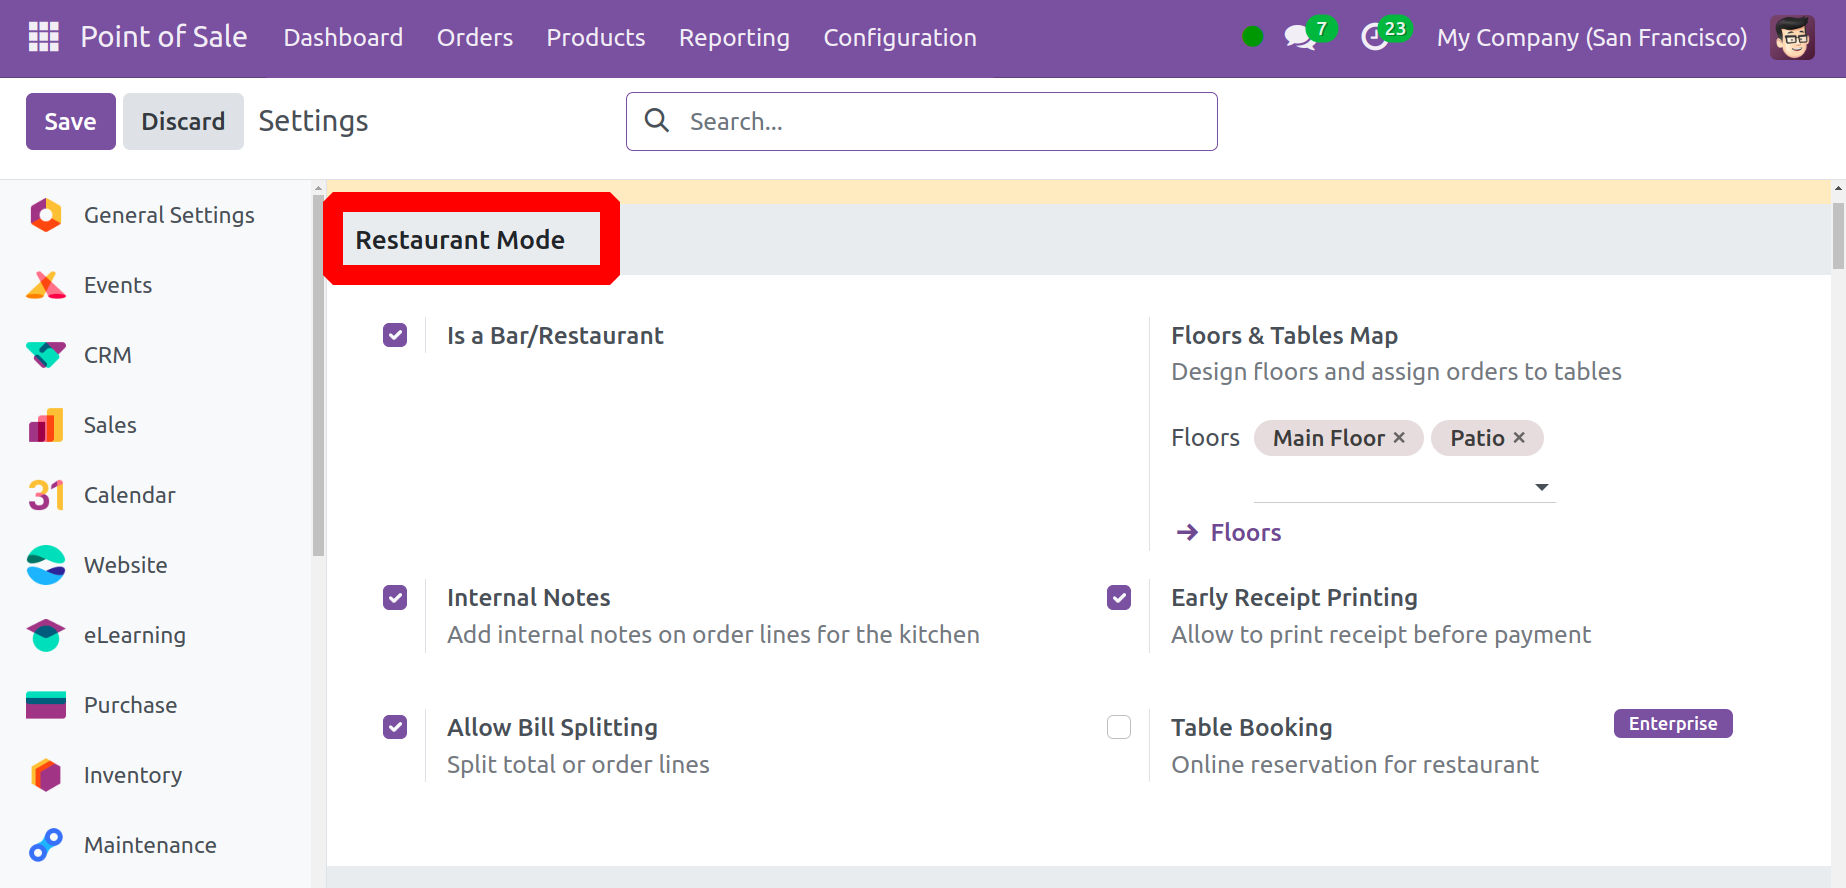
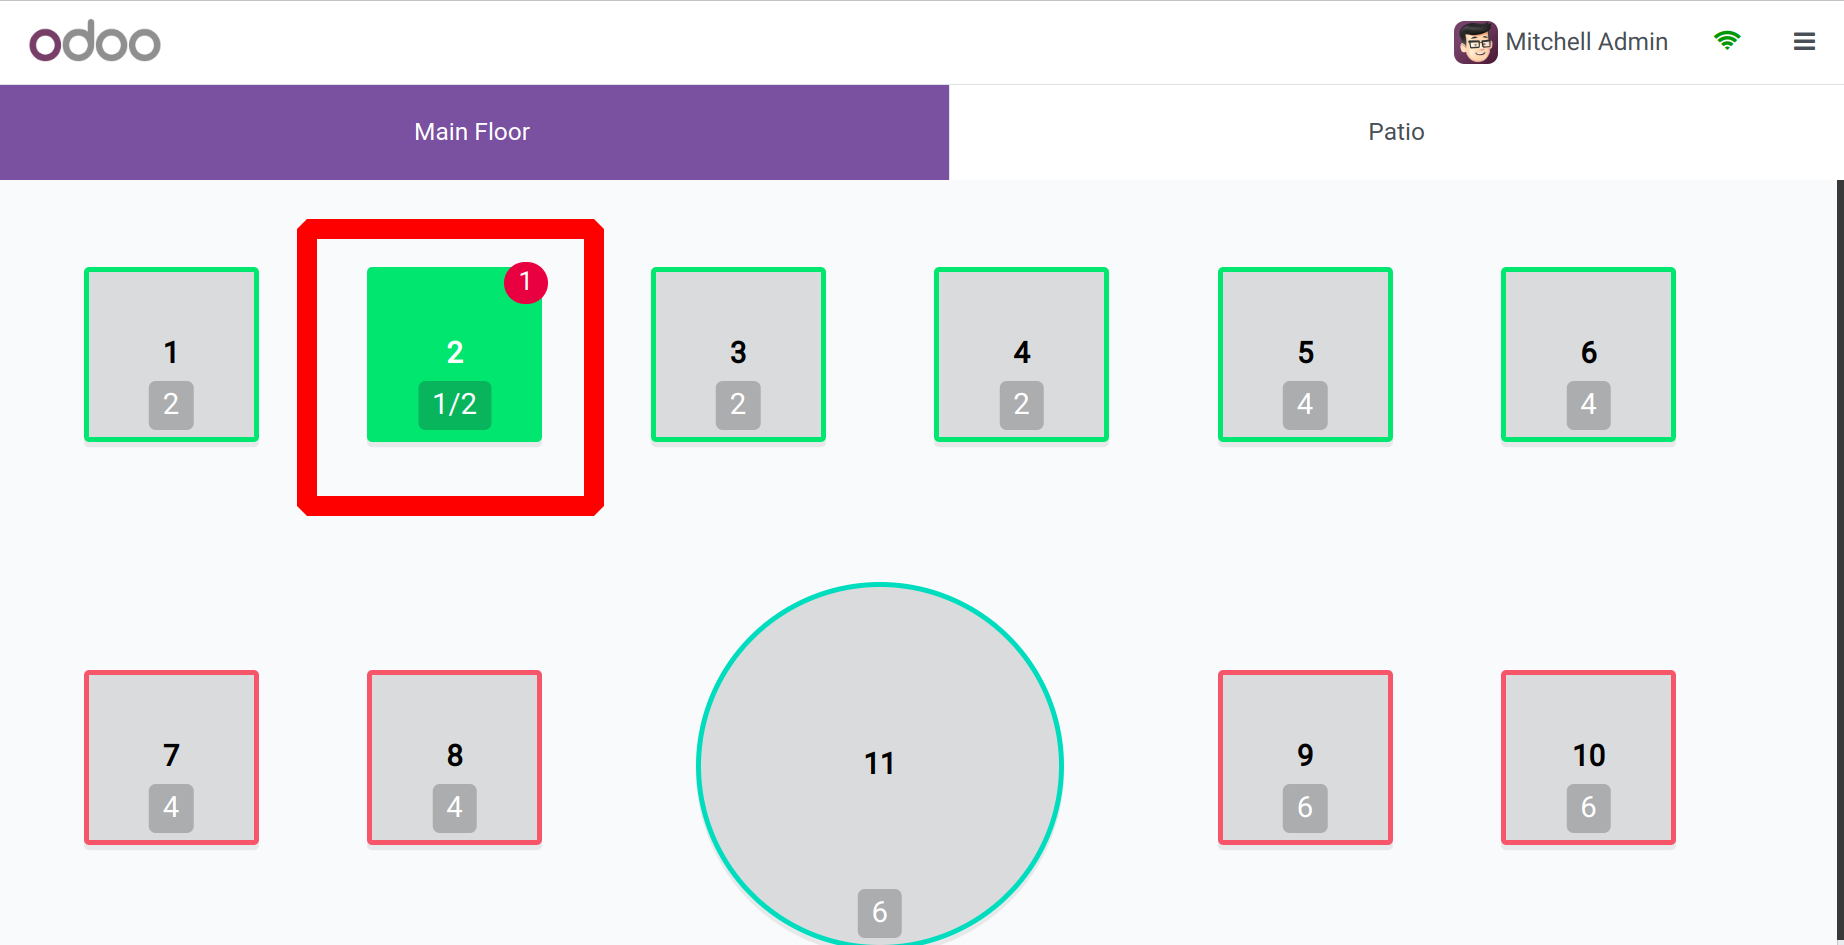
The tables and floors can be configured under the Configuration menu. While starting a
new session the configured floors and table can be chosen.

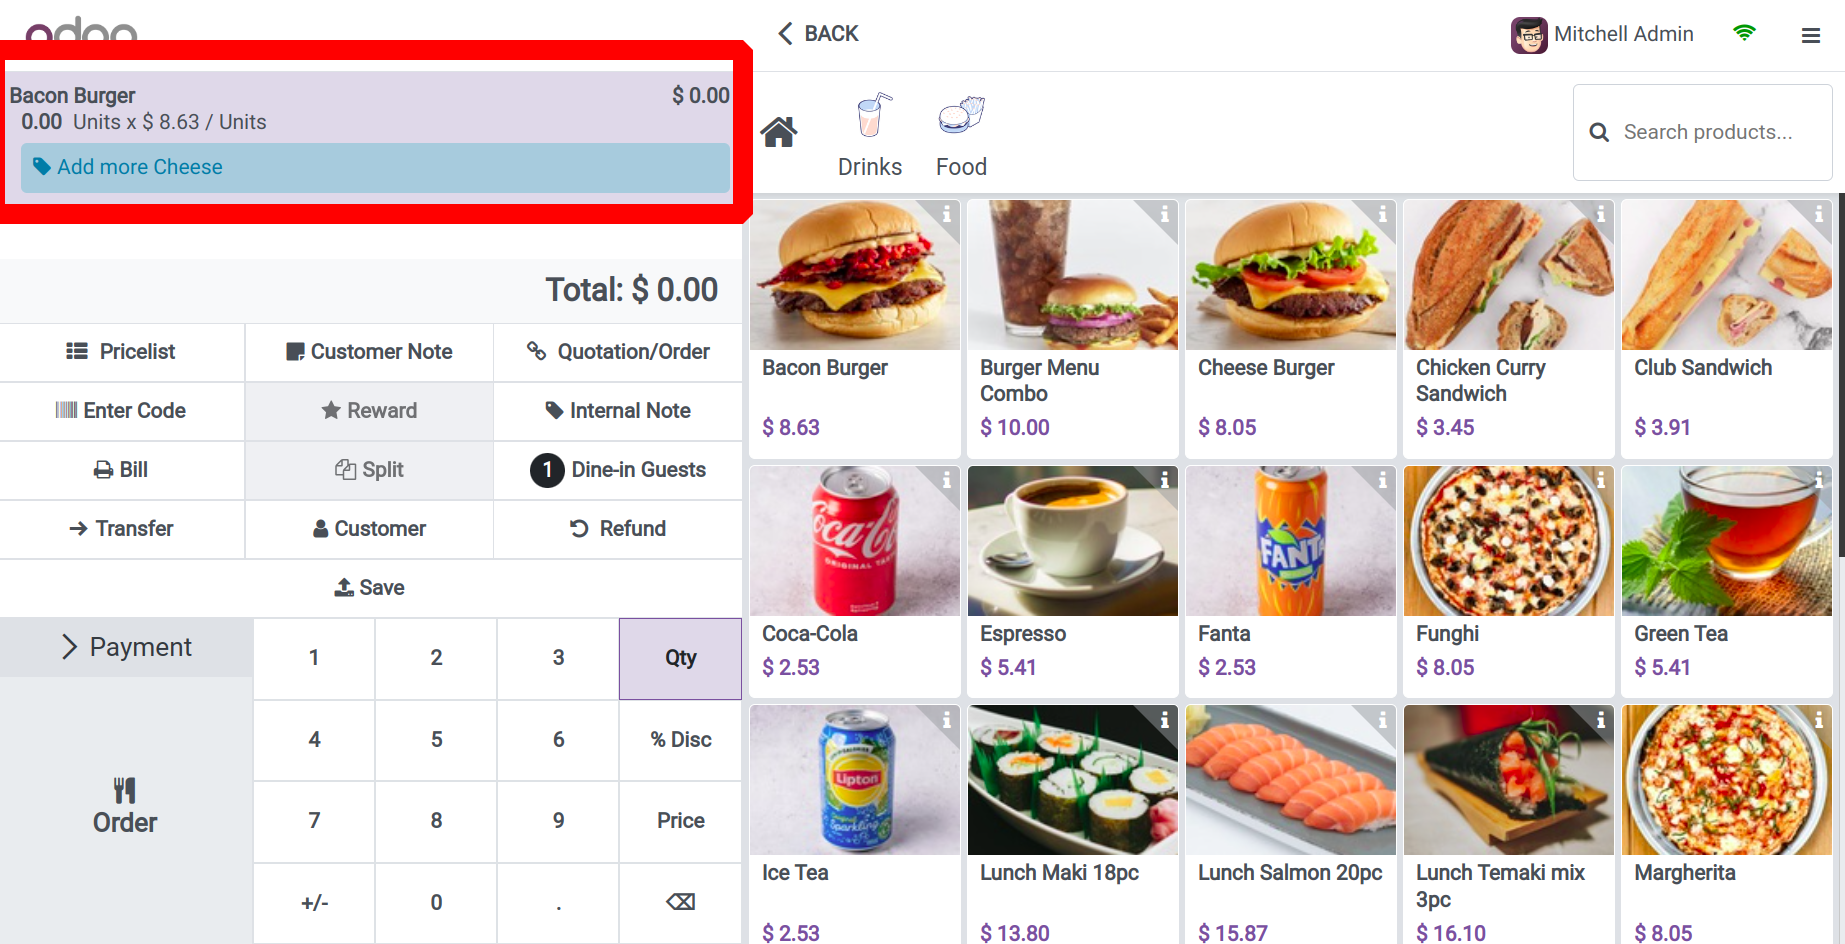
Turn on the Internal Notes option if you would like to bring any internal comments from
the borderline to the kitchen. Once the Internal Notes option has been enabled on the
back end, a new button labeled "Internal Notes" will appear inside the point of sale
session.
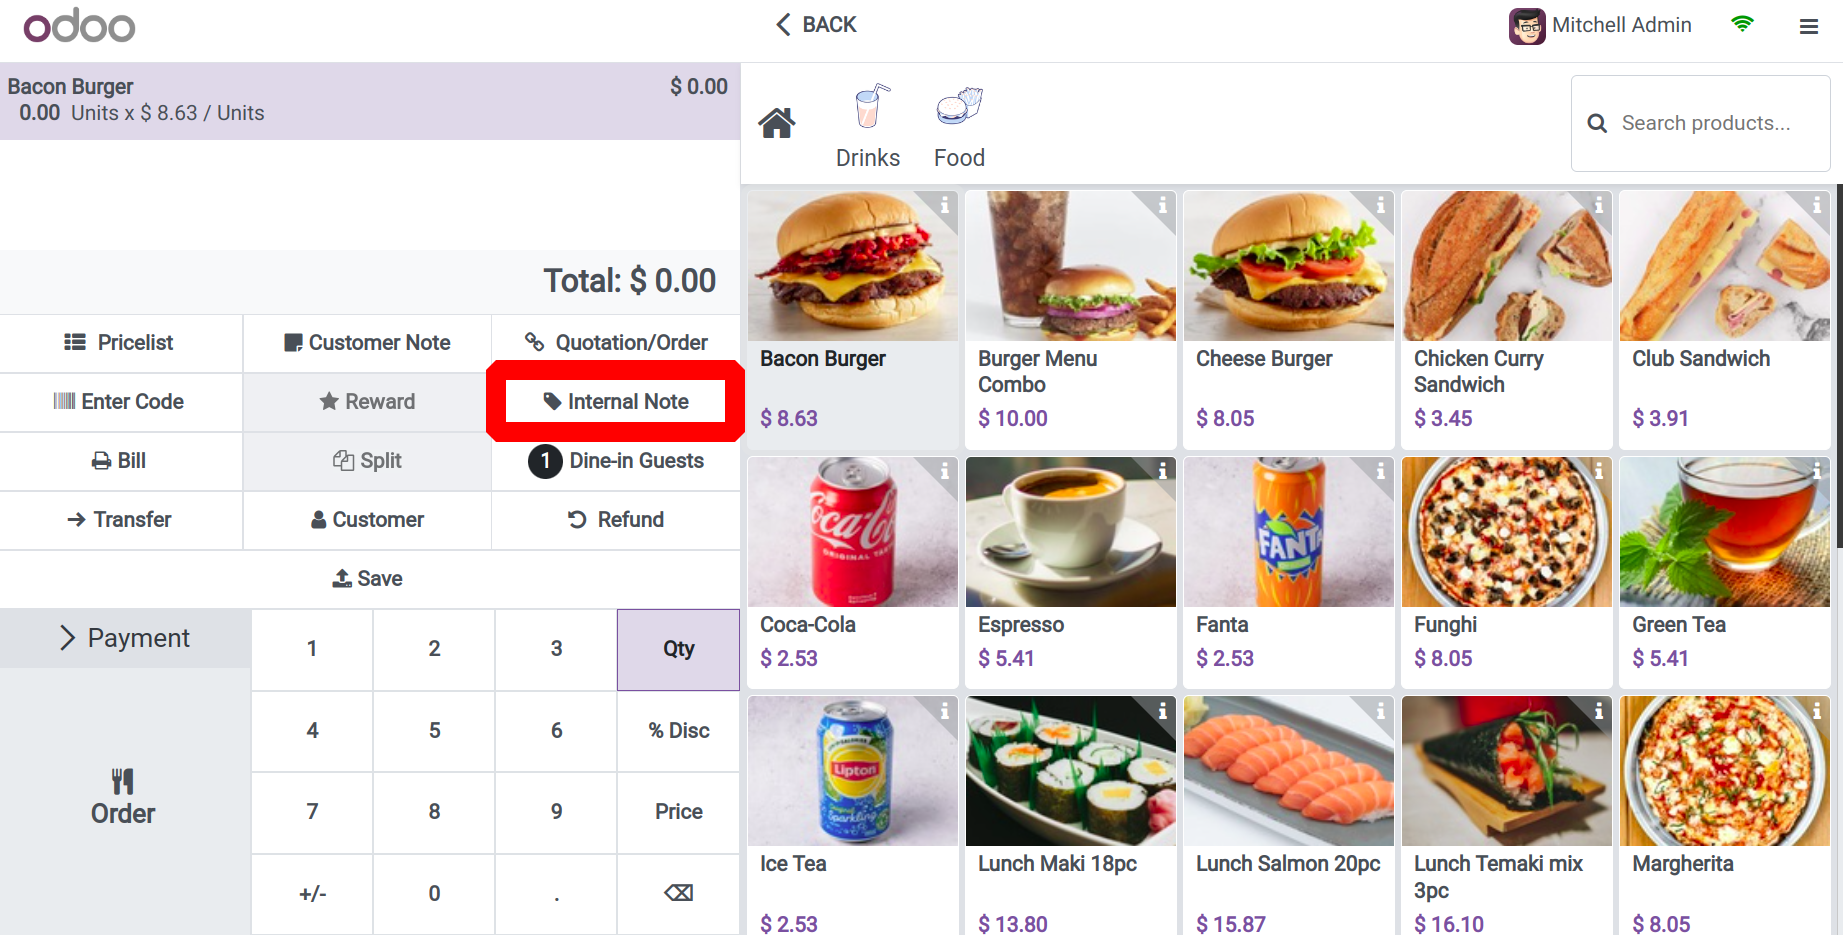
After choosing the product, click the Internal Notes icon to add notes. Click the OK
button to add remarks to the kitchen in the remarks section.
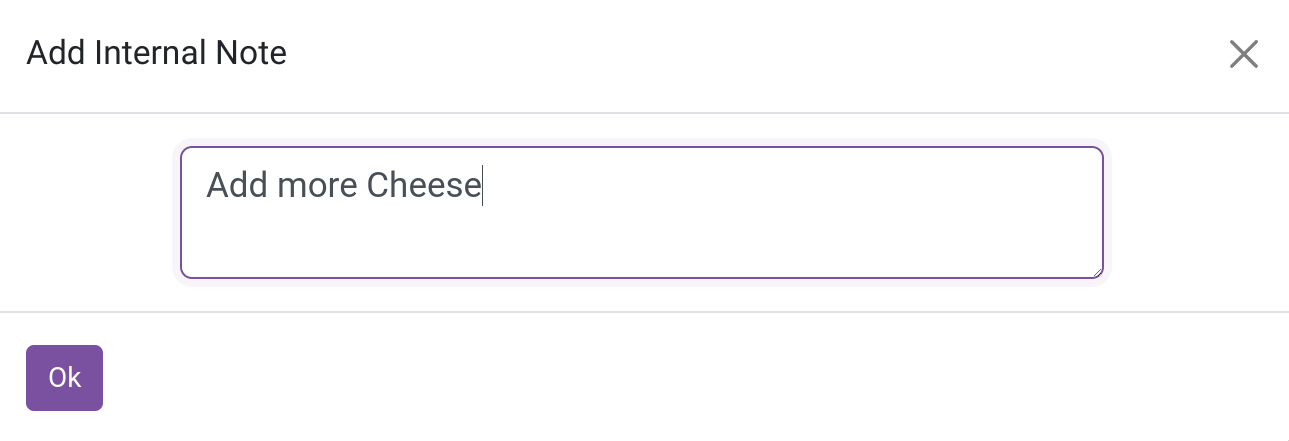
At that point, as the screenshot below shows, the note will become visible.
If you would like to allow receipts to be printed before payment, turn on Early Receipt
Printing. This option allows you to print receipts prior to completing a purchase.
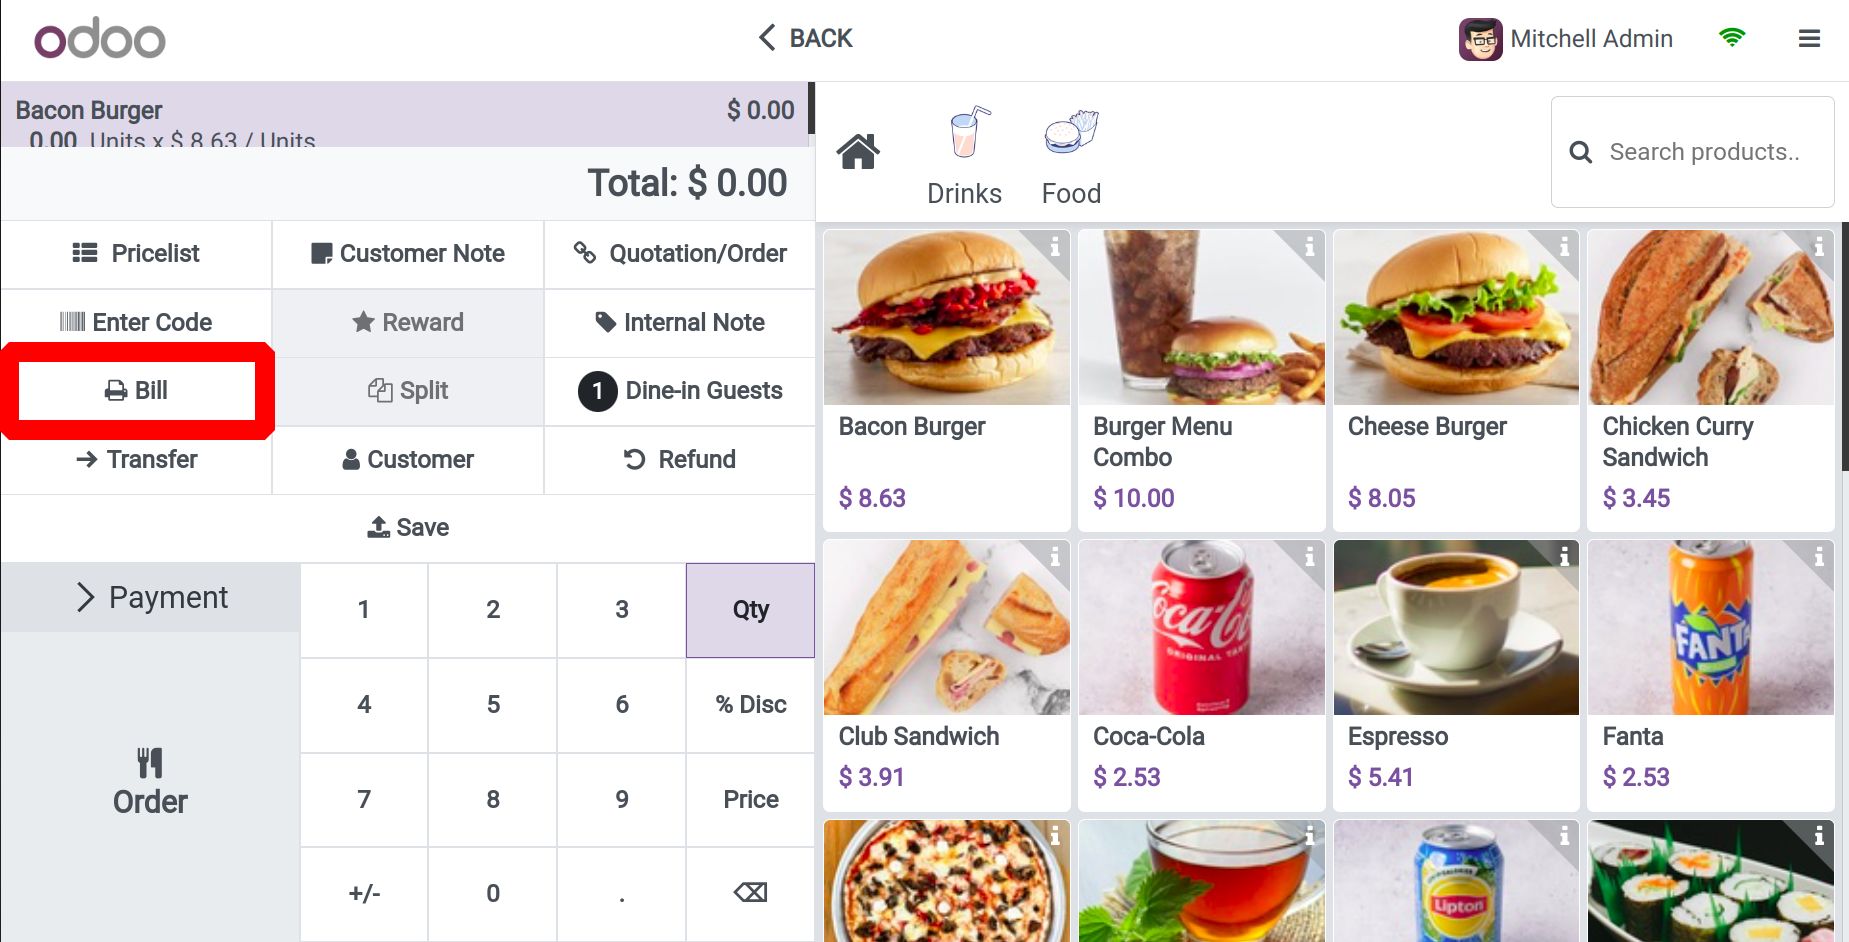
Before paying for the order, you can use the Bill option to create a receipt.
You can split the total amount or individual order lines by using the Allow Bill
Splitting feature.
Mobile self-order & Kiosk
The options for Mobile self-order & Kiosk follow. It was recently released by Odoo 17.
This option allows customers to place orders via a kiosk or their mobile device.
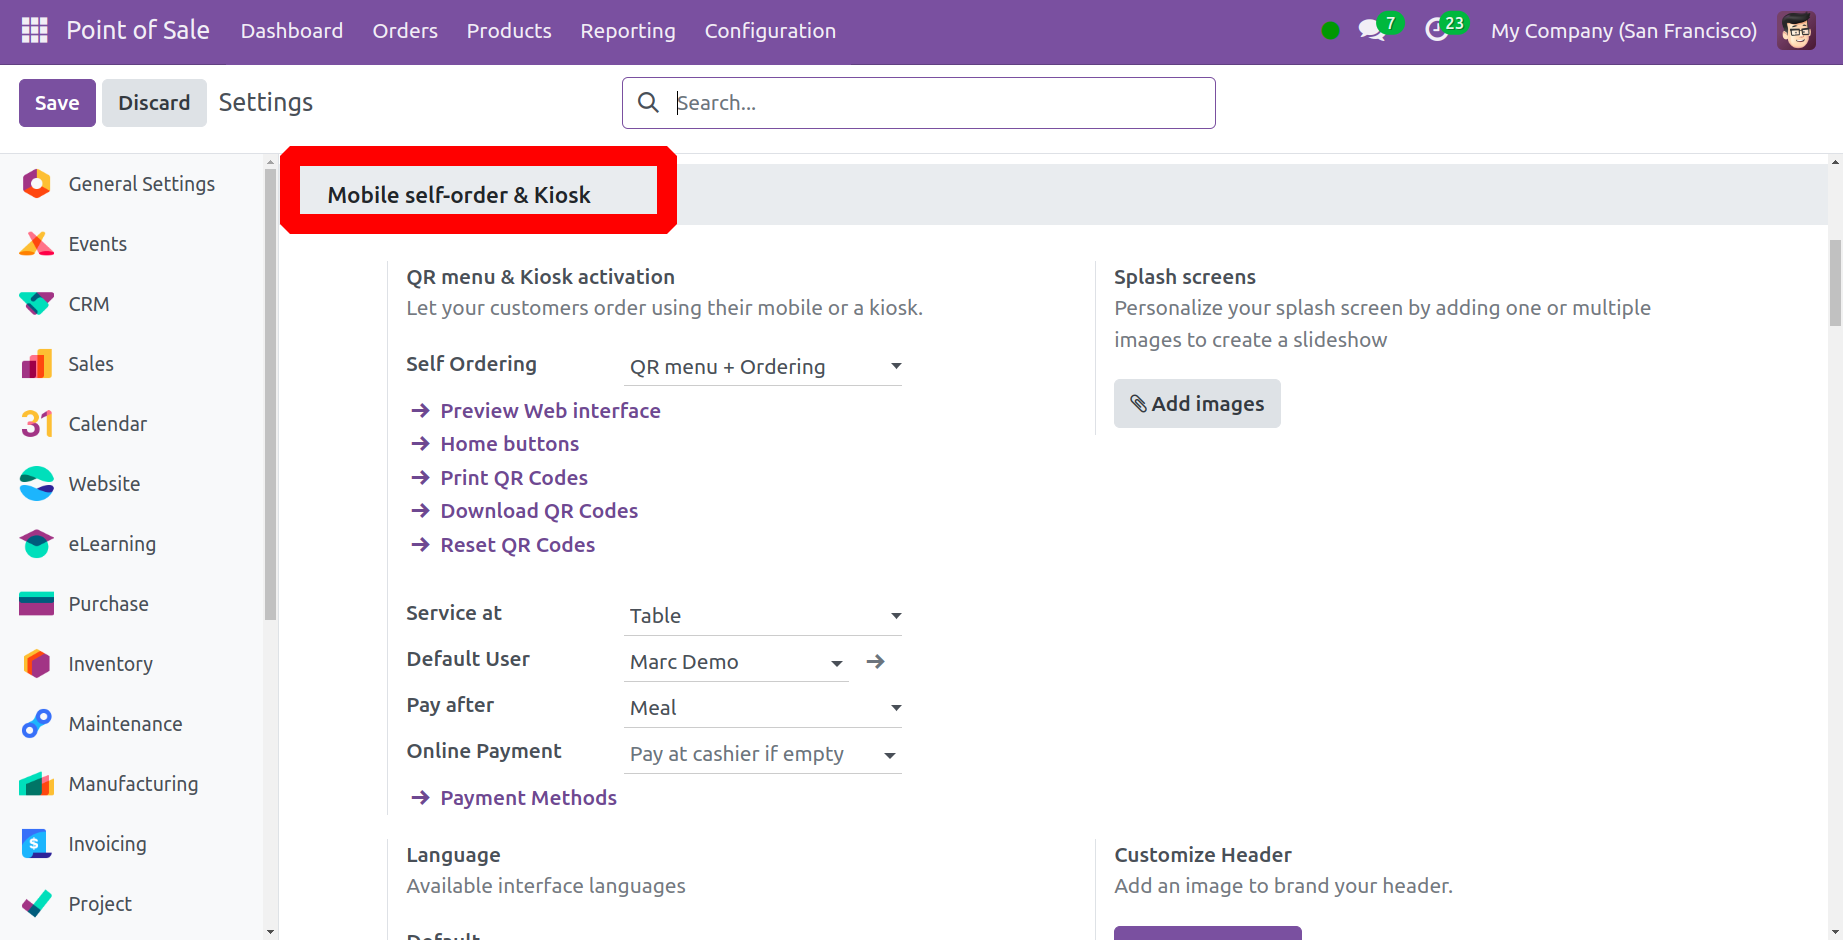
In this instance, Self-ordering may be set up as a QR Menu, Kiosk, or QR Menu + Ordering.
A synopsis Via the web interface, users can see a preview of the webpage. You may
inspect the generated preview button by selecting it from the Home buttons option. You
can also create a new one by clicking the New button.
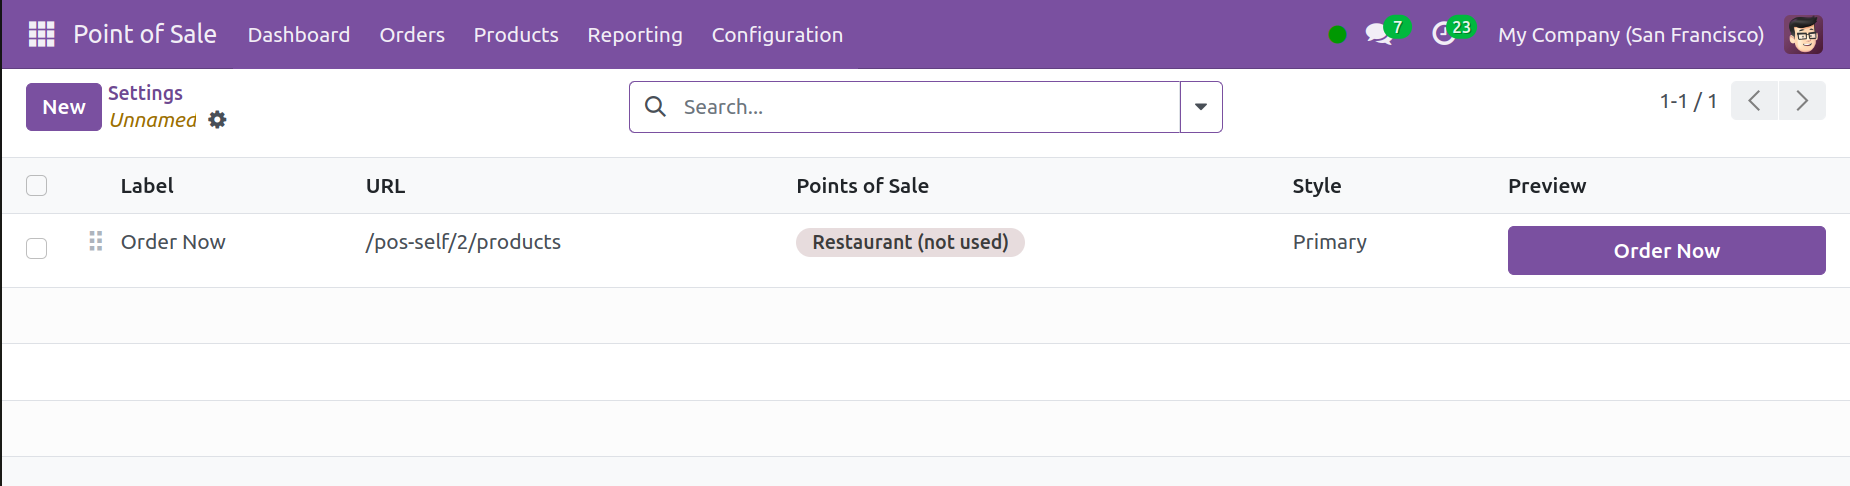
You can then use the QR Code to print, download, or reset it. From there, you can
configure other information such as Languages, Pickup at, and default user. To make
Splash Screen uniquely yours, upload an image.
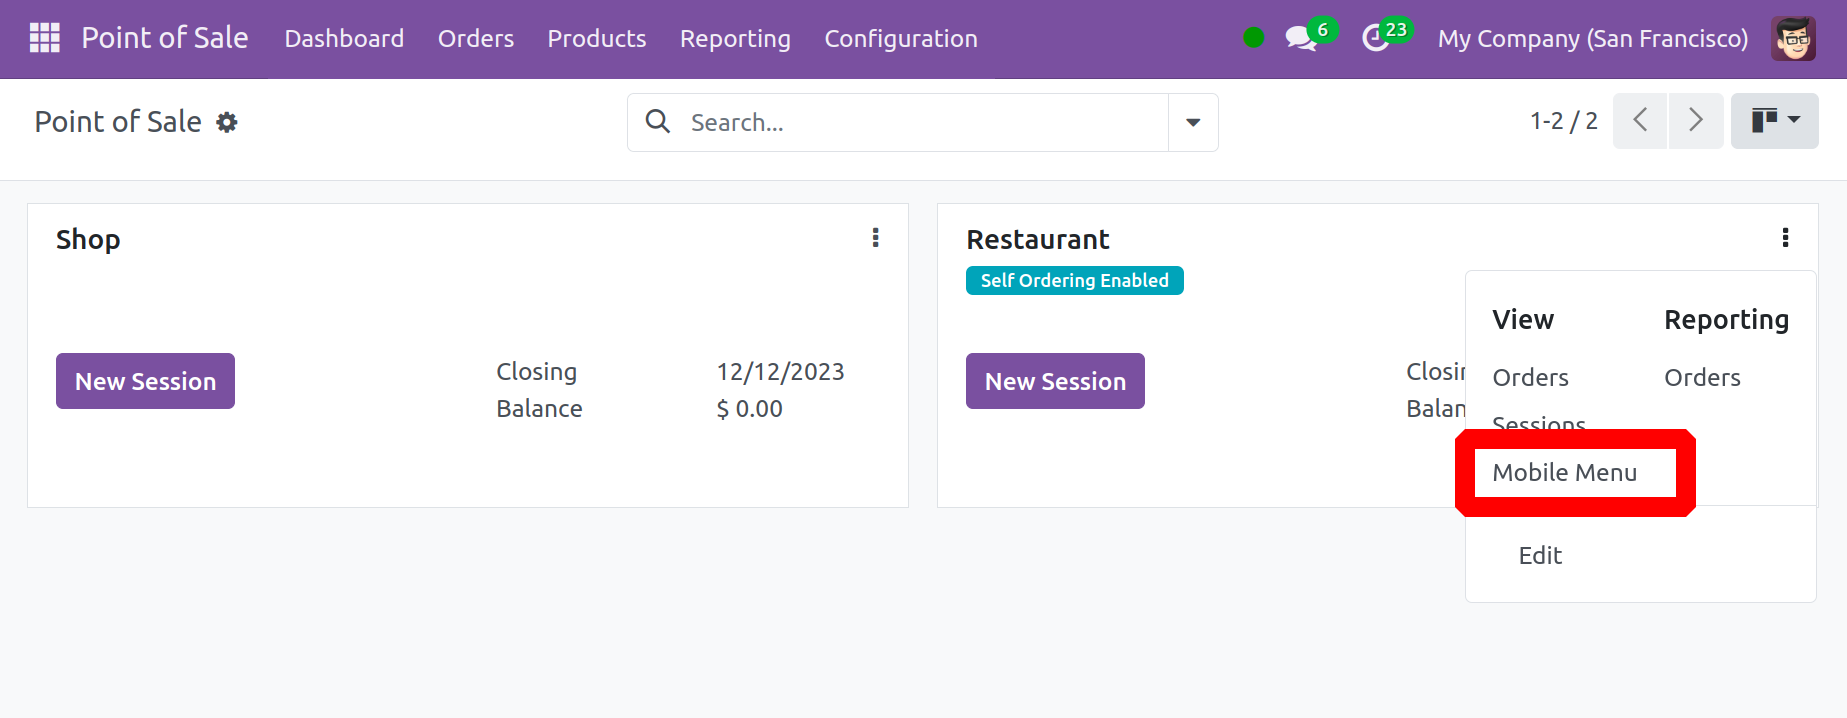
After preserving the choices, Self-ordering is now allowed for this session. There will
be a Mobile Menu option, as seen in the screenshot.
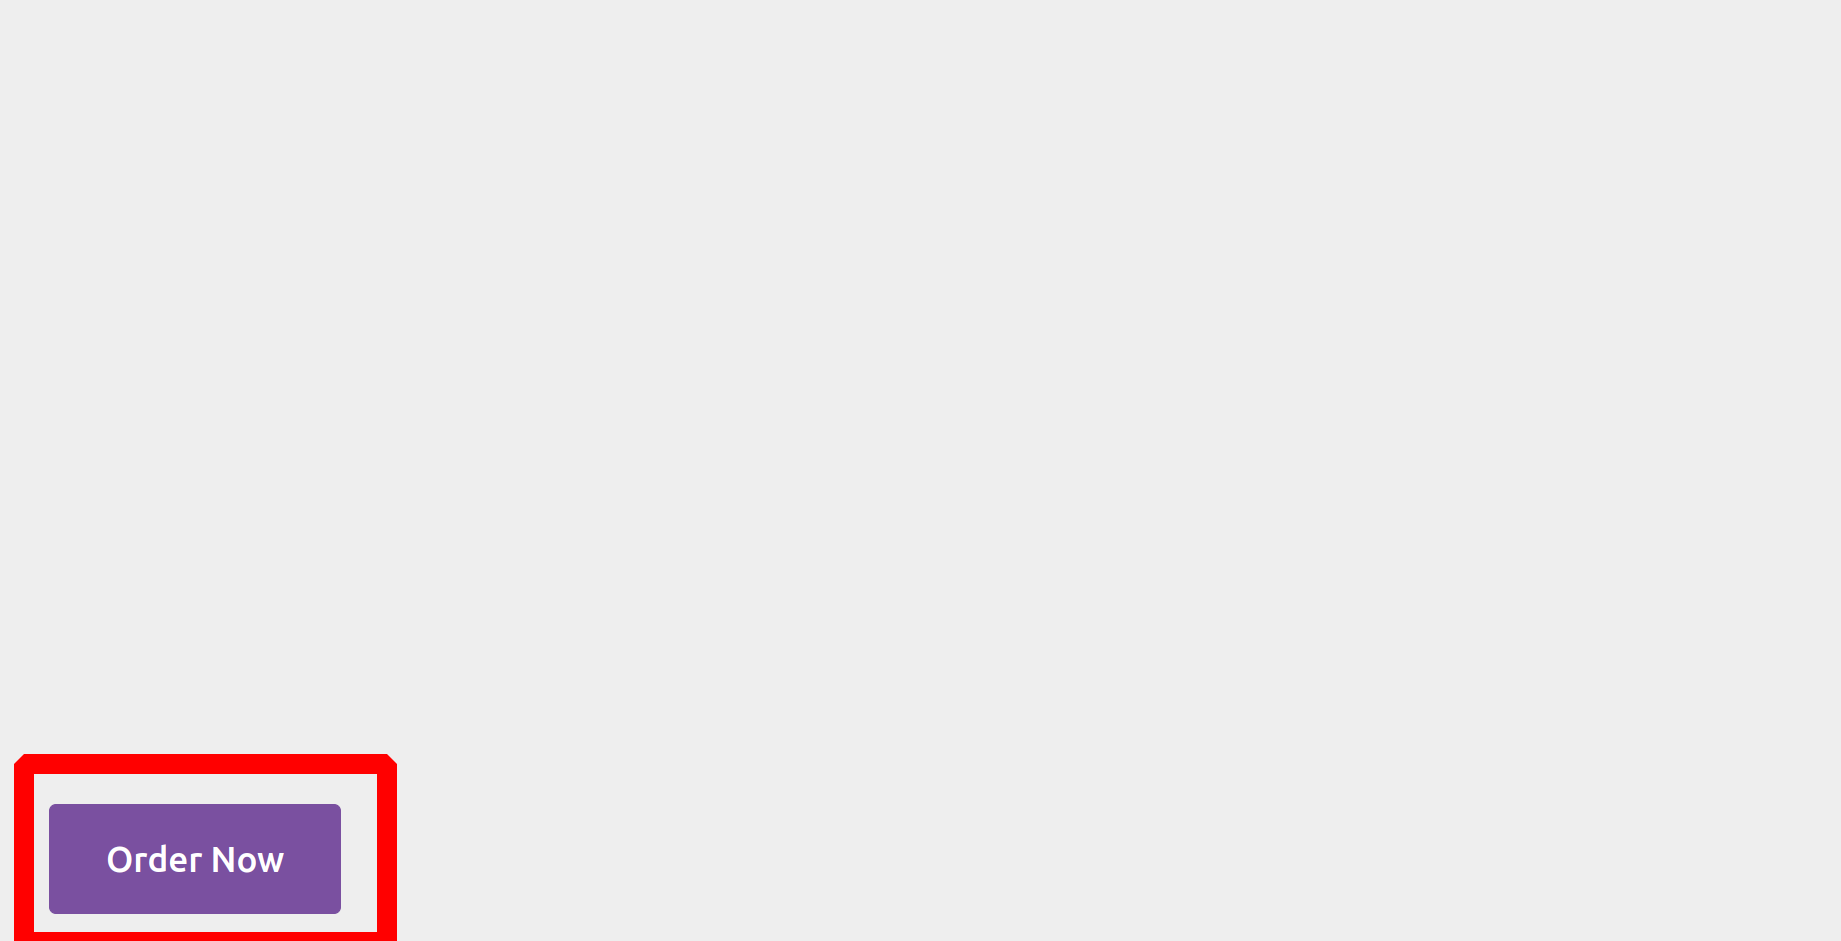
A new screen appears when the Mobile Menu option is selected. From there, customers can
place their own orders. To accomplish that, click the "Order Now" button. Clients are
only able to place orders during open sessions.
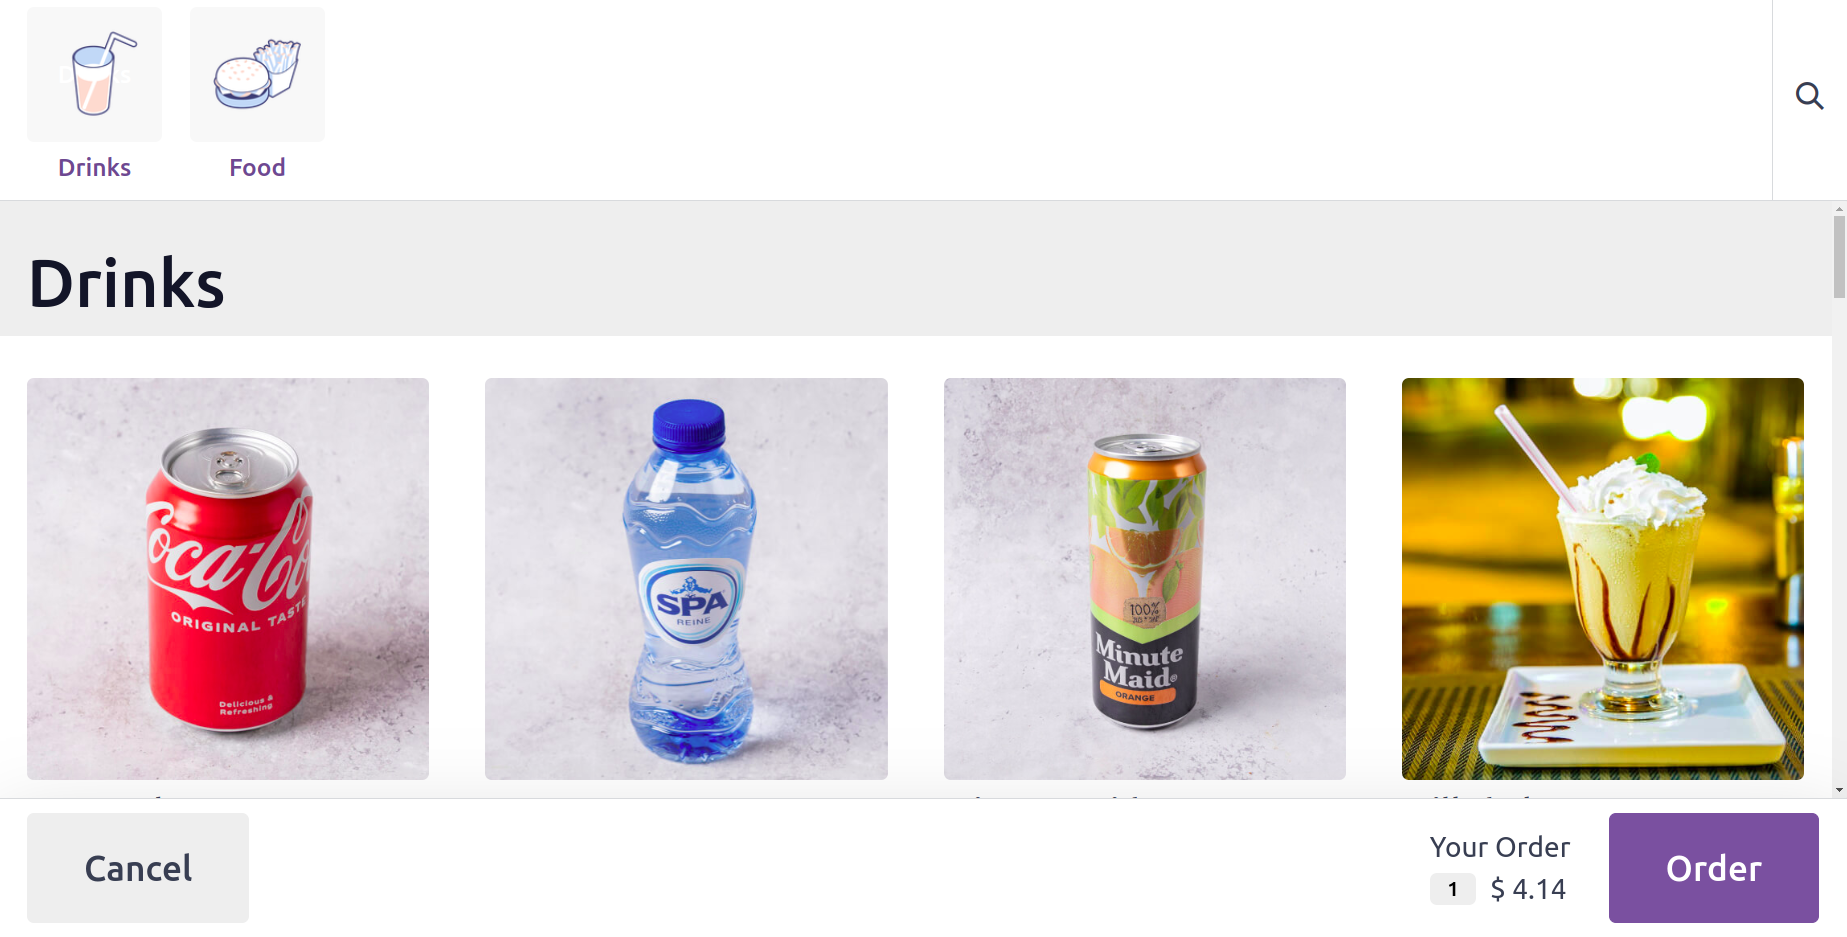
Once the desired product has been chosen, click the Order button.
After that, the client can choose Table.
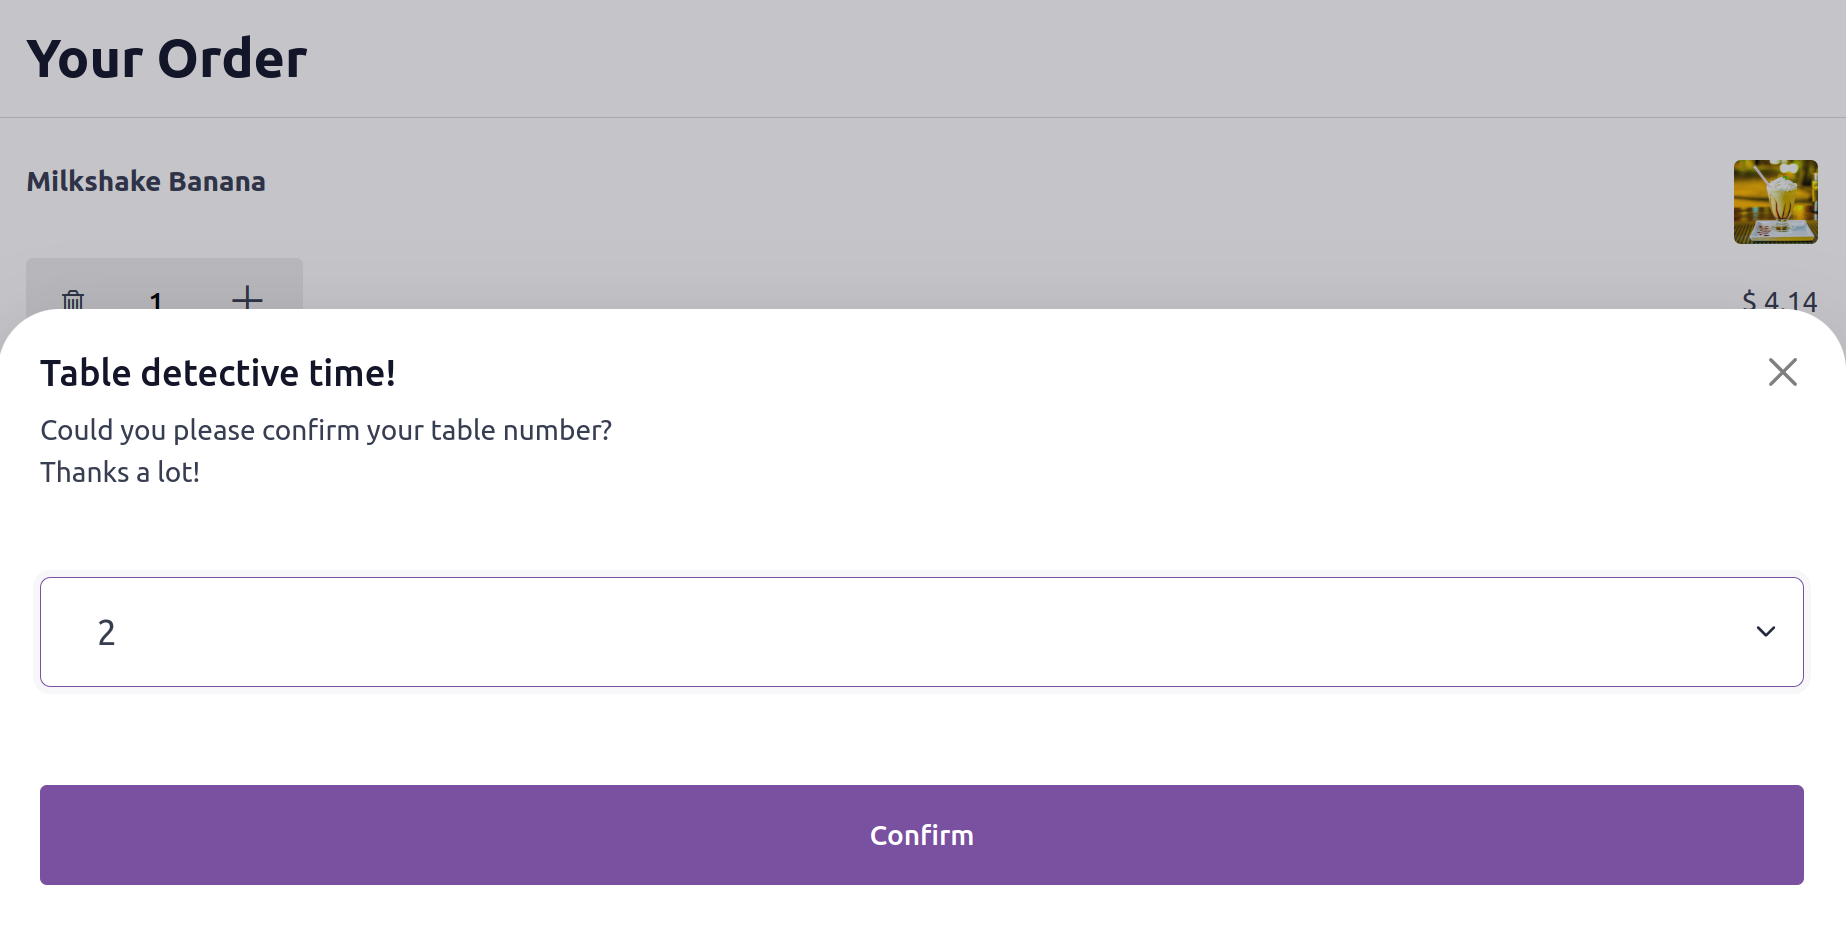
Once it has been confirmed, an order confirmation will be emailed.
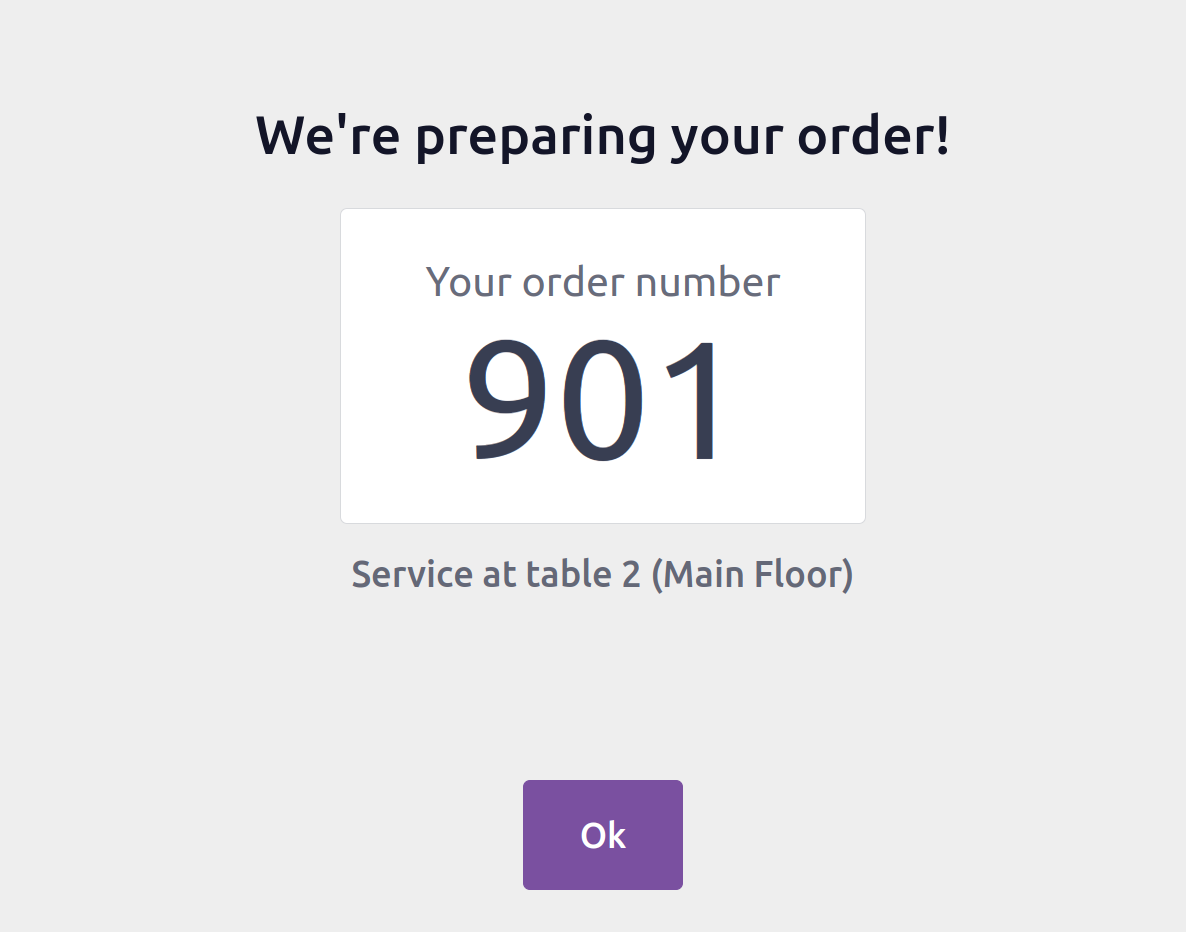
The appropriate Table within the session then contains the order. The user can complete
the order from there.
Customers can view their order and pay for it from the same smartphone device if the
cashier isn't there by tapping the My Order button.
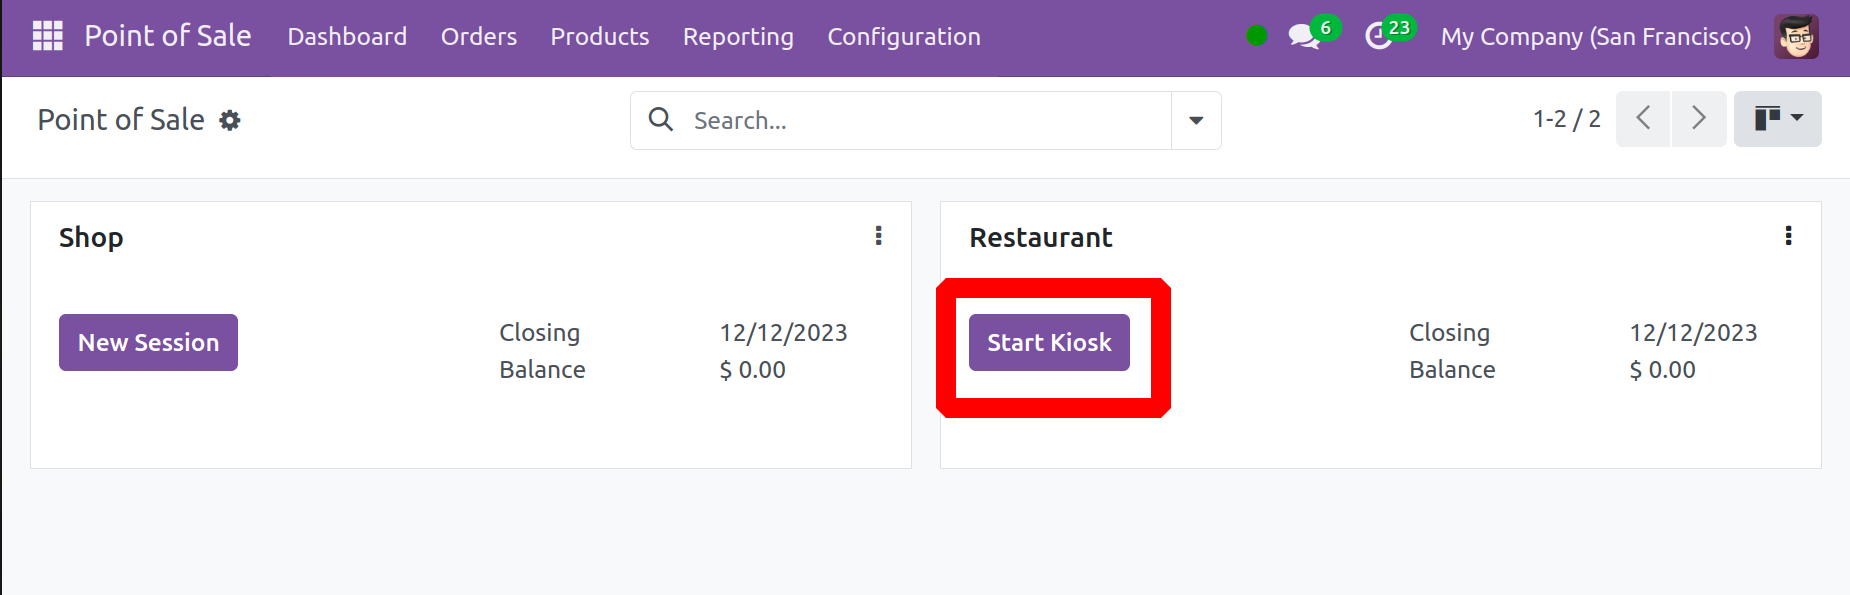
Once the Self-ordering is set up as a Kiosk, save the configuration. A Start Kiosk button
will then appear in the dashboard session.
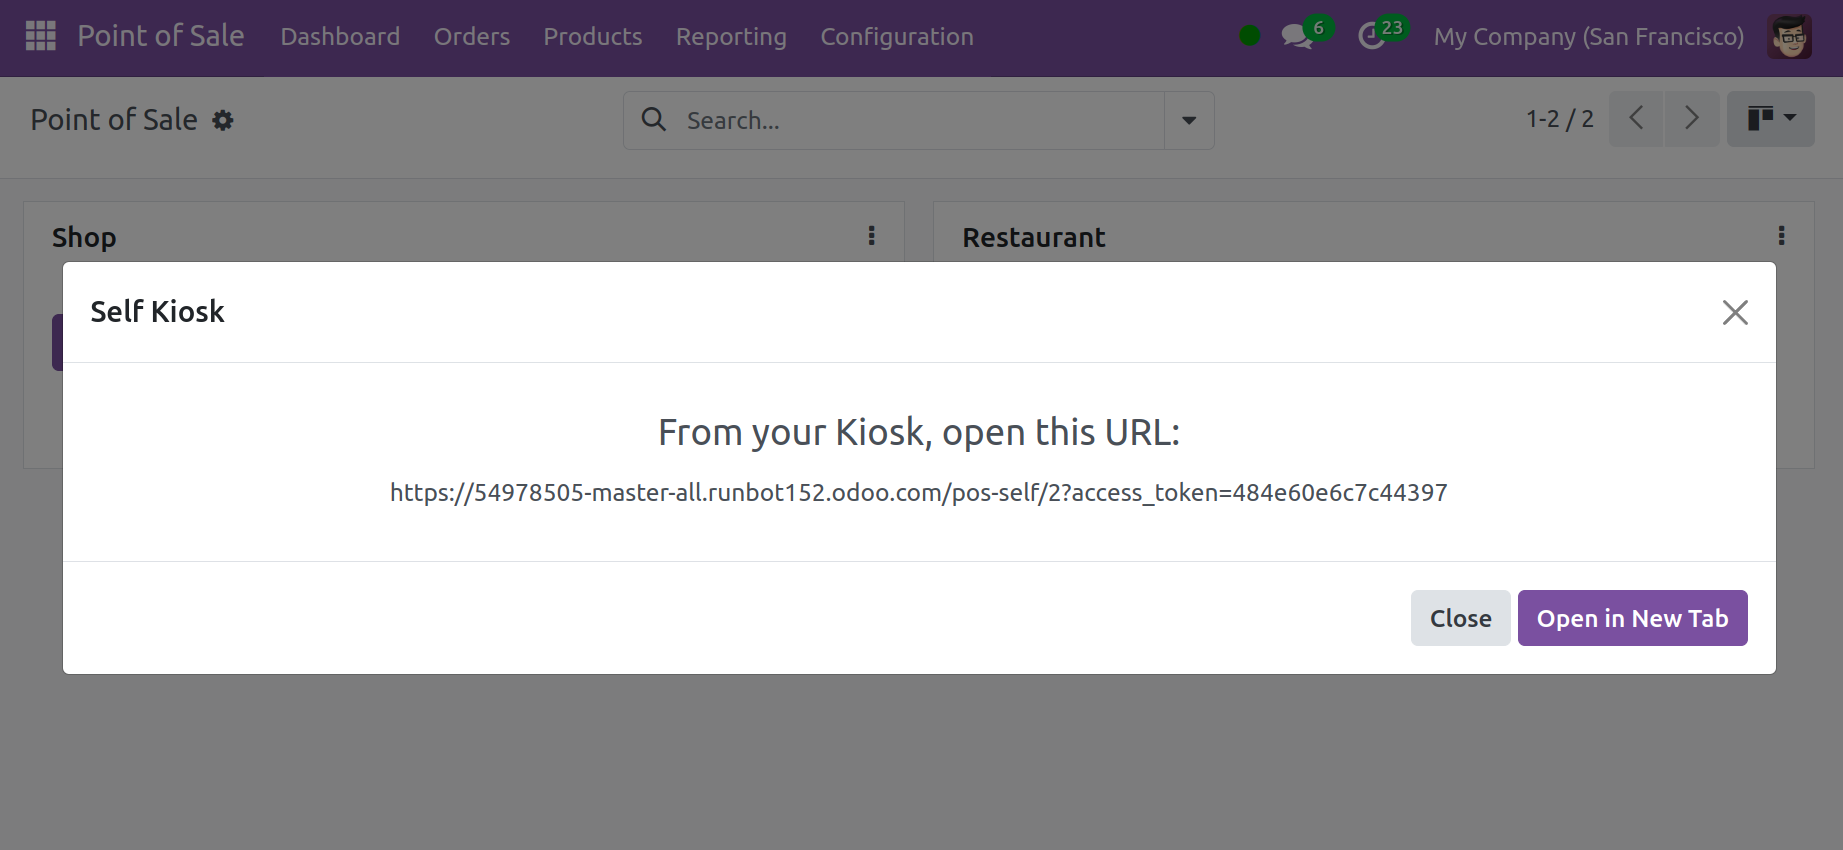
Clicking it will open a Self Kiosk window with a URL. To open it in a new tab, click the
"Open in new Tab" button.
The tax rate can be changed based on whether clients opt to dine in or order takeaway
when it comes to Eat-in/take-out. Include a financial stance in the associated field as
a result.
Payment
Users can select among the available payment methods provided by this PoS in the Payment
Method field. You can designate the lowest denomination of the currency that is used to
make cash payments by activating the Cash Rounding feature. To take tips from customers
or convert their change into a tip, use the Tips option. In the relevant field, type the
Tip Product. Customer receipts include this information for reference.
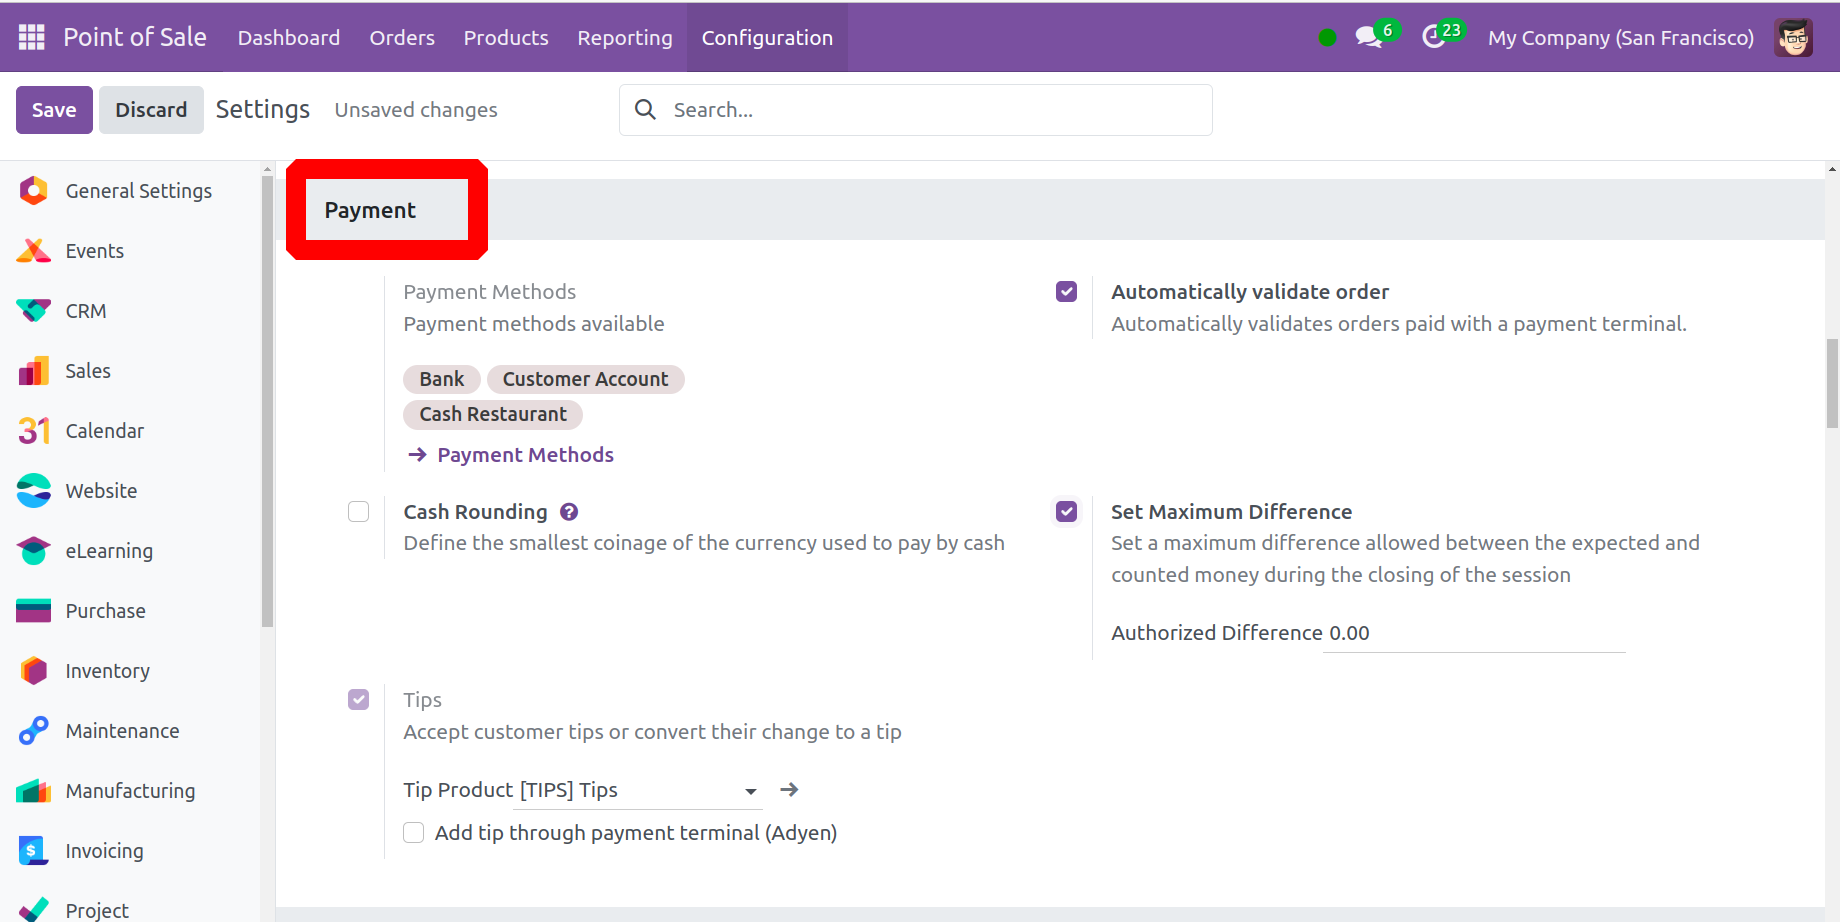
Turning on the Set Maximum Difference box allows you to establish a maximum difference
between the expected and counted money at the end of the session. The allowable
difference can be defined using the Authorized Difference option.
Orders paid for through the payment terminal can be automatically validated with the help
of Automatically validate orders.
PoS Interface
On industrial touch screens that are slow, you can improve navigation by turning on the
Large Scrollbars option. You can also restrict specific product categories by using the
Restrict Categories tool.
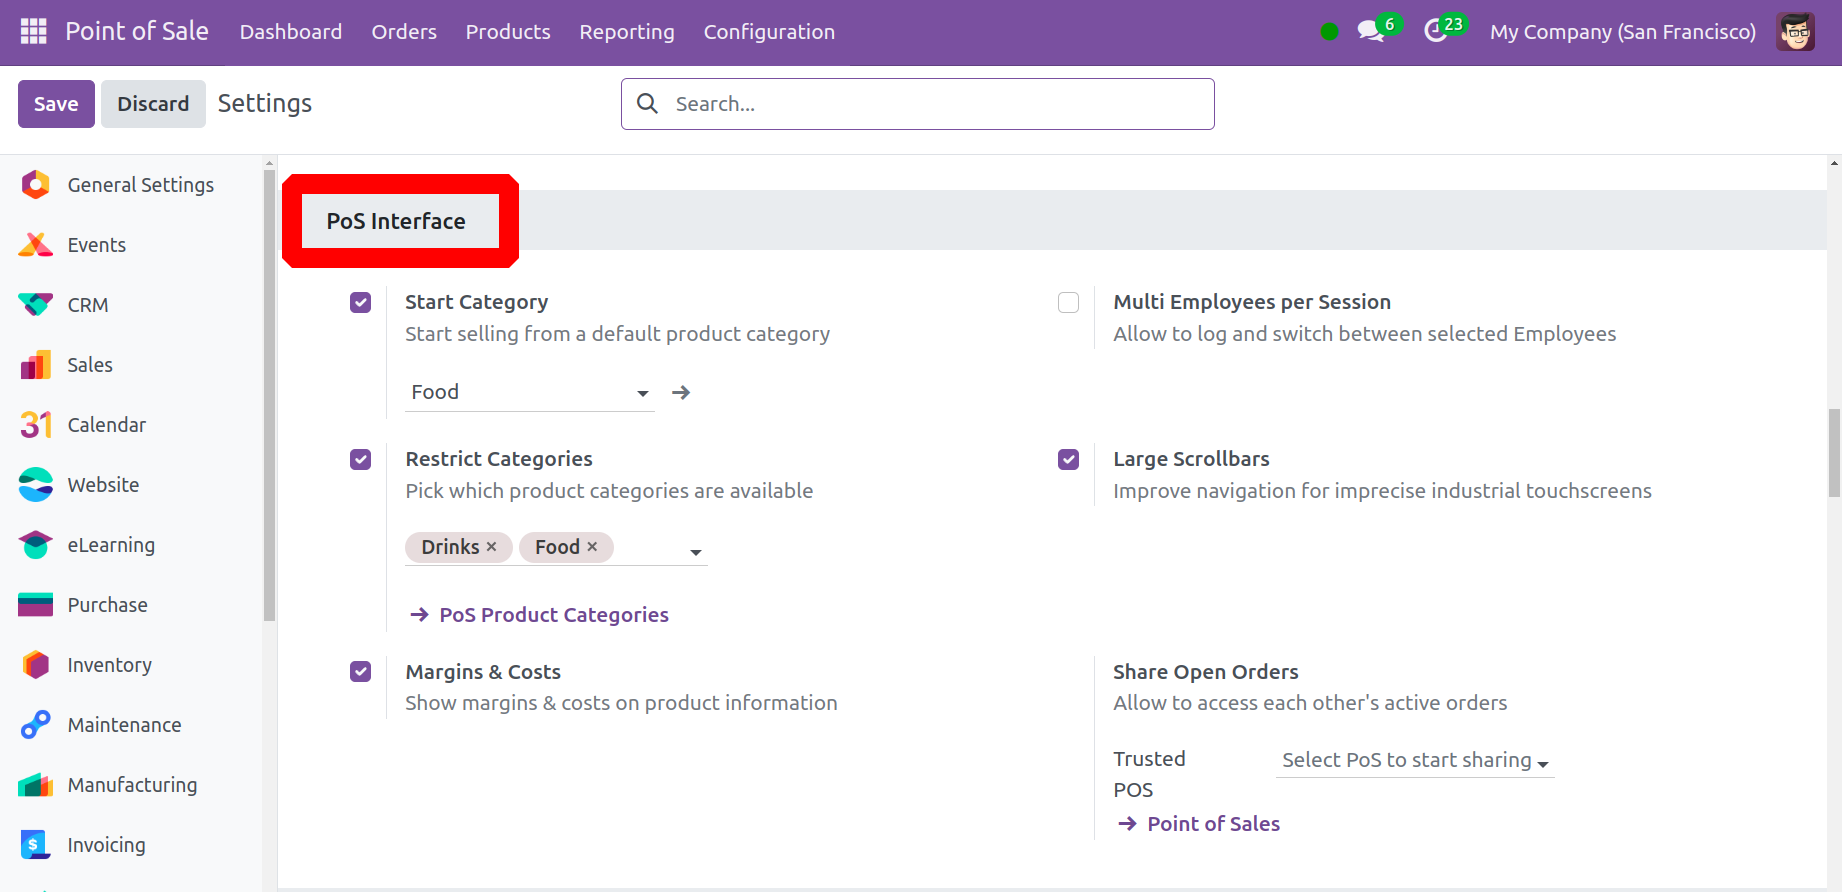
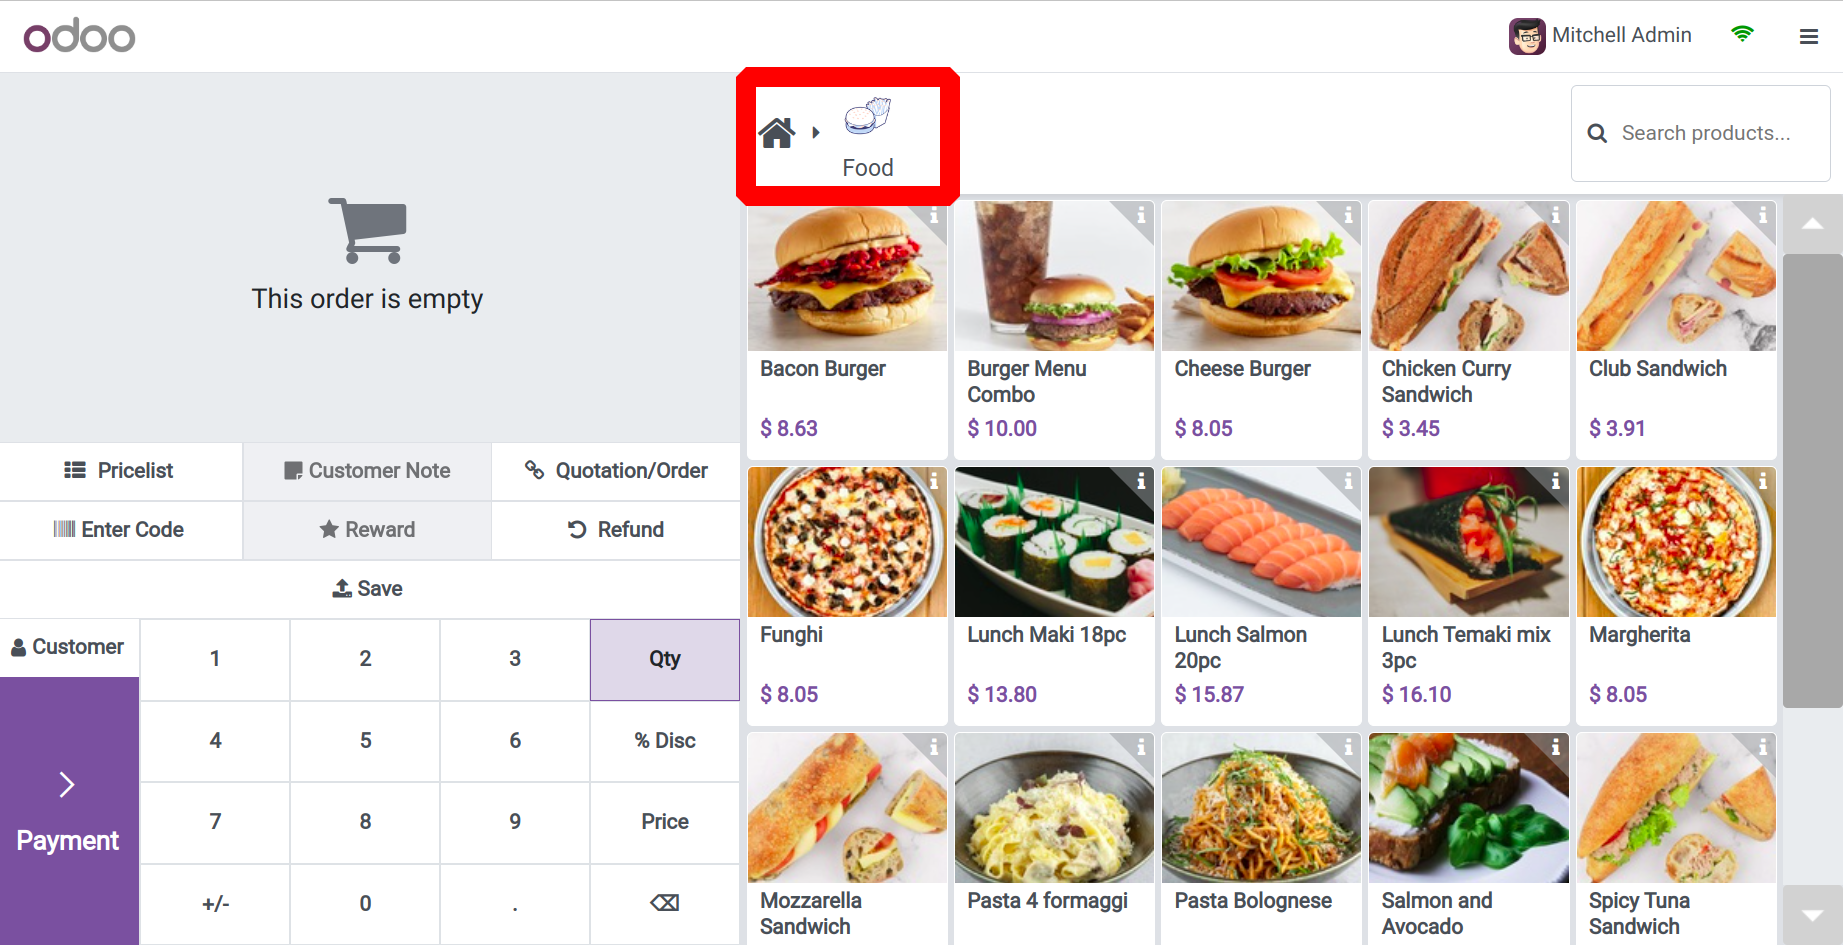
You can start selling products from a default product category by declaring it in the
field provided after activating the Start Category option. Consider adding the product
category Food to the Start Category. As shown below, the Food product category will
automatically appear to start the sale on the point-of-sale dashboard after the relevant
session has started.
Margins and Costs will be displayed alongside product information in POS when the Margins
& Costs option is enabled.
If the "Multi employee" option is selected, then multiple employees can access the PoS
session. Add authorized personnel. The necessary staff members can then access the
session by logging in using their credentials.
Accounting
You can select the Default Sales Tax for the items in the PoS under the Accounting tab.
This sales tax applies to all newly added items to the catalog. To handle the available
sales taxes, click the external link that is provided on this page.
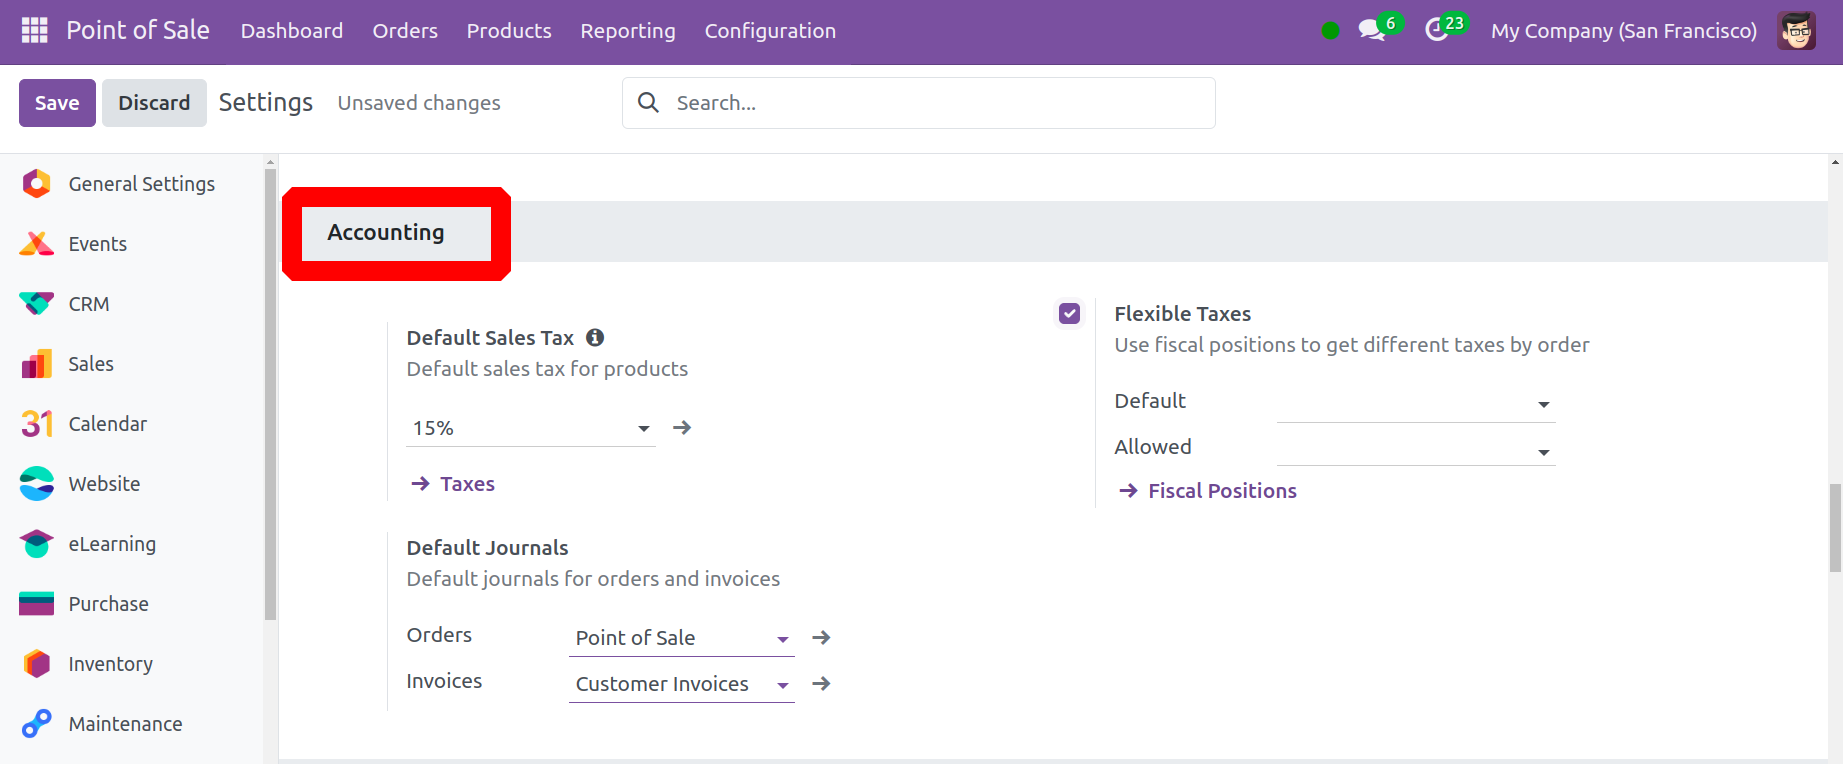
By turning on the Flexible Taxes, customers can select a certain fiscal position at the
time of order, depending on their type. Users can designate which default journal will
be used for ordering and invoicing by using the Default Journals functionality.
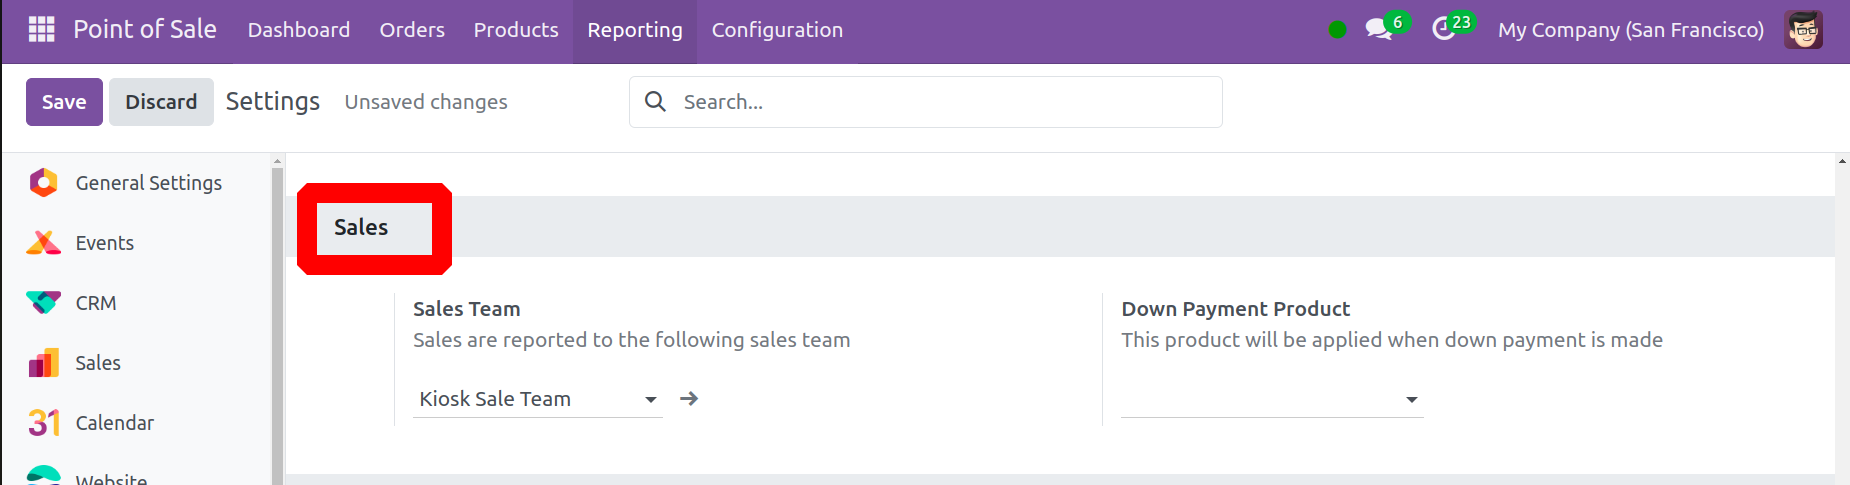
Sales
For this new PoS, you can assign a sales team under the Sales tab, and sales will be
routed to that sales team. The product you designate in the "Down Payment Product"
section will be used in the event that a down payment is received.
Pricing
By activating Odoo17's Flexible Price Lists functionality, you may select which price
lists are utilized for the items in this PoS. Either multiple pricing per product or
advanced price regulations may be the basis for it. The default and accessible pricing
lists can be entered in the designated areas. The product prices on the receipts have
two options: Tax-Included Price and Tax-Excluded Price.
The Tax-Excluded Price is the cost of a good or service before taxes are subtracted; on
the other hand, the Tax-Included Price is the total cost of the good or service
including all applicable taxes. Essentially, the tax-excluded price is the base amount,
but the tax-included pricing displays the total amount a consumer pays, including taxes.
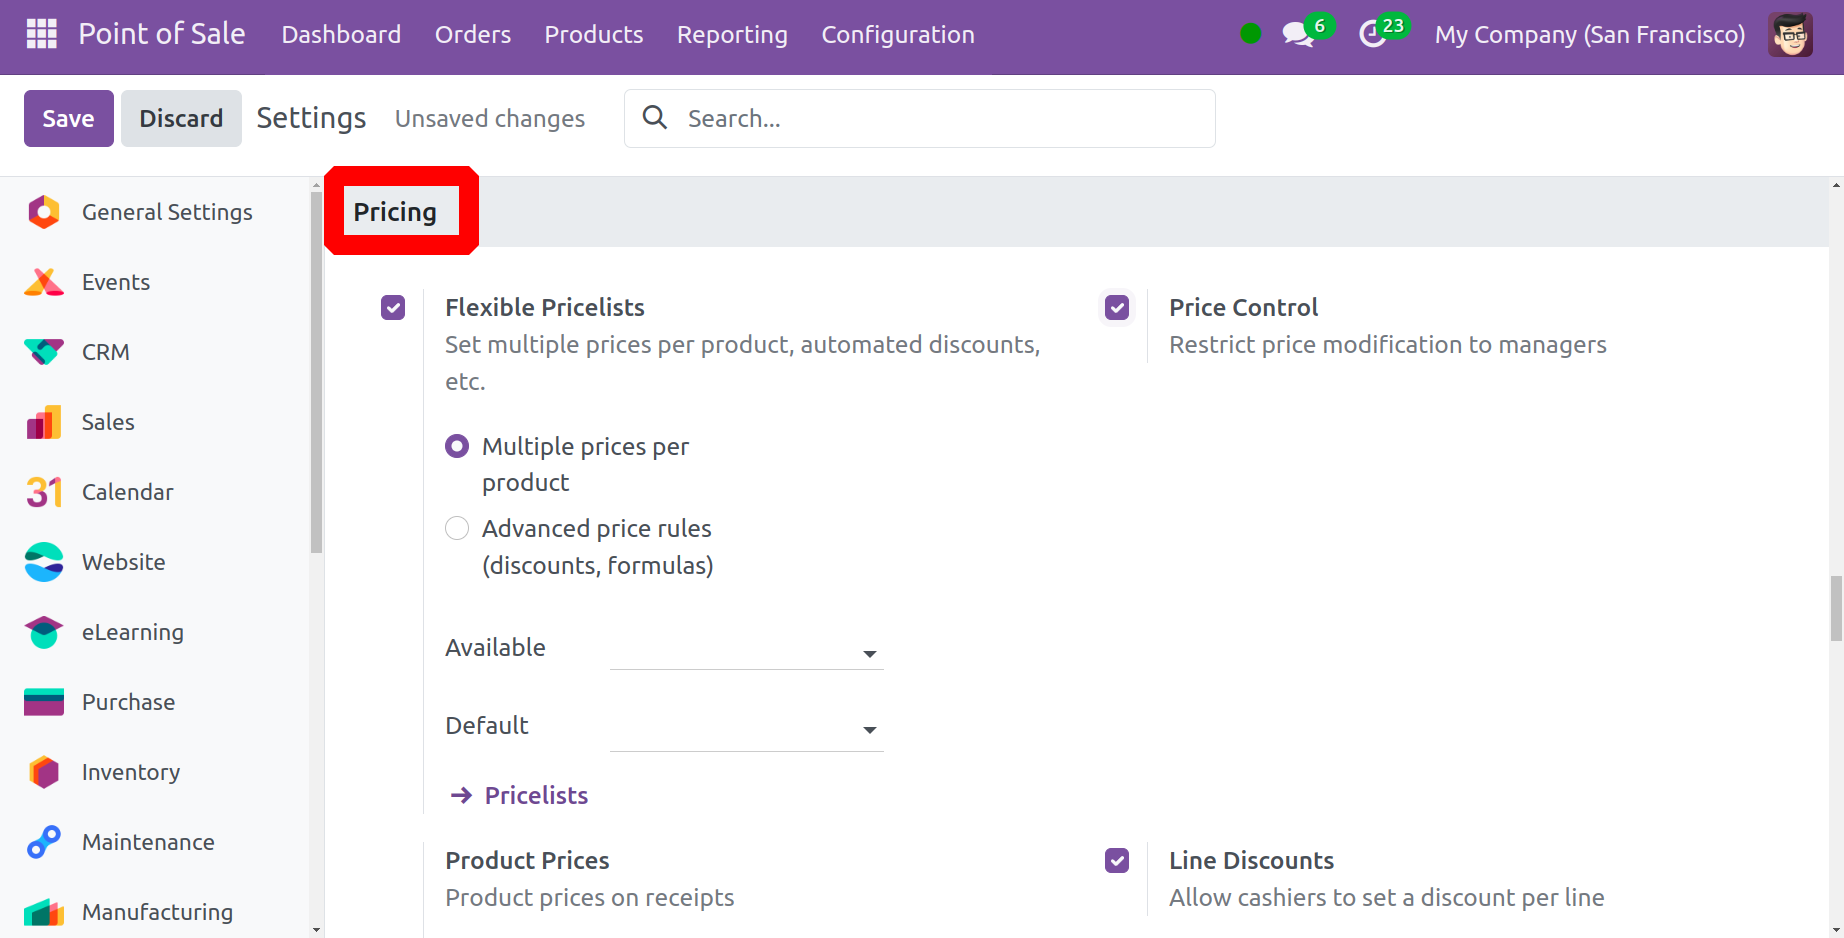
You can restrict price changes to the manager alone by using the Price Control feature.
By enabling this, only people with Manager access capabilities for the PoS app are able
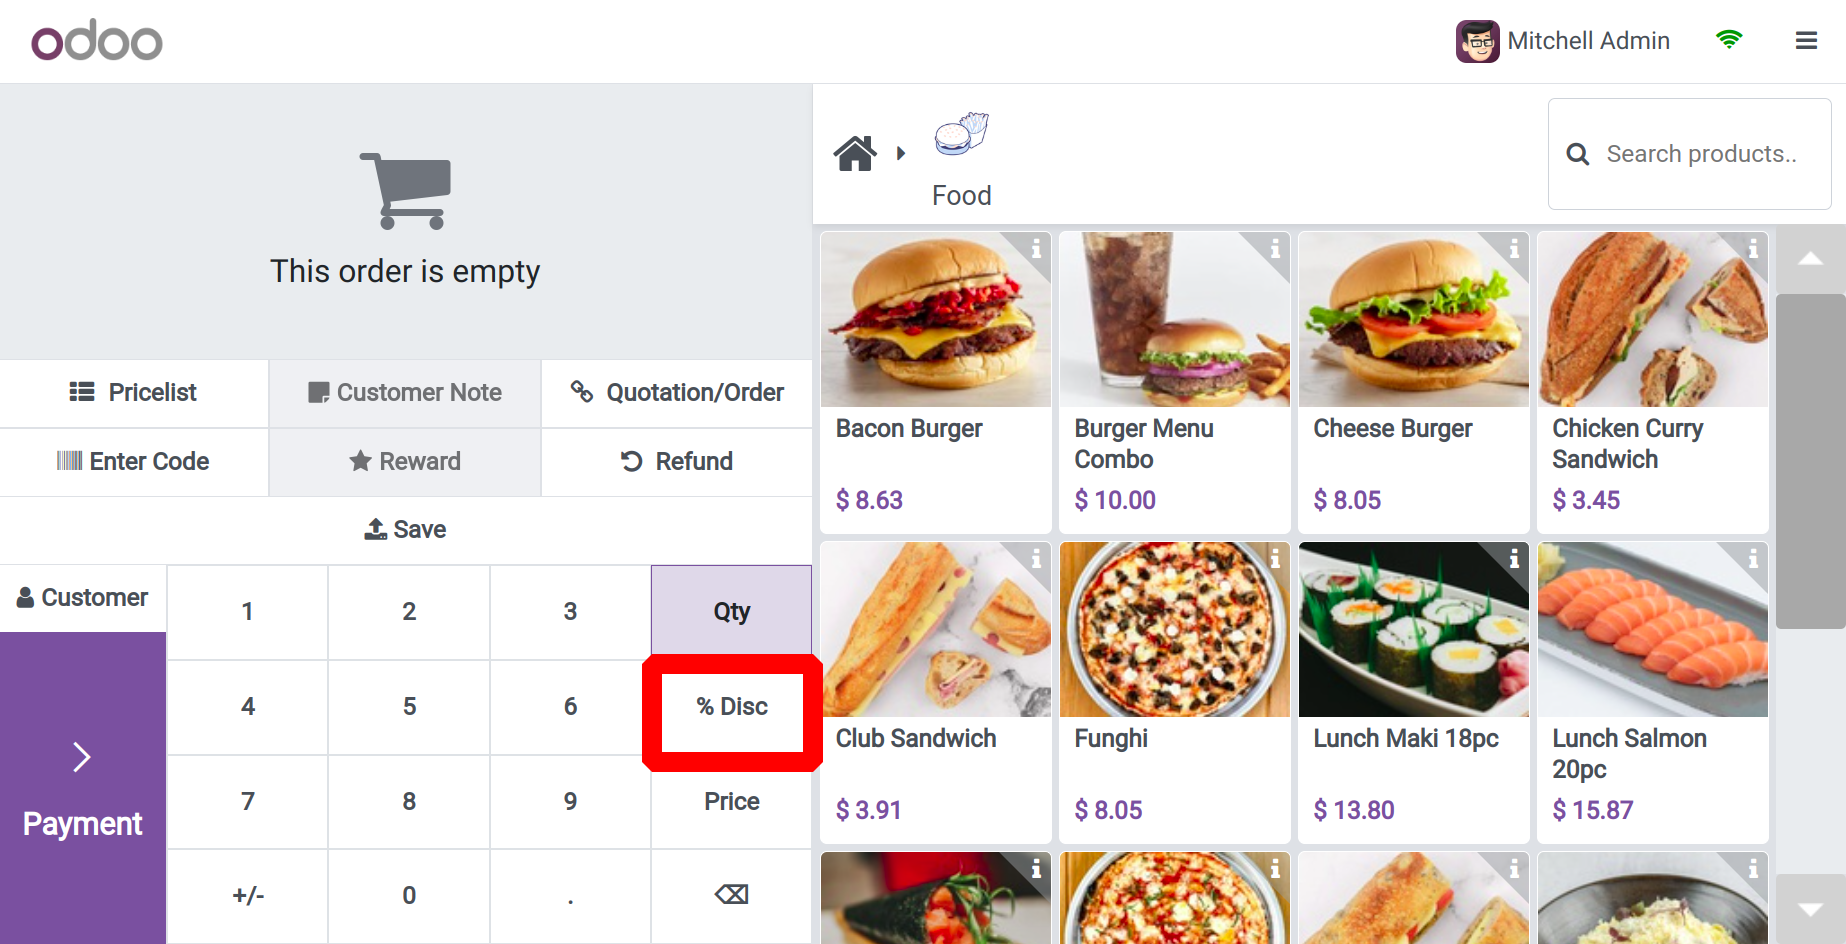
to modify the product pricing on orders. Odoo 17 will allow cashiers to set a discount
per line once the Line Discount option has been activated.
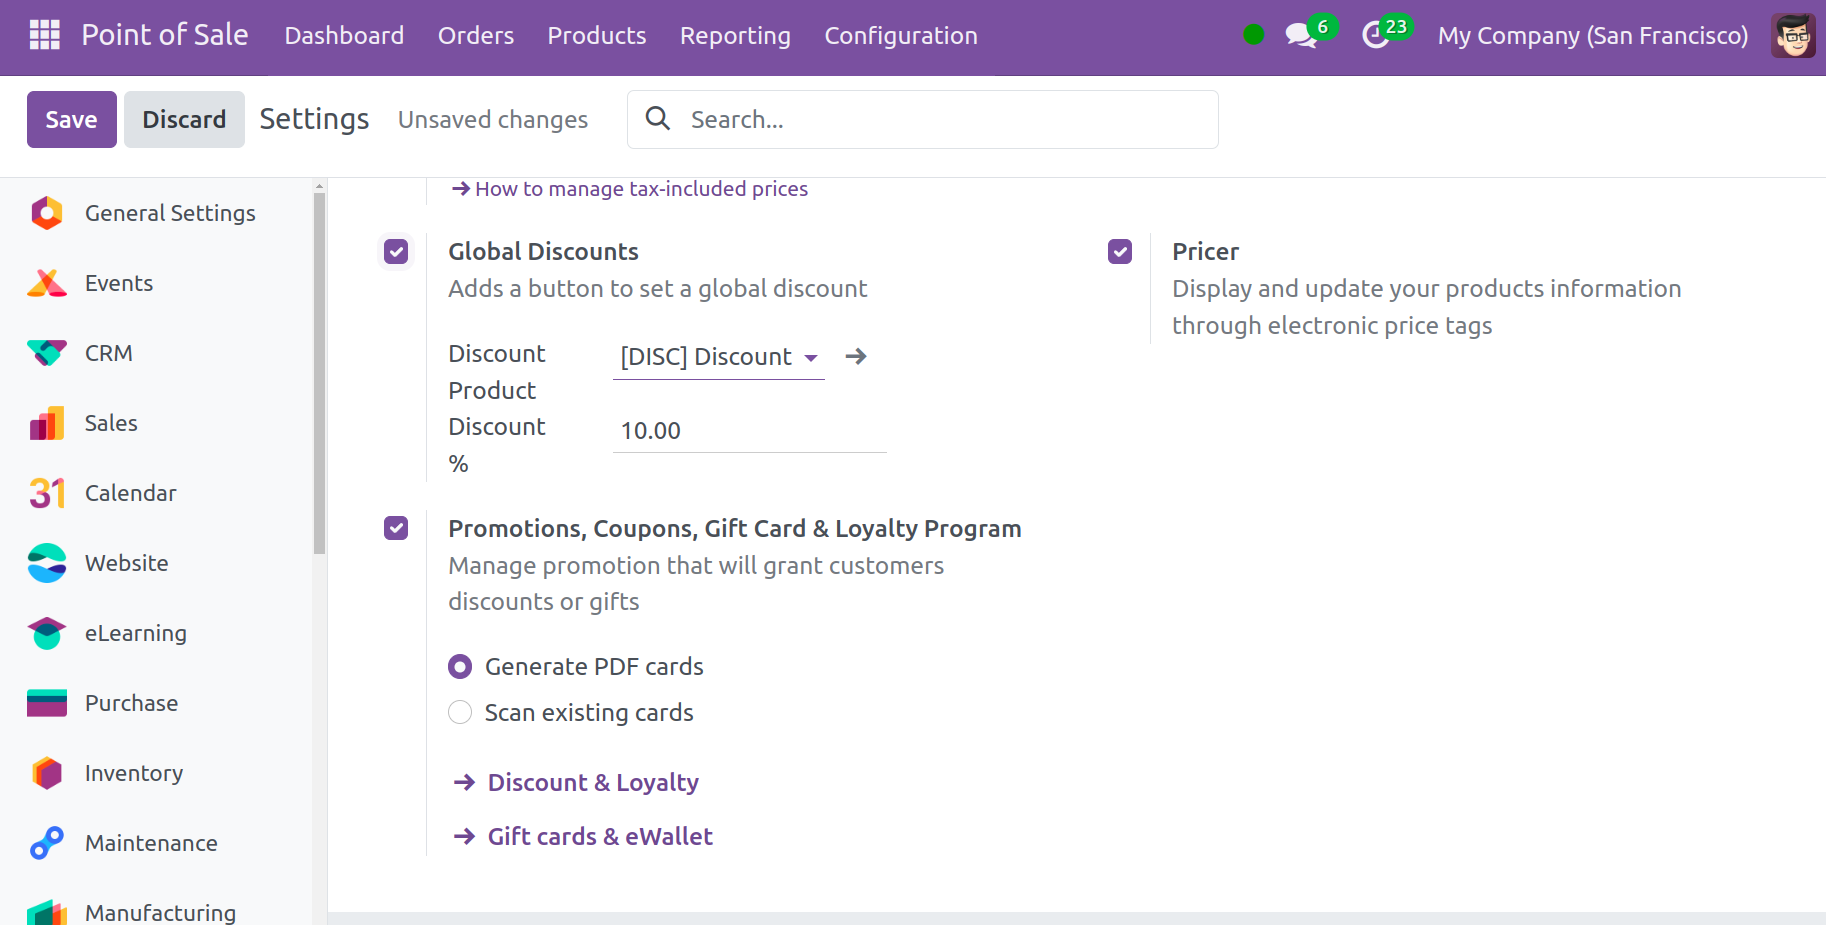
You can add a button to create a global discount on products by activating the Global
Discounts feature. You can write the discounted product and the discounted % in the
fields that are supplied.
You can boost your sales by responding to your customers' varied offerings. For this, you
can enable the Promotion, Coupons, Gift Cards, and Loyalty Programme options.
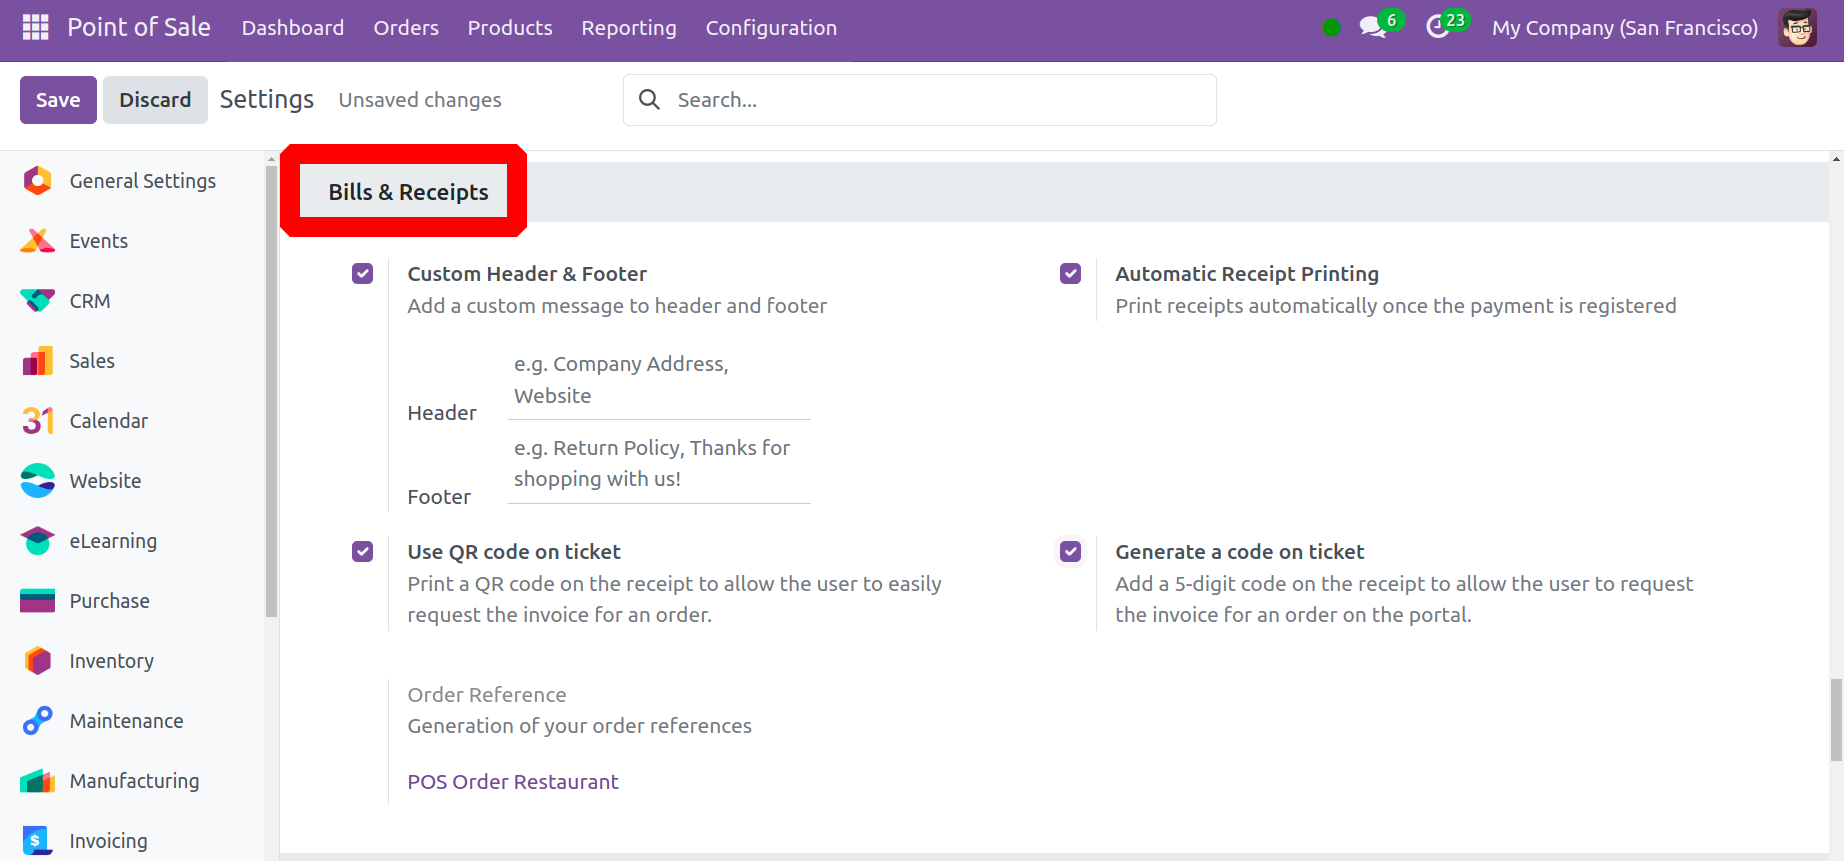
Bills & Receipts
To add a customized message to the top and footer of the invoices and receipts, use the
Custom Header & Footer function. You will receive additional fields to indicate the
notes you want on the header and footer of the invoices and receipts. You can create
receipts automatically with the help of the Automatic Receipt Printing tool once the
payment has been registered.
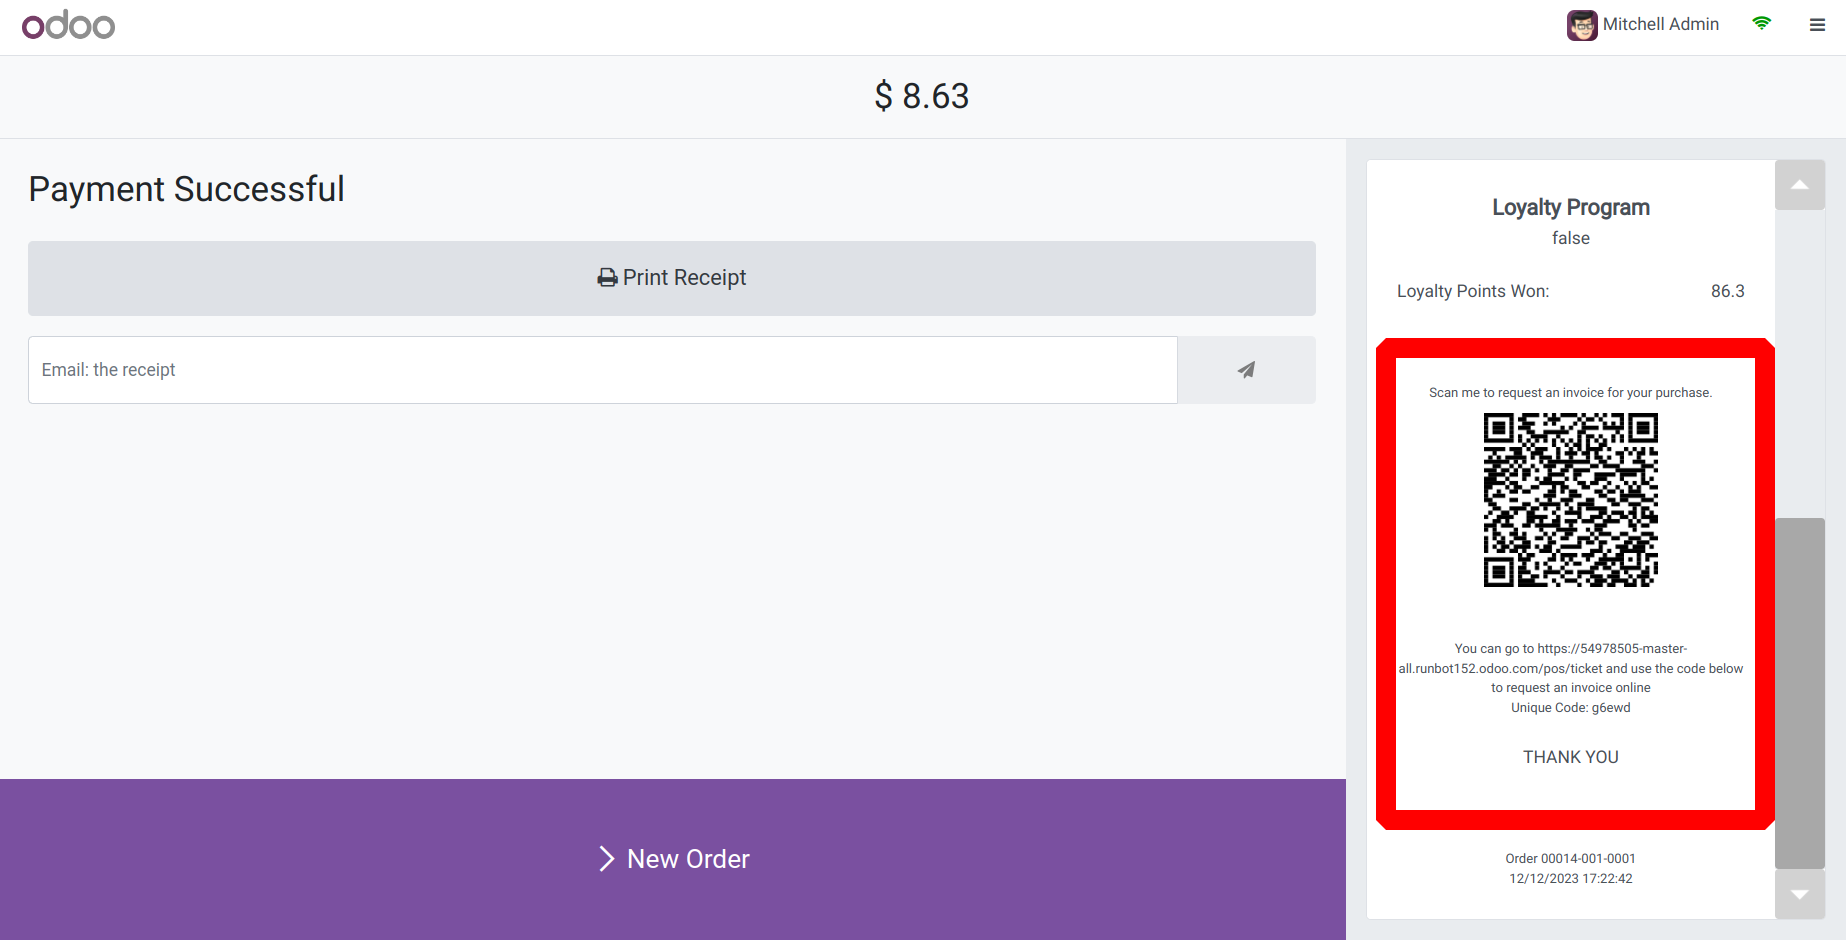
The user can instantly get an order's invoice by scanning the QR code displayed on the
receipt when the Use QR Code on Ticket option is enabled. When you allow the user to use
the portal to request an invoice for an order, Create a code on the ticket that updates
the receipt with a five-digit code.
Payment Terminals
You can view the payment terminals that are accessible in the Odoo17. Point of Sale
module under the Payment Terminals tab. You can now enable the relevant payment
terminals for your new point of sale.
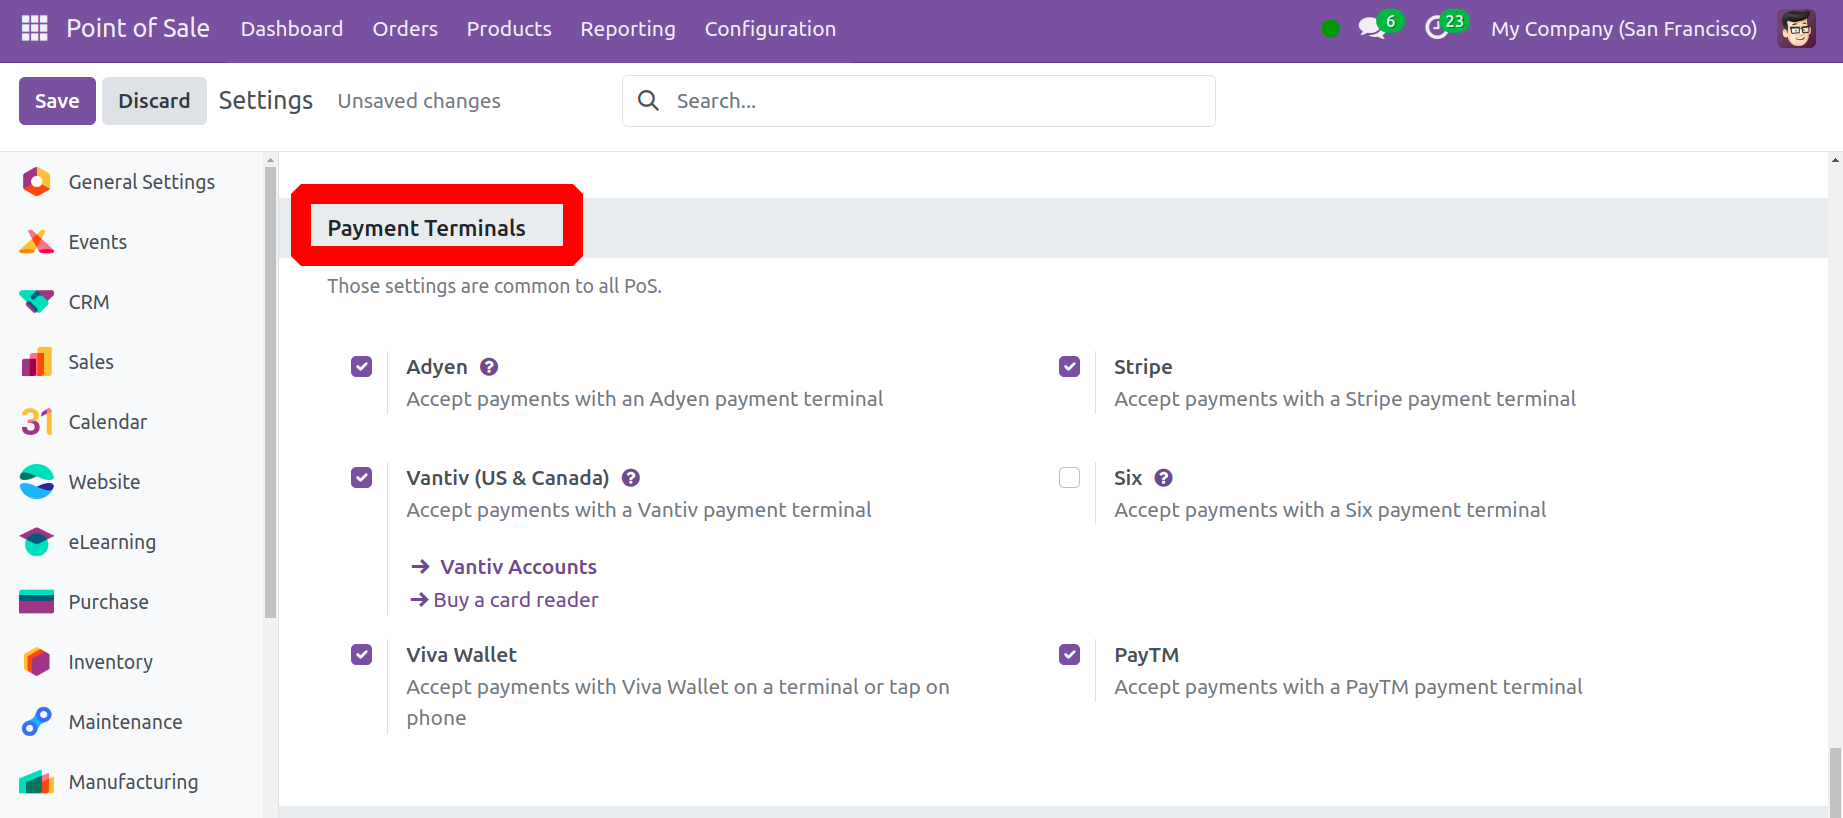
Odoo allows you to accept payments using payment terminals from Adyen, Vantiv (US &
Canada), Ingenico (BENELUX), Stripe, Six, and Worldline, depending on which option you
choose here.
Connected Devices
Odoo 17 allows devices to be connected to the PoS without an IoT Box. To add printers,
activate the ePos Printers option. They show the customer an extra display and turn on
the Customer Display feature when they are checking out. Using these choices, you can
submit a picture to add a custom background.
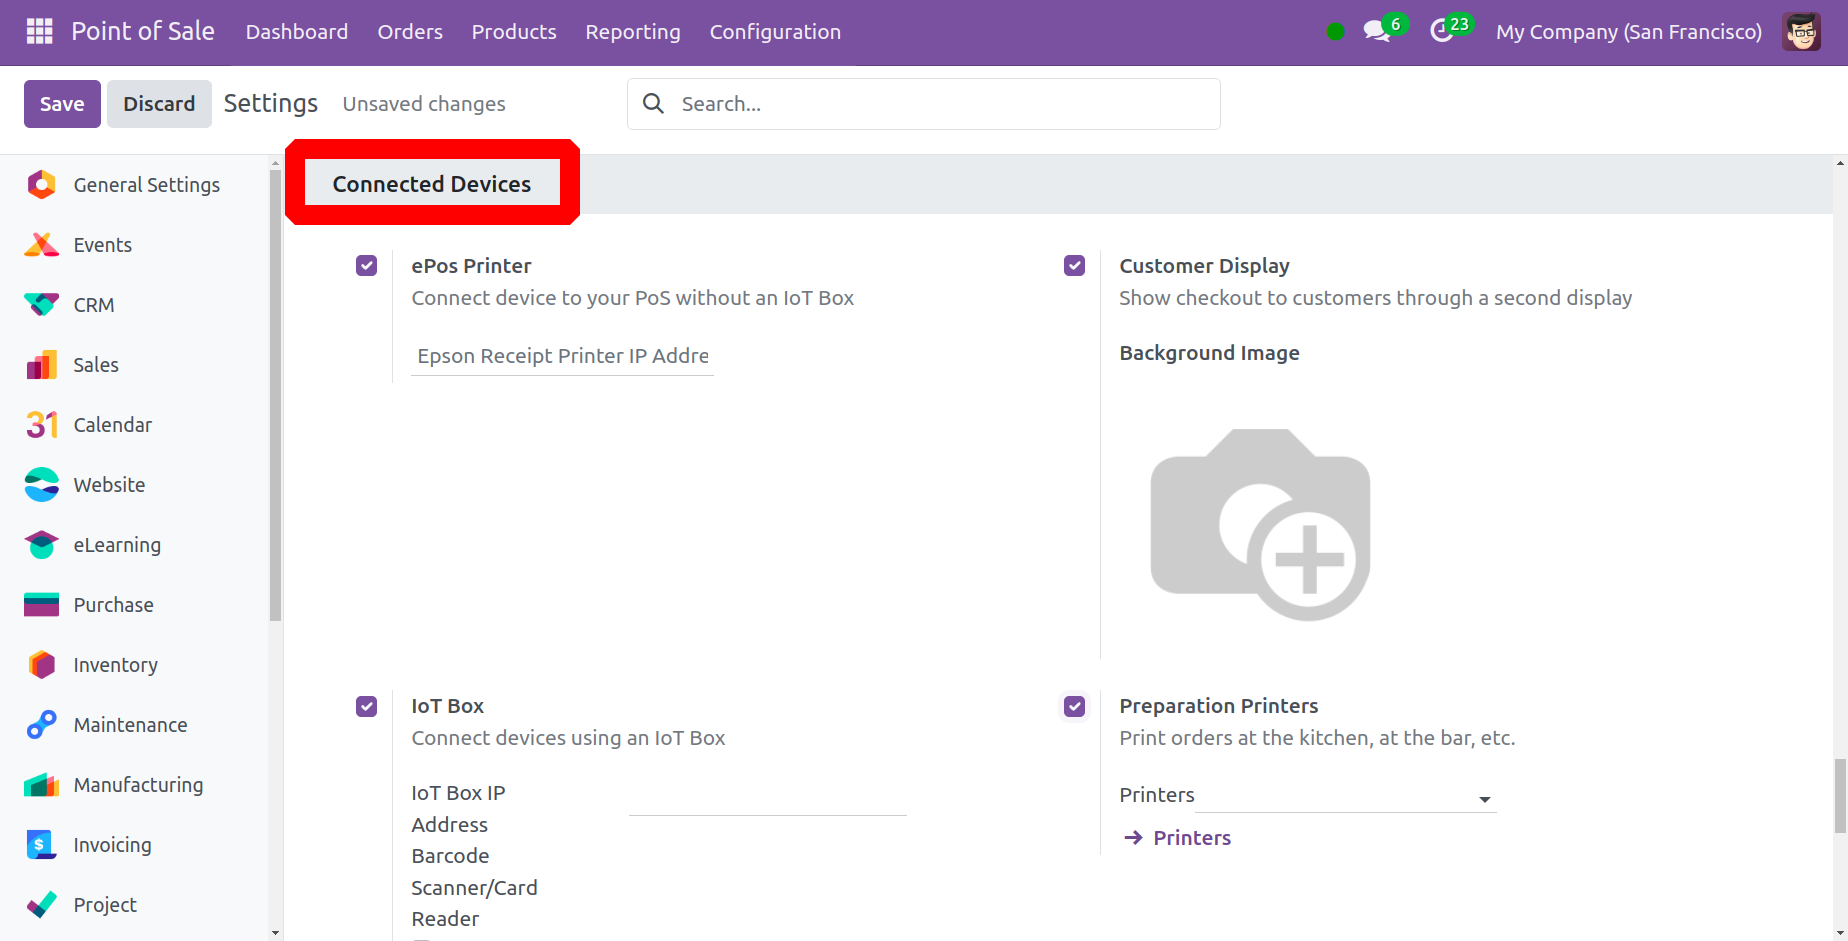
The IoT Box box allows users to connect devices. Within the settings, you can include a
barcode scanner/card reader, electronic scale, customer display, receipt printer, and
more.
Inventory
Under the Inventory tab, you can select the Operation Type that will be used to log the
product selections. You can utilize barcodes in PoS to scan products, customer cards,
and other items by placing the Barcode Nomenclature in the correct place. Using barcodes
allows you to expedite Point of Sale processes. The PoS interface will show a debug
window as shown below after developer mode is enabled. This box allows you to manually
enter the barcode of the product.
Use your PoS session to sell items first and ship them later by activating the Allow Ship
Later feature.
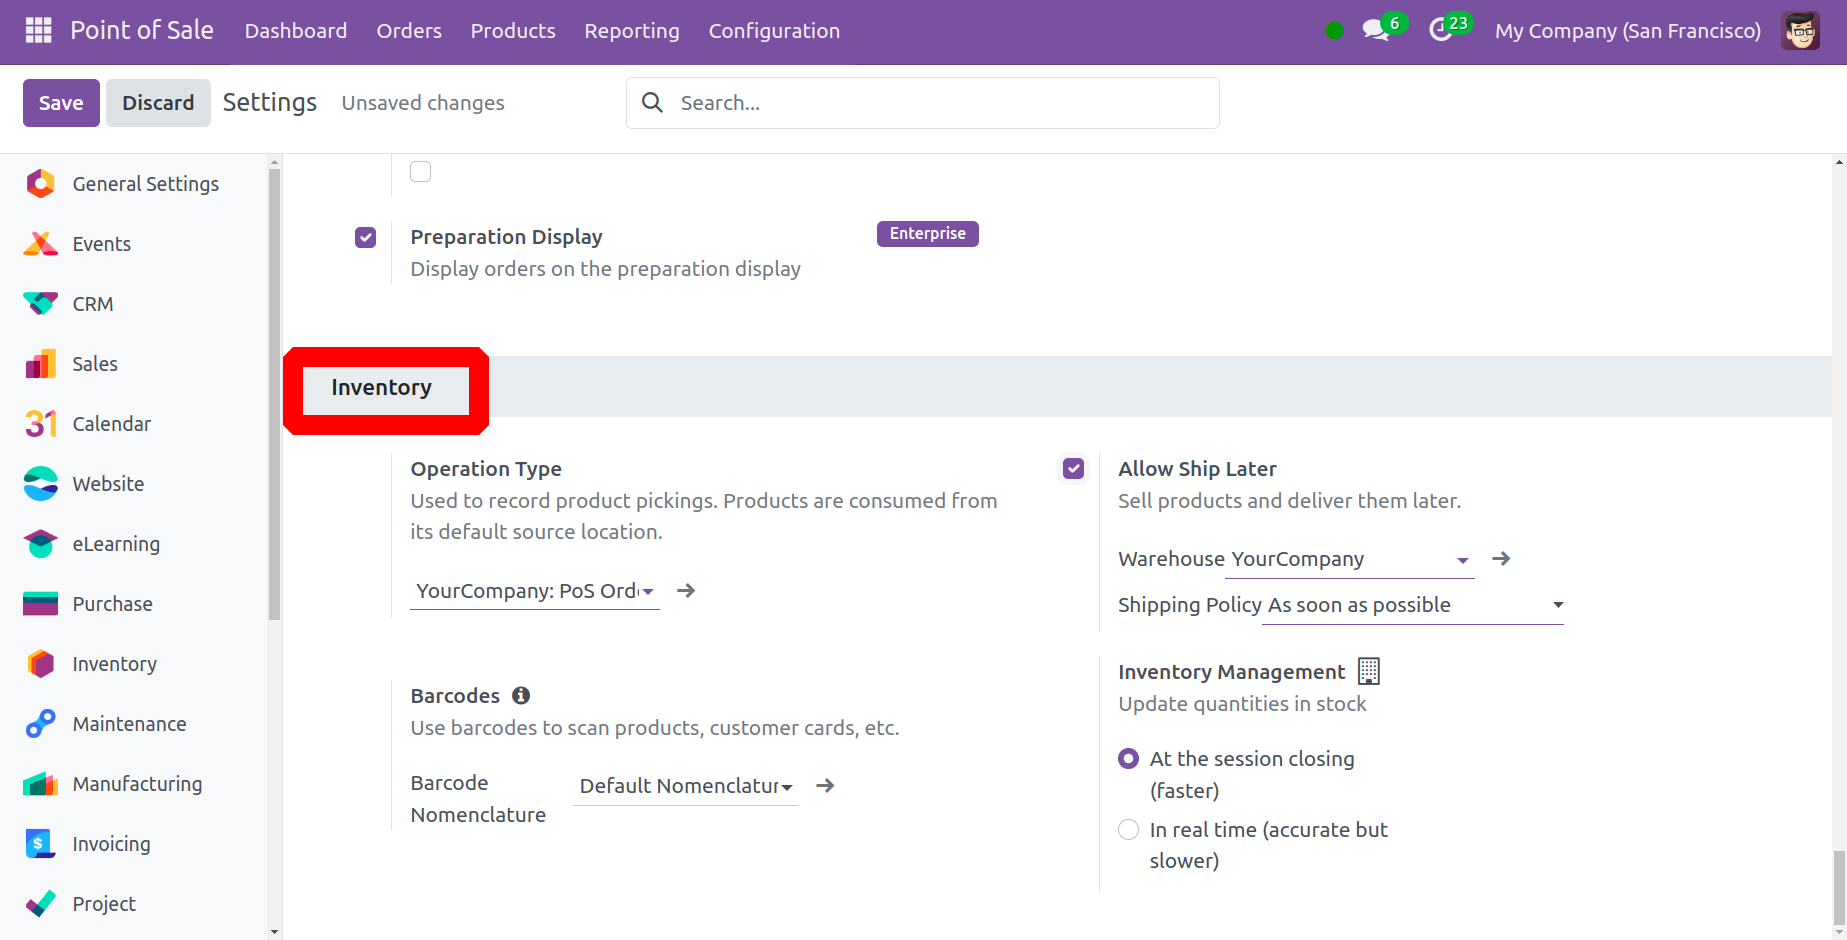
To enable this capability, you must enter the Warehouse, Specific route, and Shipping
Policy of such products in the relevant fields.
This PoS's Inventory tab may contain information on the Inventory Management details.
Here is where you may select the time to update the stock levels. You can set it to
either In Real Time or At the end of the session, depending on your needs.
The stock modifications made at the end of the session will not affect the inventory
until after it has concluded. Stock modifications have a simultaneous effect on the
inventory in real-time.
As seen in the screenshot below, the established PoS is visible on the Dashboard of your
PoS module.
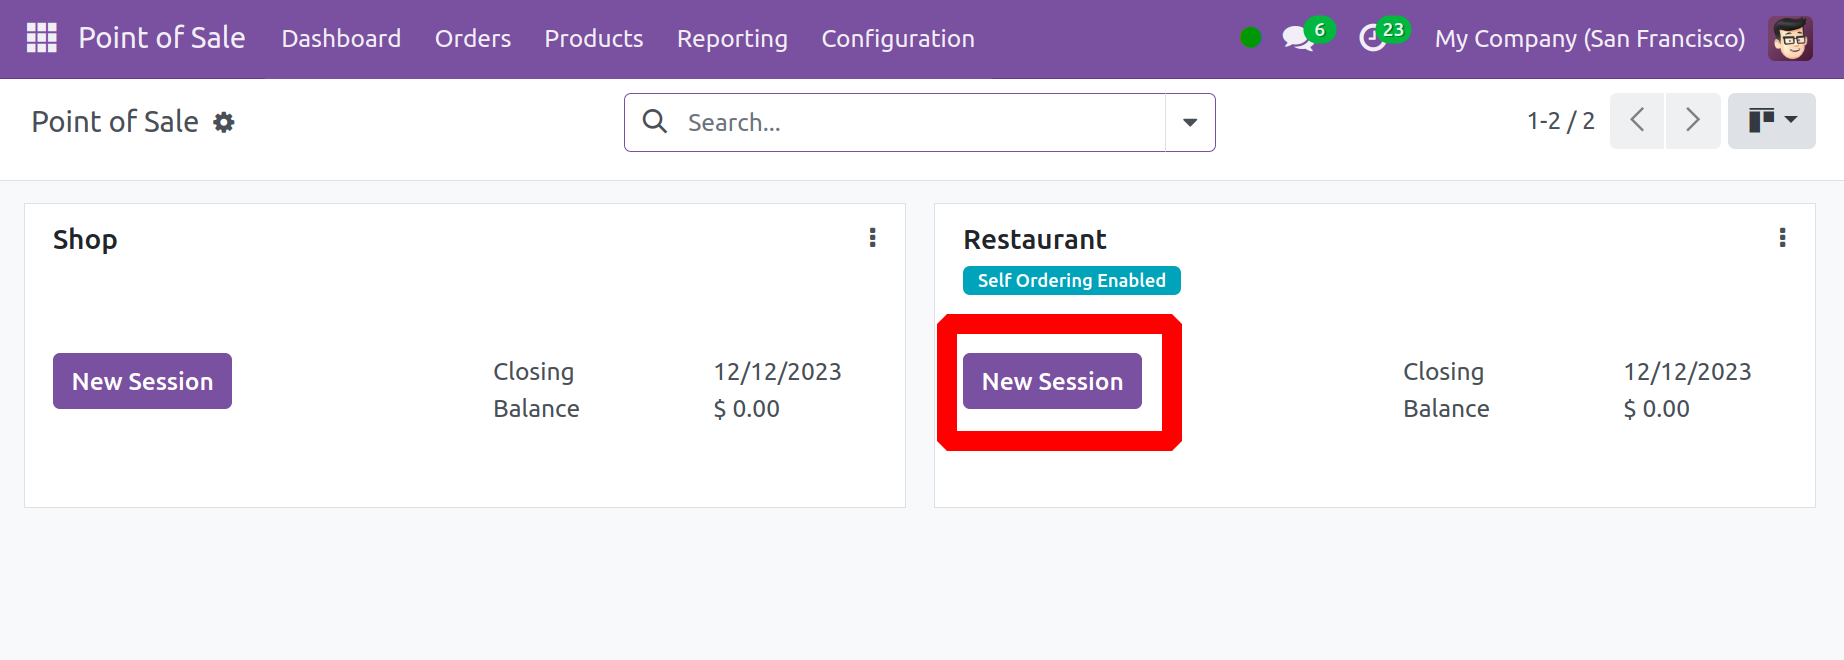
By clicking the New Session button, you can start a new session for your newly created
PoS.