Journal Groups
You may classify the journals in the Odoo 17 Invoicing module with ease by setting up distinct journal groups. In the Journal pane, the journal group can be used as a filter. Choose the Journal Groups option from the module's Configuration menu. Different kinds of journal groups can be created and managed with this platform. To establish a brand-new journal group for the module, click the New button.

Clicking the New button will cause a new line to appear on the screen, as you can see in the screenshot above. In the corresponding fields, you can define the Journal Group, Excluded Journals, and Company. In order to save the updated data, click the Save button at the end.
Journal Entries
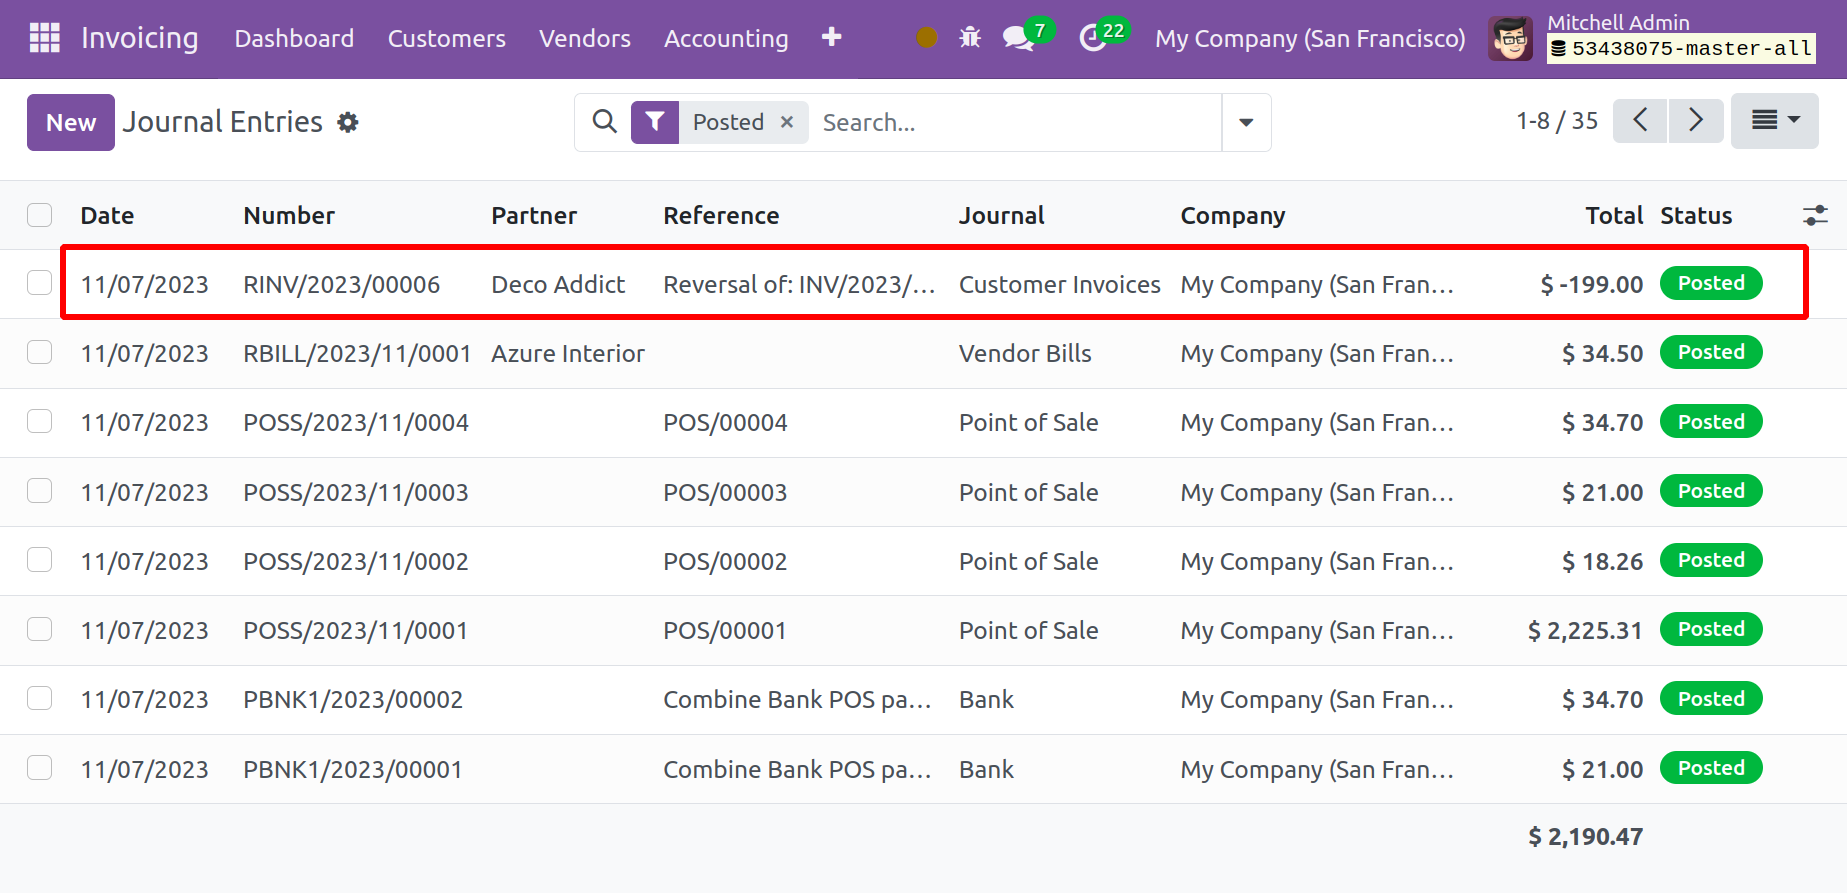
Your company's financial statements and transactions will be added as journal entries to the accounting journals detailing its business activities. Once you enable the Show All Accounting feature from Odoo 17's General Settings, you will see the Journal Entries function in the Odoo 17 Invoicing module under the Accounting menu. The Invoicing module's journal entries platform will display all entries made to the different journals.
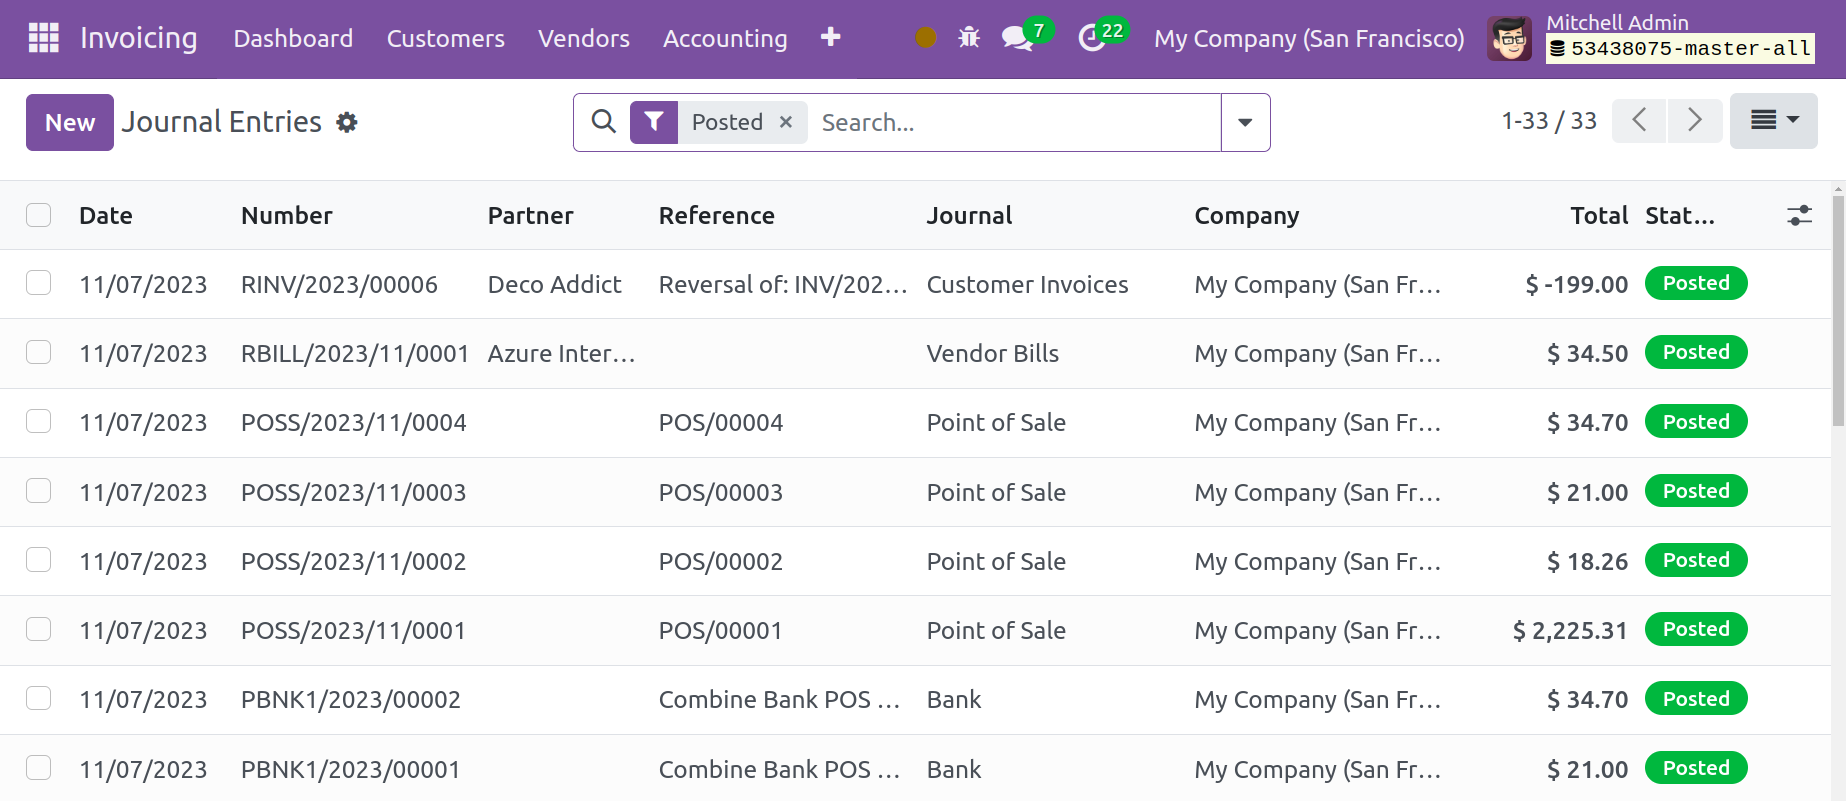
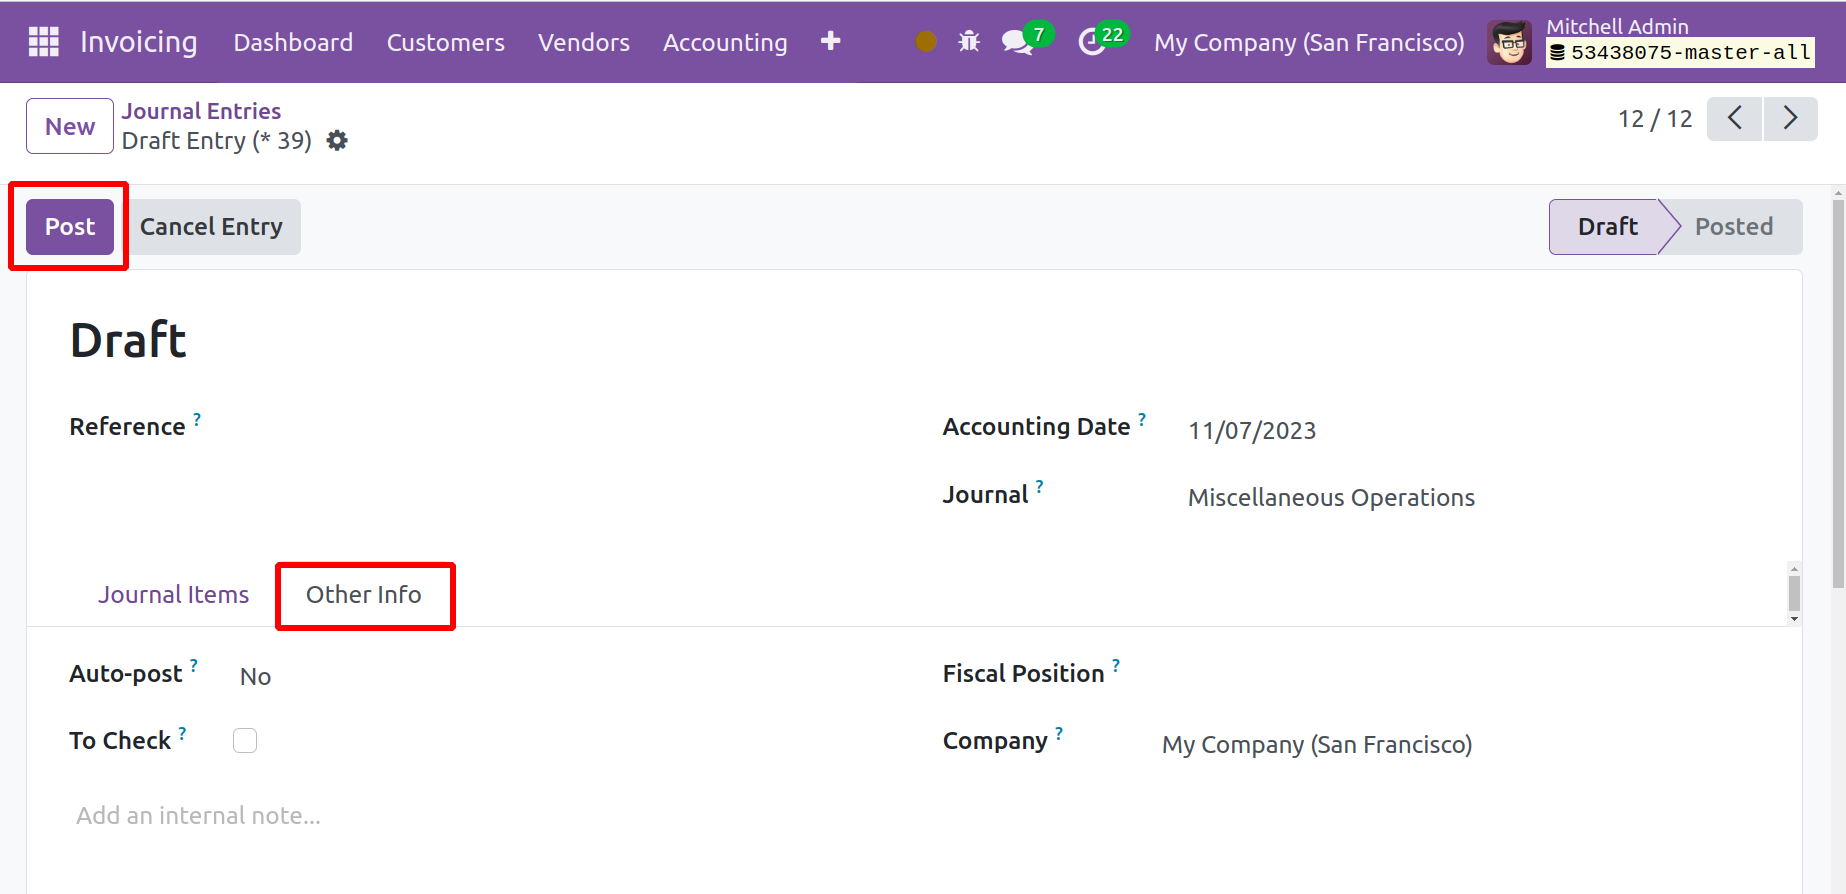
The journal entries' date, number, partner, reference, journal, company, total, and status are all displayed in this list view of the entries. The default criteria that you will see are Unposted, Posted, Reversed, To Check, Sales, Purchase, Bank, Cash, Miscellaneous, and Date. Partner, Journal, Status, Date, and Company are the default group options that you can utilize.In the designated space, you can list this journal entry's references. Enter the Journal and Accounting Date in the appropriate areas. Use the Add a Line button in the Journal Items tab to add the Account, Partner, Label, Debit, Credit, and Tax Grids details.
If you would want the entry to be posted automatically on the specified date, go to the Other Info tab and activate the Auto-Post option. If this journal entry is part of a reversal entry, the reversed entry ID will be displayed in the 'Reversal of' section. You can double-check the data you added to the journal entry by turning on the To Check option. The Fiscal Position and the Company can be added in the corresponding fields. You can include an internal message about this specific journal entry in the space provided.
By clicking this button, a new pop-up window will display, allowing you to enter the information needed to reverse the current journal entry.
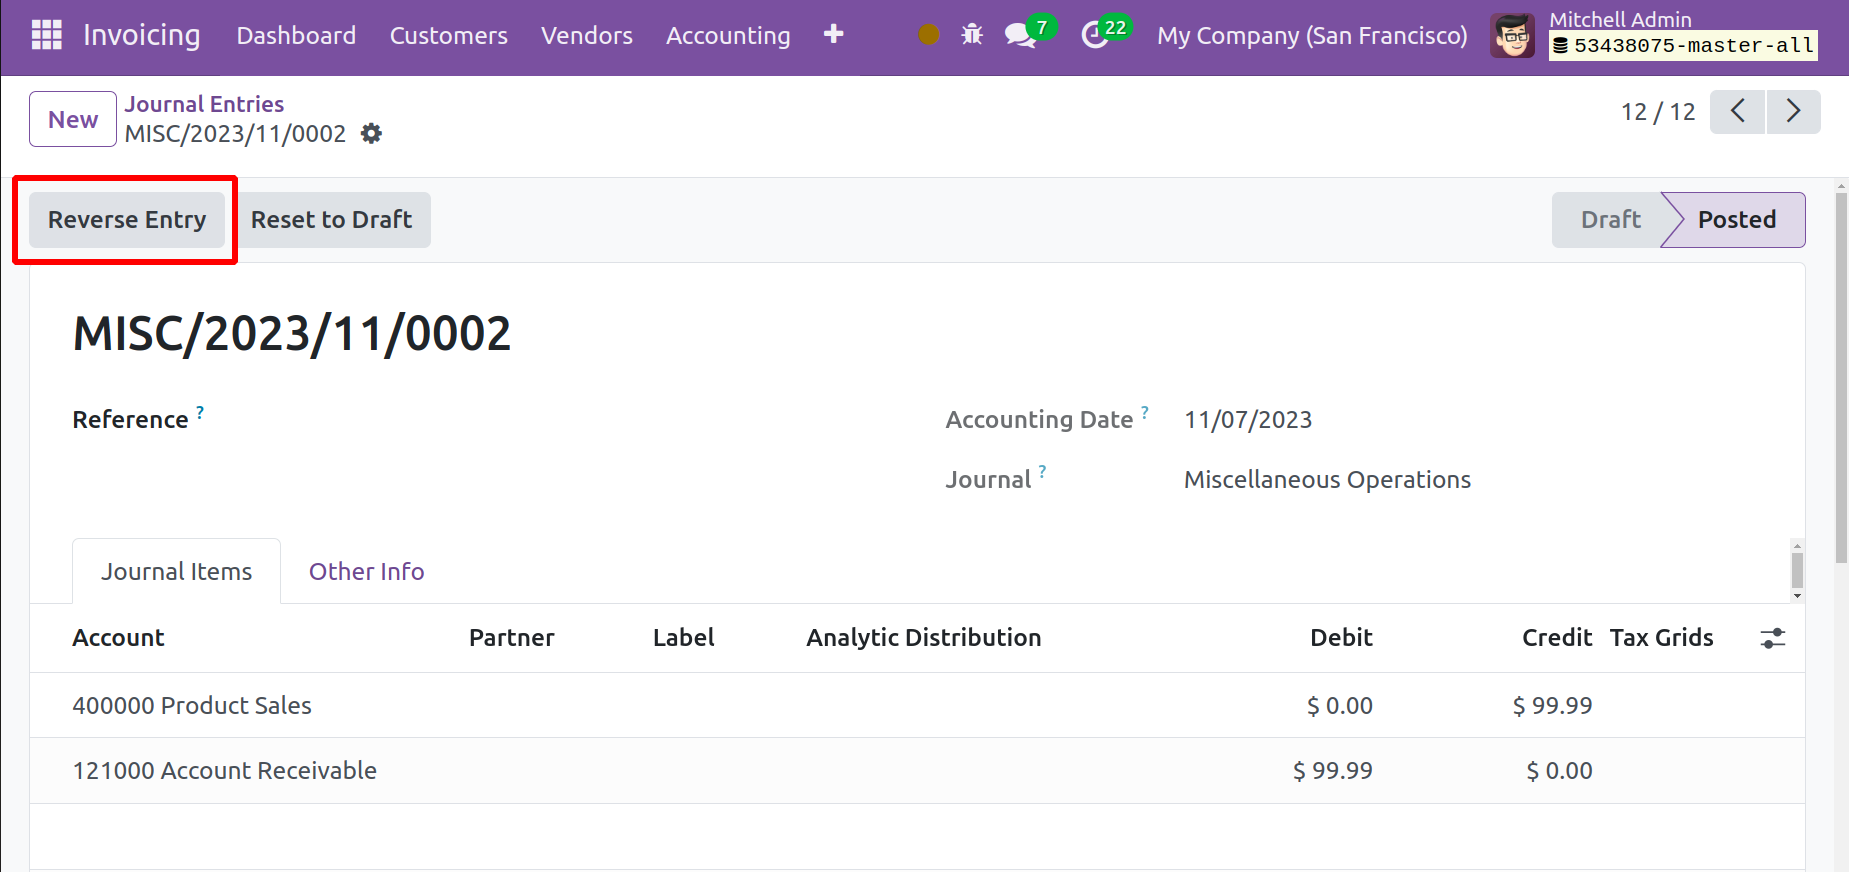
By clicking the Reversal Entry button, a new pop-up window will display, allowing you to enter the information needed to reverse the current journal entry.
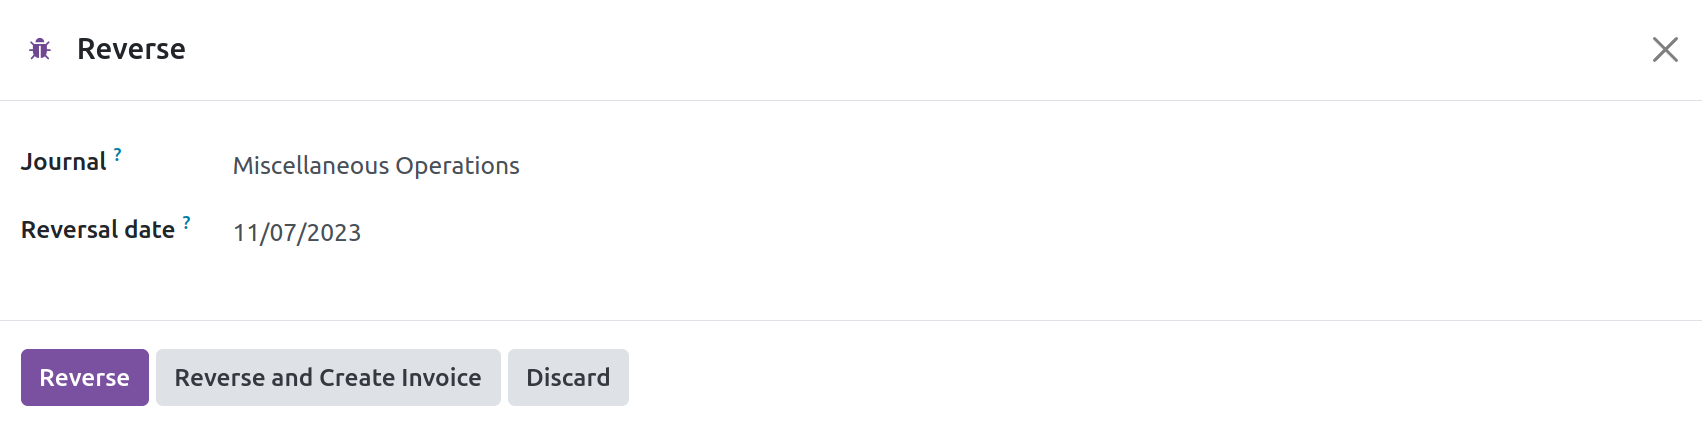
You can reverse the journal entry by clicking the Reverse option after adding the necessary information. The Journal Items that you appended to journal entries in Odoo will be documented in a designated platform accessible through the Accounting menu. The Odoo Invoicing module's Journal Items will keep track of every configuration for every journal item that is set up in various journal entries.
You can choose between List, Kanban, Pivot, and Graphical views on the platform. You can obtain information about the Date, Journal Entry, Account, Partner, Label, Amount in Currency, Debit, and Credit details from the list view.