Attendance Management
The Odoo ERP Software's Attendance module assists you in monitoring and documenting every
employee's working hours within an organization. In both small and large-scale
organizations, it is crucial to HRM operations. Each employee's pay is set based on
their working hours. With the increasing advancement of globalization, conventional
approaches to scheduling corporate employees' work hours are becoming unfeasible. Using
the traditional method increases the likelihood of errors and mistakes. Thus, a
contemporary system type is required for this. A highly integrated approach like this
narrows the margin for error.
The goal of the Odoo 17 Attendance module is to maintain records of each employee's
working hours in the office. It is possible to keep daily, weekly, monthly, and annual
records of the works.
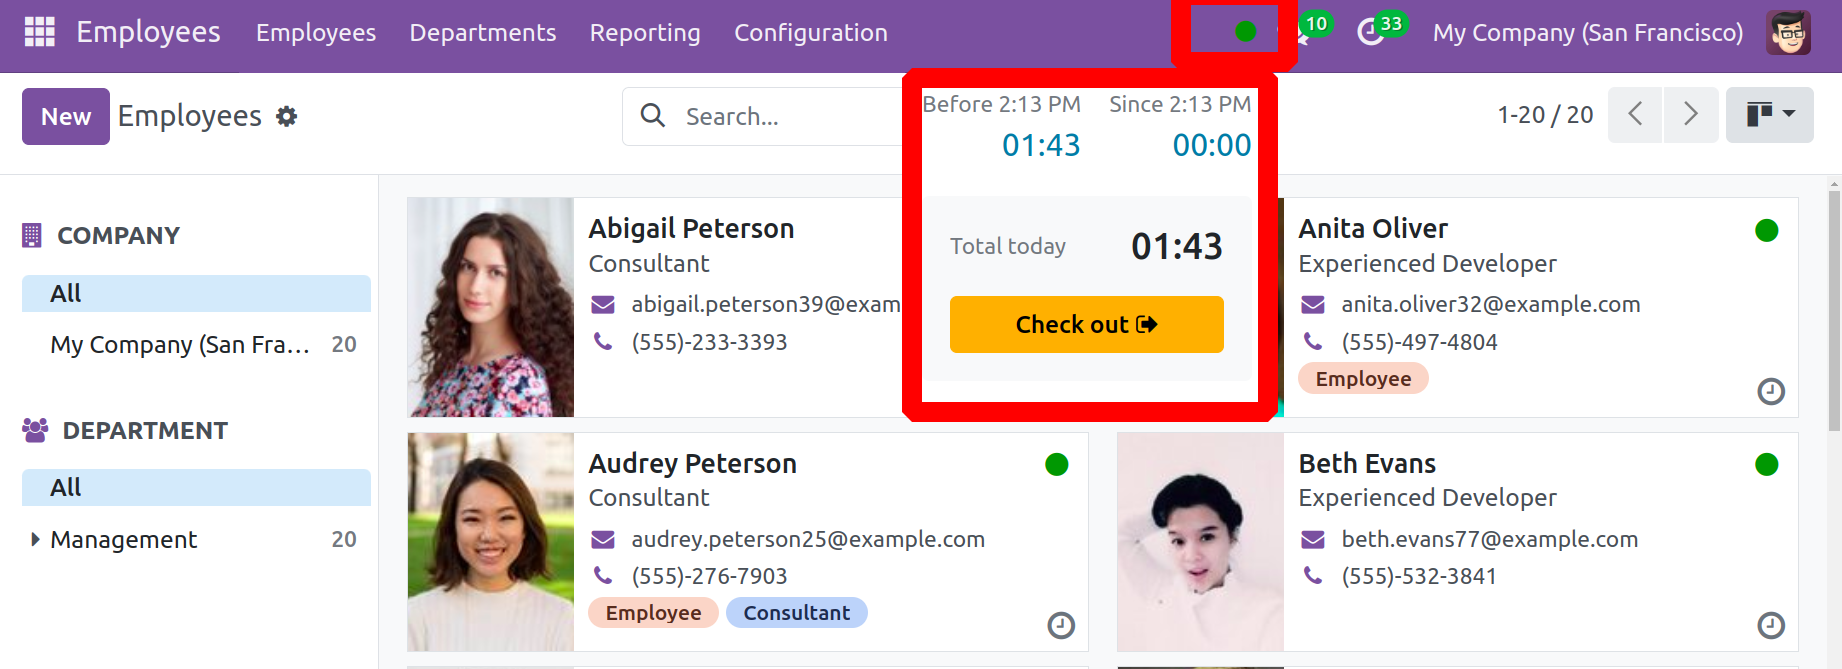
As seen in the screenshot below, the Odoo 17 employee check-in feature may now be used
from outside the app. There is a clear representation of the check-in time. The Checkout
button can then be used by an employee to complete their checkout. The Systray Check-In
and Check-Out feature was included with Odoo 17.
Now, let's examine every feature in this module.
Overview
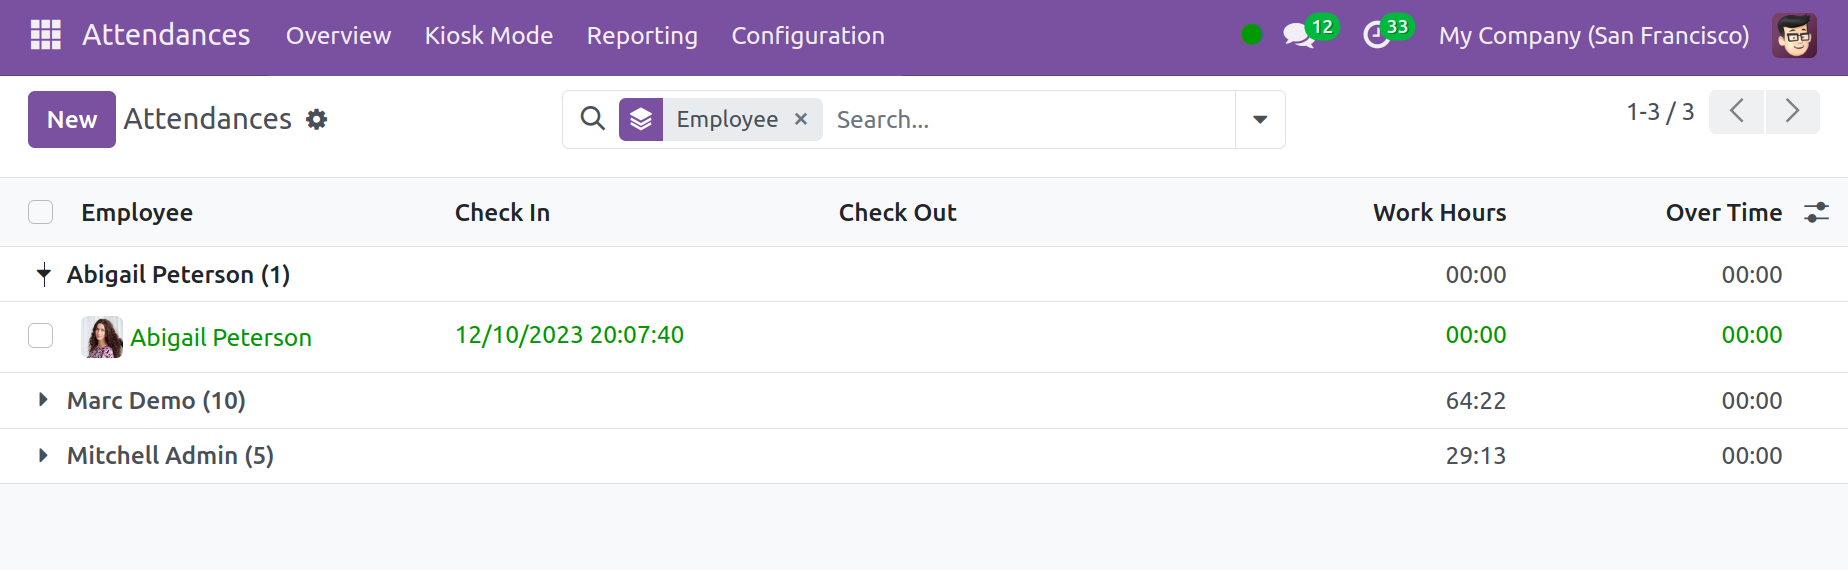
You can gather information about the company's employees with the help of the
Overview menu in the attendance module. The employee's name, their hours of work,
and their check-in and check-out times are all listed on the page.
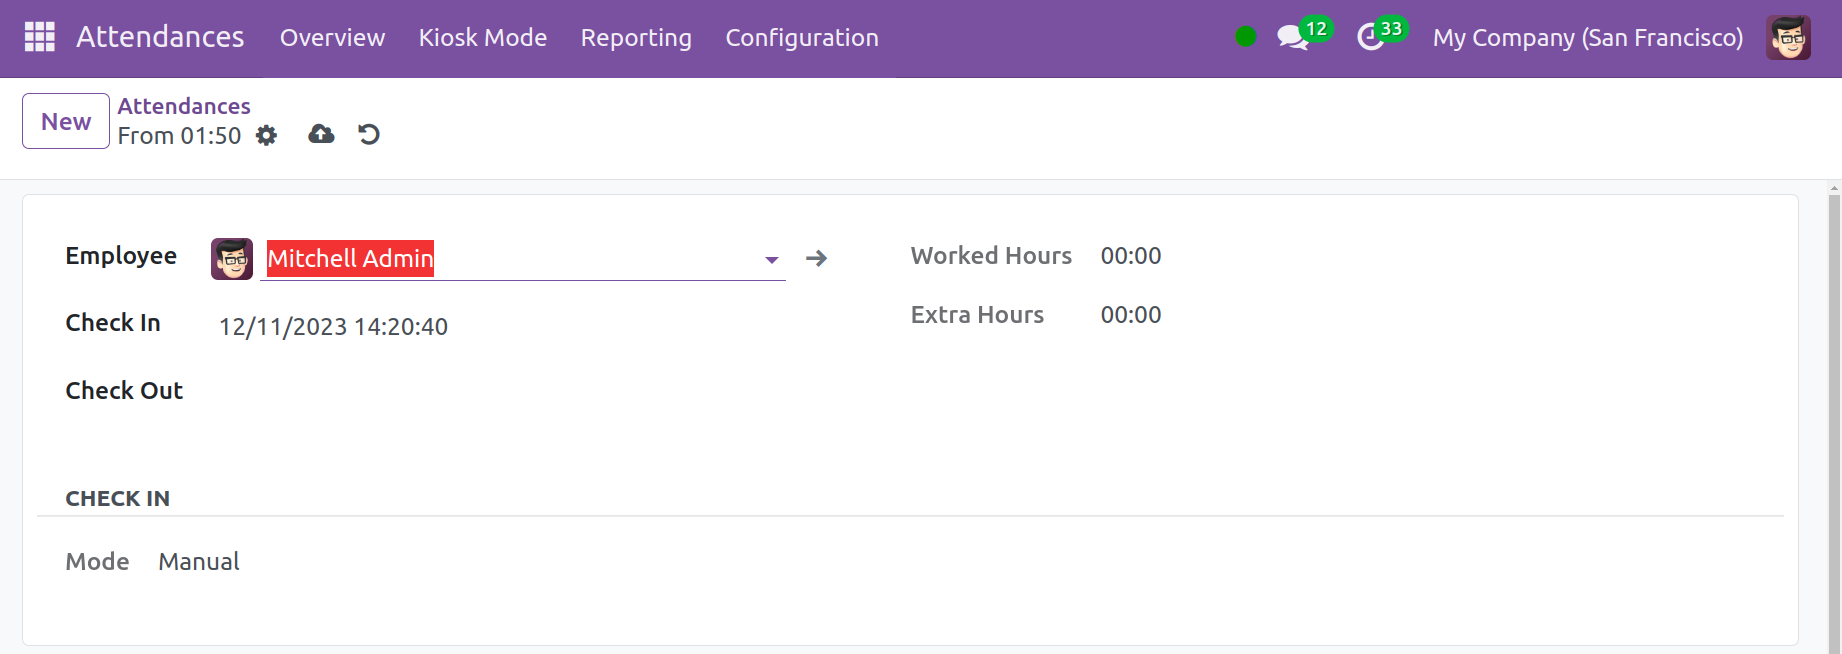
To manually enter new attendance into the system, click the New button. Select the
employee first. Next, enter the time and date of check-in and check-out. You can add
Extra Hours and Worked Hours. Next, include the check-in mode within the CHECK-IN
section.
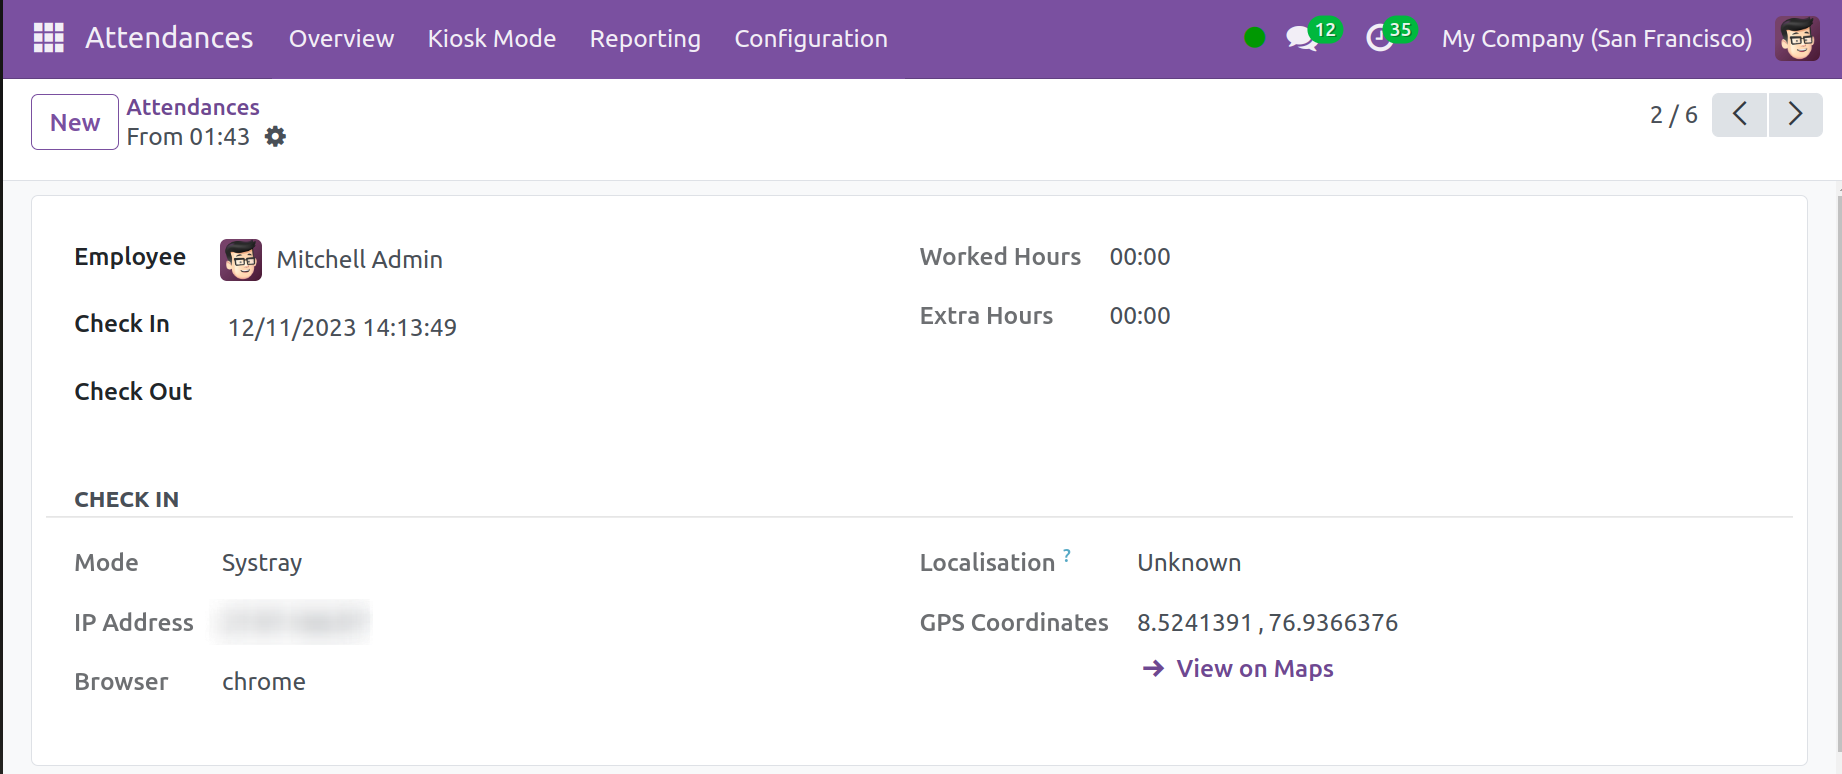
When an attendance is opened, the employee's information is shown, which includes name,
worked hours, extra hours, and check-in and check-out timings. Additional check-in data,
including the GPS coordinates, browser, IP address, check-in mode, and localization.
When users choose View on Maps, they are taken to another map page where they can easily
find the precise locations of the staff members.
Kiosk Mode
Through the use of badge scans or manual recognition, the Kiosk Mode menu assists
staff members in adding and labeling employee attendance.
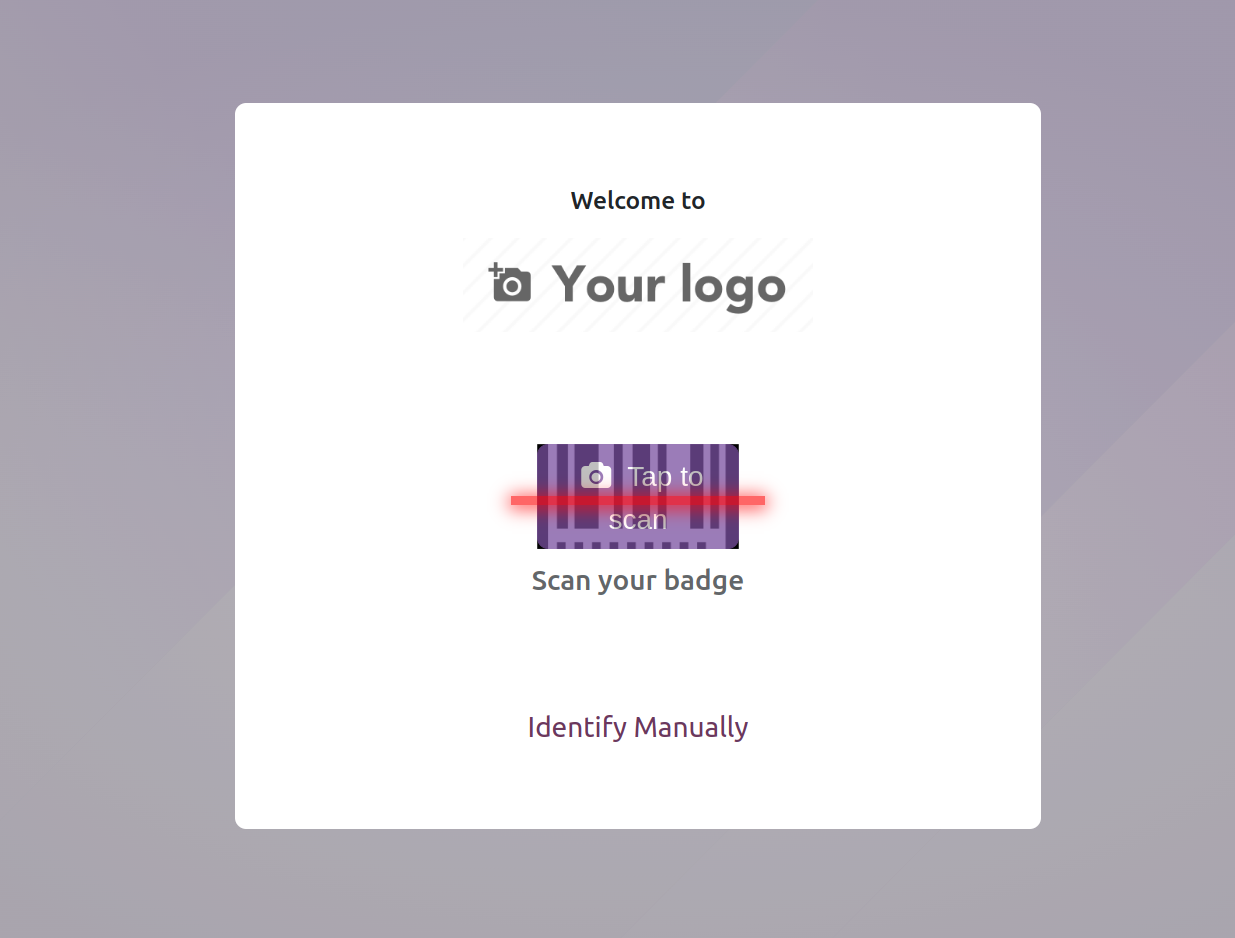
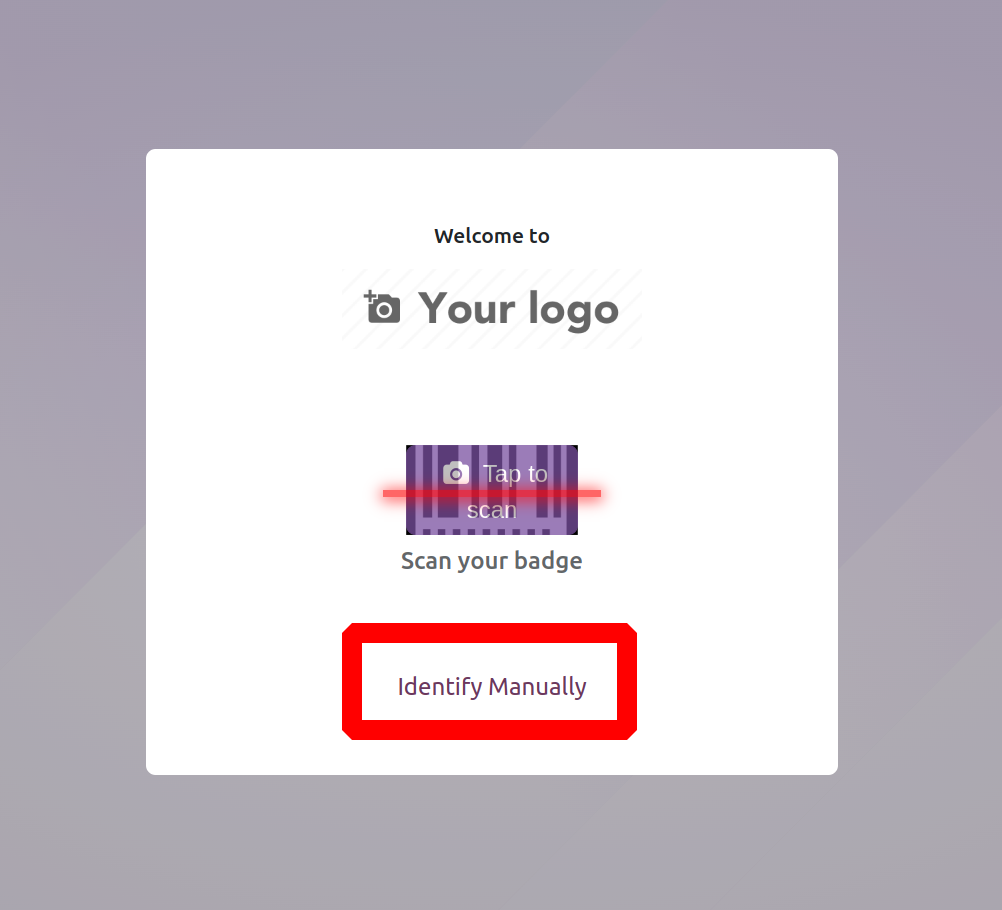
The employee ID can be used in this situation if you want to "Scan your badge."
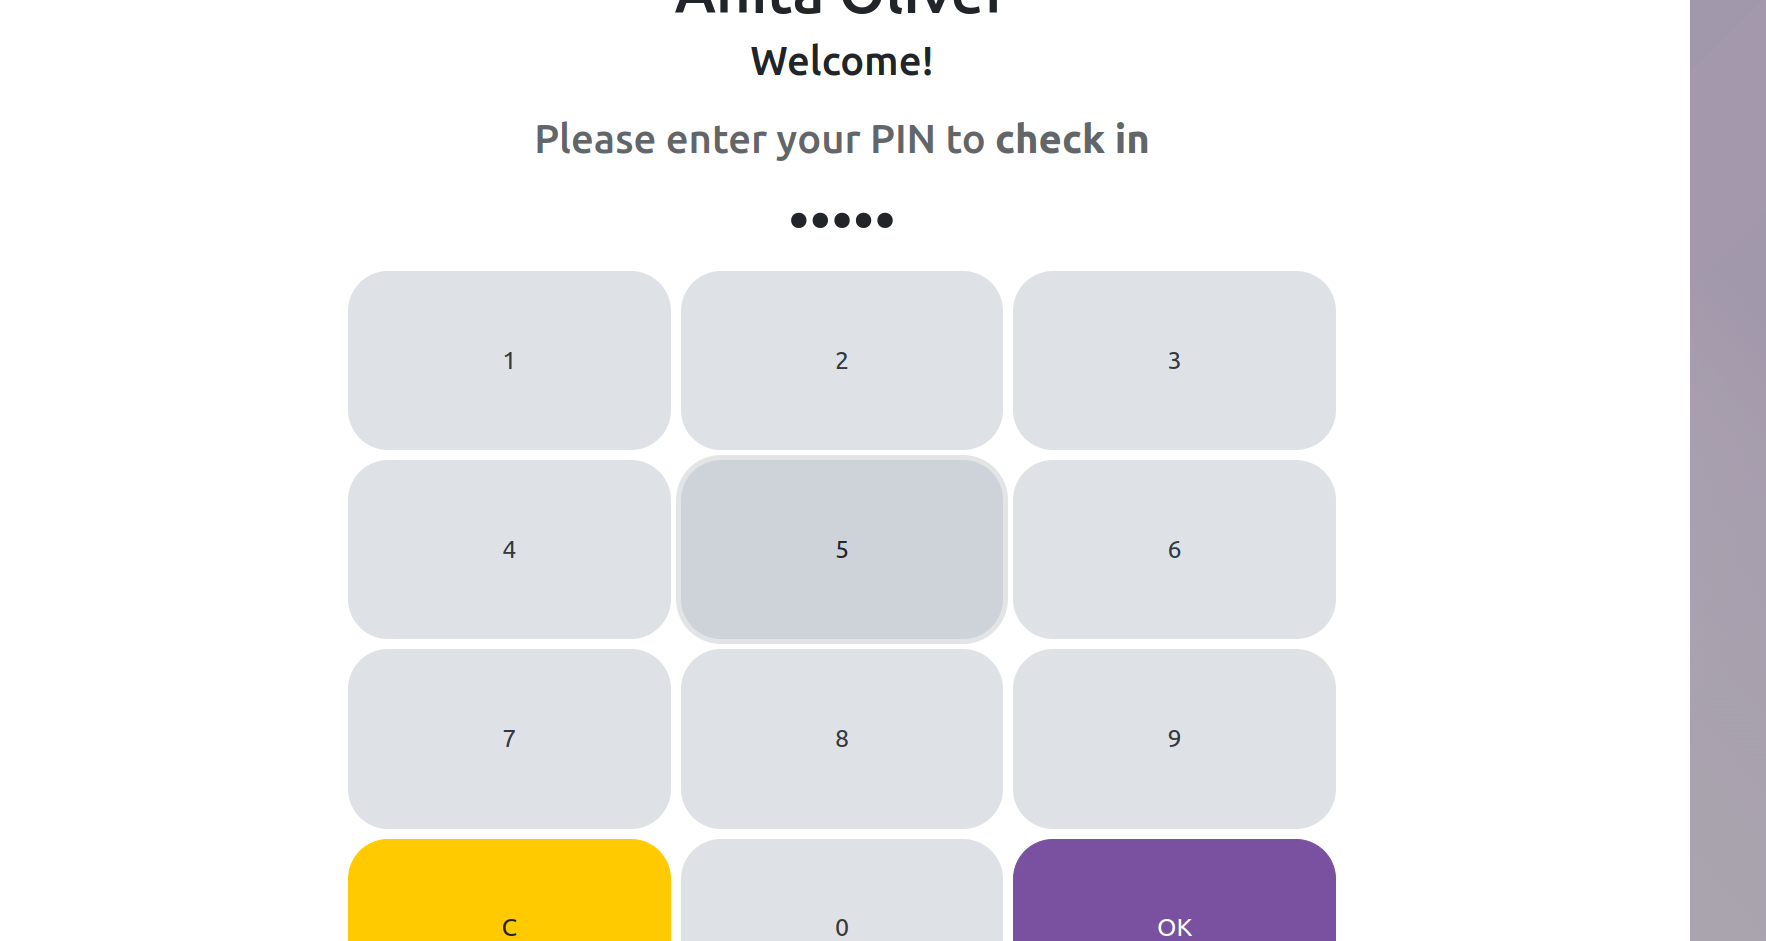
Marking attendance can also be done by selecting Manually. You will then be taken to a
page. You will be able to choose the employee's profile on the website and then input
the PIN.
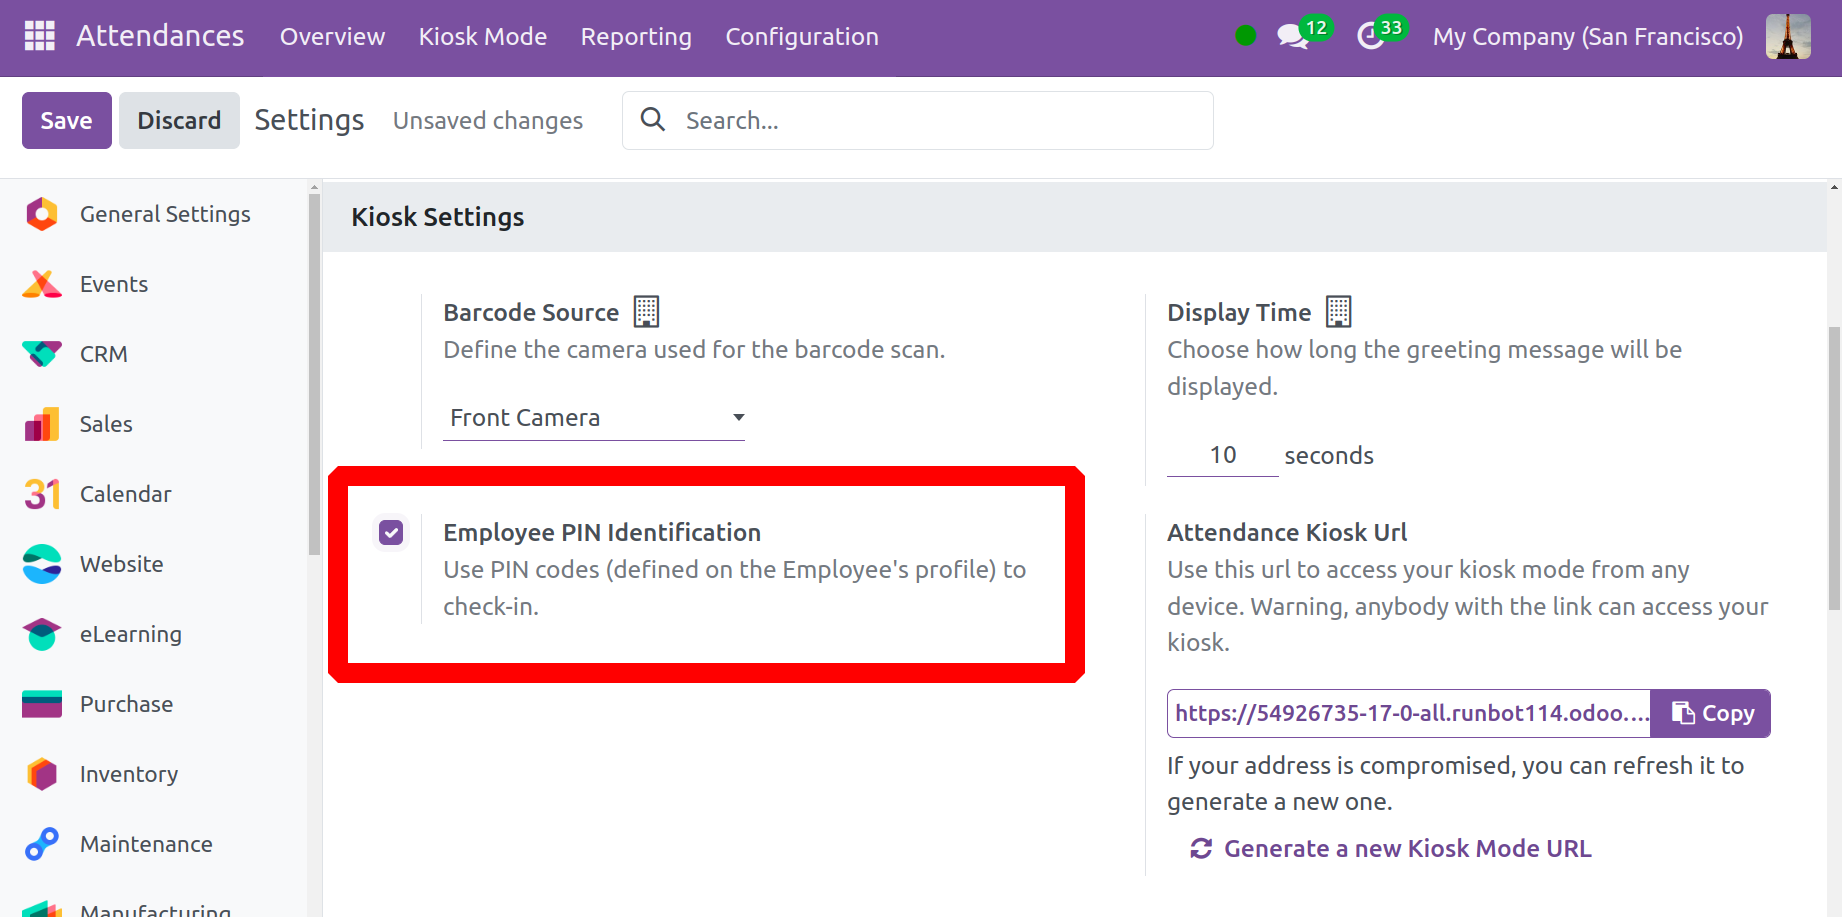
You must enable the Employee PIN Identification option in the setup menu to
accomplish this.
This option opens the possibility of using the PIN code check-in method. You may find the
PIN code on the Employee form under HR settings. You can activate the extra hours and
compare them to the hours of work completed using the extra hours option found in the
settings.
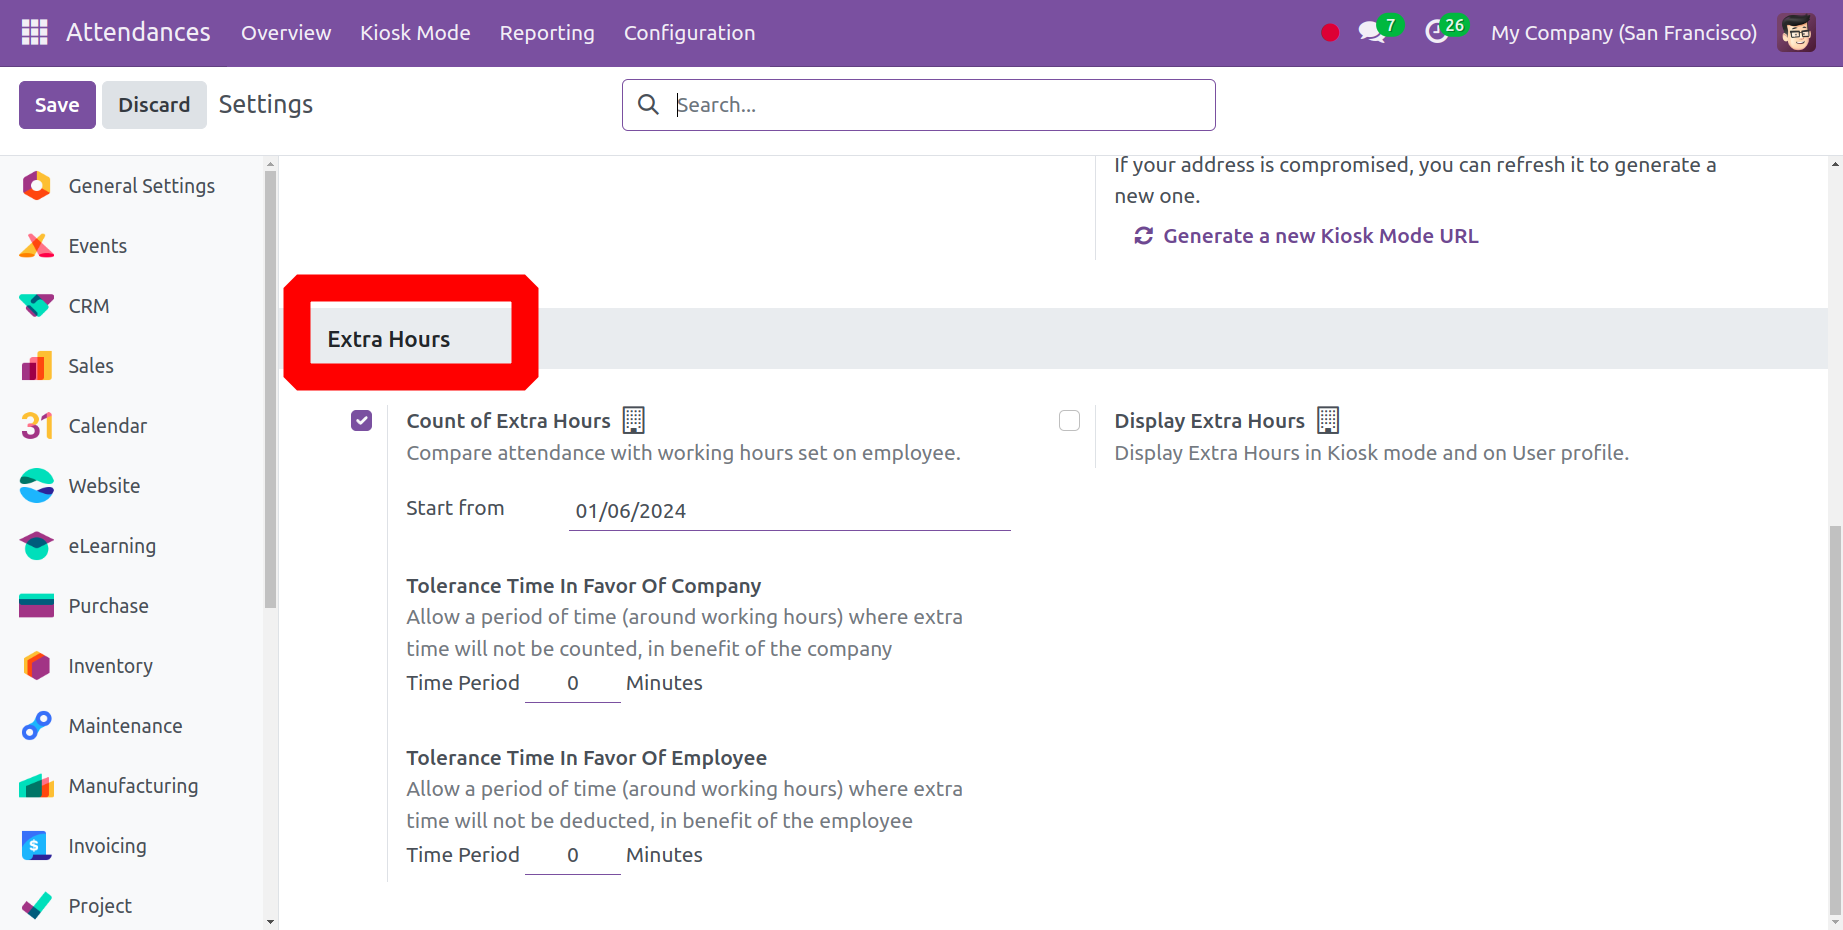
Enter a date in the field for the start of the count, and the number of additional hours
will be calculated starting on that day. You can designate a time frame under the
sections labeled Tolerance Time in Favour of Company and Tolerance Time in Favour of
Employee for which additional time will not be taken into account for the benefit of the
business or the employee.
Making an employee ID and PIN code is a simple procedure. How to create an employee's
profile is covered in the employee module. You can consult the module to get further
details.
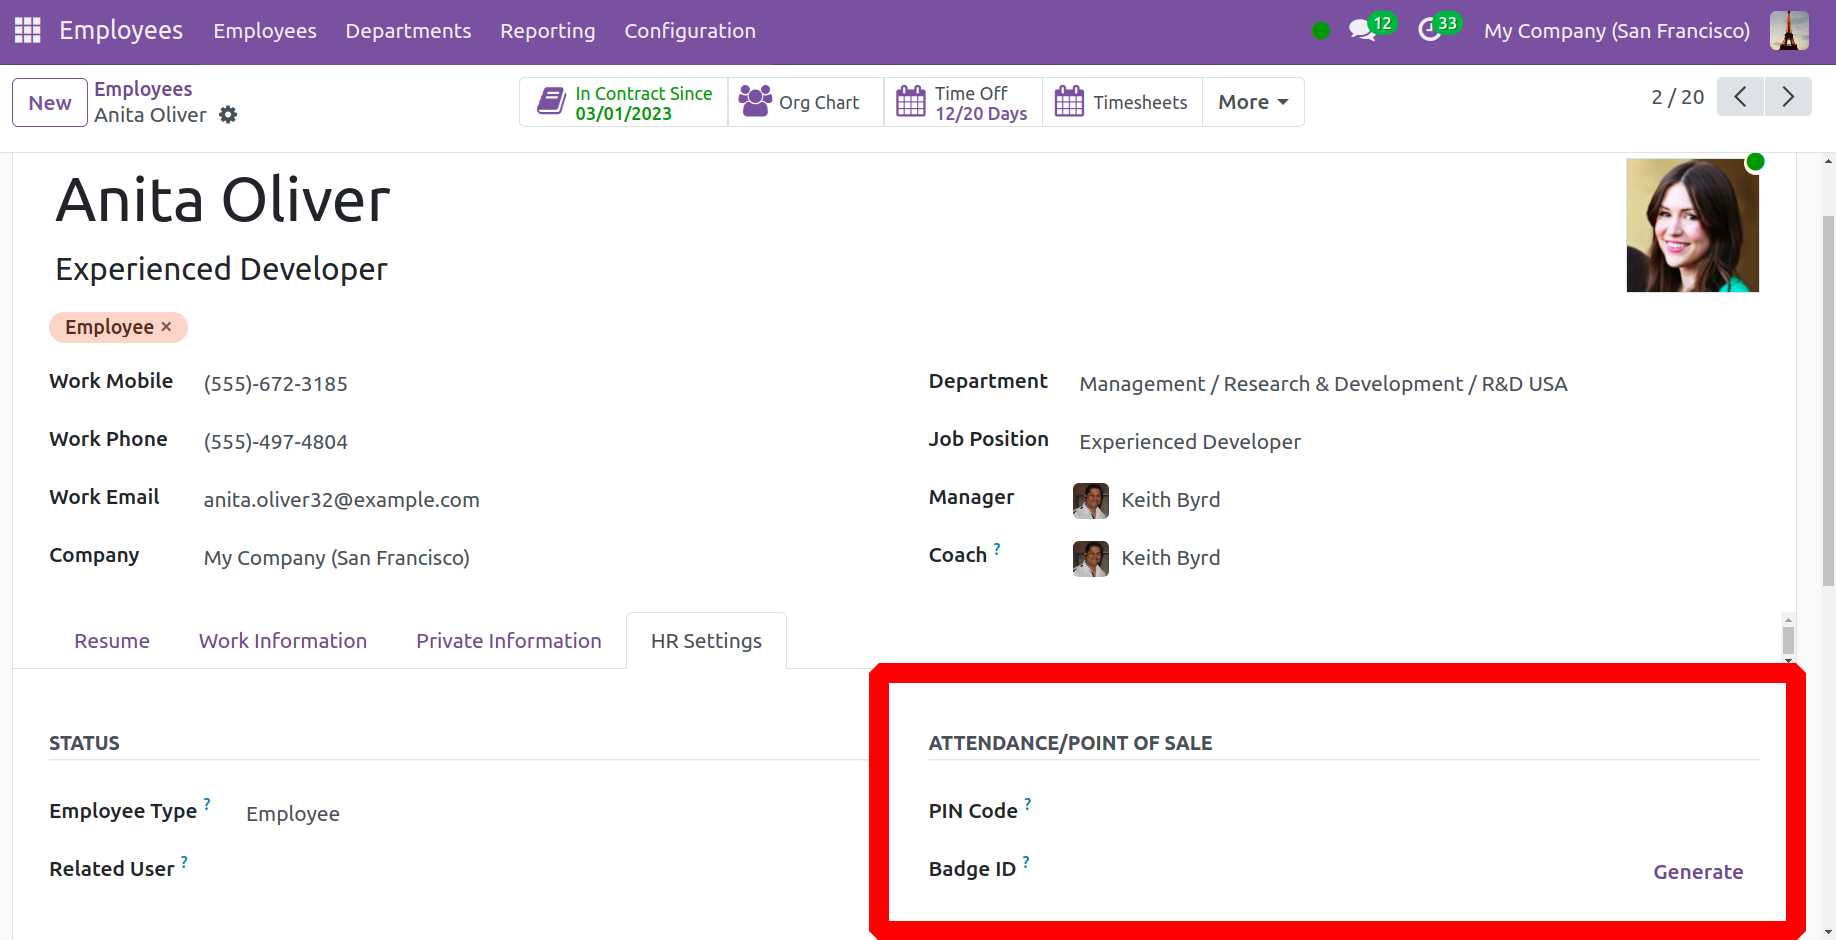
Below the HR settings, when a new employee is added to the employee module, they
have the opportunity to create a badge ID and add a PIN. You can enter a code to check
in and out under the kiosk tab in the PIN code area. The badge ID will be accessible
after choosing the Generate icon. By selecting the "Print Badge" button,
you can also print the badge.
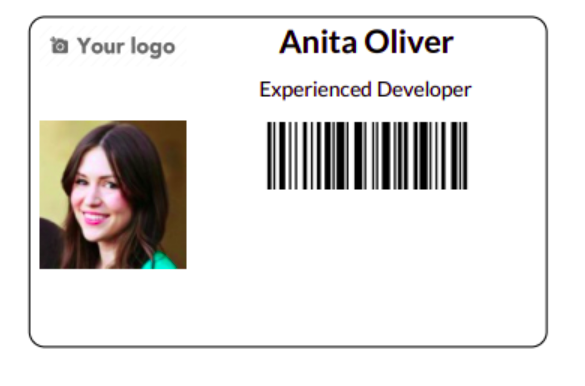
The employee may be recognized by their badge, which they can then scan on the kiosk tab.
To utilize the PIN, choose the Identify Manually option.
Selecting the "Identify Manually" option will take you to a page with an employee
list.
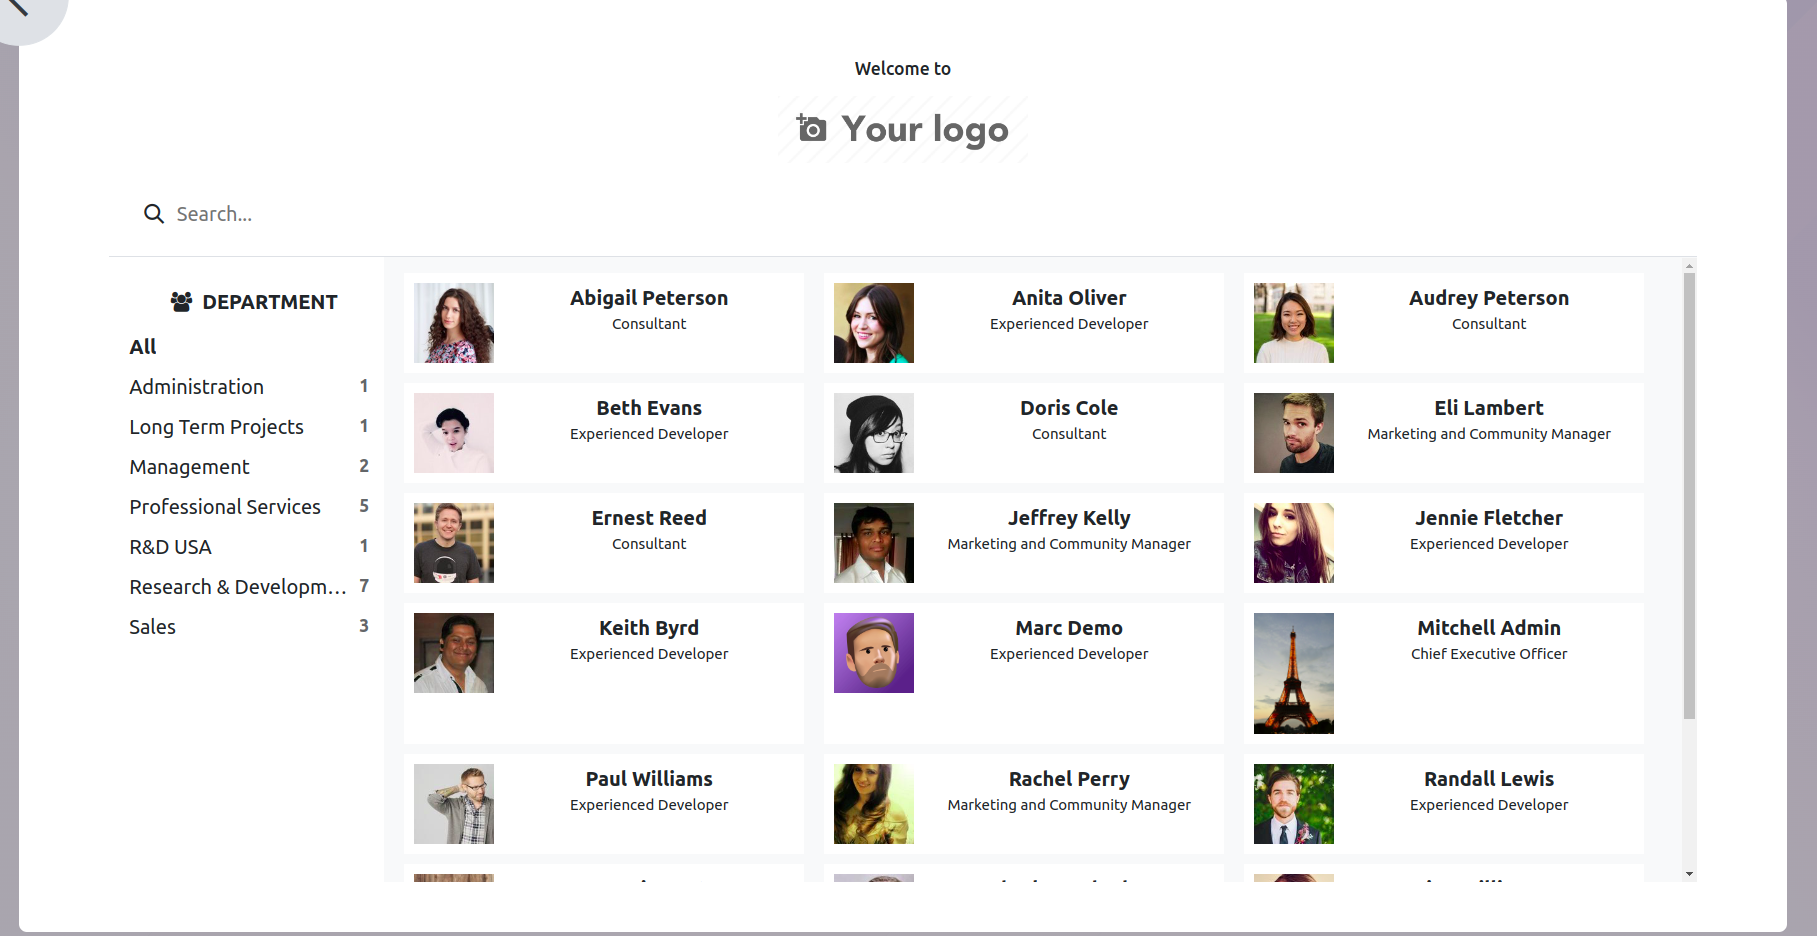
You can select the necessary profile from the list. This will open a new page where you
may input your PIN.
The procedures listed below should be used to set up check-in and check-out in the
attendance module.
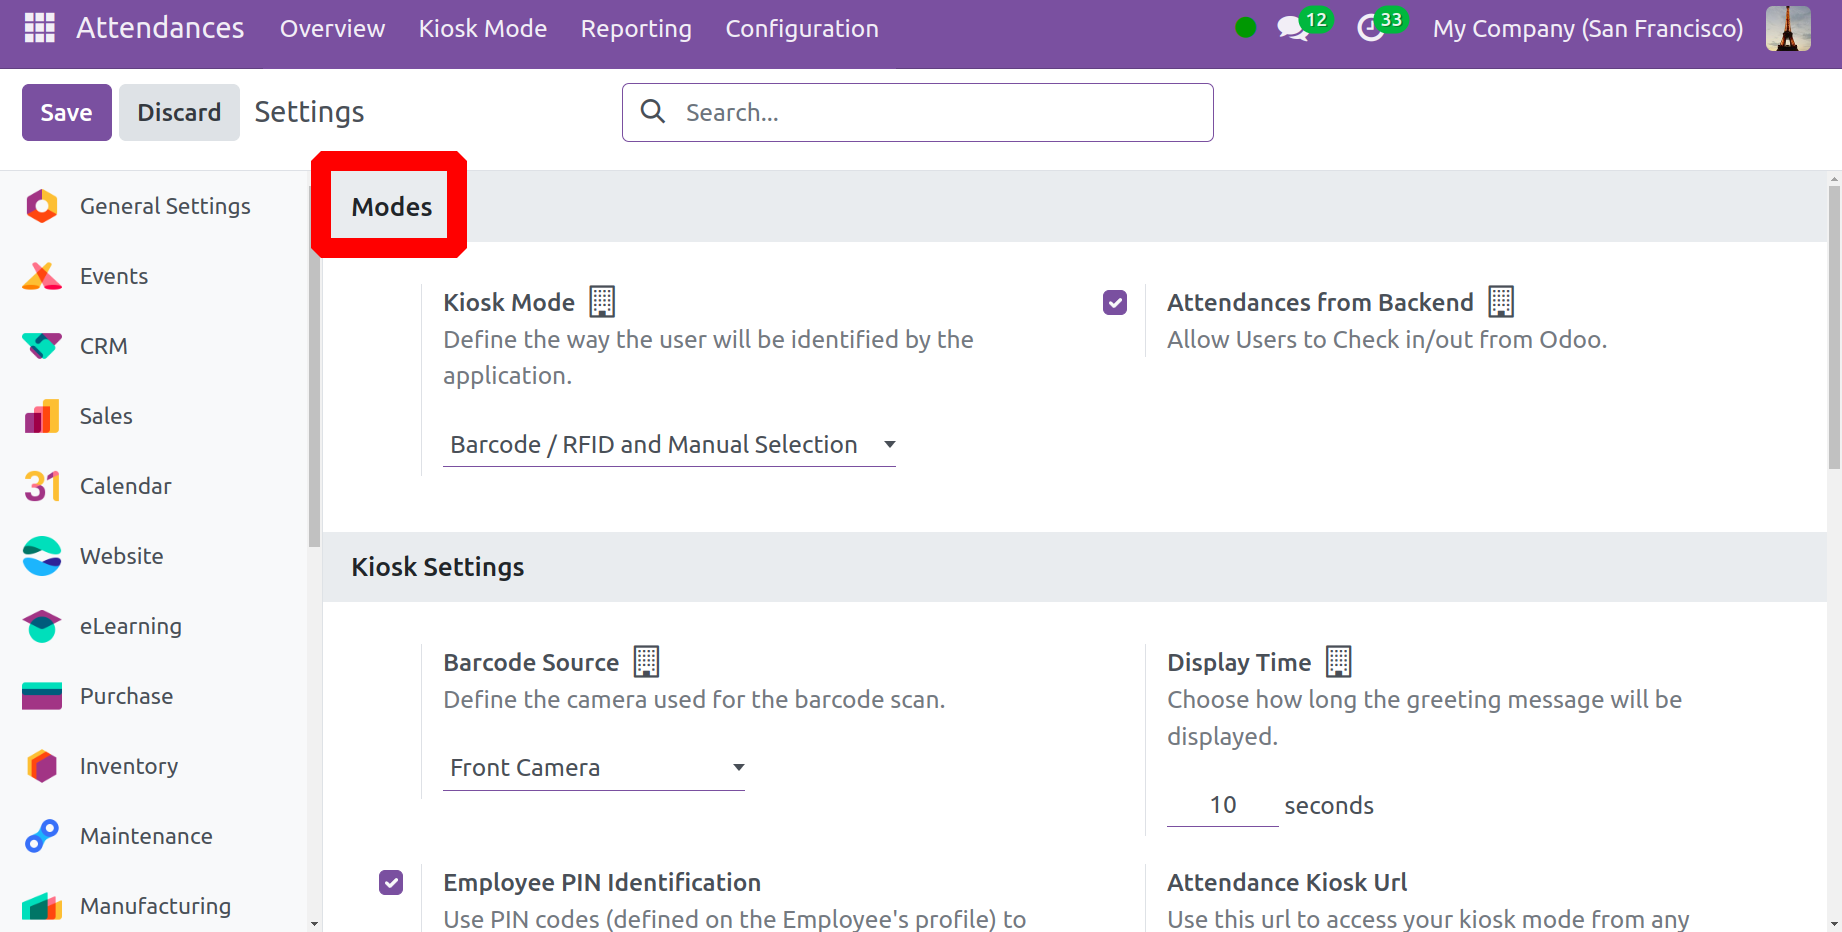
Configuration
The Attendance Module's Settings option will appear when you pick the
Configuration menu, as seen below.
After choosing a Mode, users can indicate how they would like to be recognized by
the kiosk application in the Kiosk Mode section. After that, users can utilize
the Attendances From Backend capability to check in and out of Odoo.
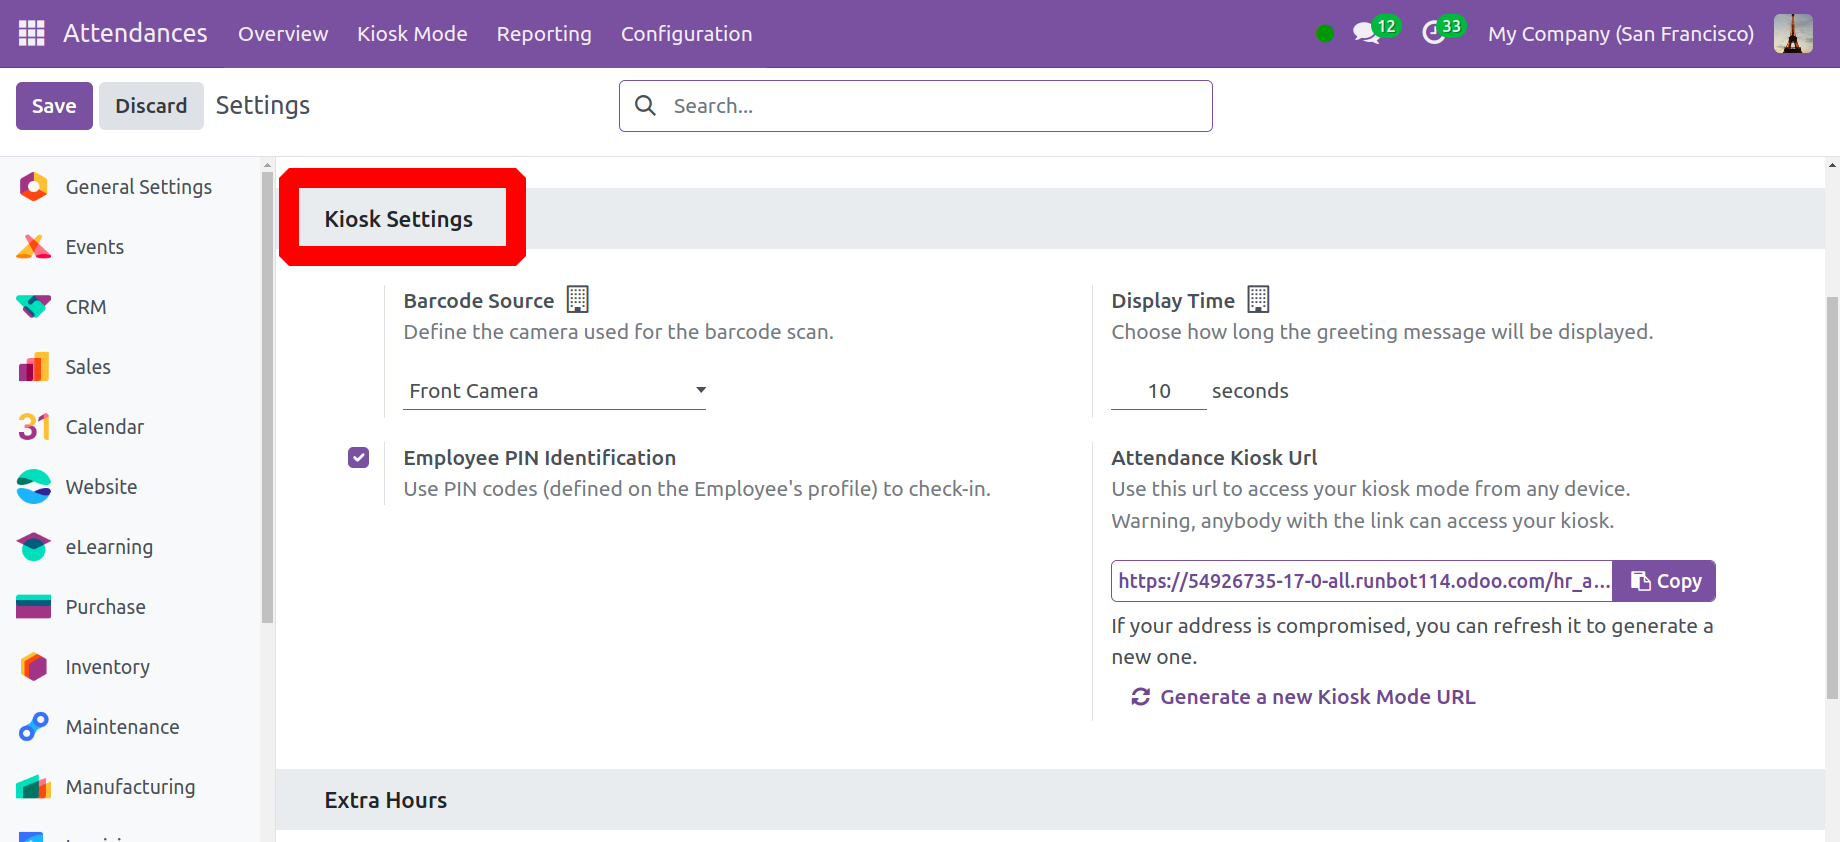
Users can recognize each program as soon as they view the Kiosk Settings area.
Under the Barcode Source option, you can discuss the camera that was used to scan
the barcodes. You can choose how long a greeting message will play in seconds using the
Display Time option. An employee can use PIN codes to sign in to work after
activating the Employee PIN Identification field. After inputting all of the
check-in and check-out information in kiosk mode, click the Save icon. Participation
accesses your kiosk mode on any device by using the URL given in the Attendance Kiosk
Url section. Note that anyone can visit your kiosk if they have an internet
connection. If it has been compromised, you can create a fresh address by refreshing it.
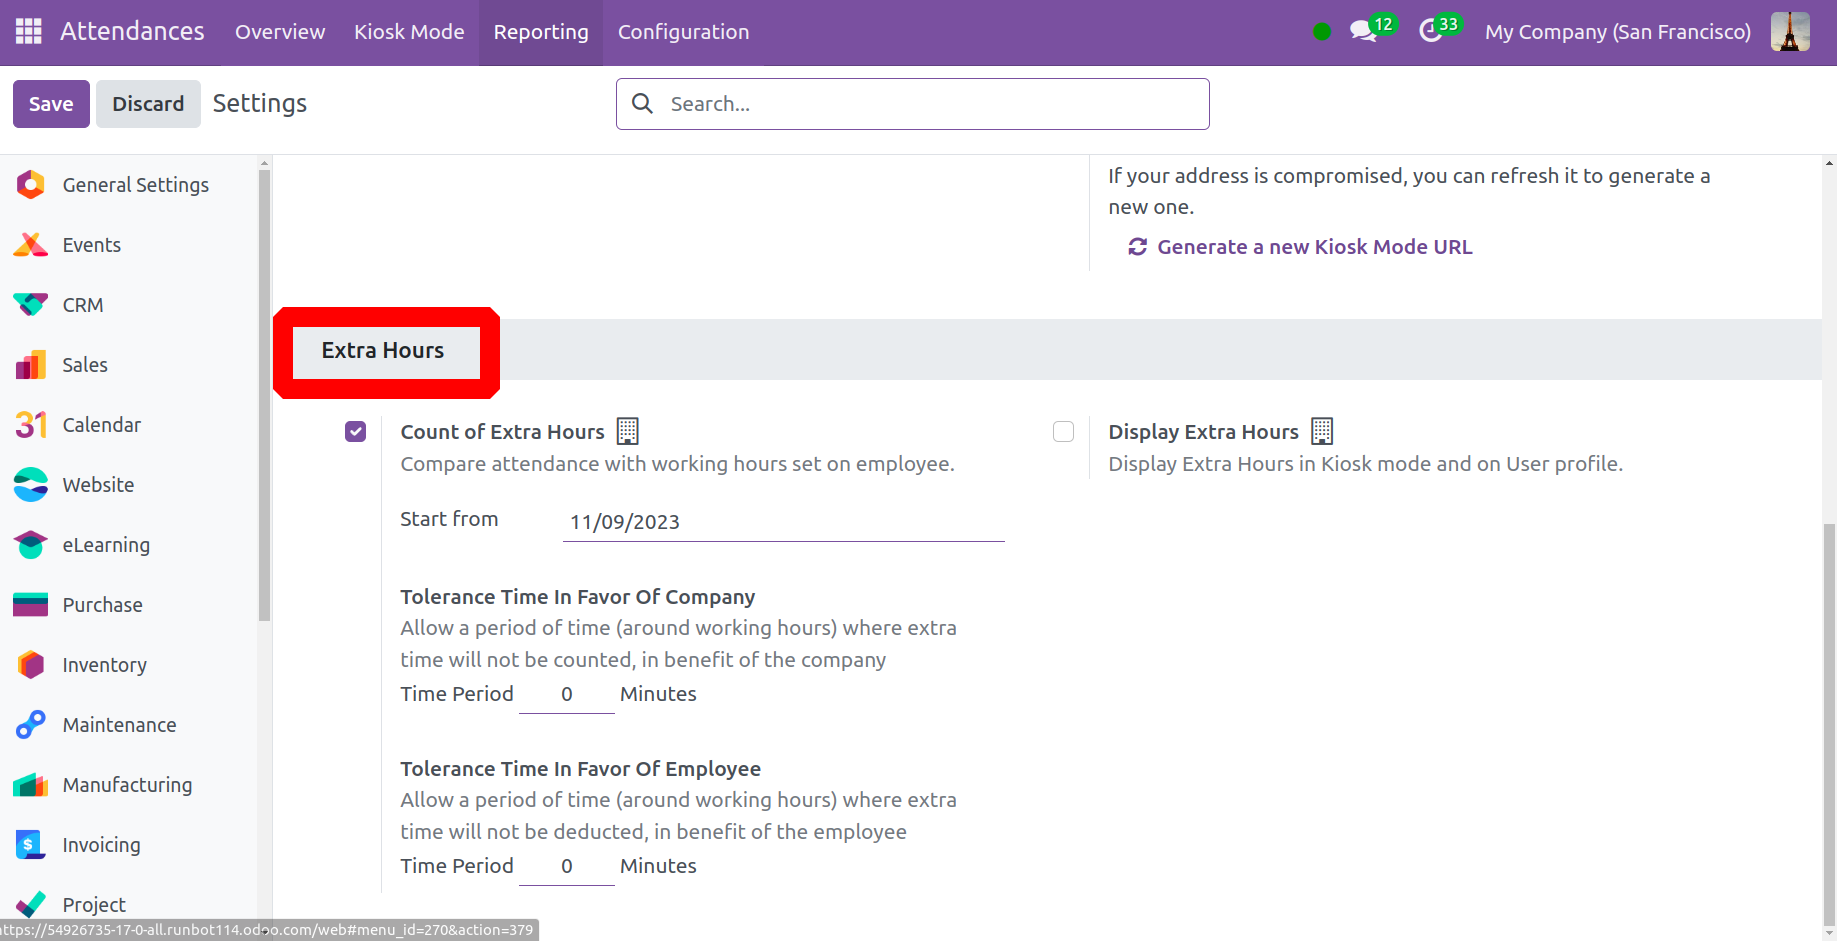
The next step is to manage the extra hours that have been established in the Odoo 17
Attendance module. To assist with counting attendance, you may find the Count Extra
Hours option under the Extra Hours section. You can select the start date and compare
attendance based on employee work hours by activating the Count Extra Hours option.
Under the Extra Hours option, you can establish a tolerance time that is advantageous to
the employer and the employee. Within the Tolerance Time in the Company's Favour, you
can expeditiously grant the company-specific working hours. You should also enter the
time that supports an employee and from which extra time is not deducted in the
Tolerance Time in Favour of Employee column.
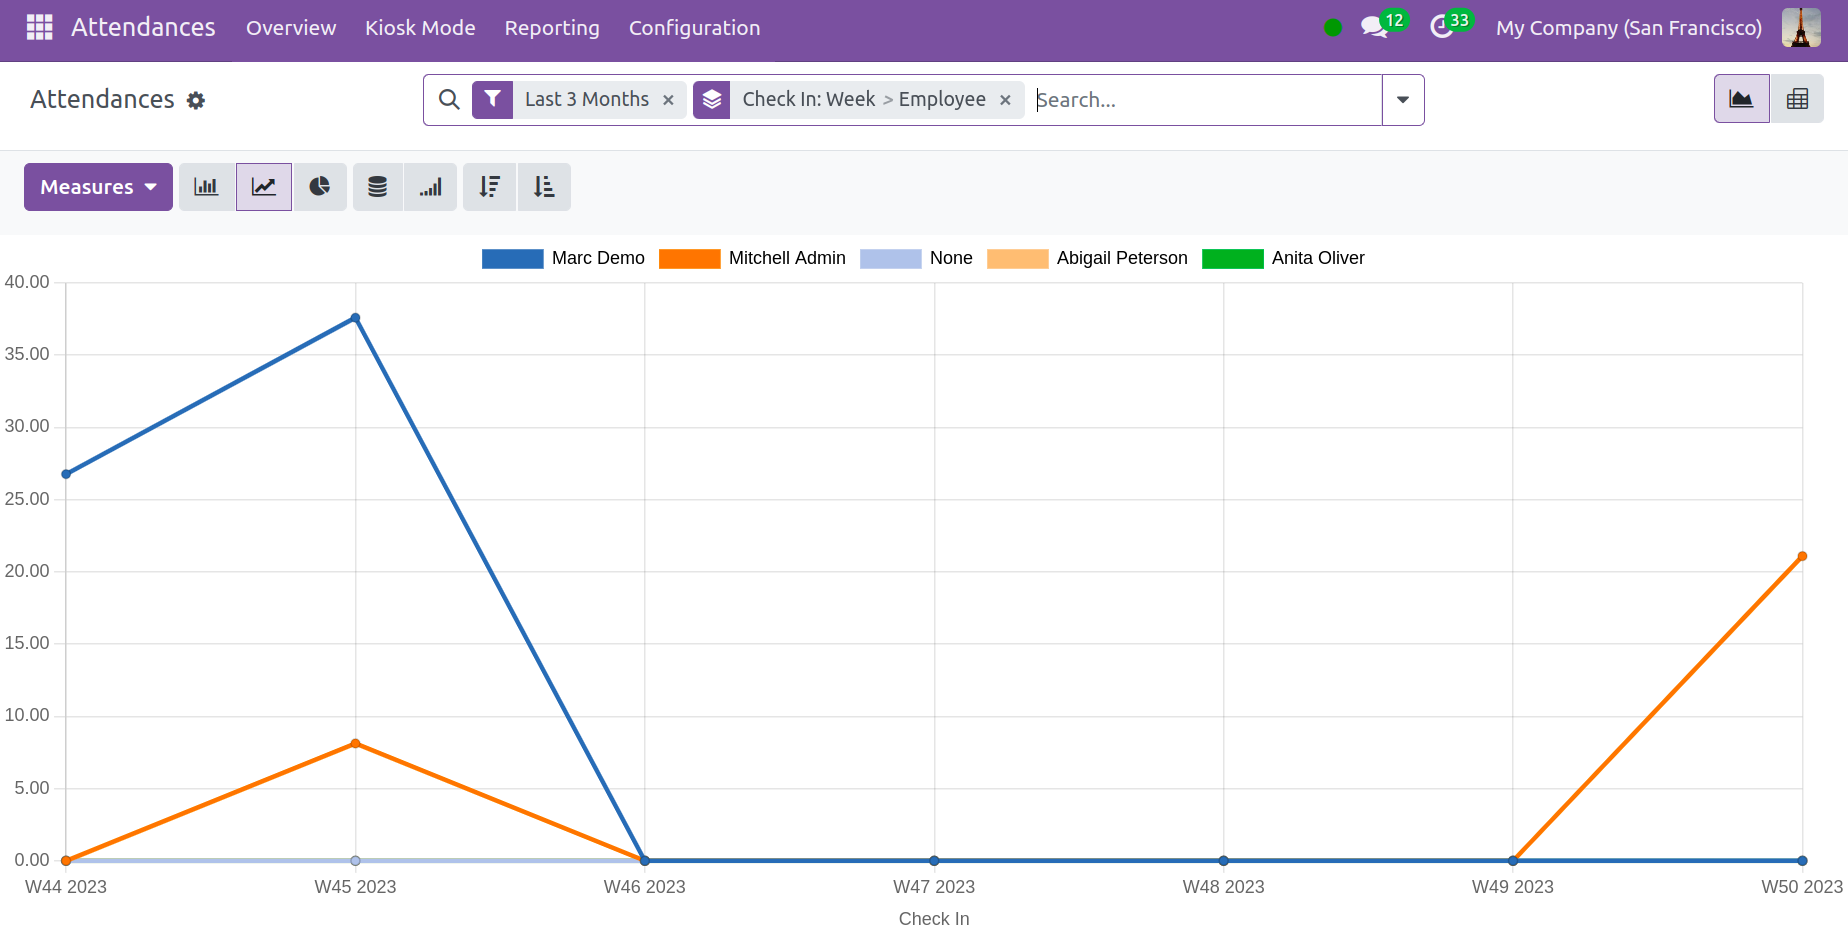
Reporting
Users have the option to create weekly, monthly, or annual employee attendance reports.
To access attendance analysis reports, choose the Reports tab in Odoo 17 Attendance. The
graph of the Attendance Analysis window shows the count on the Y-axis and the employee
check-in data on the X-axis. Users can see the check-in details for each employee in a
range of colors on the graphical representation. By choosing the Measures icon,
we can include particular data in the graph, such as employee overtime and the total
number of hours worked.
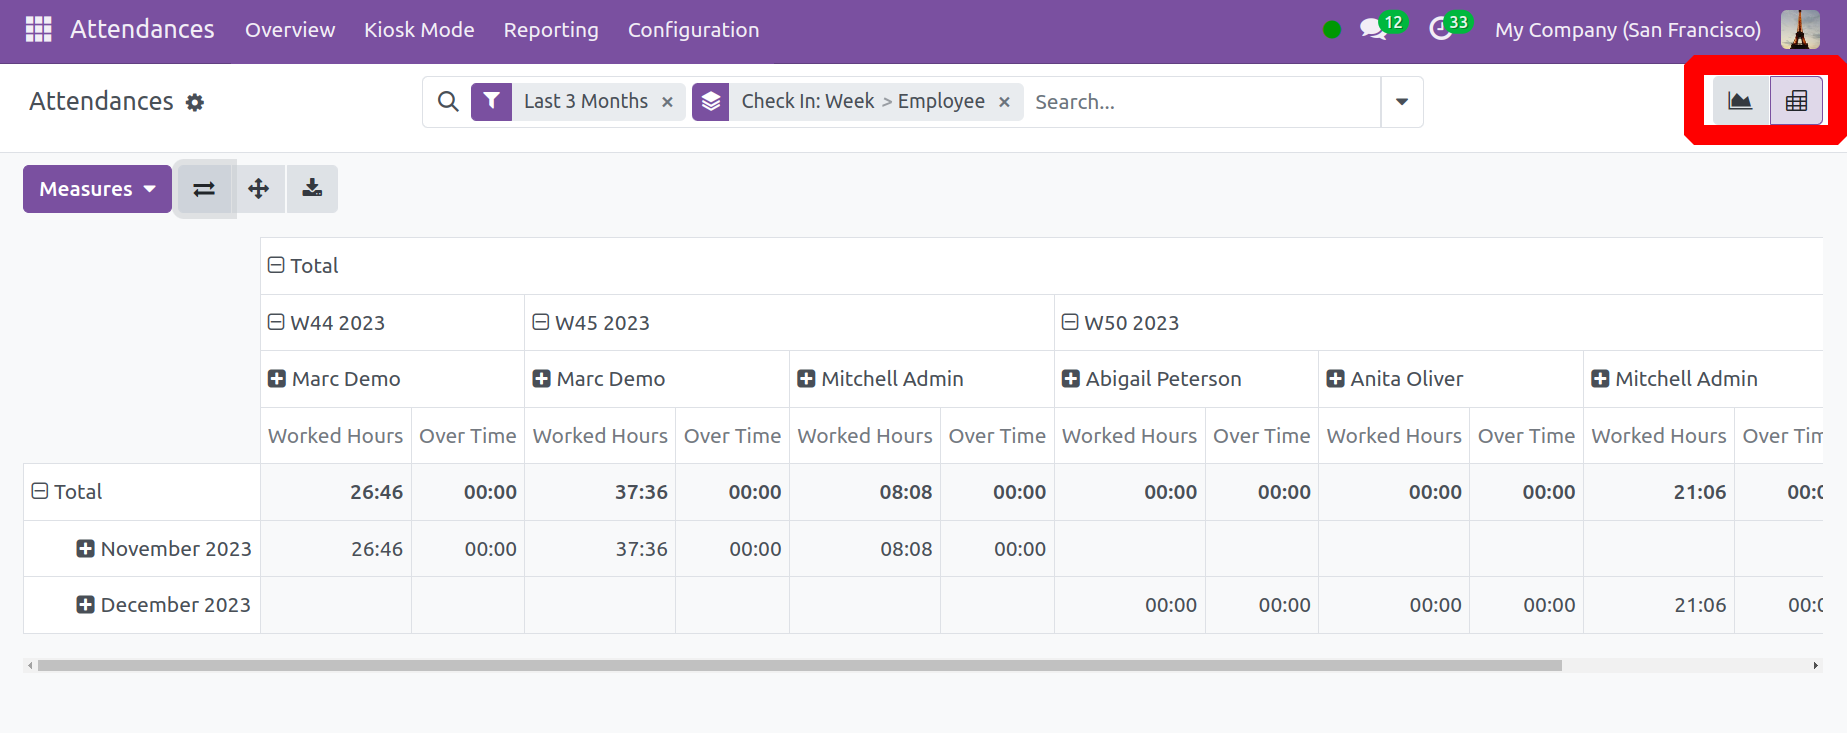
The pivot table that shows the total number of hours worked by each employee individually
can be viewed by the user in the pivot view. Based on each month, the user can ascertain
a worker's actual working hours within the company.
Managing the real working hours of employees in a company is made simple with the Odoo 17
Attendance module. Reports can be evaluated by a business to learn more about the
capabilities of its workforce and make plans.