Products
A well-organized product setup significantly influences the flawless operation of the Purchase, Inventory, Sales, e-commerce, and Rental modules. As a result, a consistent product layout implies that these modules will operate well. Odoo 17 makes it easier for you to find and change a specific product by allowing you to classify items together with their variations.
Click the Products tab on the main menu bar and pick 'Products' from the dropdown list. The products window presents a list of the products that have previously been existing in the module.
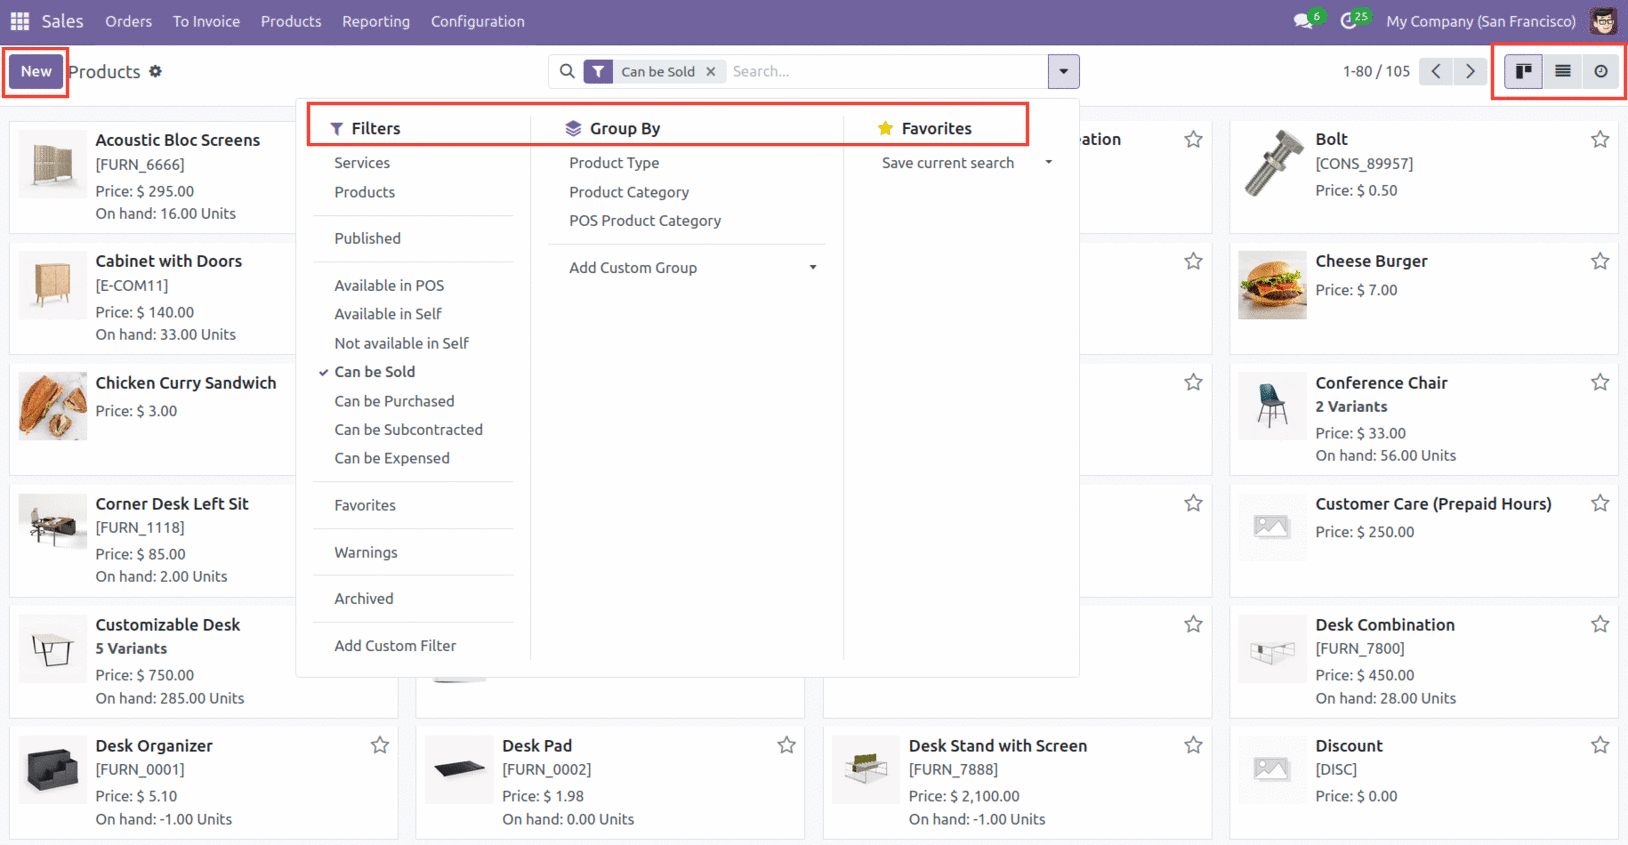
This window provides the product views in both List and Kanban formats. Filters, Group By, and Favourites are provided for easily grouping various objects. You will see My Quotation, Quotations, Sales Orders, and Create Date as default Filters. Products can be categorized by Salesperson, Customer, and Order Date. You may also examine a product's details by clicking on it. The little star icon can be used to mark the product as a favorite.
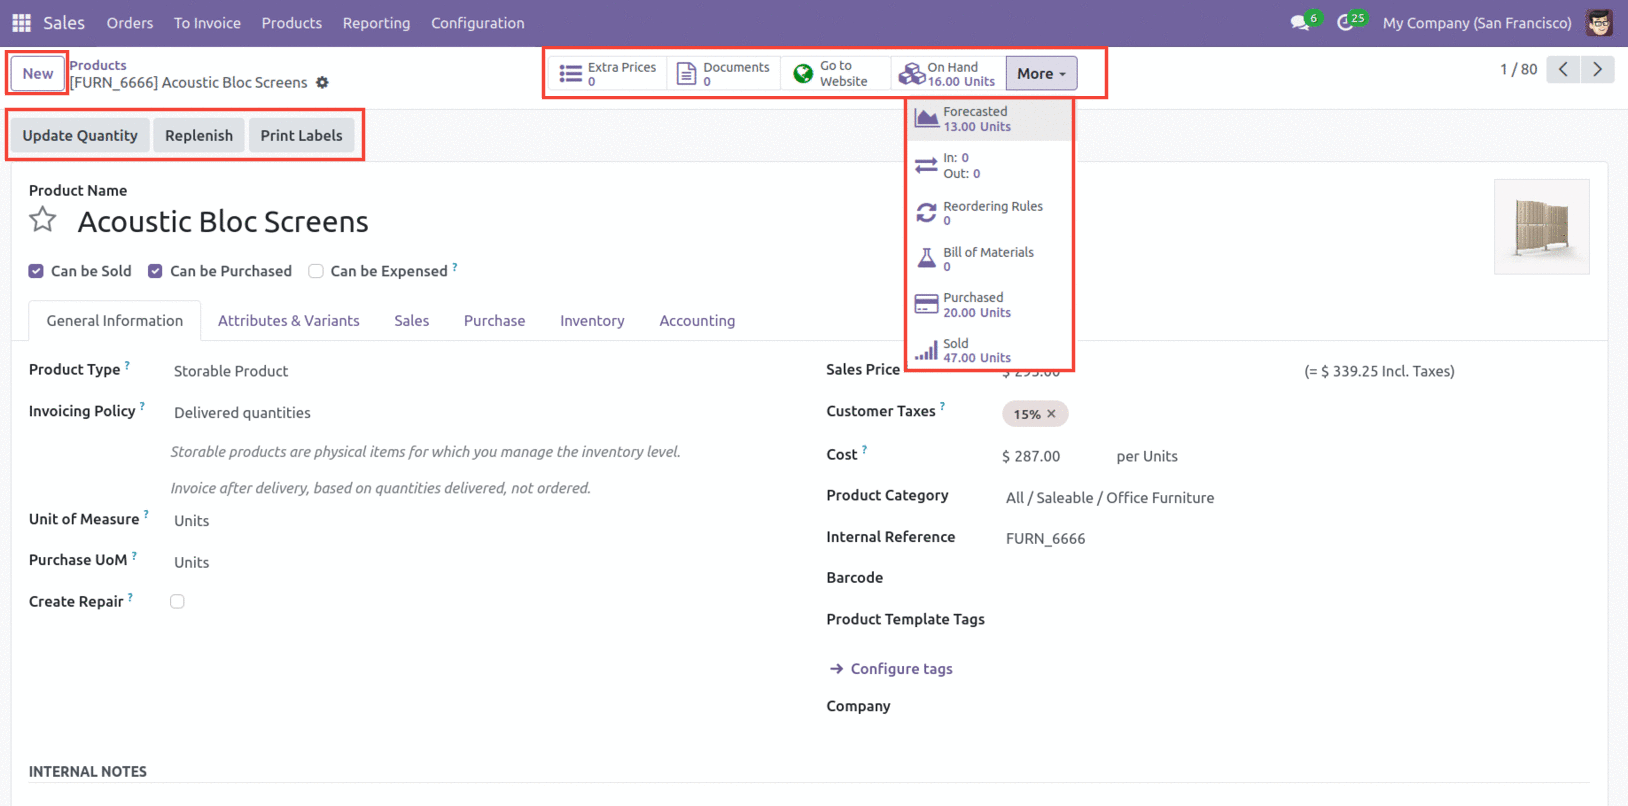
There is no Edit button, as you can see in the form view. By placing your cursor on a field, you may immediately modify it. Unlike earlier Odoo versions, the Create button is now on the right. You may also track and analyze your product information by utilizing the following tabs: Extra Prices, Go to Website, Number of Units On Hand, Number of Units Forecasted, details of In and Out product transit, Reordering, Bill of Materials, and More. When you select the More button, a dropdown list appears with the options to see the Putaway Rules, Storage Capacities, Purchase History, Sales Analysis, and Digital Attachments.
To add and configure the details of a new product in the system, click the Create button. This will open a window with the General Information, Attributes & Variants, Sales, Purchase, Inventory, and Accounting tabs where you may assign the product characteristics.
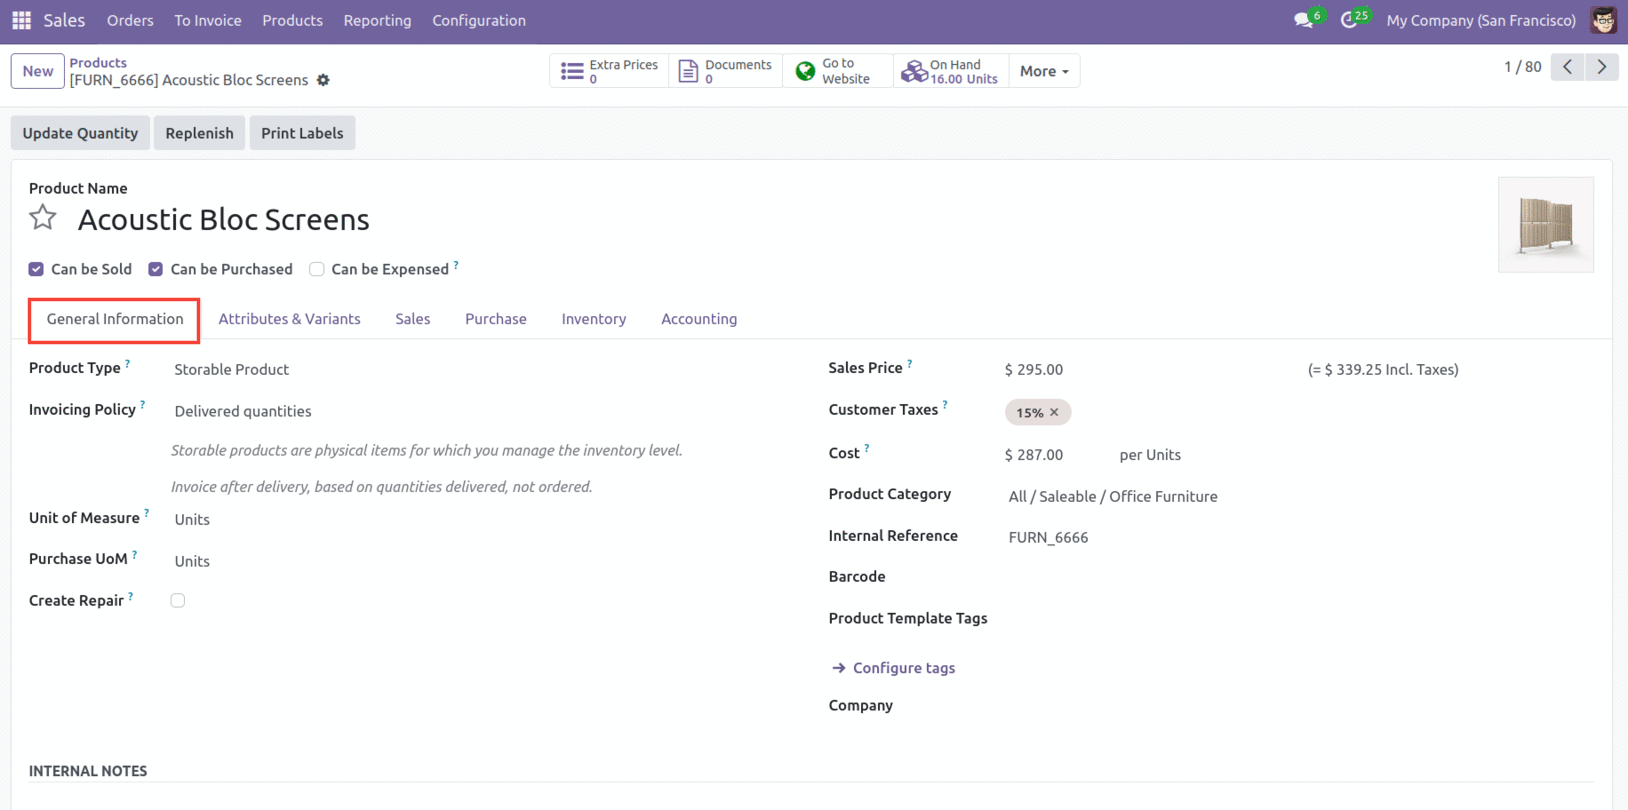
Fill up the appropriate boxes with the name of your product and its picture. Next, make sure that the Can Be Sold, Can Be Purchased, and Can Be Expensed choices are relevant to your product. You may select the Product Type from the drop-down list under the General Information tab: consumable, service, storable product, event ticket, course, or event booth.
Select "Ordered quantities" or "Delivered quantities" for the Invoicing Policy. For ordered things, the former will create an invoice; for delivered products, the latter will do so. Assign the Unit of Measure, Purchase Unit of Measure, Sales Price, Customer Taxes, and Cost in the same manner. From the available options, pick the Product Category. You can also include Internal References, Barcodes, and Product Tags. Lastly, decide which company is linked to your product, which is vital, especially if you’re working in a multi-company setup.
If your product has several variations, you may list them all under "Attributes and Variants" and link to the product accordingly.
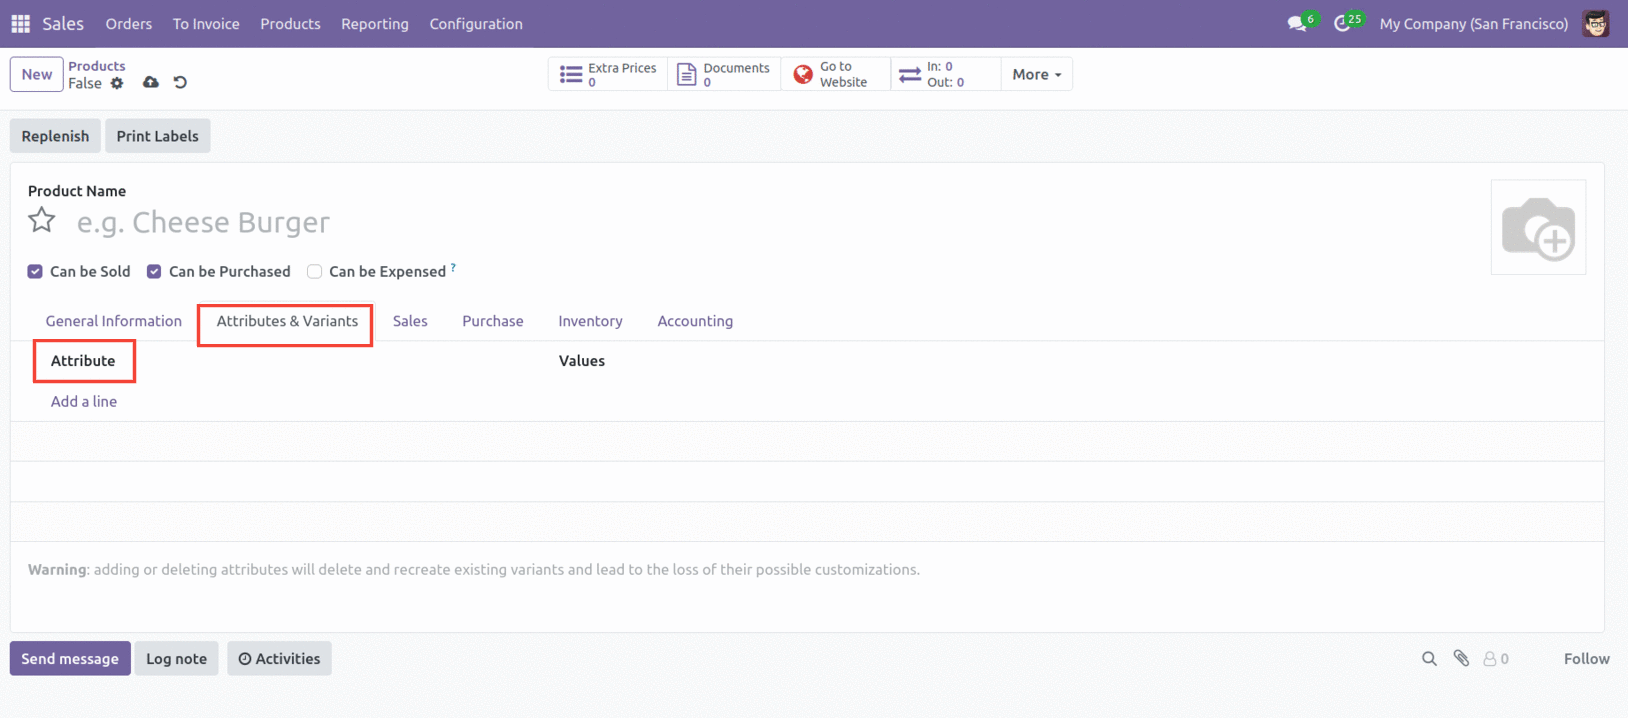
Click 'Add a Line' to set the product's variation Attributes and Values. Under the Products tab, you can also manage and compose these variants using the Product Variants option. Similar to this, you can define a product's attributes and associated values by selecting "Attributes" from the Configuration tab.
You may set up the product's sales features under the Sales tab.
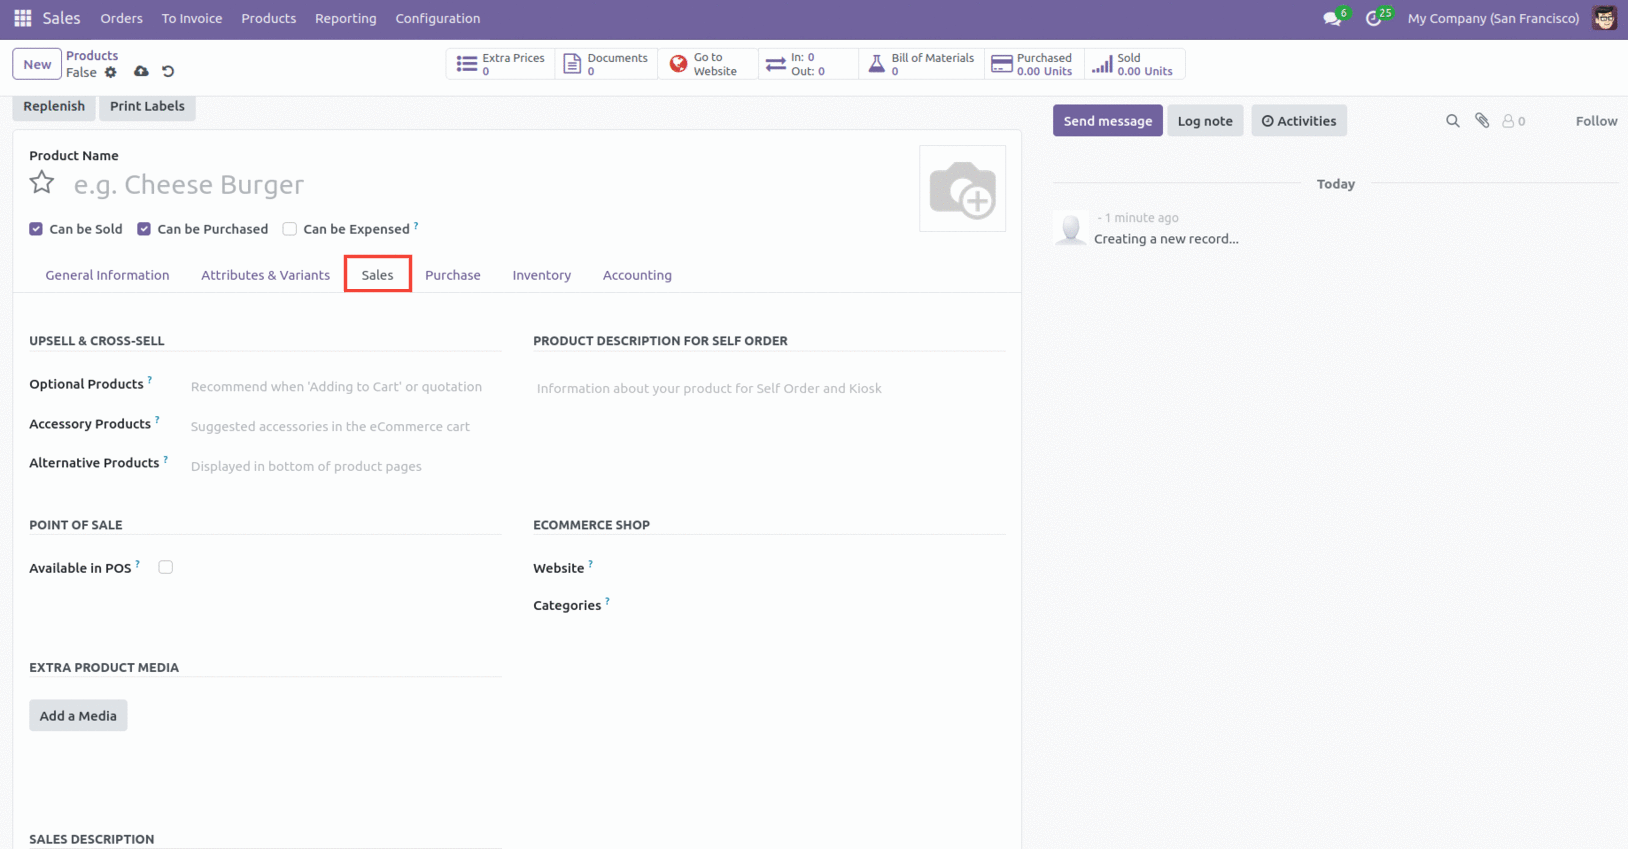
There are three fields accessible in the Upsell & Cross-Sell section: Optional Products, Accessory Products, and Alternative Products. When the customer hits 'Add to Cart,' the screen displays 'Optional Products.' When the customer reviews the cart before payment, the system proposes 'Accessory Products,' while 'Alternative Products' appears on the product page to market alternatives.
Under 'eCommerce Shop,' you may enter the website URL where the product will be published. The eCommerce website's display order is determined by the Website Sequence parameter. Indicate which eCommerce categories you wish to add the product to in the Categories area. Additionally, you may give the product a "Ribbon," such as "Sale," "Sold Out," "Out of Stock," etc. Include a remark that will show up on sales orders under "Sales Description."
To add this product to the Point of Sale module, turn on the "Available in POS" option. By selecting "Add a Media," you can additionally connect more product media.
Select Configuration → Settings now. Turn on the Sales Warnings option under "Quotations & Orders."
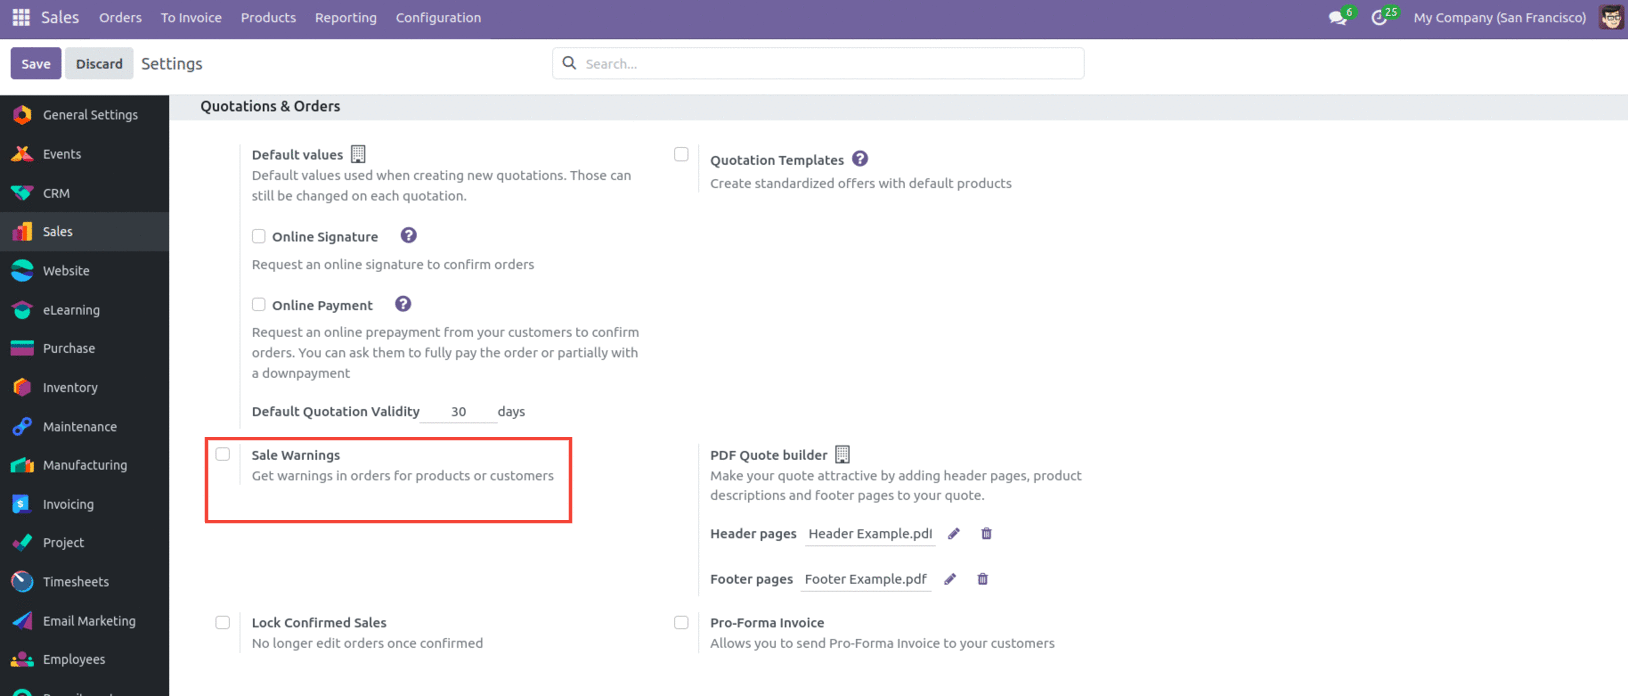
This action will generate a new section called ‘Warning when Selling this Product’ under the Sales tab.
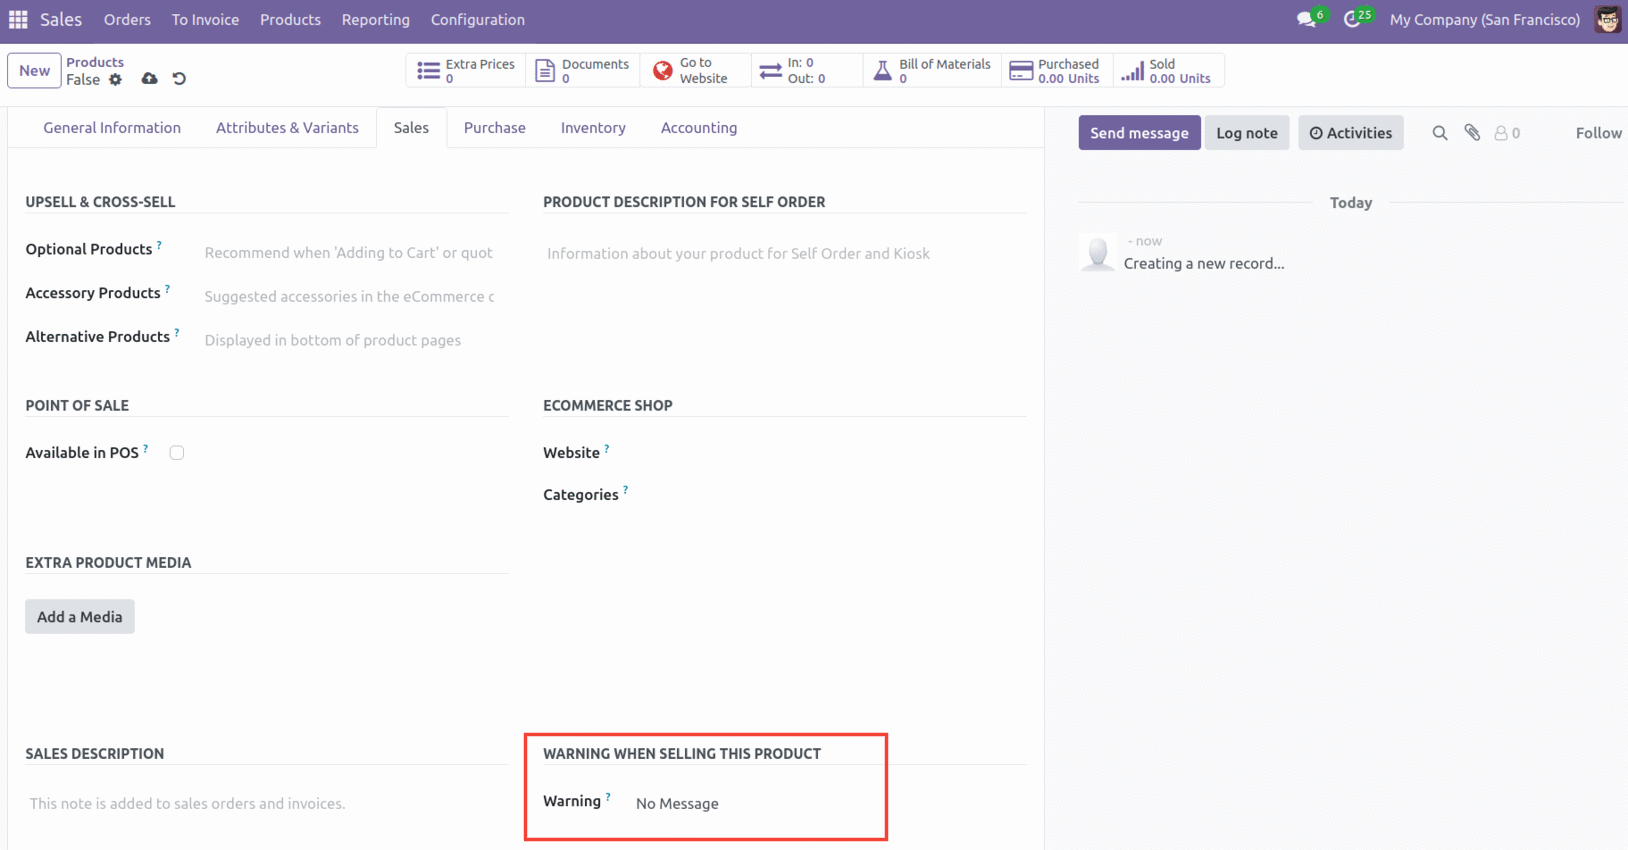
Three options are available in the dropdown list of the Warning field: No Message, Warning, and Blocking Message. The system won't show any messages if you choose "No Message." A pre-configured message will alert the user when they select "Warning," however an exception will be thrown and the flow will be blocked when they select "Blocking Message."
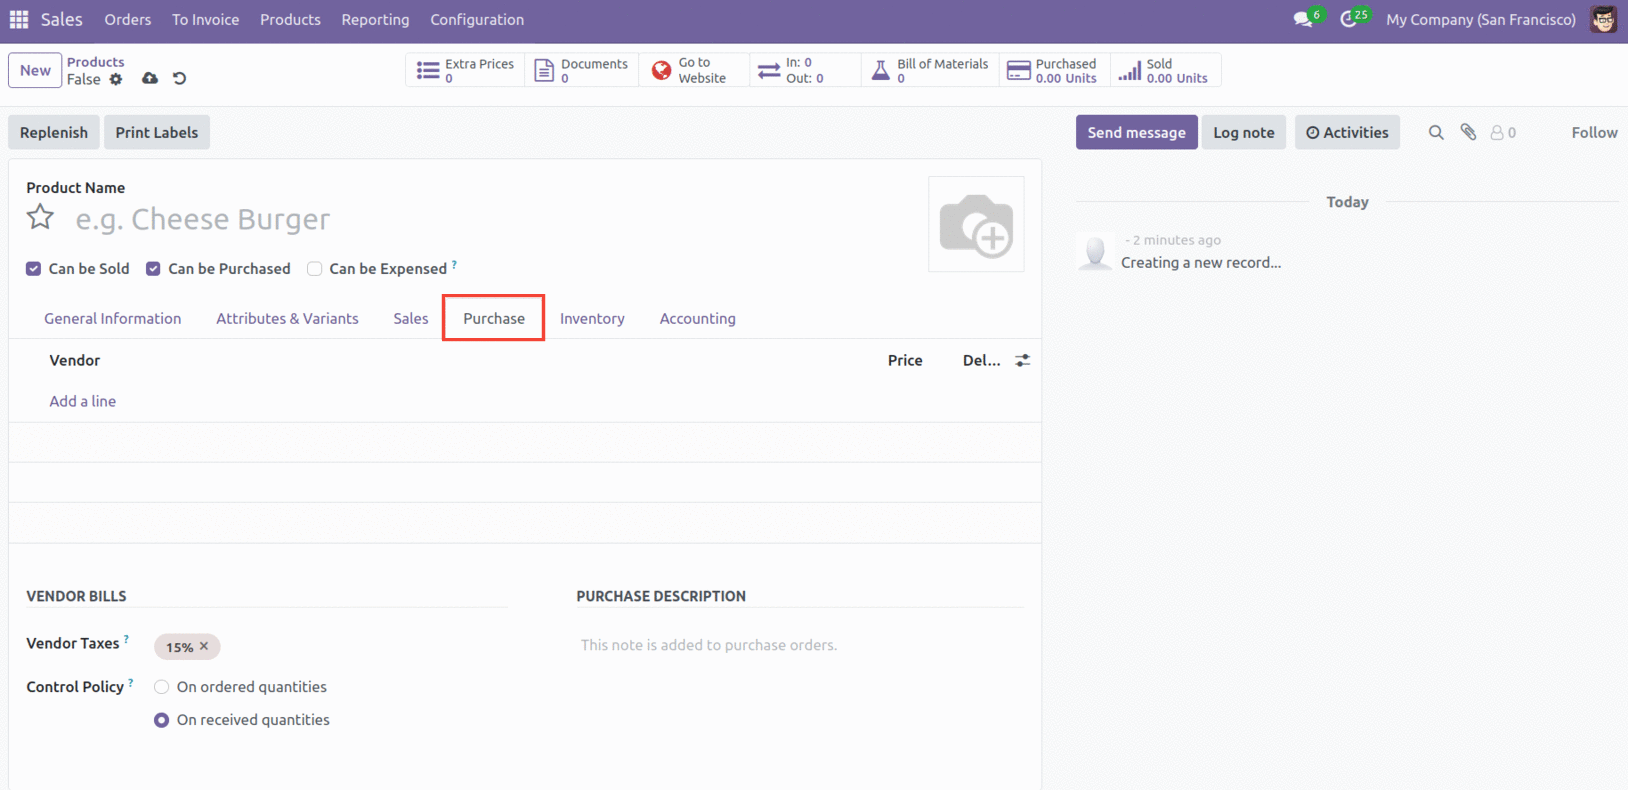
The vendor information is configurable under the Purchase tab. To add details such as the vendor's name, price, currency, and delivery lead time, click "Add a Line." Choose "Vendor Taxes" to choose the default taxes that will be applied when you purchase the item. You may select whether to manage invoices based on received or ordered amounts in the manage Policy box. Using the "Purchase Description" feature, purchase orders can have remarks added.
The Inventory tab allows you to monitor and specify inventory-related processes for the product.
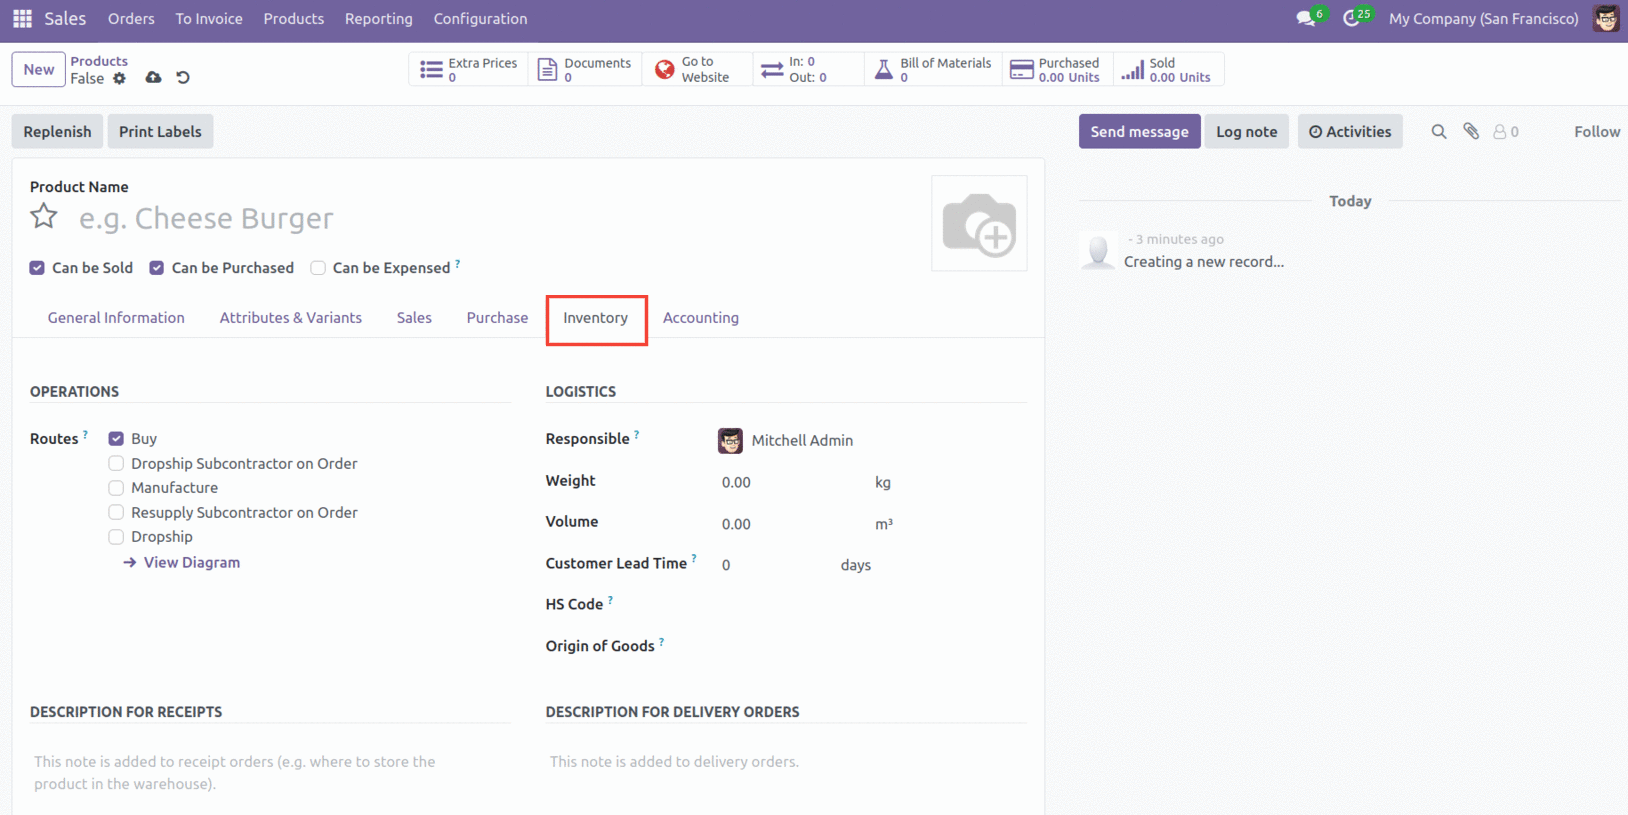
Depending on the modules installed, 'Routes' will allow you to designate the product's path, i.e., whether it will be purchased, made, restocked on demand, and so on. In the Logistics section, complete the "Responsible" area to designate the person in charge of the ensuing logistics operations-related tasks. Enter the product's weight and volume in the corresponding fields.
The "Customer Lead Time" shows how long it takes to get a sales order confirmation and have it delivered. The standard code for international shipping and goods declarations is called the "HS Code." Put the item's real manufacturing or production location next to "Origin of Goods."
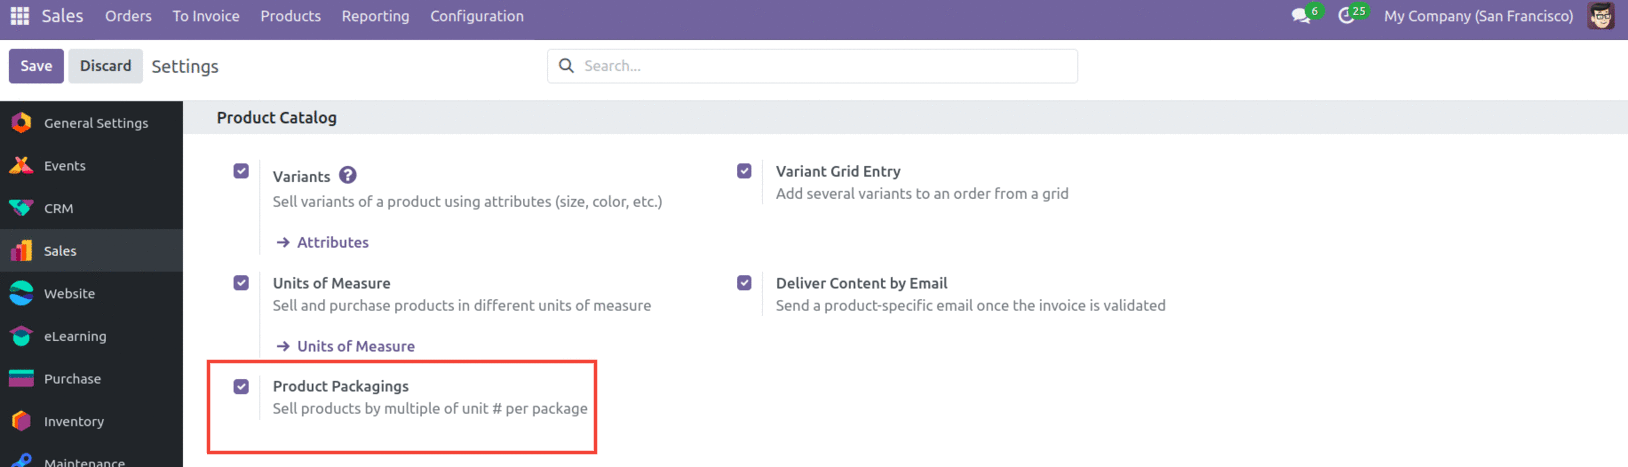
Give the Production Location and Inventory Location details, which will be used instead of the default ones, as the source location for stock moves generated by manufacturing orders and inventory operations, respectively. In the packaging section, you can add various product packaging methods. To activate this feature, you must enable ‘Product Packagings’ from the Settings menu.
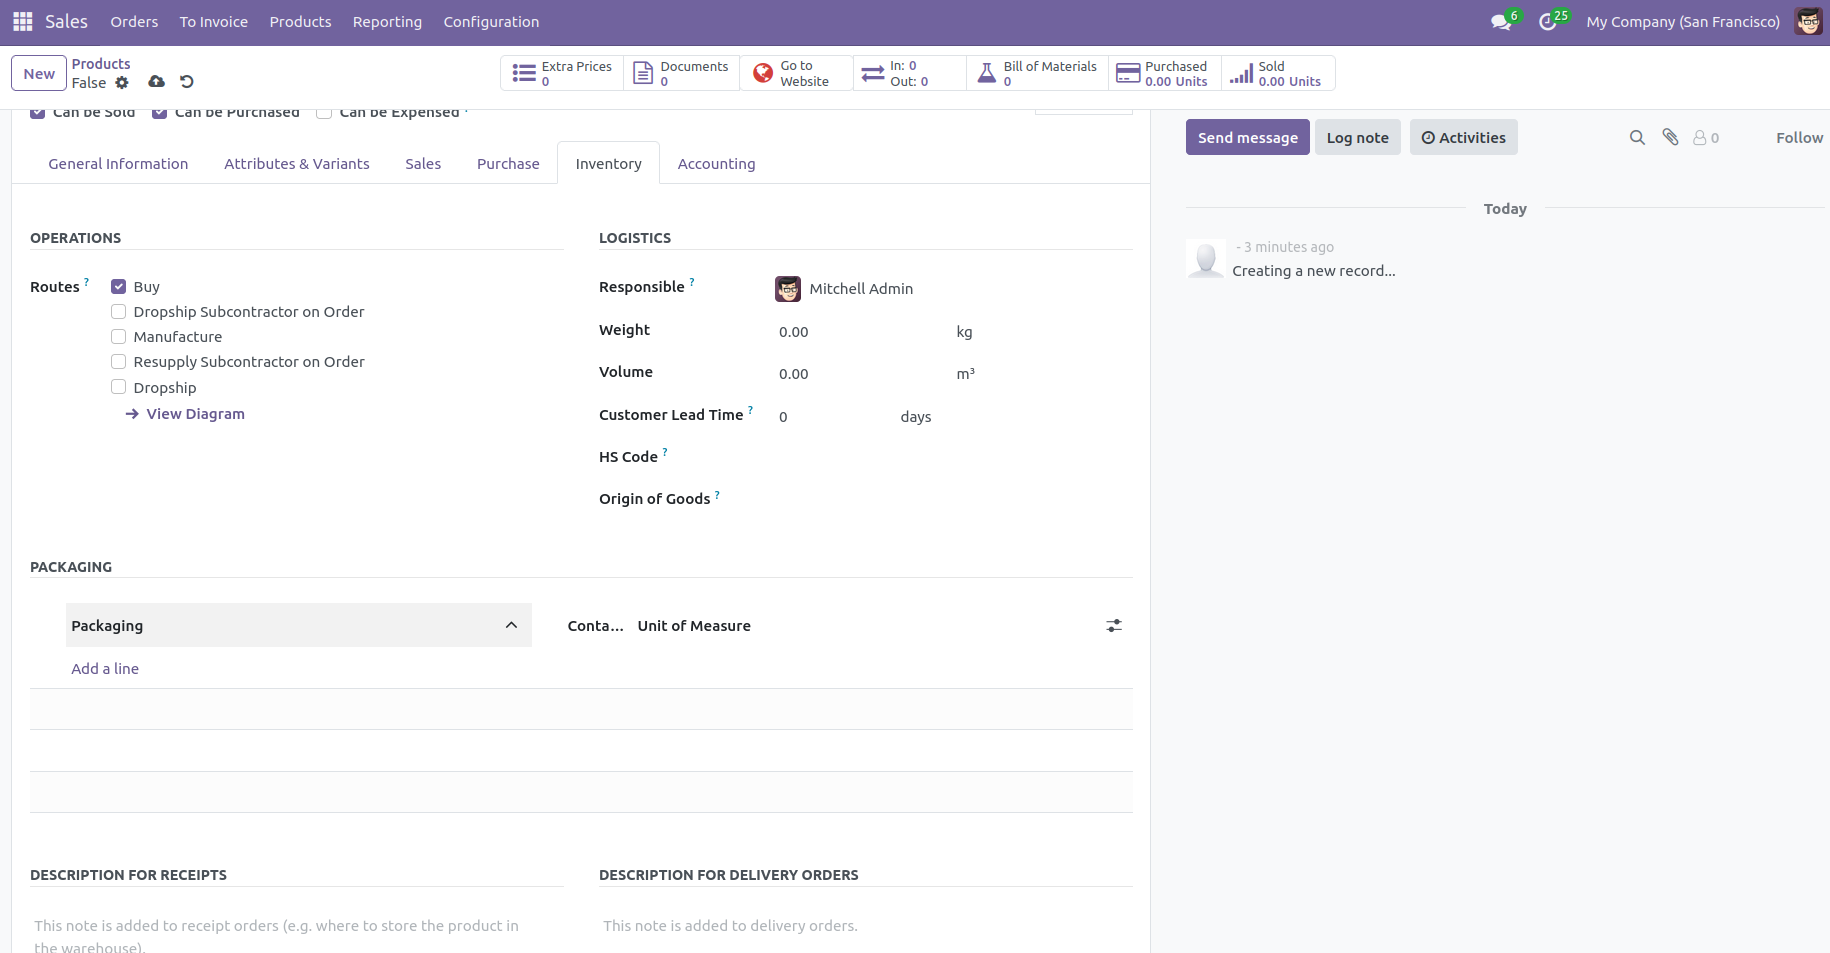
Right beneath ‘Packaging,’ you can see fields like ‘Description for Receipts’ and ‘Description for Delivery Orders.’ The text you type under the former will get added to receipt orders and the latter to delivery orders.
The Accounting tab allows you to configure an email template for sending a product-specific email once the invoice has been validated.
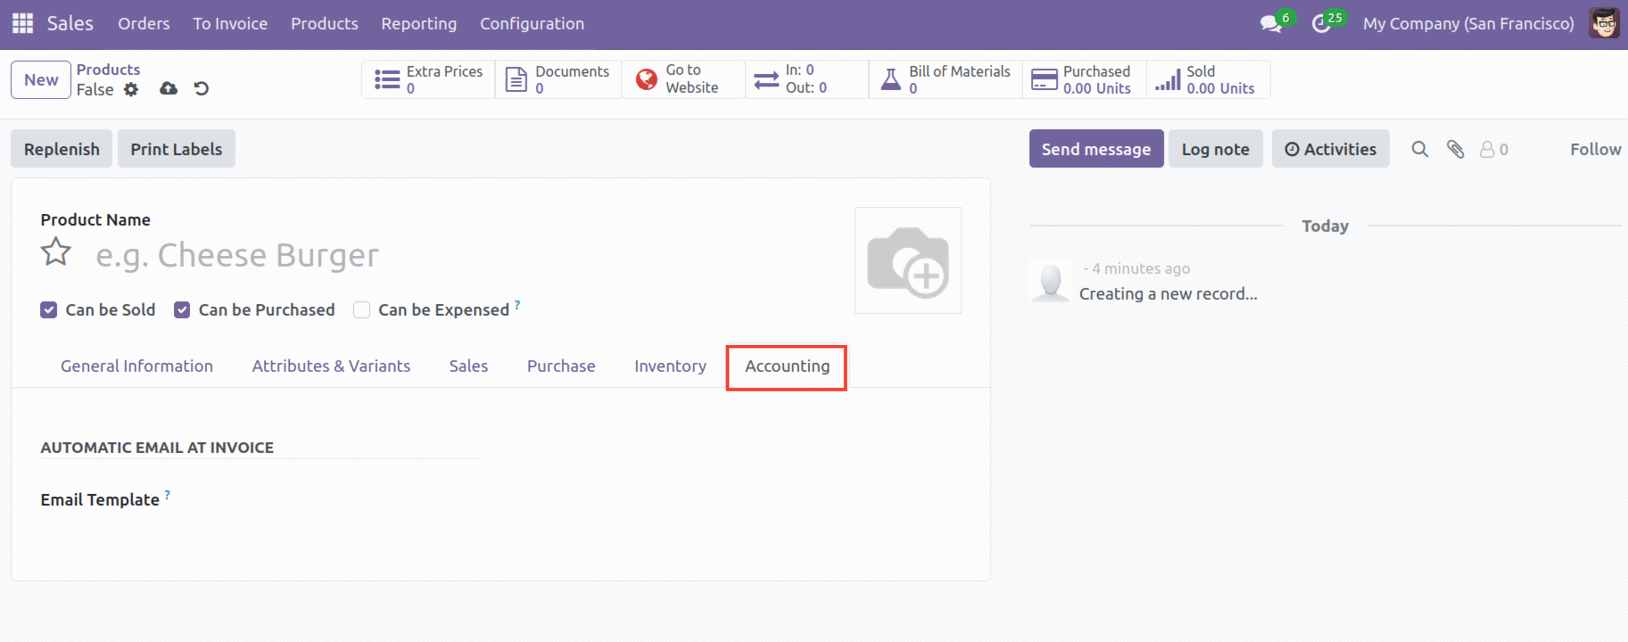
You can add this template in the Email Template field.