Website Management
Odoo 17 has a multifunctional open-source website development module. Which oversees all website activities and helps to integrate the business's retail operations with Odoo. It is a feature of the user-friendly Odoo ERP software. For entrepreneurs who need a website for their firms, the Odoo website module is highly recommended. You can manage your company data as an e-commerce site, HR recruitment portal, customer portal, job portal, and many other applications with the help of the multi-purpose capability. Modifications performed on one side are automatically detected by the other, and the module also lets you manage from both the front end and the back end.
Businesses can create and maintain their own websites with the help of the Odoo Website module. With the help of the drag-and-drop website builder, users can quickly create a website, alter its look and feel, and combine it with other services.
With the Odoo eCommerce module, users may create and maintain their own online store. It has functions including order administration, shipping choices, payment gateways, checkout, and product catalog management. Included are analytics, sophisticated marketing tools, and compatibility for many currencies.
Multiple Website Management
Thanks to the multiple website functionality, users can now have many websites in different languages. With the help of this, users may create websites for several nations, languages, and cultures, expanding their clientele. Additionally, it offers a single search bar that enables users to search many websites using its unified search feature. Customers can now more easily and swiftly obtain the information they need.
You may create and manage several websites at once with the Odoo platform. You may handle many websites for your various business needs more easily using Odoo 17. The Odoo 17 Website module makes it simple for you to administer these websites. In the Configuration menu, under the website module's Settings, you will find the option to create a new website, as illustrated below.
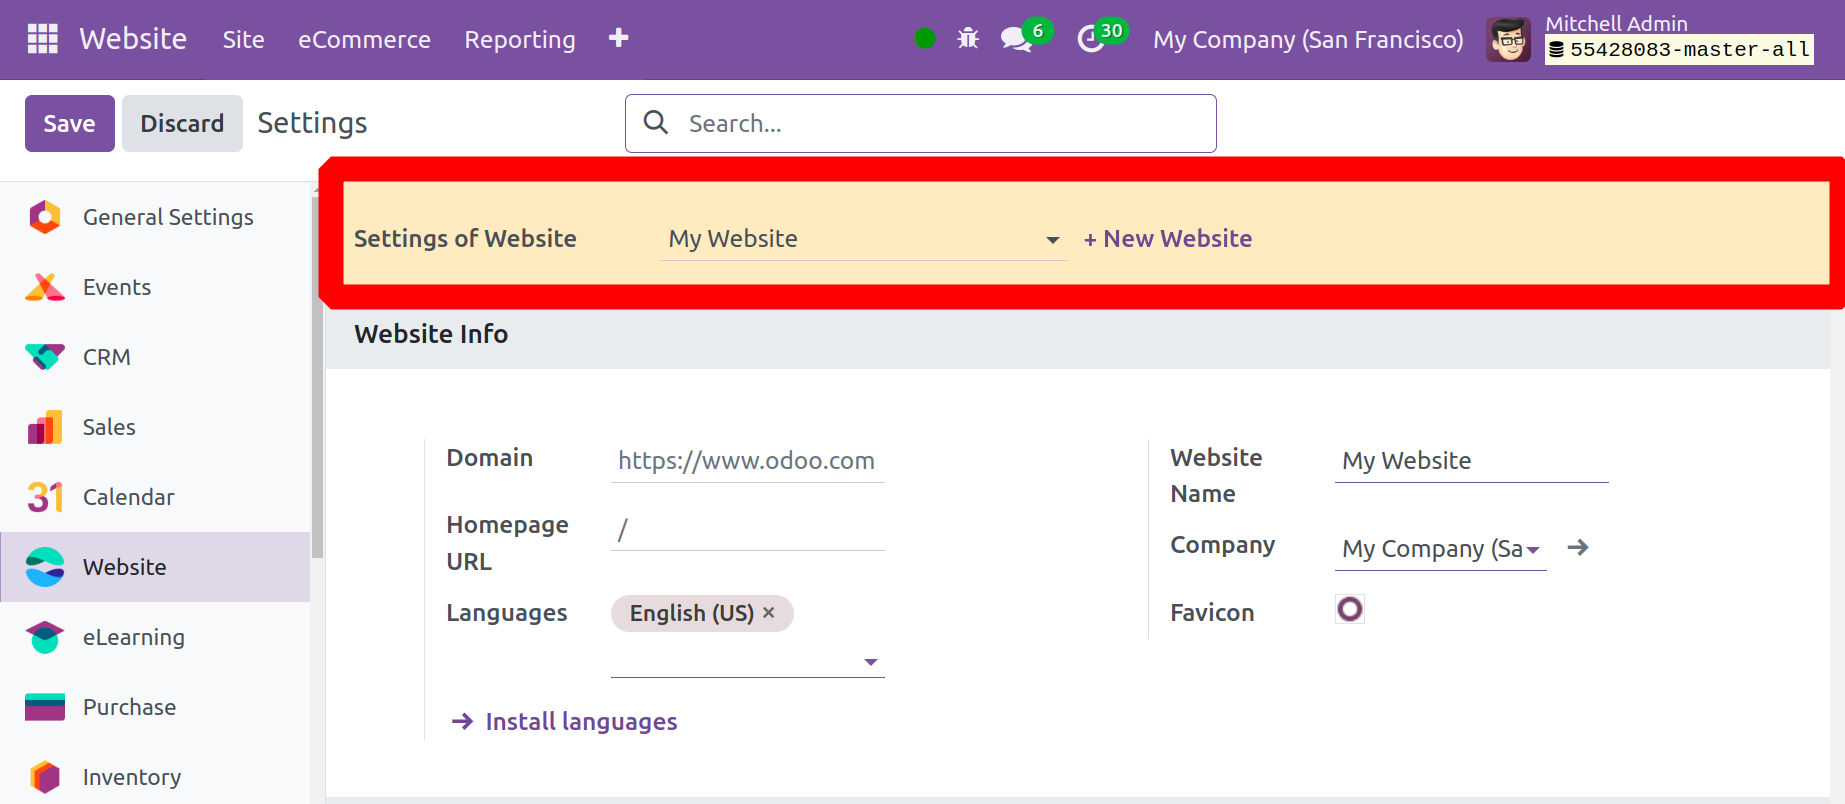
The system will show a new pop-up window where you can enter the information for the new website if you choose the '+New Website' option.
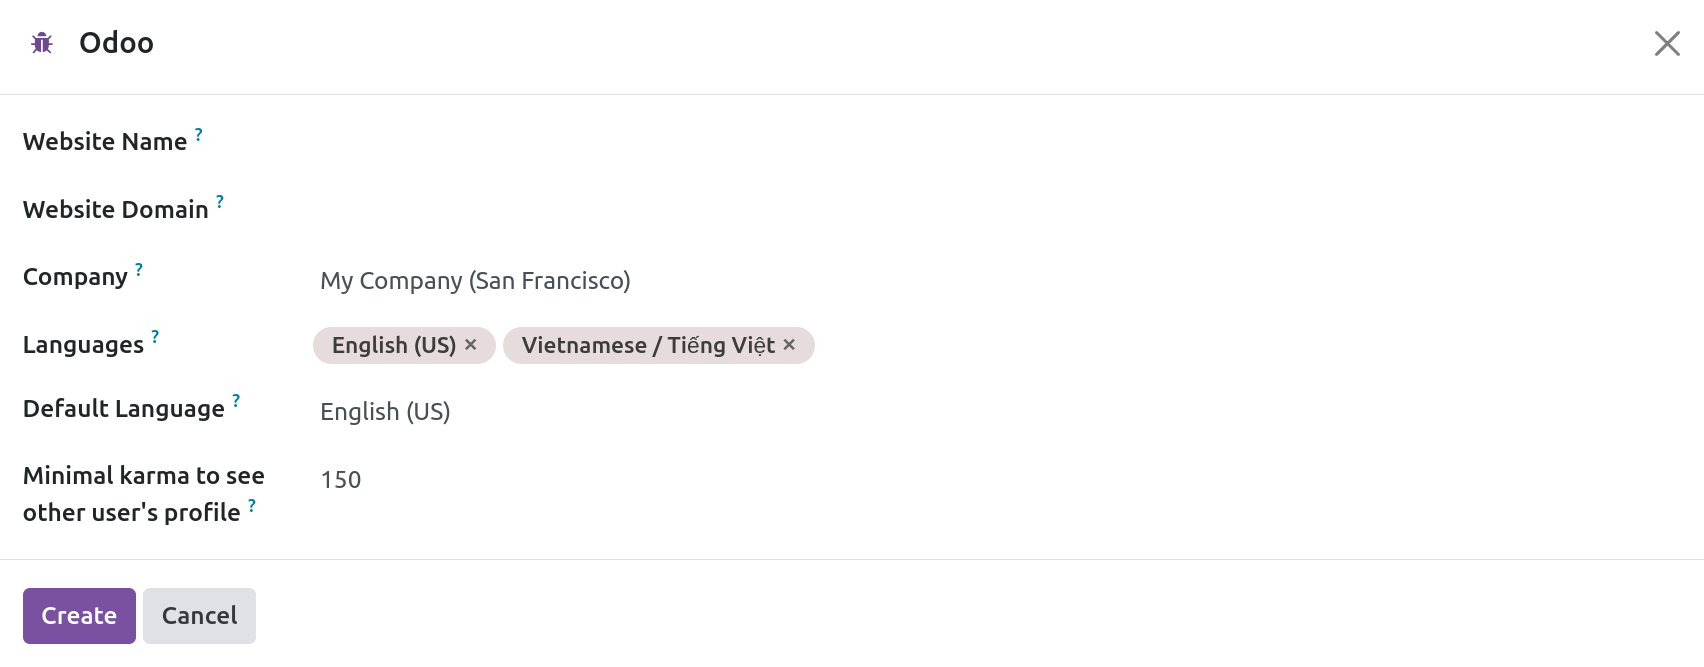
If the platform is multi-company, you are prompted to input the related Company, the Website Name, and the Website Domain in the new pop-up box. Next, you will see a Languages section where you can designate the languages in which you would like this website to be accessible.
The Default Language, which will be chosen automatically, is the last option. Click the Create button in the lower-left corner of the pop-up window once you have entered all the required data. After processing the website, the system will open a new window.
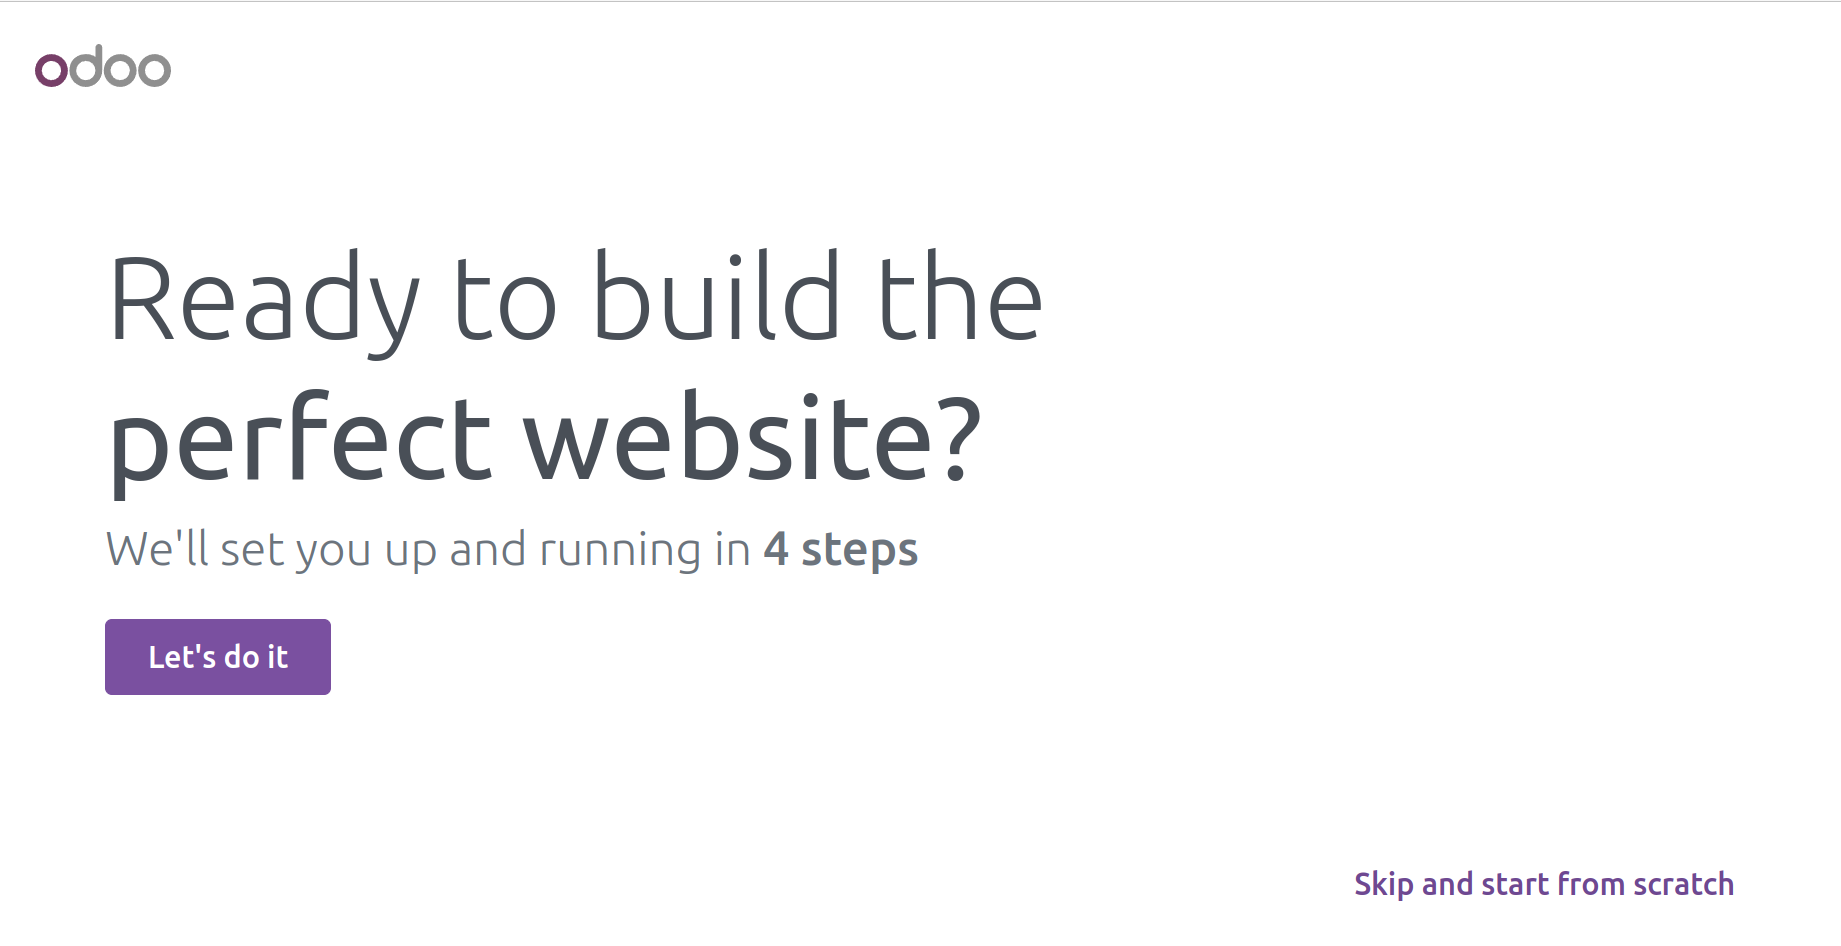
With this window, you may make a stunning website in four easy steps. Click the 'LET'S DO IT' button if you select this option. If not, you can select the 'Skip and start from scratch' button located in the window's lower right corner.
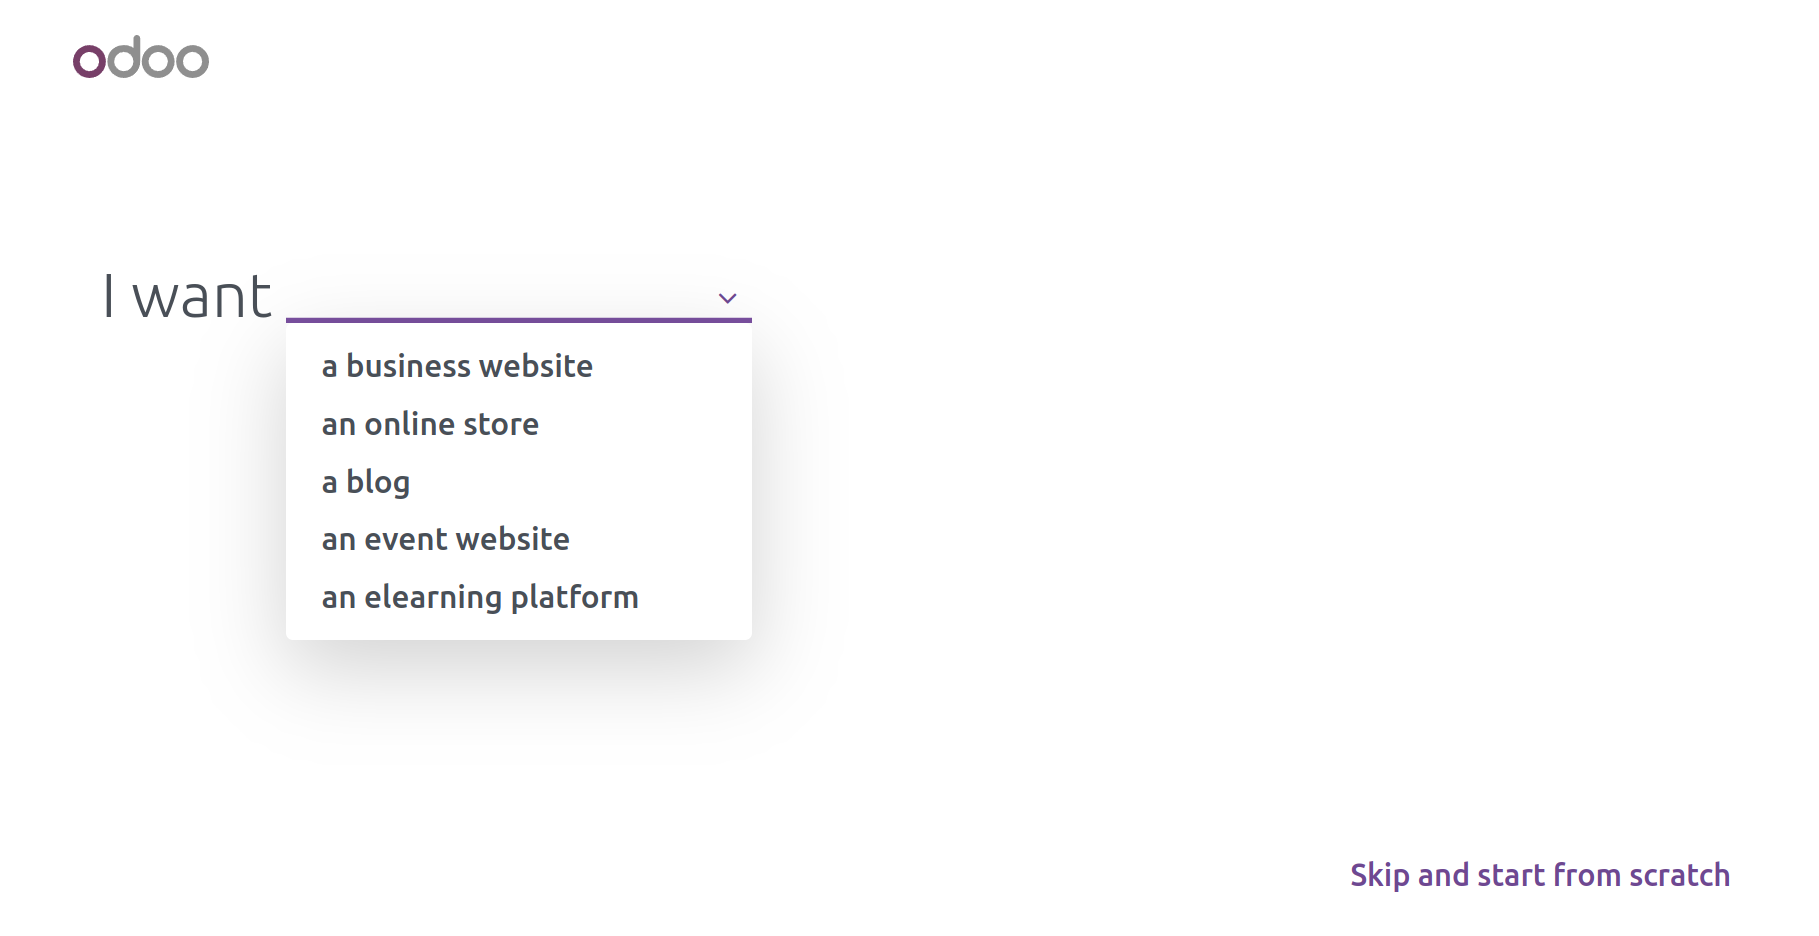
Next, you need to decide on the kind of website. "A business website, an online store, a blog, an event website, and an eLearning platform" are the kinds that Odoo suggests. Once a website type has been chosen, its goal can be specified. The system will present you with a dropdown menu from which you may choose the relevant one after you have described the reason.
The system will provide a new window with a few ready-made palettes when you enter all of these details, as seen in the image above. These can be used to improve the aesthetic appeal and style of your website. Moreover, this color scheme can help you recognize your brand easily. You can submit your logo to have it recognized automatically if you would rather not make the selection by hand. When you upload it, Odoo will read your logo and instantly detect it. Click the 'upload' arrow and follow the prompts to add your logo.

The next step is to choose and add the pages and features you need for your website from the list on the next page.
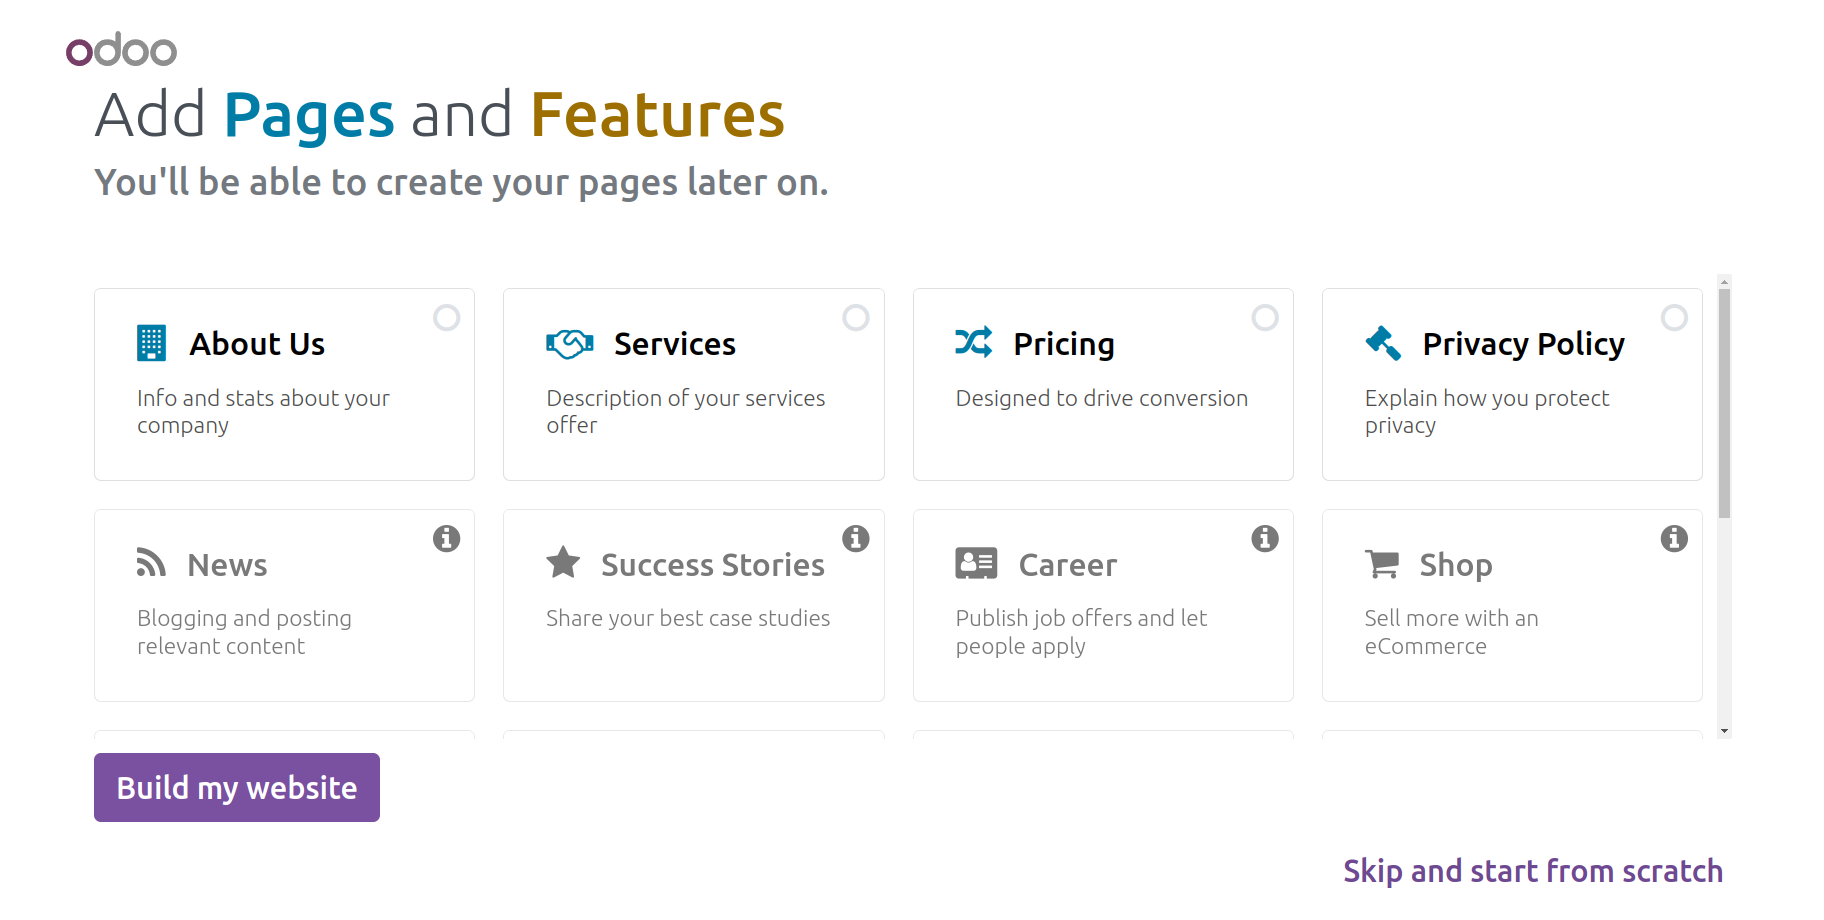
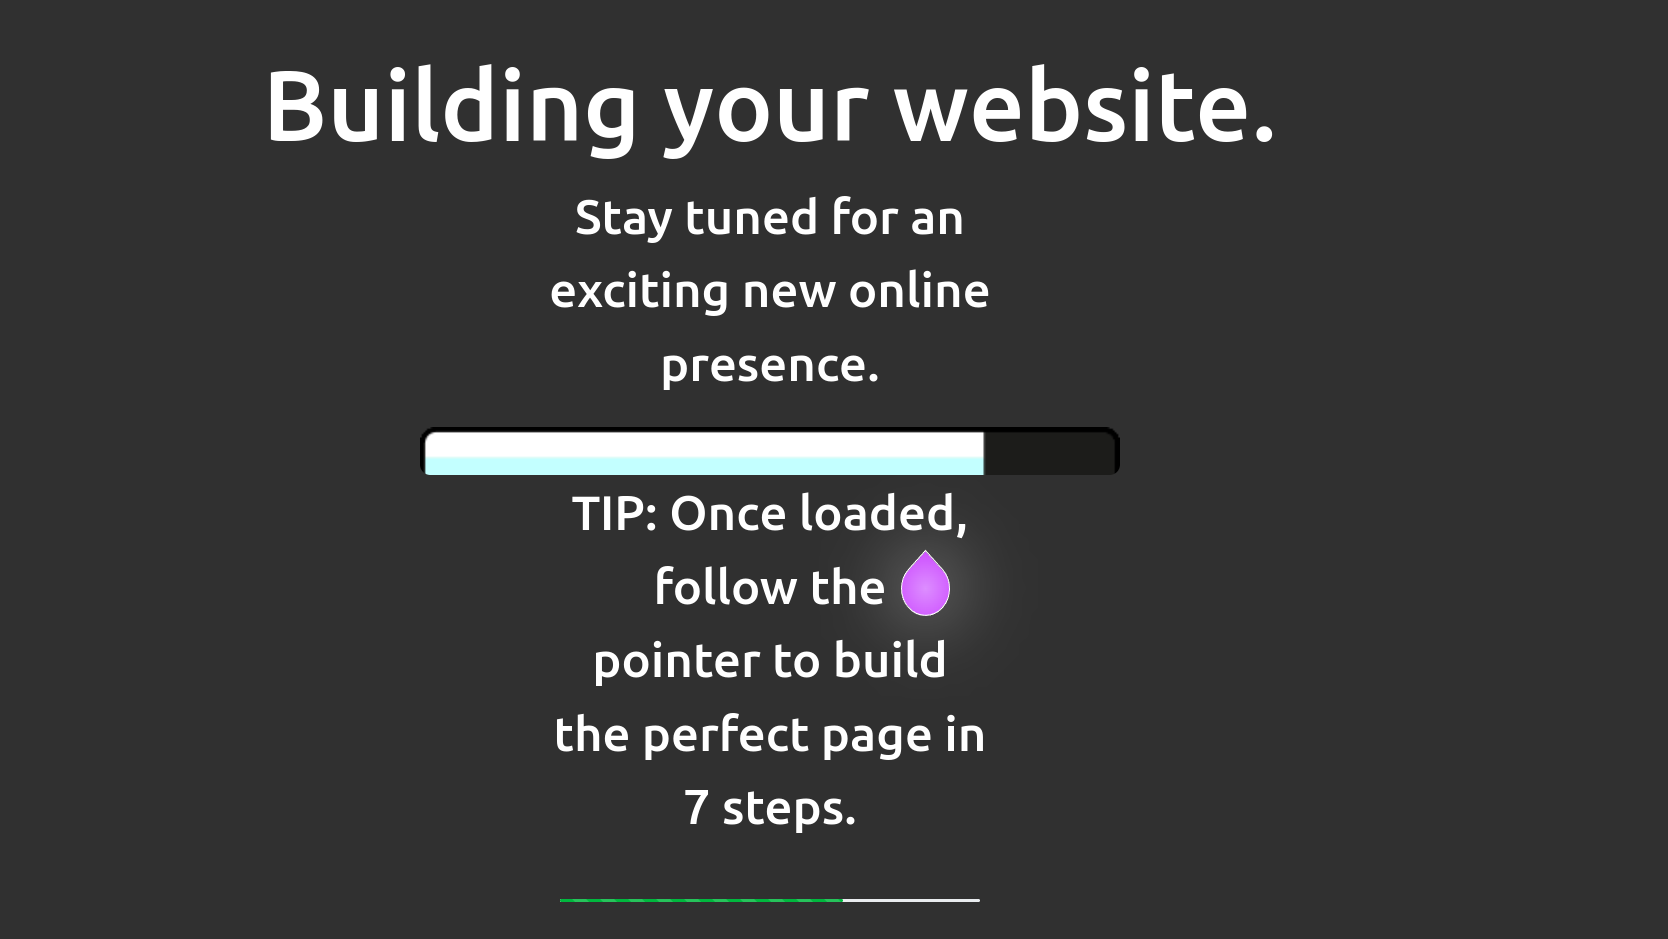
Here, you are able to view several default pages. It's not necessary for you to make each of these on your own. You only need to choose the pages you need; if more are needed, they can be created at a later time. Click the 'Build My Website' button located in the lower right corner of the same window after choosing the pages. As you press the button, the system will start creating your website, as you can see below.
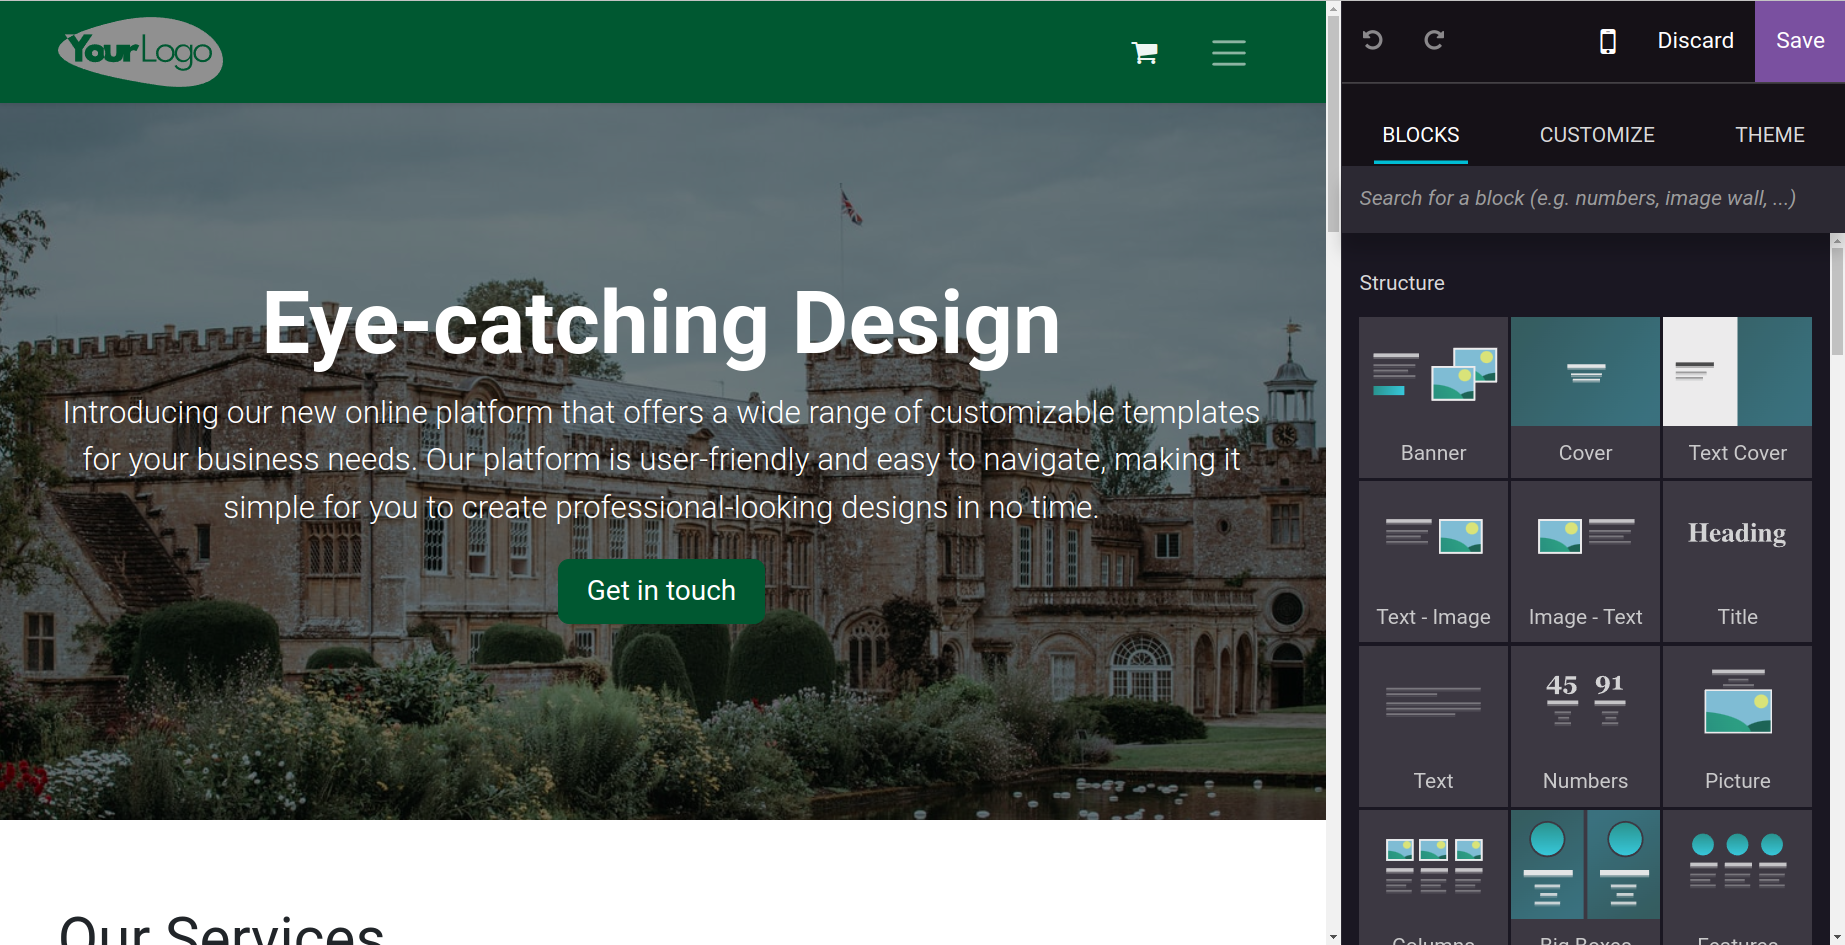
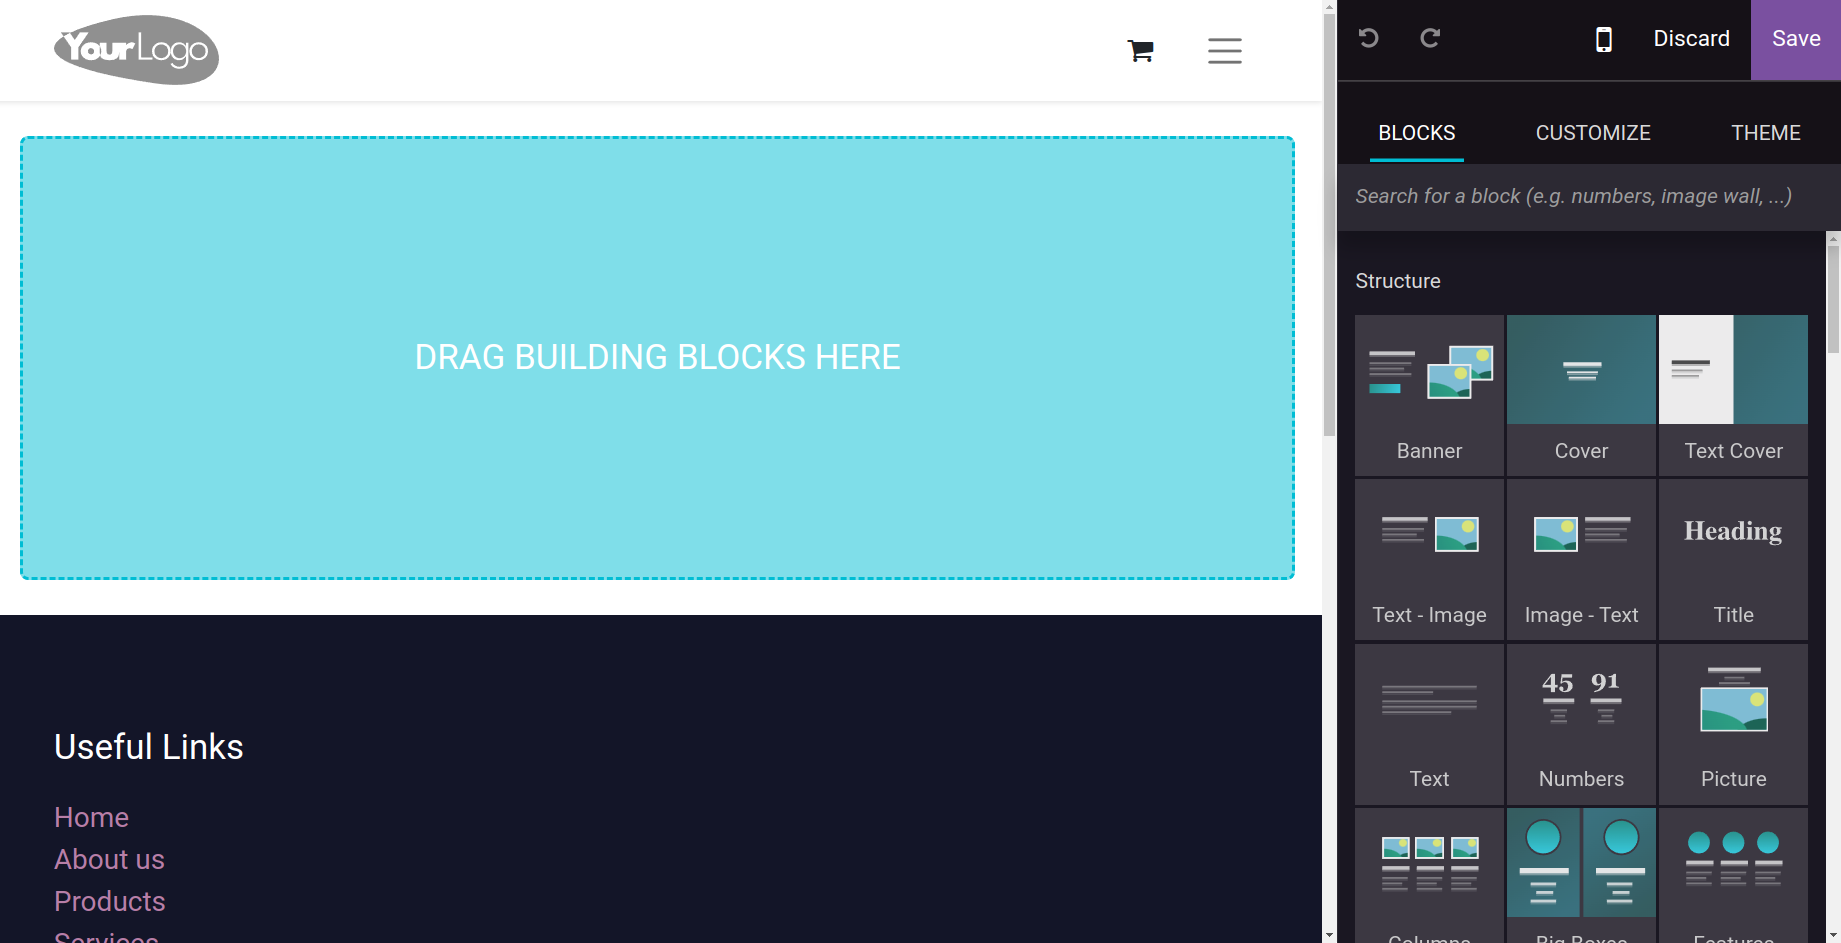
After it is finished, the Odoo system gives you a website structure that is appropriate. You can utilize the various construction blocks, customization settings, and themes on the right side of the window to craft an amazing website.
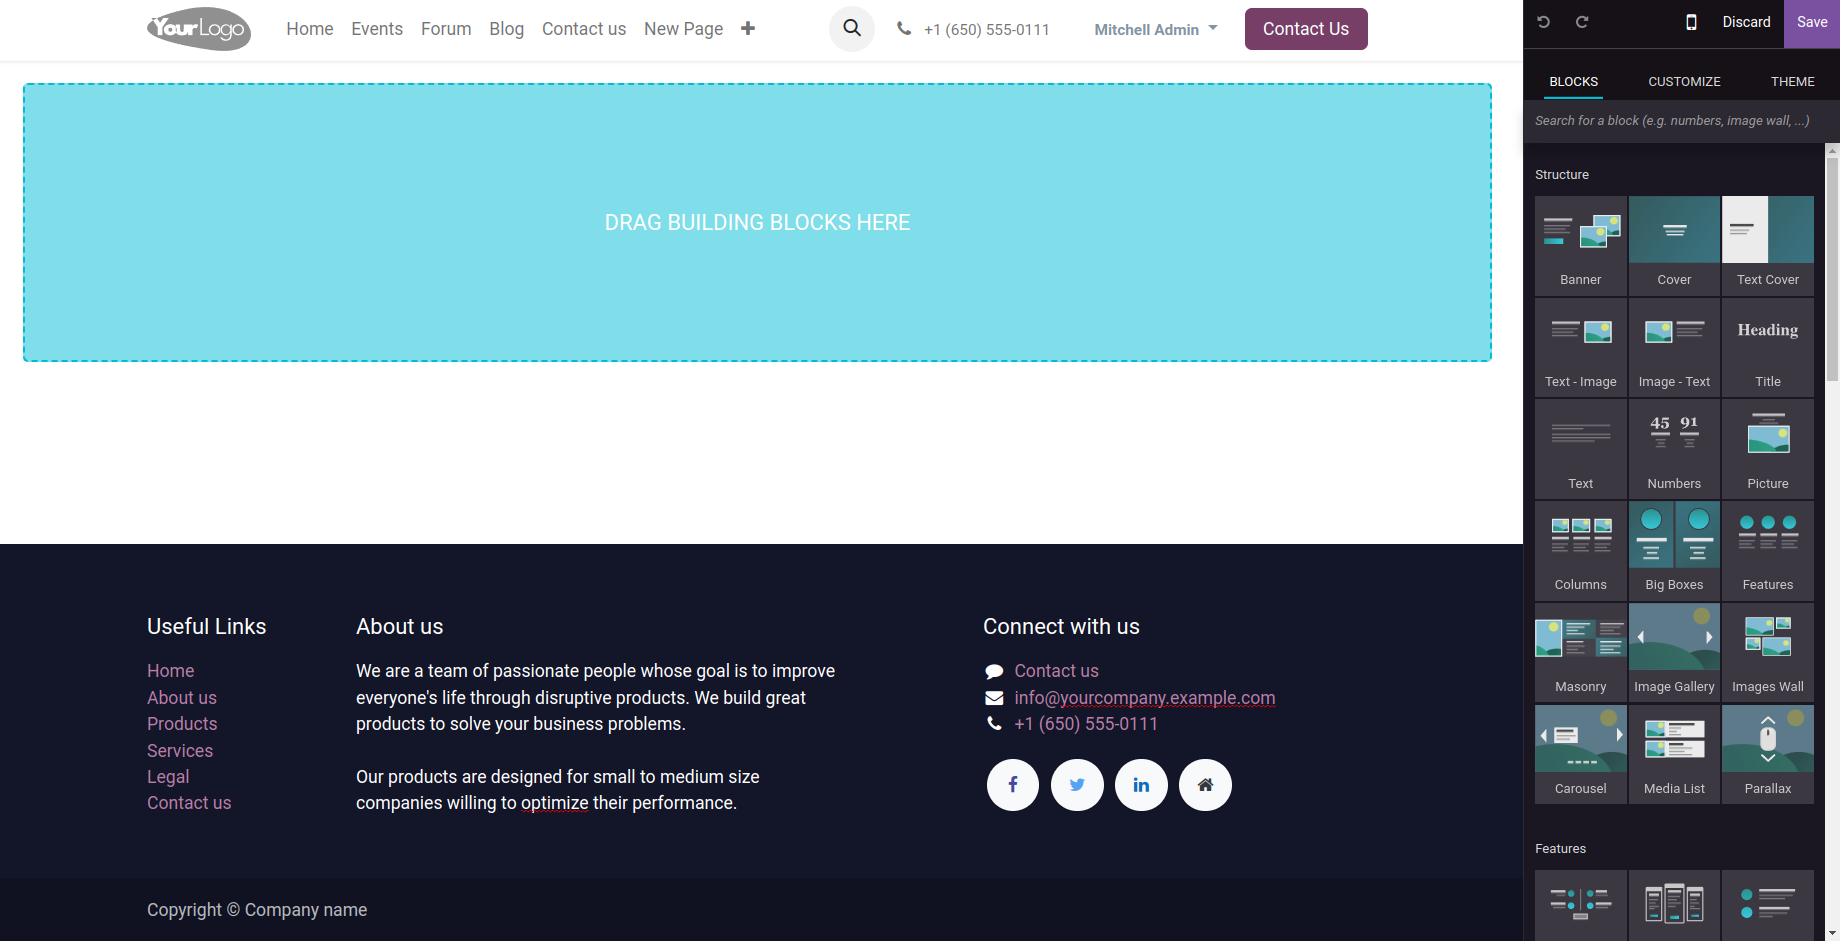
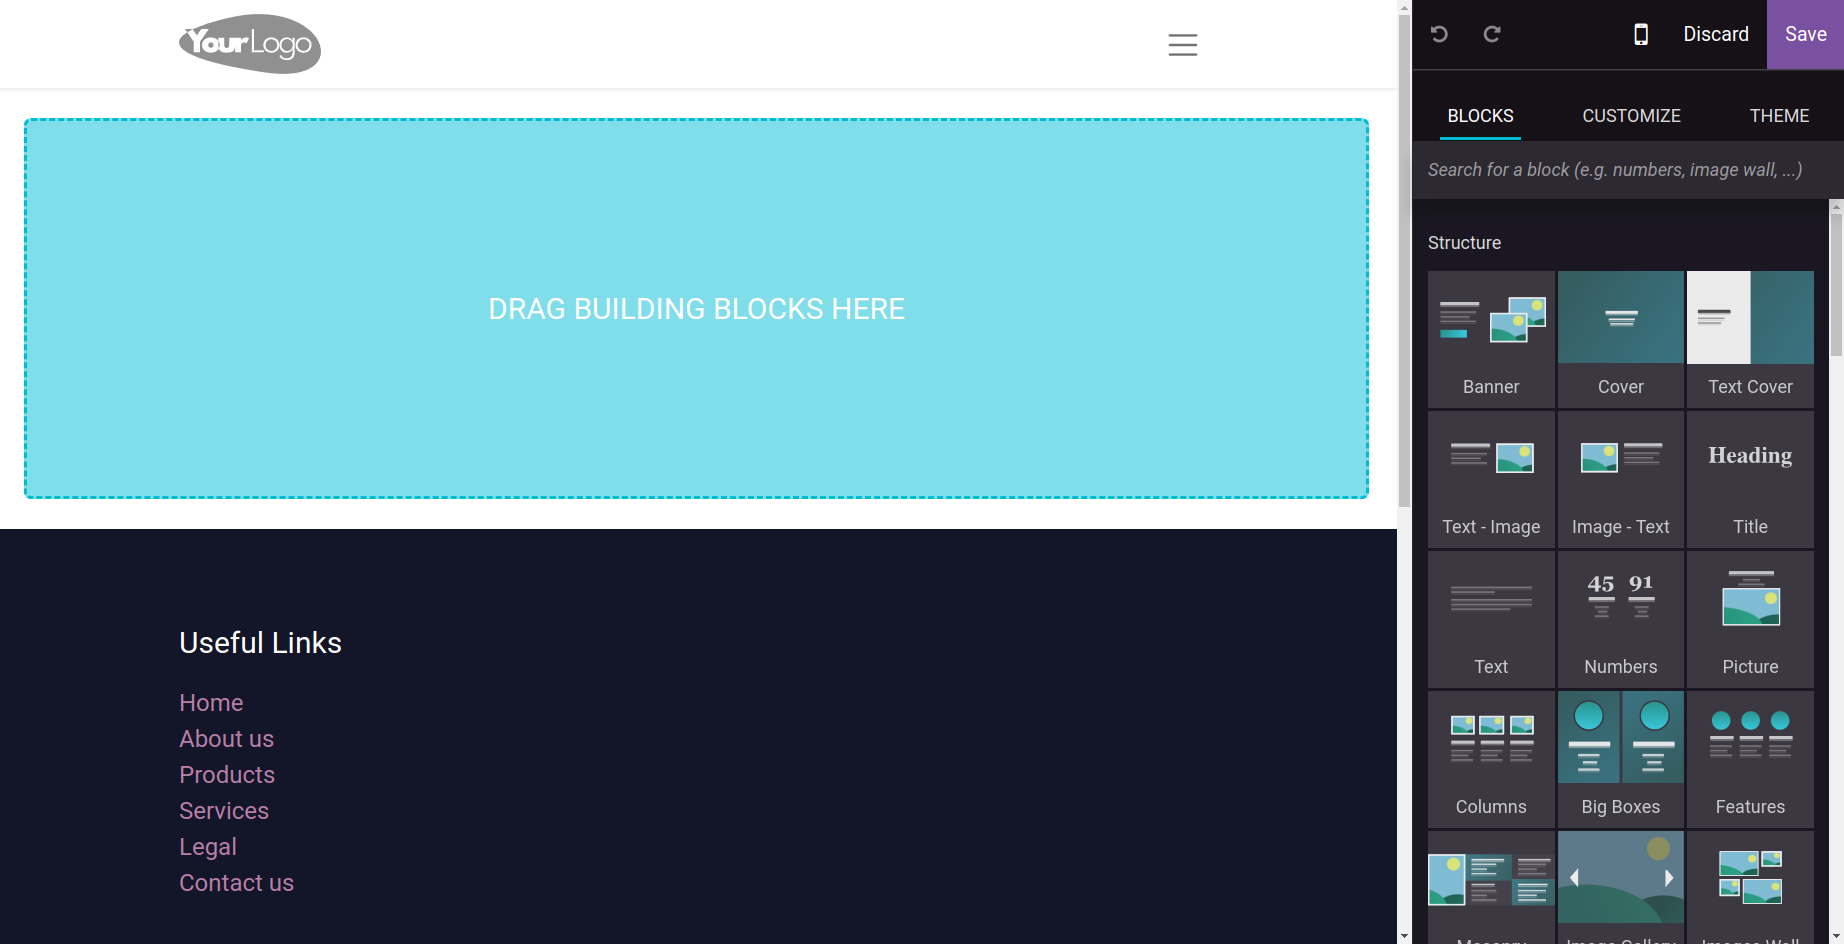
The system will display a wide variety of building blocks when you choose the Blocks area. Any of these can be used by the user to create and save their website.
This is how a user configures a website to meet the demands and specifications of the business.
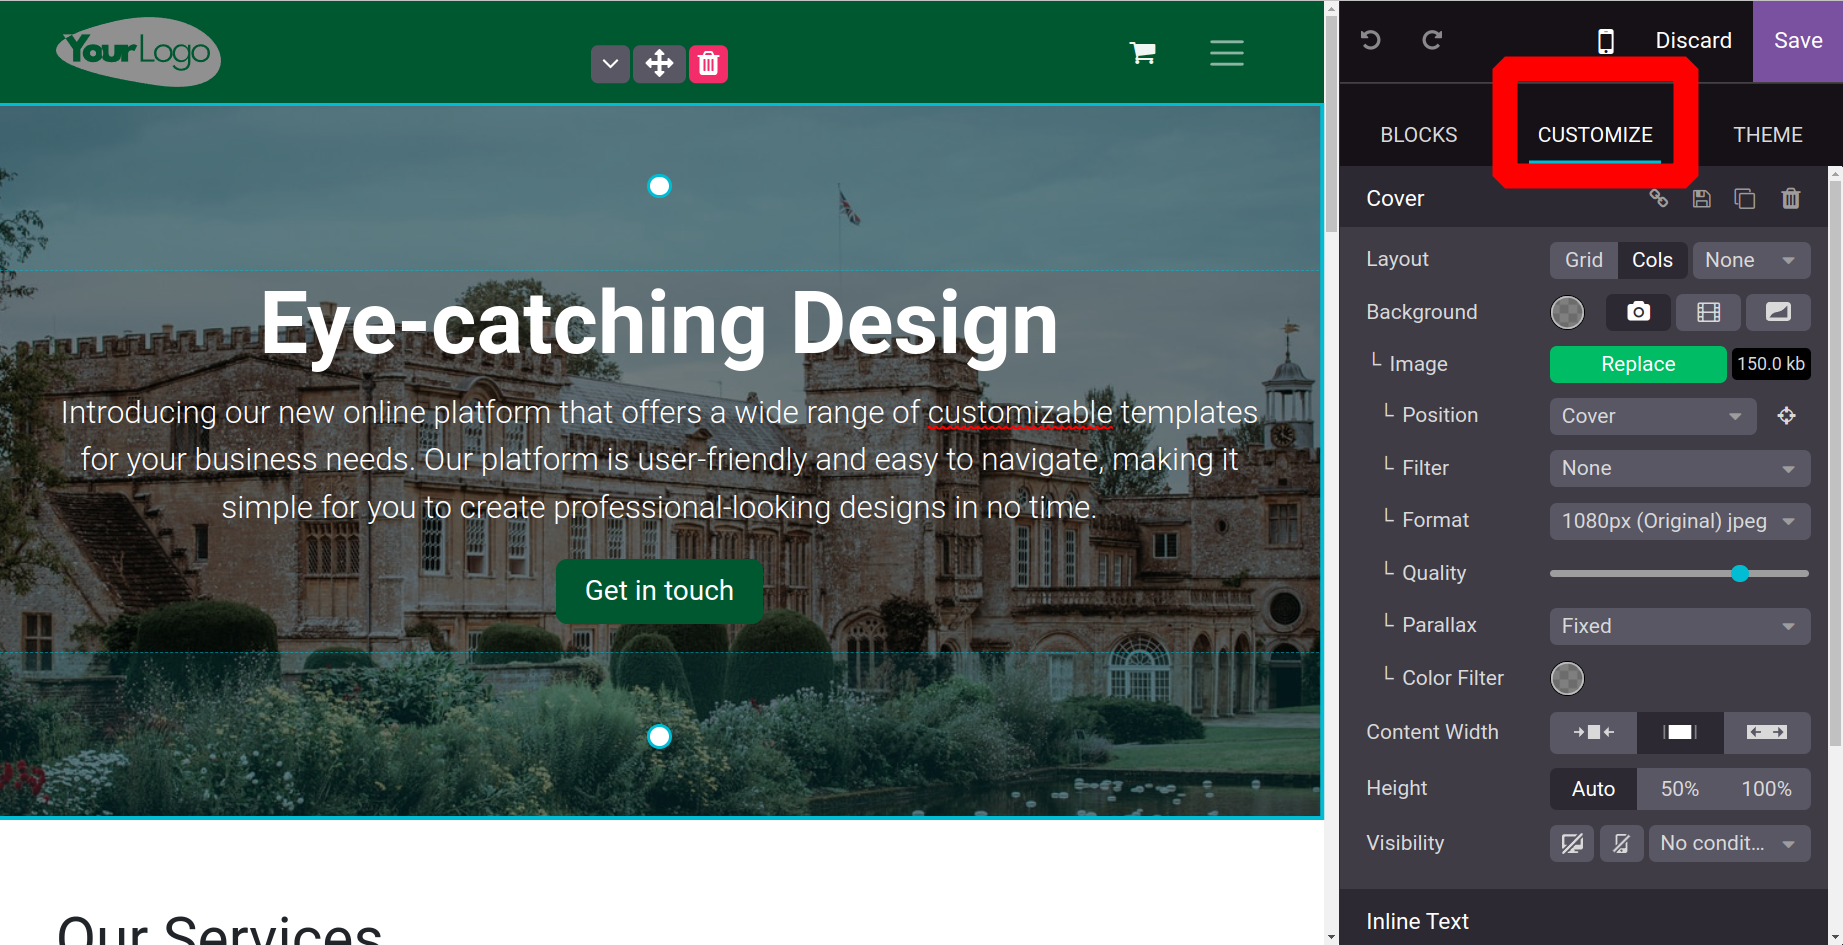
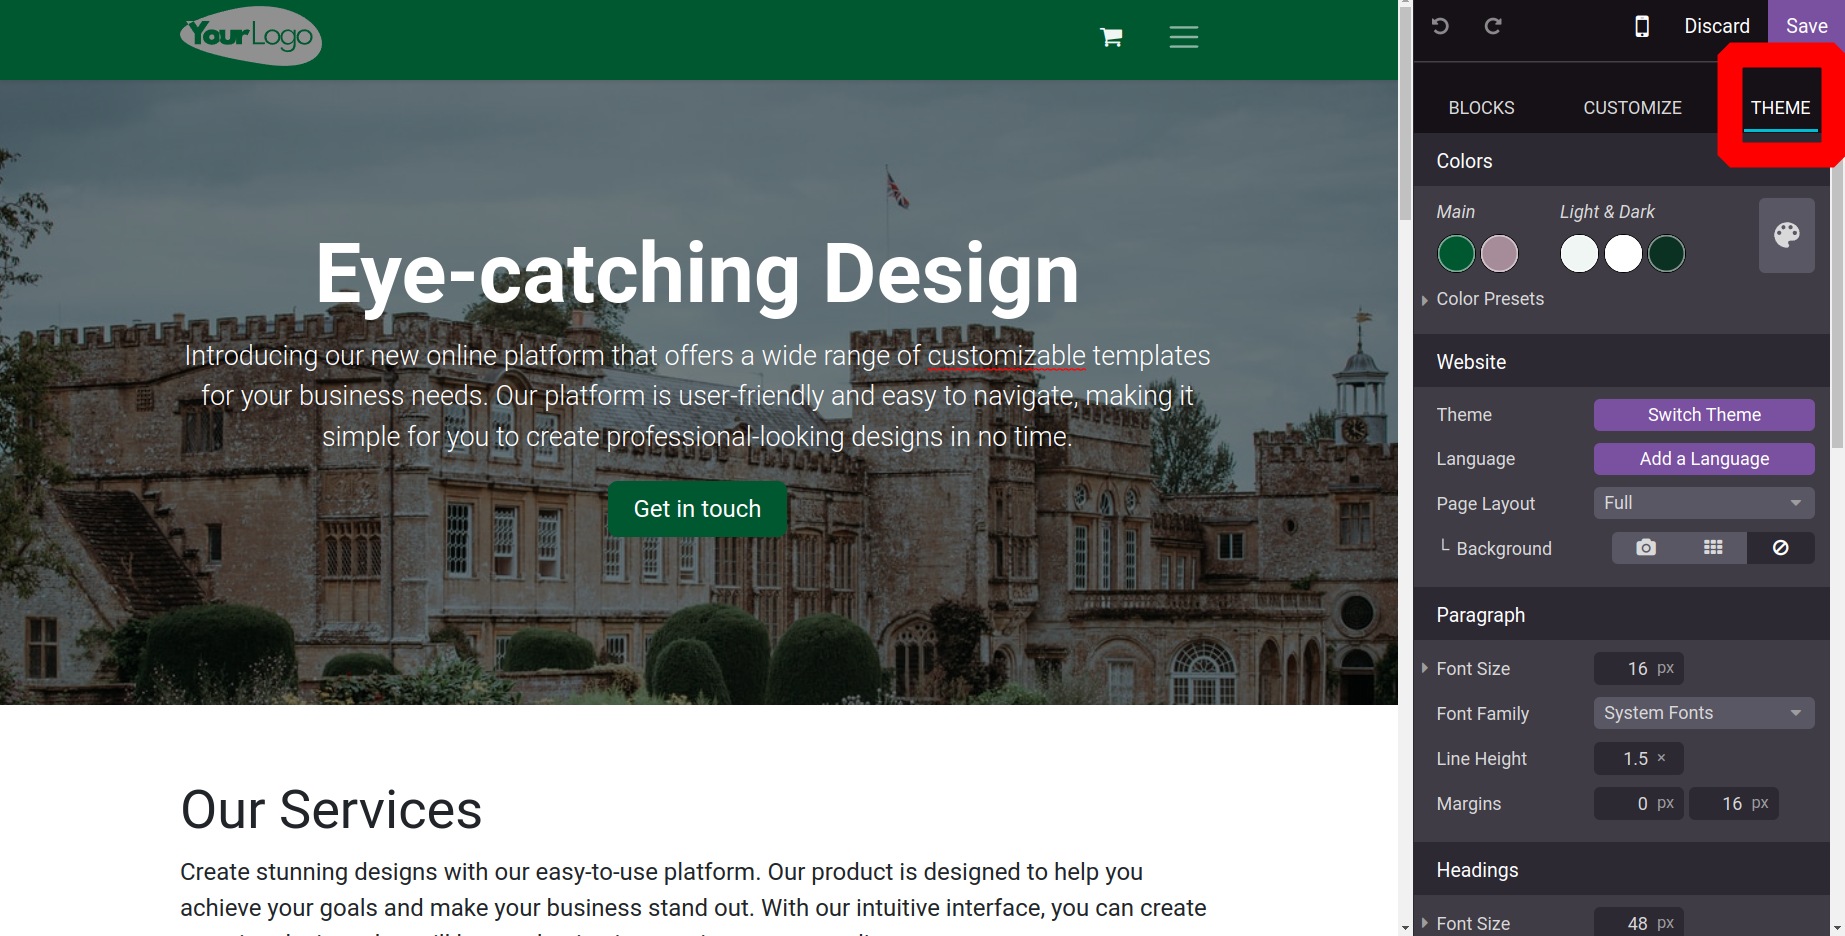
This will make the construction blocks in the window's right section easily draggable and droppable. The Blocks section has suitable blocks for you to select. To modify a block you've chosen for your page, click the CUSTOMIZE menu item
Just click on the available THEME button to change themes. The choices for developing and modifying new themes will now be shown.
It's time to talk about managing several languages with the Odoo17 Website module.
Multiple Language Management
As more people from around the globe visit websites, the need for multilingual support in those languages grows. This is particularly true for eCommerce websites, which have to be able to offer goods in the native tongue of their customers.
Comprehensive website management, including multilingual assistance, is offered by Odoo 17. With the use of technology, it is possible to create multilingual websites with material that is accessible in several languages.
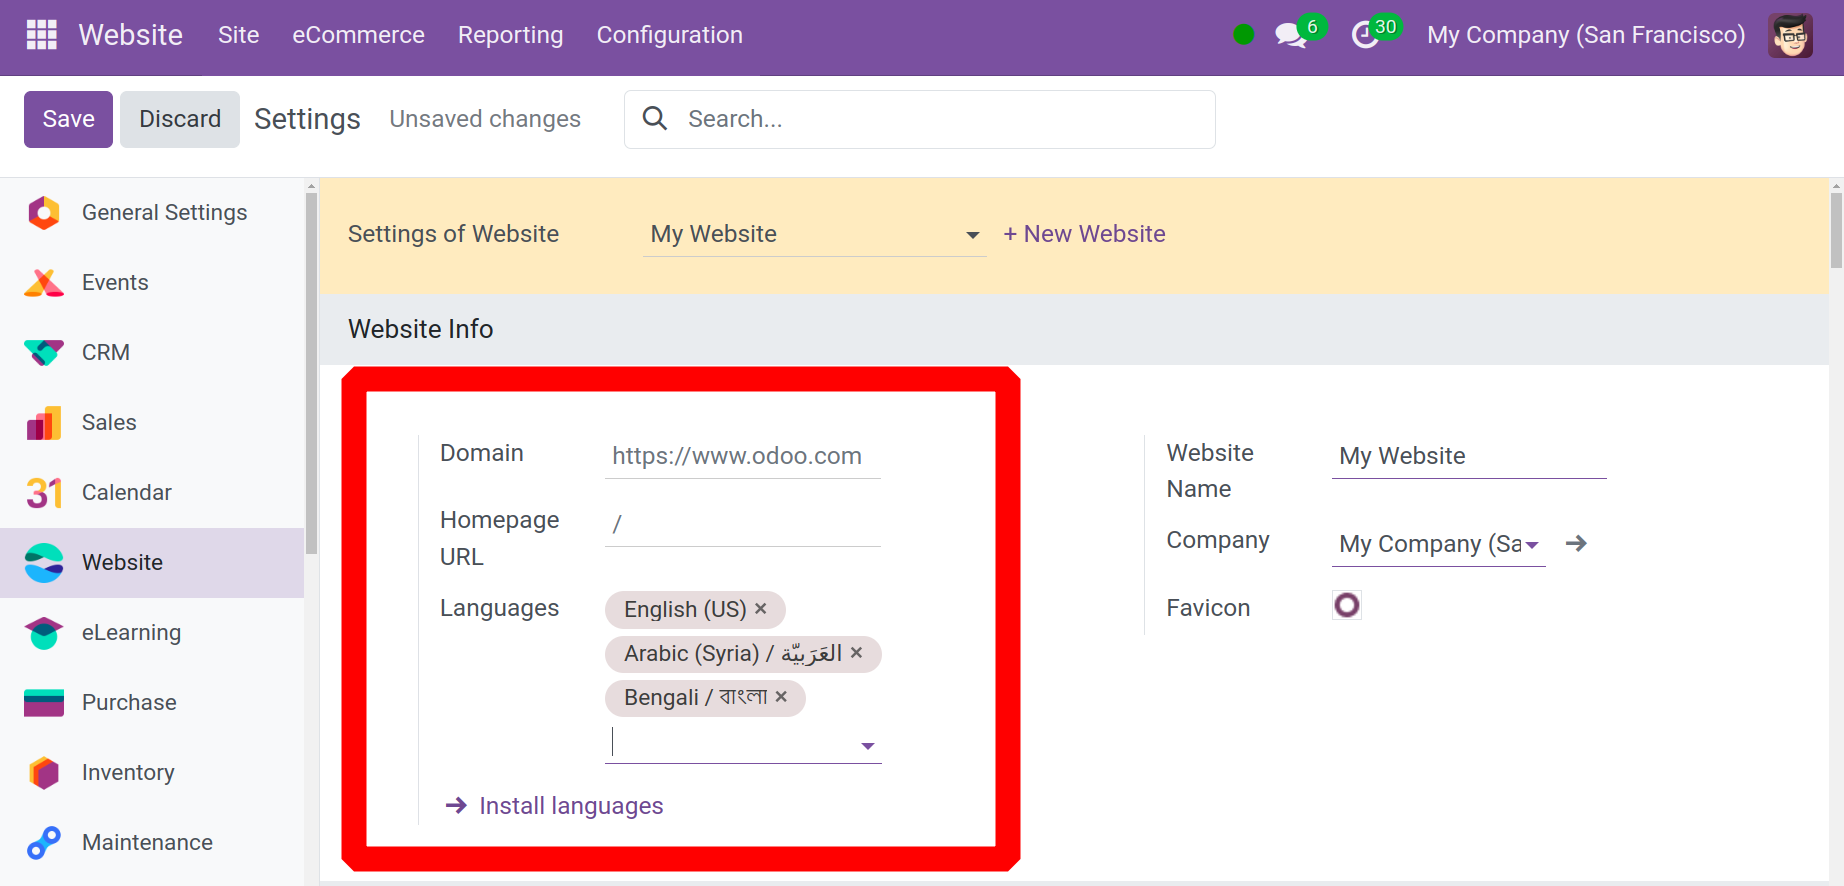
The website module's Settings allow for the configuration of several languages, as seen below.
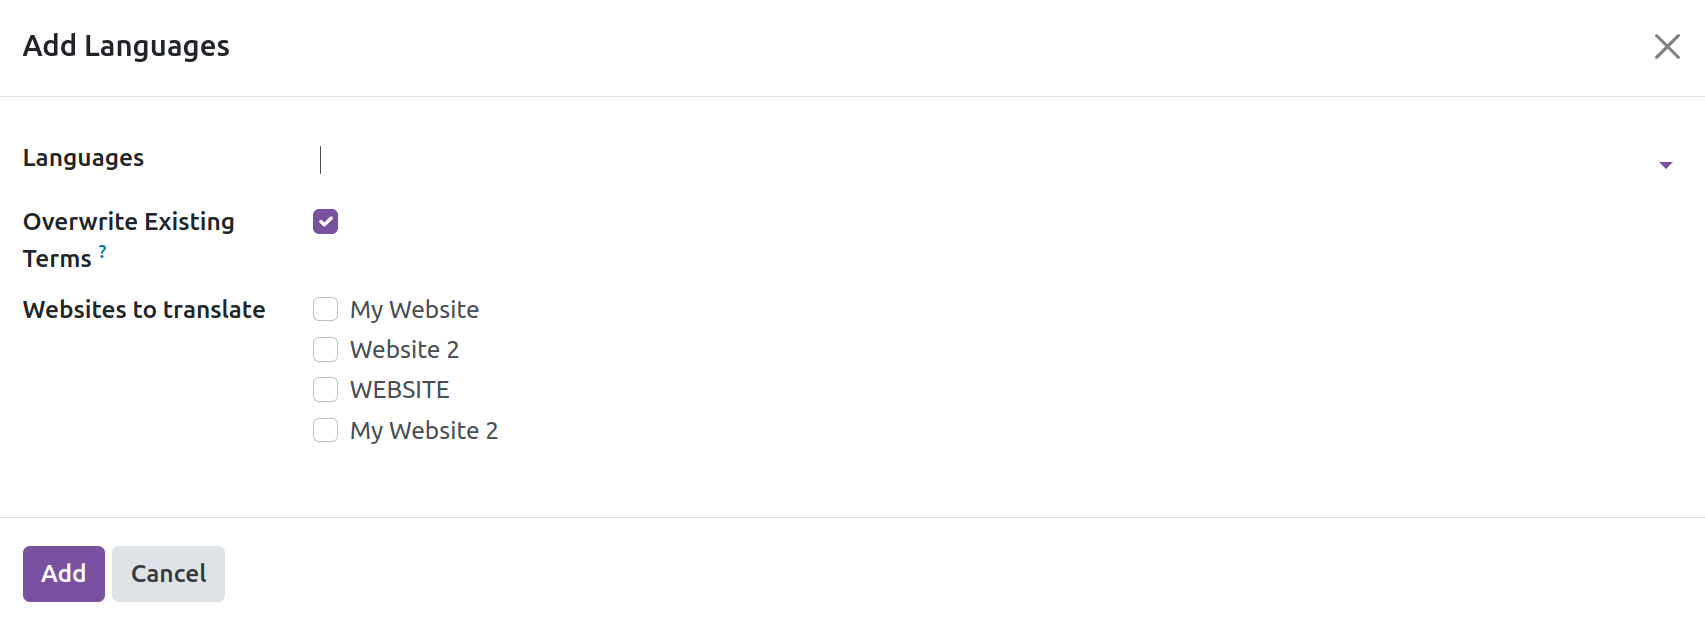
By selecting the Install Languages option, which opens a window listing available languages and providing options to activate them as needed, the user can also install more languages.
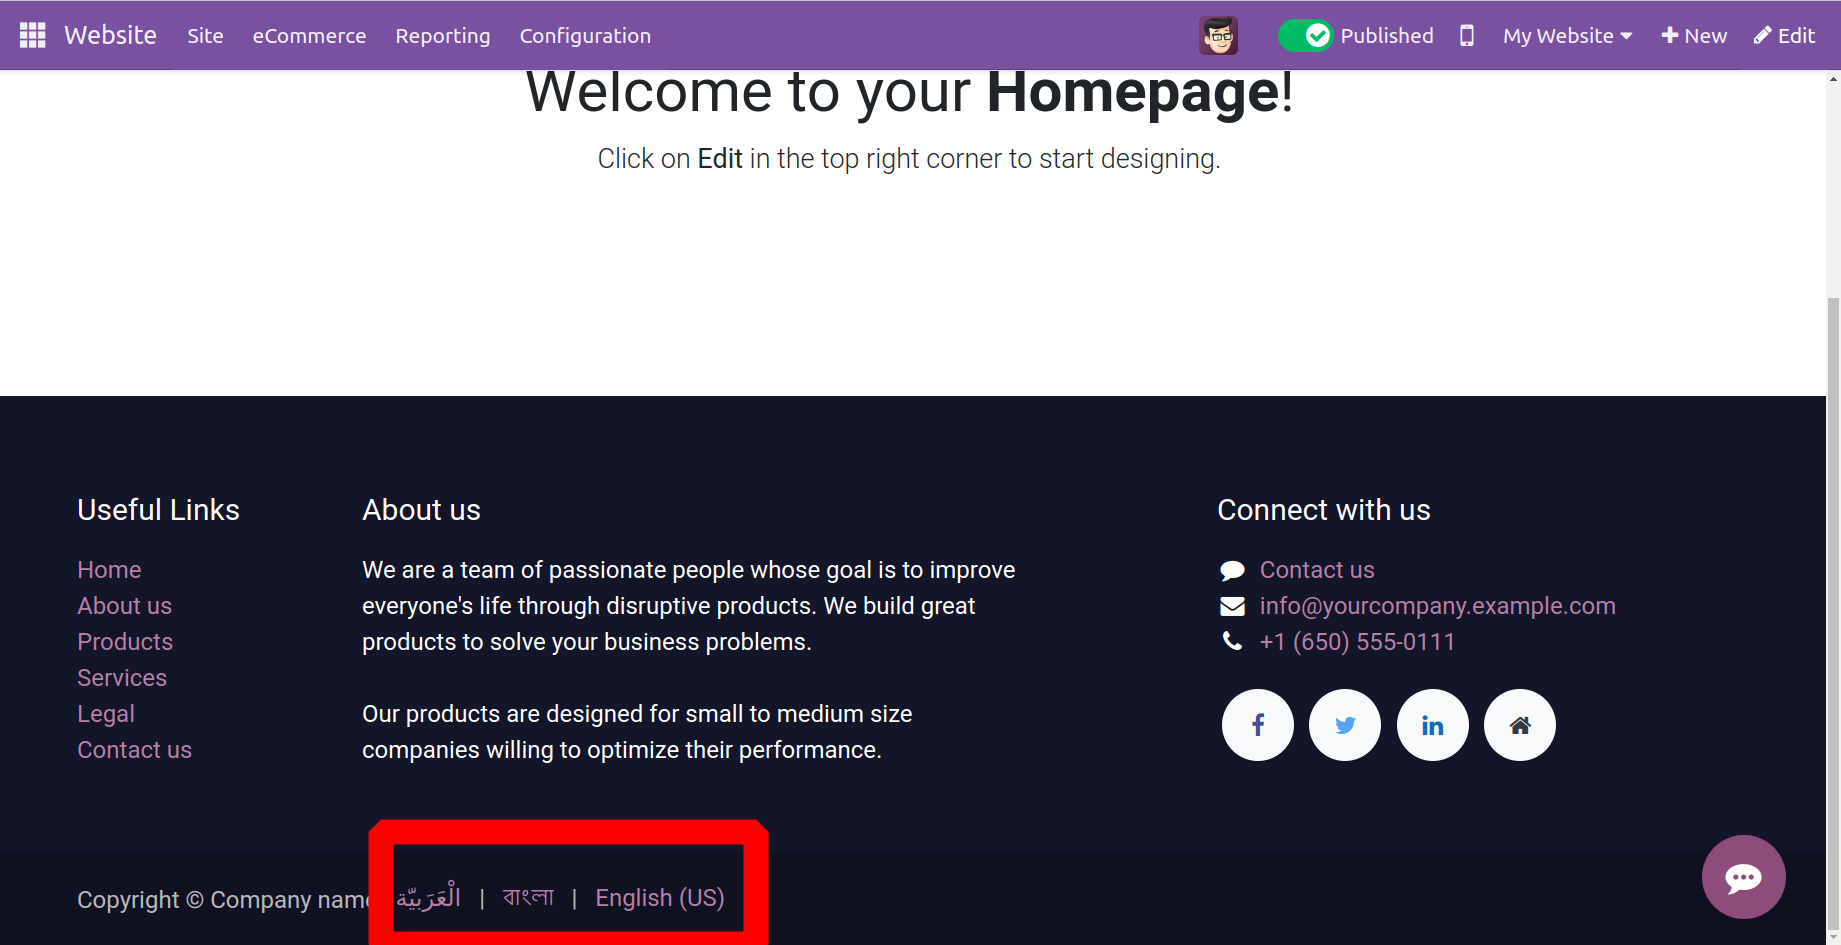
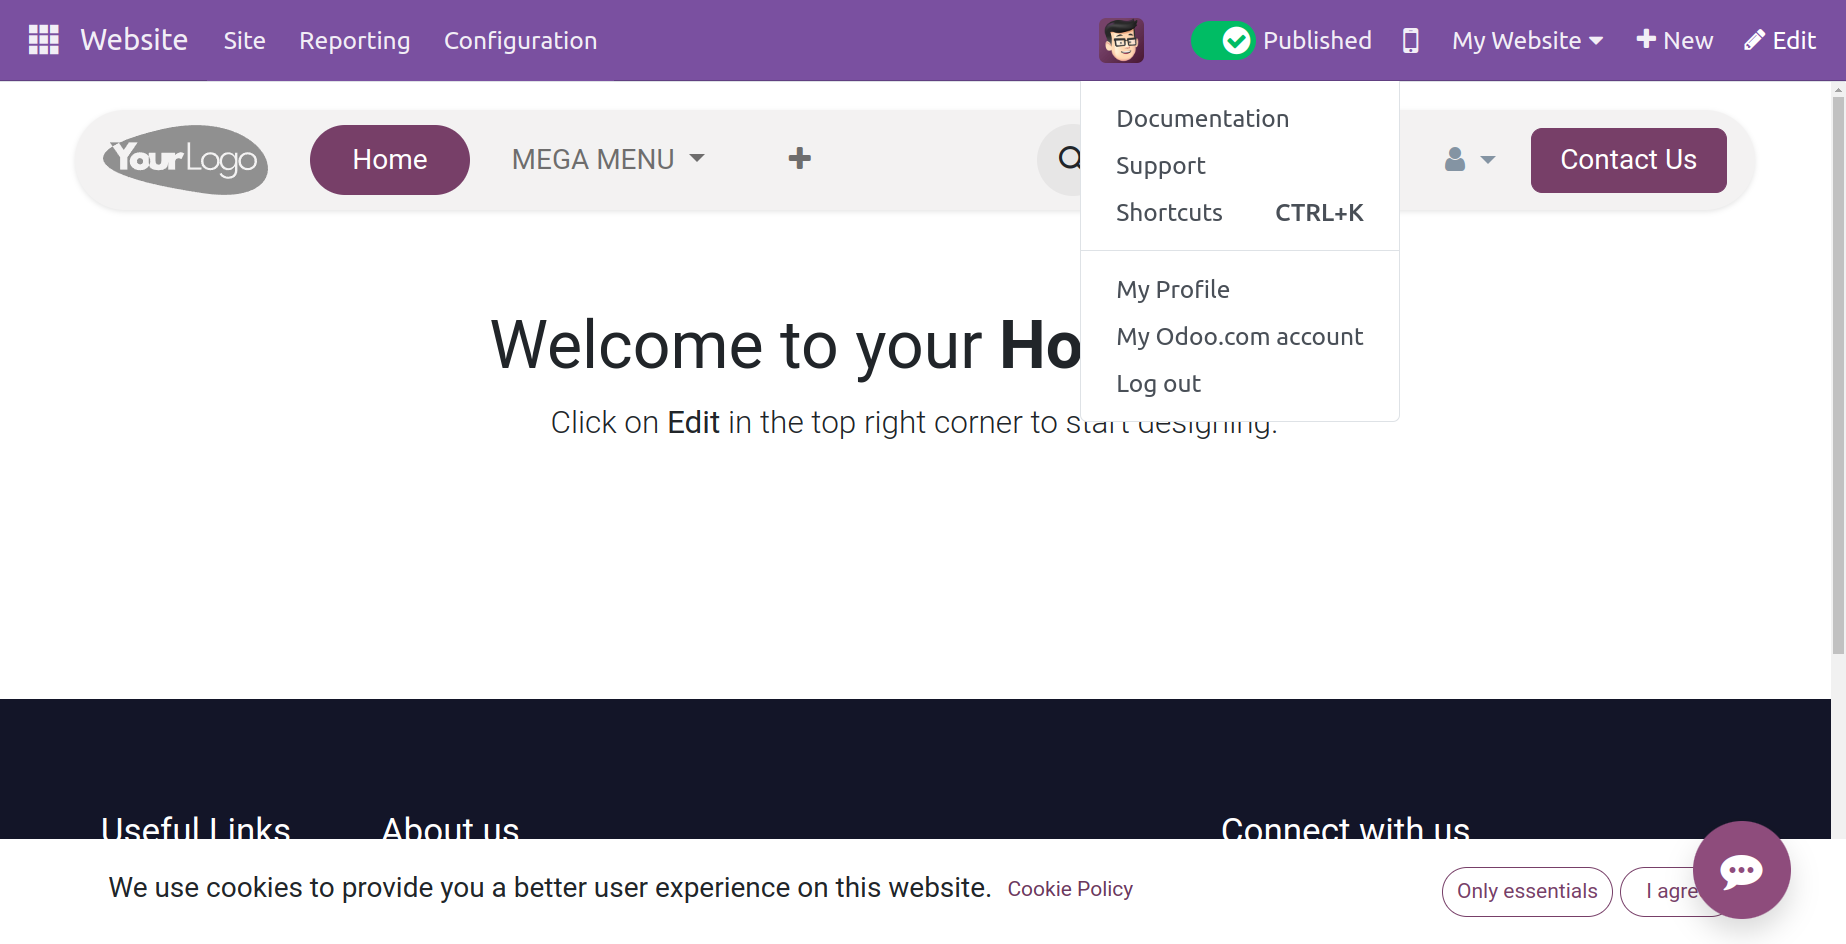
In addition to this feature, the main page of the Odoo website lets you add a new language. To view it, navigate to the main page and look for the Language option, indicated in the screenshot below, near the bottom.
Let's talk about creating pages now that we are aware of how Odoo17 makes managing multilingual websites easier.
Web Page Designing
An excellent tool for creating a website for your business is the Odoo Website module. Based on your needs, you can utilize the platform to design and build the pages of your website. Clicking the Site menu of the Odoo 17 Website module will take you to the Homepage.
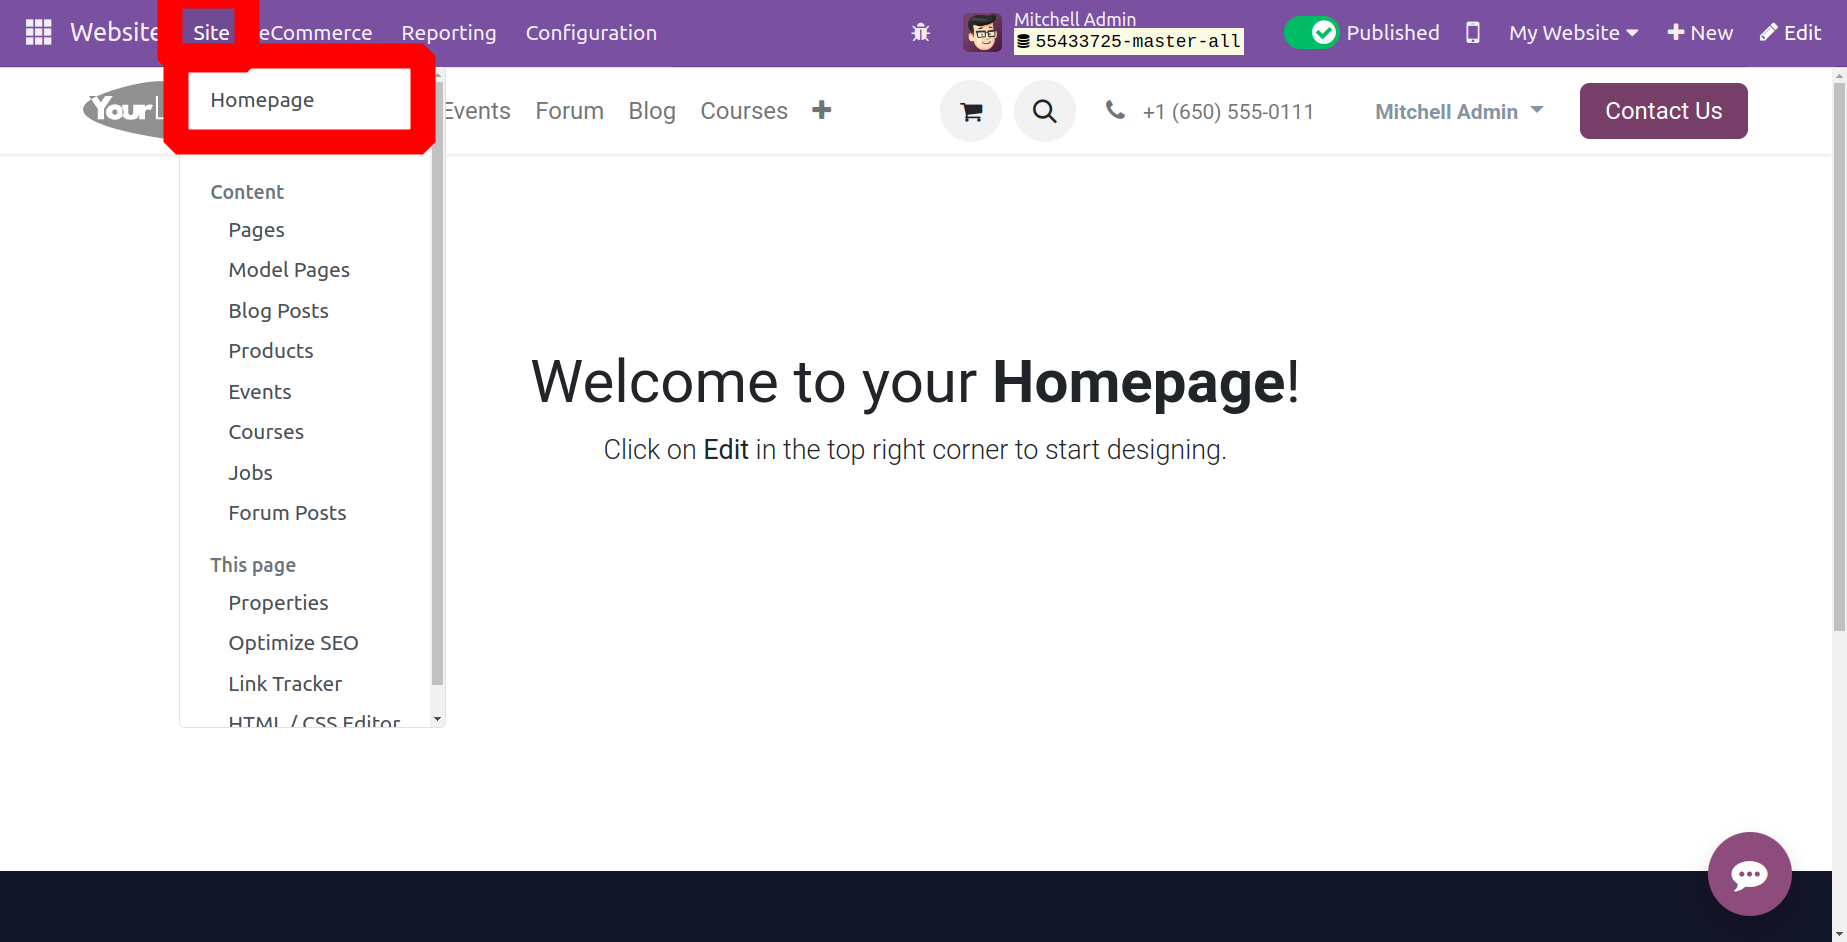
You can access the Home page window of your website with just one mouse click on the menu. Here, you can go through a number of menus and website design possibilities. From this page, you may directly manage content, create new website pages, and administer your website.
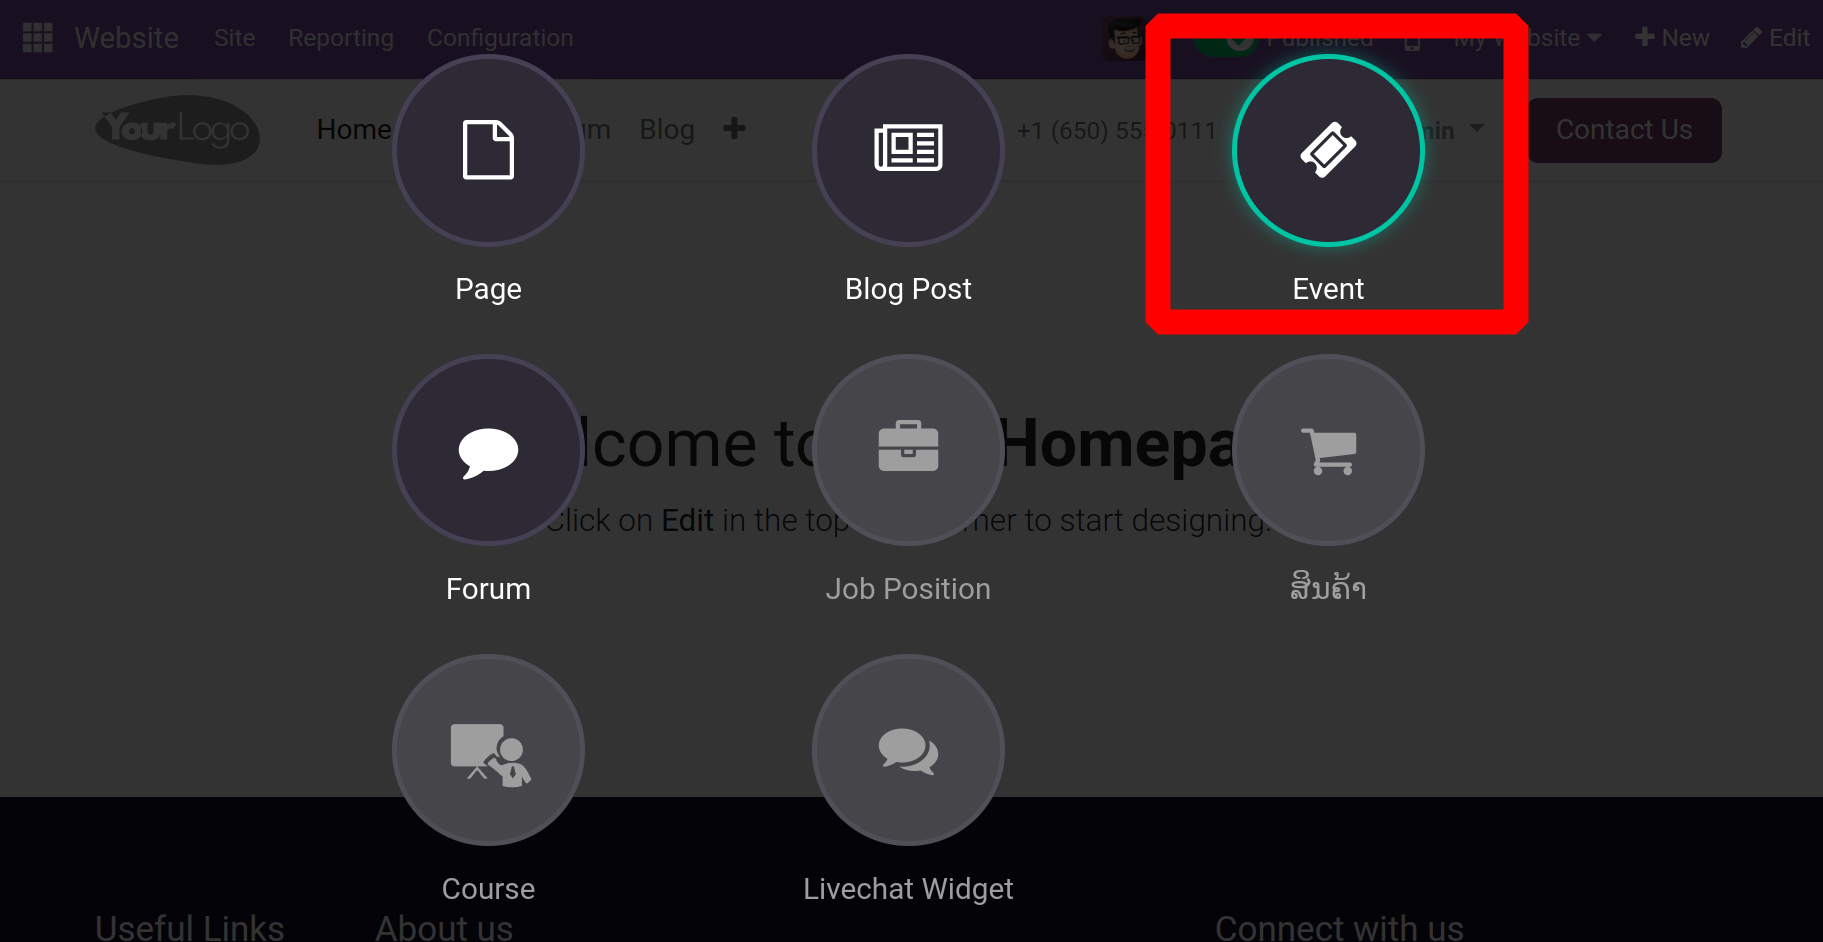
The option to create a “New" appears in the upper right corner, assisting the user in creating a new page as seen below.
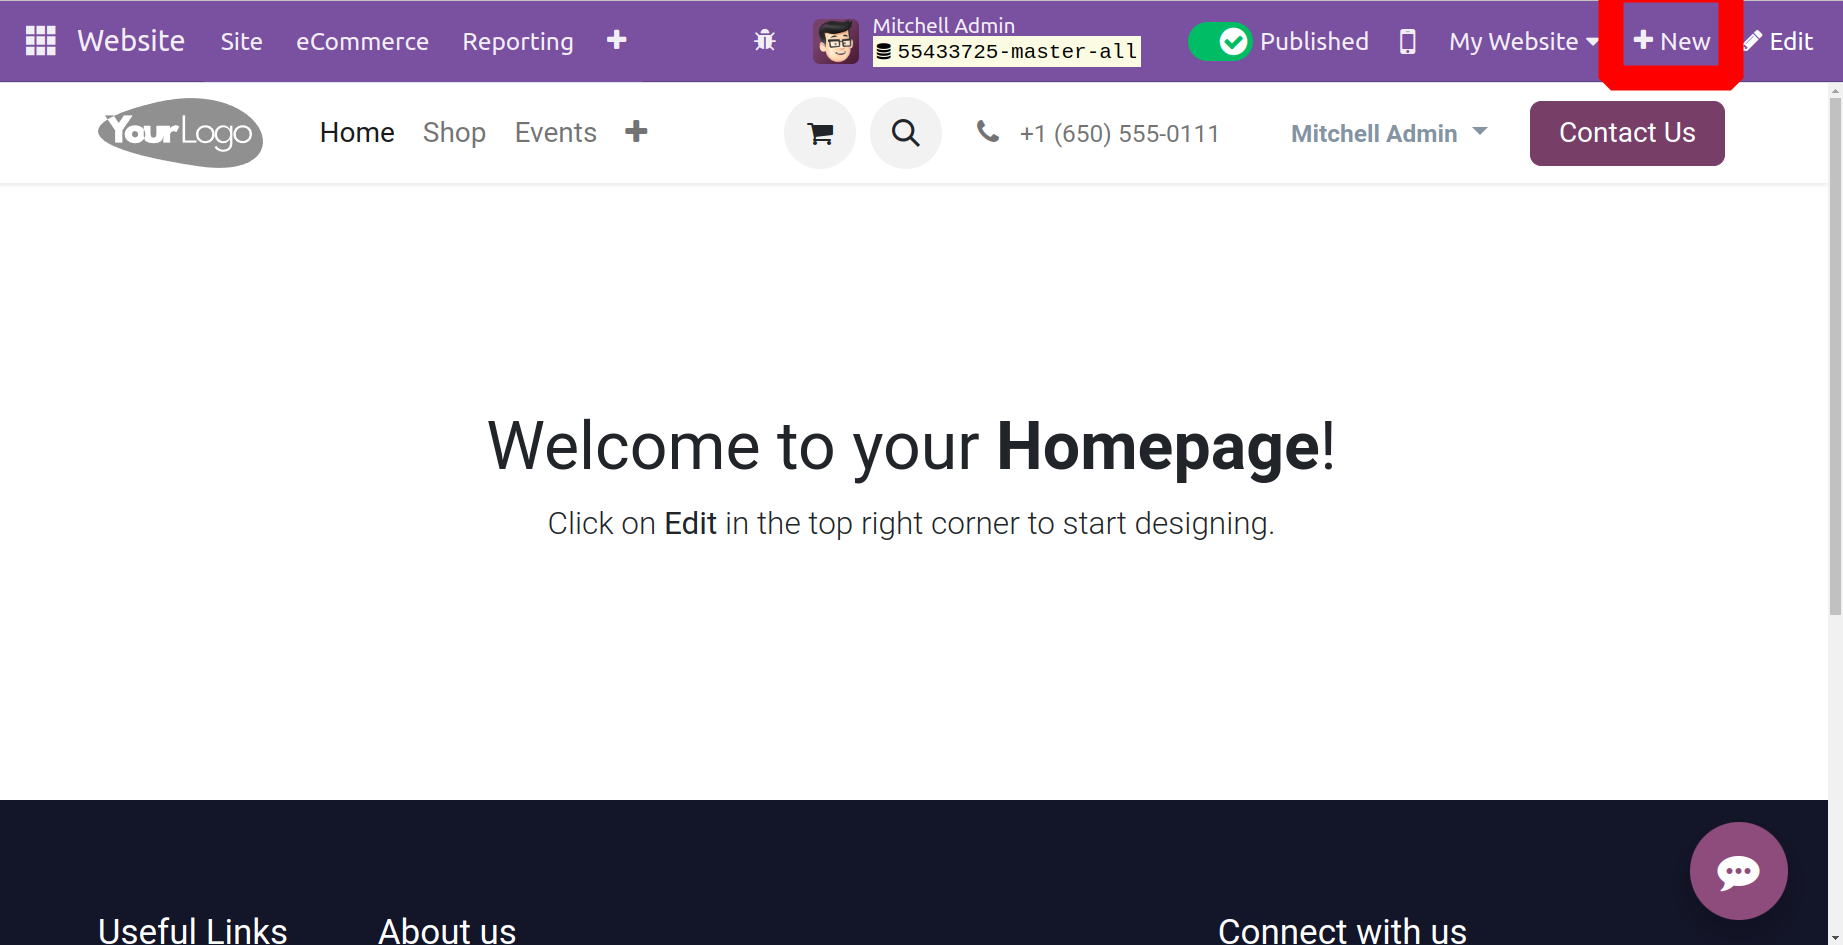
A page, blog post, event, forum, job opportunity, products, courses, and a live chat widget can all be created using the "New Page" option.
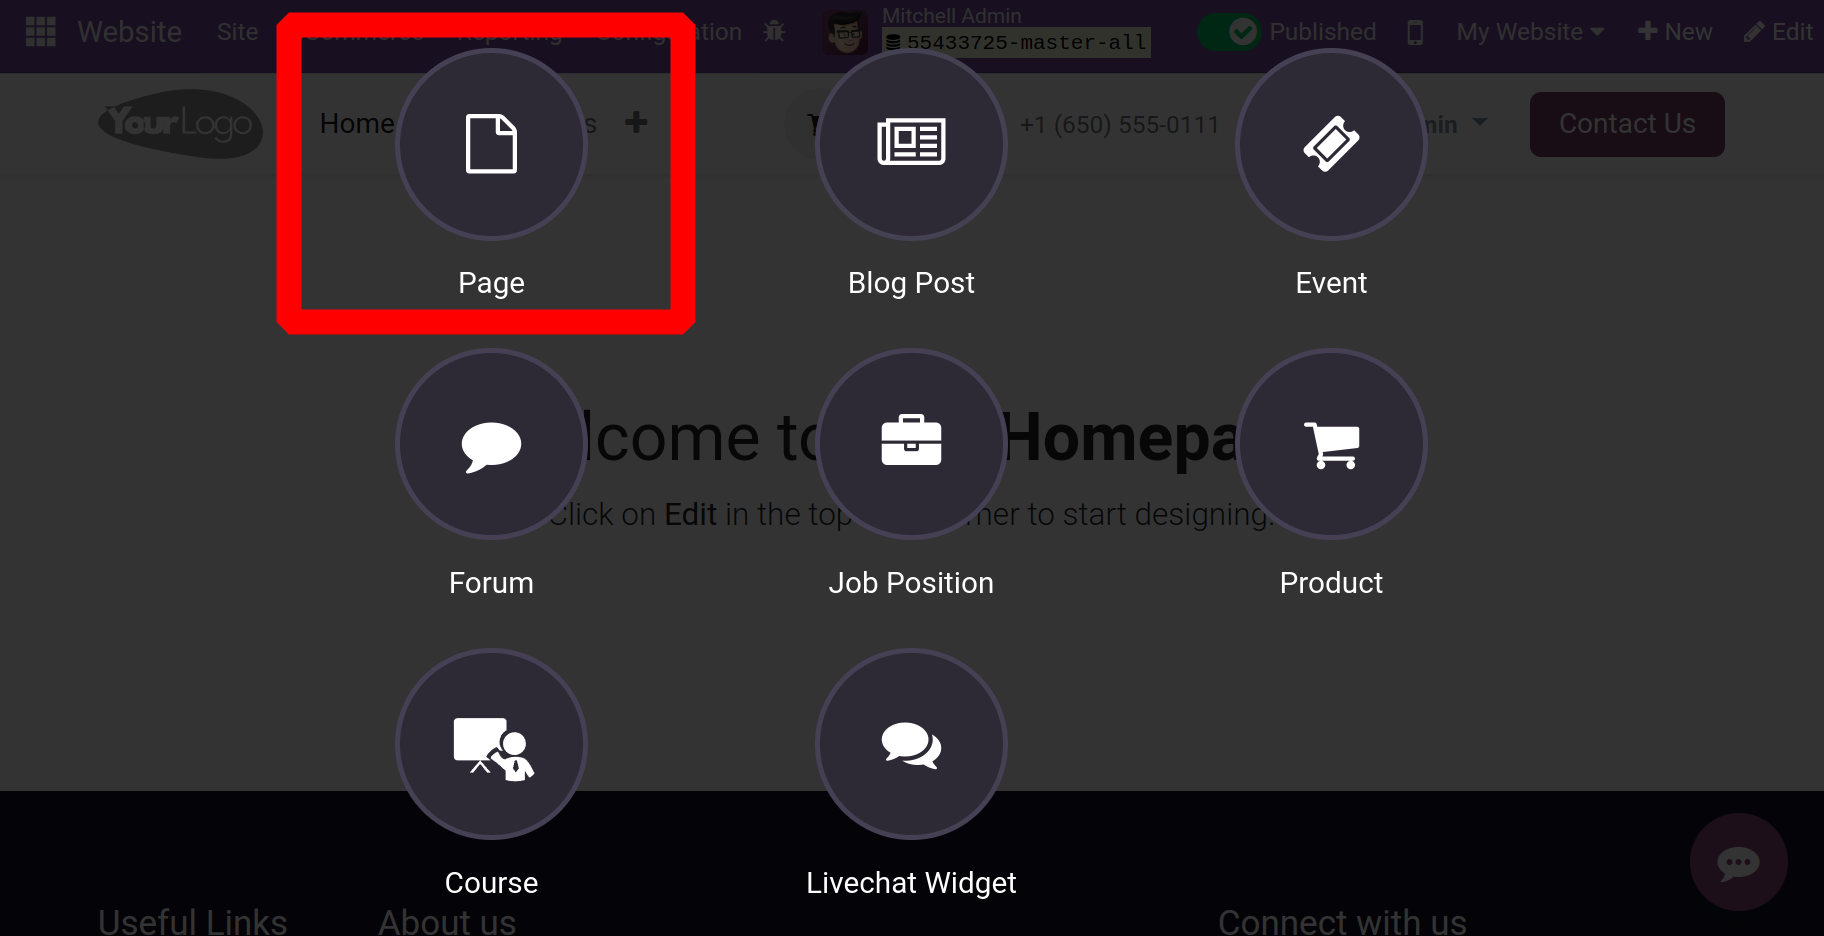
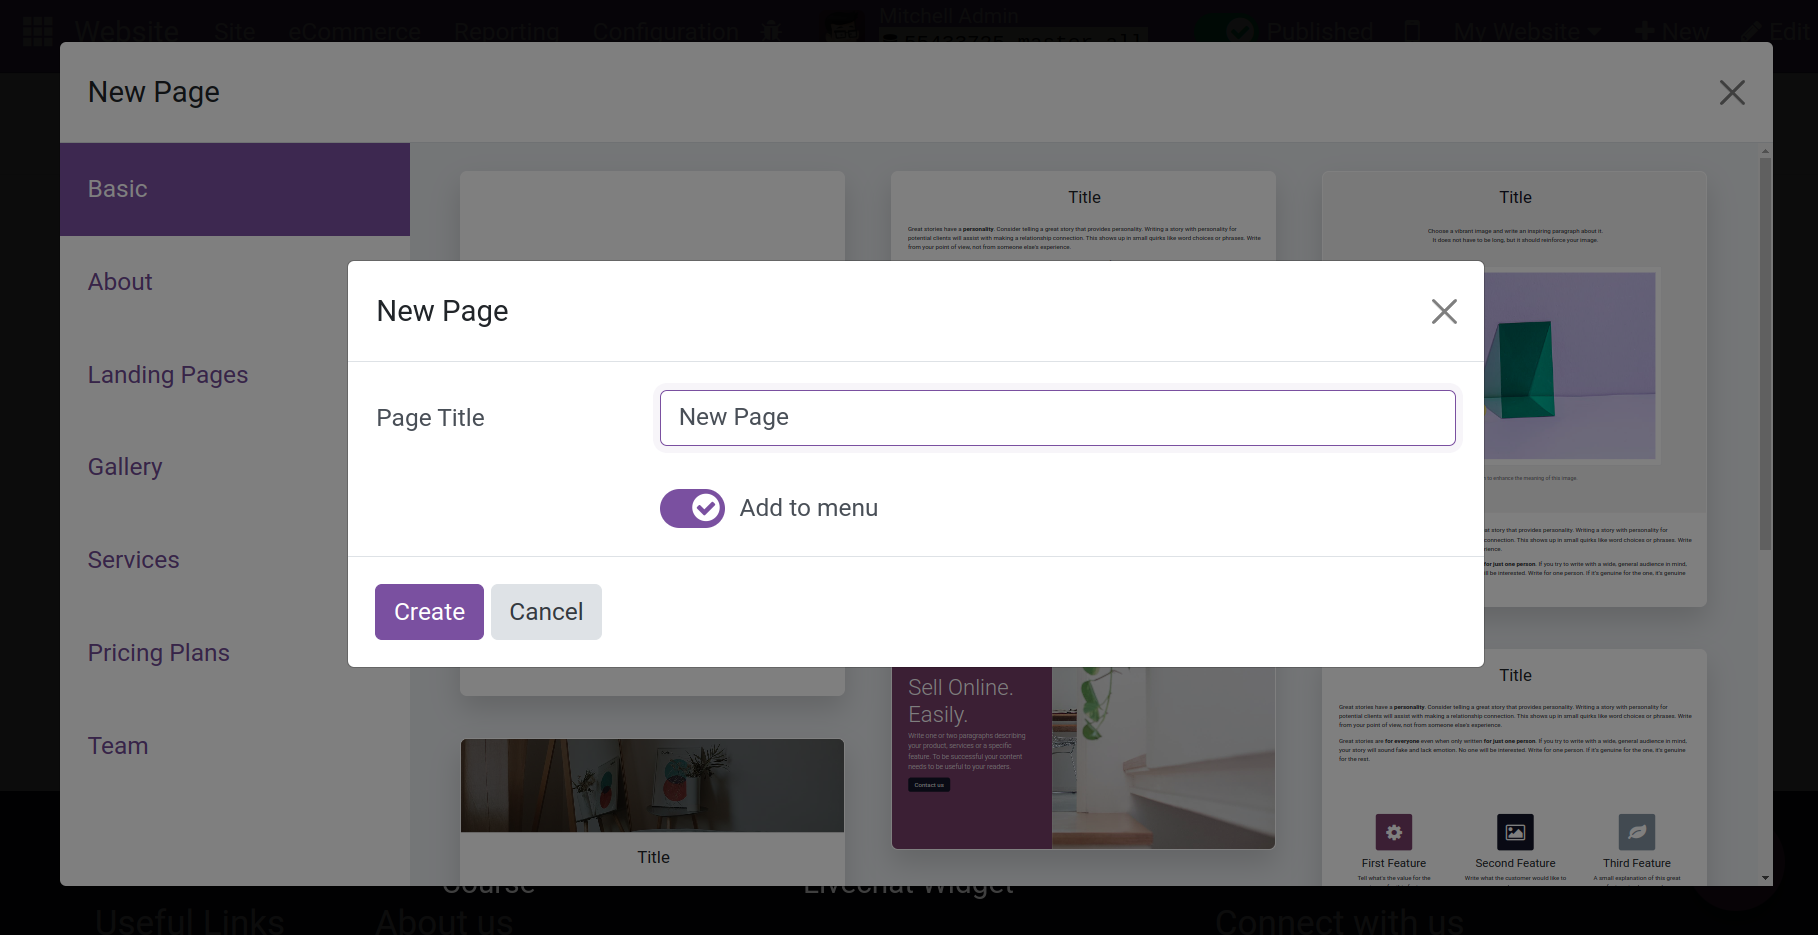
When a user clicks the "Create New Page" option, a new page window will open and the user can choose the page template from the page.
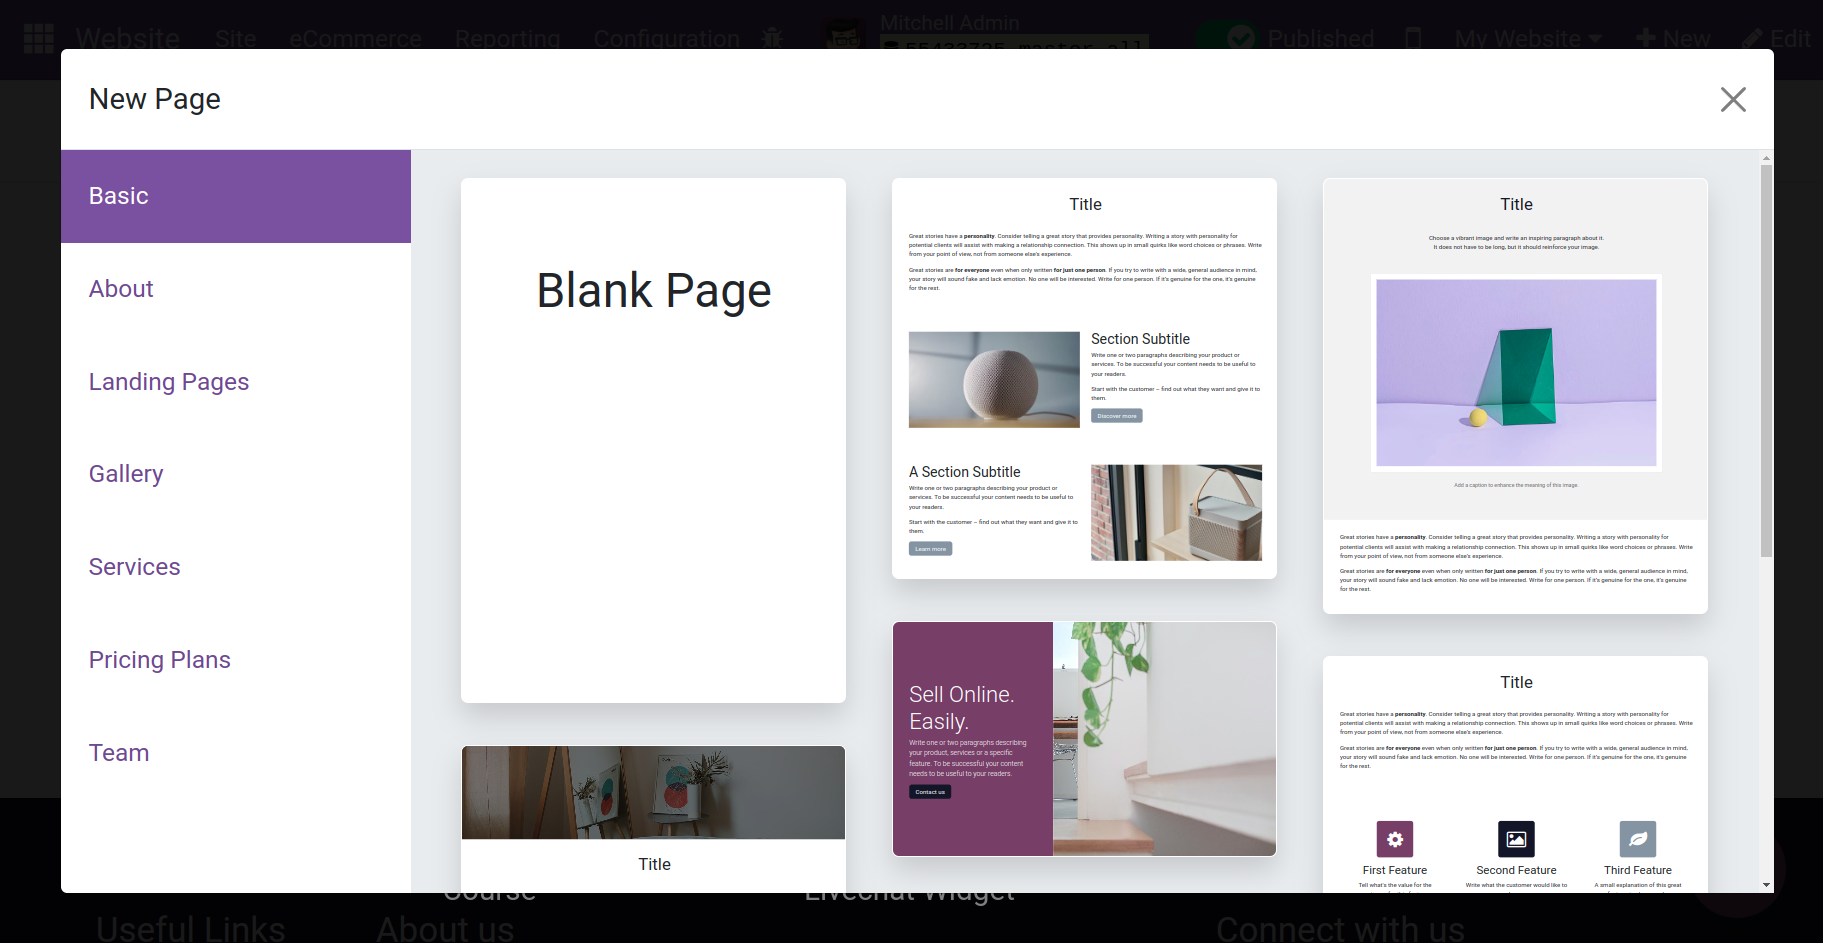
Then a box allowing them to enter and confirm the page title appears. Once the user confirms the entry, the new page is produced and offers various website builders to customize the page as needed.
In Odoo 17, a wide variety of block tools are accessible. Every page of the website has an "Edit" option that will give you access to them. Additionally, users can use this tool from any front-end page of the website. The many block tools available in Odoo can be broadly categorized into four categories: inner content blocks, dynamic content blocks, feature blocks, and structure blocks.
Every block is re-added with an enormous array of options, including Banner Block, Cover Block, Text-Image Block, Image-Text Block, Title Block, Text Block, Numbers Block, Picture Block, Comparisons Blocks, Team Blocks, Call to Action Blocks, References Blocks, Accordion Blocks, Features Grid Blocks, Table of Content Blocks, Pricelist Blocks, Items Blocks, Tabs Blocks, Timeline Blocks, Form Blocks, Map Blocks, Google Map Blocks,Dynamic Snippet Blocks, Dynamic Carousel, Products Blocks, Search Blocks, Blog Post Blocks Blocks, Events Blocks, Newsletter block, Newsletter popup, Popup Block, Facebook Block, Countdown Block, Discussion Group Block, Twitter Scroller, Alert Block, Rating Block, Card Block, Share Block, Newsletter Block, Text Highlight Block, Chart Block, You can drag and drop the Progress Bar Block, Badge Block, Blockquote Block, Donation Button Block, Add to Cart Button Block, and Rental Search Block to the desired location.
With the Customize and Theme options, the user can adjust the block while dragging and dropping it.
One can add a new snippet to the screen by just dragging and dropping it there. If one of the snippets is selected, it can also be altered based on how the page is used. Thus, the customizing feature improves the screen's usability and aesthetic appeal.
Select the snippet titled Image-Text, for instance. From there, you may alter the text and images alike. To do so, select the CUSTOMIZE section from the menu on the right side of the screen.
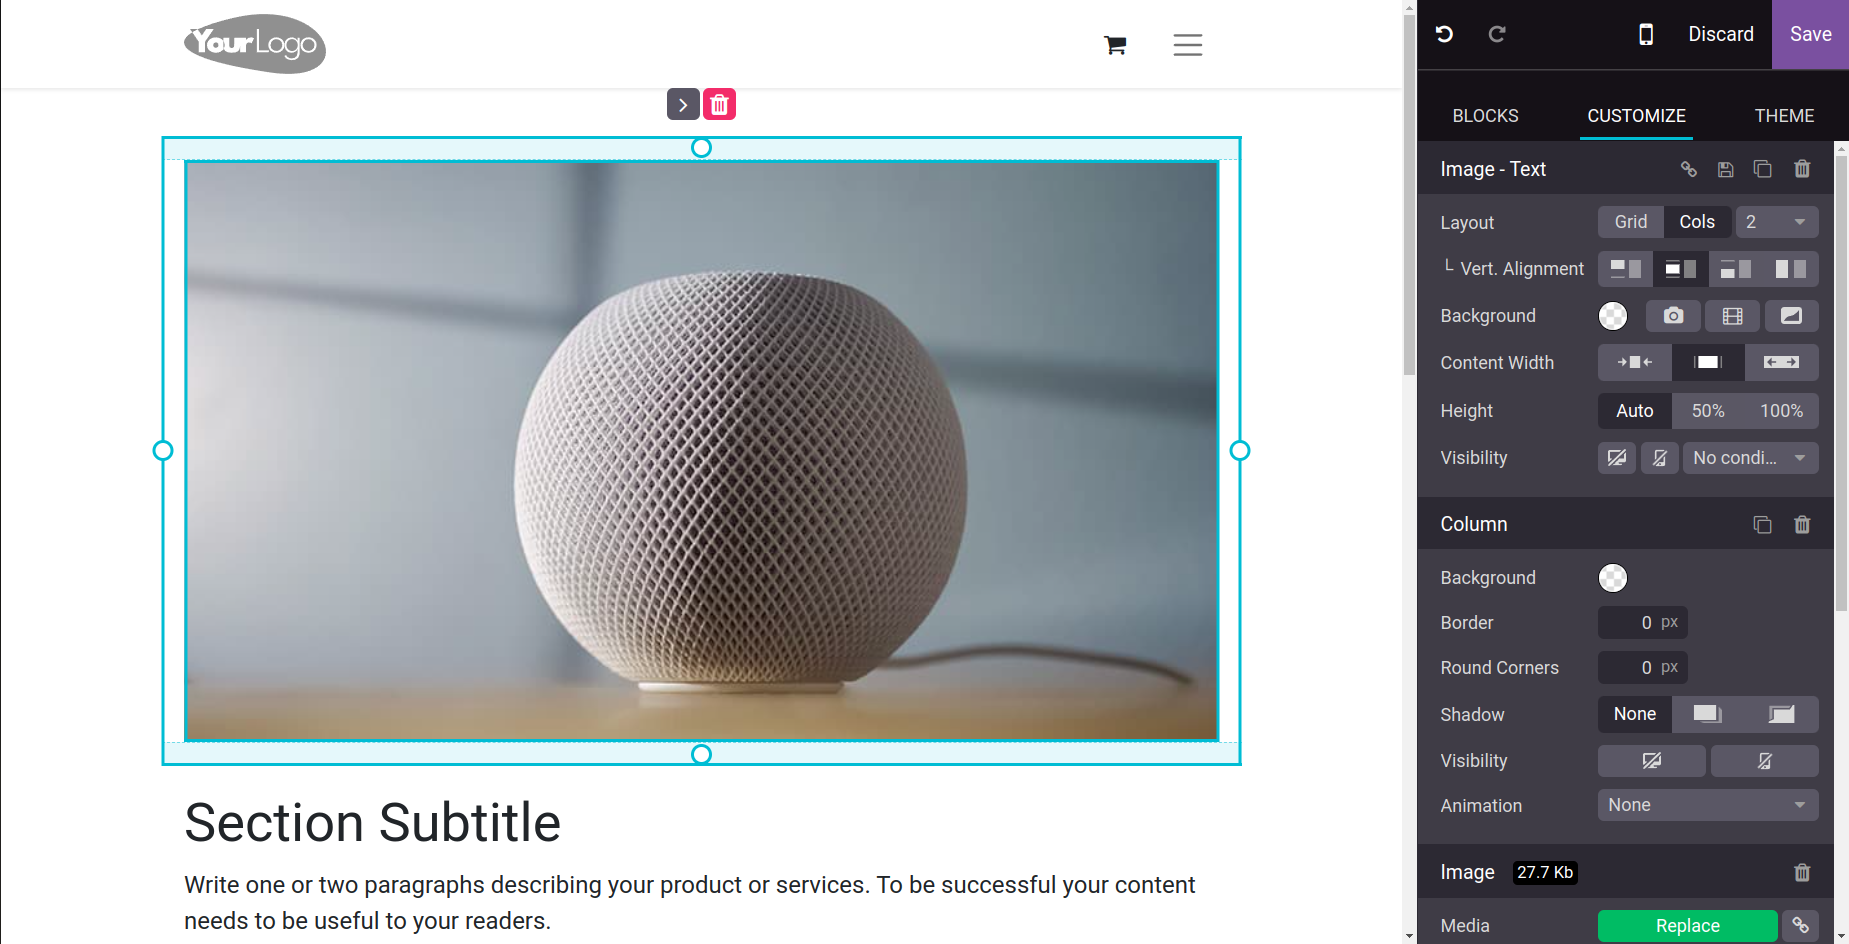
The user can change the image's layout using the Layout option. Vertical alignment, backdrop, content width, height, and visibility can all be easily changed with the appropriate selections. The user can then alter the background color in the next section. Next are the border, rounded corners, visibility, shadow, and the option to add text and picture animations.
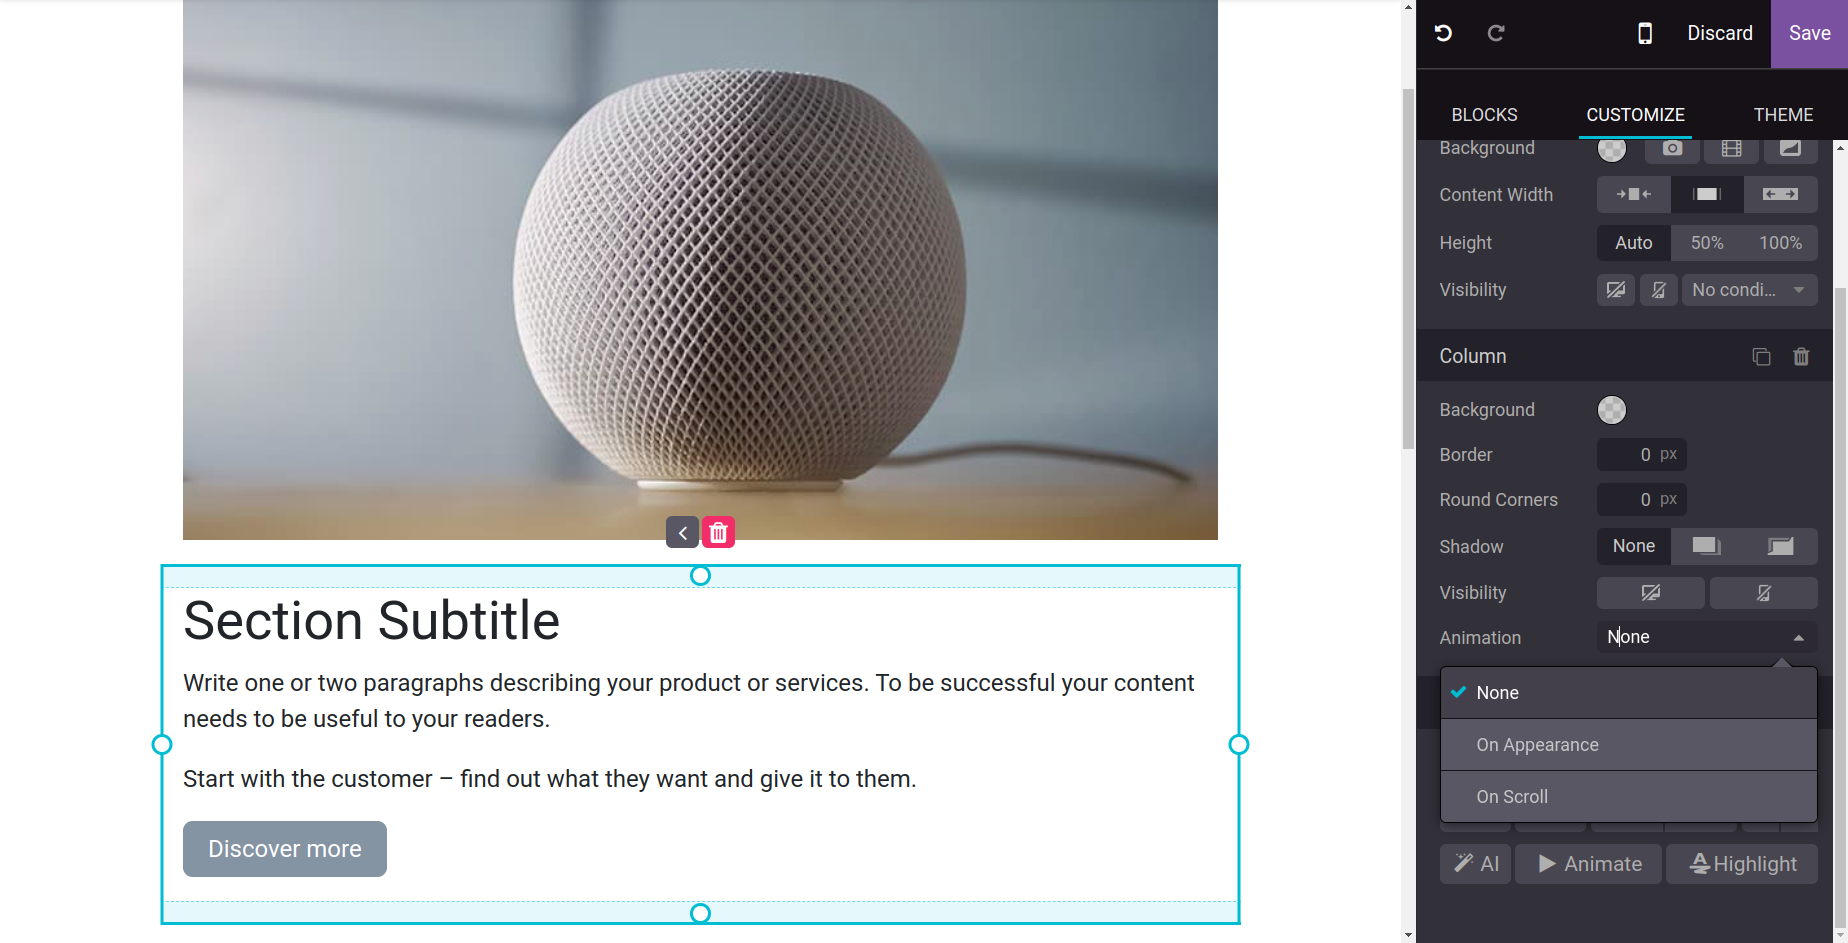
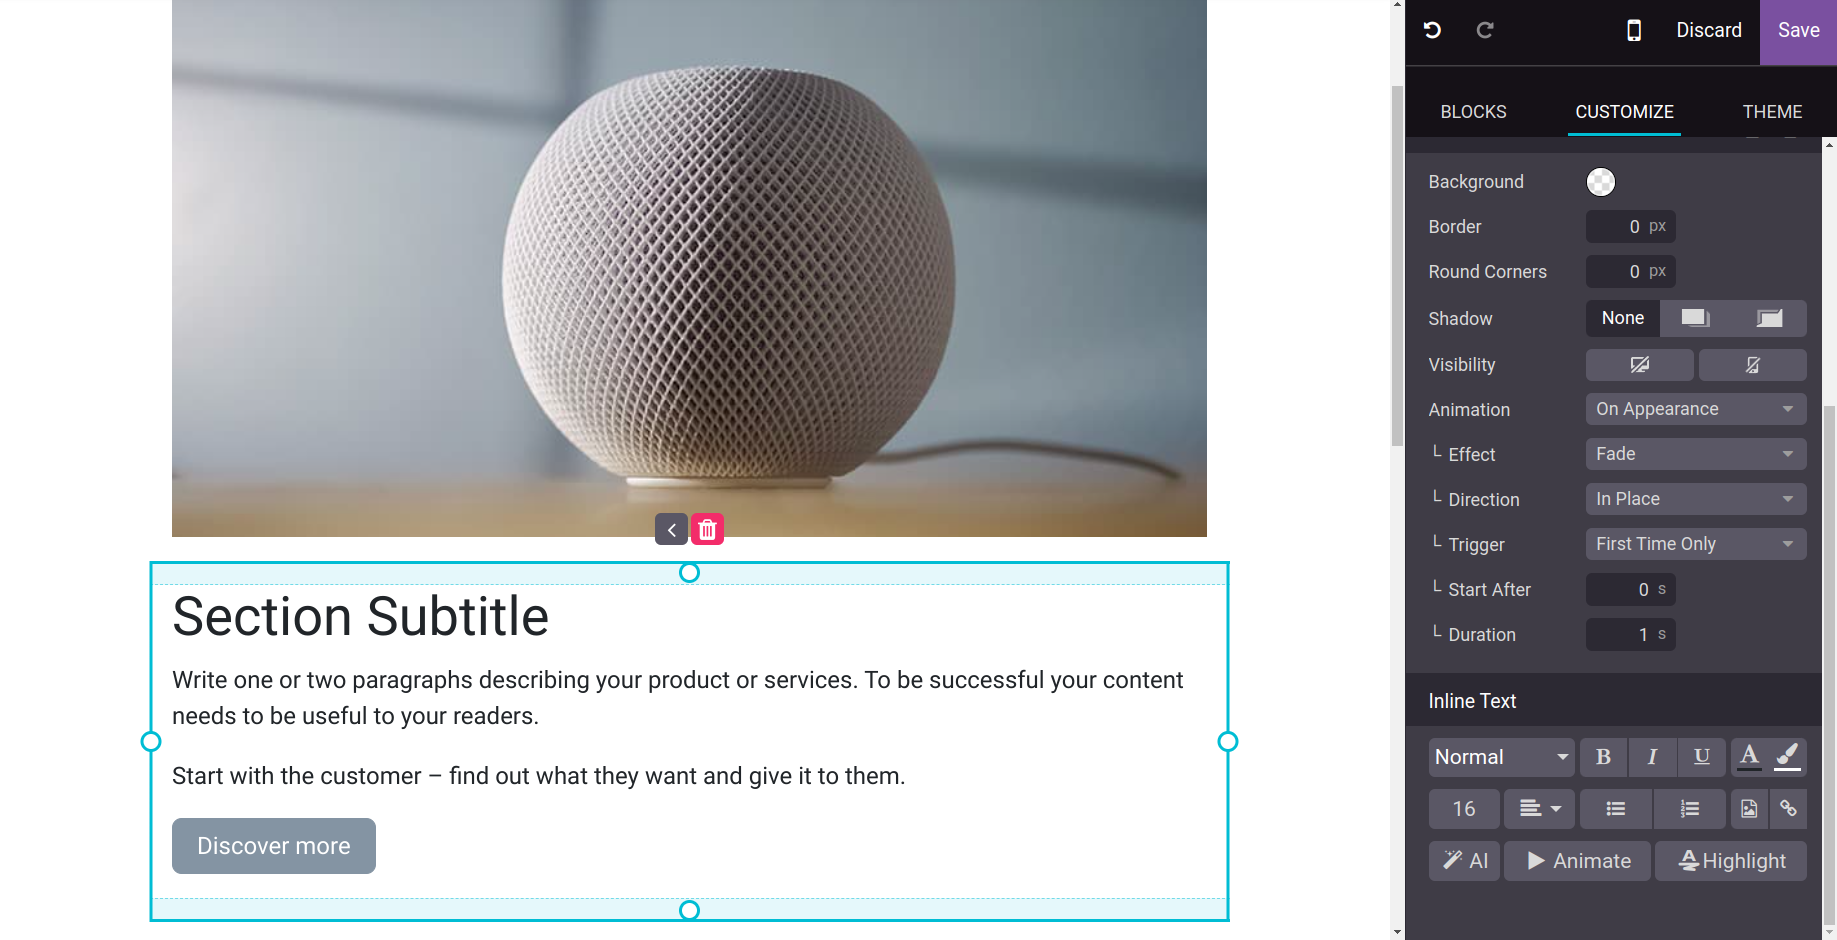
The effect, direction, trigger, time length, and other parameters can be set if the animation is selected.

Next, the text orientation and those modifications can be made in the Inline Text box by using this customized element. You can also use a text highlighter here.
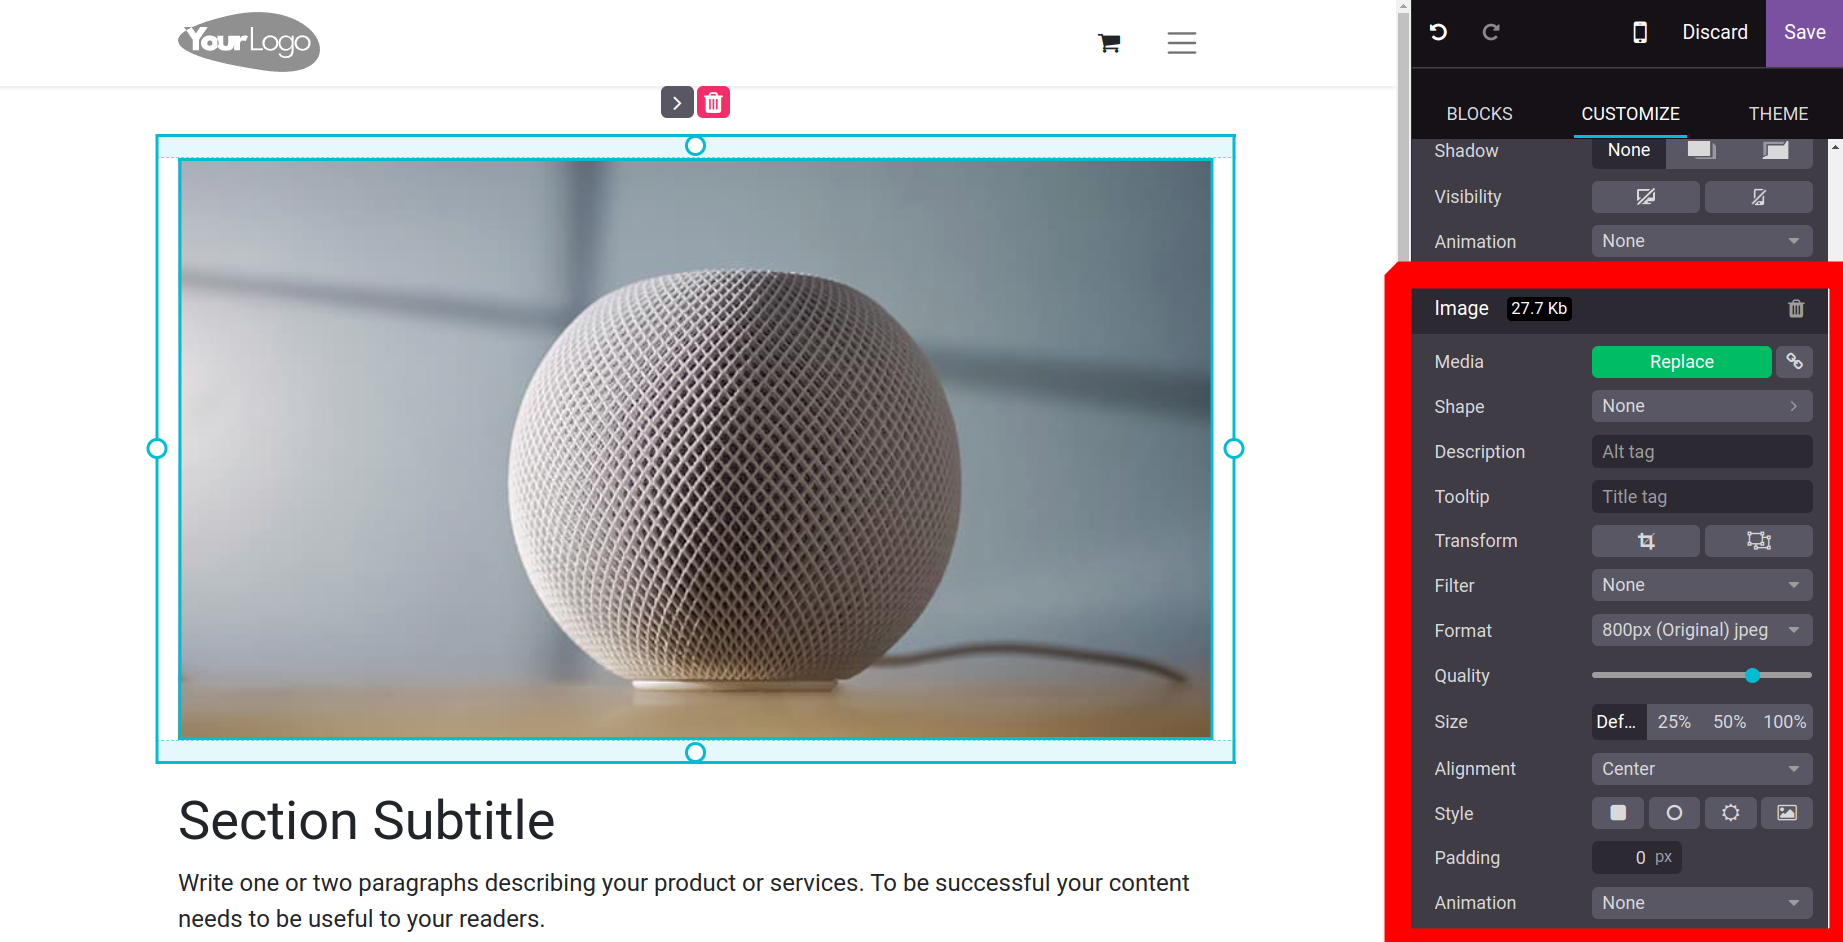
If the user chooses image customization, they can change the image, add new tooltips and descriptions, and modify the format, quality, size, transform, filter, and filter. Then, another option to alter the image's shape appears.
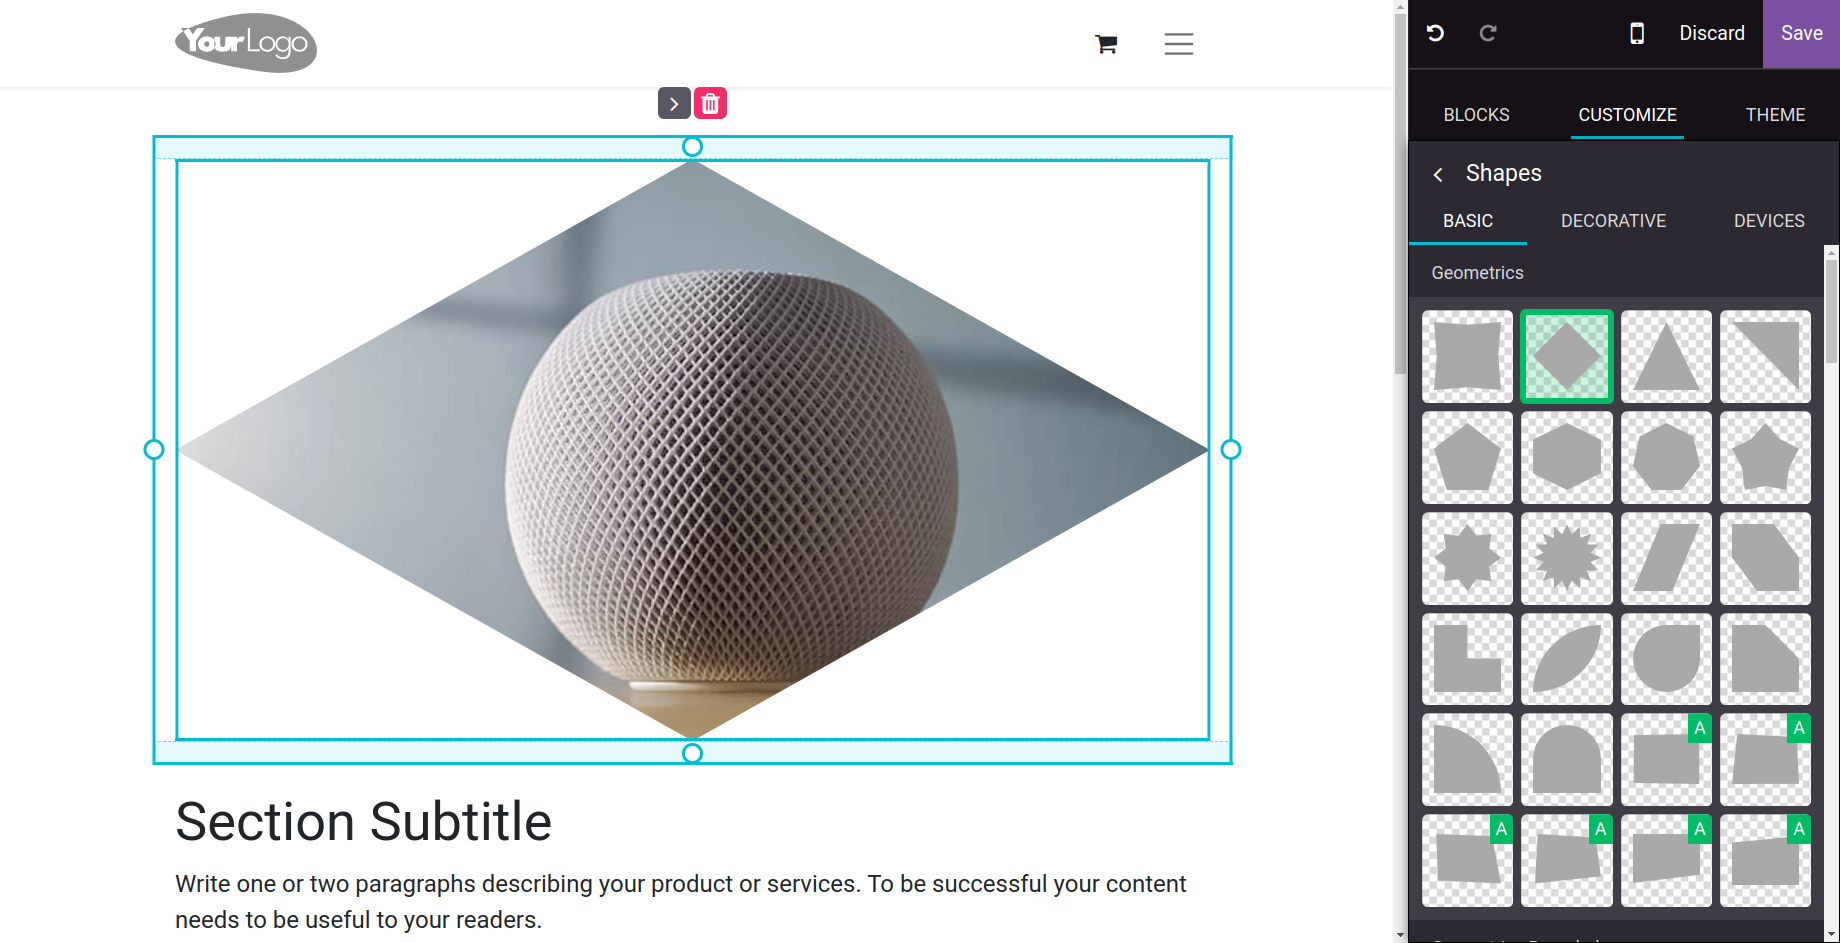
The user will get a list of several shapes, such as diamond, square, and rectangle, when they click on the shapes option. After that, the user only needs to select one.
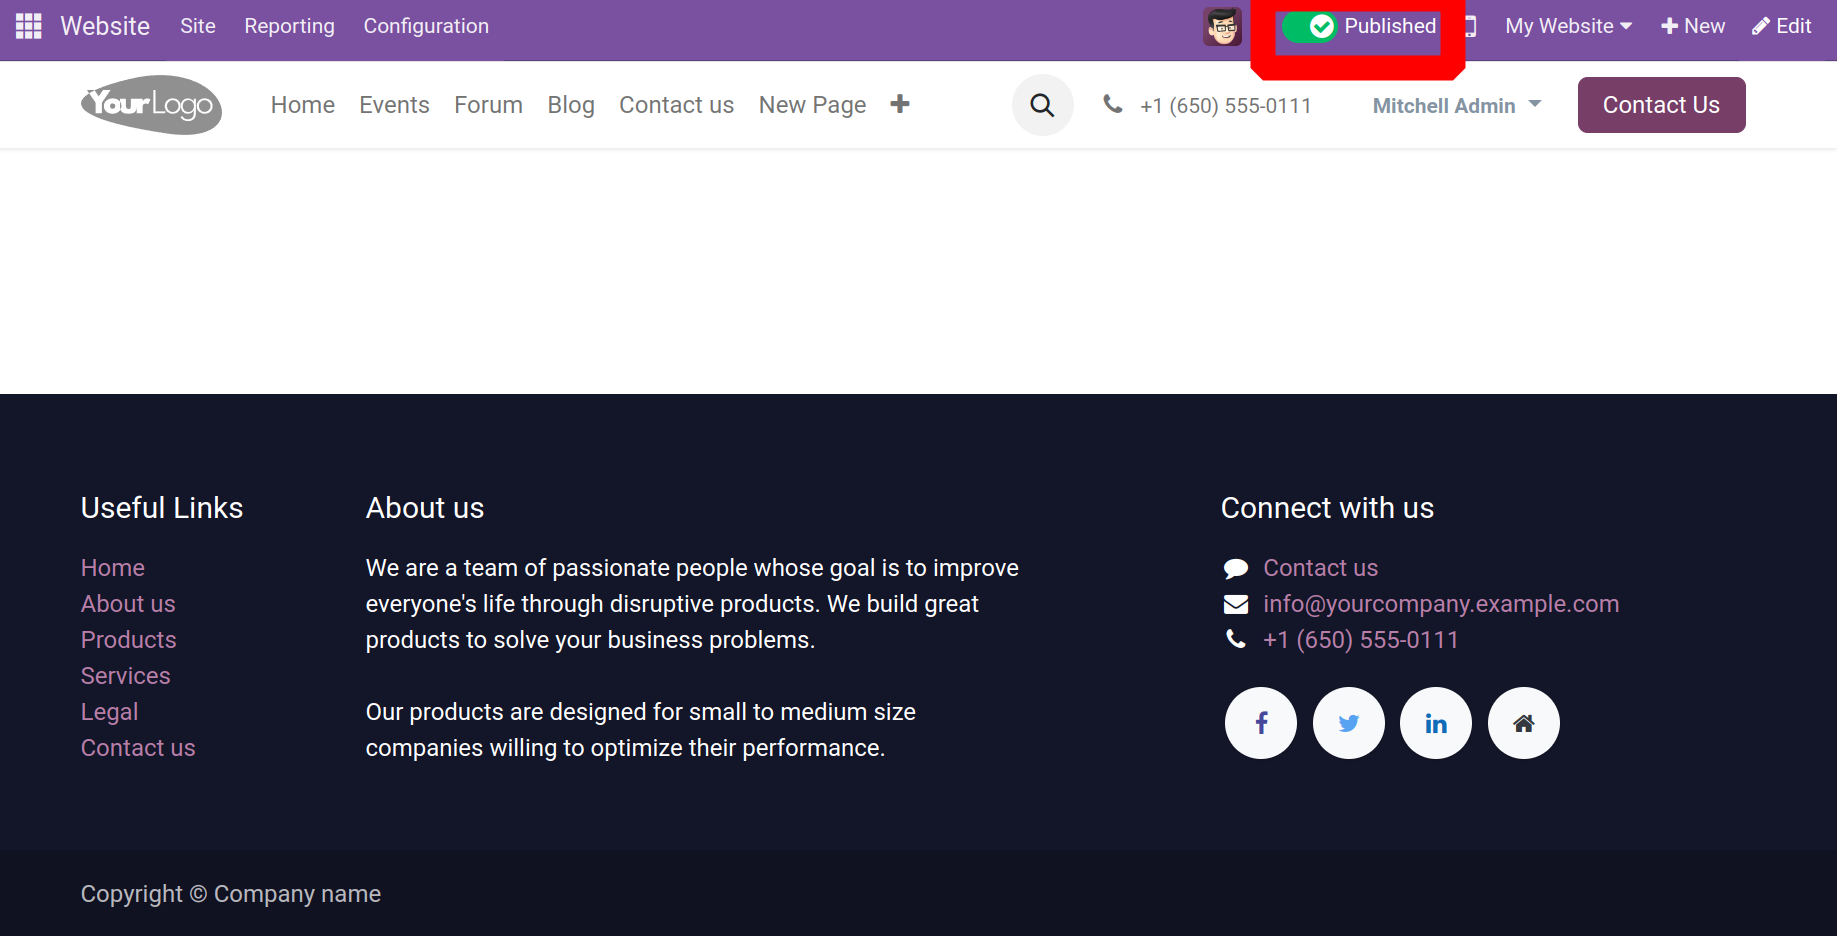
Then the Page can be Published using the button added at the top of the screen.
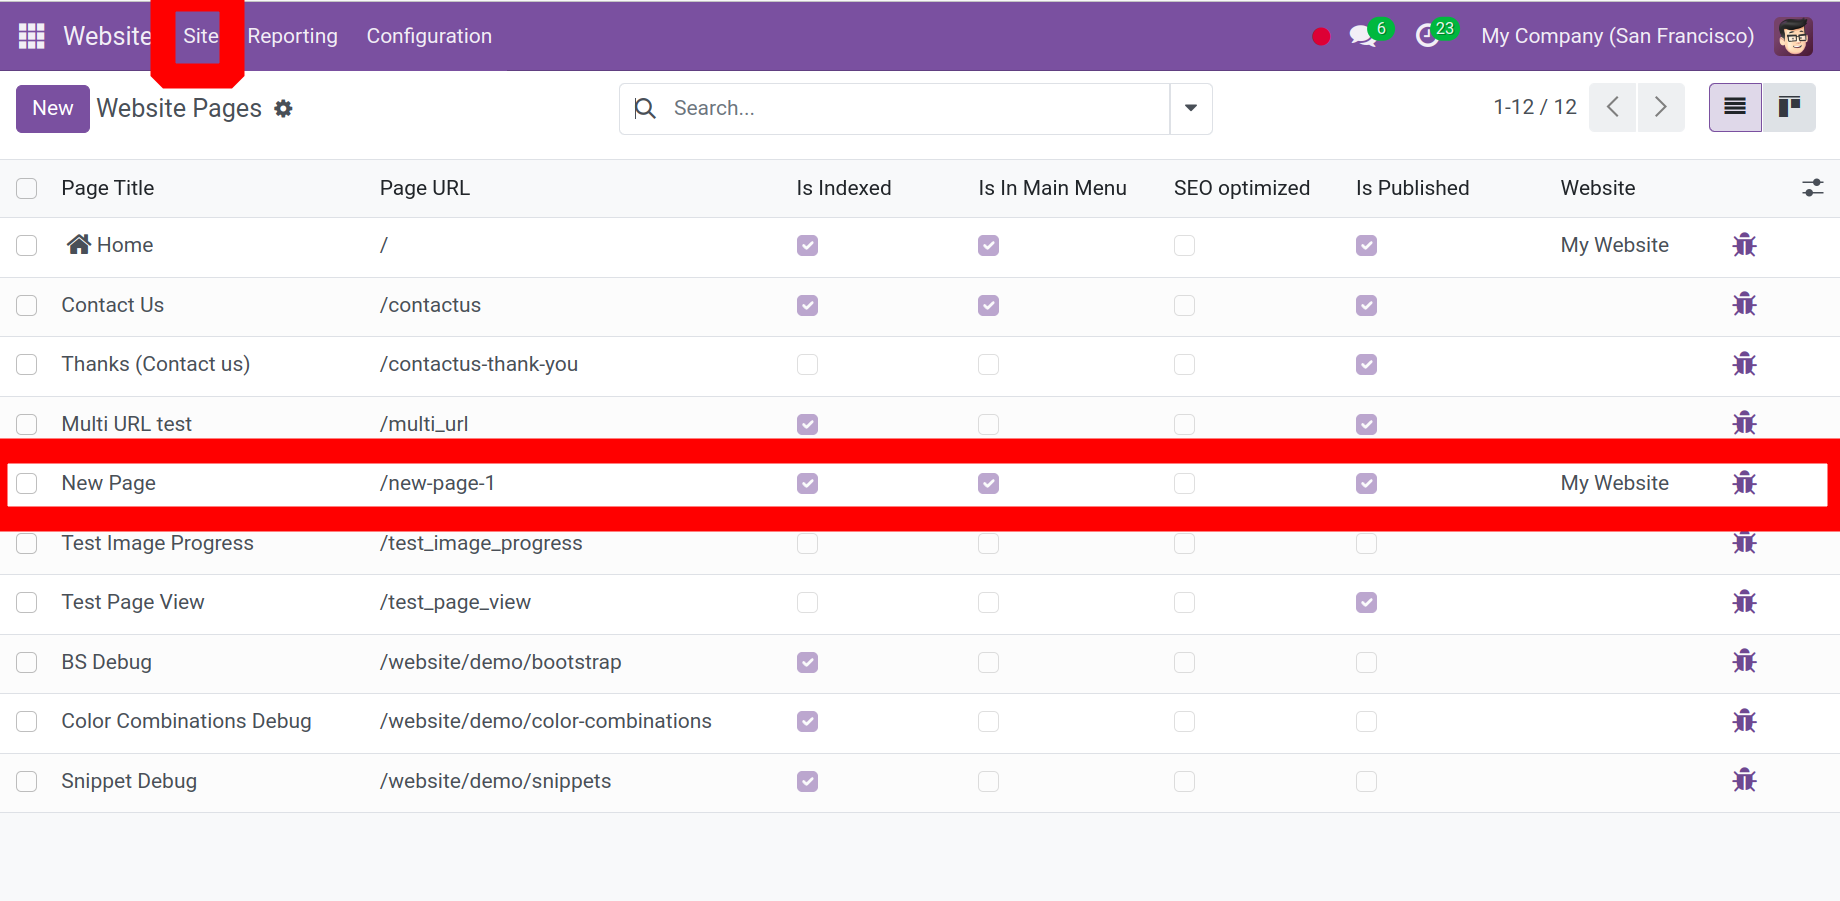
Then check the Page available under the Site menu. There inside the list, users can view the created page.
Blogs
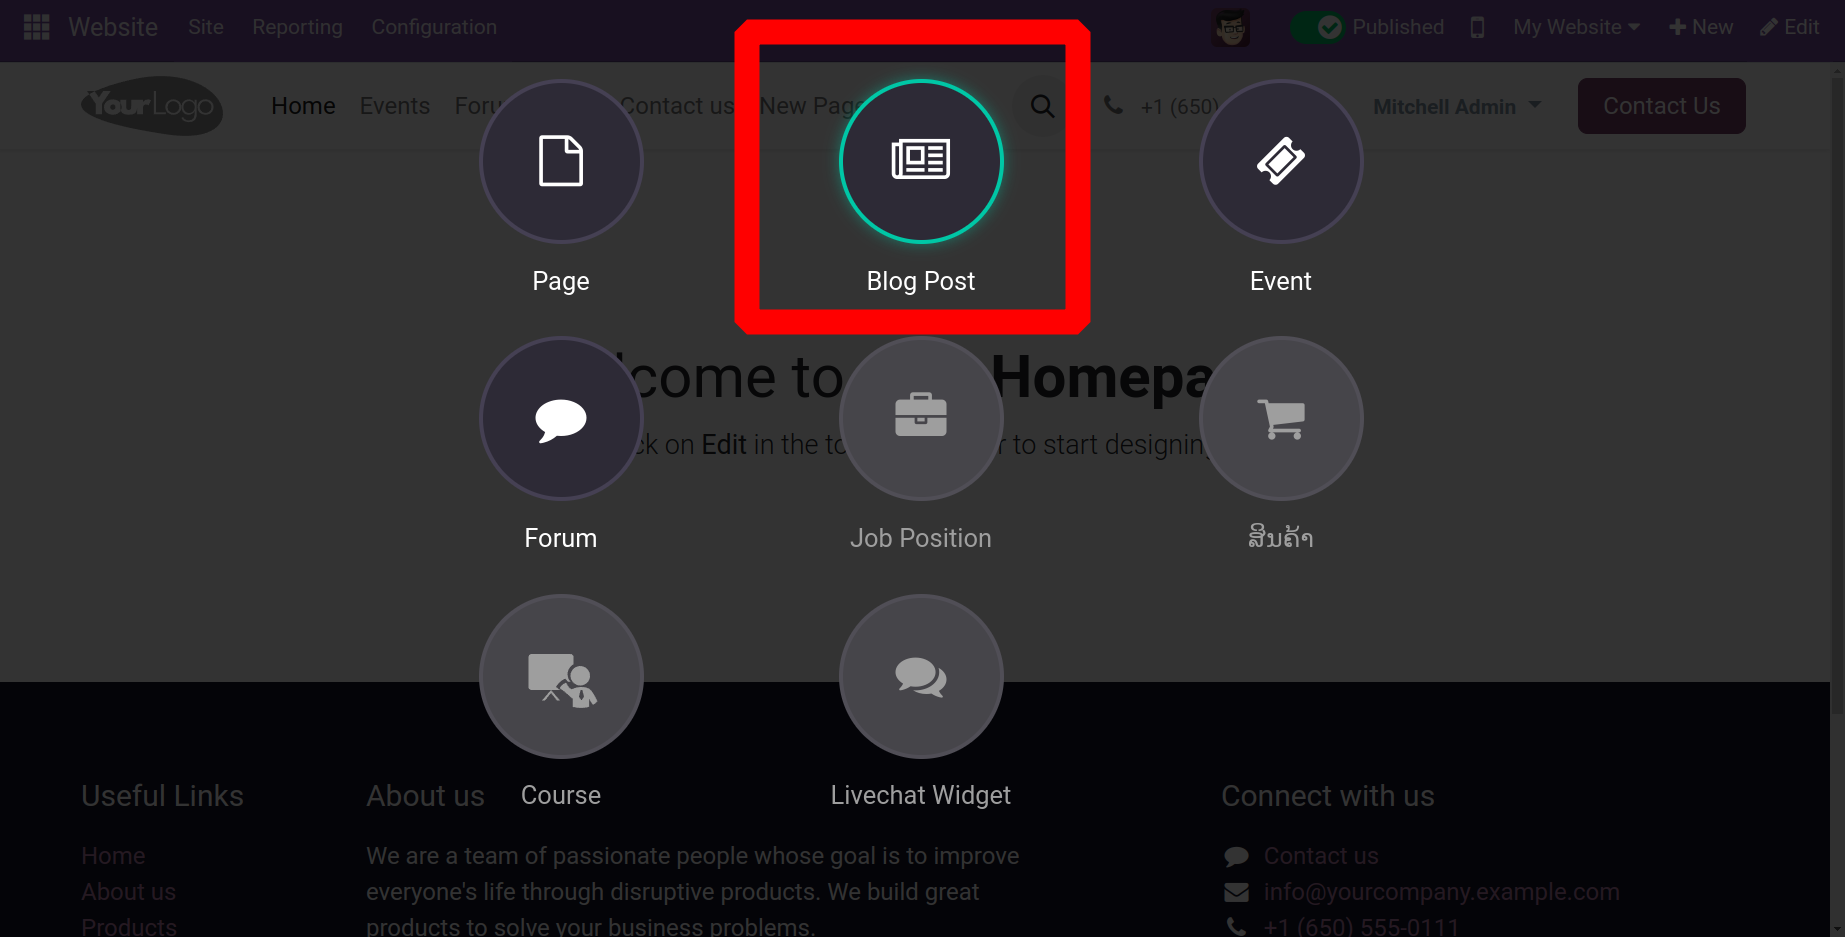
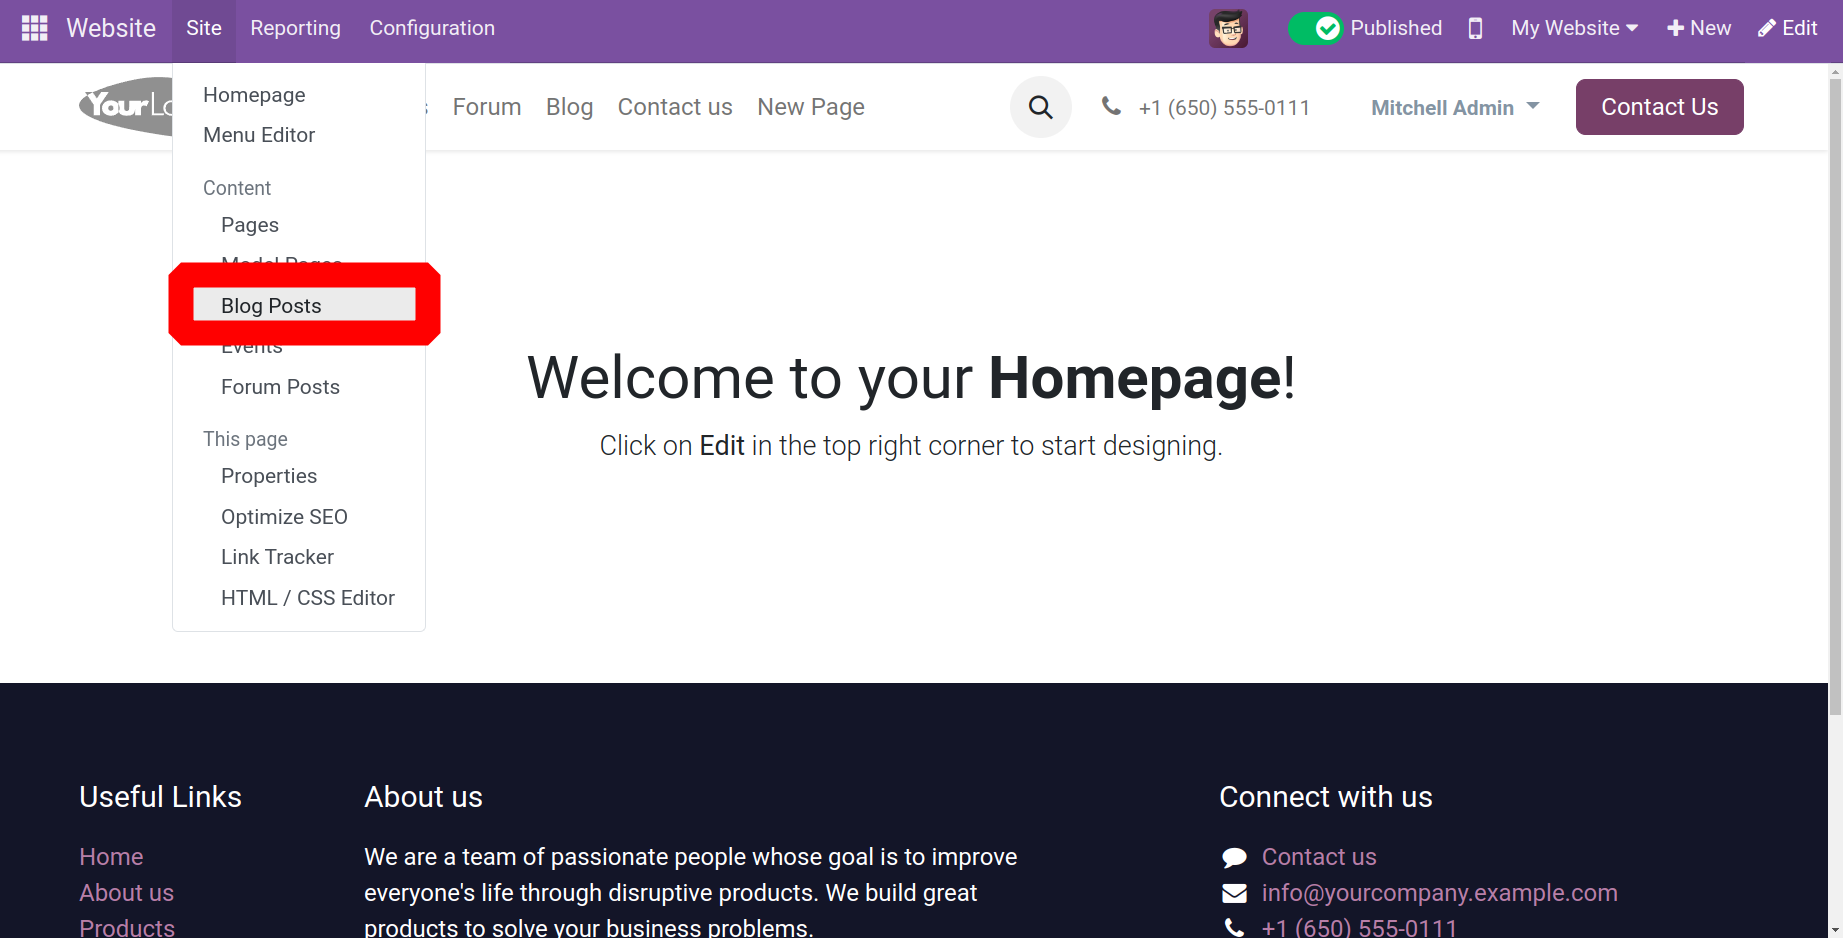
Let's return to the website and select the Blog option from the New menu located on the window's right side, as illustrated below.
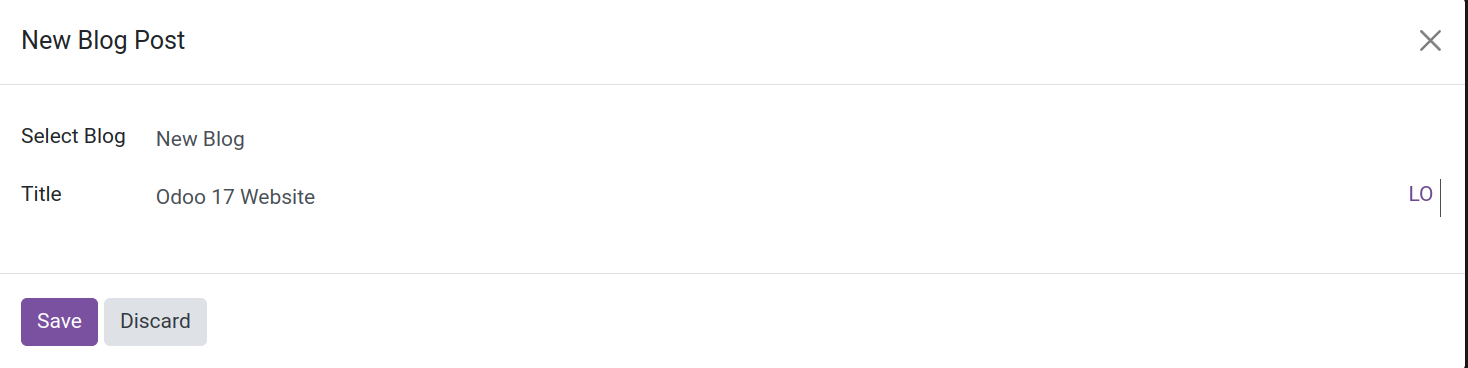
Following the selection of the Blog Posts option, a popup will show up asking the user to choose the blog name that was created, as indicated below.
Upon choosing the blog that we have previously made, we are presented with the opportunity to add content that is necessary for the blog. In addition, the user has the ability to add blocks, modify the theme, and further customize the page and content, as illustrated below.
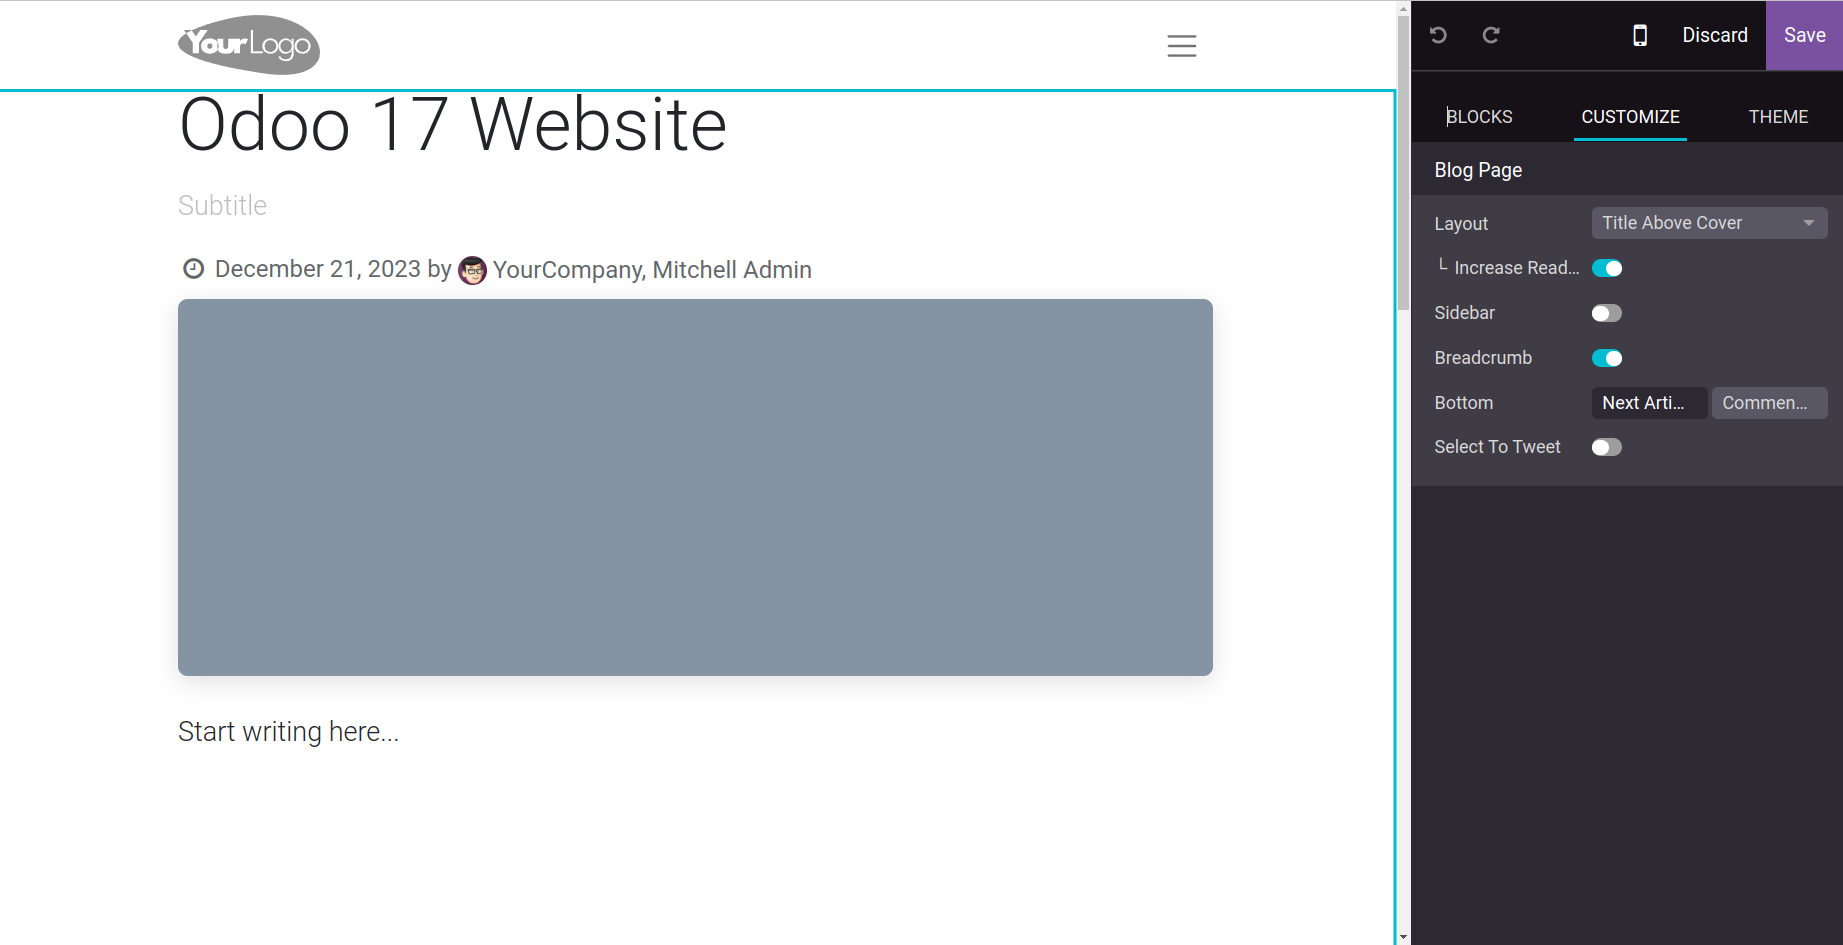
With the help of Odoo 17 capabilities, users may personalize blog articles and their content. For example, they can choose to have the Layout set to Title Inside Cover and Title Above Cover. Title Above Cover: As seen here, the blog title is displayed above the cover.
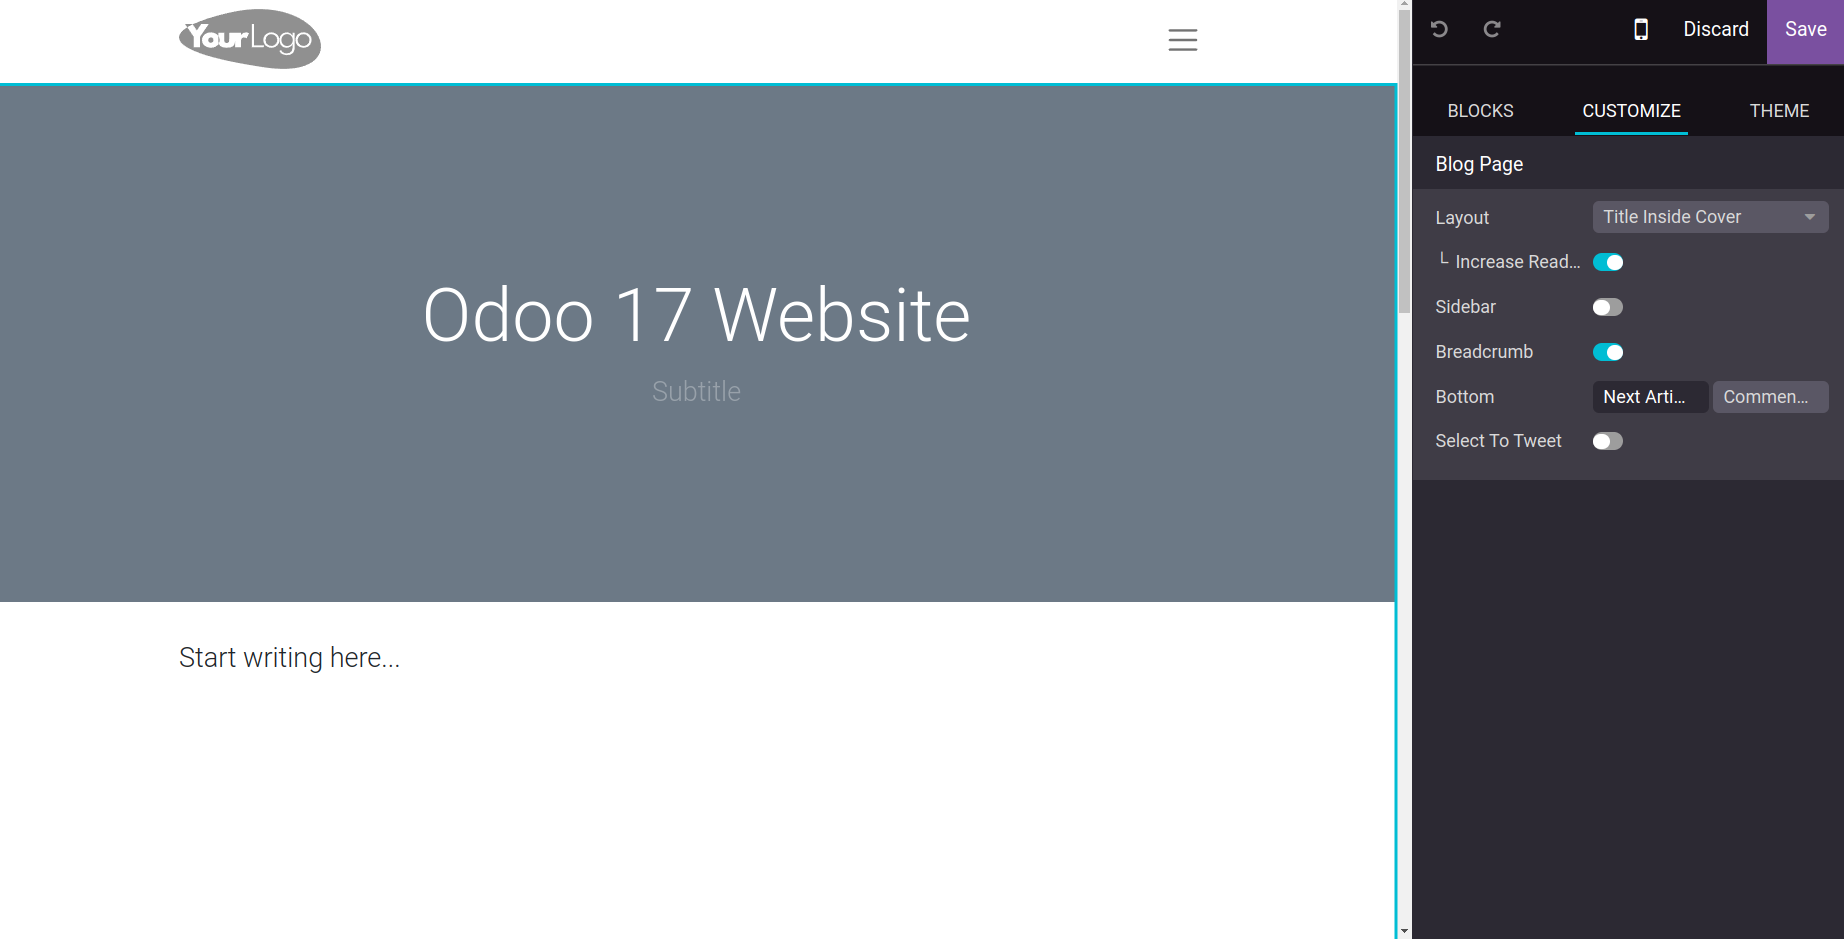
Additionally, the blog topic will be positioned inside as indicated above when the layout is set to Title Inside Cover.
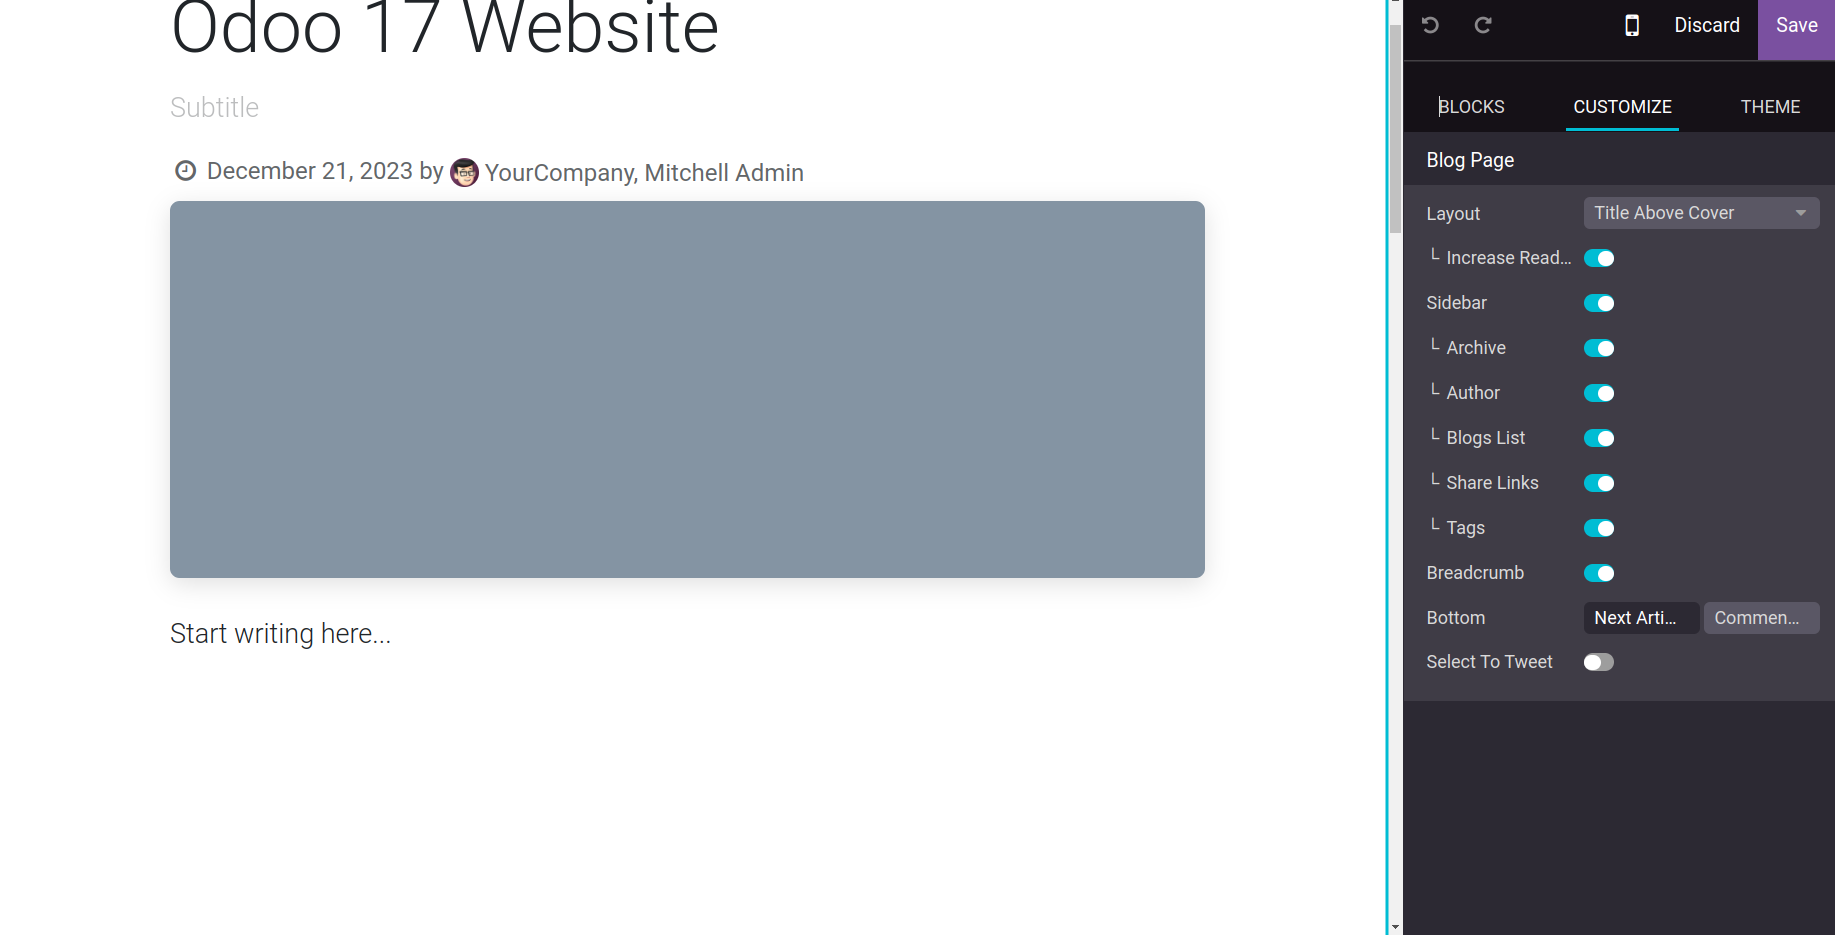
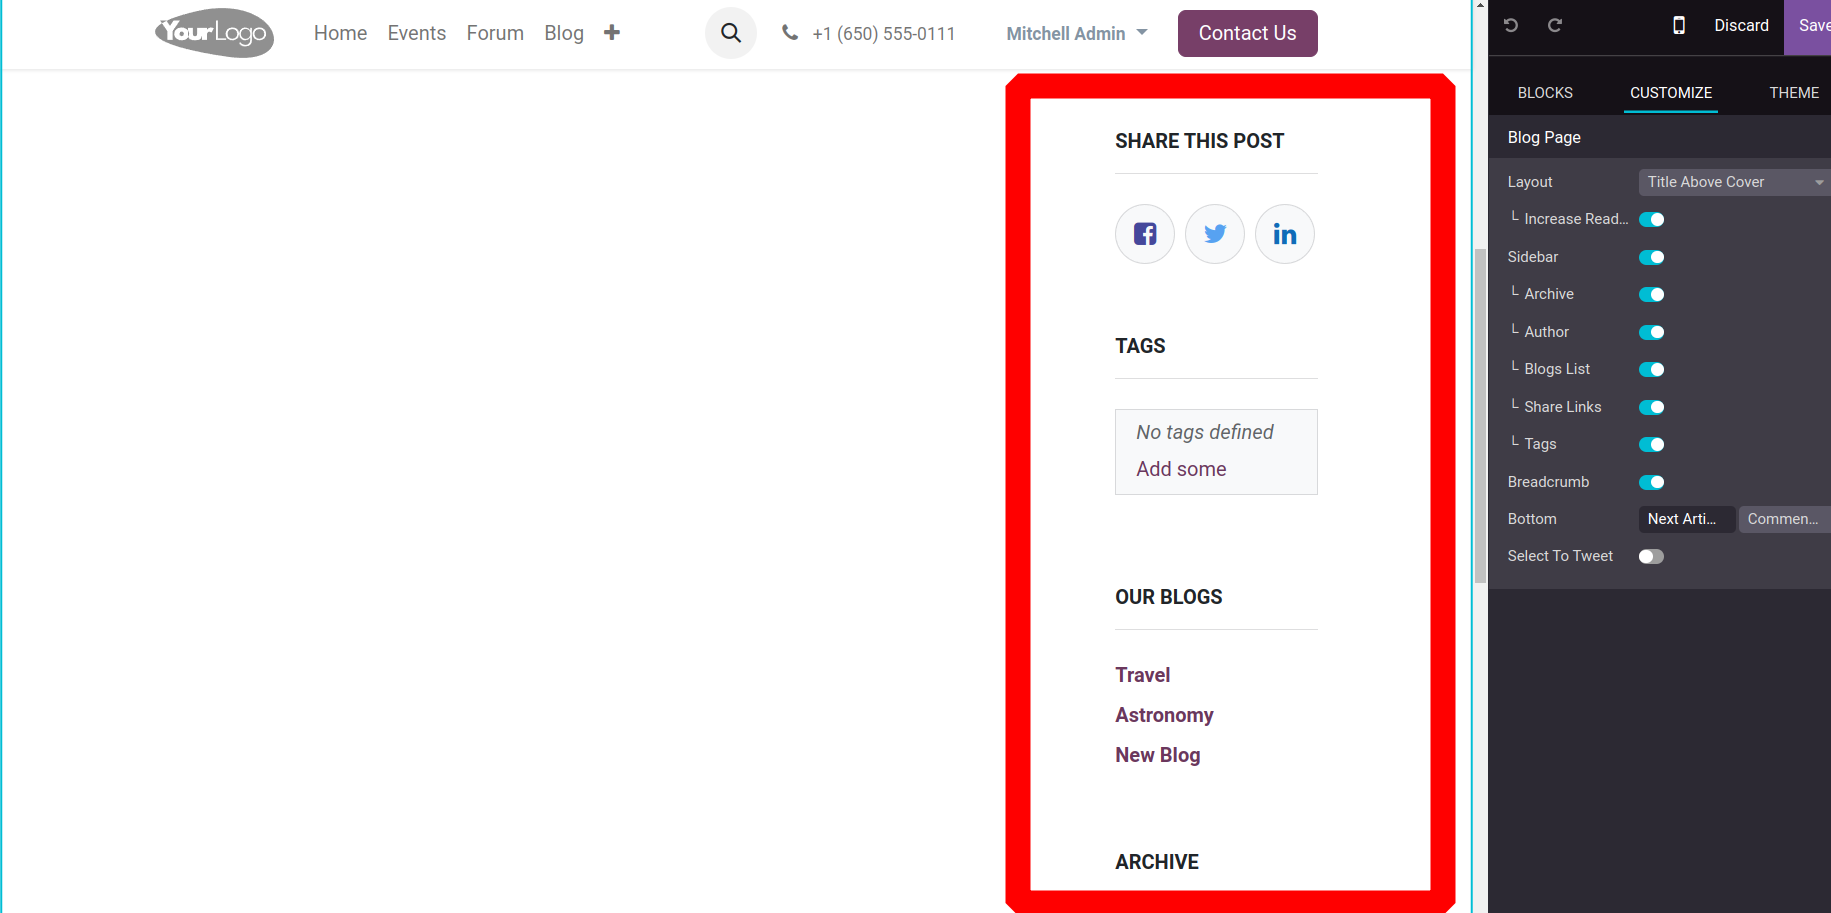
Additionally, the user can choose to enable the SideBar, which adds extra information to the side of the blog such as the ability to share posts, tags used in posts, and much more, as seen above. The user can also increase the readability field, which improves the blog's content and makes it more visible to the user.
The website module's Site menu provides access to the blog creation tool if the user needs it. This feature facilitates the user's ability to write and publish various blog entries on the website.
and a box where one may create blogs will display when we select the Blog Post option, as seen below.

You can start a new blog by selecting the New option, where you can give the blog a name, link it to a website, and choose which blog was started here. Only the website you specify in the Website field will have the blog post published there.
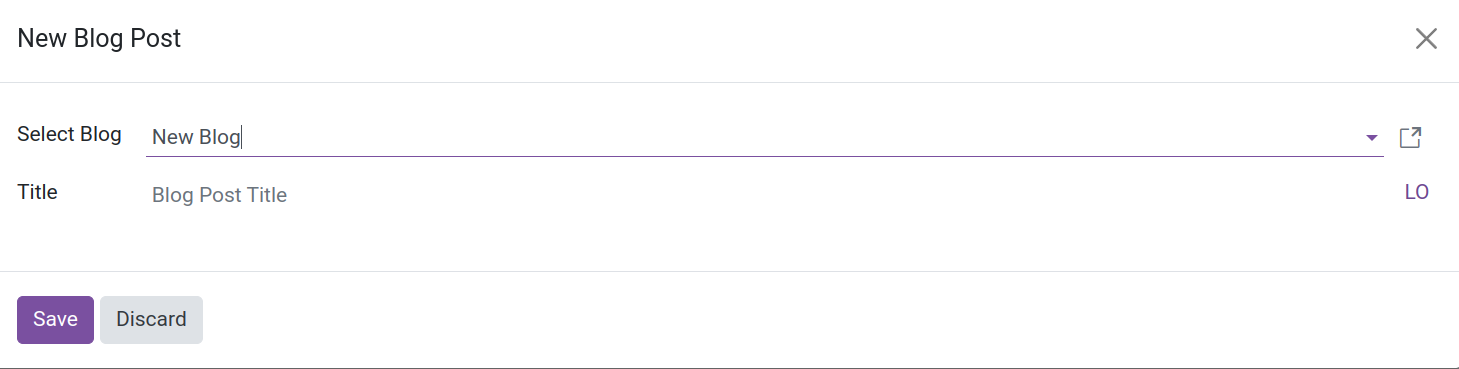
As seen below, let's establish a new blog and give it the name New Blog.
Events
A single, all-in-one platform for managing events of any size or scope. All aspects of an event planner's work, including visibility and promotion, ticket sales, and event planning, are managed by Odoo 17 Events.
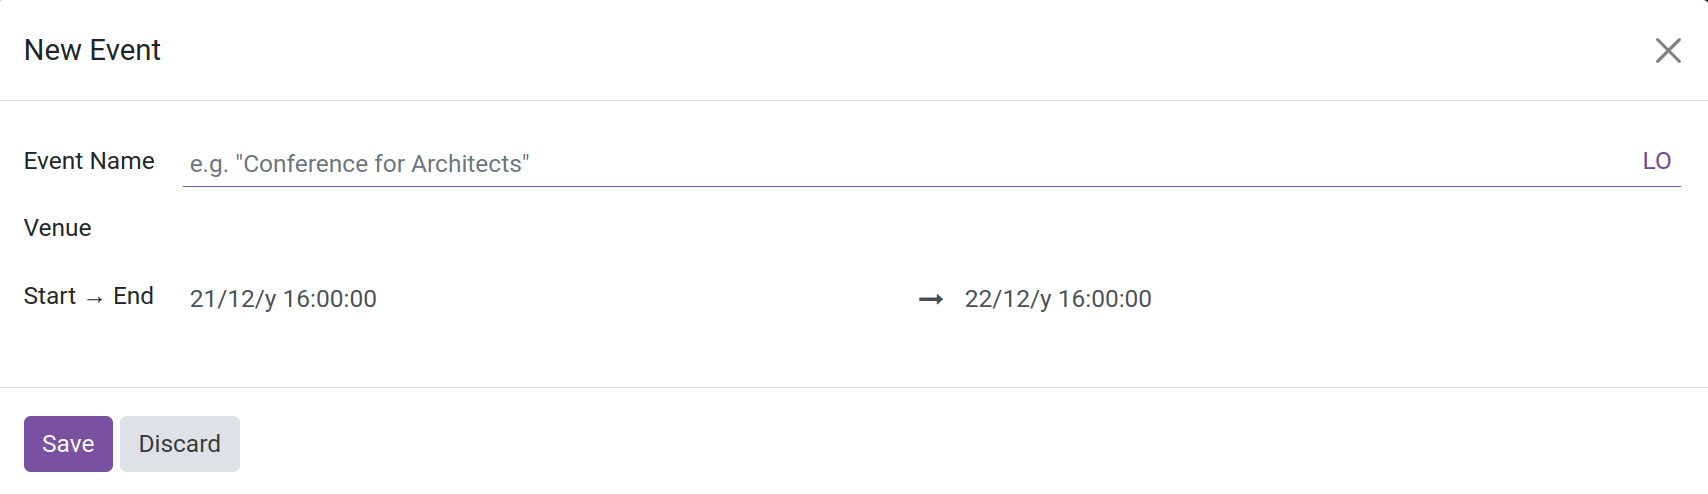
By clicking the +New button, the user can add a new event. A window will open, and they can select events from there.
That displays options such as the Event Name, Event Venue, and Event Start and End dates as seen below.
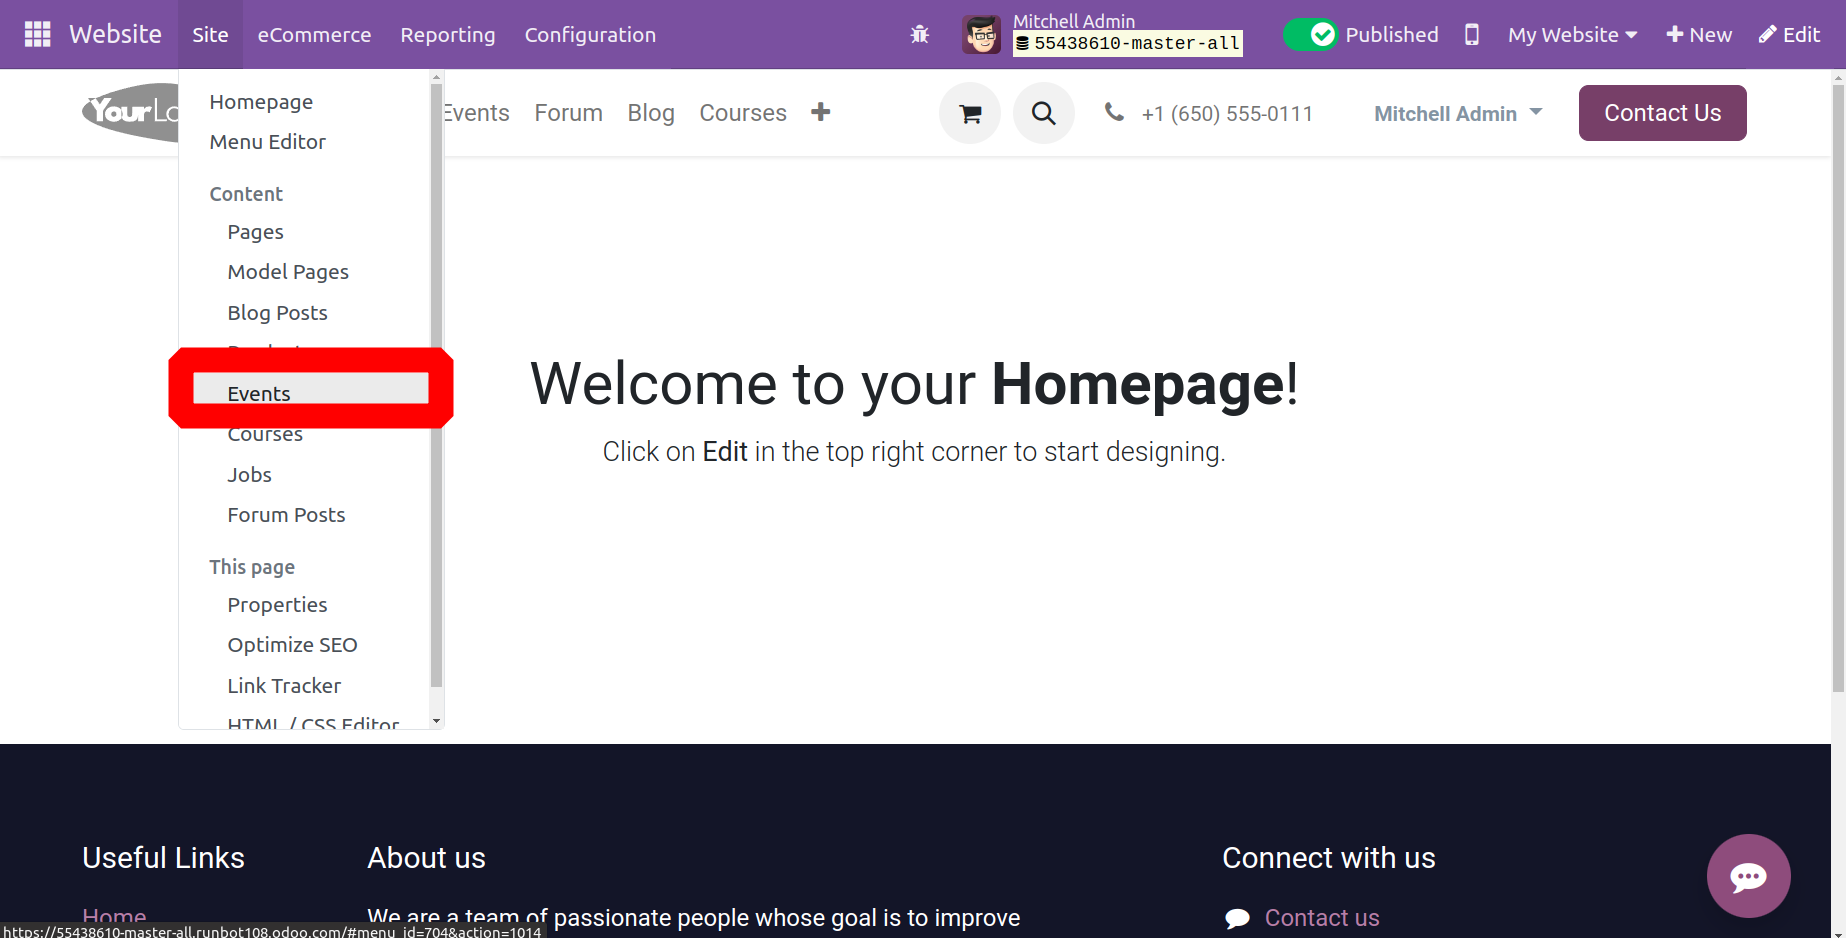
As seen below, the website module's Content section contains the 'Events' option under the Site tab.
Below is a representation of the Event Pages list view. Here you will find all of the default event pages and their information: Event, Website URL, Attendees to Expect, Start Date, Company, SEO optimized, Is Published, Website, and Stages. By choosing the Kanban view menu icon, you can also switch from the list view to the Kanban view.

The New button allows the user to create a new event from the back end as well. When the button is pressed, a window displaying the event's start and end dates, venue, and name will appear, as seen below.
The event module lets attendees suggest lectures and speakers, and it even has a form on your event website for presenter suggestions. You may use a Gantt chart to help you organize the validation process for each presentation or event in a matter of minutes. You can also show the agenda for your event in a tidy and expert manner right on your website. Give your guests easy access to search and browse your published event schedule by selecting categories such as speakers, dates, locations, and tags.
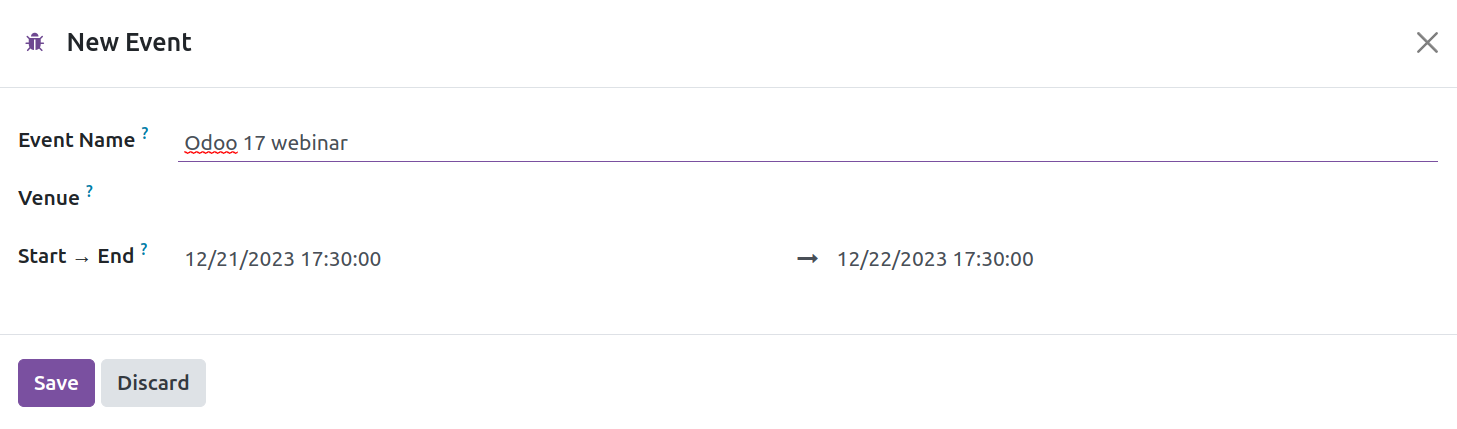
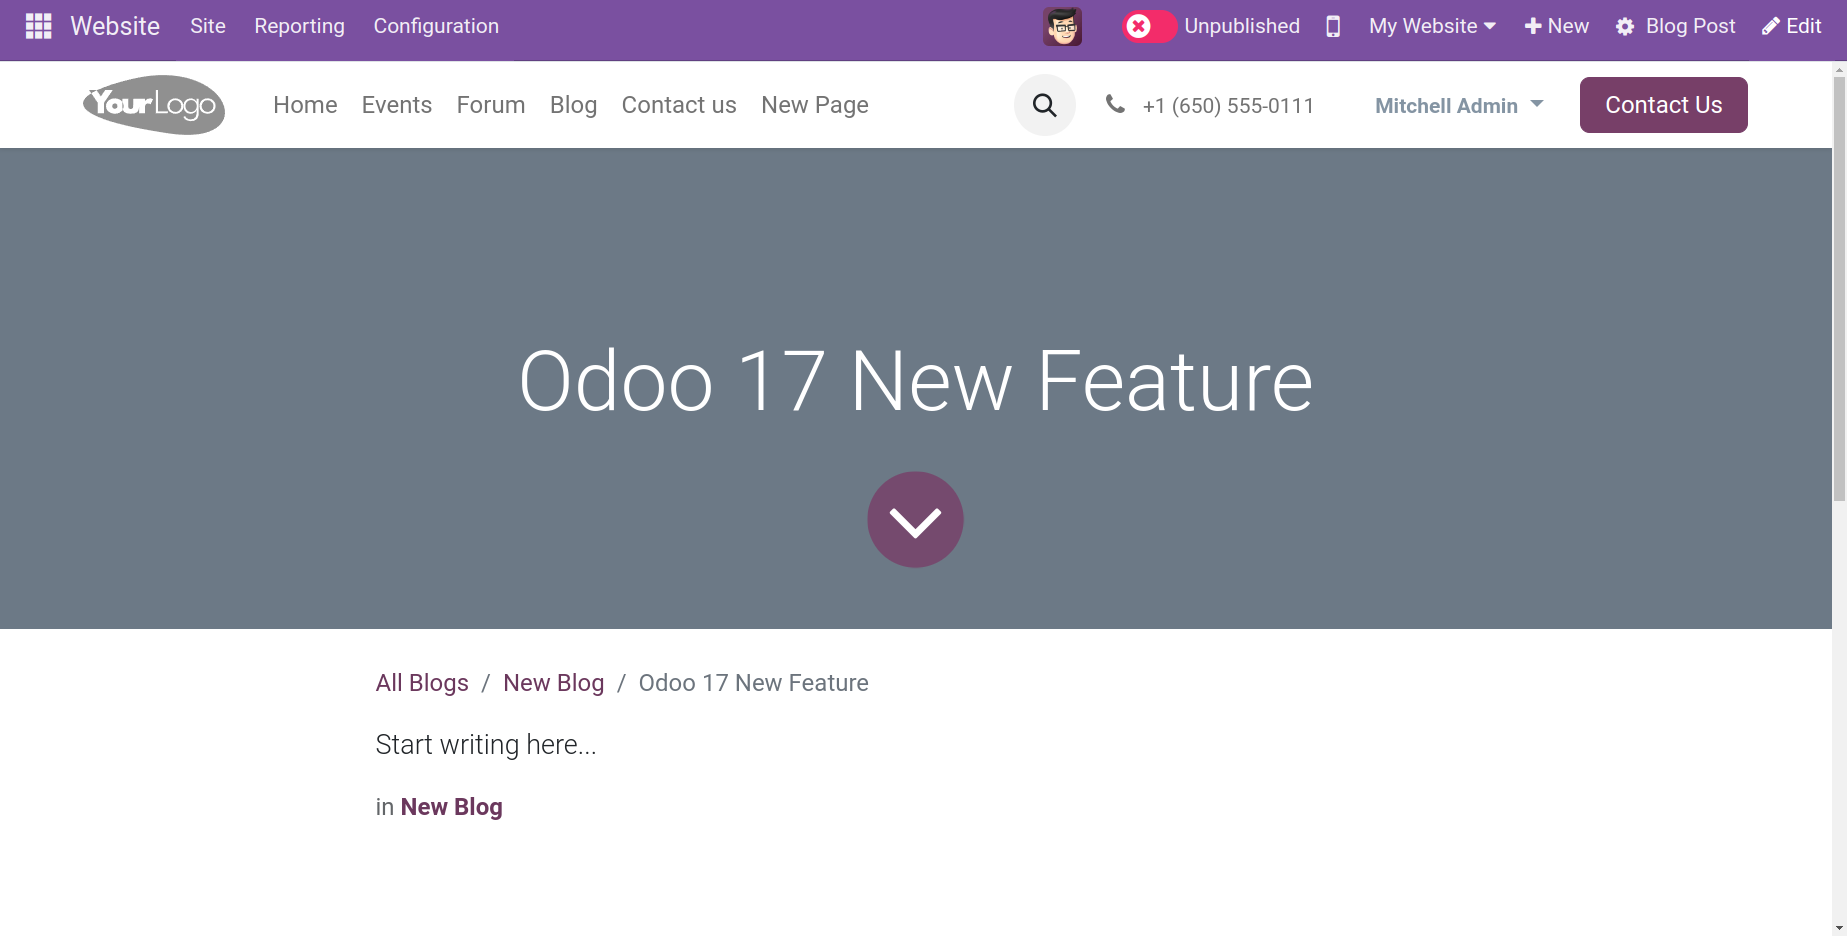
Let's create a new event in Odoo 17 and see how the user may adjust it. Let's save the event that we have made, which is called the Odoo 17 webinar.
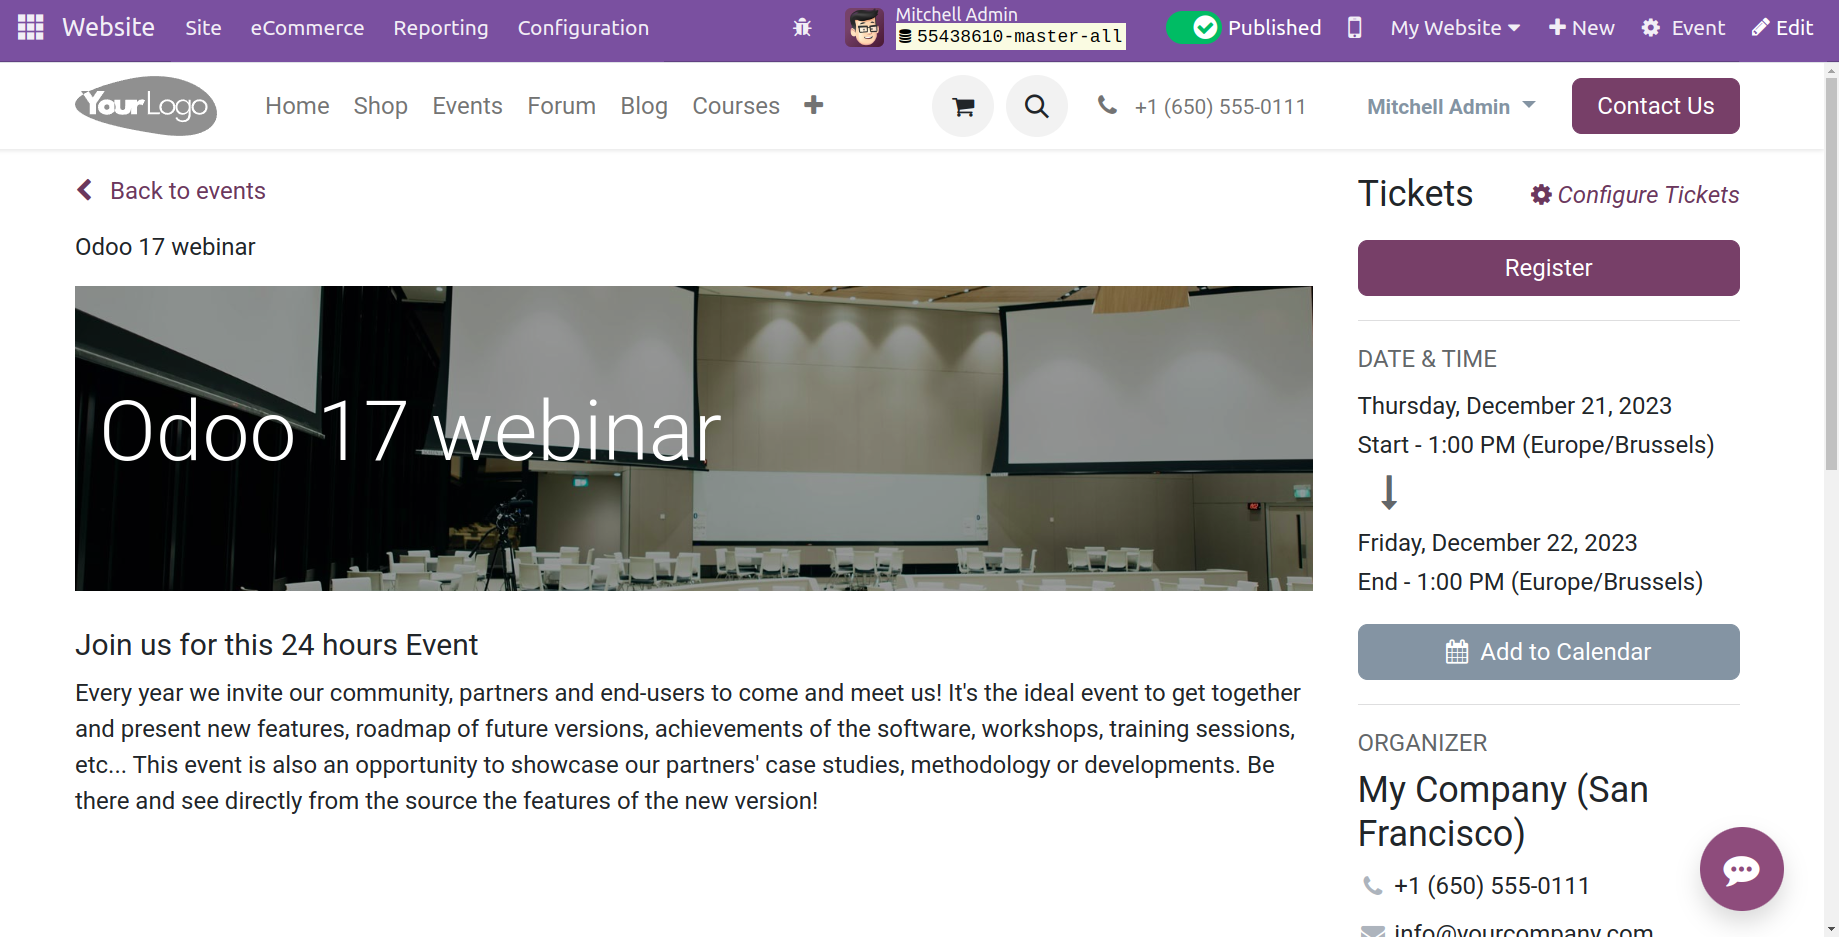
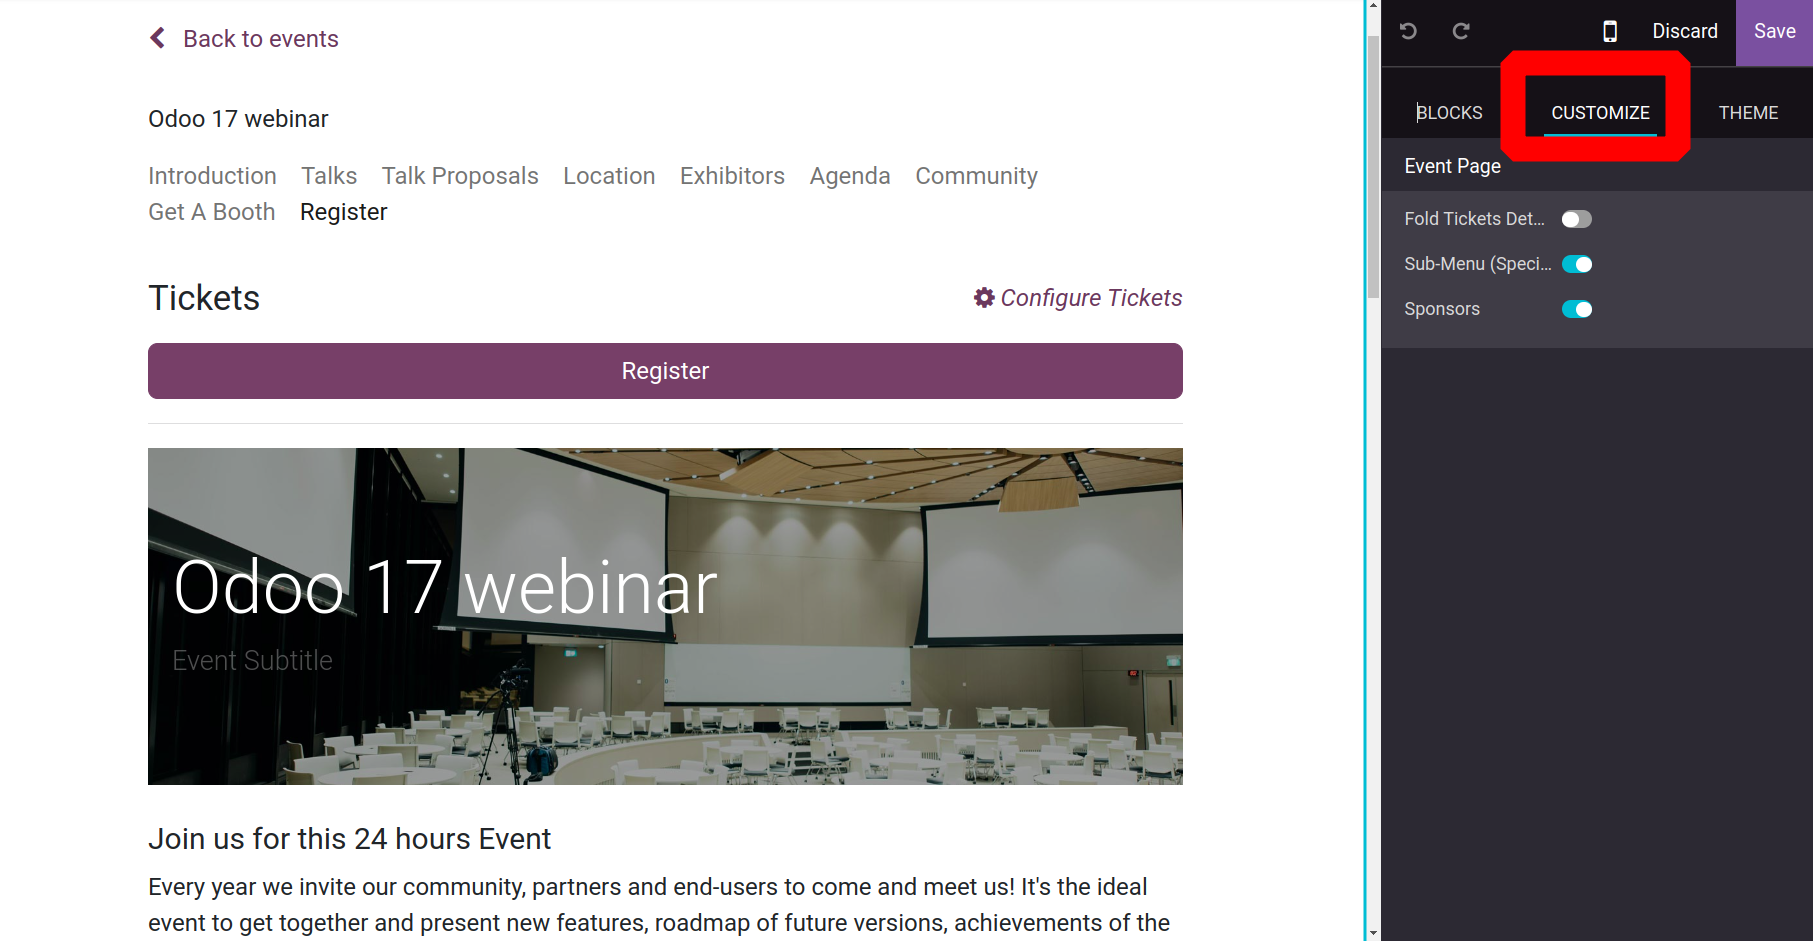
Once saved, it will take you to a customizable webpage that displays the event in its unpublished state. The user can alter it in accordance with the capabilities offered, including the ability to enable the Sponsor field as indicated below and to view Folding Ticket data and a Customized Sub Menu.
Forum
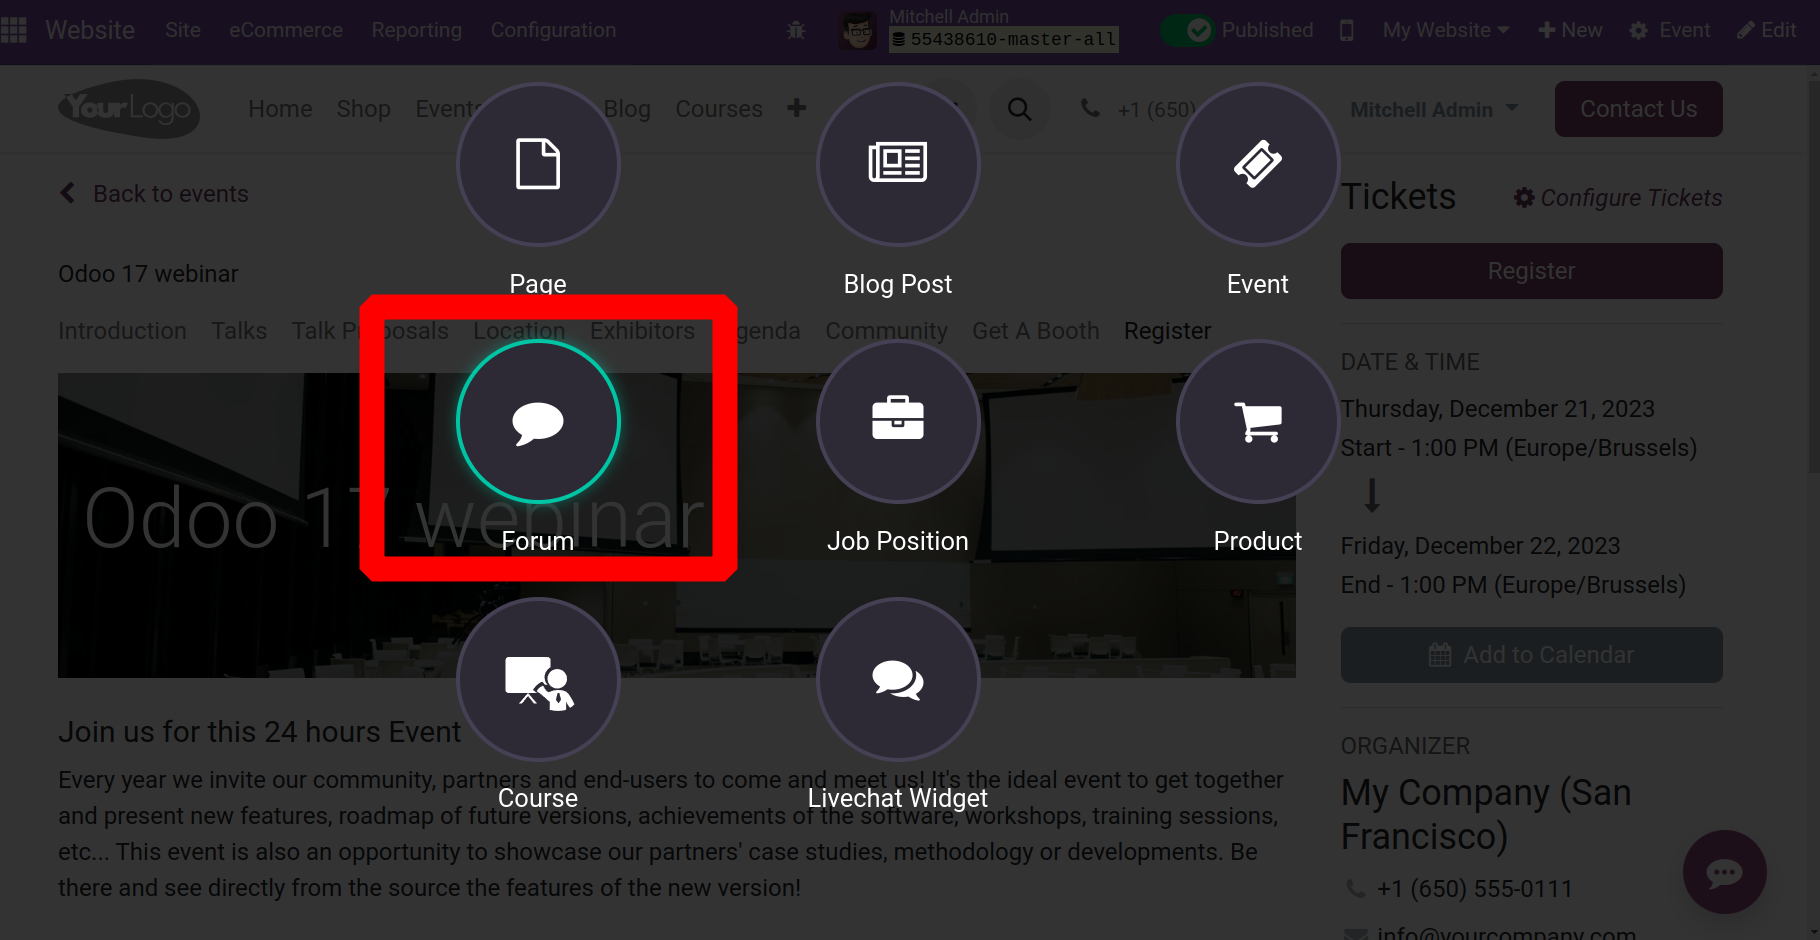
You may easily create forum posts on the Odoo 17 Website module. To do so, navigate to the +New menu, and choose Forum as displayed below.
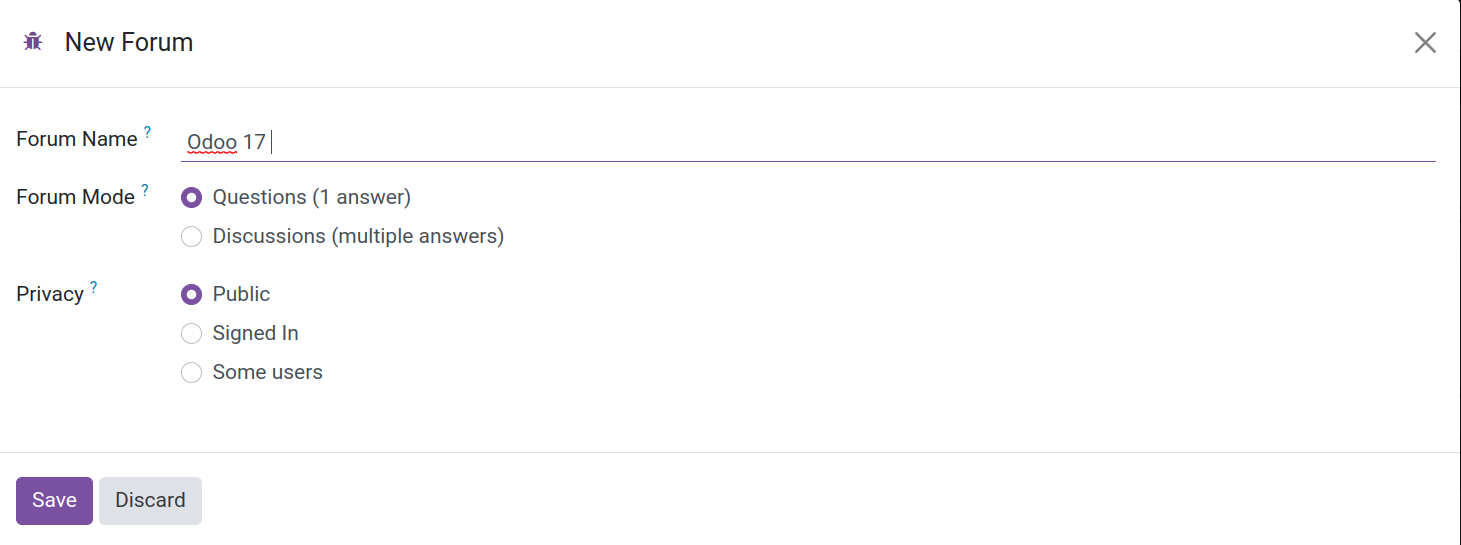
Enter the forum name, then choose the privacy and forum mode. Next, use the Save button to save it.
Afterward, the Edit button in the upper right corner can be used to alter and personalize the newly established forum.
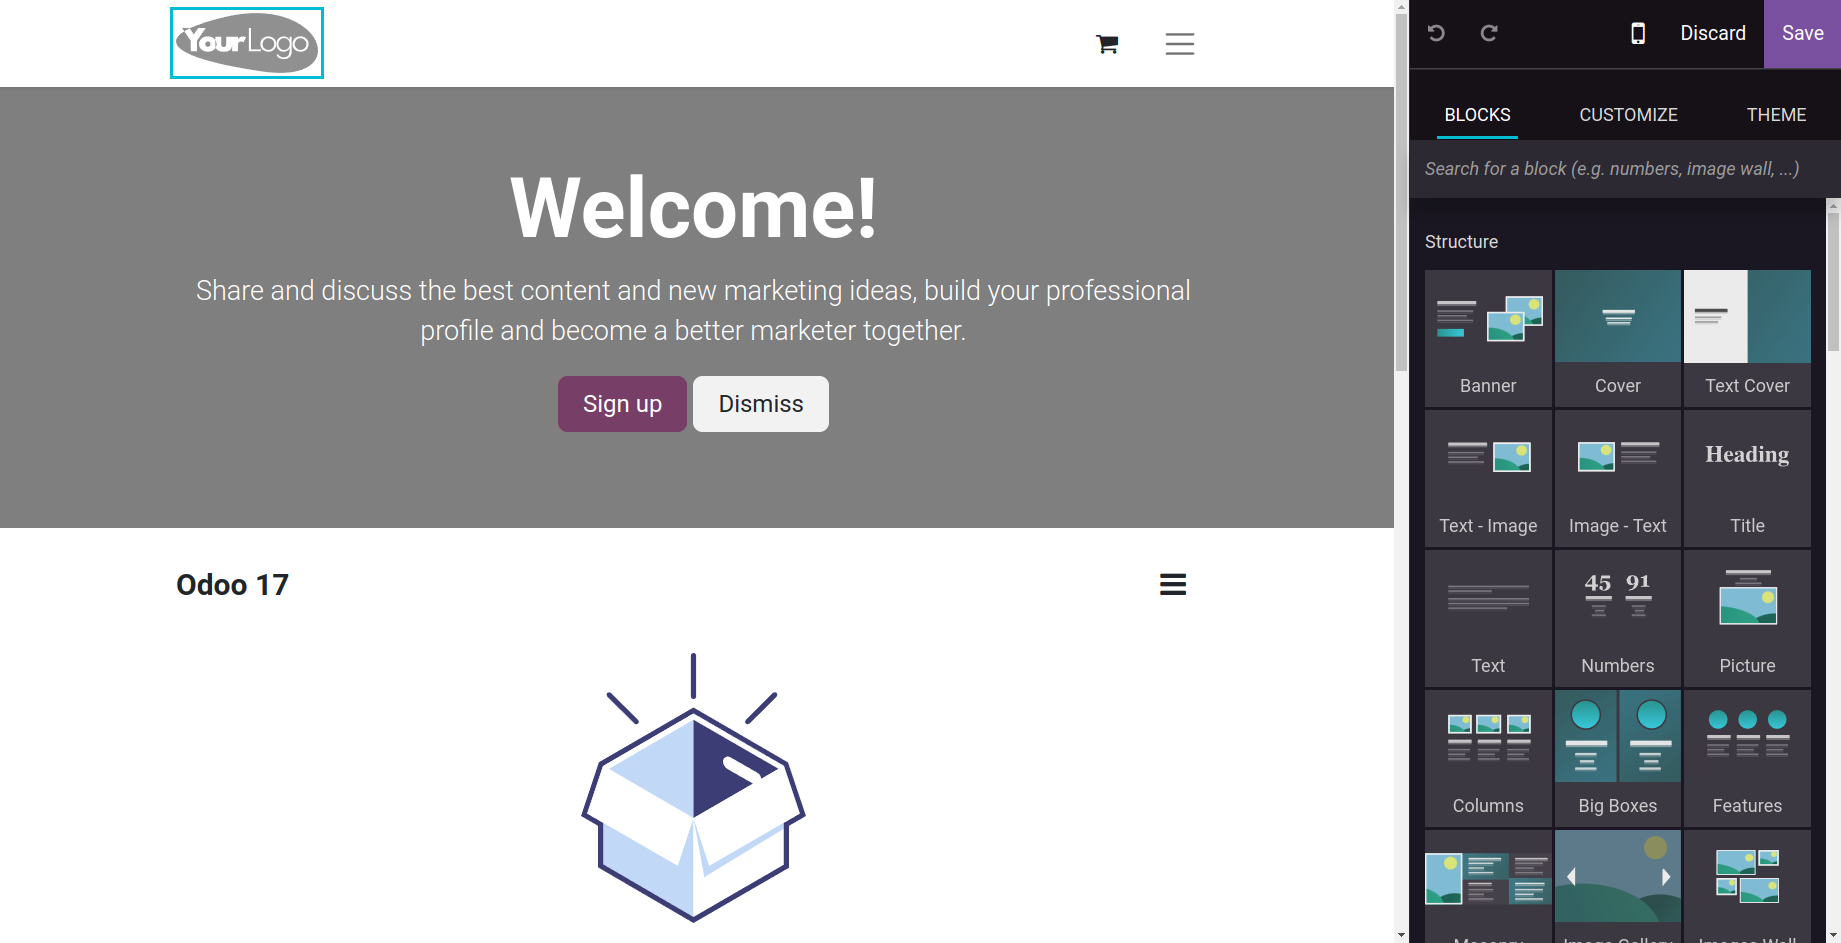
The forum feature of Odoo will act as a dialogue platform where users can ask questions and receive replies. If you create a discussion subject or a question forum on your website, people who share your thoughts can get together to have a conversation.
Menu Editor
The Odoo 17 Website module's Site menu contains the Menu Editor option, as seen in the screenshot below.
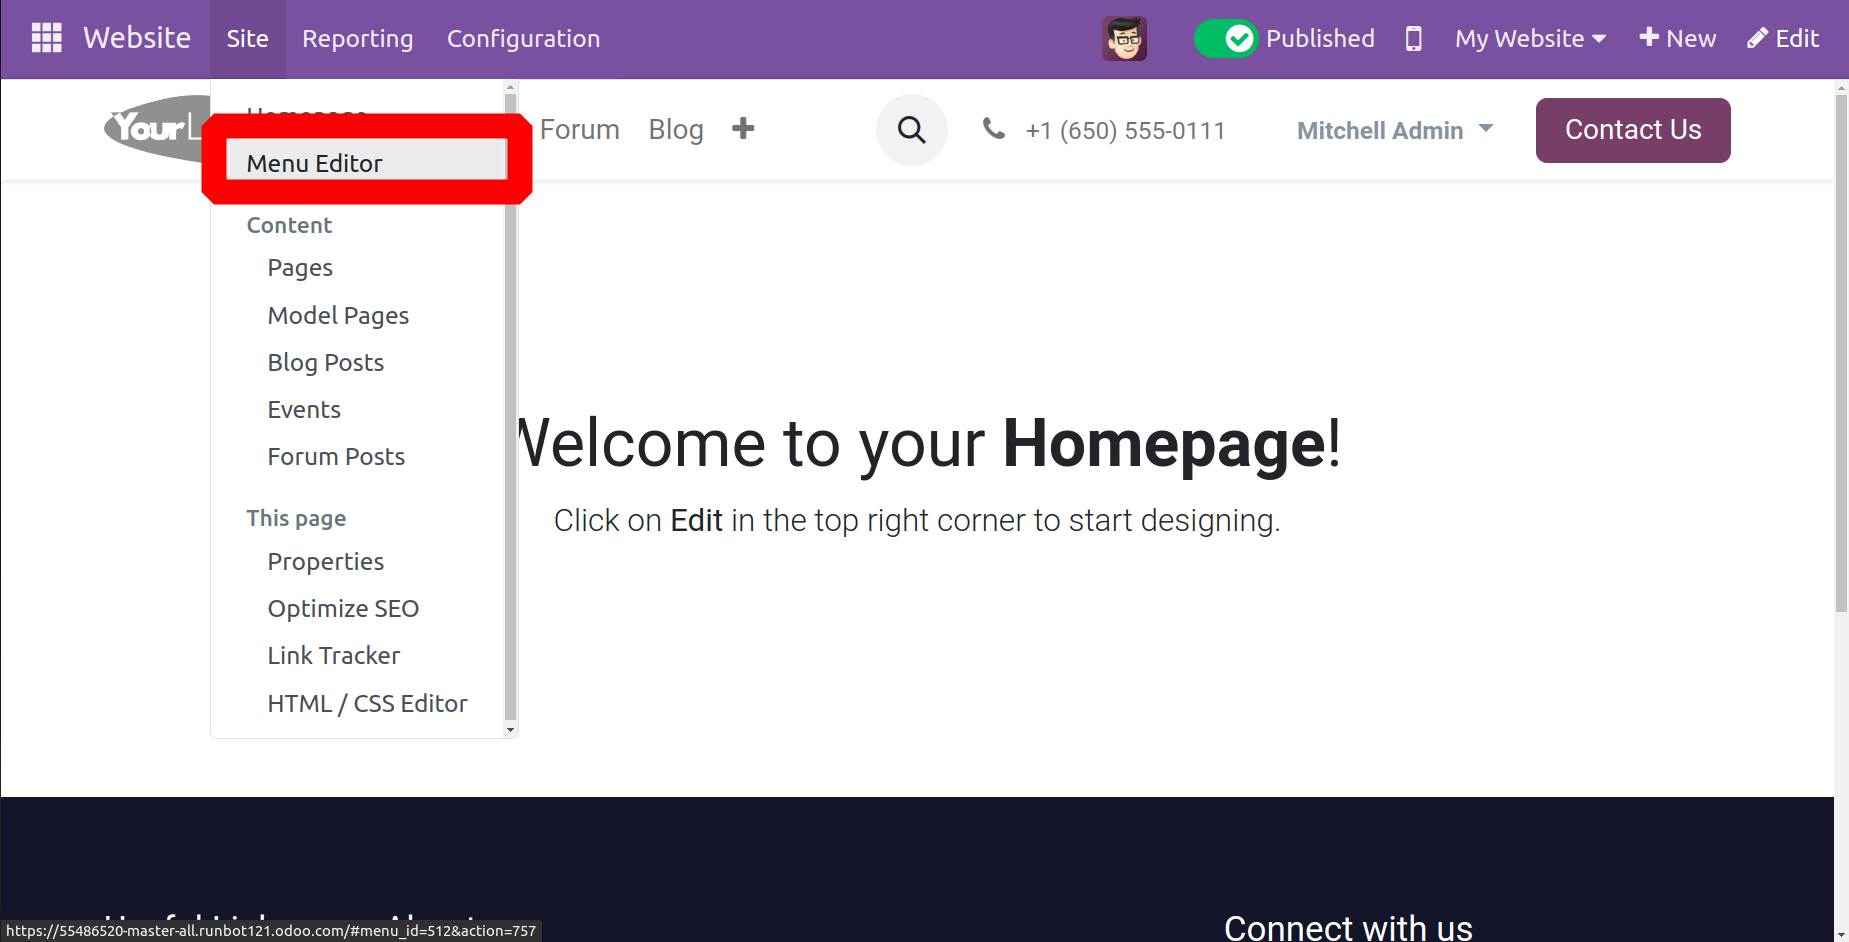
You may quickly change and alter the menu and page designs on your website using this option. You can add, edit, and remove pages from your website by using the alter menu option. Information from all of the current website pages will be displayed in the pop-up window, as seen in the screenshot above. A plethora of icons and options are also included, including Edit, Delete, Add, and Mega menu item options. More specifically, as the screenshot below illustrates, the system controls the "Edit Menu Item" and the "Delete Menu Item" on every web page.
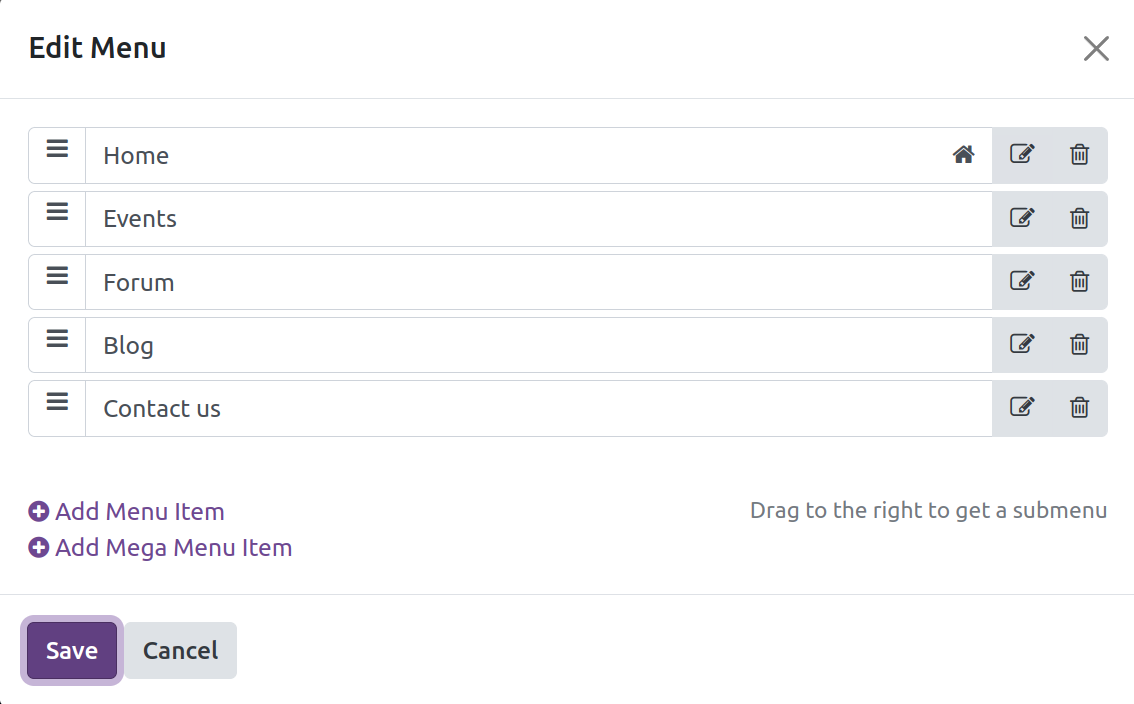
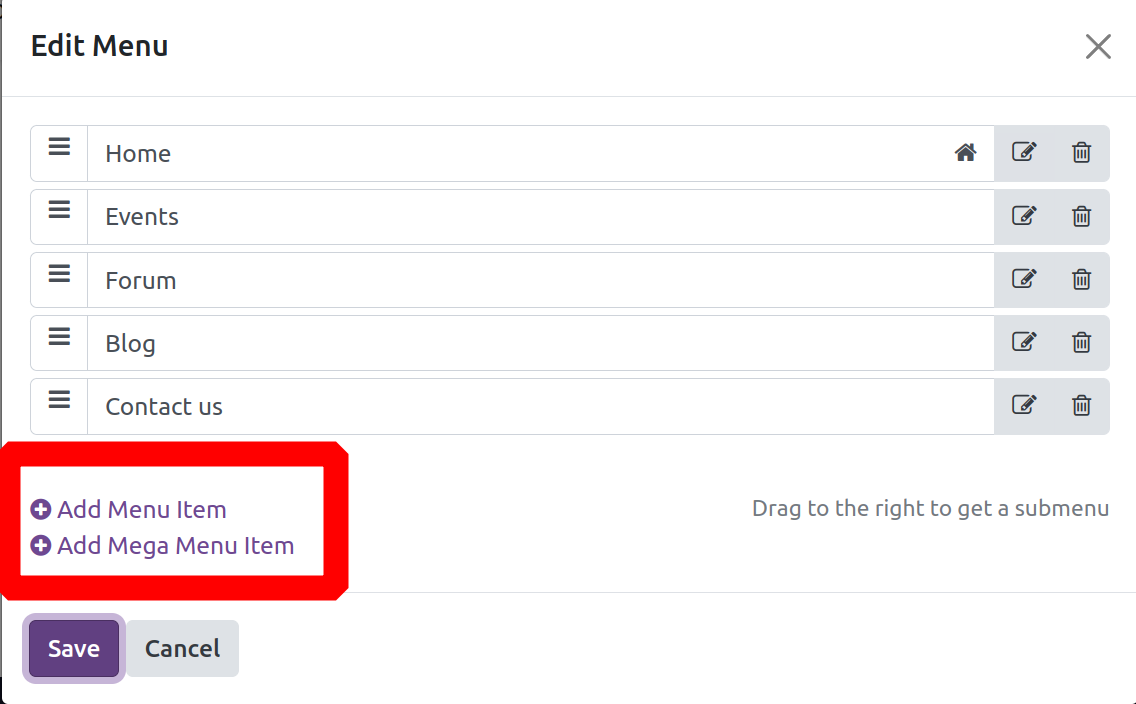
Select Update Menu Item to make changes to an already-existing menu item, and select Delete Menu Item to remove a particular menu item. In addition, as can be seen below, the popup window that appears in the lower-left corner of the window has the Add Menu Item and Add Mega Menu Item options.
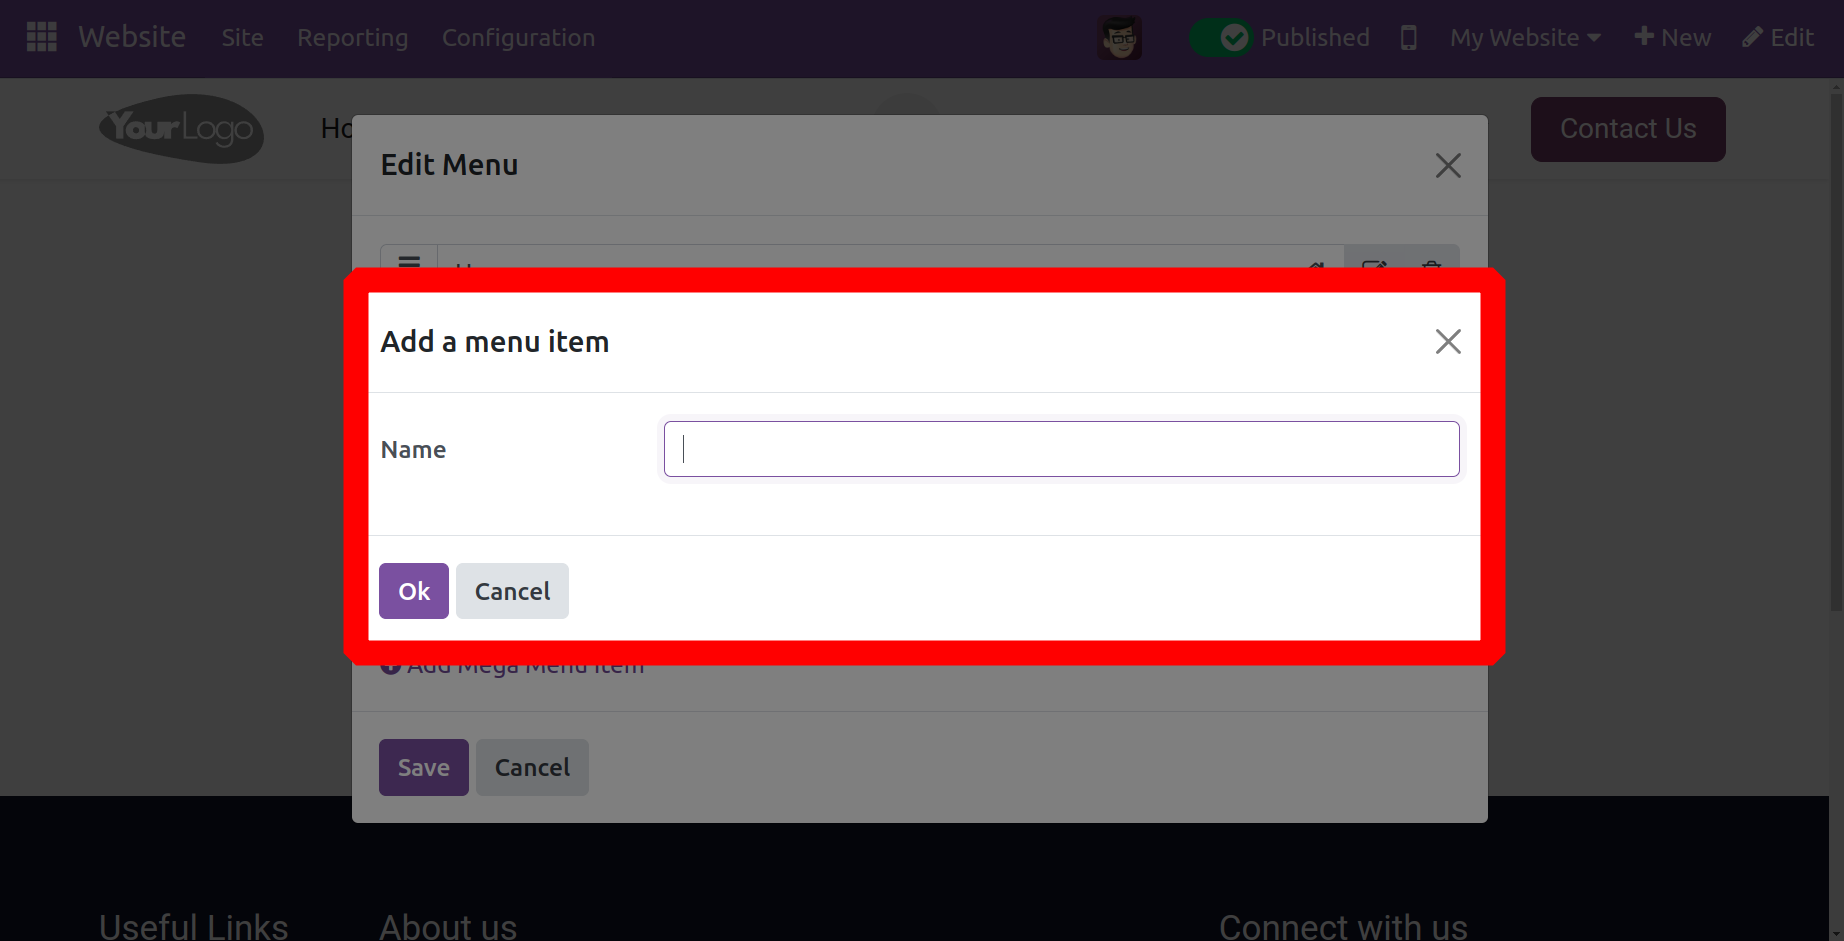
The "Add a Menu Item" pop-up box, which is displayed below, will appear when you choose Add Menu Item.
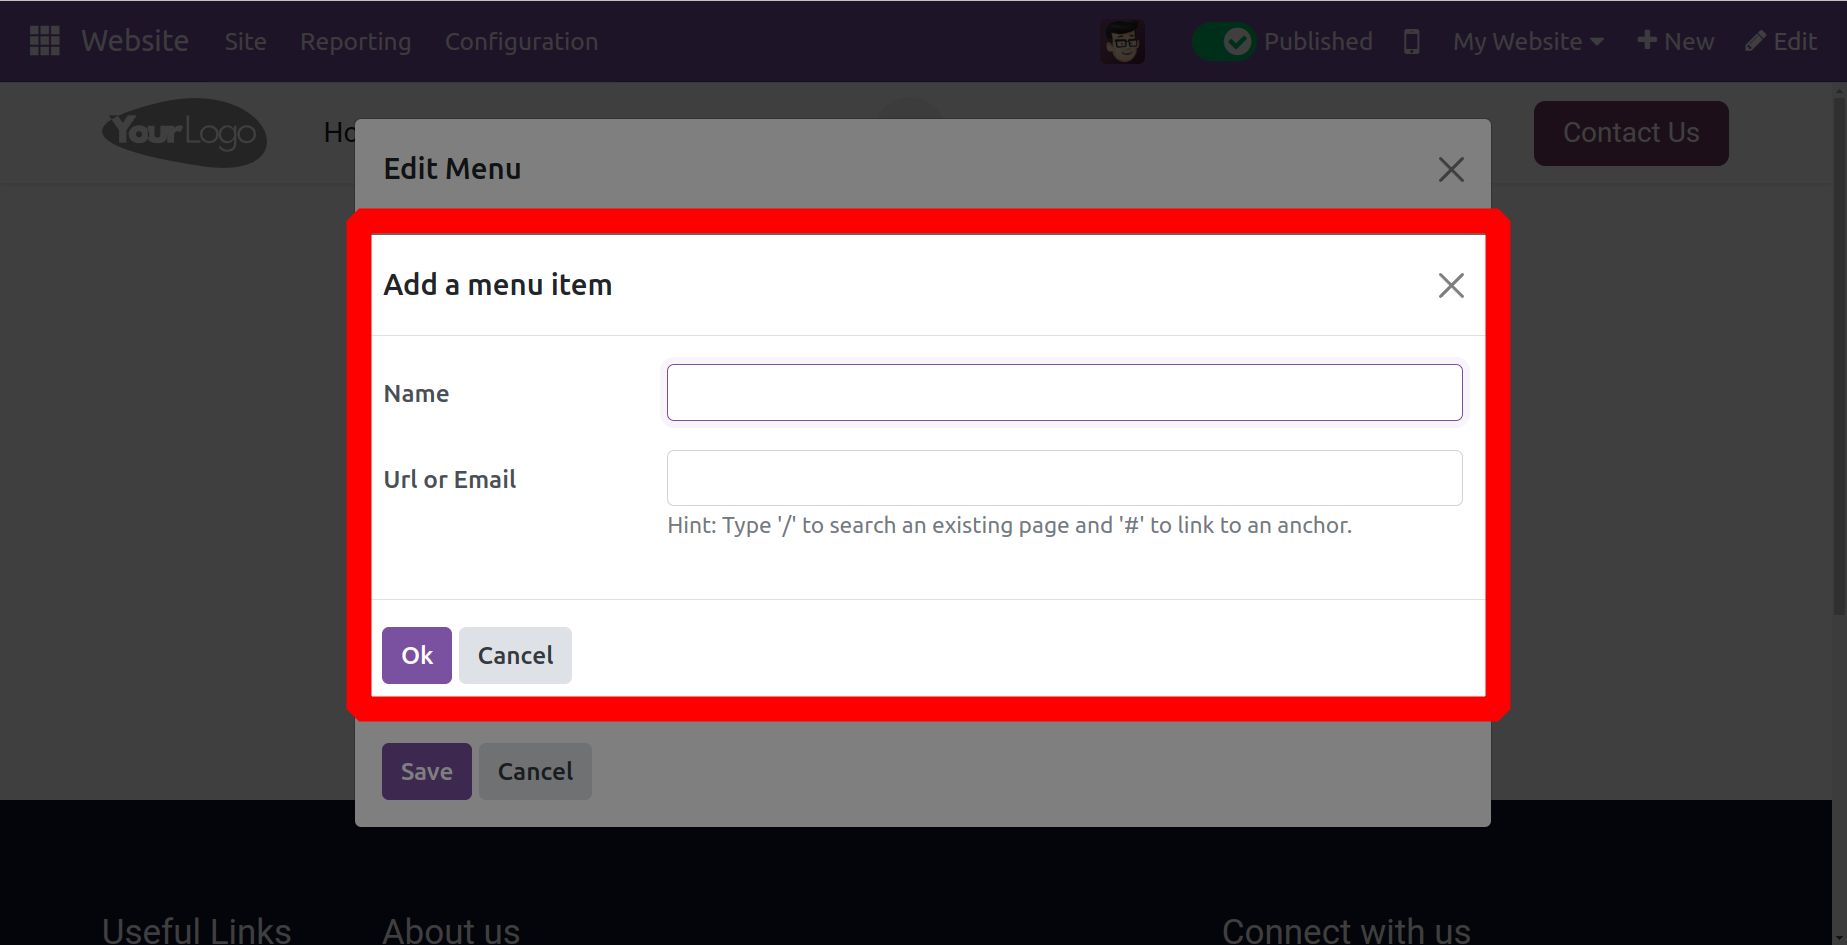
This pop-up allows you to enter the email address or URL along with the name of the new menu label. After entering all the necessary data, click OK, or select Cancel if you need to withdraw your submission.
Similarly, you have the option to "Add Mega Menu Item," which you can select to add a Mega Menu.
One can create menus and mega menus in Odoo in this manner. After it has been generated, let's save it and modify the Mega menu as seen below by using the Edit option.
We offer various template sets for the mega menu, including the ones displayed below: Multi menu, Image menu, Odoo menu, Little icon, Big Icons Subtitles, Image Subtitles, Logos, Thumbnail, and Cards.
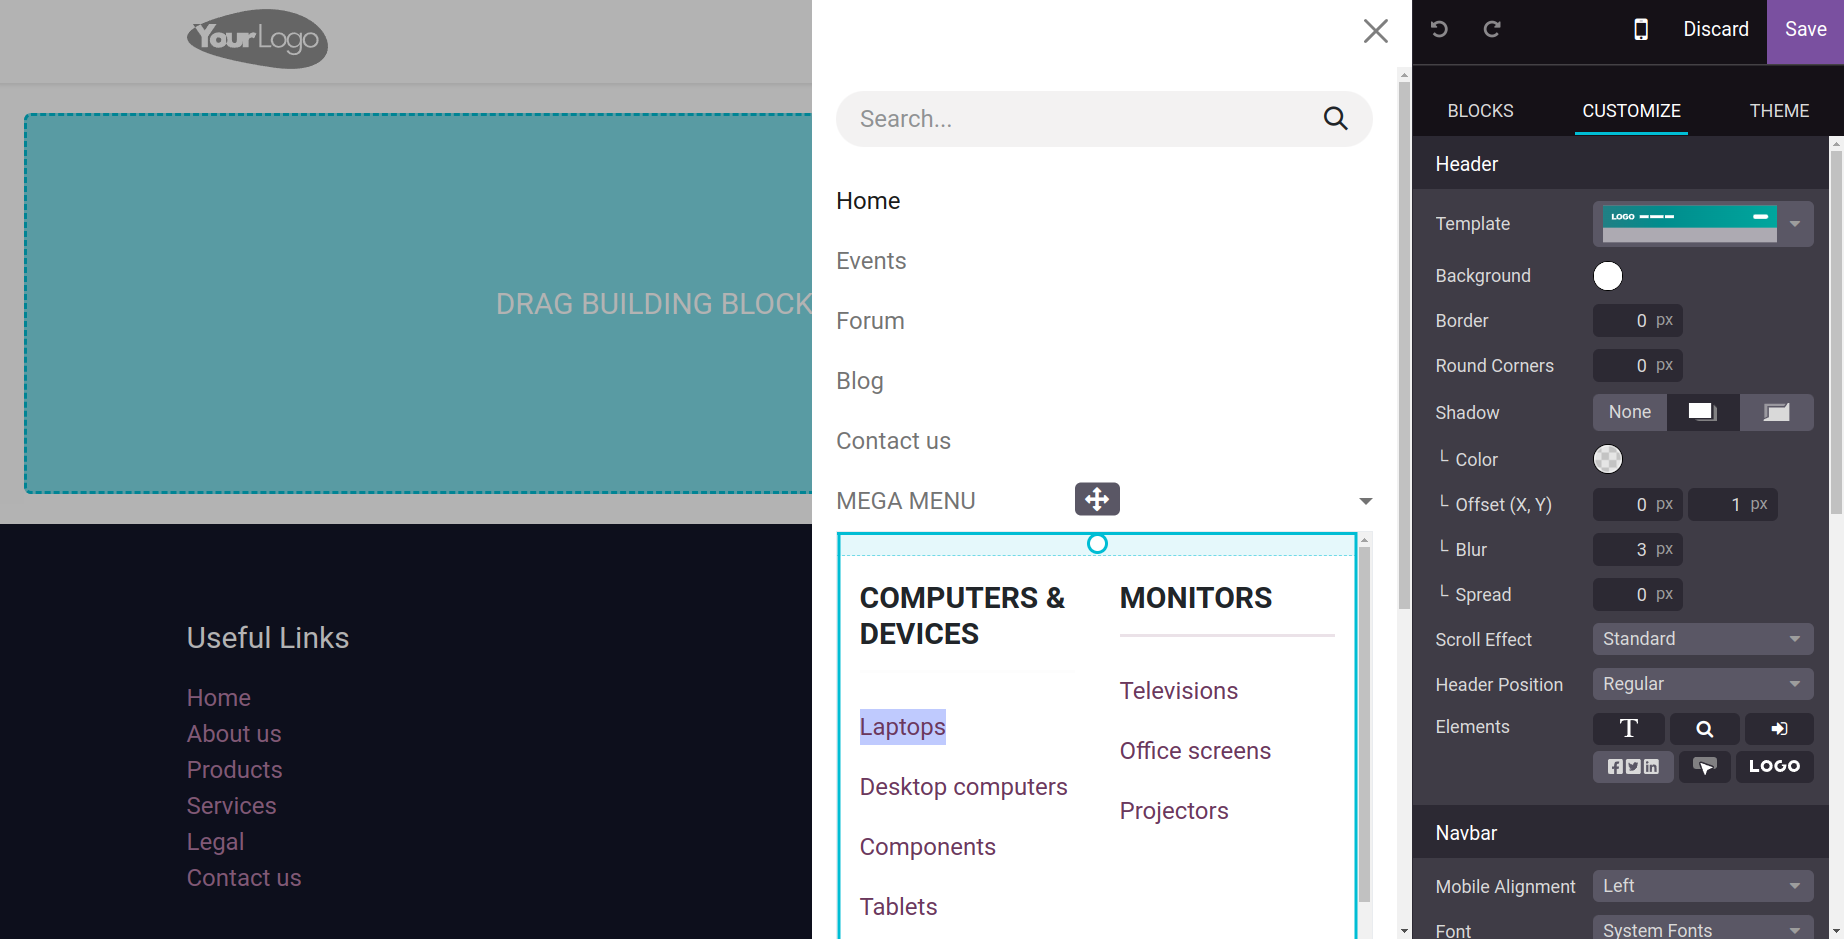
Change the menu items' names to reflect your needs. The chosen template will be displayed next to it; it allows you to change the number of columns, choose the link that will take the user to the appropriate page, and more.
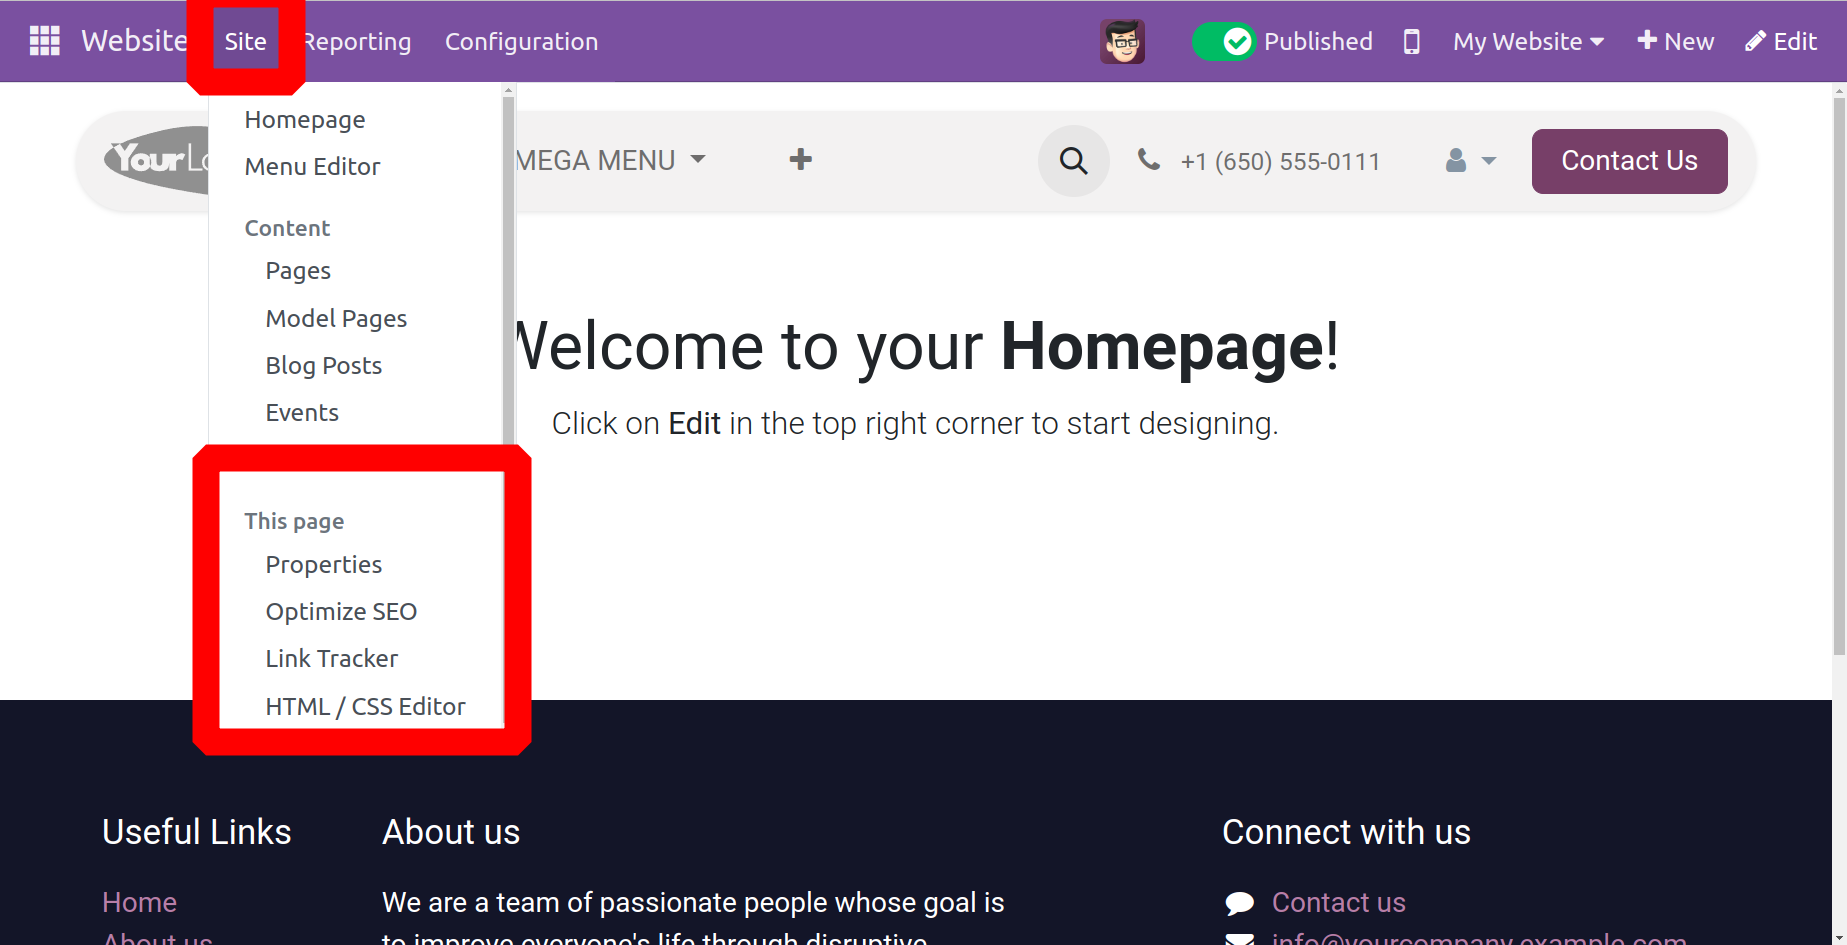
This Page
The website module's Site menu offers tools to manage the constructed webpage, including the Page Properties, Optimize SEO, Link Tracker, HTML / CSS Editor functions under the ‘This Page’ section.
Page Properties
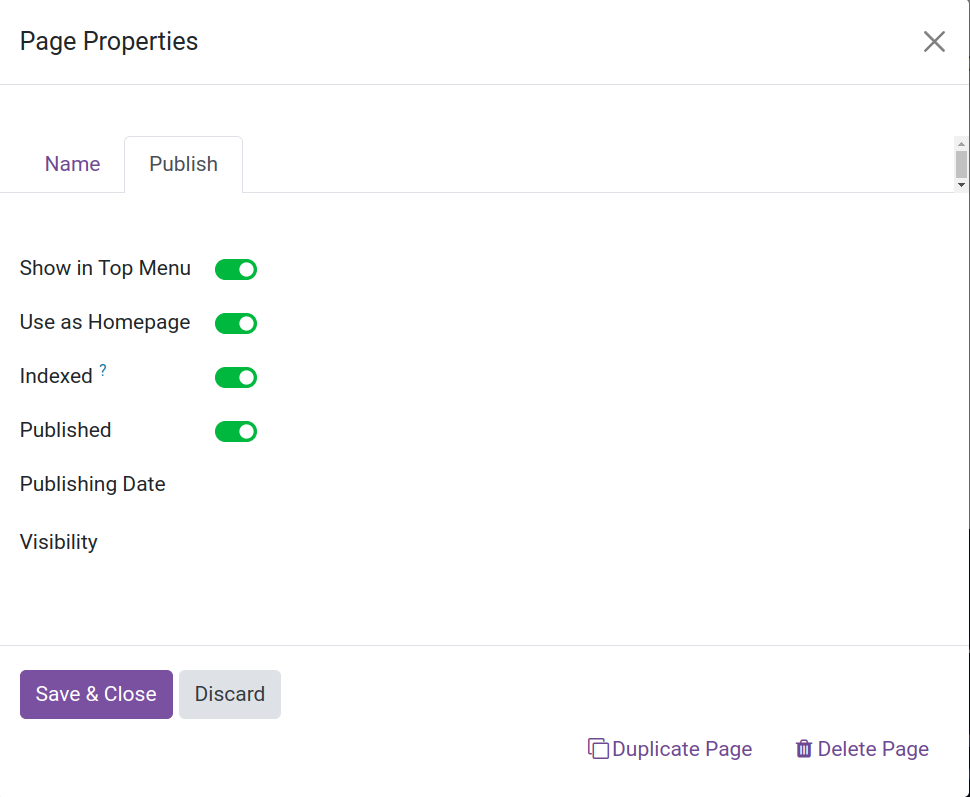
As a preview of how the website pages will be set up, the Page Properties window shows the relevant details, including the Page Title, Page URL, and enabling options like "Is Indexed, Show in Top Menu, Use as Homepage, Indexed, Is Published, Publishing Date, and Visibility." The window will also show the alternatives to Delete and Duplicate the same information.
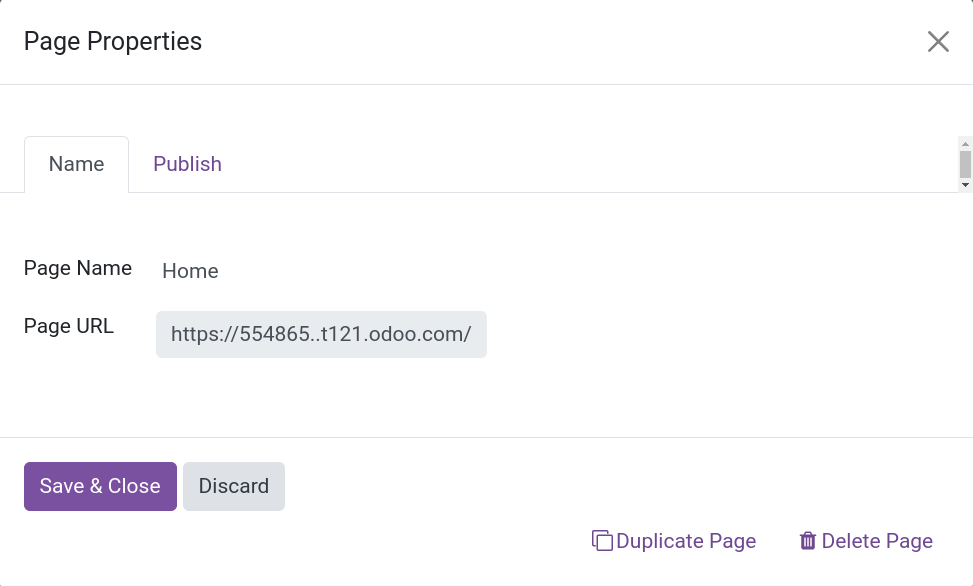
A page's visibility options, which provide users with many ways to visit the website, include All Users, Signed In, Restricted Groups, and With Password.
Optimize SEO
A set of recommended practices called search engine optimization (SEO) are used to improve your website's positioning so that search engines like Google will find it more relevant. To put it briefly, effective SEO enables you to get more visitors.
Since SEO helps to ensure that a website is visible to search engines and its intended audience, it is crucial to the operation of any website. Increased website traffic, lead creation, and ultimately sales are the results of this. Making a website easier to navigate through SEO contributes to an enhanced user experience and increased conversion rates. Additionally, SEO helps you build credibility and trust with prospective customers, which can result in higher sales.
The Odoo Website module offers top-notch SEO optimization options to strengthen and improve your website. A dedicated menu for handling the SEO aspect of the module's web pages is visible. As seen below, the website module's Site menu is where you'll locate the Optimize SEO option.
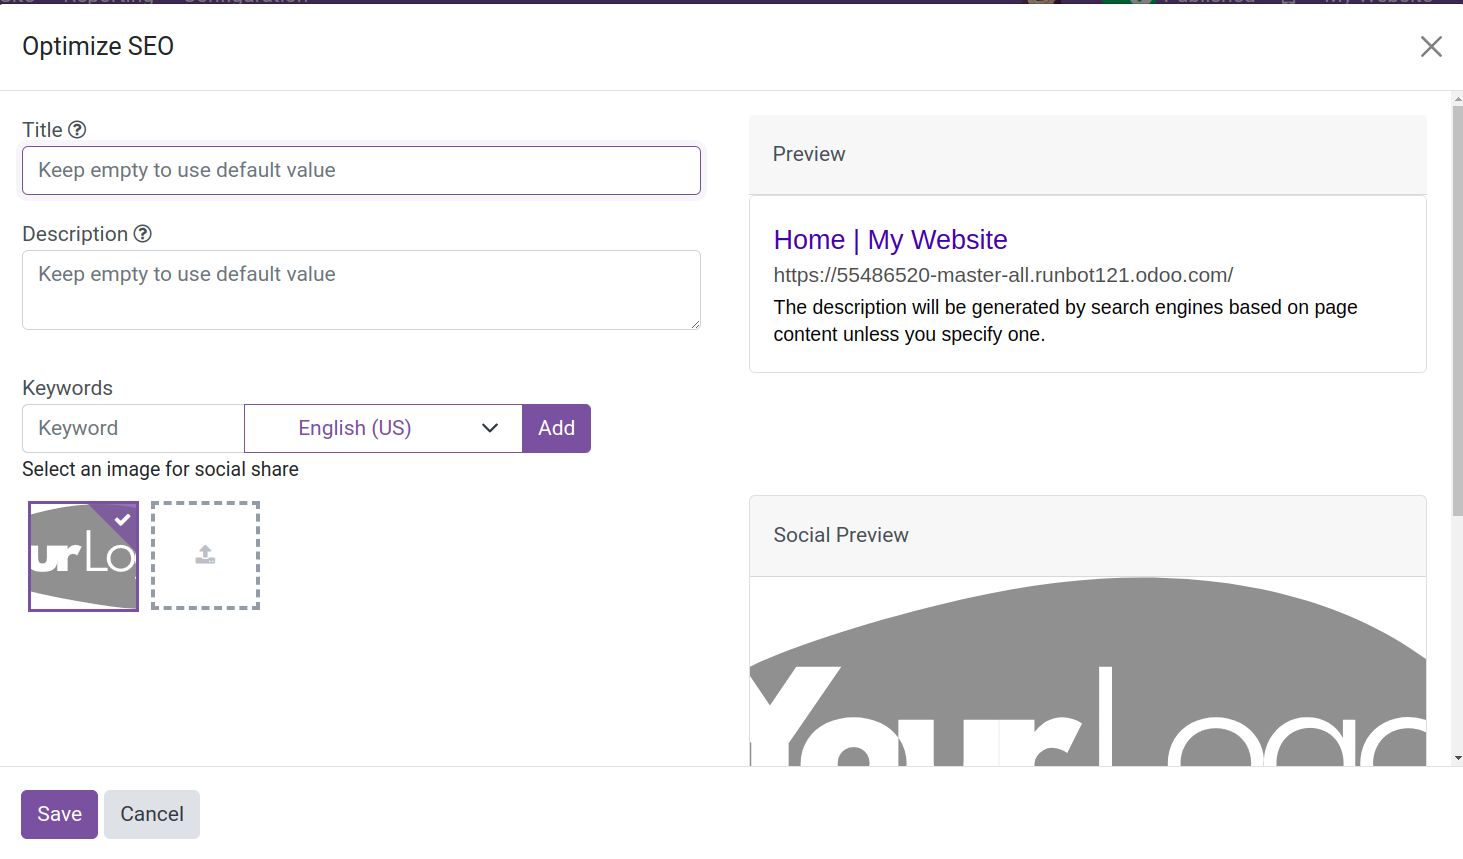
You can provide a title for the webpage here, and it will show up in the Preview section. You may also give a description of the webpage in the corresponding field. Additionally, the preview located on the window's right side will display this explanation. Additionally, you can increase traffic by adding keywords. The title and description metadata tags should be defined on every web page. These bits of content are used by search engines to advertise your website. Although you can customize them, they are generated automatically based on the content and title of the page. Make sure they are pertinent to the content of the page; if not, search engines can ignore you.
You are free to enter as many keywords as you like. You can enter the term's language in the designated field in addition to the keyword itself. Odoo has a keyword tool to assist you in creating engaging content and driving more visitors. You want to steer those kinds of questions towards your website. You can see what Google searches are related to each term and how it is used in the text (H1, H2, page title, page description, and content). It is preferable to use as many keywords as possible. Additionally, you have the option to choose an image that will show up during a webpage search. You can click to save the data once you've entered it all.
Link Tracker
Odoo 17 Link Tracker allows you to stop relying on incomplete or conjectural reports. Sort the profitable and unprofitable marketing channels.
The Link Tracker menu in the Odoo 17 Website module is a useful tool for monitoring and enhancing the functionality of links on your website. It enables you to control the link structure of your website, track link views and clicks, and evaluate link performance. It also provides comprehensive analytics and data on link performance. With the link tracker, you can rapidly redirect, link targets, and link sources. In addition, you may set targeted redirects to take immediate action and monitor and analyze link clicks from several devices and sources.
The website module's Site menu contains the Link Tracker option.
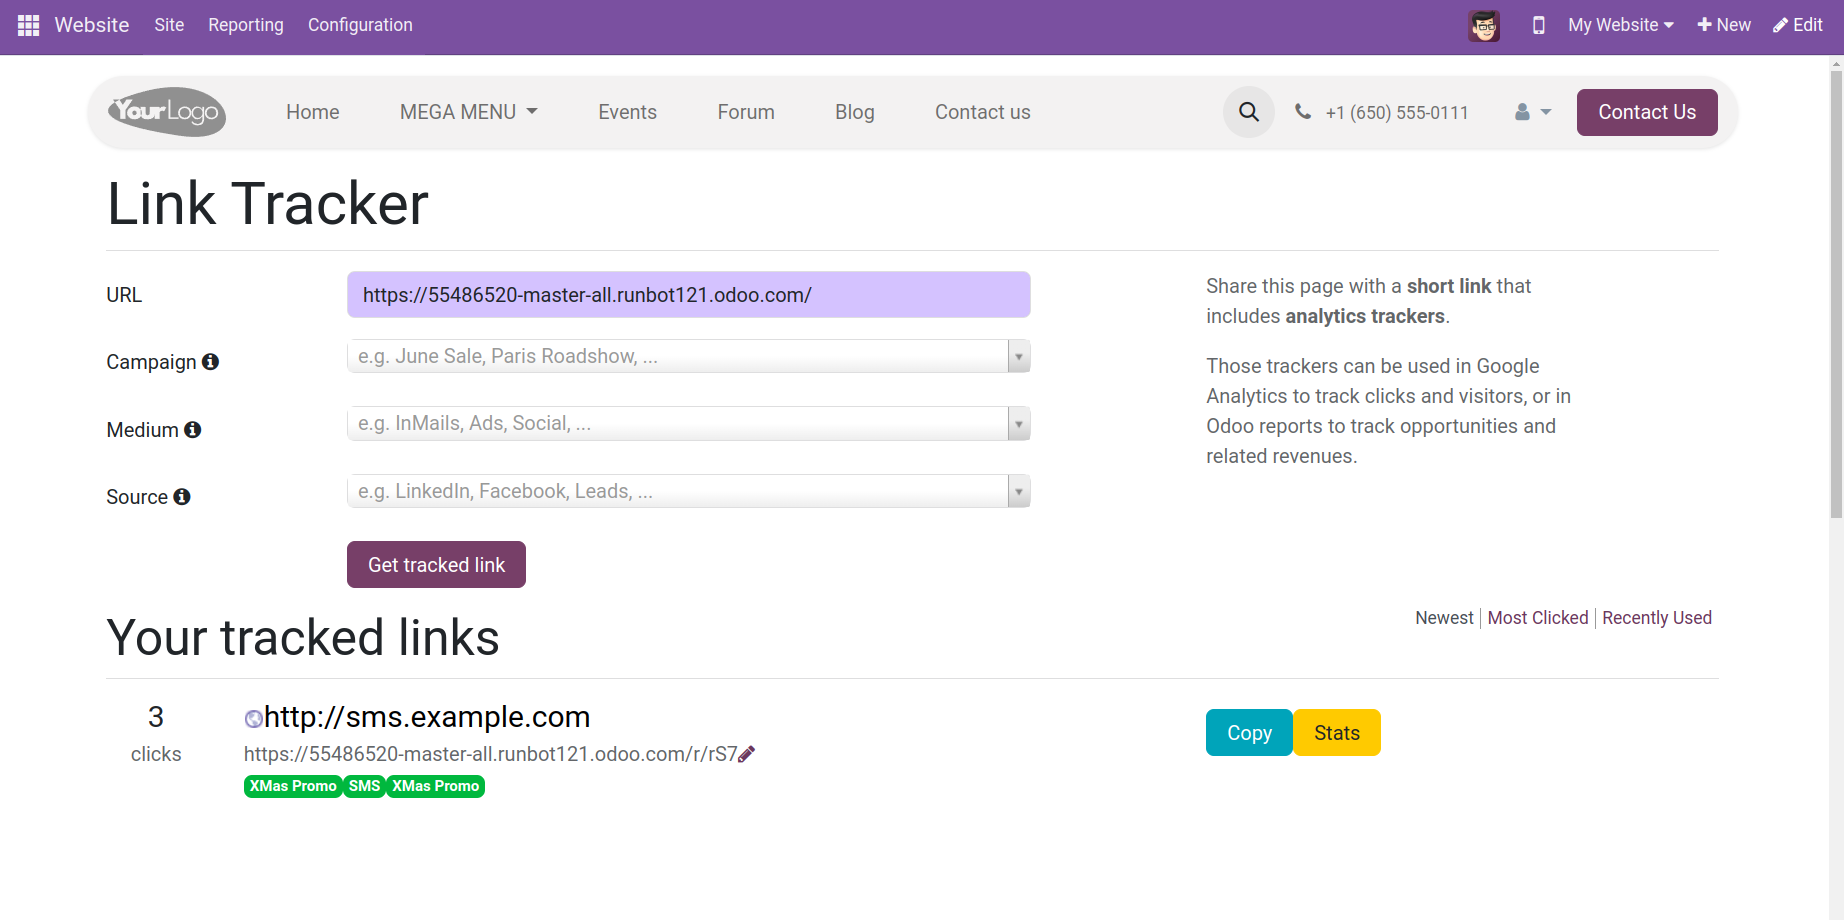
Additionally, when we open it, a popup will show up that lets the user enter the URL to start a new link tracking activity. After that, you can specify the web page's source, campaign, and operating medium. Click the Get tracked link button to retrieve tracked links. Moreover, any link that you are tracking may be seen in the Your monitored links menu. Additionally, filters are available for the tracked connections under the tracked links option. This is where you may find filters like Most Clicked, Recently Used, and Newest.
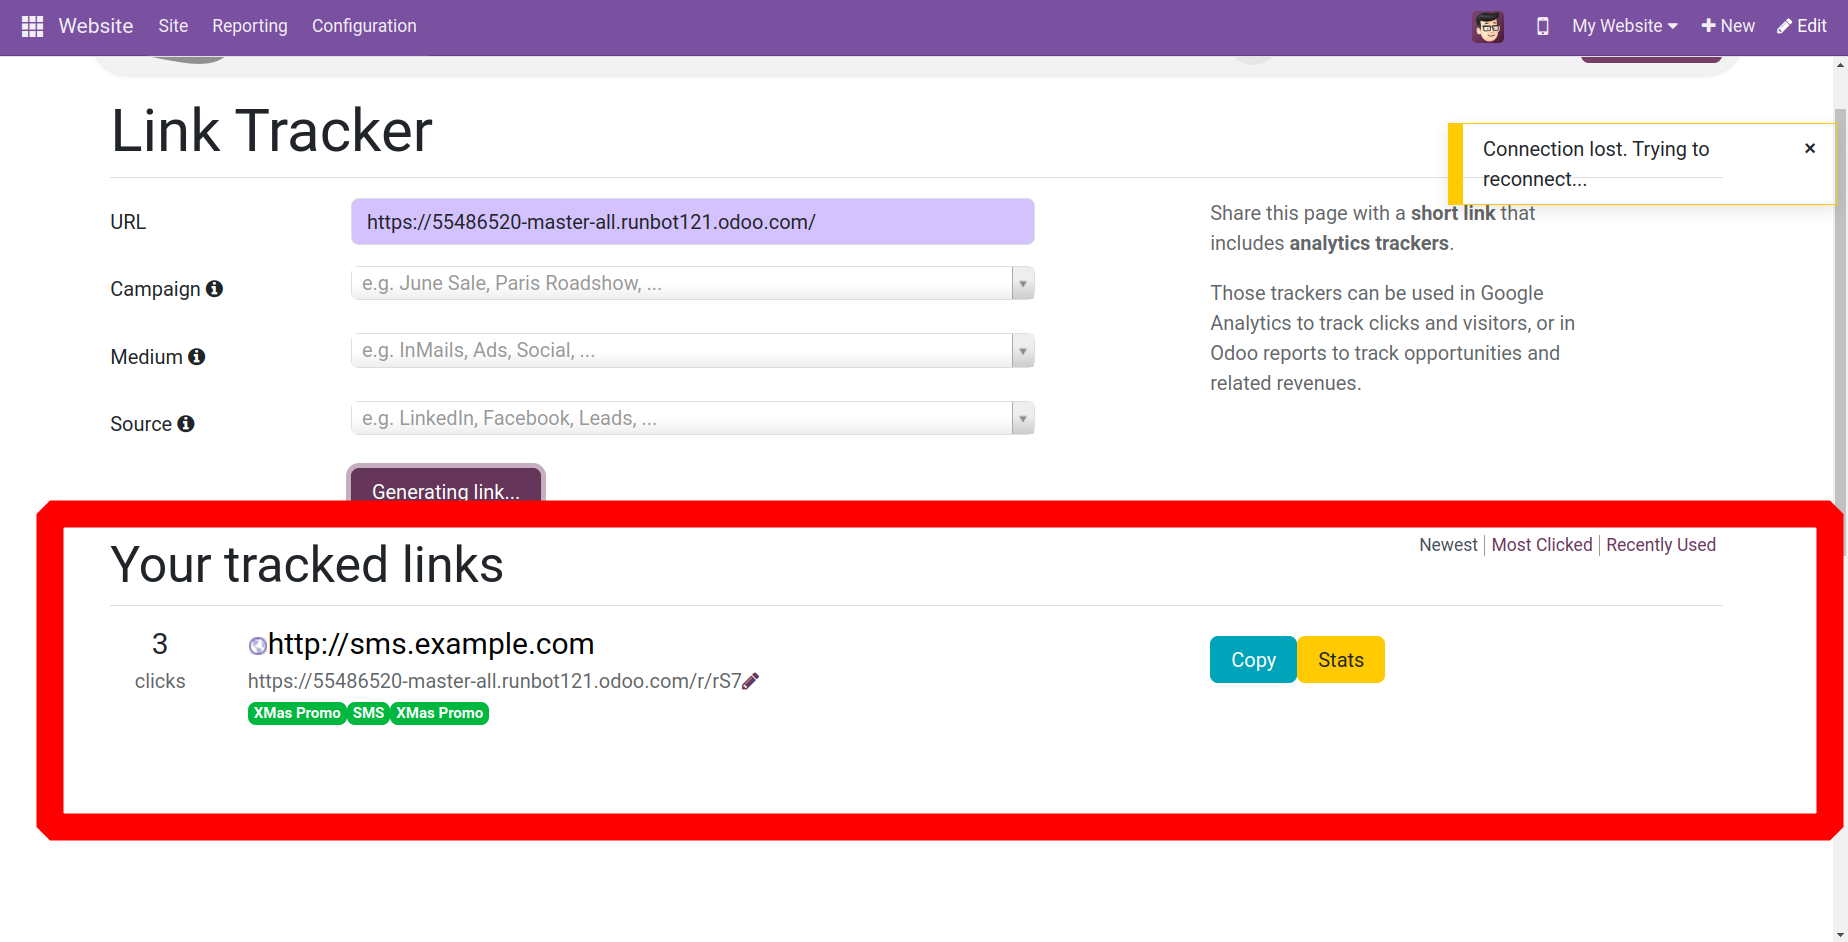
In order to use Link Tracker, you must first create a tracking link. From there, you may share the page you want to track by creating a short link that includes analytics trackers. Complete the campaign, medium, and source tags. Next, start your marketing campaign, allowing users to share the content on the channel of their choice by inserting the link into the post. Users click on your personalized link, which gathers data and displays it on your Analytics dashboard. Lastly, ascertain which links are most effective in driving visitors to your website. To improve your marketing strategy, compare the findings from multiple sources.
HTML/CSS Editor
This capability is available to users in Odoo 17 through the website module's site menu.
The HTML / CSS Editor tool in the Odoo Website module allows you to alter and reconstruct websites more technically than using block and web page design tools. Consequently, you can alter the website's appearance using the HTML / CSS menu. By adding custom HTML, CSS, and JavaScript code, as seen below, you can alter the HTML and CSS of your website.
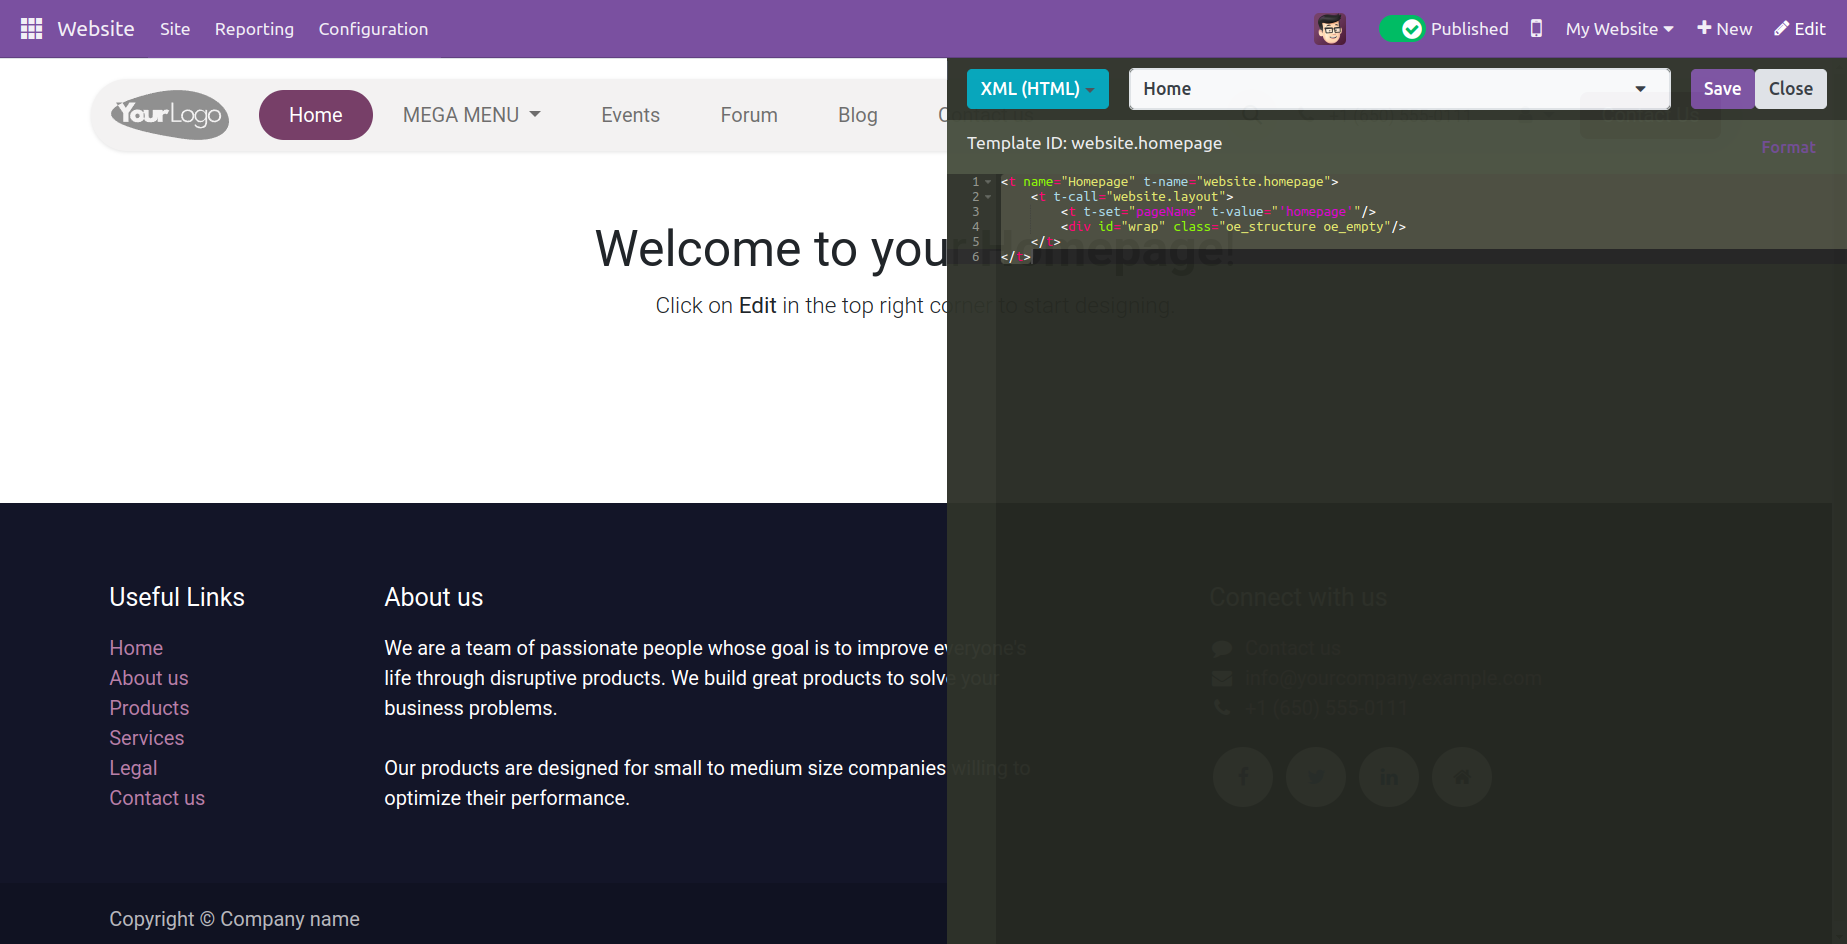
This HTML/CSS Editor tool allows you to edit or modify any part of your website, including web pages and websites. The code provider window, which is seen above, will appear when you select the menu.
Configuration
Settings
We'll go over each of the sections that make up the Odoo 17 website module's Settings.
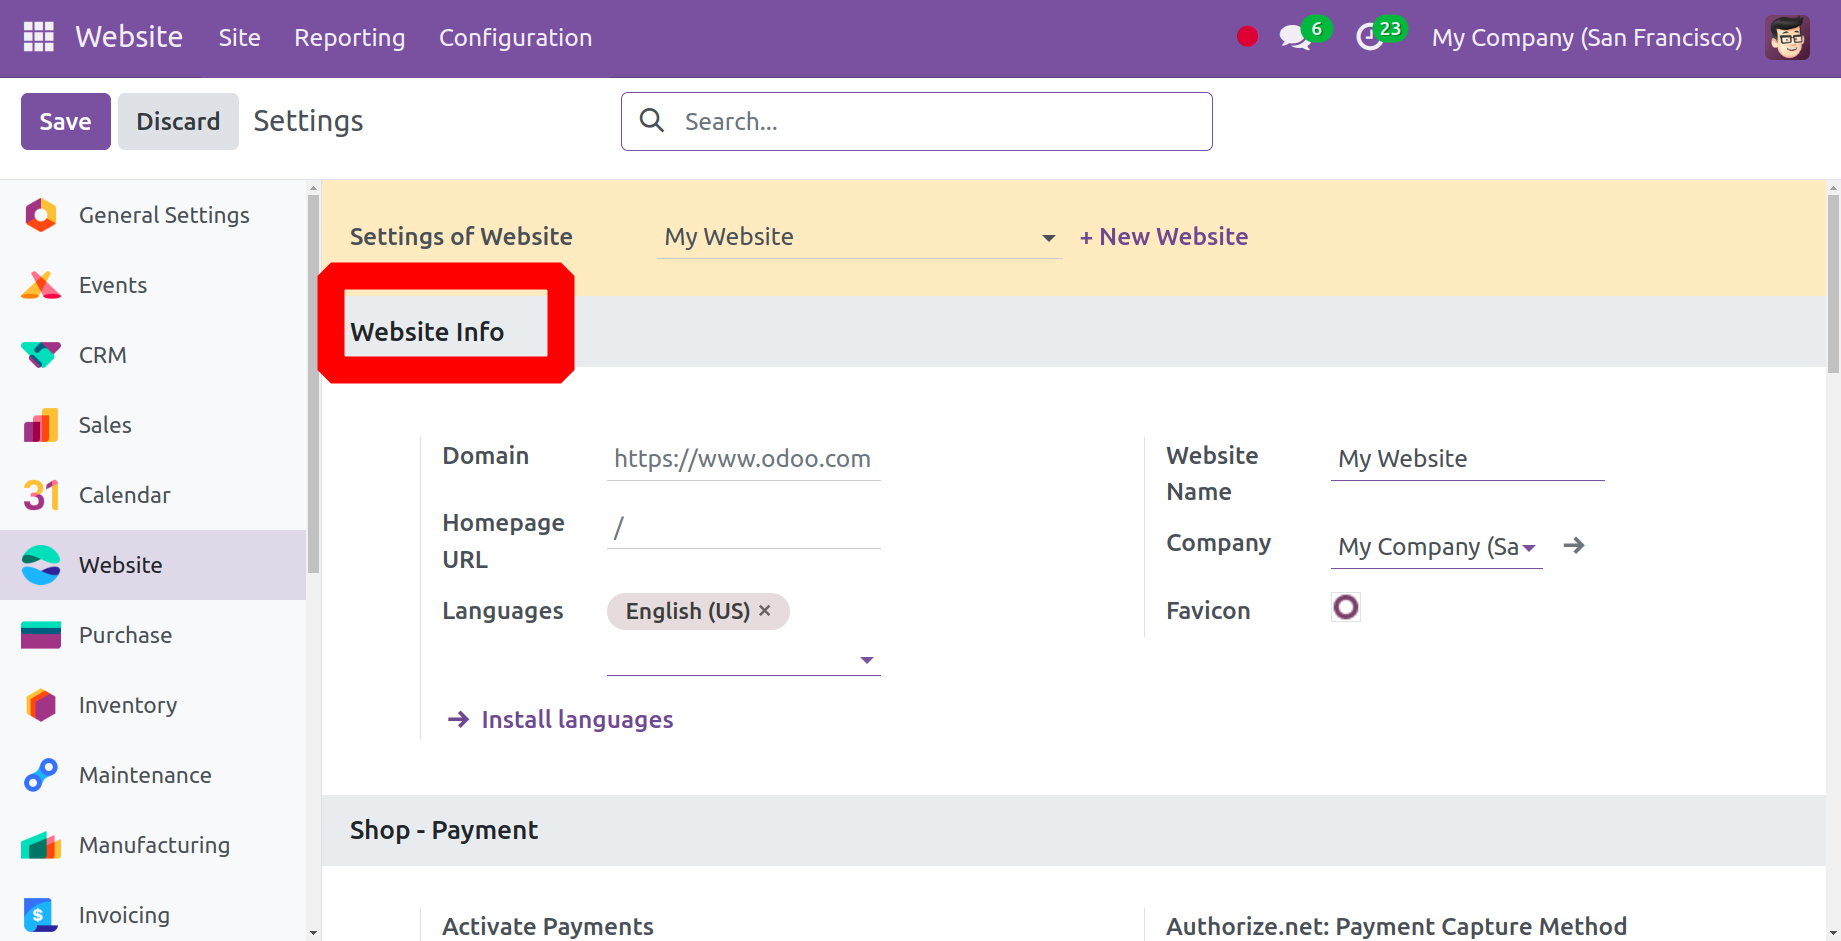
As previously indicated, a website may be configured and managed using the Settings of Website option. This opens the Website Info section, where you can see fields for Languages, Homepage URL, Domain, Company, and Favicon.
Following this option is Shop - Payment, where you can find choices like Authorize.net: Payment Capture Method and Activate Payments.
Through the Activate Payments option, Odoo 17 accepts the majority of payment methods, including Google Pay, Apple Pay, Mastercard, Visa, and Maestro. Recurring charges are another option available to you.
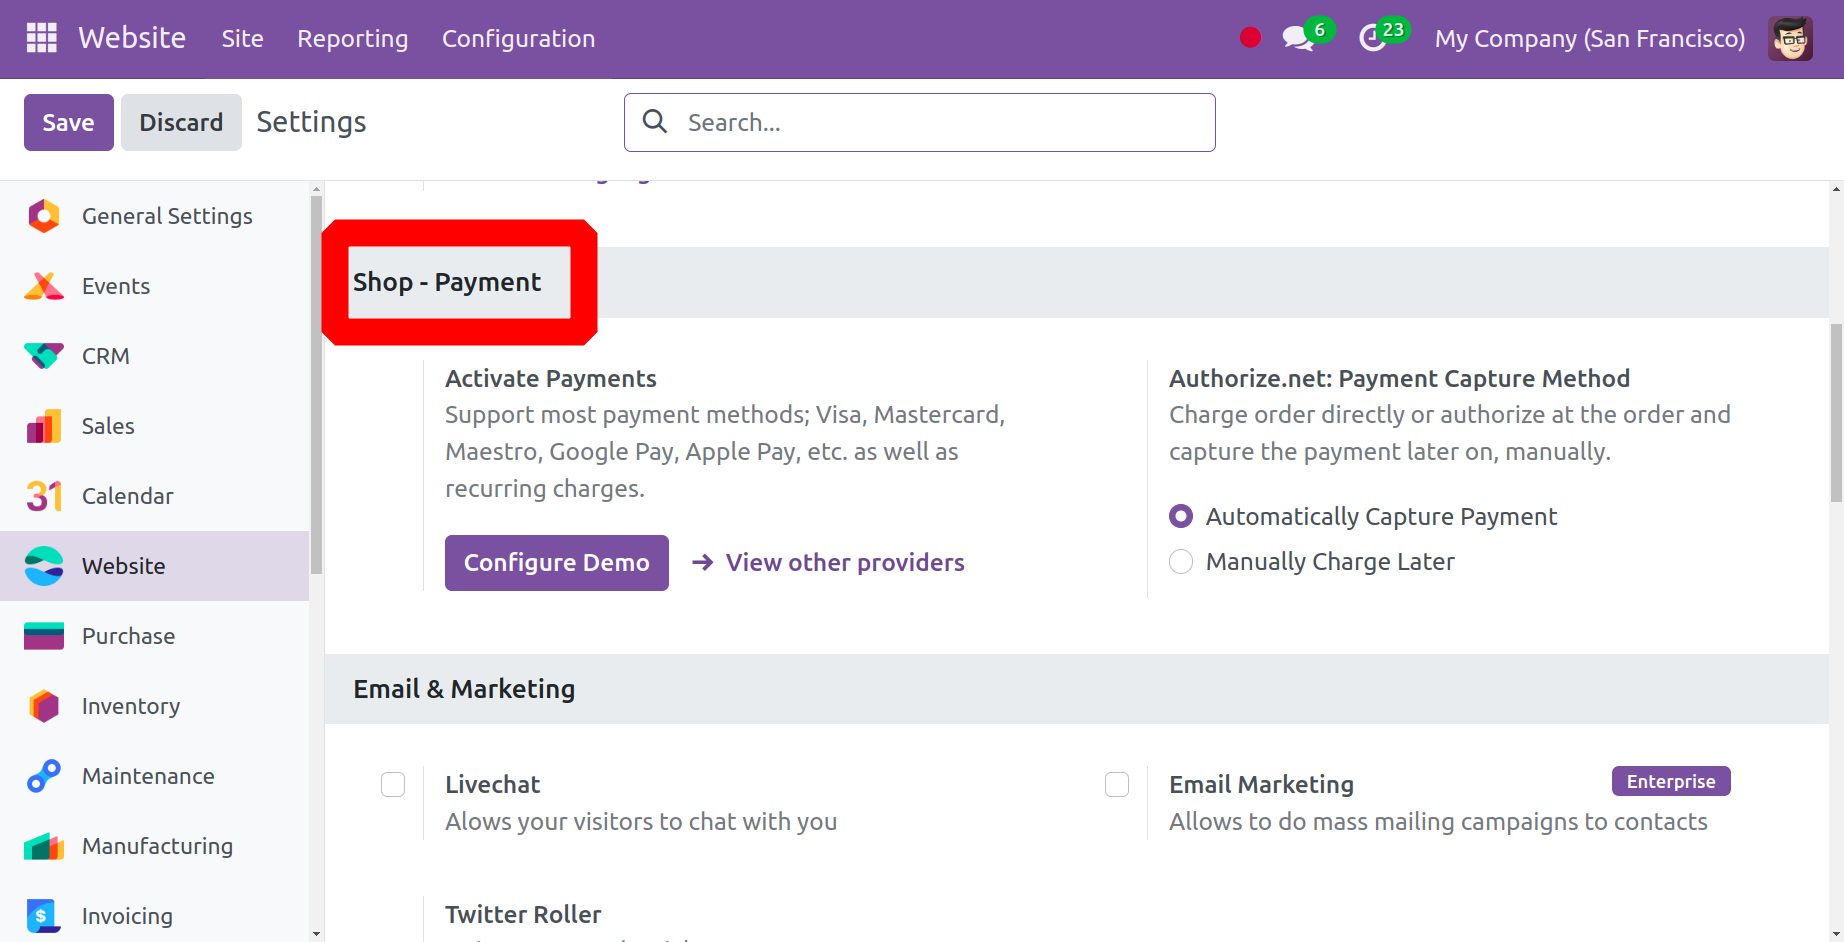
You can select between immediate and delayed payment capture for Authorize.net payments using the Authorize.net:Payment Capture Method. When 'Automatically Capture Payment' is chosen, payment is deducted as soon as authorization is given. If you choose to "Manually Charge Later," money will be collected later. Clients should be aware of this setting if they choose to perform further fraud checks or make other modifications to the order prior to money being collected.
How to configure Twitter API access, which includes Twitter Roller, email marketing, live chat, and automatically sending emails to abandoned checkouts, is covered in the next section.
You may access Twitter Roller and Live Chat from this section.
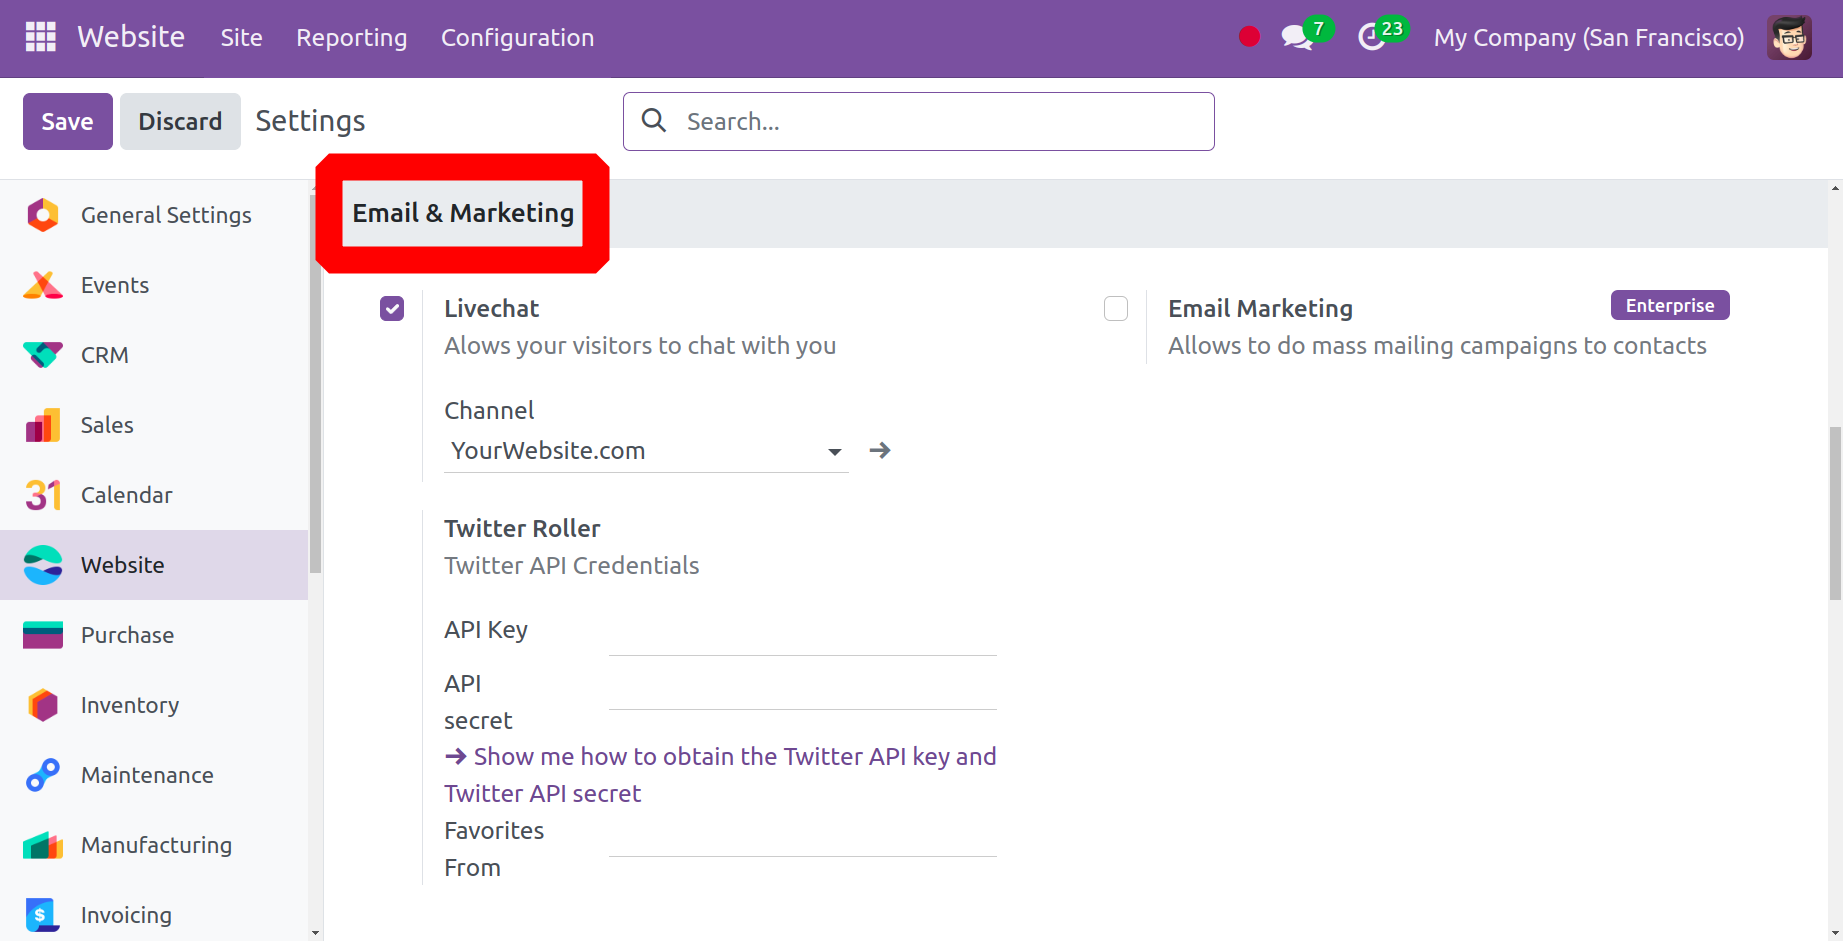
The live chat option on your website allows visitors to communicate with you. It is from here that you may configure the channel and other settings. You may set up Twitter API credentials with the Twitter Roller as well.
Out of all the communication methods, Live Chat has the highest rate of customer satisfaction. It allows for quick responses and allows your clients to carry on with their existing tasks while interacting with you because it is easily accessible.
After Live Chat is deployed, if you build your website with Odoo 17, it will be added to your database. To complete the procedure, navigate to Website > Configuration > Settings > Live Chat. Next, decide which channel to use to link to your website, or make one right away.

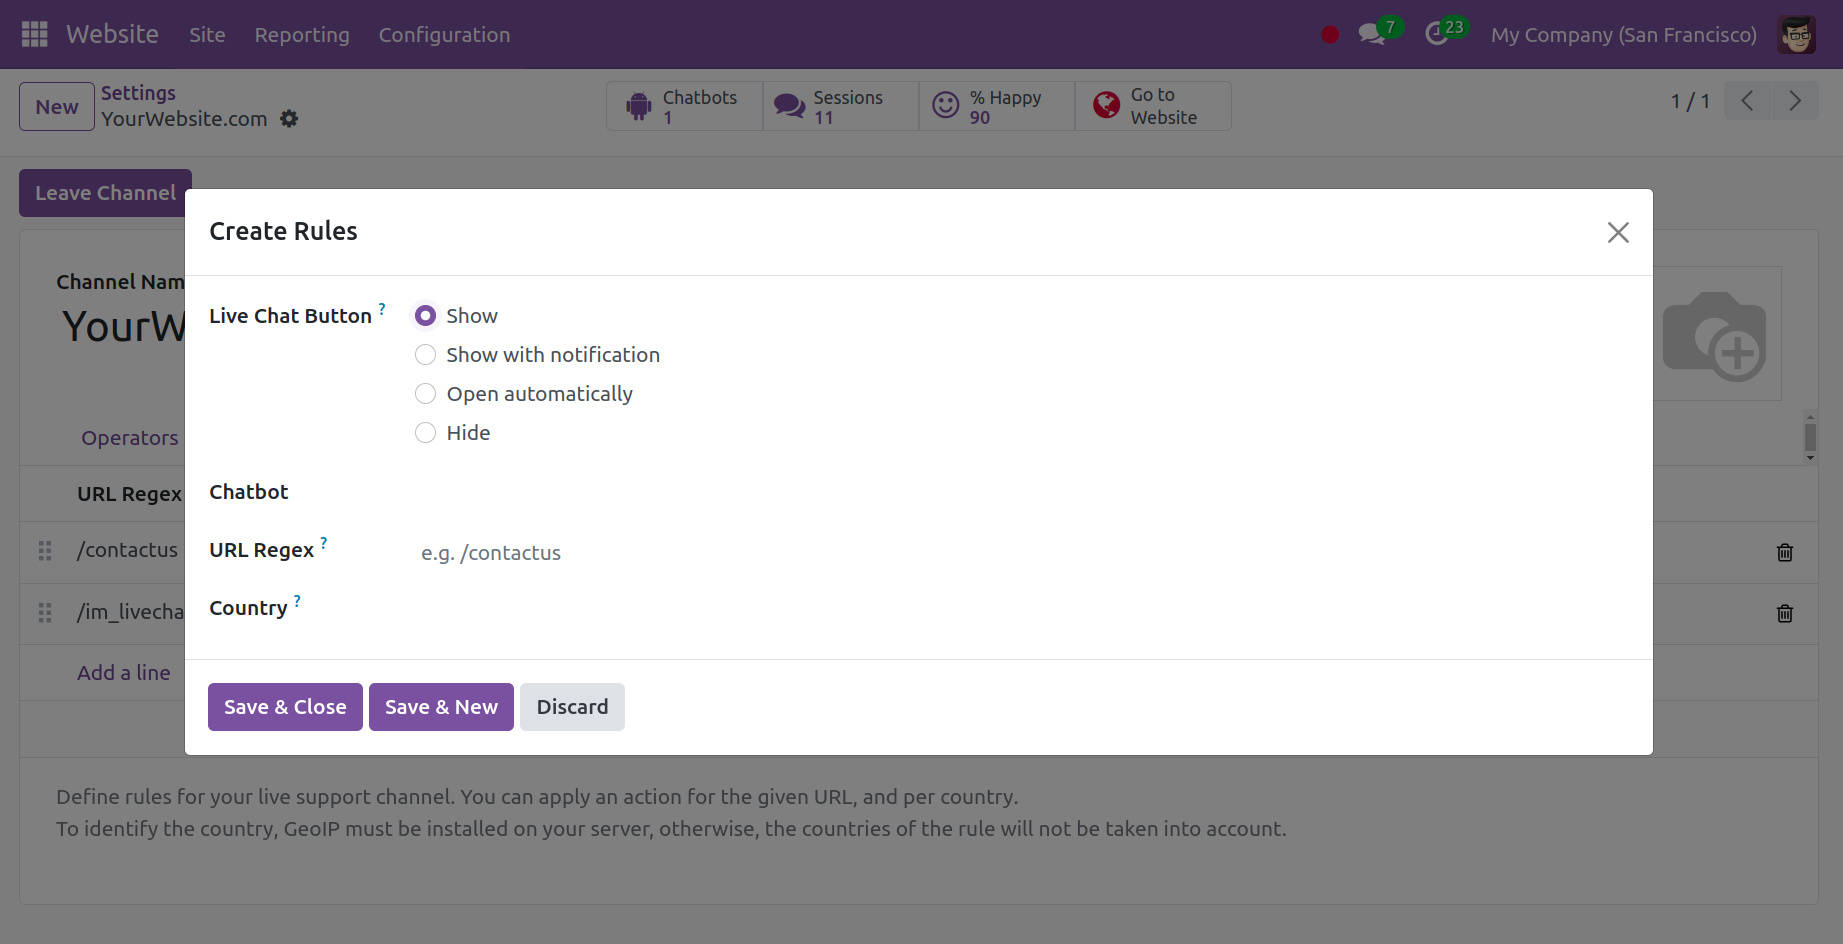
Operators: Include agents to respond to messages requesting chat. You can add as many as you like, but bear in mind that if an operator doesn't do anything in Odoo for more than thirty minutes, they are considered disconnected.
Options include using chatbots to customize the default text that shows on the live chat button, the text that greets visitors when a conversation begins, and the text that invites them to start a chat.
Rules for the Channel: Choose a response for a certain URL and/or country. In the example below, when users (from any country) arrive on the contact us page, the chat window opens automatically after the specified amount of time.
The platform of the Odoo 17 Website module also supports the Twitter Wall. Twitter Wall is one of the best social media marketing tools available. It lets you gather information from Twitter by using predefined criteria and then incorporate it into your website. The Walls option in the Twitter Wall tab of the Odoo 17 website module can be used to manage Twitter walls.
The steps to get the Twitter API secret and key are as follows.
- Visit this link to log in or register: https://developer.twitter.com/
- After connecting, proceed to https://developer.twitter.com/portal/ to finish the Twitter portal access process, if it hasn't been done before.
-
Make a project on the Twitter Portal using the following details:
- Name: Odoo Twitter Connectivity
- Use Case: Adding Twitter content to a website
- Description: Twitter Integration for Odoo
- App Name: Select an original moniker
- In the fields above, copy and paste the values for the API Key and API Key Secret.
- Visit https://developer.twitter.com/en/portal/products to obtain Elevated access. After selecting Elevated, click Apply, and then finish the form.
The Privacy section follows, with features like the Shared Customer Accounts and Cookies Bar displayed below.
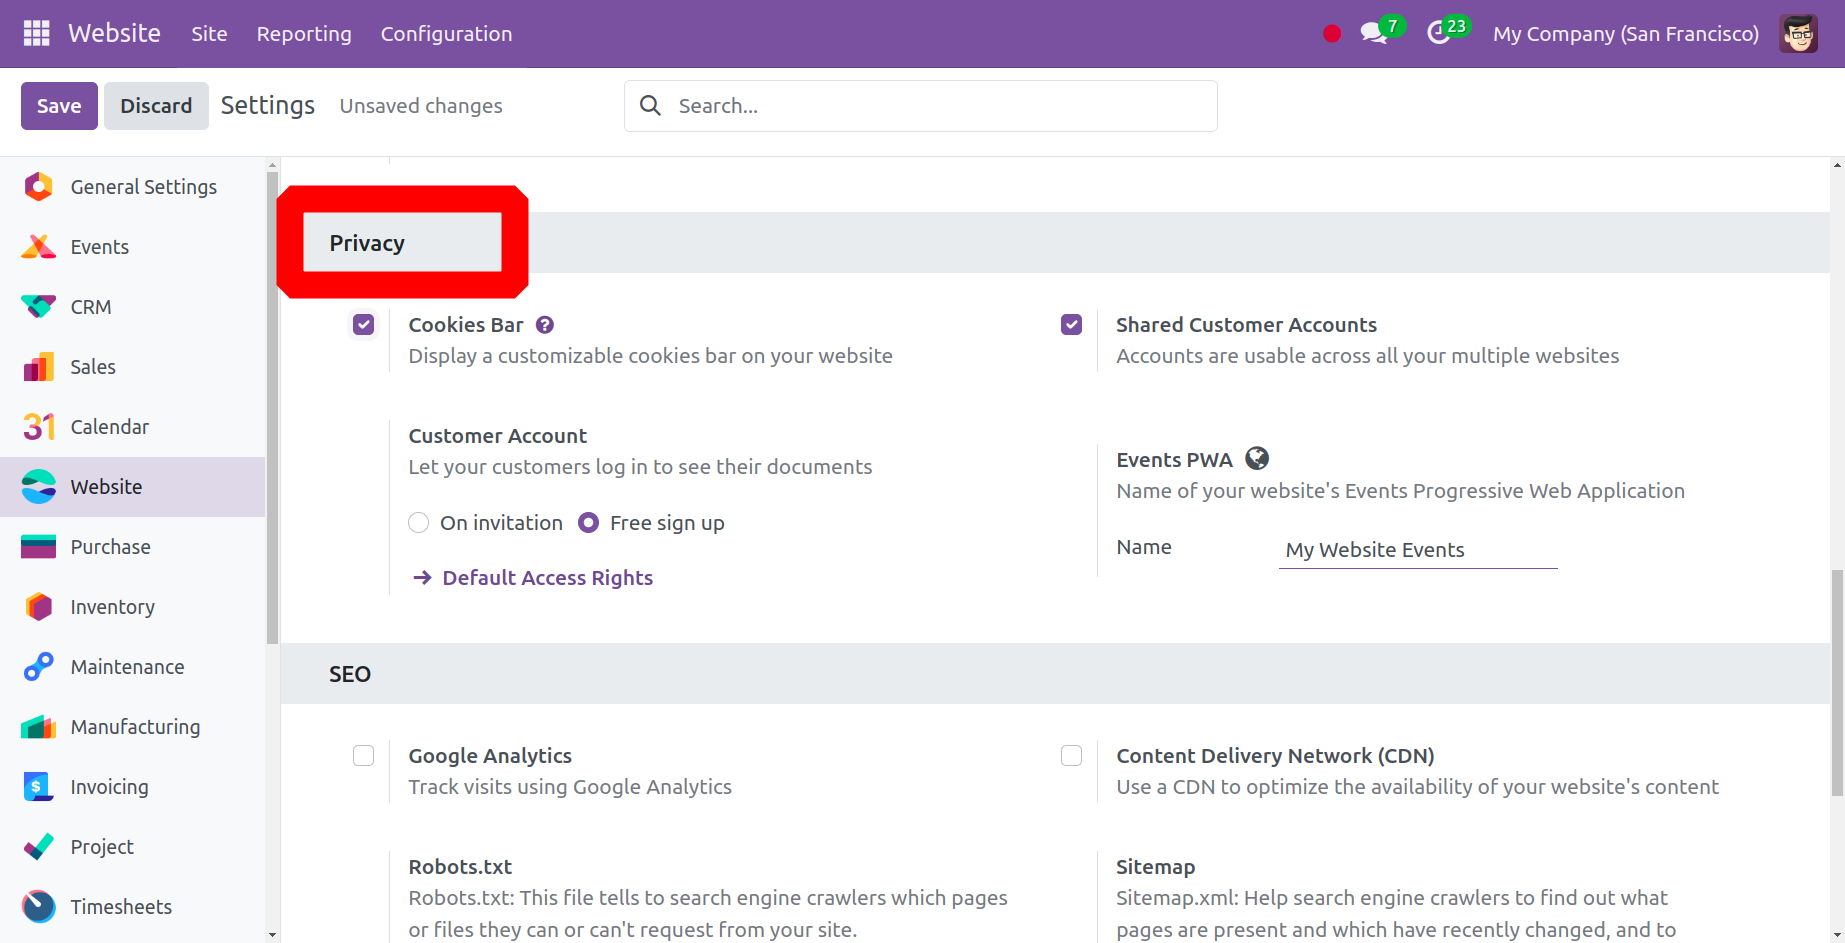
Websites that you visit can transmit small text files called cookies to your device. They are processed and retained by your browser and contain information about your visit, such as login credentials, location, language, and so forth. To do this in a friendly and transparent manner, cookie bars are widely used. When a user first visits the website, they are immediately informed that cookies are used by it and given the choice of whether or not to put optional cookies on their device.
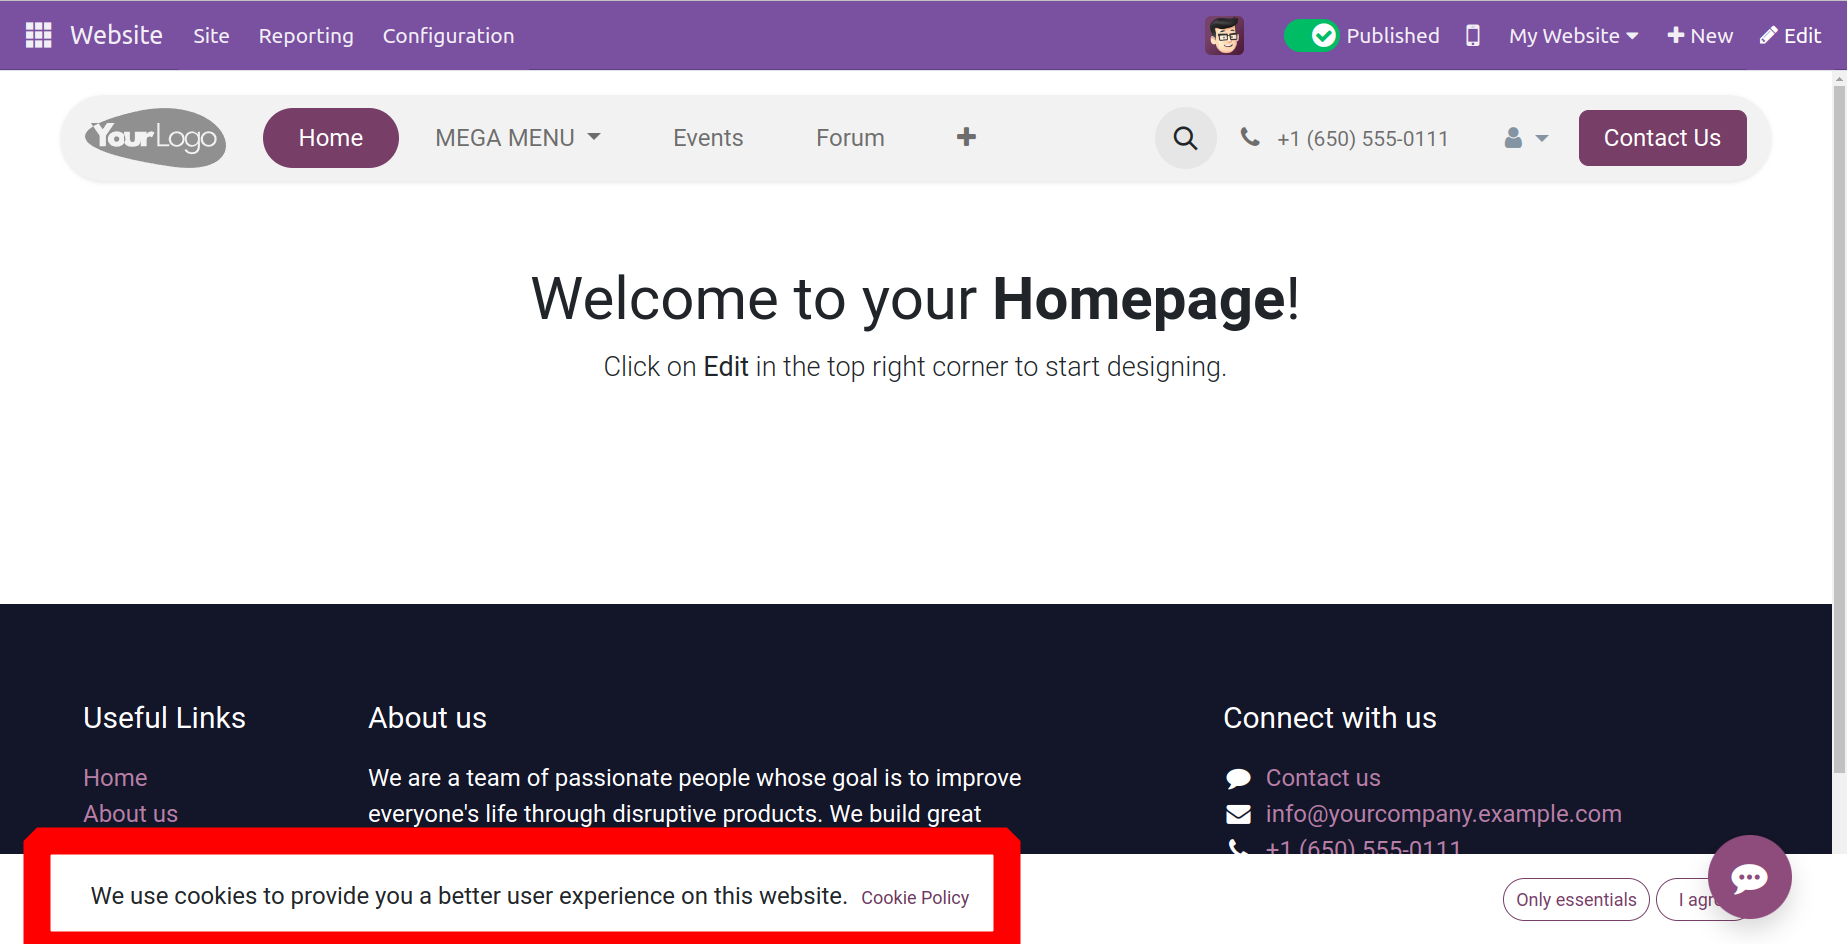
When you enable additional features for your website, Odoo 17 creates the Cookie Policy page (/cookie-policy) with the list of mandatory and optional cookies.
Customers are able to view all of their documents from one central spot when they have customer accounts on eCommerce sites. To access their account, customers must be logged in to the eCommerce website, click on their username in the top-right corner of the page, and choose My Account.
From there, customers may access their orders, invoices, quotations, and other information. You can enable customer accounts across all of your websites if you own multiple of them. At that point, the consumer will only need one account. Turn on Shared Customer Accounts in the Website Configuration Settings Privacy section to accomplish this.
Google Analytics, Default Social Share Image, Console Google Search, and Plausible Analytics are some of the features found in the SEO section that follows.
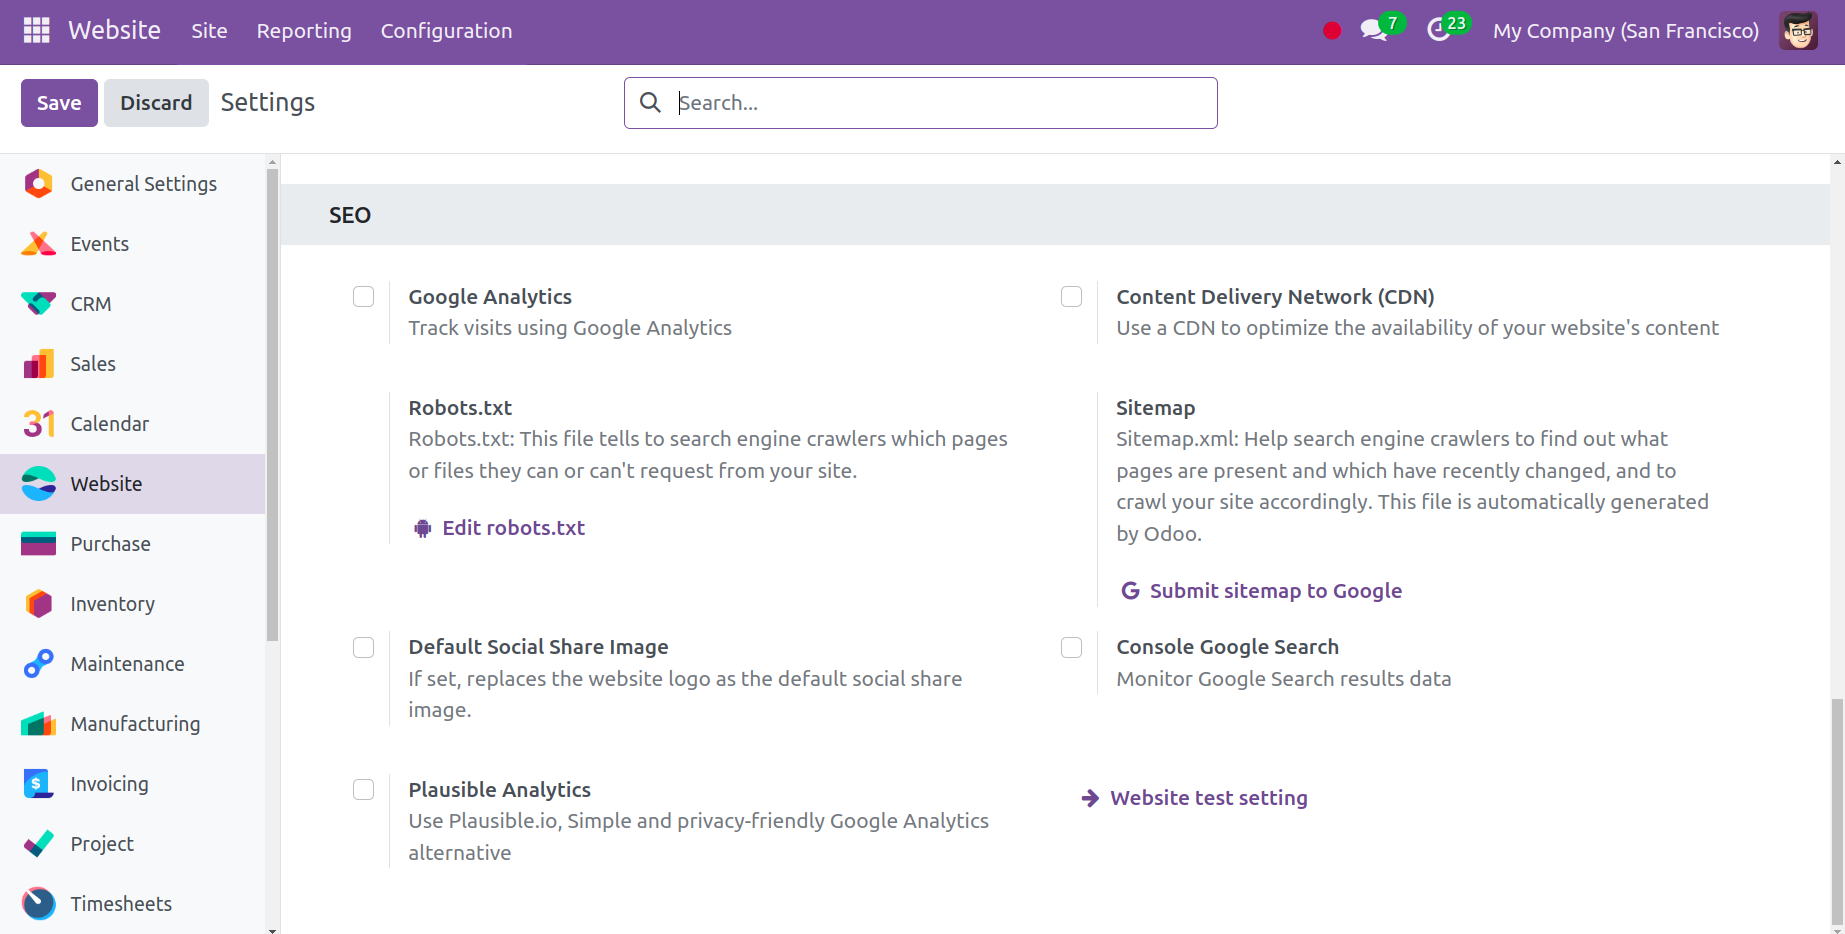
One tool available for tracking website traffic is Google Analytics. Examined are the number, duration, and other demographic characteristics of website visitors. As the owners of the website, we can use this data to better target our marketing efforts and make improvements to the website.
The next step requires the tracking ID for our Google Analytics site. For this, we need to create an account with Google Analytics. After successfully logging in, we create our Google Analytics property by providing the account name, account number, website name, and URL. We must create the client ID for our Google Analytics API after obtaining the tracking ID. We generate our Analytics API credentials by first choosing the Analytics API after we have successfully logged in. We create a new project, enable the Analytics API, and configure the API credentials after selecting the Analytics API. The Client ID can then be created, and finally, by selecting the "Access Google Analytics" button, we can grant Odoo access to Google Analytics. After a little loading time, a graph showing the number of people who have visited our Odoo website will now show up in our dashboard.
You can utilize the Google Places API to validate addresses given by visitors by using the Address Autocomplete feature.
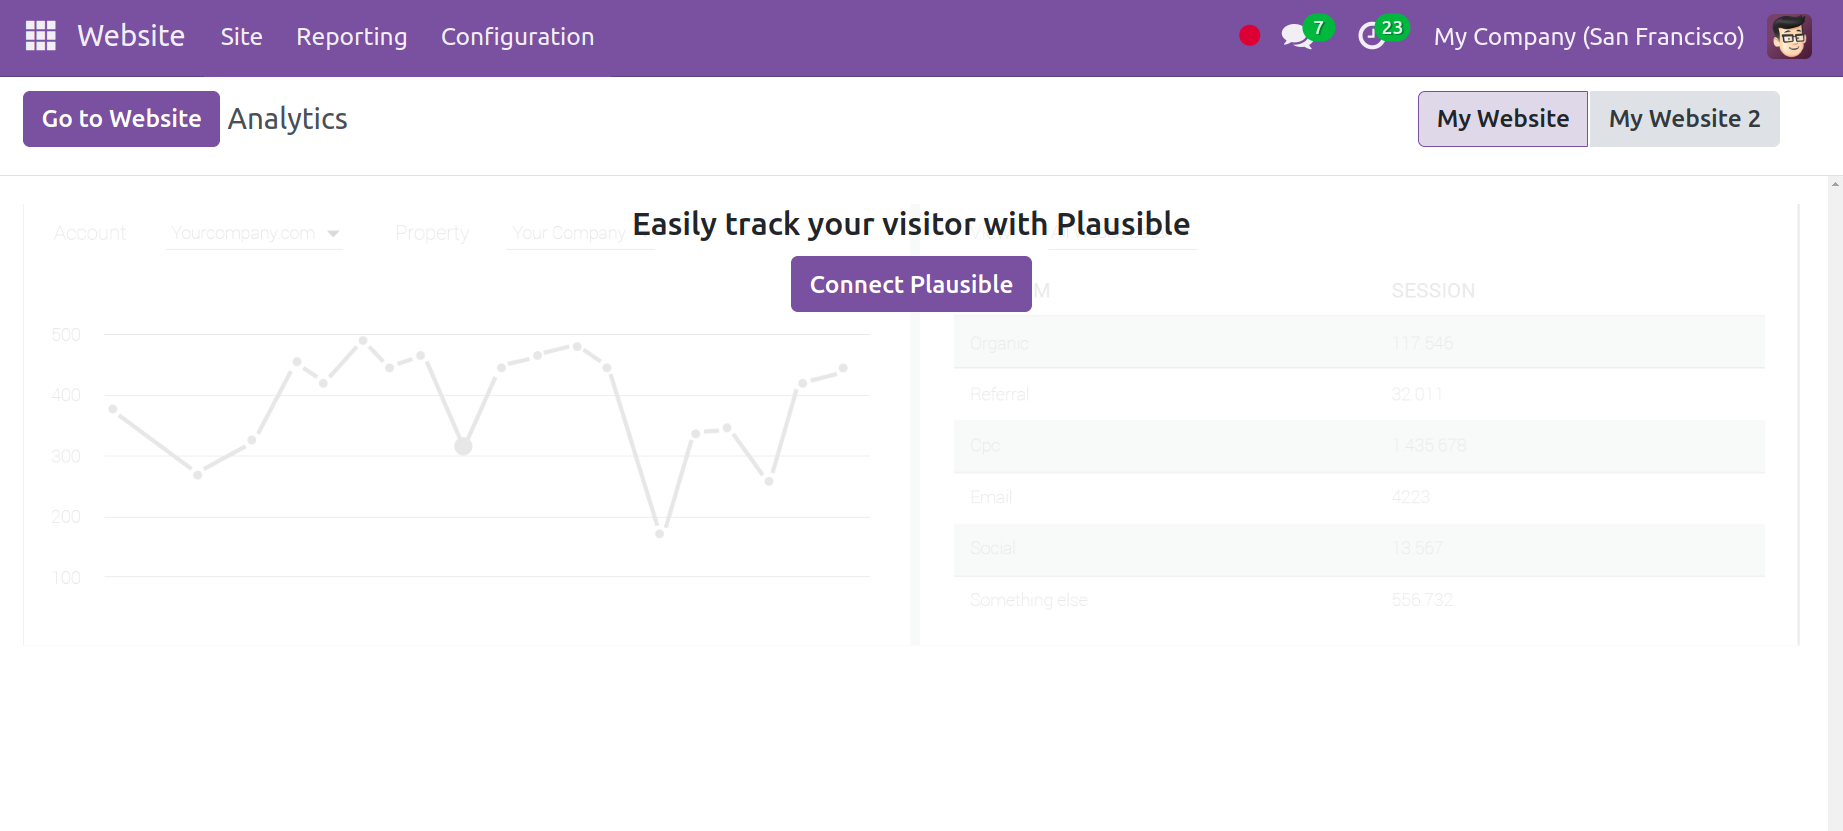
You may allow Plausible Analytics to use this feature in the settings. It's an open-source, easy-to-use, light-weight, and private website analytics tool.
You can upload an image to replace the website logo as the default social share picture if the Default Social Share Image option is activated.
Google offers a free tool called Google Search Console that helps you monitor, manage, and fix issues related to your website's visibility in Google Search results. Although it's not required, using Search Console can help you better understand how Google sees your website and make it appear in search results.
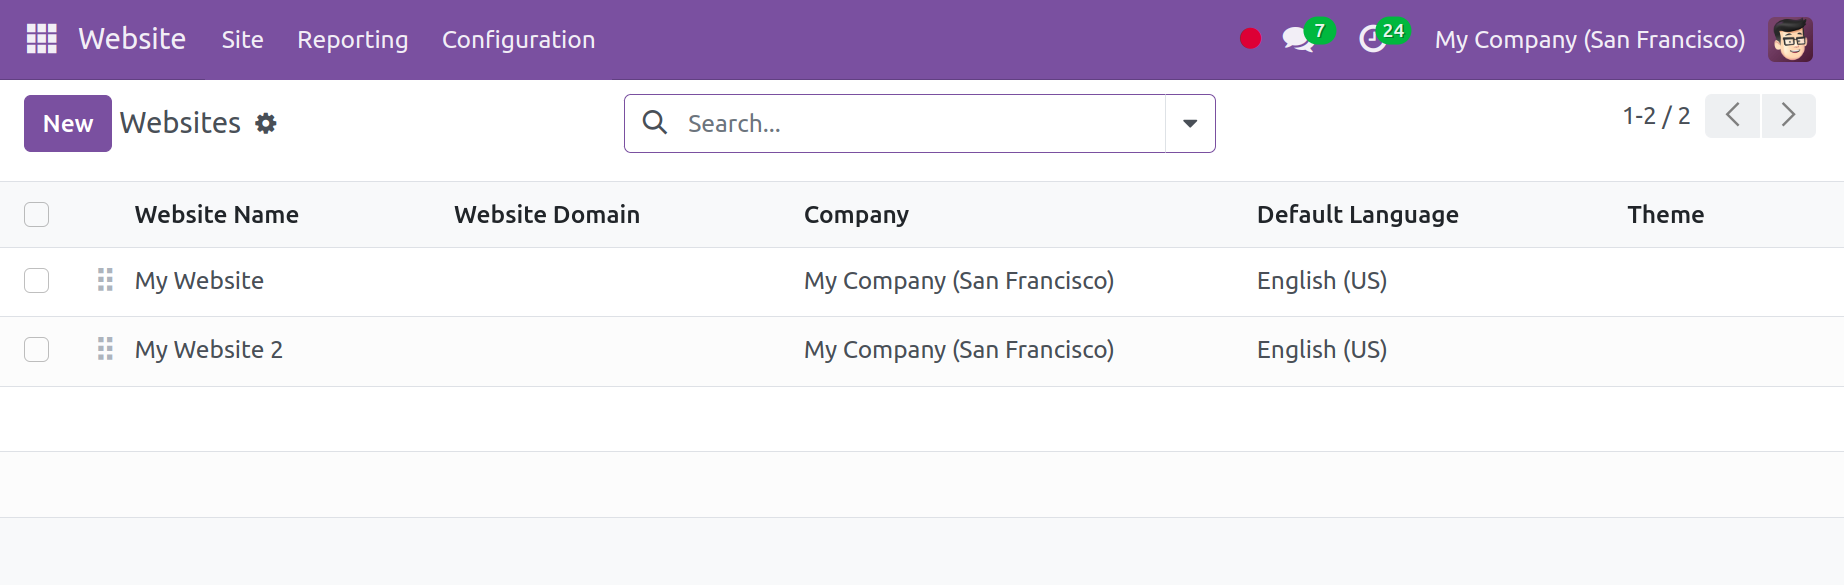
Website
Under the Websites tab, a list of all the built websites may be found. The Configuration menu contains the Websites option. Here, the list view displays the name of the website, its domain, the company name, the default language, and the theme. Click the New button to add a new one.
Redirect
The Redirect option, located under the Configuration menu, can be used to redirect or rewrite content on website pages. Redirect rules that are preset include information such as action, name, URL from and to, and website. Click the New button to add a new one.
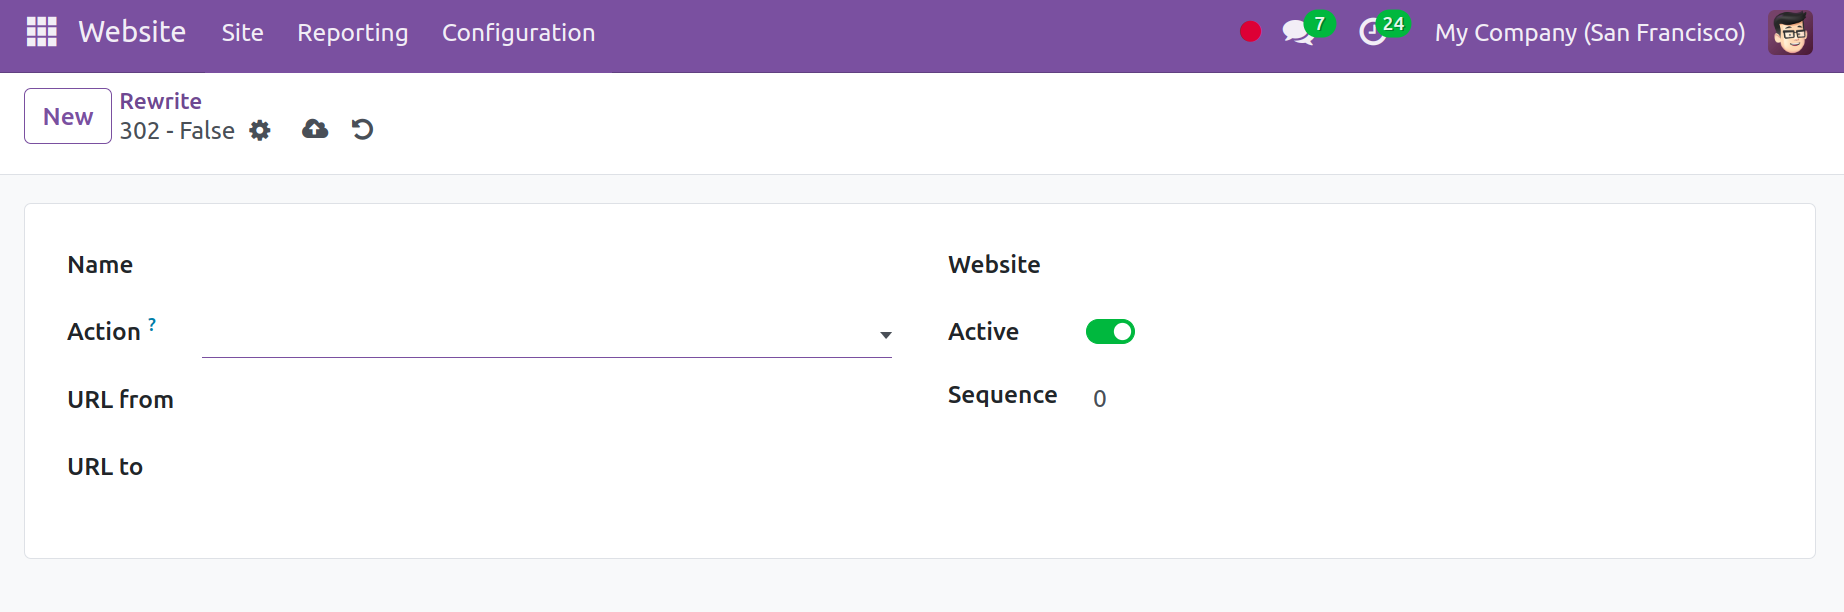
Add the redirection rule's name first. Next, select the Action item from the list. There are four alternatives in the list. Depending on what they require, users can select the appropriate course of action.
301 Moved Permanently : The updated URL will remain in the browser's cache.
302 Moved Temporarily : The browser will ask for the new URL again the next time it is accessed instead of storing it in its cache.
404 Not Found : In case you wish to delete a particular page or controller
308 Redirect/ Rewrite : If you would like to rename the controller with a new URL
After selecting the action, the URL From and URL To can be entered. Next, you can add other information like the sequence number and name of the website.
Menus
Here, we've already talked about adding a new menu from the website's front end. The website menus can be created, edited, and viewed from the back end as well. Choose the Menus option from the Configuration menu to accomplish this.
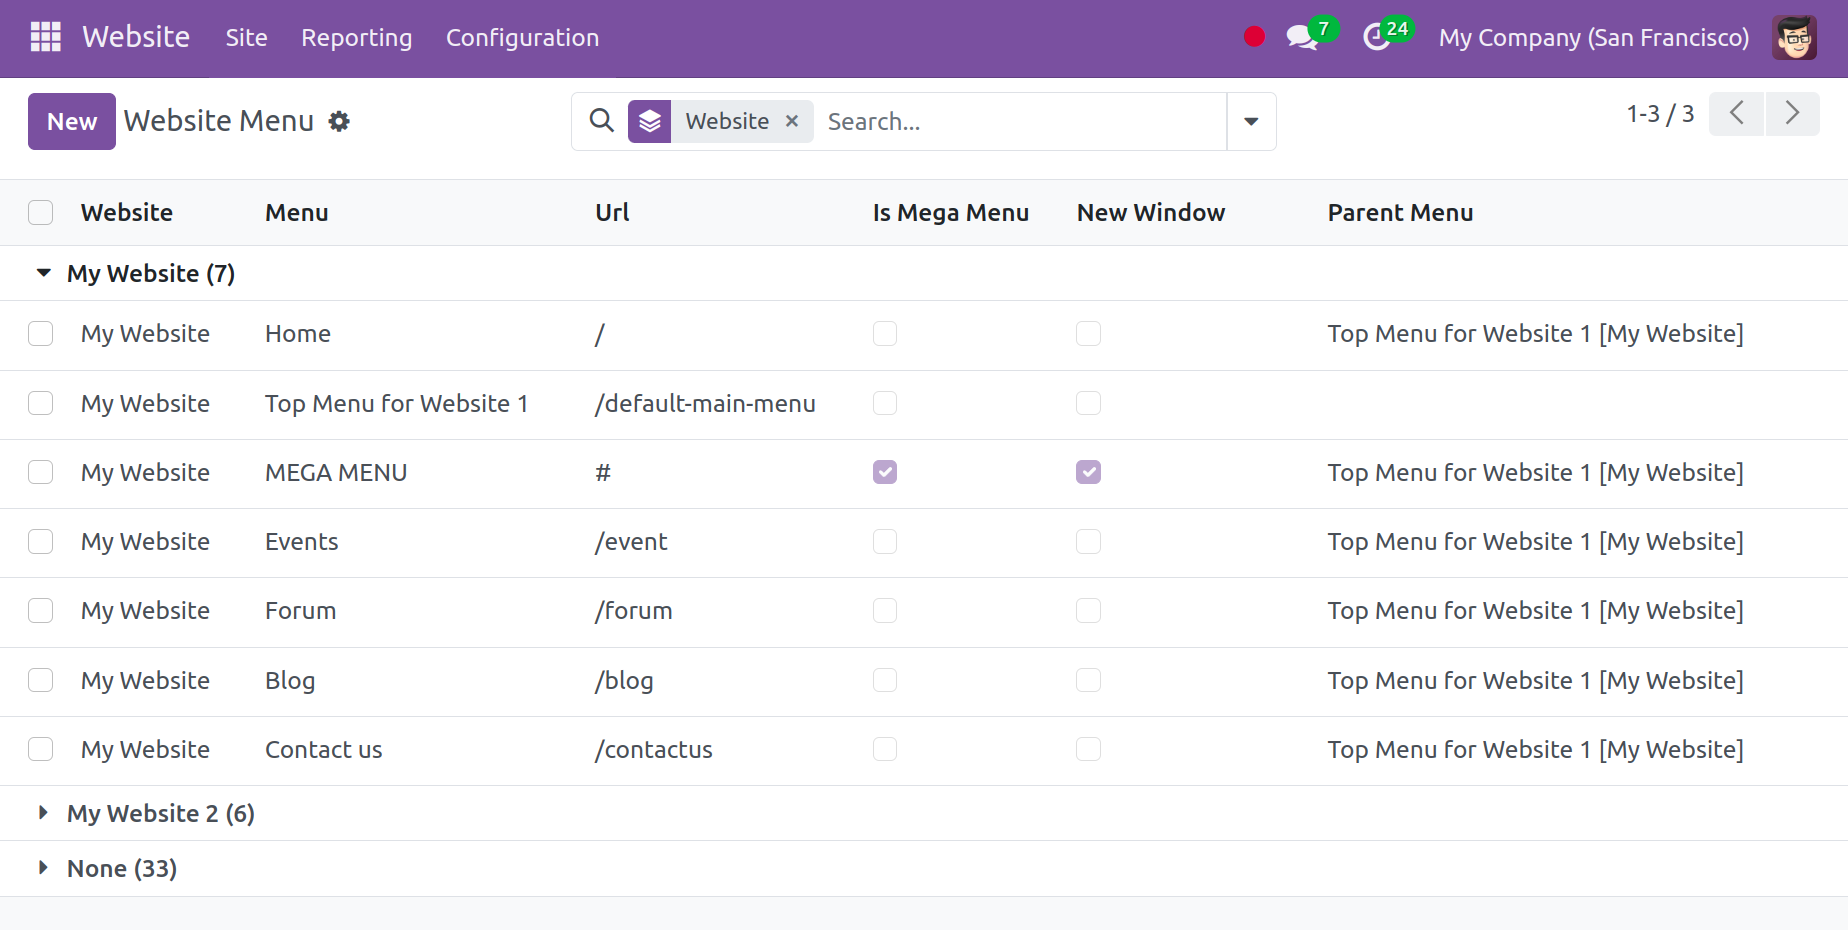
You can browse all of the menus from many websites at once in this list. The website's name, URL, and whether or not it has a mega menu, The details displayed in the list are the parent menu and the new window. Click the New button to add new content.
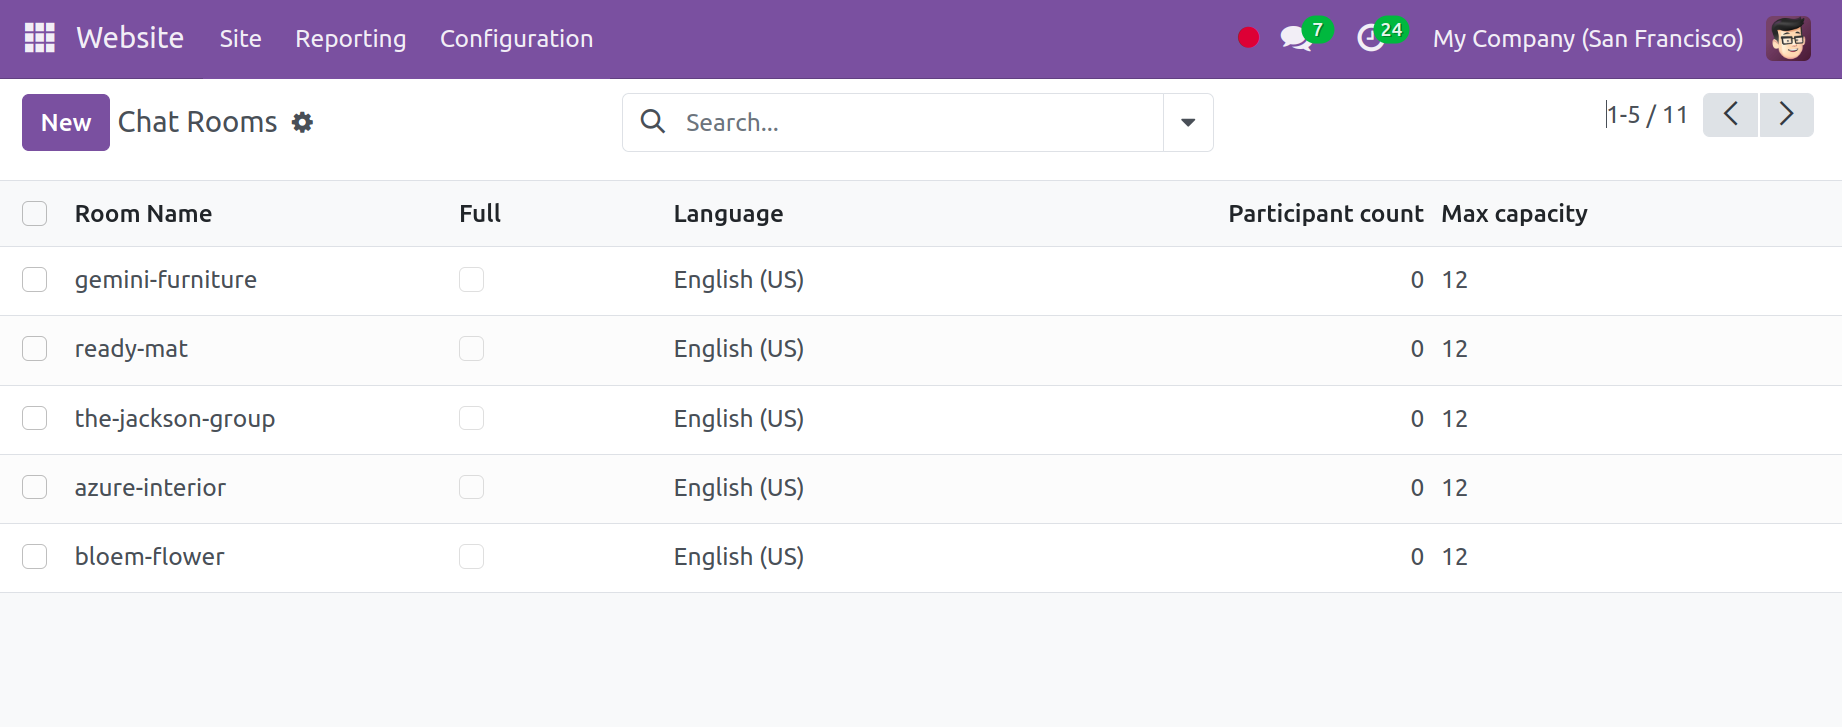
Chat Rooms
From the back end, users may access every detail of the chat rooms they have made on the website. Select the Configuration tab and select the Chat Room option. You may examine the room name, full, language, number of participants, and maximum capacity there. Click the New button to add a new chat room.
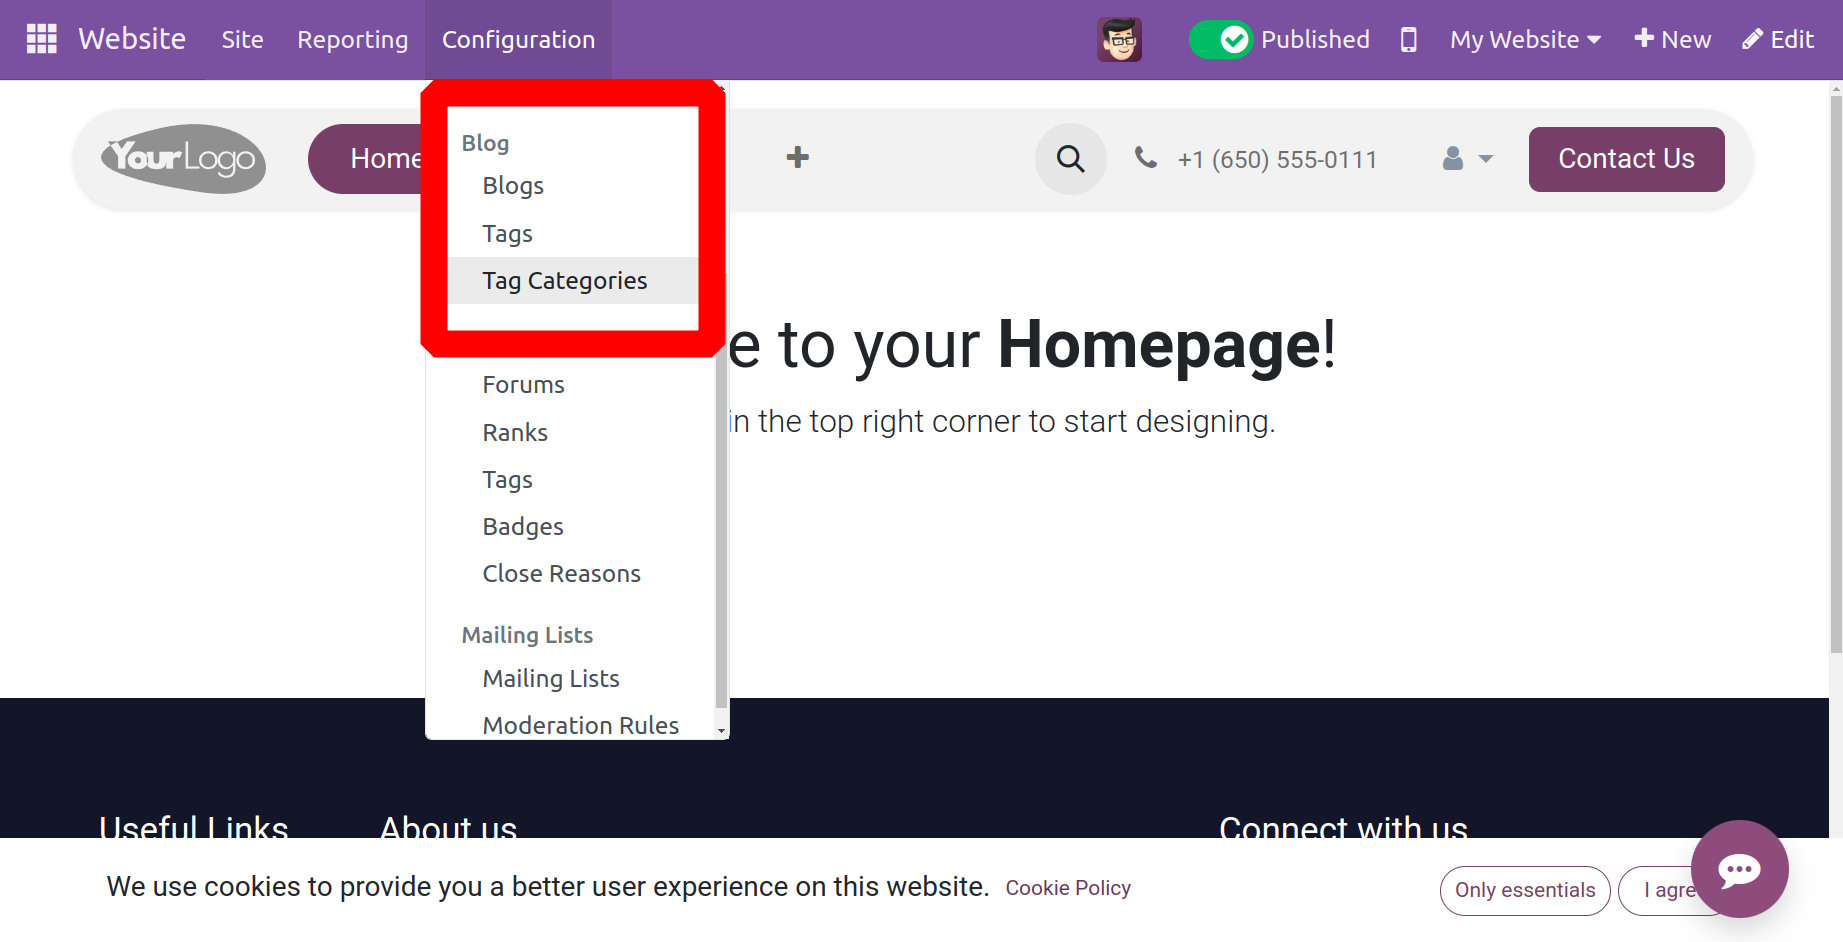
Blogs
As seen below, the Configuration section may have the Blogs option. In addition to the creation of blogs, it also comes with two other options: Blog Tags and Blog Tags Categories.
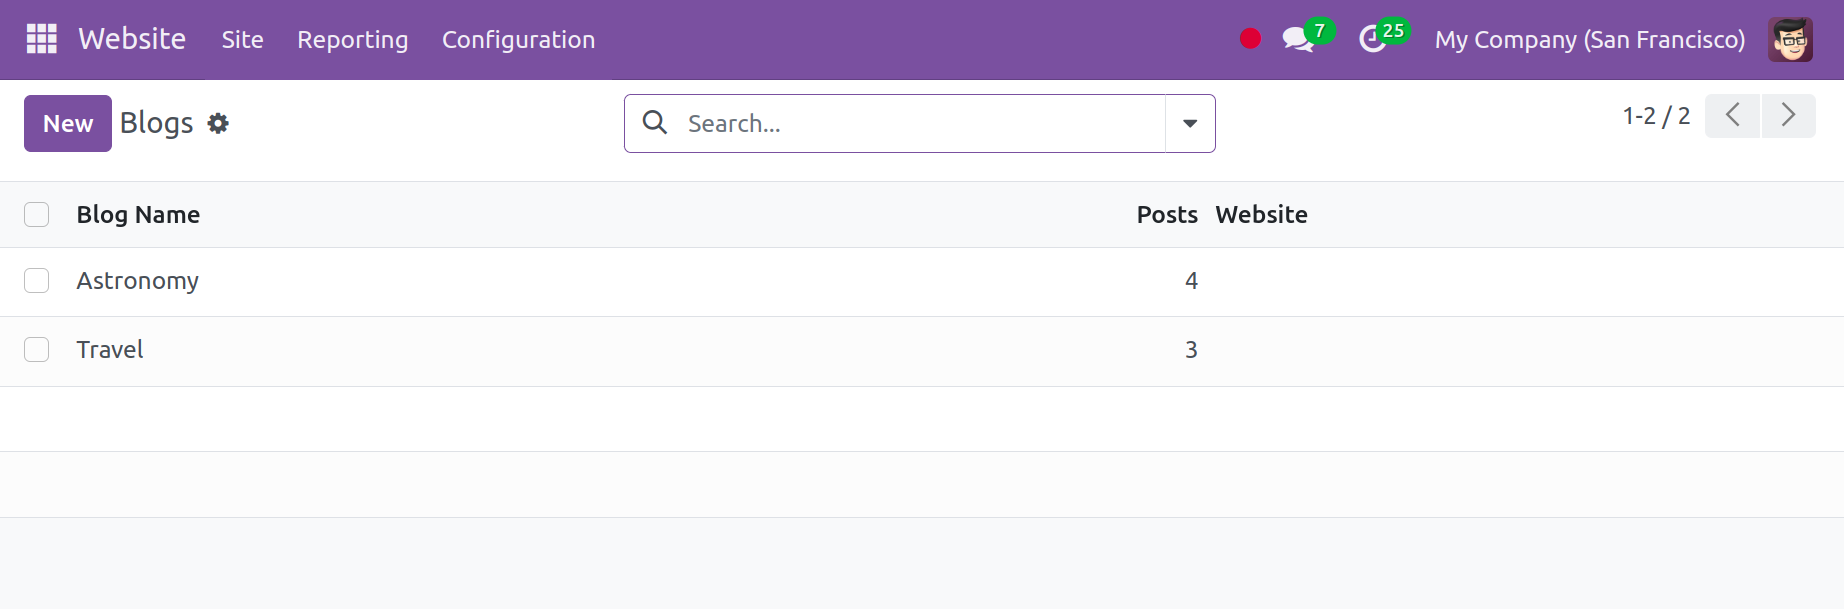
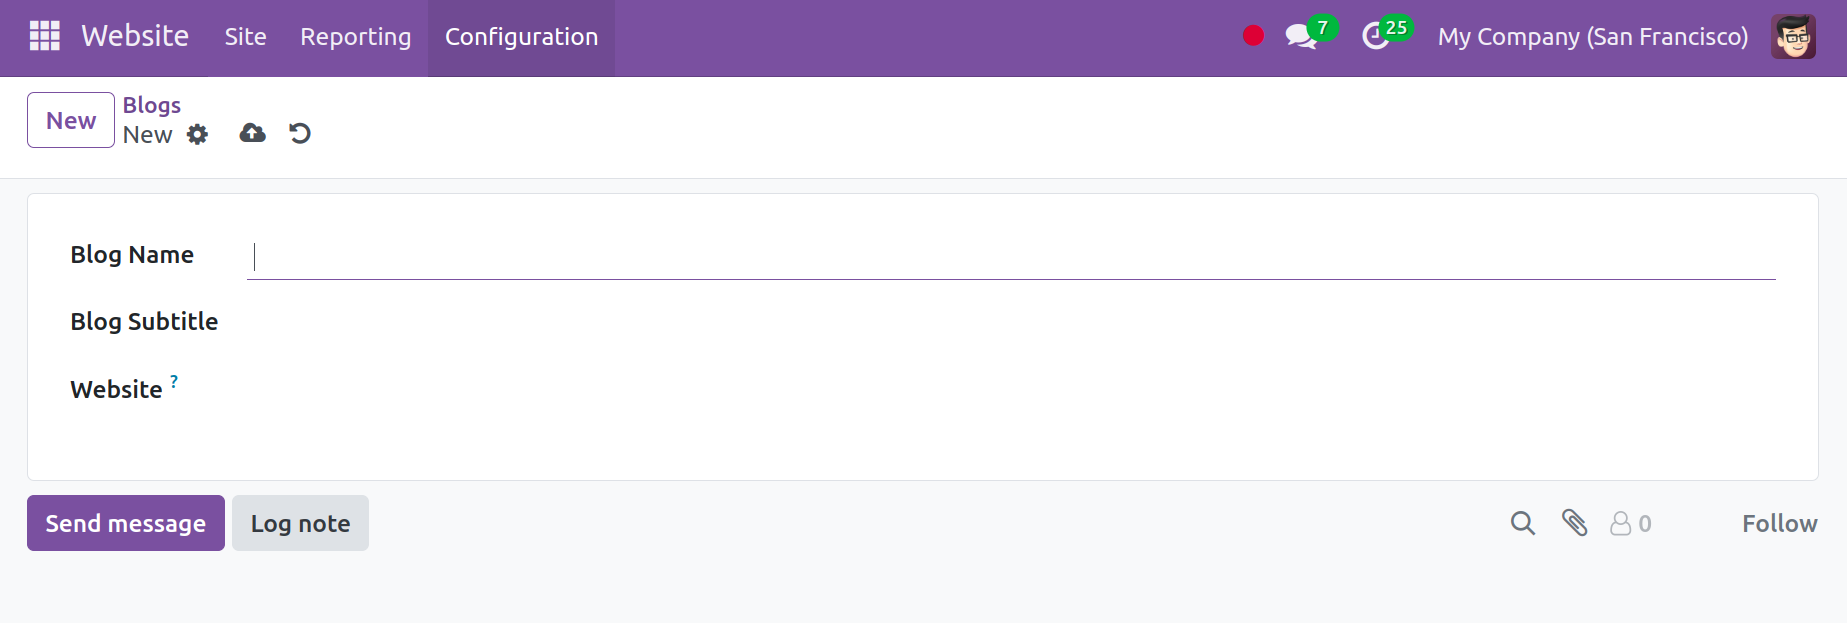
Select the Blogs option to view and add blogs. From there, you may view the website, the blog name, and the quantity of entries. Click the New button to add a new blog.
Mention the blog's name, subtitle, and website in the creation form.
All specified Blog Tags on this platform will be shown here, along with pertinent details like tag name, category, and articles.
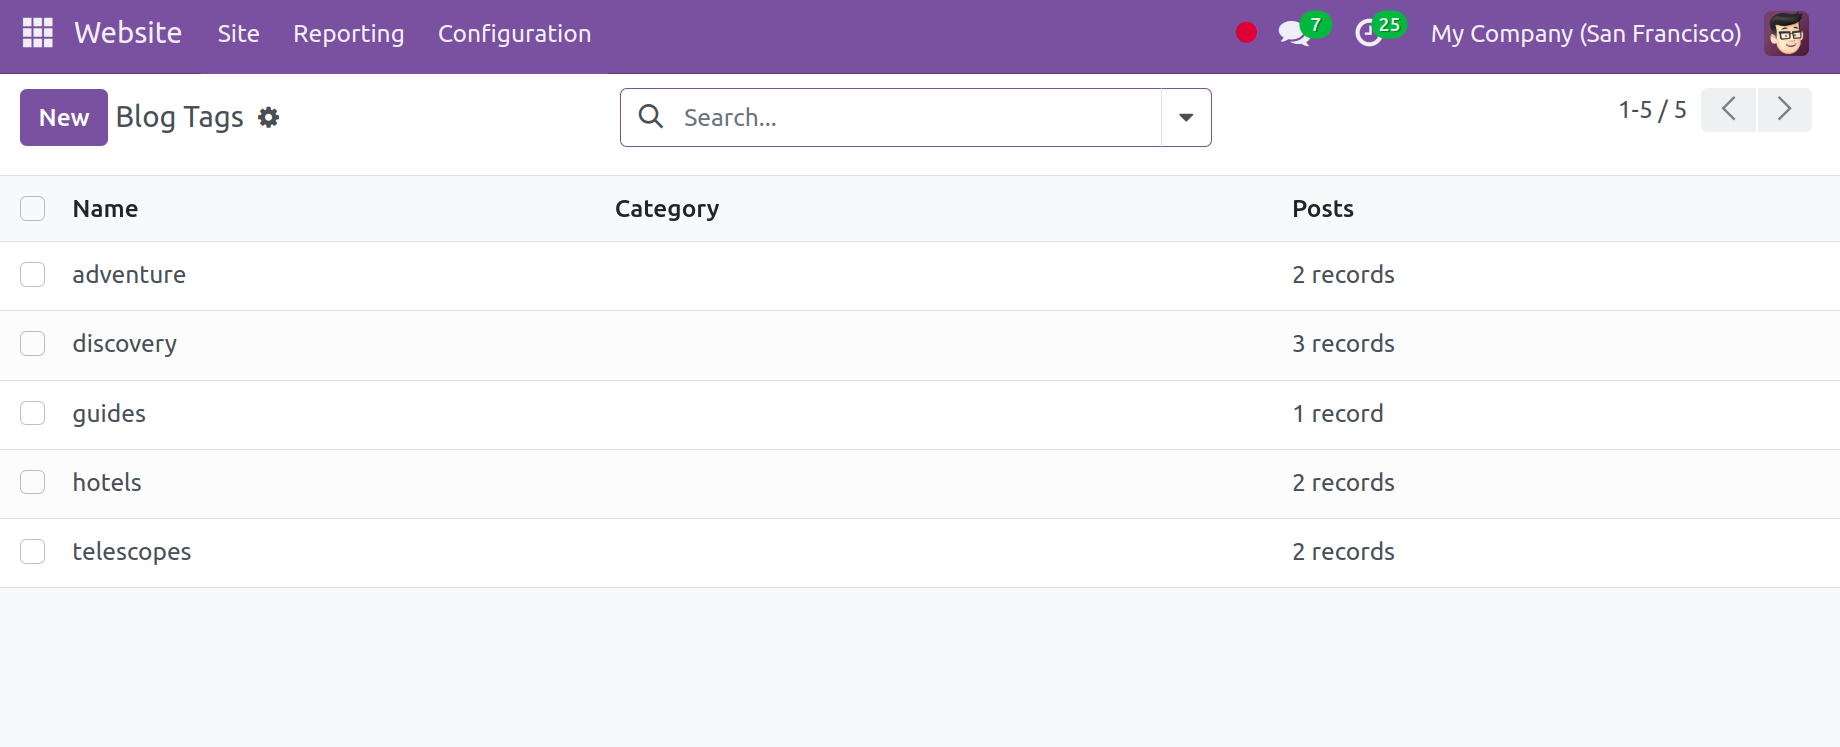
To create a new one, click the New button with your mouse, and the system will display a new form view.
In a similar vein, the user can also name their Tag category.
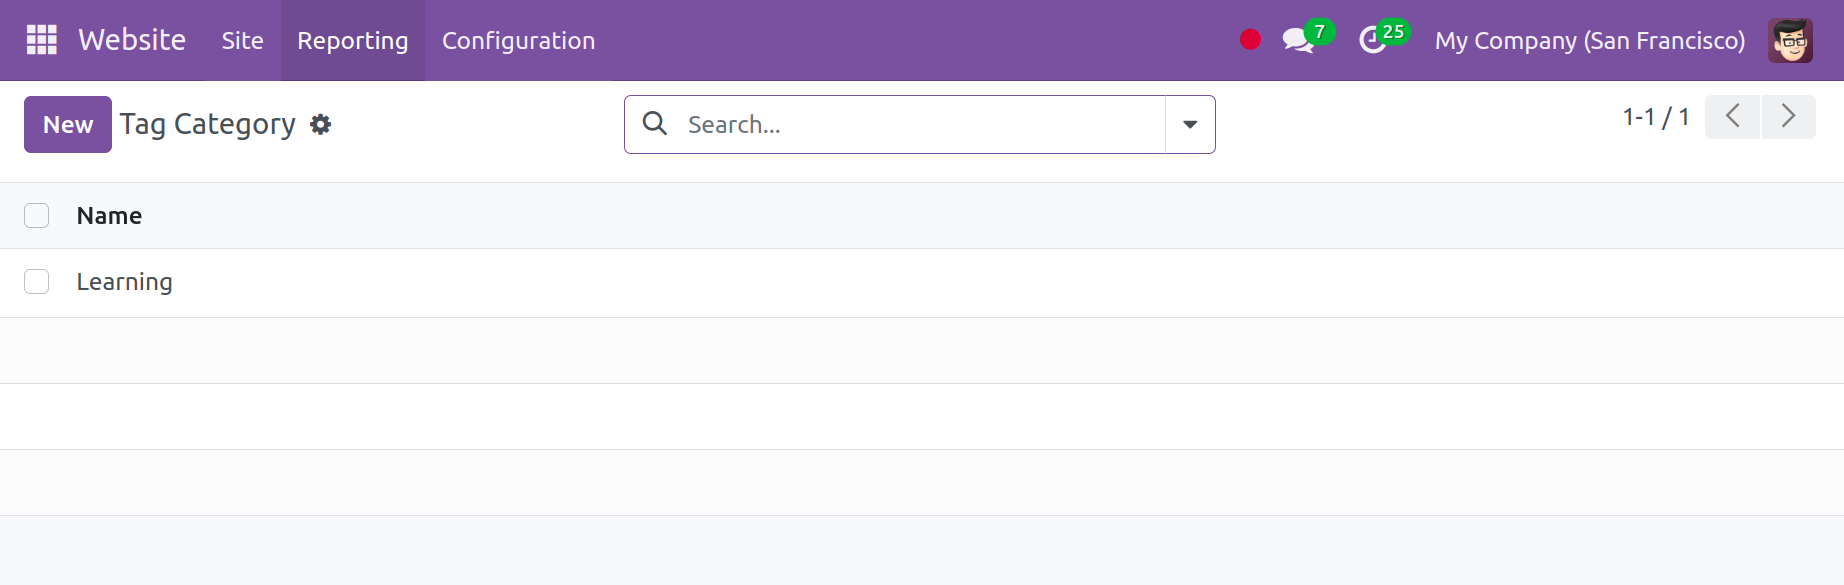
This is how a blog can be made and posted on the internet with a designated tag and tag category.
Forums
The forum section inside the Configuration included some more options like Forum, Ranks, Tags, Badges, and Close Reasons.
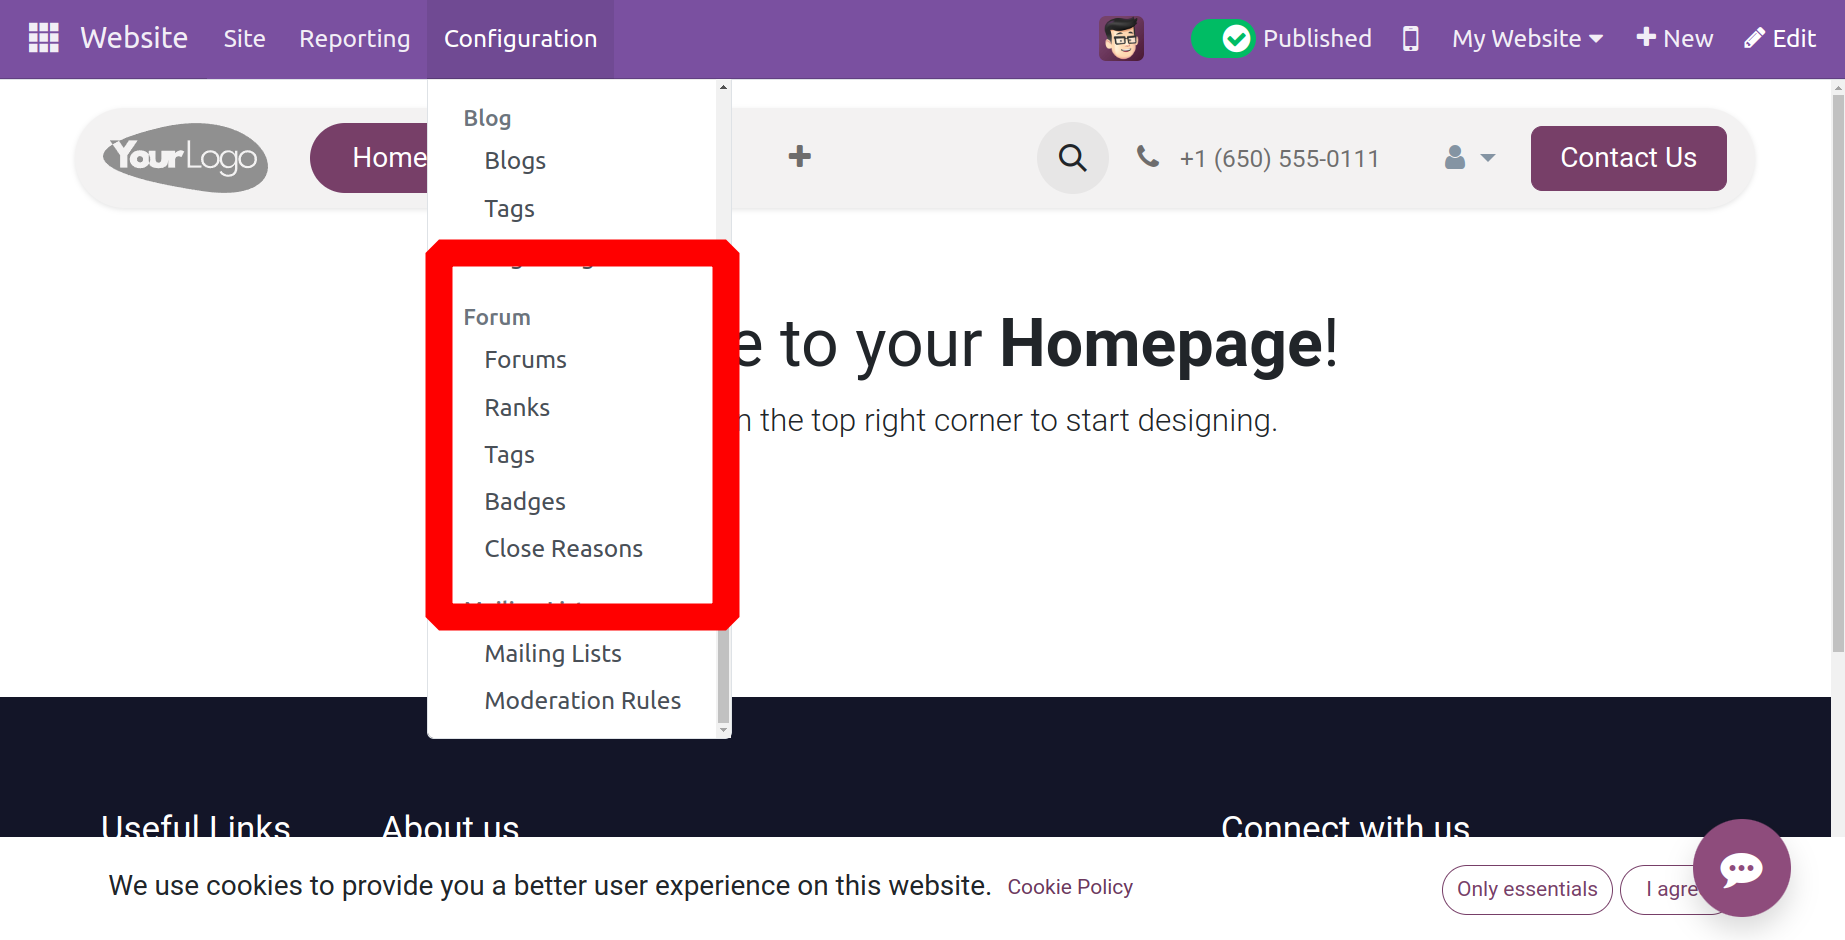
If the user wants to start a new forum, he can do so via the website module's Configuration menu by selecting the "Forum" option, as seen below.
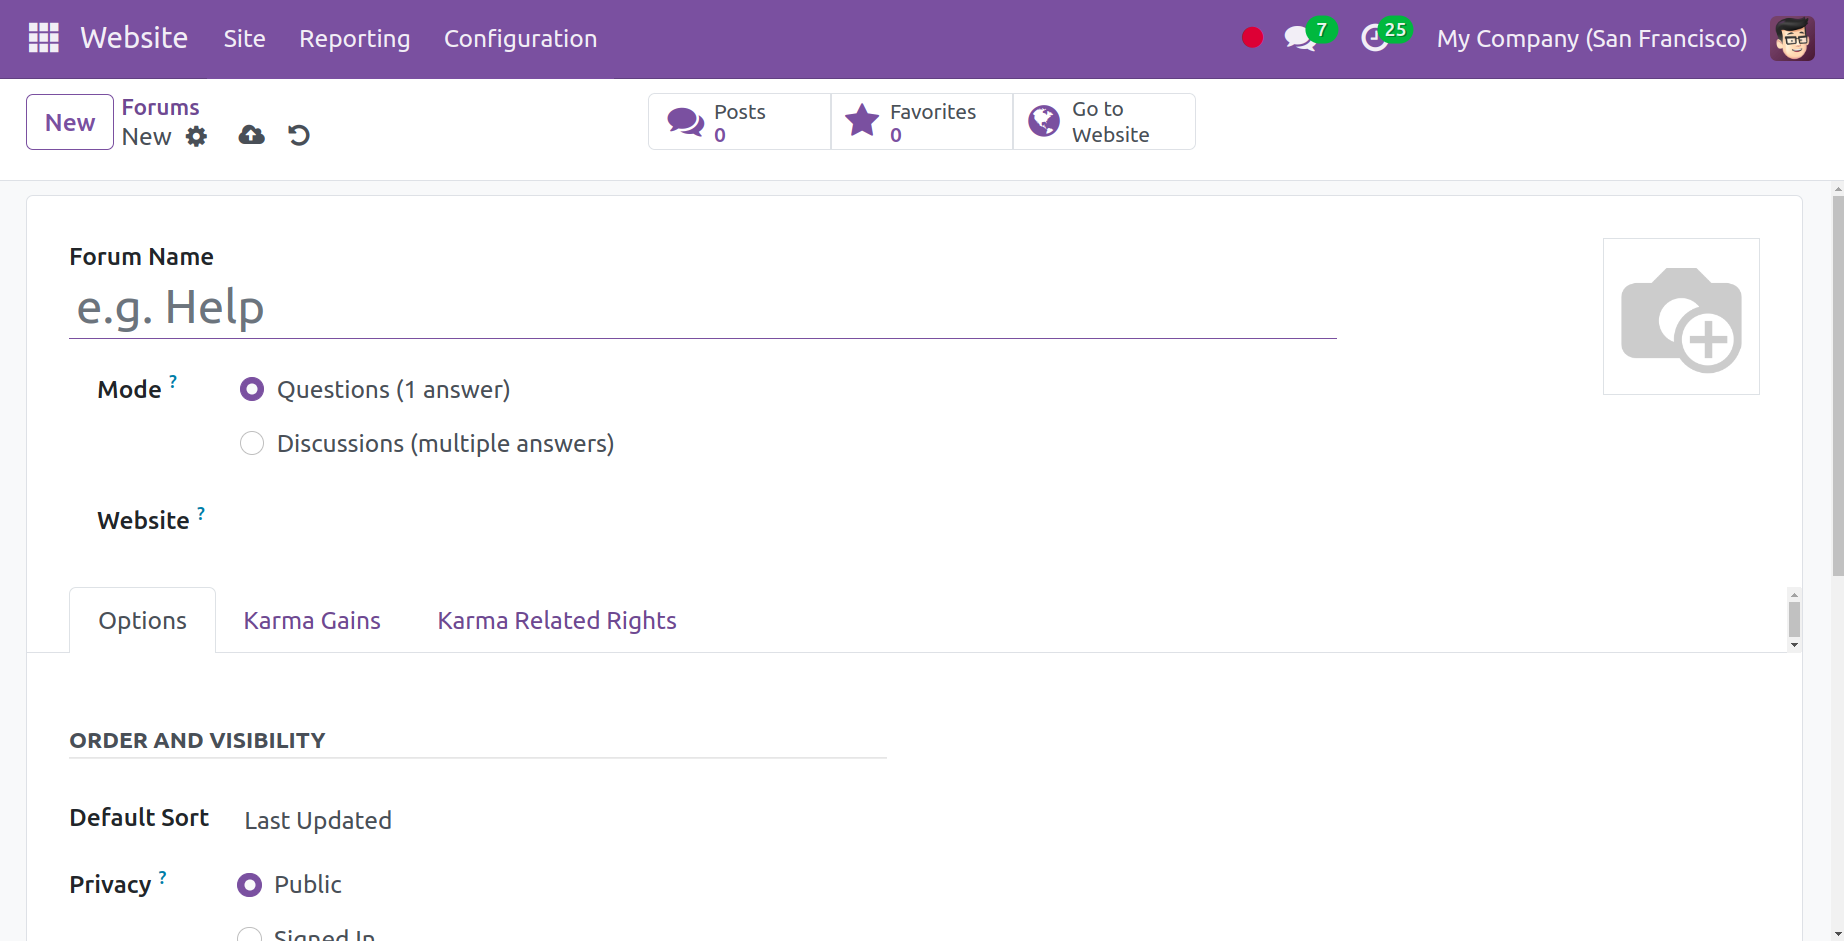
The user can choose the website where the forum needs to be published, as well as establish a forum name and choose between question and debate modes on the forum. We also have pages like Option, Karma Gains, and Karma Related Rights in the Forum form view.
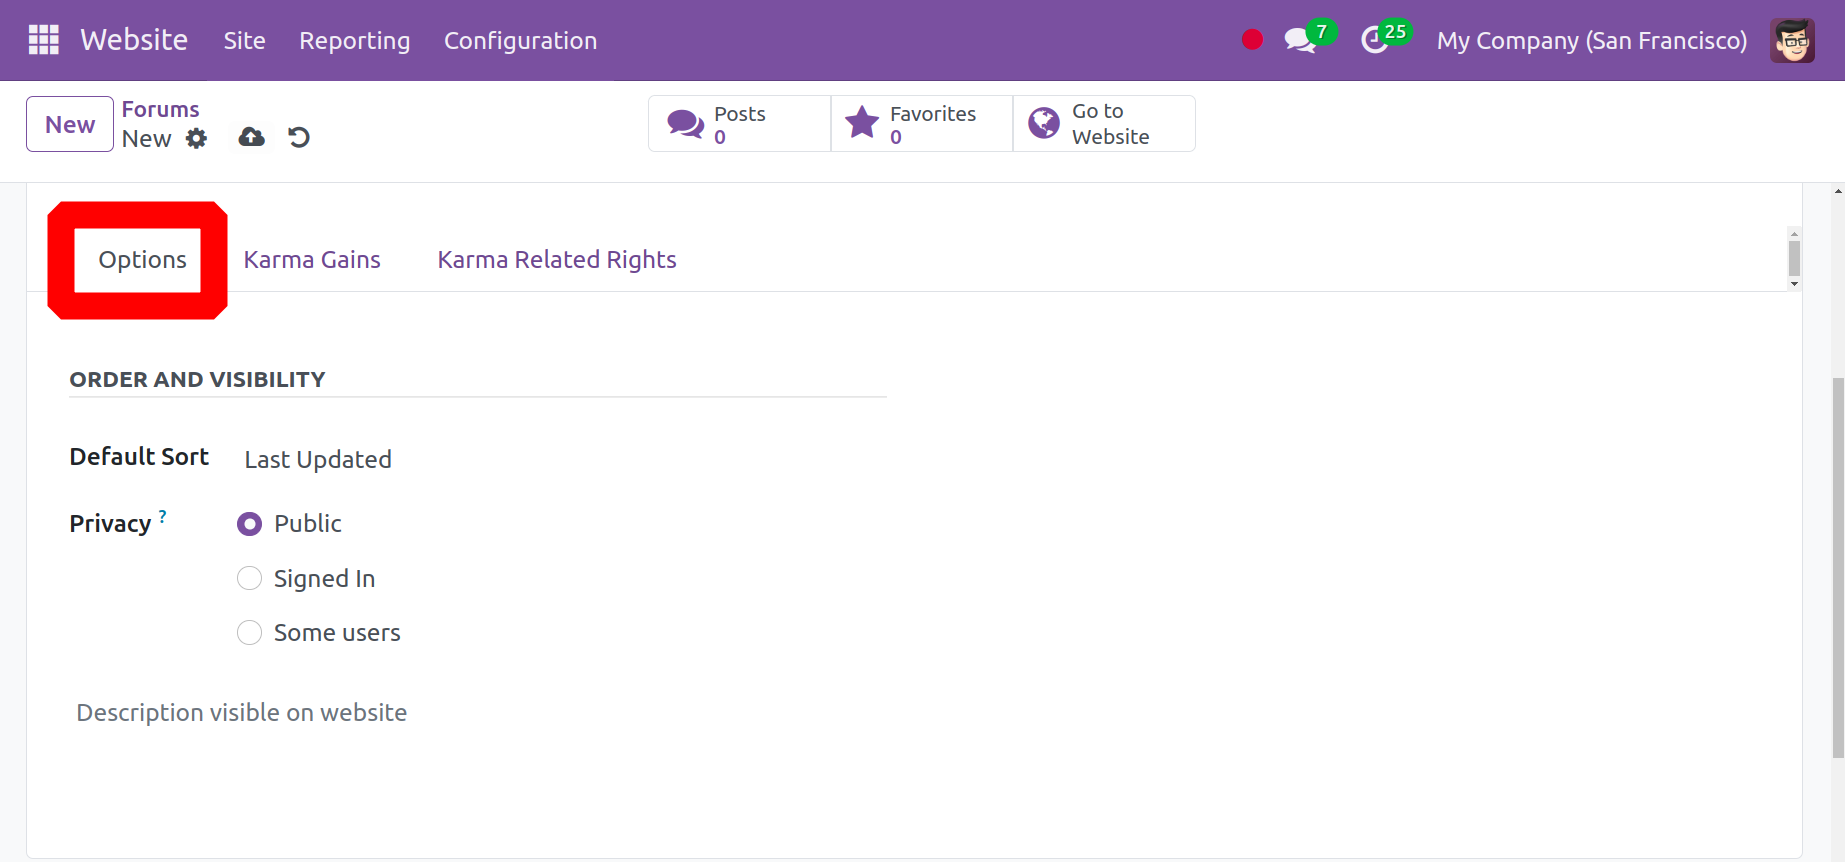
You can set the Privacy, and Default Sort parameters on the Options tab. In the Default Sort field, you can choose a default sorting option. It can be the Most Voted, Relevant, Answered, or Newest. You can adjust the forum's privacy in the Privacy section. Choose the Public option if you wish to open the forum to the public. 'Signed In' means that only those who have signed in will be allowed to view the forum.
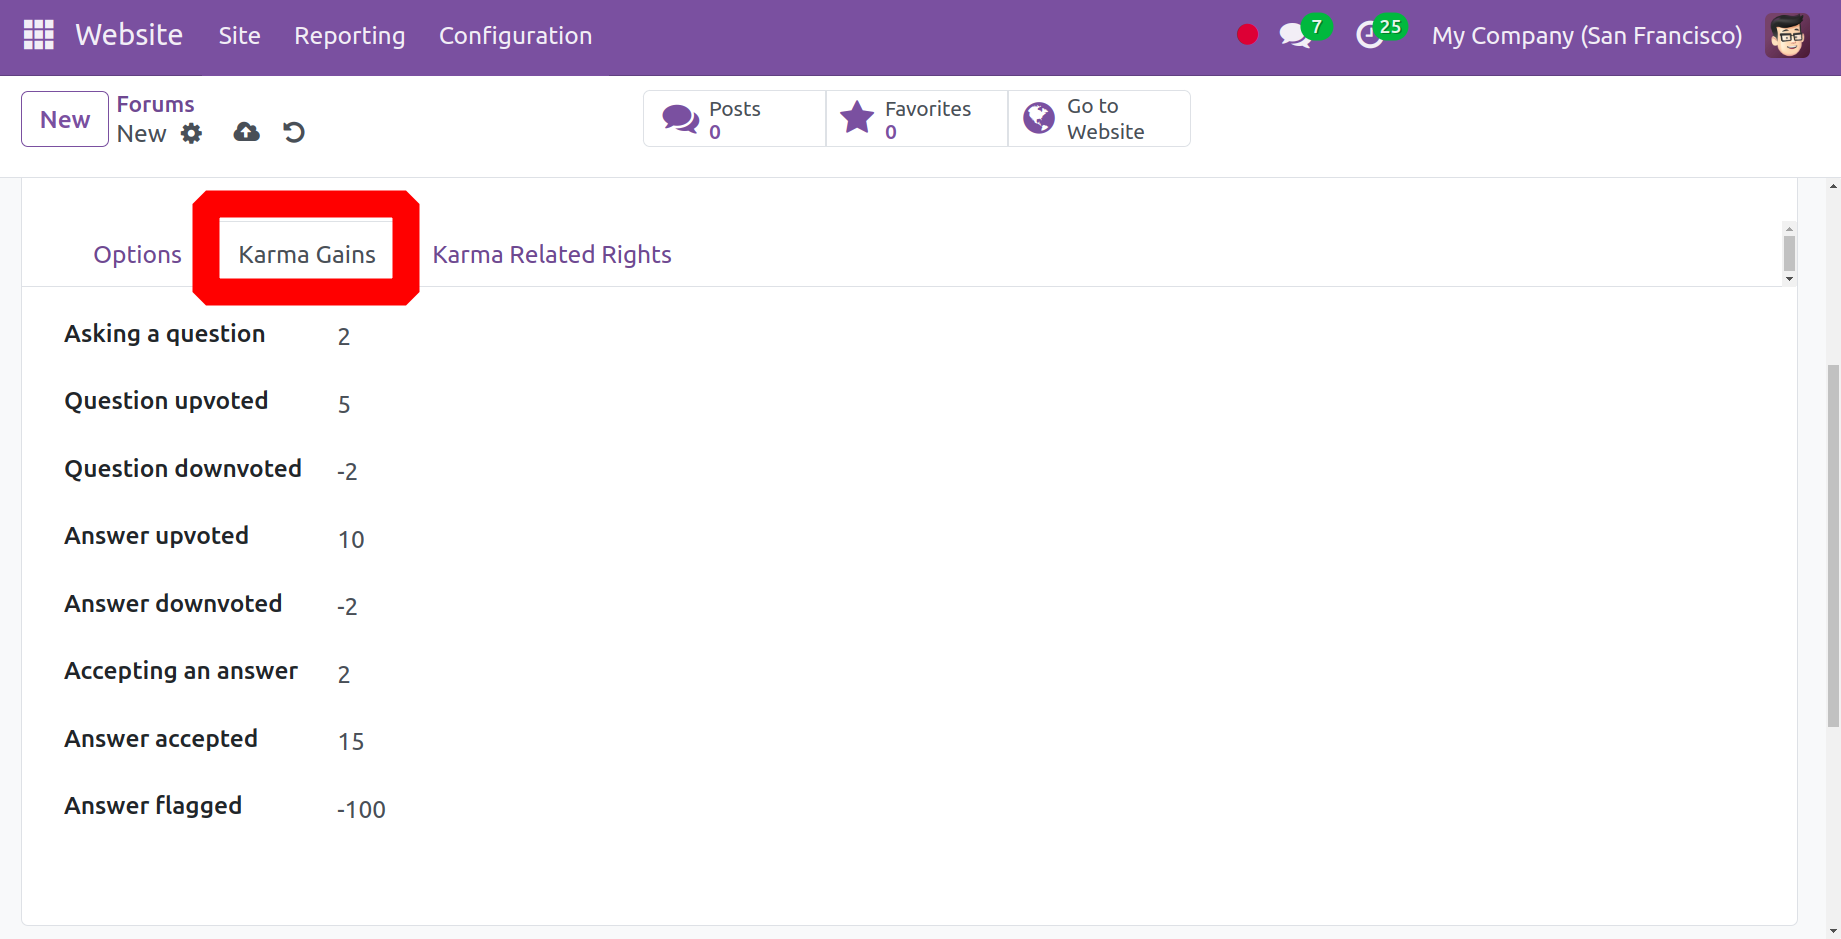
You can give participants varying karma points using the Karma Gains tab. Players can obtain the indicated points by engaging in the activities listed above.
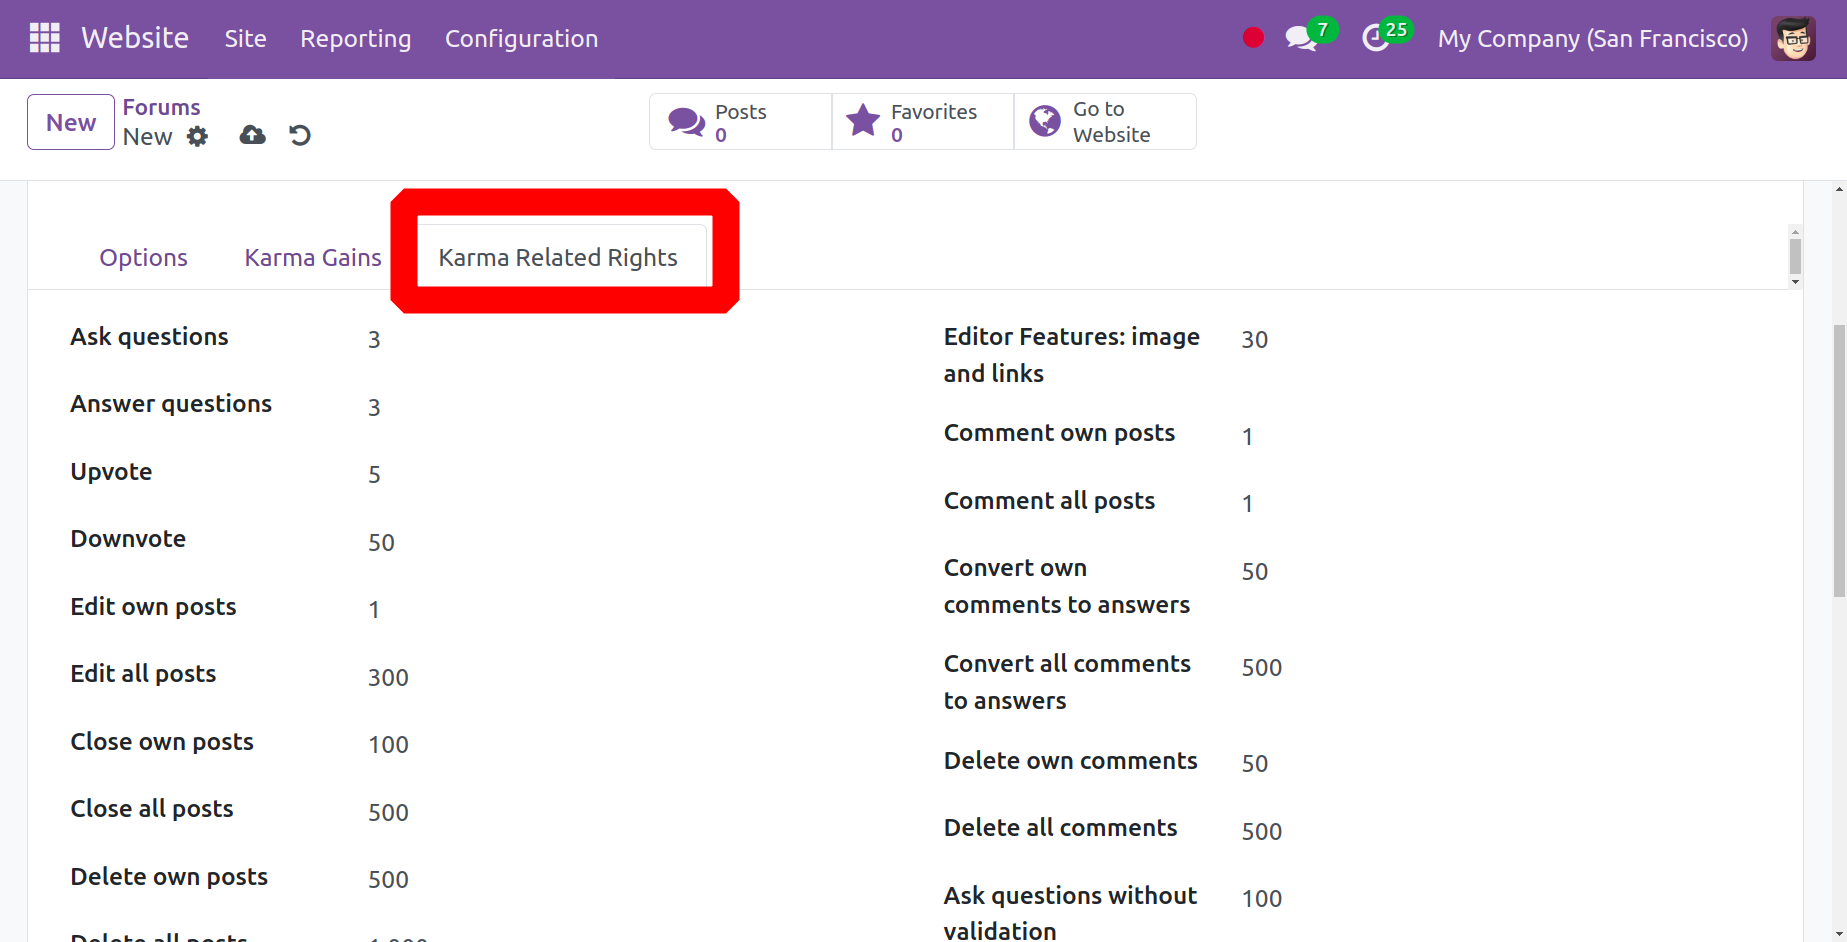
The karma points acquired will let people acquire particular rights. The Karma Related Rights tab is where you may set this right. The permissions that a user can get by accruing the specified amount of karma points are listed on this tab.
Different ranks for forum participants can be defined using the Configuration menu of the Odoo 17 Website module, which the user can access from within the forum. You can see the details of every configured ranking in this platform, as indicated below. Your karma points will determine how far you can go in the ranks.
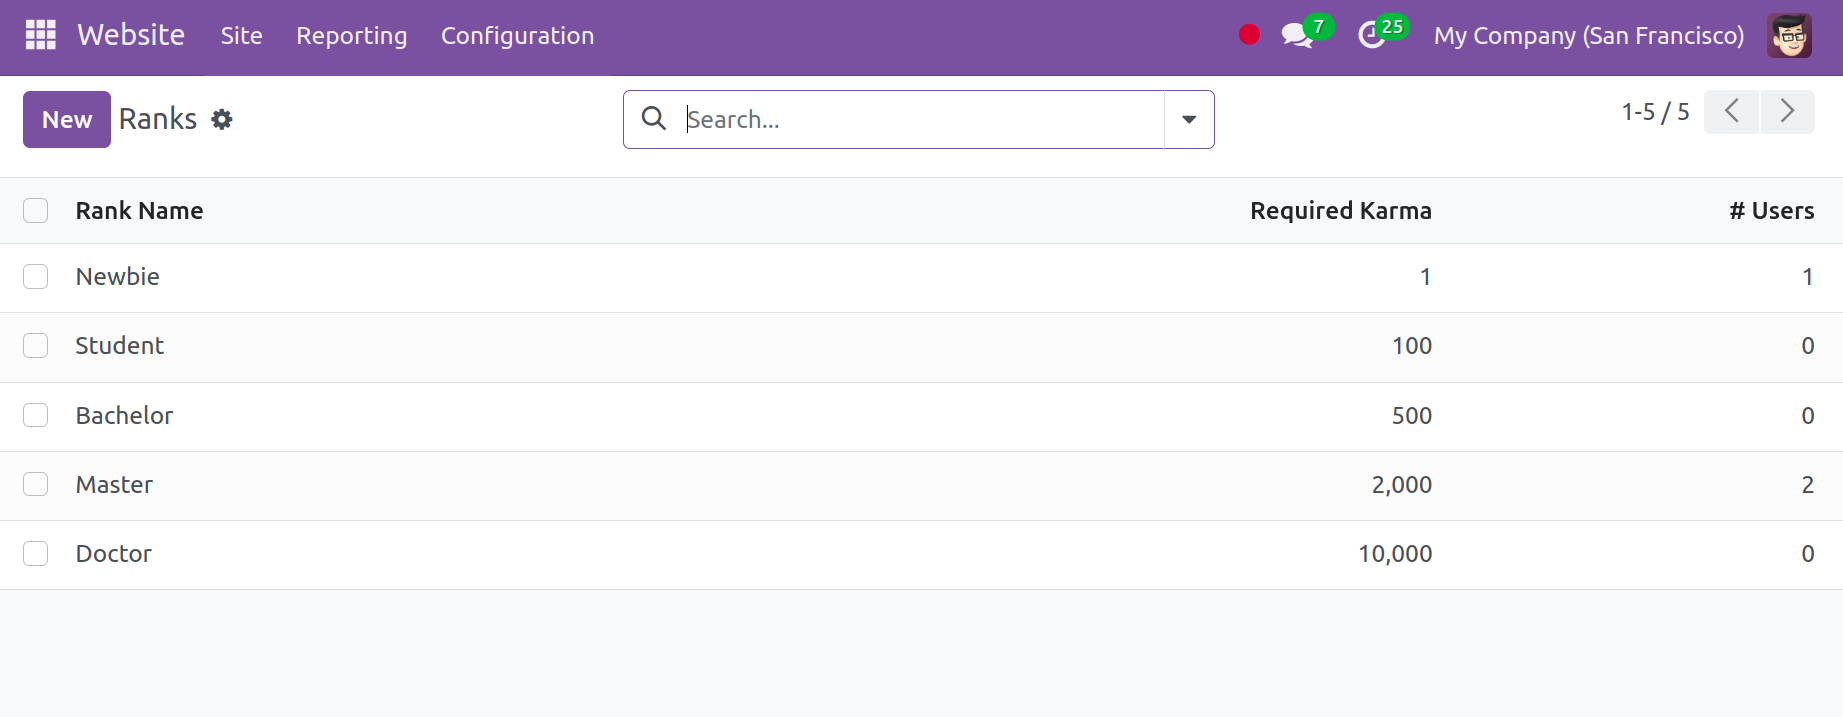
To reach the specified rank, enter the Rank Name and Required Karma in the designated spaces. Additionally, you can fill in the extra box on the platform with a description for the rating.
The user has the ability to create Tags within the Forum.
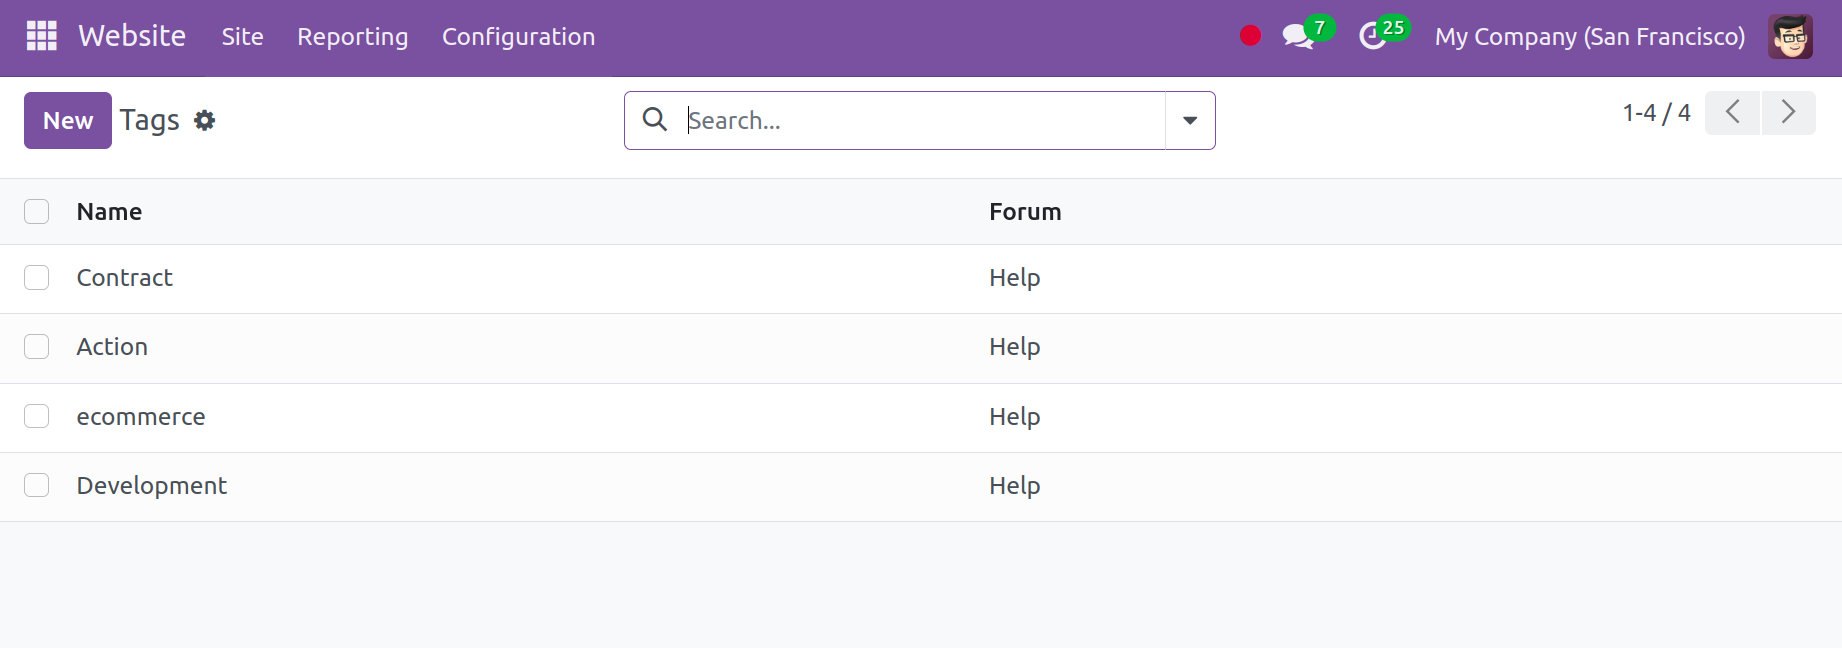
It would make it simple for website visitors to group forum posts according to their specifications. As seen below, it can be enabled from the website module configuration.
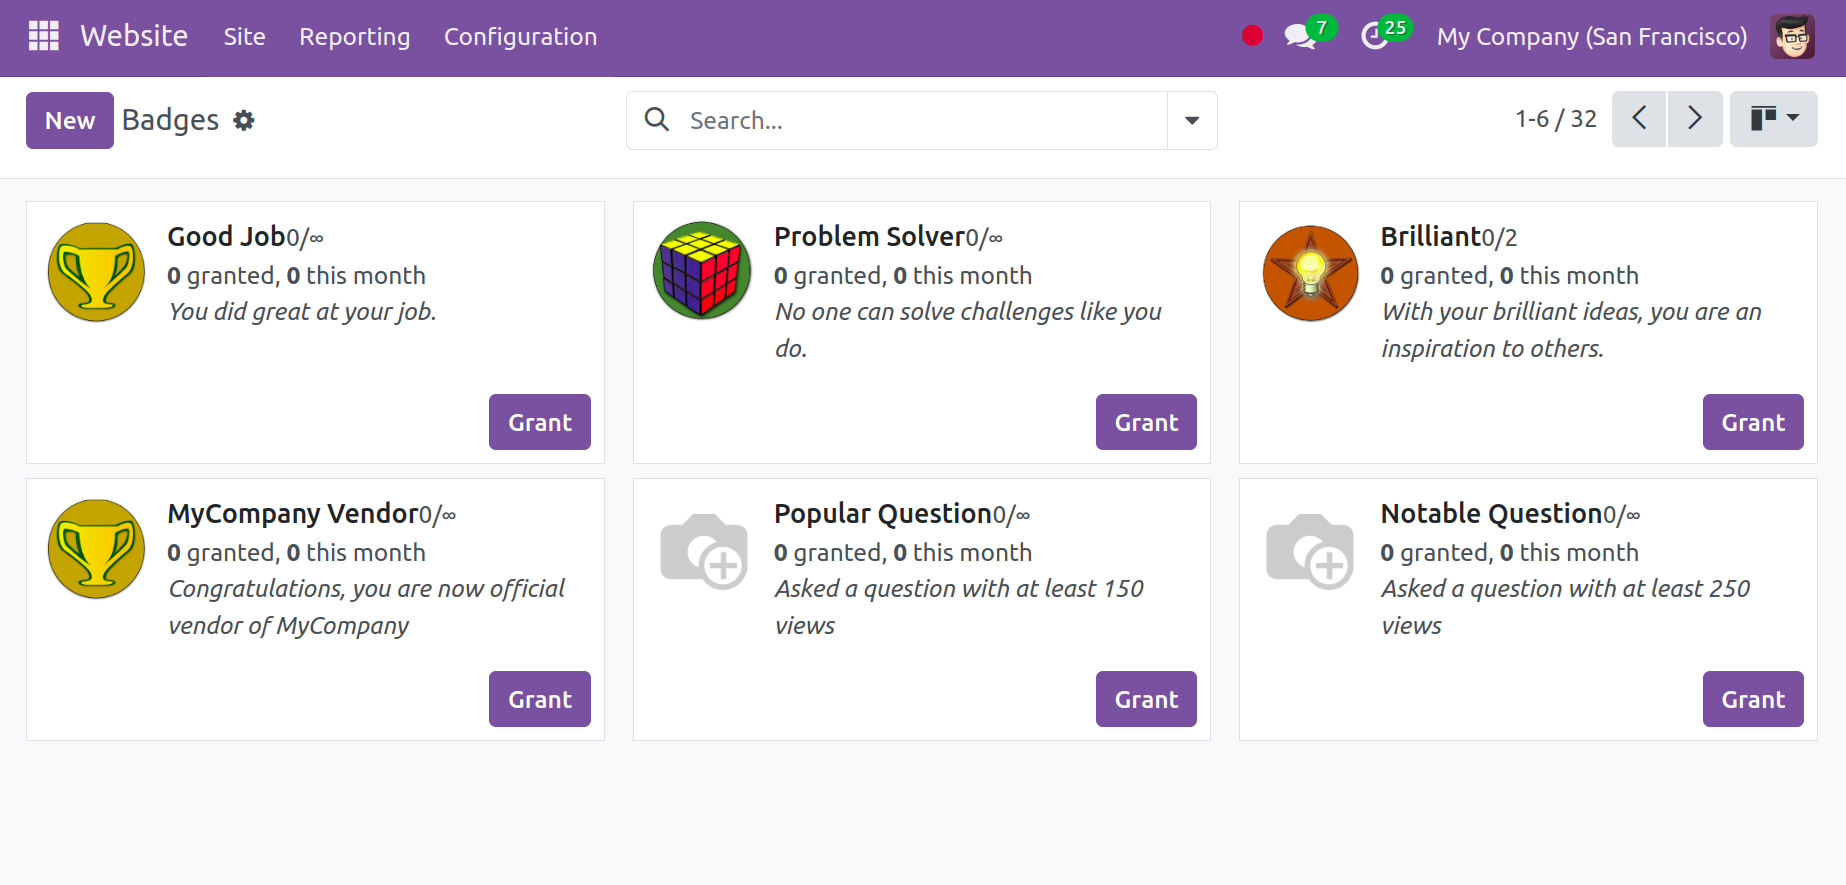
The next option under Forum is Badges, which can be enabled through the website module's configuration.
A dedicated platform for making and maintaining badges for users that view the forum posts on your website is included in Odoo 17. You can set up particular configurations to let users earn badges by engaging in the different activities you present on your forum. As rewards for finishing the tasks on your website, these badges are provided.
In the designated fields, you can make reference to the Badge and upload a picture of it. You can describe the new badge by filling out the Badge Description section that will appear. The box below allows you to add more details and define badge rules through the Granting, Rewards for Challenges, and Statistics areas.
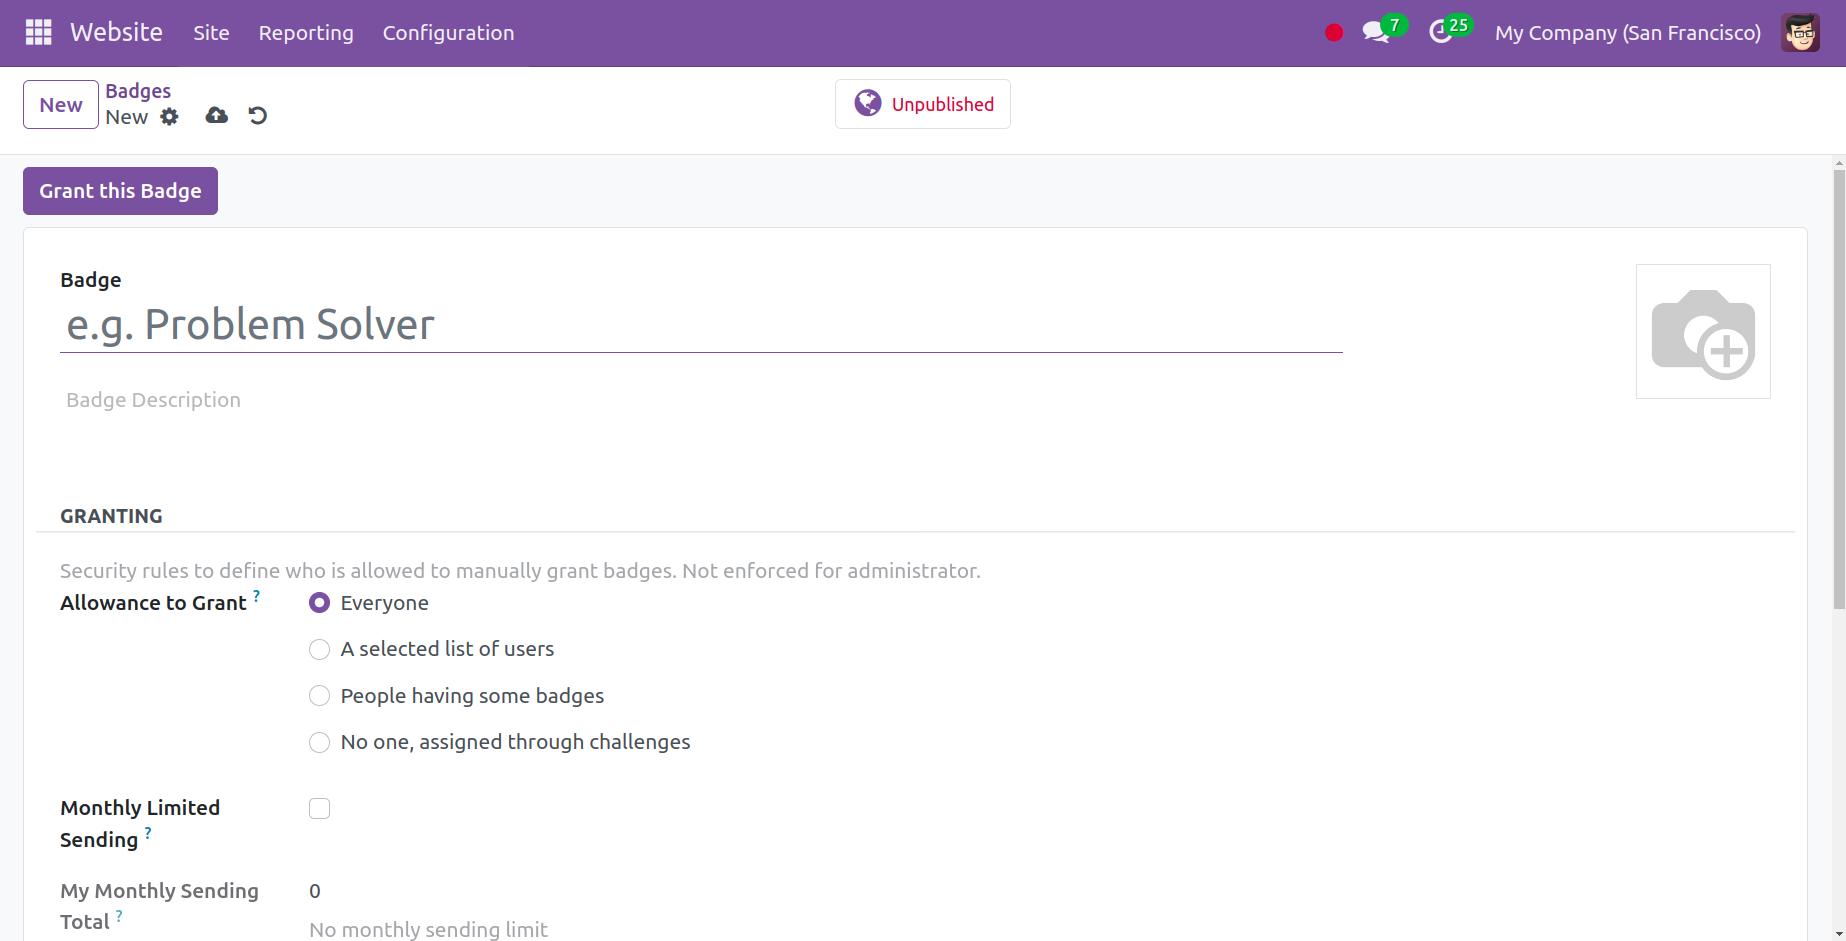
From the options provided in the Allowance to Grant section, you can specify who is eligible to grant this badge. Fill up the fields with My Monthly Sending Total and Monthly Limited Sending.
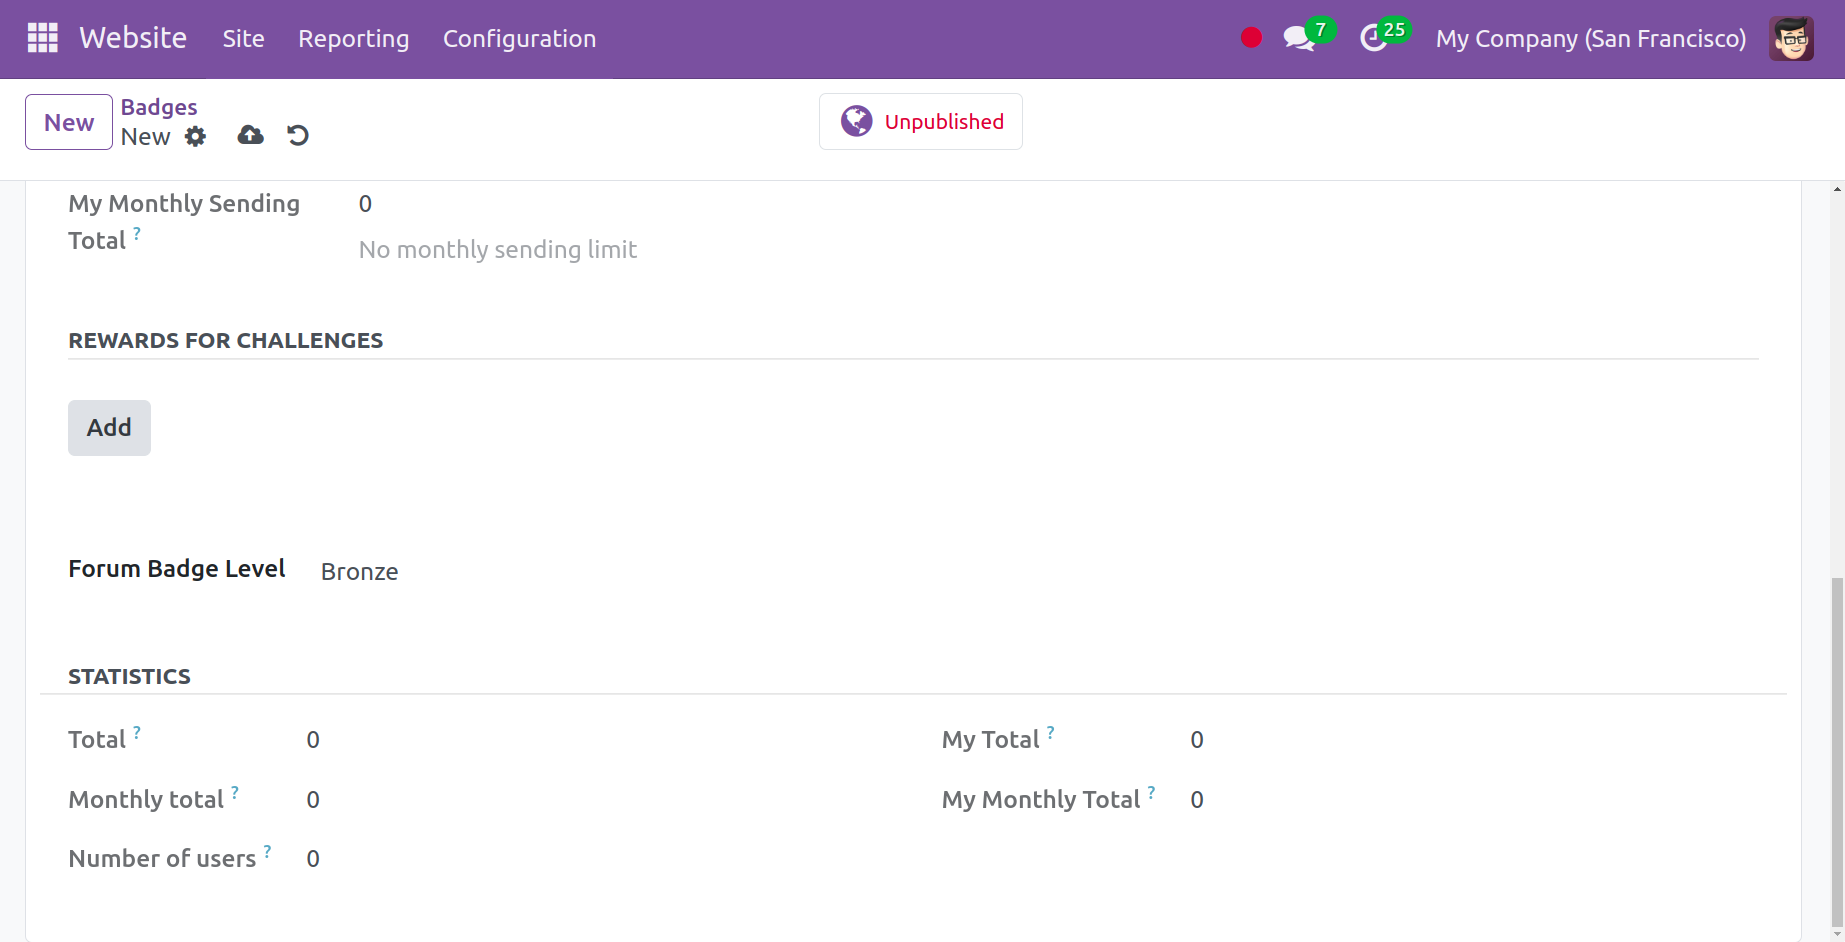
By selecting the 'Add' option, you may input the rewards for the challenges in the Reward for challenges area. Upon selecting the 'Add' button, the pop-up window displayed below will appear.
You can enter the Total, Monthly Total, Number of Users, My Total, and My Monthly Total in the Statistics area of the badge creation box.
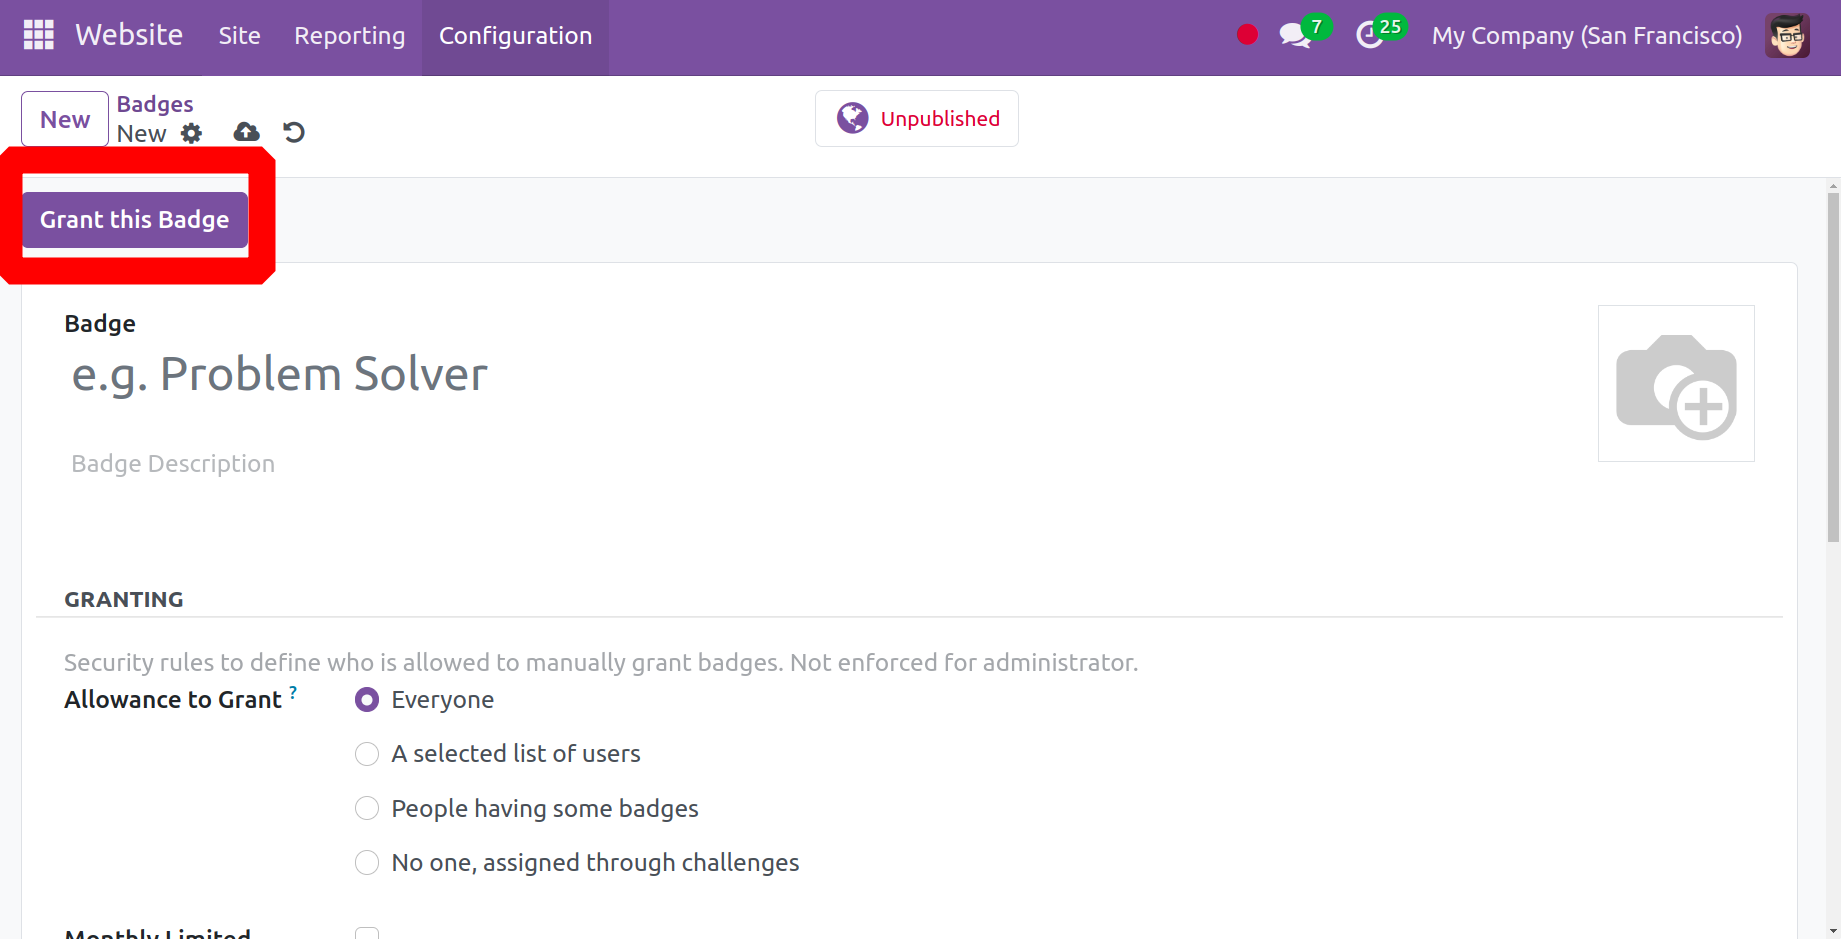
Click 'Save' to save the updated badge after completing the needed fields. By choosing the Grant this Badge option in the conversation, you can give participants this badge.
The Close Reason option is the next option under Forum, and it can be enabled from the website module configuration.
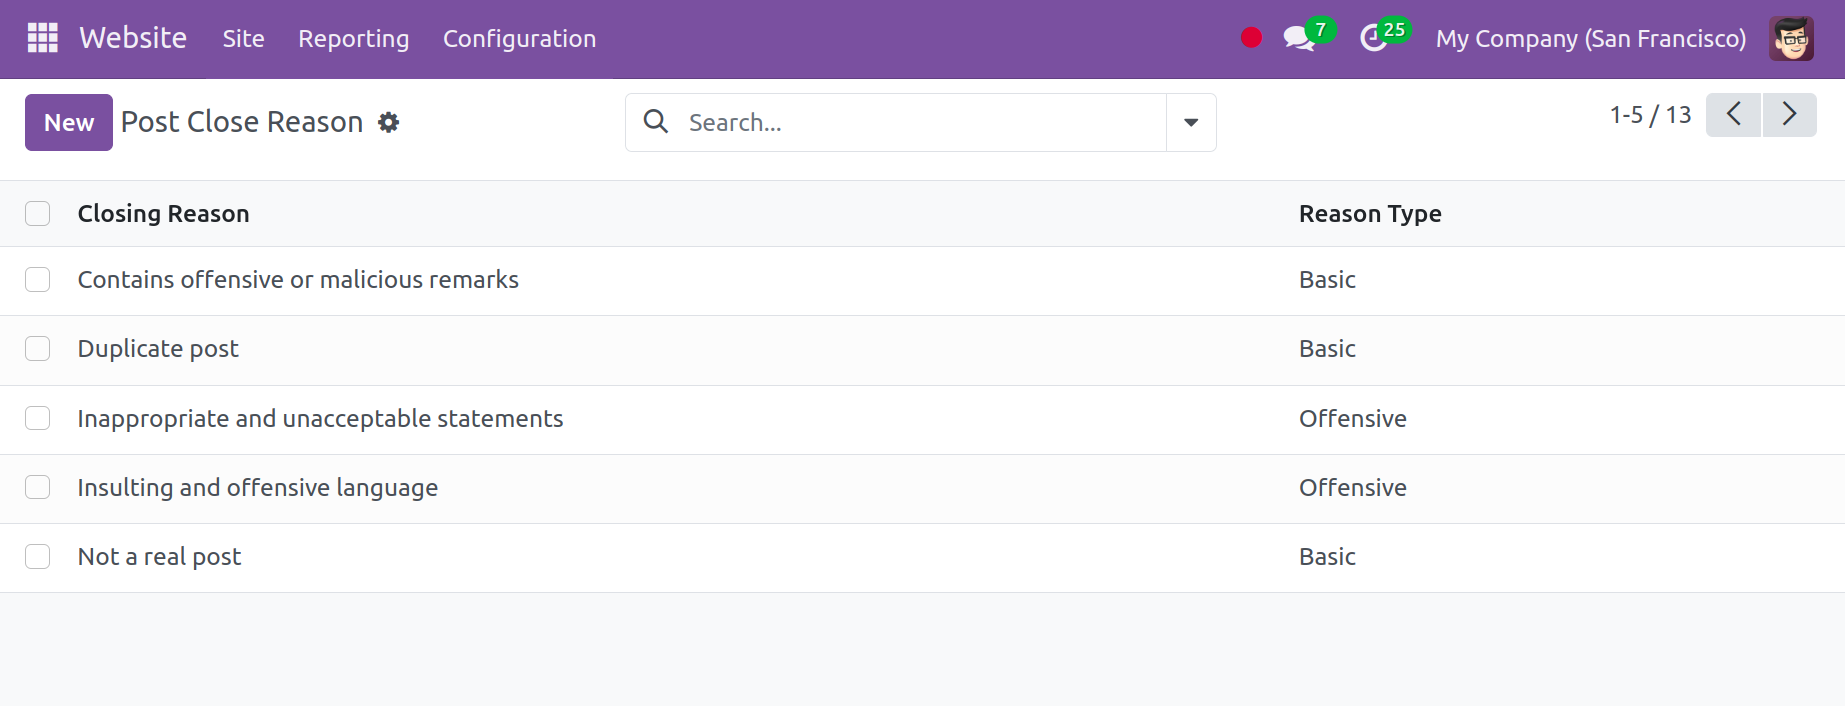
You can remove forum postings from your website by using this option.
Reporting
You may create reports and analyze customer data using the Reports tab in the Odoo 17 Website and eCommerce module. This includes assessing the performance of the product, orders and sales, consumer behavior, and website traffic. The Reports tab allows you to track performance metrics such as page views, conversion rates, and website visits. It can also be used to learn more about marketing campaigns and customer segmentation. Additionally, the reporting feature is quite helpful for producing financial statistics, such as sales and profitability.
This module's Reporting capability makes it simple and quick to generate reports. To get precisely what you need, you can modify the columns and filters and decide which data to include. Additionally, Odoo 17 allows you to automate reports so that they are generated automatically on a regular basis. By doing this, you ensure that you always have the most recent information and save time.
The Reporting feature allows you to create visually stunning and polished reports. Additionally, you may easily evaluate the data in your reports using the reporting tab. You are able to spot patterns and areas for development right away. Additionally, you have the option to export the reports to Excel, PDF, and CSV, among other formats.
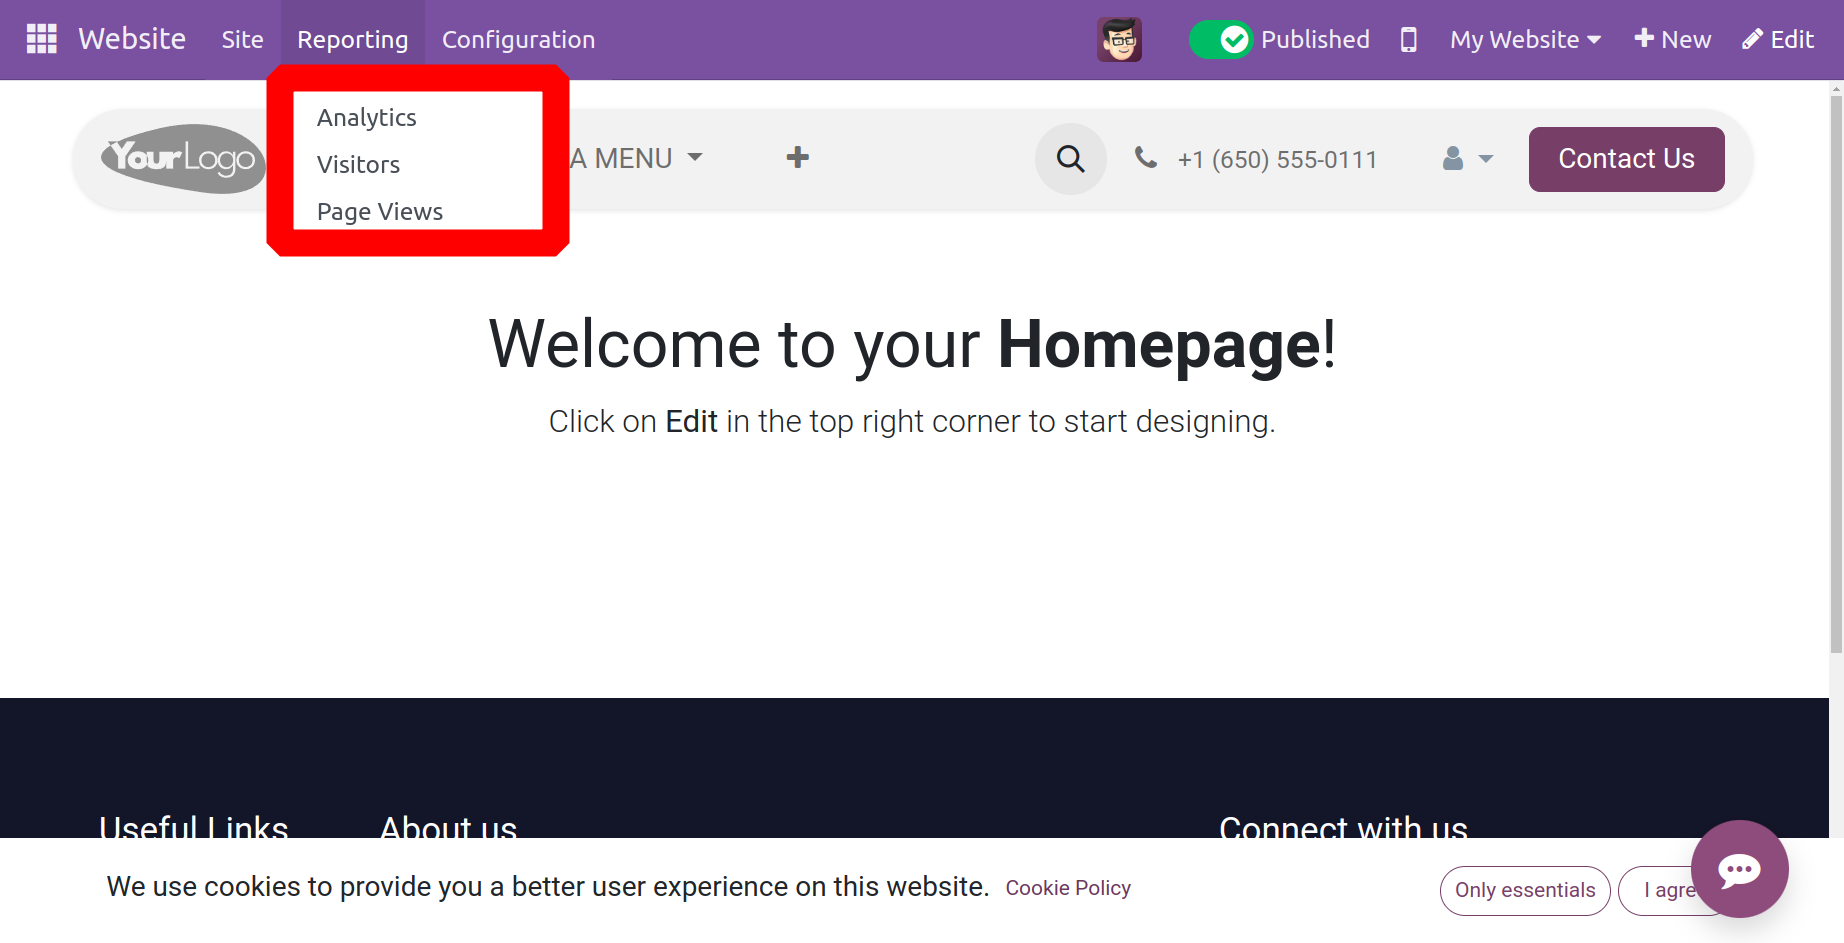
Analytics
Many tools are available in Odoo 17's Analytics menu under the Reports tab to help you monitor and assess the functionality of your eCommerce or website. Among many other things, it can be used to monitor website traffic, assess sales effectiveness, and display data. It enables you to make data-driven decisions and provides insights into user behavior. Additionally, you can track website and eCommerce performance by creating custom reports and dashboards using the Analytics menu.
Visitors
Users can view reports on website visitors, including their location, the pages they've visited, and the duration of their visits, by accessing the visitor's menu on the Reports tab of the Odoo 17 website module. Use the menu to view the most popular visits and pages, visitor flow, and visitor map. You may also see visitor details, which include details about every single visitor, including their location, IP address, and the pages they have viewed. Users may also create a report on website visitors using the menu, which is useful for analyzing website traffic and making judgments about how to make the website better.
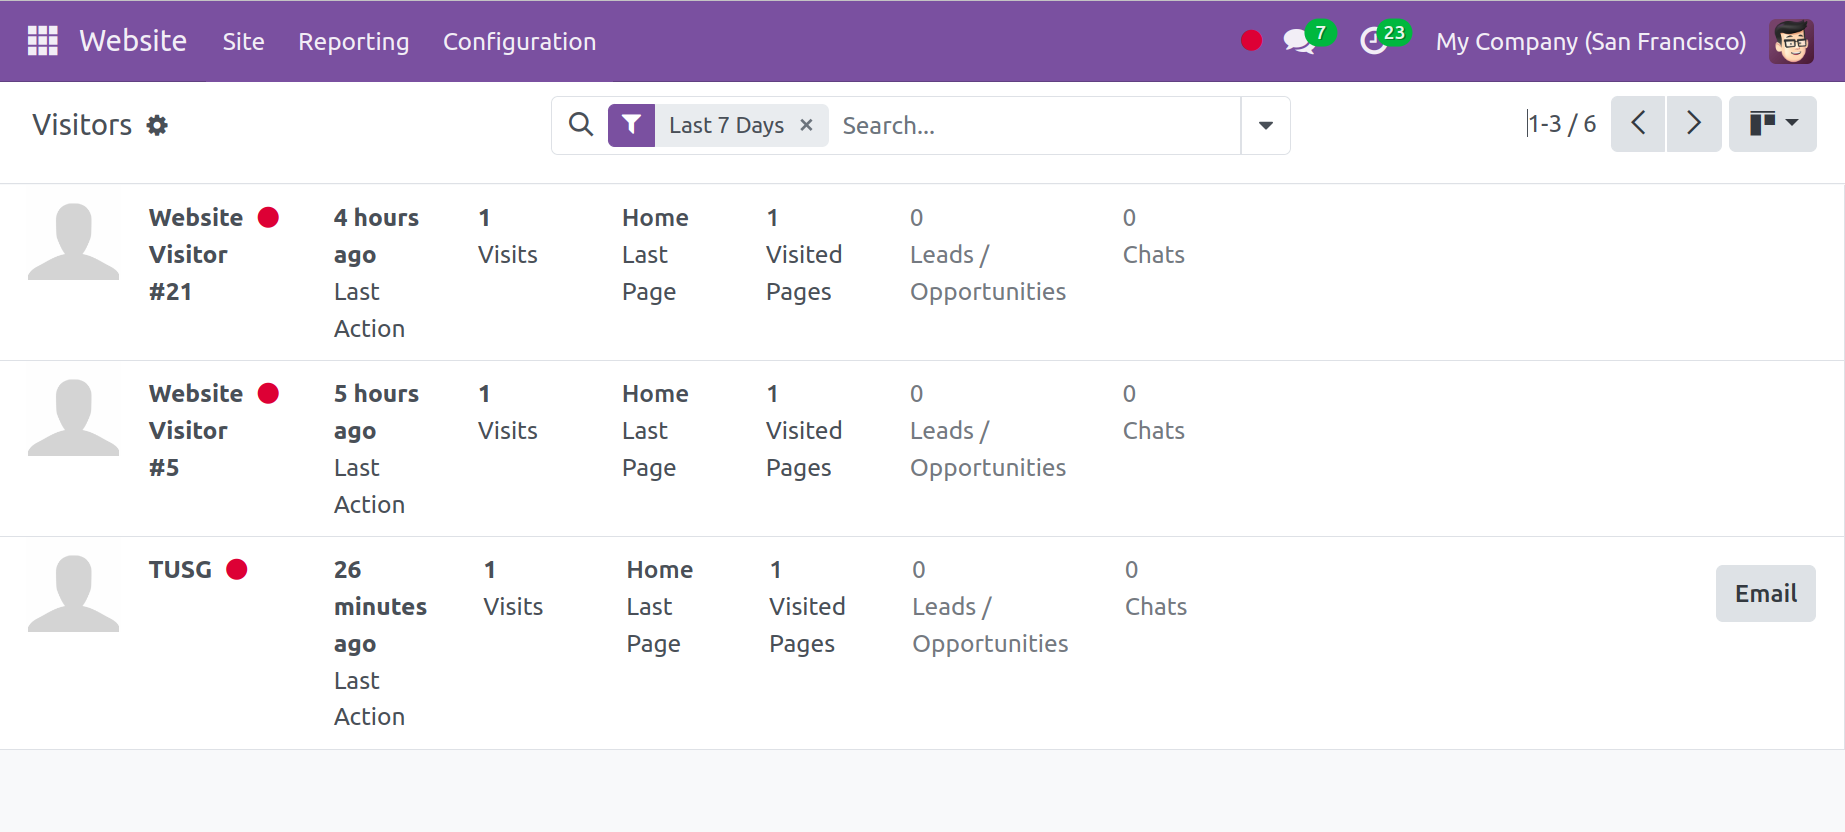
The history of every website visitor will be saved on the visitor's page, as seen in the screenshot above. The most recent activity, the number of visitors, the number of pages viewed, any conversations, the number of leads or opportunities created, and more are all visible. The Kanban view is shown in the screenshot above; to switch to the List or Graph view, click the corresponding menu button in the upper-right corner of the window.
Users can receive reports that enable them to assess the effectiveness of their websites by selecting the Visitors menu. Included are reports on visitors by nation, time spent on pages, bounce rate, and page views. Customers can also track visits to their website in real time by accessing a visitor log through the visitors menu. IP addresses, browser types, operating systems, and other relevant data are all included in the visitor log.
Page View
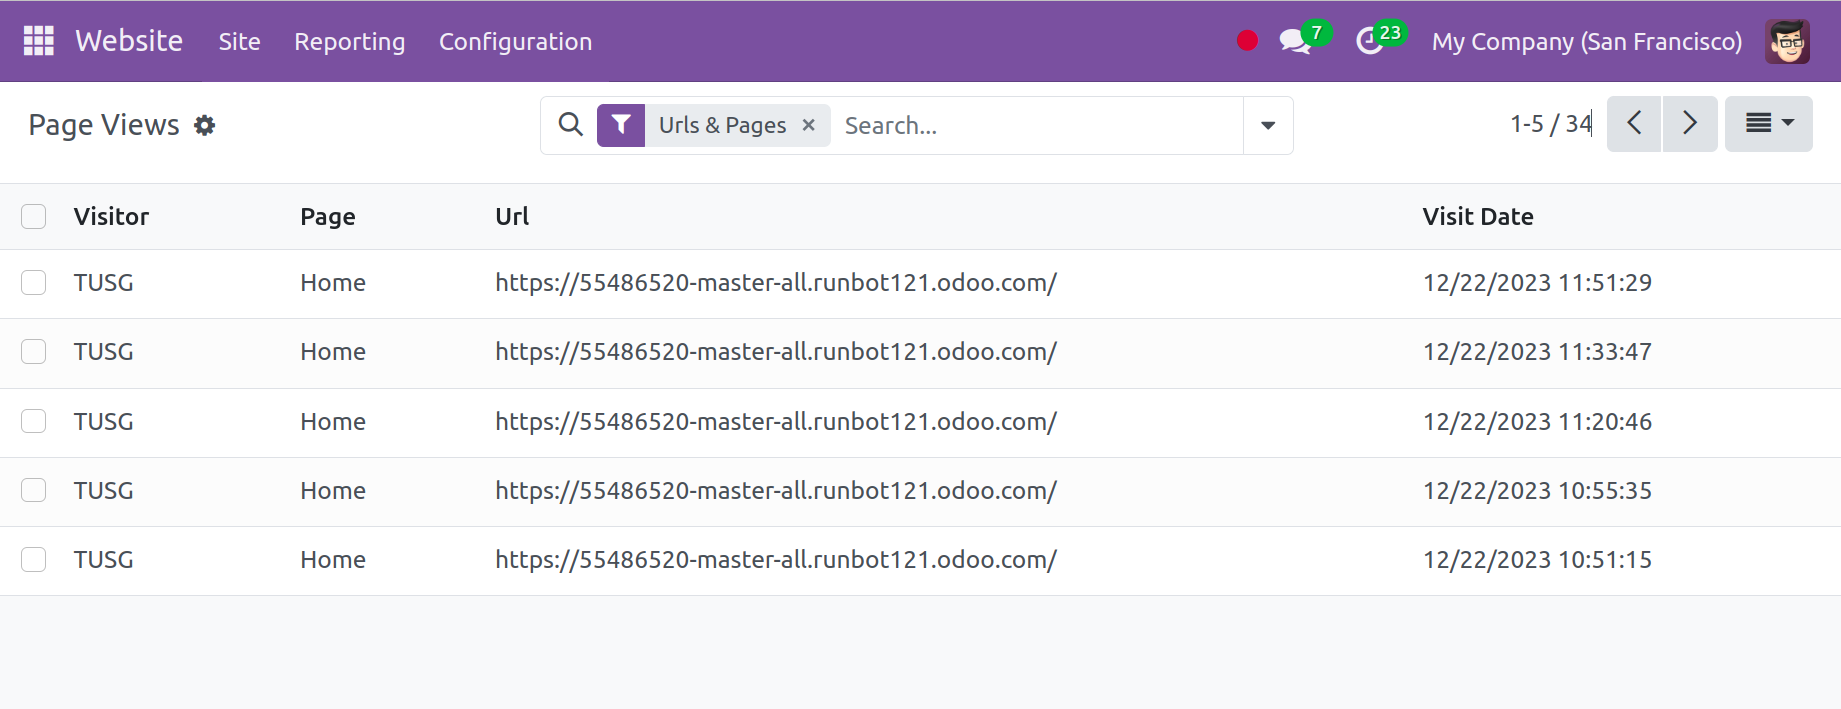
A thorough analysis of visitors' activities on your website may be found on the Reporting page of the Odoo 16 Website module via the Page view menu. It gives the total number of visitors, the number of visitors per page, the number of page views for each page, the name of the visitor, the name of the page, the URL, the product, the date of the visit, and the average length of the visit. Additionally, you can discover the most popular pages, as well as the most popular entry and exit pages, by navigating this window. You can further refine the results using a range of preset and custom filtering parameters from the page view menu in addition to these options. The window's default filters are Pages, Urls & Pages, and Products. Adding Custom Filters is another option available to you.
The website module of Odoo 17 provides a simplified and adaptable solution that lets companies create and maintain an online presence with integrated e-commerce features for a seamless online experience.