Email Marketing Management
To facilitate communication, Odoo 17 has an Email Marketing Module that allows users to
send specific ads or other marketing-related messages to a target audience or their
clientele. This module will support the business in its efforts to influence its
clients. The module contributes significantly to the marketing strategy's growth. Such
effective marketing strategies would greatly assist the organization in achieving
success. The module is actually a reasonably priced tactic that can be used to ensure
that team members and customers are properly and frequently communicating with one
another. Positive relationships both within and between the groups are facilitated by
the module.
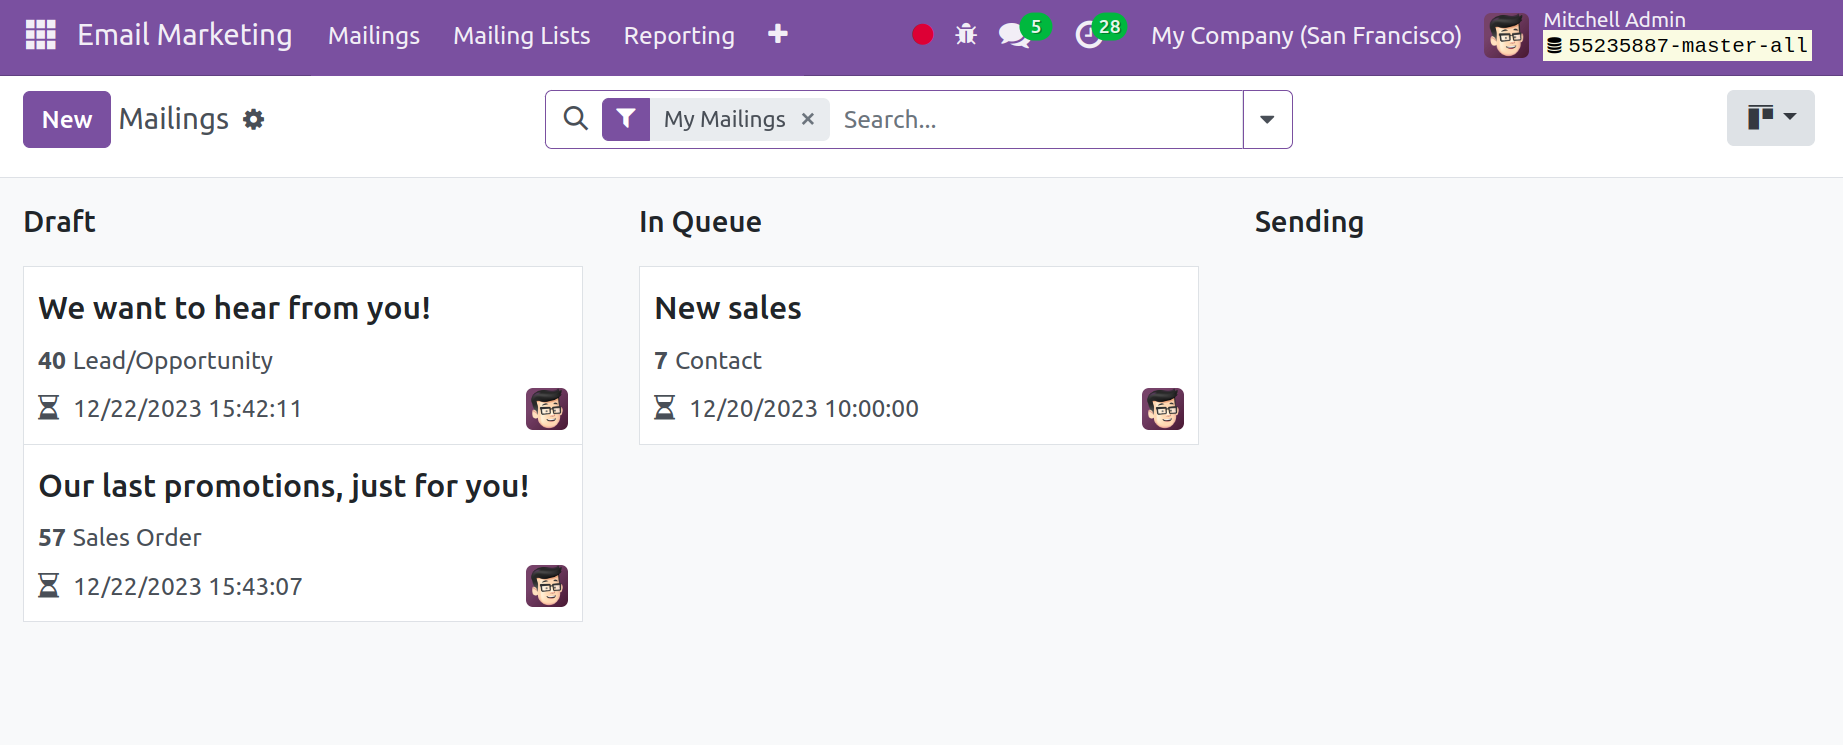
The Mailings menu page will appear when you first open the module, as seen below.
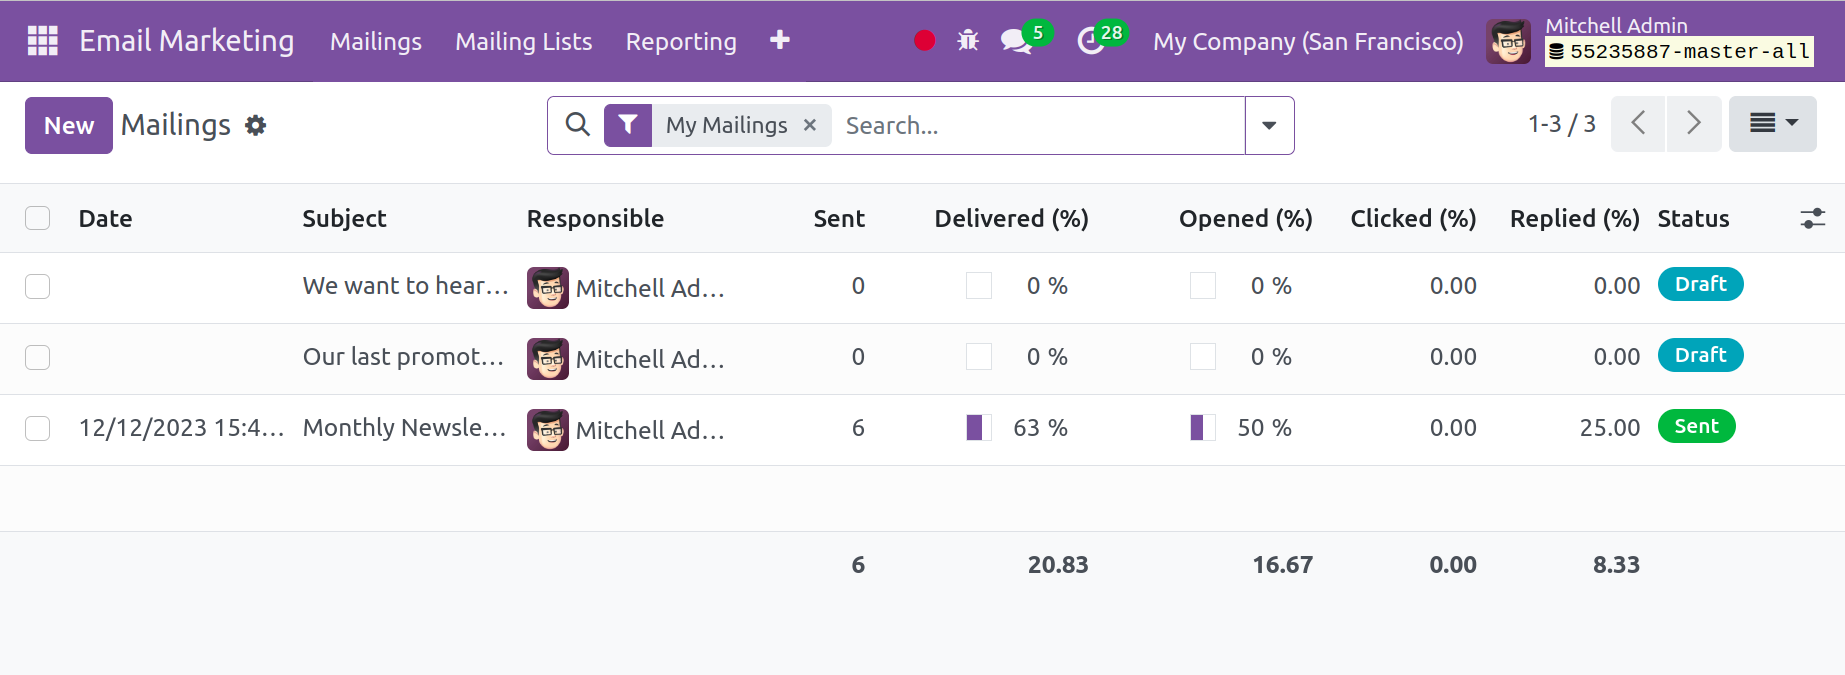
The graphic illustrates how the emails contain the date, subject, and accountable party
in addition to sent, delivered, opened, clicked, and replied options. The page is made
up of pre-made mailings. The page is visible in the following views: graphical, list,
calendar, and kanban. Click the New icon to create a similar type of mailing.
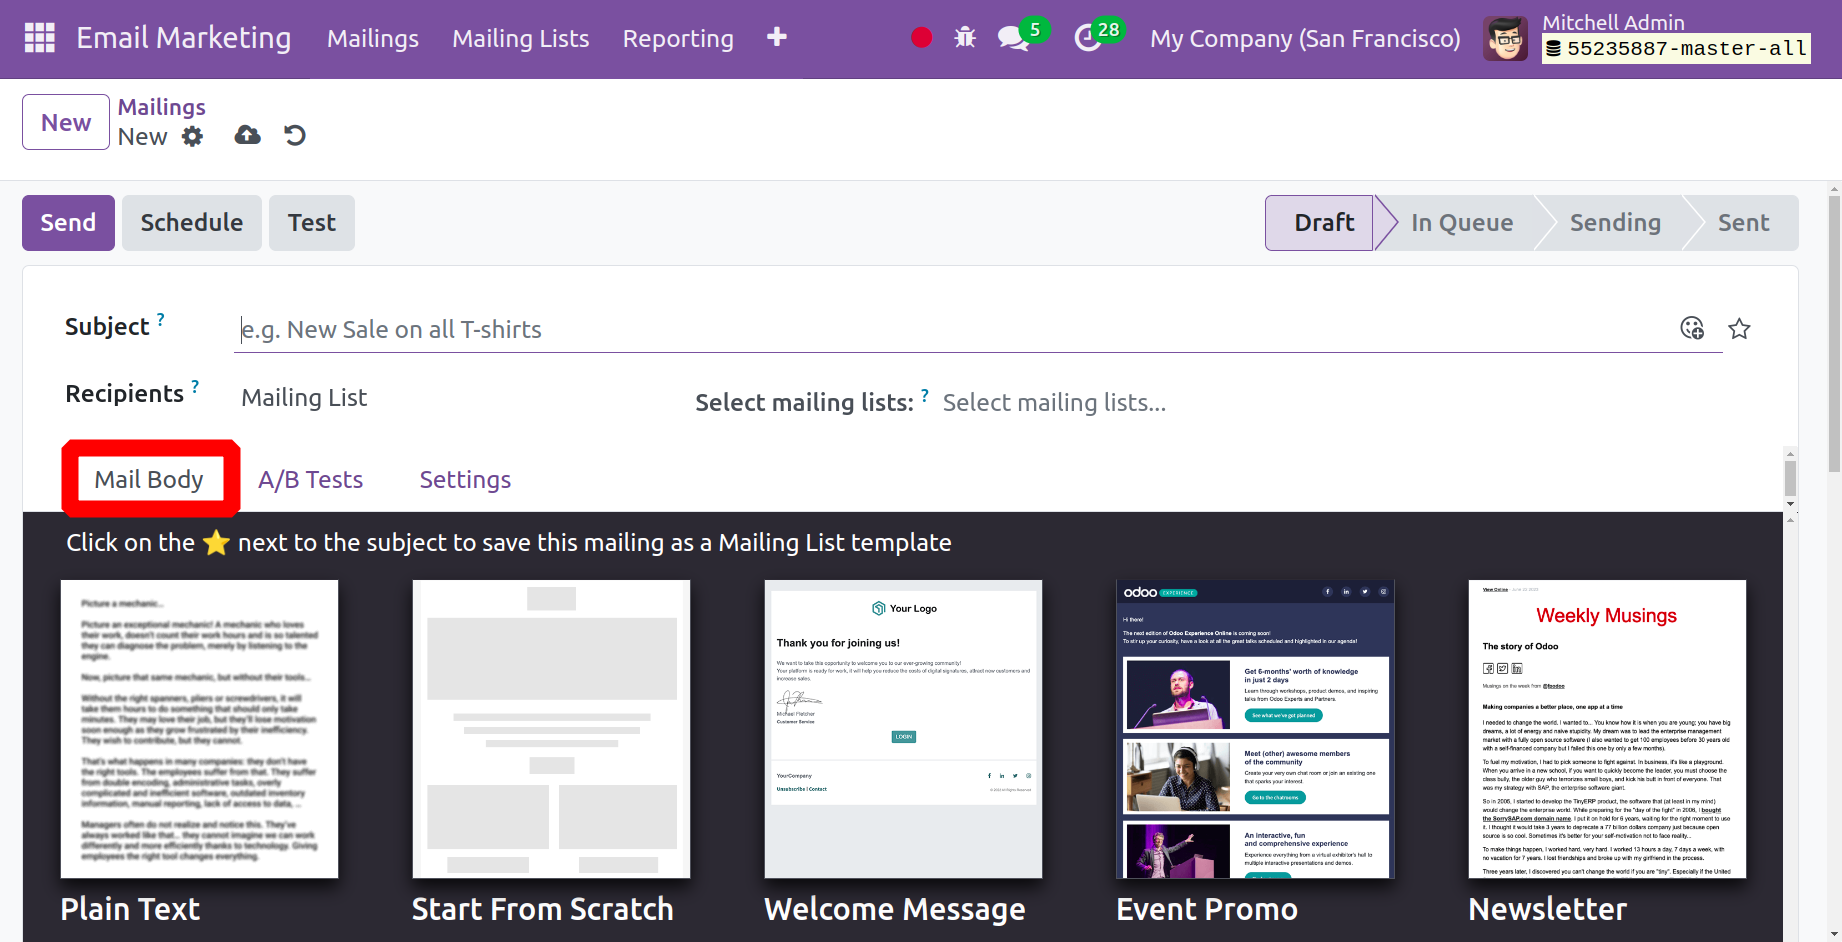
You must enter the mailing's subject on the creation page. The recipient's list can be
created by using the drop-down menu. Go to the contacts option in the drop-down menu if
the email needs to be sent to every contact. You can choose any item from the list
because there are a lot of options. If not, you have the option to start a mailing list
on your own using the form found in the main menu bar. You can select any mail body for
the specific mail by selecting it under the Mail Body tab. After deciding on a model, we
can begin creating the mailing according to our preferences.
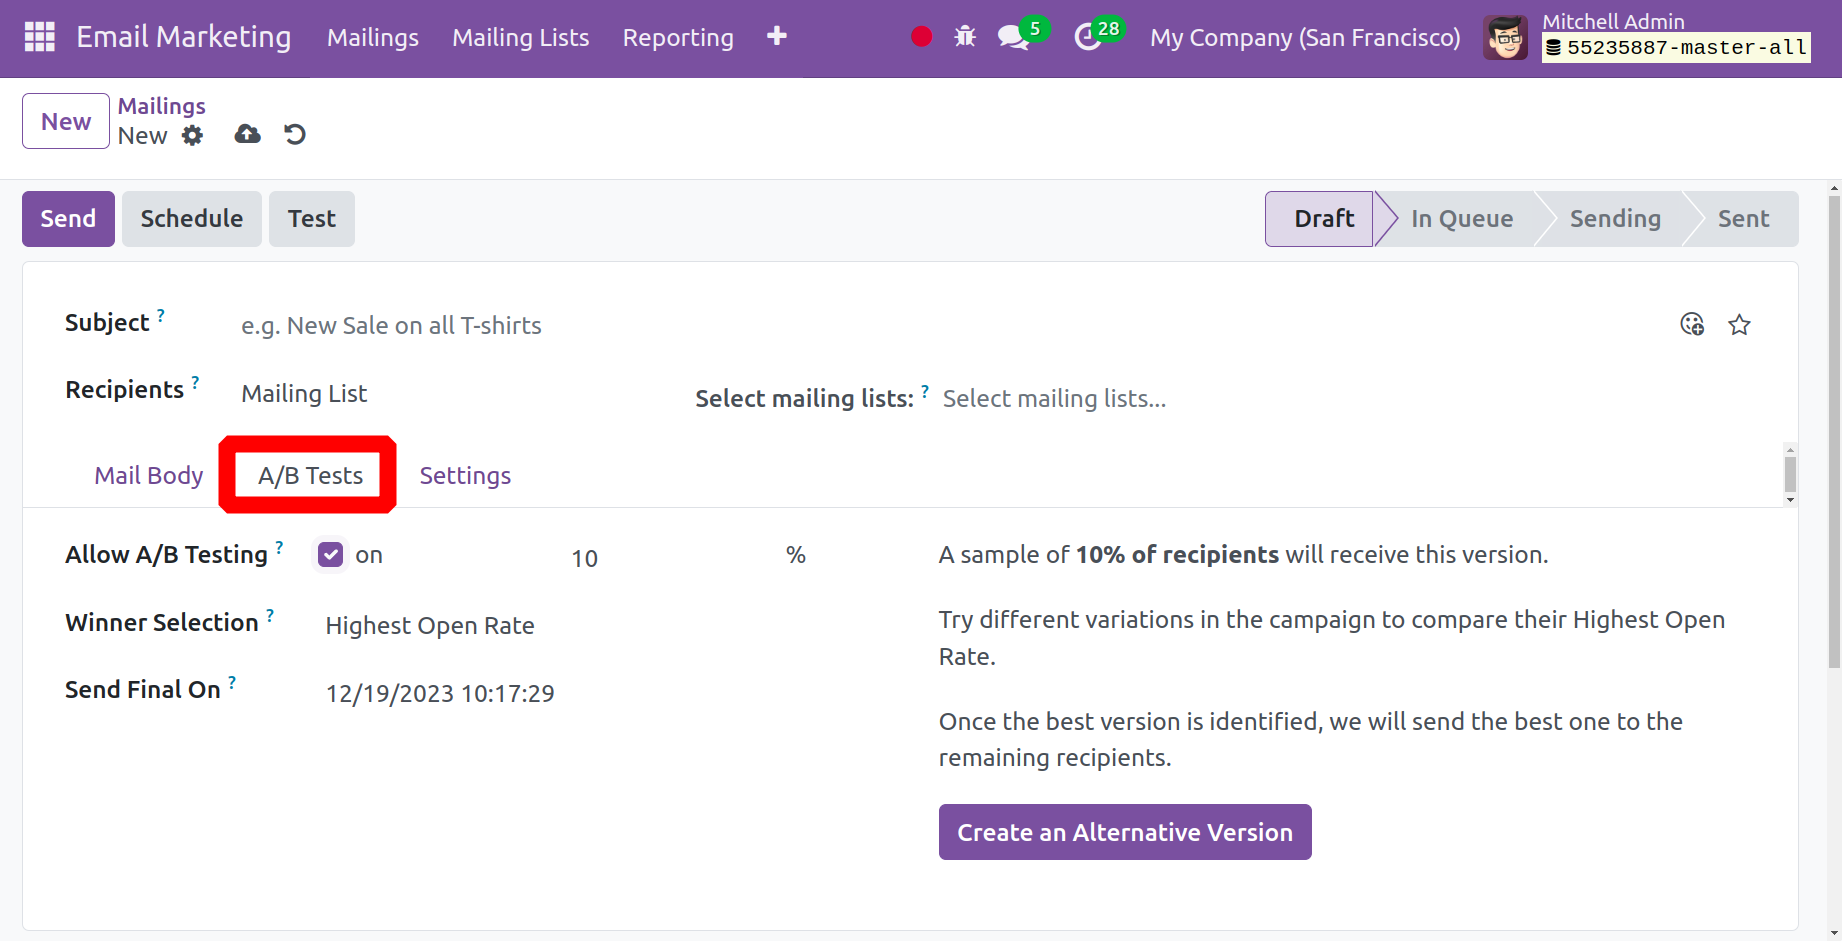
You can choose to activate the Allow A/B Test option by using the A/B Test. The next tab
is A/B Tests. Comparing two versions to discover which will yield better results is
known as A/B testing. For example, if Allow A/B Testing is set to 10%, 10% of all
recipients will receive one version of the SMS. To begin constructing the alternate
version, click the Create Alternative Version option. This version can then be
distributed to an additional 10% of recipients. Select the most appropriate criteria for
winner selection, such as the highest click-through rate. As a result, the criteria
entered will determine which SMS template wins. Numerous campaign variations are
compared using this statistic since the winner in this scenario is determined by having
the highest click rate. Once the best version has been identified, it will be
distributed to the remaining recipients. The date of the last transmission to the
remaining recipients may then appear in the Send Final On field.
You must now enter certain information under the Settings option, like the following.
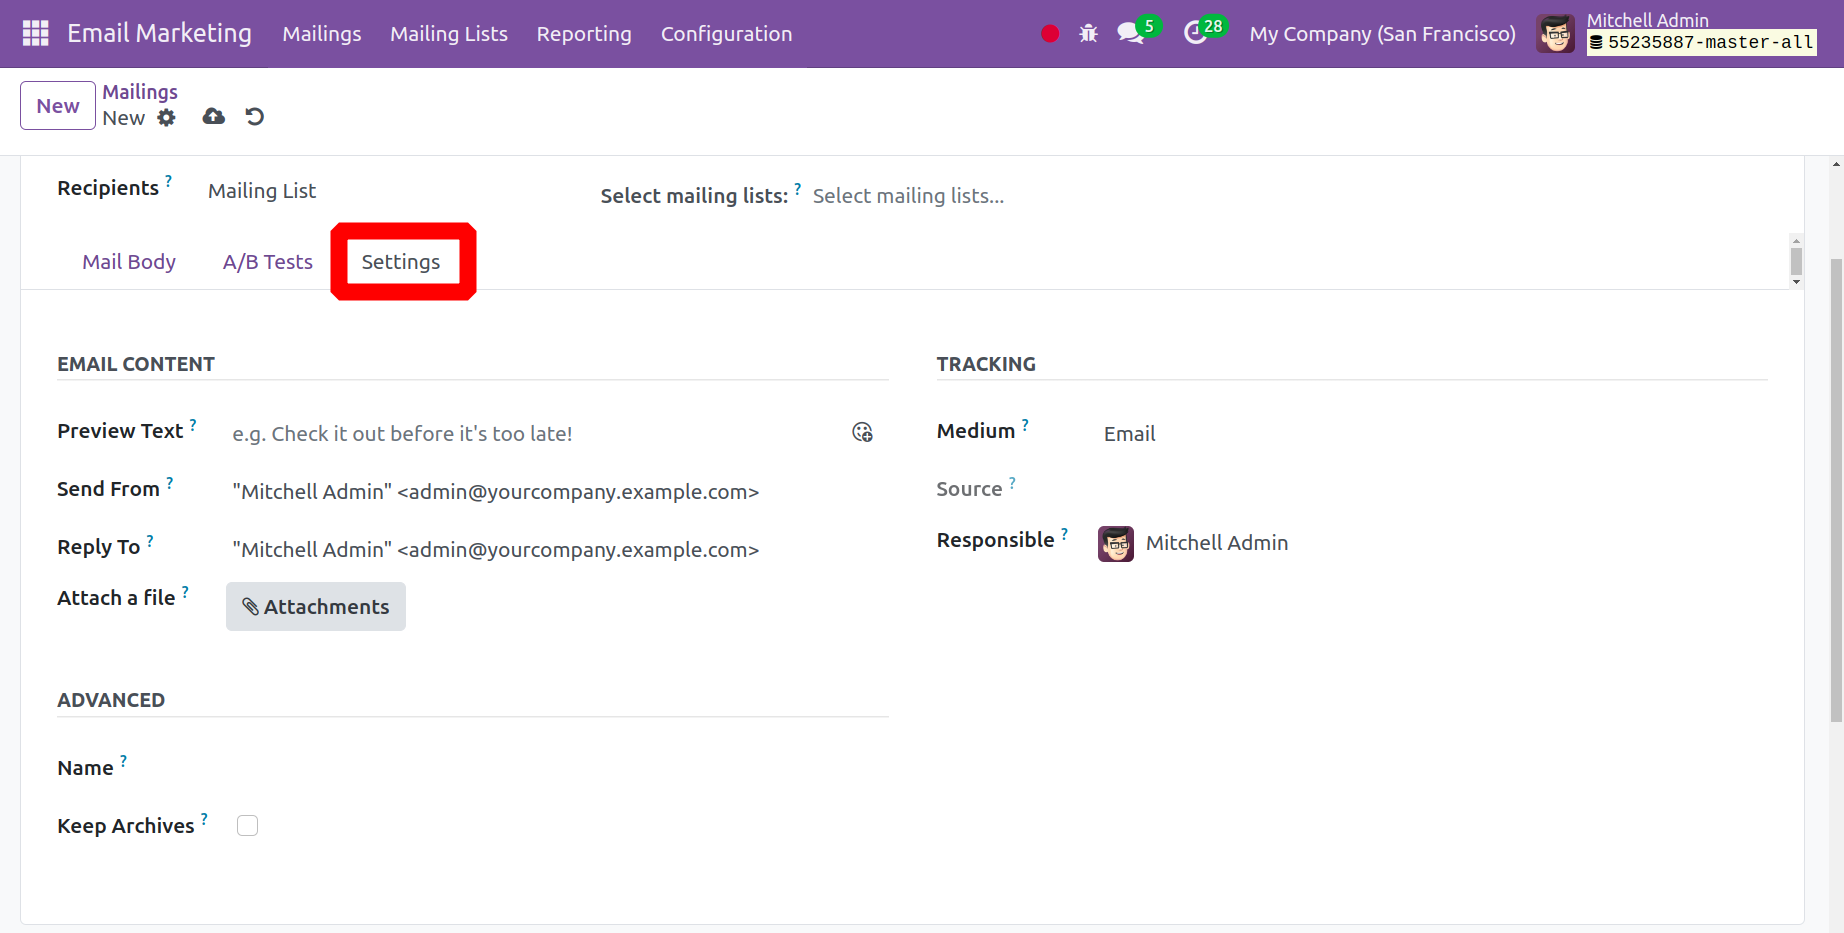
Included in the details is the preview text, which can be presented as an
attention-grabbing statement that appears when the letter is opened. You have the choice
to open this specific email in various inboxes. You can leave the space empty if the
mail's first character ends up being the first. The send from and reply to options can
be added, respectively, as can the accountable officer. The feature assists the client
in tailoring their response to the email they received. To support the mail, you can
attach some files by selecting the Attach a File option. Additionally, you have the
option to track the accountable party.
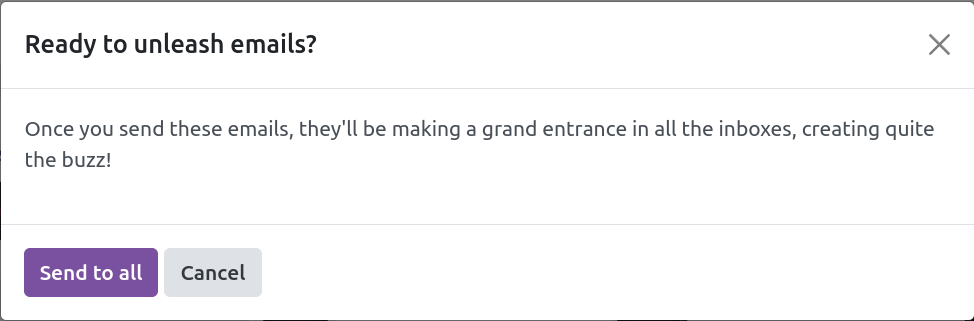
Once all editing fees have been paid, you can access the Send, Schedule, and Test
options. A popup similar to the one below will open when you select the Send icon.

You can click Send to all, and the mail will immediately be delivered to every recipient.
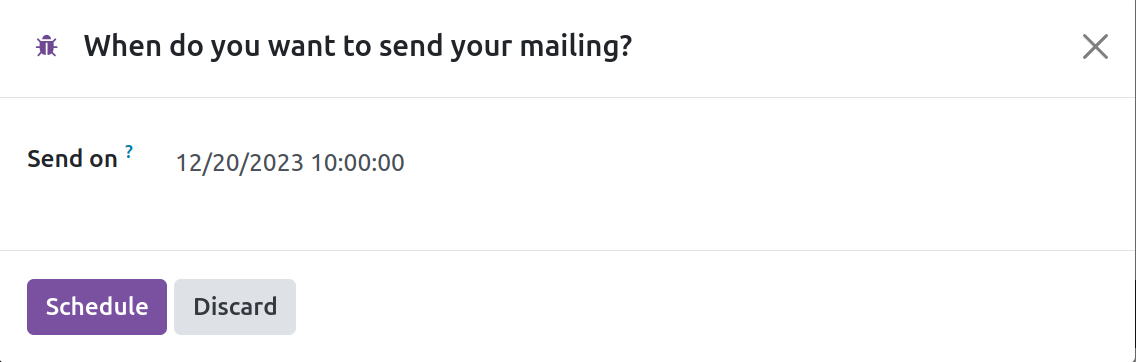
The following new page will show up when you pick the Schedule icon.
This Schedule icon can be used to set a date for the designated recipient. A new window
will open after the mailing date has been confirmed.
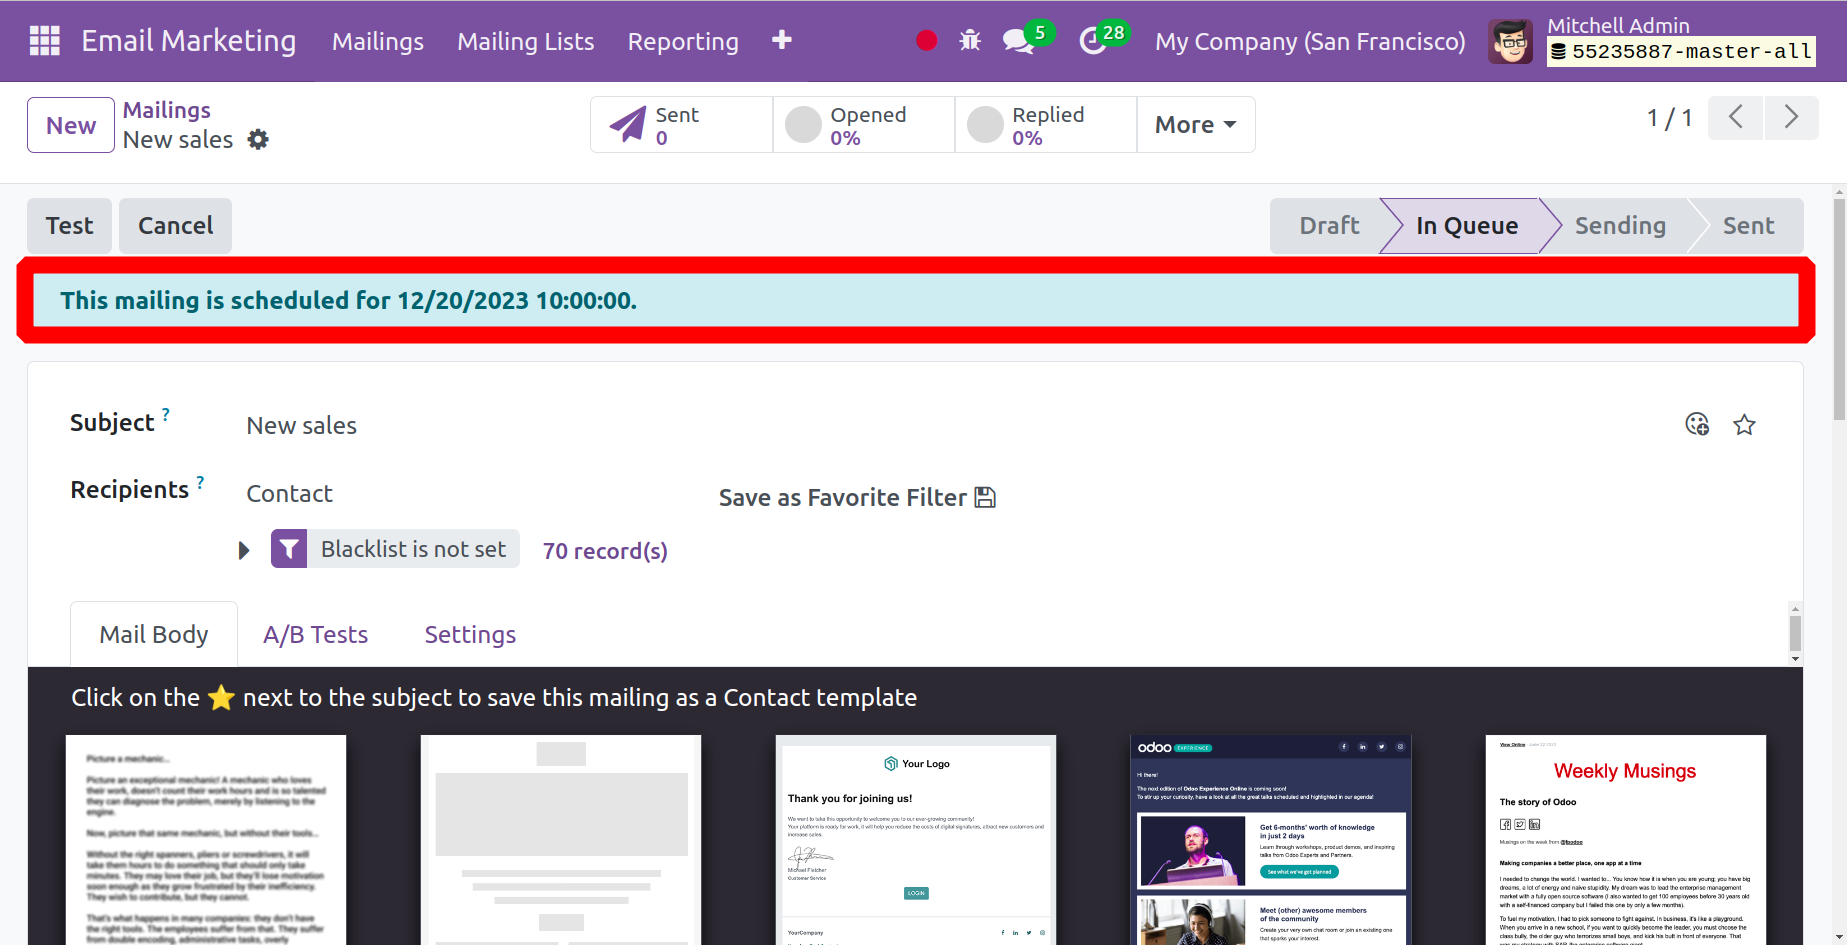
The scheduled email date is visible. The email's status will be displayed as a draft when
using the queue option. It will automatically send the mail on a specific day and date.
You can click on the Test icon to test a specific email. After the email has been created
and sent, you can view its status, which includes Quotation Order, Invoiced, and the
overall percentage of recipients who received, opened, clicked, replied, bounced, sent,
and ignored, in that order.
As can be seen in the screenshot below, the status of every email can be viewed by
selecting the Kanban view for that specific message.
The mail can be changed using the available Group By and Filters options.
Mailing Lists
You can send mail to a single person or a group of individuals by using the mailing lists
option found within the Email Marketing module of the Odoo ERP Software. The Email
Marketing module also makes it very simple to create a mailing list. Creating an email
address is simple when you use the Mailing Lists menu option. Using this menu, you can
create individual mailings for the company's various promotions, events, and adverts.
The Email Marketing module itself displays the option in its main menu bar. You will see
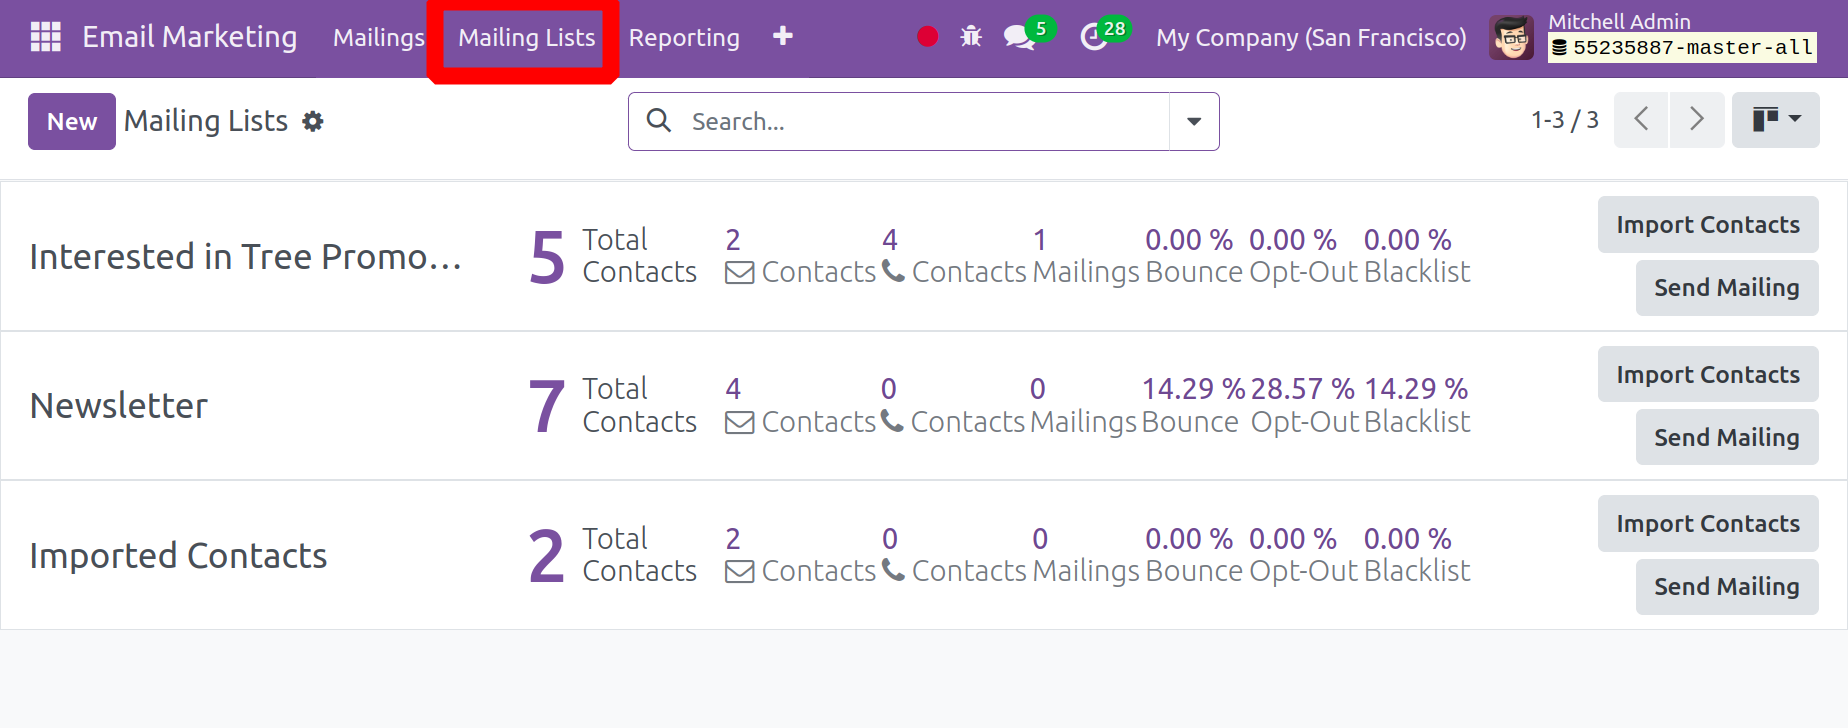
the page in Kanban view when you select the mailing list option. Below each line is the
total number of contacts. Choose a specific contact to obtain it.
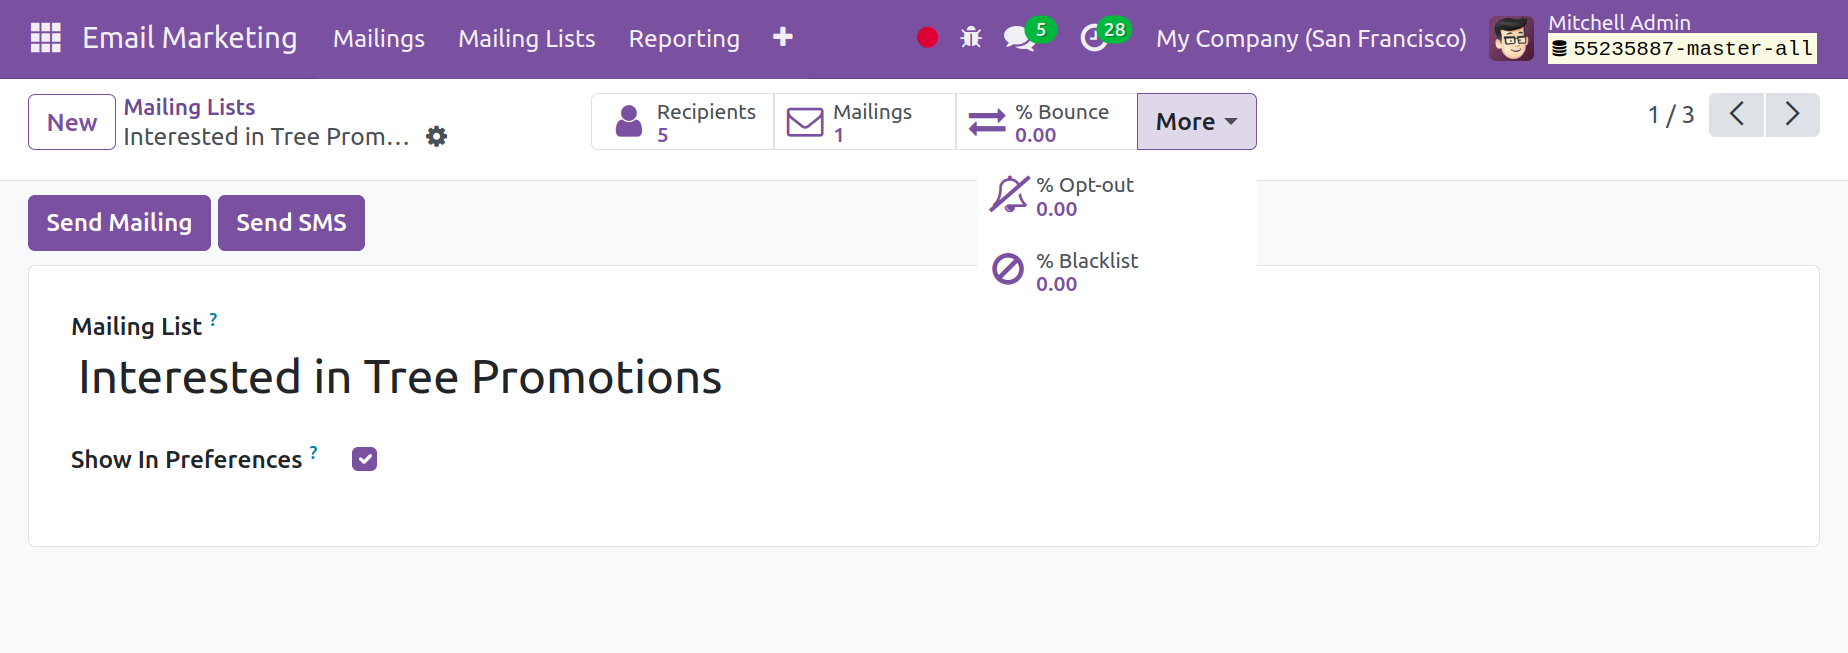
You will find advanced options, including information on the recipients, mailings to
these contacts, bounce rate, opt-out, and blacklist, on this specific contact's page. It
is simple to create a new email list with the aid of the New icon. You will be prompted
to provide the mailing list's title when you click the New icon.
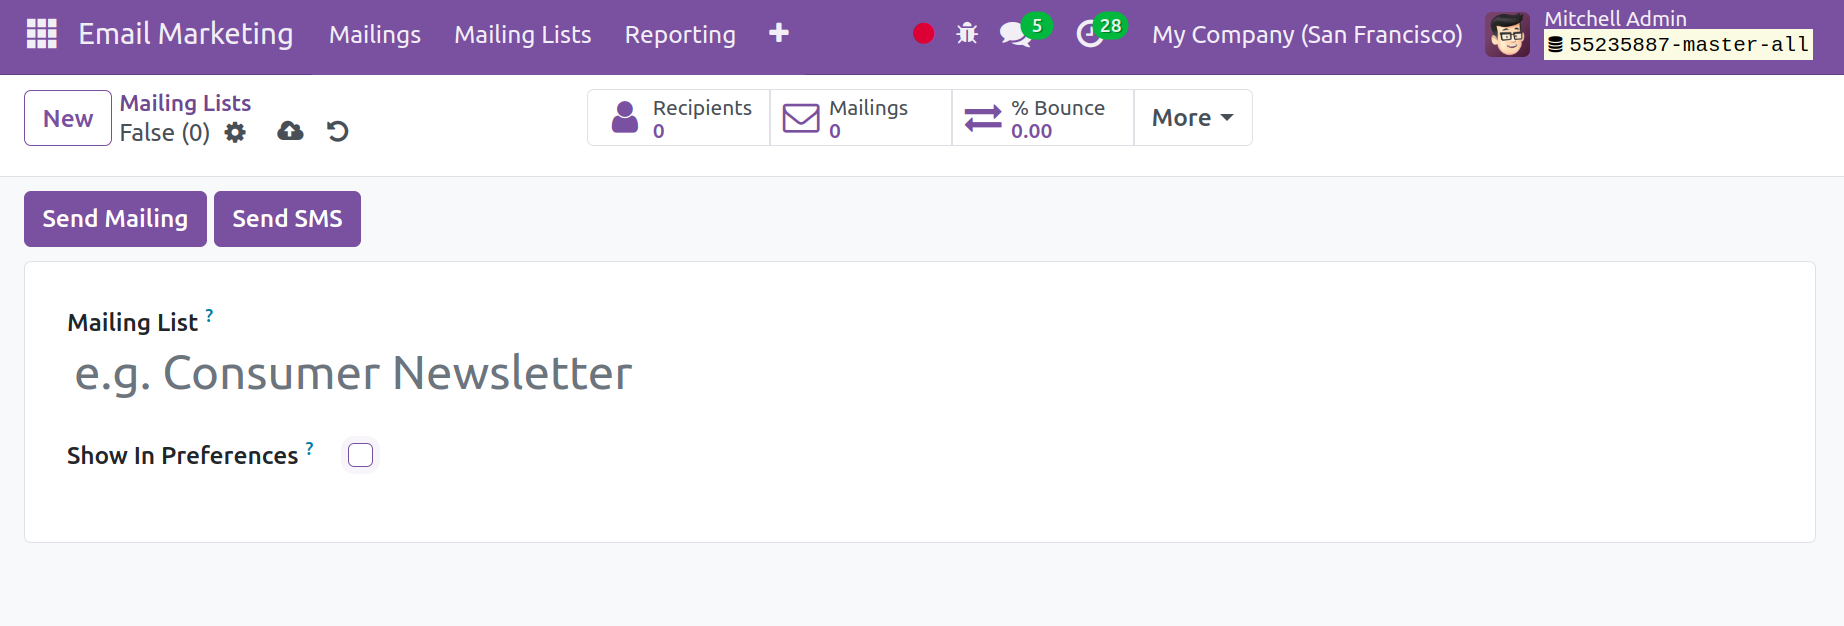
Here, all you have to do is fill in the designated space with the mailing list name.
Through the Show In Preference option, you can start the program. The receivers will
then be able to update their subscription preferences by accessing the mailing list
through the un-subscription website.
Mailing list Contact
There will also be a contacts sub-option under the mailing list choice. To create
contacts for specific mailing lists, the Email Marketing Module offers the ability to
contact the mailing list. As you can see below, when you open the menu, all of the
mailing list's created contacts are displayed.
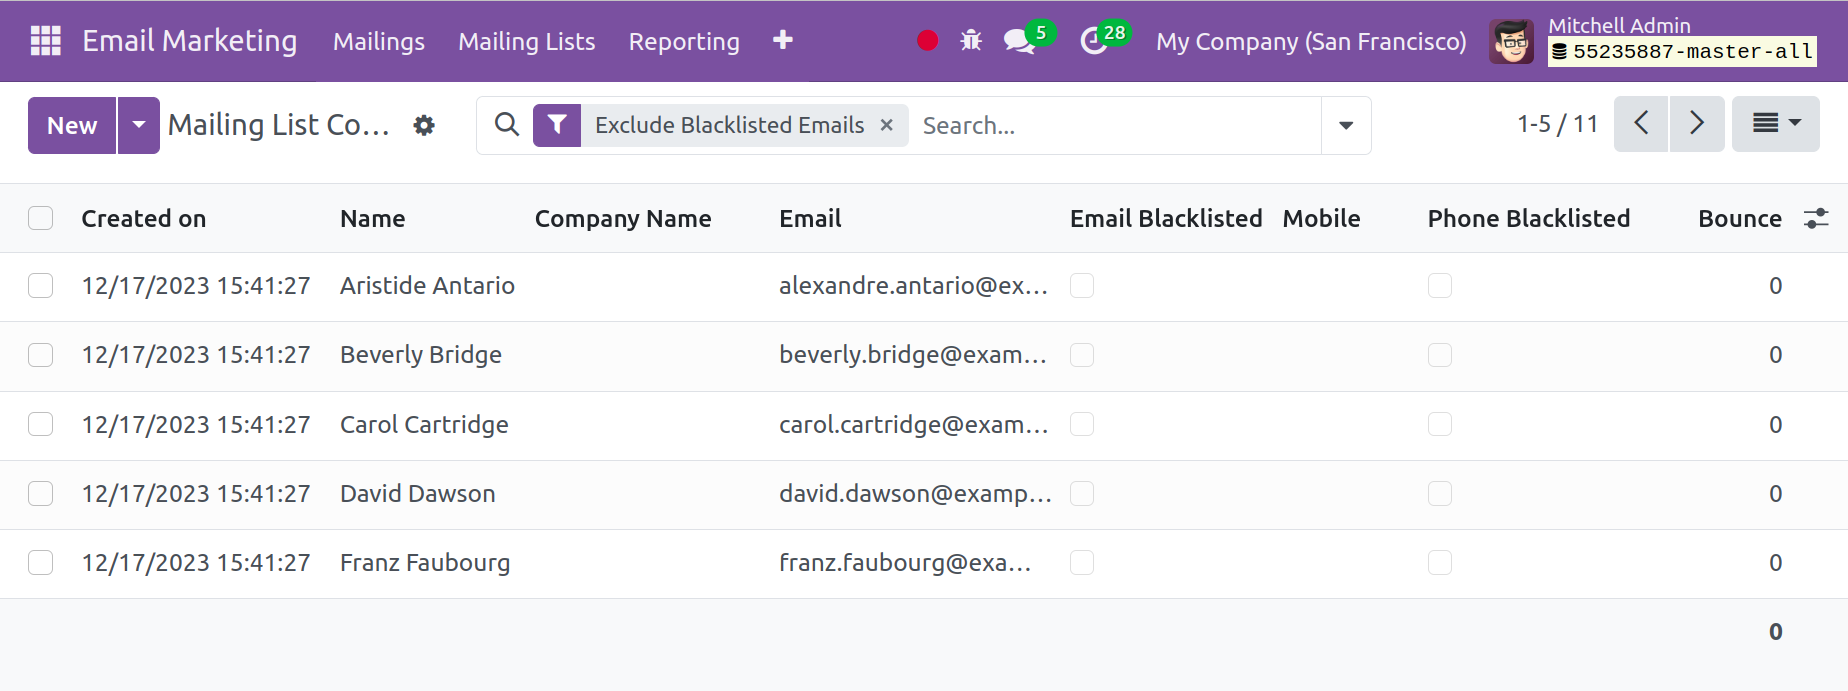
Numerous details are available on this page, including the date of creation, the
contact's name, email address, blacklisted email address, phone number, mobile number,
and bounced email information. The page is also visible in pivot, graphic, and Kanban
views. You will be informed as to whether or not the phone number and email are blocked.
The contact will not accept any bulk mailings from any of the lists if the specific
email is blocked. Additionally, the phone number is of the same type that is blocked.
There won't be a collective grin from the roster. Go to the New icon to create a contact
that is similar to the mailing list.
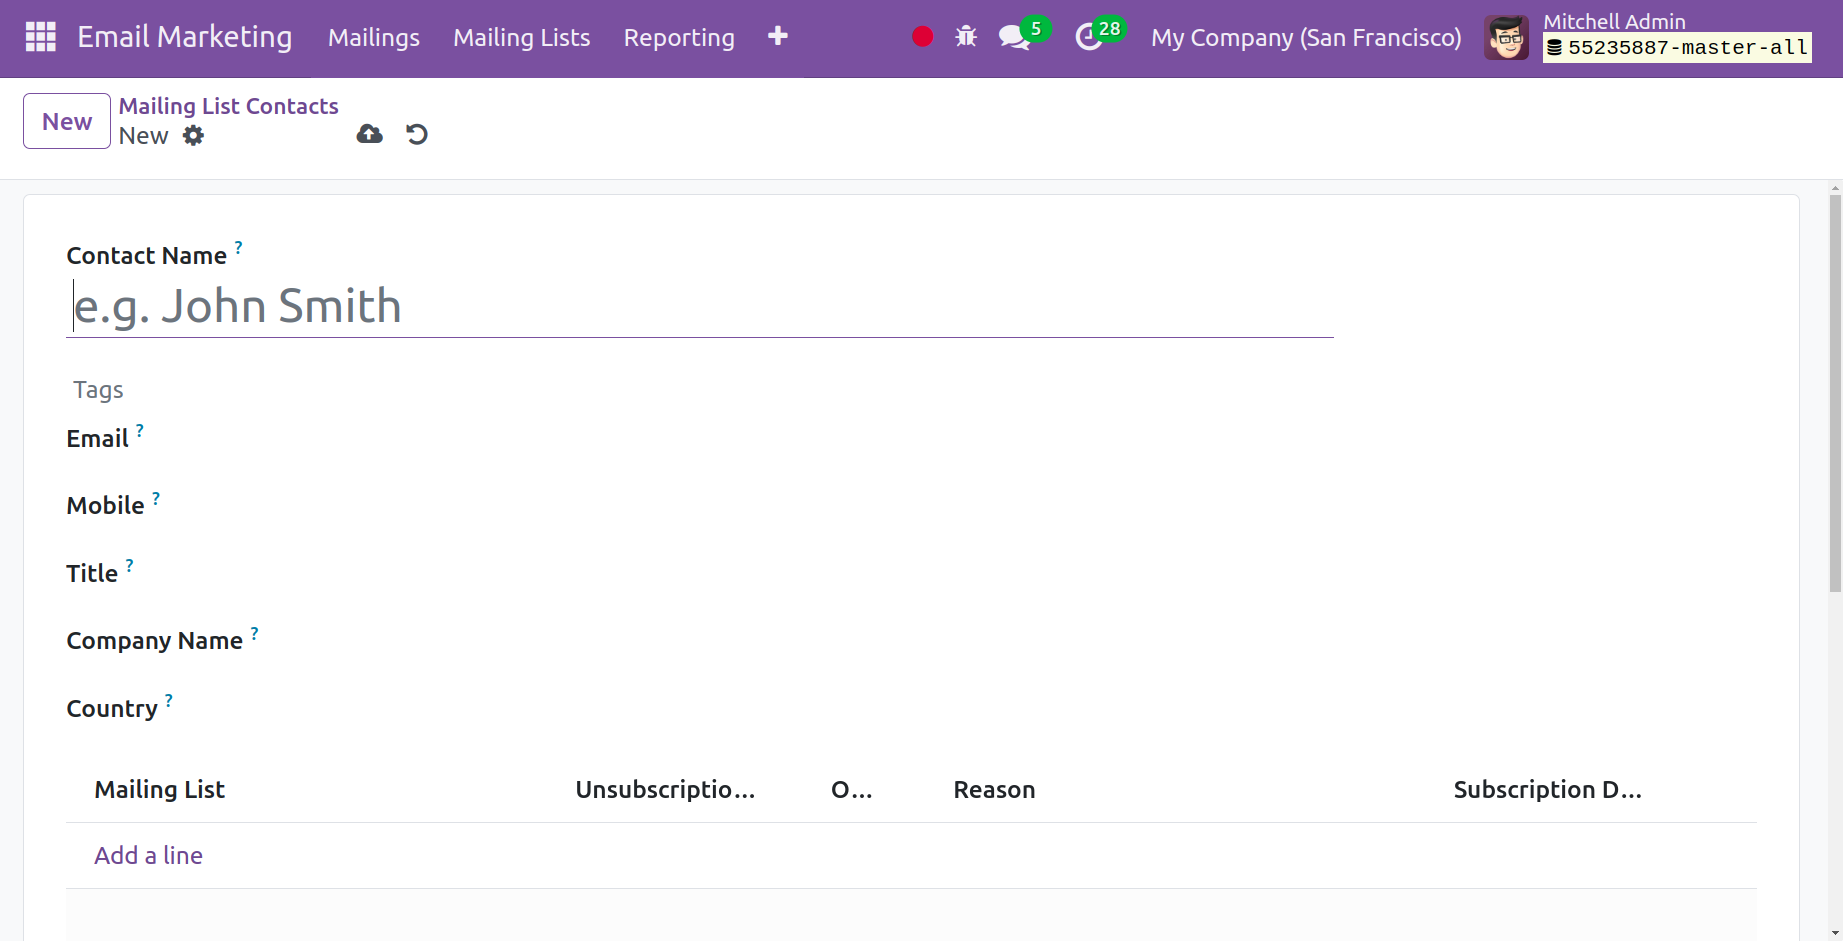
You can include the contact's name in the designated space, email address, mobile number,
title, company name, and country name while creating the mailing list contract. You can
put the contact list below the mailing list, or the put a Line option will add it
automatically. Once the creation process is complete, you may select the Save icon to
add the newly generated list to the one that already exists.
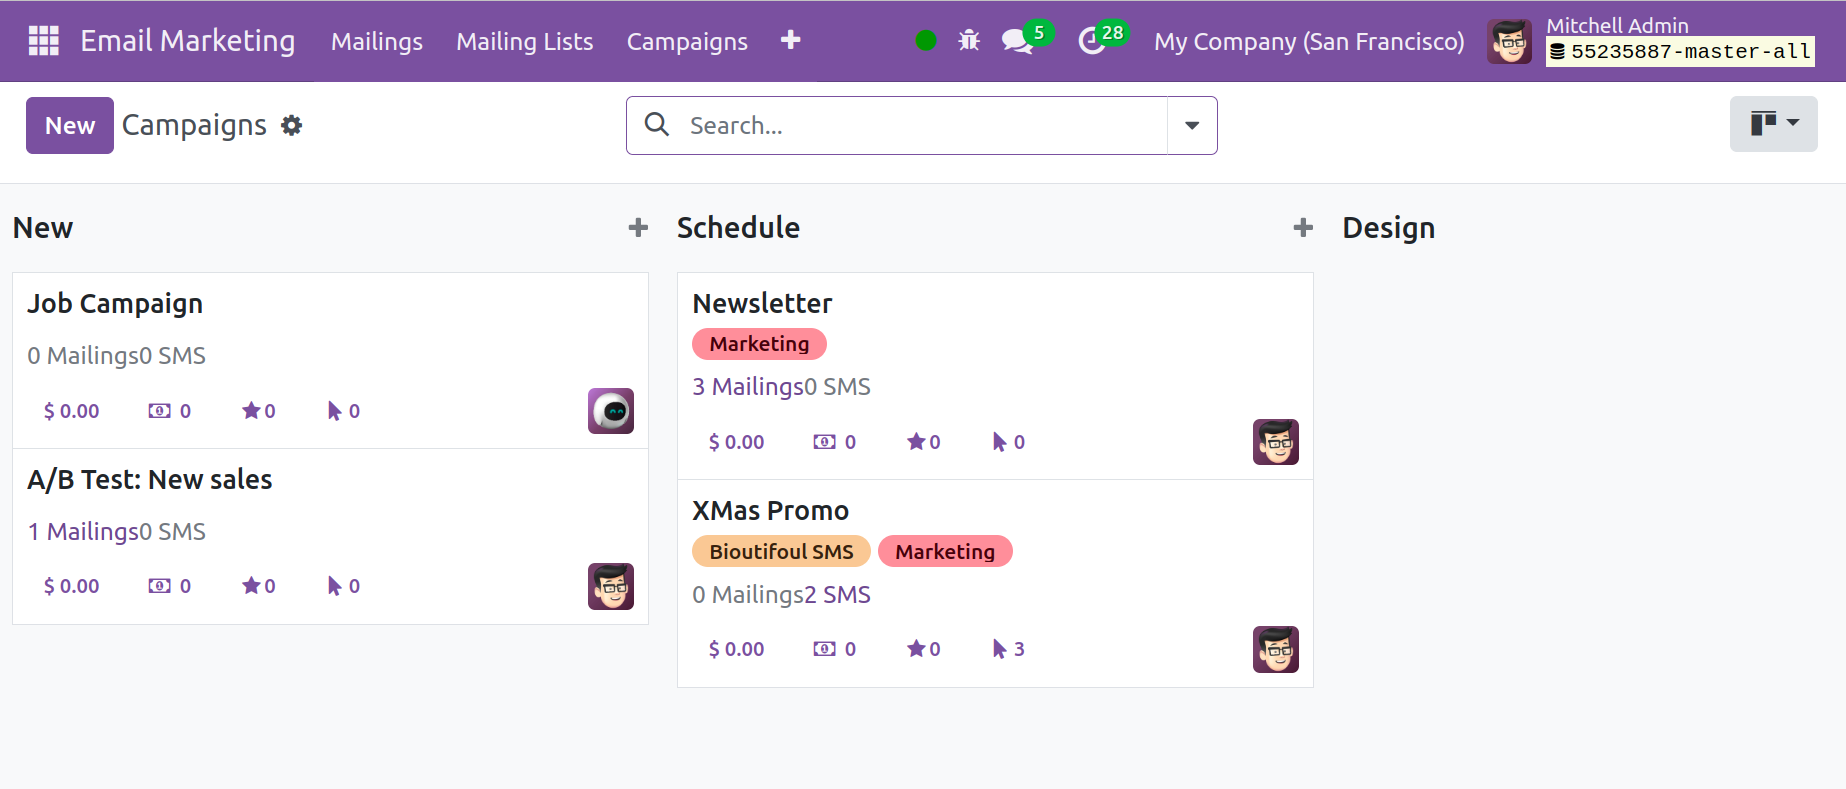
Campaign
The email marketing module's campaign aids in boosting your business's profits. The
settings menu of the module will provide the choices. The Campaign page will look like
the screenshot below.
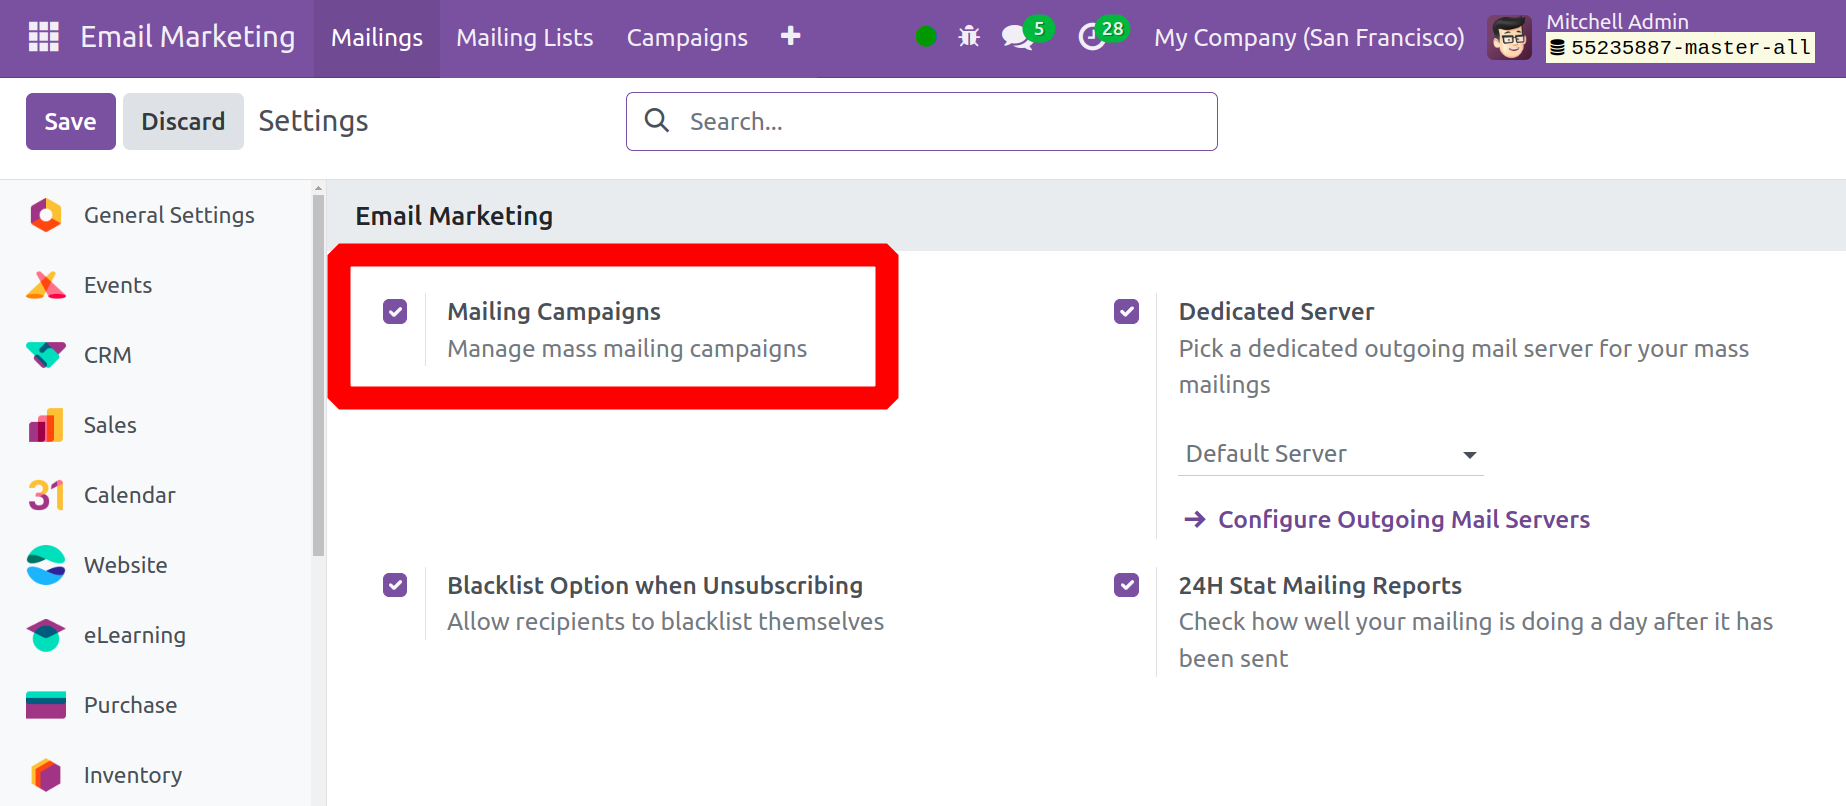
The campaign menu will appear on the module's main page when you activate the mailing
campaigns option found under the settings option in the configuration menu.
The page where you may choose a campaign is displayed in the image, as seen below. You
can view details of previously created campaigns at different stages on this page.
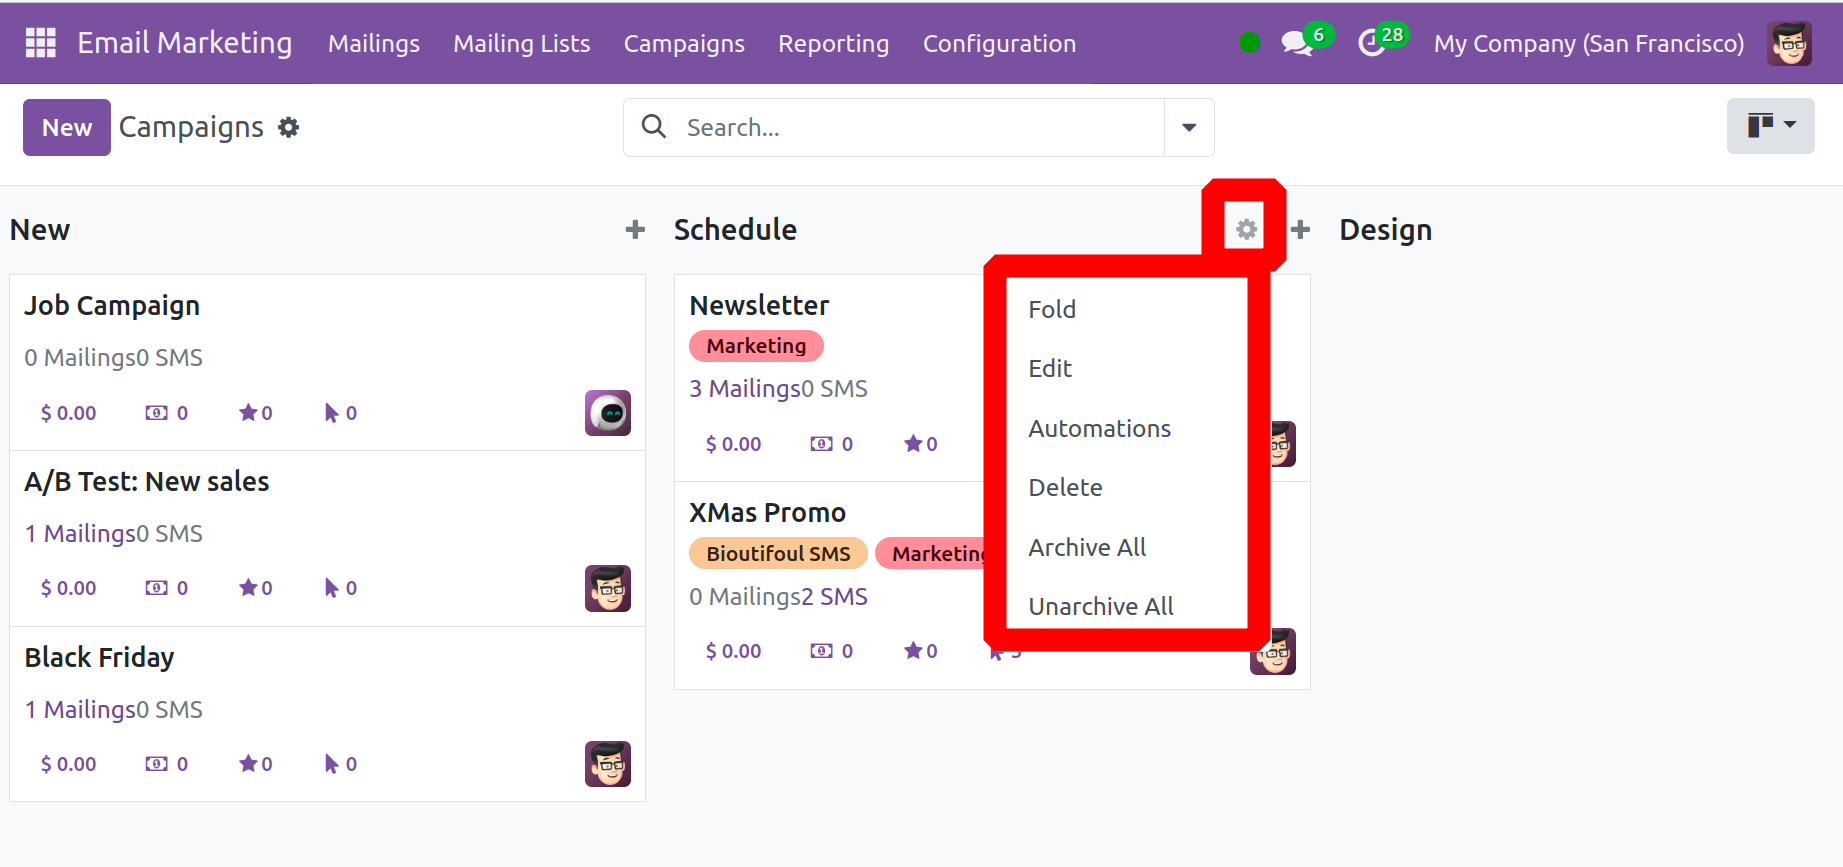
Users can examine some options, including Fold, Edit, Automation, Delete, Archive all,
and Unarchive all, inside the stage settings. This indicates that the Fold button can be
used to fold the stage from the Kanban perspective. Click the Edit button to make
changes to the stage. Use the matching button to archive or archive the stages.
Additionally, by using the Automation button, various automation rules can be added
while the stage is changing.
You can add the campaigns to the stages you choose by using the plus icon that is
available on each step. As seen in the figure below, you will be given a space to enter
the campaign name, accountable user, and relevant tags when you pick the Add icon.
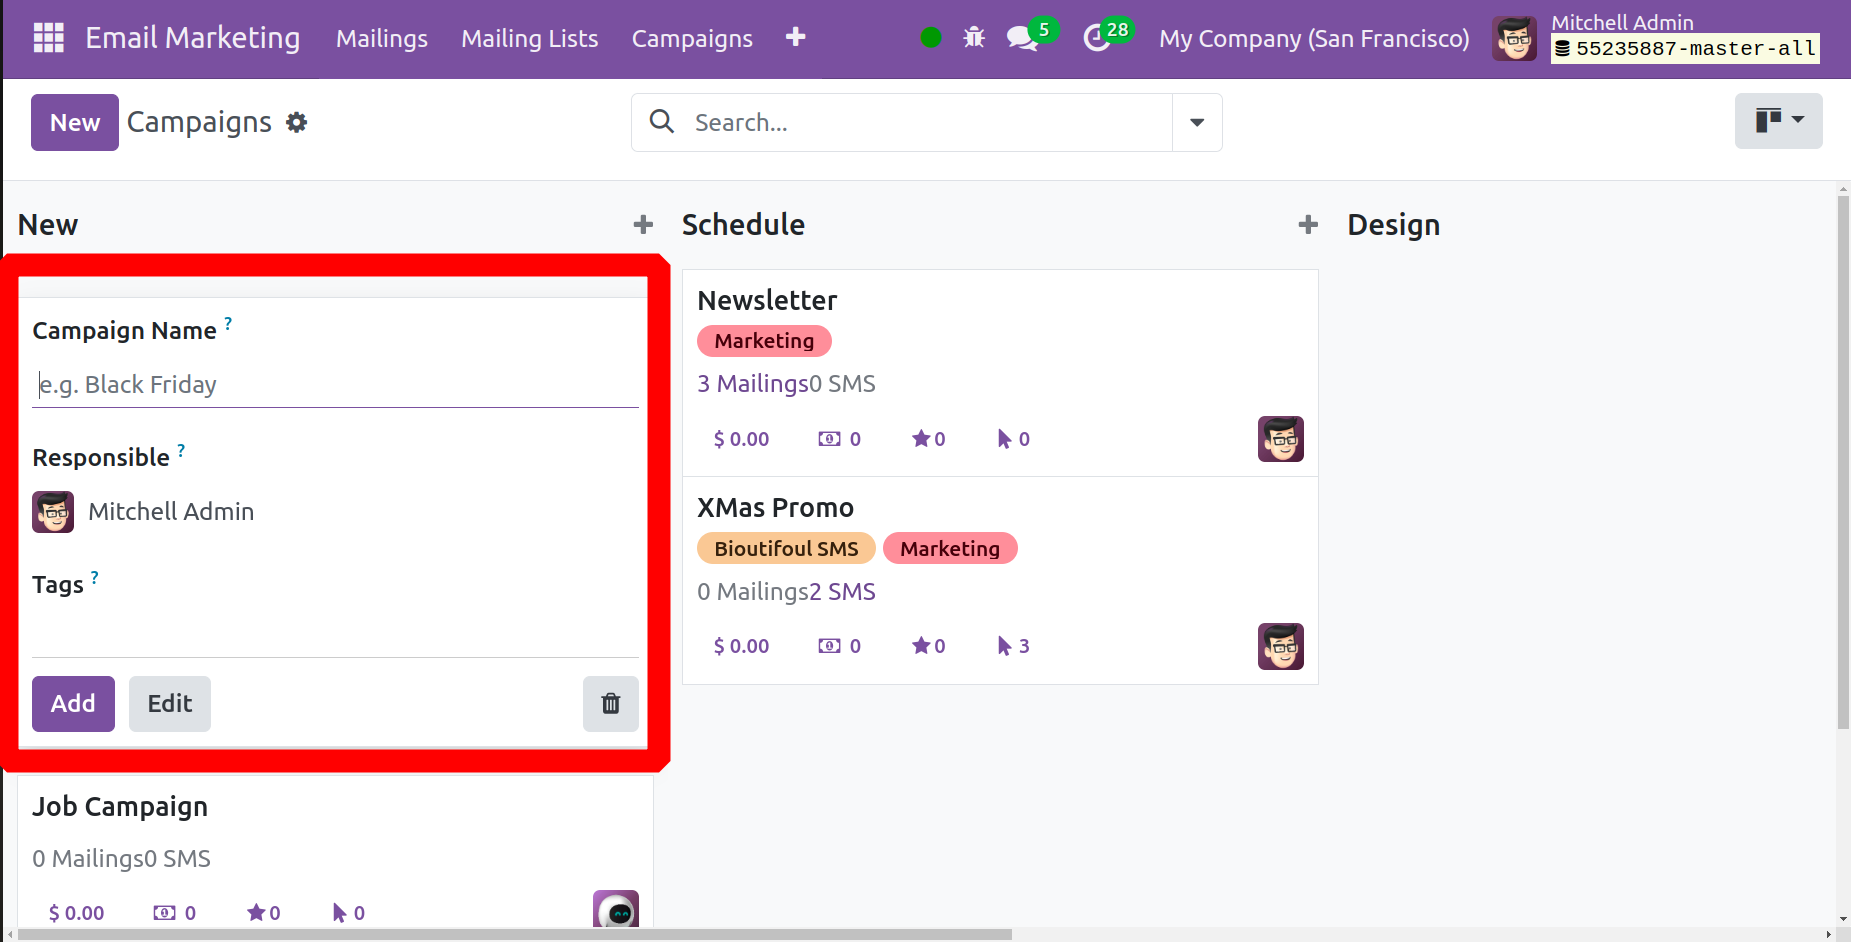
You can use the Edit option in the space to make the required adjustments to the newly
established campaign. You will then be taken to a page similar to the one in the
screenshot below.
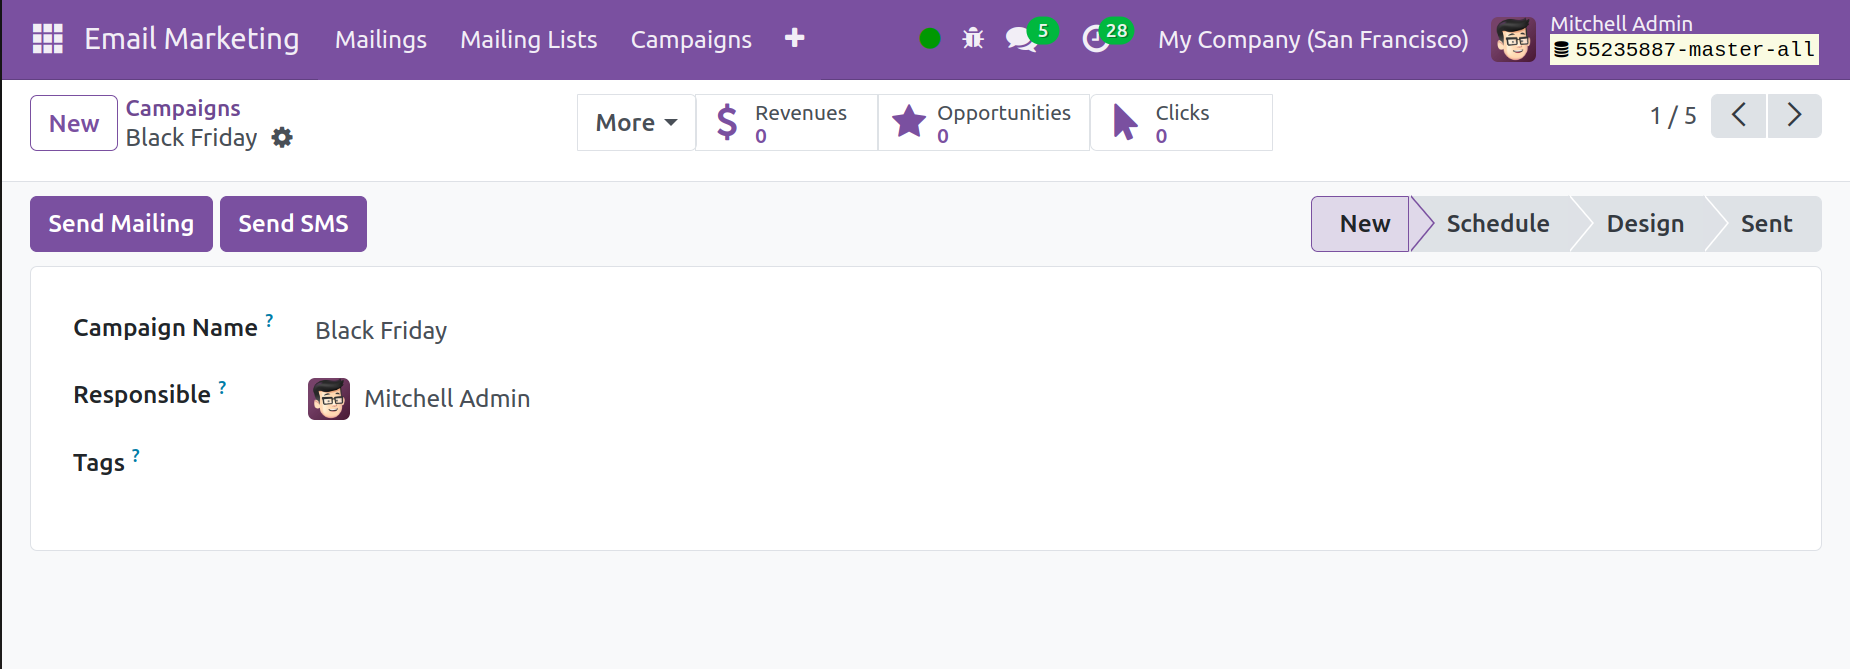
You can select the Send Mailing option to send the email. You will then be taken to an
alternate page.
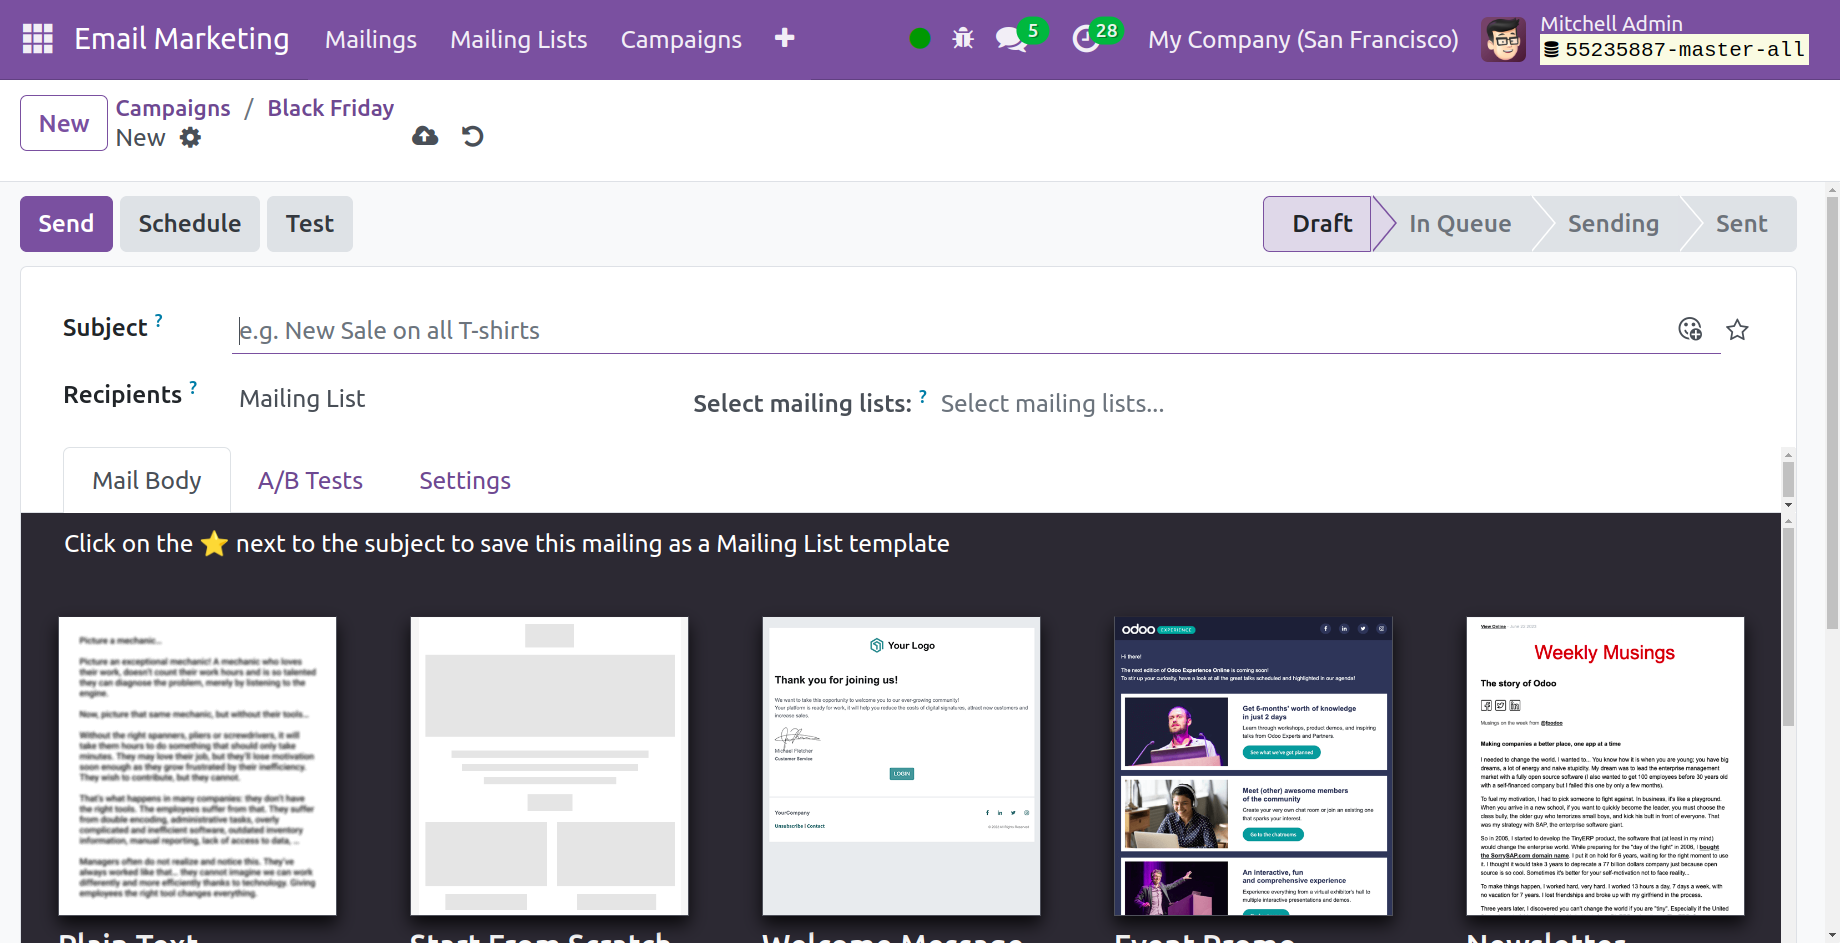
You can add the subject, recipients, and mailing list selection option on the email
composition page, accordingly. You have a few tabs behind it, including settings, A/B
testing, and mail body. After creating those emails, you can click the Send icon that is
located on the left side of the screen. Next, as seen in the graphic below, the
corresponding campaign will display every mailing under a smart button.
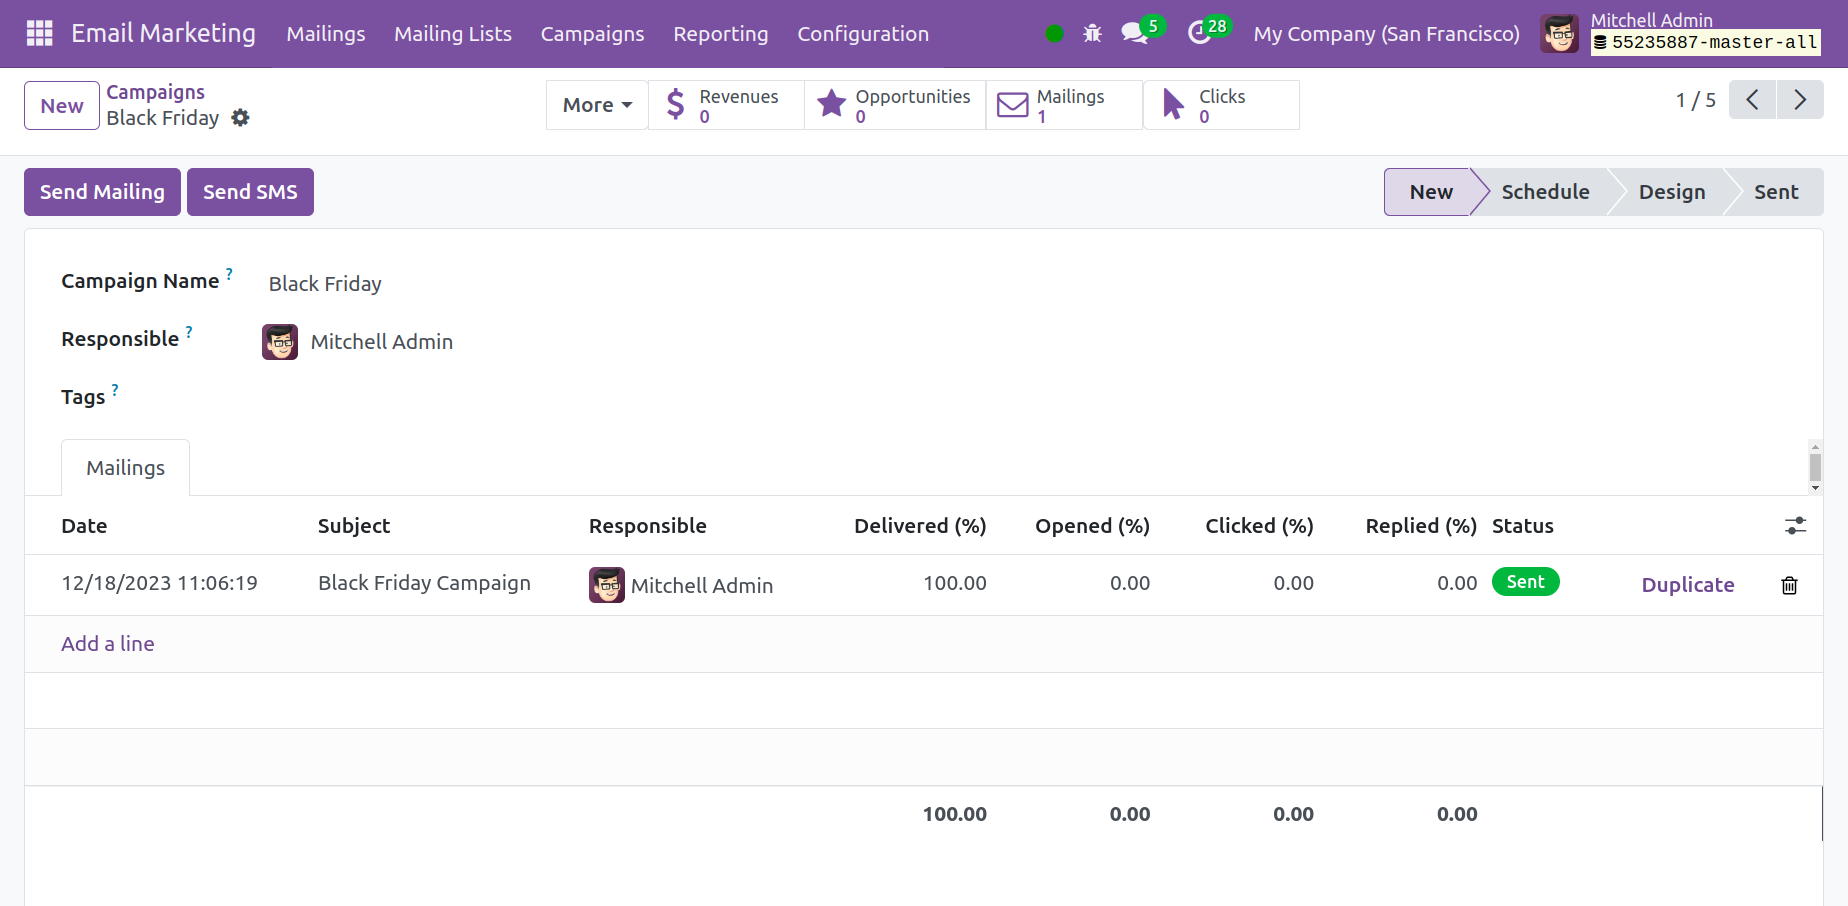
You can access all of those emails by clicking on the mailings smart button, which
enables you to conduct a thorough study of those messages. You can send SMS as well as
emails if necessary. Revenue received, the total number of opportunities and quotations
generated, mailings, and clicks are all included in the smart buttons.
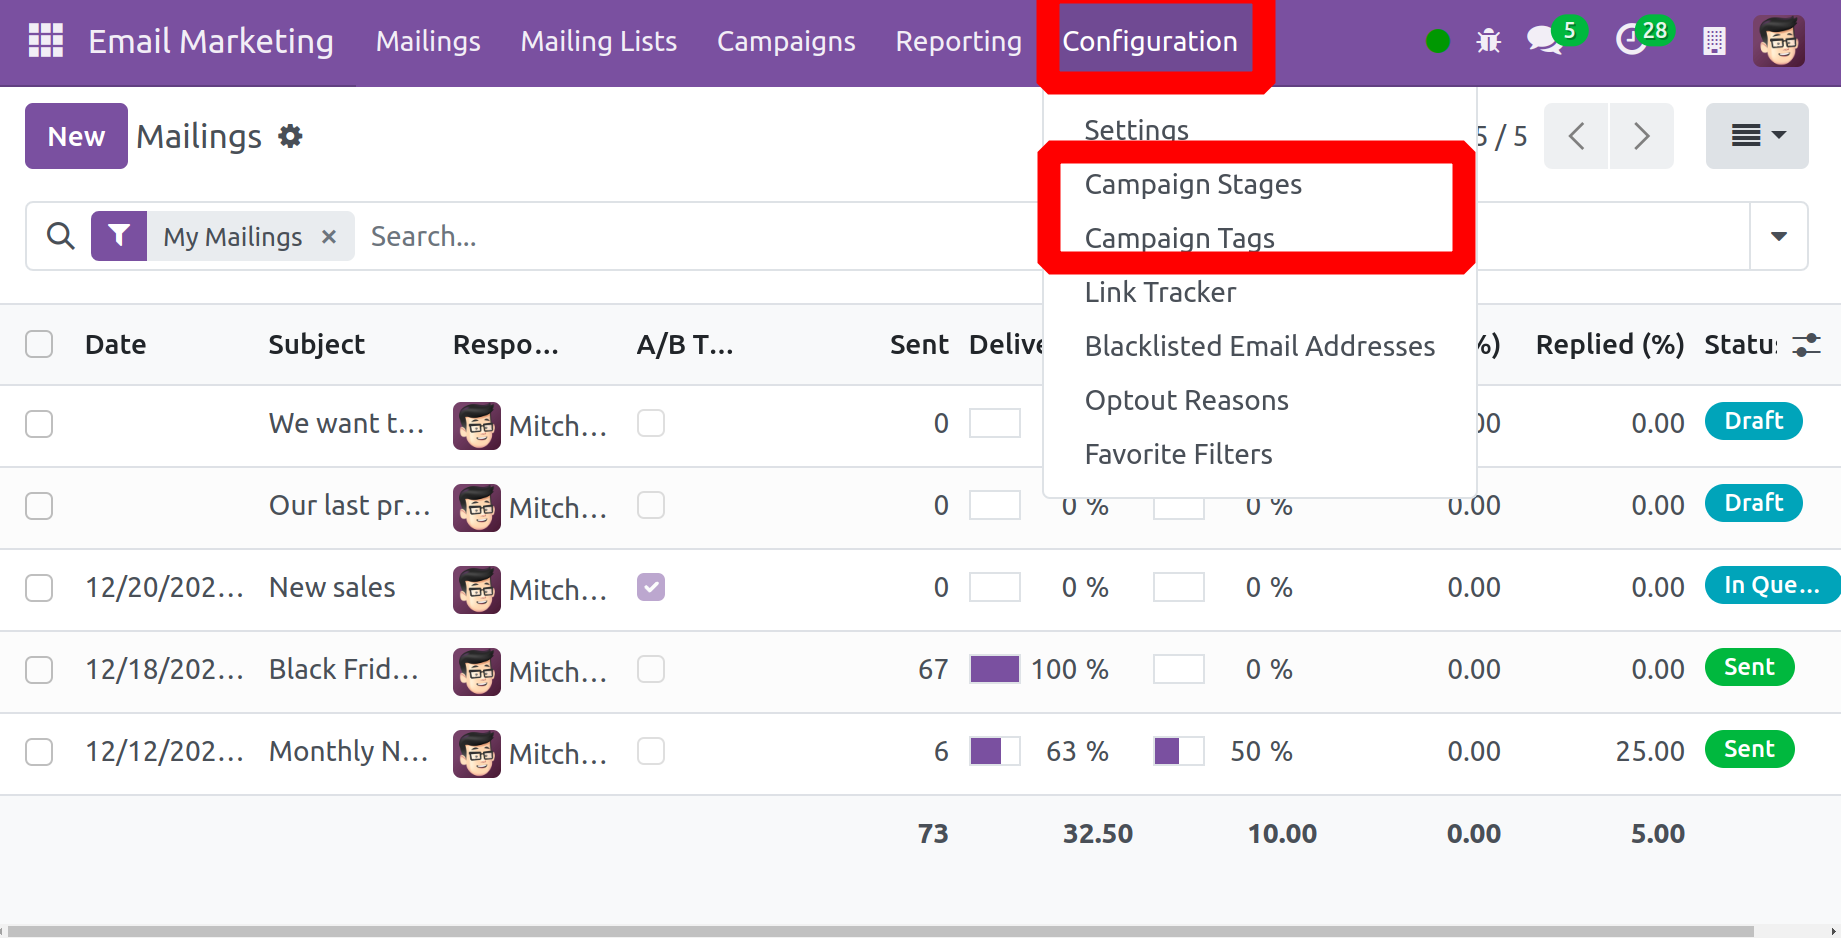
You will now have the ability to select the Campaign Stage and Campaign Tag when you
activate the marketing campaign option from the settings menu under the Configuration
menu.
As seen in the image below, you will be redirected to a page listing previously generated
campaign stages upon selecting the appropriate stage.
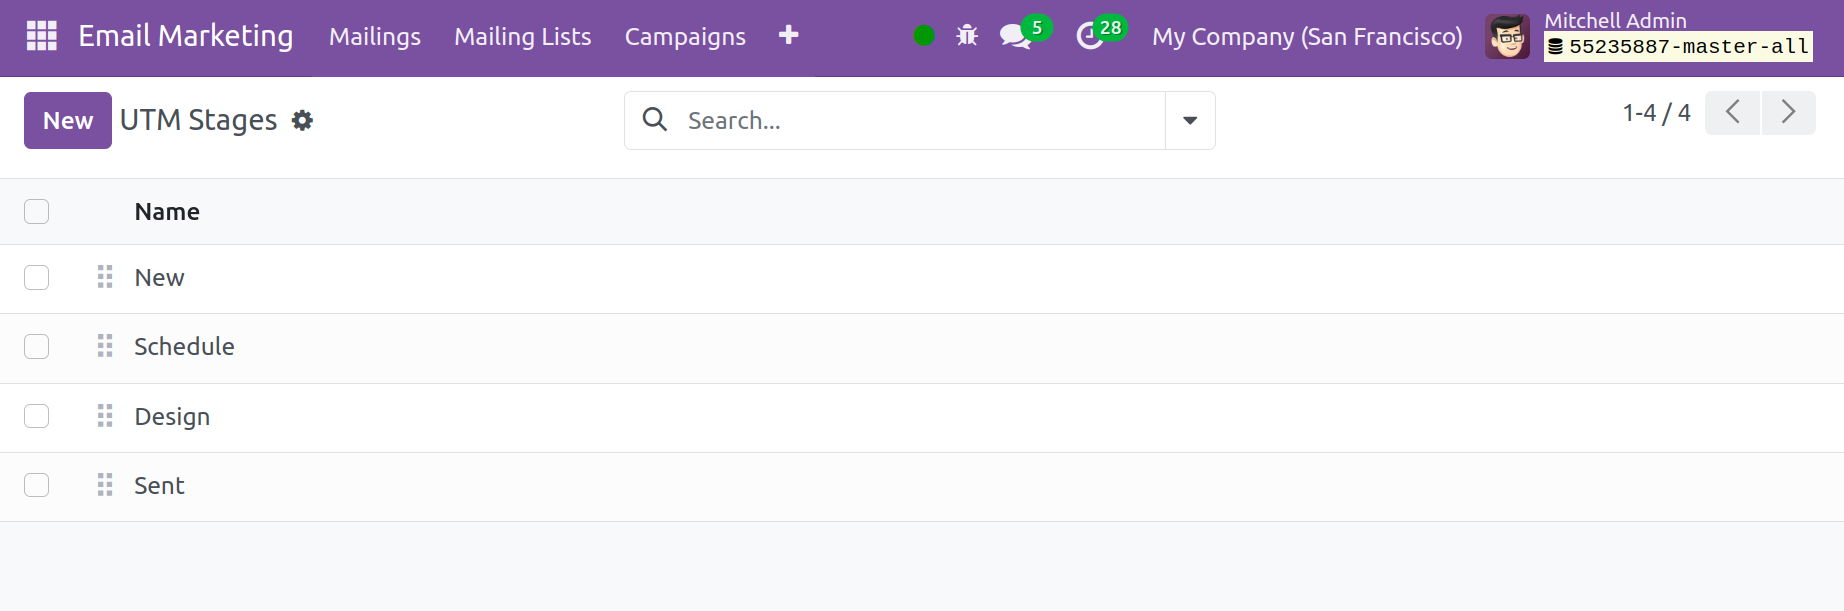
You can utilize the New symbol to create a new campaign stage, which will provide you
with adding a new line. You will receive the campaign tags after a few simple steps, and
the campaign tag page will look like the picture below.
The campaign tags are shown below. You will see a list of previously created tags; select
the New symbol to create a new one.
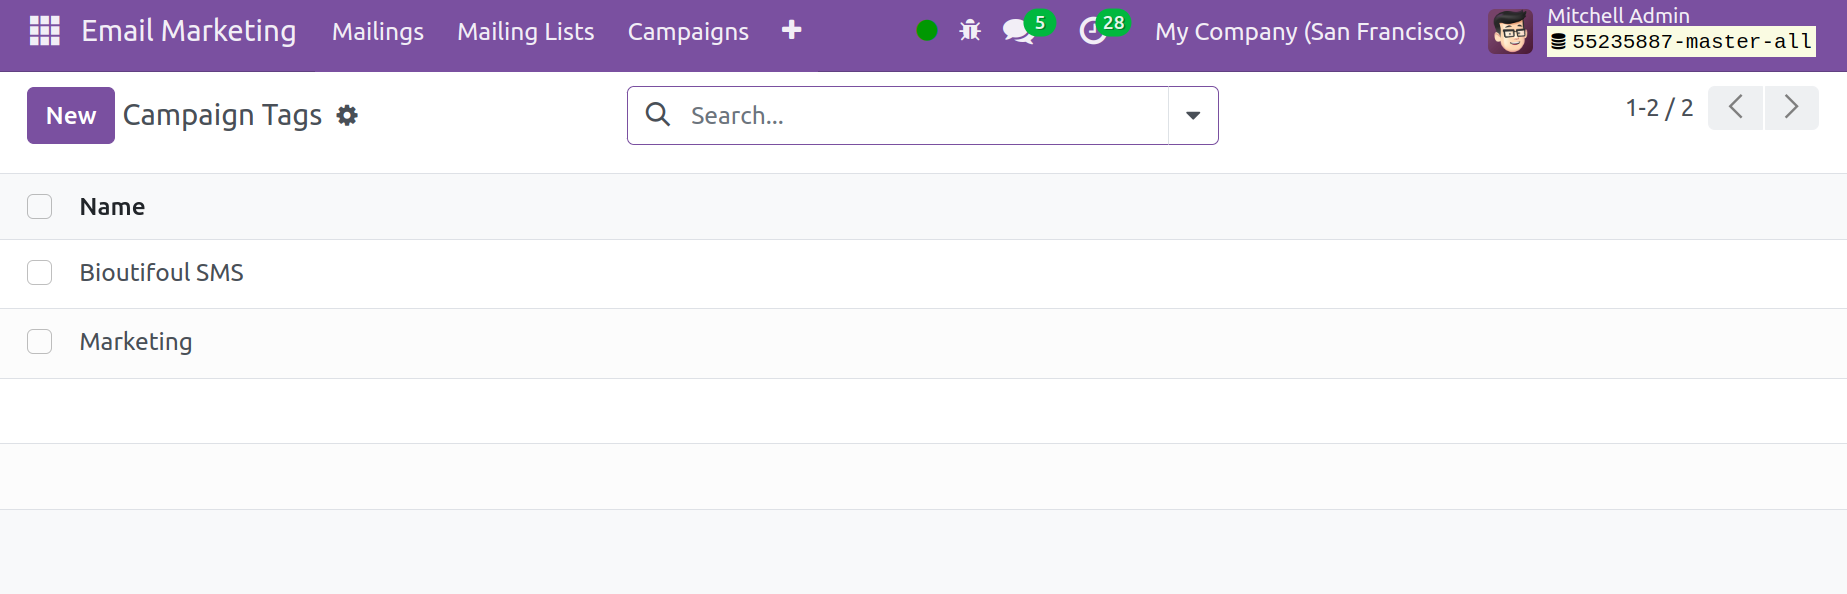
After that, a new line will show up beneath the list's last tag. The user can input the
new tag name there.
Link Tracker
You can track the campaigns with the aid of the Link Tracker tool. The Configuration menu
will provide access to the choices.
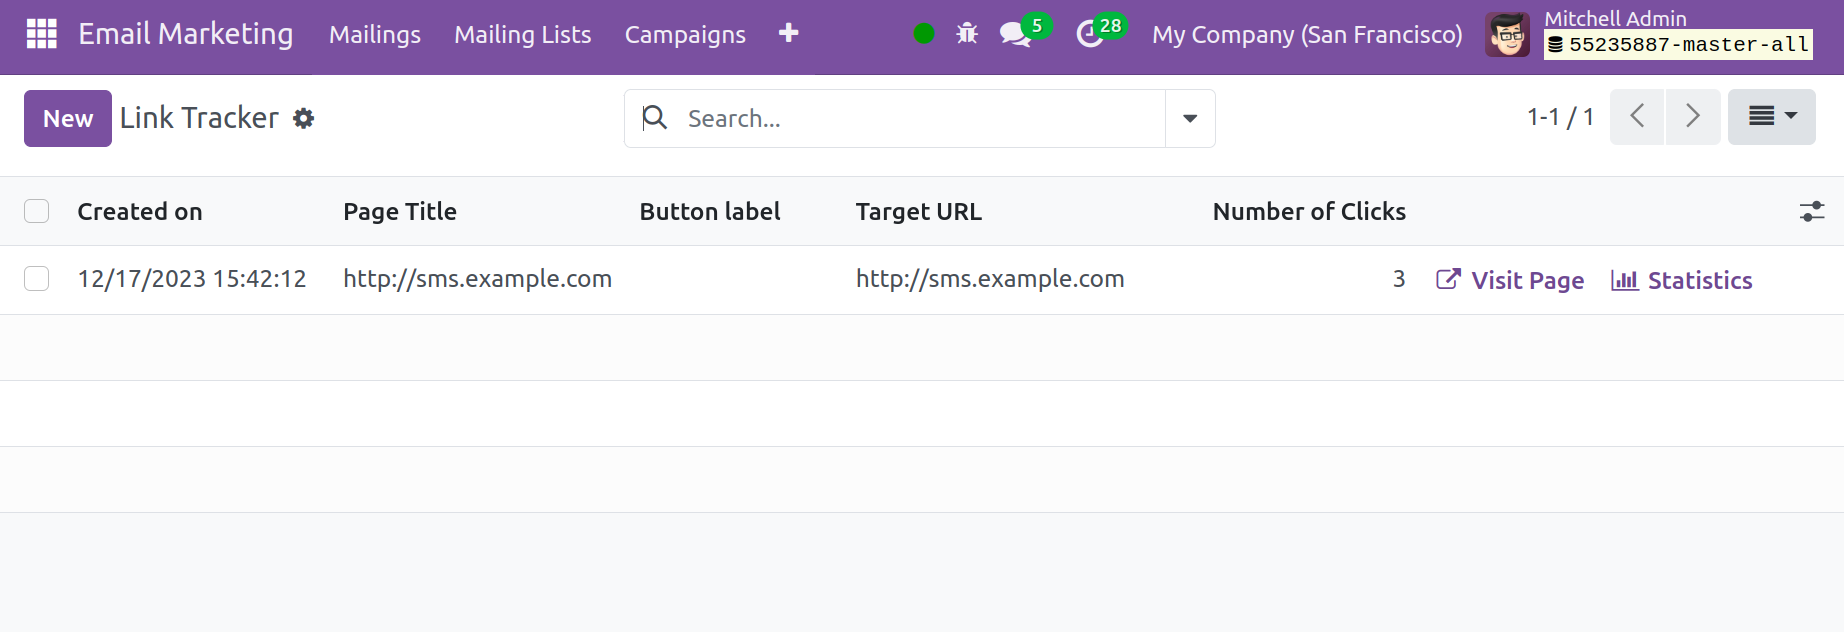
Details, like created on, page title, button label, target URL, and click count, are
displayed on the page.

The "Visit page and Statistics" button will appear, and clicking it will take you to the
link's statistics page on the website.
Blacklisted Email Address
The emails can be added to the blacklisted list if any of them need to be prohibited. The
Configuration menu will have the available options. Additionally, as the screenshot
below illustrates, the page will be blocked.
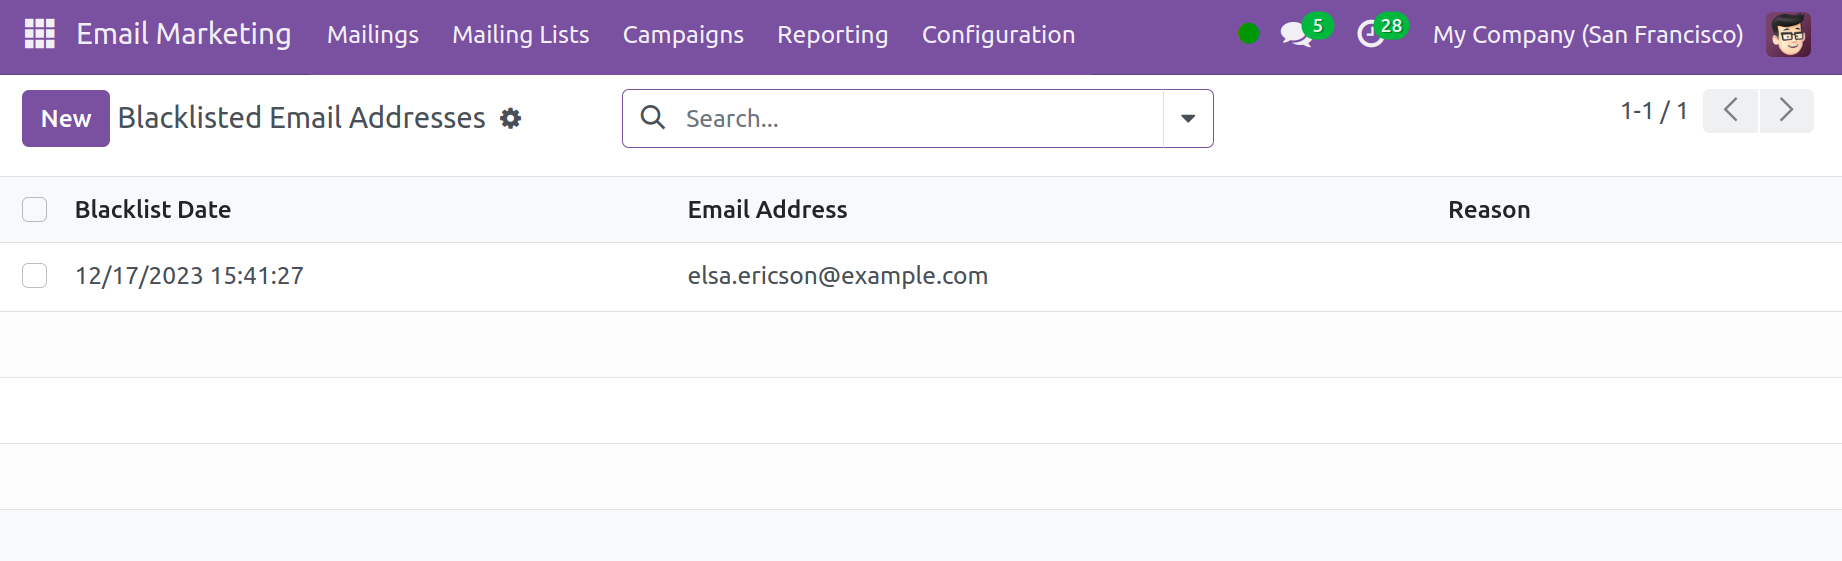
The list of mail addresses that have been blacklisted is available here. You can now make
a new icon by selecting the New icon option. The creation page will look like the
illustration below.
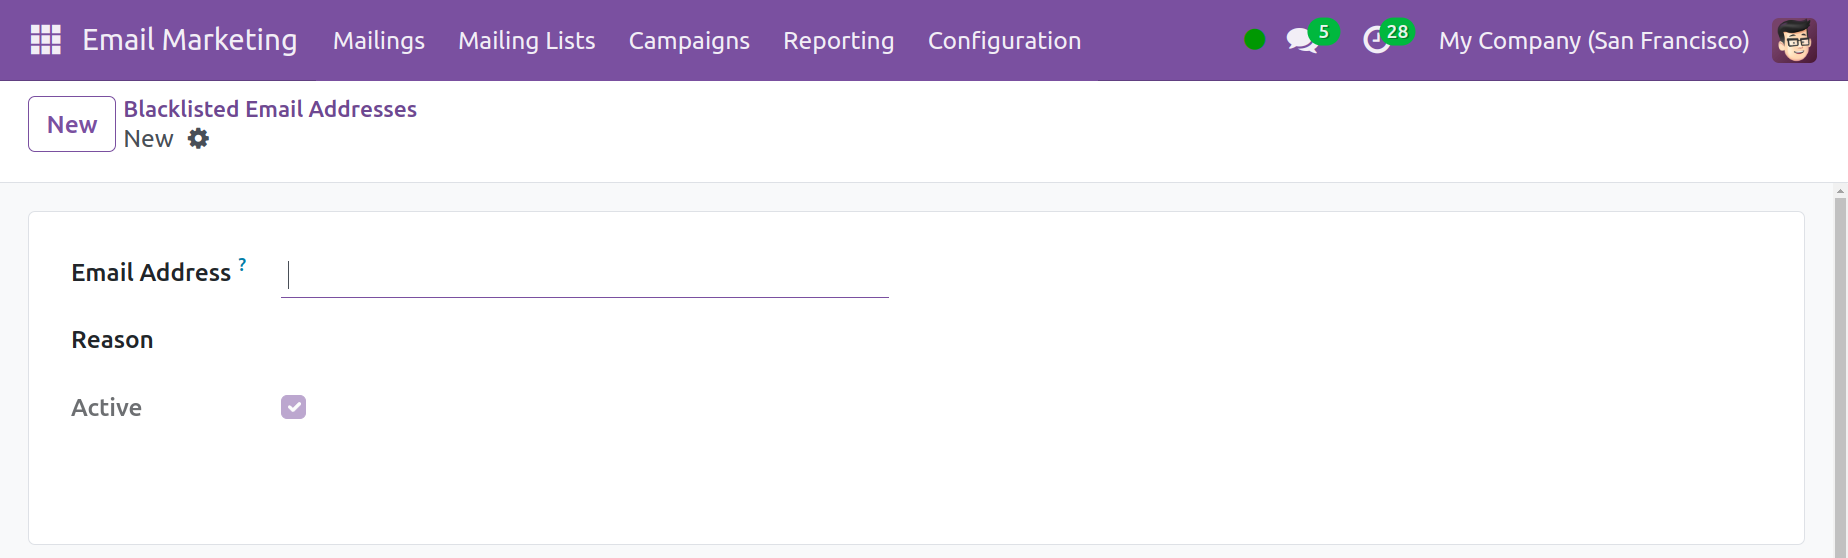
You can enter the email address that needs to be blocked here. After that, select the
Active icon to make the choice active.
When unsubscribing, you can notice a blacklisted option under the settings options. This
enables the receivers to manage their blacklist using the un-subscription website.
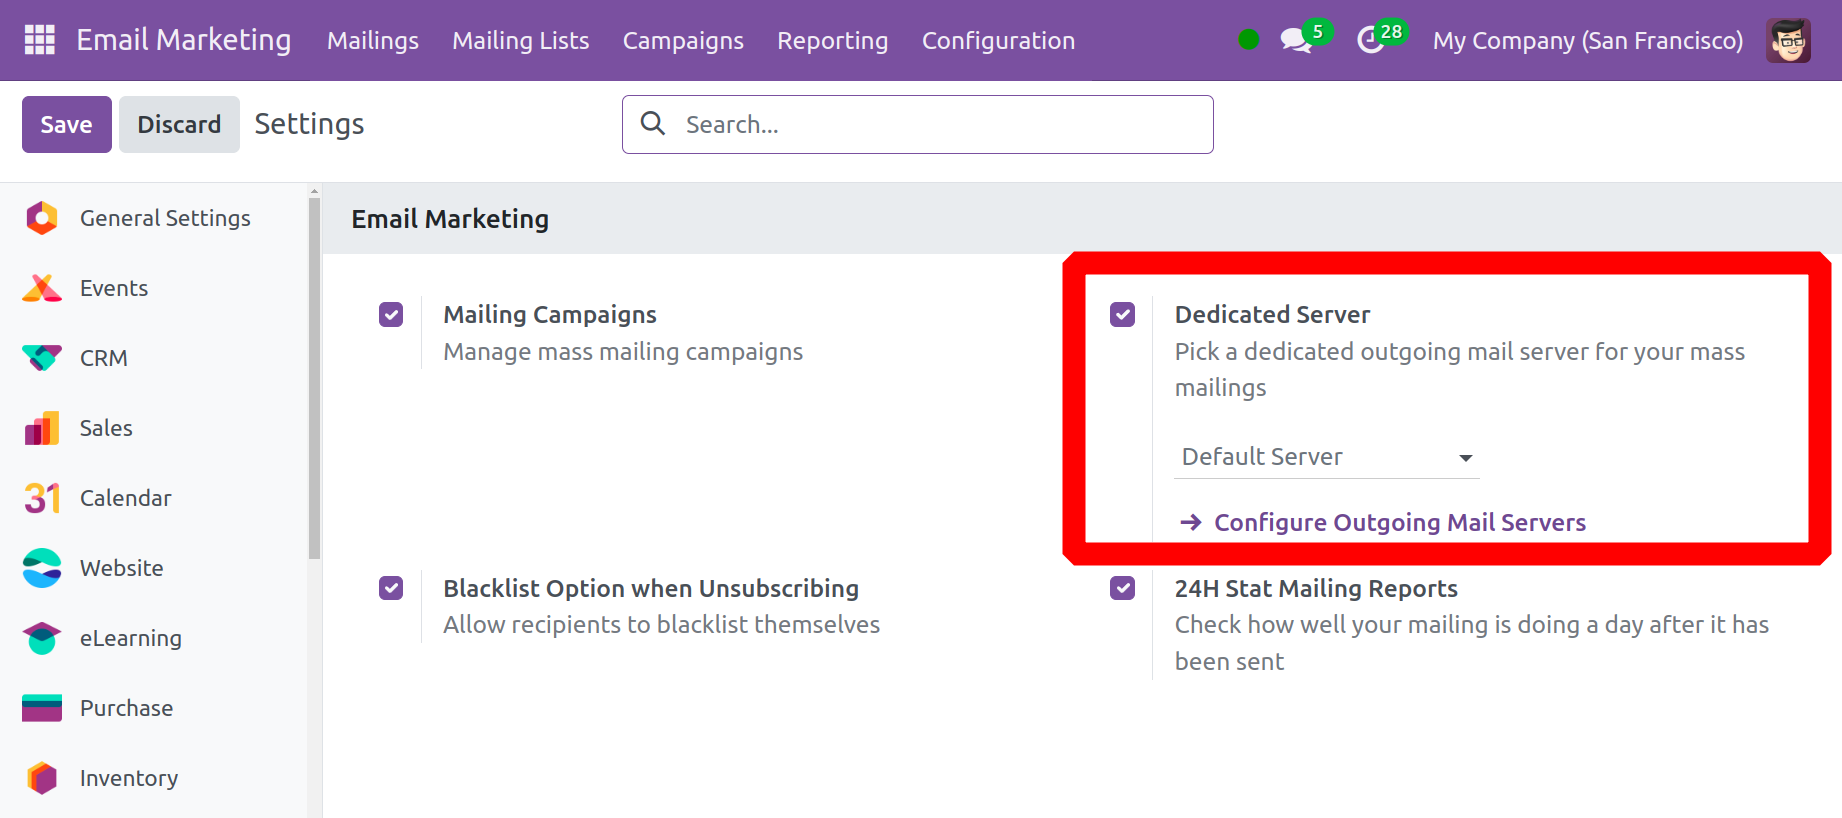
Close to it is the dedicated server option, which enables you to add one if needed for
the mailing.
Opt out Reasons
A variety of reasons could lead to the cancellation of a subscription. There are numerous
reasons why this module has to be changed. The OptOut Reasons are included in the
Configuration menu.
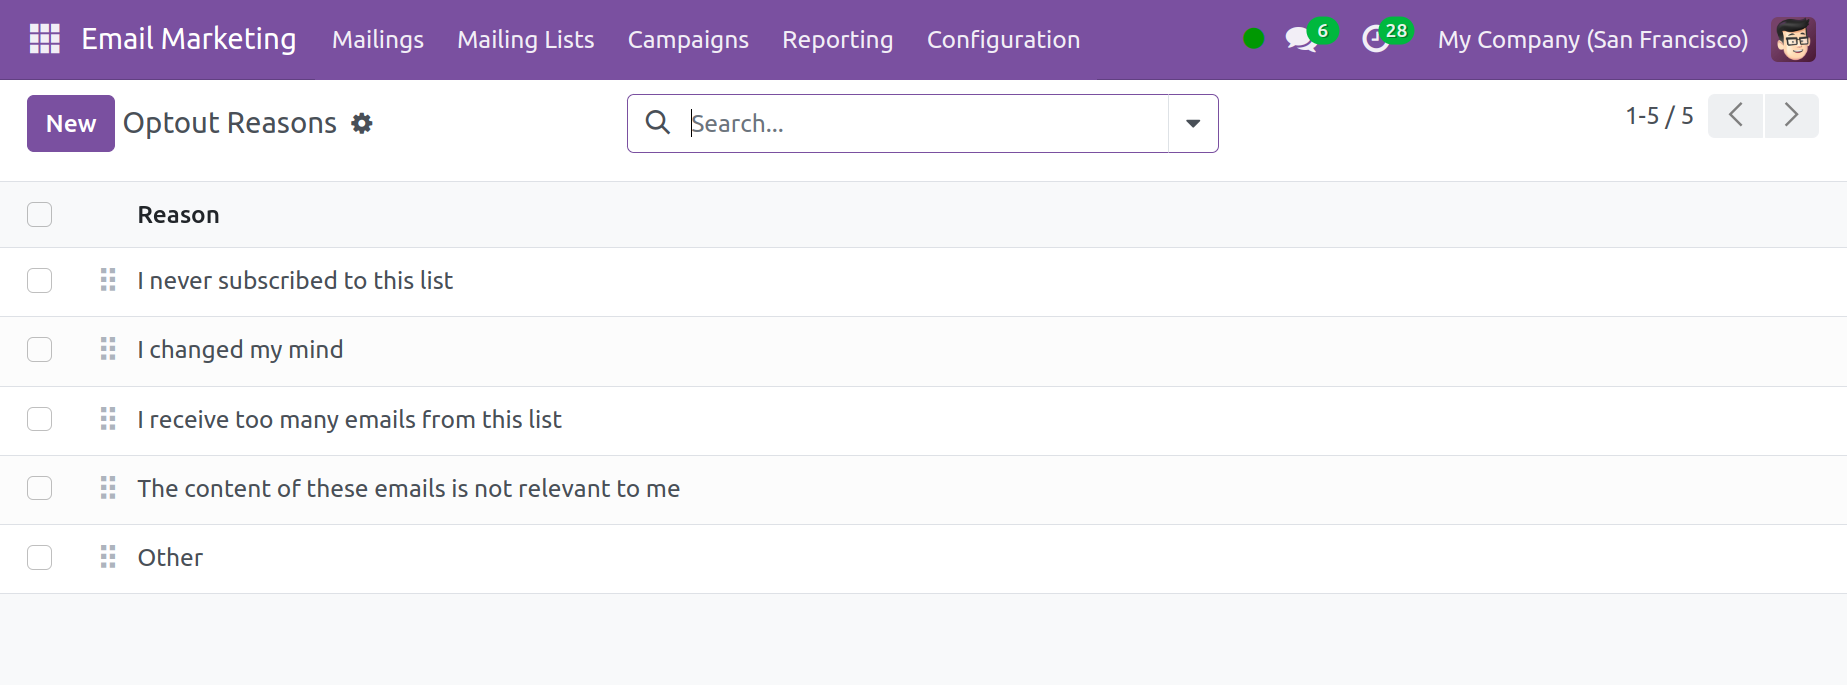
To add a new reason, click the New button. On a new line below the list, the user can now
enter the additional reason.
Favorite Filters
You will also find a Favorite Filters option under the Configuration menu, as seen in the
screenshot below.
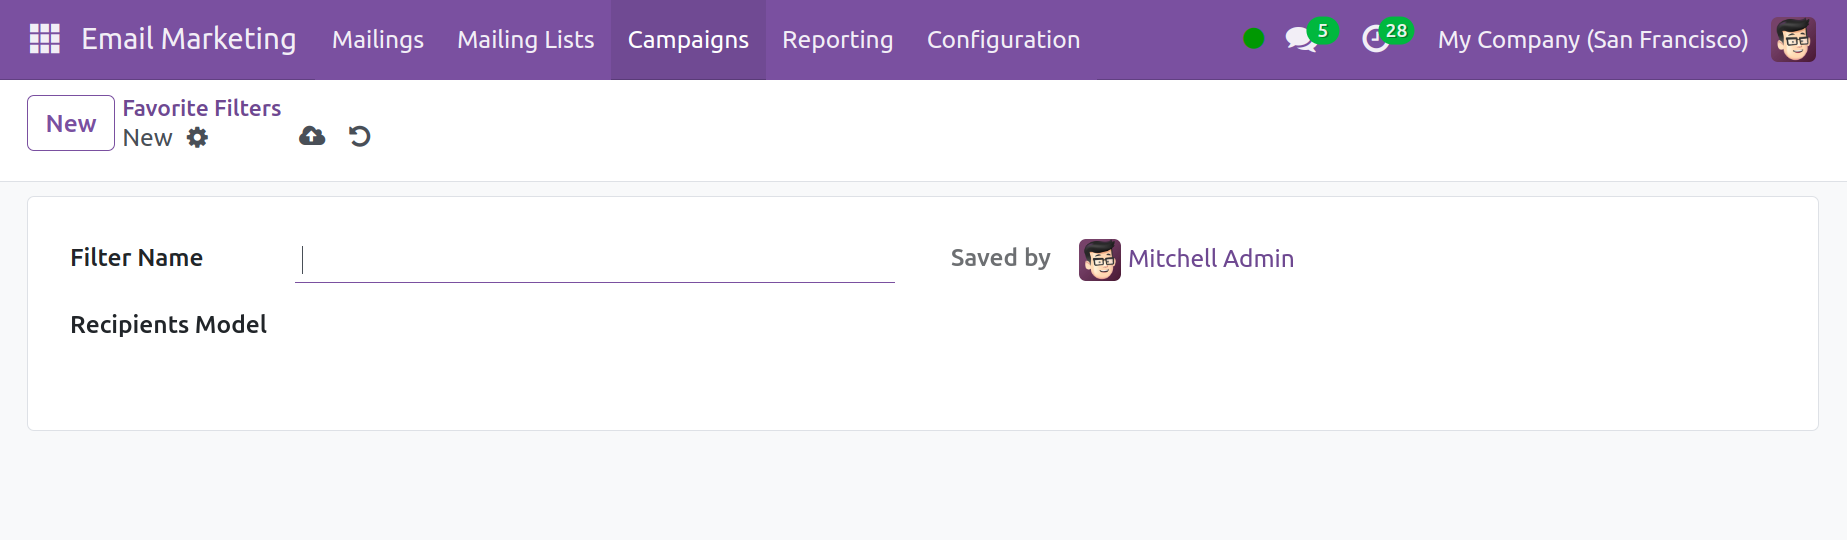
The filters that are part of the favorites list can be added here. In a similar vein, you
can use the New icon and add the new one to the list.
Reporting
You can enhance the module with the aid of the email marketing Reporting menu. The
reports available under this option can be used to analyze the highs and lows of email
marketing. The reporting page looks like this in the screenshot below.
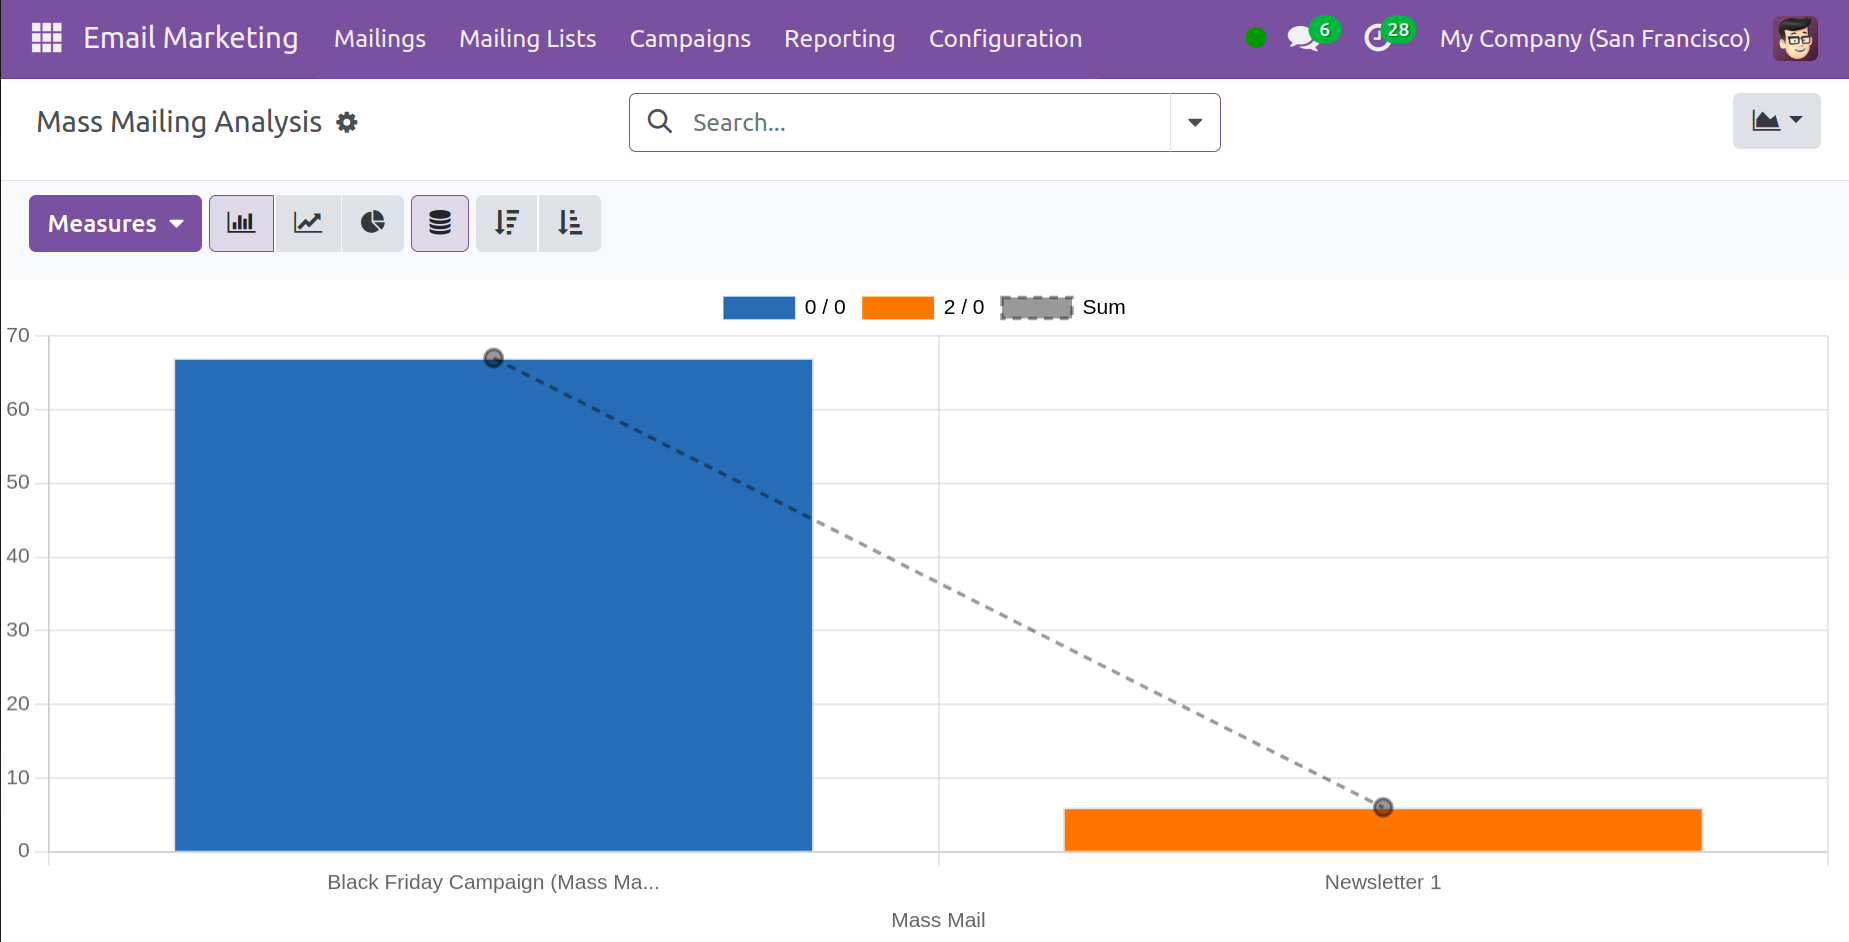
You may see pie, line, and bar graphs under the graphical mode. If necessary, you can
additionally utilize the measures. On the pivot view, the analytical report will be made
available. You can use the Filters, Group by, and Favorites choices appropriately.
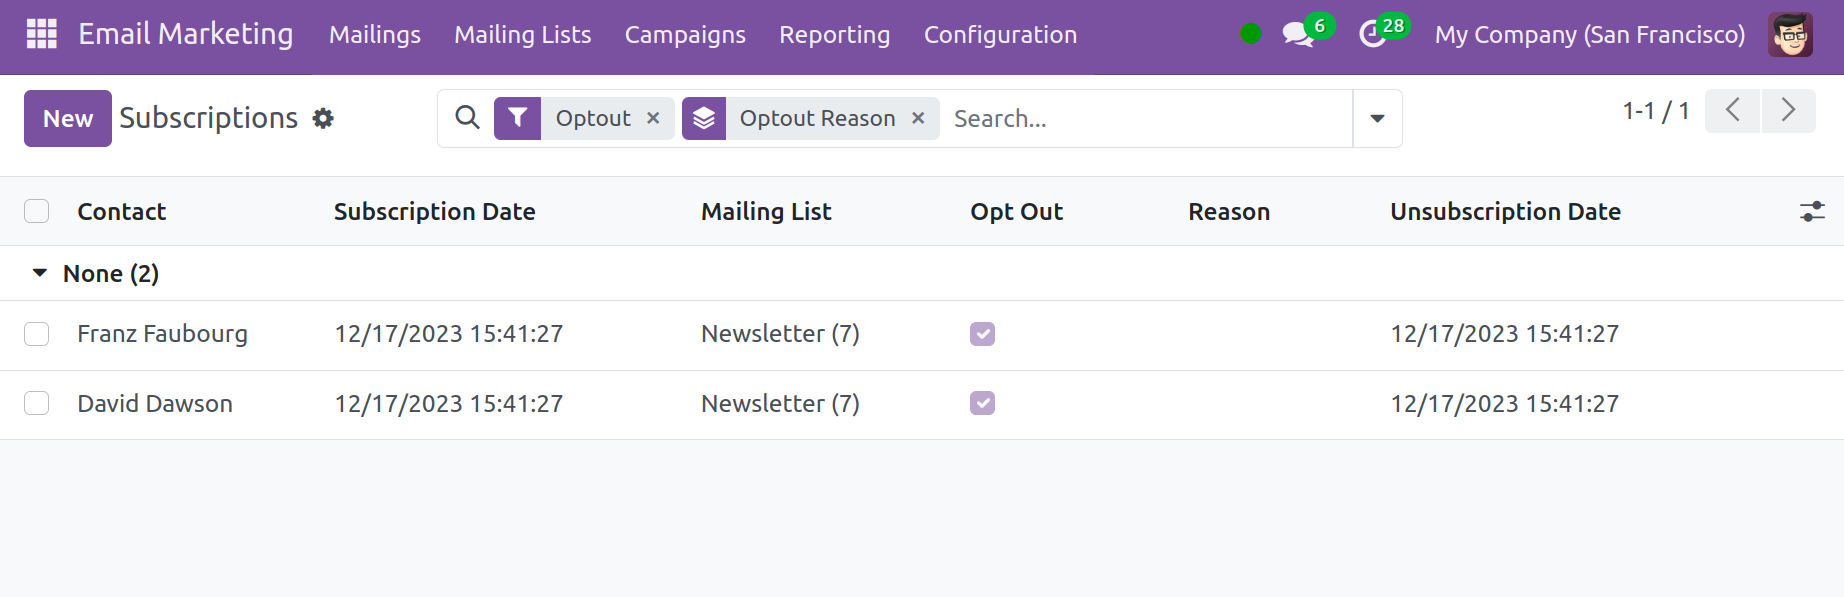
In addition, the Reports menu now includes a brand-new report named Opt Out. The report
facilitates comprehension of the subscription's specifics. The list view shows the
contact, Subscription Date, Mailing List, Opt-out, Reason, and Unsubscription date.
The email marketing module can be used in its entirety to enhance the mass emailing
process. The module and its functionalities will handle all the risks involved with
sending the mailing.