Event Management
Odoo 17 Software's Events Module is an adaptable framework for managing various event types in an organized way. This module makes it simple for customers to participate in webinars, workshops, charitable events, sponsored products, seminars, and much more. Odoo Events Module will offer you excellent help for making the event a huge success by ensuring that everything is organized flawlessly, from choosing a date for the event to selling tickets for that specific event. Let's now examine how to use Odoo 17 ERP's Events module.
You will see a dashboard with an event page that is already configured when you select the Events Module, as seen below.
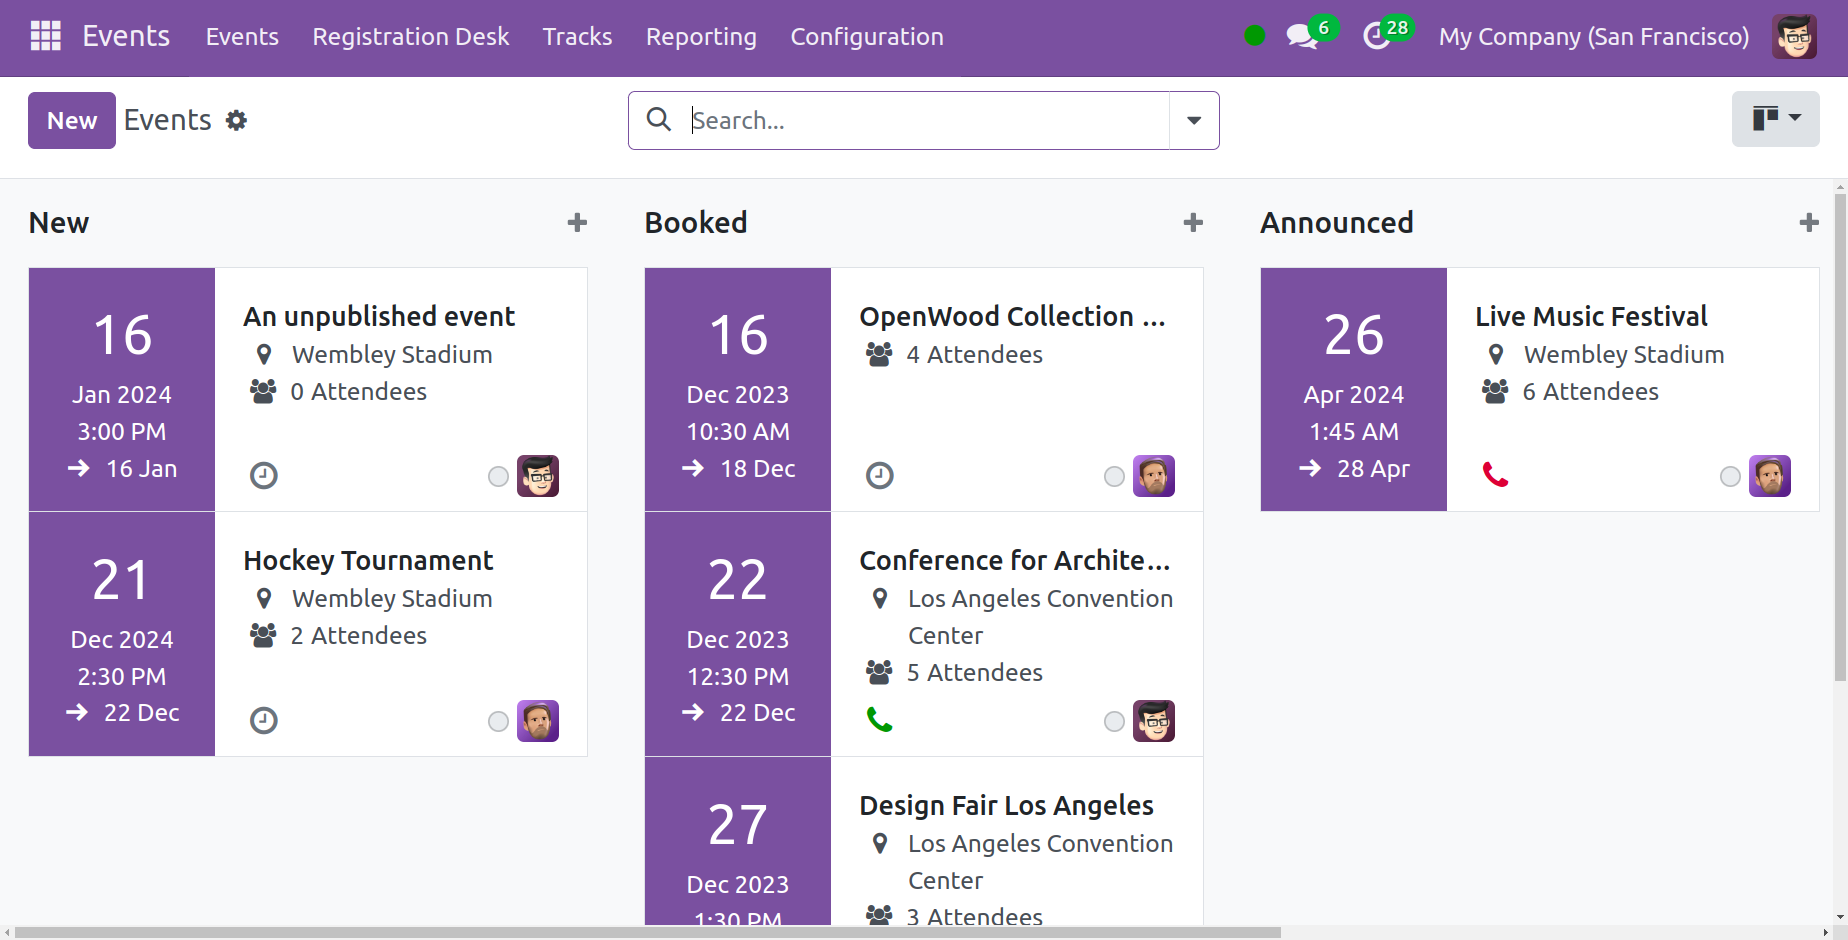
This window allows you to view the events in a Kanban View format. By clicking on the Add a Column button, you can quickly create a new stage. This feature facilitates adding a new stage to the list of events that already exist. If you need to create a new event under a specific stage, use the plus icon that appears in the window. You can see the stages in the Kanban, edit, delete, archive, and unarchive those specific events as needed by using the settings icon that is provided in each step. In addition to Kanban View, there are four other views available: Calendar, List, Pivot, and Graphical.
The event's title, readily trackable location, date, time, and attendance count are all displayed in the Kanban view. You have the ability to group by and use filters for categorizing. Select the New icon available on the page, as depicted in the figure above, to create a new event.
After clicking the "New" button, a screen will appear asking you to enter the event name and select which options to activate, including the "Website Submenu," "Booth Register," "Showcase Tracks," "Allow Track Proposals," "Extra Register Button," "Showcase Exhibitors," and "Community options." These options will appear in the event's website view upon activation.
The Website Submenu facilitates the management and presentation of menus that are specific to a website. The Booth Register can be used to register for the events. Allow Track Proposal allows one to monitor the location. The community tab on the website will subsequently be accessible through the Community option. To access these Booleans, you have to enable the debug mode.
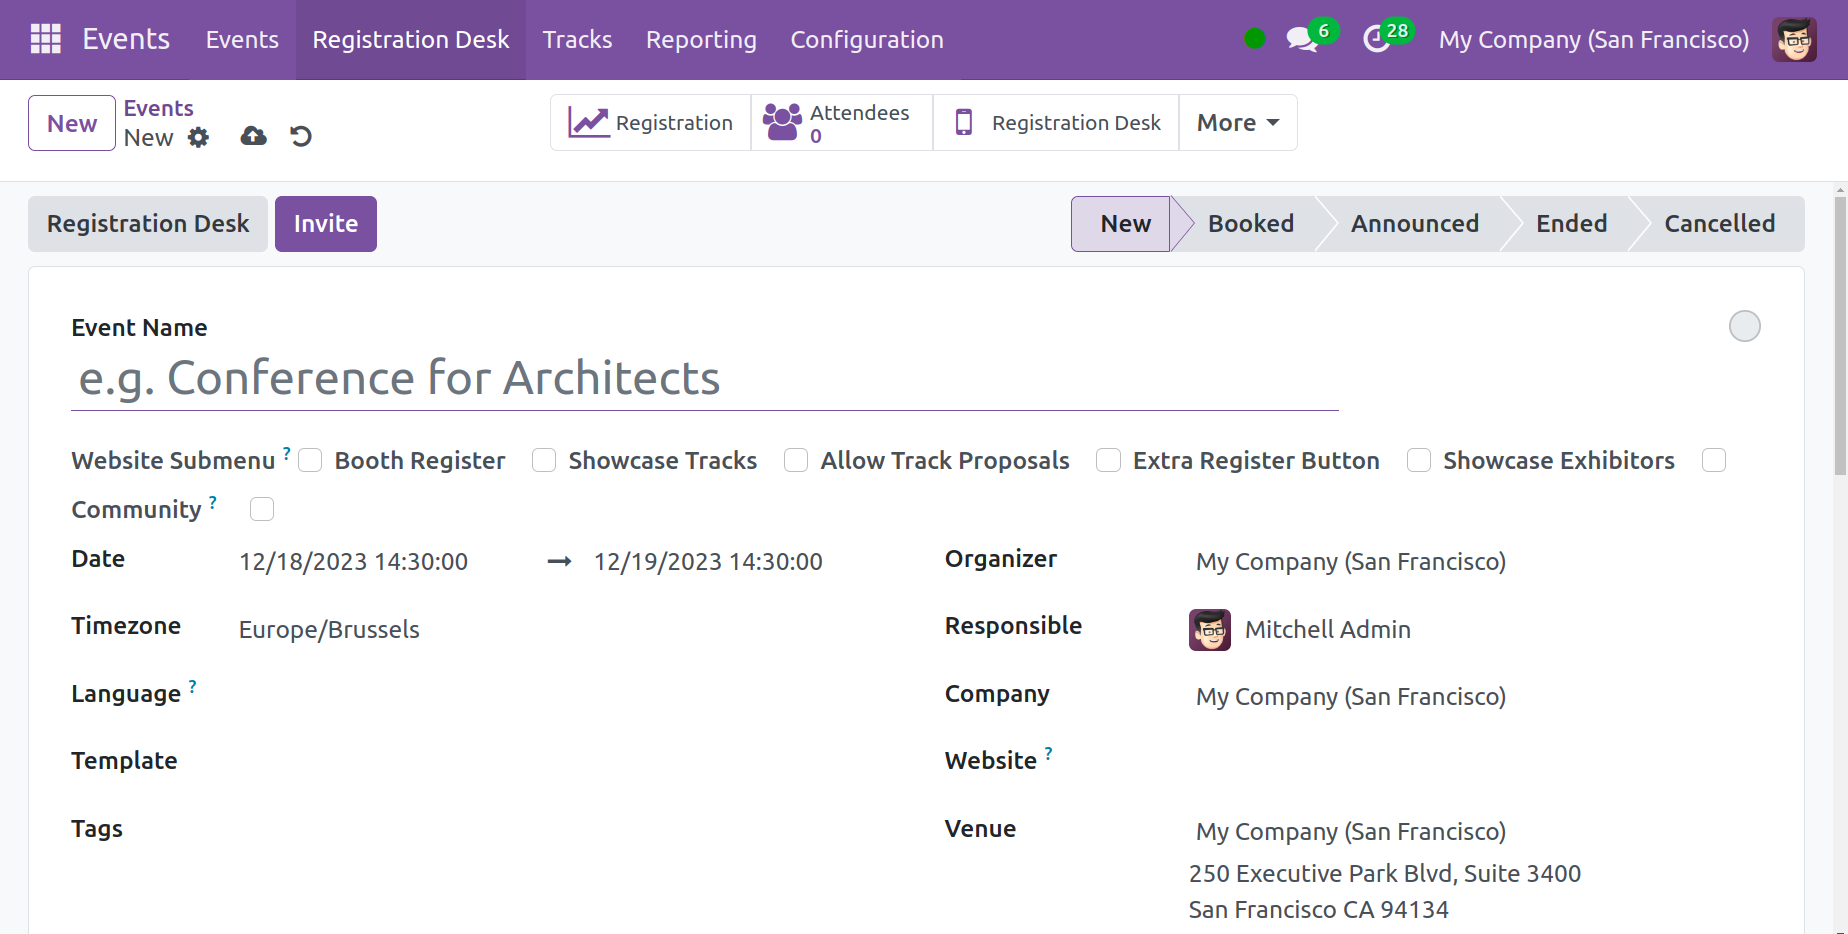
In order to prevent future confusion, please provide the Starting and Ending Dates, the Time Zone that is currently displayed on all event pages, the Event Template, any tags that should be displayed on the website, the Name of the Company, the Event Organizer, the Person Responsible for the Event, the Website where the Event must be published, the Event Venue, and Upload your File in the designated field. You may easily limit the event to a certain number of guests by using the Limit Registrations feature.

By selecting the Add a Line option on the Tickets Tab, adding a new ticket is simple. When creating the ticket, you have the option to pick an Event Ticket as the Product Type. You can indicate the price of the ticket as well as the beginning and ending dates of the ticket sale. In the provided Maximum field, you have the option to choose the quantity of tickets. You will receive the confirmed ticket in the Confirmed area and the unconfirmed tickets in the Unconfirmed section.
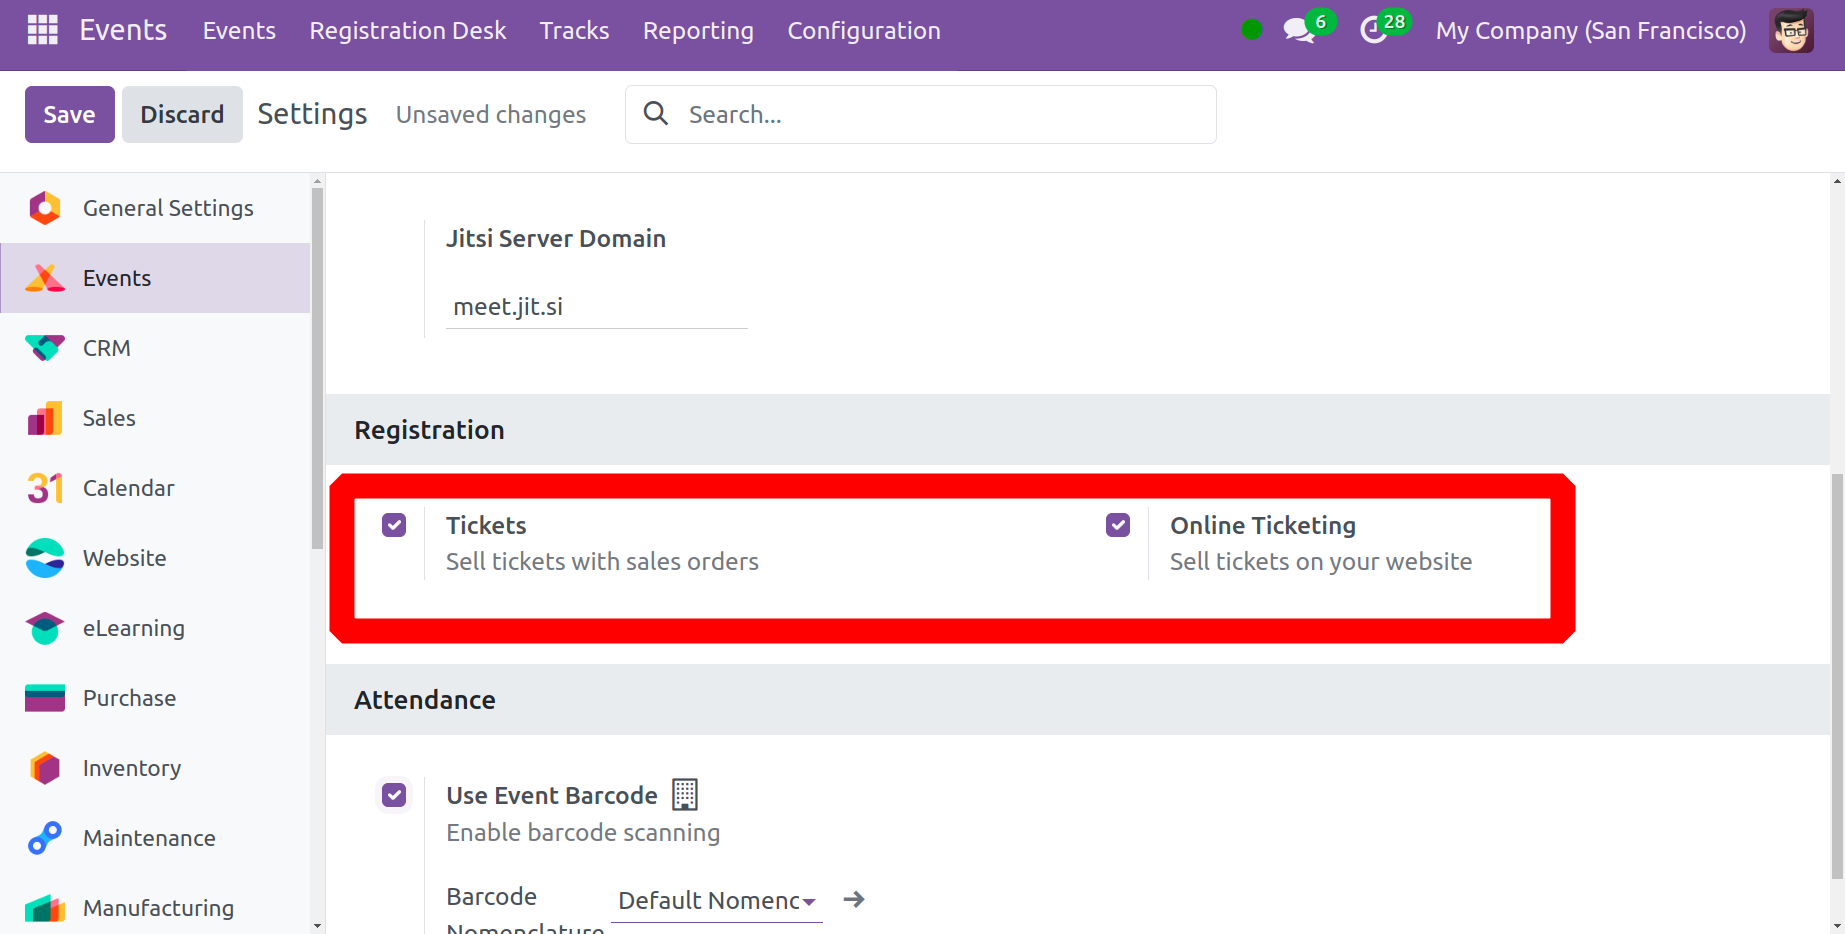
As seen below, you may see an option in the Settings menu to activate the Tickets and Online Tickets option. You have the opportunity to sell the tickets and then market them in conjunction with the sale orders.
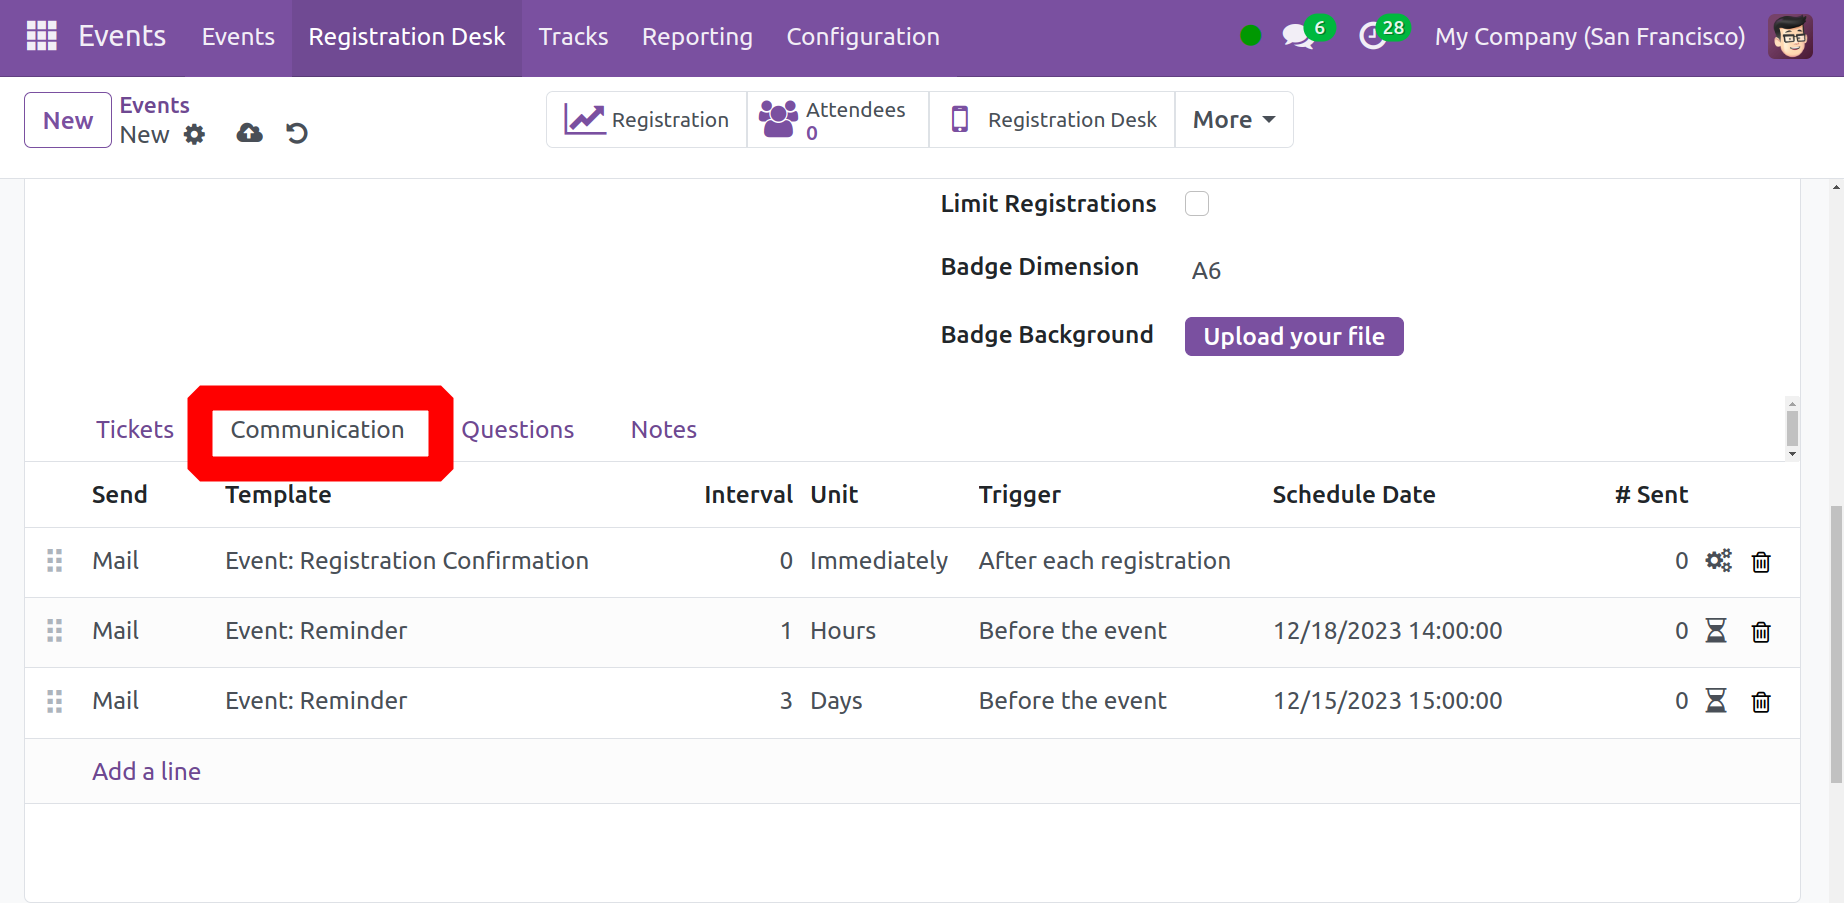
After the registration procedure, you may submit the attendees' email or SMS in the corresponding Template Field on the Communication Tab. You can send the mail as soon as you register, or you can wait a certain number of days, weeks, or months to send it if necessary. And as seen in the picture below, this can be entered in the Intervals, Units, and Trigger fields. Additionally, the planned date and the SMS or mail number are provided in the corresponding fields.
The questions that members ask when registering online can then be added to the Questions Tab. It is possible to incorporate required questions about specific events.
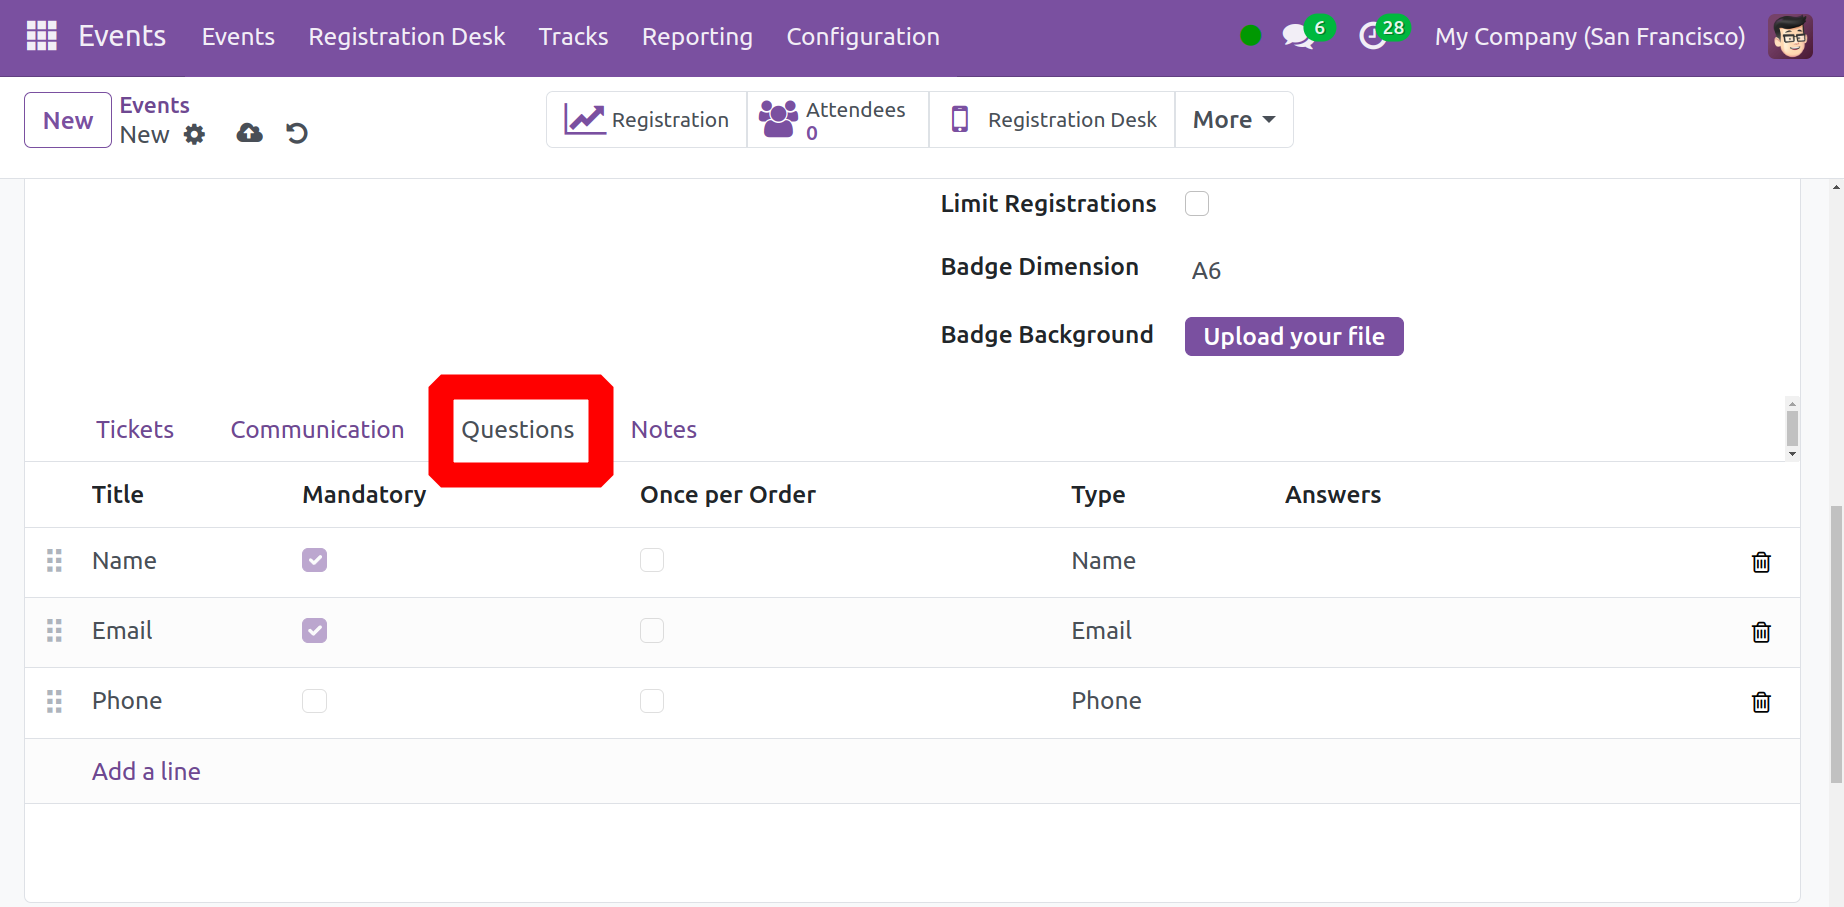
You can use the Add a Line option to include a question for a specific event. After that, a pop-up box will appear asking you to fill in some details, like the question you wrote for the event in the designated field. Your question will be asked once when the "Ask only once per order" field is triggered. If not, the question will be posed to every person who has a reservation for the event.
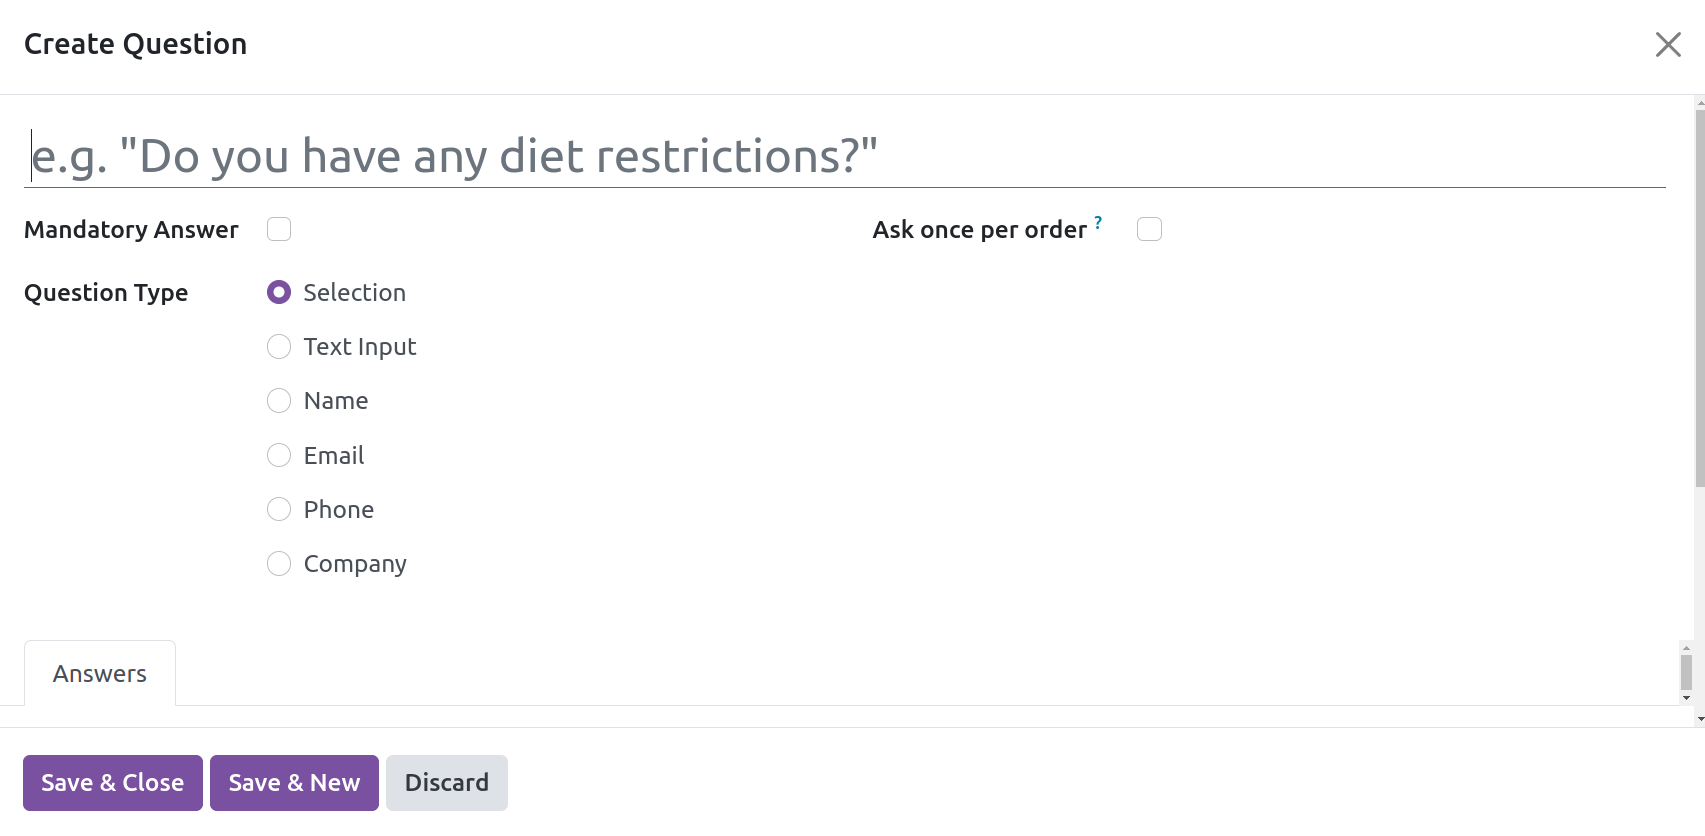
Depending on your needs, you can set the question type to Selection of Text Input. Lastly, select the Save and Close icon.
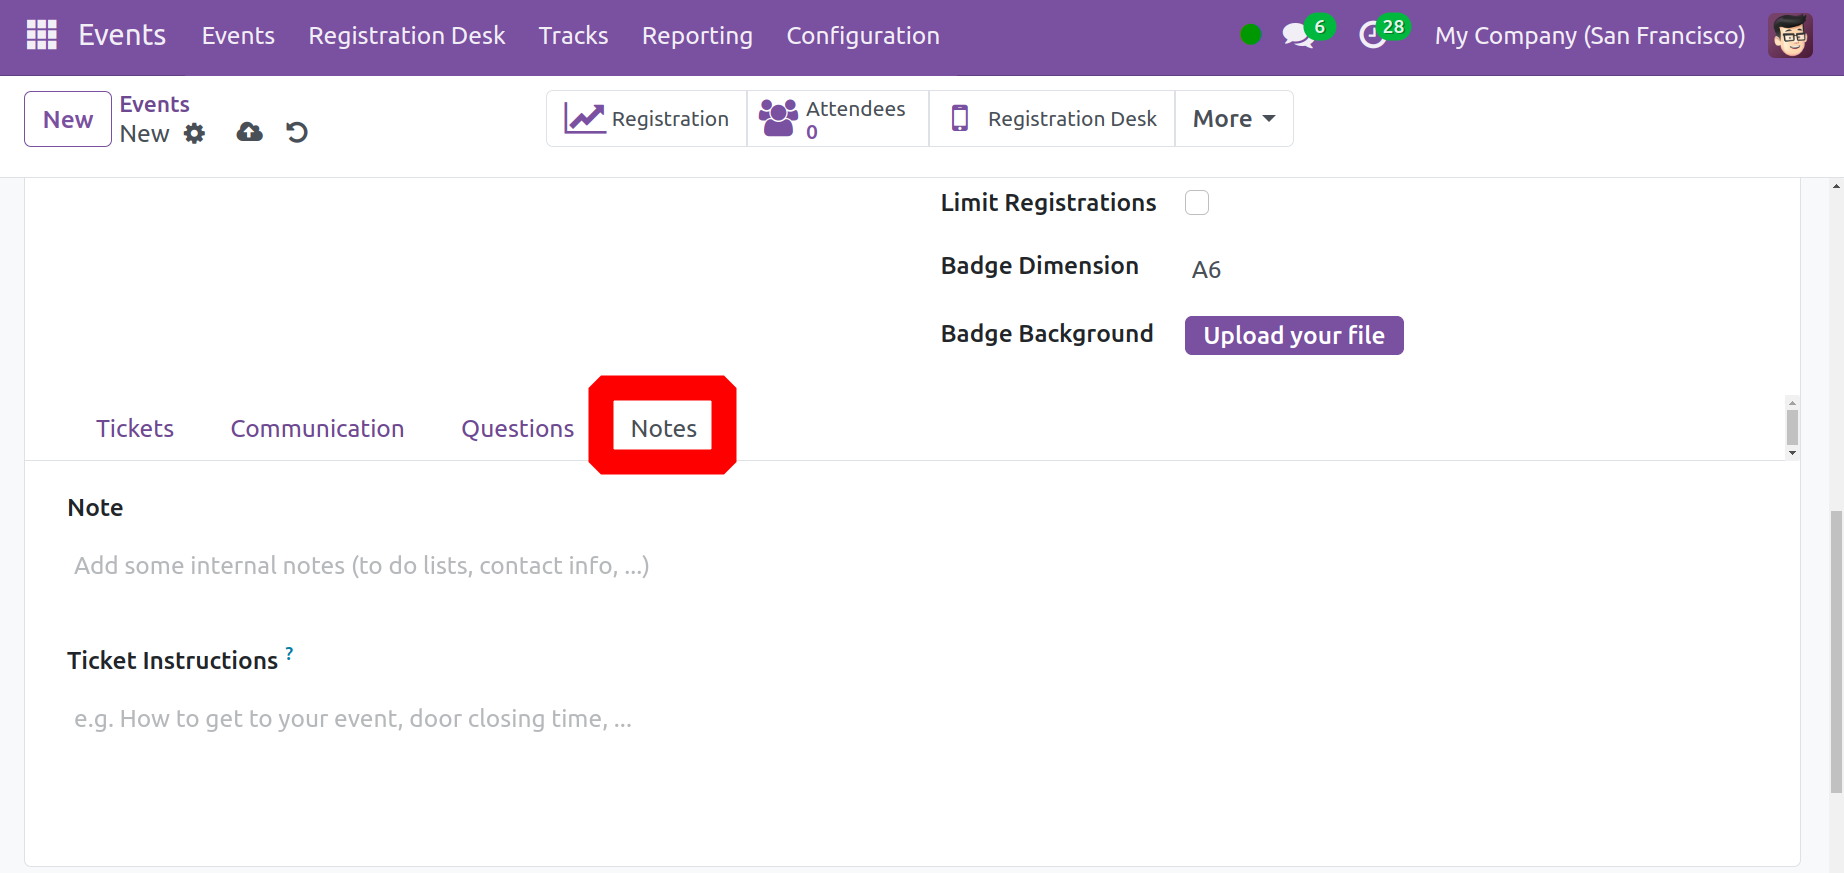
The last option is the Notes tab, where you can add descriptions and comments about the event as well as the ticketing instructions. Lastly, to add the event, select the Save option.
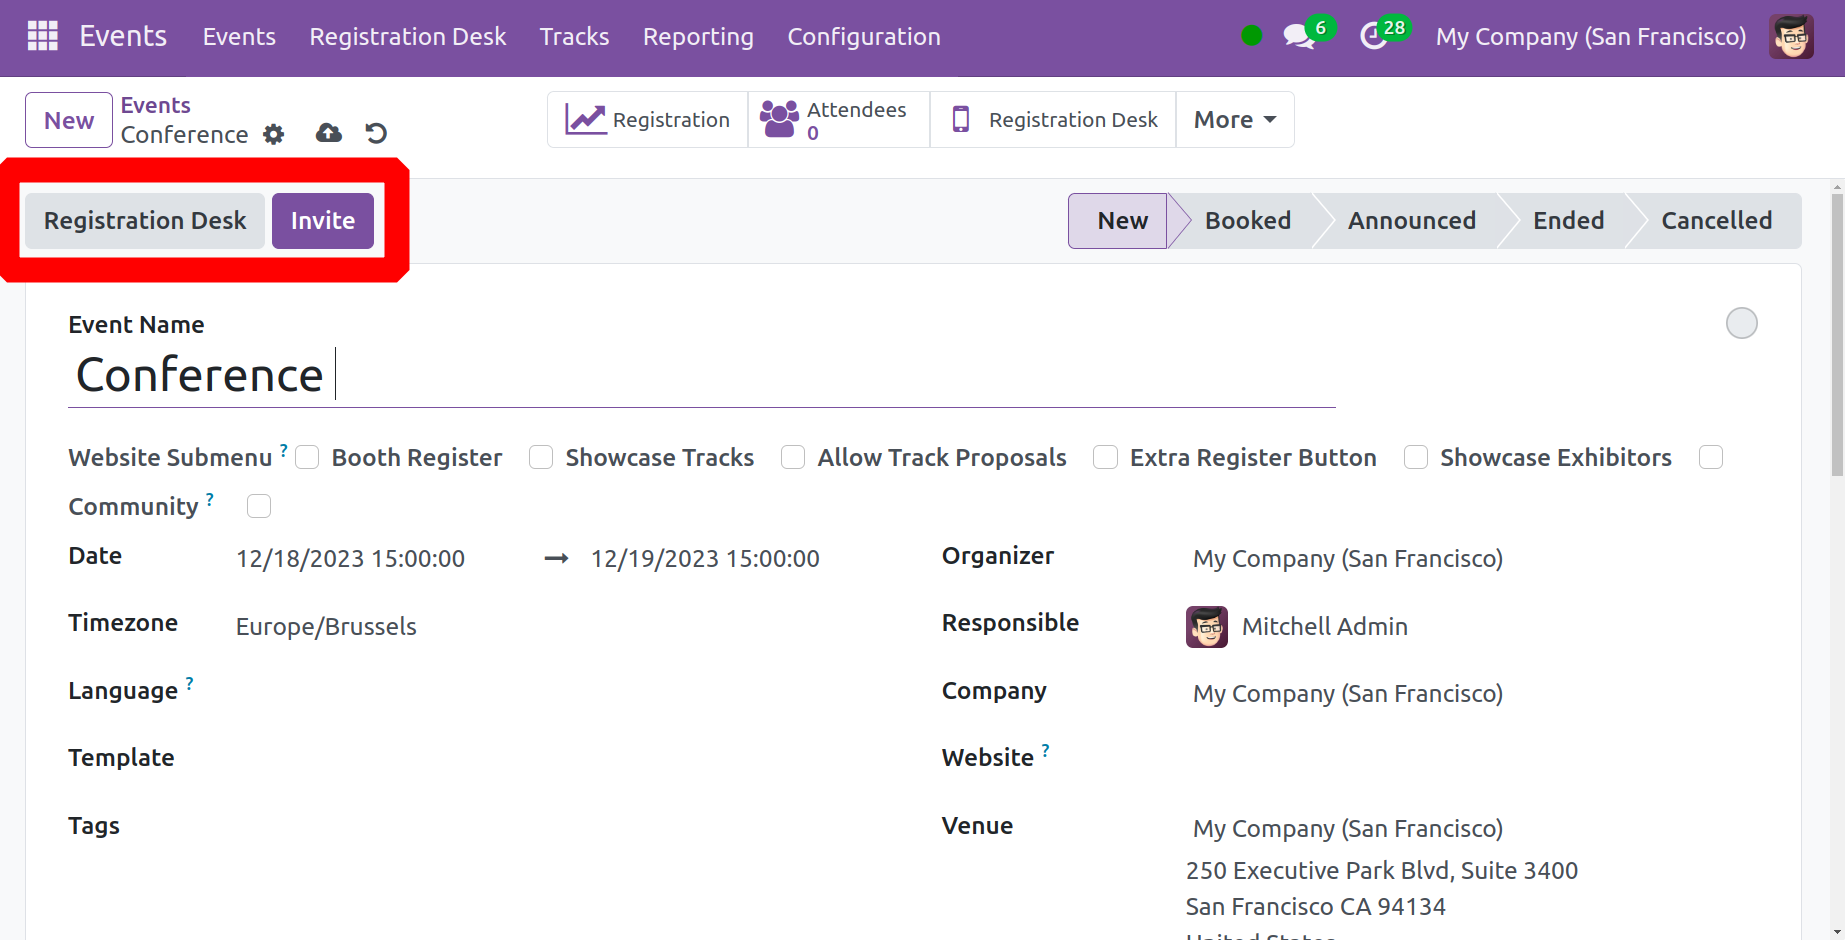
You only need to click the Invite button to add new attendees to the event.
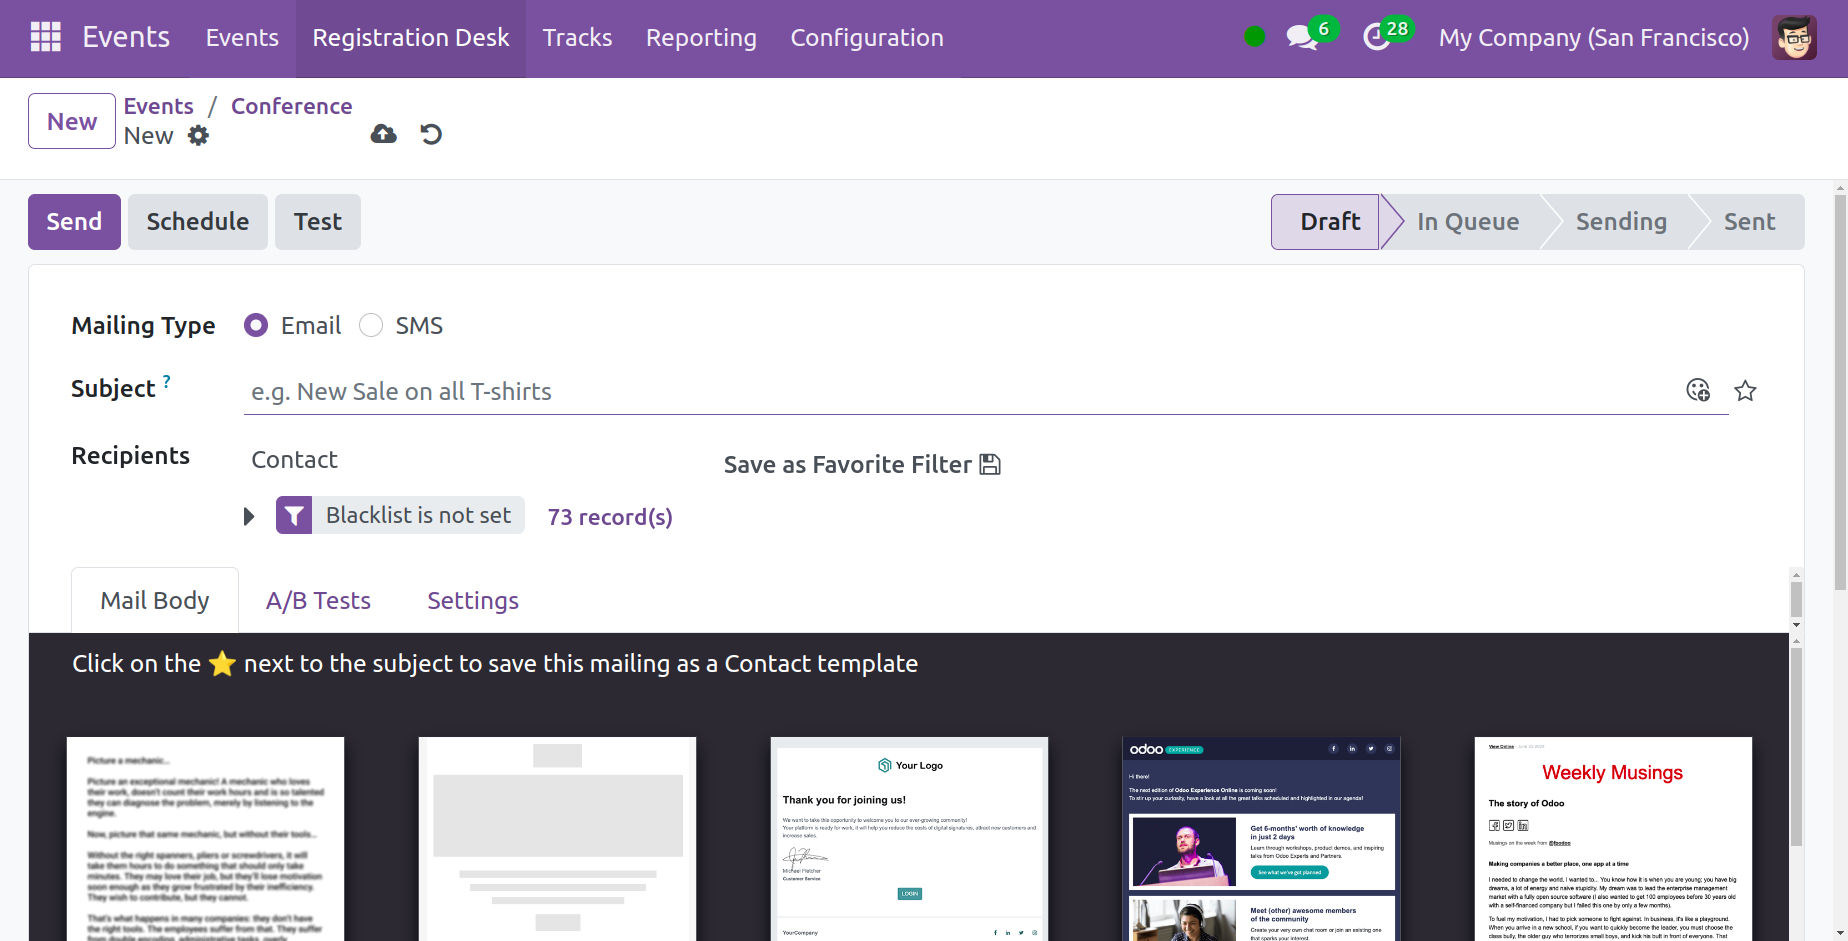
When you do so, a new page will appear, as seen in the screenshot below, asking you to create and send emails or SMS for marketing purposes, similar to what we did in the Email and SMS Marketing Modules. You can use the Schedule option to choose a time to send this email or SMS.
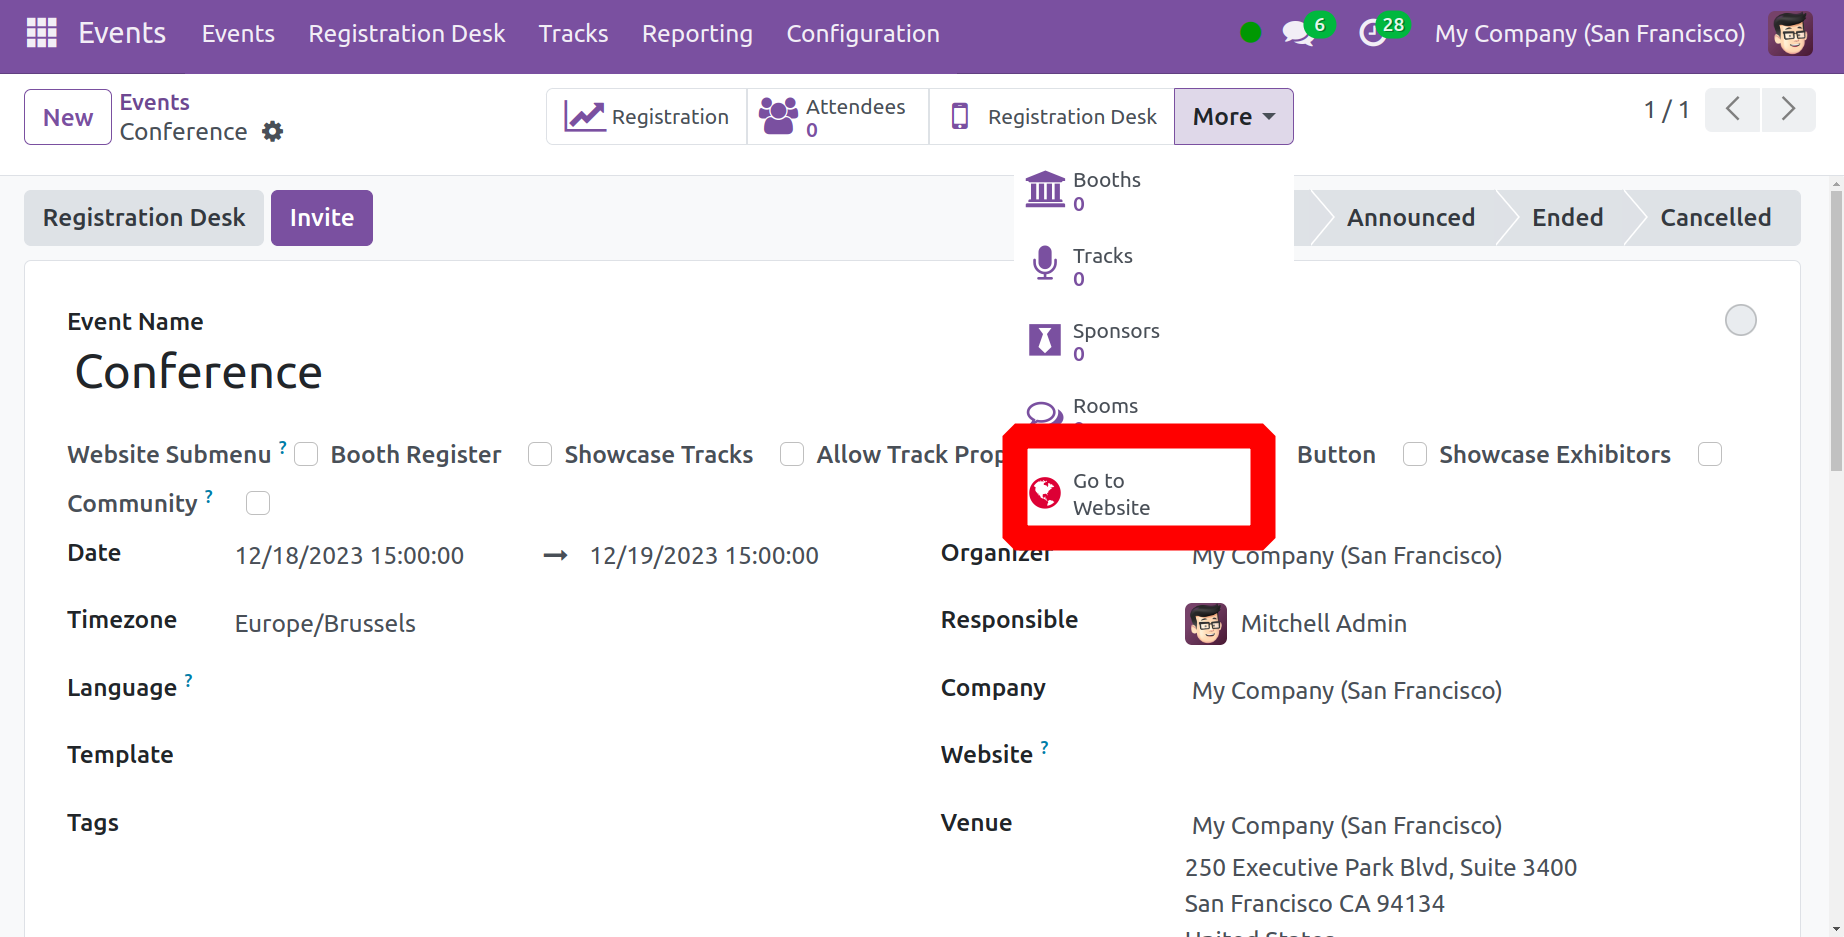
Click the Go to Website option, as seen in the screenshot below, to publish your event on a certain website. Event pages are currently modified based on the website's themes.
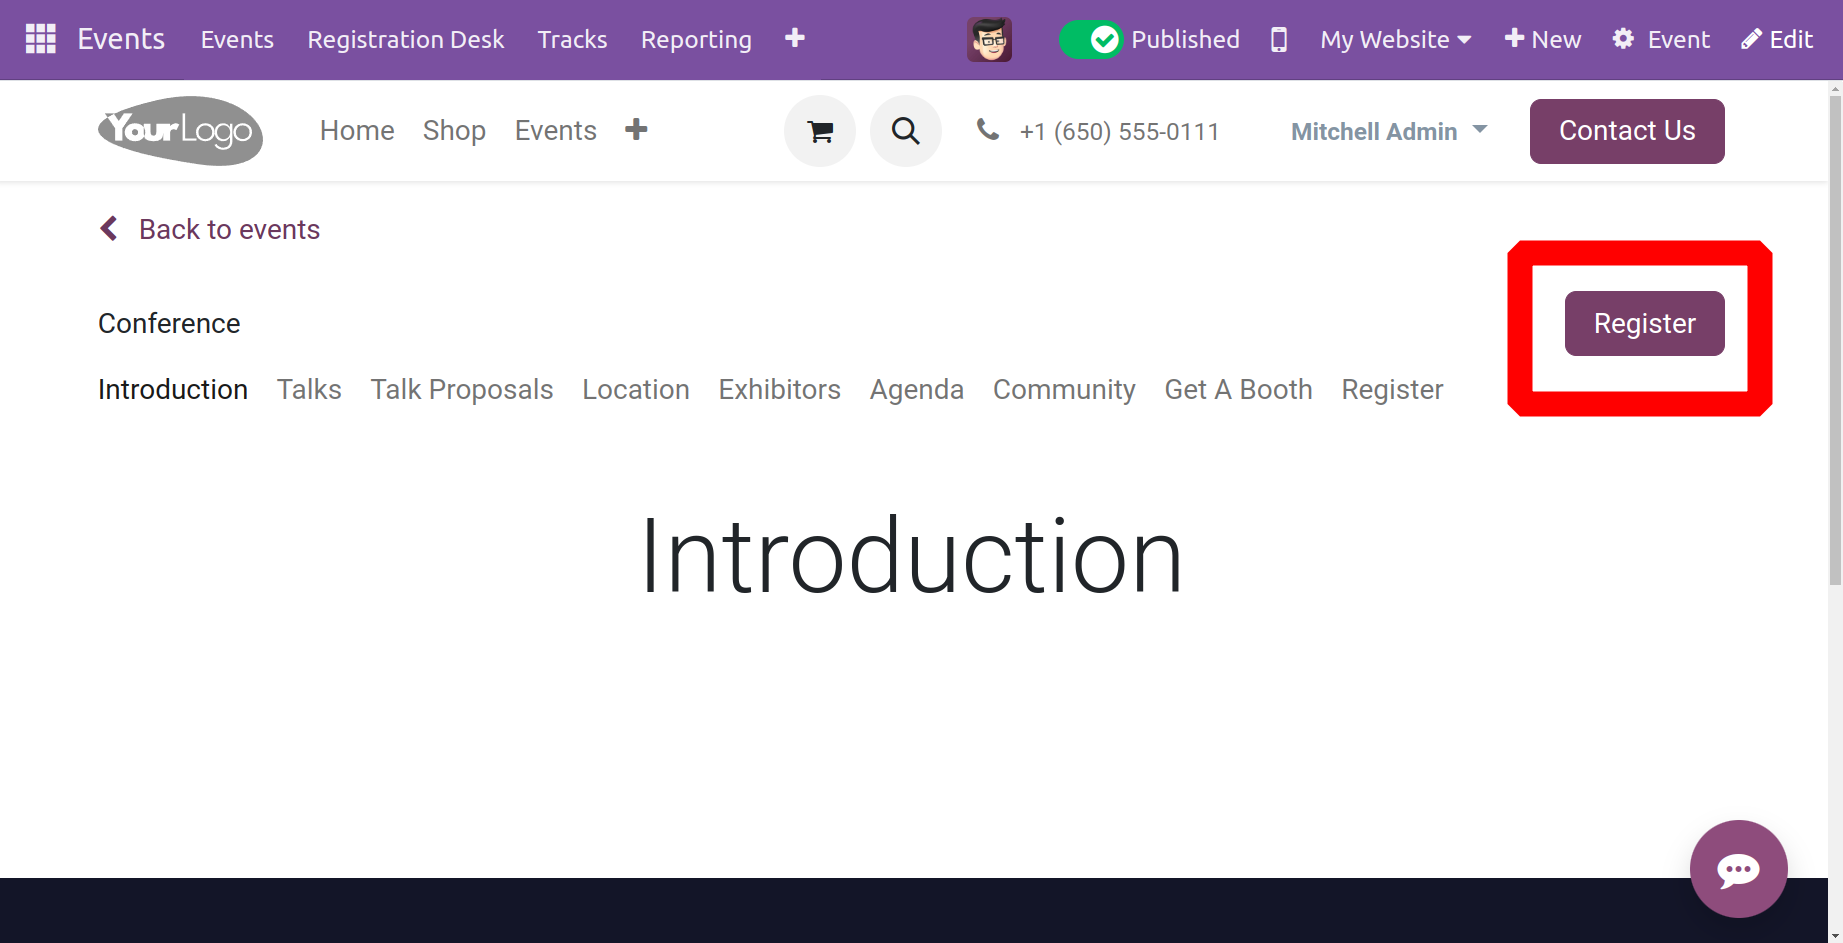
If the work is in an unpublished form, maintain it as published. Once those steps are completed, you can register for the event by choosing the Register option, as seen below.
The created community rooms will be displayed under the Community sub-menu, as previously stated. The website will display the talks, venue, exhibitors' agenda, Twitter wall, and registration for all attendees who have enabled it.
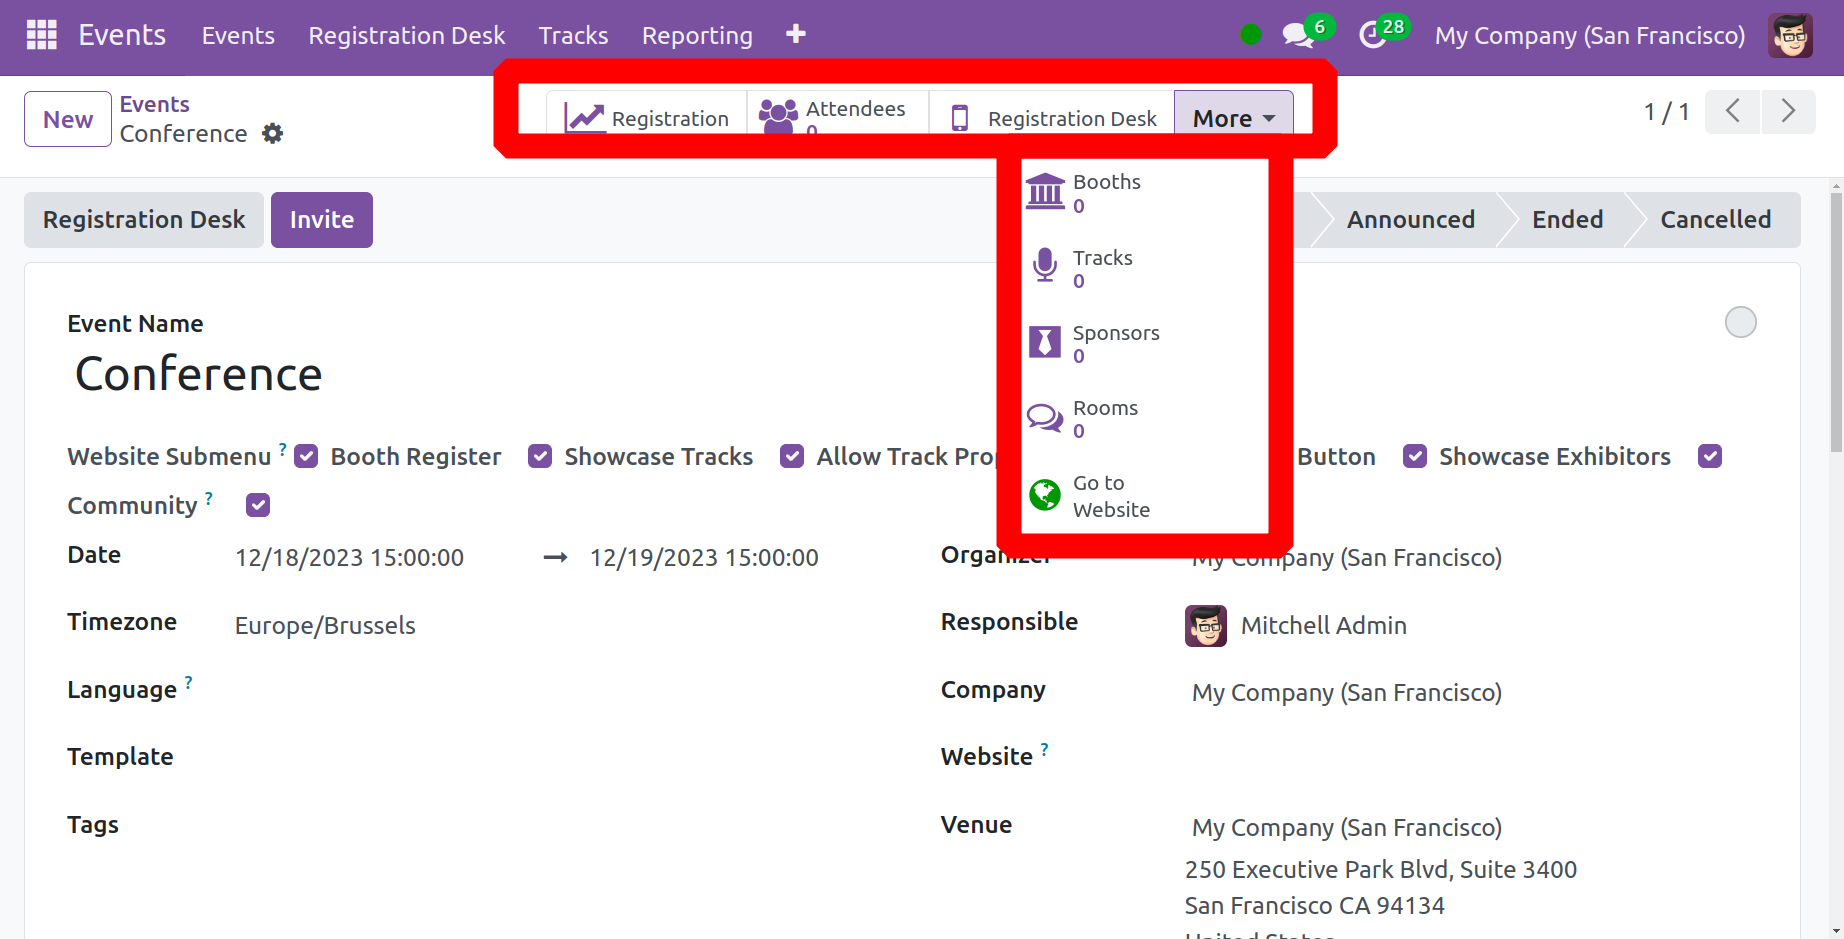
The smart tab has more complex options, like Registration, Attendees, Registration Desk, Booths, Tracks, Sponsors, and Rooms, in addition to the Go to Website option. Using the specialized stat option, you can even monitor the registration details.
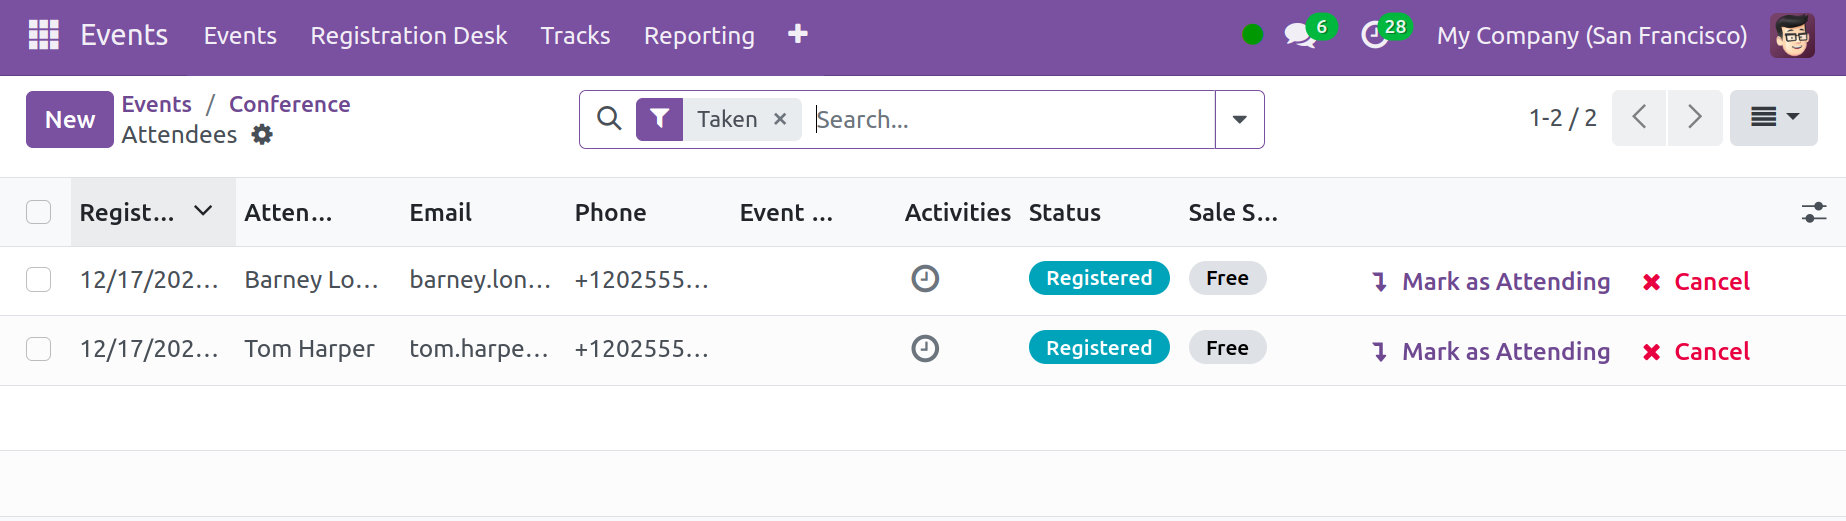
You can see a list of all registered attendees for the events by selecting the Attendees option. You can find some information there, like the attendee's name, email address, phone number, event ticket, next activity, and status, in that order. You have two options: b to cancel the attendees. For the purpose of recording attendance, confirmed registrants will also receive a Mark as Attending button.
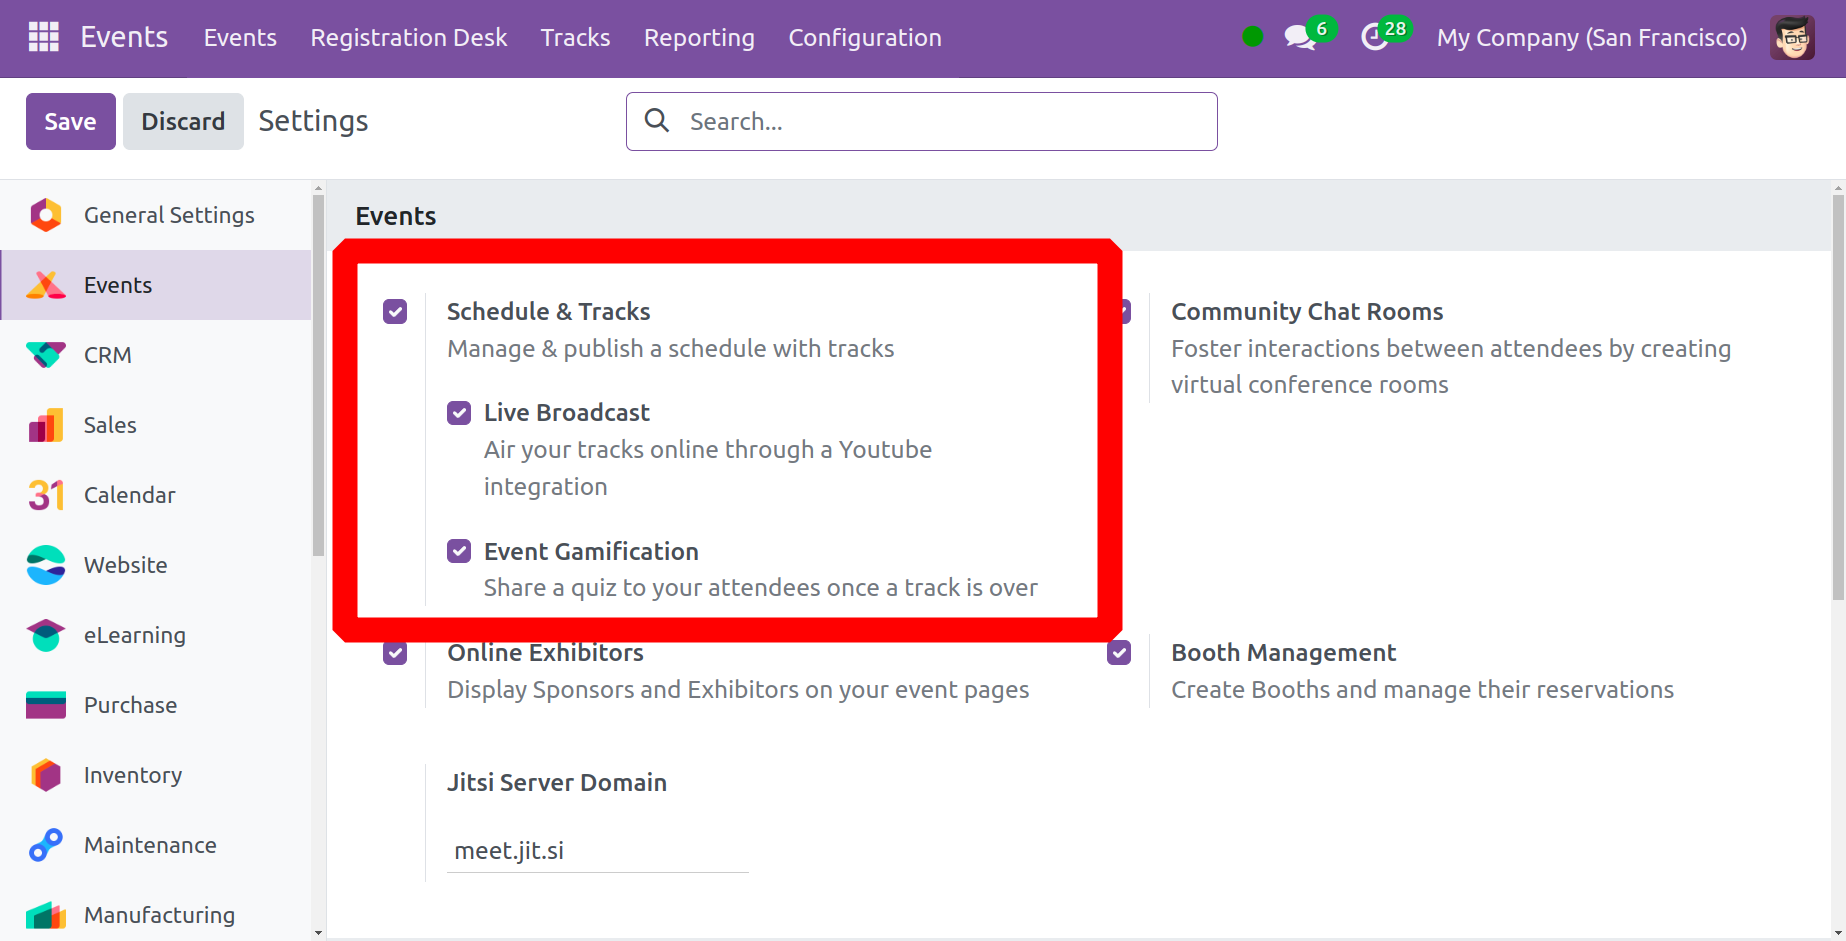
The Events Tab in the Settings option should activate some features, including Schedule & Tracks, Community Chat Rooms, Online Exhibitors, and Booth Management, as illustrated below.

These choices will be displayed in the Events Module's main window if we activate them. For those in attendance, a virtual conference room will be created in the Community Chat Room. Sponsors and exhibitors can be seen by selecting the Online Exhibitors option. Making booths and managing their reservations are done using the Booth Management option. You may see a list of the booths you booked for the event when you select the Booth option. You can describe your event calendar, including speeches, seminars, and other activities, using the Tracks option. You can obtain the sponsors' details by selecting the Sponsors option. Attendee meetings and general talk on a variety of topics will take place in the talk Room.
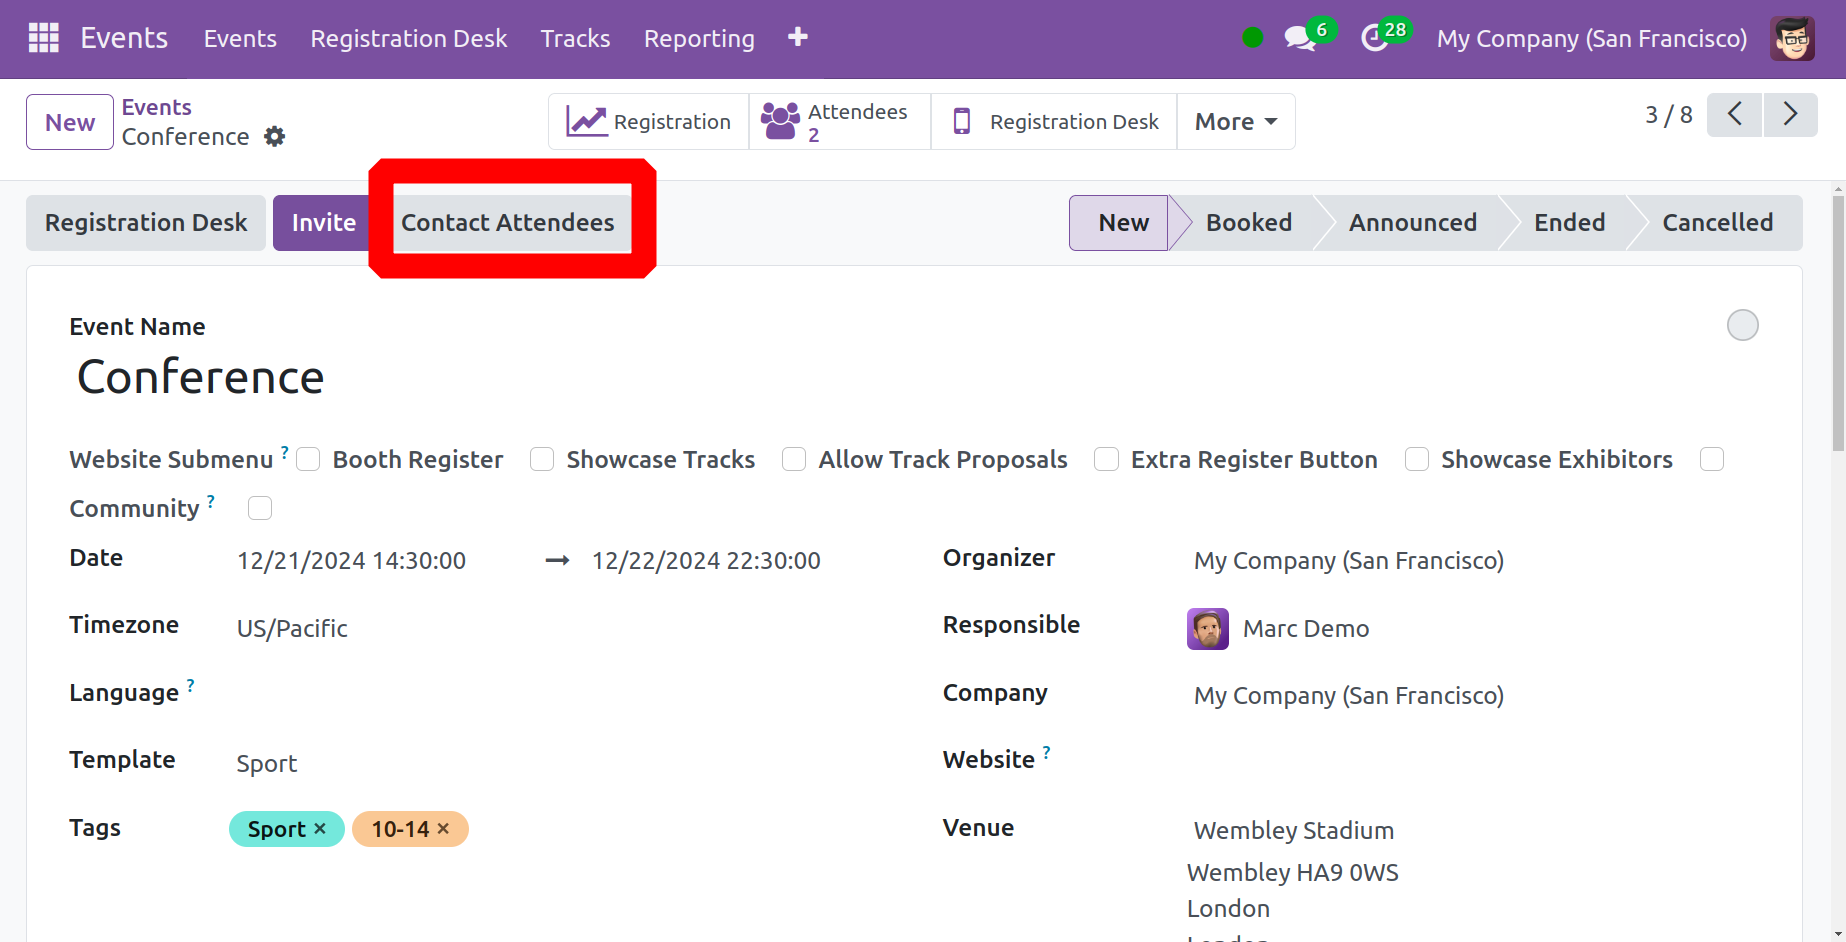
You can send an email or send an SMS to attendees by utilizing the Contact Attendees feature, which is located next to the Invite button.
The creation of new events in the Odoo 17 Events Module requires the completion of these procedures.
Registration Desk
Attendee registration is aided by the Registration Desk menu item.

After selecting an item from the menu, the following page offers two options for selecting attendees: manually choosing each person or using badge scanning.
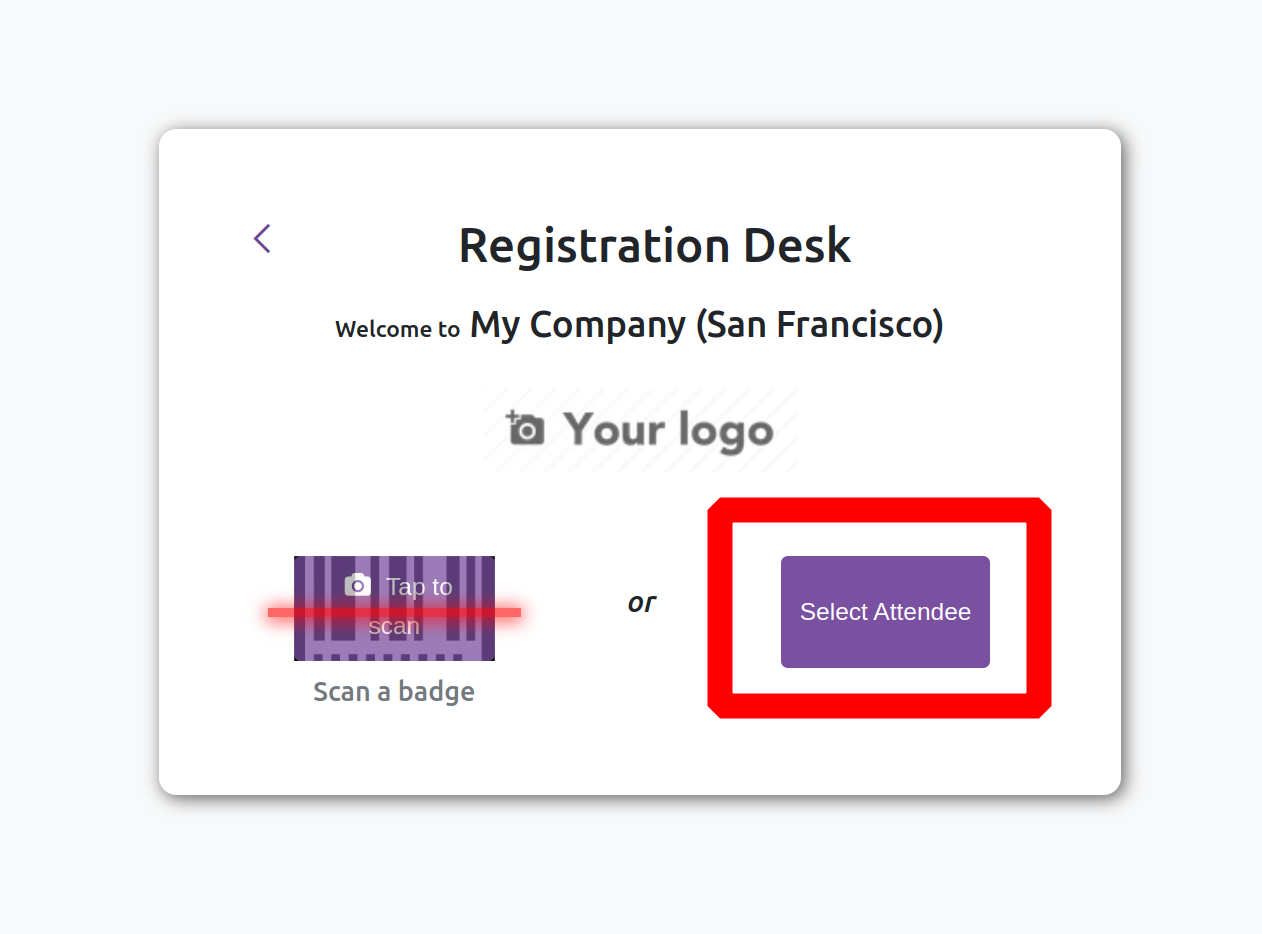
if the button marked "Select Attendees'' is clicked. There will be an attendance list on display.
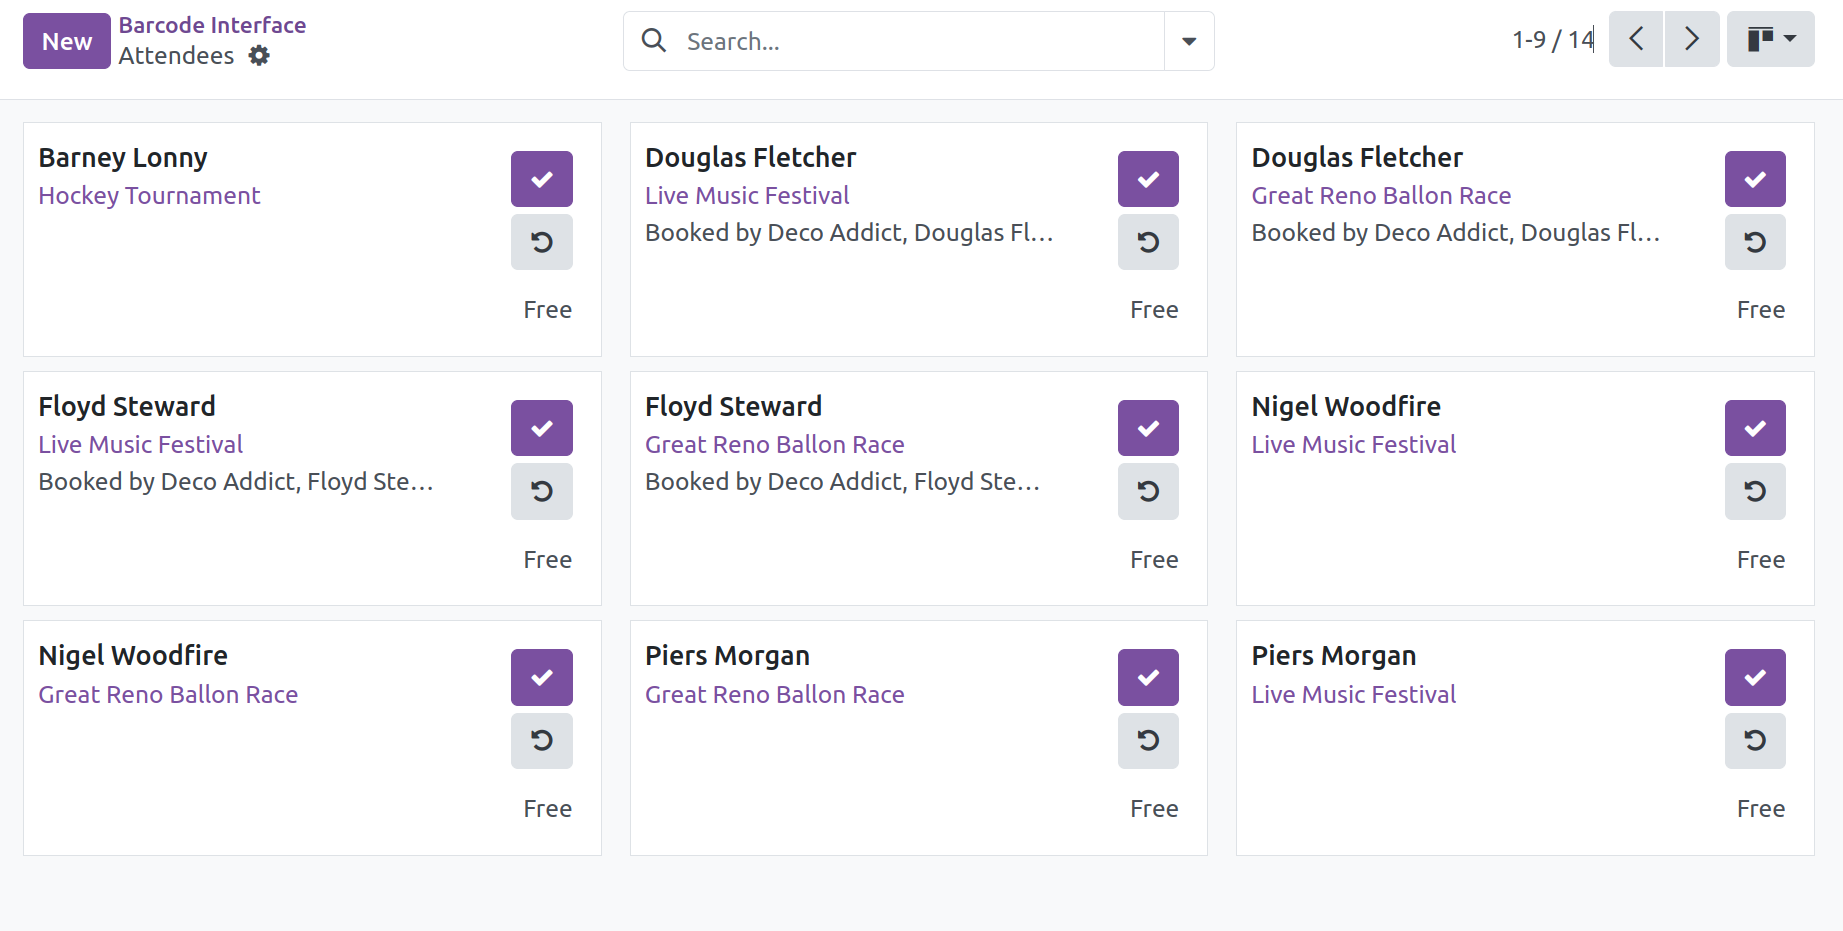
The user can designate the attendees as attended by clicking the Tick button.
Event Tracks
Within the Events module, the Tracks, Reports, and Configuration tabs are the main ones. Now, let's examine the features included in the Tracks tab. Users can manage and arrange events using a track with the assistance of the Tracks Tab. Different talks and programs can be added to the events using the Schedule and Tracks option in the Tracks Tab, which is accessible through the Setting menu of the Events module, as demonstrated below, to increase the success of the event.
You will see the following field on the Event formation window when you activate this option in the Events Module settings. As seen in the screenshot below, you can compile the external proposals for publishing a specific event on the website by activating the Track Proposal option.
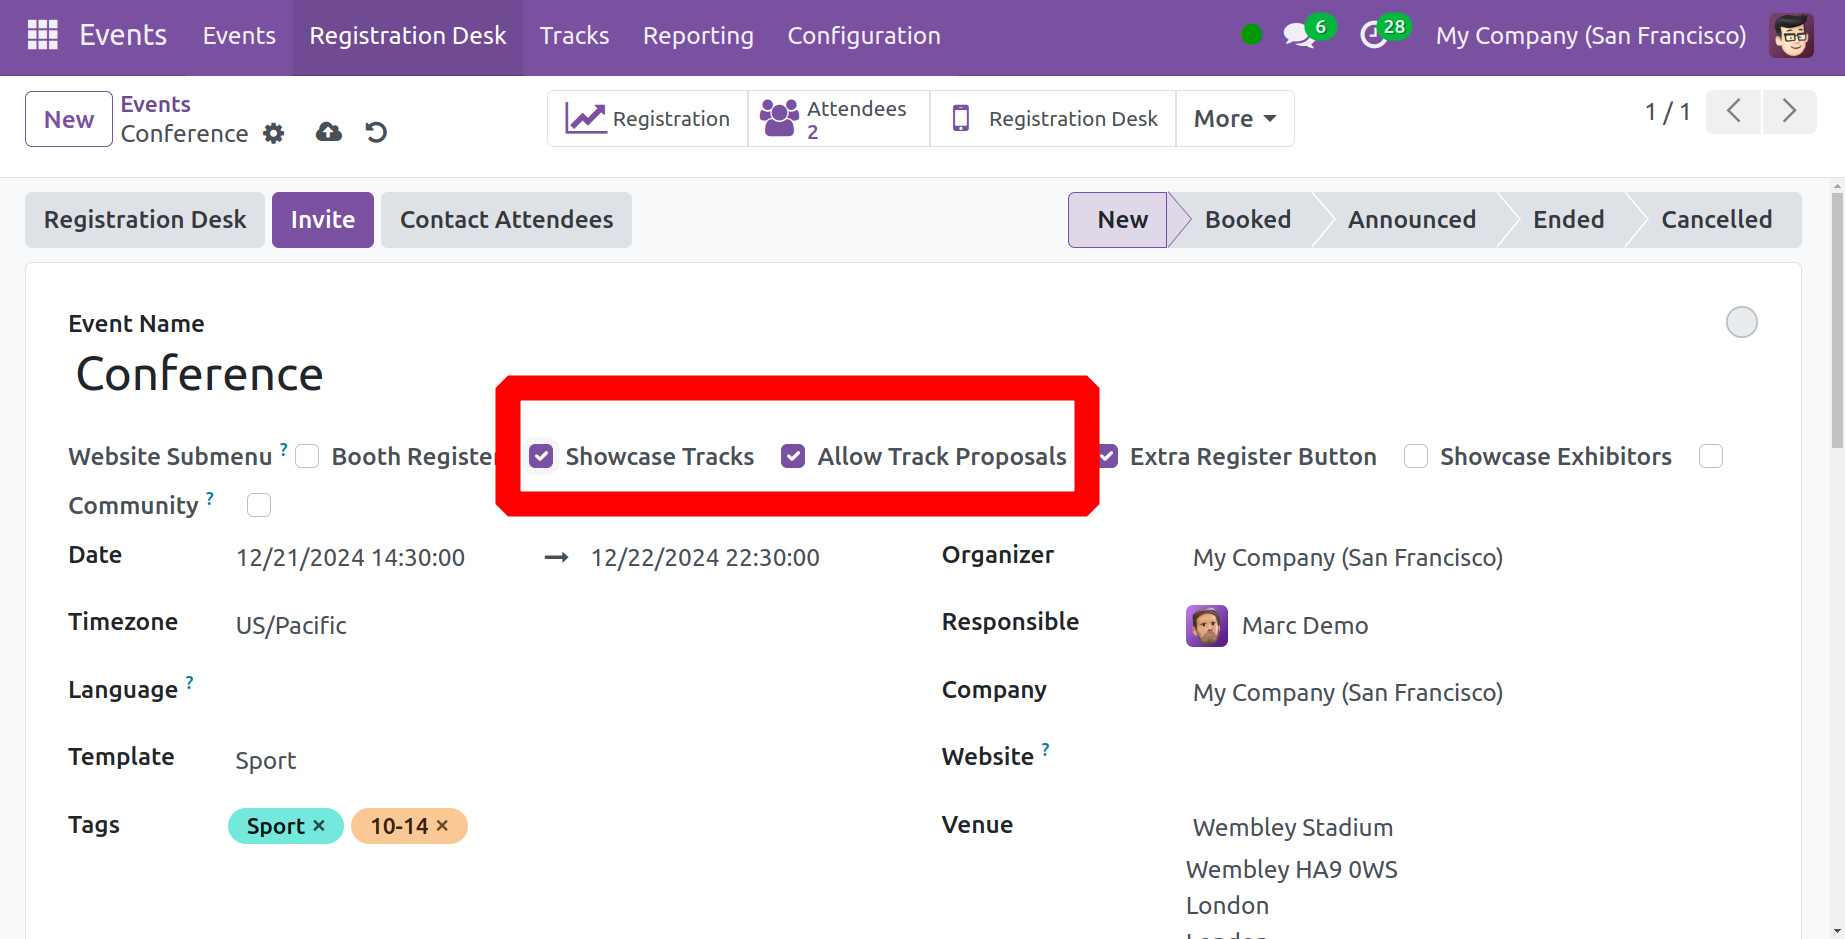
The event schedule can be viewed on the event's website page by selecting the Showcase Tracks option. It consists of lectures, seminars, or other events. By choosing the Go to Website option, you will be directed to the event's webpage.
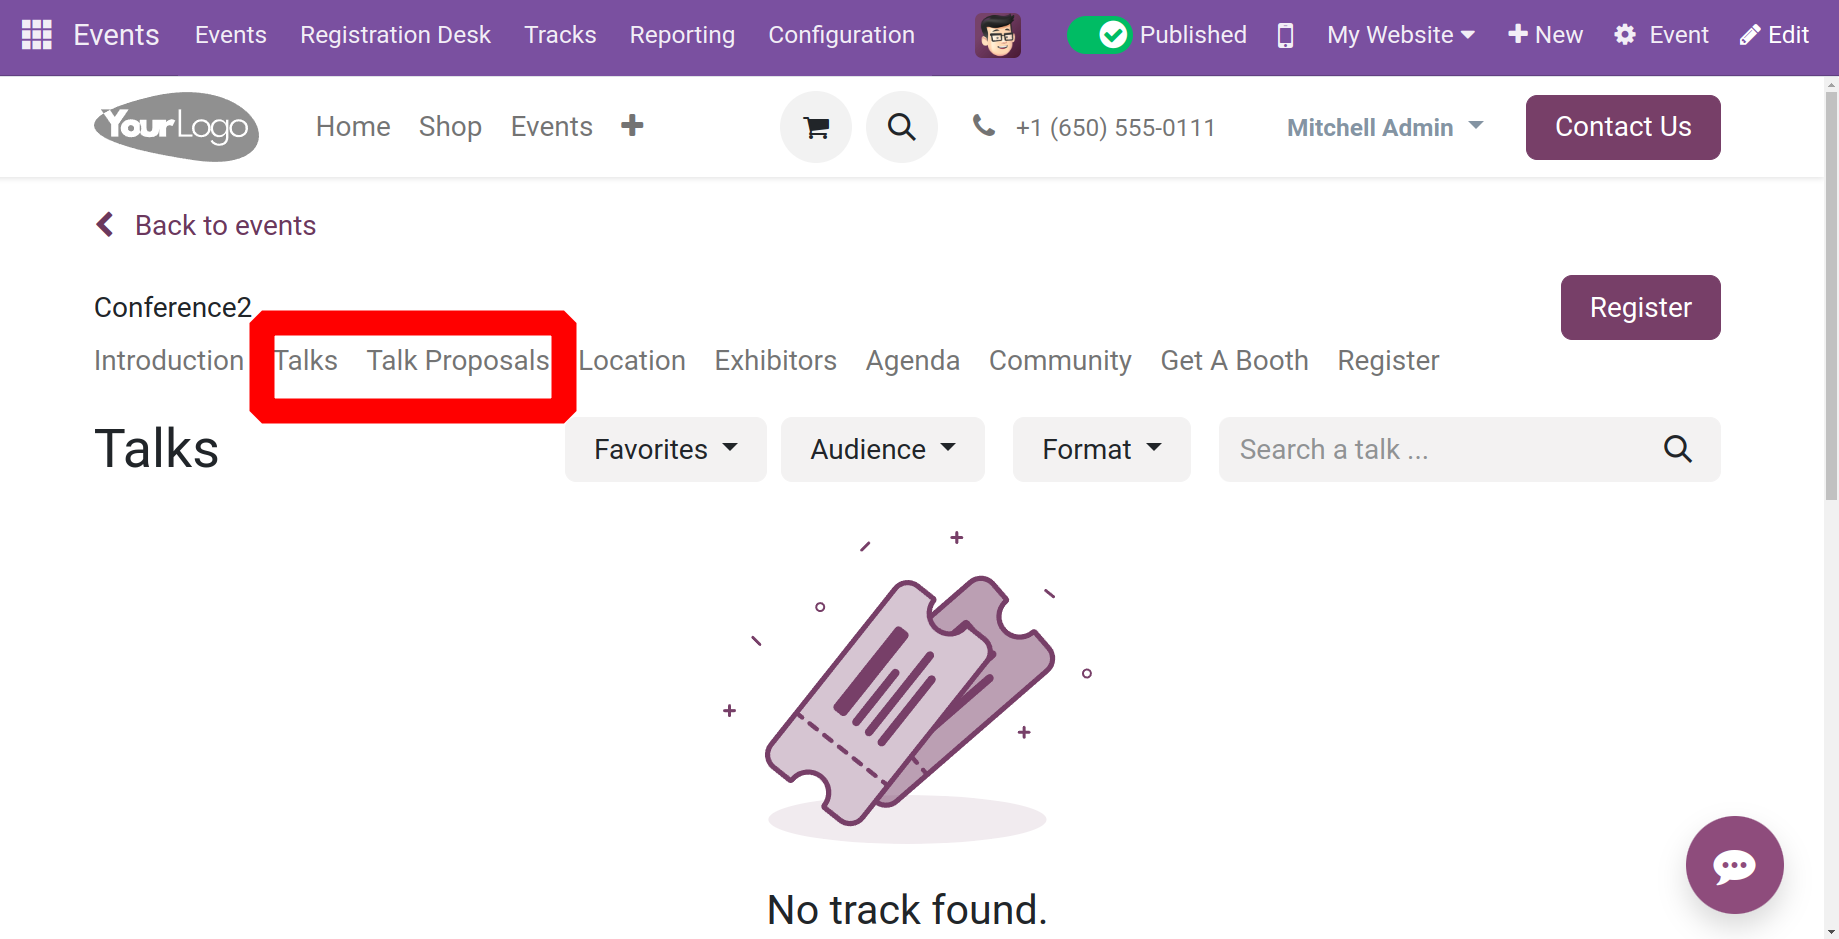
As seen in the image above, there is a lectures option on this website page of events where you may see all of the released lectures for that specific event. The Talks Proposals option is located next to that one, and it allows you to submit ideas for the event's talk.
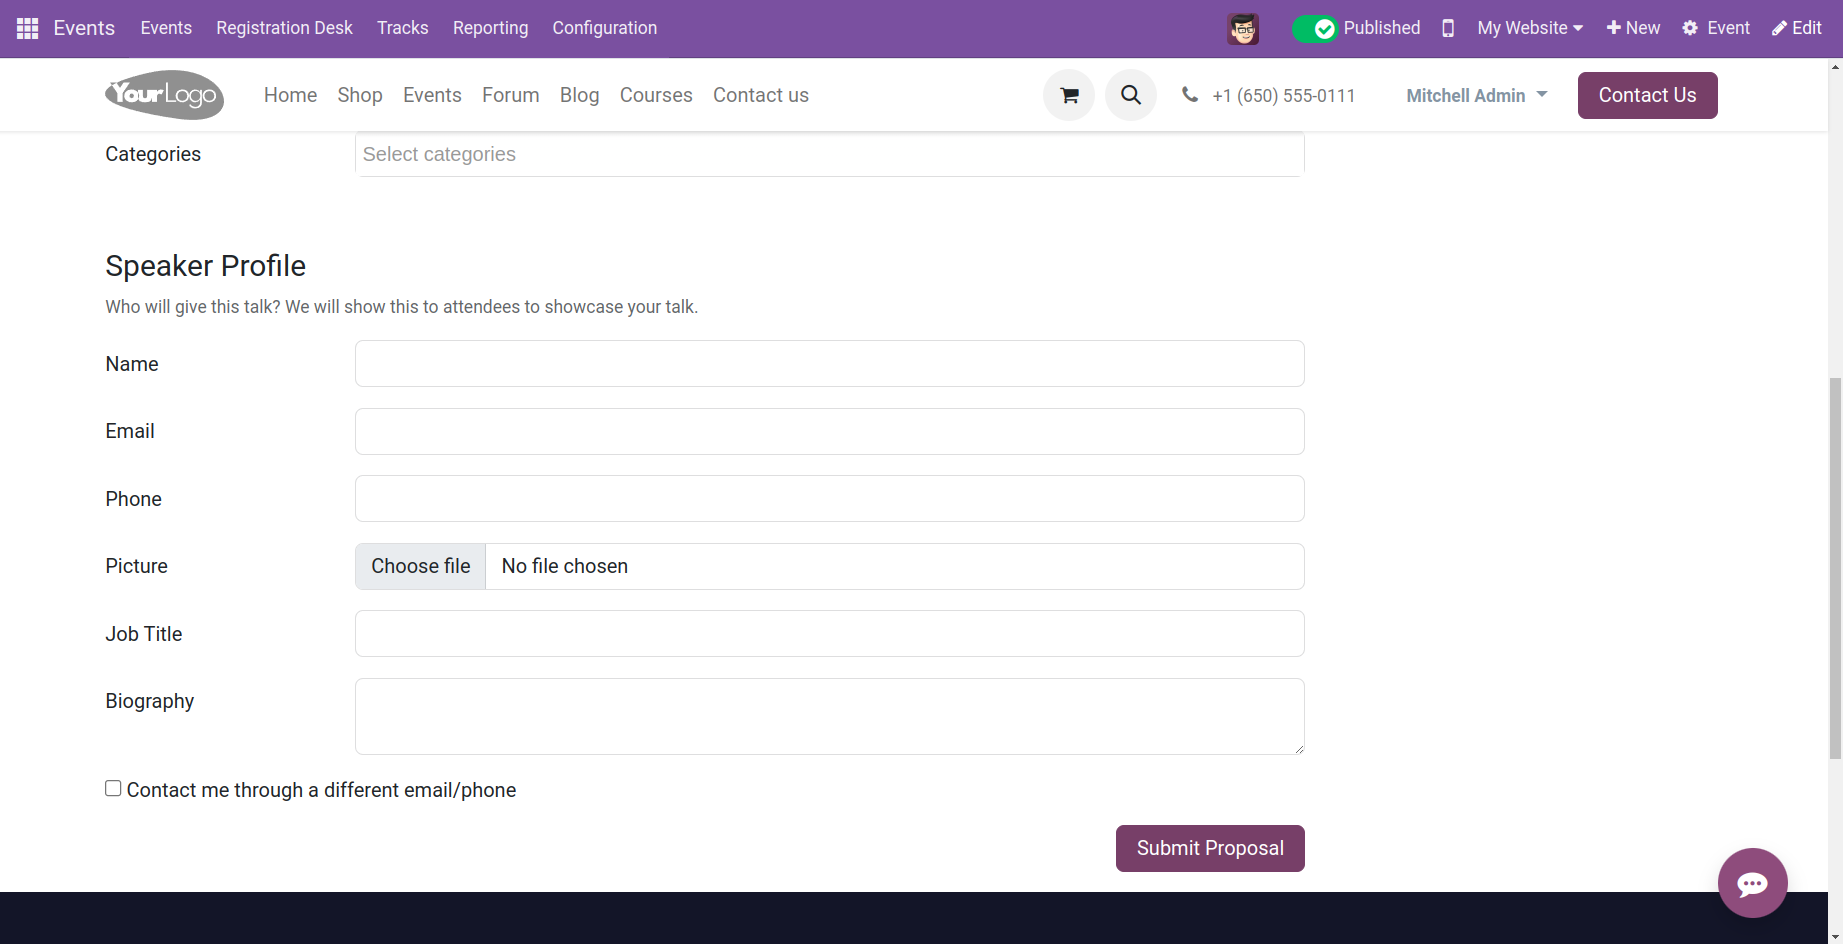
Use this Talk Proposal option if you are writing a project report about an event. You will be given a page to complete a form there, similar to the one in the illustration below. You must enter the talk titles in the designated spaces on that form, as well as the talk's introduction in the area allotted for it.
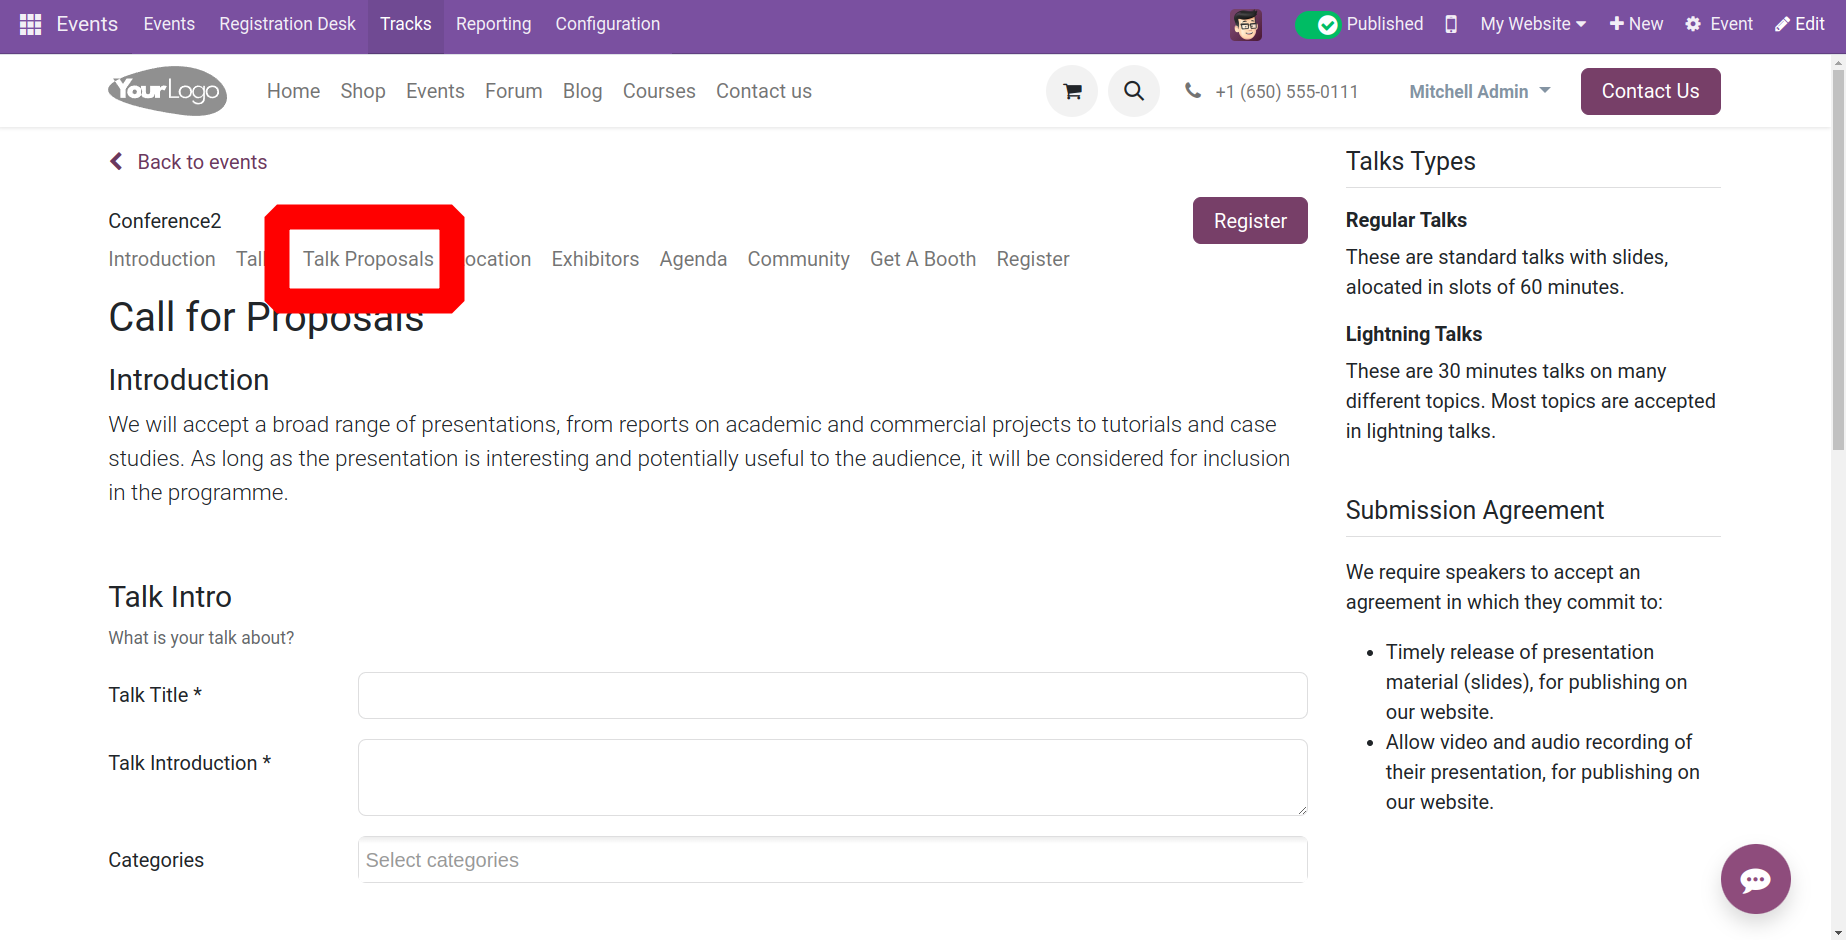
Space, Audience, Format, and many more under the headings. You can include the speaker's details for that specific talk in the Speaker Profile section below. As seen in the screenshot, you can now enter certain information in the designated area, such as your name, email address, phone number, picture, job title, and a brief biography. You can just provide the extra email address or phone number when the "Contact me through a different email/phone" option appears on a separate email or phone number. Once you have completed entering all required information, click the Submit Proposal icon to submit the lecture.
This submitted proposal will appear in the tracks menu, where you may manage those suggestions. Only after you activate the Schedule and Tracks option in the Events Module's settings will this option become visible.
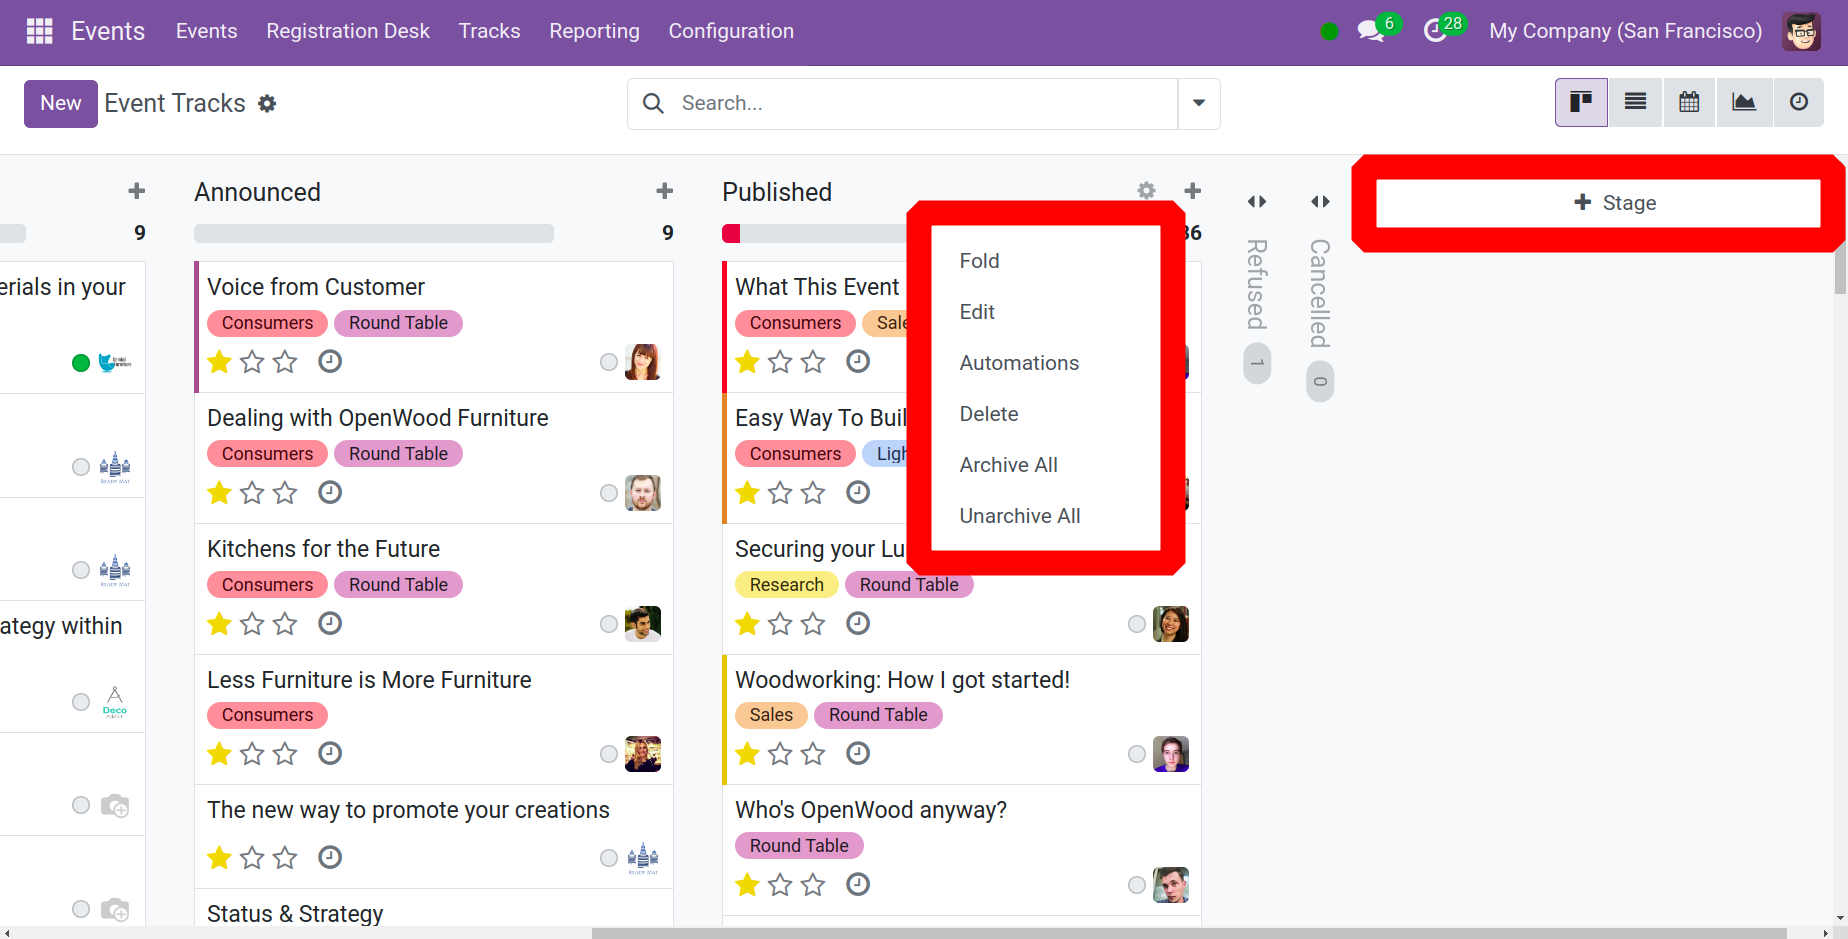
The Tracks window displays the proposals from many speakers here. You can choose multiple stages for each track so you can manage their progress. You can add more stages to the list of stages that are already specified by choosing the +Stage option. You can quickly and easily add a new track to any desired stage by using the plus icon. You can create a new track by selecting the New icon. A popup similar to the one in the image below will appear when you click the new icon.
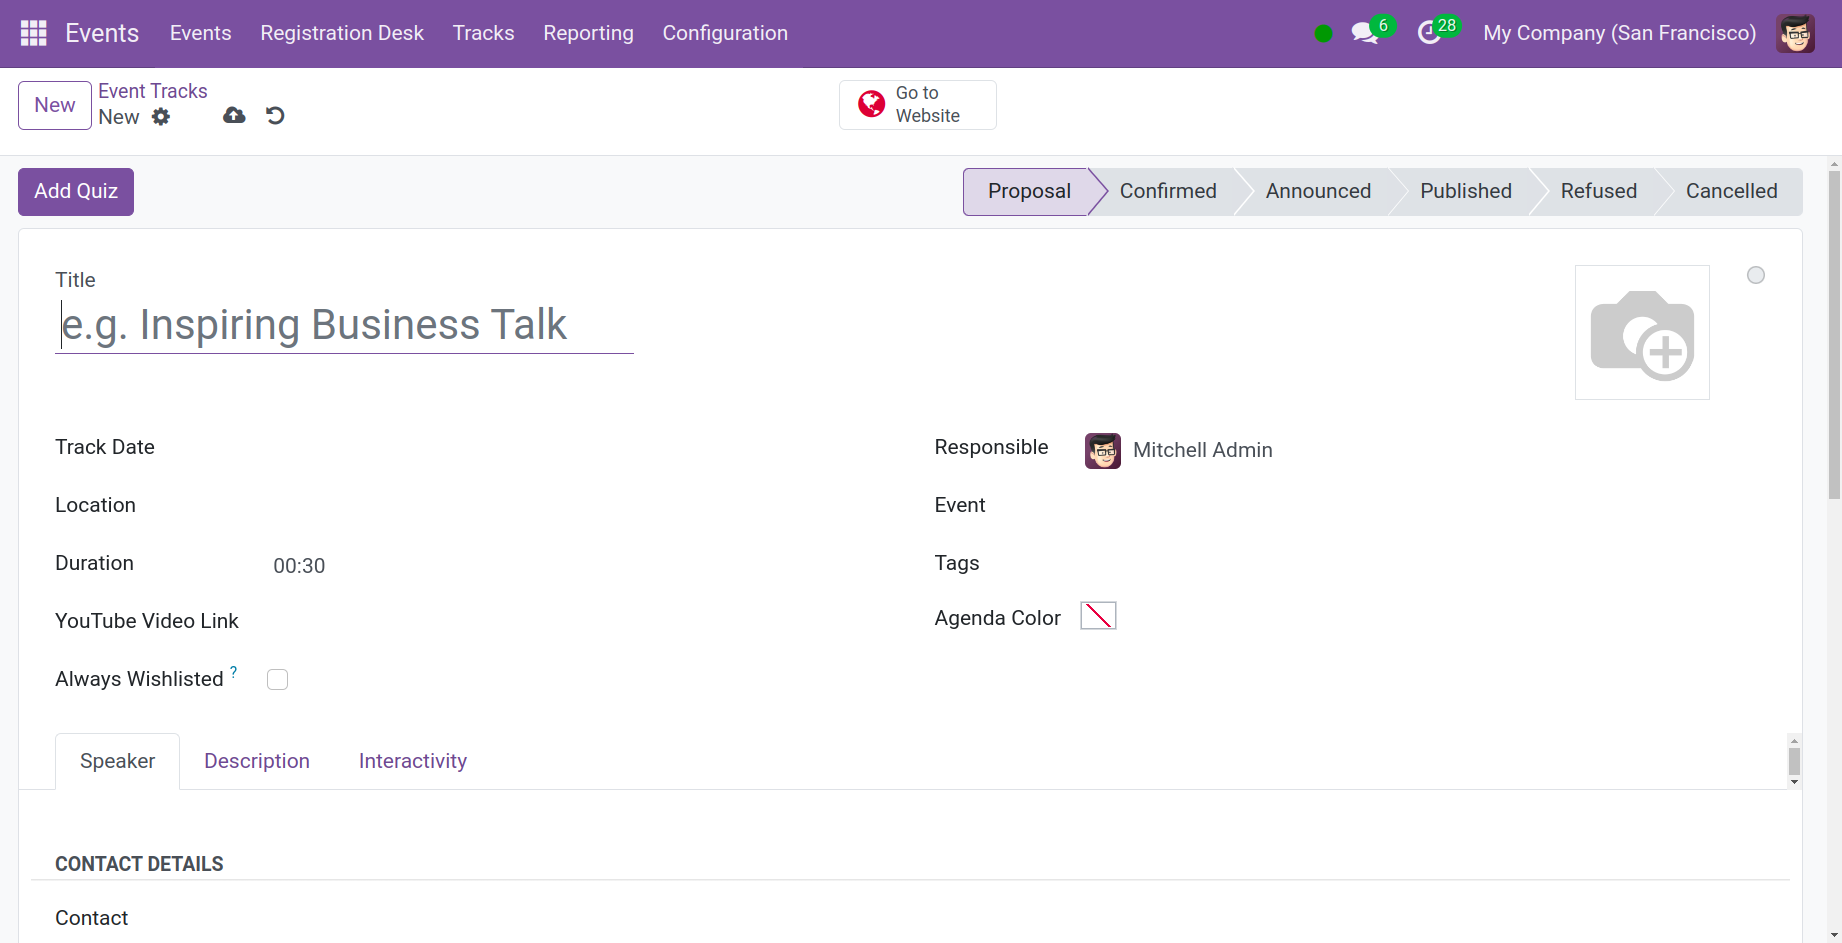
Give the lecture a title in this window and, at the very beginning, add an image to the talk that you are producing in the corresponding spaces. Mention the track date, talk location, duration, and if you'd like, the YouTube video link so that guests may watch your track with ease. For attendees who have registered for the event, you can maintain the talk as a favorite by selecting the Always Wishlisted option. In the fields provided, enter the name of the Responsible Officer, the Event name, any relevant Tags, and the color of the tag.
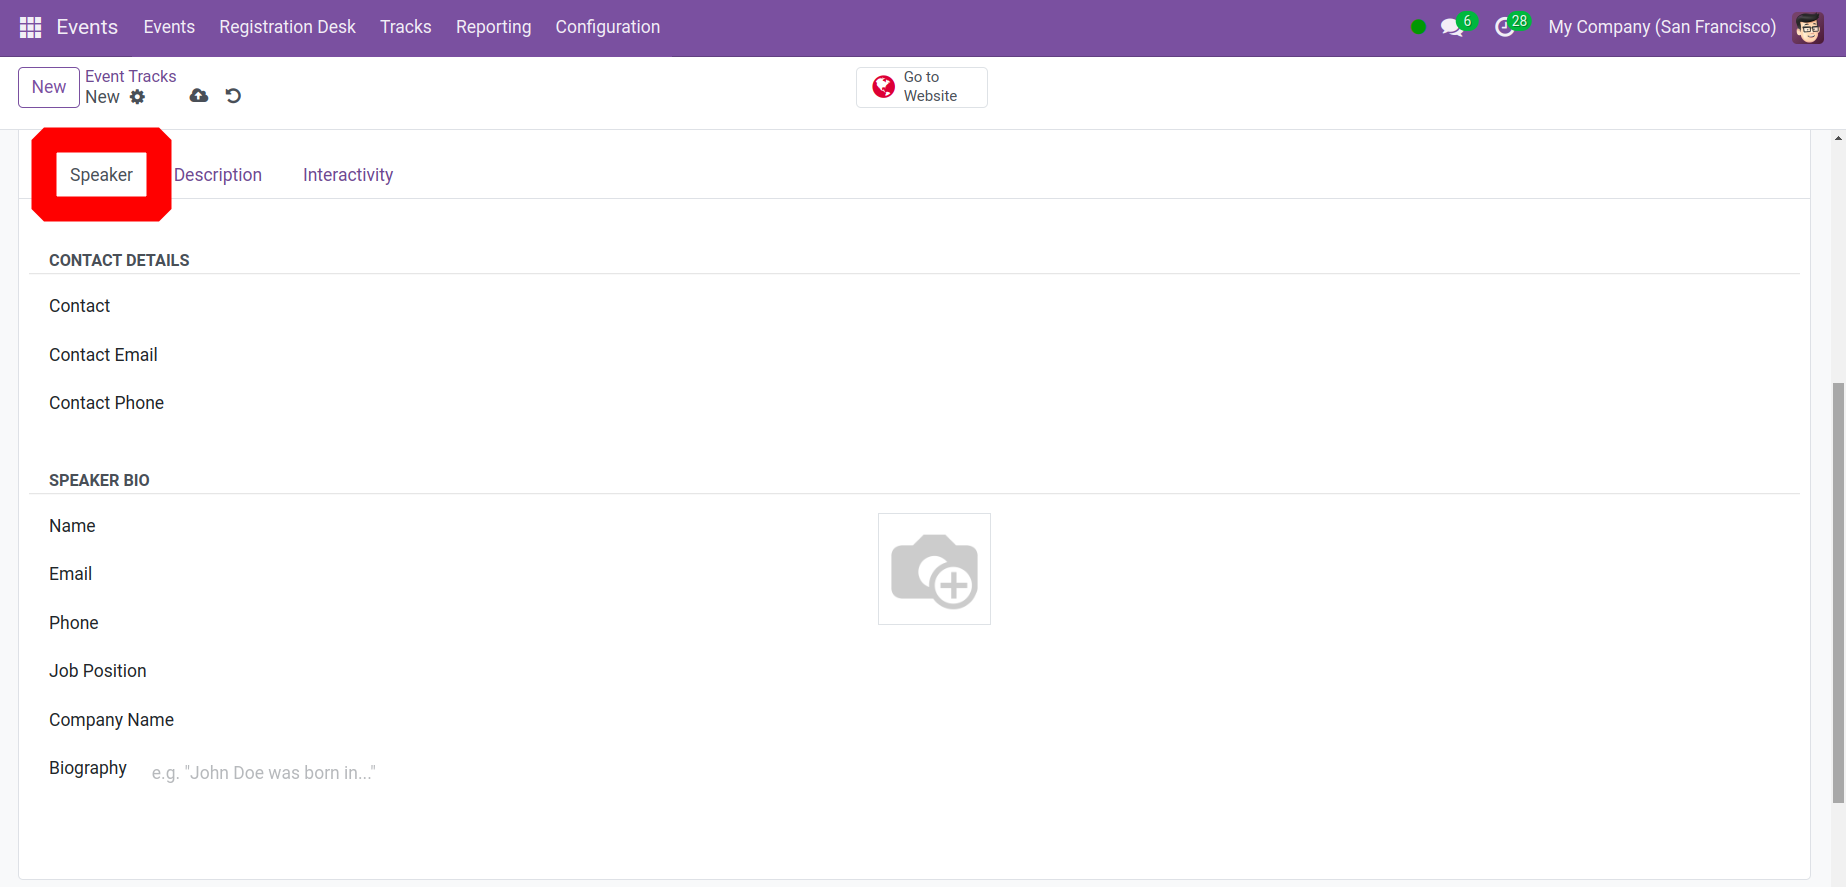
You can enter the Contact Details—Contact, Contact Email, and Contact Phone—in the Speakers Tab. You must provide the speaker's name, email address, phone number, job position, company name, and a brief biography in the Speaker Bio section. As seen in the screenshot, you are given an area to upload the speaker's image.

You can include a brief summary of the discussion in the Description Tab.
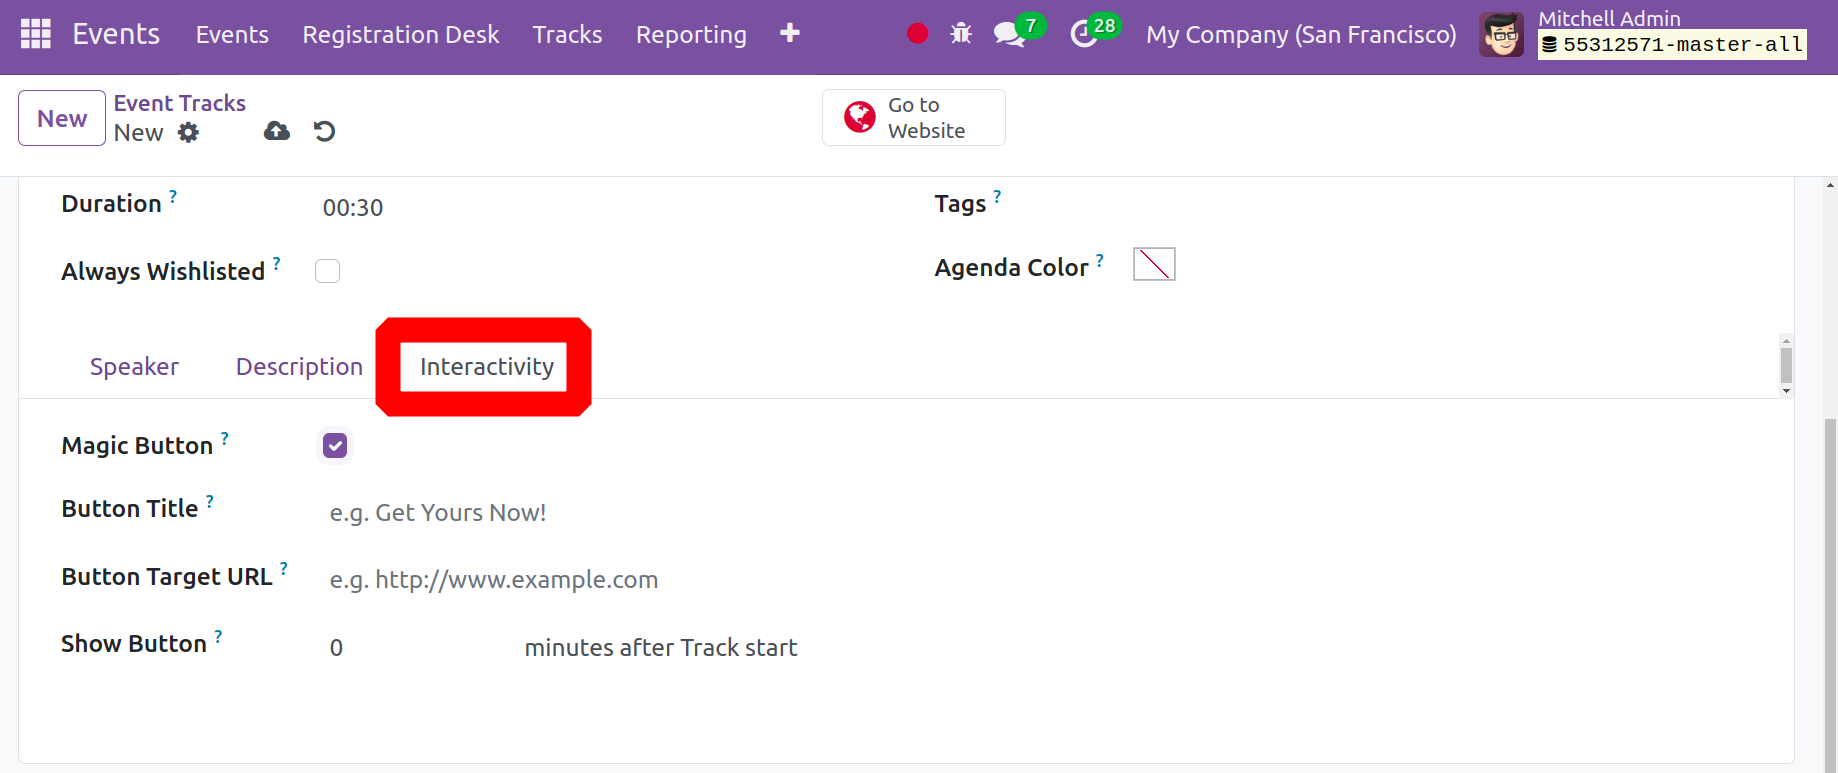
Additionally, you have a Magic option in the Interactivity Tab that may be used to prompt guests to take action while they are seeing the track. When you select this option, a new field asking for the button's title and target URL will appear. By naming the time, you may control when the button shows on the track. Lastly, select the Save button.
After the participants finish the track, you can add a quiz using the Event Gamification option in the Event module's settings.
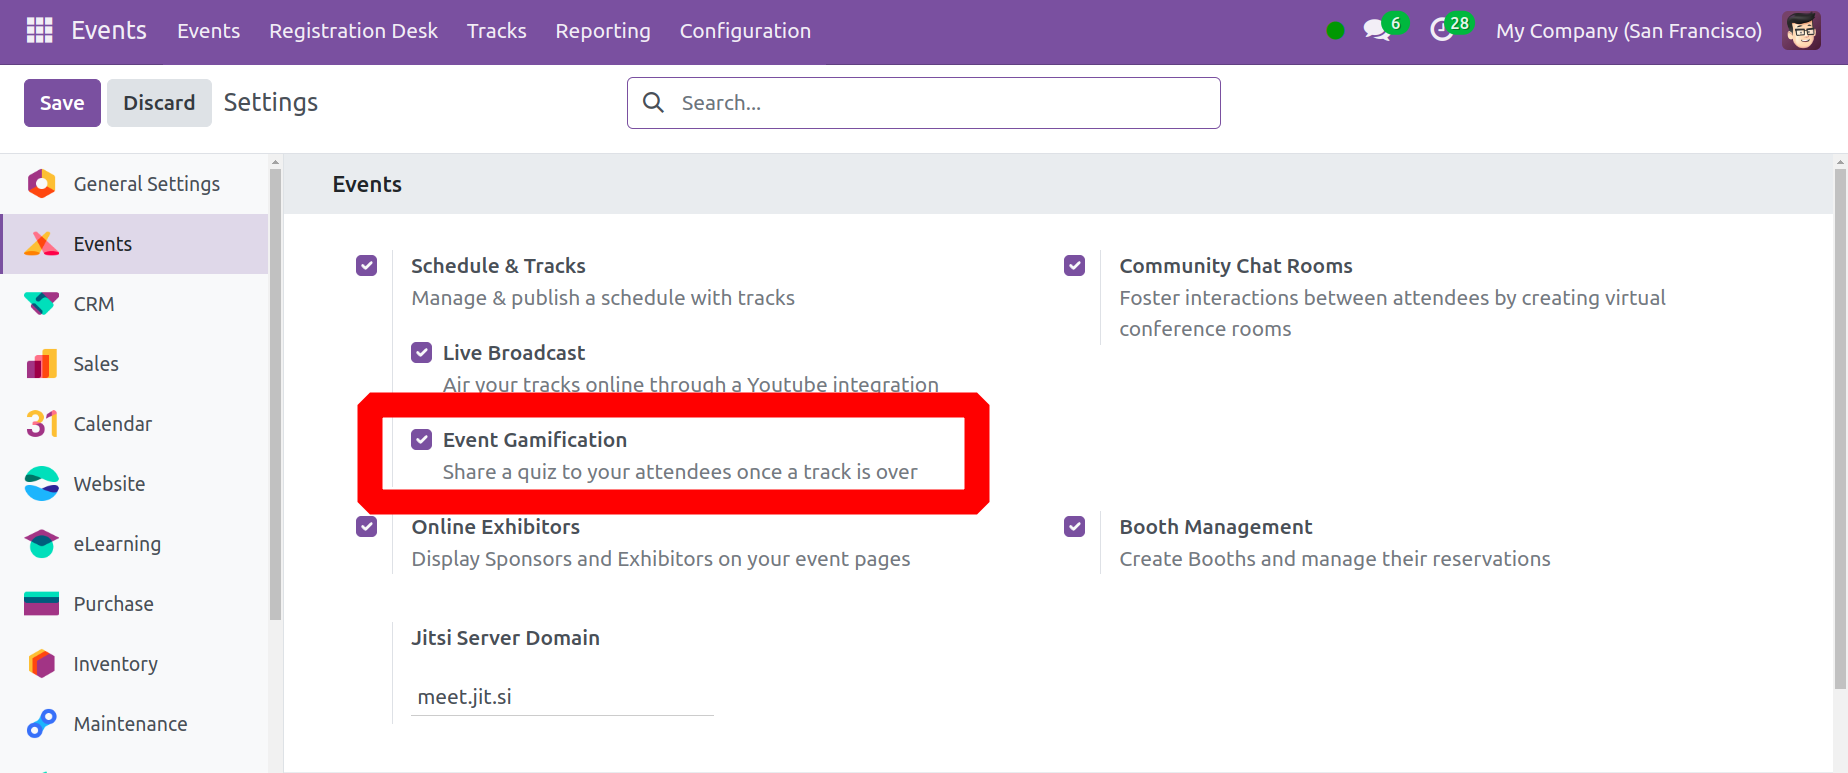
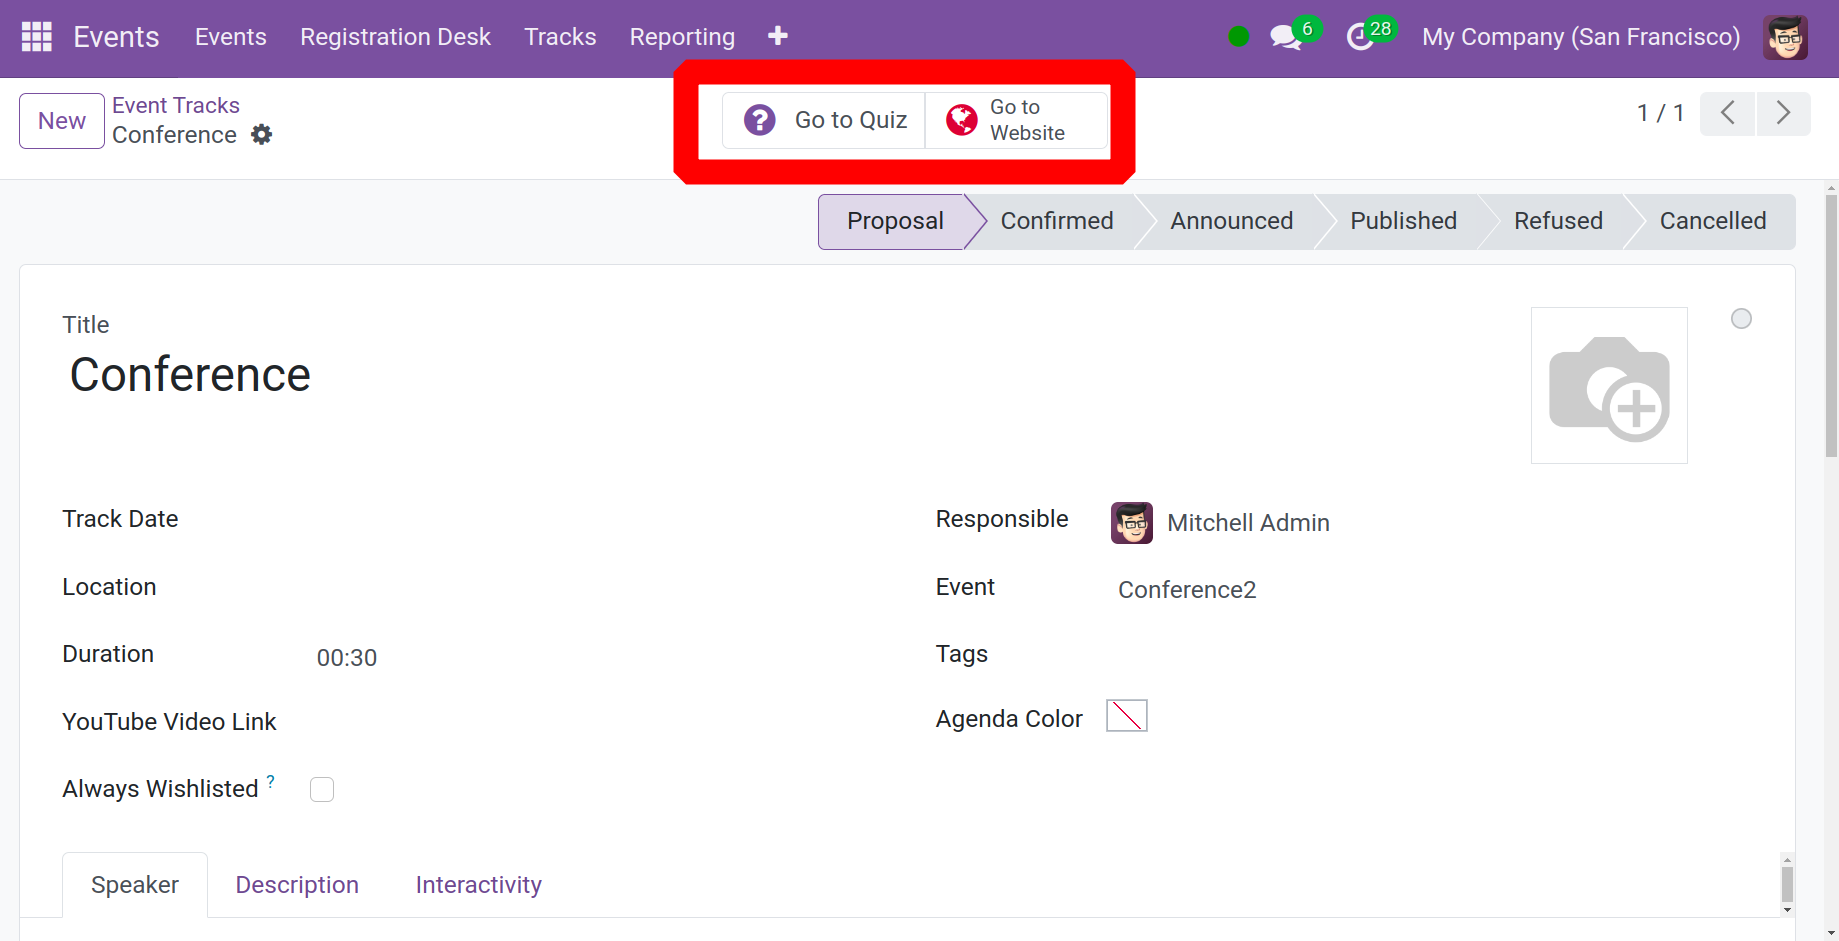
You will find an Add Quiz option in the track formation window. To activate this option in the settings, follow the instructions in the image below.
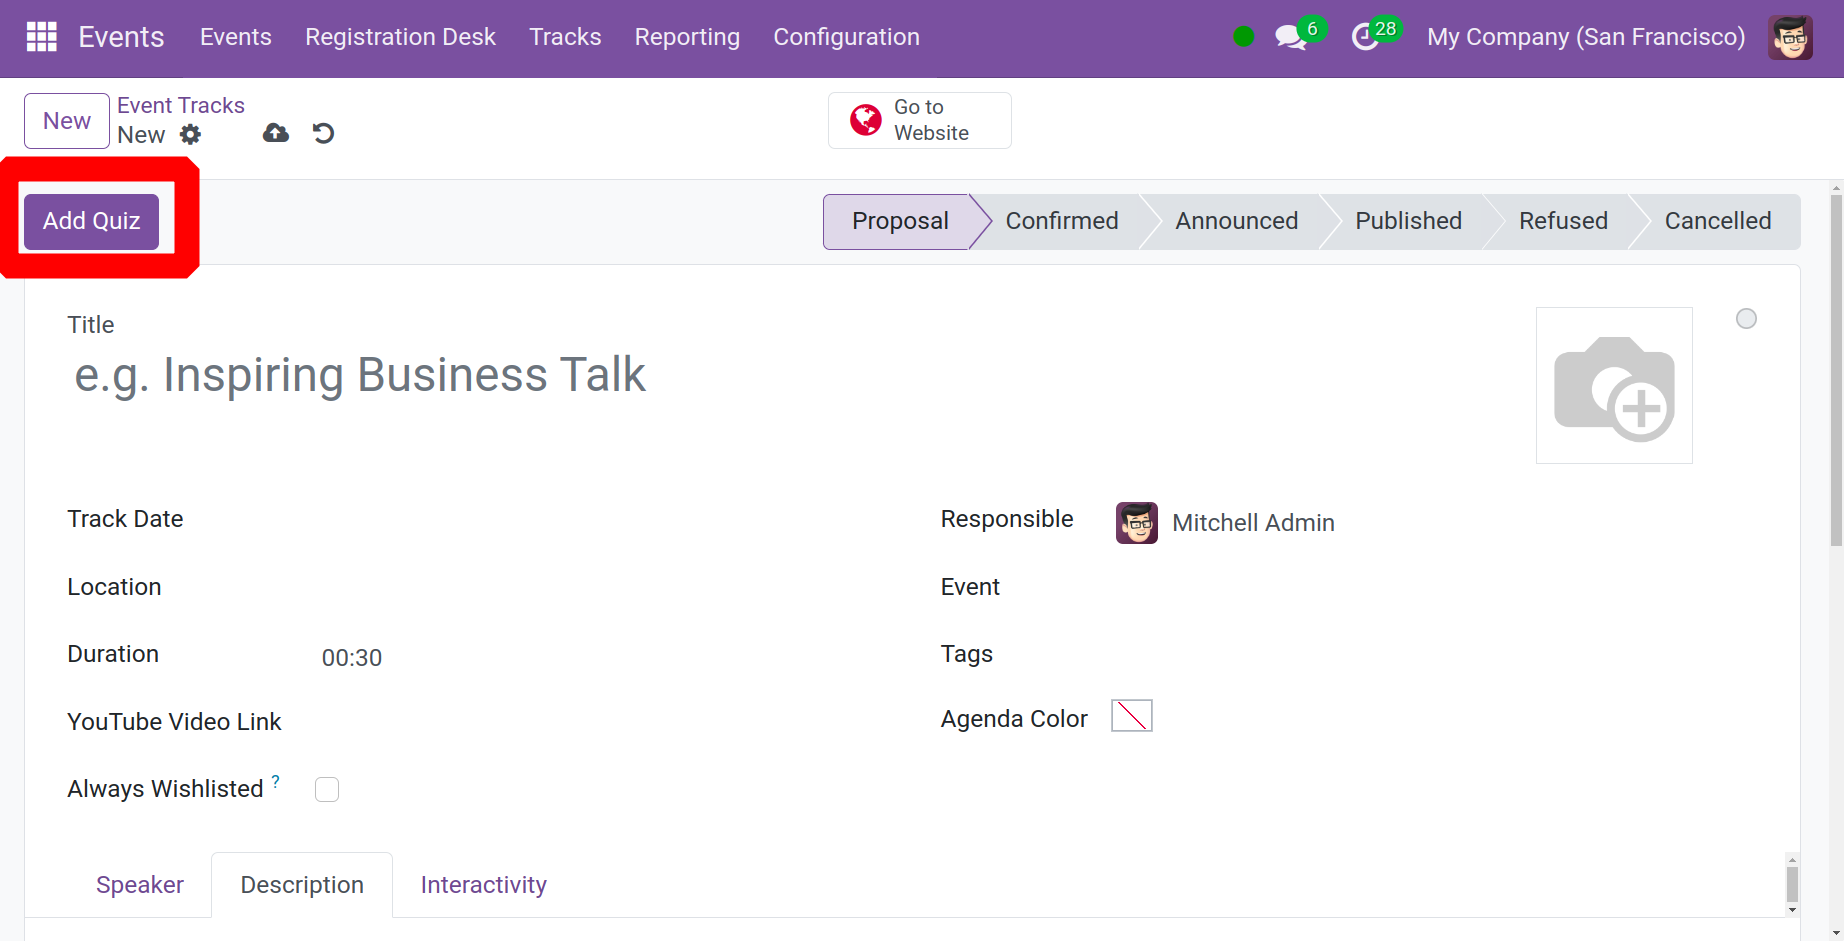
When you choose this option, a window allowing you to add the question as needed will appear.
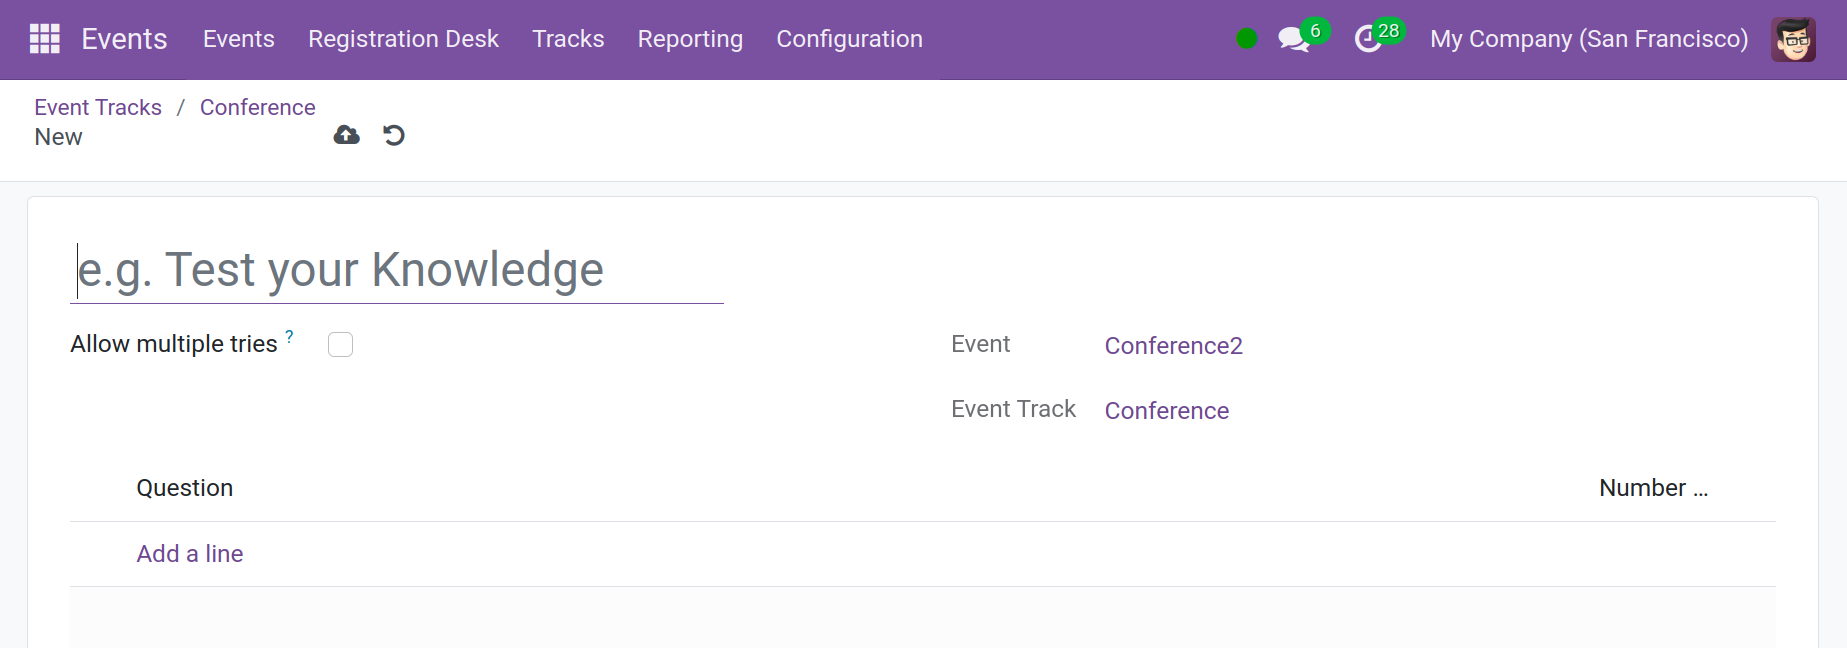
Create a name for the quiz first, then enter it in the designated space. You can allow the participants to reset the quiz if they would want to give it another go by activating the Allow numerous tries option. You can ask additional questions by using the Add a Line option. Lastly, click the "Save" button.
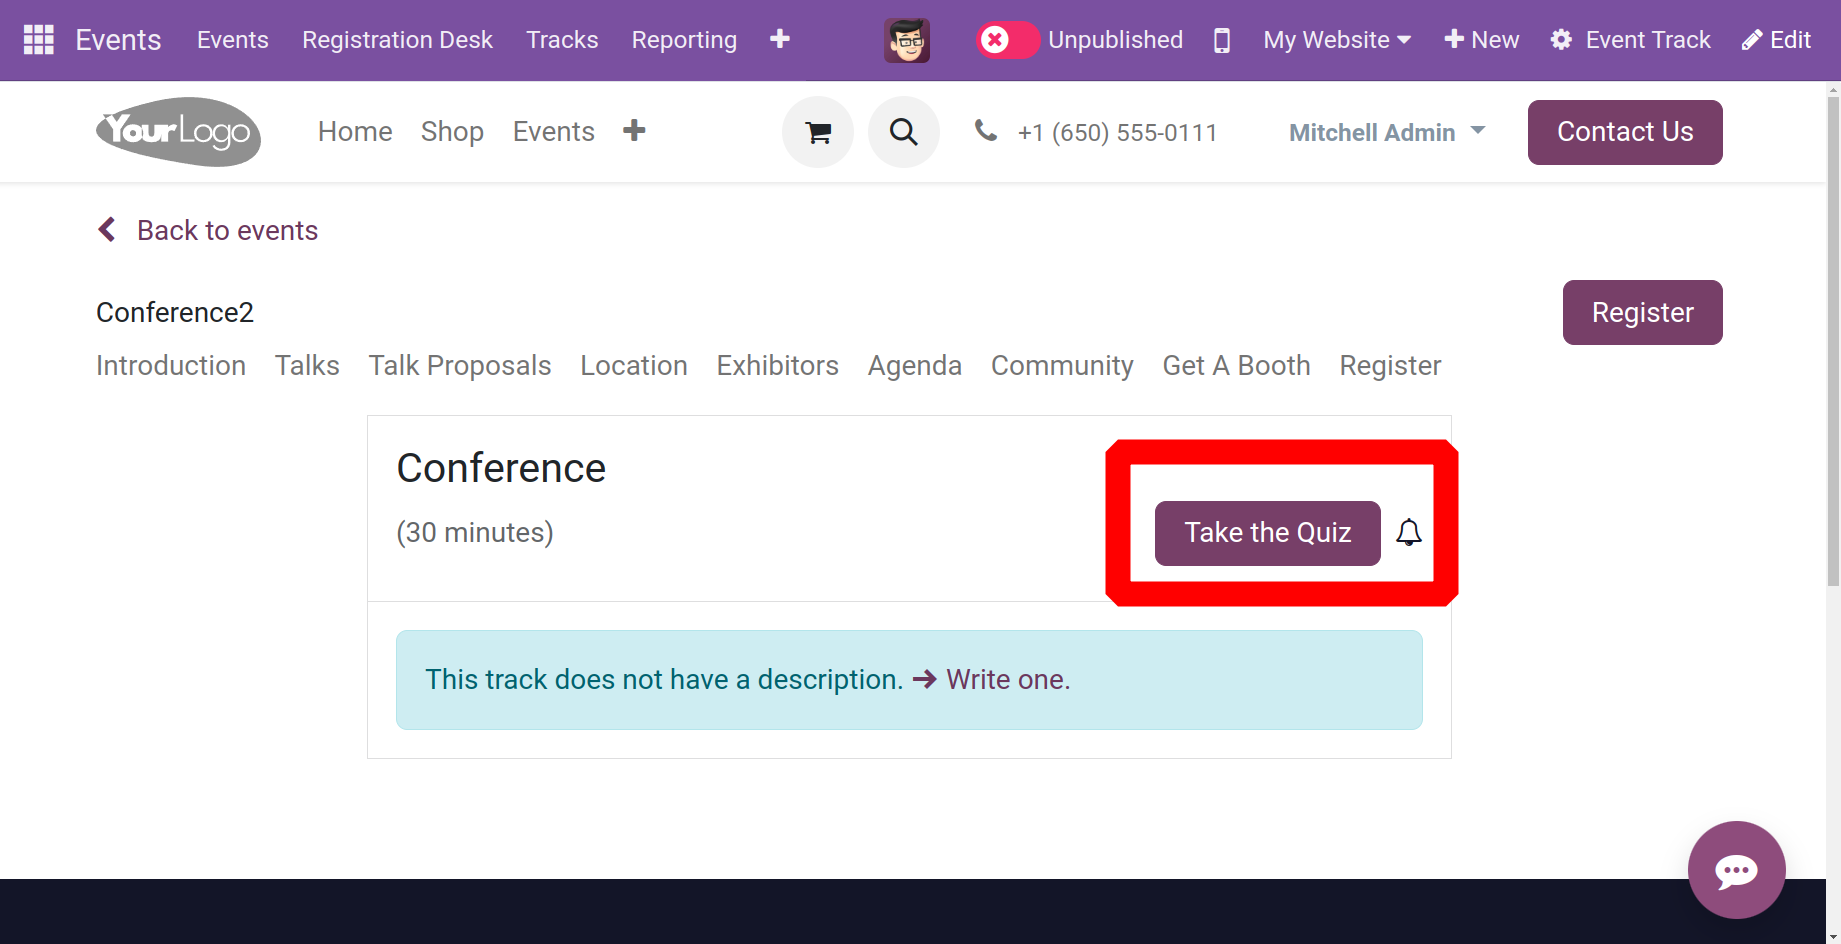
Next, select the Go to Website option, as indicated in the above image, to post this to your website. After choosing the choice, a window where you can change the Unpublished status to Published form will show up. After watching the track, attendees can take the quiz by choosing the Take the Quiz option.
By choosing the Check your Answers option, you may even verify the answer in the window.

These are the main actions we take when utilizing the Odoo ERP Software's Events Module to create and manage the event's tracks.
Configurations
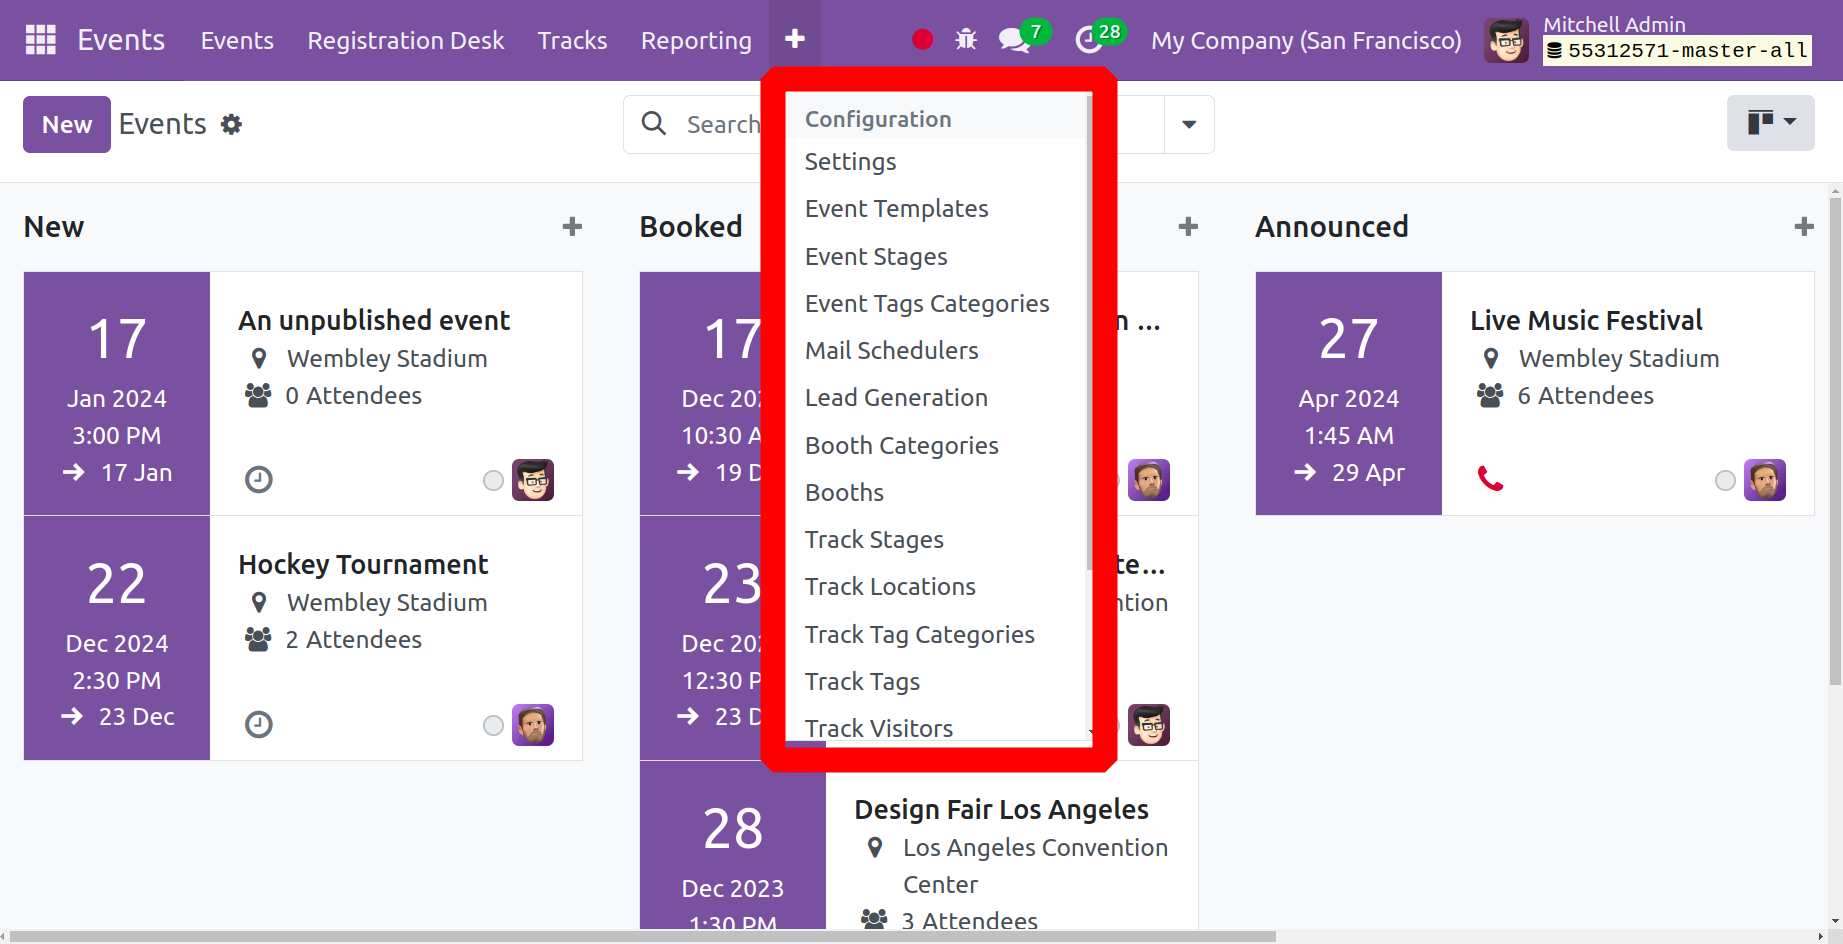
Configuration is the next tab in the Events module. Users can improve the events module's performance with the aid of this tab. You may streamline the procedure and event administration with this module. Options like Event Tag Category, Event Stages, Event Templates, and many more are available under the Configurations tab.
Event Templates
Users can configure templates for events that are appropriate for their events by selecting Event Templates from the Configuration menu. You can select the template for the typical kind of event from the list of scheduled templates.
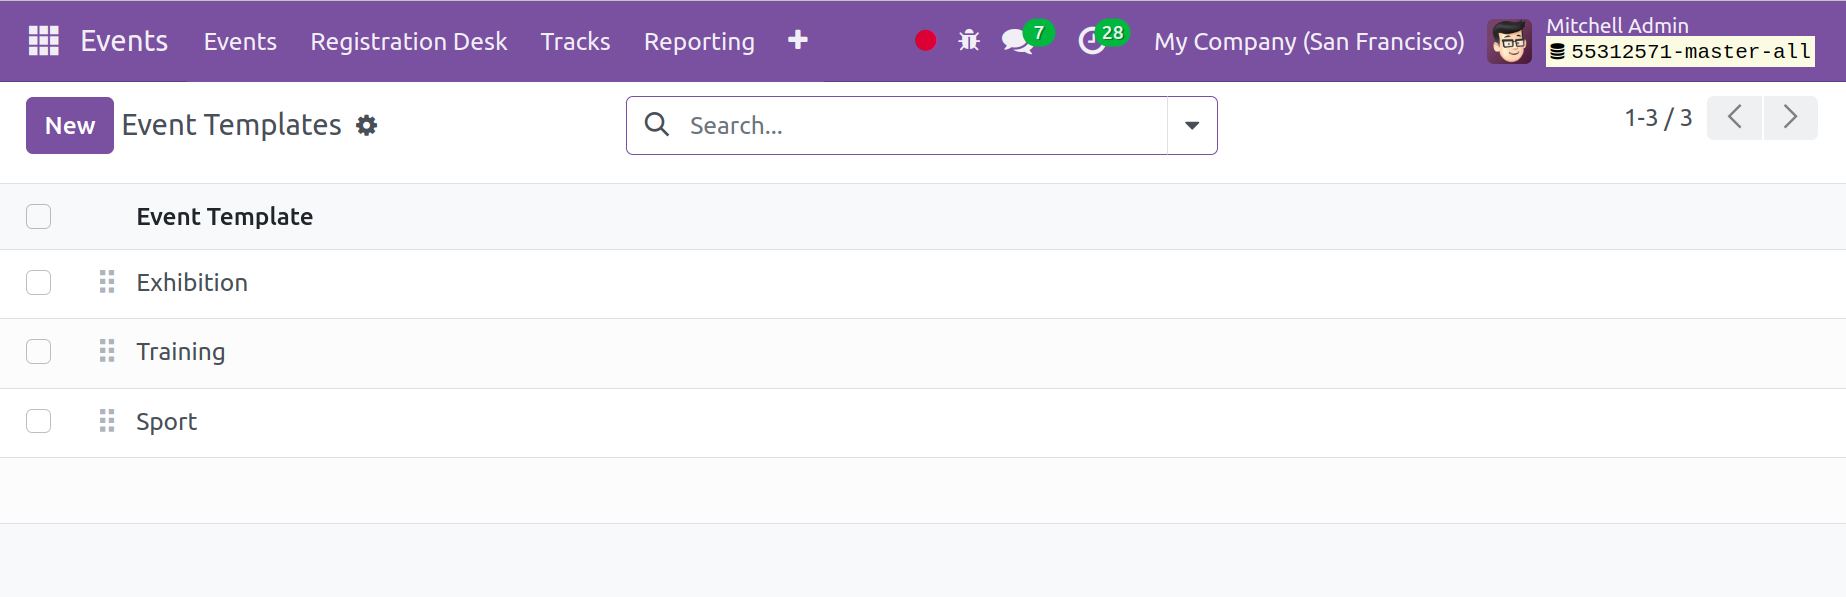
As seen in the screenshot below, we can quickly create a new event template by selecting the New icon.

In the designated space, enter the name of the event template. The remaining options for creating this template are the same as those for creating a new event. You can adhere to the identical procedures that we have described in the field above. This window's tabs are identical to those in the event formation.
Event Stages
You can identify different stages according to the actions performed on them by using the Event Stages tab. You may easily create and manage the stages using the setup menu. You will find an event stage list that has already been established here.
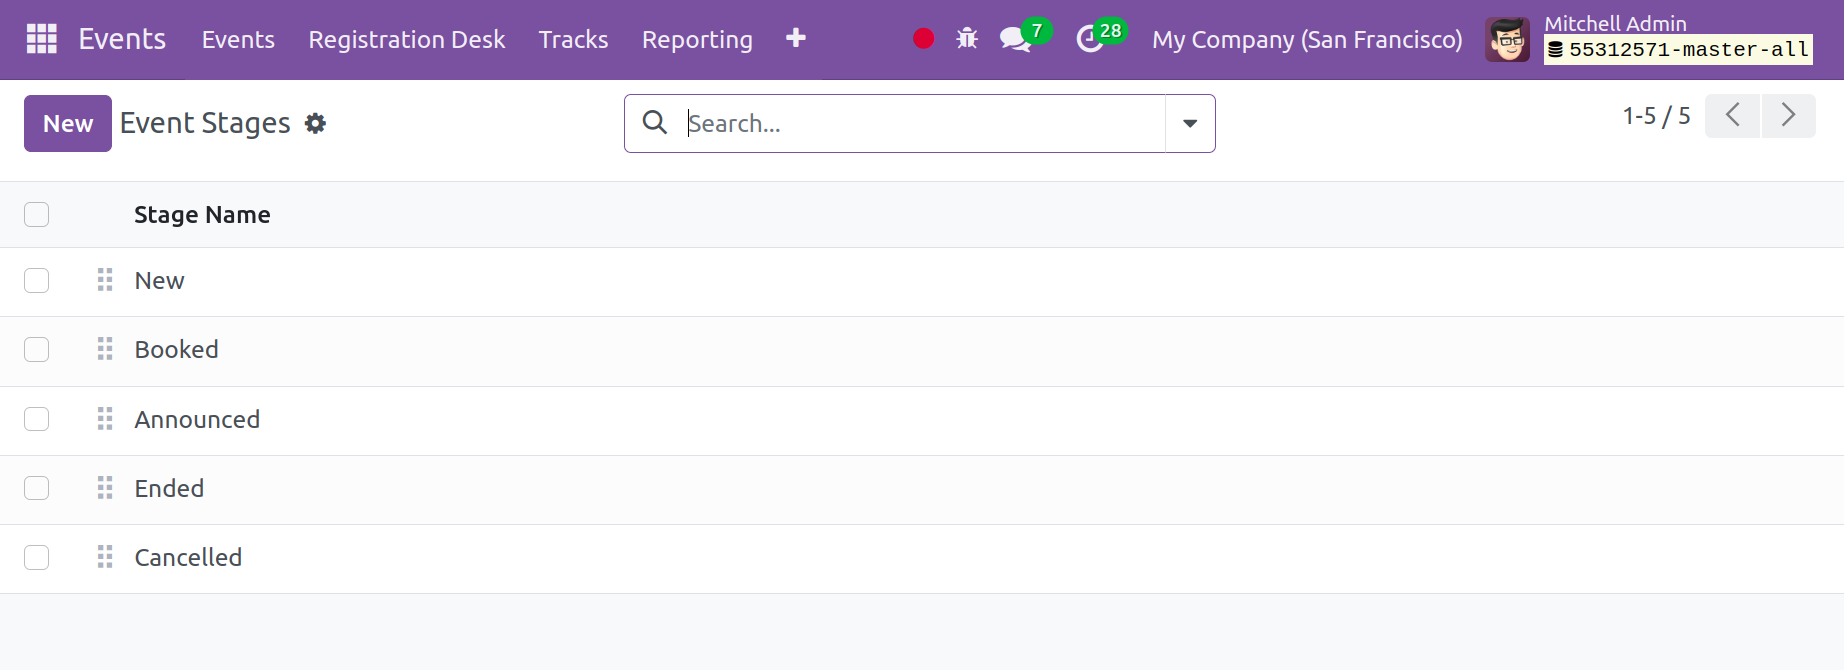
To add new stages, use the New option. This will take you to a window where you may enter some information, as seen below.
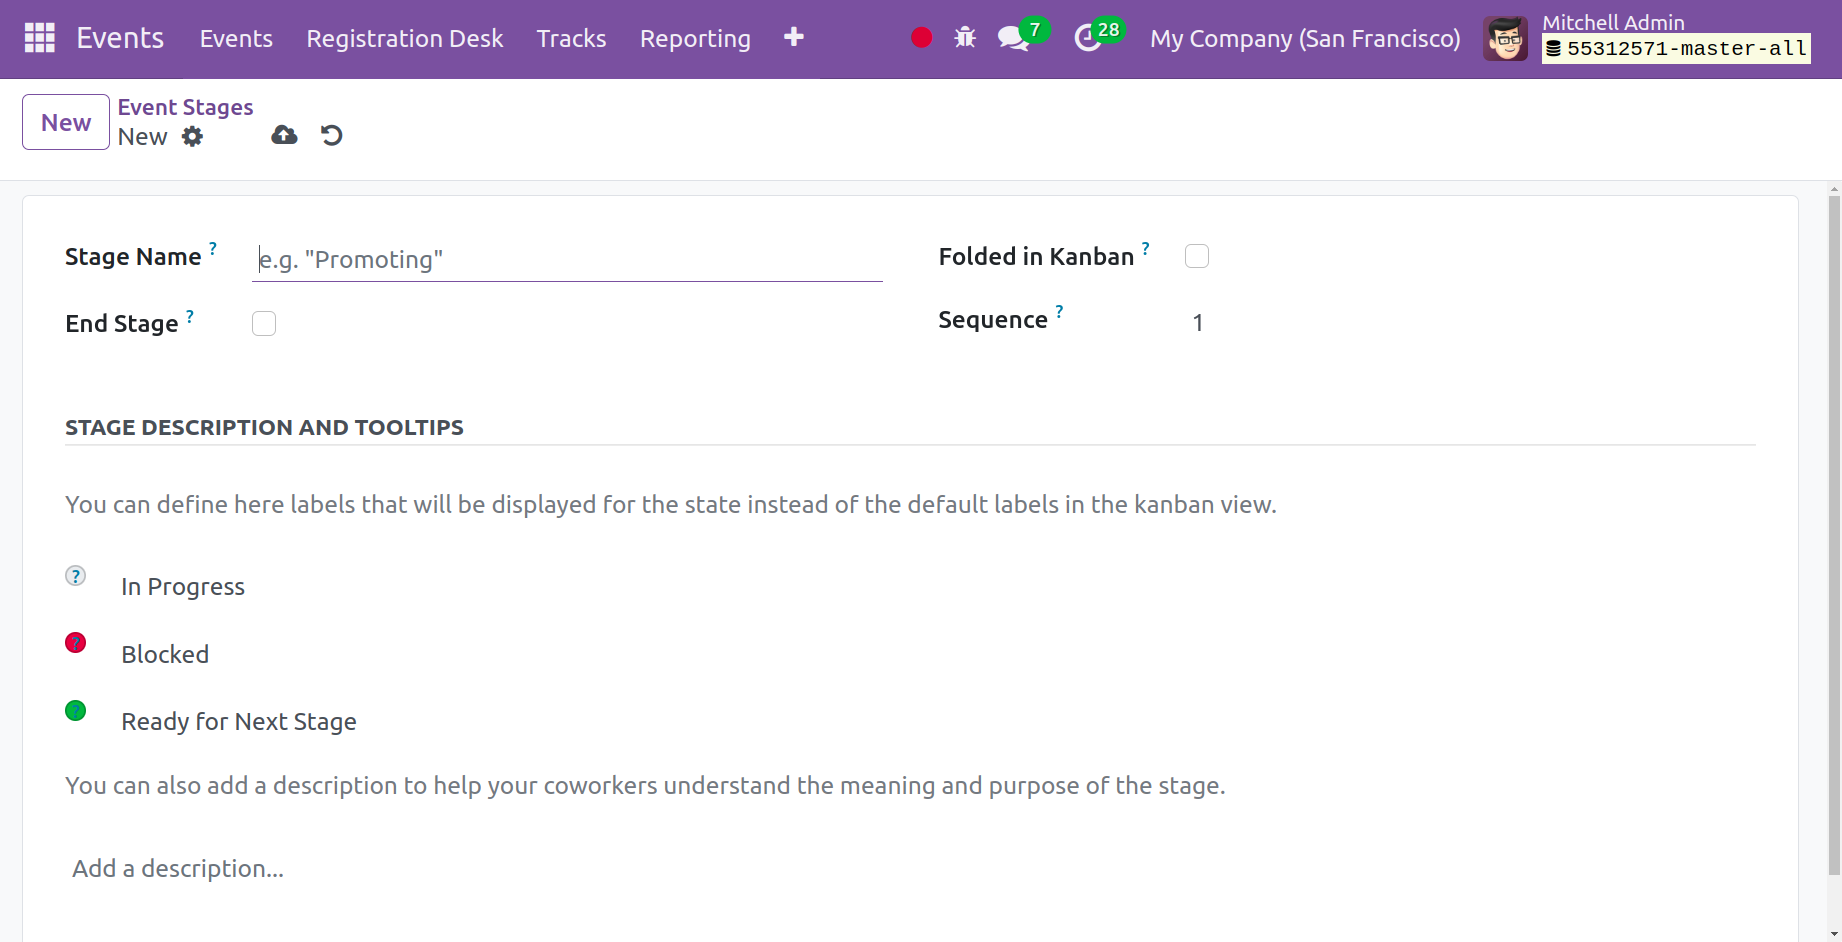
In the designated area, state the name of the stage. The events will advance to the process completion stage upon activating the End Stage. You can select Folded in the Kanban to fold this stage in the Kanban view. You enter the number of stage sequences in the designated space. You can specify labels other than the default labels in the Kanban view for the state under the Stage Description and Tooltips option. You might give the other workers a brief summary of the stage so they can understand its purpose. Lastly, click the "Save" button.
Event Tags Categories
Event Tags Categories is the next option in the Configurations tab. This option is meant to provide an explanation of the different categories for the event's tags.
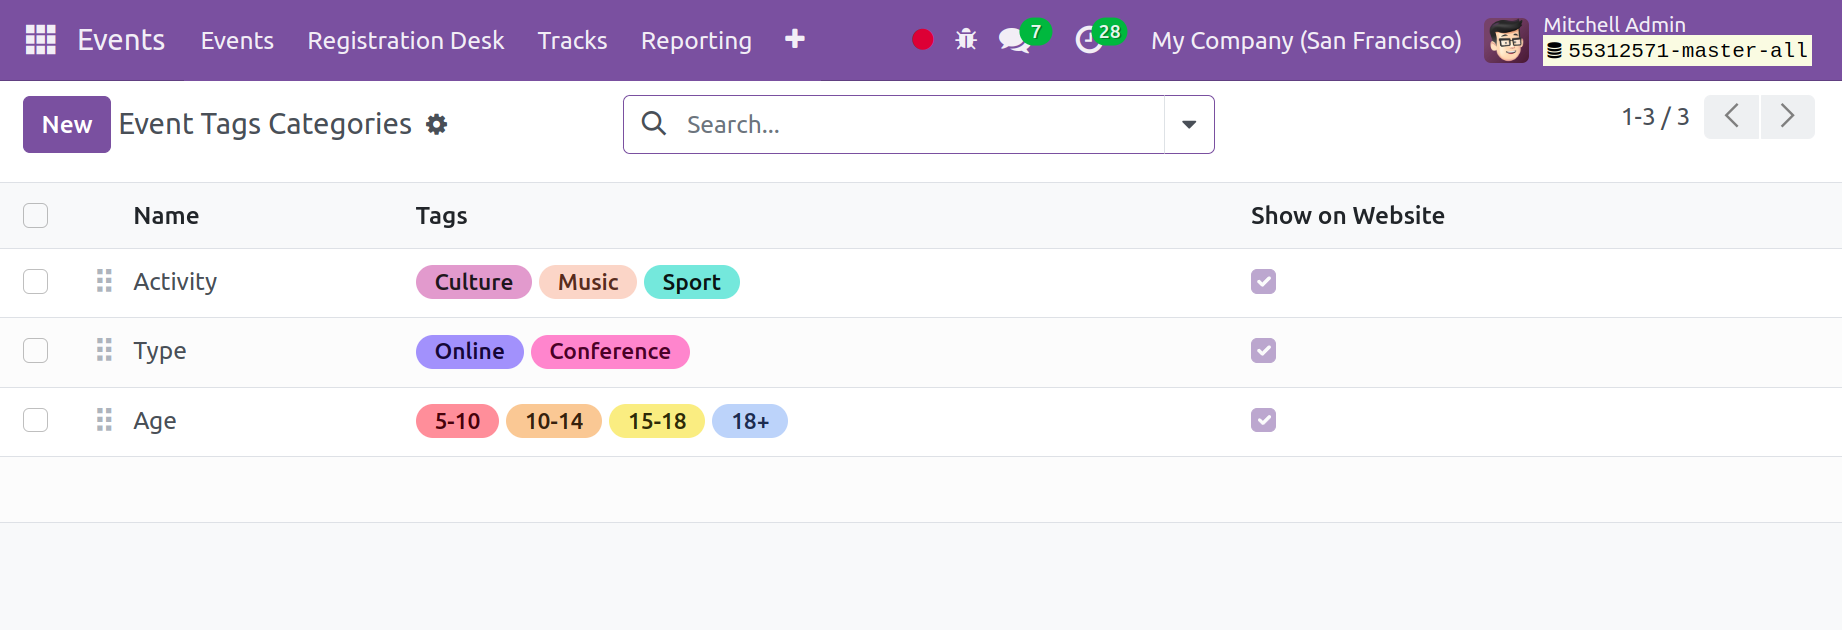
When you choose the viewpoint, a popup containing other tags will show up. Select the New icon to create a new category for the event tags.
Events Mail Scheduler
The other option in the Configuration tab is Events Mail Scheduler, which aids in obtaining the list of configured emails that are to be sent to the designated participants either before or after the event.
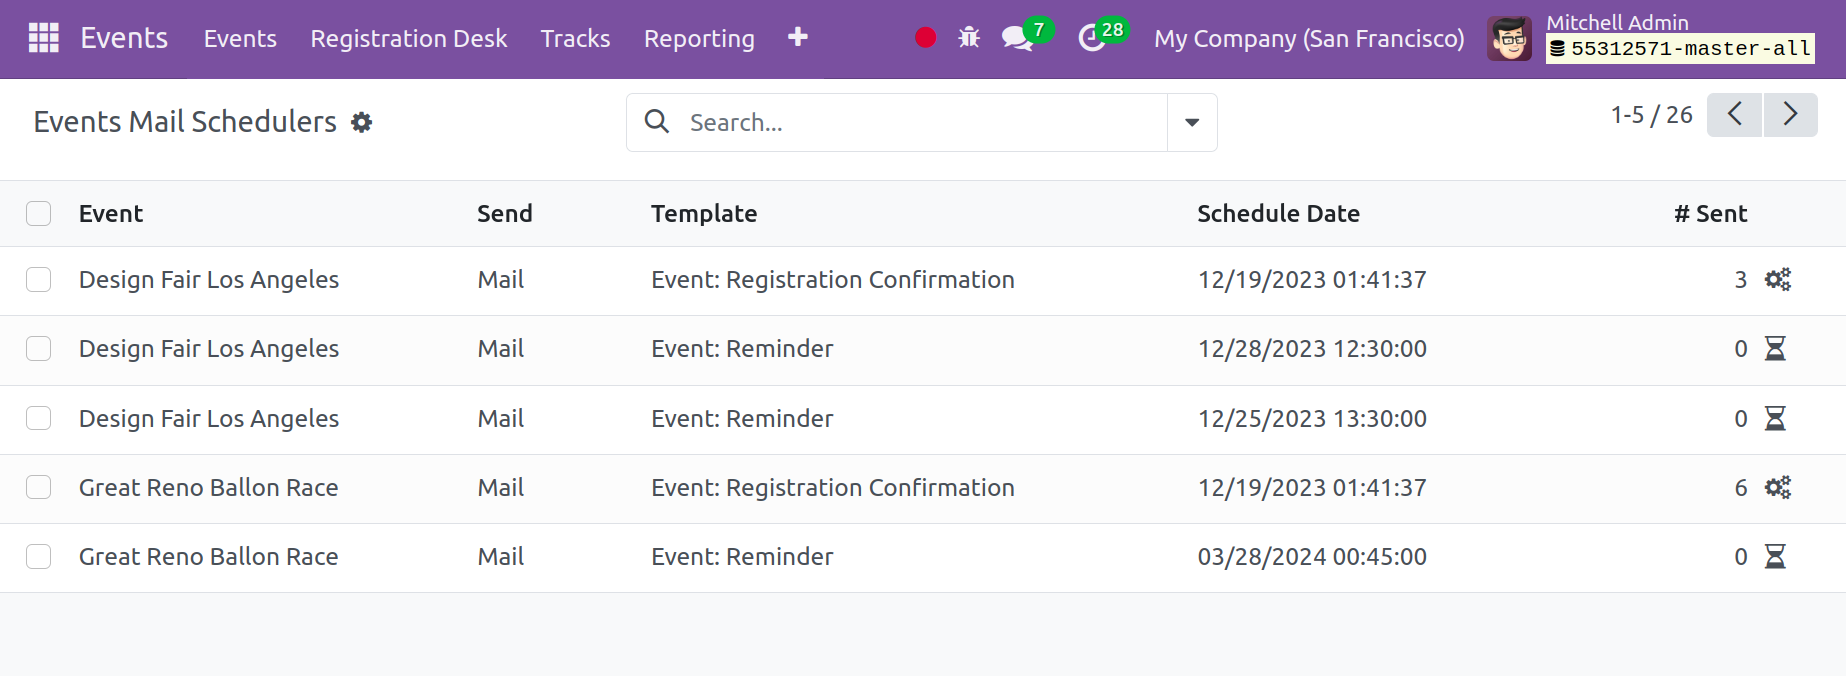
A few details are shown on the page, including the event name, Send, Template, Scheduled Date, and the total number of emails sent.
Lead Generation
The next option is Lead Generation, which greatly simplifies the lead creation procedure.
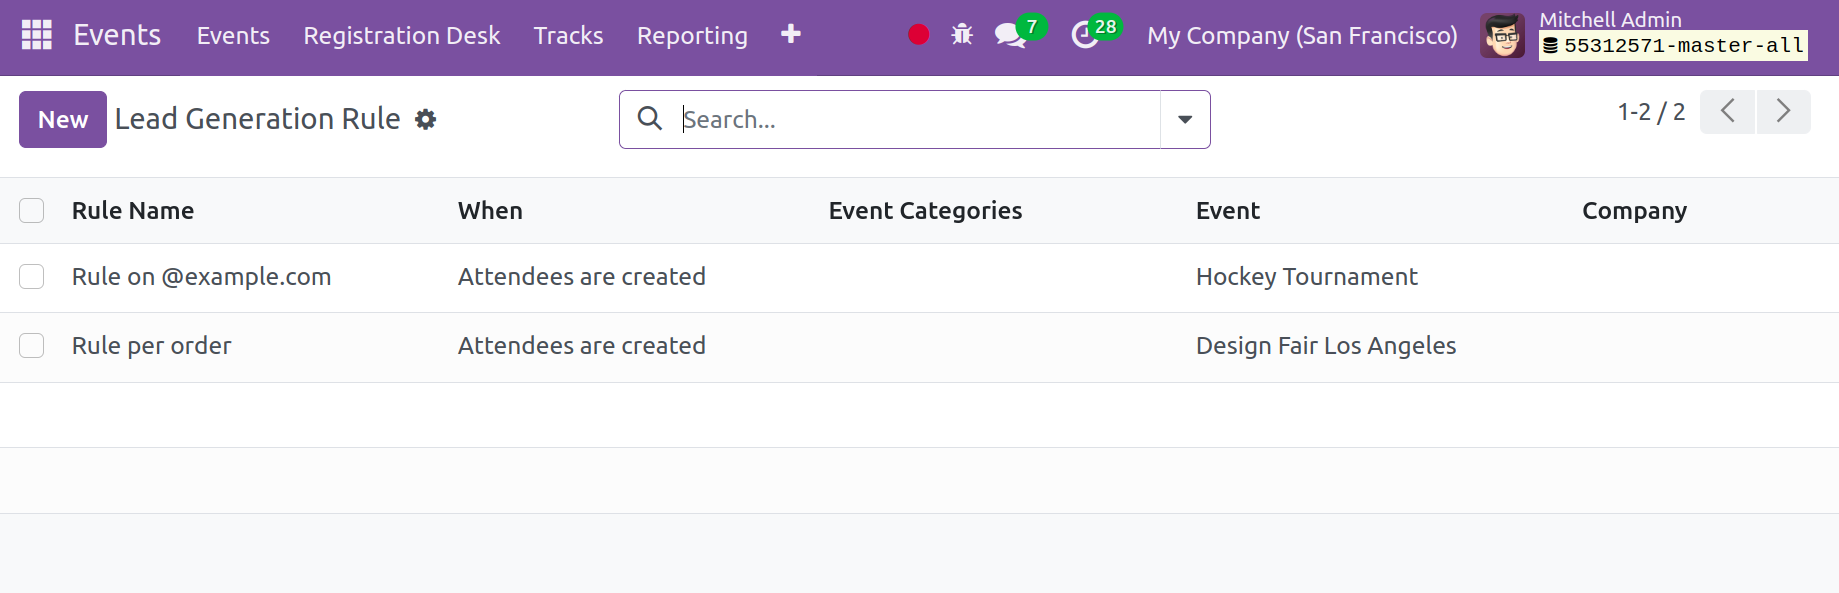
This will display the list of lead-generating rules that have already been created. A few details are included in the List, including the name of the rule, the kind of lead creation, the time, event categories, and the firm name. You may quickly create a new rule for lead generation by using the New icon.
Enter the rule's name in the designated space. You are able to make a lead for each order or each attendance. If you choose the Per Attendee option, a lead is created for each attendee; if you choose the Per Order option, a lead is created for each batch of tickets or sales orders. When the attendees are established, confirmed, or attended, we can take the lead independently or jointly with the attendees. In order to select the attendees and include only those from this specific event category and event, provide the event and event categories. Odoo 17 will apply this newly established rule to the events that are associated with that specific firm when receiving a specific company name.
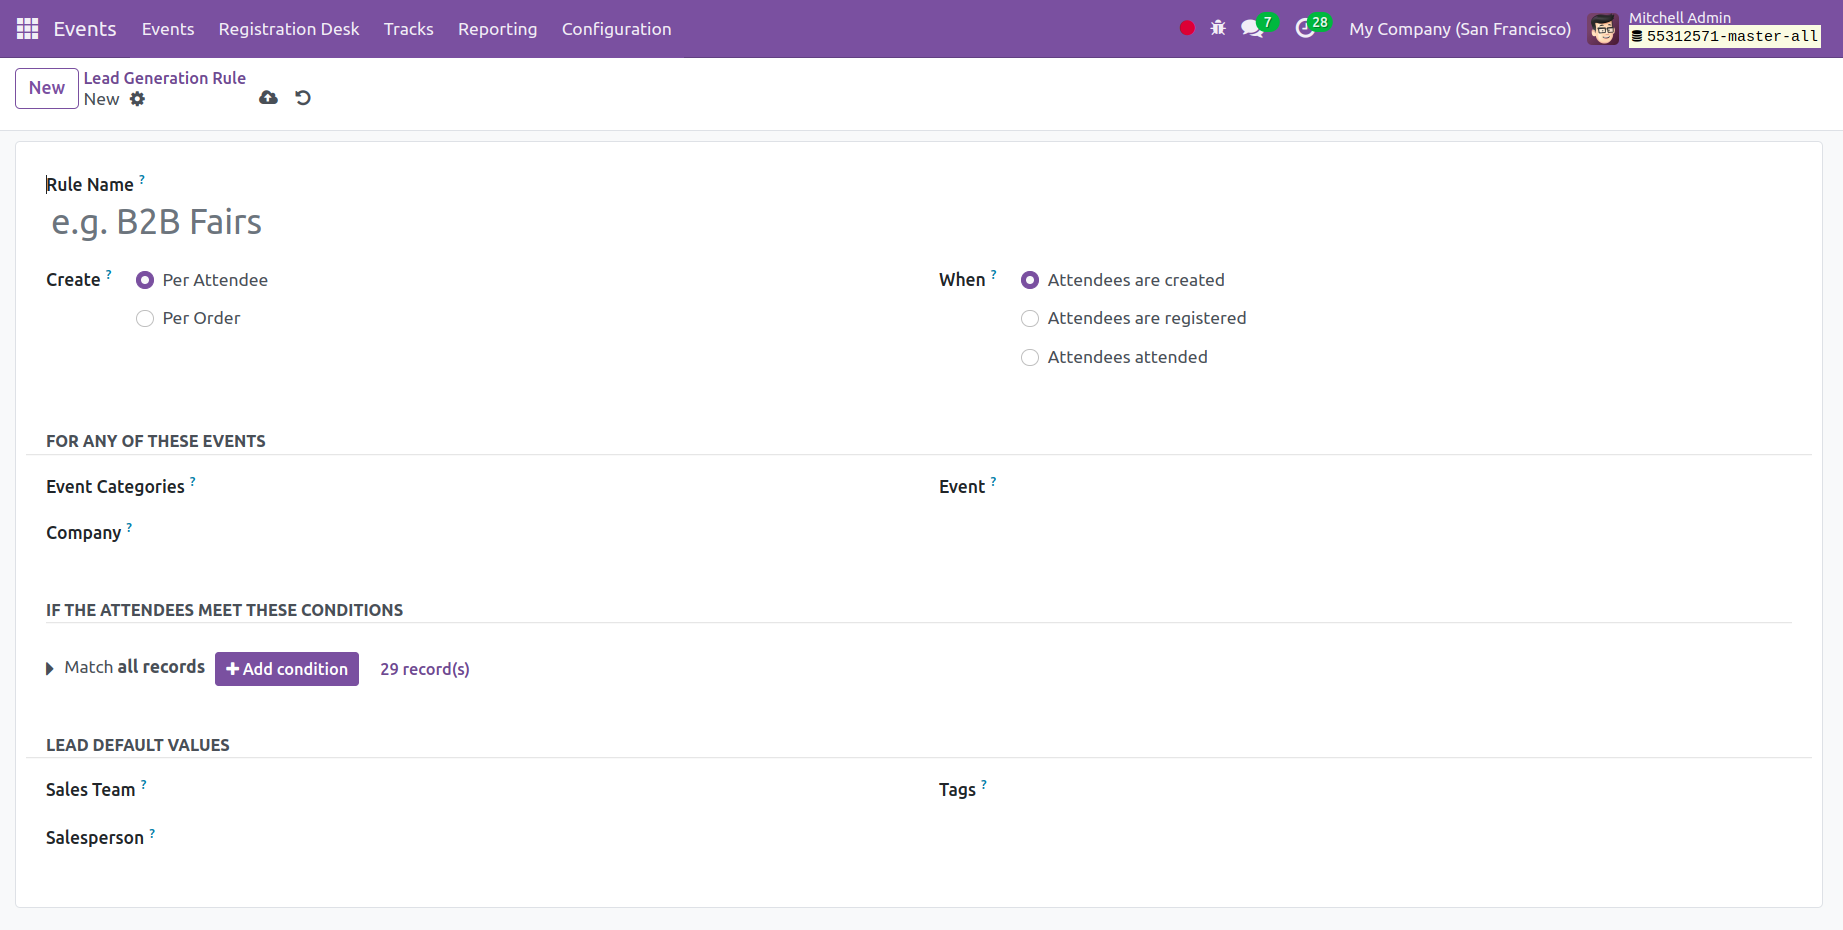
Filters can be turned on to help you choose the participants who meet the specific requirements. You can enter the name of the Sales Team, Salesperson, and Tags in the spaces provided below the Lead Default Values tab. Odoo created a lead for this specific sales team and salesperson on its own after providing the Sales Team and Salesperson. The generated lead by itself will make up the produced Tag. Lastly, click the "Save" button.
Booth Categories
Booth Categories is the next option in the Configuration Menu. Some booths will be rented by companies to outside firms in order to promote the event's goods and services. Odoo 17 assists you in classifying such booths into different groups for this reason. The option will appear in the Configuration menu.
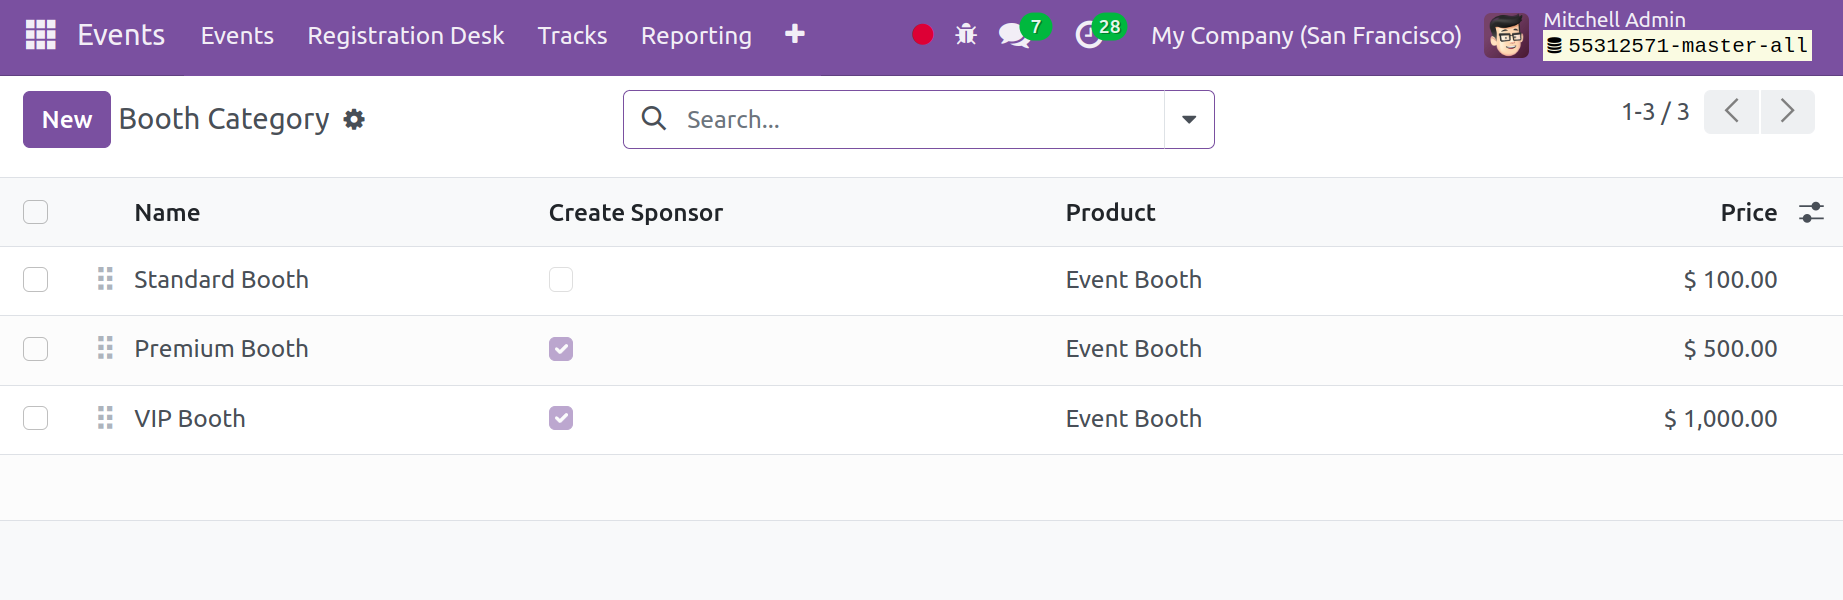
You can get a list of preconfigured booths along with their associated costs by selecting the Booth Category option. Creating a new booth category in the Events Module is a relatively simple process. To do that, select the New icon, as in the picture.
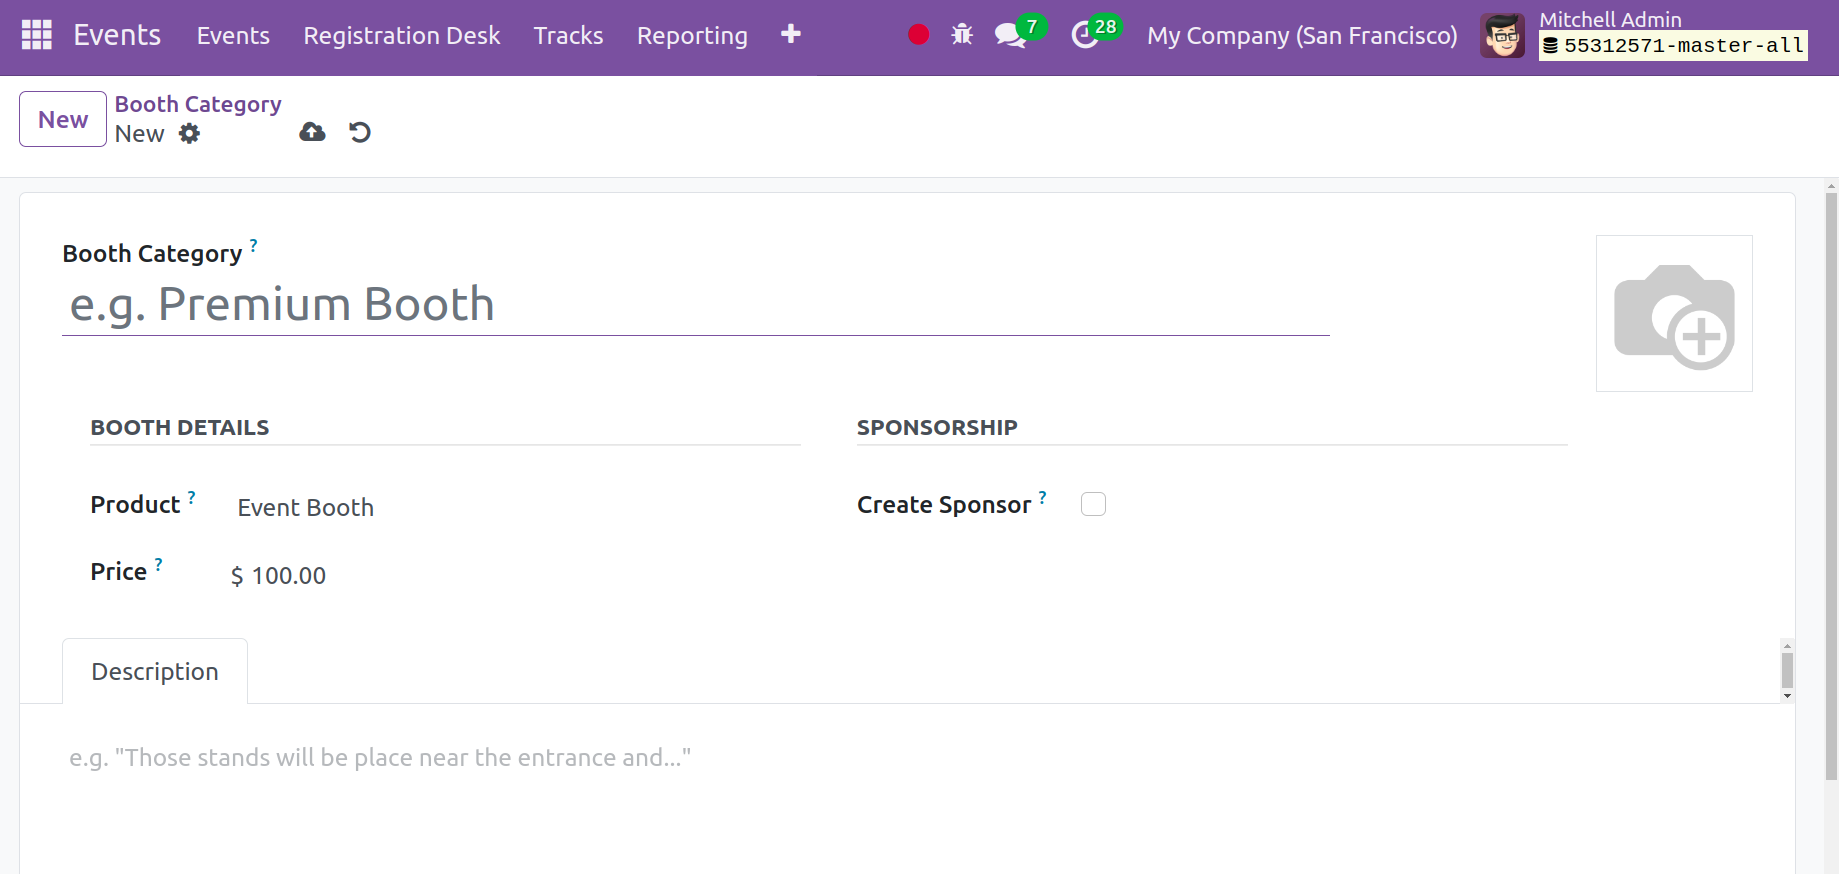
After that, a window asking for data will appear, including the specific name of the booth category. Using the Sales Module, you can also create an event booth as a product and specify its cost. You can accomplish this by selecting the Event Booth and Product under the BOOTH DETAILS Tab. You can activate the Create Sponsor option located beneath the SPONSORSHIP Tab. This will cause a sponsor to be created for the user when they reserve a booth. You can include additional information about the Booth Category in the Description field. Lastly, click the "Save" button.
Booths
The Configuration menu's Booths option, as seen in the image, is the next option.
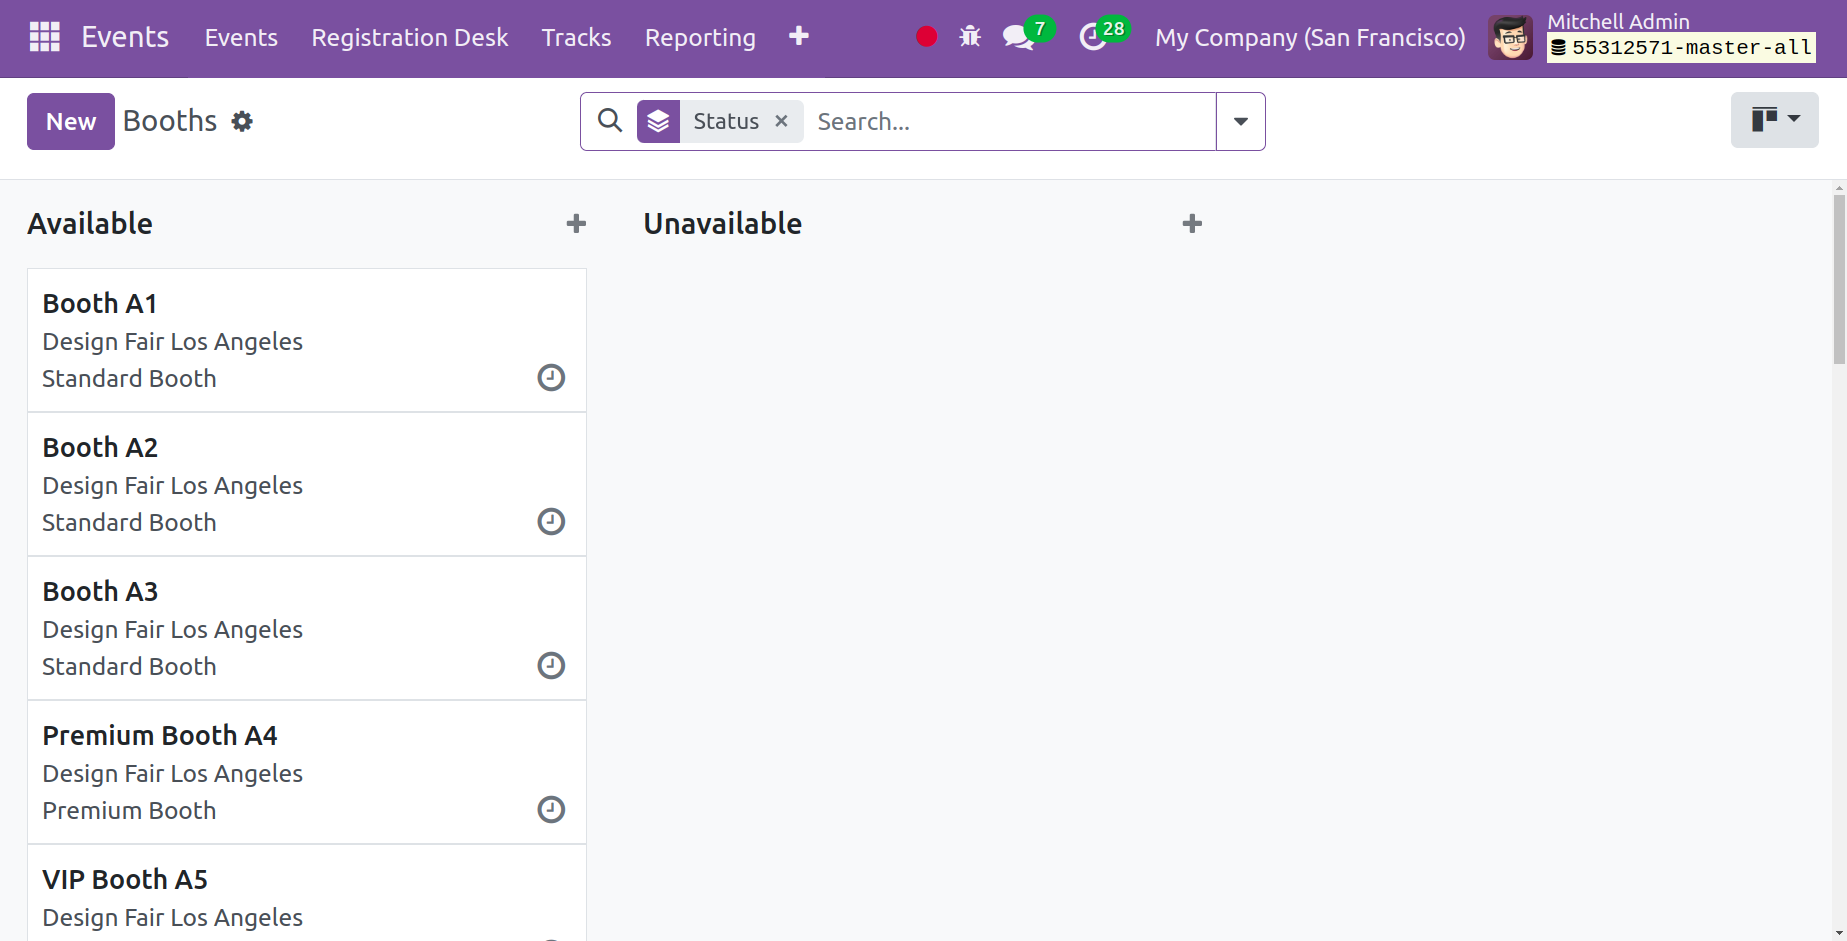
You can find the previously constructed booths on this page. As seen in the above graphic, there will be booths that are Available and Unavailable in this window. It is also possible to switch to a list view for this Kanban view. You can select the New button to add more booths to it, which will open a new window.
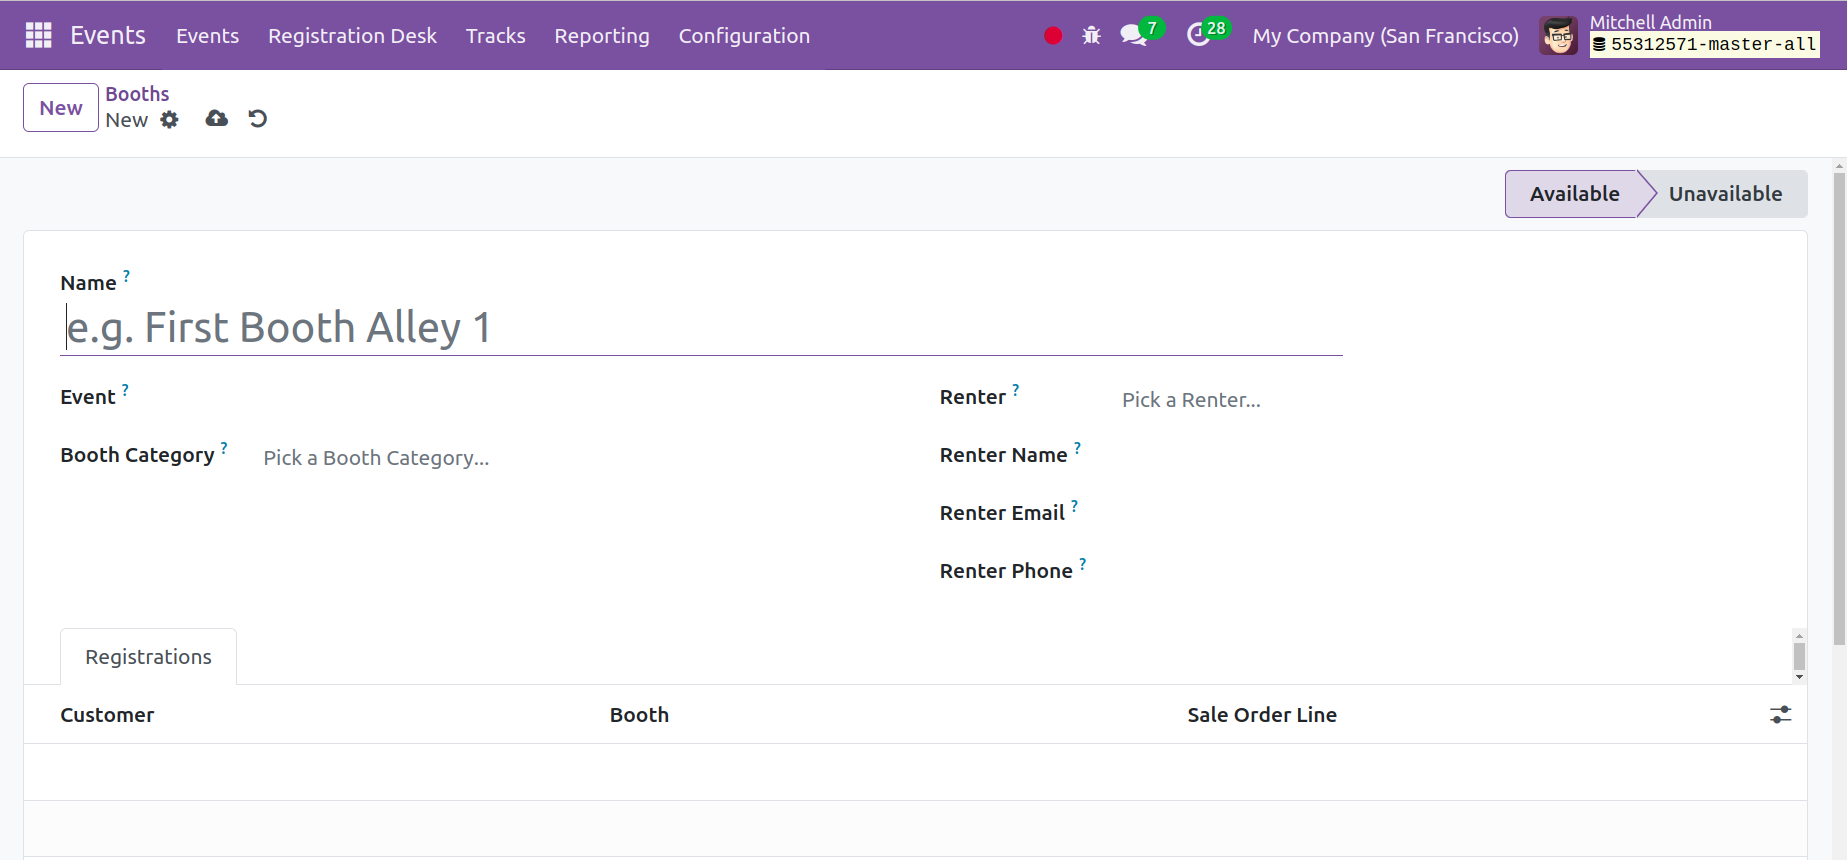
Enter the name of the booth, the event, the booth's category, the renter's name, email address, and phone number in the designated places on this page. As seen in the above image, you will find the customer's details section beneath the Registrations tab. Lastly, click the "Save" button.
Track Stages
The following option is Track Stages, which helps us create and oversee different phases for the tracks in the Odoo 17 Events Module. As seen below, the Track Stages window will display every stage that has been configured.
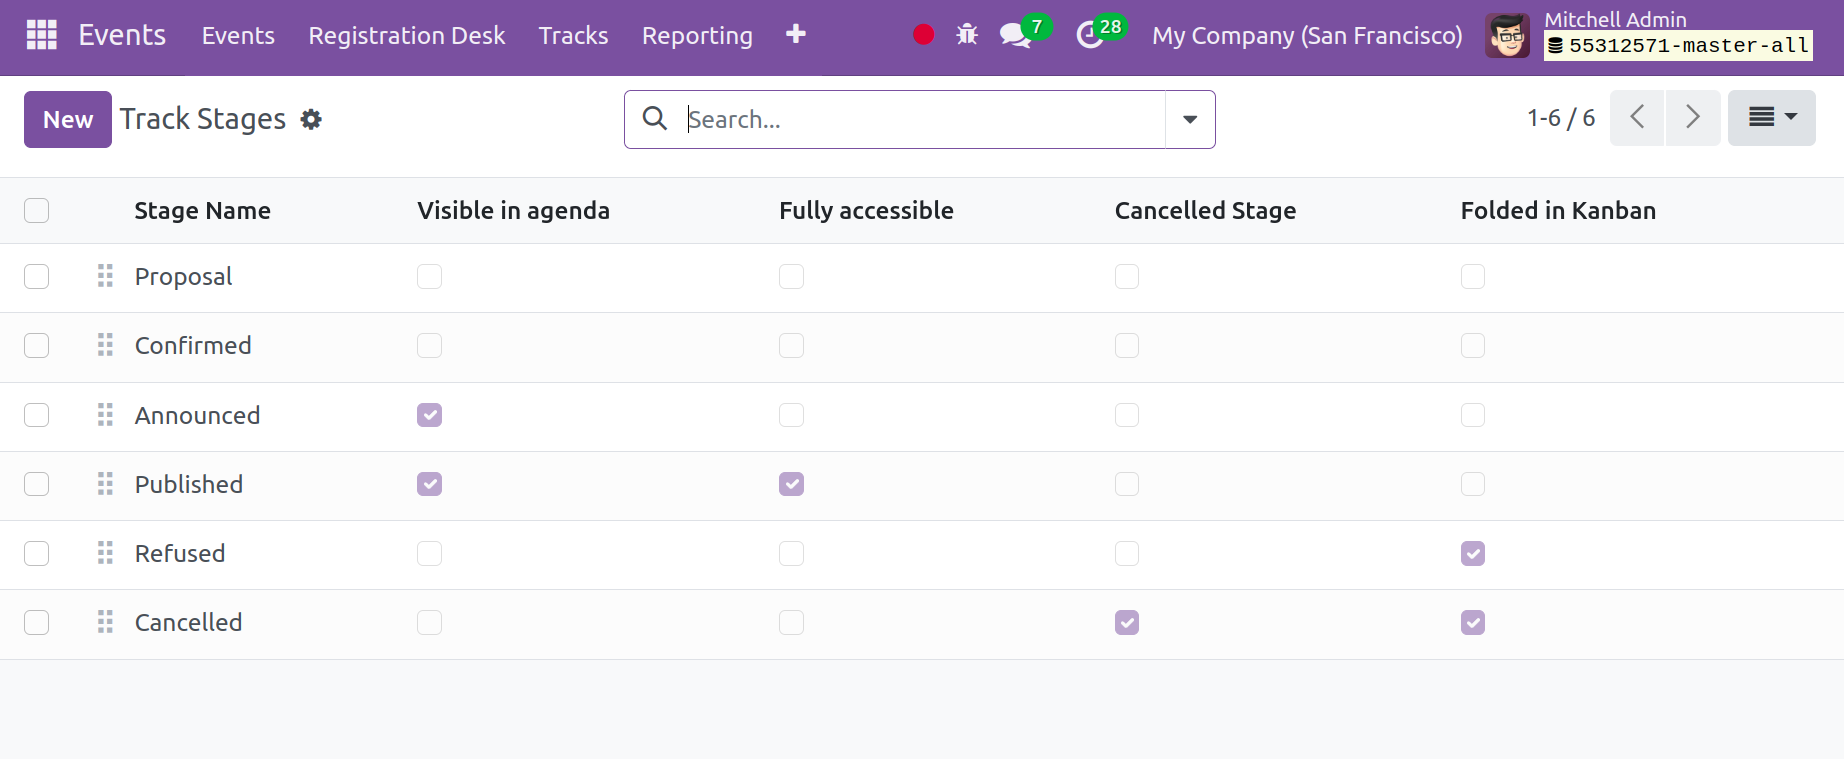
All associated tracks are shown in the front end when the shown in Agenda option is activated. The tracks will be released, and upon selecting the Fully Accessible option, consumers will receive an access link. Click the New icon to create a new Tack stage.
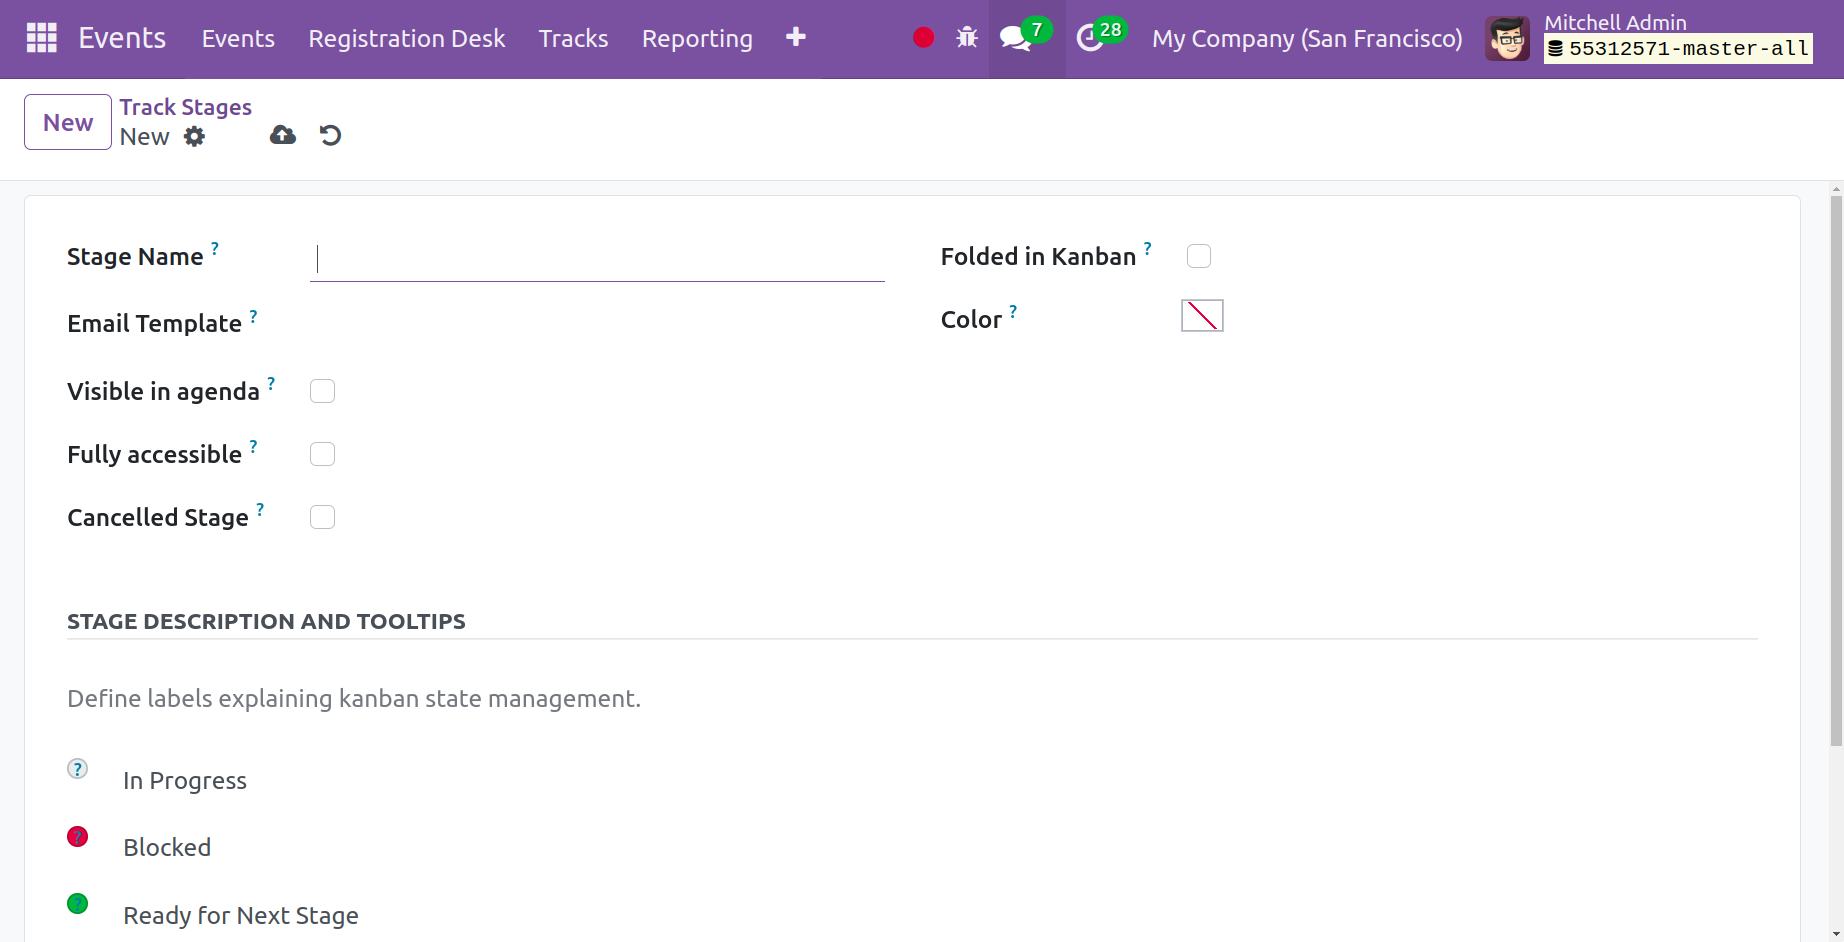
A stage name must be entered at this point. The customer will receive the generated email after receiving an email template. Users can activate the Fully Accessible, Canceled Stage, Folded in Kanban, and Visible in Agenda settings as they see fit. You can optionally provide a color for the stage. You can include a comment on the stage in the designated space after mentioning labels that inform the Kanban stage management in the Stage Descriptions and Tooltips Tab. Next, select the "Save" option.
Track Location
The Track Location option, which gives you the locations that are configured to create events and tracks, is the next option in the Configuration menu.
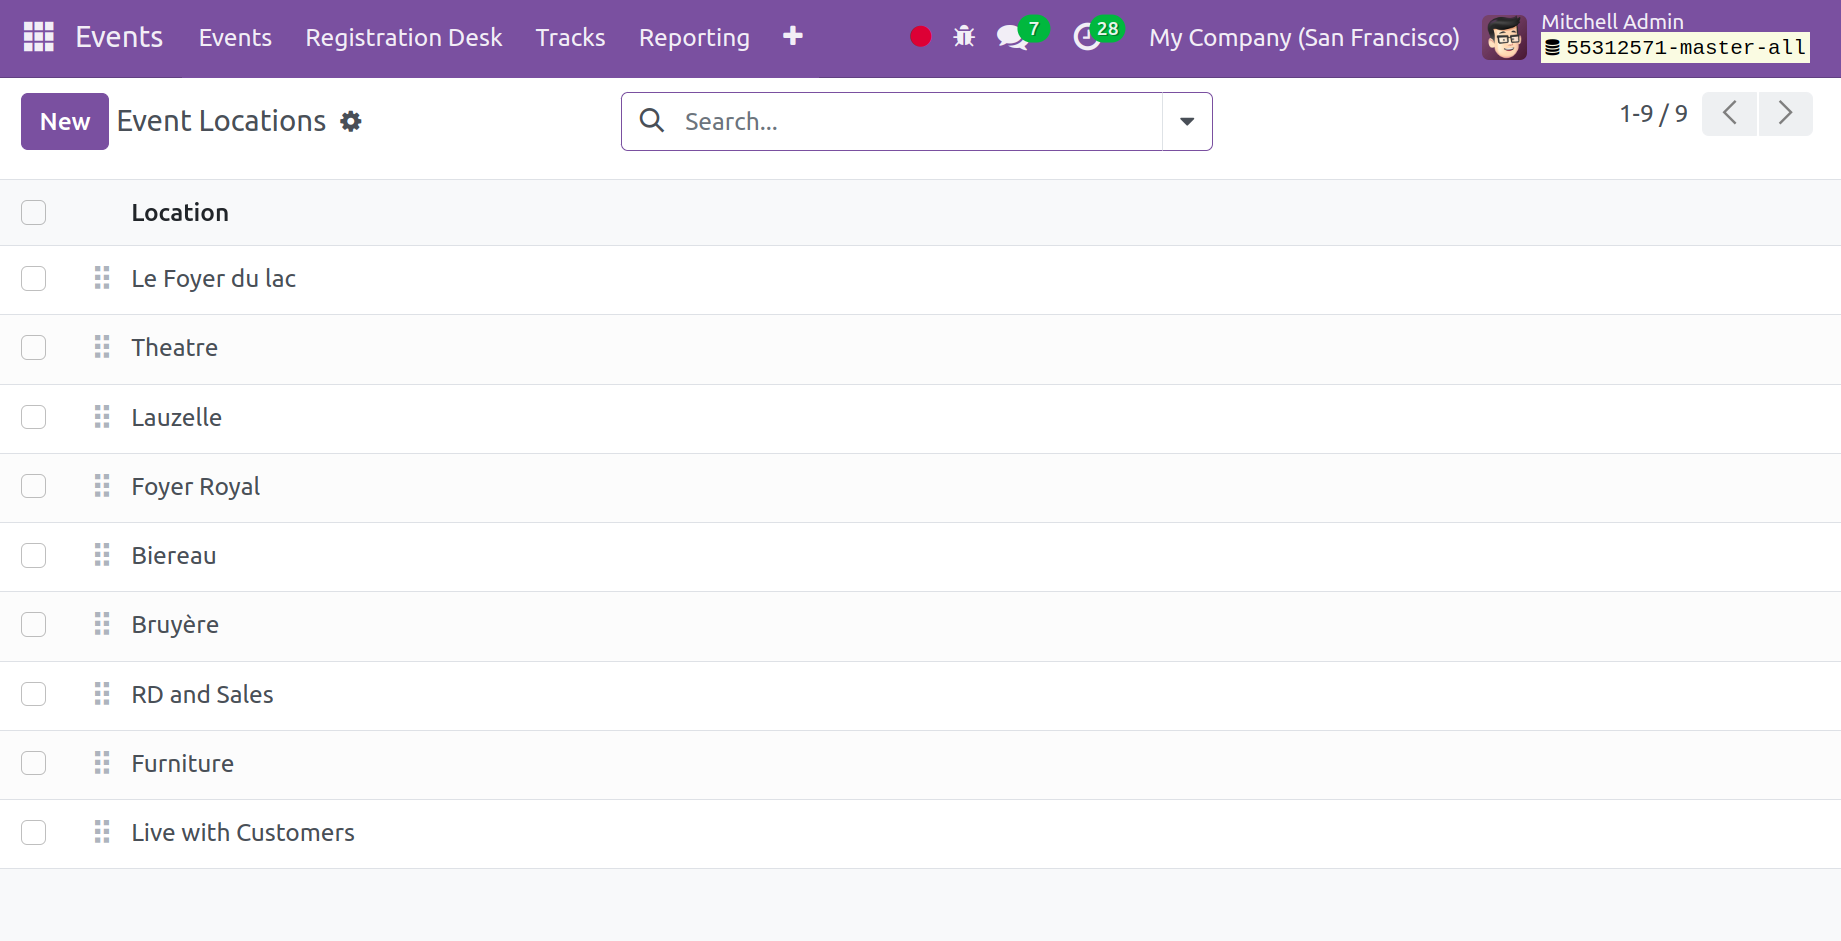
Select the New button to add a new location to the track. This will allow you to add a new destination quickly and efficiently.
Track Tag Categories
Another way to create additional categories for the track tags is with Track Tag Categories. You can view the names and tags of specific tag categories by selecting the appropriate option in the Configuration menu.
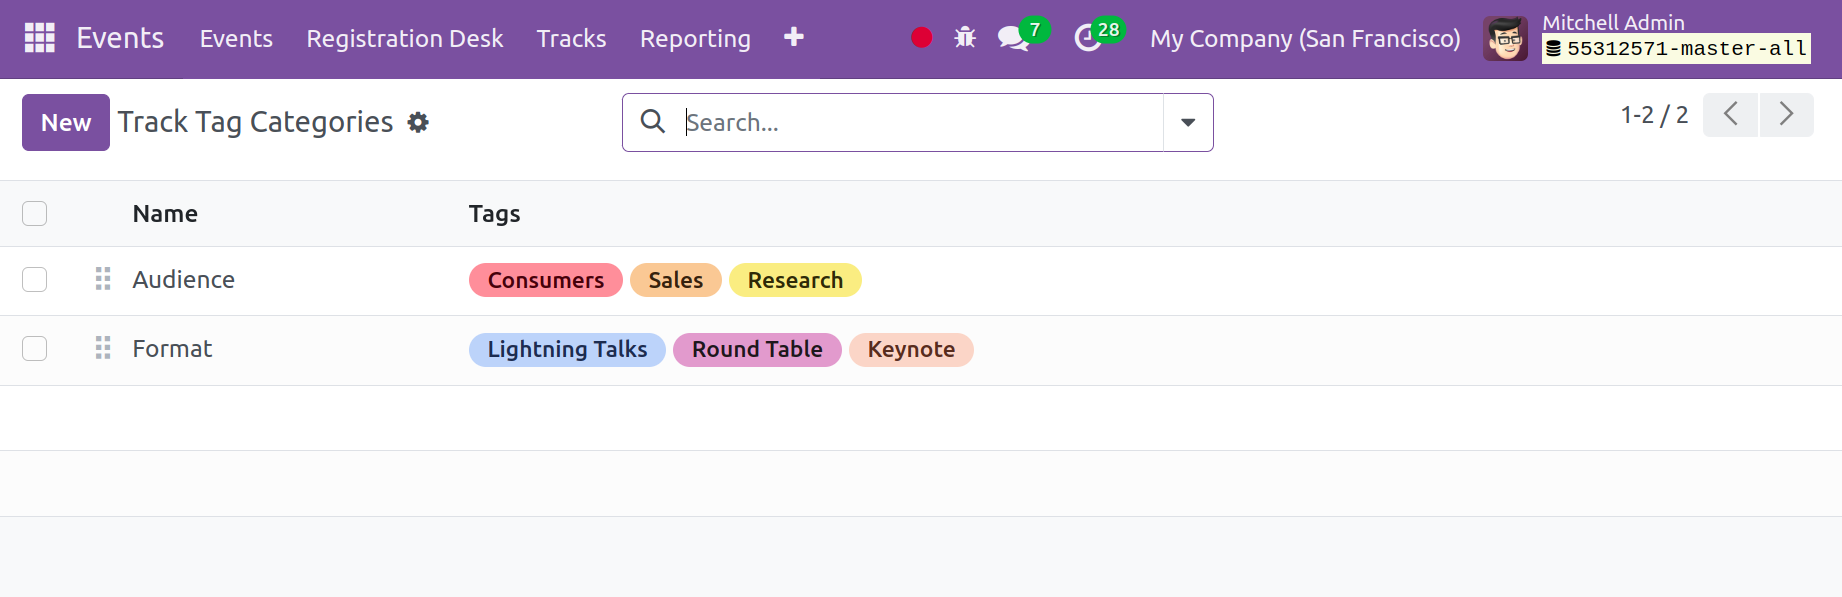
To create a new tag category, click the New icon. This will bring up a screen where you can enter the category name. You can also add a new track category with ease by using the Add a Line option. Next, select the "Save" option.
Tracks Tags
The Events module's Tracks Tags option in the Configuration Menu is used to maintain and create new tags for certain tracks.
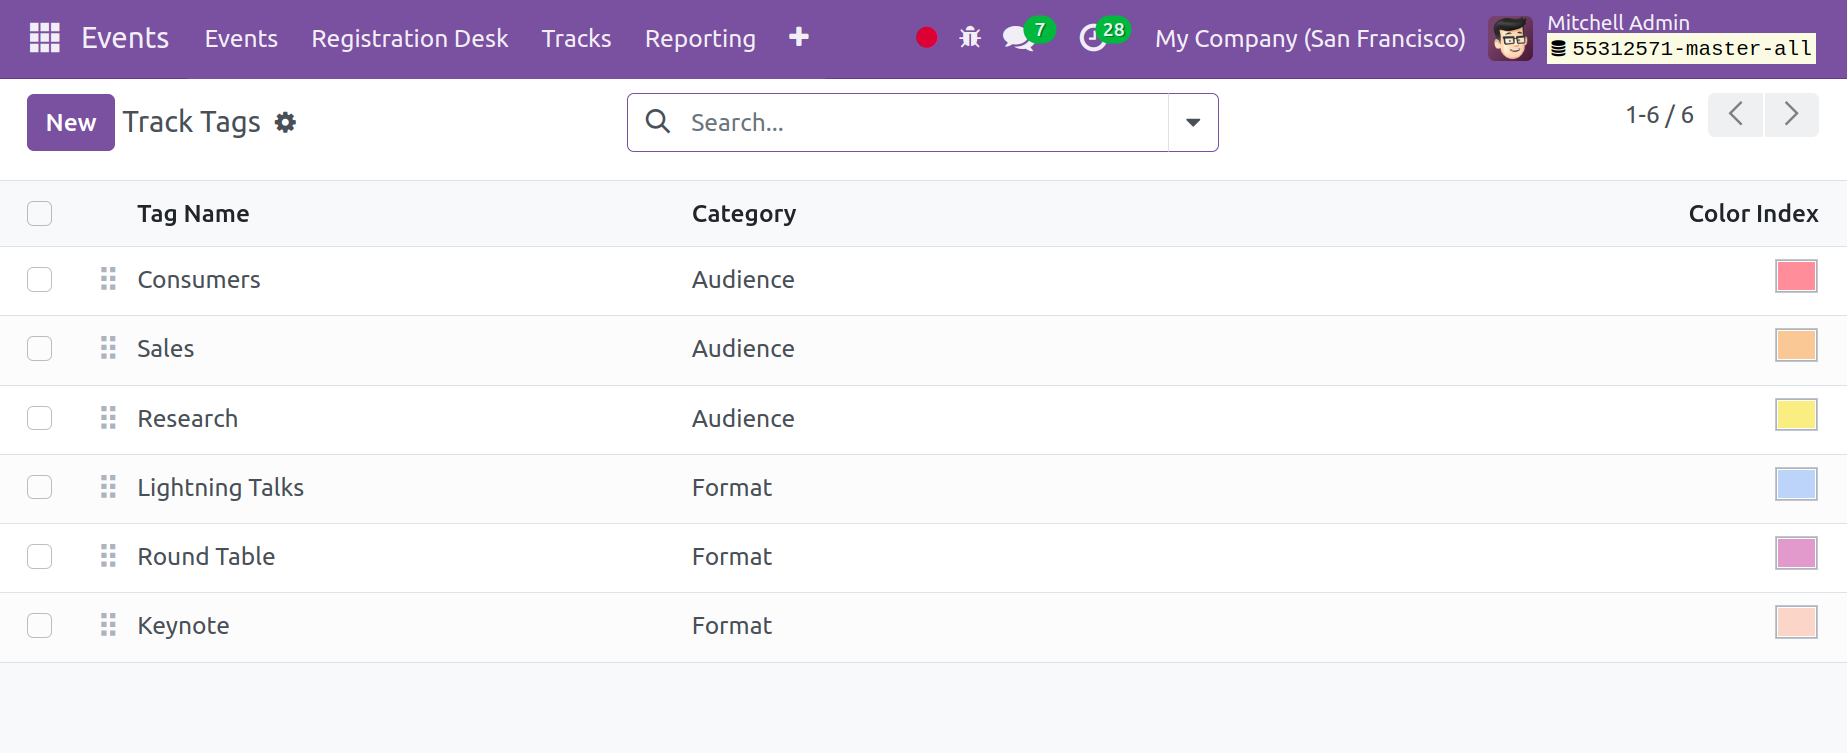
A collection of previously created tags, along with their titles, categories, and specific colors, are displayed here. Click the New icon to create a new track tag. You must enter a category and the tag name in the window. Next, select the Save button.
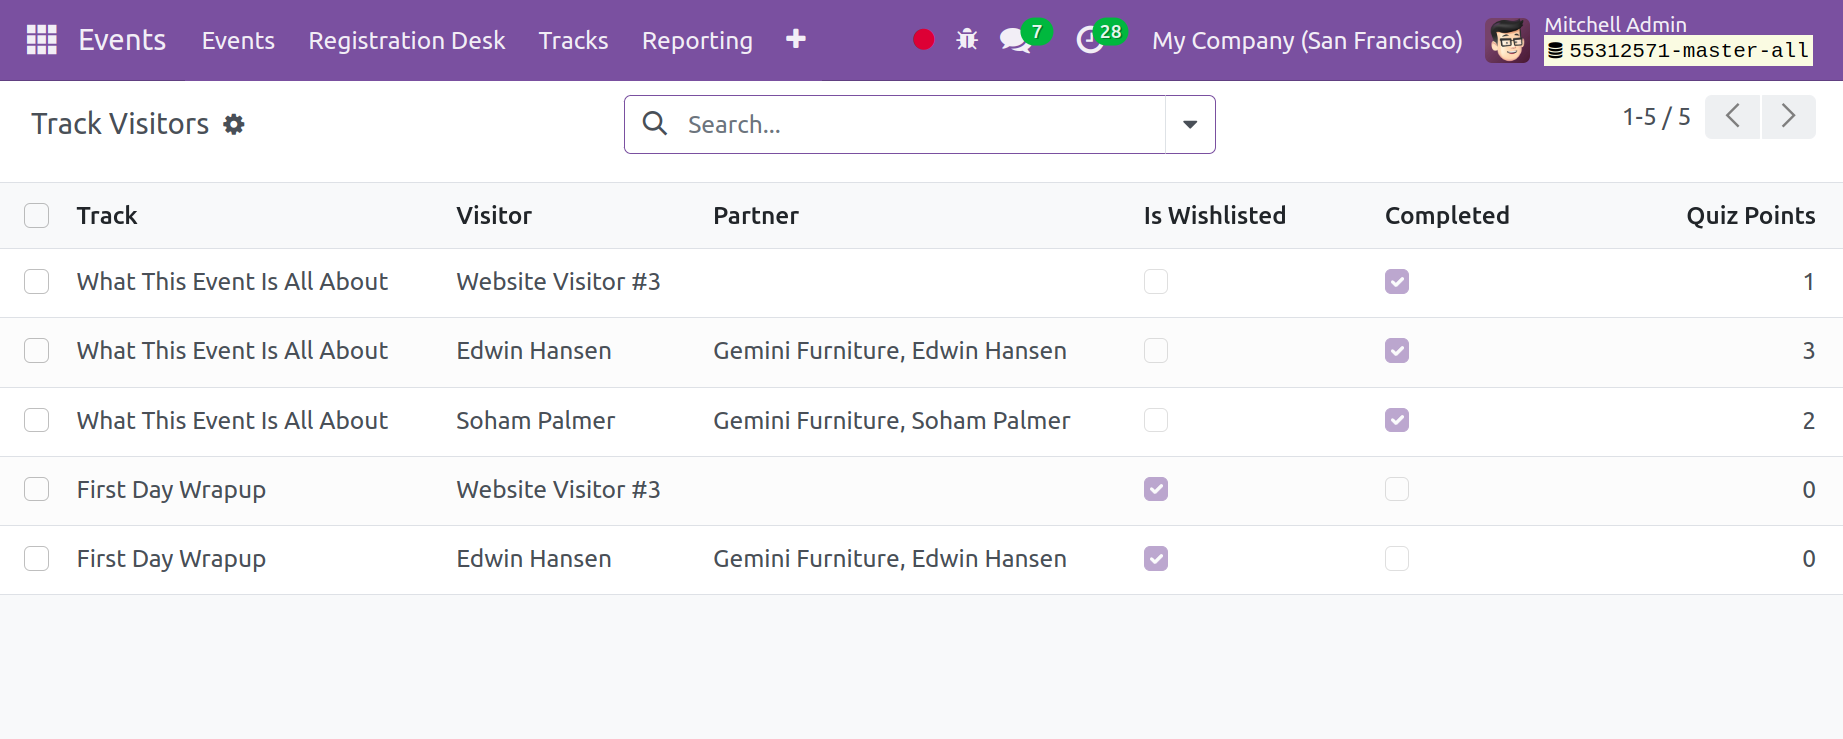
Track Visitors
The information based on track visitors that are published on the website will be saved in the Track Visitors option, which is the following option. You can find the information on this page, including the track name, visitor, partner, and quiz points. Check the Is Wishlisted option if the visitor has put the music to their wishlist. Additionally, proceed to the Completed field if the visitor has finished the track.
Sponsor Levels
You can identify different tiers of sponsors for the event with the use of the Configuration menu's Sponsor Levels option.
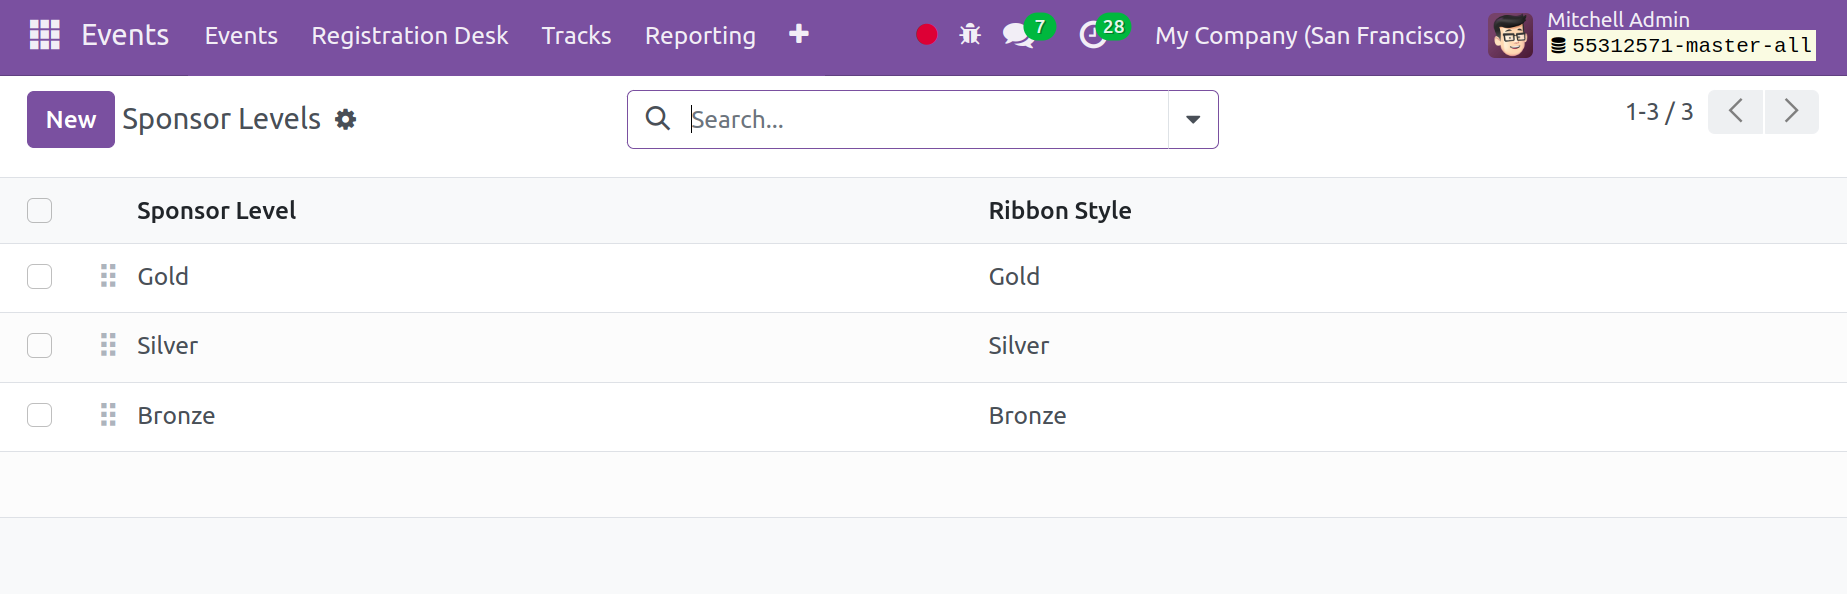
You may see different Ribbon styles and sponsor levels in the window. Next, select the New option to add a new sponsor level. You can add a ribbon style and sponsor level to the new line in the window.
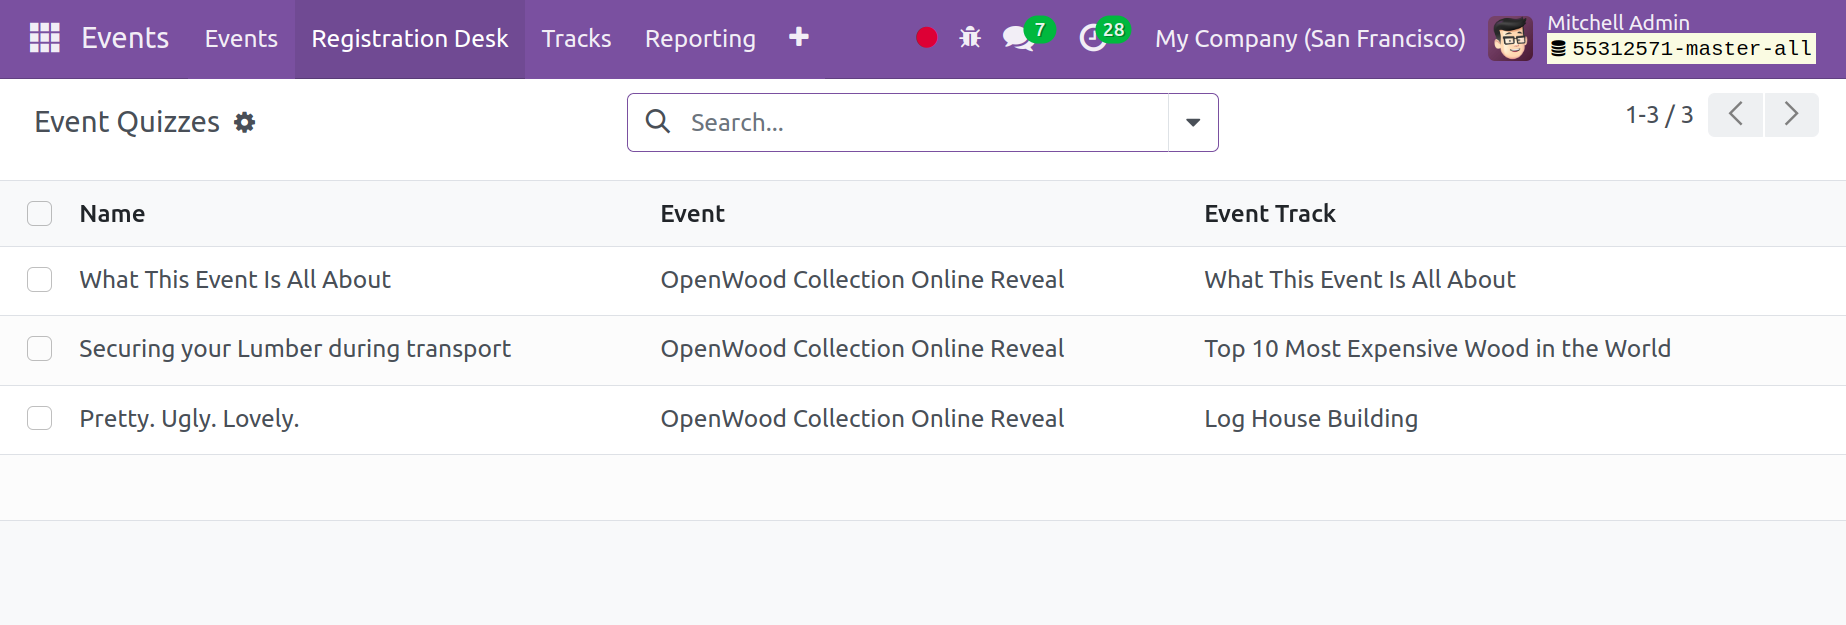
Event Quizzes
To create fresh tests for each event, use the Event Quizzes option. You will receive the name, event, and event tracking on this page, in that order. You can click on any quiz to view more information about it.
You can select the Event Quiz Questions option, as indicated, to obtain every question for the quiz.
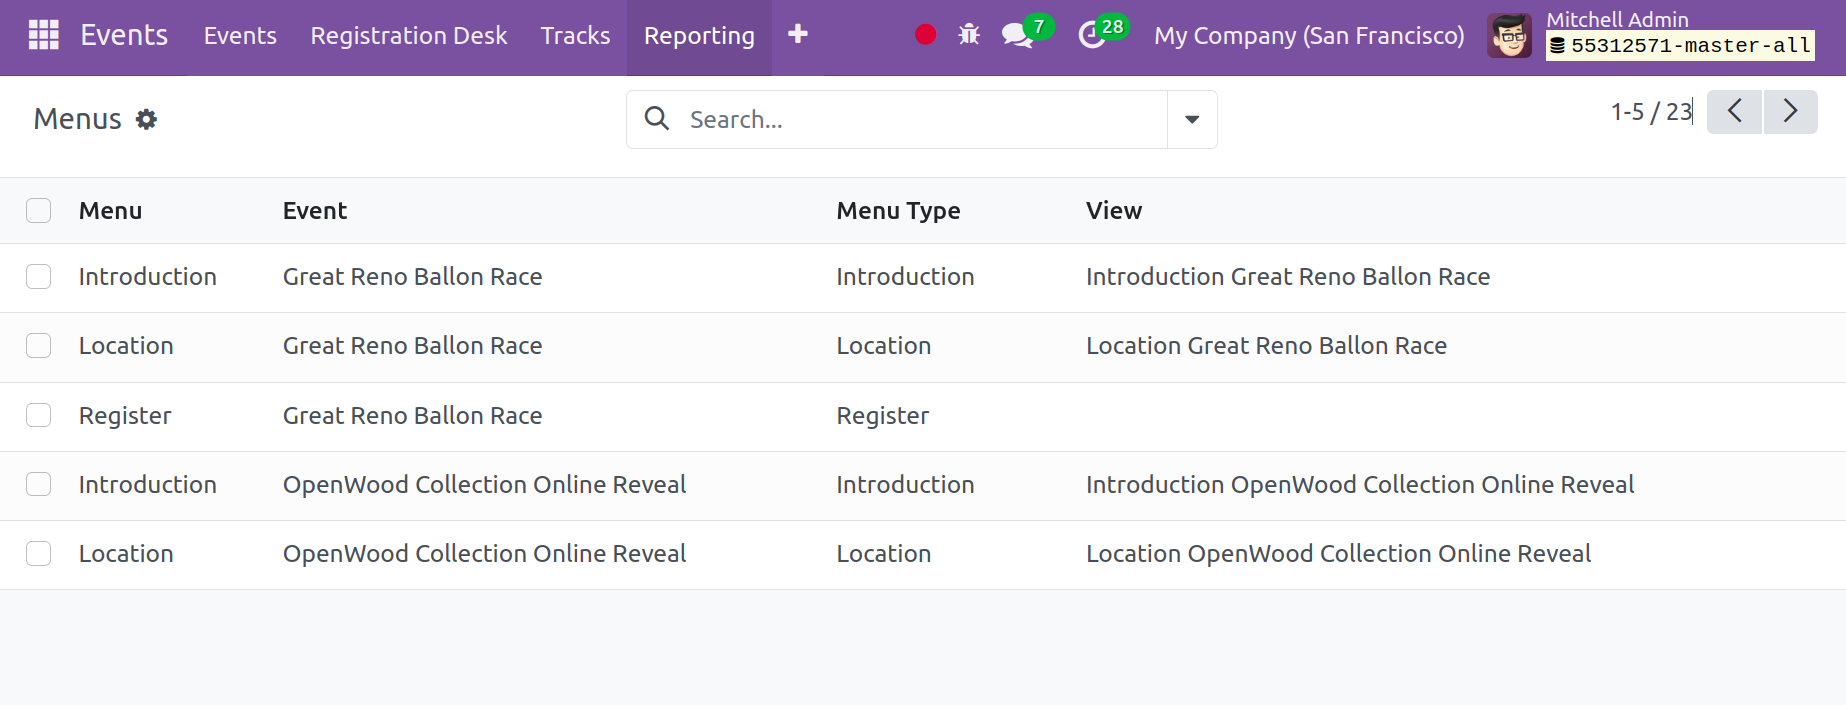
Website menus
The image below illustrates the list of previously generated Website menus that you will get when you select the Website Menus option.
Reporting
The Events Module's Reporting Menu will assist users in creating dynamic reports about the events and individuals that attended them. This reporting tool really aids in making wise decisions to improve the existing situation.

One option for improving the analytical report is to select a measure from the available options. You may improve the reports by grouping the reports by using the filters and group by option. The graphical view also displays the report's pivot perspective. You may find out how many people attend each event by using the Attendees option found on the Reporting Tab. You will also receive a list, graphic, and Kanban view of the page in addition to this pivot view.
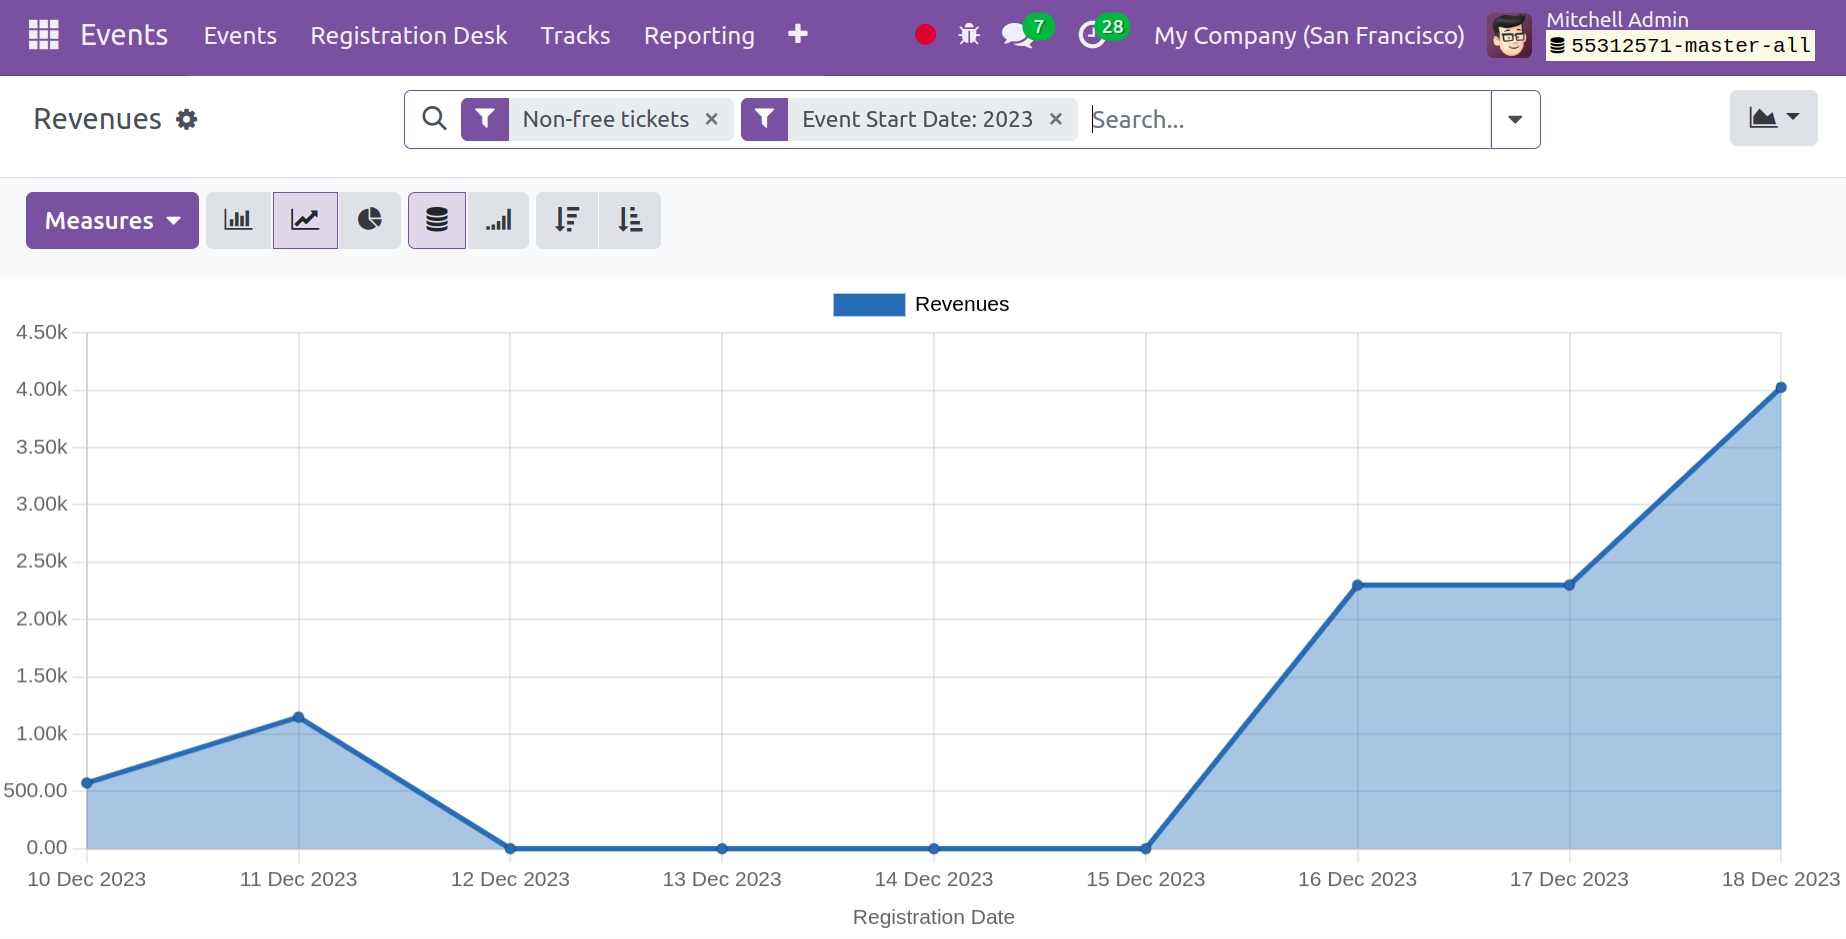
You can obtain the total revenue, count, and untaxed revenue by selecting the Revenue option in the Reporting tab.
The Events Module is incredibly beneficial for the organization's effective event administration. This module offers full assistance for organizing events, posting them on the website, selling tickets, controlling guest lists, and overseeing all event-related tasks.