You must coordinate several operations at once to run a business
successfully. Contact management is one such process.
Maintaining a record of the relationships with your customers, vendors,
partners, subcontractors, and other business associates will be
very time-consuming. You might turn to contact management software for
aid in these circumstances. You can sync all of your contacts in one
location with the Odoo17 ERP solution's Contacts module. This module
will manage your contacts, which is crucial for business management. The
Contact module
is accessible via Odoo's main dashboard. Odoo 17 will open a new window
with the instructions displayed below.
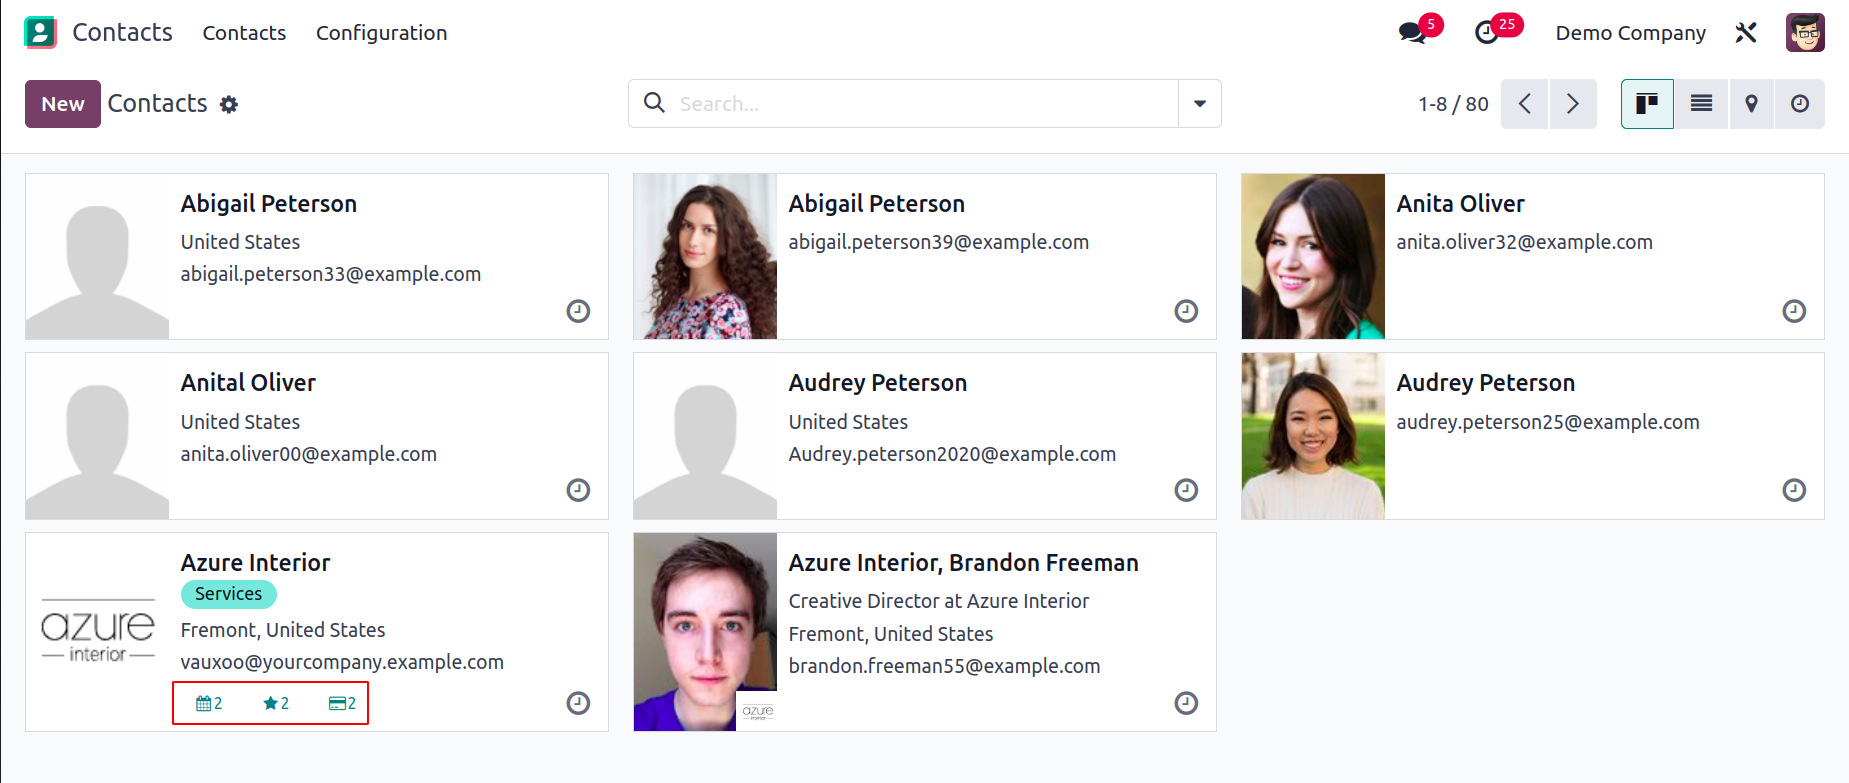
This is the Contact dashboard's Kanban view. You will see a glimpse
of the contacts saved on your system, as shown in the screenshot.
You can view the contact's photo on each profile in addition to
their basic information. You may see little icons for the amount of
Opportunities, Planned Activities, Sales Orders, Shopping Carts, and
Purchases on each tab. You can schedule an activity with the
selected contact by clicking on the tiny clock icon.
The Name, Phone, Email, Salesperson, Activities, City, Country, and
Company are all displayed in the
list view of the contact dashboard.
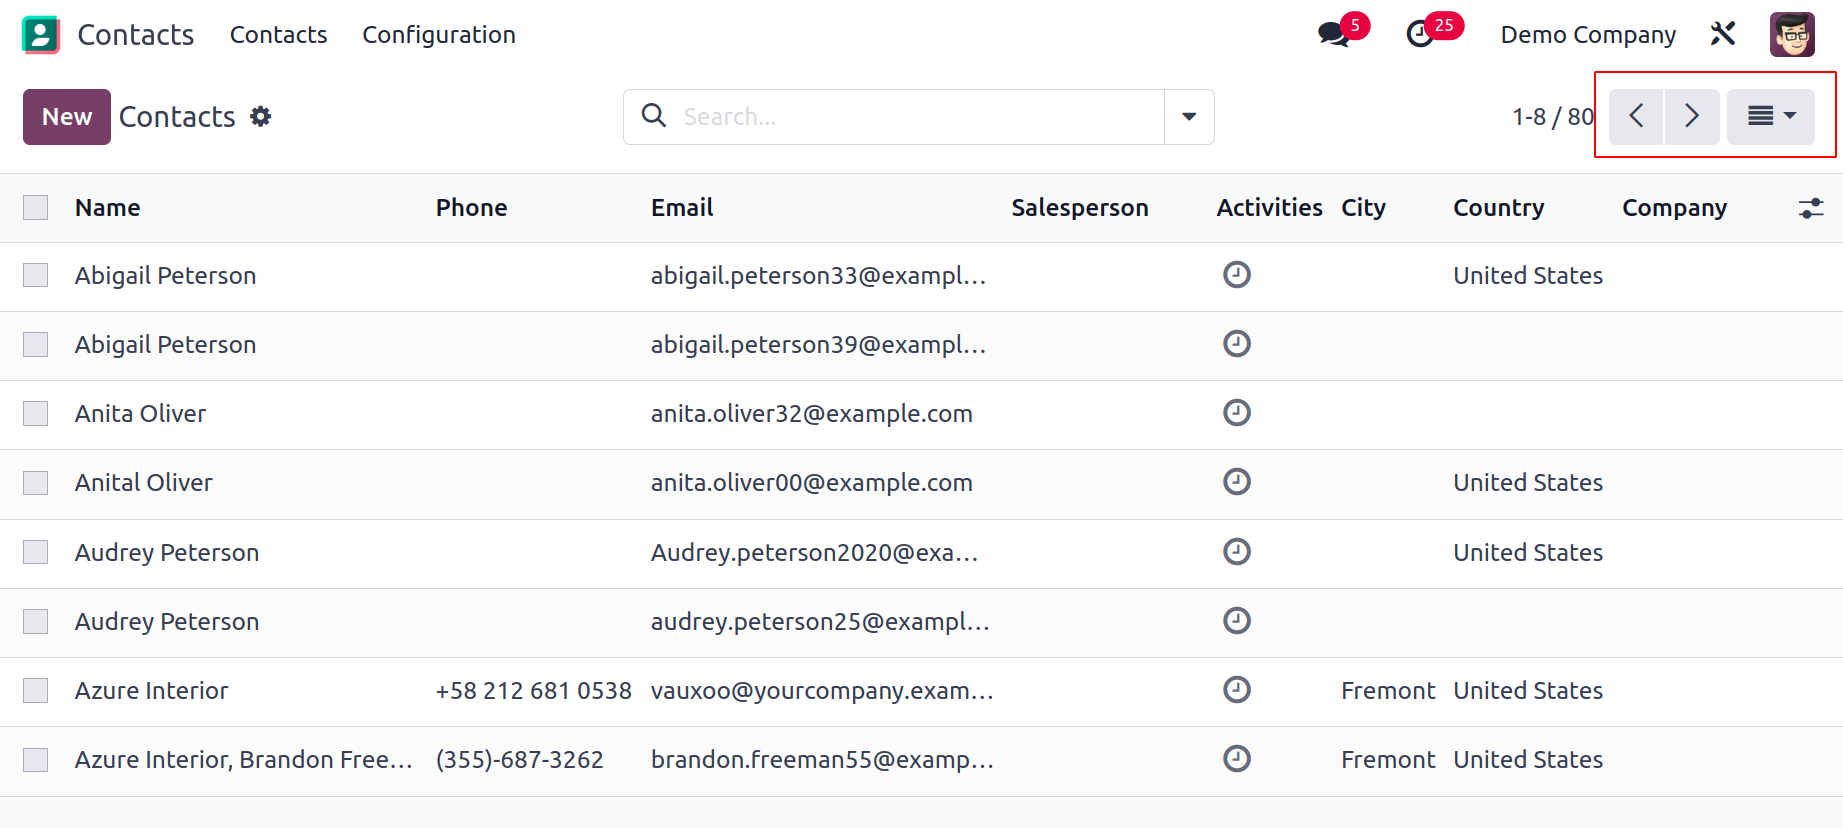
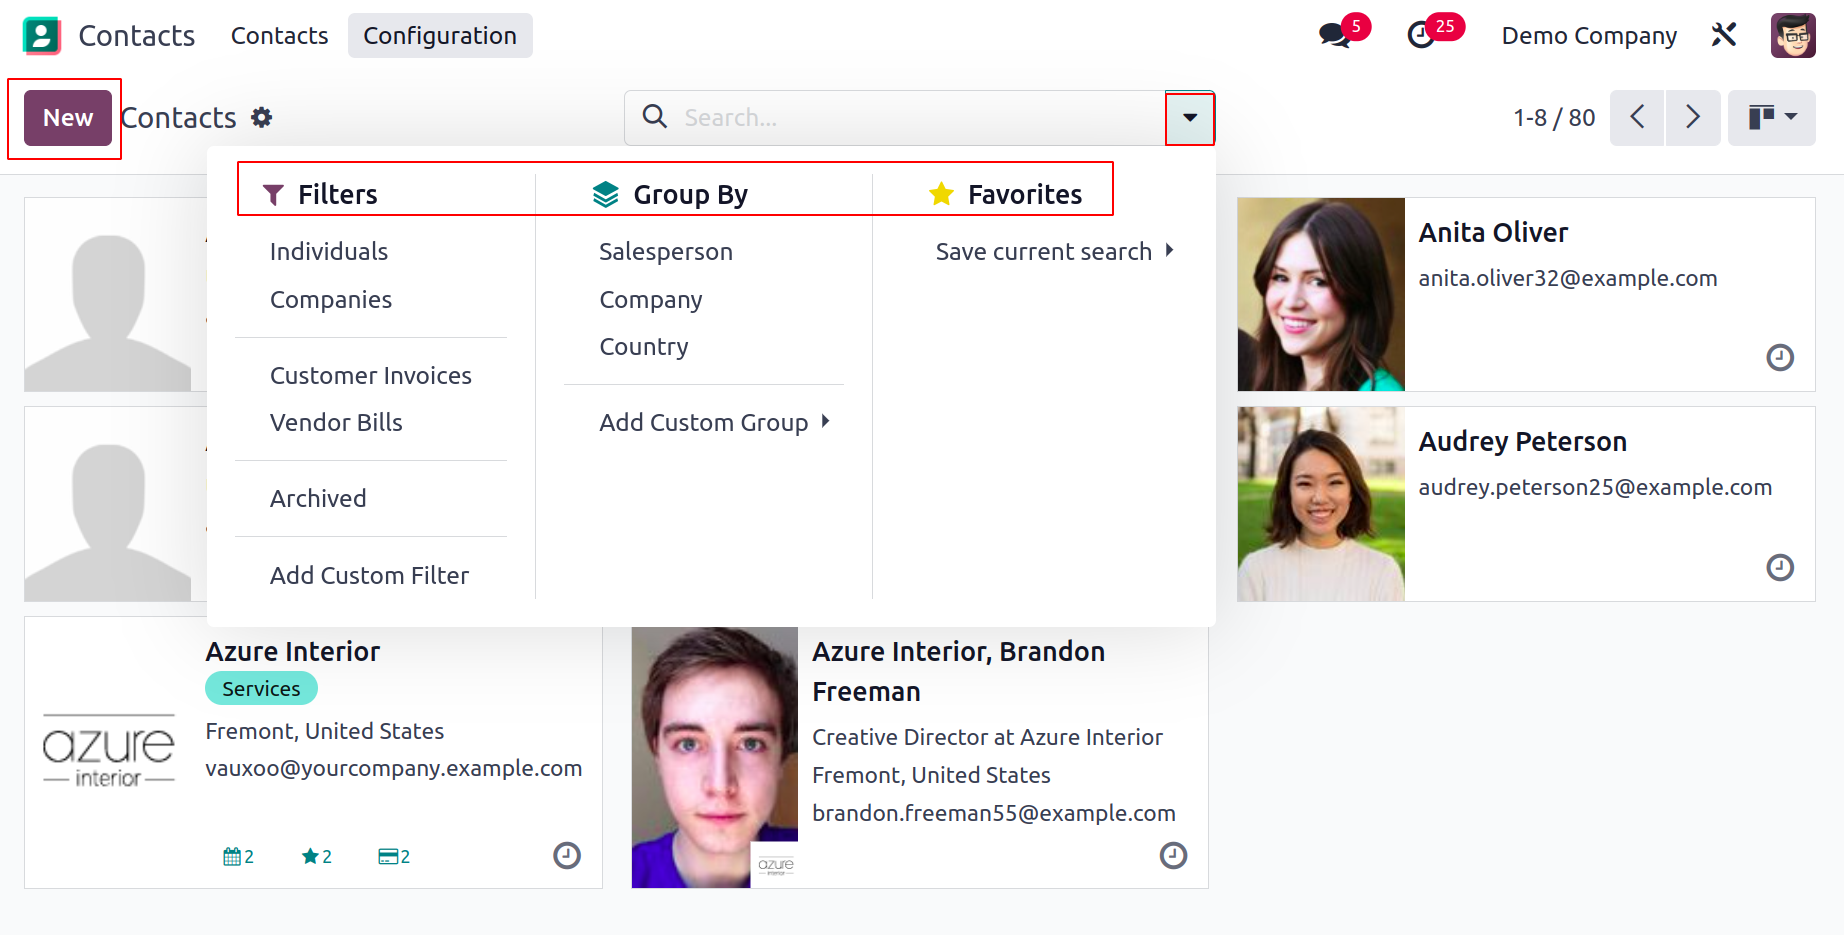
Individuals, Companies, Customer Invoices, Vendor Bills, Subcontractors, and Archived are
available as filters in the Filters menu. Using the Group By option, you may divide the
contacts into groups
based on Salesperson, Company, and Country. In order to add a new contact to the module,
click the New button now.
A new form view will appear when you click the New button, as seen in the screenshot
below. In Odoo 17, adding a new contact is identical to adding a new client in terms of
configuration.
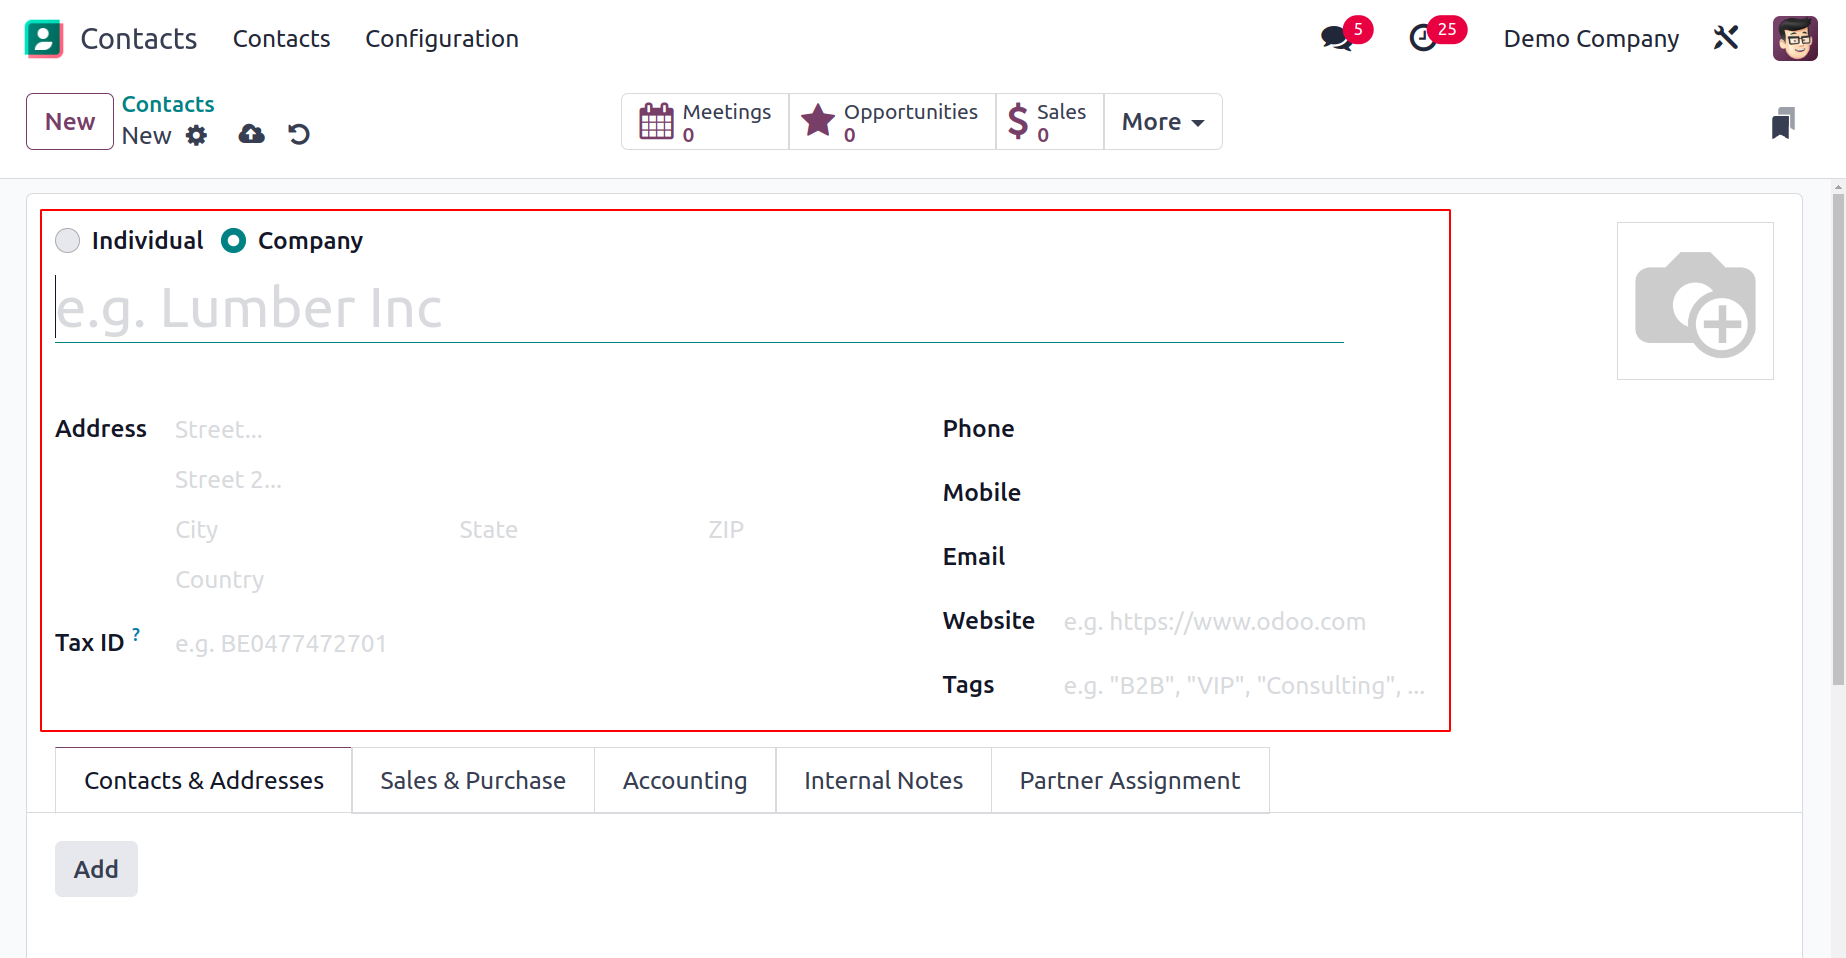
In the field provided, you can mention the new contact's Name. You can choose how the
contact will be entered into Odoo 17 before creating it. By choosing the right option
from the provided field, you can save it as Individual or Company. After that, you may
fill out the appropriate boxes with the Contact's address, Tax ID (Tax Identification
Number), phone number, mobile number, email address, website, language, and tags. Using
the Add button, you may add other Contacts & Addresses associated with
this Contact to the record. As seen below, a pop-up window will appear as a result.
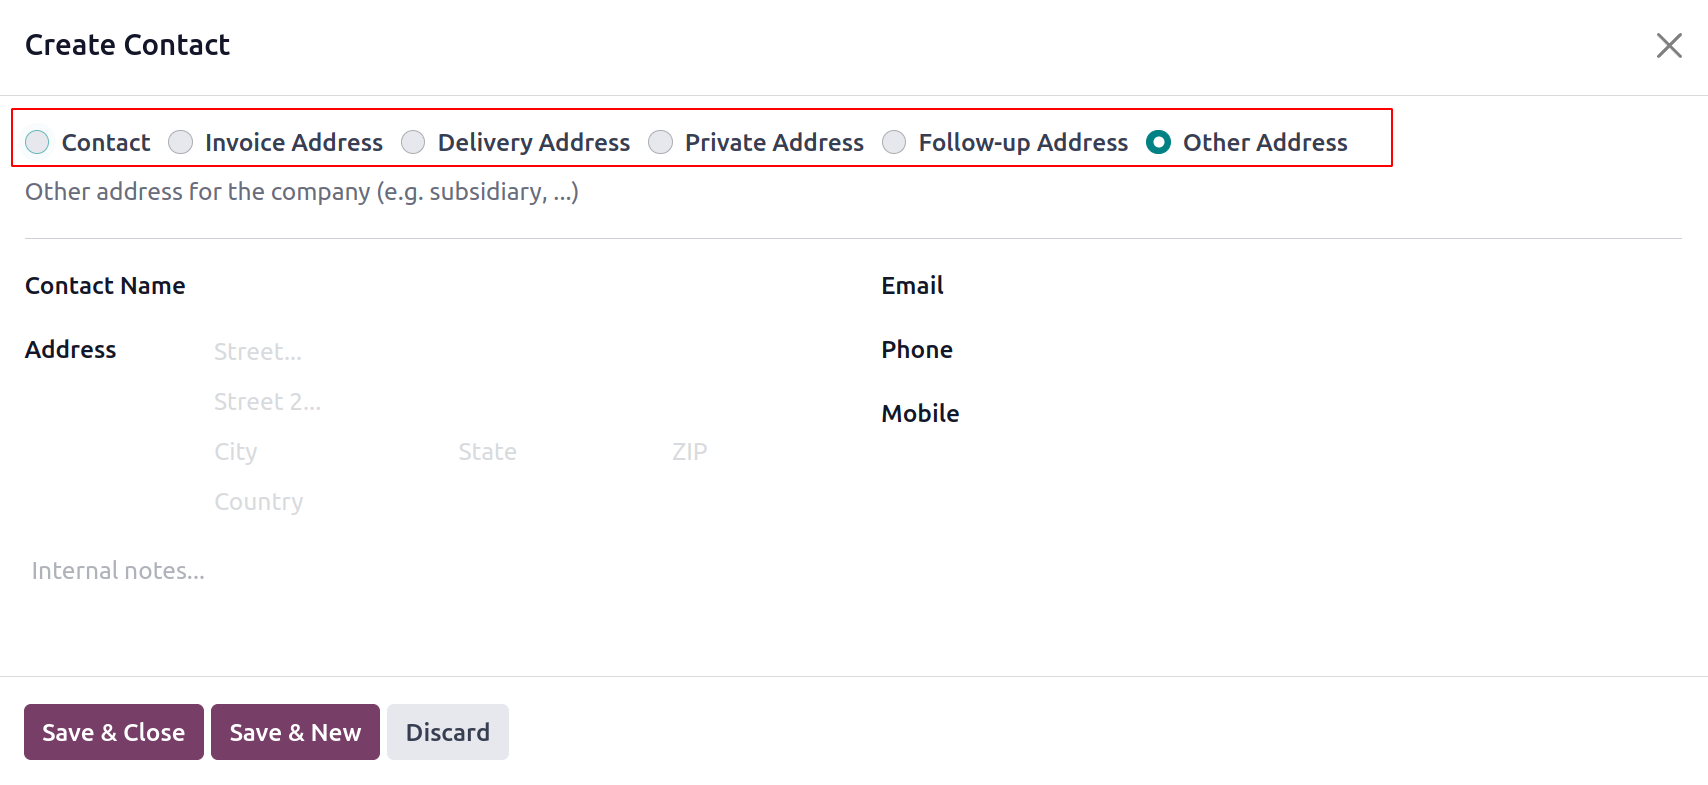
A Contact, Invoice Address, Delivery Address, Private Address, Other Address, or
Follow-Up Address that is connected to the current contact can be added using this
pop-up. You may include the contact's name, address, email, phone number, and mobile
number in the fields provided. Select "Save & Close" from the menu.
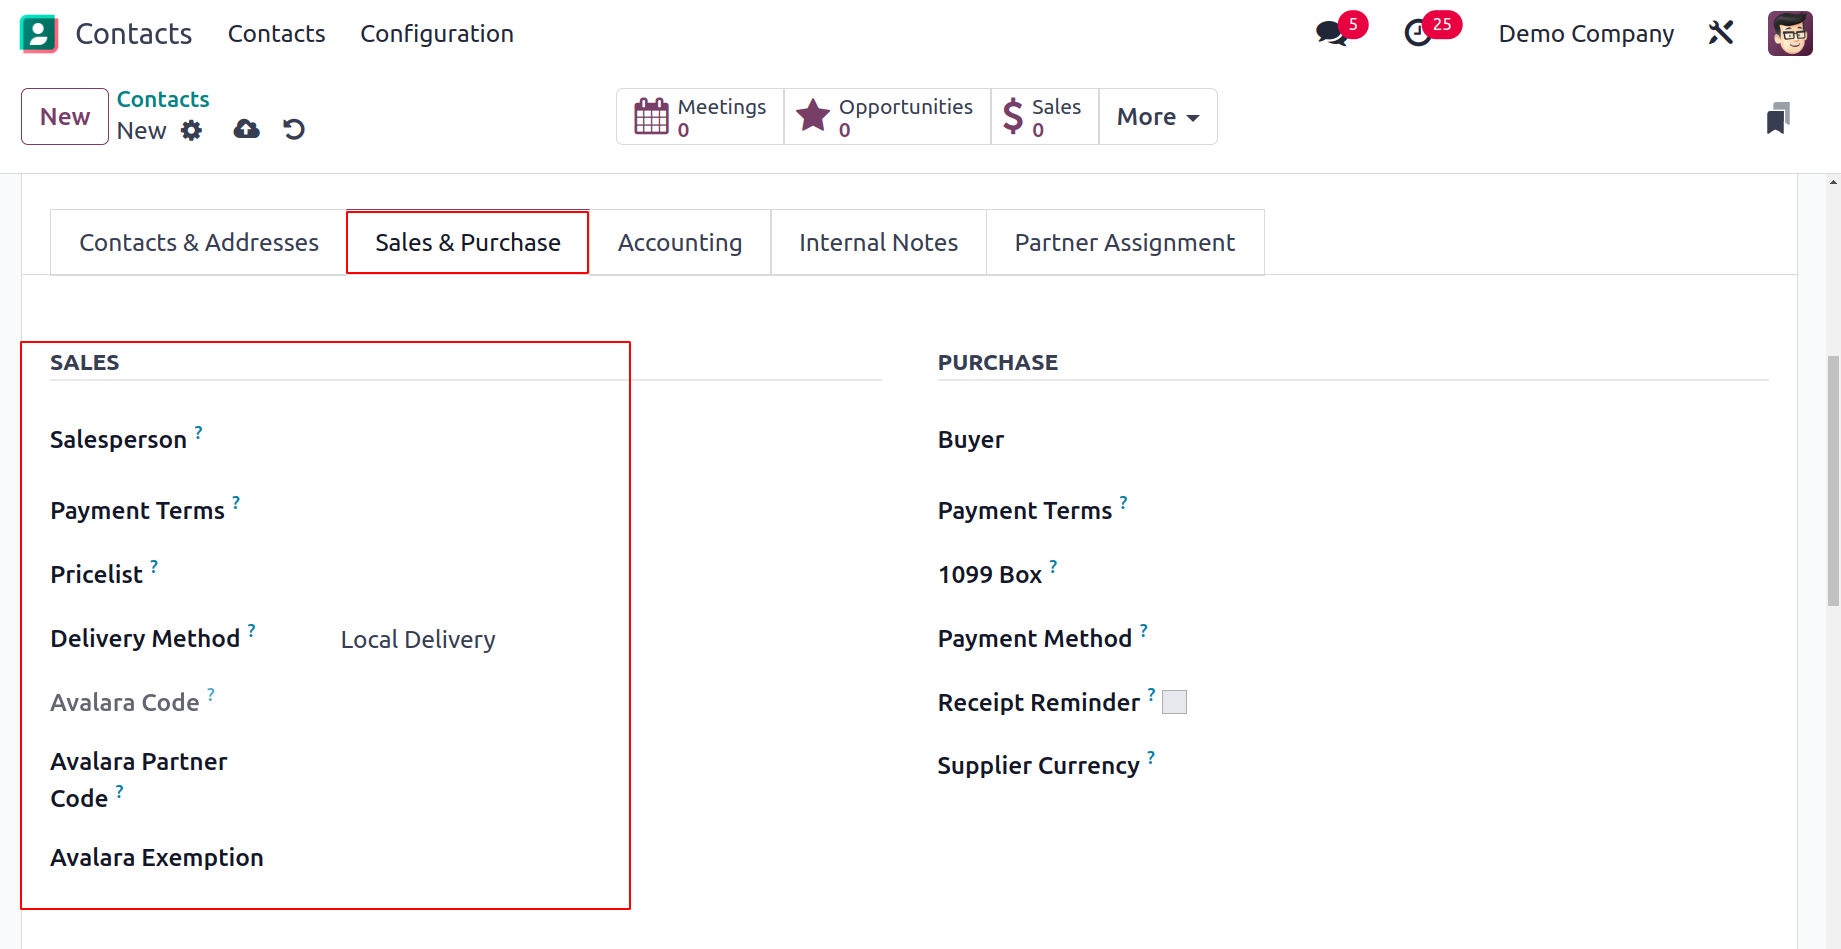
You can designate a Salesperson on the Sales & Purchases page to manage the contact's
associated sales processes. Sales orders and invoices from the contact will instead
utilize the Payment Terms you specify here rather than the default ones. You can enter a
suitable Price List in the field to conduct sales to the contact. The Avalara Partner
Code and Avalara Exemption may both make reference to the customer code that has been
put up in Avalara for this partner. The Avalara gateway allows for cross-referencing of
the code included in the Avalara Code. The Delivery Method section allows you to specify
the delivery method that will be utilized for this contact's sales orders.
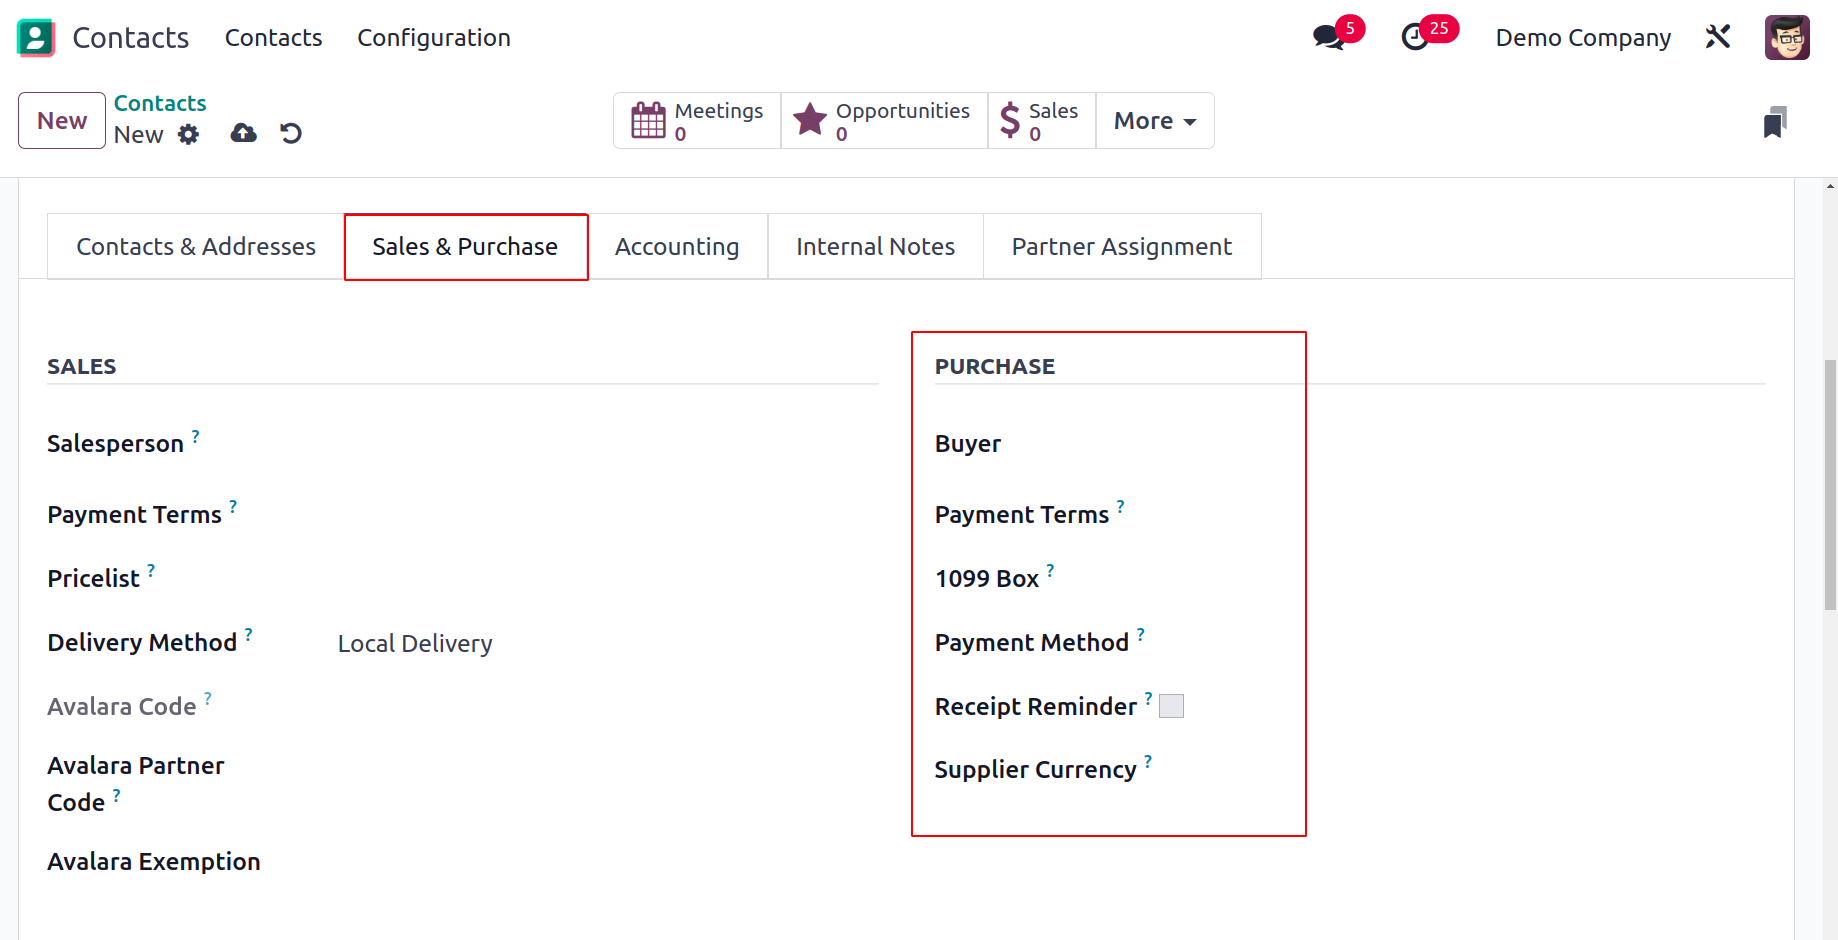
You can fill out the boxes for the desired Payment Method for paying this contact,
Supplier Currency, 1099 Box (the Journal items of this contact will be added up in the
selected box of the 1099 report), and Payment Terms used for the purchases and vendor
bills under the Purchase section. By turning on the receipt reminder, an email will be
sent to the contact ahead of the anticipated receipt date, asking them to confirm the
precise time.
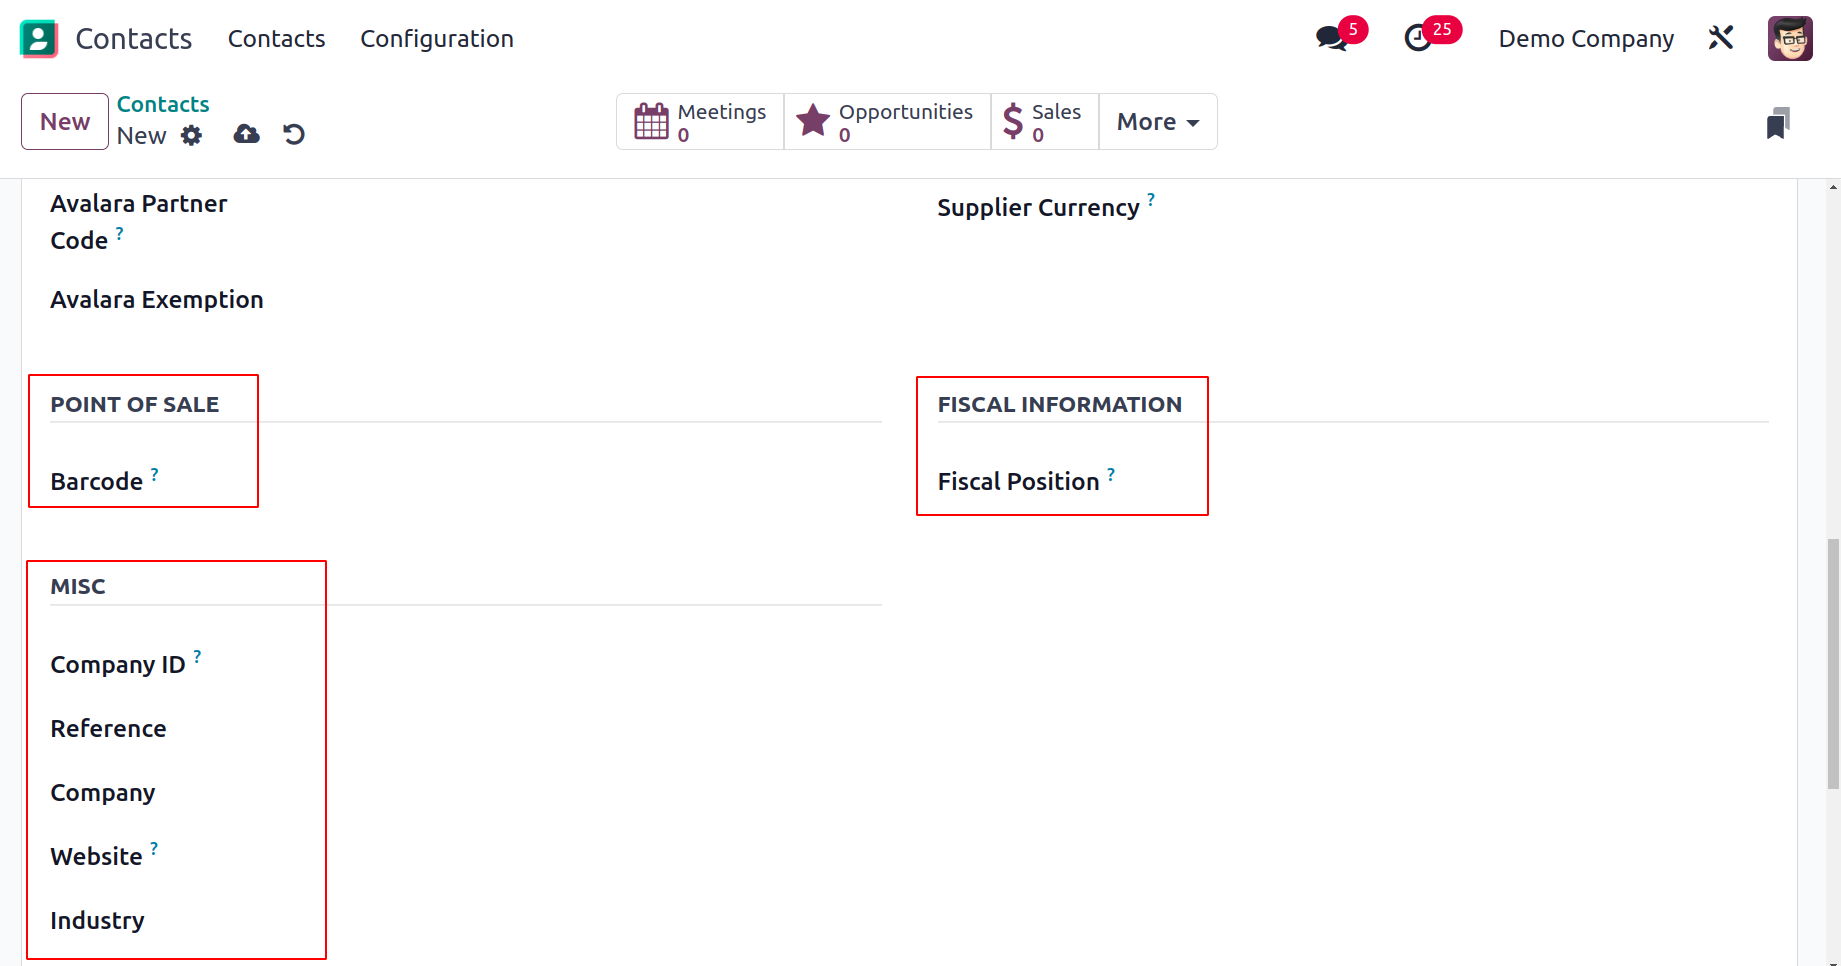
You can set a Barcode to identify this contact in the Point of Sale area. In the Fiscal
Information area, enter your fiscal position. You can fill in the appropriate fields in
the Miscellaneous section for the Company ID, Reference, Company, Website, Website Tags,
Industry, and SLA Policies.
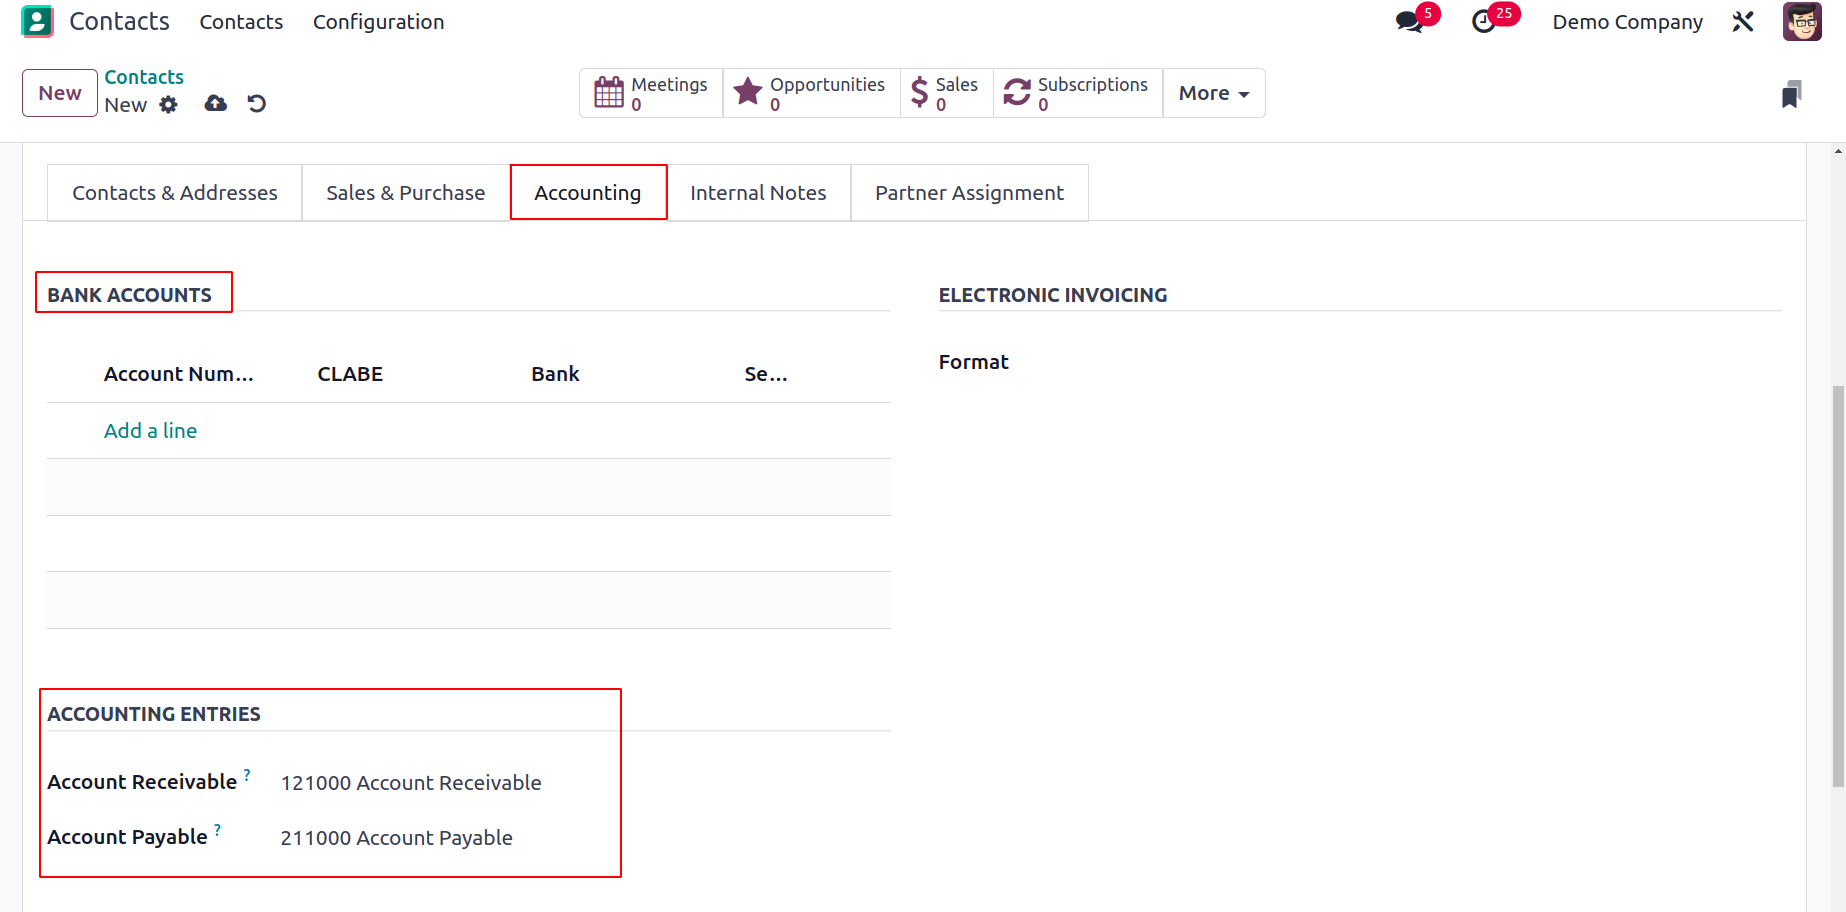
Under the Accounting tab, you can specify the information needed for the contact's
accounting procedures. You can mention the Bank and the Account Number by clicking the
Add a Line option. The Account Receivable and Account Payable fields can be used to
specify the payment receivable and payment payable accounts, respectively. You can turn
on the Check Vendor OCR option if this contact utilizes
OCR numbers on their vendor bills. Additionally, for vendor bills, you can define a
Default Vendor Payment Reference.
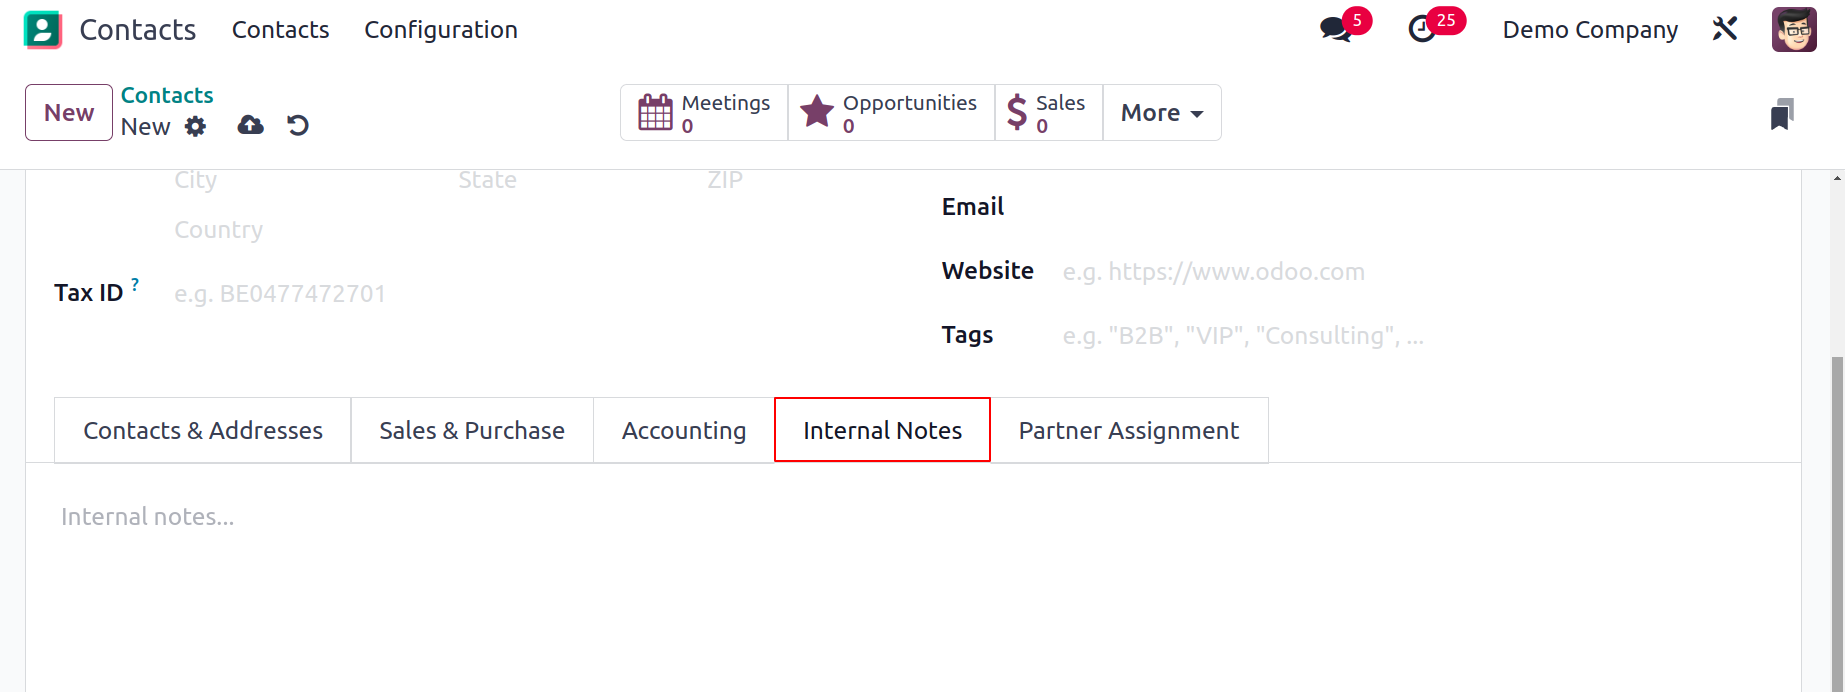
The Internal Notes section is where you can add any further contact-related notes. Under
the Partner Assignment tab,
the Partner Activation and Partner Review information can be added. In the relevant
boxes, you can enter the Partner Level, Commission Plan, Activation, Level Weight, Most
Recent Partner Review, Most Upcoming Partner Review, and Partnership Date.
Set the contact's geolocation in the designated space.
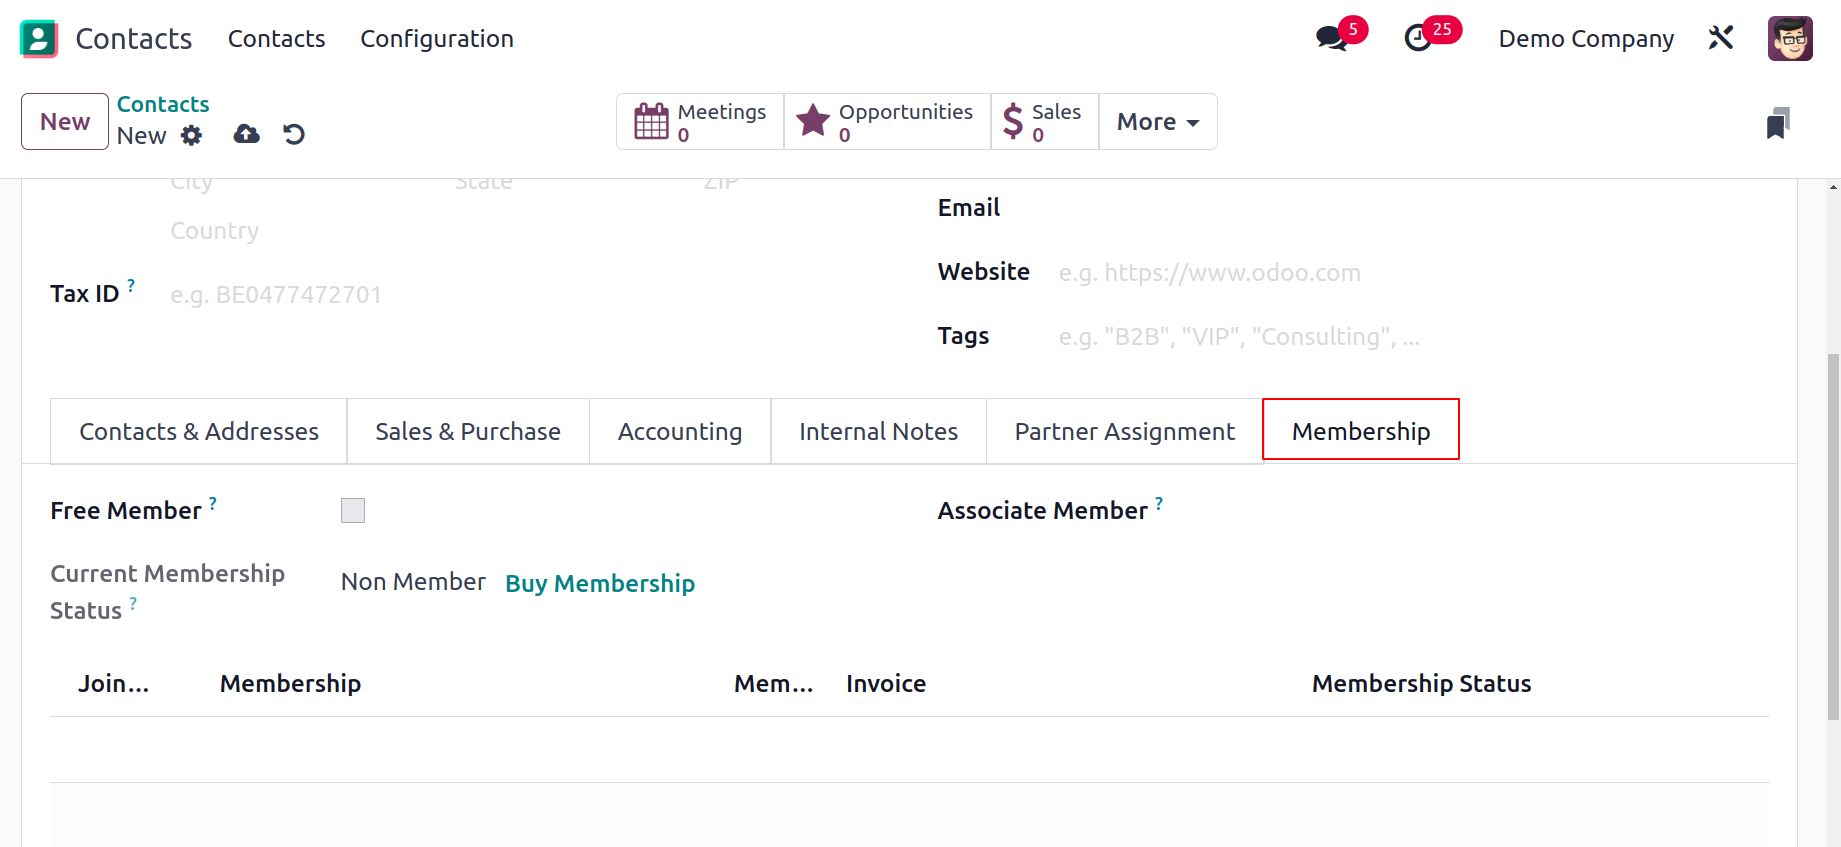
You can turn on the Free Member field from the Membership tab if you wish to provide the
contact with a free membership. The member with whom you want to associate your
membership is designated as an Associate Member. Here, you can see the contact's current
membership status.
This tab also allows you to view the Join Date, Membership, Invoice, and Membership
Status. When you fill out all of these forms, the information is instantly captured, and
a new contact is made.
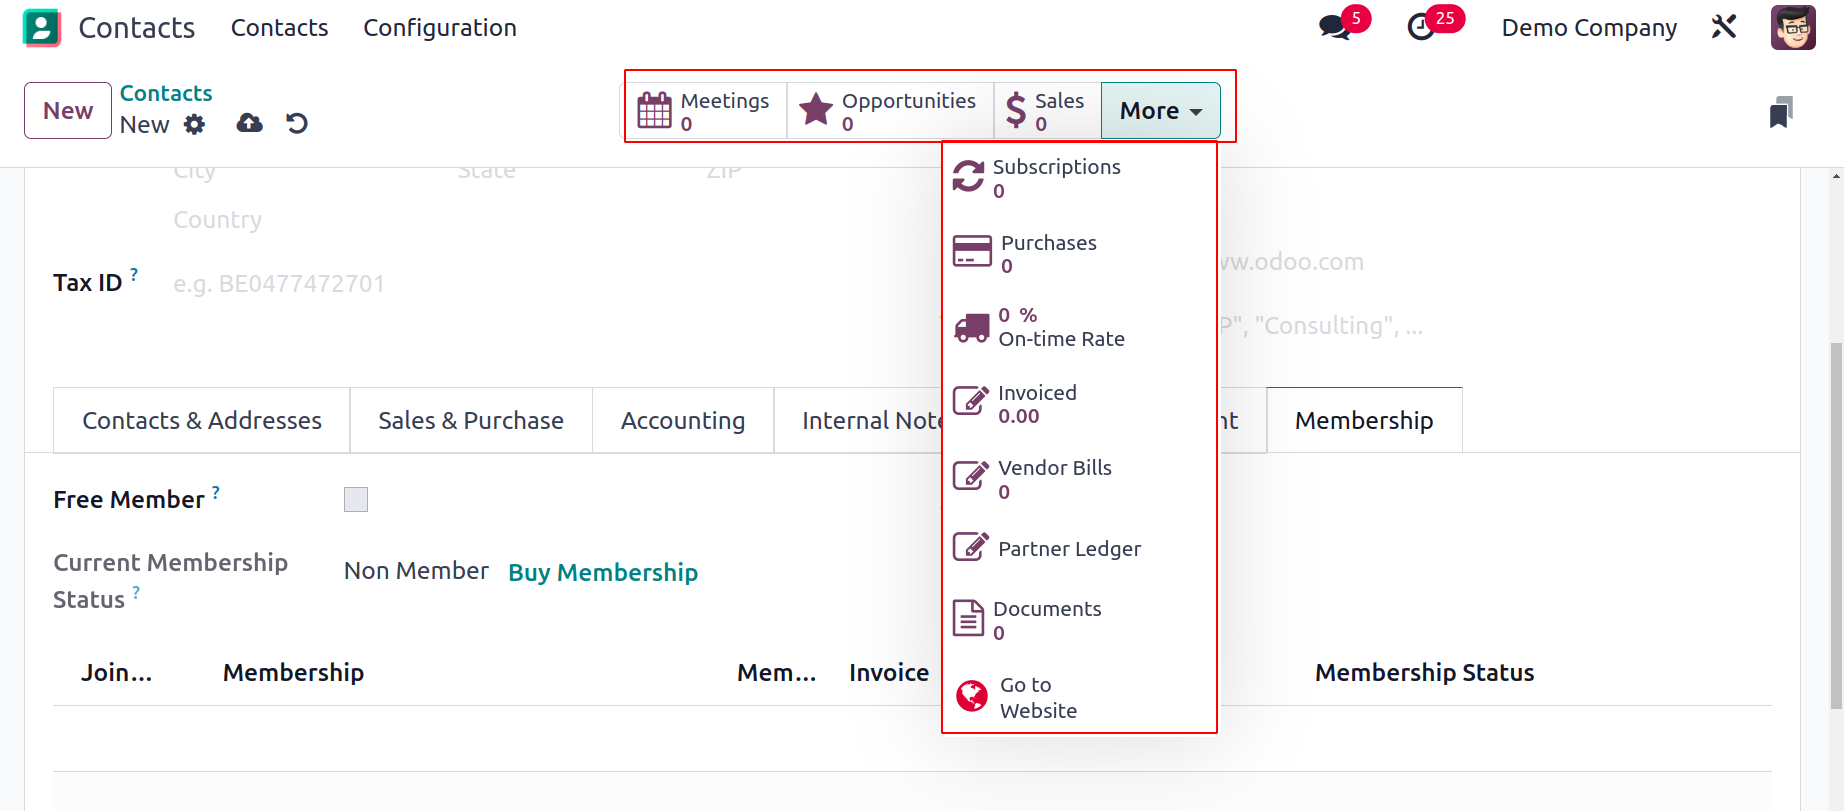
You can access several smart buttons from the contact's form view, as shown in the
screenshot above. Viewing scheduled meetings, opportunities, sales, PoS orders,
subscriptions, purchases, deliveries, invoiced amount, vendor bills, partner ledger,
documents, and direct debit mandates are all possible with these smart buttons. You may
quickly create a new contact in this module by paying attention to the instructions
provided in this section.
Configuration
The Contact module's Configuration menu contains a number of options that can be used to
improve
the module's functionality. Here, we'll go over each of these choices and how they work
within the Contact module.
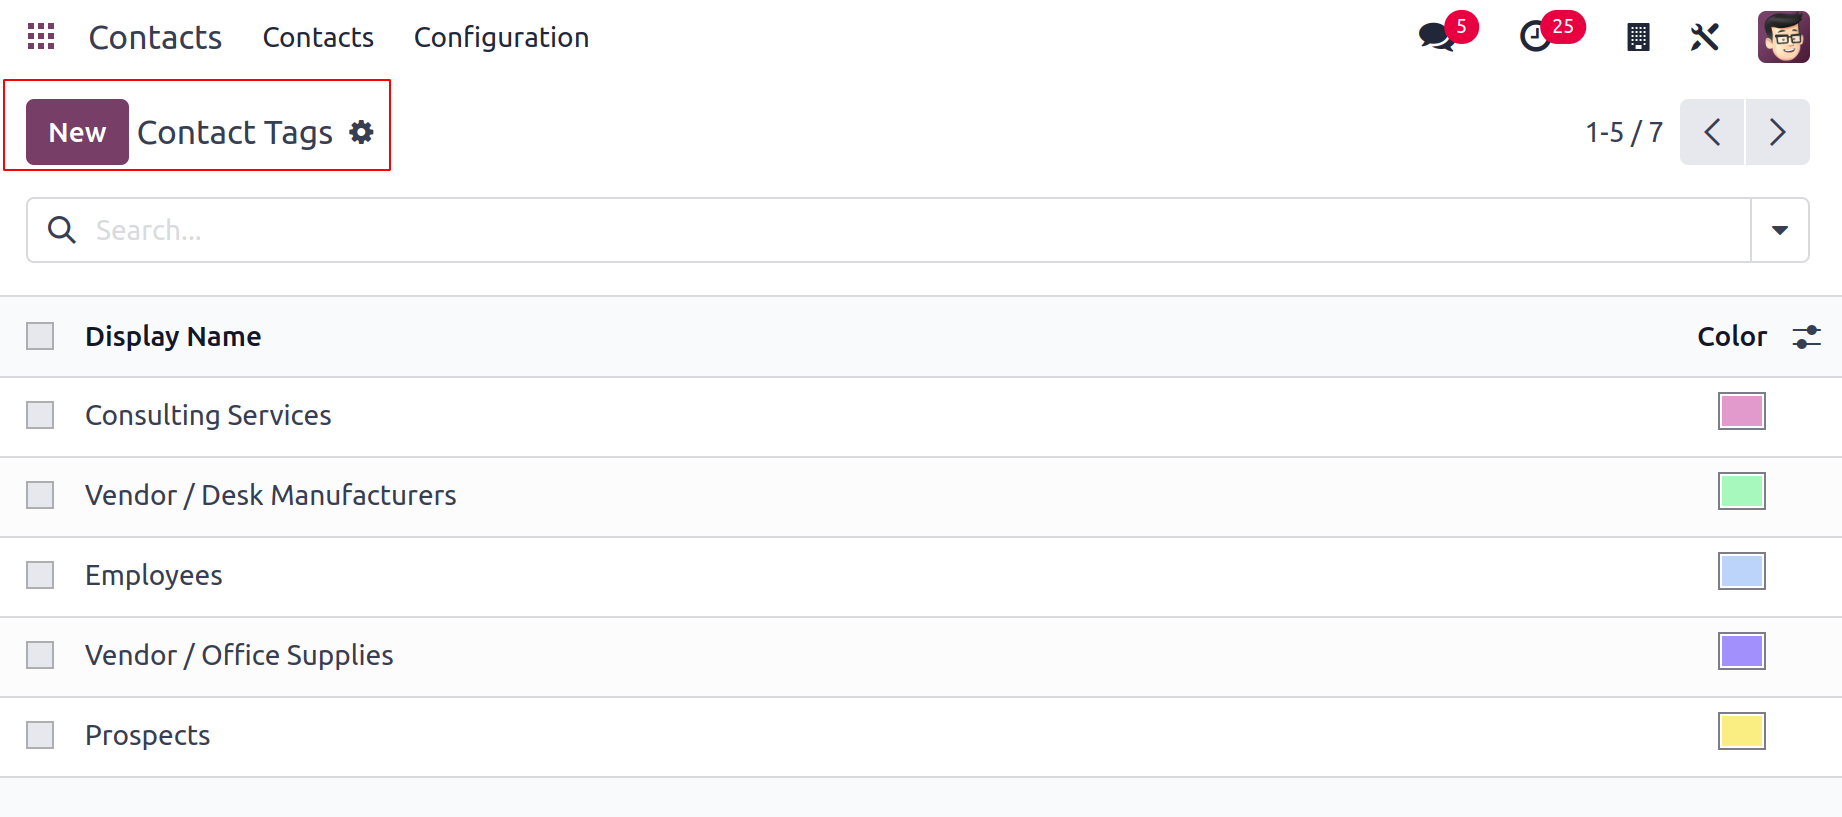
Contact Tags
The Configuration menu makes it simple to set tags for contacts. The Configuration
menu's Contact Tags option will take you to a window where you
can view the tags that have previously been set up for contacts. The Display Name and
Colour will be displayed.
To make a new tag, click the New button. As seen in the image below, a new form will
emerge where you may
enter the name of the new tag in the appropriate field.
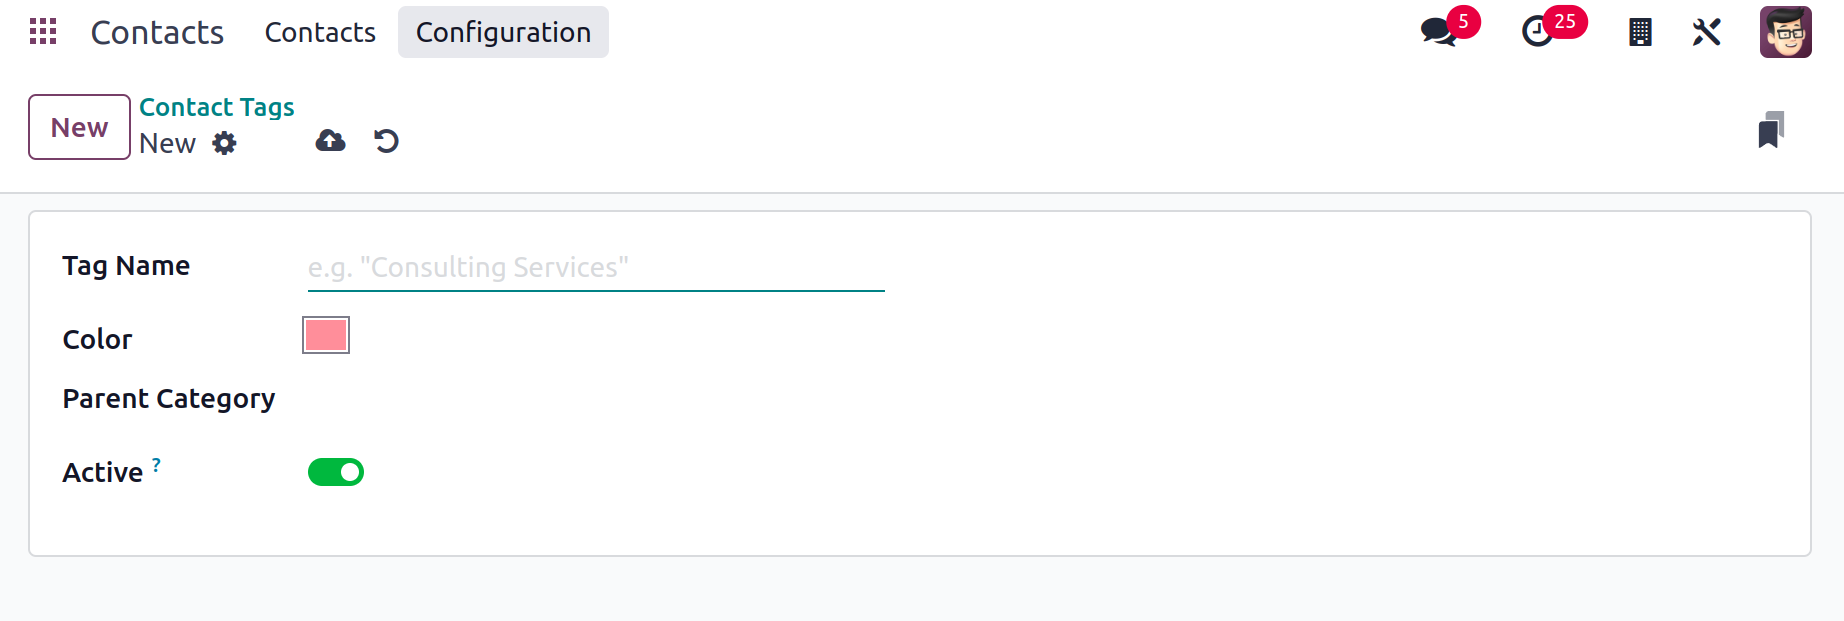
Choose a tag color for quick identification, then enter the Parent Category in the
appropriate areas.
To make the new tag active, turn on the Active field.
Website Tags
You can configure Website Tags to categorize contacts for tracking and analysis, much
like we did with Contact Tags. The Configuration menu will have this option. The website
Tags window will display any previously created website tags. Otherwise, you can use the
New button to add new tags.
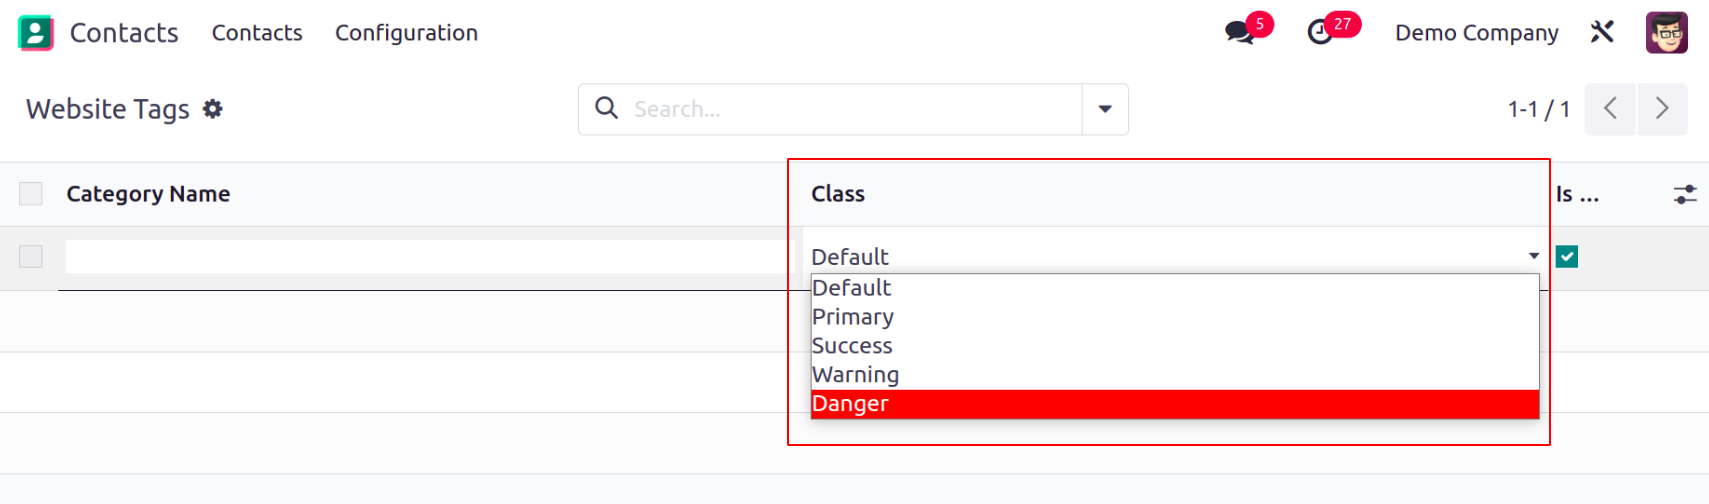
The window will add a new line to which you can add the Category Name. From the
drop-down menu, which includes the choices Default, Primary,
Success, Warning, and Danger, you can choose the Class. Click the Save button after
choosing the right class.
Contact Title
You can go to the Configuration menu and use the Contact Title option to set
pre-configured contact titles.
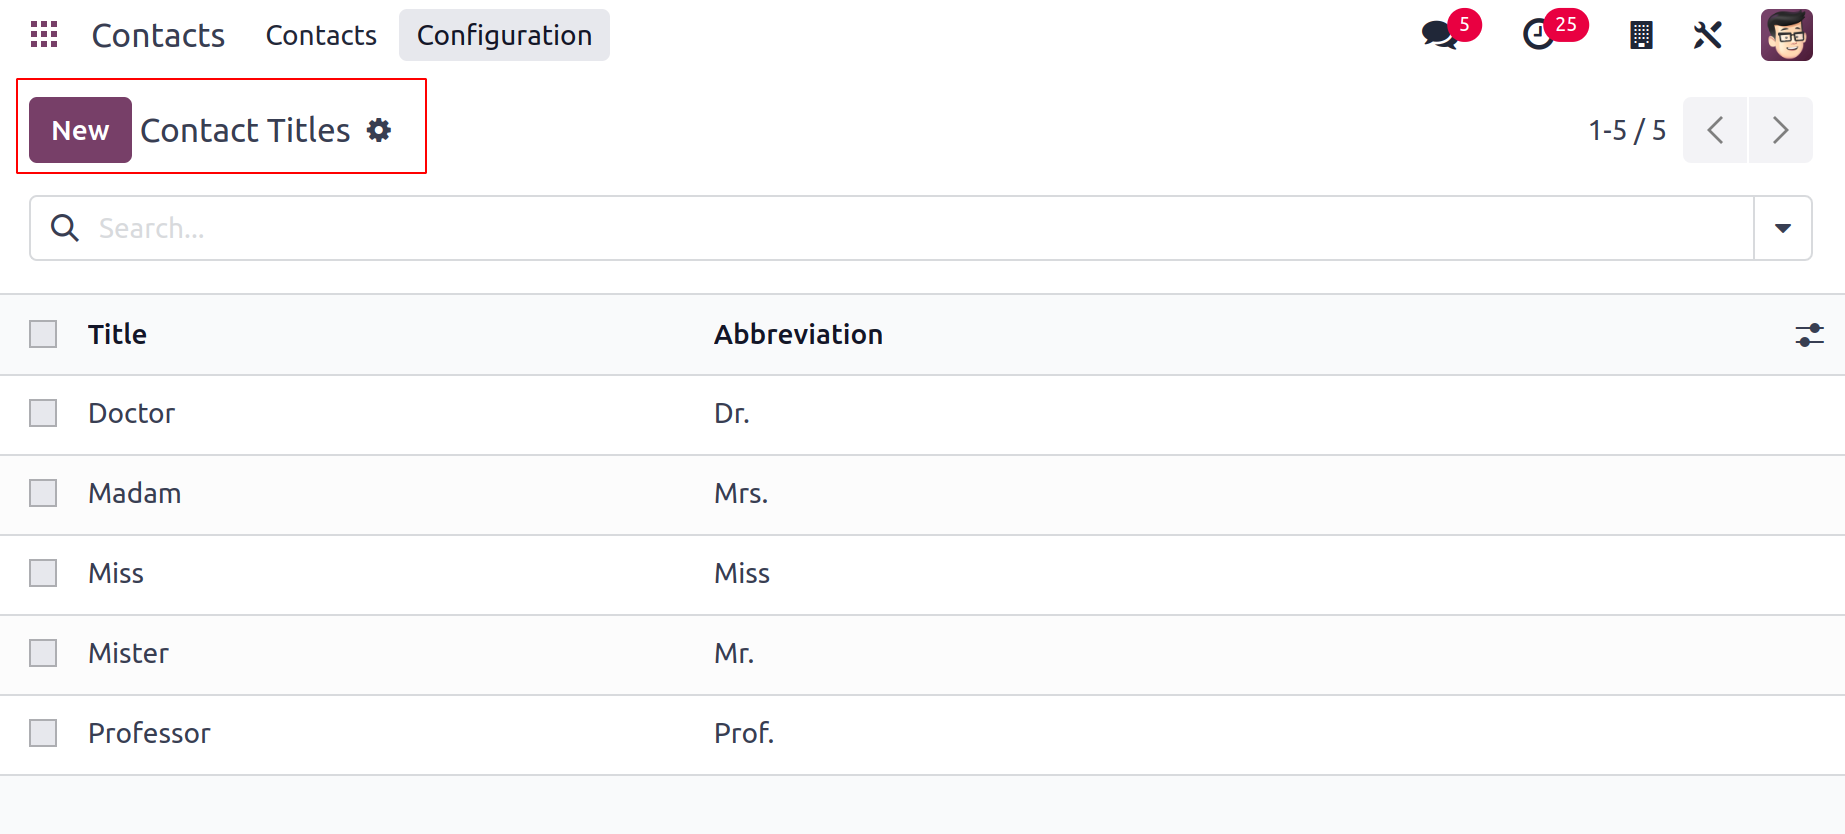
You can make a new Contact Title by selecting the New option. Type the title's
abbreviation in the appropriate field, then press the Save button.
Industries
Sometimes, while setting up a new contact in the Contact module, you could be asked to
mention industries. In these situations, configuring Industries from the Configuration
menu will make it simple
to choose them when adding new contacts. The window will display a list of
pre-configured industries.
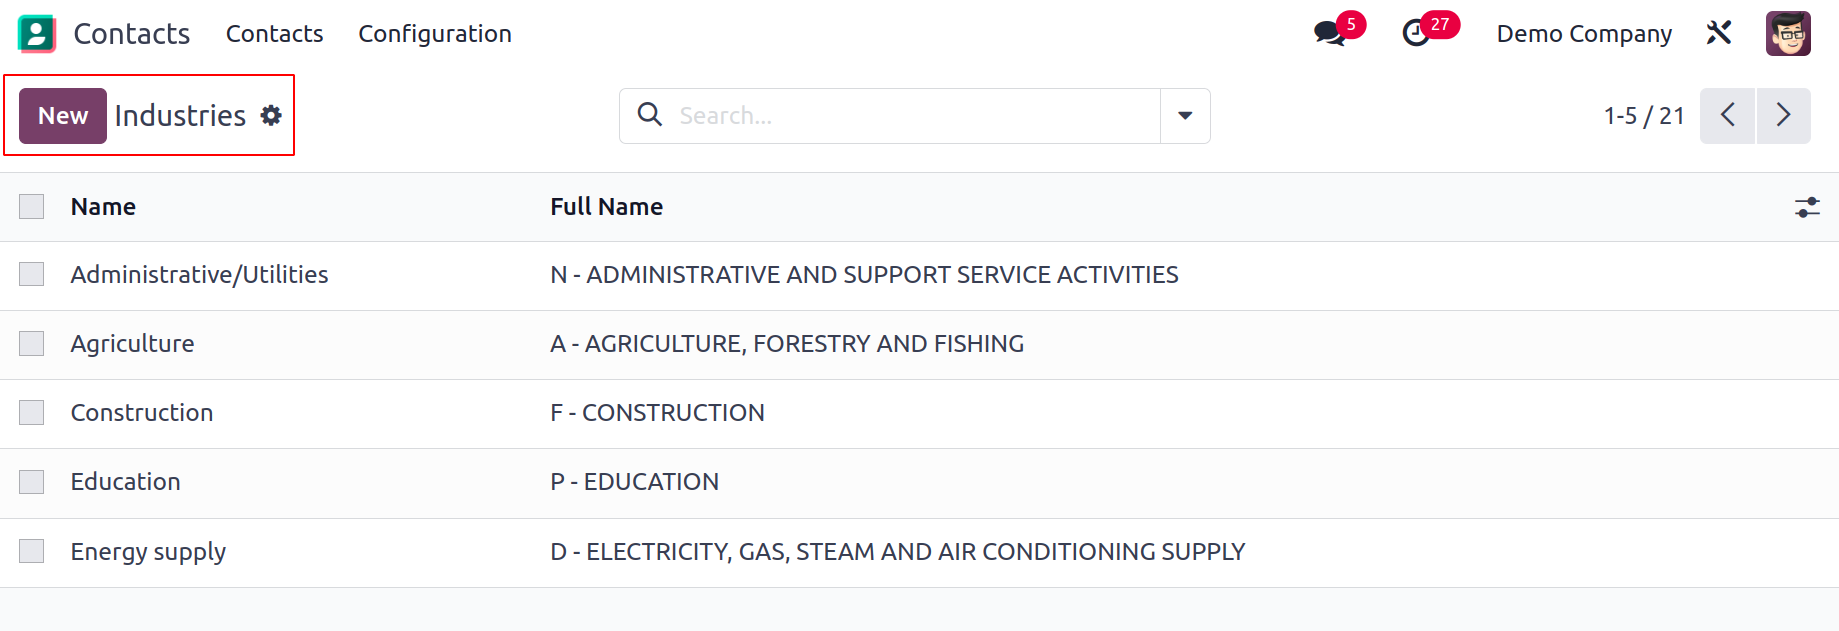
To add new industries, click the New button. Under the current list, a new line will
emerge where you can define the Name and Full Name of the Industry.
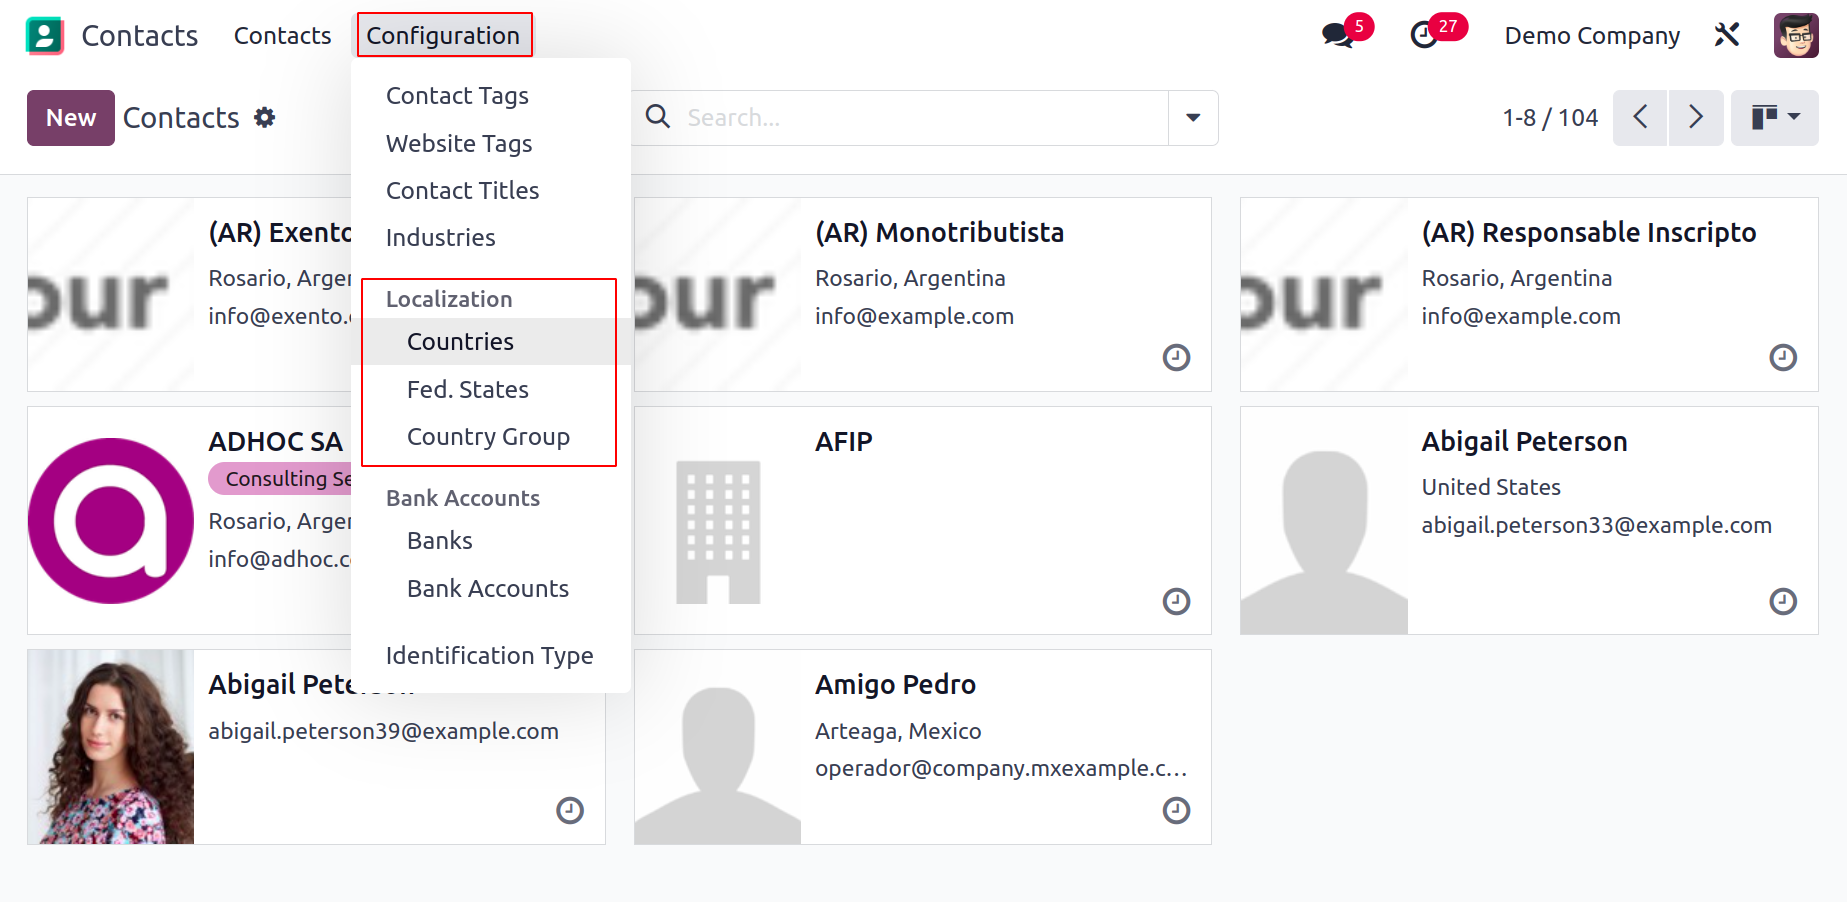
Localization
You will find choices to view the configured Countries, Fed. states and Country Groups
under the Localization tab of the Configuration menu.
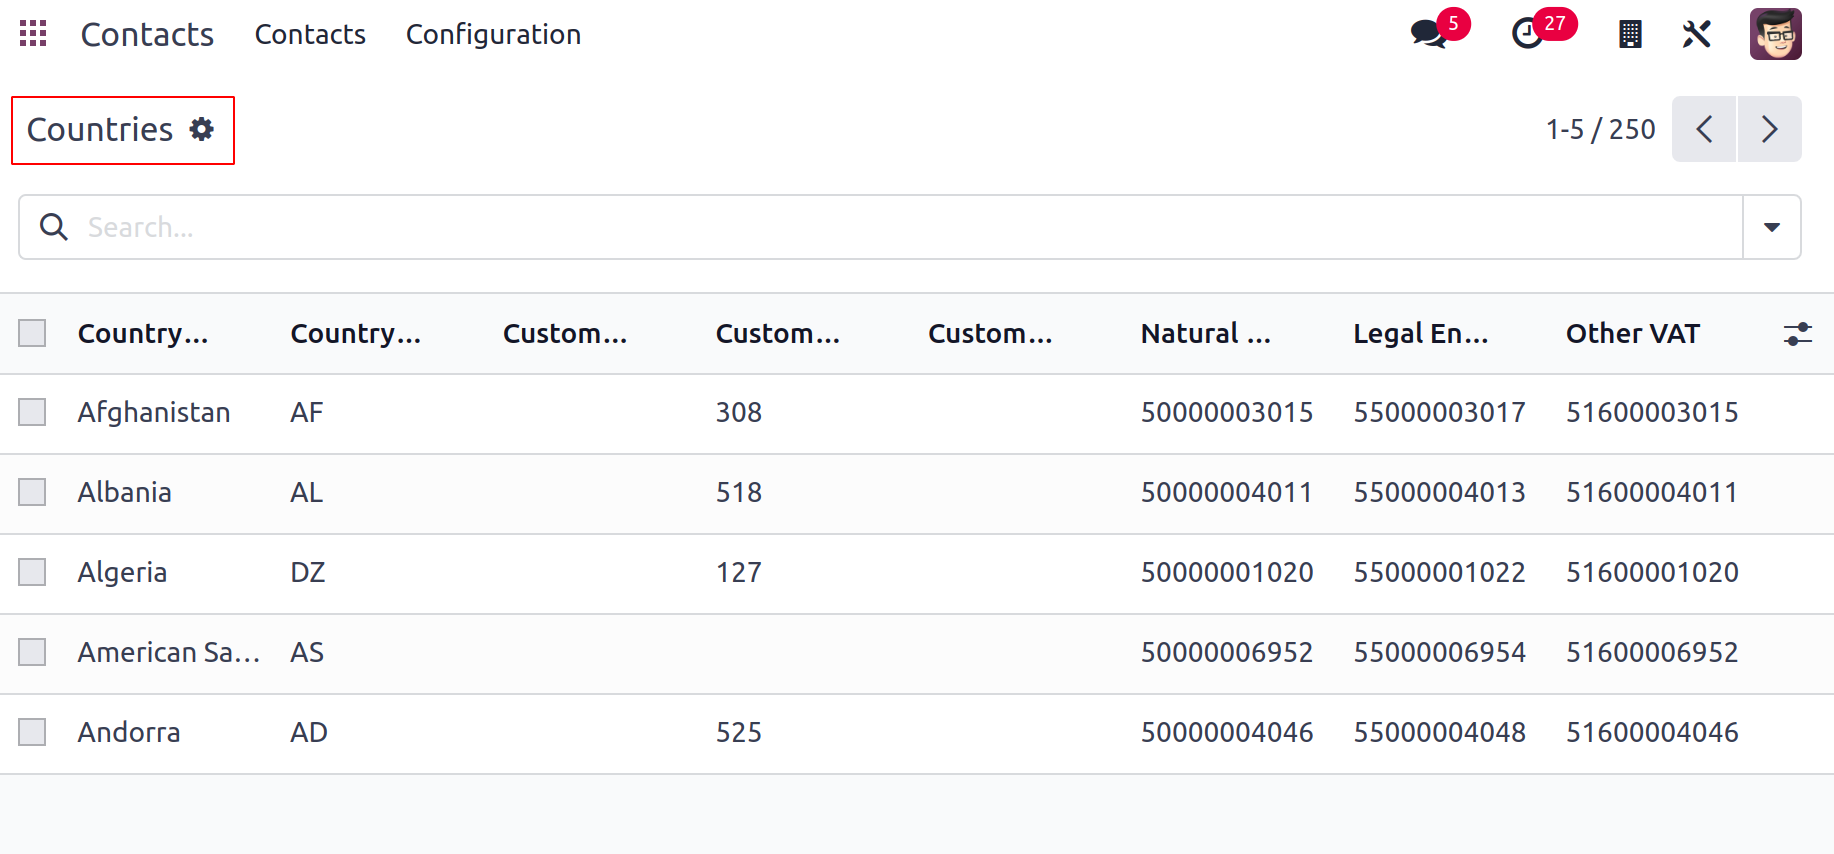
Countries
The list of Countries will include the following information: Intrastat Member, Use on
eBay, Country Name, Country Code,
Customs Name, Customs Code, and Customs Abbreviations.
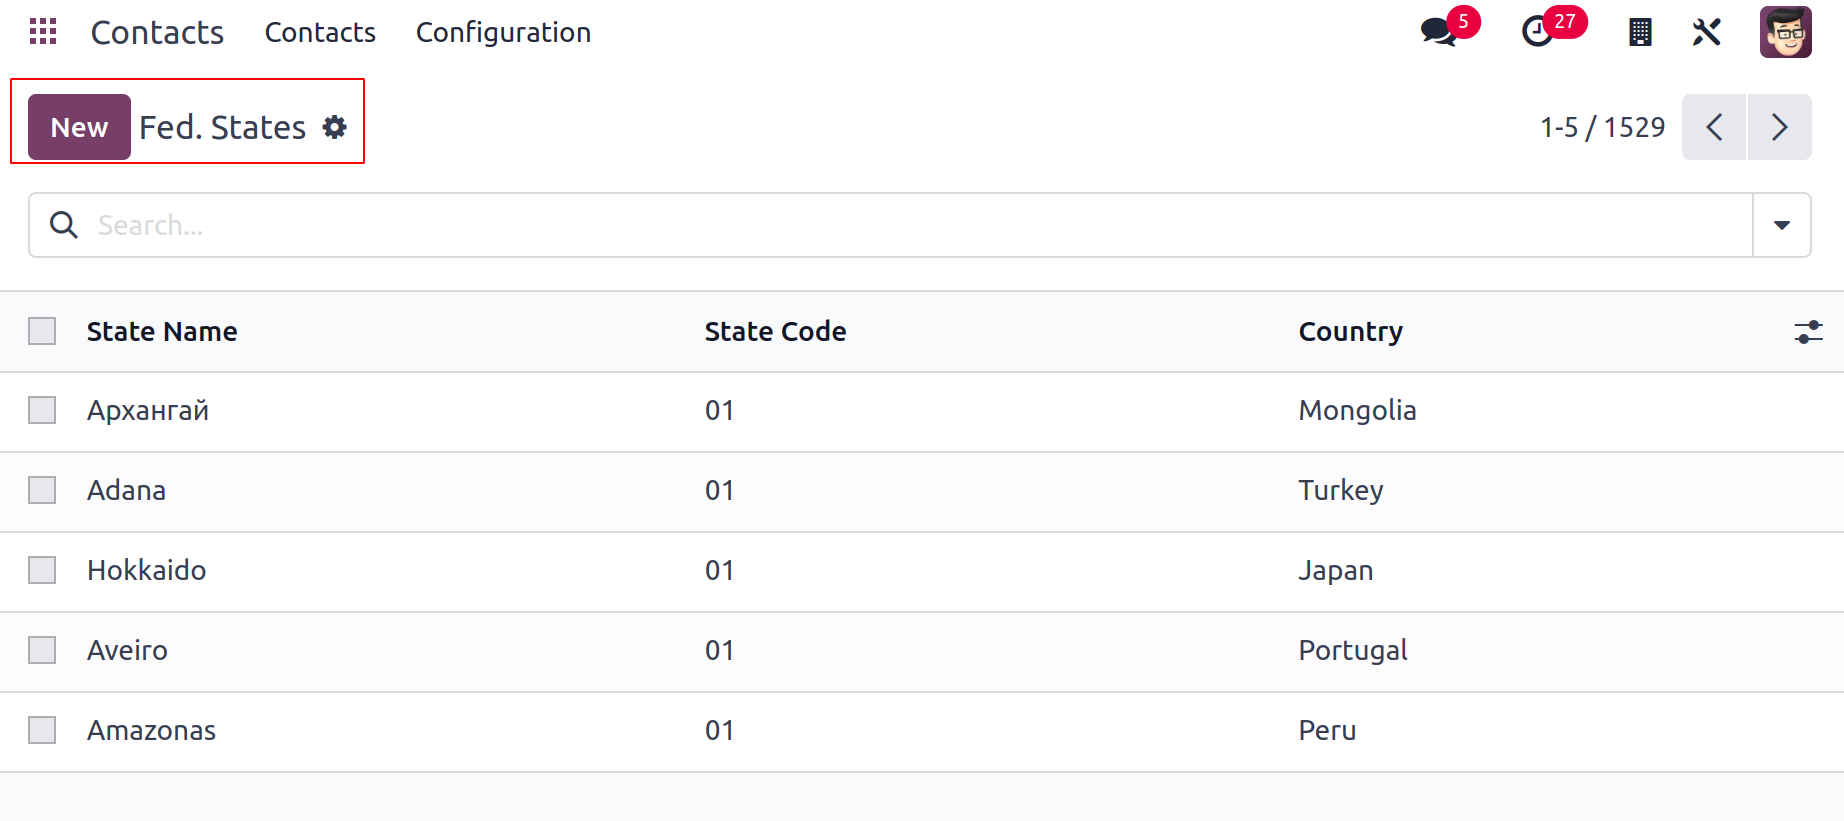
Fed. States
The State Name, State Code, and Country are displayed in the Fed. States list. You can
expand this list by adding a new state using the New button.
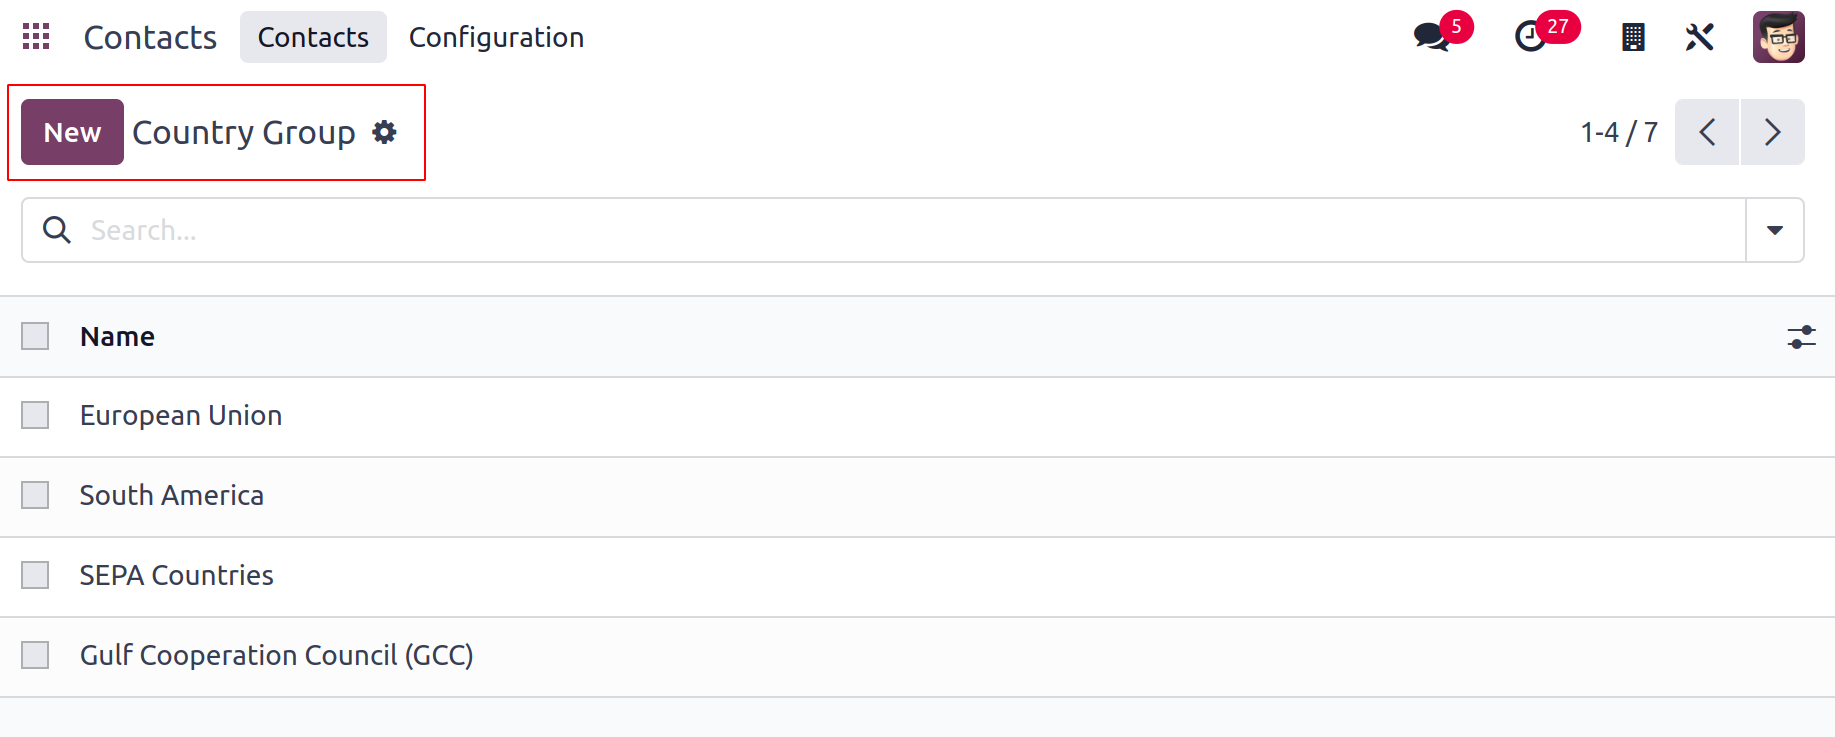
Country Groups
The Contact module's corresponding menu will provide the names of the Country Groups. To
add another country group to this list, click the New button.
Bank Accounts
Contacts' financial and account information can be saved using this platform. All of the
banks defined in the module will be displayed when you choose the Bank option from the
Configuration menu.
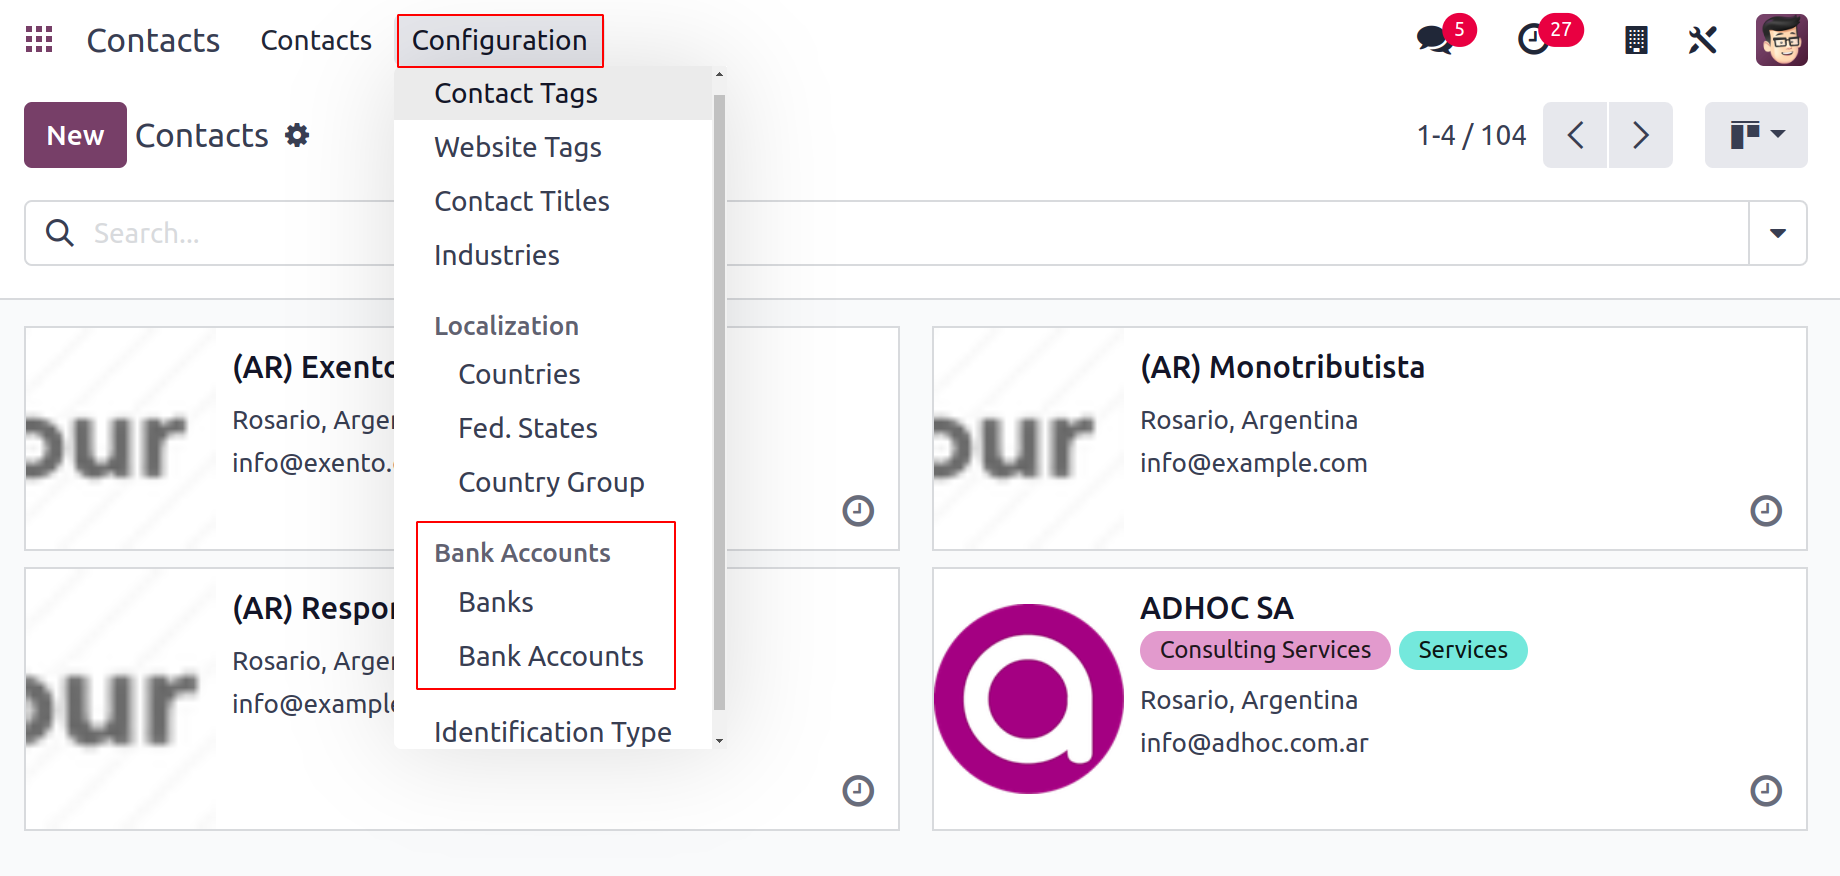
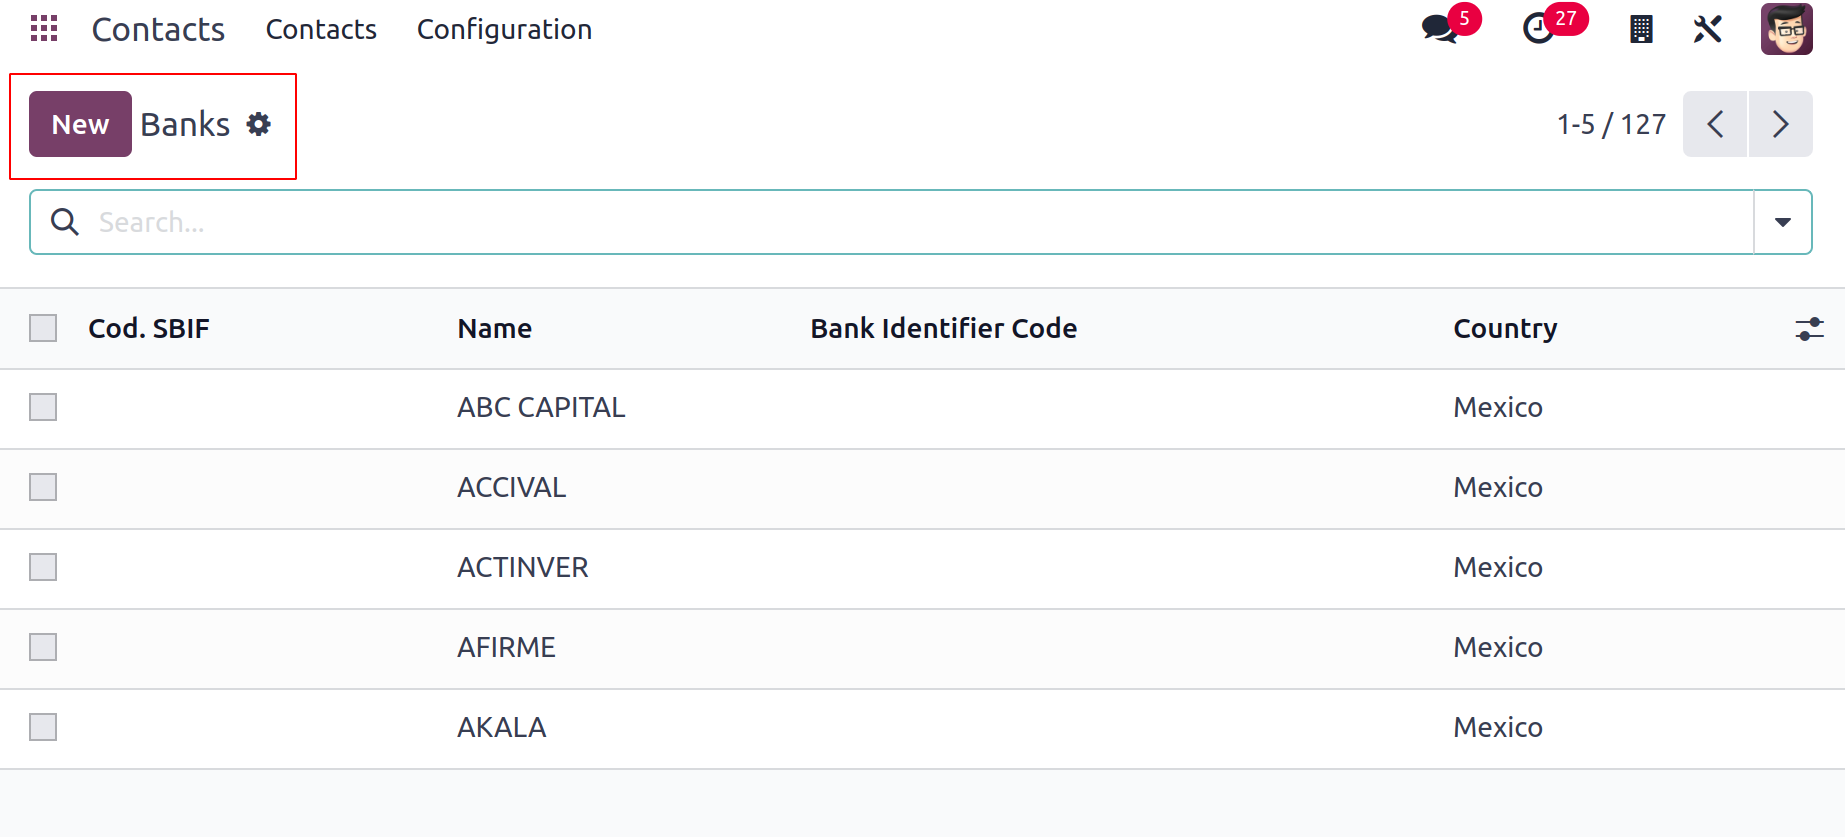
Banks
The Cod. SBIF, Name, Bank Identifier Code, and Country are all included in the list view.
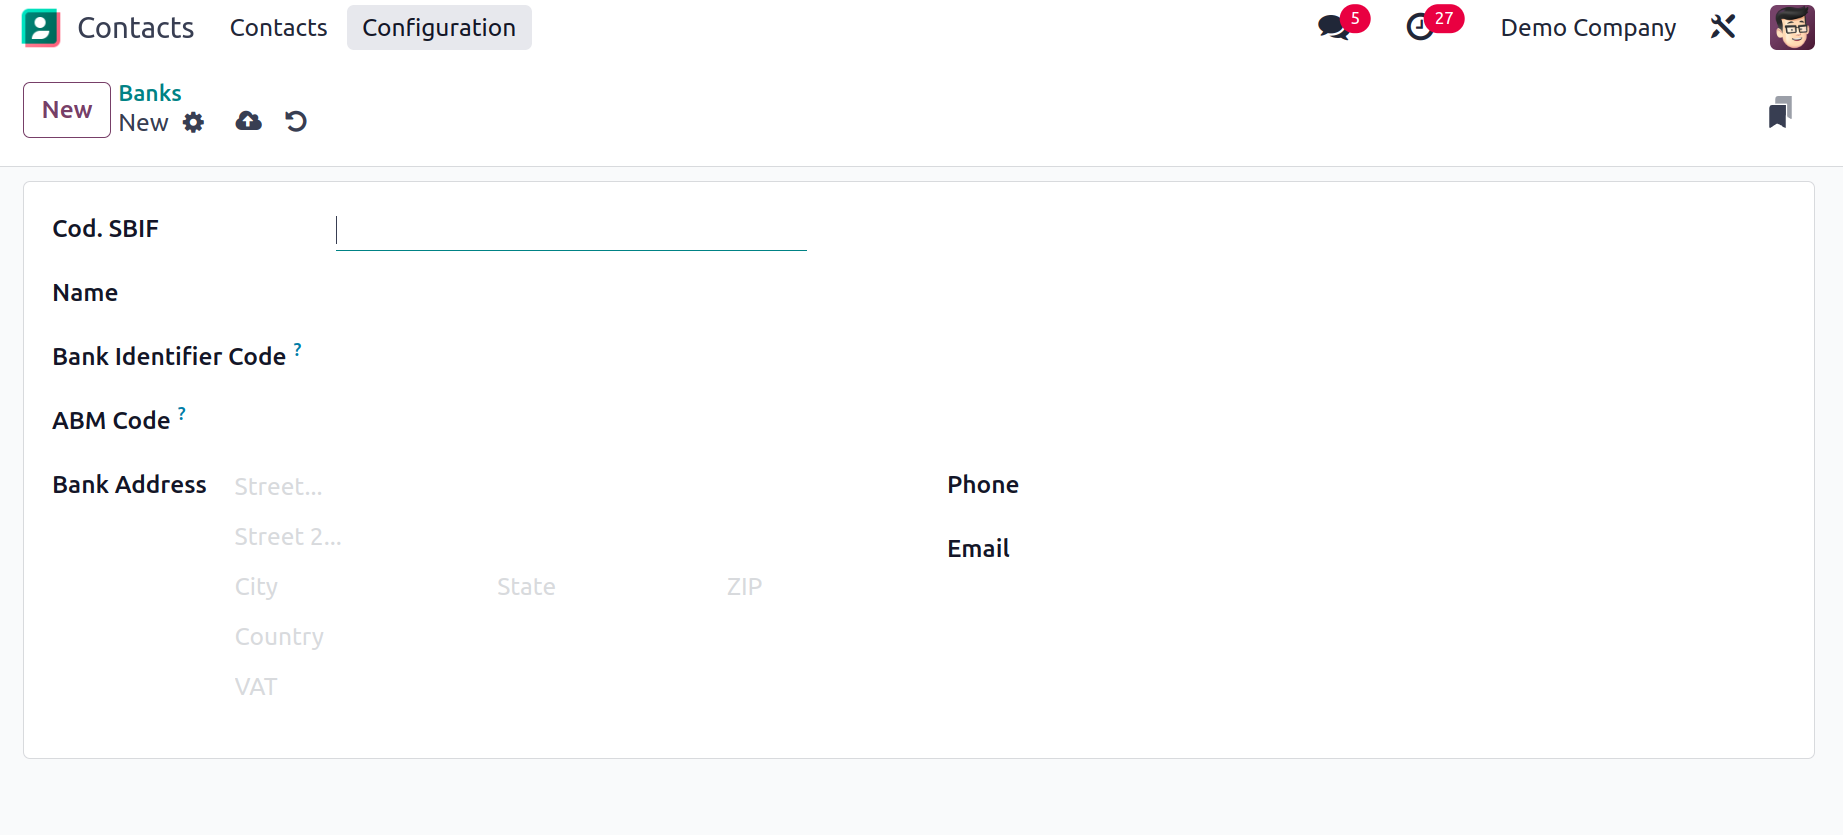
You can click the New button to start a brand-new bank.
By doing so, a new form view will open where you can enter your name, bank identifier
code, bank address, phone number, and email.
Bank Accounts
The bank accounts for the contacts you've saved in your system are displayed in the Bank
Accounts pane.
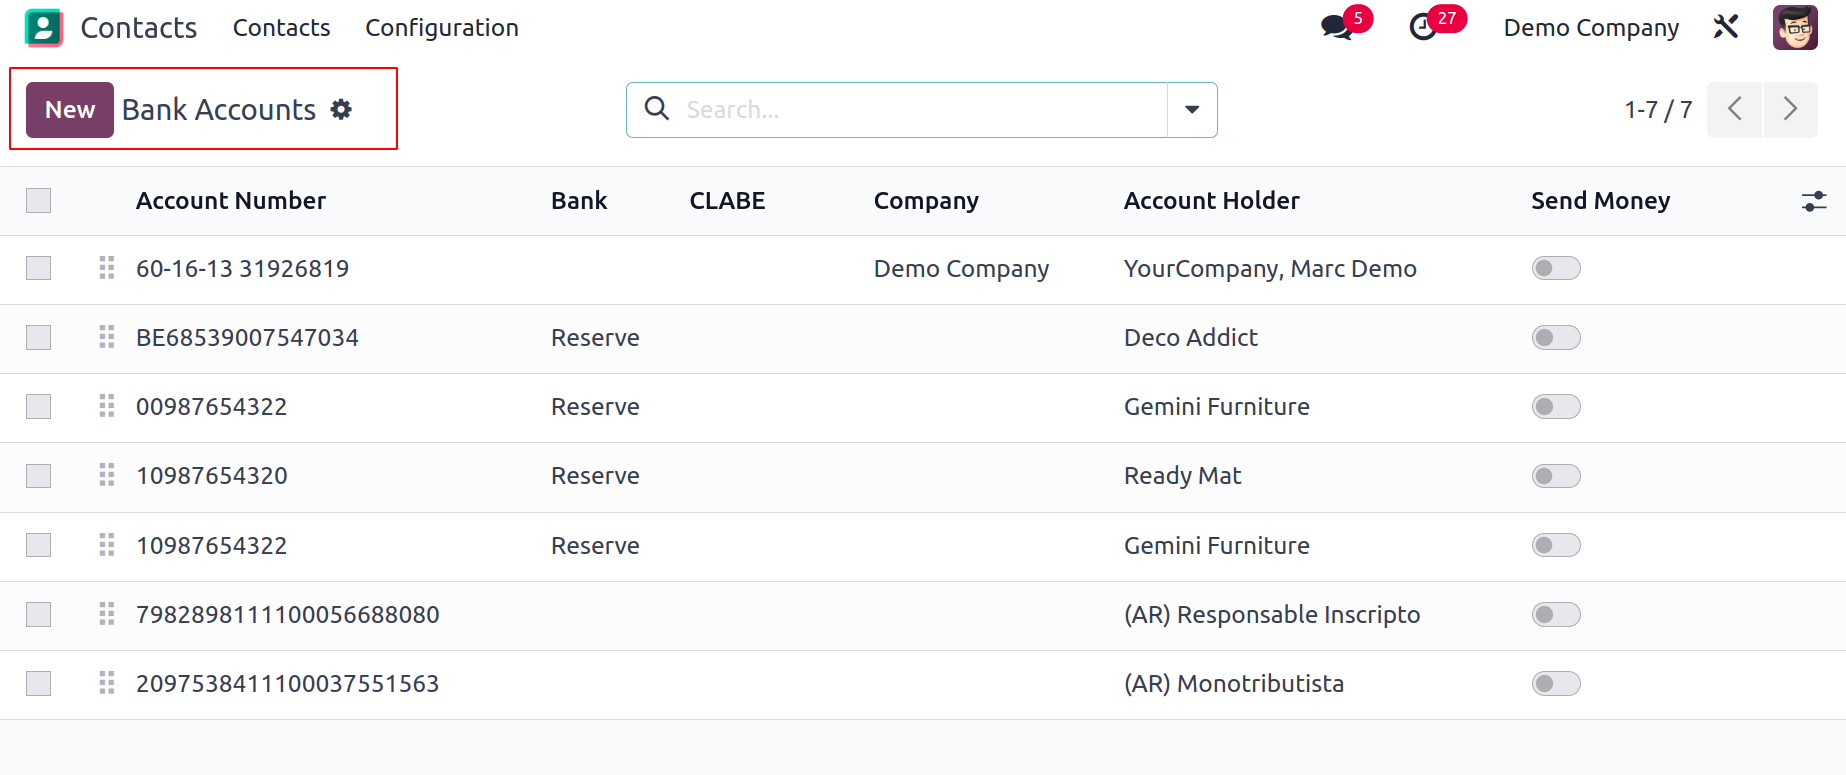
The list view of the bank accounts looks like this. From this window, you can examine the
Send Money status as well as the Account Number, Name, Company, and Account Holder. When
you click the New button, a new form view will open up where you can add another bank
account for contacts.
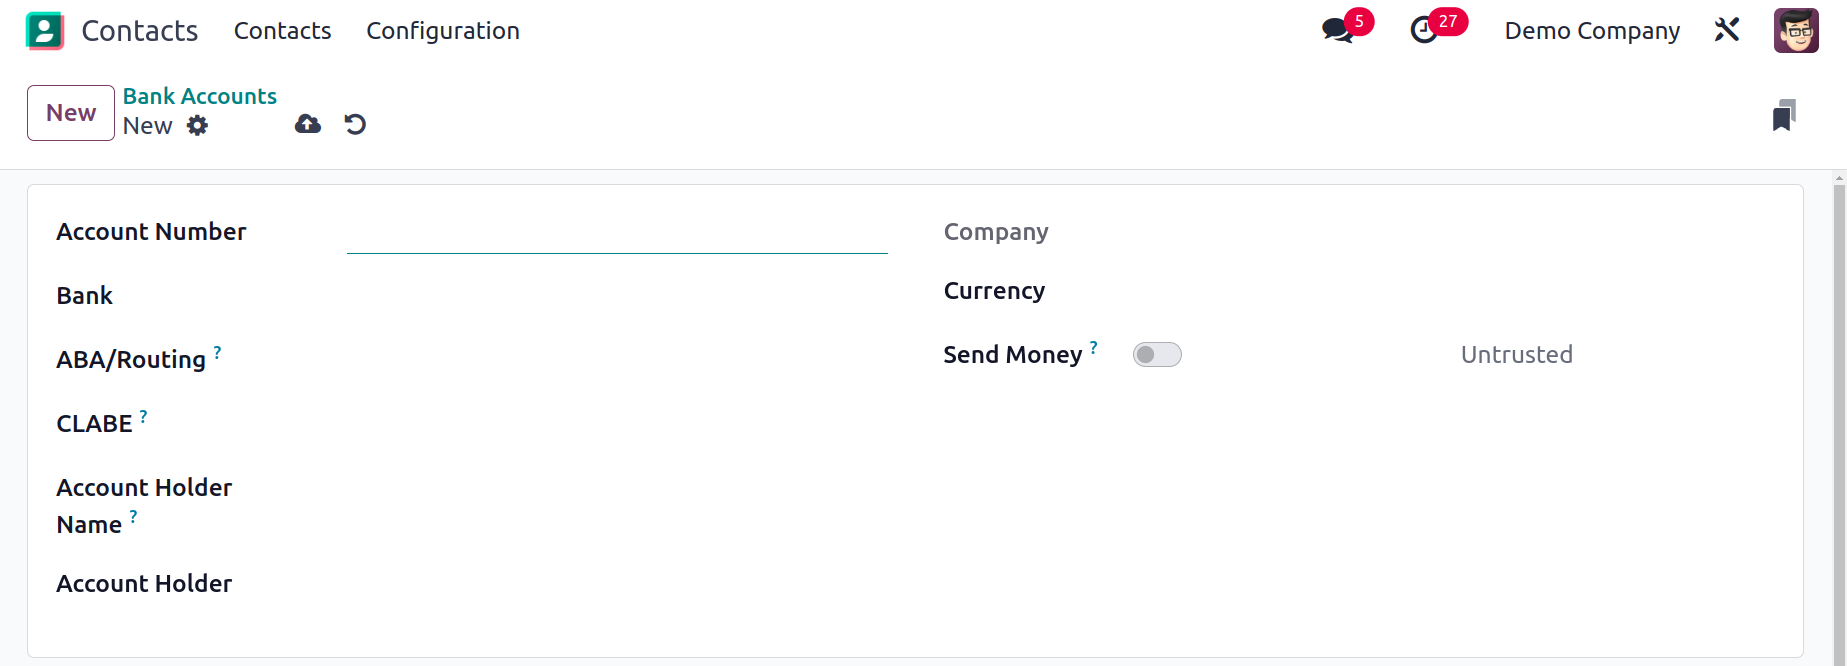
In the relevant fields, you can provide the Account Number, Account Holder, Account
Holder Name, Bank, ABA/Routing, and Currency. You can turn on the Send Money option if
this account can be used to send money.
The handling of contacts will be made easier by using the Odoo 17 Contact module. This
module is the ideal option for your business's real-time contact management needs.