Vendor Bills
One of the critical stages in the buying process that demands the
highest care and precision is creating vendor bills.
With the aid of Odoo17, the payment to the vendor will be easily
registered in the form of a vendor bill.
These automatically generated vendor bills will be connected to the
configured vendors in Odoo 17.
Depending on your company's regulations, vendor bills may be produced
using the quantities that were ordered or
those that were delivered. This billing policy can be set in the
Purchase module's Settings menu.
Below is a screenshot of the Purchase module's Settings menu.
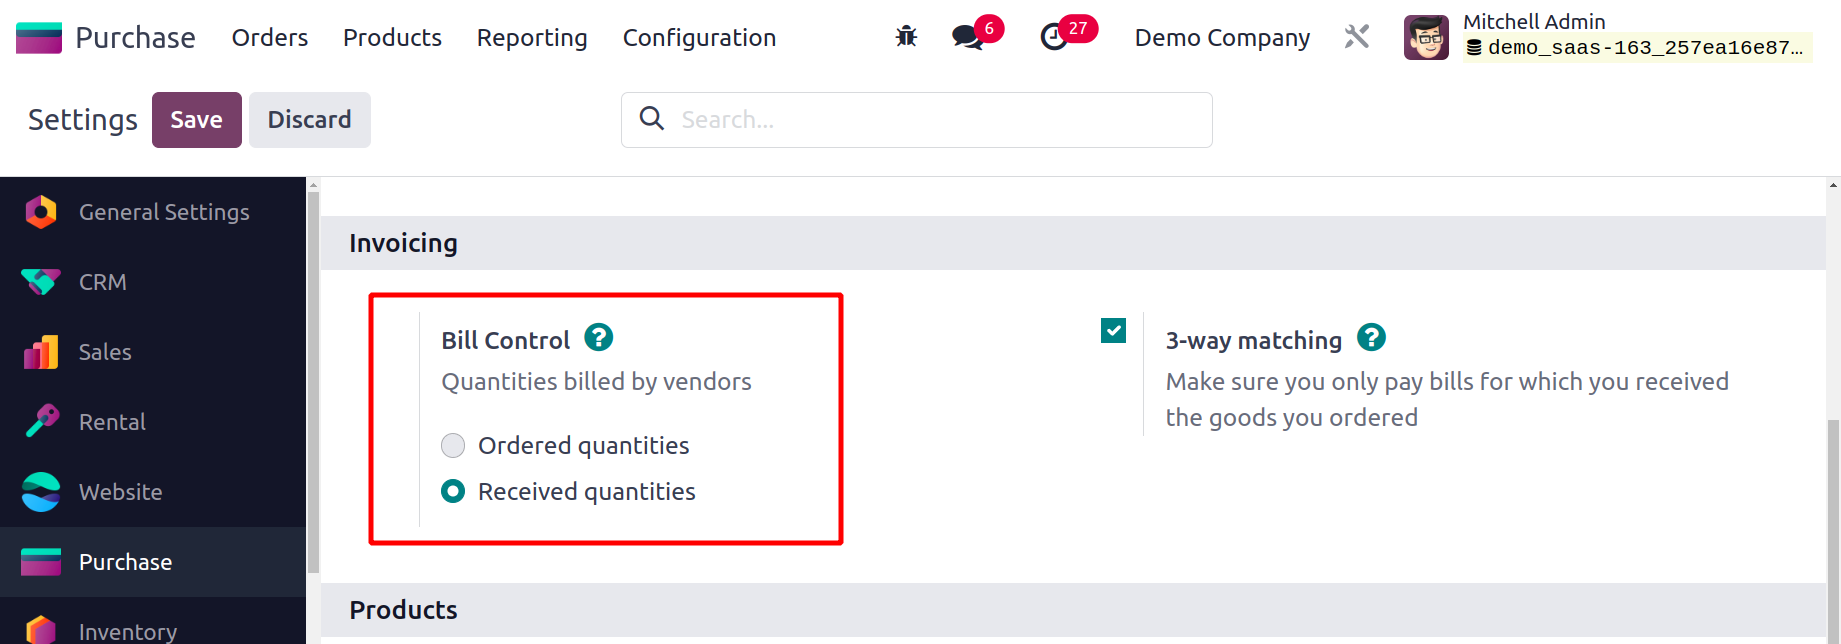
Here, you can specify the policy for creating vendor bills by using the
Bill Control option found under the Invoicing tab. With the aid of this
option, you may choose how to manage vendor invoices. When the vendor
bill must be paid following the confirmation of a purchase order will
depend on the control policy you choose here. You have the option of
paying your vendors either before or after receiving their goods. You
can use the bought quantities bill control option to pay your vendor
bill for the items you bought as soon as your purchase order is
confirmed. Here, a draft vendor bill will be produced by taking into
account the amounts specified in the relevant purchase order. After
receiving the ordered goods, you can create vendor bills using the
Received Quantities option. Using this option, you can pay the vendor's
bill according to the quantities you've received.
Odoo17 will set this control policy as the default on all newly
generated goods as soon as you select a suitable Bill Control option
from the Settings menu. A specific product's product detail form is
where you can make changes to the default control policy for that
product.
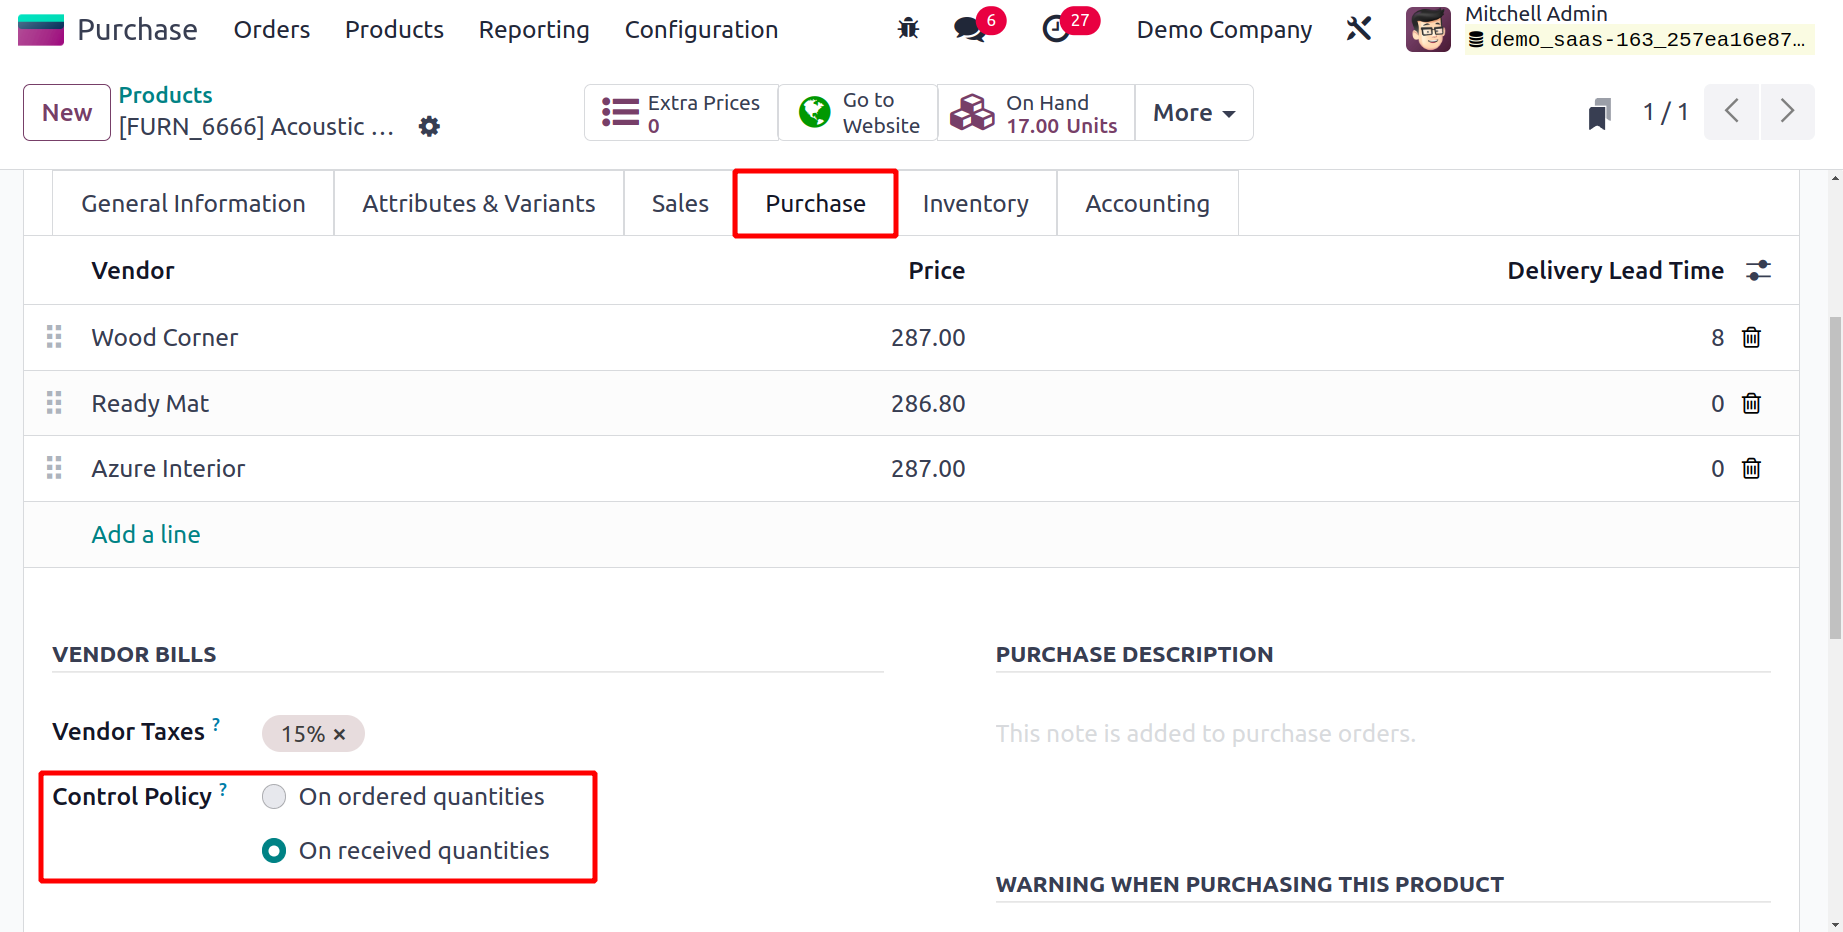
You may manage the Control Policy under the product's Purchase tab, as is
noted in the image above. All goods come with this option. This
functionality enables you to directly manage the essential products'
billing procedures.
Let's now examine the processes used to create the vendor bill and make
payments on it.
In order to generate the vendor bill, you will receive the option to
‘Create Bill’ after completing a purchase order, as shown in the
screenshot below.
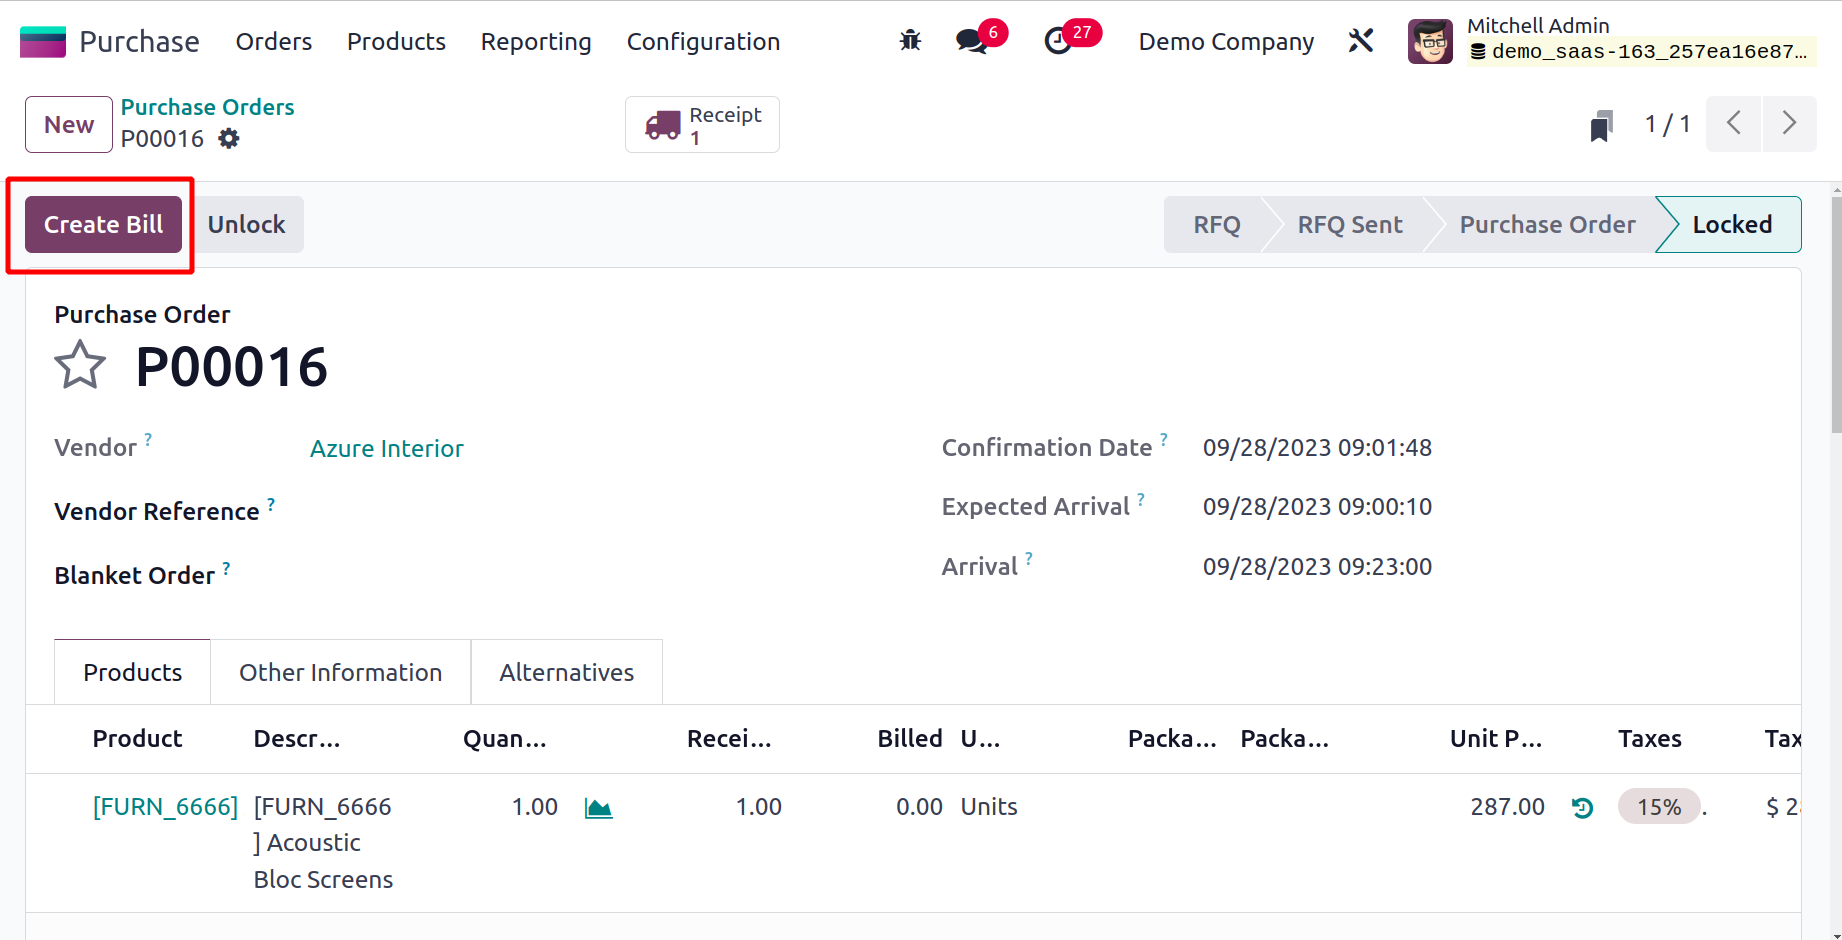
When you click on this button, Odoo17 will take you to a new screen where
you can view the vendor bill in draft form.
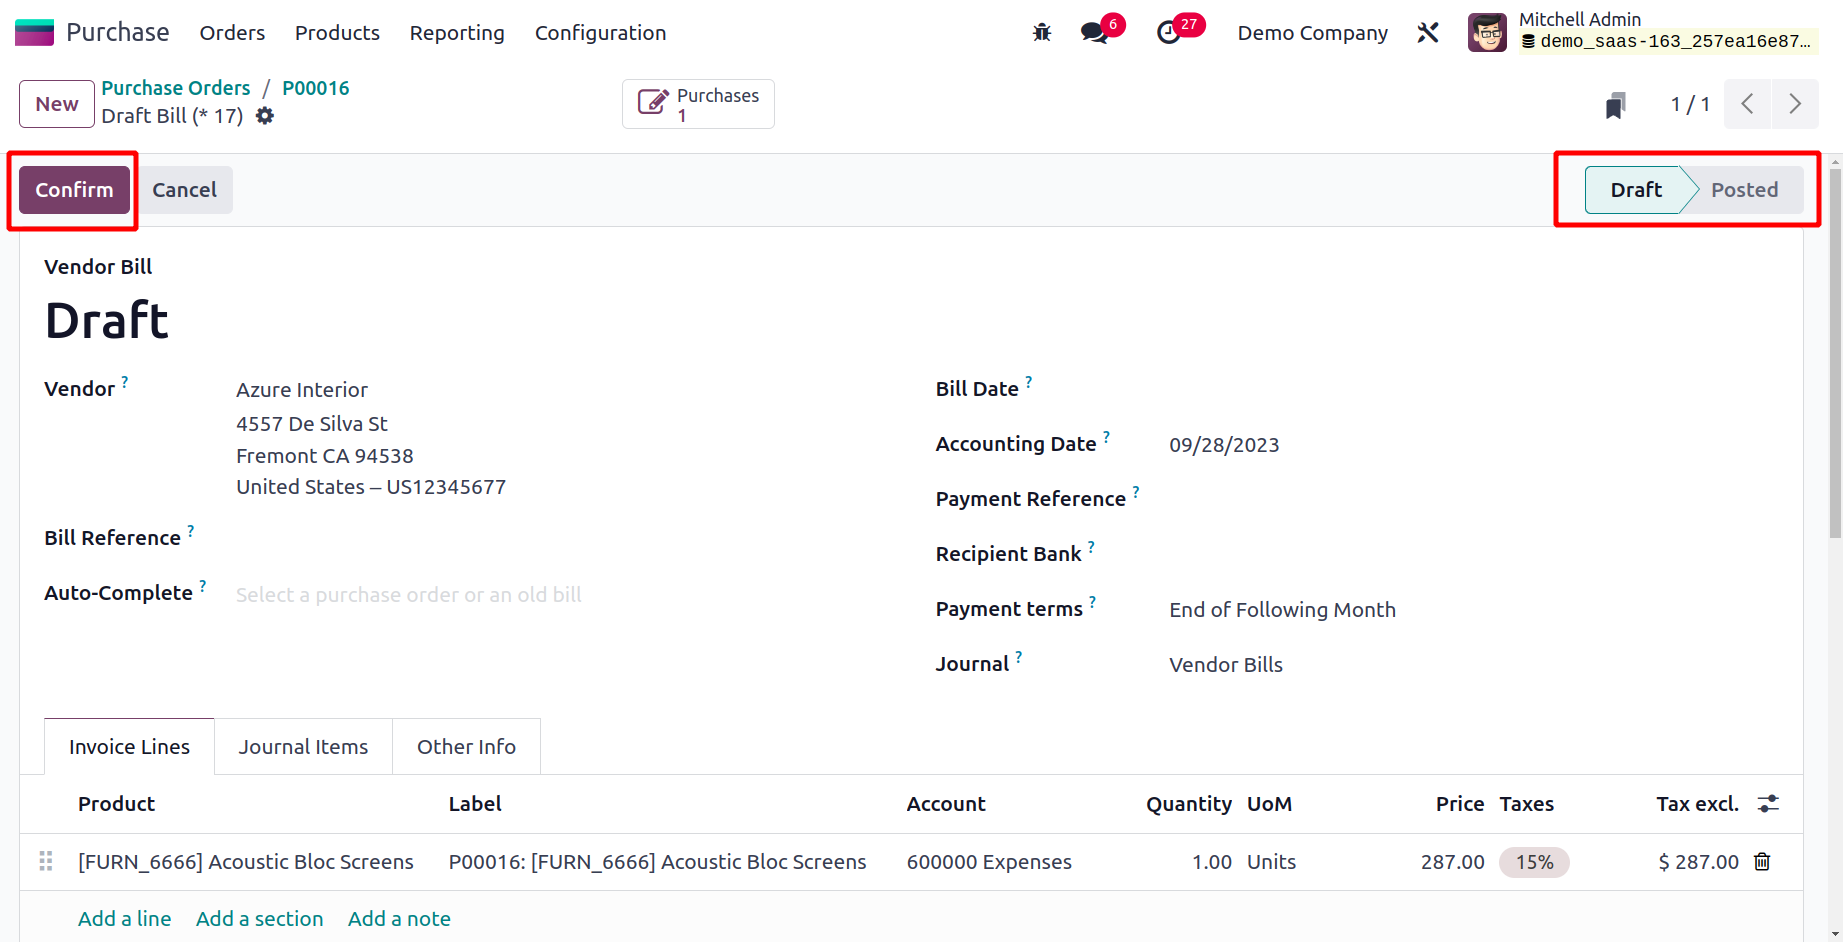
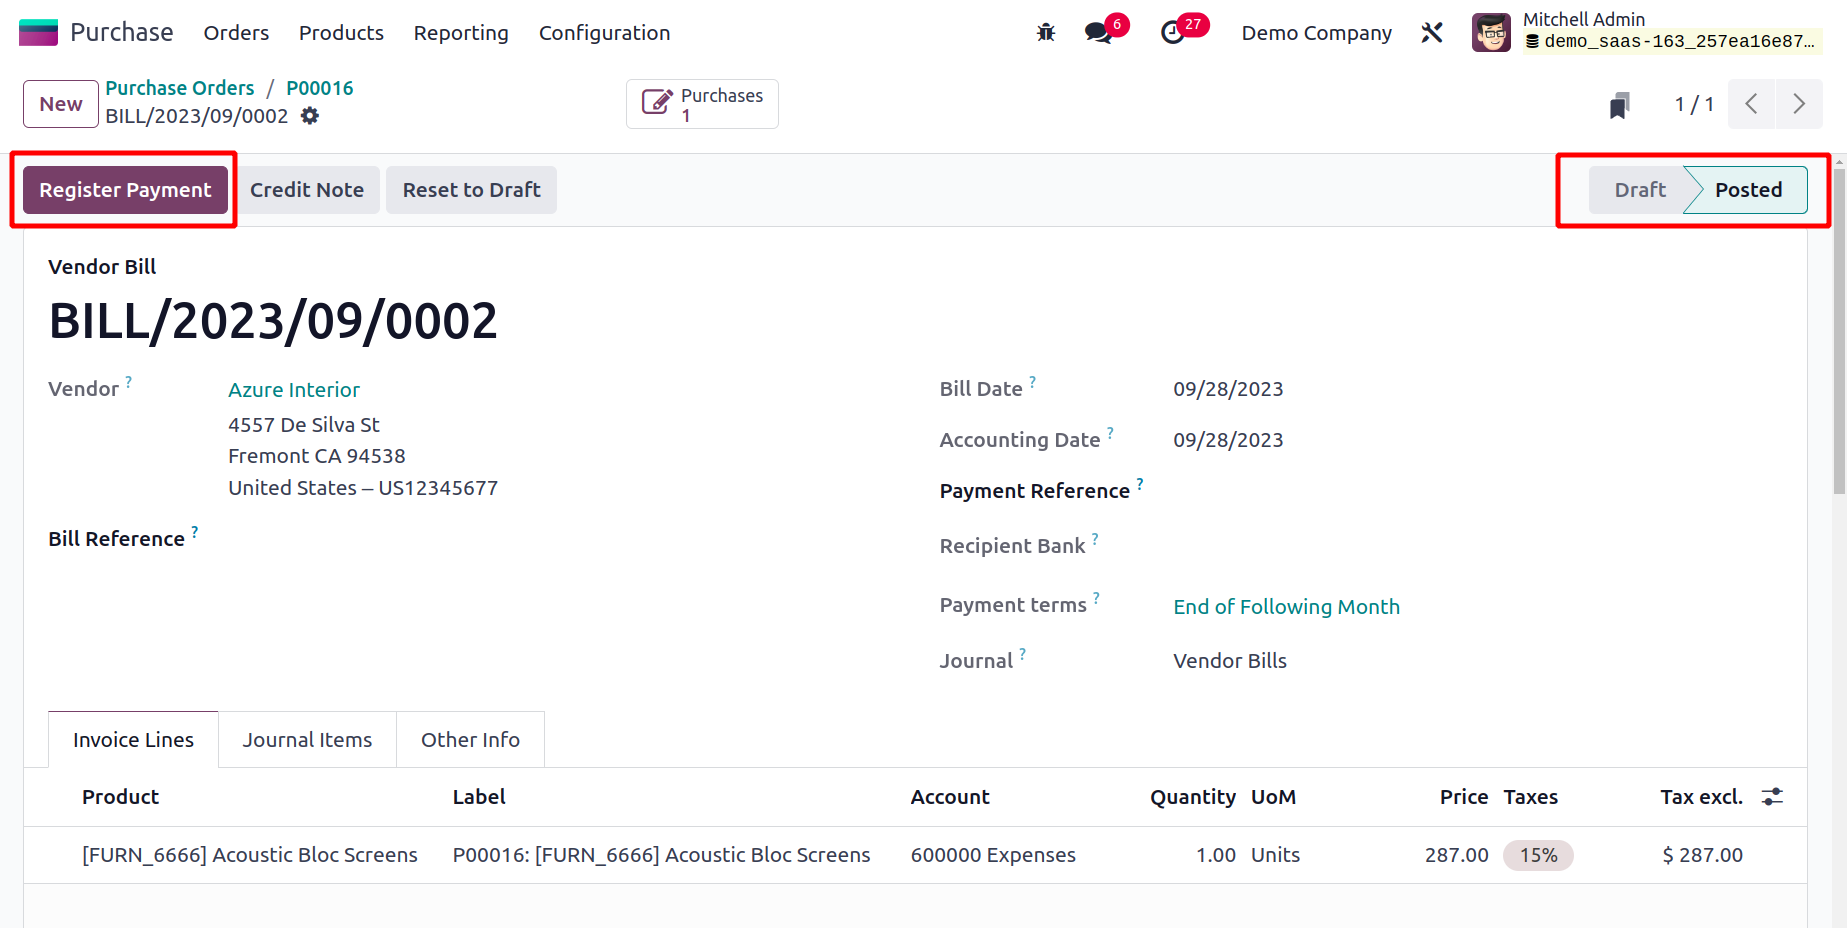
Before approving it, you can double-check the information provided in the
draft vendor bill. The Vendor, Bill Reference, Bill Date, Accounting
Date, Payment Reference, Recipient Bank, Journal, and Due Date
information is included. To automatically fill out the form, you can
upload a previous bill or purchase order.
You can view a list of the things you ordered in the Invoice Lines. The
associated fields allow you to see the journal entries and other details
related to the vendor bill. To confirm the vendor bill, click the
Confirm button.
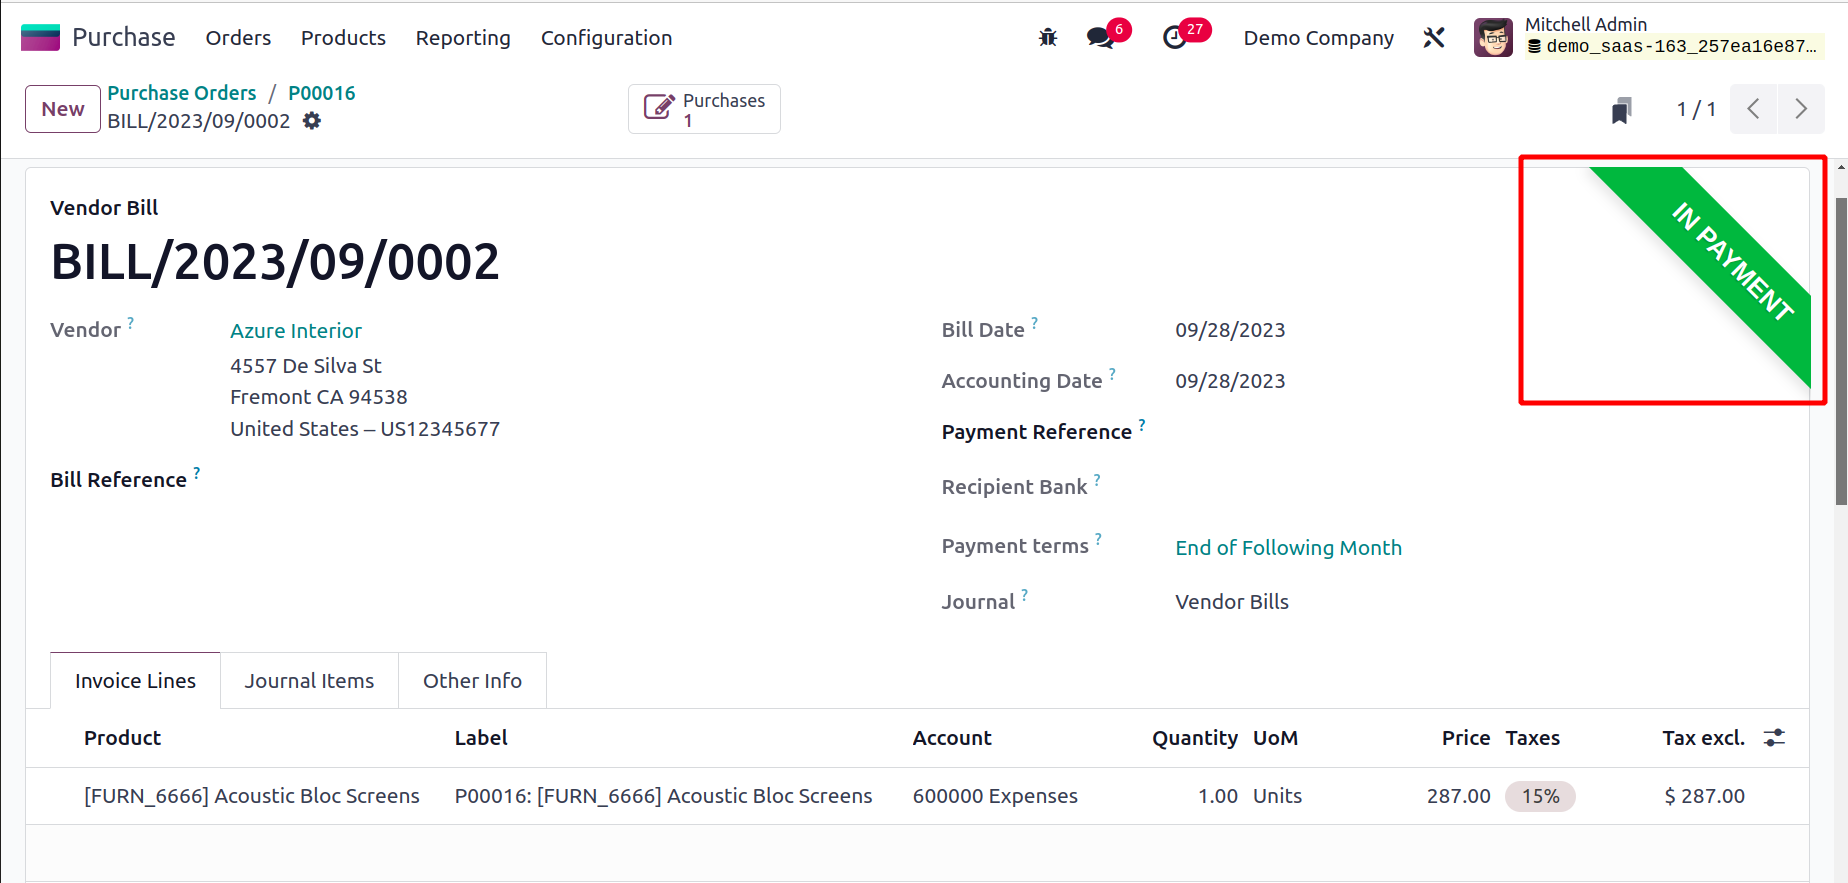
The status of the vendor bill can be shown as Paid as seen in the image
above after completing all payment steps. This is how we create vendor
invoices for the things we've received.
Now that we have a clear understanding of how Odoo17 generates vendor
invoices, let's talk about how the Purchase module creates purchase
agreements.