Payments
To keep track of all customer payments, Odoo17's Accounting module provides a dedicated
platform. From the Payments menu item under the Customers menu, you can
view payment history.
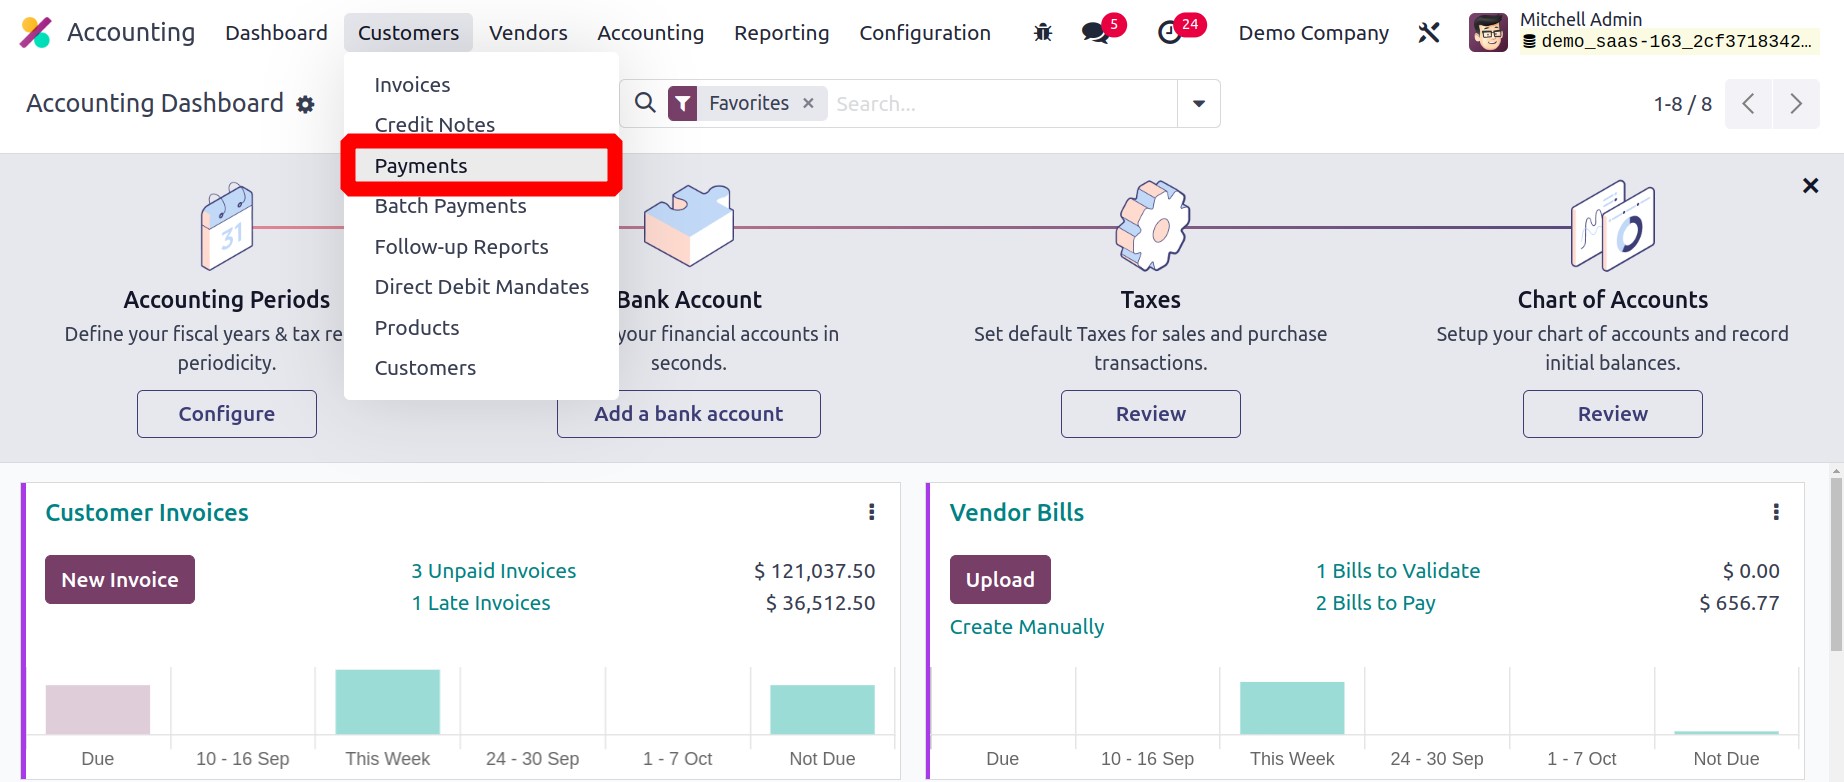
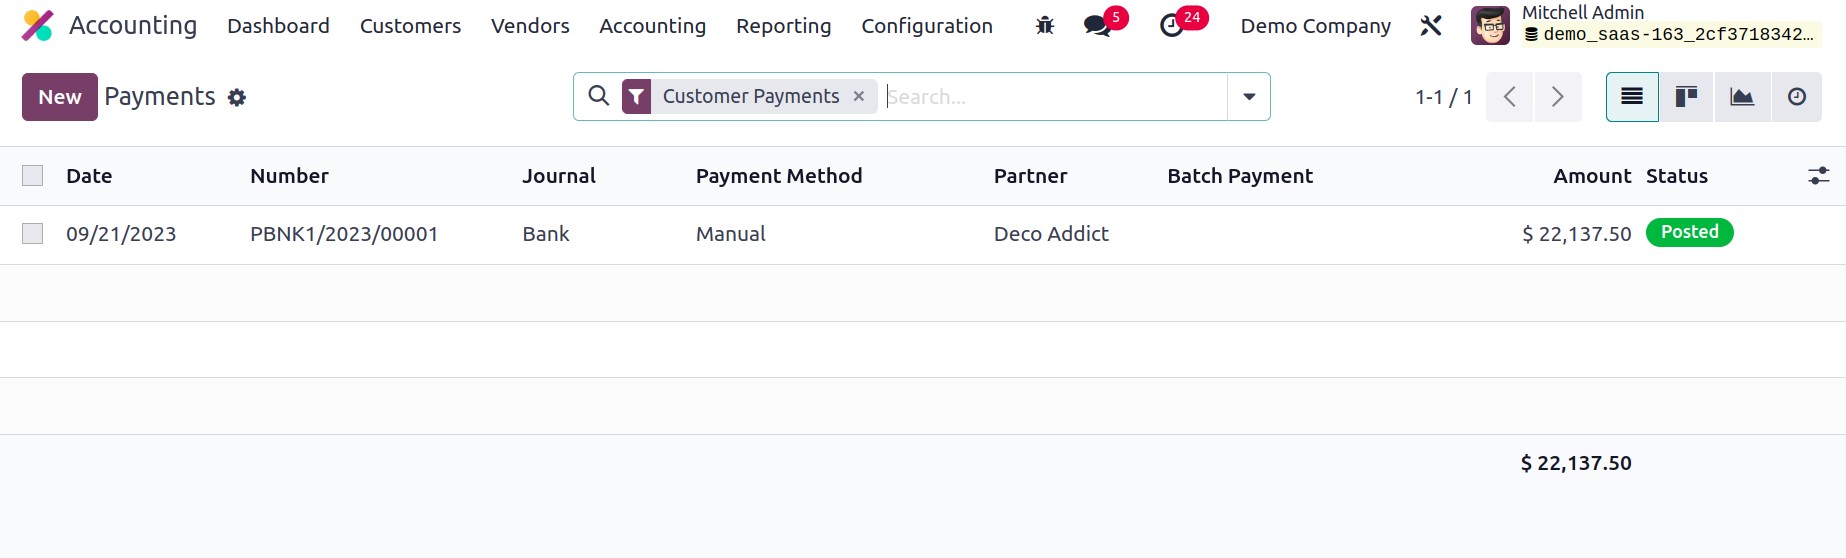
The Date, Number, Journal, Payment Method, Partner, Batch Payment, Amount, and Status
are displayed in the list view's preview.
Depending on your needs, the platform's views can be switched between List, Kanban, and
Graph. You can group by and use filters as sorting options. Odoo17 provides the
following default filters: SDD CORE, SDD B2B, Revoked SDD Mandate, Customer Payments,
Vendor Payments, Internal Transfers, Batch Payments, Not Batch Payments, Draught,
Posted, Sent, Bank Matched, Reconciled, Not Reconciled, Payment Date, and Checks to
Print. Using the Add Custom Filters option to add custom filters is simple.

Grouping payments by Customer/Vendor, Journal, Payment Method Line, Batch Payments,
Status, Payment Date, Currency, and Company is permitted. If necessary, you can create
unique grouping options using the Add Custom Group option. To manually create a
payment record, click the New button.
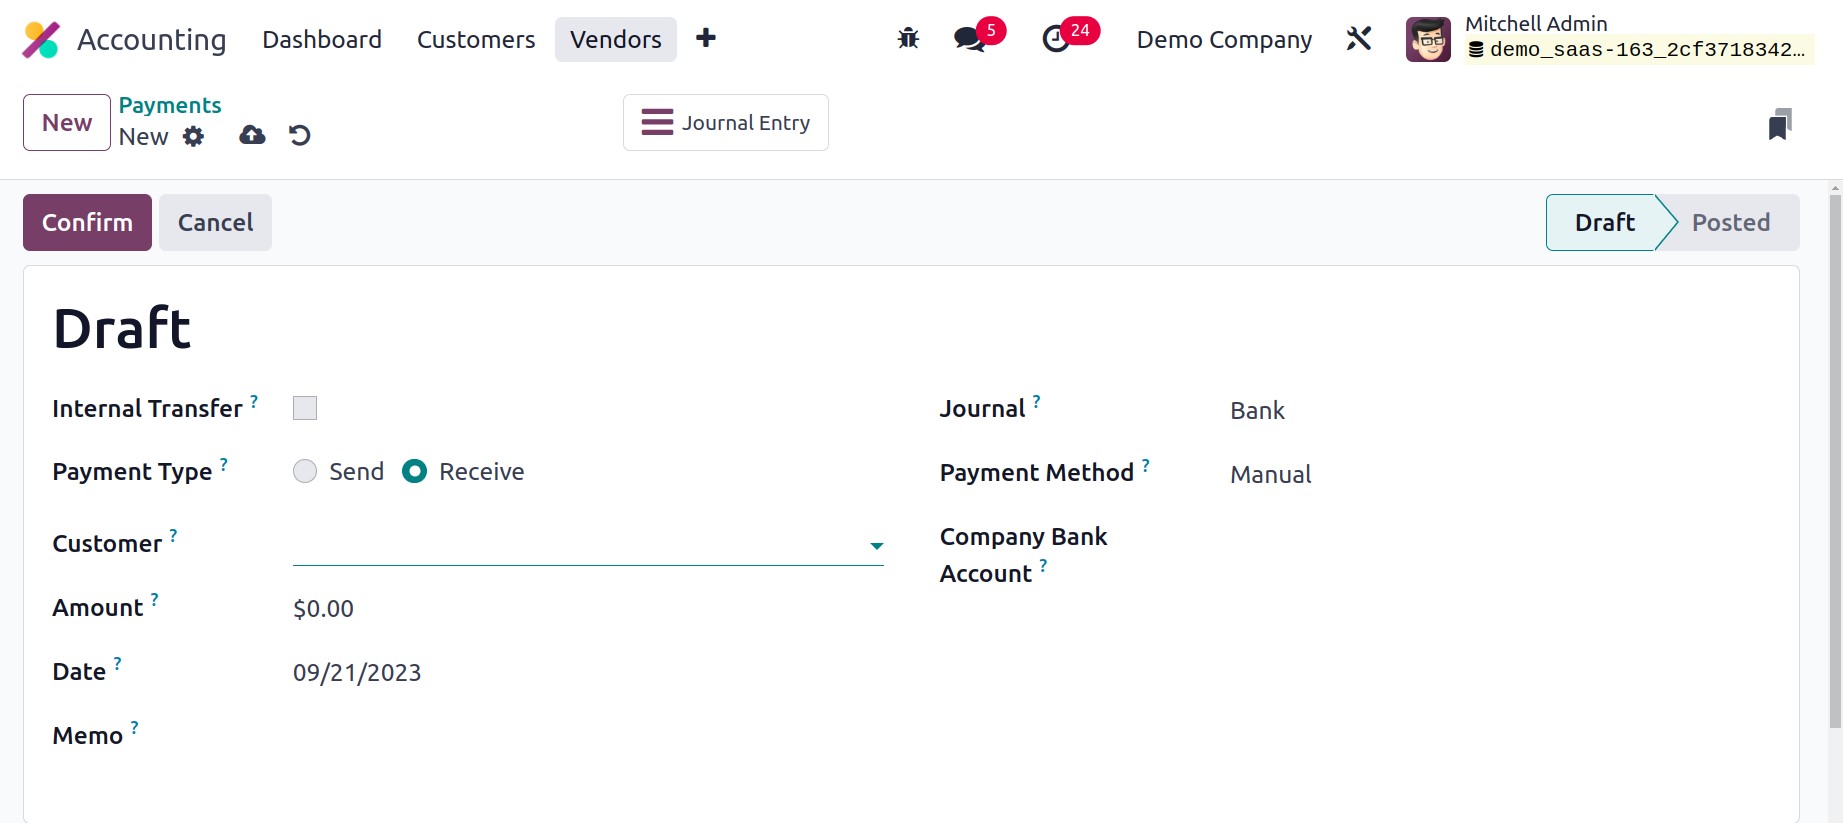
You can turn on the Internal Transfer field if you are establishing this payment
record for an internal transfer. Internal transfers are transactions that shift money
from one company account to another. The Payment Type can be changed to Receive
because it is a payment from a consumer. When paying a vendor, the payment type
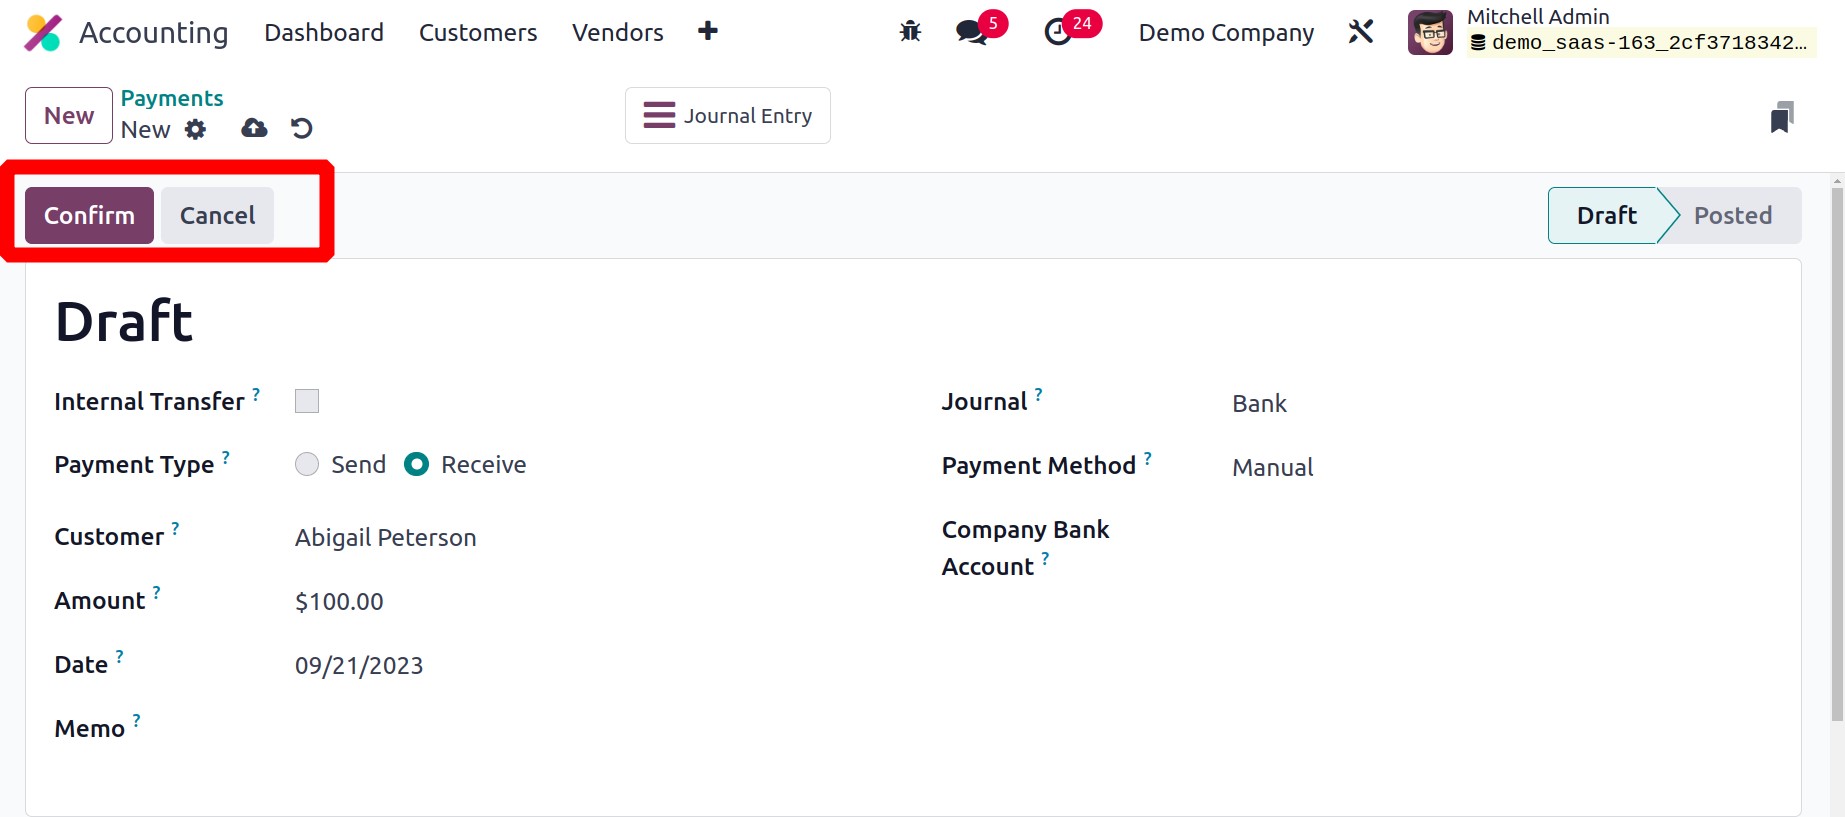
Send is employed. In the Customer section, you can provide the customer ID.
You can enter the Amount, Date, Memo for the payment, Journal to record the payment,
Payment Method, and Company Bank Account in the corresponding fields. The customer has a
variety of payment options, including manual, cheque, batch deposit, SEPA credit
transfer, and SEPA Direct Debit. You can approve the draft payment by clicking the
Confirm button.
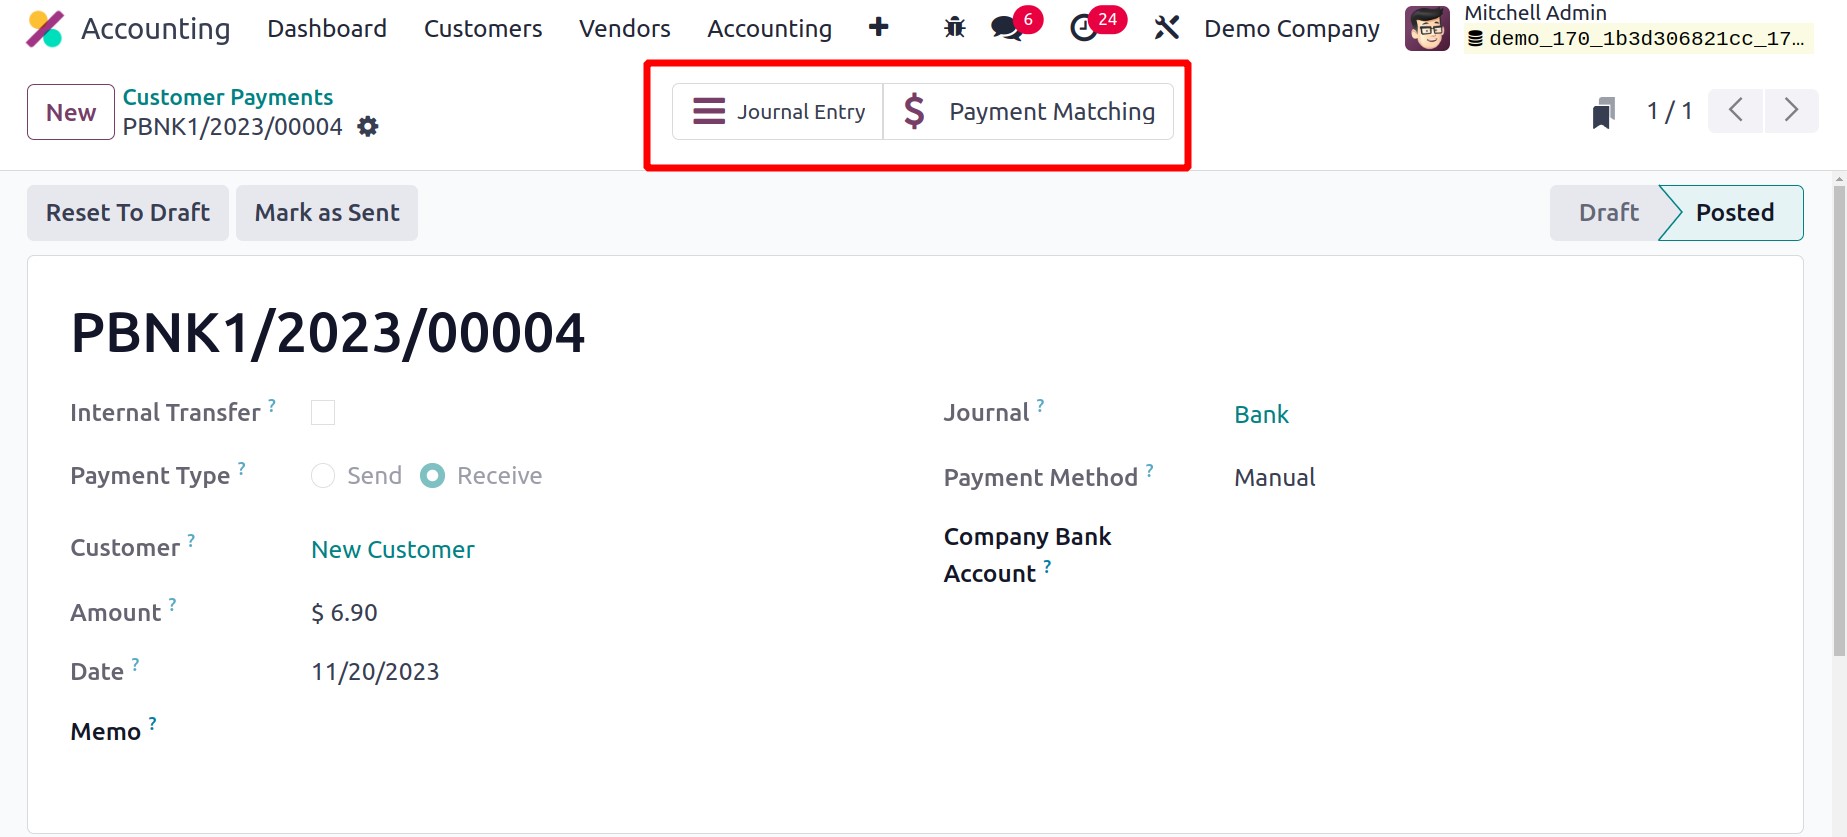
With the help of the matching smart button present in the window, you can view the
Journal Entries associated with this payment. When the customer has finished paying, you
can use the Payment Matching smart button to add this payment to any outstanding
invoices for that specific customer.
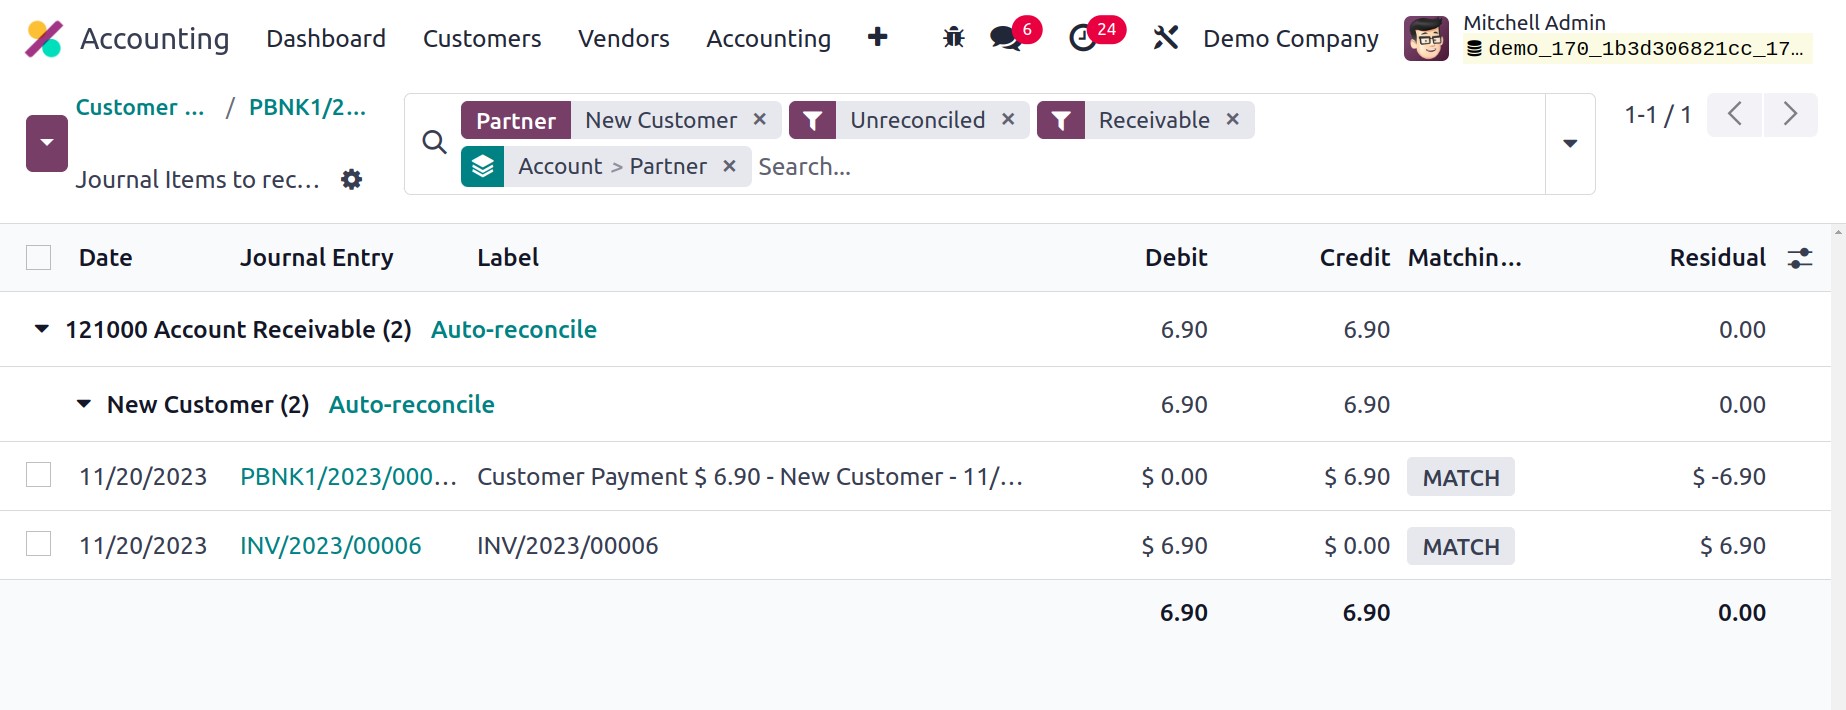
The Payment Matching tab will allow you to match the payments. The Account Receivable 2
entries added.
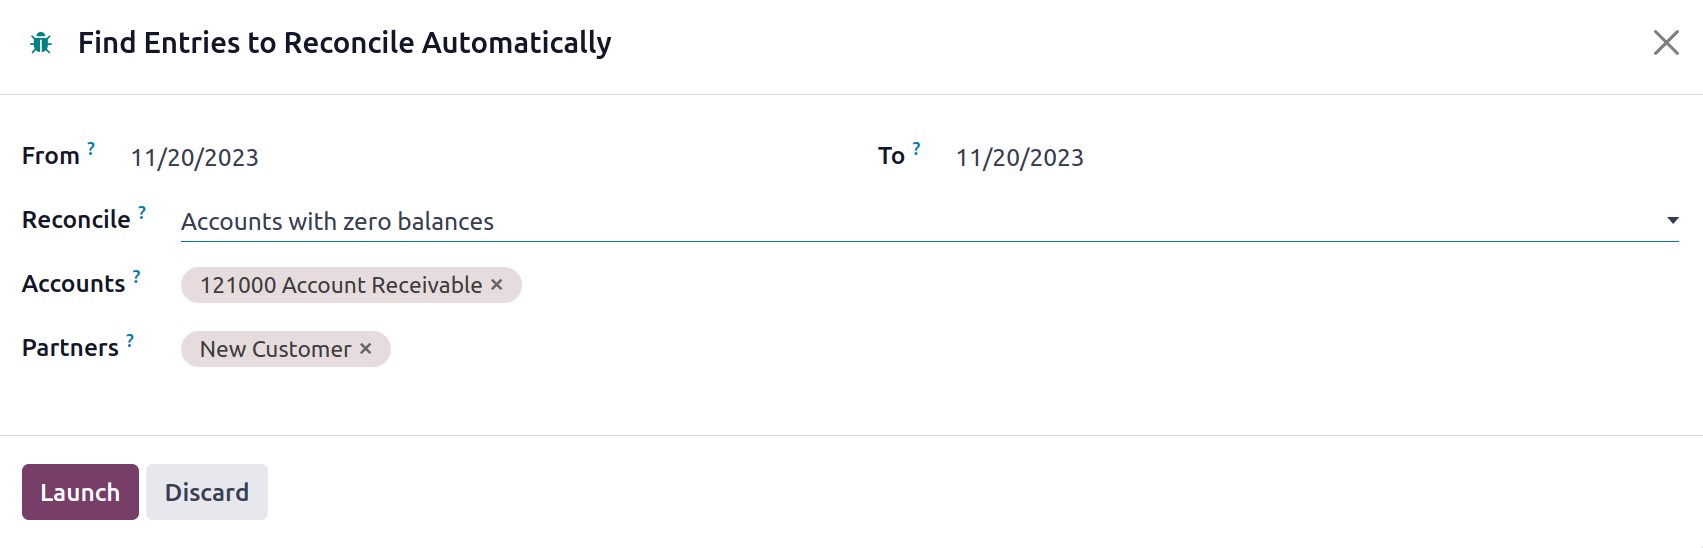
When the Auto Reconcile button is clicked a new popup window will appear. Add from and
To dates for automatic reconciliation. Then choose either Accounts with Zero balance or
Opposite balances one by one in the Reconciliation field. Account and partner are also
mentioned there. Then click on the Launch button to start the reconciliation.
Now the payment matching is completed here.
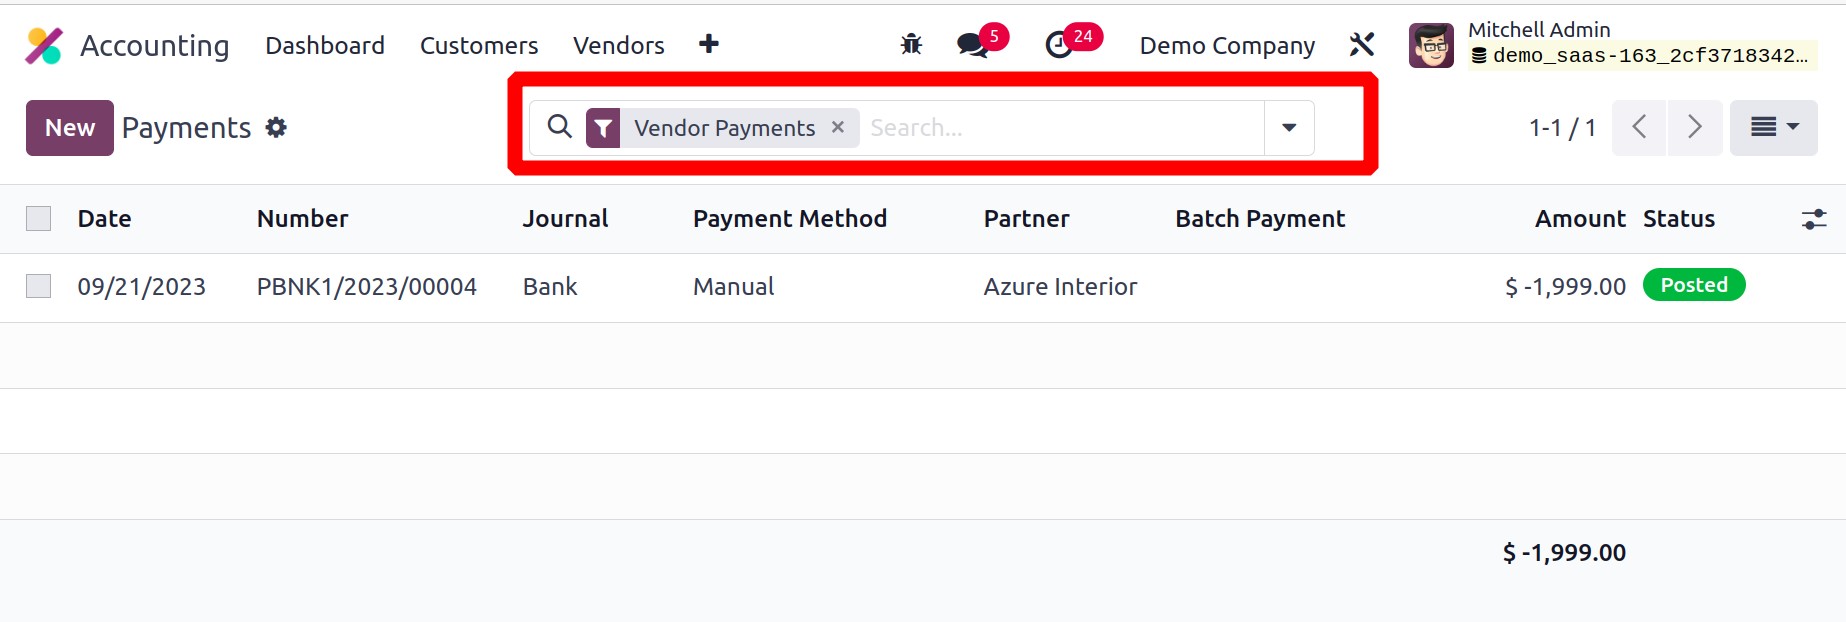
Odoo17 provides you with the option Payments under the Vendor menu as well
in order to manage vendor payments. This platform resembles the client payment window in
many ways.
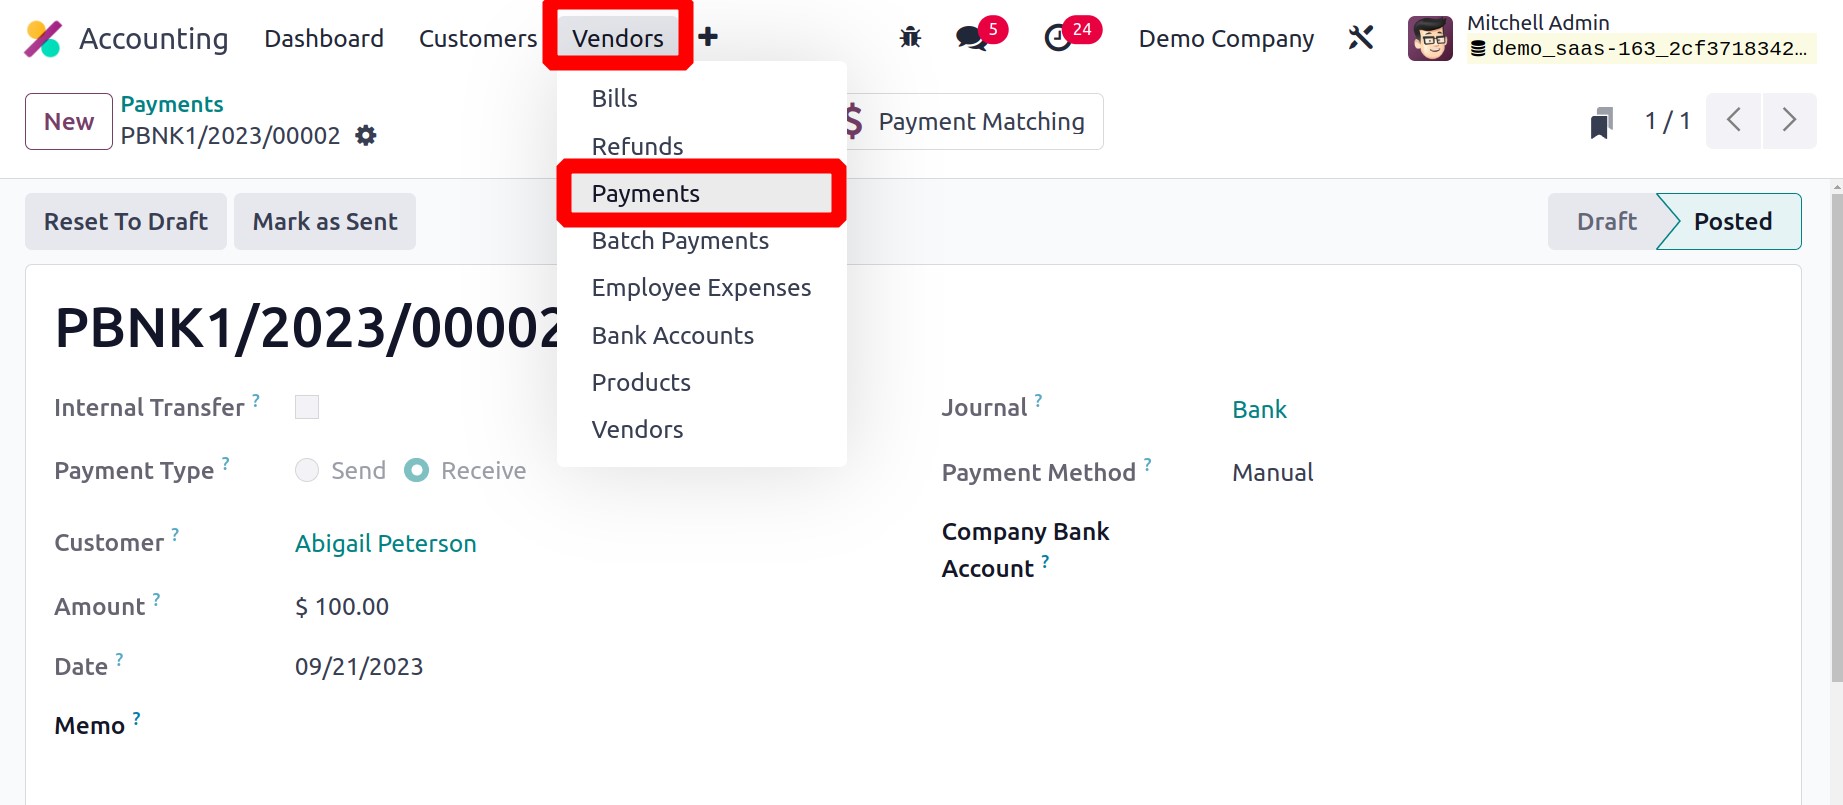
Instead of the customer name, the vendor's name will appear in the list view of the
vendor payments. By selecting the Vendor Payment filter as indicated in the above image,
you can access the list of vendor payments directly from the customer payment window.
You must enter the Vendor ID and Vendor Bank Account in the appropriate areas when
recording a vendor payment.
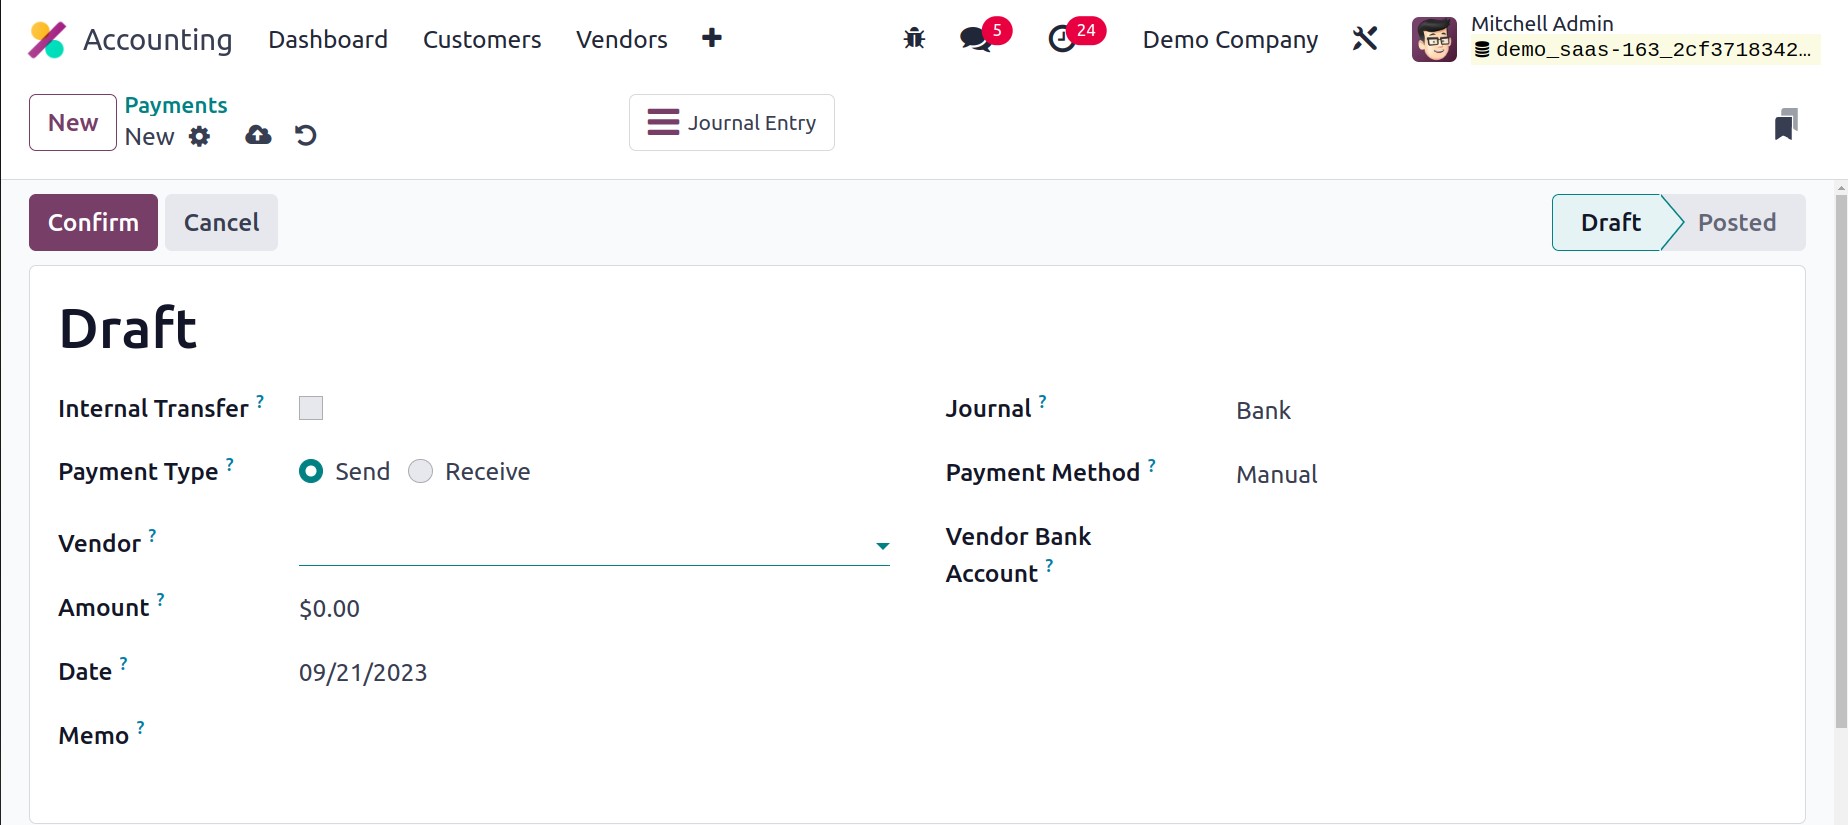
The Payment Type will be Send because it is a vendor payment.
Now, let's talk about the Accounting module's receipt management window.