Odoo 17 Documents
Your organization's business will suffer from improper document management, which will also result in spending more than necessary. The essential papers will also require a lot of time to organize. Your company can become more productive and efficient by implementing a solid and well-defined document management system. Through its Documents module, the Odoo17 ERP provides a comprehensive solution for all problems relating to document management. The module's flexibility enables you to work according to the needs of your business. This module enables you to store your data and documents digitally, which will be a more favored method of information storage.
The Document module in the Odoo17 ERP system is a good option for clearing up the clutter in document handling. The Odoo17 Document module is a solid and better option if you wish to set up a centralized system for document storage. The system enables you to save data effectively in a variety of formats, including PDF forms, URLs, photos, and videos.
You can install the module from the Odoo17 Applications to obtain it. You can click the Document menu icon to open the Dashboard window for the module. The image below shows the module's Dashboard window.
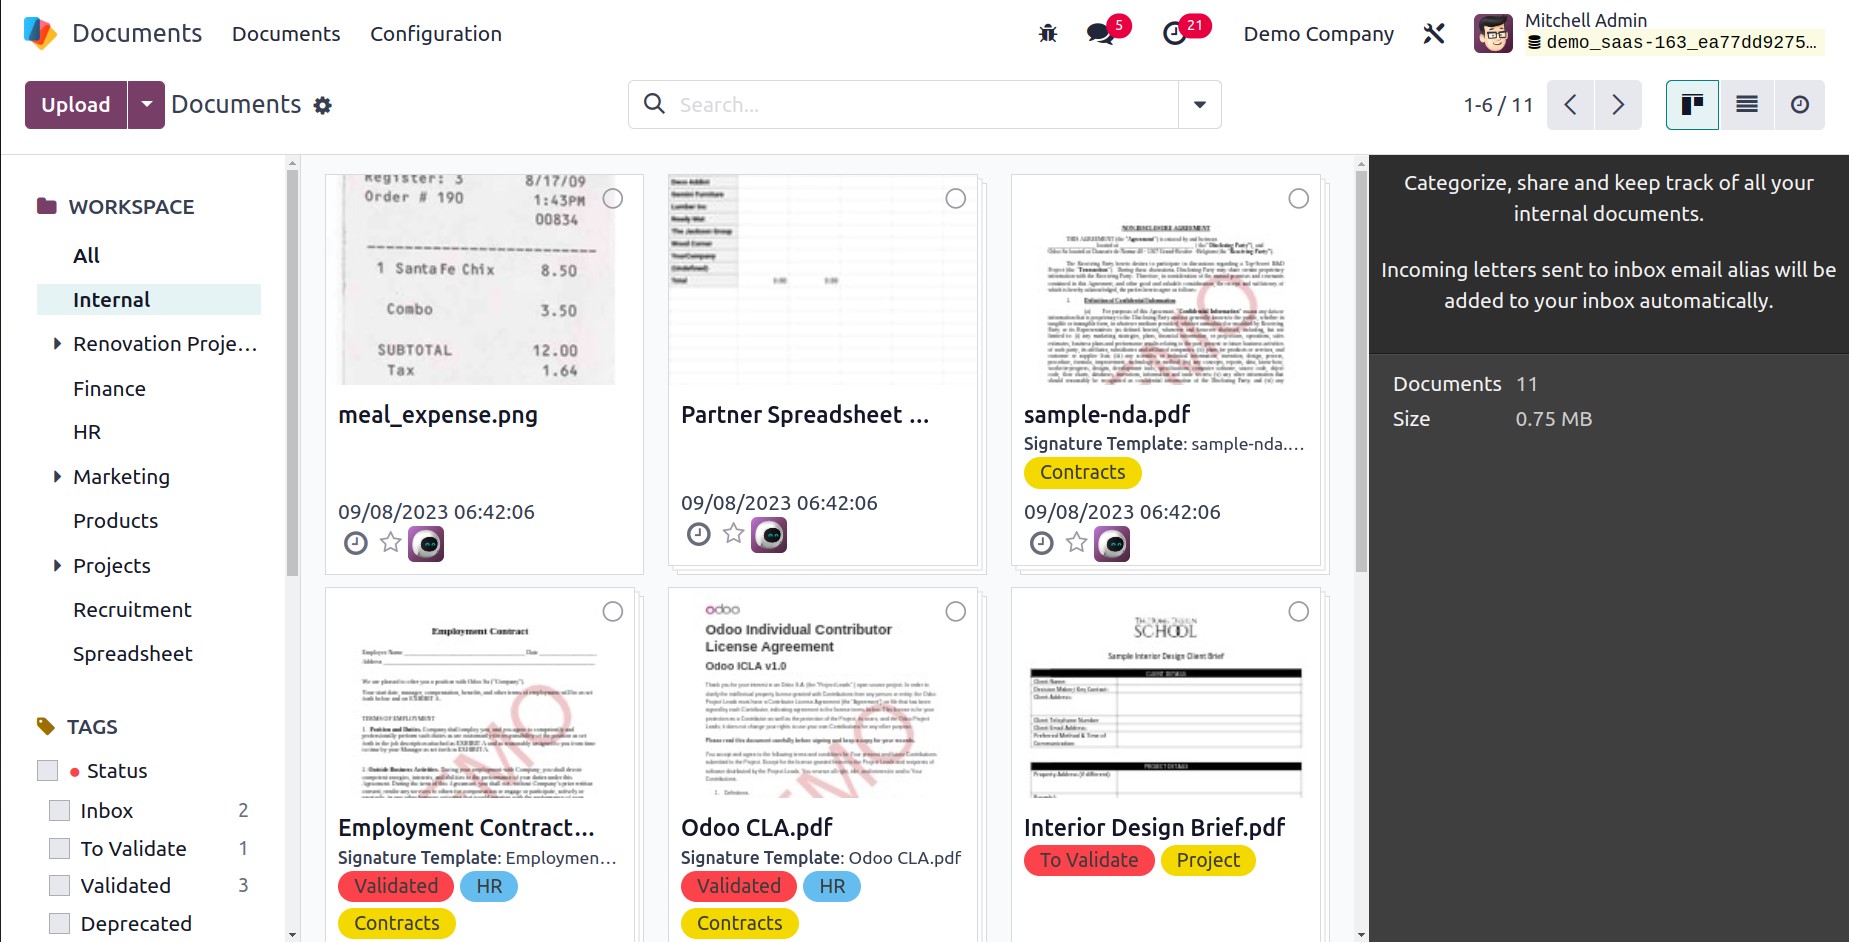
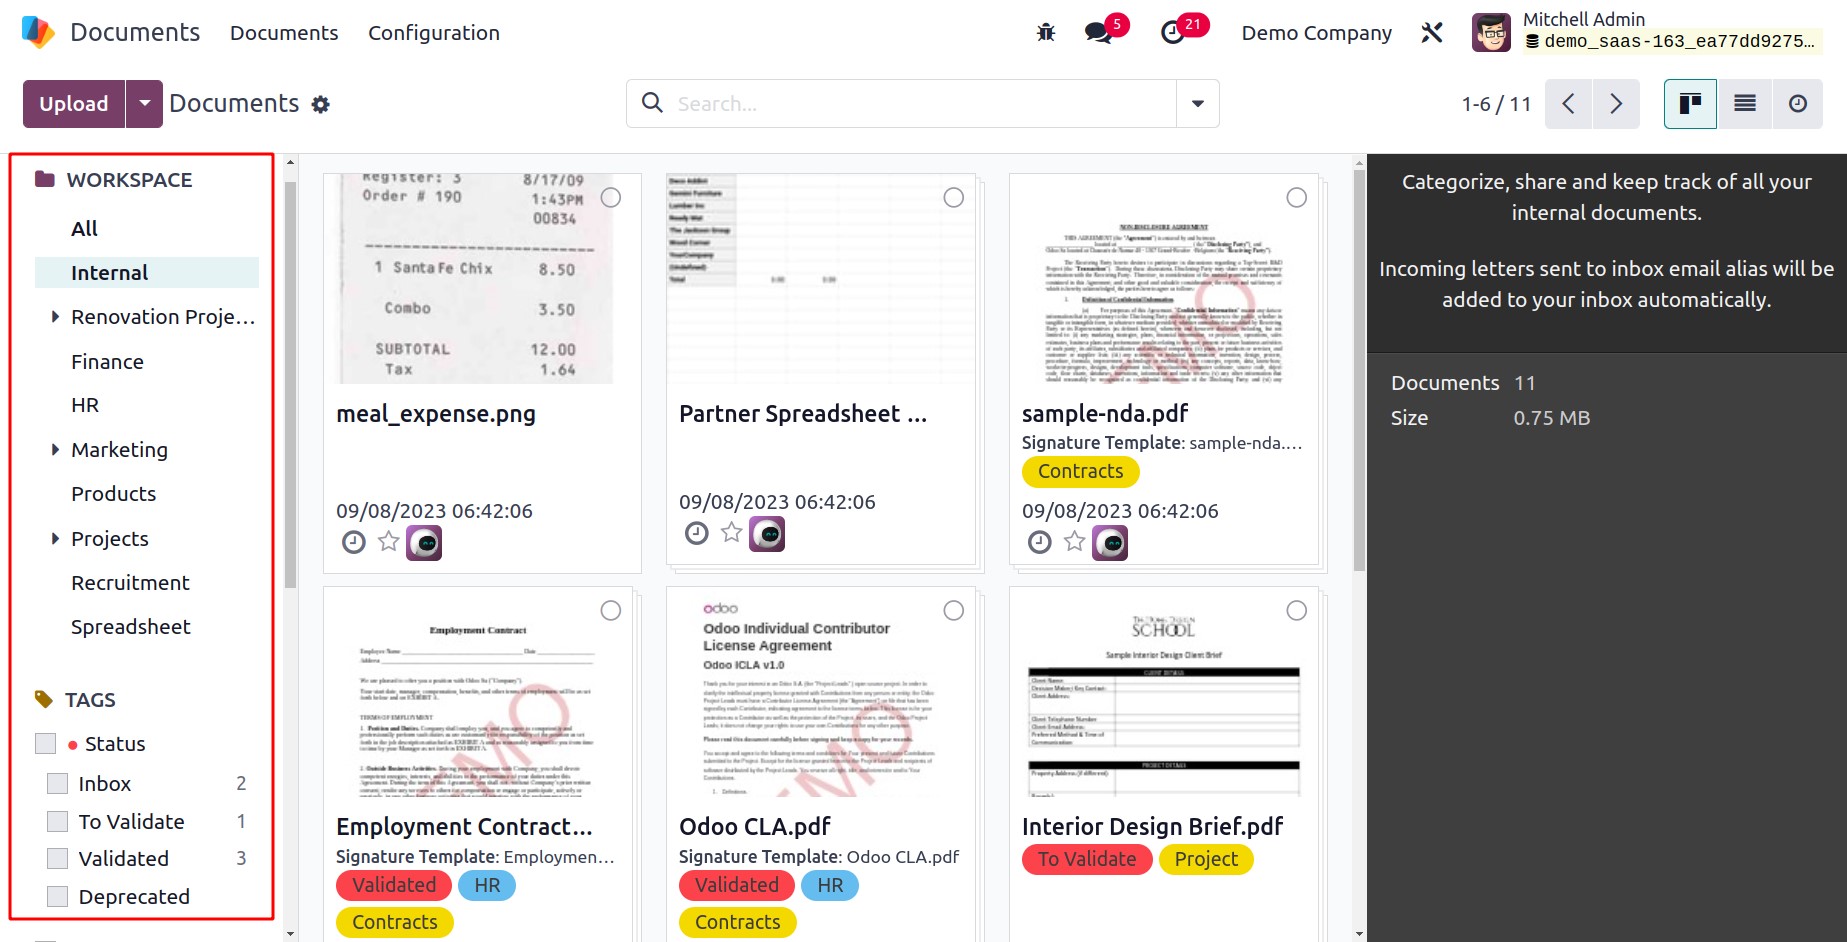
The papers dashboard window gives you a sneak glimpse at all the preconfigured papers stored in the system, as you can see in the image above. The left side of the window is where you can see the workspace details. You can organize your documents using the system according to their workspace and several categories, like Internal, Finance, HR, Marketing, Products, and many others. You can choose "All" to see every document without categorizing them. Tags may also be used inside each workspace so that you can easily recognize your documents.
Then, as demonstrated below, the system will display the document in detail.
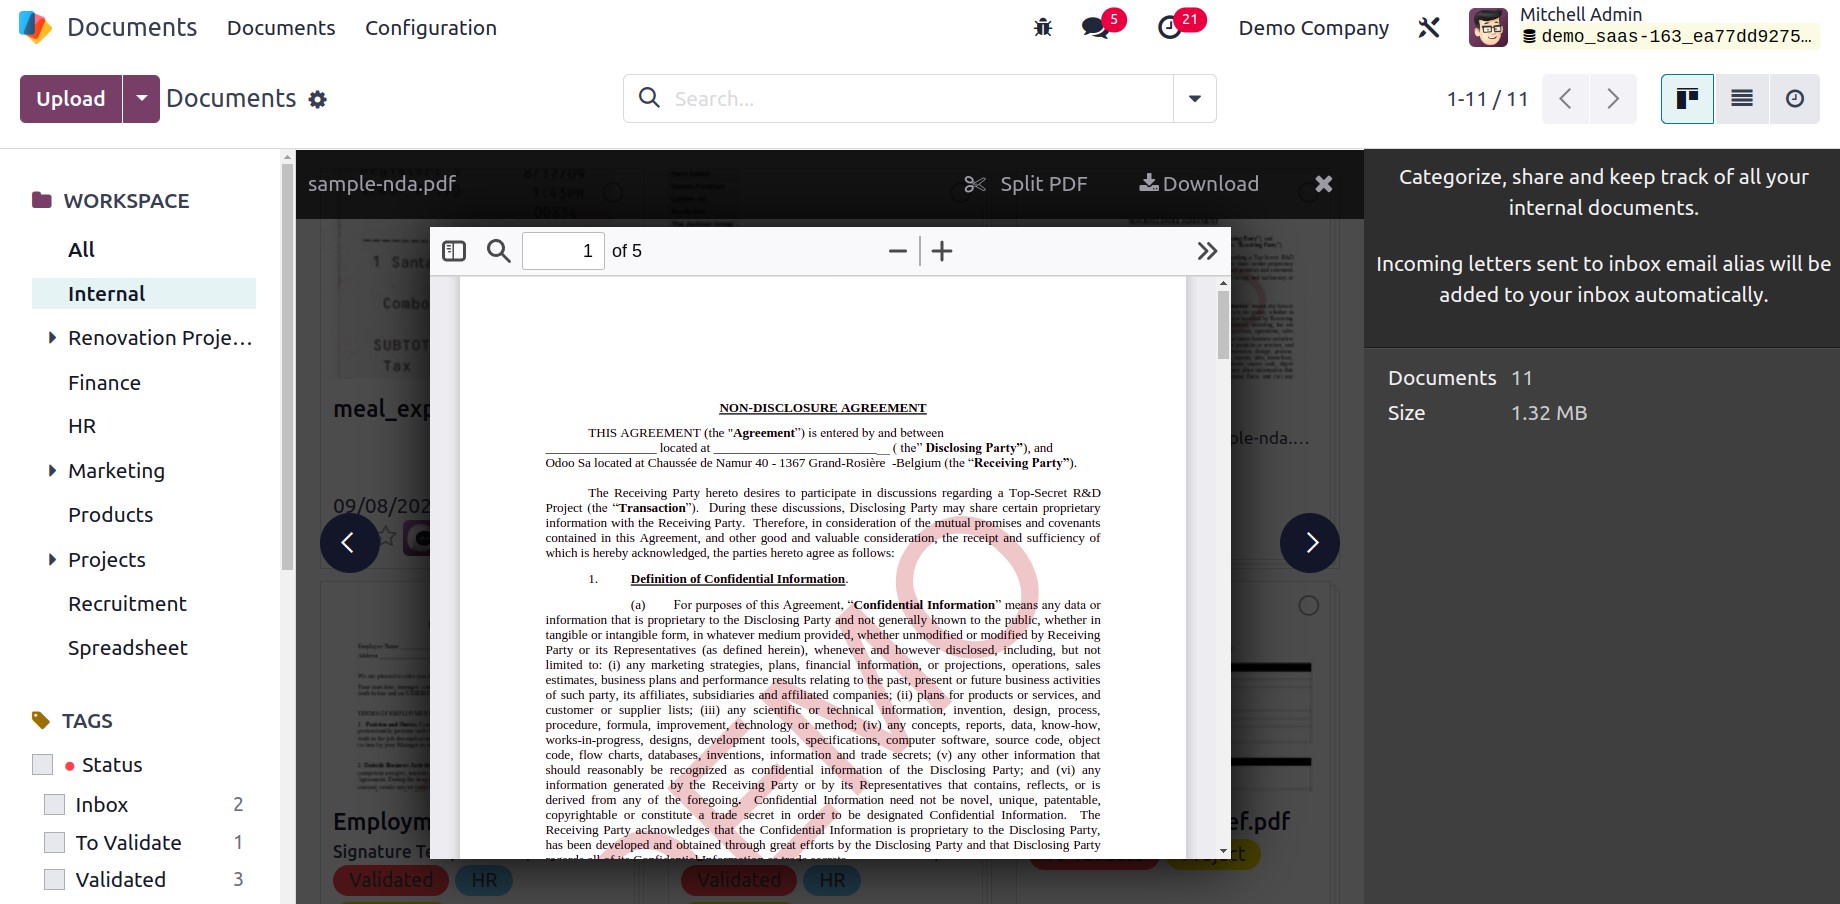
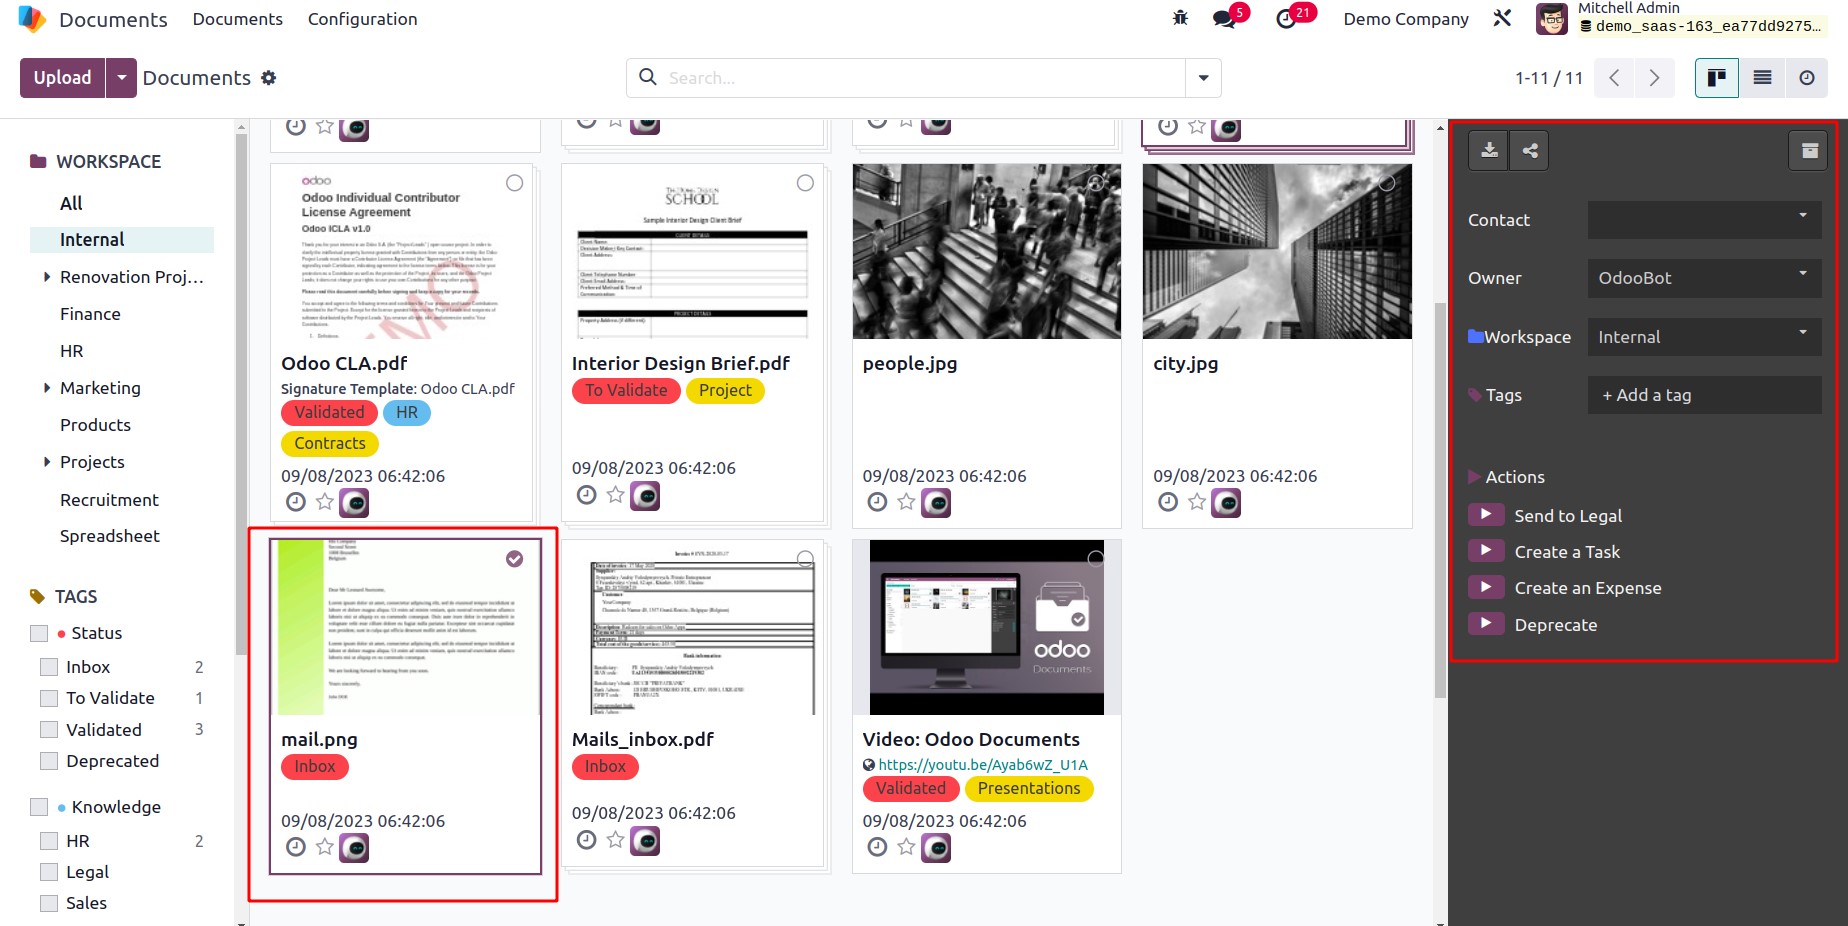
Each of these document files can be chosen, and when you do, the right side of the window will display a quick summary of the record you have chosen. You can see different menu icons for carrying out various tasks in each document record. These are the buttons highlighted in the image below: Select Document, Activity Scheduling, and Toggle Favorite.
You can choose that specific document using the menu "Select document." The information will now appear in the right section.
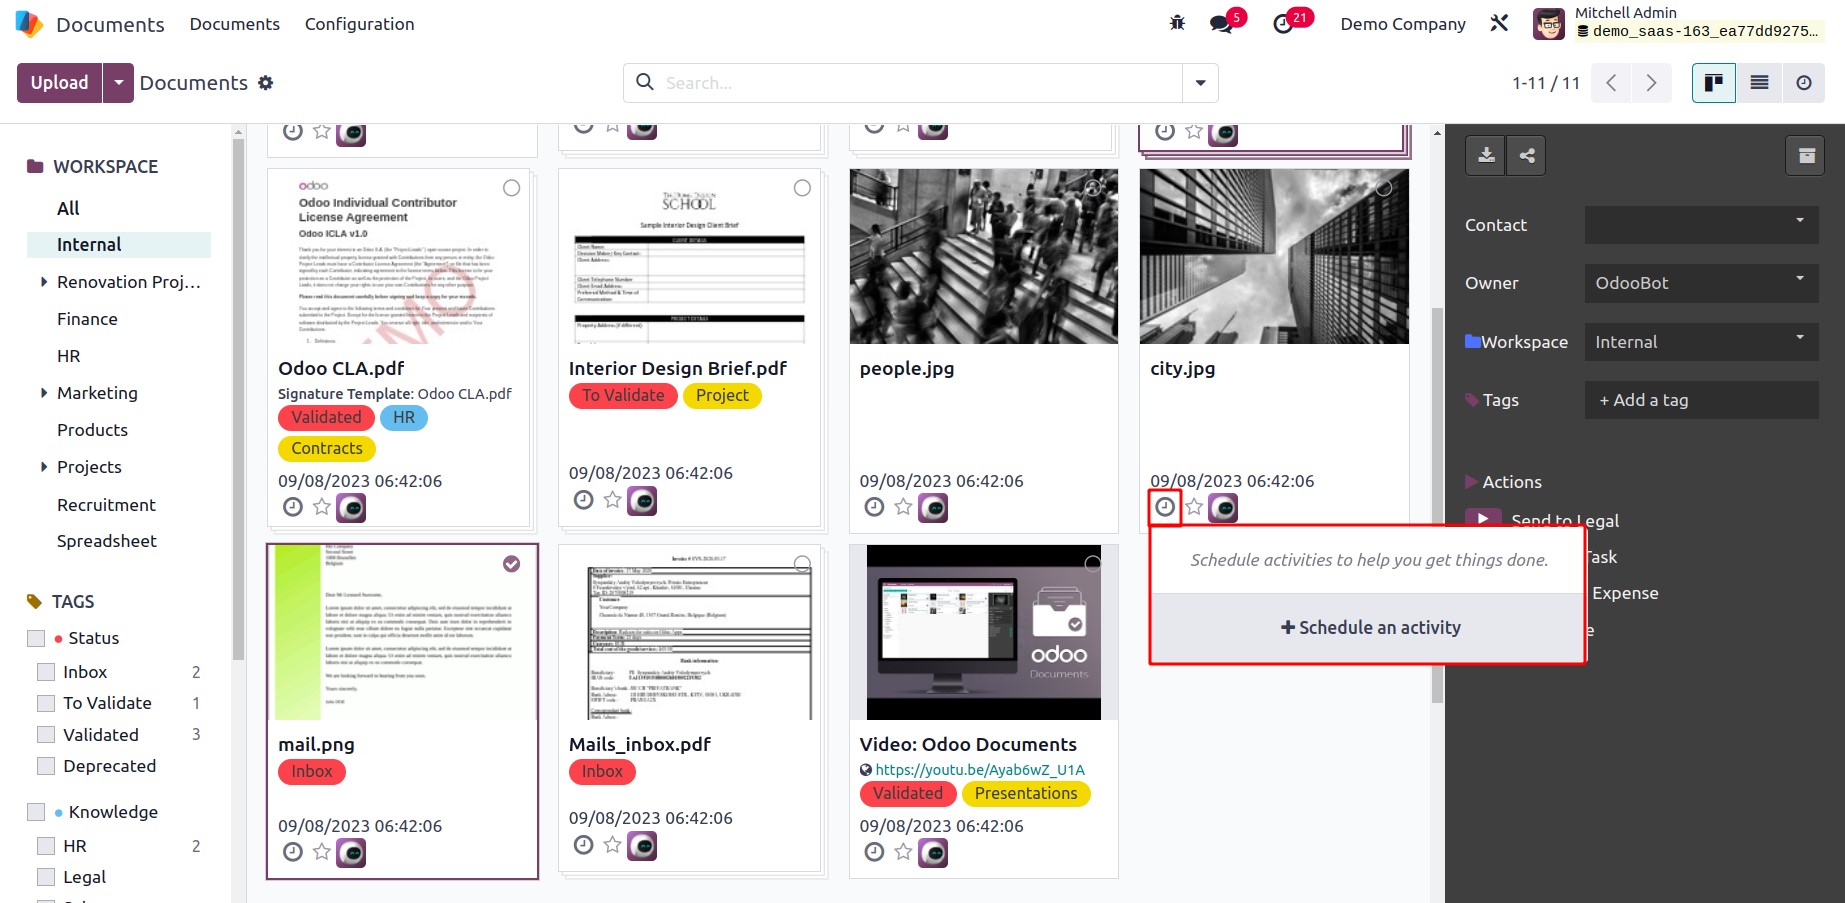
In the image below, the option for scheduling an activity is highlighted. You can immediately plan an activity by using this icon.
The pop-up window for scheduling can be accessed by clicking the SCHEDULE AN ACTIVITY button.
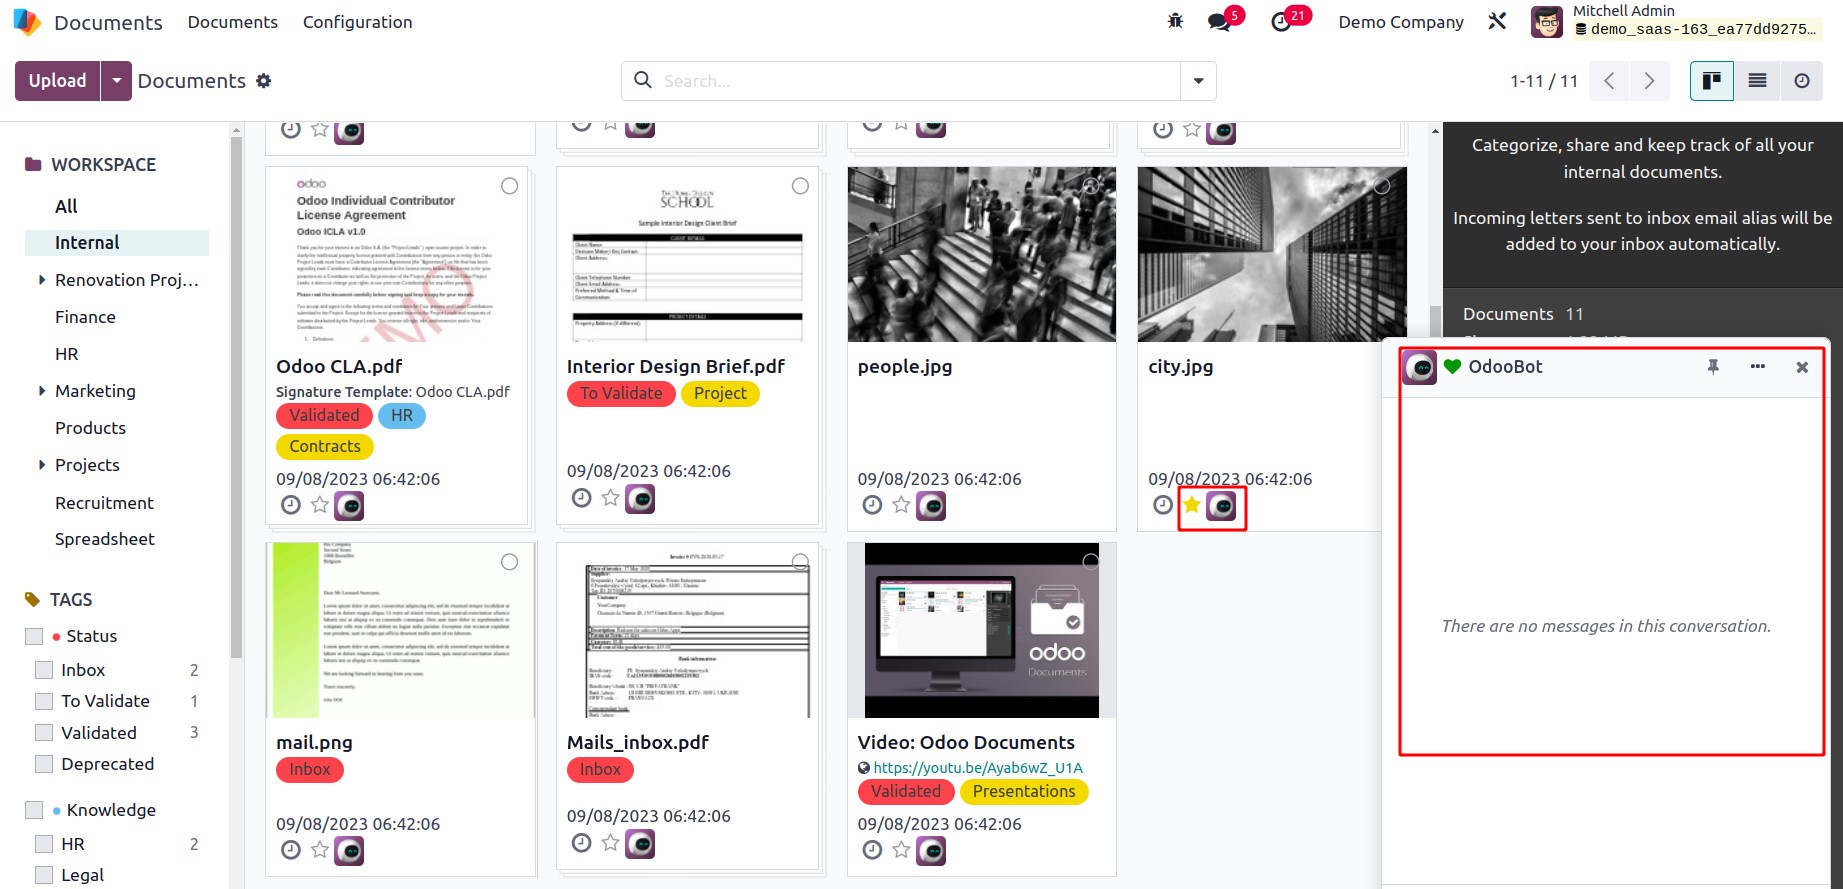
Additionally, the system shows the Favorite option, which enables you to designate your crucial documents for simple data access. Additionally, the system provides you with an icon to initiate a direct chat with the accountable party. This icon is highlighted in the image below; if you click it, a pop-up chat window, which is also shown in the screenshot, will appear.
The module additionally enables you to view the dashboard window as a list in addition to the Kanban view. You can click on the List view menu icon in the window's upper right corner to view it in list mode.
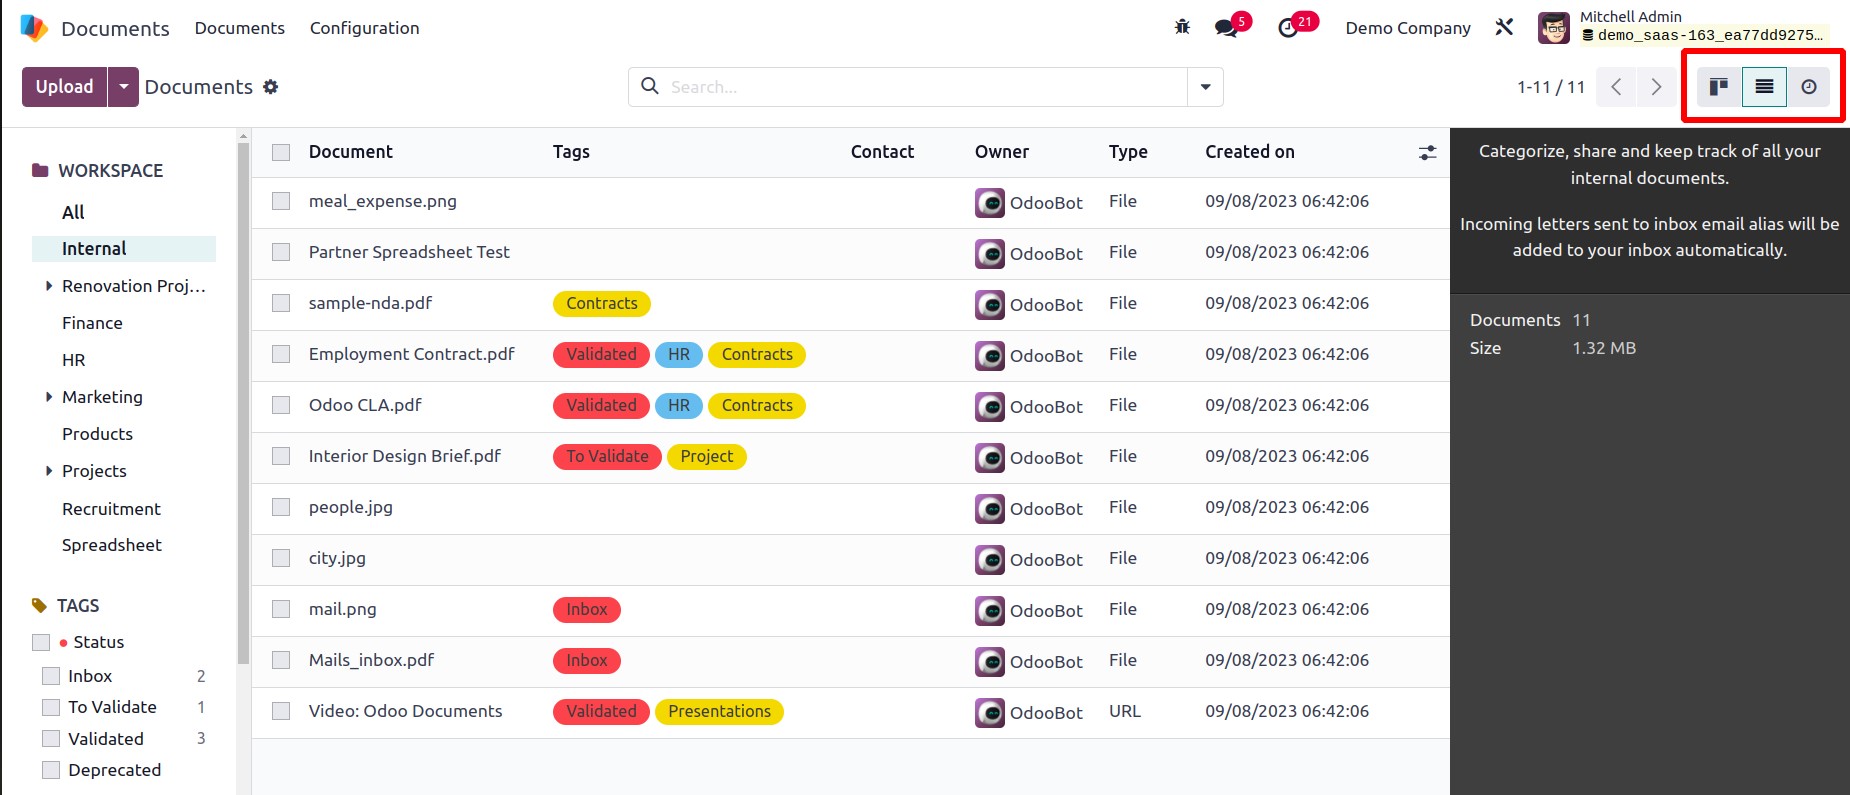
For categorizing and organizing your data, the Dashboard panel also has a number of preset and customizable Filters, Favorites, and Search options. My Documents, My Favorites, PDF/Document, Spreadsheet, Image/Video, URL, Locked, Requested, and Archived are the default Filters available under the Filters tab. Your records and data can be categorized using the window's left-hand side.
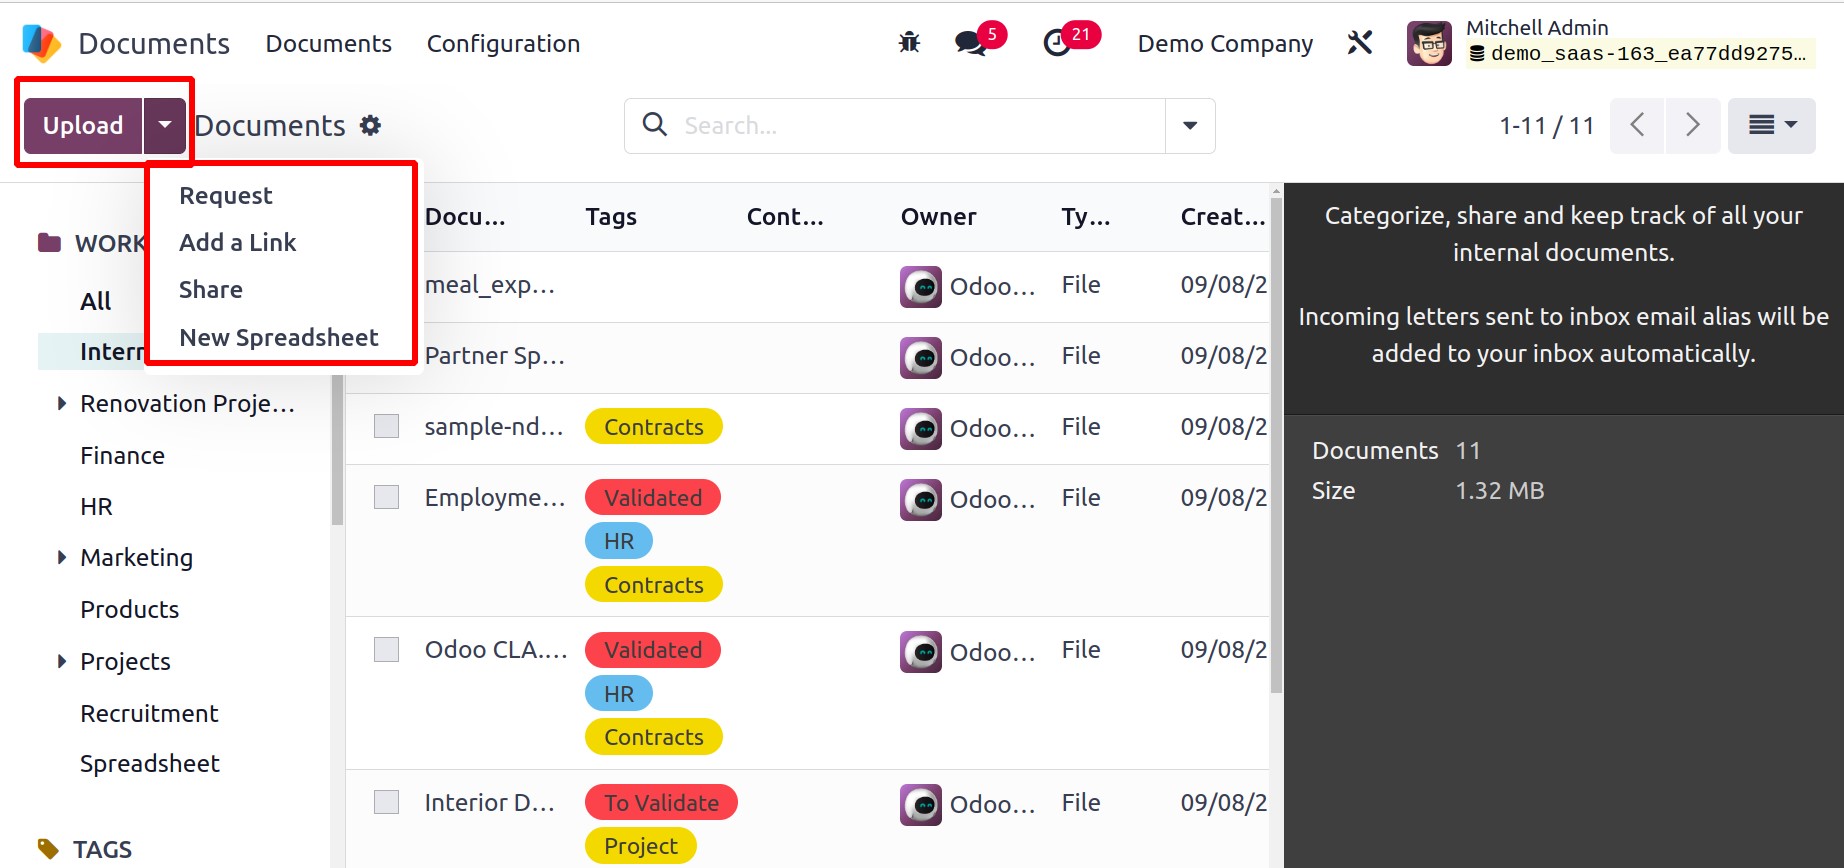
You may utilize the UPLOAD button in the top left corner of the window to add new files to the system. By clicking on the file after uploading the document, you have the option to share it. The Share button must then be clicked. We can upload a file to comprehend it.
The right part of the file contains the specifics after a successful upload. The right side of the screen displays a number of options, including Open Chatter, Download, Share this selection, Replace, Lock, and Archive.

You can choose the file to share and then click the SHARE button at the top of the window. The system will now show you a pop-up window where you must enter the information for sharing the chosen record. The pop-up window's screenshot is shown below.
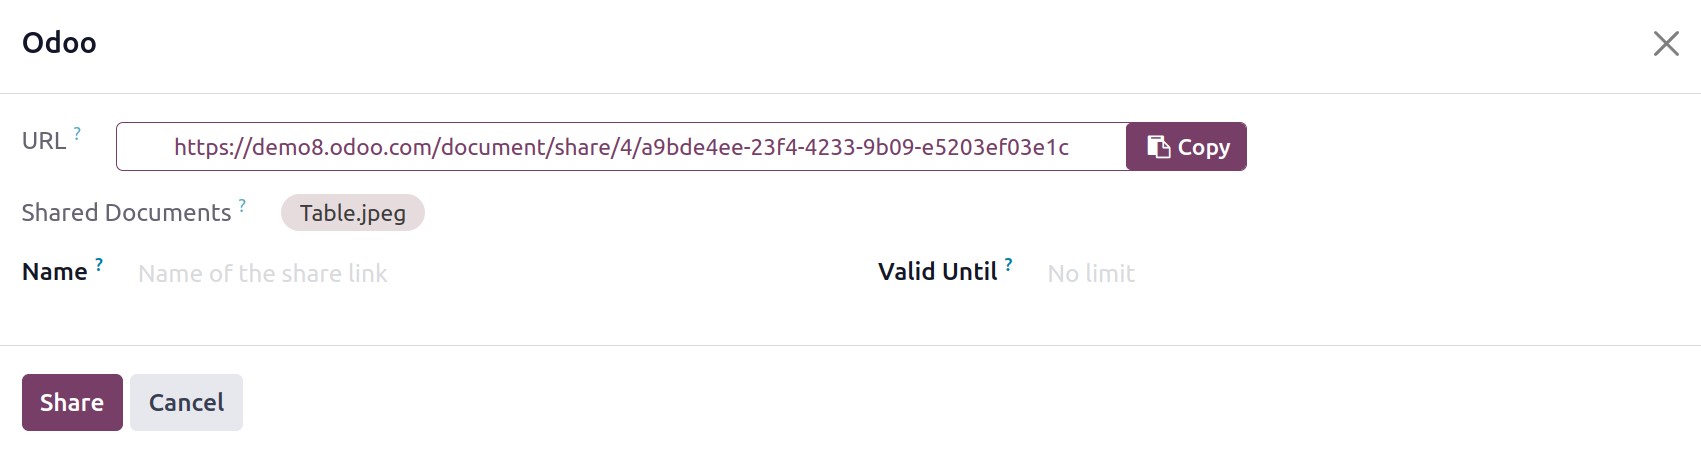
To create a URL, use the GENERATE URL button that is located in the URL field. Then, you may include the name in the Name field and designate the Valid Until field with a date. You can select the Share button after providing all the necessary information.
The options to Download, Share, Replace, Lock, and Archive are conveniently located within the document information, as shown in the figure below. Documents can be shared with someone outside of your organization or workspace with the use of the share option. Using the Archive button, you can archive the document independently of the others.
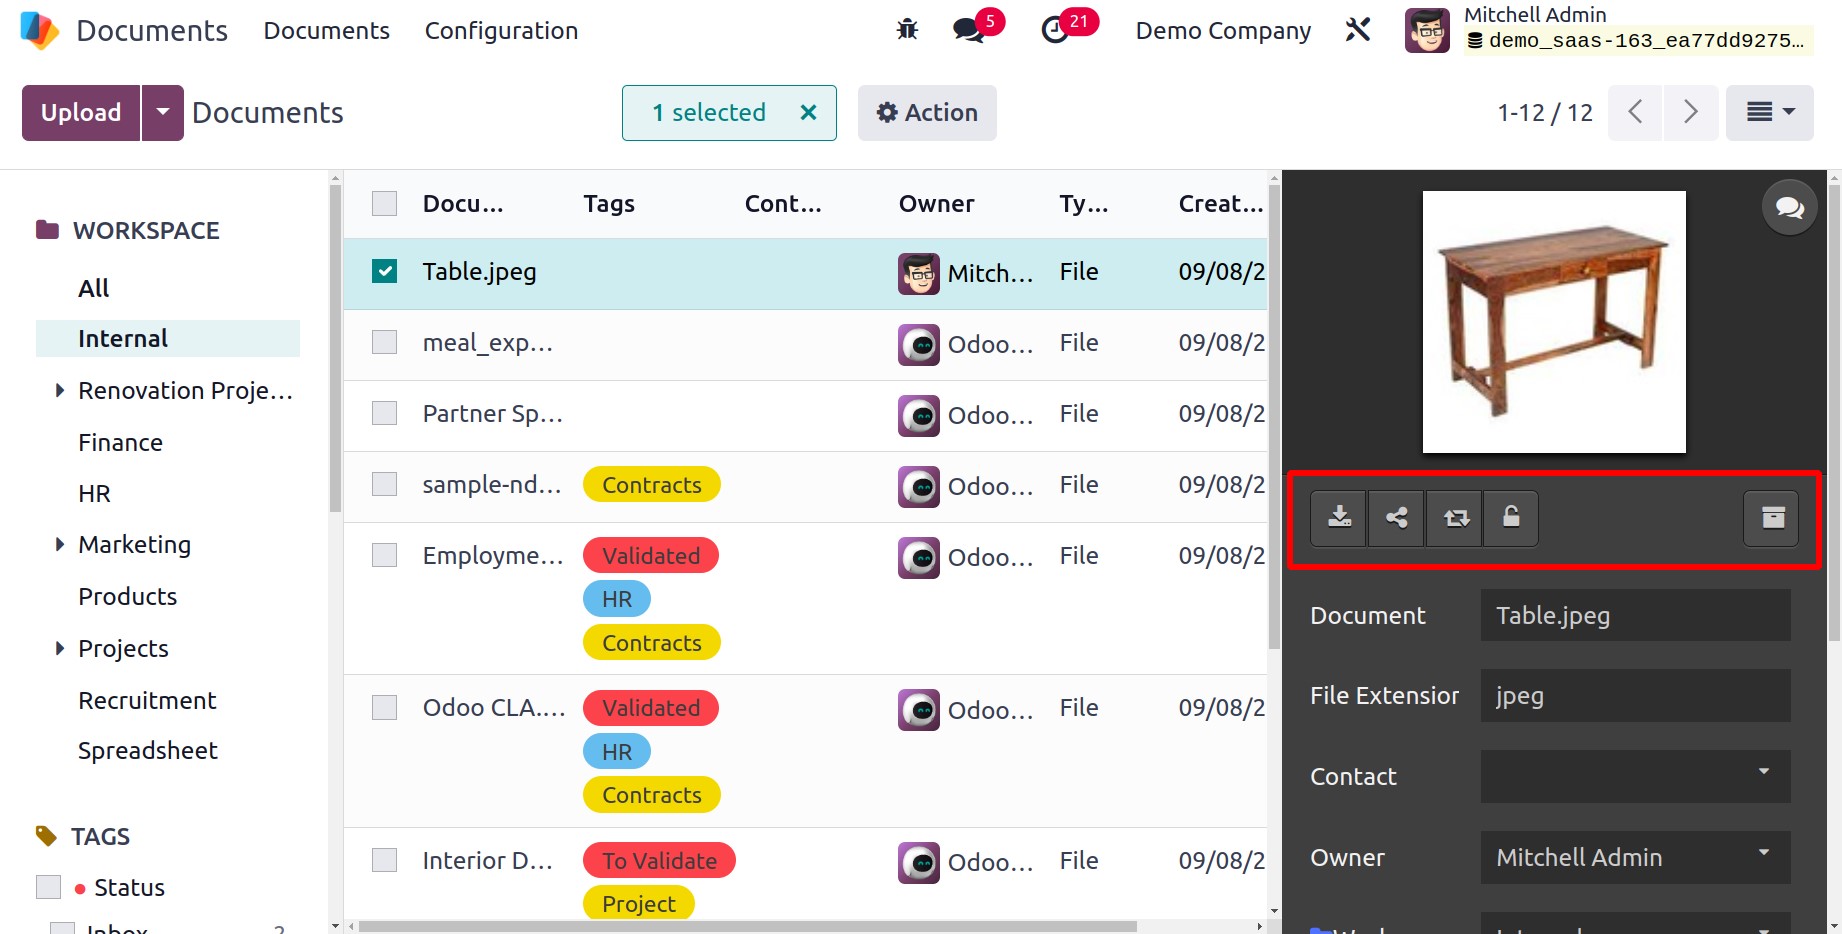
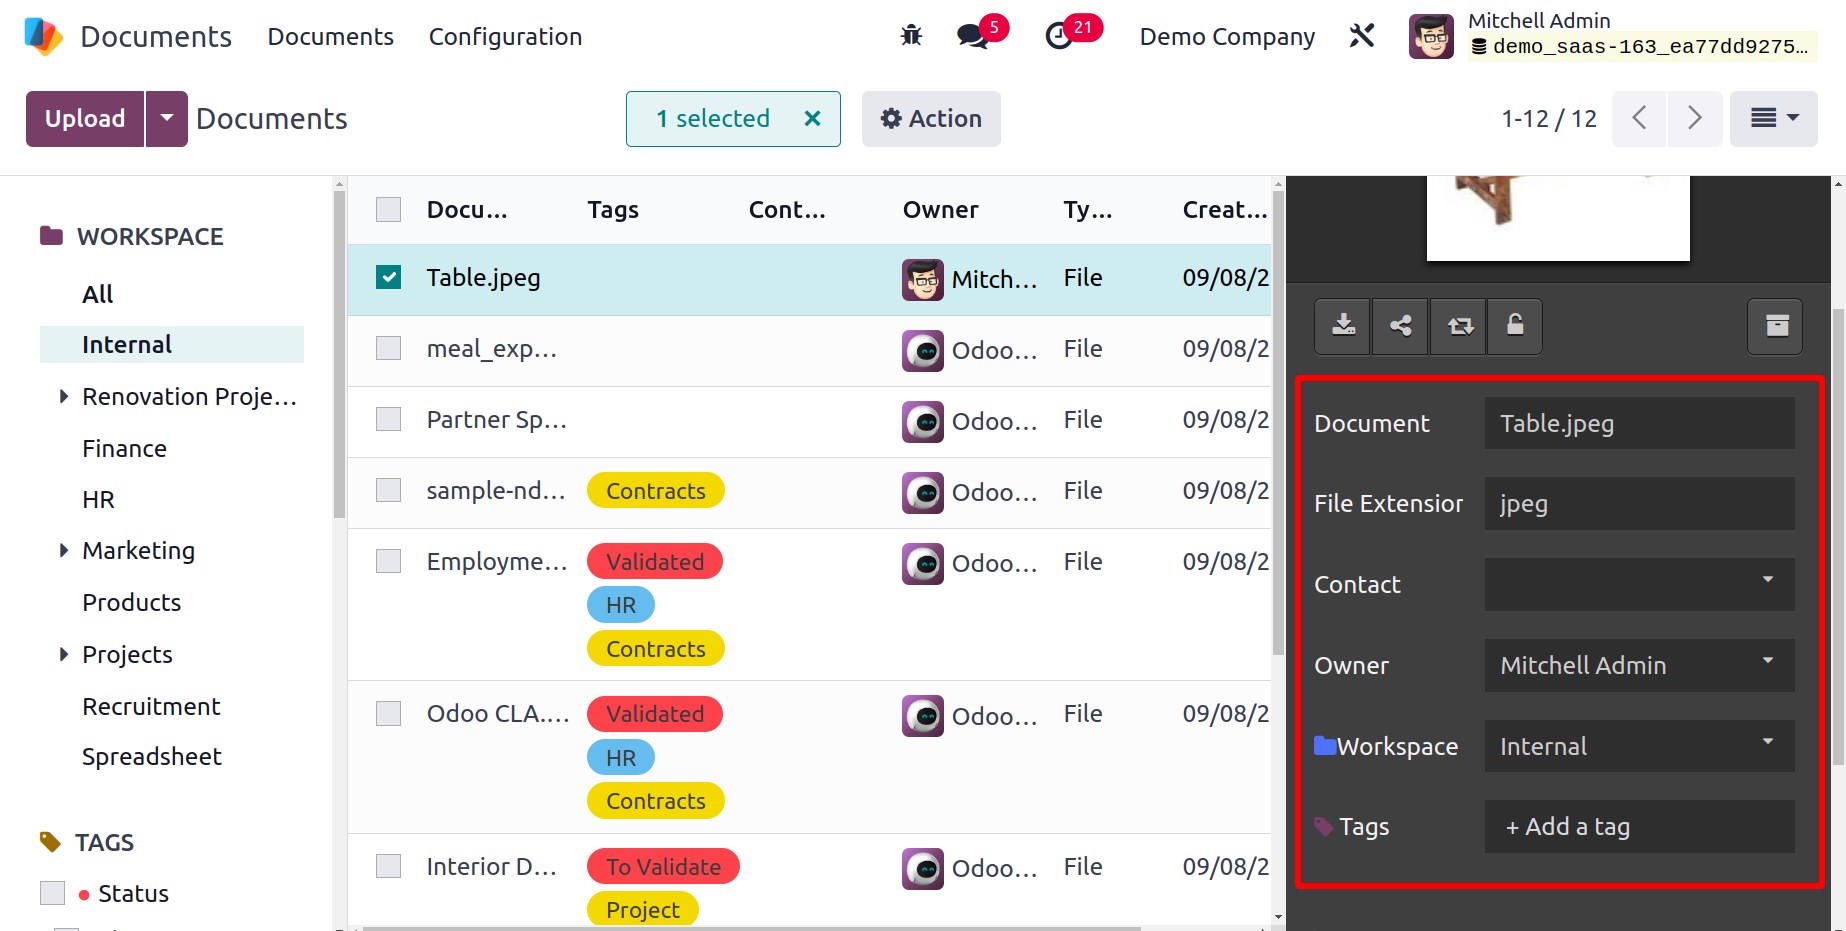
The options for describing additional document information, such as Name, Contact, Owner, Workspace, Tasks, and Tags, are also available for your review. You can change it if you want to. New tags can be easily added to the file. Simply click once in the Add a Tag space to add a tag. The dropdown menu will then be displayed. The tags can be chosen from this menu.
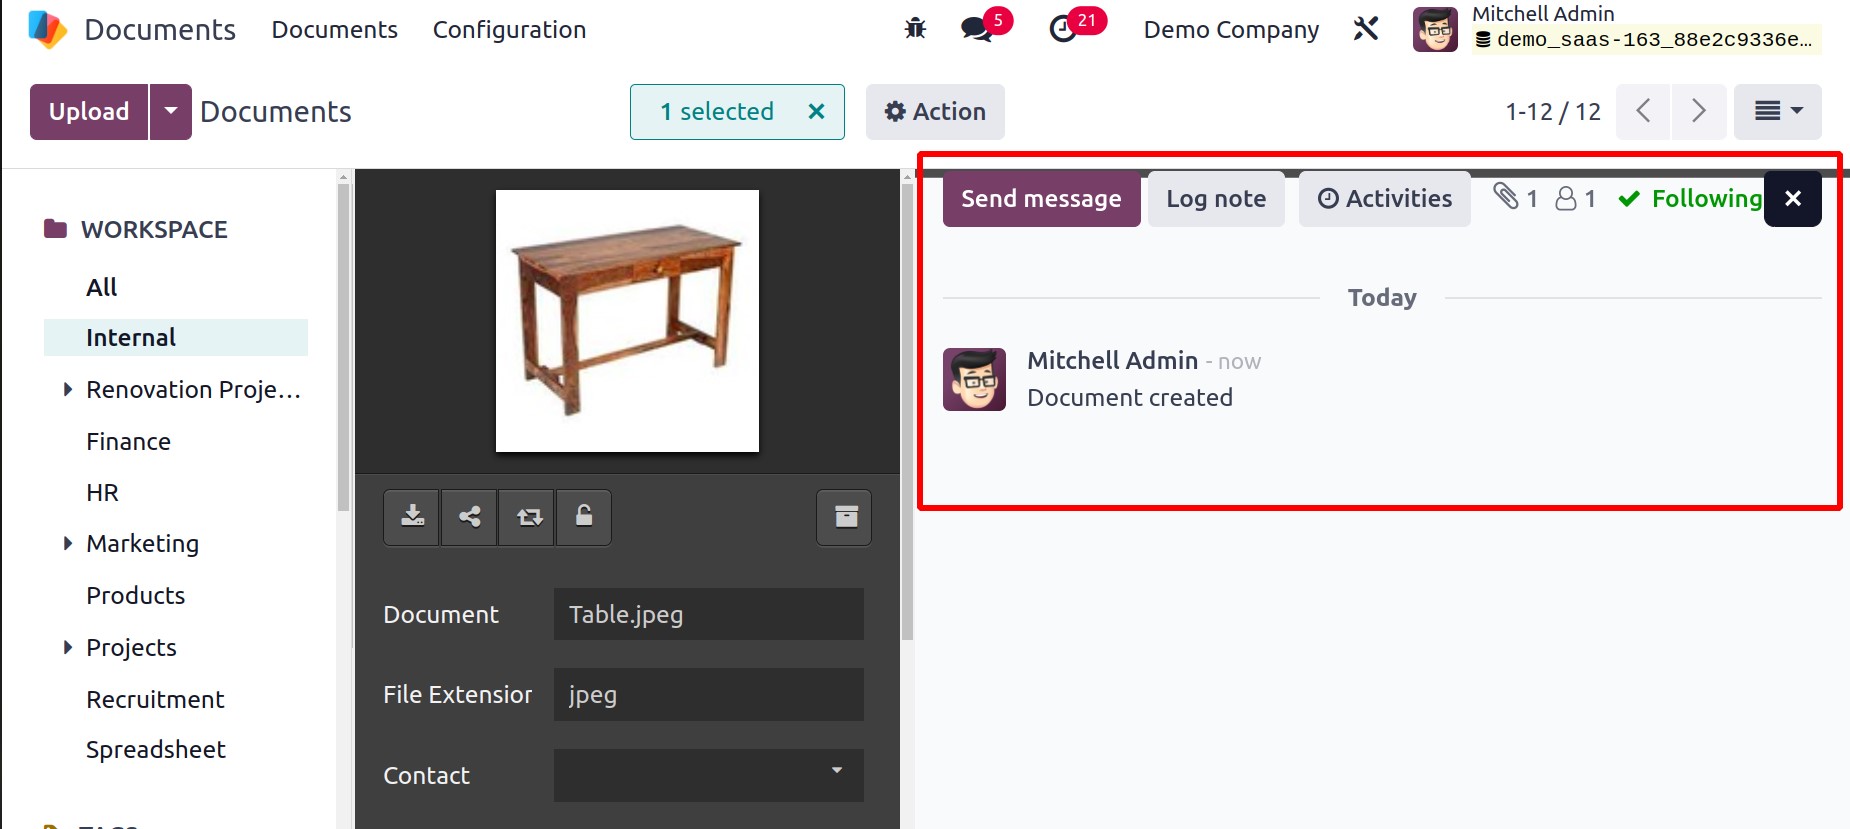
The Open Chatter menu icon, which is located in the window's upper right corner, can be used to plan tasks based on this file as well as send messages to the document's followers and submit Log notes. Below is a representation of the chatter menu icon.

The choices that are discussed and accessible under the Chatter option are shown below.
You can also have various automated actions for documents in each workspace. As seen in the illustration below, several activities can be seen when you look at the bottom of the right side of the window.
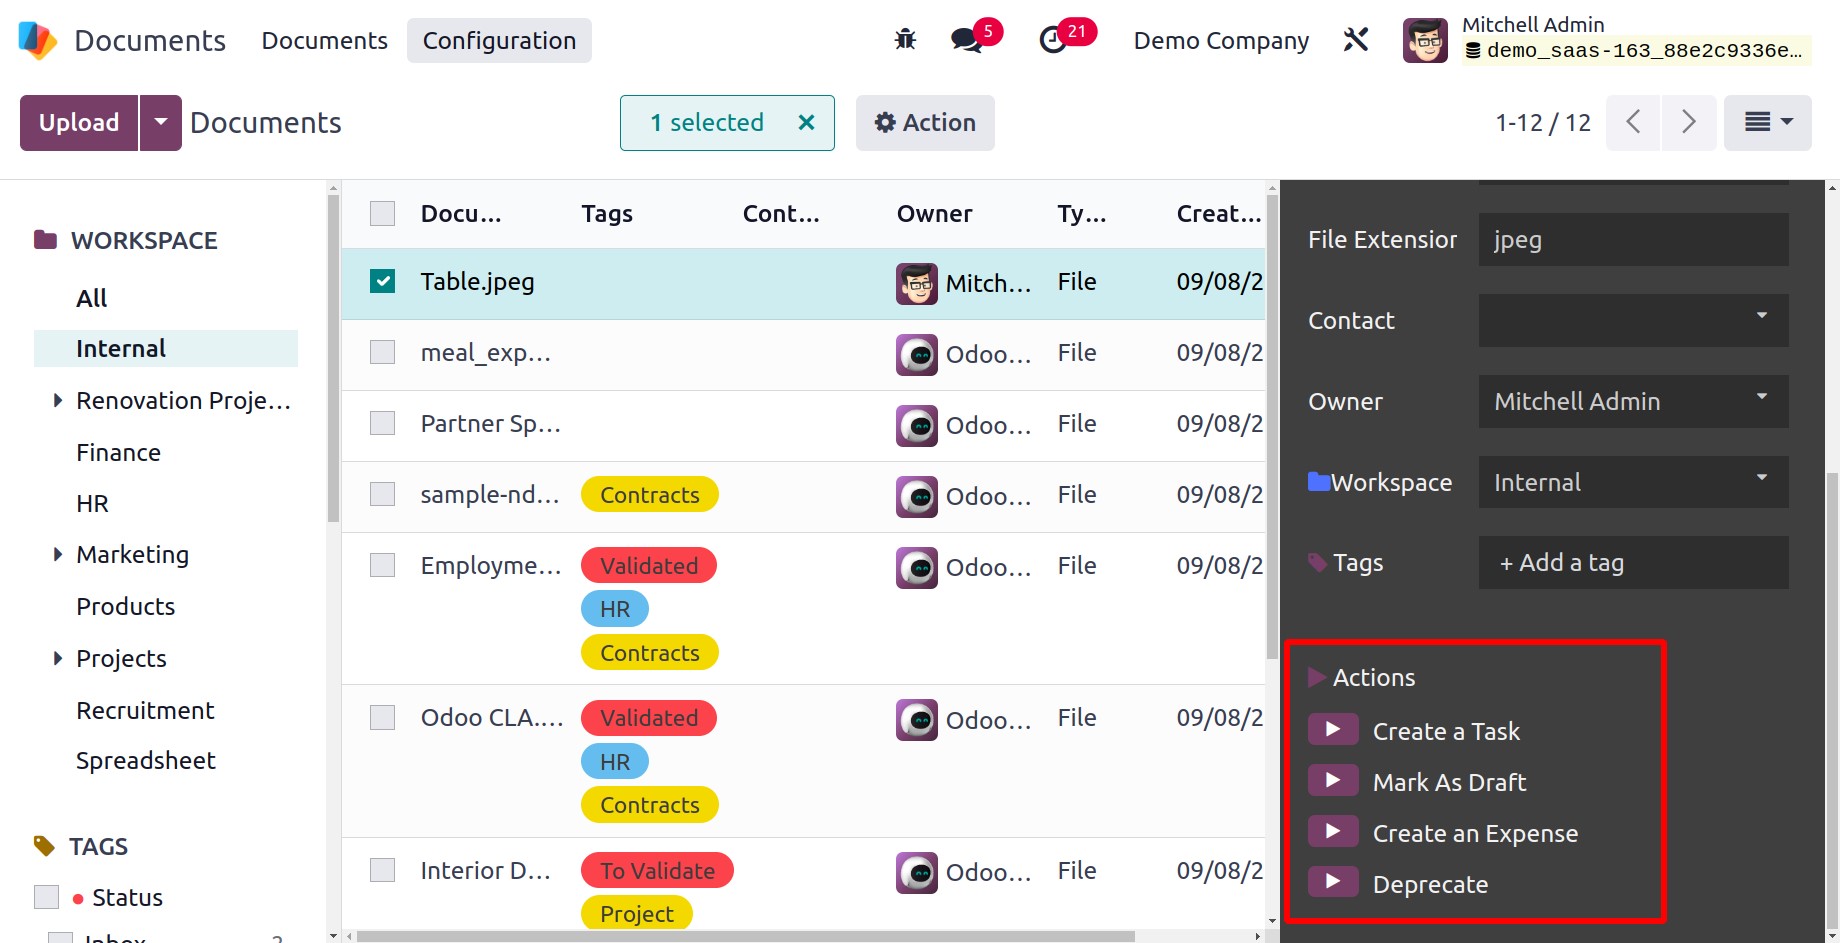
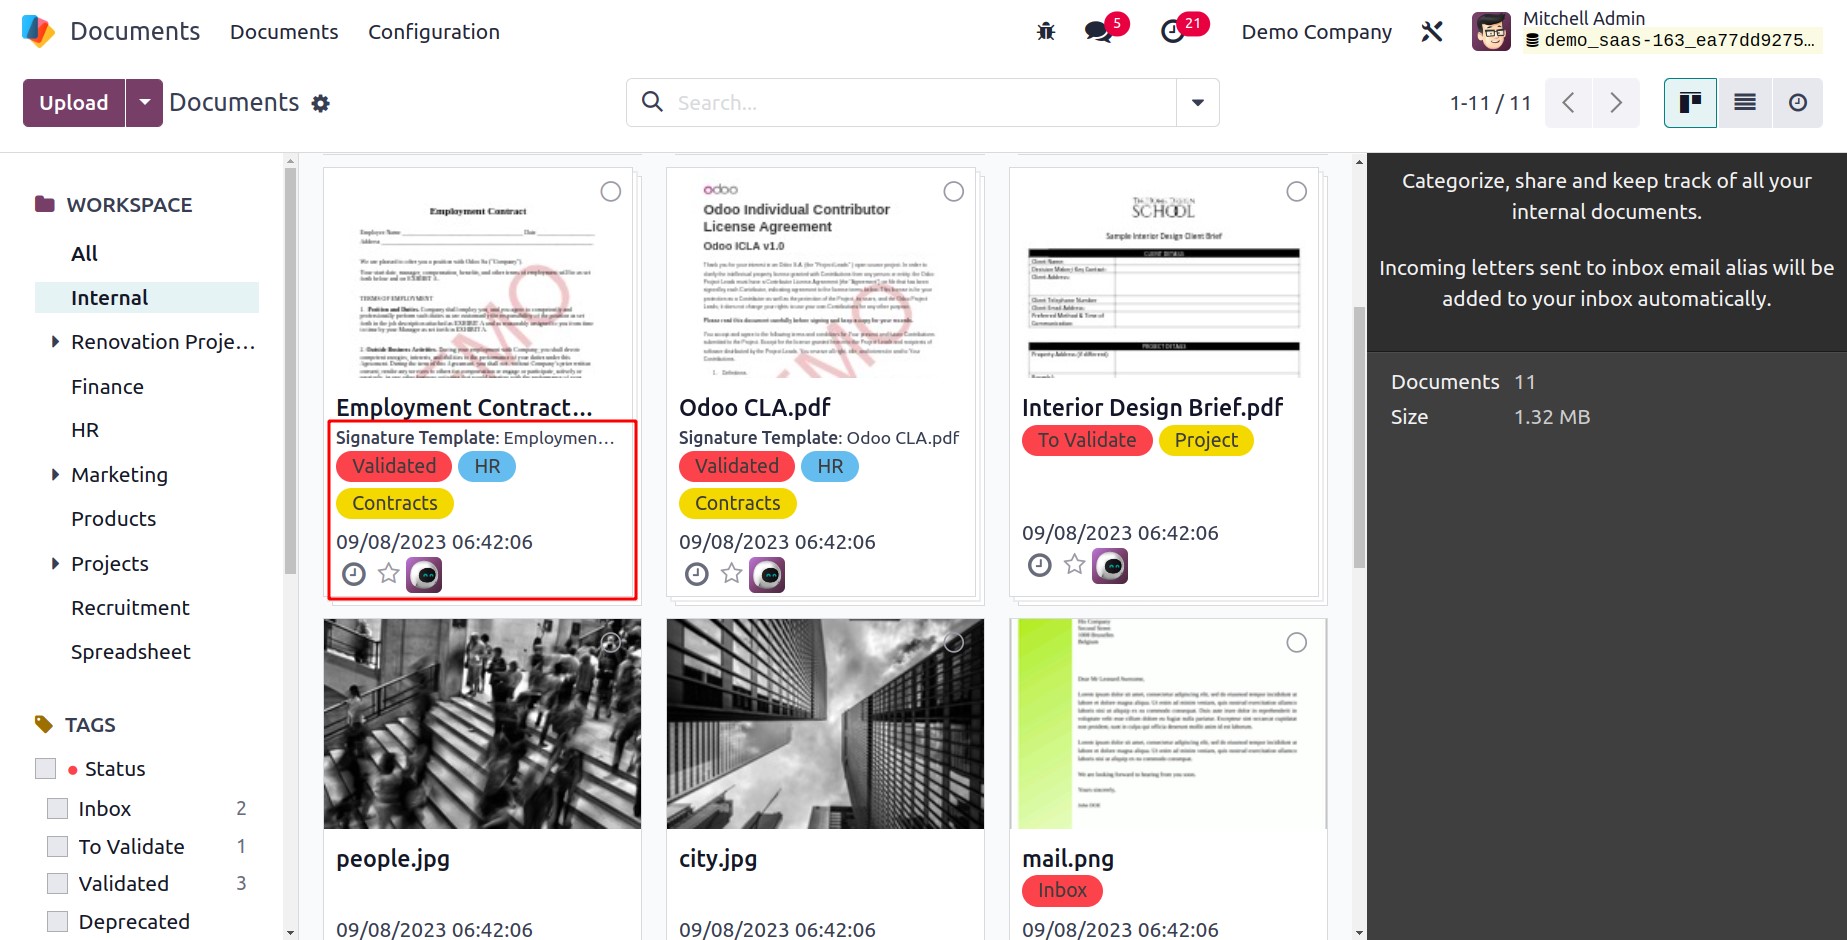
You may carry out all of these tasks directly from this platform thanks to the Odoo17 Document module. Depending on the type of document, the various action types will be shown. You can see the possibilities for carrying out different activities, for instance, Create a Task, Mark as a Draft, and Deprecate in the Partner Spreadsheet Test document. The platform lets you perform the following operations on the Employment Contract document: Create a Task, Sign, Mark As Draft and Deprecate.
Create Spreadsheet
You can construct spreadsheets by clicking the New Spreadsheet button on the Document module's home screen window.
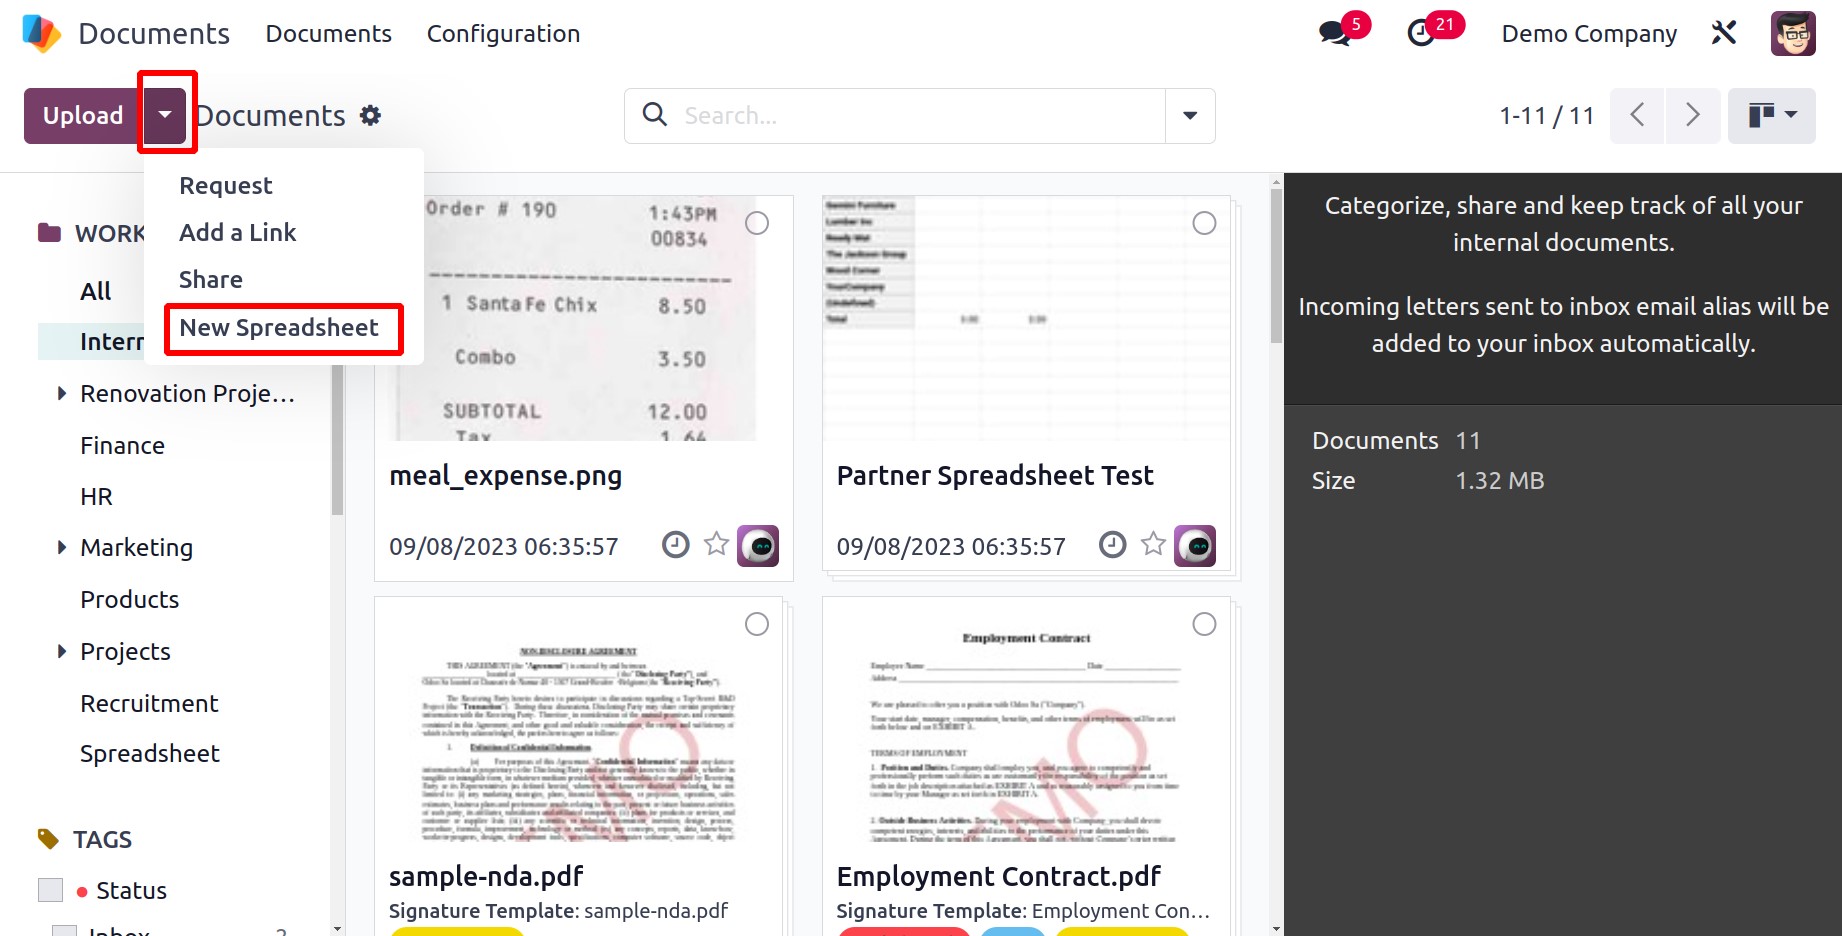
This option is practical for gathering your related data group into a single sheet and organizing it for analysis. When you click on this button, you will be sent to a new window, as shown below.
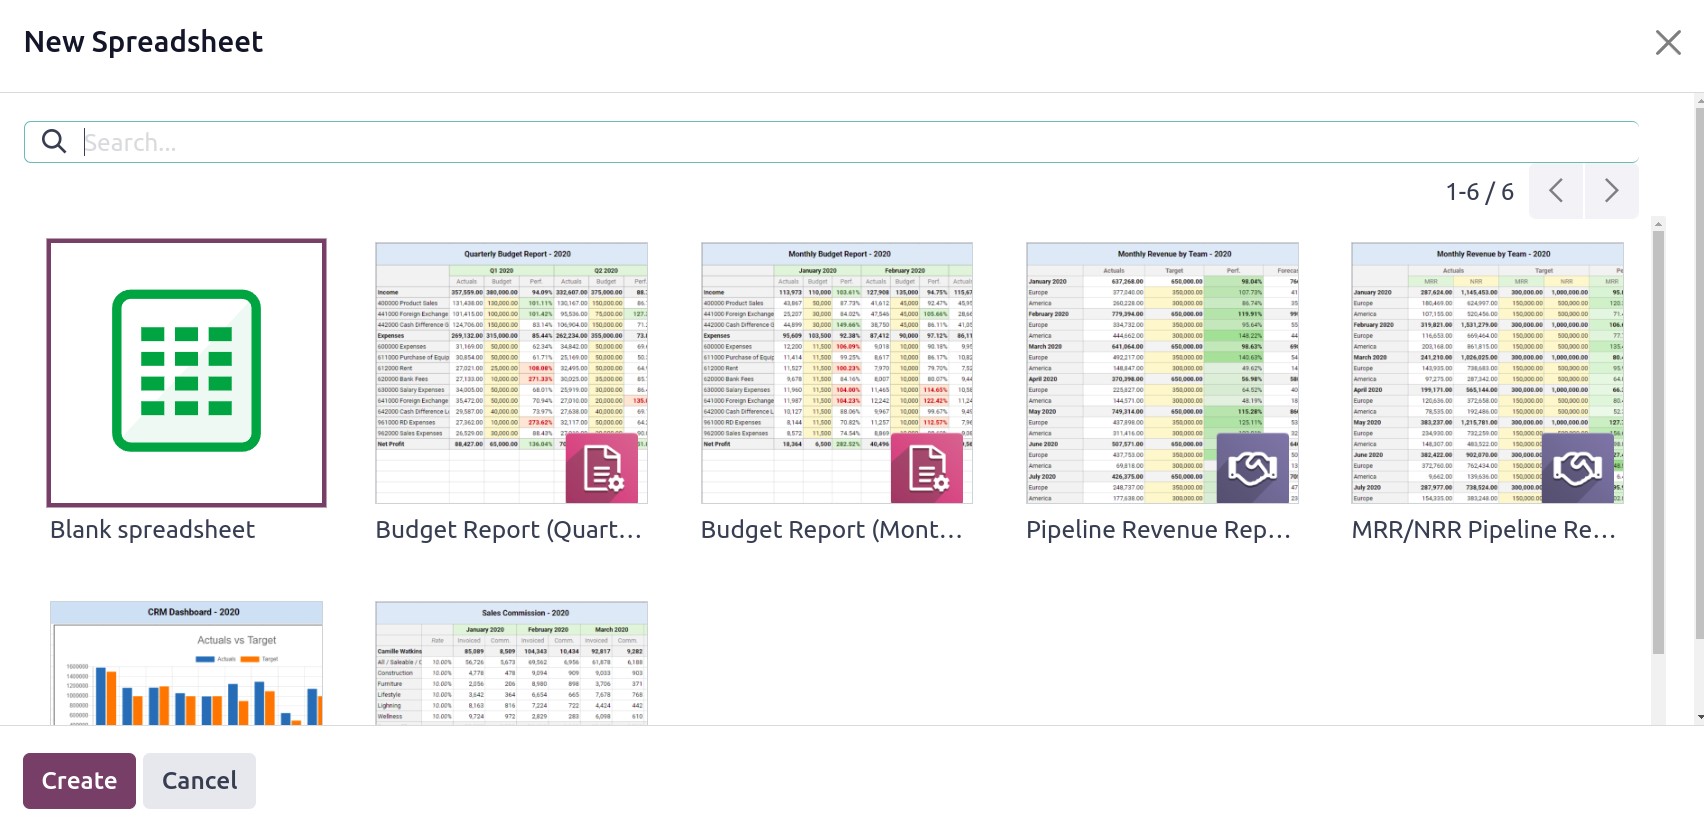
For adding various reports or files, the window has multiple spreadsheet kinds. You can choose an appropriate model to incorporate your data. To create a new type of spreadsheet, you can alternatively select the empty one. The CREATE button is located in the bottom left corner of the window and can be used after choosing the spreadsheet. After that, you can update your spreadsheet with the pertinent information and links.
Sending a request for a document
You have the ability to easily access an external document created by one of your coworkers, team members, managers, or employees by using the Odoo17 Document module. You can submit requests to the connected people using the REQUEST menu that is accessible from the Documents dashboard pane.
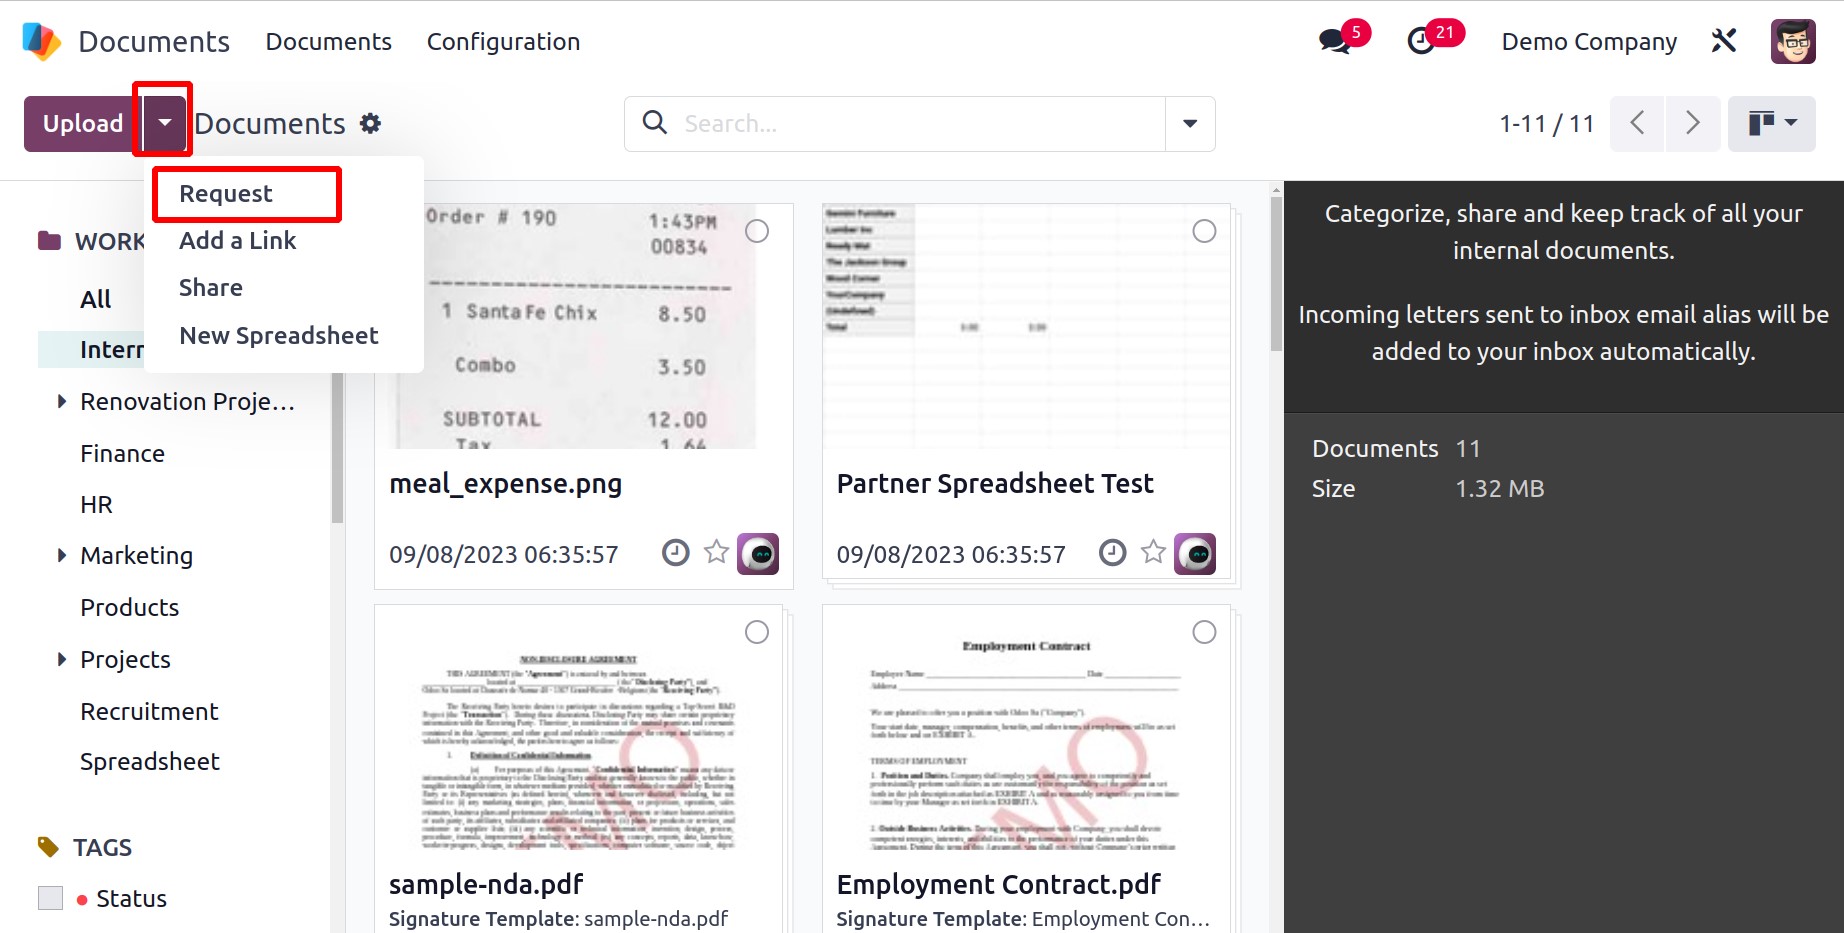
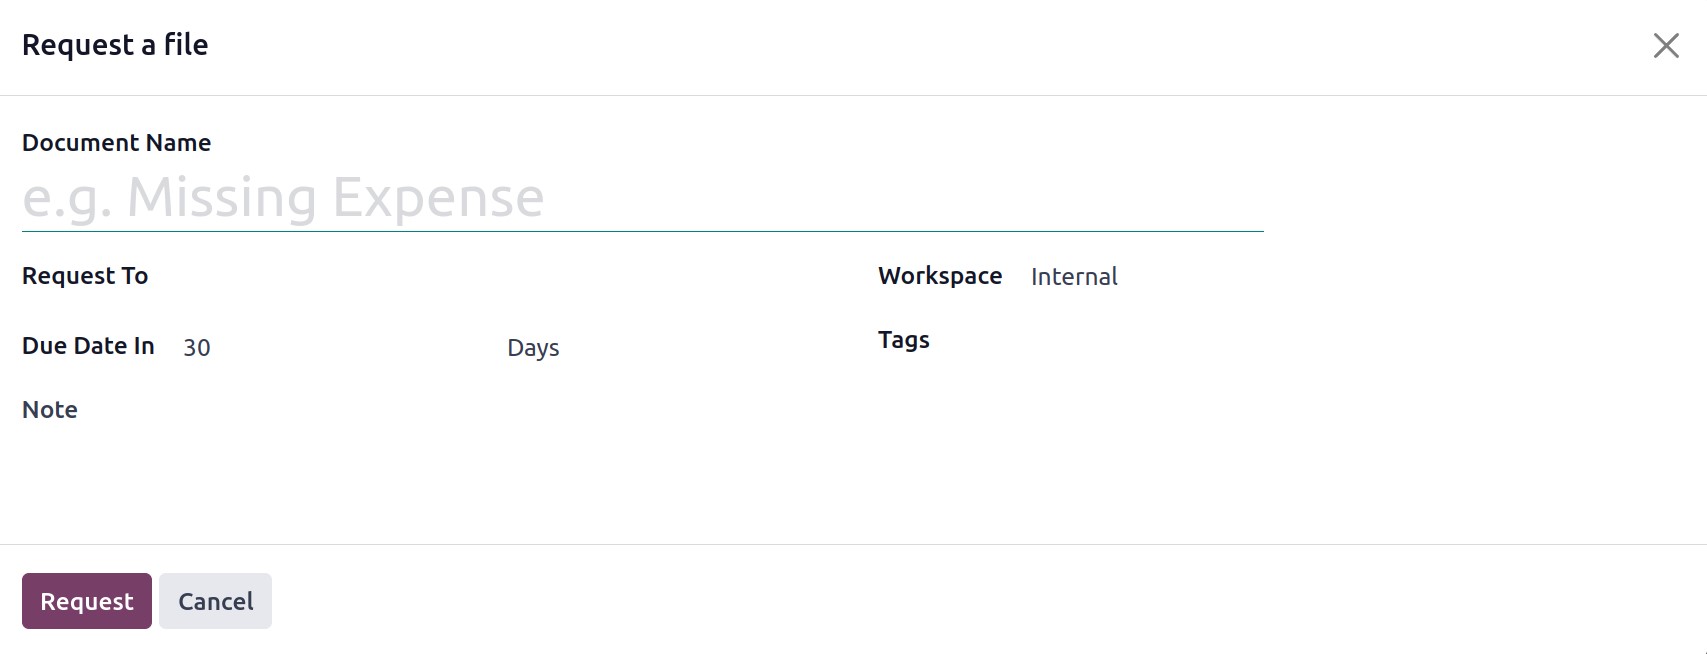
The option labeled Request is underlined in the image above. You should click the Request button to make a request for them. The system will now direct you to another pop-up window where you can provide the necessary information. The Document Name can be entered first in the designated field. Mention the name of the person you are requesting from in the Request To field. Additionally, you have the option to define the Due Date in terms of days, weeks, or months. Based on the document we choose, an automatic allocation for the Workspace field will take place. The request can also have Tags added to it. You can use the designated Note box to add any internal notes you want to the request.
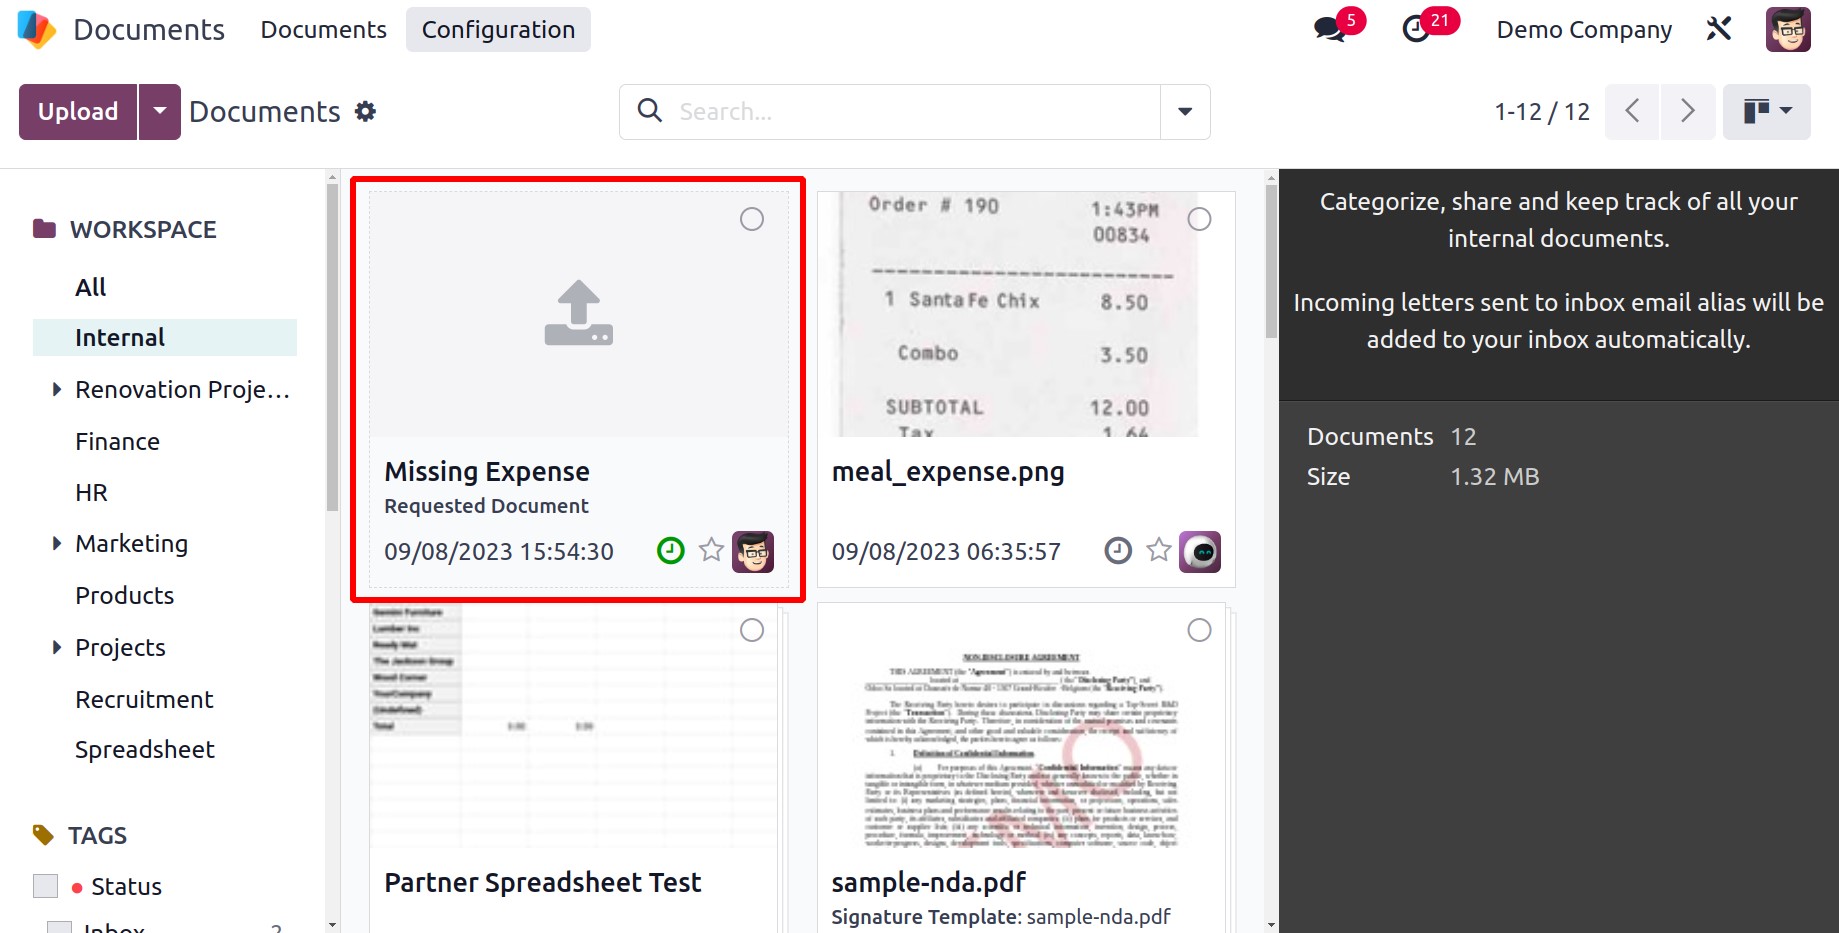
After providing all the necessary information, you may send a request by selecting the Request button. The Request will now appear in the Documents pane, as indicated in the screenshot.
By selecting the upload file button after receiving the file, you can upload it.
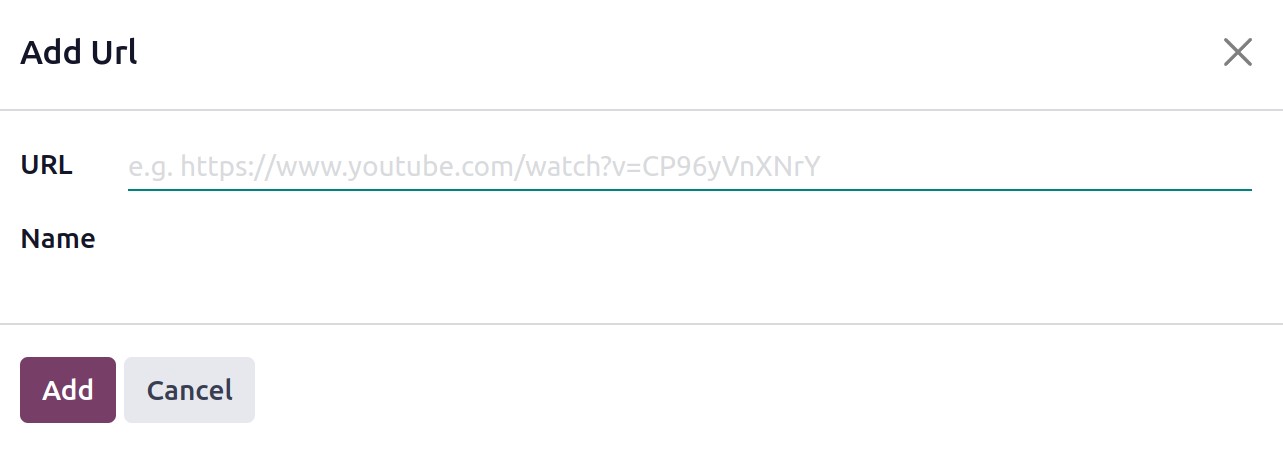
Add a Link
You can upload external links to the Document module in addition to using the document forms. You can accomplish this by selecting the Add a Link button on the module's dashboard pane. In the picture below, the Add a Link button is underlined.
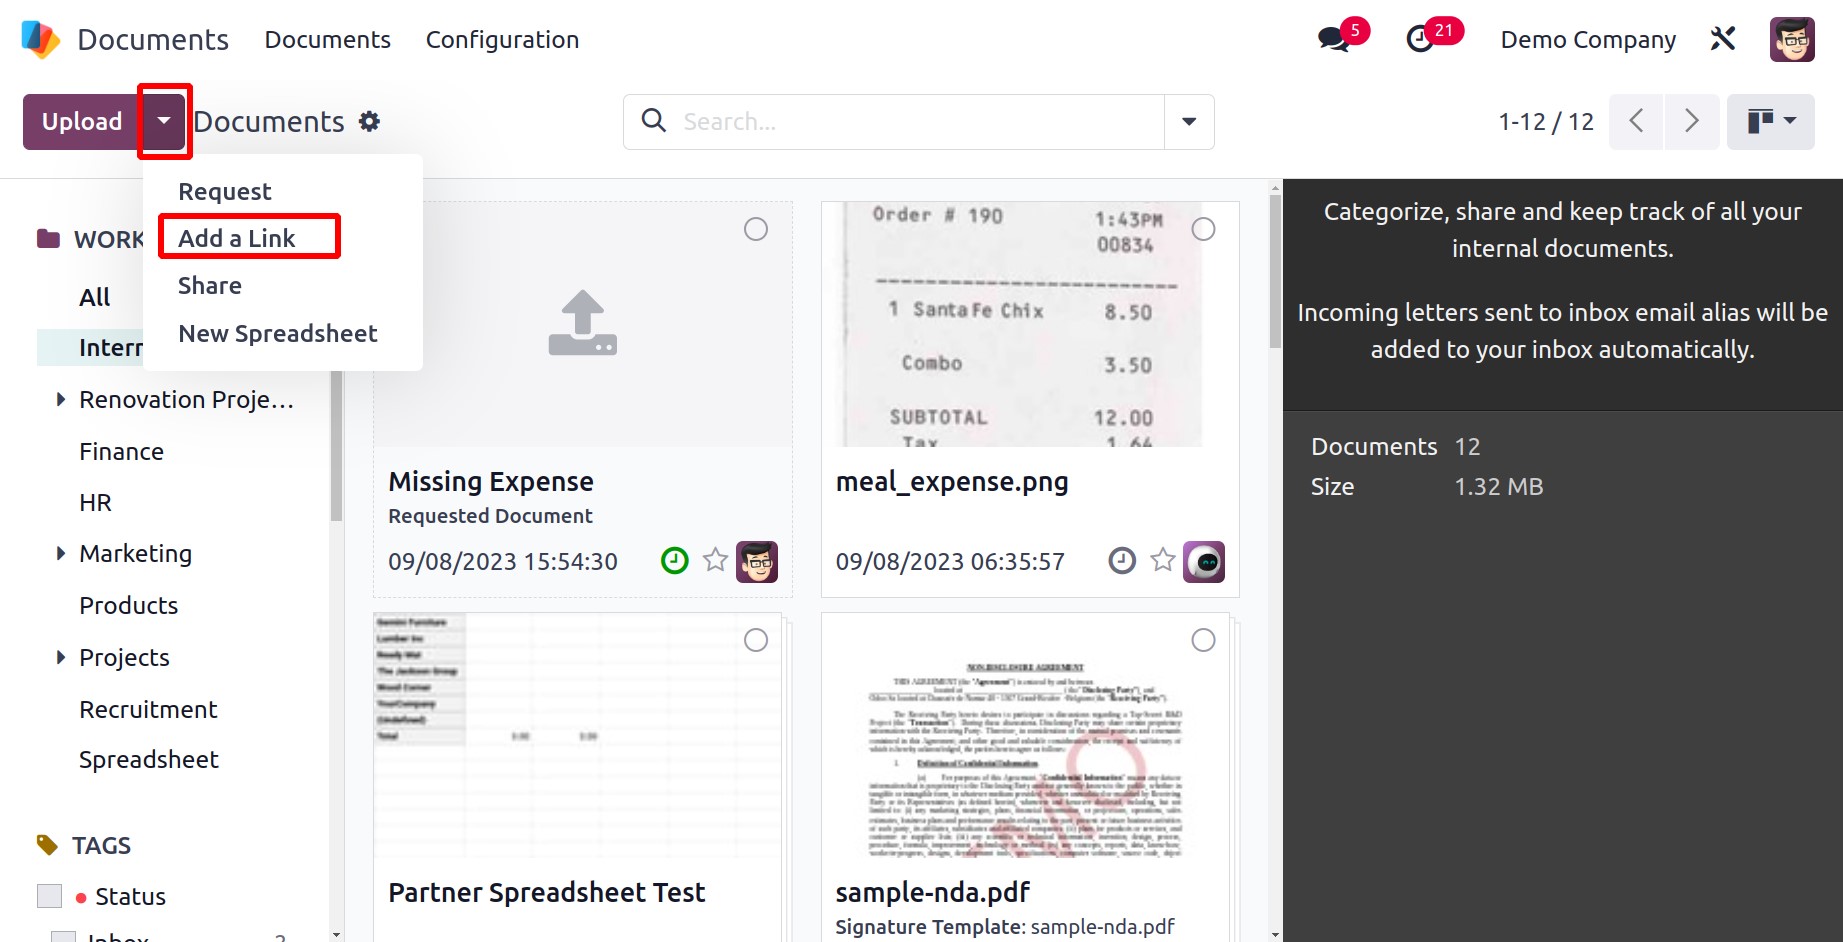
You can add a URL by clicking the Add a Link button once, which will open a pop-up window. You can provide the file's name and URL in this field. The URL is now saved in the database.
Settings
Numerous options are available in the Settings menu of the Odoo17 Document module. Take a look out the window with me. We can navigate to the Configuration Settings of the Document module to get to the Settings panel.
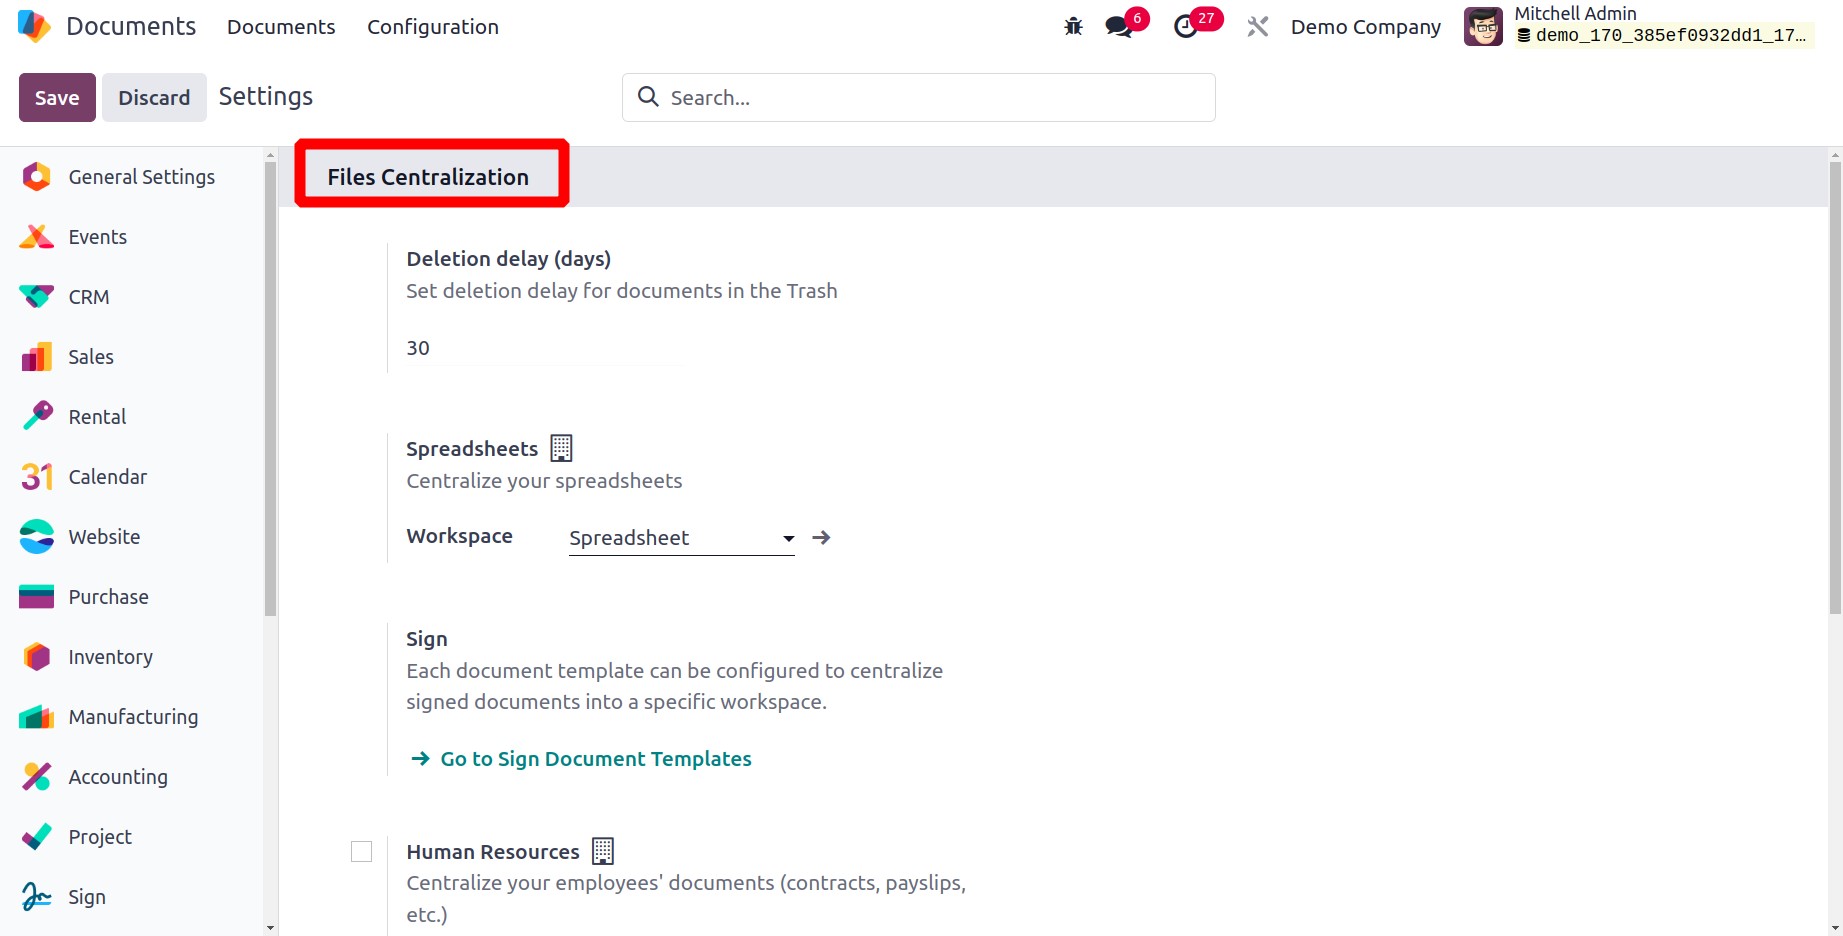
Under the Files Centralization area, you may discover a variety of possibilities here. There, Deletion delays can be expressed in terms of days.
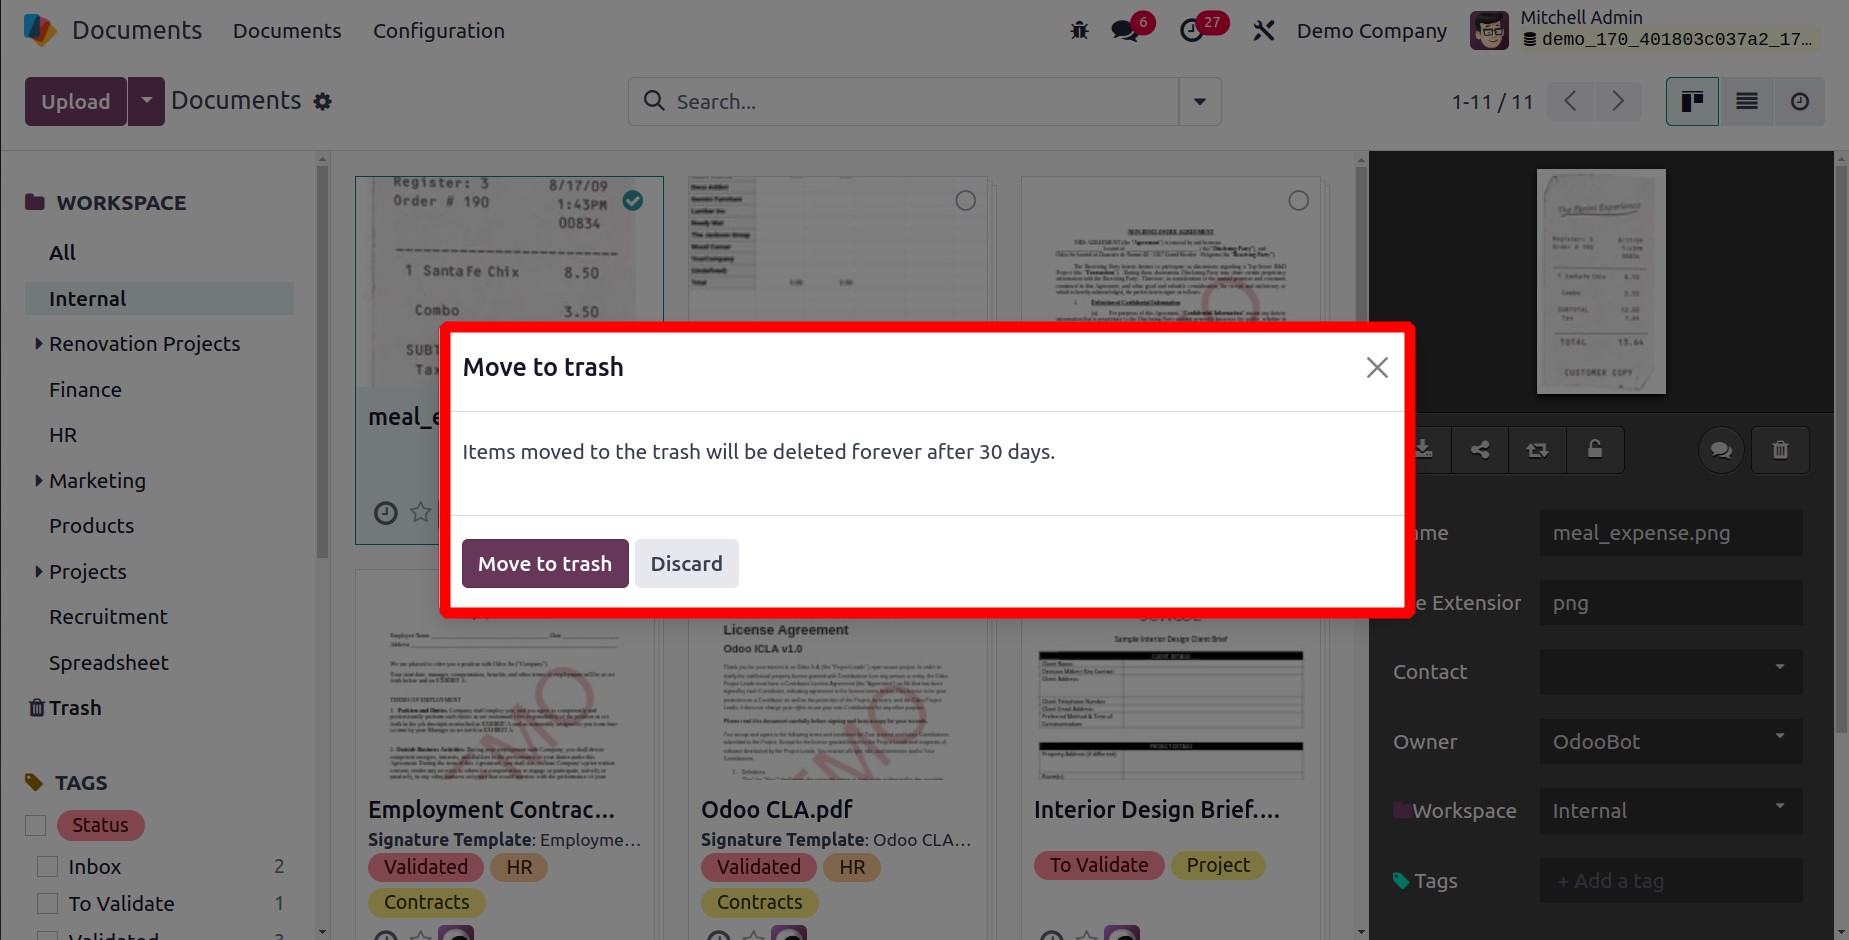
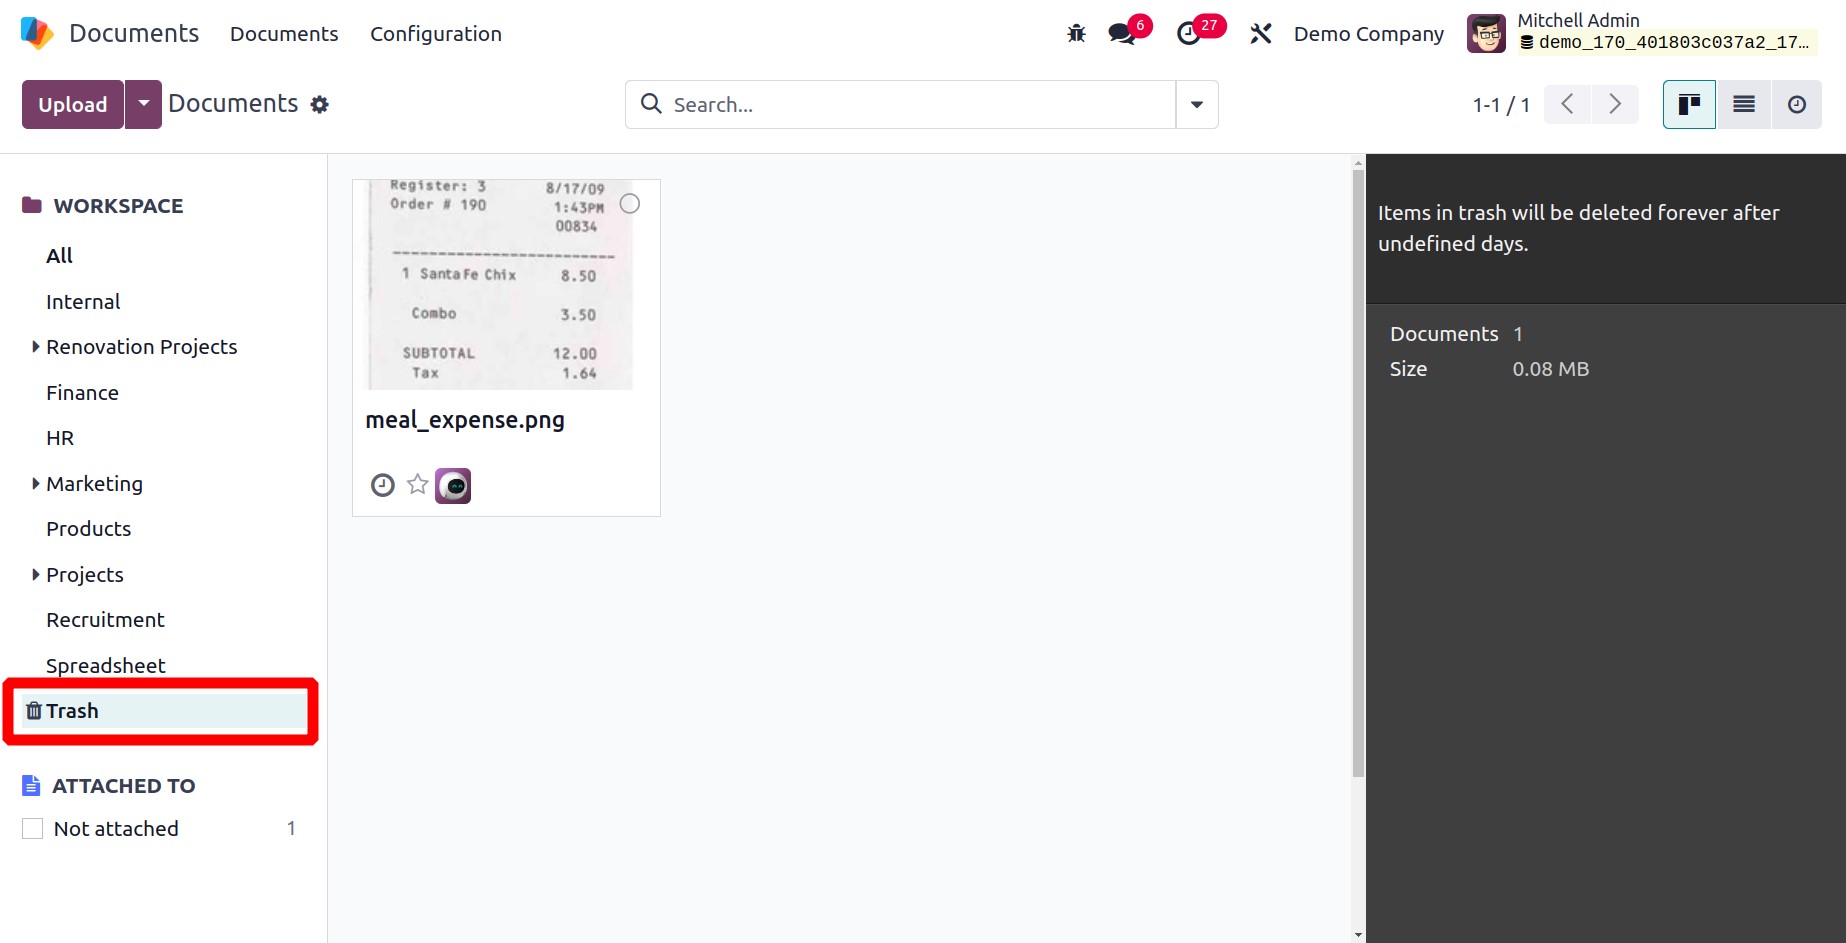
A window that appears after a document is erased notifies users that it has been put to the trash and will be deleted within 30 days. The deleted document will appear in the trash, which may be accessed using the dashboard.
As a result, users can specify when documents in the trash will be deleted. Subsequently, every document template has the option to be set up to centrally store signed papers in a designated workspace.
Human Resources, Product, Project, Recruitment, and Accounting are the available possibilities. These choices are all made to centralize the files that customers upload with their purchases. The Document and Product module can be integrated by turning on these settings.
Human Resources is the window's first available choice. To centralize your employees' paperwork, turn on the Human Resources option. You can tick the box next to the option to make it active and then click the SAVE button. The central location will include all employee records, including contracts and pay stubs. The dropdown menu can be used to define the Workspace, Payroll Workspace, Default tags Payslips, and Contracts.
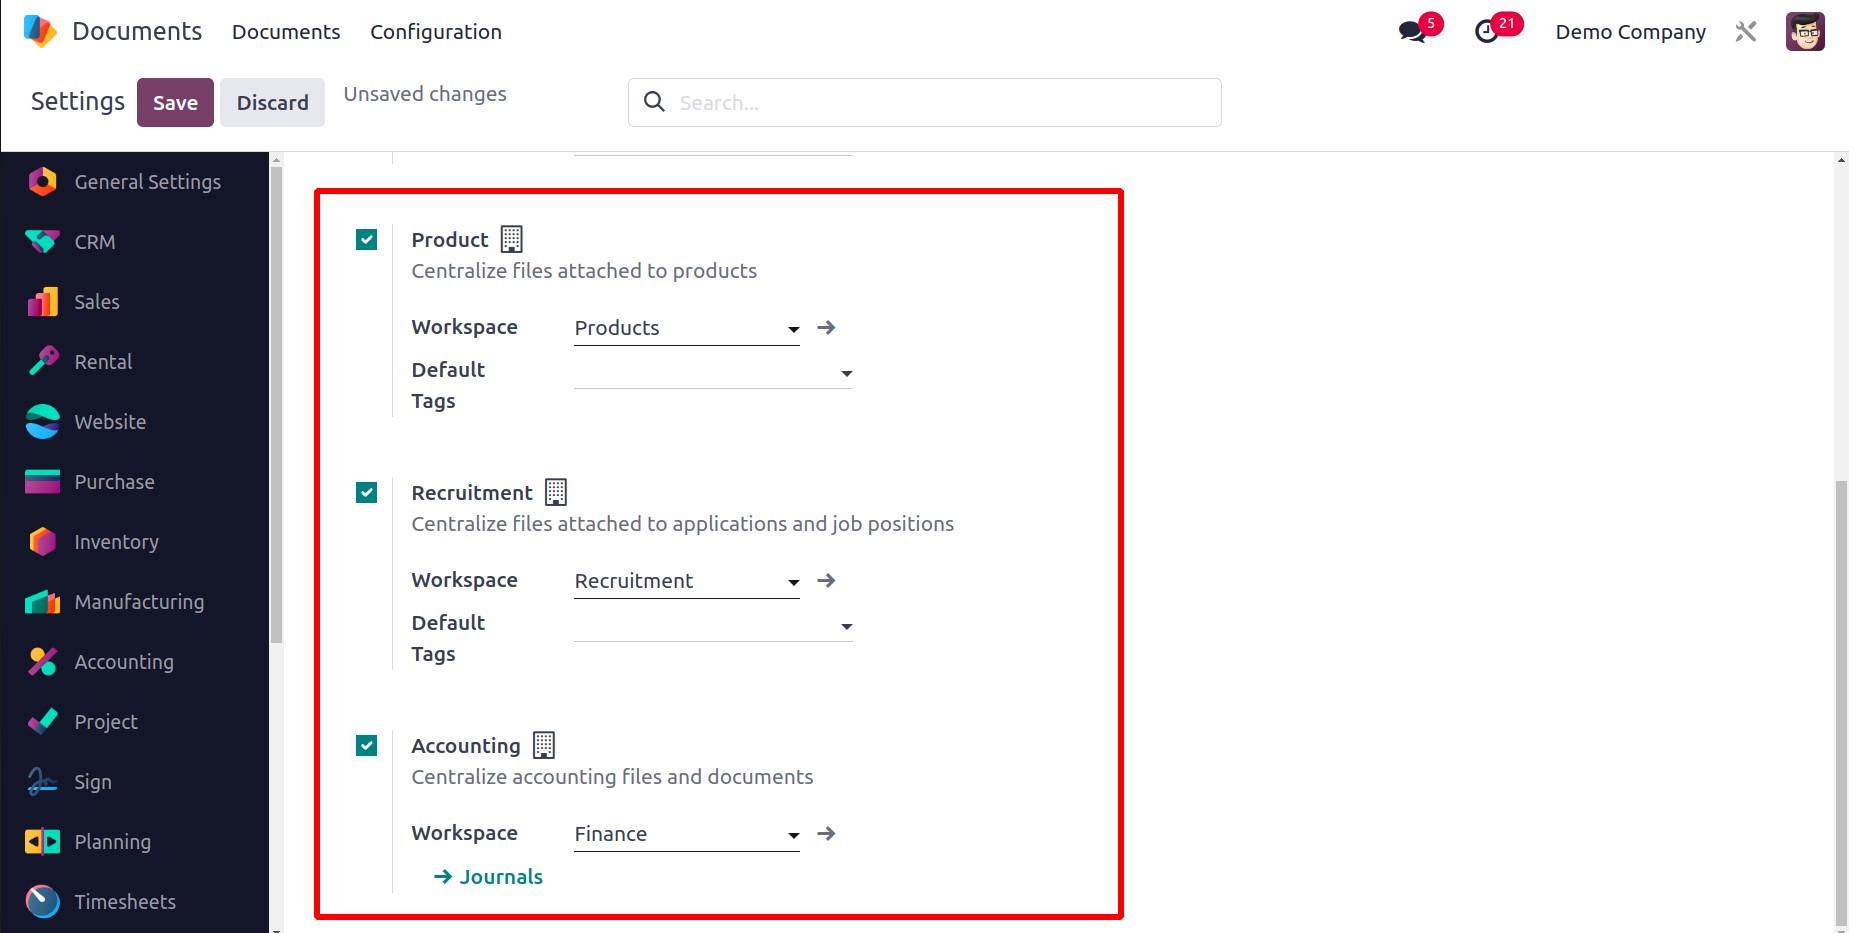
Additionally, the Product may be engaged to centralize files associated with Products. The Workspace and Default Tags options are also available here. The system also allows for the centralization of Spreadsheets.
The Accounting and Recruitment fields can also be made active. The system will centralize any files related to applicants and open positions once you turn on the Recruitment field. The Workspace and Default Tags can also be defined here.
Enabling the Accounting option will allow you to centralize the accounting files and documentation. Click on the journal to create journals to synchronize after choosing the workspace.
Workspace
The Configuration tab offers access to the Workspaces menu in the Odoo17 Document module.
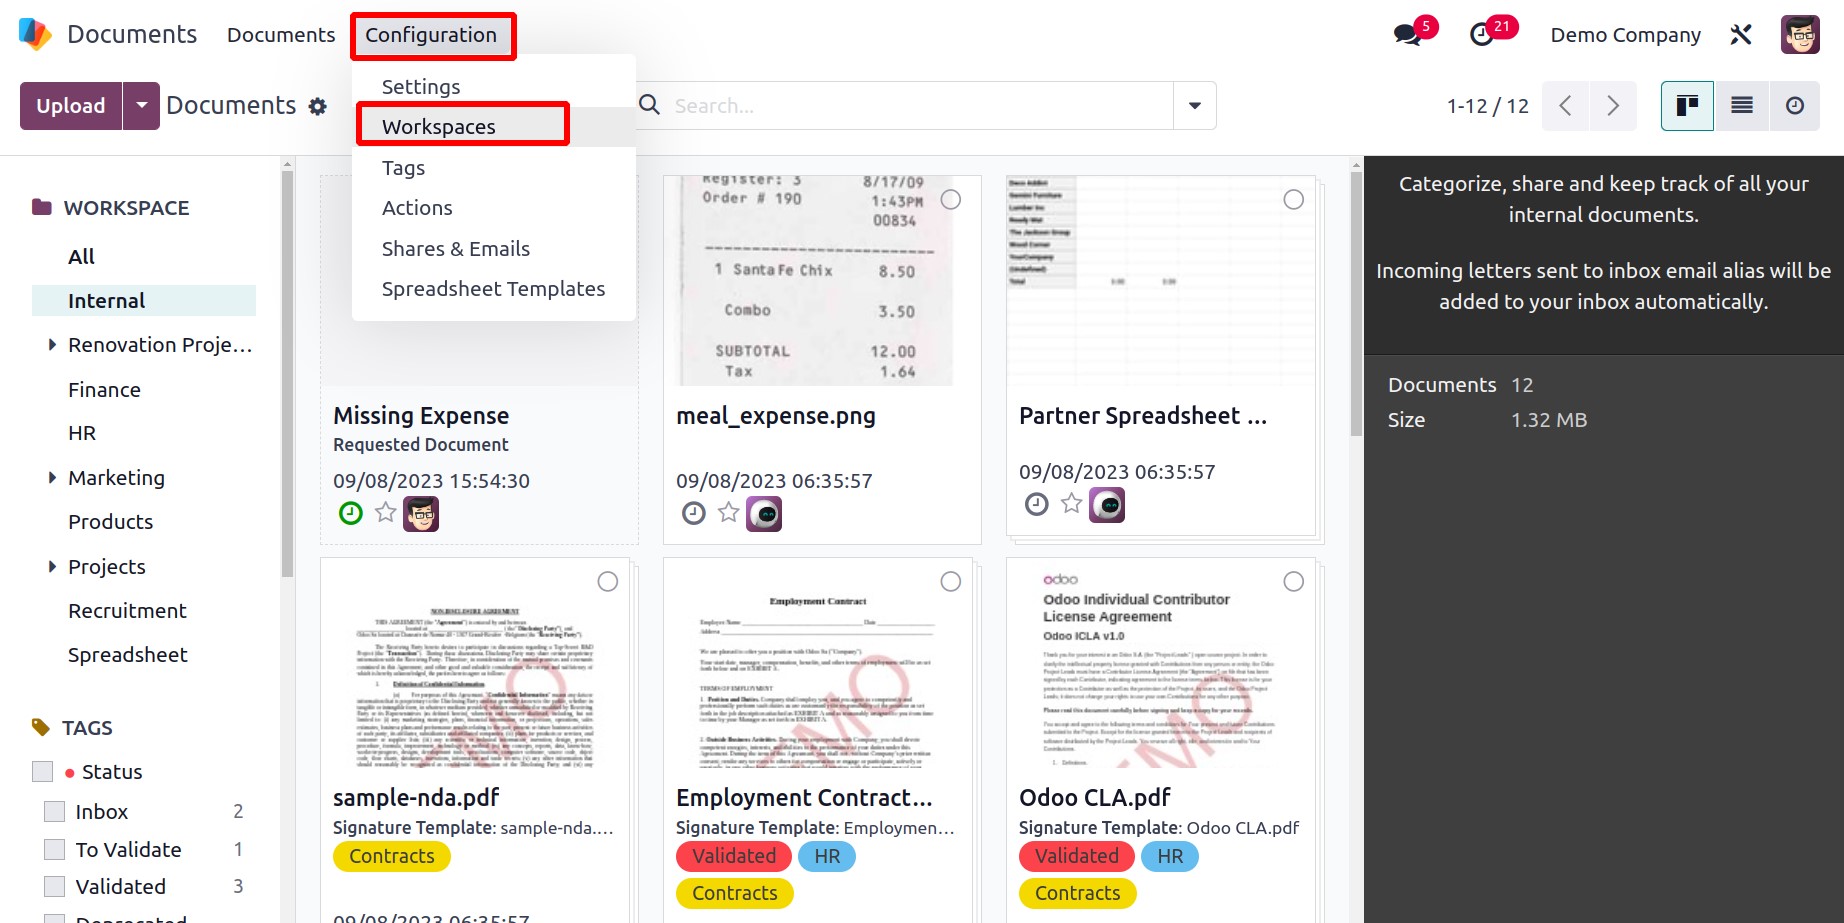
You can manage workspaces with the help of the workspace option. You will immediately enter the Workspace window, as depicted in the image below, when you click on the Workspace option.
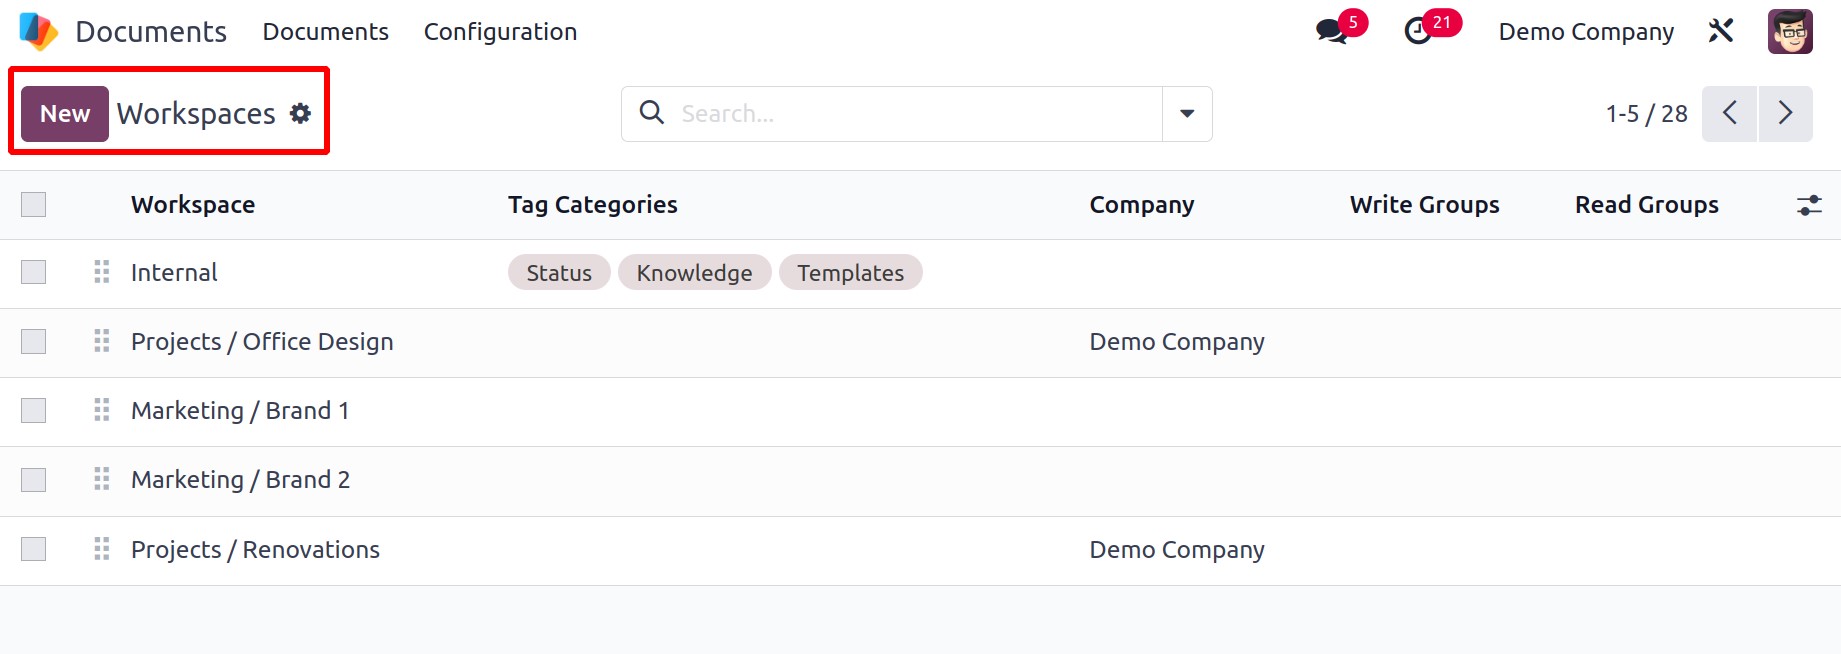
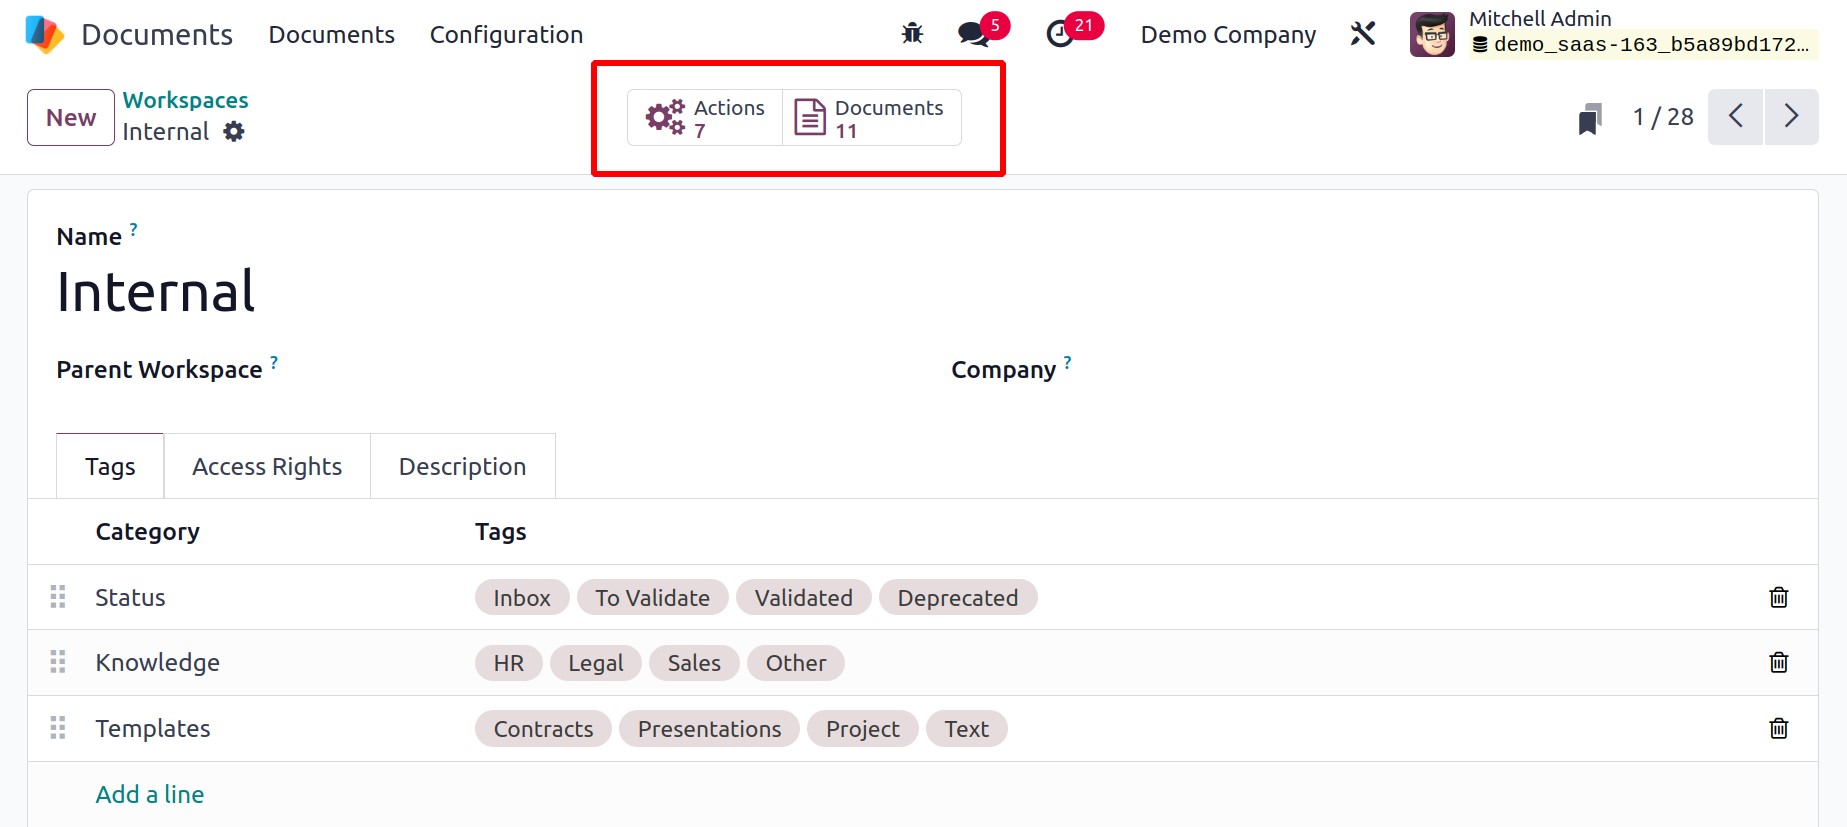
Odoo17 creates the workspace tool to design and maintain every aspect of the workspace without forgetting anything. You can see a sneak preview of the already-defined Workspaces when you gaze out the window. Each record will be listed in the window along with any pertinent information, including the Workspace Name, Tag Categories, Responsible, Company, Write Groups, and Read Groups. Click on the appropriate Workspace if you wish to see it in detail. You may now view the selected workspace in detail and use the EDIT button to change any of the details.
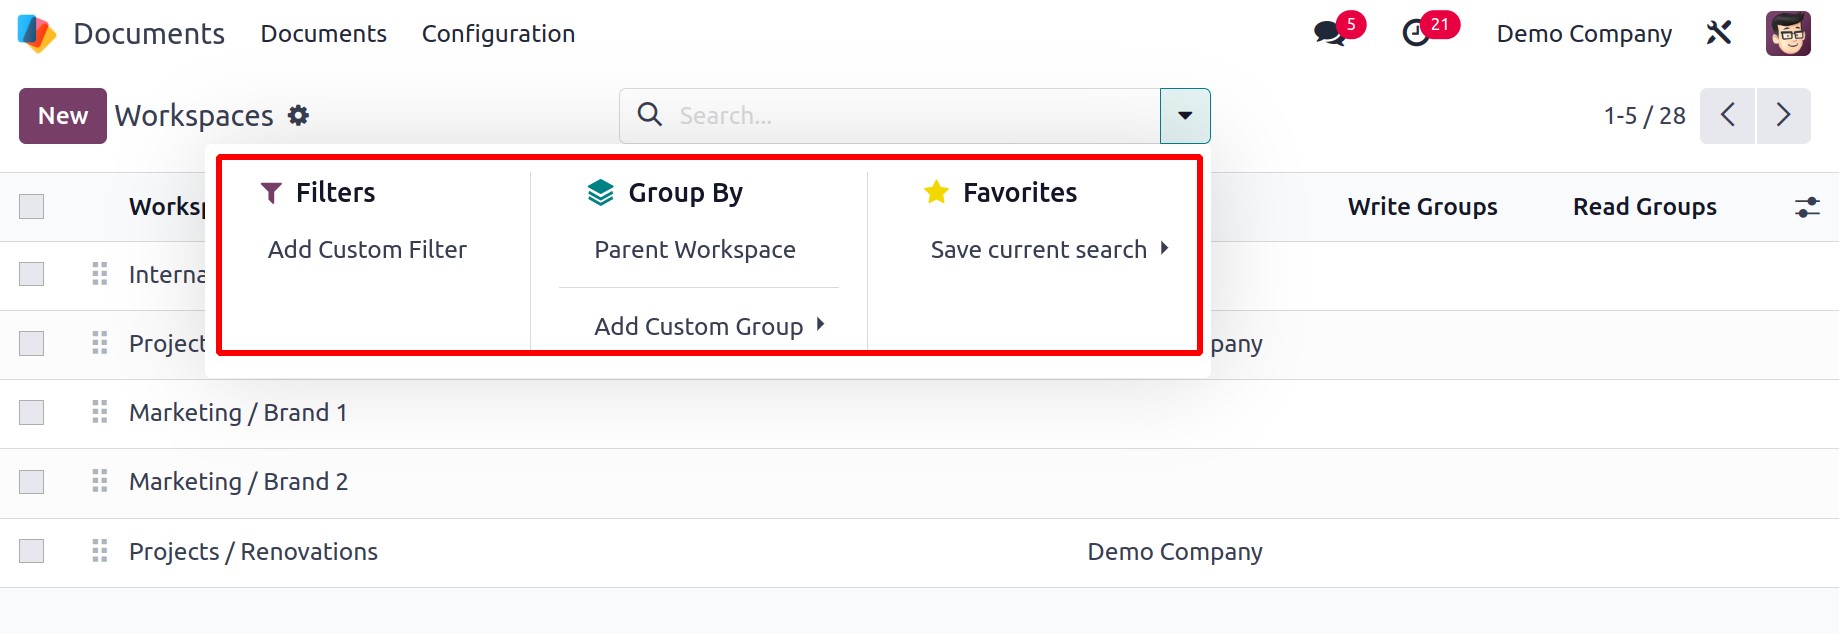
You can edit a filter on the Filters tab. Similar to that, you may use the Group by tab to organize the data in the window. Parent Workspace is the accessible default Group By option in this case. The window will arrange the records in accordance with the parent workspace when you choose it, as seen in the image below.
In addition, a New button is shown in the window's upper left corner. This window can be used to create new Workspaces. You can access the Workspace creation window, which is seen in the image below, by clicking this button.

Using this creation window, you can rapidly establish a workspace for any document category. This form allows you to provide the relevant information, such as the workspace's name and Parent Workspace. Additionally, the firm linked to this workspace can be set to only allow the chosen firm access to the workspace. You can now navigate between tabs and click on them to see the fields that are listed underneath each tab.
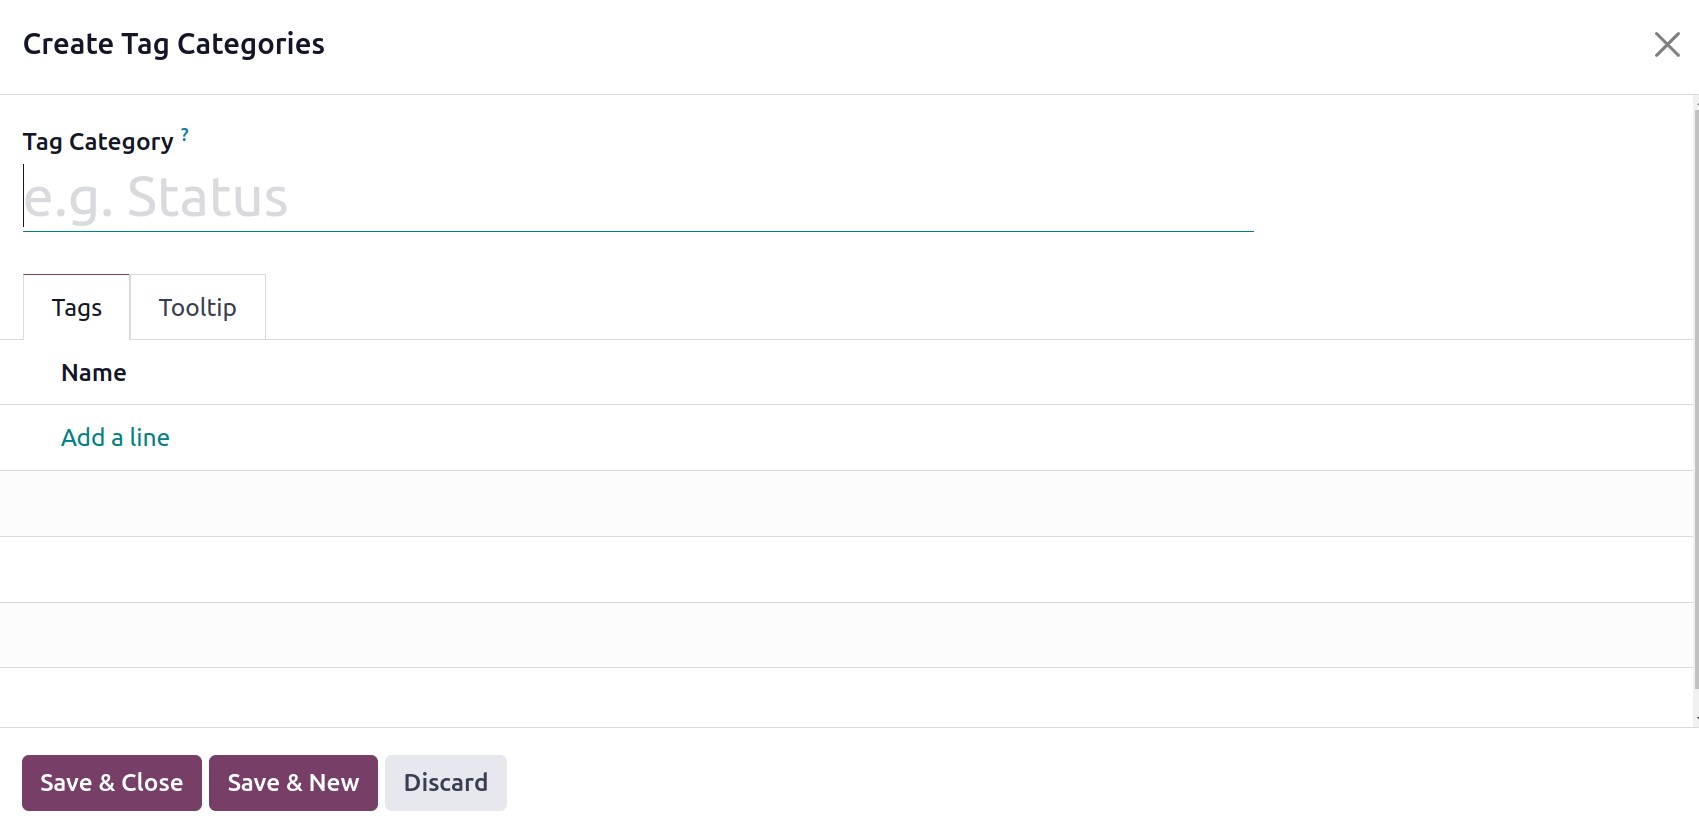
Under the Tags tab, the Tag categories can be customized particularly for the workspace. You can do this by selecting Add a line from the menu. A pop-up box for establishing Tag Category will now appear.
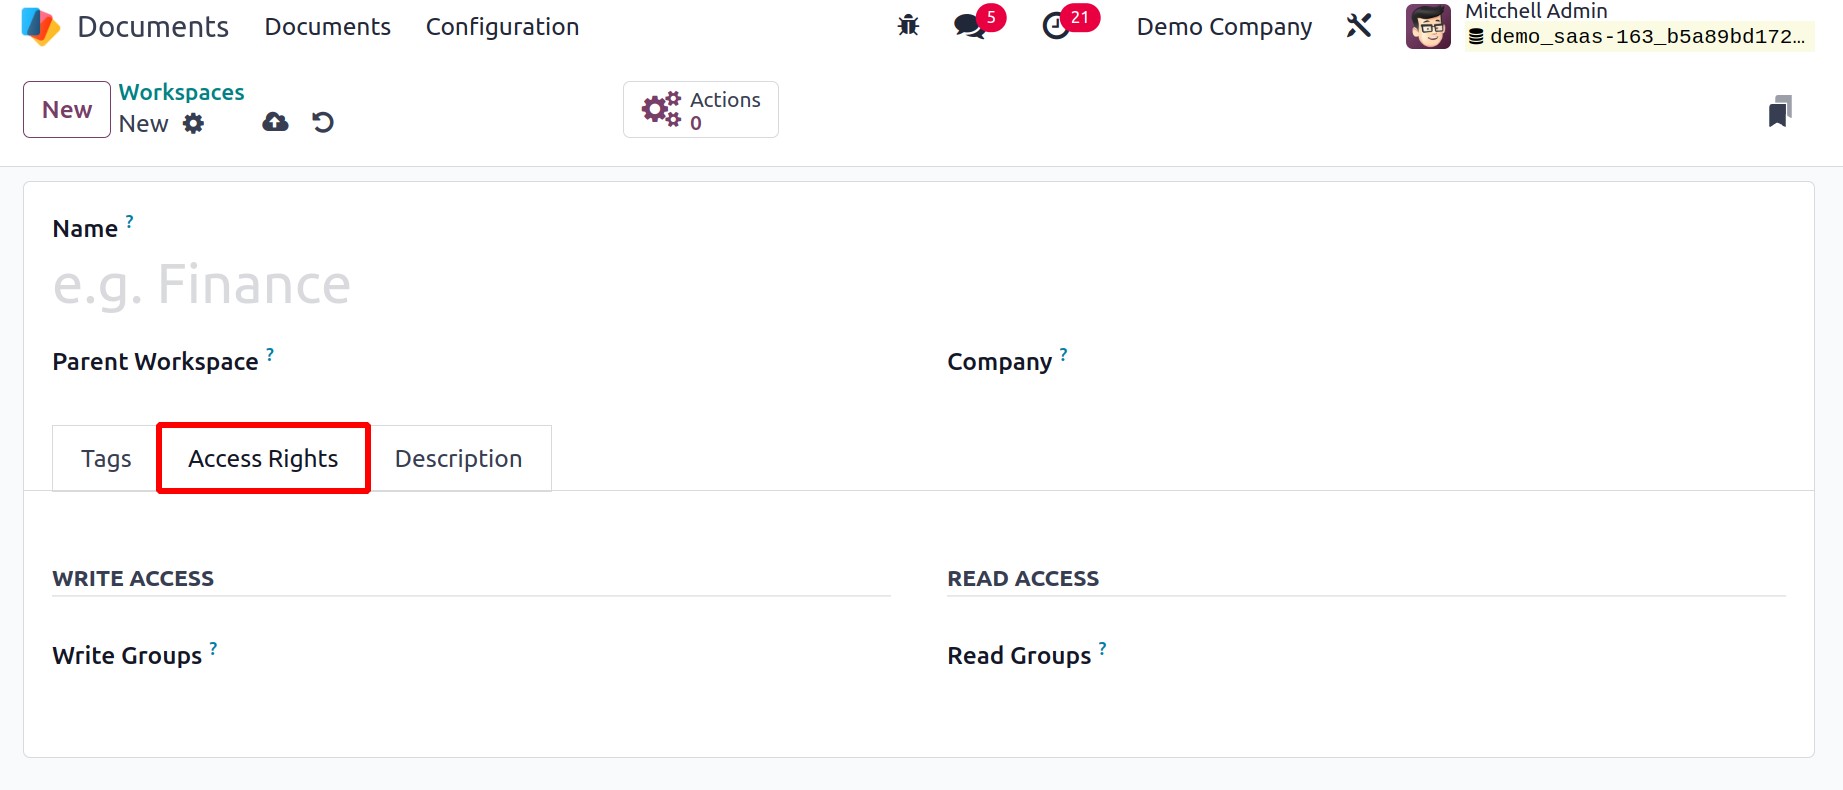
You can create Tag Categories and enter the necessary information. You may view the Write Groups field in the Write Access and the Reads Group in the Read Access sections of the Workspace creation window's Access Rights tab. Individual access rights can be set using these settings. Both write access and read access can be granted to access groups. The workspace's document can be viewed, created, or edited by the Write Groups. Without authorizing creation or editing, the Read Groups can view the workspace and read its contents.
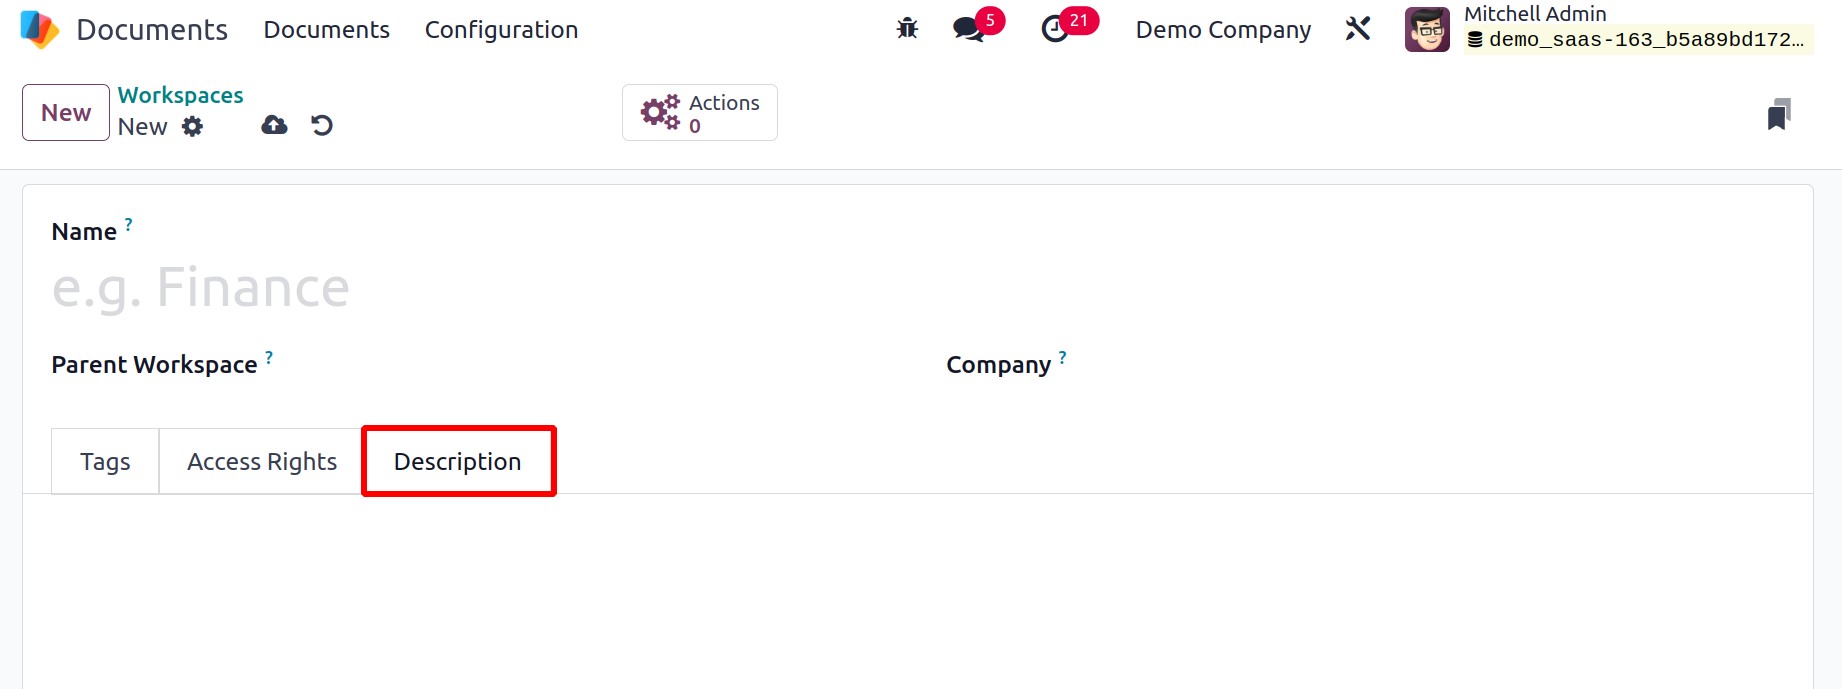
Additionally, the Description tab enables you to describe the Workspace.
You can save the Workspace after entering all the necessary information. You may now see the recently created Workspace in the list of Workspaces.
Two smart buttons located in the window's top right corner also provide you access to the Documents and Actions window directly in addition to these other possibilities.
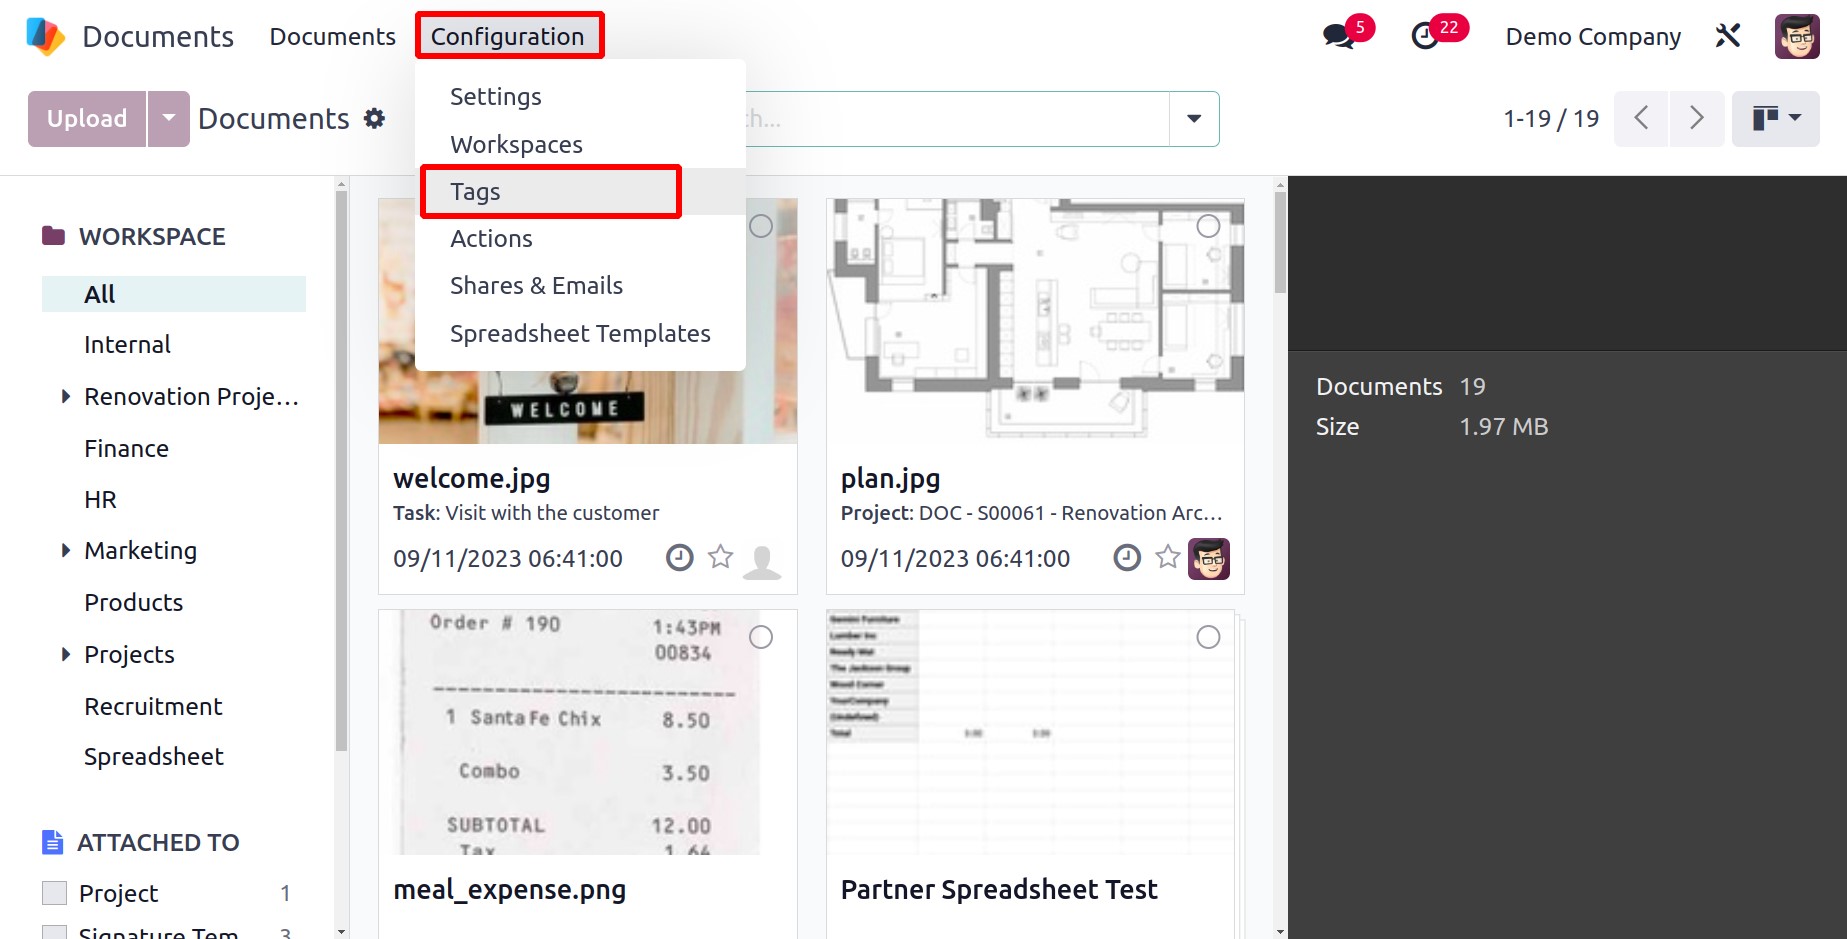
Tags
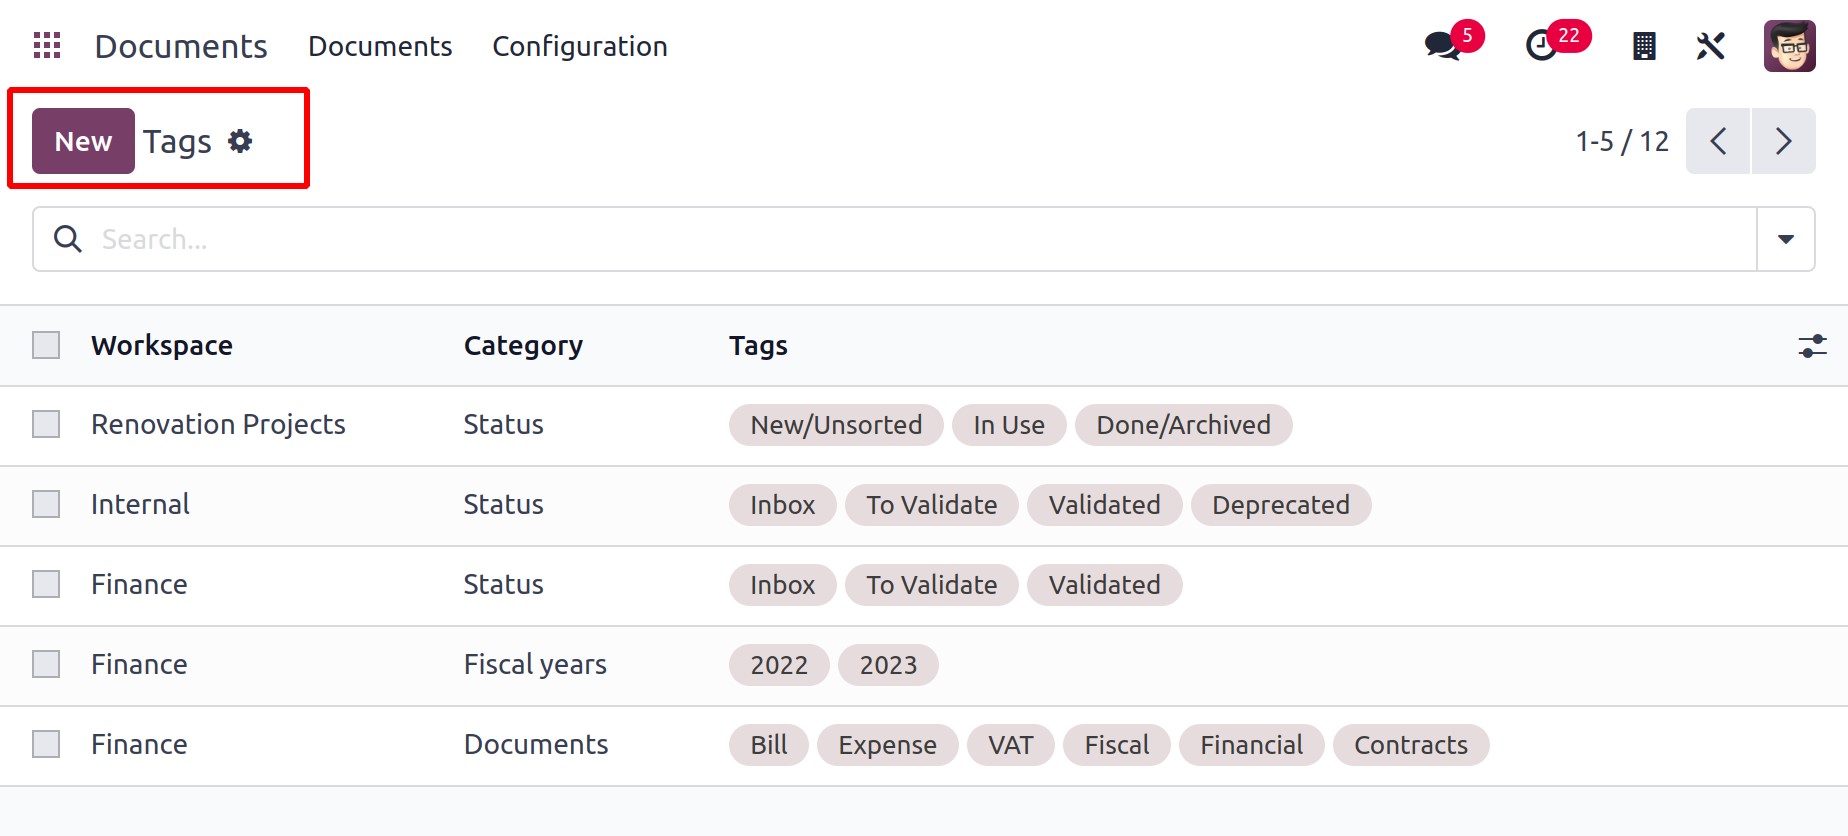
To set up new tags for each category, choose the Tags option on the Configuration tab of the Odoo17 Document module. The Tags window, where you may see all of the tags that have previously been defined in the system, can be viewed by clicking on the Tags menu. Come gaze at this window with me.
It is possible to choose, inspect in detail, and update the details of each of these created Tags. Making new tags is quite simple. You can do it by selecting the NEW button.
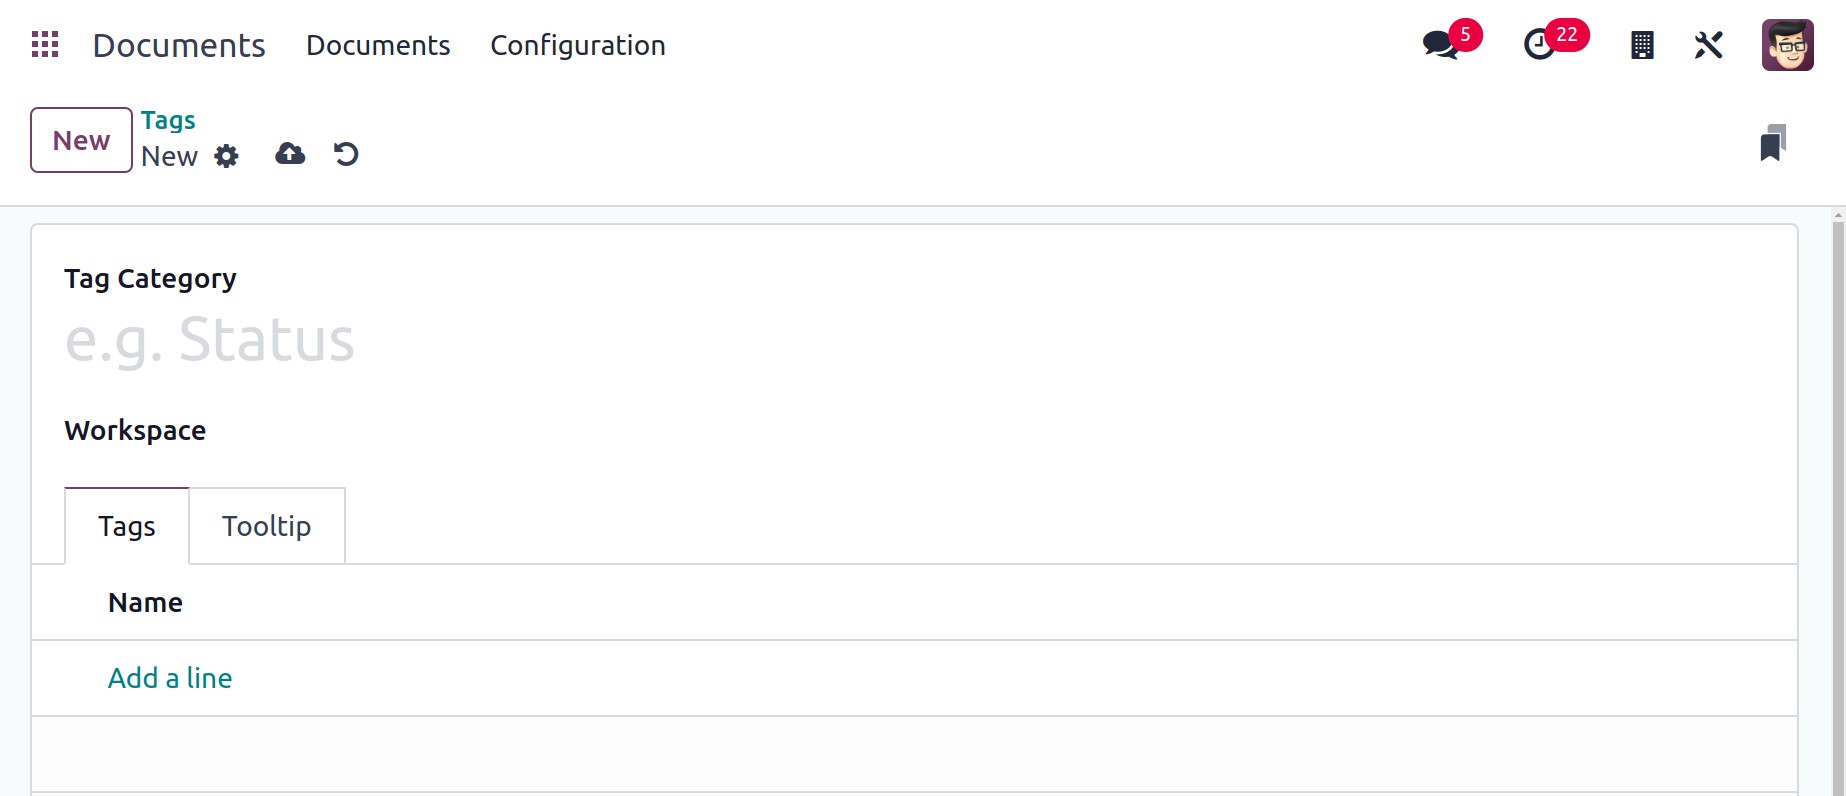
The system is now showing the creation form. You can assign the Tag Category in the creation form. After that, you can choose a Workspace. By selecting Add a line under the Tags tab, you can add tags to this category. You can explain the wording that appears when you hover over this tag category or its tags in the Tooltip tab.
You can save the information by selecting the SAVE option after giving the necessary information.
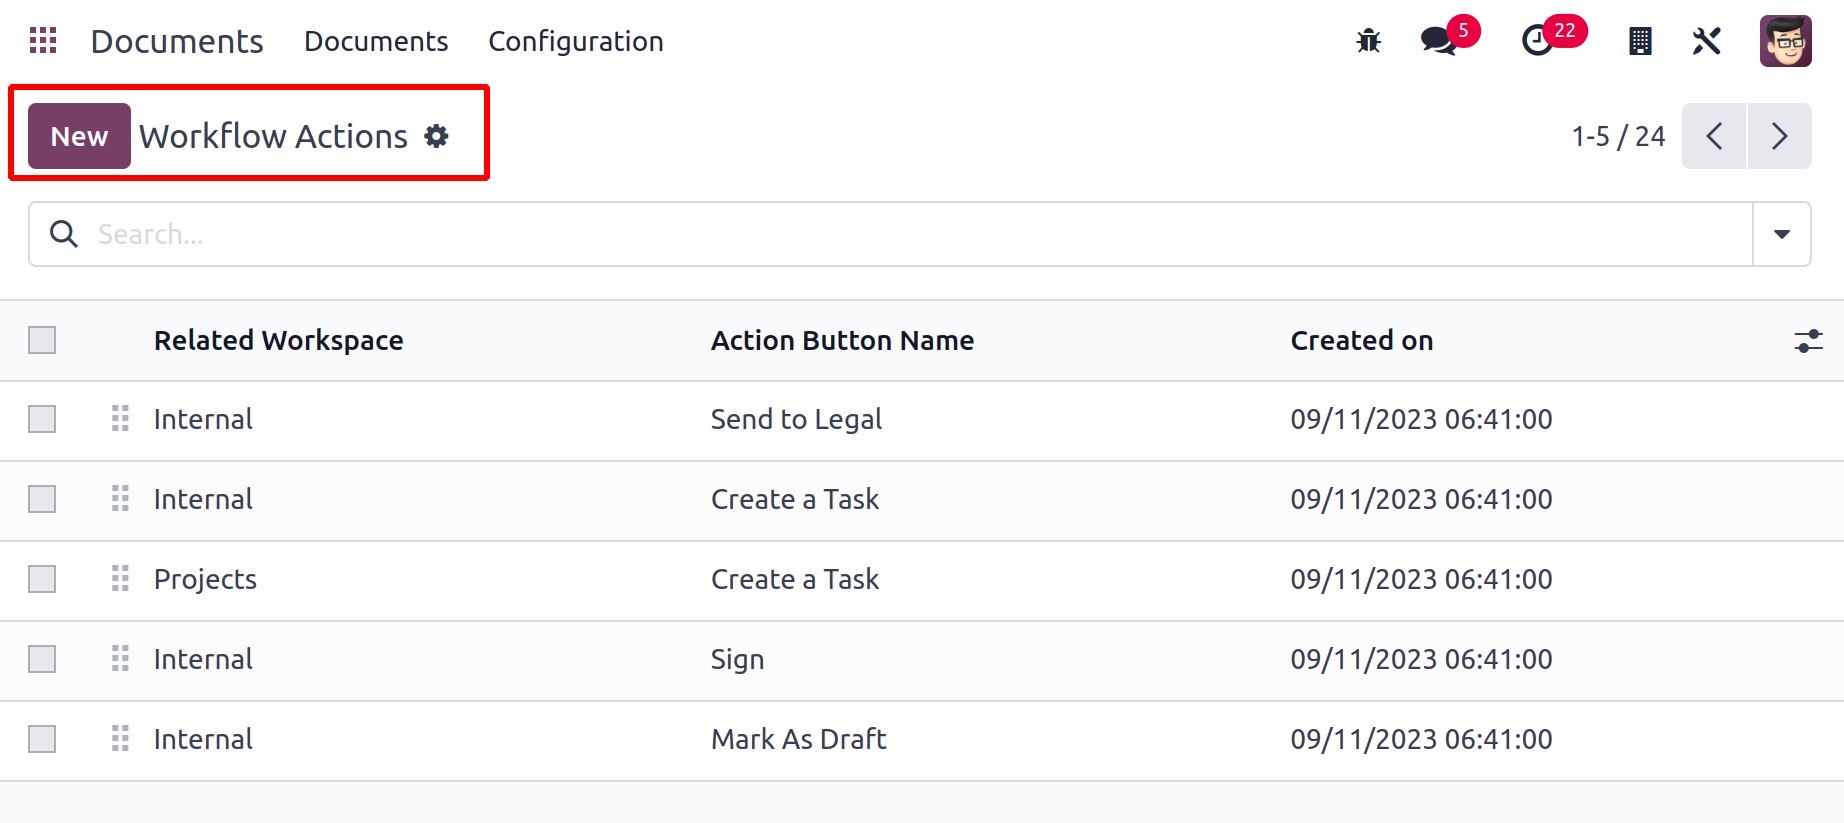
Actions
Several actions can be performed on a document directly from the dashboard. Such workflow actions can be configured from the Configuration, by choosing the Actions option. A list of actions can be viewed from the list. To create a new one, click on the NEW button.
You must first add the Action Name inside the creation window. Next, the action's tooltip may be mentioned. There are two tabs on the form: one for adding Conditions and the other for adding Actions.
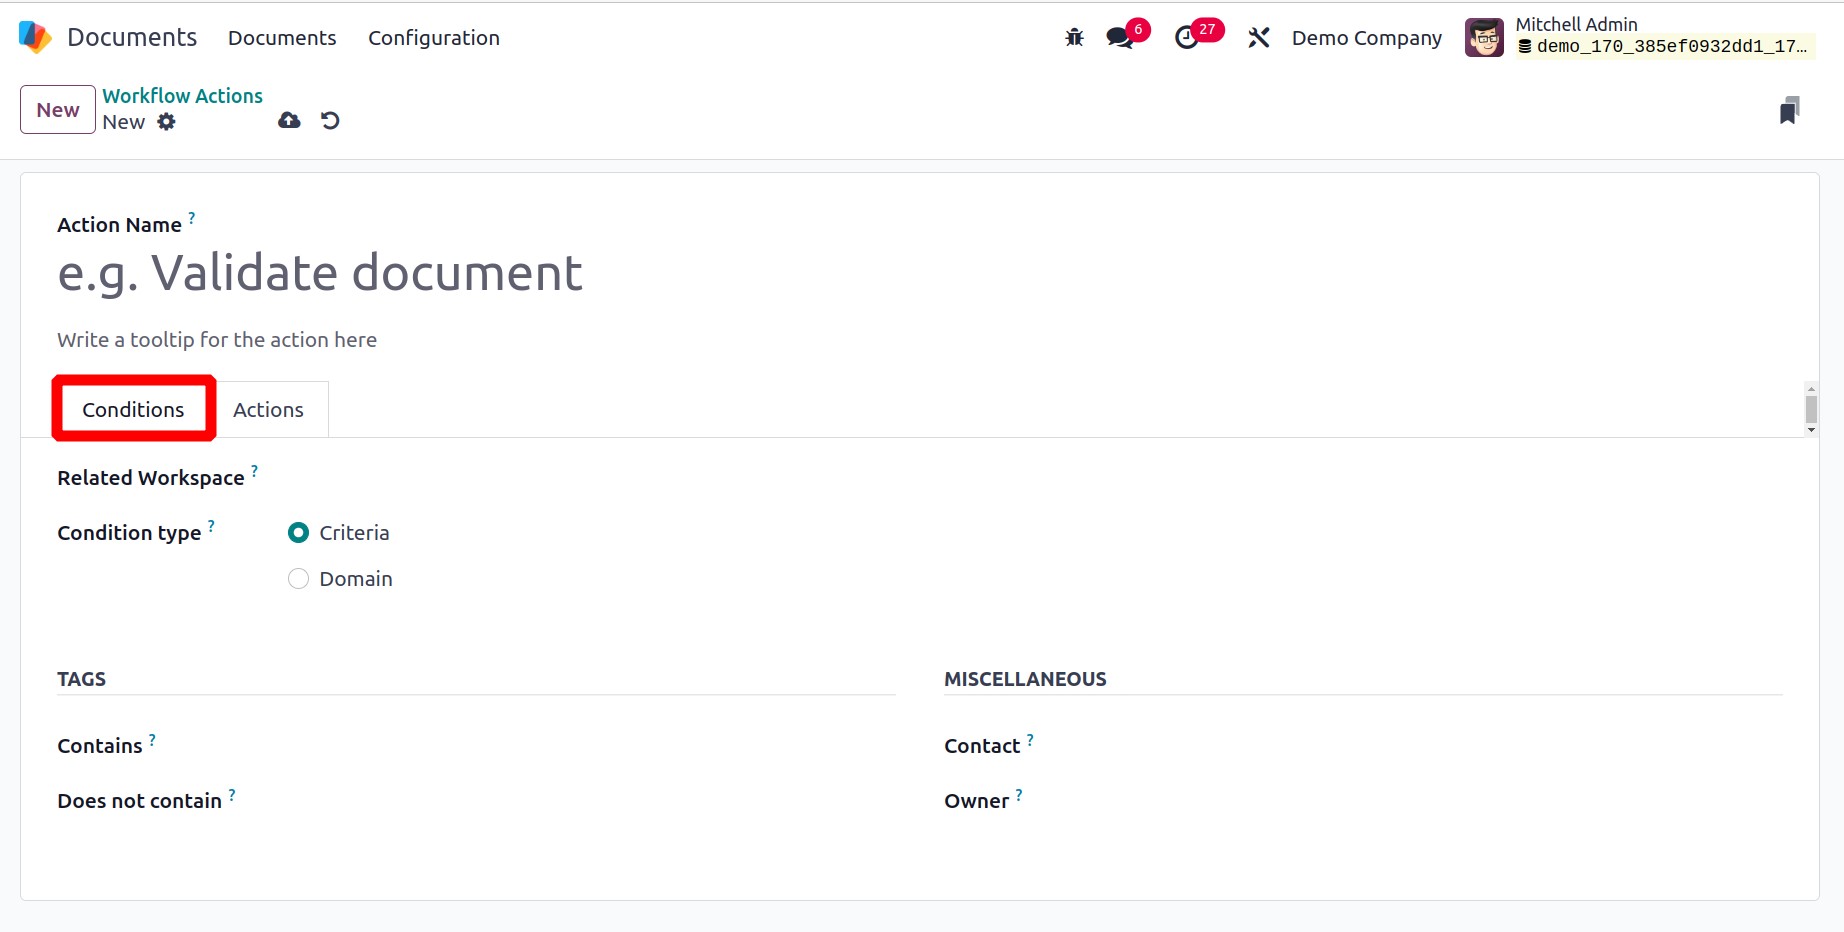
Add the relevant workspace to the Conditions tab, then select the condition type (Domain or Criteria). Next, add tag contains and does not contain in the TAGS section. Include the Owner and Contact in the MISCELLANEOUS section.
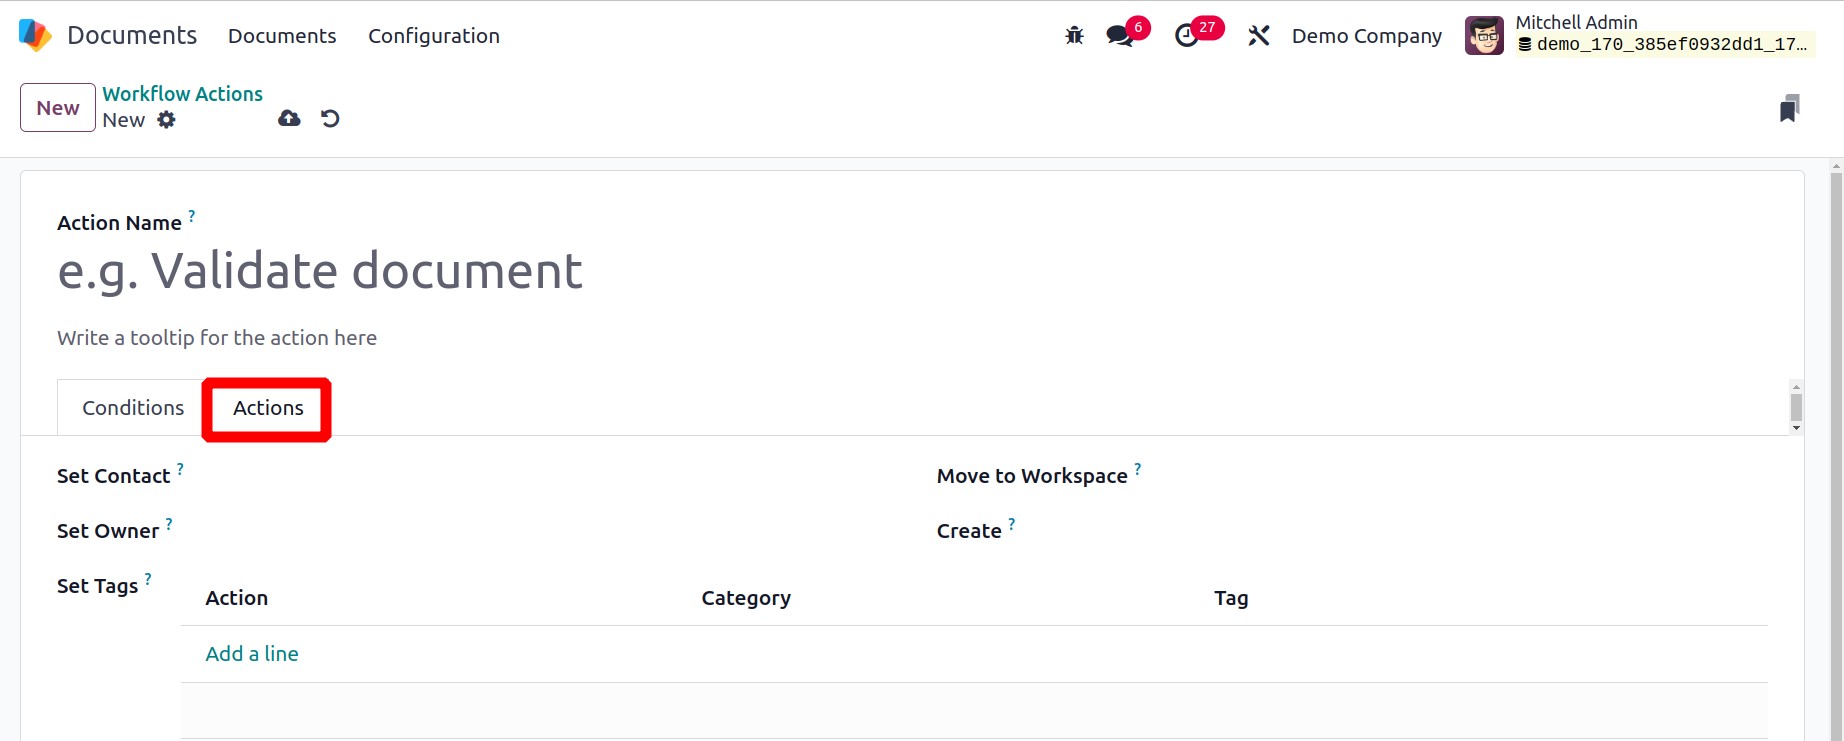
Set Contact, Set Tags, and Set Owner under the Actions tab. Subsequently, select Actions from Add, Remove, and Recycle.
Shares & Emails
You may access the Share links window by using the Shares & Emails menu found on the Configuration tab of the Odoo Document module. Below is a representation of the window's appearance.
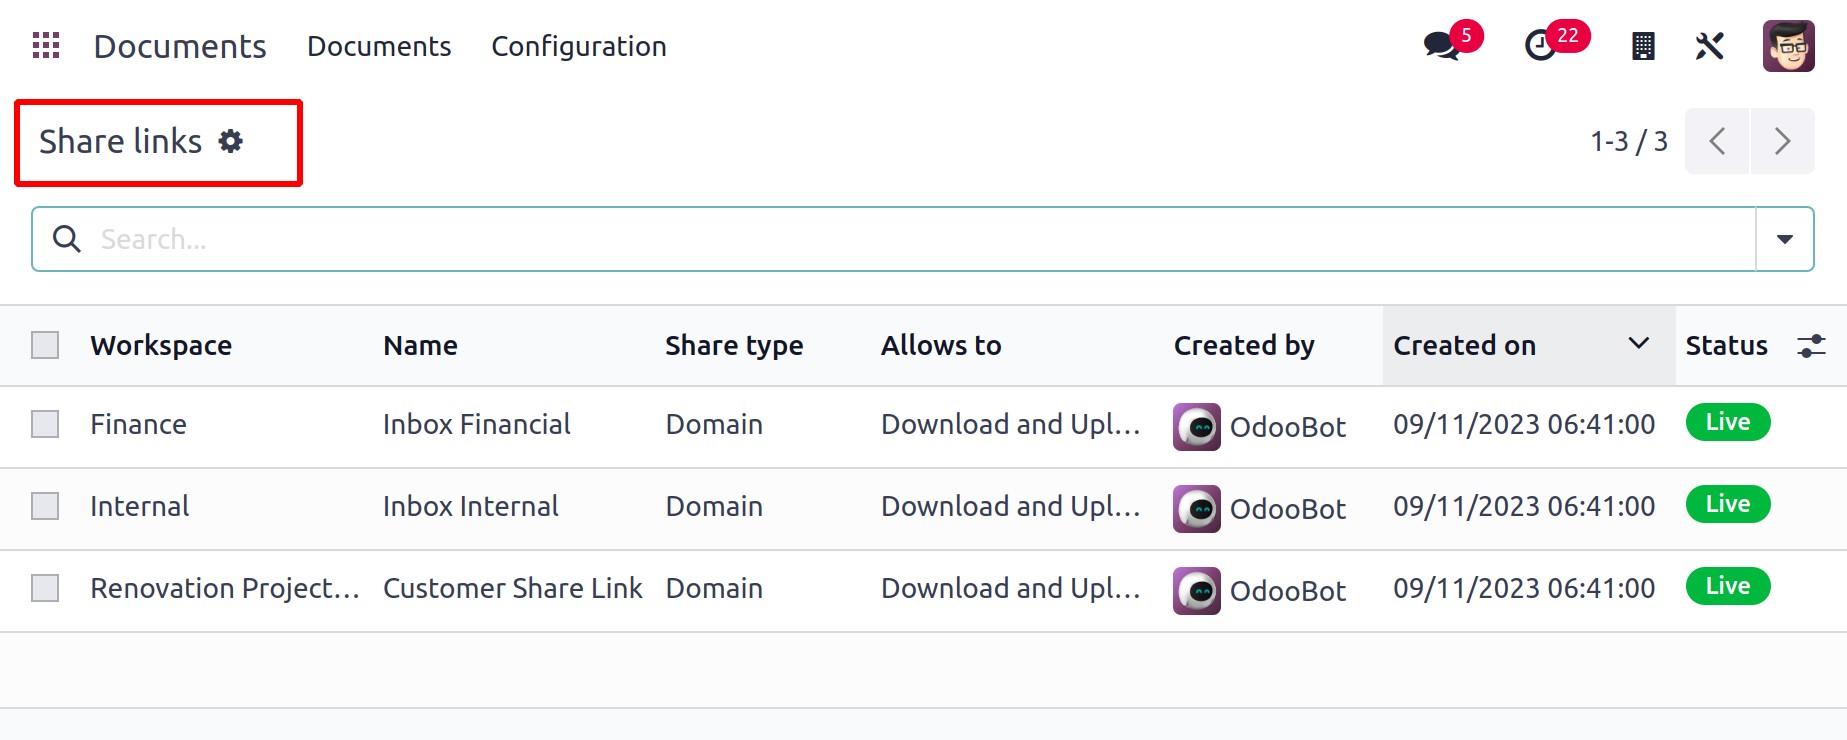
You can get all the information about the shared document links and emails in this box. You can see a preview of the share links in this window, along with information about the workspace, name, share type, allows to, creator, creation date, and status.
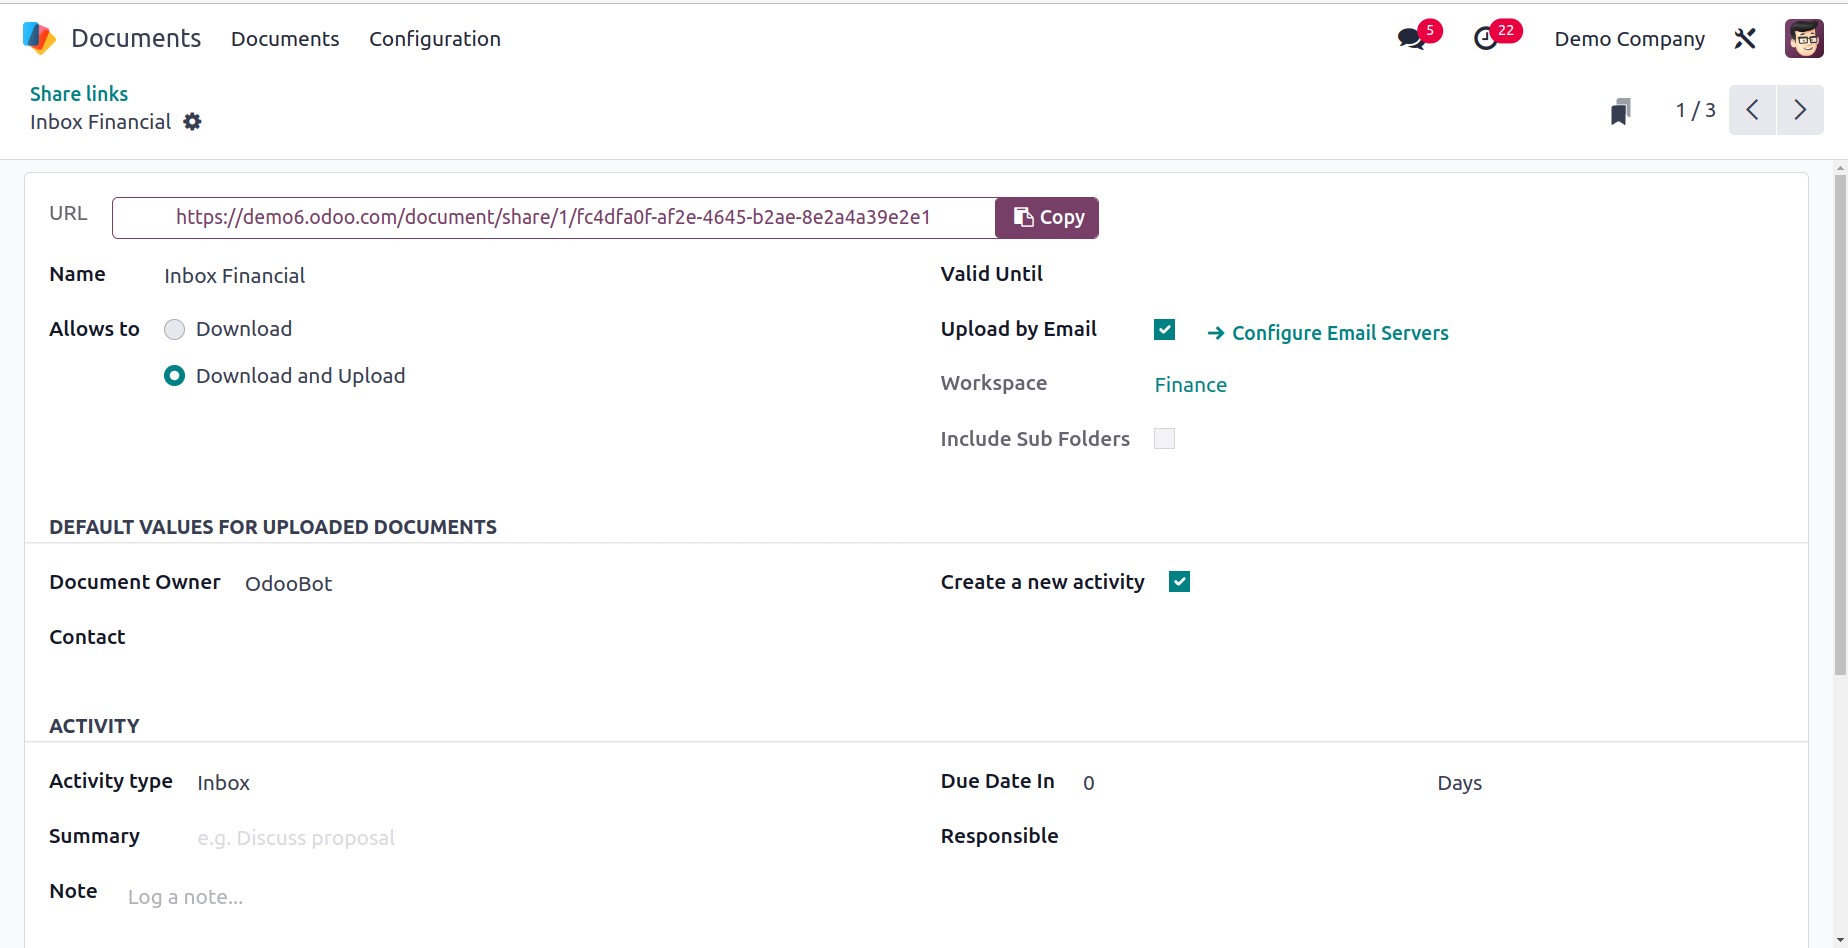
By clicking on them, you can view the details of each of these records.
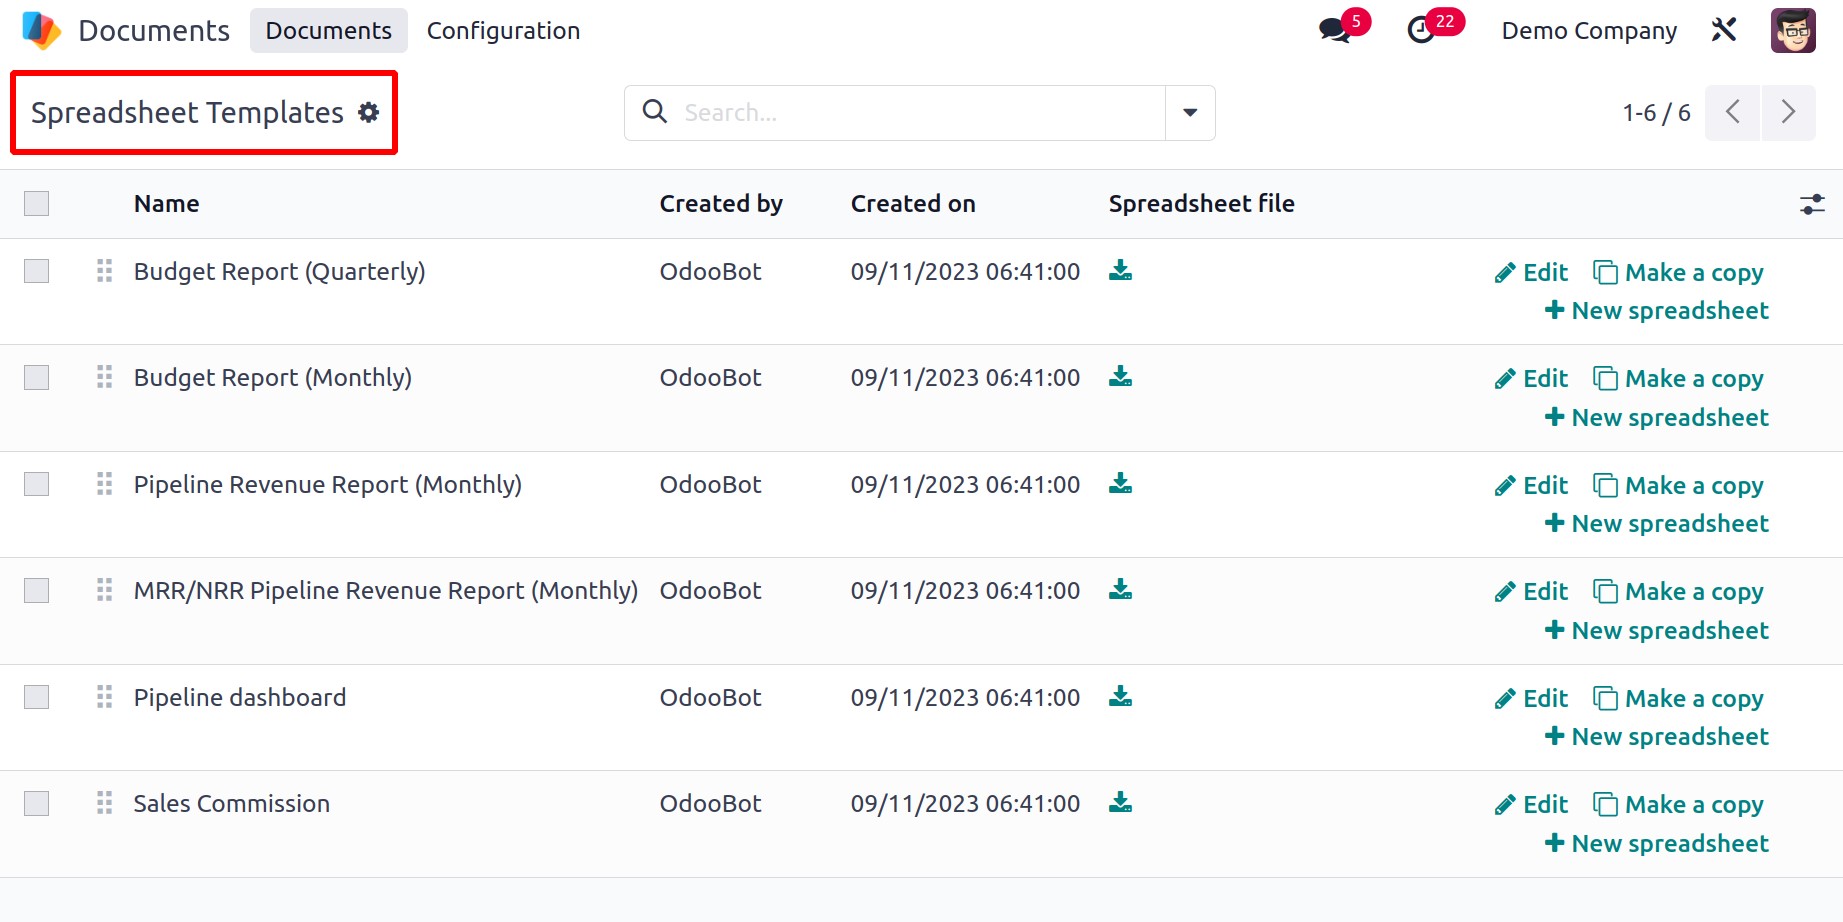
Spreadsheet Templates
The module's Configuration tab also contains a Spreadsheet Templates option. Using this window to manage spreadsheet templates will be quite helpful. The pane, which is quite helpful for subsequent actions, will show all the produced spreadsheet templates. Additionally, the box shows the options to build a new spreadsheet, change an existing template, and create a copy of the spreadsheet template.
All papers may be found in one place thanks to the Odoo Document Management System. Odoo17 Document, the best software option, is a great way to make your business paperless.