Field Service
No matter what the circumstance, it is crucial to put your consumers first to successfully manage your business. You may provide customer service in person with the Field Service module for Odoo 17. Utilizing ERP software will make managing on-site work simple and organized. Odoo 17 stands out from other software since it will support all fieldwork-related procedures. Every step of the registered field service will be monitored by the program. Customers occasionally need professional support while implementing or installing services or goods they have acquired from a business. In these circumstances, you can assist the clients by adding the service information to the Field Service module. The entire procedure will be tracked in this module. You can make a quote for the field service and produce an invoice based on the activities finished or the number of hours worked.

The My Tasks window will appear when you launch the Field Service module, as seen in the screenshot below.
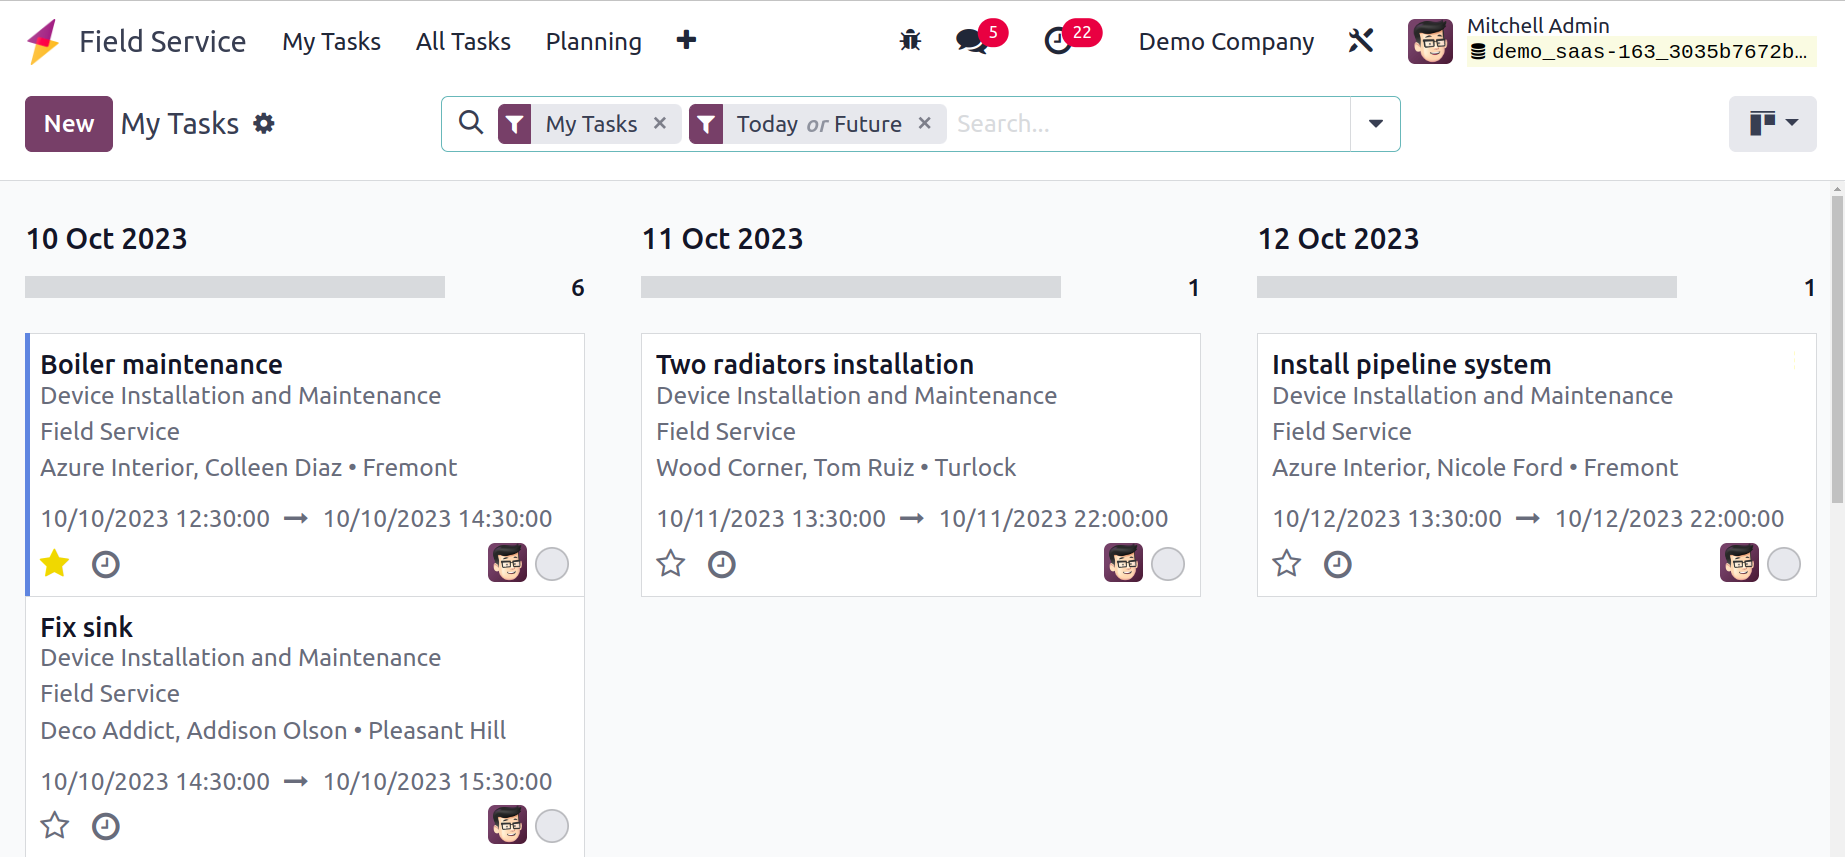
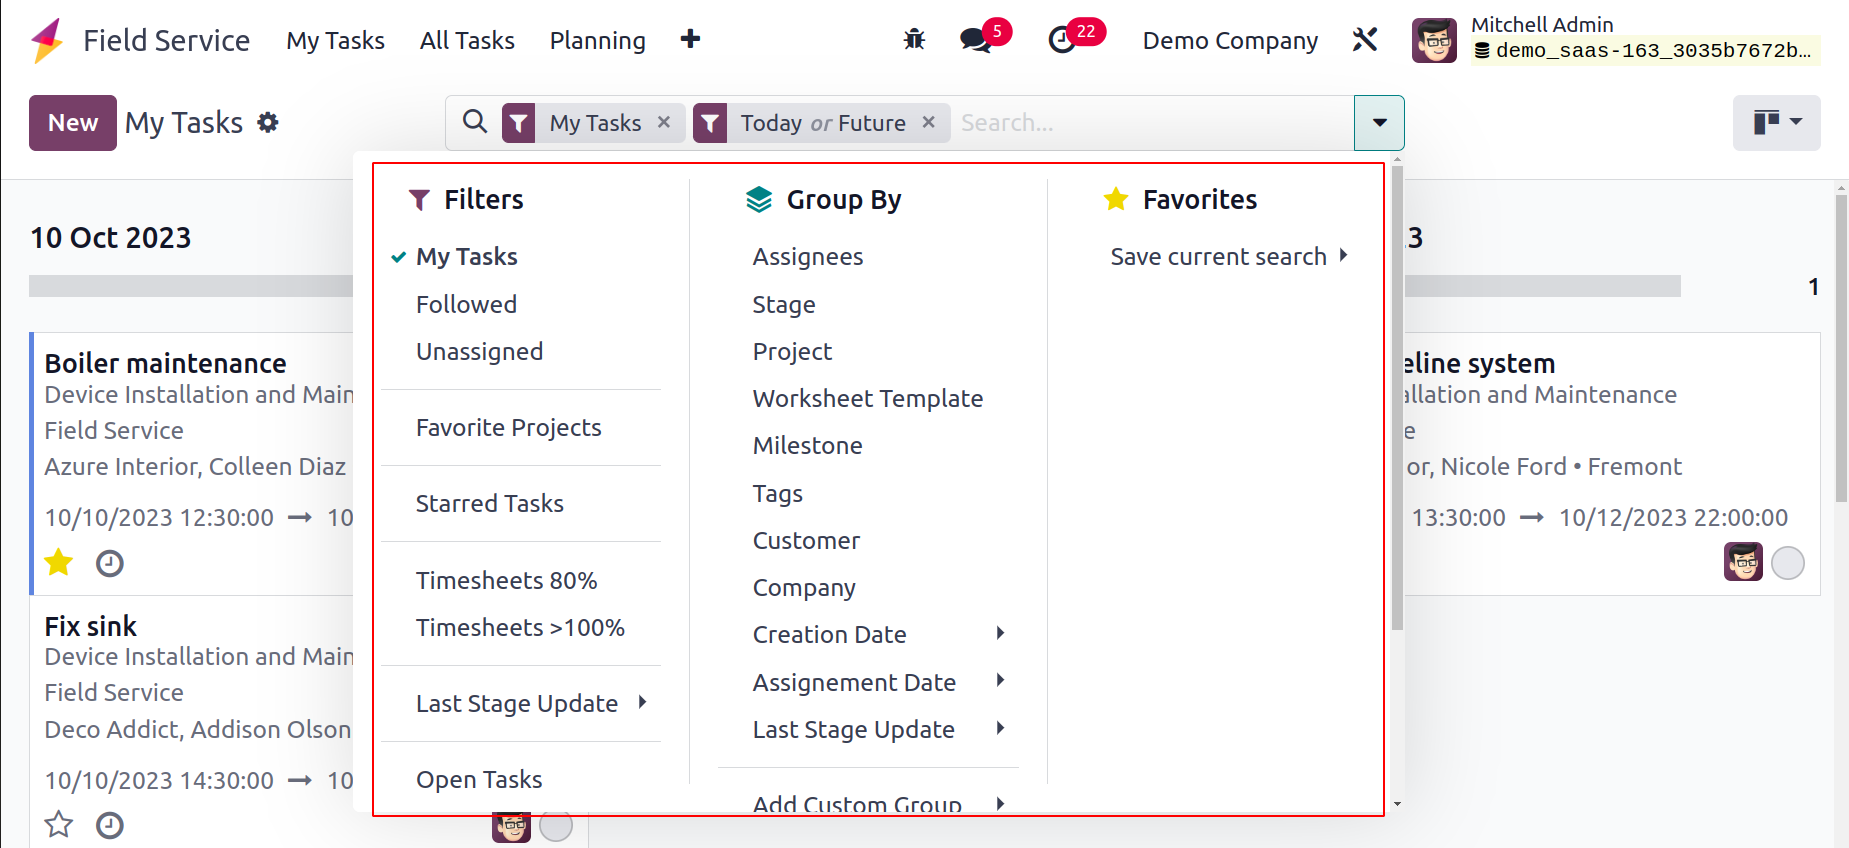
Your allocated tasks will be displayed in this window in a Kanban view. The job can be controlled based on when it was created. As filters for the tasks in this window, the user will see My Tasks, Followed, Unassigned, Favorite Projects, Timesheets, Last Stage Update, Open Tasks, Closed Tasks, Closed on, and Archived. Using the Group By choices, you may organize the jobs. Assignees, Stage, Project, Worksheet Template, Milestone, Customer, Company, Creation Date, Assignment Date, and Last Stage Update are the predefined Group By choices.
Kanban, List, Map, Calendar, Gantt, Pivot, Graph, and Activity views are available for the platform. You will receive information about the task's name, customer, assigned workers, tags, and scheduled date.

To prioritize tasks, utilize the star icon. You can use the tiny clock icon present on each job to schedule new activities for that task. Direct personnel assignments are possible via this window. You will be given a space to add the new employee to this task, as seen in the screenshot above.
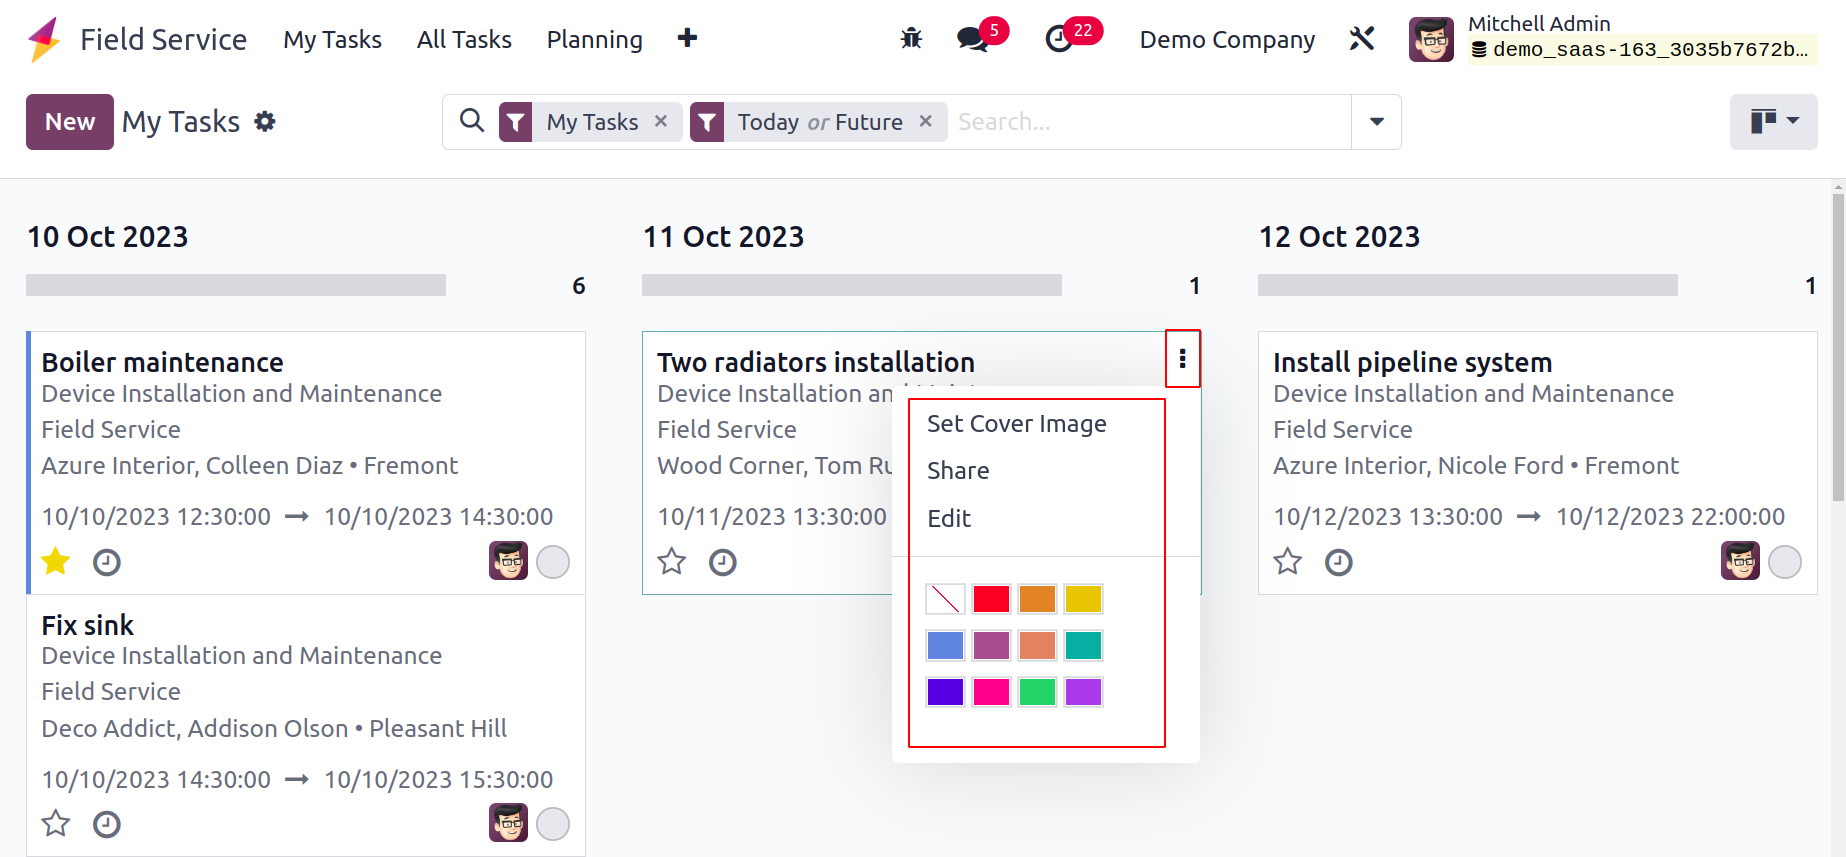
Options like Set Cover Image, Share, and Edit are available by clicking the three tiny vertical dots in the upper right corner of each task.
In this window, let's see how to add a new task. If you want to do this right away, just click the New button, and it will take you to the form view as seen in the screenshot below.
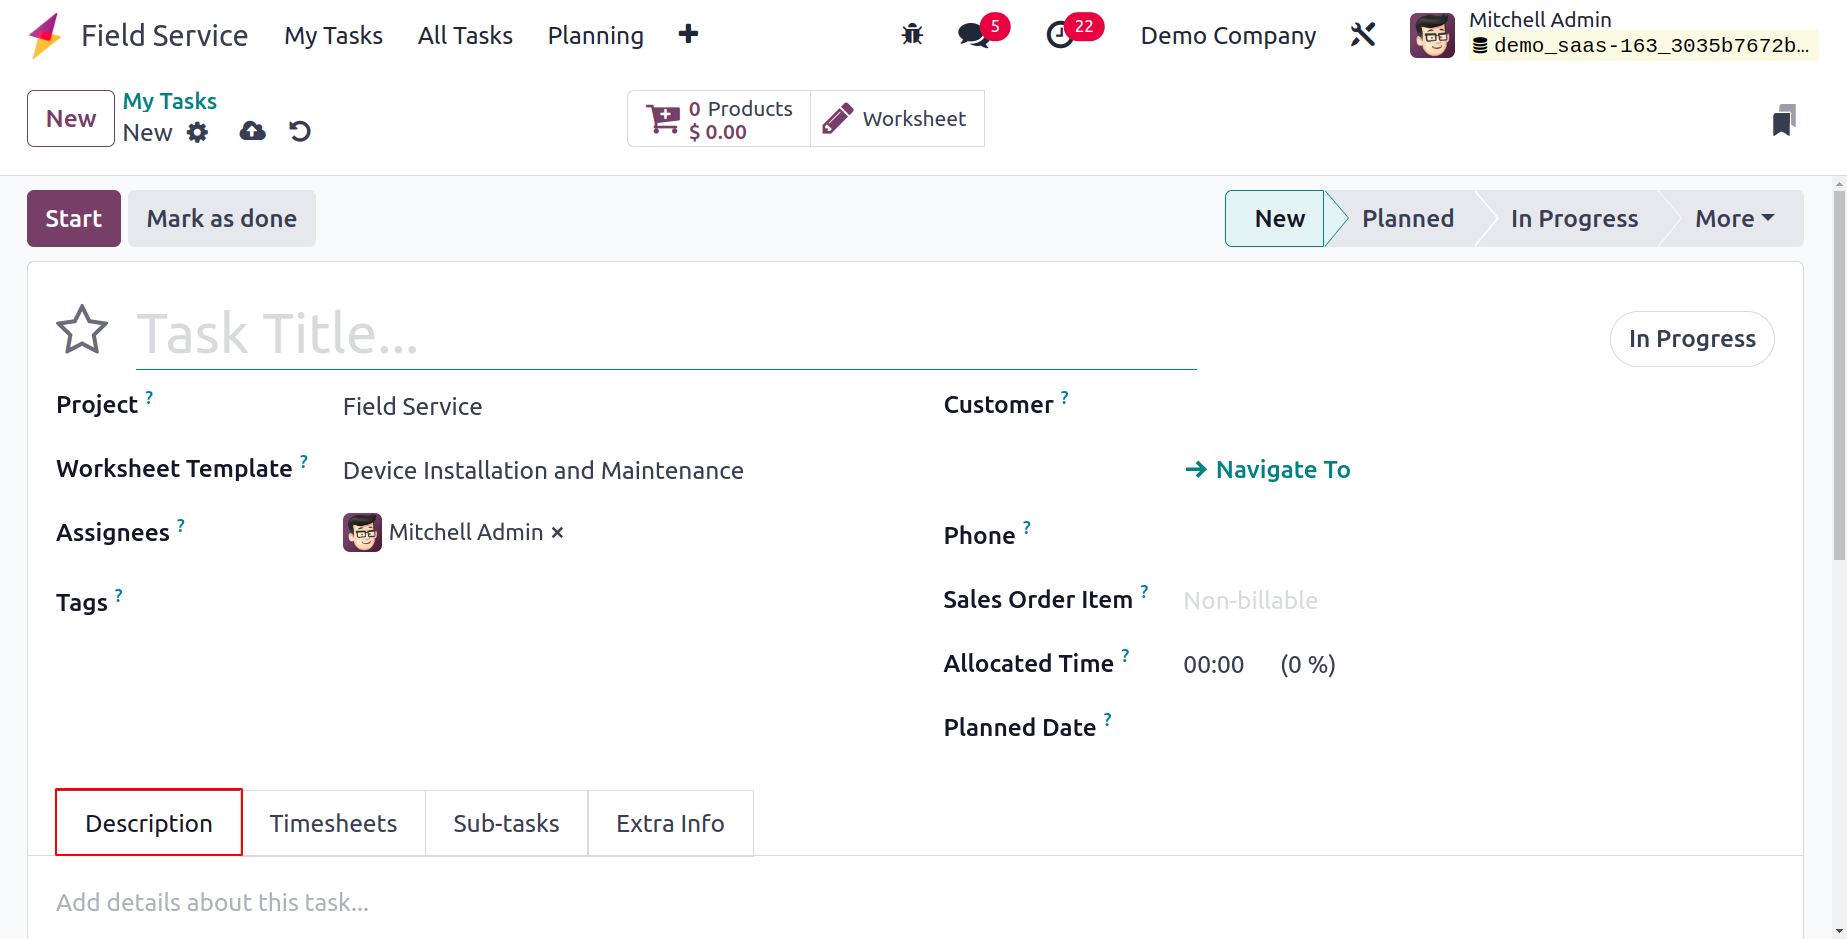
The task's name can be entered in the provided field. To track the progress, you can set up tasks within the project you establish for this service in Odoo 17. The Project can be chosen from the drop-down menu. Choose from the available options a Worksheet Template that is appropriate for this activity. You can appoint staff members to this assignment in the Assignees area. You can add relevant Tags for the work in the relevant field. You can enter the customer's information in the Customer area. You can choose a sales order to which you want to invoice this specific task by selecting it in the Sales Order Item area. The Allocated Time section allows you to specify the overall time allotted for this task. You can specify the task's scheduled date in the Planned Date column. The Description tab contains further information regarding the task.
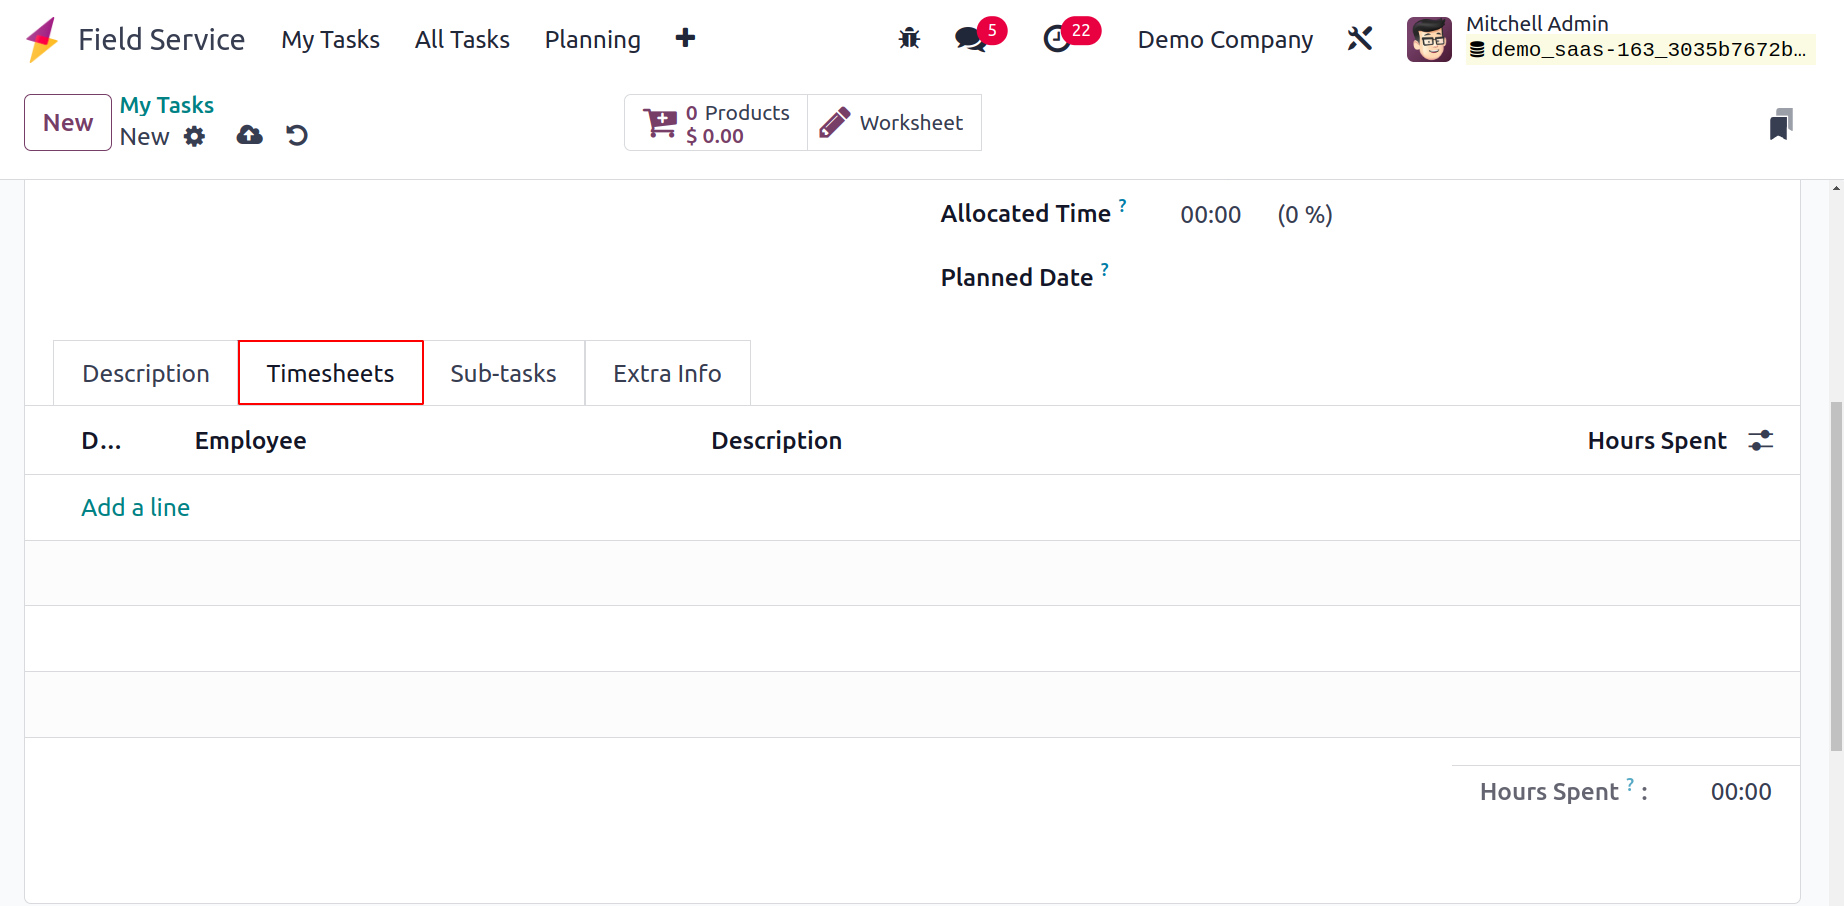
Using the Add a Line button in the Timesheet tab, you can track the time that employees spent working on this activity. Details about the Date, Employee, Description, and Hours Spent can be added here.
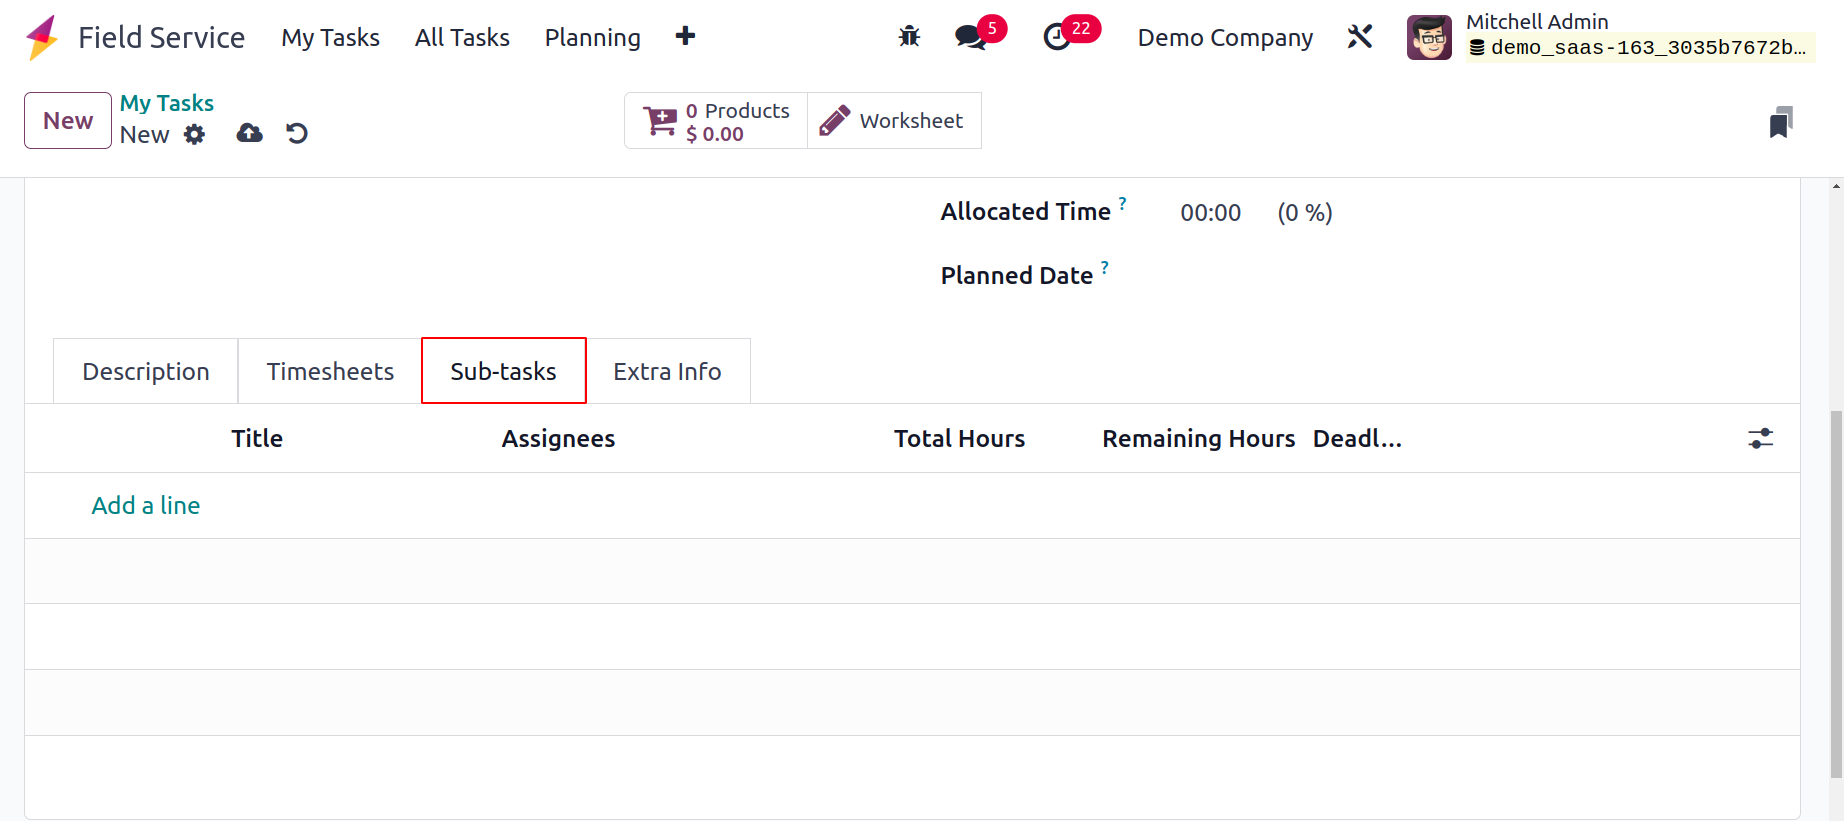
You can divide this task into various sub-tasks under the Sub-tasks section to methodically monitor the entire procedure. From this page, you can allocate staff to these sub-tasks.
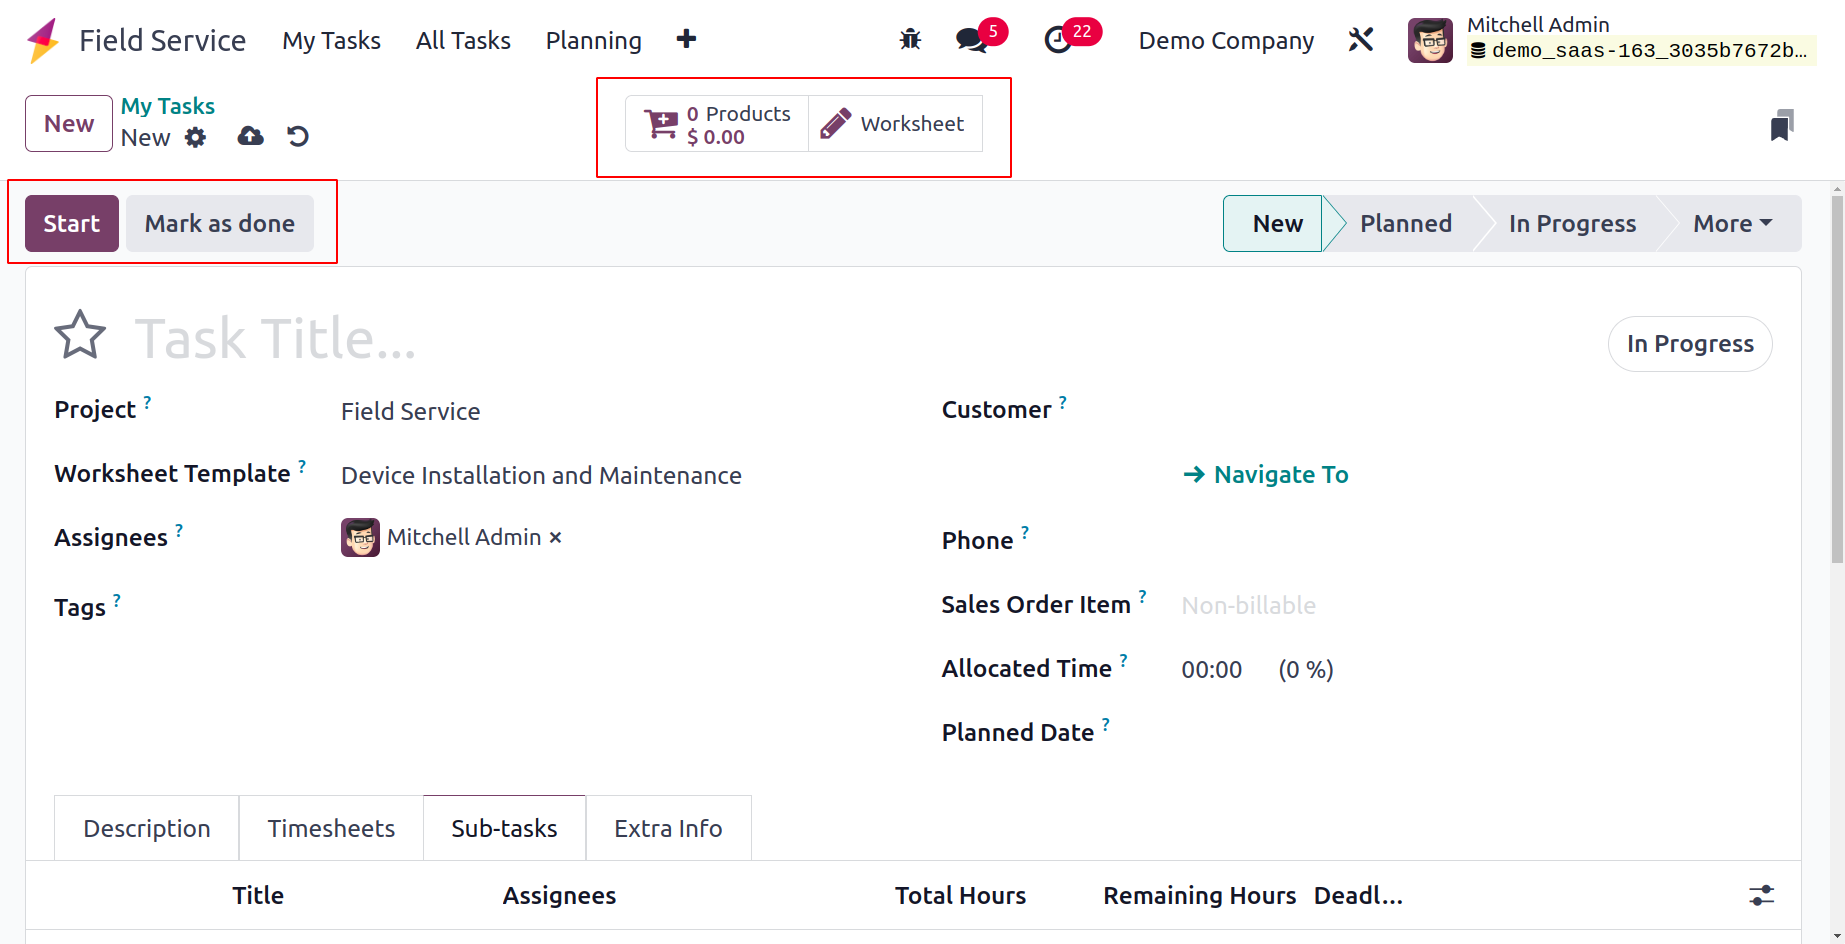
The smart buttons Products and Worksheet can be found in the form view and will display information about the worksheets and goods related to this assignment. Once the configuration is complete, click Start to begin automatically keeping track of the time spent on this project. When you press this button, Odoo17 will begin keeping track of the time.
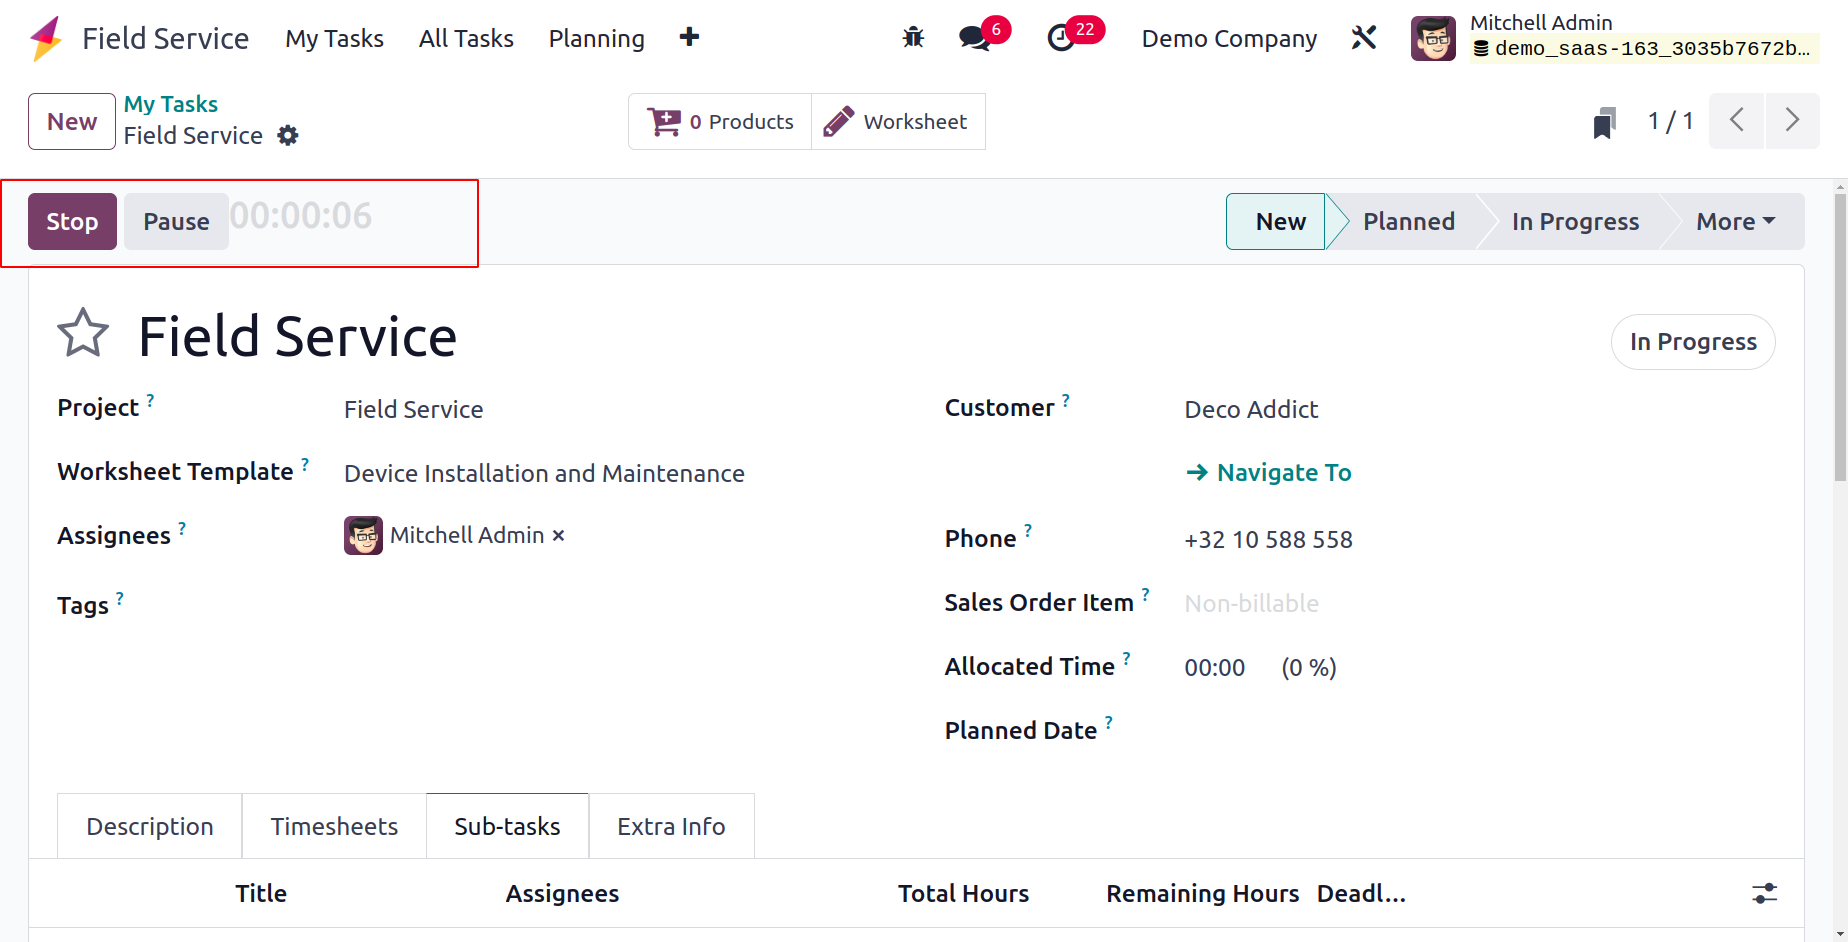
You can use the Stop button once the task is finished. A pop-up window asking you to confirm the time Odoo17 recorded will appear.
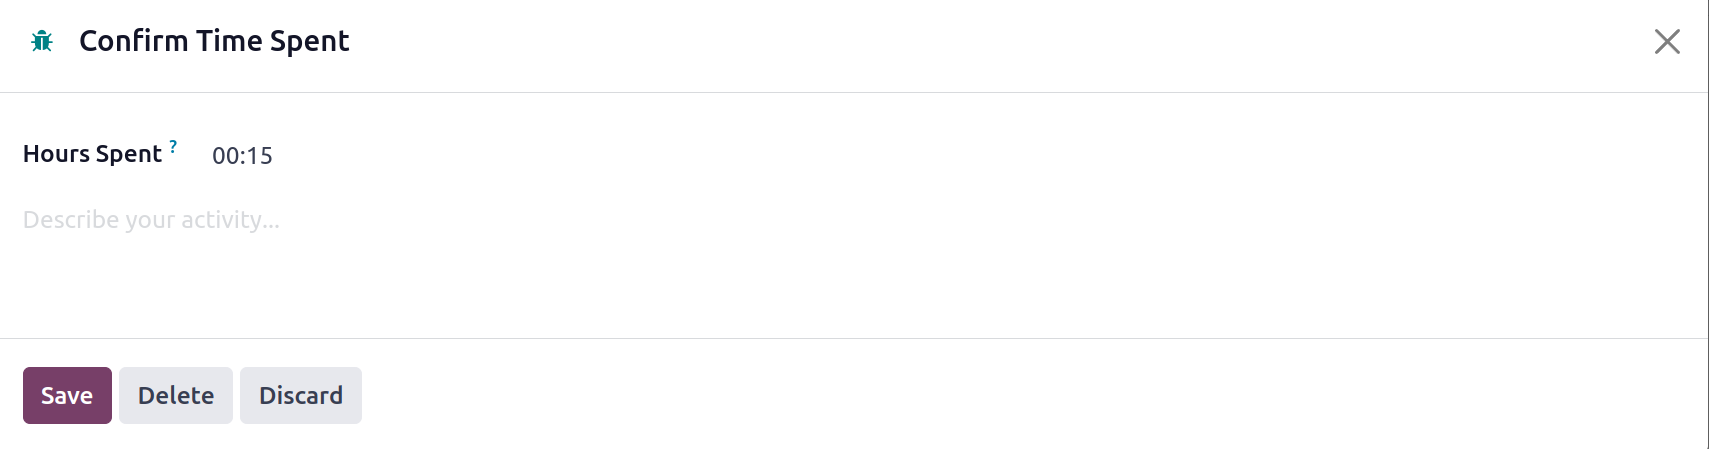
Here, you may verify how much time was spent manually. The task's Timesheet tab will have a record of the tracked time.
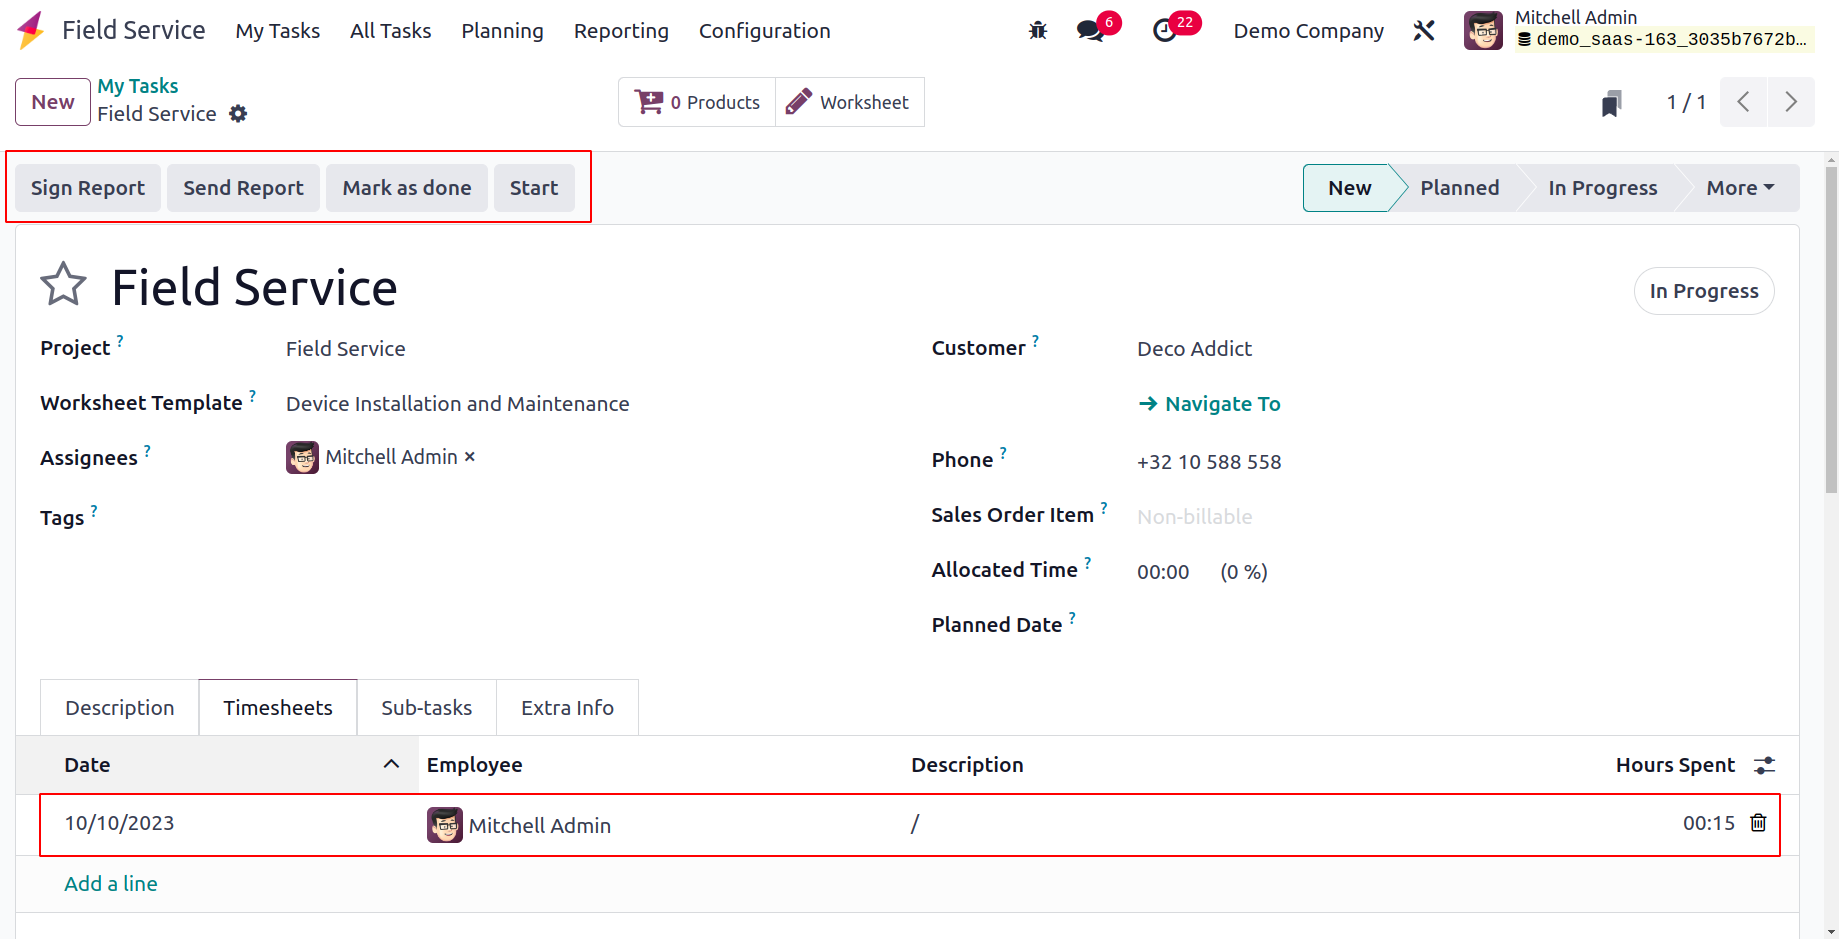
Click the Mark as Done button once the task is finished. A new button to create an invoice for the task will then appear on the screen as a result. After this, you can create an invoice and finish the payment process.
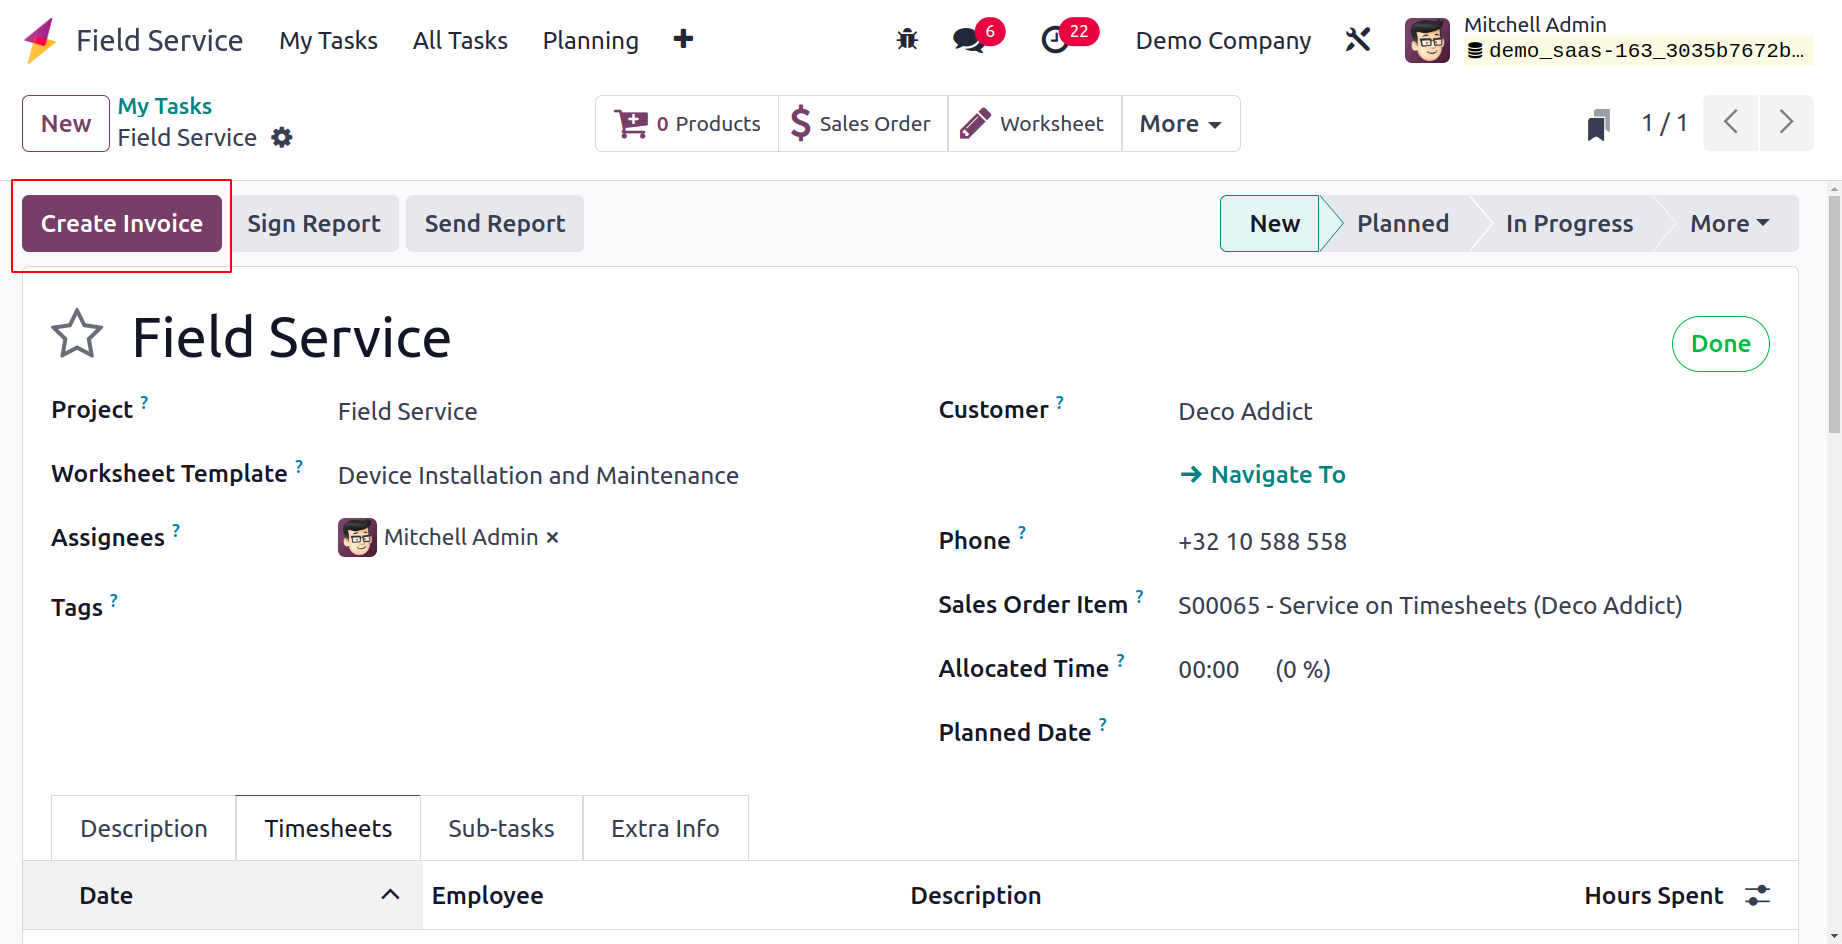
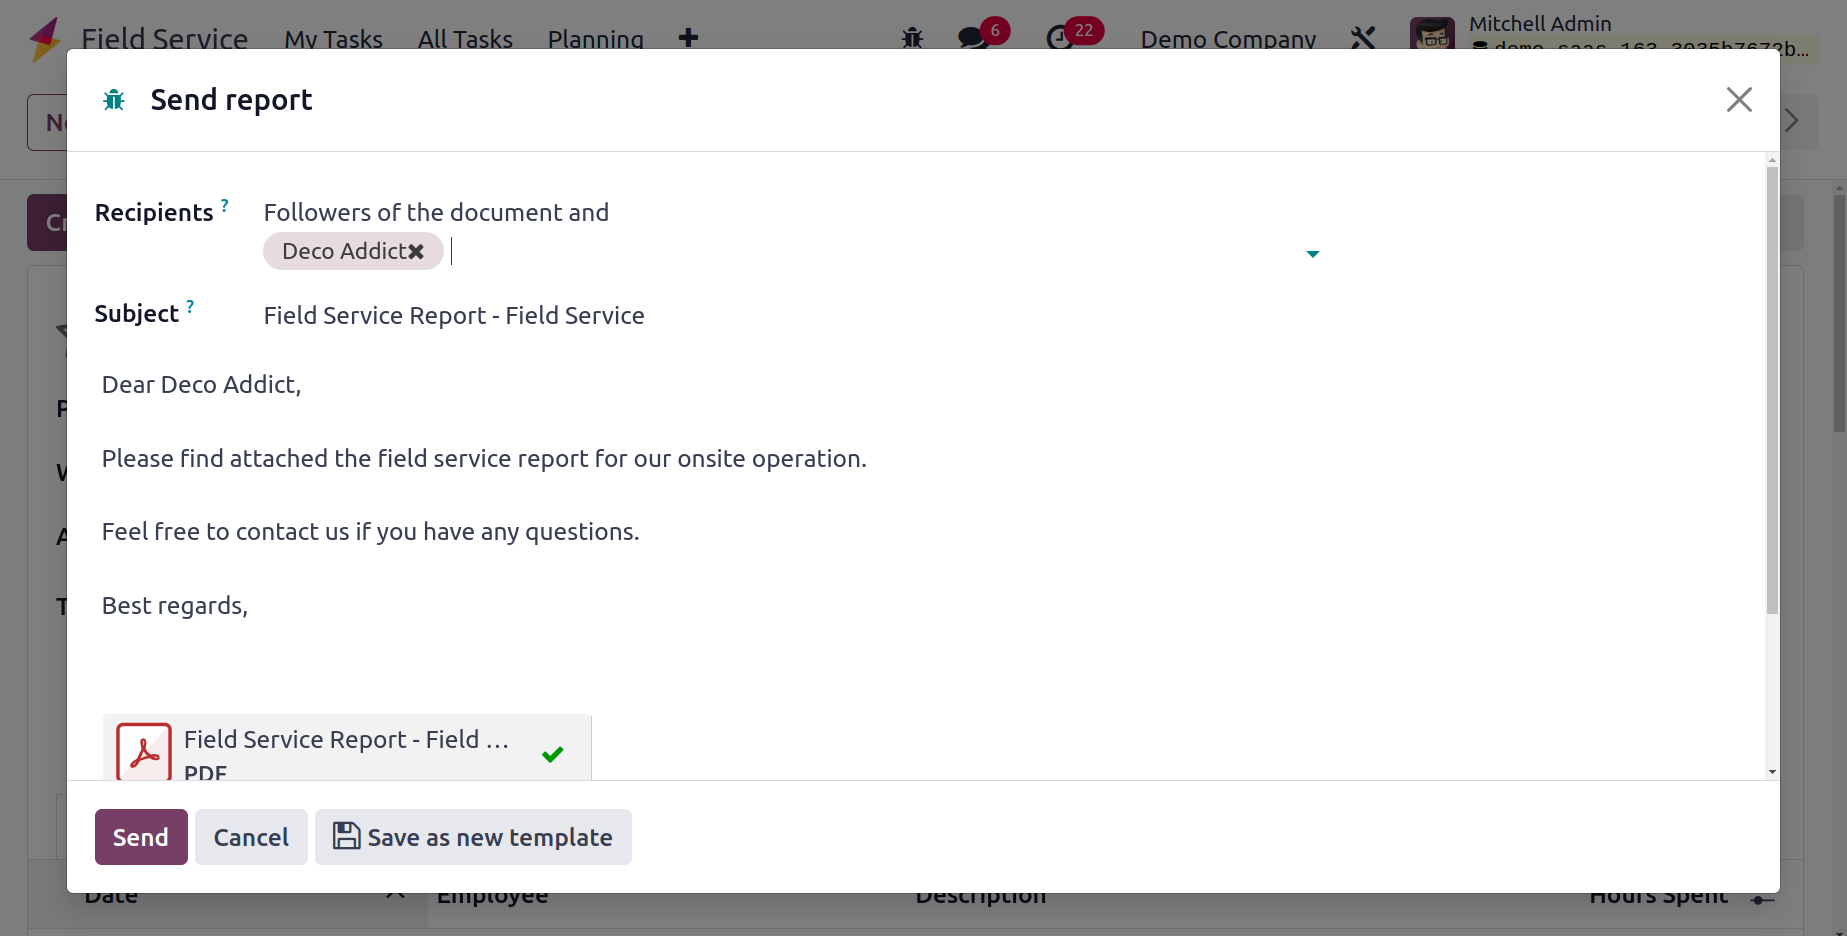
On this screen, there is a Send Report button that you may use to send the worksheet's report to the relevant customer. You can review the report's content and add the appropriate attachments to the automatically created email. Next, press the Send button.
You can access the customer portal by clicking the Sign Report button on the task's form view, as shown in the screenshot below.
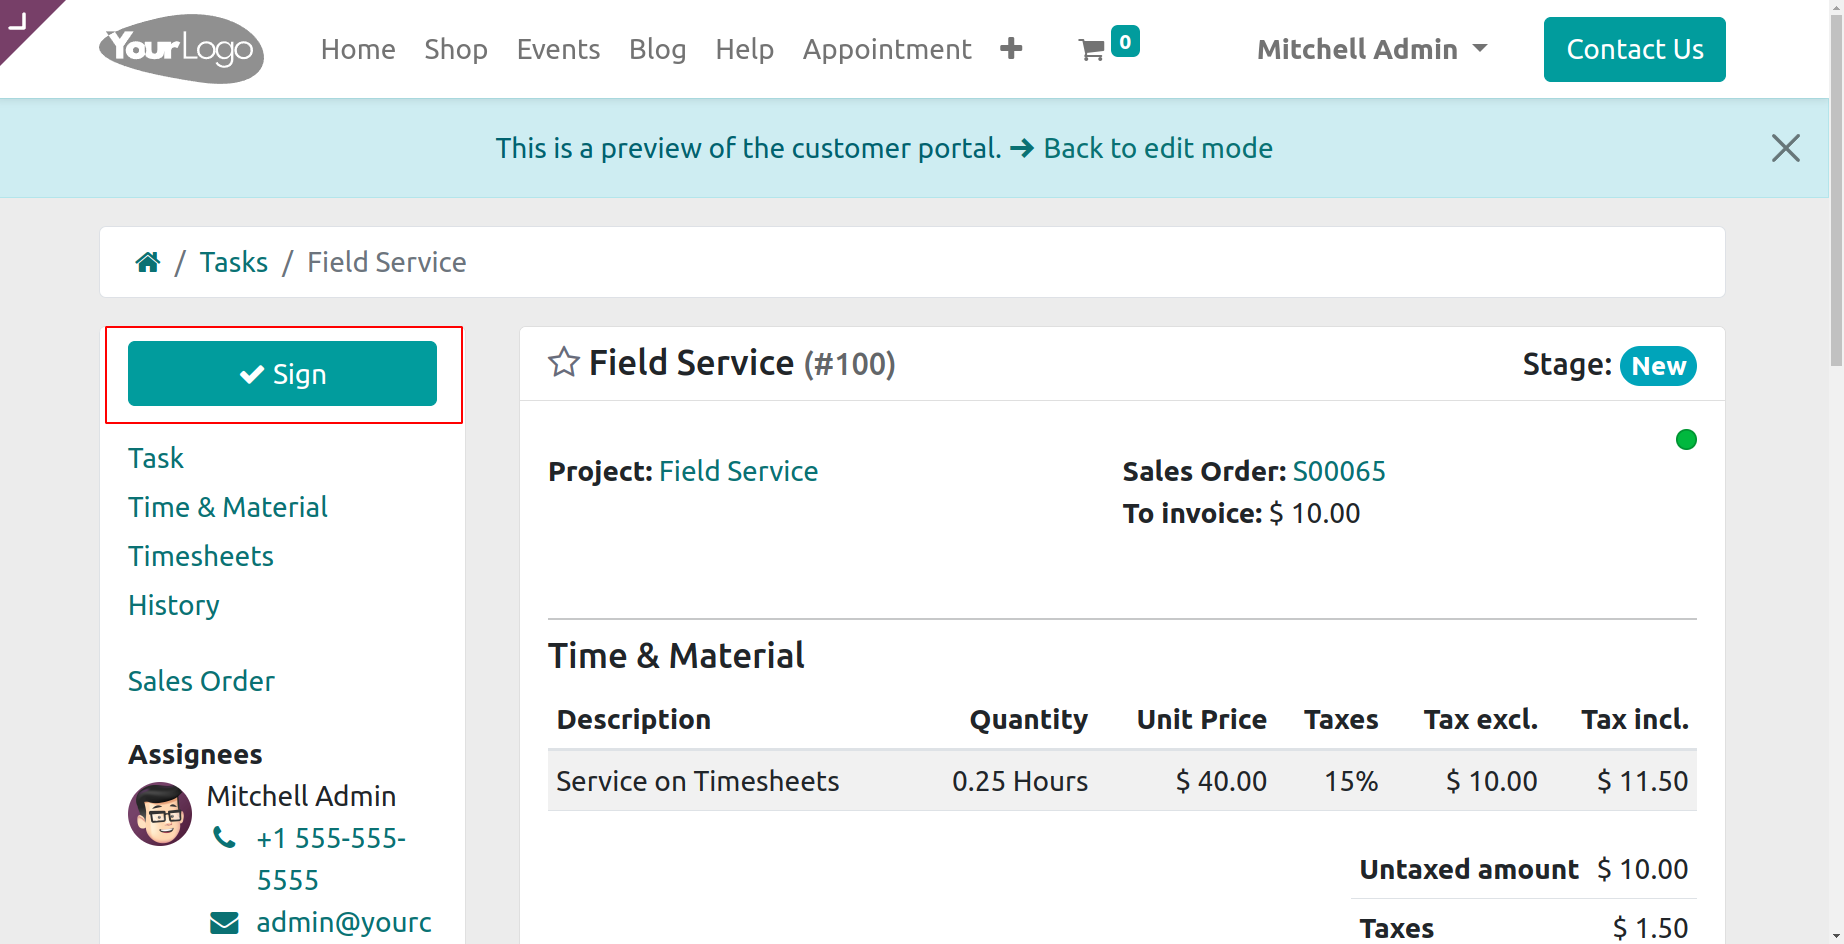
This is a screenshot of the customer portal's preview, where users can electronically sign documents.
You can select the Map option from the My Task menu to view the tasks on a map, as seen in the screenshot.
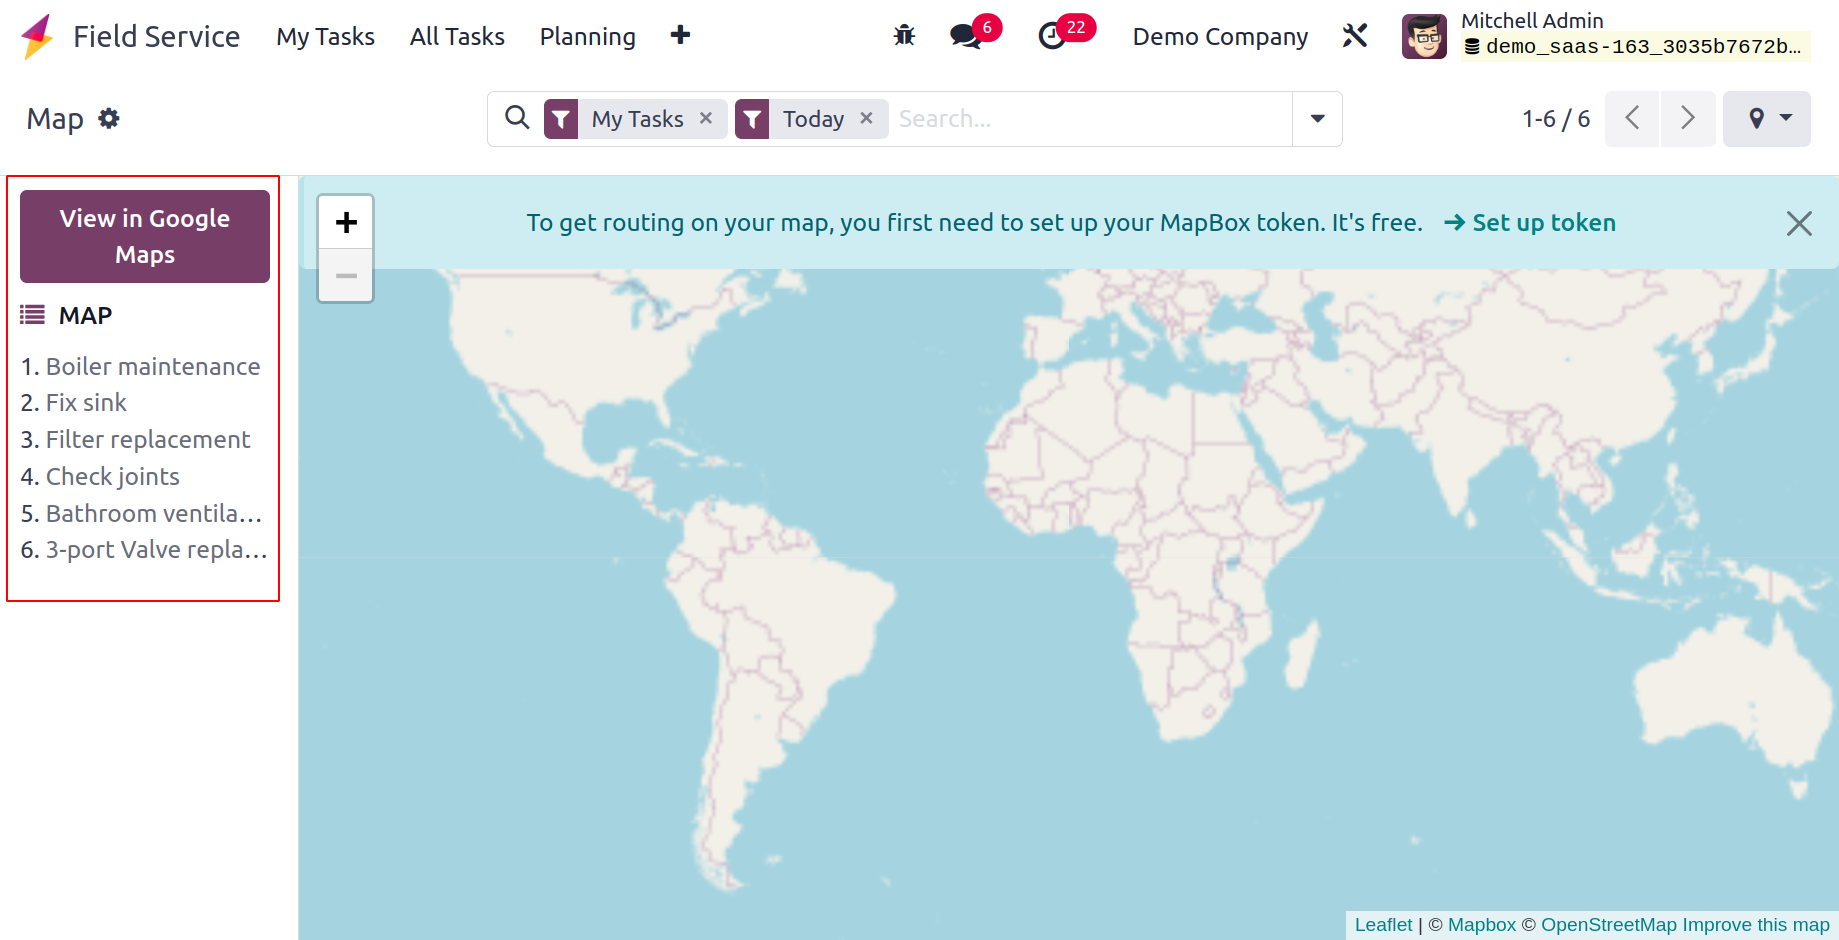
Here, you may view the tasks in Google Maps by selecting the option to View in Google Maps. You will see a preview of the task details when you click on the task listed on the map. Name, address, customer, phone number, worksheet template, project, assignees, and scheduled date are some of the details.
All Tasks
You may access the All Tasks option in the Odoo17 Field Service module, which will keep a record of all the field service tasks set up in your system. You may see here every task that has been given to a different employee.
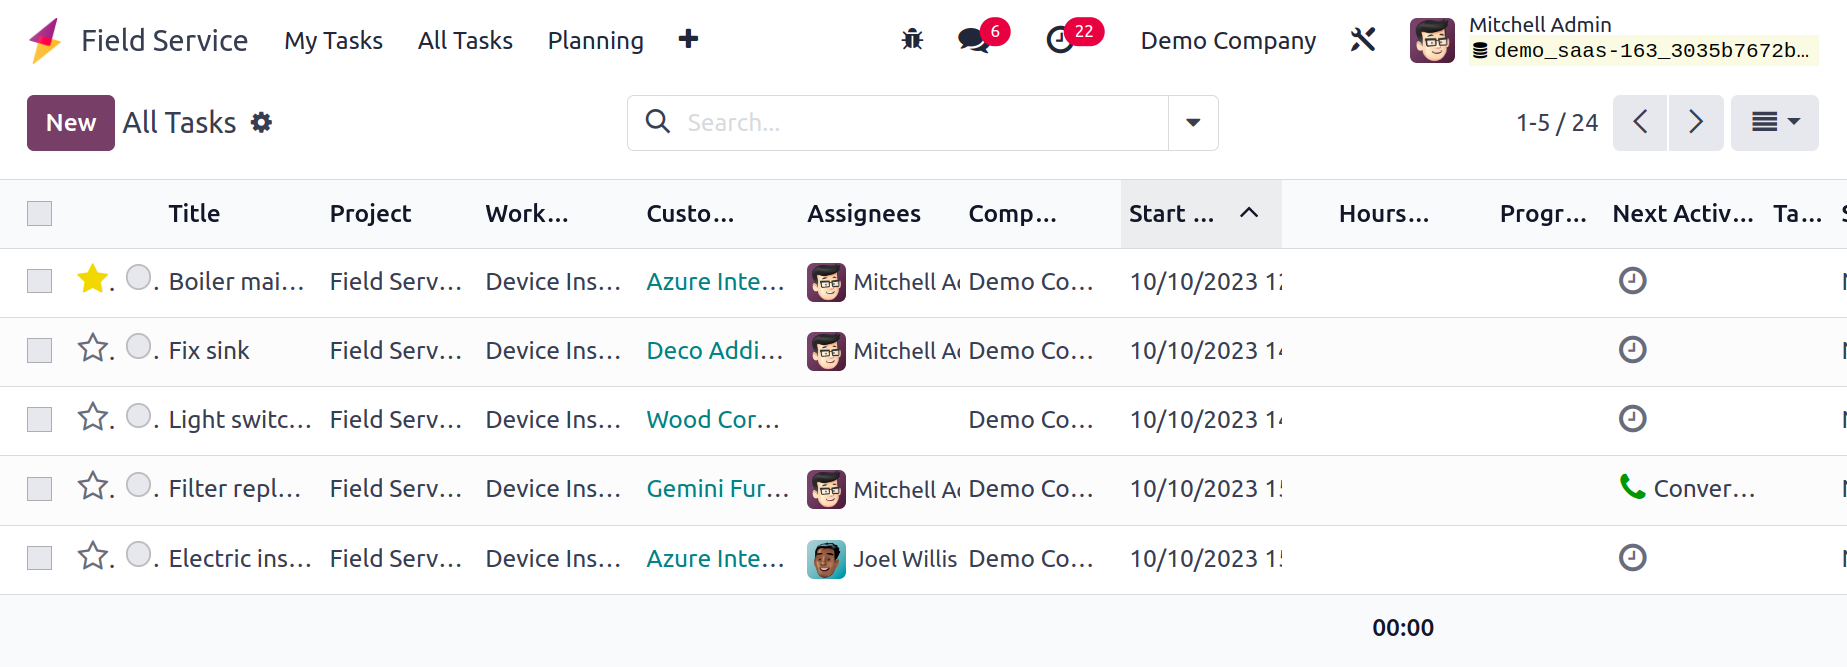
List, Kanban, Map, Calendar, Gantt, Pivot, Graph, and Activity views are available for this platform. The List view of all tasks is depicted in the screenshot up top. Details about the Title, Worksheet Template, Project, Customer, Assignees, Company, Start Date, End Date, Activities, and Tags are included in the list's preview. You can create a new task using the New button, just as we covered in the previous session.
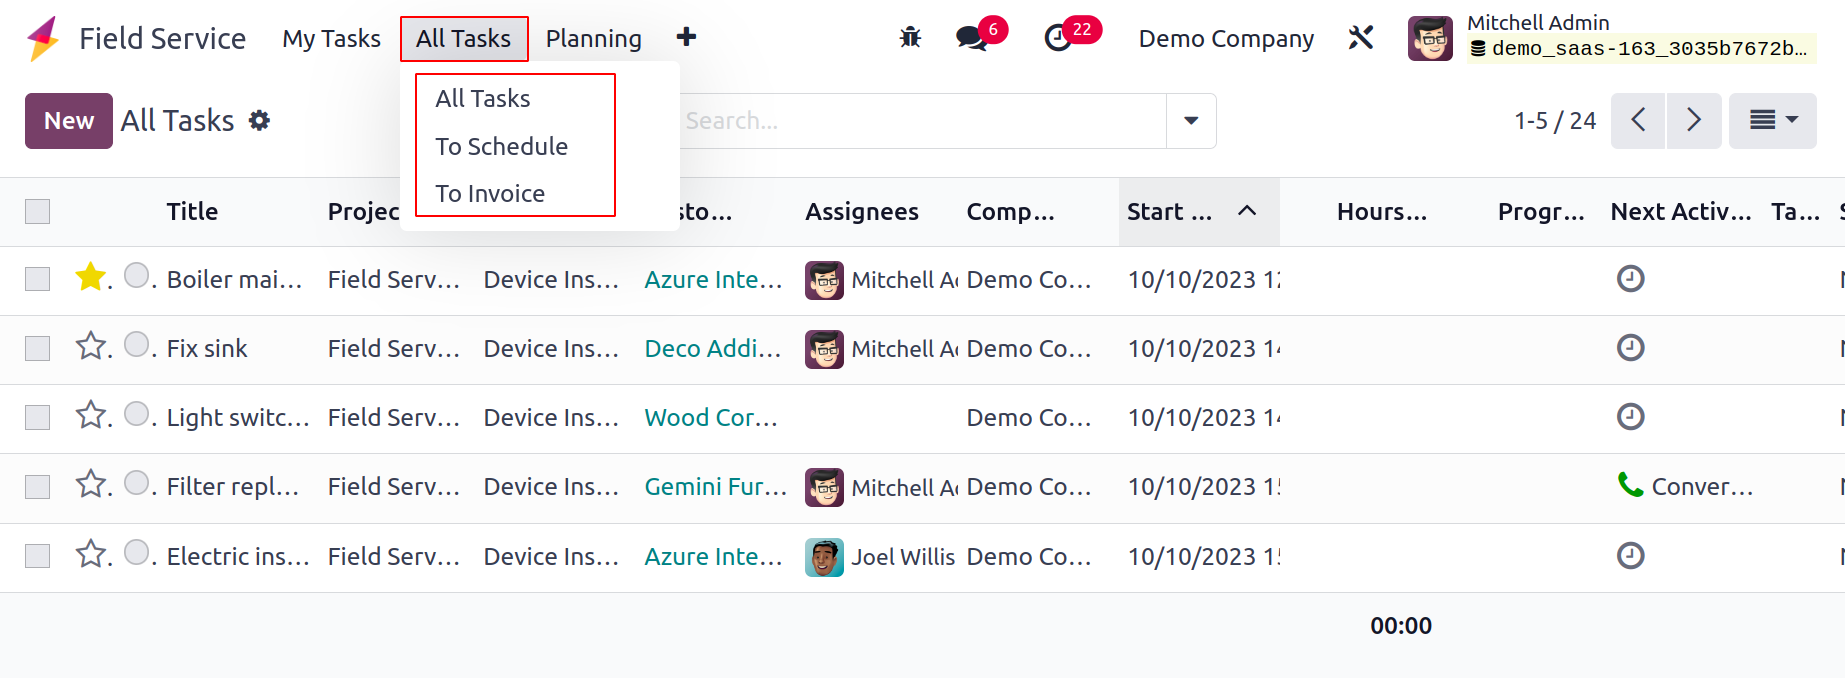
You may find the To Schedule and To Invoice submenus under the All Task menu.
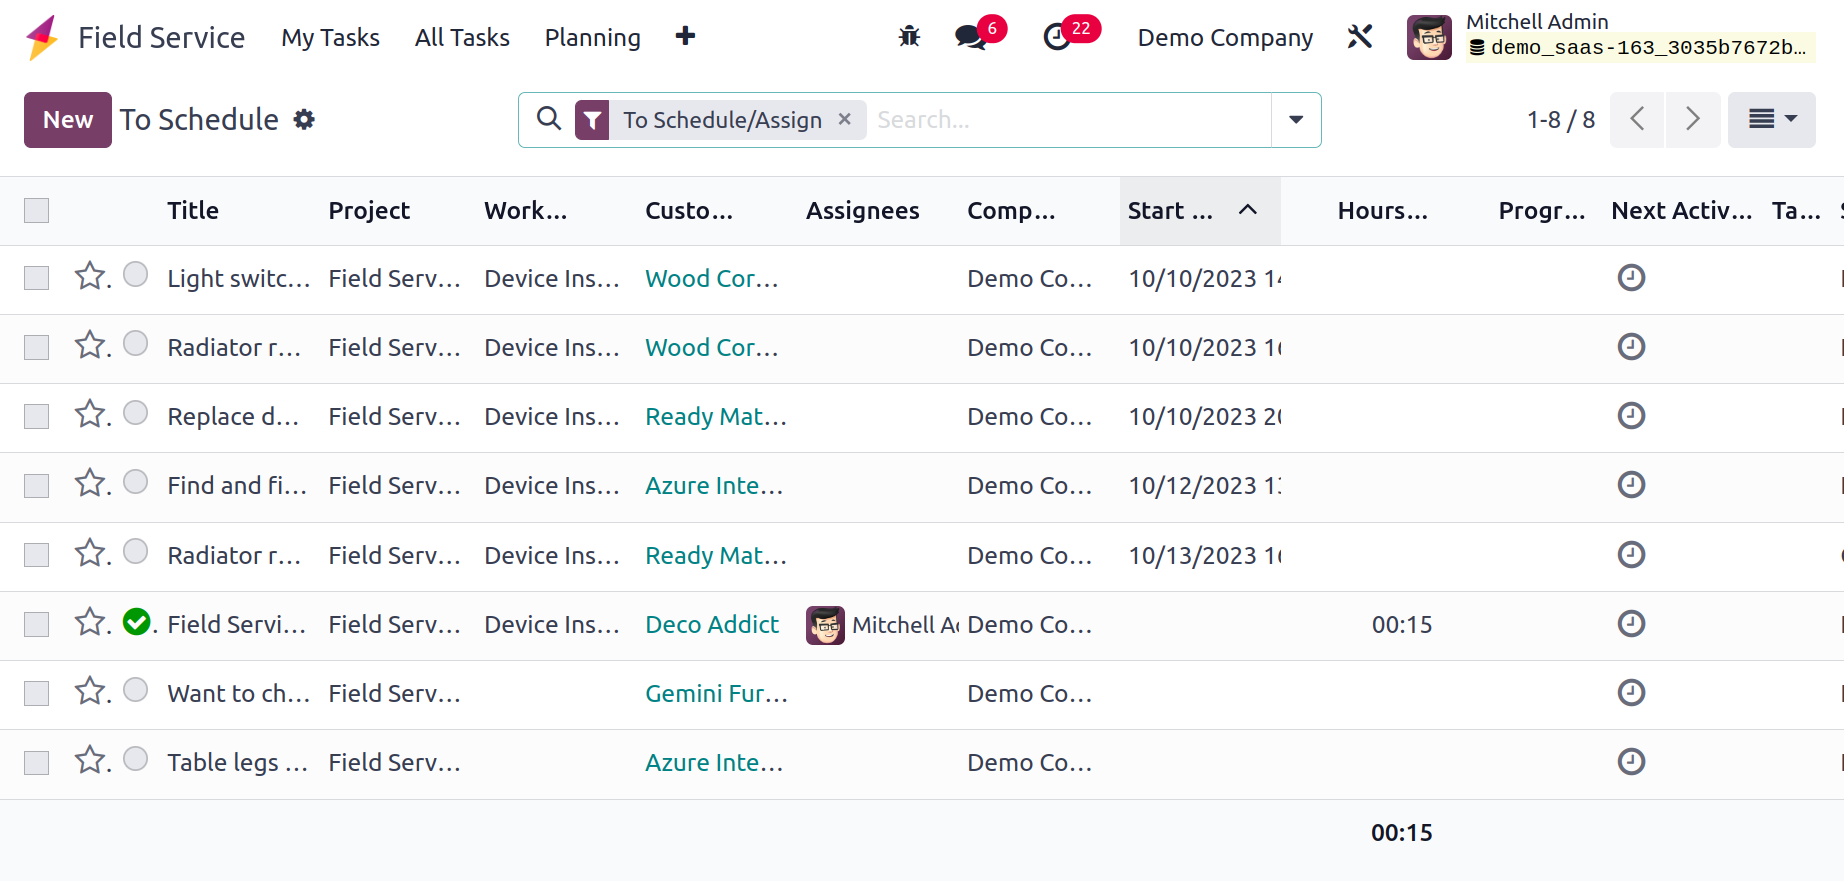
The To Schedule platform allows users to view the jobs that are awaiting scheduling. You may also use the To Schedule filter option in the All Task view to get this list.
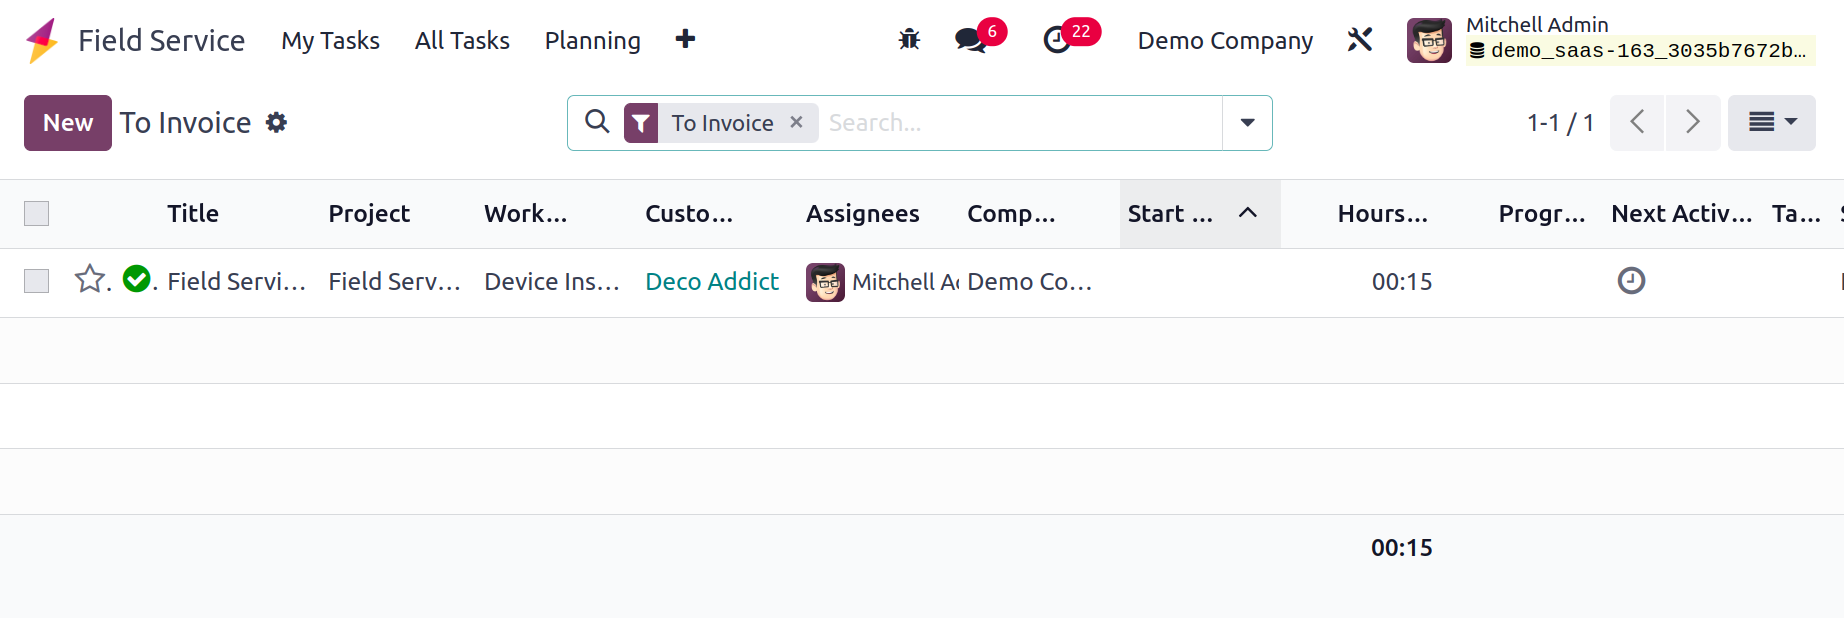
The To Invoice platform will display the tasks that need to be invoiced. From this list, you can easily choose the work you want to complete and create an invoice.
Planning
The field service scheduling will become more organized and systematic with the use of a separate platform for job planning based on available dates. The user will have a dedicated platform in the Odoo17 Field Service module where they can check the available dates and schedule jobs and services based on workers, projects, and worksheet templates.
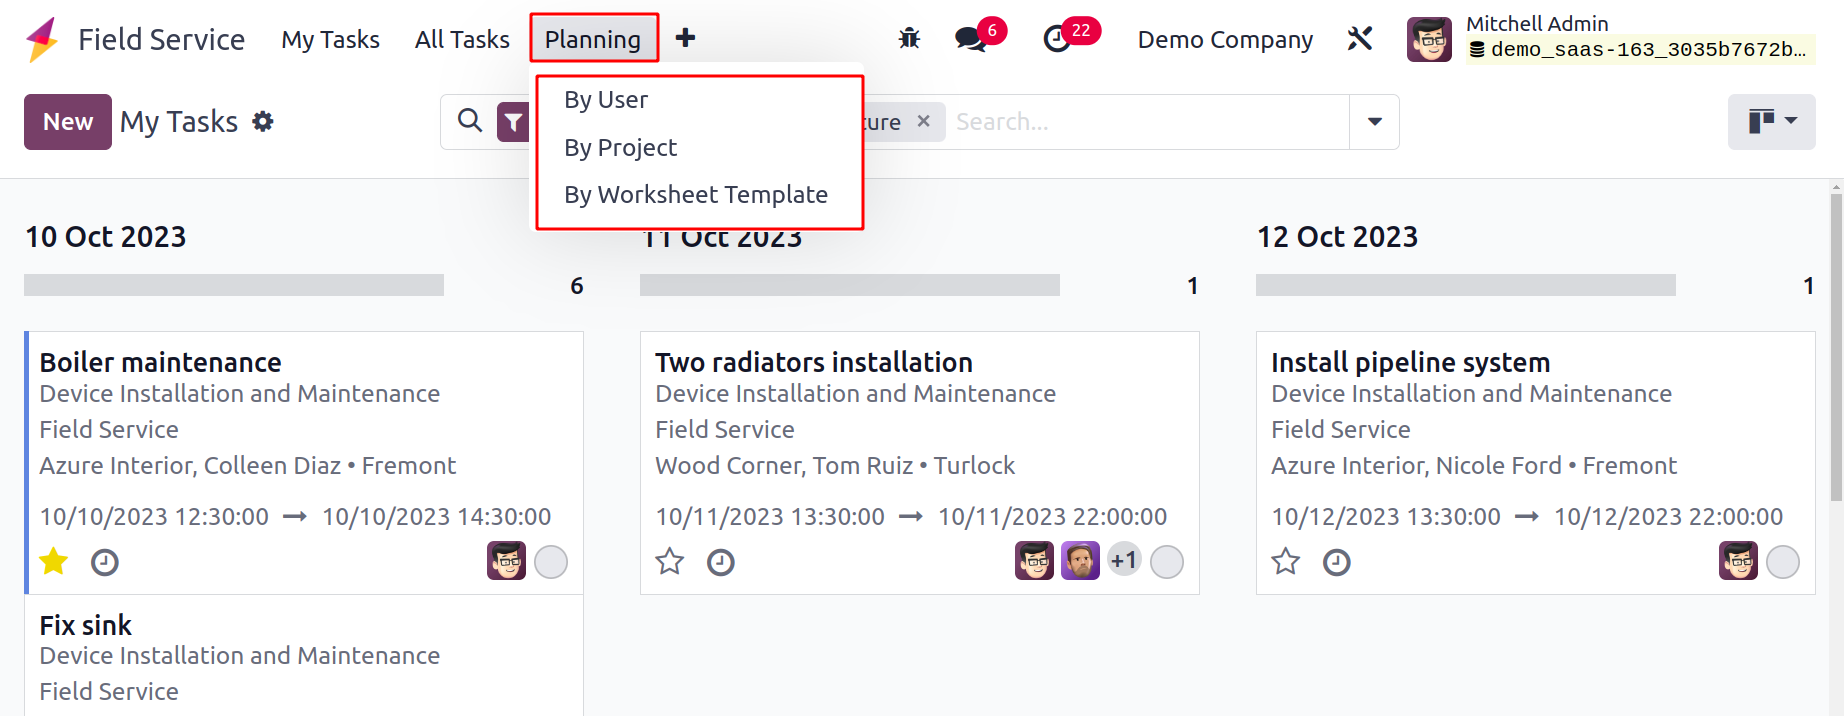
With the Planning’s By User option selected, a Gantt view displaying the tasks allocated to users will be displayed. On the left side panel, the user's name will appear.
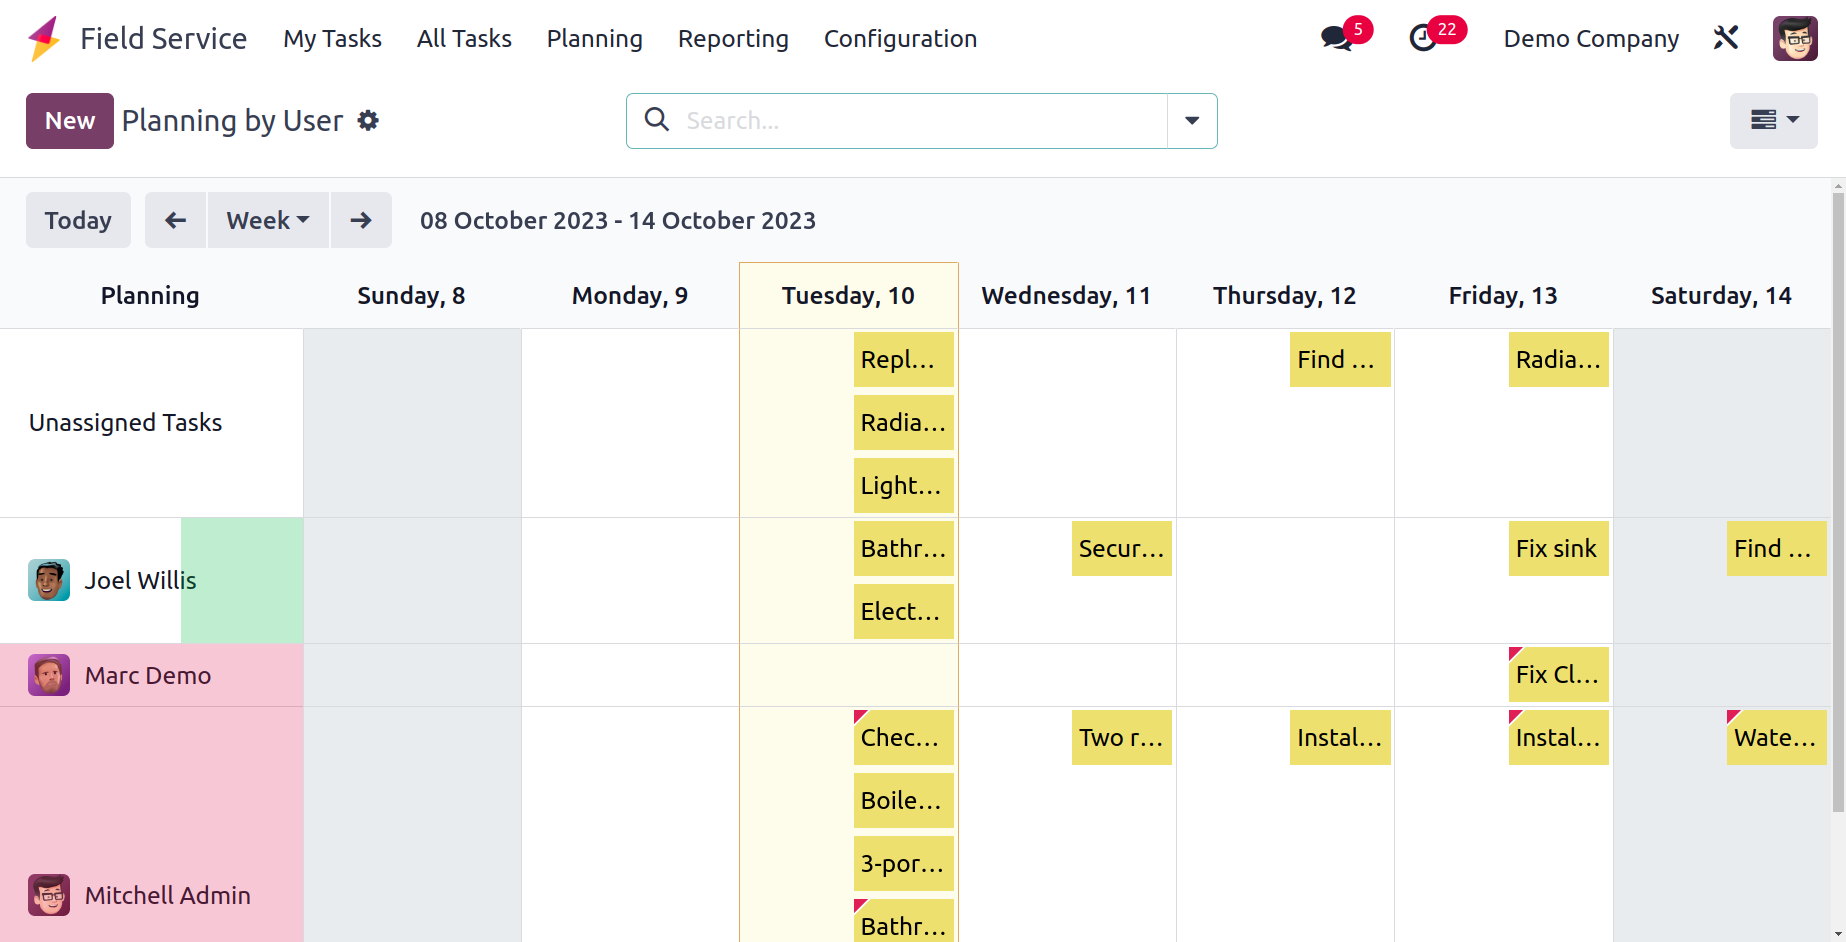
You will receive information about the task planned for a specific date based on the user. The view can be customized to reflect a day, week, month, or year.
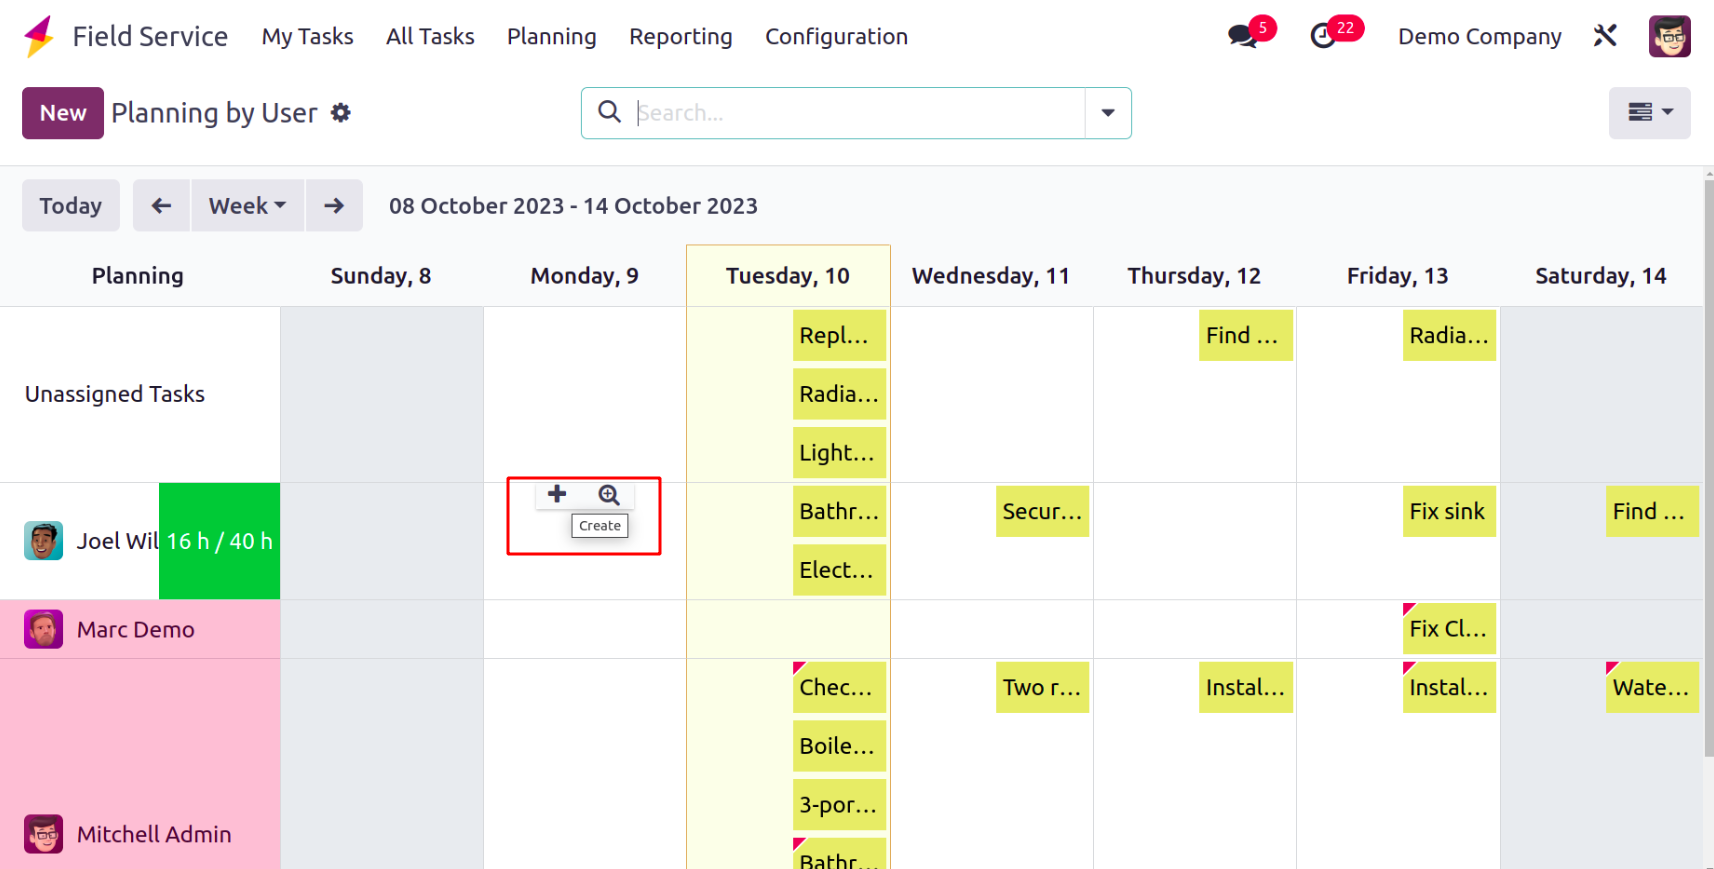
Use the New button to create a new task plan. Instead, you can hover the cursor over a certain date to see a plus icon, as shown in the screenshot above. By clicking on this + sign, a new pop-up will appear where you can enter the specifics of the brand-new assignment. The work will then be automatically assigned to the appropriate employee if you do this.
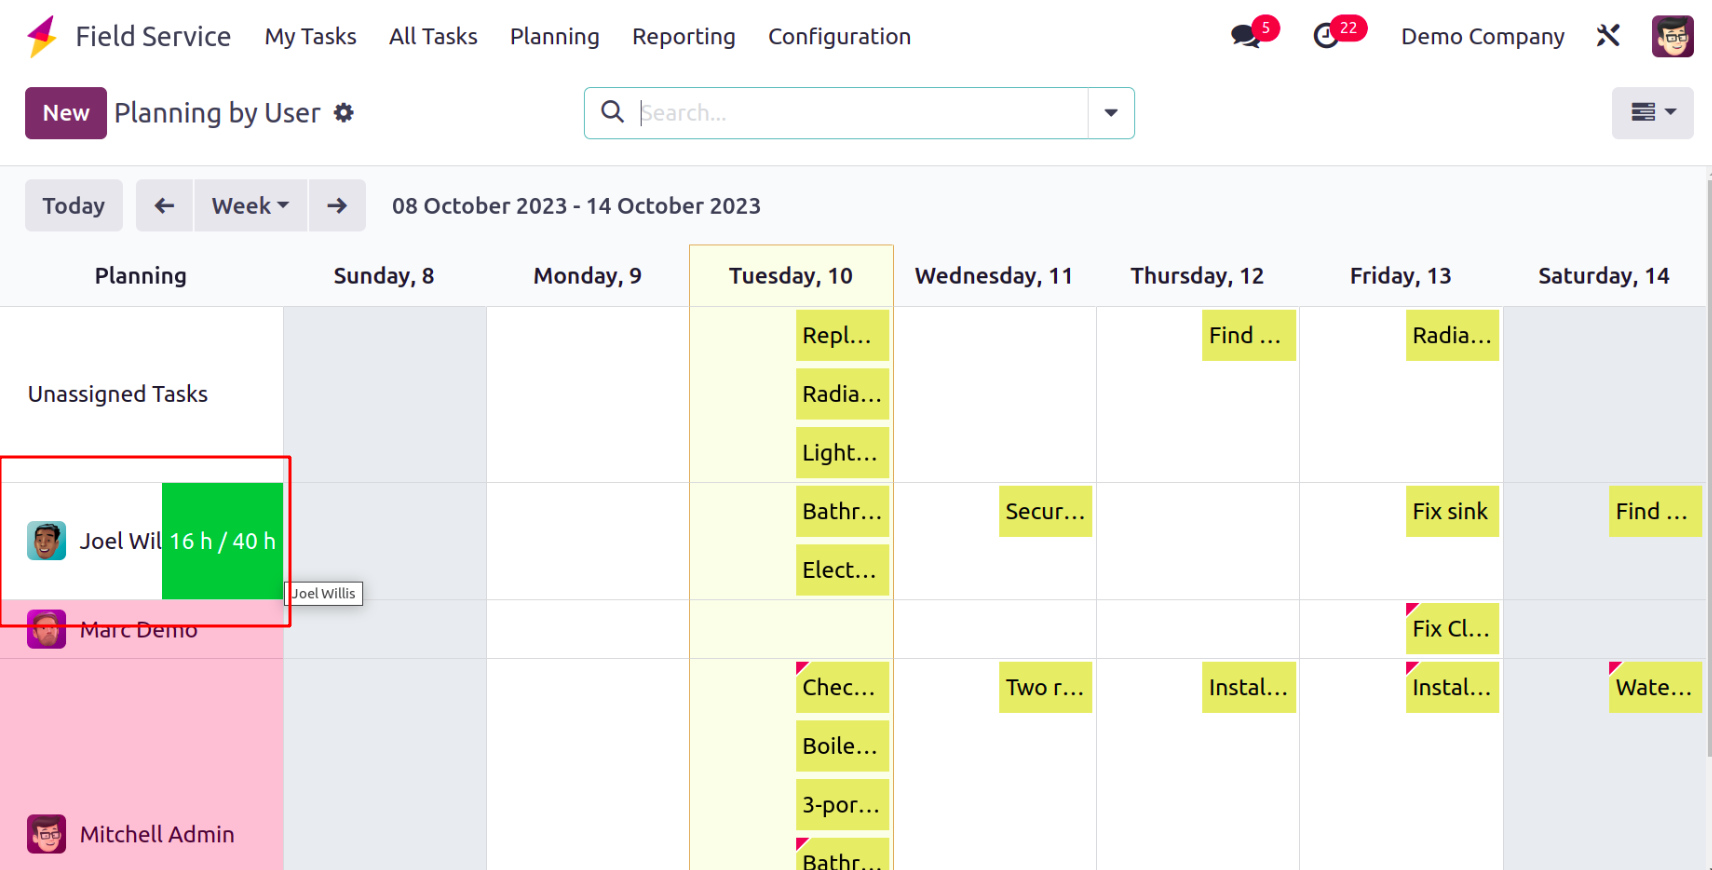
As seen above, an employee's total hours worked are displayed next to their name.
You can proactively plan and allocate work to a specific project by selecting the Planning By Project option.
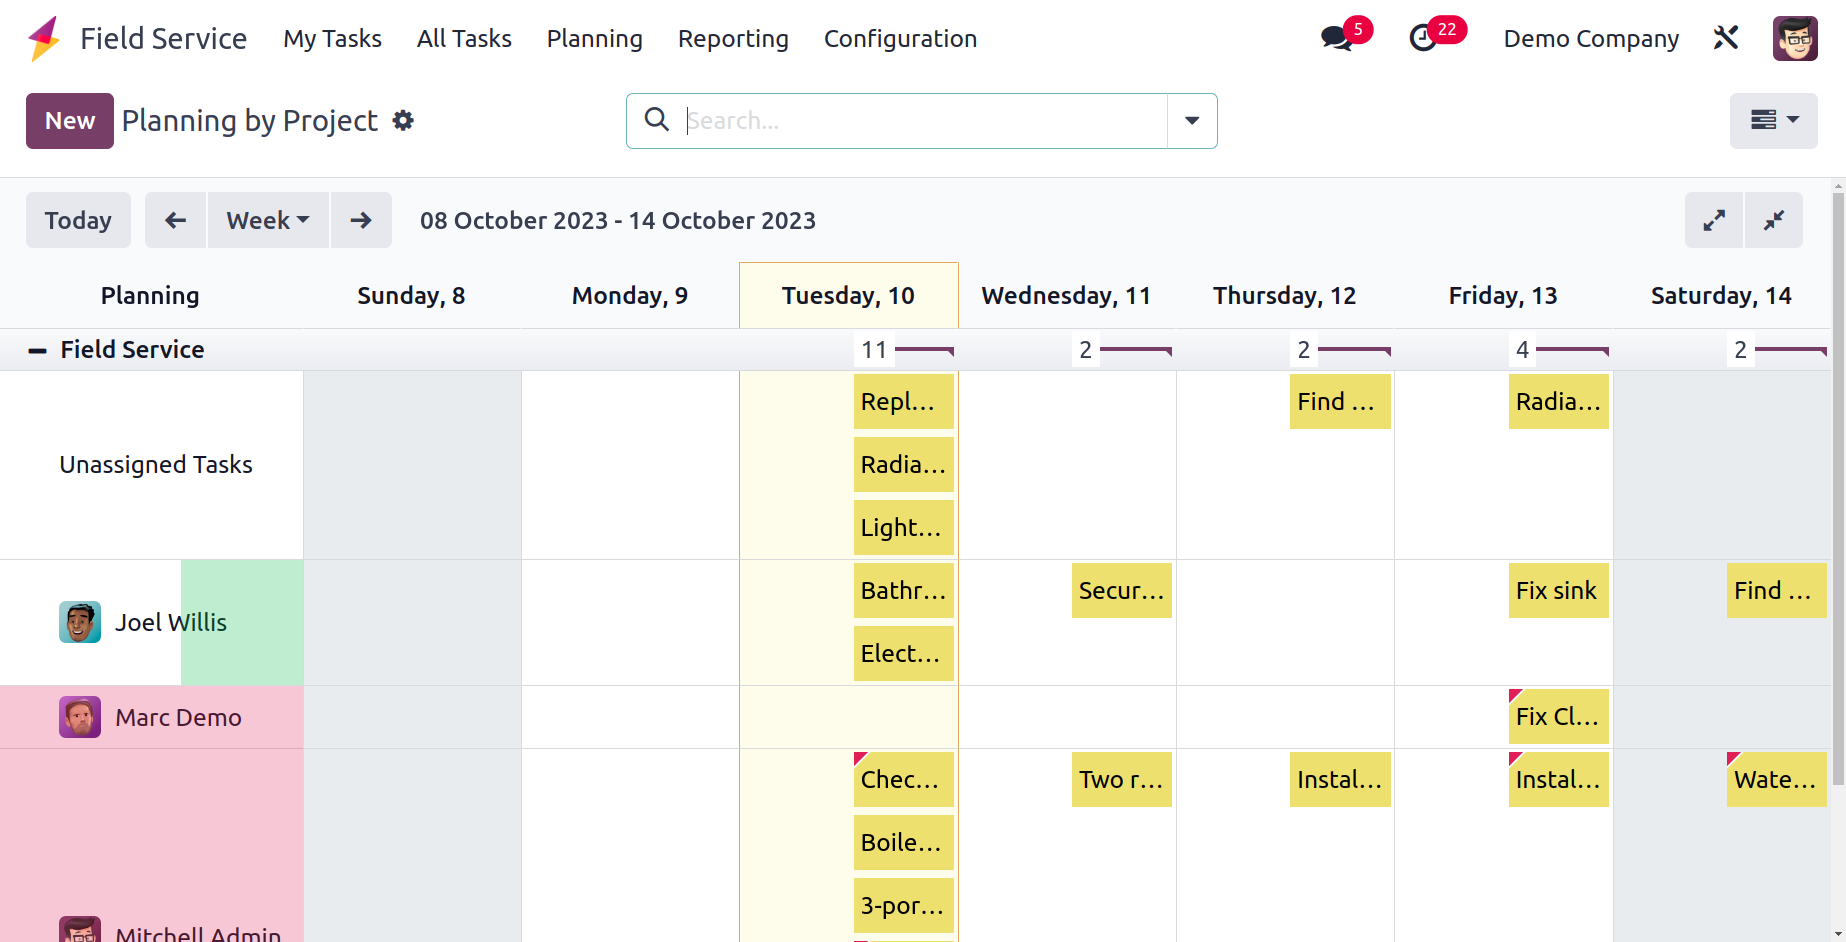
In this window, you can see the tasks that correspond to the specified projects. In this box, you have the option to expand and collapse the Gantt view's row options. You can choose an available date from the corresponding row and click the + icon to add a new task to an existing project.

The platform for planning with worksheet templates is displayed above. The task will be organized in this case using the corresponding worksheet template.
Projects
For each field service, you can build a distinct project. In the Field Service module, you can establish projects that are appropriate for the services you plan to provide. If a new task you create for field service falls under the same category as an existing project, you can put it there. You will benefit from earlier project configuration while generating new tasks. At the time of task creation, you will have the opportunity to choose among these preconfigured projects. The features we covered in the Project module are also included in the Project menu. The Project menu is located here, underneath the Configuration menu.
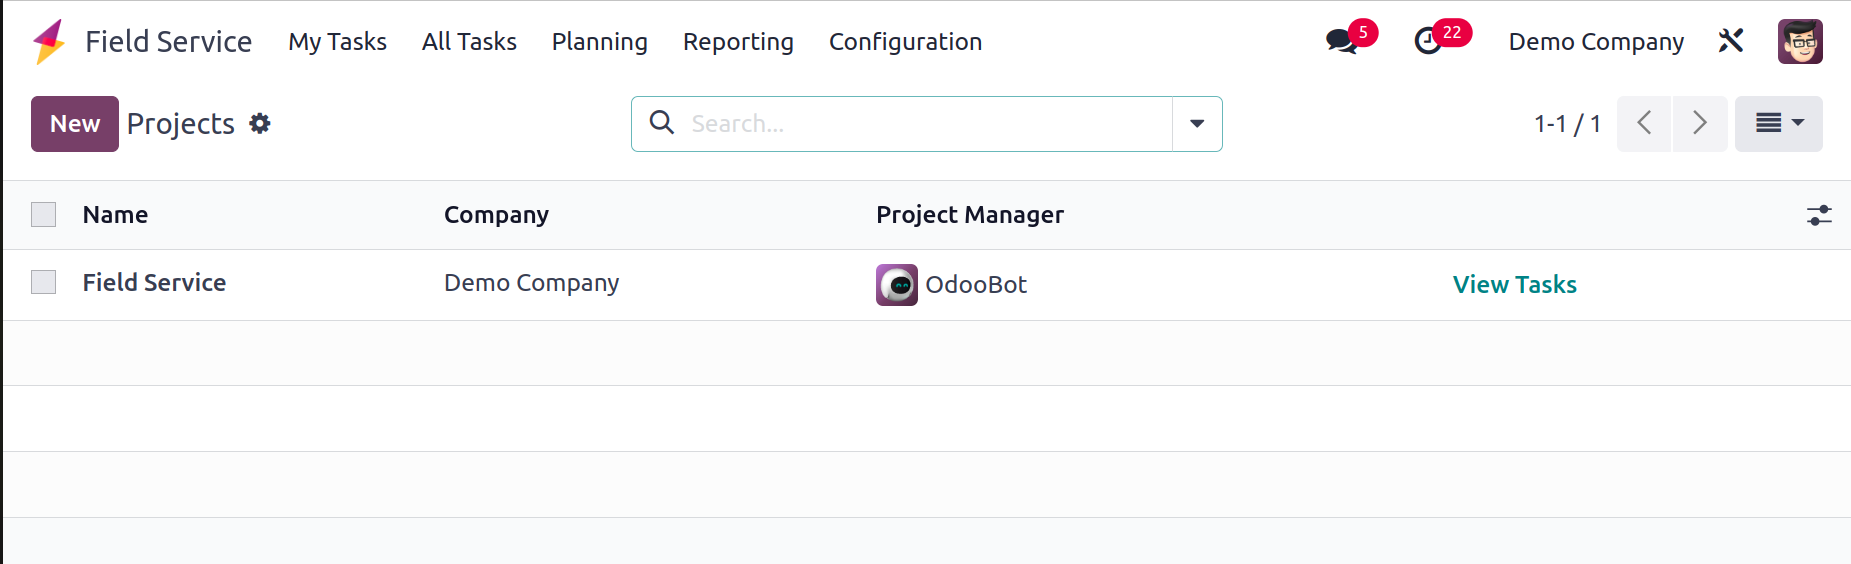
On this platform, a list of the projects that have previously been made will be visible. The name, the worksheet template, the company, the start date, the end date, the allocated hours, the project manager, and the stage are all displayed. To start a new project, click the New button.
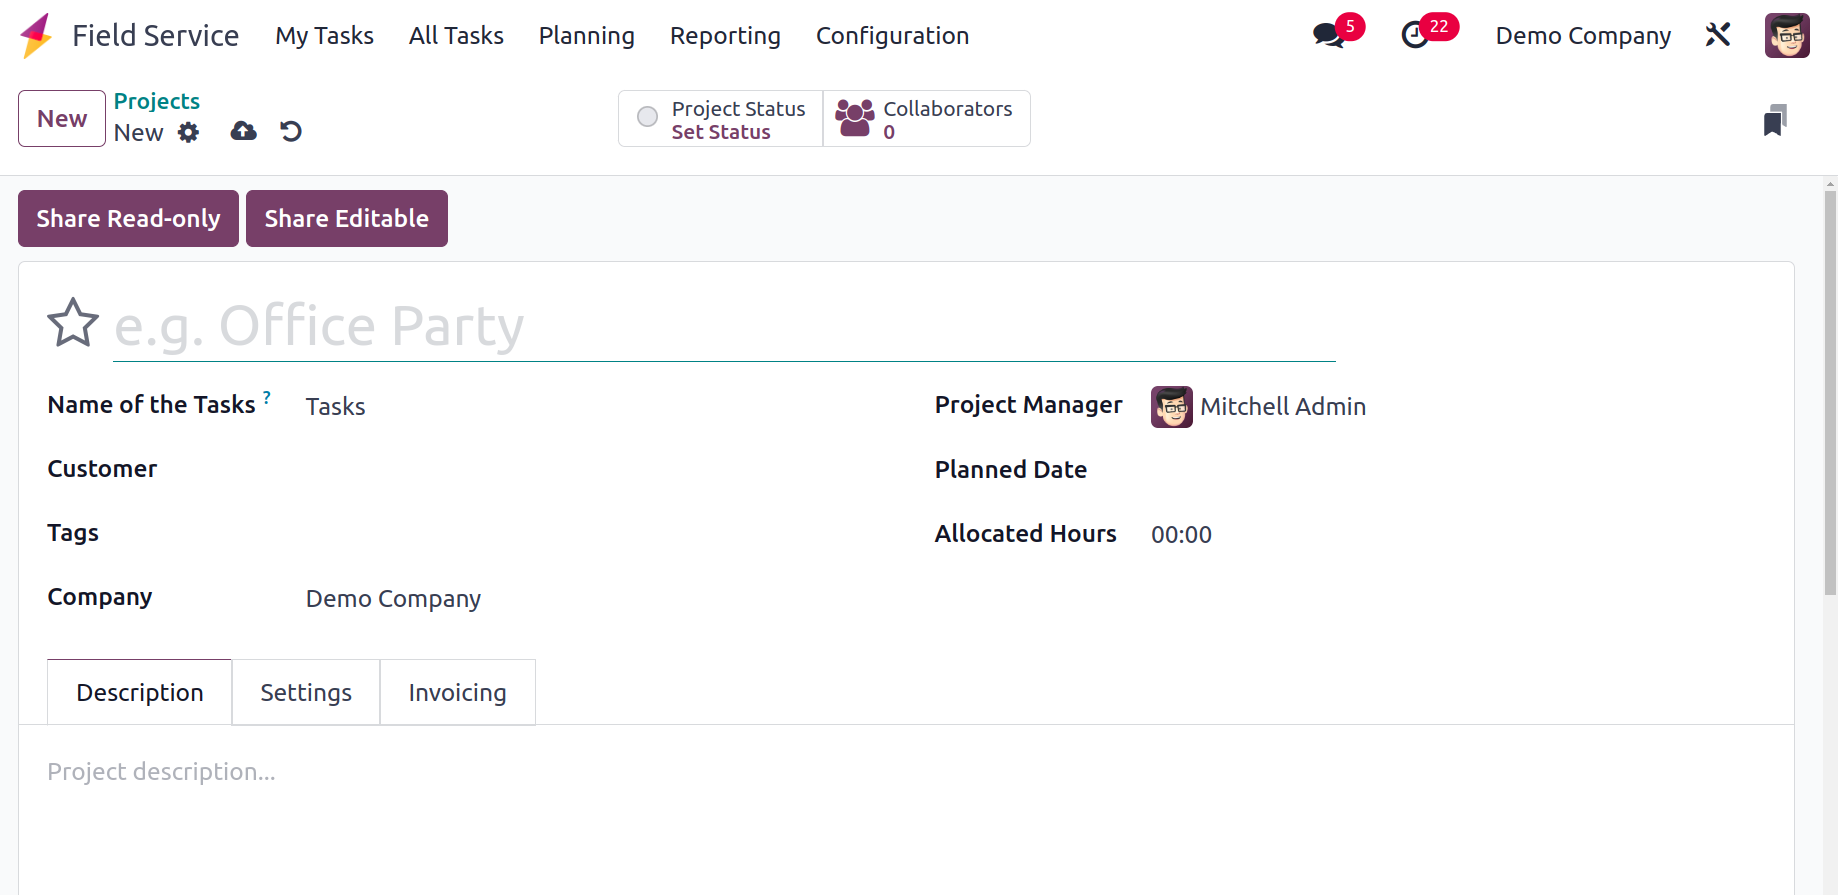
As seen in the preceding screenshot, selecting the New button will launch a fresh form view. The specialized field may now include the project's name. The Name of the Tasks section allows you to give the tasks that are part of this project a name. If a specific Customer was the inspiration behind this initiative, you can note that in the appropriate field. You can enter the company name and the appropriate Tags in the applicable areas. You may see the project manager's name here. You can select a new manager from the drop-down menu if the project manager changes. The project's scheduled date can be entered in the Planned Date box. The Allocated Hours section allows you to specify the total number of hours necessary to finish this project. The Description tab is available here and provides further project-related information.
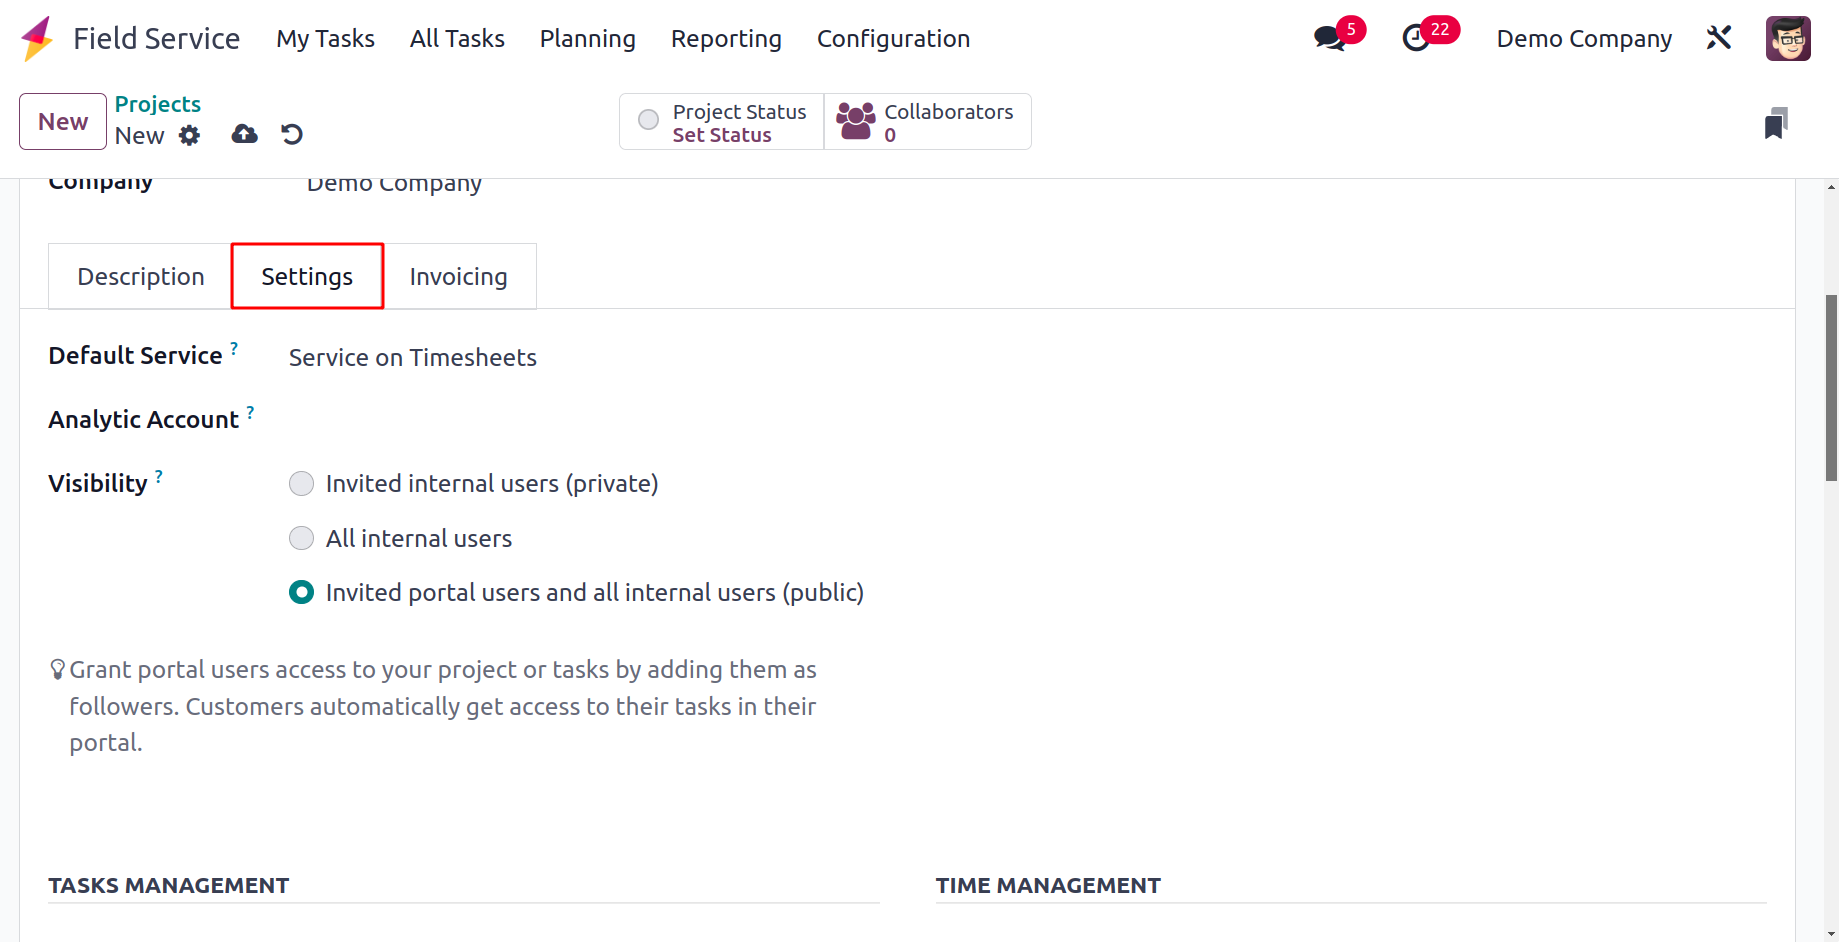
You can link this project's tasks and timesheets by adding an Analytic Account in the appropriate section on the Settings tab. This will keep track of the project's expenses and earnings. In the relevant section, you can choose to make the project visible to invited internal users, all internal users, or both invited portal users and all internal users. The access to the project and its tasks will be determined by this selection.
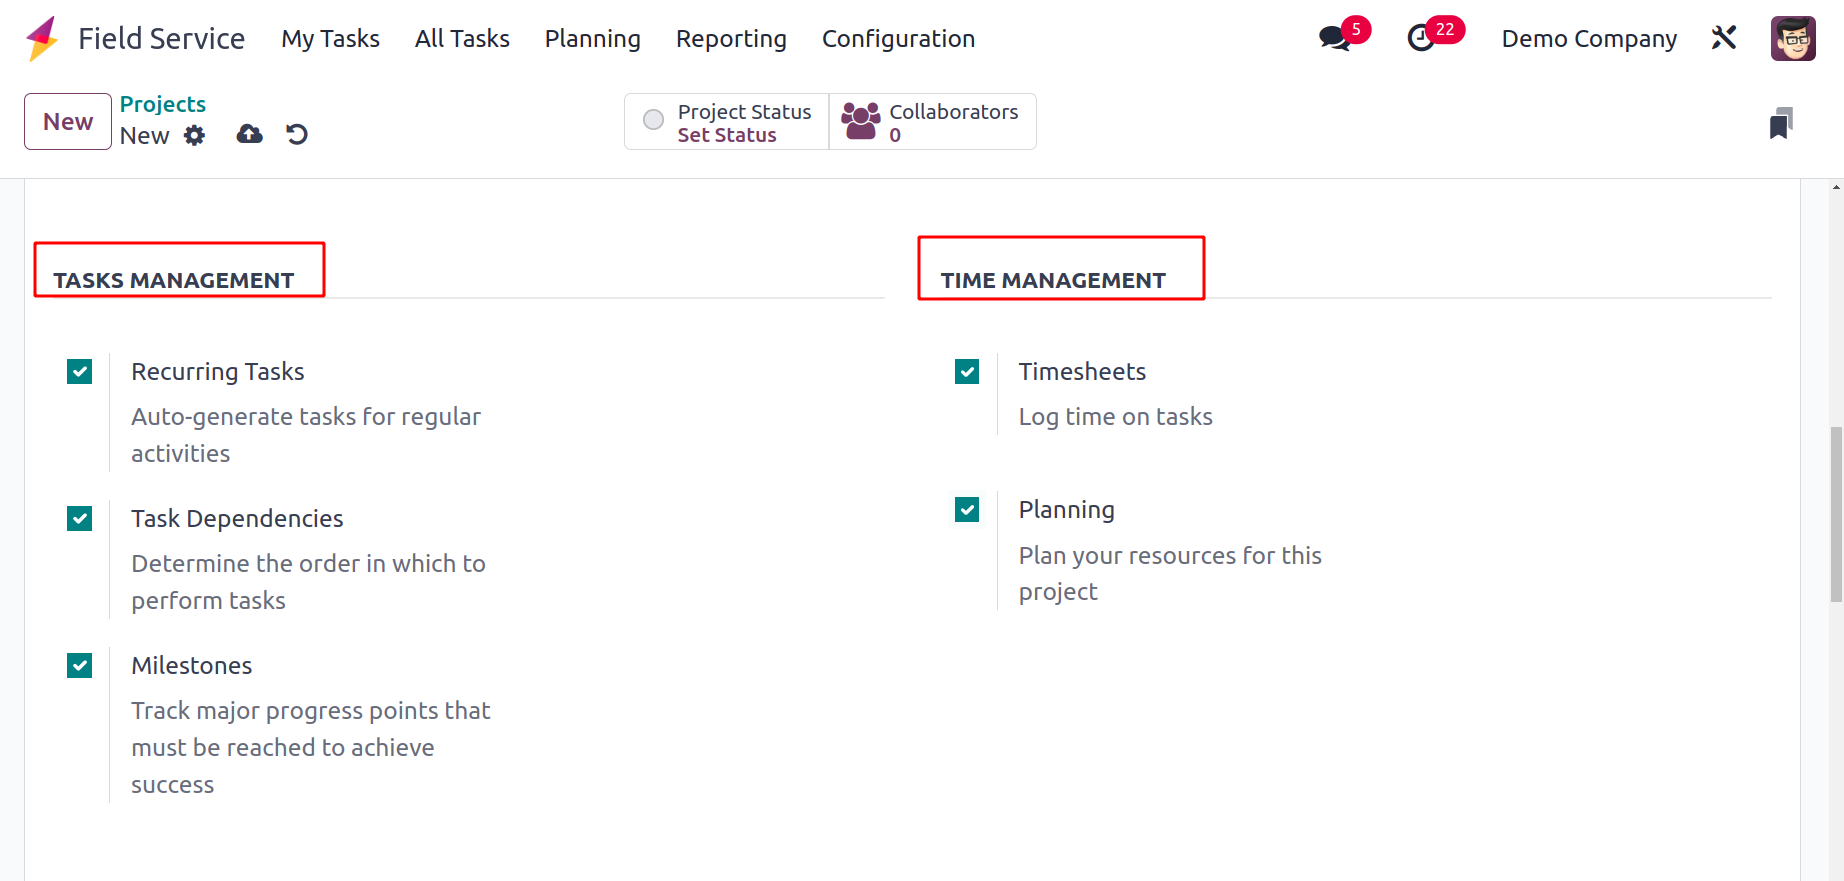
You can turn on the Sub-task option in the Task Management session to divide the tasks into manageable milestones. You can select the Recurring Tasks option to allow the automatic scheduling of tasks at regular intervals. You can set the order to complete each work by activating the Task Dependencies. The Milestone option can be used to keep track of significant advancements that must be made to succeed. To keep track of the time spent on tasks and log it in a timesheet, turn on the Timesheets option. For this project, turn on the Planning option to organize your resources.
You can invoice the appropriate customer for your time and materials by turning on the Billable option. Once the Products on Tasks option is turned on, it is feasible to keep track of the materials used to complete the activities. To categorize and share your documents with the relevant customer, enable the Documents option. You can enable the Worksheet option in the Field Service session to generate worksheet reports of the tasks that need to be approved by the relevant customer.
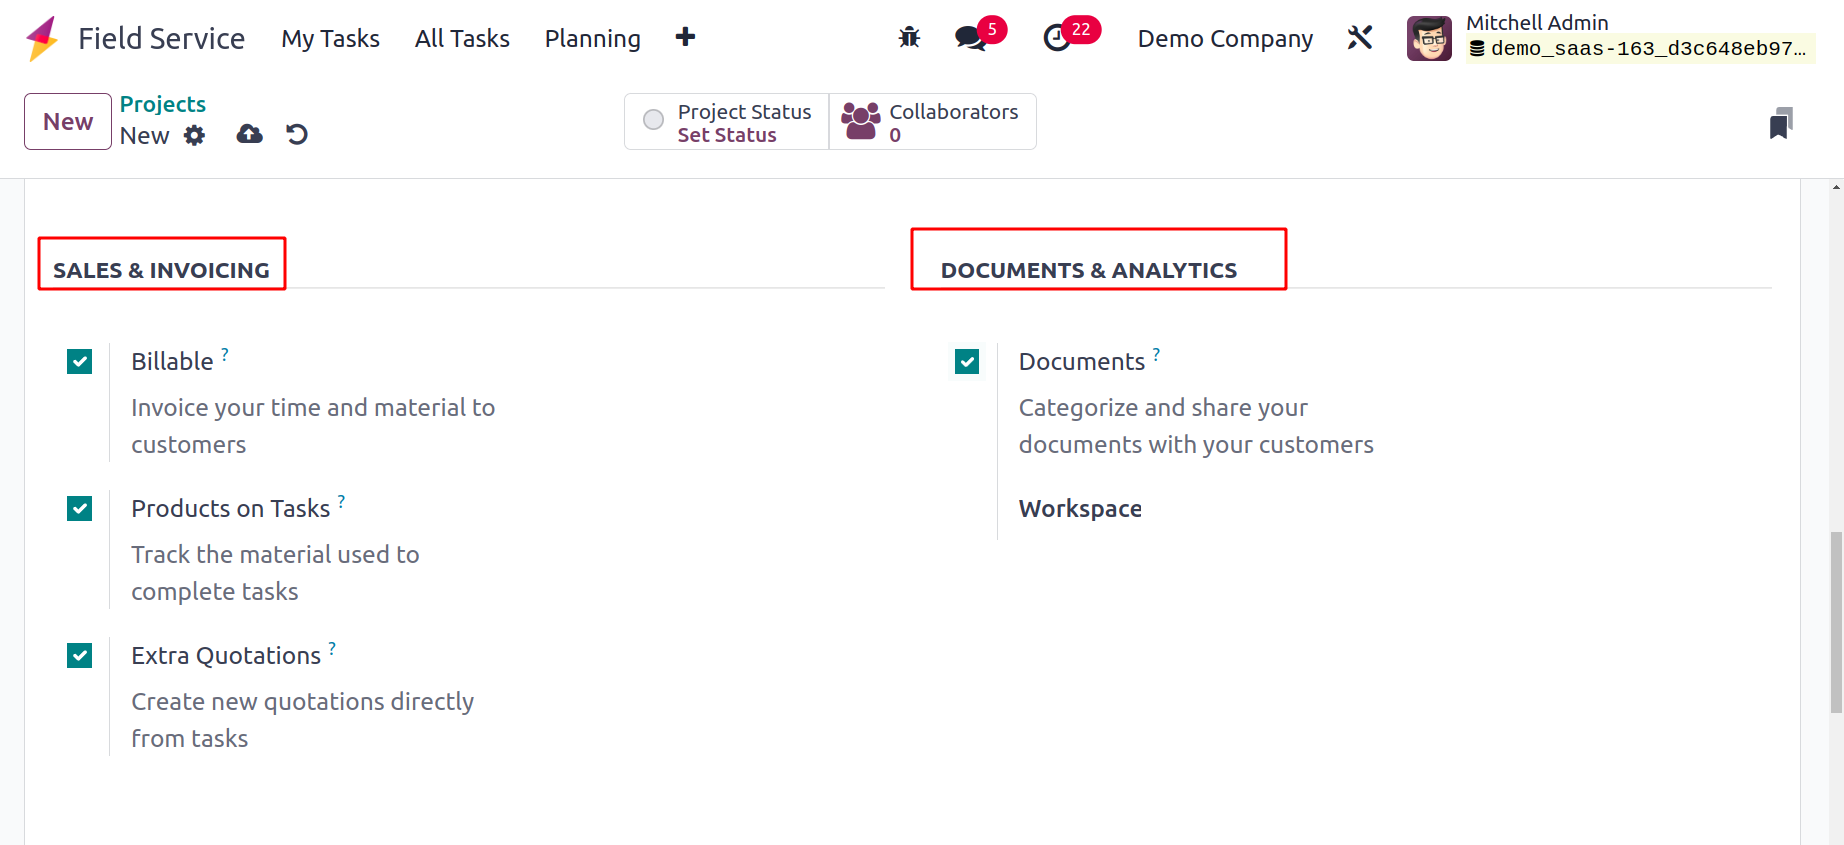
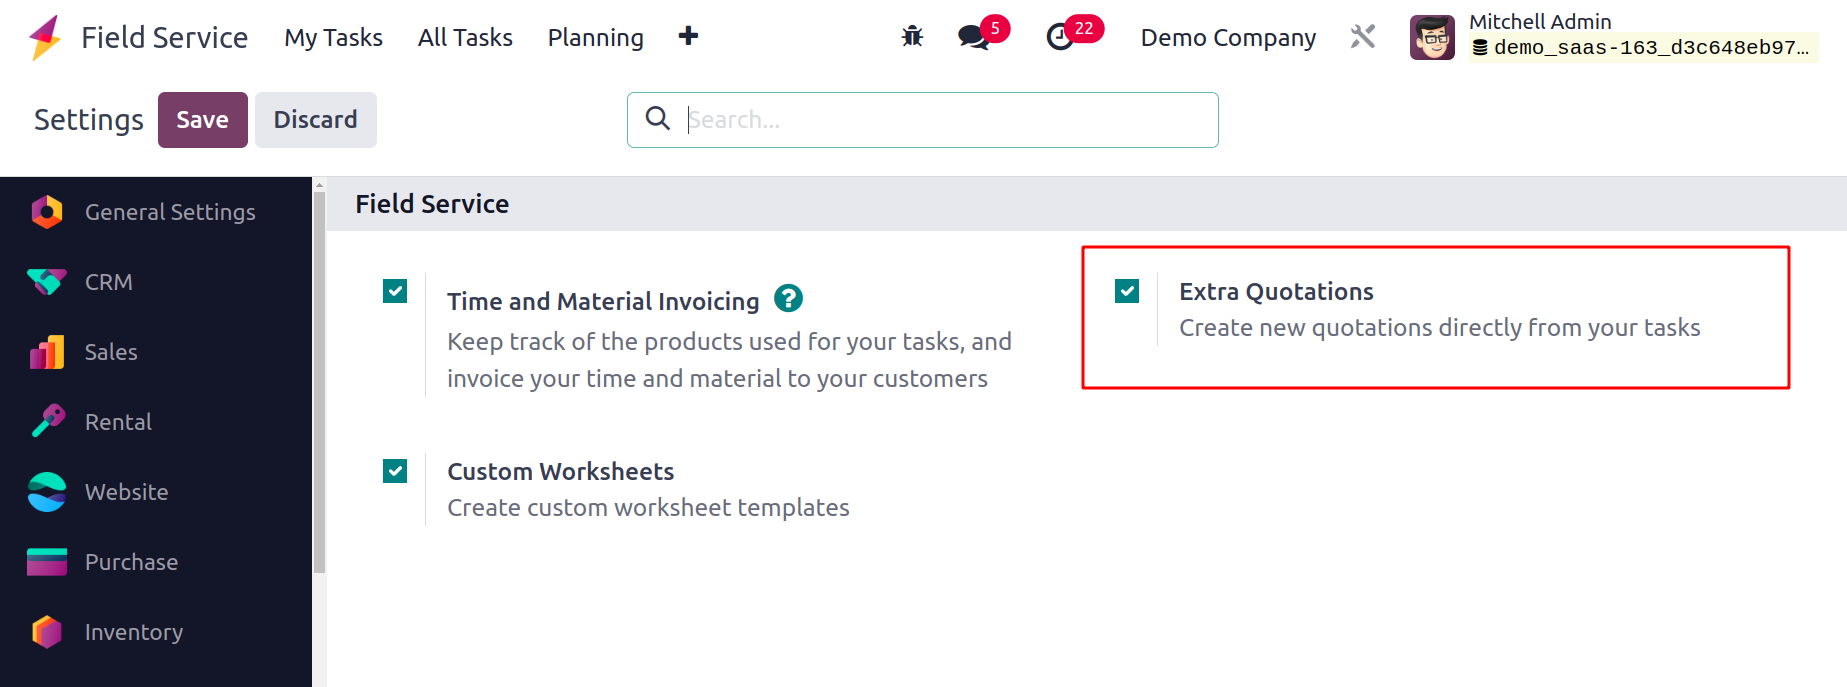
The Extra Quotation option makes it possible to add new quotations right from a task. You must first enable the Extra Quotations settings in Settings to access this option.
You can configure Default Service for the invoicing process under the Invoicing tab. The service that will be used by default when billing for time spent on a task is indicated here. It can be altered on each task separately by choosing a particular sales order item. You can add the Employee, Service, Unit Price, and Hourly Cost using the Add a Line button.
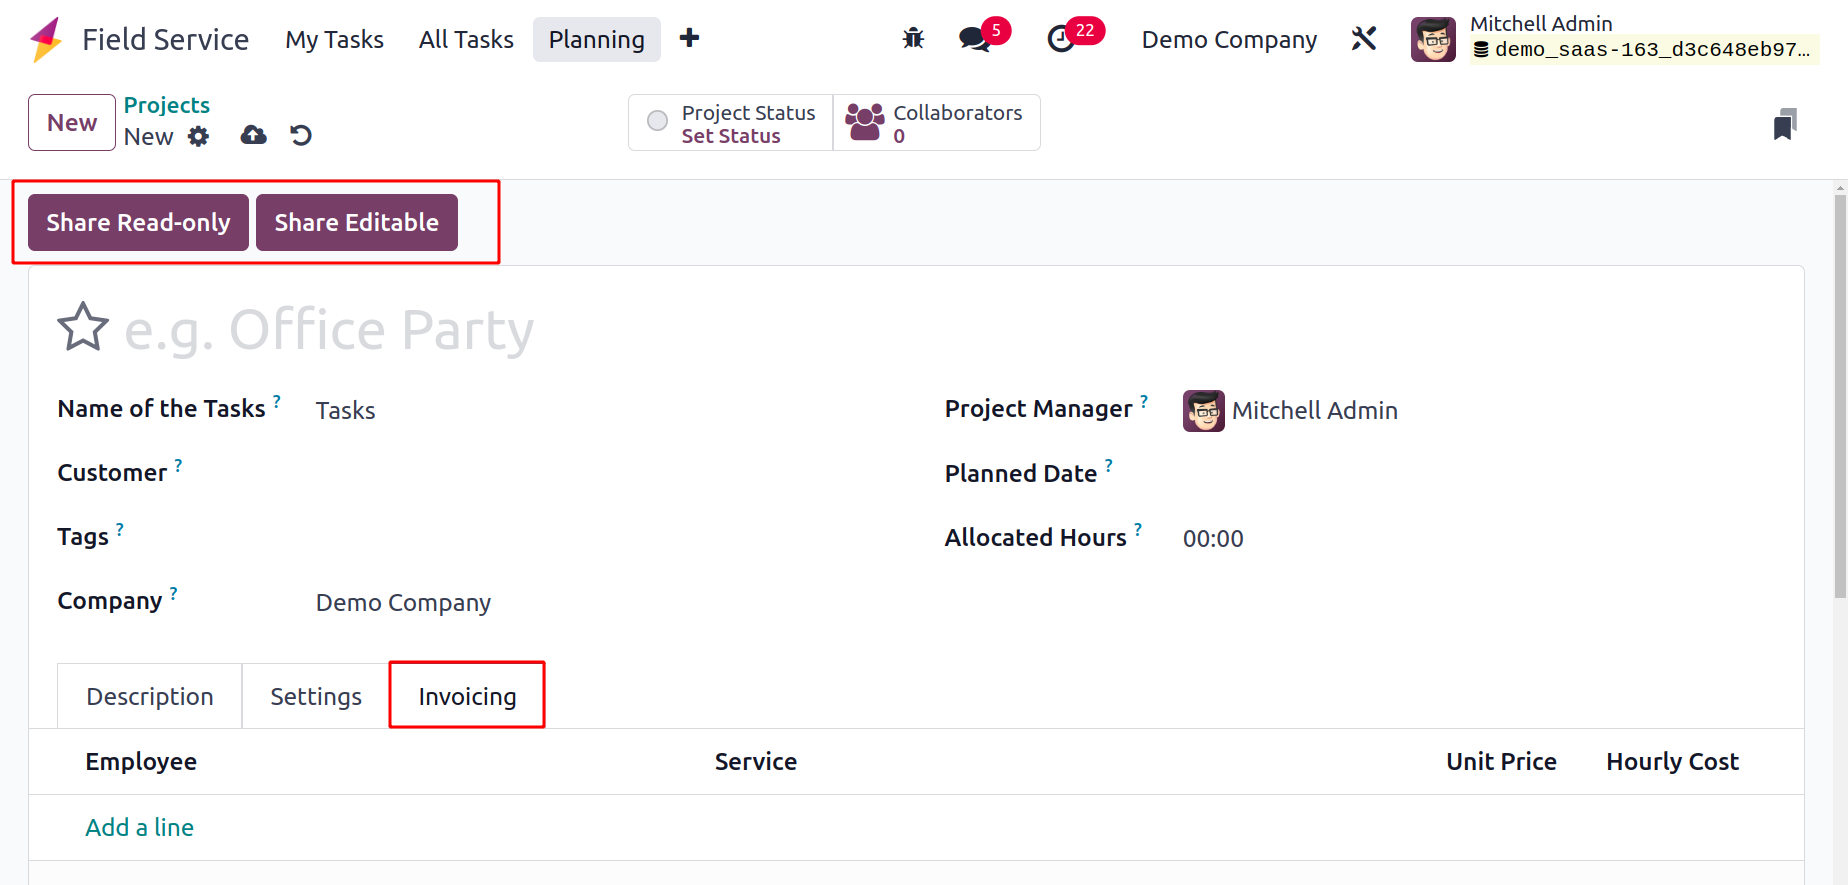
Once the project has been configured, you can use the Share Read Only button to grant others read-only access. You may provide others access to editing by using the Share Editable button. Additionally, this platform will provide you access to the Set Status smart button, which will take you to a different platform as illustrated below.
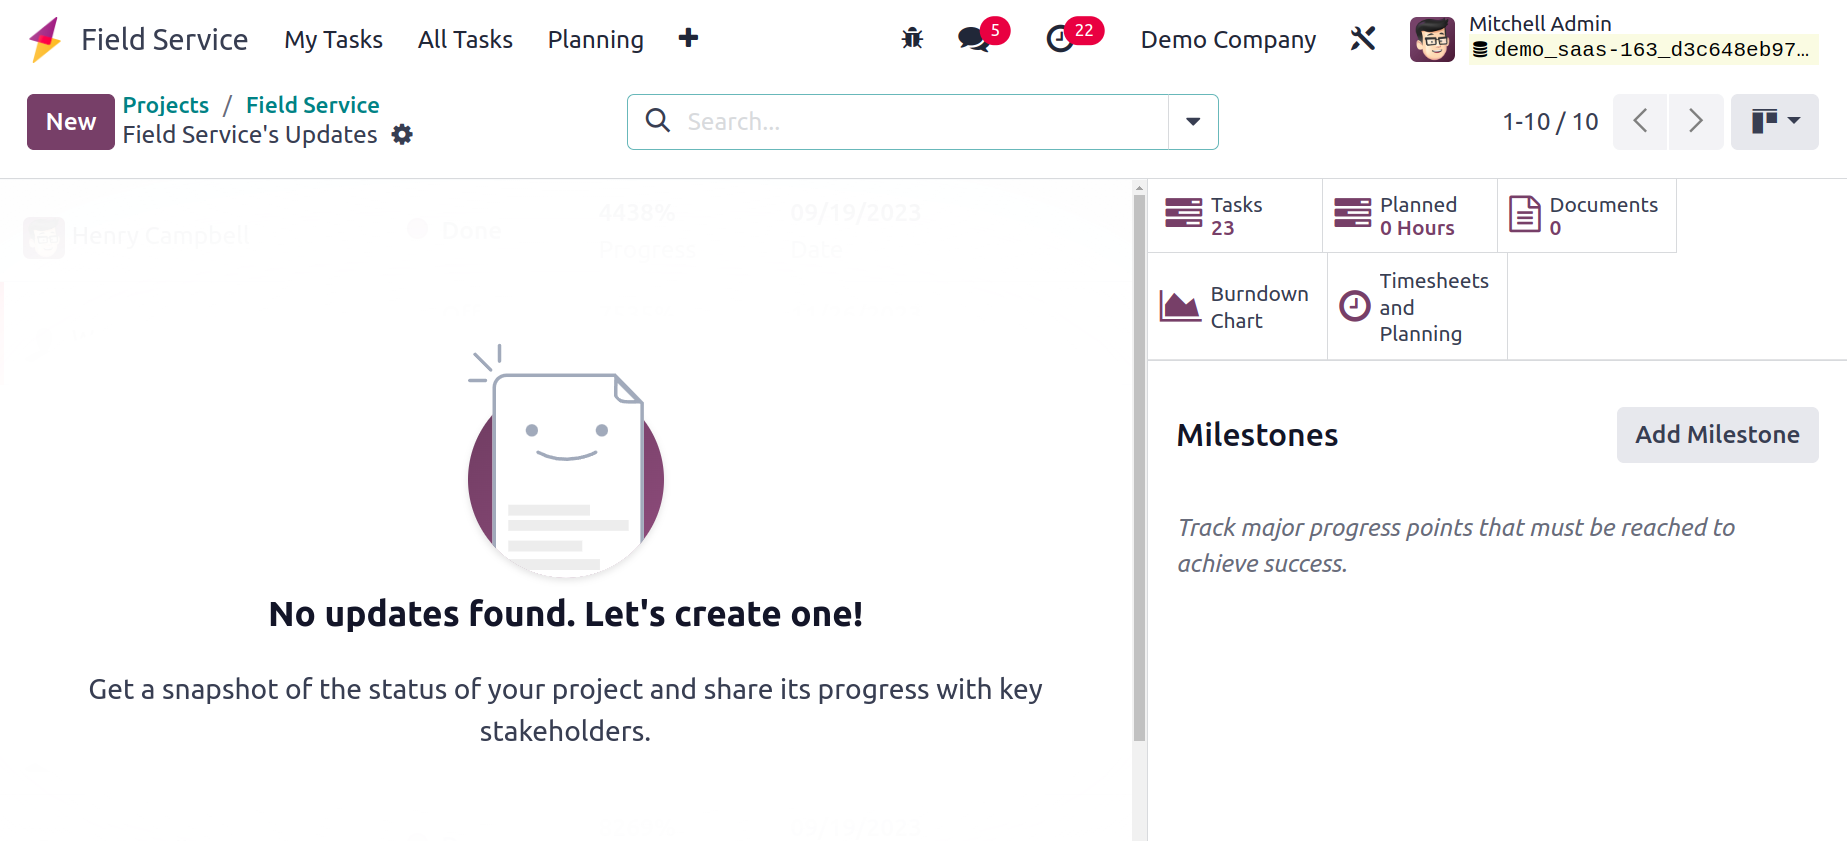
The updates from the field service will be detailed on this platform. You can update the project's status here and inform the stakeholders of its advancement. You may view the project's Sales and Profitability information on the right side of the screen. You can use the New button to add the updates to the project.

The above-described new window will then appear. Give the project's status in the specified field a title. You can choose the project's status from the provided drop-down menu. You may find information about the Project's Author, Date, and Status in the relevant field. You may add the project's summary and activity data using the Description tab.
Stages
You can set several phases for the jobs from the Configuration menu of the Field Service module to organize the field service duties methodically. You can then arrange the tasks according to how they should be completed. Under the Configuration menu, you can find the Stages option. As seen in the screenshot below, this platform will display the names of the stages that have previously been constructed.

To establish a new stage for the field service duties, click the New button.
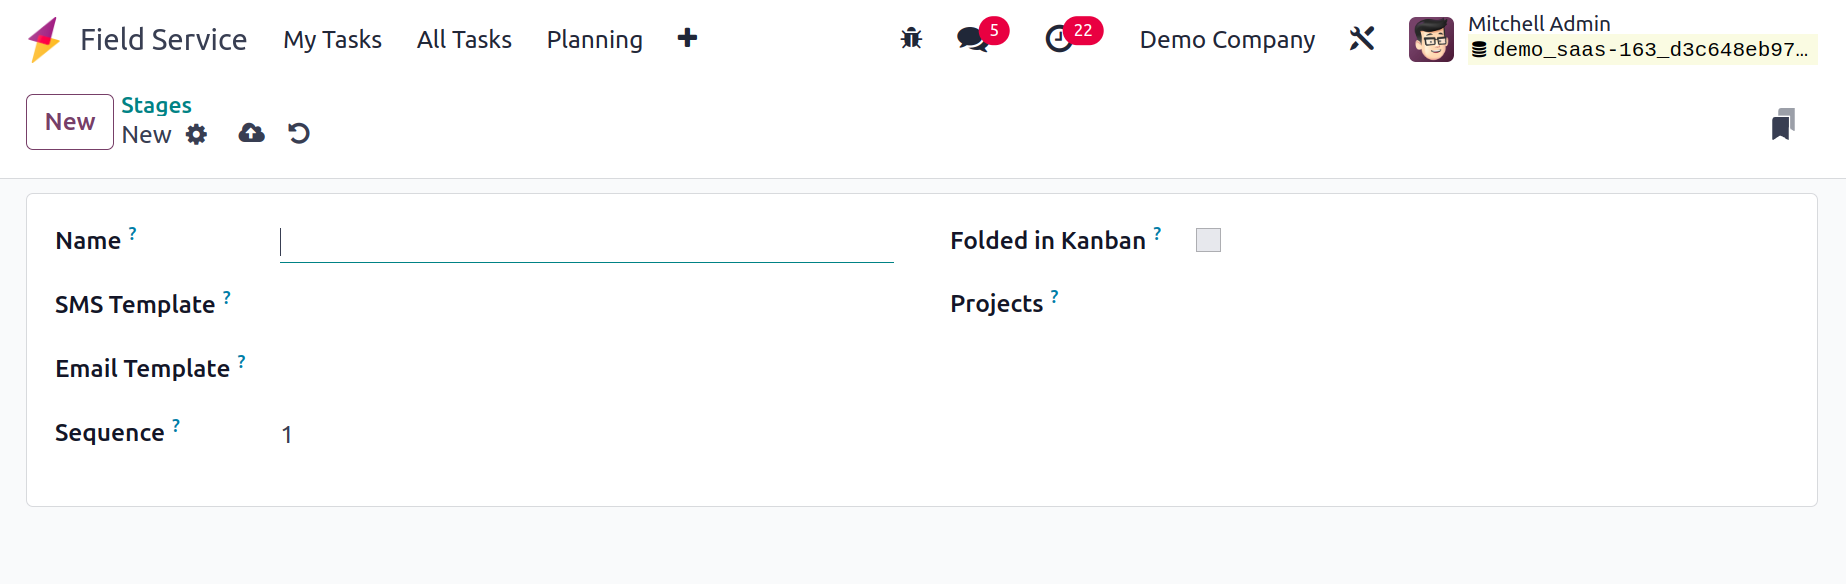
When you click the New button, a new form view will emerge so you can enter the information for the new stage. You can provide the stage's name in the appropriate field. Configure SMS and Email Templates so that Odoo will notify each customer by SMS and email when the task reaches this stage. If you want to add this stage to a specific project, you can indicate its name in this form. This stage will be folded in the Kanban view by turning on the Folded in Kanban option. Using the labels and tooltips, the designated employee can restrict access to tasks or mark them as prepared for the following step. The coworkers will be better able to grasp the stage's goal if a stage description is added. The new stage is prepared for usage for tasks once you have mentioned all the relevant details.
Worksheet Templates
You can define how to carry out a field service operation with the use of worksheets. With the aid of such worksheets, you can organize your entire business. It contains information about the specific stages that make up a task, the protocols that must be followed, the tools needed to carry out the tasks, and other elements that are essential to its successful completion. You can locate the Worksheet Template option in the Configuration menu of the module, which will assist you in creating worksheet templates.
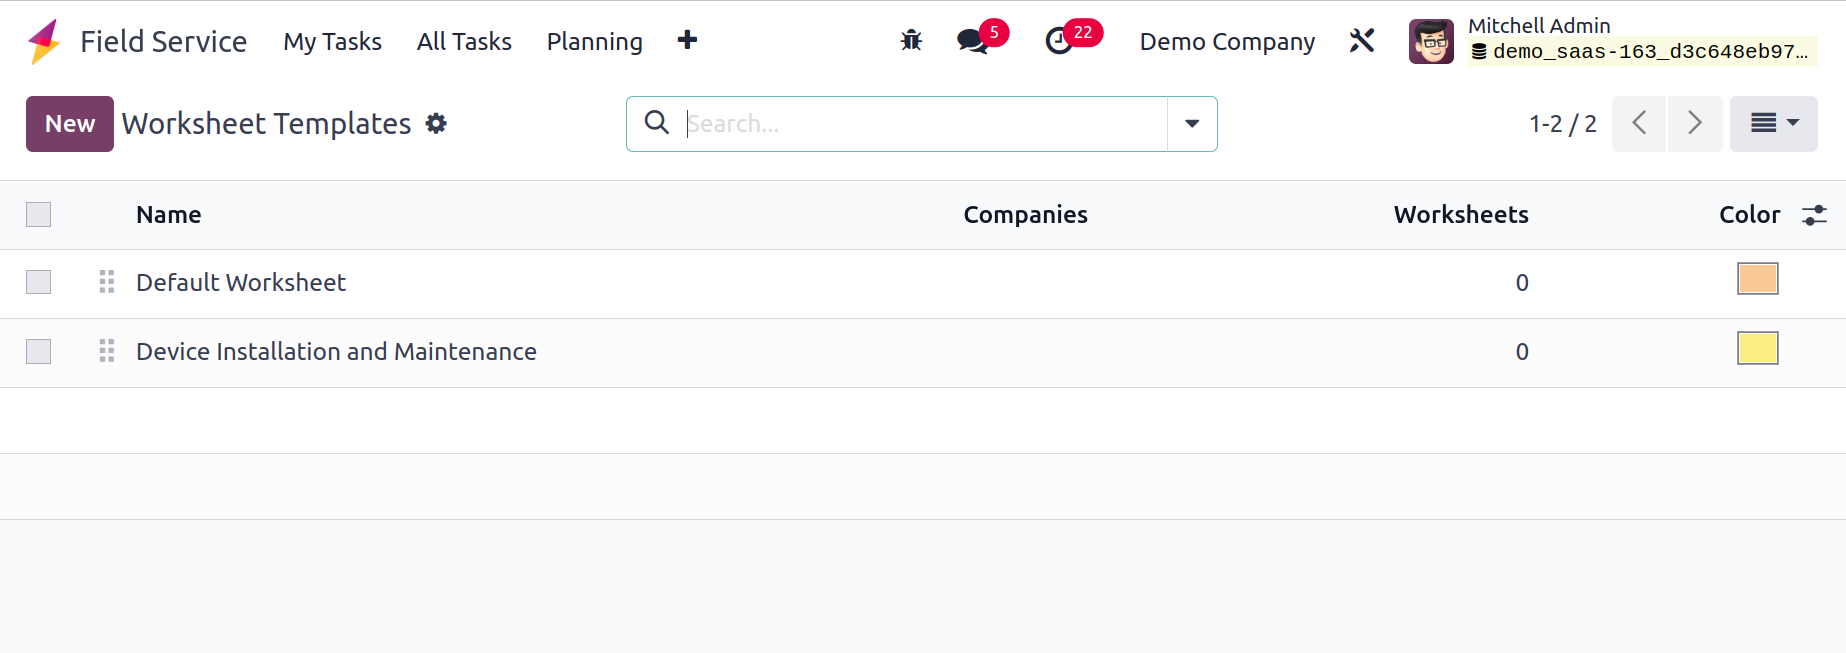
This page displays the pre-configured collection of templates together with information on Name, Companies, Worksheets, and Colour. To create a new template, click the New button.
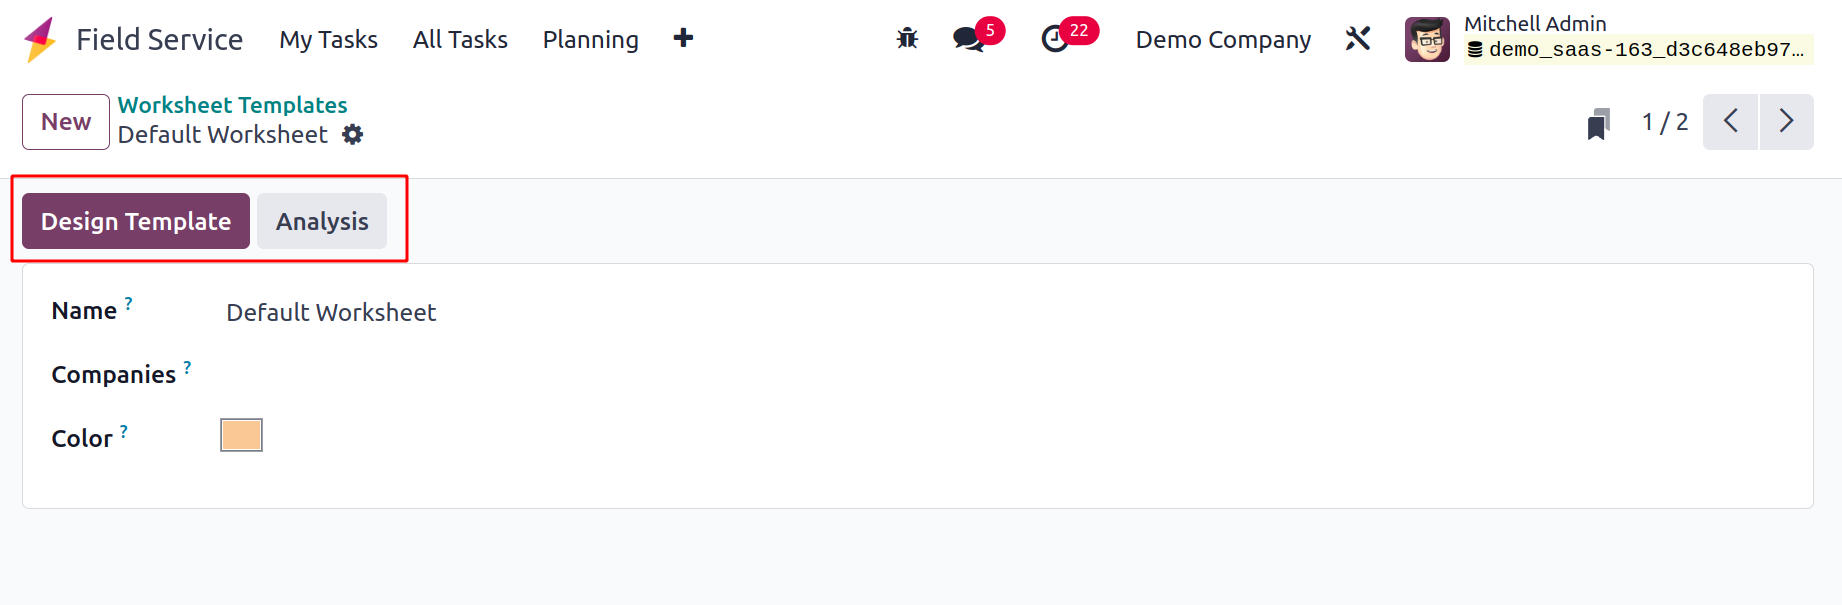
Here, you can fill in the relevant fields with the Names and Companies. Choose a color for the template from the list that is provided. You can use the Design Template button to customize the template after inputting the necessary information.
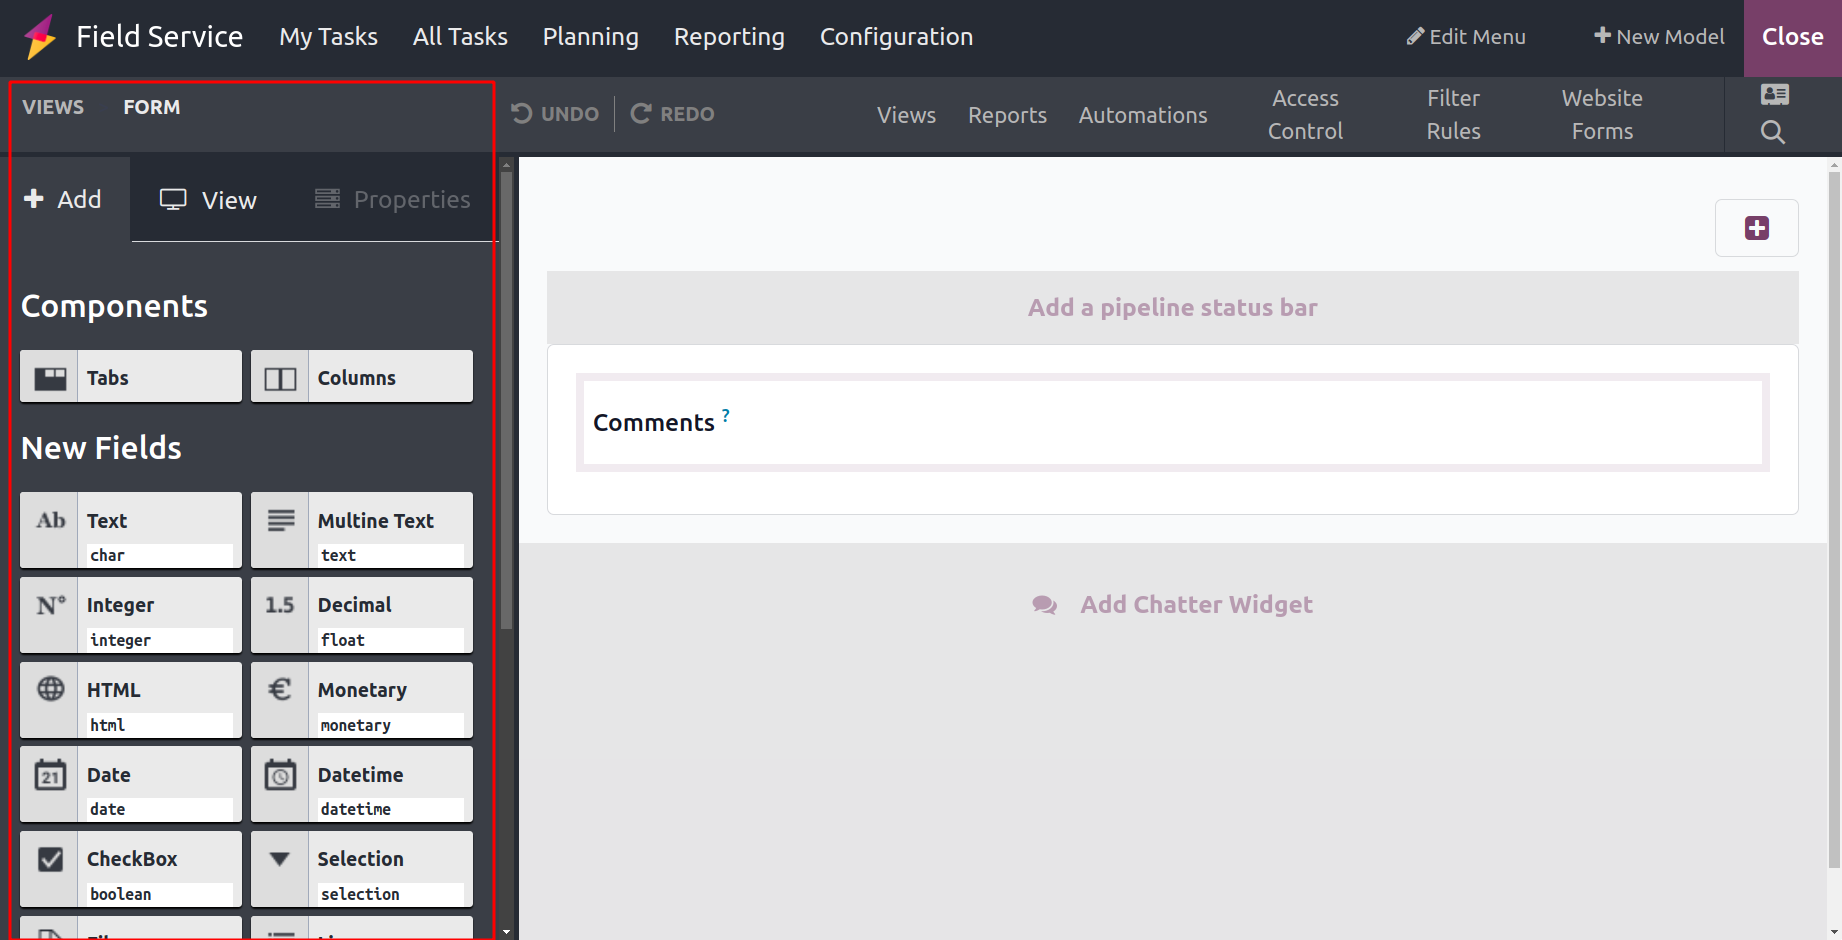
This will take you to a new window where you may design the template using sophisticated editing features. You can utilize them after building the template while developing new field services.
The tasks completed with this template can be examined using the Analysis button.
Settings
You can turn on Time and Material Invoicing from the module's Settings menu. By selecting this option, you may keep track of the supplies used for your projects and bill your clients for your time and materials.
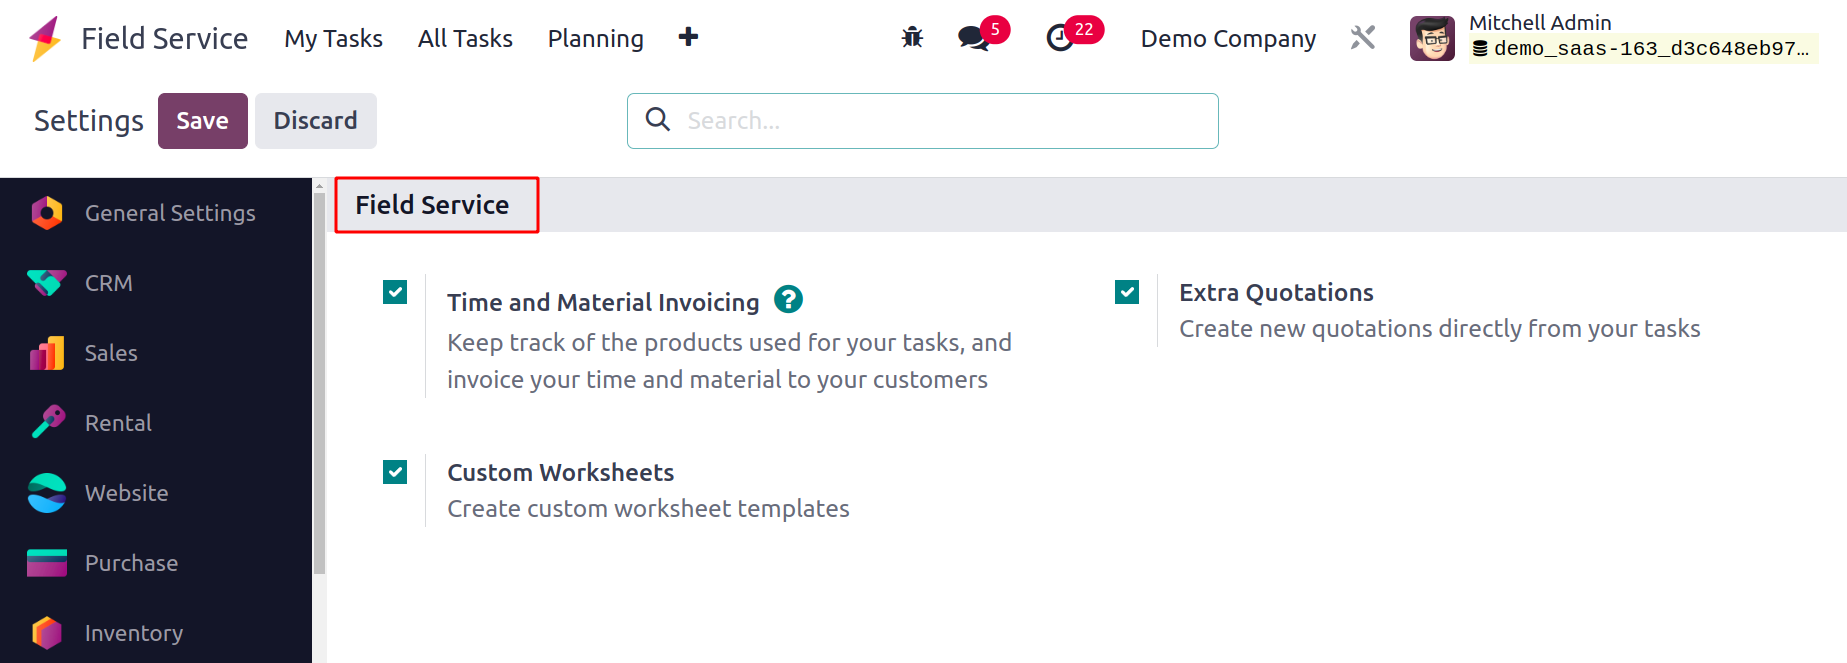
You can turn on the Custom Worksheets option to build custom worksheet templates. You can add new quotations right from your tasks by using the Extra Quotations feature.
Reporting
The Field Service module's Tasks Analysis option under the Reporting menu can be used to examine the tasks that have been entered into the module. On this platform, you can assess the field services duties.
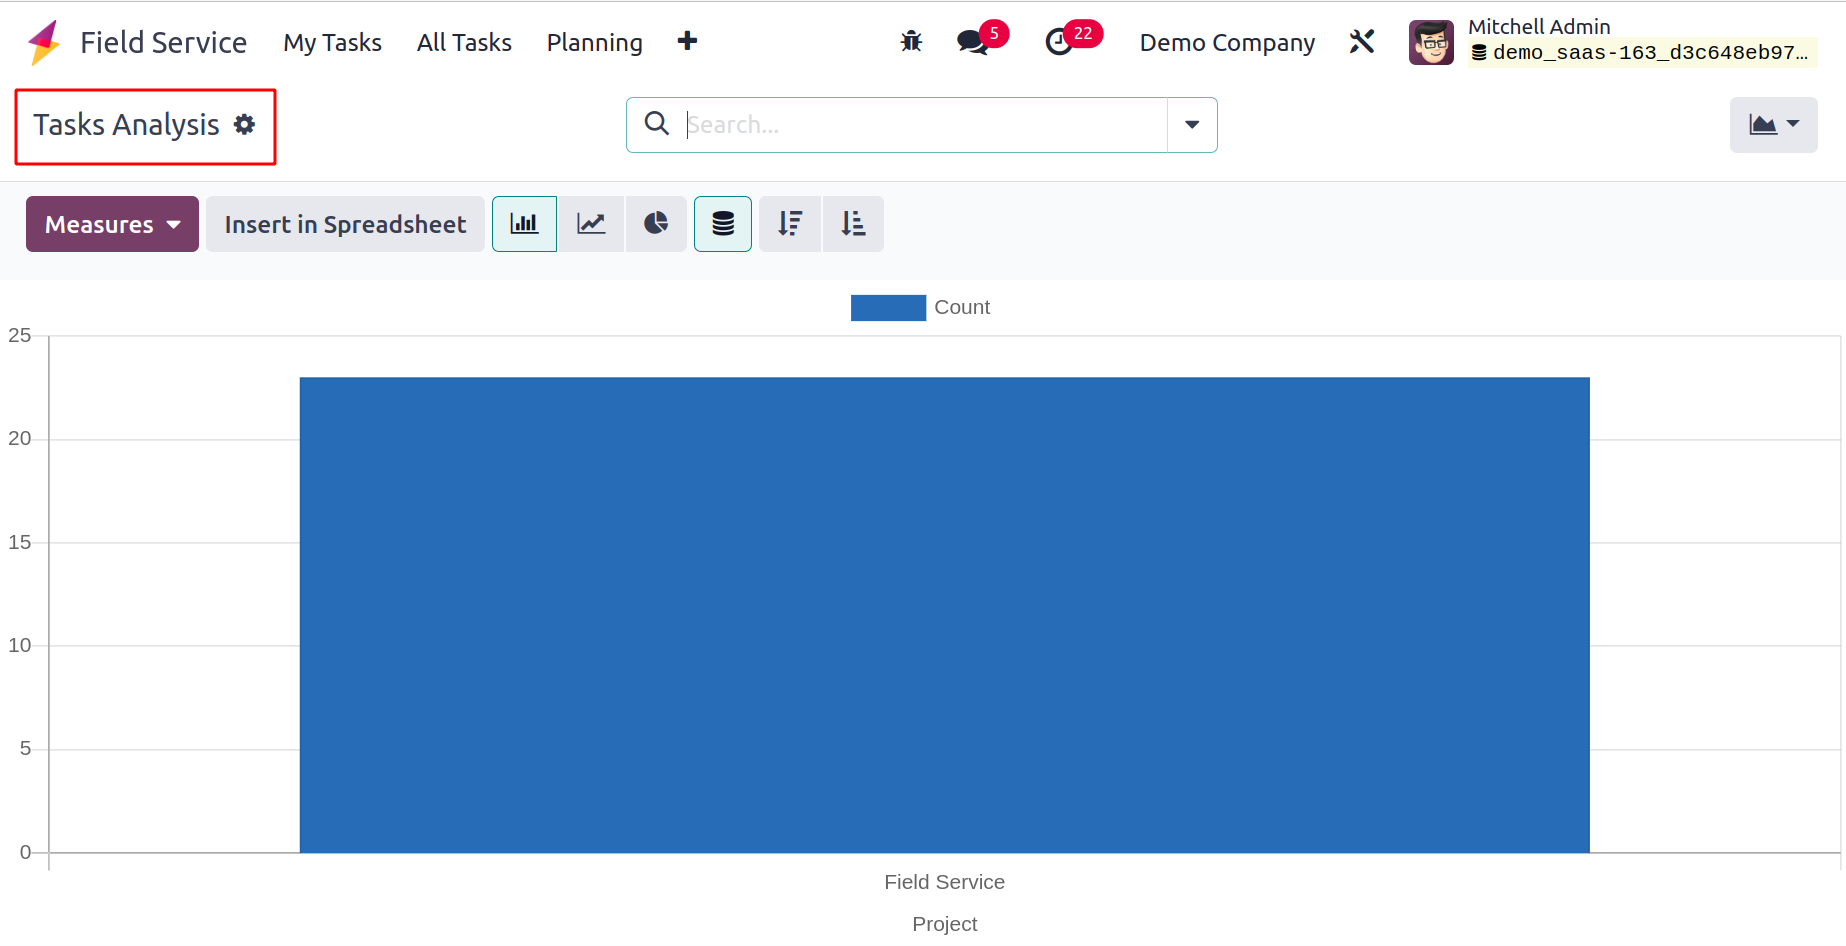
You can utilize the appropriate Filters and Group By choices for effective analysis. Graphical and pivot views are available on this platform. You can choose a suitable view based on your needs. The Custom Filter and Group options can be used to create unique reports. Days to Deadline, Effective Days, Overtime, Planned Days, Progress, Remaining Days, Remaining Hours on SO, Working Days to Assign, Working Days to Close, Working Hours to Assign, Working Hours to Close, and Count will all be provided as measures.
You will receive complete support from the Odoo 17 Field Service module to carry out all tasks methodically and efficiently.