Expenses
The Odoo 17 Expenses module simplifies managing business expenses. Employees can easily
report their expenses, which allows managers to rapidly assess and approve them. This
also benefits accountants, who can document and proceed with payments for future
transactions.
My Expenses
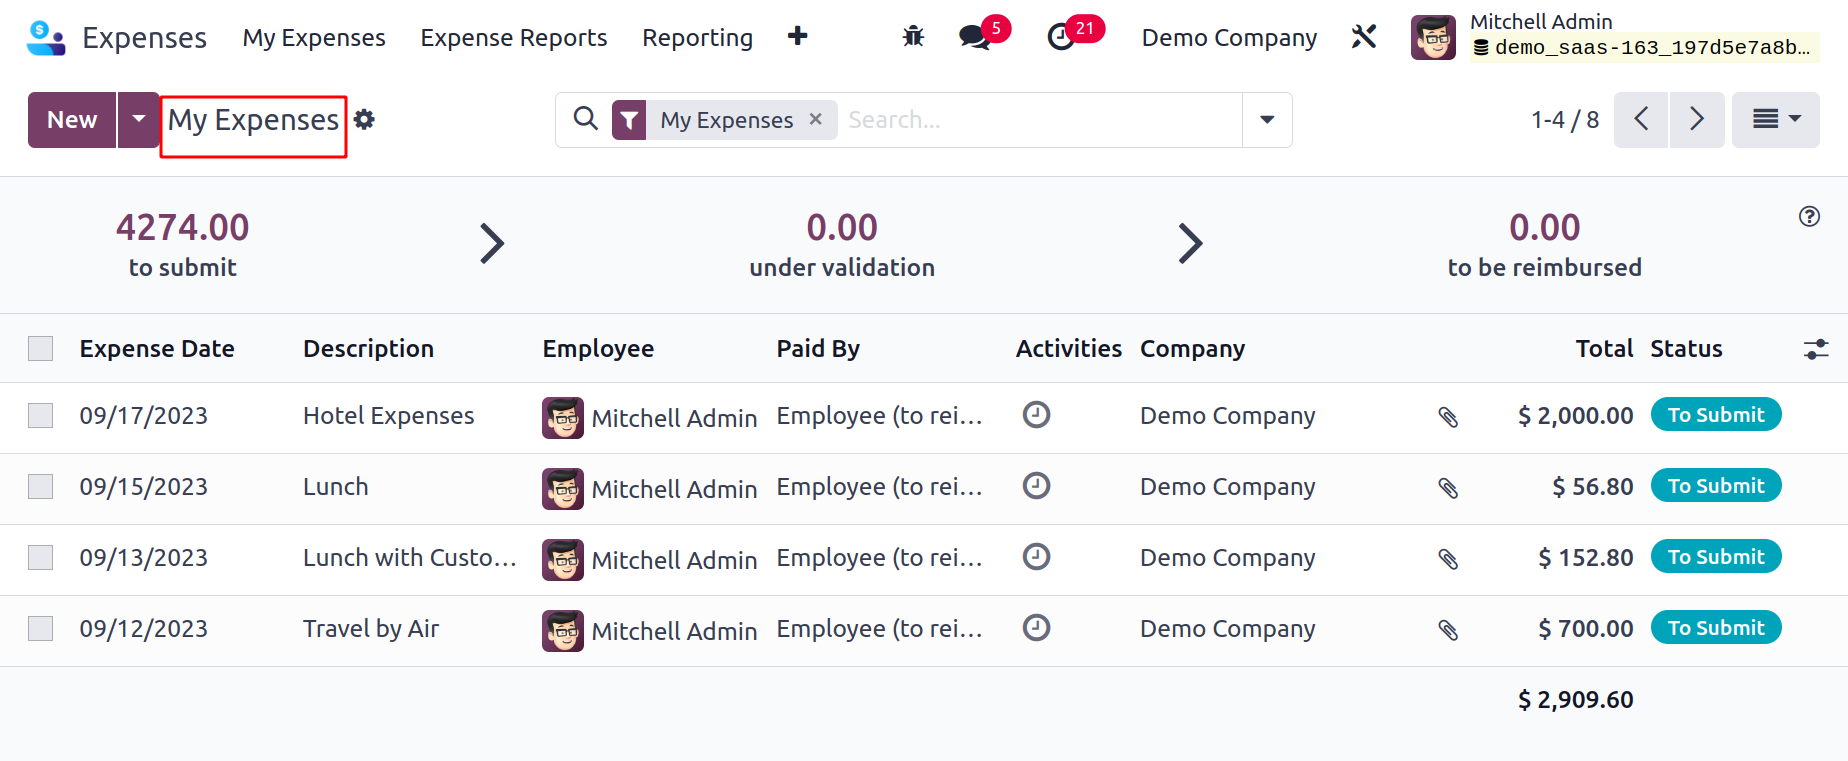
You can access the expense module's dashboard once you select the My Expenses option from
the My Expenses tab. The My Expenses page allows users to access the history of
previously reported expenses. We may find information about expenses in the List view,
including the Date of the Expense, the Employee, the Company, the Status, the
Description, the Activity, and more. You may see the reimbursement amount, the cost of
validation, and the expenses to report at the top of the window. After examining the
report, a user can see a clear picture of the state of the expenses.
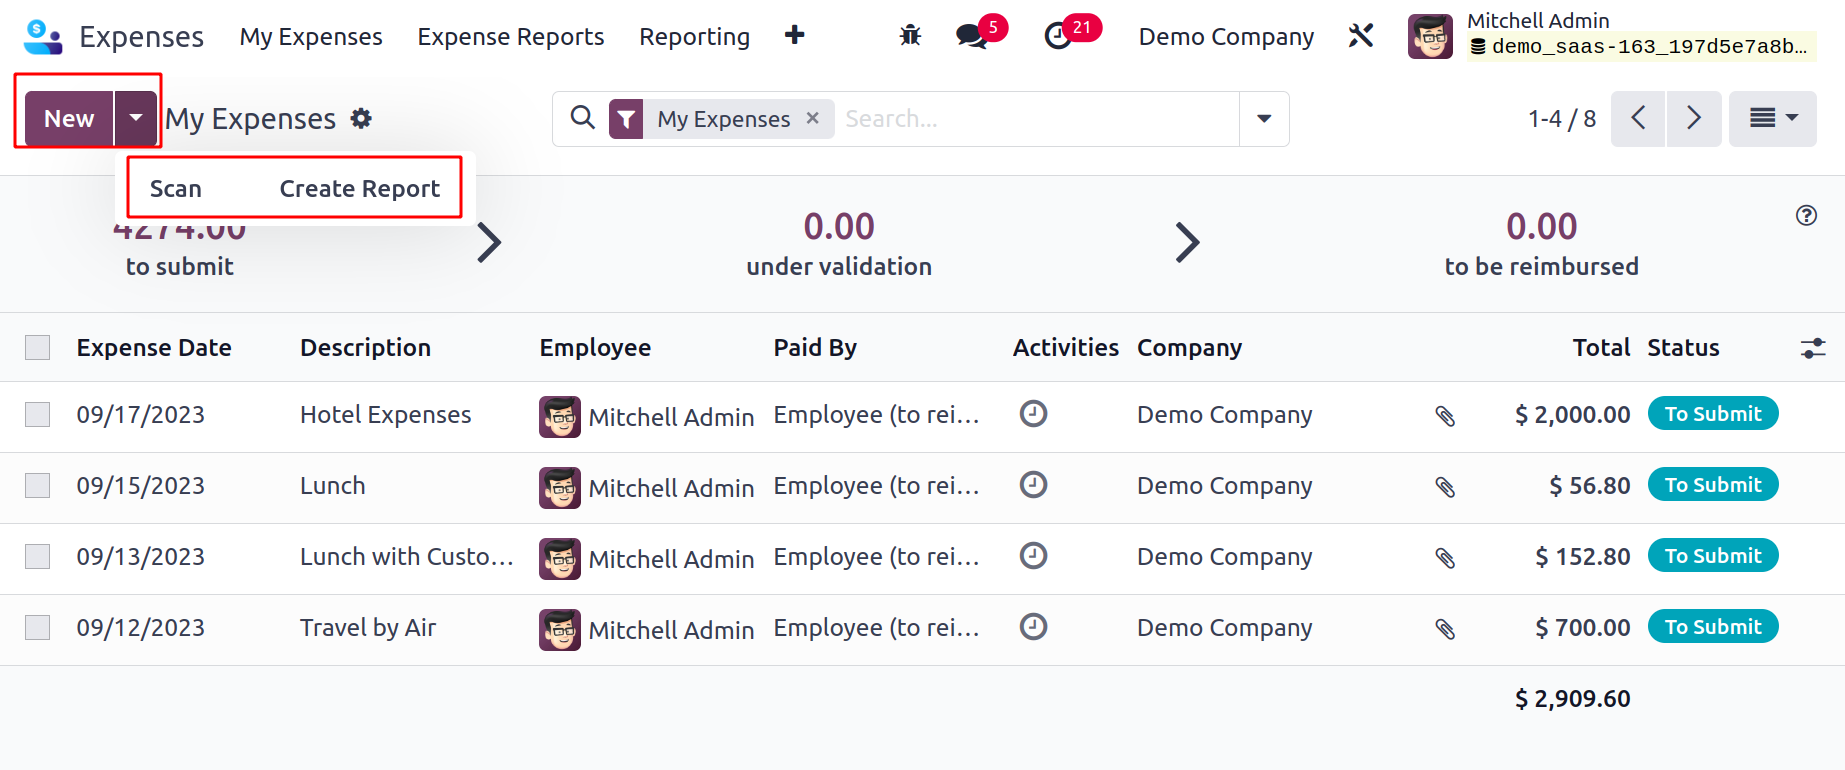
You can upload an expense report from your system using the SCAN icon. Once you click the
Create Report button, you can also create a new report. Select the NEW icon in the My
Expenses window to add a new expense.
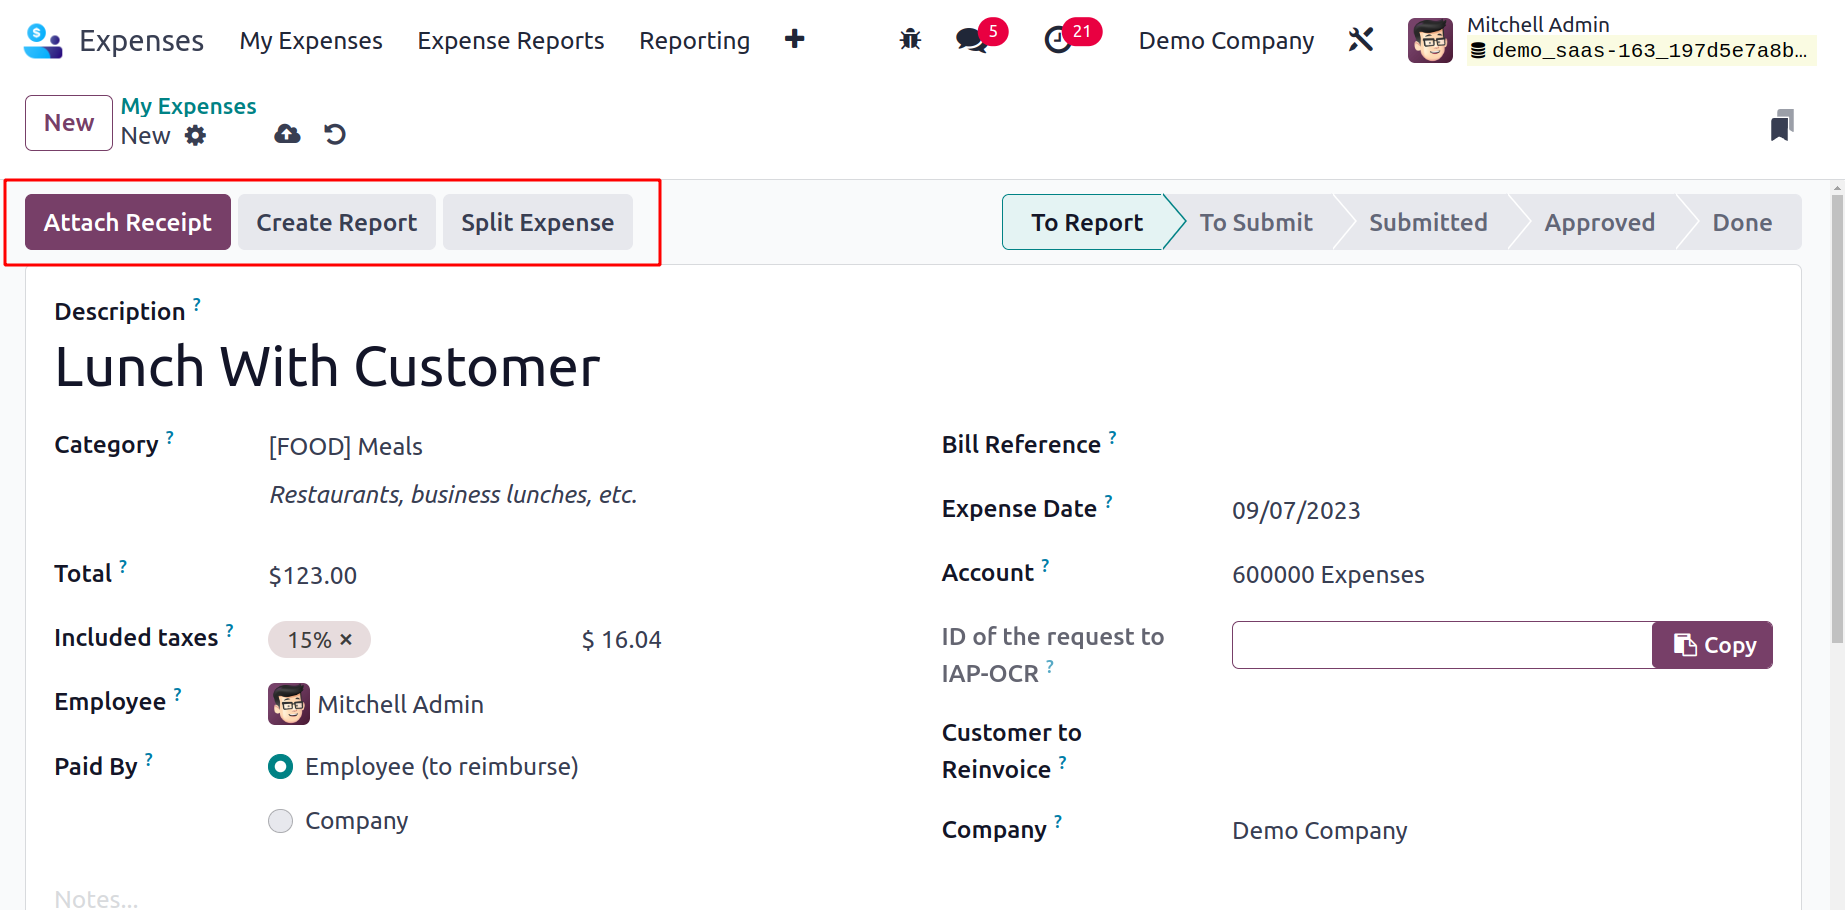
Fill out the Description section in the new window with information about your spending,
and then select the appropriate Category. Users have access to a variety of spending
categories, such as Communication, Gifts, Travel and accommodation, Others, etc. Users
can enter a given expense's total cost in the Total column. In the Employee option, you
can select a specific employee's name.
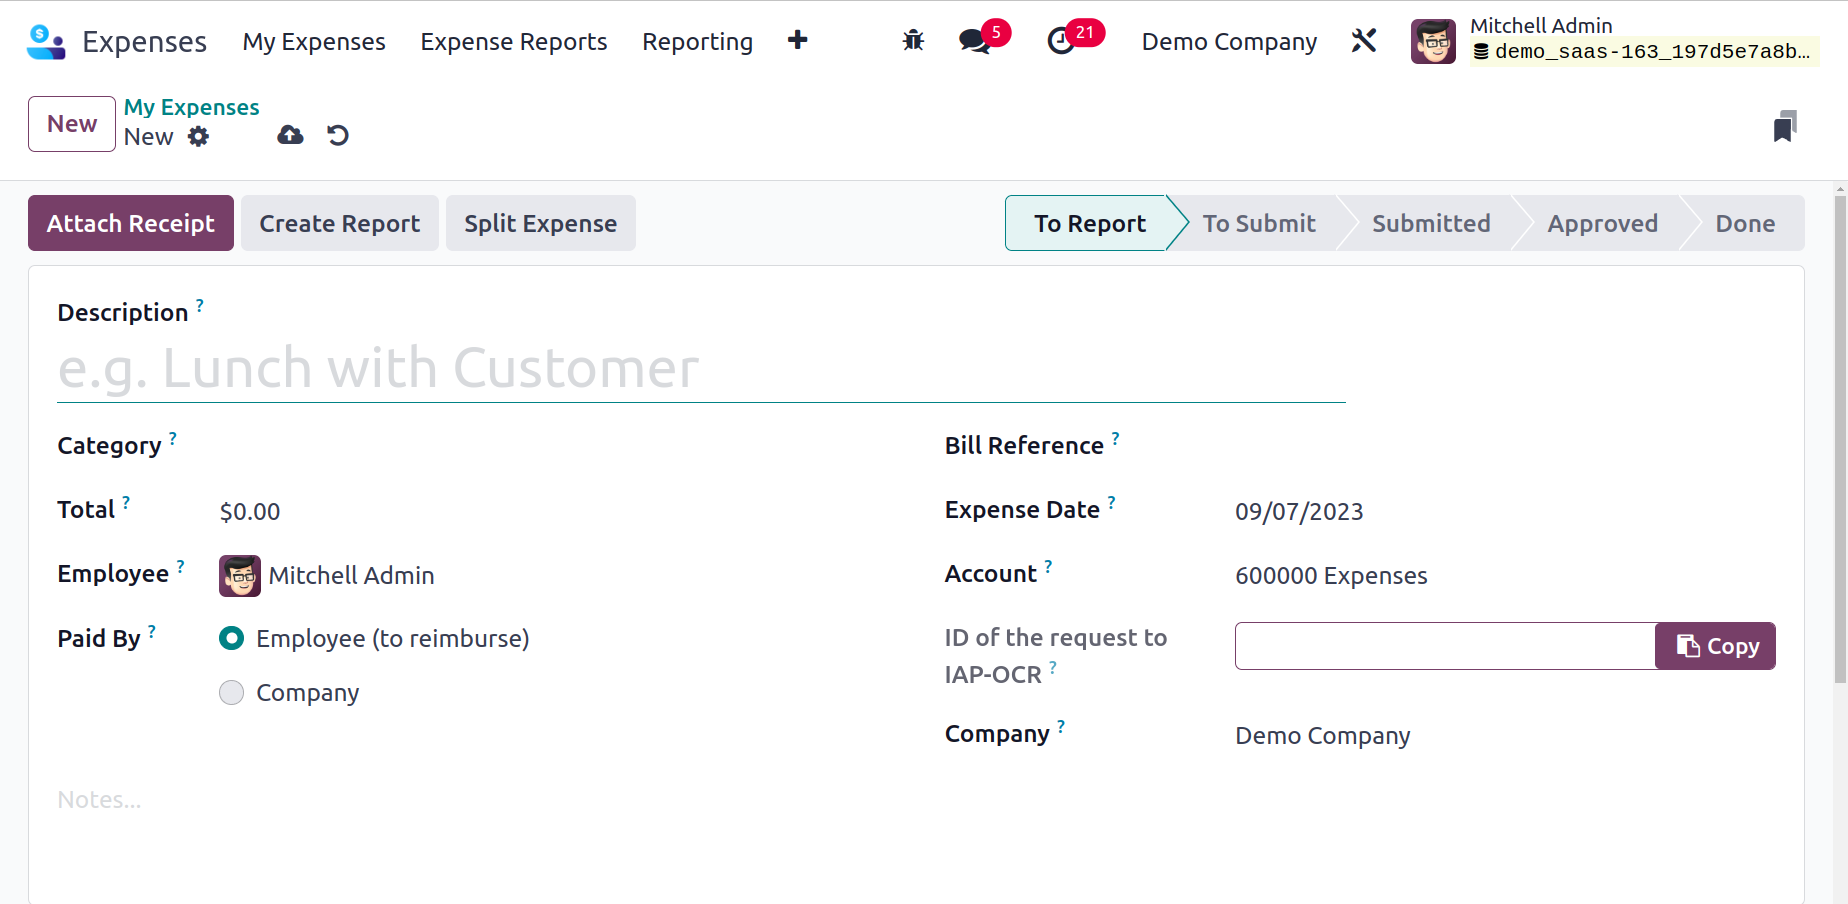
Additionally, you can choose who should pay the expense in the Paid By section. Paying by
both the company and the employee is an option. If the employee is paid, the business
will later repay the employee for any expenses incurred. Additionally, we can add the
Bill Reference and Expense Date, which shows the date on which your item was billed. The
anticipated expense account can be selected in the Account option. Additionally, we may
choose the category for clients to invoice under and the name of the business.
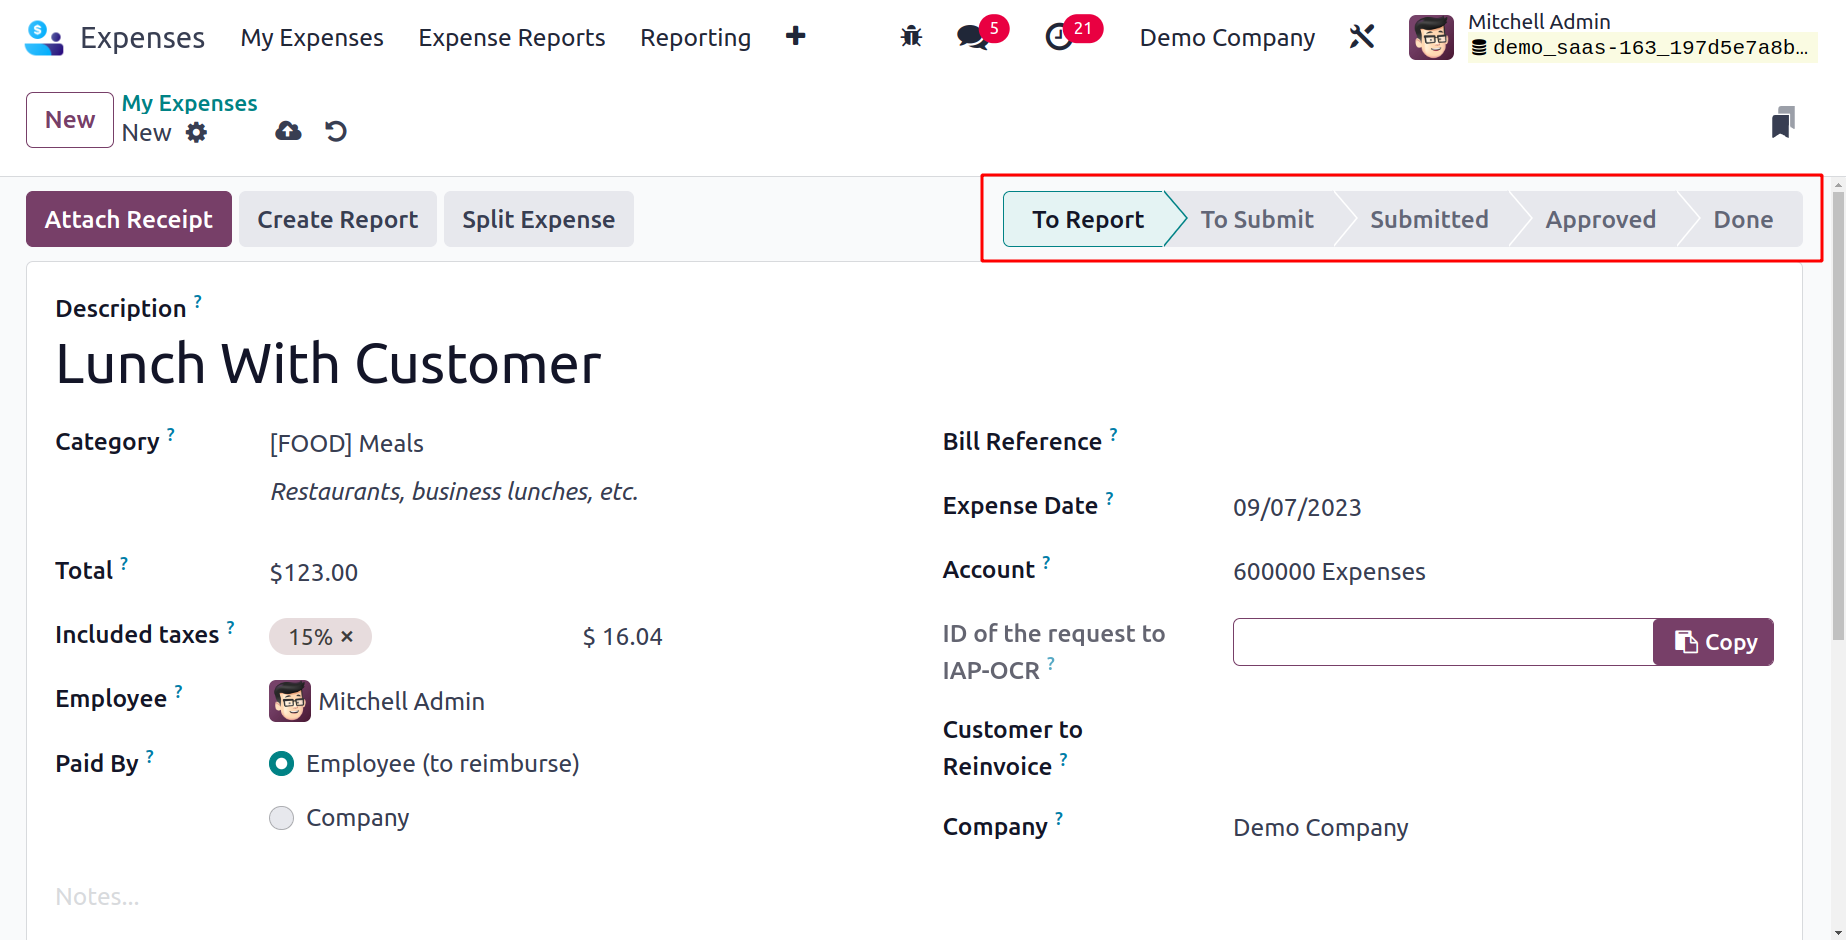
The Odoo 17 automatically saves every item of data. Additionally, you have the option of
categorizing the spending as To Report, To Submit, Approved, Refused, Submitted, and
Done.
Click the Attach Receipt icon to upload any cost receipt. After selecting the Split
Expense button, you can divide the expense. Selecting the Create Report icon in the My
Expenses pane may quickly define an expense report.
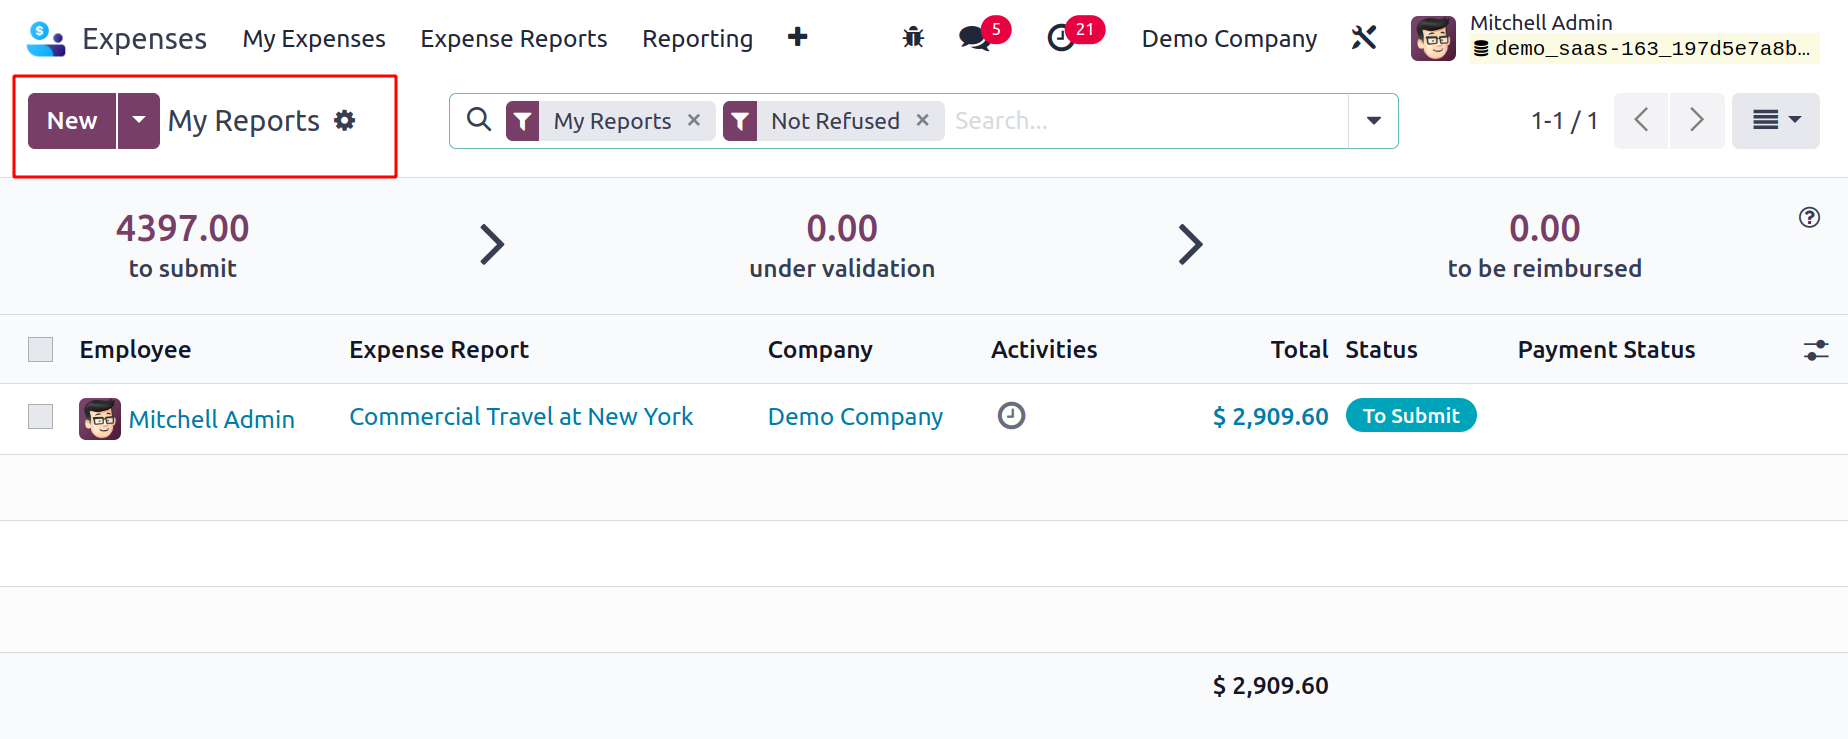
My Reports
The My Reports menu may be found below the My Expenses tab, and the user has access to
all currently available reports. The user sees every little nuance of reports on
subjects like Employee, Activities, Payment Status, Expense Report, Company, and more.
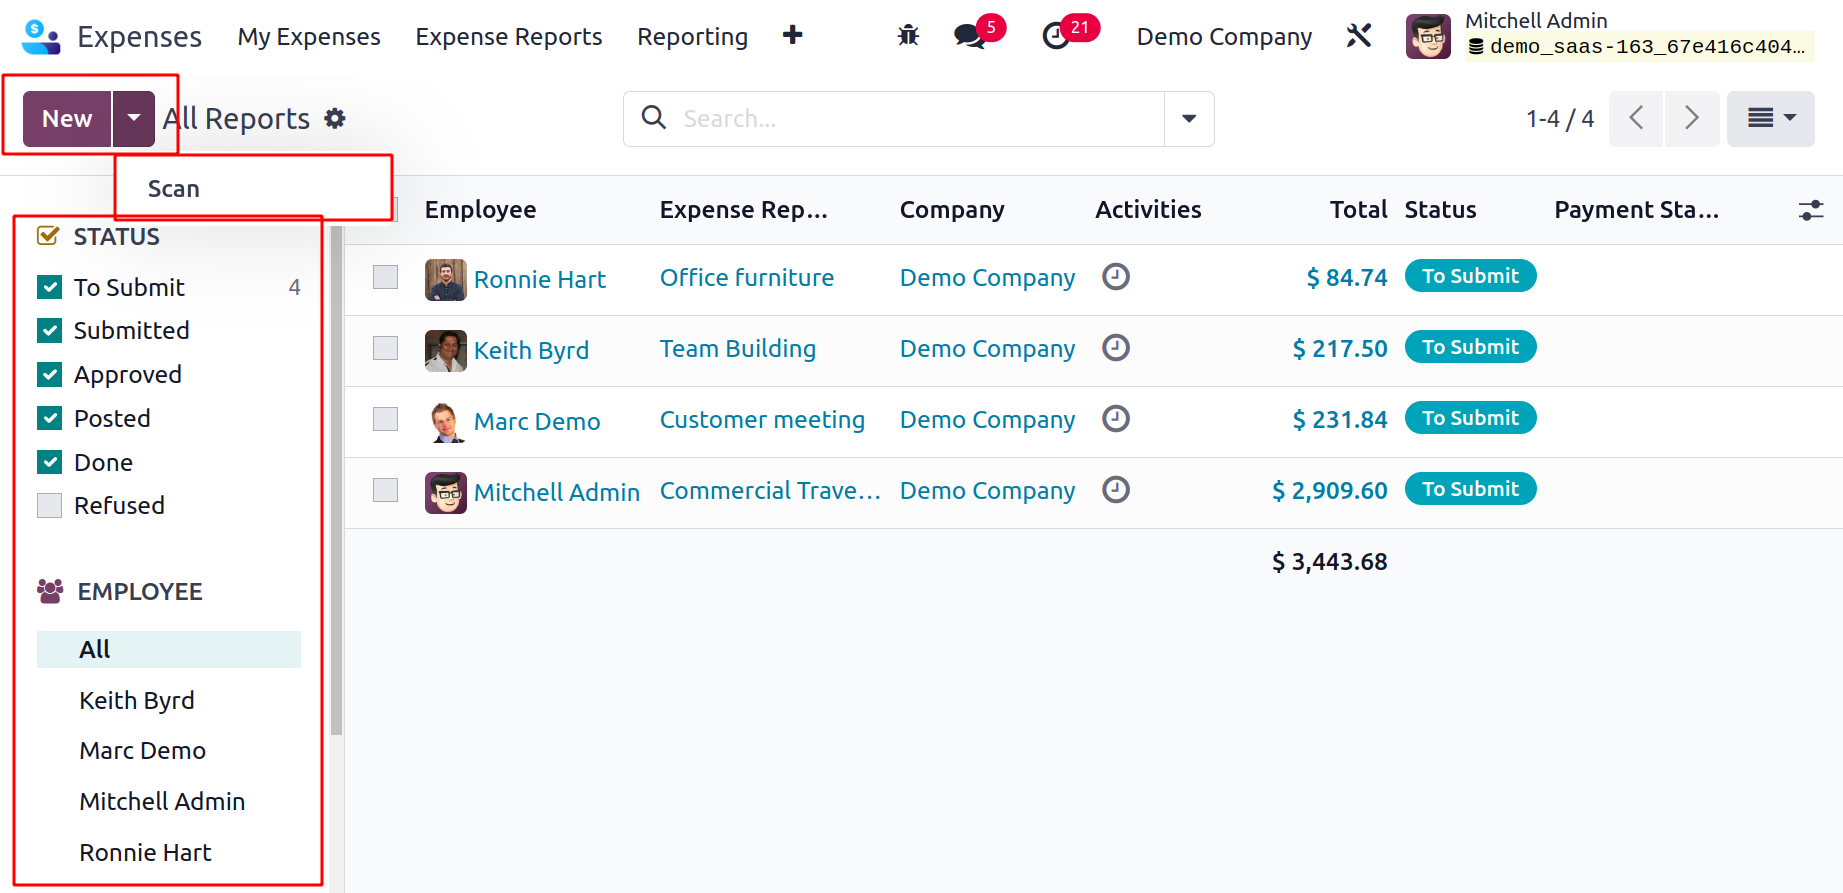
You may rapidly upload report data to Odoo 17 by selecting the SCAN icon. After clicking
the NEW icon, creating a new report is straightforward.
Expense Reports
A user can see all report information by selecting the Expense Reports tab. The Expense
Reports window's List view provides report information, including Employee, Company,
Status, Payment, and more.
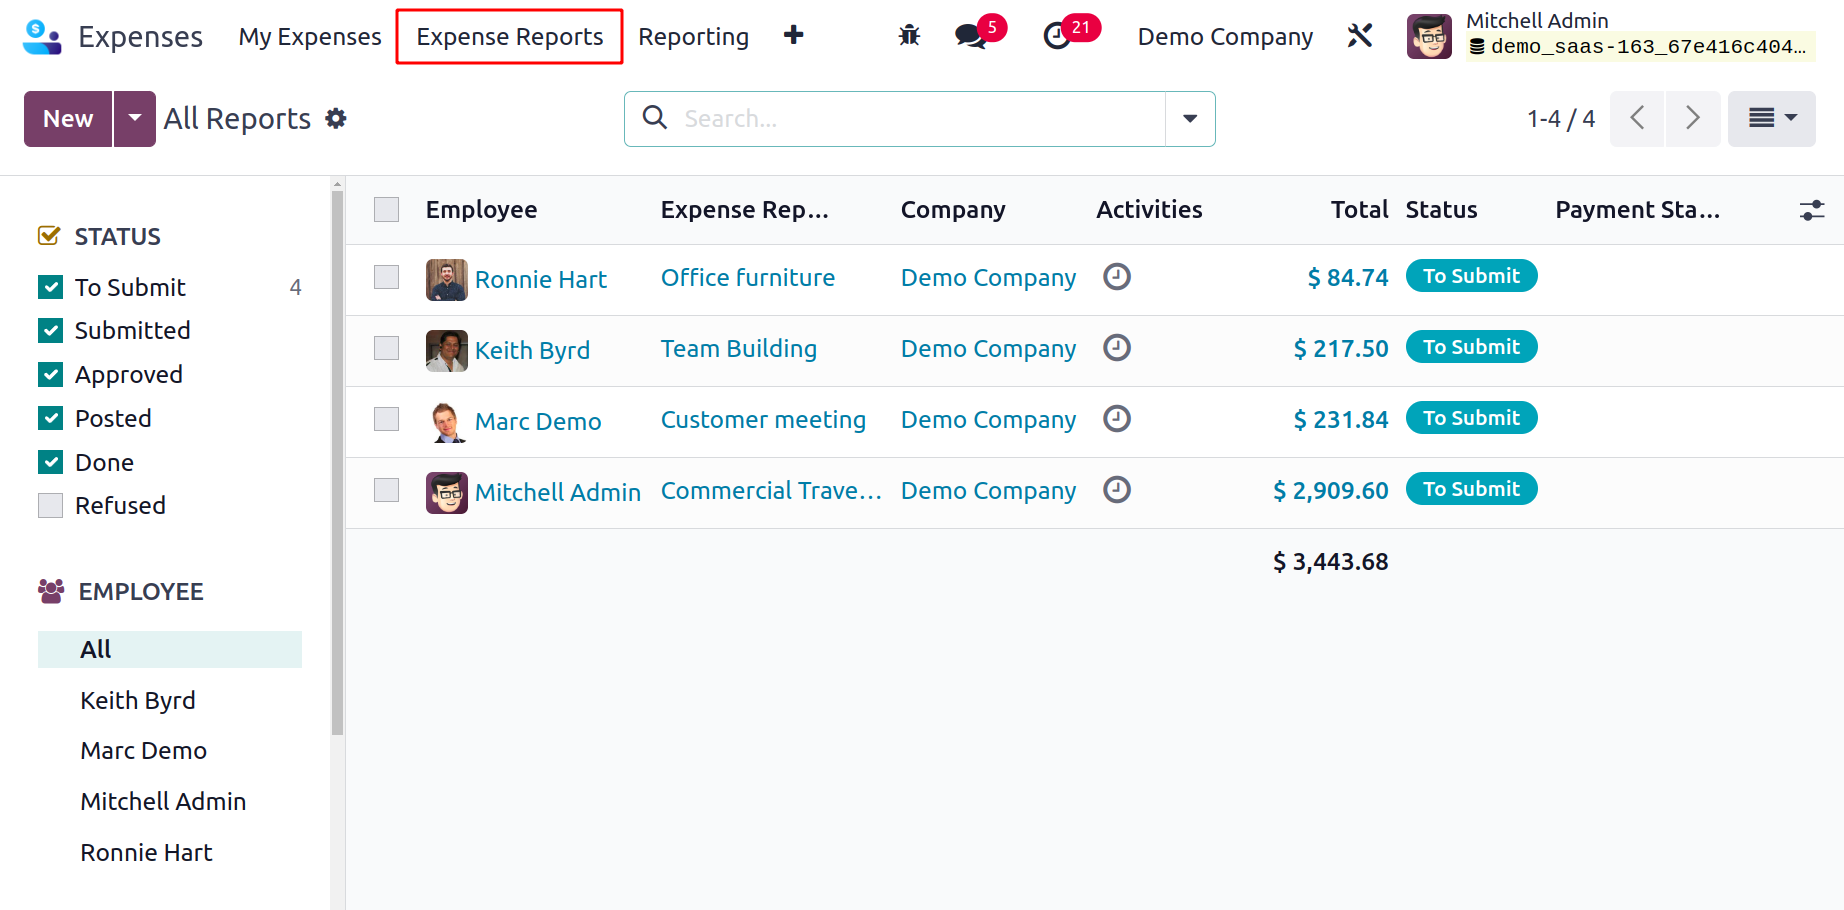
The reports can be arranged according to CATEGORIES, STATUS, and EMPLOYEE. Users can see
all of these in the window's left corner. Additionally, you can add a record by
selecting the Scan option. You must specify a new report for an employee by clicking the
New button.
When you click the New button, a new page appears with a report description added to the
Expense Report Summary area. You can choose the Employee and the Company later. In the
Manager area, select the appropriate Manager for your report.
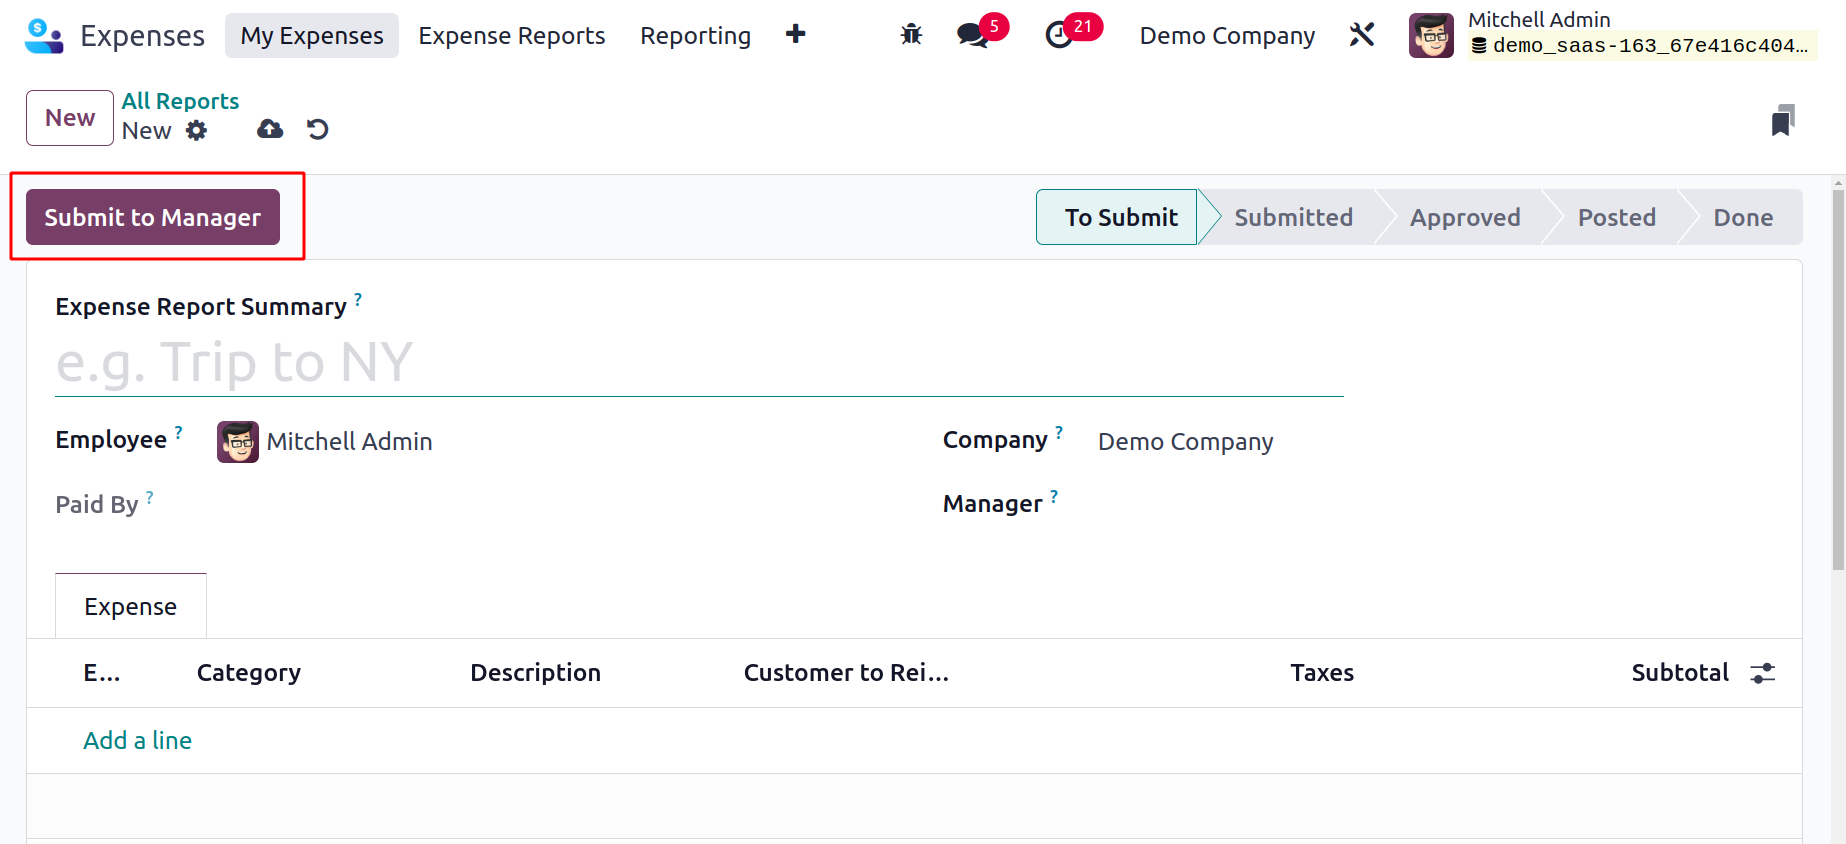
You can mention the expense information pertaining to the report after selecting Add a
line from the Expense tab. Once the user selects the expenses, the total untaxed amount
is displayed to them. By using the Submit to Manager button after providing all the
necessary information, you can send the report to the management.
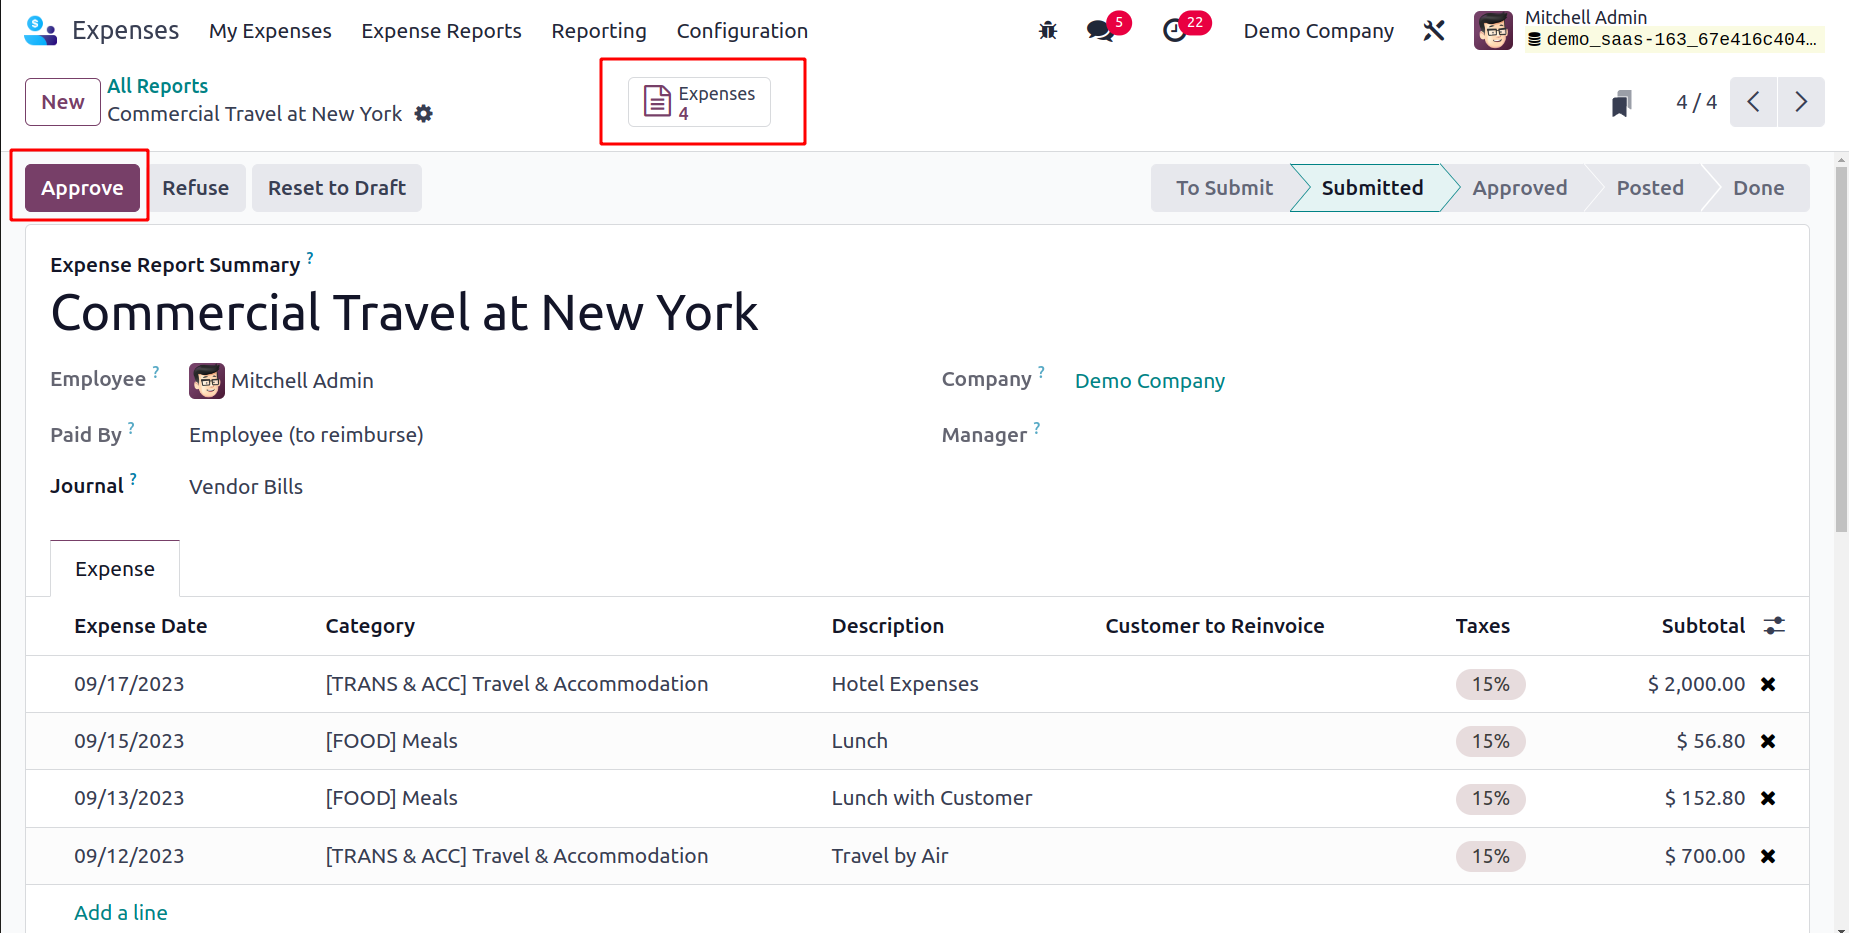
By selecting the Expenses smart button after submitting the report to a manager, you can
view the created expense document. Additionally, the stage is modified to Submitted. By
using the Approve icon, the concerned management can approve the report.
As a result, managing reports in the Odoo 17 Expenses module is simple.
Configurations
Within Odoo 17's Configuration function, we may control the expense parameters and
categories. Now that we've defined each menu, we can go on to the setup tab.

Settings
Once you pick the Settings option from the Configuration tab, it is simple to set default
journals and expenses.

After turning on the Incoming Emails option under Expenses, users can create expenses
from emails they receive. You must first create a domain alias. Once you've configured a
domain alias, you can forward an email with an attachment receipt.
After turning on the Expense Digitization (OCR) option, you can use artificial
intelligence and OCR to digitize all of your receipts. Users have three options for
selecting an important expense digitalization method: Do not Digitize, Digitise
Automatically, and Digitise Only On-Demand. We must turn on the Reimburse in Payslips
option under the Expenses menu in order to get expenses on employee payslips.
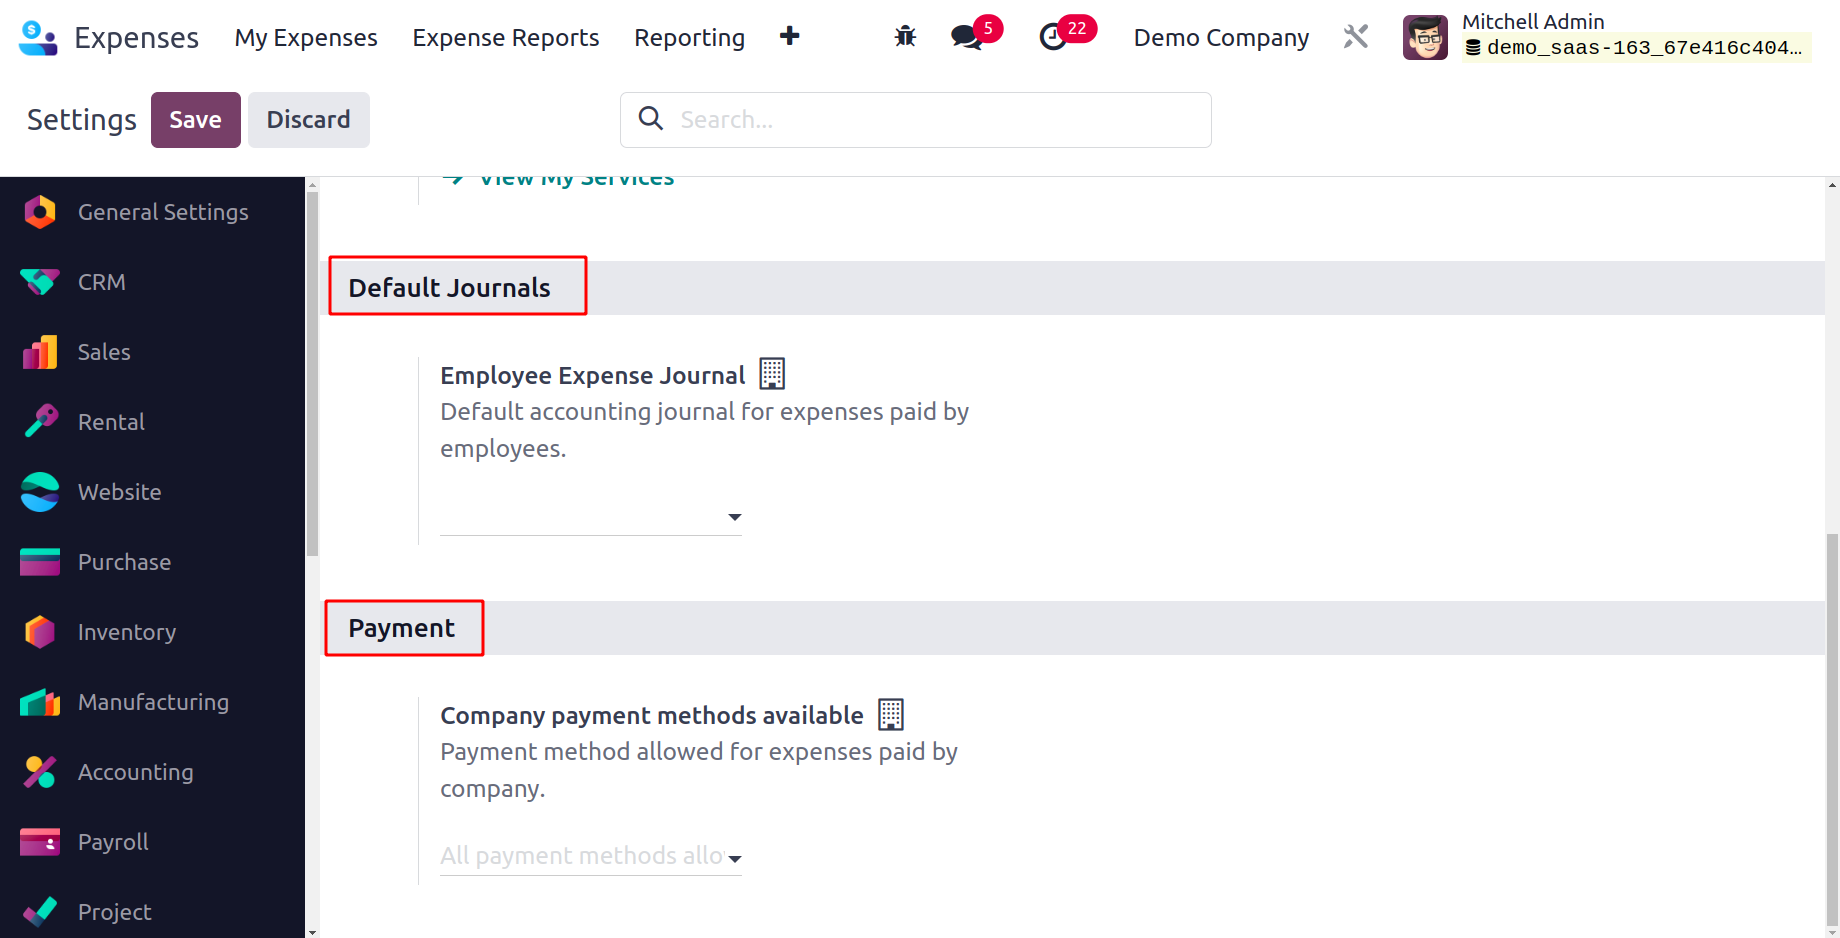
You can select a default account journal for employee-paid costs in the Employee Expense
Journal box in the Default Journals section. Within the Company Expense Journal option,
you can also choose the default accounting journals for which the company pays expenses.
The payment methods allowed for the expenses paid by the company can be mentioned inside
the Company payment methods available under the Payment section. You must click the SAVE
symbol to observe additional changes in Odoo 17 after all necessary fields have been
enabled.
Expense Categories
You may manage product categories with the help of the expense module in Odoo 17. Based
on each type of expense, it is simple to organize product costs. Select the Expense
Categories option in Configuration to add a new category. You may find information for
each type of charge in the open Expense categories screen, including Name, Sales price,
Vendor taxes, Internal references, Re-invoice expenses, and more. After selecting the
NEW symbol, you can create an expense category.
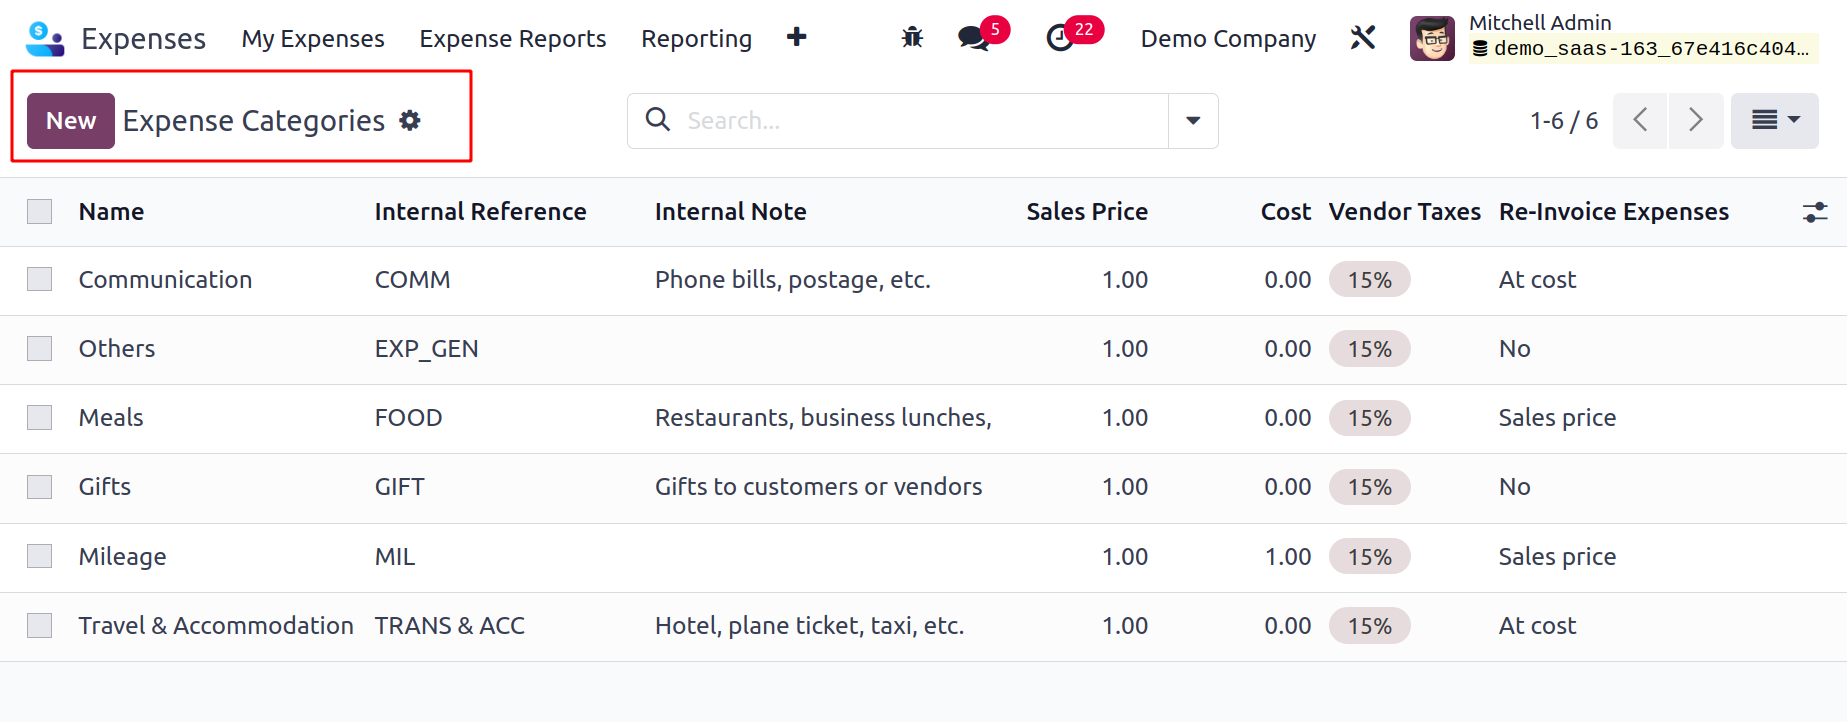
As a result, we can sum up commodity expense categories in Odoo 17 rapidly.
Reporting
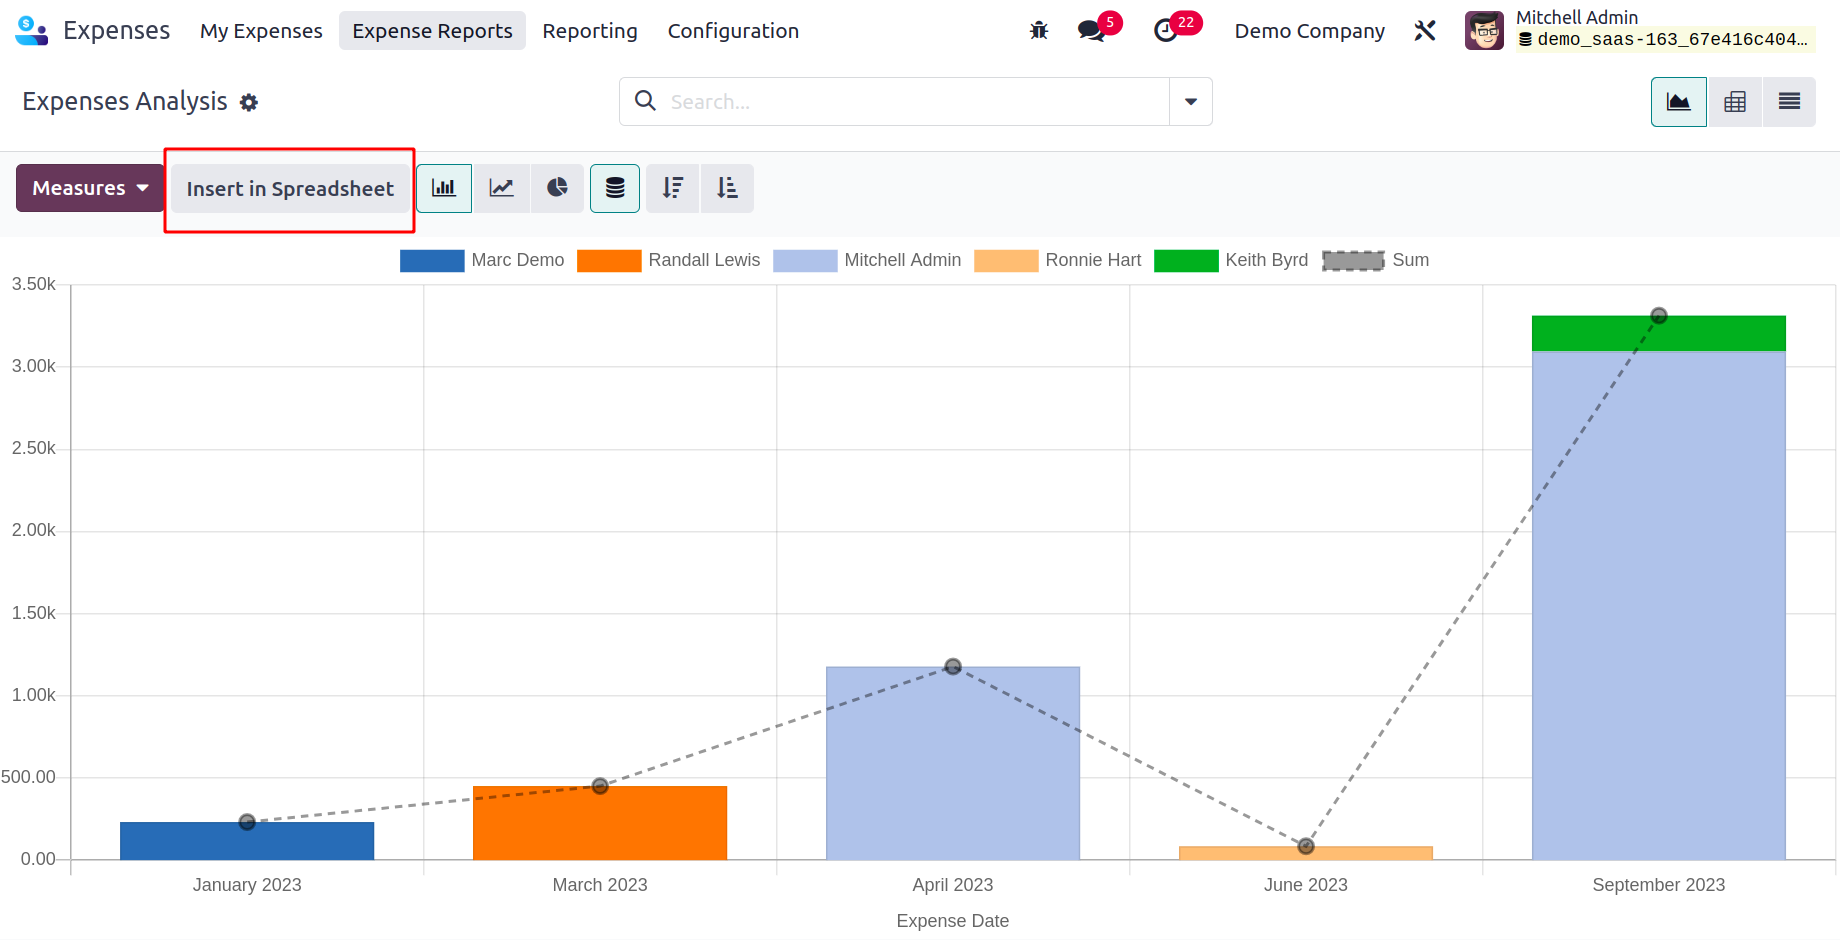
By using the Reporting tool in Odoo 17 Expenses, we can assess business spending. A
graphical representation is displayed when you select the Expenses Analysis menu in
Reporting. The Graph view shows the Expense Date on the X-axis and the Total Expenses
count on the Y-axis. On the graph, we can see the expense total for each employee in a
variety of colors. Additionally, by selecting the MEASURES icon, you can alter the
values that are applied to the graph.
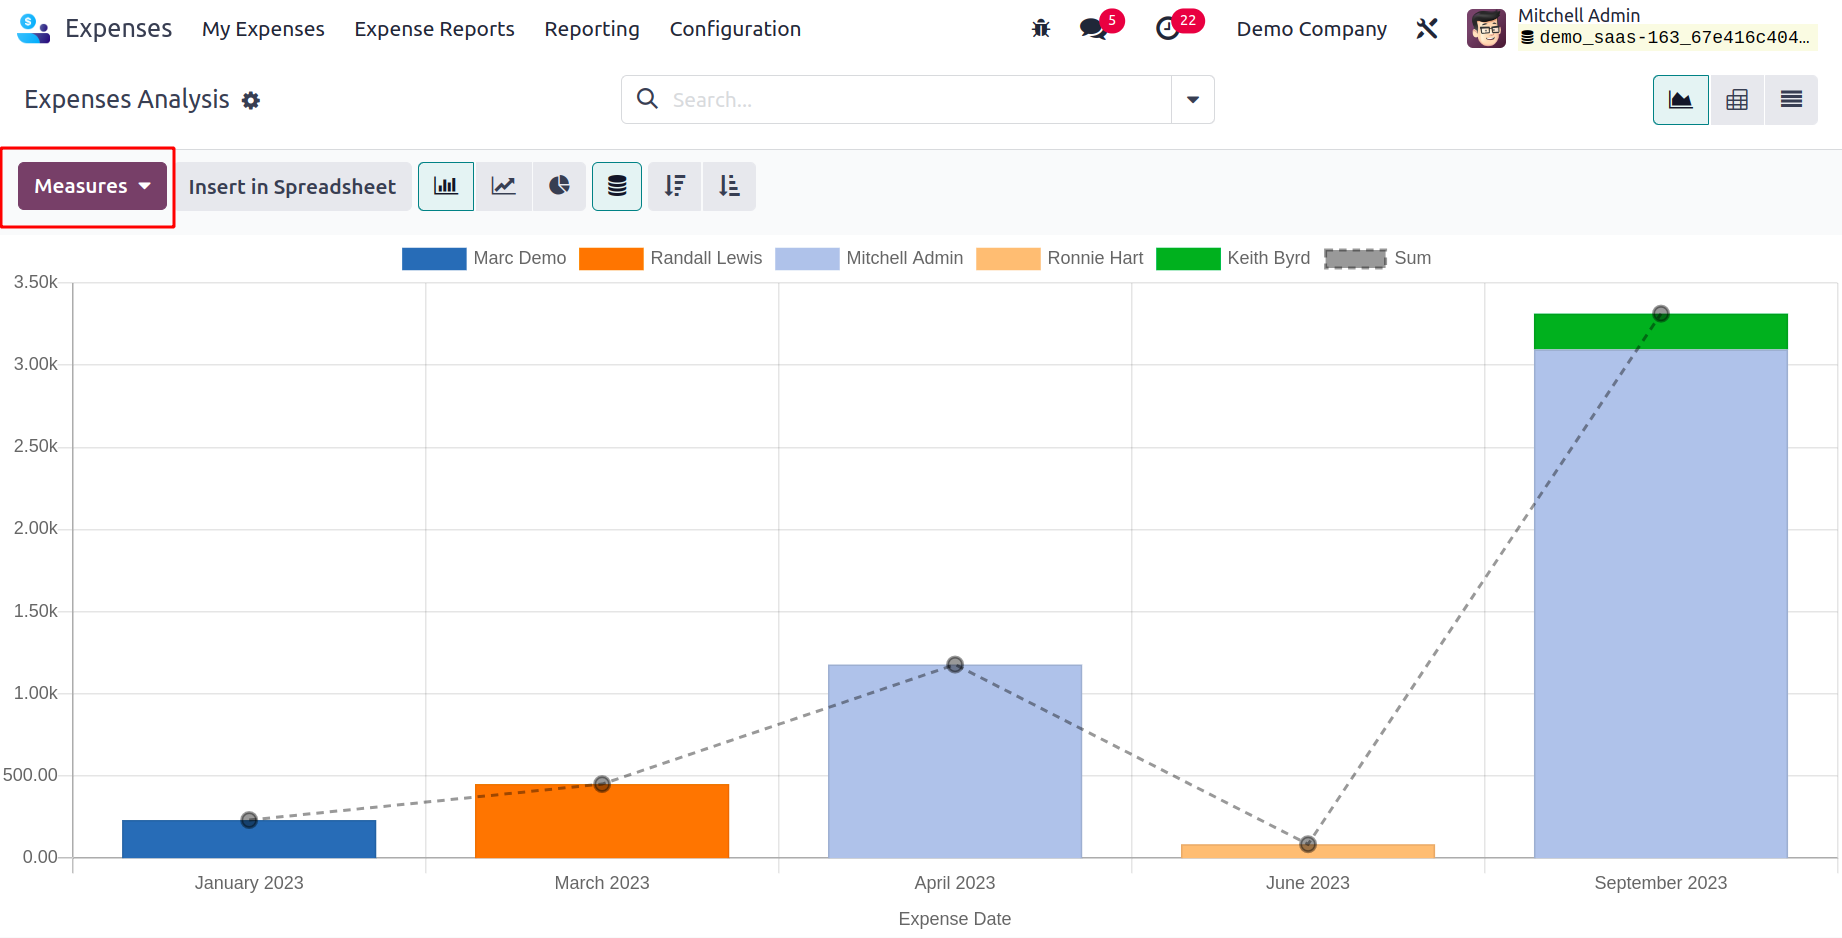
Tax amount, Total, Total Untaxed Amount in Currency, Tax Amount in Currency, Count, and
more are a few of the measures. The graph can be seen in bar, pie, and line chart
styles. If you need to upload a file, click the INSERT IN SPREADSHEET button.
The reporting function of Odoo 17 provides us with a summary of business expenses.