Odoo 17 Email Marketing
The Odoo 17 platform's Email Marketing Module assists you in creating effective and efficient campaigns. The highly user-friendly module will help you control the email layouts and other aspects of it. Additionally, you can choose the ideal themes for email marketing campaigns accordingly. In the module, the process is quite simple. We can choose from a variety of email templates and create our own, utilizing the capabilities offered. These emails are quite simple to send to the necessary recipients.
You have the sophisticated capability of sending such emails to the people you mention. By minimizing the number of pointless emails you send to other people, you may increase the likelihood that they will be accepted, opened, and clicked on. You can select the targeted groups and send messages to them. You can choose leads, prospects, and additional groups from our contacts based on the country, date, or other criteria.
You can improve the campaigns with the aid of the module. We can entirely rely on the system because it generates accurate emails every time. The module may monitor and control the bounce rate, orders, click-through rate, leads generated, and revenue generated. You can see that the module was combined with a few other modules for the seamless operation of the functions, including CRM, Marketing Automation, Survey, and Events module. Let's take a closer look at the varied roles that the options offered by this module play.
You will see the module's main dashboard after selecting it, as seen below.
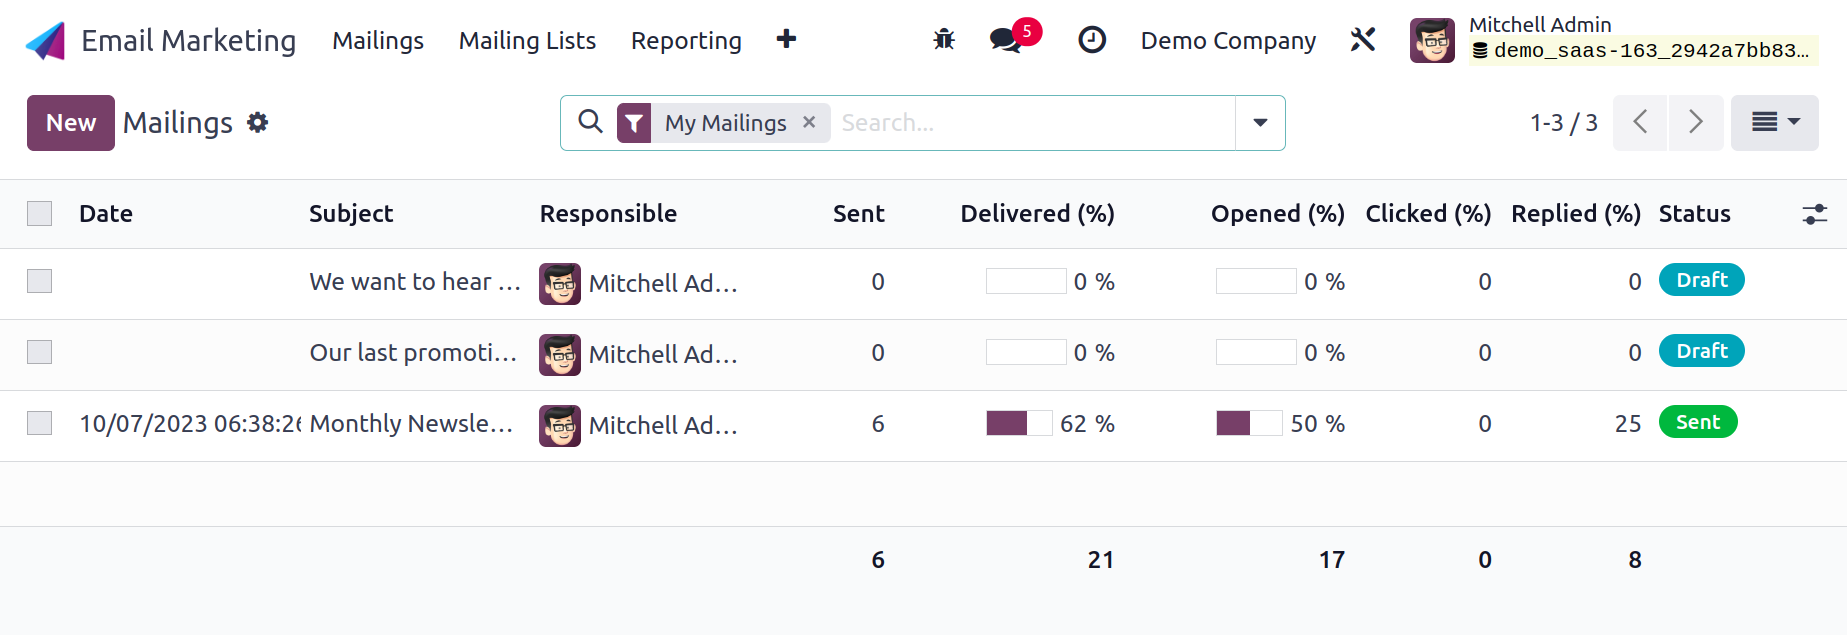
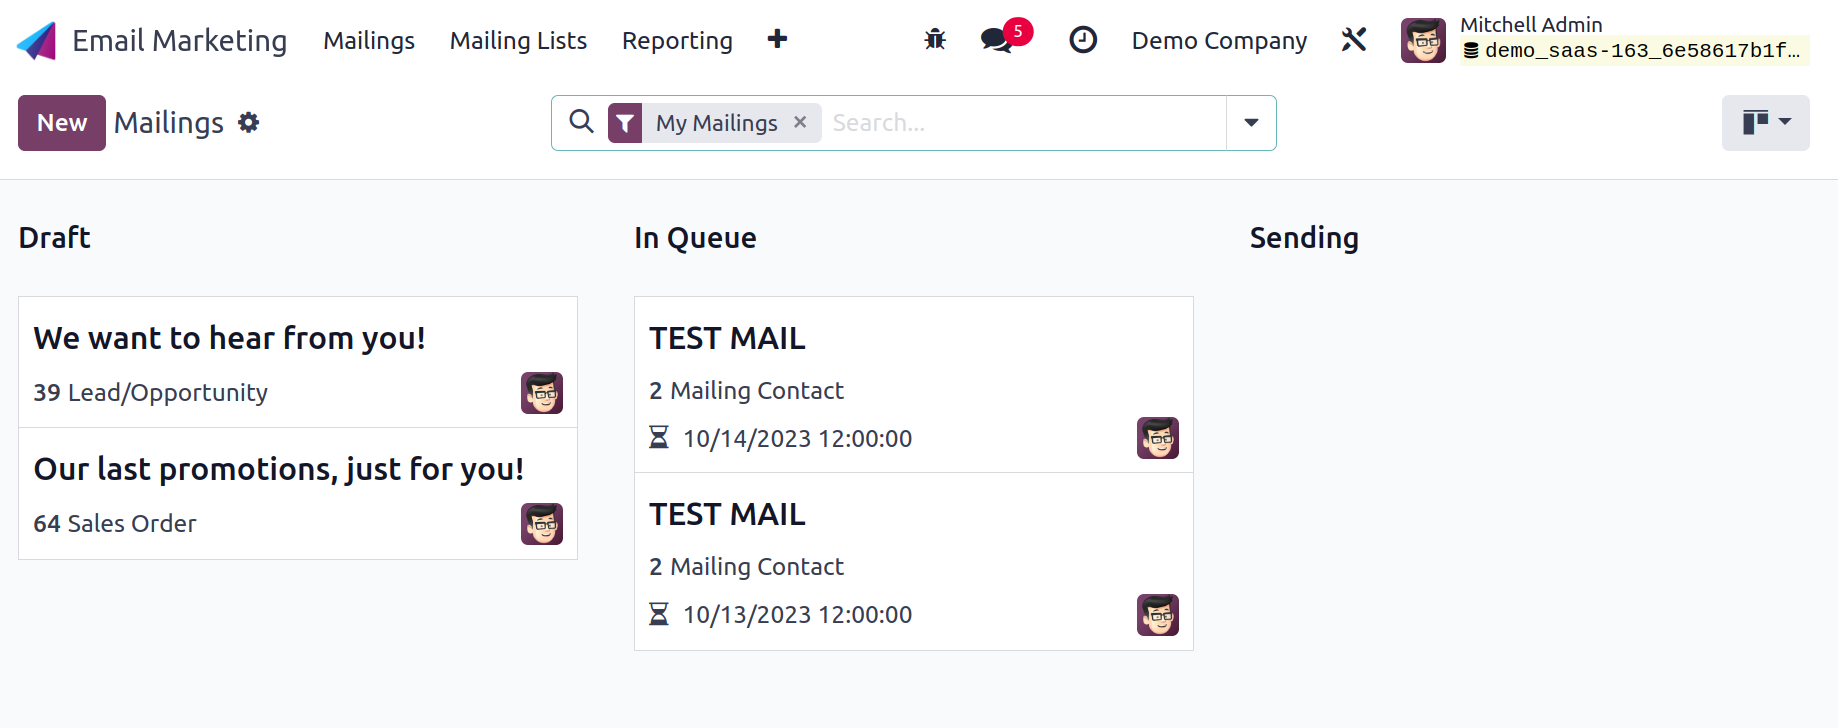
You will receive emails that have already been sent to you along with information on the date, the email's subject, the user who sent it, whether it was delivered or not, and if it was opened, clicked, or replied to. Additionally, the page is viewable in Kanban, List, Graphical, and Calendar views. On the right side of the page are the options for those views.
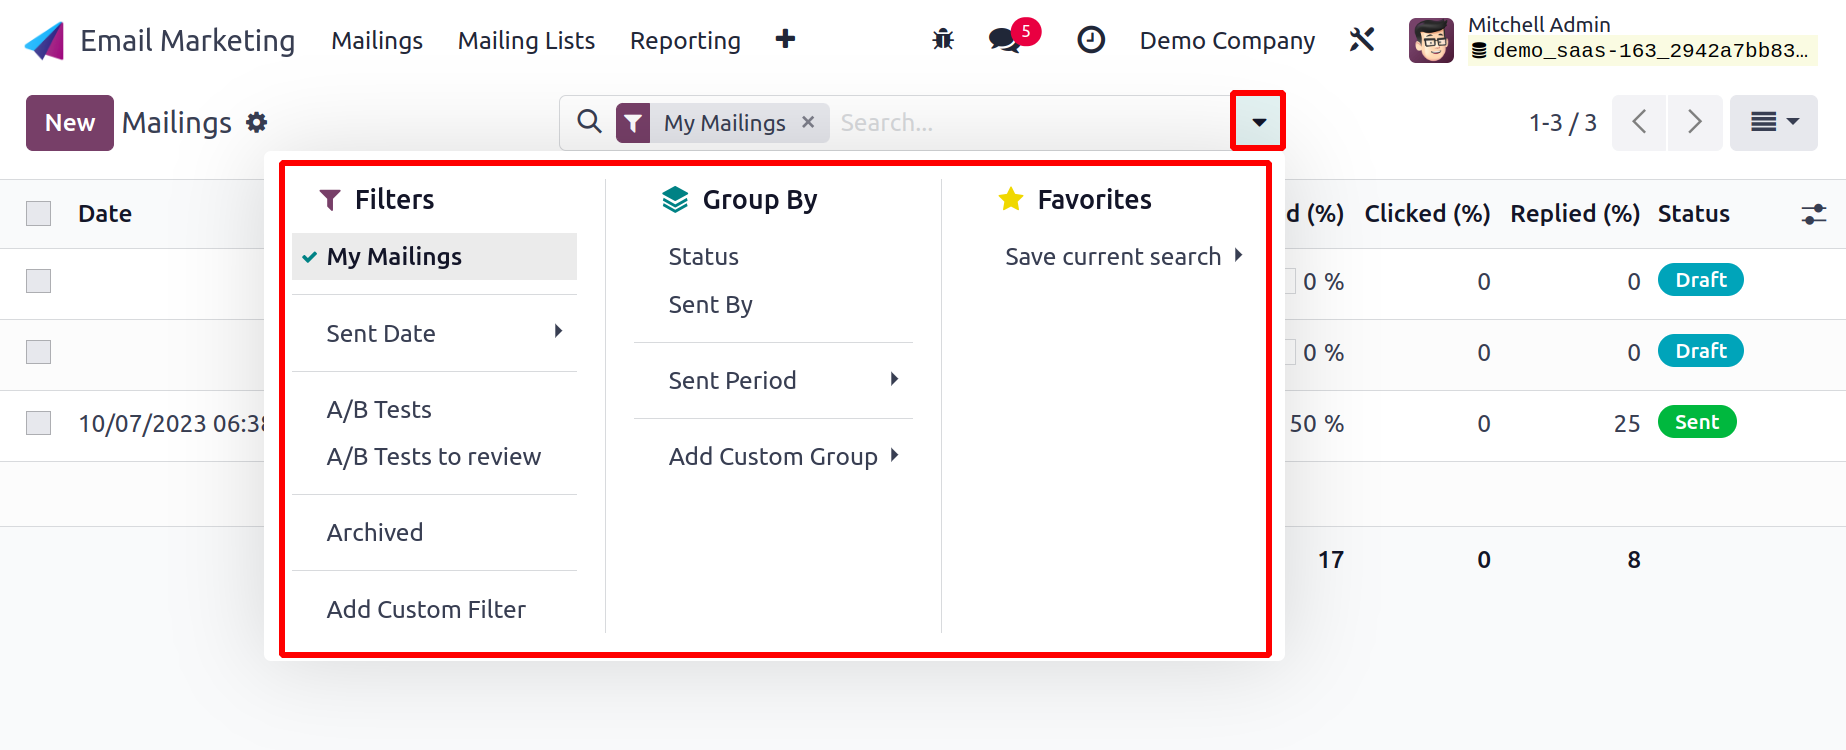
You can sort using the Group By and Filters options based on your requirements. The person's chat box will appear when you choose a specific responsible user from the list, as seen below.
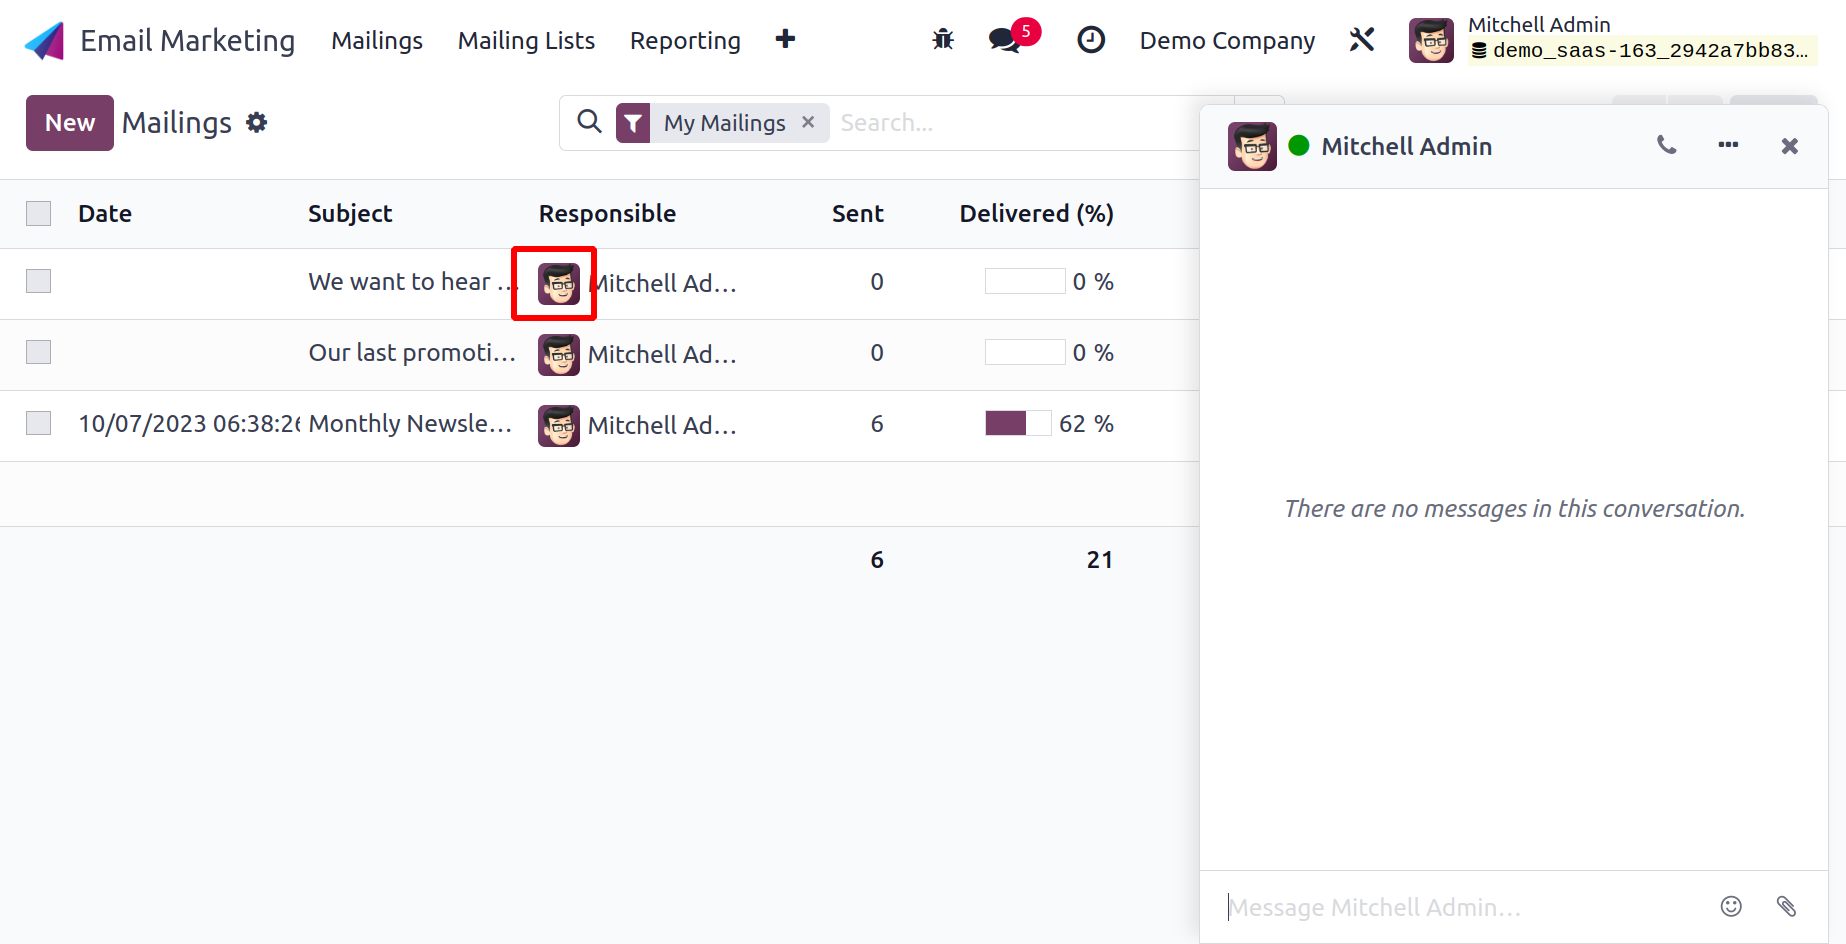
You may get in touch with this responsible user here. By choosing the specific data record that we desire, we may analyze and study it in detail throughout all the data records. in the image below.
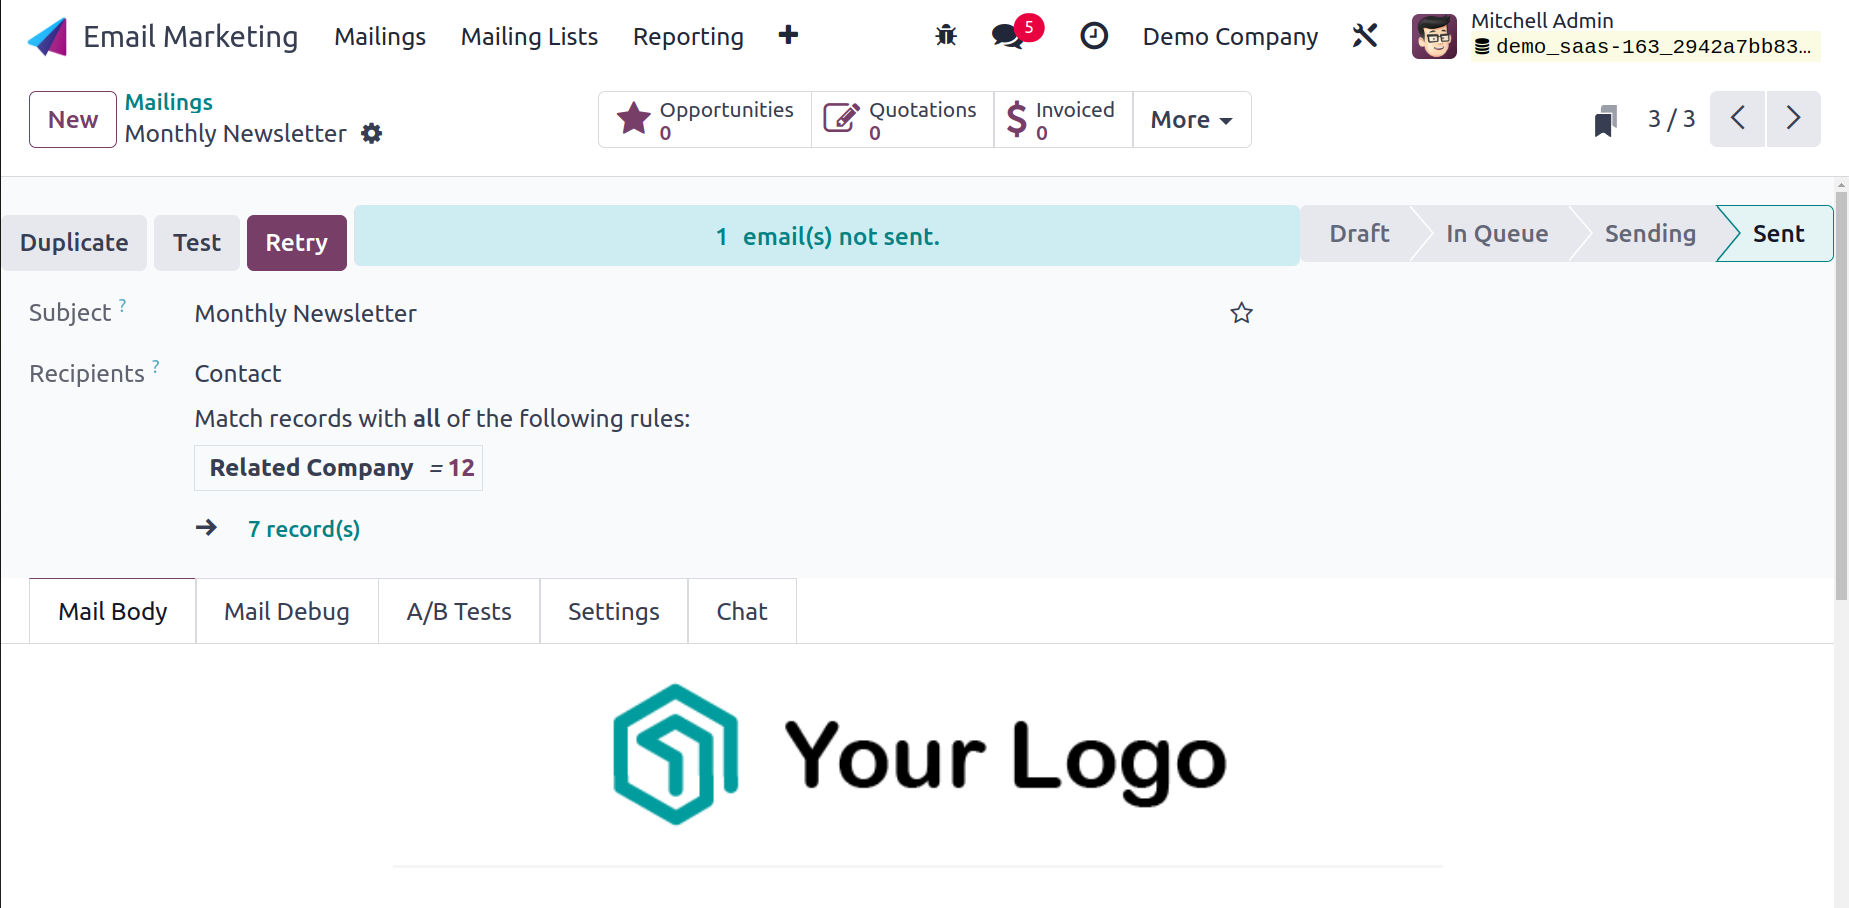
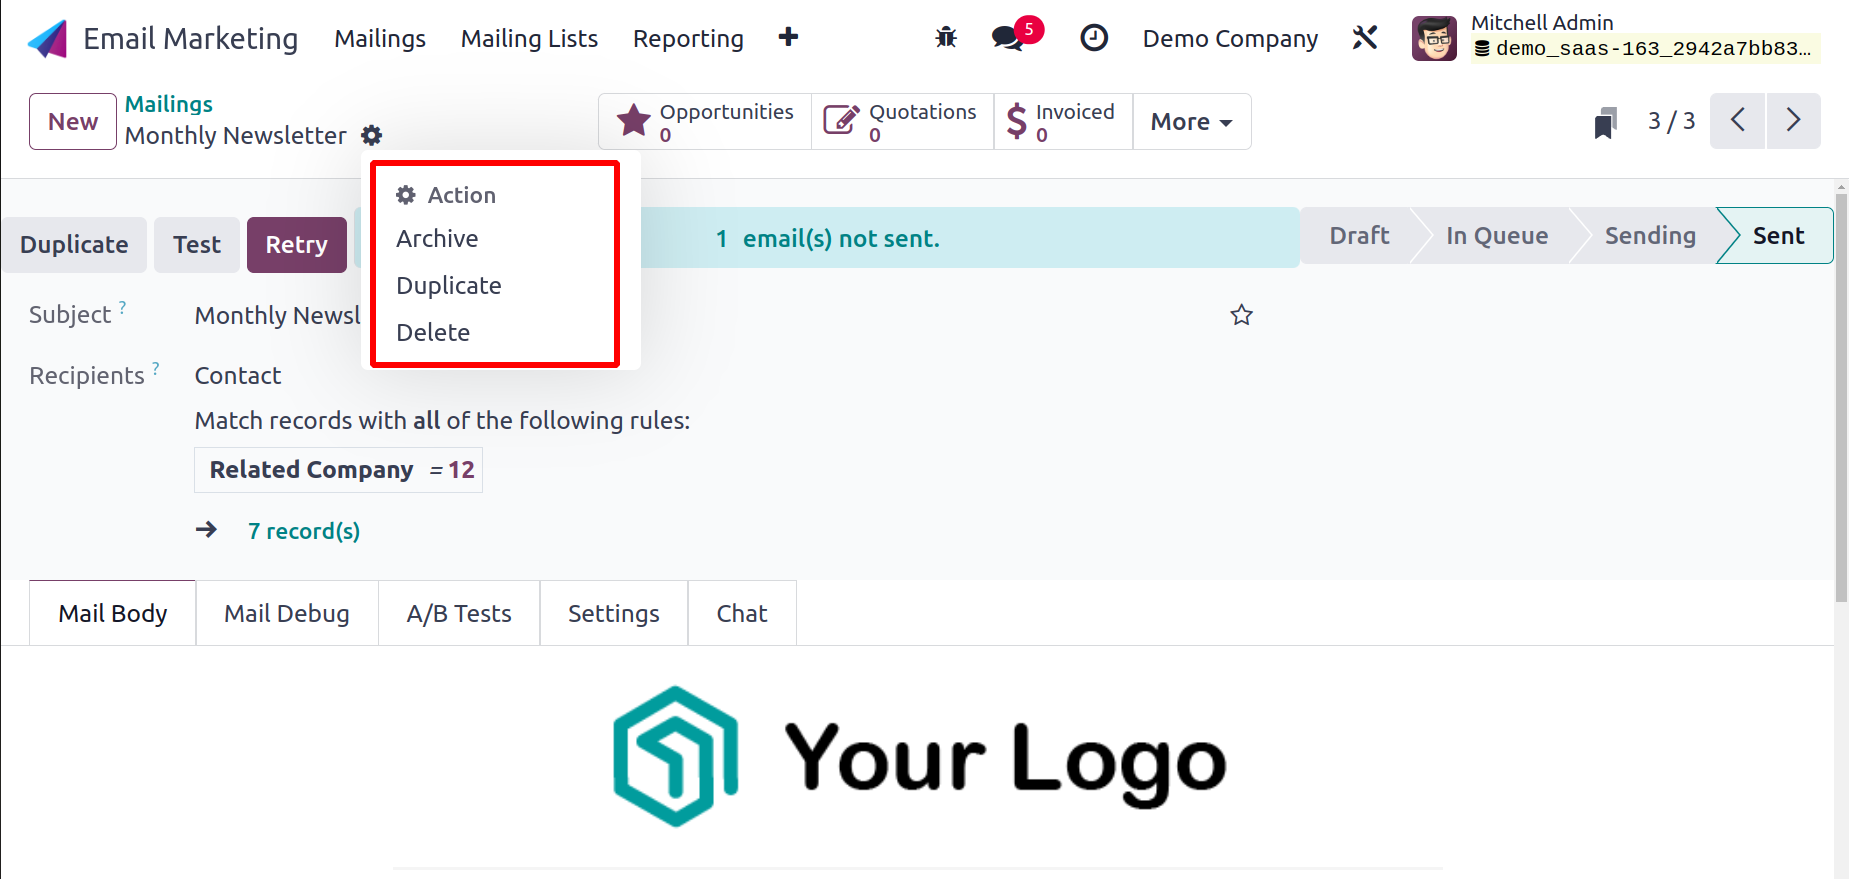
One of the records on the mailing list is represented by the image that is supplied below. You will clearly receive all the details, depending on the specific mail here. You can use the Action icon, which is seen in the image below, to carry out more actions. You can also use the Archive, Duplicate, and Delete options found under the Archive option as needed.
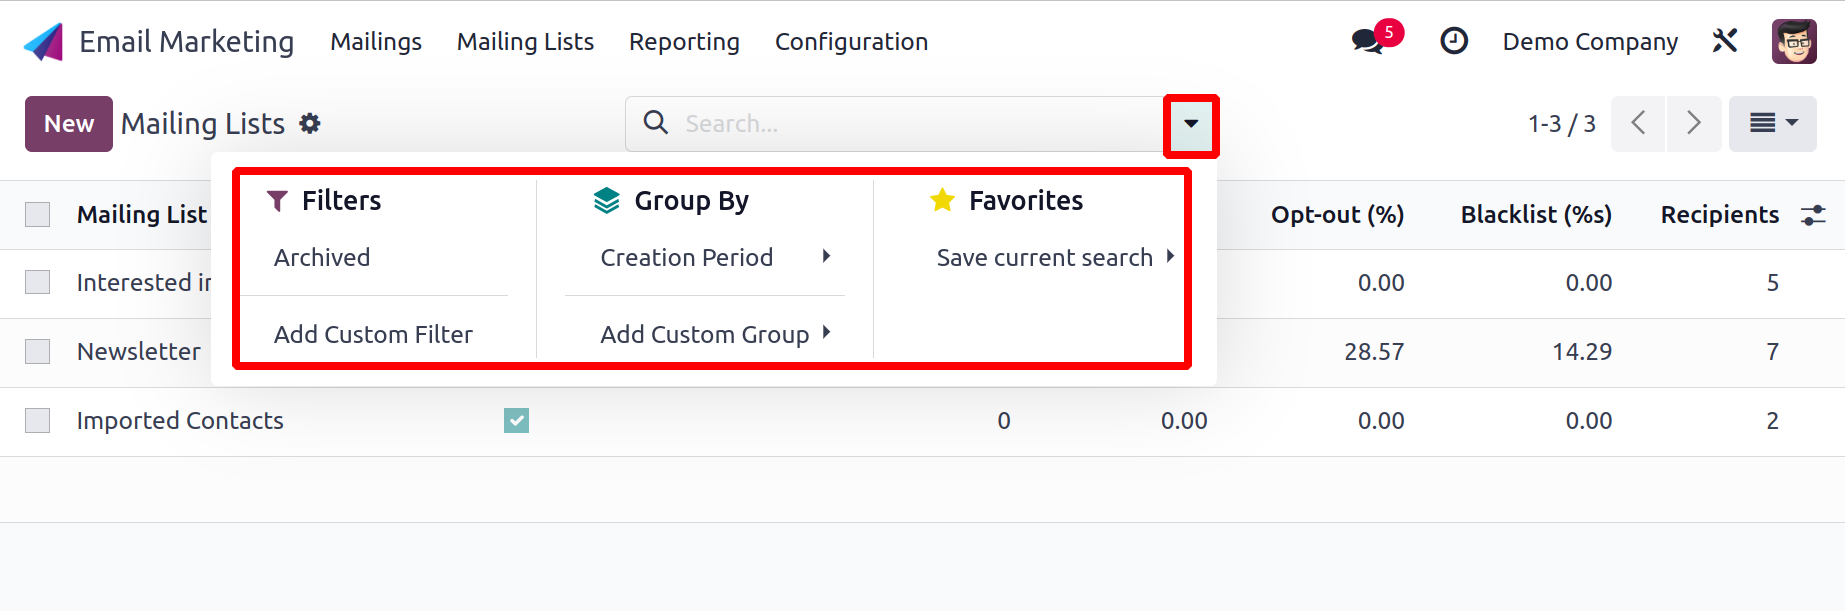
You may now choose from a variety of filters under the Filters option, including My Mailings, Send date, A/B test, A/B tests to review, and Archived. Status, Send By, Send period, and Add Custom group options are also available under the Group By option. The specific message can also be added to Favorites, which includes the options to Save a Current Search, Insert View in the Article, Insert Link in the Article, and Add to My Dashboard.
Now, select the New option on the window's left side if you want to create a mailing of a similar type.

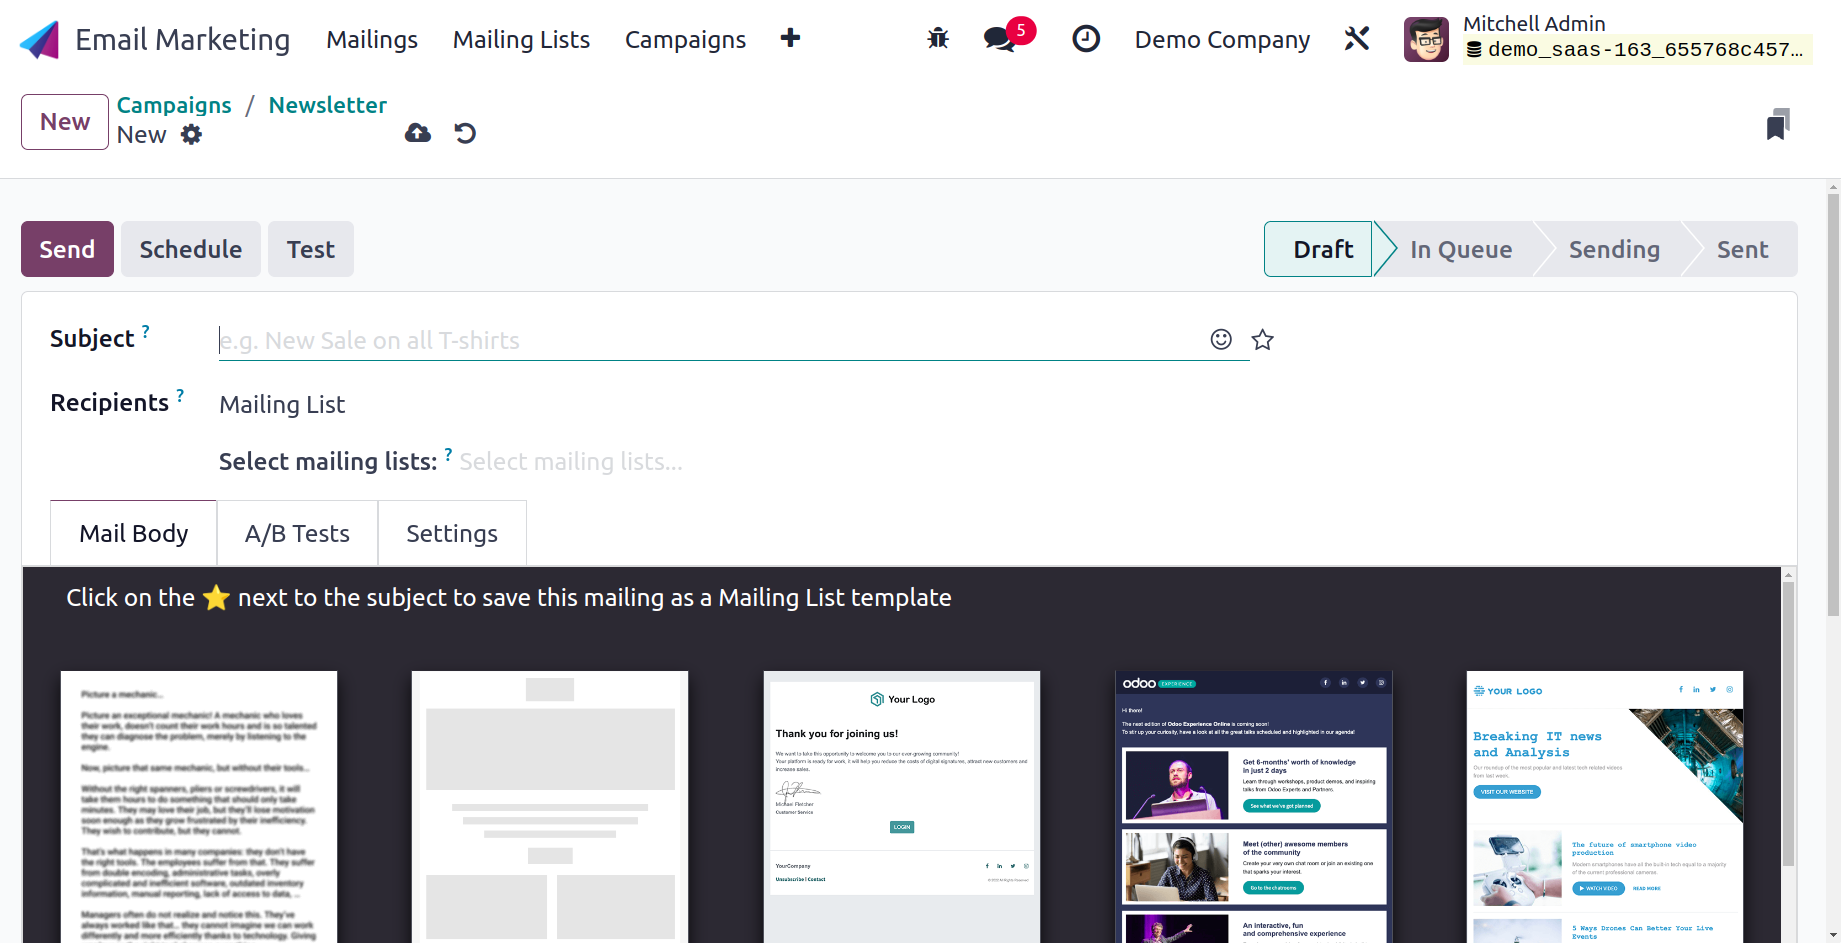
The area for entering the mailing's subject can be found on the creation page. If necessary, you can also use emojis in the topic. You may choose the Recipients option from the drop-down menu just below it by clicking on it. You may now choose the mailing list selection in the field provided. Under the mailing list's drop-down menu, there are options that must be selected. From the main menu, you can also access a mailing list that you can customize.
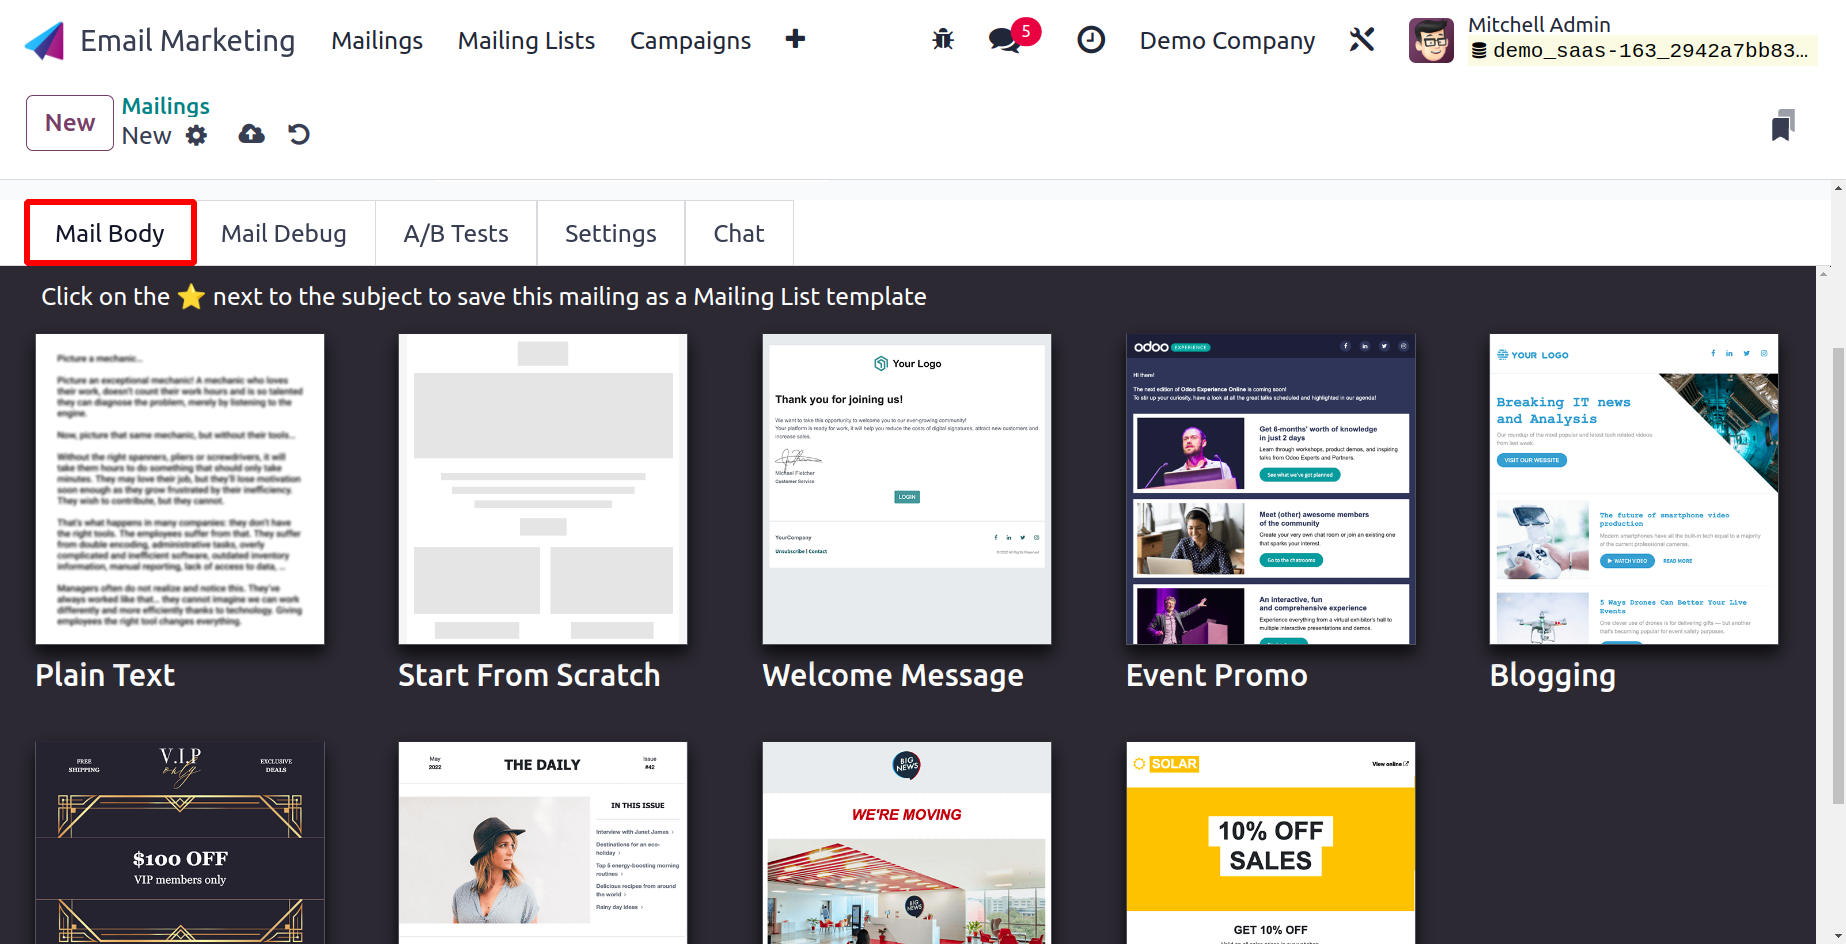
You can choose from a variety of mail bodies for the mailing that are listed under the Mail Body tab. You can change and customize them after choosing a specific one from that list.
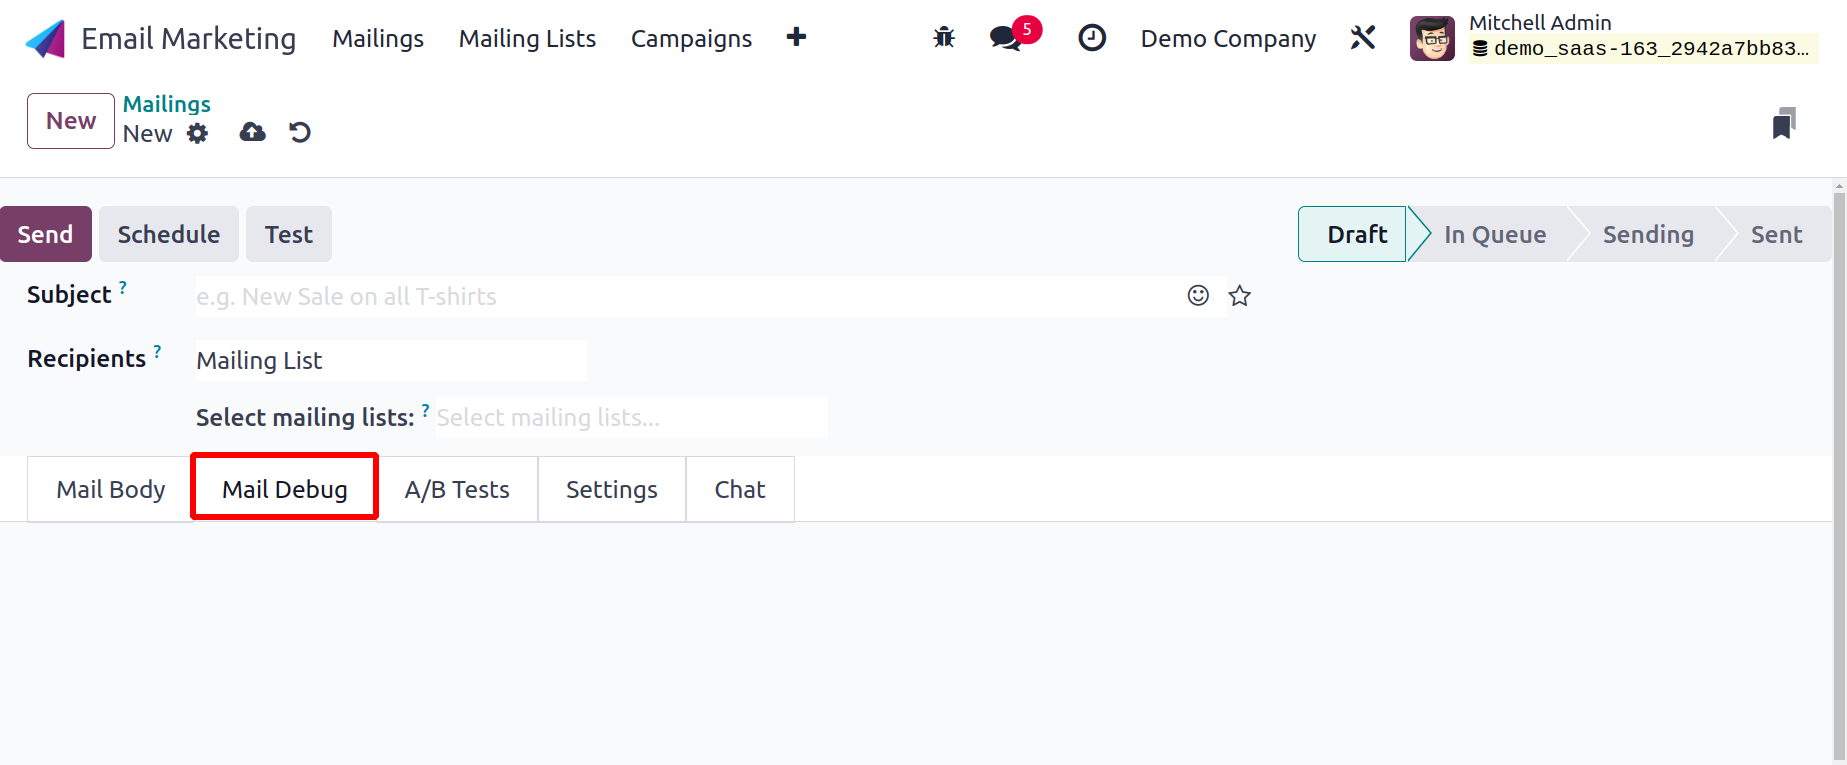
A completed version of the generated real email template will be displayed inside the Mail Debug tab.
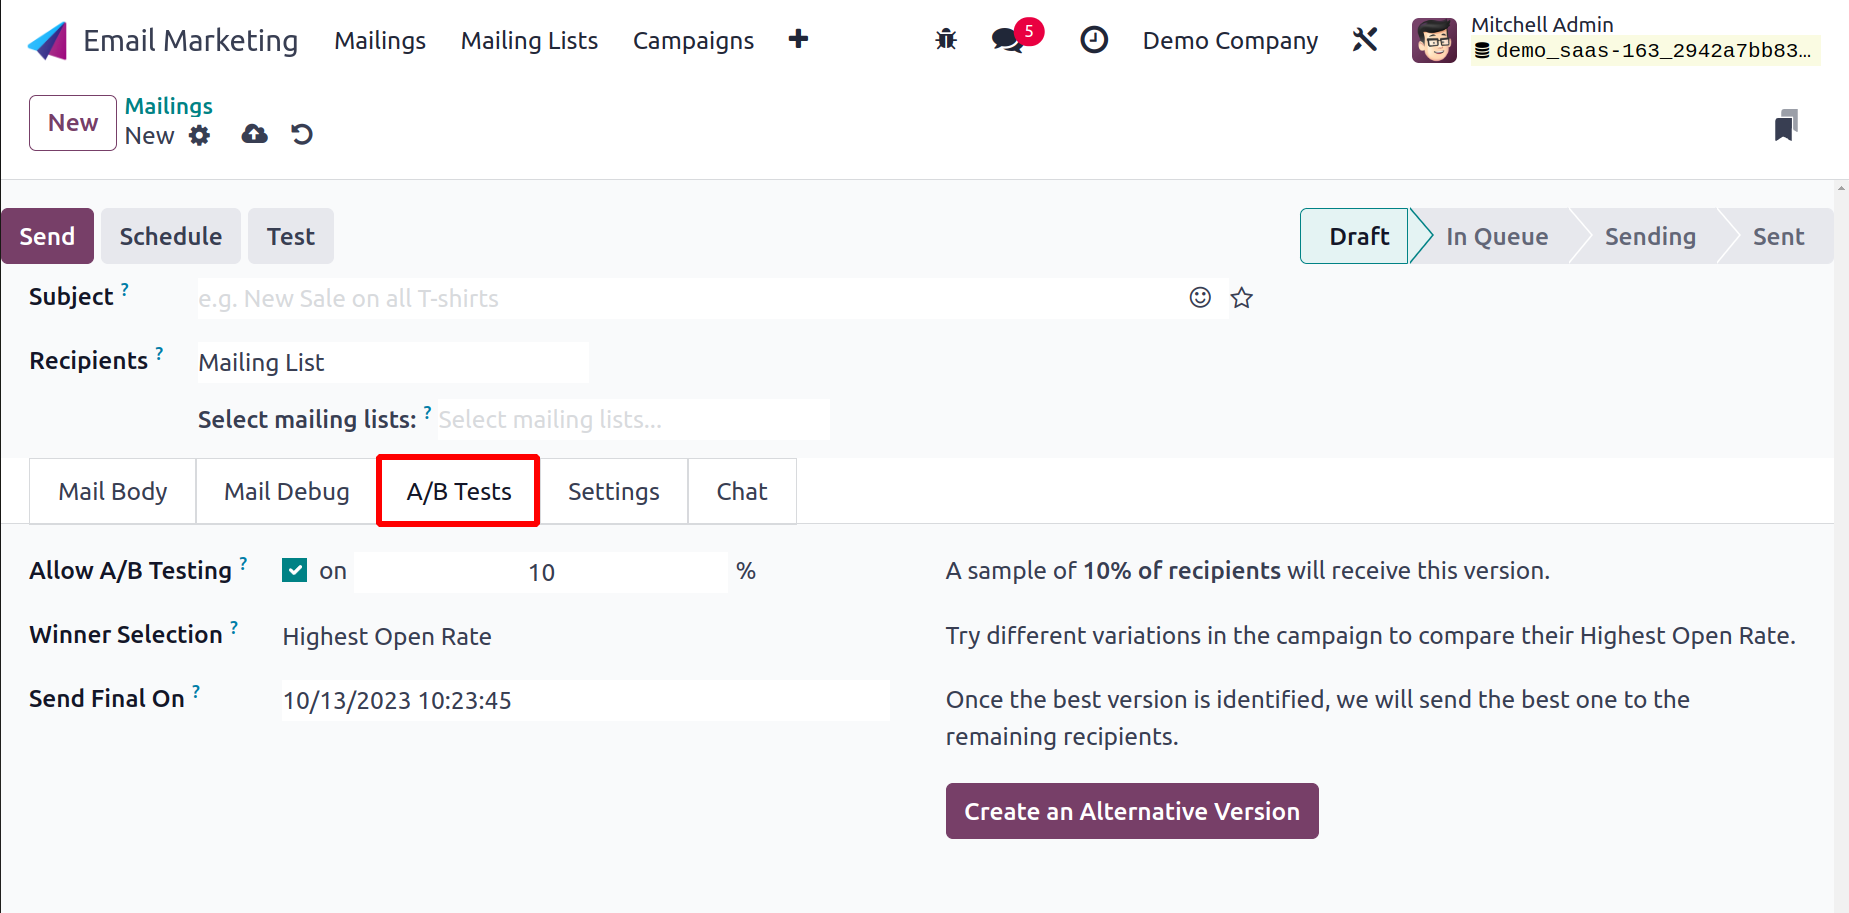
You can now choose to activate the A/B test within the A/B Tests section, as seen in the figure above. A/B testing allows you to send multiple versions of the mail to a set of people in the mailing list and track the responses. This will help to identify what type of mail gets more response from recipients and it will be considered as the mail with the highest open rate. Such emails can be used to target the audiences.
Additionally, as illustrated in the screenshot below, the Settings menu allows you to submit certain information.
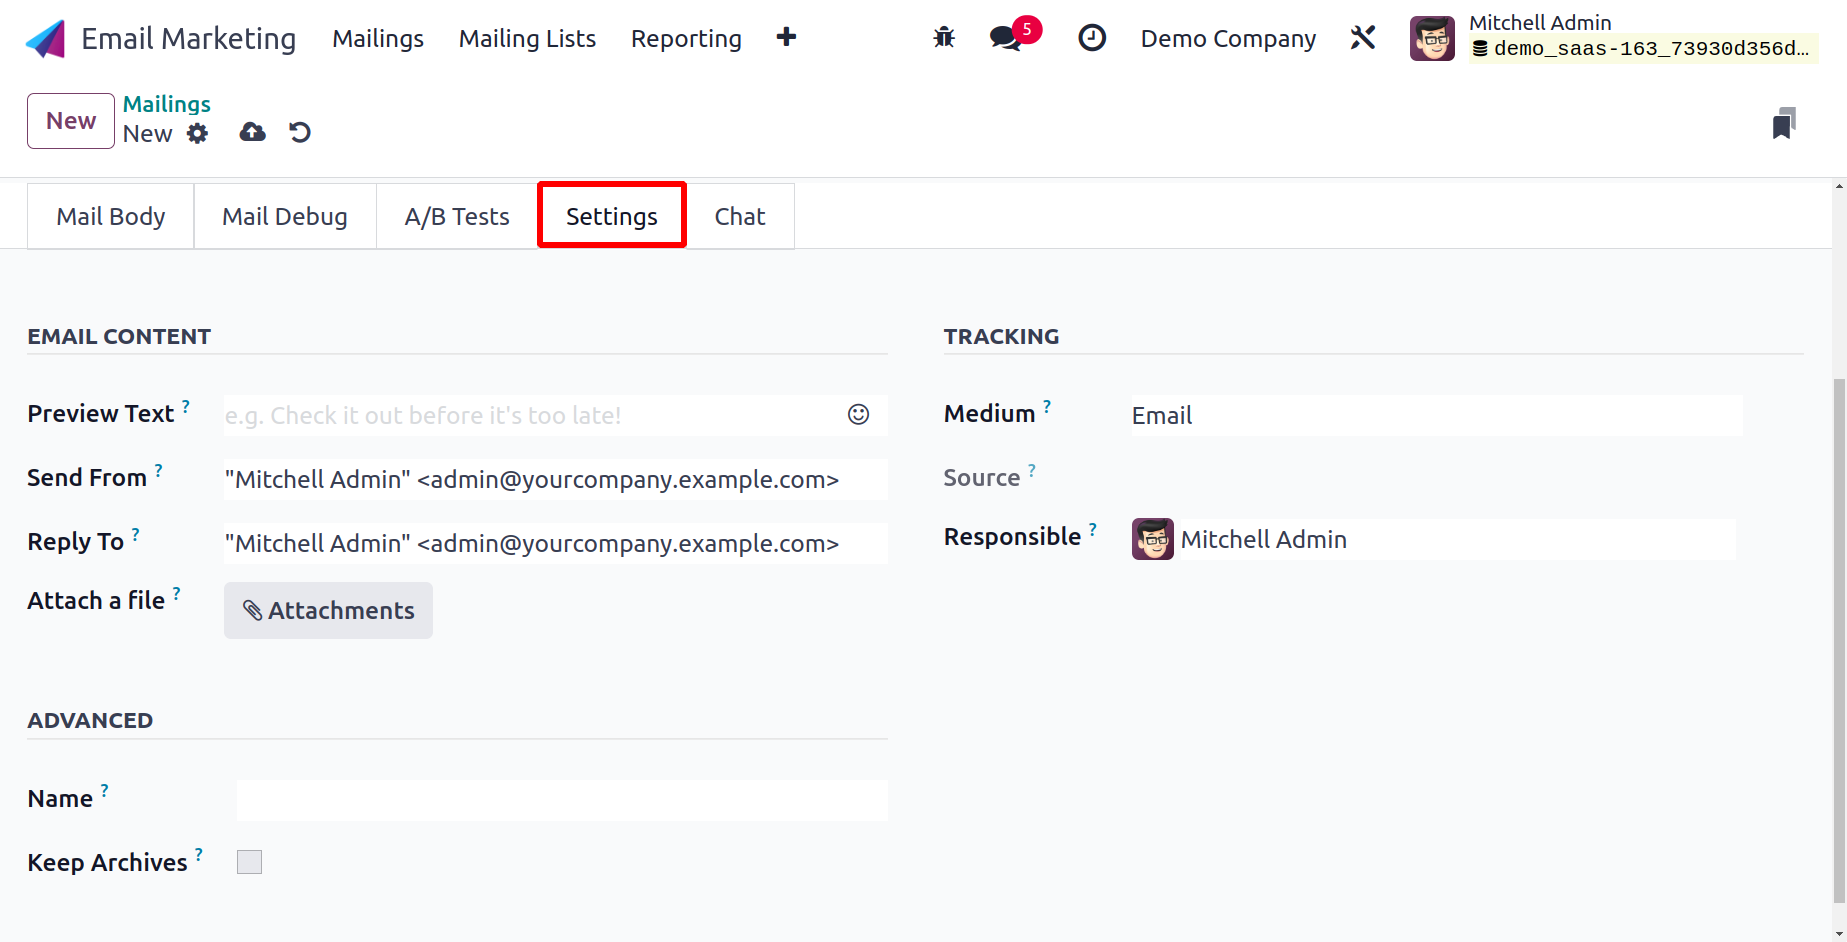
One of the choices is Preview text, which encourages users to choose the mail. Near the mailing's subject line is where you can see the preview text. The message in the preview text will appear along with the mail subject to increase the opening rate. Additionally, the responsible individual will be present in the area on their own and may be replaced as needed. You will find the Send From and respond to options below, which are presented appropriately. You can attach files to support the subject of the email by choosing the option to "Attach a File."
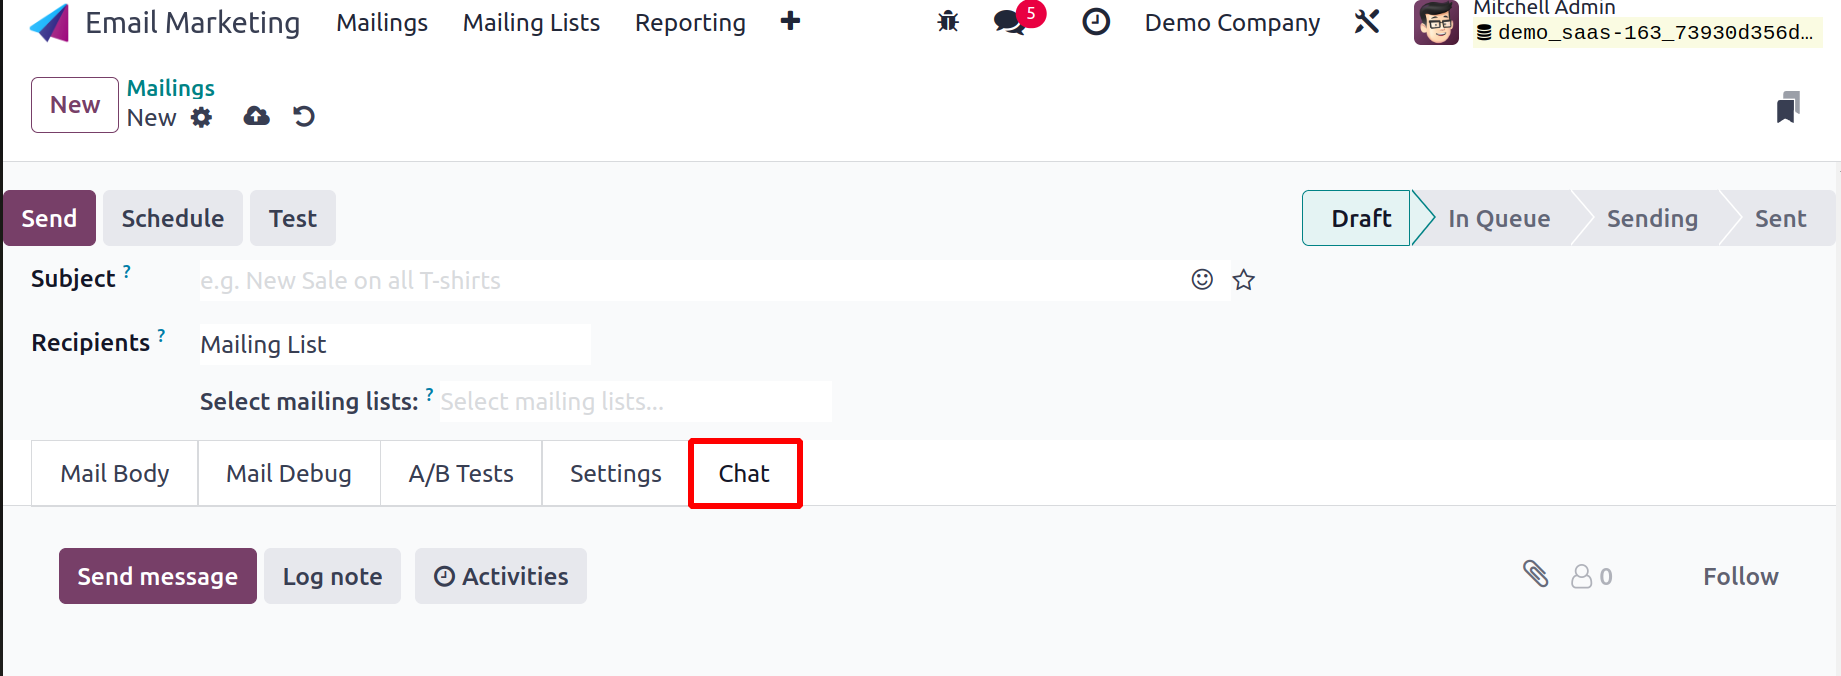
You can choose to view the Send message, Log not, and Schedule activity options under the Chats tab, as shown.
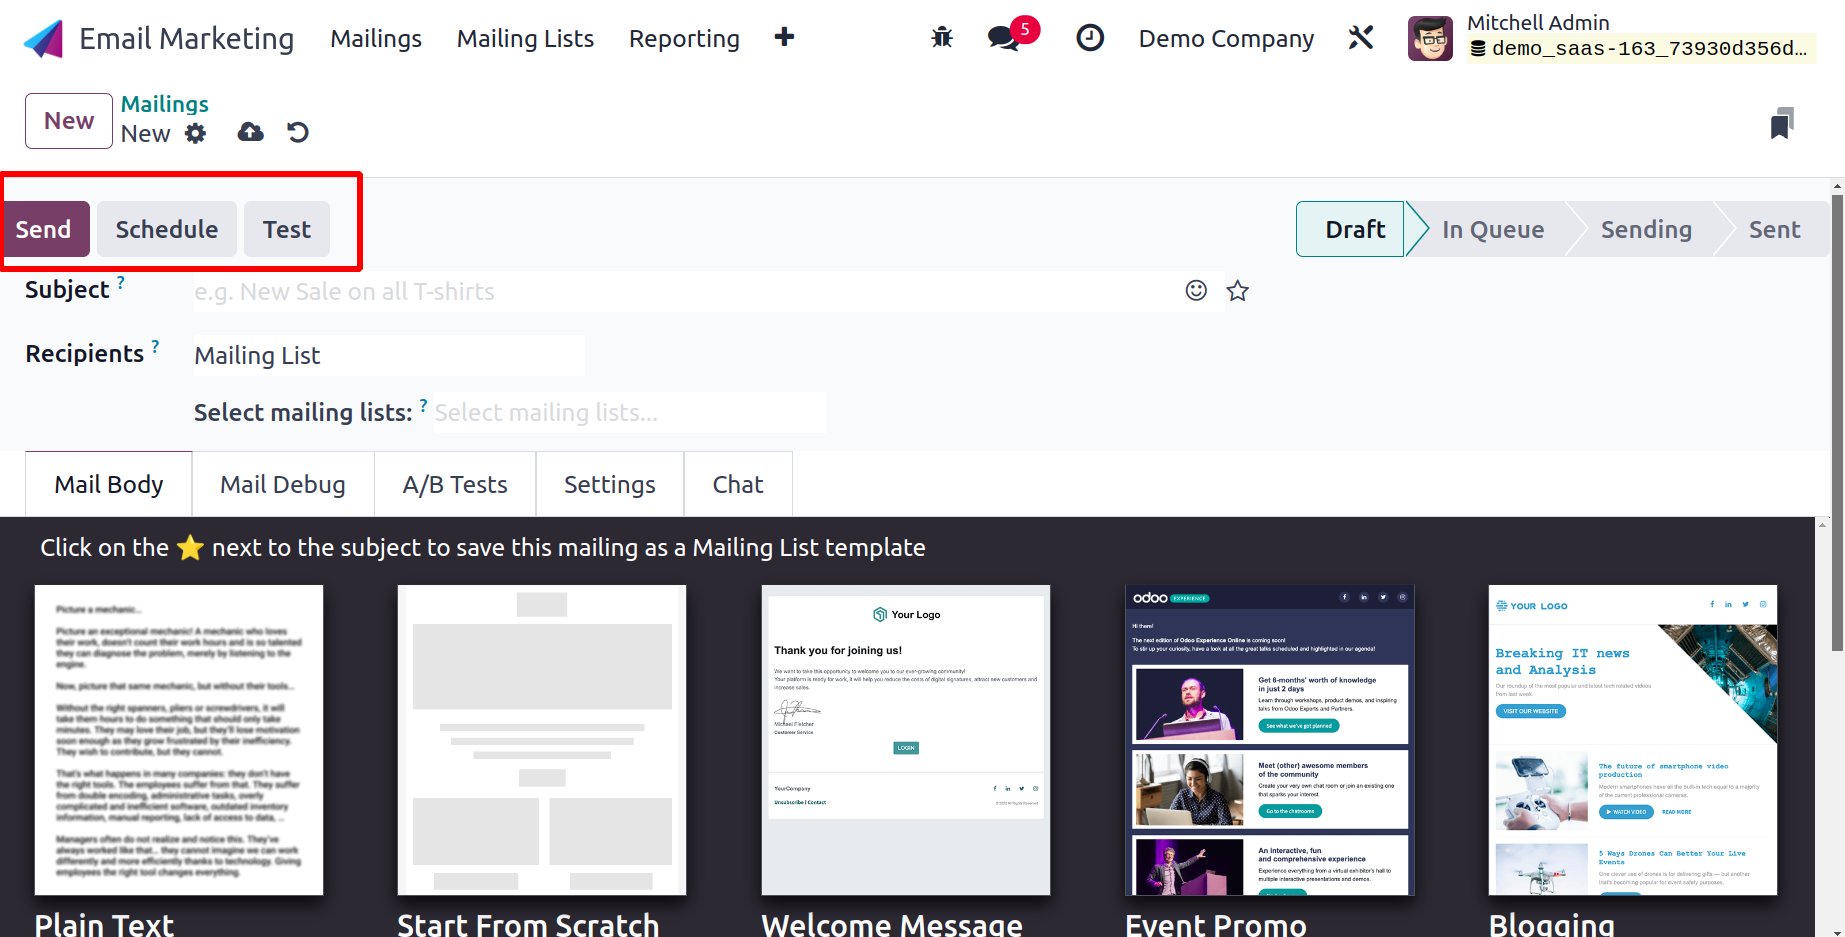
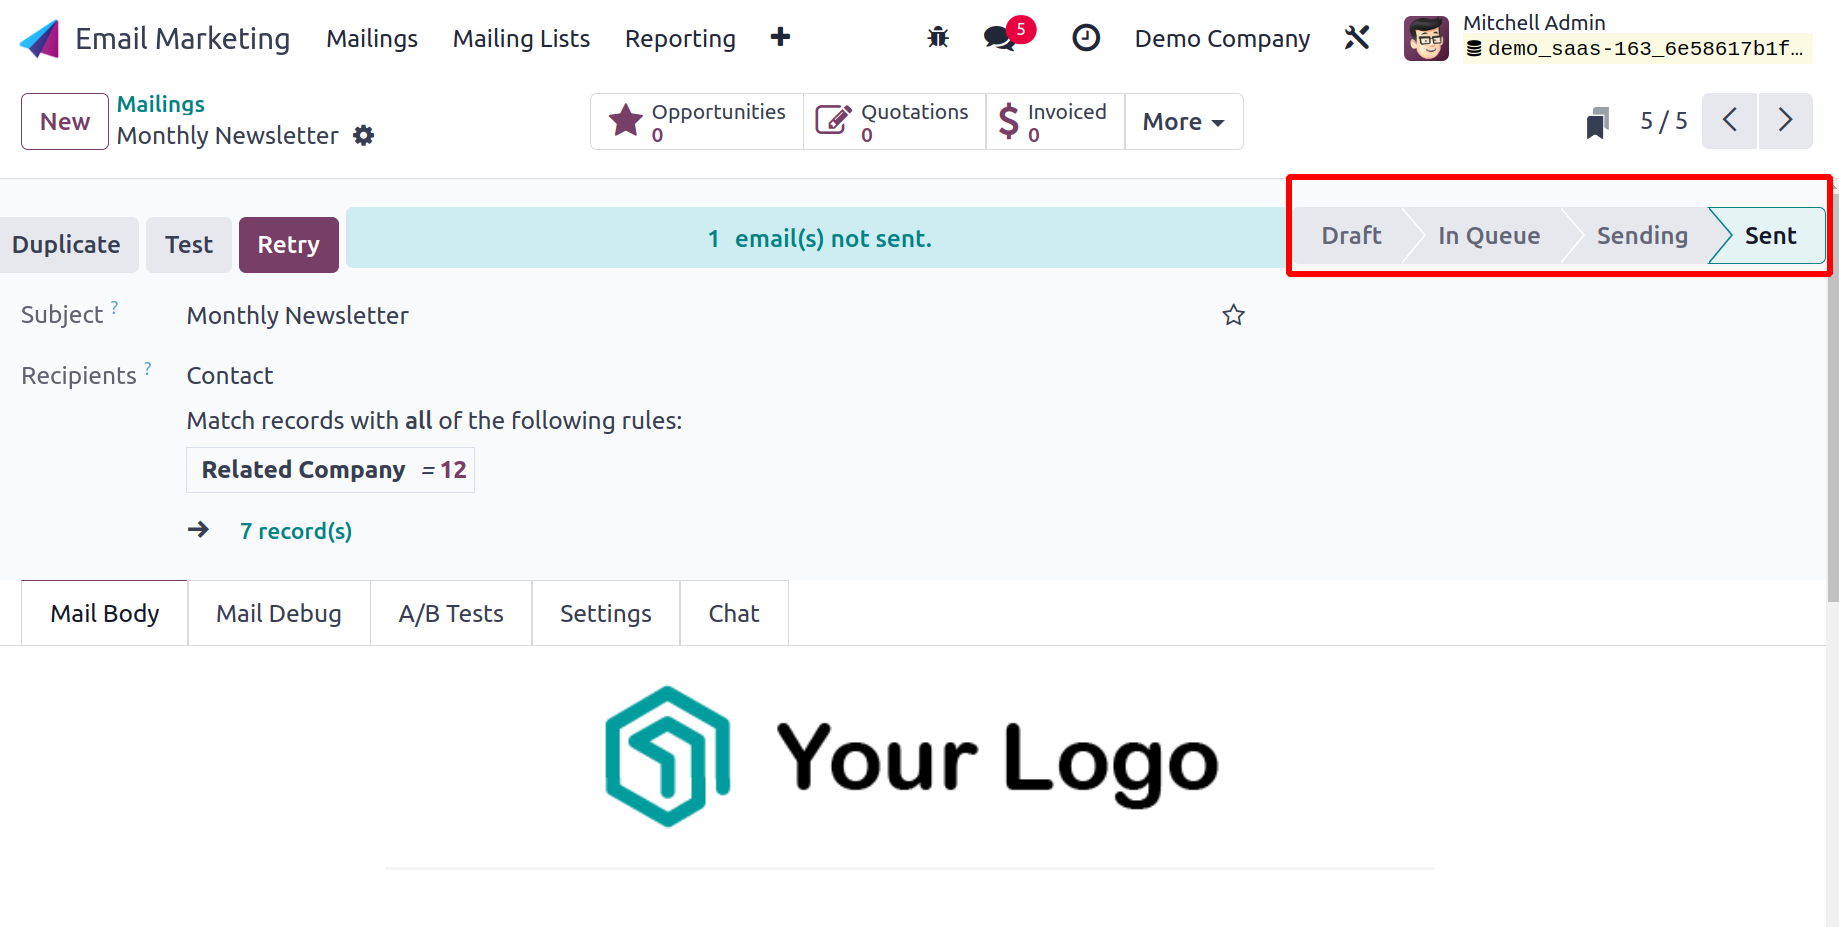
After giving all the information required to create the mailing, click the Save icon to add the mailing to the list that has already been created. As shown on the page supplied above, the Save option includes Send, Schedule, and Test options. You will get a page similar to the one below after choosing the Send option.
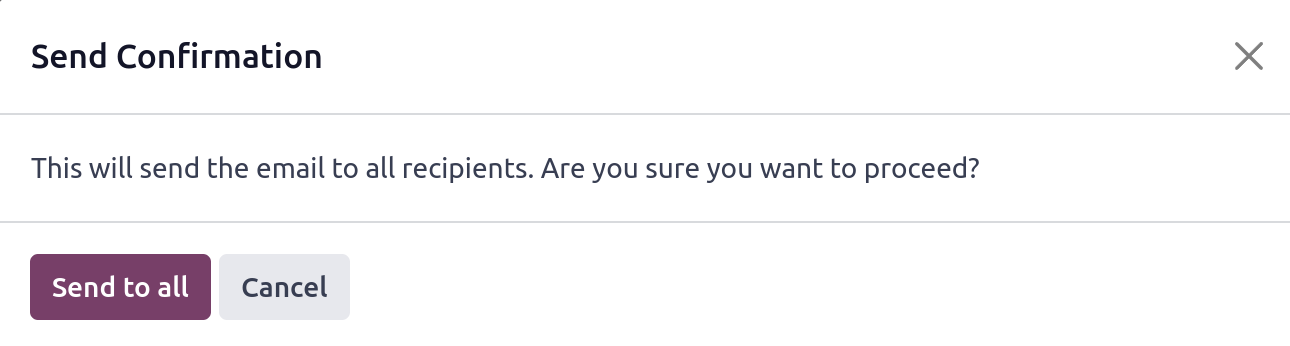
The page will request confirmation of whether or not the message should be sent to every recipient. If so, click the ‘Send to all’ icon to continue. When you do this, the email's status will change to Sent, as seen in the screenshot below.
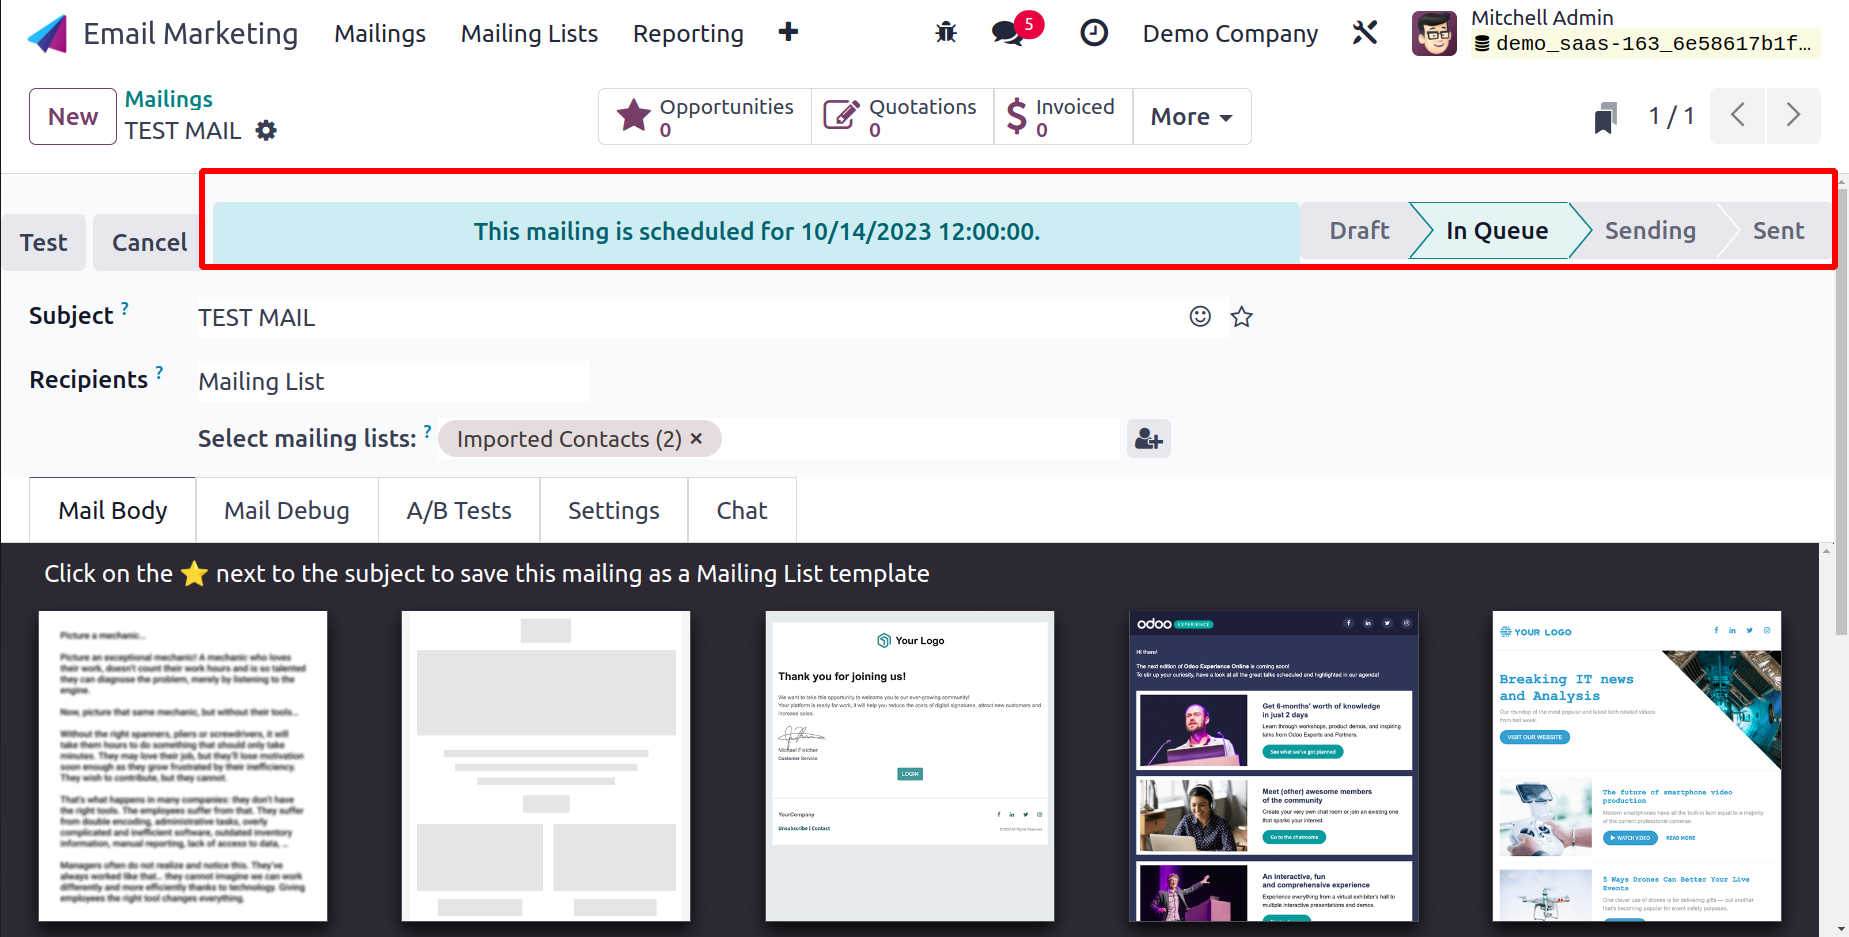
Choosing the Schedule option will now take you to a screen where you can specify the date on which the mail should be sent to the specific recipient.
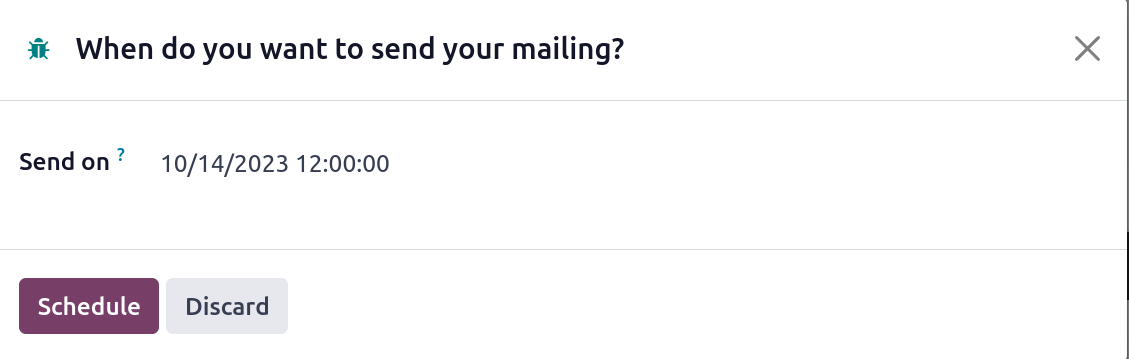
The date can be entered in the Send on option. then select Schedule from the menu. You will now see the scheduled date on the home page, with the status set to IN QUEUE. And on the designated day, the email will be automatically sent.
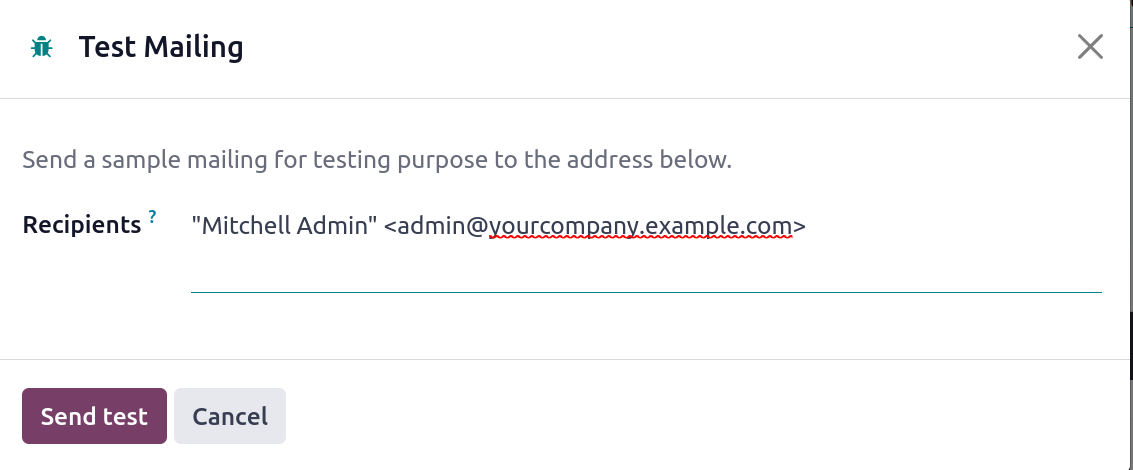
Additionally, the TEST option enables you to test your mail at the specified address.
You will be given some smart buttons, such as Leads, Opportunities, Quotations, Invoiced, Received, Opened, Clicked, Replied, Bounced, Sent, and Ignored, as indicated in the screenshot below, once you have completed all of those steps.
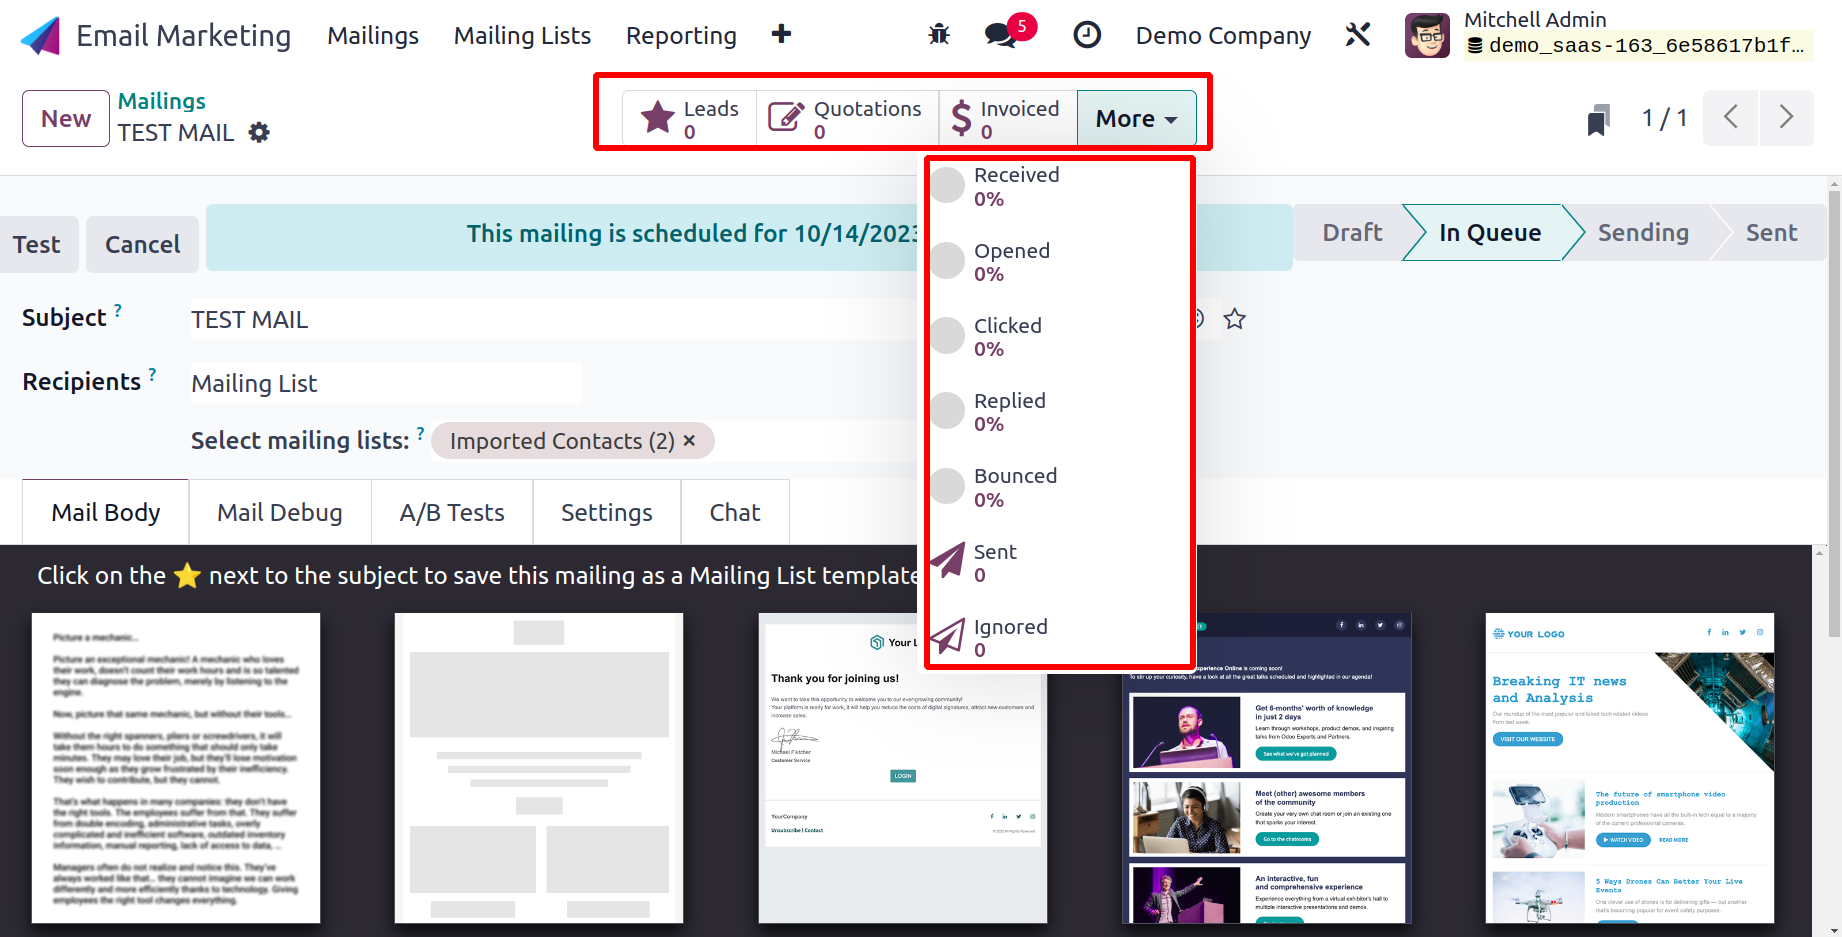
The Lead button assists you by providing a link that takes you directly to the lead page, where you can get all the information you require about the leads generated by this email. Then, under these smart buttons, Quotations, Invoices, and percent of those who received, opened, clicked, replied, bounced, sent, and ignored will be accessible. You will find the clearly shown status view that we generated on the Kanban view. It's because those stages serve as the foundation for the kanban perspective. The screenshot below then displays the Kanban view.
Mailing Lists
You can choose to send the email one at a time or in bulk under Email Marketing. You may save a lot of time by sending out emails in bulk, which is quite helpful. Within a few steps, the mail can be delivered to a sizable number of recipients. Utilizing the functionality under Email Marketing, the Mailing List feature aids in the creation of email addresses. The mailing list can be created for a number of reasons, including marketing, company promotions, and events.

The dashboard contains a Mailing List menu. Under the Kanban view, the option offers a new type of view. You will find a mailing list that has already been formed on the page, as shown in the image. The page is also visible in the List view. The names of the mailing lists, total contacts, valid recipients, valid SMS recipients, and other information are all included in each mailing list. You can go to a specific one of them for further information.
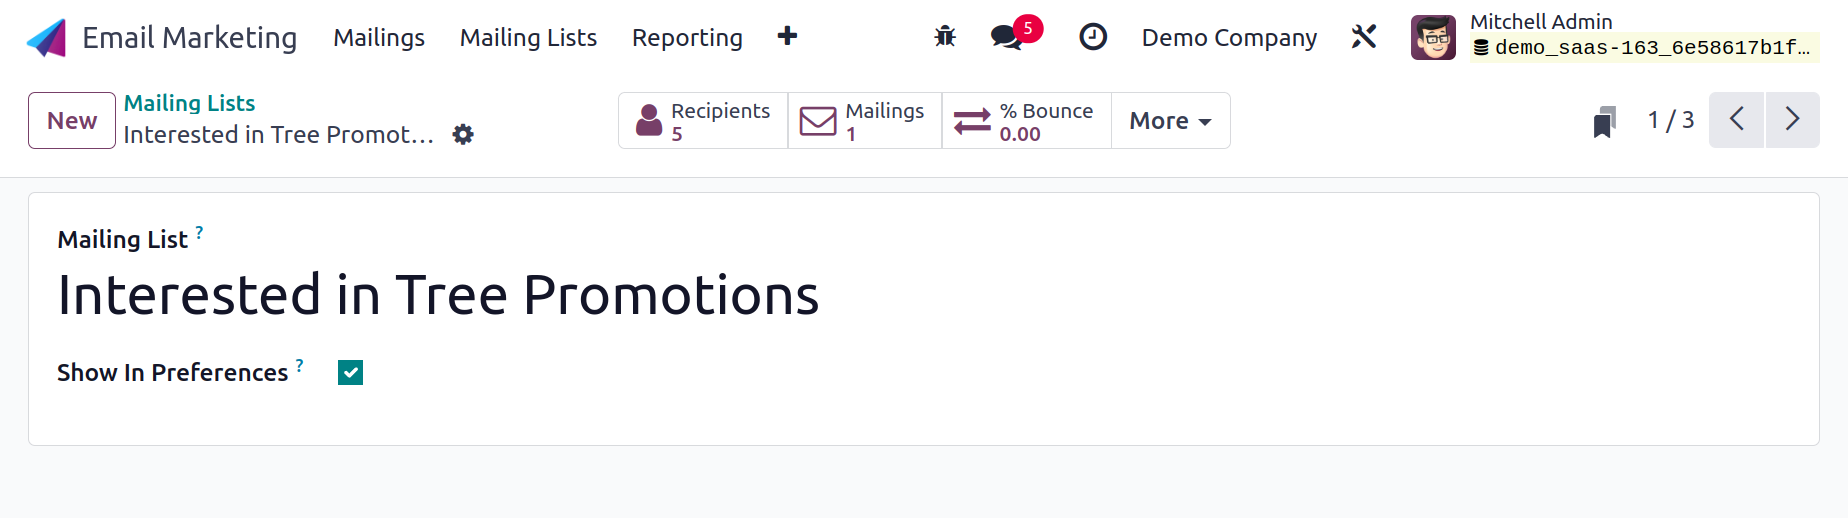
When you choose a specific one, you will land on this page. You can choose to trigger a preference option that will display the mailing on the main list. You will receive the contacts' details, as displayed below, after choosing the amount of contacts offered on each list.
The page contains information like the date it was established, the name of the contact, the name of the company, the contact's email, whether it is blacklisted or not, their phone number, whether it is blacklisted or not, and whether they have chosen to opt-out of bounces.
Returning to the mailing list page, you may now sort and arrange the data as needed using the Filters, Group By, and Favorite options. Using the list option on the right side of the page will display the List view.
Simply click the New icon on the left side of the screen to create a mailing list of this nature.
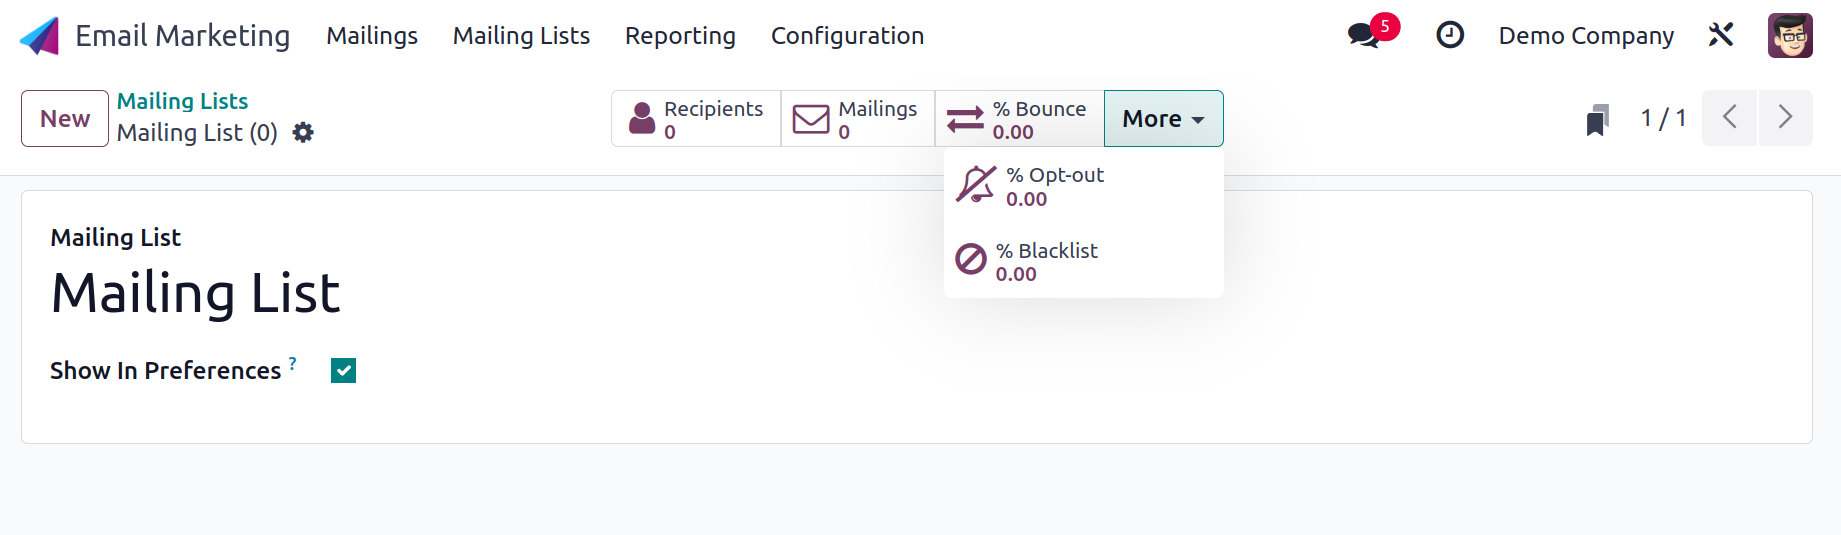
You can provide the mailing list's name in the field provided on the creation page. You can show the mail to the public with the help of the preference option. Additionally, you can notice several intelligent buttons with options for Recipients, Mailings, Bounce, Opt-out, and Blacklist. These buttons provide instant access to the designated window. Go to the Save icon to enter all the necessary information. After that, the newly created mailing list will appear on the home page.
Mailing List Contacts
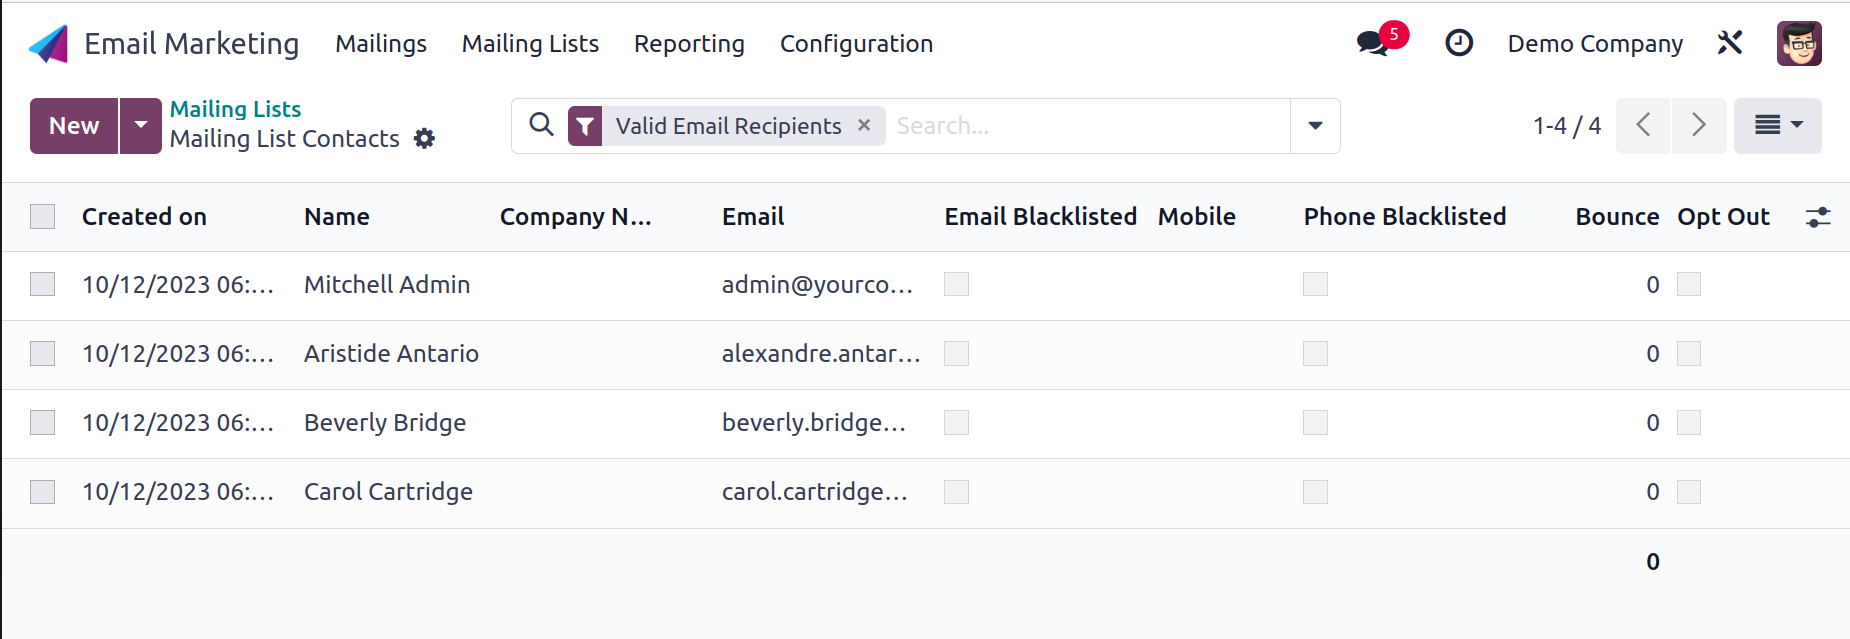
You can find new contacts for your mailing list with the aid of mailing list contacts. The mailing list contact’ page will be displayed, as seen in the picture below.
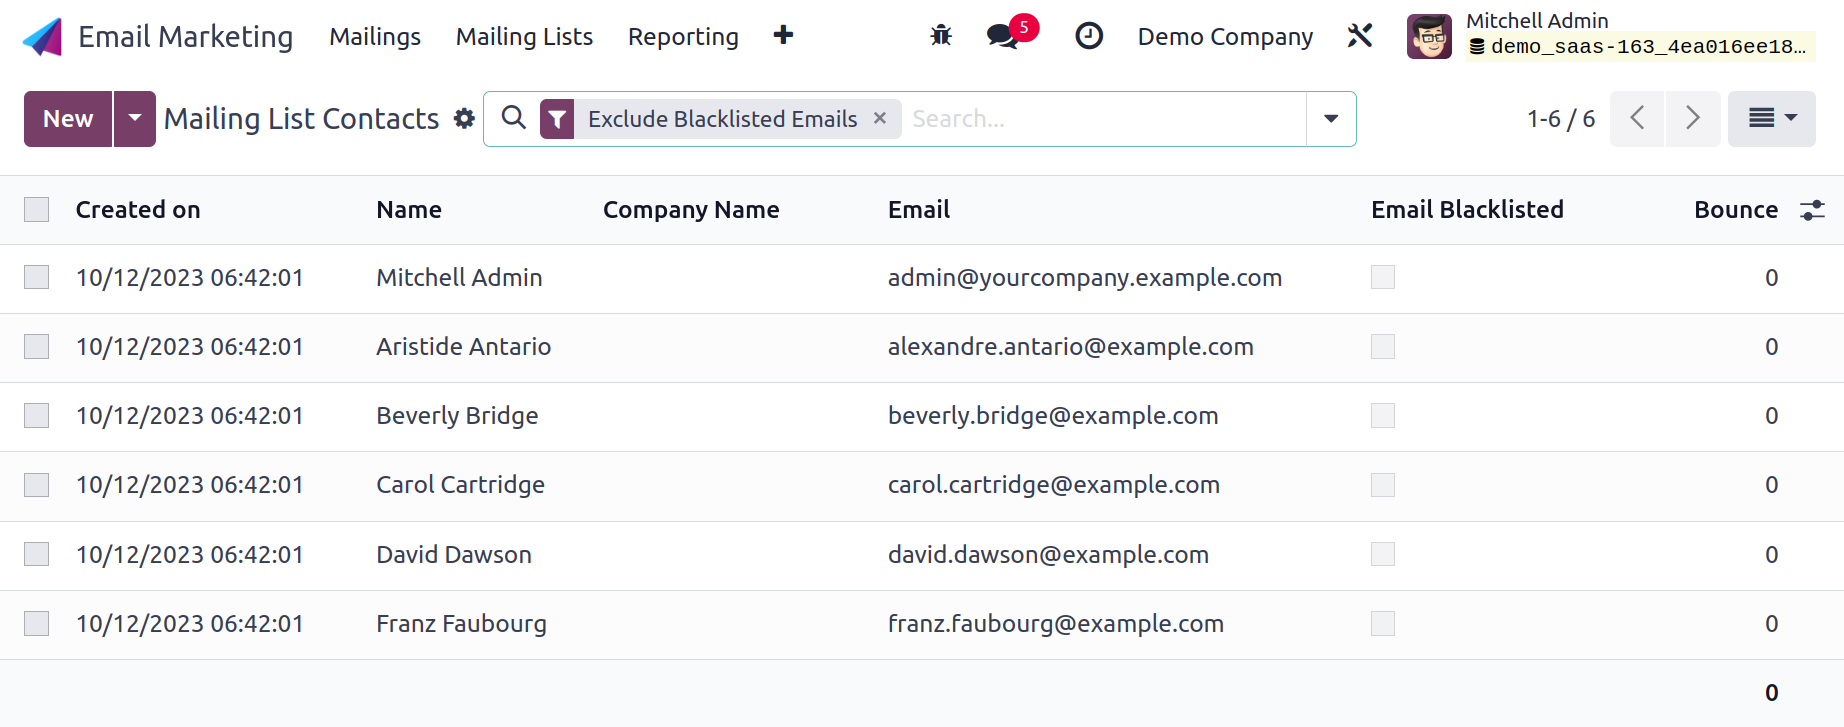
The list of mailing list contacts comprises information such as the date the list was formed, the contact's name, the name of the company they work for, their email address, the option to activate the email blacklist, their mobile phone number, the phone blacklist option to activate, and bounce information. An already formed mailing list contacts list is present on the page.
You can organize things according to our needs using the Filters and Group By options. Bounced, Excluded Blacklisted Emails, Exclude Blacklisted Phone, and Add Custom Filters are all available under the Filters option. You can access the New icon on the website to build a comparable mailing list contact.
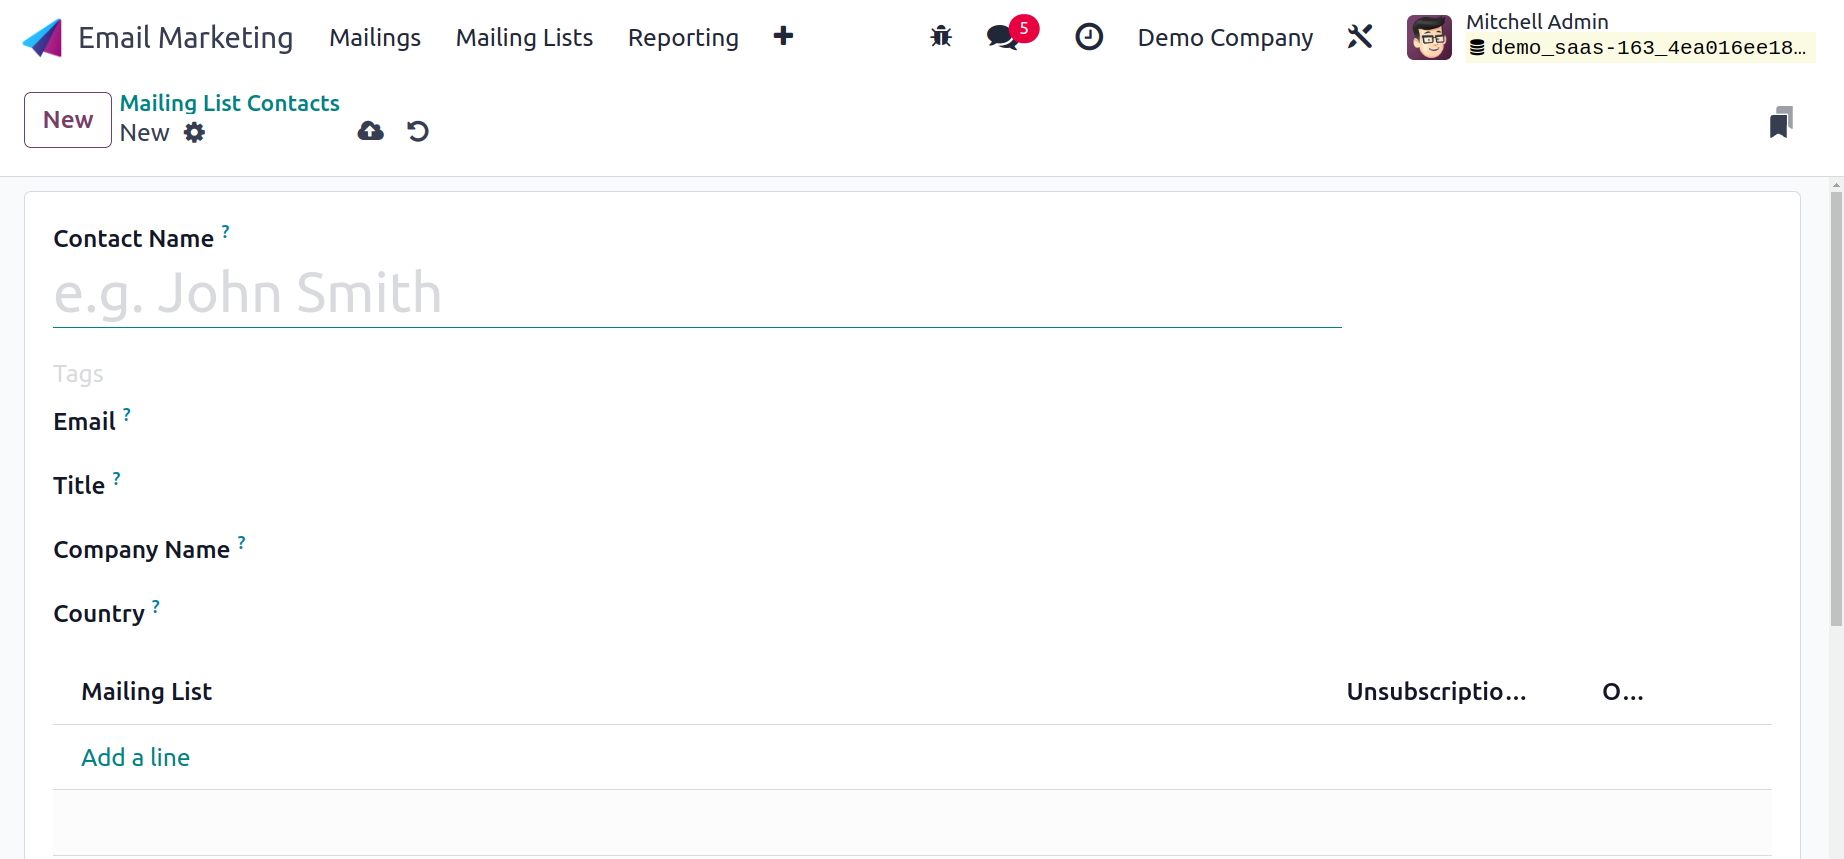
You can find the information you need to enter on the creation page, including the Contact Name, tags, email, mobile number, title, company name, and country. The Add a Line option can be used to include the new mailing list. If necessary, you can select the unsubscription date option. Finally, click the Save icon to add this newly generated contact to the list already present.
Reporting
You can create reports on a sizable collection of emails with the assistance of the reporting option under Email Marketing. As seen in the image below, the mass mailing analysis view will be displayed.
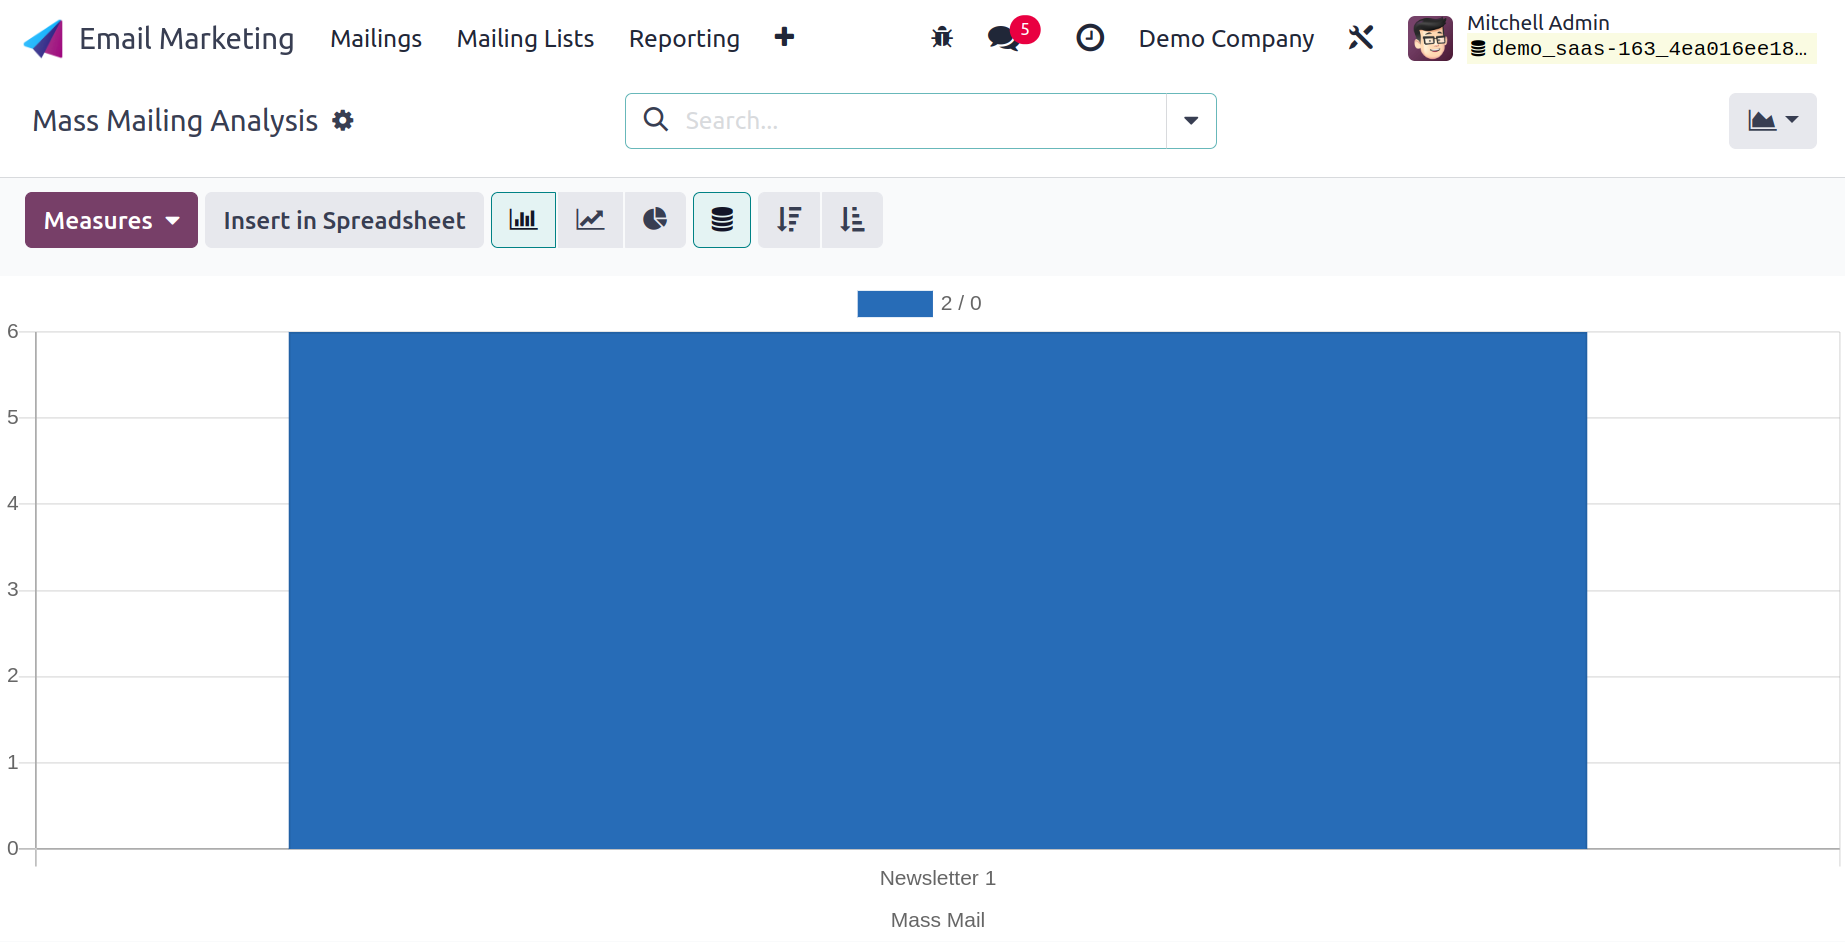
This is a graphical representation of the bulk mailing list. Additionally, the Pivot, List, and Bar views all display the graphical view. You can see the page in Kanban, List, and Pivot views in addition to the Graphical view.
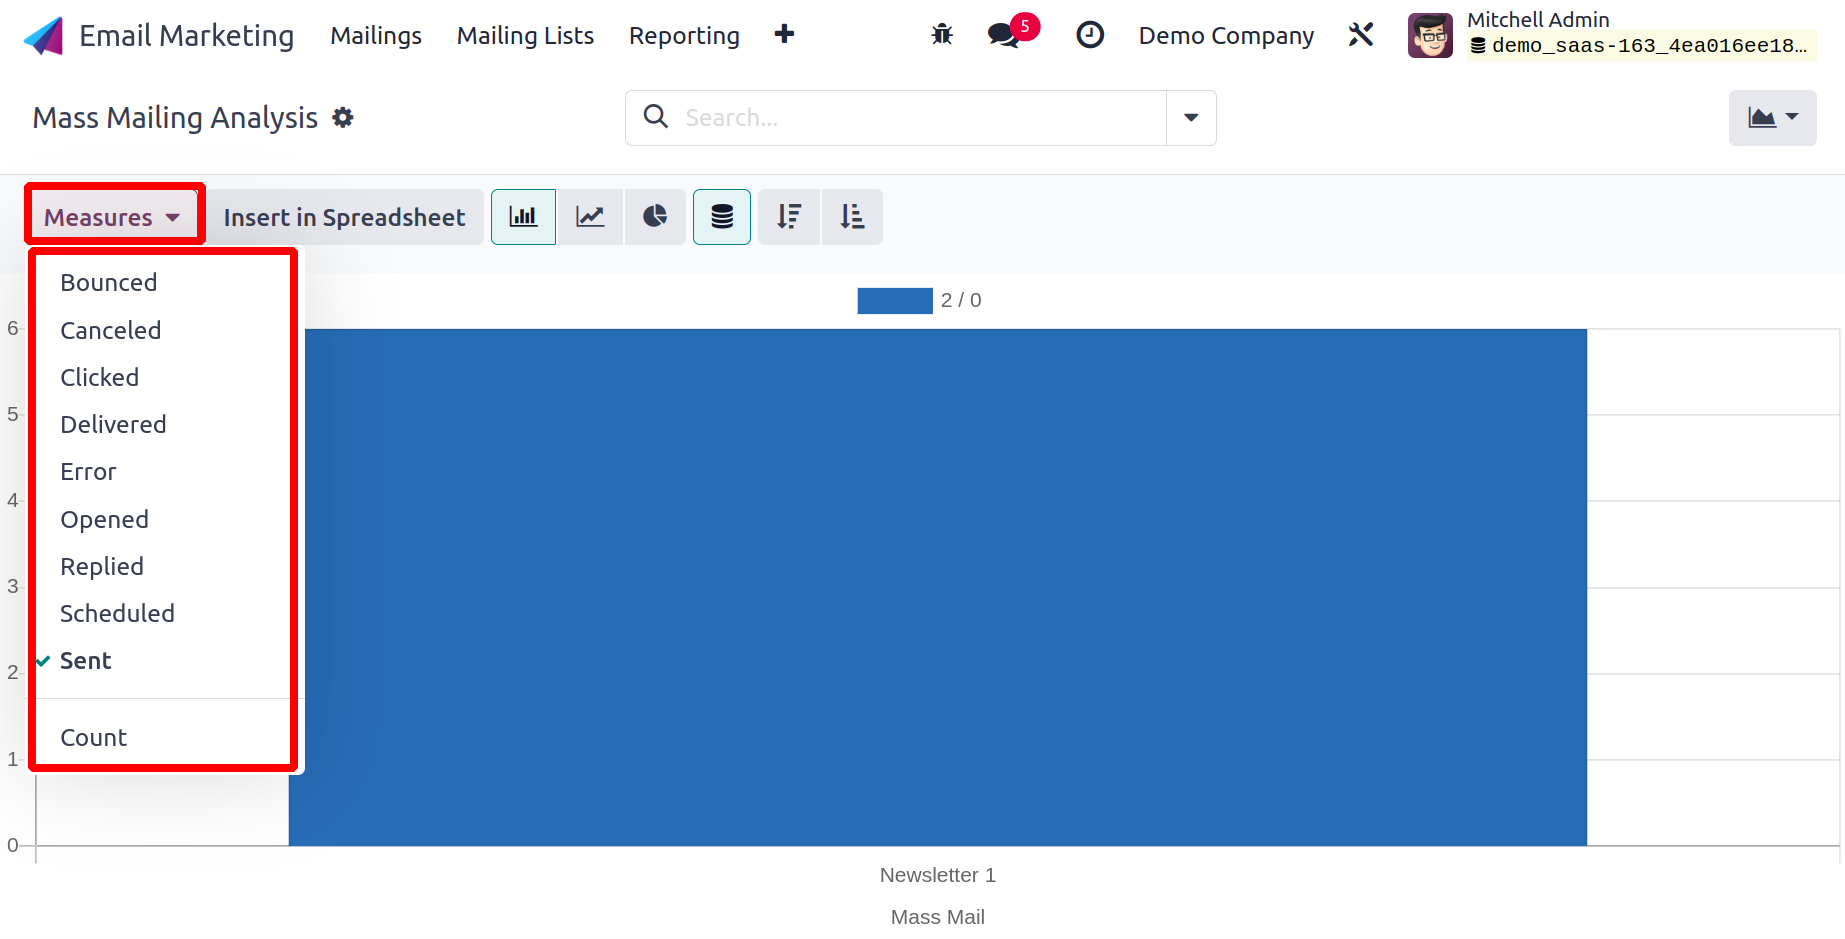
Use the many Measures options listed below to choose from alternatives like bounced, canceled, clicked, delivered, error, opened, replied, scheduled, and sent. The reports can be arranged in either ascending or descending order. If needed, you can group the bulk message using the Filters and Group By option. State, Sent By, Scheduled Period, and Mass Mailing Campaign are all part of the Group By option.
The reports will be presented in List format by the List view of the bulk mailing analysis, as illustrated below.
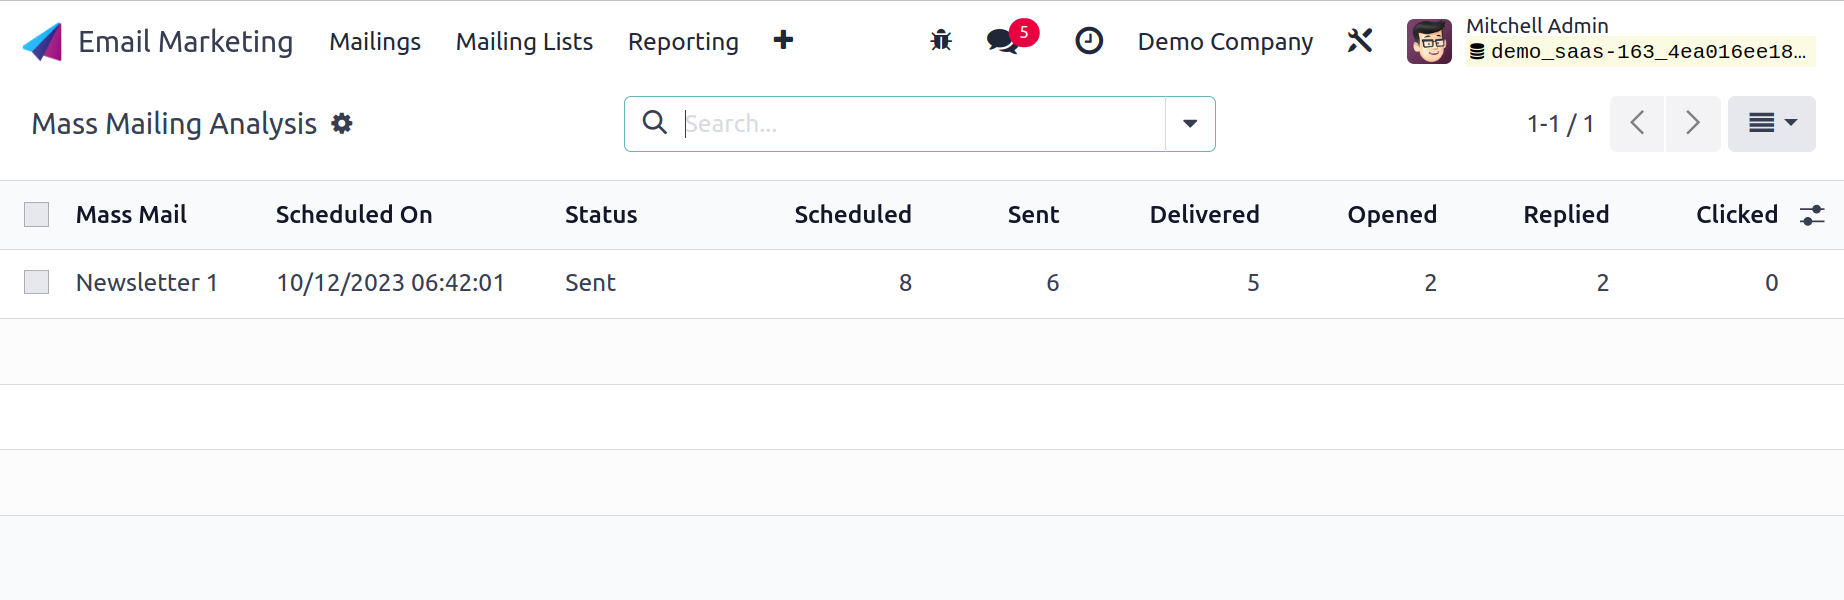
Details such as Sent, Scheduled, Delivered, Opened, Replied, and Clicked options are displayed in tabular form on the list view of the website.
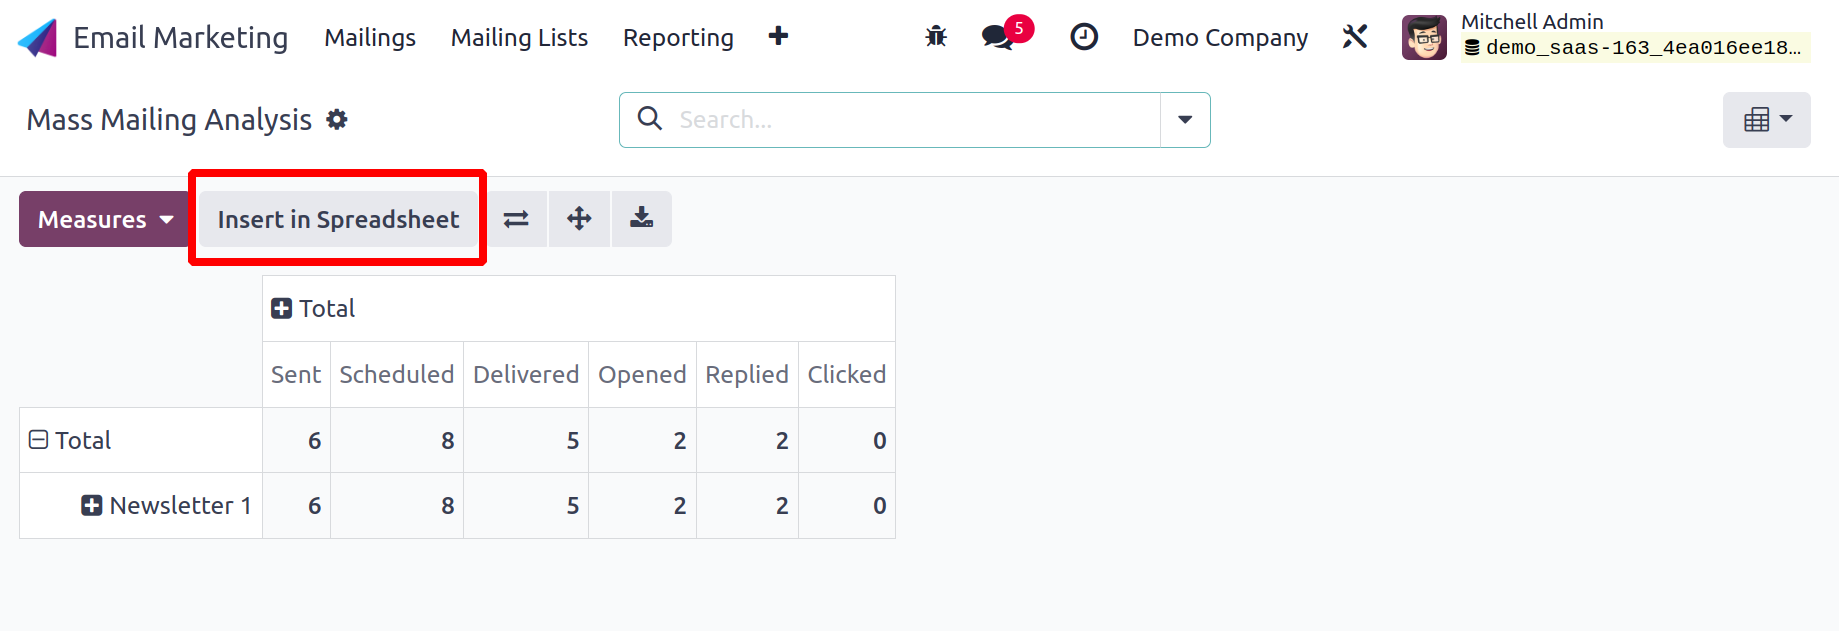
Additionally, you will receive the Pivot view. You can analyze the mailing list of a specific contact using the reporting tool beneath the mailing list contact and make any necessary modifications. You can insert the contact under the spreadsheet using the Insert In Spreadsheet option. These are the elements of the Email Marketing reporting option. regarding the Odoo17 software.
Additionally, a new report called Opt Out has been introduced to the Reports menu. The report makes it easy to understand the details of the subscription. The contact, Subscription Date, Mailing List, Opt Out, Reason, and Unsubscription date are all displayed in the list view.

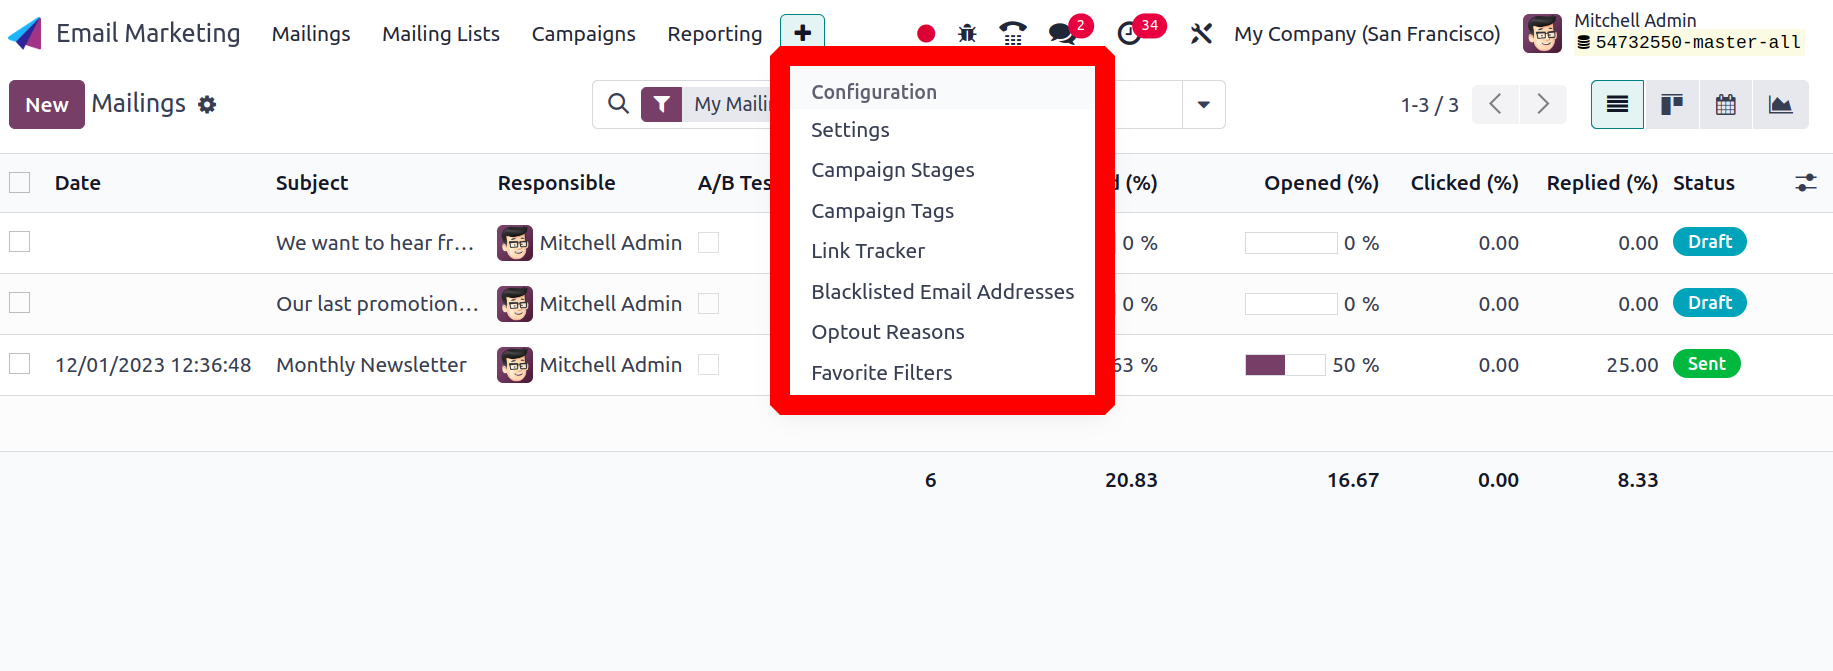
Configuration
You can choose from settings like Settings, Campaign Stages, Campaign Tags, Link Tracker, Blacklisted Email Addresses, and Favorite Filters under the Configuration menu.
Settings
The Settings option receives some features under these options, including options for dedicated server, 24 hour stat mailing reports, and mailing campaigns, respectively.
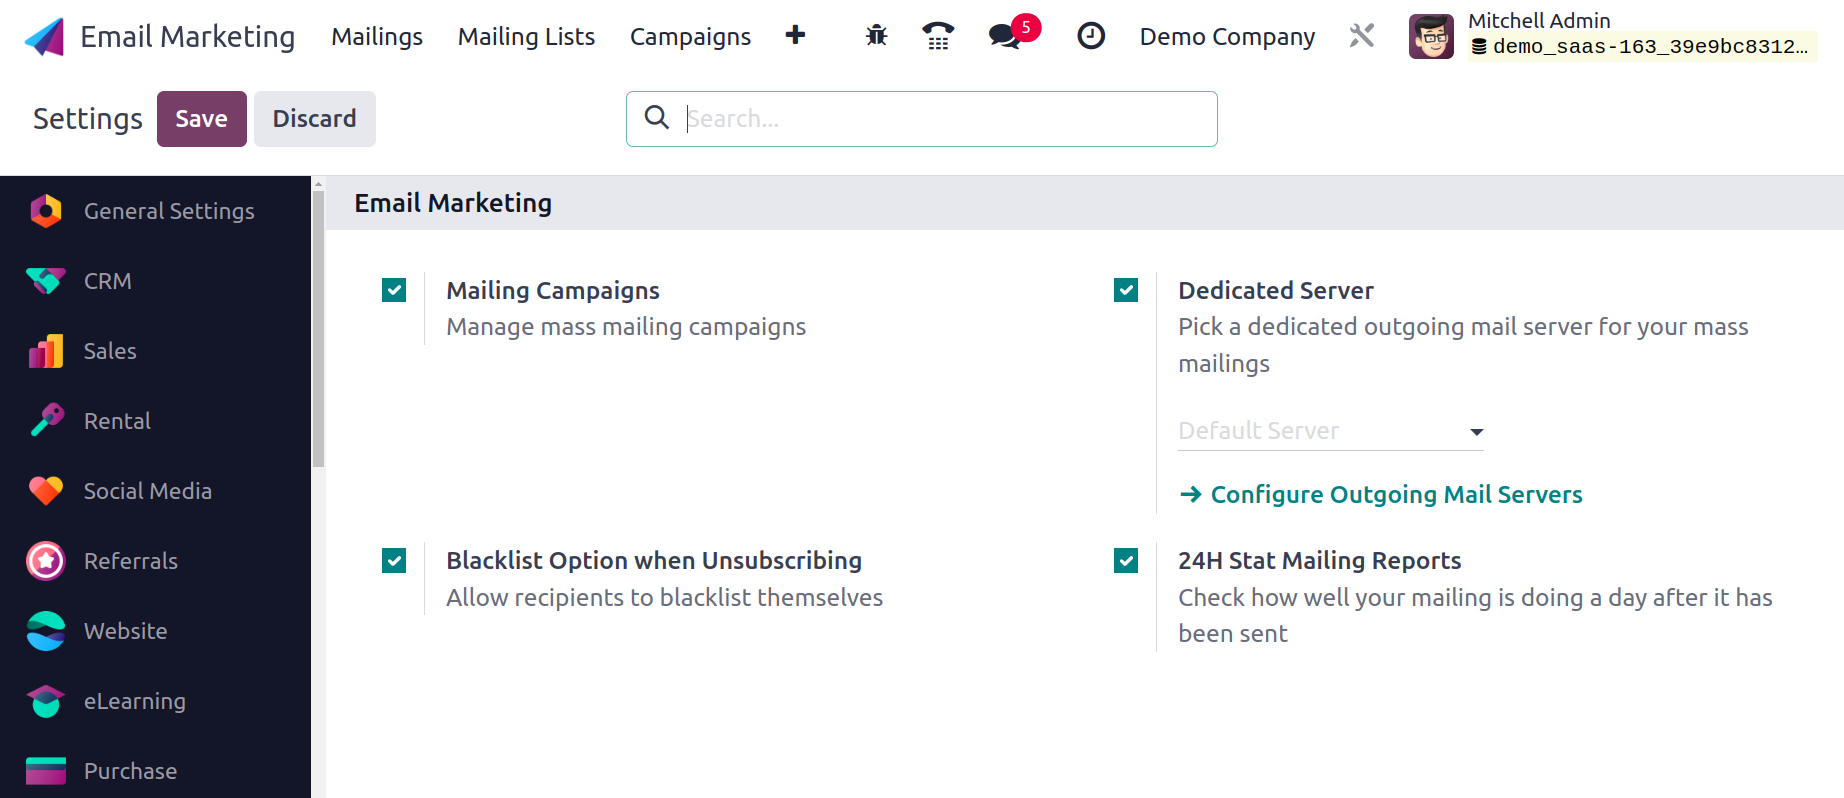
By assisting marketing campaign software, the Mailing Campaign option develops a helpful mailing campaign tool for the system. You must activate the Mailing Campaign option in the Settings menu in order to start the system. You may activate the option in the Settings menu and then select the Save icon.
You may control the campaigns and AB test the mailings with the help of this mailing campaign feature. You can access the newly activated option here by using the plus icon on the module's home page. The campaign page will look like the image below.
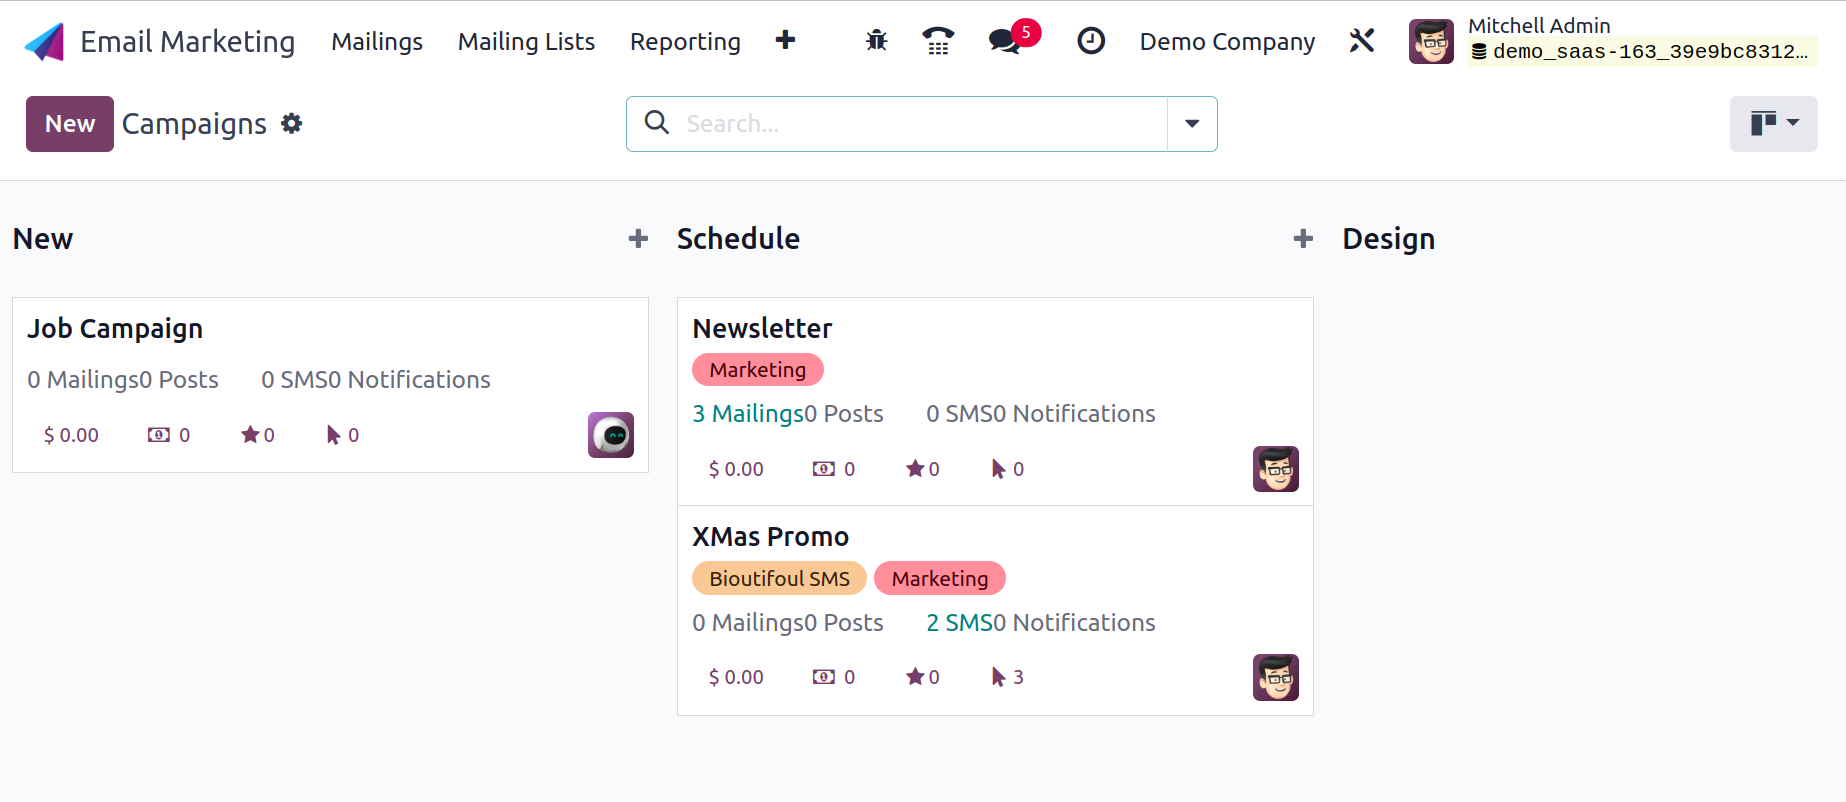
You may find a list of already-created campaigns on the Campaign page. Both Knaban and List views are available for viewing the page. The picture up top shows the website in Kanban mode. The website offers the campaigns based on different stages. You can view stages, including New, Schedule, Design, and Sent, in that order. You could also create new stages based on what we need. These stages are displayed in card form in Kanban view. You will find information in each box, including, for example, Posts, Mailings, SMS, Notifications, Clocks, Opportunities, Revenues, and Quotations. The options, such as Edit, Delete, and Coloring, are provided by the three dots, which are visible on the right side of each card.

You only need to click on the necessary Campaign to learn more about that particular one. The page is displayed below.
Every stage on the Campaign page has a + symbol next to it that offers options like Settings and Quick Add. You can create new campaigns by using the plus icon, as shown in the screenshot below.
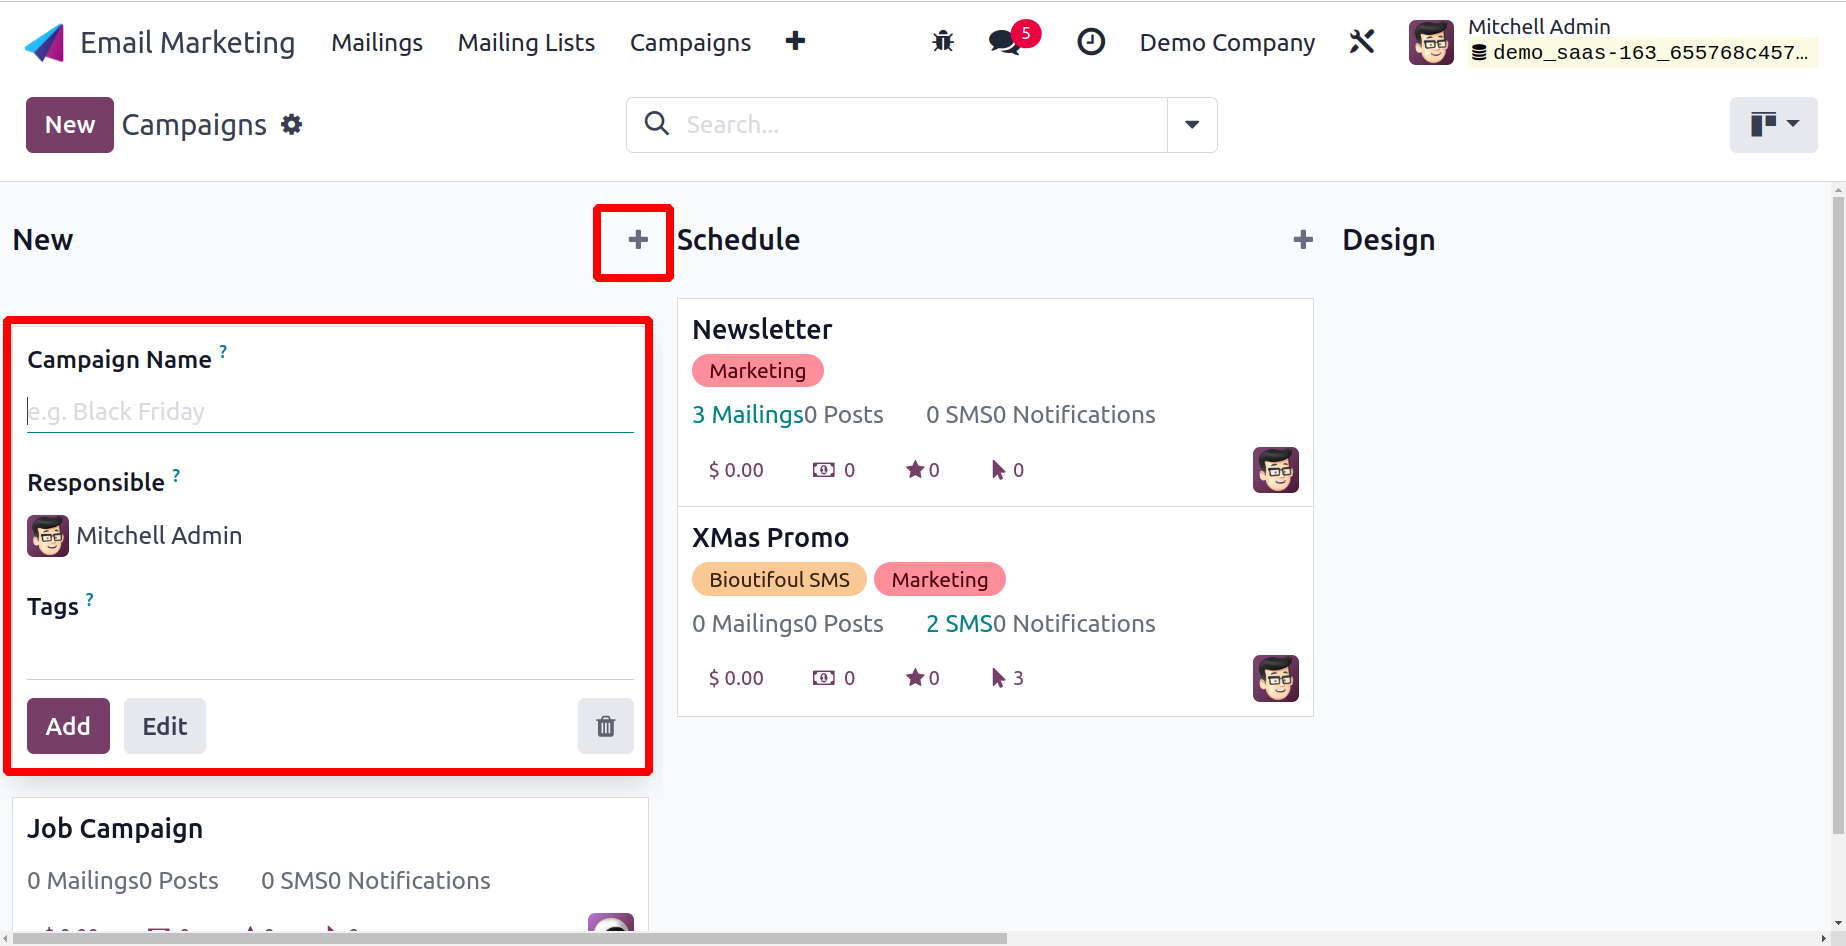
Here, you can see the fields for entering the campaign name, the user who will be accountable for it, and any necessary related tags. The stage that has been built can be further edited using the Edit option. Go to the Add icon after supplying all the necessary information. You can find sub-options like Fold, Edit, Automation, Delete, Archive All, and Unarchive All in the Settings menu.
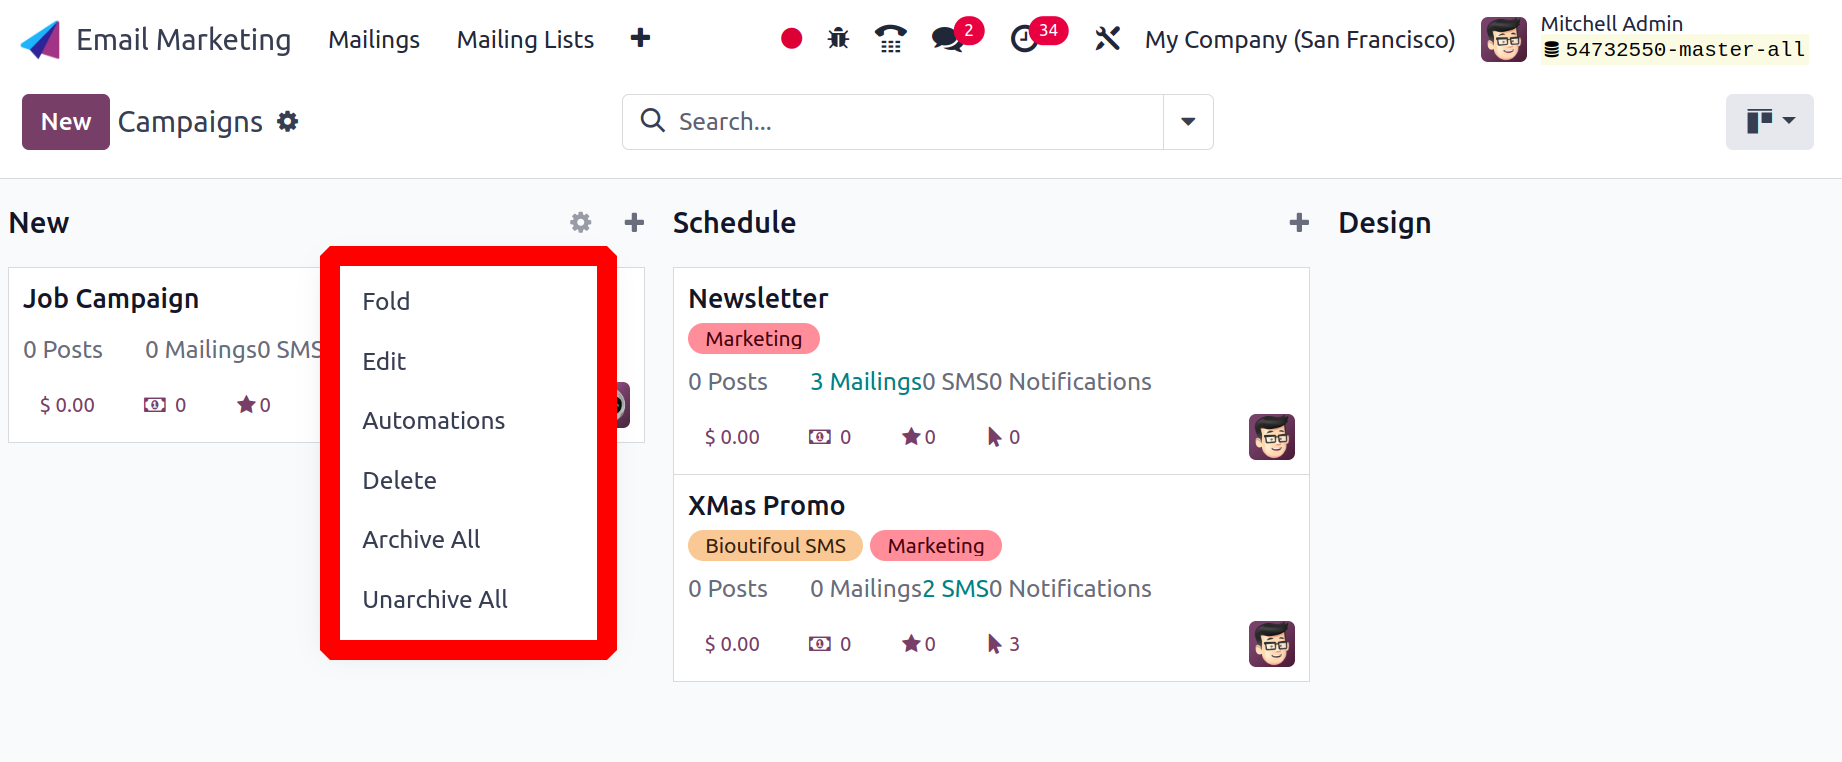
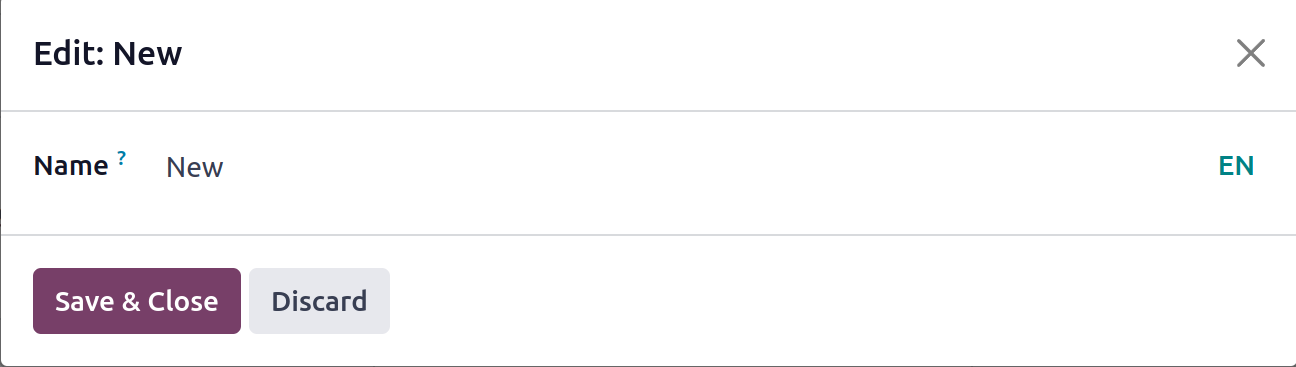
You can fold the stage you need to fold using the Fold option, which is one of these possibilities. When you choose the Edit option, a new window will appear where you may enter the changes you want to make.
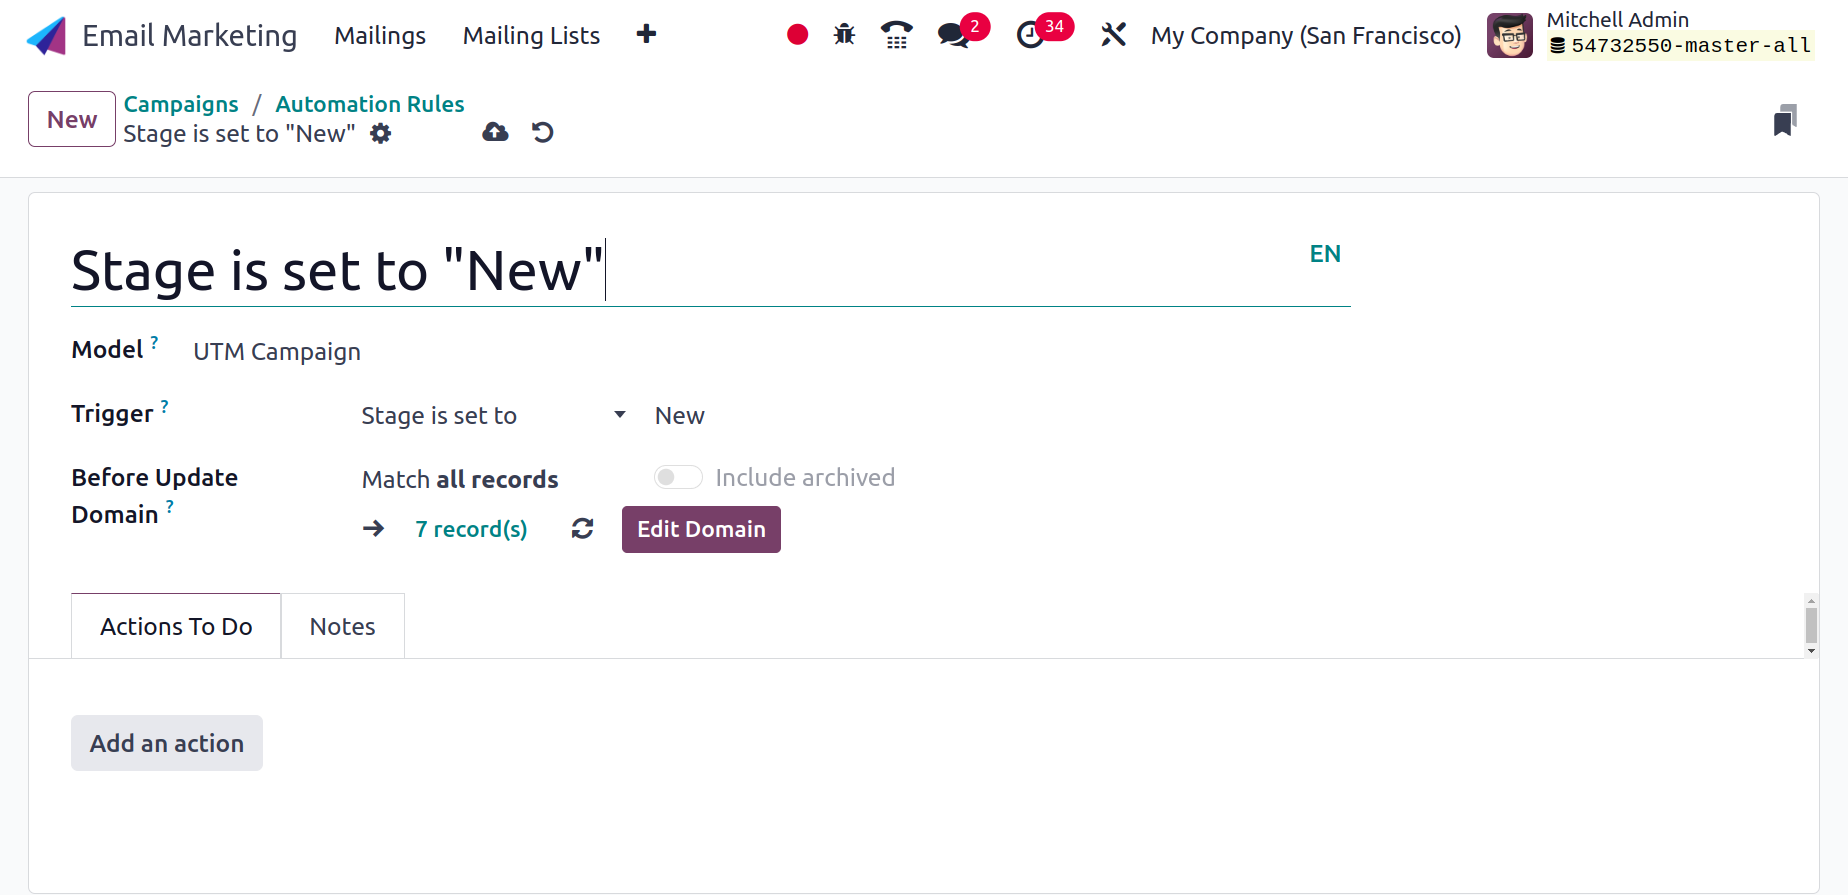
The user can add automation rules using the Automation option. On the Actions To Do tab, add the rule name, choose the model, set the trigger action, and set the necessary action. The Notes tab is where notes can also be added.
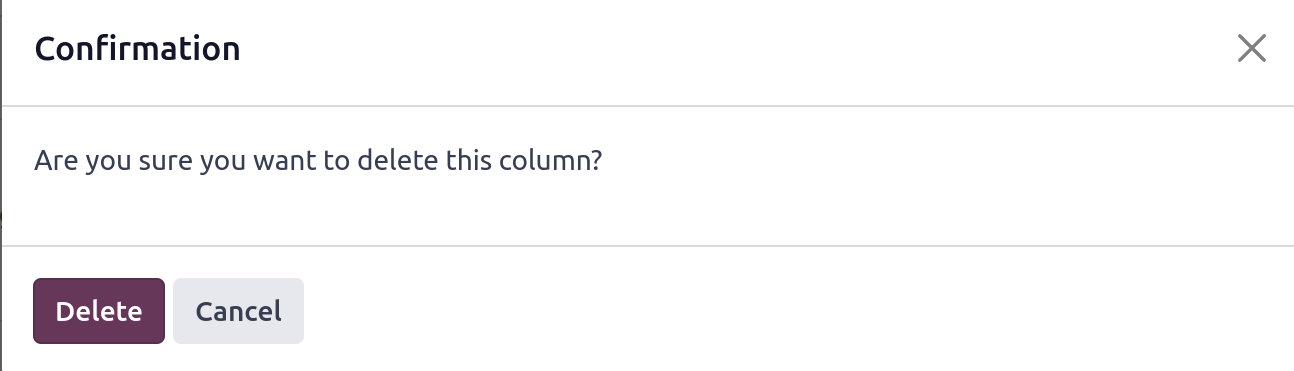
When you choose the Delete button as well. You can select the Ok symbol if you are certain that the column will be removed.
All of the records in the column will be archived if the Archive button is chosen, and the archived data will remain intact if the Unarchive button is clicked.
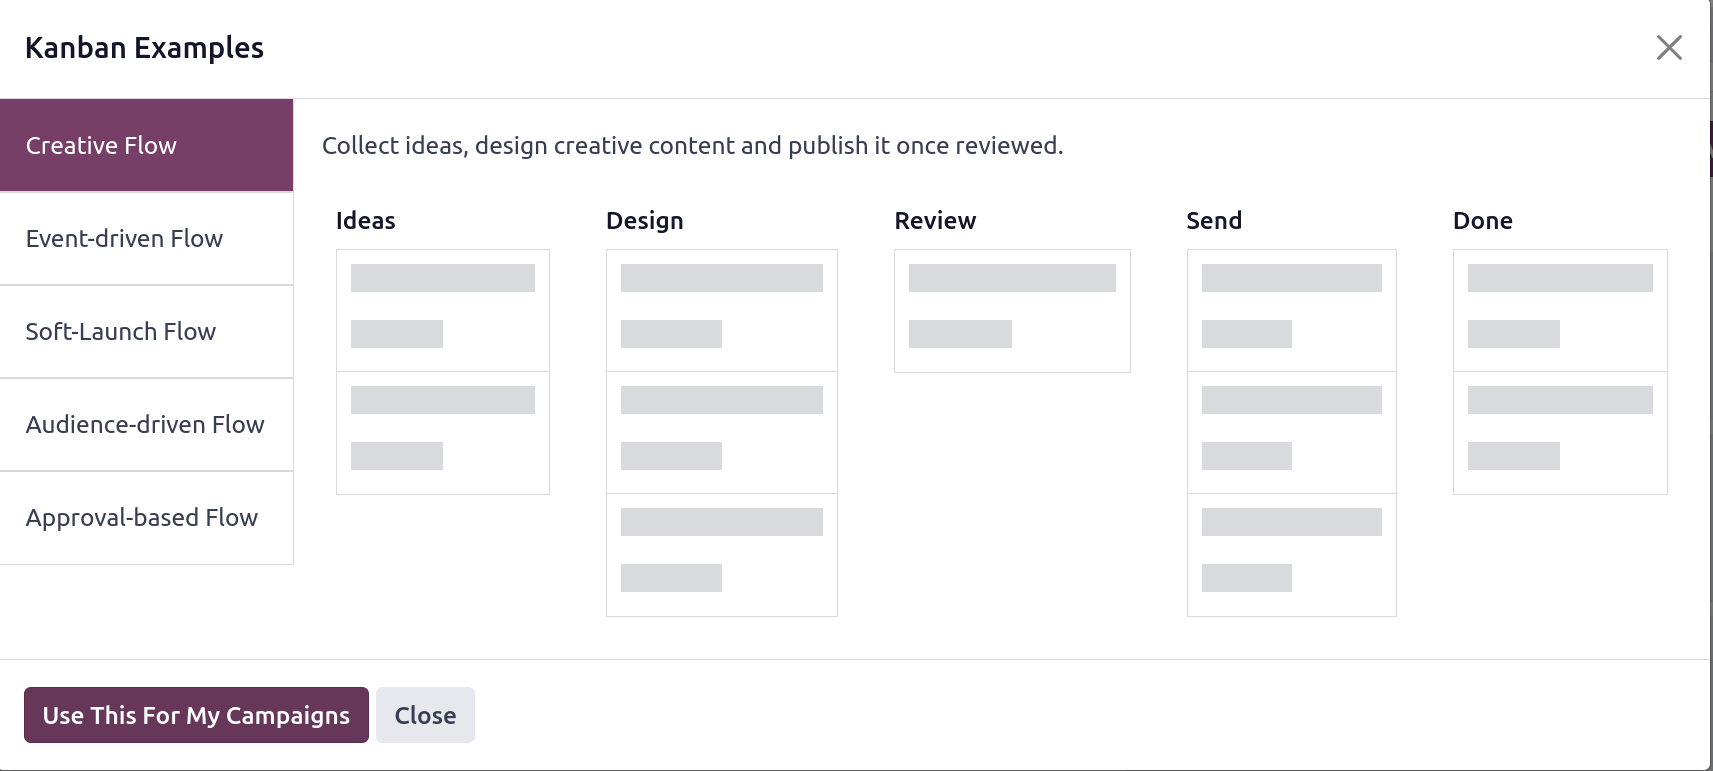
Additionally, you will have the choice of adding a new stage to the current list. Additionally, certain samples are given to you; to get the samples click on the See examples.
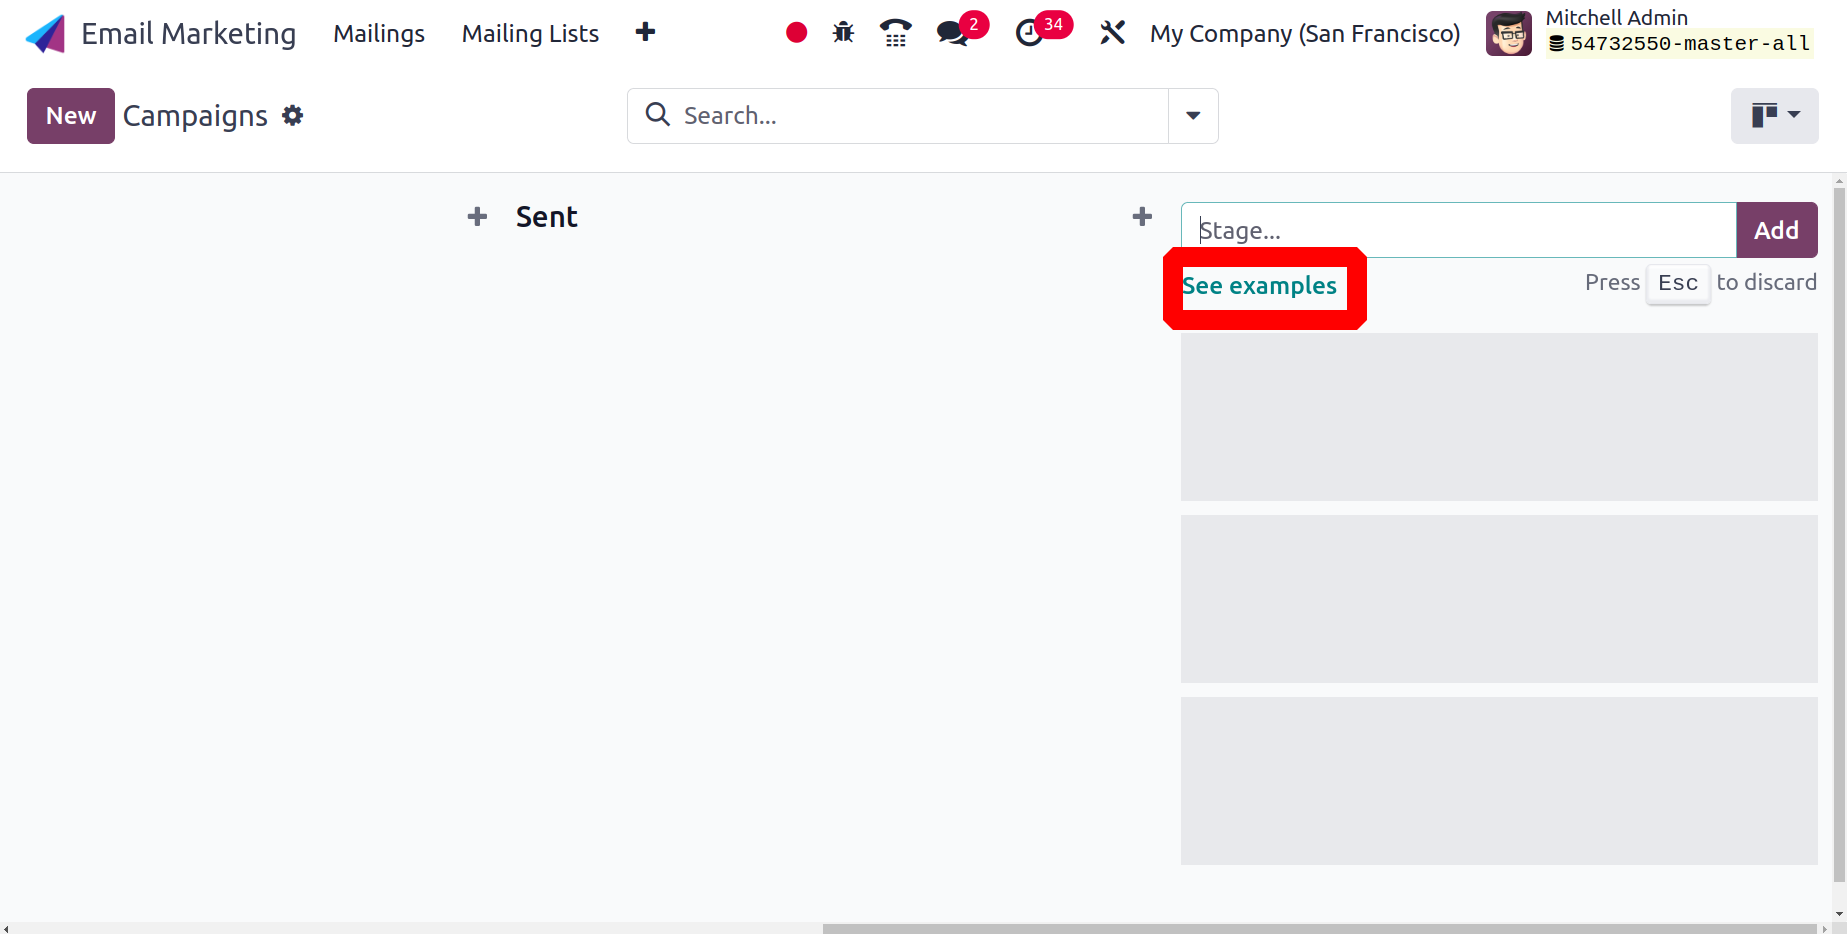
You can apply these examples by using the Use This For My Campaigns symbol.
The campaign page also has a list view option. You can examine more information on the list view, including the campaign's name, the user who is in charge, the stage, and any relevant tags.
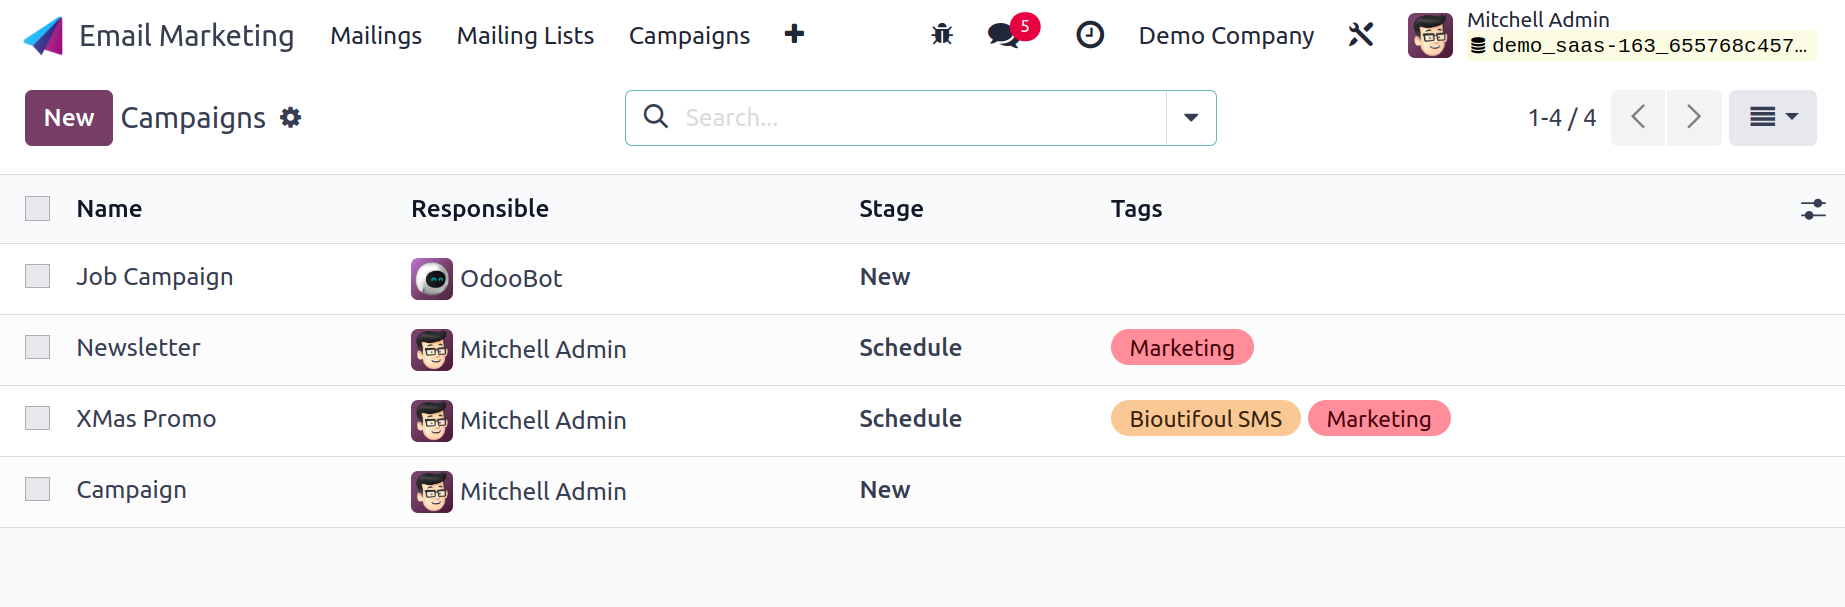
You can also find some filters on the page. These campaigns can be categorized based on our needs using the Group By option. Go to the NEW icon, as seen in the screenshot below, to create a campaign of a similar style. You will be taken to a new page where you can create a new campaign after choosing the New option.
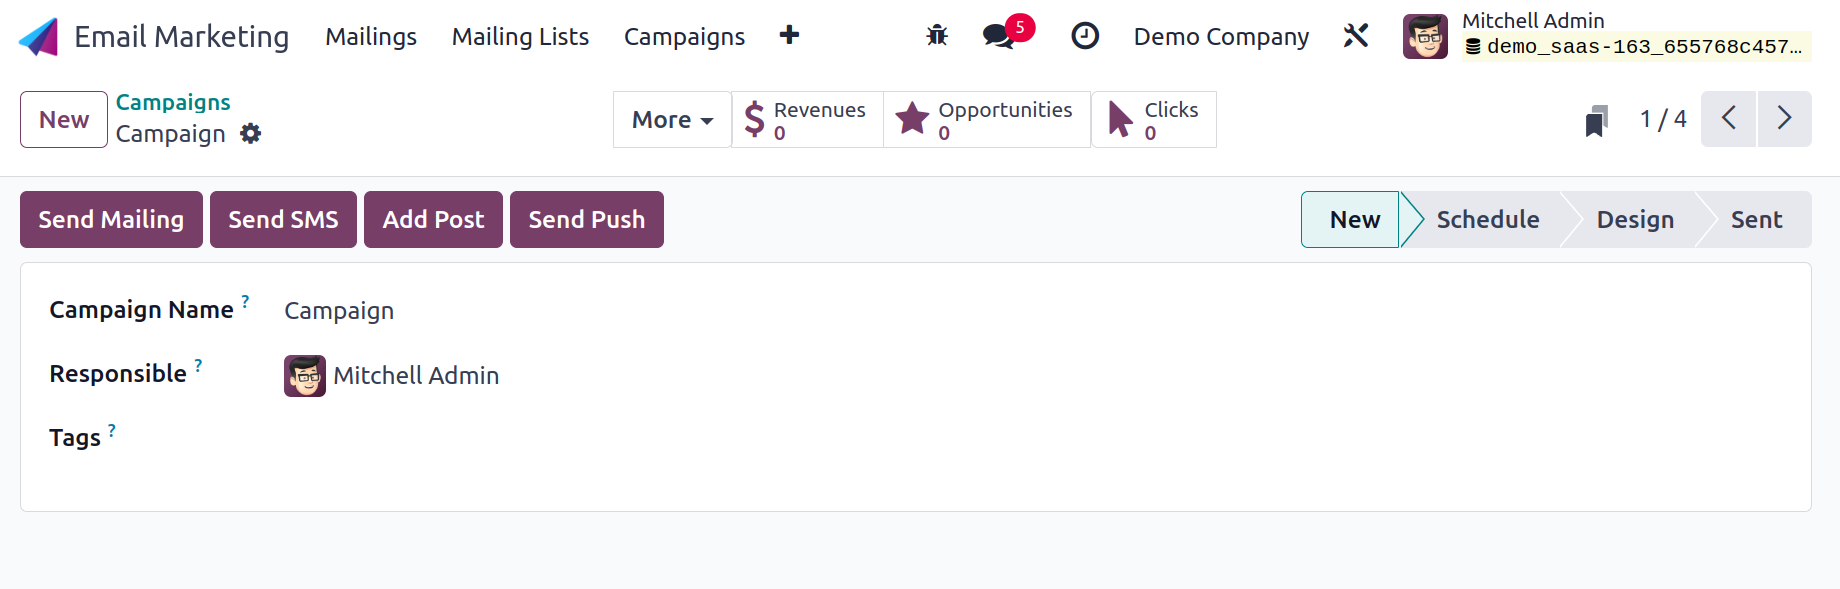
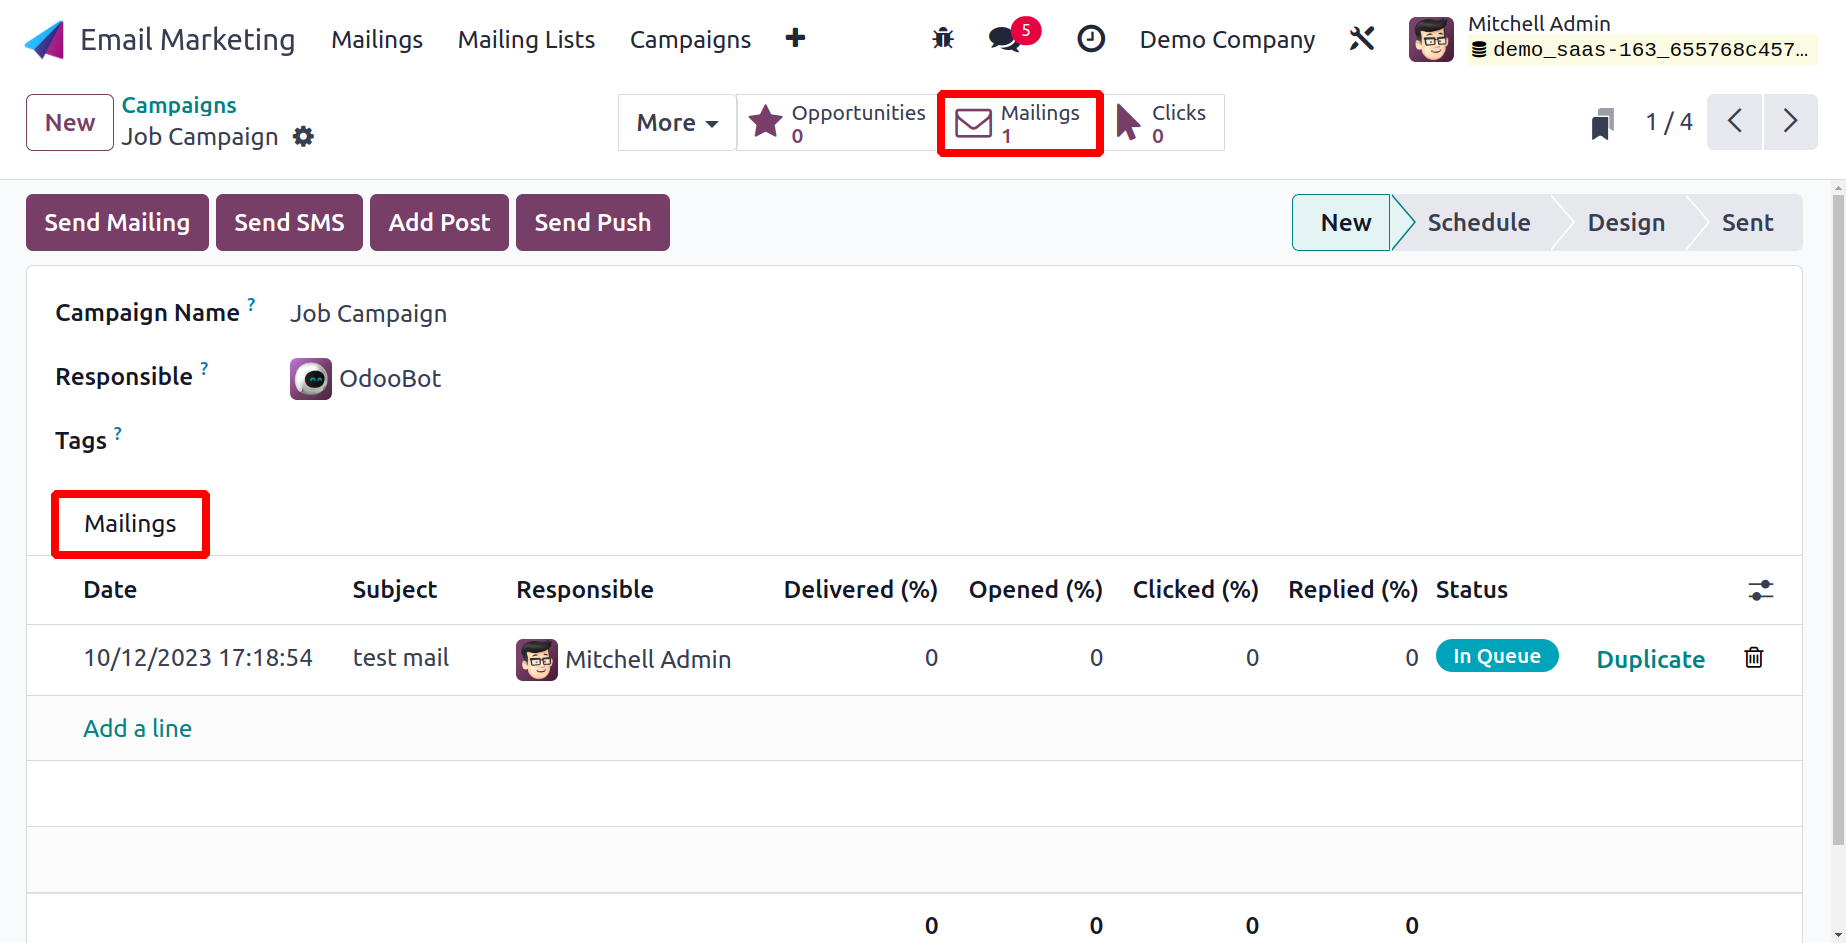
You must provide the campaign's name, the user who will be in charge of it, and any necessary tags on the creation page. You can now select the Save icon after adding all the necessary data. Additionally, you will have options like Send Mailing, Send SMS, Add Post, and Send Push. You can see the status, including New, Schedule, Design, and Sent on the right side of the page. Additionally, you can notice several smart buttons with possibilities for Engagement, Revenes, Quotations, Opportunities, and Clicks. The operations designated by those buttons can be reached immediately.
You can send the email associated with this campaign using the Send Mailing option.
You can send mail quite easily by using the Send button. On the module's home page, under the Mailing tab, are those sent items.
There are alternatives available here that can be used appropriately, like Send Mailing, Send SMS, Add Post and Send Push. You will get a new window after choosing the option Add Post, as seen in the image below.
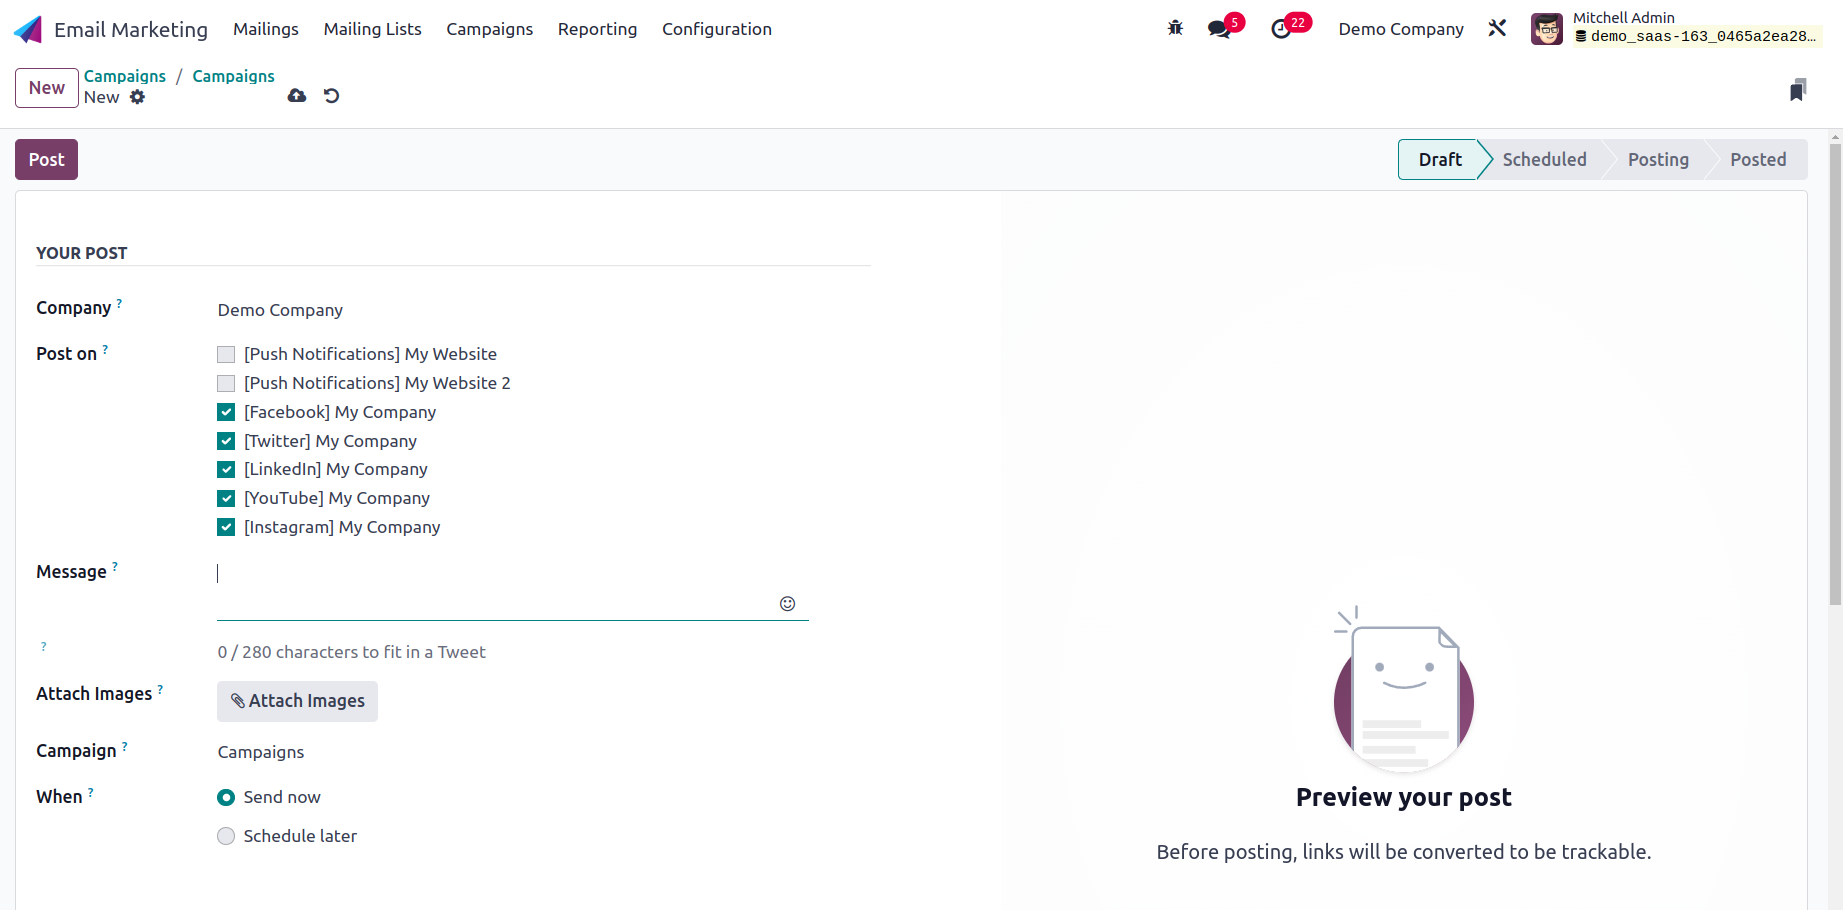
You may see the automatically provided details on the post option. If social media is supported, you can attach photos. Additionally, the campaign name is filled in on its own. Go to the POST symbol to finish.
You may now choose to give the Campaign Stages and >Campaign Tags by activating the Marketing Campaign option under the Email Marketing Settings option. The menu item will appear under Configuration.
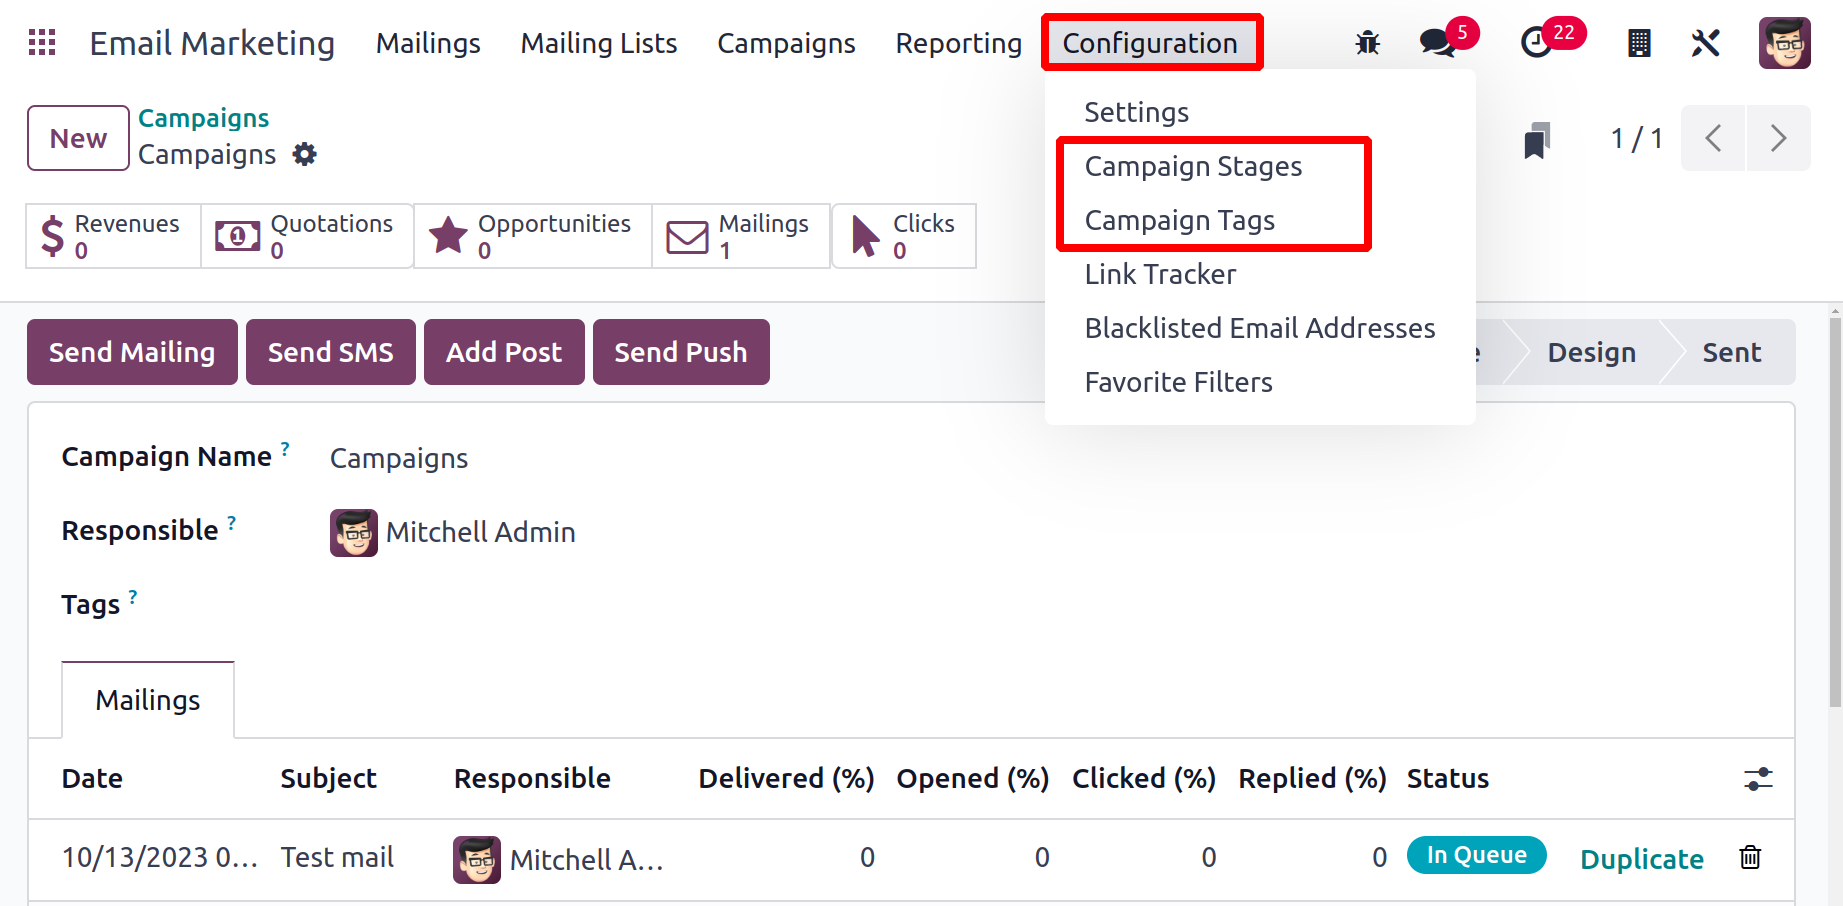
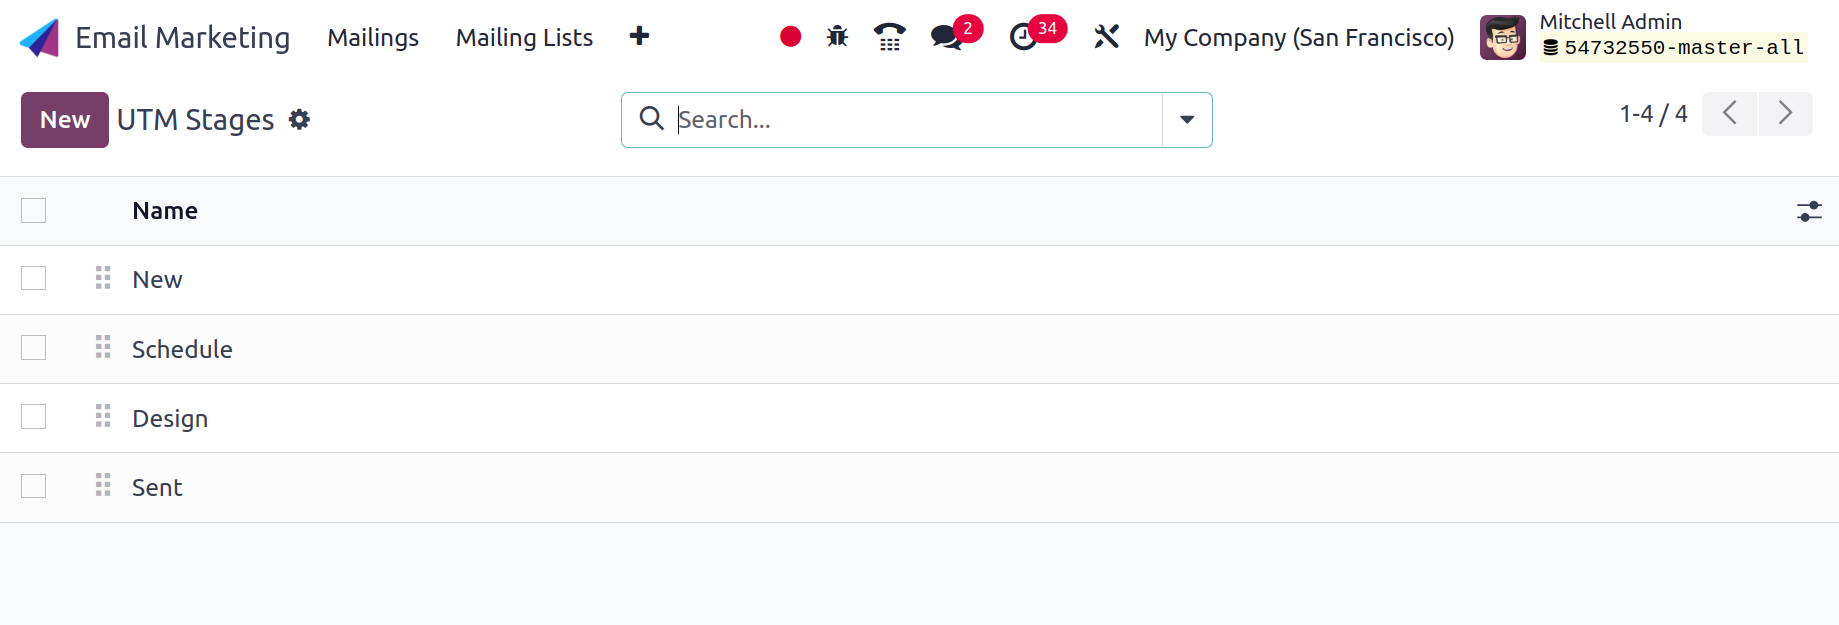
Go to the Campaign Stage option in the setup menu, as shown in the screenshot above, to view the UTM phases.
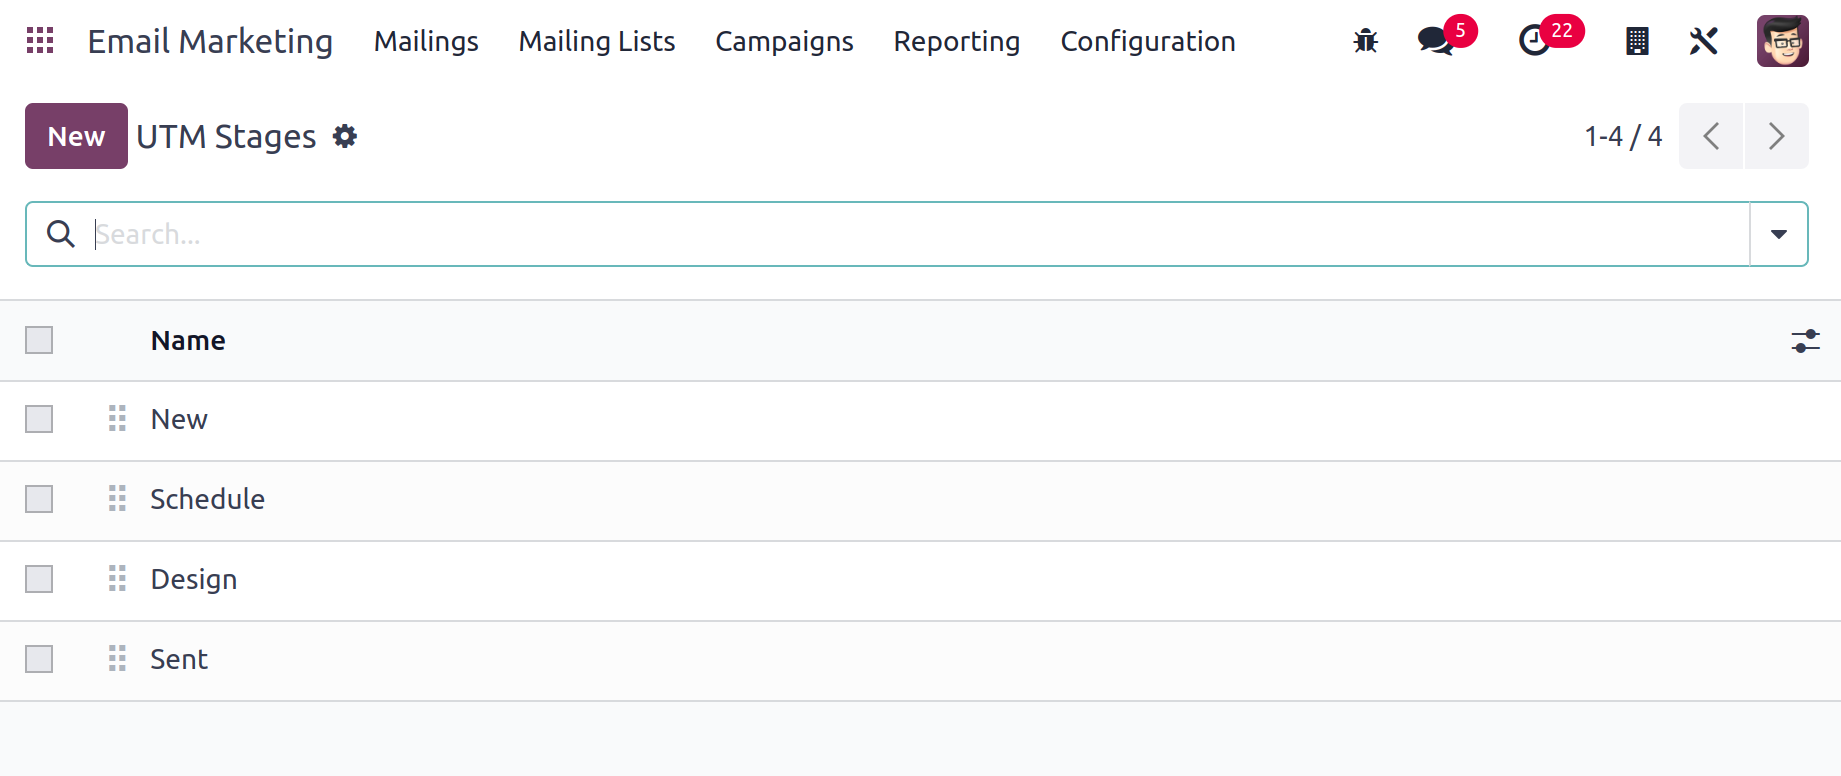
You may see every stage of the campaign that has already been set up in this window. Simply select the New symbol on the window's left side to create a stage of a similar design. When you choose the option, a new line will appear where you may quickly create a new stage.
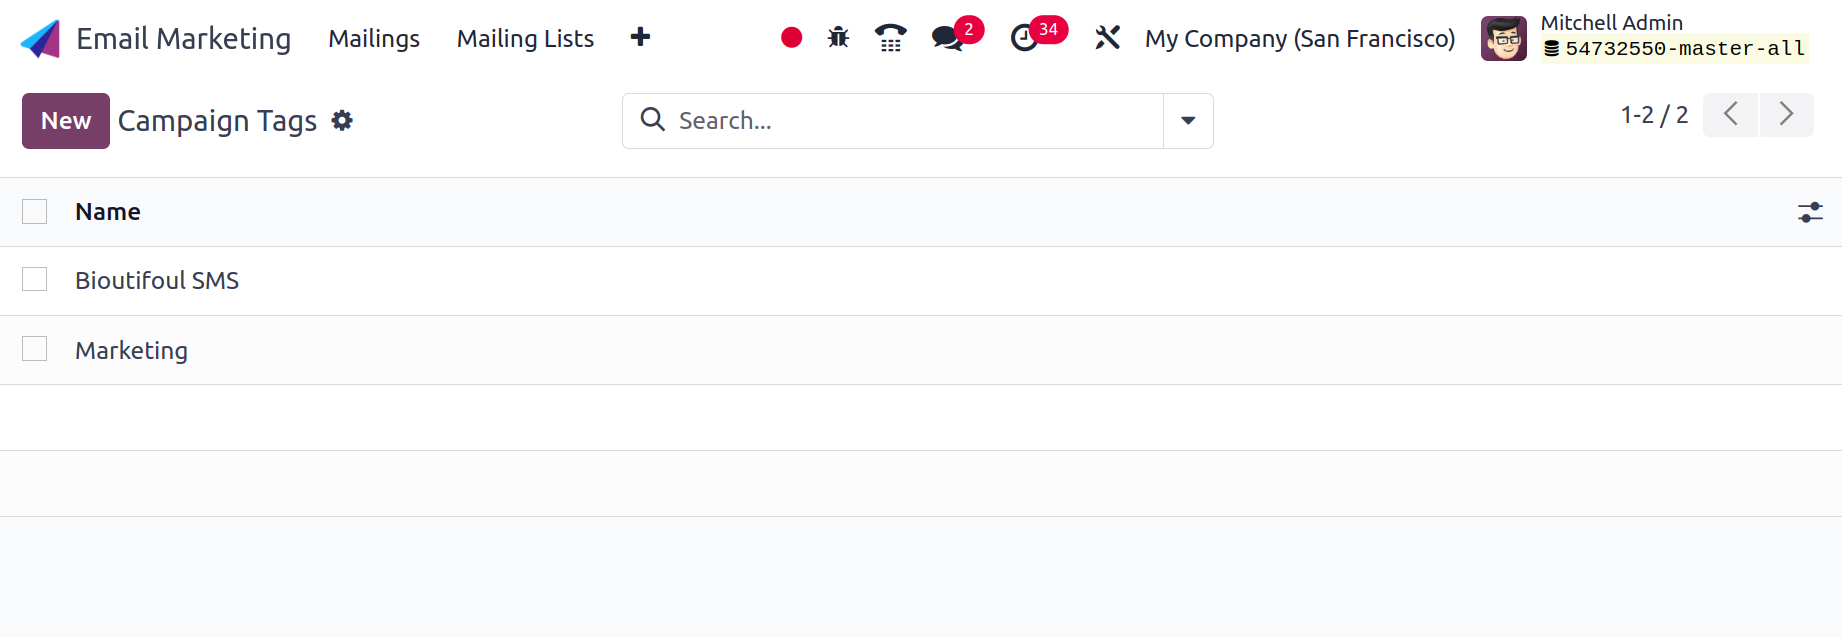
You will find the choice for Campaign Tags underneath the selection for the campaign stage, as shown below.
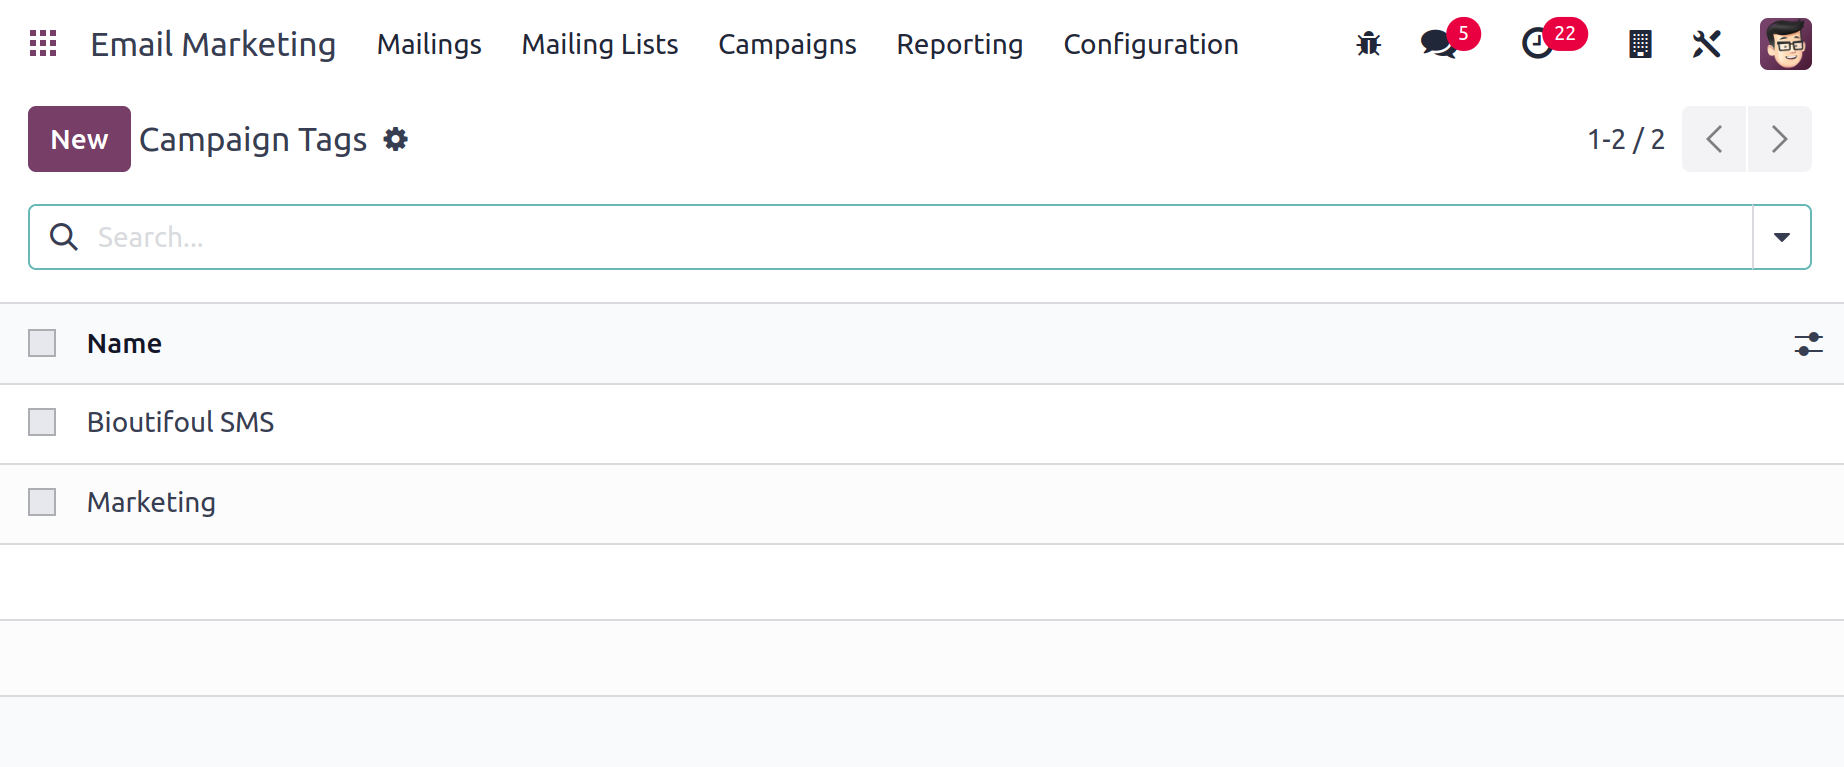
You can find the campaign's already-created tags on the page. Additionally, the New icon can be used to add additional tags to the campaign. A new line will be displayed where you can quickly add a new tag, just like in the campaign stage. Go to the Save icon to finish.
Campaign Stages
Configuration has the stages that were made for the Campaign. The Campaign phases is a list of the phases. The user can add new stages by clicking the New button.
Campaign Tags
Campaign Tags are located under the Configuration menu. There is a list of the created tags displayed. Next, new tags can be added using the New button.
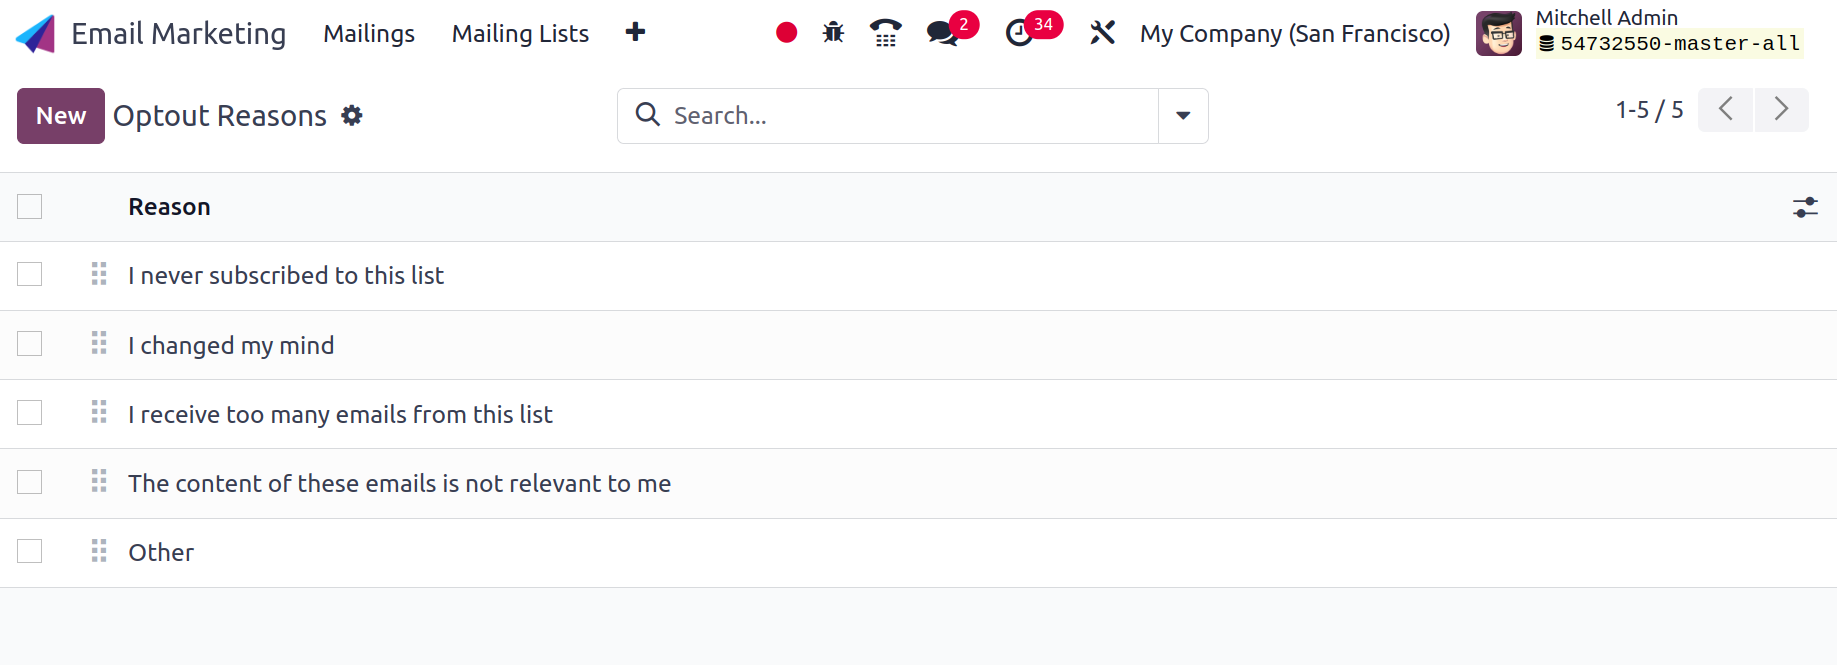
Optout Reasons
There may be a range of causes for subscription cancellations. This module has to be adjusted for a plethora of reasons. The Configuration menu contains the Optout Reasons. Click the New button to add a new reason. The user can now specify the additional reason on a new line that appears beneath the list.
Link Tracker
Link Tracker is the following selection under the Configuration menu. There is a choice under the Email Marketing module called Link Tracker because regular follow-up and analysis are required for Email Marketing. You may find the option in the Configuration menu of the module, as we have already mentioned. The webpage will look like the image below.
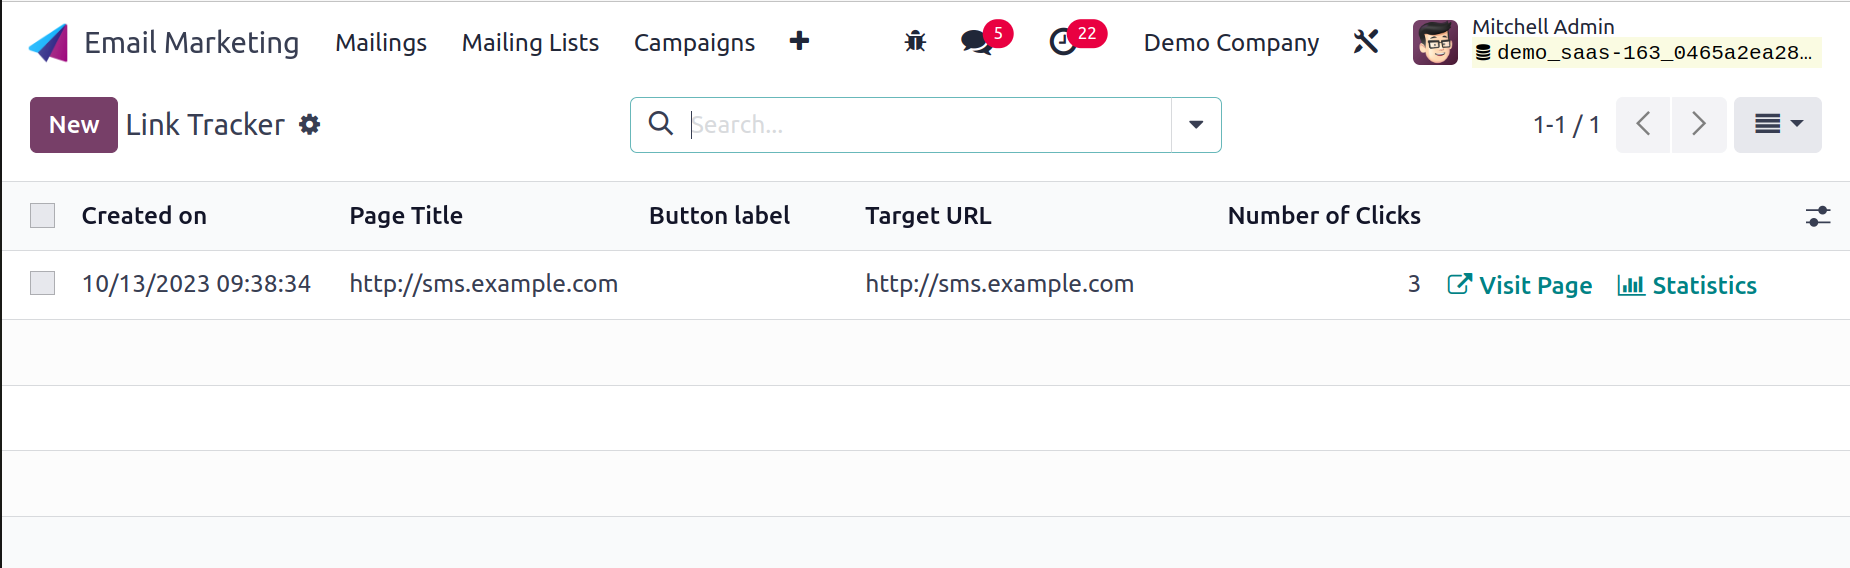
You can find some pre-made link trackers on the page. Some important information is provided on the page, including the date and time of creation, the page's title, the names of the buttons, the target URL, and the total number of clicks. The Visit page and statistics, which are regarded as direct connections, are available on the website page.
As shown in the screenshot below, you will also receive the page's statistics.
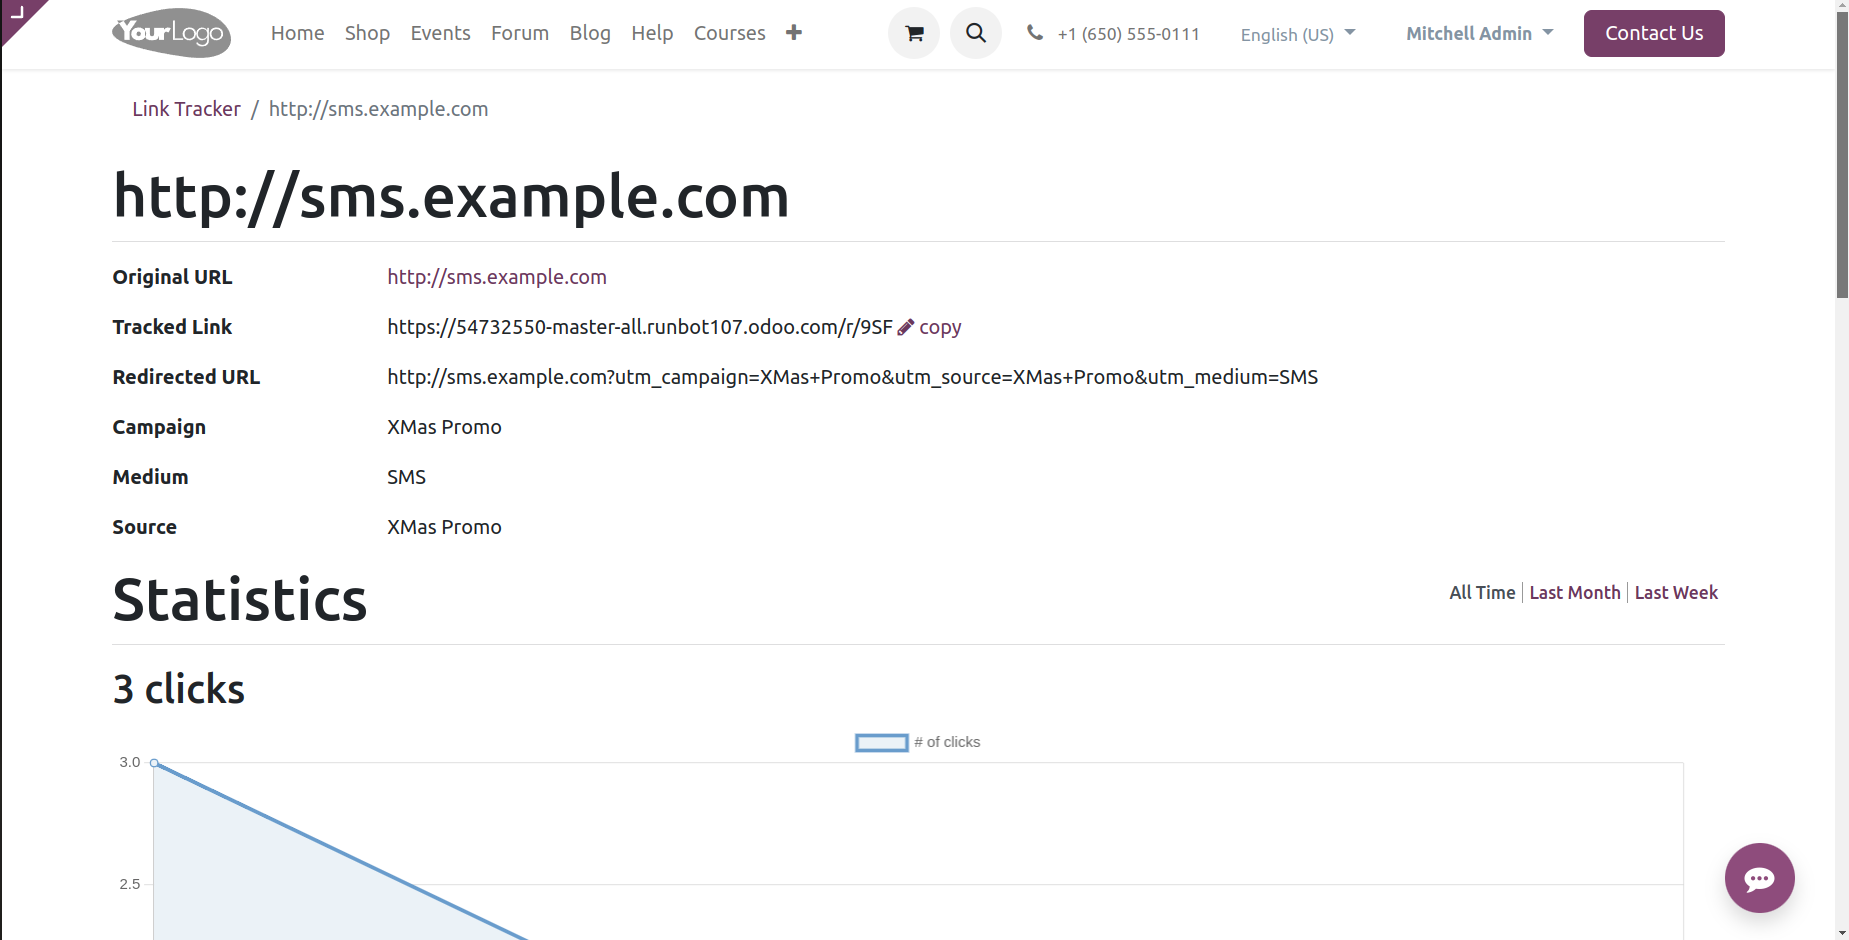
By choosing the graphical view of the page, you may also access this graph. With the help of the Add Custom Filter option, which is located under the Filters option, you can create some flyers. You can classify the data according to campaign, Medium, Source, and Mass Mailing by using the Group By option. A comparable link tracker can be simply created by selecting the New icon.
Blacklisted Email Addresses
Users can get assistance from the banned email addresses option in the Email Marketing module's Configuration menu on certain specific instances. This unique functionality of the blacklisted email addresses option in the module is helpful if there are certain circumstances where some emails are barred or reported from the mail list. You won't receive any letters unless you add them to the mailing list. In the setup menu, the option is located under the link tracker selection.

You can view the previously created blacklisted mailings on the page for the blacklisted email address. Details like the blacklisted date and email address are given on the page. You only need to click the New icon on the page to add a new mail address to the blacklist. On the left side of the page, there is an option. You will be taken to a new page after choosing the New option where you can enter the information needed to add the email address to the Blacklist.
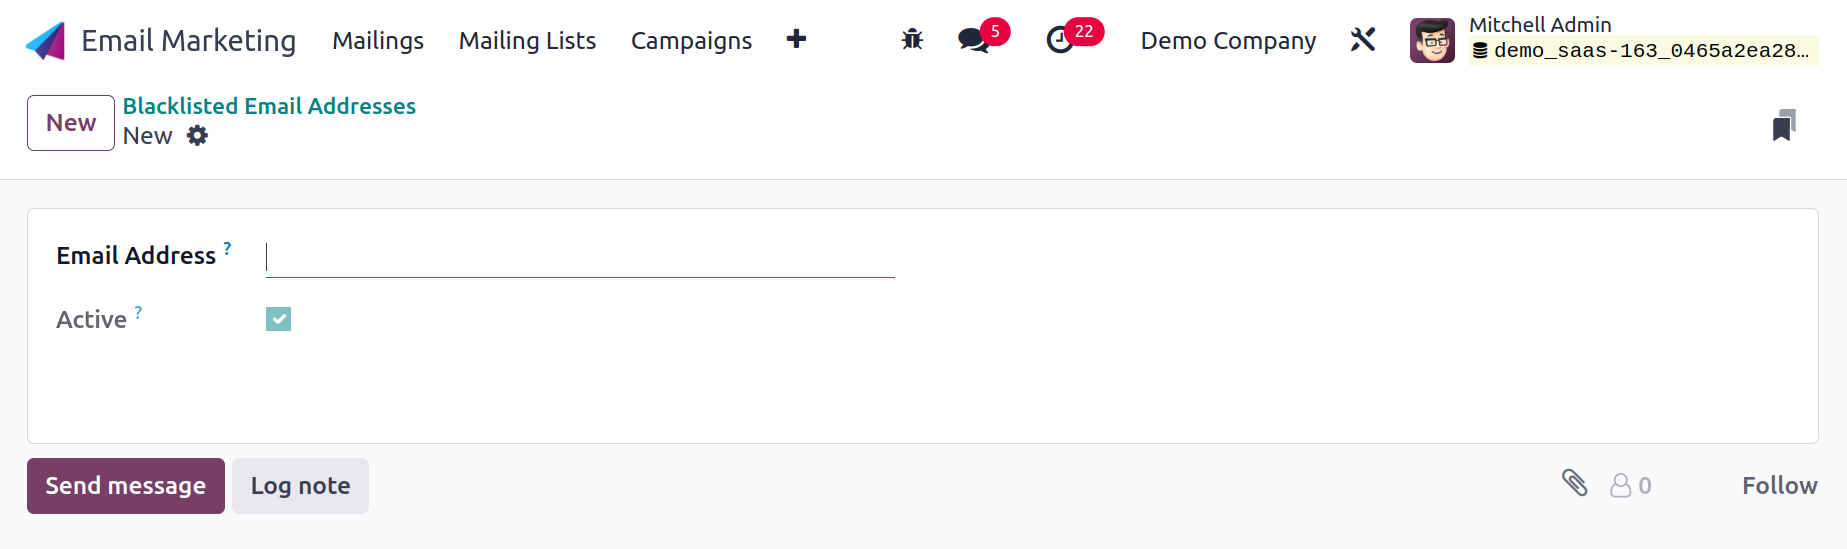
The screen has a field for entering the Email Address that needs to be banned as well as an option labeled Active that is already activated. The window for generating a Blacklisted email account is shown in the image above. In the Email Marketing module's settings, there is also a Blacklisted Option when Unsubscribing that you can choose from. With the aid of the unsubscription page as well, the option enables the user to control their status as being on the blacklist. Therefore, in order to be activated, you must activate the option from the settings, as indicated below.
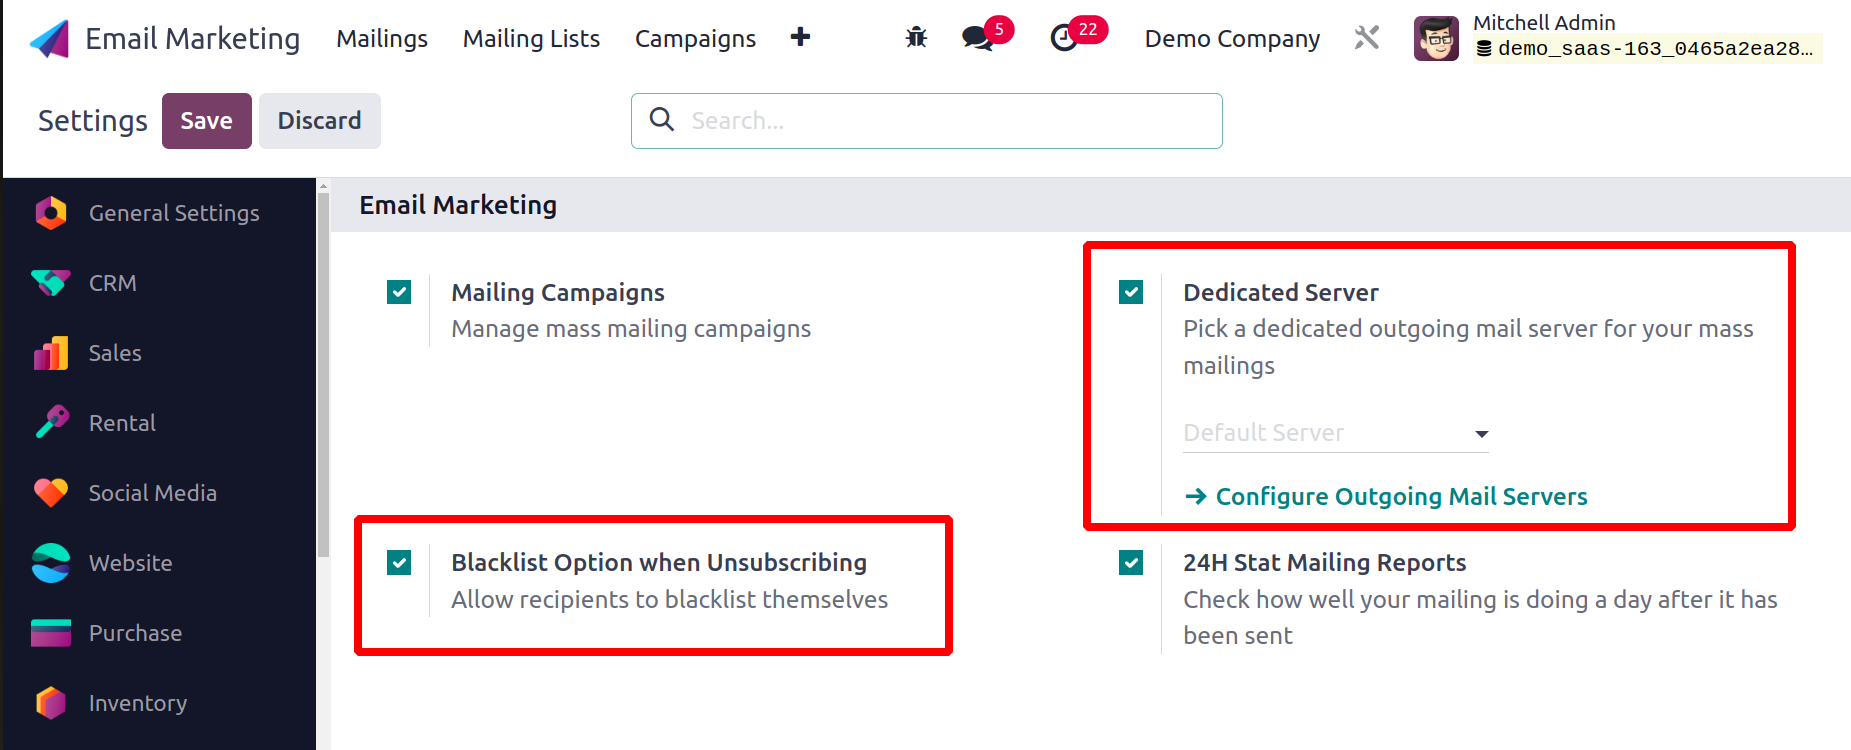
Near that blacklisted Email Address choice, there is another Dedicated Server option that you can notice. Under the settings, you have offered a dedicated server for mailing. You must first activate the dedicated server option under the settings option in order to access this option. The settings of this dedicated outbound email server are then accessible. You will be taken to a new page as shown below, after selecting the option.
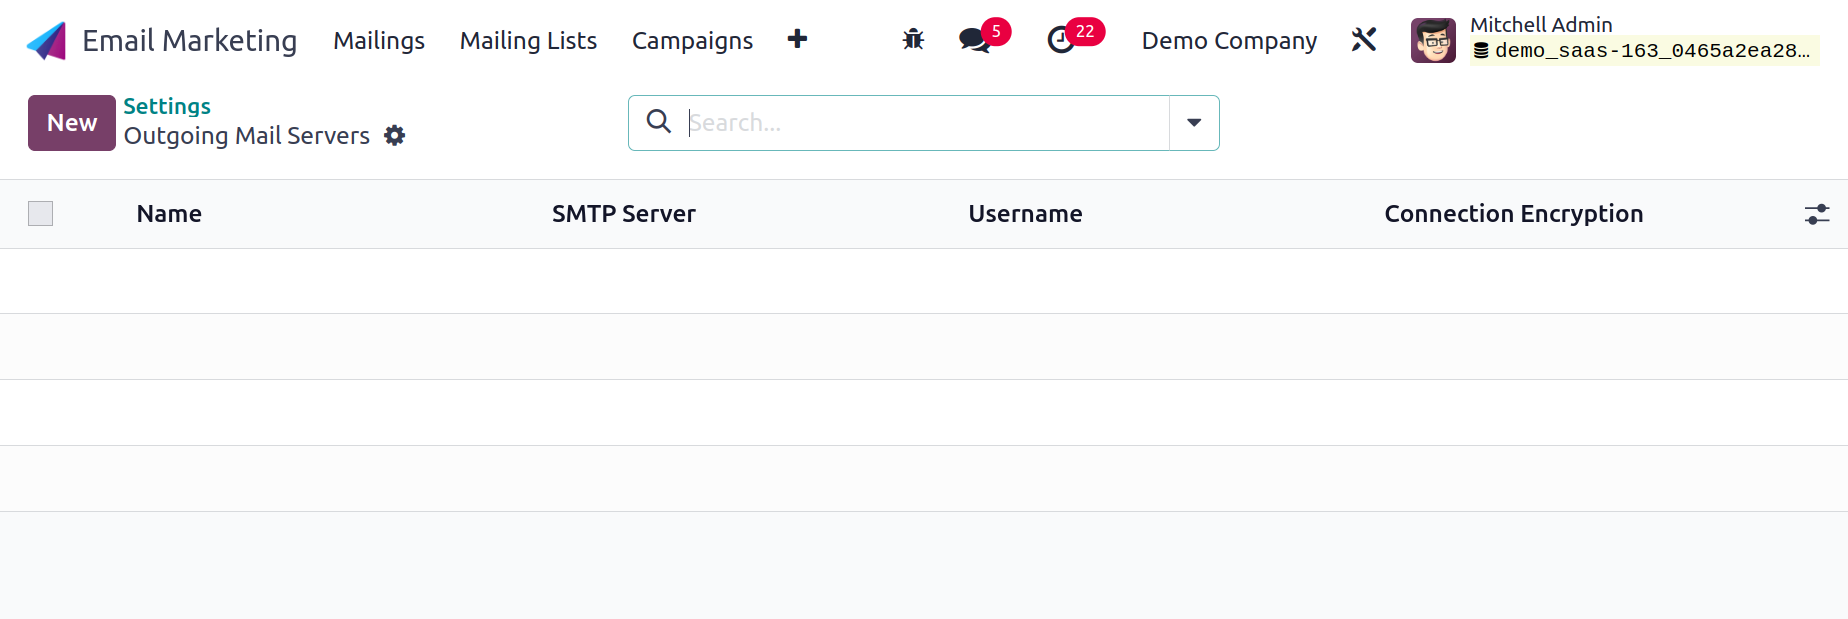
You can enter information on the page such as the priority name, SMTP name, username, and connection encryption options, among others. You may also click the New icon to build a similar kind of dedicated server.
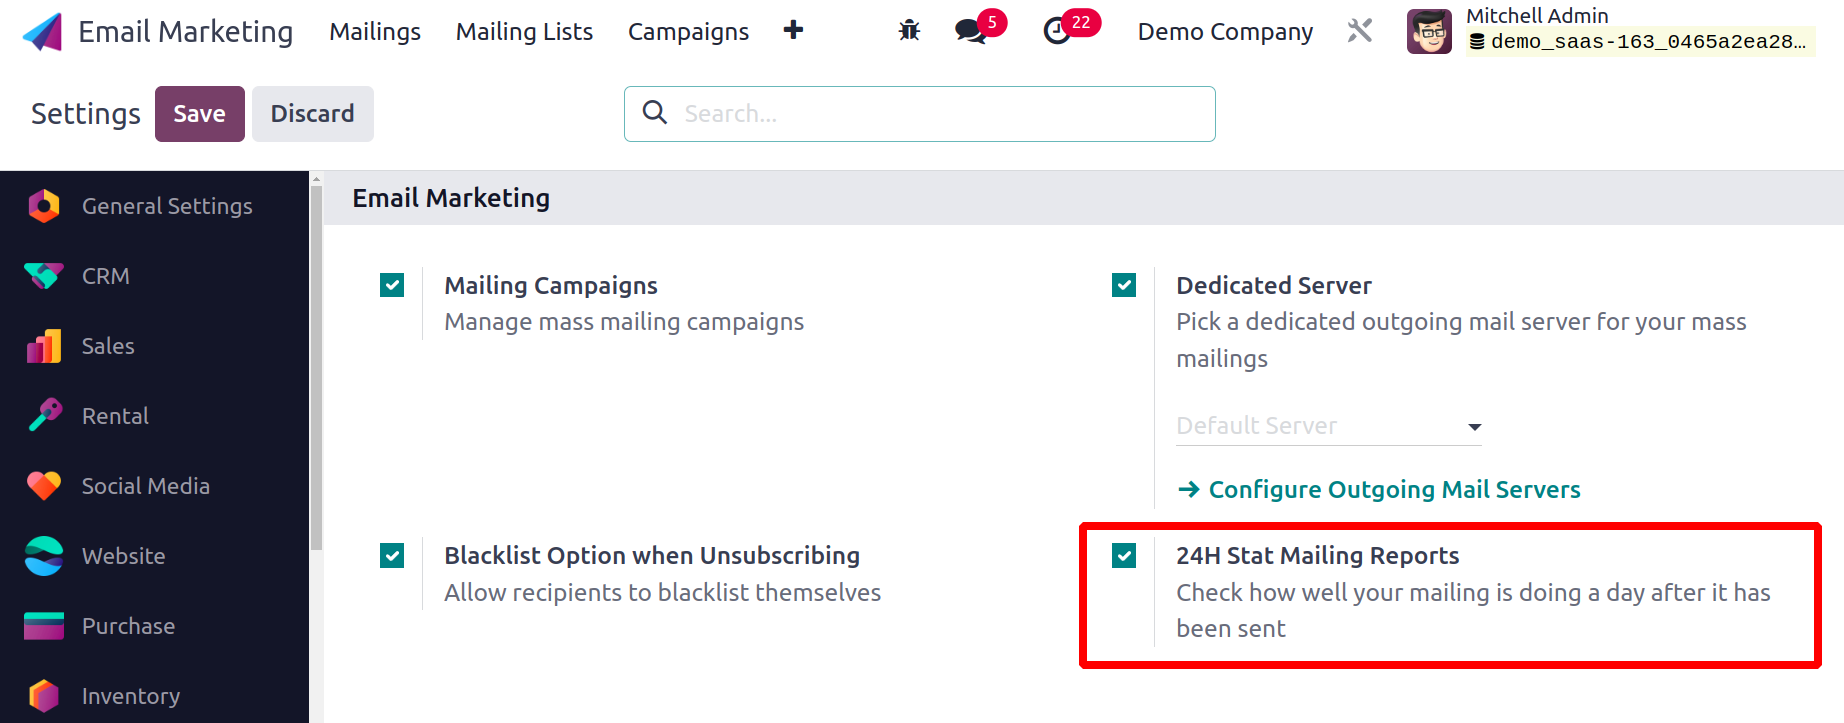
In the module's settings, you may now select the 24H Stat Mailing Reports option. You can use the option to see how well your mailing was handled a day after you finished sending it. You must activate the option from the Email Marketing module's settings in order to get it. Don't forget to click the Save icon after making the appropriate adjustments to the settings in order to save the changes.
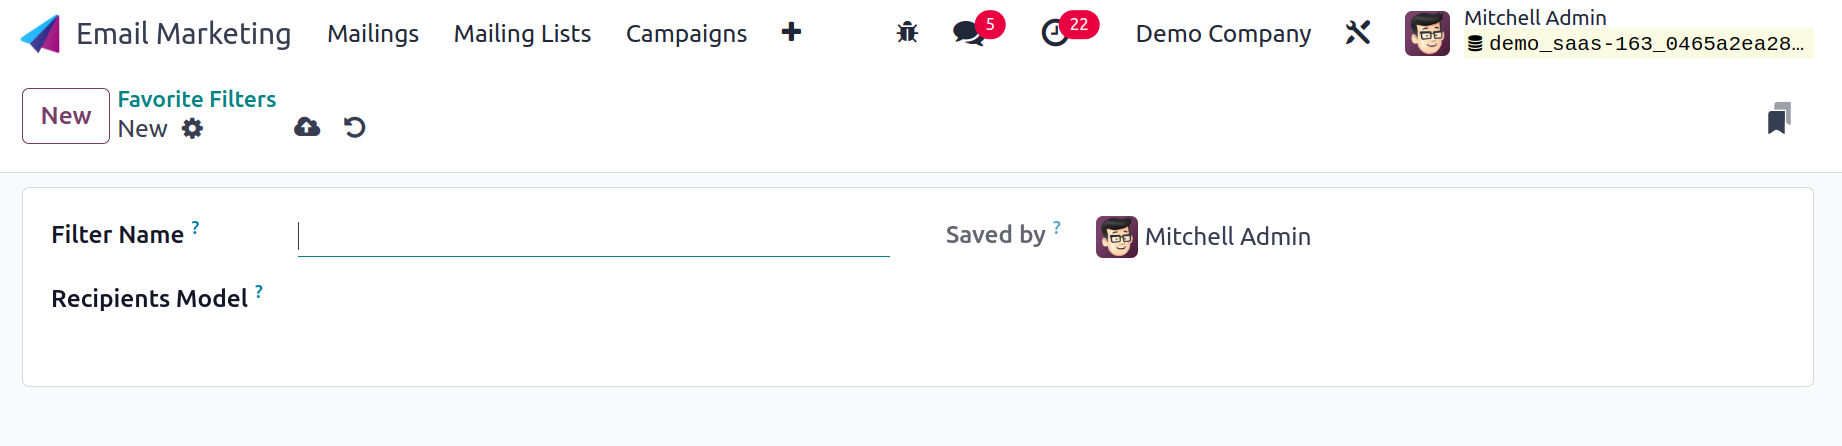
Favorite Filters
Under the Email Marketing module's configuration menu, you have the choice of Favorite Filters just below the blacklisted email address. The feature page will look like the illustration below.
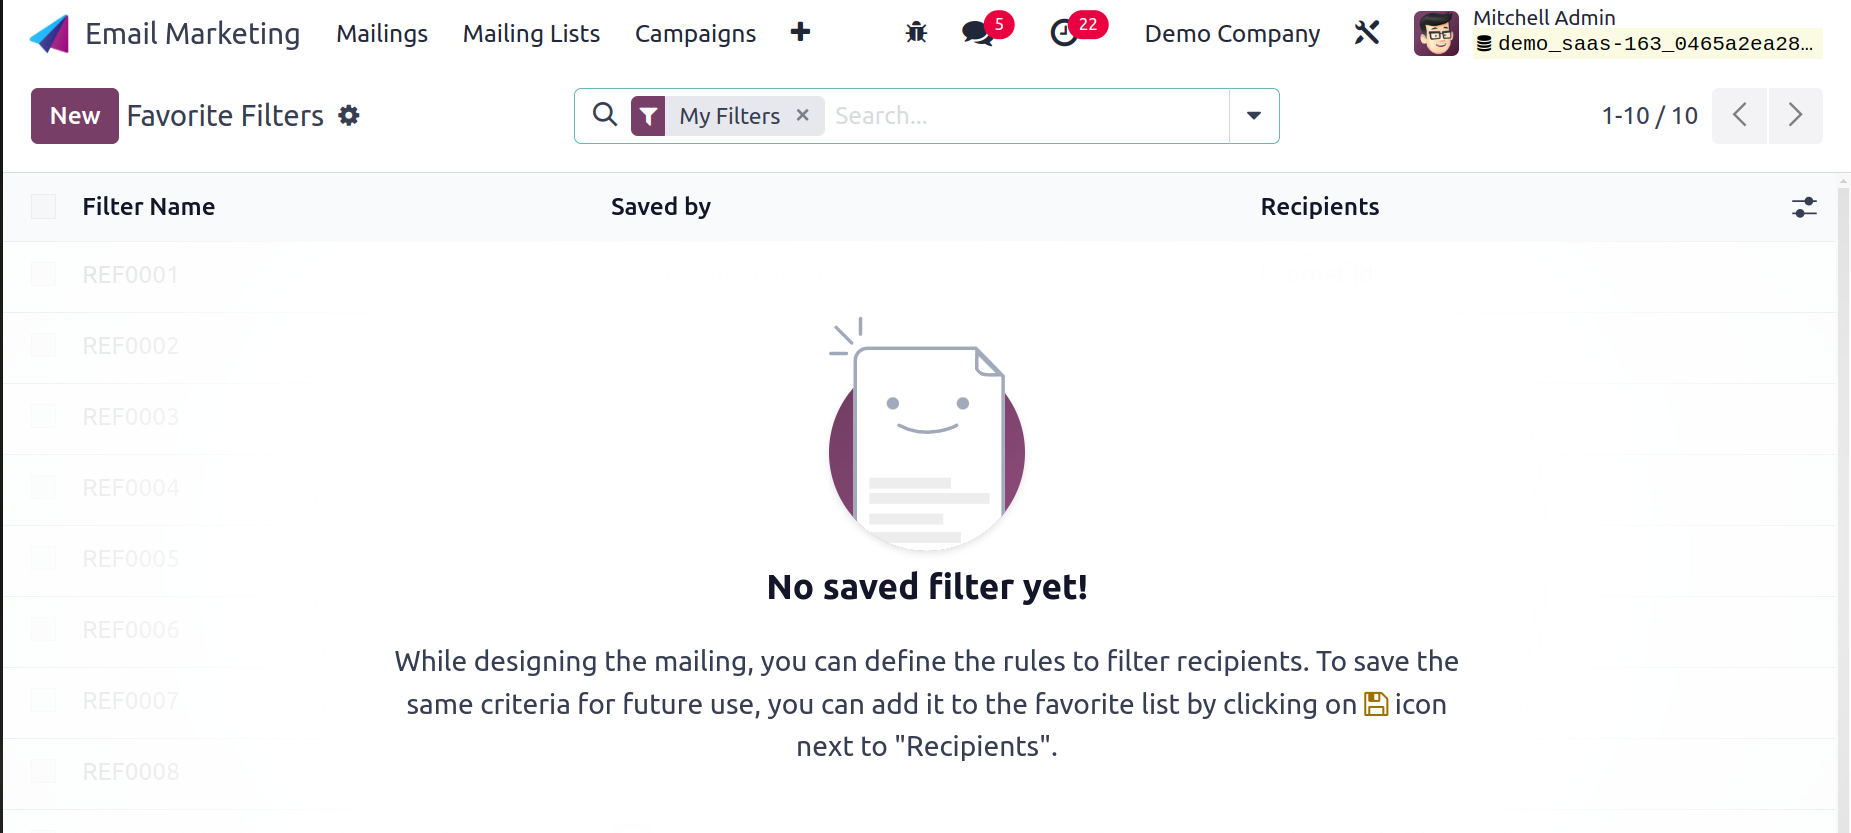
You can define the appropriate rules to filter the recipients while creating the mailing by using the option of favorite filters. By using the star icon, which is located directly next to the recipient selection, you can simply add the basis to your favorites in order to save it. Details on the page include the filter name, who saved it, and the receivers. Simply select the New icon on the left side of the screen to create a favorite filter of a similar type.
All things considered, the feature is incredibly helpful for individuals who send emails and aids in promotion as well.
Through a complete and integrated platform, email marketing in Odoo 17 optimizes marketing efforts, improves client engagement, and streamlines communication.