Spreadsheet Management
A thorough work analysis is essential to any firm. An effective business must operate
with the correct analysis. This makes it possible to assess a company's whole
operational data set with ease on a single page. In every business, reports are
considered to be quite important. Depending on the organization, there may be
differences in the reporting criteria and the need to take further actions, like
filtering, to work with those reports. All of these tasks are straightforward and quick
to execute with Odoo reports. Odoo 17 gives a Spreadsheet module to handle the
documentation.
The screenshot below shows the dashboard of the Document module. From there the users can
also manage spreadsheets. Clicking the Upload button will upload a new spreadsheet
document to the Documents module; alternatively, click the New Spreadsheet button to add
a new spreadsheet.

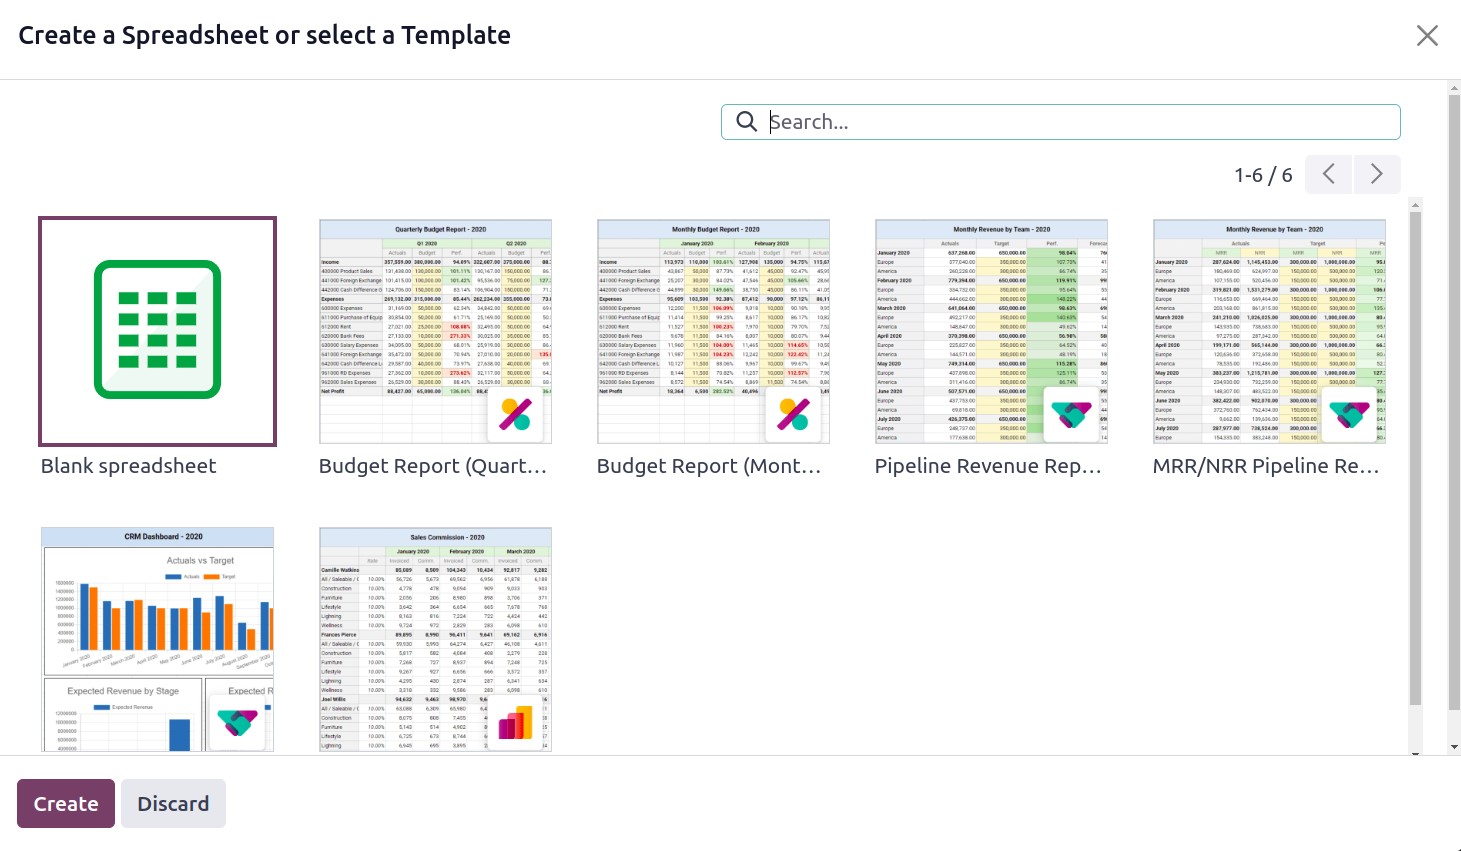
The user can select the required spreadsheet template from the following box if they are
creating a new spreadsheet. After selecting the appropriate one, press the Create
button.
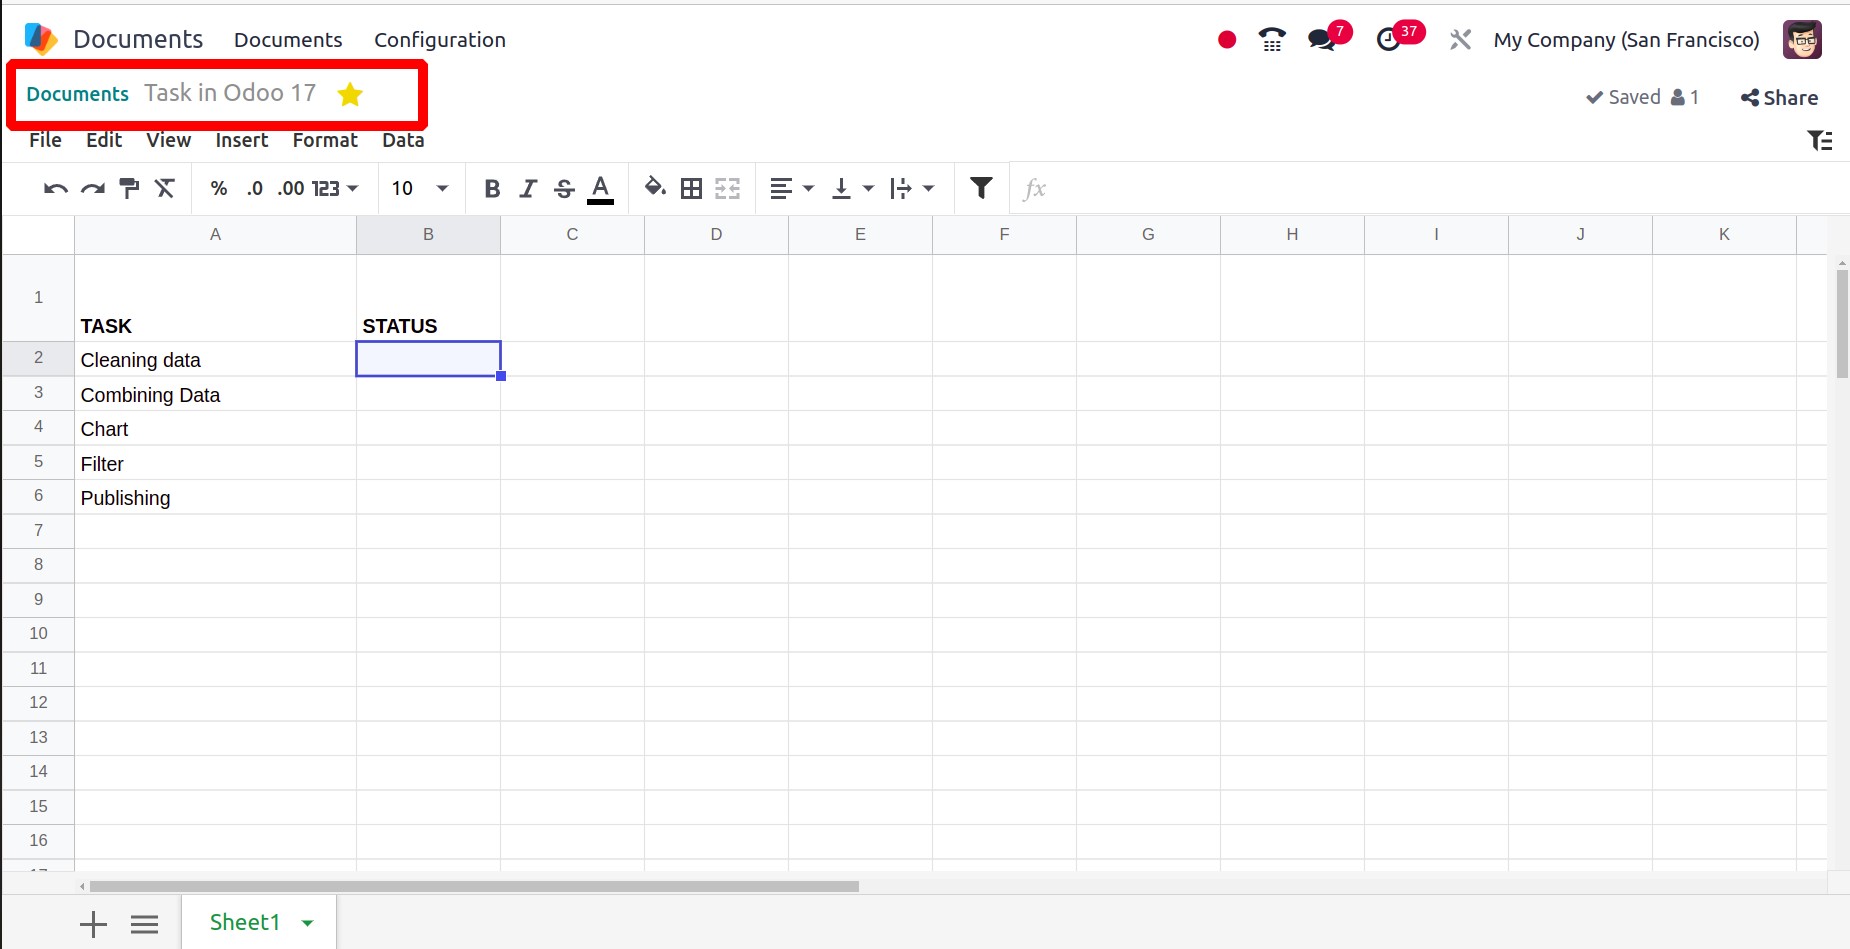
Then an empty spreadsheet will launch and open in the Documents module, where it will
automatically save. The users can then easily add more data to the spreadsheet at this
point. Name the spreadsheet, and it's possible to make it a favorite by adding stars.
Let us now examine the features included in the Odoo 17 Spreadsheet.
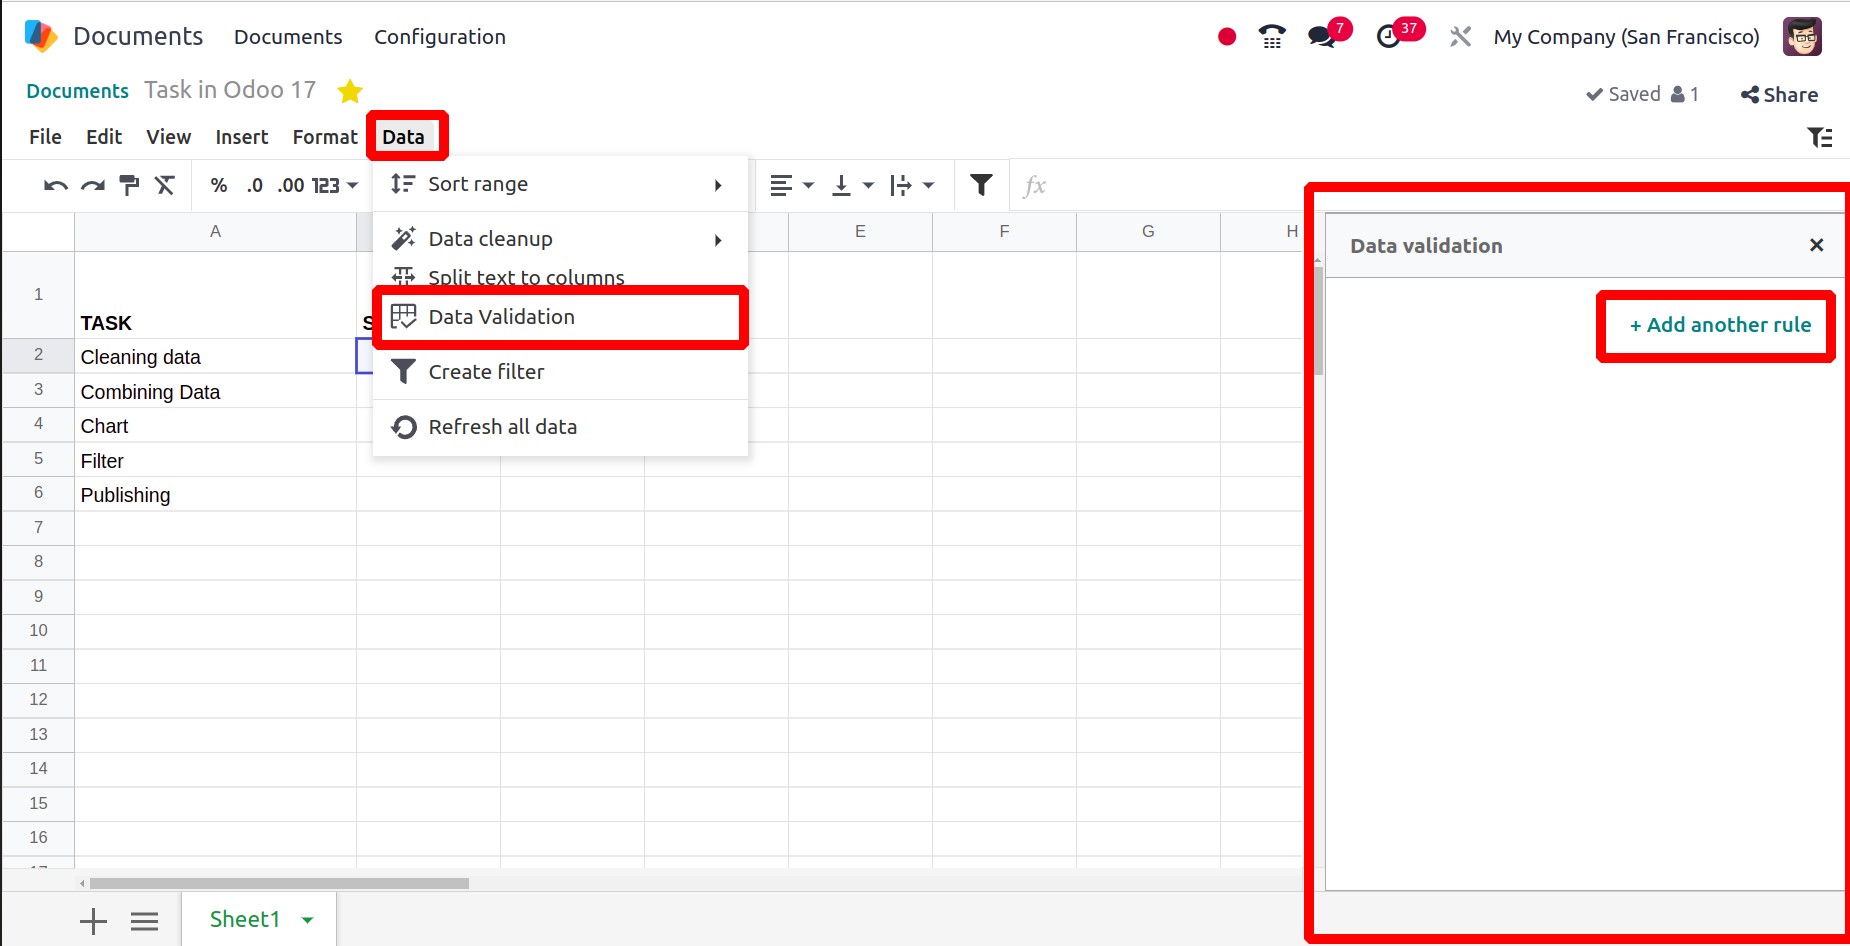
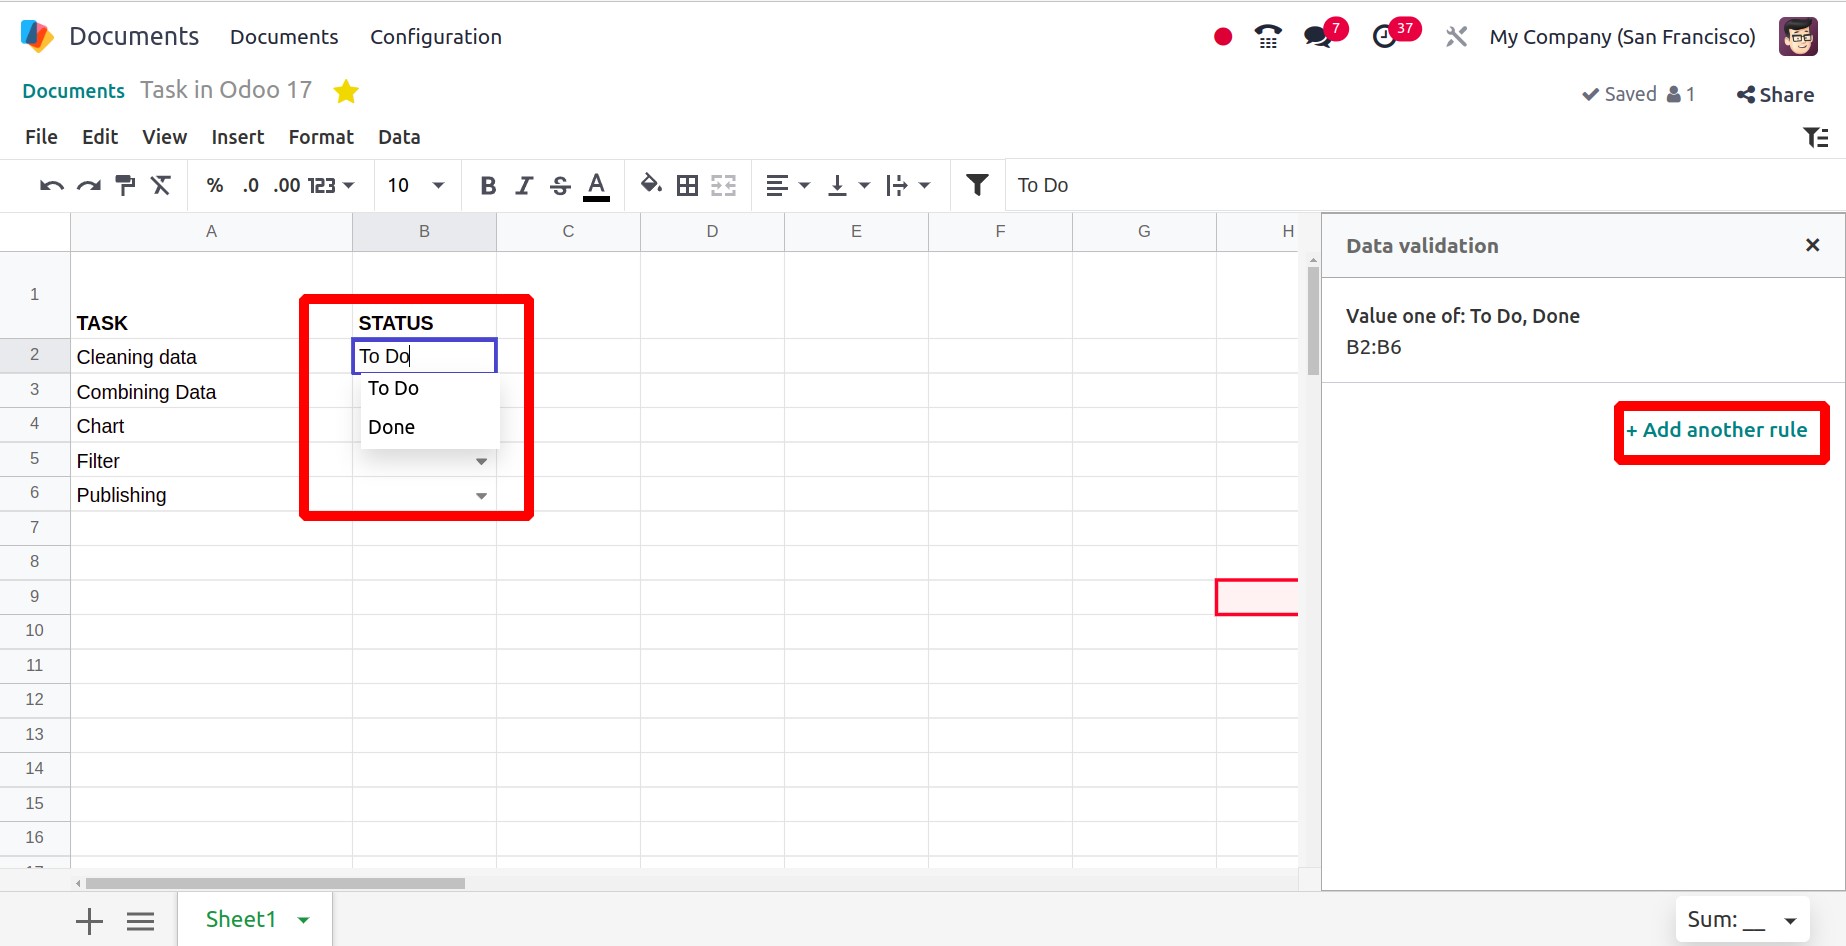
The Data menu contains the Data Validation menu. It made a tiny new box appear on the
spreadsheet's right side. Click the +Add another rule button to add a new Data
Validation rule.
Mention the cell range to which the rule is applied in that box, then select the criteria
and its values, display kind, etc., and keep the rule safe.
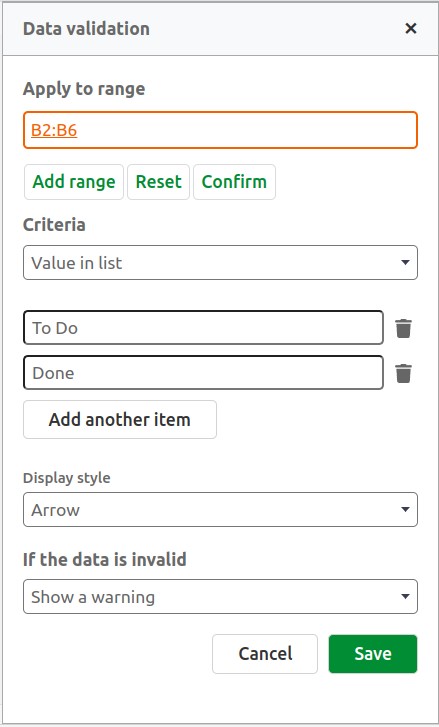
The values can then be seen from the cell that was mentioned. Next, by selecting the +Add
another rule button, a new rule can be added.
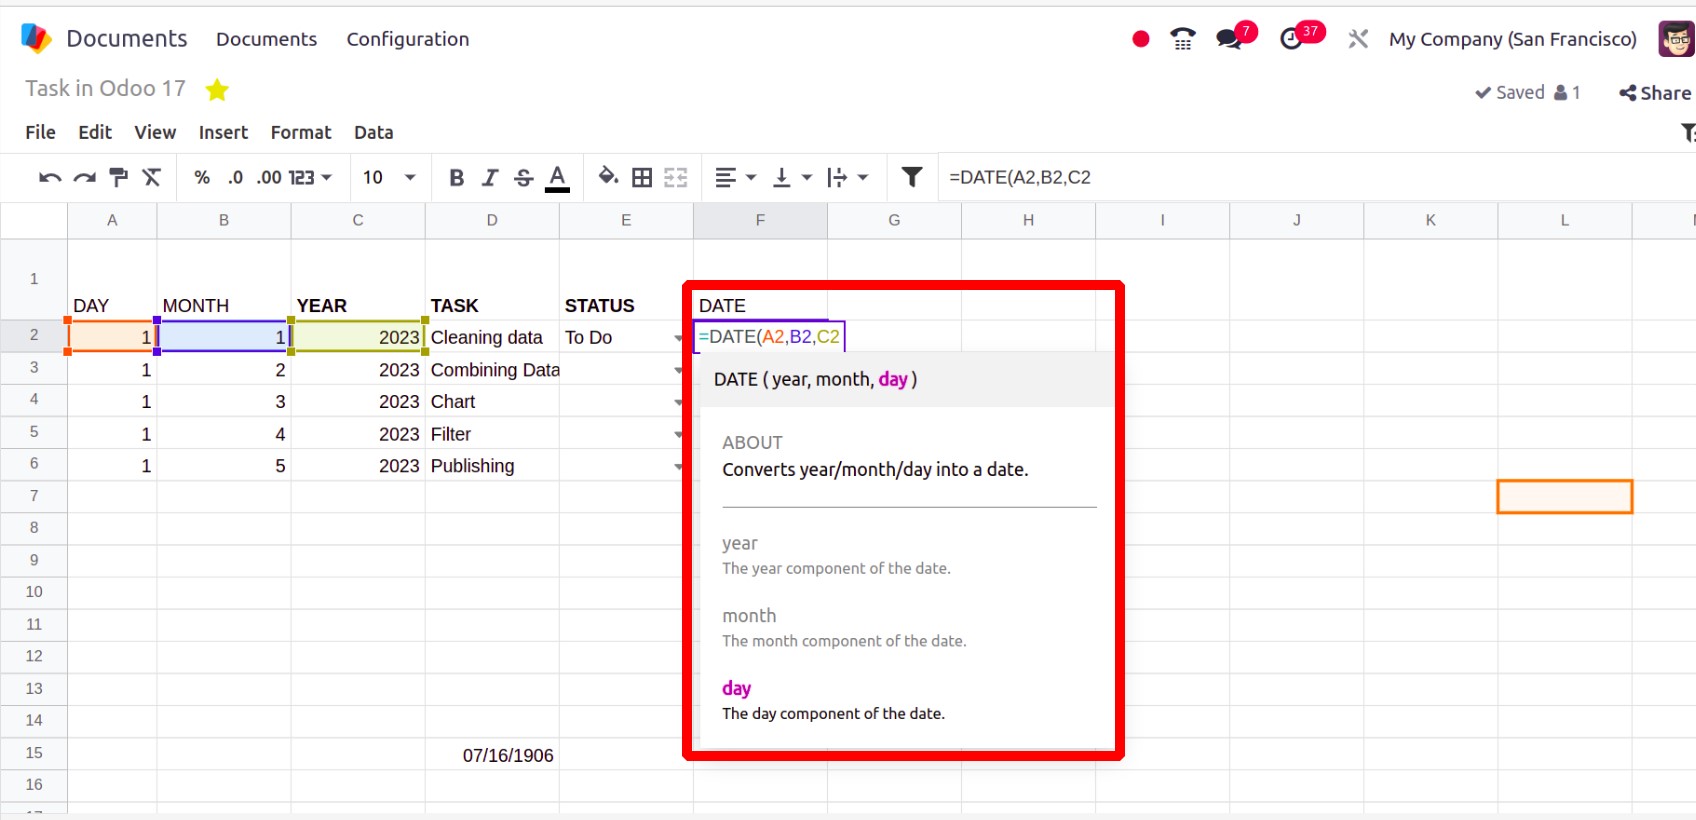
By inserting a = symbol in the cell, as seen in the screenshot below, the user can
quickly enter data, such as the date. Select the appropriate choice from the list.
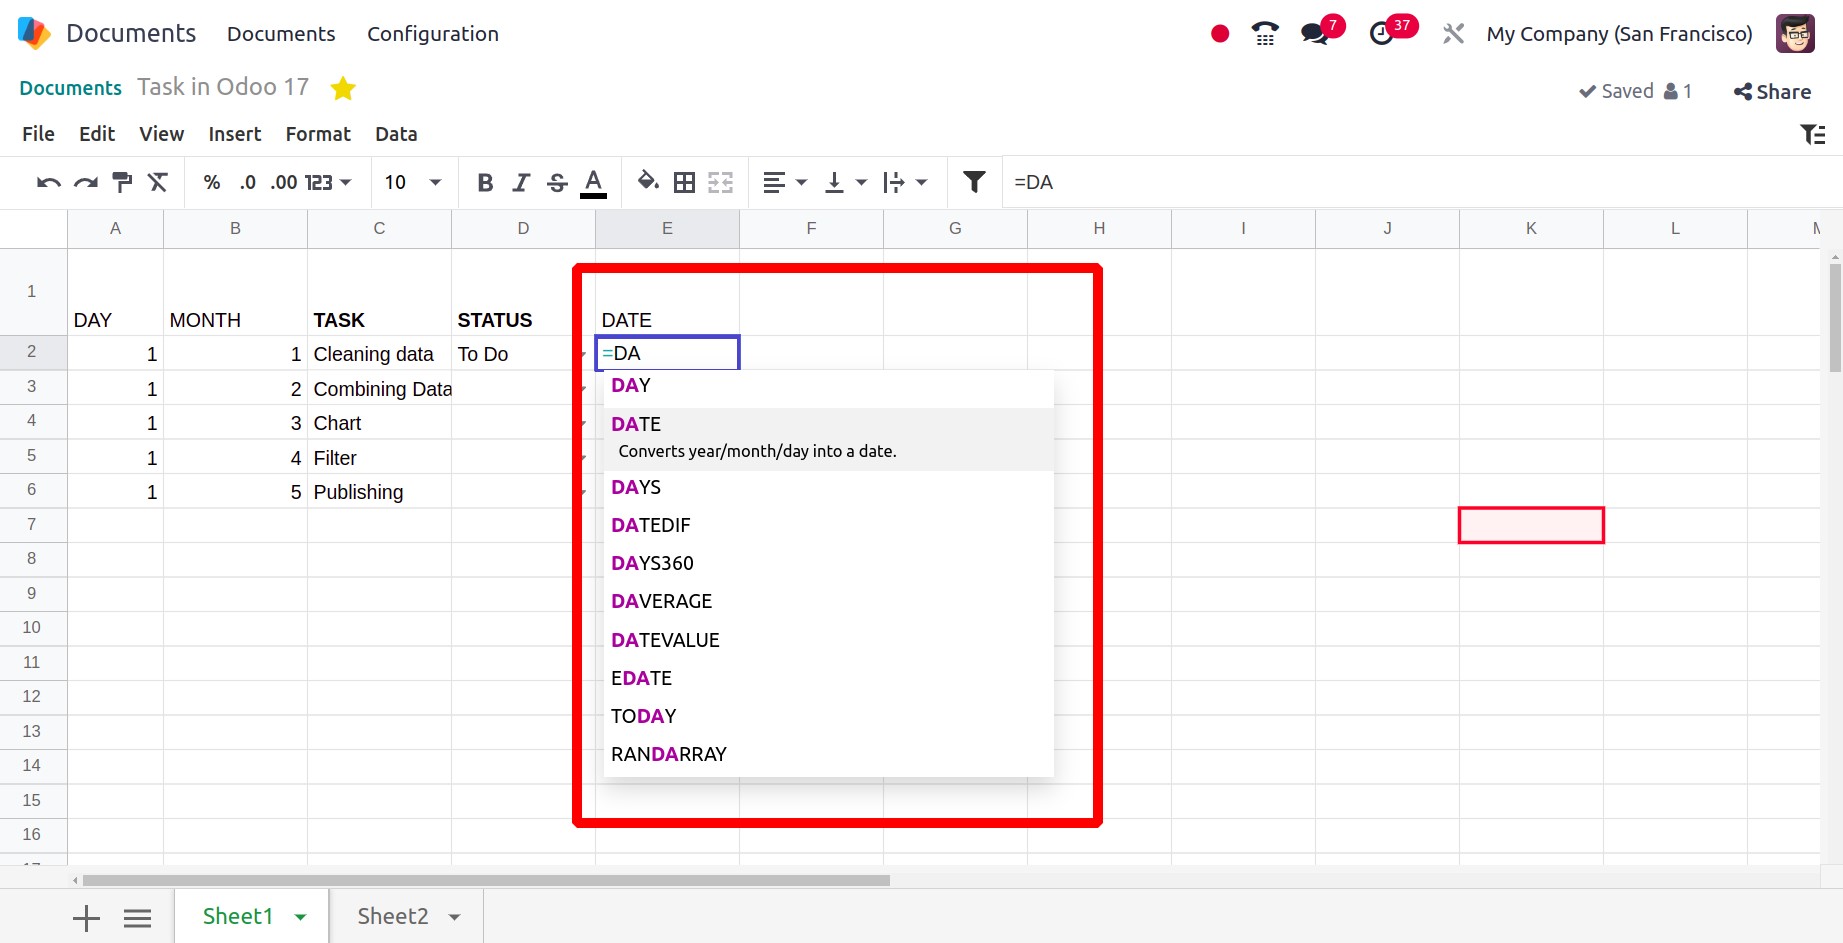
Next, pick the matching cells. And depending on the cells you've chosen, the date will
change there.
Text can now be divided and placed in a different cell. To do this, first select the
cells, and then, from the Data menu, select Split text to column. The other box once
more opens to the right. Mention and reaffirm the norm there.

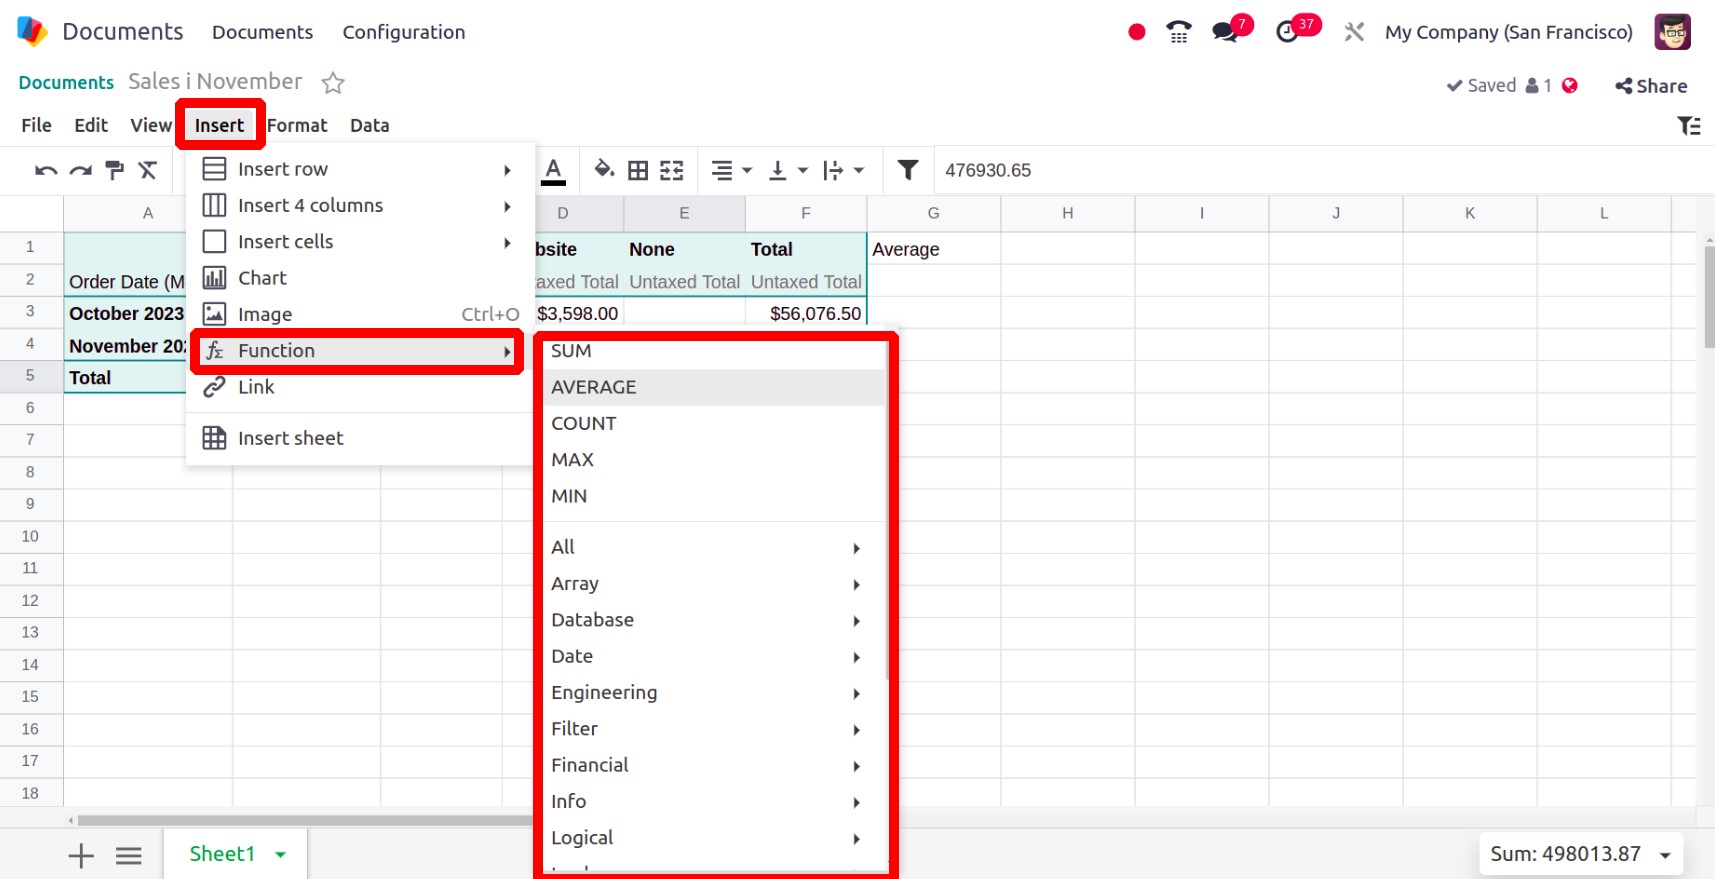
It is possible to add many functions, such as Sum and Average, to a cell in Odoo 17.
Click the Insert menu and select Functions from the list to accomplish it.
In the Odoo 17 spreadsheet, data can now be cleaned up. Thus, it is now simple to prevent
data duplication. The Data menu contains the Data cleanup option. Duplicates can be
eliminated, and whitespaces can be trimmed.

Reports may need to highlight certain data points. On rare occasions, the user might
highlight data according to its values. An Odoo 17 spreadsheet can be formatted using
this kind of conditional formatting. Let's examine its operation. To apply conditional
formatting, select Conditional Formatting from the Data menu. A fresh side window then
appears.
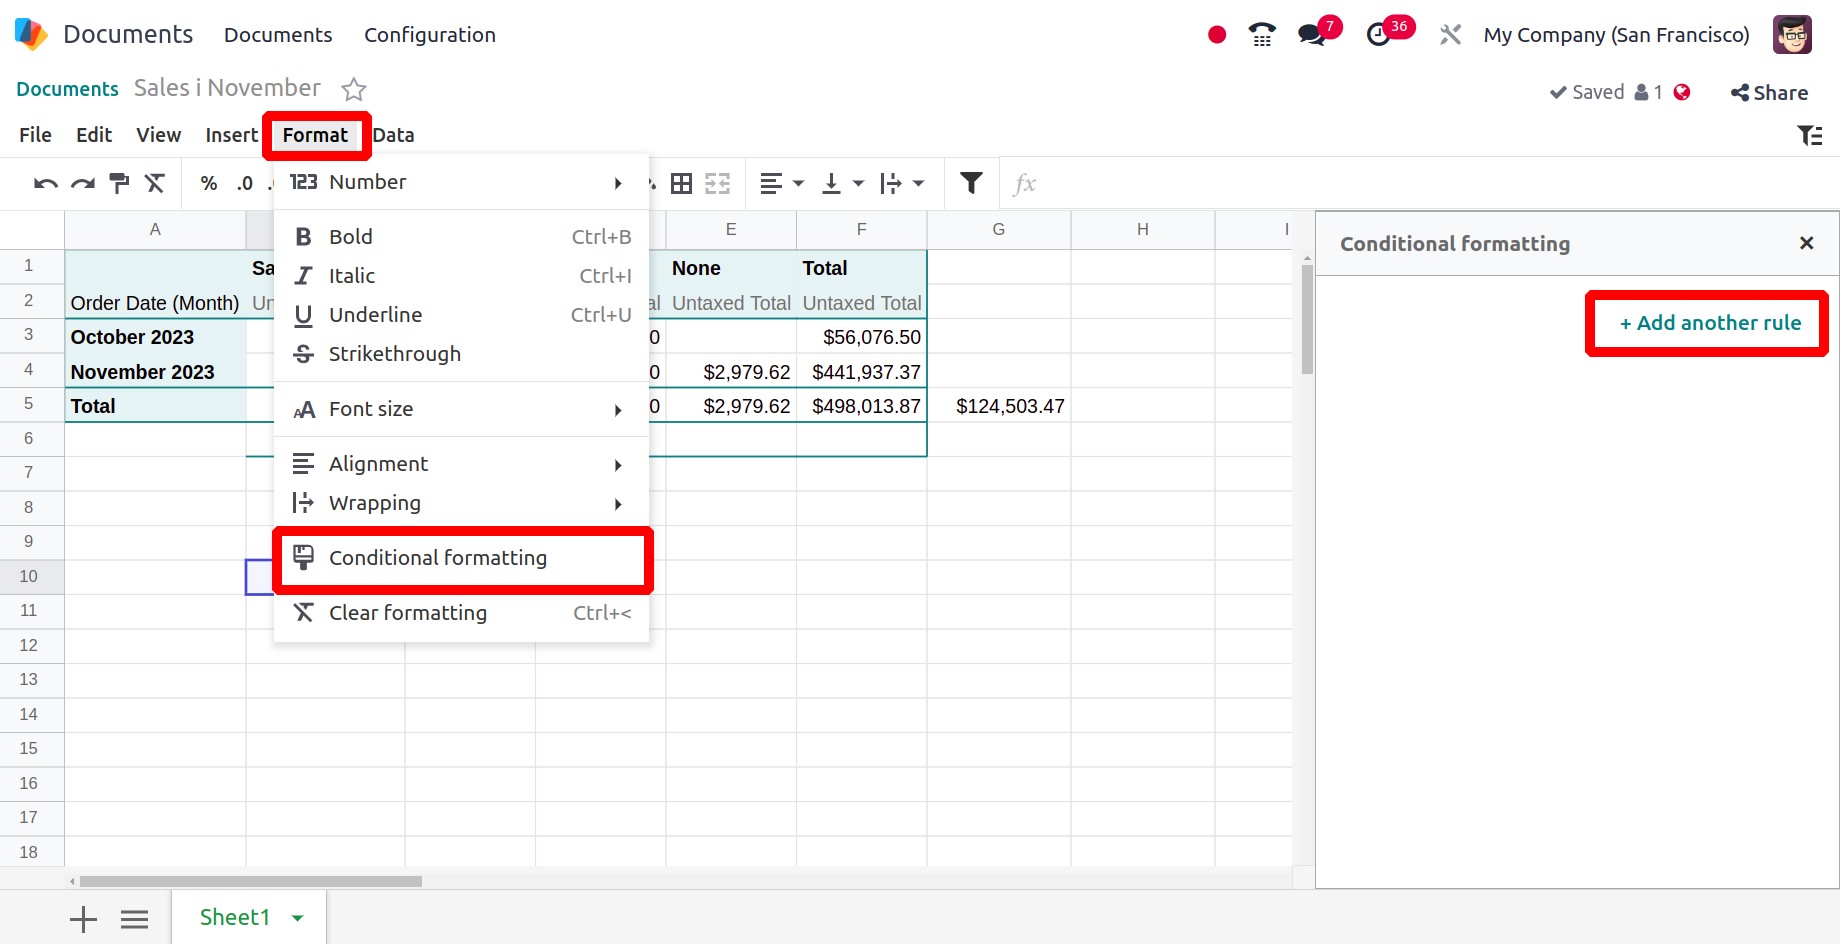
Add the cell range first, then apply the condition. You can choose which format rules to
use.
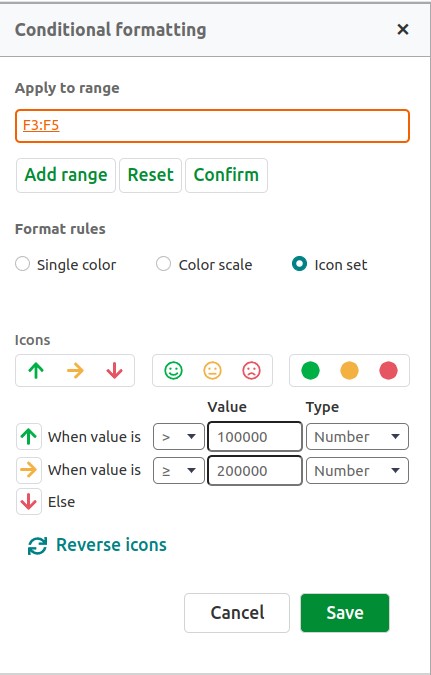
Such formatting can be used in three different ways. Using a single color is one
approach; using a color scale or an icon collection is another. At this moment, three
distinct kinds of icon sets are offered. Pick the best option available. Next, enter the
condition in the designated fields. And then save it. The formatting is done based on
the added condition after saving. Any other field can use the same highlighting.
Conditional formatting is also done while adding new ranges.
Possibly most of the reports are overly lengthy. It is too difficult to find a specific
piece of data in the report if someone needs to see it. A filter option is necessary in
these situations, and Odoo17 has one for data in spreadsheets. Let's examine what
transpired now. A Filter symbol appears in the right corner of the screen. So feel free
to click on it.
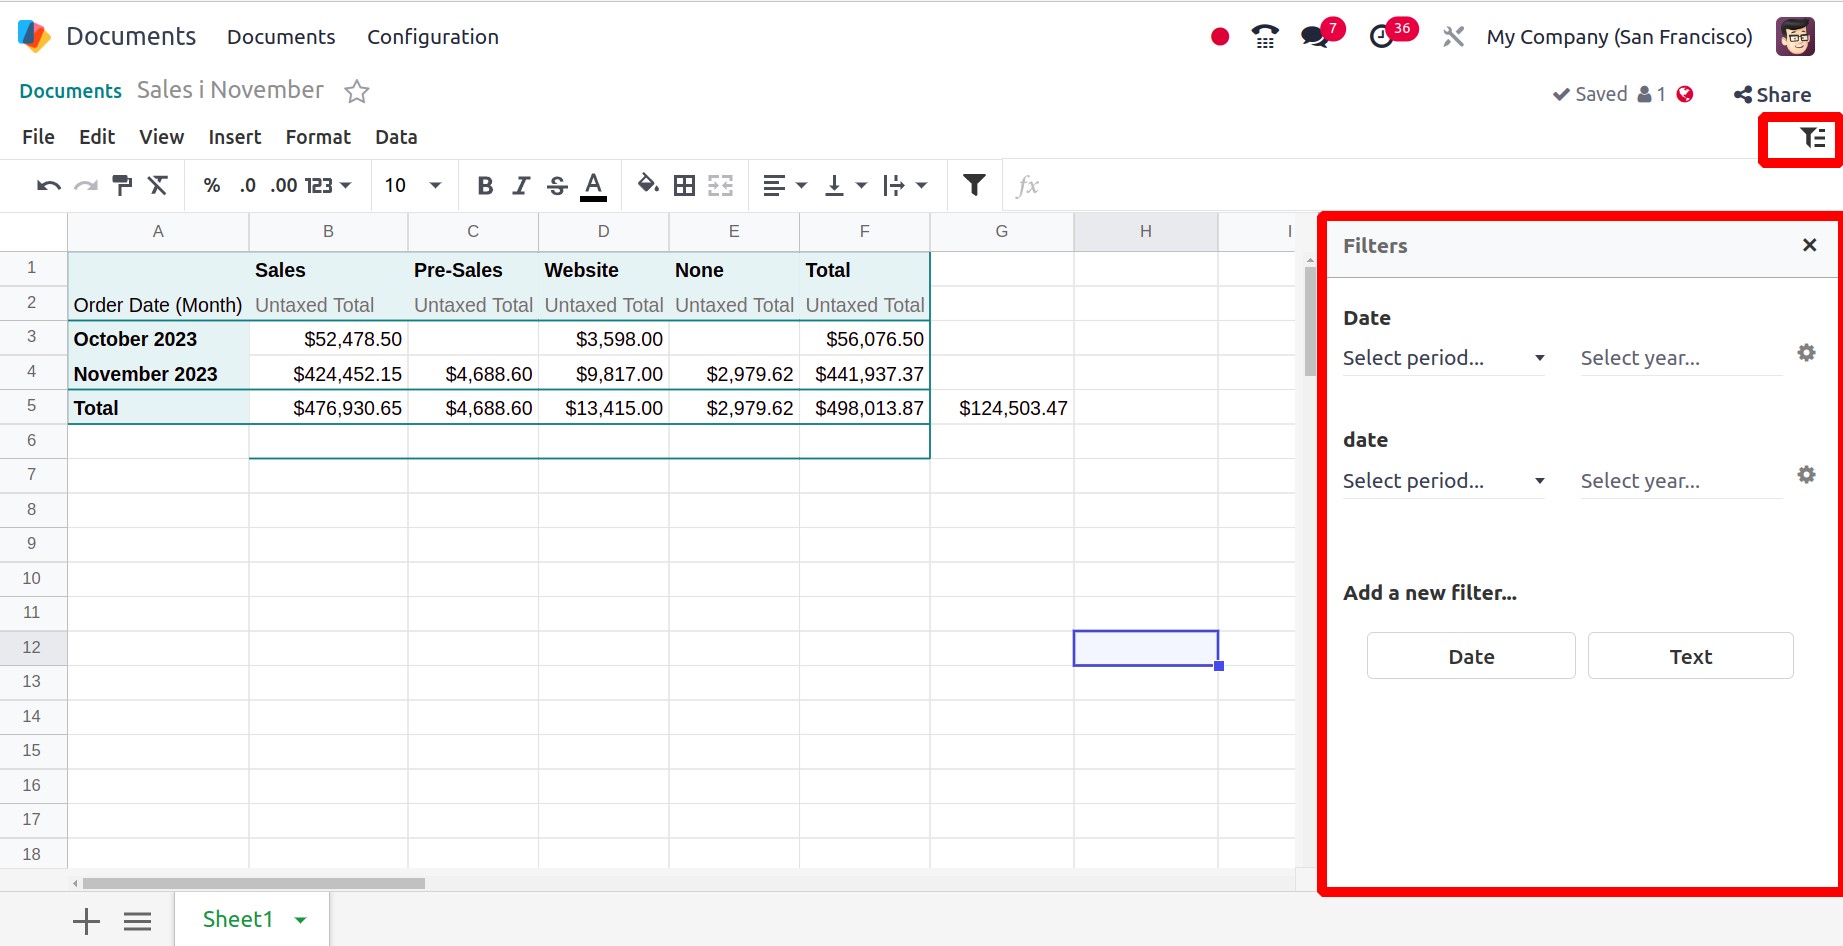
After that, a filter might be used if needed. Filters based on Text, and Date can be
created. The filter is finished and prepared to be applied to the sheet after a segment
has been chosen and the necessary data has been entered. Don't forget to save the
filter.
A graph-based analysis could be included in this section. Charts can be added based on
the given criteria. Sometimes, these graphs are easier to understand than a lengthy list
of numbers. Navigate to the Insert menu and choose a chart from the list to add.
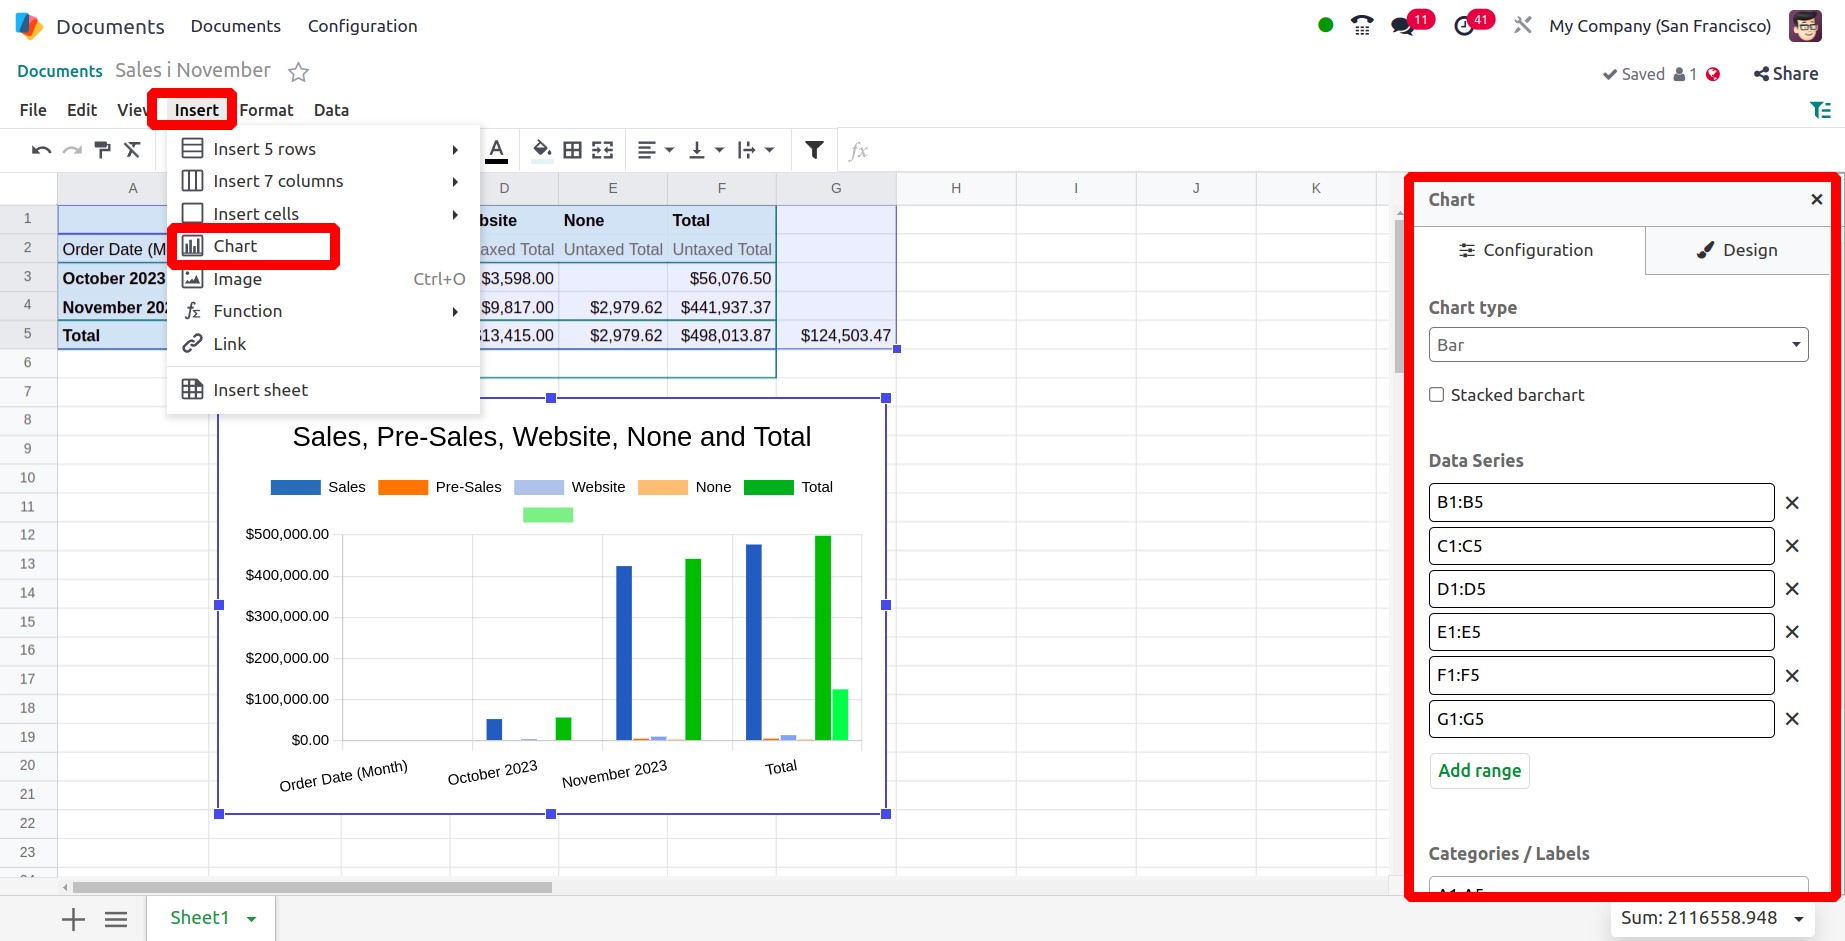
On the window's right side, a page is open. You can choose from a variety of graph types
and characteristics. Design and Configuration have their own sections. From there, a
chart type can be chosen. Bar charts, pie charts, and line charts are the three types of
charts. Next, discuss the variety of data series. The title of the selected information
will be appended when the Data series contains titles checkbox is checked.
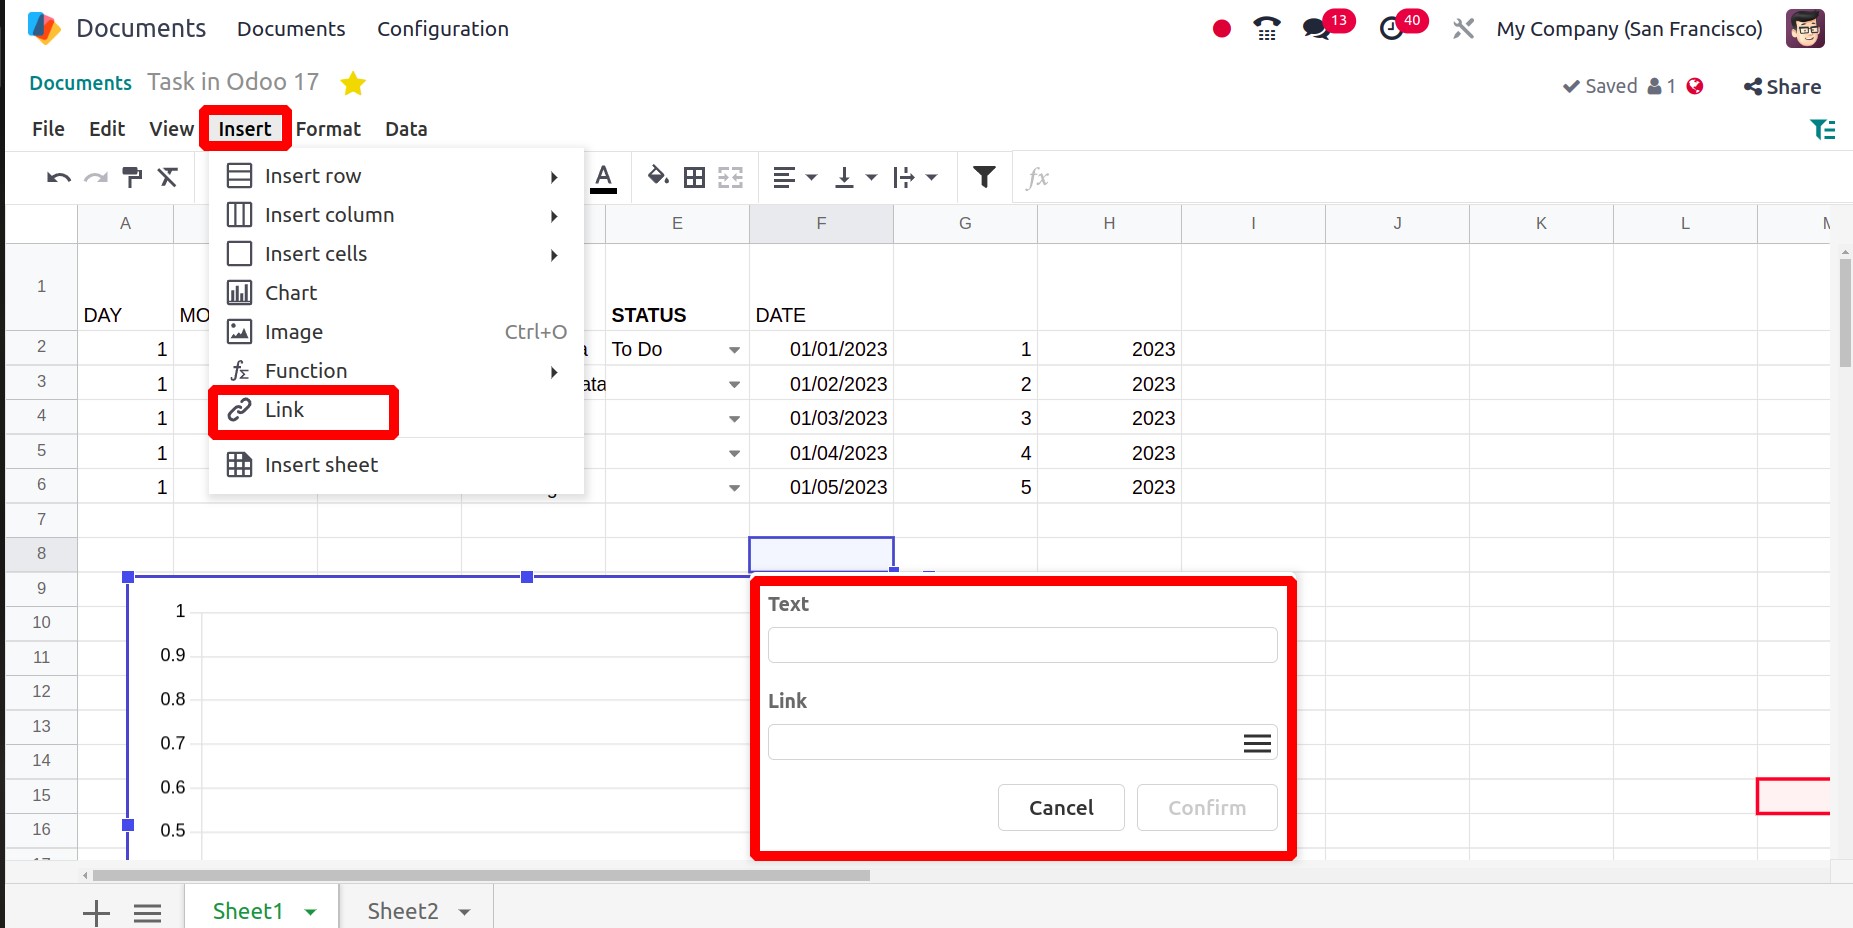
You could occasionally need to examine an additional file or video in addition to this
report. In an Odoo 17 spreadsheet, you can include a link to an alternate page in the
current report. Select the Link option from the Insert menu to achieve this.
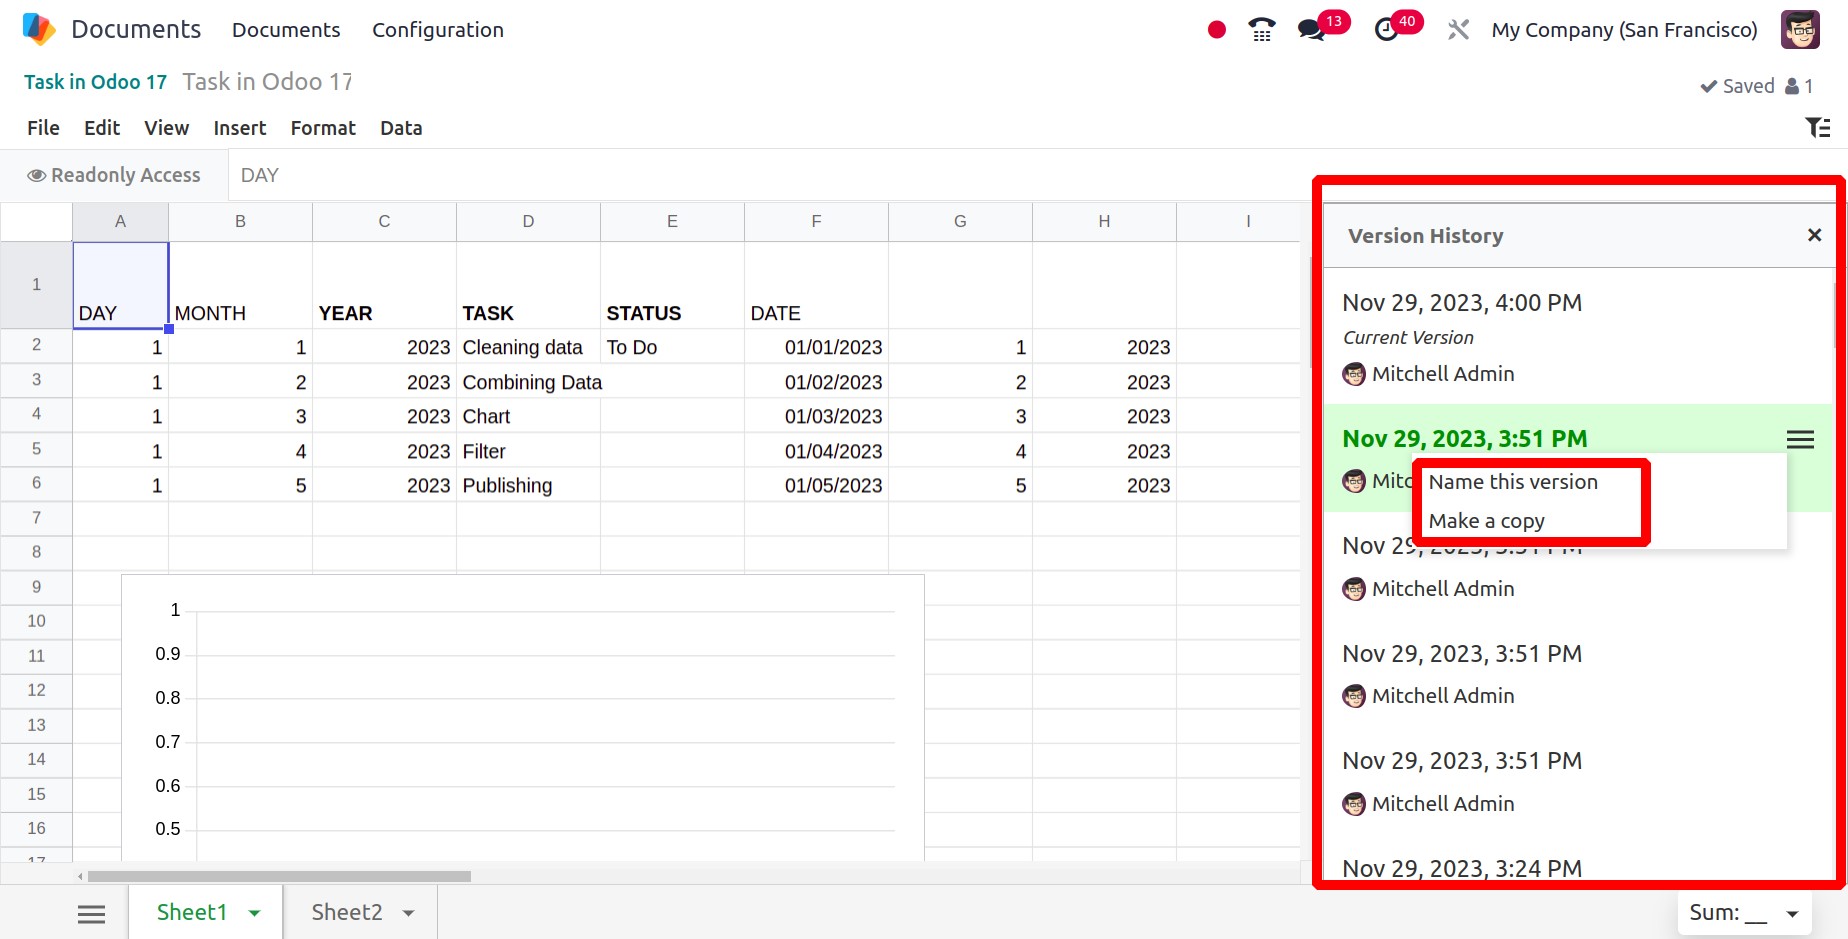
The See version history option is located in the File menu. When you select the See
version history option, a new box will show up on the spreadsheet's right side.
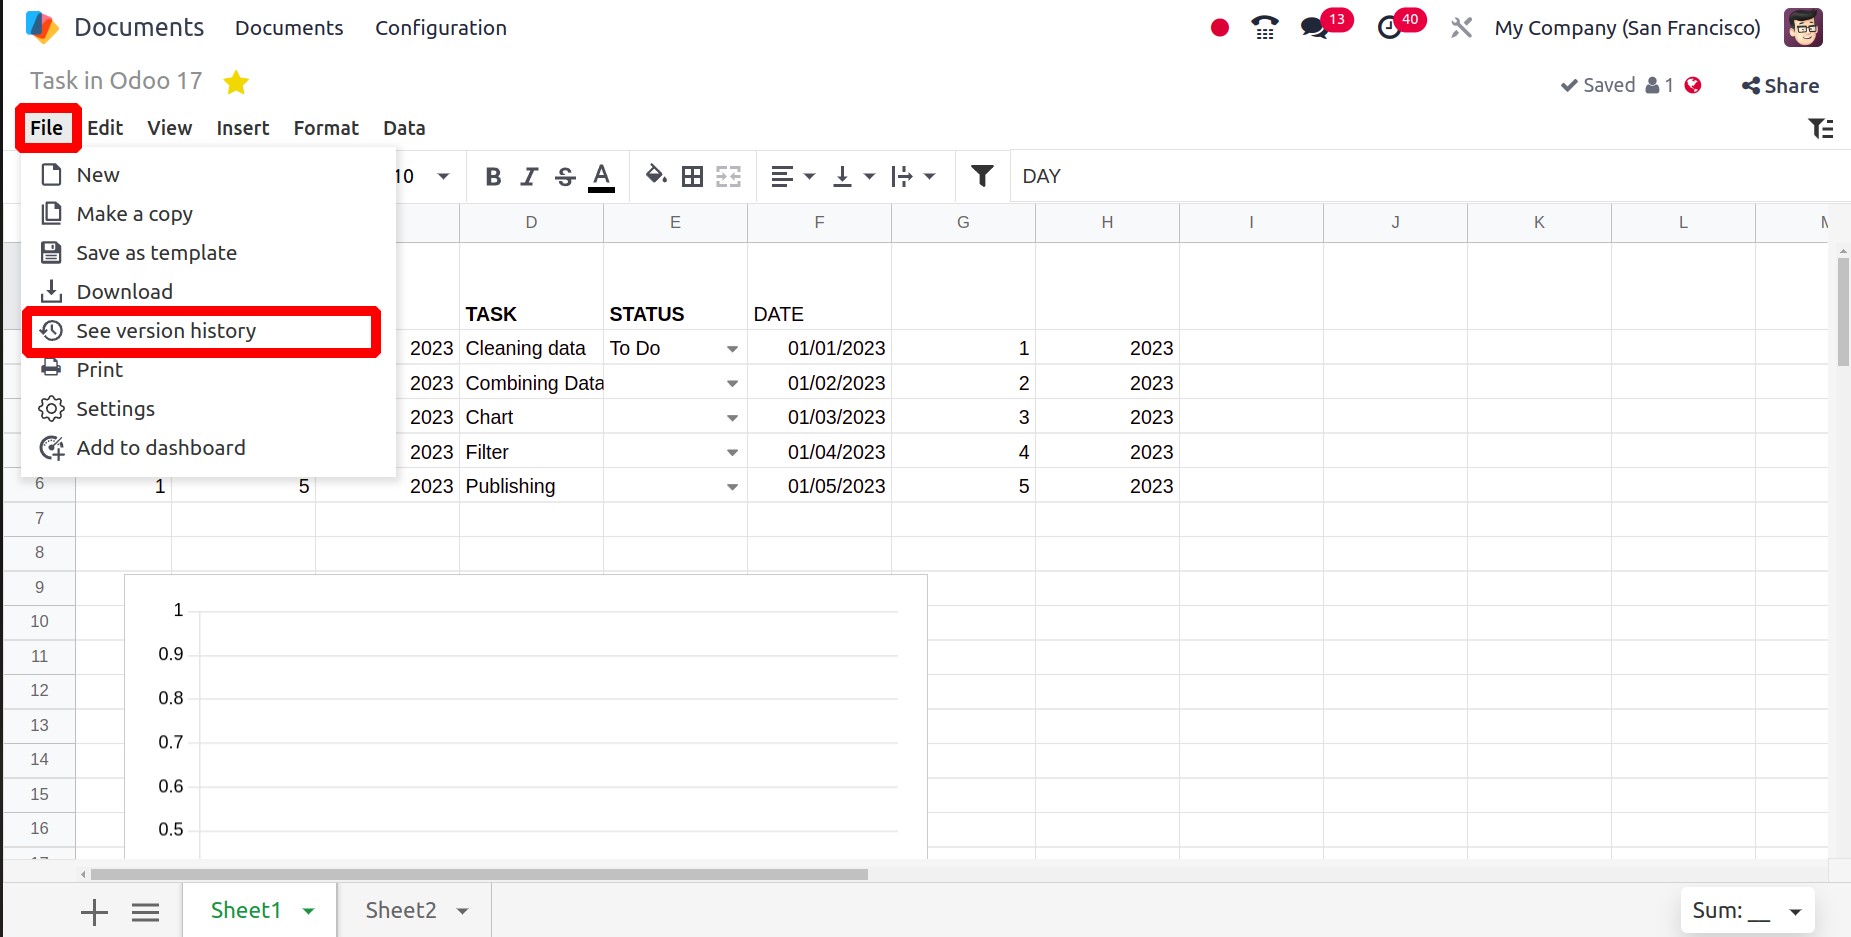
Subsequently, the spreadsheet versions will be displayed there. Two options like Name
this version and Make a copy are available there.
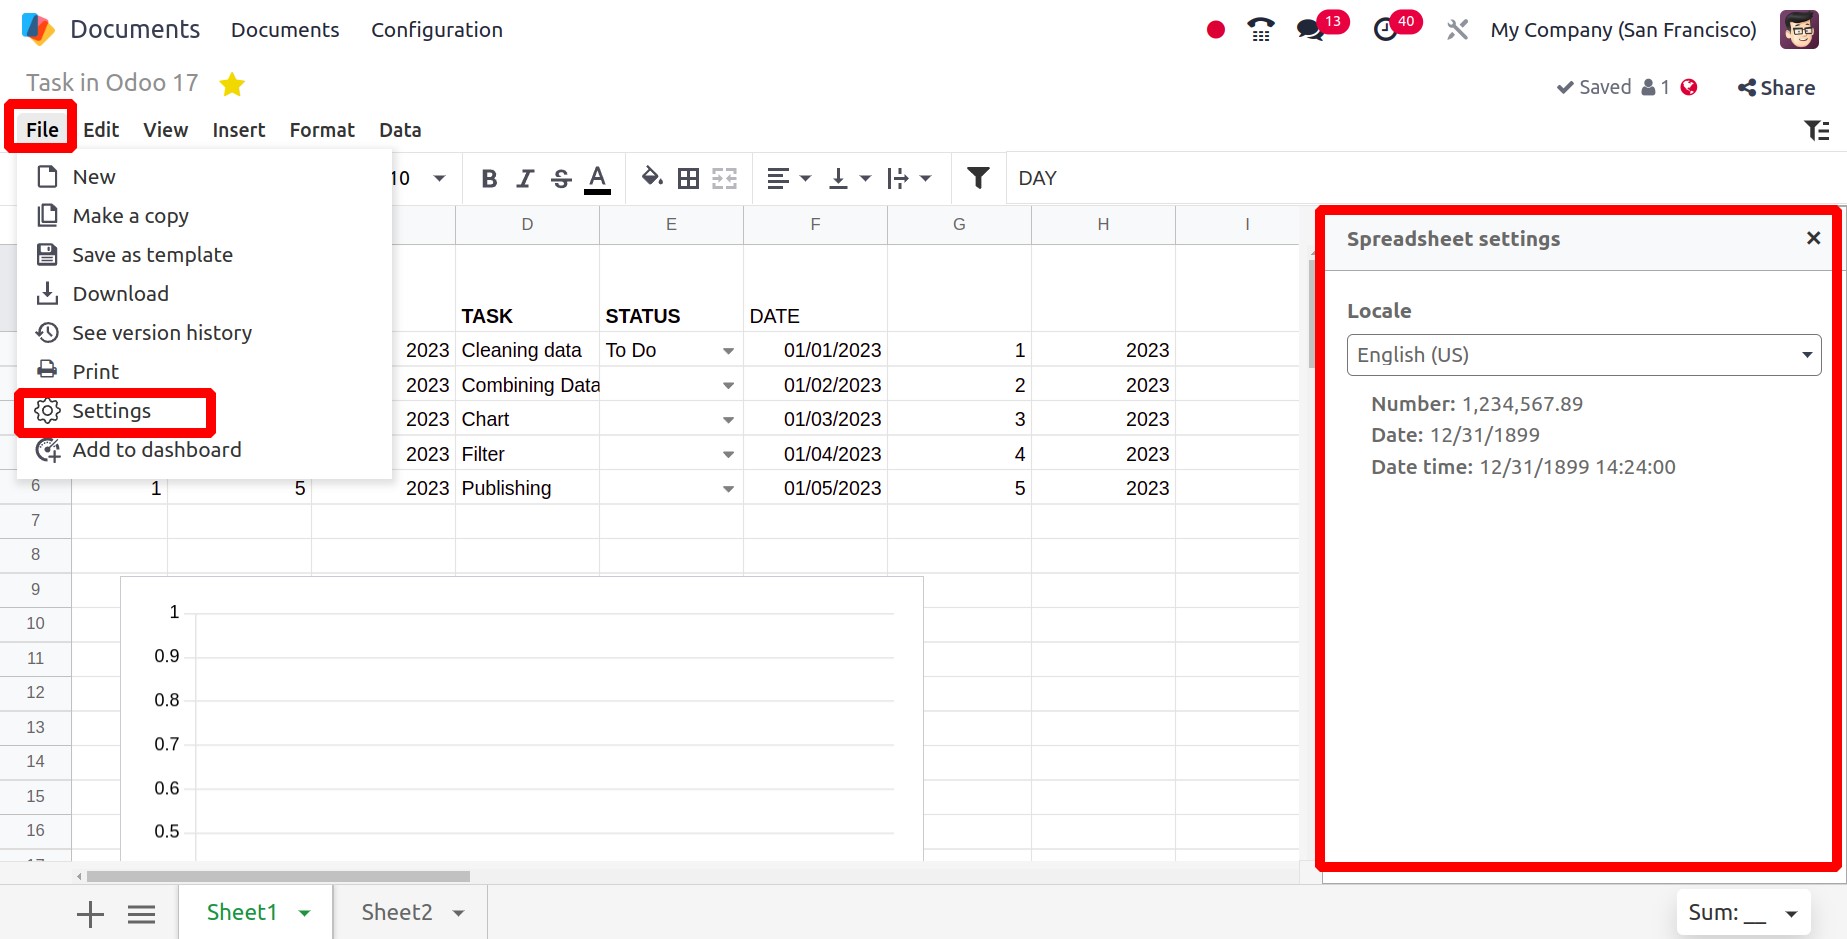
Locale, number, date, and time can be viewed on the right side by choosing the Settings
option from the File menu. The locale can be altered.
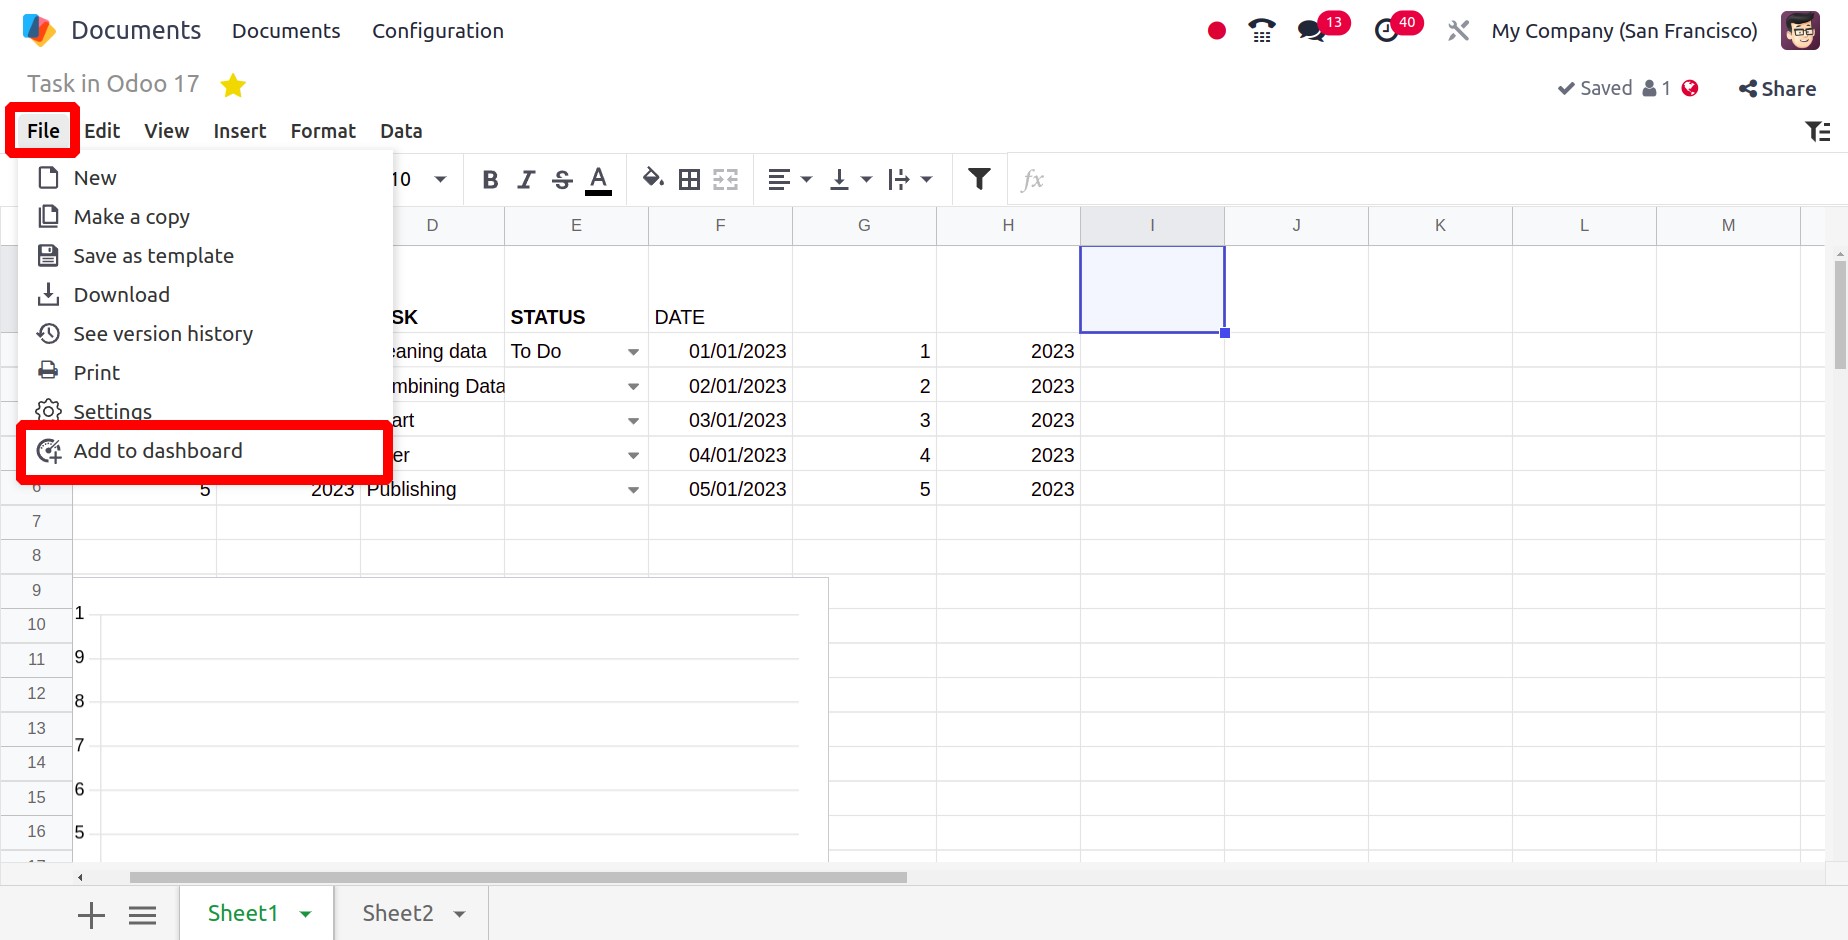
Finally, the spreadsheet may be added to the dashboard. that is, the choice that is
present in the File menu. Select the "Add to dashboard" option.
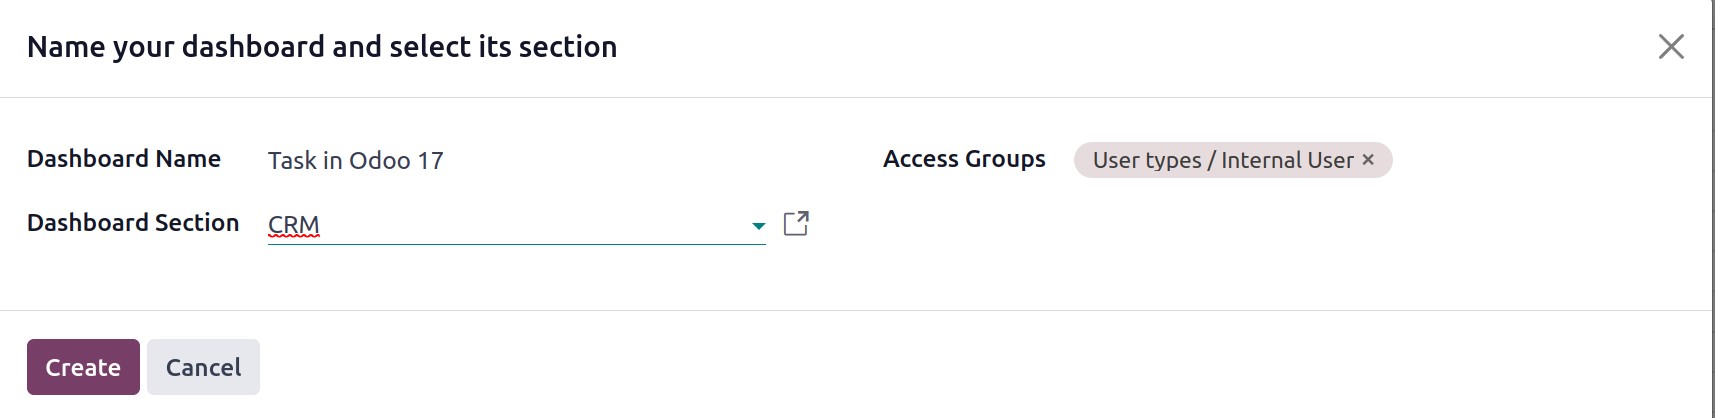
A popup window will then show up. After entering the dashboard's name, section, and
access group, click the "Create" button.
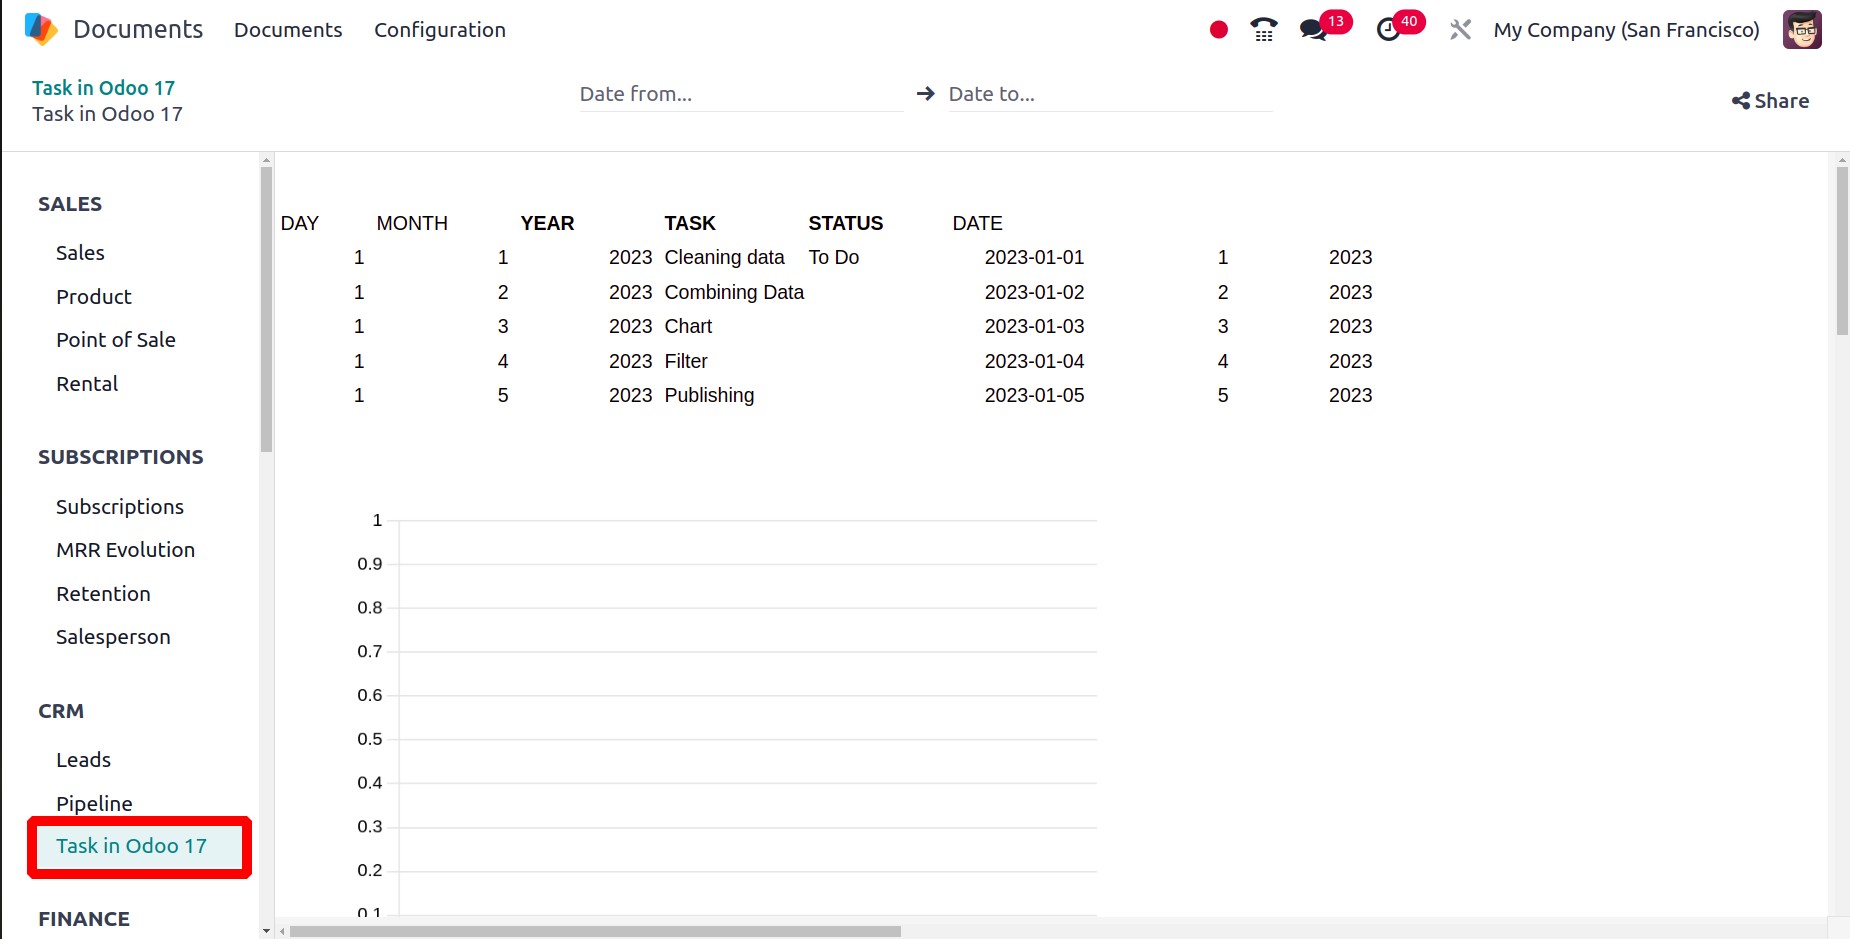
The spreadsheet will thereafter be included in the Dashboard. which, as the screenshot
below illustrates, was inserted inside the CRM section.
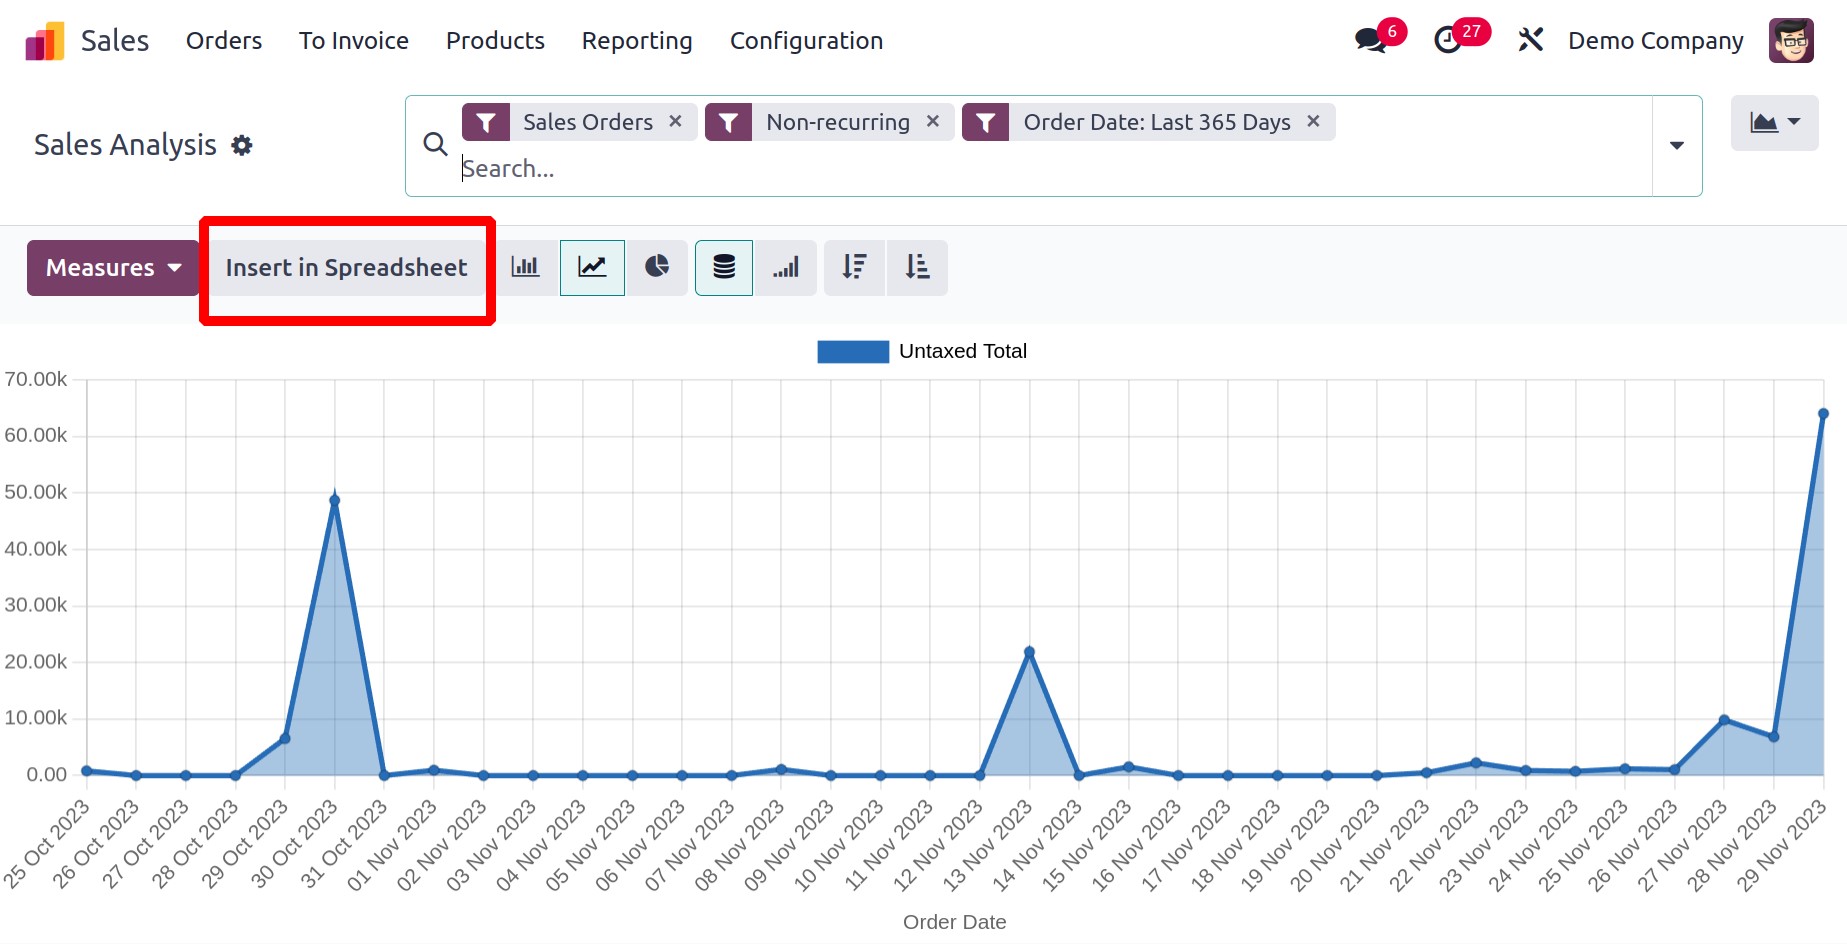
By selecting the Insert in Spreadsheet button, users of the Pivot view of Reports in
every module can contribute data to the dashboard.
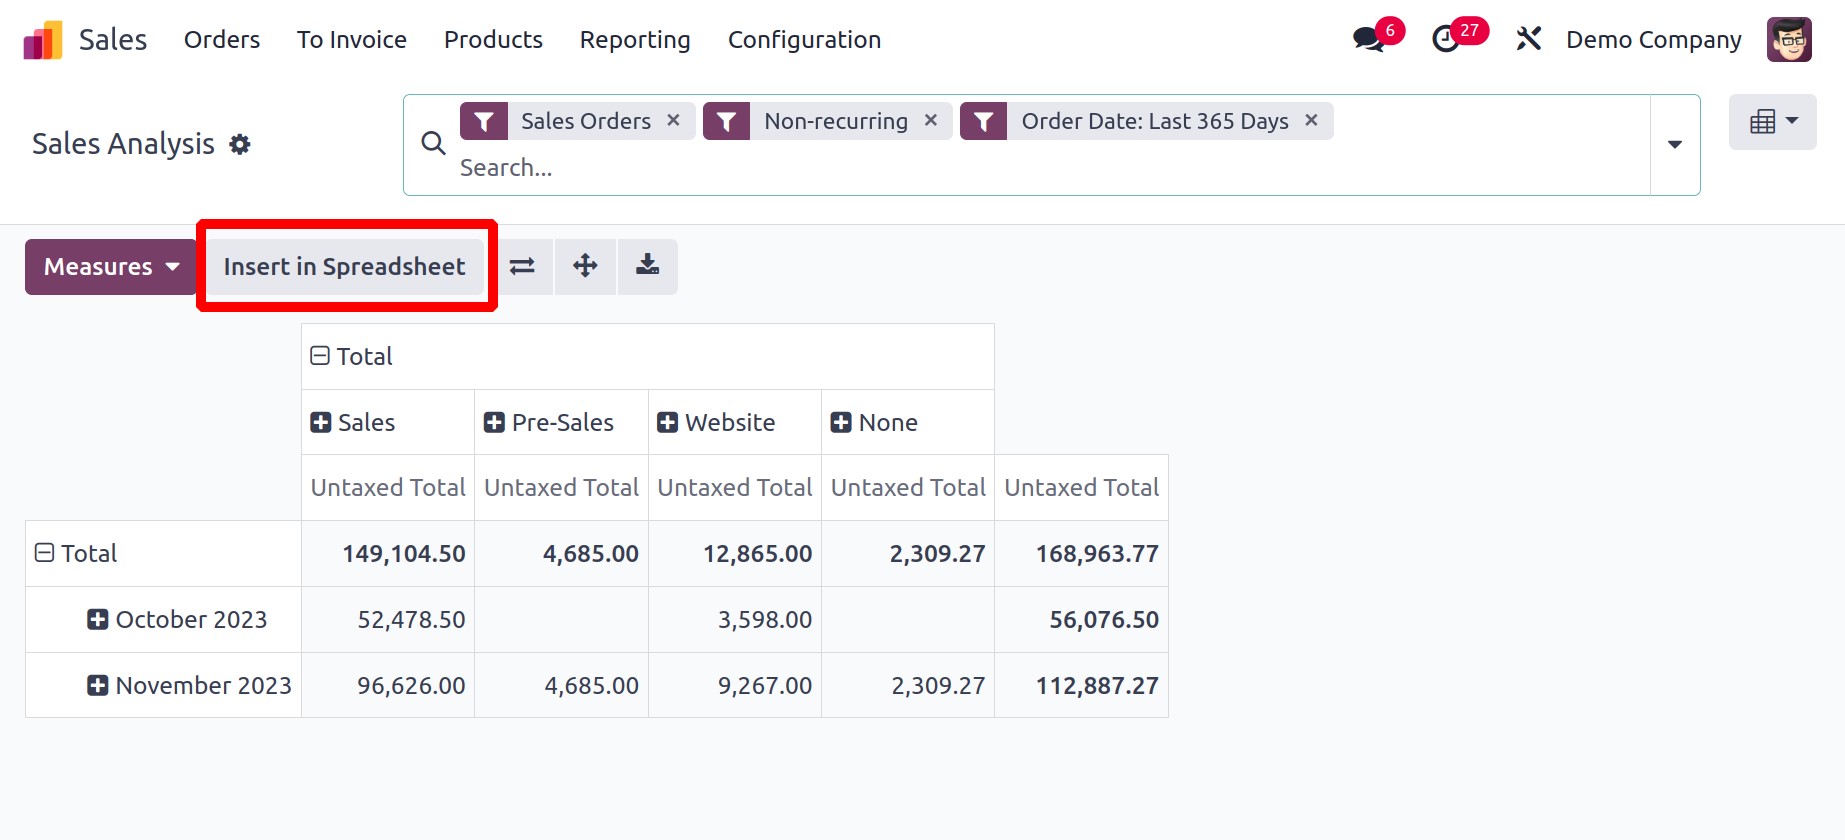
However, Odoo 17 also has the Insert in Spreadsheet button accessible within the Graph
view.
These functionalities are part of the Odoo spreadsheet. There are some spreadsheet
features that are already available, as everyone is aware. An Odoo 17 spreadsheet has
all of these functionalities as well. Tools like New, Show Formula, Add Column and Rows,
Font sizing and formatting, and Strikethrough are also available in the Odoo17
spreadsheet.