Sign
Odoo 17 Sign
The Odoo17 ERP platform's Sign module is intended for delivering, signing, and approving
documents electronically. You can upload your PDF file quickly and effortlessly with the
module's user-friendly drag-and-drop fields.
The module works as a strong tool to sign documents more quickly without paper and a
pen. Better productivity and fewer complicated document signing processes will result
from getting documents signed as soon as possible.
The Odoo17 Sign module provides you with a cutting-edge method for sending, signing, and
approving documents by setting up contacts with the aid of drag-and-drop preset blocks.
Additionally, it will make it simple to submit signature requests and aid in tracking
the progress of each given document.
Additionally, the system aids in producing reports, such as audit reports, for all
parties at any time or place. All signatures made using the Odoo Sign module will be
recognized as legal electronic signatures in accordance with the US ESIGN Act, EU
Regulation 910/2014, and eIDAS. It also affirms that virtually all nations require
electronic signatures.
Say farewell to unexpected expenses tied to printing, copying, faxing, scanning,
shredding, and postage. The sign module ensures everything is accessible online, 24/7,
from anywhere—no more concerns about crucial documents disappearing.
Furthermore, you won't have to wait for everyone to sign for hours, days, or even weeks,
which will allow you to save more and more time. With only a few clicks, you may
complete it using the Odoo 17 Sign module. Similar to how it will assist you in lowering
mistakes and risks related to document signing.
Installing the module from the Odoo17 apps is what you should do initially in order to
gain access to the Odoo17 Sign module. The module will then open when you click the Sign
module menu icon.
You can examine a preview of the templates that have previously been developed in the
platform in the module's home dashboard window, which displays the templates. Below is a
screenshot of the dashboard window.
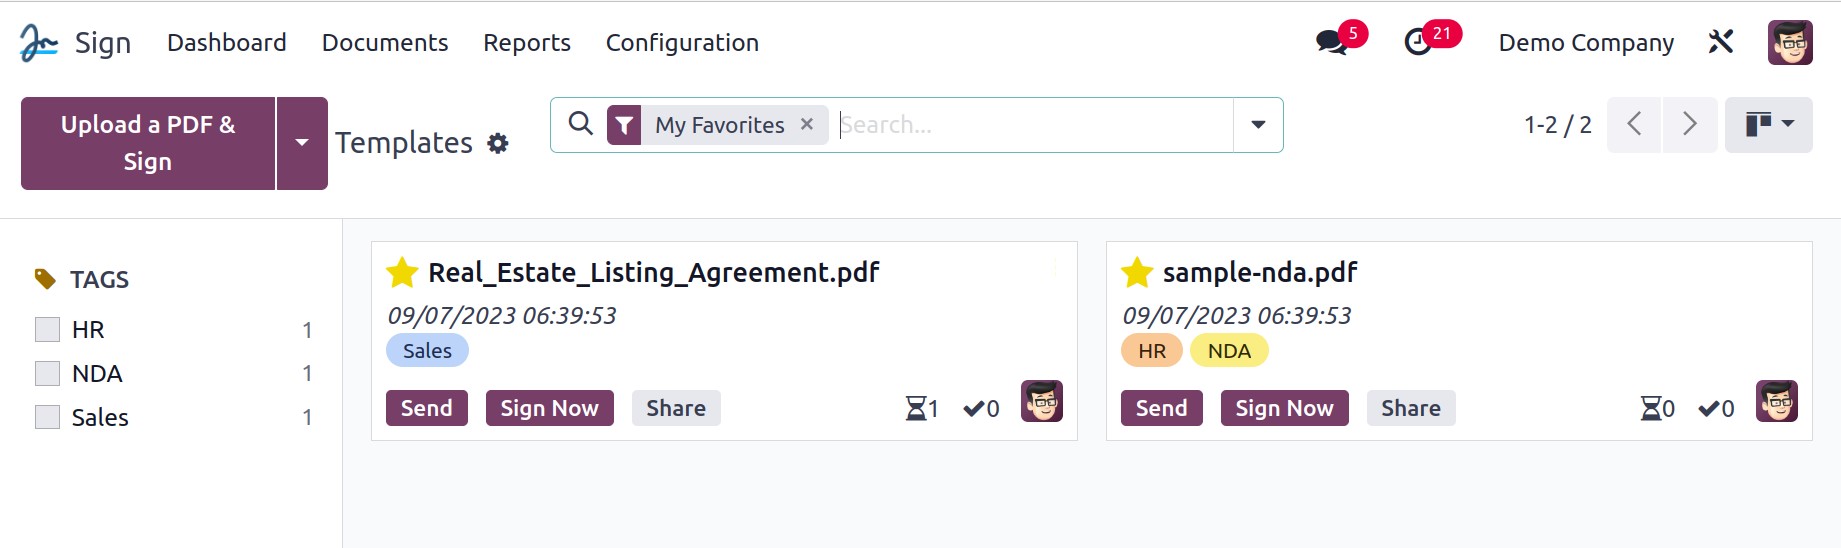
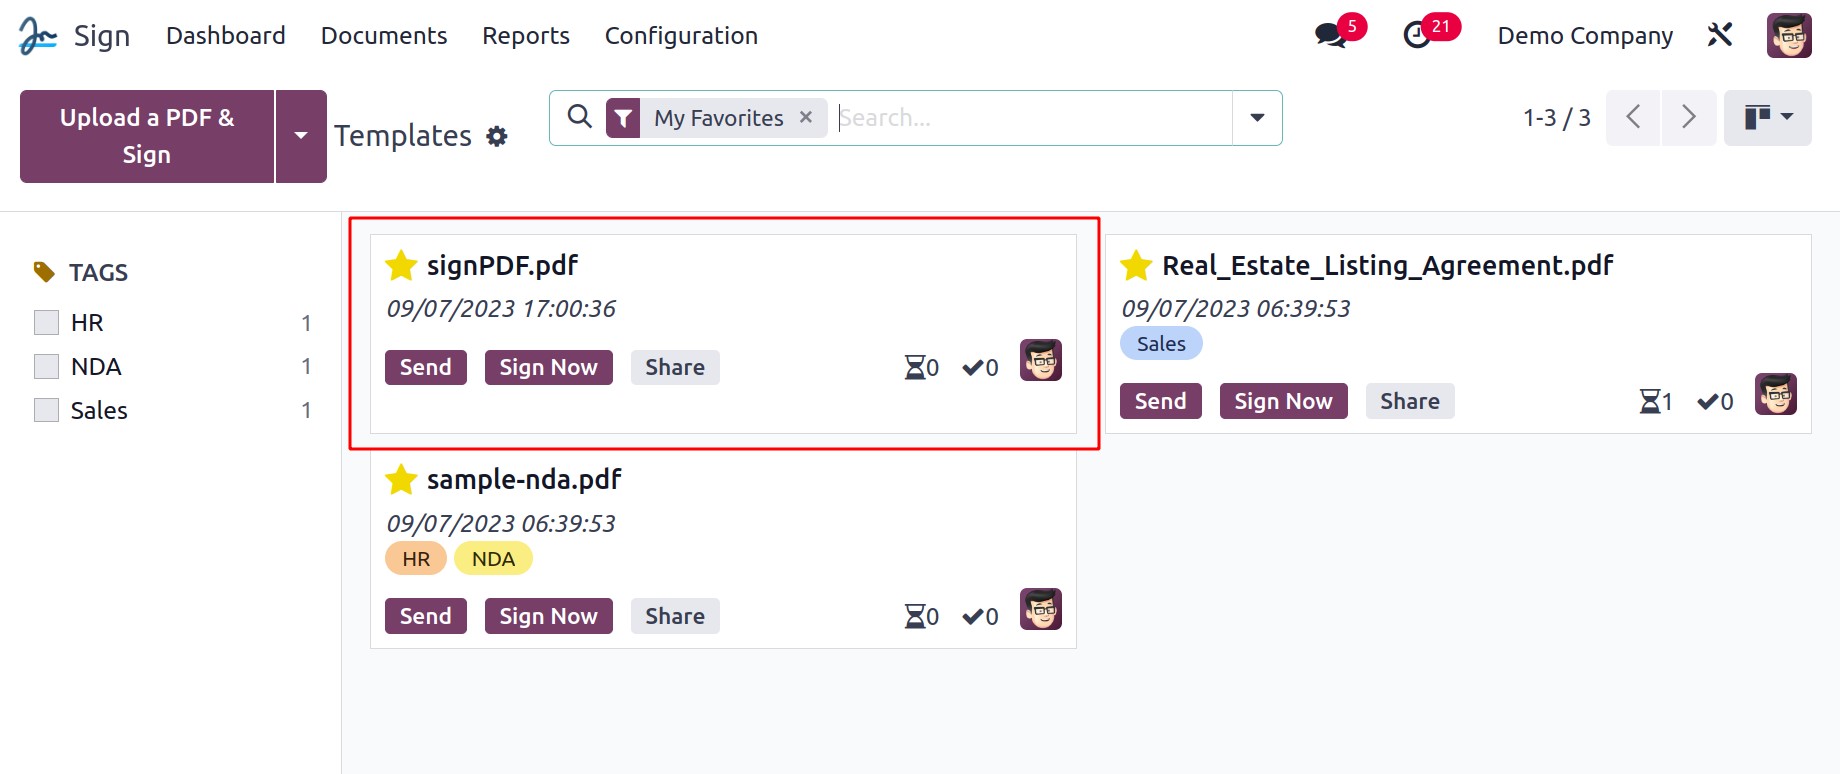
The dashboard panel for the module's templates may be seen in the Kanban view in the
image above. By choosing the menu icon for List View, you can also access this module
from List View. The right side of the window will display all of the templates you have
generated on the platform, as shown in the screenshot. The templates will all be grouped
in independent card-like structures, which is a better method of data representation and
makes it easier to interpret the information. A brief description of the relevant
template is included, together with information about the pdf's name, date, defined
tags, SEND, SIGN NOW, and SHARE buttons.
On the bottom right of each Template record are icons that can be used to examine the
number of papers currently being worked on for that template, the number of documents
that have been signed for that template, and the image of the person in charge.
Additionally, each record's drop-down menu triggers will have a number of handy
alternatives. You can click on the three accessible dots on the upper right of each
record—highlighted in the figure below—to open the dropdown menu.
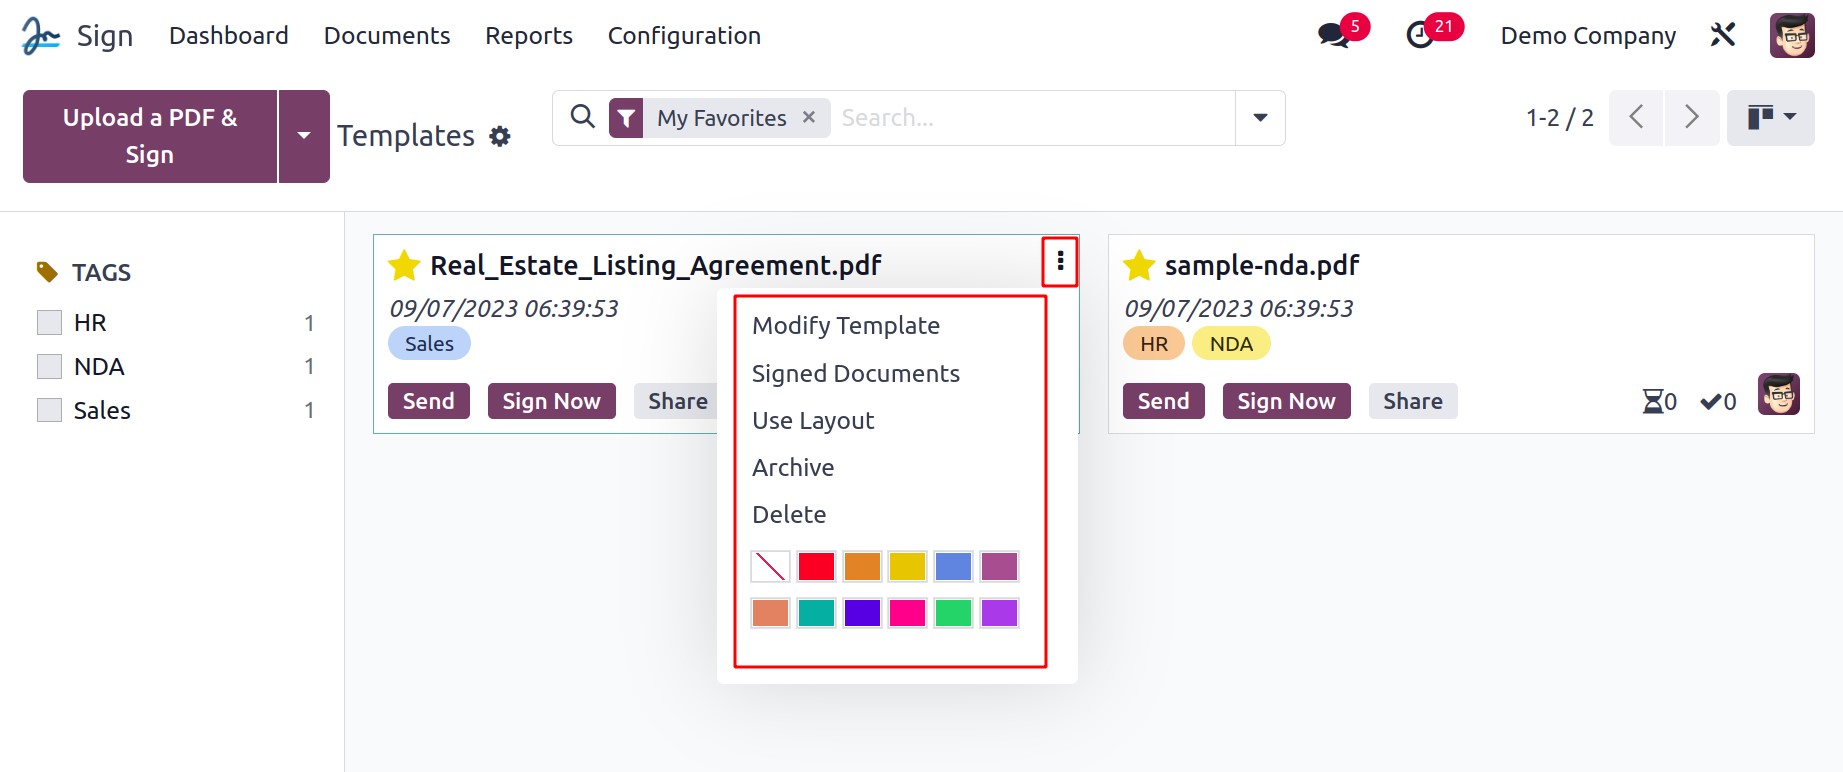
Options like Modify Templates, Signed Documents, Archive, Use Layout, and
Delete are available from the drop-down menu. Additionally, the various colors
offered in the dropdown menu can be used to mark your template with a distinctive color
to help others immediately recognize it.
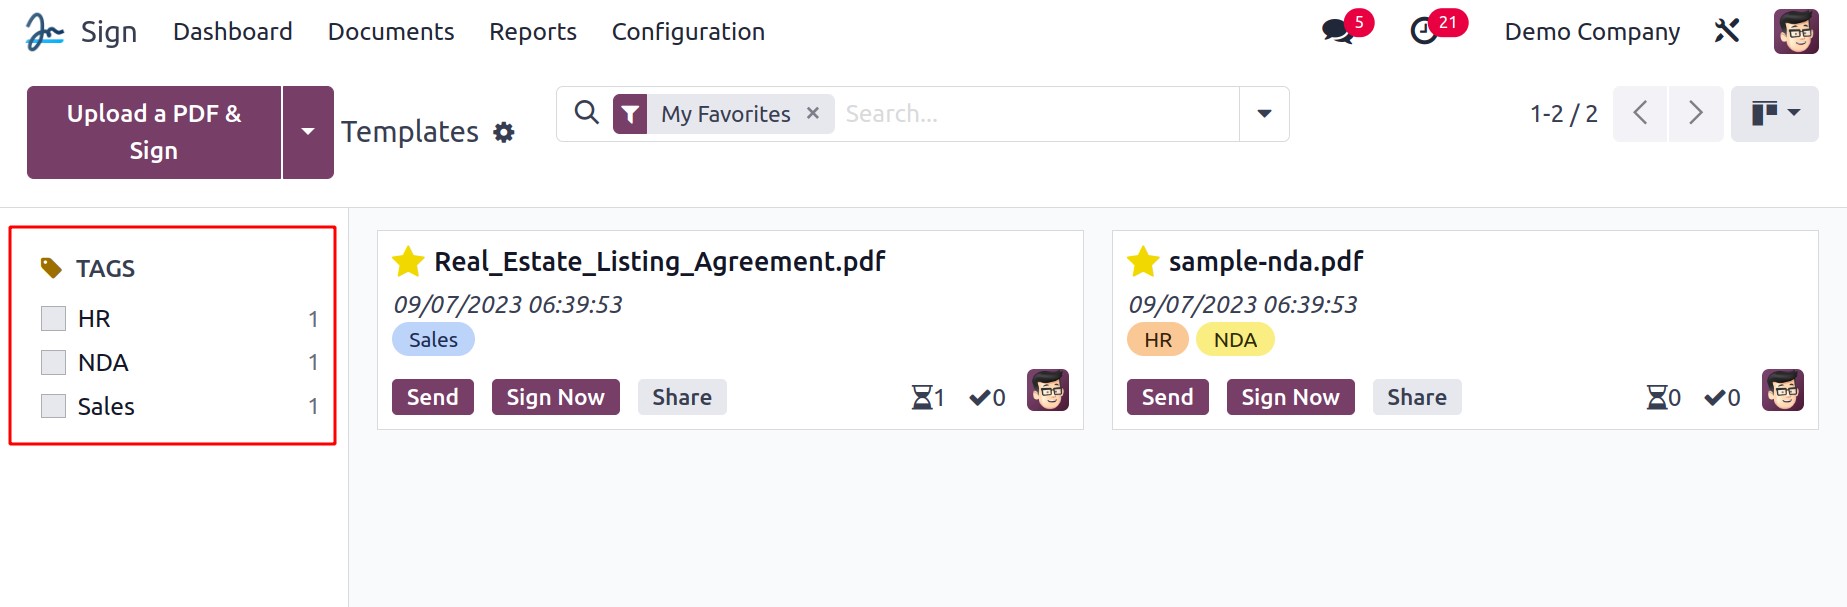
Based on the defined tags, the information in the Templates window is categorized and
arranged on the window's left side. This choice is excellent, particularly if you have a
lot of data to manage.
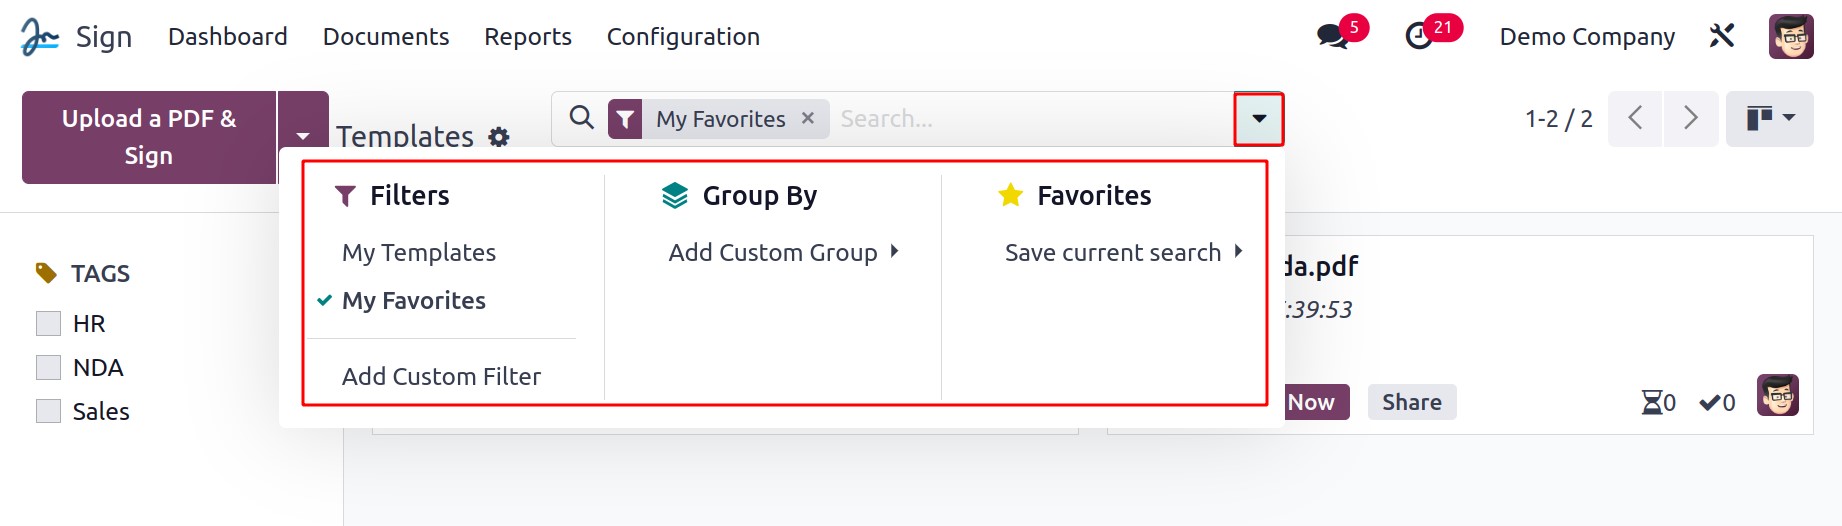
The Filters, Group By, Favorite, and Search tabs, which can also be viewed
and chosen from the top of the window, contain the different pre-filled and customizable
string features. My Templates and My Favorites are the pre-added default filters under
the Filters menu.
At this point, we can examine the window's List view. For that, we can click on the List
view menu icon, which is located in the window's upper right corner.
The UPLOAD A PDF TO SIGN and UPLOAD A PDF TEMPLATE buttons can be seen
together with the Export All button in the window's top right corner.
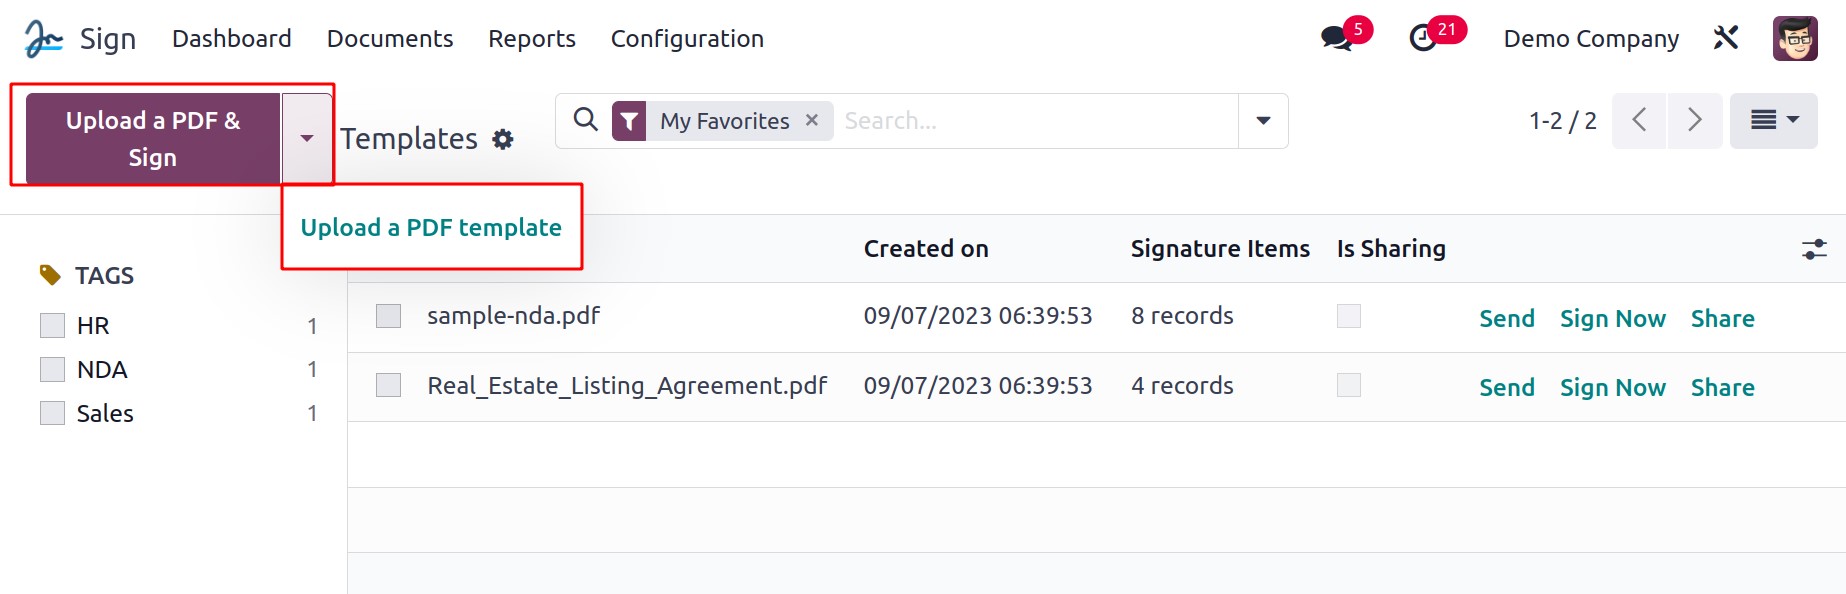
You can upload a PDF from your computer to sign it using the UPLOAD A PDF TO SIGN
button. Consequently, if you wish to sign a document, you can click on this button and
choose the pdf file from your computer to sign.
By selecting the UPLOAD A PDF TEMPLATE option in Odoo17, it is also possible to
update a PDF template. You can then choose the necessary PDF from the system after
clicking it. As soon as the PDF has been successfully published to the Odoo 17 system,
you will see a preview of the recently uploaded PDF, as seen in the image below.
To read the PDF in its entirety on the Odoo17 system, click on the preview.
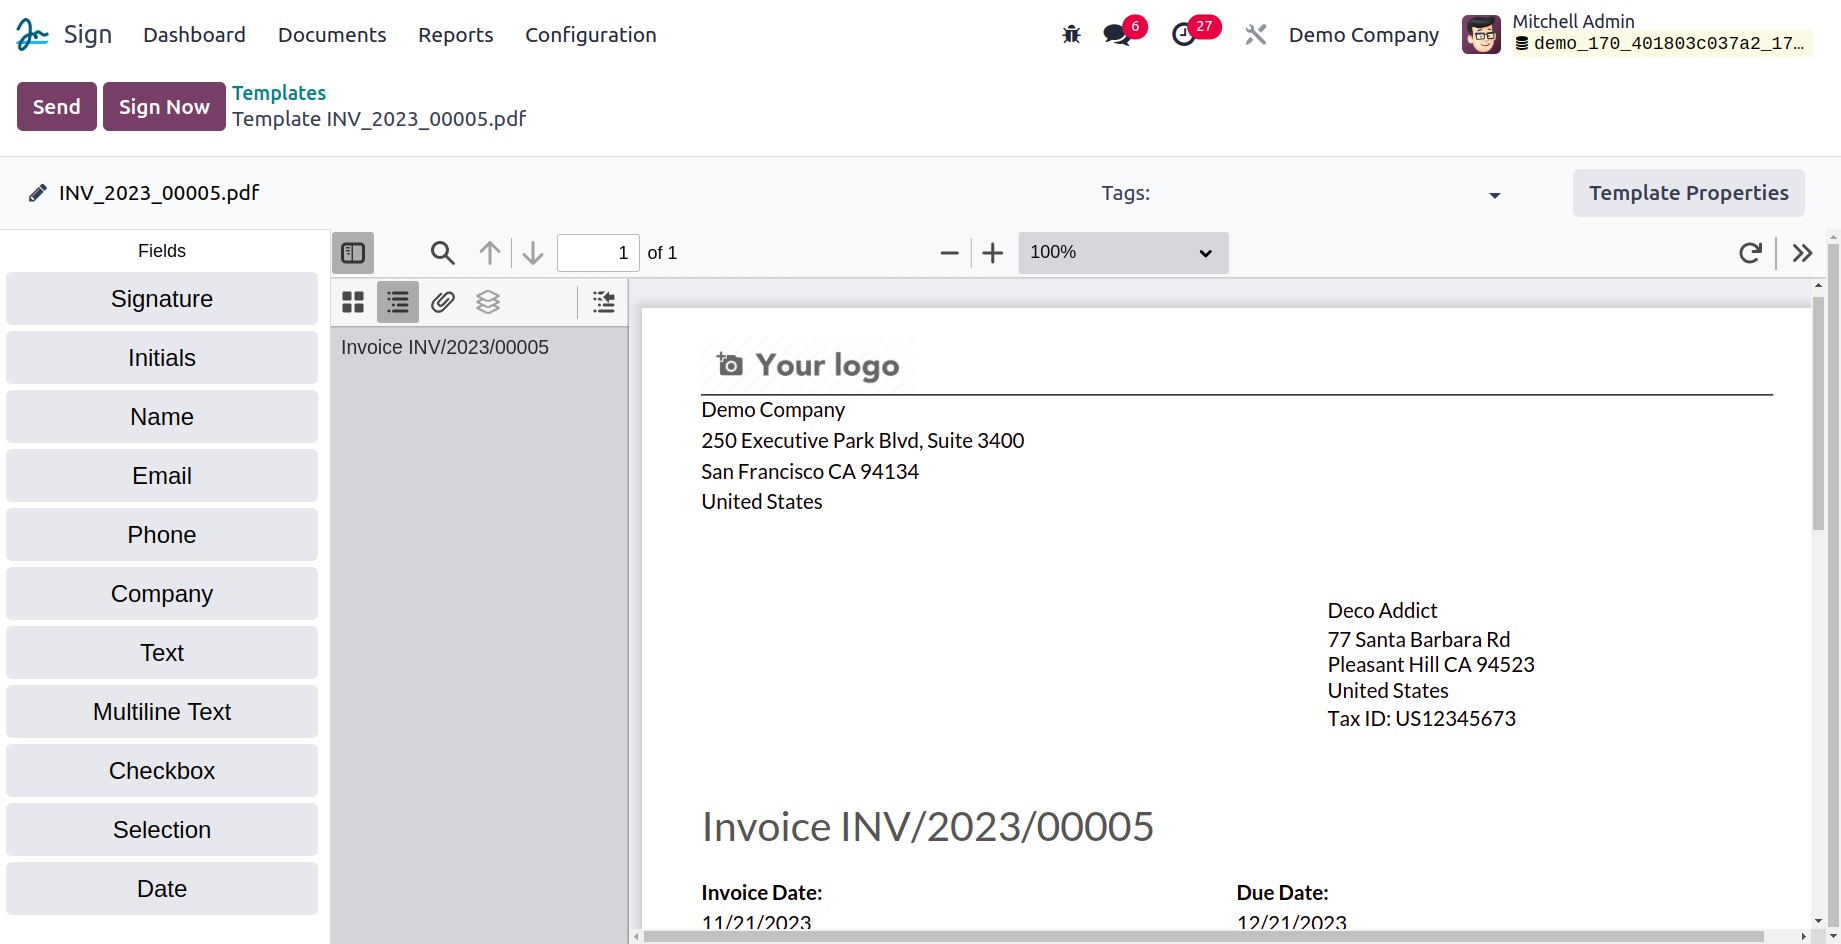
The detailed view of the pdf is seen in the image above. You can view several
alternatives here. There are several fields on the left side of the window, which are
highlighted in the illustration below.
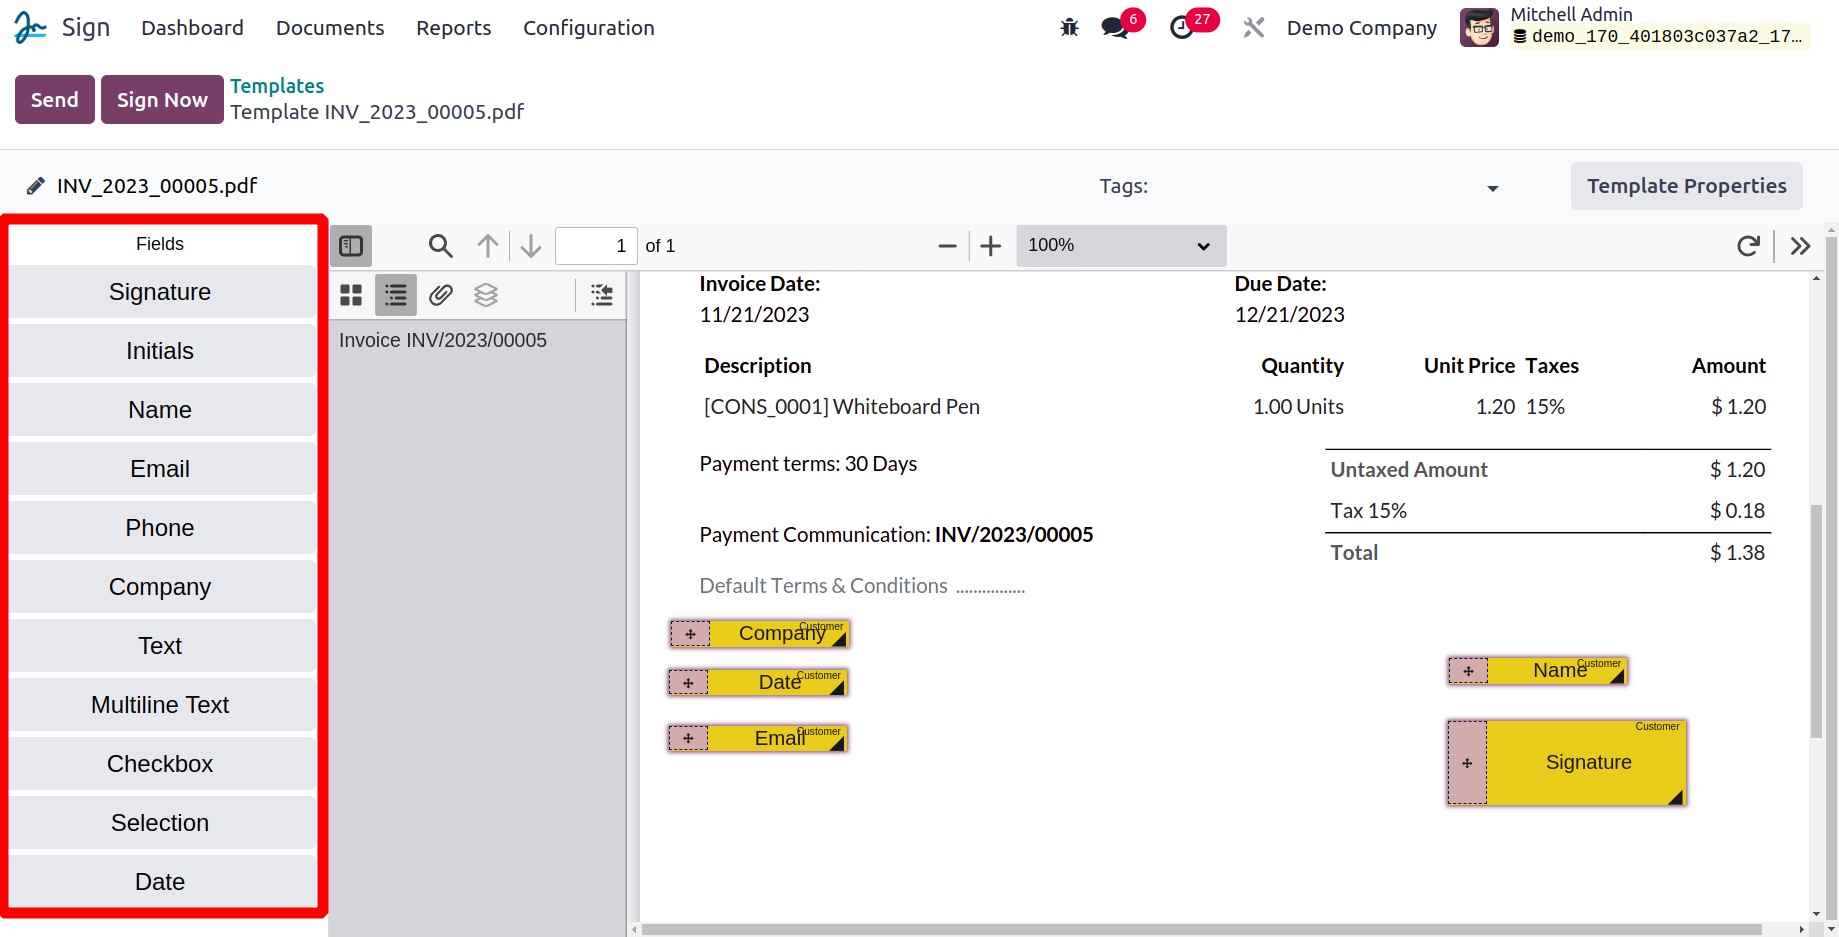
Signature, Initials, Name, Email, Phone, Company, Text, Multiline Text, Checkbox,
Selection, and Date are among the various fields that are present. You can drag and drop
each of these fields into your pdf to add the information to the corresponding fields.
For instance, you can drag the Signature field from the left to the PDF and put it in
the designated area if you want to add a signature. To complete the details and for
confirmation, you can choose the applicable fields from the pdf. That is, you can click
on the field if you want to add a signature to the pdf. Next, as illustrated below, a
pop-up will appear.
You can now select the individual whose signature you must have in the designated
location by clicking on the field. The pop-up will show a list of individuals, including
Customers, Companies, Employees, Human Resources, and Responsible. You can choose the
right folks from this list. You can mark the dropdown if the additional field must be
filled out by the chosen person. You can use the validate option to verify the
information.
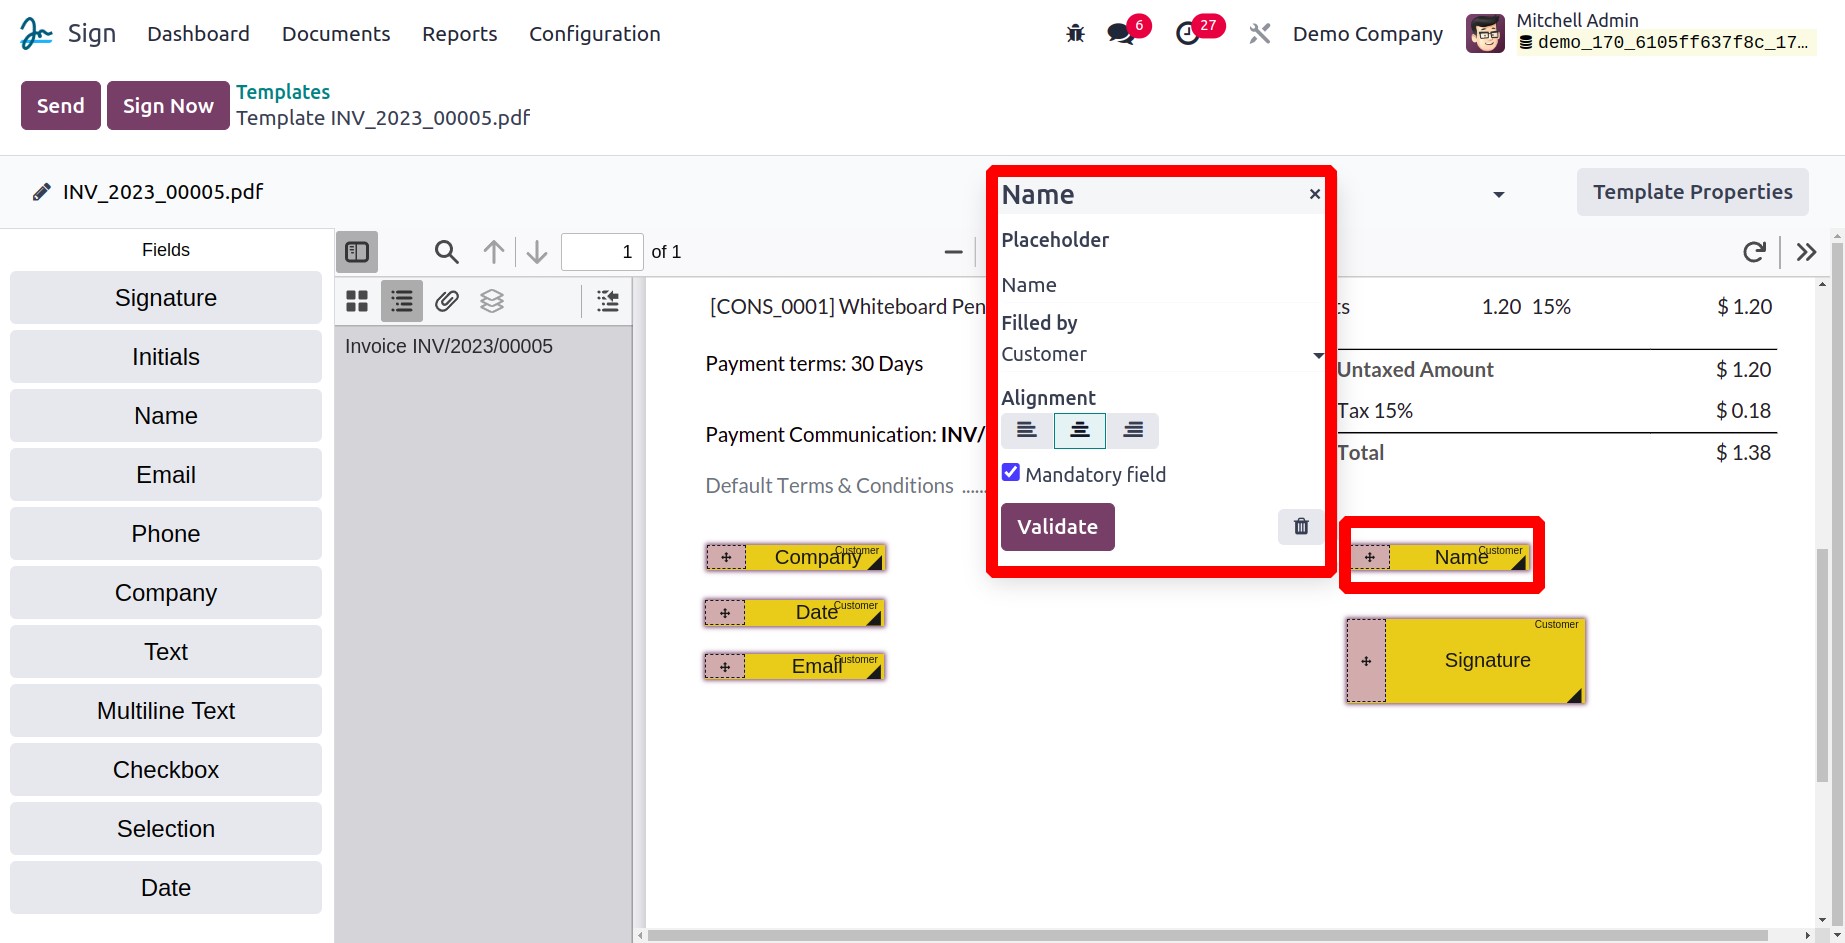
Additionally, you can add tags to the Tag field to make it simpler to identify the
document template. By dragging the Name field onto the document, you can first add the
name field.
By selecting the +icon, the Name field (along with all other fields) can be resized and
relocated to any location. In a similar vein, a row can be shown to indicate who the
person is who must sign the paper. In other words, it will be the allocated person's
responsibility to fill out the field. More responsible people can be configured, and the
Roles menu can help you do so. The Configuration tab provides access to
the Roles menu, which will be covered in more detail below. To view the pop-up, simply
click on them like in the image.
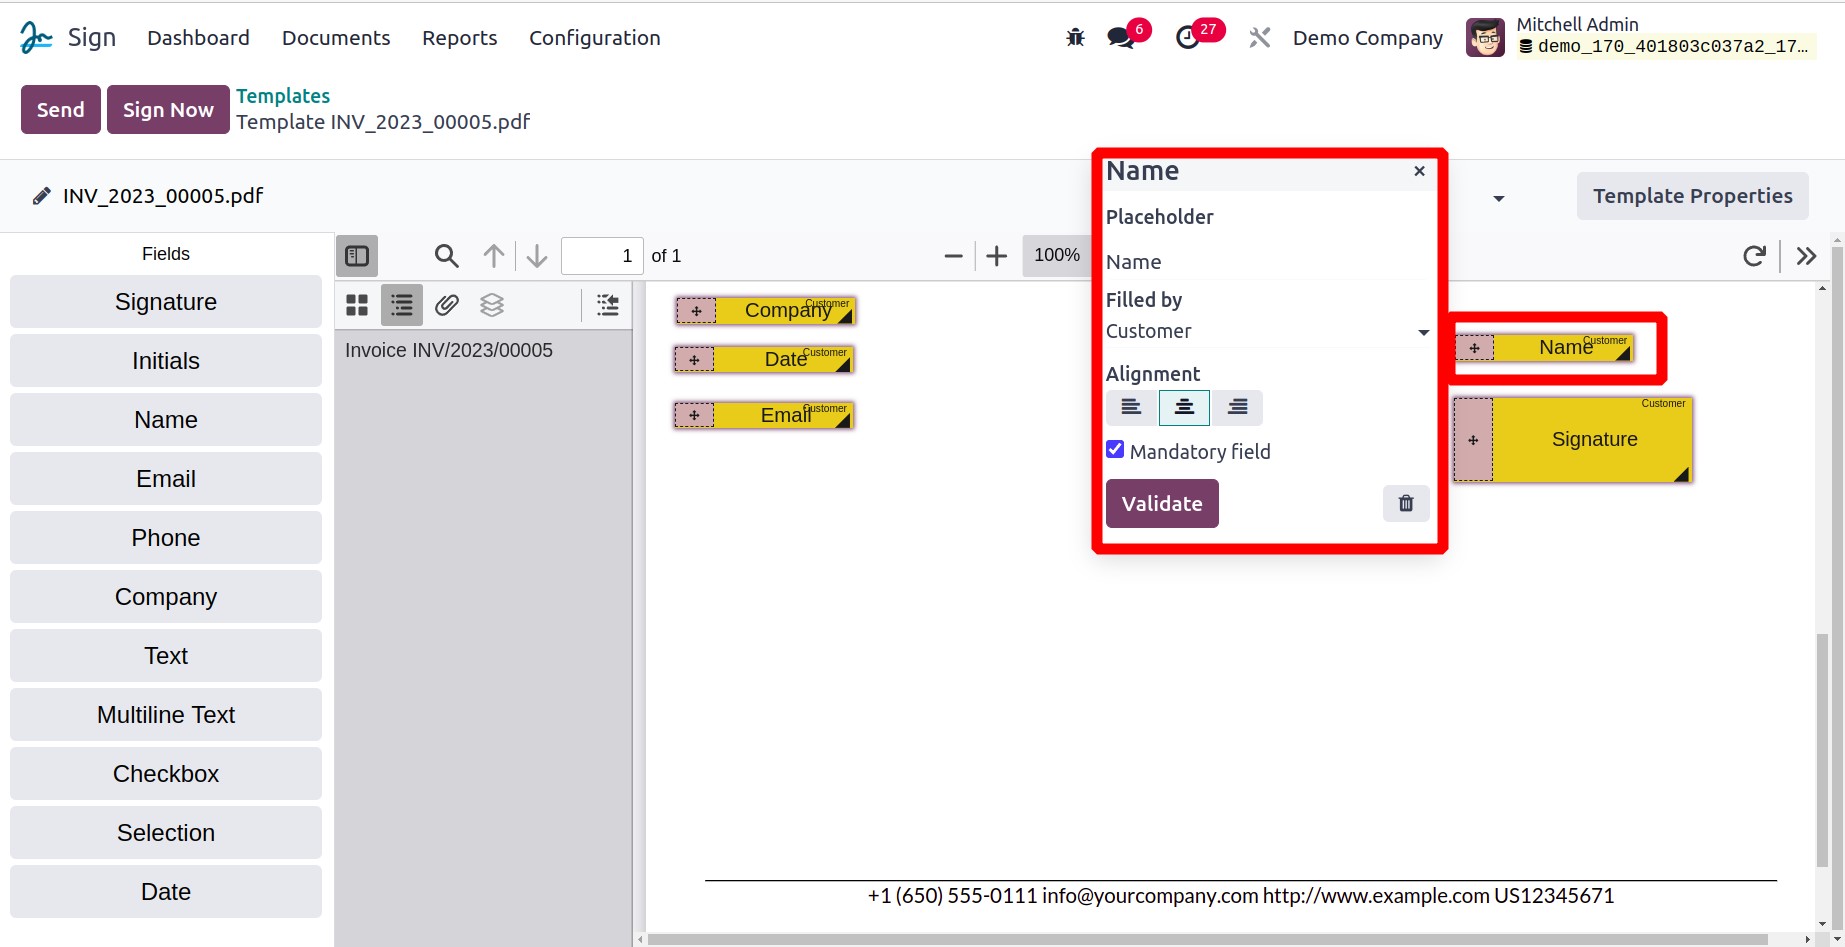
You can even specify whether or not the field is required. Afterward, click the
VALIDATE button to confirm it. The Signature field can then be added to the
document using the same drag-and-drop technique. The Date and other essential fields can
also be used in your documents. You can click the SAVE button to save the
document after entering all the information necessary to complete all the necessary
fields. The PDF template is currently stored on your computer.
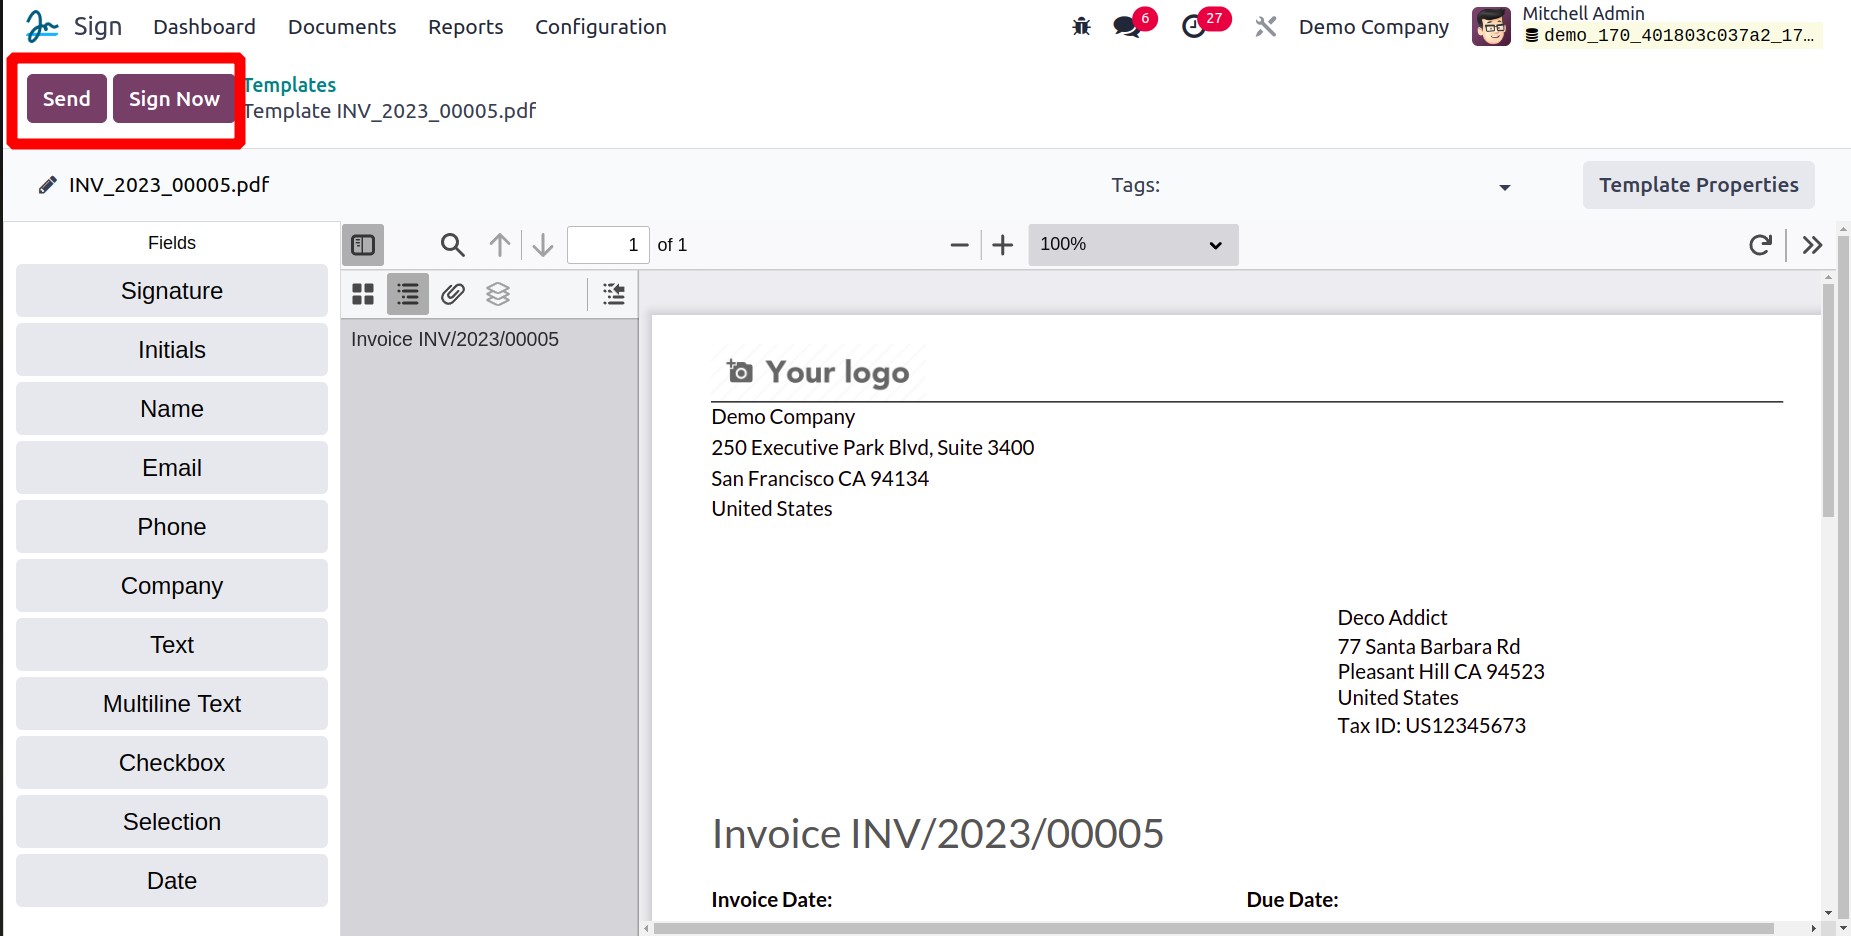
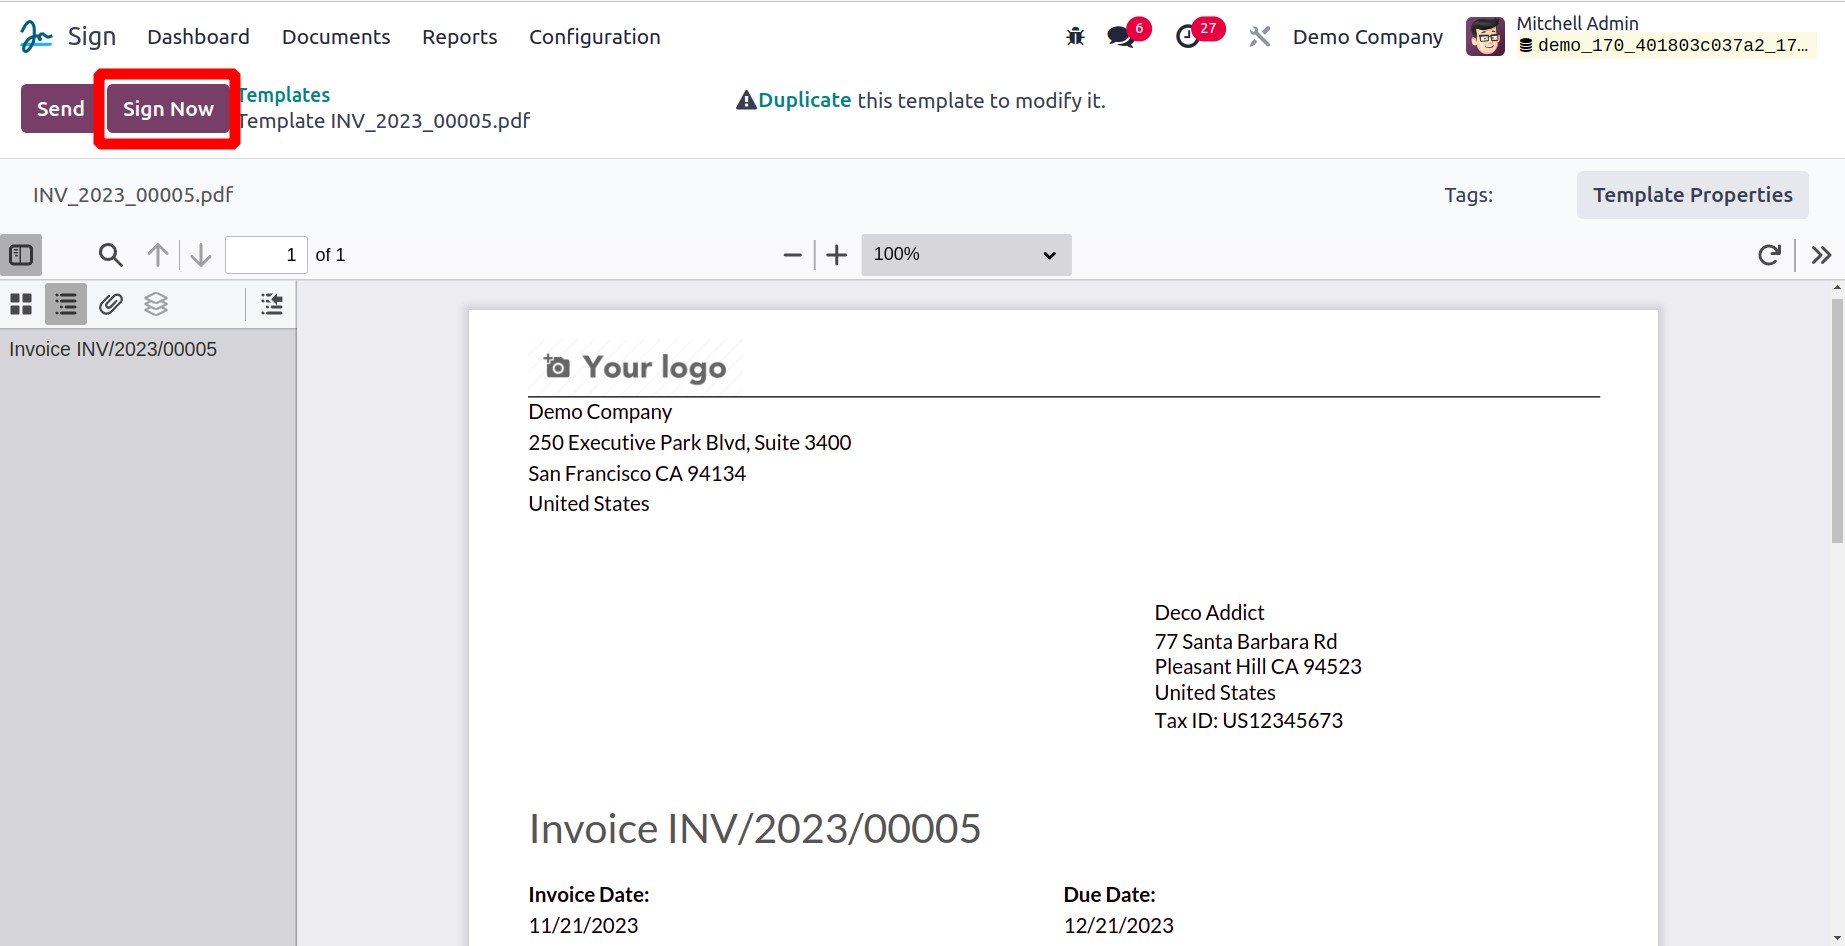
The Send and Sign Now buttons are visible when you look at the upper right
corner of the window. You can send the paper to the related person by pressing the
Send button. The document can be signed by pressing the Sign Now button.
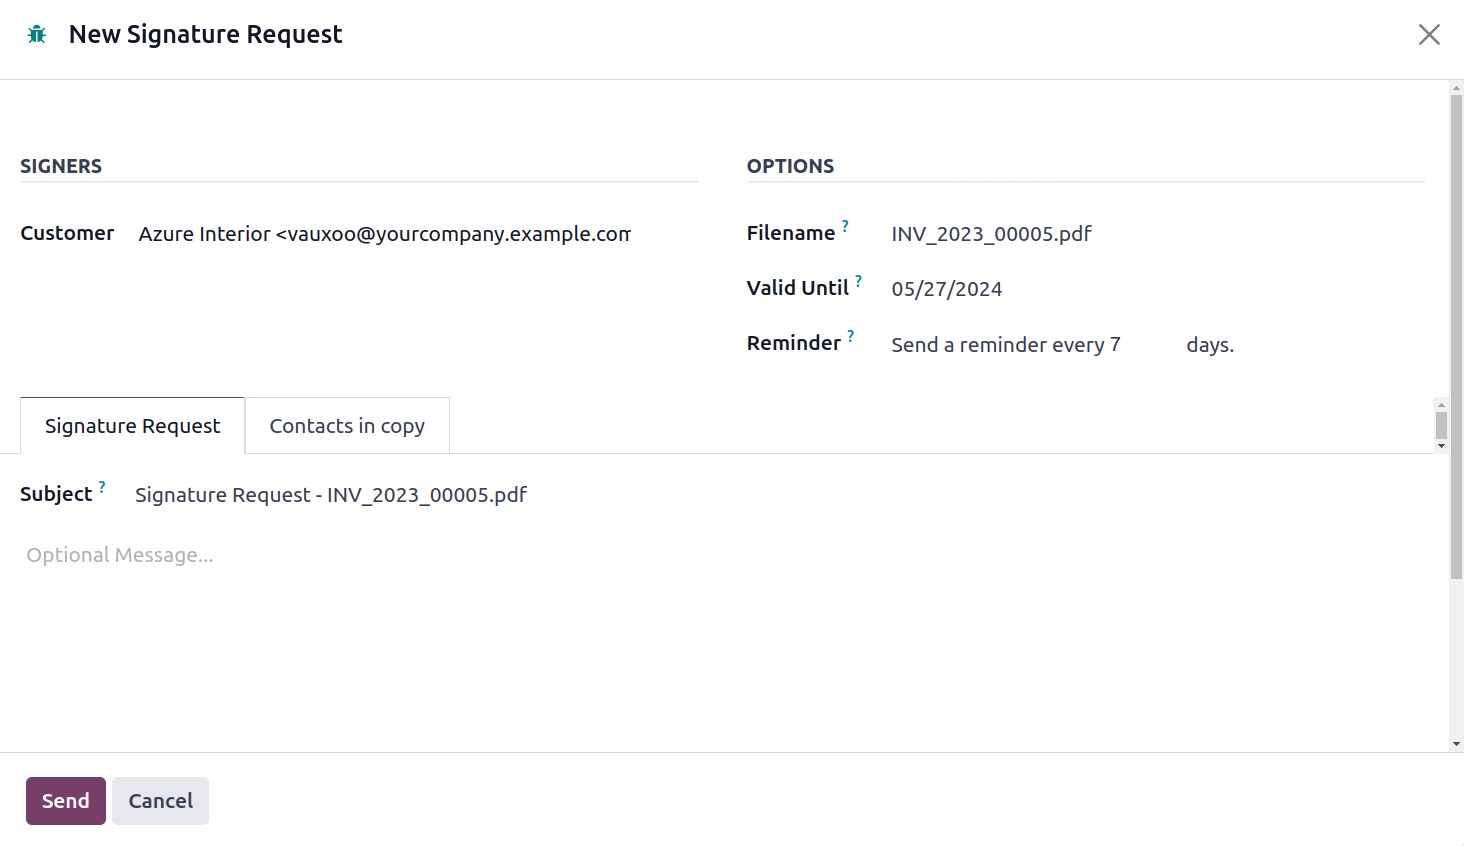
A new pop-up window will appear once you click the SEND button, as illustrated in
the above screenshot.
You can enter the names of the relevant individuals to whom the document will be emailed
in the Customer box of this opened pop-up window. The document's File Name will
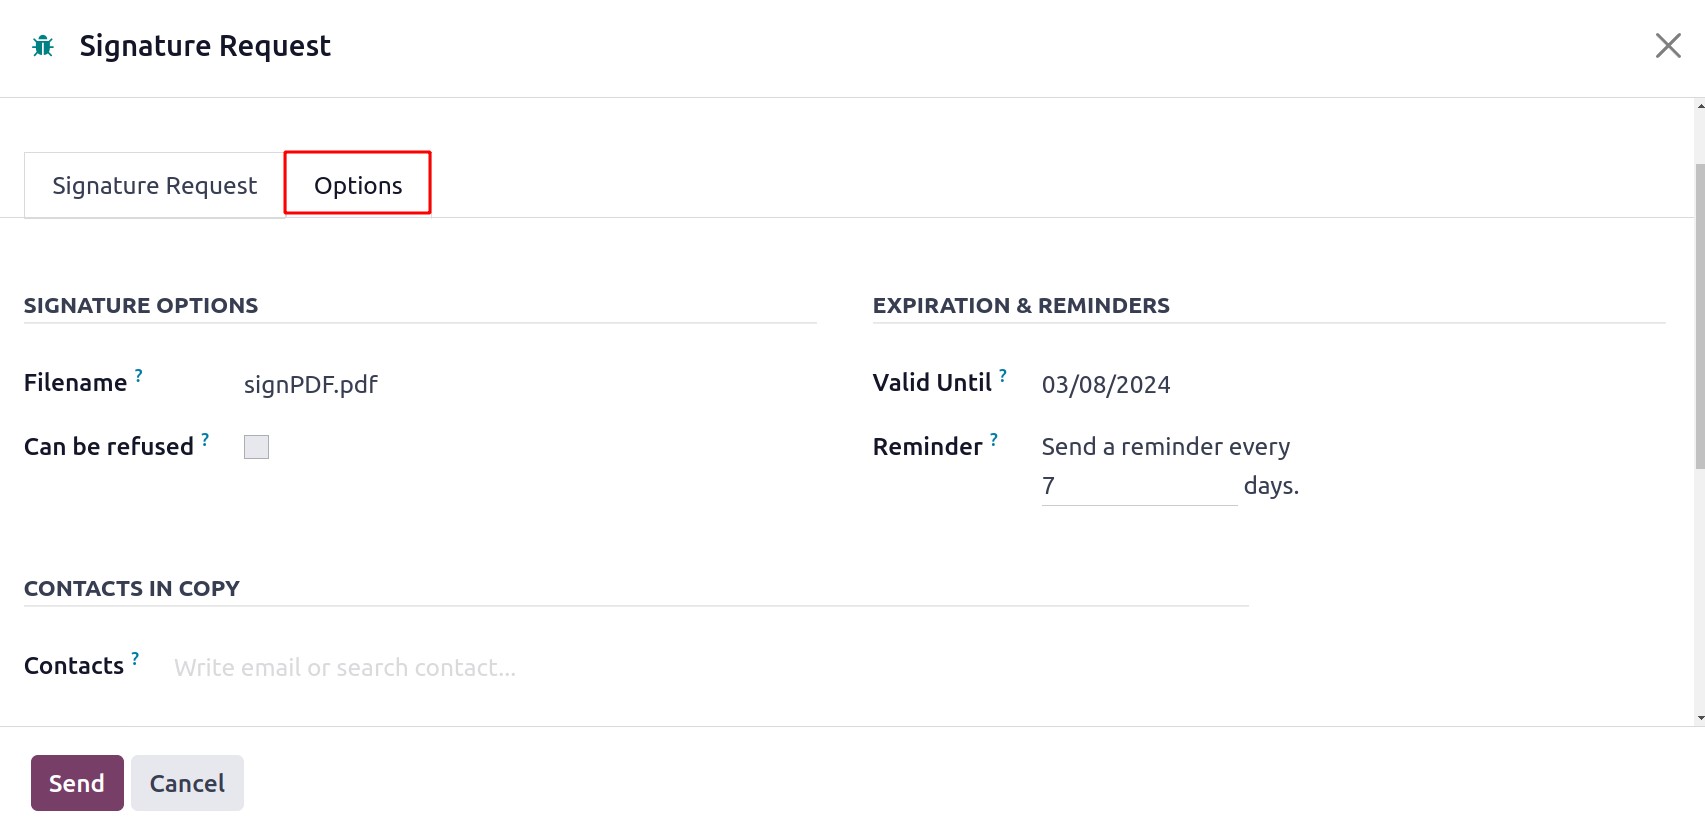
automatically be assigned to the fields for Filename. The Option contains Valid
Until and Reminder dates. You can add a message that will be sent to those who have
signed the given document on the Signature Request tab. The Contacts in
Copy option allows adding Contacts; the contacts in Copy will be notified by
email once the document is either fully signed or refused.
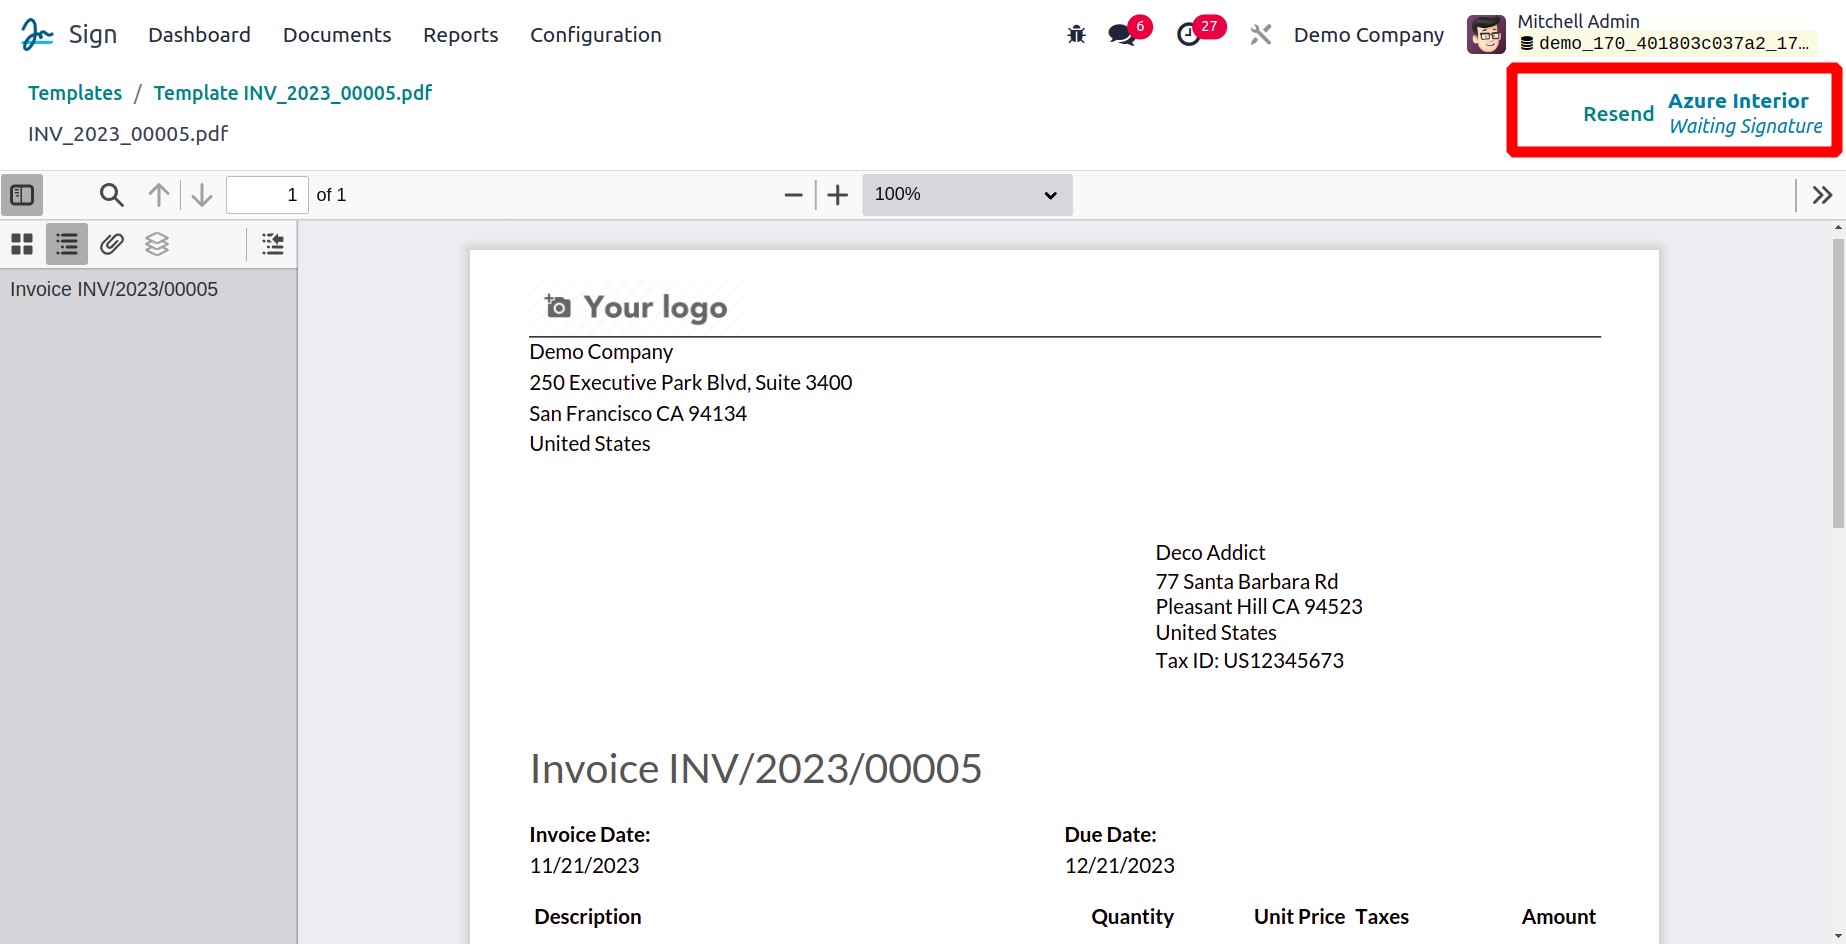
You can select the SEND option after providing the information. Now, you will
illustrate the document so that the system can alert you that it is ready for signature
and that the sender's information is likewise illustrated.
You can resend the invitation by selecting the Resend button in the top right
corner.
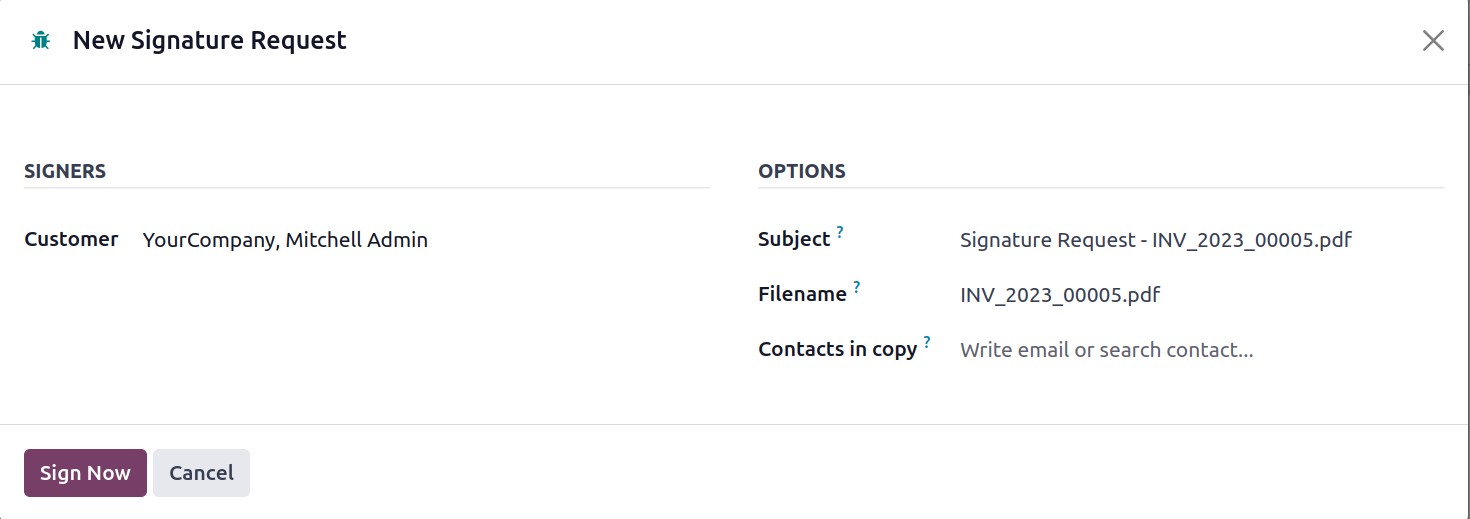
When the SIGN NOW button is selected, a Signature Request pop-up box will also appear,
with the Customer, Subject, and File name automatically assigned.
In the Customer area, you can include the email or other contact information of the
recipients of the signed document. In the provided area, it is also possible to include
the File name.
The SIGN NOW button is then available for use. Here prepared to sign the
contract.
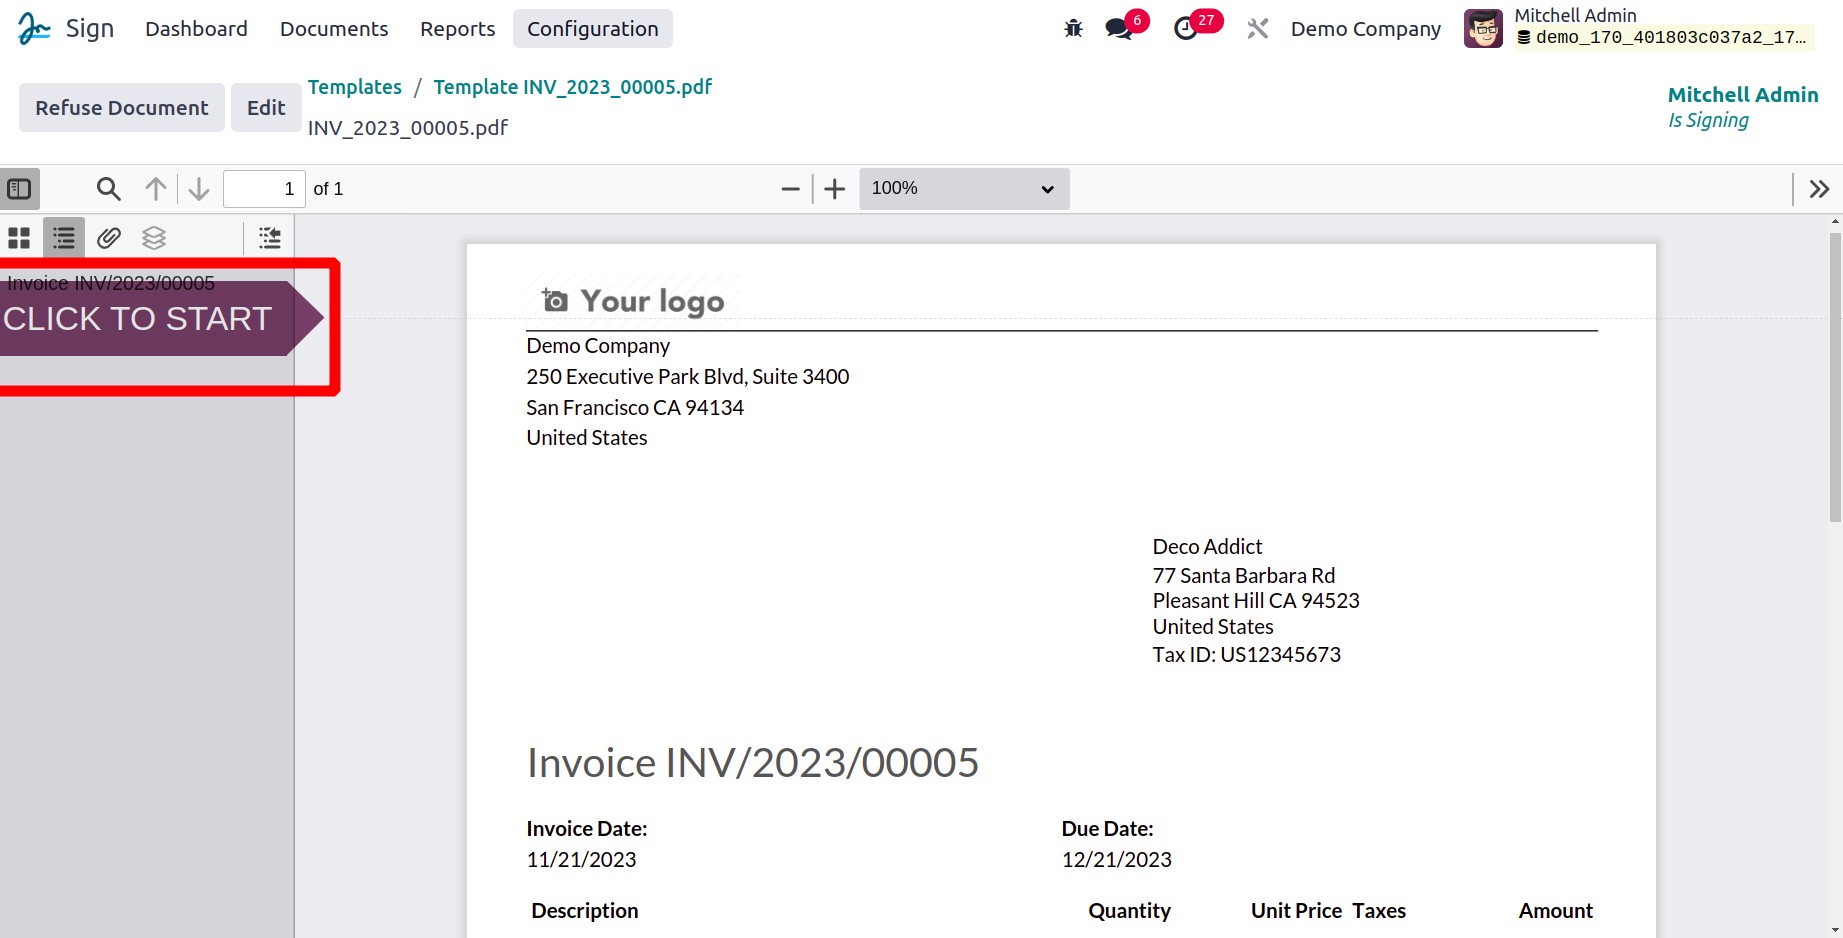
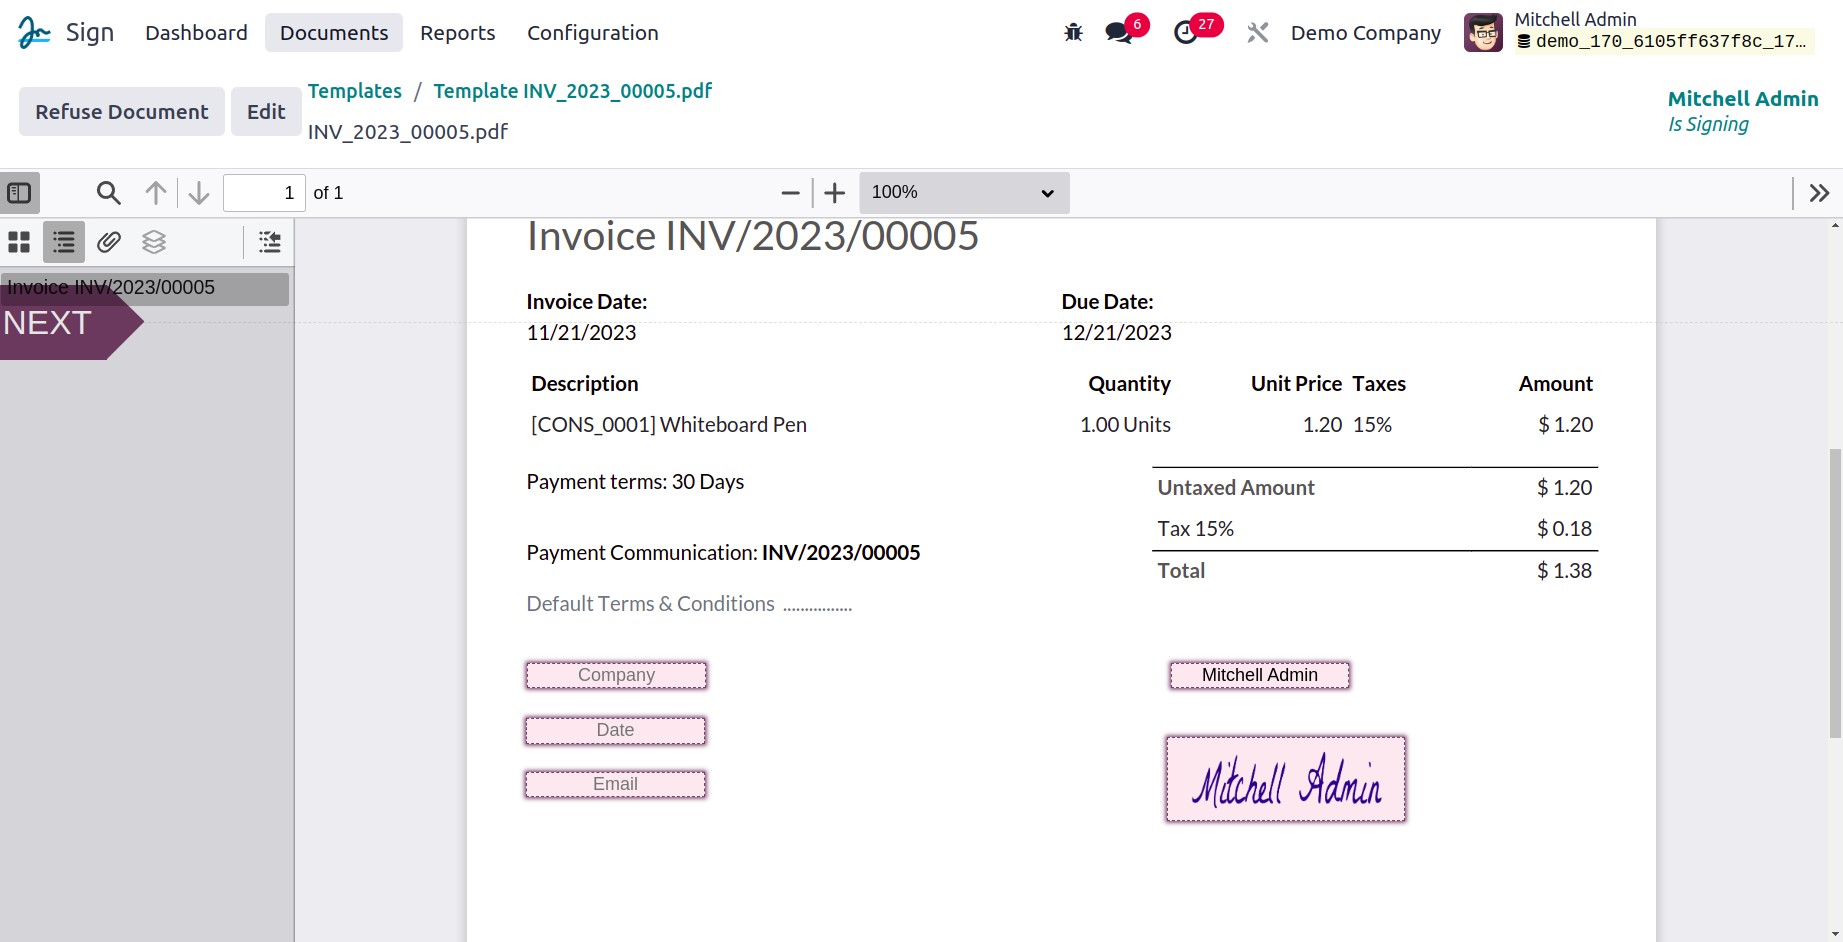
To complete each essential field, click the CLICK TO START button here. Odoo
identifies each field and displays the following one without skipping a beat.
You will be taken from the start of the document to its conclusion in the exact model.
You will go on to the next filling area after finishing the first column. The system
will display a pop-up window in the Signature box for you to mark it. Below is a picture
of the pop-up window.
You will be taken from the start of the document to its conclusion in the exact model.
You will go on to the next filling area after finishing the first column. The system
will display a pop-up window in the Signature box for you to mark it. Below is a picture
of the pop-up window.
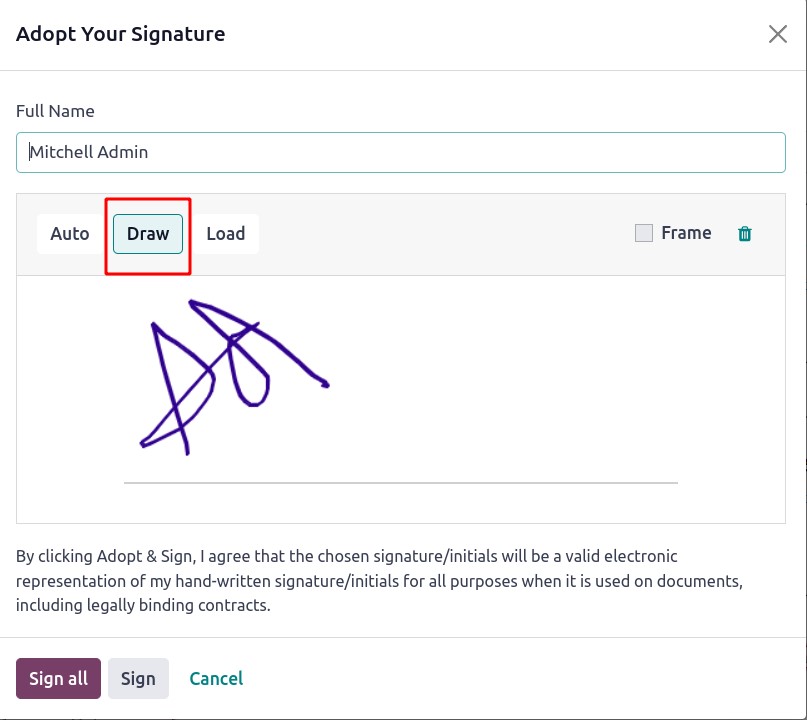
Your signature will be incorporated into this window. You can start by entering your
full name in the Full Name form. After that, you can choose to sign. Odoo17 gives you a
variety of signature options, so you may customize your signature any way you want. This
option is for drawing. By choosing this option, the client can use a mouse pointer,
digital pen, or other device to sign the document.
The Auto option is the next one. Here, the customer has access to a number of
signature styles, and the system lets them select the style they want.
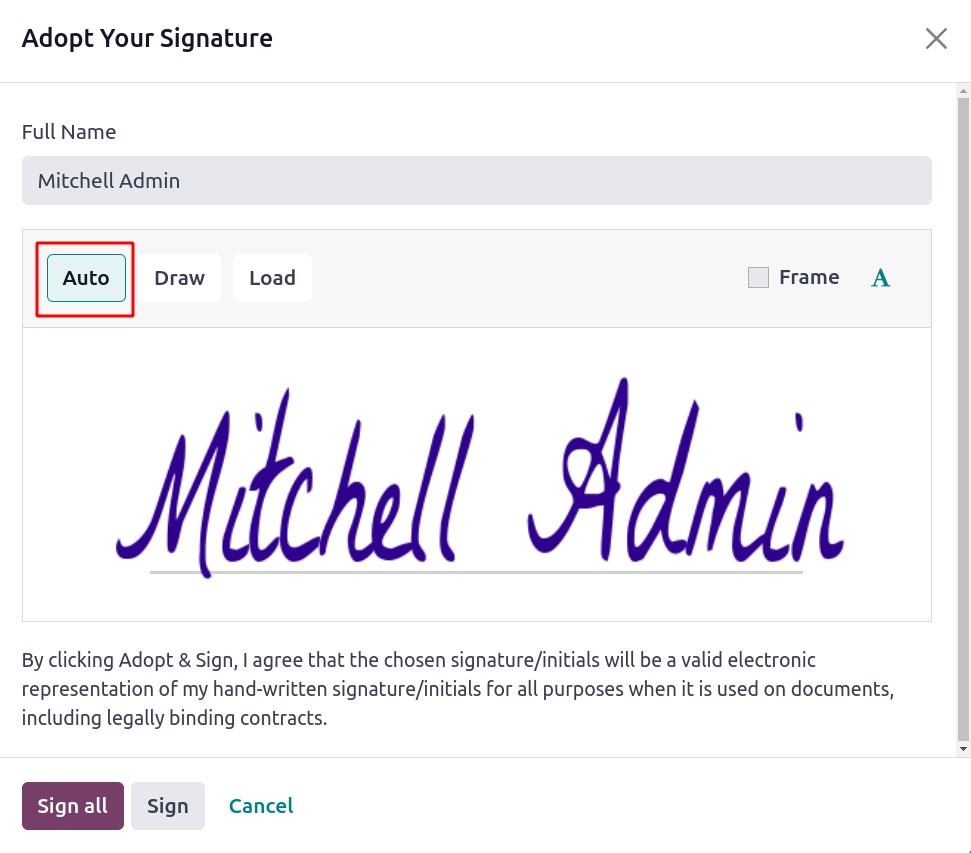
The customer can load their signature from their system by selecting the Load option.
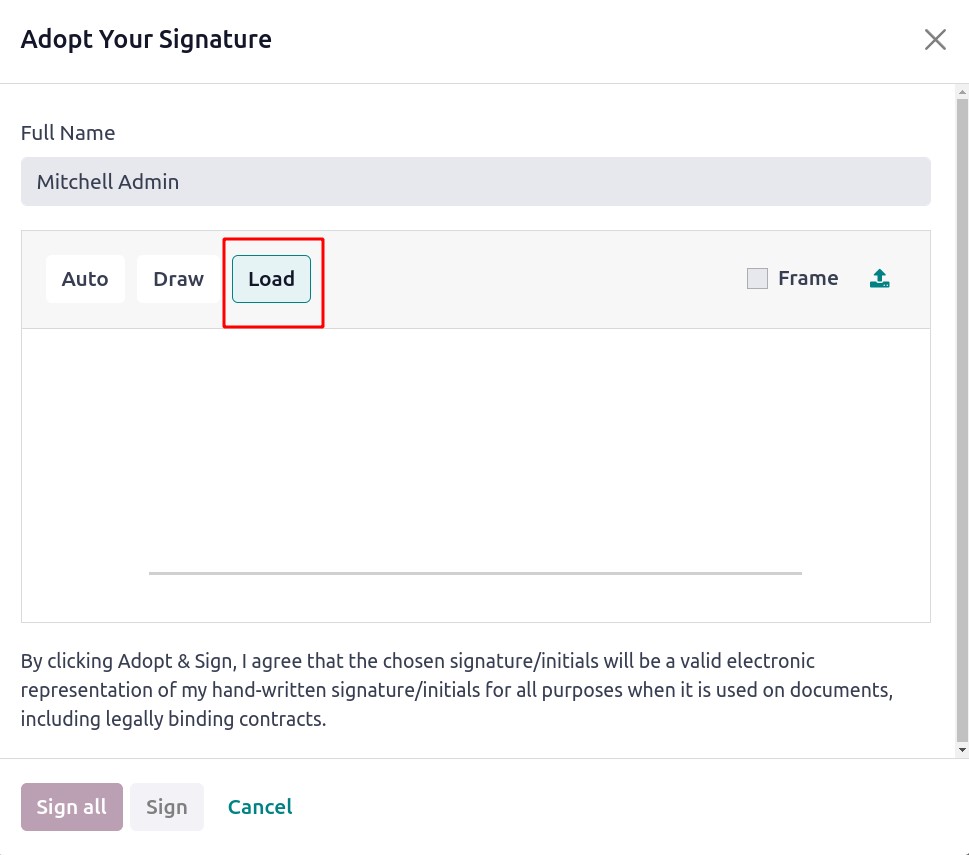
Additionally, the system will display a declaration message, as seen in the screenshot
above. The customer can select their chosen method and then click the Sign All
button. By pressing this button, the user agrees that their electronic signature will be
confirmed as a valid and binding legal document.

When you have completed all of the fields in the document, click the button that says
"VALIDATE AND SEND COMPLETED DOCUMENT" at the bottom of the page.
After that, a pop-up will appear informing you that the client will receive an email
with a copy of the signed document and that the signature has been stored. You may
access the SIGN NEXT DOCUMENT, DOWNLOAD DOCUMENT, and CLOSE buttons, as
well as information about any more documents that need to be signed if it is specified
in the pop-up.
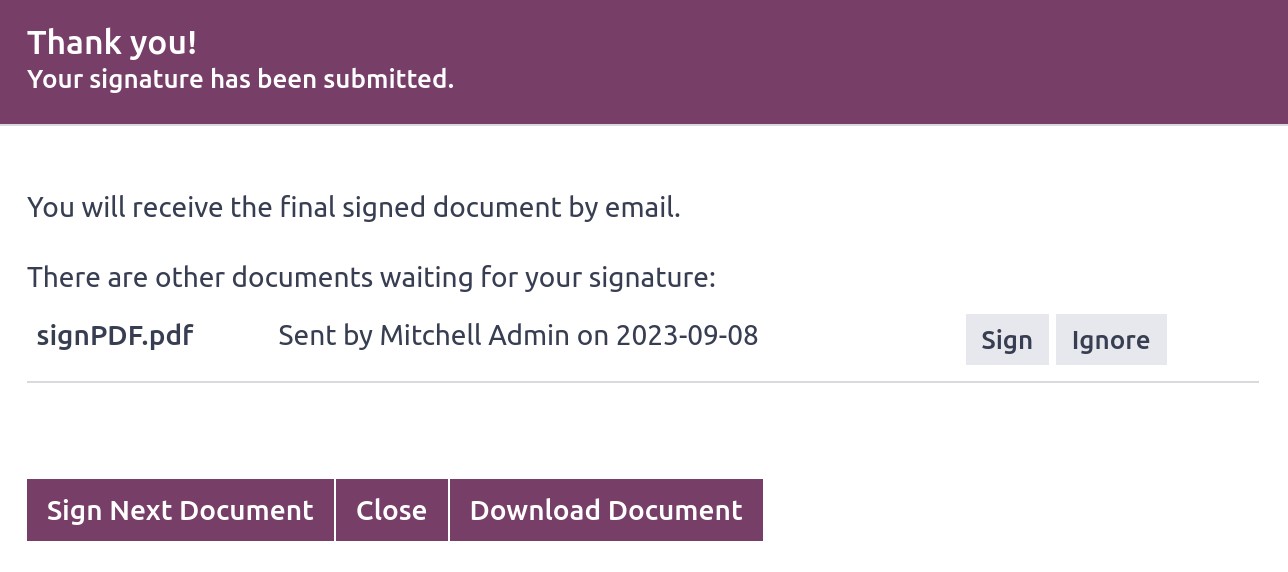
By selecting the DOWNLOAD DOCUMENT button, the signed document can be downloaded.
Viewing the Documents tab on the module will help.
Documents
You can access the Documents window by using the Odoo Sign module's Documents tab. The
actual location to manage all the paperwork we sent out for signatures is here.
Under the Documents tab, All Documents, Waiting for Me, and My Requests are available.
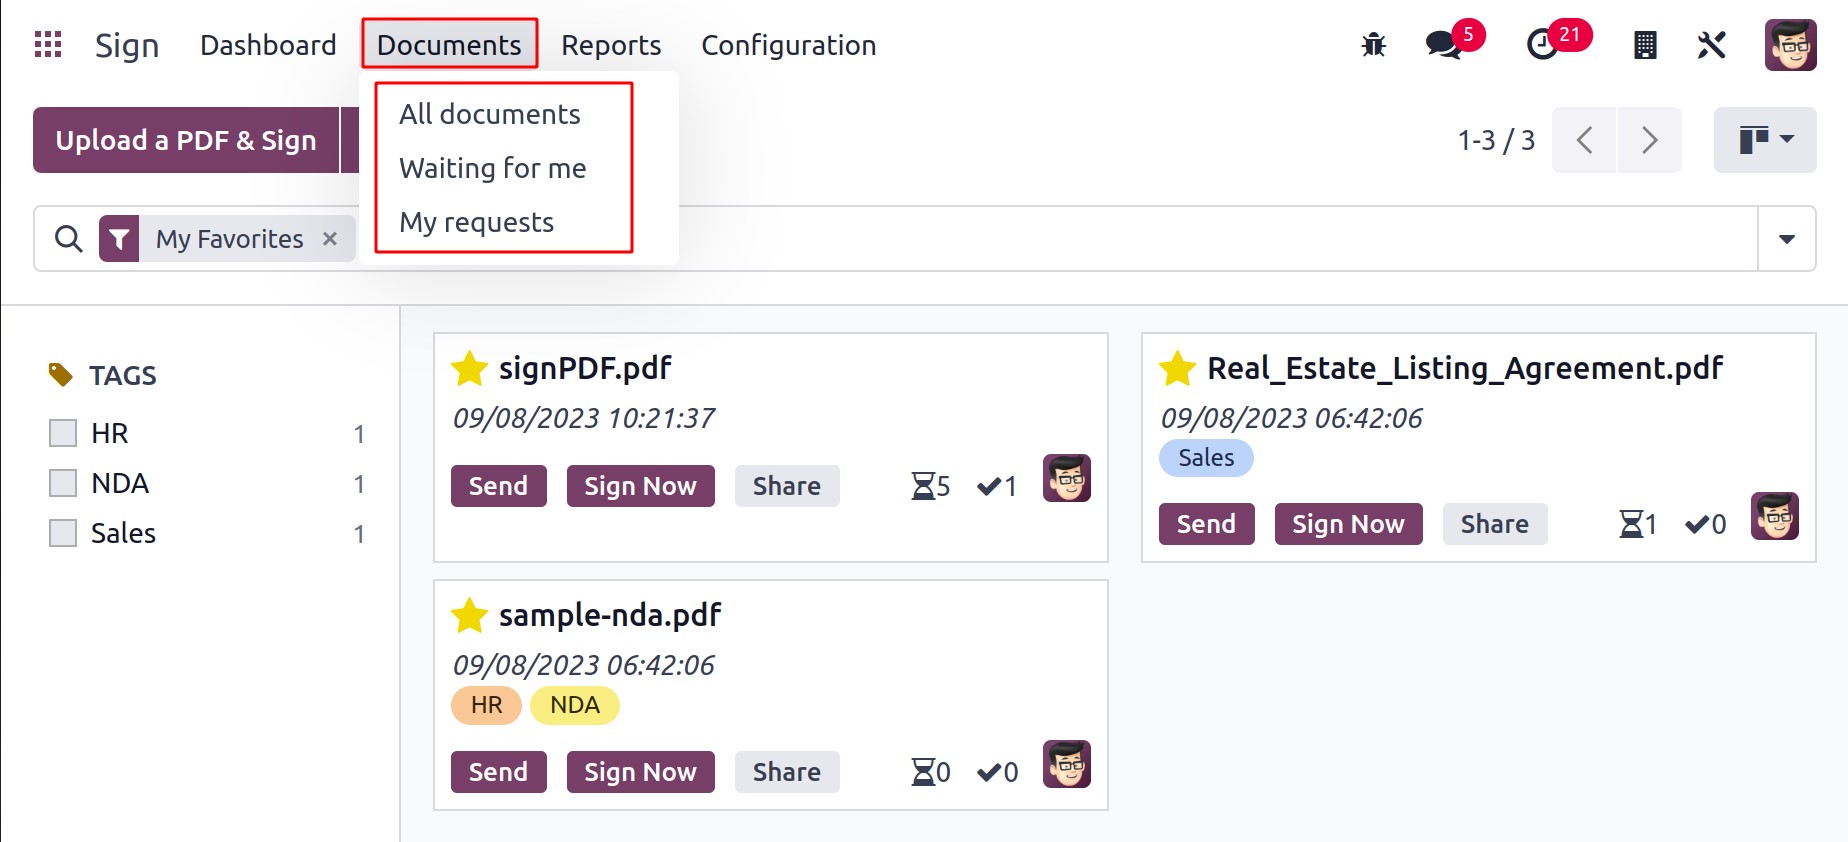
In the filters menu, you can choose from a number of pre-defined and personalized
filters. My Documents, My Requests, My Favorites, Expiring soon, Waiting for me, Waiting
for others, Sent, Fully signed, Canceled, and Archived are the basic filters that can be
used to filter your document. By using different Group By choices, the papers can
be quickly categorized. Template and State are the pre-selected Group By options.
If you have a lot of documents to manage on your PC, all of these choices are incredibly
helpful.
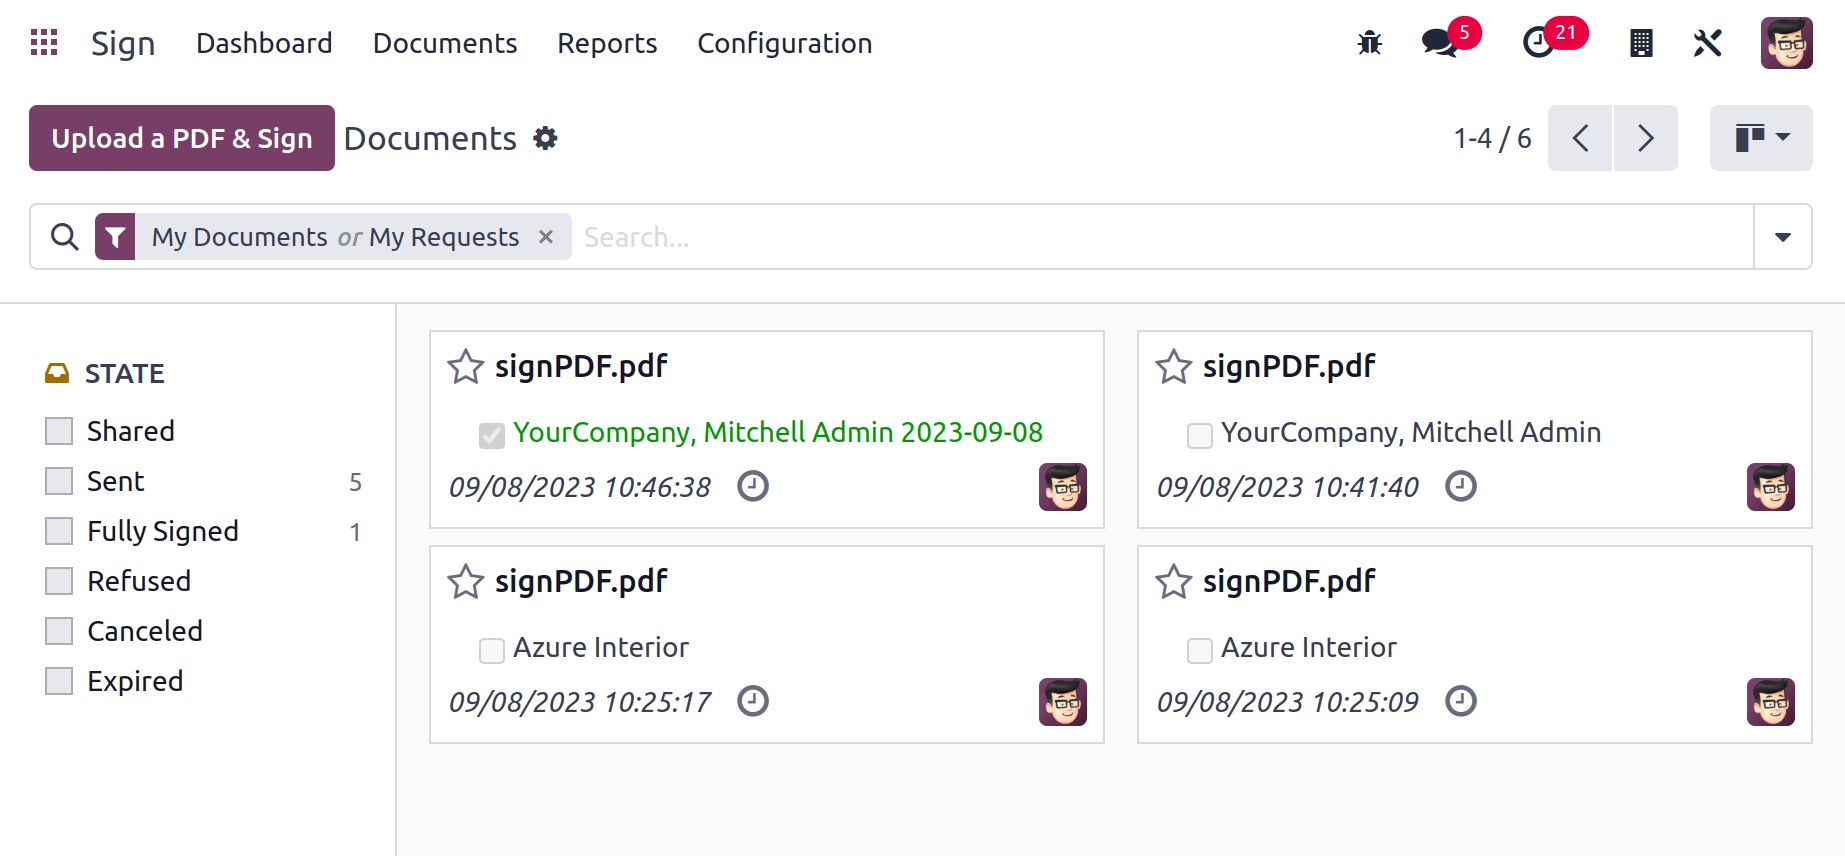
The filters are located on the left side of the Document window. Using these options,
you can classify your document according to its status and tags.
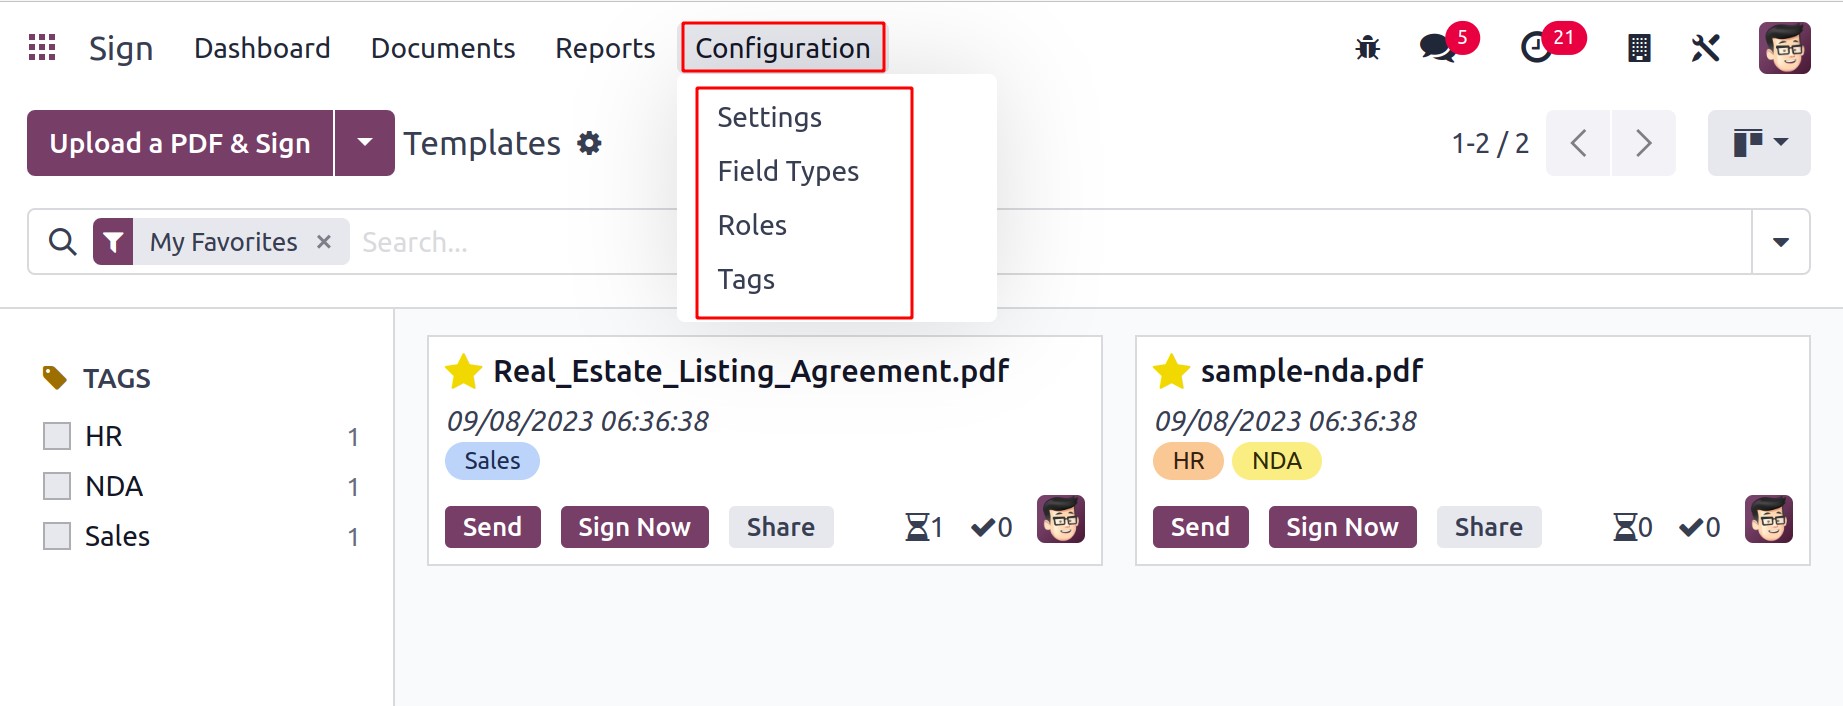
Configuration
The Settings, Field Types, Tags, and Role menus, which will be very
helpful in carrying out your document signing procedure, are included in the
Configuration tab of the module.
Settings
You will be taken to the Settings window as seen in the window when you select the
Settings menu.
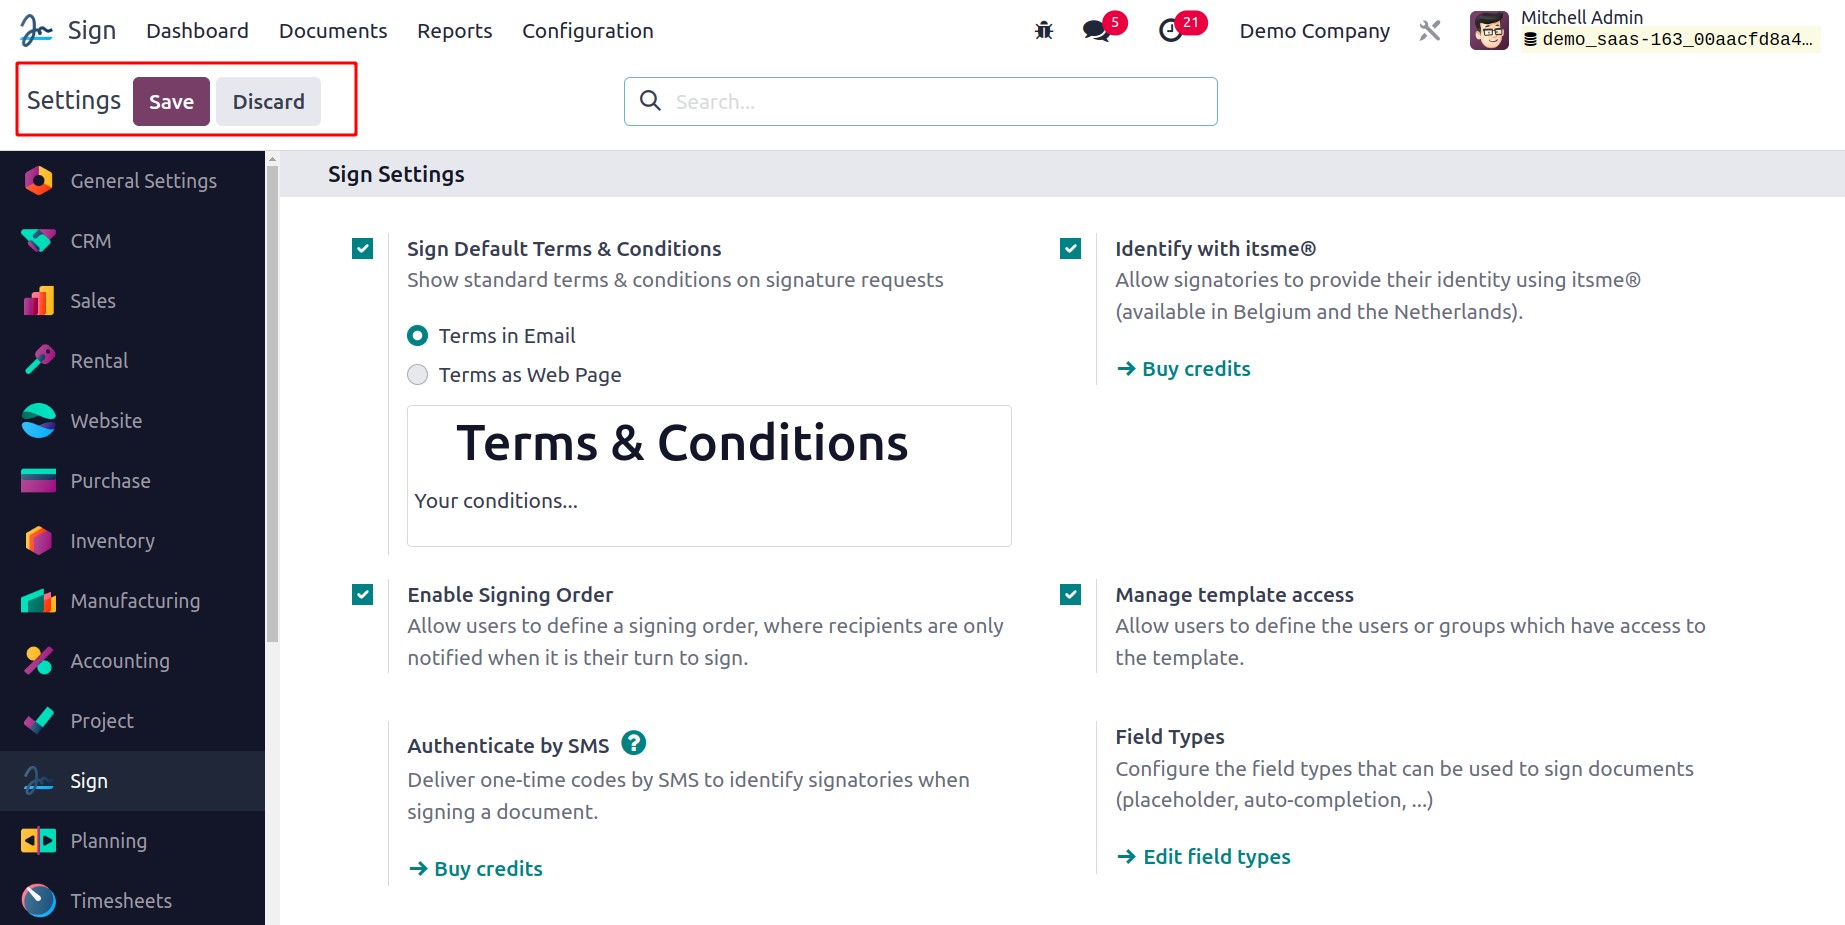
You can see the option to Sign Default Terms & Conditions in the Settings window.
This option to display common terms and conditions on signature requests can be saved.
The terms have two possible definitions, including,
Terms in Email: Each email requesting a signature will include the wording at the
bottom.
Terms as a Web page: Each signature request email will include a link to your
material at the bottom.
Identify with itsme@ is the next selection, which enables the signatories to use
this to prove their identities. By this ‘Enable Signing Orders,’ you can define a
signature order with signing orders, in which the receivers are only informed when it is
their turn to sign. You can specify the persons or groups who have access to the
template using the Manage Template access option.
Users can send one-time codes by SMS to identify signatures when they sign a document by
utilizing the Authenticate by SMS feature.
Field Types
From this field types option, you can view and create more fields or signature item
types. The view contains the Field Name, Type, and Autofilled partner field. To create a
new field, you can use the NEW button.
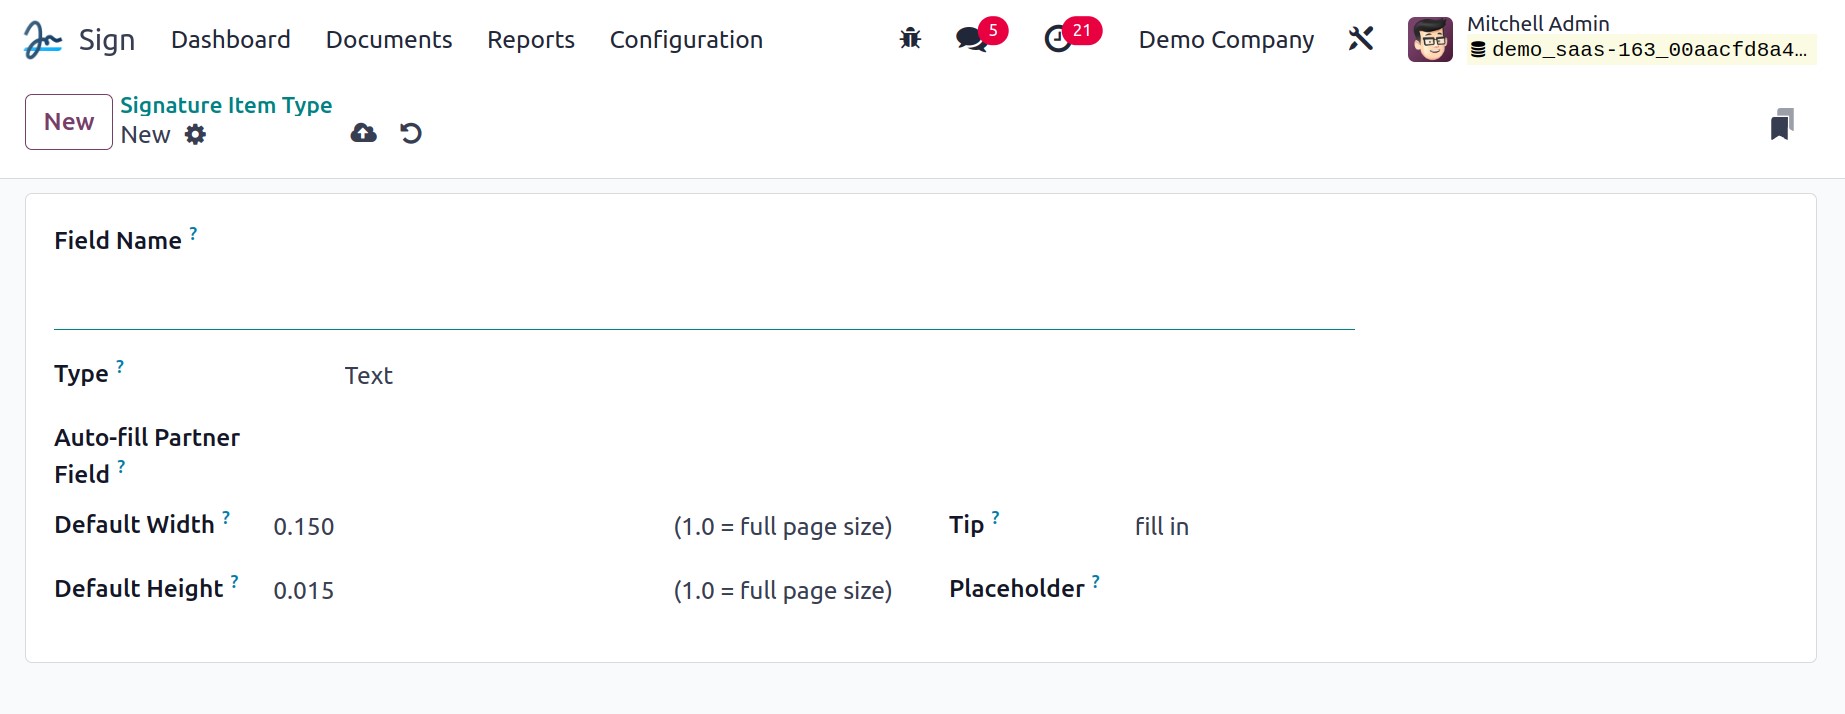
In a new field, add the Field name in the provided place. The Type can be
chosen from the dropdown list. The list contains Text, Signature, Initial, Multiline
text, Checkbox, and Selection. Auto-fill Partner Field allows the user to
auto-complete the field with the added technical name while signing the document. Then,
you can add Default Width, Default Height, Tip, and Placeholder while
creating a new field type.
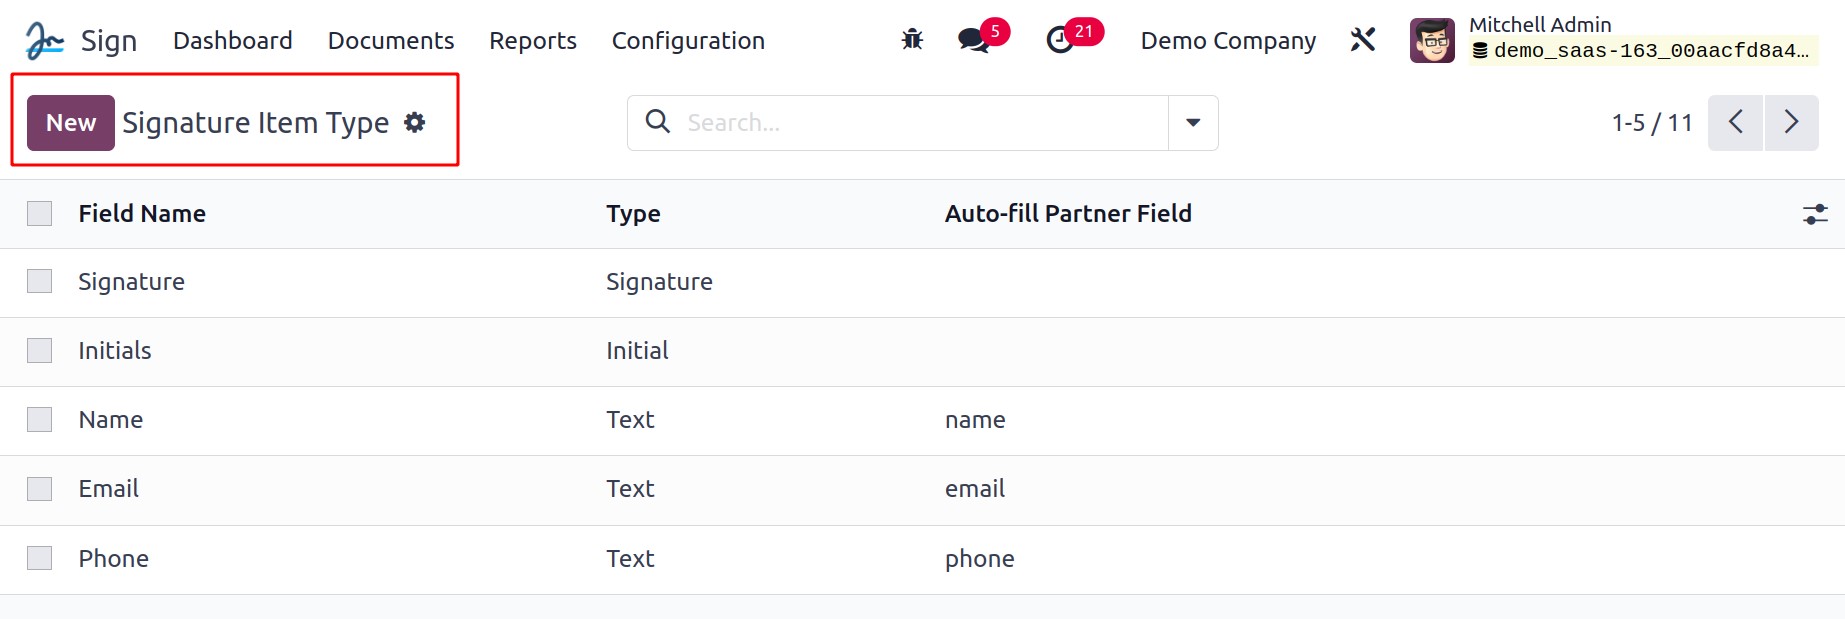
Roles
You can set up signature item roles according to your business needs using the
Roles menu found on the Configuration tab of the Odoo17 Sign module. The
Signature Item Role Window will open when you select it from the Roles menu, as can be
seen in the image below.
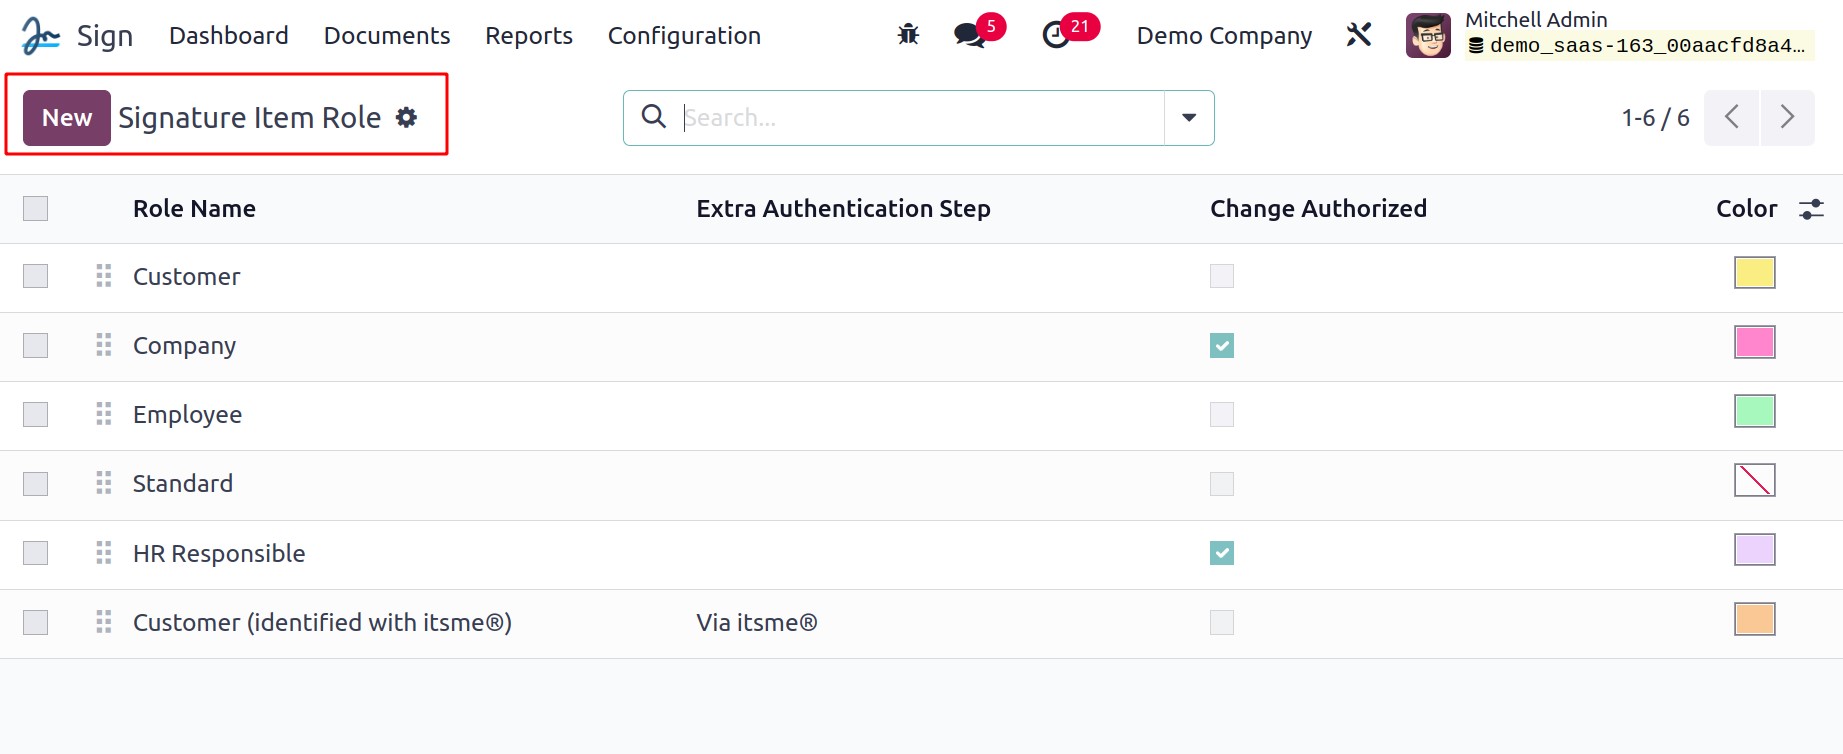
You can view every Signature Item Role that has ever been created in the system in the
Signature Item Role window. The term "Role" refers to the person who must sign the
contract. According to your needs, the platform lets you configure new roles. To create
a new role, use the NEW button.
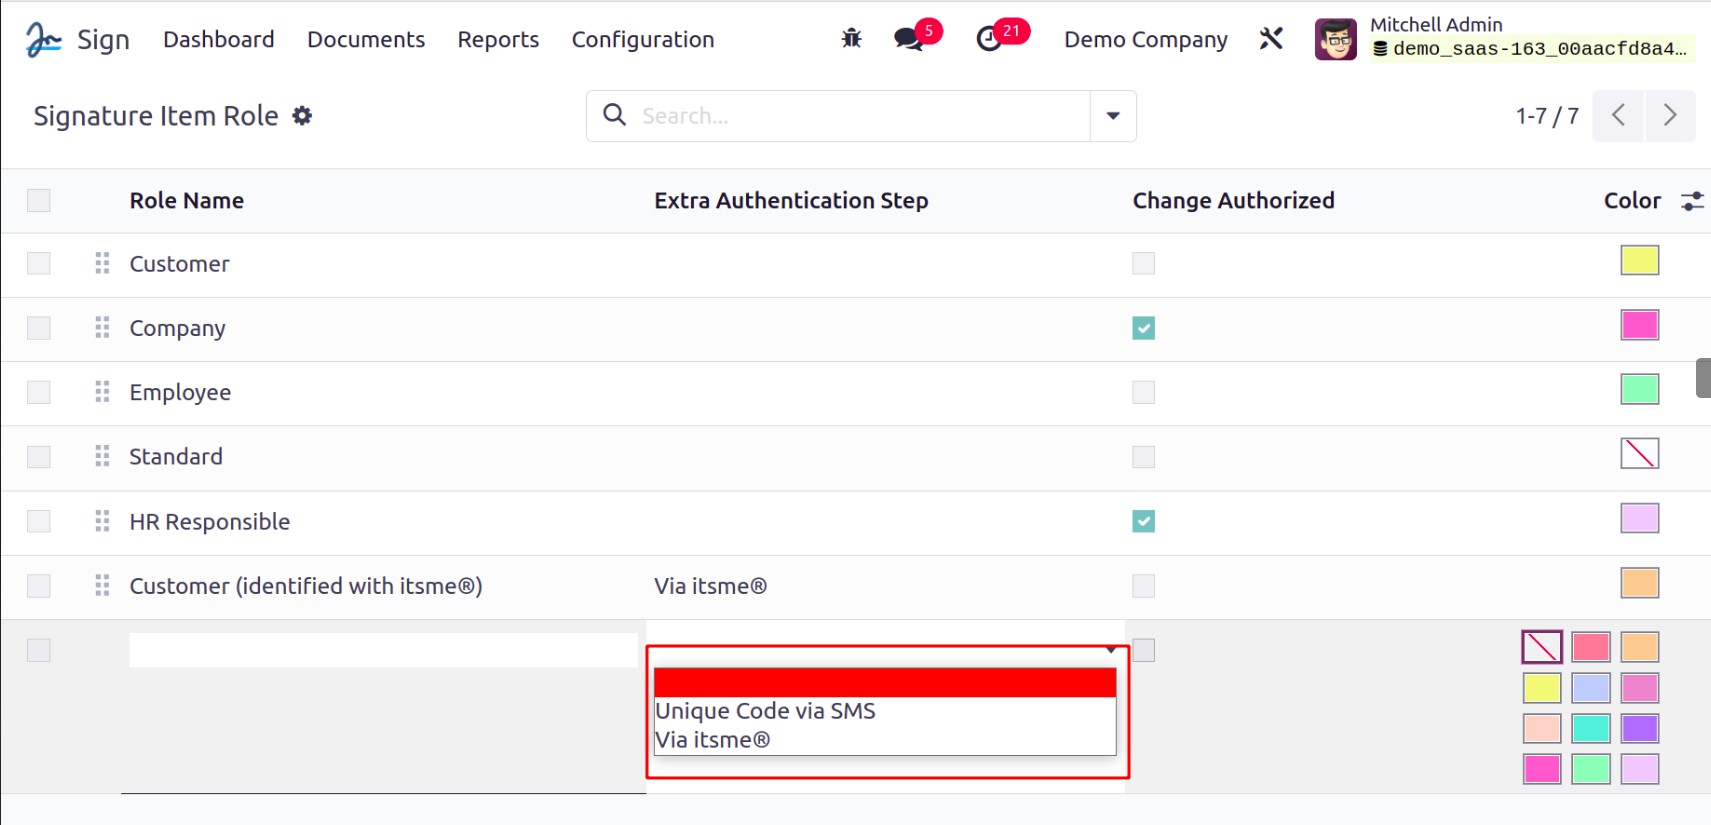
In order to configure a new Signature Item Role, the system will now show a new row in
the same window where you can enter the Role Name and choose Extra
Authentication, either Unique Code via SMS or Via its me@. Additionally, you can
choose a color to help you immediately recognize the new Role.
The best module for easily signing and requesting a sign digitally is the Odoo17 Sign
module. The module will make your job easier by helping you keep track of each
document's status.