Transfers
Businesses with numerous warehouses must control the movement of goods
from one place to another. In some circumstances, the businesses may
have various branches in various cities, making it very difficult to
efficiently coordinate product transfers. Companies frequently handle
such circumstances by designating primary warehouses and secondary
warehouses for product delivery. The handling of product transfers
from one location to another is made simple with Odoo17's Transfers
feature.
Transfers of inventory include the movement of goods inside and outside
of warehouses.
Internal transfers are also included for the movement of goods within
the company's warehouses.
The management and configuration of warehouses are supported by the
Odoo17 ERP system, which we
shall cover in the following section. You may control the product
transfer between the configured
warehouses and locations by using the Transfers
option found under the Operations menu after defining the company's
warehouses and locations in detail.
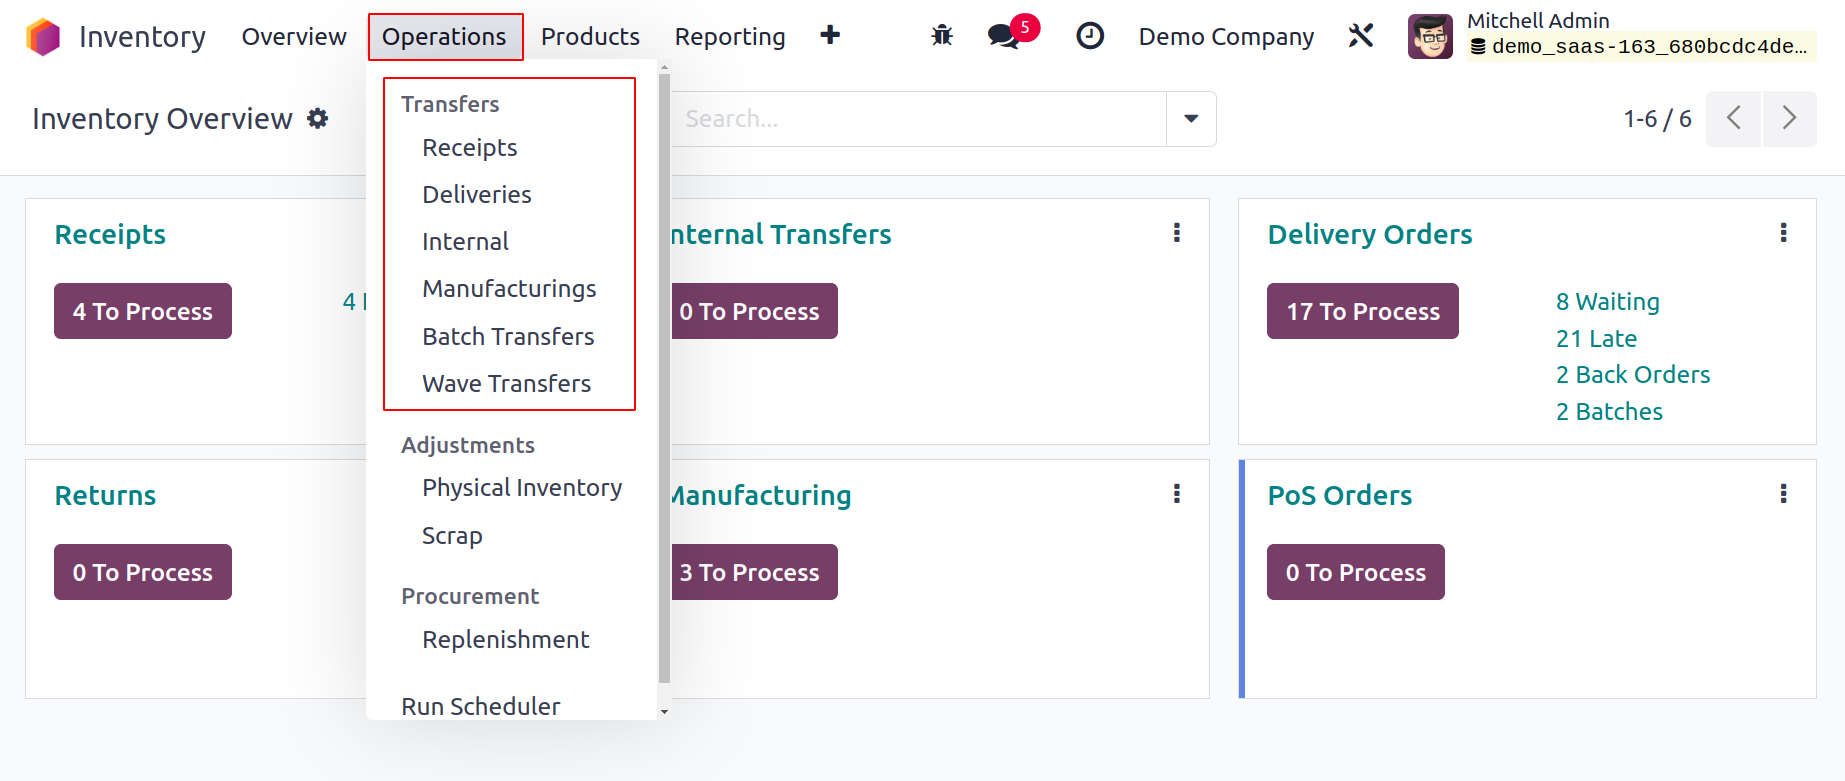
You will find transfers like Receipt, Deliveries, Internal,
Manufacturing, Batch Transfer, and Wave
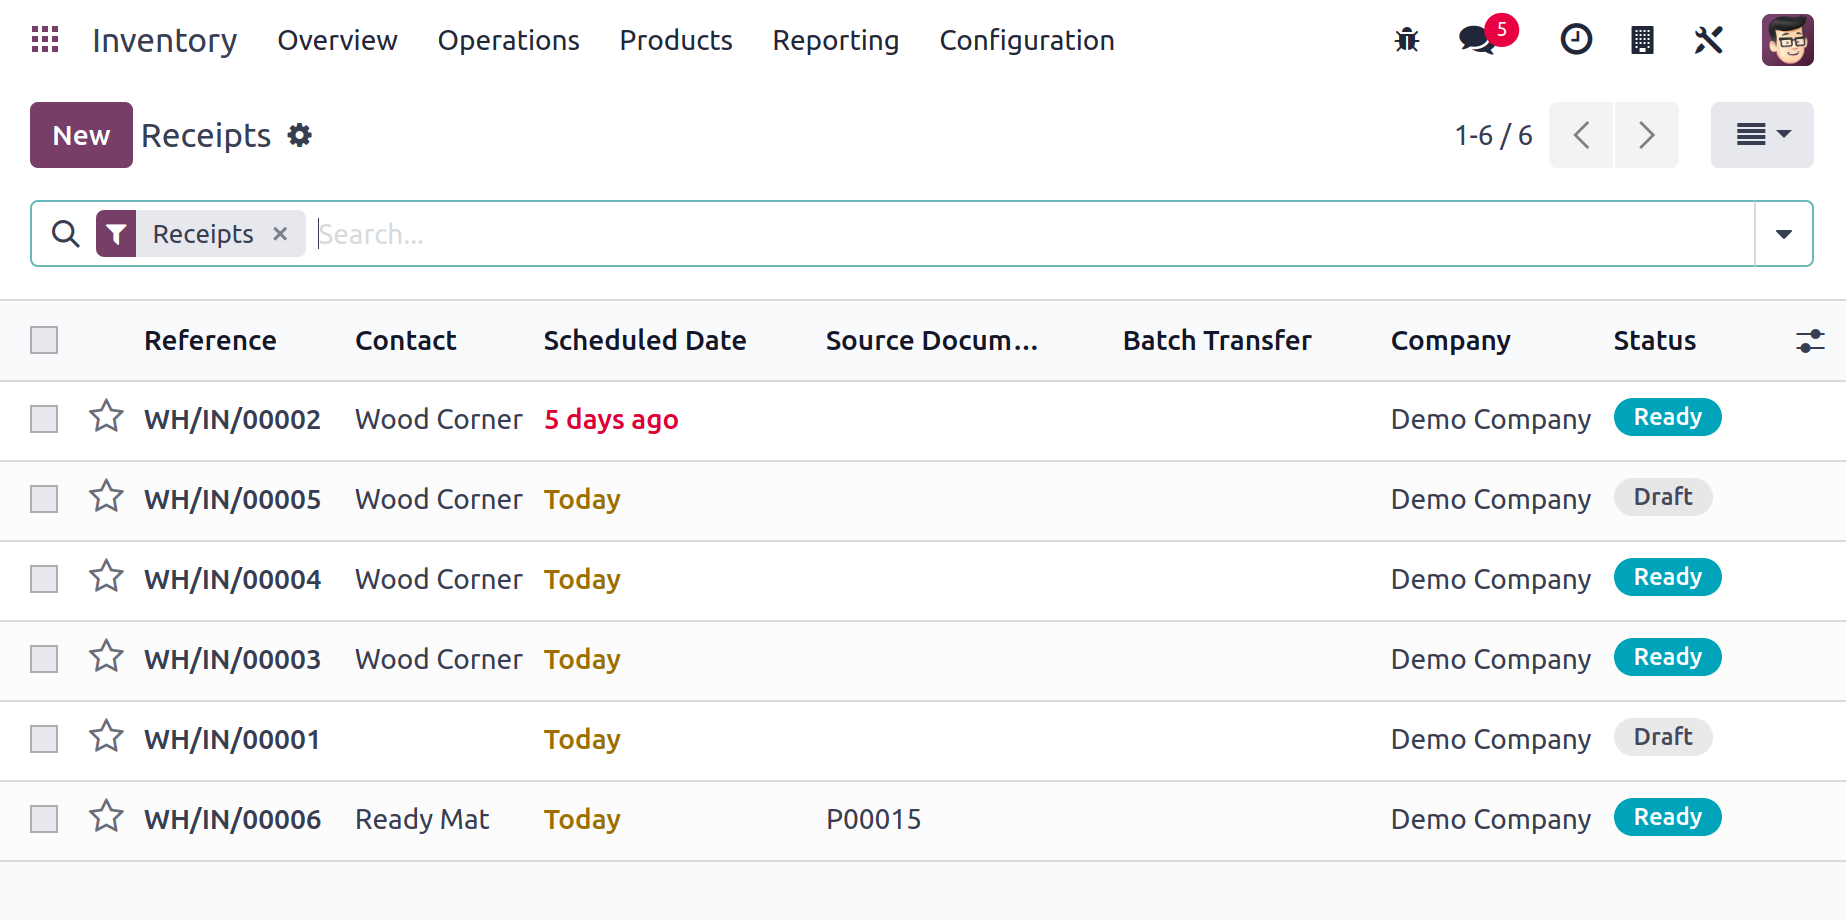
Transfer under the Transfers option, as shown in the image above. You
will find information about
the Reference, From, To, Contact, Scheduled Date,
Source Document, Batch Transfer, Company, and Status of the
preconfigured transfers here, as shown in the image below.
You can easily complete the sorting tasks by using the Group By and
Filters options.
For this platform, you will also receive Kanban, Calendar, and
Location views.
Let's now examine how Odoo17 enables you to establish a new transfer
for the transportation of
goods between two locations. Click the New button to do this.
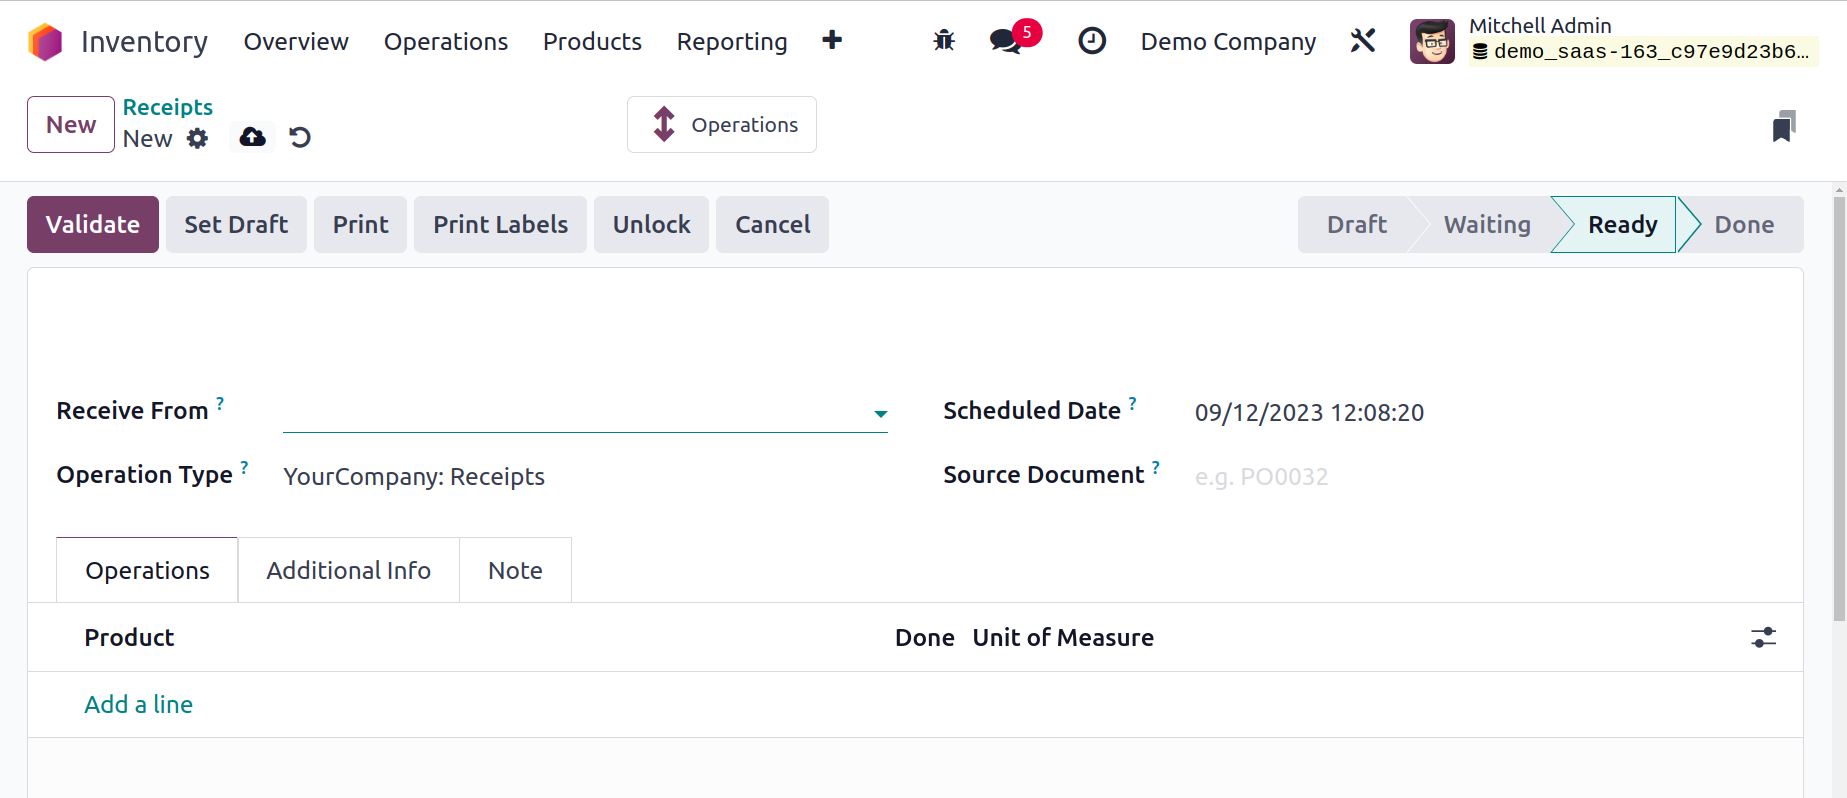
The partner id can be entered in the Contact area of the new
transfer creation window. Various transfer kinds can be managed
using this platform. Receipt, Internal Transfer, Delivery
Orders, Returns, Manufacturing, Resupply Subcontractor, POS
Orders, Dropship, and Manufacturing are a few of them. In the
Operation Type area, you can choose the transfer type you want
for your product movement. Odoo17 provides a separate platform
in the Configuration menu, which we shall cover already, to
create various kinds of operation. You can specify the product's
source location and destination location after choosing an
appropriate Operation Type. The Scheduled Date feature can be
used to indicate the anticipated date of stock movement. You can
include a reference to the document pertaining to this product
transfer in the Source Document area. You can use the Add a Line
button on the Operations page to list each item that is part of
this transfer individually. You can describe the products'
names, packaging, demand, and UoM in addition to their names.
The quantity of the product that is intended to be transferred
is referred to as the demand.
Under the Additional Info tab, you may add the Shipping
Information.
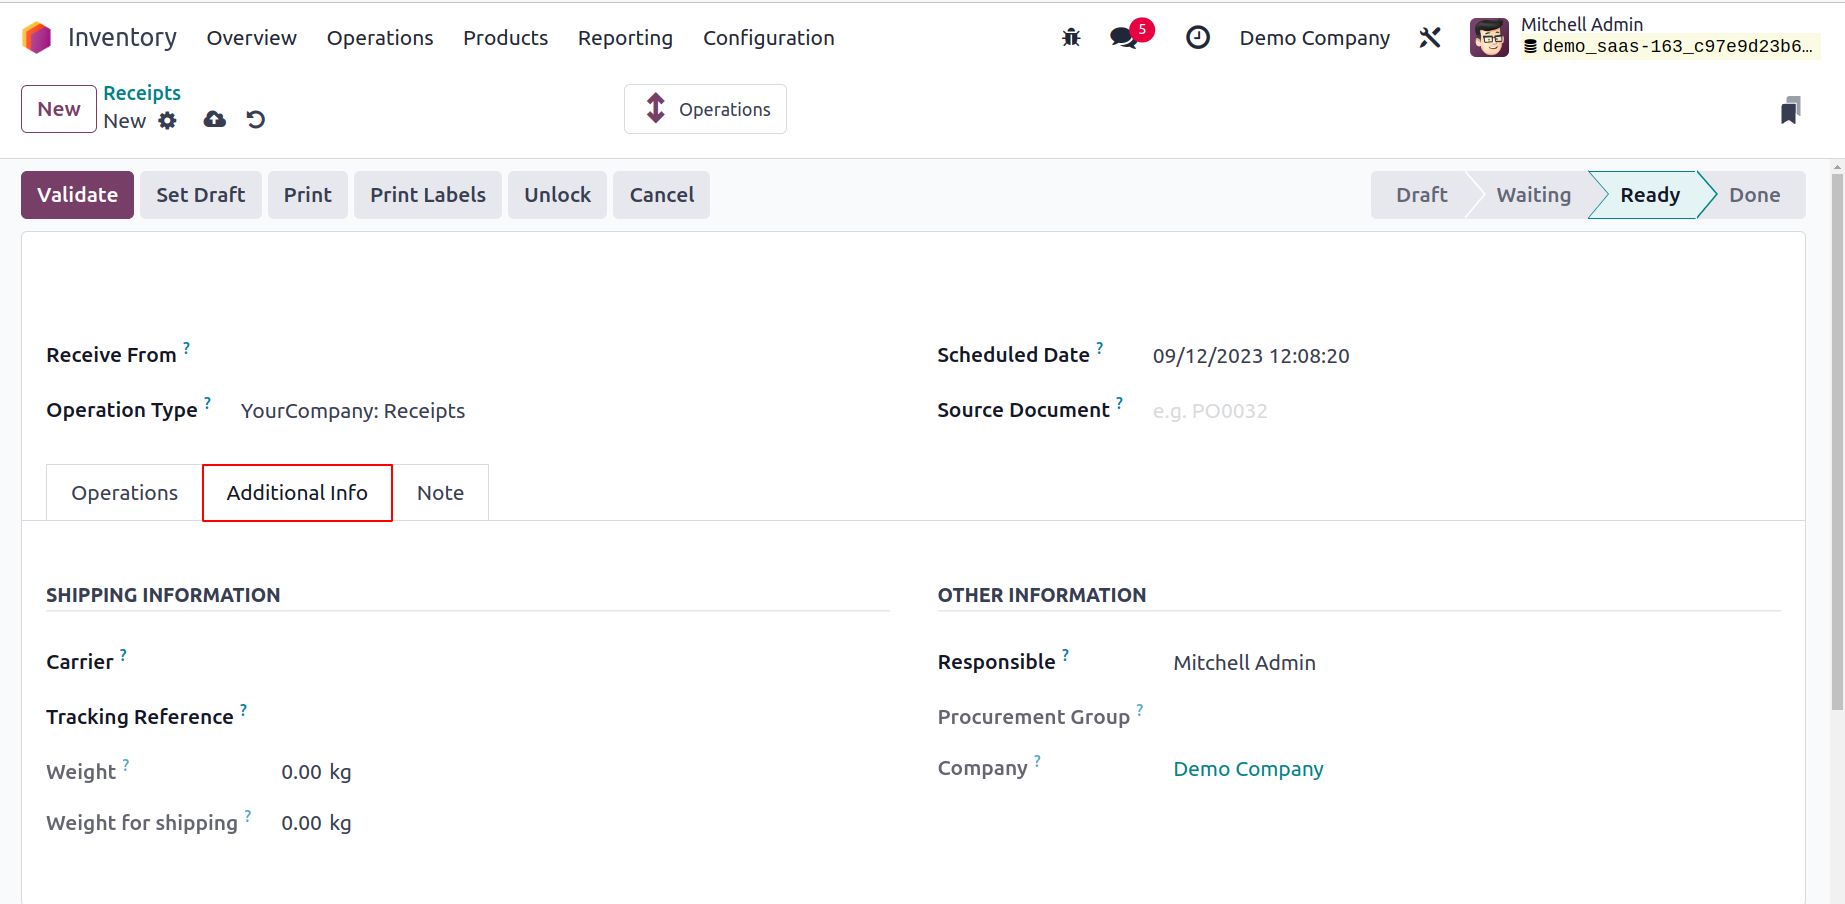
The Carrier Details, Tracking Reference, Weight, and Weight
for Shipping of the goods involved in this transfer can all
be added here. You can configure the transfer's shipping
policy in the Other Information section. Depending on your
company's policy, you can set it to "As soon as possible" or
"When all products are ready." You can also designate a
Responsible employee to be in charge of the transfer's
future activities. Finally, fill in the respective fields
with the Procurement and Company information. You can add
internal notes about this transfer on the Notes tab. The
transfer will be saved after the Save button is pressed.
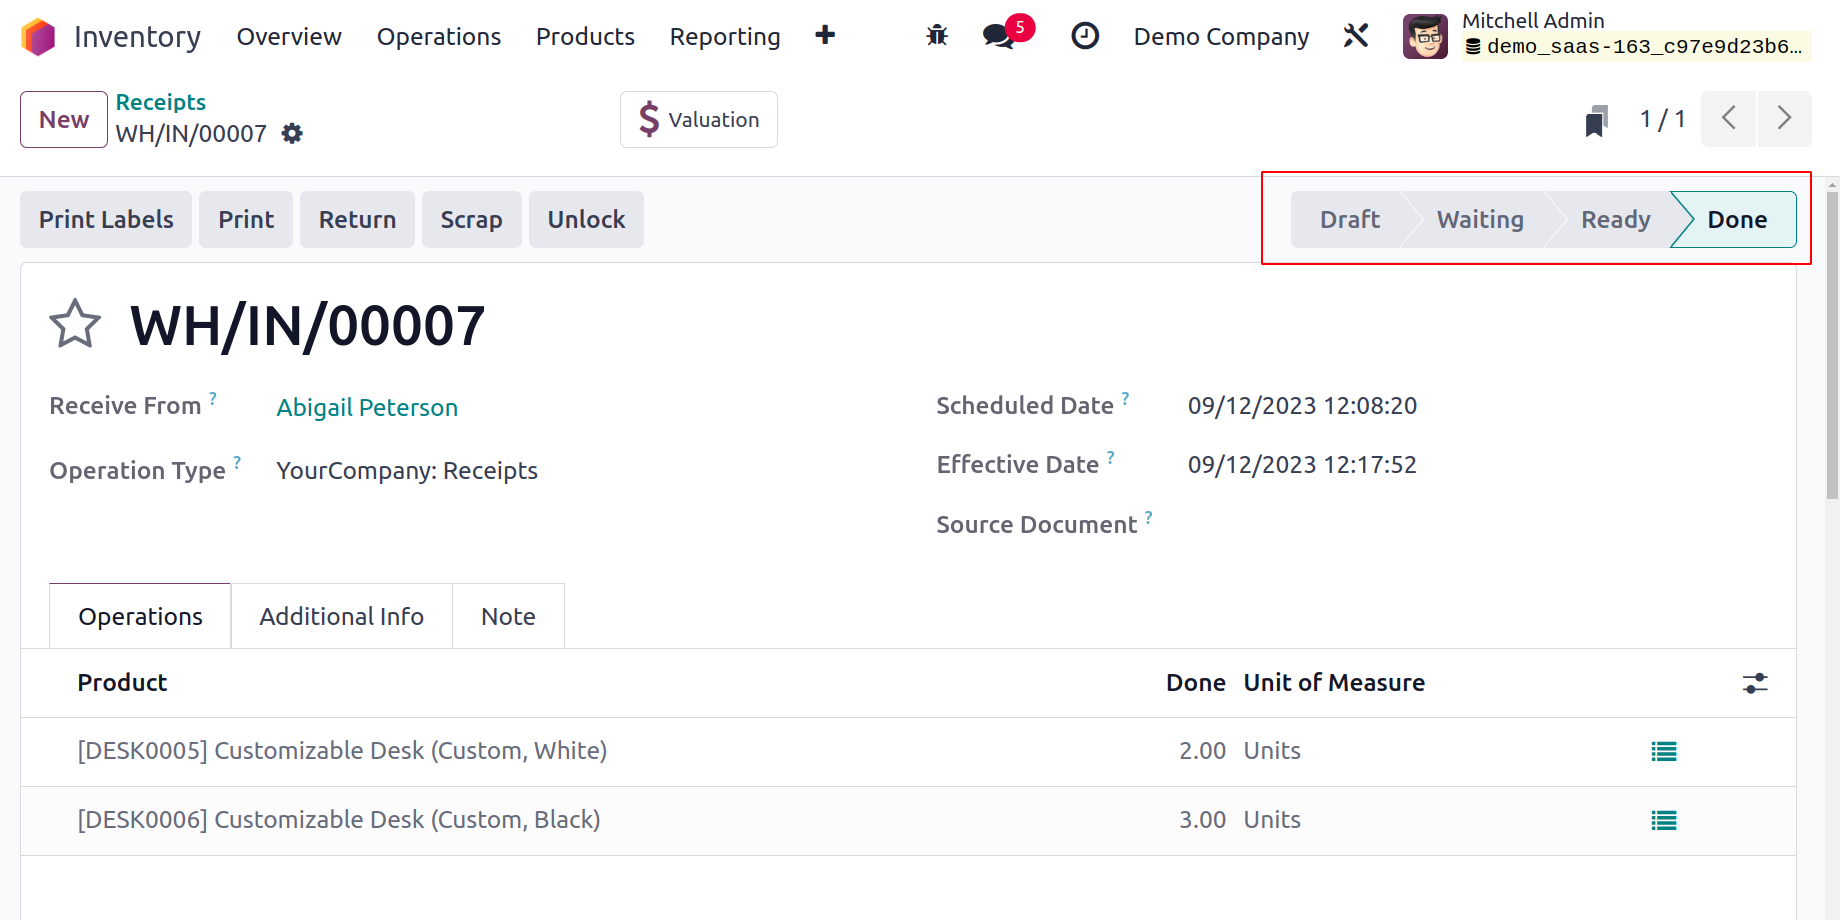
The transfer is initially in the Draft phase. When a
transfer is in the Waiting stage, it means that some
products are not yet available. The transfer can be seen
in the Ready state if it is prepared to be processed. To
advance the transfer to the Ready stage, click the Mark
as Do button. Click the Validate button once the
transfer process is finished. The transfer process is
now complete.
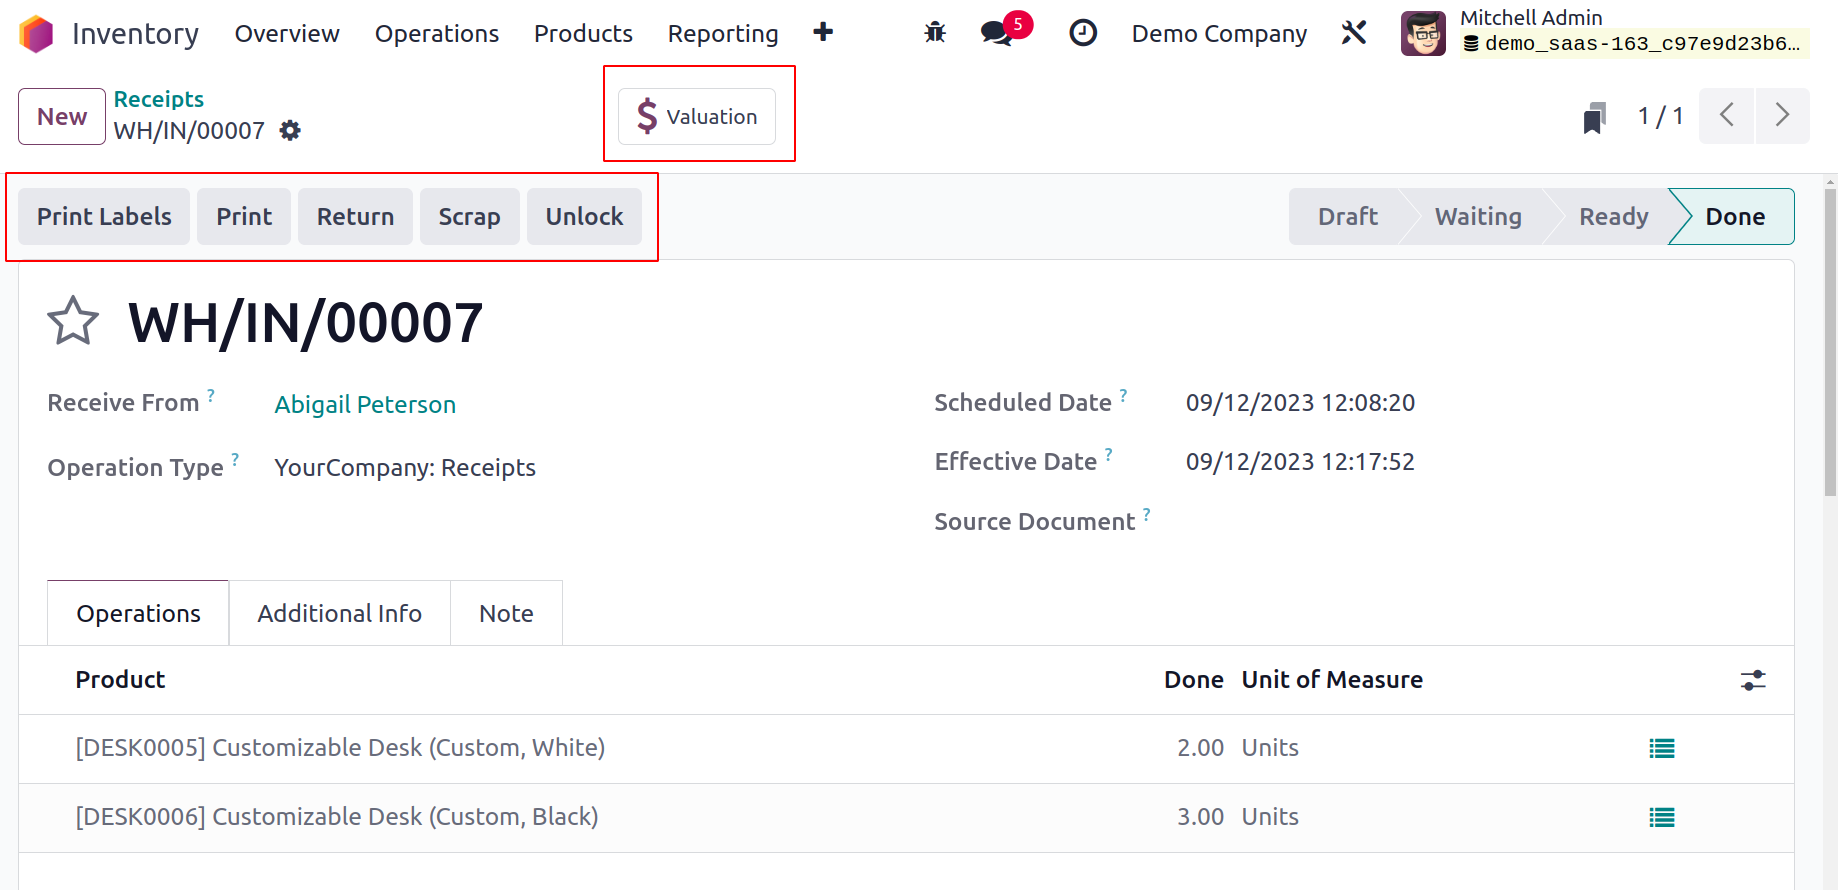
The Print Label button can be used to produce labels
for the recently transferred products. You can print
off the transfer's delivery slip using the Print
button. The Return button allows you to send the
items back to the previous place. The freshly
transferred products can be sent to scrap using the
Scrap button if you discover any flaws in them.
Using the smart button labeled Valuation located in
the window, as seen in the above image, you can
obtain the stock valuation report for this transfer.
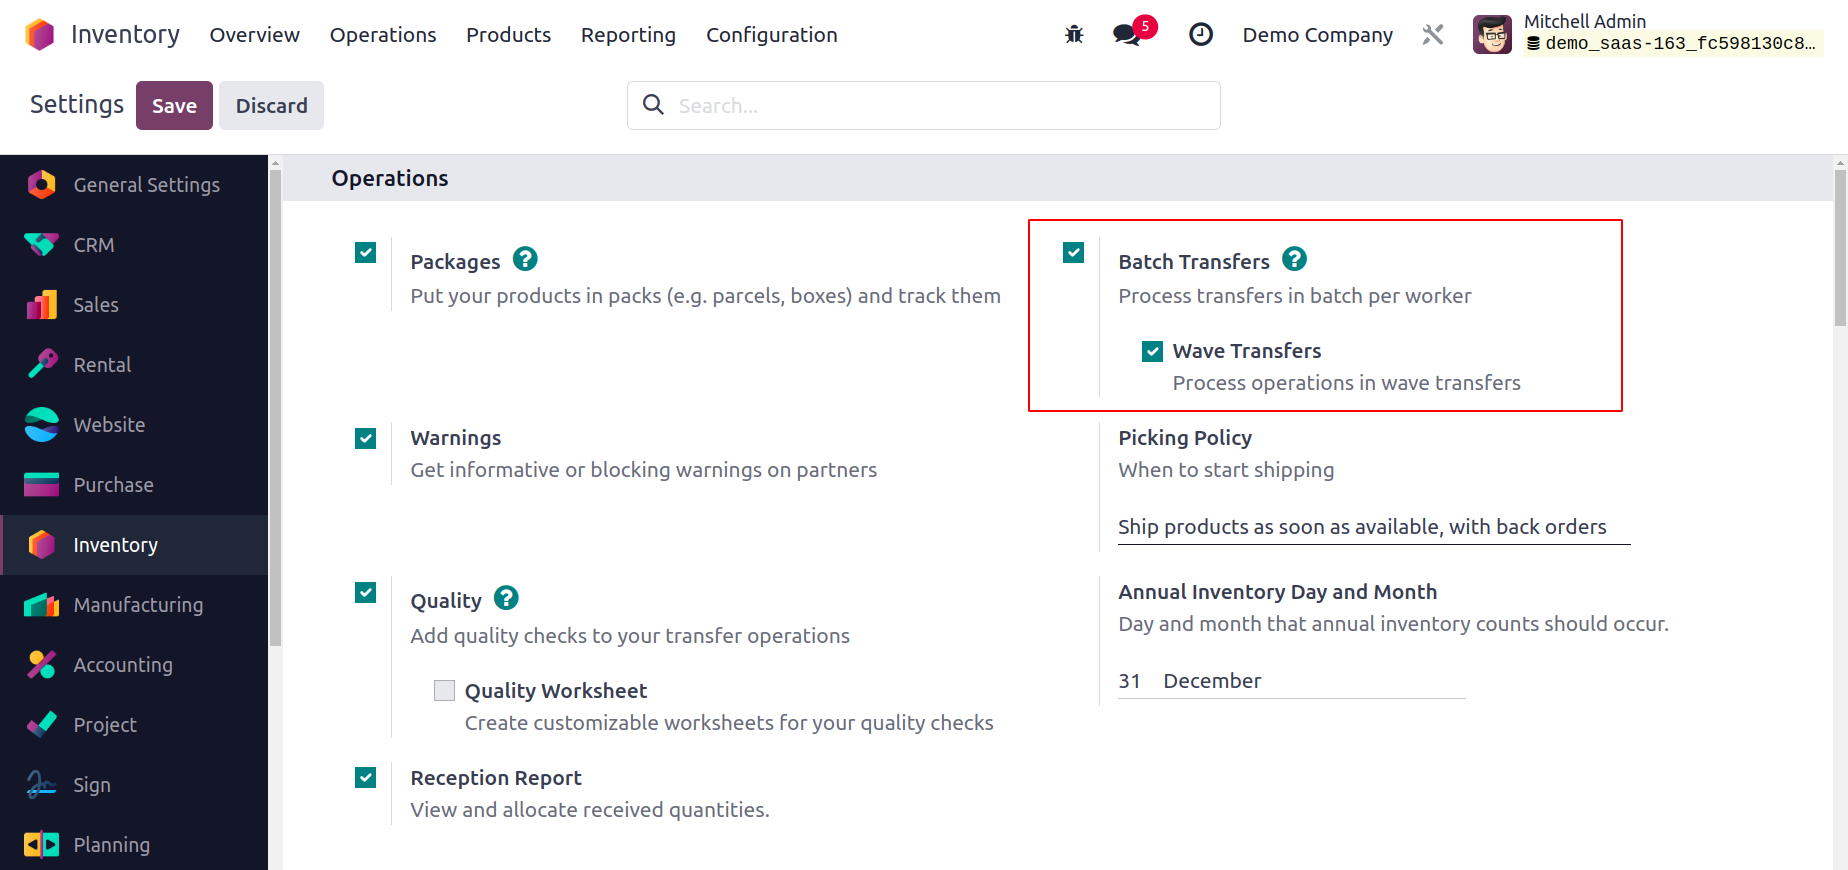
Batch Transfer
With the aid of the Batch Transfer tool in Odoo17,
you are able to execute several transfers
simultaneously. You can utilize this tool to carry
out group transfers, which will help you save time
and effort. All transfers added to the batch are
performed simultaneously when transferring in
batches. The challenges associated with managing
bulk transfers can be reduced by employing this
technique.
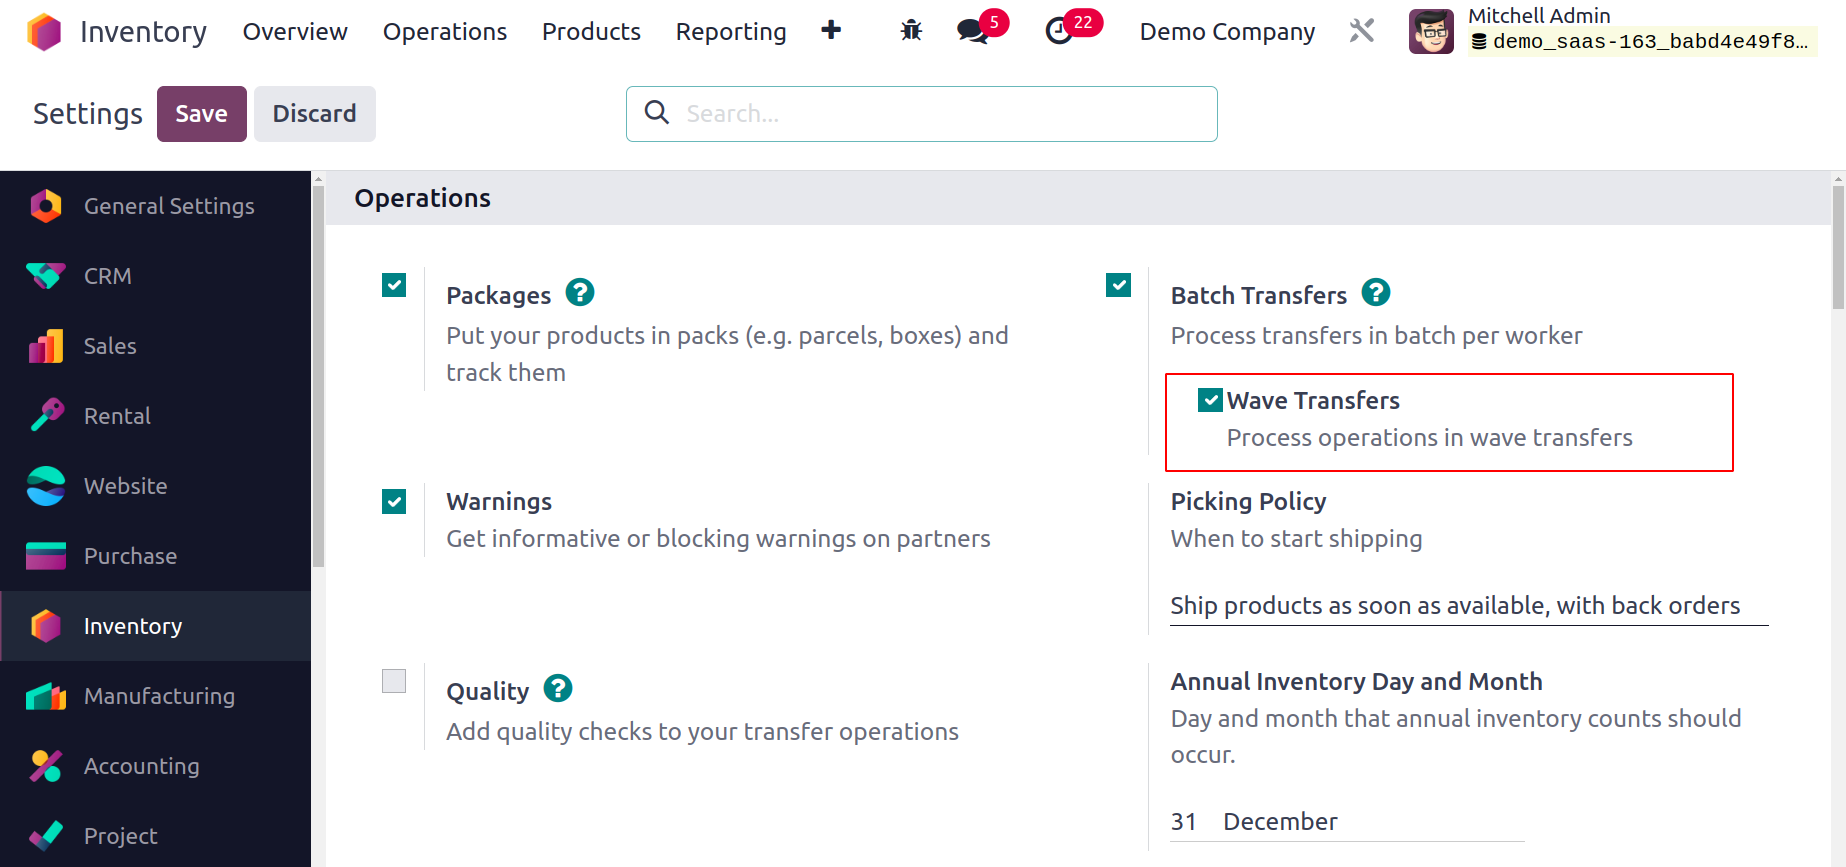
As seen in the image below, the Settings menu of the
Inventory module allows you to easily activate the
Batch Transfer option.
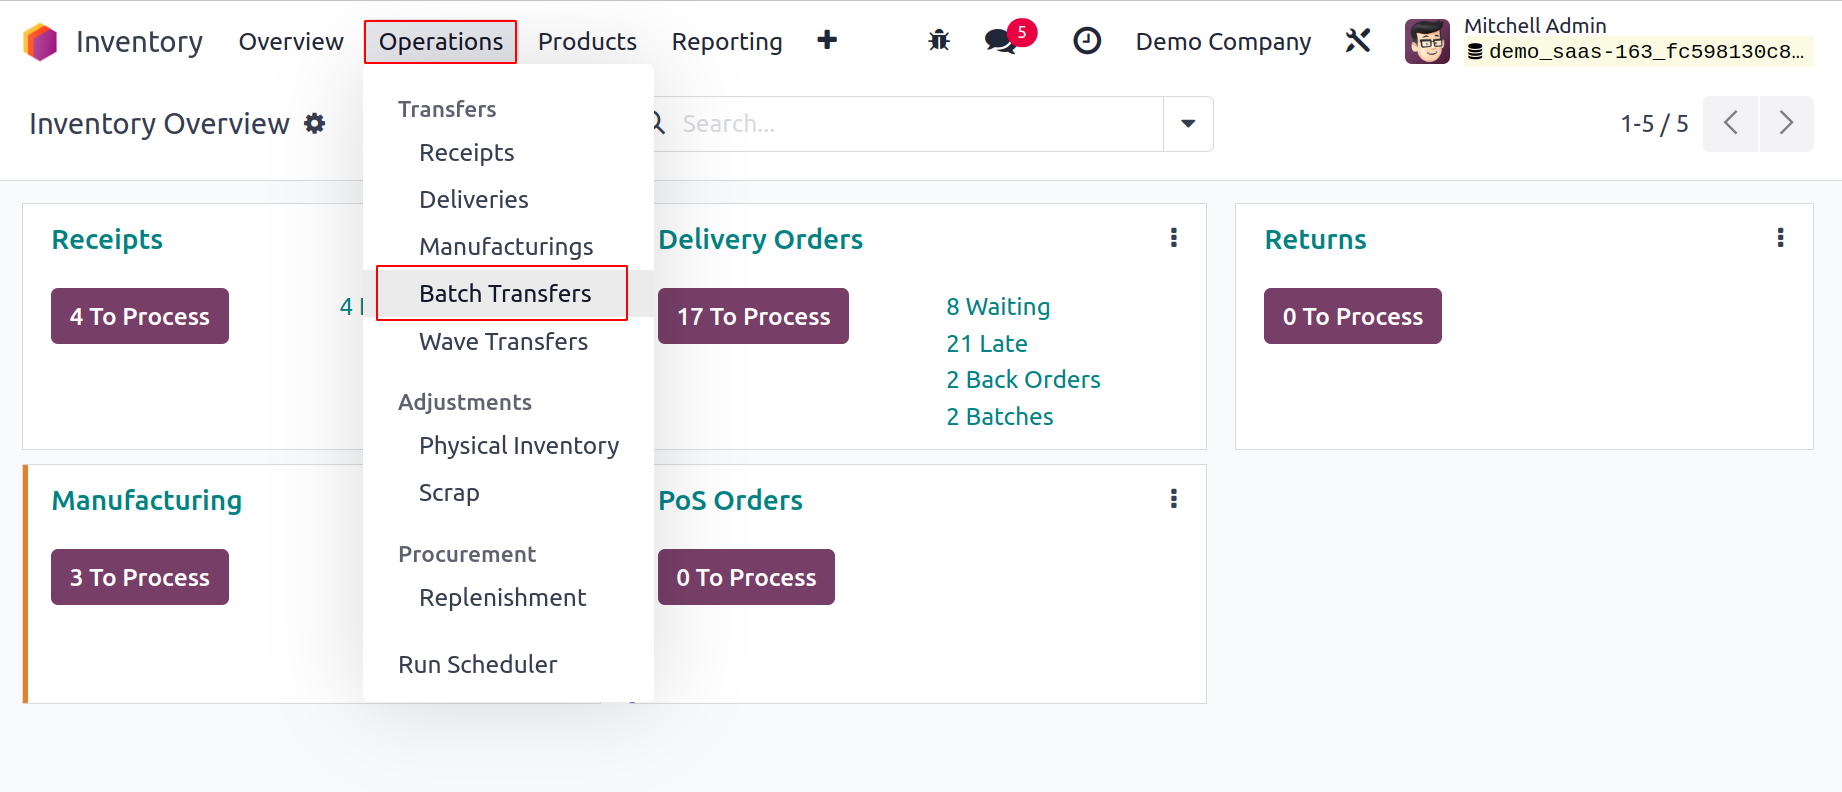
To save the new modifications after choosing the
Batch Transfer option, click the Save button. From
the platform accessible under the Operations menu,
as illustrated below, you can now handle batch
transfers.
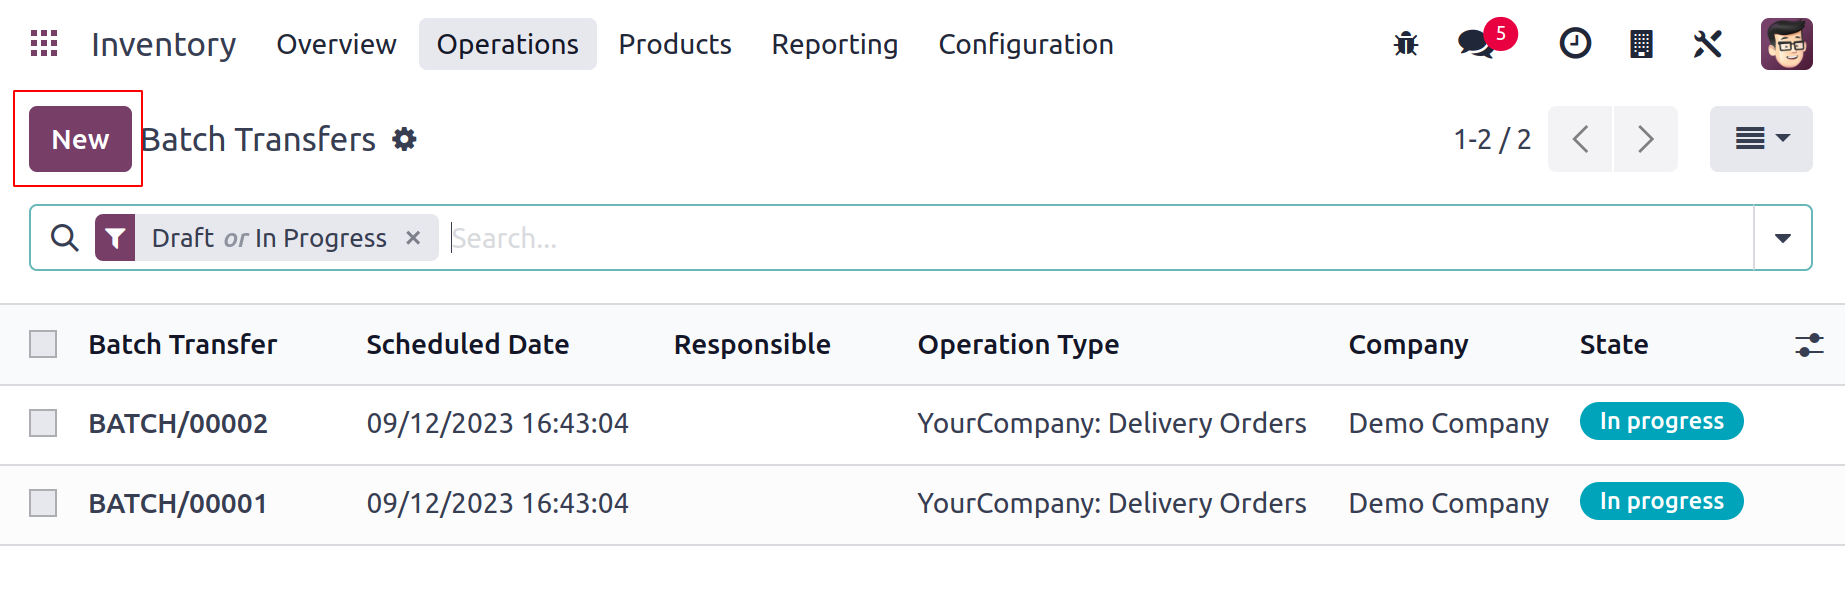
Here, you can see a list of already-created batches
as well as information on Batch Transfer, Scheduled
Date, Responsible, Operation Type, Company, and
State. You can also change the platform's
perspective to a
Kanban one. Use the New button to start a fresh
batch transfer.
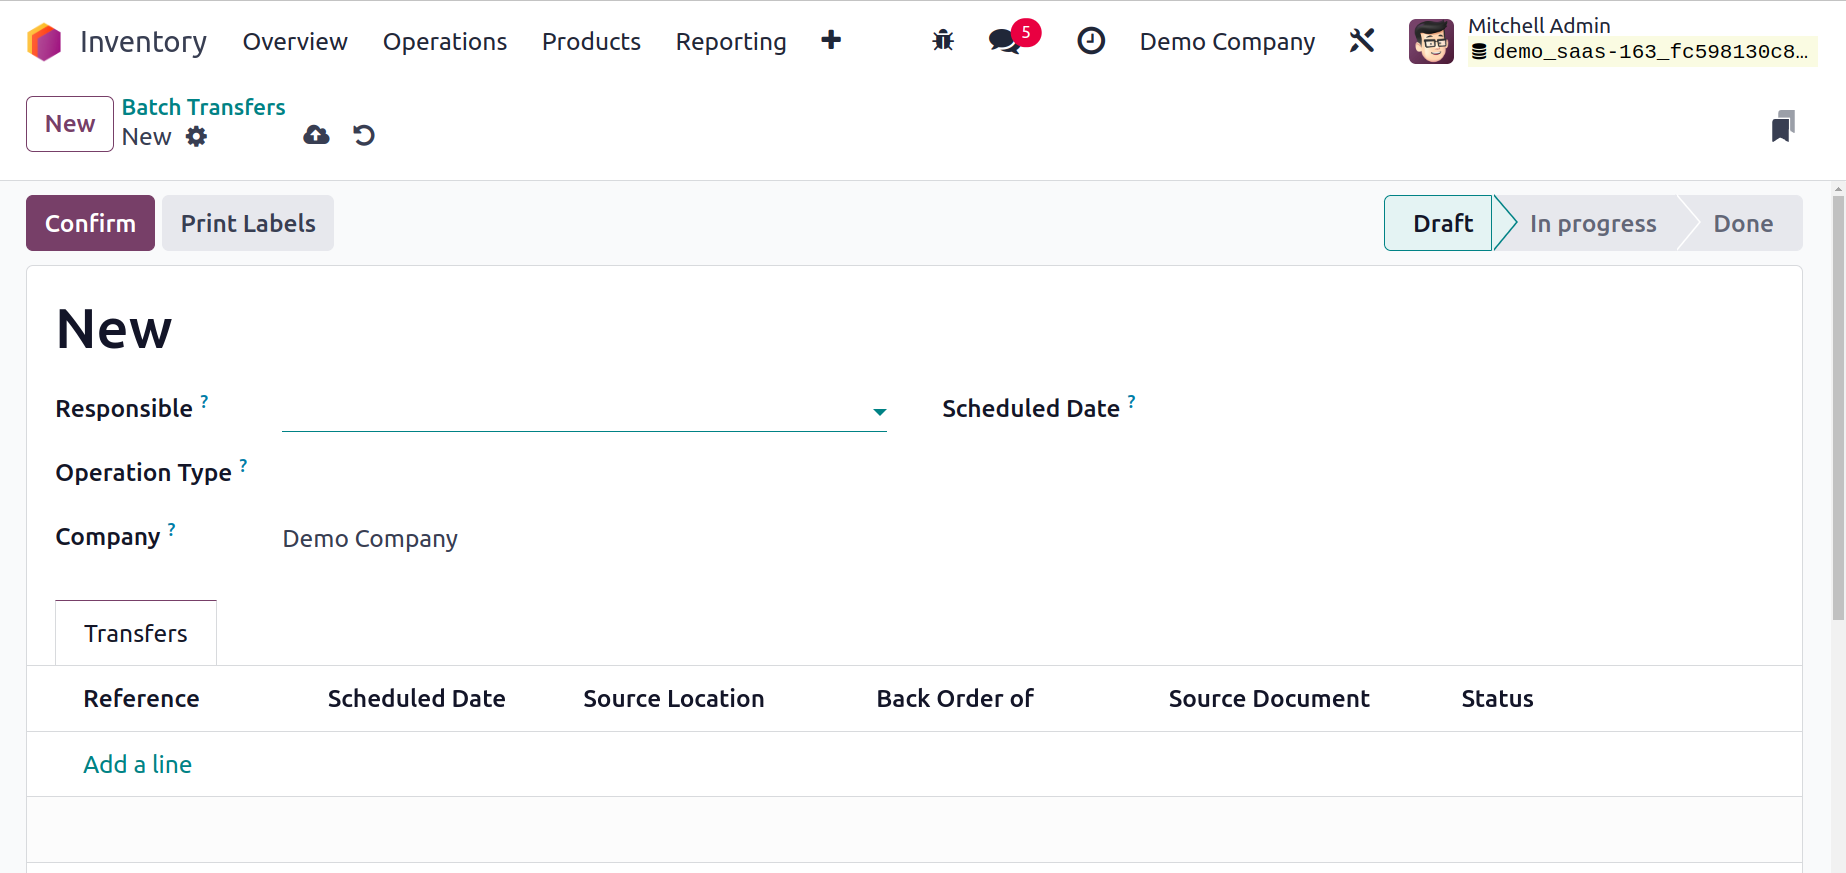
You can designate a worker to handle this batch
transfer's impending tasks in the Responsible box.
Fill in the blanks for Operation Type and Company.
Odoo17 enables you to include transfers with this
operation
type to this batch by providing the Operation Type.
You can manually plan the transfer's anticipated
date in
the Scheduled Date column. If the scheduled date for
this transfer is not manually defined, Odoo17 will
use
the earliest scheduled date of the transfer that is
part of the batch.
You can now add transfers one at a time to this
batch using the Add a Line option in the Transfer
tab.

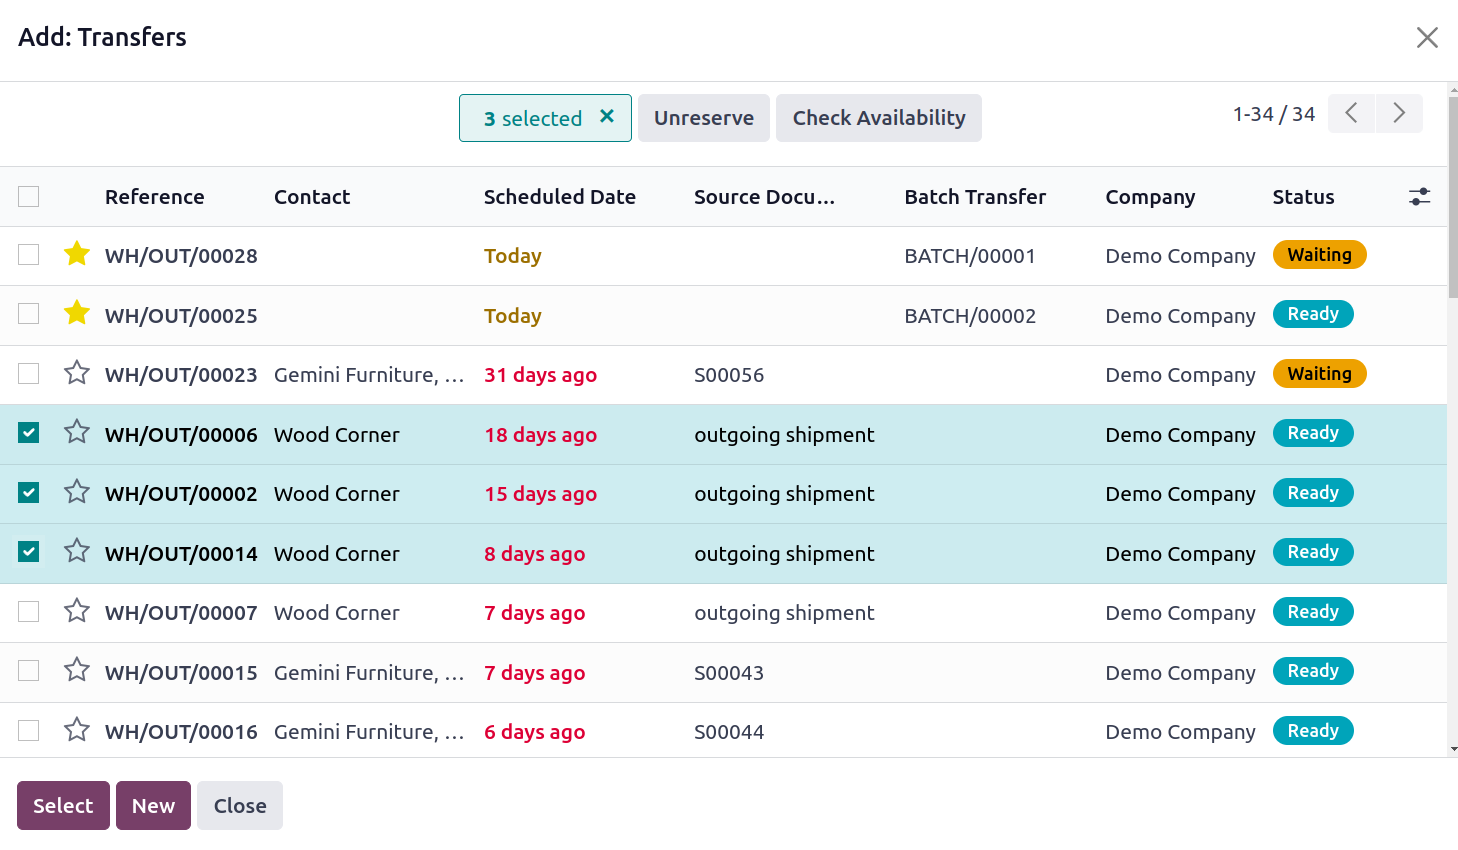
A new pop-up window will open as soon as you click
the Add a Line button, allowing you to choose the
transfers for this batch. A list of various
transfers for the chosen operation type in various
phases will be presented to you. The transfers are
available for selection from the list. Choose
transfers from the same stage either in waiting or
ready state, if possible. You can use the Select
button to add them to the batch.
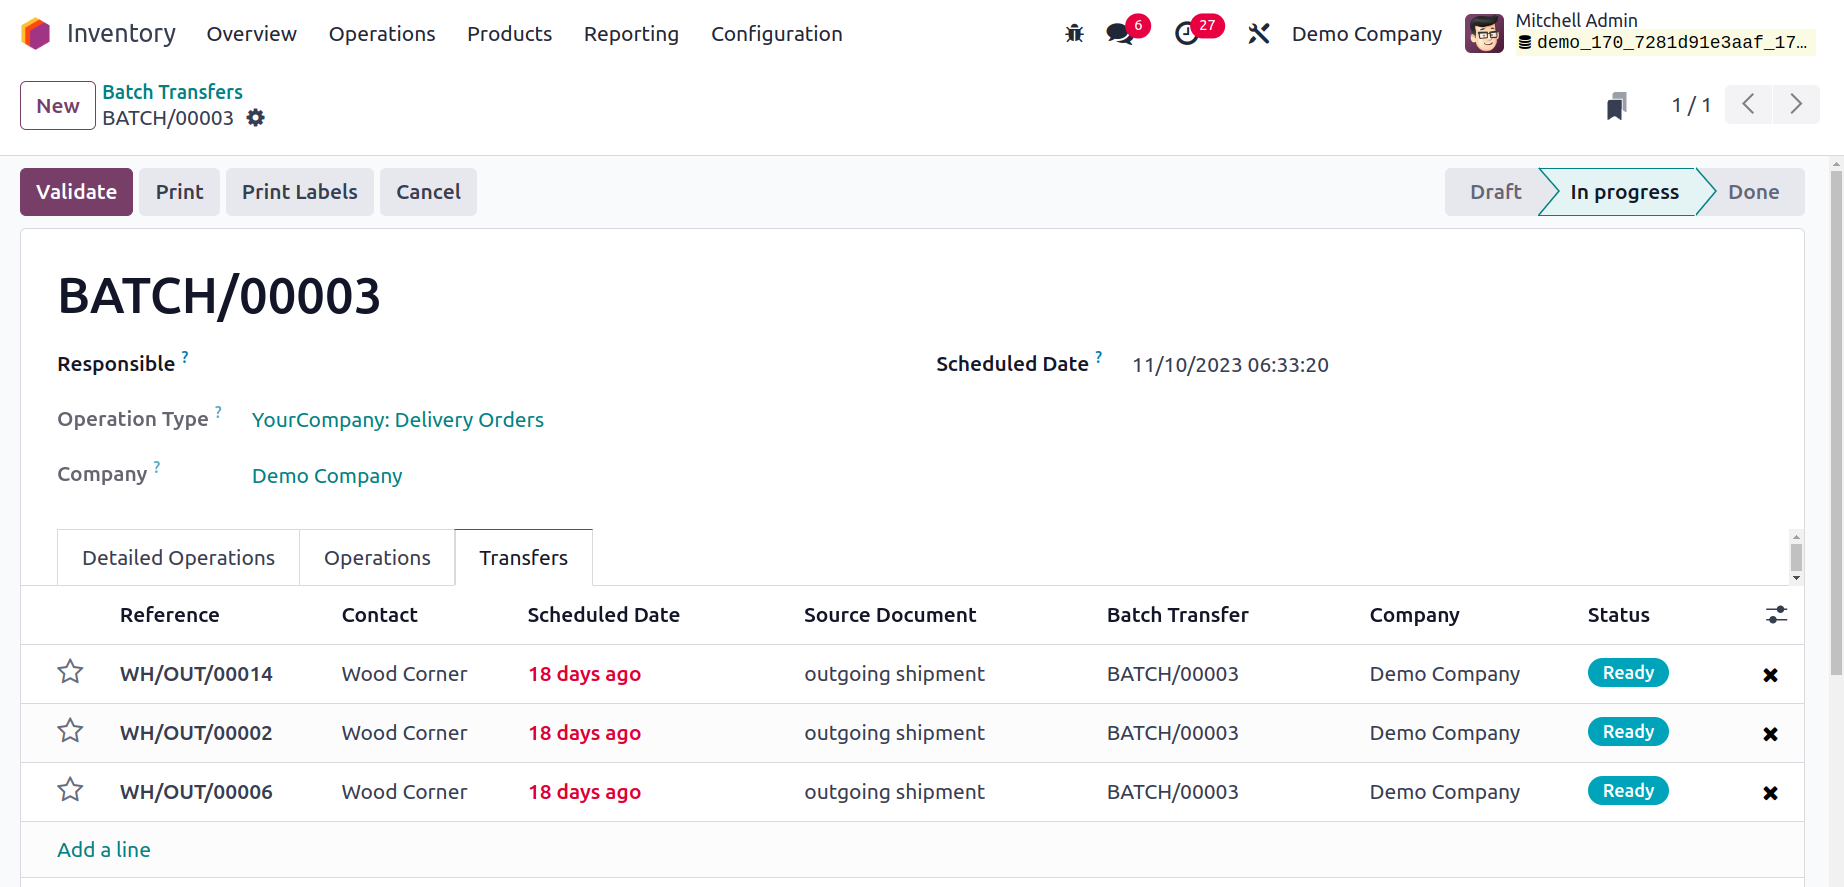
The list of chosen transfers will be automatically
included in the batch, as seen in the figure above.
The icon ❌ shown in
the following screenshot can be used to remove any
of the transfers from the batch. Utilizing the
Confirm button after confirming availability, you
may finalize the transfer.
Finally, you can finish the batch transfer operation
by clicking the Validate option.
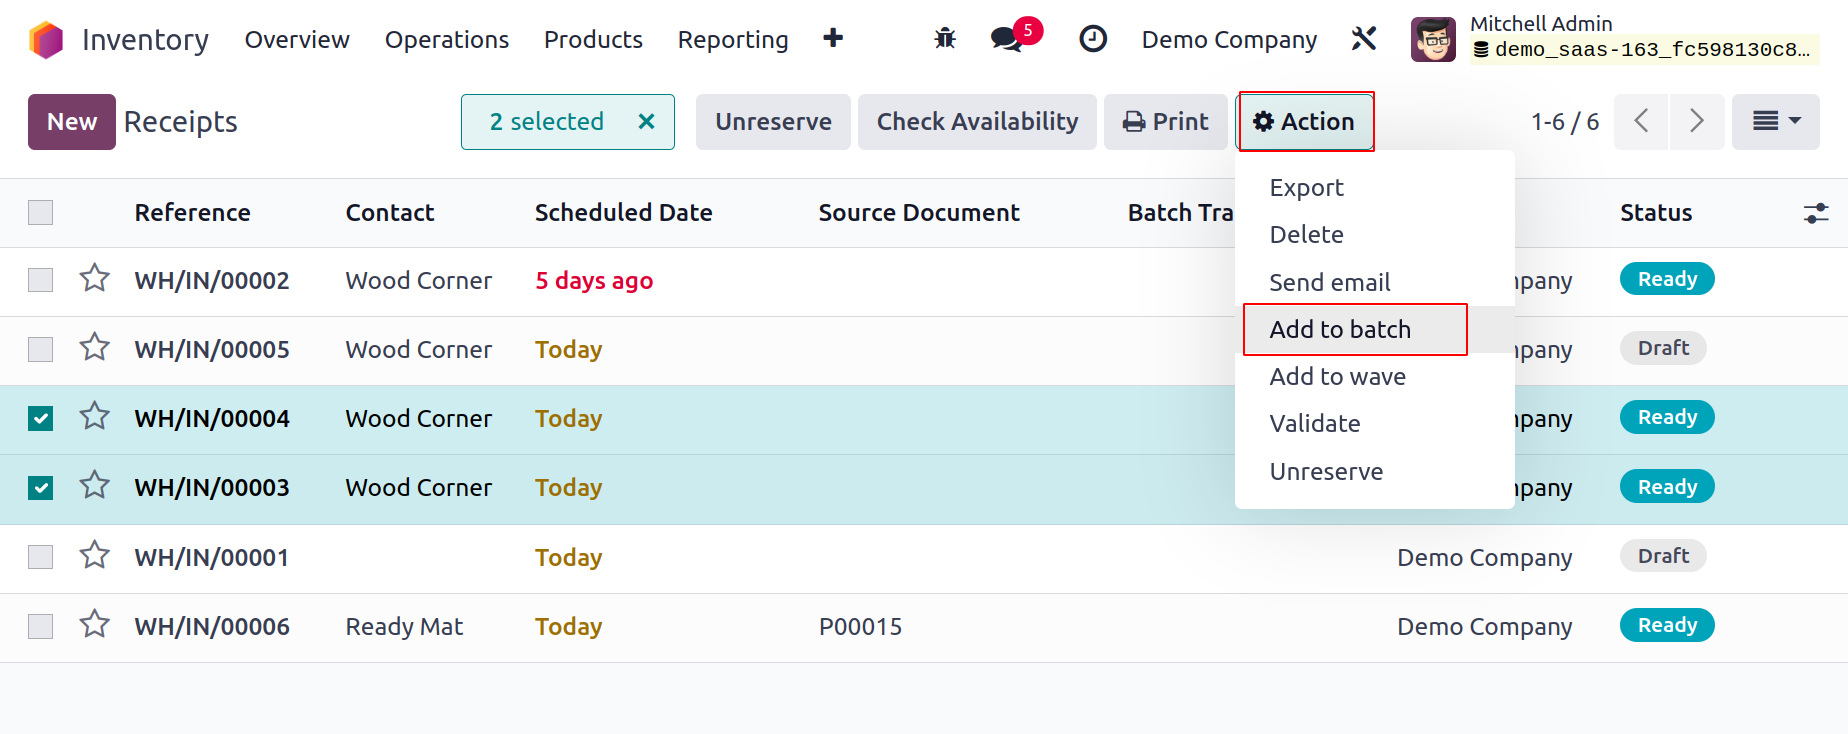
From the Transfers option, you can also make fresh
batches of transfers. You can do this by going to
the Operations menu's Transfers platform. You can
choose the transfers you want to include in a batch
from the list of available transfers. Remember that
the chosen
transfers must have the same status and operation
type. After choosing the necessary transfers, an
Action button will appear.

You have the choice to include the chosen transfers
in a batch from the Action button. Click on the Add
to Batch button. As seen here, a wizard will appear.
The chosen transfers can be added to an
already-existing or a brand-new batch transfer. You
can indicate the Responsible employee in the
provided field for a new batch transfer. Activate
the Draft option to produce the new batch in the
draft state. A new batch transfer will be created in
the Inventory module after pressing the Confirm
button. You may monitor and control the new batch
transfer from the Batch Transfer portal.
Wave Transfer
The Wave Transfer technique serves the same function
as the Batch Transfer choice. You can move a lot of
goods from one place to another with this technique.
However, once a transfer has been added to a wave
transfer, it cannot be taken out of the wave.
Compared to batch transfers, the wave transfer
approach is more sophisticated. Be sure to activate
it from the Settings menu in order to get this
feature in the Odoo17 Inventory module.
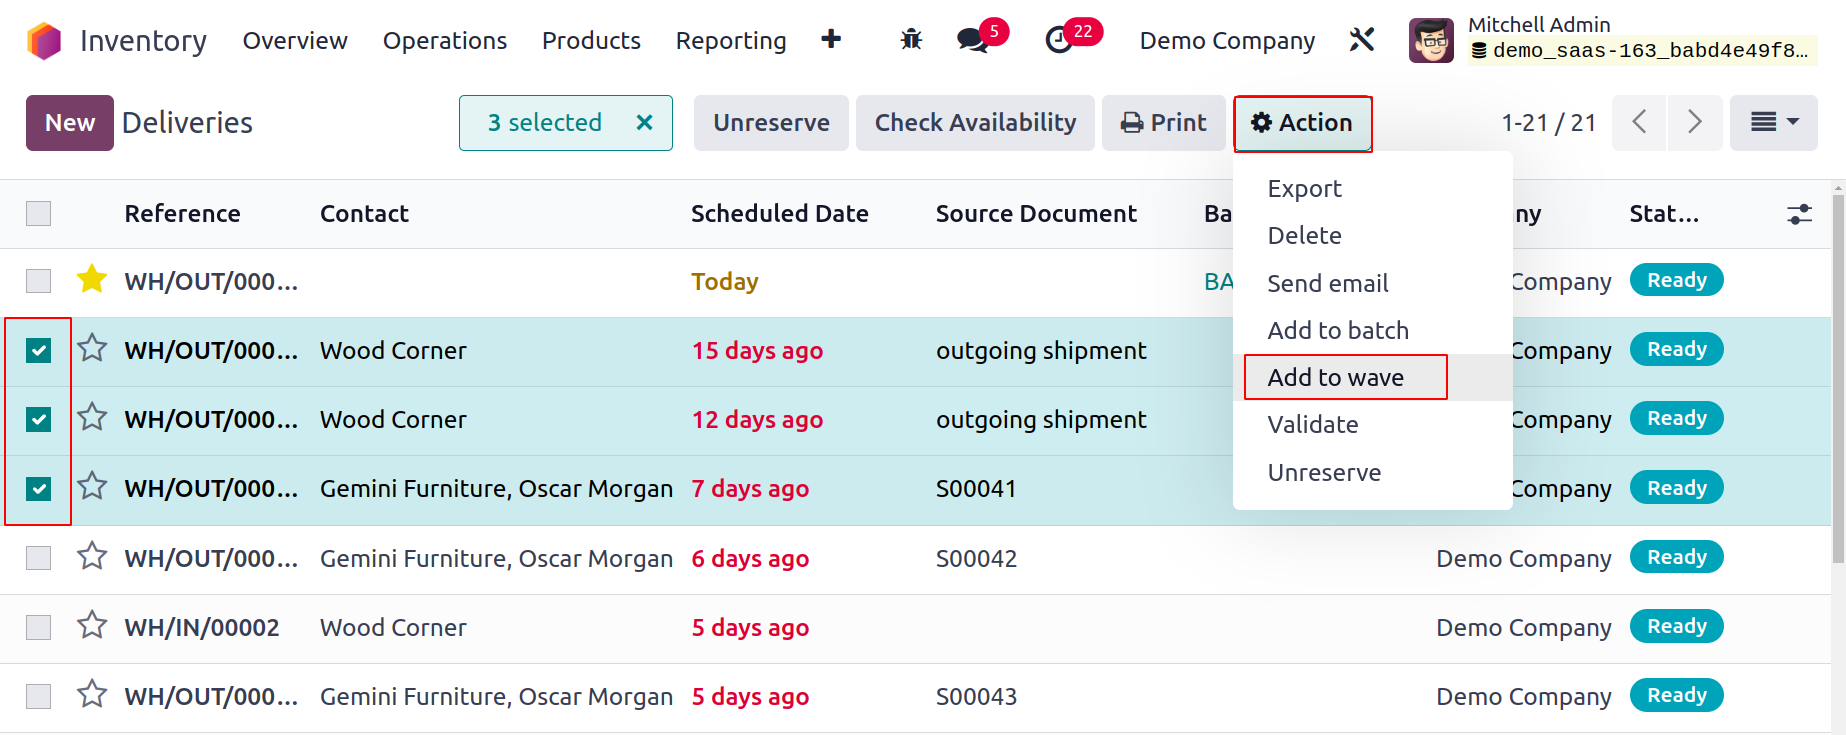
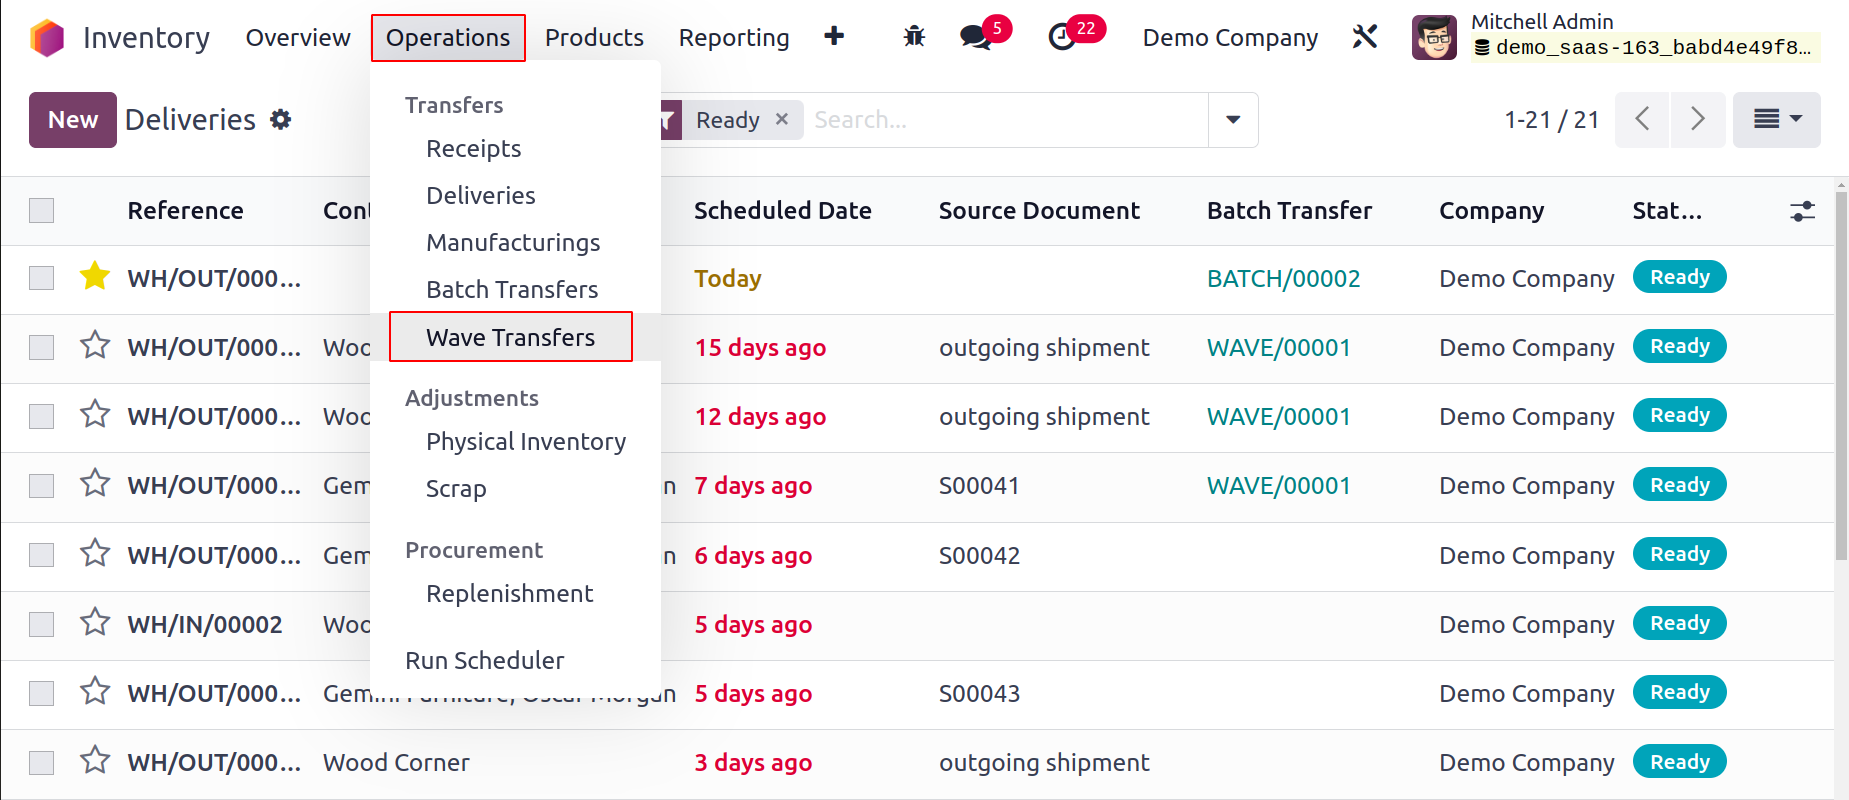
You can access the Transfers platform after the Wave
Transfer feature has been enabled. To include
transfers in a wave transfer, choose the transfers
from the Transfers window that share the same status
and operation type.
As soon as you choose the necessary transfers, the
Action button will appear on the screen, where you
may choose the Add to Wave option. A new pop-up will
appear on the screenshot after clicking this button.
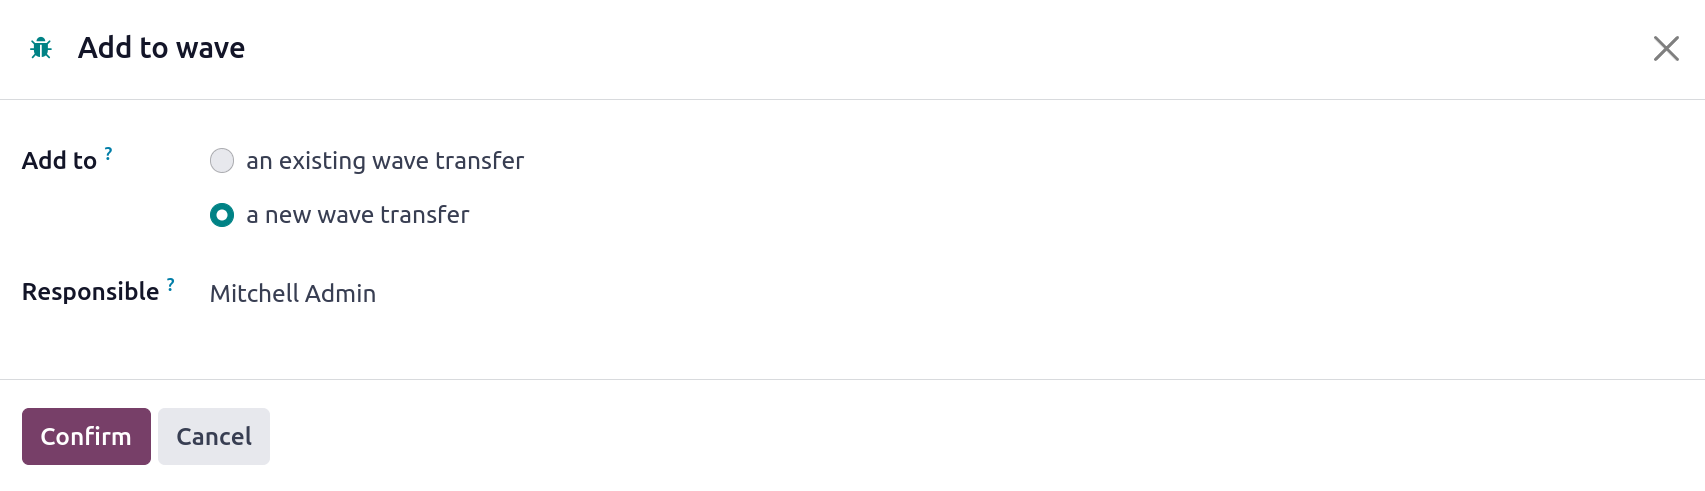
A fresh transfer or an existing wave transfer may
both include the chosen transfers. You must identify
an officer in the Responsible field for a new wave
transfer. Click the Confirm button to finish.
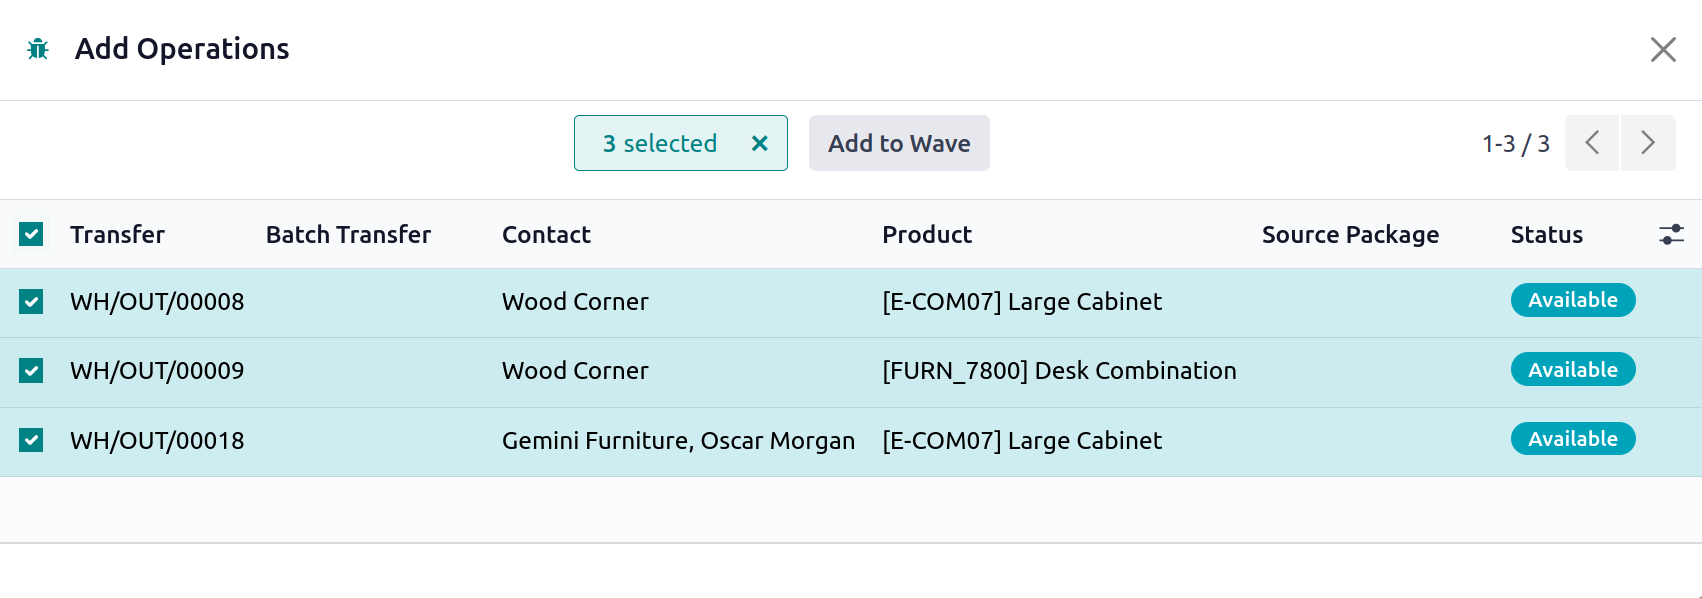
All orders from the selected transfers will show up
on your screen as soon as you confirm the transfer.
From the list, choose the necessary orders, then
click the Add to Wave option.
The brand-new wave transfer has already been made,
and you can view it from the Operations menu's Wave
Transfer platform.
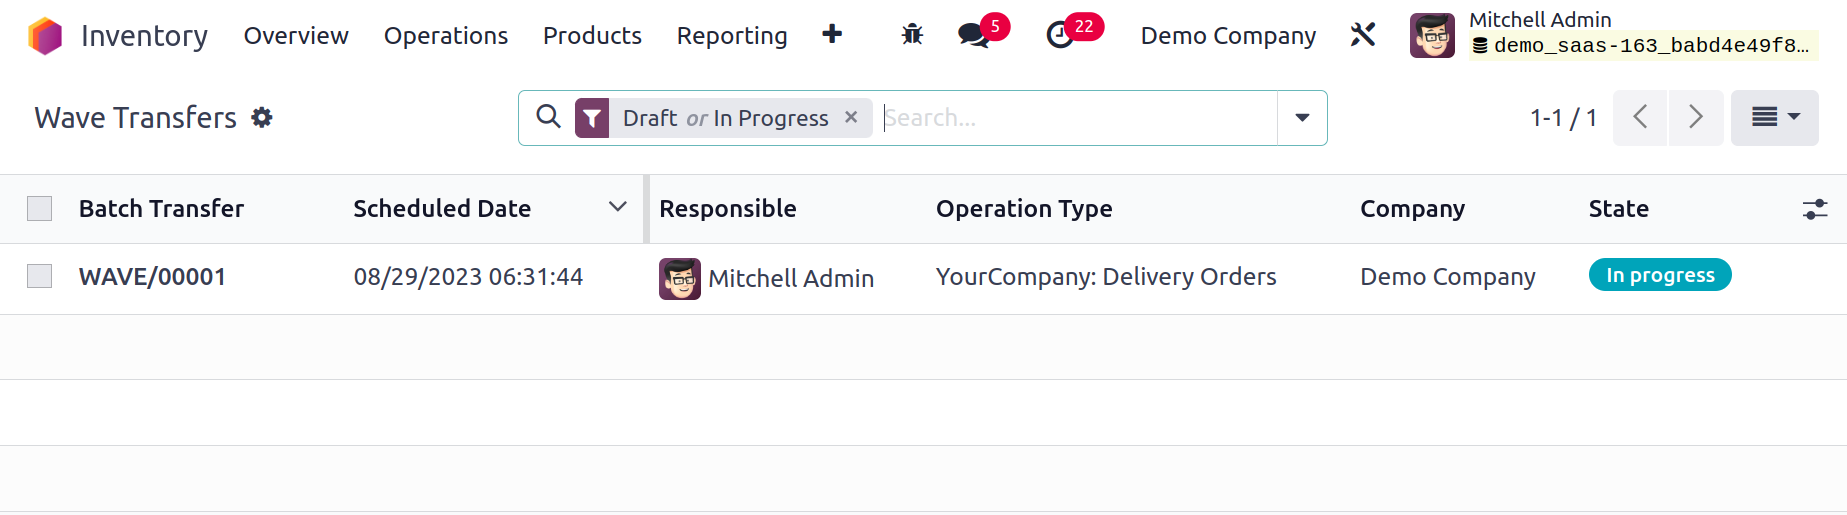
The specifics of the Wave Transfer, Scheduled Date,
Responsible, Operation Type, Company, and State will
be displayed in the list's preview. A new window
will pop up when you click on the Wave transfer to
verify the transfer.
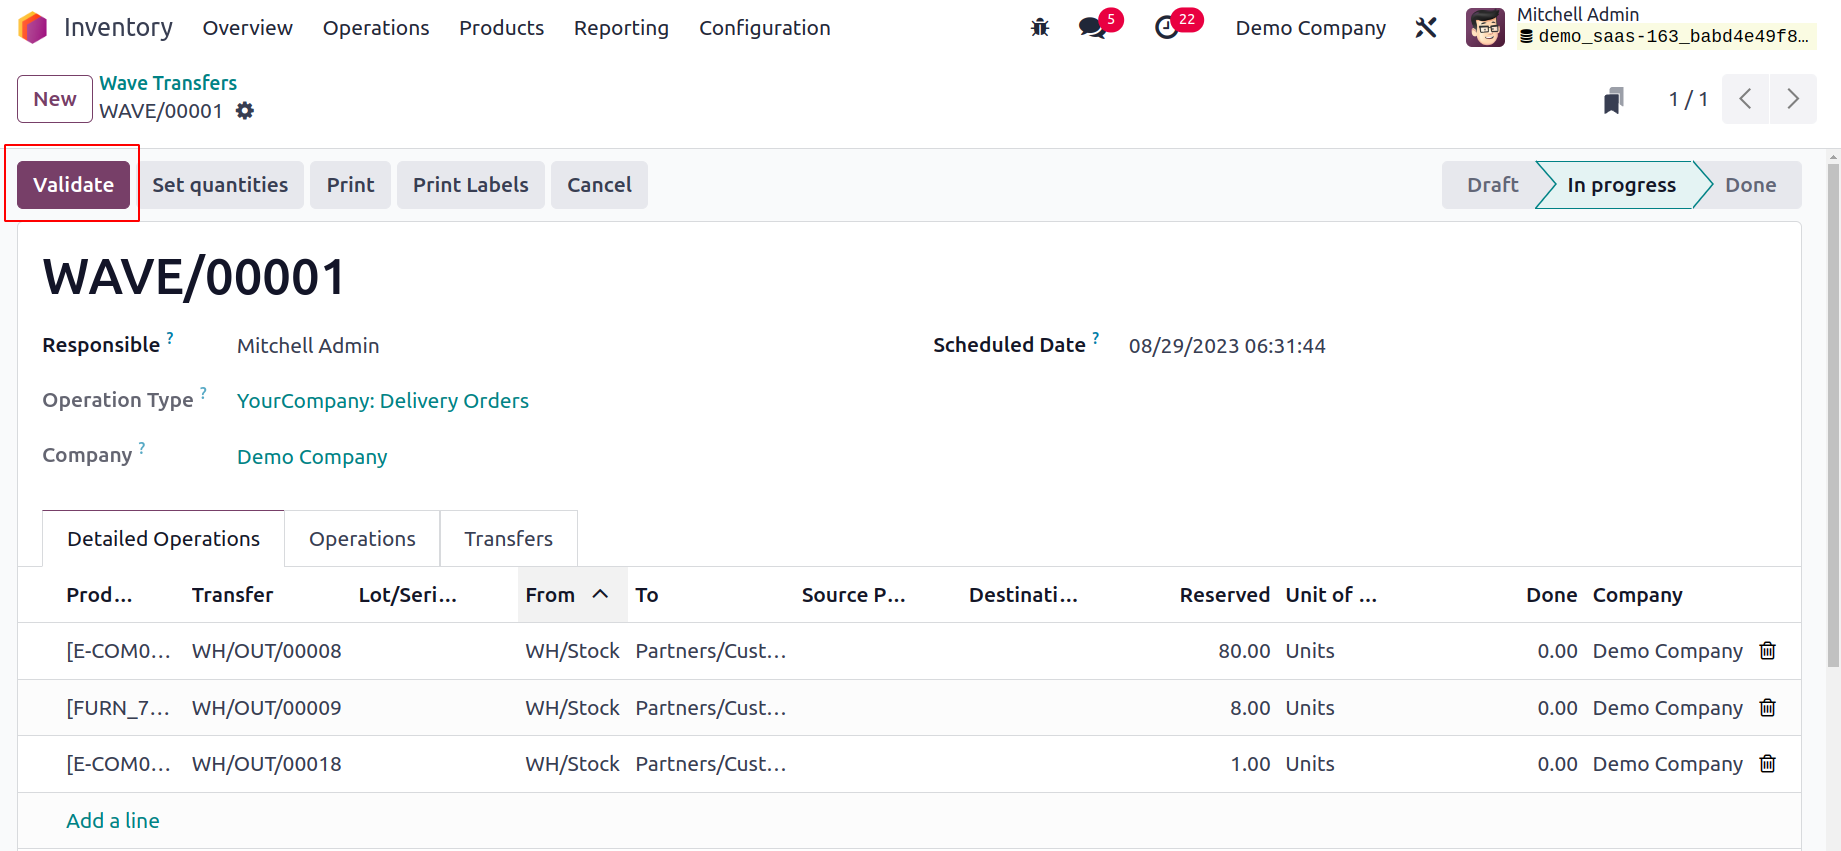
To finish the transfer, click the Validate button.
Let's look at warehouse management in Odoo17 now that
we are clear on the product transfer capability in
the Inventory module.