Orders
With the help of the Odoo 17, you can take orders and record them by
beginning a new session. Similar to how we did in the Sales module,
the Point of Sales module allows us to set the products, product
variants, and product attributes for the PoS. In the Sales chapter
of Odoo 17, we already went into great length about product
configuration. You can refer to this chapter if you have any
questions about how to configure a product in Odoo 17. Sales - Odoo
17 Enterprise
Book Now, start accepting orders by clicking the New Session button.
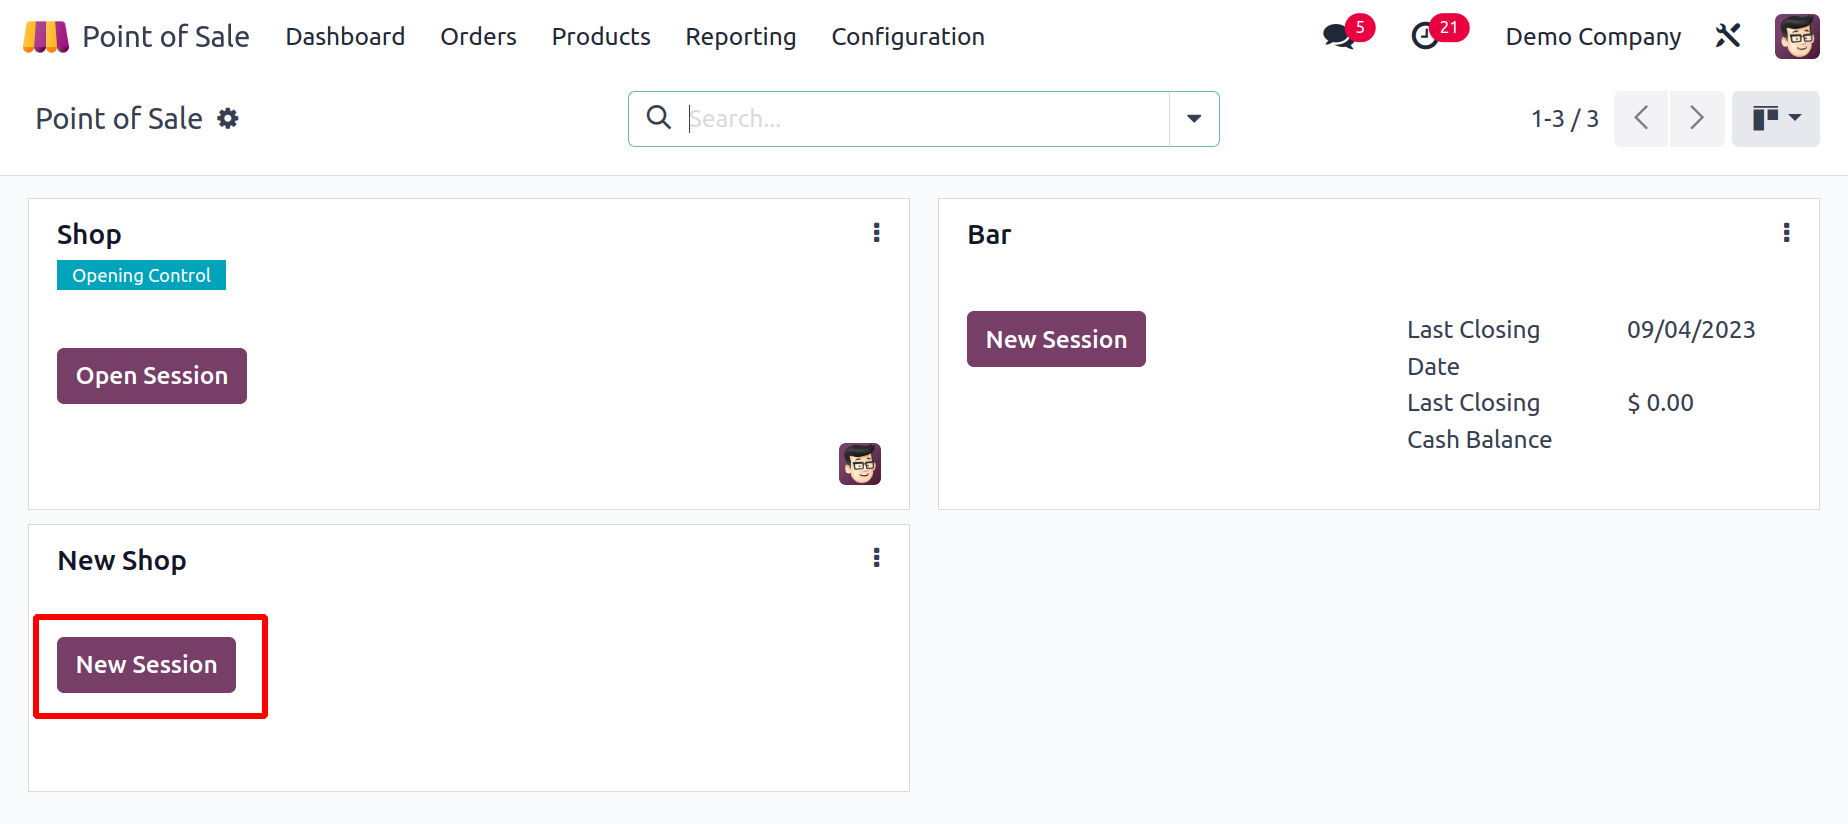
You will then be directed to a new window where you must either scan
your IDs or choose a cashier in order to enter the new store.
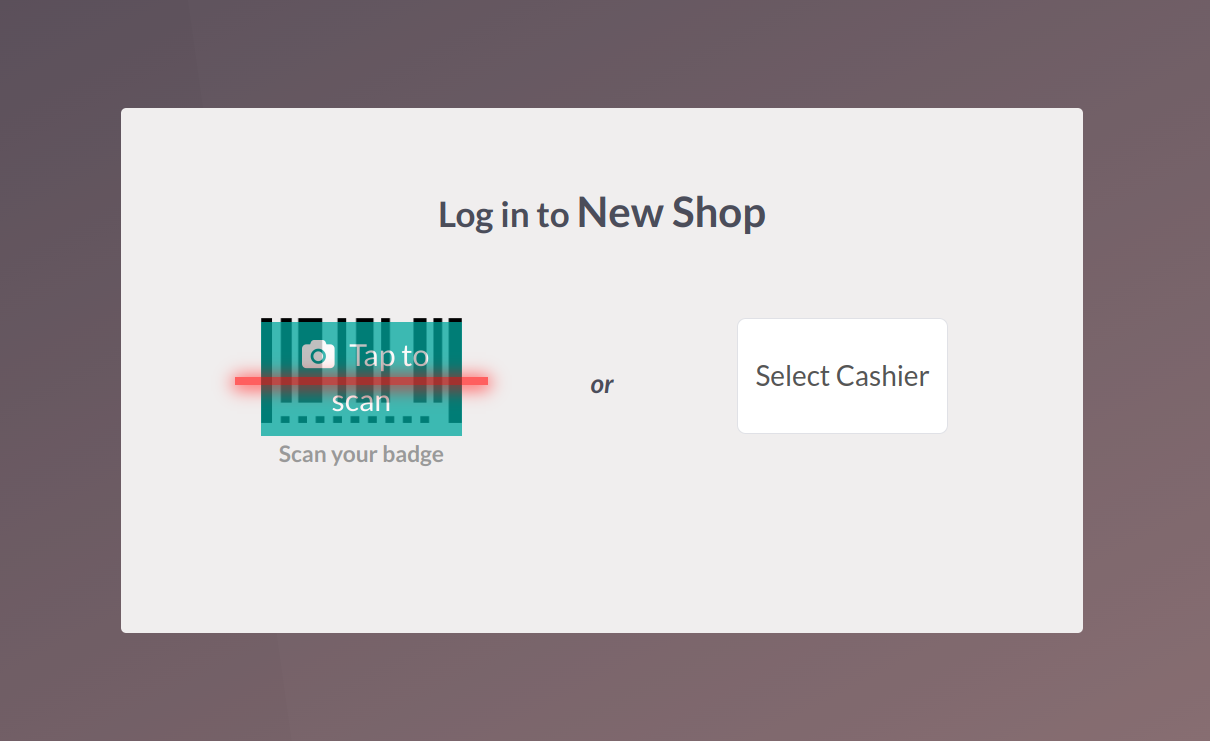
To sign in to a new session, you can use your employee badge or
employee PIN Code.
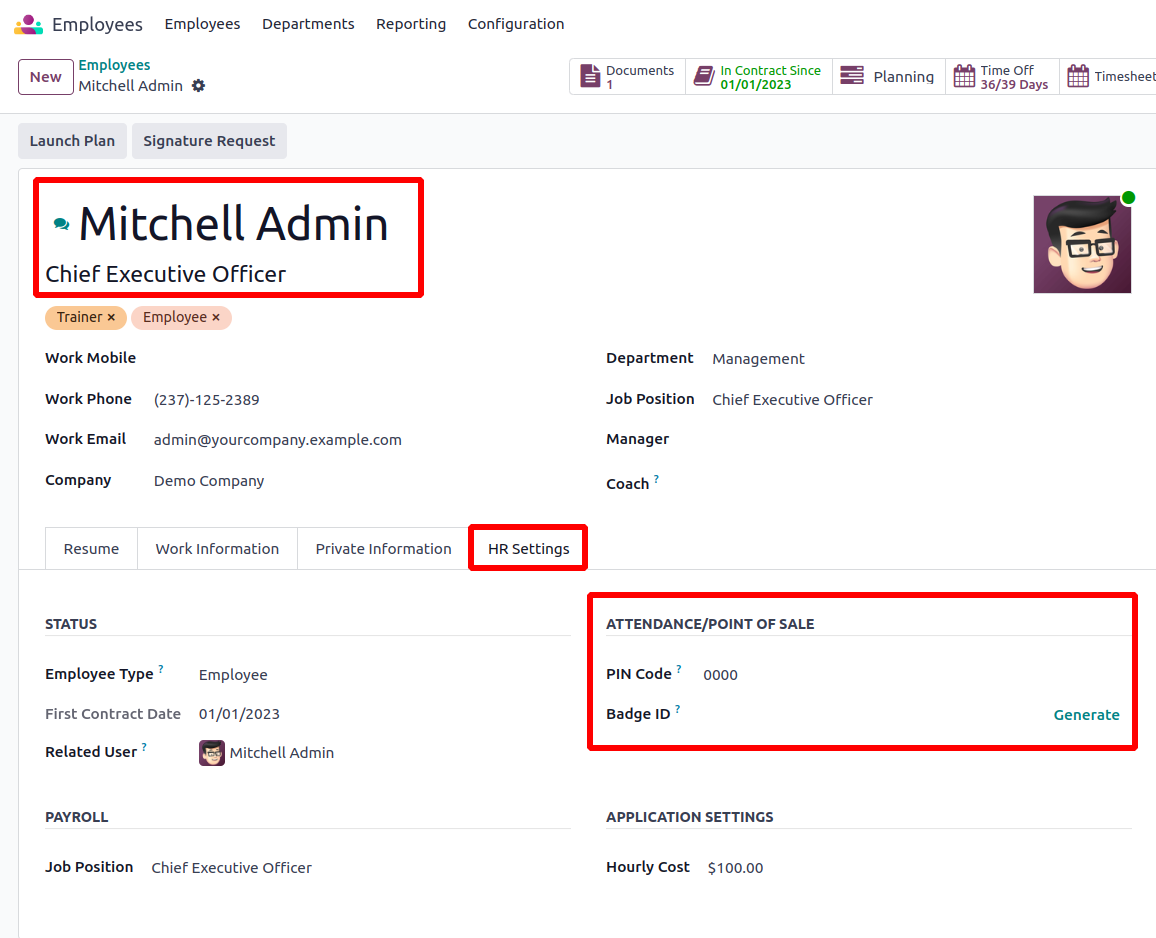
The designated officer or HR will offer a special pin for each
employee when creating their record in the Employees module, which
may be used to log in to other platforms, including attendance and
point of sale. It will be accessible
via the Employee form view's HR Settings tab, as illustrated below.
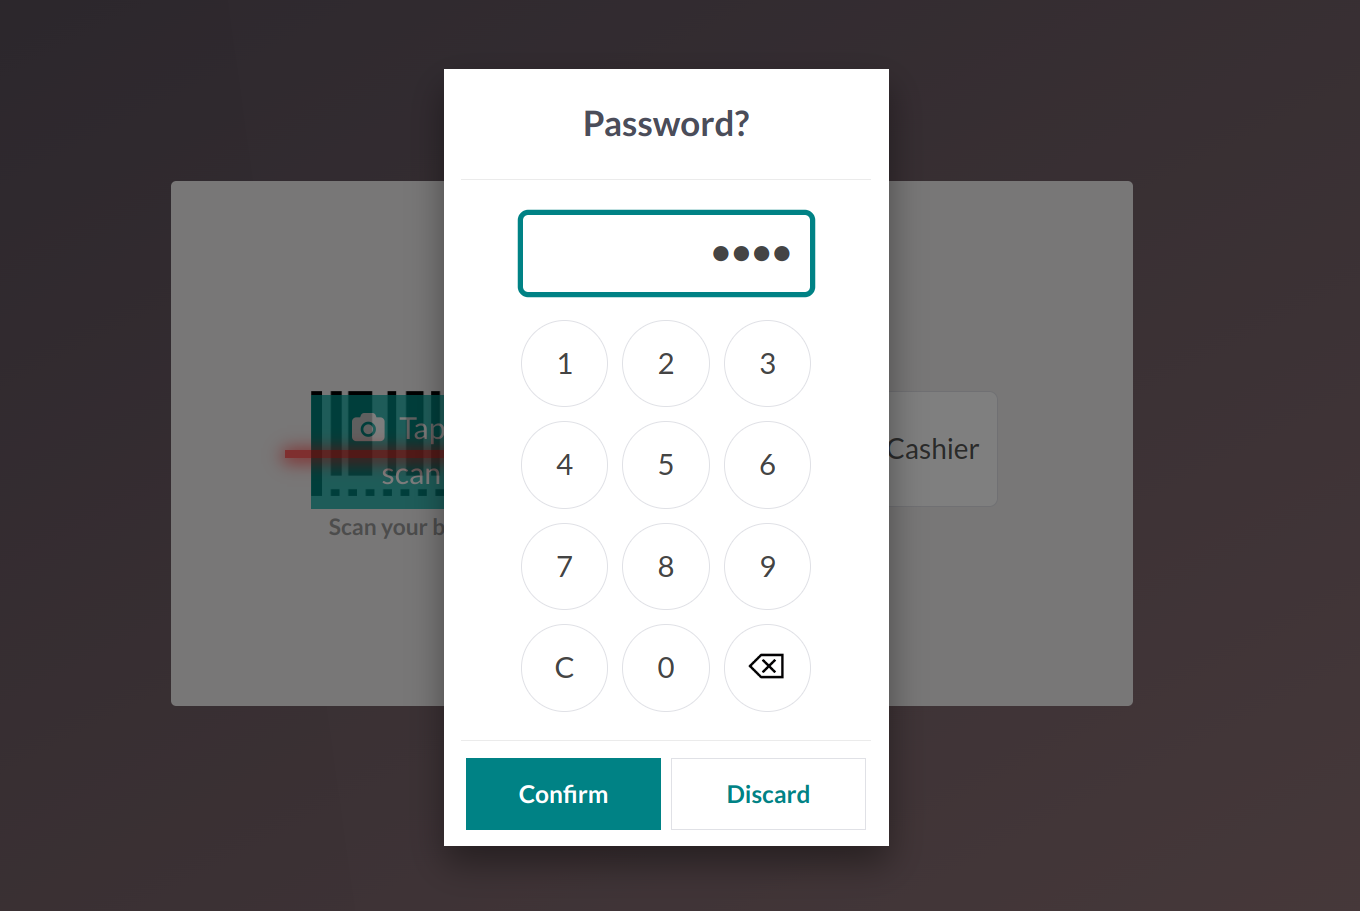
You can access the PoS session by entering the PIN code provided
below, or you can print your badge ID by clicking the Print Badge
button. The Scan your Badge field accepts the Badge ID. Choose your
name from the Select
Cashier section and input the PIN if you want to log in using the
PIN.
A pop-up asking you to set a starting balance at
the PoS cash box will appear as soon as you start the new session.

The sum listed here represents the session's opening balance before
the sales start. You can utilize the tiny money icon or just state
the Opening Cash. When you click this, a new window will appear.
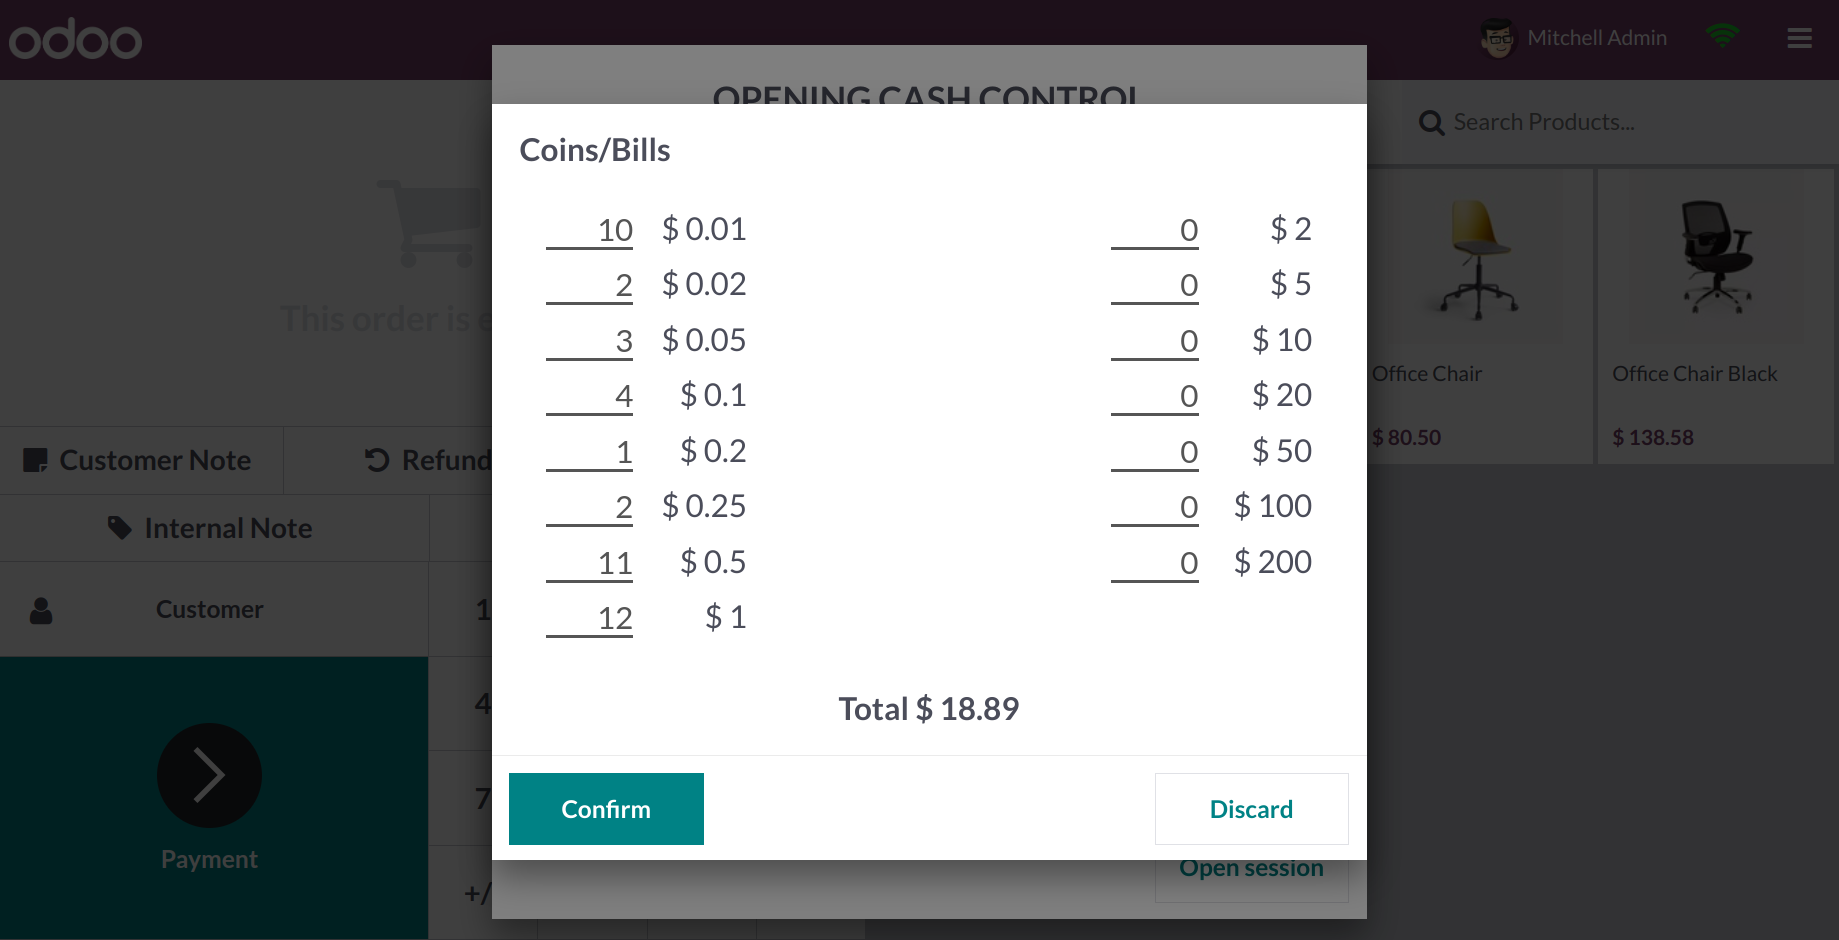
Here, you'll see the coin and bill values that have been set up on
the backend. Here, you can choose how many of each currency you want
to use, and the entire cost will be shown in the window. The Opening
Cash will show up in the corresponding field after you click the
Confirm button.
You can now start the session with this amount by clicking the Open
Session button.

This is the PoS session's order interface. You can use the PoS
Categories of the products, which are visible at the top of the
screen, to acquire a list of products in a specific category.
Otherwise, you can use the search bar to look for the needed
product.
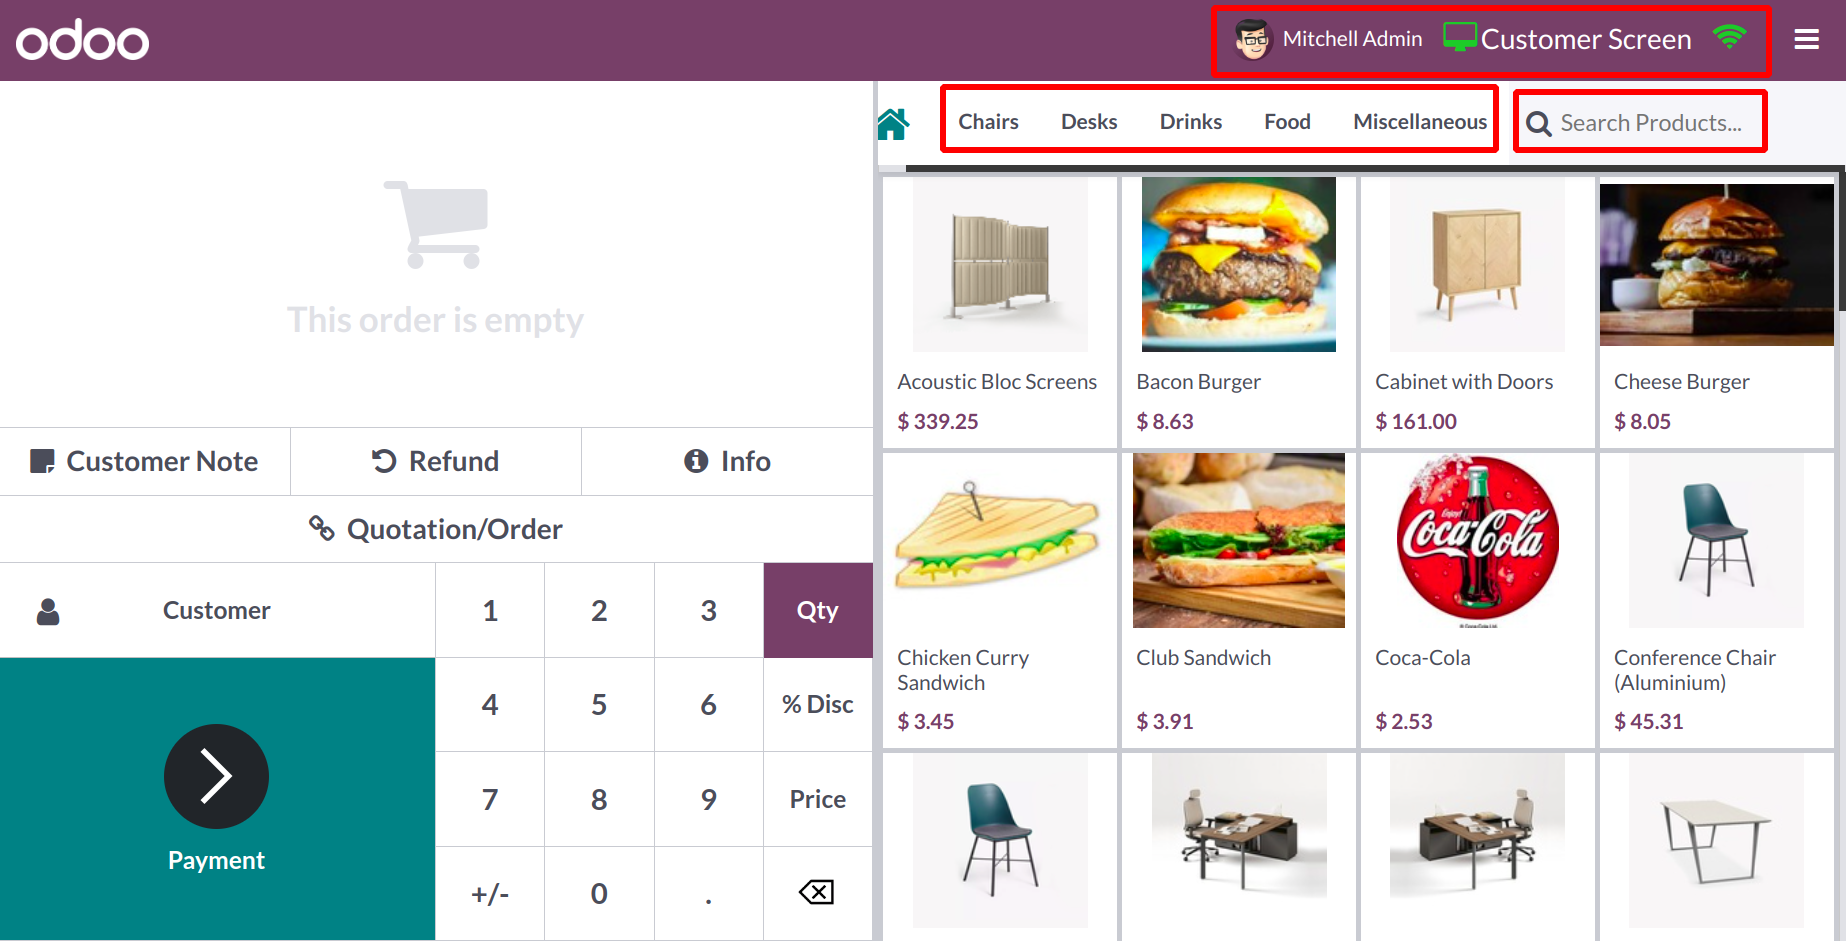
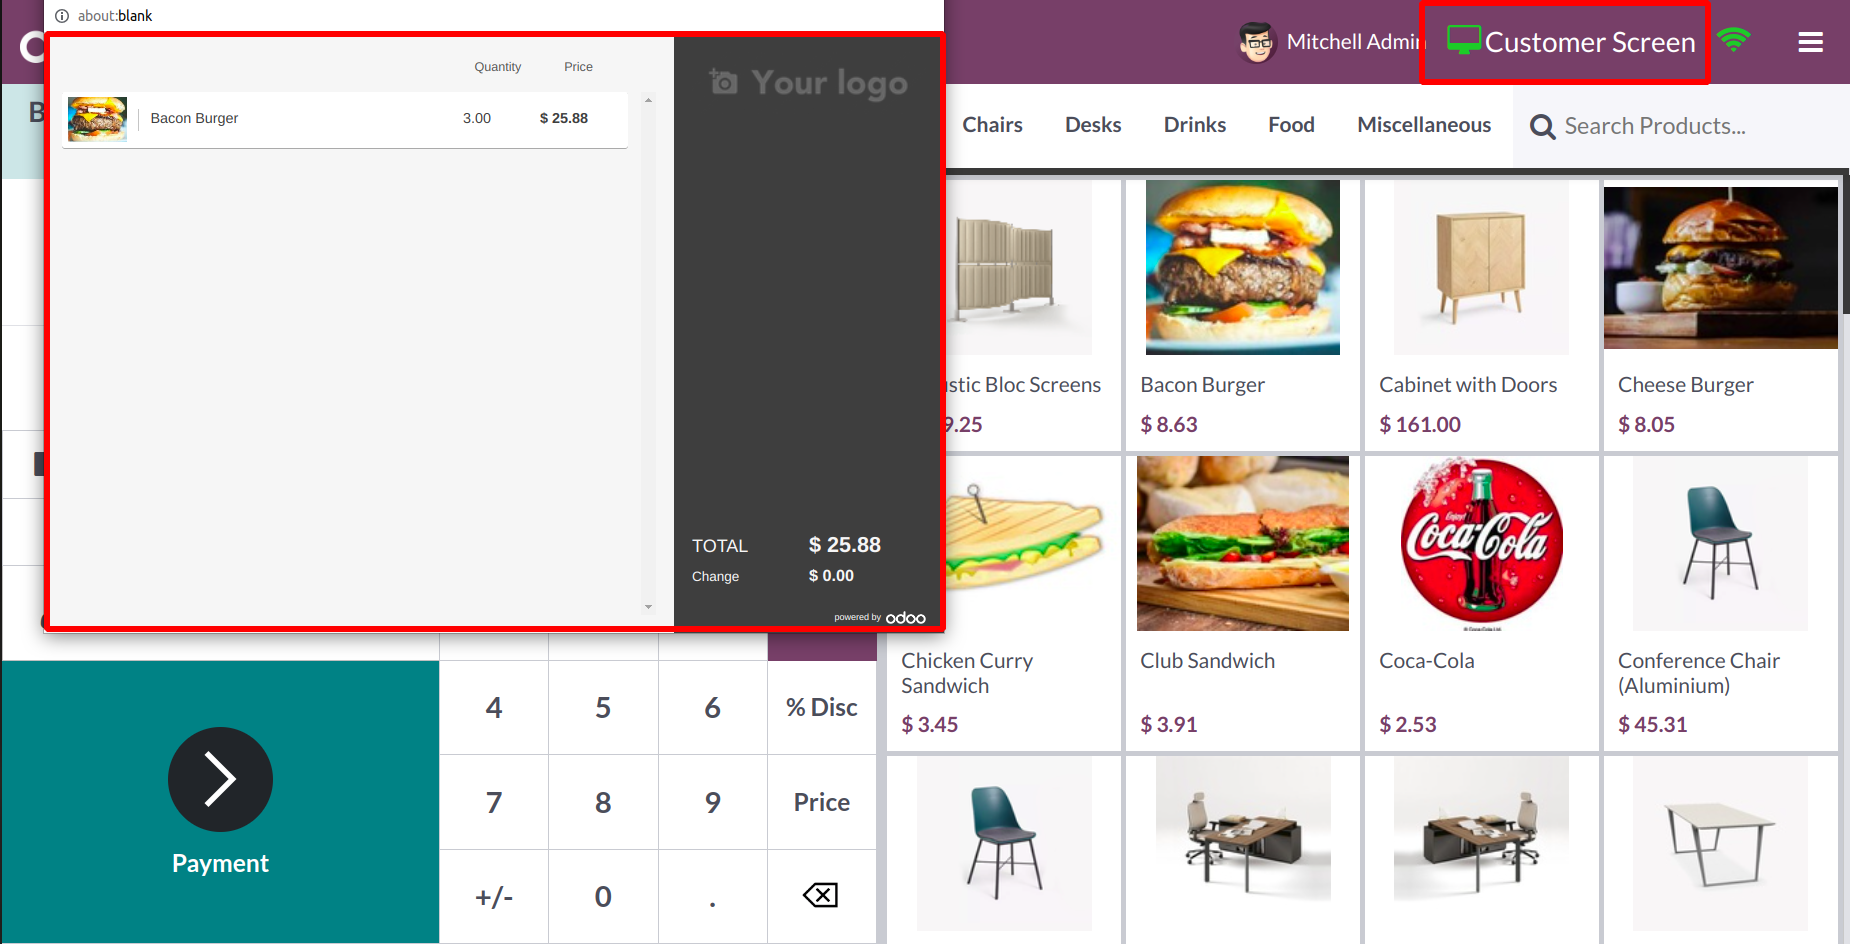
You can see the synchronization and connection status of the customer
screen in the top right corner of the screen. Customers will check
out on the consumer display via a second display.
You can utilize the LOCK button, which is highlighted in the picture,
to
lock the session. The session will end when you click Close Session.
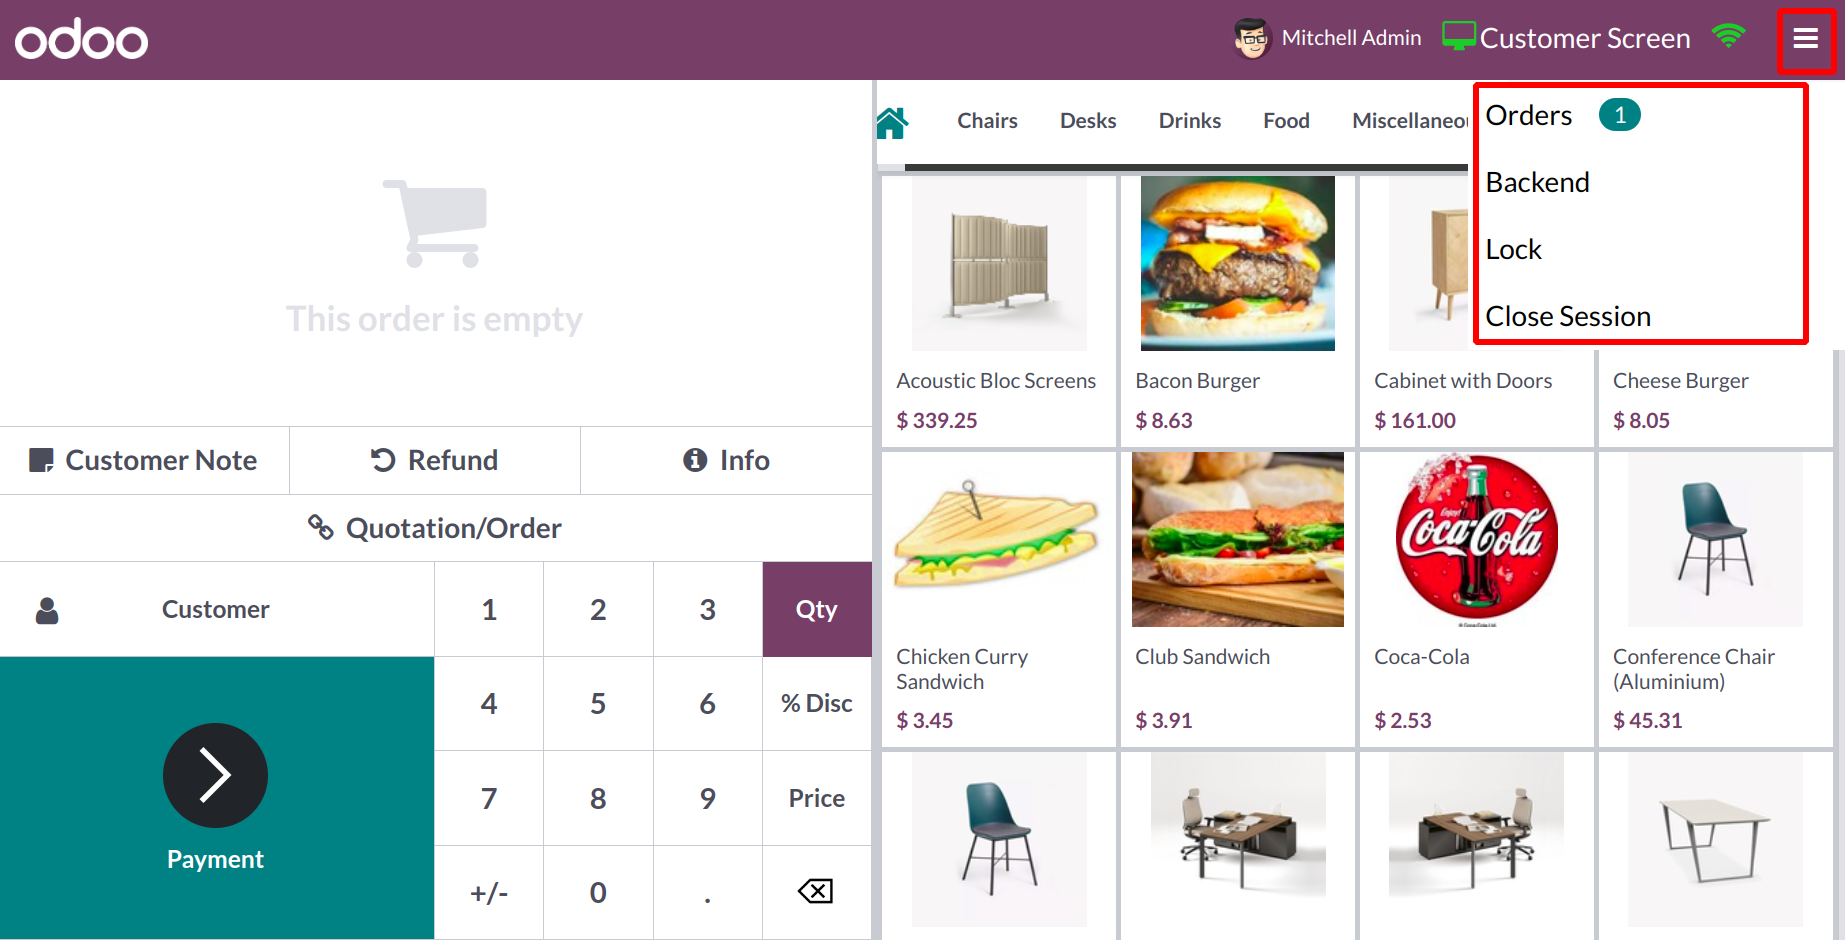
From the Orders option, you may view all the orders made during this
session. The date, receipt number, customer, cashier, total, and
status of the orders are all displayed in the window.
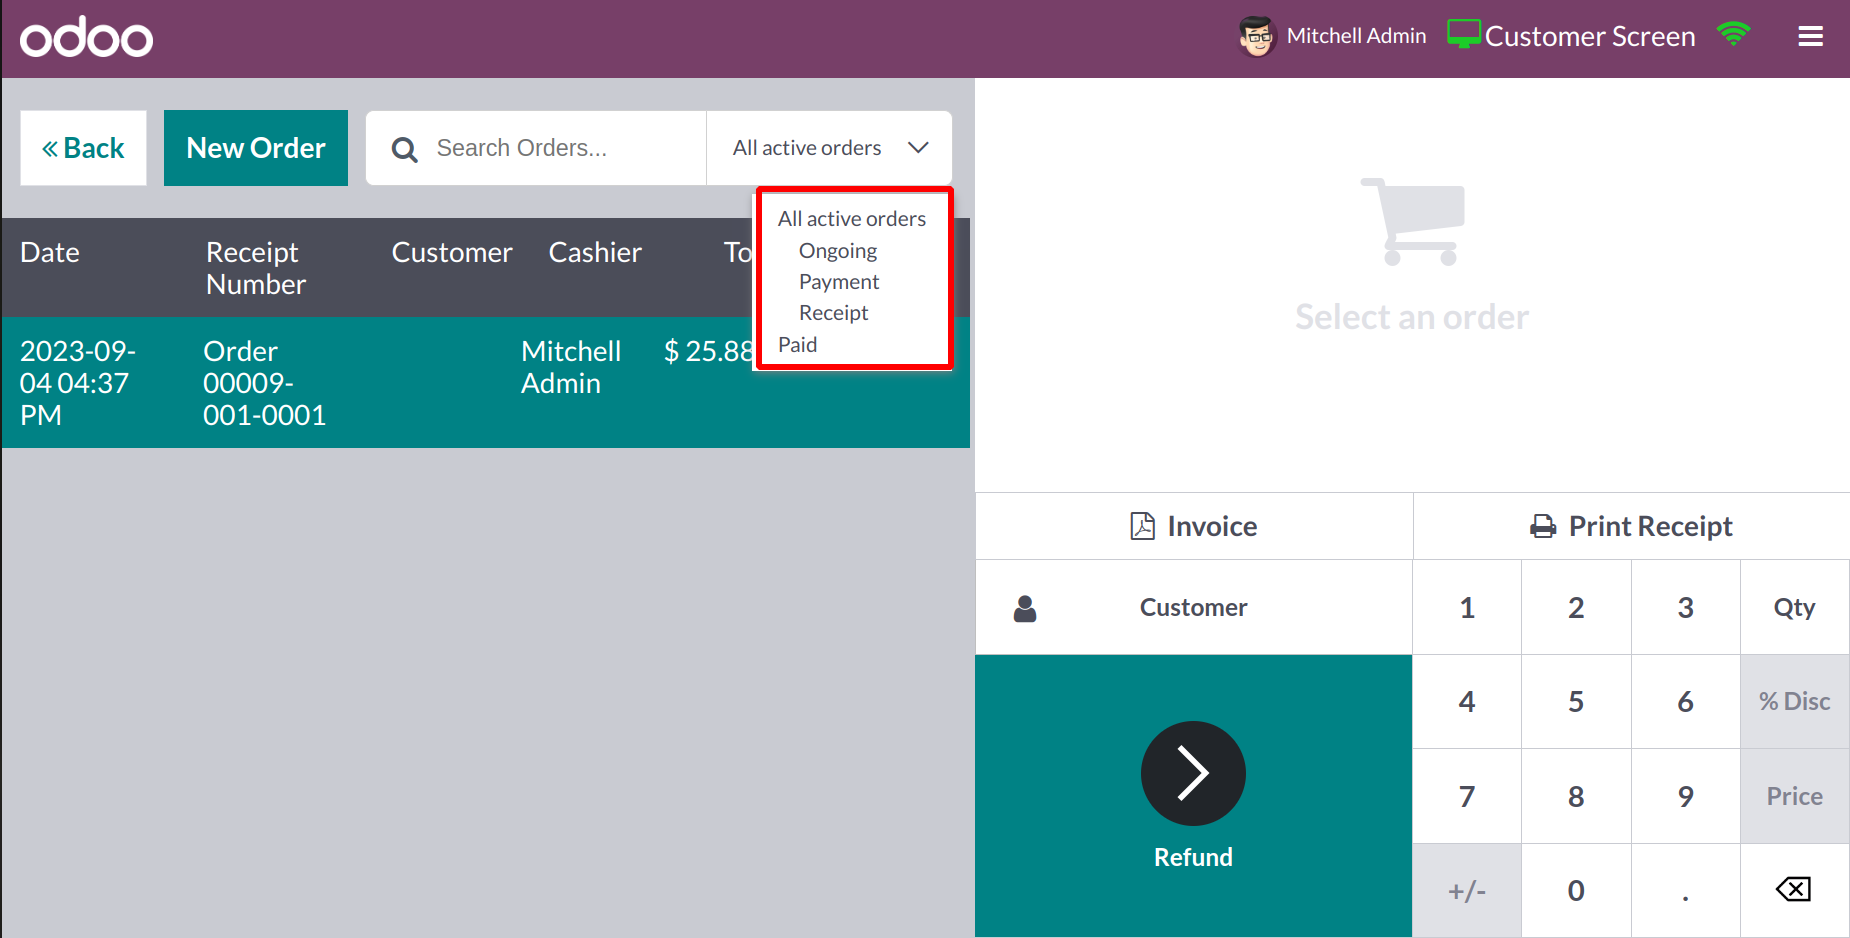
Orders can be searched for using the Search bar, and you can filter
the results using the options for All Active Orders, Ongoing, Paid,
Payment, and Receipt. You can make a new order right from this
window by selecting the New Order button.
You will find a menu specifically
designed for entering the Cash In and Cash Out information.
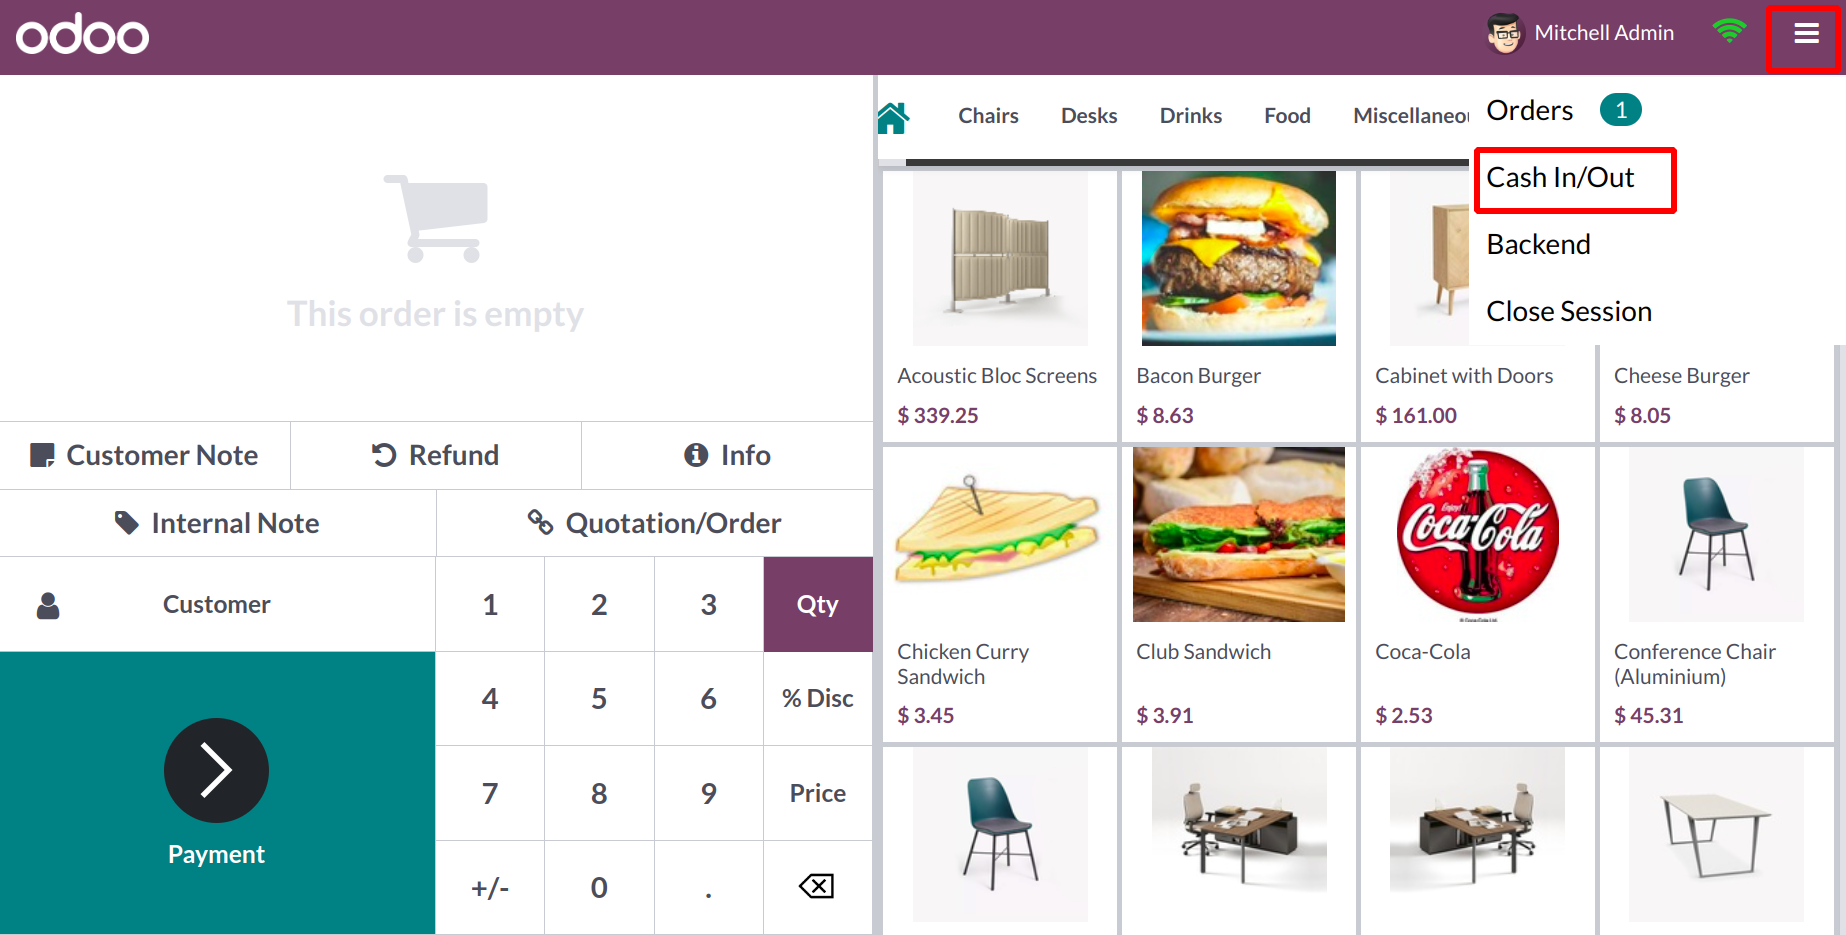
In an emergency, the employees can find themselves with no choice
except to steal money from the counter. To ensure transparency, it
is crucial to enter the cash in and Cash Out information in the
accounting when they return the money to the counter. Let's use an
illustration to explain this. Imagine that a worker stole cash from
the cash register to pay for
travel. To enter the information, click the Cash In/Out option.
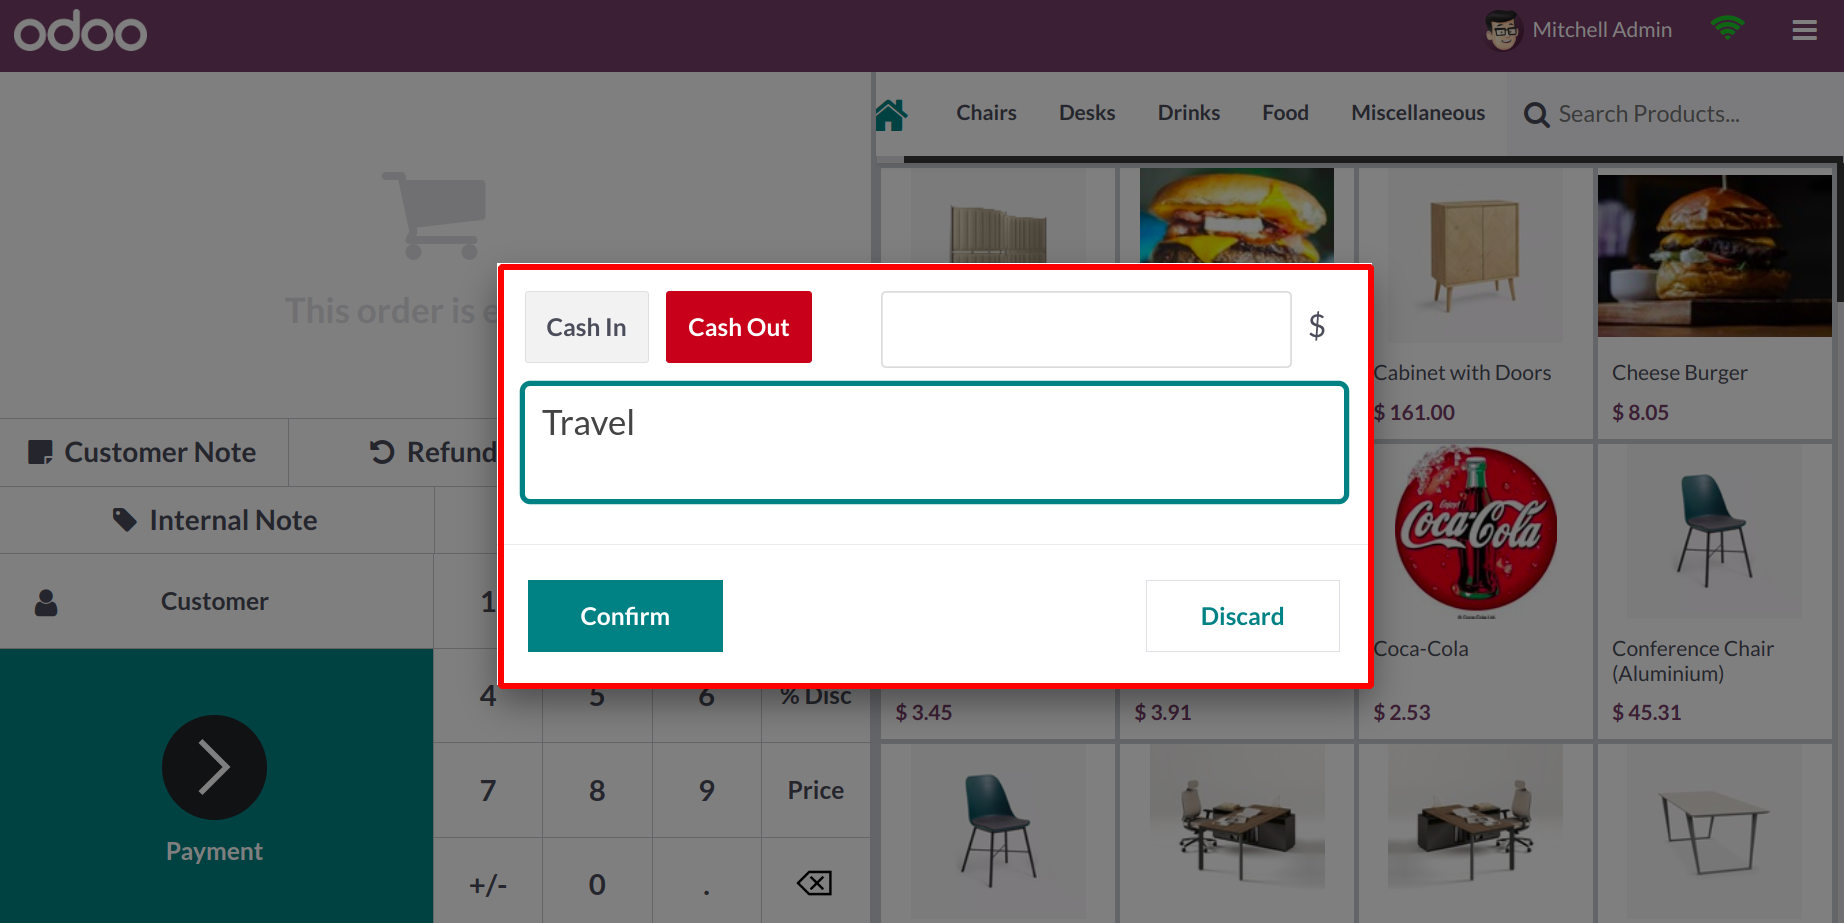
Choose Cash Out from this menu, then enter the employee's withdrawal
amount. In the provided box, provide the explanation, then press the
Confirm button. Odoo17 will log the Cash Out information. By
selecting the Cash In button, once the
employee returns the money, you can enter the sum on your counter.
Let's now examine the PoS ordering process. On the right side of the
screen, a list of products will be shown along with their names,
pictures, and prices.
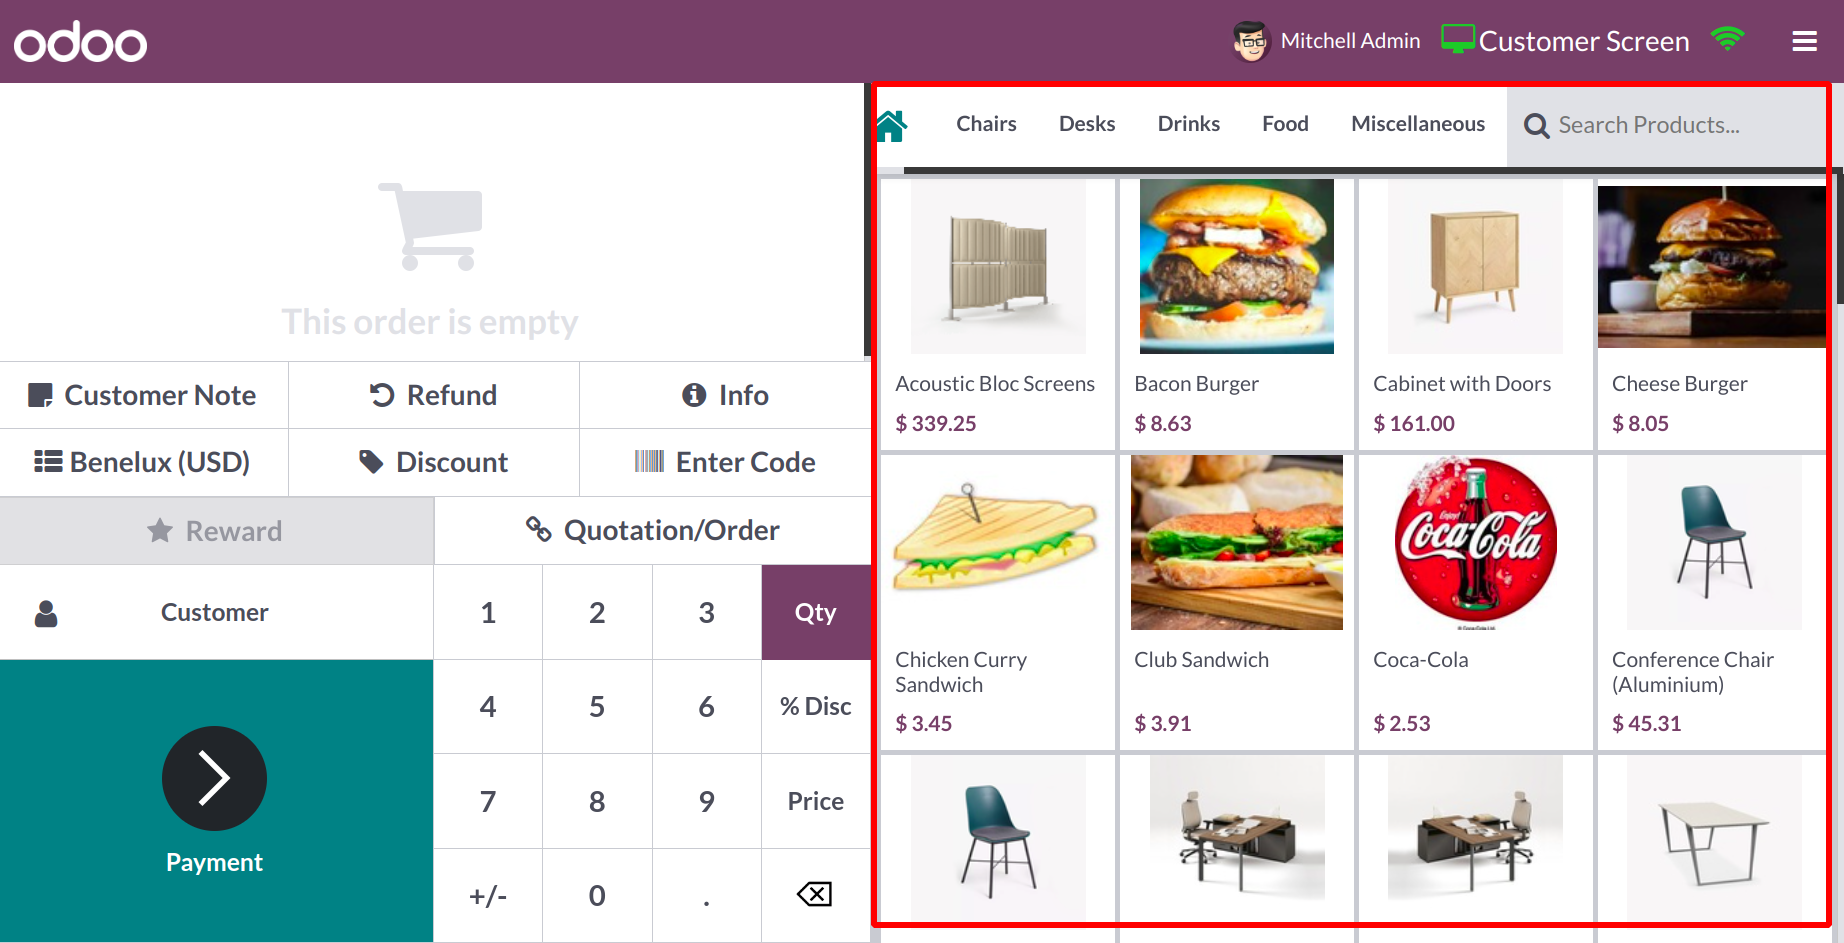
You can choose the product from the provided list when a customer
puts in an order, and it will be added to the billing session. You
will receive the functionality indicated in the aforementioned
graphic in the billing session, depending on how this PoS session is
configured in the backend.
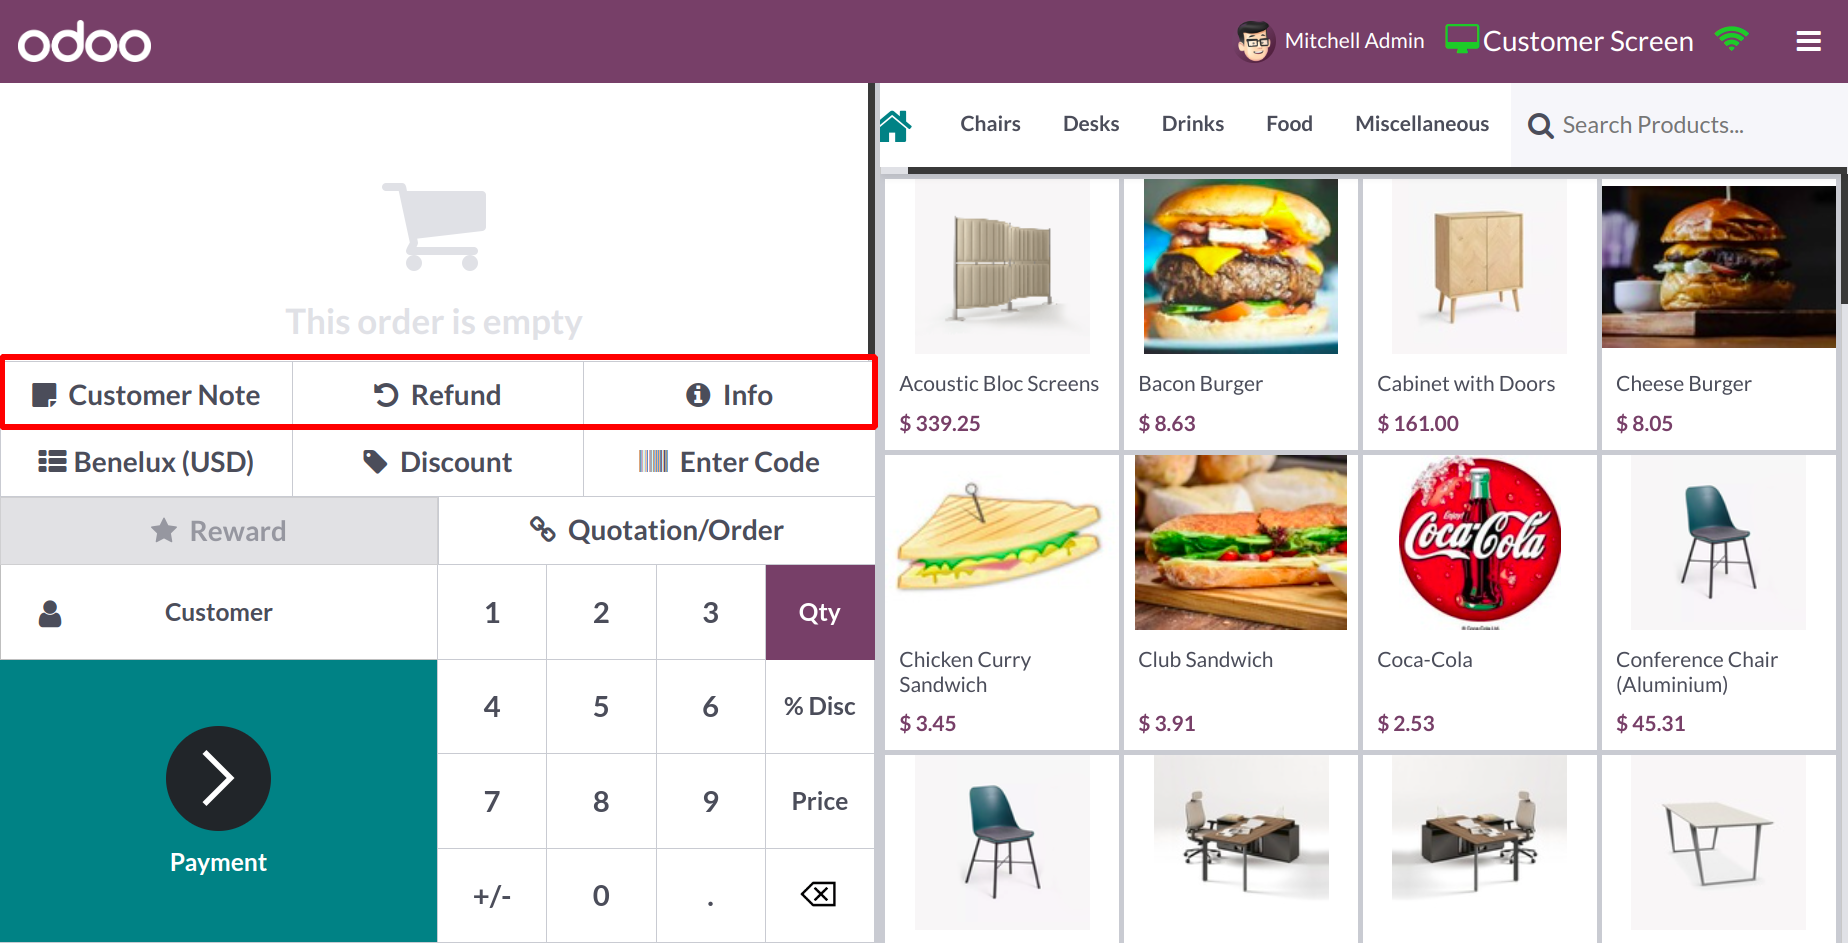
You can include a note in the bill by clicking the Customer Note
button. Use the Refund button if the consumer requests a refund
after making the purchase for a specific reason. Additional details
on the ordered item are available by clicking the little Info
button.
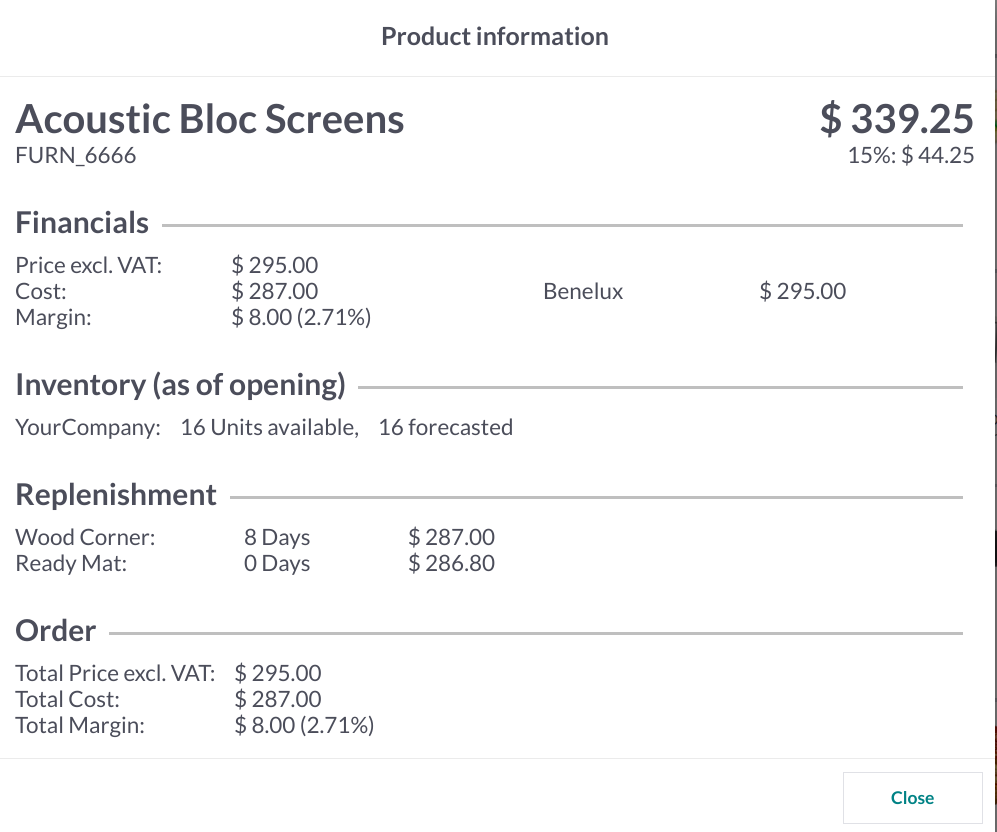
As seen in the figure above, it comprises the financial, inventory,
replenishment, and order details.
To set the tax on the order, use the Tax field. If there is a
Discount that applies to this order, you can select the
corresponding button and specify the amount of the discount.
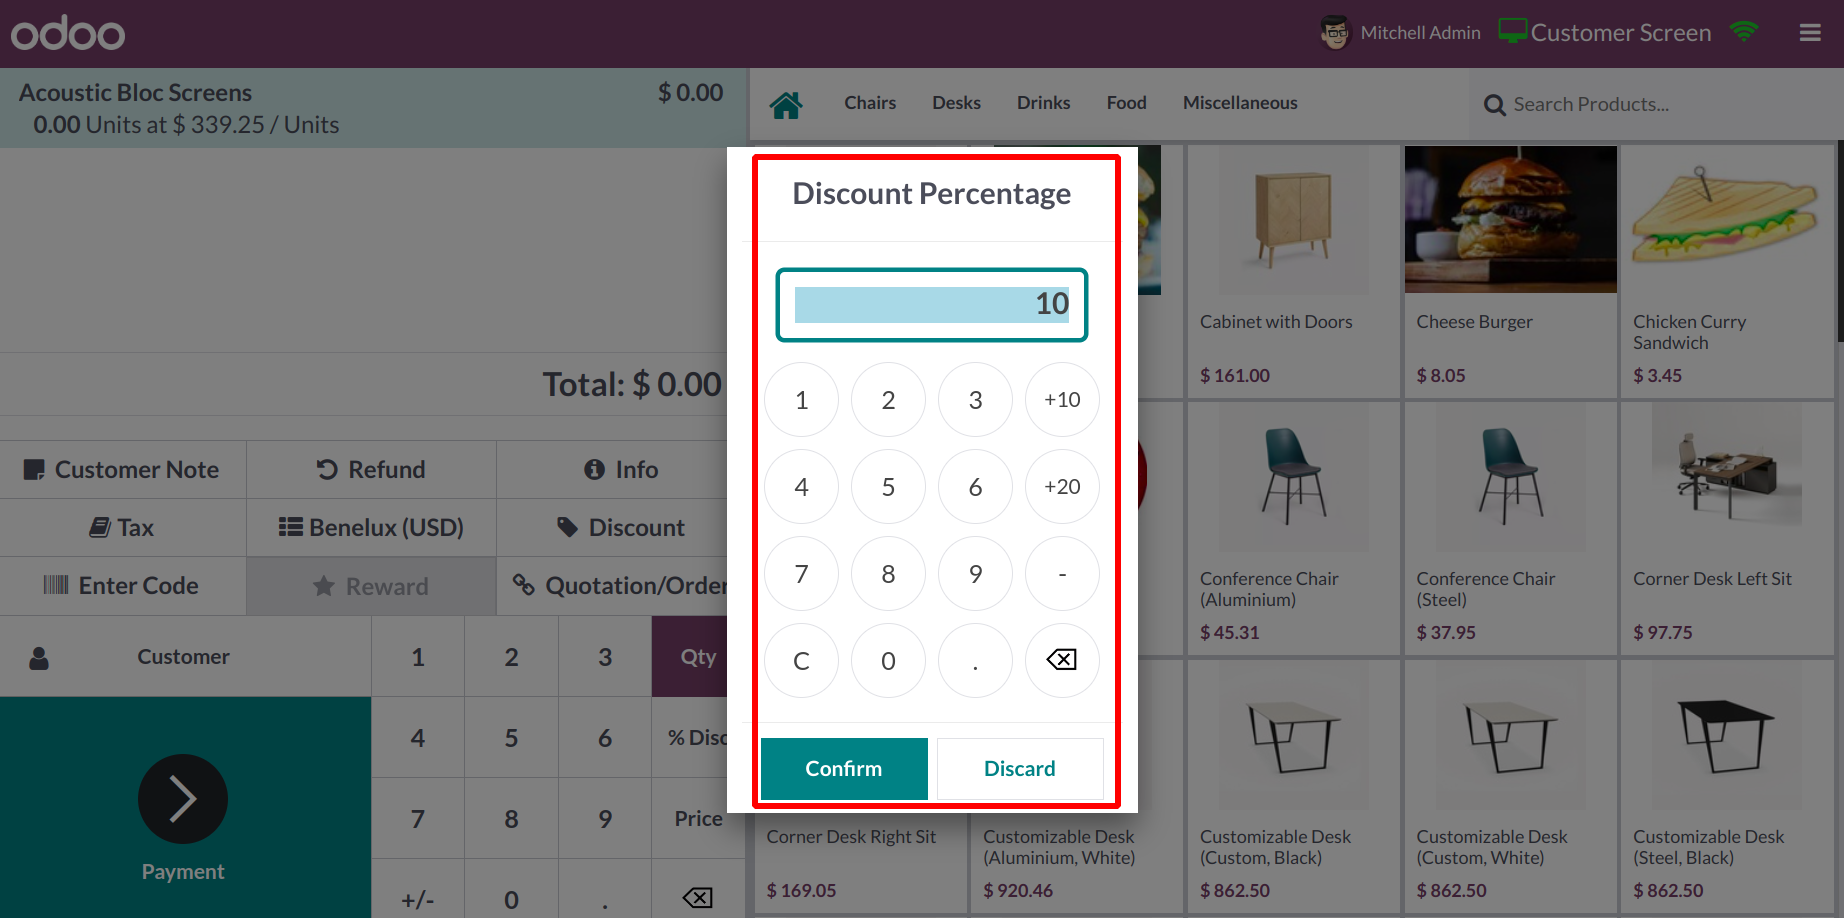
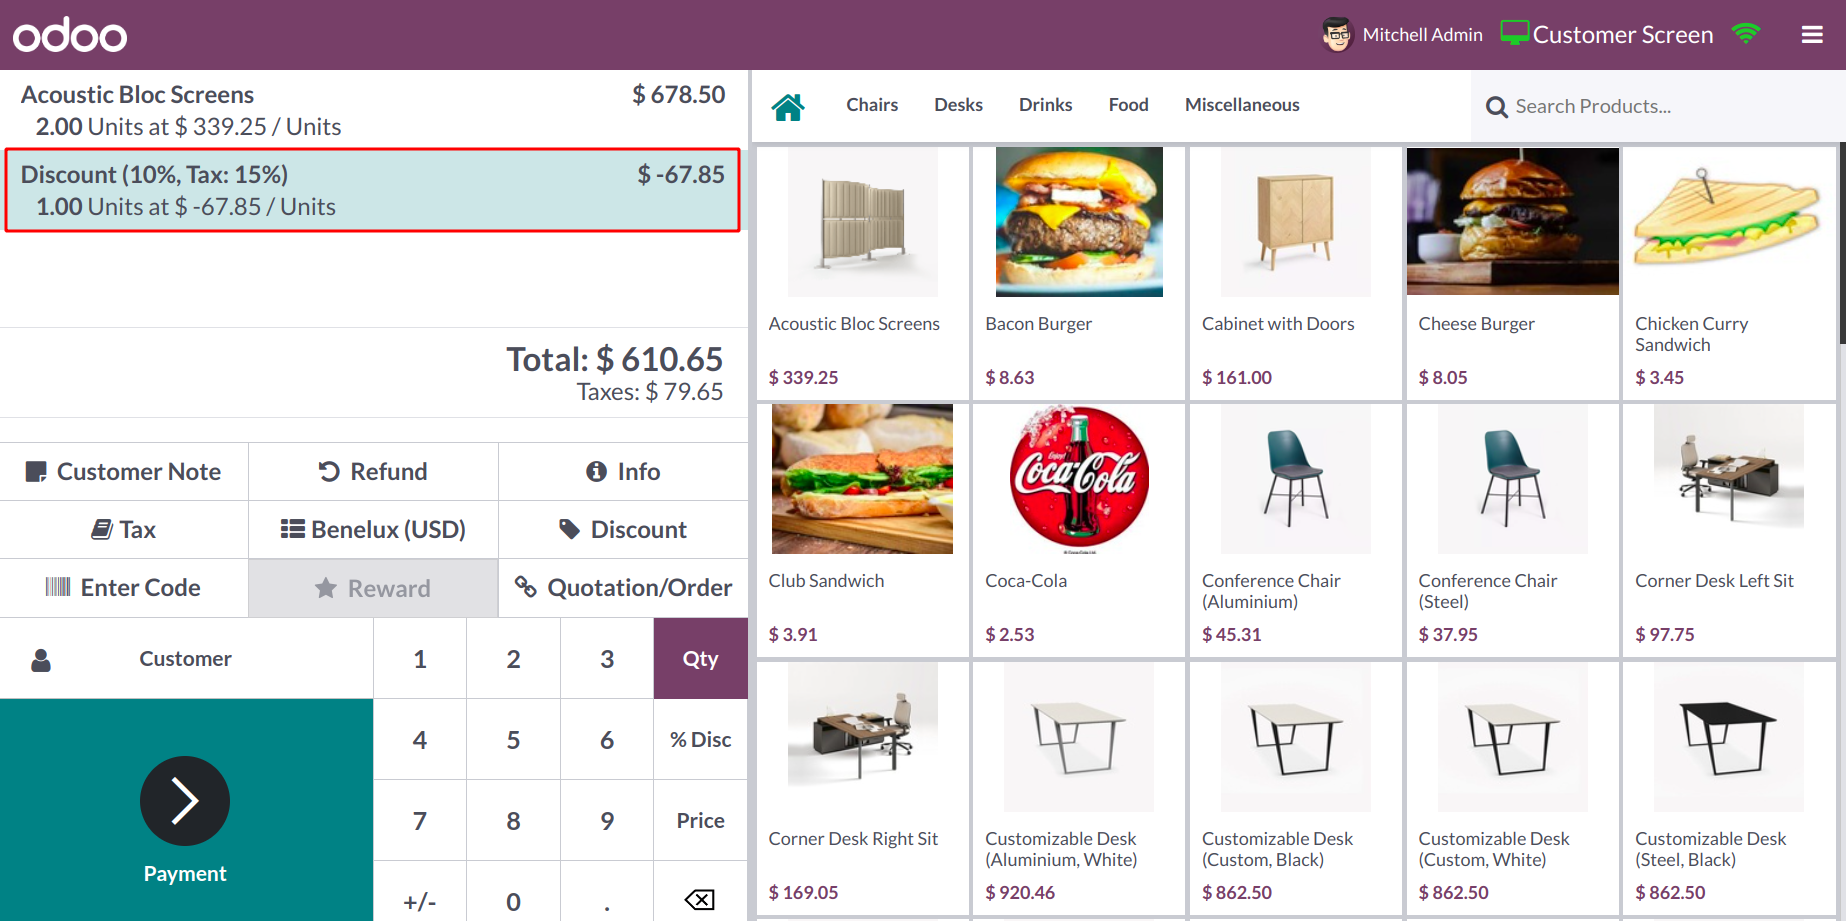
The amount of the discount will be applied to the order once you
click the "Ok" button.
Use the Internal
Note button to add any internal remarks to this order. To divide the
cost, click the Split option. If the order includes multiple items,
you can use this button to divide the cost and pay for each item
separately. Bars and restaurants typically employ the Guests button.
This button allows you to invite people to a particular table.
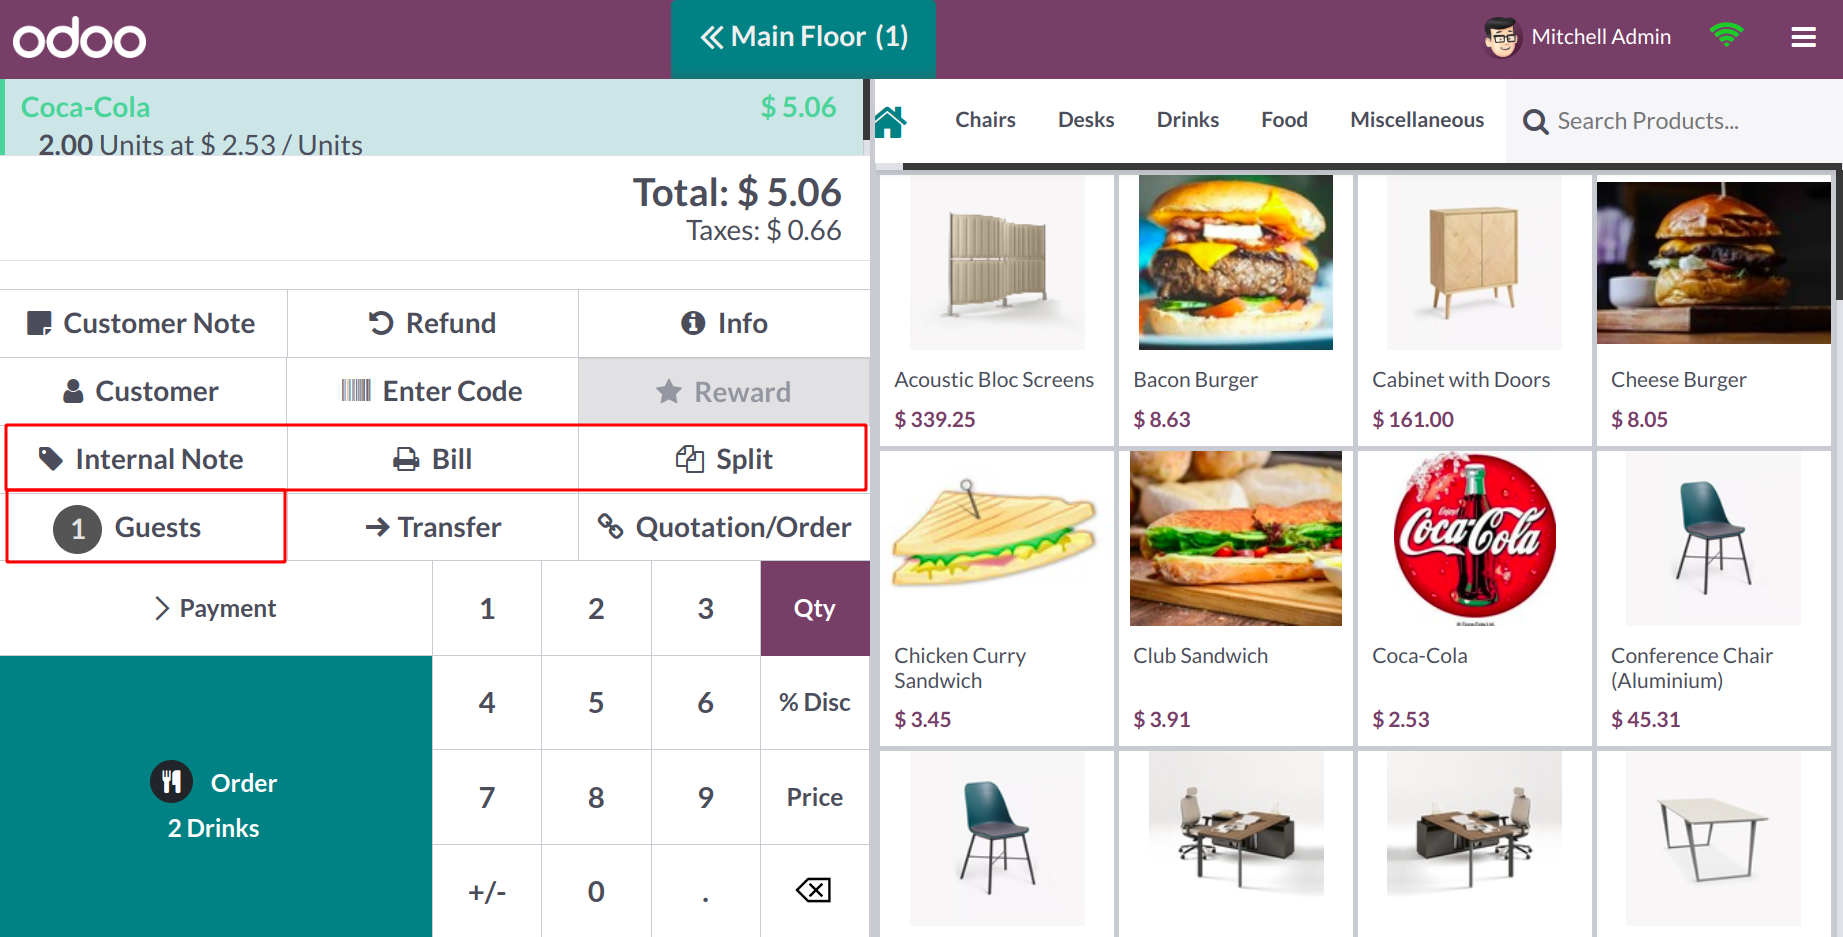
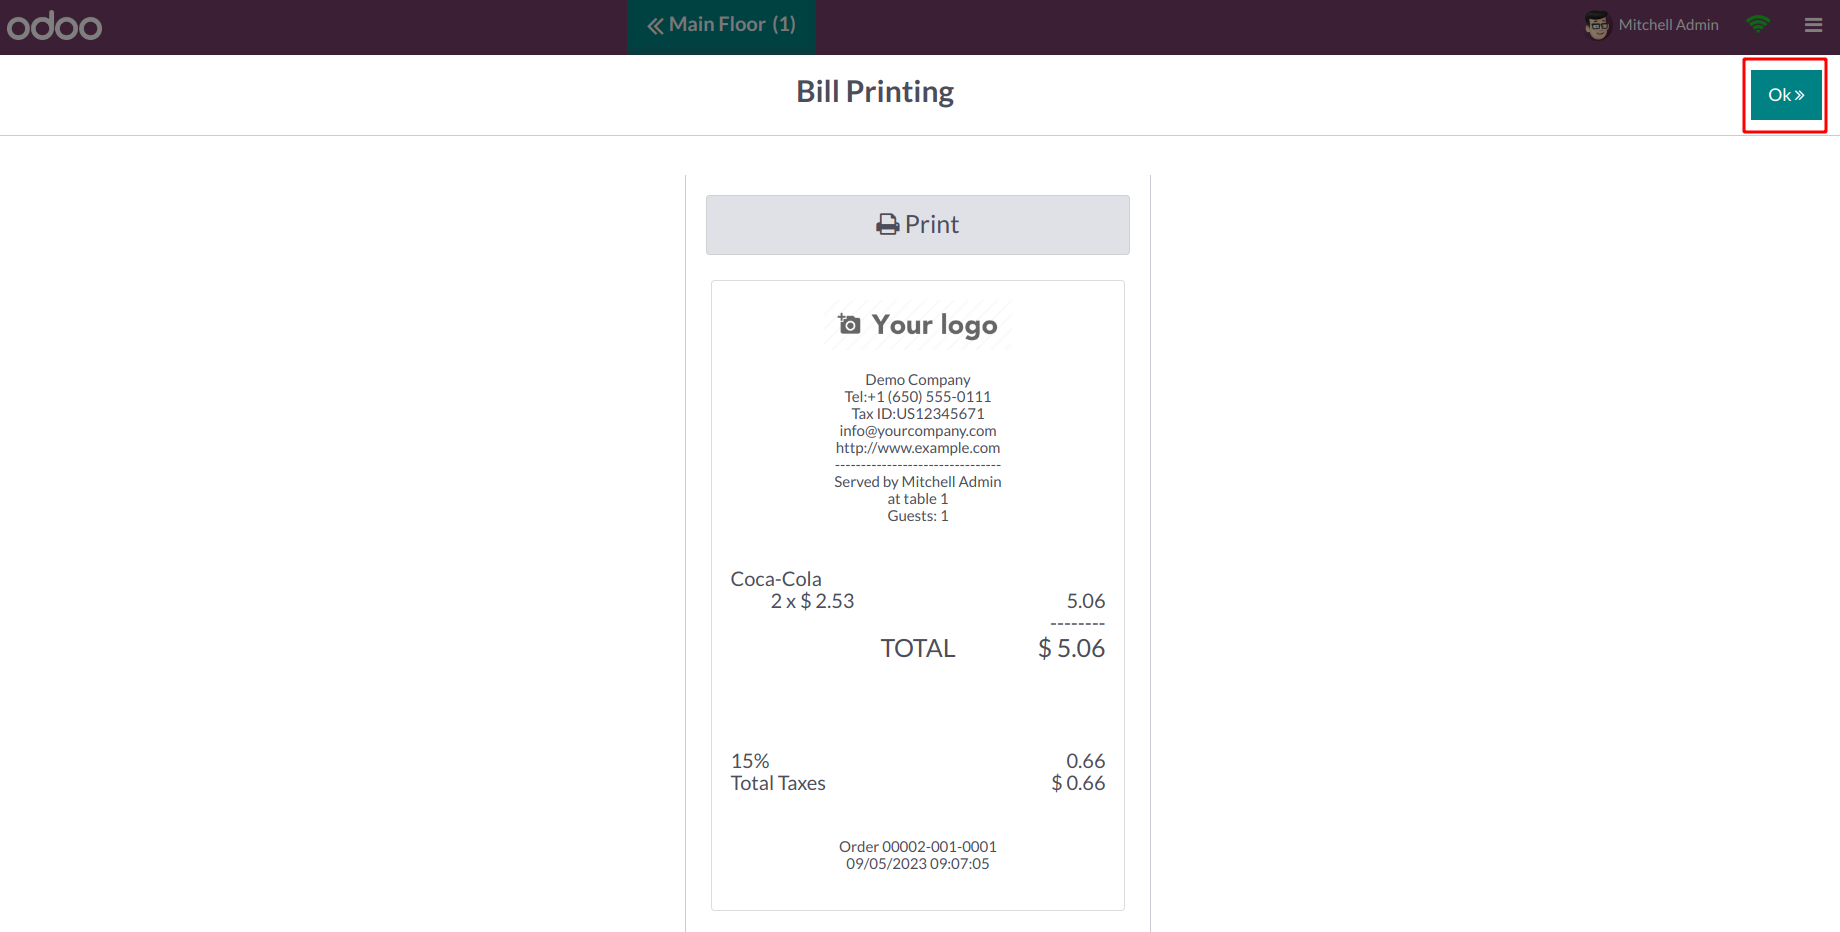
You can print off the bill by selecting the Bill button. The pop-up
window
allows you to enter printing information and print the bill as
needed.
Use the Enter Code button to specify any gift cards or discount
coupons that the client may have, and the offer will be added to the
order. Likewise, the Reward button
will display any rewards that this client is eligible to claim.
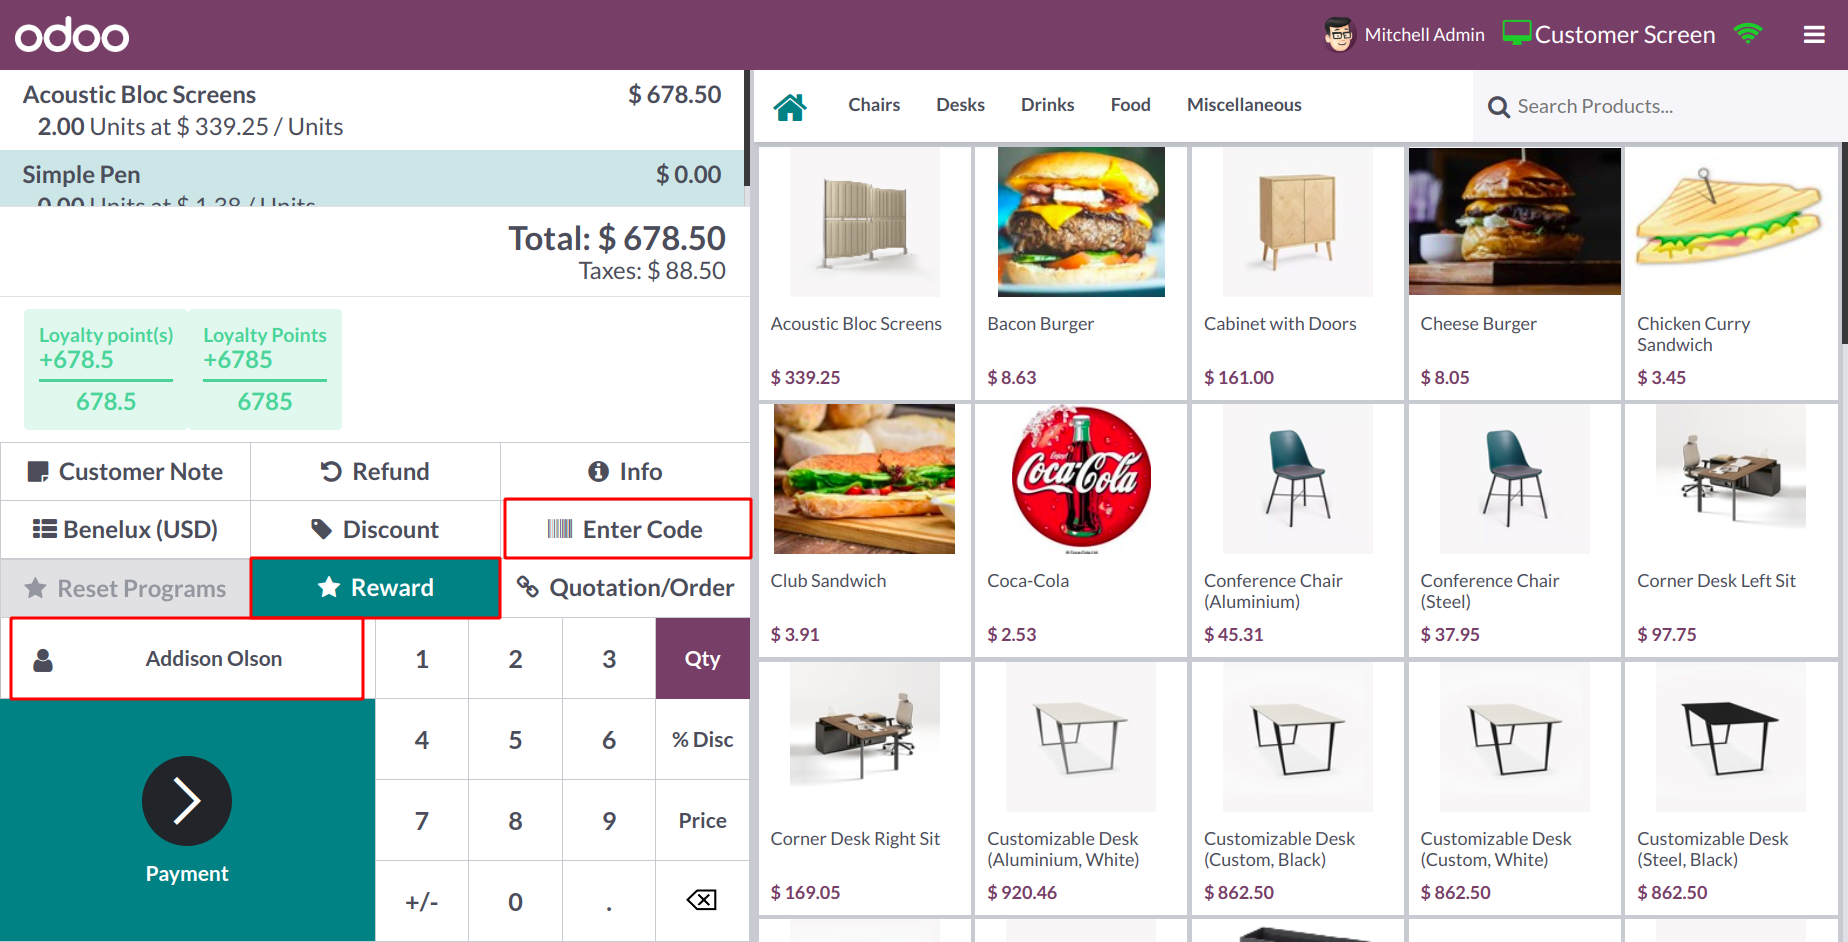
You can choose the customer for this order by using the Customer
field. The snapshot above depicts the client list that is
currently available. You can choose your client from the provided
list.
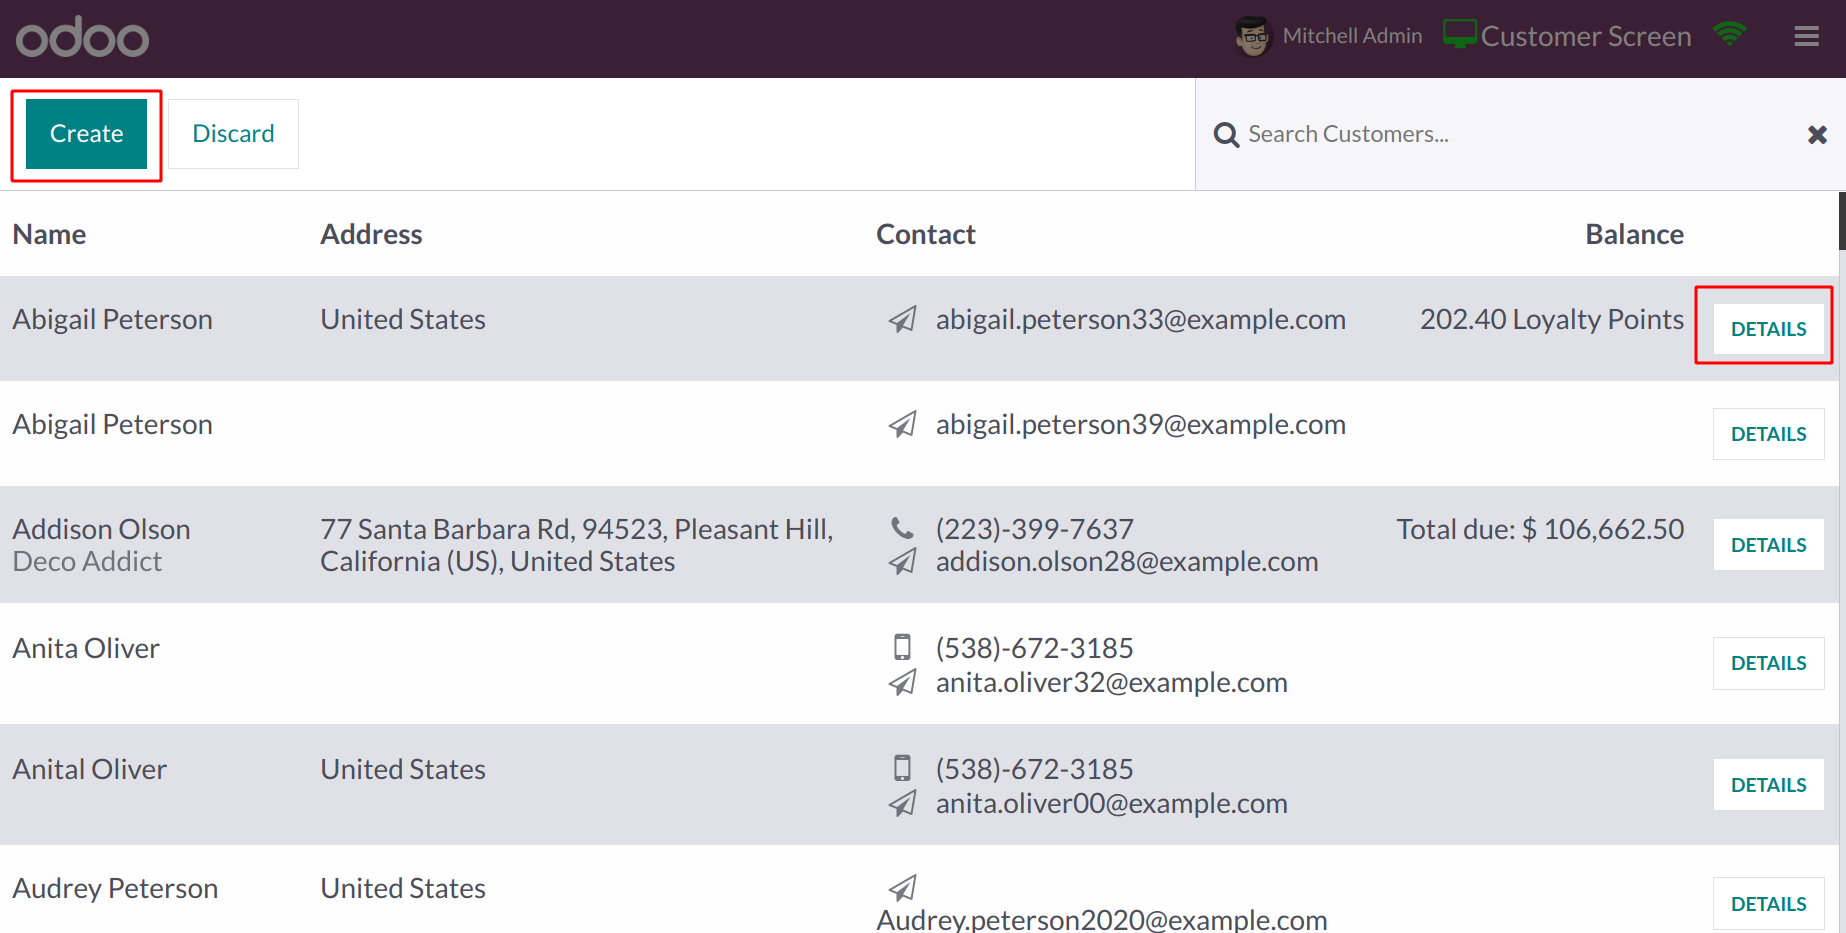
If the customer record is not present, you can use the Create button
to create a new customer. The customer you've
chosen will be fully described when you click the Details button.
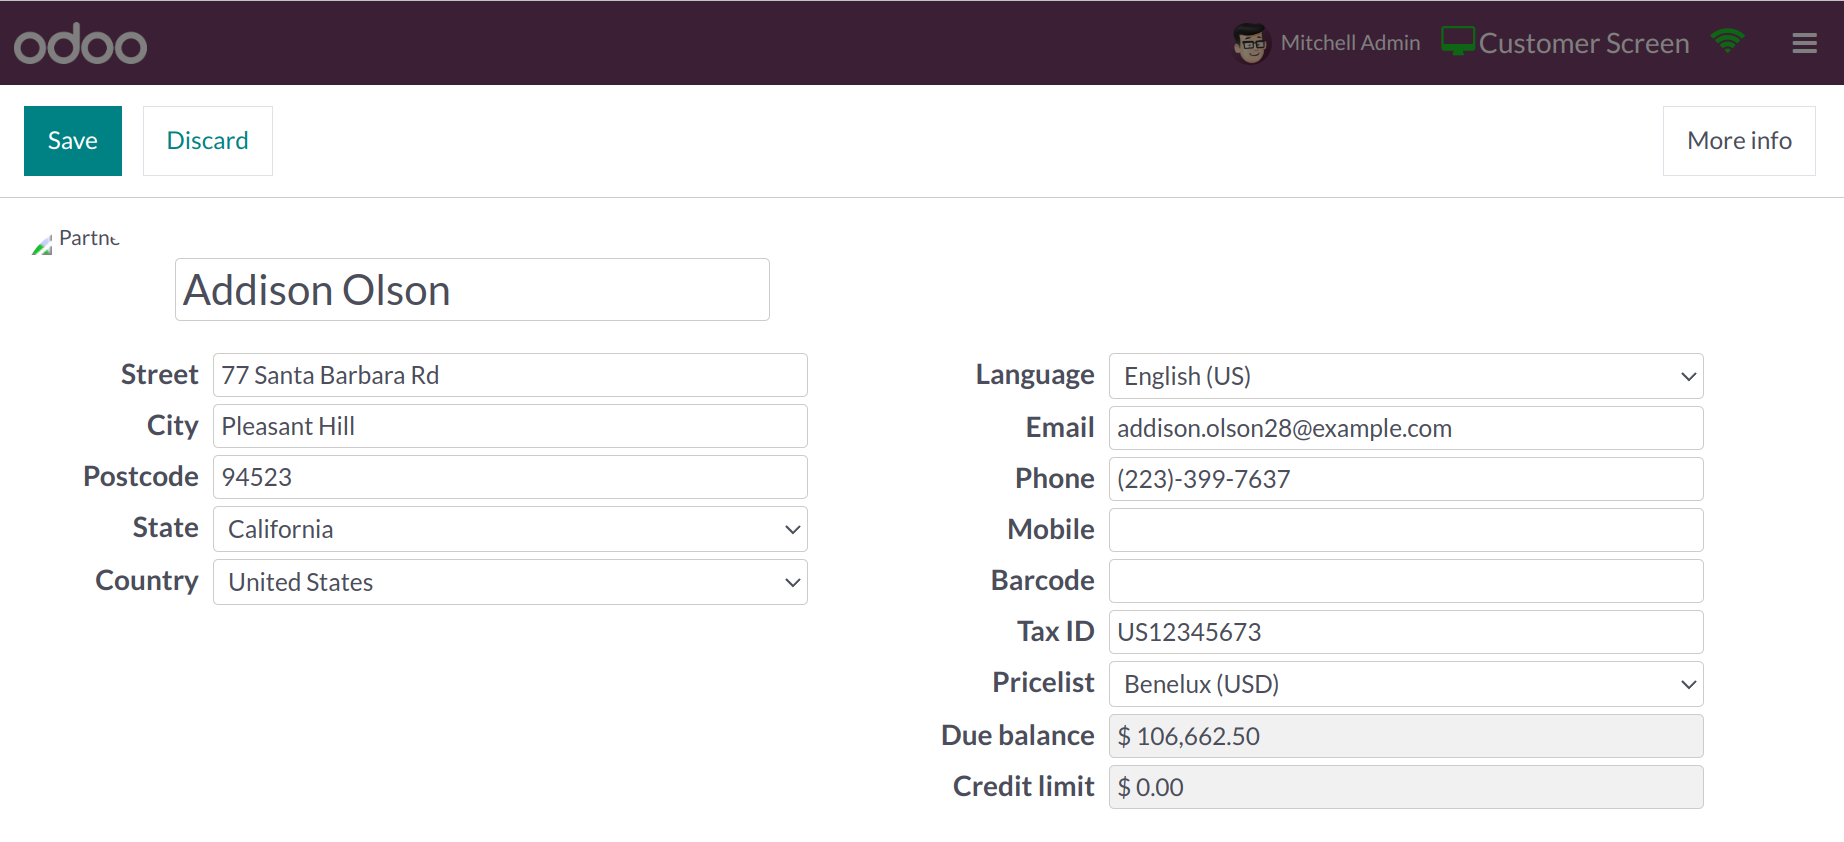
This information comprises the client's Name, Picture, Street, City,
Postcode, State, Country, Language, Email, Phone,
Mobile, Barcode, and Tax ID. To learn more, click the More Info
icon.
Use the associated button to view the Quotation or Sales Order
associated with this order. Additional buttons for setting the
quantity, percentage
discount, and price of the items added to the order will be
available.
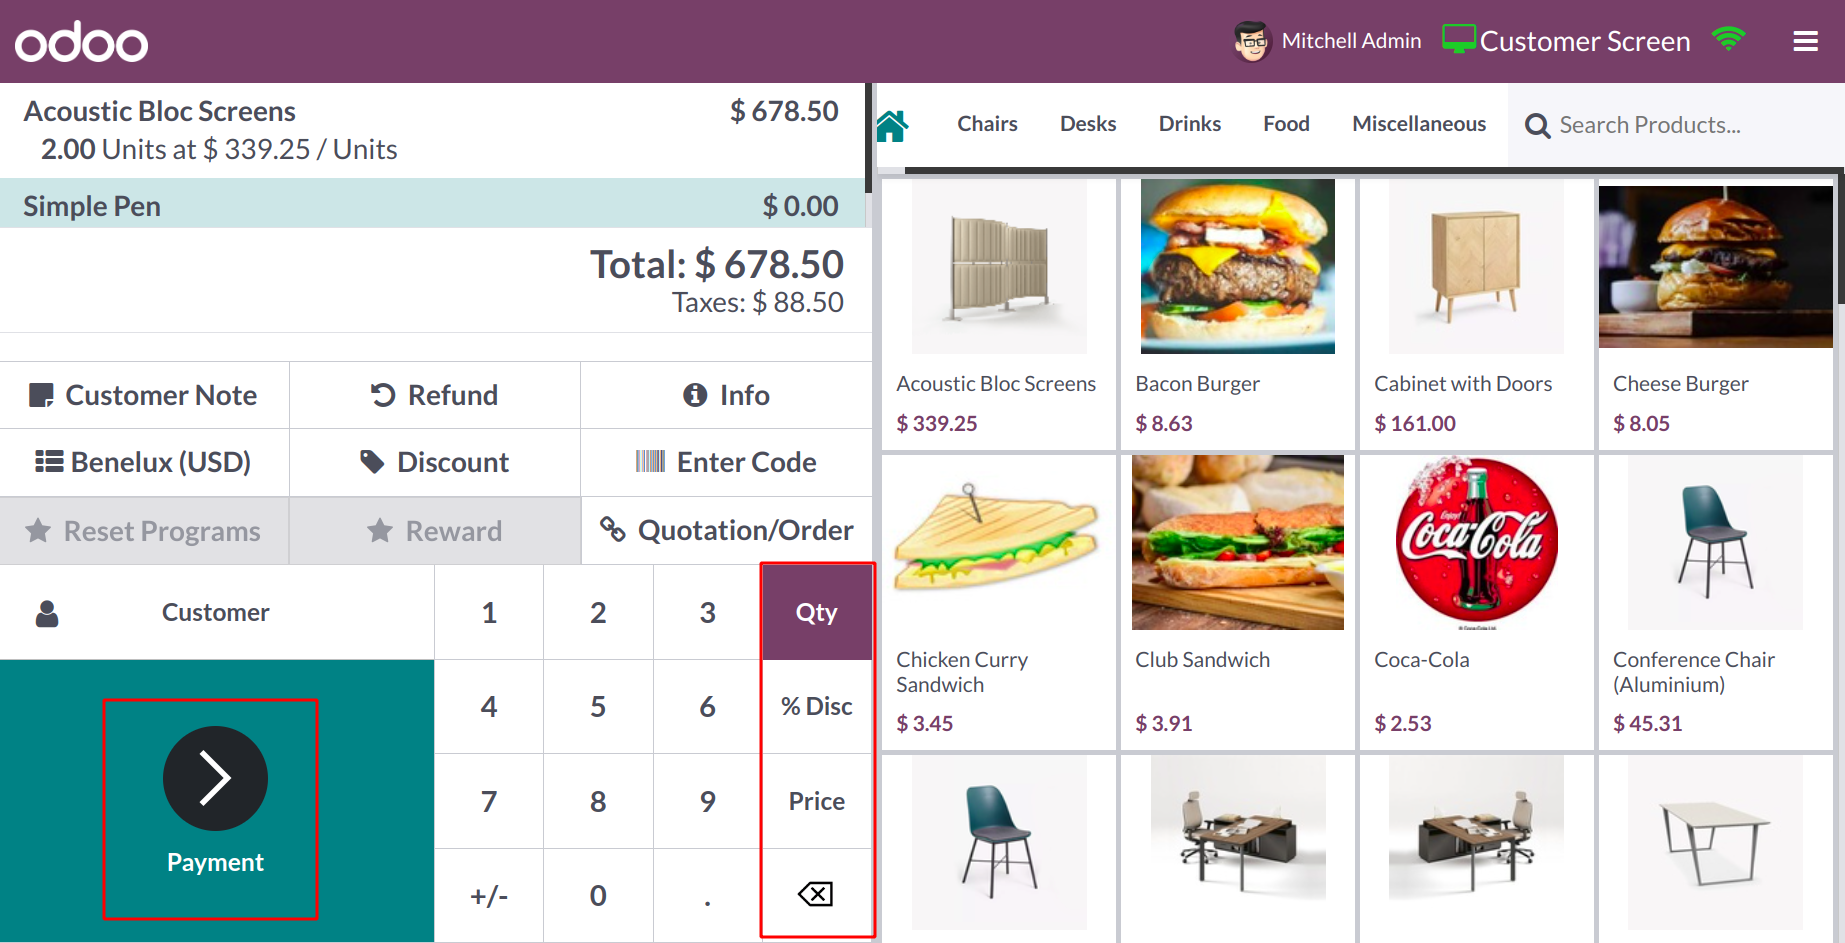
Click the Payment button to start the payment. As seen below, Odoo
takes you to the payment window.
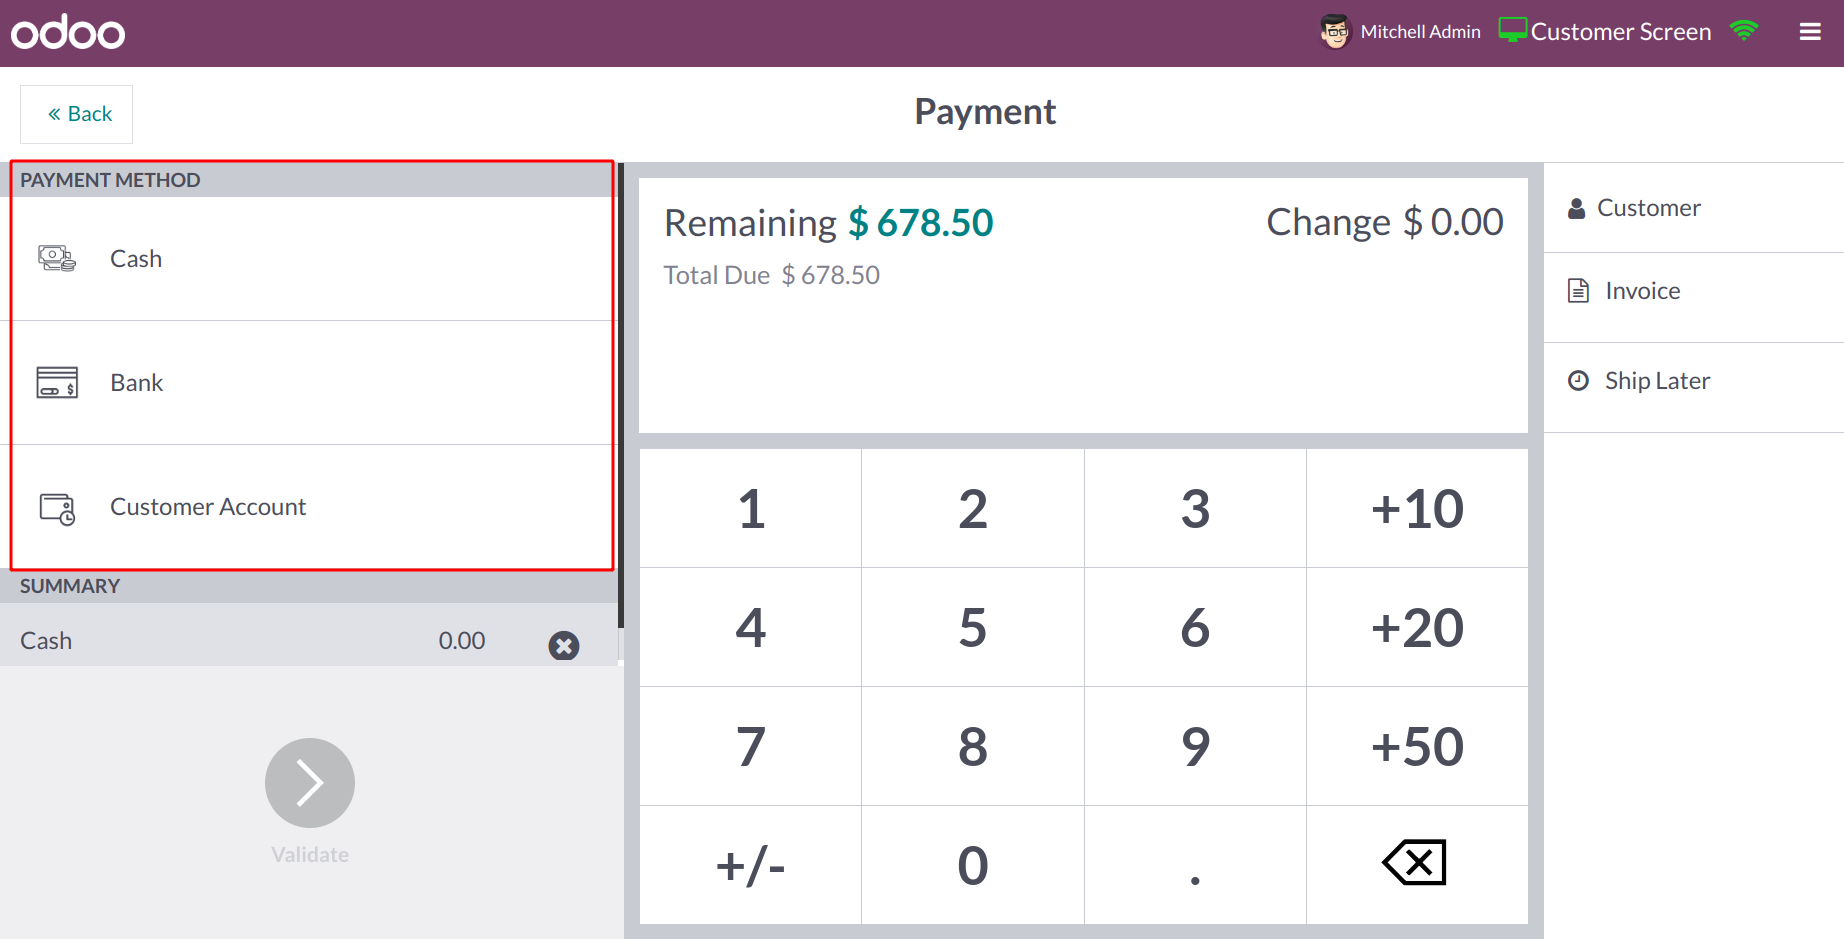
On the left side of the screen, you can see the Payment Methods that
are accessible for the current POS session. Choose a payment method
that will work for the customer's request. The appropriate Summary
will be provided in the given box after choosing the payment option.
You can see the customer's name on the right side of the screen. To
create an invoice for this order, click the Invoice button. The tip
can be entered using the Tip button if the consumer wants to leave
the employee any tips. If a consumer wishes to place an order for a
product
now and have it delivered later, they can use the Ship Later button.
The Remaining Change and Total Due will be displayed on the payment
screen. You can validate and confirm the payment using the Validate
button. Odoo will ask you if you want
to receive the receipt and invoice after you validate the payment.
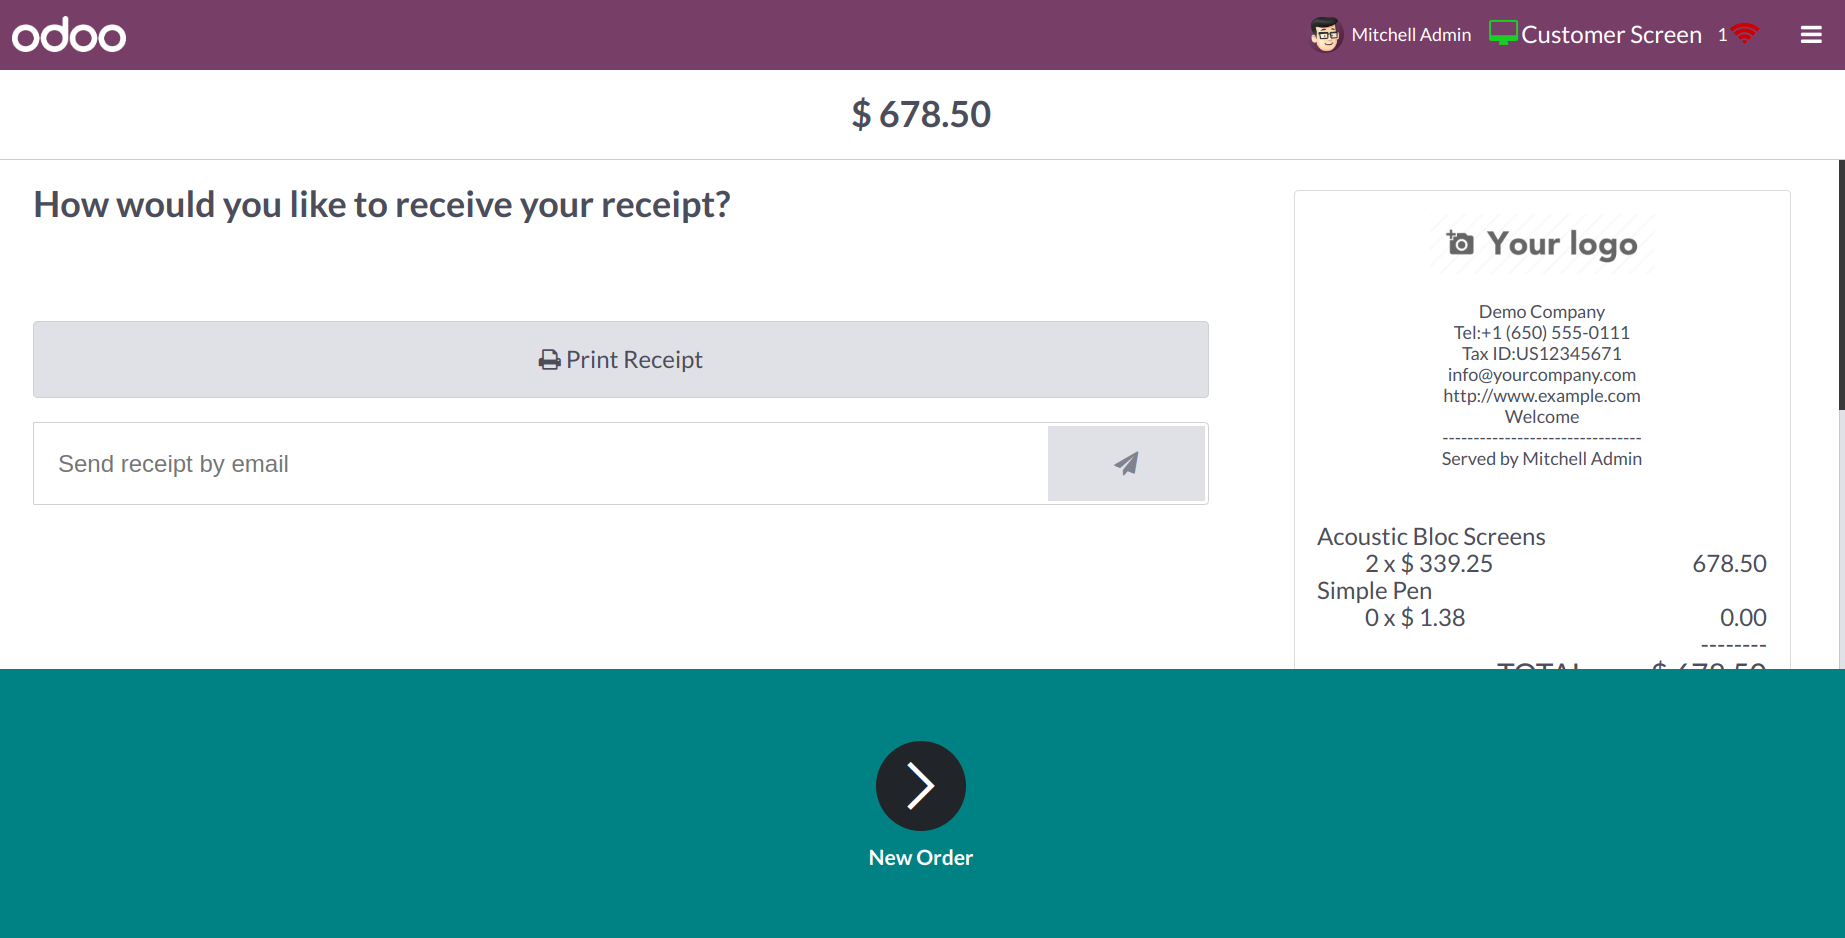
Using the Print Receipt button, you can print the receipt. The
receipt and invoice may also be delivered to the client via email.
The order is finished after the receipt and invoice have been sent.
To end the current PoS session, click the Close button located in the
top right corner of the screen. You will see the specifics of the
closing session in a pop-up window when you click this button.
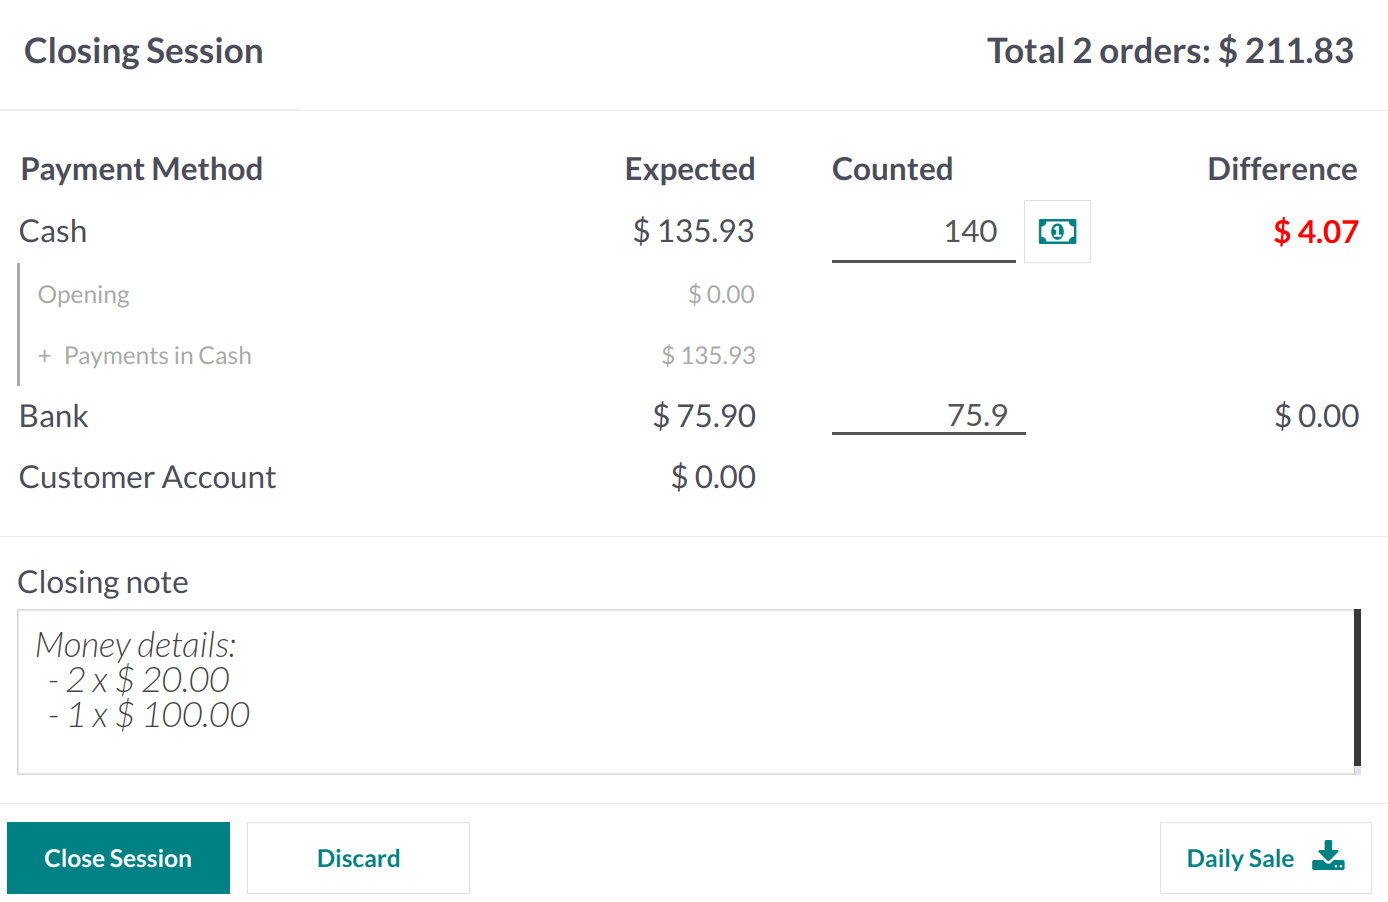
It contains the Payment Methods used to record customer payments as
well as the history of the payment information for that specific
day. The Opening Cash for the session is displayed in the Expected
amount. You can enter the entire amount taken in from today's sale
in the Counted area. It is the session's final balance. You can use
the money icon to help you figure out the total using the selected
coins. The difference between the session's opening cash and closing
balance is displayed in the Difference section. Use the Add a
Closing Note box to add a note
before the session is finished. Press the Close Session button now.
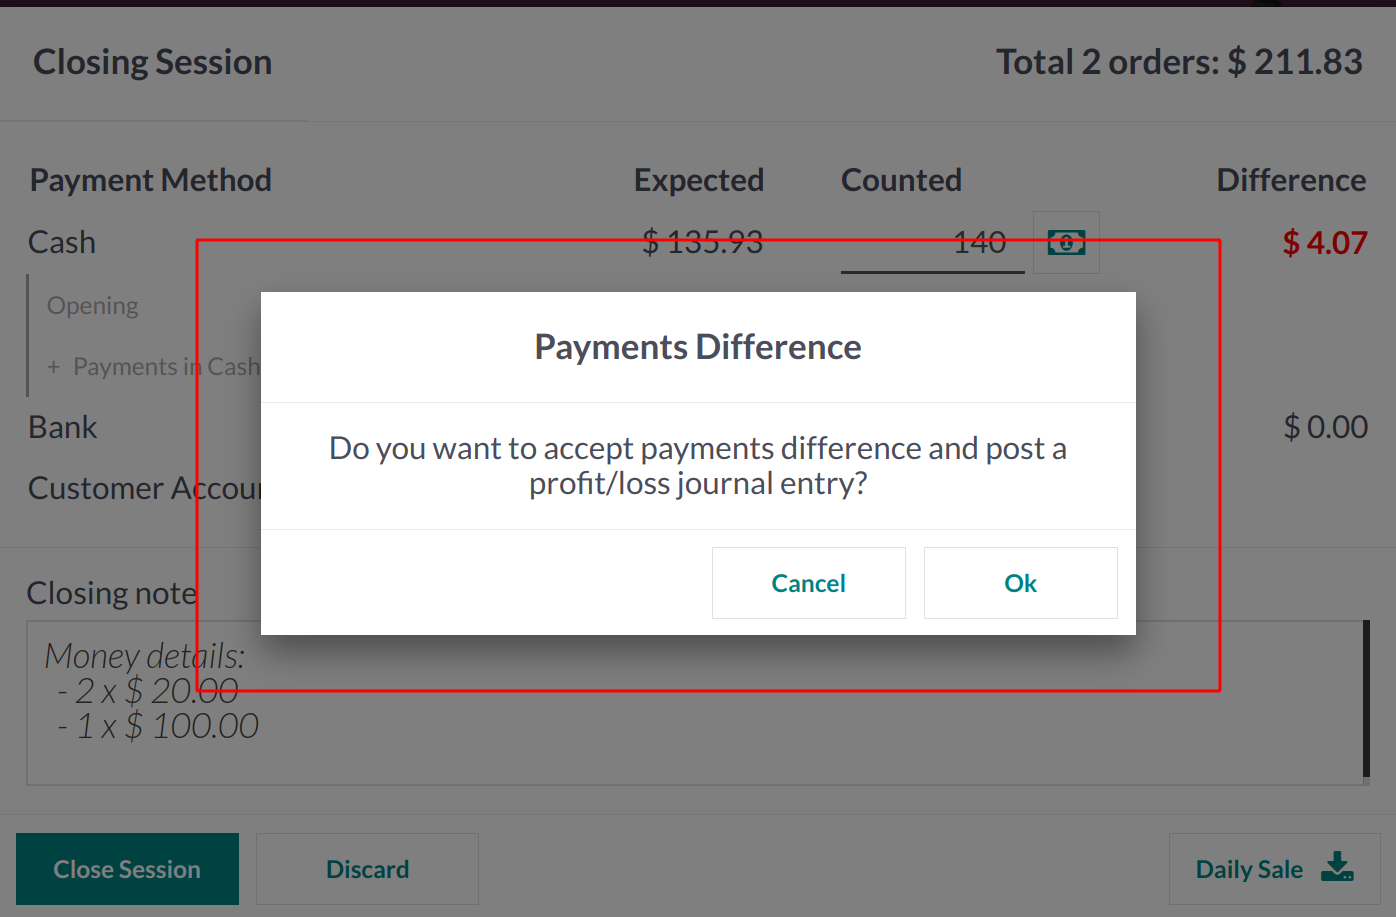
Odoo will ask you to accept the payment difference if there is any
difference reported in order to post a profit/loss journal item in
your accounting. Let's press OK and observe what happens. The
meeting is now over. You can
choose the Profit and Loss reporting option in the Accounting
module.
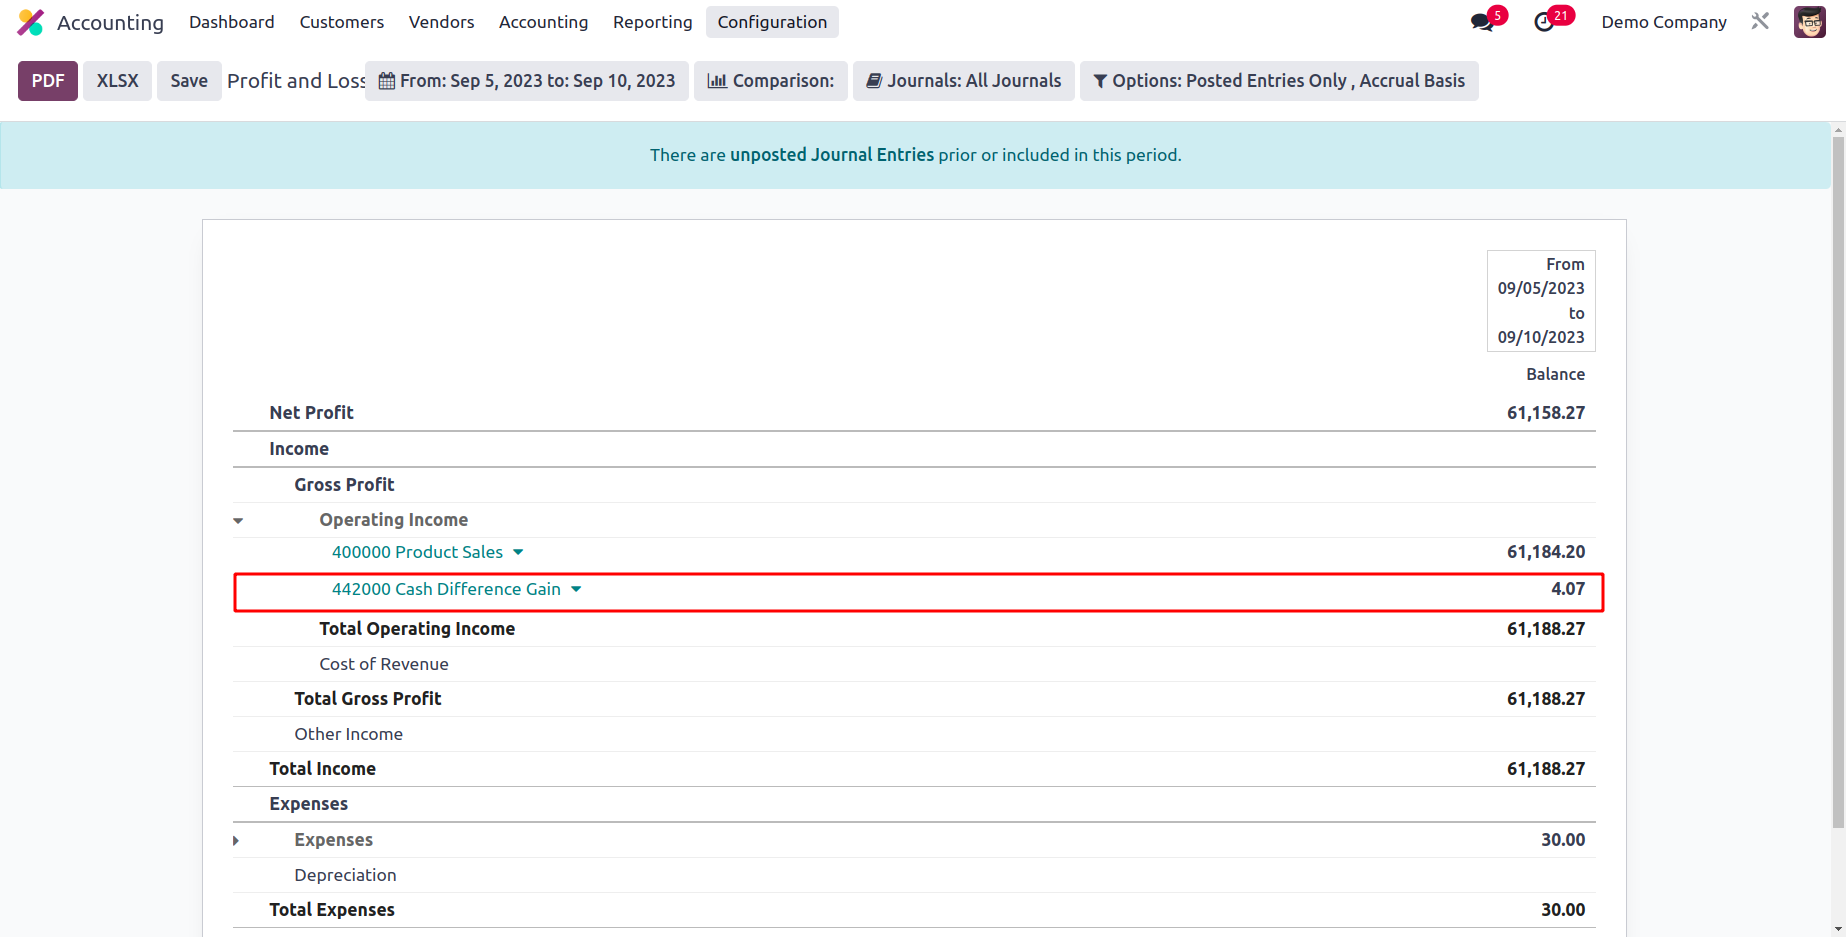
The session's difference will be recorded in the Cash Difference Gain
account and treated as income in the profit and loss report. The
record for the cash discrepancy discovered
during the counting can be seen in the General Ledger of this
account.
This is how Odoo manages various PoS sessions.
The Orders menu of
the PoS module's backend will show a complete list of all orders.
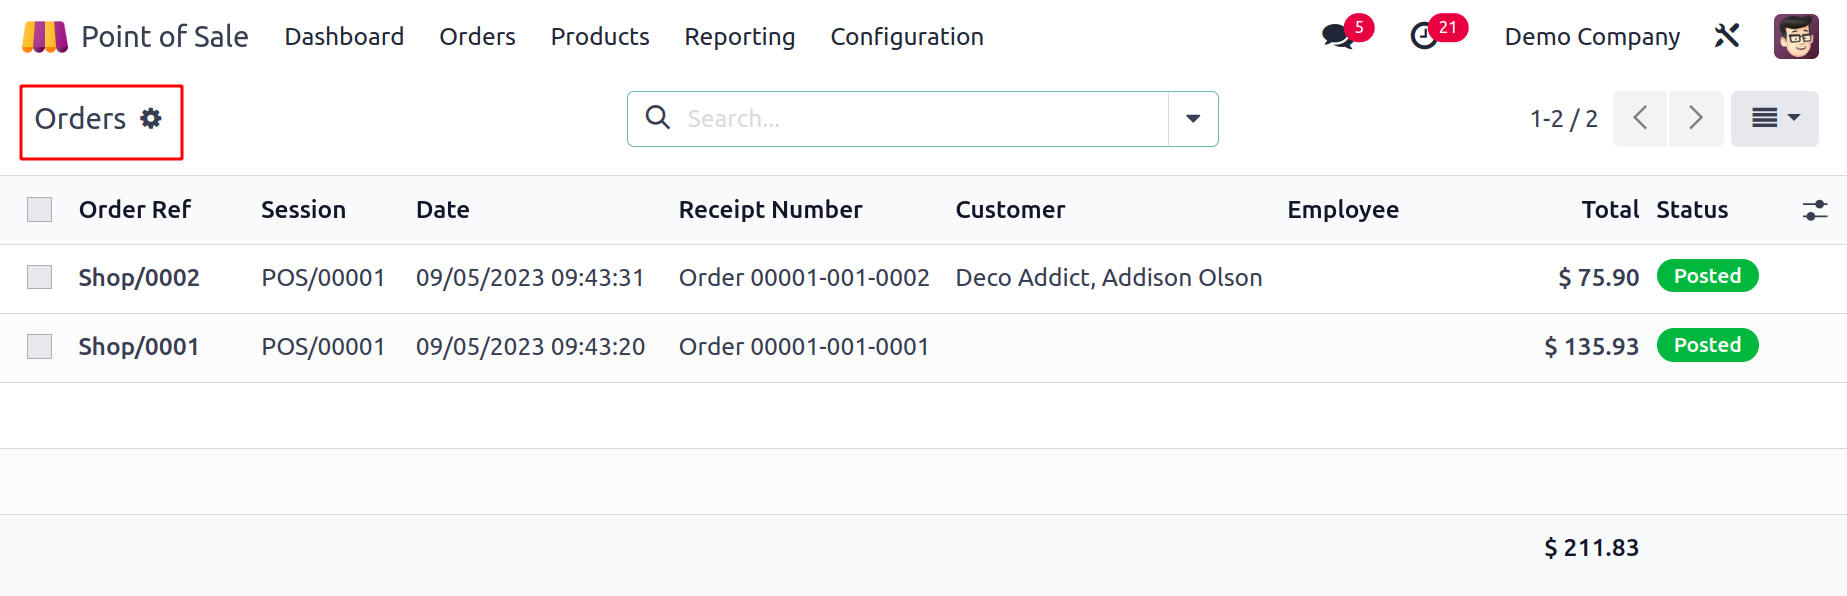
The Order Reference, Session, Date, Receipt Number, Customer,
Employee, Total, and Payment Status are all displayed in the list
view. You can also view this window at your convenience in Kanban
and Pivot. You may organize the orders based on Session, Cashier,
Customer, Status, and Order Date. Invoiced, Posted, and Order Date
are the window's default filters. To
create new sorting choices, use the Custom Filters and Group by
options.
Choose the Sessions option from the Orders menu to access the
Sessions history. This window will display the Session ID, Point of
Sale, Opened By, Opening Date, Closing Date, and Status.
You will see My Sessions, In Progress, and Opening Date as default
filters.
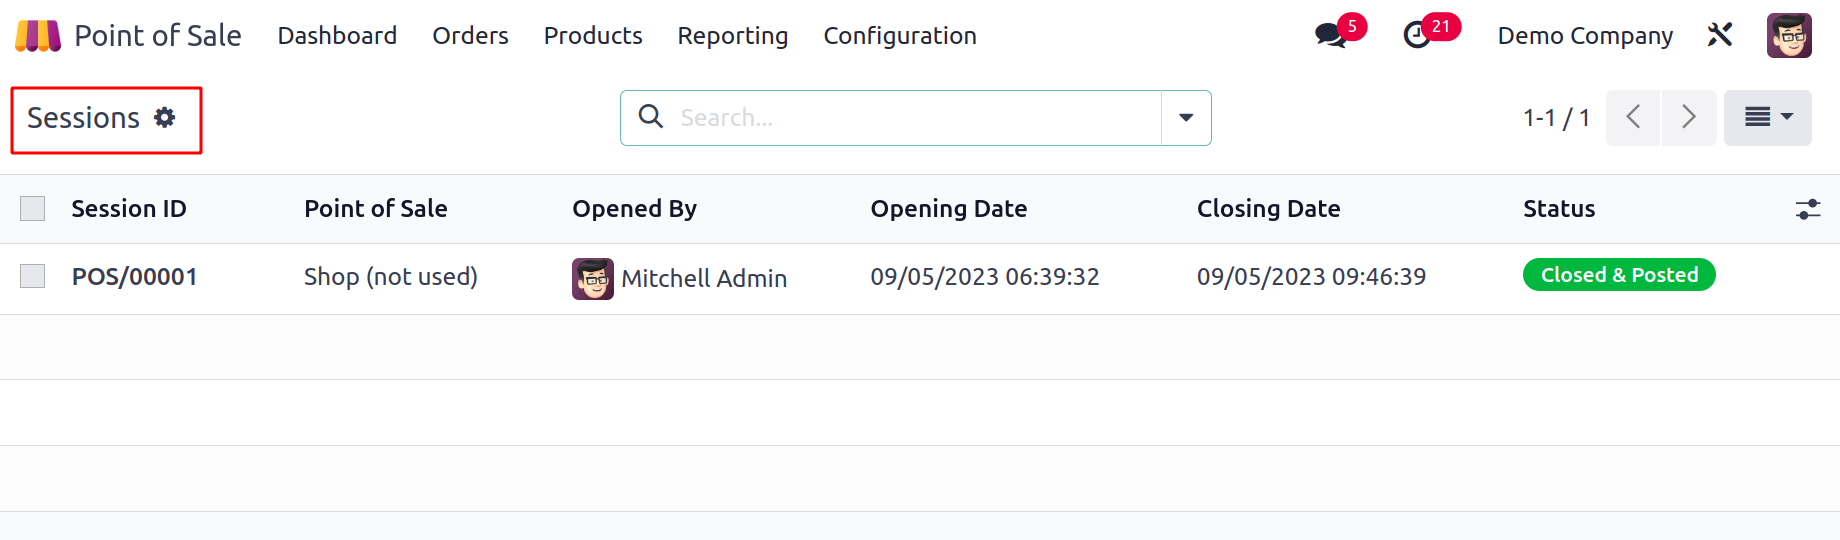
By Point of Sale, Opened By, Status, Opening Date, and Closing State,
the sessions can be divided. You can click on a session
to gain more details, and then a form view will appear, as seen
below.
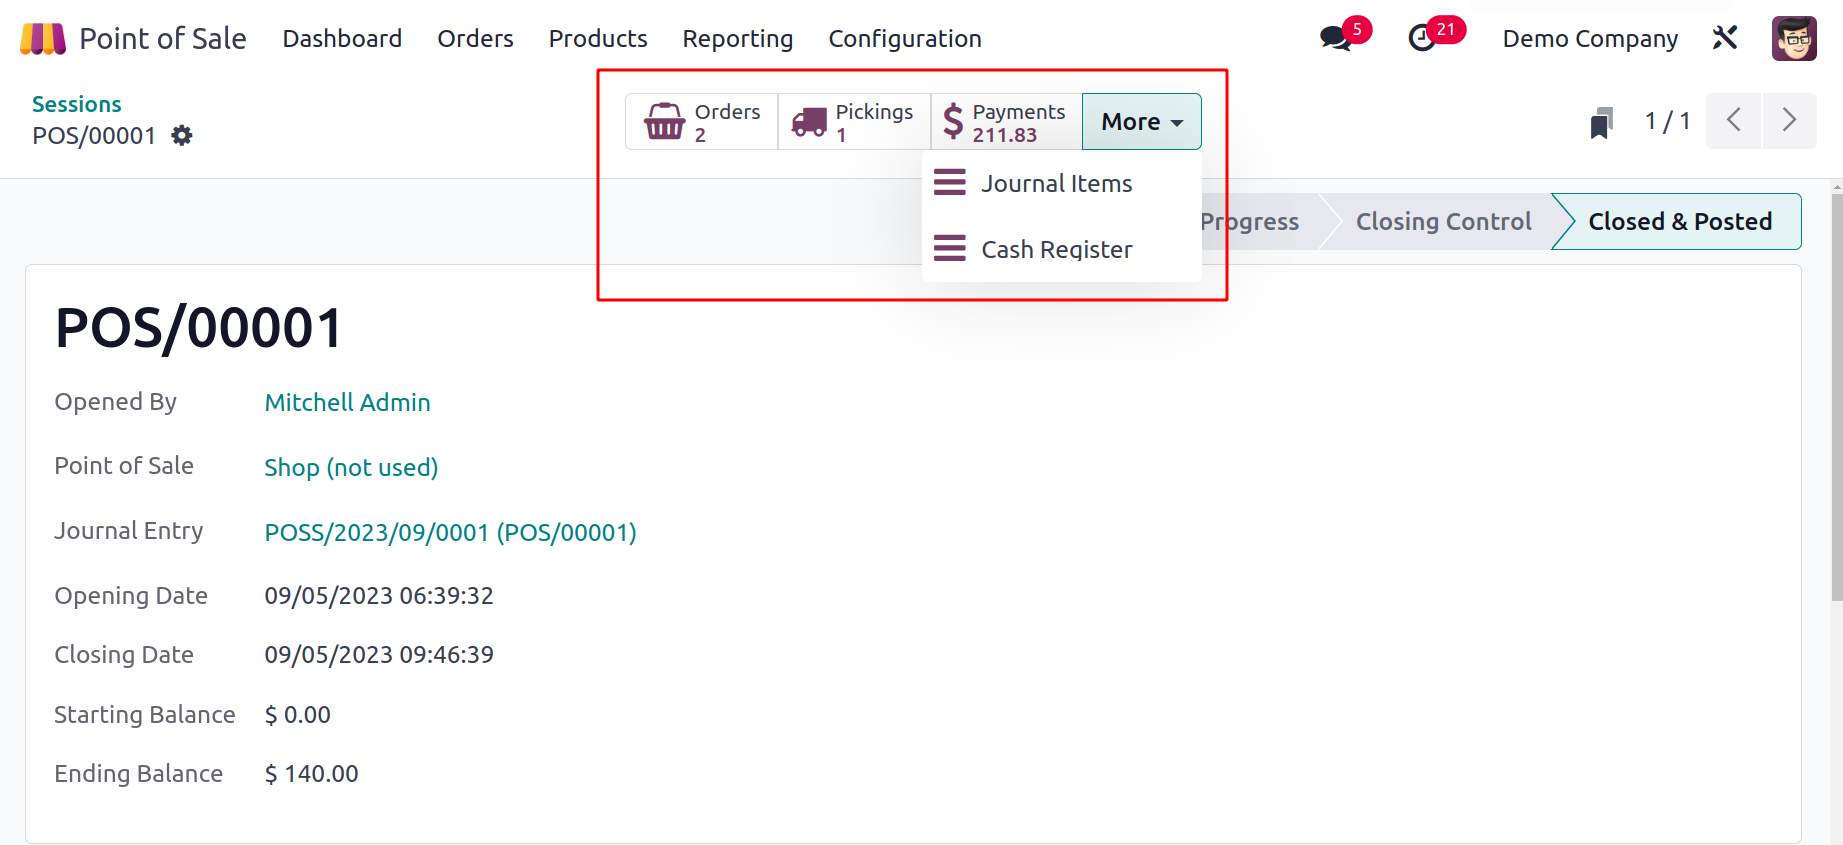
You may find information about the total number of Orders, Pickings,
Payments, Journal entries, and Cash Register in the smart buttons.
The session status is displayed in the window's upper right corner.