Odoo17 constantly makes sure to incorporate some intriguing features for users with the
release of its current edition. If we look at Odoo versions from the past several years,
we can see how the software has evolved to achieve the quickest processing times and
better integration when it comes to managing several company operations at once. The
most recent addition to Odoo 17, the Knowledge module, will make it easier for users to
create and distribute articles and documents inside an organization. This highly
integrated module functions as a knowledge center where staff members can exchange
expertise, facilitating effective communication inside the company. This module allows
you to generate and distribute a wide range of articles and work-related knowledge.
To suit your demands, the new Knowledge module can function as a collaborative library.
This module's development aims to consolidate all dispersed firm data and papers into
one location for convenient access during emergencies.
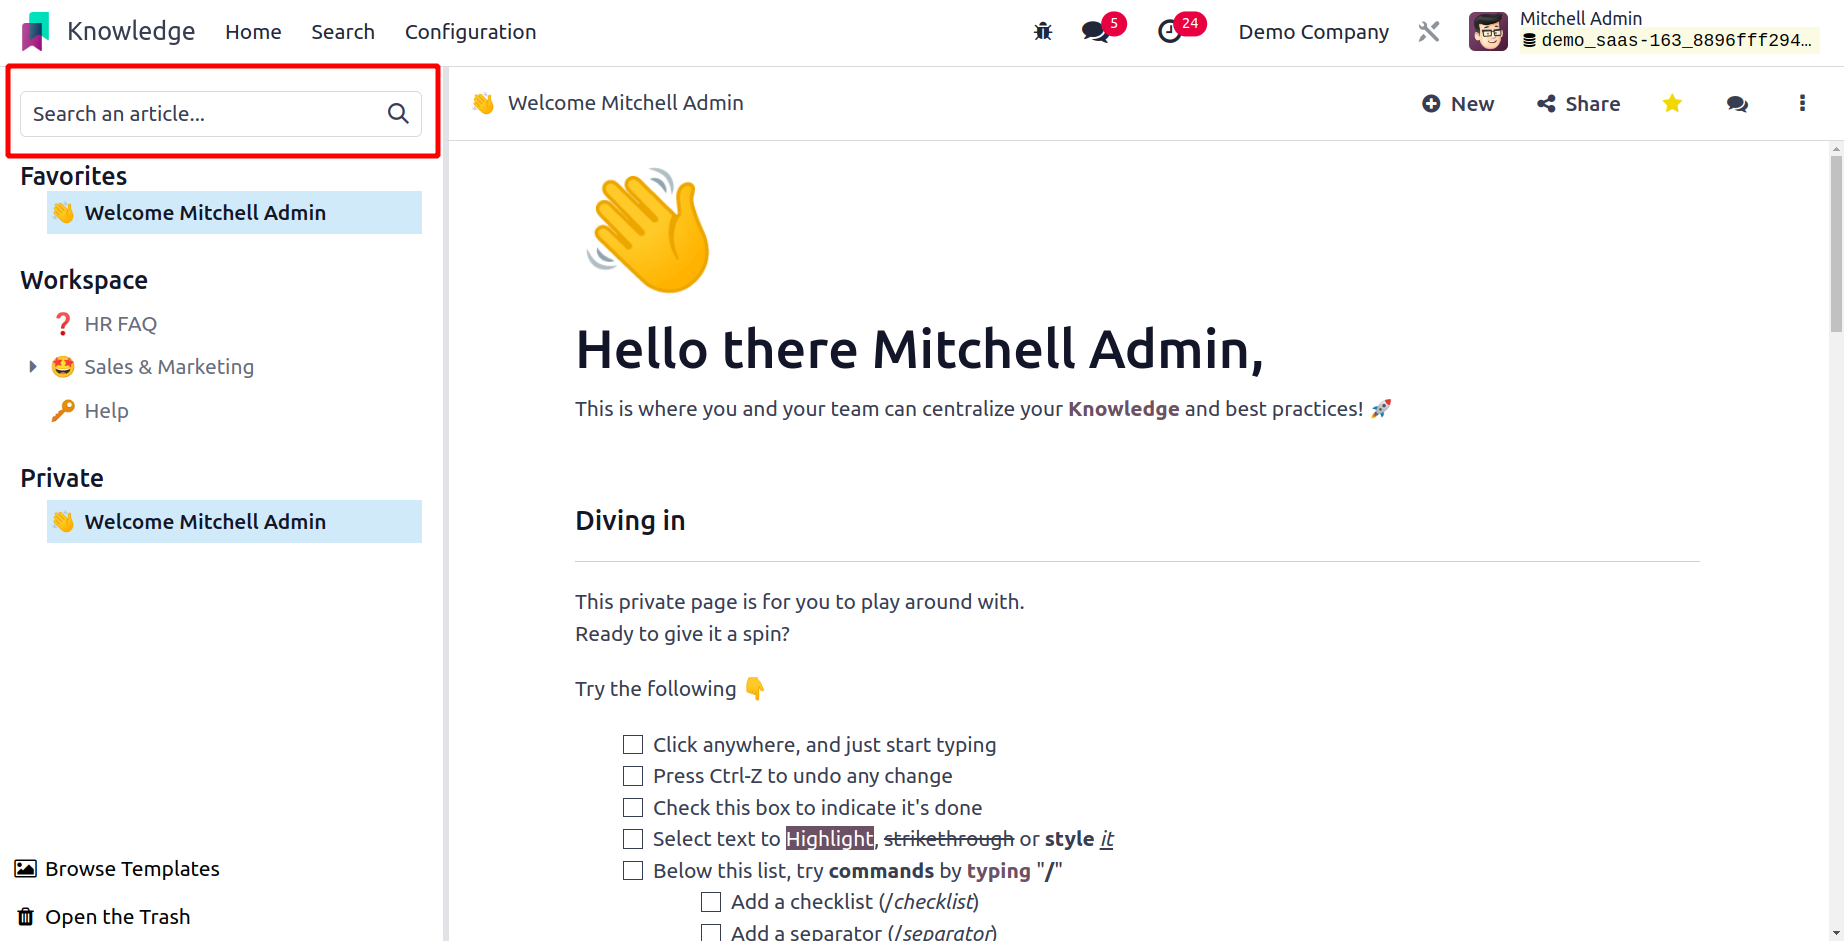
The home screen of your Knowledge module is displayed in the screenshot above. All of the
module's menus are located on the left side of the screen. You can search for items in
this module by using the Search bar. A new pop-up window that looks like the one below
will open when you click the search button.
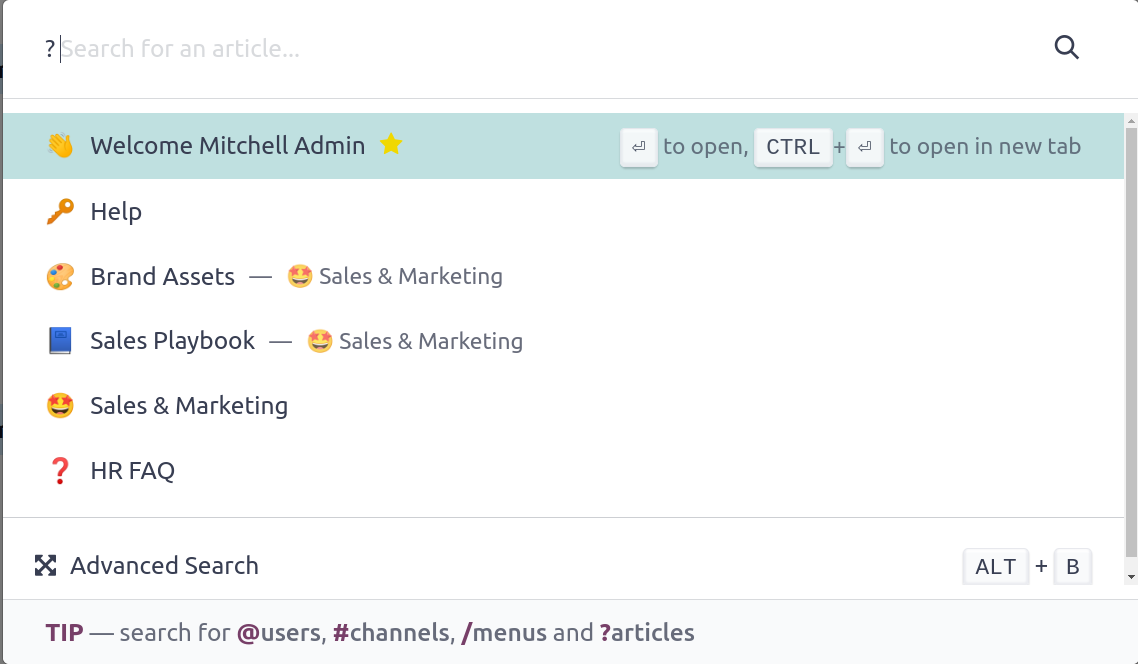
This is where you can provide the article's name. You may search for certain people,
channels, and menus with this same wizard. You can use @ to obtain the list of users.
Using # will display the channel list, and using / will display the available menus. The
list of all the articles in the Knowledge module that are available will be displayed to
you on a new platform when you click on the Advanced Search button.
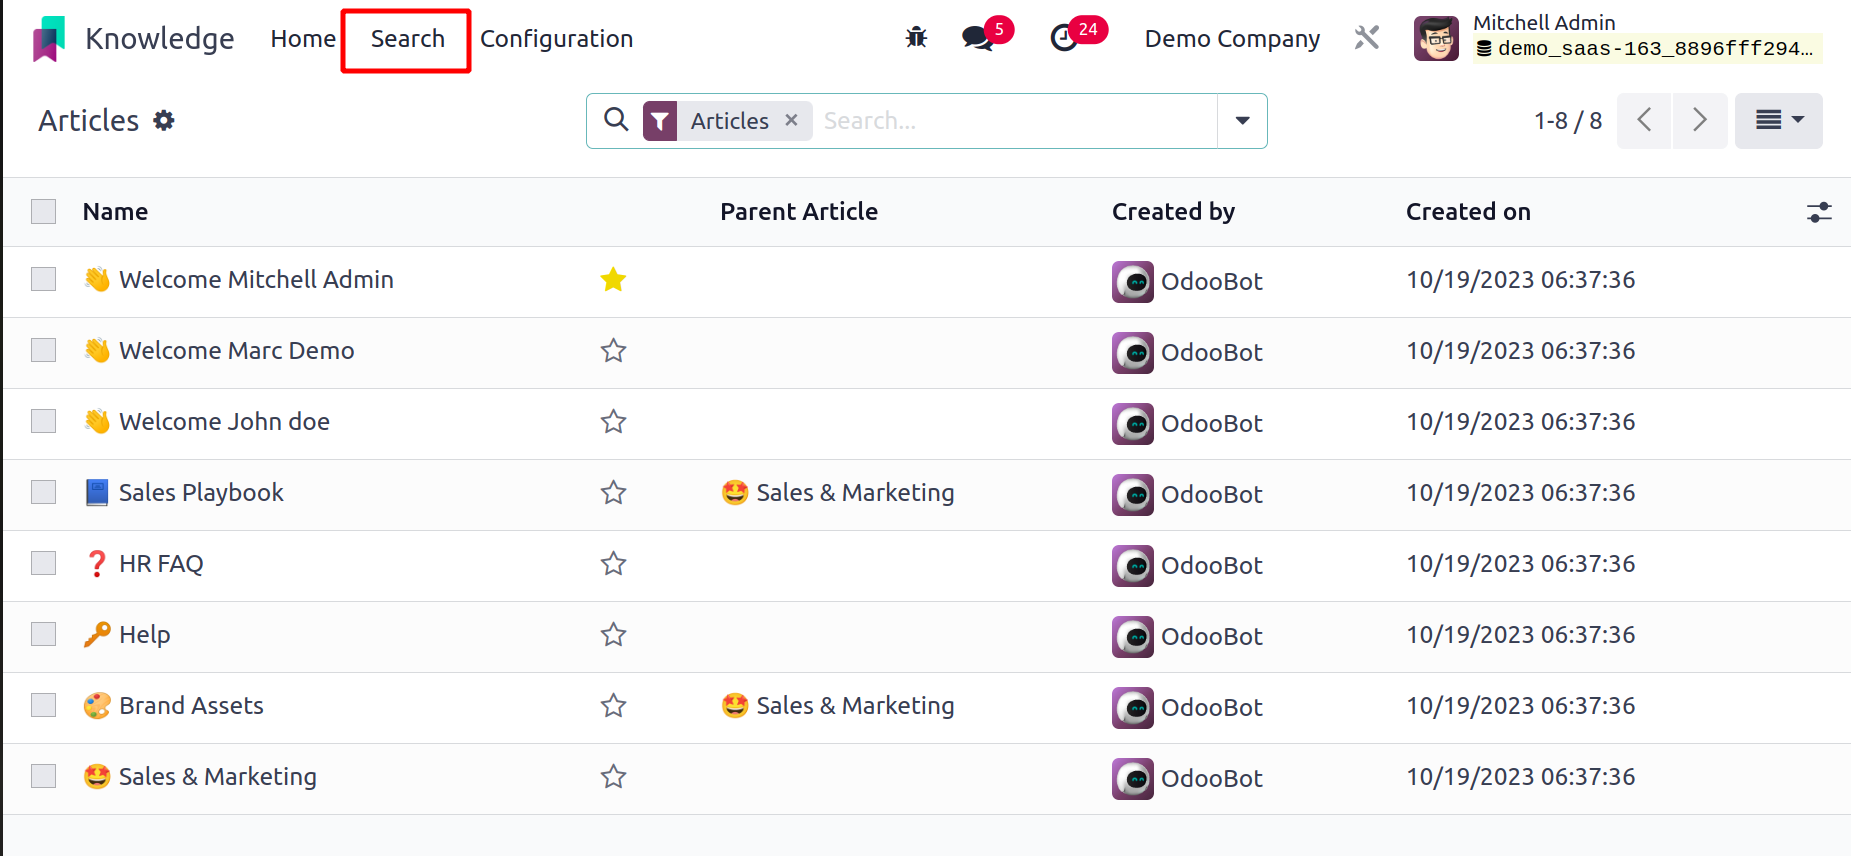
You may view the Name, Parent Article, Created By, and Created on details of the articles
in the list view. The module's main menu bar contains the Search menu, which you can use
to open this window.
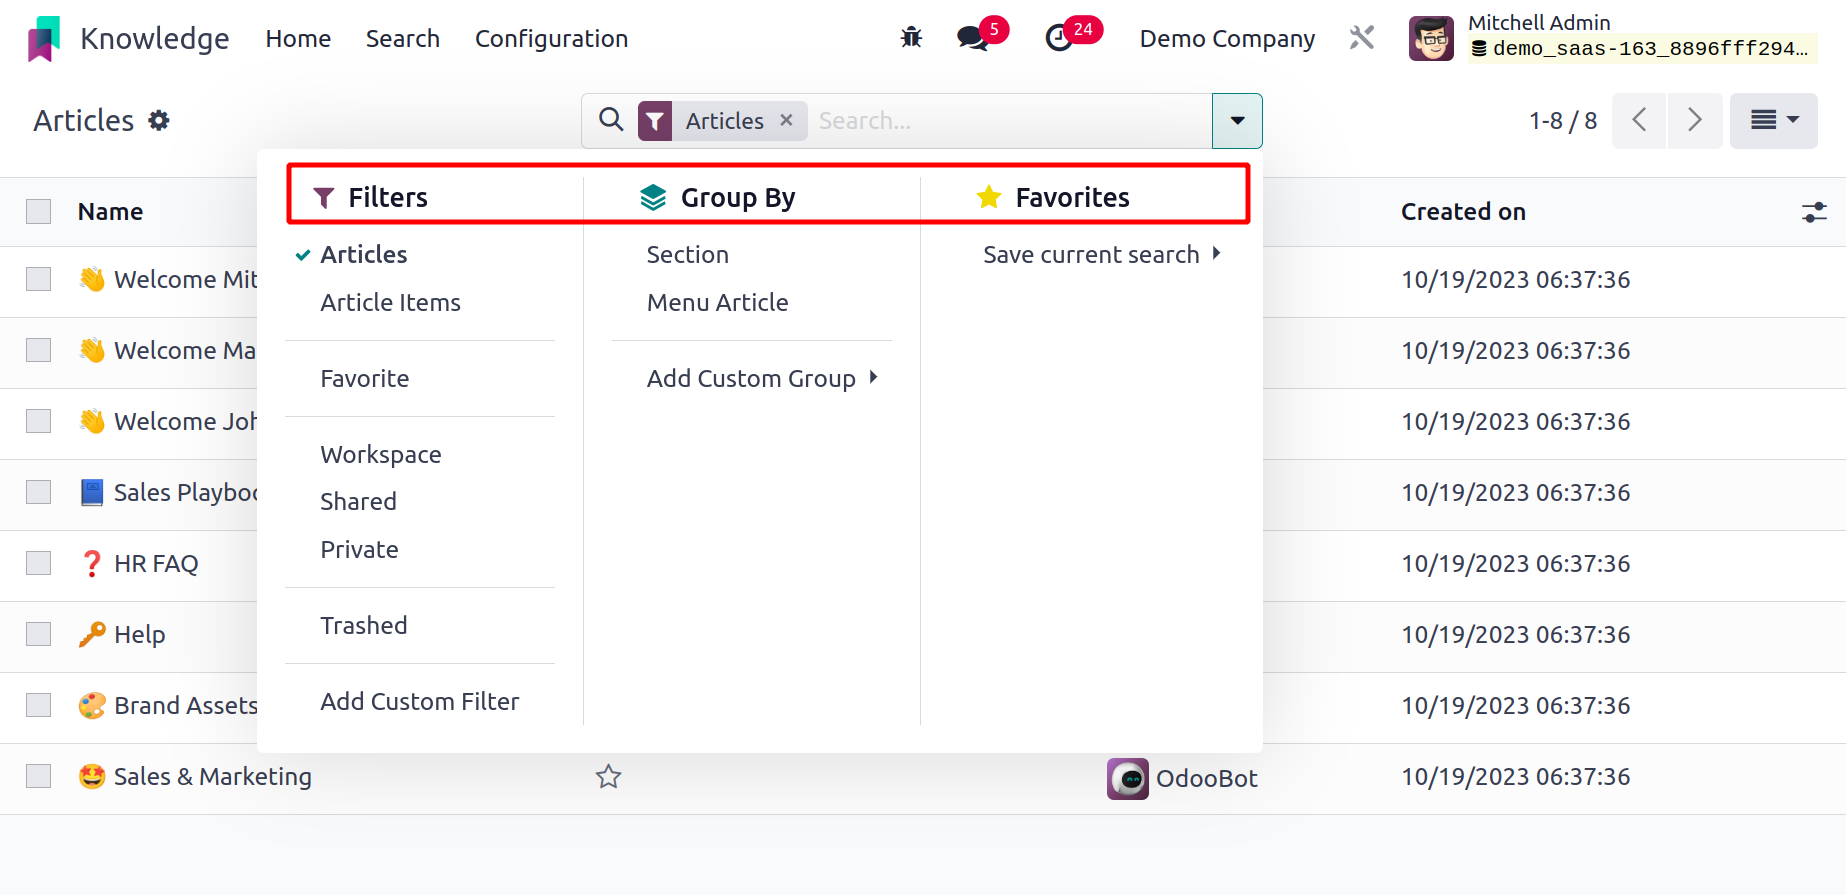
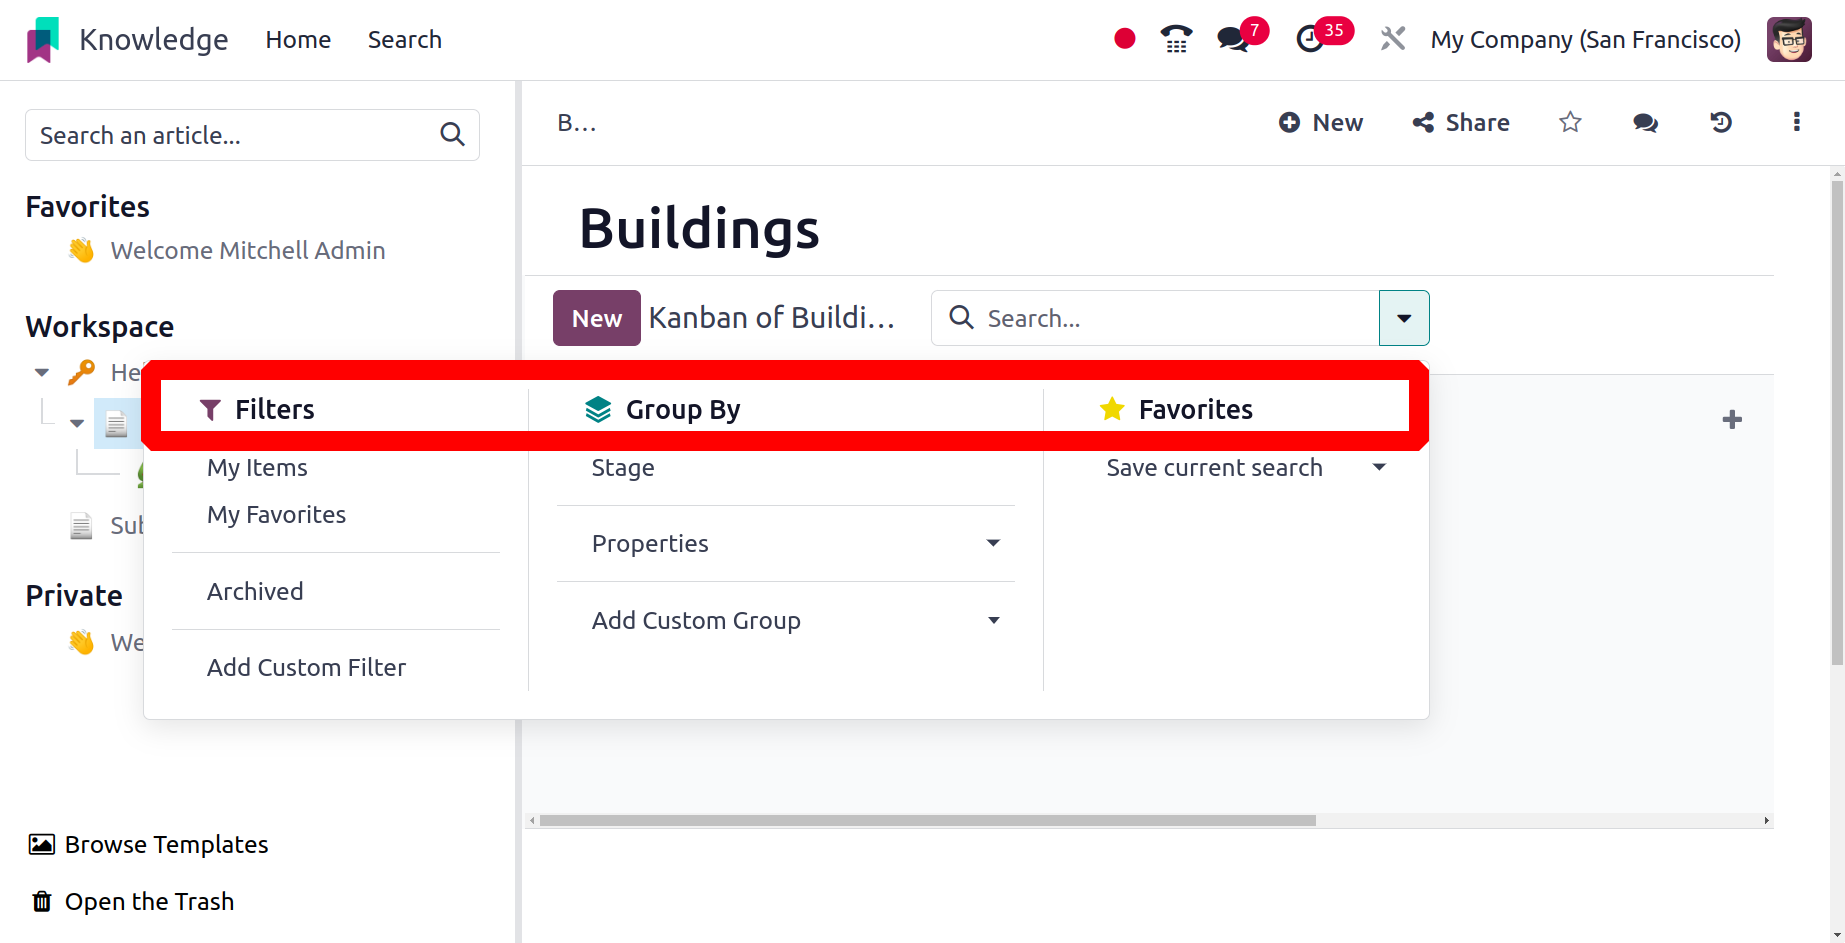
You can look up articles using the search bar. Article Items, Favorite, Workspace,
Shared, Private, and Trashed are among the filters available for the articles. The Add
Custom Filter button also allows you to define several custom filters for the articles.
Using the default Group By option, you can arrange the articles by Section and Menu
Article. To give articles a custom grouping option, use the Add Custom Group button.
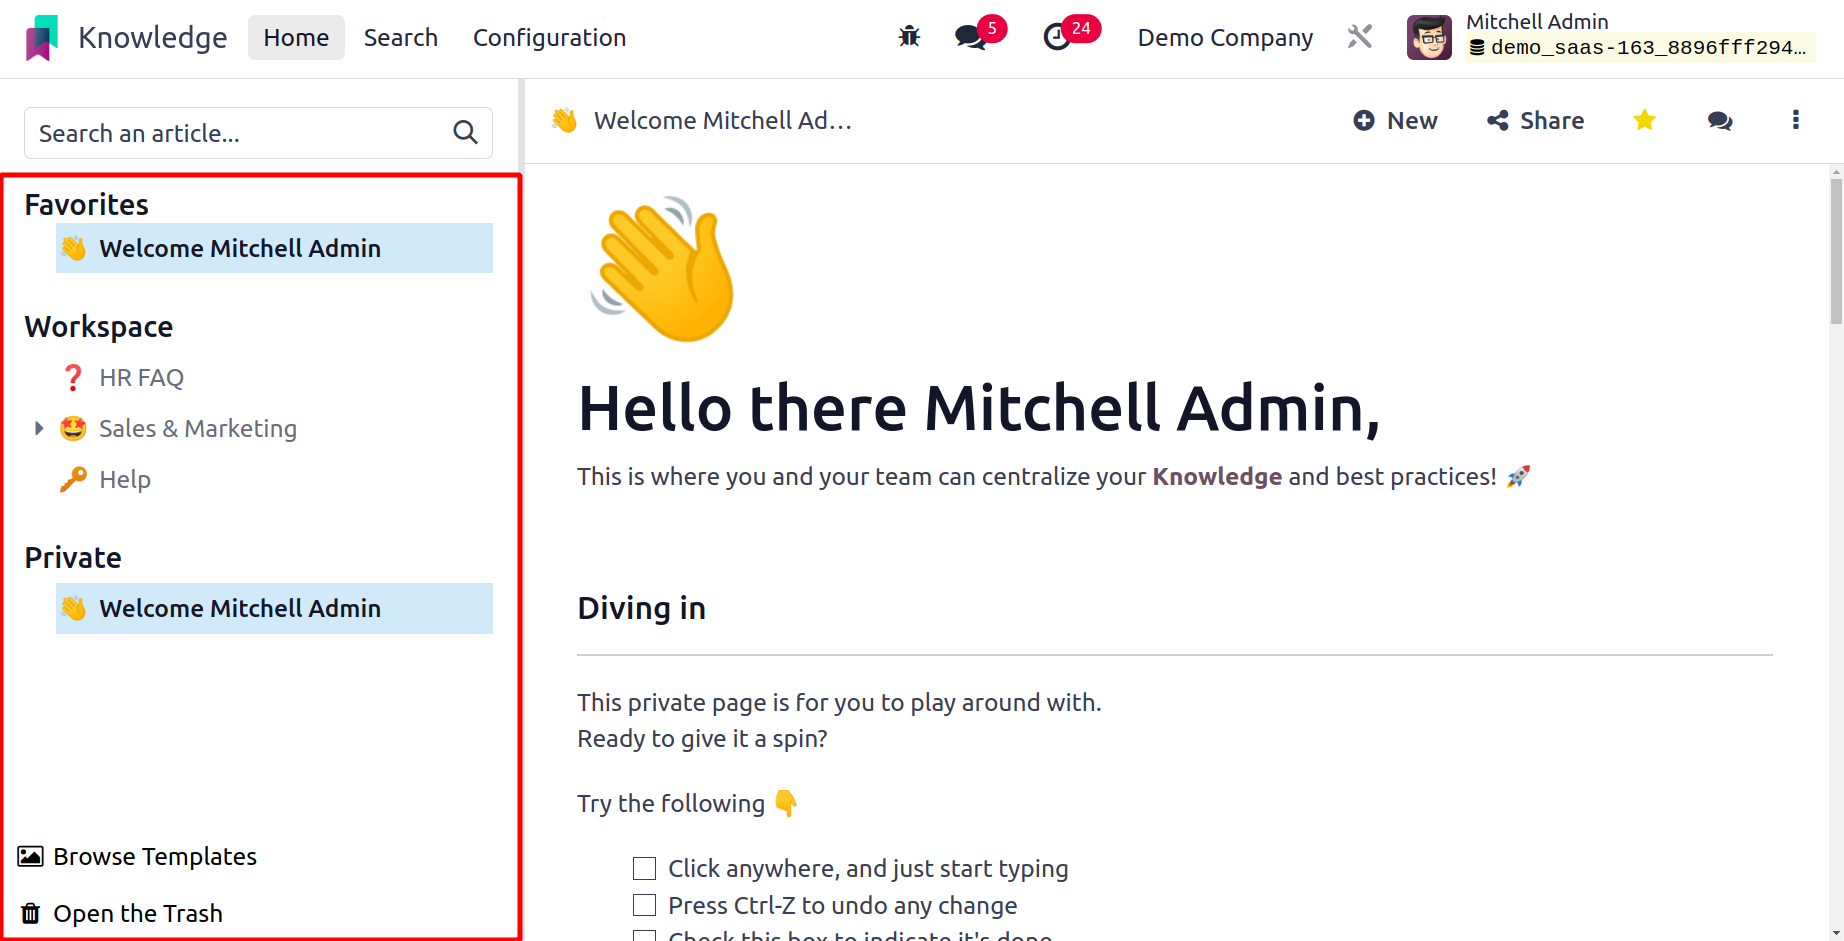
You can add articles to your favorite list by clicking the Star icon that appears on
every item. The home page itself will provide you with access to a list of your favorite
articles. All of the articles that you have marked with the star icon will be displayed
in the Favourites menu on the left side of the screen, as seen in the image below.
Workspace and Private papers will also have their own menus.
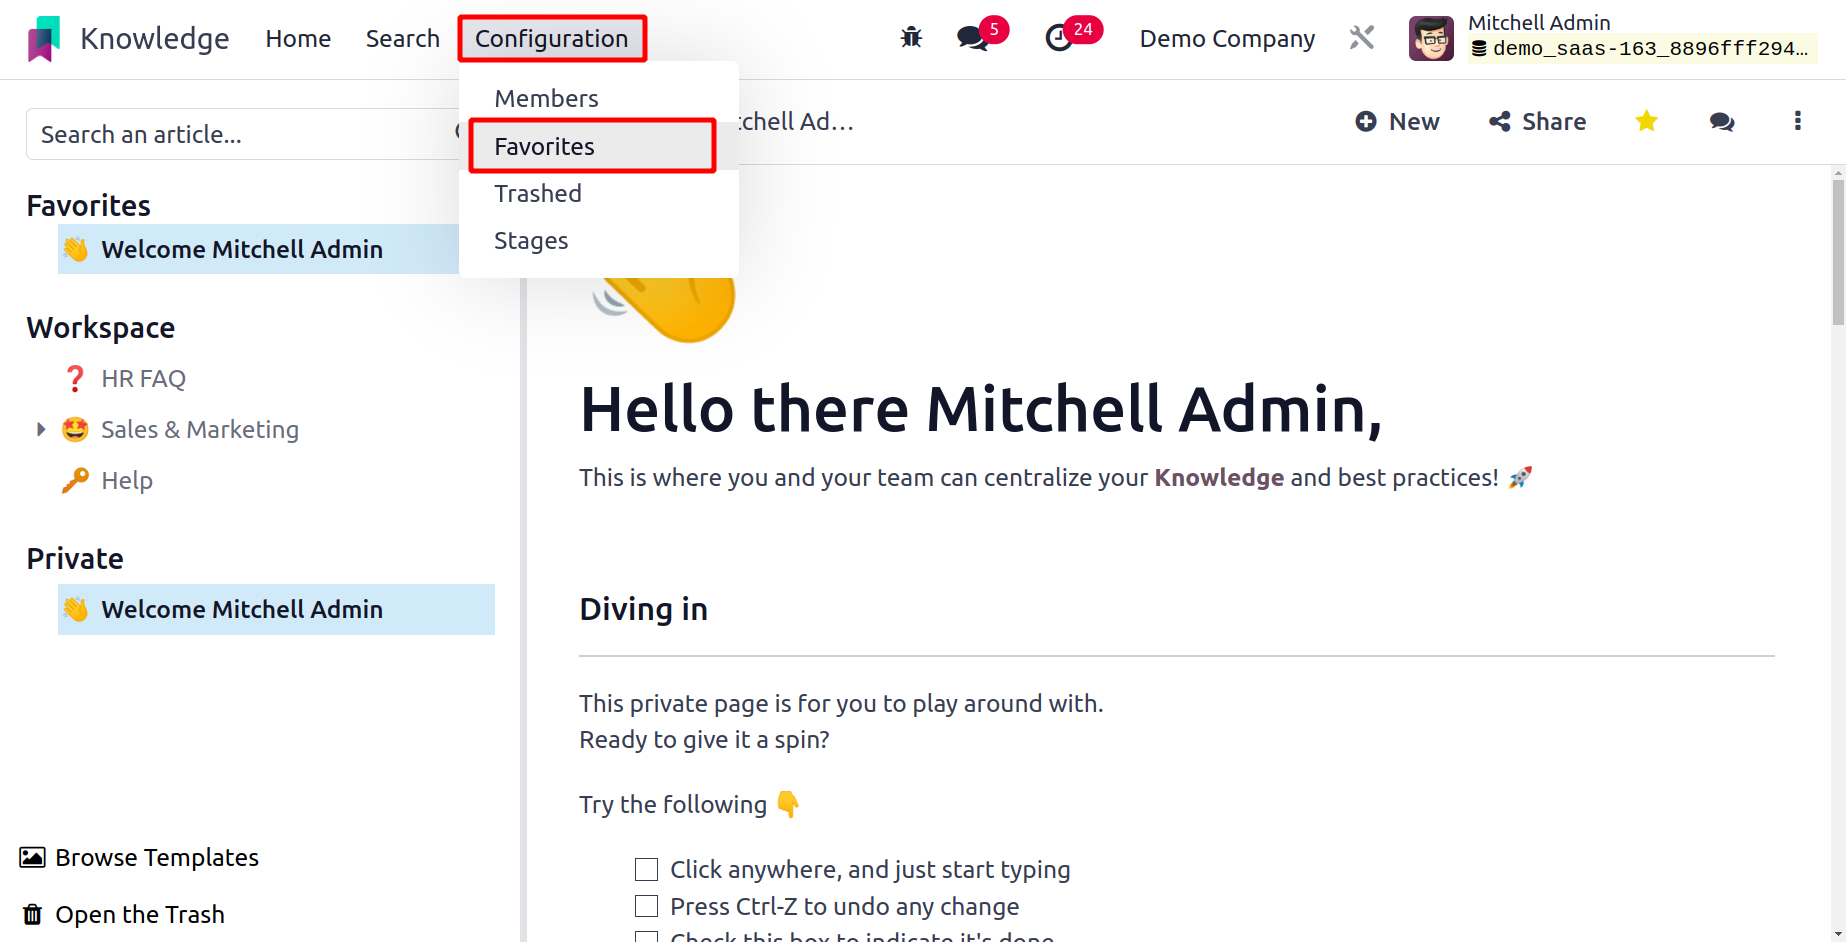
You may access the Favorite option in the Configuration menu of the module, which will
display a list of all the articles that you have favorite together with information
about the author and article name. By choosing the Article name and User in the
corresponding column, you may use the Create button to add an article to your list of
favorites.
Let's examine the process for adding new articles to this module.
Create New Articles
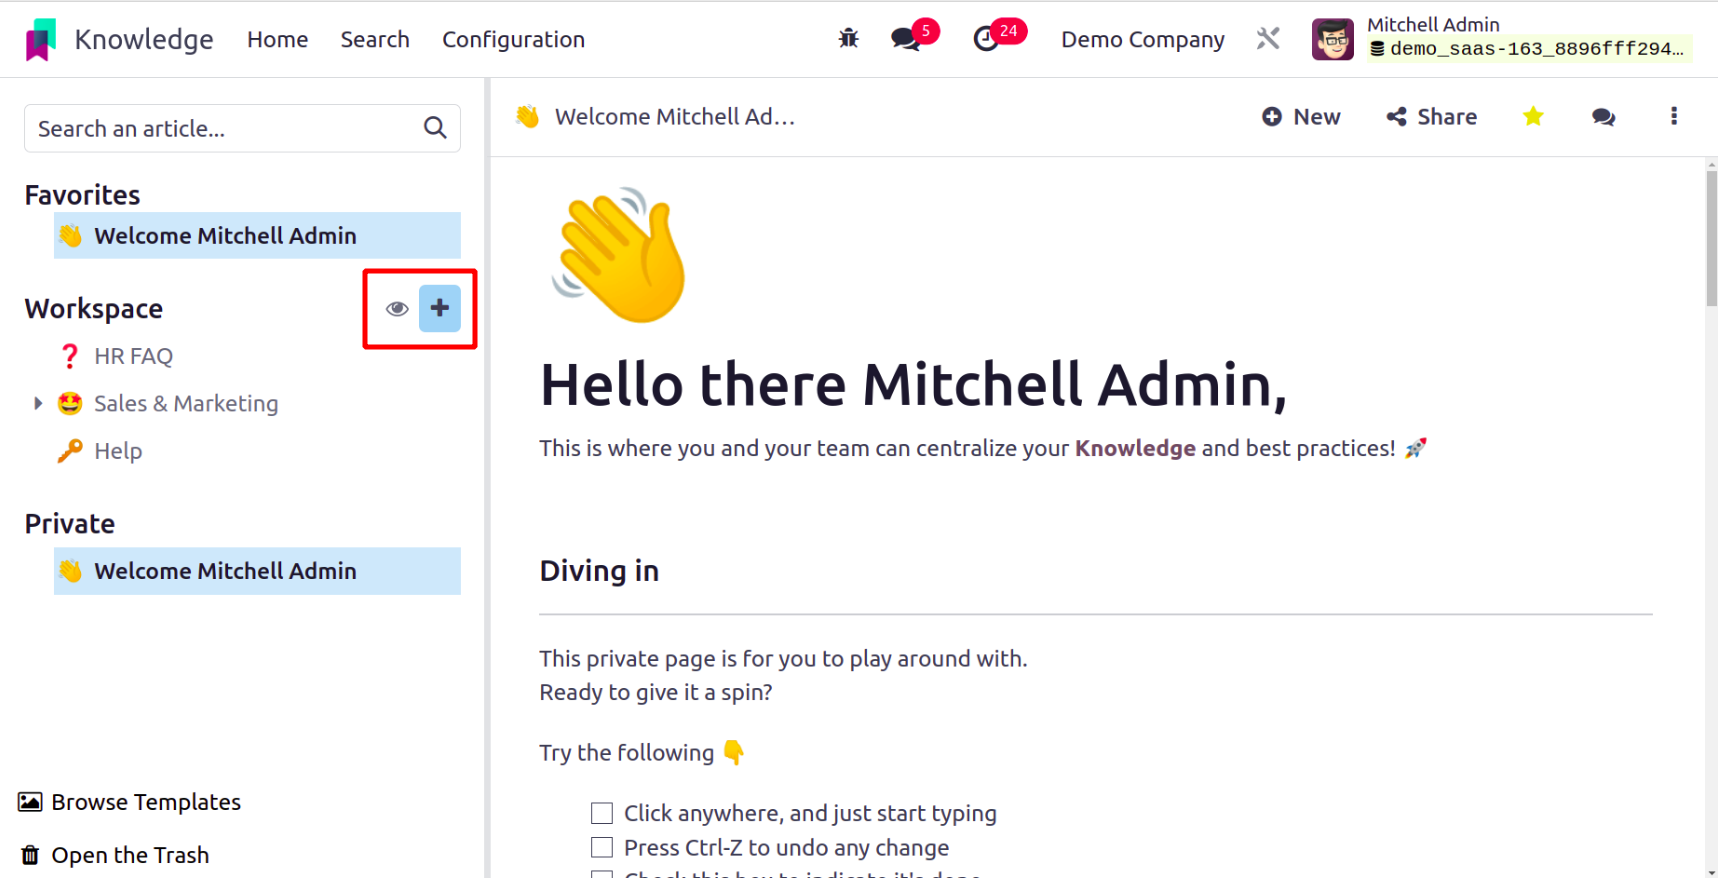
Everything in this module is arranged neatly. You can move your cursor close to the
Workspace menu to start a new article for your workspace. As seen below, a plus icon
will pop up, guiding you to a new window where you can start a new article.
In this box, you can create a new article based on your needs. Users can add additional
features inside the article box. Among them are the following: Load template, Create an
item list, Create an item calendar, and Create an item Kanban.
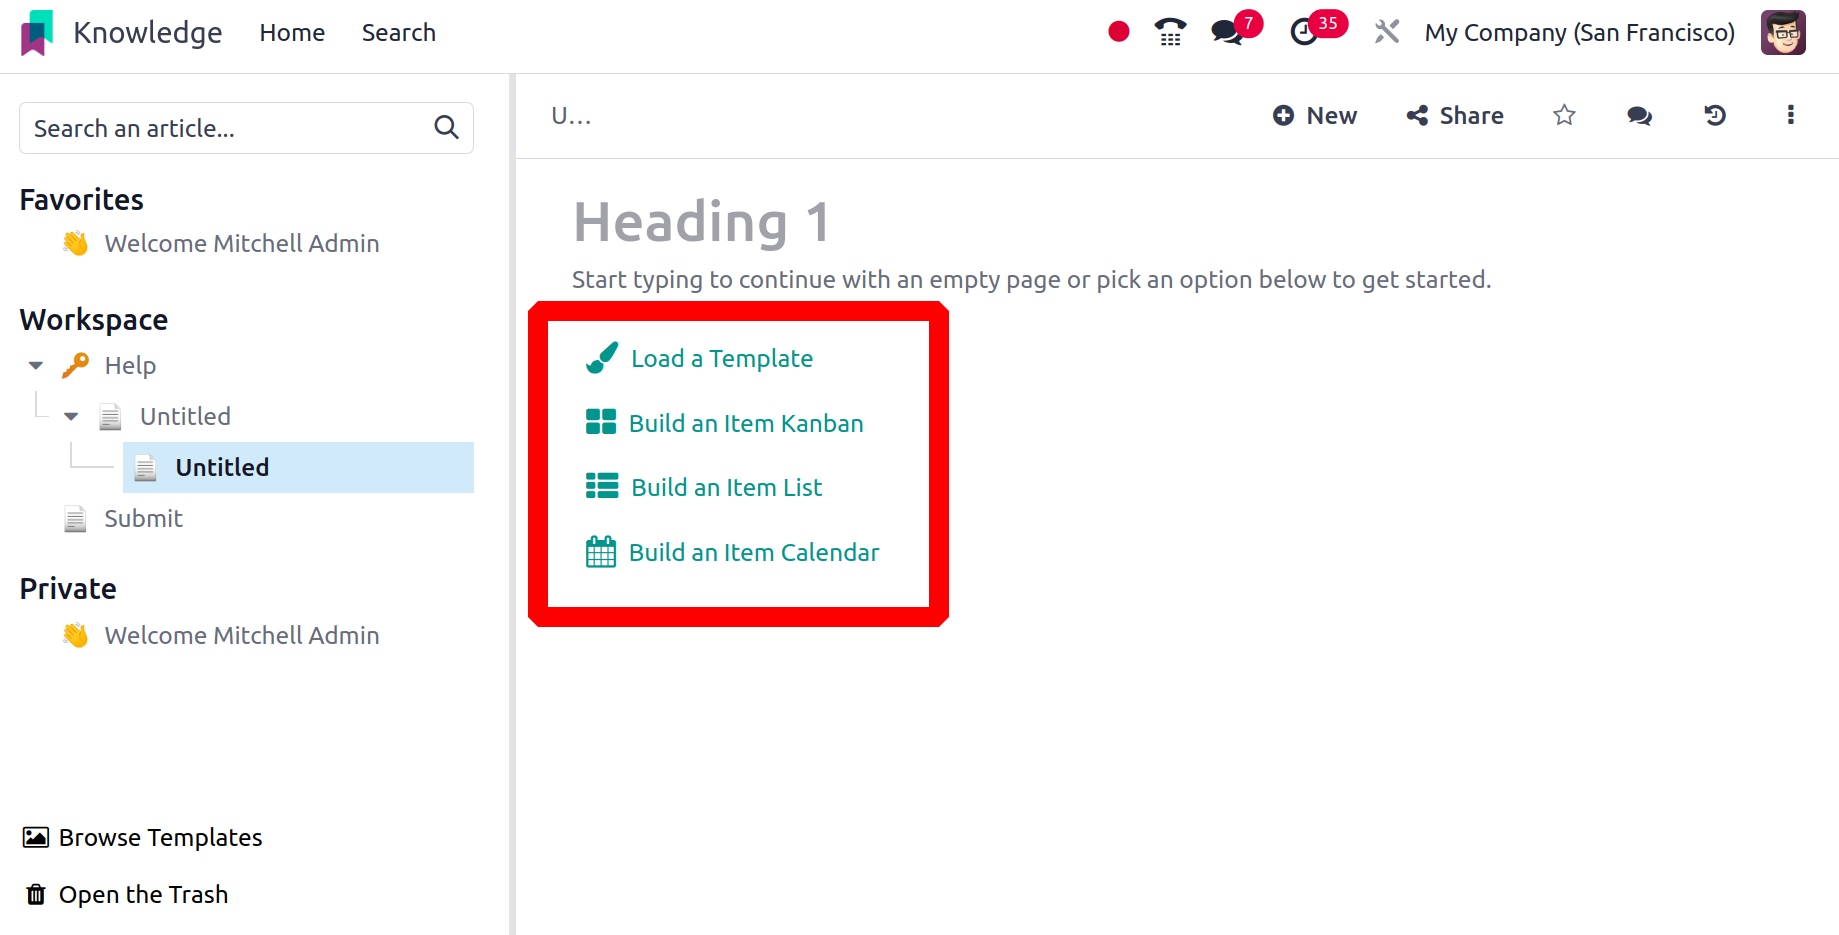
● Load Template
The Load Template option will cause a new popup to appear when clicked. The window's left
side displays templates arranged according to several categories. Users can choose a
template from the relevant category, and then click the Load Template button to add it.
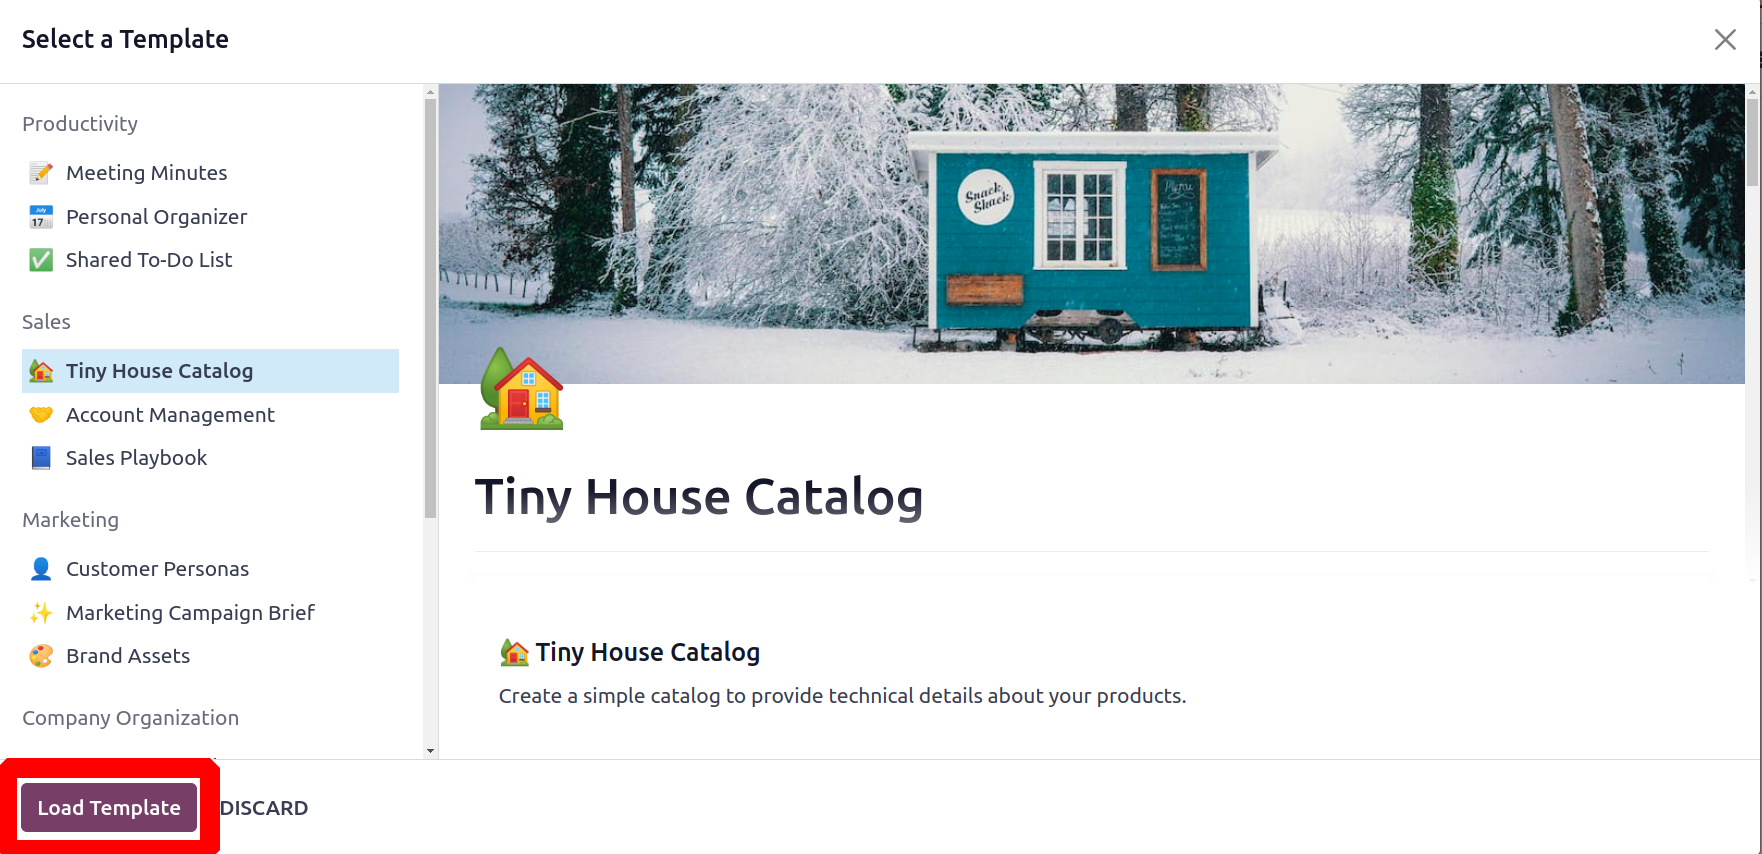
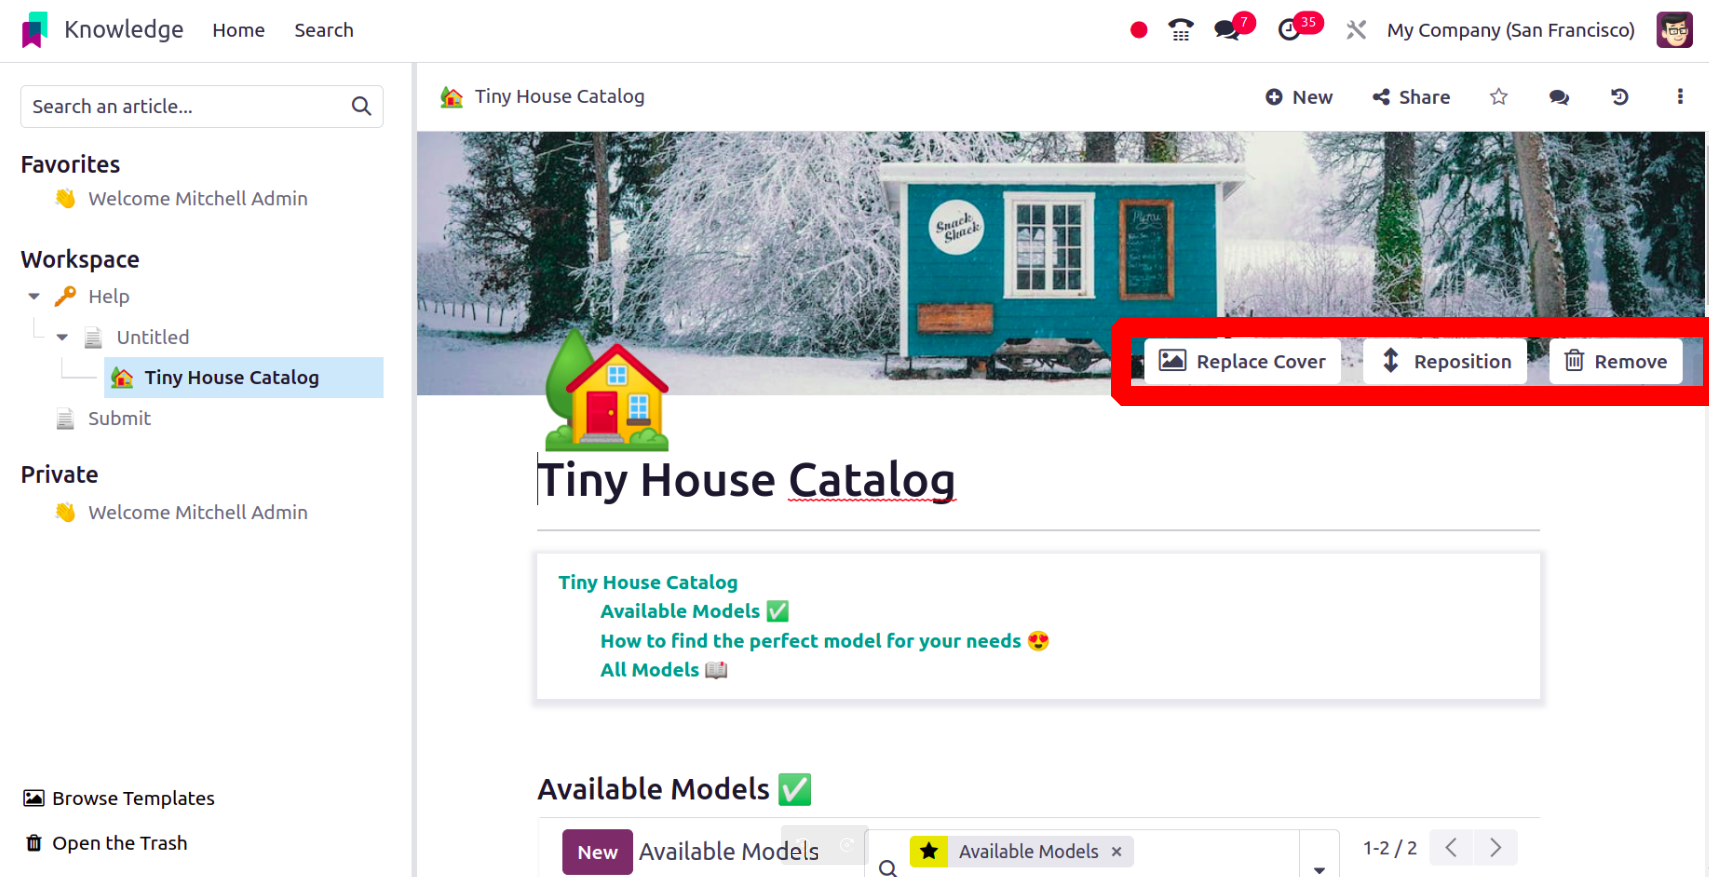
After that, the article will automatically be expanded using the chosen template. The
image can be moved, swapped out, and deleted.
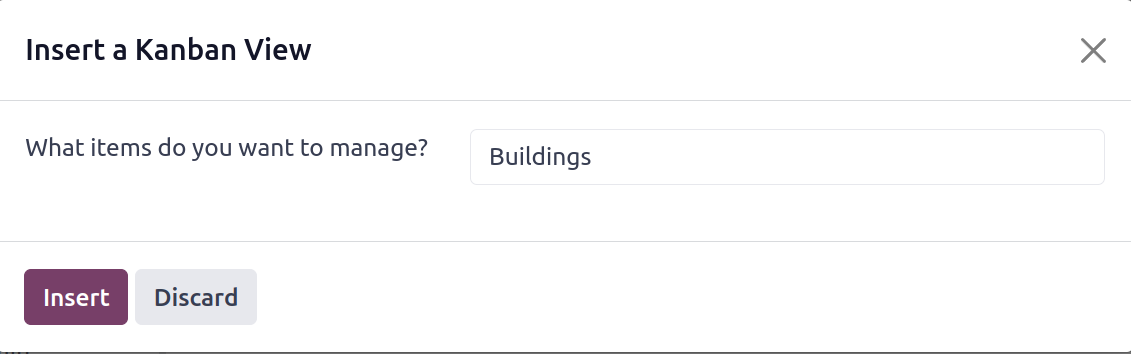
● Build an Item Kanban
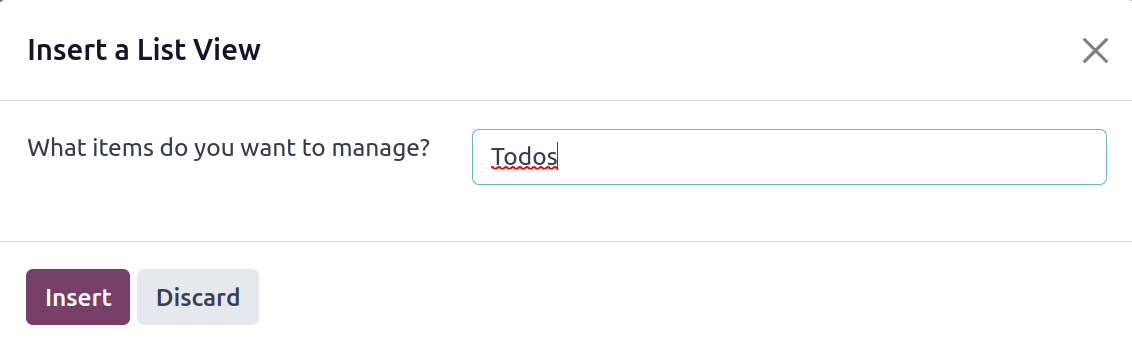
A message box asking to add the items you wish to manage will appear when you click the
Build an Item Kanban button. Thus, when you add an item, the Kanban view will also be
added based on that item. Next, press the Insert button.
The article will then include the Kanban perspective. By default, the name appears as
entered by the user in the popup window. You can use the Open button to open it in full
screen mode and rename it. Click the + symbol to add more stages to the Kanban display.
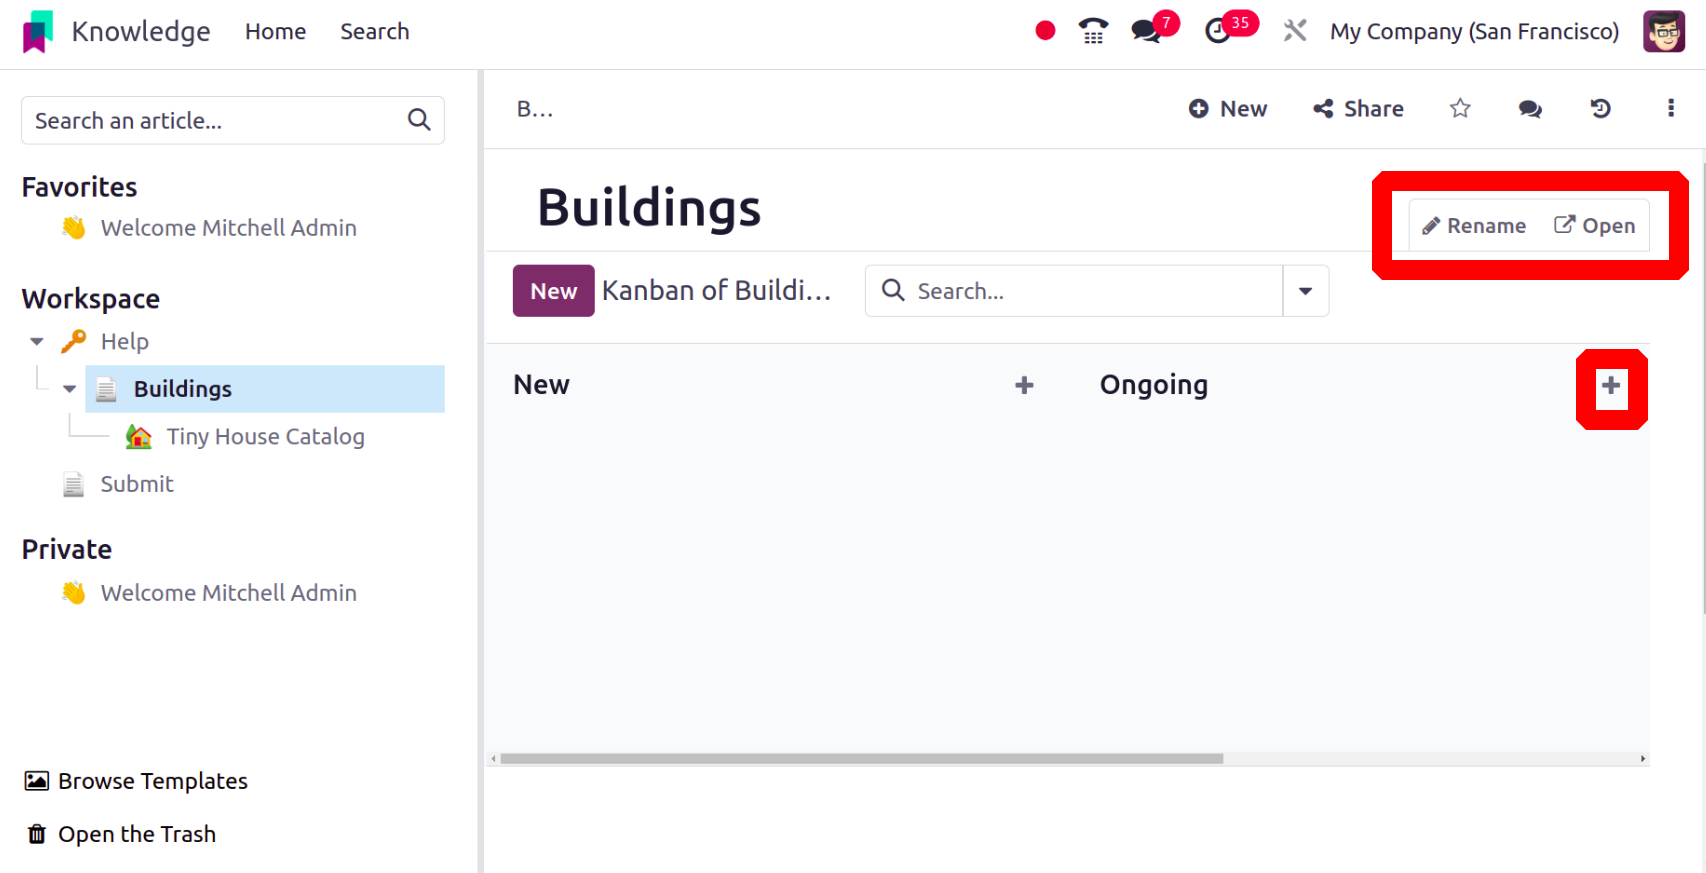
It is possible to select the Filter, Group By, and Favorite options directly from the
Search bar.
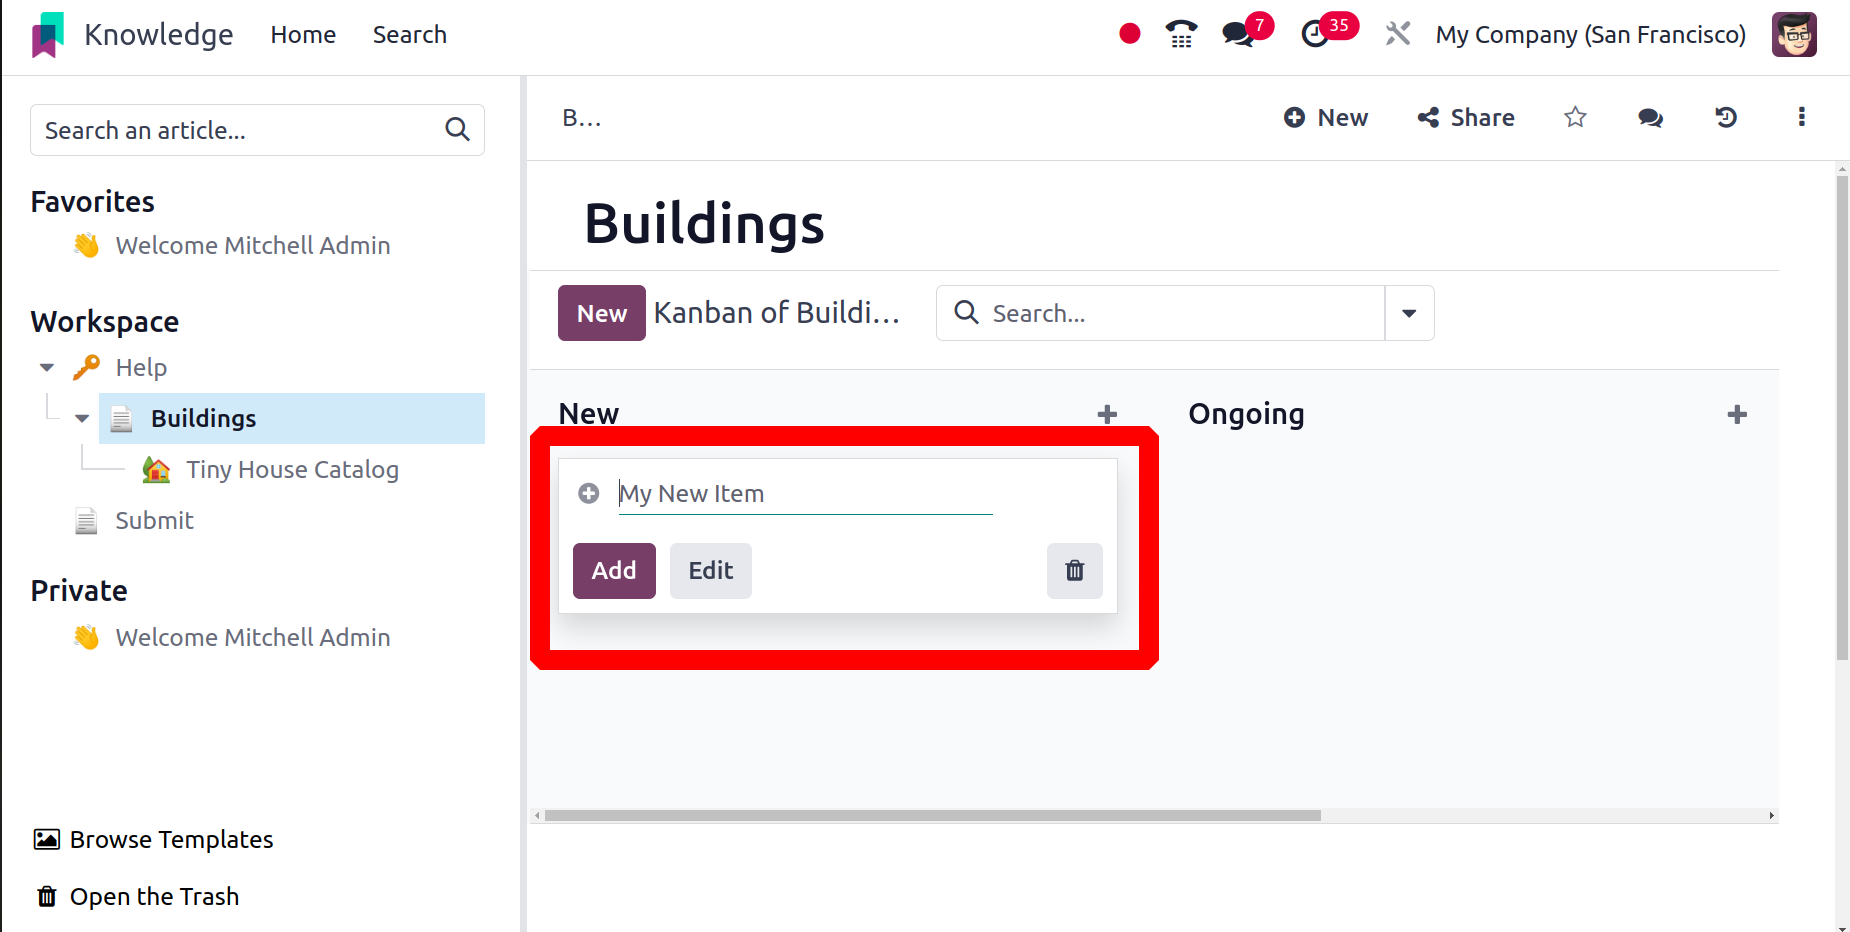
Then, to add new things, click the New button. By selecting the New button, a new item
can be added within the first stage, as demonstrated below.
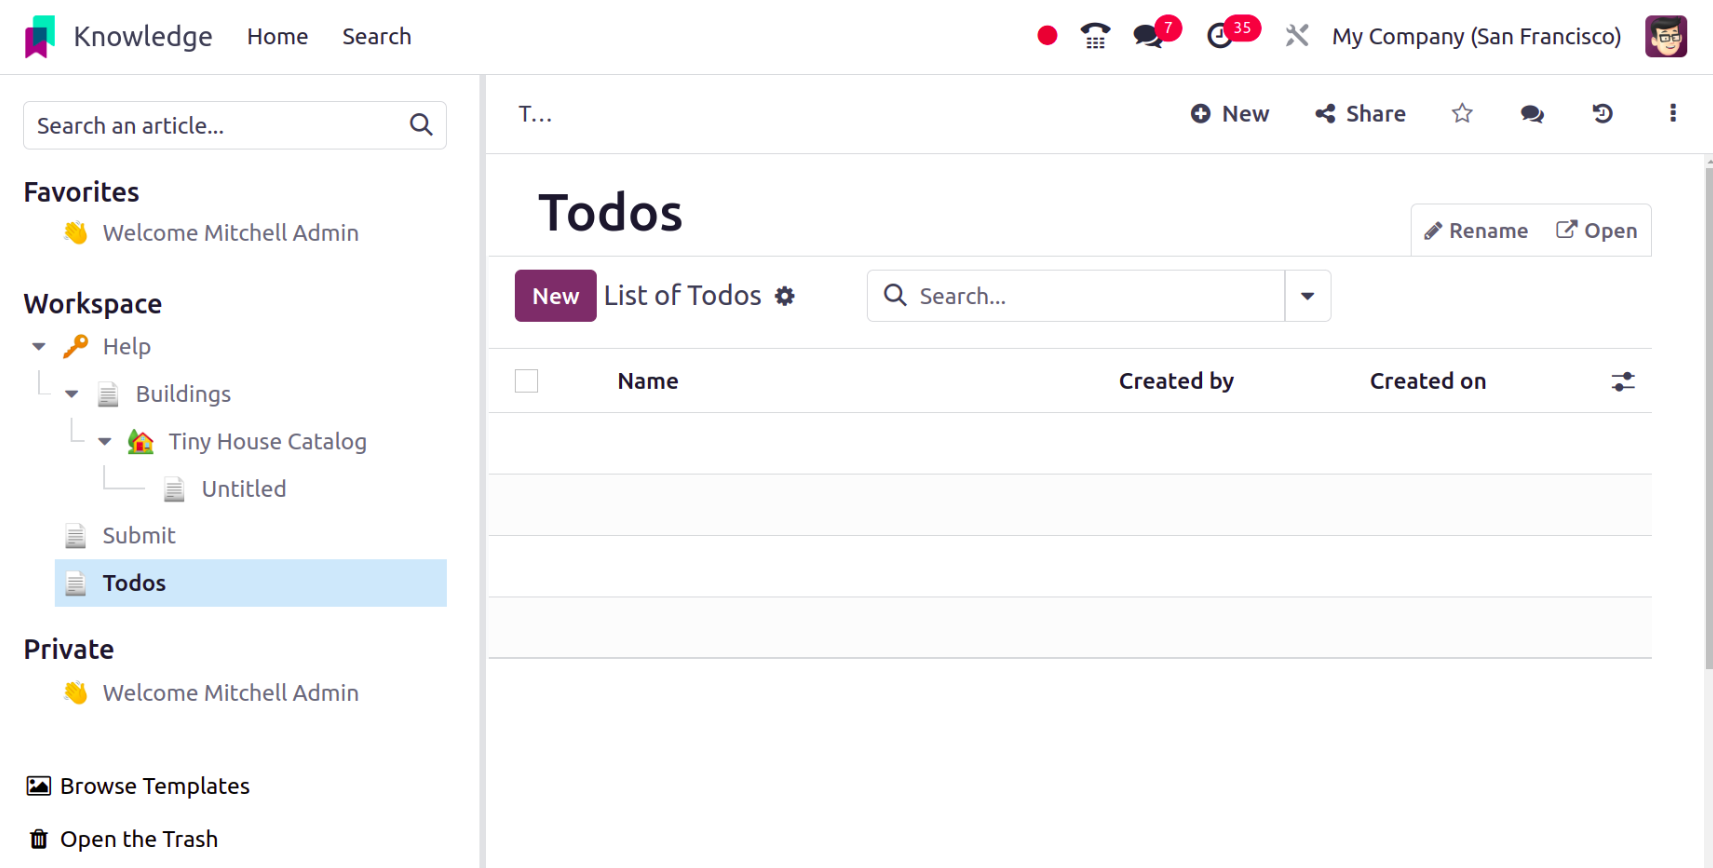
● Build an Item List
As previously noted, the item that the user wishes to add can be mentioned inside the
popup box to add a new list view. Next, press the Insert button.
There, a listview was constructed that could be renamed and opened in full-screen mode.
You can add new things by clicking the New button. This screen also displays the Search,
Group By, and Favorite choices.
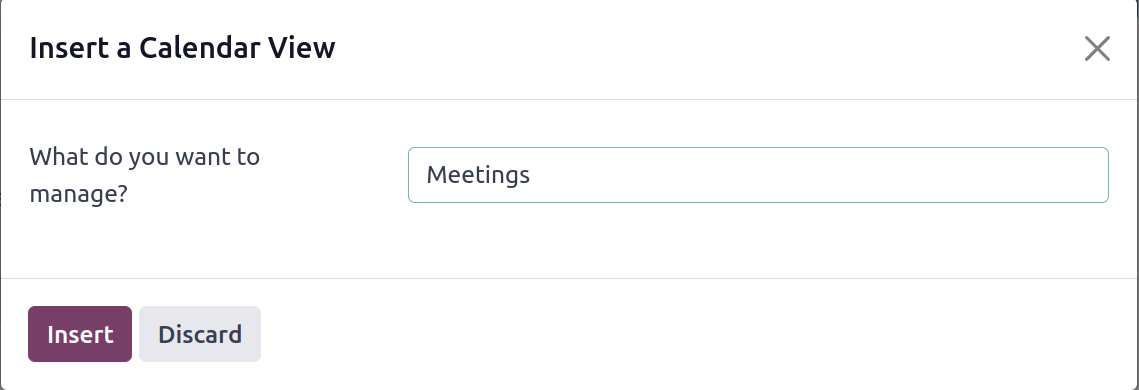
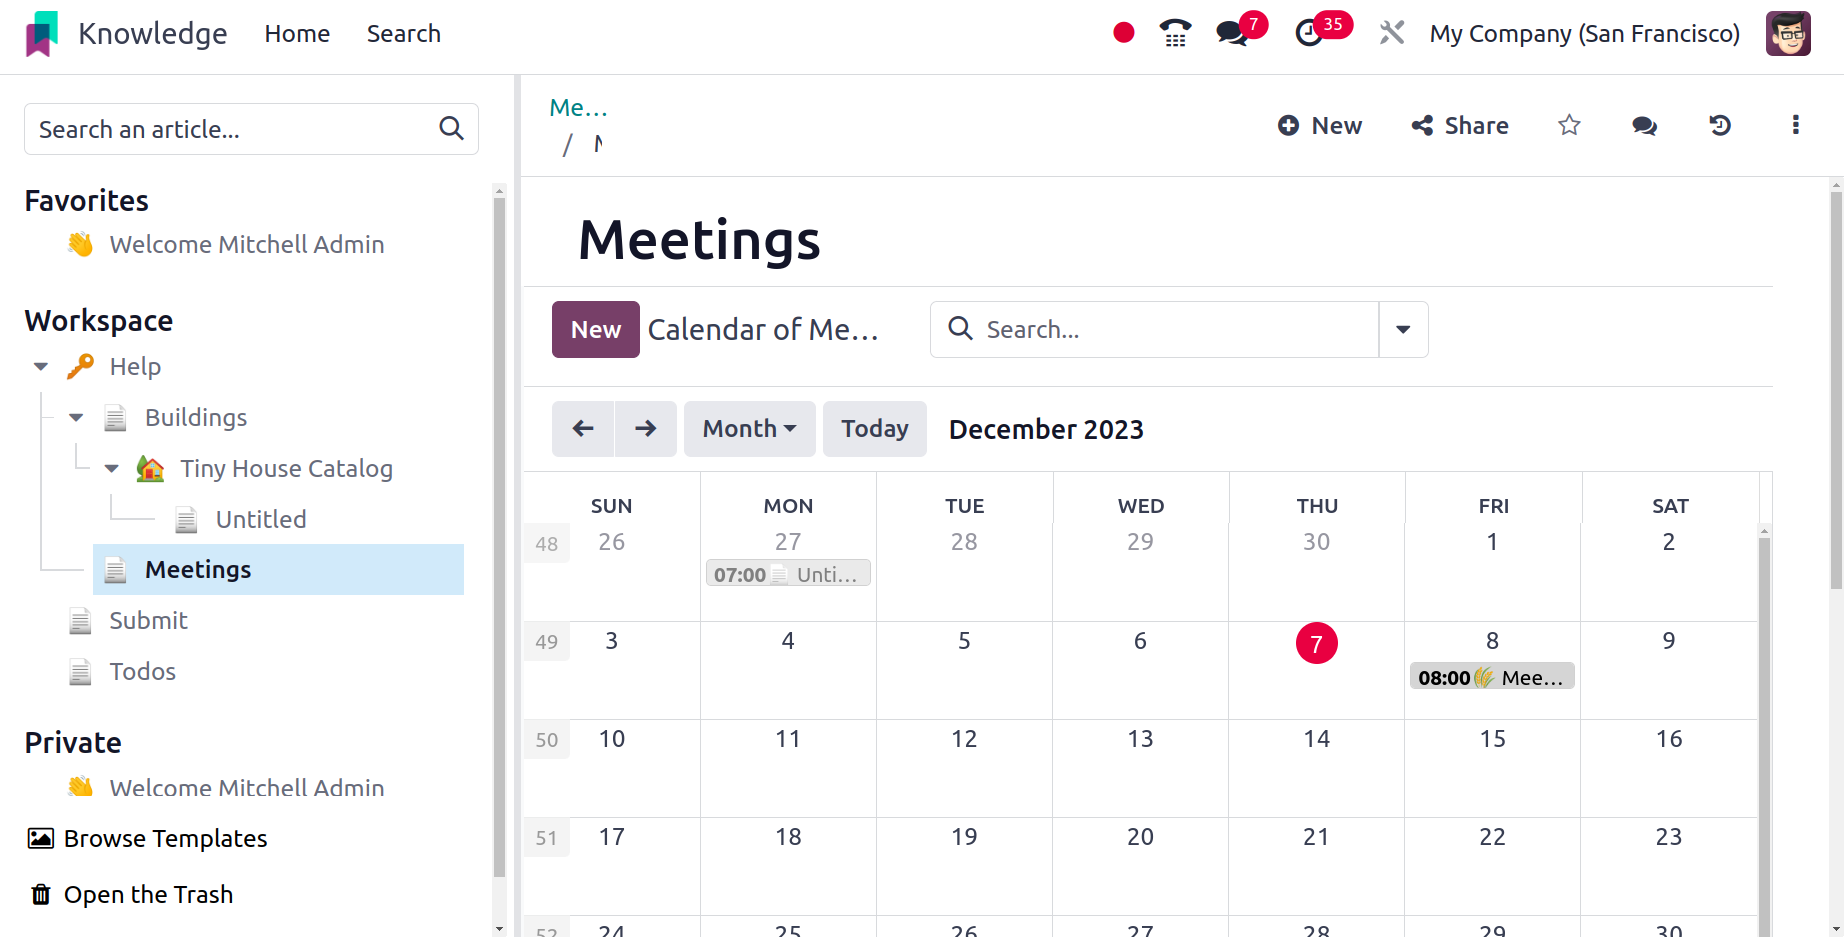
● Build an Item Calendar
Similar to inserting a list view or kanban view, the user must first specify which
item(s) they wish to manage. The Calendar will show based on the newly inserted item.
After that, press the Insert button.
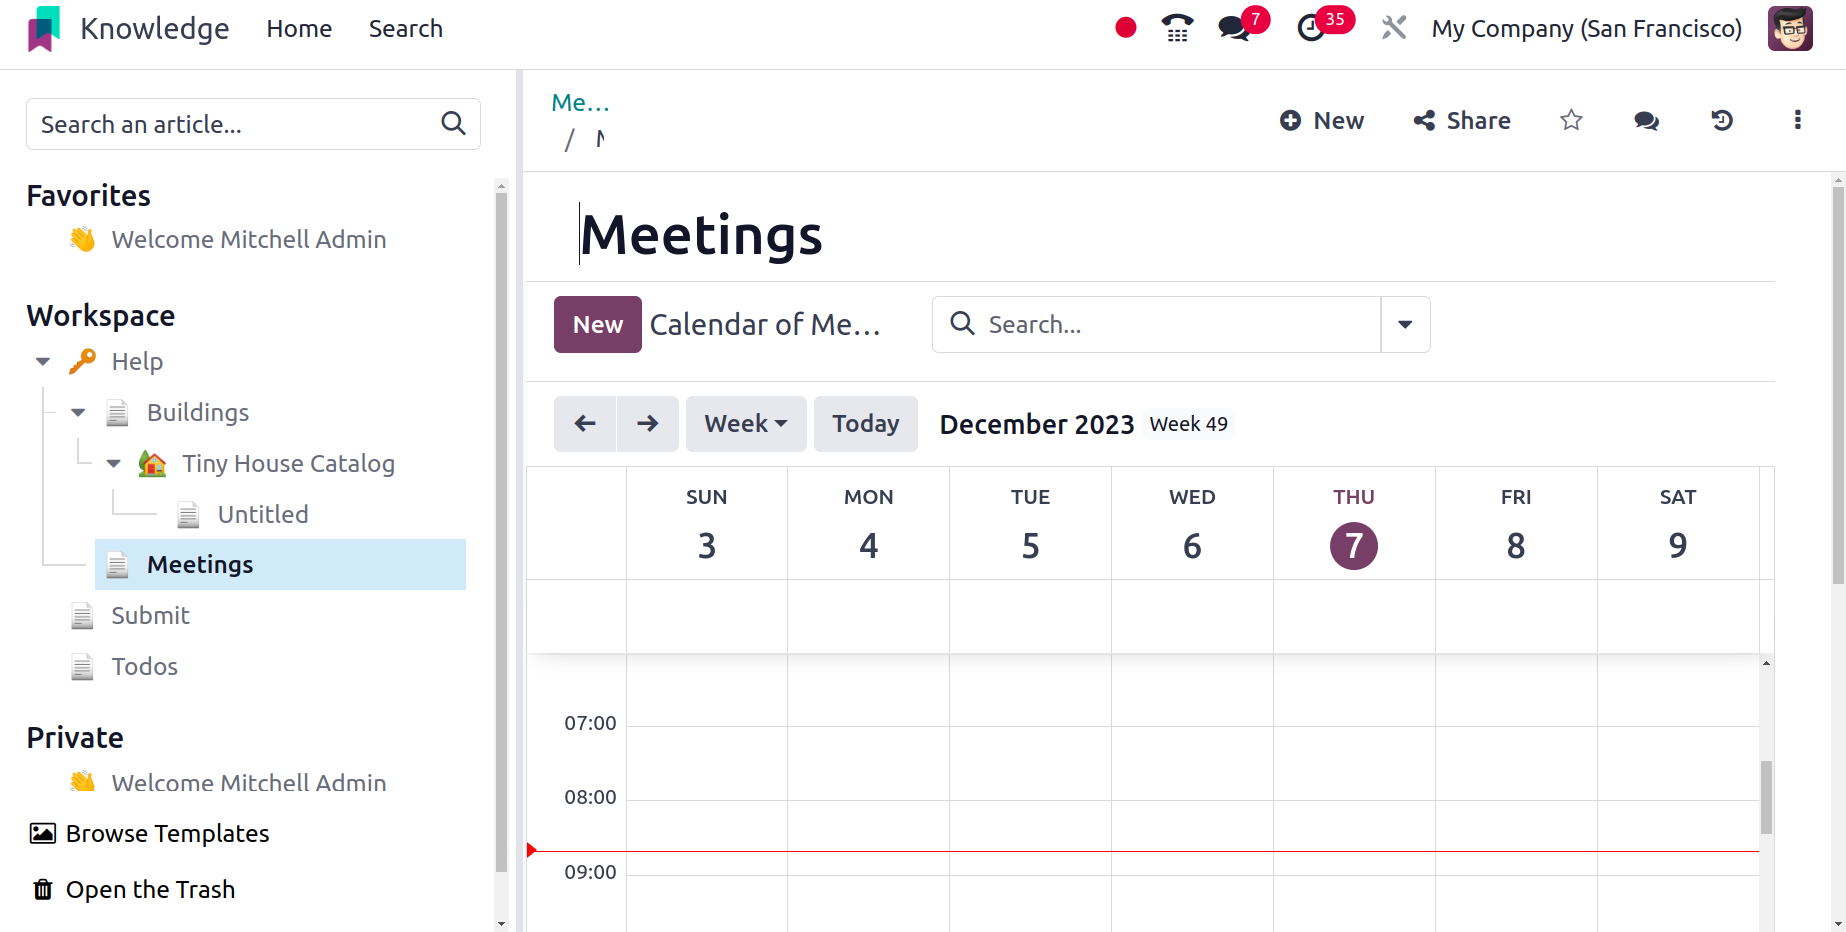
After that, a fresh calendar will show up on the screen. The calendar view can be
customized to appear daily, monthly, or annually. Click the New button to add a new
meeting.
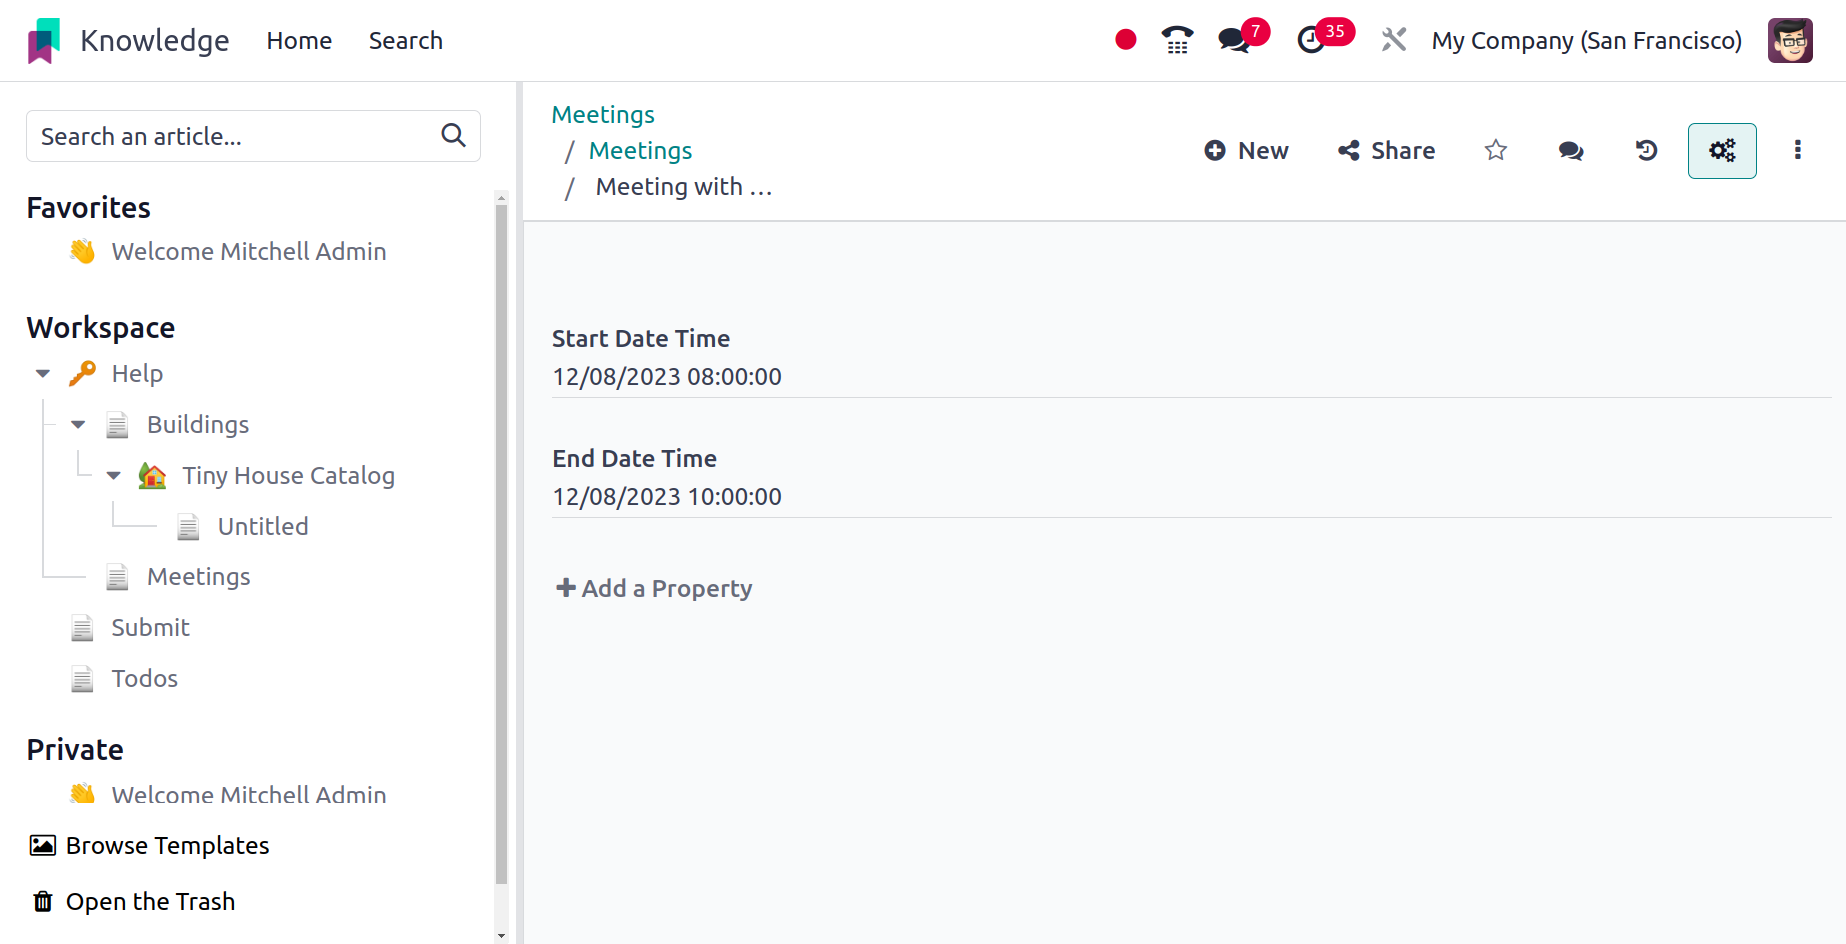
Next, state the title, as well as the start and end dates and times. The Add Properties
button can be used to add properties.
The generated meeting will show up on the calendar with the additional icon and image
after it has been saved.
A title can be added to the article. The Cover image, icon, and properties can be added
to that new article.
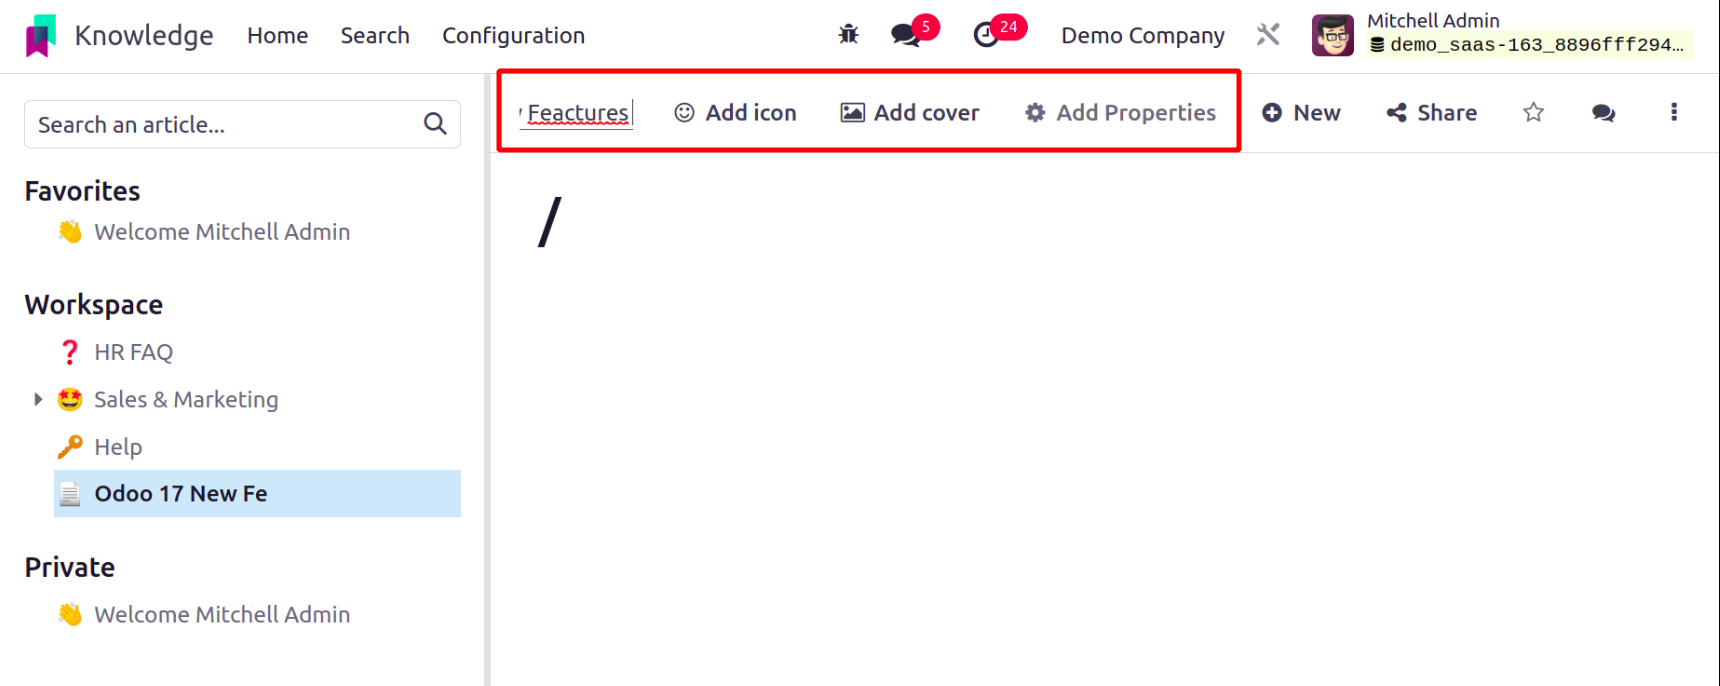
You may improve your writing while adding content to your article by using the / icon,
which offers several alternatives.
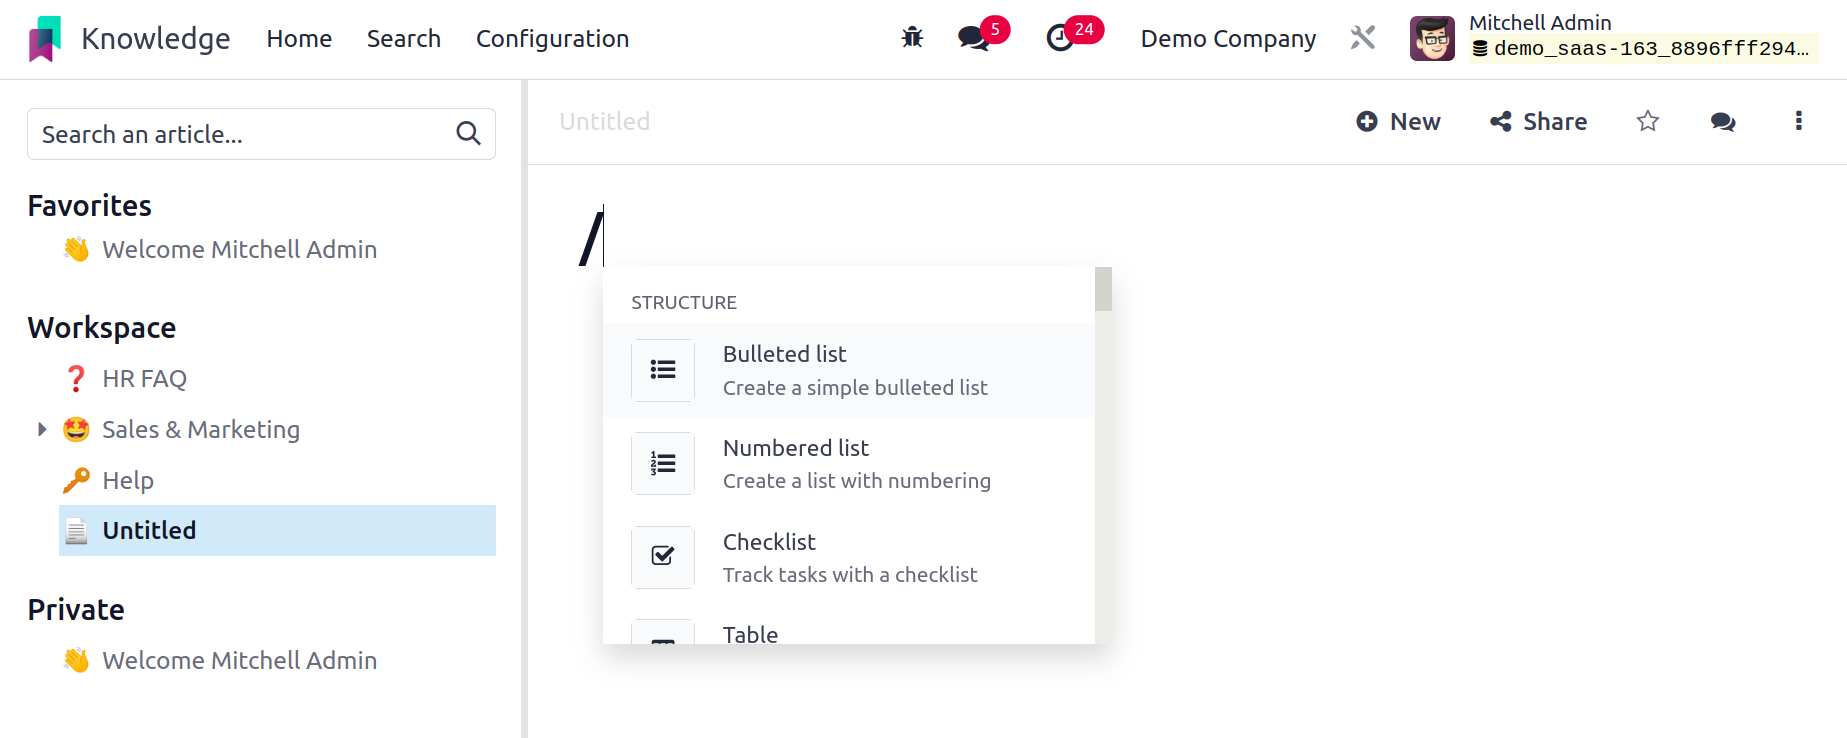
Users can add various structures, such as a bullet list, numbered list, checklist, table,
separator, quote, and columns, while the / appended.
After that, you can add an info banner by selecting Banner Info in the Banners section.
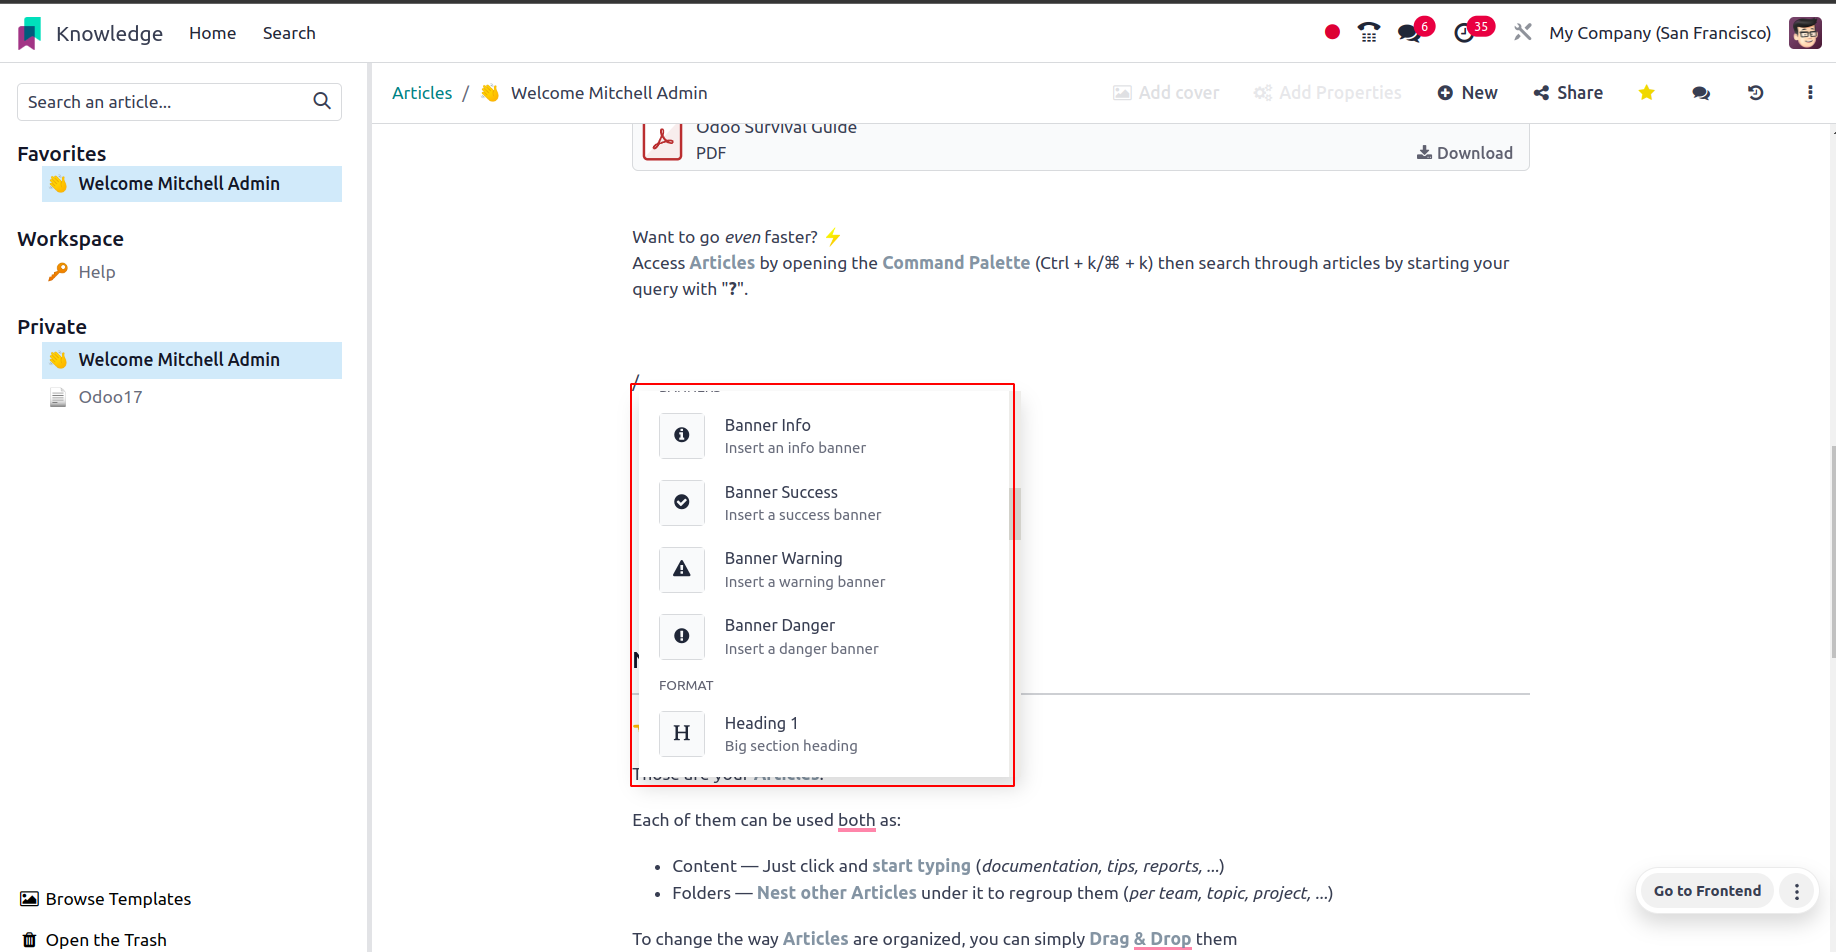
You can add a success banner by using Banner Success. You can insert a victory banner by
using Banner Warning.

You can add a risk banner by using Banner Danger.
Using this / icon, you can add media like videos, images, and articles after the headings
and text.
Within the article, widgets such as stars and emoticons can be inserted.

With ChatGpt, an artificial intelligence tool, content may now be added.
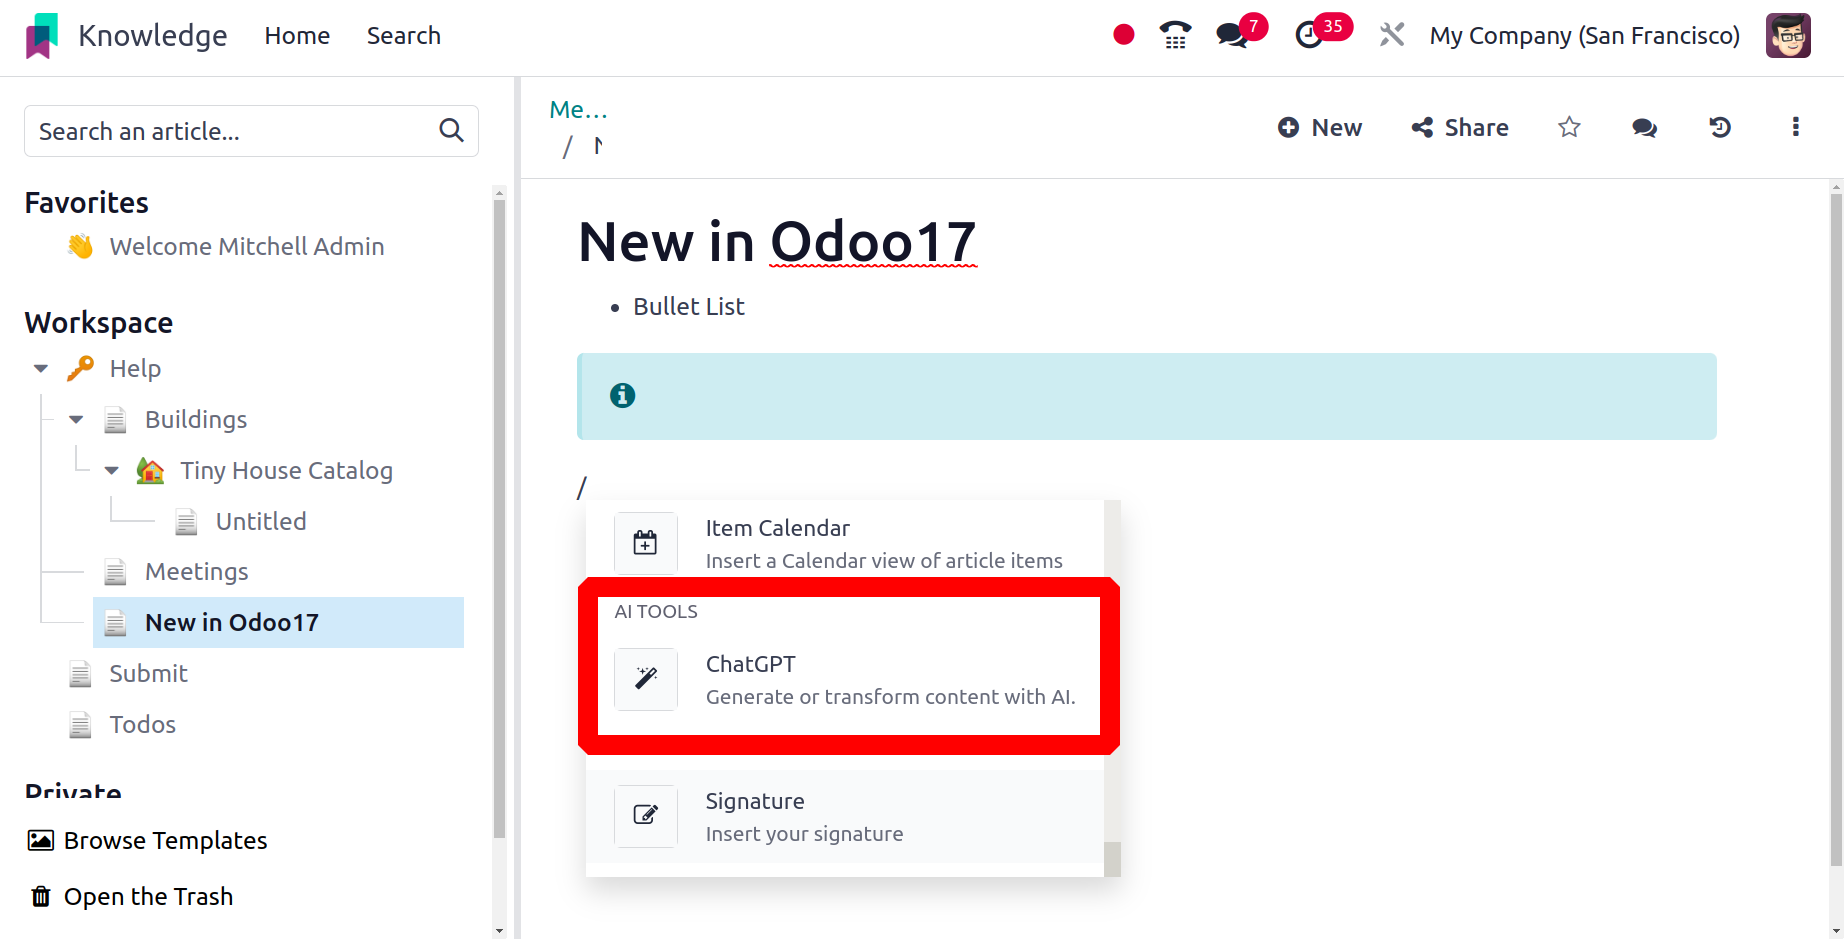
Then the topic needed can be added to the search section, then the content can be added
to the article.
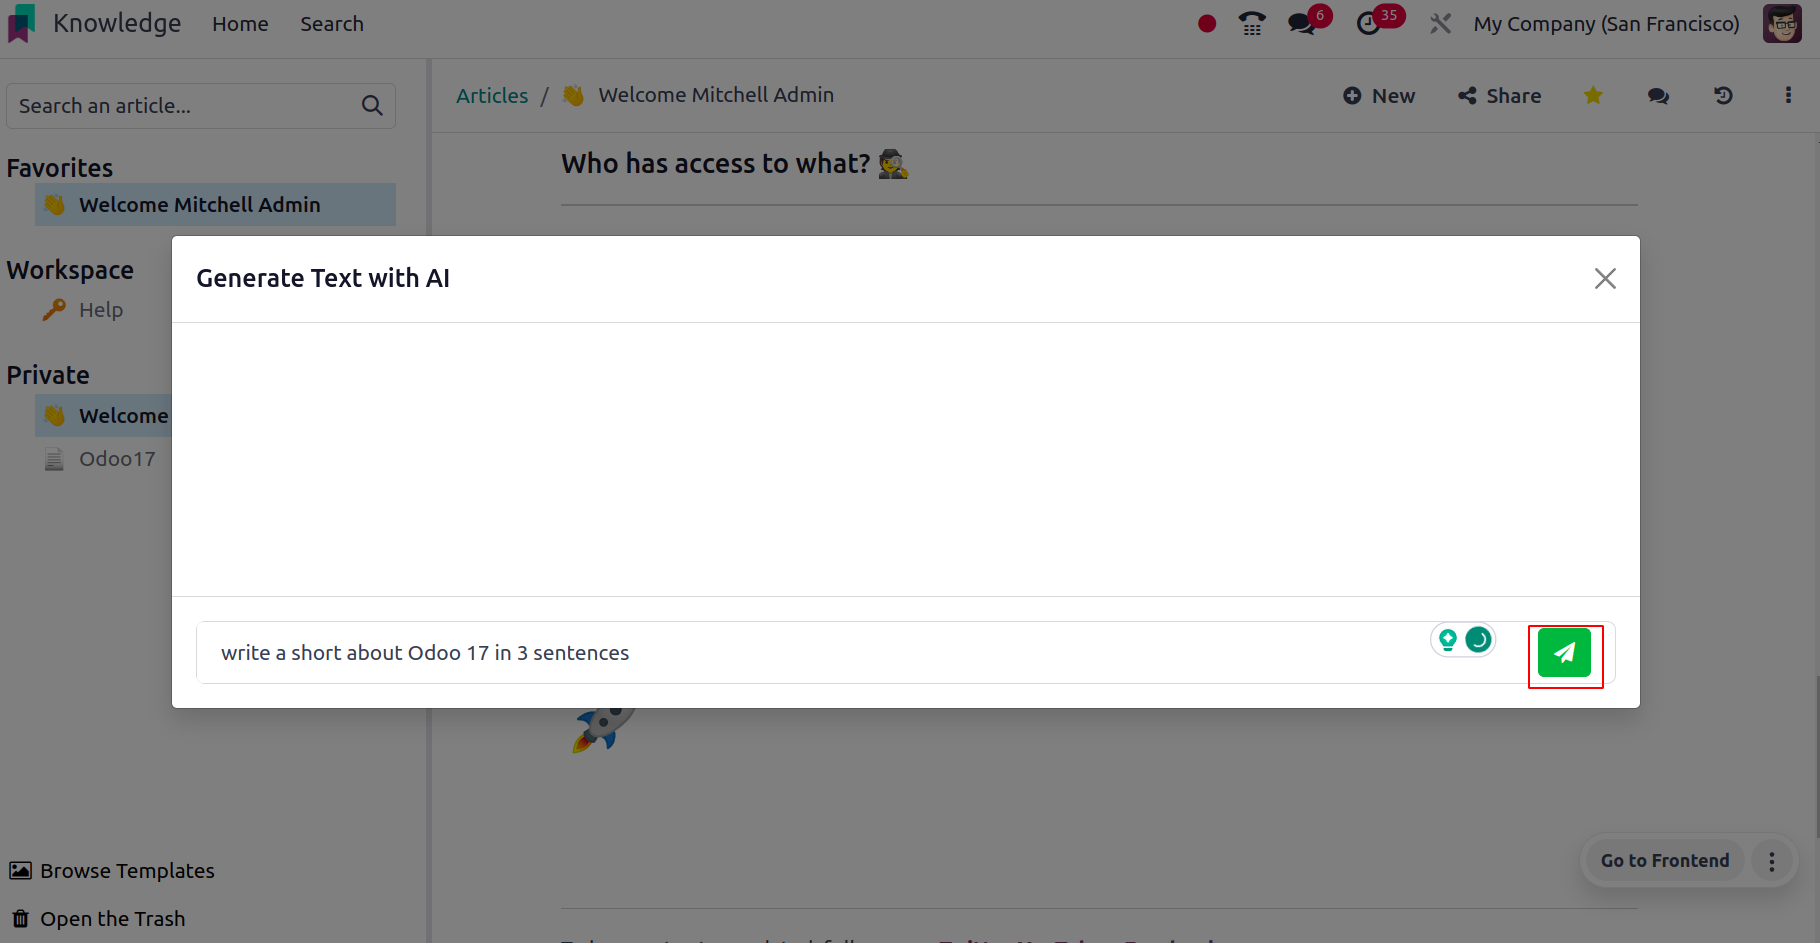
The content will be generated by the AI.
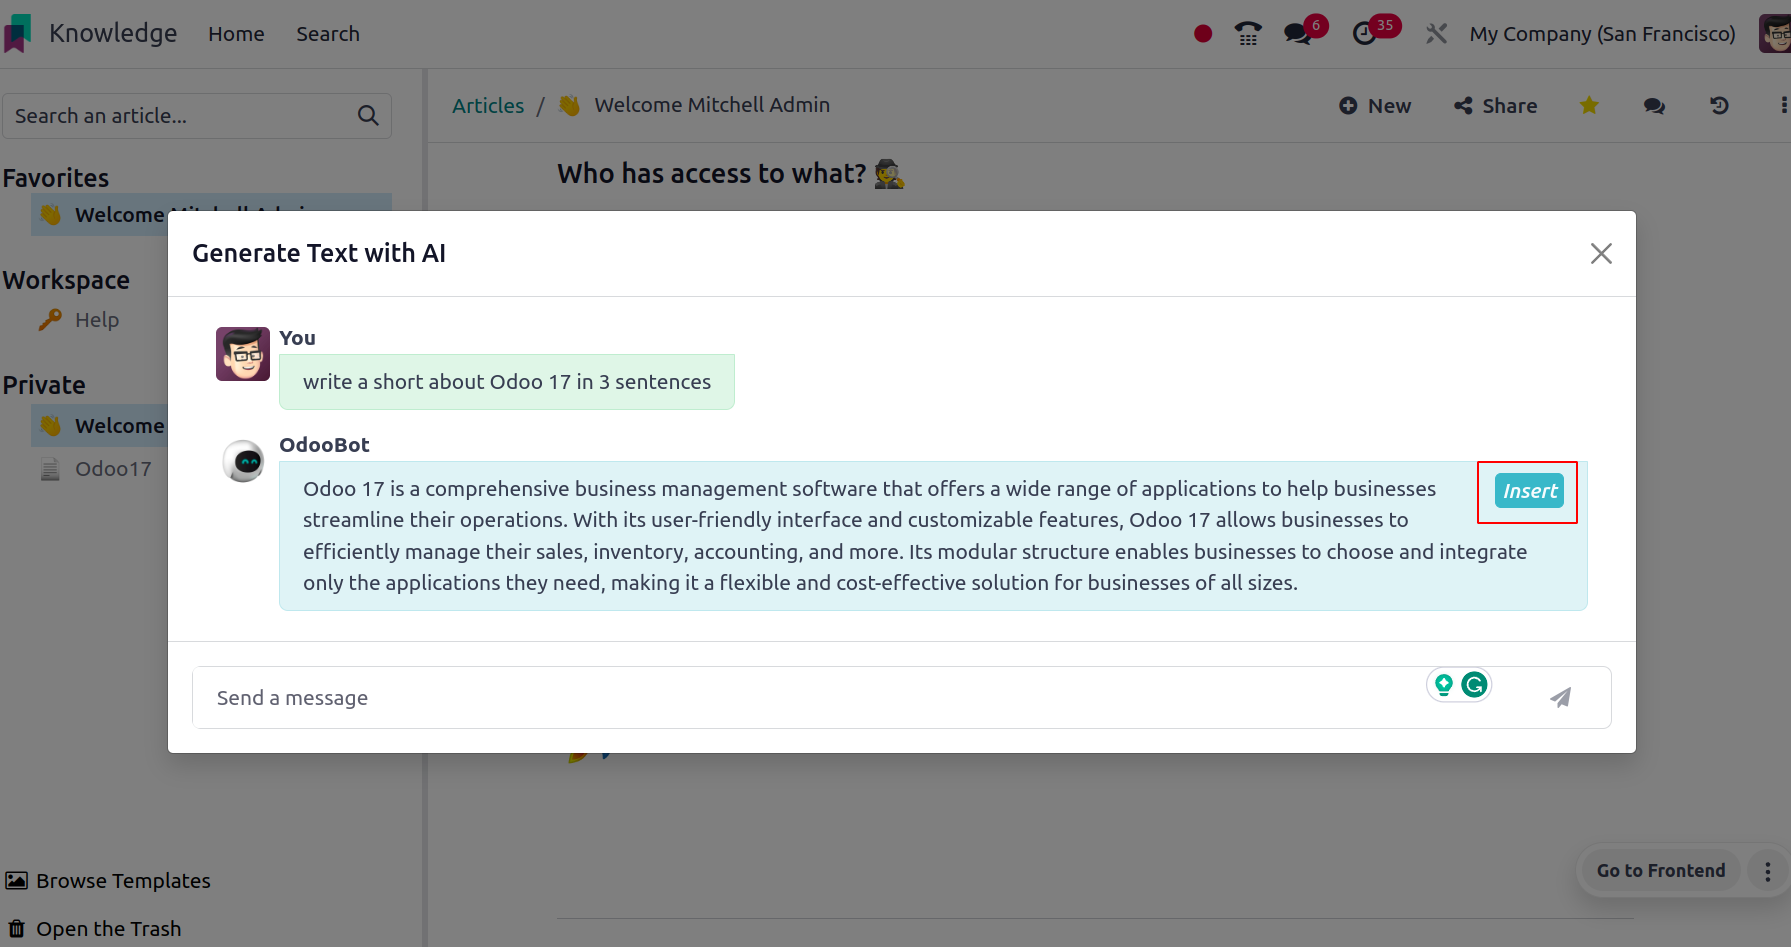
The Insert option inserts the content to the article at the required position.
You can use the + New icon in the same way to create a nested article under a parent
article.
Using the star icon, you can mark an article as a favorite after it has been created.
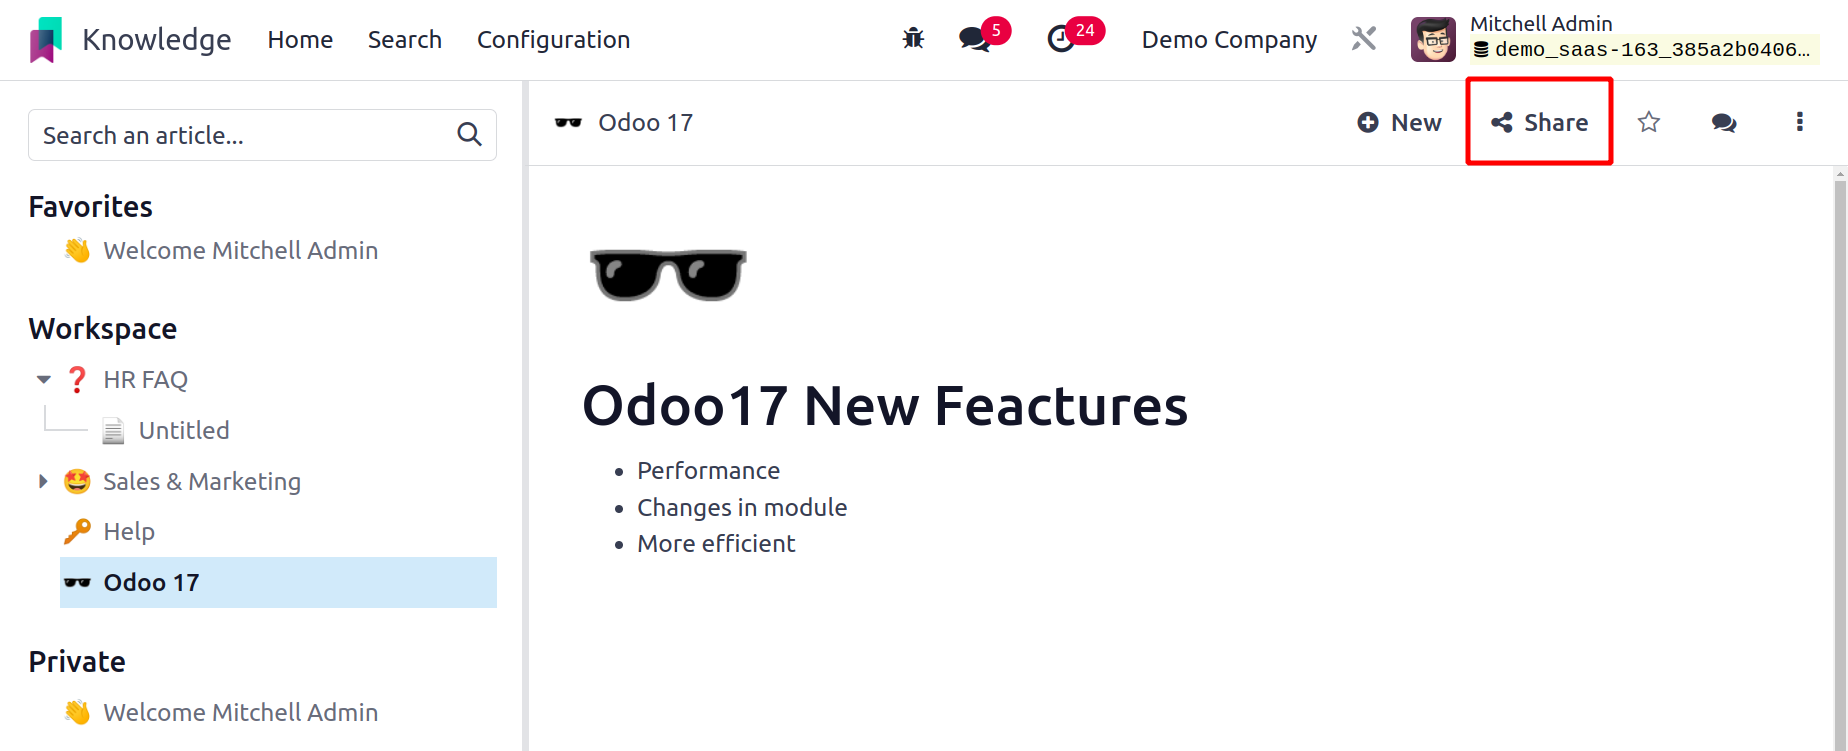
Sharing Articles
The Workspace platform article will be accessible to all database internal users. Setting
access permissions for a Knowledge Module article is simple. Once the article is
finished, you can click the Share button located in the upper-right corner of the
screen.
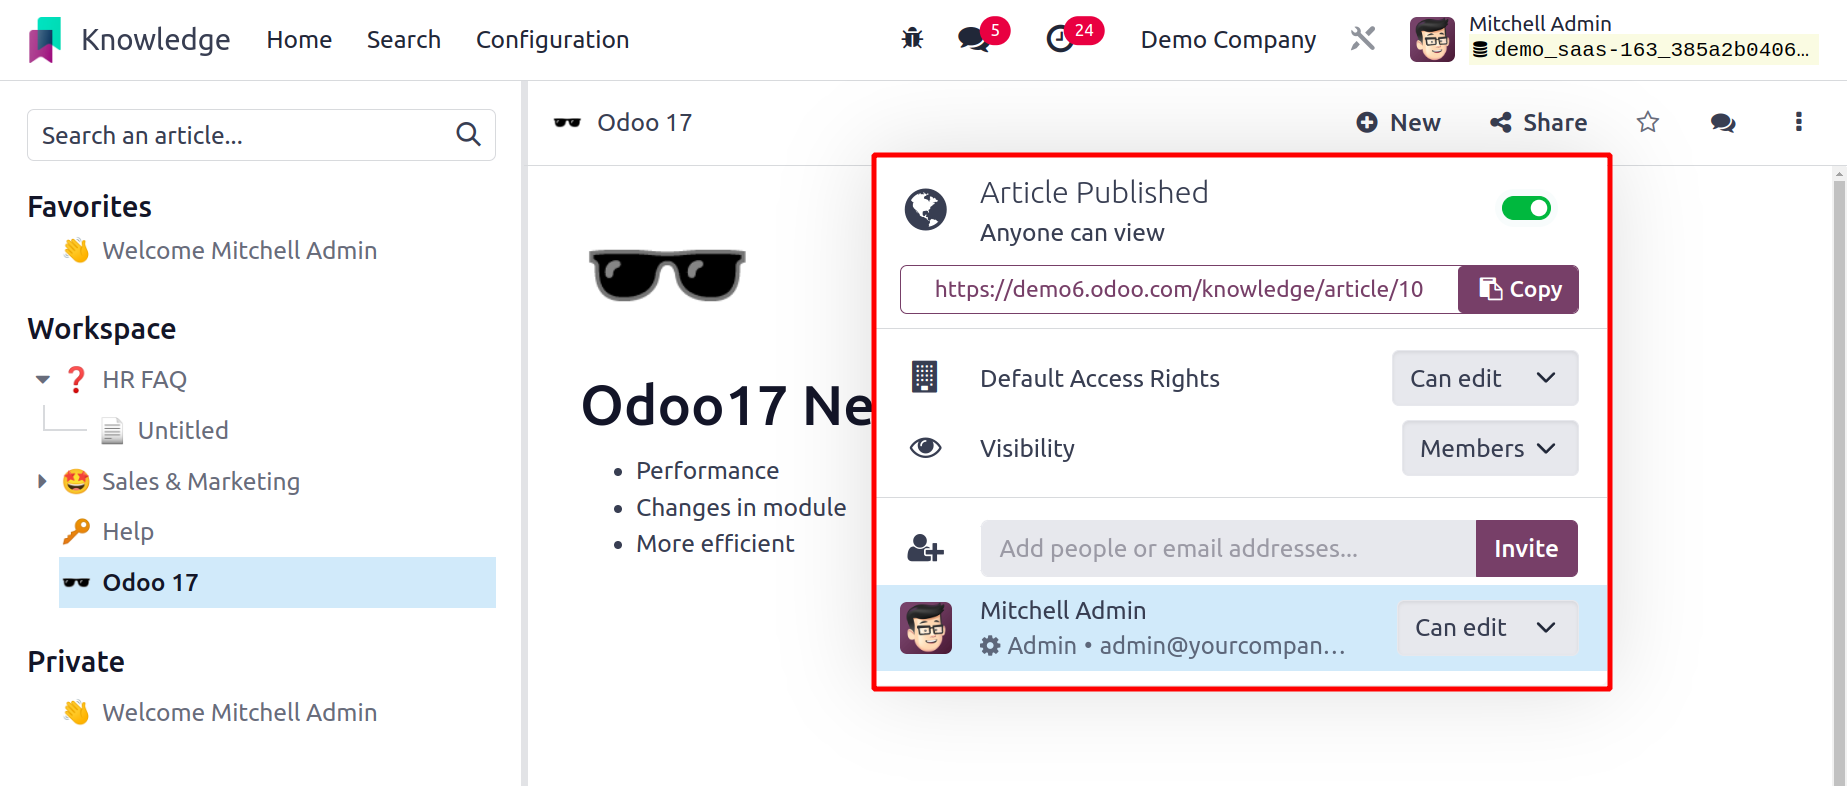
You can share the article with everyone by publishing it on the website and activating
the Share to Web option.
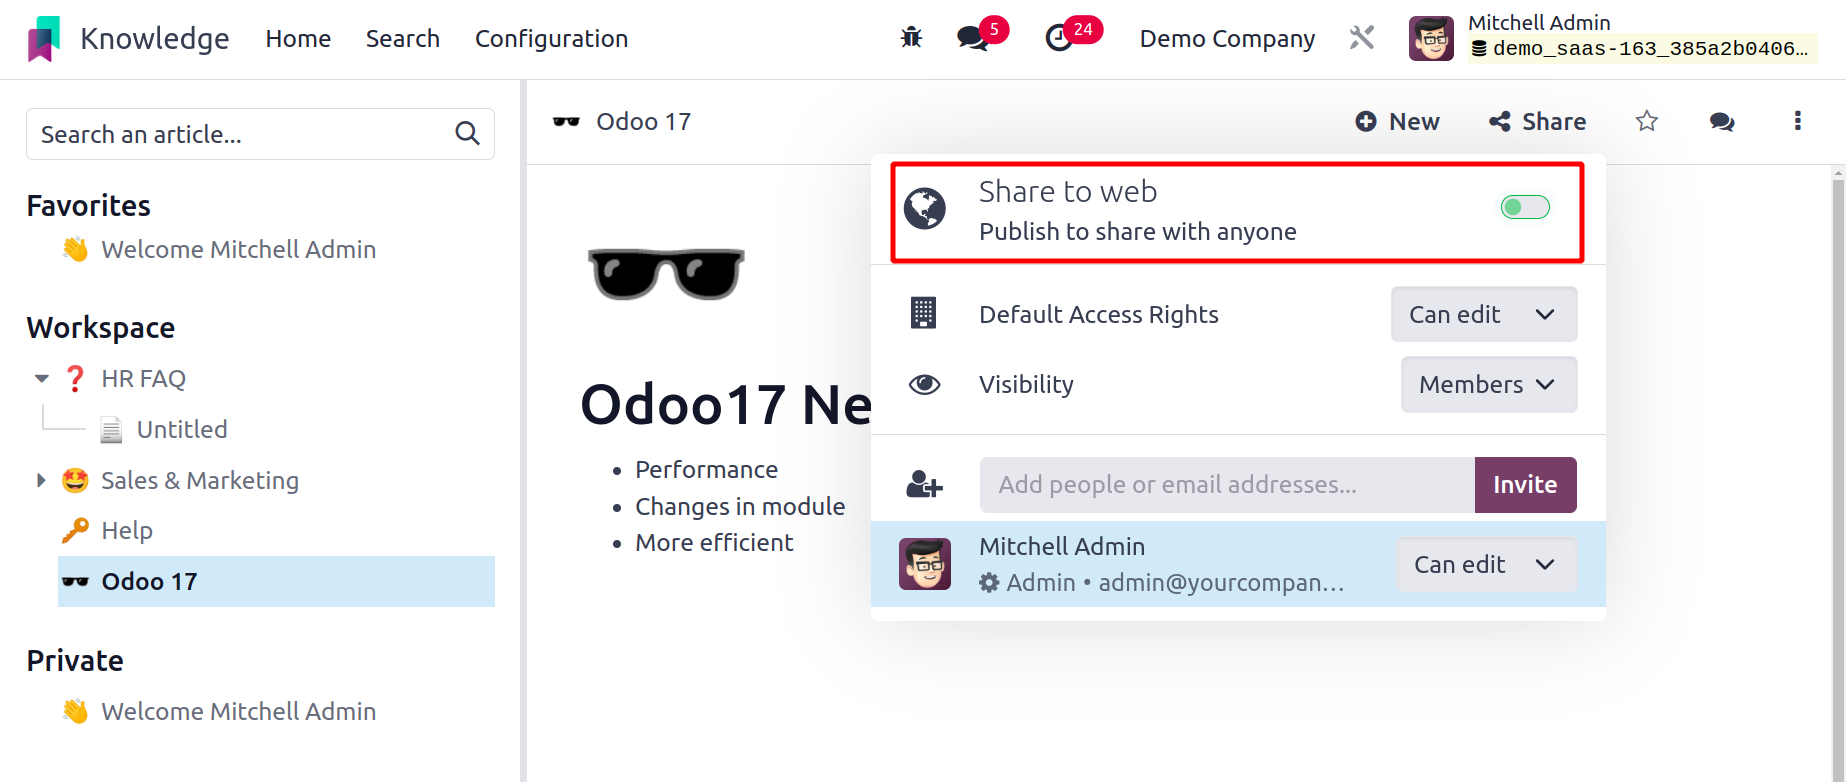
An article link will be sent to you, which you may copy and post to other platforms. The
Invite button can also be used to extend an invitation to readers or editors of the
article.
As seen here, a new wizard will emerge.
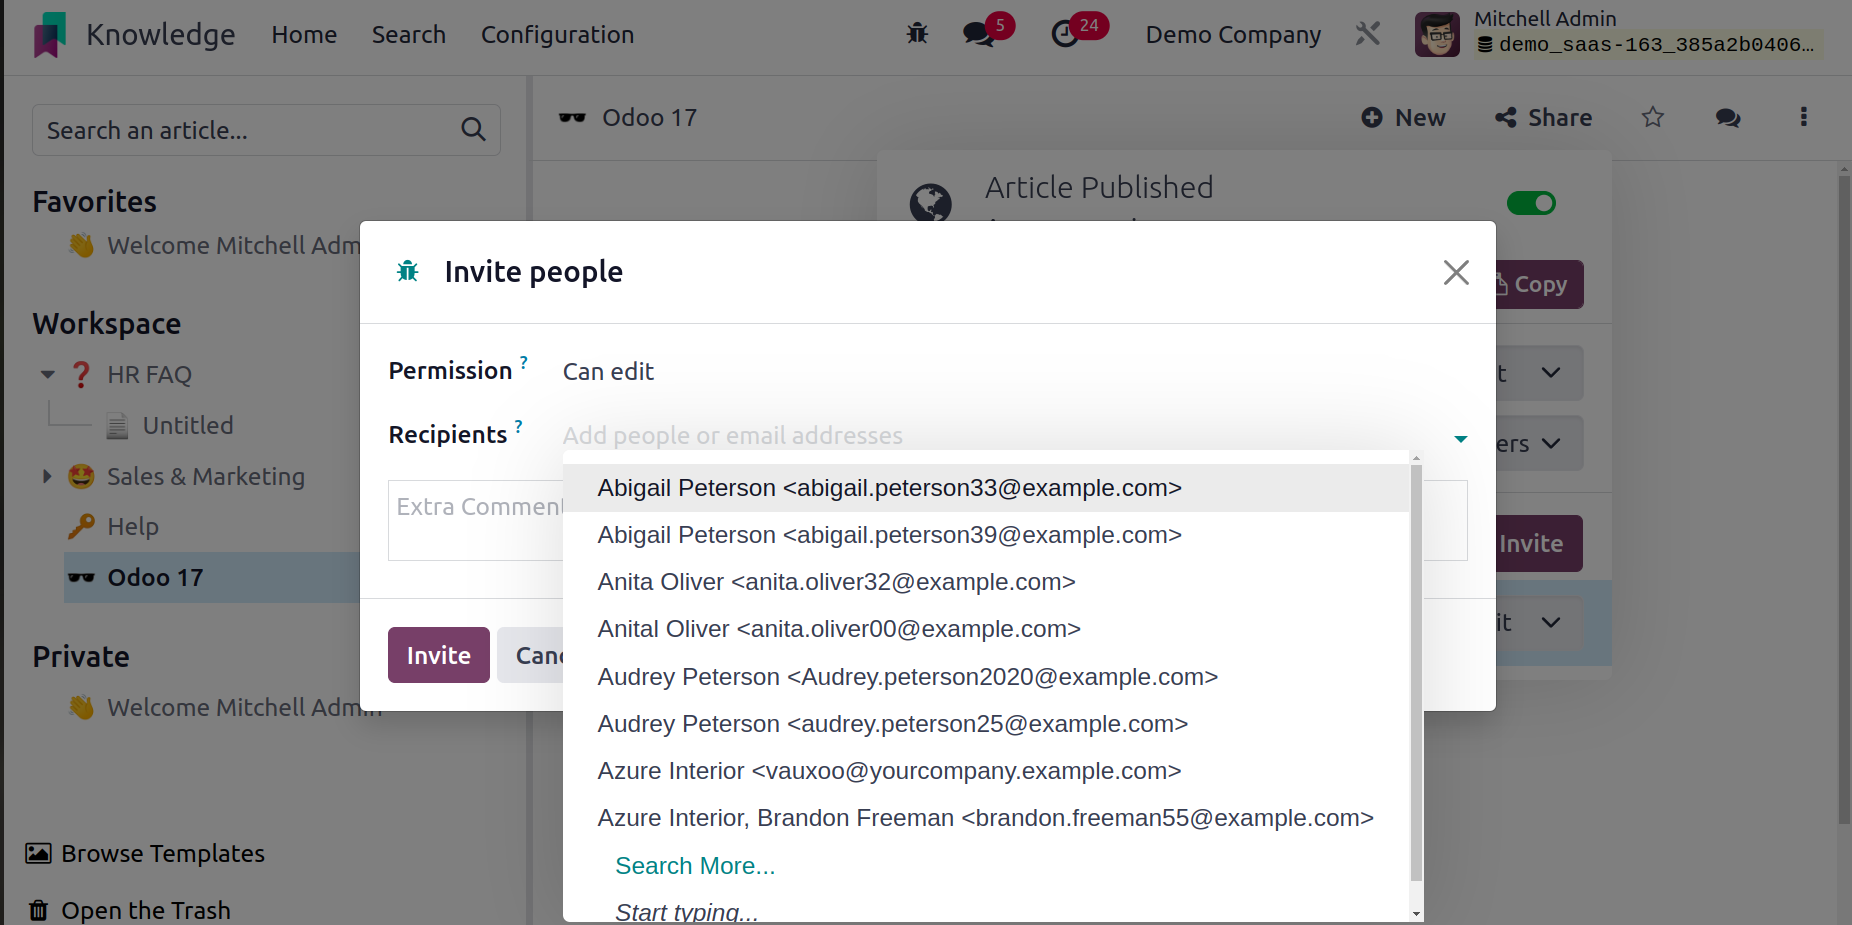
You can configure users' access rights when you invite them. You can check the Can Read
option in the Permission column if you wish to prevent editing of any type and grant
reading access only. Users will be able to edit and read the article by choosing the Can
Write option. By choosing the No Access option, the aforementioned users will not be
able to edit or see this article.
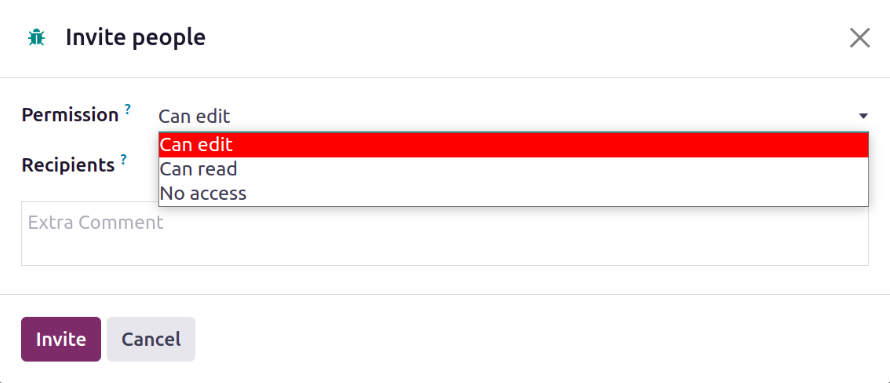
You can invite the users by clicking on the Invite button after stating them in the
Recipients area. The list of users who have access to this post will now be displayed
when you click the Share button, as seen in the screenshot below.
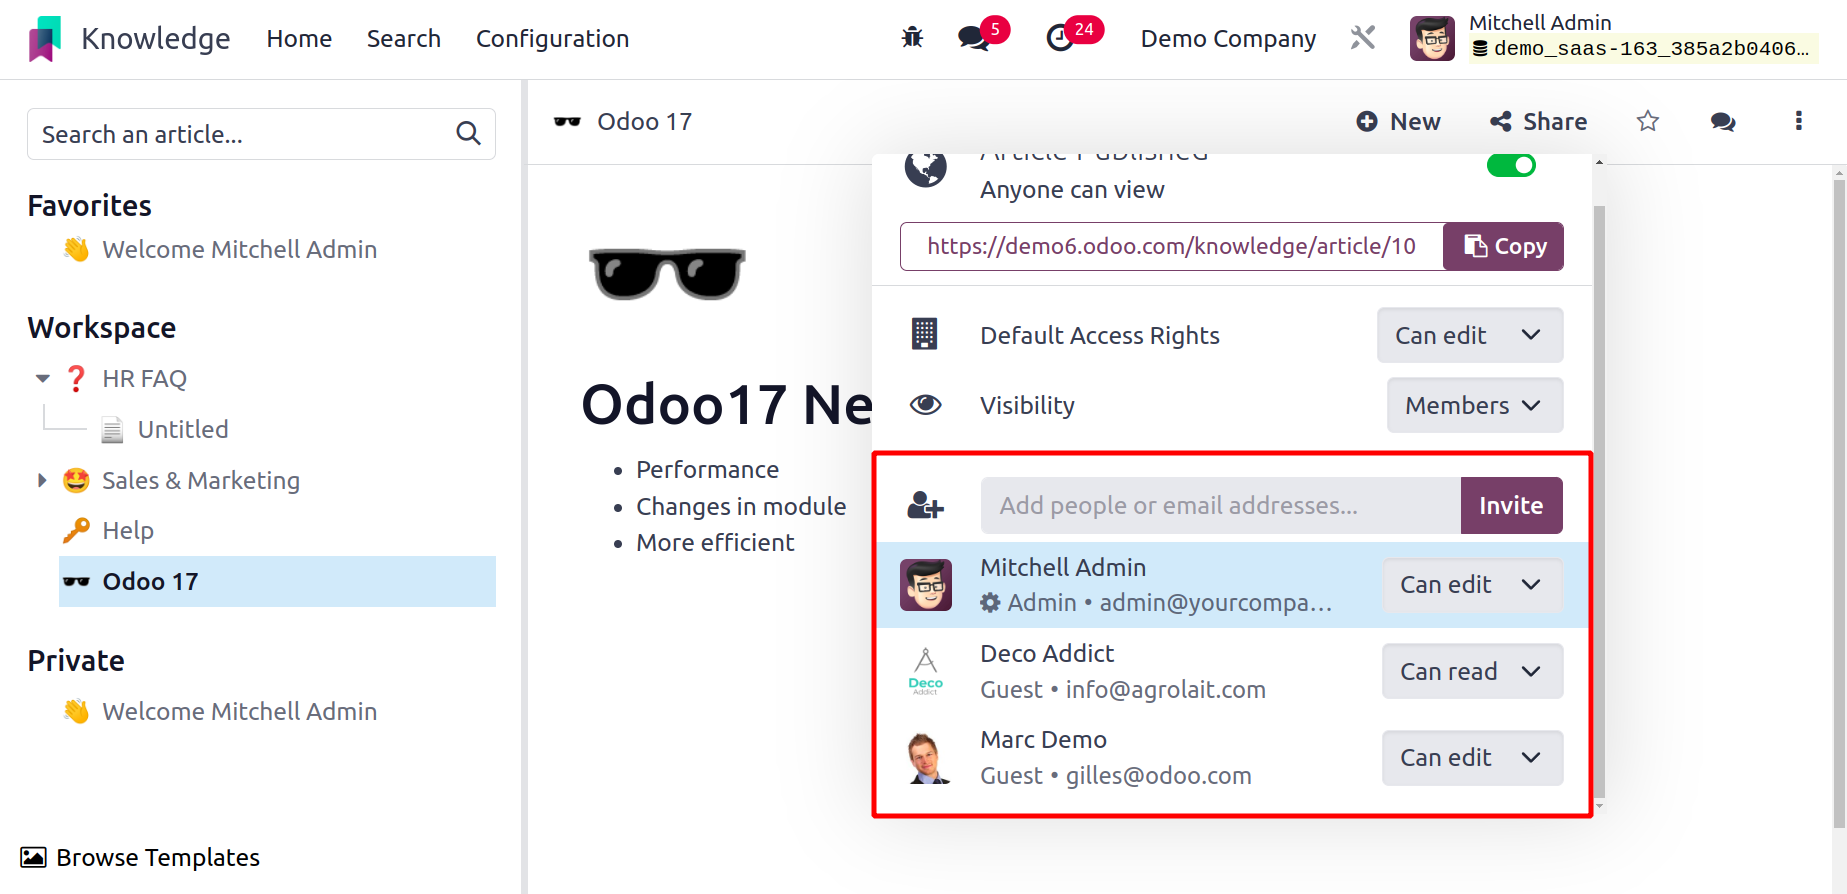
By selecting the ❌ icon, users can be eliminated from the list.

This box also allows you to define the internal users' access rights.
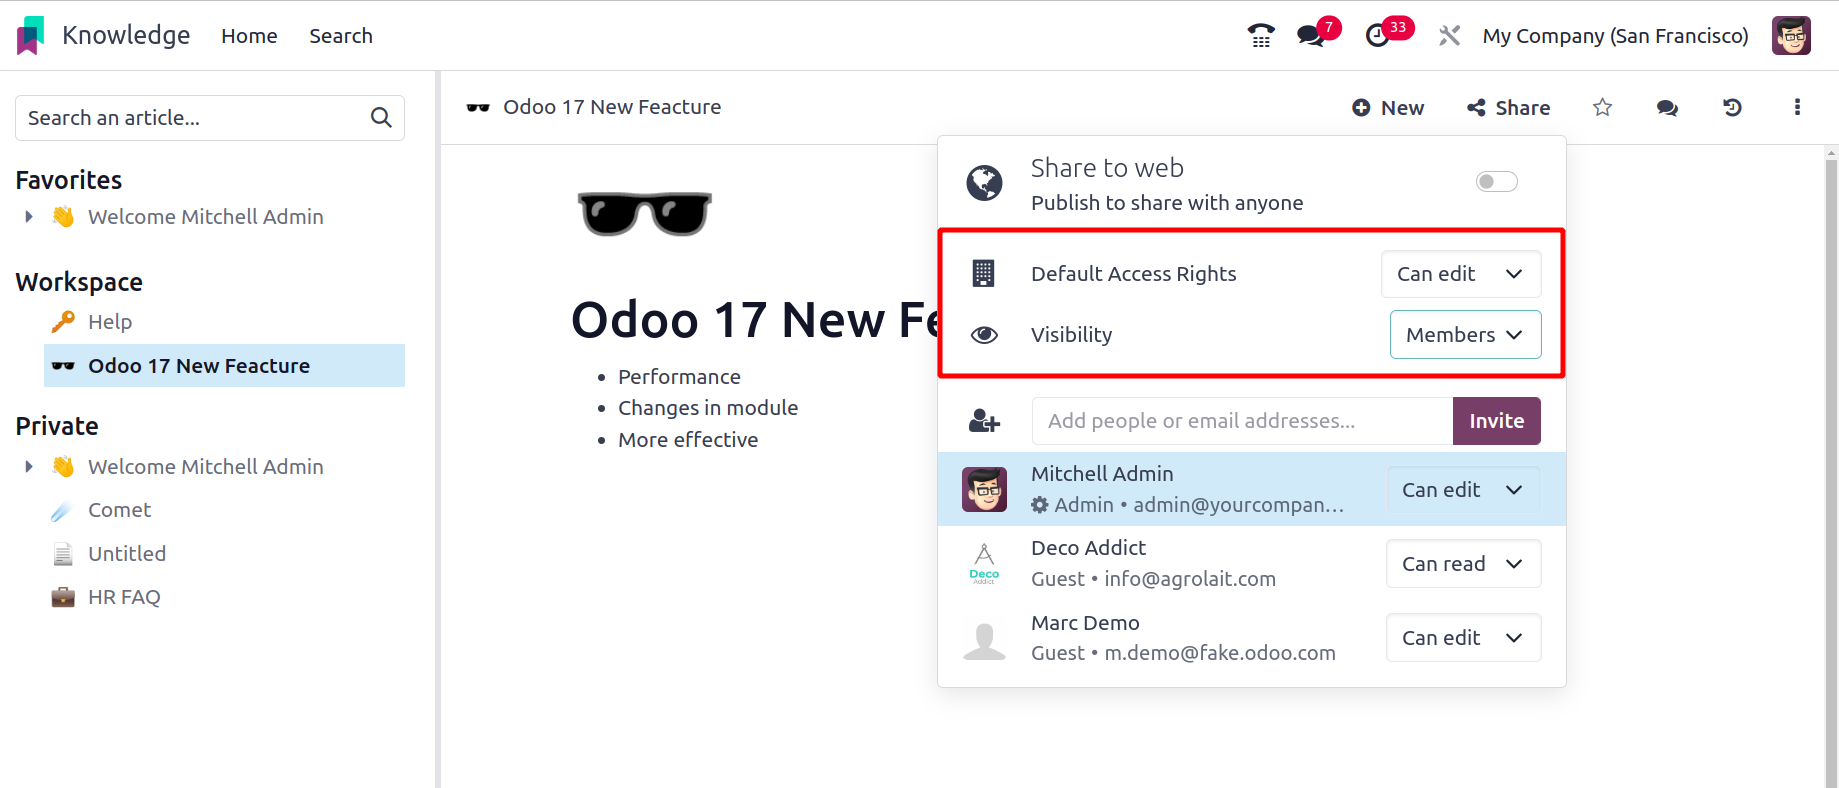
Depending on your needs, you can set the access right to Can Read, Can Write, or No
Access.
The Open chatter icon might help you start a conversation with the article's users.
Operation Tools
The three vertical dots in the upper right corner of the screen indicate the various
operating tools that Odoo provides for an article. These tools can be used for a variety
of tasks.
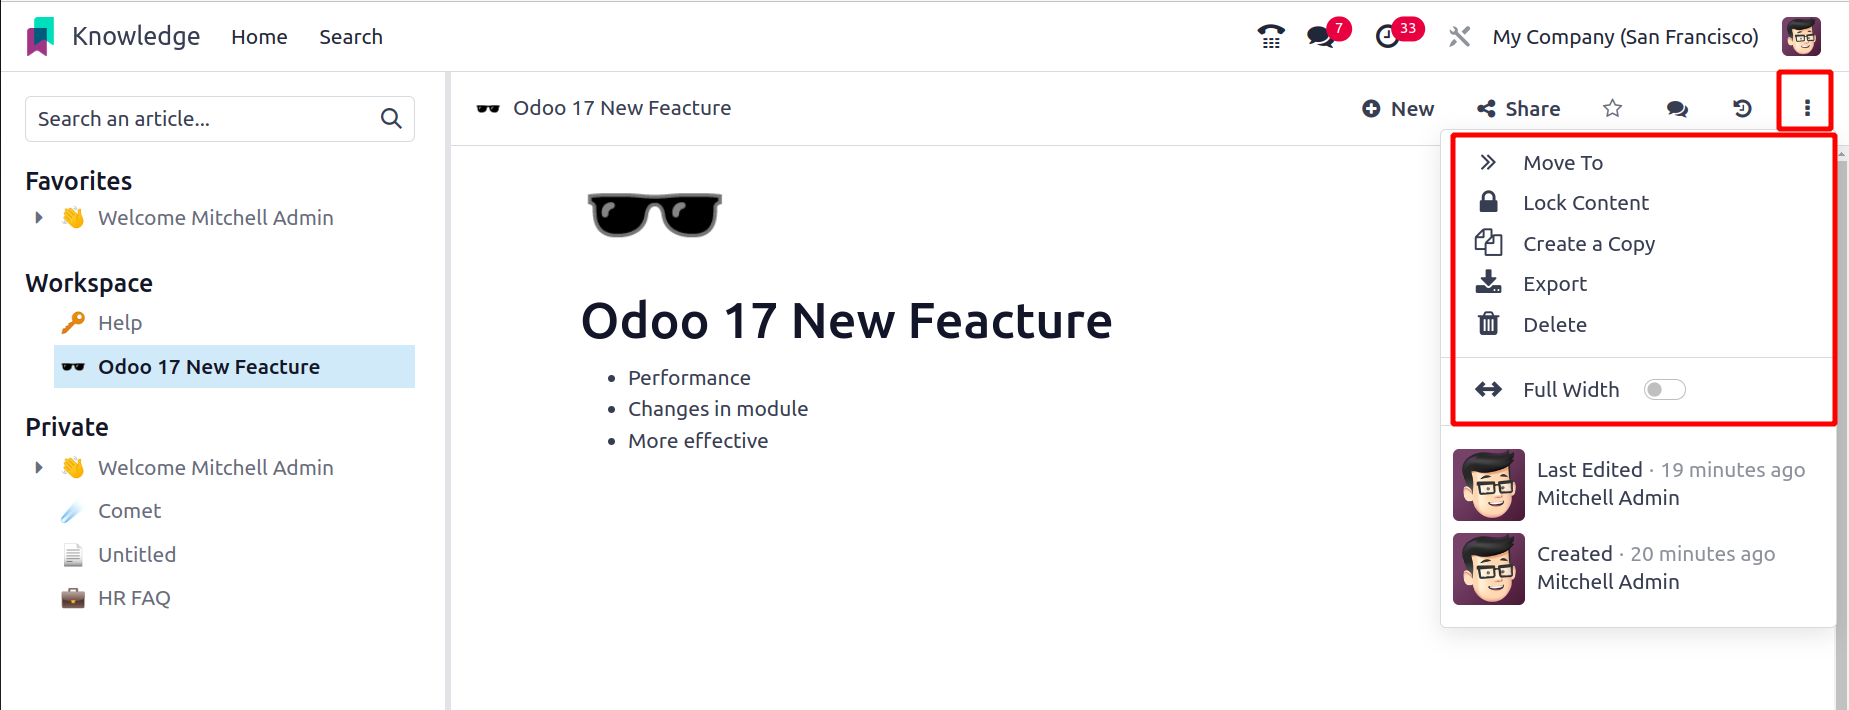
You can click on the Move To option to move this article to a different folder. This will
open a pop-up window where you can choose a different folder or parent article, as seen
below.

You can move this article from the current folder to the specified folder by clicking the
Move Article button after giving the folder name.
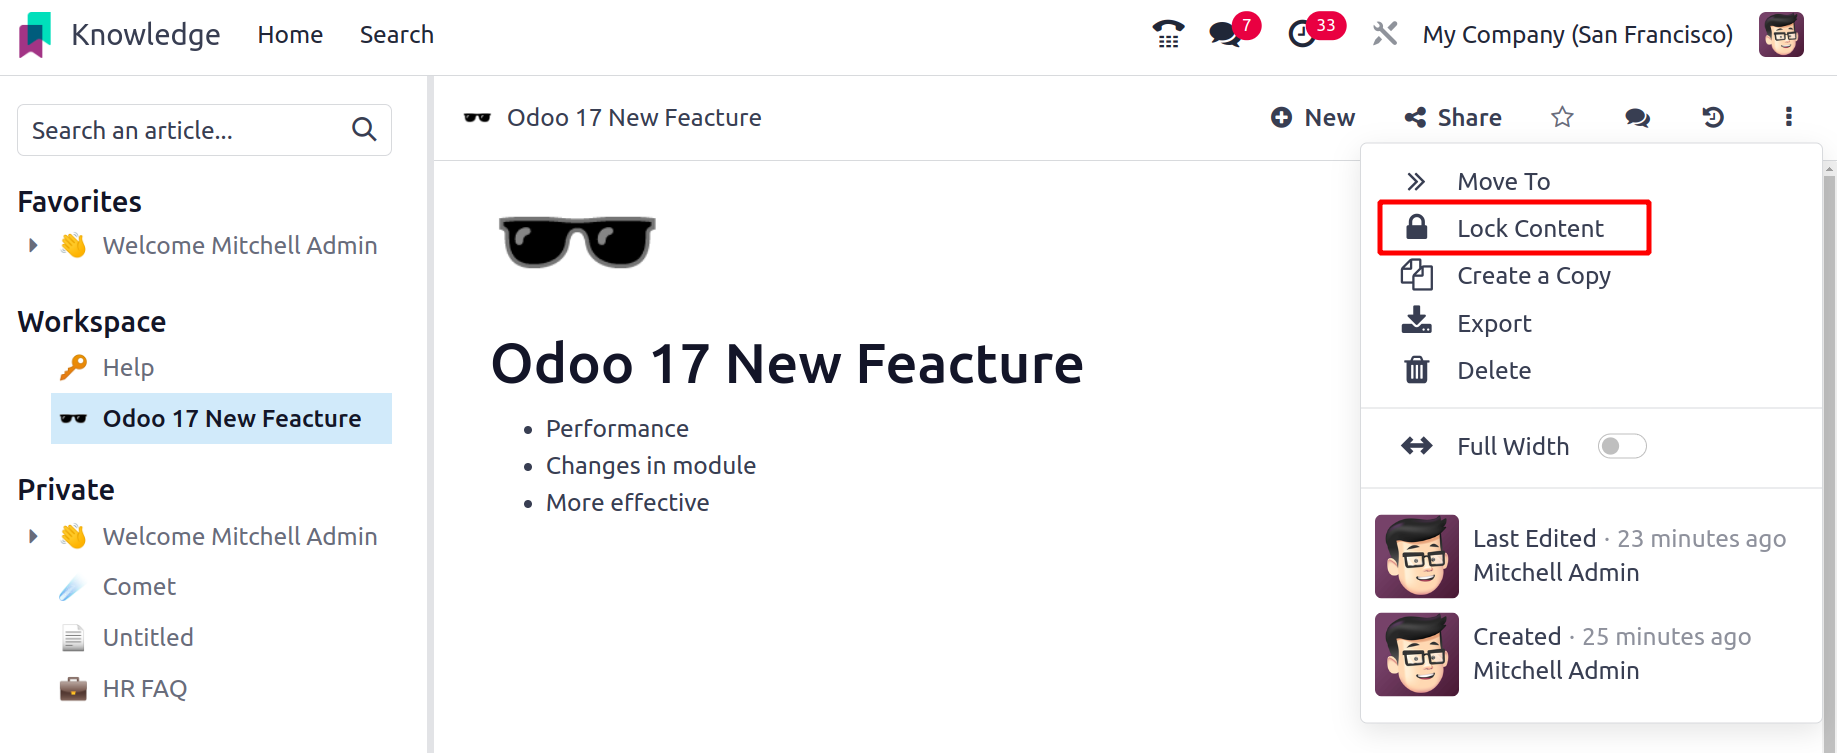
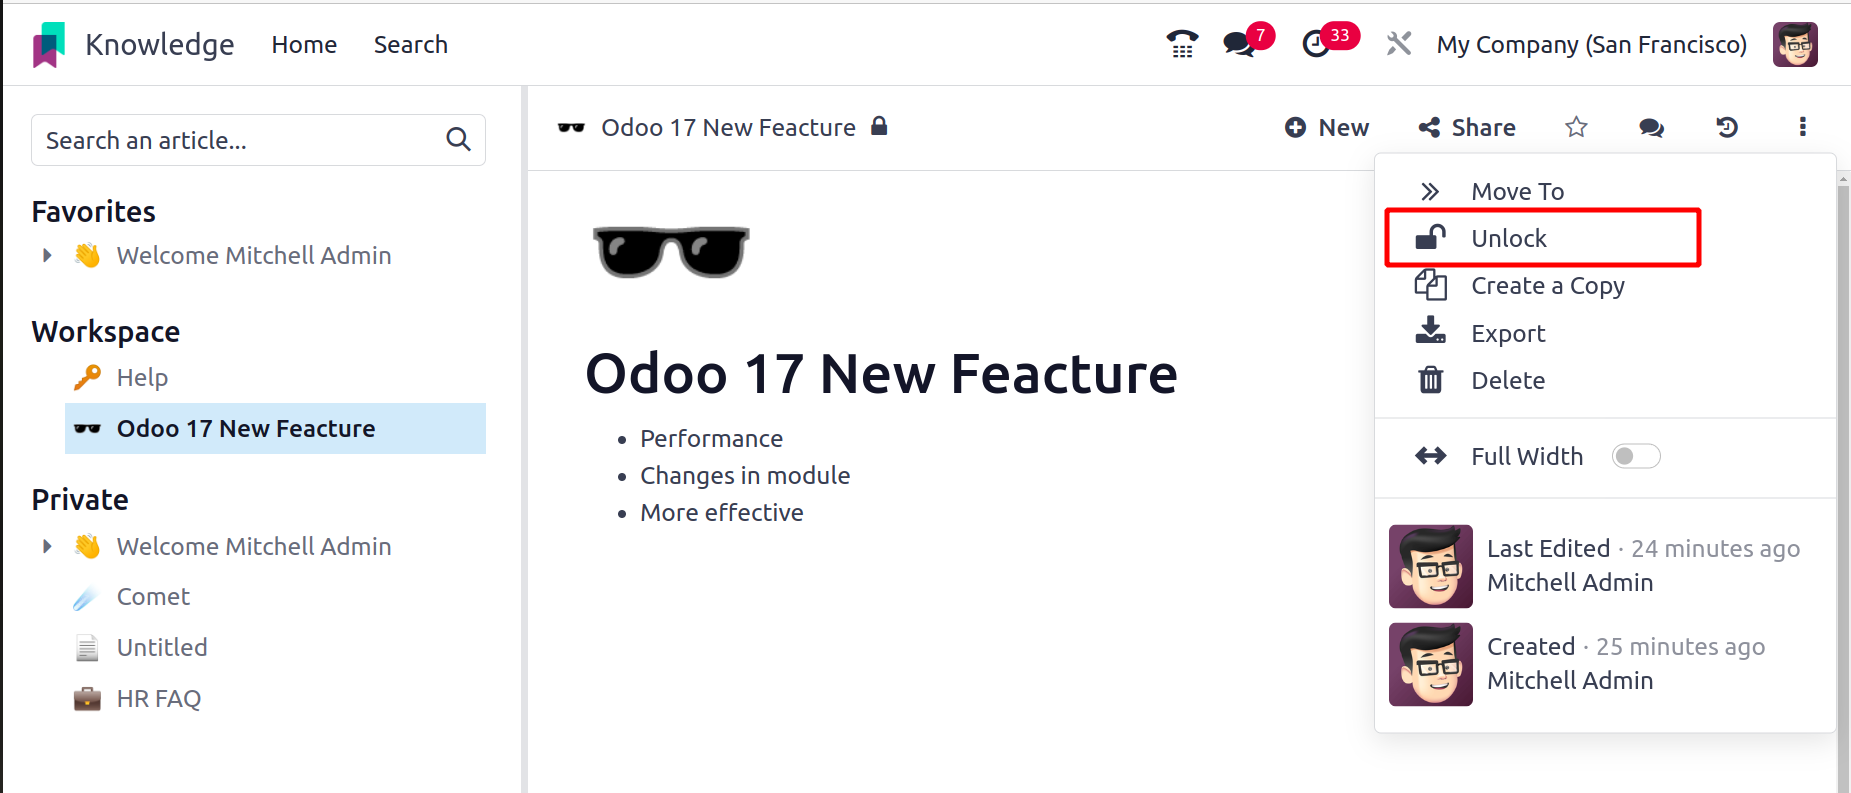
To lock your article, select the Lock option. Edits of any type to a locked article will
not be permitted by Odoo17. Such articles can be unlocked by using the Unlock button.
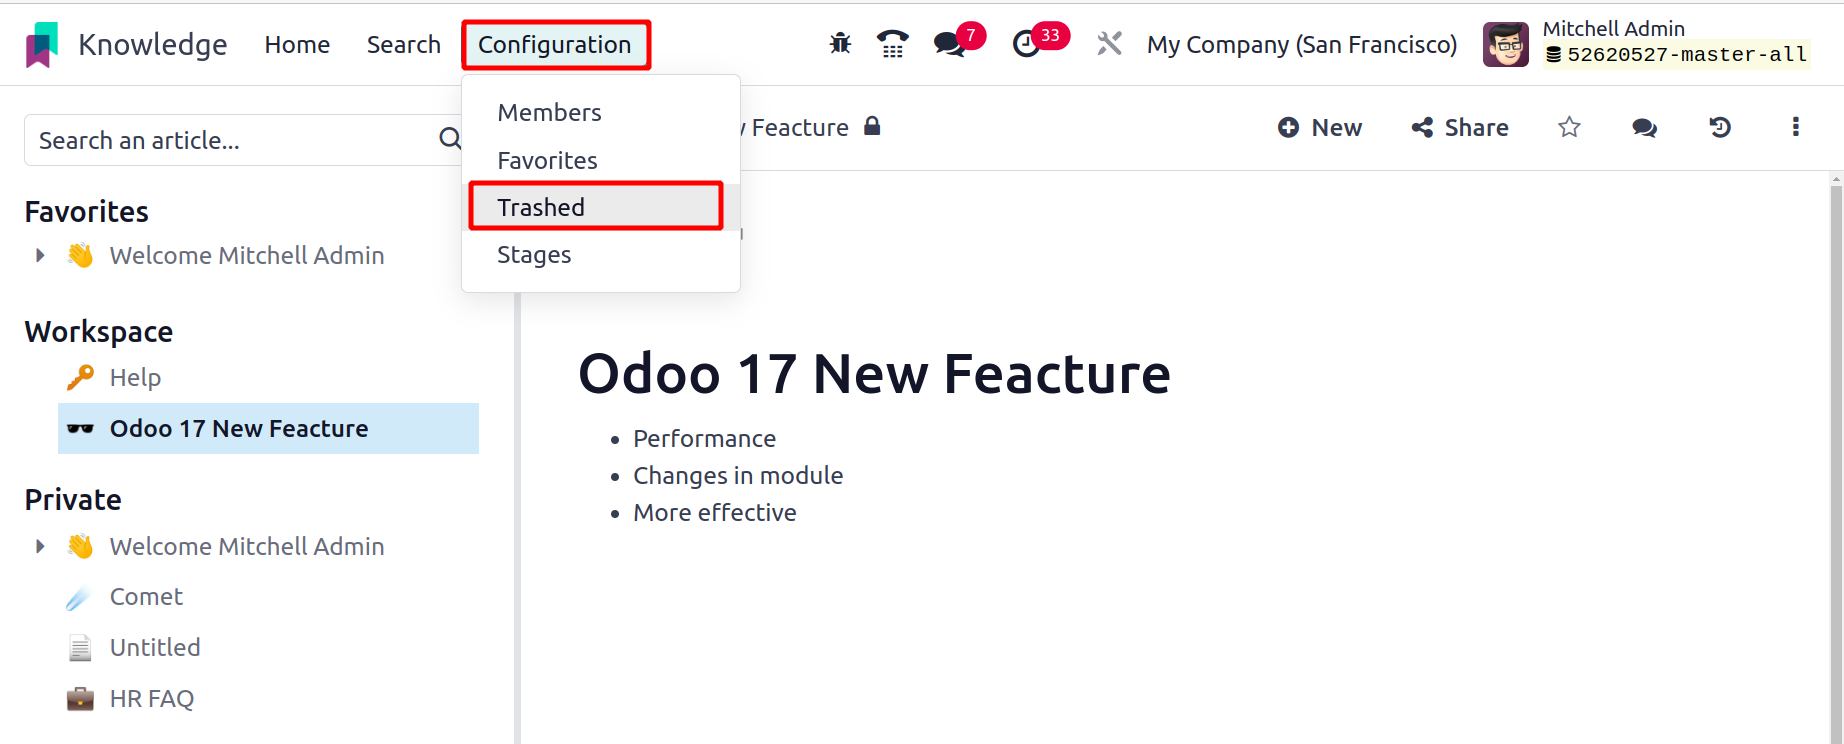
You can remove the article by clicking the Delete button. It will be relocated to the
Trashed folder, which you can see from the Configuration menu, as soon as you click the
Delete button.
The information about the Name, Parent Article, Last Edited By, Last Edit Date, and
Deletion Date of each trashed article will be displayed in the list. Click on the
corresponding article if you wish to take it out of the trash.
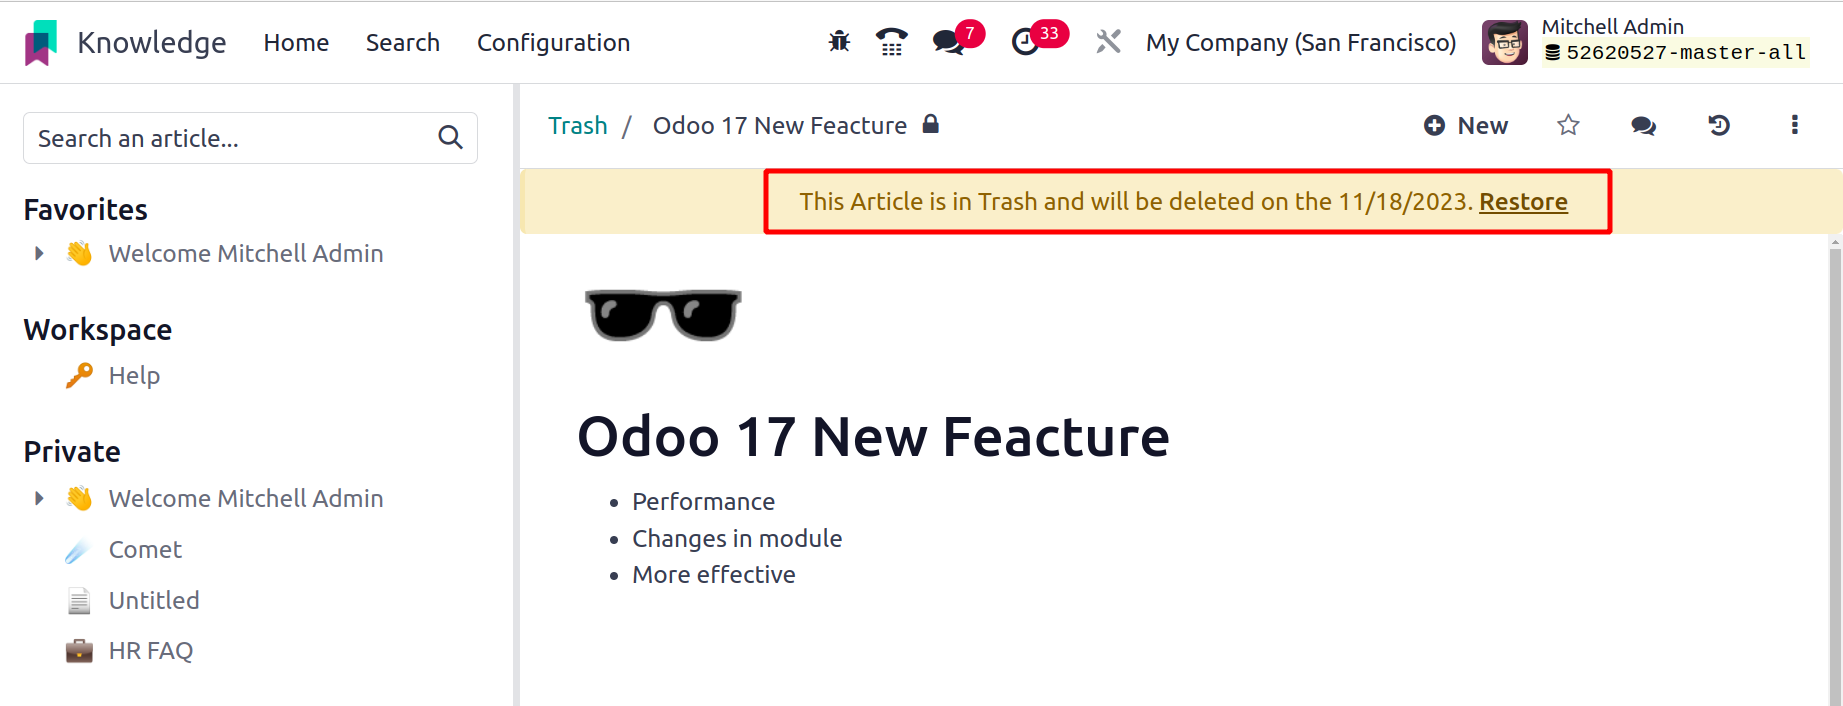
Odoo17 will retrieve the content when you select the "Remove from Trash" option.
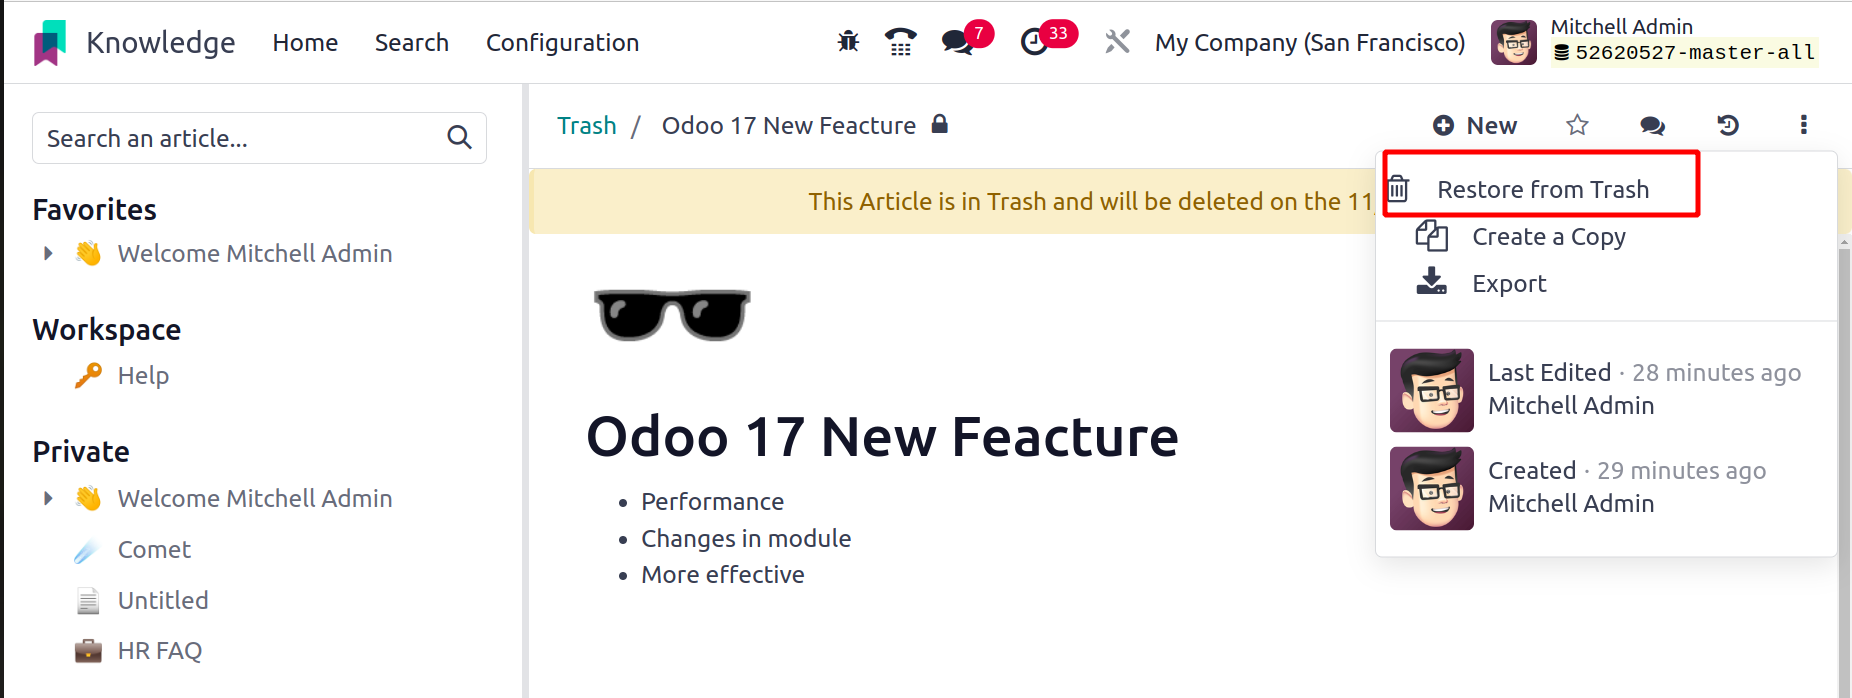
The trash list in your Knowledge module can be accessed instantly by tapping the "Open
the Trash" smart button located on the home screen.
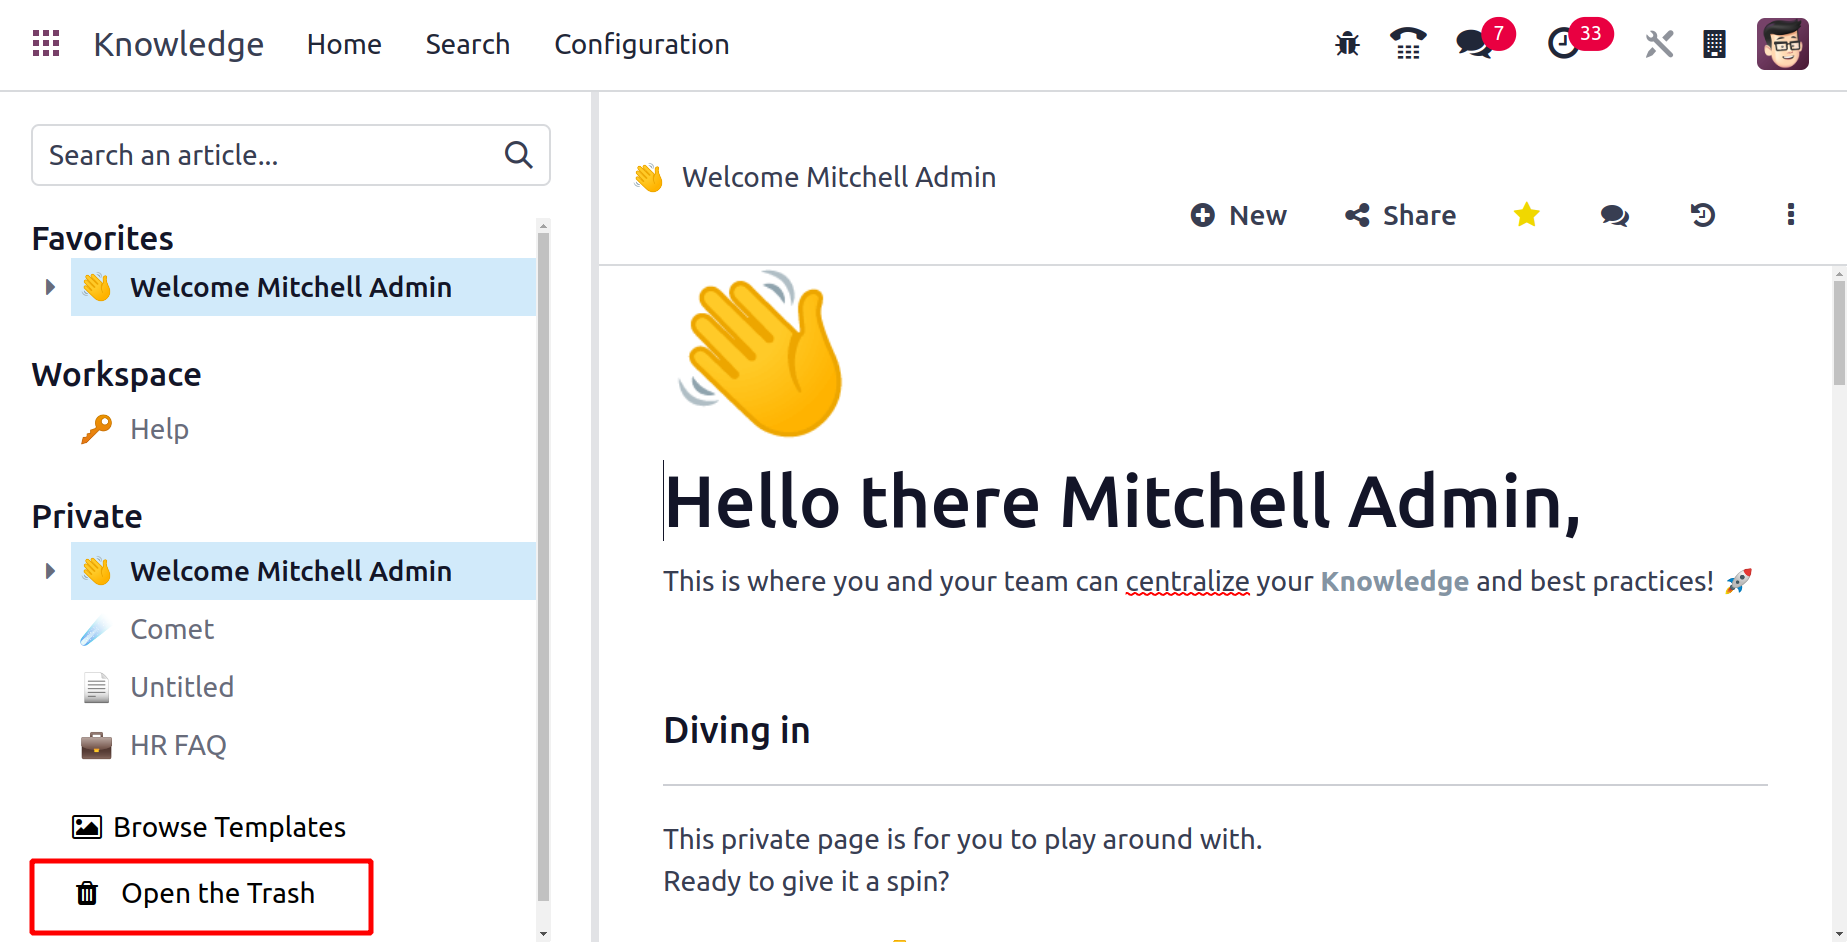
Before being completely erased from your database, the deleted articles will be kept in
your garbage for an additional thirty days.
Using the Create a Copy button, you can copy the article and put it in your private
folder.
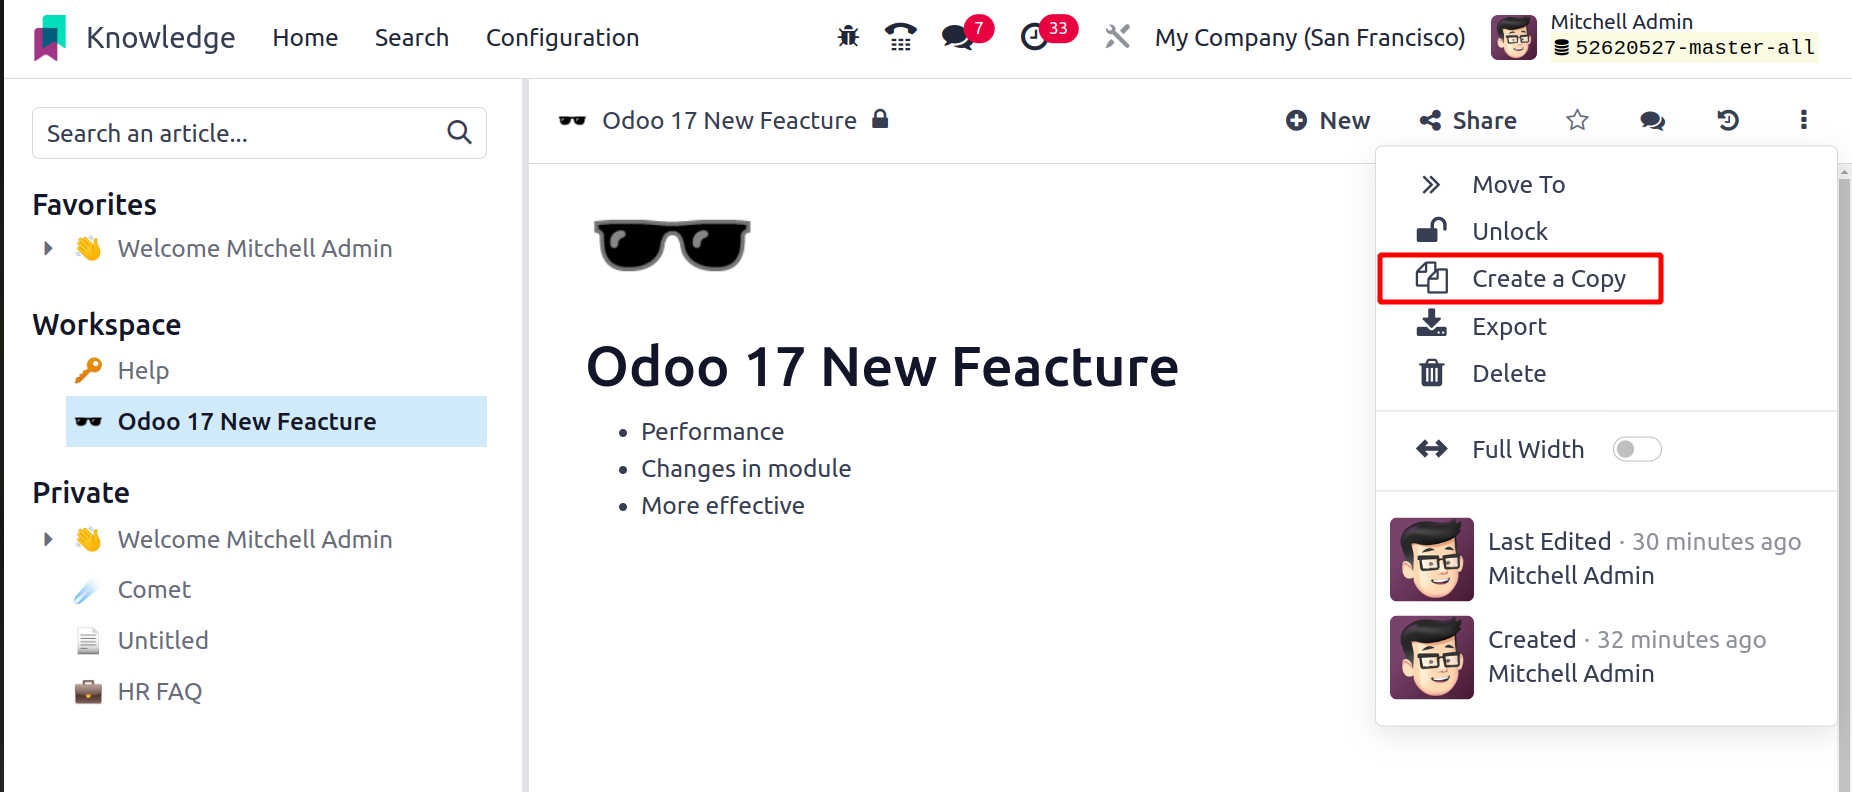
The article will display in full width if the Full-Width option is enabled. Additionally,
this operation tools menu will provide you with the article's Last Edited By and Created
By details.
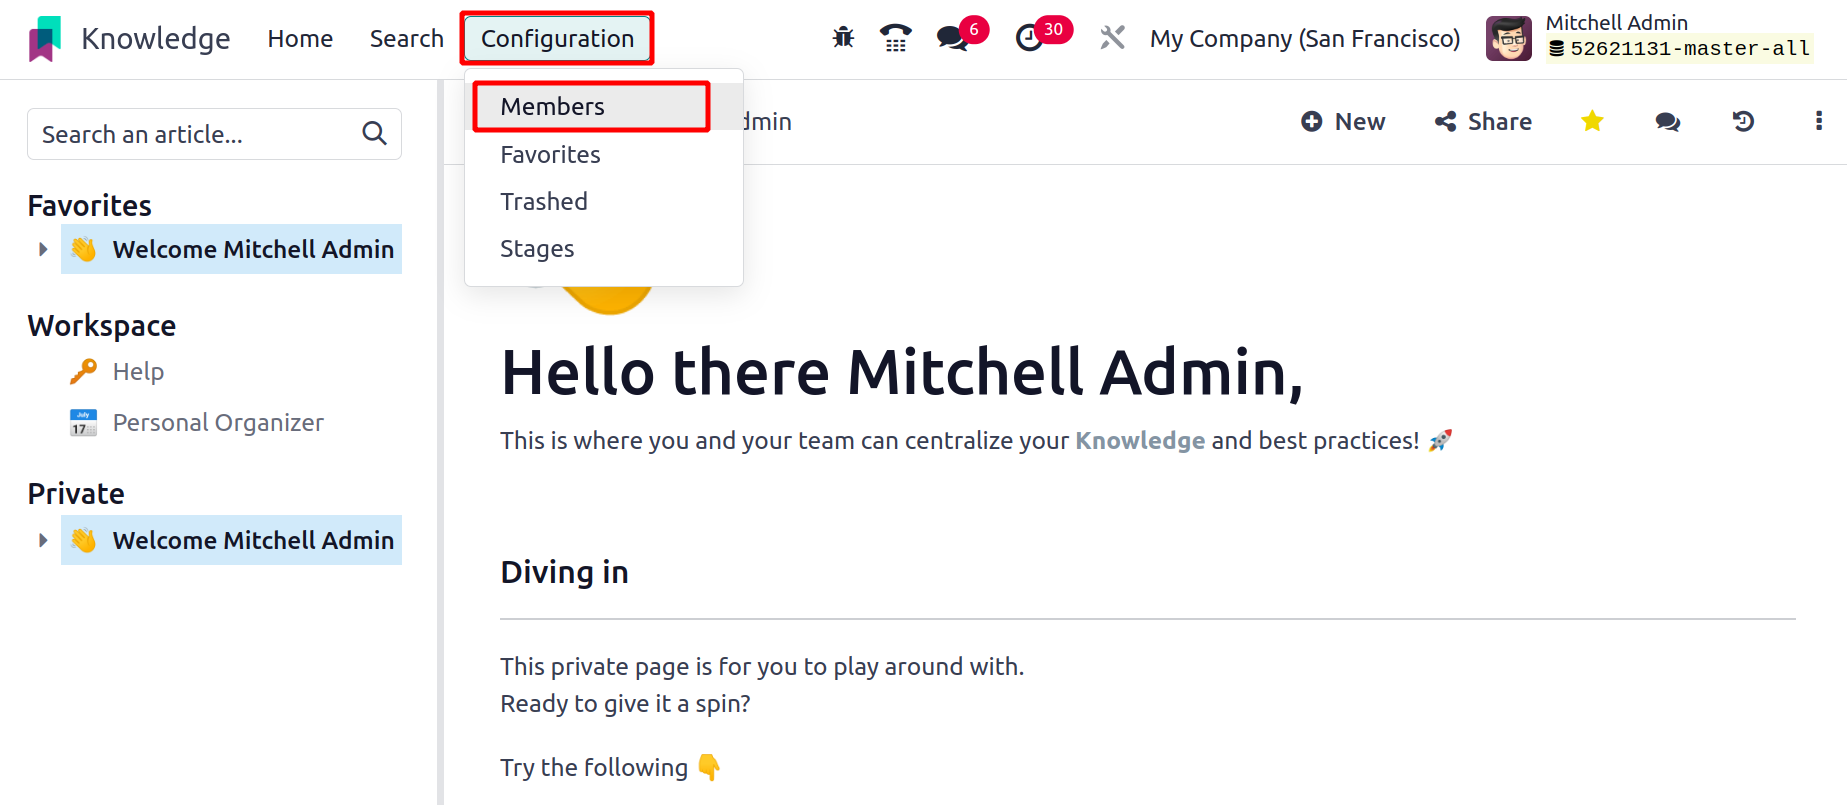
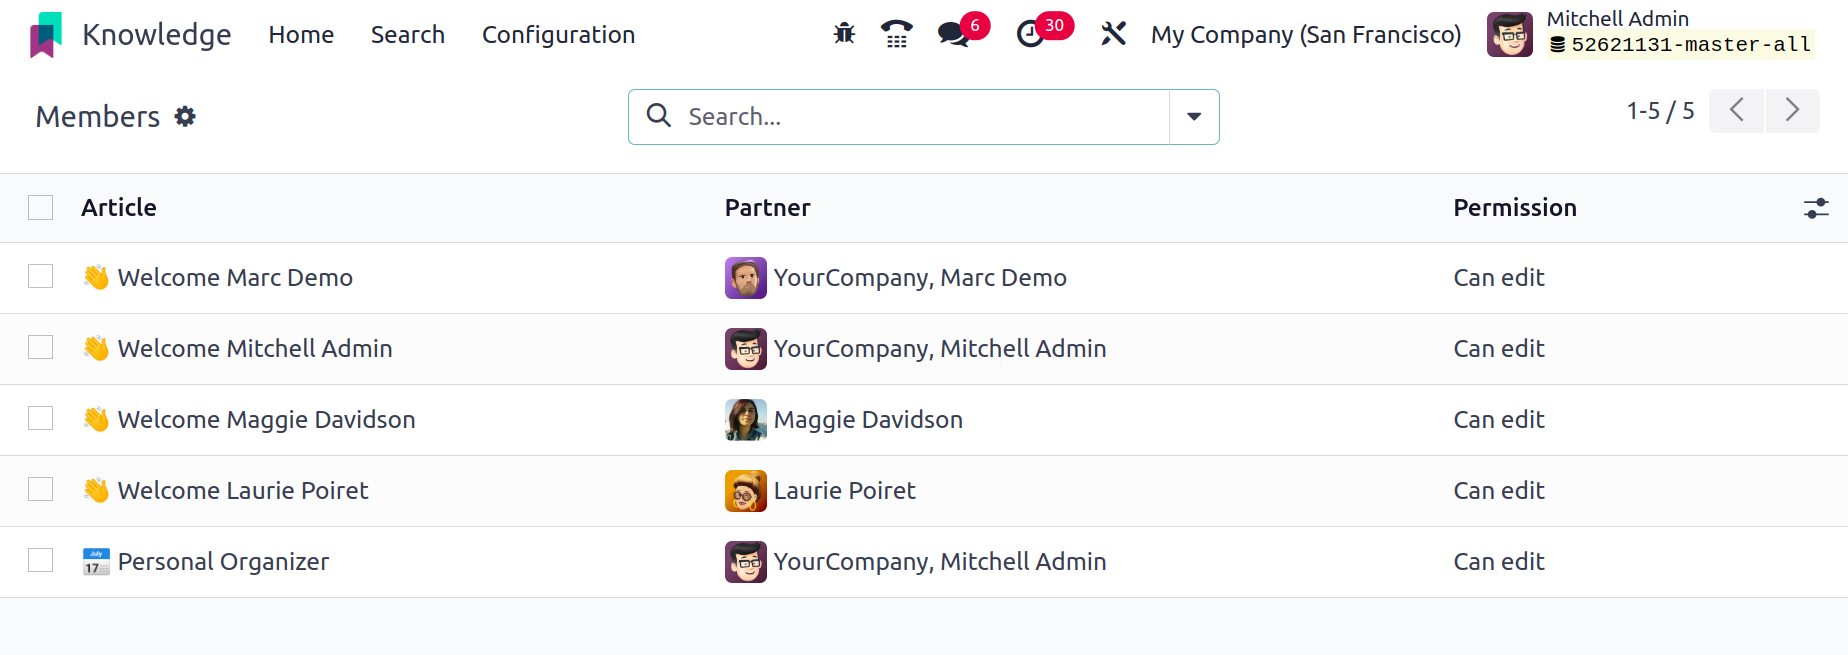
Members
You will find a separate option to control the members of the articles in the Odoo 17
Knowledge module. This platform is available through the Configuration menu.
The list view will display the Article, Partner, and Permission that have been granted to
them, as seen in the screenshot below.
An article will open in a new window when you click on it.
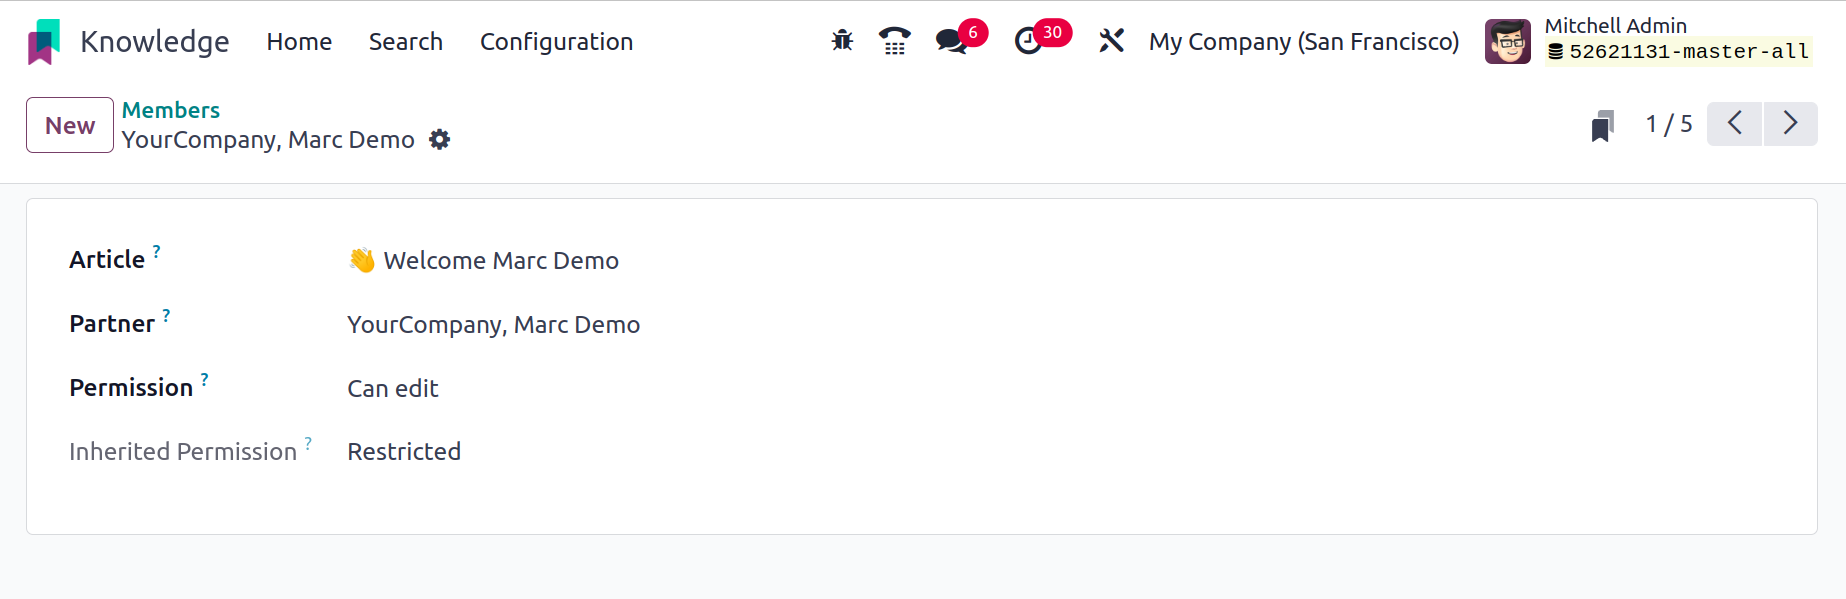
The Permission box is where you can make changes to the partner's access rights. You may
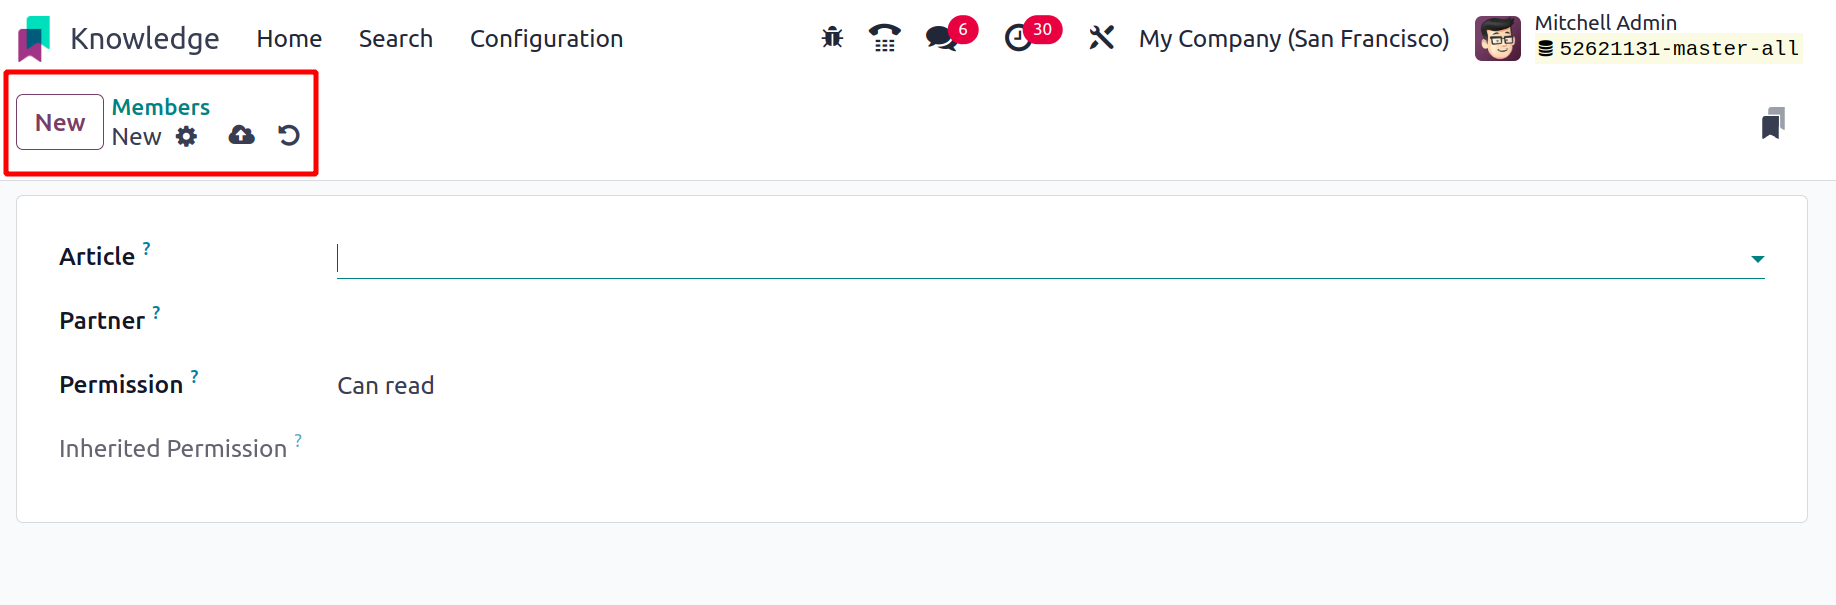
see the member's inherited permission in this pane. You can add a new member to any
article you've made and adjust permissions by clicking the New button in the left corner
of the screen.
You can easily and methodically develop and share information with your colleagues with
the help of Odoo 17's new knowledge management system.