Live Chat
With the help of the unique Live Chat module in Odoo17 ERP, you may conduct direct connections with website visitors for your business. An instantaneous contact method such as live chat will help the business and its clients to develop and preserve a solid rapport.
The Odoo17 Live Chat module is another useful tool for generating leads and chances. You may provide your visitors or clients with excellent assistance and services by putting in place a Live Chat module. You are able to provide your clients with exceptional service and answer all of their questions and concerns. Easily visible at the bottom of the page, a Live Chat widget is available for visitors to your website. With this widget, you can instantly strike up a conversation with visitors as well as your sales team or other responsible people in your organization.
We may talk about the features of the Odoo 17 Live Chat module in this chapter. Installing the module from the Odoo apps will add it to your dashboard after the module is installed. To access the module, click the Live Chat menu item.
The module's home dashboard window will resemble the picture below.
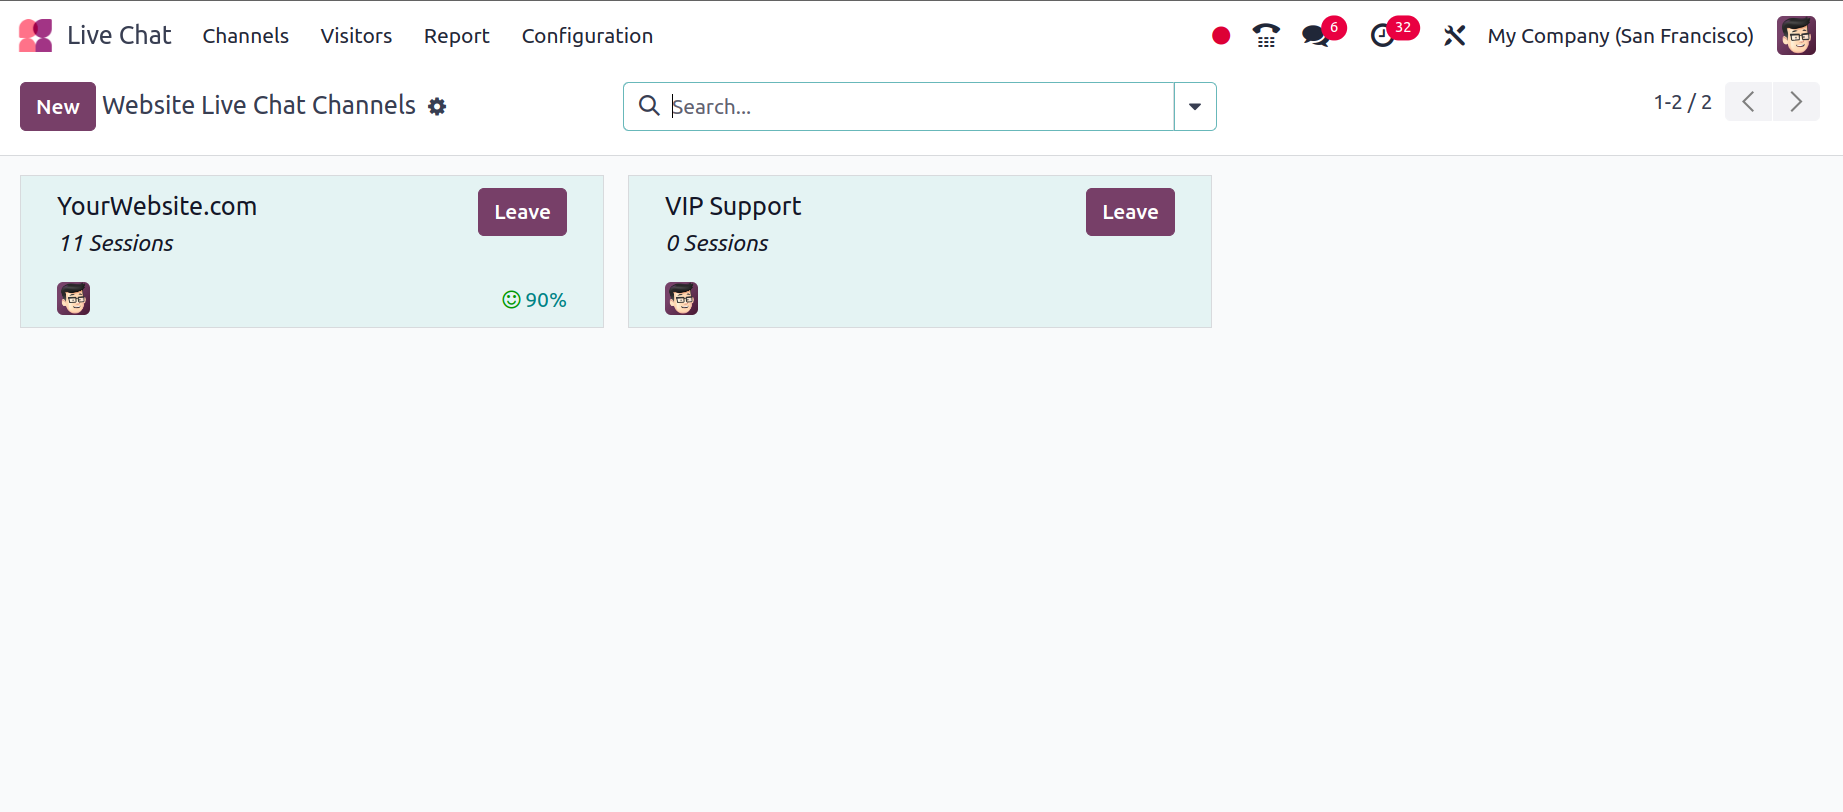
All of the existing Live Chat channels on the platform will be shown in this window. This window will show channels in a kanban format and provide you with a glimpse of all the Live Chat channels that have already been explained. By browsing this window alone, you may see all the important information about the live chat channel, the name of the website channel, the number of operators, the number of sessions, the percentage of satisfied customers, and the LEAVE or JOIN buttons. Using the Filters and Group By tab, you can also add different custom filters to the display. To carry out the relevant actions, select the Favourites tab and use the choices to store the current search, import records, link to the spreadsheet from the menu, add to my dashboard, and add to Google Spreadsheet. You may also establish new Website Live Chat Channels using this window.
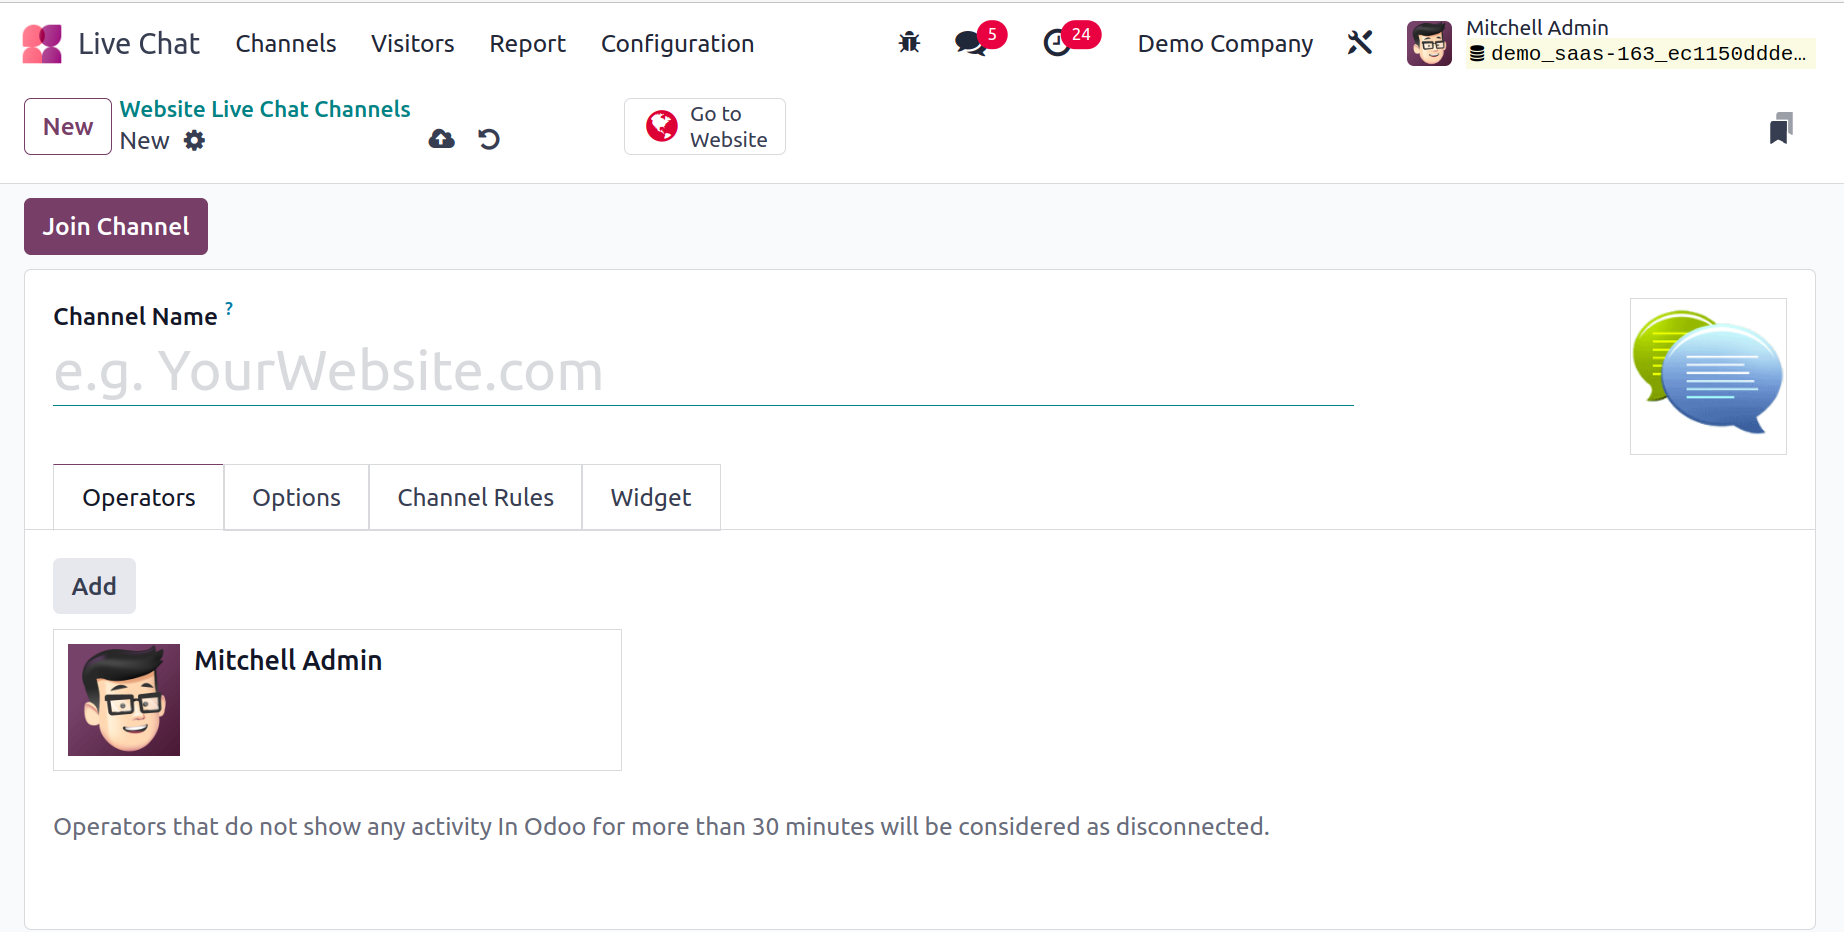
You can click the New button, which is located in the window's upper left corner, to accomplish this. You will now be able to see a creation form similar to the one in the picture below.
You can enter the Name of the Website Live Chat Channel in the designated field of this creation form. For the website's live chat channel, you can also post an image. You can choose to add operators to the live chat channel under the Operators tab. You can click the Add button to add an operator to the channel.
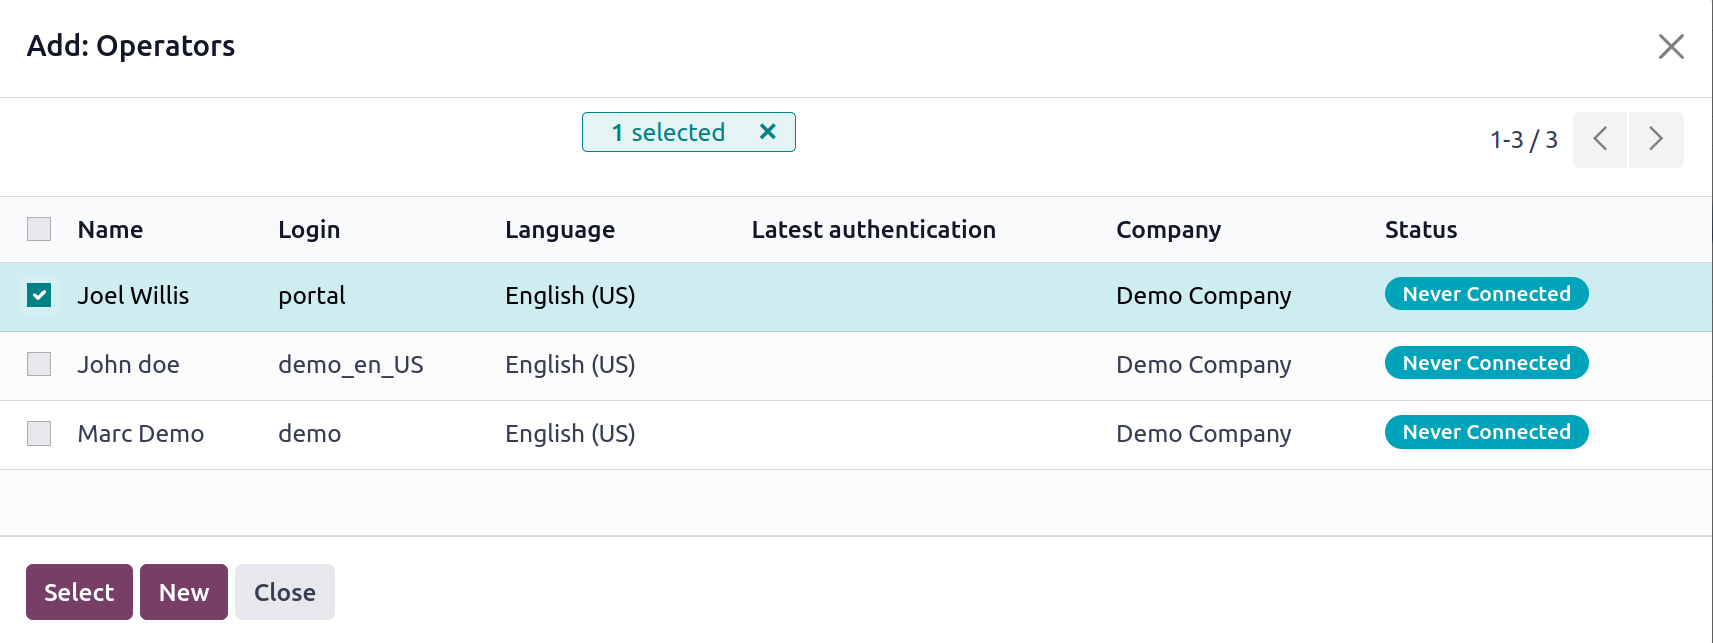
At this point, the system will provide you with a pop-up window with all the predefined operators' details shown. By clicking the New button, you may either create a new one or choose the appropriate one from the list.
Should you need to generate a new Operator, you can select the New button found in the pop-up window. You will now illustrate the new operator creation window as it is displayed below.
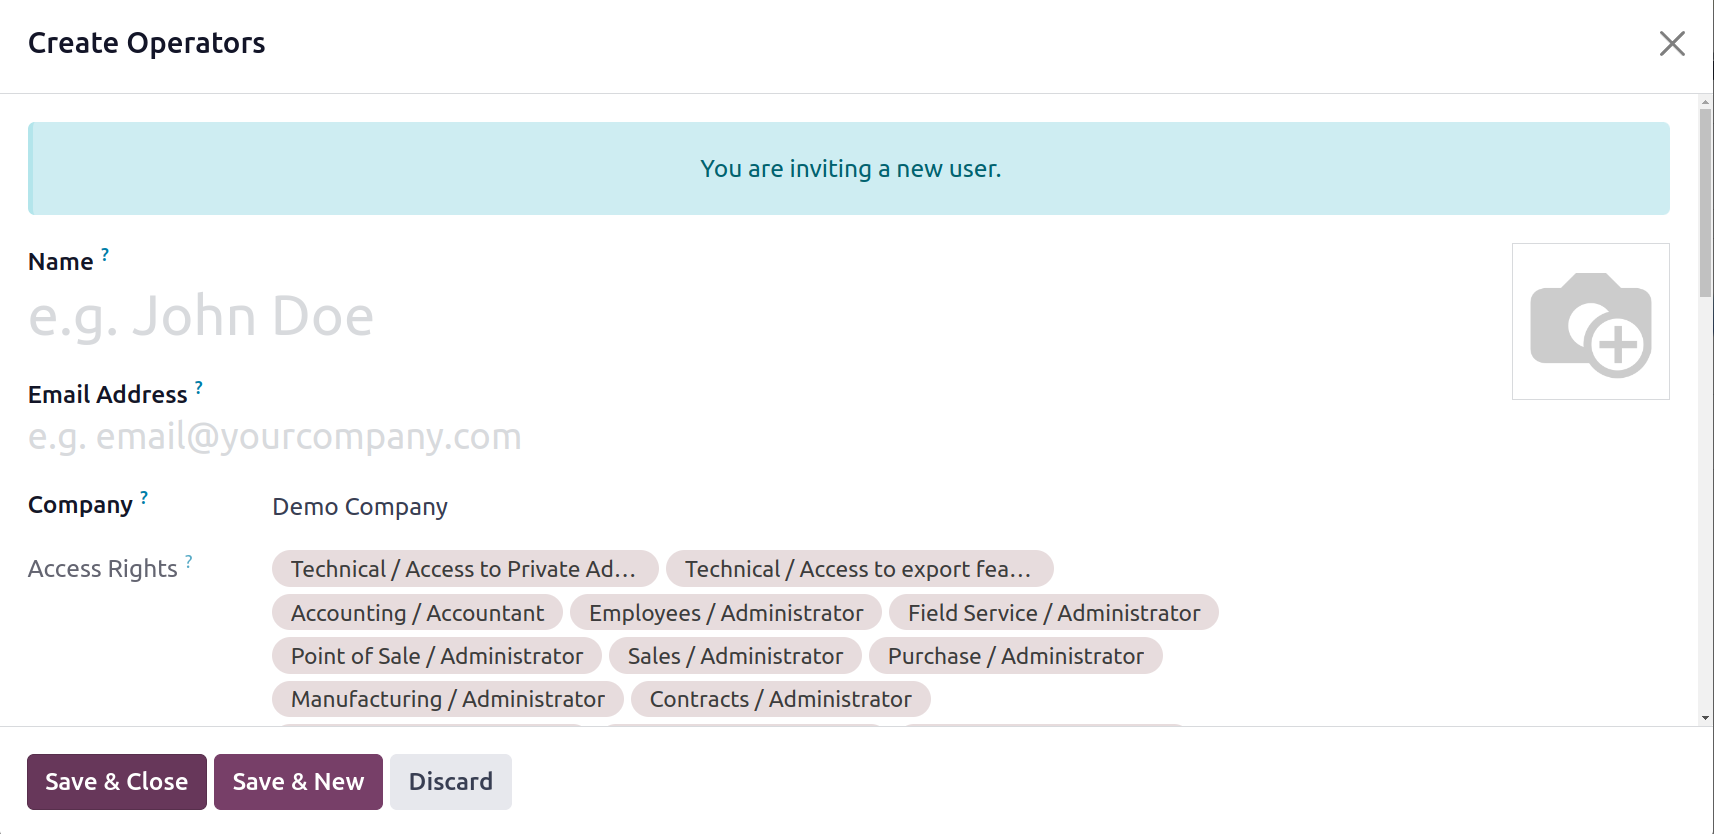
Here, you can provide all the necessary information, including the operator's name, the email address they used to log in to the system, and the user's default company. You may also include the phone and mobile numbers. The Default Warehouse option allows you to provide the details of the default warehouse. Additionally, the operator's image may be displayed in the designated space. After entering all necessary information, you may save the new operator's details by clicking the Save & Close button. If an Operator remains idle in Odoo for longer than thirty minutes, they will be deemed disconnected.
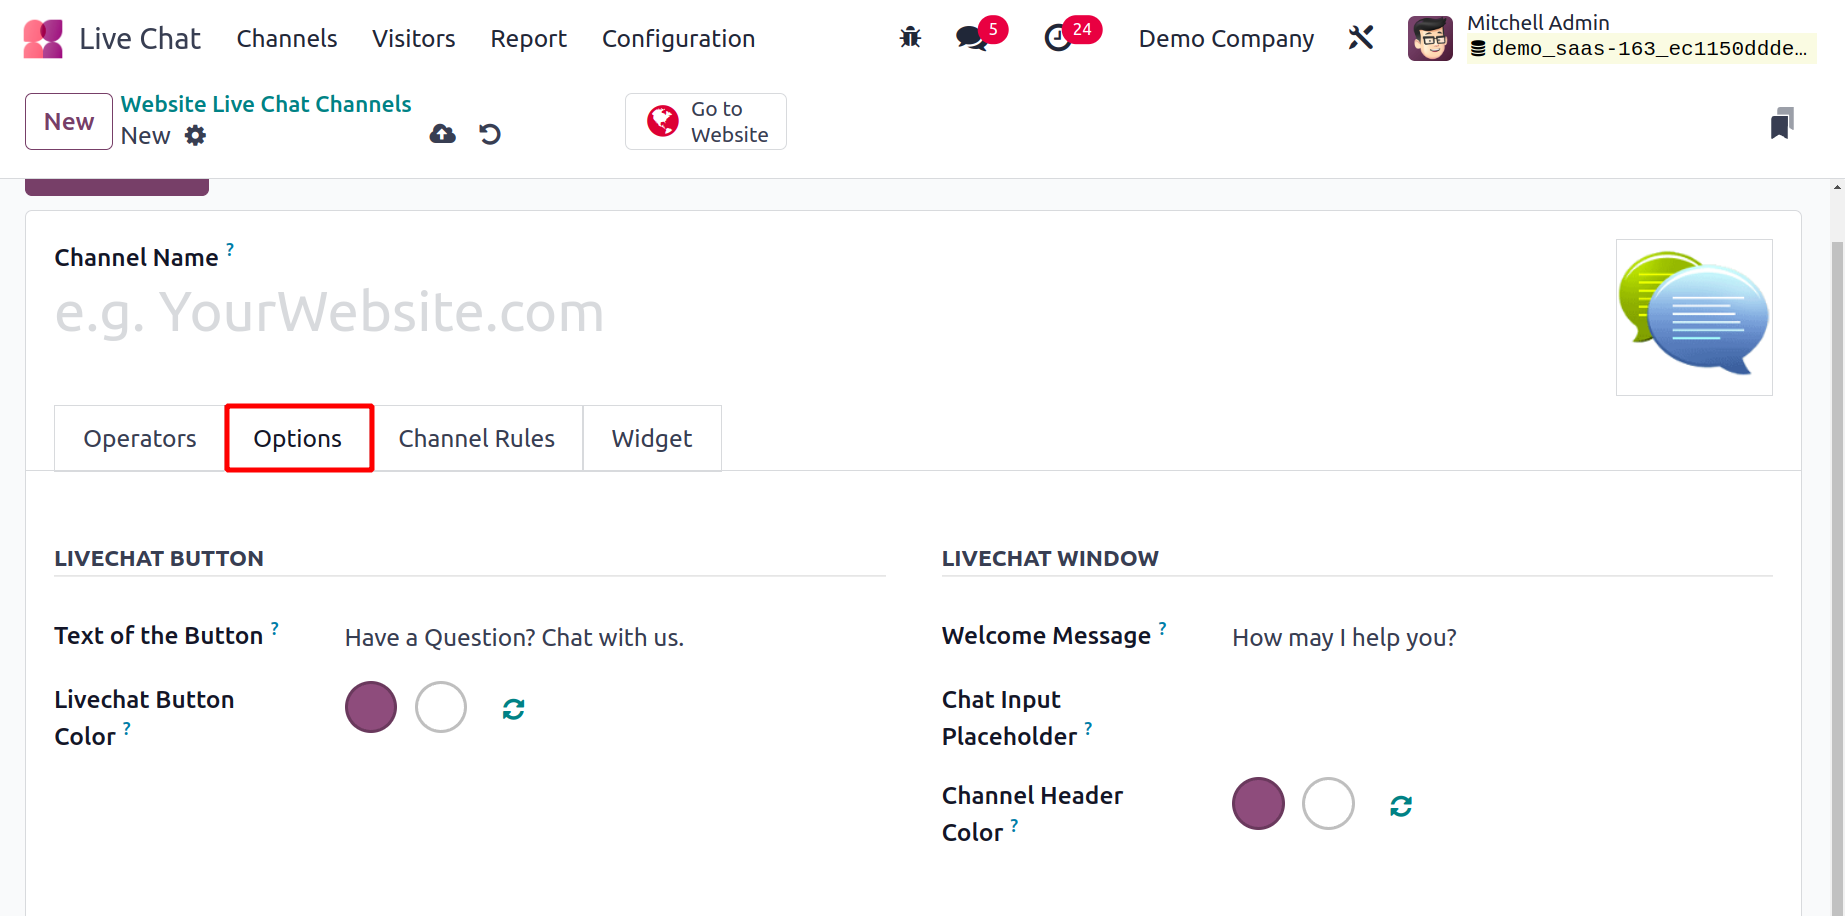
You can customize the LiveChat window and button using the settings available in the settings tab of the Live Chat Channel creation window. You may explain the default wording that appears on the Live Chat support button on the wording of the Button field by going to the Live Chat button area. Likewise, the Live Chat Button Colour option allows you to specify the Live Chat button's default backdrop color. You have a field to enter a welcome message in the Live Chat window section. This is regarded as the welcome message that your guest will receive automatically when they start a new discussion. The Chat Input Placeholder field can include the text that asks the user to start a chat. The Channel Header Color option allows you to specify the channel header's default backdrop color.
You can specify different guidelines for your live help channel under the Channel Rules page. You can limit the chat to the designated countries by defining channel rules. Assume that the individuals in charge of the sales staff at your business do not speak the same language as the website visitor. The Chatbox can then be hidden for visitors from that specific nation.
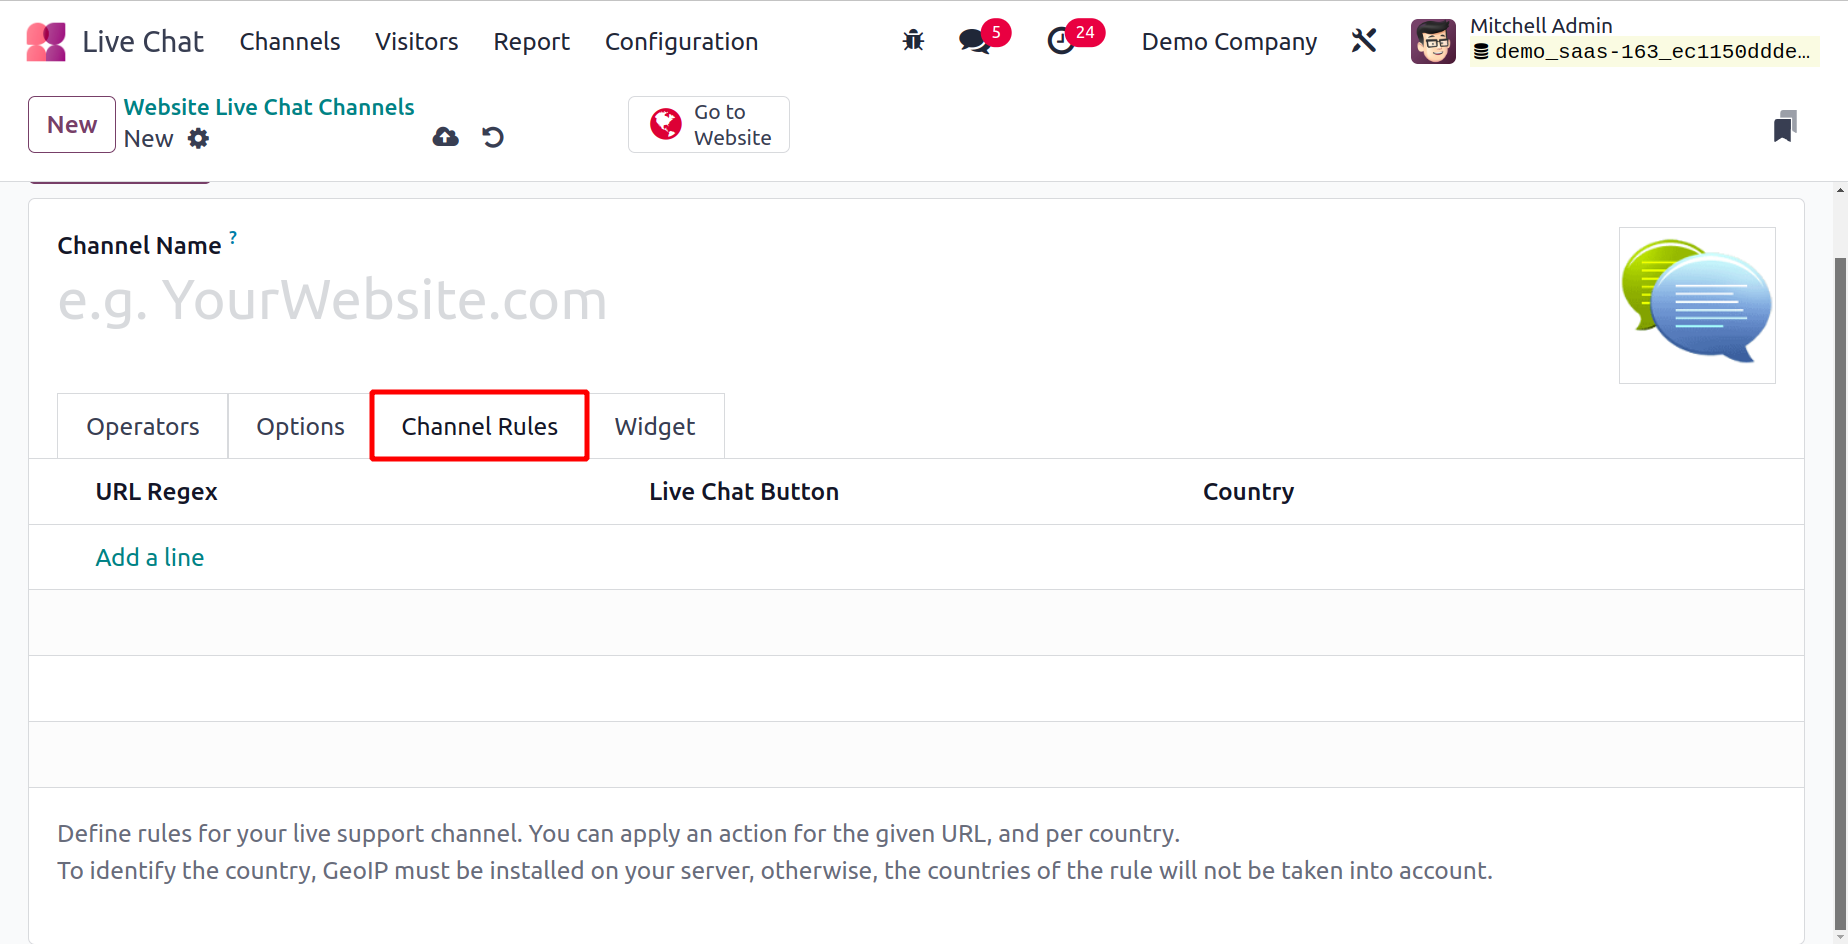
Using the Add a line option, an action can be applied for the given URL and per nation. A new pop-up window for defining rules will appear once you click the Add a line button. Below is a picture of the pop-up window.
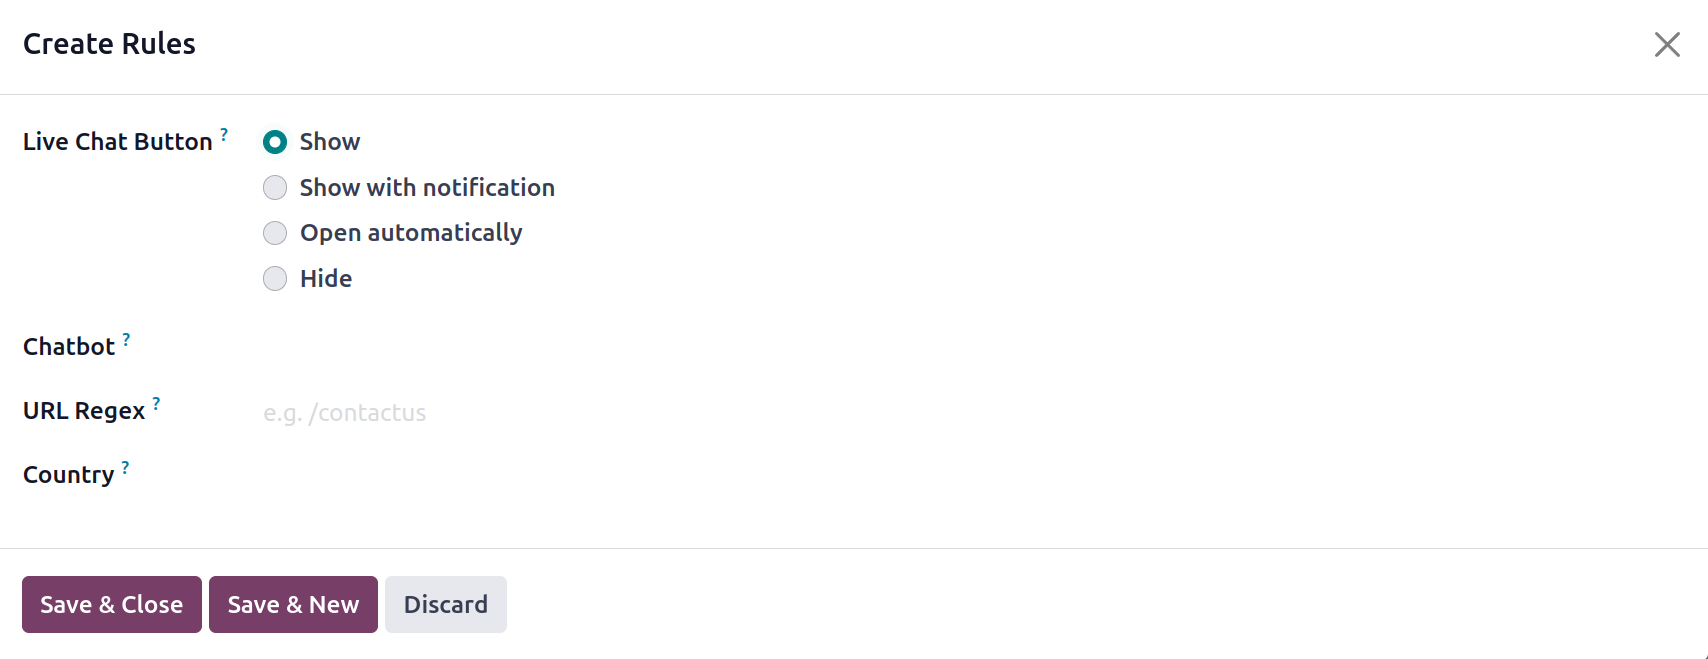
In the Create Rules window, there are three distinct ways to configure the Action. In other words, you can Hide the button, Auto pop up, and Display the button. Let's talk about each of these.
Show: The chat button will appear on the sites if you choose to show the button.
Show with Notification: Shows the button and launches the dialogue box on its own.
Open automatically: the chat will open automatically.
Hide: On the pages, hide the chat button.
Afterwards, you will see the URL Regex field. This field is quite useful for describing regular expressions that indicate which web pages this rule will be applied to. Country is the next field that can be filled in the window. Here, you can specify which nations you wish to apply this rule to. For instance, if you choose Belgium and the US and set the action to "Hide Button," users from these two nations will not be able to see the chat button on the given URL. You need to install Geo IP on your server in order to use this feature and find out the visitor's country. If not, the rule's counties won't be taken into consideration.
Once all the fields have been filled out, click the Save & Close button to save the new channel rule.
You can now obtain a widget by saving your recently established Live Chat Channel. Click the Widget tab after saving the details.
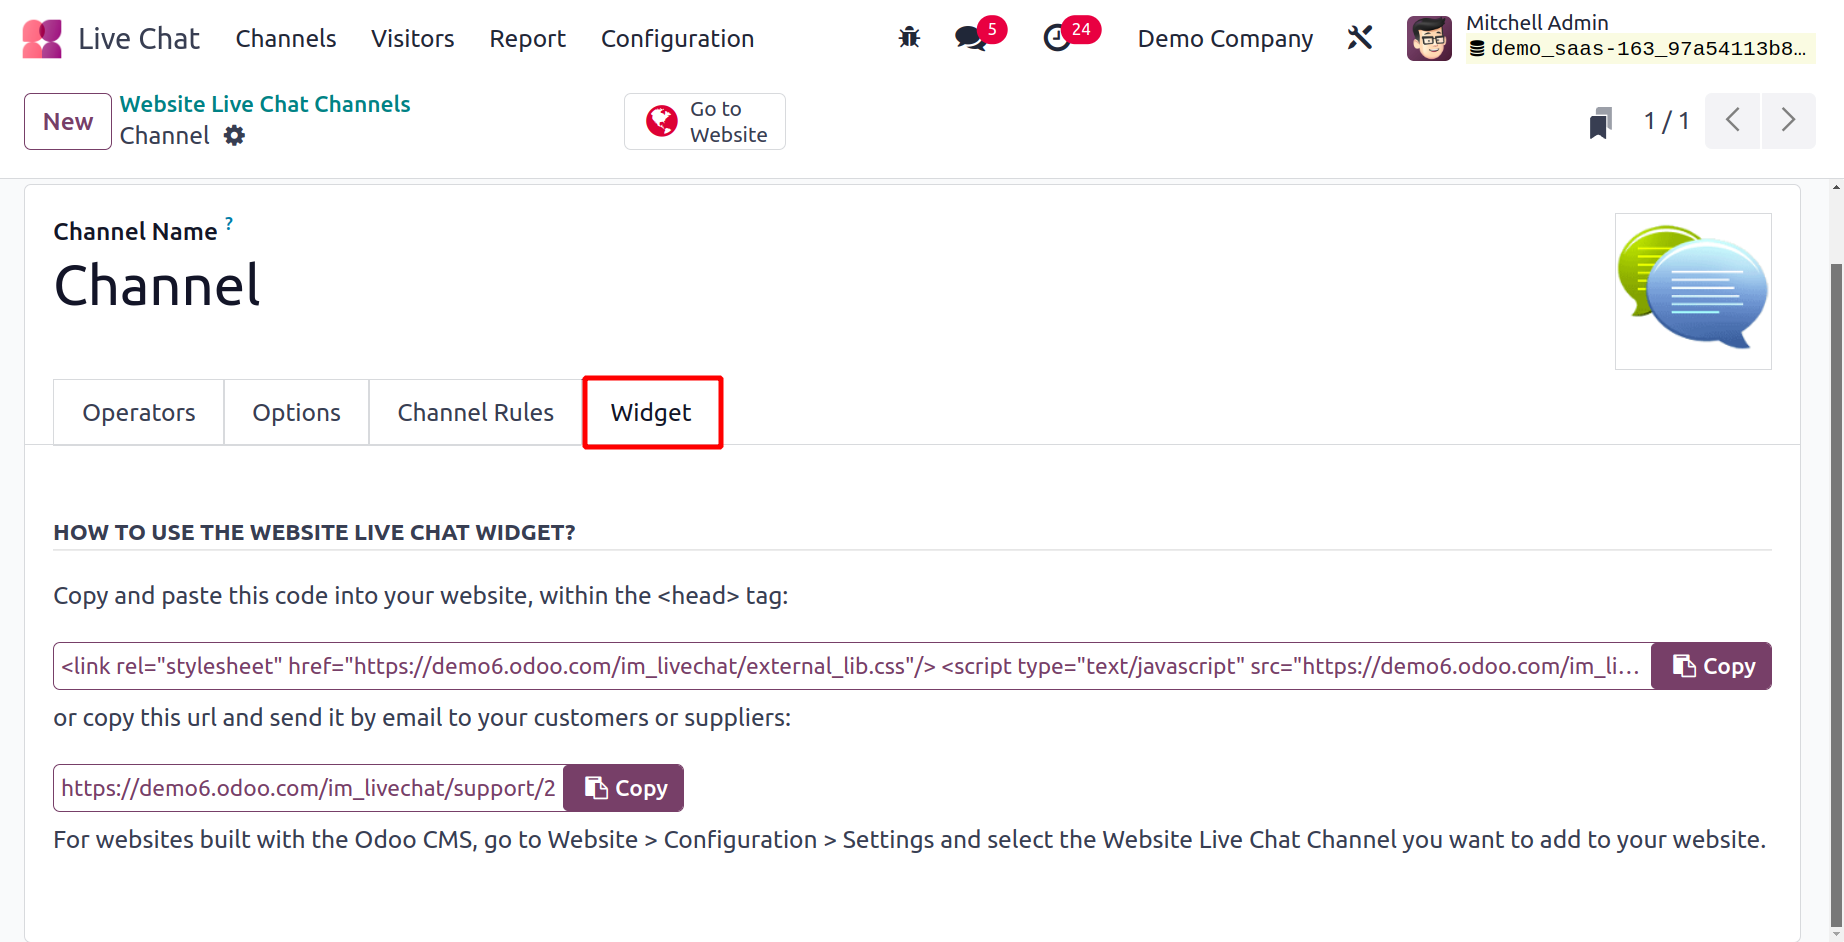
In addition to providing the code and URL, the widget tab offers usage instructions for the Website Live Chat widget. It is simple to copy and paste the code shown in the tab onto your website. Alternatively, you may also copy the provided URL and forward it to your suppliers or customers via email. If Odoo was not used to construct your website, these two approaches are appropriate. You can add the Website Live Chat channel to your website by going to Website -> Configuration -> Settings if the website was made using the Odoo CMS.
We've just launched a brand-new Live Chat channel. Publishing the just-formed channel on your website is the next step. Only then it will be possible for us to interact with guests. To accomplish this, Odoo17 provides you with a smart button that serves as a direct link to the Website module. The smart button, which is seen in the figure below, is visible and accessible in the upper right corner of the window.

To publish the new Live Chat channel on your website, click the Go to Website button and navigate to the website.
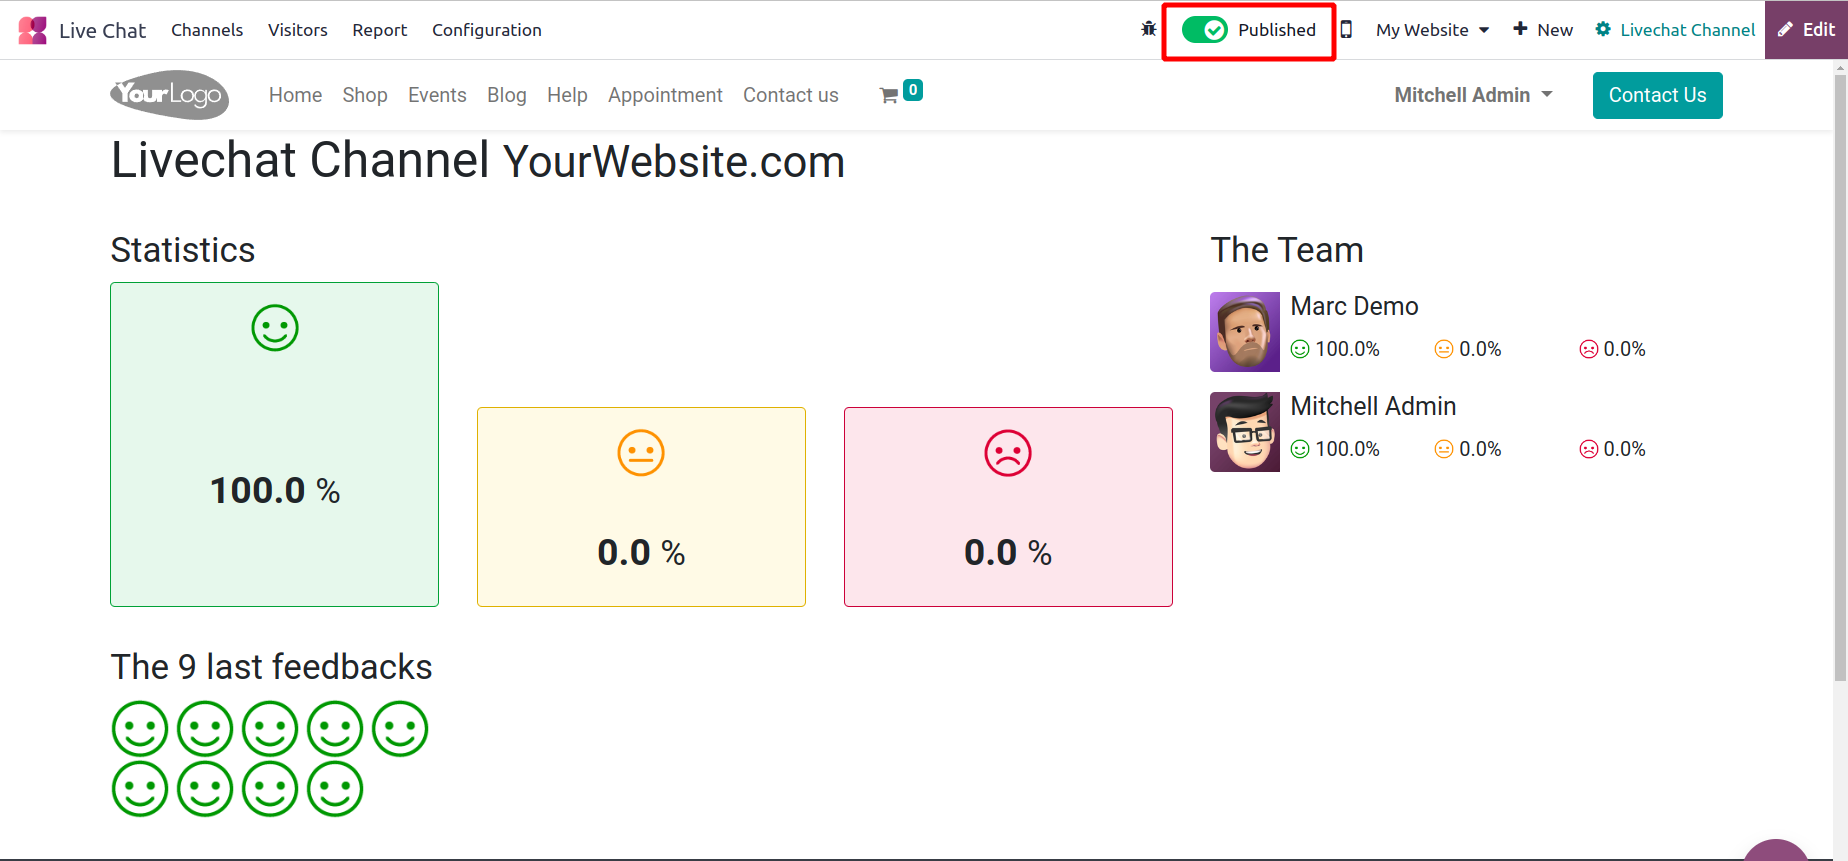
The Unpublished status can now be changed to Published, as shown in the figure above. Now that it's finished, you can utilize the live chat feature.
The Discuss module and the Odoo17 Live Chat module are closely connected. As a result, the chat will also appear as direct messages in the Discuss module.
Live Chat
All of the information about website visitors is continually kept up to date by the Visitors tab found in the Odoo17 Live Chat module. The Visitors window will appear as indicated below on the screen when you click on the Visitors tab in the system.
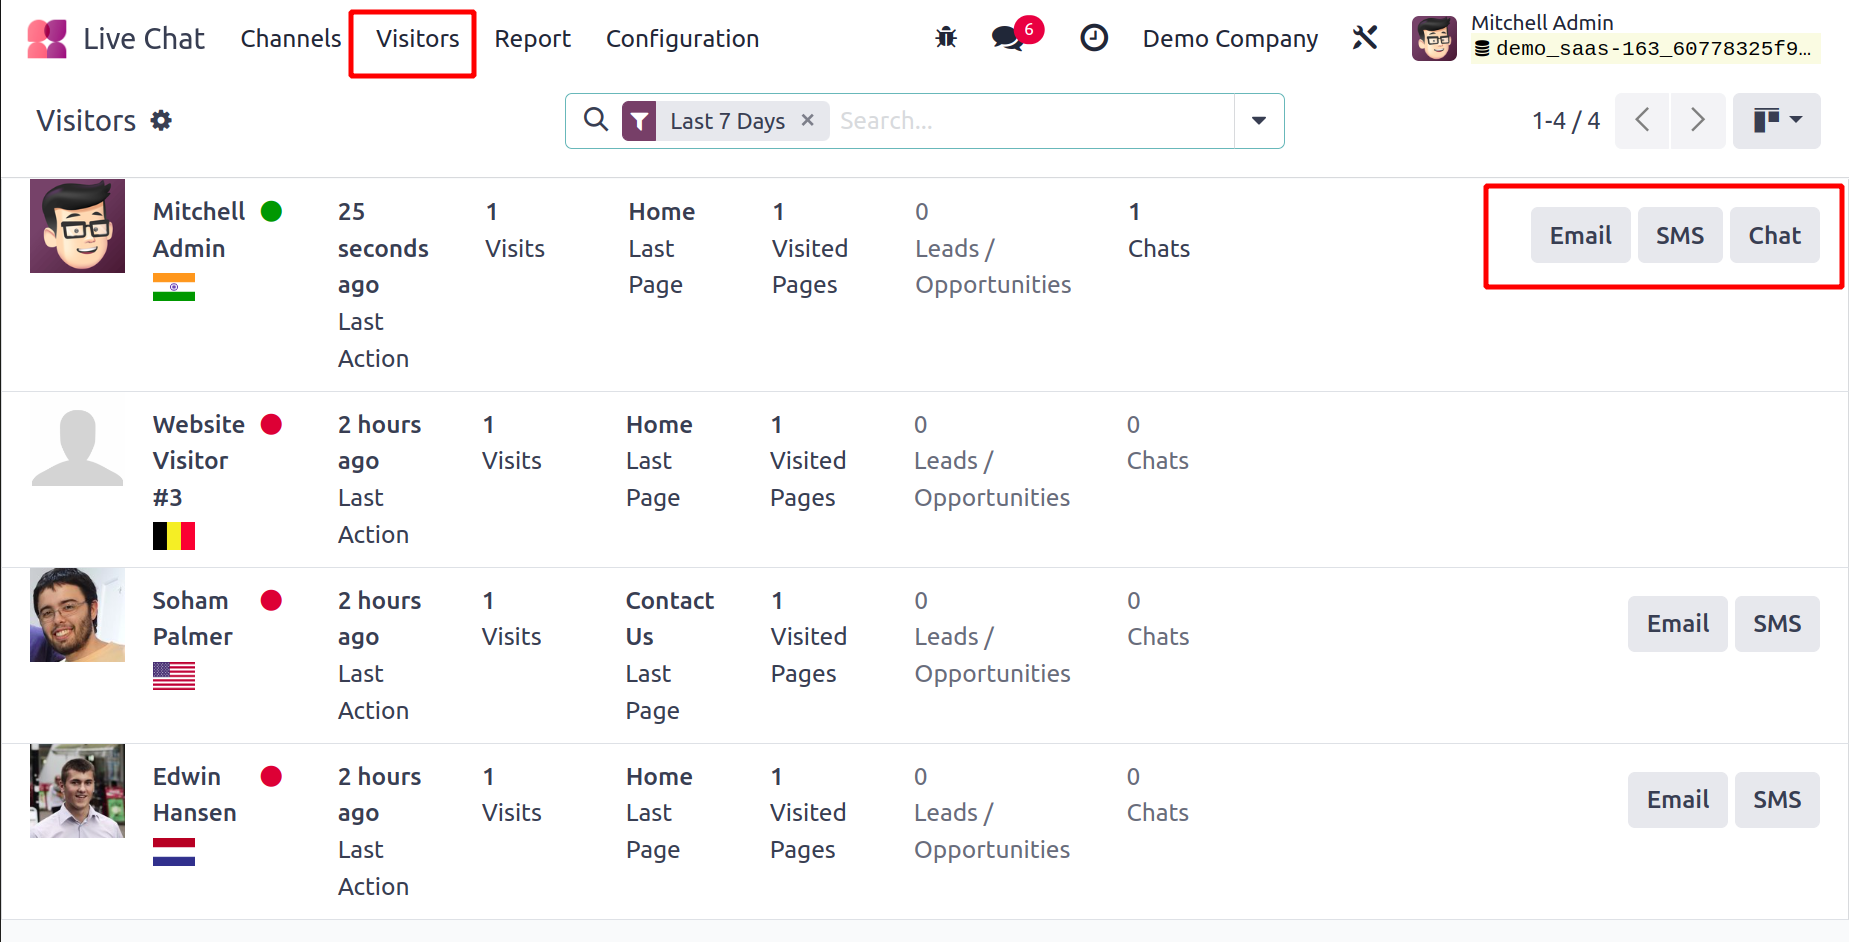
The Website module also provides access to this window. You can view the window in List, Graph, and Kanban view formats thanks to the system. The Kanban view is seen in the image above. You can notice that the system is describing every website visitor's details when you glance at this window. The information includes the visitor's name (if their name is already saved in your system; if not, it will show as a number), the last action time, the number of visits, the number of pages browsed, the number of leads or opportunities, and the number of chats. The pane additionally shows the buttons for SMS, CHAT, and EMAIL to start matching conversations.
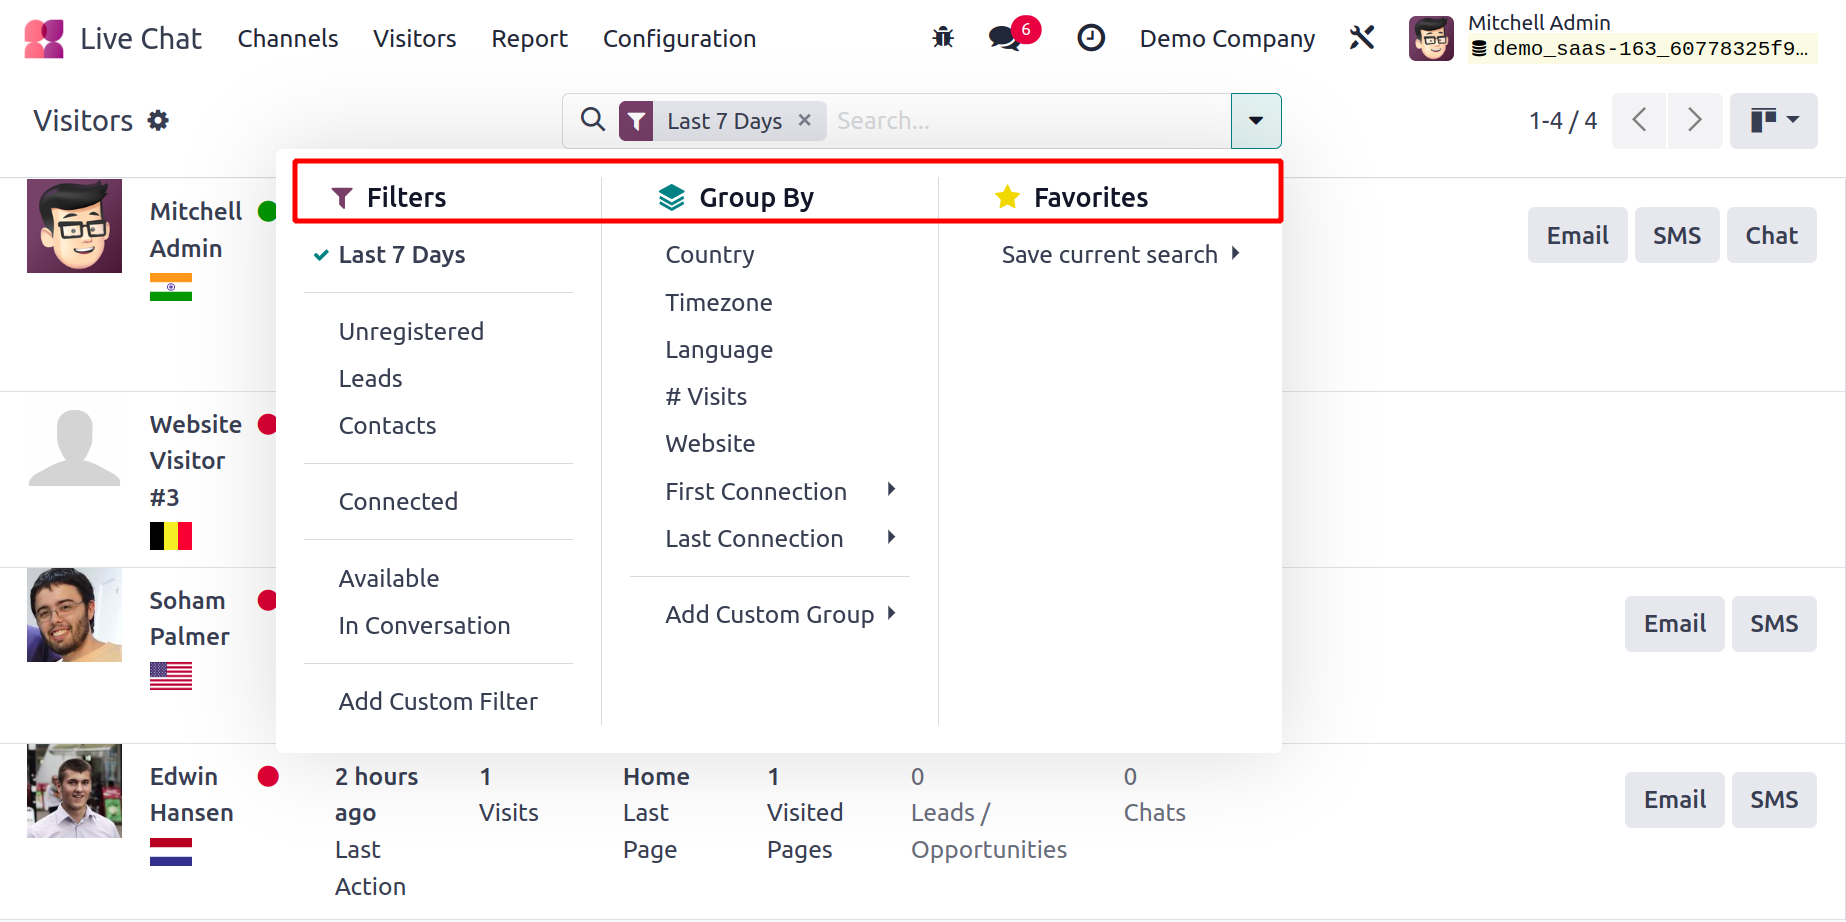
Numerous default and modifiable filter settings are available under the Filters tab. Last seven days, Unregistered, Leads, Contacts, Connected, Available, In Conversation, Push Notification On, Push Notification Off, and Archived are the basic filters that are available in the pane. To filter the list, choose the necessary Filter option. The standard Group By options, such as Country, Time zone, Language, Website, First Connection, and Last Connection, are available under the Group By tab. Furthermore, you may streamline the procedures by using the Search and Favorite options.
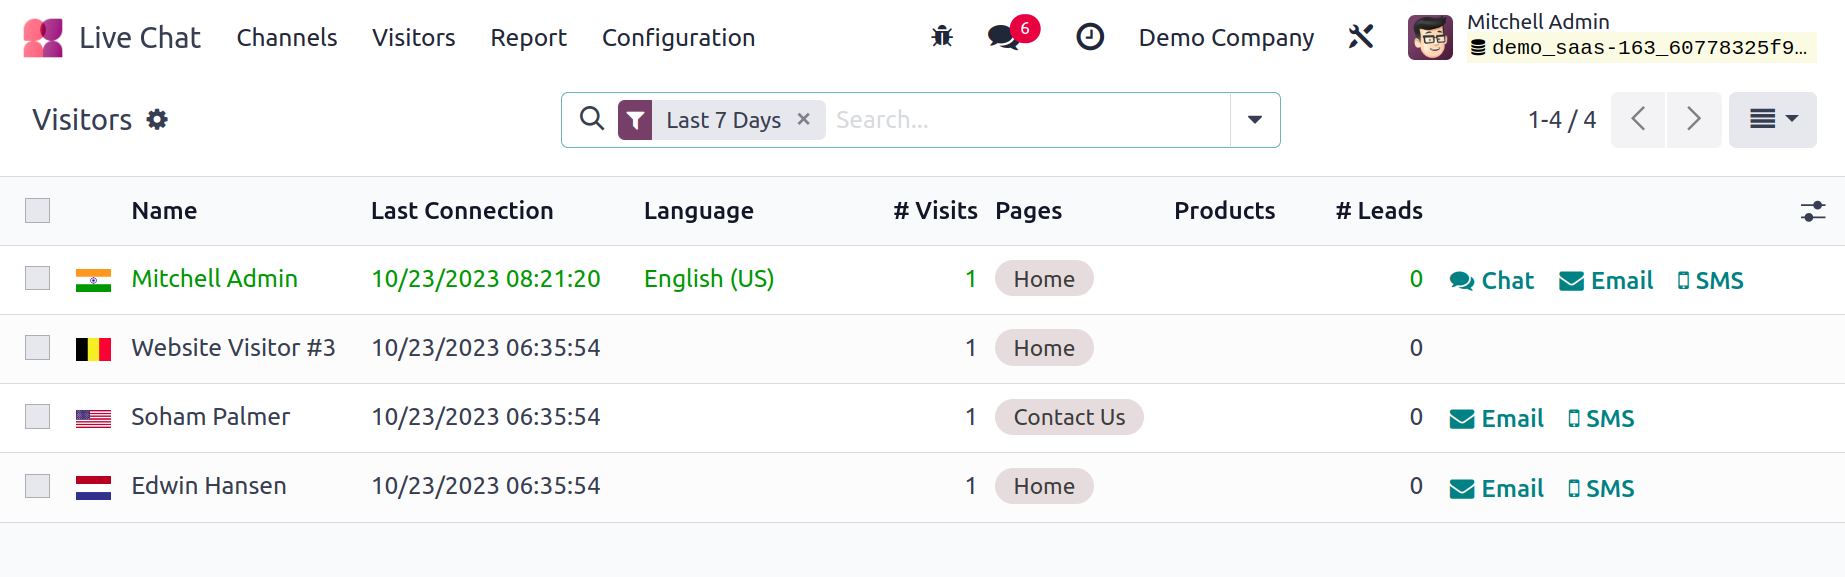
You can now view the Visitors window in a List style by clicking on the List view menu item in the upper right corner, which is displayed in the image above. This is a list of every visitor to the website, complete with their Name, Last Connection, Language, Visits, Pages, Products, Leads, and the icons for Chat, Email, and SMS to carry out those actions.
A pop-up chat widget will appear when you click on the Chat menu, as seen in the image below. This chat box allows you to initiate a discussion. As indicated in the figure below, you can see the Show Member List, Open in Discuss, and Close chat window icons at the top of the pop-up chat window.
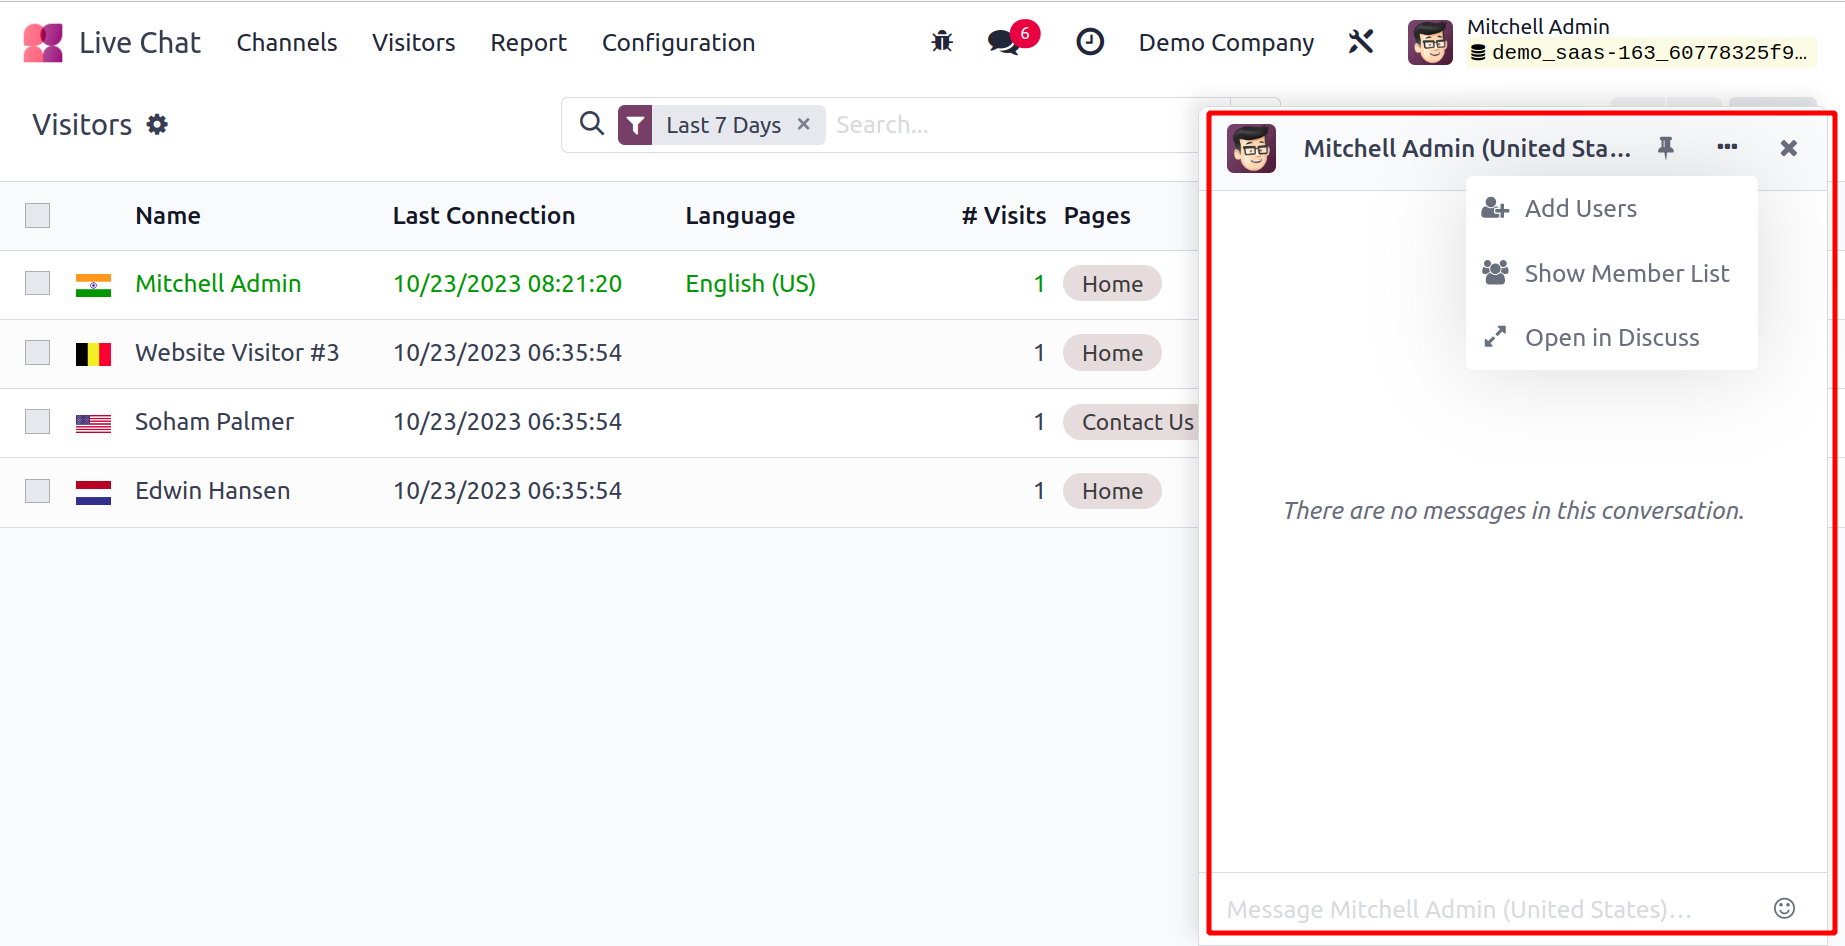
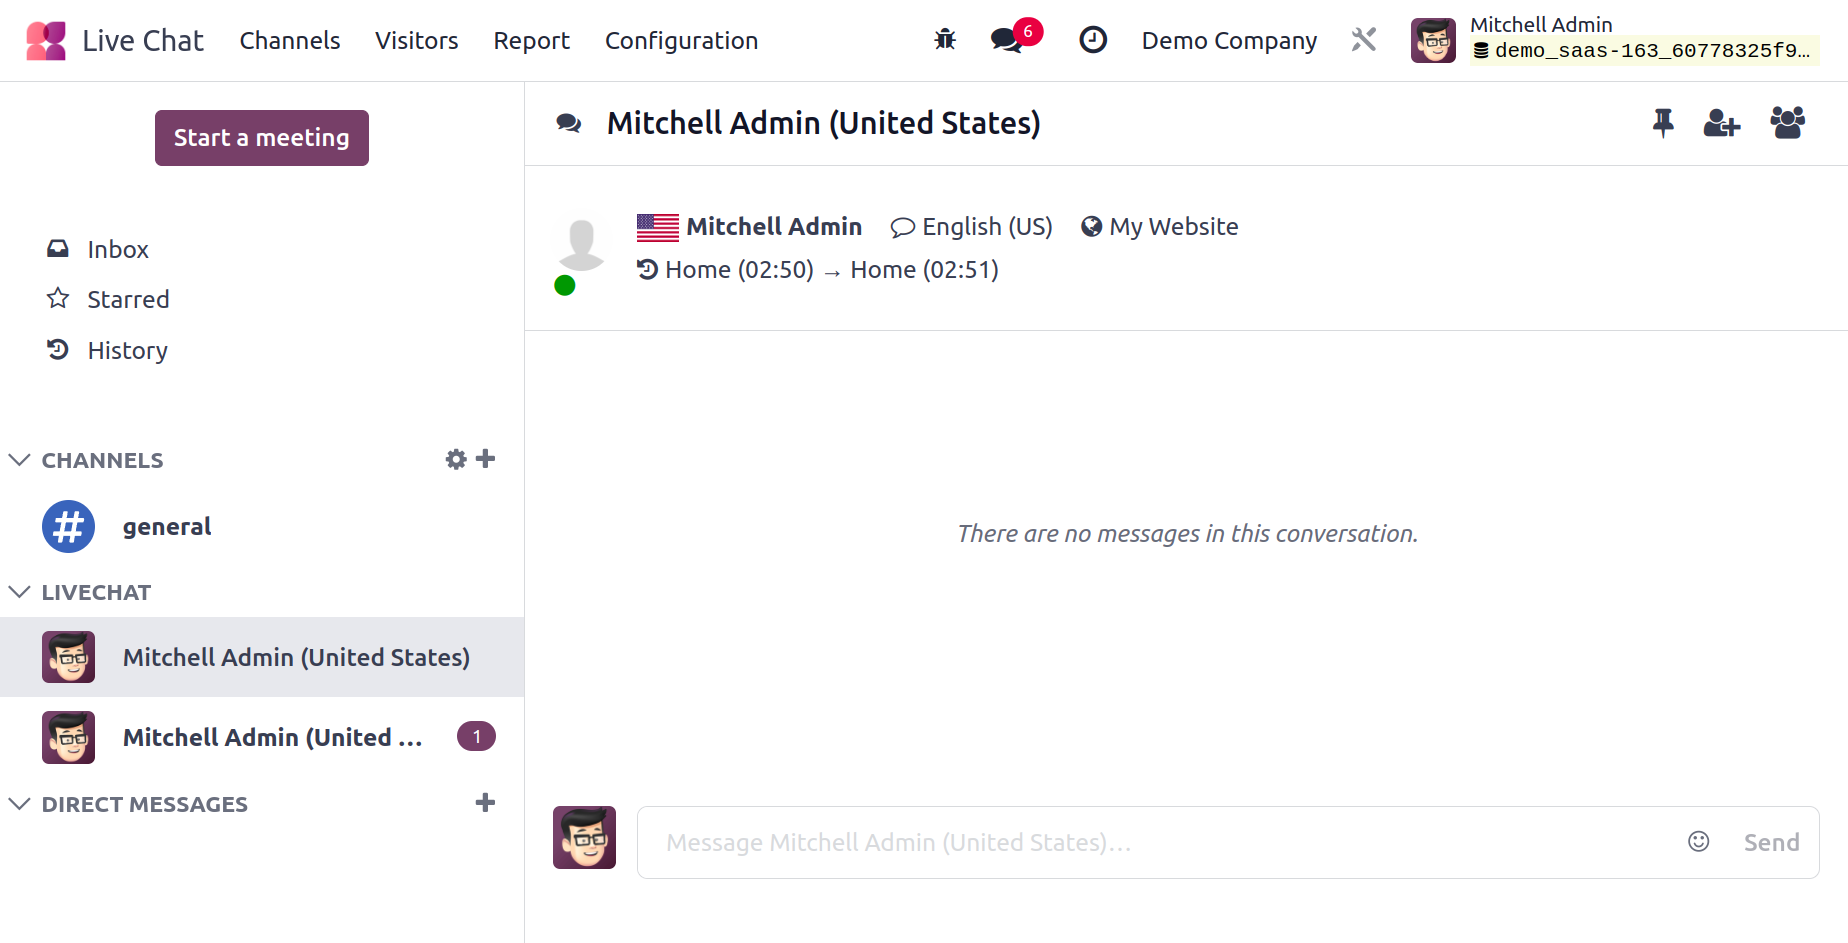
The opportunity to add new members will be displayed in the chat box along with a list of all the members when you select the Show member list menu. You may see the discussion in the Discuss module by using the Open in Discuss menu.
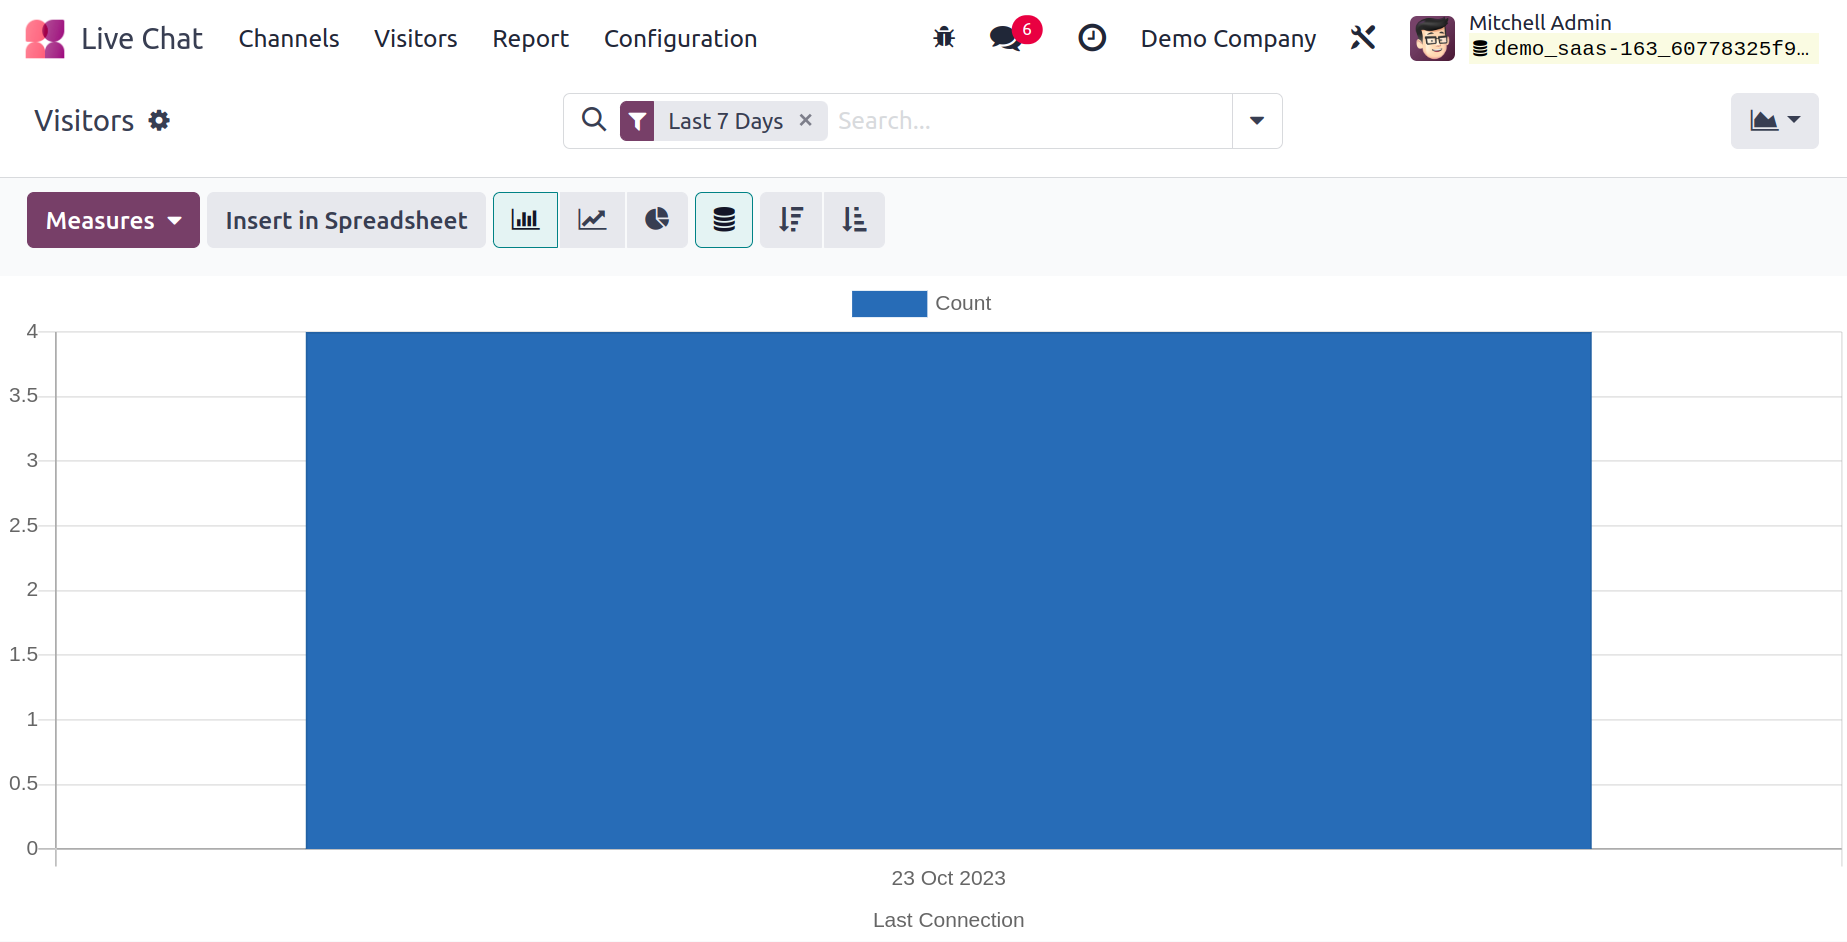
The Visitor's window depiction in Graph view is shown below.
Canned Responses
The prepared answers to the often-asked questions by visitors to your website are called canned responses. Setting up different canned responses will help you save a lot of time and work from your human resources. Many of the frequently asked questions will be present in a chat. With the help of this function, you can shortlist them and set up these typical answers in the past. Now let's examine the Canned Responses pane. The Live Chat module's Configuration tab has the Canned Responses menu.
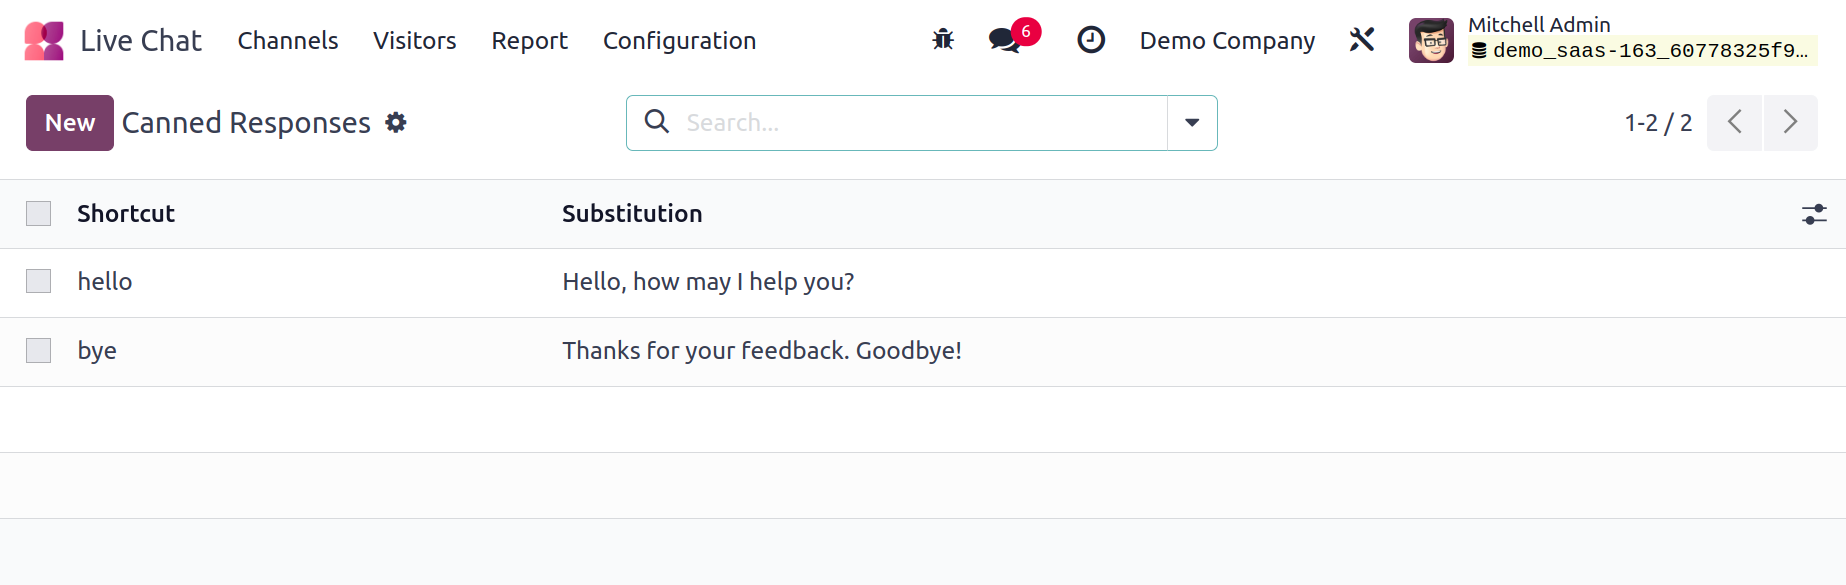
A few Canned Responses that have already been explained on the platform are available for viewing here. The shortcut and substitution, as well as all of the configured canned responses, will be shown in the window. Use the New button to add new Canned Responses. You will see a new row in the same window where you can define a new Canned Response after clicking this button.
After discussing the Canned Responses function of the module, let's take a closer look at the Reporting part.
Chatbot
You may enhance customer contact and support via Odoo 17 Live Chat by integrating a chatbot through the configuration of predetermined responses and automation. This will allow the chatbot to connect with users and offer instant assistance. Tailor your chatbot to effectively manage commonly requested queries and expedite communication.
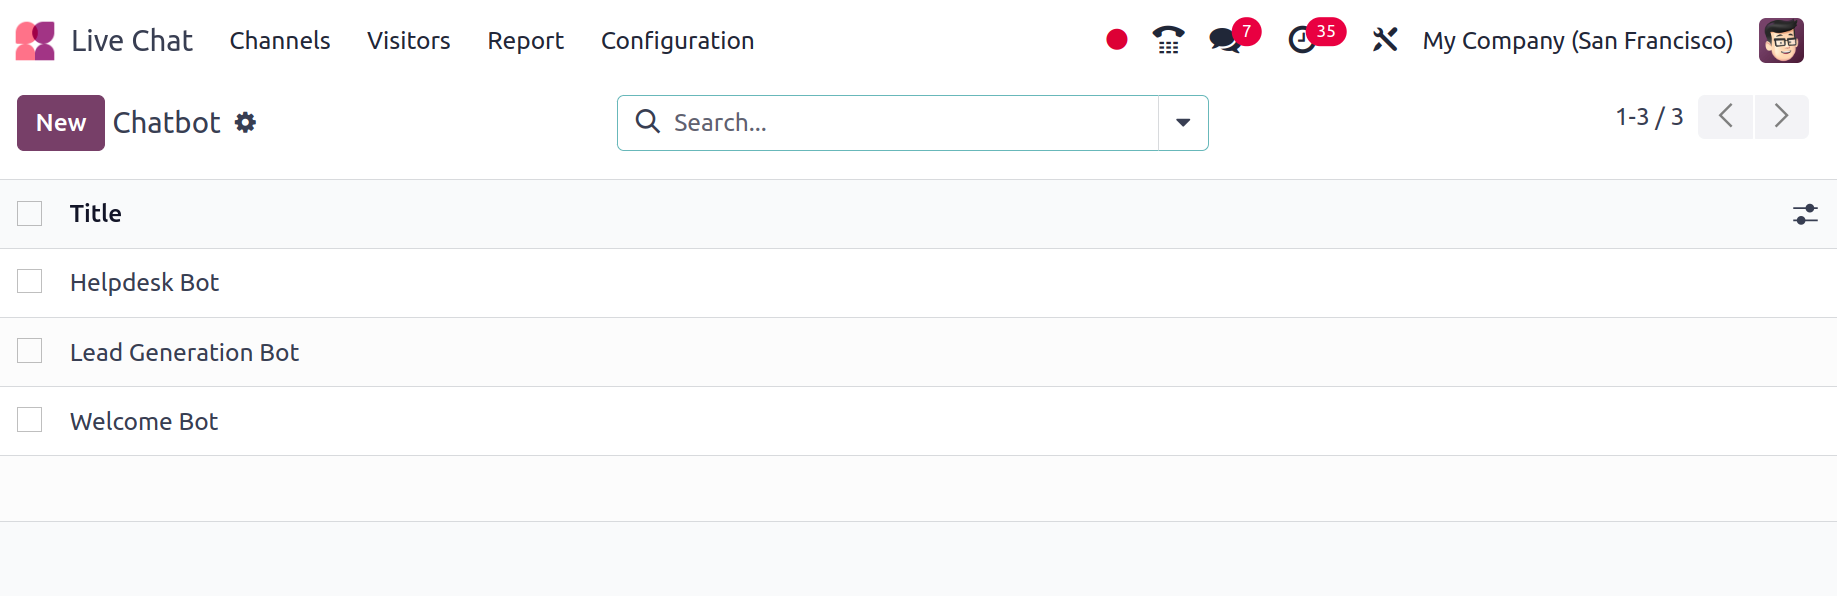
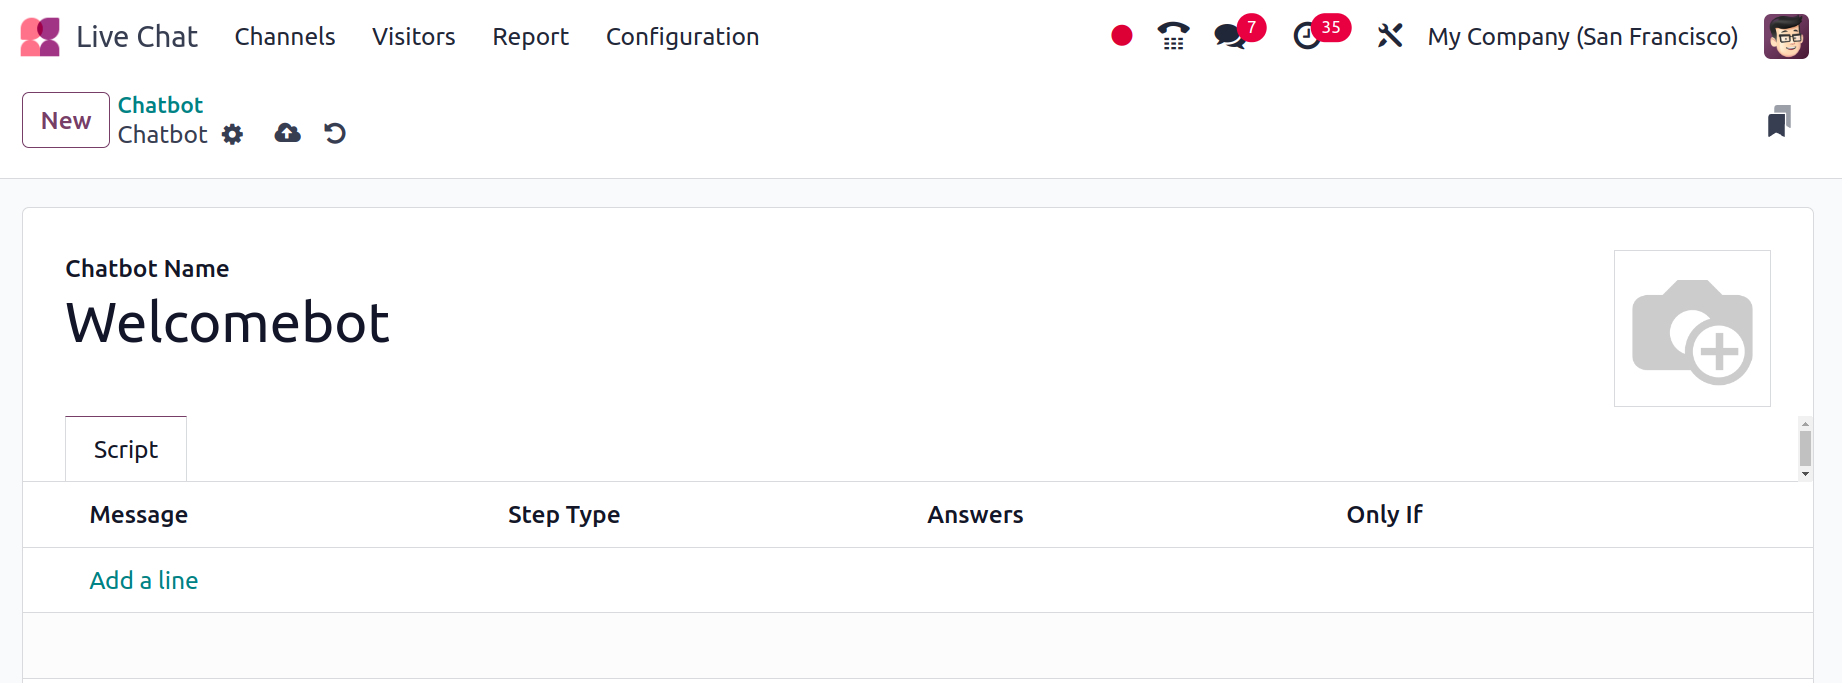
Thus, the Configuration menu has the Chatbot option. There is a list of the configured ones. To add another, click the New button. You can customize the messages and reply responses by adding the chatbot's name and selecting the Script tab.
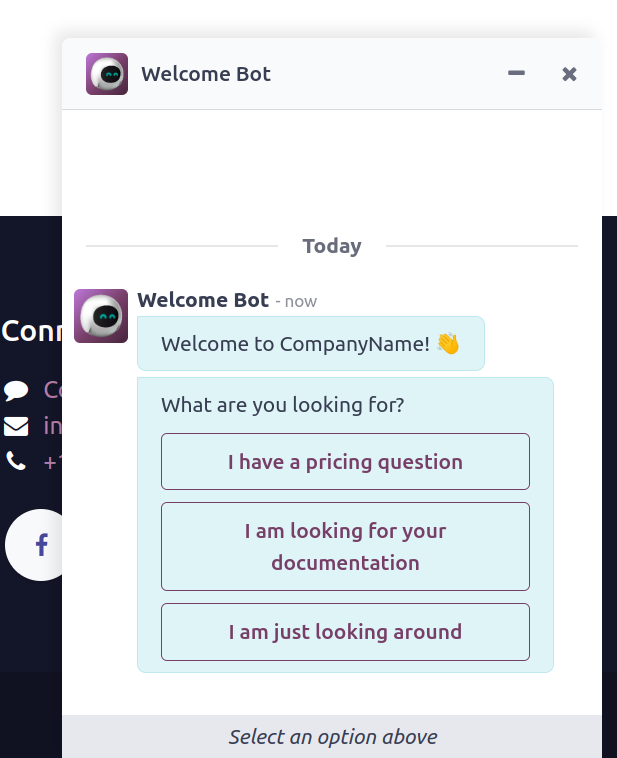
Save the Chatbot that was generated after adding the Script. After that, a Test button will show up at the top of the display.
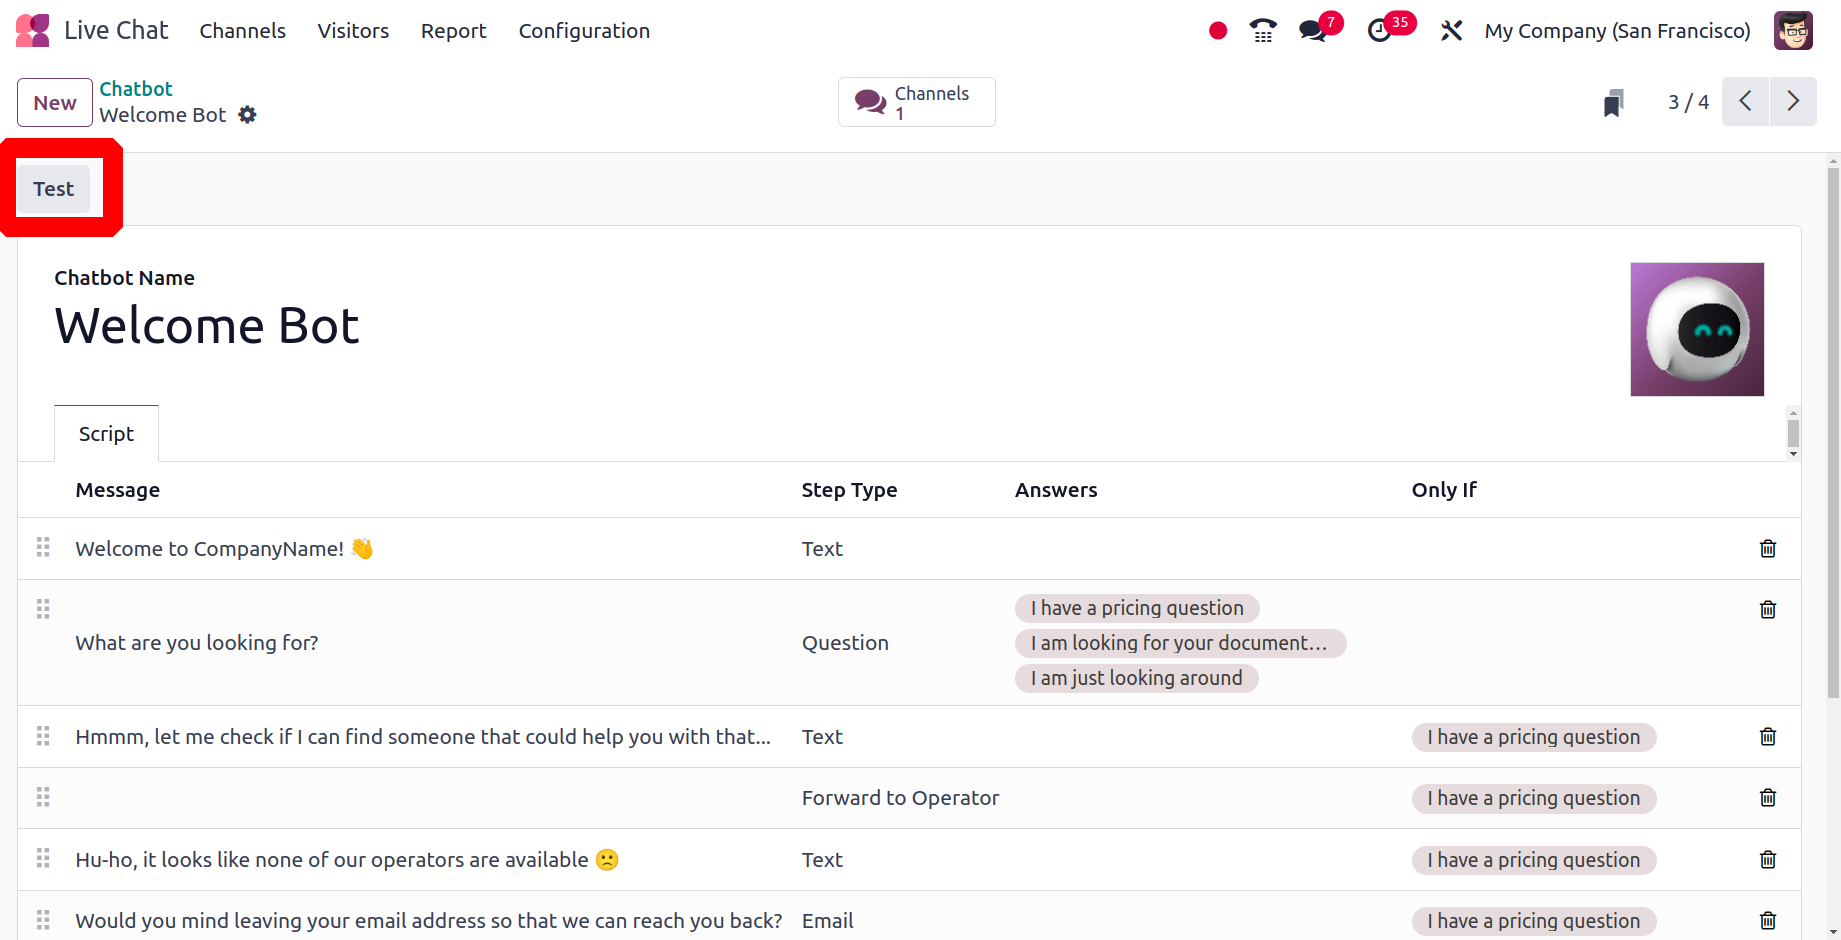
The customized message will then show up in the chat window. if any of the messages are selected by the user. The configured response will then show up automatically.
Reporting
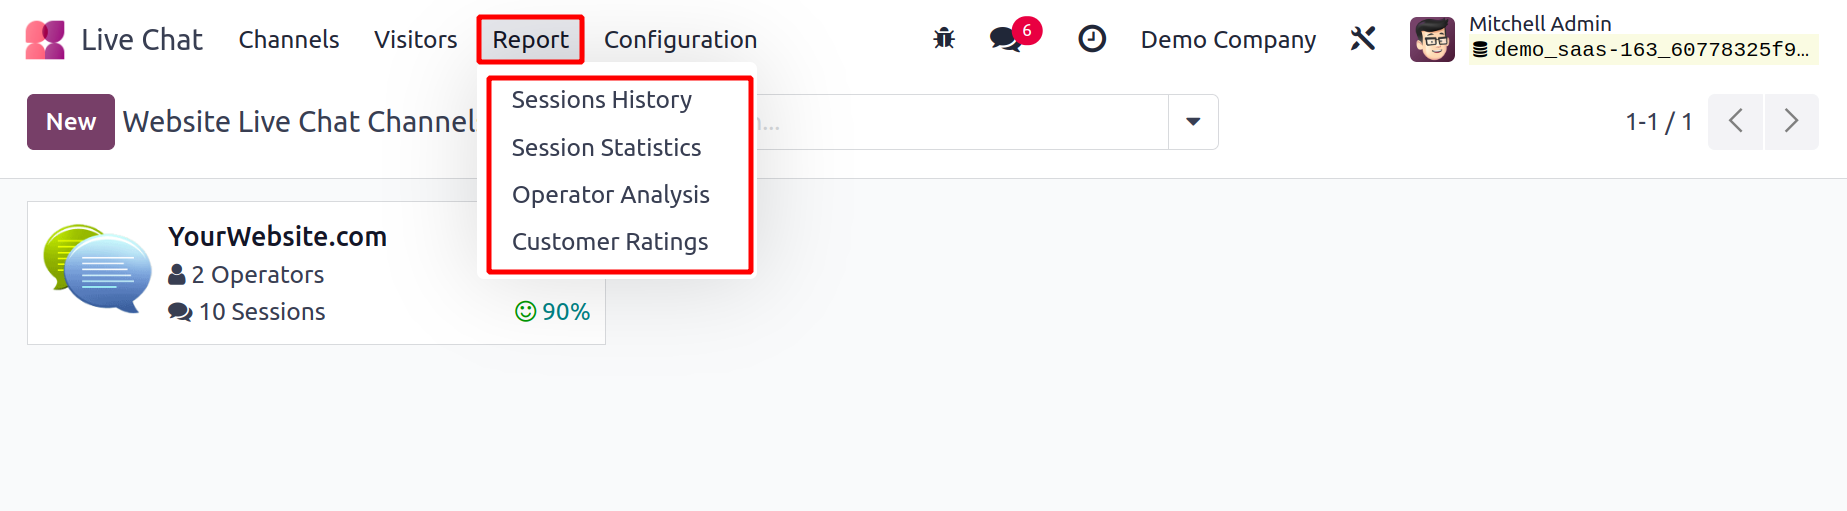
A number of sub-menus, including session history, Session Statistics, Operator Analysis, and Customer Ratings, are available under the Reporting page of the Odoo17 Live Chat module.
Sessions History
All of the sessions created in the Live Chat module are reported on using the Sessions History option found in the Reporting section.
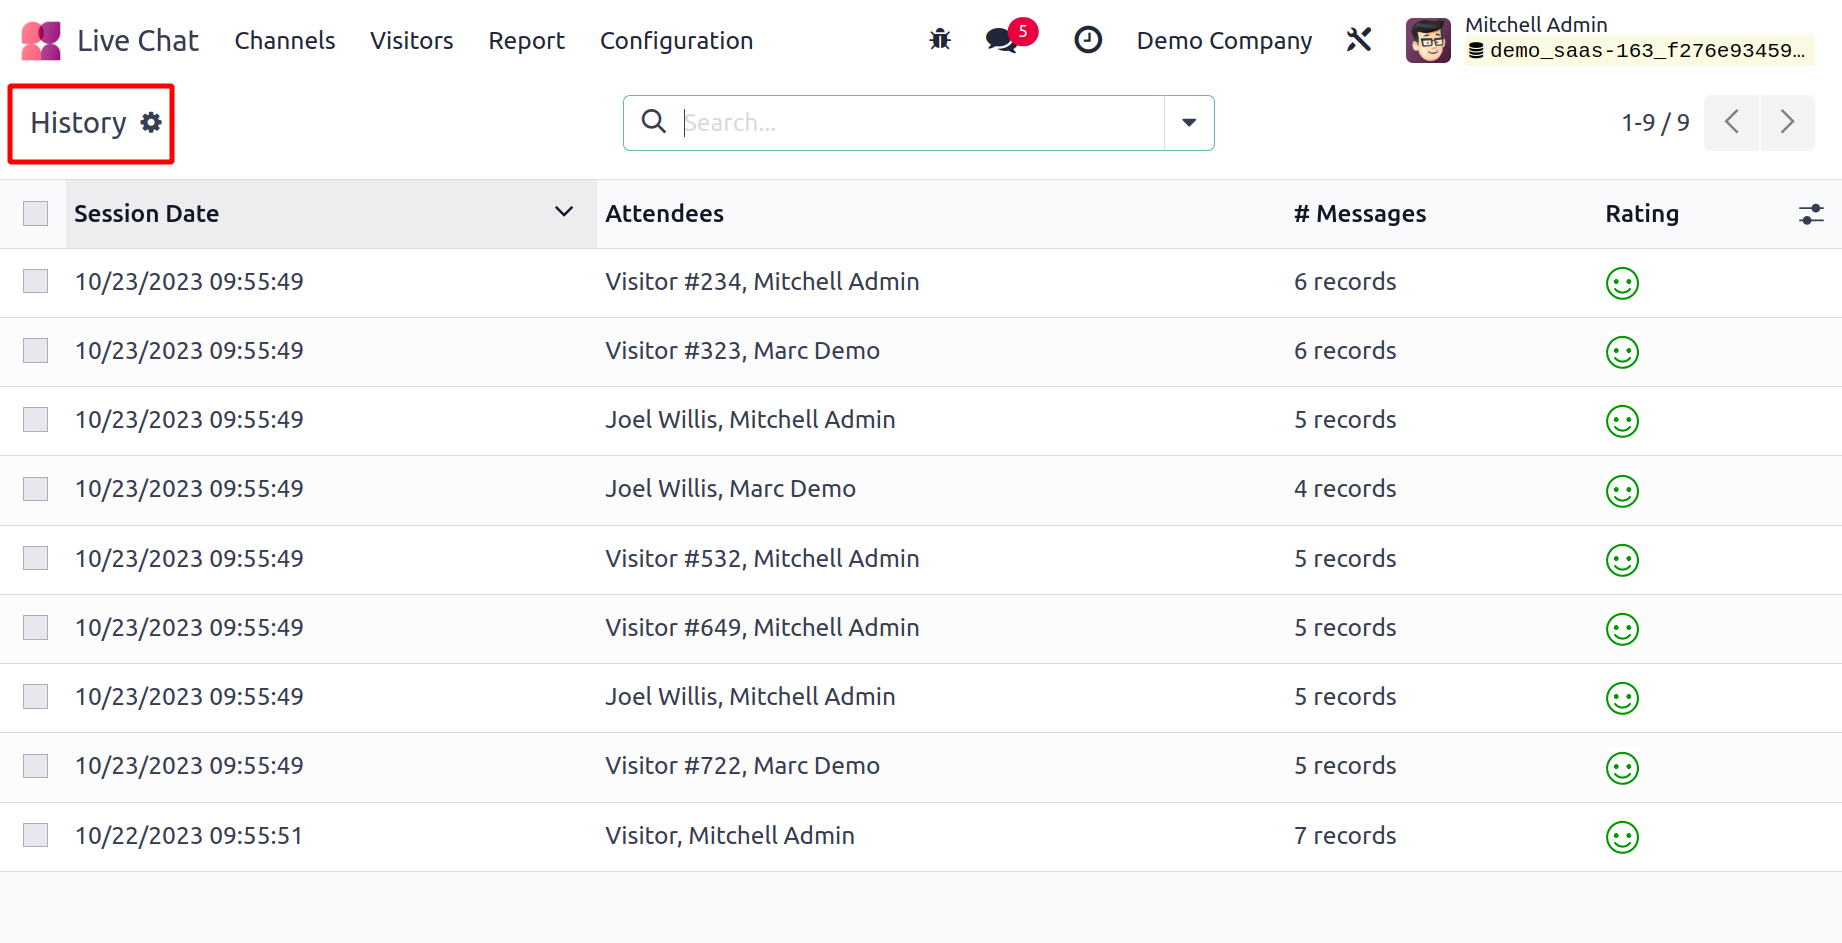
All of the platform's constructed session histories are accessible from the Session History window, which is depicted in the window above. Important details about each session's past, like the date, time, attendees, number of messages, and rating, will be highlighted in the window.
Session Statistics
You may access all of the session statistics reports in both graph and pivot formats by opening the Session Statistics window. Below is a graphic illustration of the Session Statistics pane.
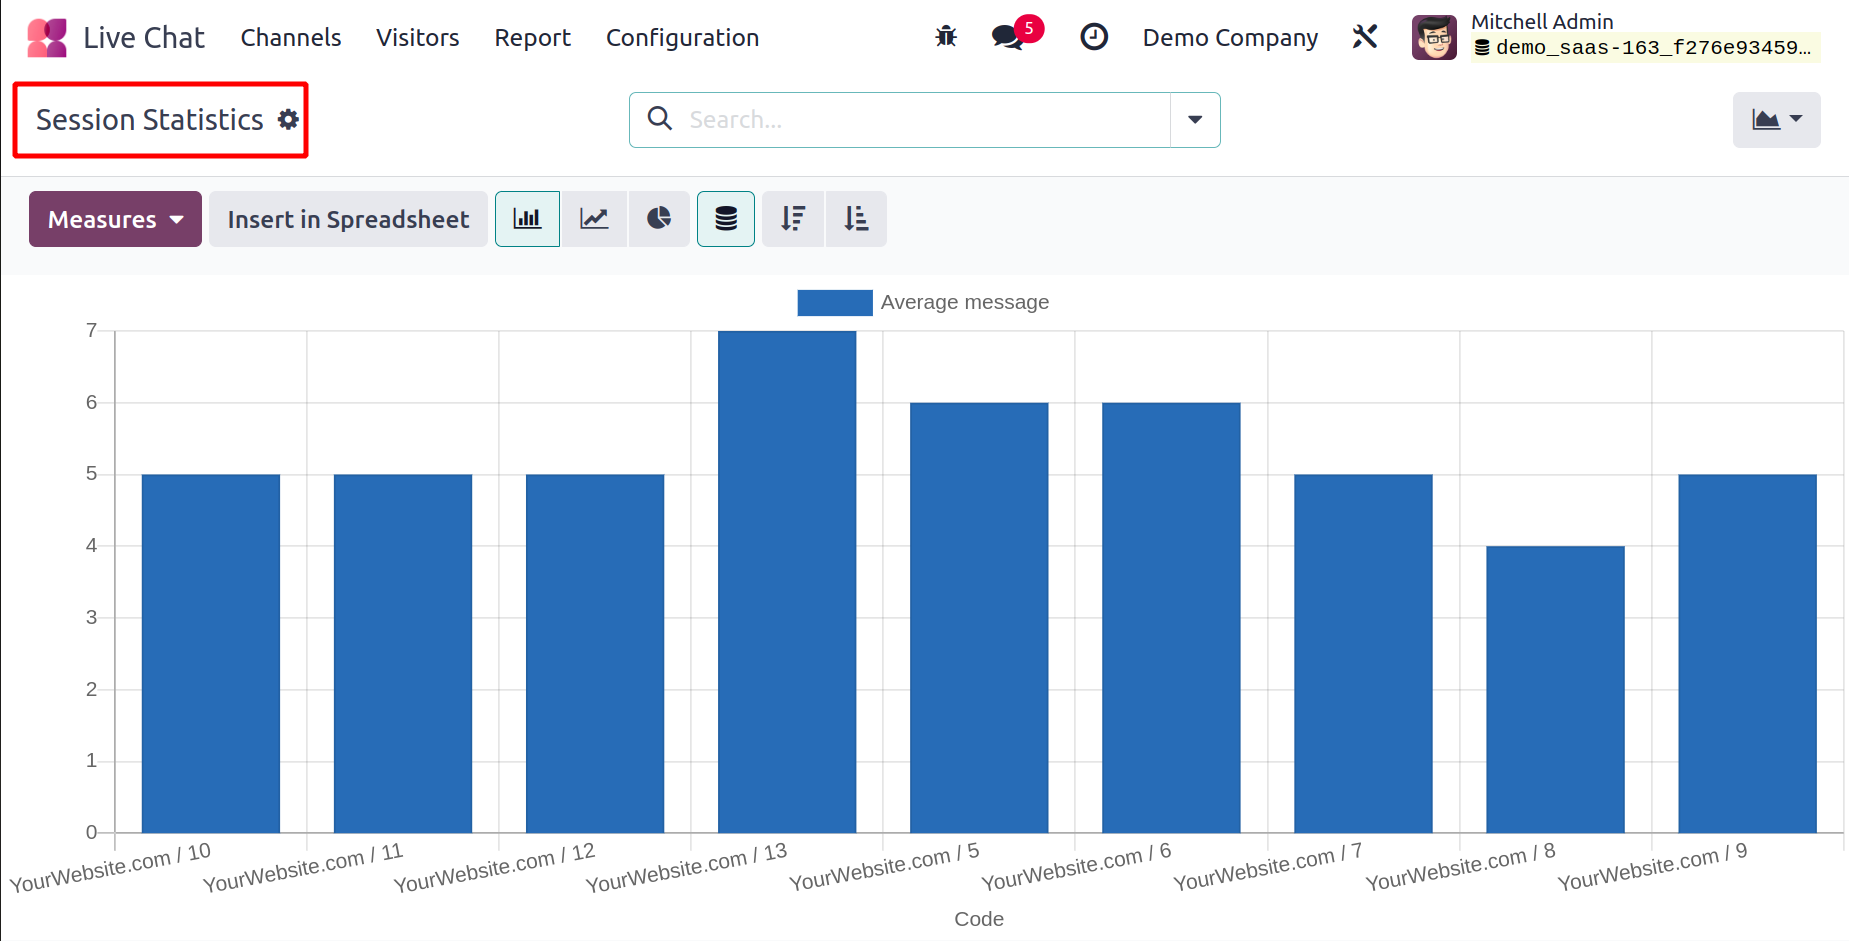
This is the window represented as a bar chart; line and pie charts are also available for viewing. There are various ways to see the Session statistics report. You can click on the MEASURES tab to alter the graph's measures. You will now draw a set of measures, just like in the picture below.
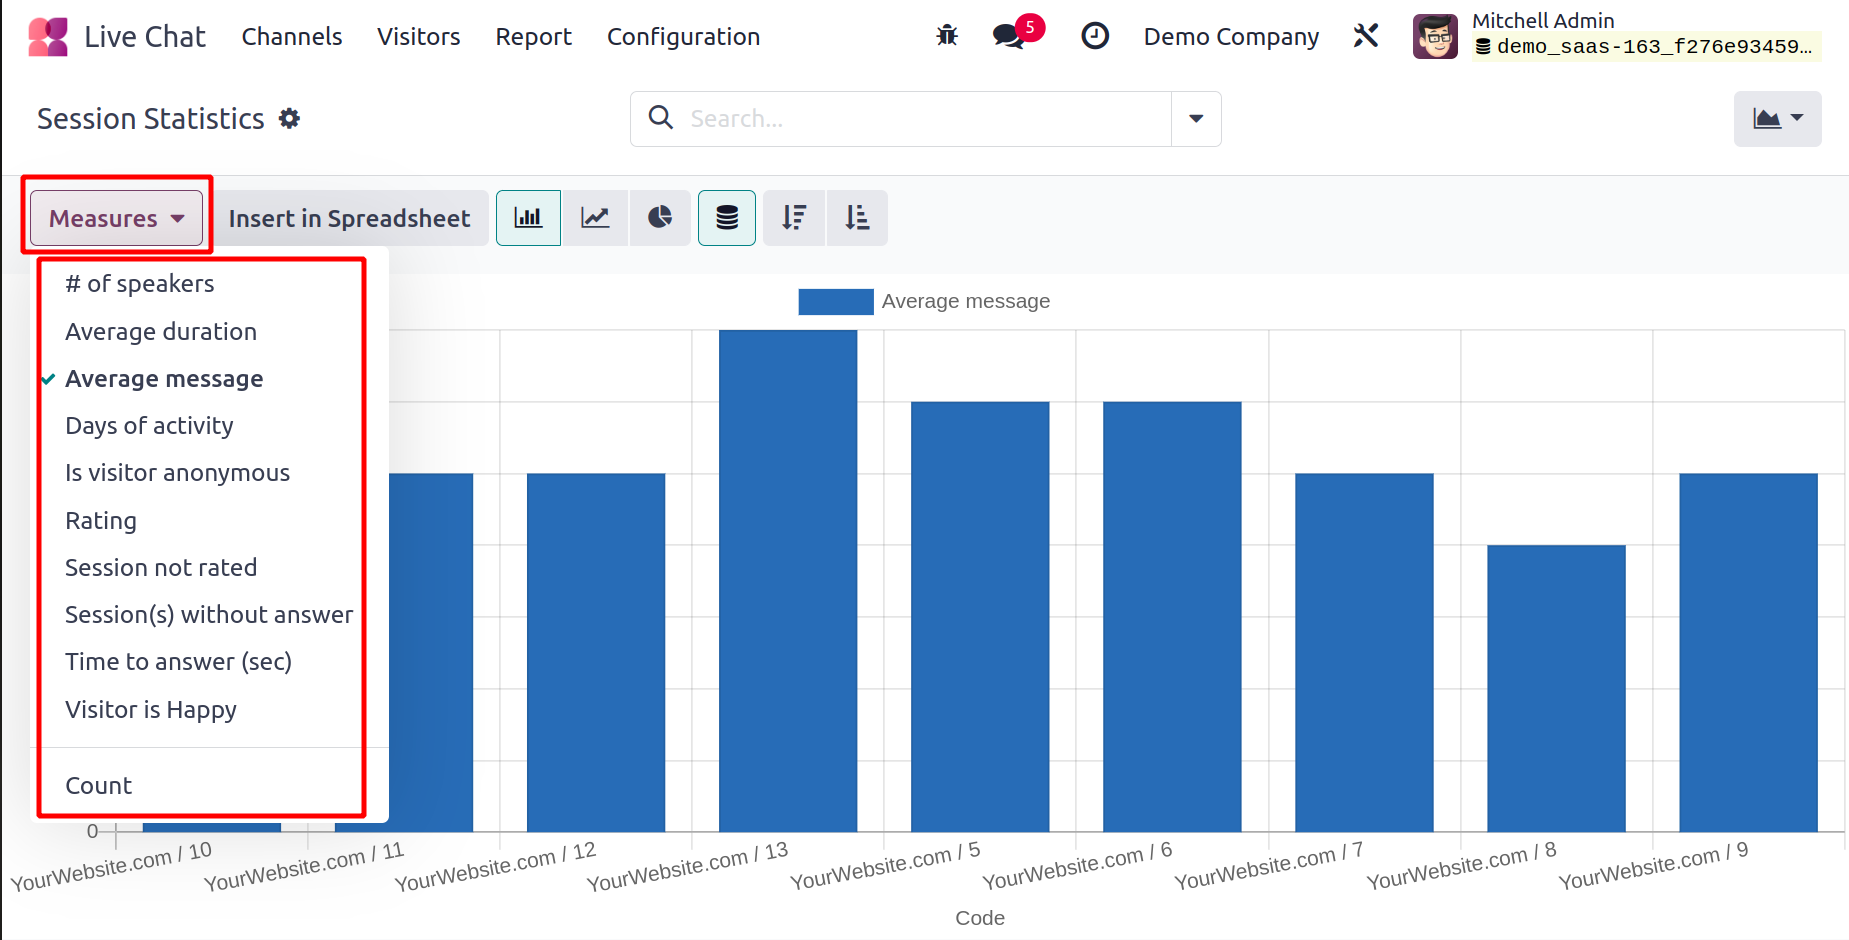
There are settings like "Number of speakers" under the MEASURES tab. Days of activity, Average message, Average duration, Are visitors unidentified? grading Not rated, Not rated, Not rated, Without a response, there is time to respond, and the visitor is satisfied.
Furthermore, the window offers a number of pre-configured and user-customizable grouping and filtering options that let you separate the necessary information from the entire list. Missed Sessions, Treated Sessions, Last 24 Hours, This Week, and Start Date of the session (month, quarter, and year) are the default filters accessible under the Filters tab. Similarly, Code, Channel, Operator, Creation Date (hour), and Creation Date (Year, Quarter, Month, Week, and Day) are the default options under the Group By section.
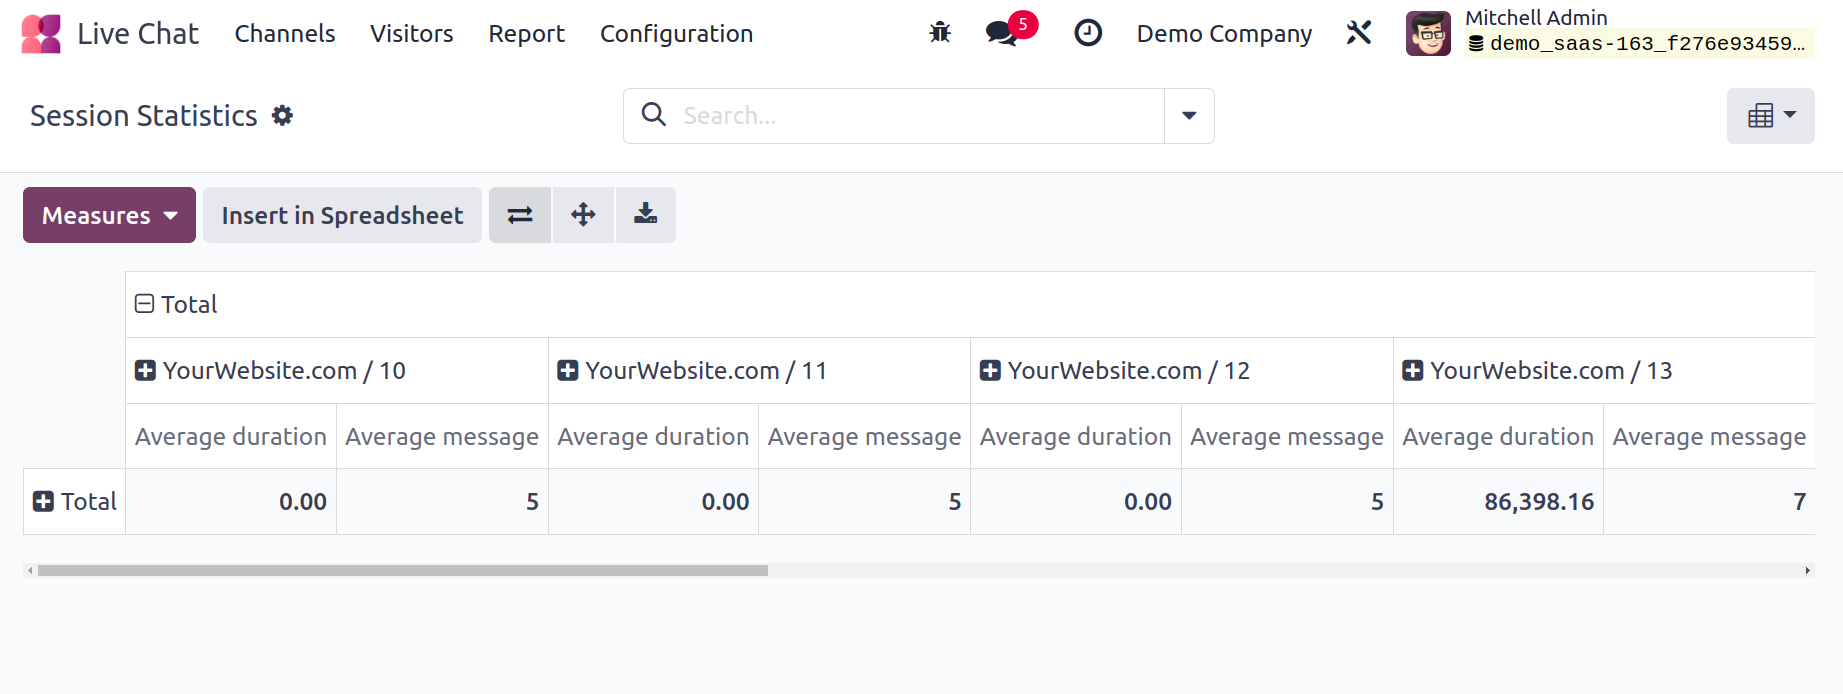
Let's now examine the Session Statistics window's Pivot view. Alternatively, you can click on the Pivot menu icon that appears in the window's upper right corner.
Operator Analysis
You can create reports on Live Chat based on live chat operators by using the Operator Analysis menu found in the Reporting part of the Odoo17 Live Chat module. You can also examine the Operator Analysis window in Graph and Pivot view.
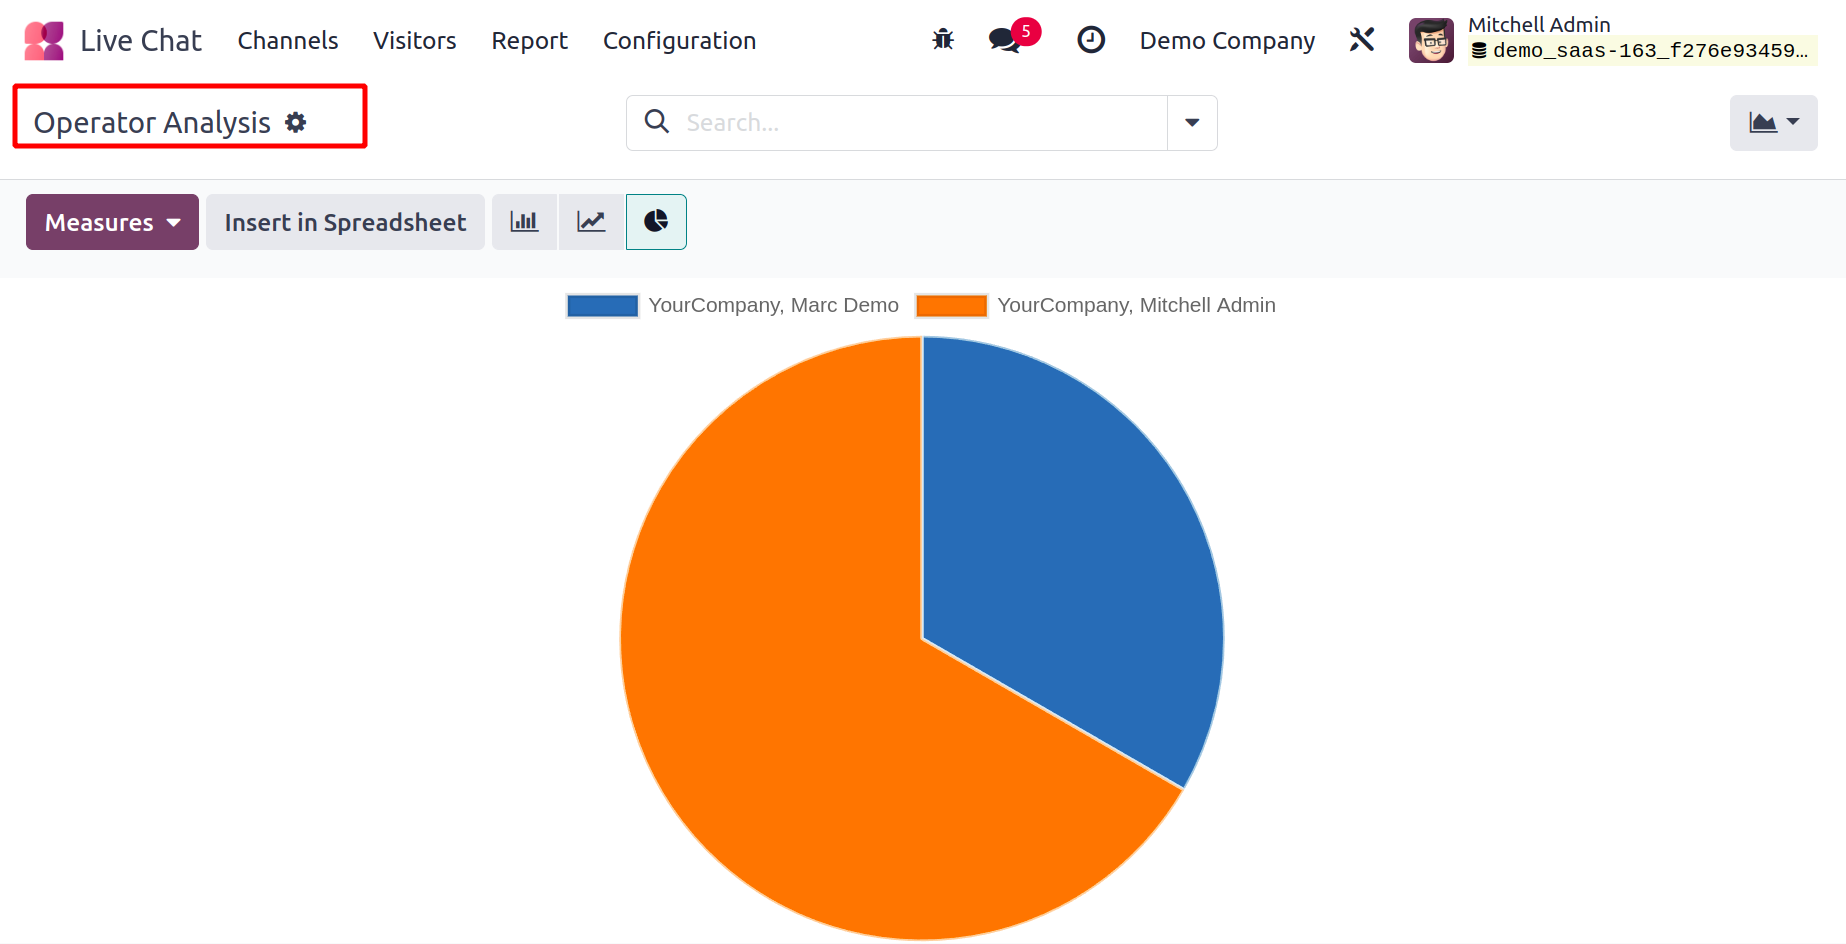
The Pie Chart depiction of the window is shown in the image above. The window can also be seen in pie, line, and bar charts. The window's MEASURES tab shows the Time to Answer, Average Duration, and Number of Sessions. Additionally, you can use a variety of pre-configured and modifiable FilterS, Group By, Favourites, and Search options.
Customer Rating
You can record all of the responses that website visitors provide in accordance with the interactions that take place between the company representative and visitors by using the Customer Rating option found under the Reporting tab of the Odoo Live Chat module. To open the Customer Rating window, click the Customer Rating menu.
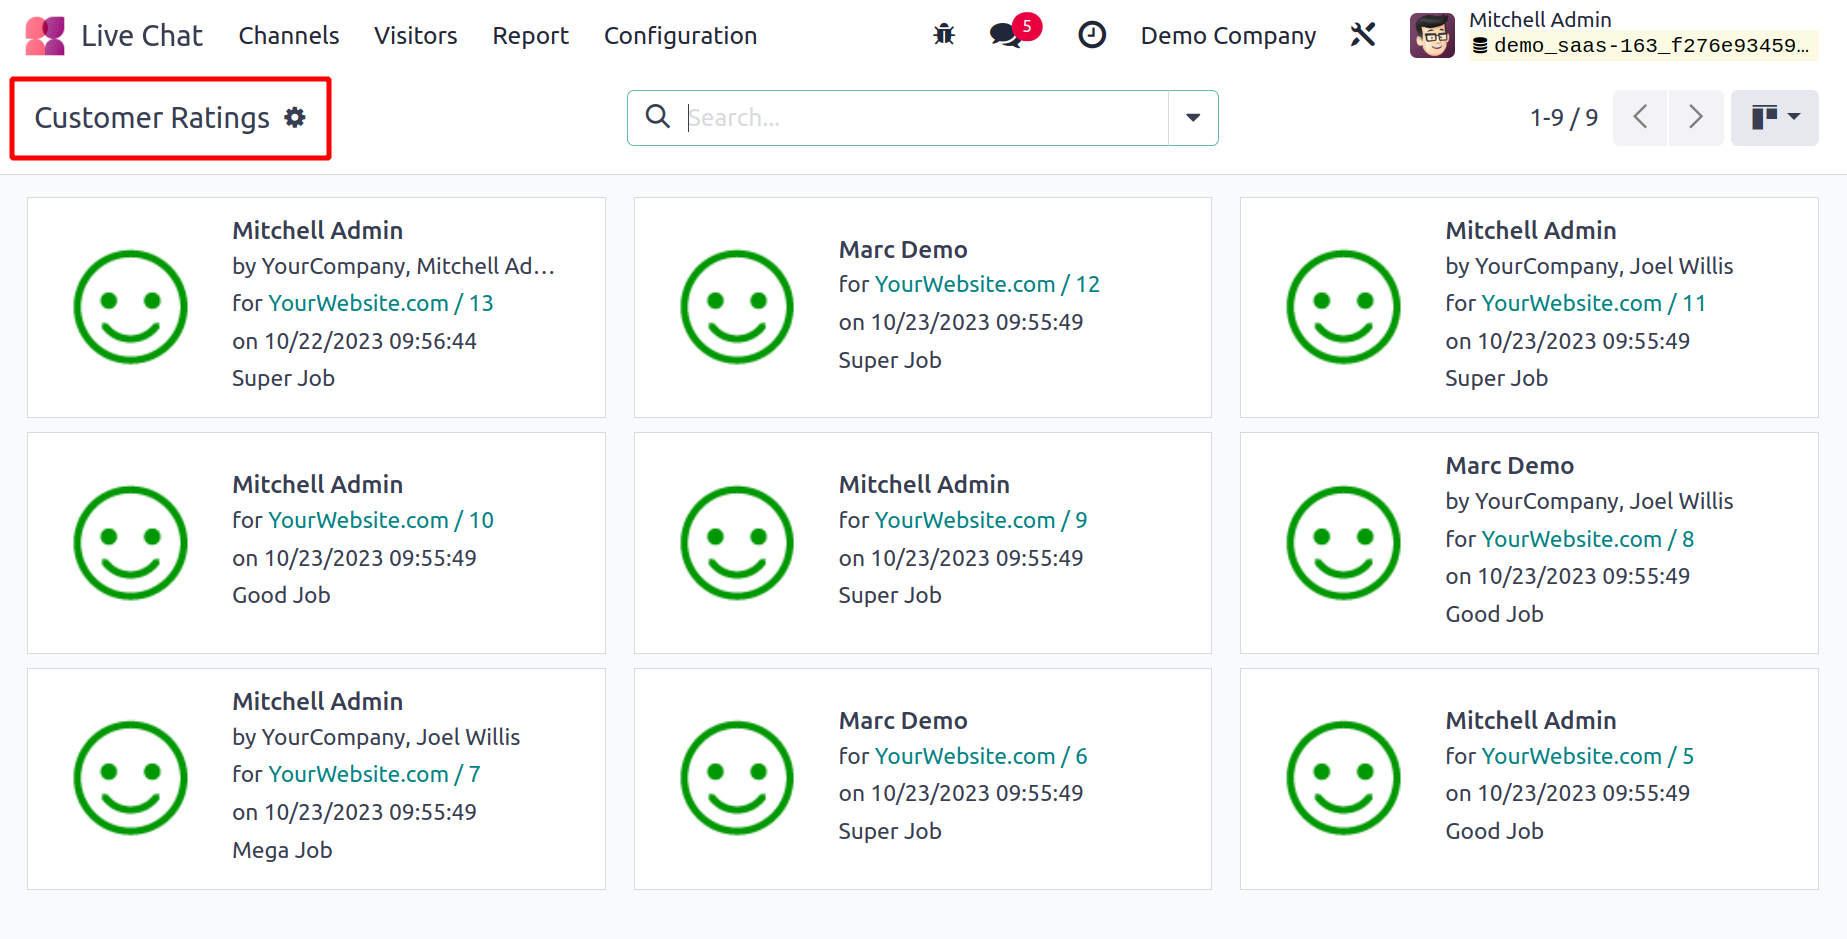
All of the analytical reports of the customer ratings on Kanban view are available for viewing here. The report is also available to see in List, Pivot, and Graph views. Obtaining visitor ratings will assist you in examining, enhancing, and fortifying your business's consumer interactions. You can also adjust the default and configurable filters, grouping settings, and search capabilities in this box. The settings are available under the corresponding tabs.
One of the most effective ways to engage with consumers is through the Live Chat module of the Odoo17 ERP, which is a source of delight for users. This is a special and ideal approach to improving your customer service.