Events Management
One of the best marketing techniques used by businesses nowadays to promote their goods and services to a large audience is
holding an event. You may host any kind of event using the all-inclusive event management system included in Odoo 17. This module can be readily handled and used without any difficulties. You can easily create new events, publish them on the company website, manage registration, sell tickets, and do a variety of other tasks connected to event planning
and execution using the user-friendly platform offered by the event management module of Odoo17.
The Events module of Odoo 17 will be covered in this chapter.
You will arrive at the main dashboard after opening the Events module, which displays all configured events on this platform. For the events platform, you will get
Kanban, Pivot, List, Gantt, Calendar, Map, and Graphical views.
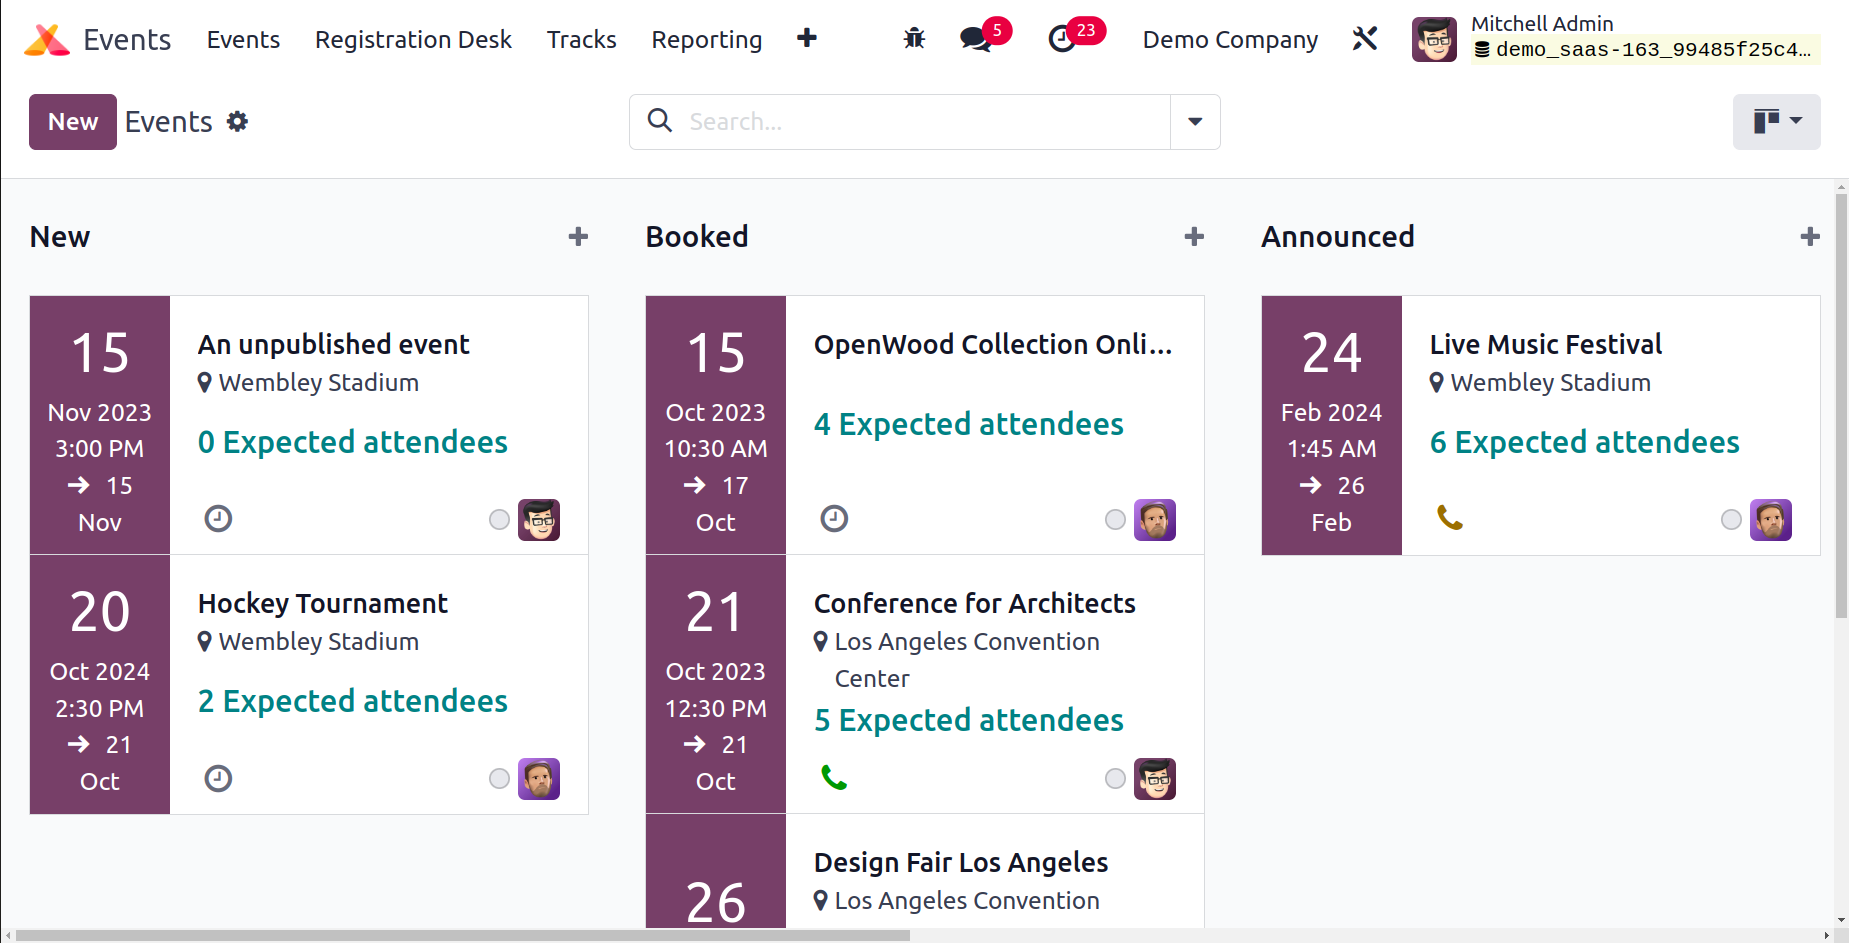
The events are organized in the Kanban view under various stages, as seen in the screenshot above. By categorizing them according to the appropriate stages, you will have a clear understanding of how the event develops. By selecting the plus sign (+) next to the Add a Column option, you can quickly assign a new stage for events. The stage can be folded on Kanban view, edited, deleted, archived,
and unarchived using the settings icon next to the stage title.
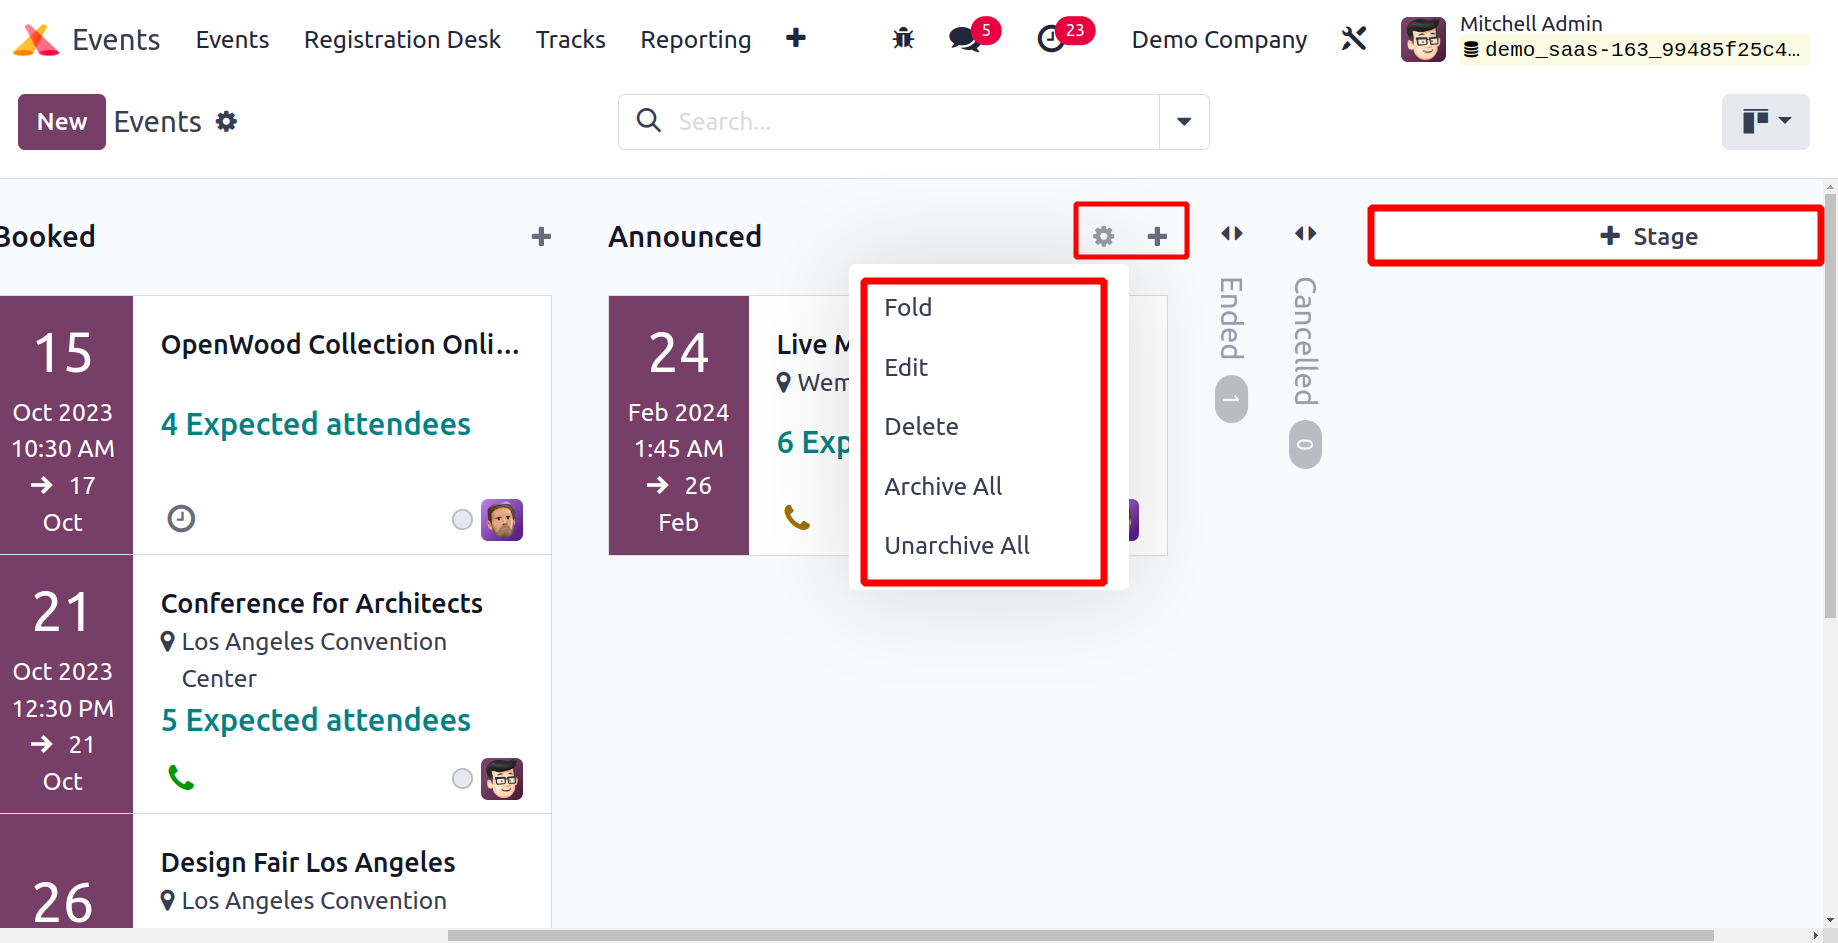
The event's name, location, date, time, and anticipated attendance will all be listed in the event preview. The employee's picture who initiated that event is visible, as indicated in the screenshot. The clock indicator for each event will assist you in planning your timetable for that specific event. You may sort and find the necessary
data from the shown events by using the default as well as resizable Filters and Group By options.
Click on the plus icon next to the stage's title, as indicated in the screenshot below, if you wish to add a new event
immediately under a particular stage. In the provided areas, you can enter the event's name and start and end dates.
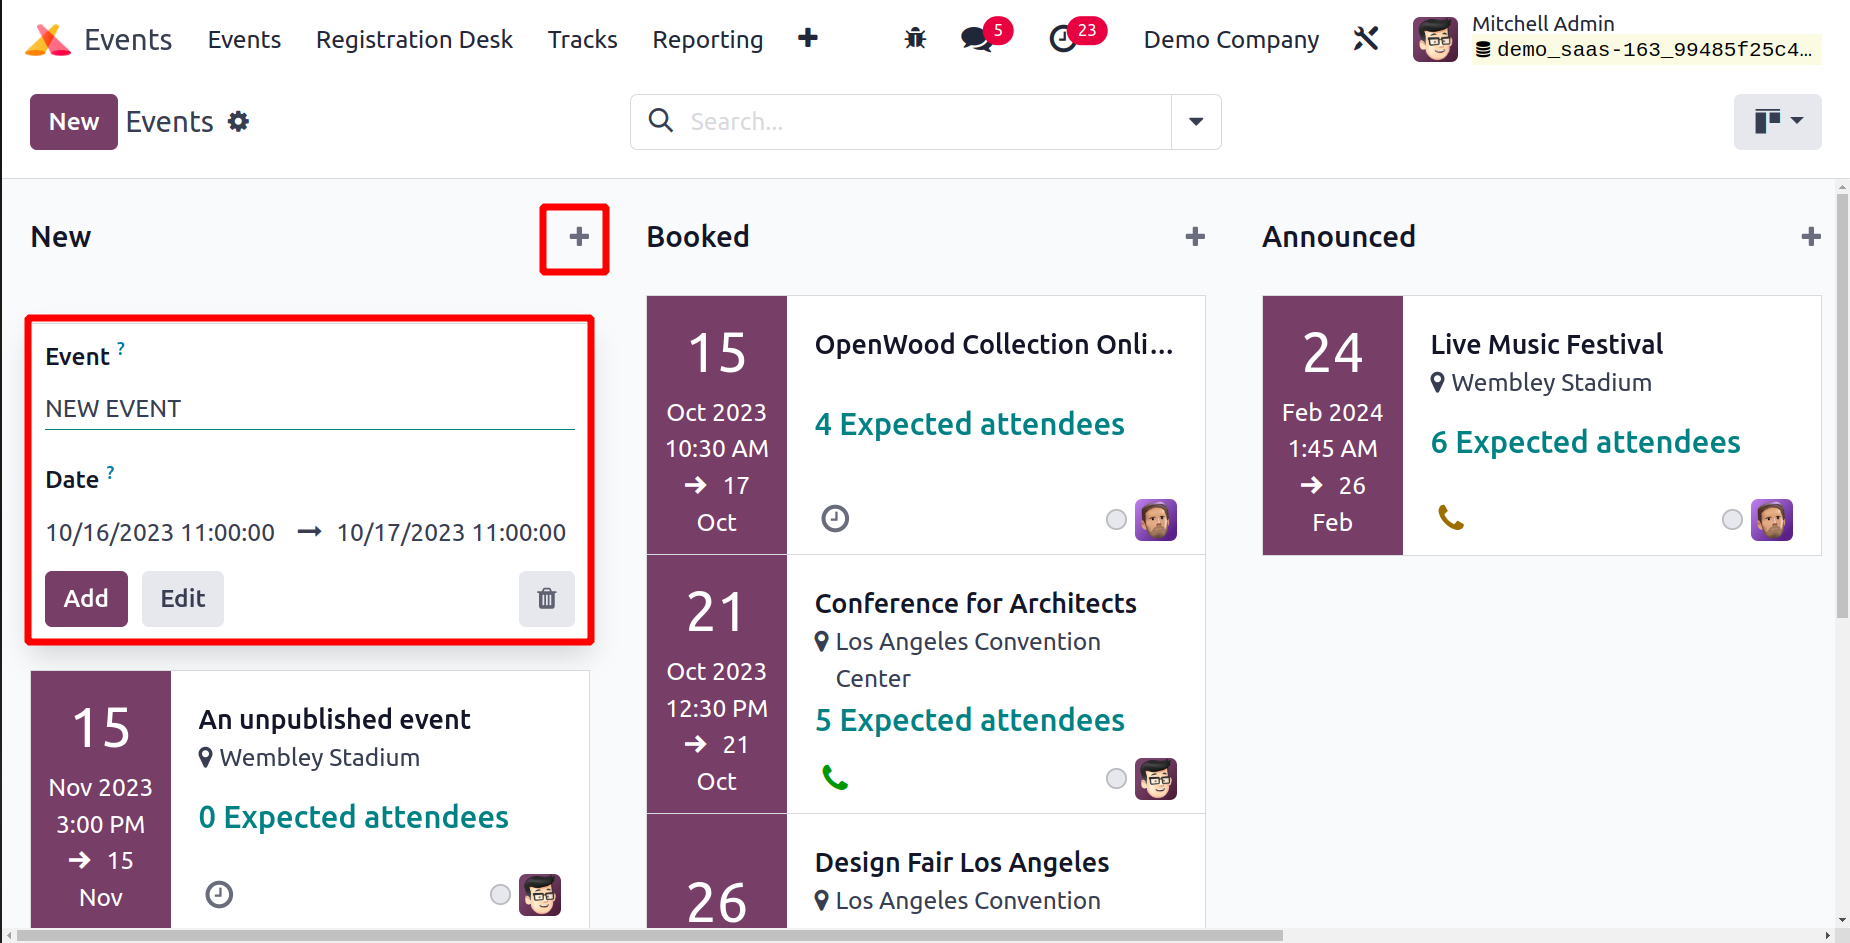
The event will be added to the appropriate stage when you click the Add or Edit buttons, respectively. By selecting the New button, you can also set up new events.
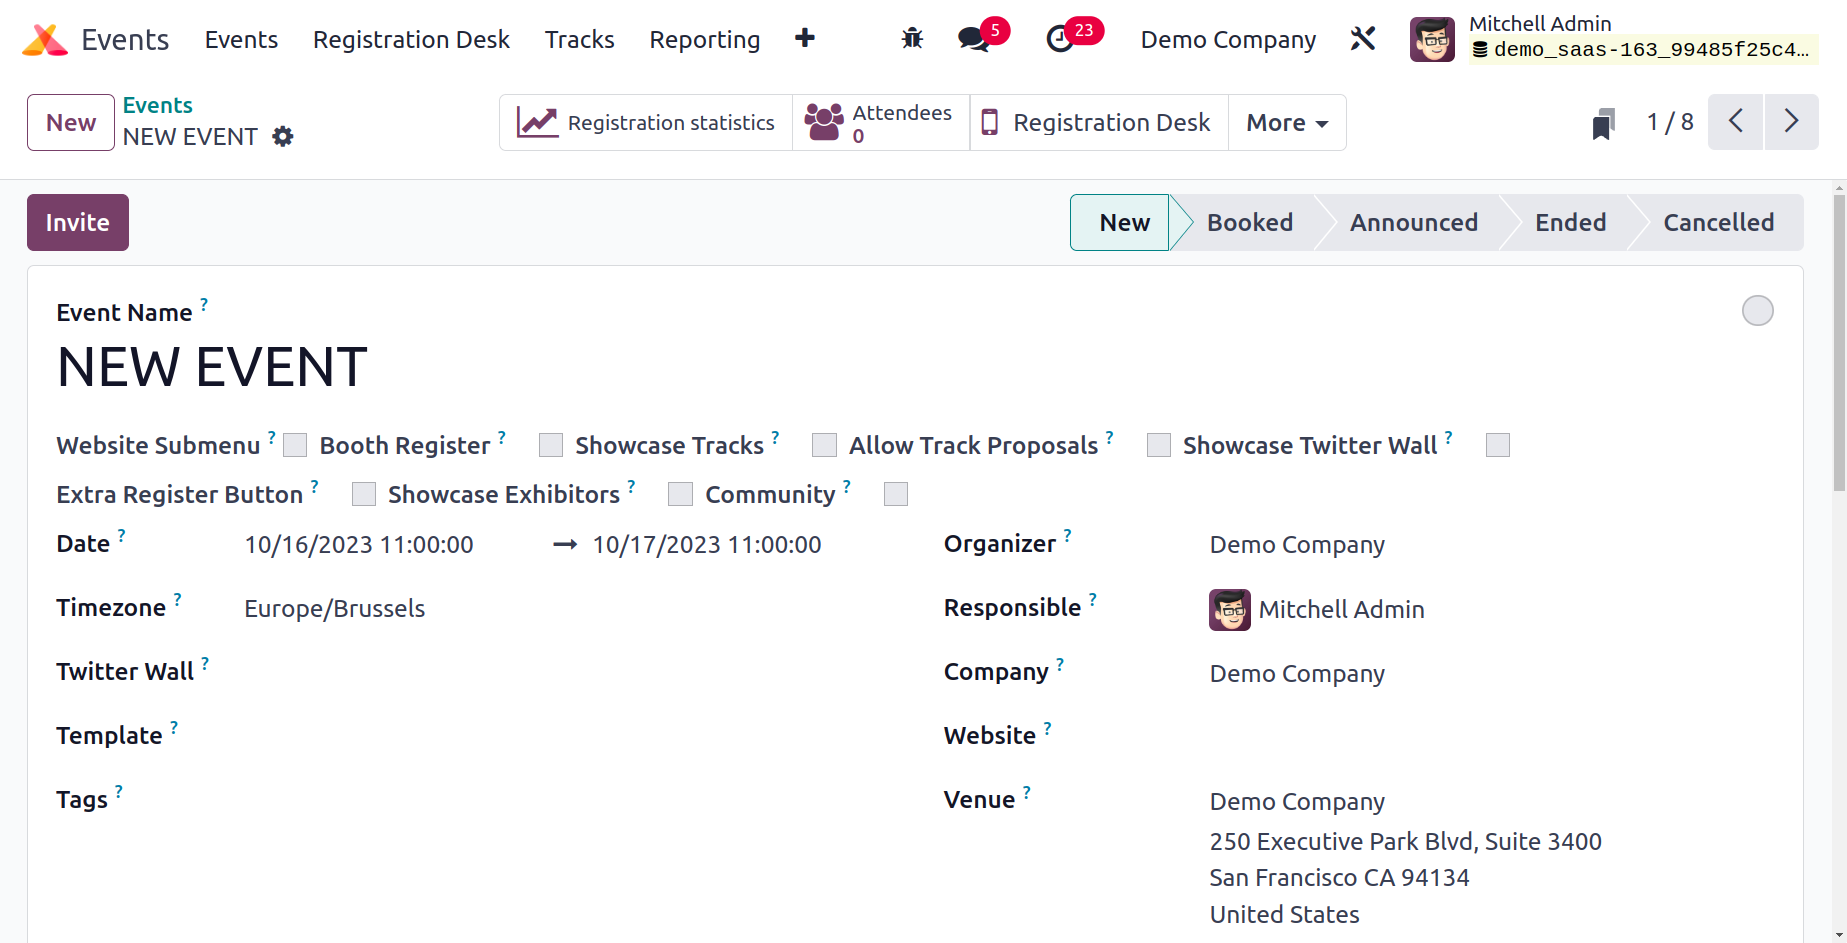
The Event Name section allows you to enter the event's name. Event-specific menus can be shown and managed on the website by turning on the Website Submenu option. The Showcase Tracks, Showcase Twitter Wall, Extra Register Button, Showcase Exhibitors, and Community tabs are all included in the submenu. Website-specific menus can be managed and displayed with the help of the Website Submenu. The menu for the Booth Register. The events can be registered using the Booth Register. By using Allow Track Proposal, one can keep tabs on the location. After then, the website's community tab will be visible via the Community option. The debug mode must be activated in order to access these Booleans.
In the appropriate areas, enter the event's Starting and Ending dates, Timezone, Twitter Wall, appropriate Event Template, Tags, Event Organiser, Employee Responsible for the Event, Company, Website to restrict event posting to the chosen Website, and Venue. Using the ‘Upload Your File’ option, you can provide a map of the exhibition.

The Limit Registration button will open a new field where you can enter the maximum number of guests. In addition, the Badge Dimension can be mentioned in the corresponding field, and also have the option to add a Badge background.
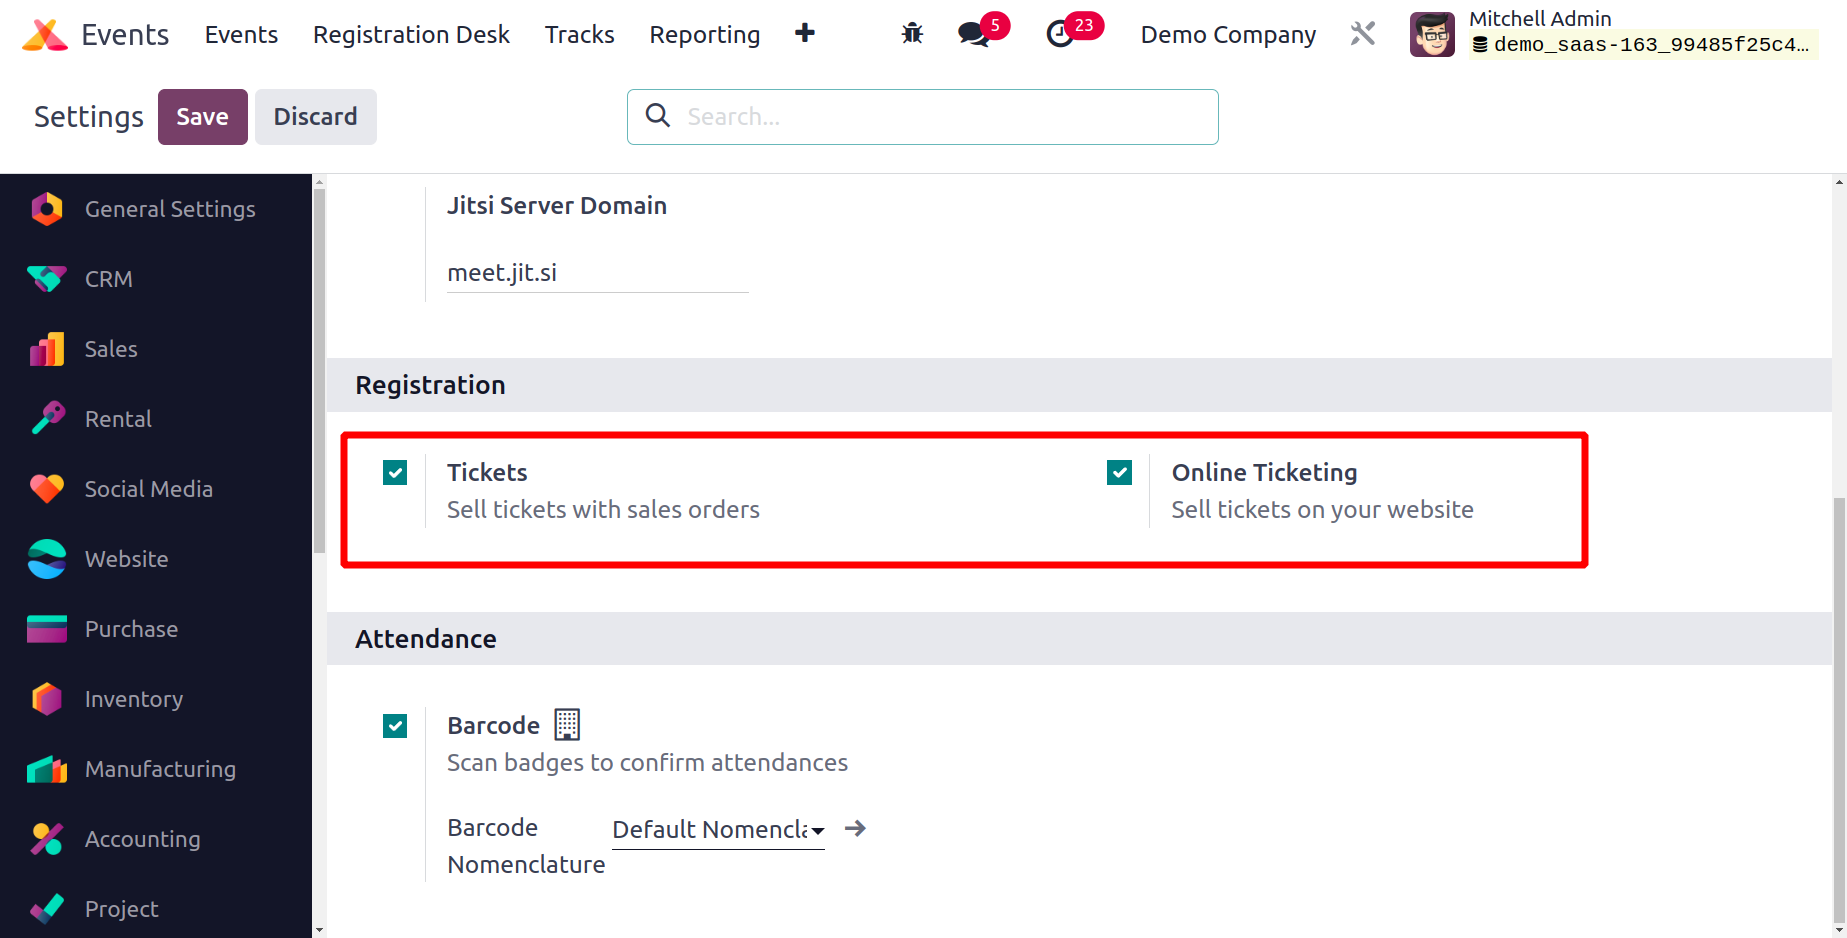
You may activate the Tickets and Online Ticketing options in the module's Settings menu. You can use these alternatives to sell tickets online and by sales orders, respectively.
Under the Tickets option in the event creation window, you can now set up tickets for the events.
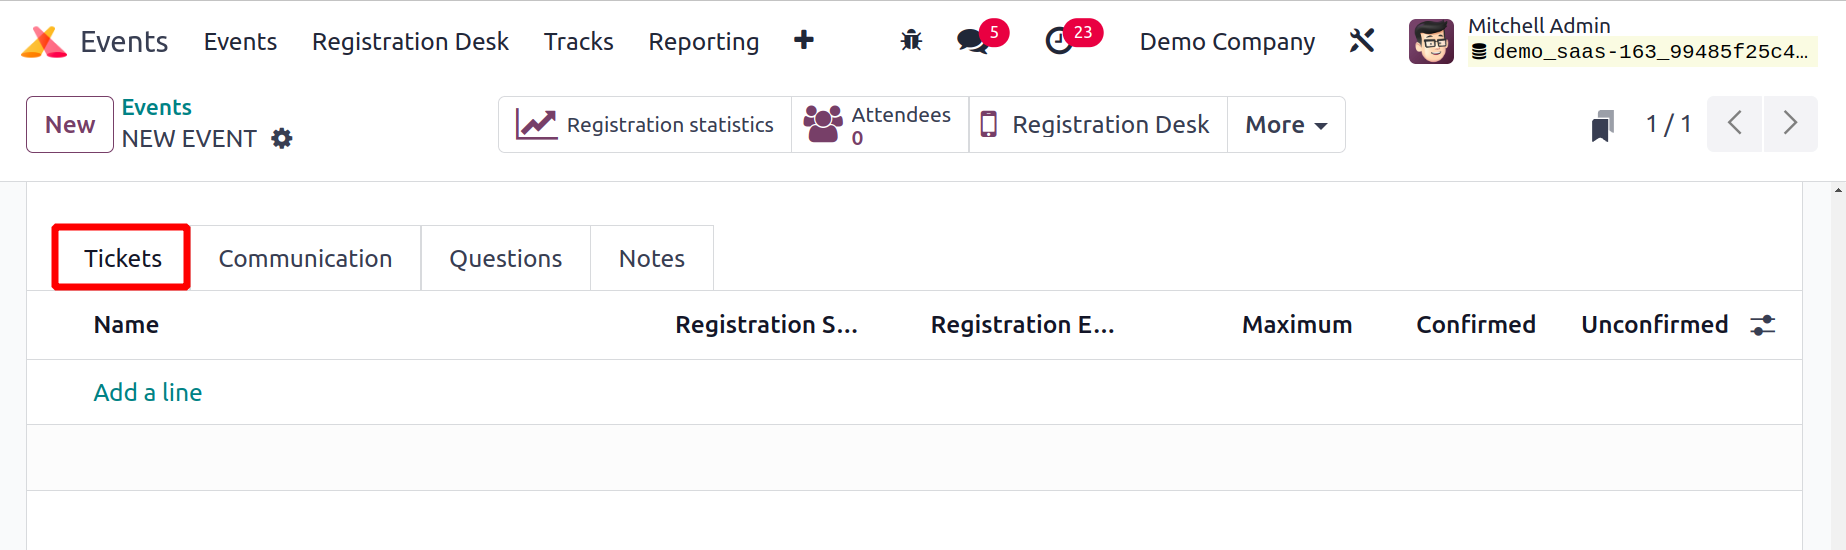
You can choose the event tickets you want by clicking the Add a Line button. Prior to that, you can set up the event ticket in Odoo 17 as a product. You can select Event Ticket as the product type while configuring the ticket. Under the Tickets tab, you may add these tickets. In the relevant fields, enter the price, the start and end dates for the sale, and the maximum number of tickets that will be offered. When customers purchase tickets on your website, you will receive the quantity of confirmed and unconfirmed tickets in this tab.
You can let other companies use your booths at events to advertise their goods and services. You must first enable the Booth Management option from the Settings module in order to configure booths for an event.
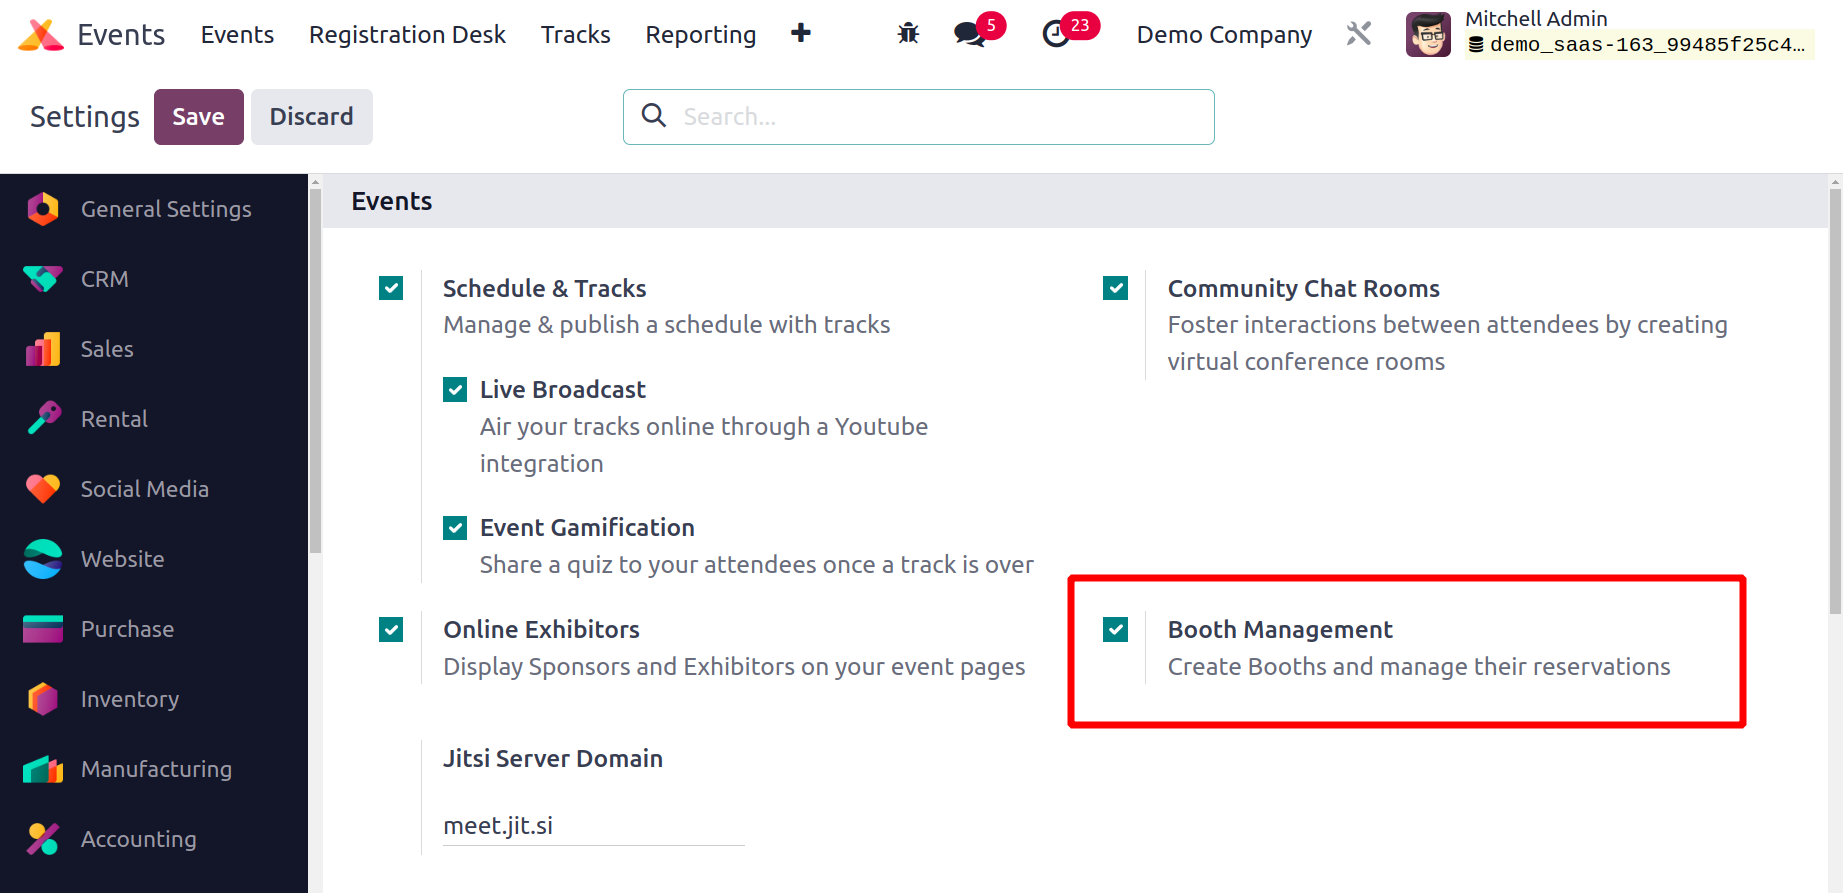
The Booths tab will appear in the Events creation window as soon as this option is activated, as illustrated below.
You can add booths to this event by selecting Add a Line from the menu. An informational pop-up window will appear for the booth.
In the relevant fields, you can input the Name, Booth Category, and Renter Information. The renter's name, email address, phone number, and mobile number are among the information provided.
When you post this event on your business website, the Registration tab will provide information about the visitors who have registered for this booth.
The Email/SMS that will be sent to guests to notify them of the event can be mentioned under the Communication tab.
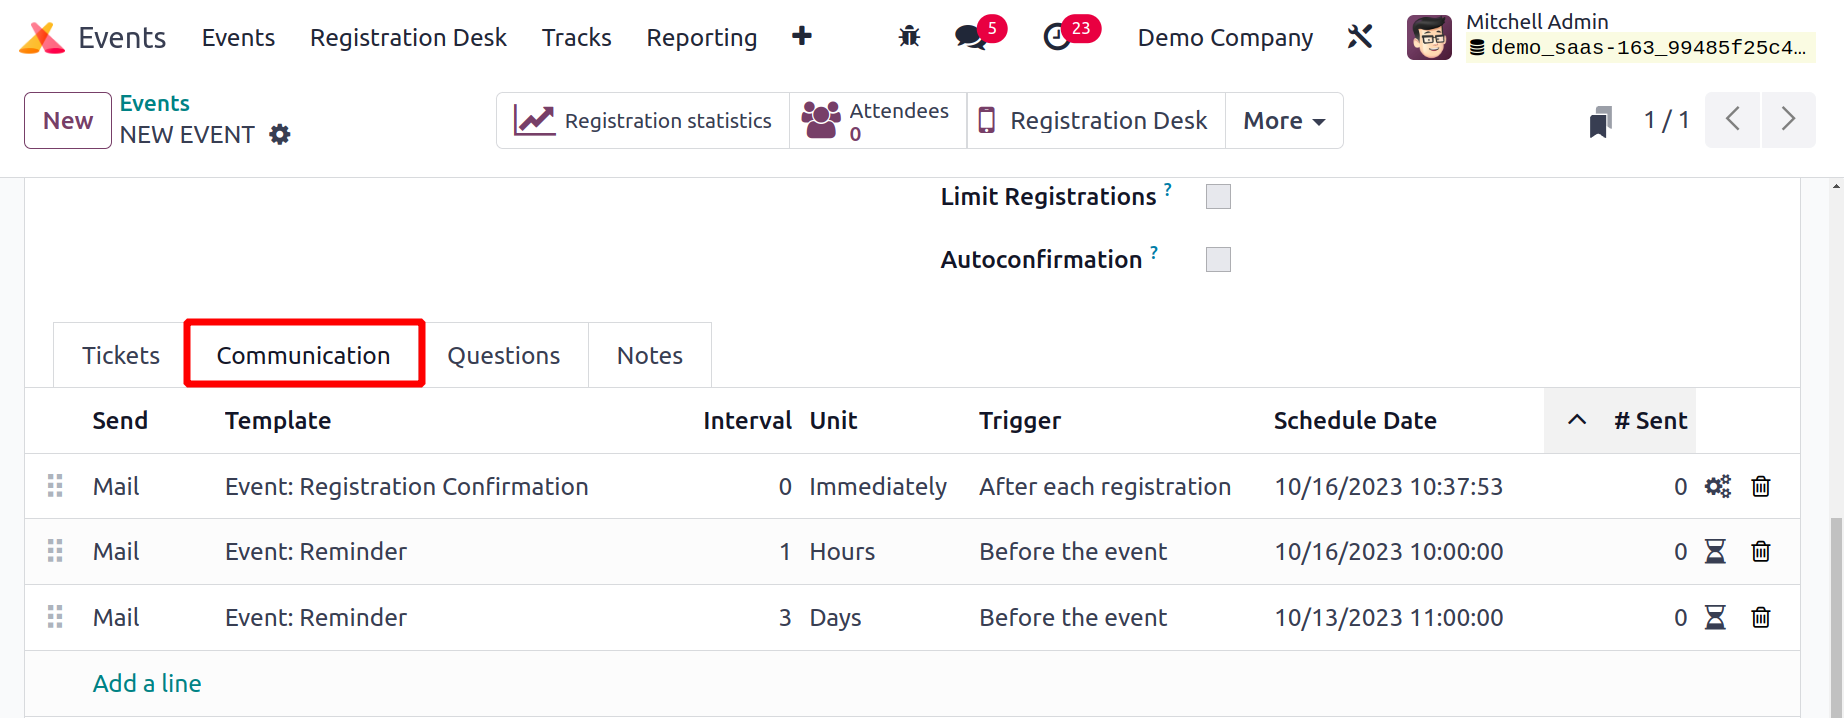
You can choose to communicate by SMS or Mail by using the Add a Line option. In the Template area, pick an appropriate template for the email or SMS. You can send the participants a mailer or SMS right away or a predetermined number of hours, days,
weeks, or months prior to or following the event. This page can also show the scheduled date and the total number of emails or SMS messages delivered.
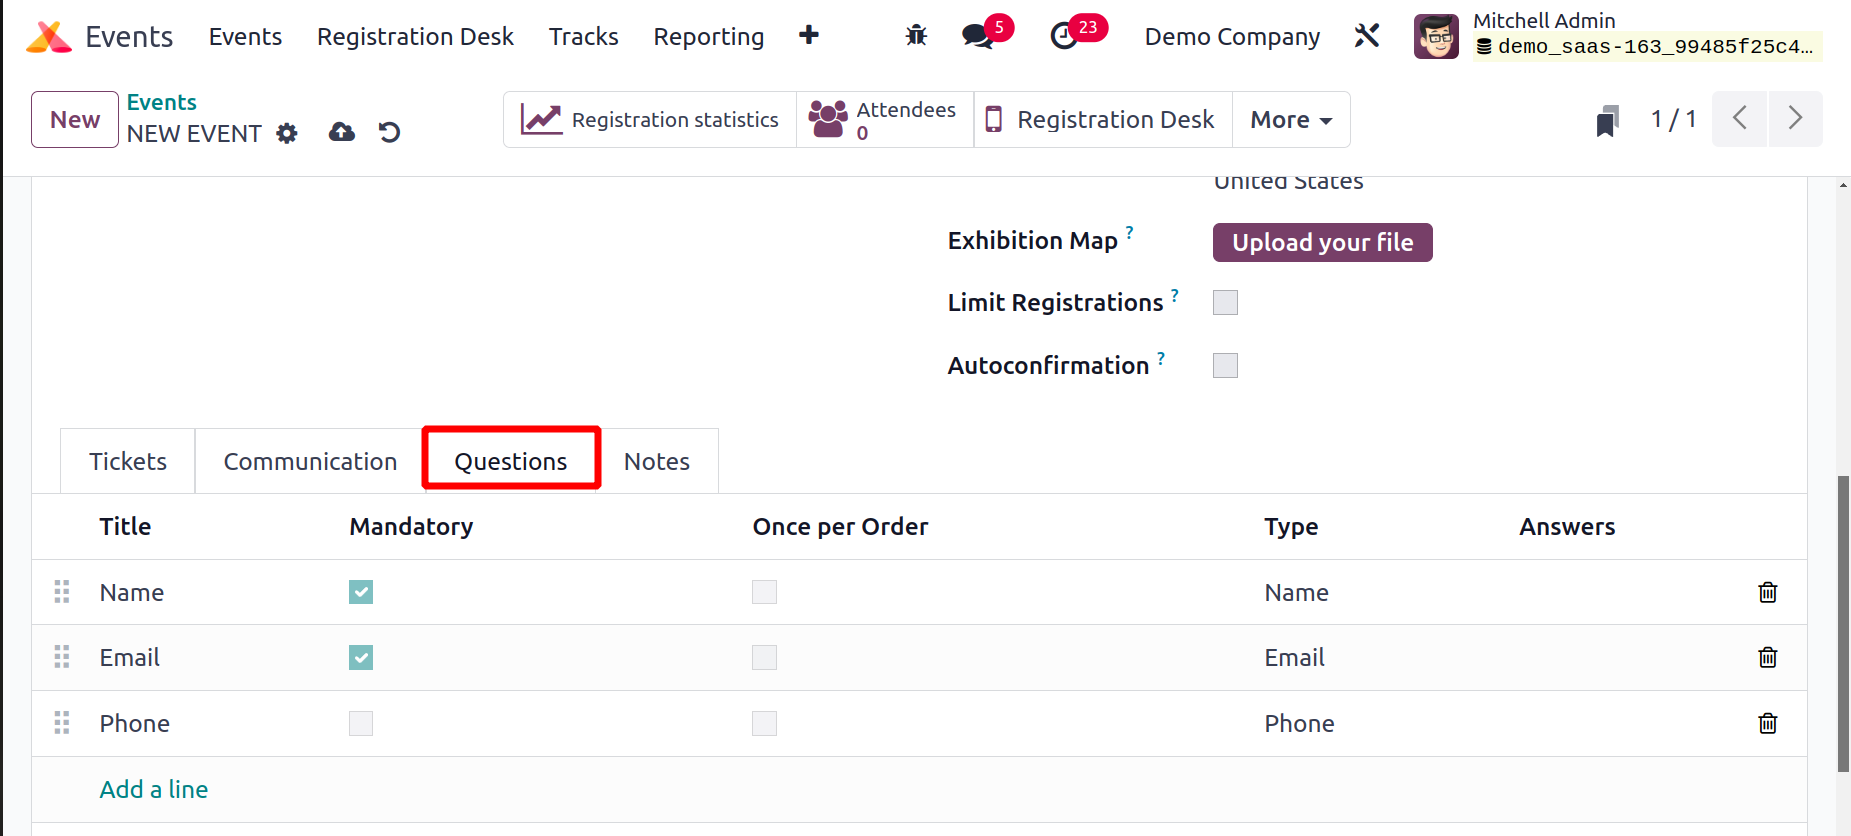
You can interview the attendees when they sign up for the event online. For instance, if your business decides to provide food for the attendees, you might inquire throughout the online registration process about the participants' dietary preferences. These questions can be mentioned in the event creation window's Question tab.
When this option is selected, the Question tab will appear in the event creation window, as seen in the figure below.
To add questions, select the Add a Line option. A pop-up box will appear.
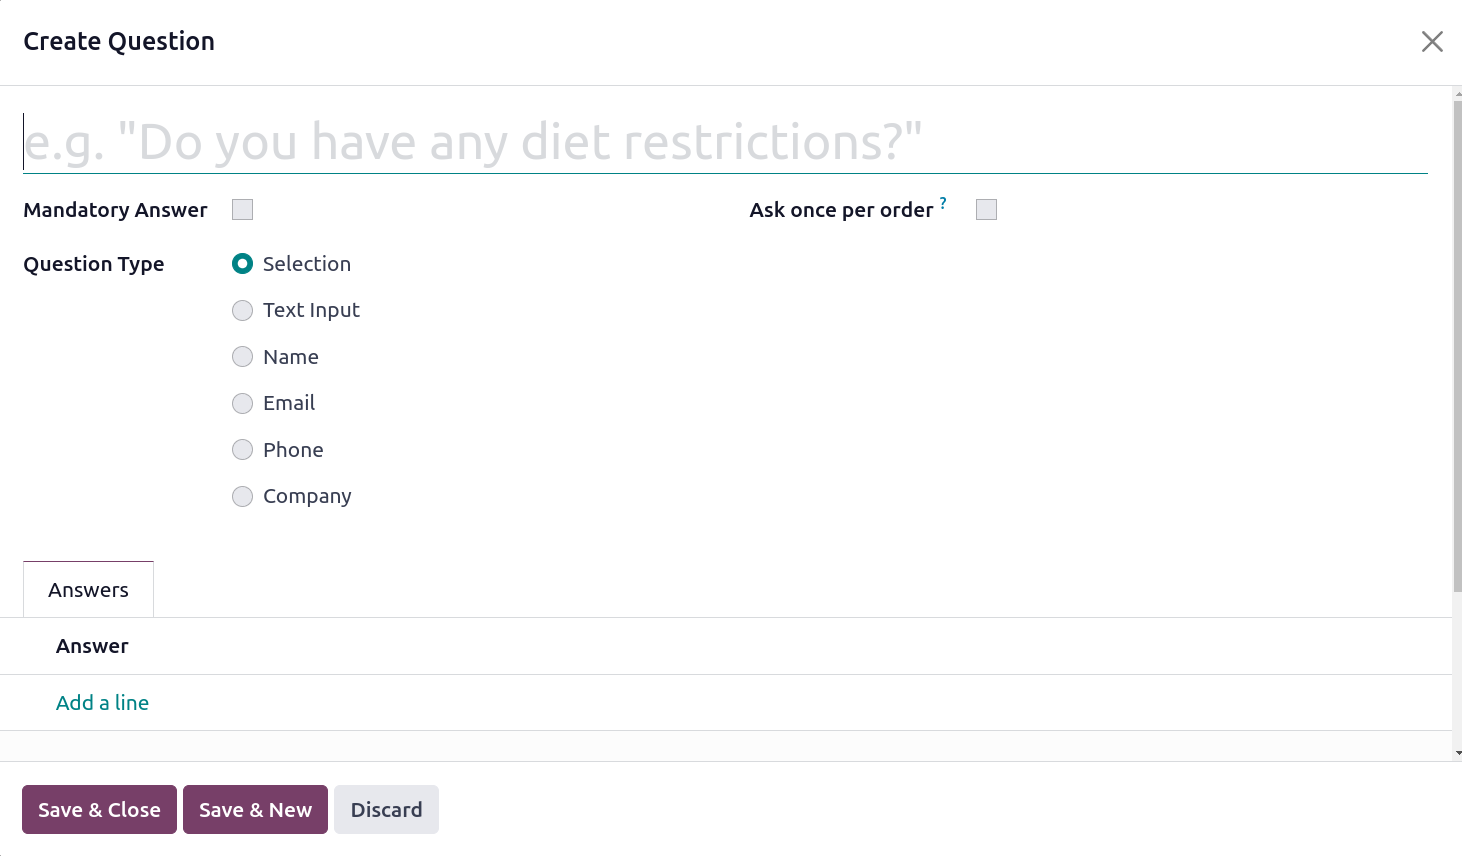
Enter the question in the space provided. The value of this question will be communicated to every attendee if the "Ask only once per order" option is enabled. The Question Type setting has two options: Text Input and Selection. You can specify the answers you want to
pick in the Selection type by referring to the Answers page. To save the question, press the Save button.
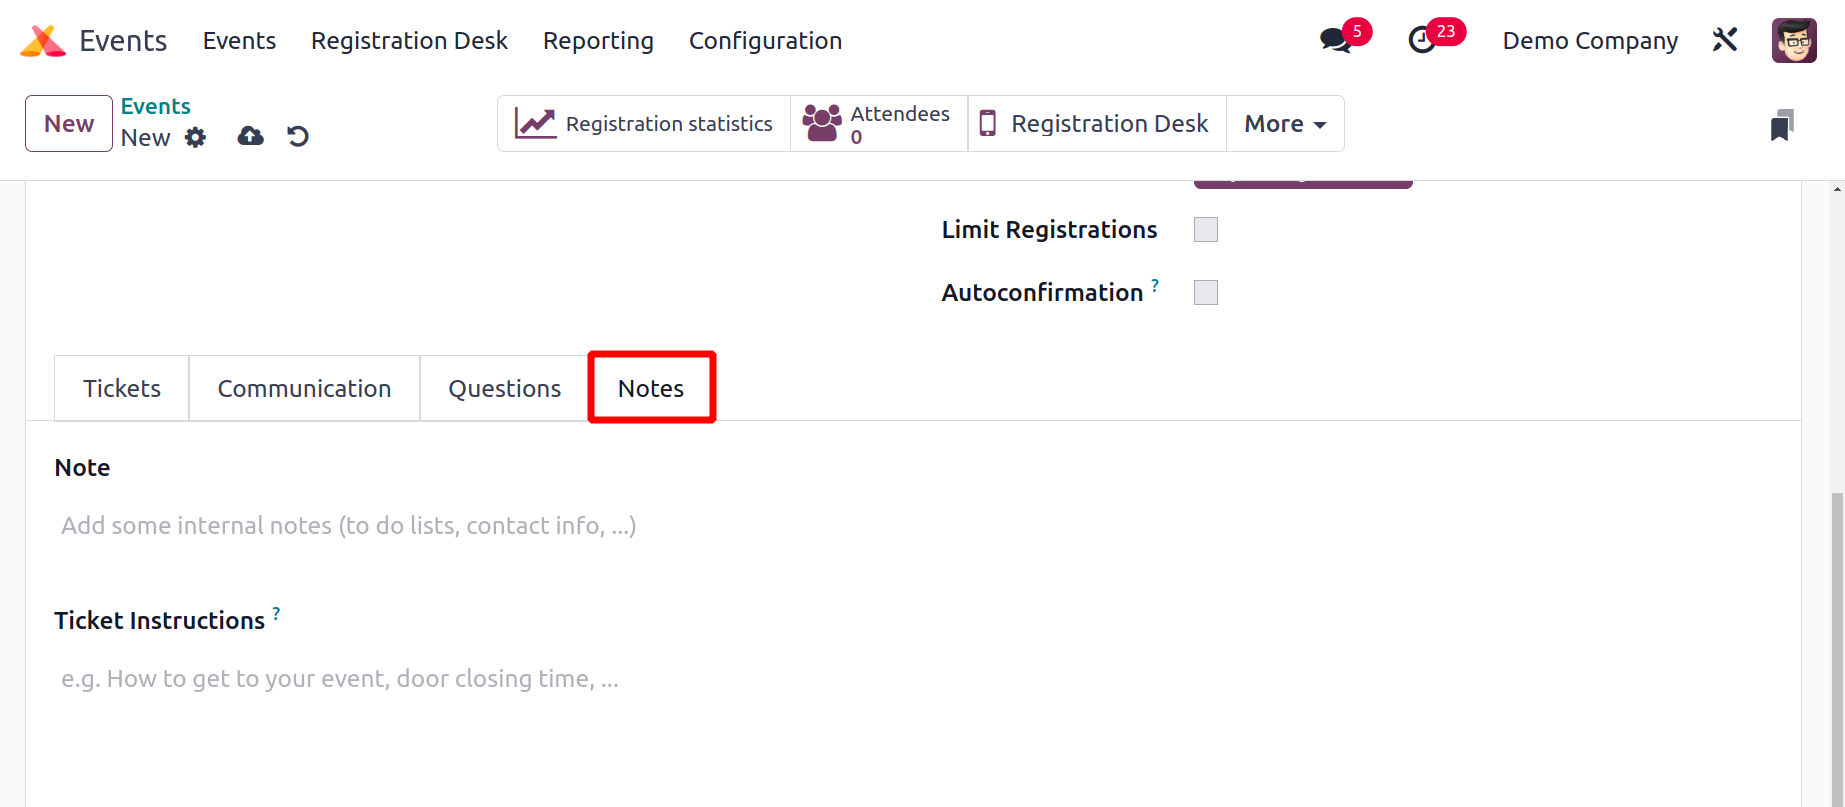
Additional details regarding the event and ticket instructions might be mentioned in the Notes tab.
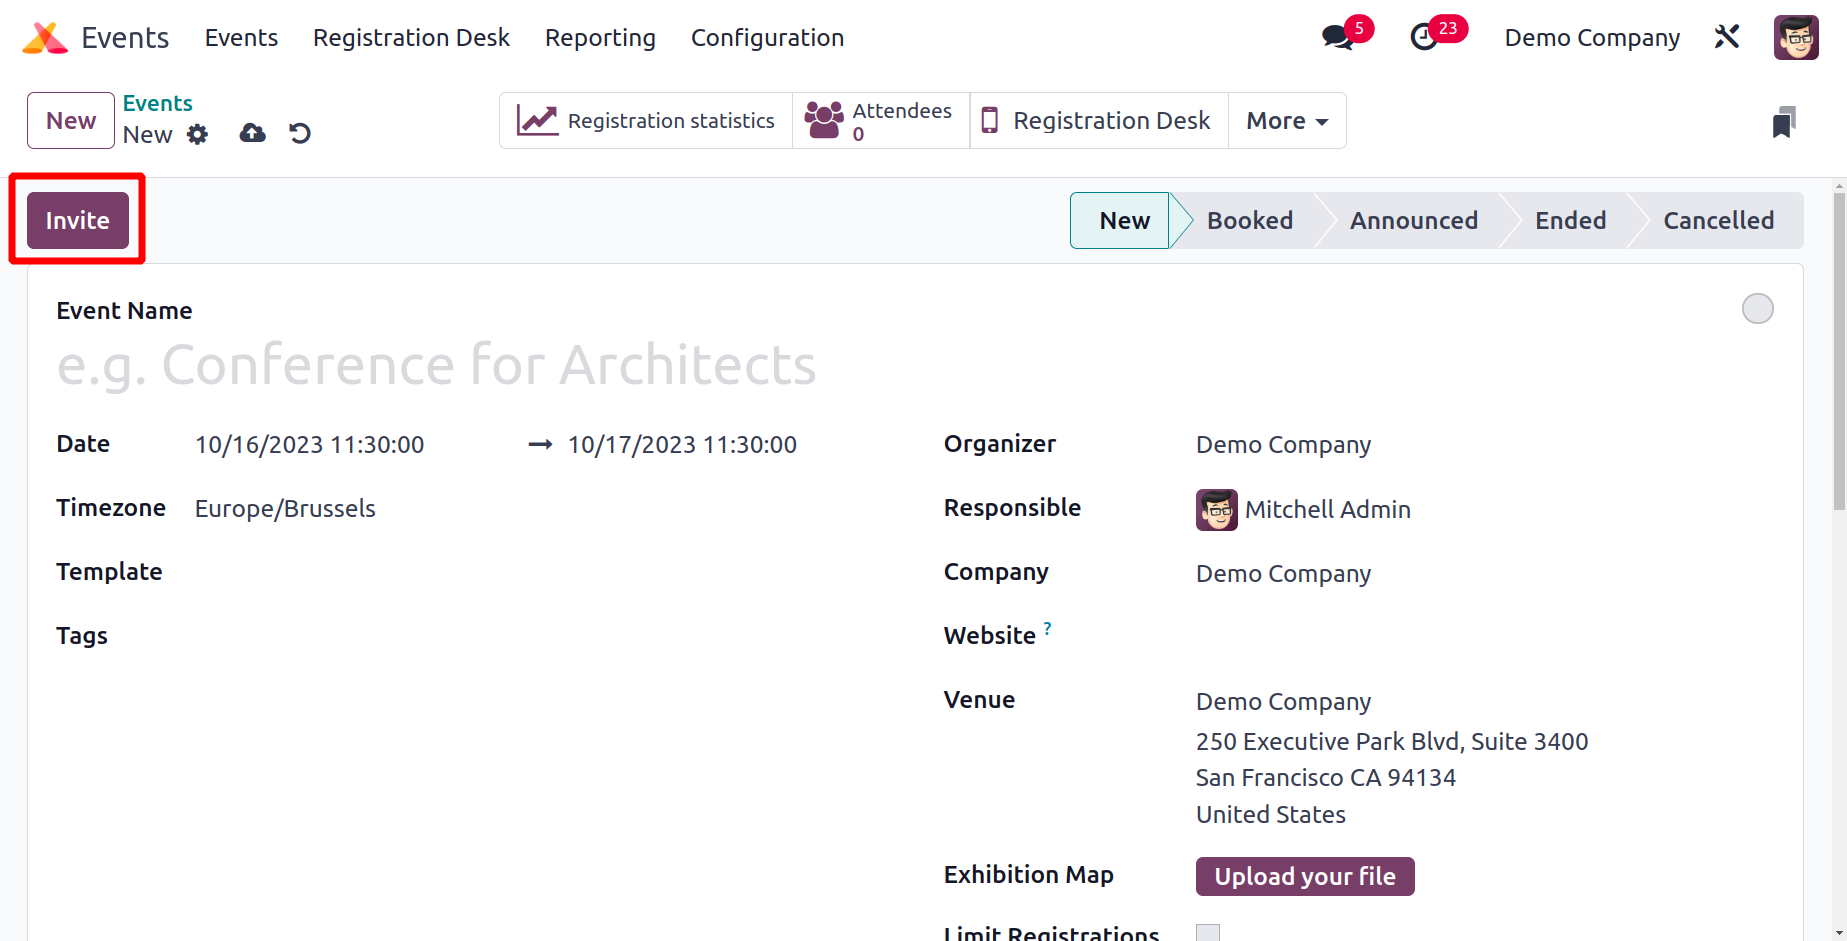
You may save the new event by clicking the Save button after providing all the necessary details.
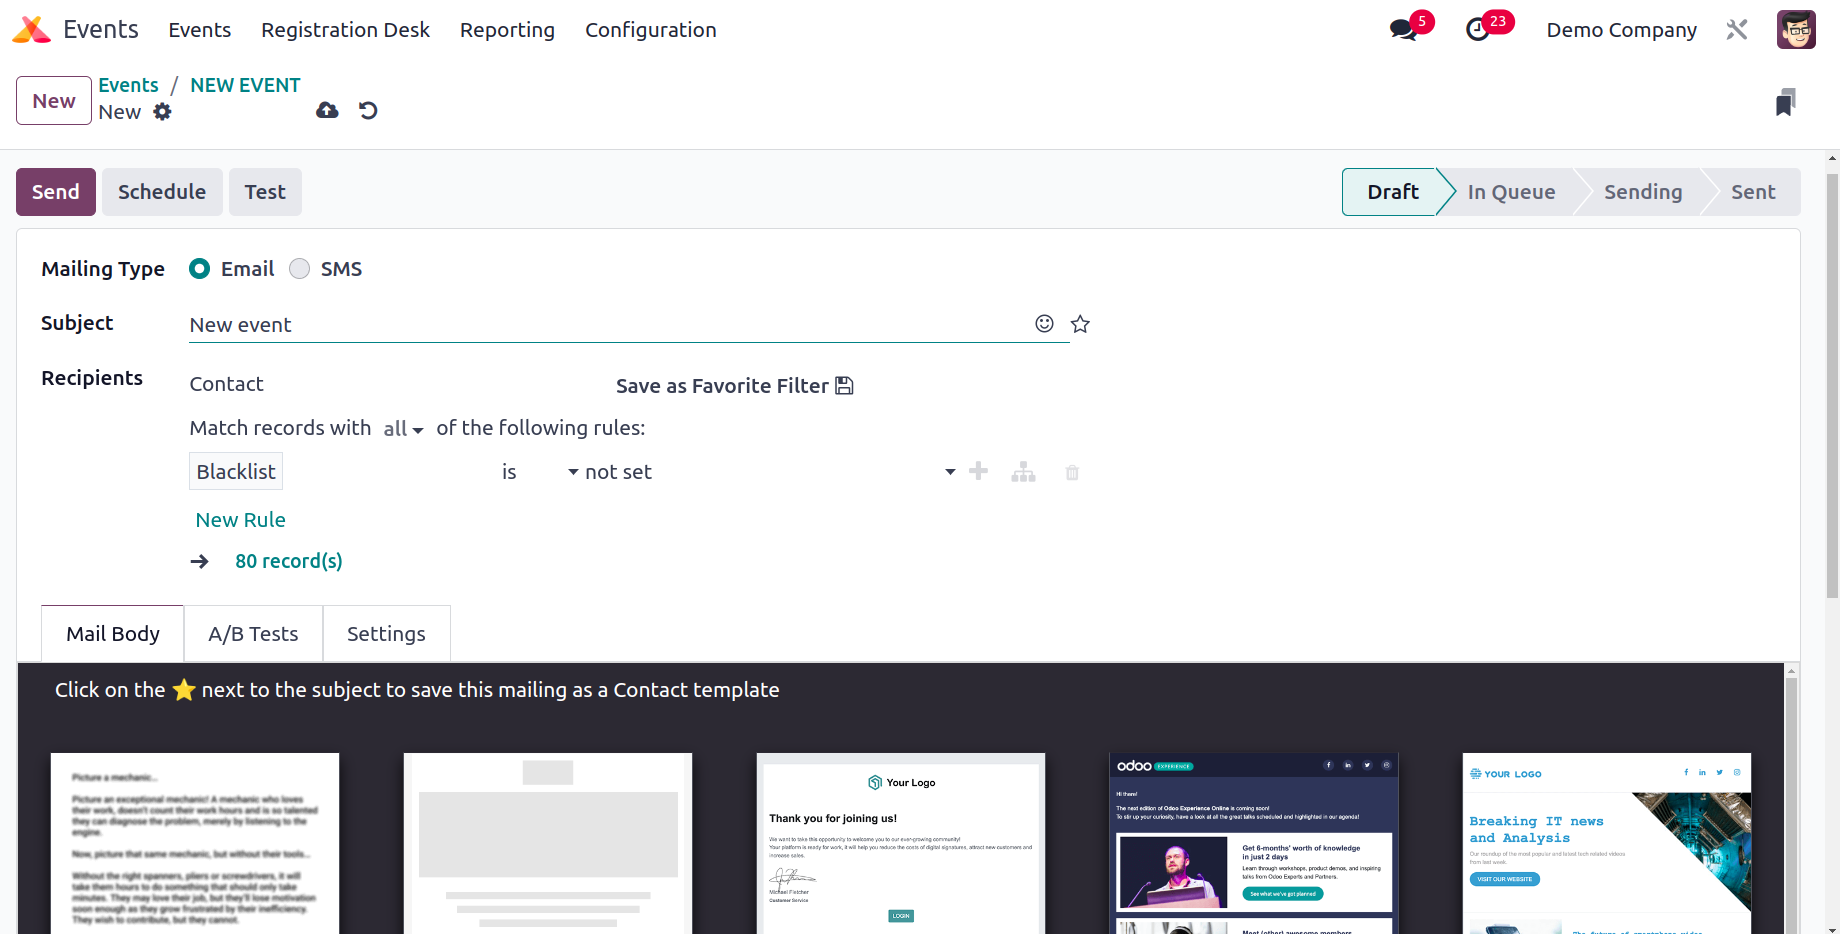
The window will display the Invite button, which you can use to invite others to the event. The Invite button opens the window you see below.
On this platform, you can create invitation mail or SMS, precisely like we covered in the Email and SMS Marketing modules. If you would like additional information on how to create marketing emails or SMS, check out these modules in the Odoo 17 Enterprise Book.
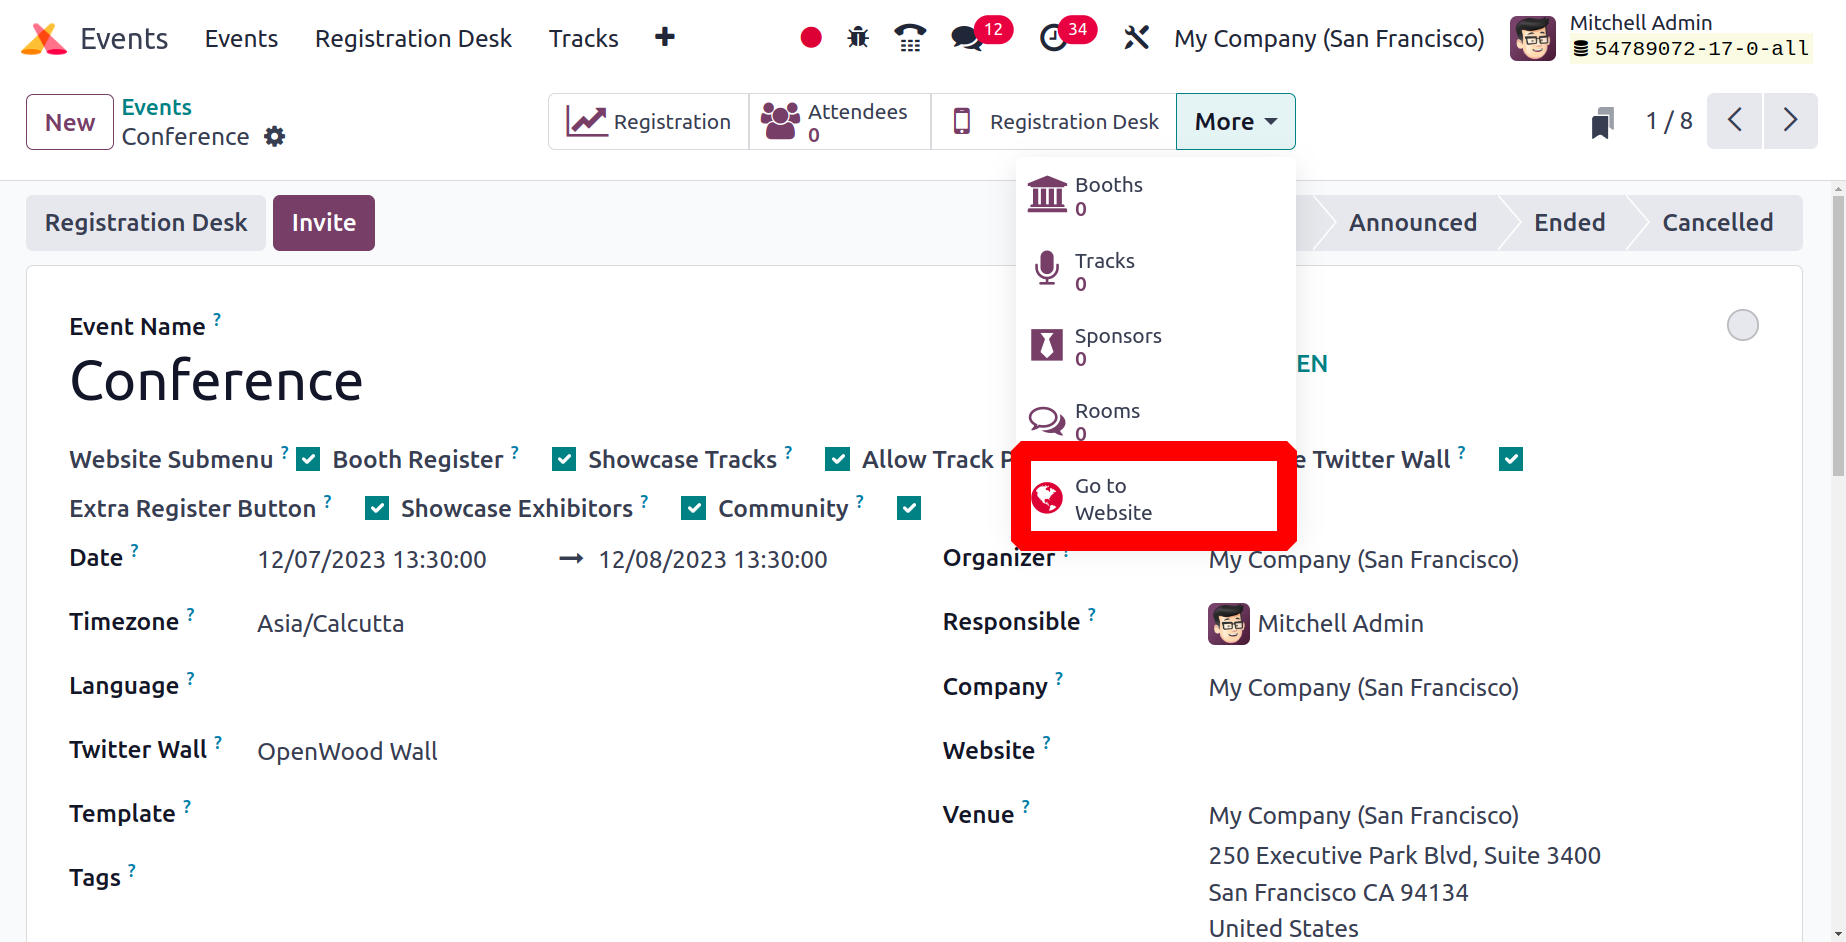
To post the event on your website, click the 'Go to Website' button right now.
The screenshot below shows how the website appears. As can be seen below, the website now has the menus and the Register button.
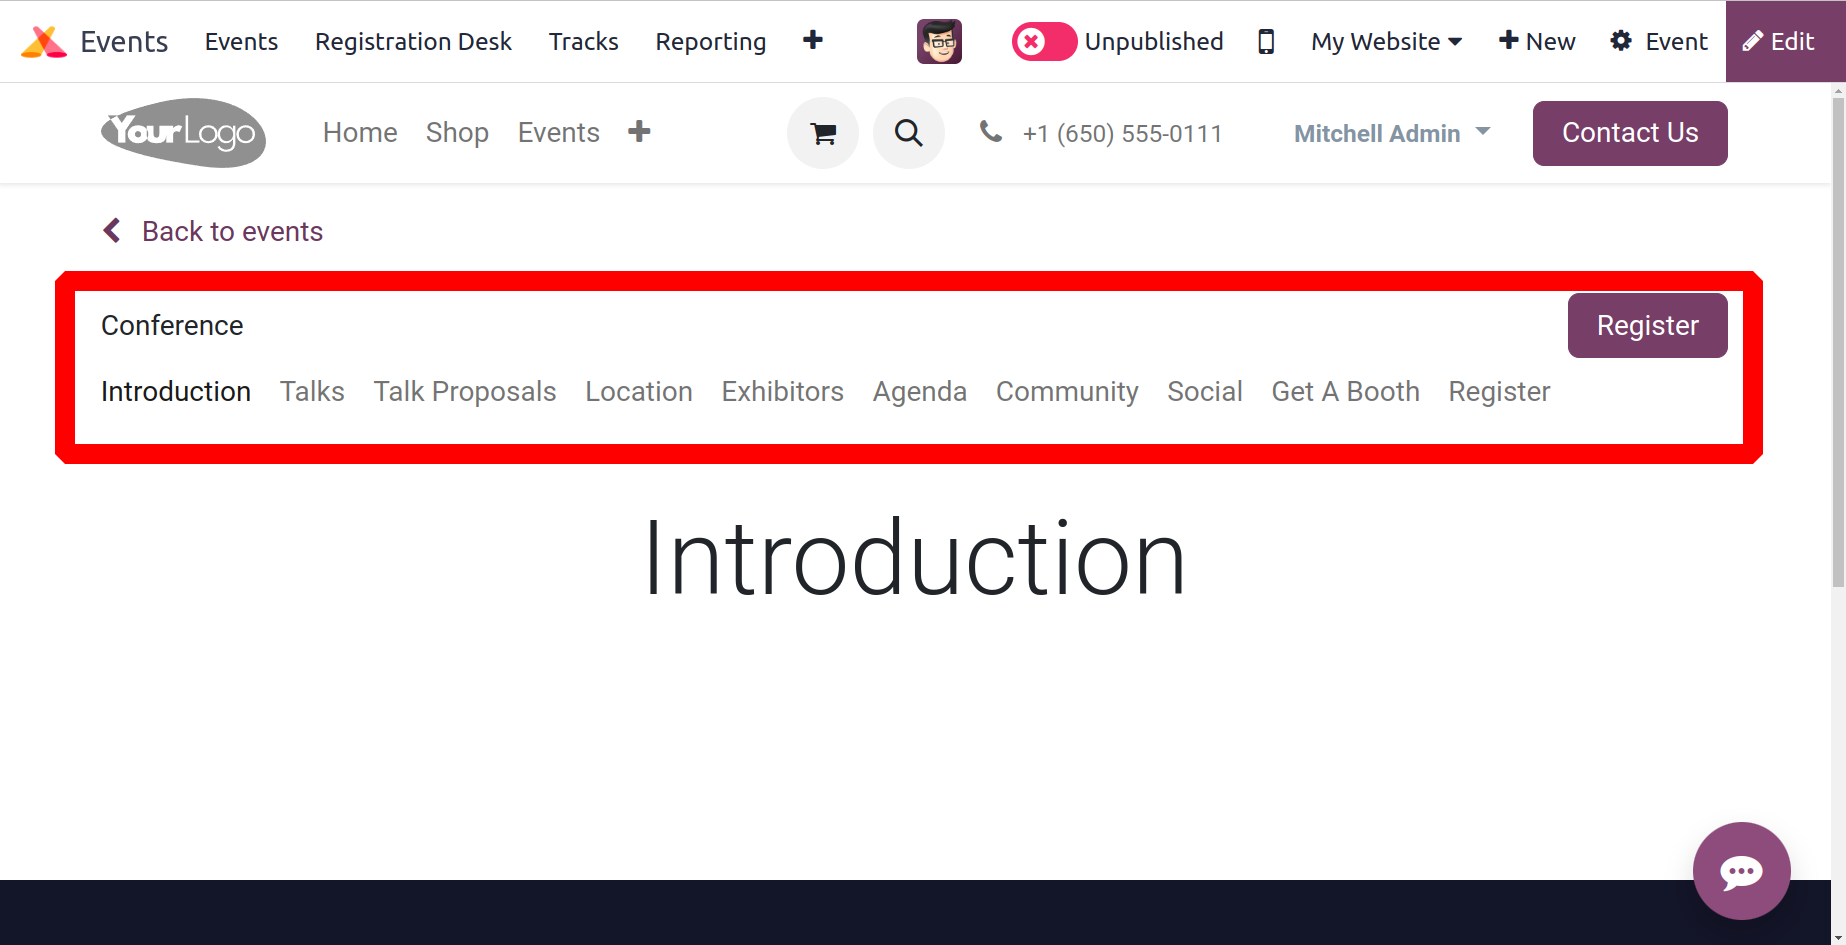
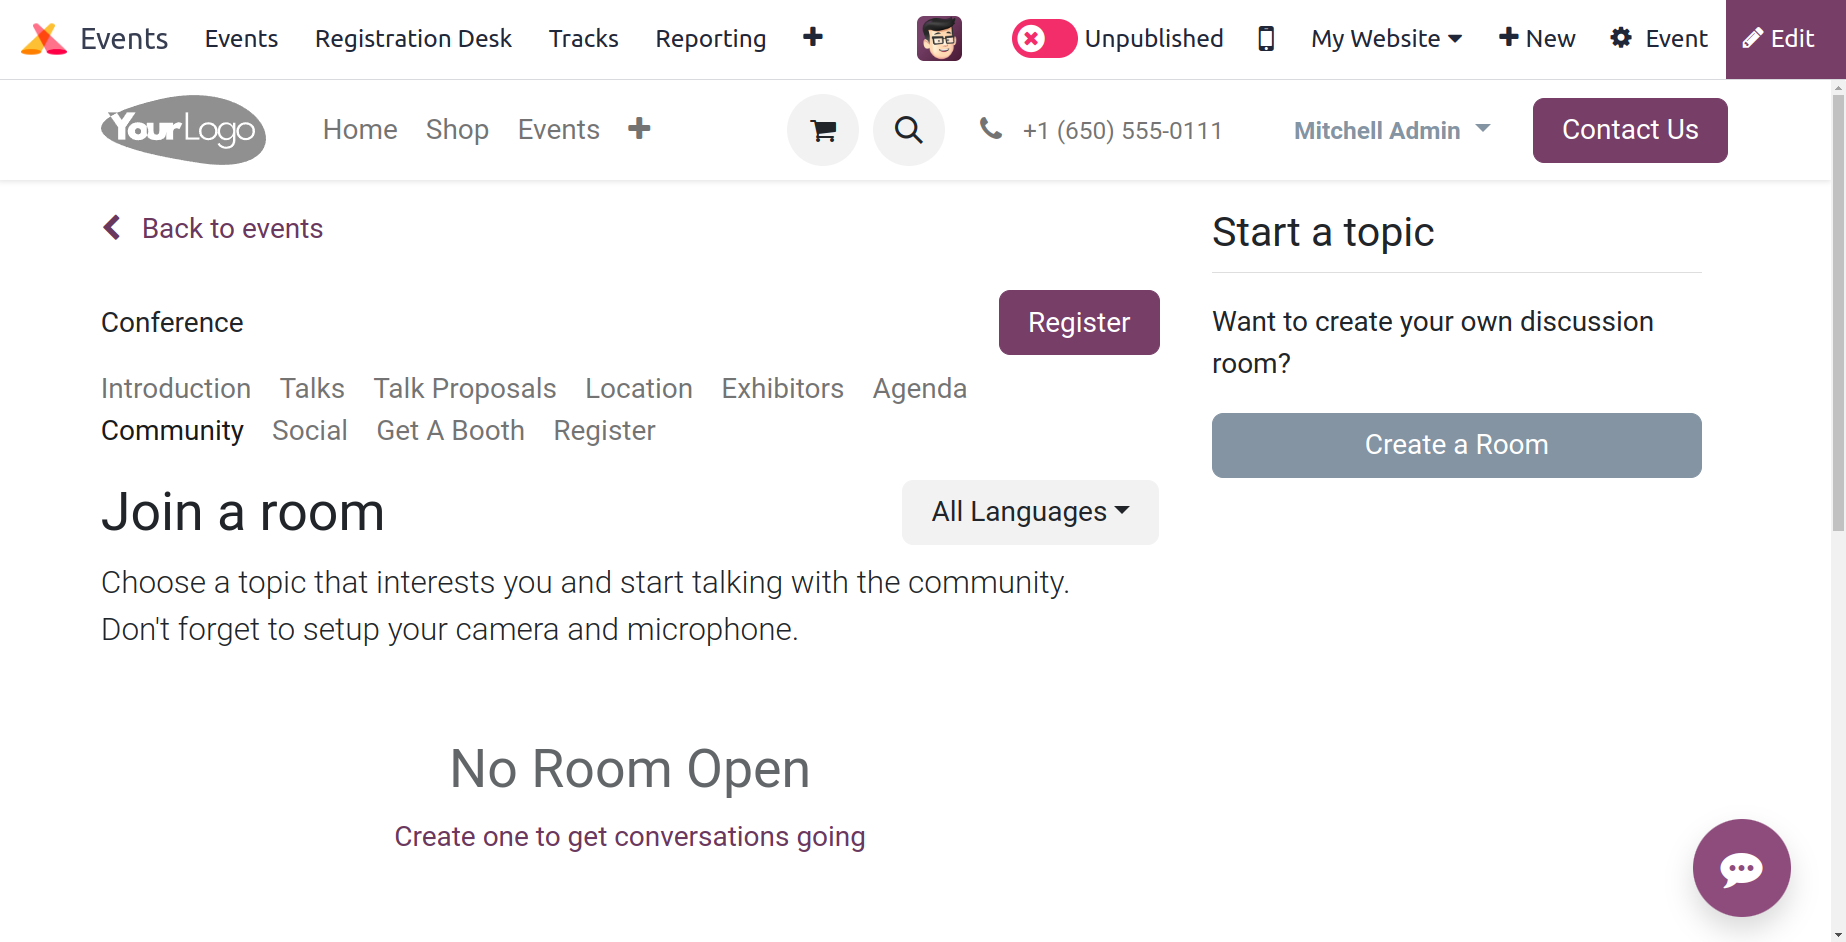
As said before, the created community rooms will be shown under the sub-menu Community.
The Talks, location, Exhibitors Agenda, Twitter wall and registration all the enabled ones inside the events will be shown on the website.
To change the event's status from "Unpublished" to "Published," click on the corresponding button.
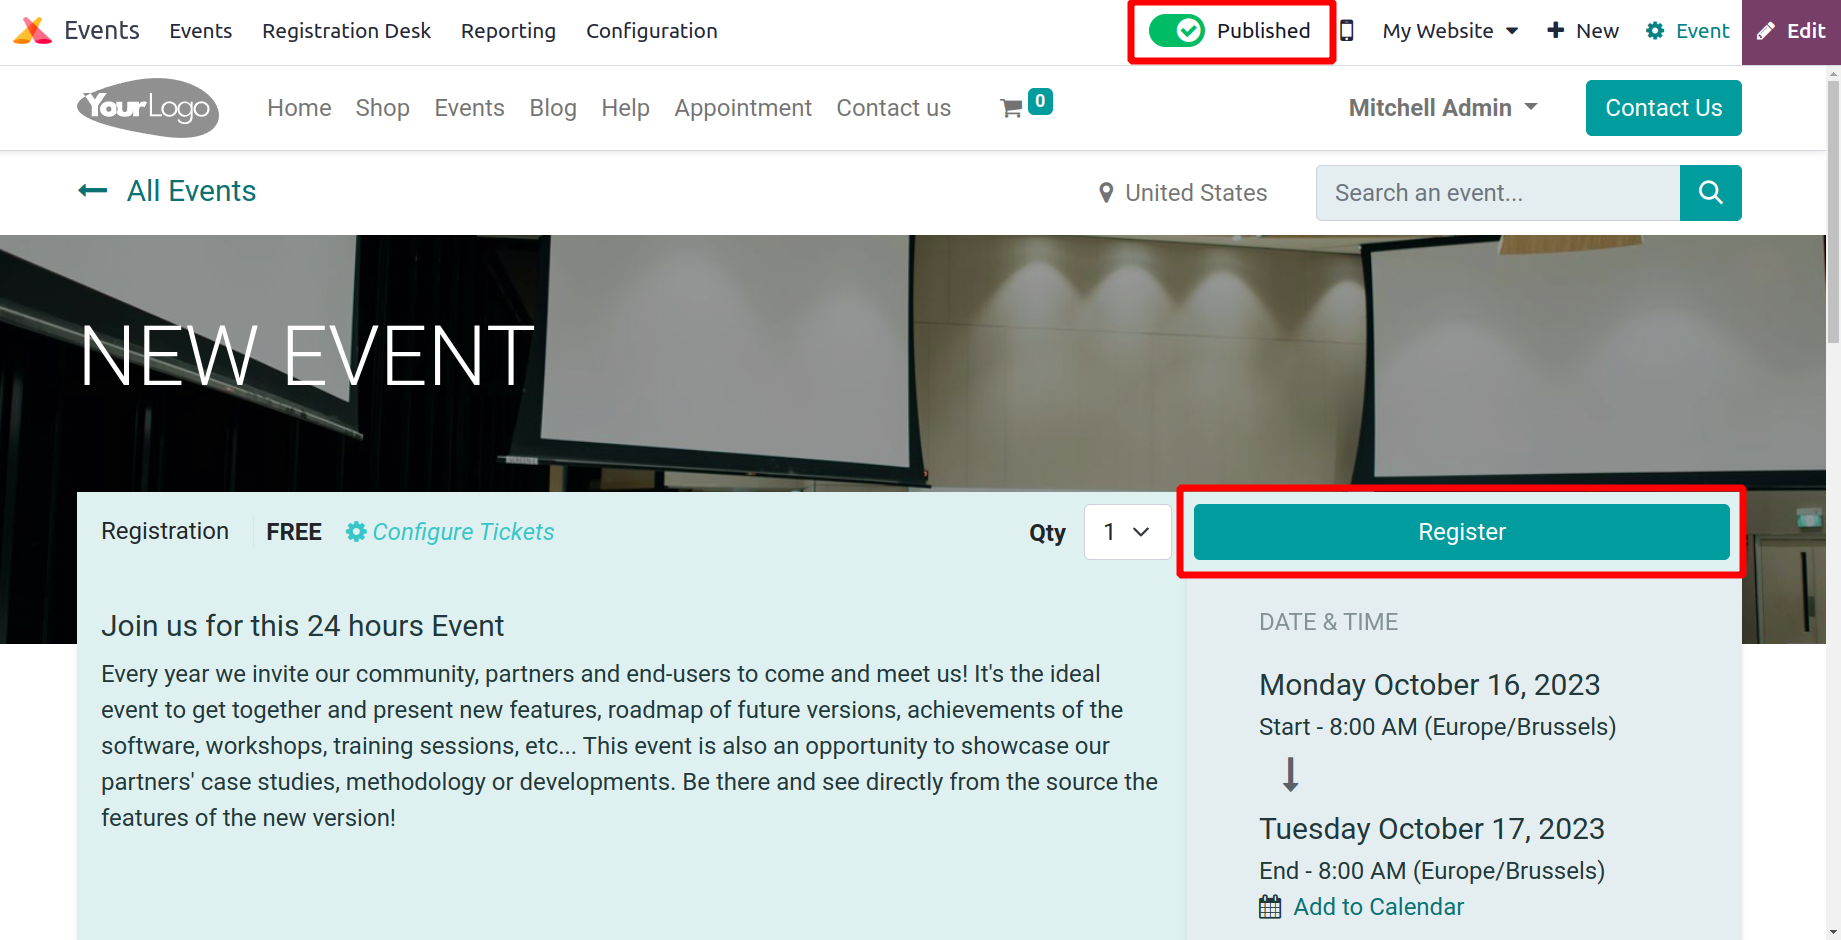
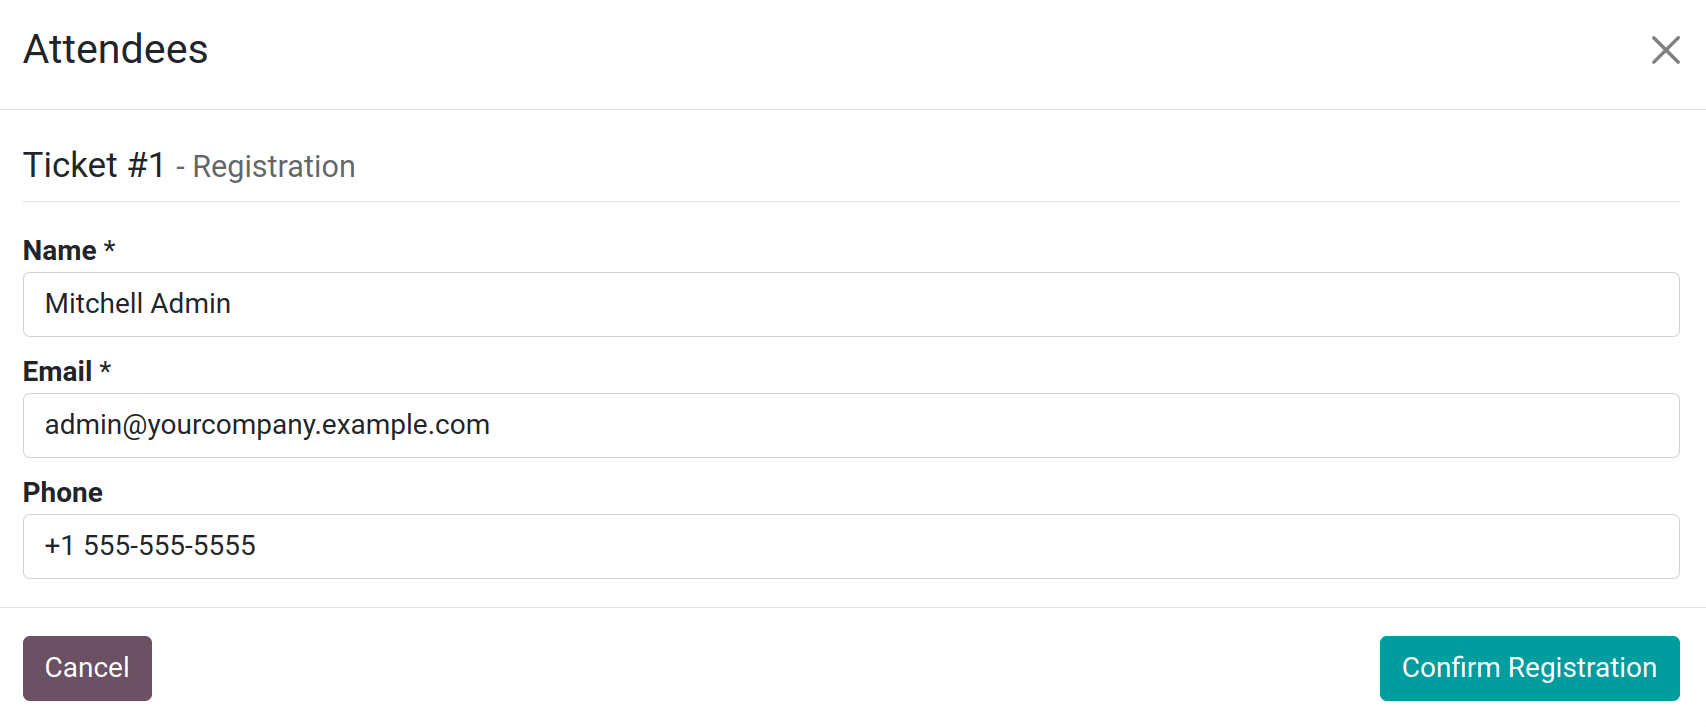
The 'Register' button is used by attendees to sign up for the event after it has been published.
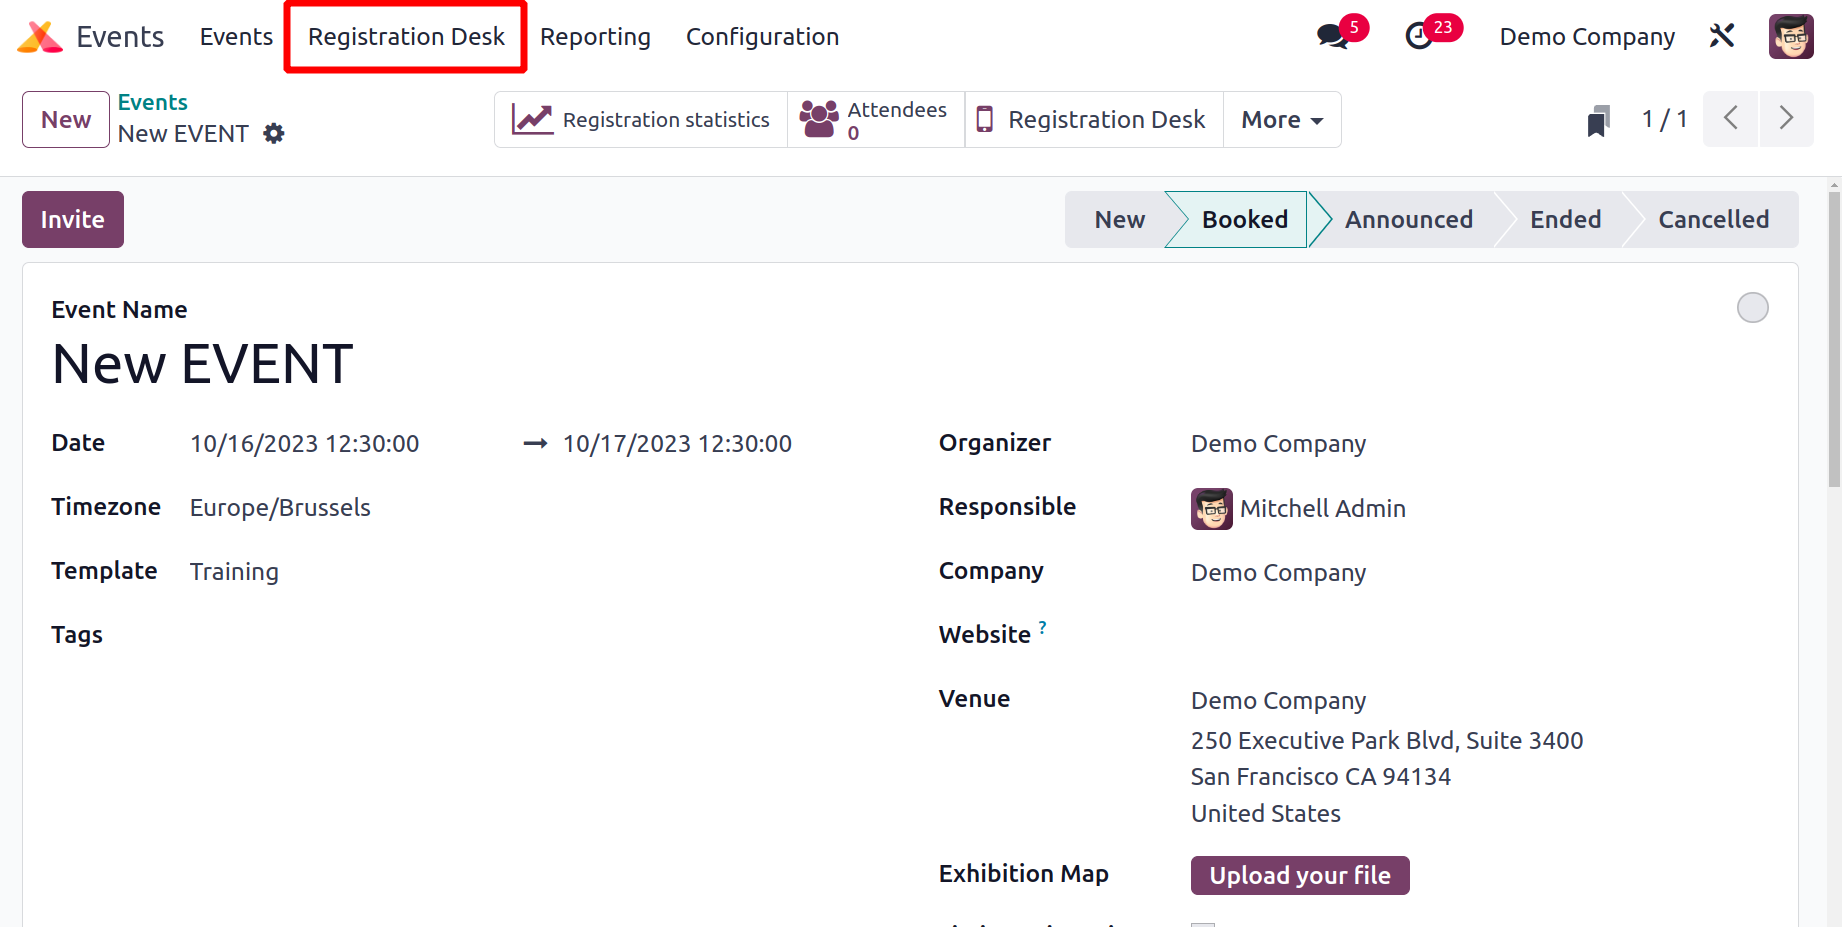
A published event's event description box will display a variety of smart buttons, as seen in the figure below.
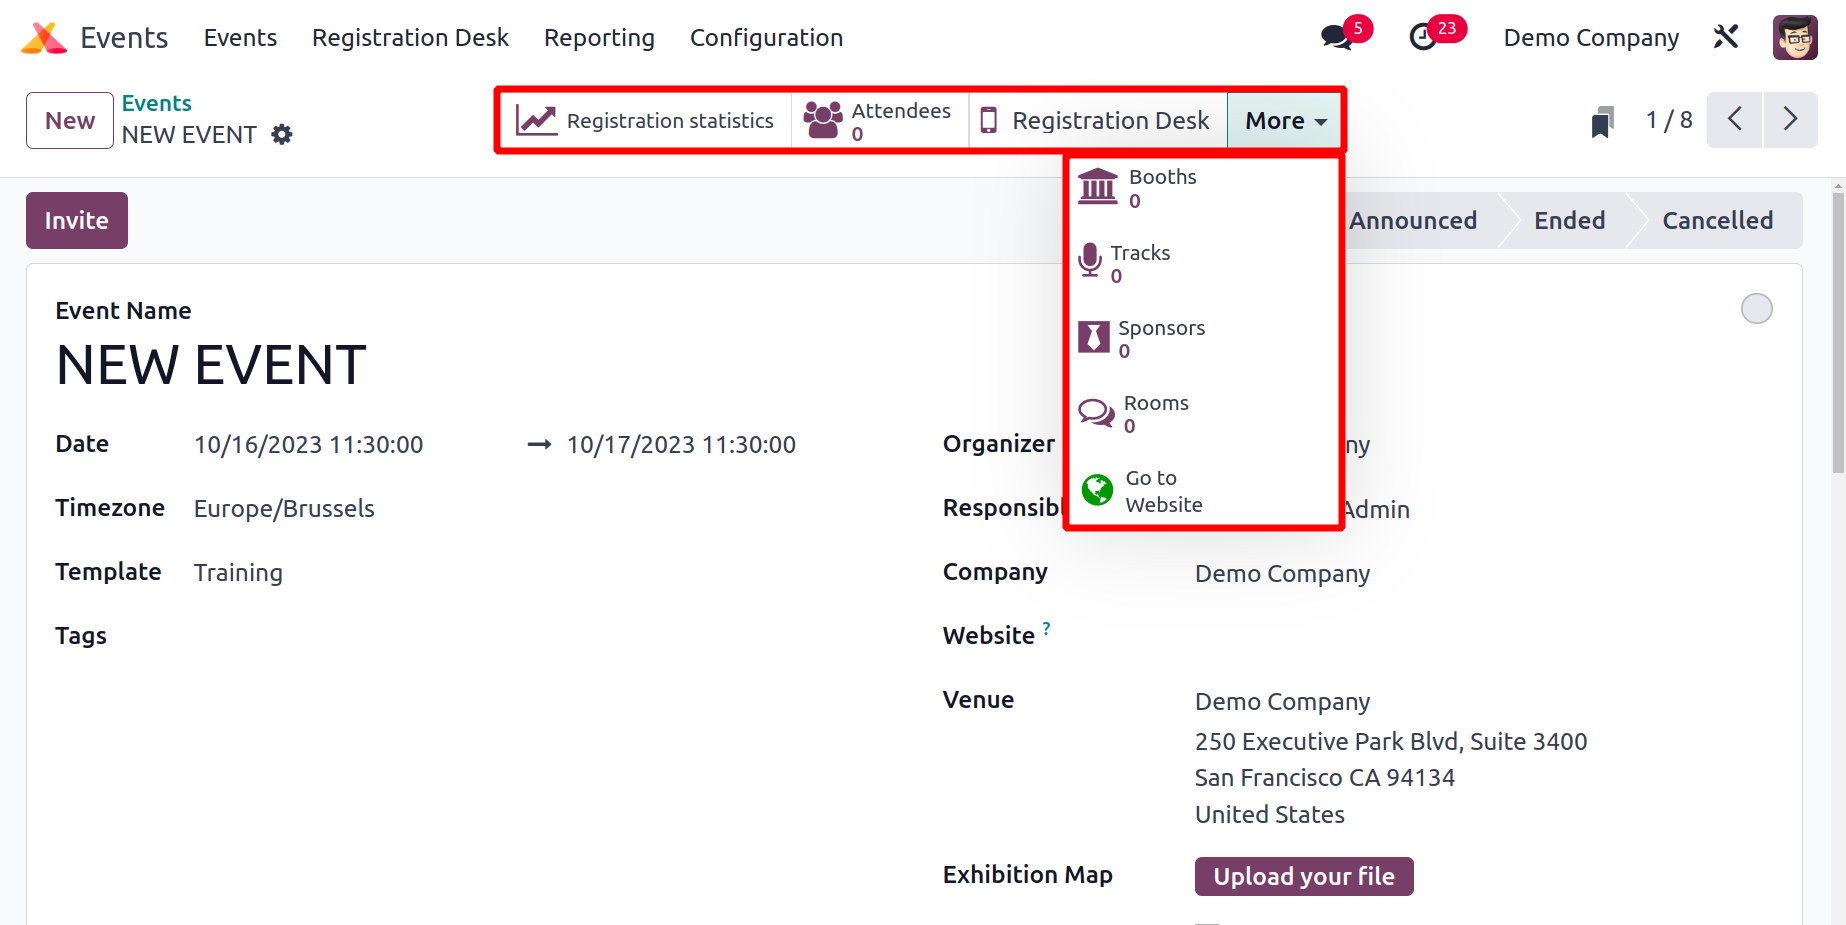
The Attendees button will display the complete list of attendees to this event. On this platform, you can get a list of all Attendees who have registered for the event.
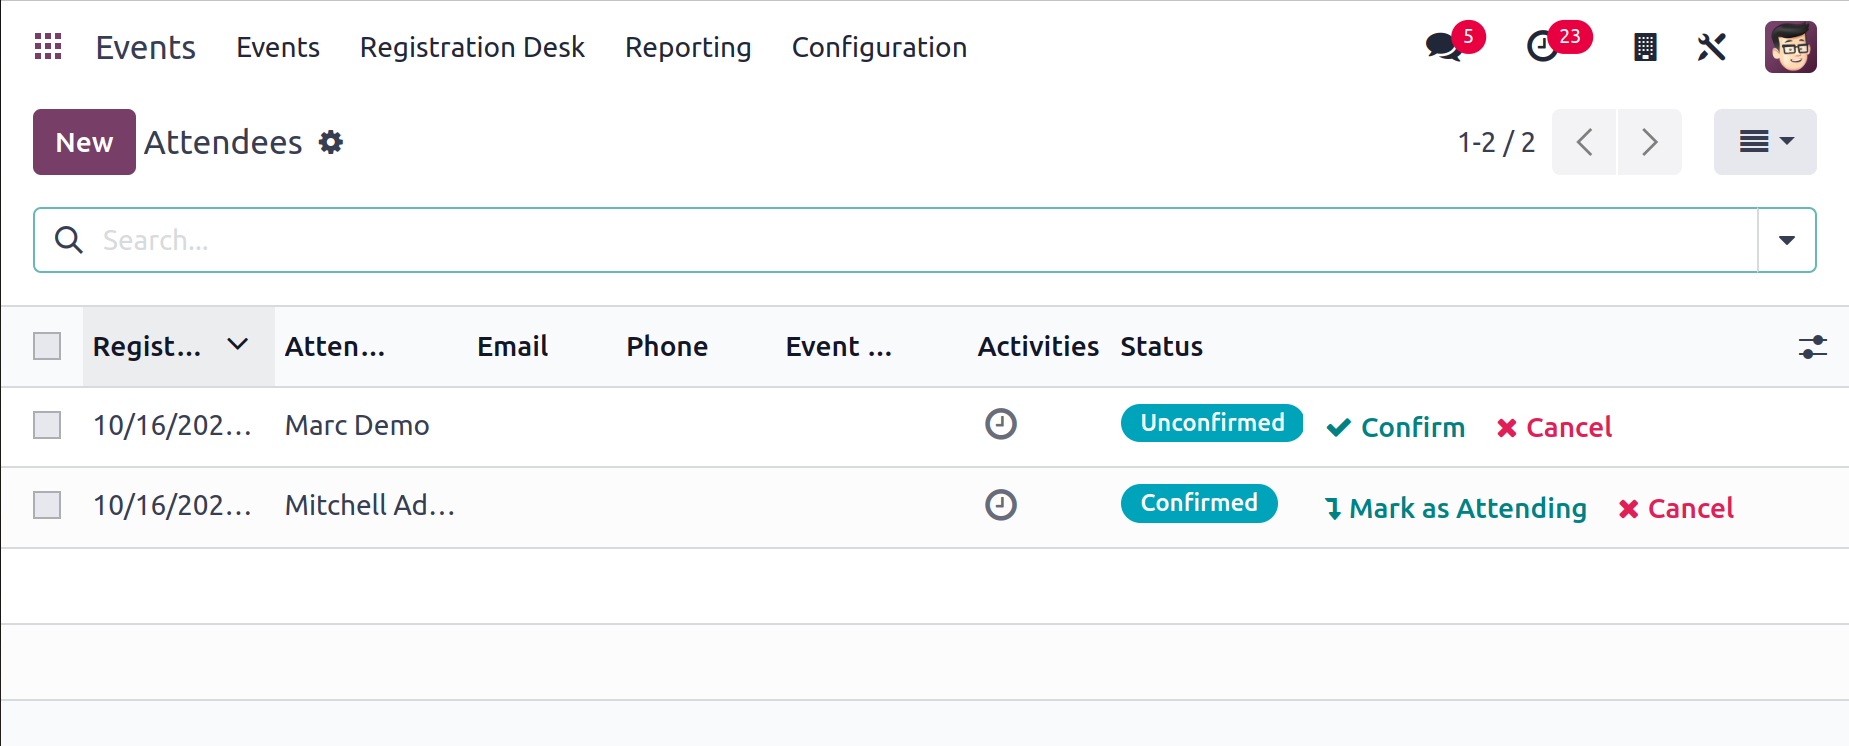
In this box, you can view the Registration Date, Attendees' Names, Emails, Phone Numbers, Event Tickets, and Status. Additionally, you will see the Cancel, Mark as Attending, and Confirm buttons as seen in the illustration.
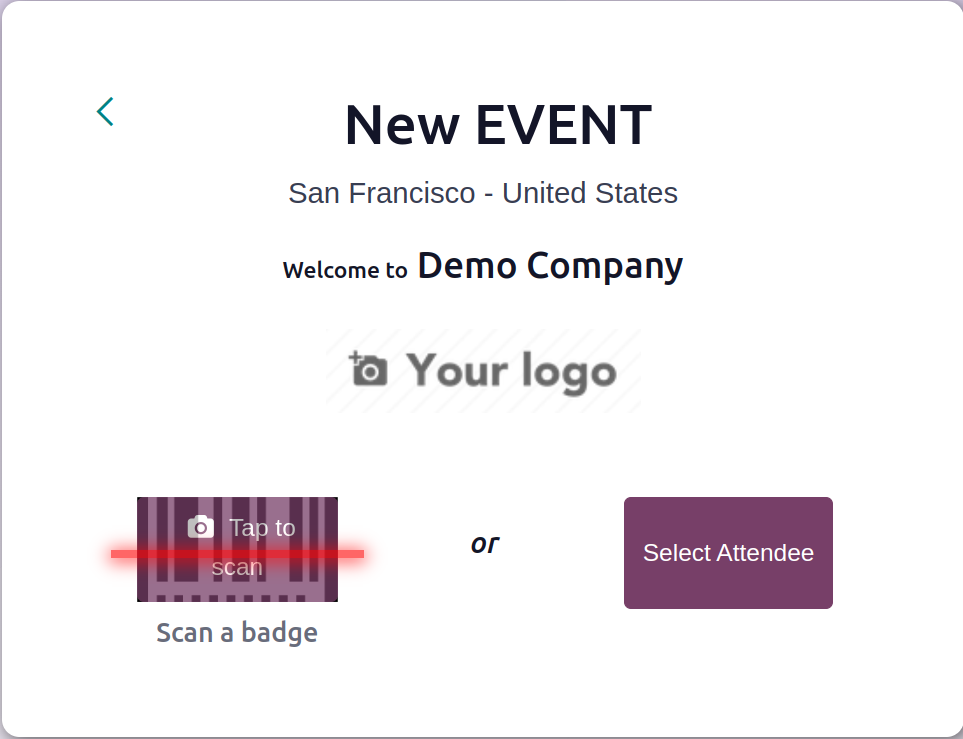
The button for the registration desk will take you to a new window where guests can confirm their registration for the event by scanning their badges or manually choosing the guests. You must first enable the Barcode option under the Attendance tab in the Settings menu in order to access this option.
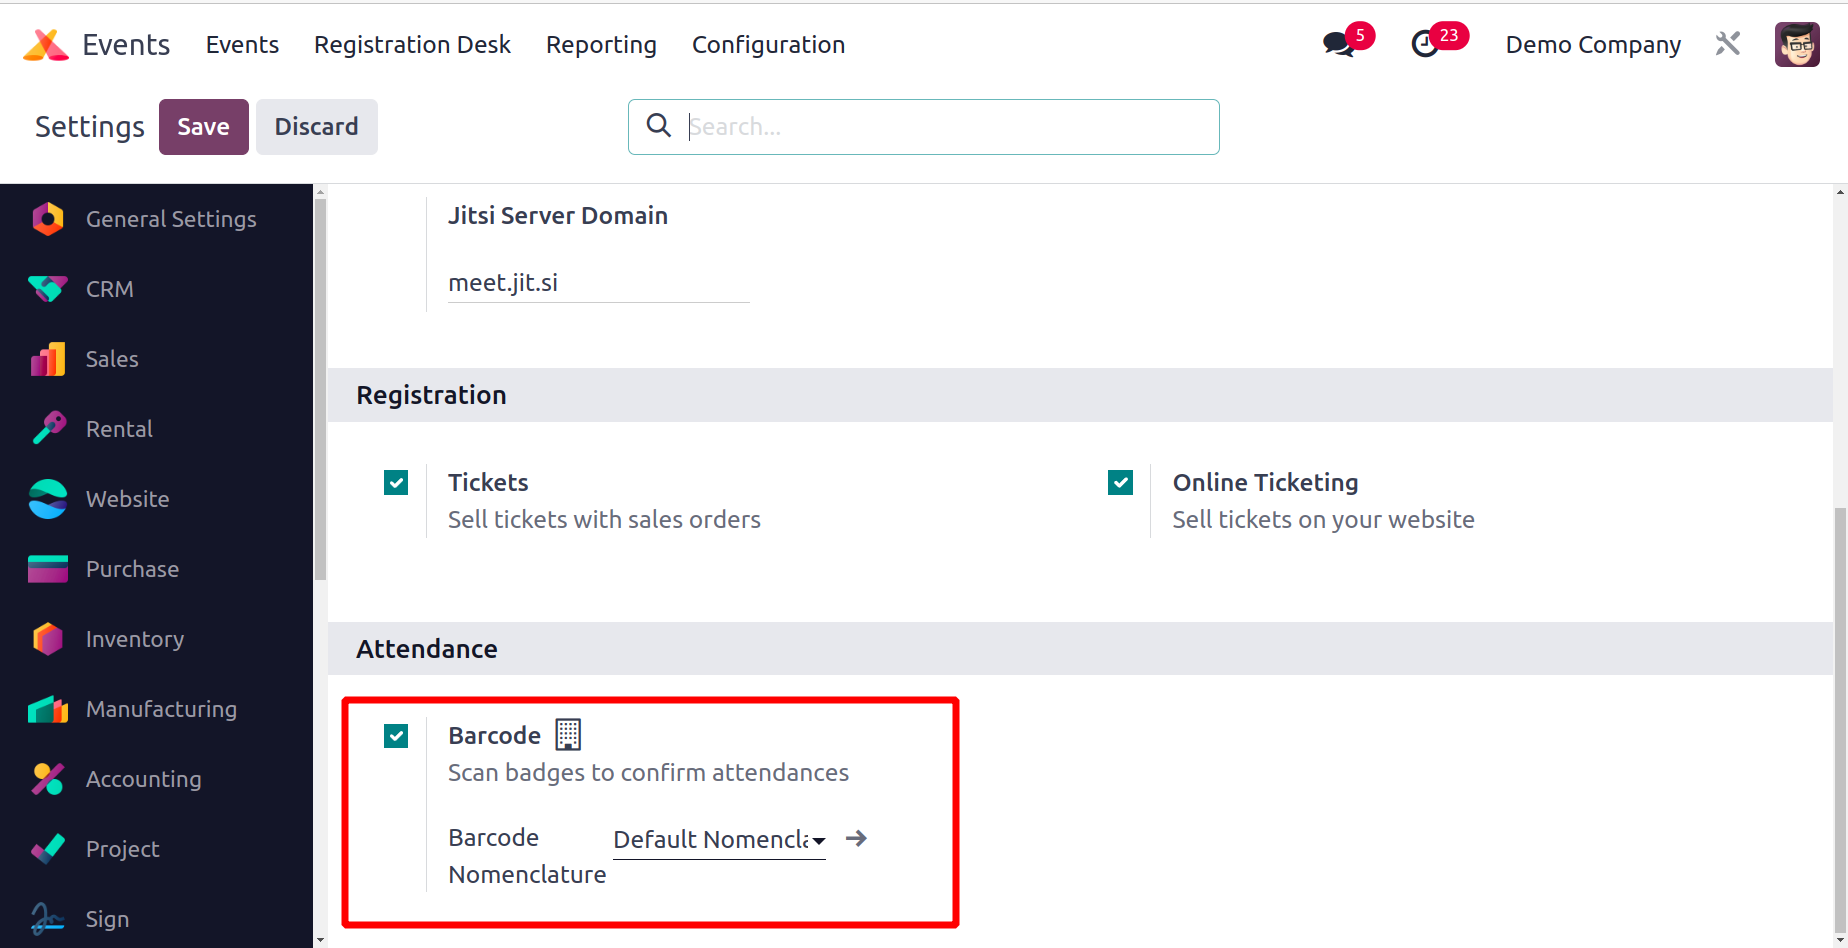
You can use this feature to scan badges to verify attendance.
The main menu bar of the Events module also has a Registration Desk option.
The data of each configured booth for this event will be displayed in the Booths button. The event's schedule is saved when you press the Tracks button. Using the Sponsors button, you can learn more about the event's sponsors. For the purpose of having discussions about the event, you can assign chat rooms
to the attendees. You can get in touch with the event's attendees and track speakers via the Contact Attendees and Contact Track Speakers buttons, respectively.
Look at the Events Track in the Odoo 17 Events module right now.
Event Tracks
You can accept talk proposals from various speakers and post the event schedule on your website using the Odoo17 Events module. The Events module's Event Tracks menu will capture all
of the tracks from events that have been posted online. Activate the Schedule & Tracks option in the module's Settings menu.

This will add a navigation menu with a schedule, tracks, and a track proposal form to your event's web pages.

You can activate the Showcase Tracks option in the event creation box to display the event's tracks, and you can enable the Allow Track Proposals option to make a track proposal form available to speakers on your website.
The 'Go to Website' button on Odoo 17 will take you to the website for this specific event.
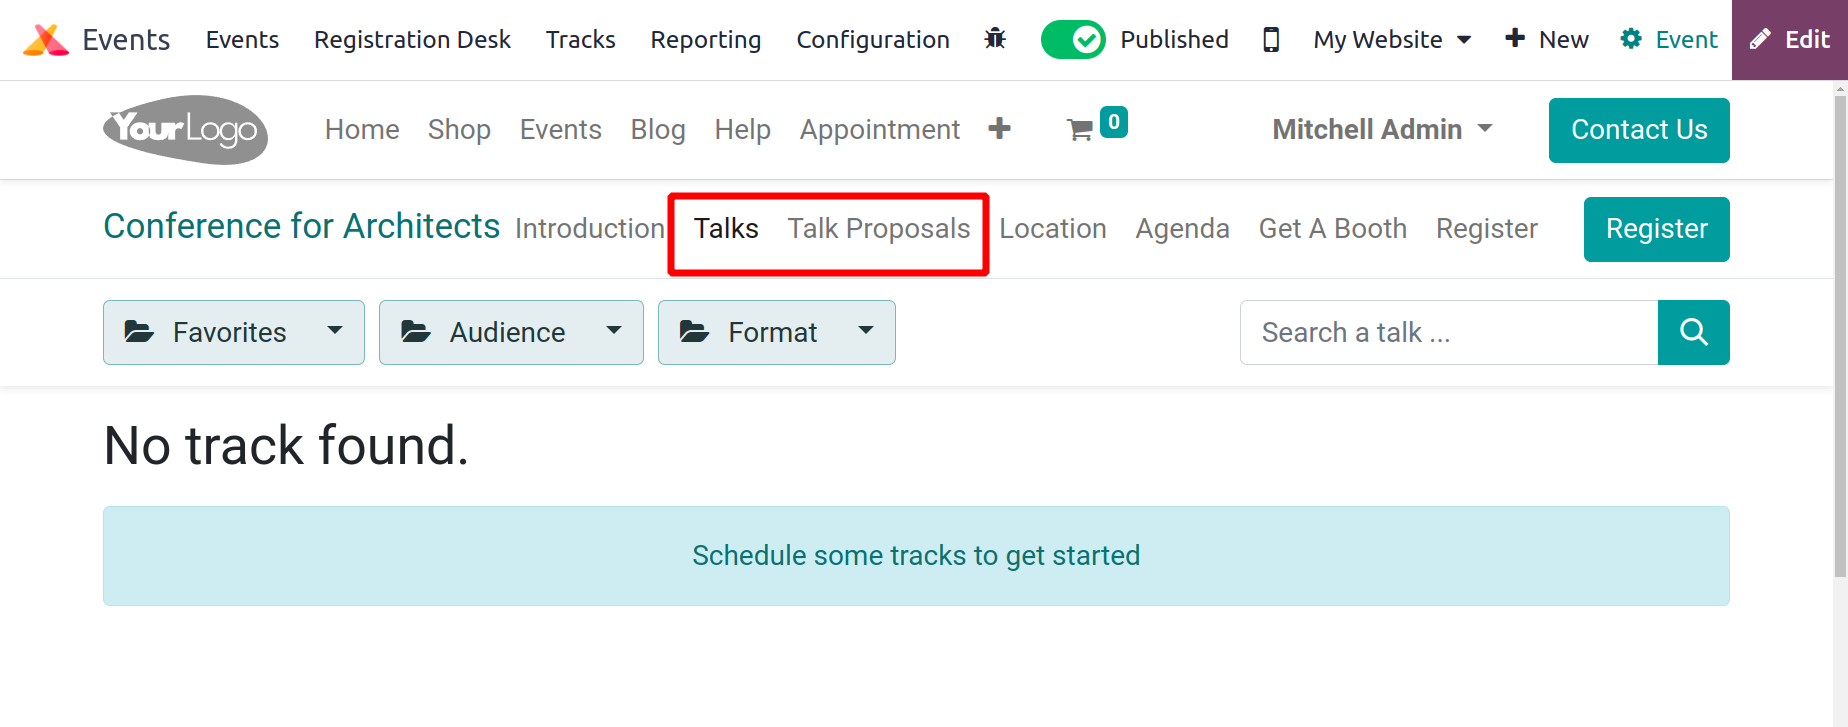
The Talks page, which can be seen in the image above, displays all of the speeches given by various speakers about the event. For speakers to fill out and submit a proposal for a discussion at the event, visit the discussion Proposal link. The Talk Into field is where the speaker
can provide information about the talk. The talk's title, introduction, and categories are all listed in this area.
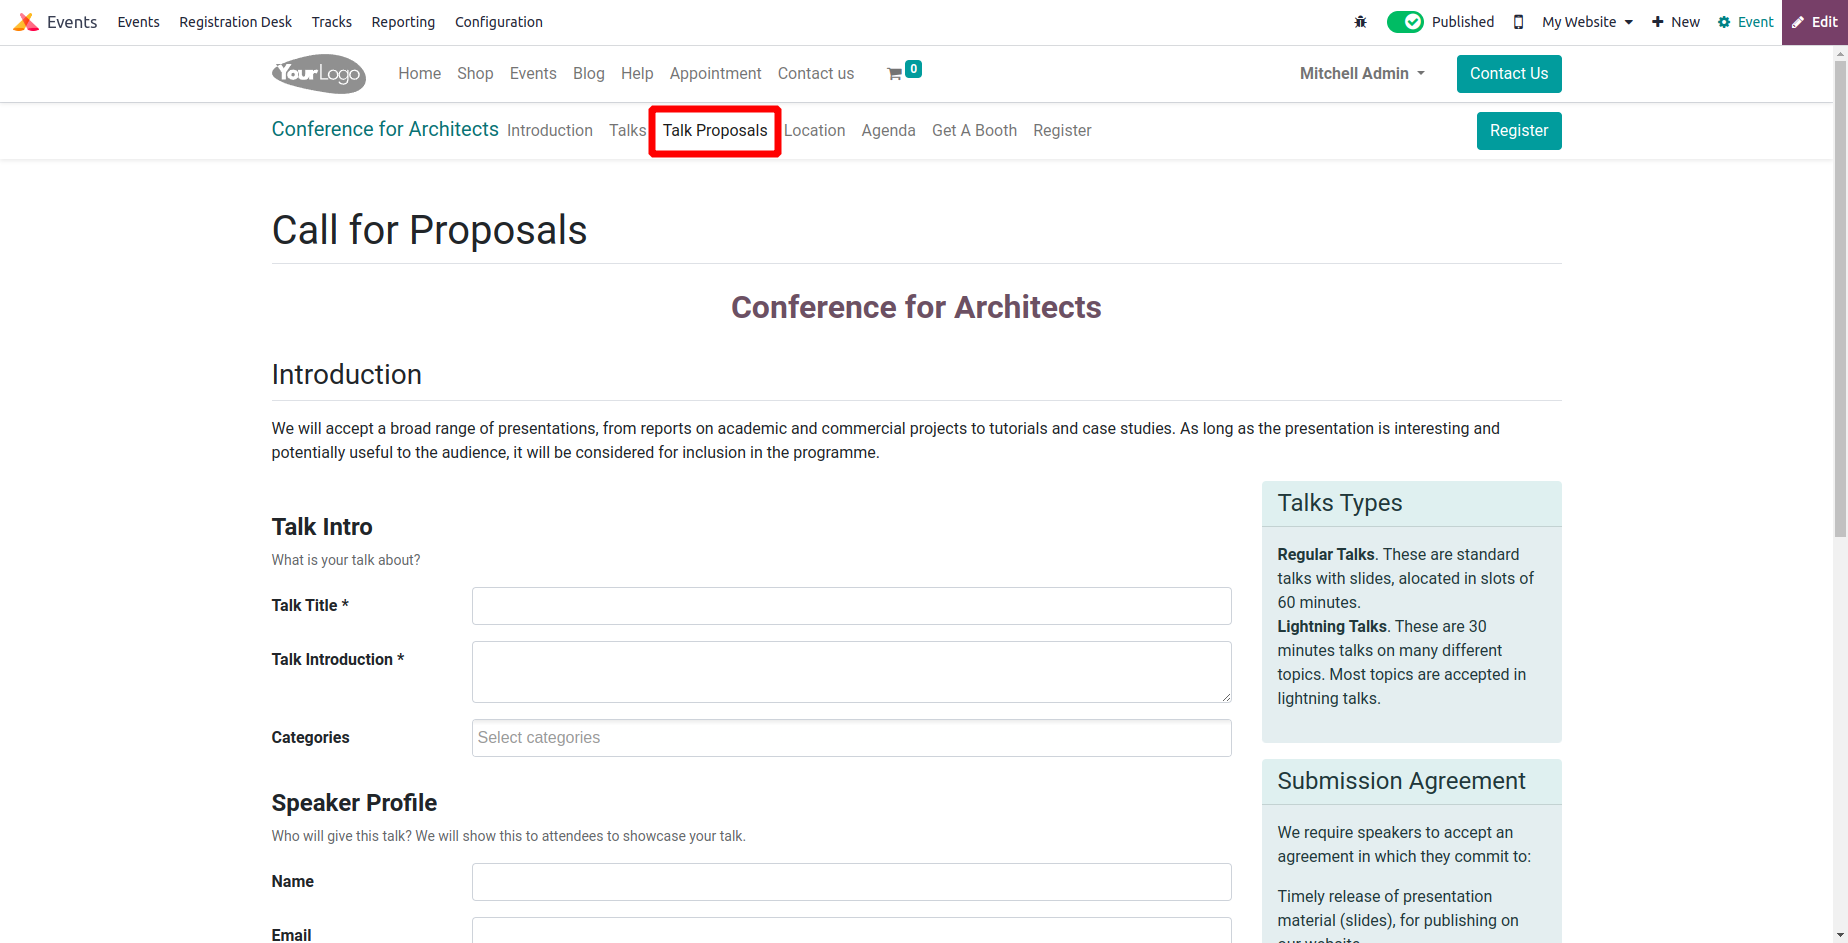
The user can enter the speaker's name, email, phone number, job title, biography, and picture in the Picture section of the Speaker Profile. The user will be given extra fields to provide
additional contact information if they want to activate the "Contact me through a different email/phone" option.

To submit the proposal, click the Submit Proposal button.
From the Tracks menu in the Events module, you can handle all these submitted suggestions with ease in the backend.
Only after activating the Schedule & Tracks option from the Settings menu will this menu appear on the Events module.
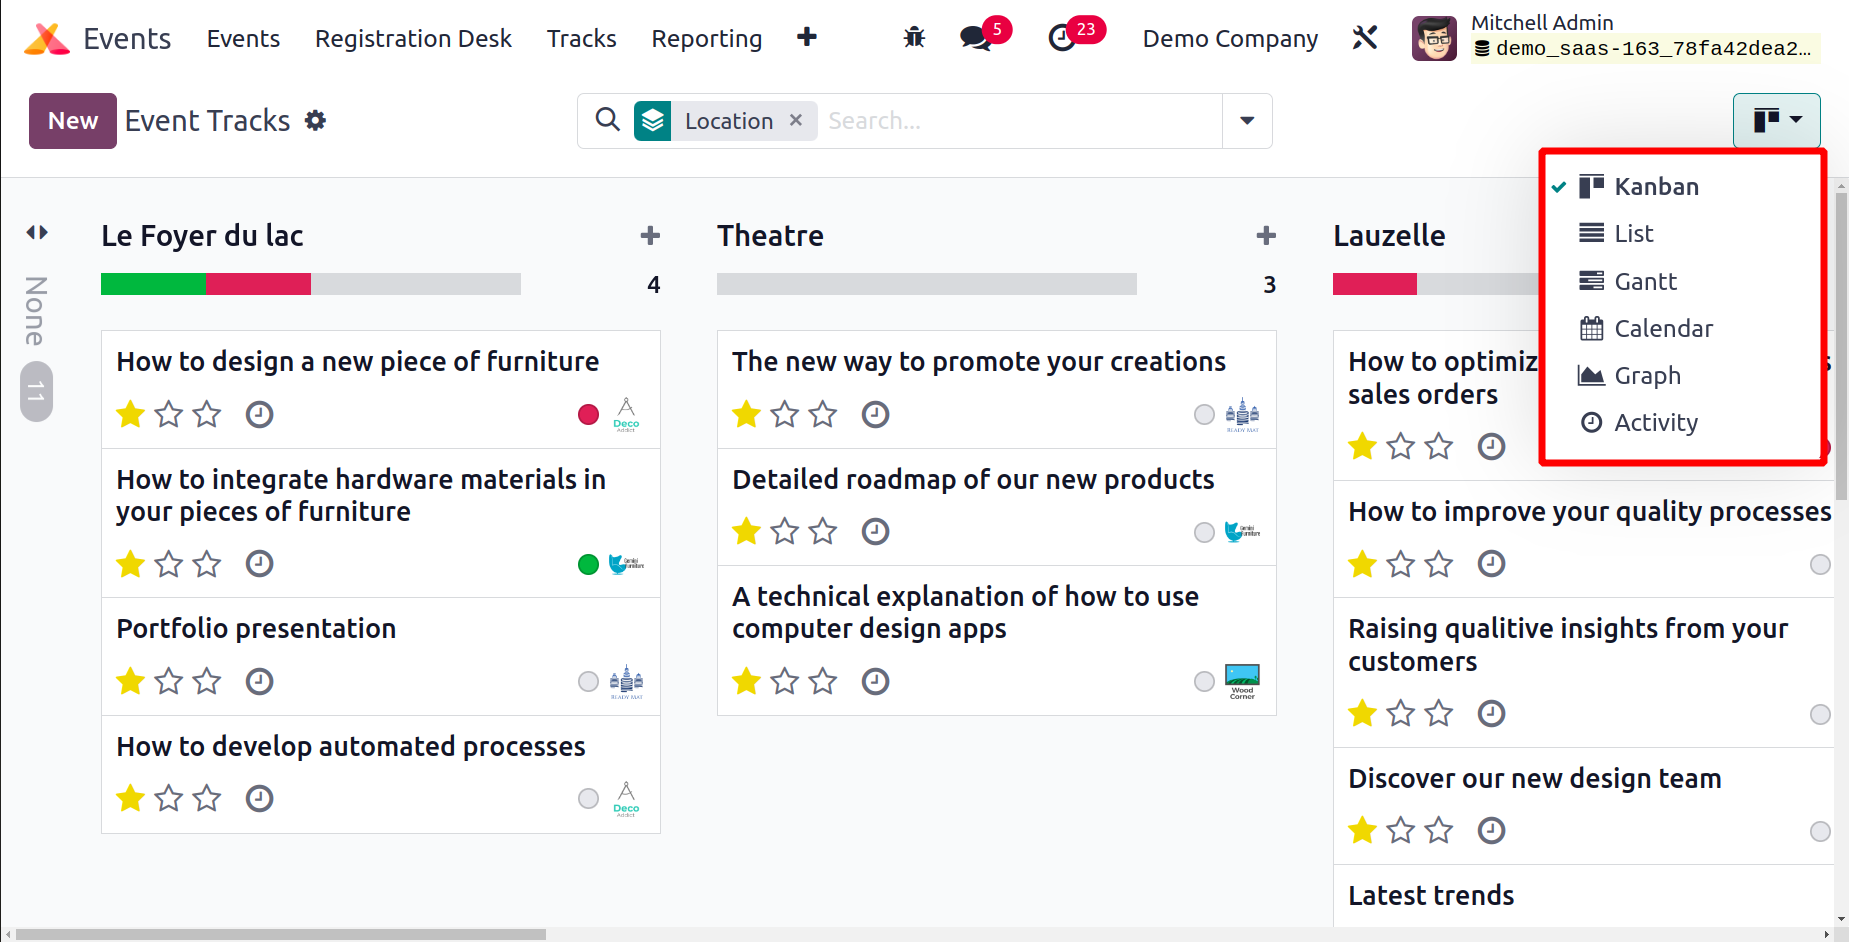
All event tracks are shown in this window, along with track suggestions from various presenters. The event tracks are organized under different phases in the Kanban view. You can classify the event tracks using the Filters and Group By options to meet your needs. You are able to add a new stage for the tracks by using the + icon next to the Add a Column option.
On this platform, you can use the Kanban, List, Calendar, Activity, Gantt, and Graphical views.
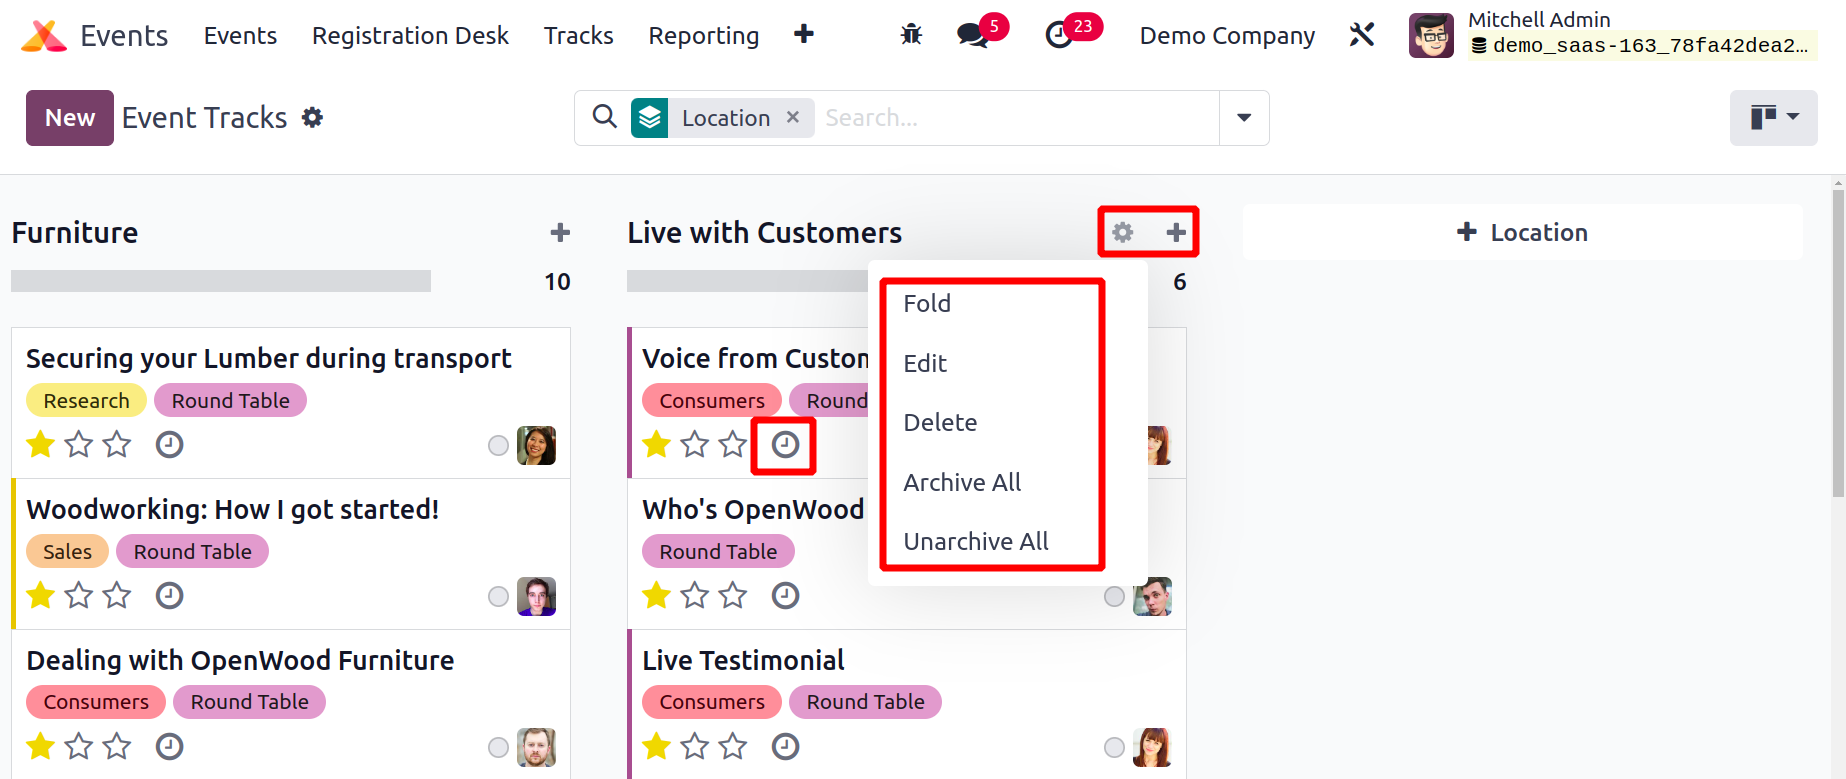
You can schedule tasks for the chosen track by using the clock icon. Each event track has three vertical dots that can be used to View, Edit, or Delete the track. Use the plus icon that is displayed to the right of the stage's title if you wish to add a new event track under that stage.
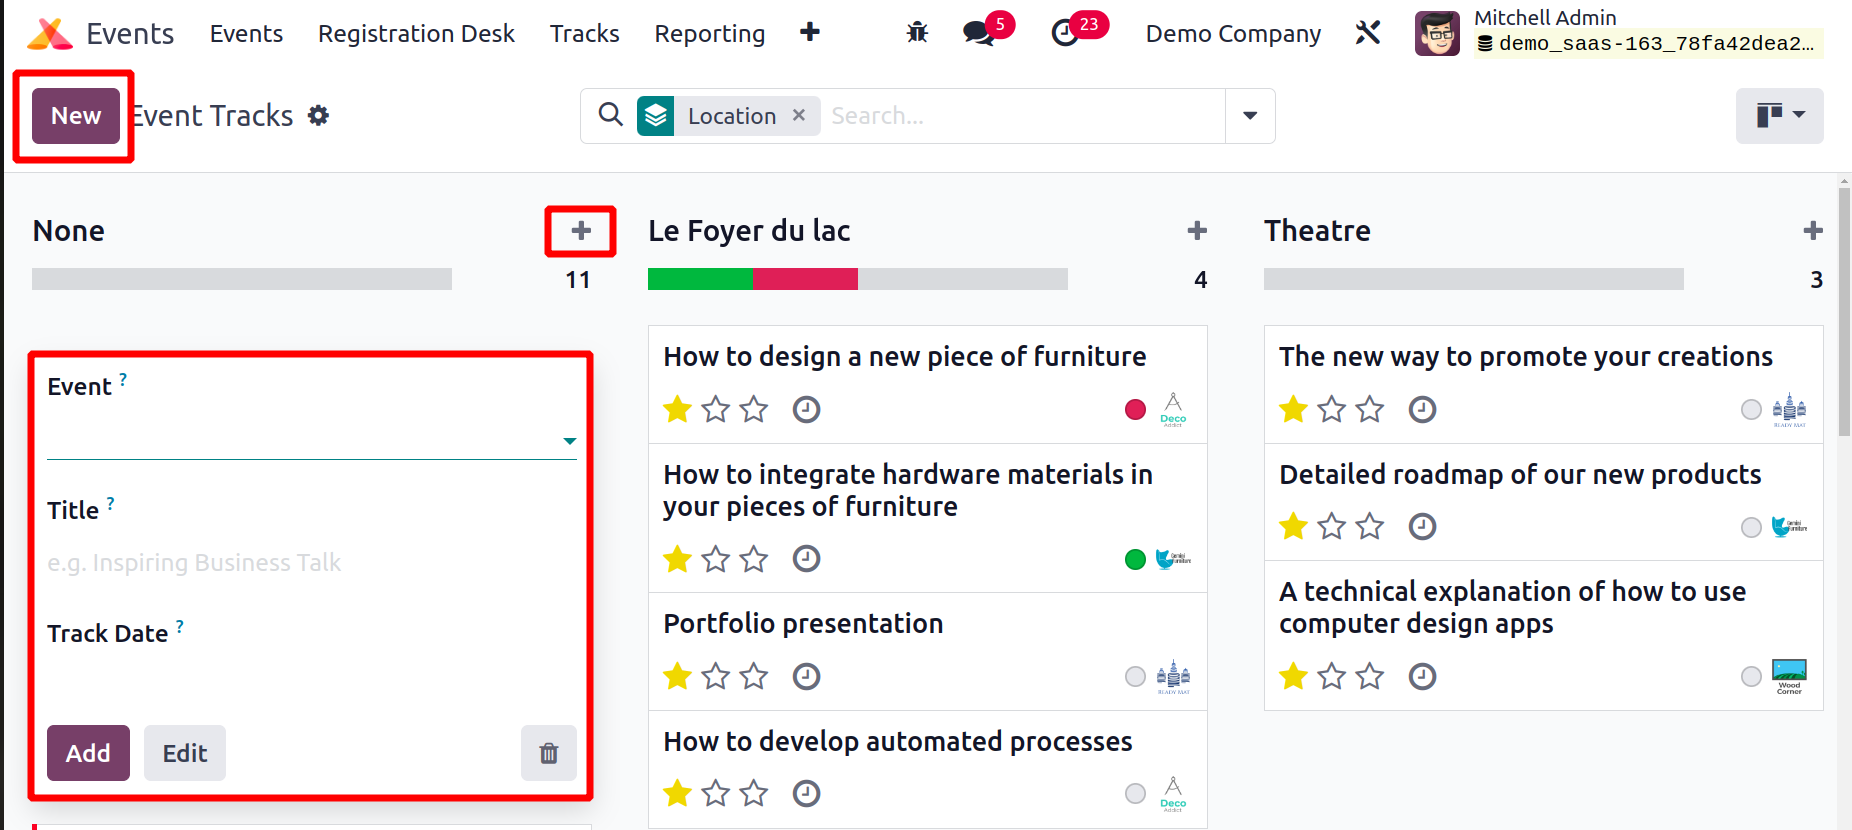
Enter the track's title in the appropriate field, then click the Add button to add the track to the stage you've chosen. On this platform, you can also create a new event track by clicking the New button.

Mention the event track's name in the Title field. In the corresponding fields, include the Track Date, Location, and Duration information. The attendees can view your track on YouTube by mentioning the track's YouTube video URL in the designated section. The 'Is Youtube video link?' option can be turned on if the video is already accessible on YouTube. Each guest who has registered for the event will have the talk marked as a favorite if the "Always Wishlisted" option is enabled. Fill in
the appropriate fields with the Responsible Employee's name, the Event, the appropriate Tags, and the color.
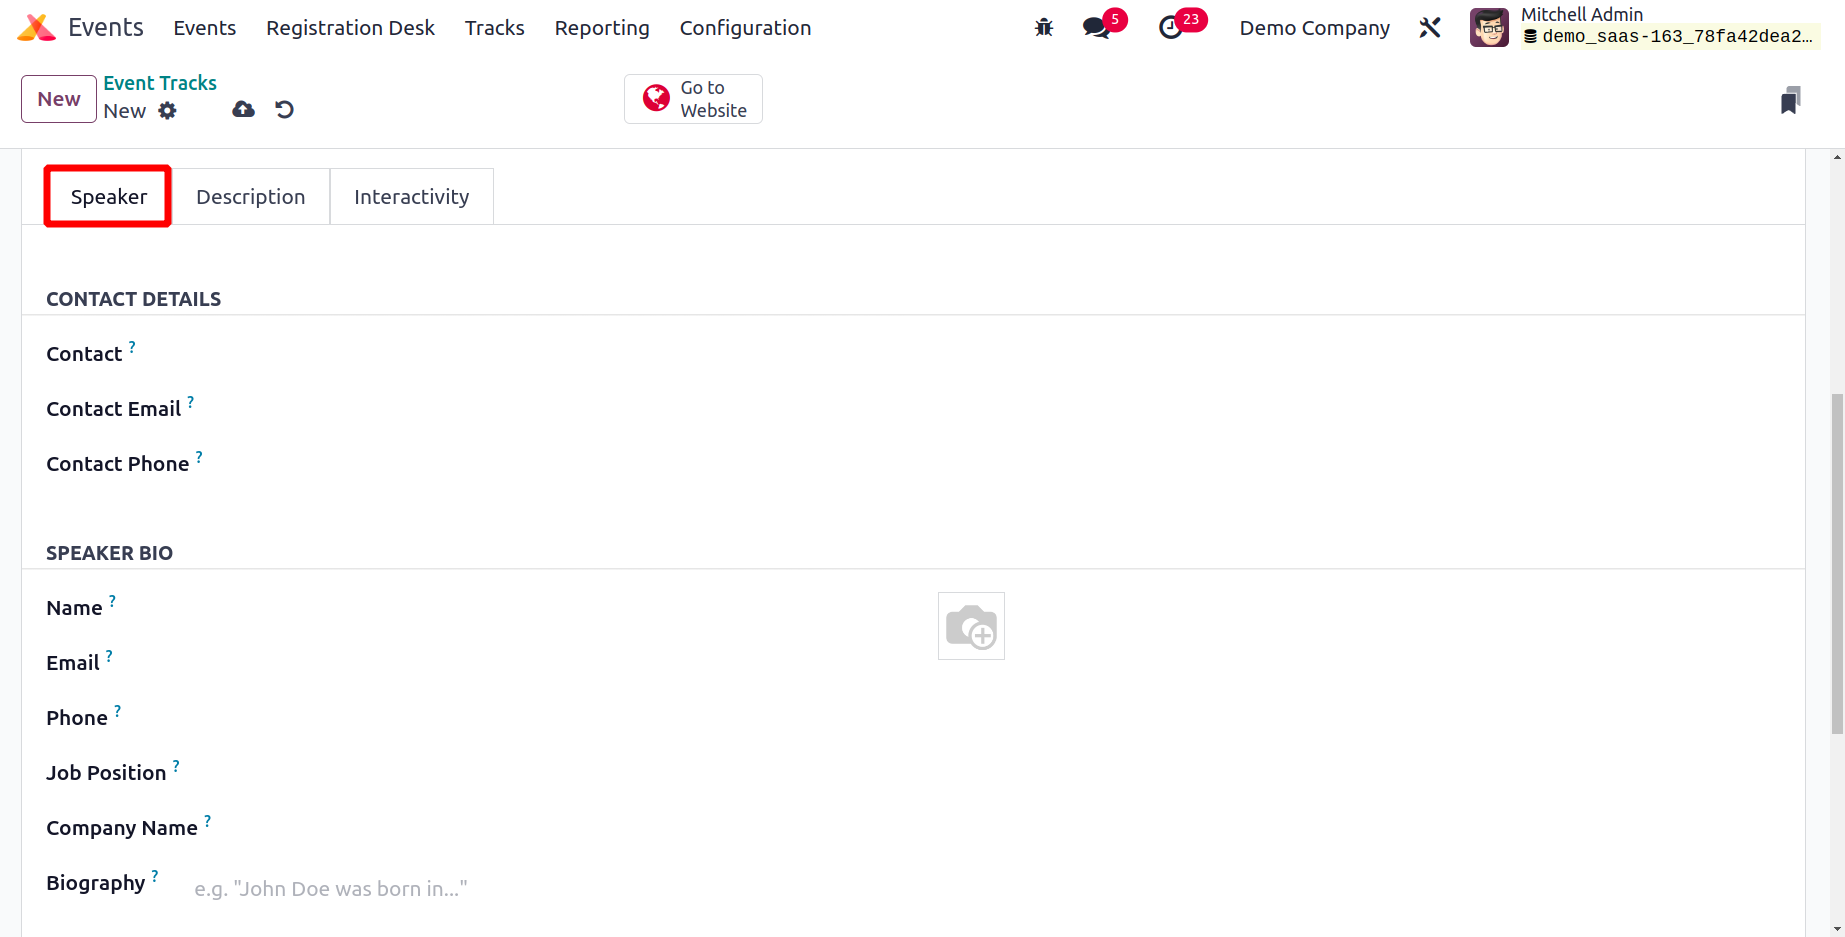
You can add details about the talk's speaker under the Speaker tab. Contact information and a speaker bio are included. The contact details area allows you to enter the Contact Name, Email, and Phone. The speaker's bio includes their name, email, phone number, job title, company name, and biography. In the designated field, you may also submit a photo of the speaker.
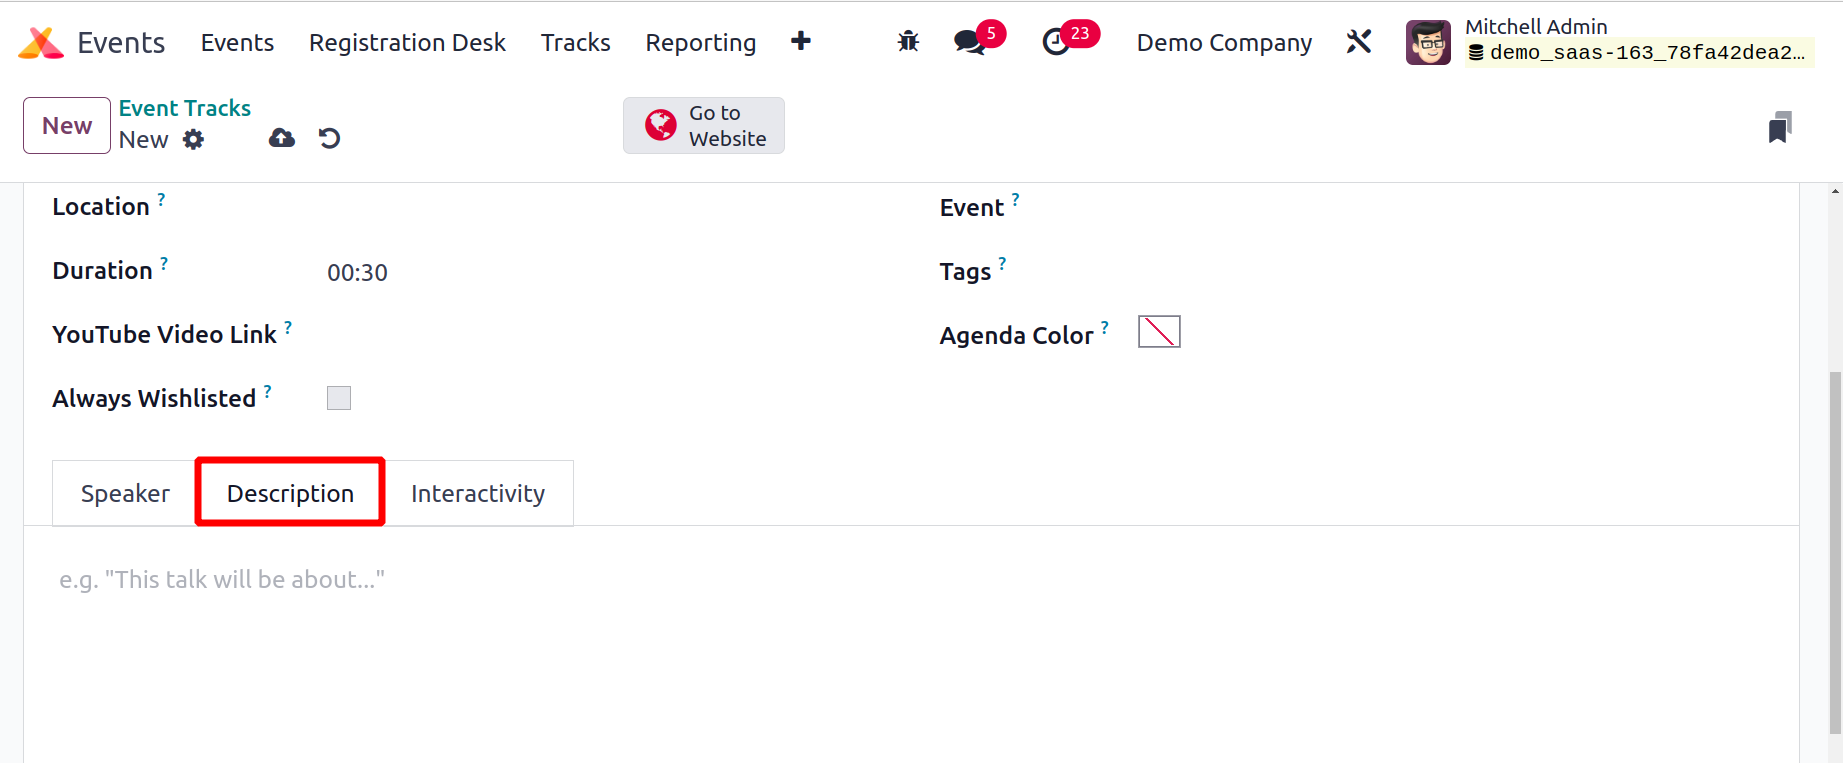
Instructions and other crucial talk-related details can be mentioned in the Description tab.
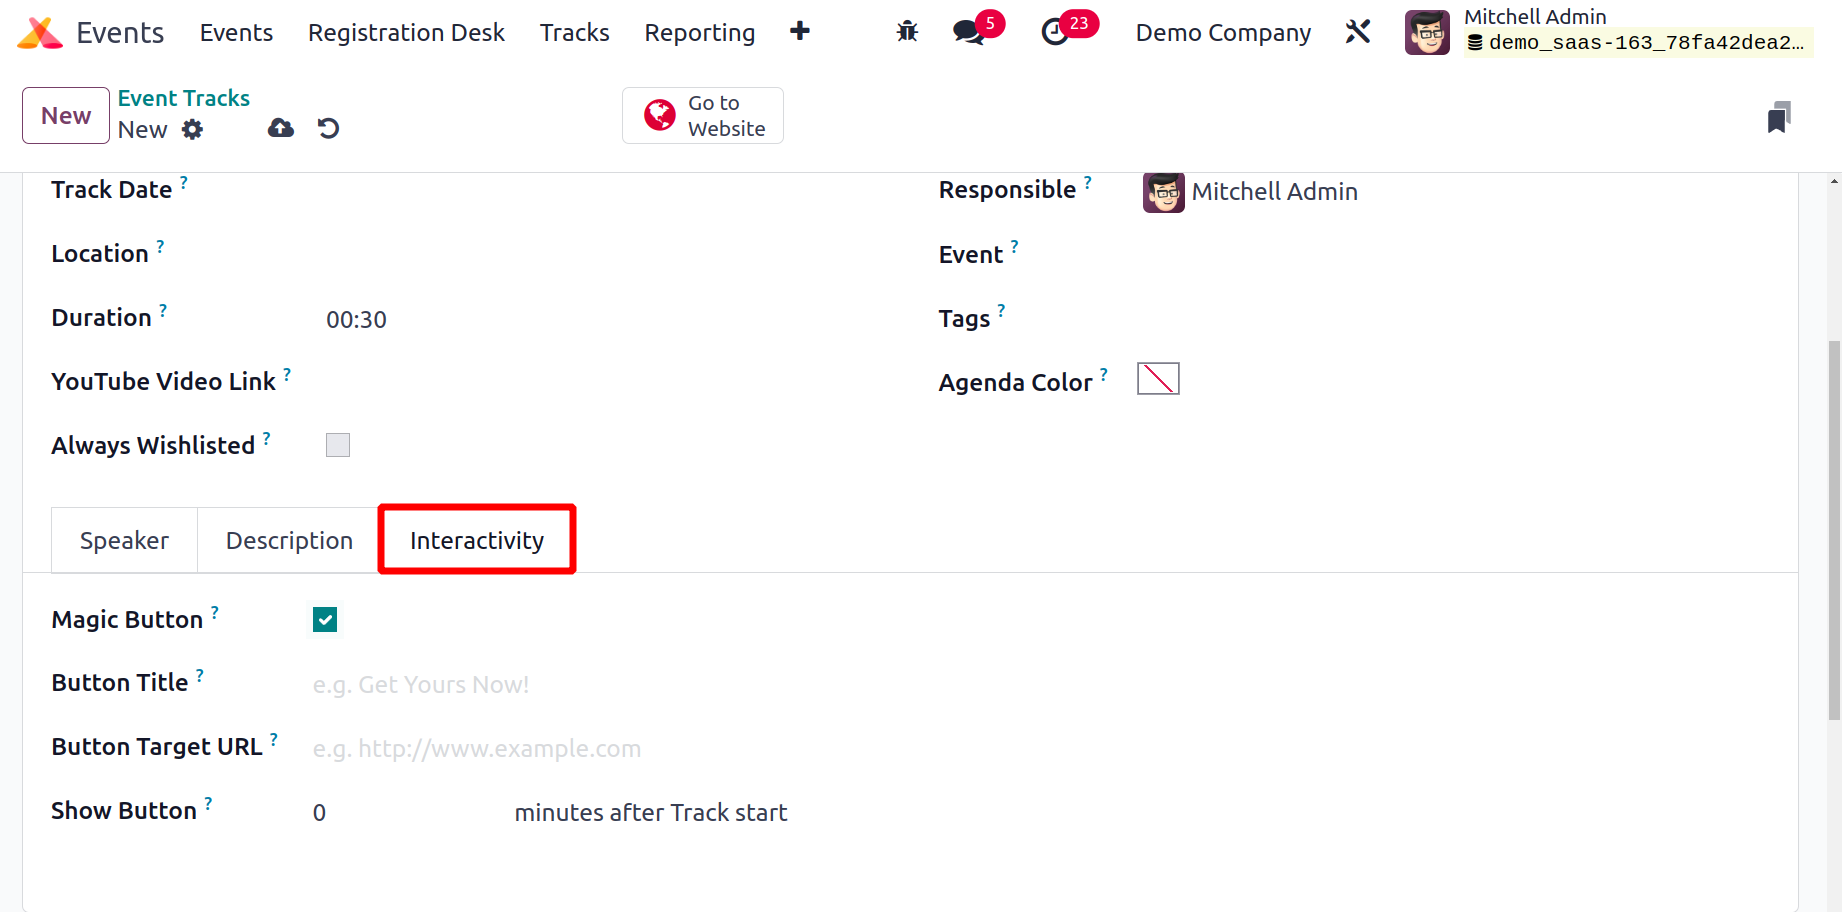
You can activate the Magic Button option under the Interactivity menu. When this option is selected, Odoo17 will provide a call to action to your audience members while they are listening to your lecture.
The Button Title, Button Target URL, and Button Appearing Time can all be customized under this tab.
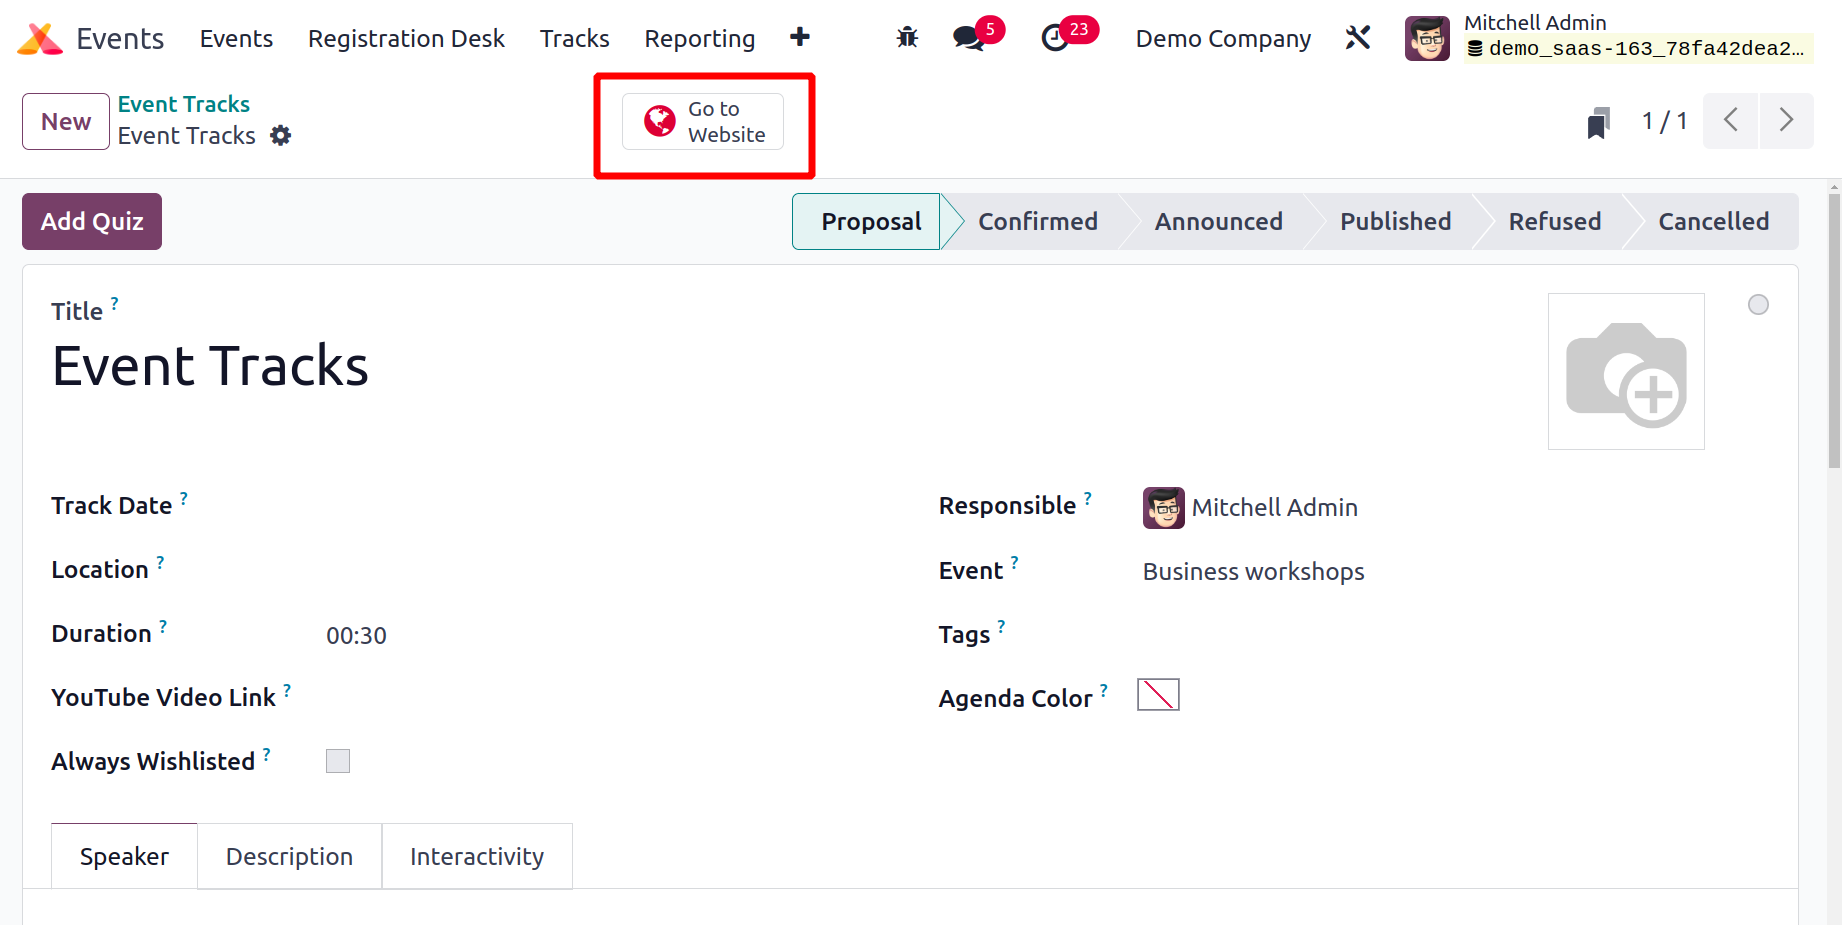
You may now save the freshly created track by clicking the Save button. You can ask the audience members questions about the talk when the track is over.
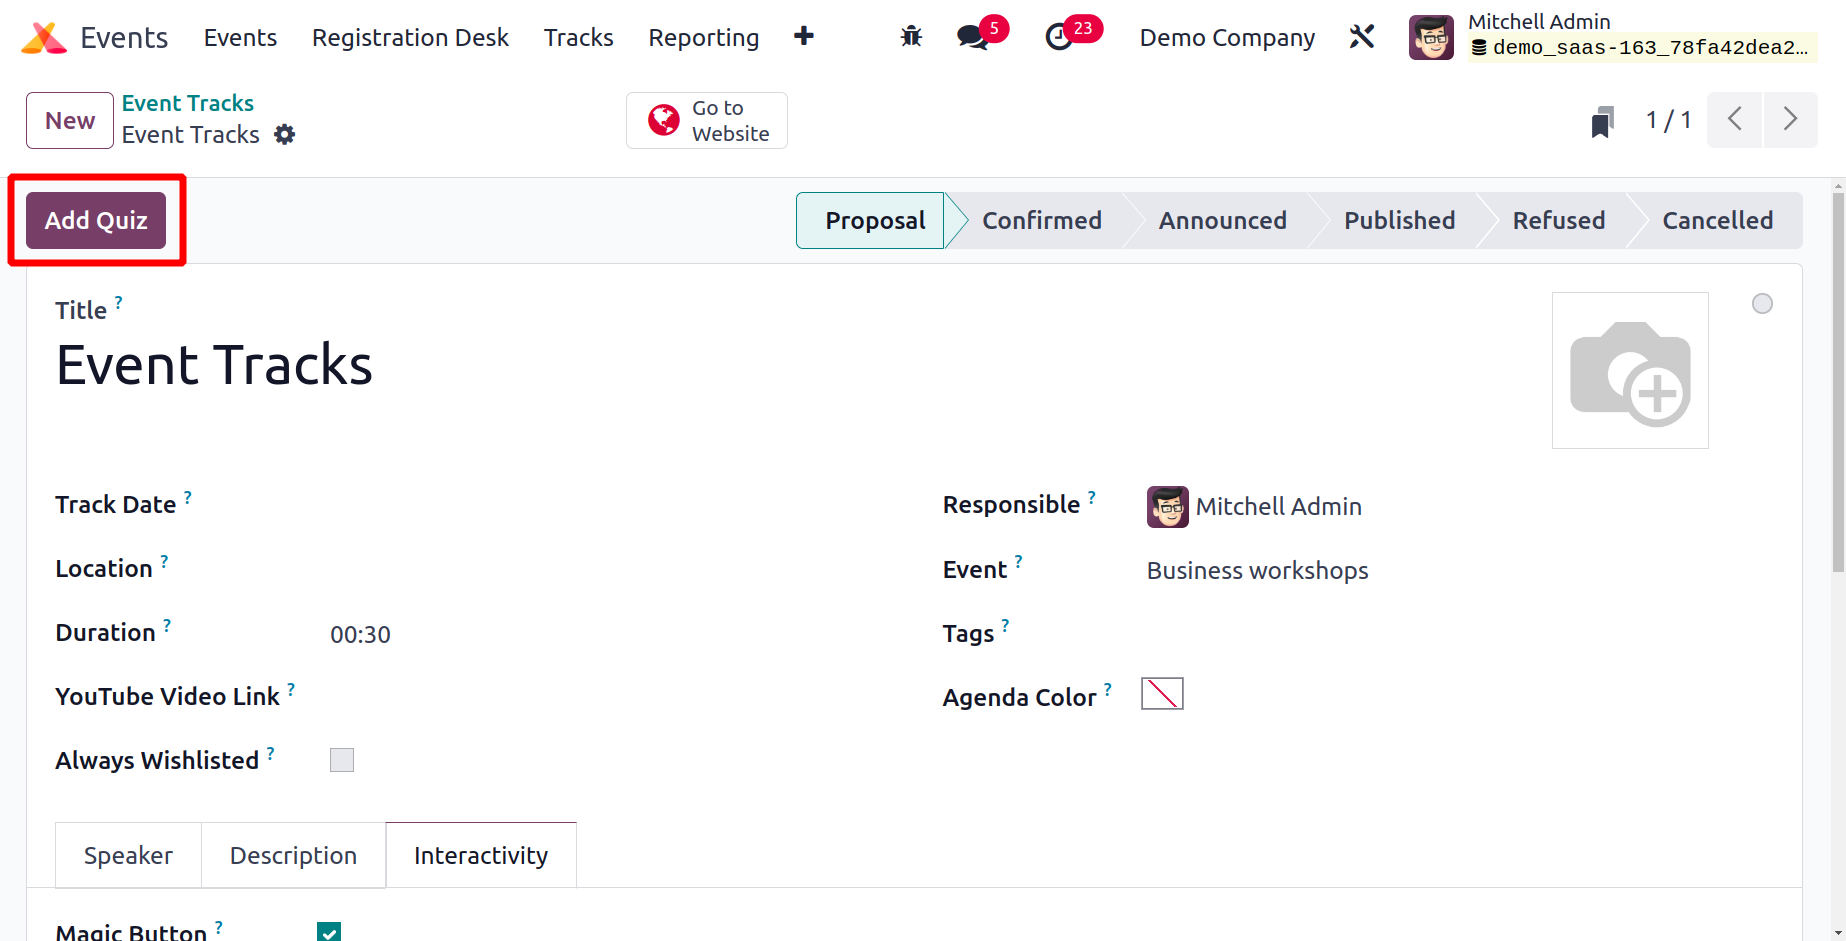
You can enable the Event Gamification option in Odoo17 to include questions in your track.

The 'Add Quiz' option is now visible in your event creation window.
You will now be taken to a new window as shown below, when you click the Add Quiz button to add questions for the event track.
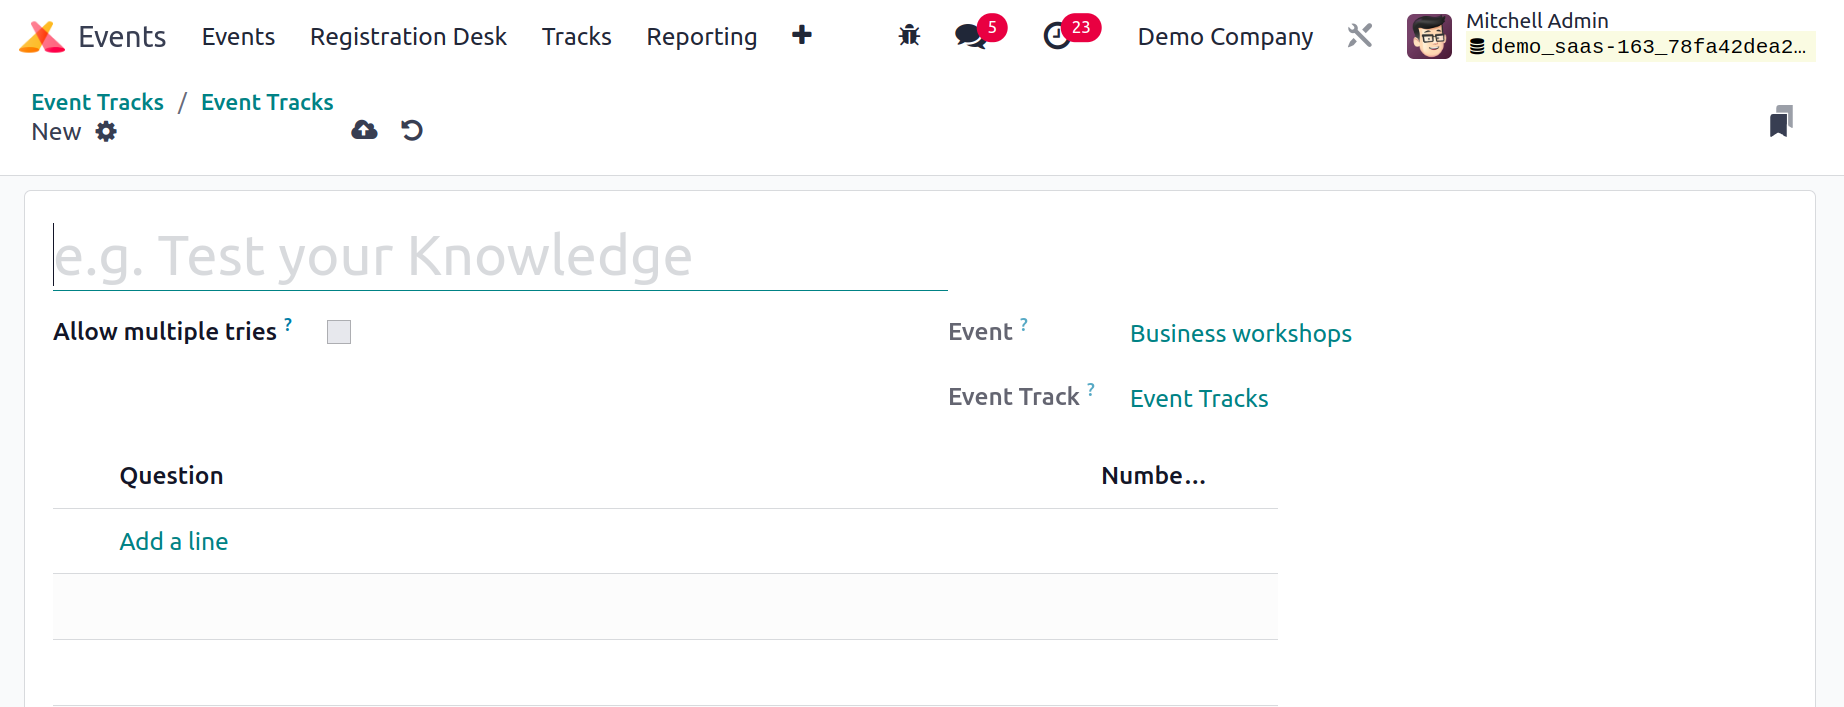
For the quiz, you can enter a title in the provided field. The 'Allow multiple tries' option can be turned on to allow participants to restart the quiz. This window displays the name of the Event and Event Track.
Under the Question tab, you will find the Add a Line option to set up questions.
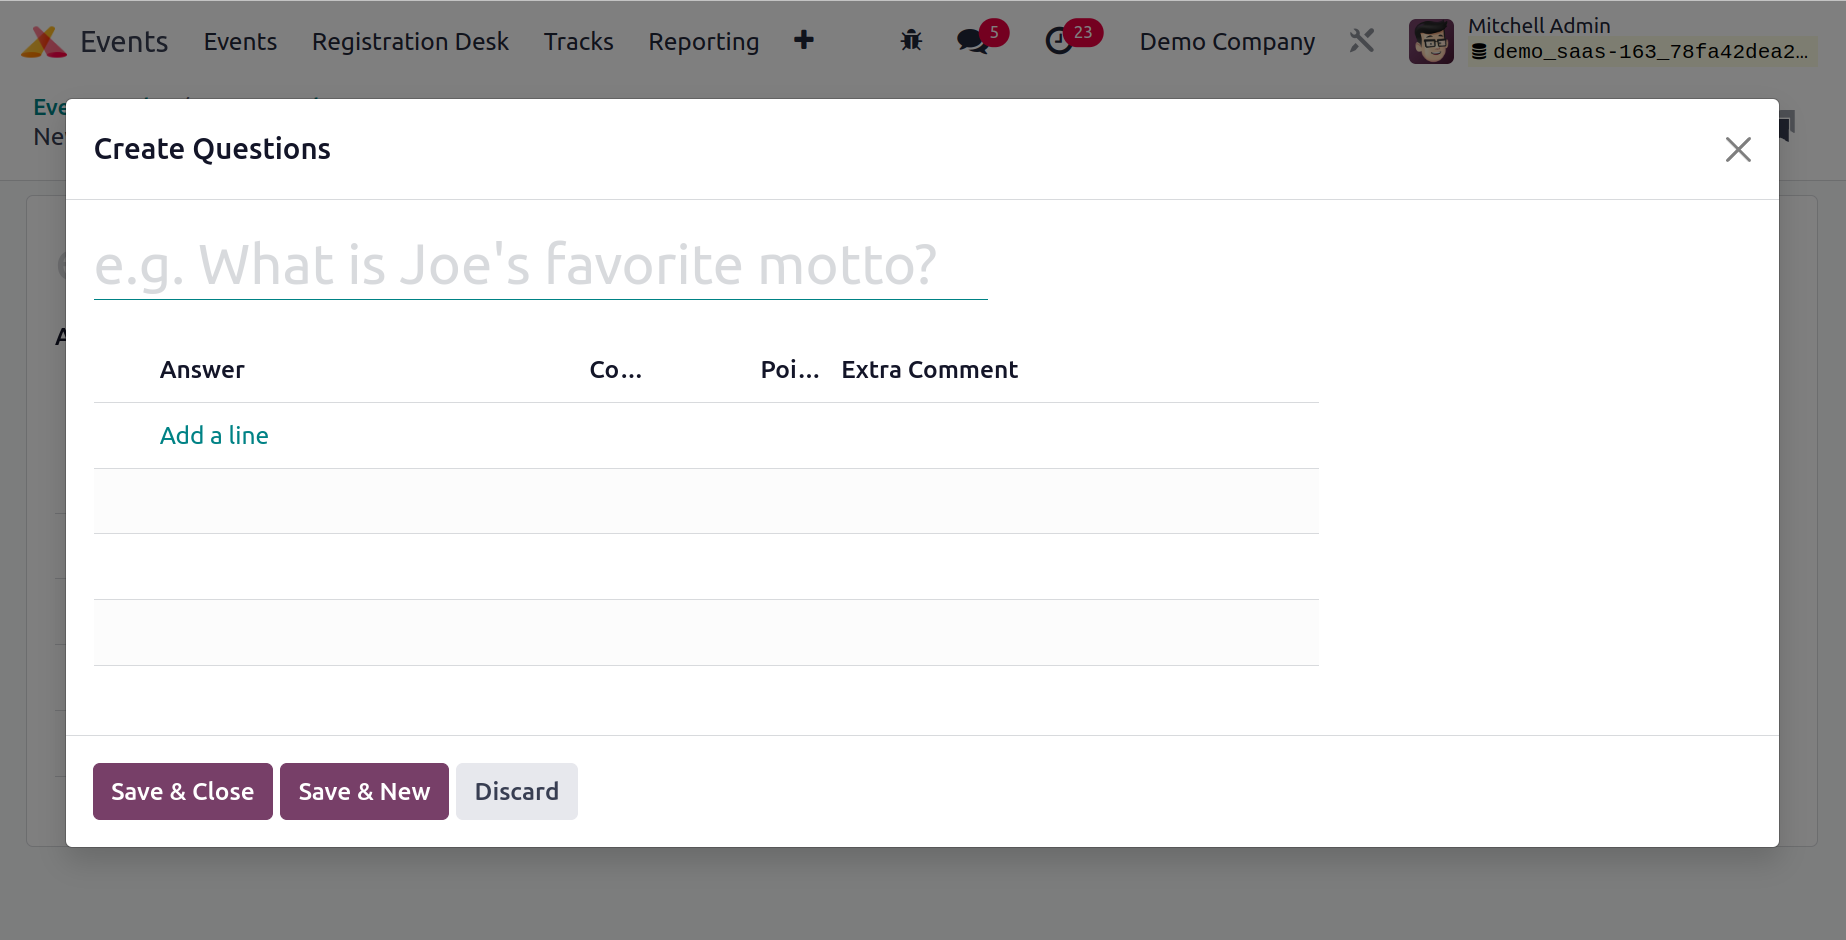
Add the question to the pop-up window's designated field and answer choices to the Answer line. You can select the right response from the list of alternatives and mark it with the appropriate number of points in the respective fields. Attendees who choose the right response from the available options will be rewarded with the designated number of points.
You can make any additional comments for the answer line in this window as well. To save the quiz, click the Save option at the end.
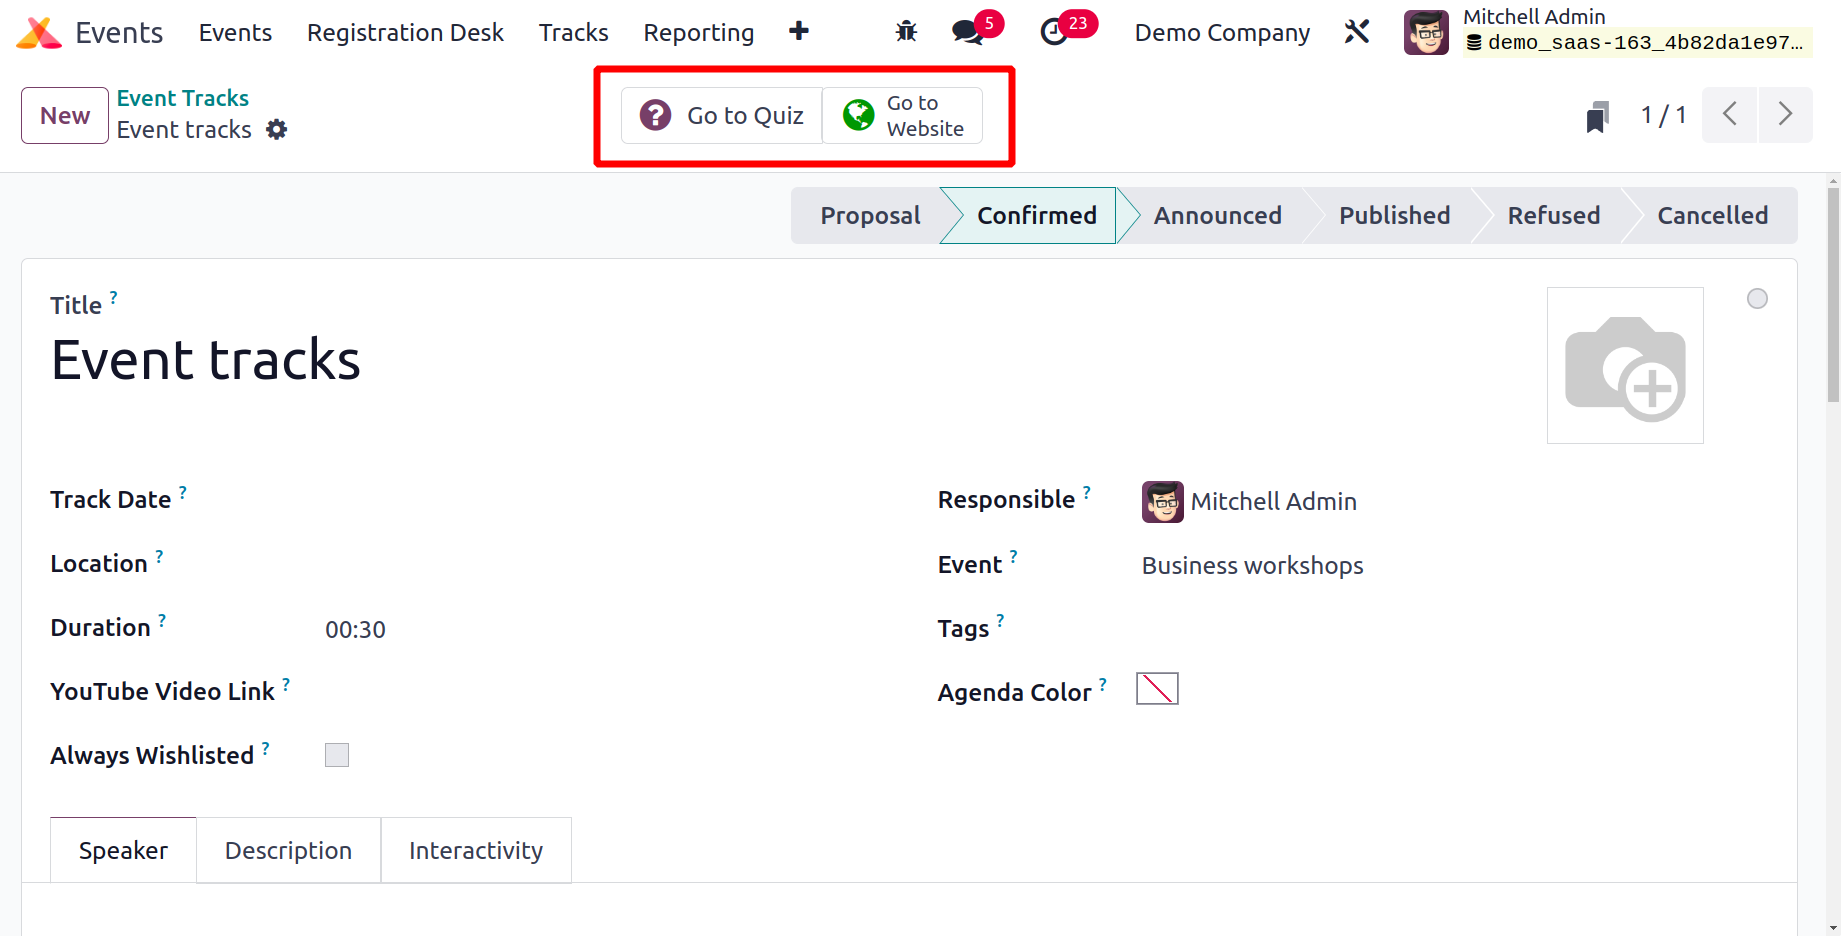
Now, publish this event track on your website by clicking the "Go to Website" button.
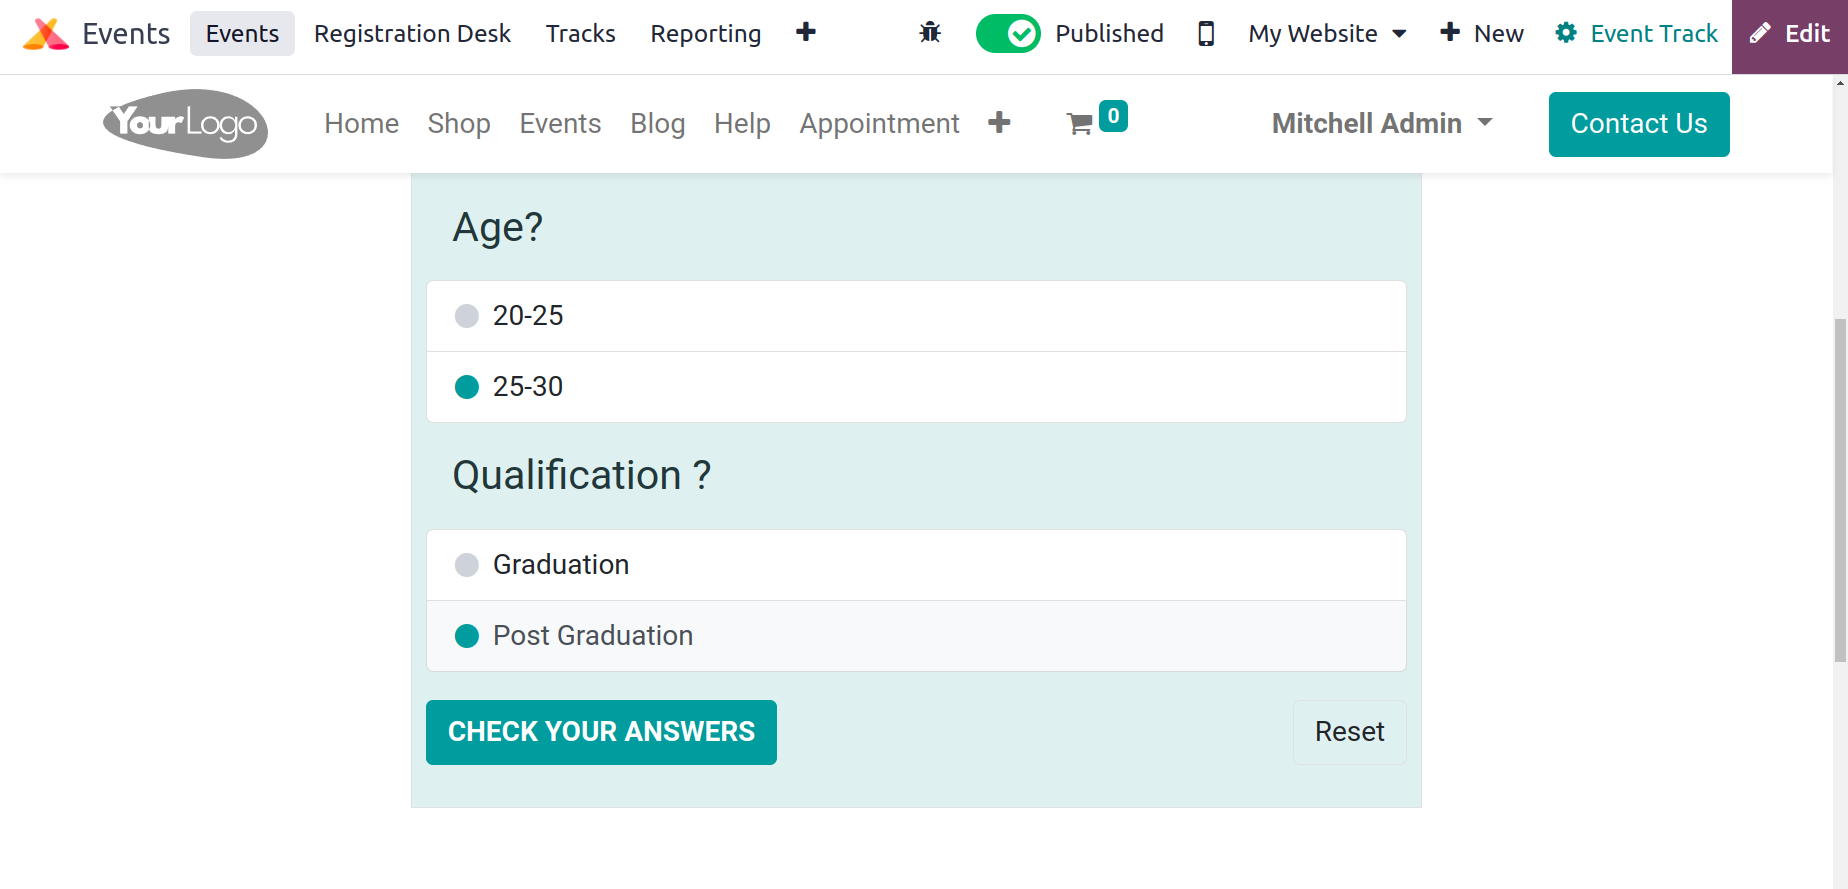
To change the status to "Published," click the Unpublished button where it is indicated in the screenshot. The Take the Quiz option is available for participants to click after the session.

The button labeled "CHECK YOUR ANSWERS" will verify your responses and provide the right response.
The 'Wishlisted By' button, which is located in the smart tab will provide you with the total number of visitors who added this event track to their wishlist.
The "Go to Quiz" button will take you to the page where the quiz's questions are located.
Let's now talk about the choices the module's Configuration menu offers.
Configuration
In Odoo 17, the Events module's Configuration menu has advanced configuration options. You can improve the module's performance by using these parameters. Let's examine the choices provided by the Configuration menu.
Event Templates
Using the Event Template option in the Configuration menu, you may set up appropriate templates for events in Odoo 17. These templates can be used when creating a new event. On this platform, you may design a variety of templates depending on the type of event.
As shown in the screenshot below, you can choose from the available templates or create a brand-new one specifically for your event.
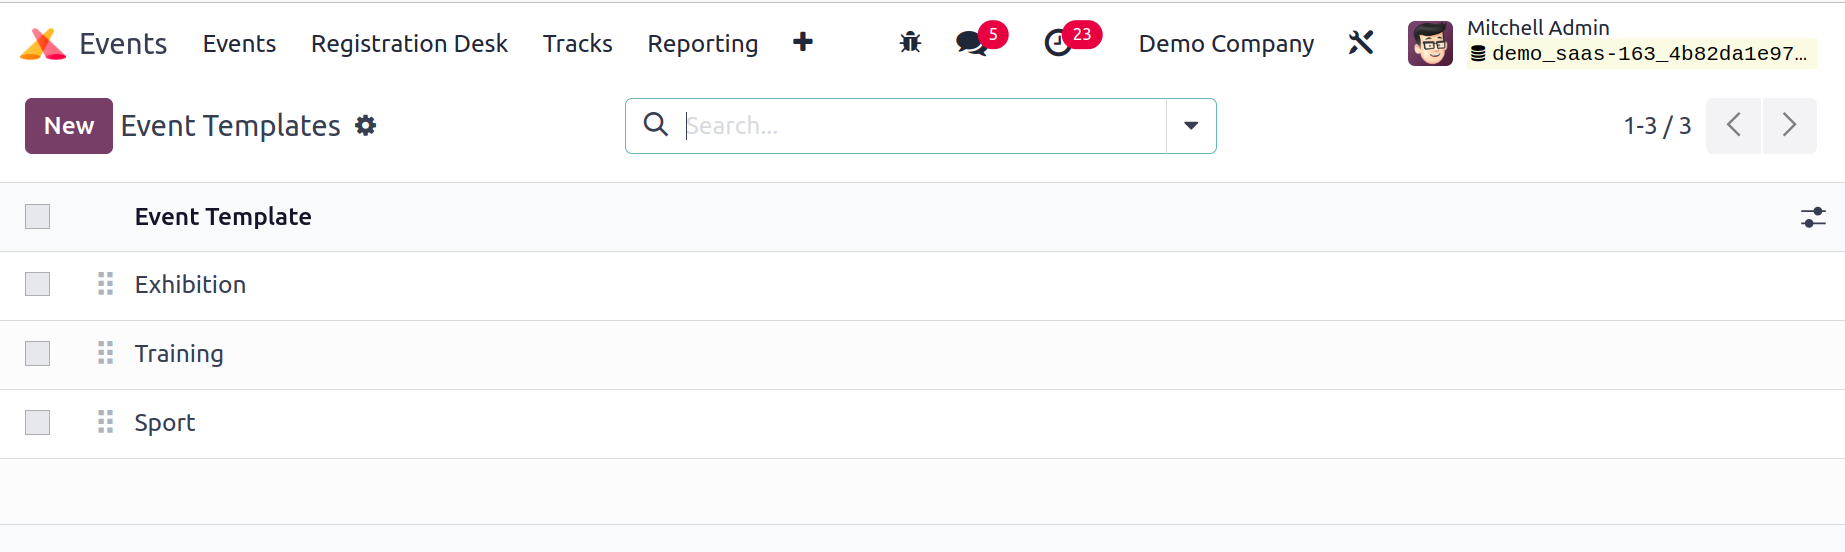
Using the New button, you can make new templates.

The Event Template field can be used to provide the name of the new template. The remaining fields are identical to those in the box for creating new events. As we mentioned earlier in the Events session earlier in this chapter, you may complete the template by including information about Tickets,
Communication, Questions, Booths, and Notes. When you create a new event that falls under the same category, you can use these recently produced event templates.
Event Stages
By designating distinct stages for events based on the process they are undergoing, it is simple
to categorize and organize events in the Events module. To add new stages to the event, use the Event Stages option found under the Configuration menu. As seen in the graphic below, the Events module's stages can all be adjusted.
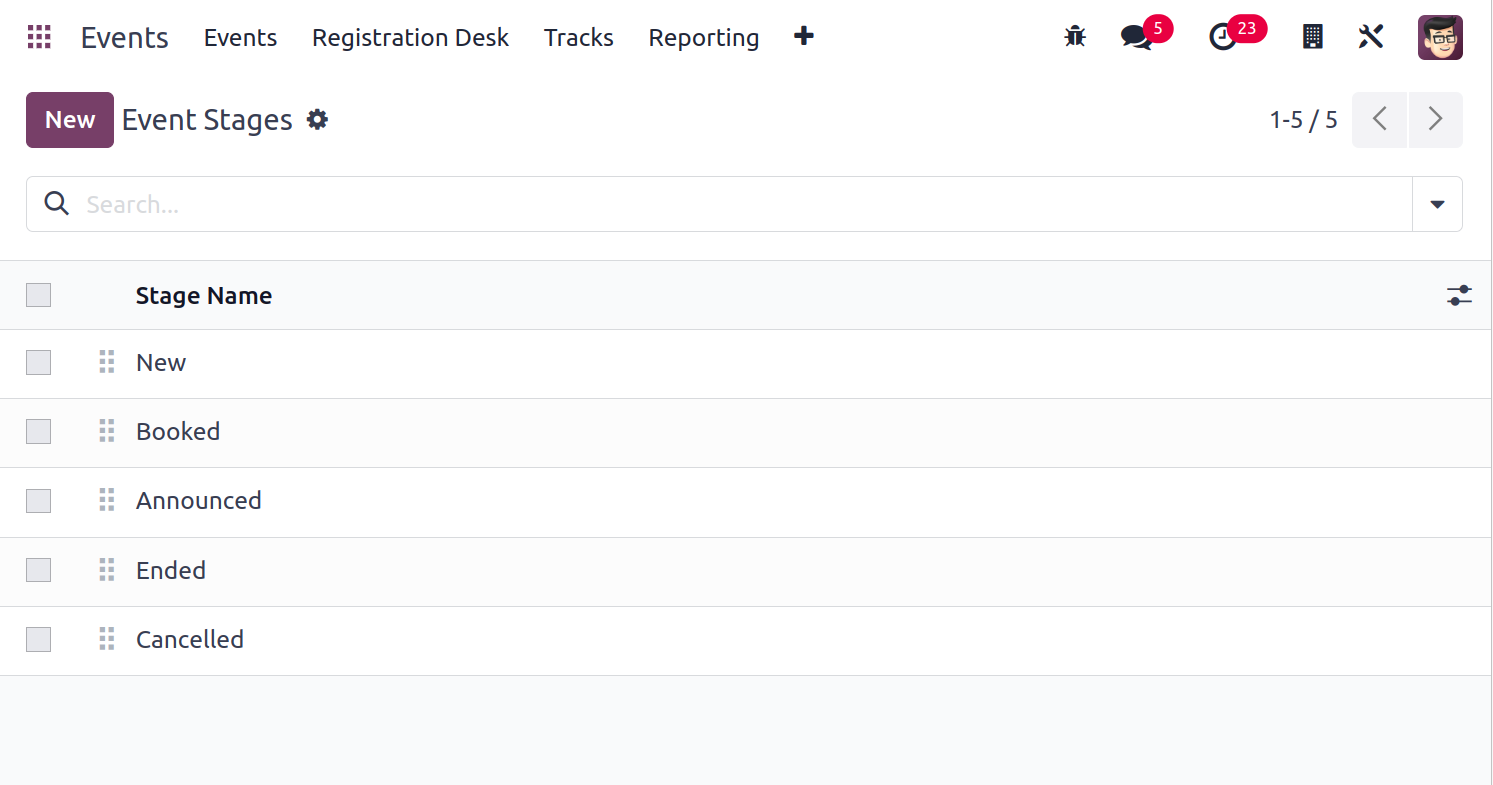
To create a new stage, click the New button.
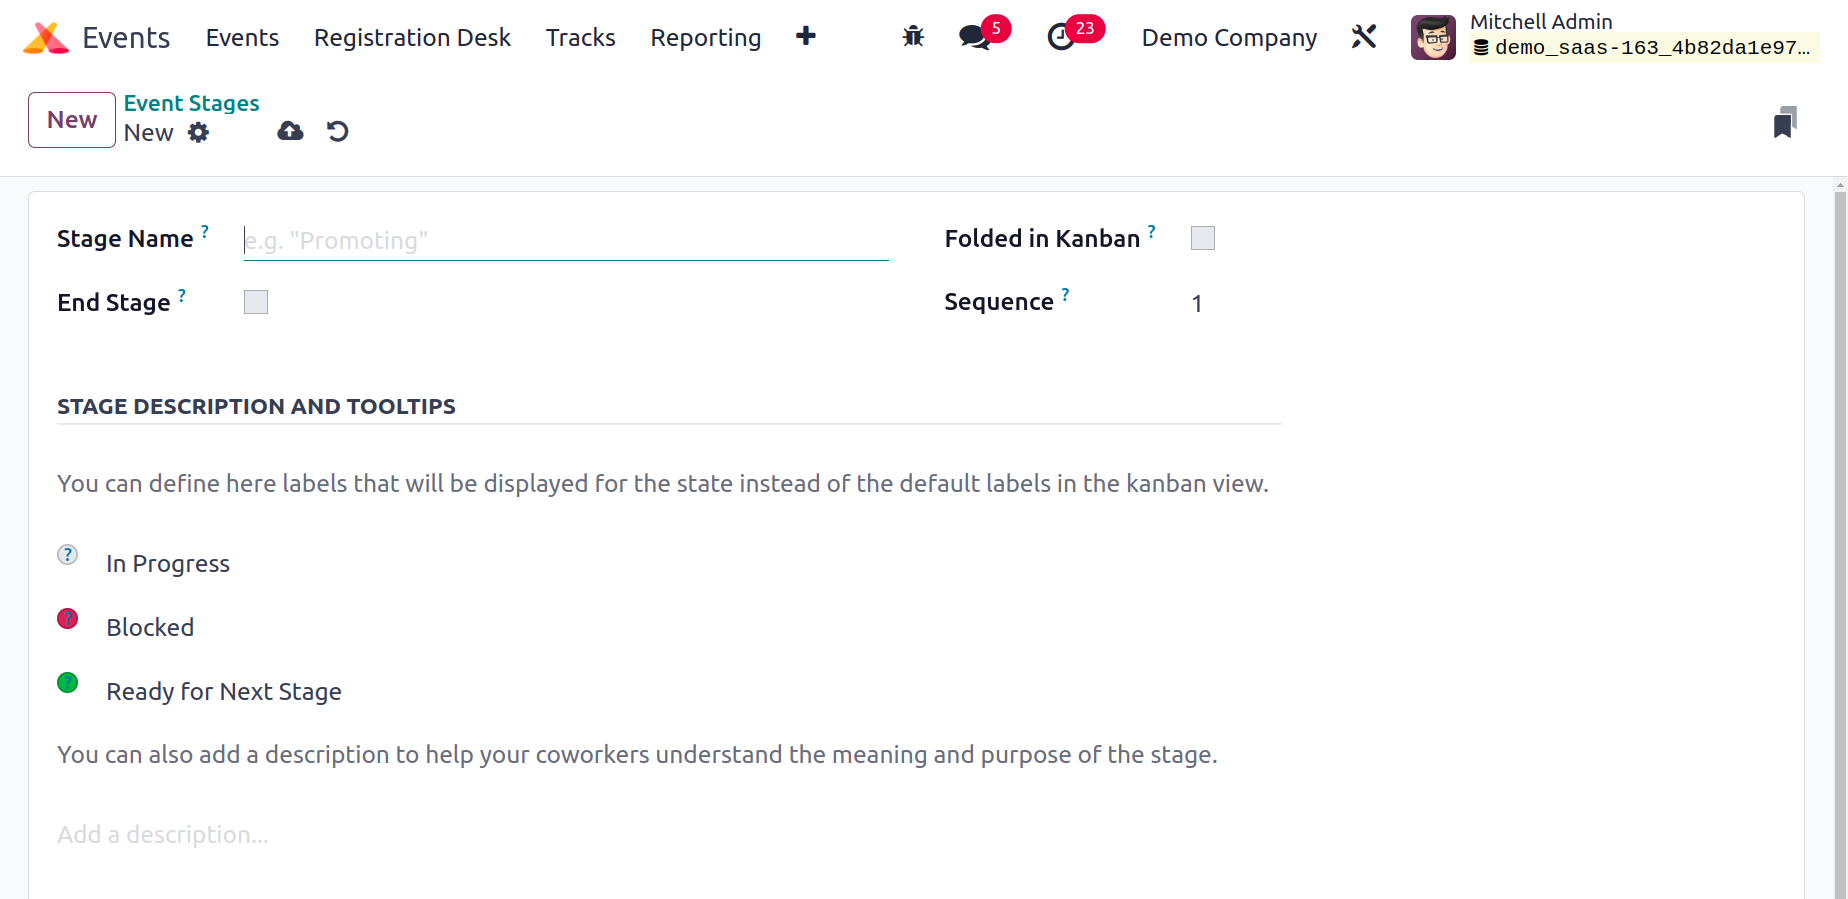
Mention the stage's name in the Stage Name. When the End Stage is turned on, Odoo17 will automatically transfer the completed events to this stage. You may activate the Folded in Kanban option to fold this stage in the Kanban view. In the provided field, enter the stage's Sequence number. In the Stage Description and Tooltips tab, you can add several labels for this stage as well as a description of it. Once all fields have been filled out, press the Save button.
Event Tags Categories
You can apply appropriate tags to the events in the Events module of Odoo17. You can simply categorize events using these tags, and you may search for specific events using the tags that have already been applied. Additionally, you can apply other categories to event tags.
Using the Event Tags Categories option from the Configuration menu, you can group tags under a certain category.
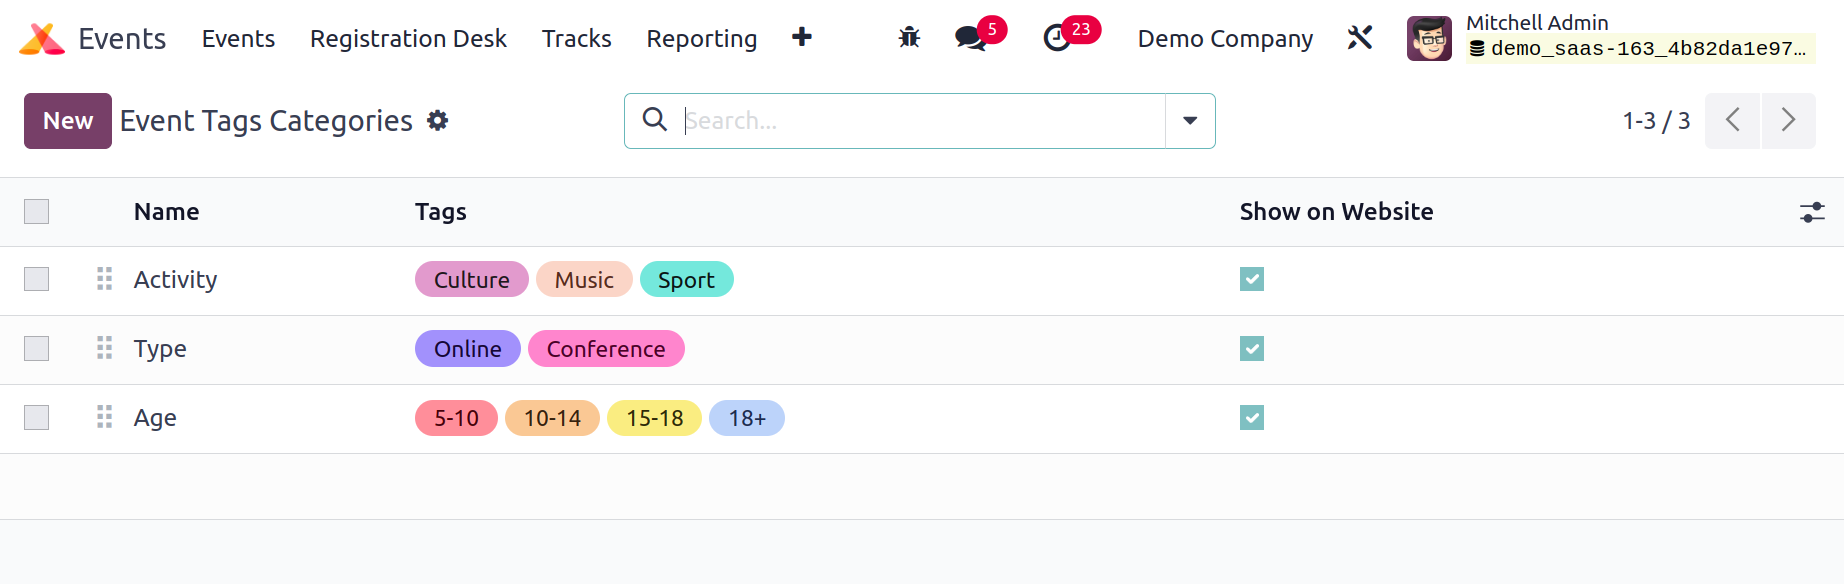
You may find several categories for tags that were developed in the Odoo17 Events module here. The list comprises the category name, tags that are included in each category,
and whether or not the tag category is viewable on the internet. You may now quickly create a new category for the tags in the module by using the New button.
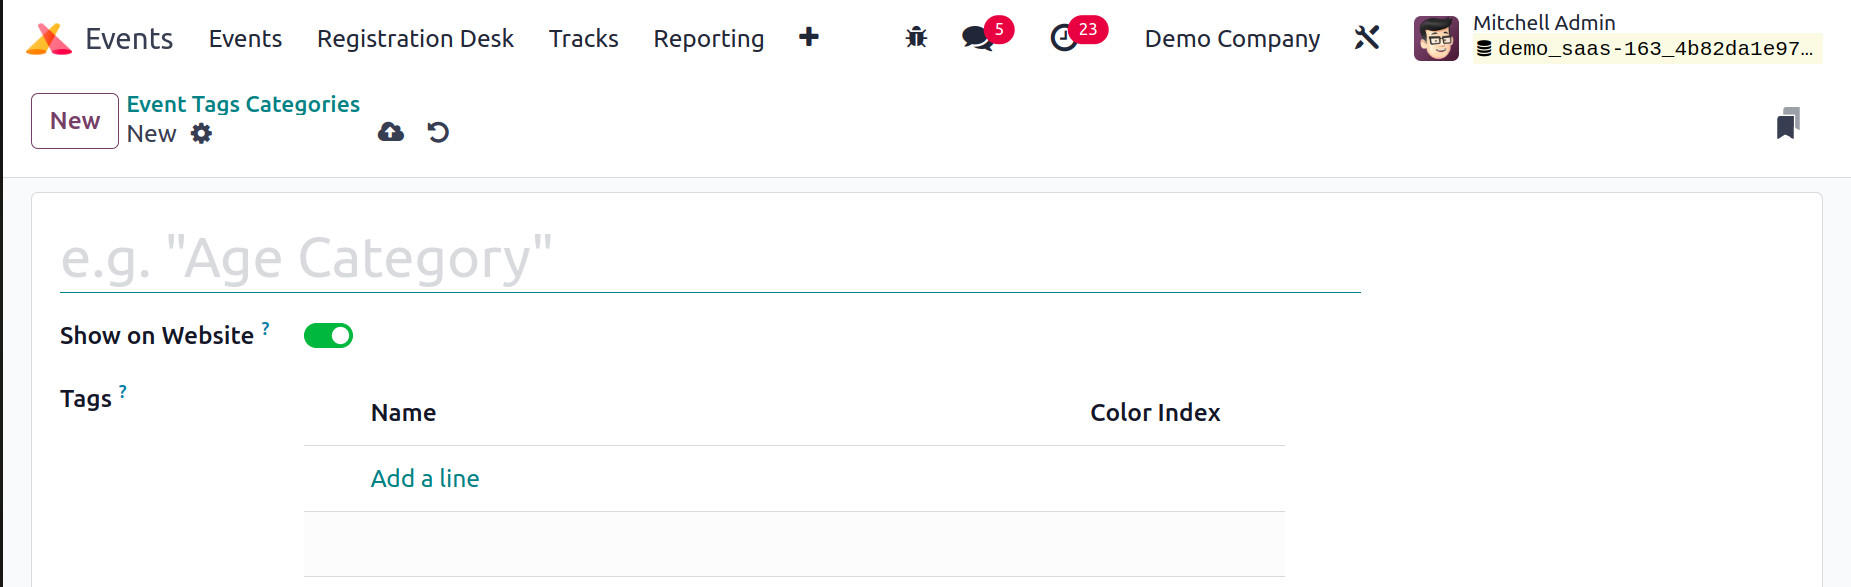
To make the tag category visible on the website, enter the name of the category in the appropriate field and turn on the Show on Website option. You can add tags to this category by choosing Add a Line from the menu.
For each tag that falls under this category, choose appropriate colors. In order to add this new category to the current list, utilize the Save button.
Events Mail Scheduler
We configured the Emails/SMS schedulers to send an email or SMS to the attendees as a
reminder when creating a new event in the Odoo17 Events module. Under the Events Mail Scheduler option, you can get a list of all planned Emails and SMS.
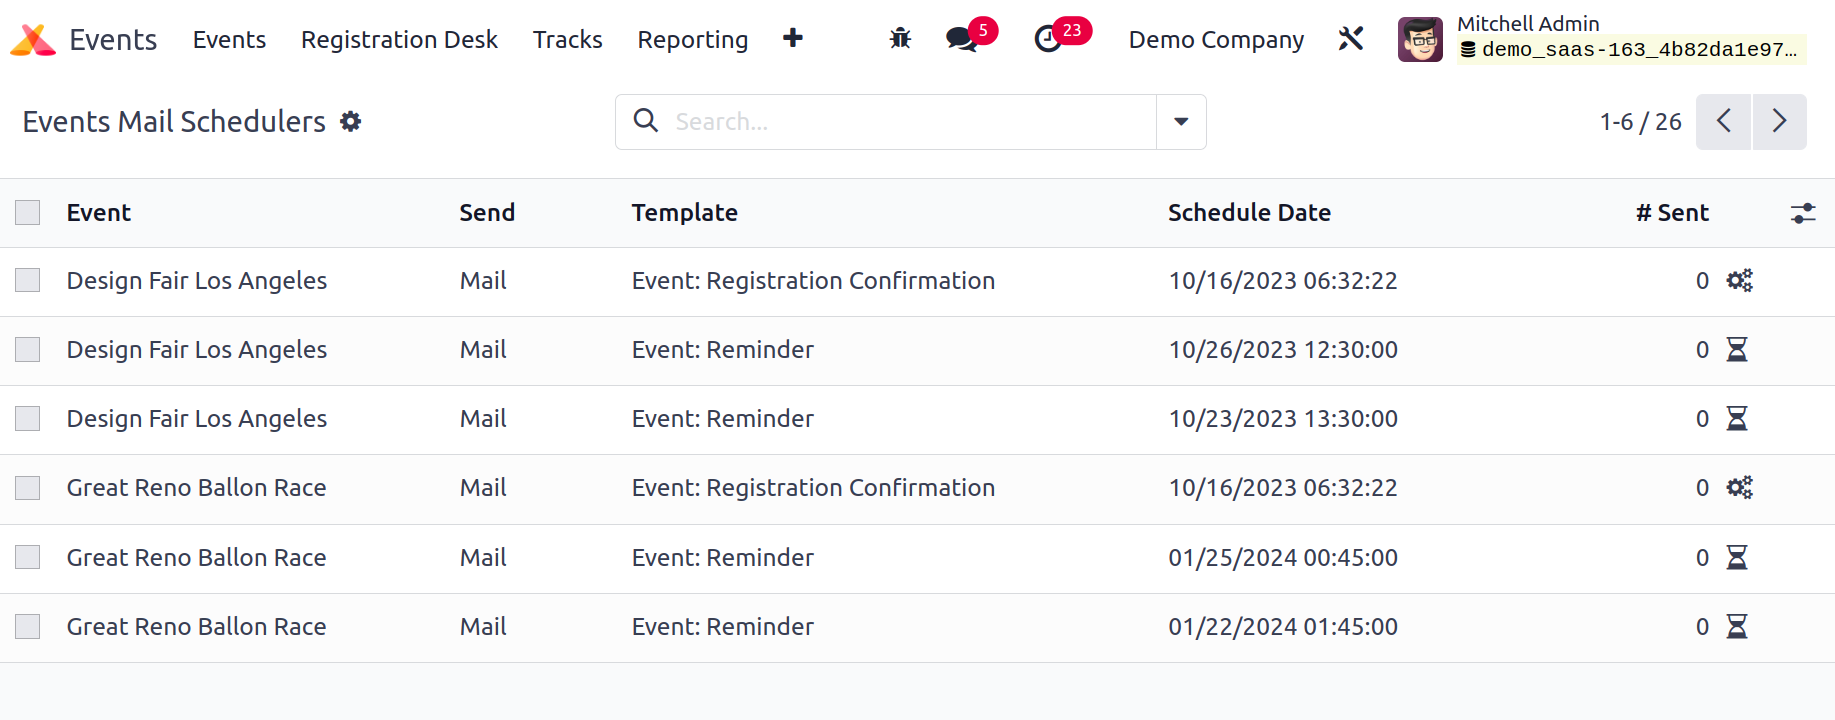
The event name, Send, Template, Schedule Date, and the total number of emails and SMS sent are all displayed in the list preview.
Lead Generation
In Odoo17, you can quickly generate leads based on the information of participants who have registered for an event. You can utilize the Lead Generation option in the Configuration menu to define lead generation rules.
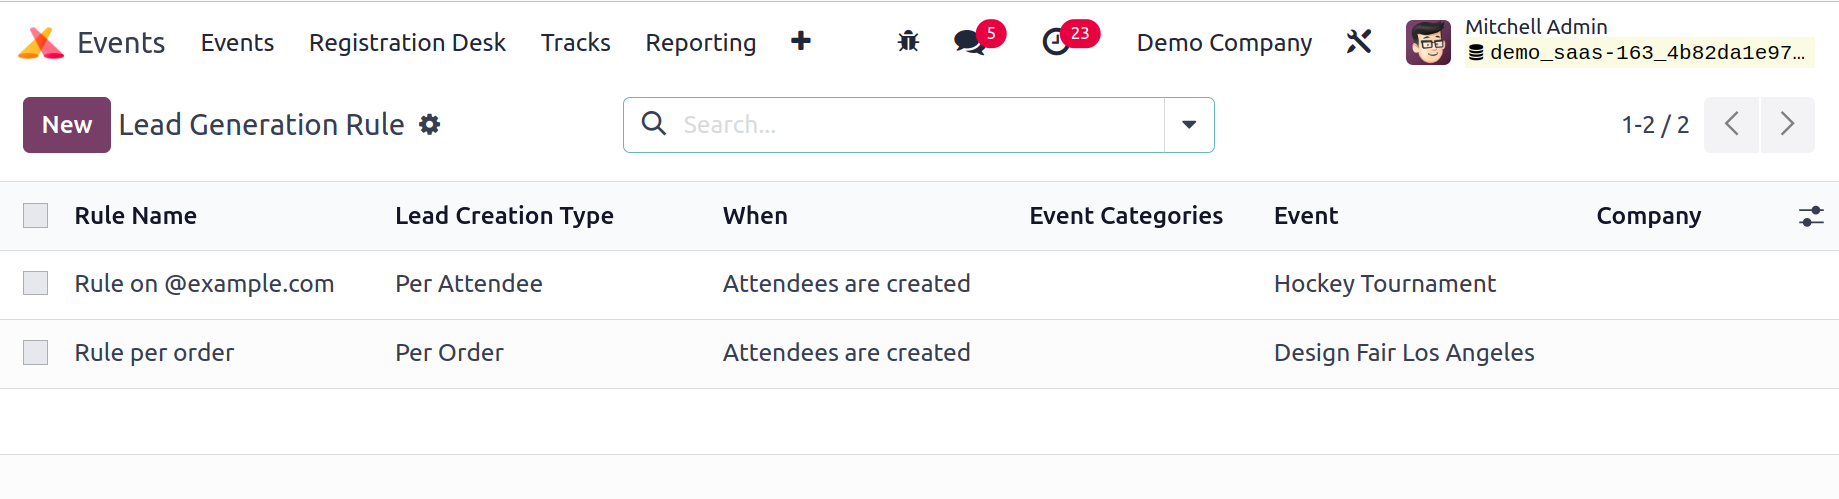
On this platform, a list of existing lead generation rules will be visible. Details regarding the Rule Name, Lead Generation Type, Lead Creation Date, Event Categories, Email, and Company will be provided. To create a new lead generation rule, click the New button.
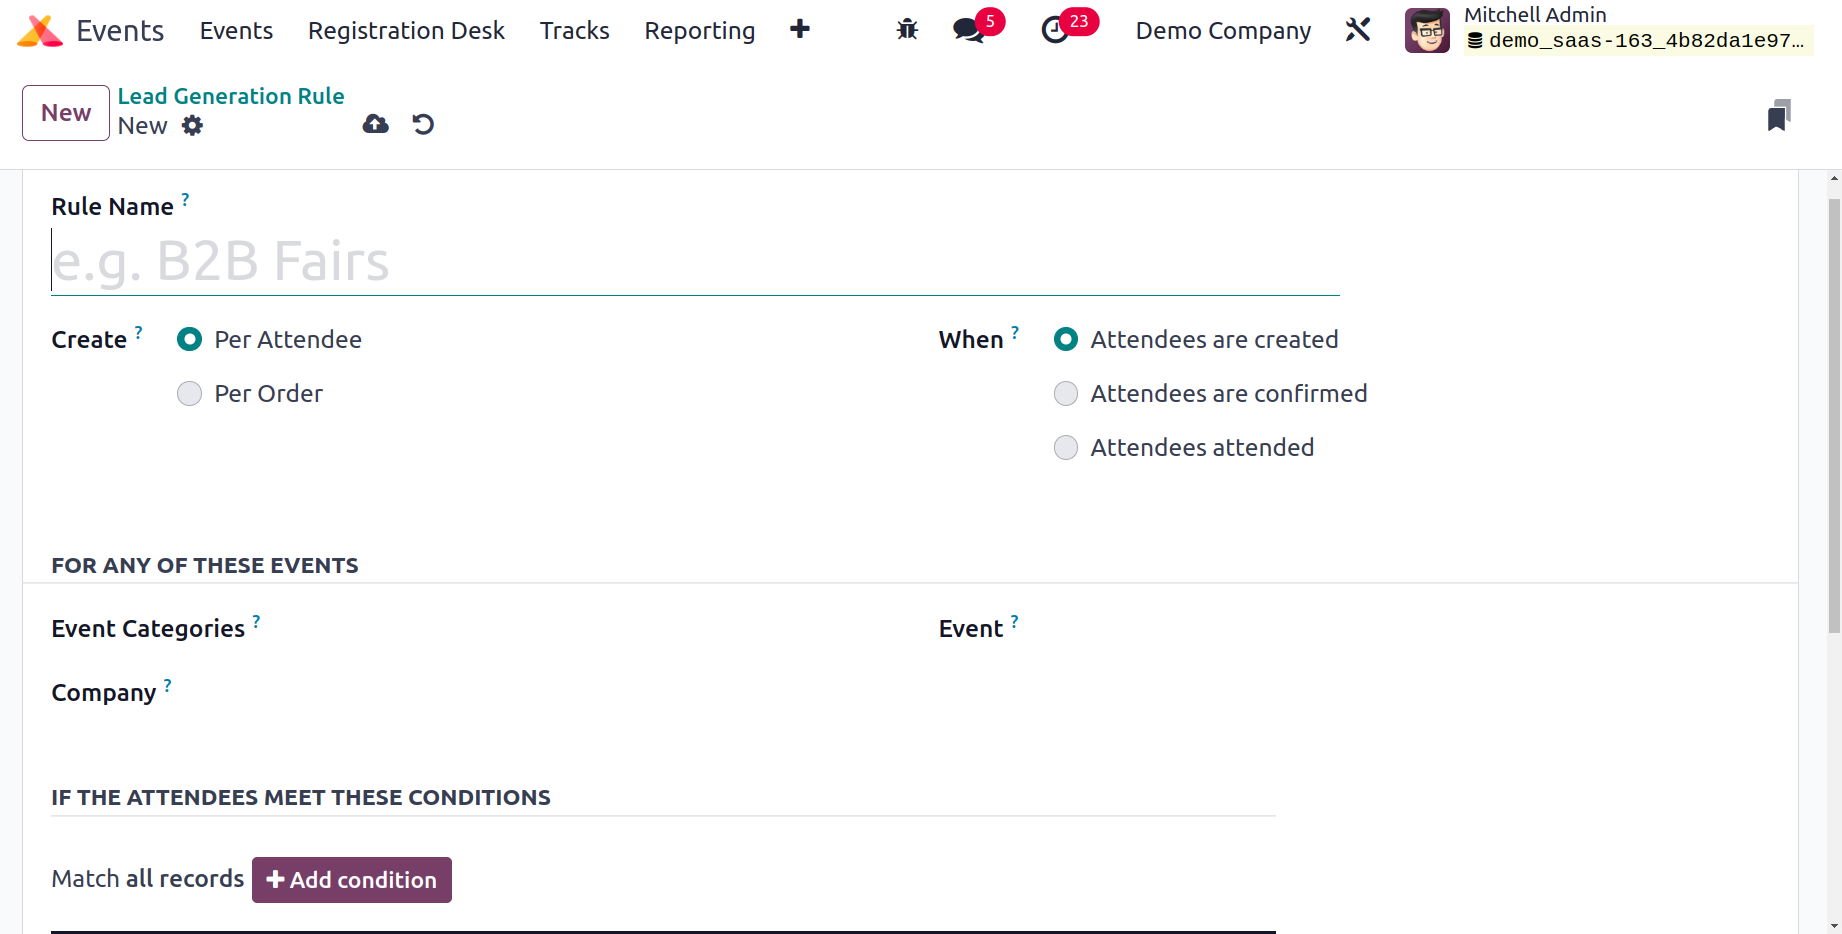
First, enter the Rule Name in the corresponding field. You can produce leads based on attendees or orders. When the attendees are established, verified, or attended, the lead may be generated manually or automatically. The appropriate fields can be used to set these parameters. In Odoo 17 to apply this rule to all participants who are part of the specified event category, company, and event, you can mention a specific event category, company, and event. Additionally, you may specify criteria to filter participants by using the Add Conditions option.
You can make note of them in the designated fields to assign the generated leads to a certain sales team and salesperson.
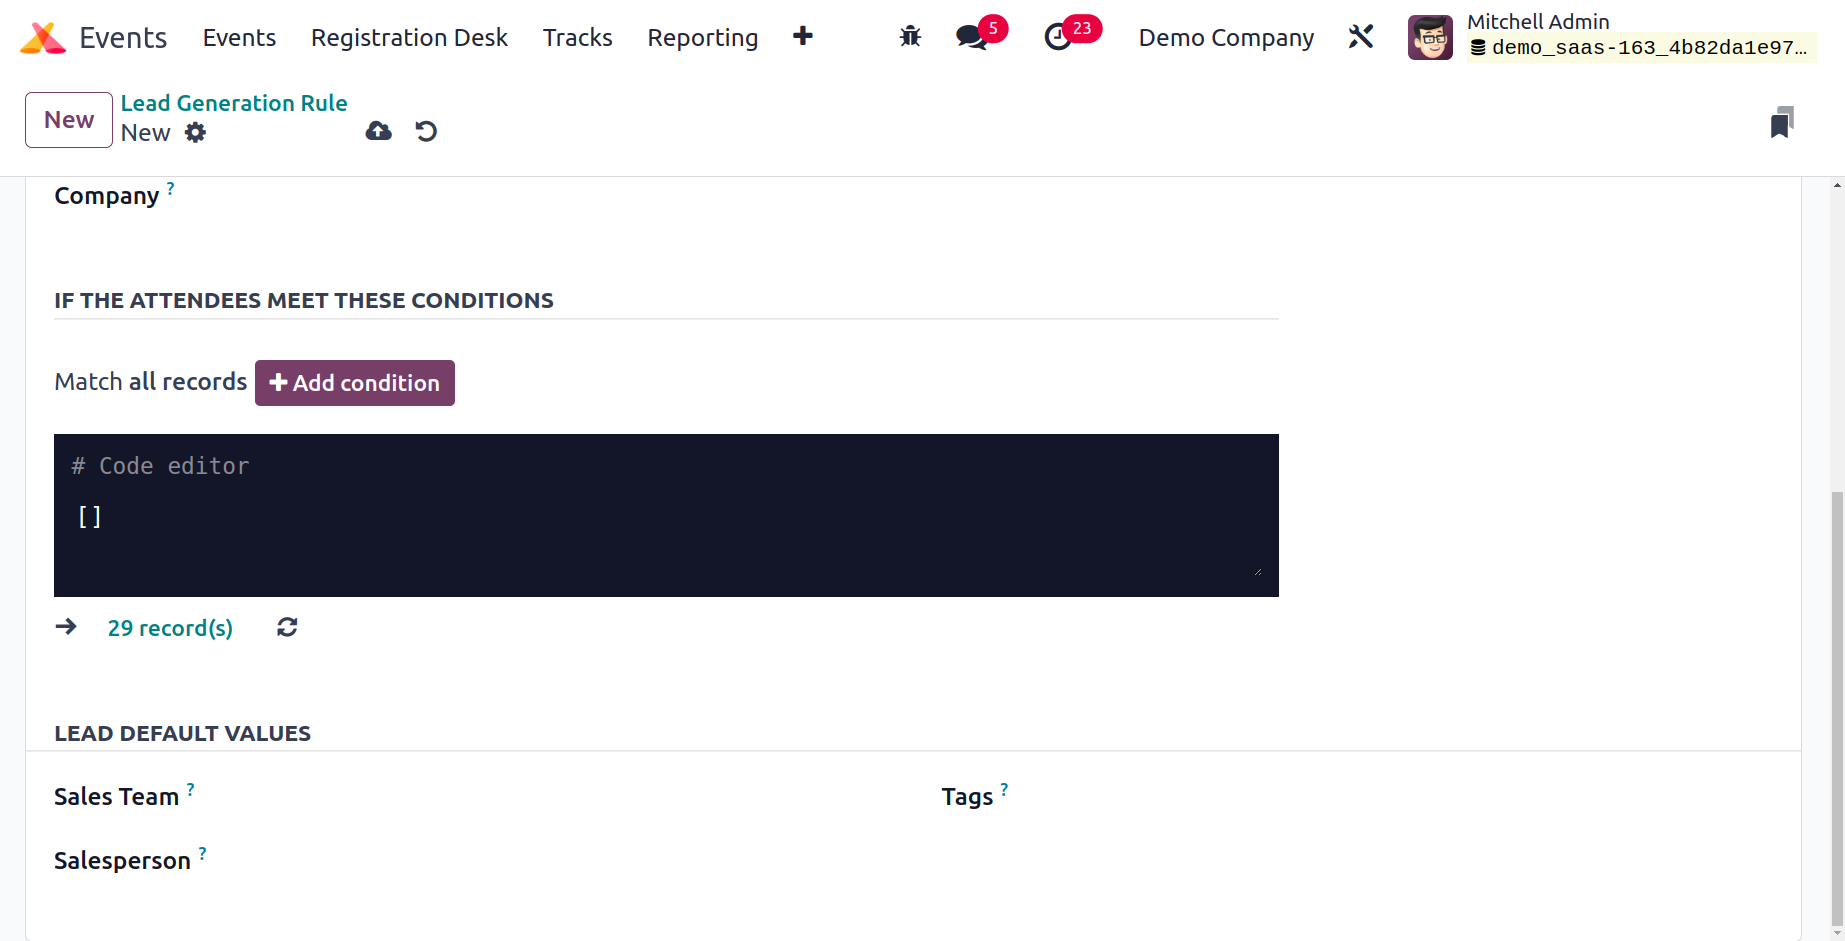
The leads in this window can also have a Sales Team,
Salesperson, and Tags mentioned. You may save the newly established lead generation rule by clicking the Save button.
Booths
When creating a new event in the Odoo17 Events module, you can set up booths for it. The event website will have the configured booths available. Any company or organization can reserve a booth from the event website if they like to advertise or introduce their goods or
services to the guests of a certain event. You can set up new booths under the Events module's Configuration menu.

The configured booths were divided into Available and Unavailable categories in the Booths window's Kanban view. The Filters and Group By options on this platform may be used. Using the New button makes adding a new booth to this window simpler.
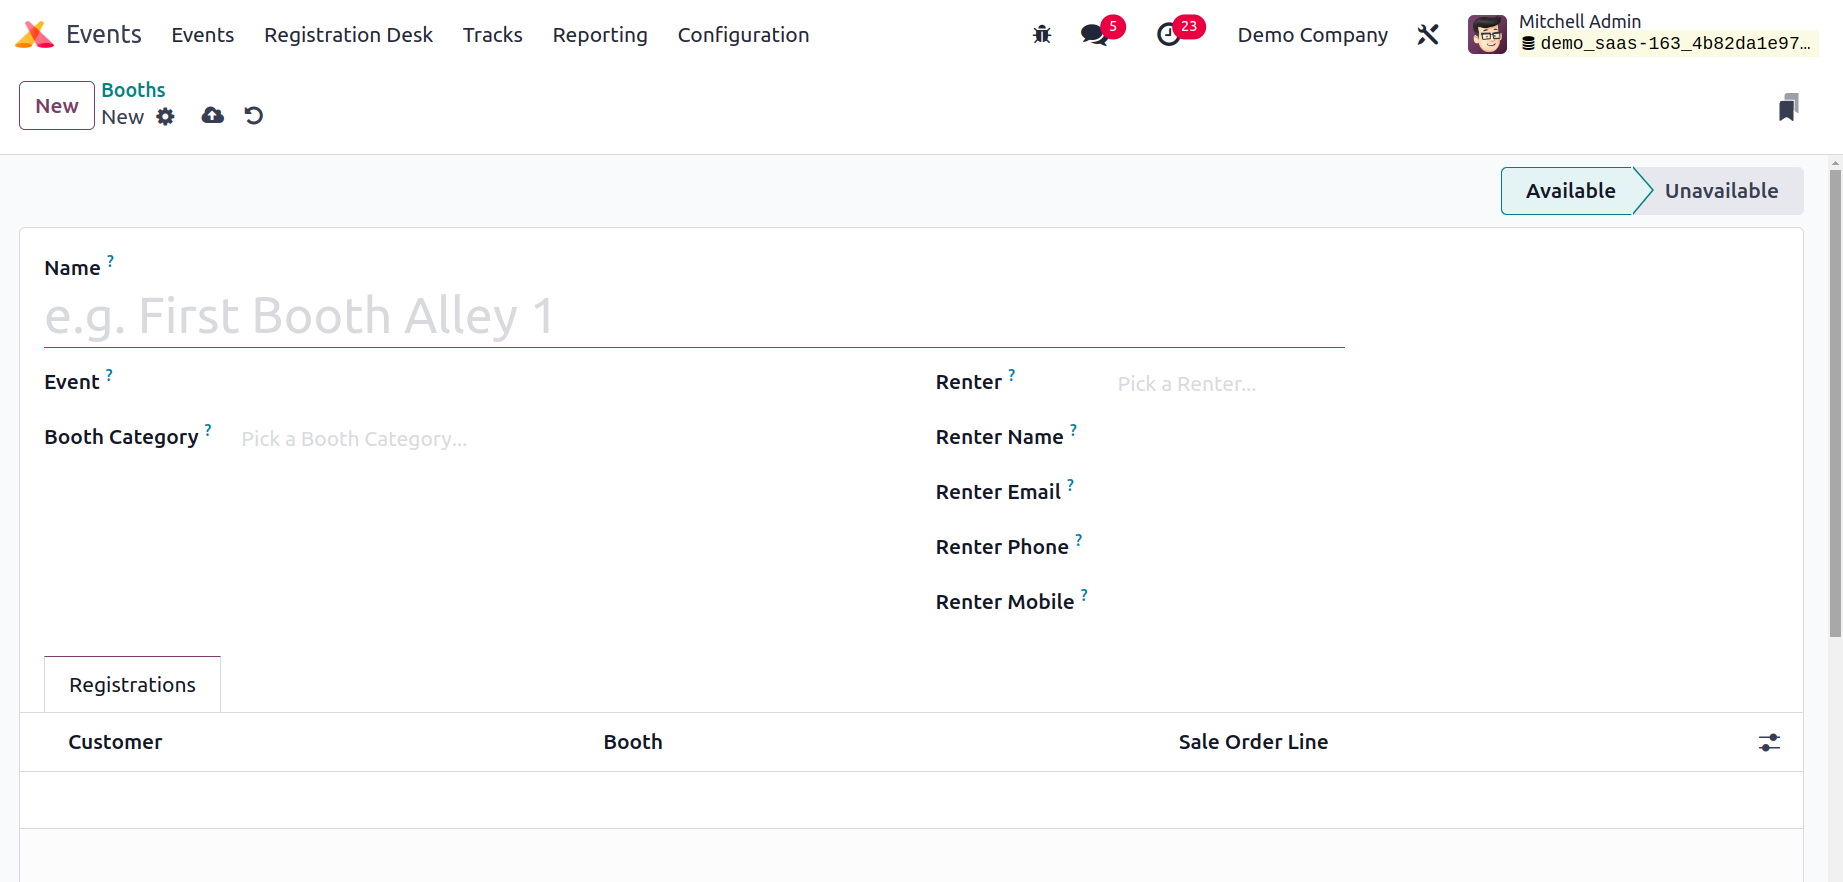
In the appropriate boxes, you can input the name of the booth, the event, the booth category, the renter, the renter's name, their email, their phone number, and their mobile number. Under the Registration page, you can view the information about the customers who registered for this booth. To save the new booth, click the Save button.
Booth Categories
You can find the Booth Categories option in the Configuration menu of the Odoo17 Events module. You can use this option to group booths into several categories.

From this list, you can obtain information about Name, Create Sponsor or Not, Product, and Price. To create a brand-new category for booths, click the New button.
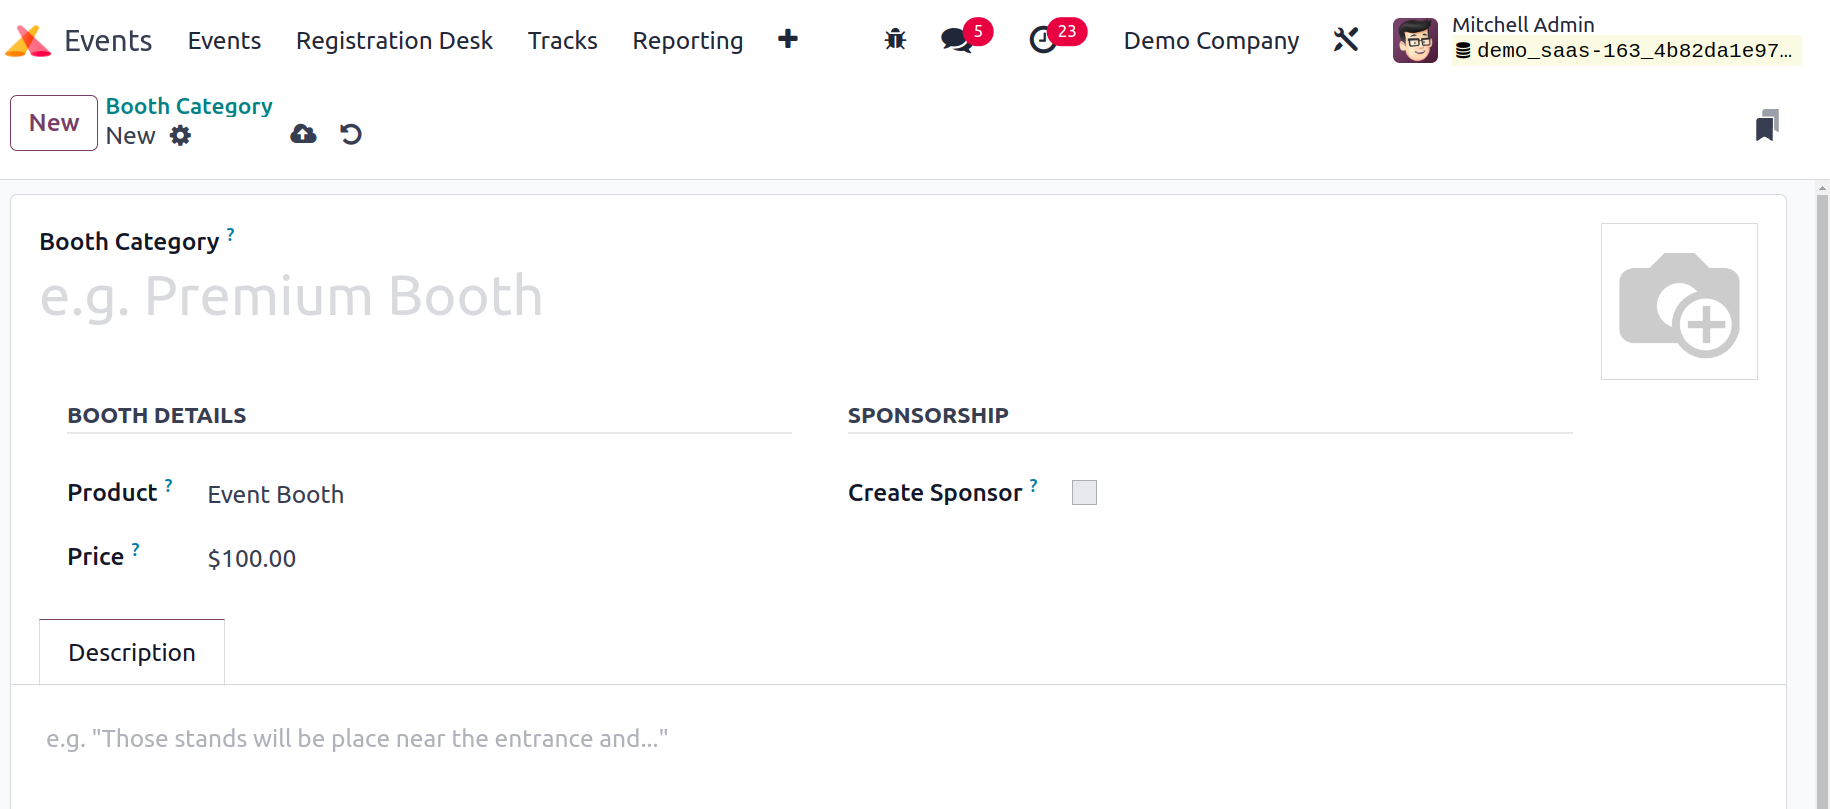
You can enter the Booth Category in the provided space in this window. You can specify the Event Booth as the product in the Product column. Put a price in the appropriate field for this booth category. The Create Sponsor field is available. When a user books a booth, a sponsor will be created as a result.
You can add more information about the booth category under the Description tab. The new booth category can be saved by clicking the Save button.
Track Stages
Different stages assigned to the event tracks will give participants a clear understanding of the actions taken and the progress made.
To construct and manage different stages for the tracks, utilize the Track Stages option from the Configuration menu in the Events module.
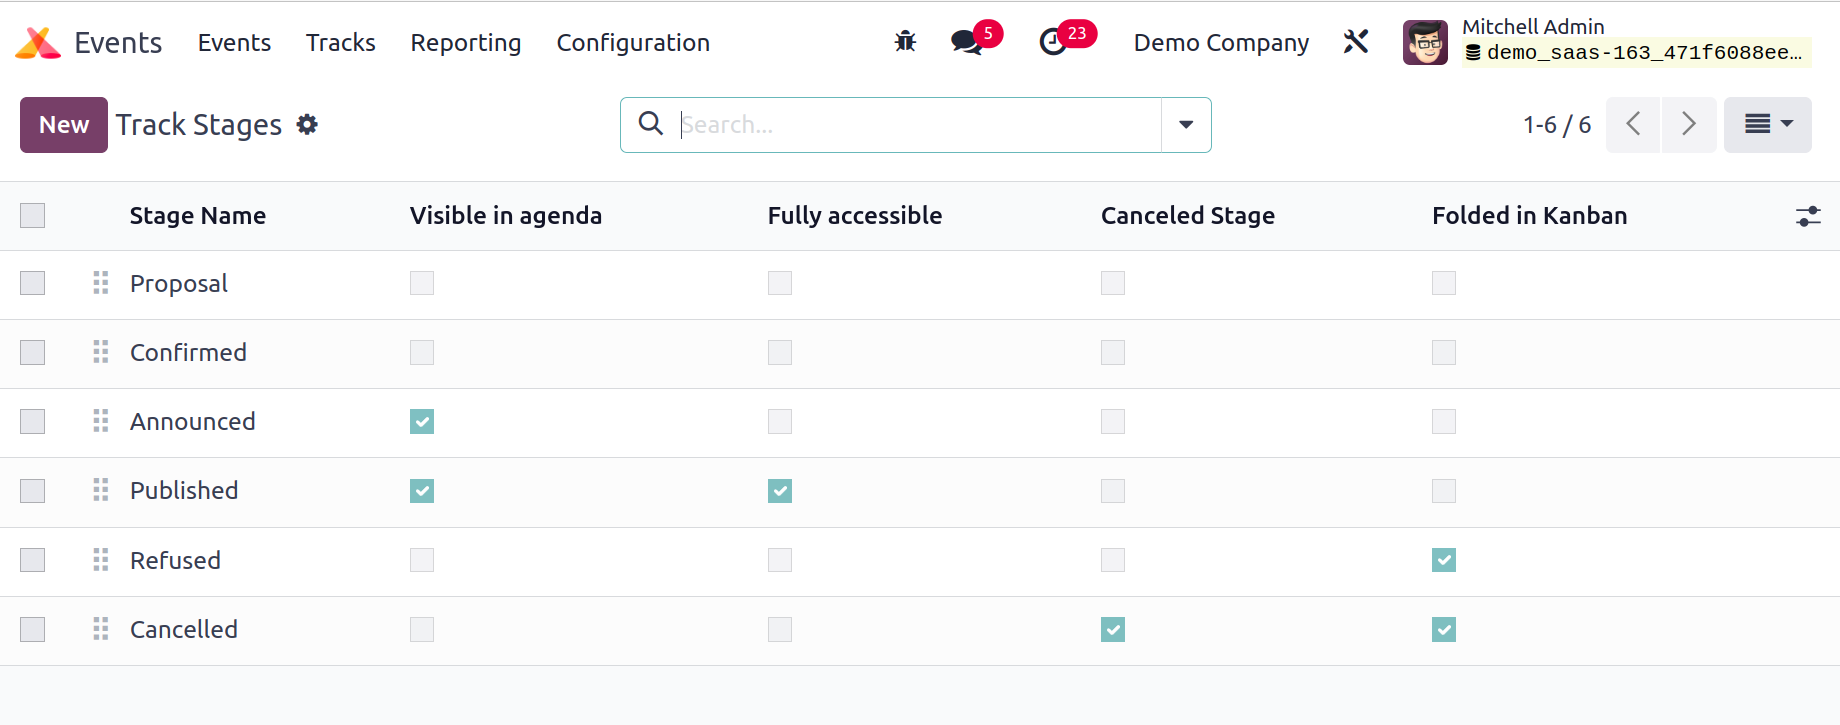
As seen in the screenshot above, this window displays stages that have already been produced. To create a new stage, click the New button. In the designated field, provide the Stage Name. When an event reaches this stage, Odoo17 will automatically send the customer an email if you add an email template. To make the associated track visible in the frontend, turn on the Visible in Agenda field.
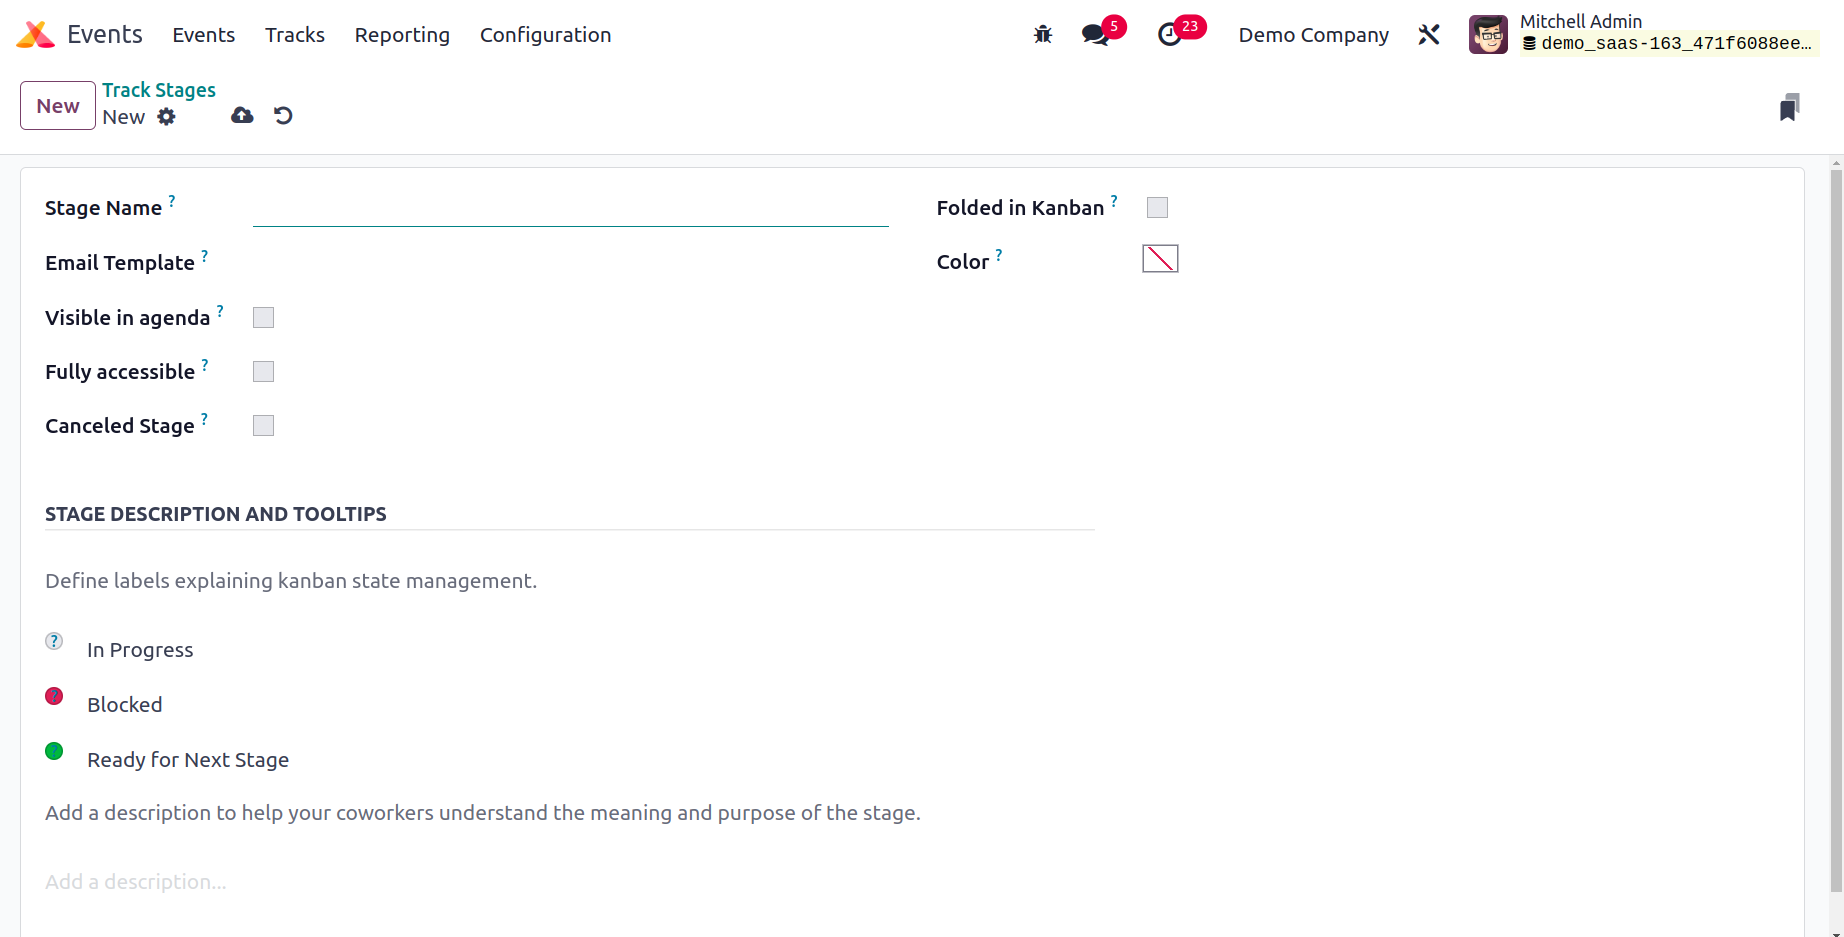
Customers can gain access by activating the Fully Accessible field. All event tracks that have been canceled will be added to the Canceled Stage once it is activated. Enable the Folded in Kanban field to fold this stage in Kanban view. The Colour option lets you choose colors for the stage.
The Stage Description and Tooltips tab allows you to set the stage's labels, and the description. Click the Save button once all fields have been filled in.
Track Locations
It is crucial to include the event's location when creating a new event or event track. Under the Track Locationa menu, such configured places can be observed.
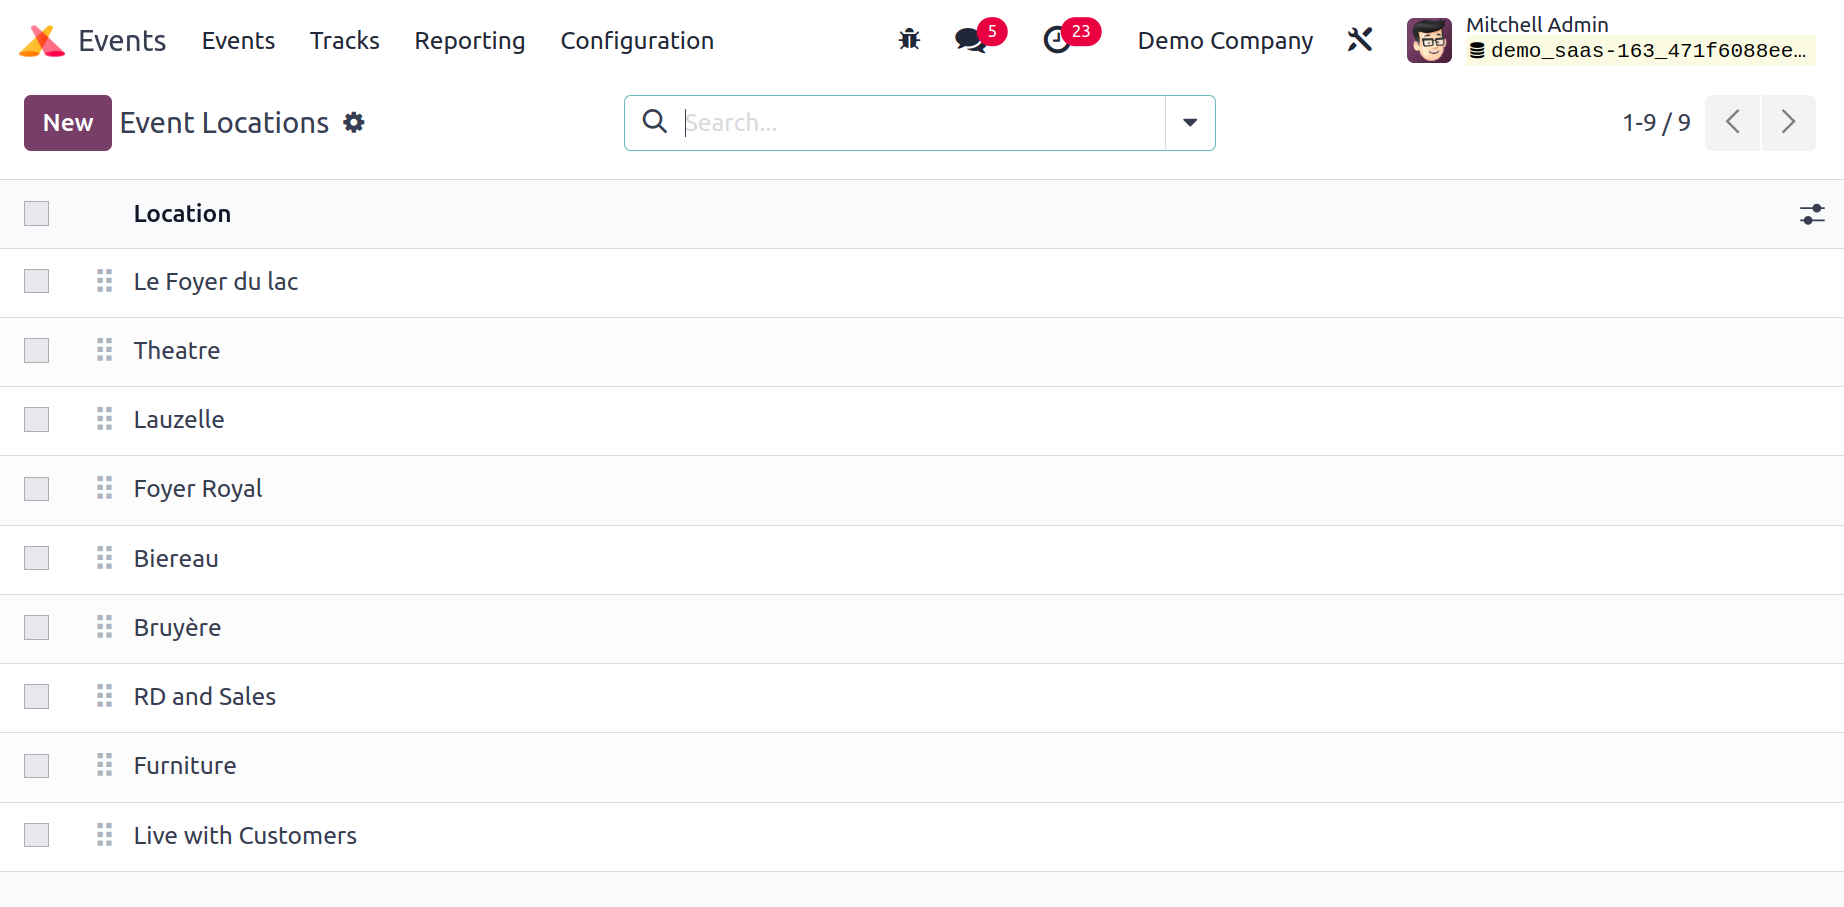
All of the venues for the events and event tracks generated in the Events module are listed here.
Track Tag Categories
The development of Event Tag Categories was also covered earlier. You can create categories for track tags in a manner similar to this. Use the Track Tag Categories option under Configuration to accomplish this.
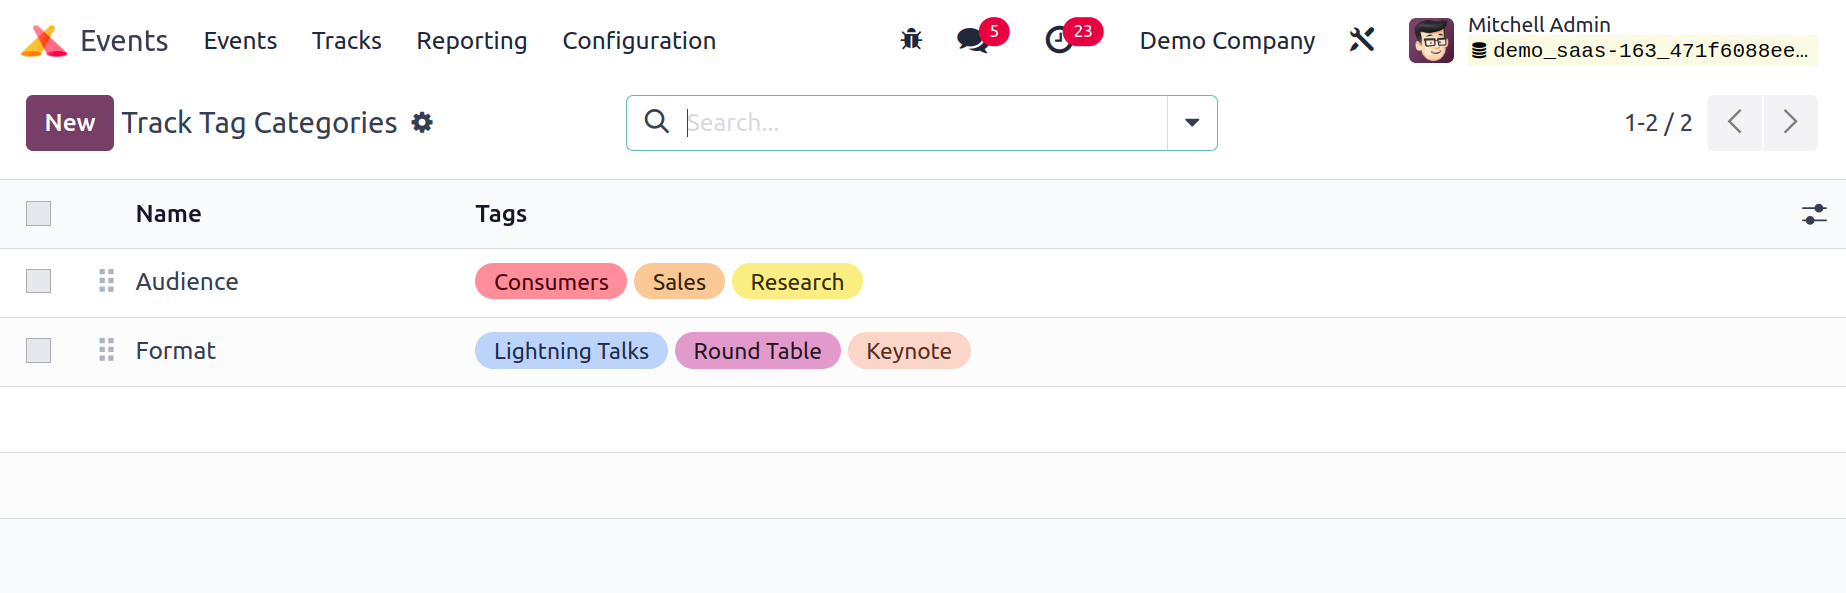
On this platform, as shown in the image above, you can see the name of the category and the tags that are included in each category. To create a brand-new track tag category, click the New button.
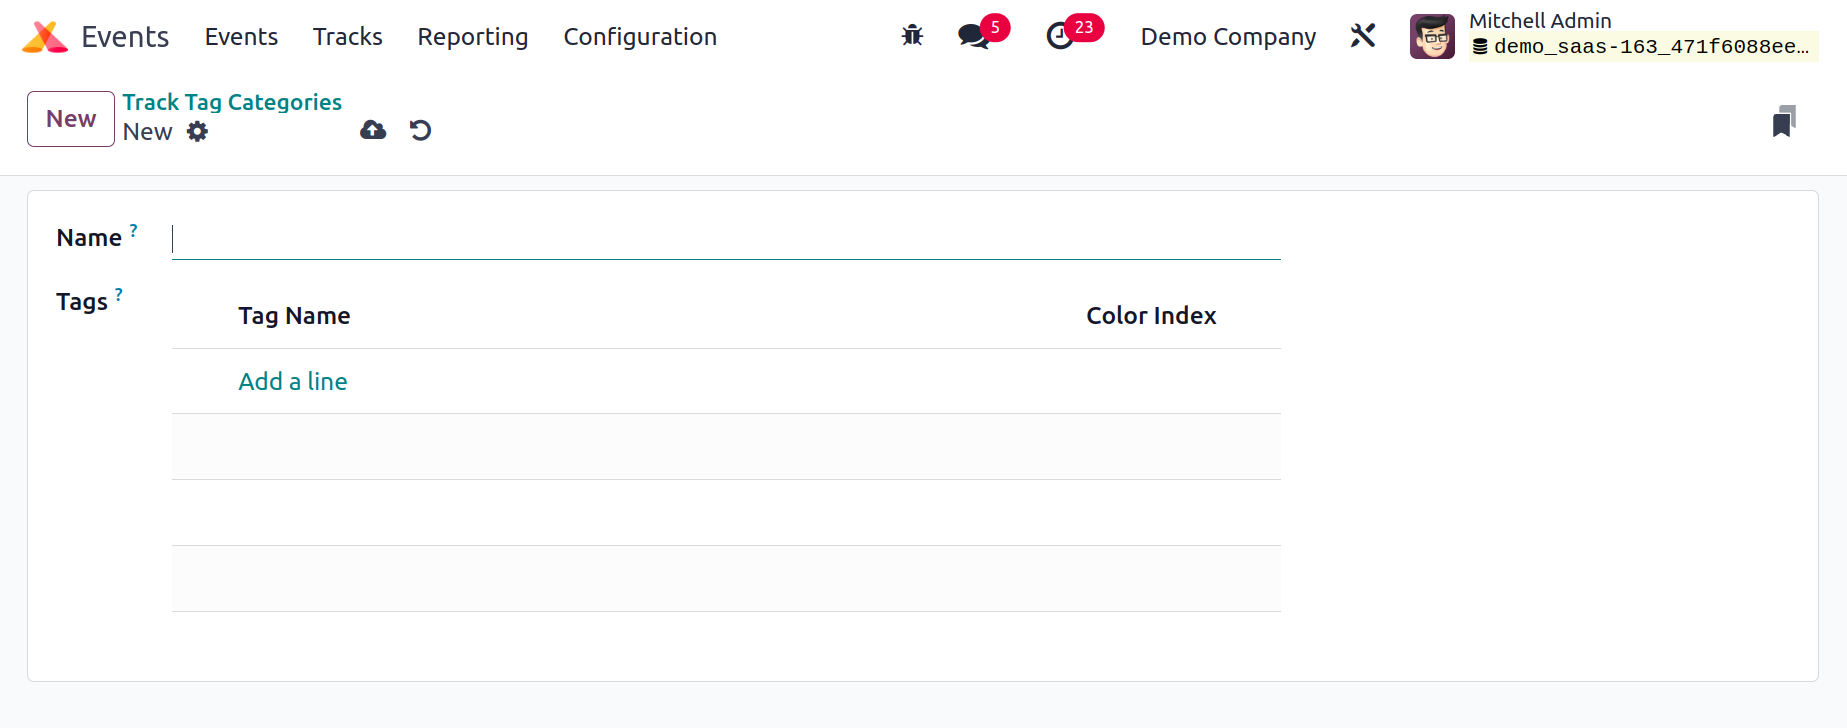
In the available field, you may enter the Name of the Category. For this category, add tags by using the Add a Line button. Click the Save button once all the details have been added.
Track Tags
You may simply generate and manage track tags now by using the Configuration menu's Track Tags option.
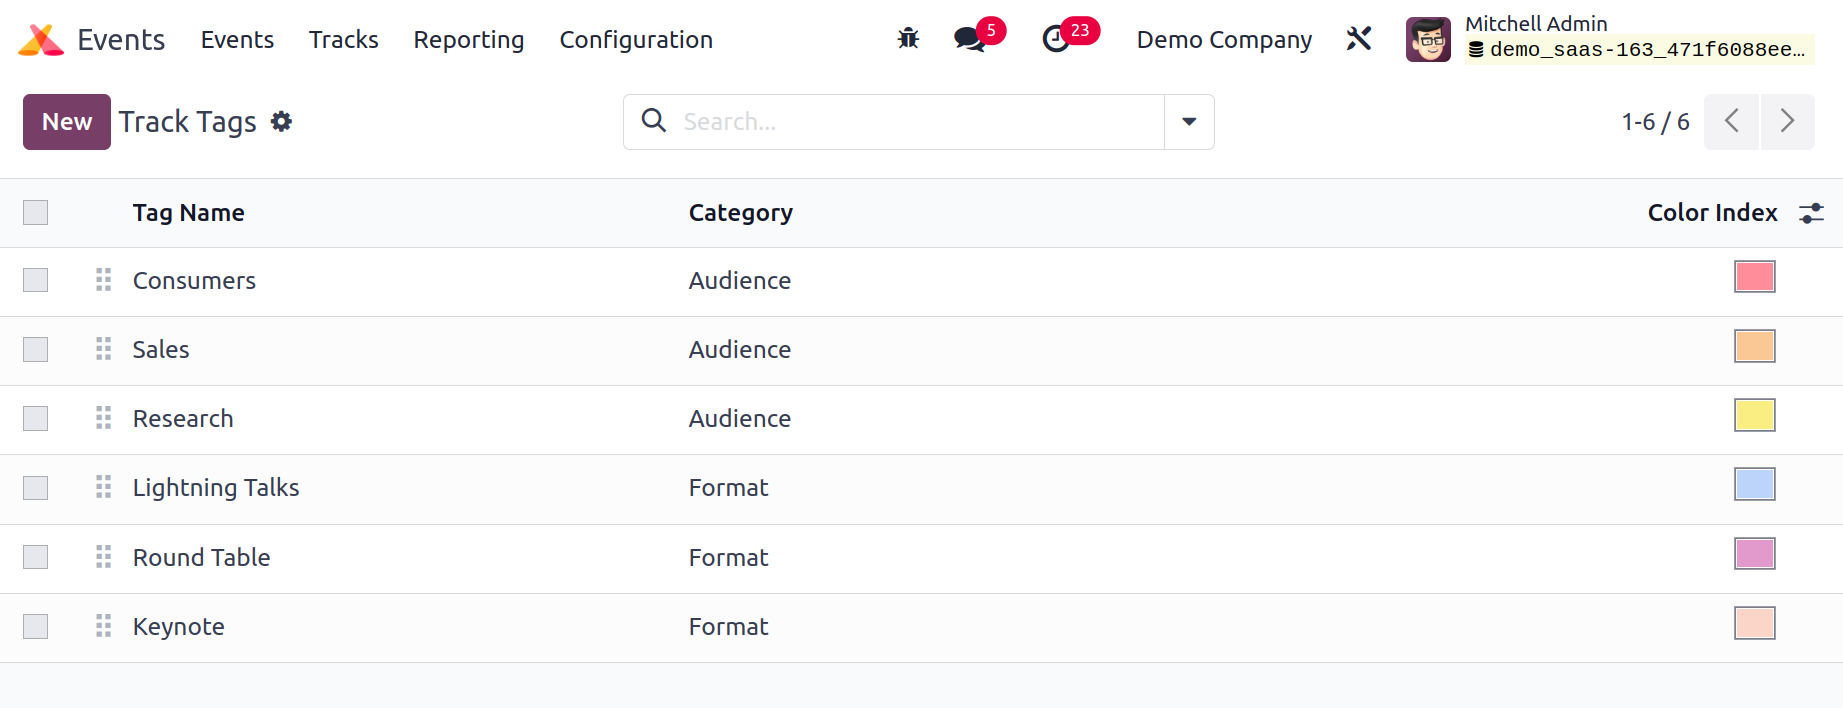
The Tag Name, Category, and Colour Index will be displayed in the list. You can add a new line below the current list of tags where you can provide the name of the new tag by clicking the Create button.
Add a color to the track tag and choose the category from the drop-down menu. You can save the new tag by selecting the Save option.
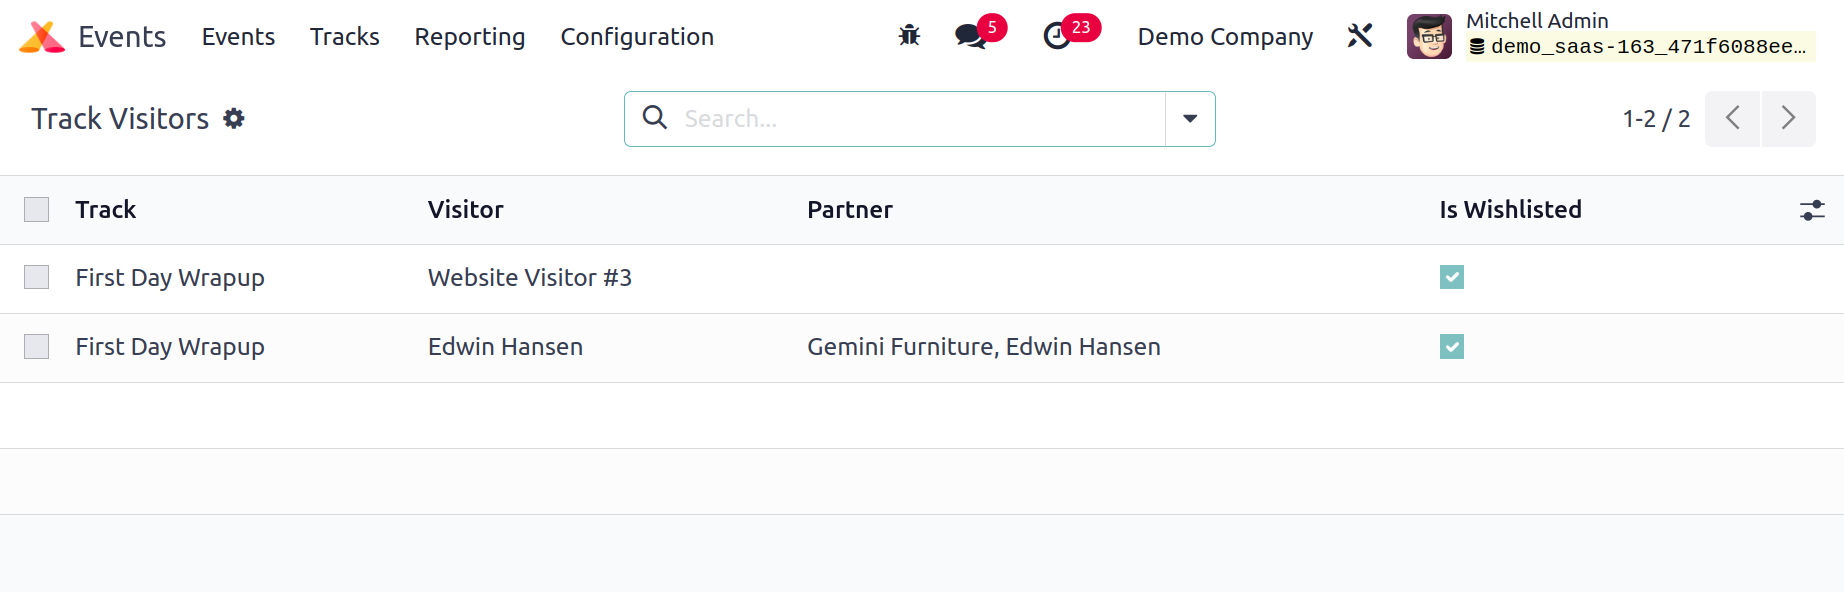
Track Visitors
The Configuration menu's Track Visitors option can be used to keep track of a published track's visitors' information.
Each visitor's Track Name, Visitor, Partner, and Quiz Points are listed on the list. If a visitor added the track to their wishlist, the 'Is Wishlisted' field will be indicated as ticked. If the visitor completed the track, the 'Completed' field will show as ticked.
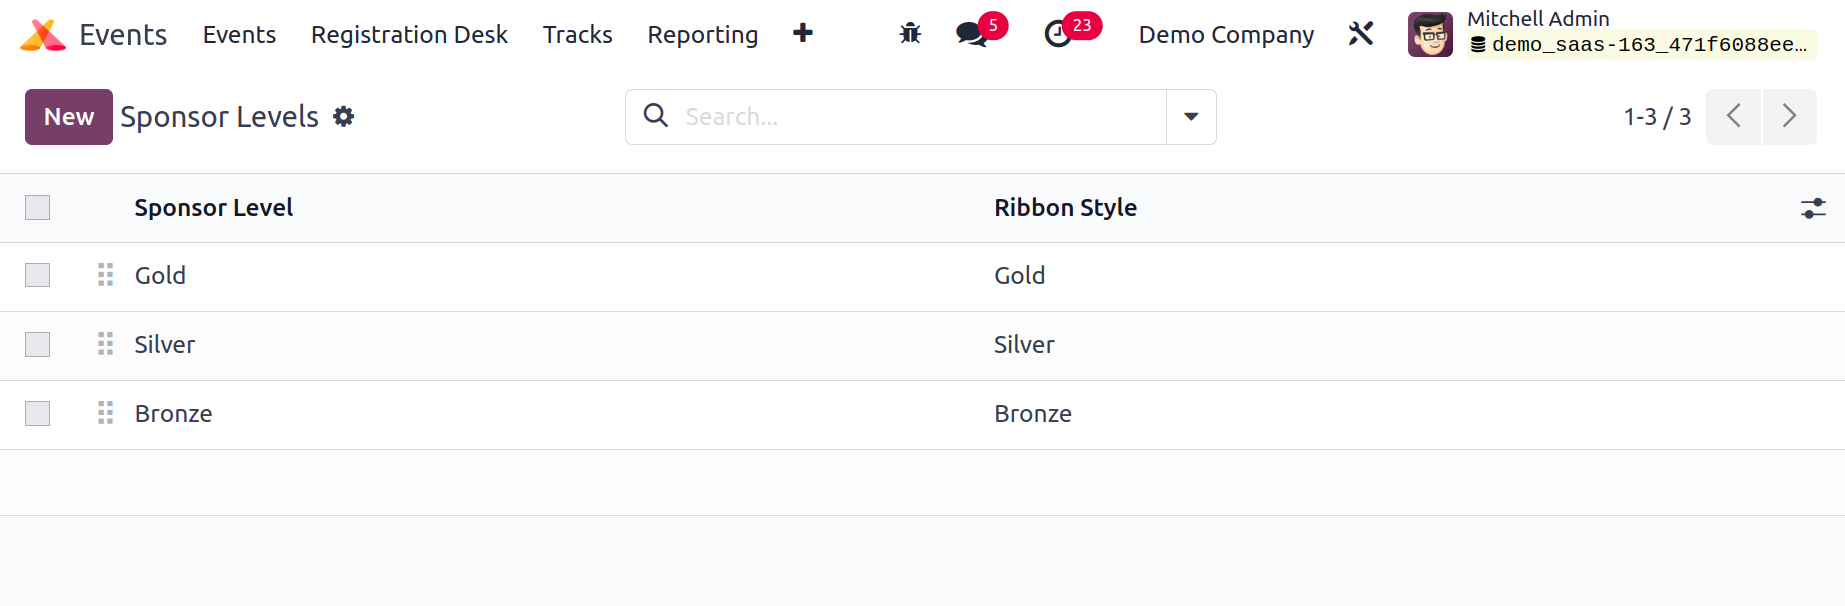
Sponsor Levels
You may quickly assign multiple tiers to the event sponsors in the Events module. This can be done through the Configuration menu's Sponsor Levels option.
You will receive the
complete list of all levels generated for the sponsors, along with a picture of each level's ribbon design. You can add a new level for sponsors by selecting New.
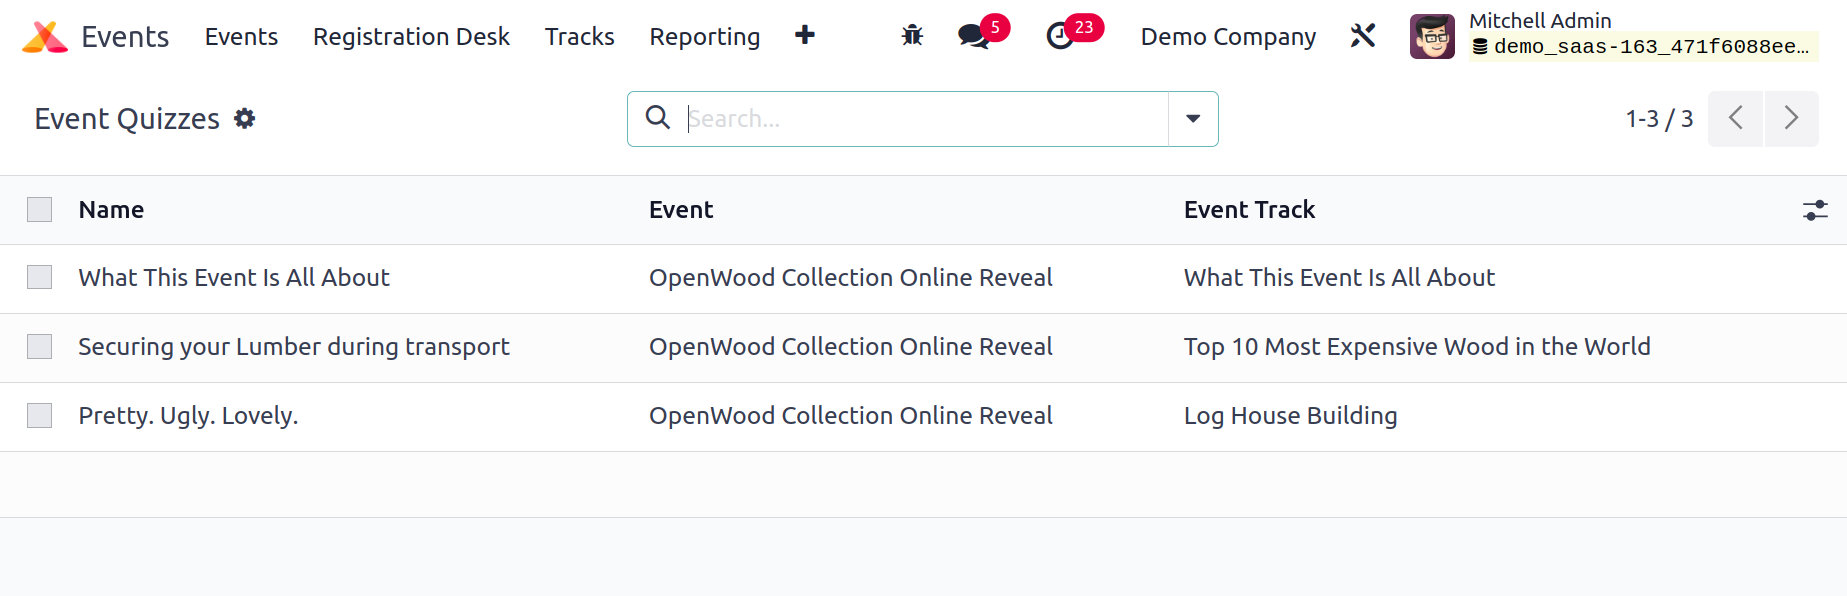
Event Quizzes
All quizzes generated for various events will be recorded by Odoo17 using the Event Quizzes platform. You will receive the following list of all quizzes from various events.
The quiz's Name, Event, and Event Track information can be found in the list's preview.
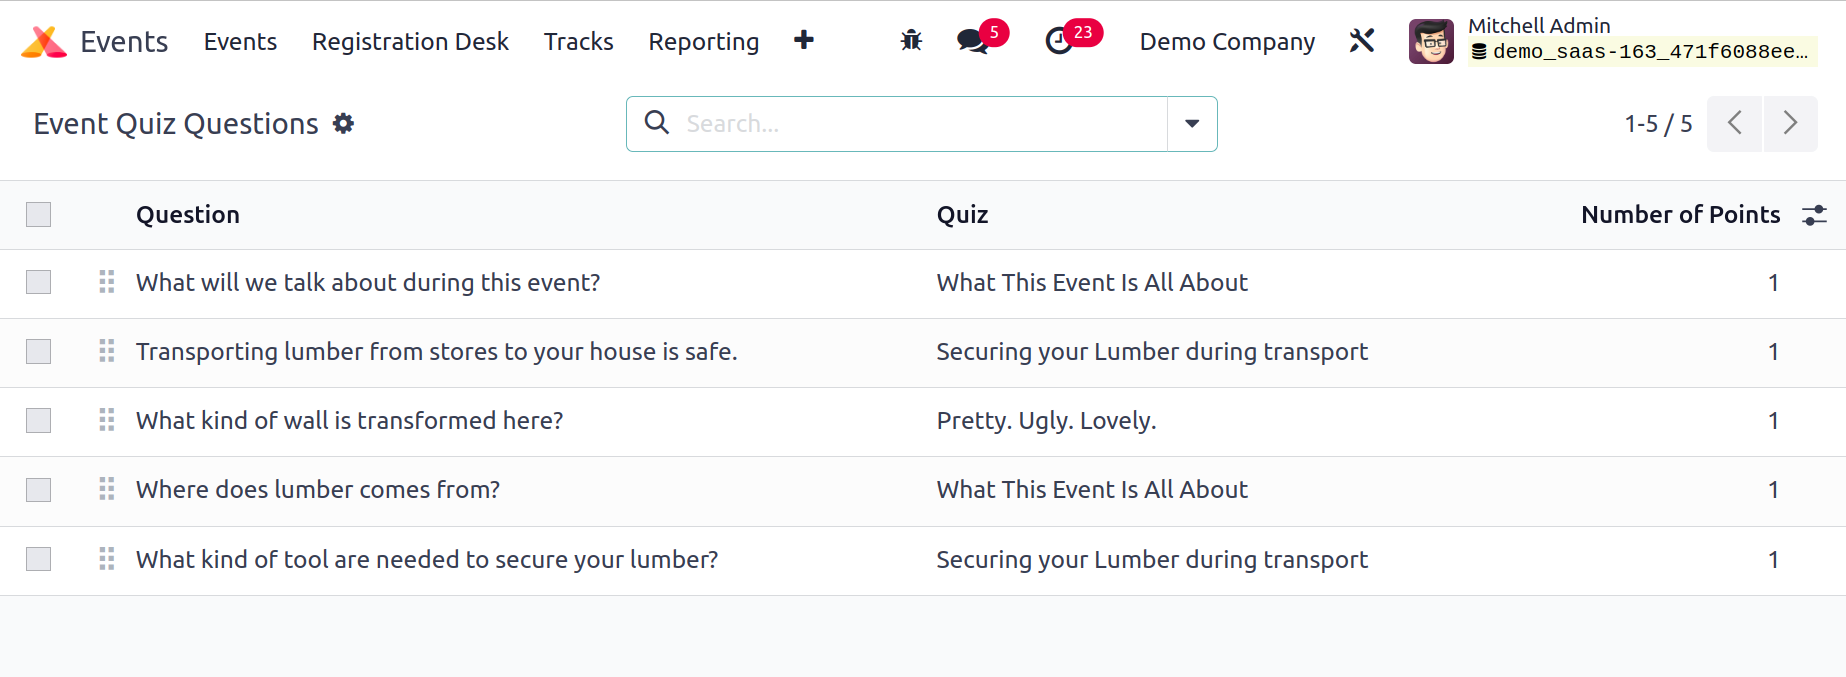
The Event Quiz Question platform is where you can find the quiz questions prepared for various quizzes.
This window will display all questions and associated quizzes, as seen in the image. On this platform, you may also find out the specifics of how many points are given for each question.
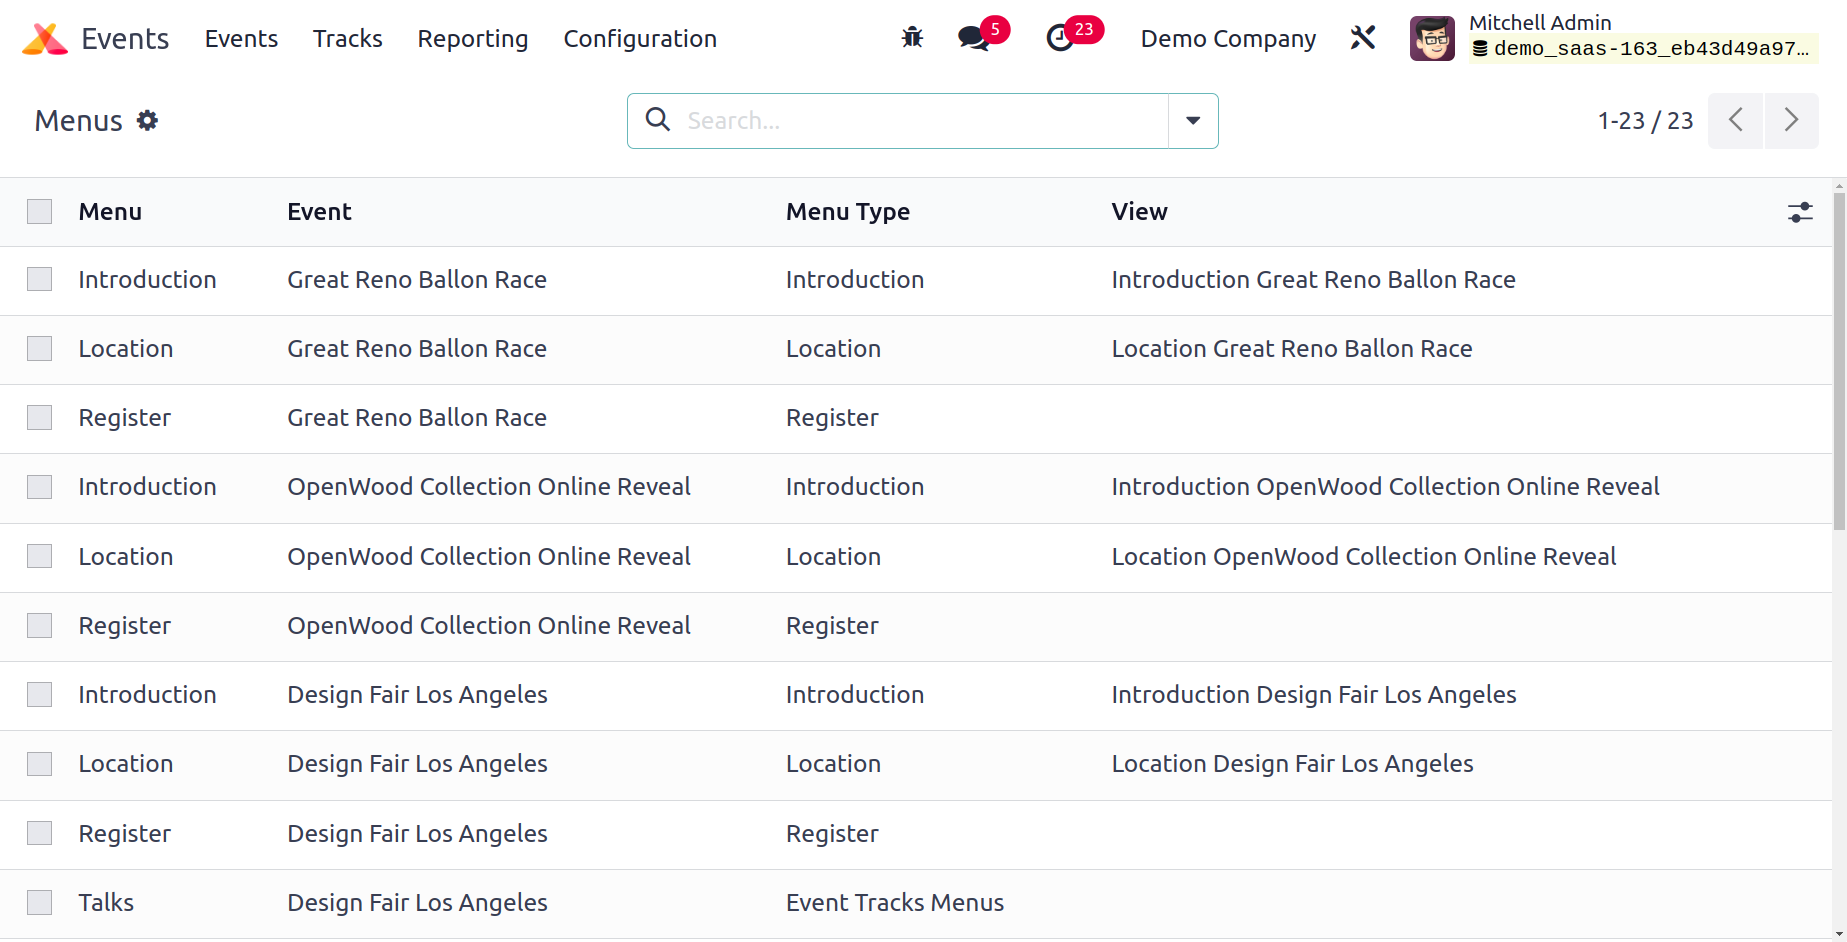
Website Menus
The list of all menus that are specified on the webpage for the events generated in the Events module will be listed under the Website Menus option in the Configuration menu.
The name of the Menu, the Event, the Menu Type, and the View were all listed.
The settings offered by the Odoo17 Events module are as described. Let's now go into more detail regarding the module's Reporting capability.
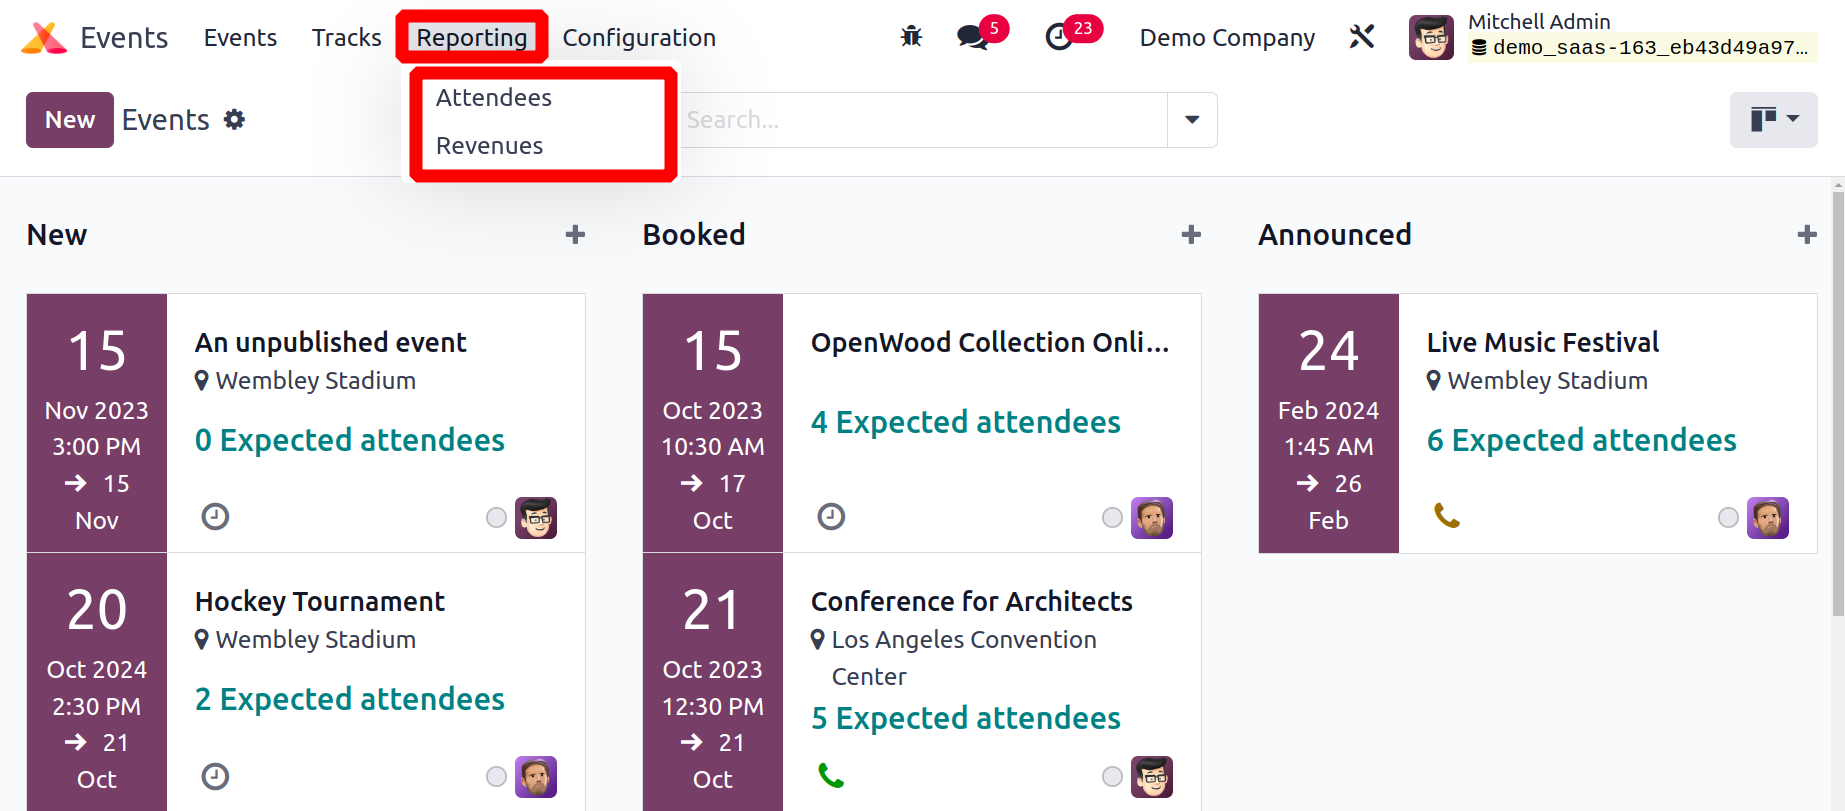
Reporting
You may build reports regarding the events you create in the Odoo17 Events module and the guests who attend the events. Odoo 17 offers a beneficial platform for analyzing the effectiveness of the organization in organizing events by offering reporting options. By examining the reports generated on this platform, you can optimize your working techniques and select fresh approaches to increase production.
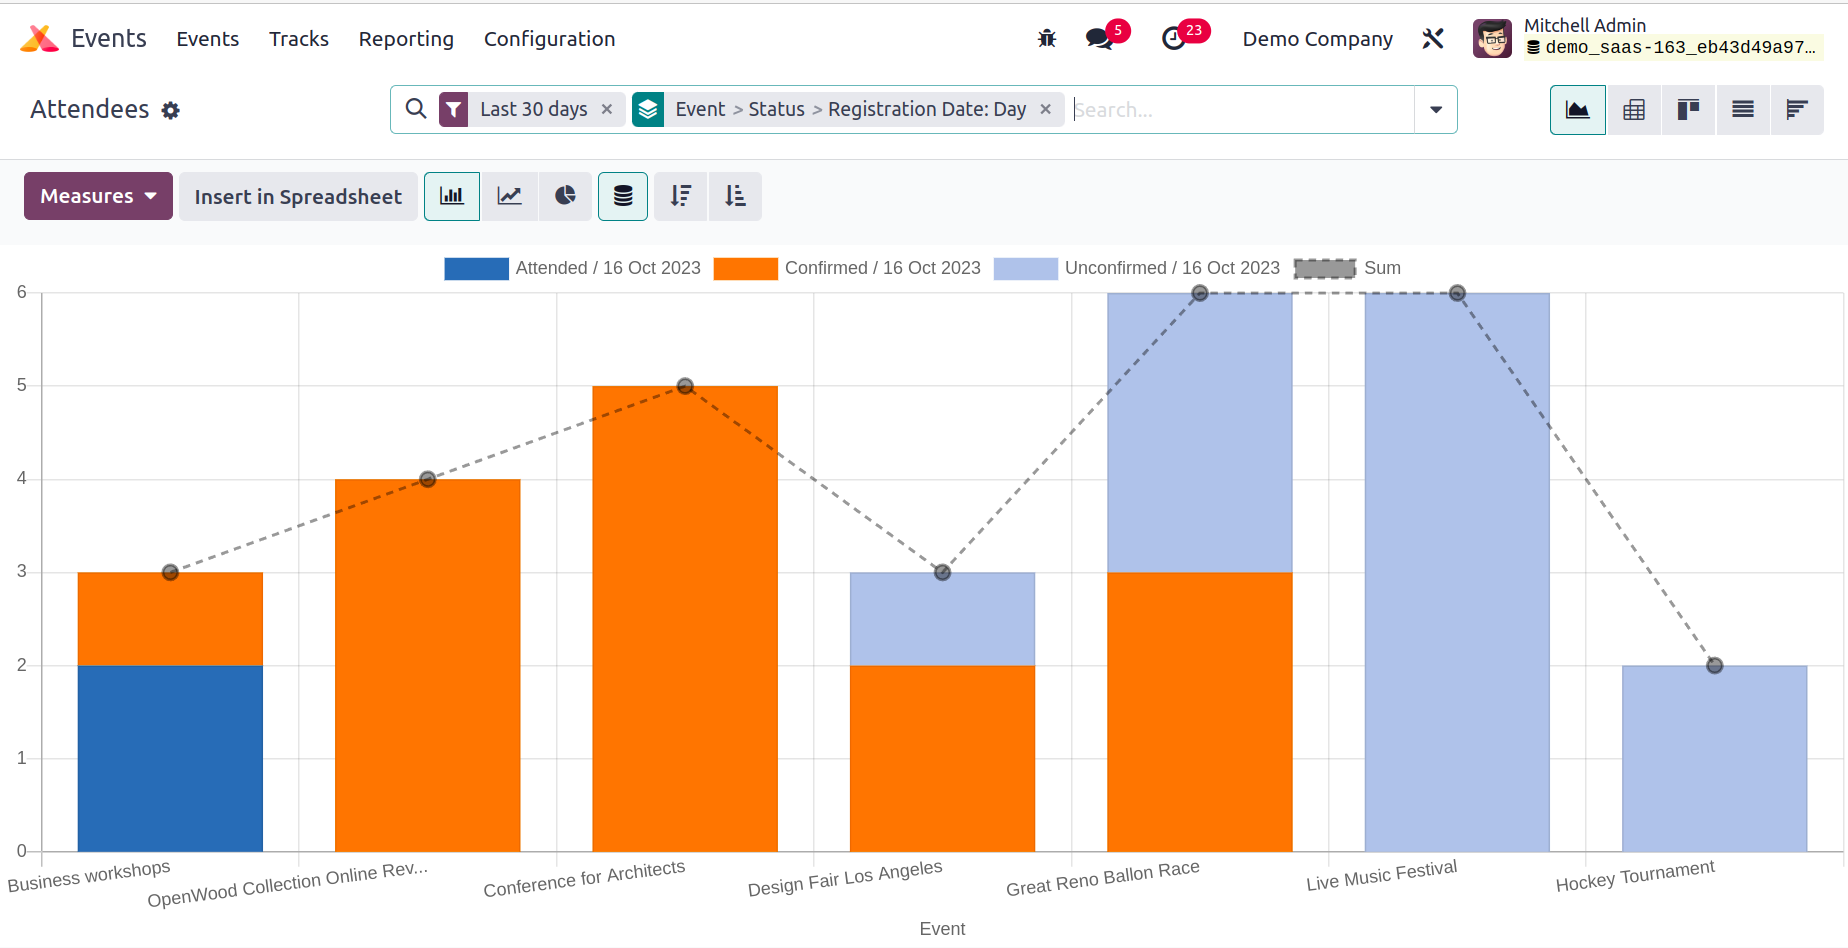
The report can be viewed graphically and in pivot in the Event Analysis window.
The report's Graph view is displayed as above. Bar, Line, and Pie charts are included in the Graphical view.
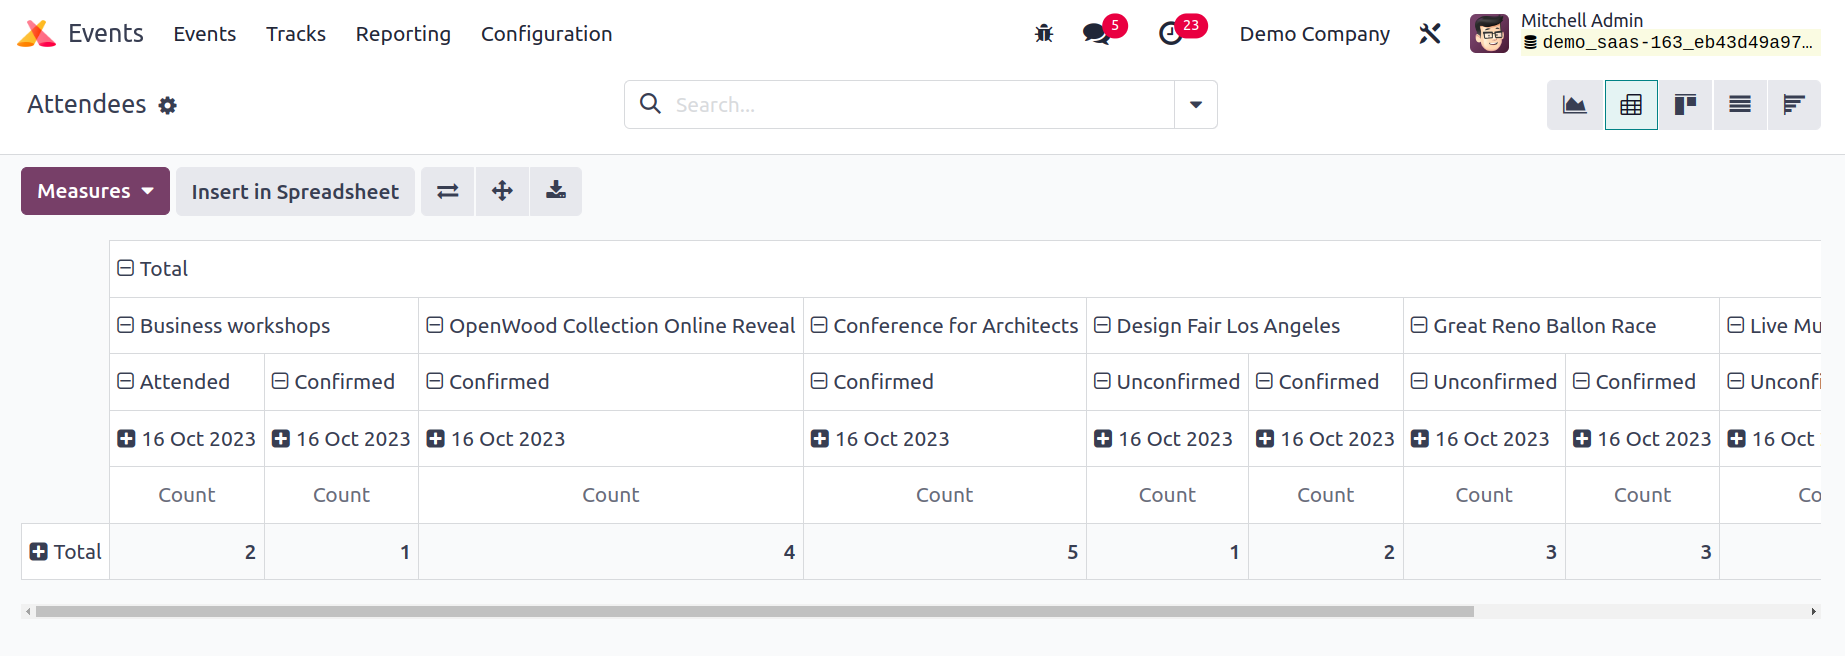
The number of attendees who took part in each event will be displayed in the Pivot view of the Attendees report. From the Measures option, you may choose the appropriate measures for your report.
To increase the amount of data available in the report, you can also use the Filters and Group By options. These settings are also available in graphic view. On this platform, you can see data using the Kanban, List, Graphical, and Cohort views.
The report also allows for the retrieval of the revenue report. Additionally available are Graph view and Pivot view. You can select the right measures for your report from the Measures option.
Excellent facilities for event creation and full event administration are provided by the Odoo 17 Events administration module. This session will help you handle the stress of organizing an event. No matter the scale of the event, Odoo 17 offers a comprehensive solution for all activities related to event management.