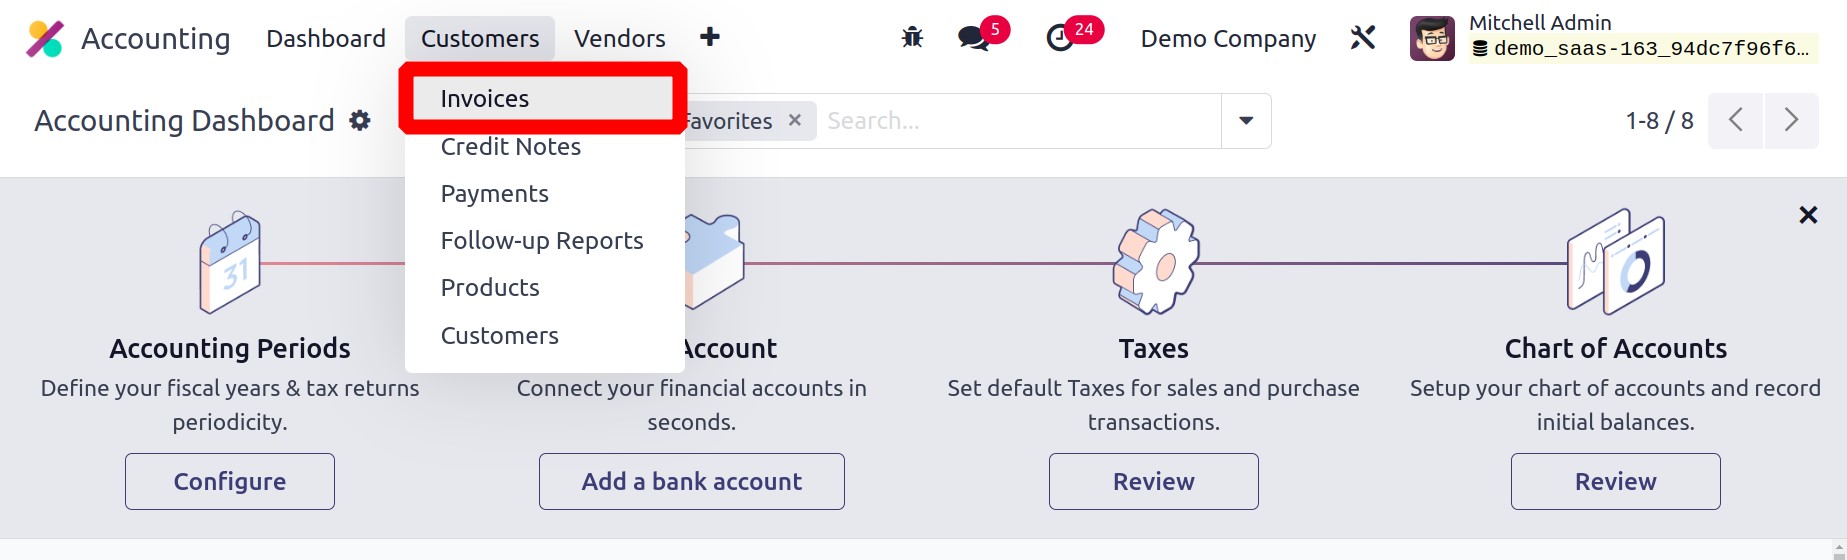
Customer Invoices
Depending on the operation you carry out and the module you employ, Odoo17 offers a
variety of techniques for automating the generation of customer invoices. The
administration of bills was covered during our discussion of the Sales module.
In Odoo17, you will receive a draft customer invoice after you confirm a sales order.
Just verify the draft invoices before sending them to the appropriate clients. All of
these automatic invoices will be tracked and controlled in the Accounting module's
Customer menu's Invoices platform. You can manually produce invoices on
this platform as well.
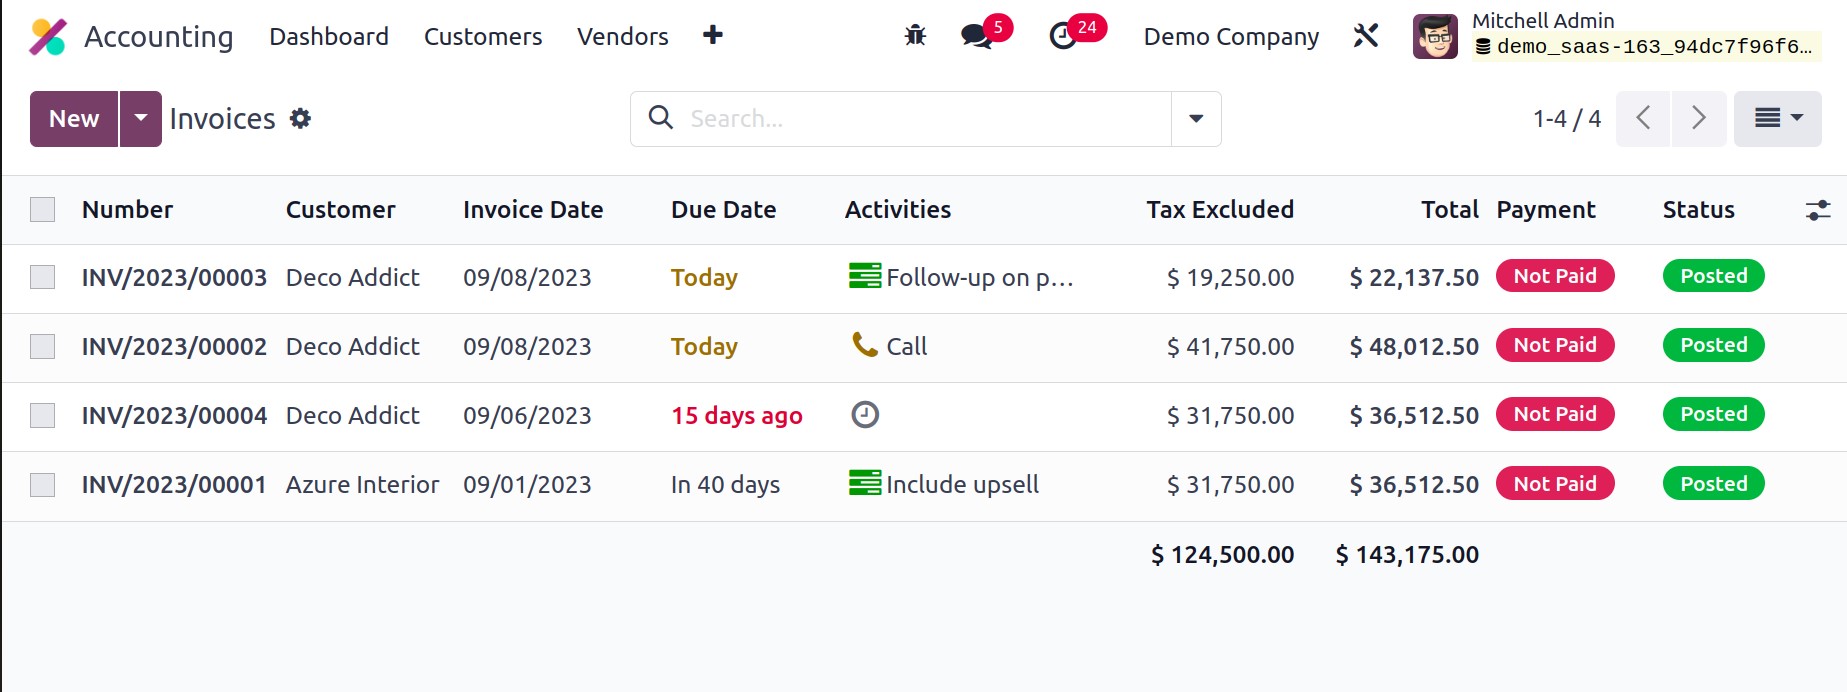
Below is a list of all the invoices that were recorded in the Accounting module. Details
about Number, Customer, Invoice Date, Due Date, Activities, Tax Excluded, Total, Total
in Currency, Payment Status, and Status are provided in the list view. The list view can
be made larger by including more information about the customer invoice. Use the tiny
icon next to the Status field, which is highlighted in the image below, to accomplish
this.
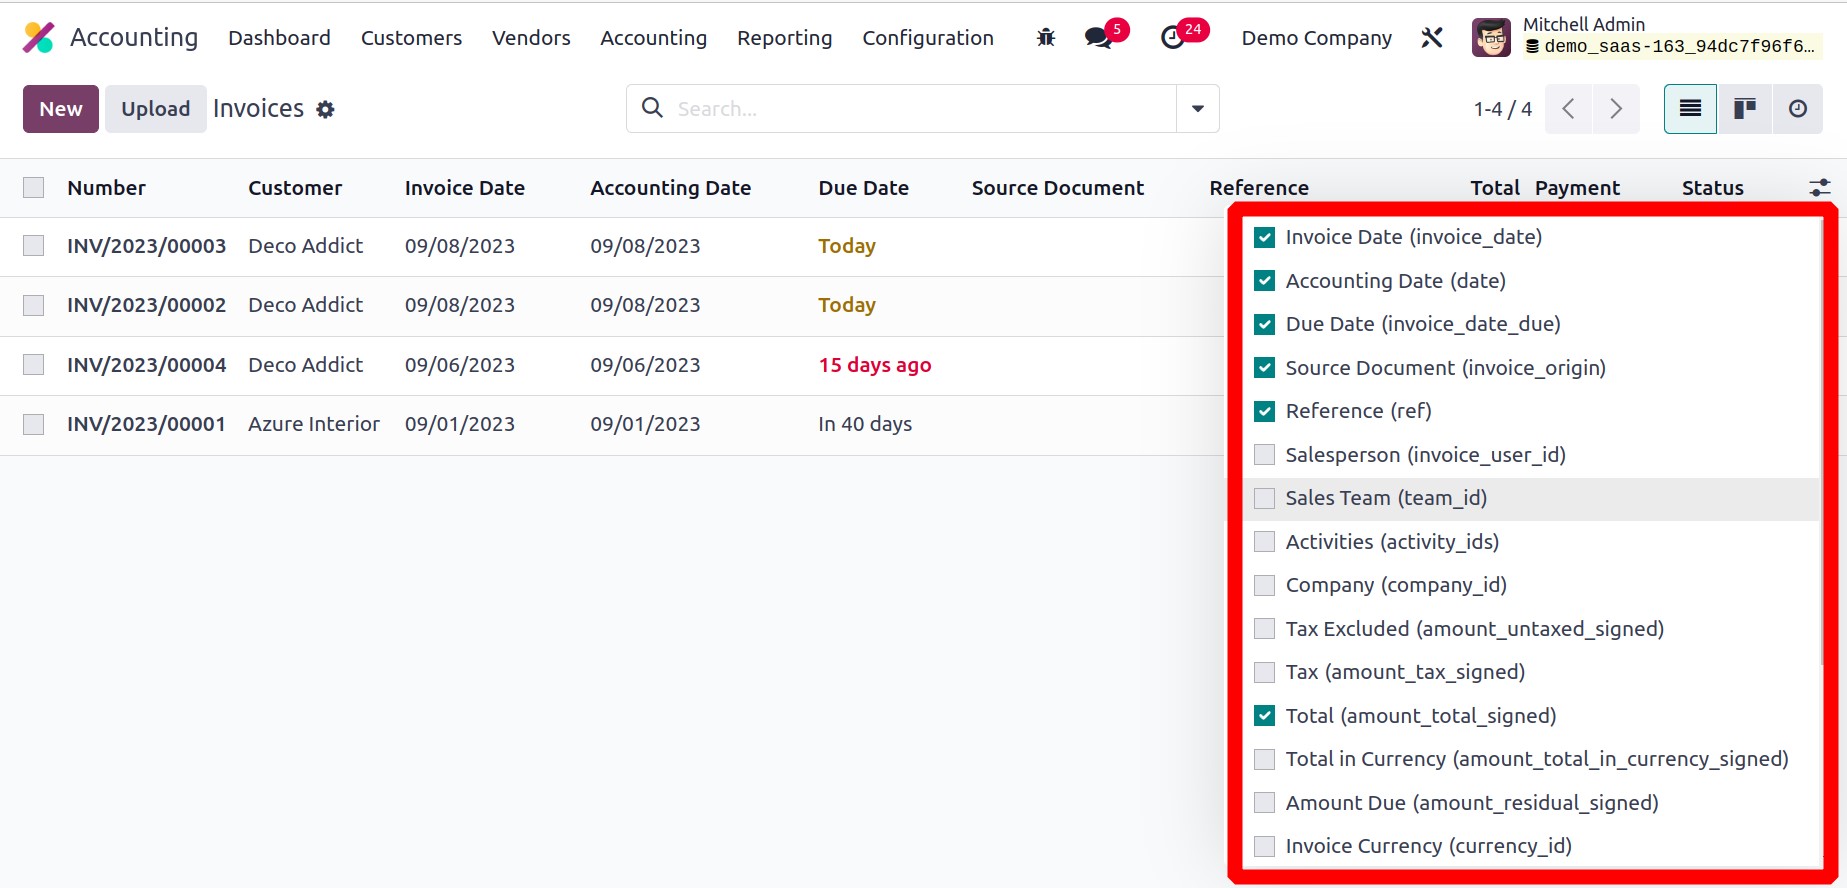
You can enable or disable the needed fields for the customer invoice's list view using
this option. Invoice Date, Due Date, Source Document, Reference, Salesperson, Sales
Team, Activities, Company, Tax Excluded, Tax, Total, Total in Currency, Amount Due,
Invoice Currency, To Check, Payment Status, Electronic Invoicing, and Status are all
included.
You can sort the bills based on My Bills, Draft, Posted, Canceled, To Check, Unpaid,
Paid, Overdue, Invoice Date, and Due Date using the default Filters. Using the Add
Custom Filter option, you may design your own invoicing filters.
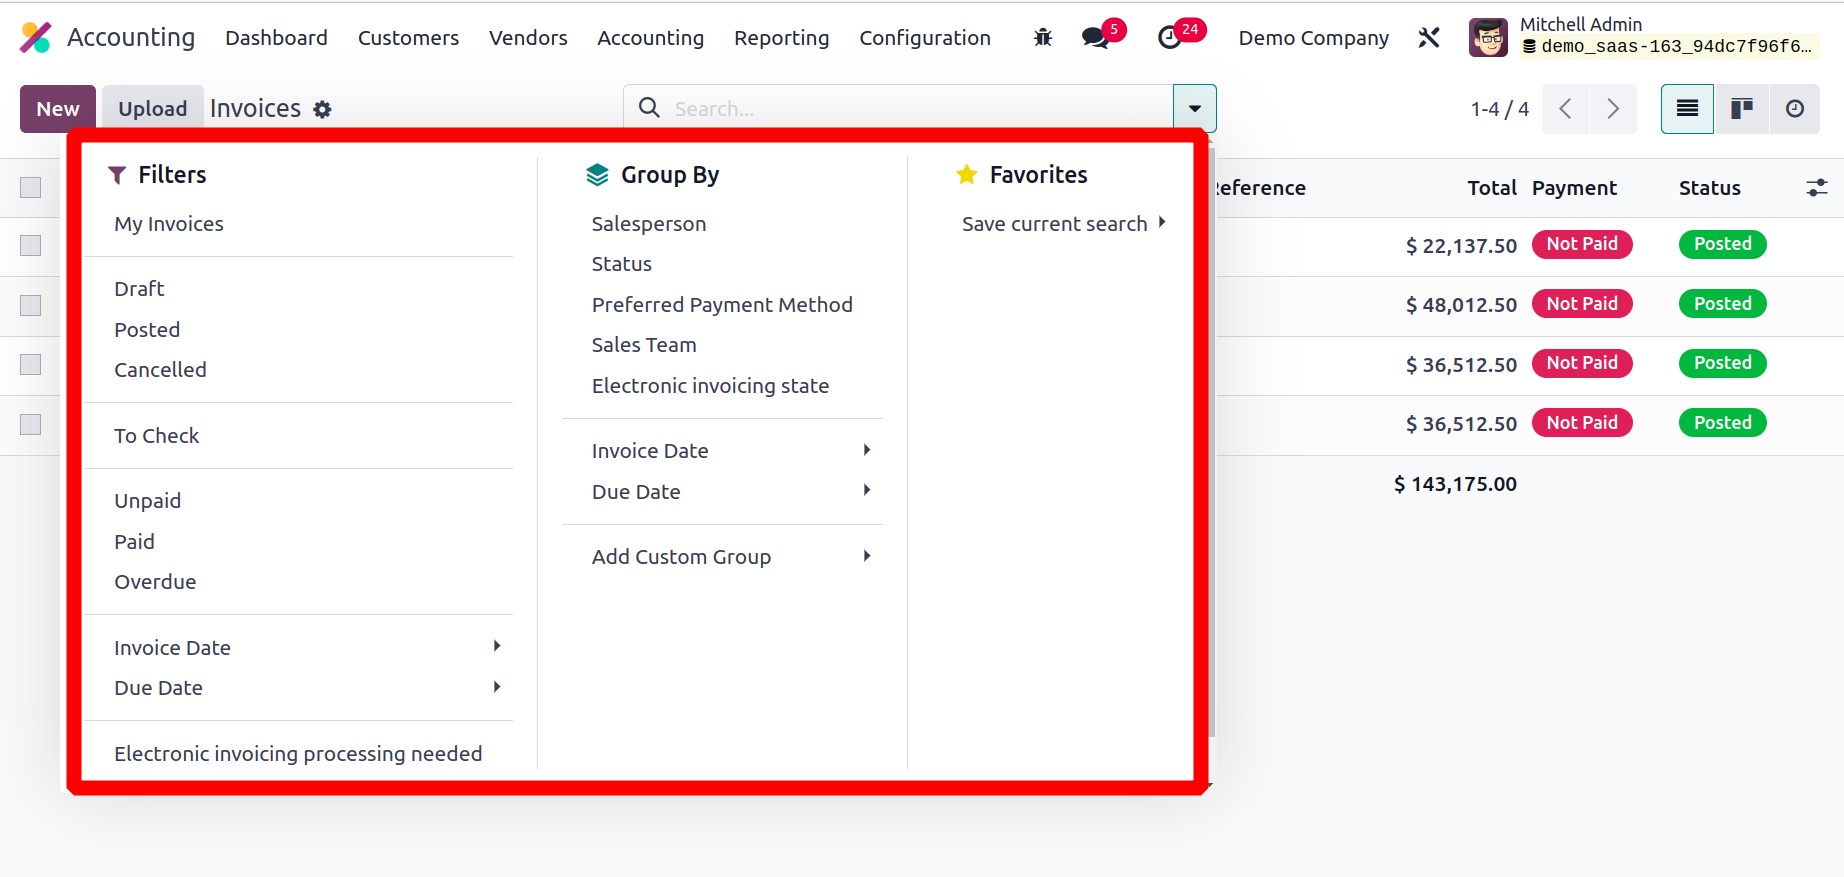
The available invoices can be sorted by salesperson, status, sales team, electronic
invoicing state, preferred payment method, invoice date, due date, and referrer using
the Group By option. You can add custom group choices with the aid of the Add Custom
Group button.

The invoice platform's Kanban view is depicted in the image above. An invoice can be
uploaded to the database using the Upload button. Clicking the New button will
take you to the invoice creation box, which is seen below, where you can manually create
an invoice.
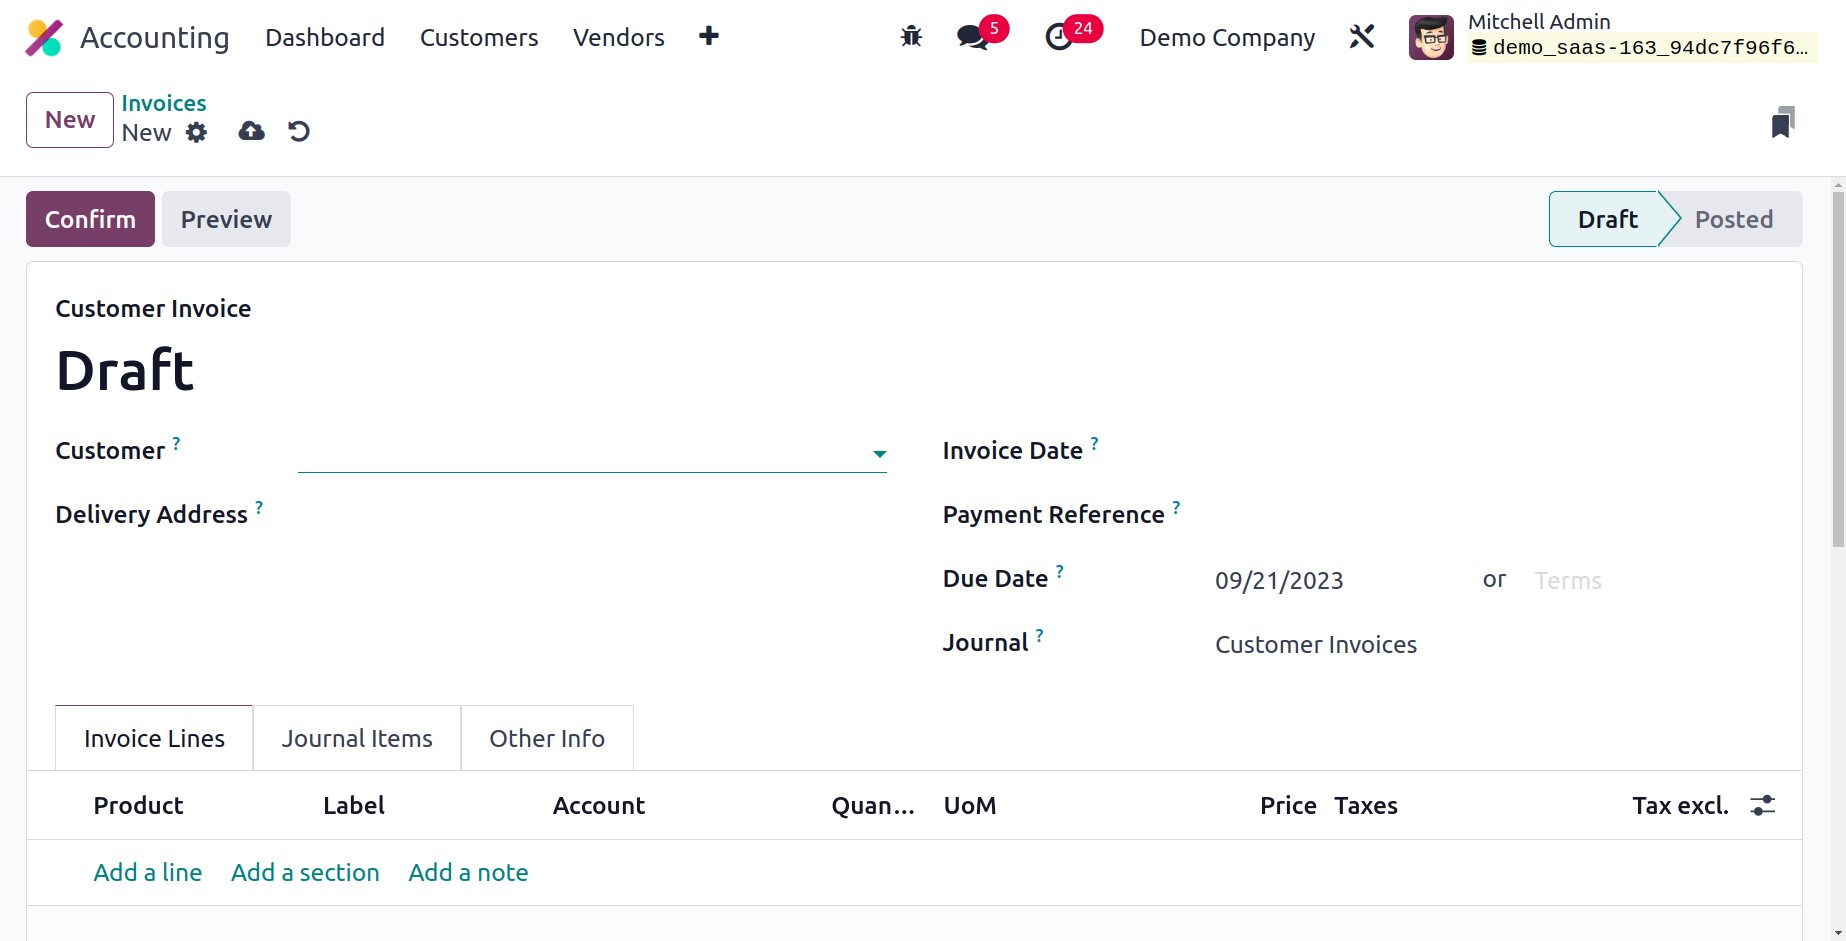
We're going to draft an invoice right now. In the Customer area, you may write the
customer's ID, and in the Delivery Address field, you can write the customer's current
delivery address. In the relevant fields, provide the invoice date and payment reference
for the journal items. The appropriate Payment Term will immediately display on
the invoice once you provide the customer ID in the relevant field in accordance with
the configuration. If not, you can specify a Due Date for the invoice by which the buyer
must pay it. Choose an appropriate Journal for the invoice.

Three more tabs, including Invoice Line, Journal Item, and Other Info, are
displayed on the invoice screen for completion. Using the Add a Line button found under
the Invoice Lines tab, you may individually mention each item on the list of products.
Product, Label, Account, Analytic, Quantity, UoM, Price, Taxes, and Subtotal data are
all included. The products that are listed in the sales order's order line will appear
in the invoice's invoice line if it was created from a sales order. To add a section and
a remark to the invoice, respectively, use the Add a Section and Add a
Note button. The Untaxed Amount, Taxes, and Total of the invoice are visible
after adding products under the Invoice Line.
The Journal Items page displays relevant journal entries with the data of the Account,
Label, Origin, Reference, Analytic, Debit, Credit, and Tax Grids in accordance with the
products you put into the invoice line.
You may use the delete icon to remove any of these diary entries and the Add a Line
button to add a new one.
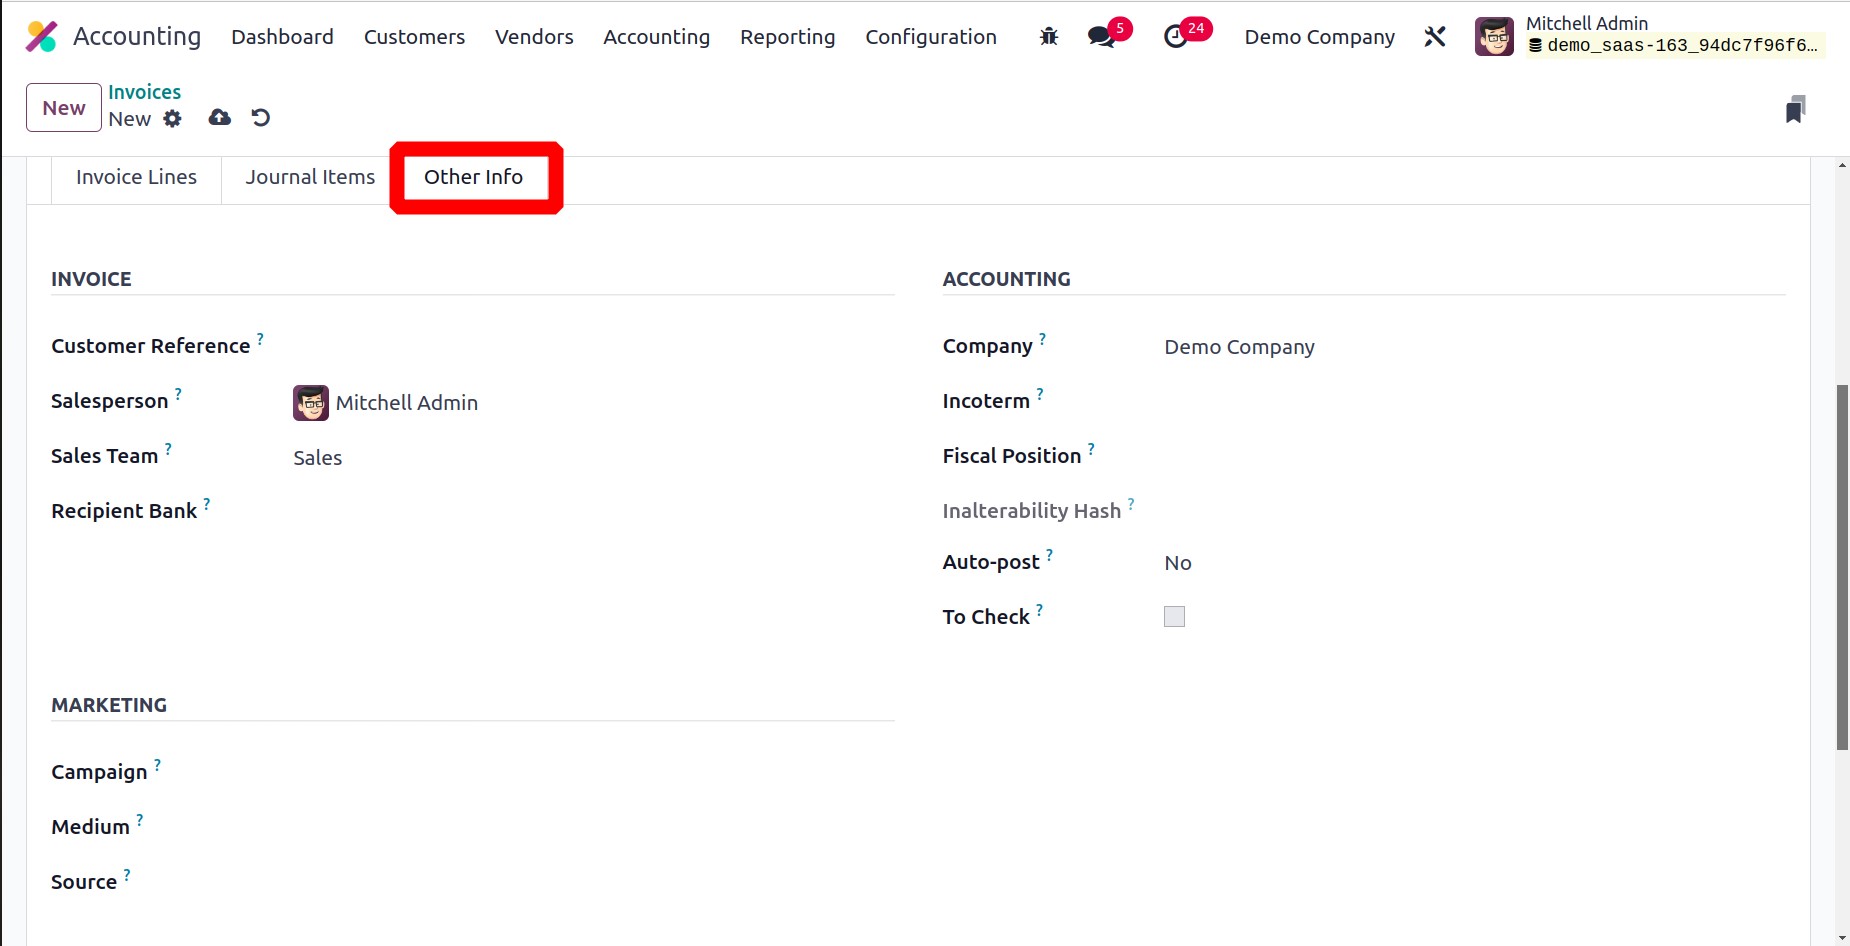
The Invoice, Accounting, and Marketing information of an invoice are mentioned in the
Other Info tab. You can include the Customer Reference beneath the Invoice field.
By entering their IDs in the designated places, this invoice can be assigned to a
specific salesperson and sales team. The Recipient Bank section
allows you to specify the bank account number that will receive payment for the invoice.
You can provide a referrer's ID in the Referrer section if you have one for this
sale.
To indicate the Campaign, Medium, and Source of this invoice, use the
Marketing field. You can provide your company identification number in the Accounting
Section’s Company field. Enter the Incoterms, Fiscal Position, Intrastat Country
(Arrival Country), and Inalterability Hash in the appropriate fields to adjust taxes and
accounts for specific customers or sales orders/invoices.
When creating an invoice, if there is any information about which you are unsure, you may
turn on the To Check field. This field must be enabled if the move needs to be
checked again.
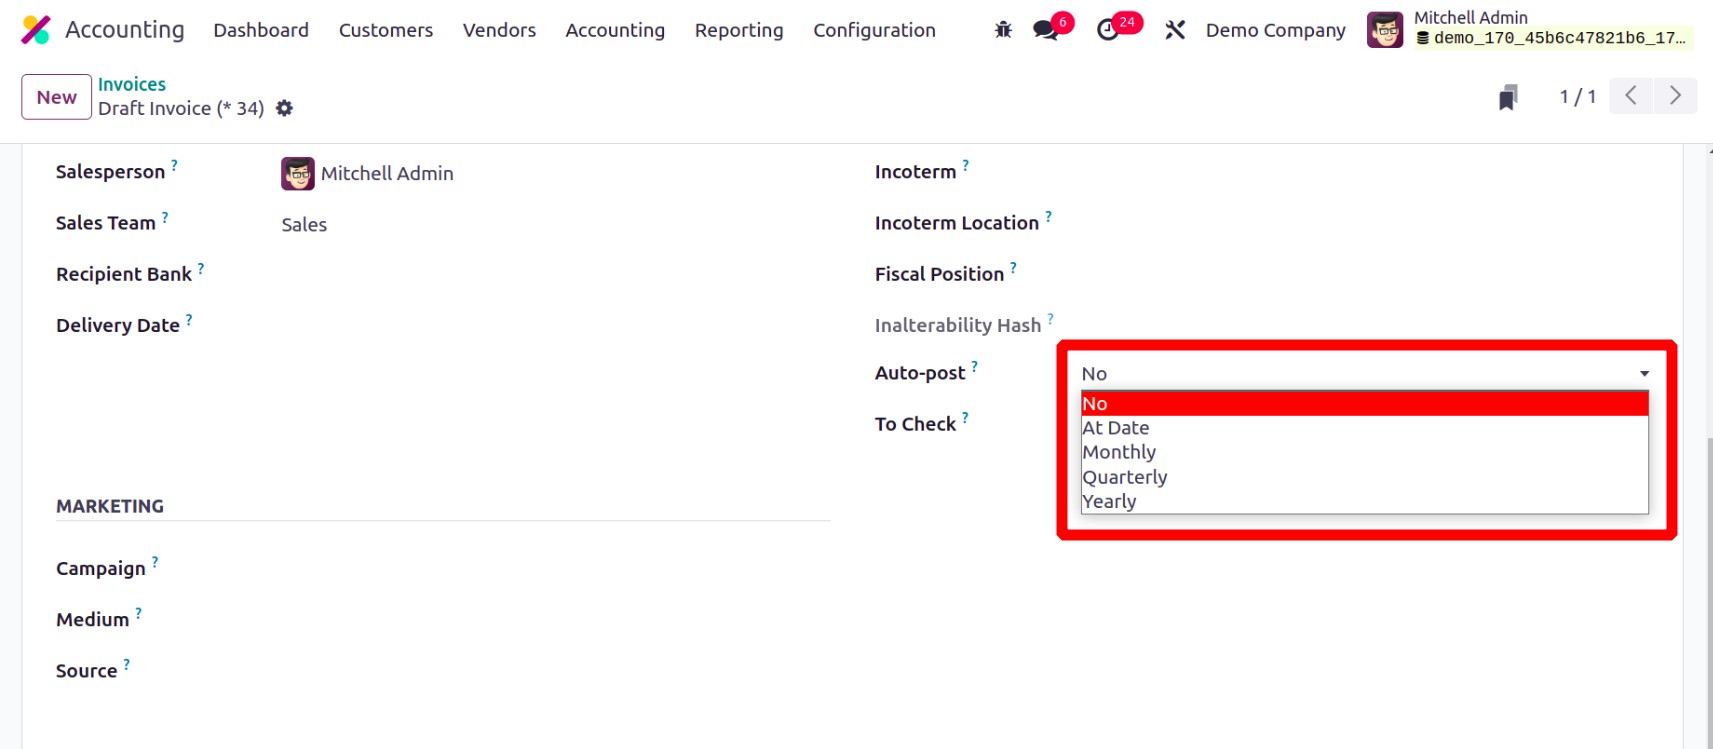
By choosing the appropriate time frame from the Auto Post area, you may
automatically post this entry. You can specify a date in the Auto Post Until section
that will determine how long this repeating move will be posted. Now it's possible to
choose Monthly, Quarterly, or Yearly auto posting. You can choose No from the Auto Post
section if you wish to do it manually.
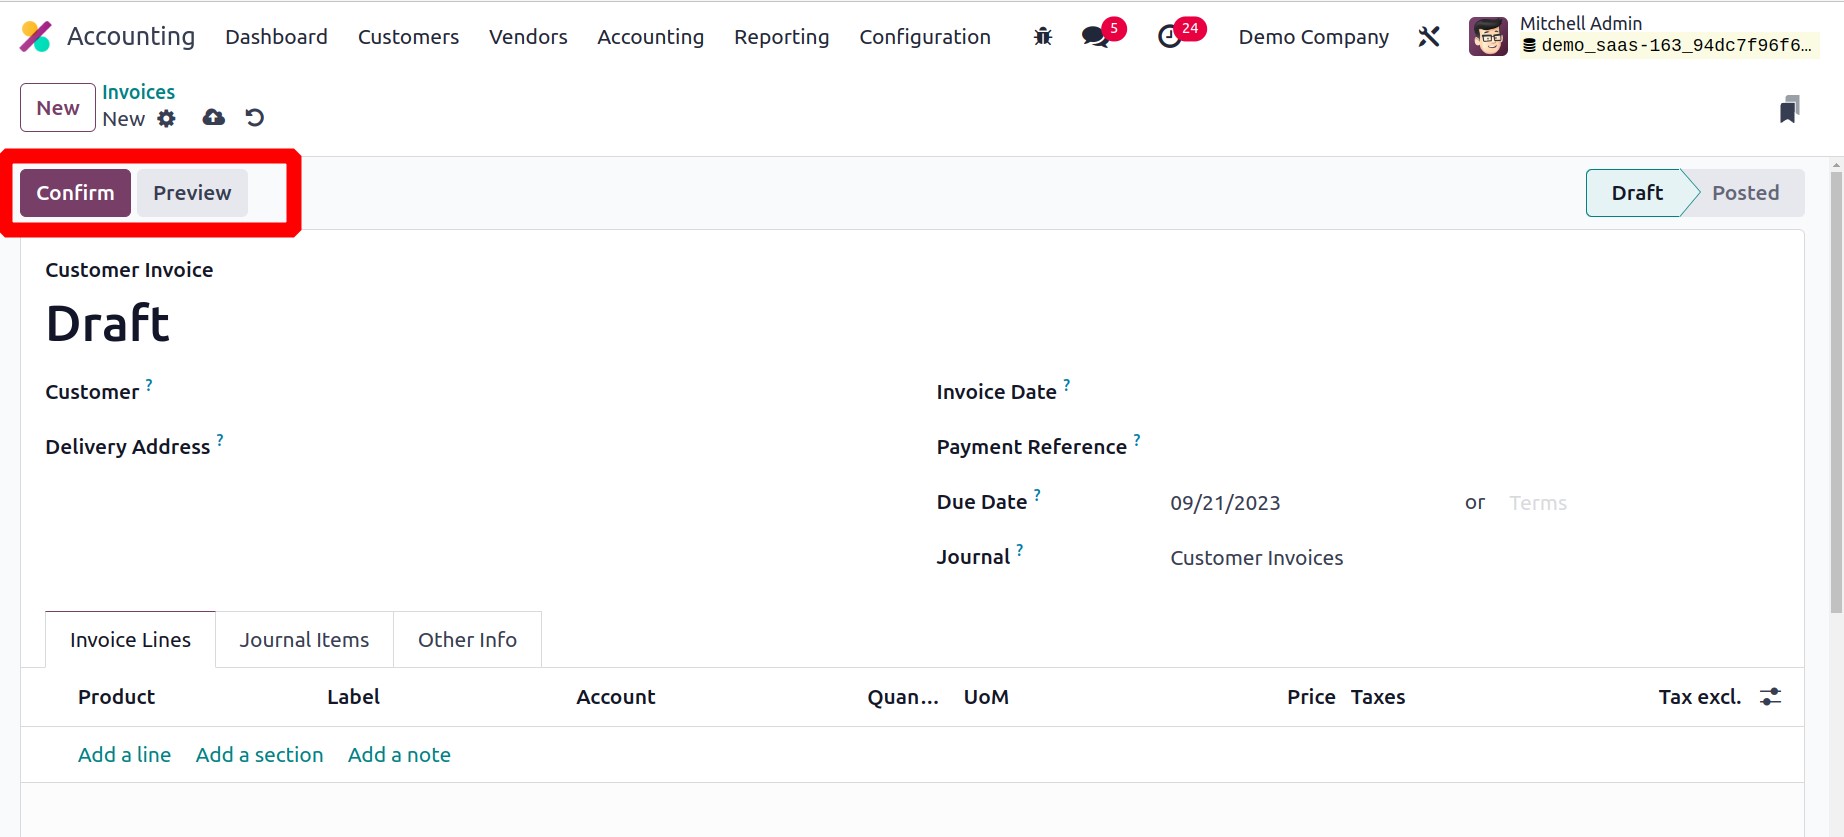
The draft invoice is now complete. When you confirm this invoice, the status will change
from Draft to Posted once you click the Confirm button.
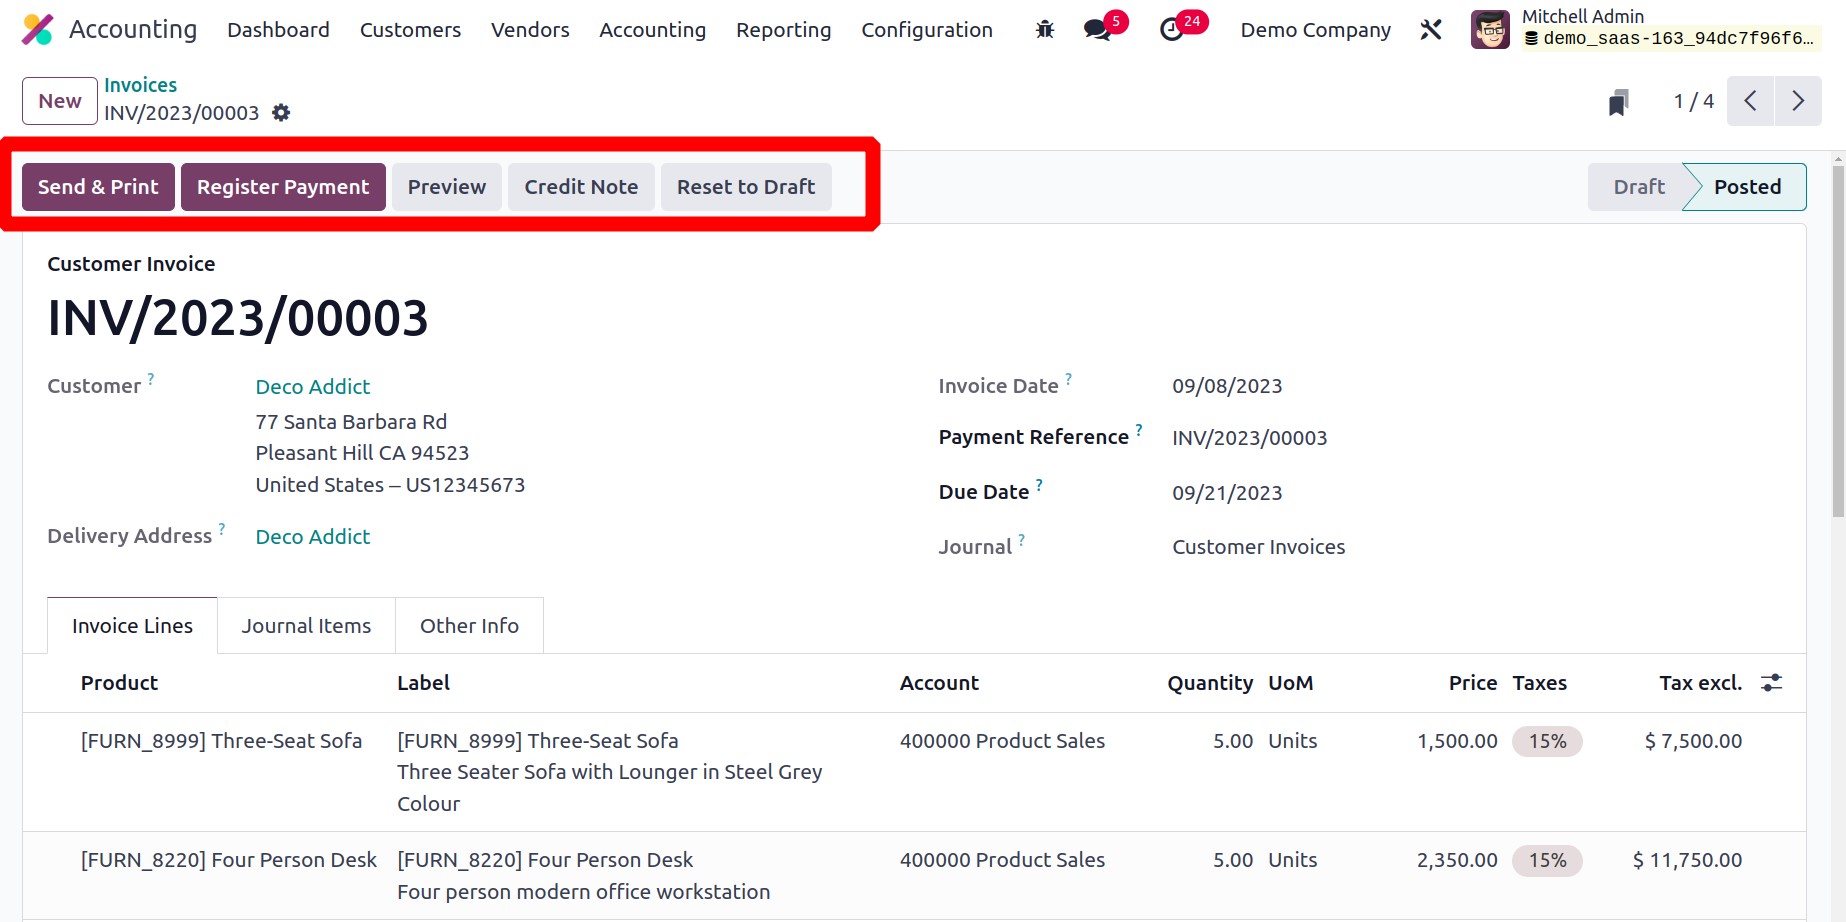
A validated invoice sample is displayed in the screenshot. Using the Reset To
Draft button, you can return a confirmed invoice to drought status. Use the
Preview button to show the invoice to the customer in advance.
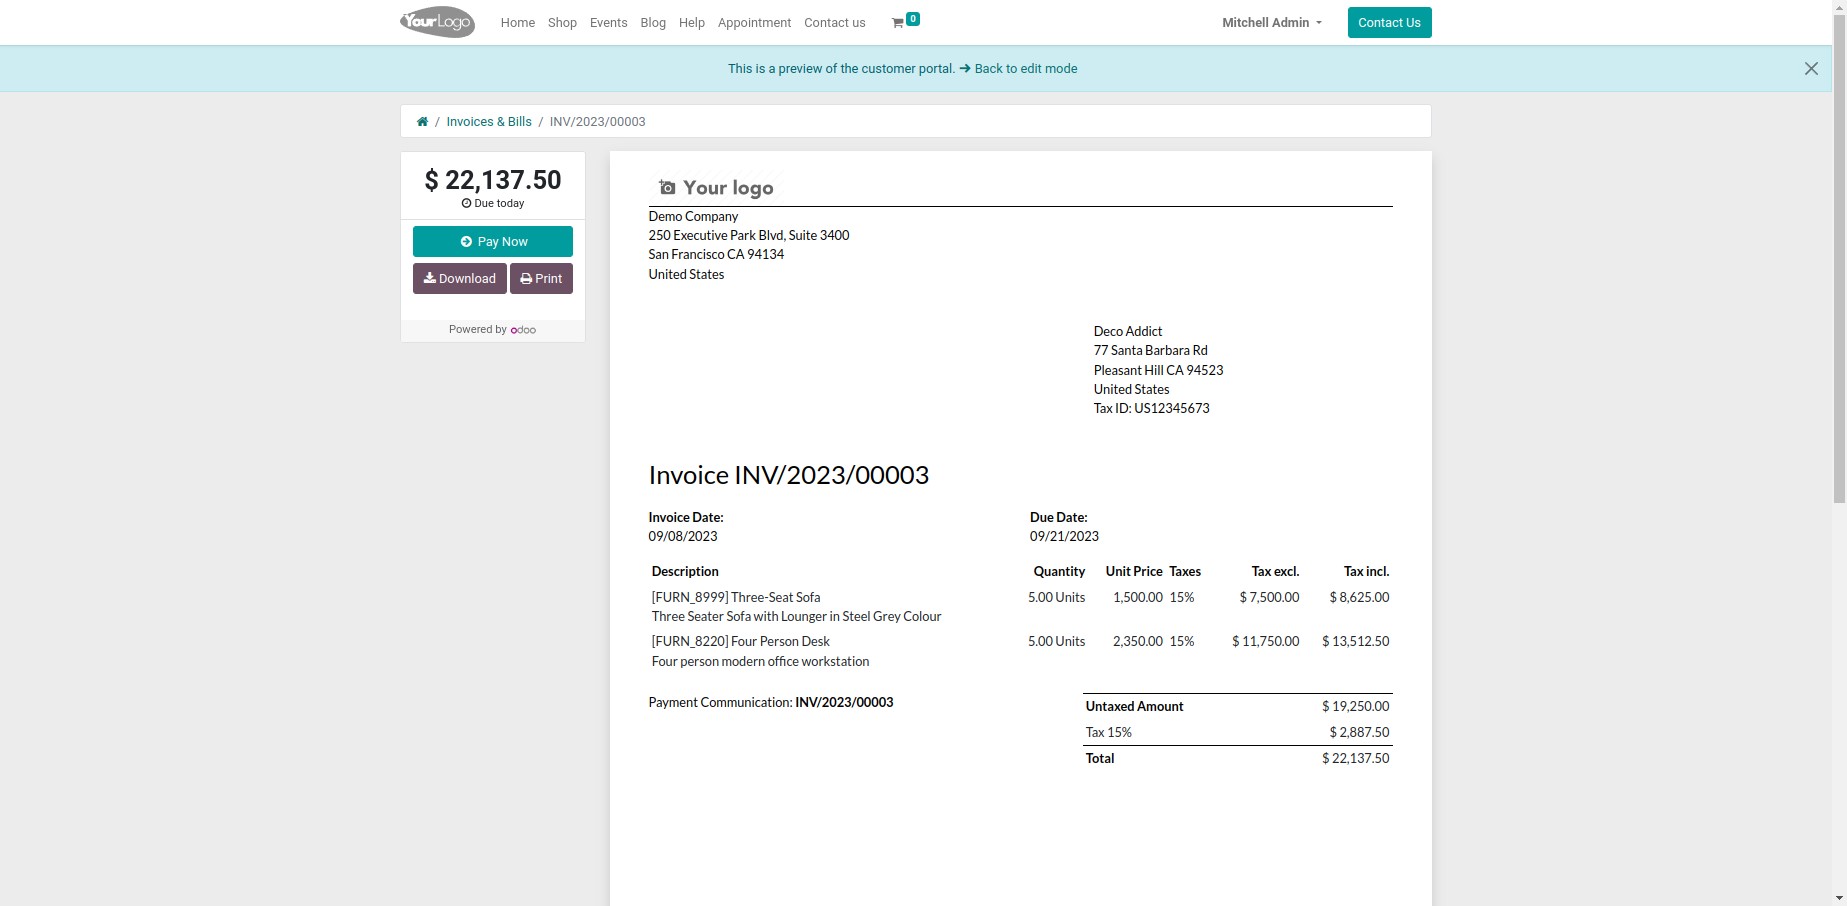
This is the client preview of the invoice from the client site, where the client can
evaluate the invoice and pay the sum using an appropriate payment option. The consumer
will have the ability to send a message to the appropriate salesperson as well as
download and print the invoice.
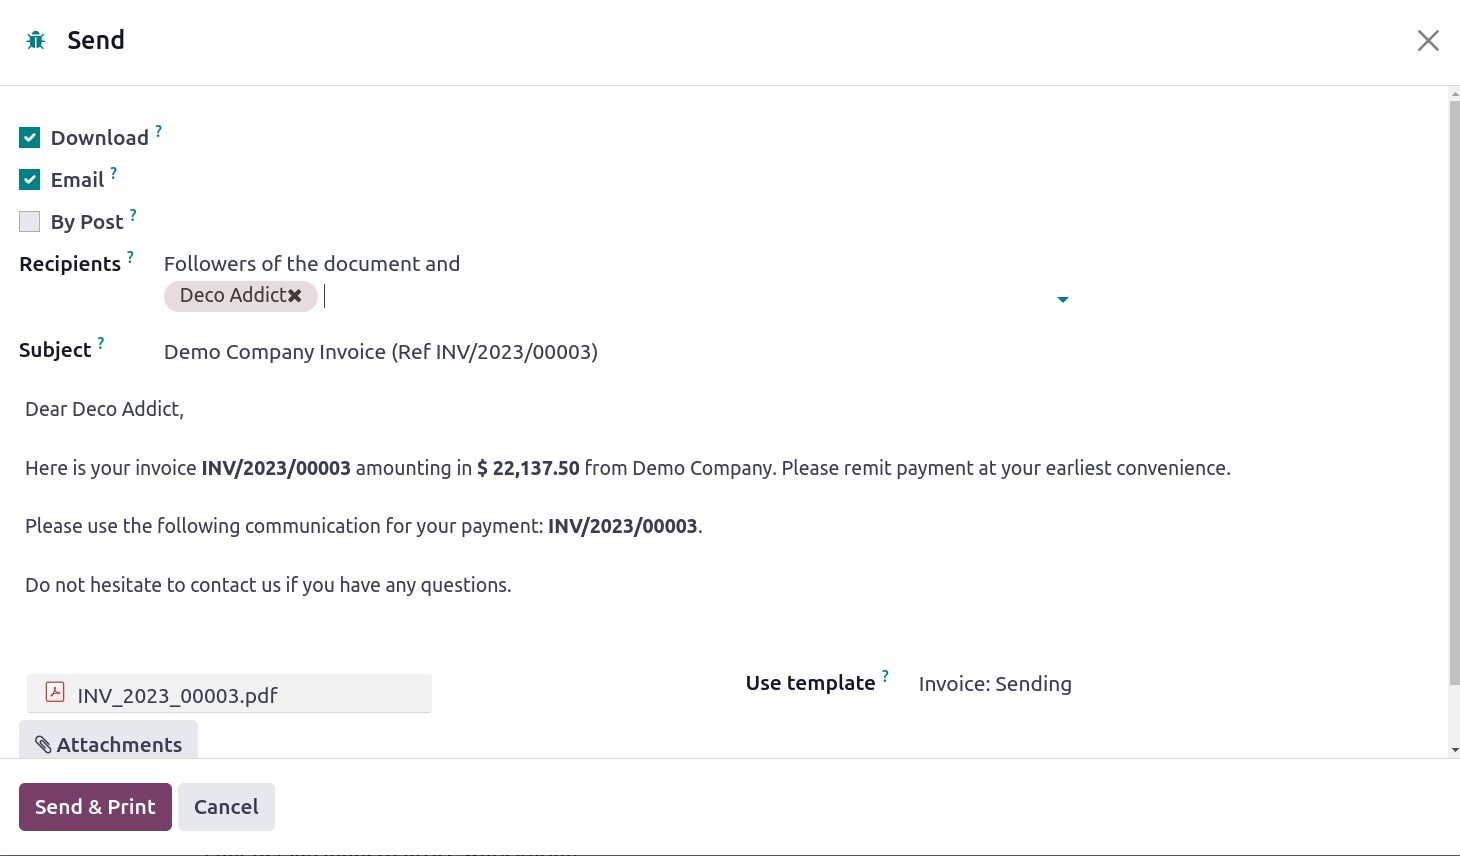
You can mail the invoice to the client by clicking the Send & Print option. A
created automatic email will look like the one below, where you can edit the recipient
list and topic to suit your needs. You can click the Send button once the invoice has
been attached to the email. The consumer can review the contents and submit payment once
they receive this mail.
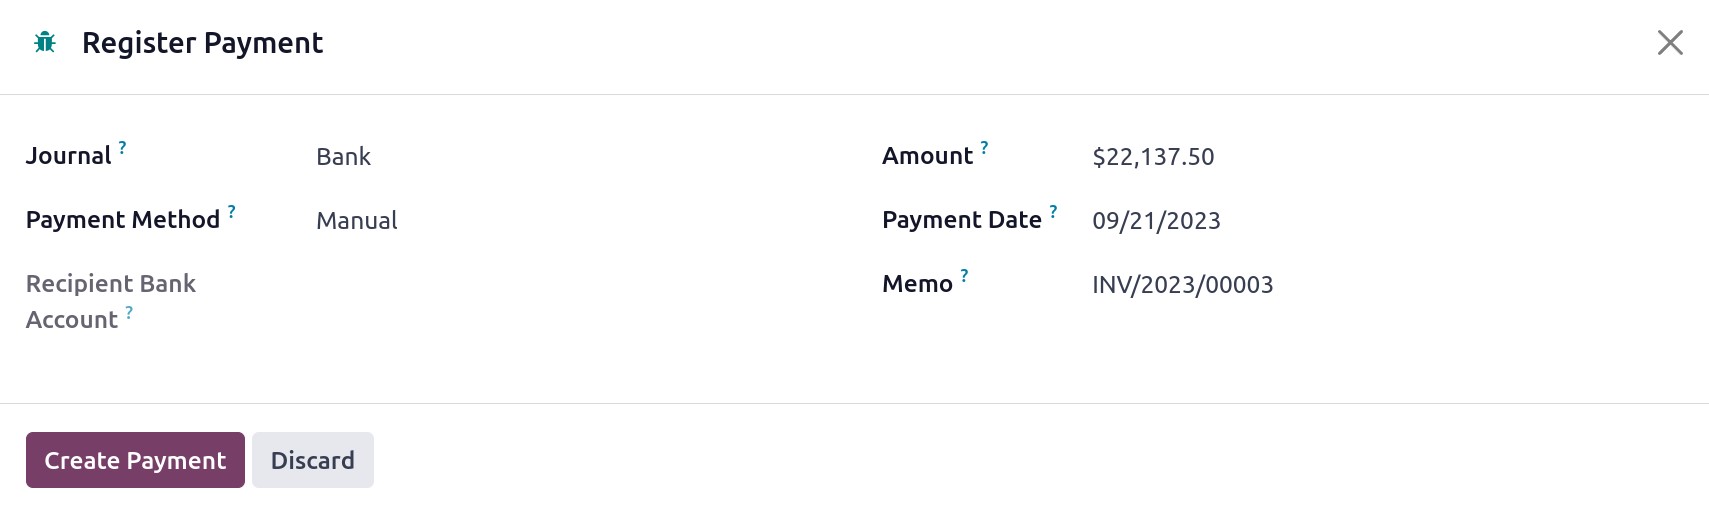
Using the Register Payment option, you can document their payment after the
payment processes are complete. To confirm the information of the payment registration,
Odoo17 creates a pop-up window. As seen in the above image, the window will display the
Journal, Payment Method, Recipient Bank Account, Amount, Payment Date, and Memo. If
necessary, you can alter the details that are already available. Click the Create
Payment button to continue. This step can be used to finish the payment registration.
The status of the invoice can be seen as In Payment once the customer has paid
it.
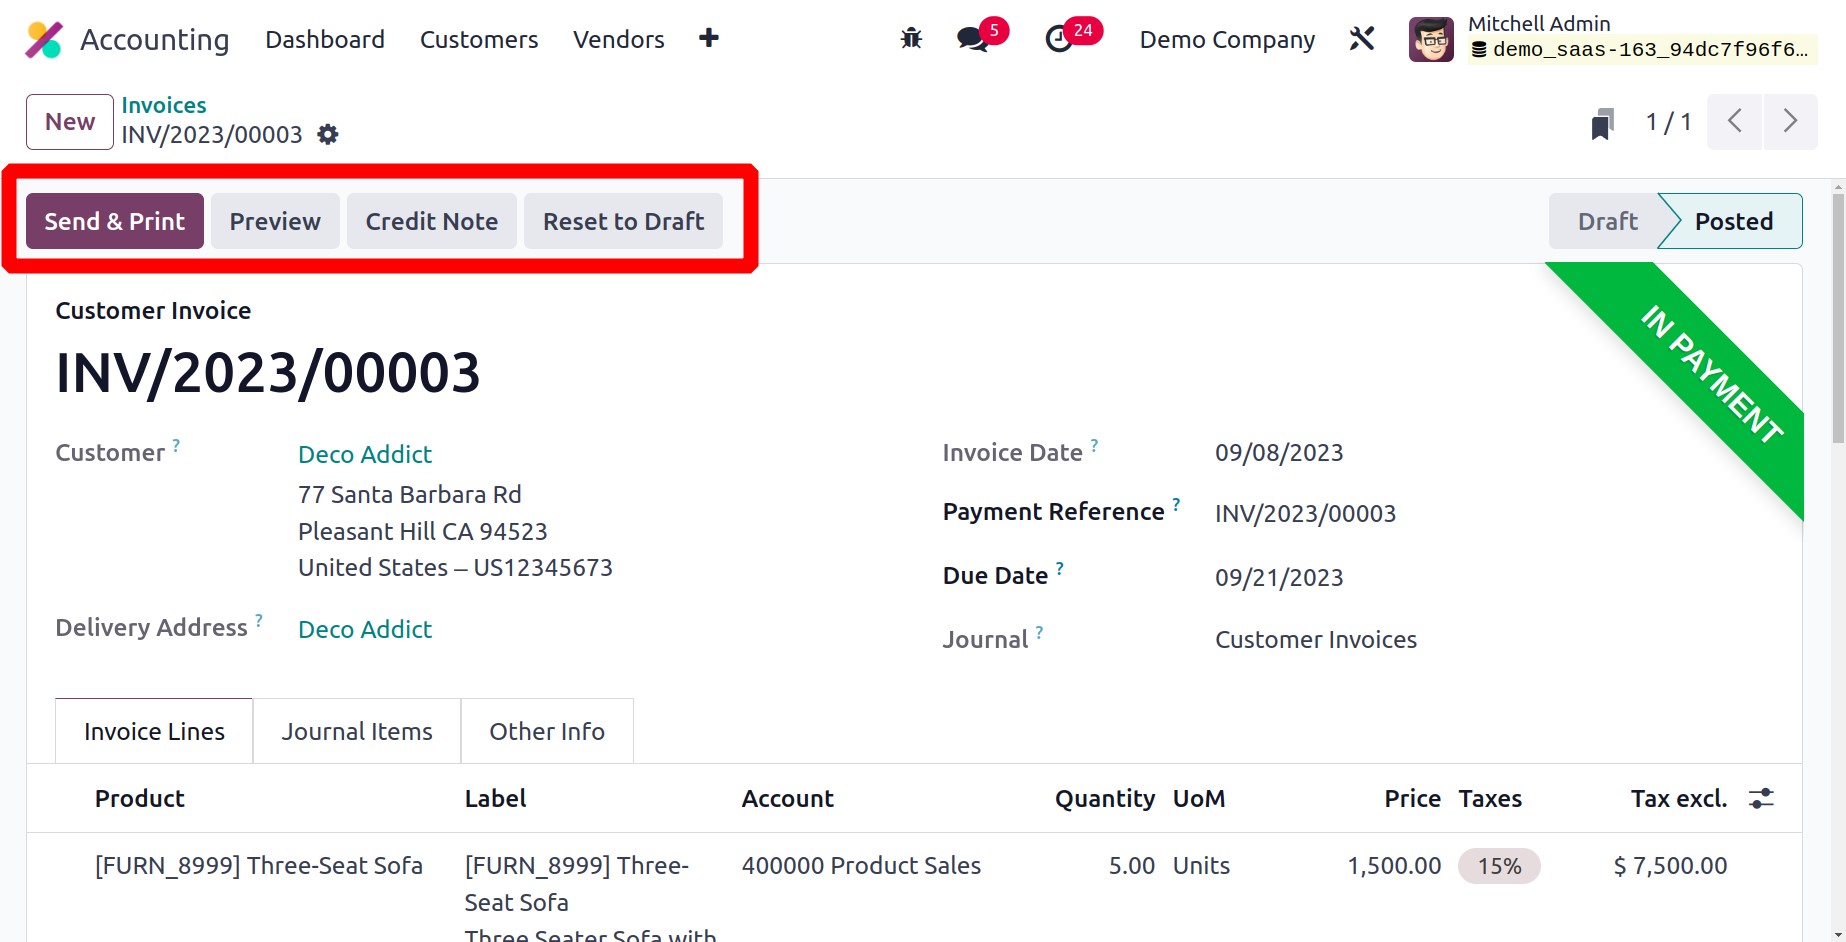
Any errors in the invoice, incorrect product deliveries, damaged items, or service
rejections might result in the issuance of a credit note to the consumer. The Add Credit
Note button can be used to accomplish this. When you click on this option, a new wizard
to define the credit note will emerge.
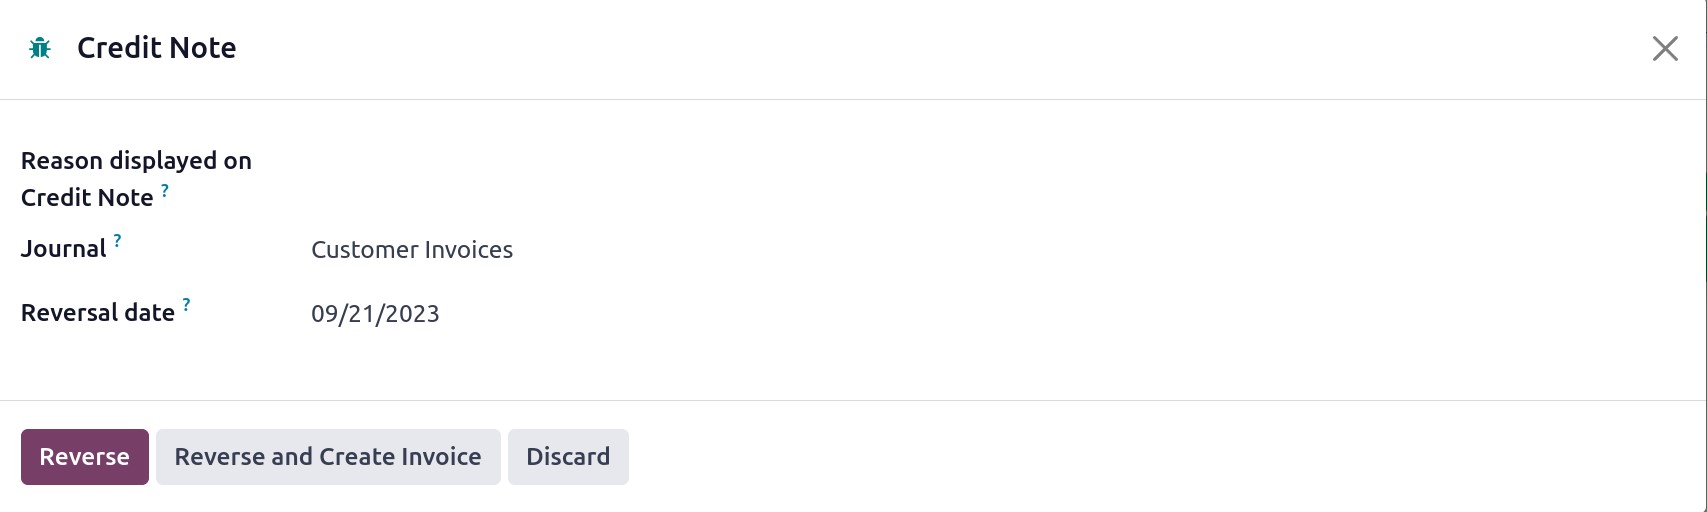
In the Reason area, you can specify why this credit note was generated. The
Journal Entry Date or a Specific Date can be used to set the Reversal Date. The
Use Specific Journal box allows you to specify the journal entry that will be
used to record the credit note. You can click the Reverse option to reverse the payment
after the Reversal Date appears on the screen.
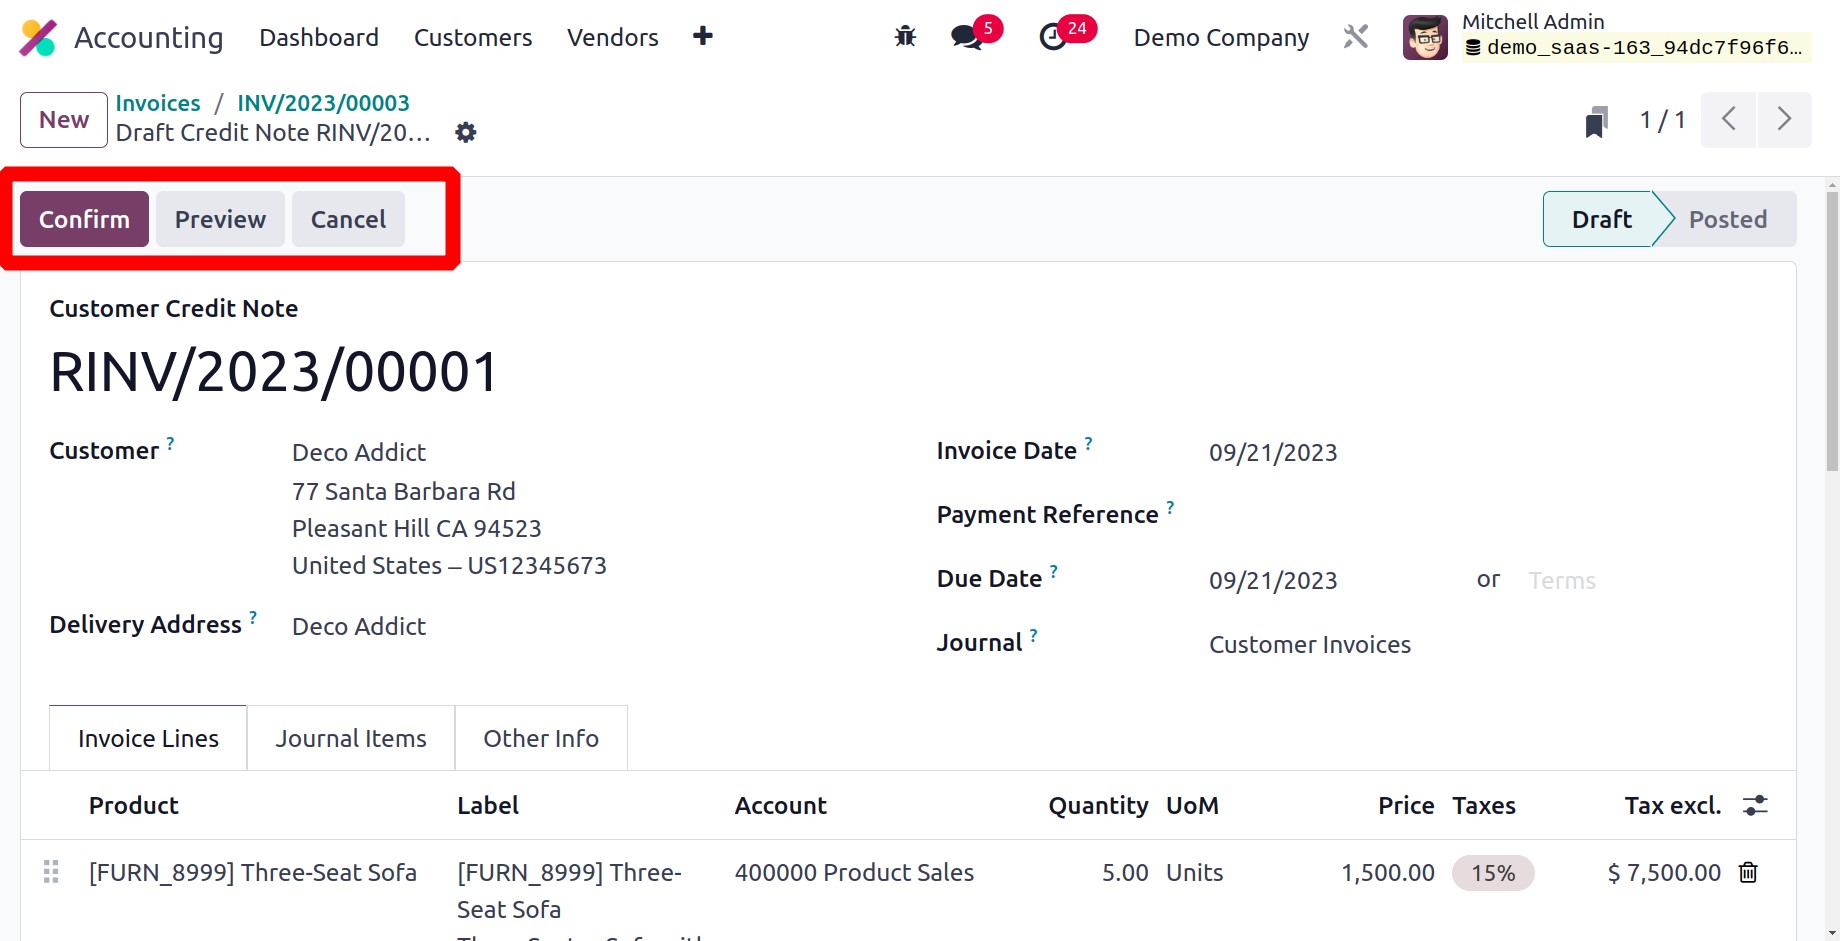
To view the draught customer credit notice, Odoo directs you to a new window. To confirm
the customer credit note, click the Confirm button. The Register Payment
button can be used to record the payment later.
This is how the Accounting module of Odoo17 handles customer invoices. Let's next talk
about the module's Credit Note platform.