Employees
In all types of firms, it is essential to manage staff effectively. In order to create a seamless workflow within the firm, human resources should be monitored and handled appropriately. To manage all forms of employee-related tasks, you need a suitable system. All of your employee information will be stored in a single database by the Odoo 17 ERP system, allowing you to quickly and easily obtain any information you need about a specific employee. In the Odoo Employee module, you may create records of employees based on their job descriptions and places of employment. The Odoo 17 Employee module can be connected with additional HR modules to increase the system's functionality.
The features and capabilities of the Employee module in Odoo 17 will be covered in this chapter.
An employee profile that includes personal information, employment details, a contract, a resume, and many other things can be created using the Employee module. When you create an employee profile in the module, you may use the profile window to access documents, timesheets, contracts, equipment, work entries, and payslips linked to the employee as well as schedule or plan activities with the specific person. You will see a Kanban view of the employee profiles saved in the system when you first launch the module.
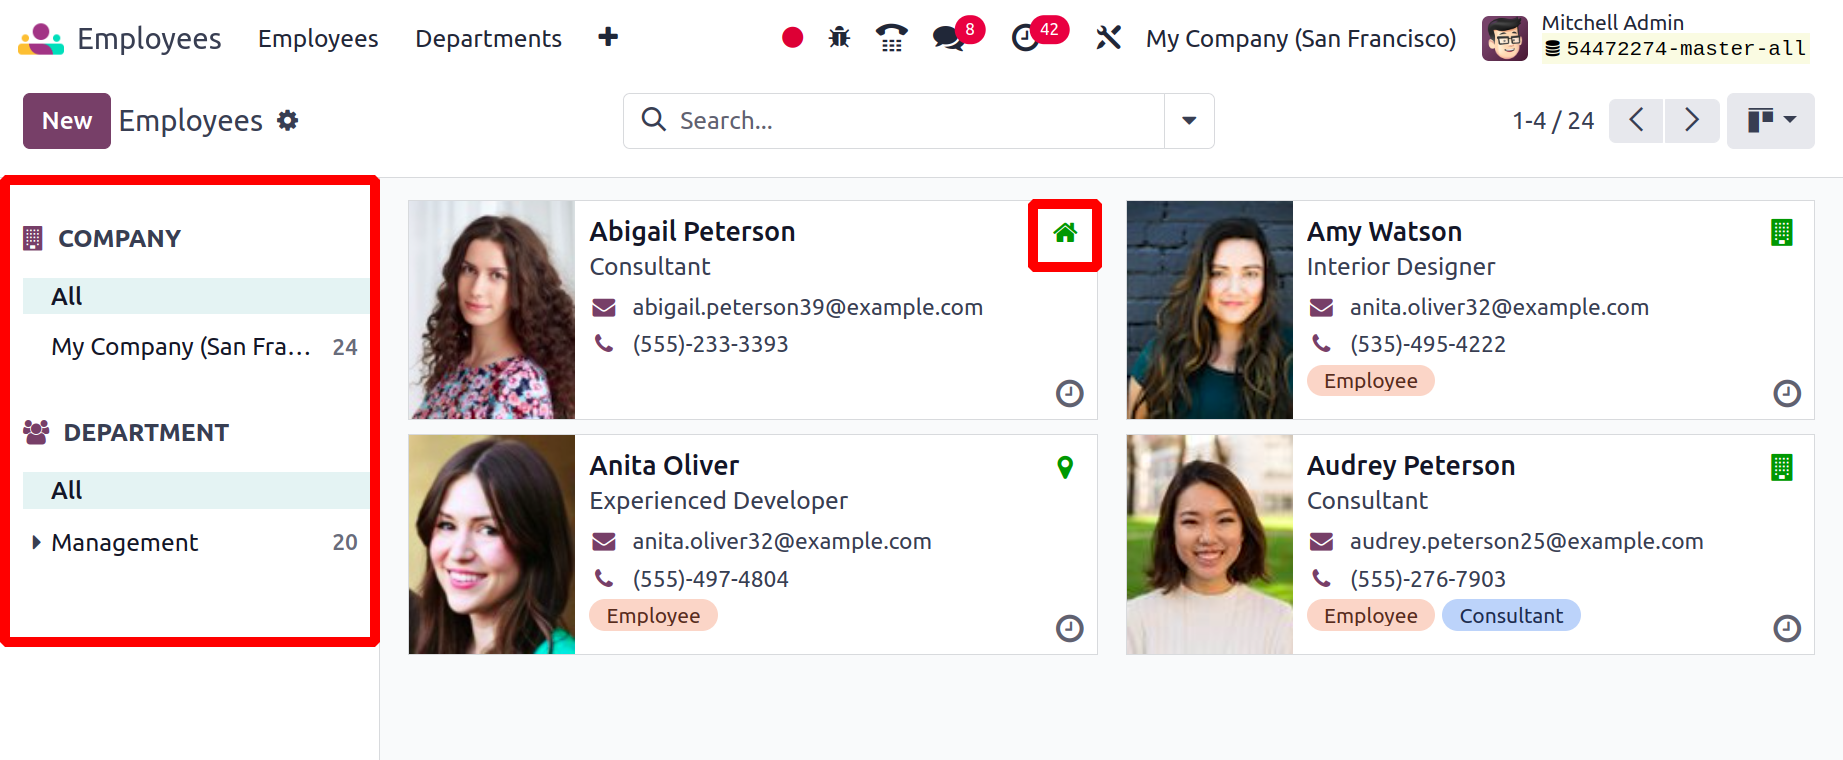
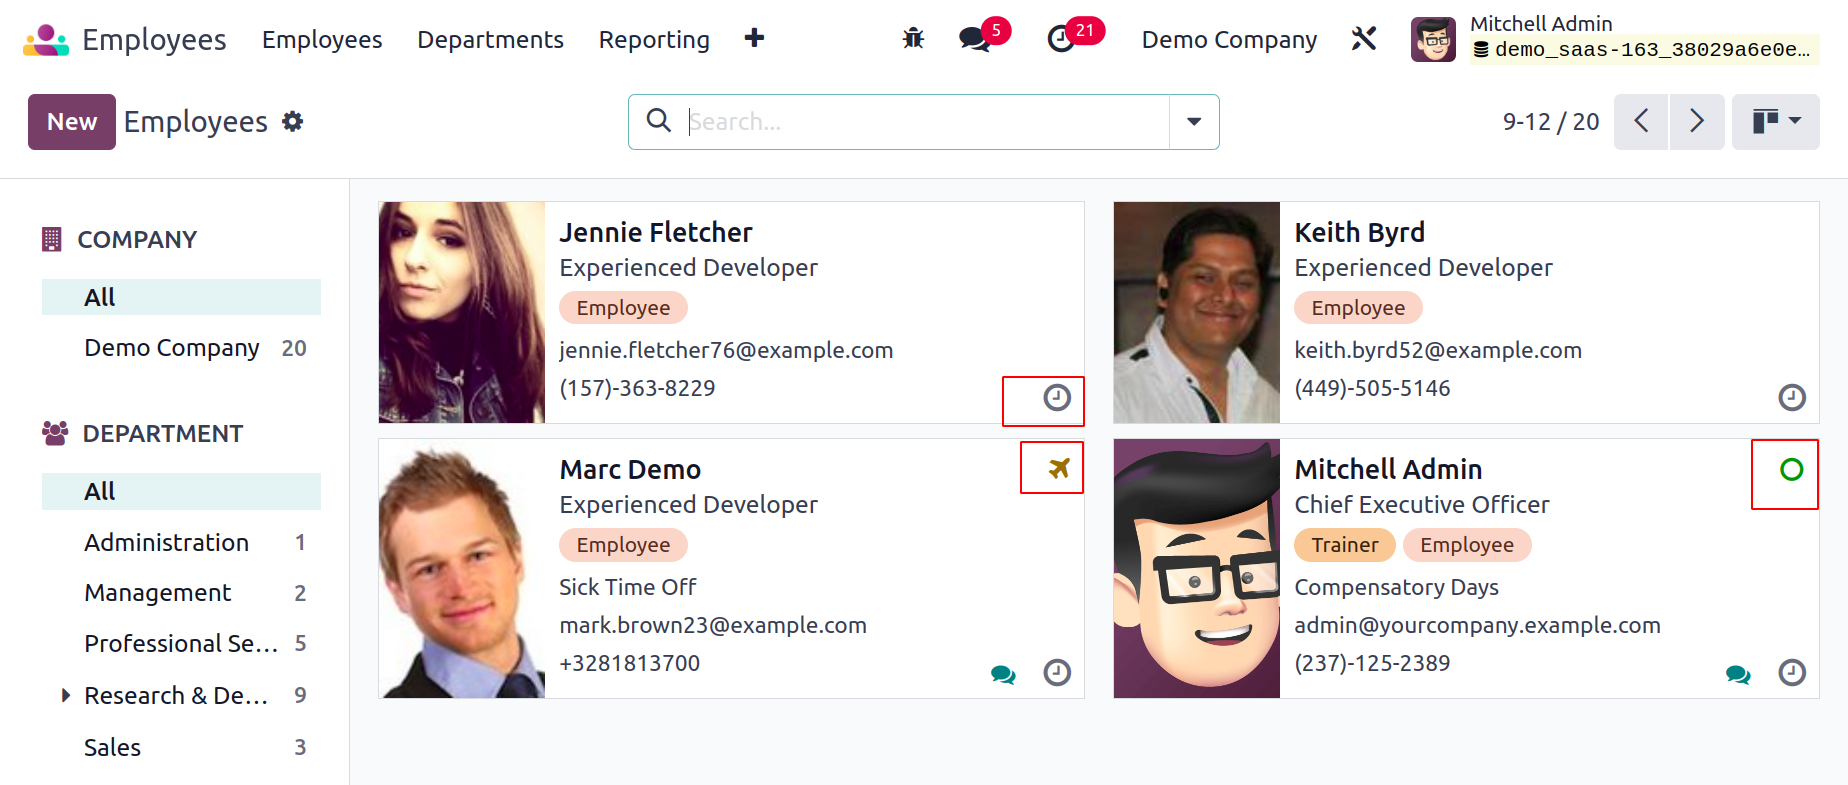
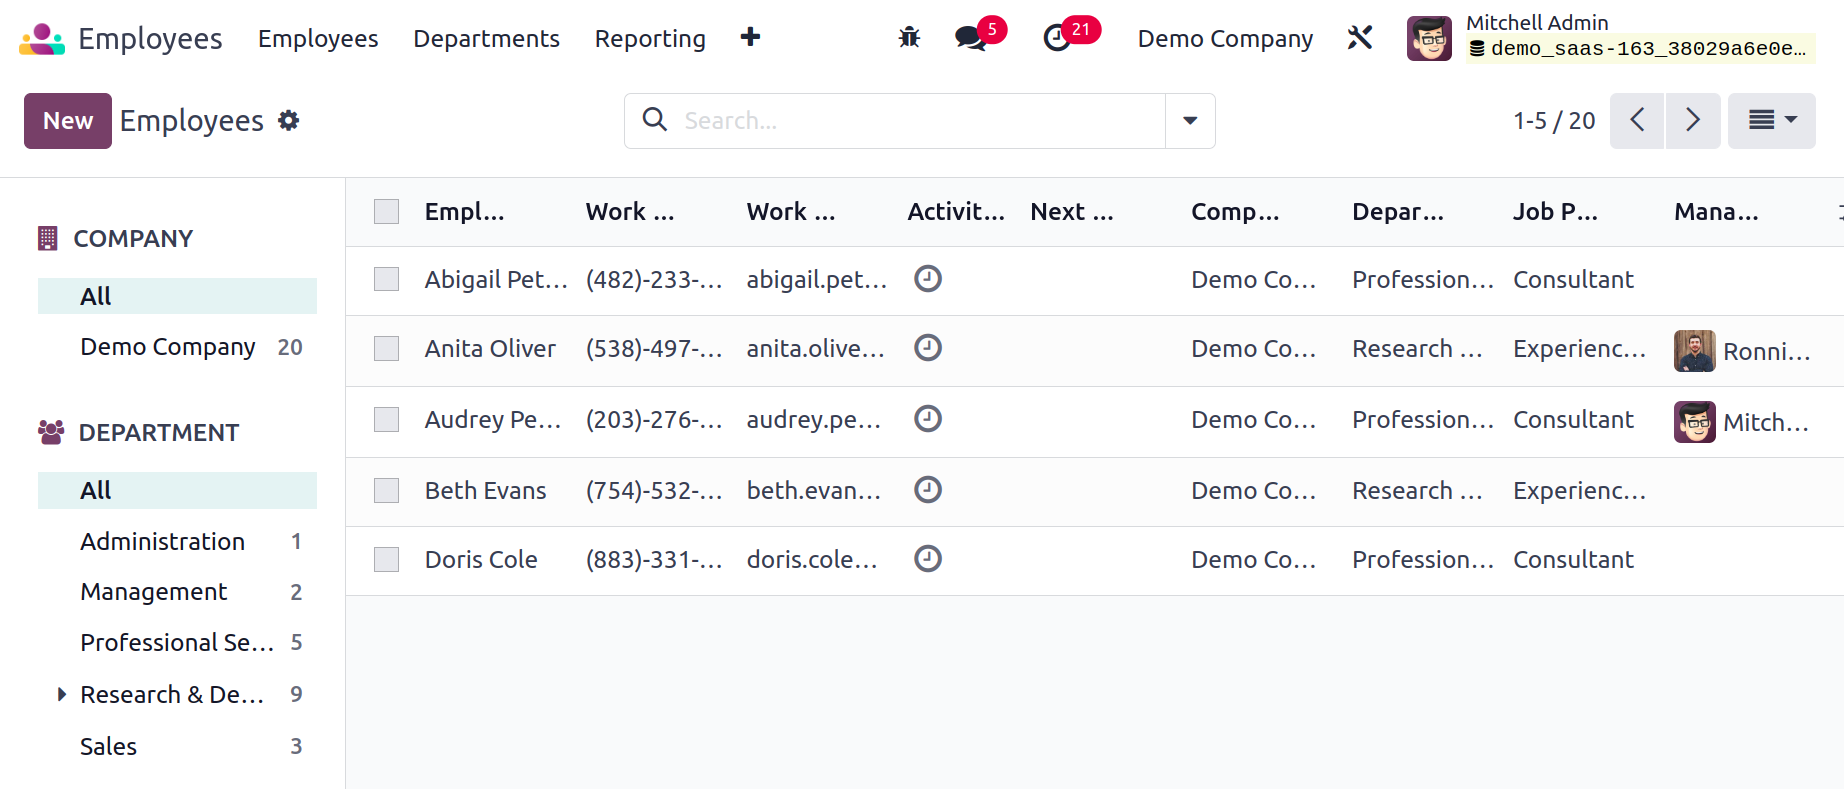
If you are working in a multi-company environment, you can easily categorize the employees of each company using the panel available on the left side of the screen. It is also possible to view employees based on their Departments. Each employee profile will show some basic information related to the respective employee, such as name, job position, contact information, and photo. Additionally, as seen in the image above, there is a building or house icon on top of the profile, signifying if the person works from home, the office, or some other location.
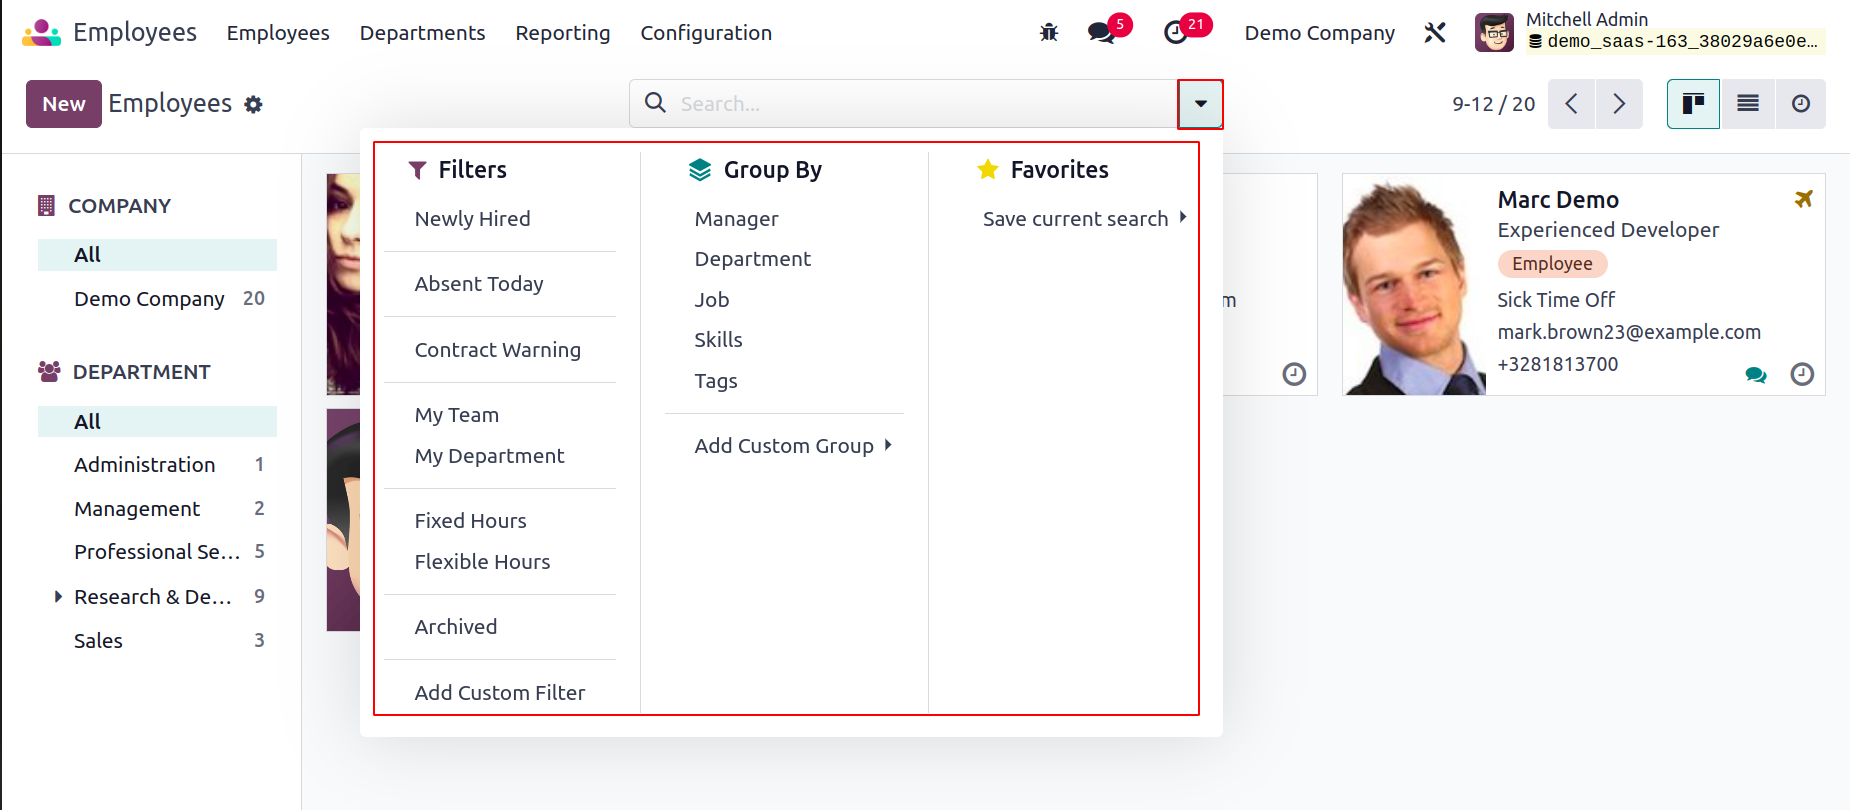
As default filters, you'll have access to Newly Hired, Absent Today, Unread Messages, Contract Warning, My Team, My Department, Fixed Hours, Flexible Hours, and Archived. To categorize the employees according to their manager, presence, department, job, skills, and tags, use the categorize By option
Name, Work Phone, Work Email, First Contract, Activities, Next Activities, Company, Department, Job Position, and Manager are all displayed in the list view of the employees. You can now create a new profile by clicking the Create button.
There will be a new form view where you may edit the employee's information. Include the employee's name and position within the organization in the relevant boxes.
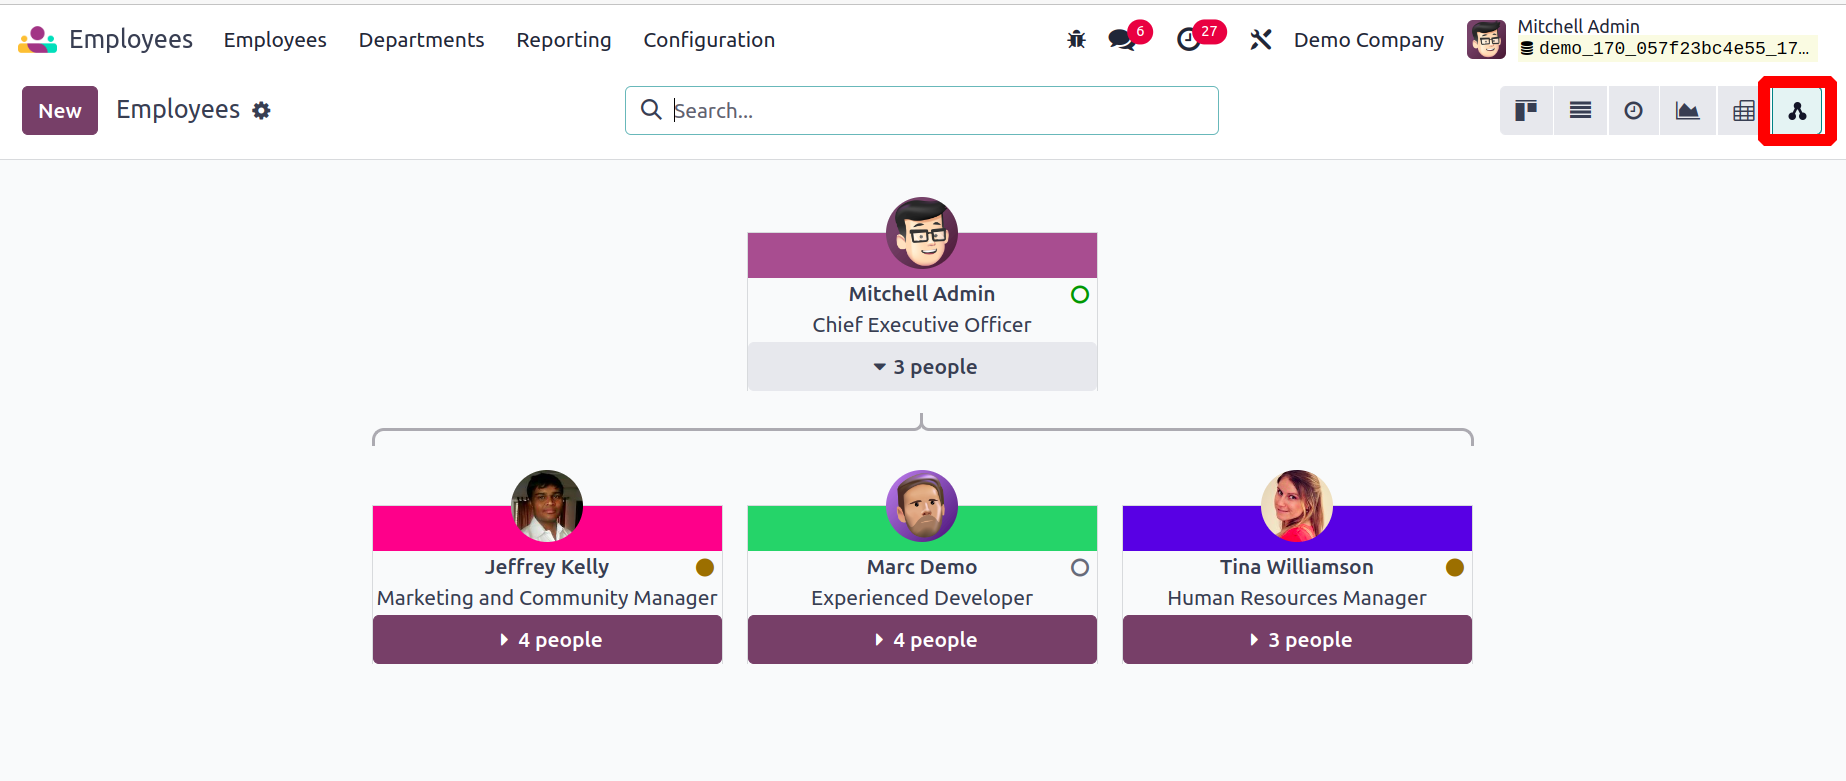
The new structure view that Odoo 17 offers makes it simple for users to comprehend the staff structure. Employee managers only need to drag and drop to alter the hierarchy.
Additionally, you can provide the employee with the appropriate tags. You will be given particular fields to enter the employee's company, department, manager, and coach, as well as their work mobile, work phone, and work email. An area will be designated where an employee's photo can be uploaded.
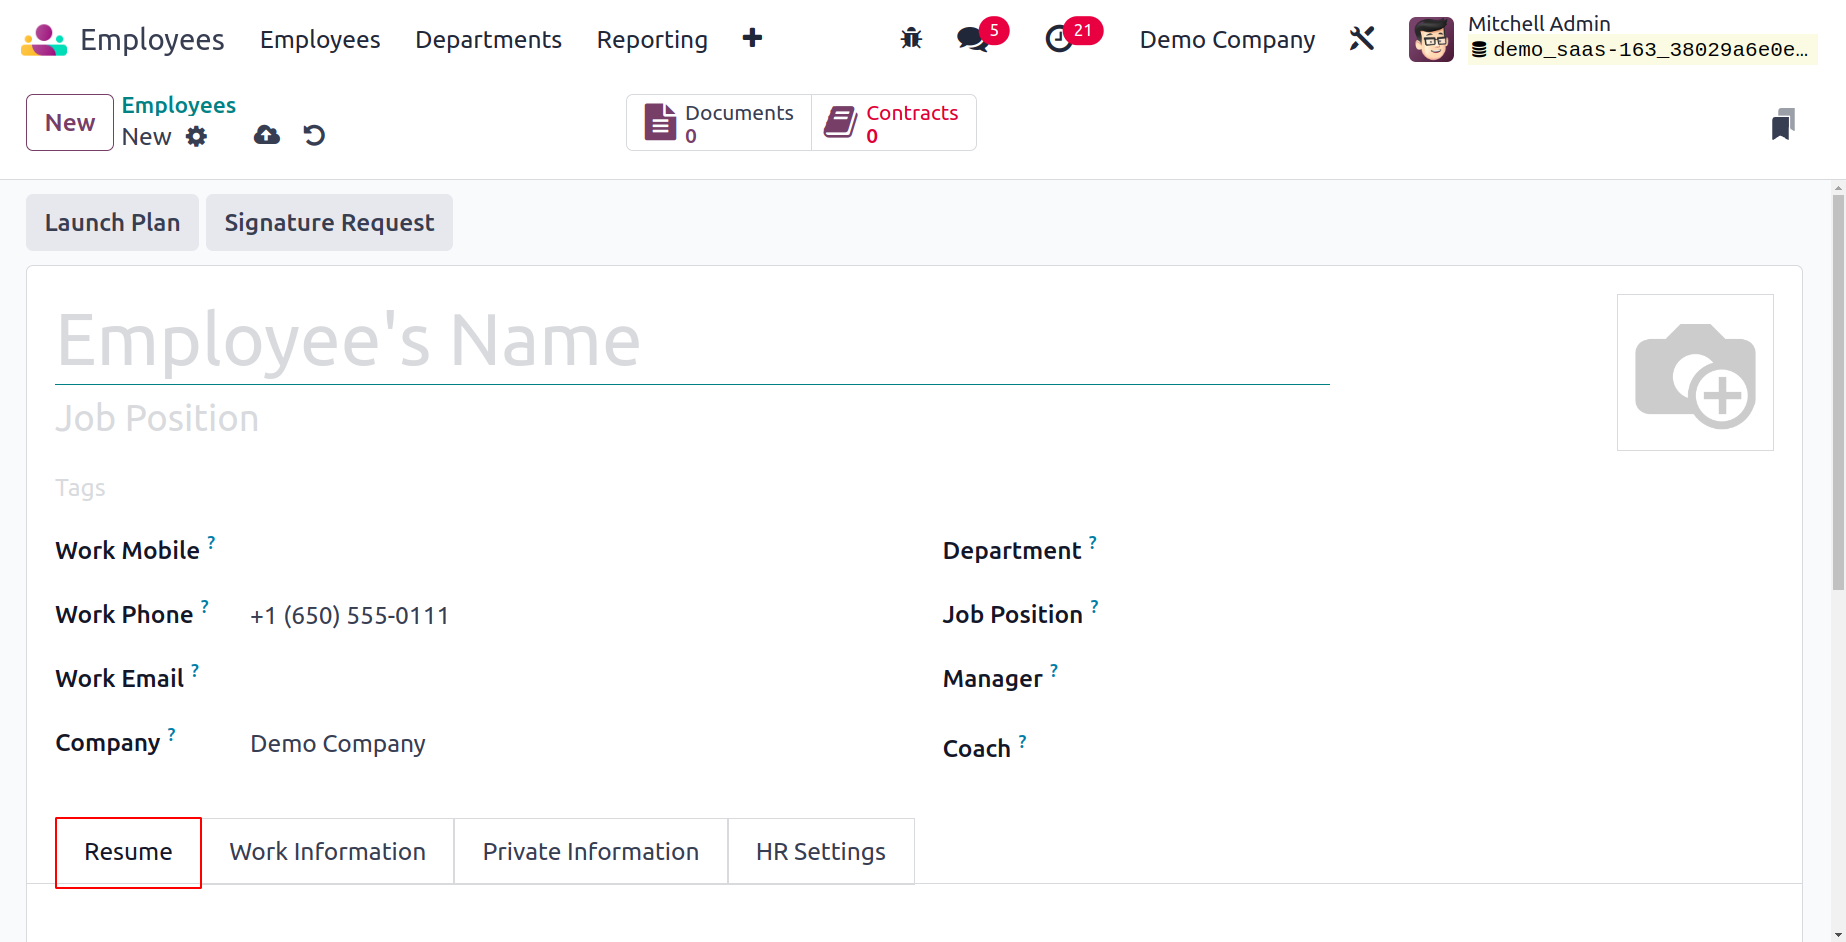
Let's update the employee profile by adding the resume and the skills. You will receive the Resume tab for this, as displayed below.
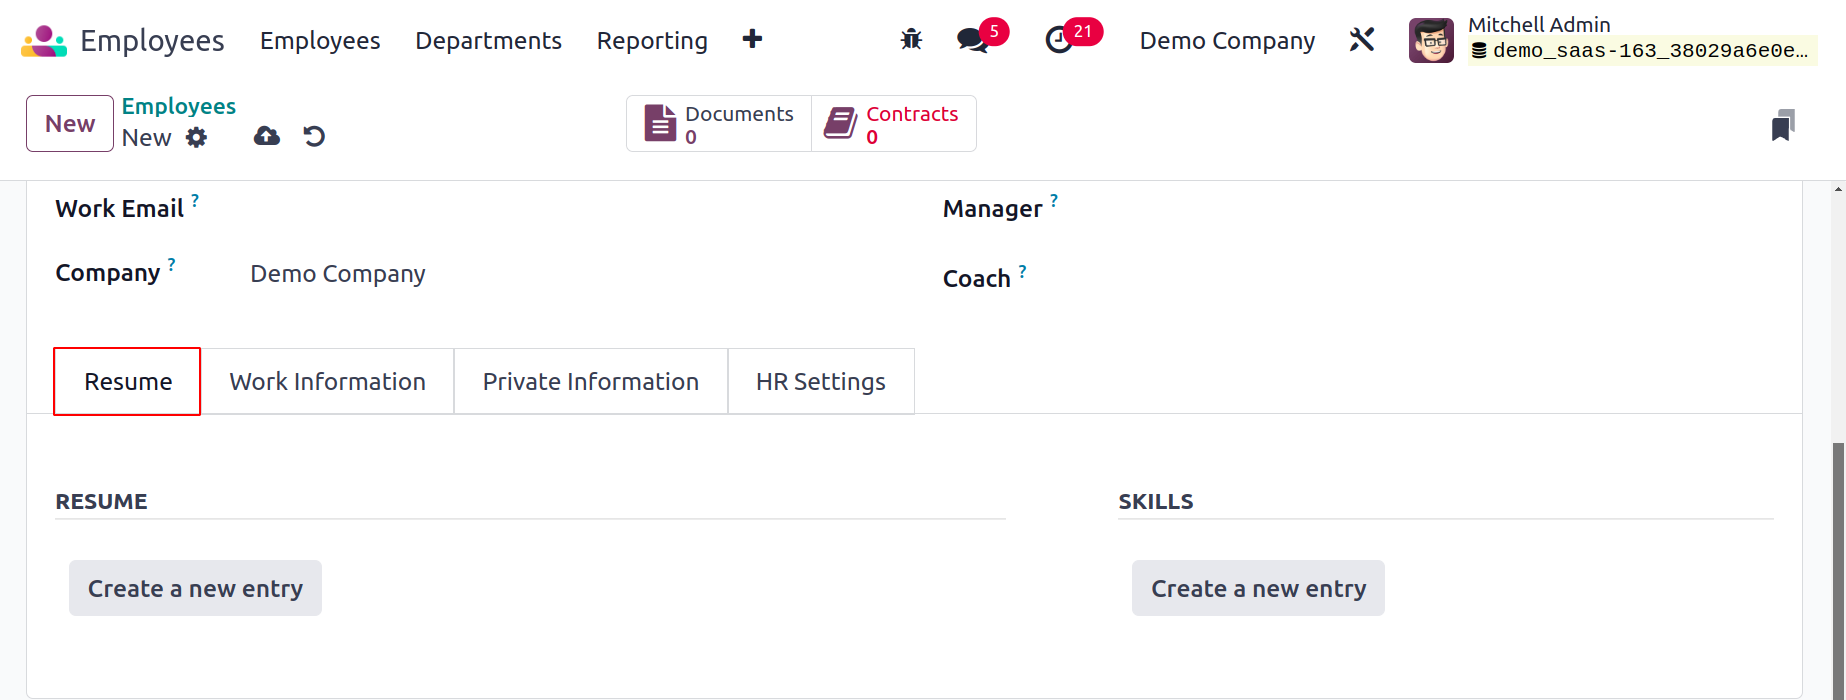
If you want to add resume lines to your profile, click Create a New Entry. Under the Resume, you can provide information about your schooling, professional experiences, internal certifications, training history, and other qualifications. A pop-up will open as soon as you click this button, as displayed below.
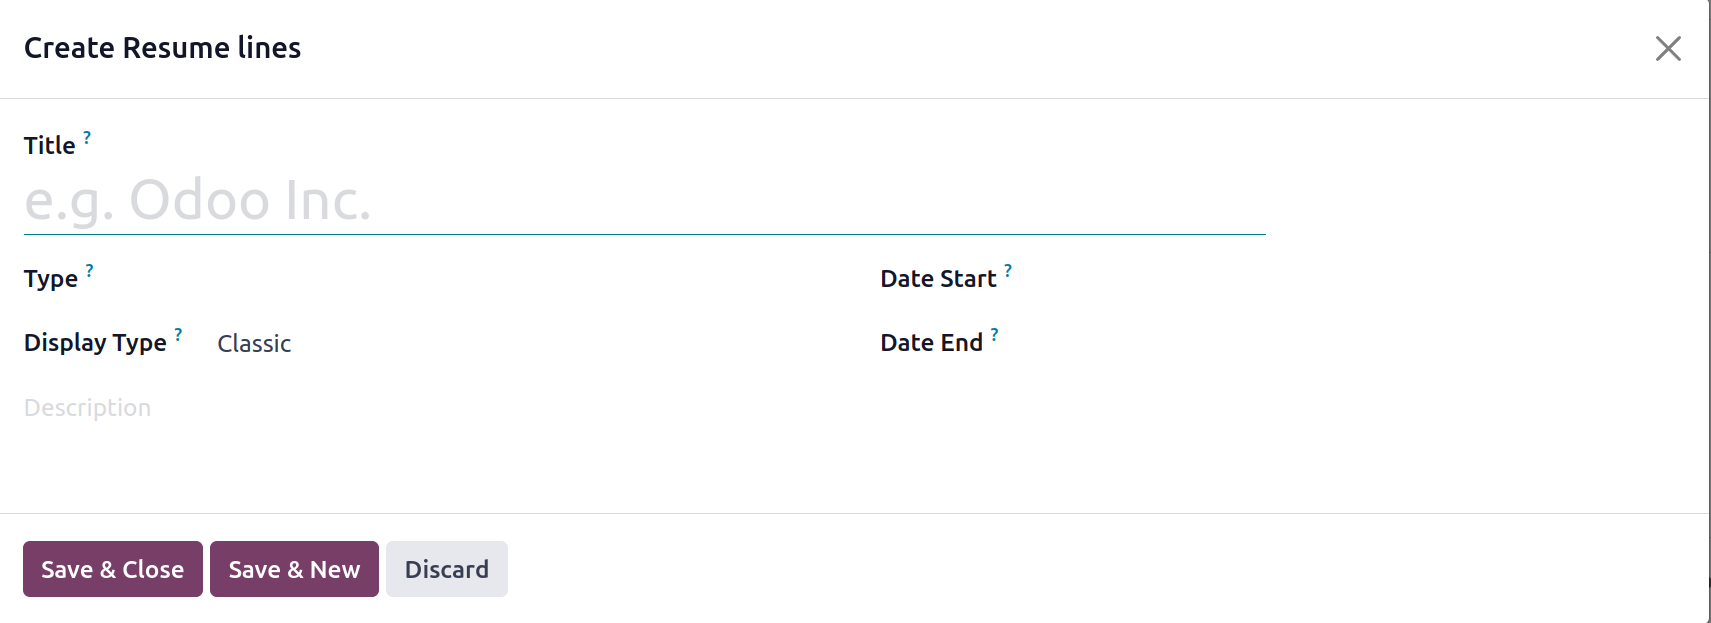
Enter a Title and choose Type from the drop-down menu. Experience, education, internal certifications, or internal training are all viable options. Additionally, you can build a new Resume Line Type using the module's Configuration menu. You can choose Classic, Certification, or Course as the Display Type after mentioning the Type. In the Date Start and Date End boxes, specify the time frame. You may provide more information about this resume line in the description area.
This is what it appears like after adding resume lines. You may add more resume lines to this tab by using the Add button. To add the employee's talents, click the Create New Entry button in the talents field.
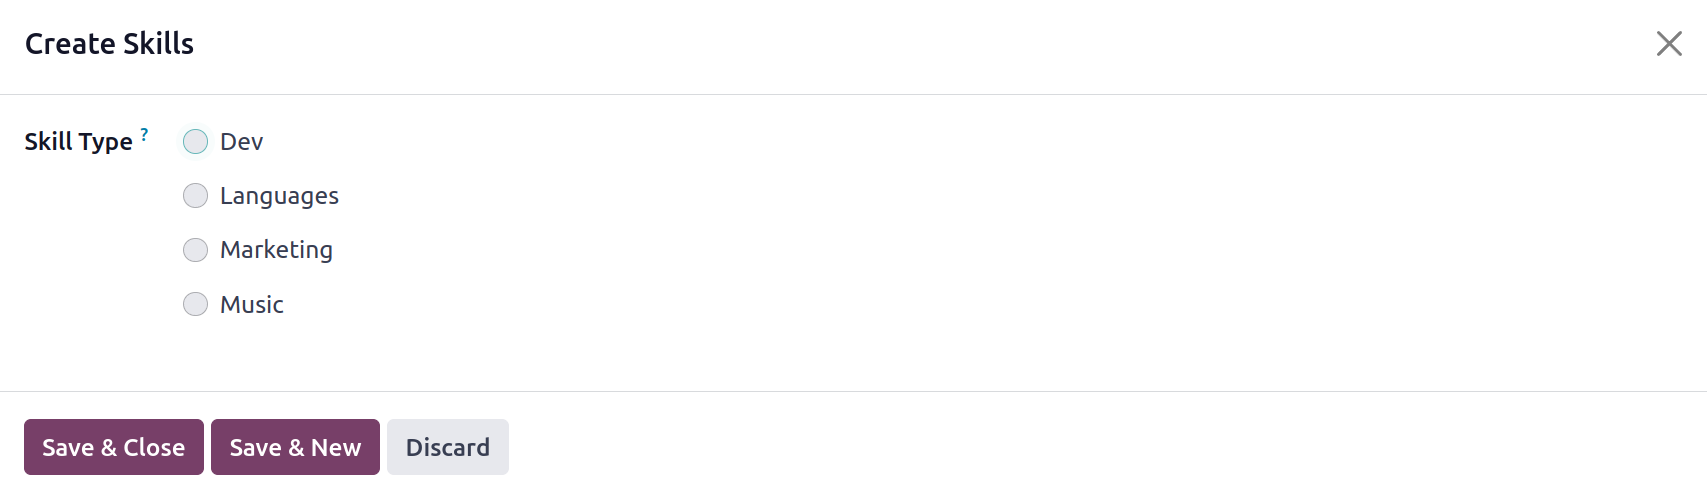
You will see a pop-up where you may choose the employee's skill type and specify a specific skill. Mark the employee's skill level in the Skill Level field.
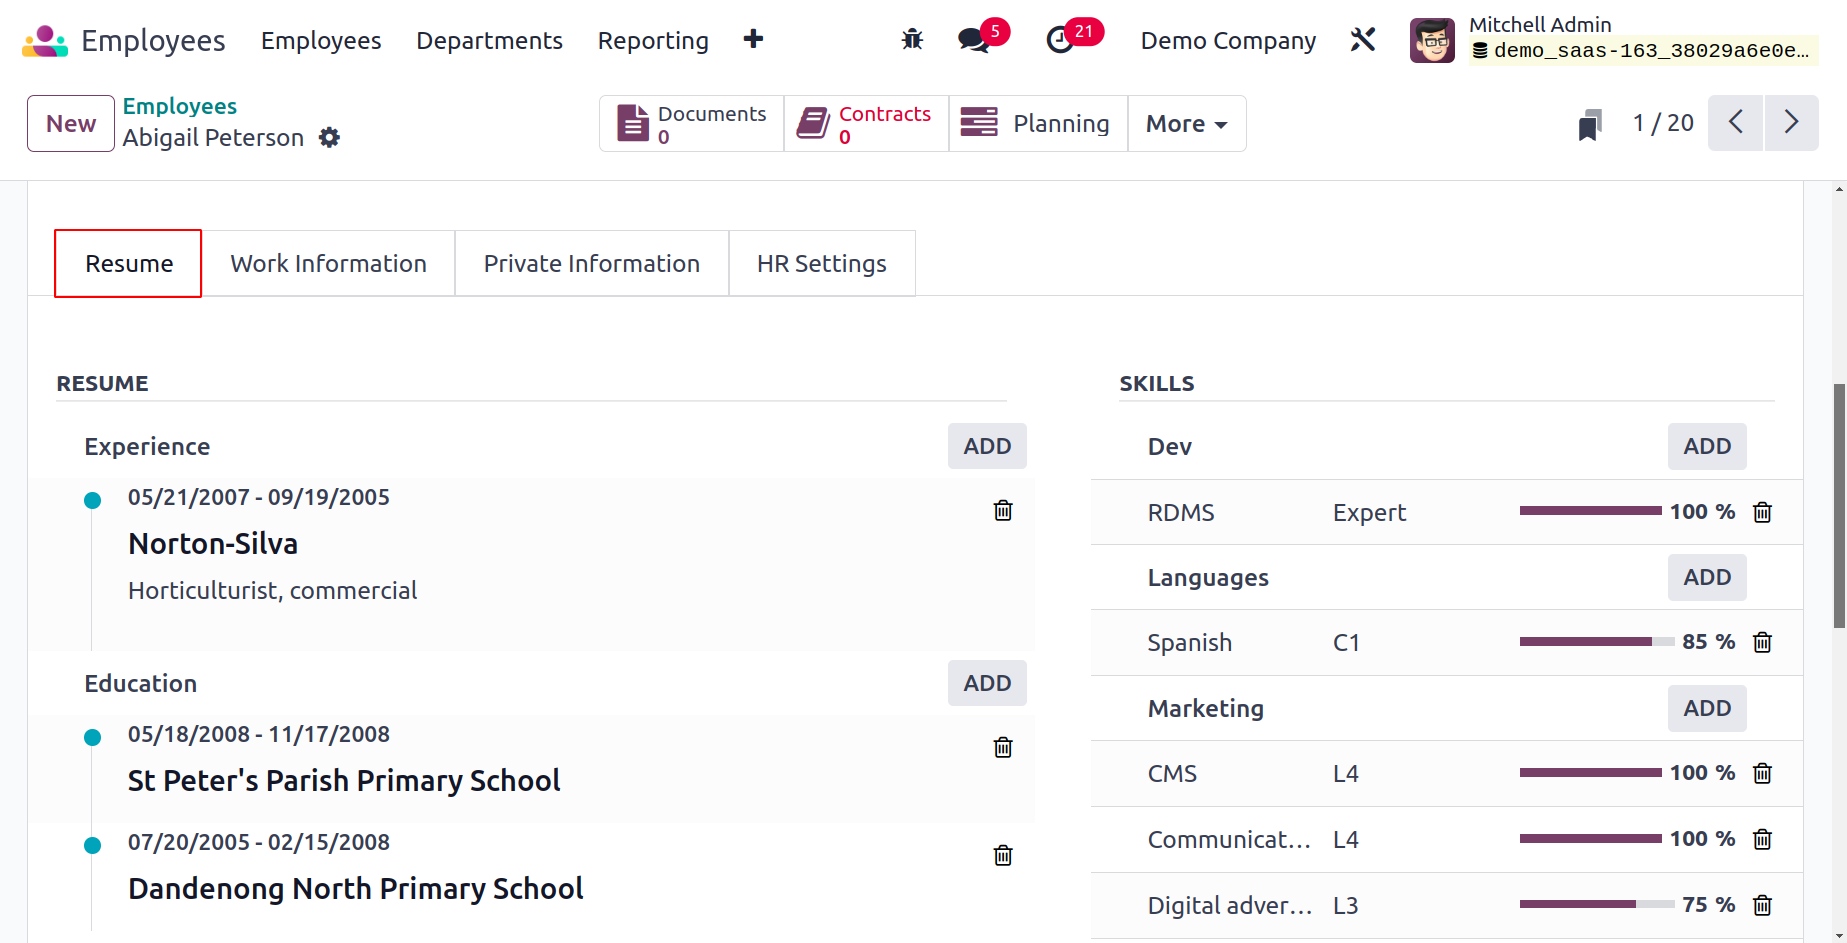
Using the Add button found on the Resume tab, you can add new skills.
Fields for essential employee-related job information can be found on the Work Information tab.
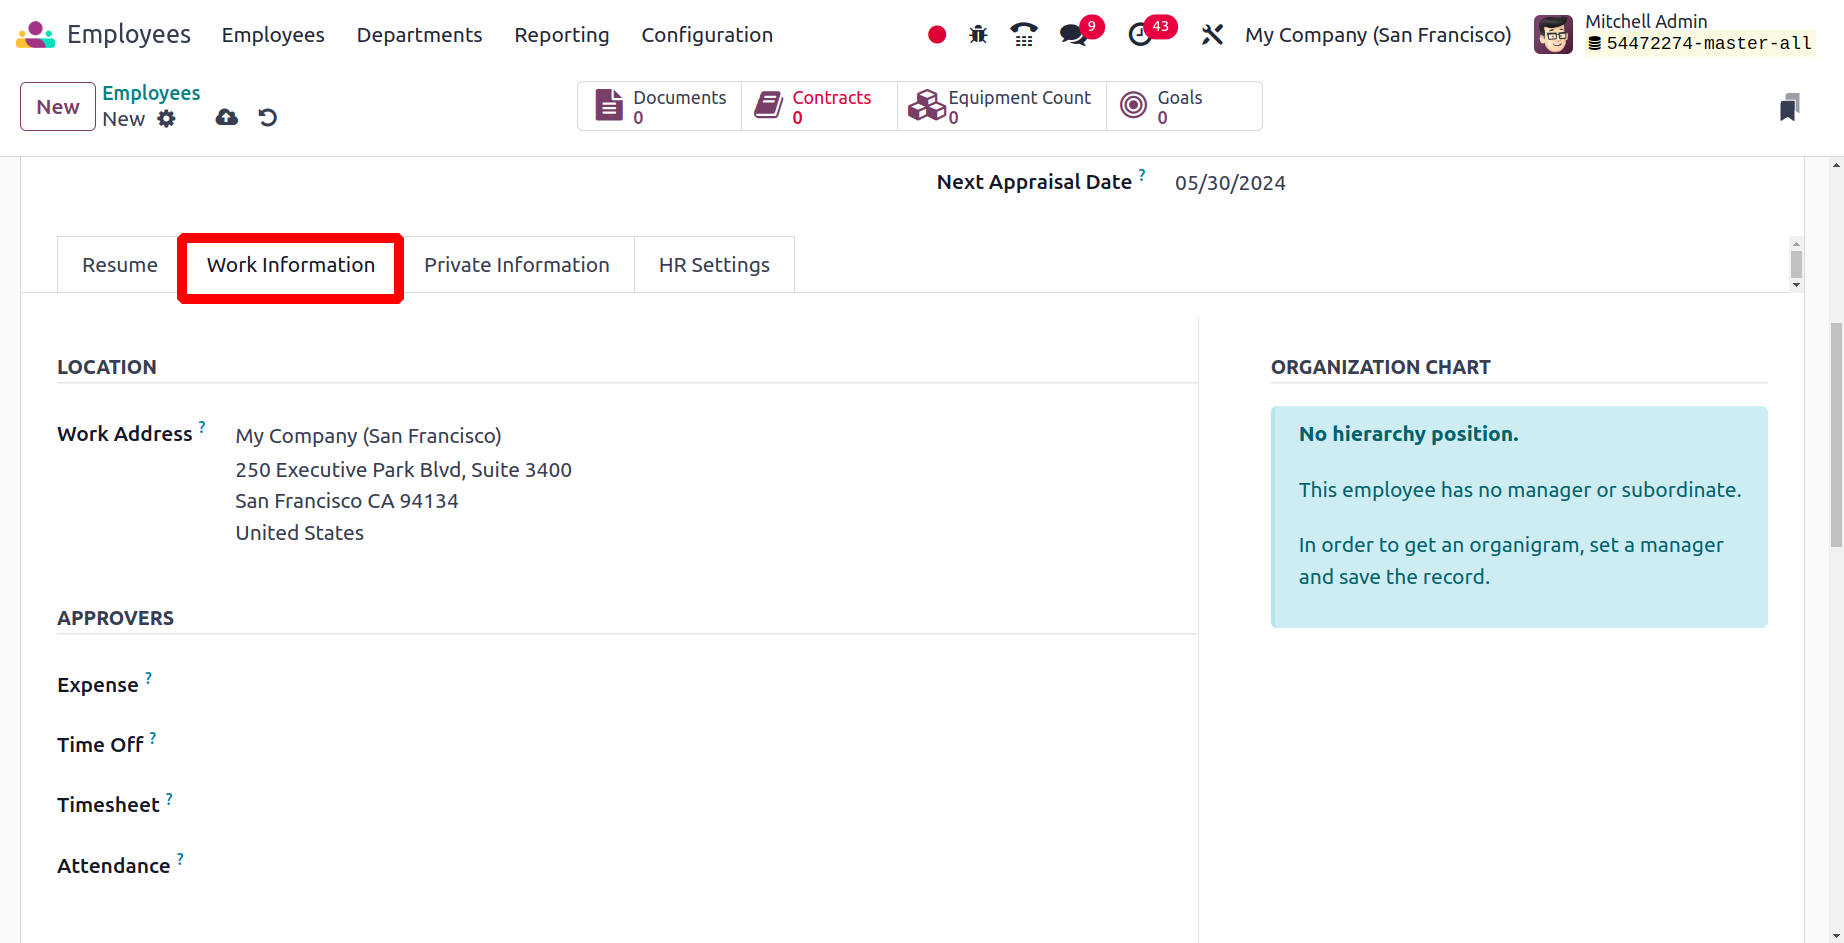
Mention the work address and location in the Location section. The approvers of this employee's expense, time off, and timesheet can be included in the Approvers area.
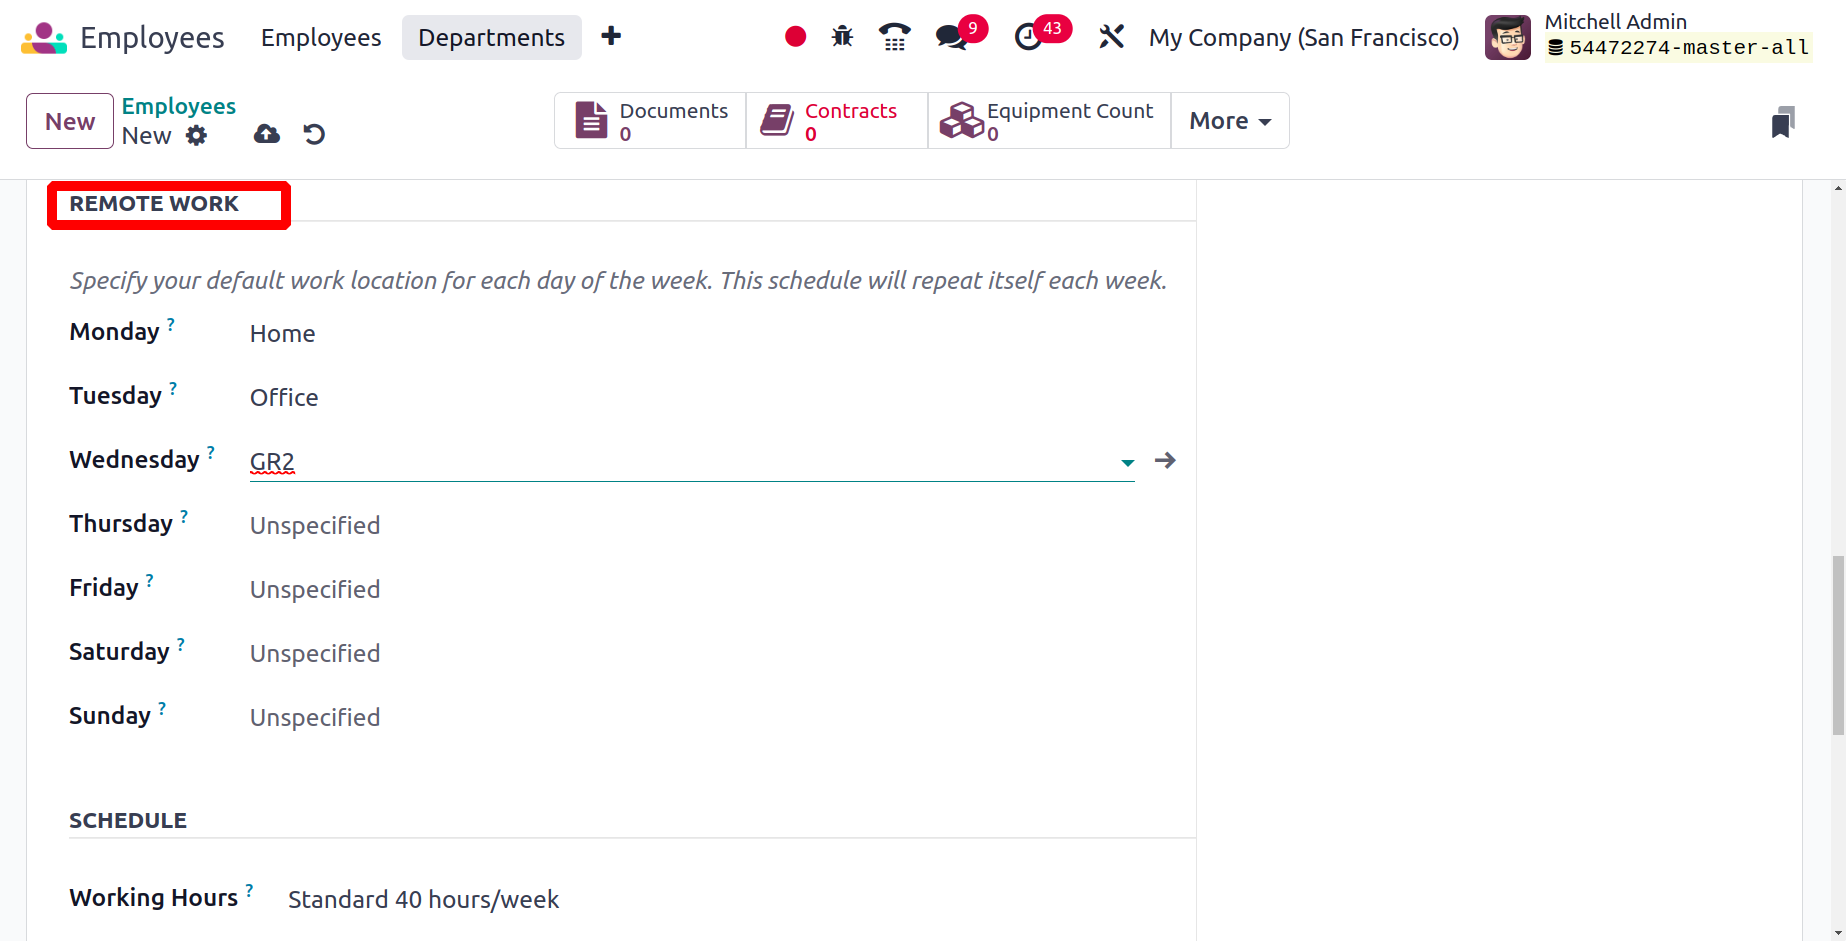
The REMOTE WORK part, which was added to Odoo 17, details each employee's work location for every day of the week. This schedule is automatically updated every week. From there, users can quickly ascertain the employee's daily work location. The employee profile on the dashboard will display the matching icon in the upper right corner based on the selection made here.
The SCHEDULE section will provide details about the employee's work schedule. You can turn on the Flexible Hours field if the employee is permitted to work flexible hours. In any other case, you must state the employee's weekly working hours. Set the Timezone to specify the time zone that the resources will operate in. Mention the position that the worker is qualified to hold. Only the shift templates for these positions will be visible when establishing a shift for this employee.
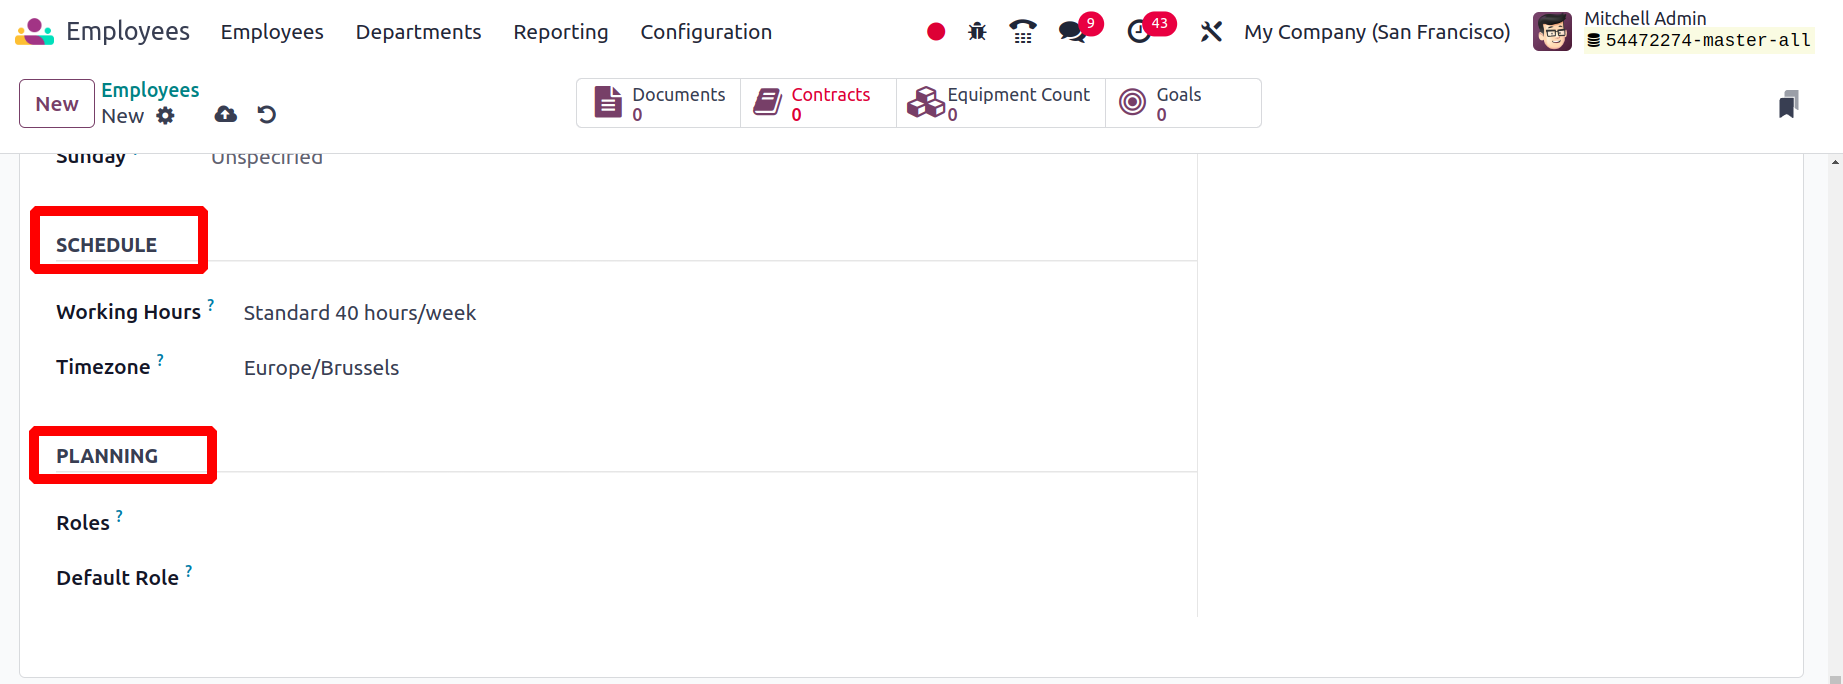
The Default Planning Role allows users to specify the role that will be automatically chosen when creating a shift for a particular employee.
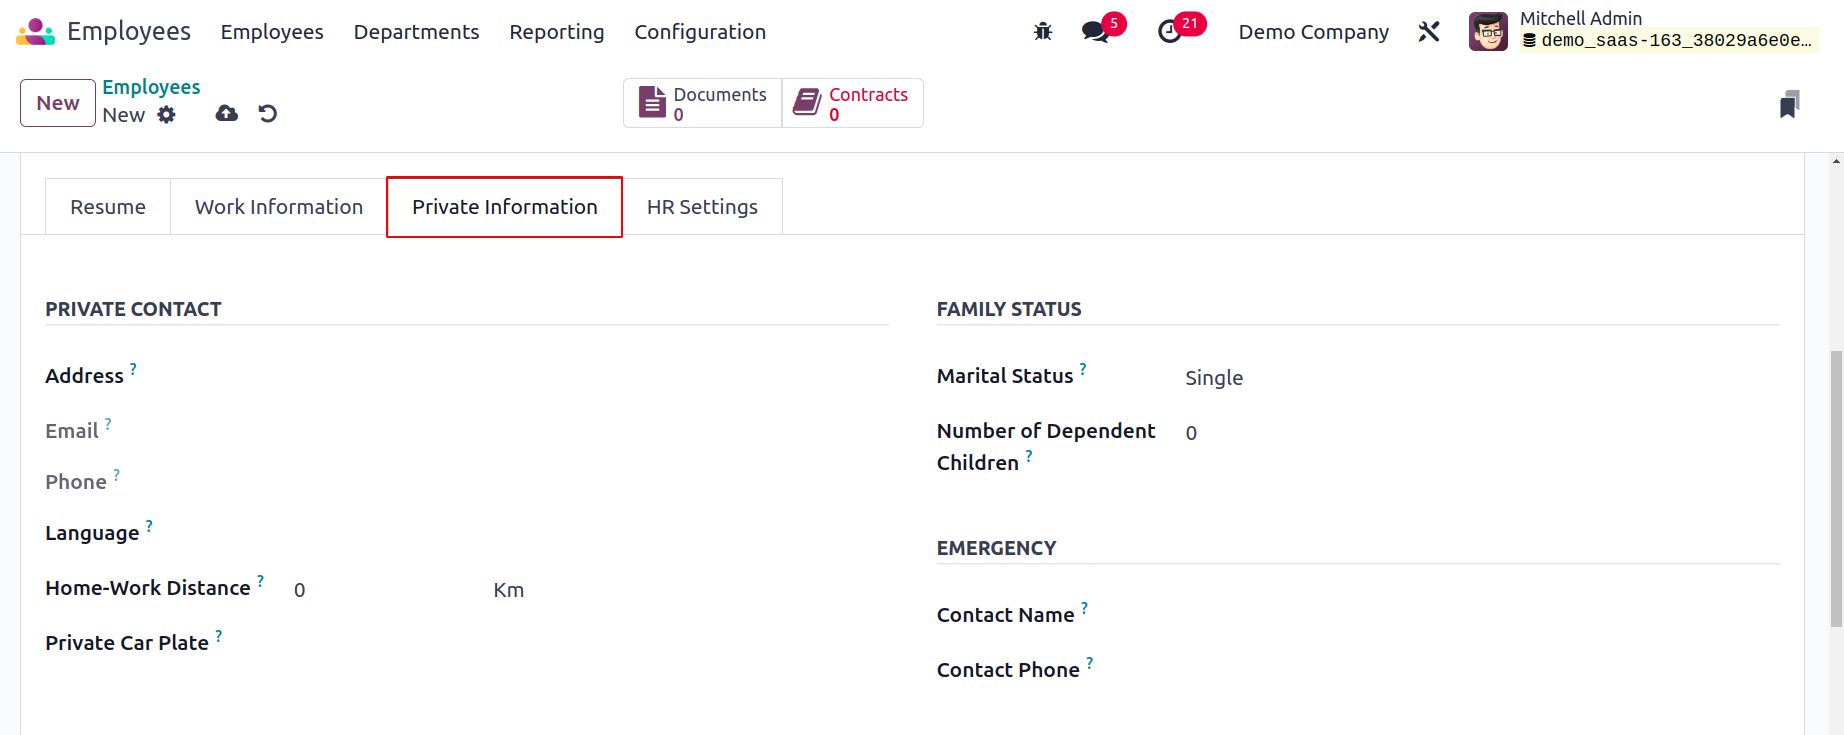
Mention the employee's private address, email, phone number, language, and distance between home and work under the "Private Contact" area. The employee's marital status, the number of dependent children, the name of the emergency contact, and their contact number can all be added under "Family Status."

You can include information about the Certificate Level, Field of Study, and School under the Education section. The relevant fields allow for the addition of the Visa No., Work Permit No., Visa Expire Date, and Work Permit Expiration Date. You will be given a specific field to upload the employee's work permit. Nationality, ID number, passport number, gender, date of birth, place of birth, and country of birth are among the details of citizenship.
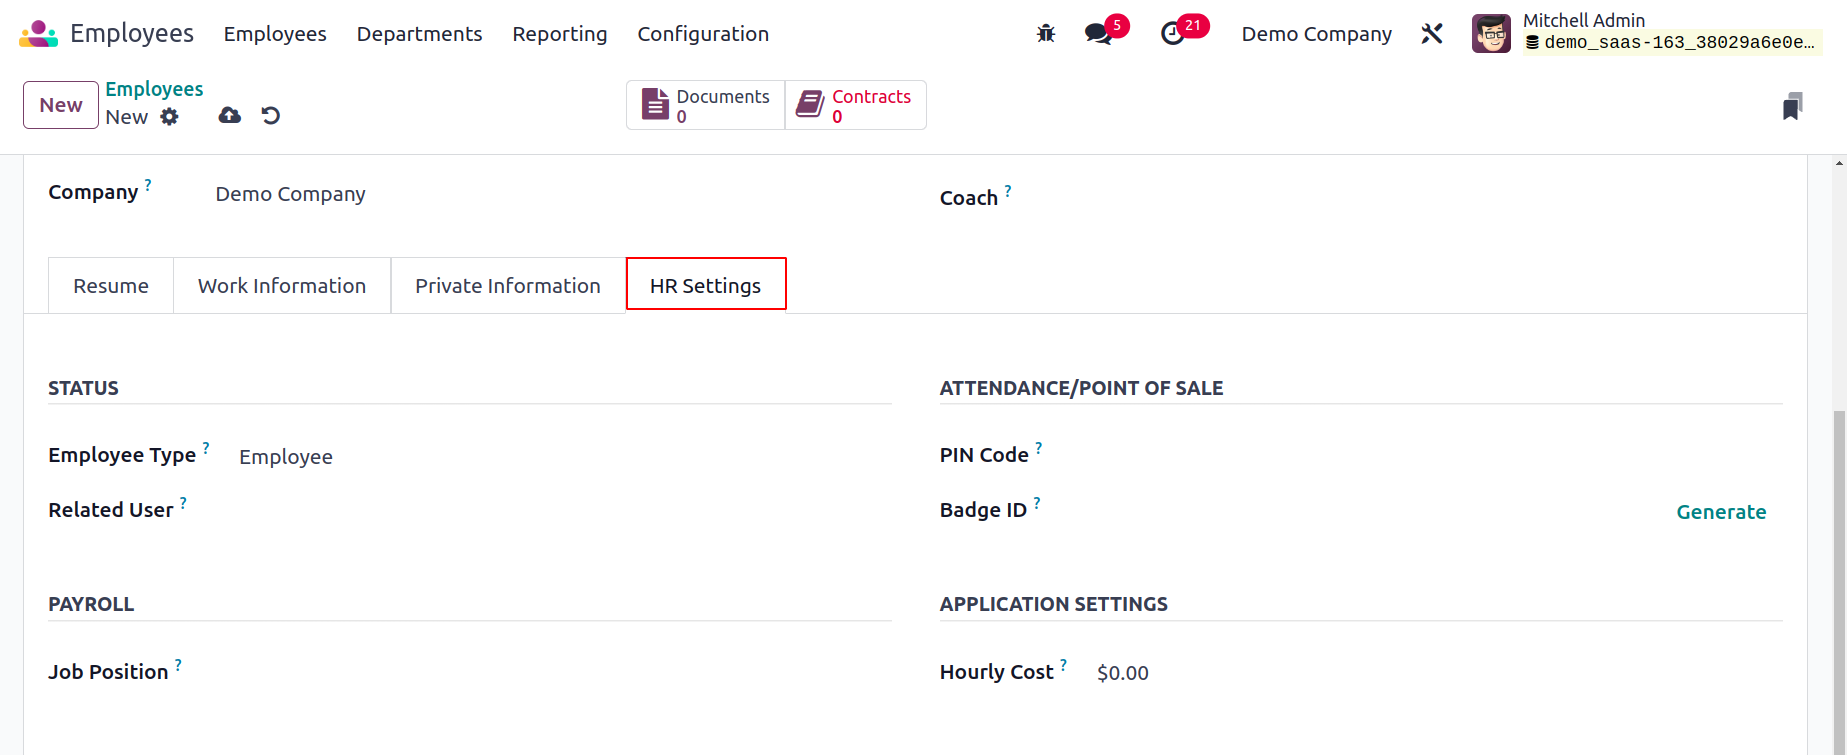
You will have access to a number of smart buttons on the form view to track the employee's associated operations once you have finished configuring the employee profile. The employee's associated documents will be seen when you click the Document button. If the employee has any equipment assigned to them, you can control it using the Equipment smart button.
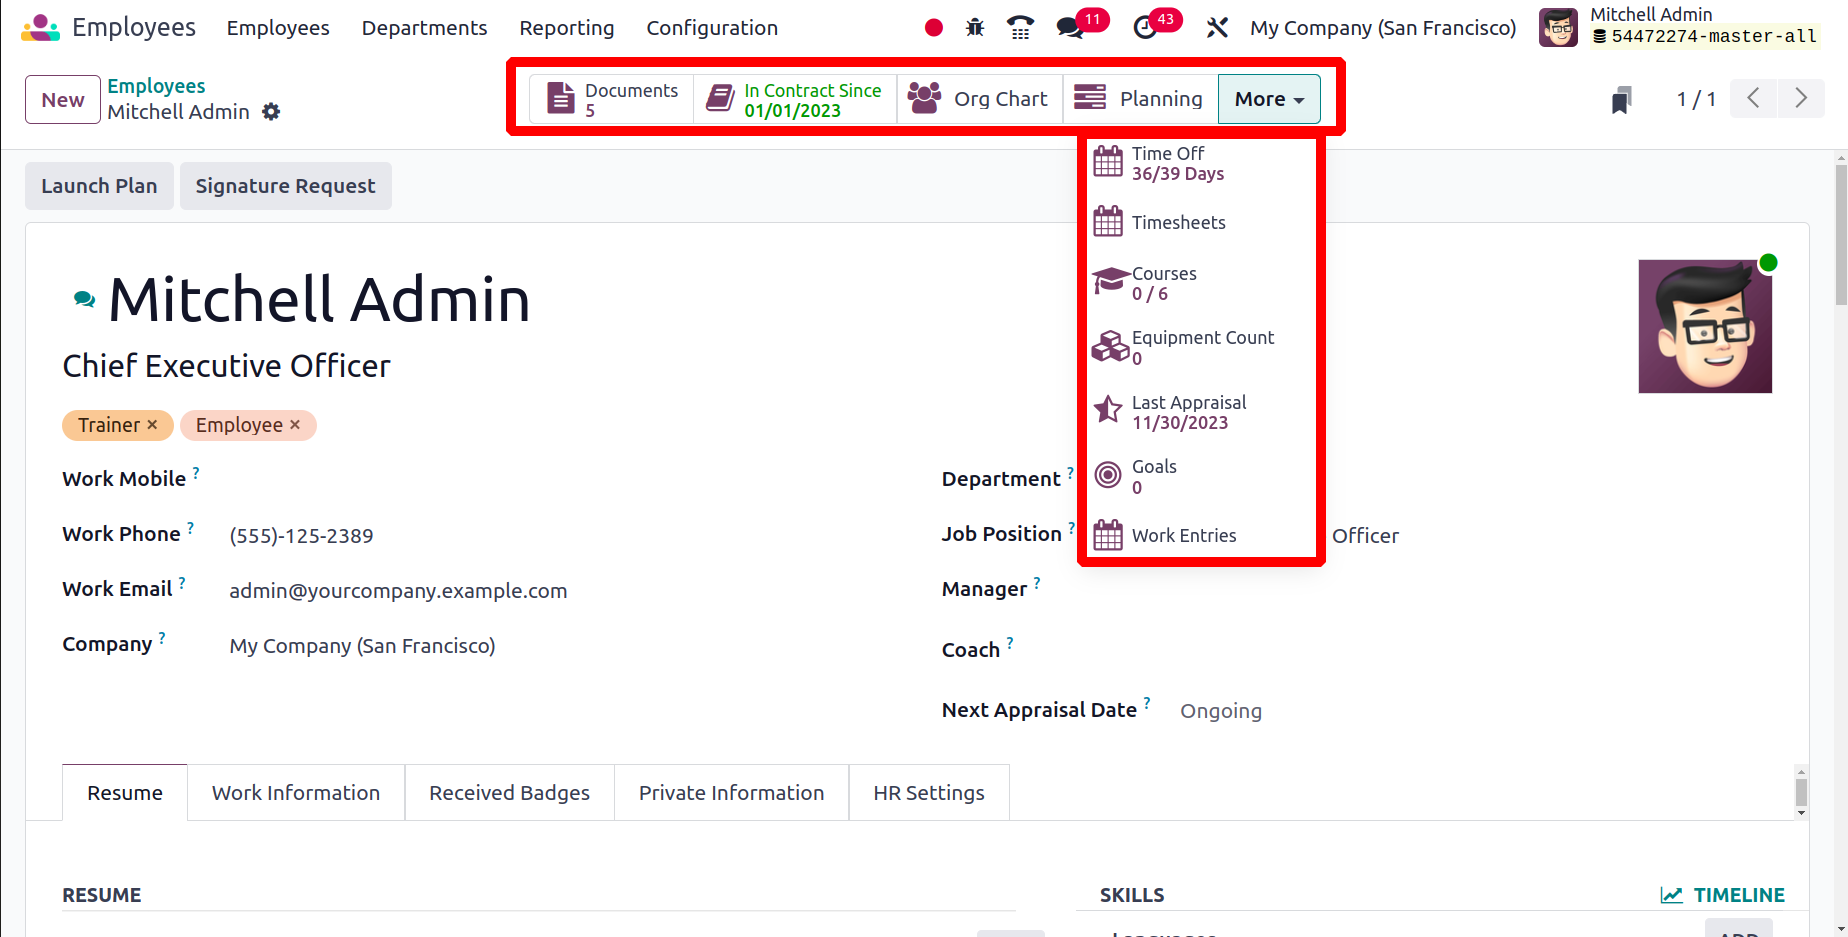
The employee's hierarchical view is contained in the Org chart.
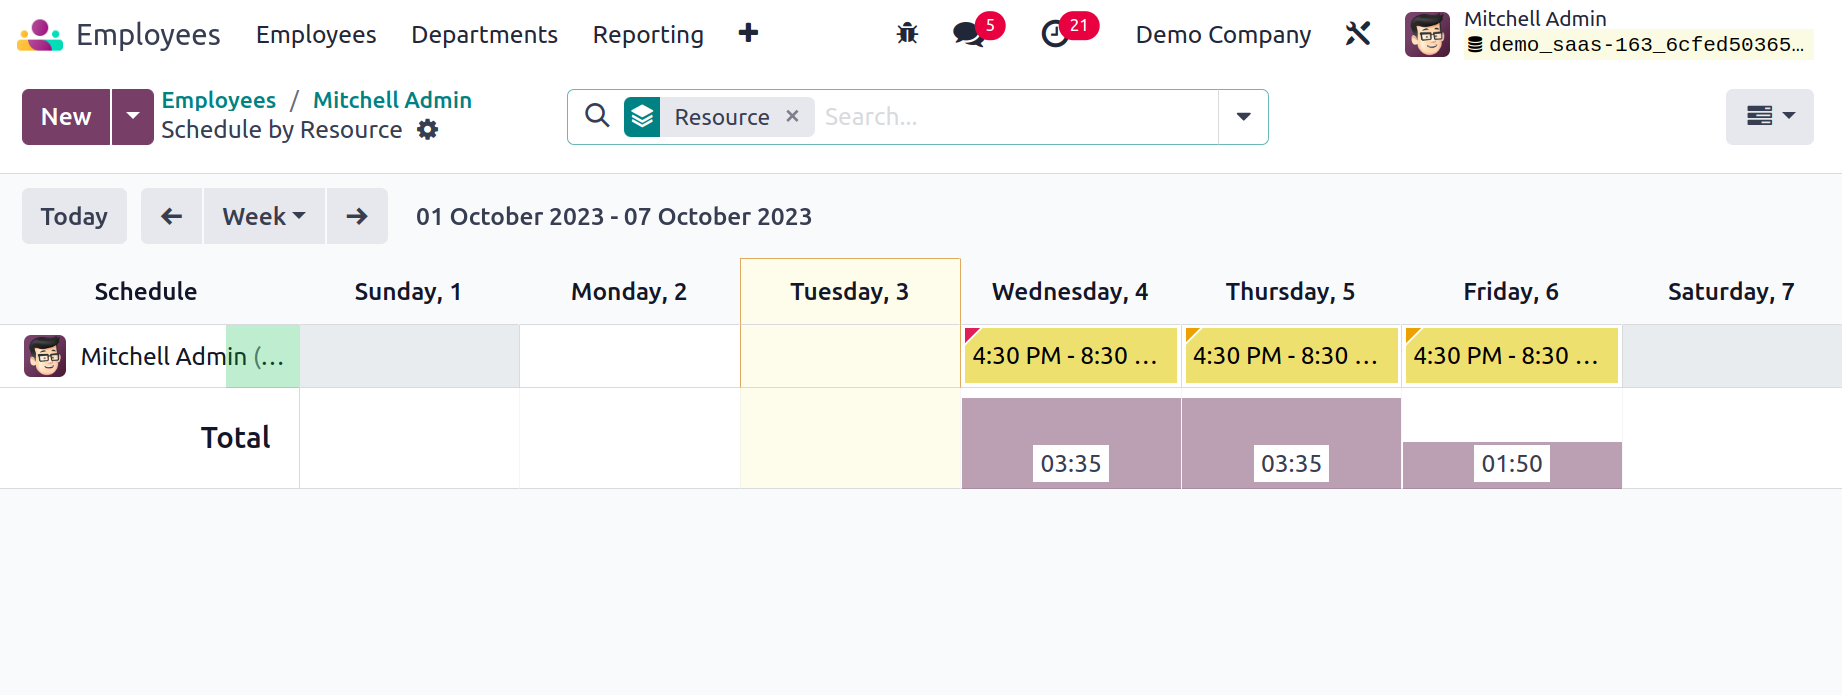
The Planning smart button can be used to view the many tasks this employee has scheduled. Details of the planned actions will be provided in the Gantt view, as seen below. From this window, you can schedule new tasks with this employee.
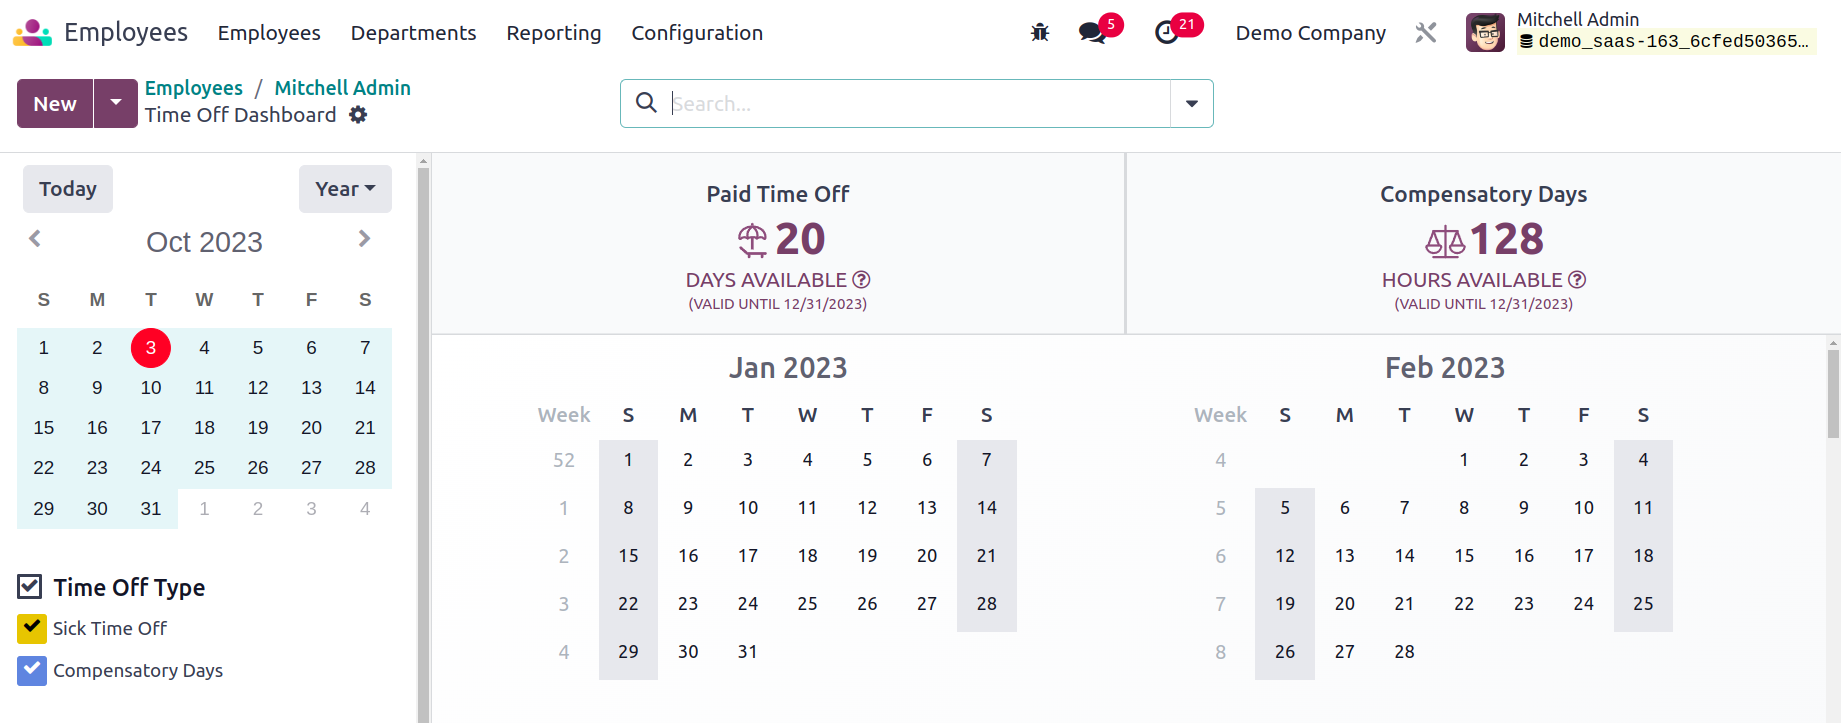
Using the Time Off option, it is possible to view the employee's time off taken on a monthly and annual basis.
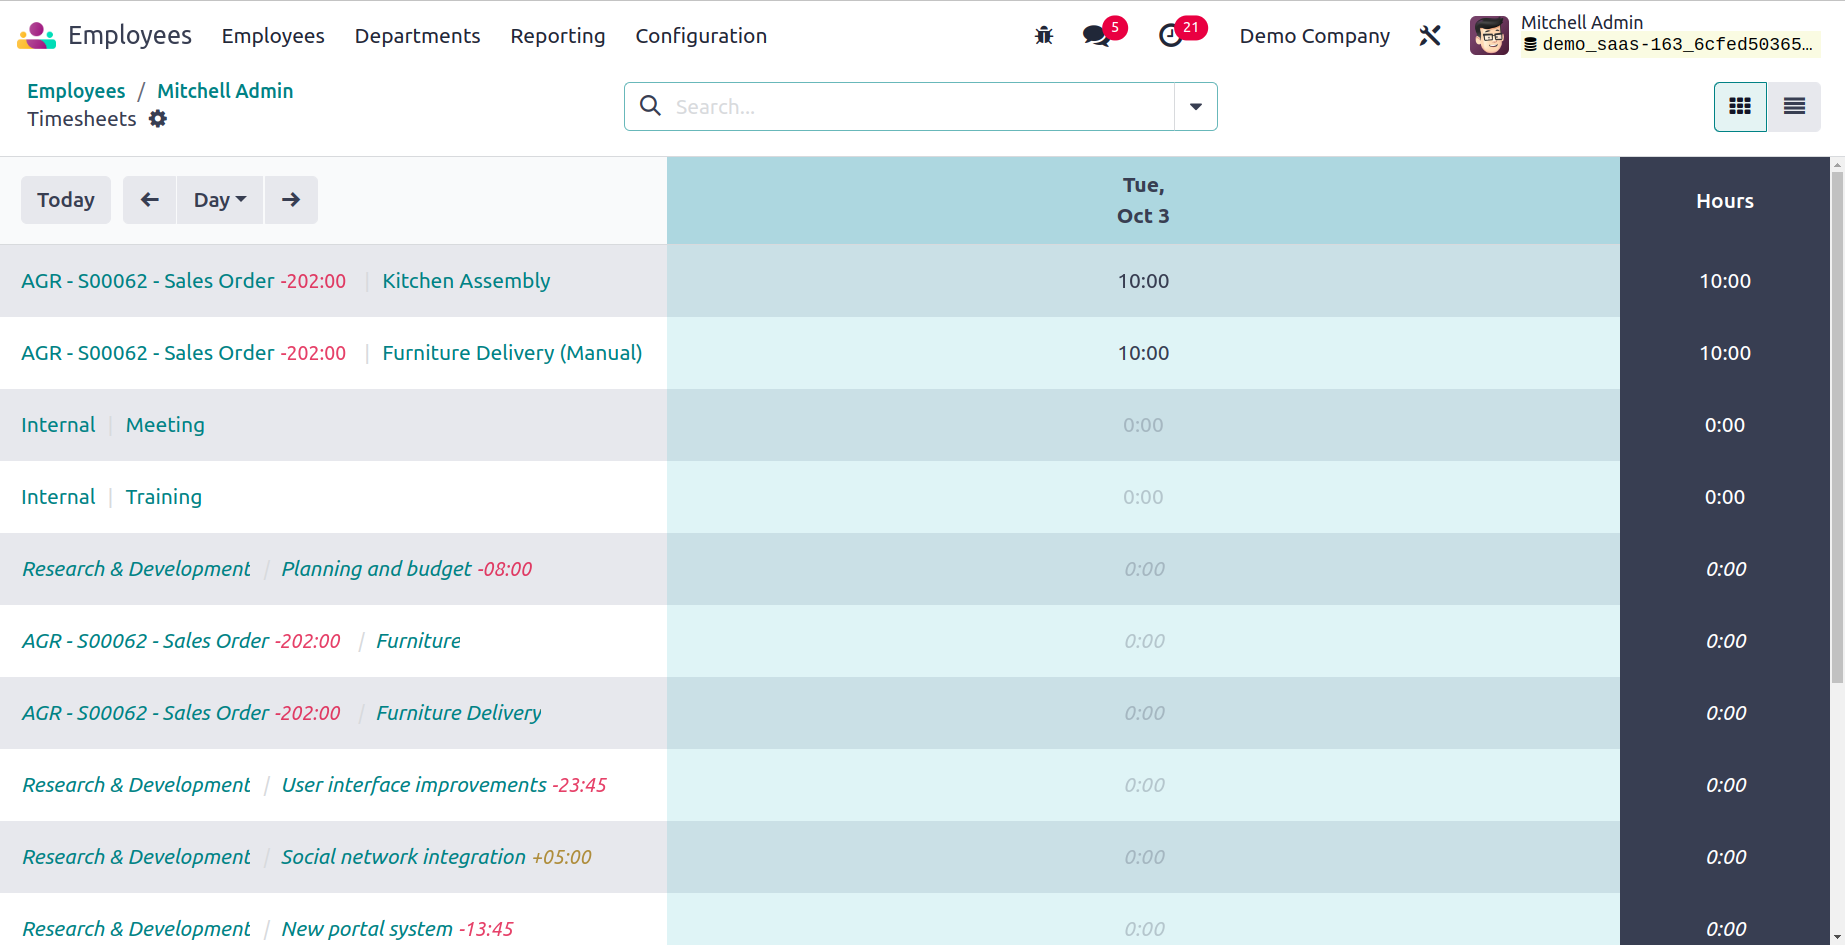
The employee's timesheet will be displayed when you click the Timesheets button. It will display the employee's logged time spent on each task.
By selecting the Cars button, the employee's assigned vehicle can be viewed. The vehicle information, Start Date, End Date, and Number of Attachments are all displayed in the employee car history report. The employee's current contract will be seen when you click the Contract Smart button.
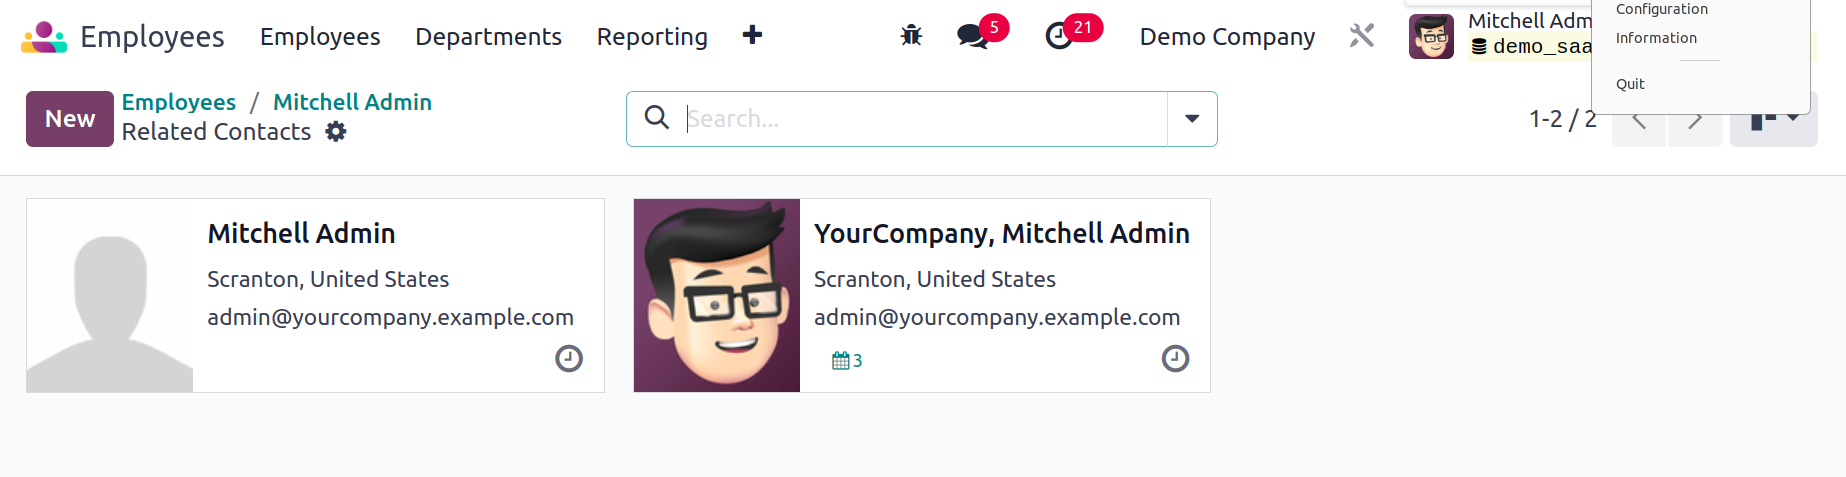
Using the appropriate smart button, you can view work entries that are relevant to the employee. The employee's work entries for a specific month will be displayed in the calendar view. The payslip created for the specific employee will be displayed through the Payslip smart button. The Reference, Employee, Batch Name, Company, Basic Wage, Next Wage, and Status are displayed in the list view. The Attendance button will take you to the employee's attendance record, which displays the employee, check-in and check-out times, as well as work hours. Using the Extra Hours smart button, as illustrated below, you may check to see if this particular employee has any extra hours accrued. The button for related contacts will display the employee profiles of those connected to the present employee. On the form view, you will find the Request Appraisal button, which can be used to create a request for the employee's appraisal. Using the Launch Plan button, you may start the employee's onboarding and offboarding plans. To send a request for signature on specific documents, use the Signature Request button. Use the matching option on the window to subtract additional hours.
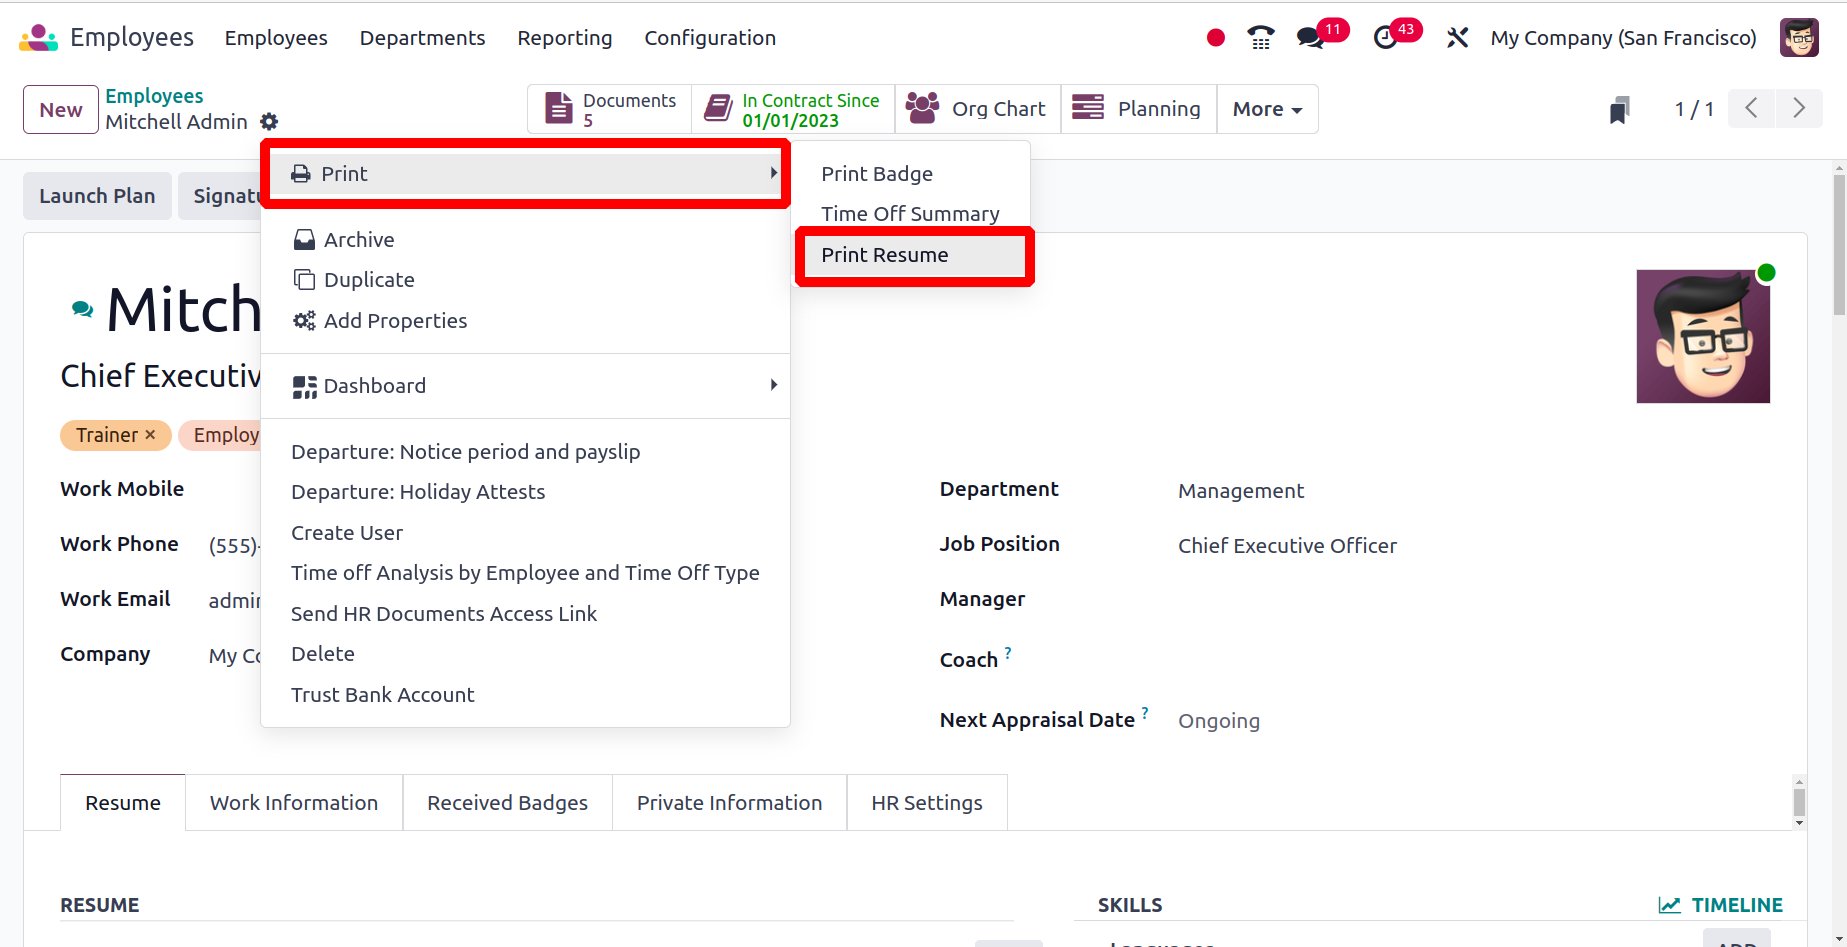
There's a Print Resume option on the Action button. The user can print the employee résumé with ease by using this.
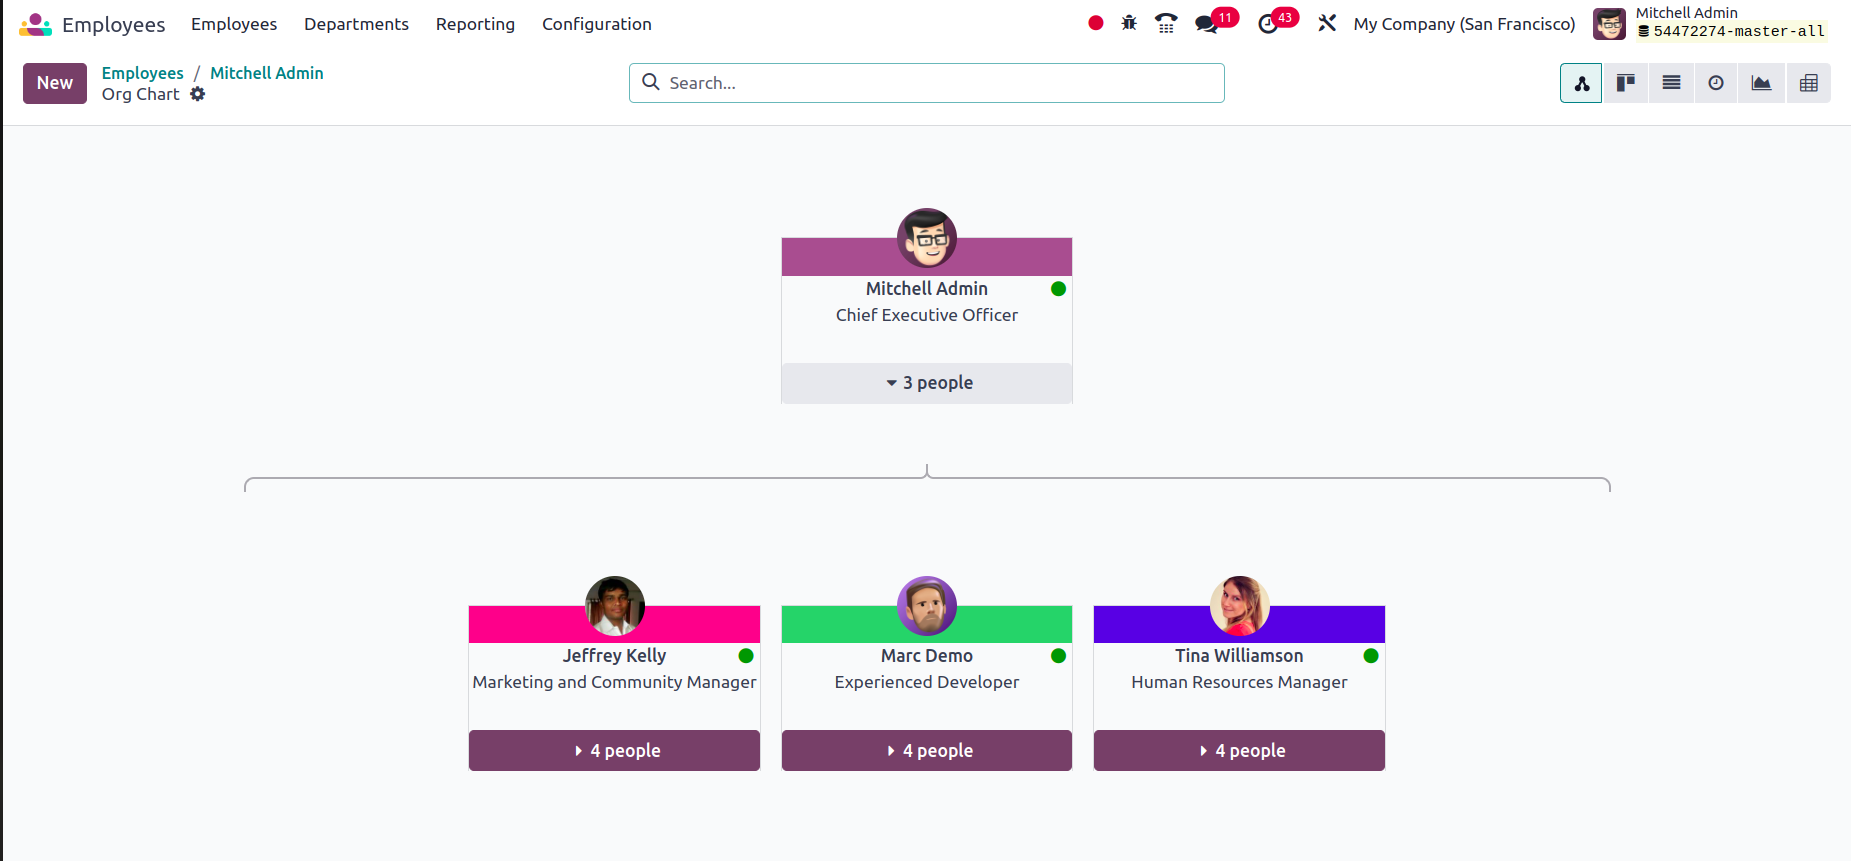
Org Chart
Users can now find the employee organizational chart under the Employees menu. Click the Org Chart to do that.
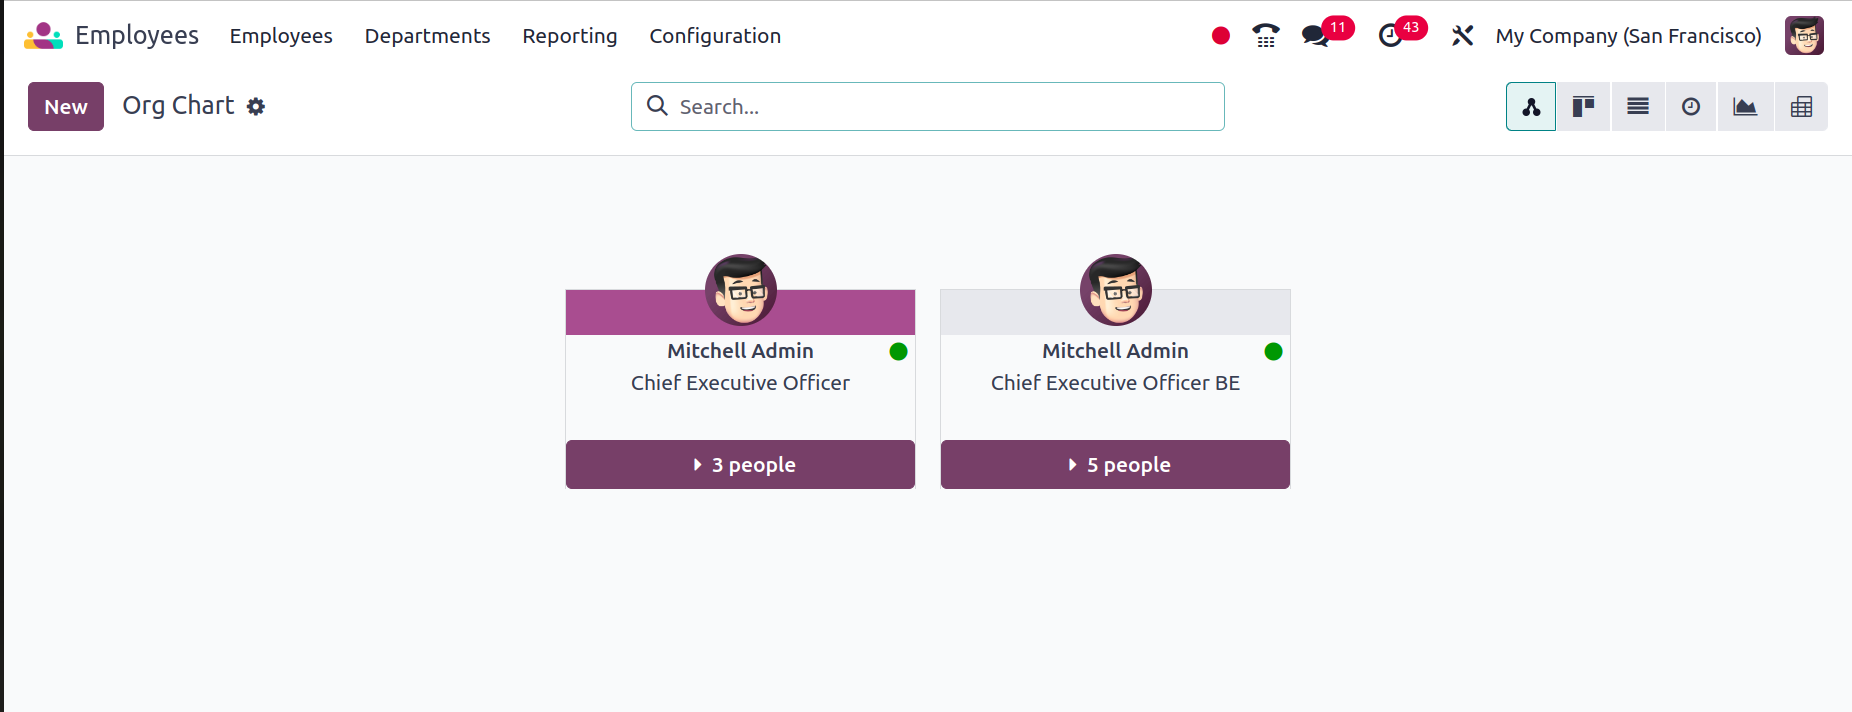
The number of employees that work under each person will appear and when you click on ‘3 people’ it will unfold and show the subordinate details who are working under the manager. If you want to change the manager of the employee, you simply drag the employee and drop under the new manager.
Contracts
To view the contracts set up for various employees in the organization, choose the All Contract menu option from the Odoo17 Employees module. The platform for all contracts' Kanban views is provided here.

The contracts are categorized into New, Running, Expired, and Canceled stages. To add a new contract under a particular stage, click the plus icon. Each contract will list the name, title, and compensation of the relevant employee.
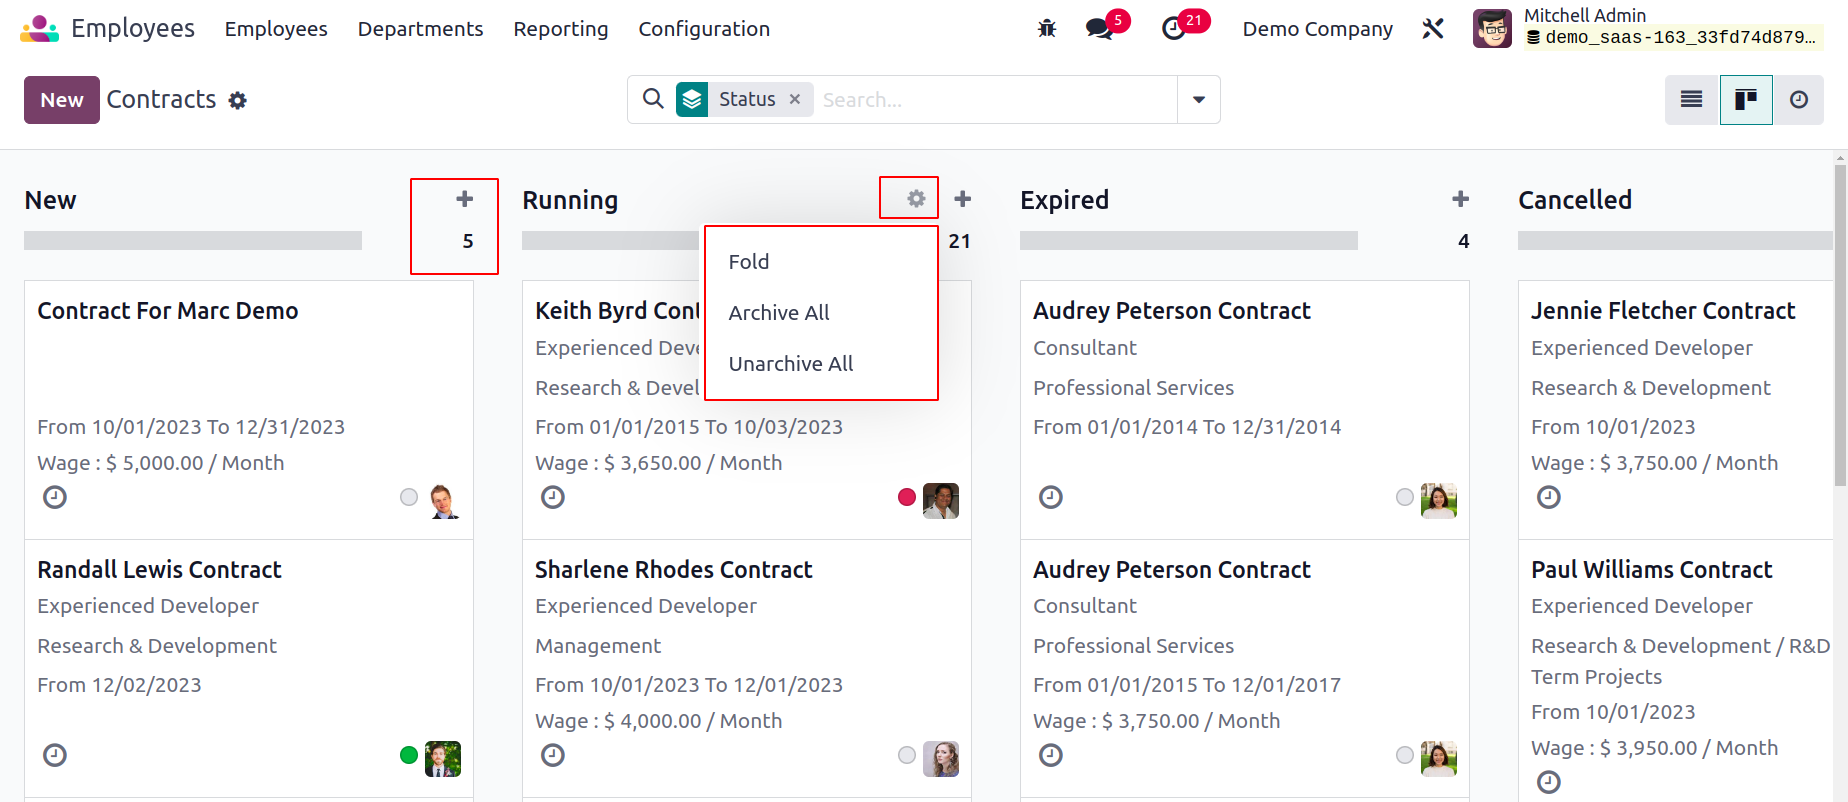
On the upper right of each stage, you can see the total number of contracts for that stage. Each contract has three tiny vertical dots that can be used to Edit or Delete the corresponding contract.
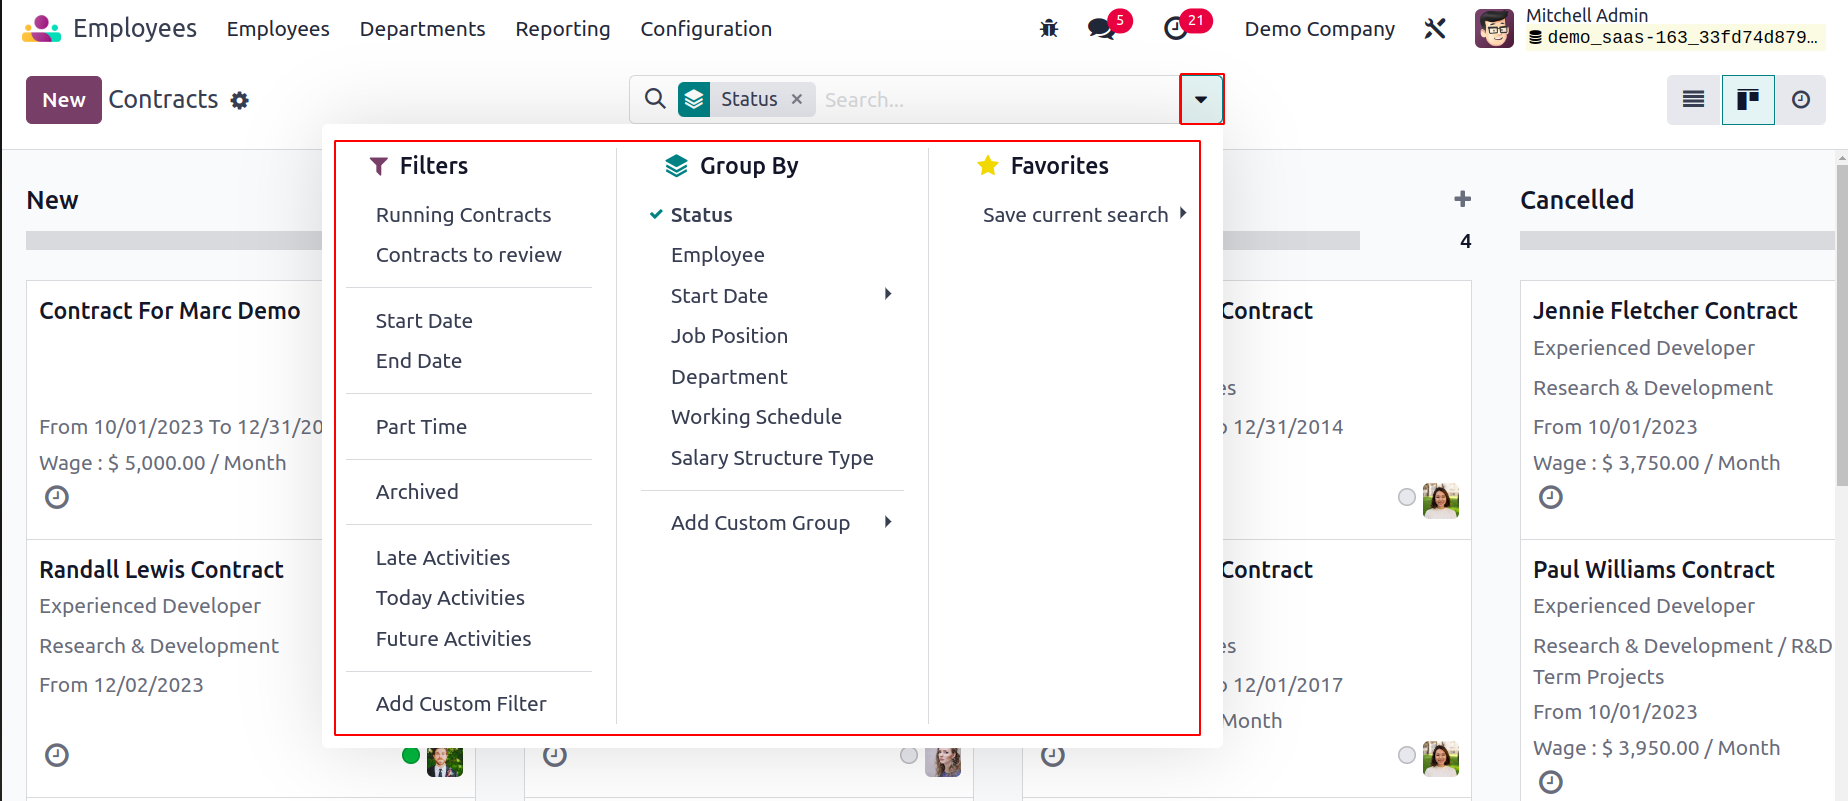
As filters, you can choose from the following options: running, not running, change of occupation, employed, archived, late activities, today's activities, and upcoming activities. You can utilize Status, Employee, Start Date, Job Position, Working Schedule, and Salary Structure Type to organize the contracts. The Contract Reference, Employee, Job Position, Start Date, End Date, Working Schedule, Salary Structure Type, Status, and Company are all displayed in the list view of the Contracts. In order to create a new contract, click the New button now.
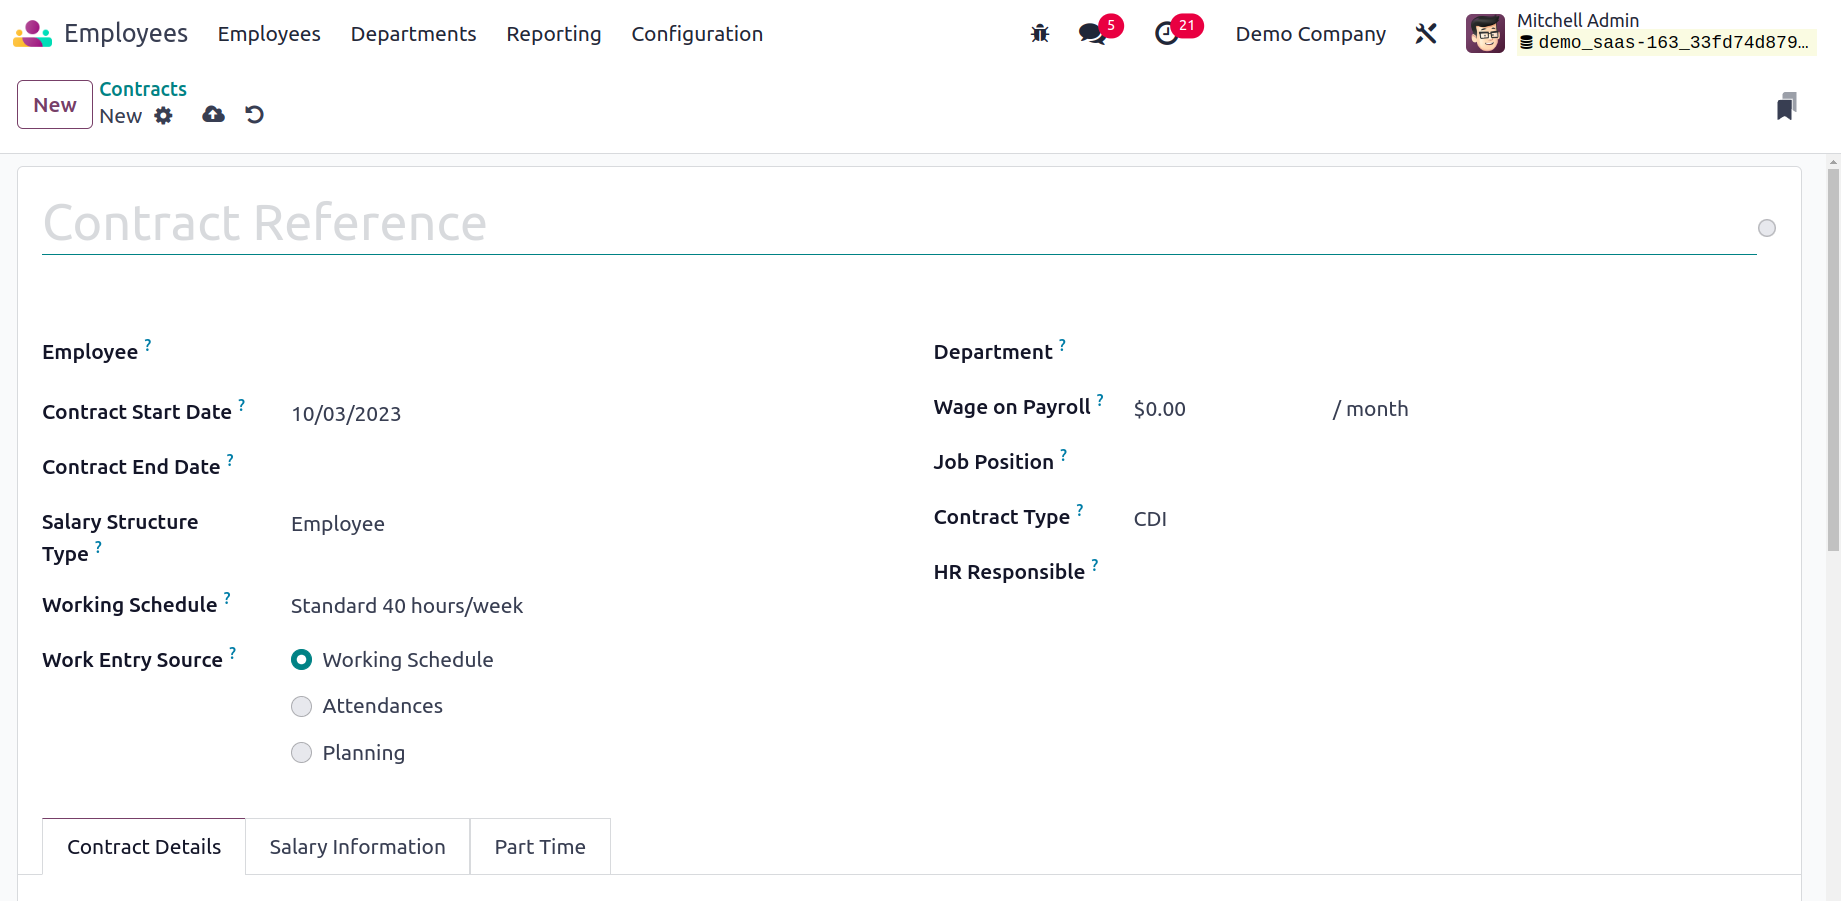
You can include a title in the contract to serve as a reference. Use the appropriate fields to indicate the Contract Start Date, Contract End Date, Salary Structure Type, Working Schedule, Department, Wage on Payroll, Job Position, Contract Type, and HR Responsible. The source for generating work entries will be specified by the work entry source. Working schedules, attendance records, or planning can all be used to generate work entries.
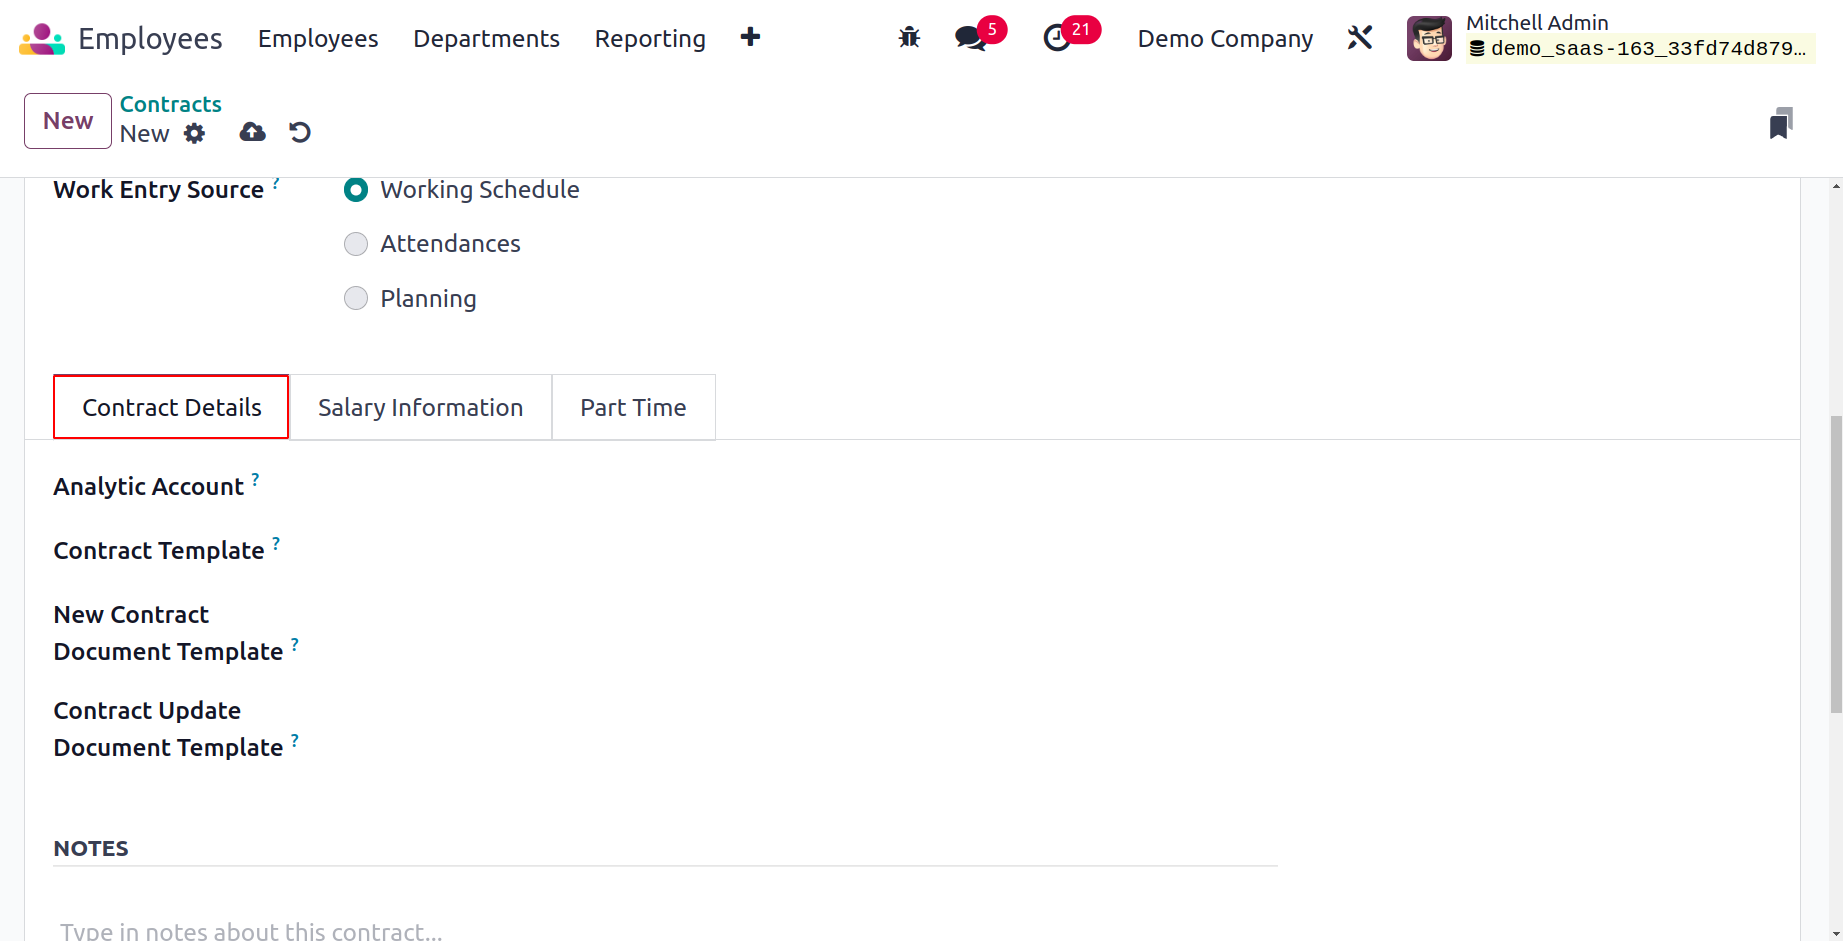
You can make a reference to the Analytic Account under the Contract Detail tab. The Contract Template field allows for the specification of the default template to be applied when making an offer to an application. The New Contract Document Template section allows the applicant to provide the default document that they will need to sign in order to accept a contract offer. The default document that the employee must sign in order to amend the contract is shown in the template for the contract update document. You can write remarks about this contract in the remarks field.
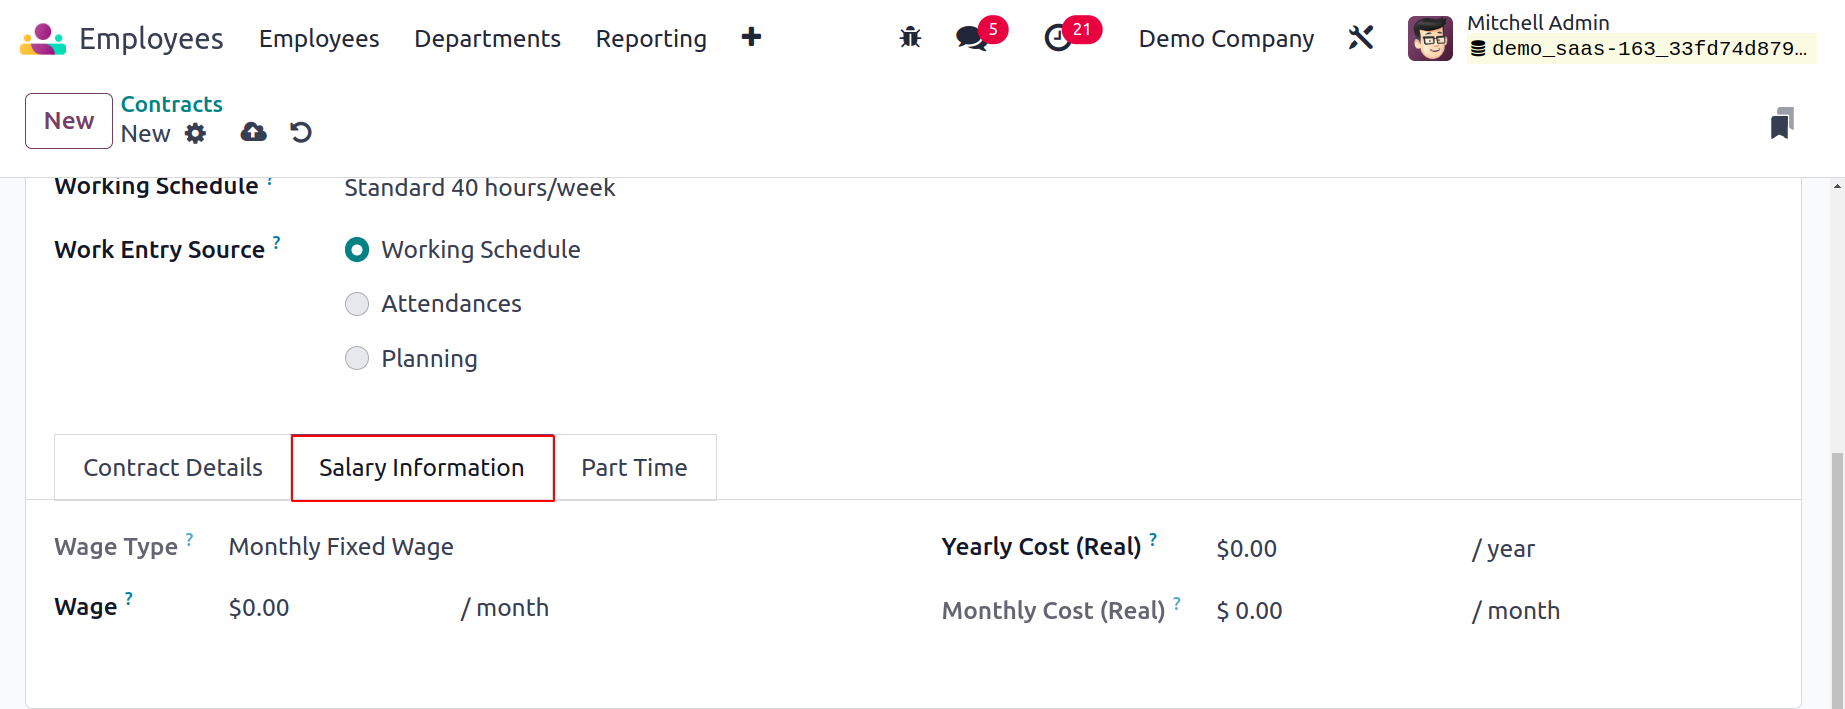
Under the Salary Information tab, choose the Wage Type and enter the employee's gross monthly wage. You may find out from the relevant fields how much an employee really costs the firm on a monthly and annual basis.
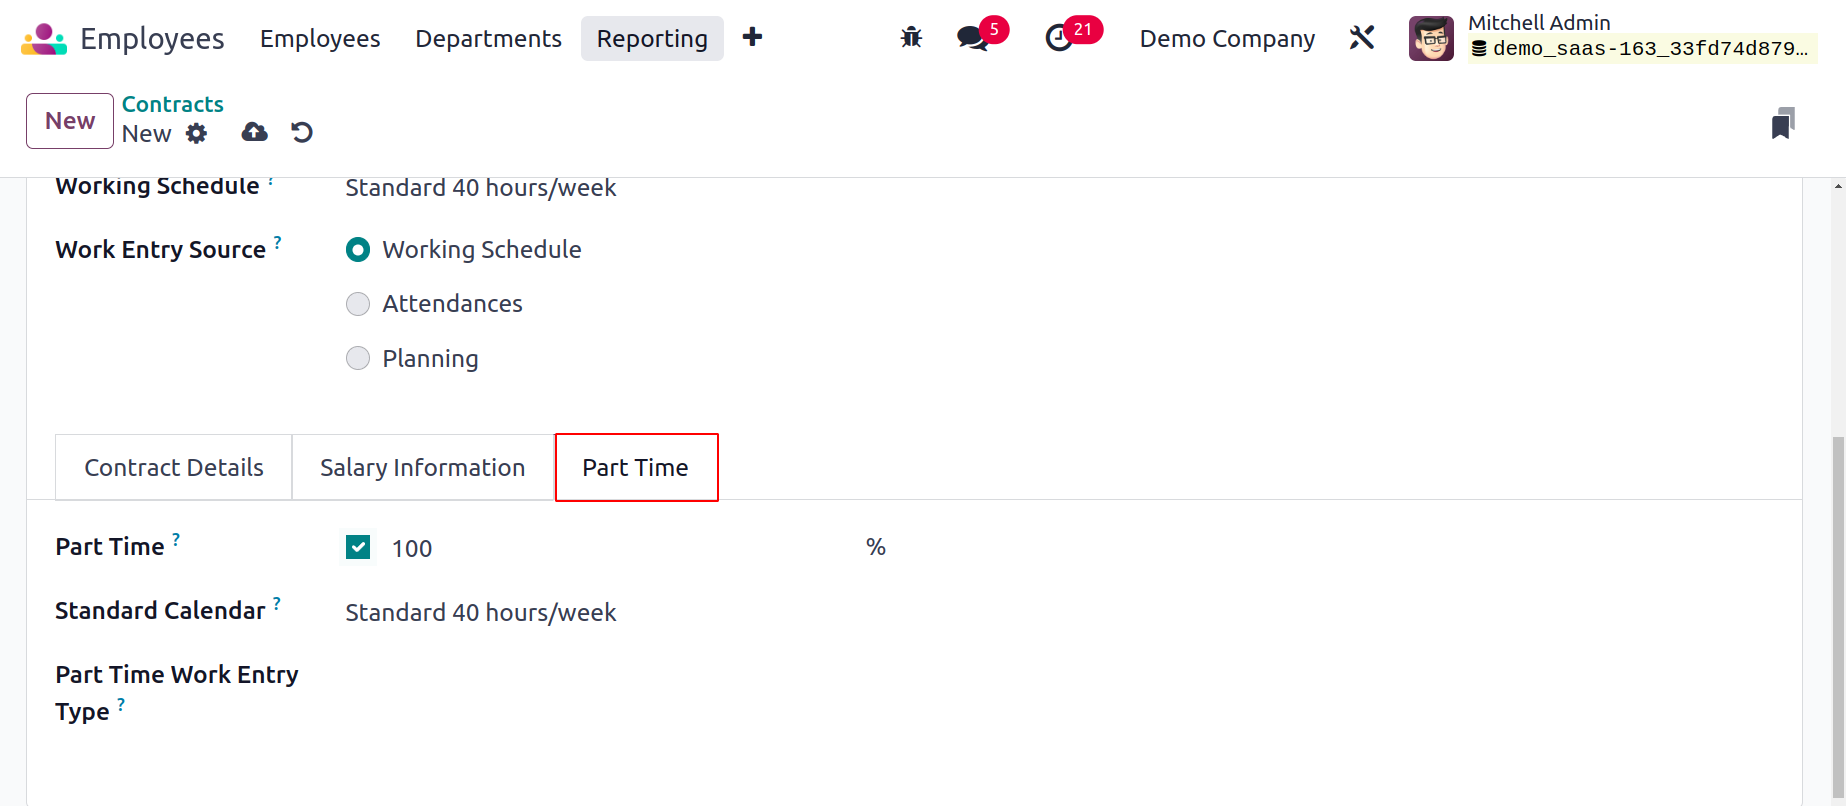
You can activate the Part-Time option for the contract for part-time employees under the Part-Time heading. Set the Standard Calendar to calculate the employee's part-time proportion. The Part-Time Work Entry Type field allows you to specify the work entry type that was used to create work entries that correspond to the full-time working schedule.
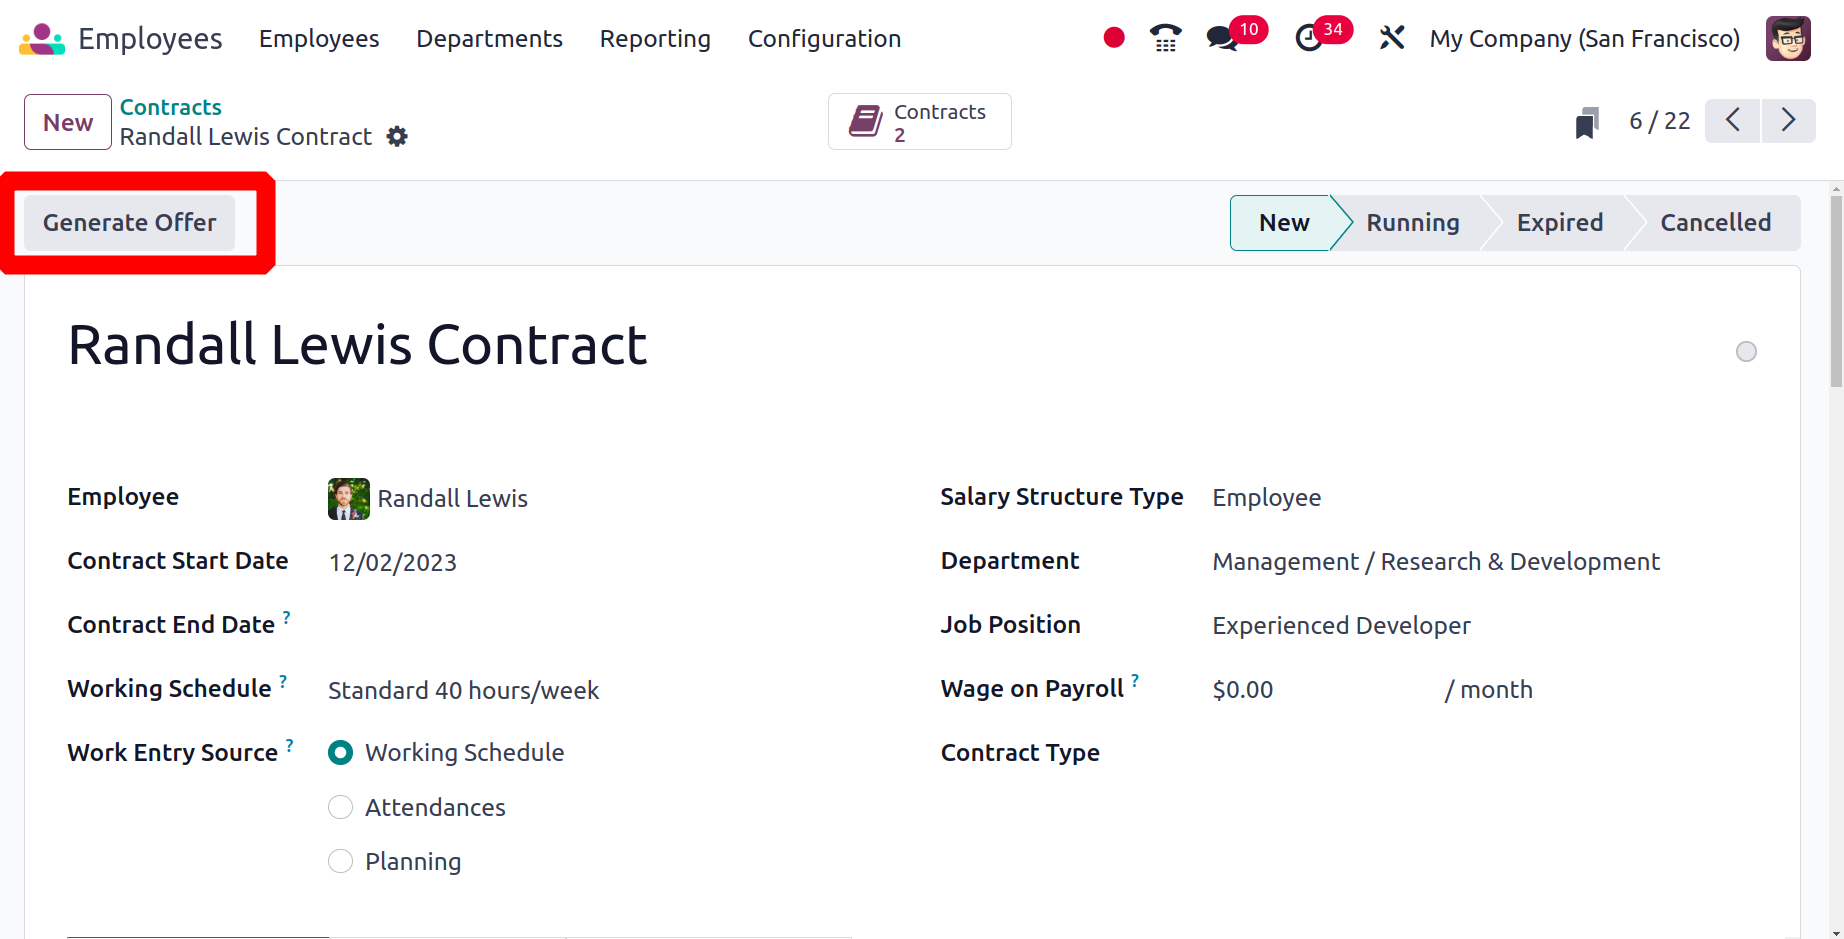
You can create an Offer sent to the appropriate employee once you have finished configuring the employee contract by selecting the Generate Offer option, as shown in the image above. When you click on this button, a pop-up window similar to the one below will appear.
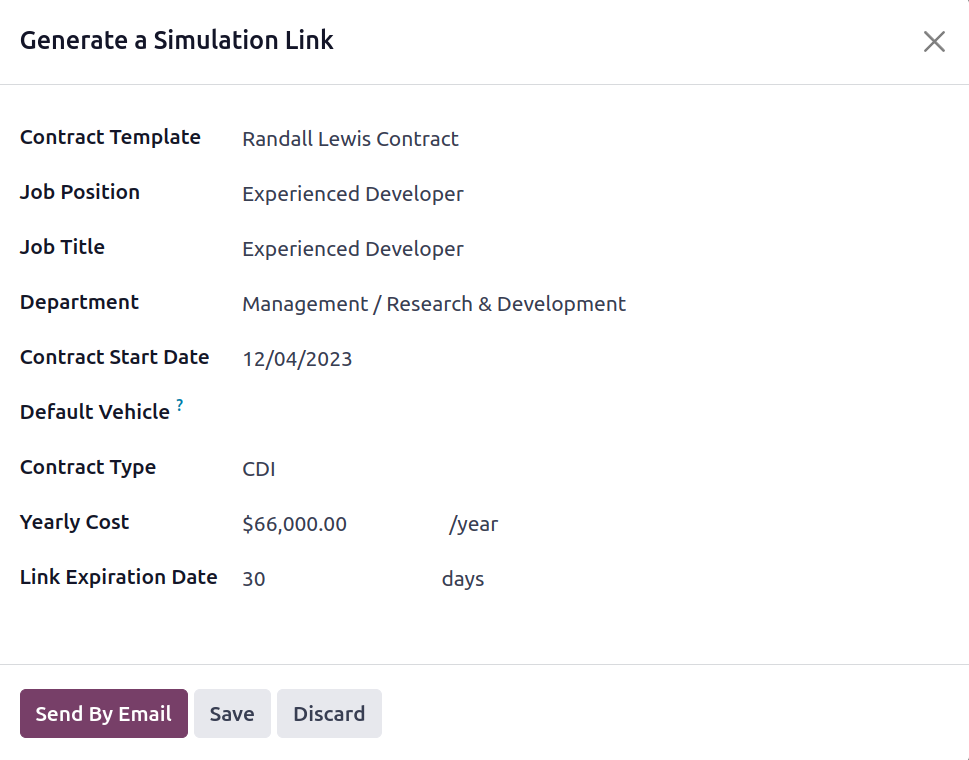
You may find information on the offer, like template, the job title, the job position, the department, the contract type, contract start date, Link expiration date, and the annual cost here. The Default Vehicle represents the company car assigned to the default employee. The pop-up window will include the Offer Link. You can send a message to the appropriate staff by clicking the Send By Email button.
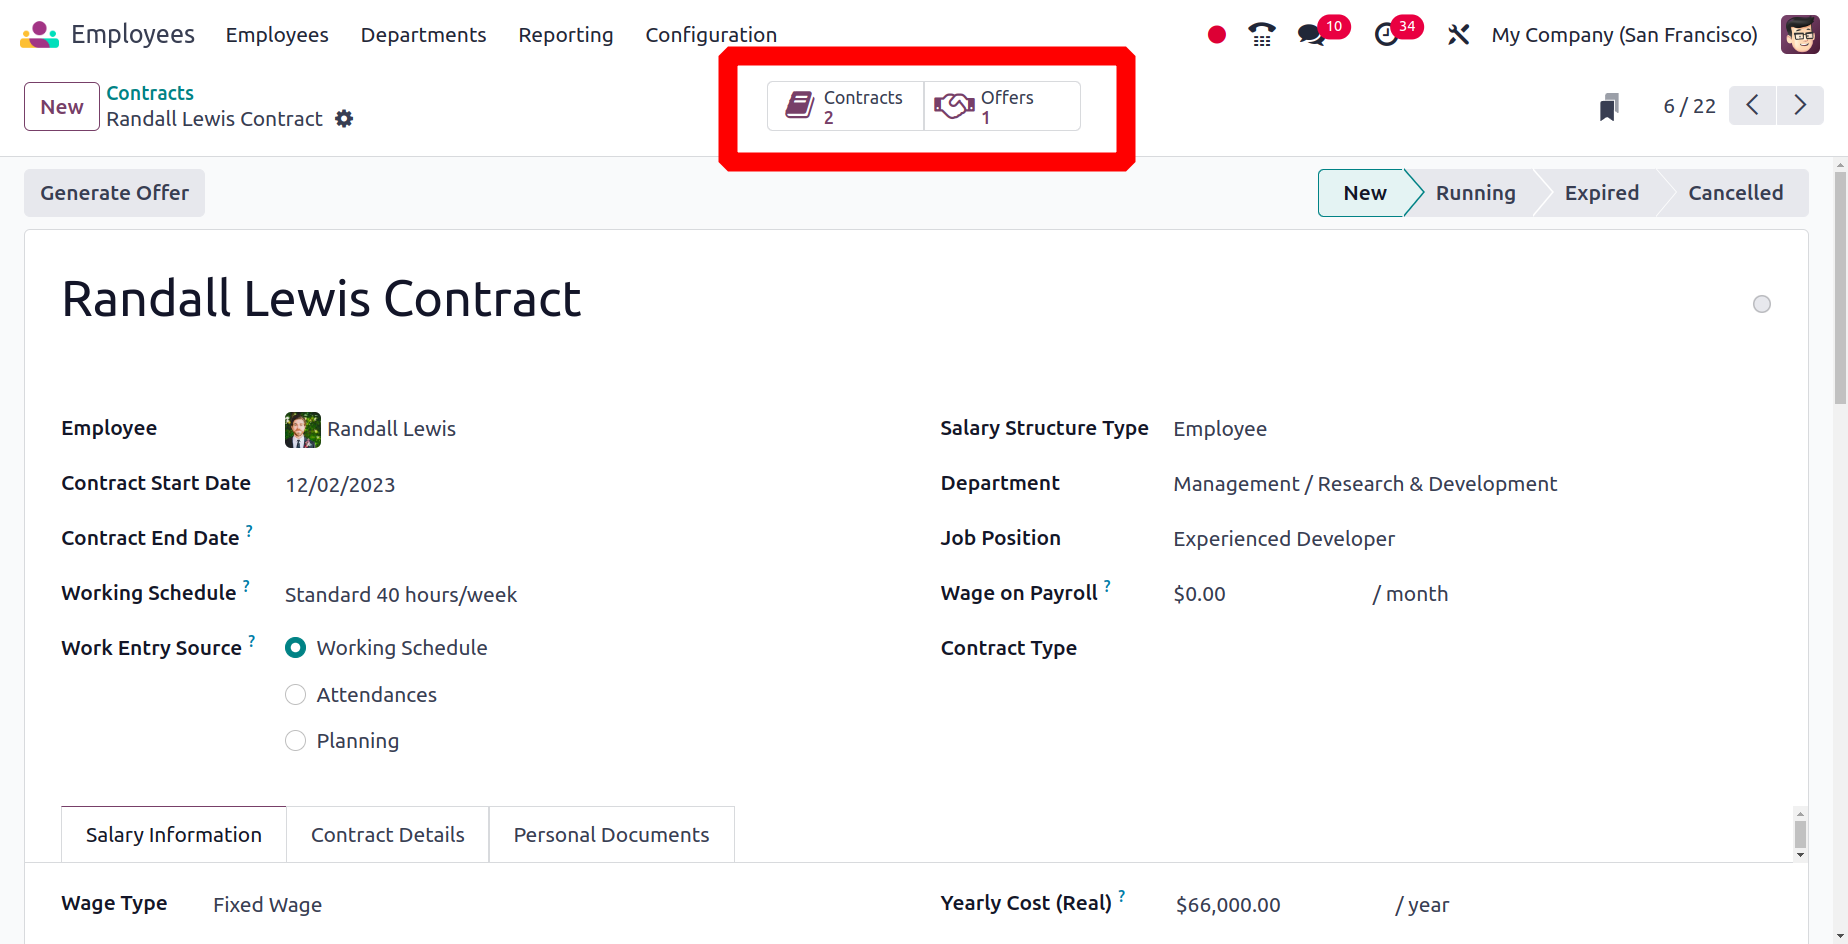
Then the offer will be shown inside the smart tab Offers.
Departments
You may simply categorize employees based on their departments by configuring the data of the departments that are accessible in your company in the Odoo17 Employee module. You can navigate to the Configuration menu and choose the appropriate option to configure the Departments of your business. You will find the pre-configured list of departments in the Employees module, as seen in the screenshot below.

From this list view, you can acquire information about the Display Name, Company, Manager, Employees, and Parent Department. To set up a new department, use the New button.
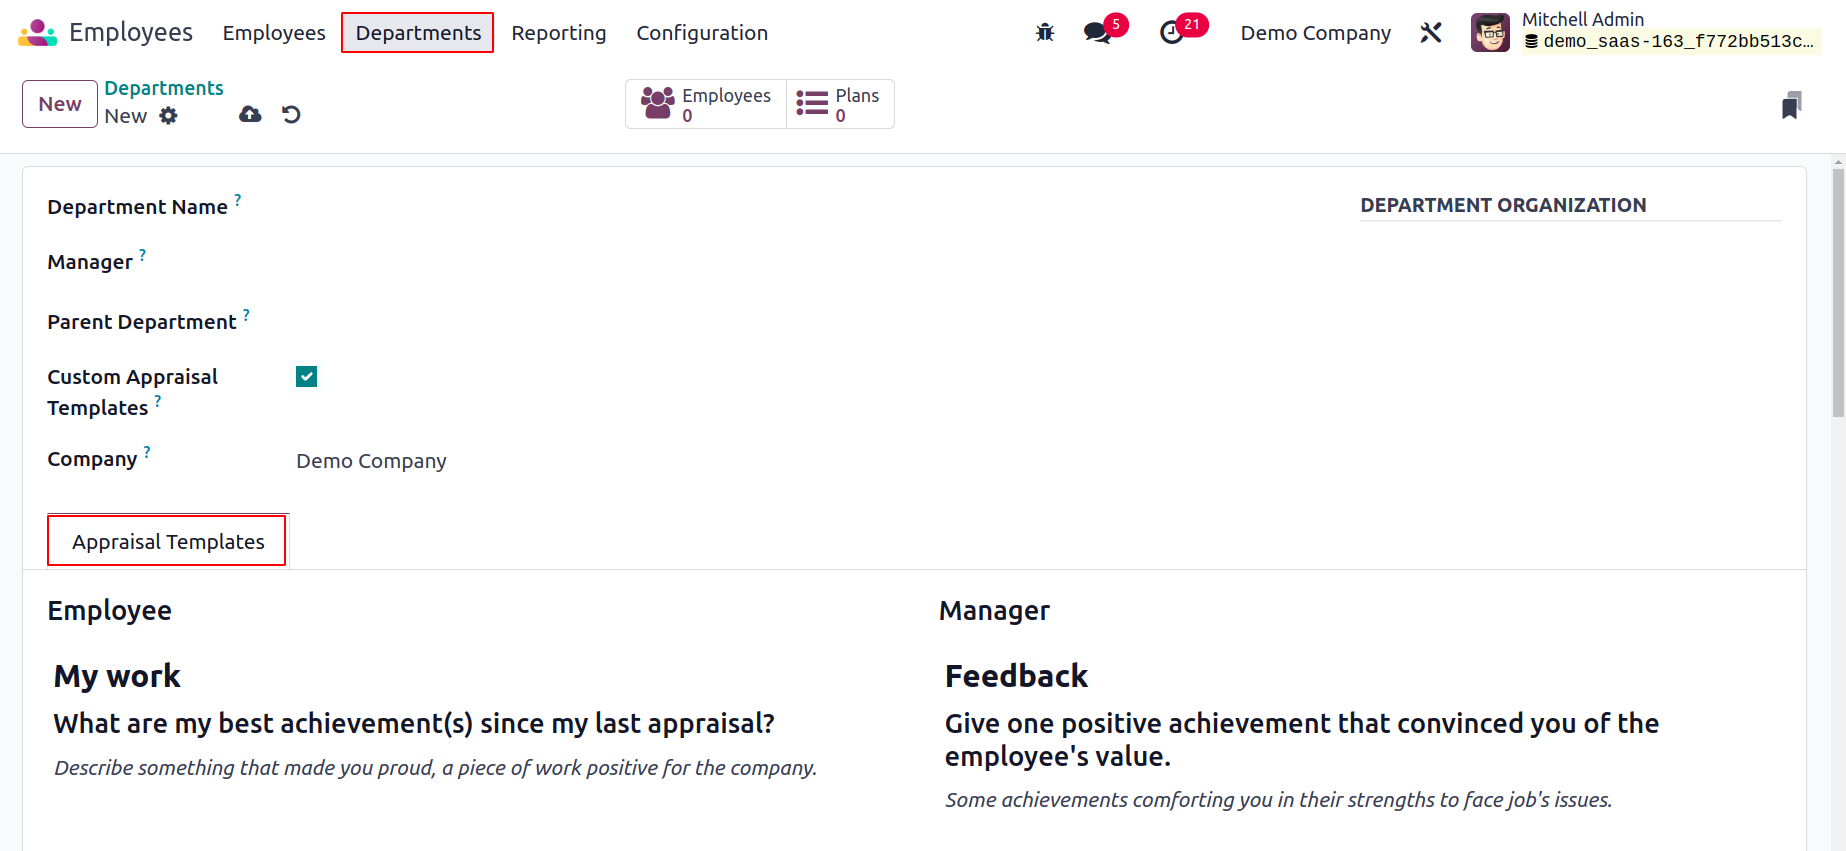
You can include the Department Name, Manager, and Parent Department in the appropriate fields. If you want to alter an appraisal template for this department, turn on the Custom Appraisal Templates. Once this option is enabled, a new tab named Appraisal Templates will appear where you can add a new appraisal template. The Company's name will appear in the appropriate field automatically. Indicate the Appraisal Survey, which is the department-specific default survey template. You will receive the Employees smart button to view the department's employees and the Plans smart button to manage the department's numerous plans after generating the record for the department.
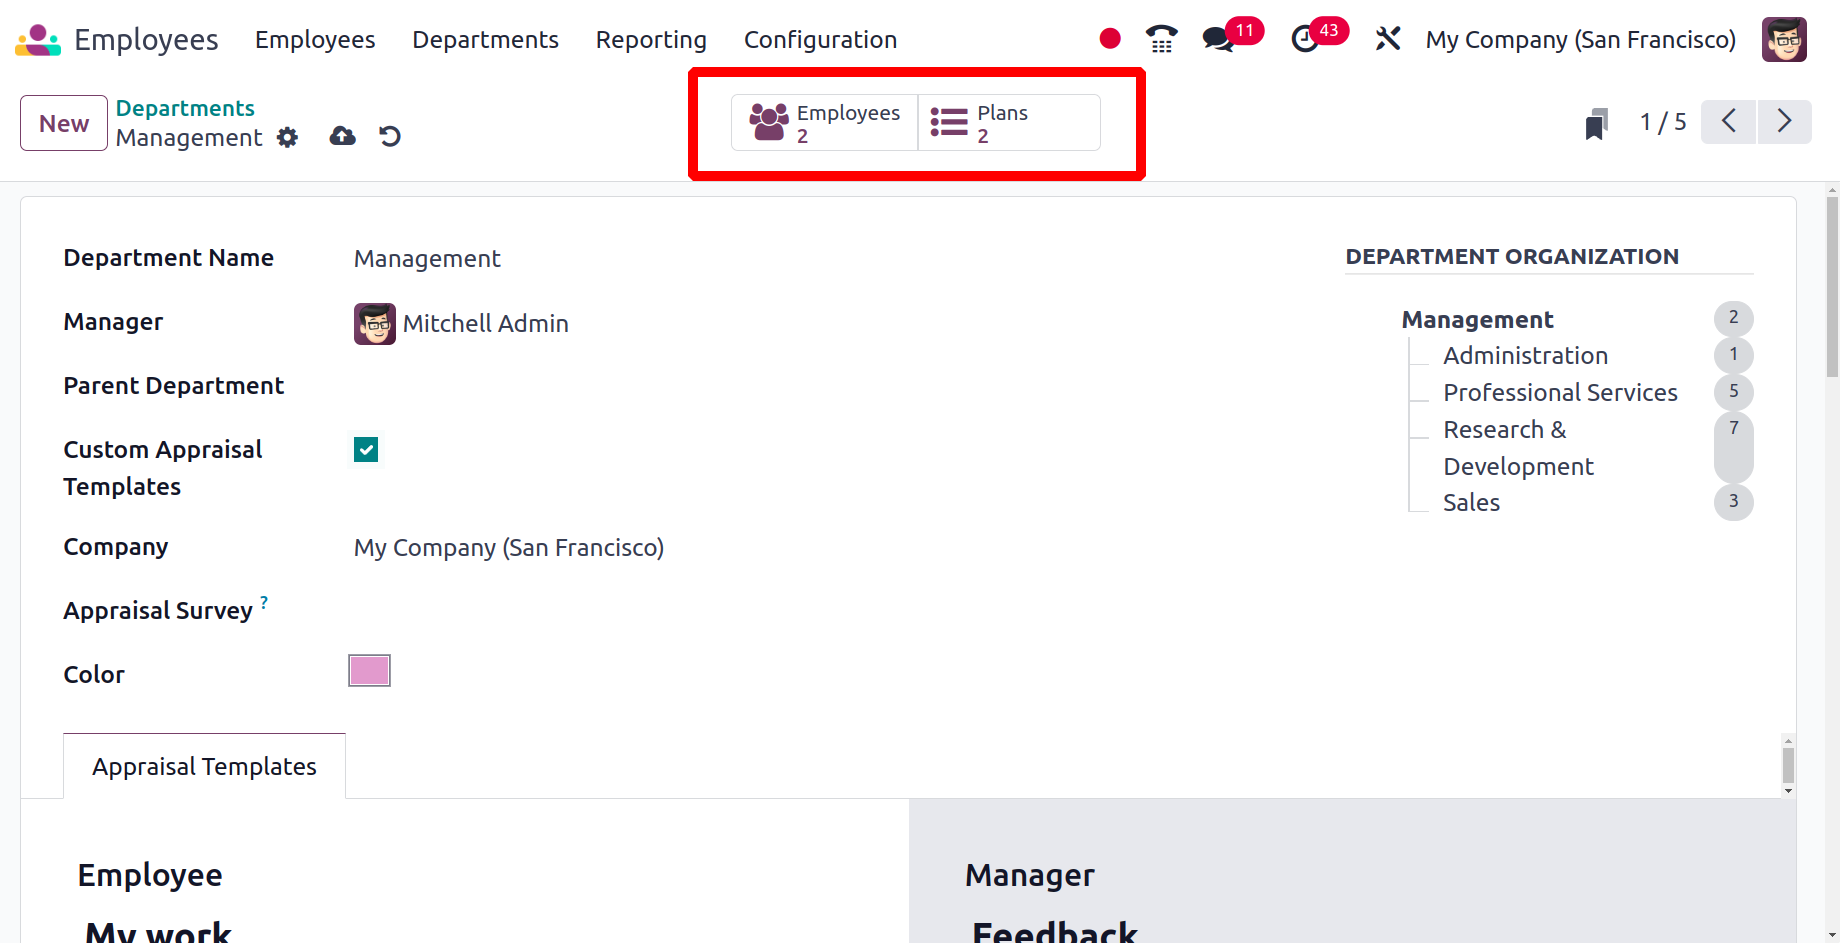
Two smart tabs Plans and Employees are displayed when the created department has been saved. Every employee in the department is visible on the Employees tab. All activity plans, including those for onboarding and offboarding, will be displayed in the Plans.
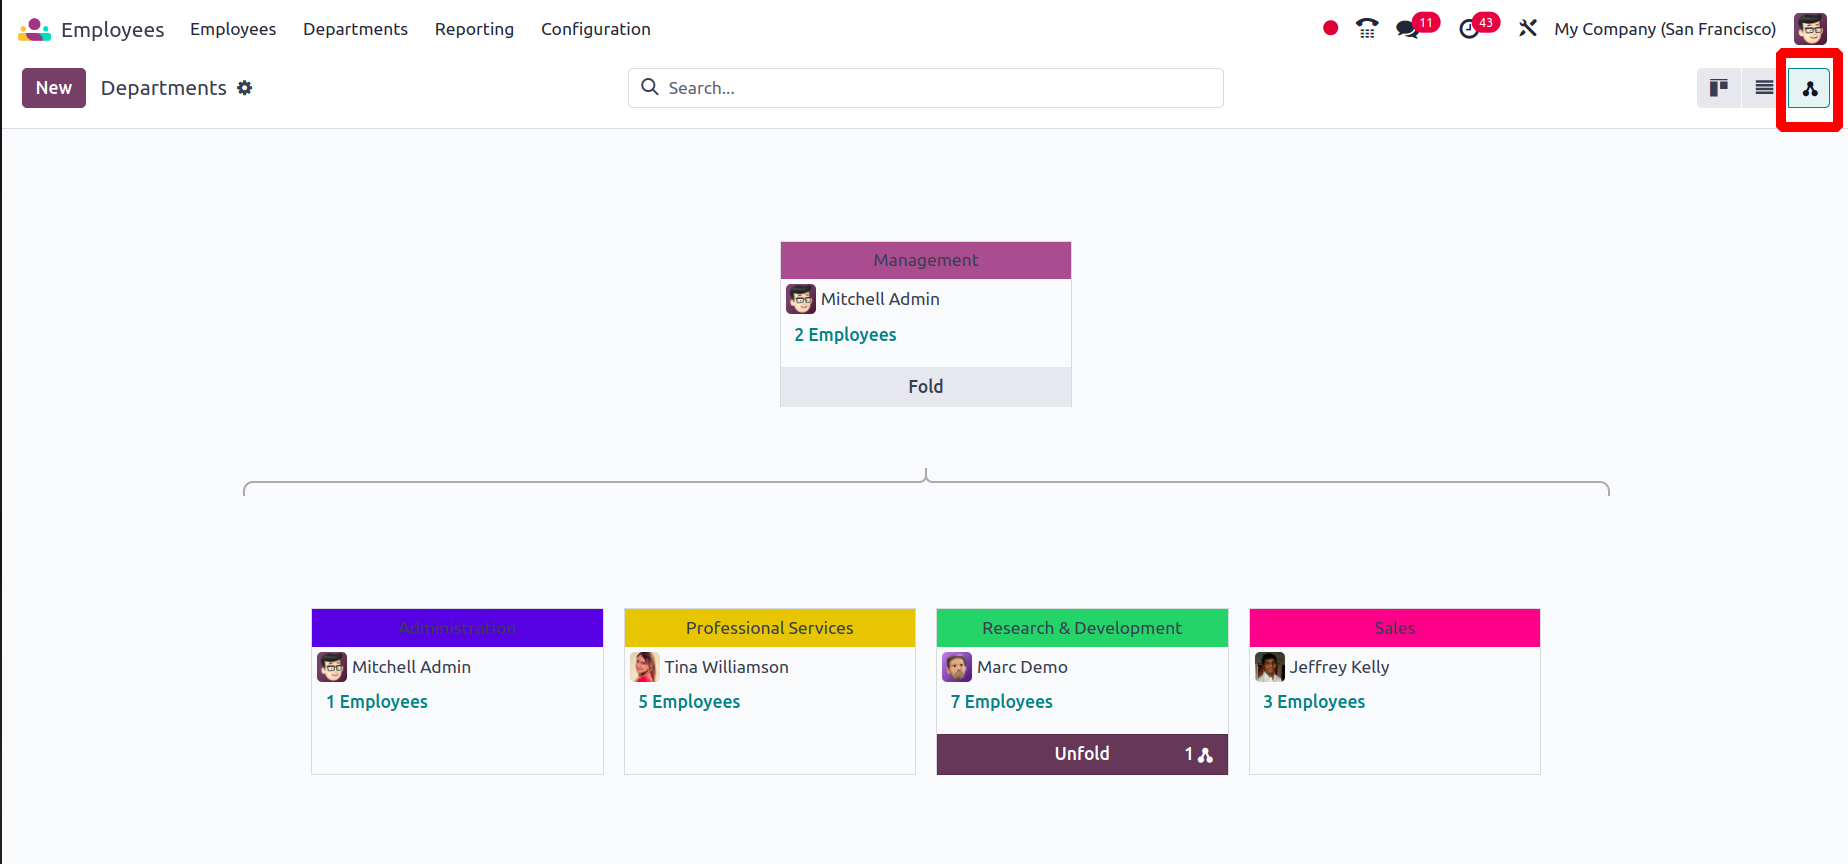
The Hierarchy Chart view is also available in this department. The perspective is delineated by the department. There are a certain number of employees under each block.
Job Positions
The position held must be included when building an employee profile. Let's examine how different job positions are organized within a corporation. You can do this by choosing the Job Positions option from the Configuration menu.
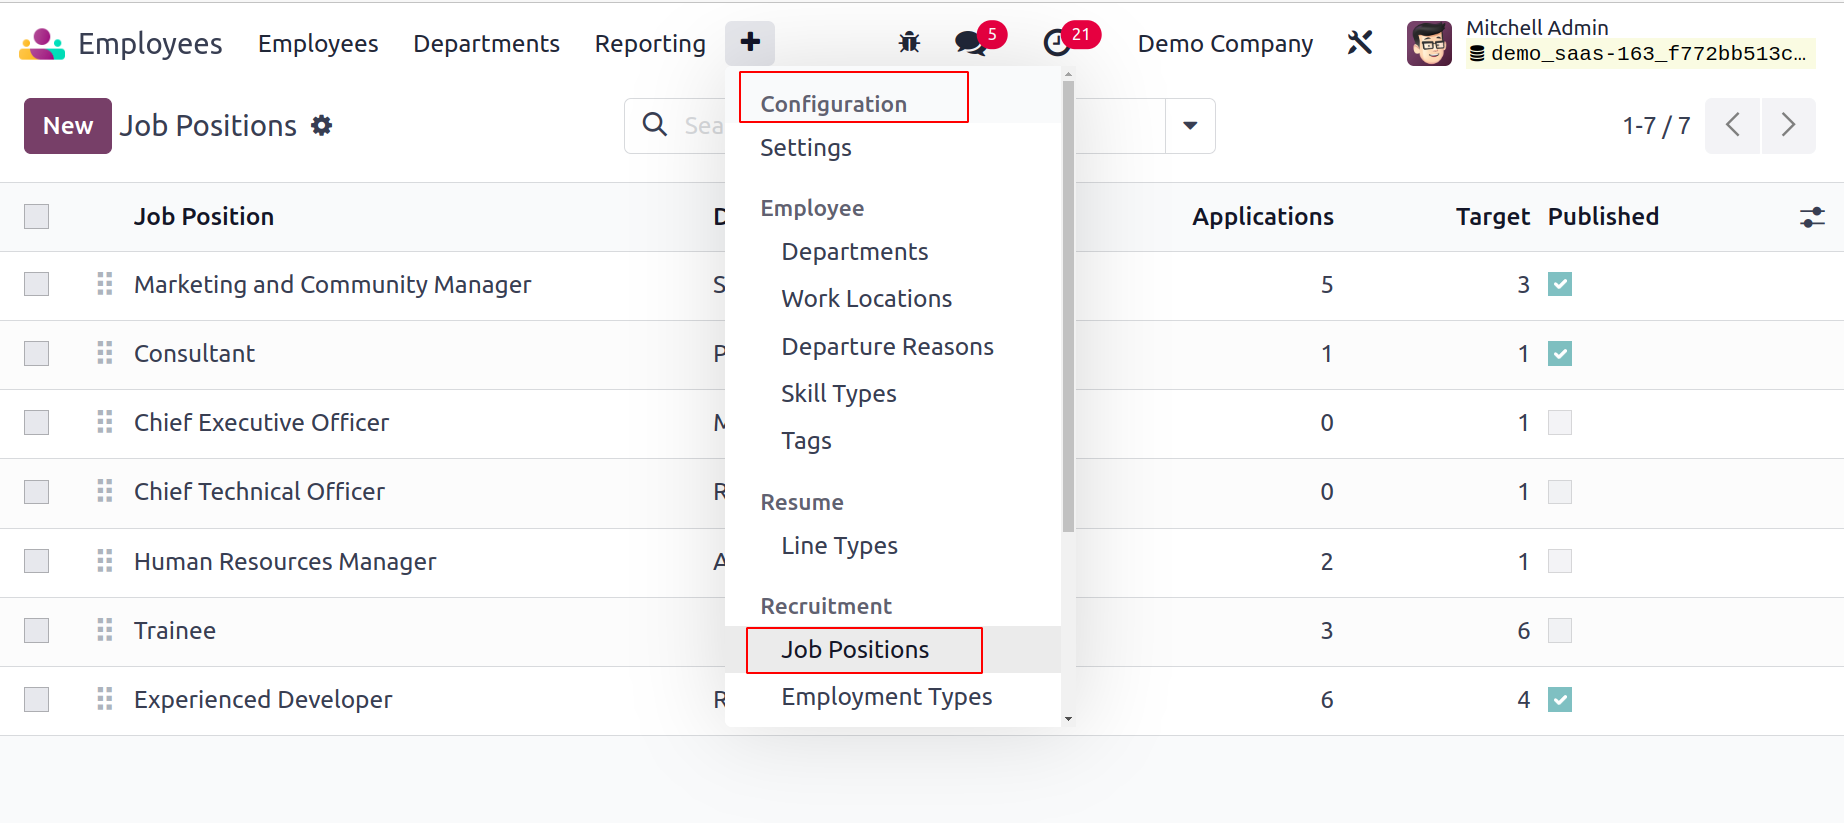
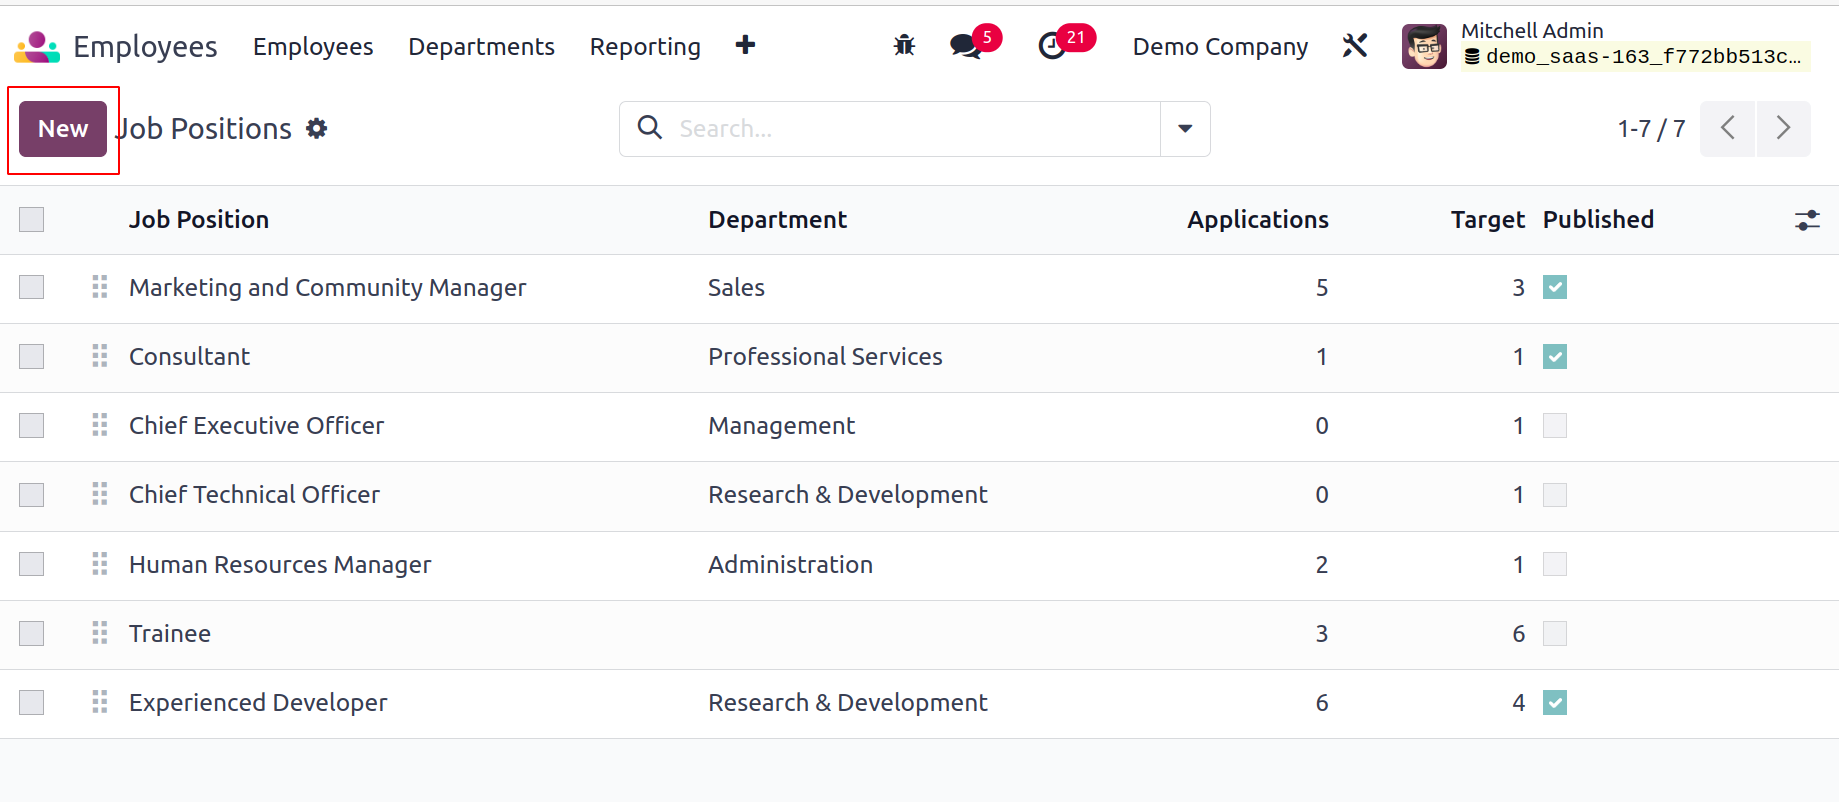
The list of pre-configured employment positions is available here. Create new job roles by pressing the New button.
Odoo17 will launch a fresh form view as seen above where you can customize the new Job Position's specifics.
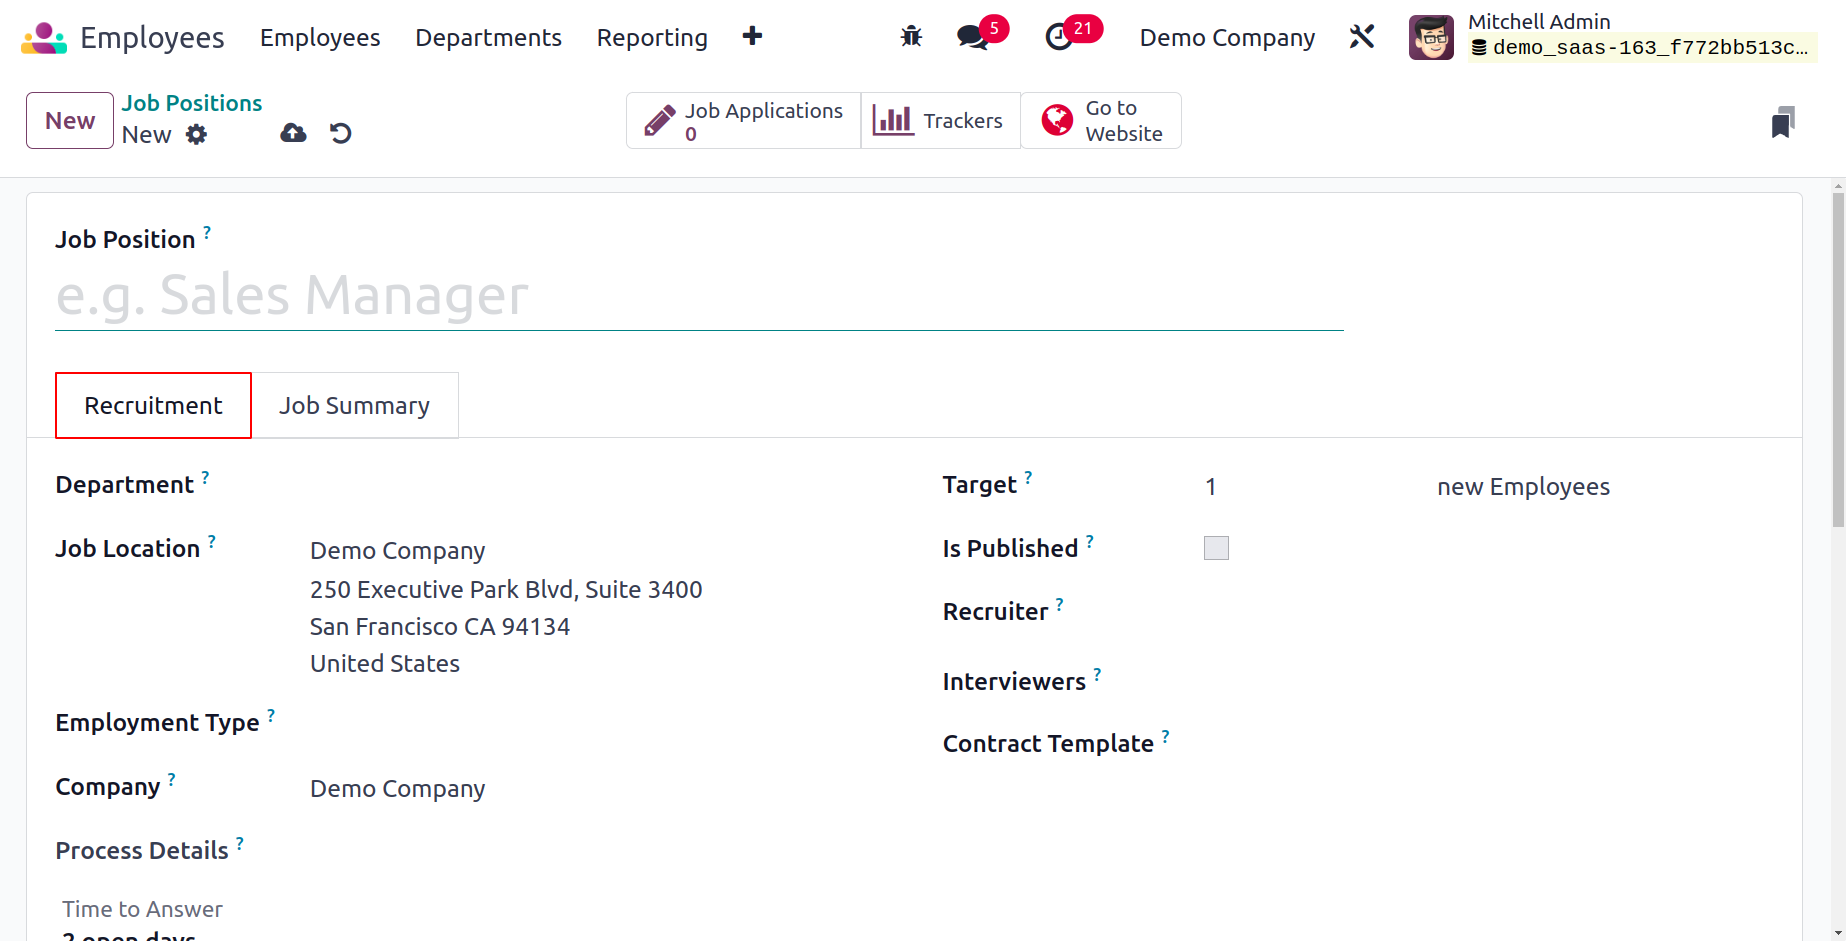
You can enter details in the Recruitment tab after mentioning the Job Positions.
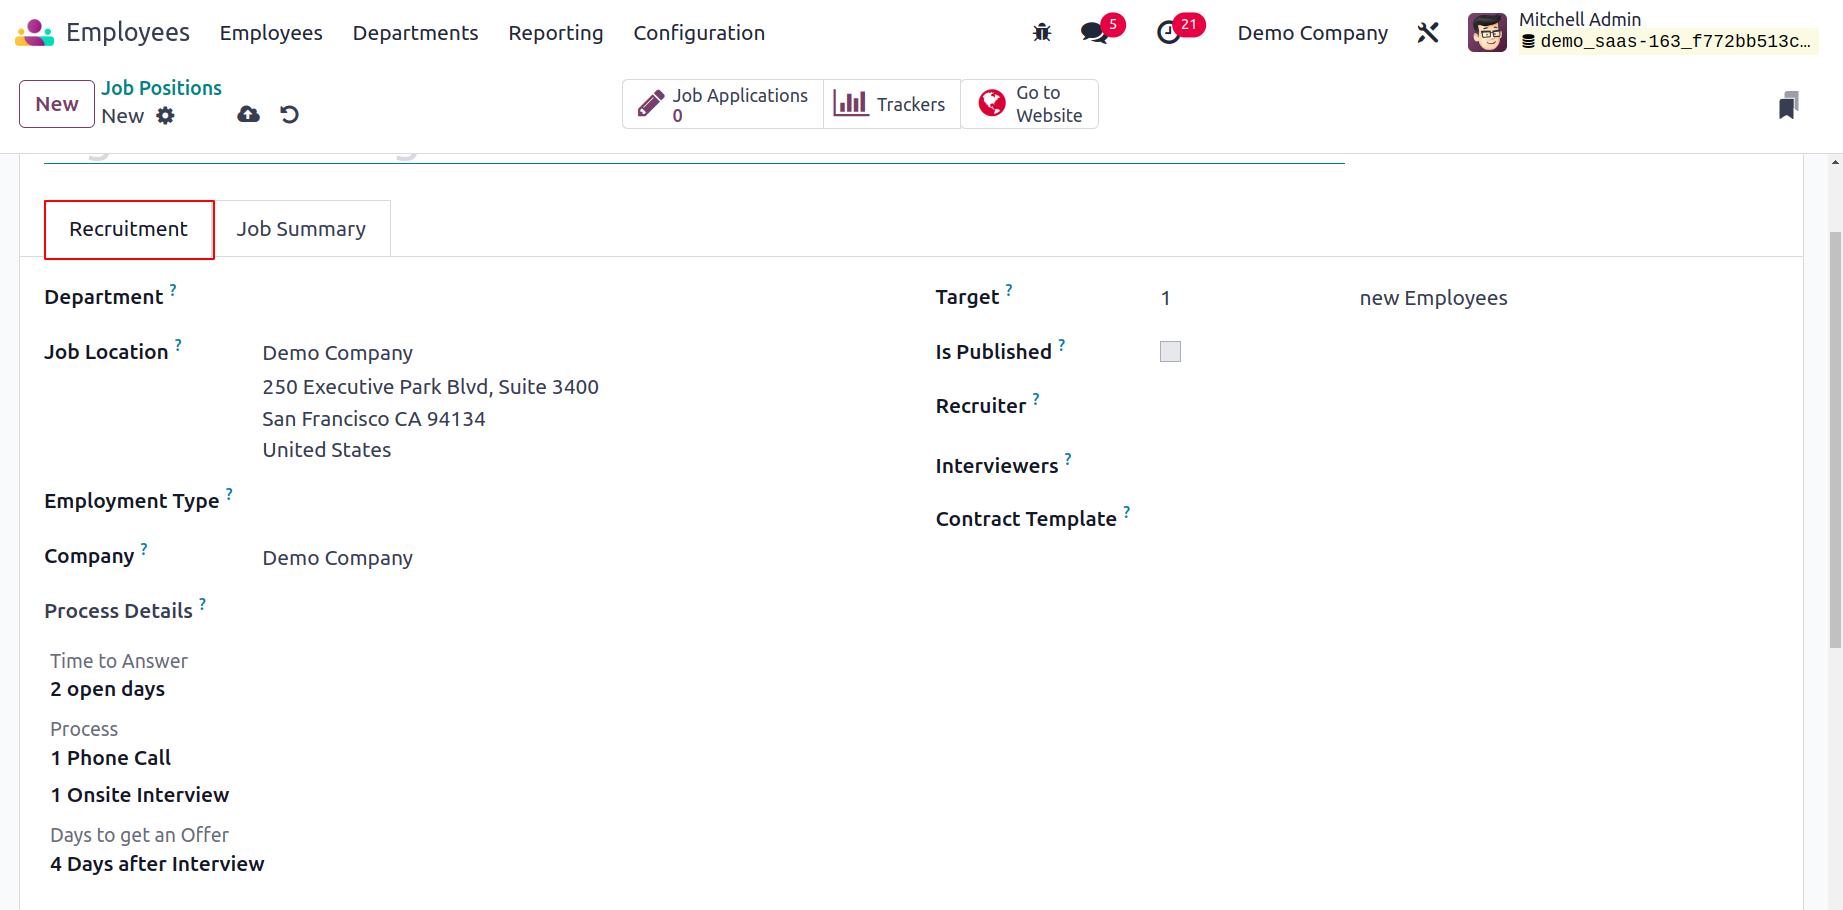
These specifics will be applied to the hiring process for this post. Enter the appropriate information for the Company, Department, Job Location, and Employment Type fields. The Process Details area can be used to specify any additional information that will be displayed on the job submission page. It contains information on the Process, Days to Get an Offer, and Time to Answer. The Target box can be used to indicate how many employees you plan to hire for this specific employment post. If the application has already been published on the company website, set the Is Published field to true. In the appropriate fields, you can also enter Recruiter, Interviewer, Interview Form, Contract Template, and Website.
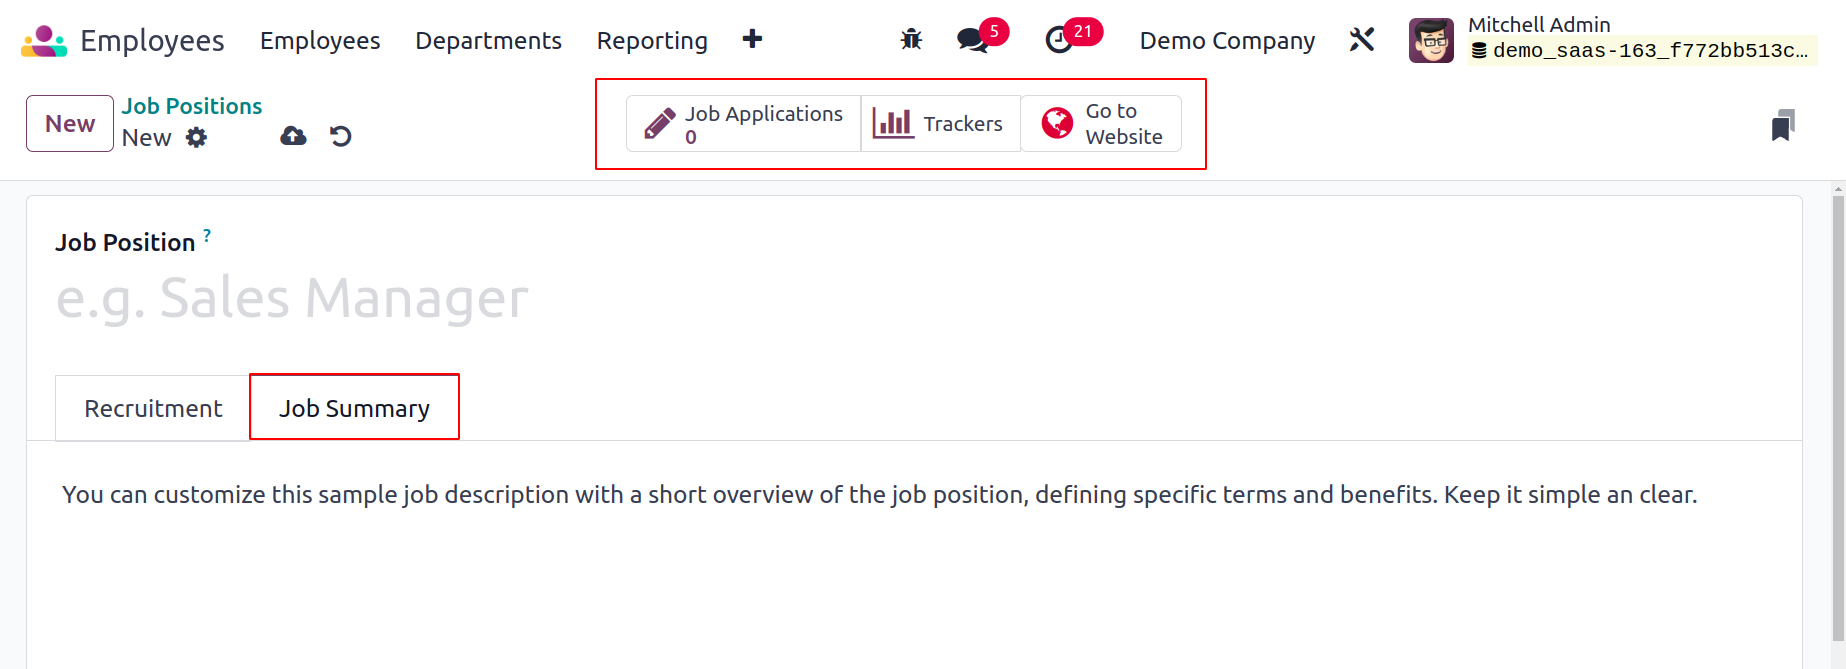
The job summary section allows you to add a job-related description that will appear on the application.
The Job Applications smart button can be used to manage every application for this specific job opportunity received from different sources. The documents relevant to this job opportunity will be shown when you click the Documents button. The Trackers will display several sources for jobs.
Employment Types
There are many different types of employees in a corporation. Some may be full-time employees, while others might be interns. To configure the different employee kinds in your company, use the Employment Types option found in the Configuration menu.
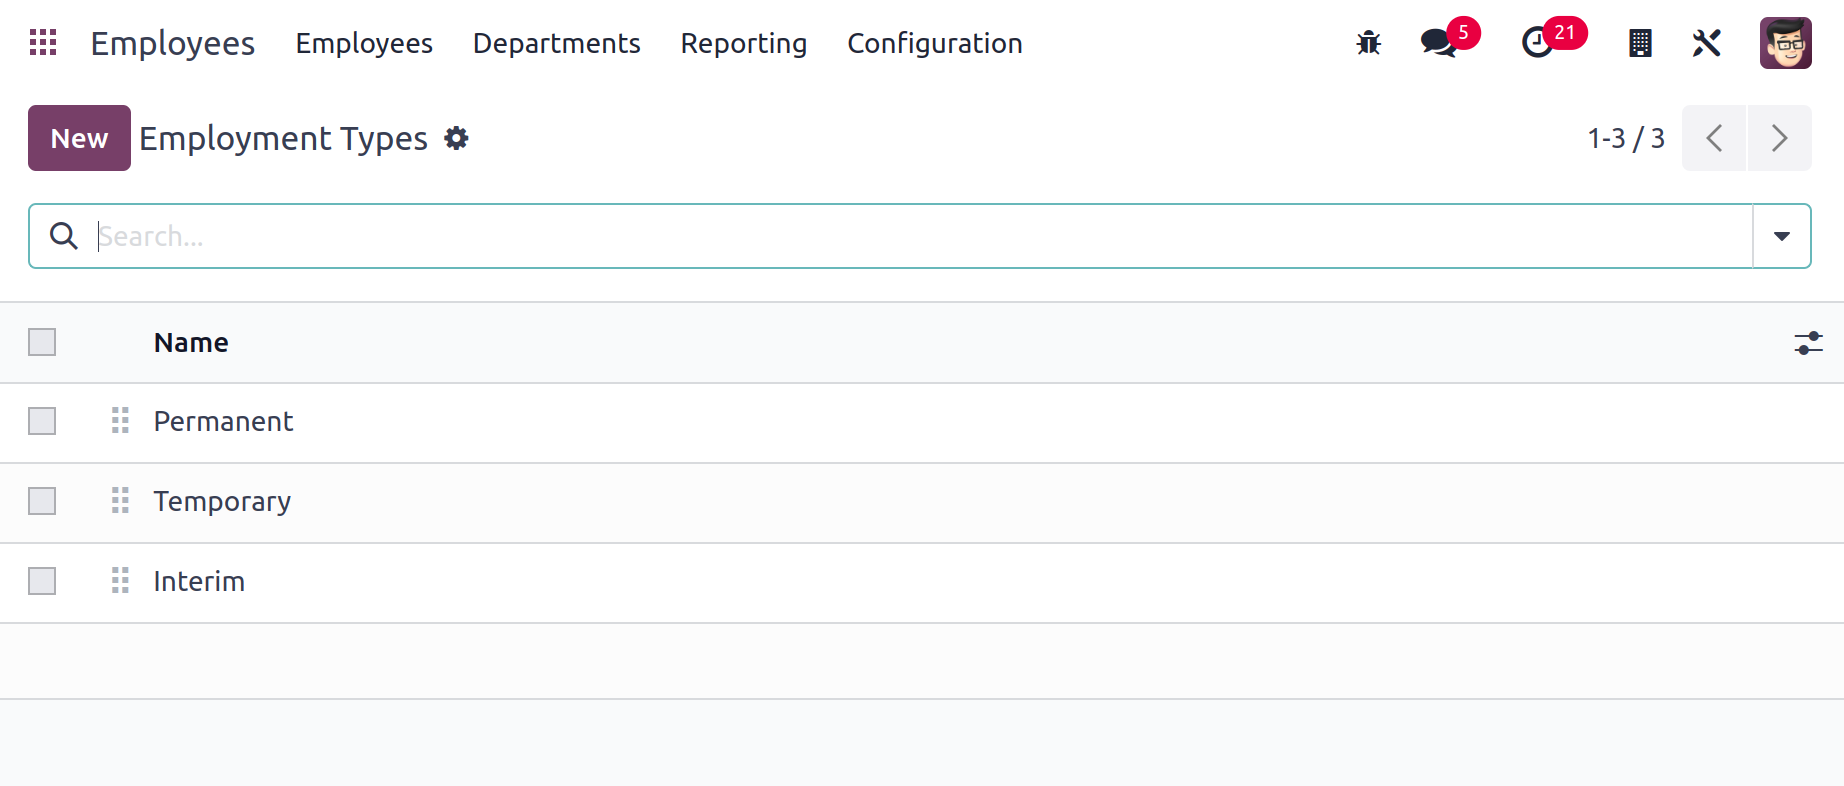
Using the New button, you may create Employment Types quickly. The Employment Type must be mentioned in the space provided before you click the Save button.
Work Locations
If your firm has many branches and workplaces, you may use the new Odoo17 Employees module to create unique entries for each workplace. The Work Location option is available from the Configuration menu and may be used to configure several locations for your business.
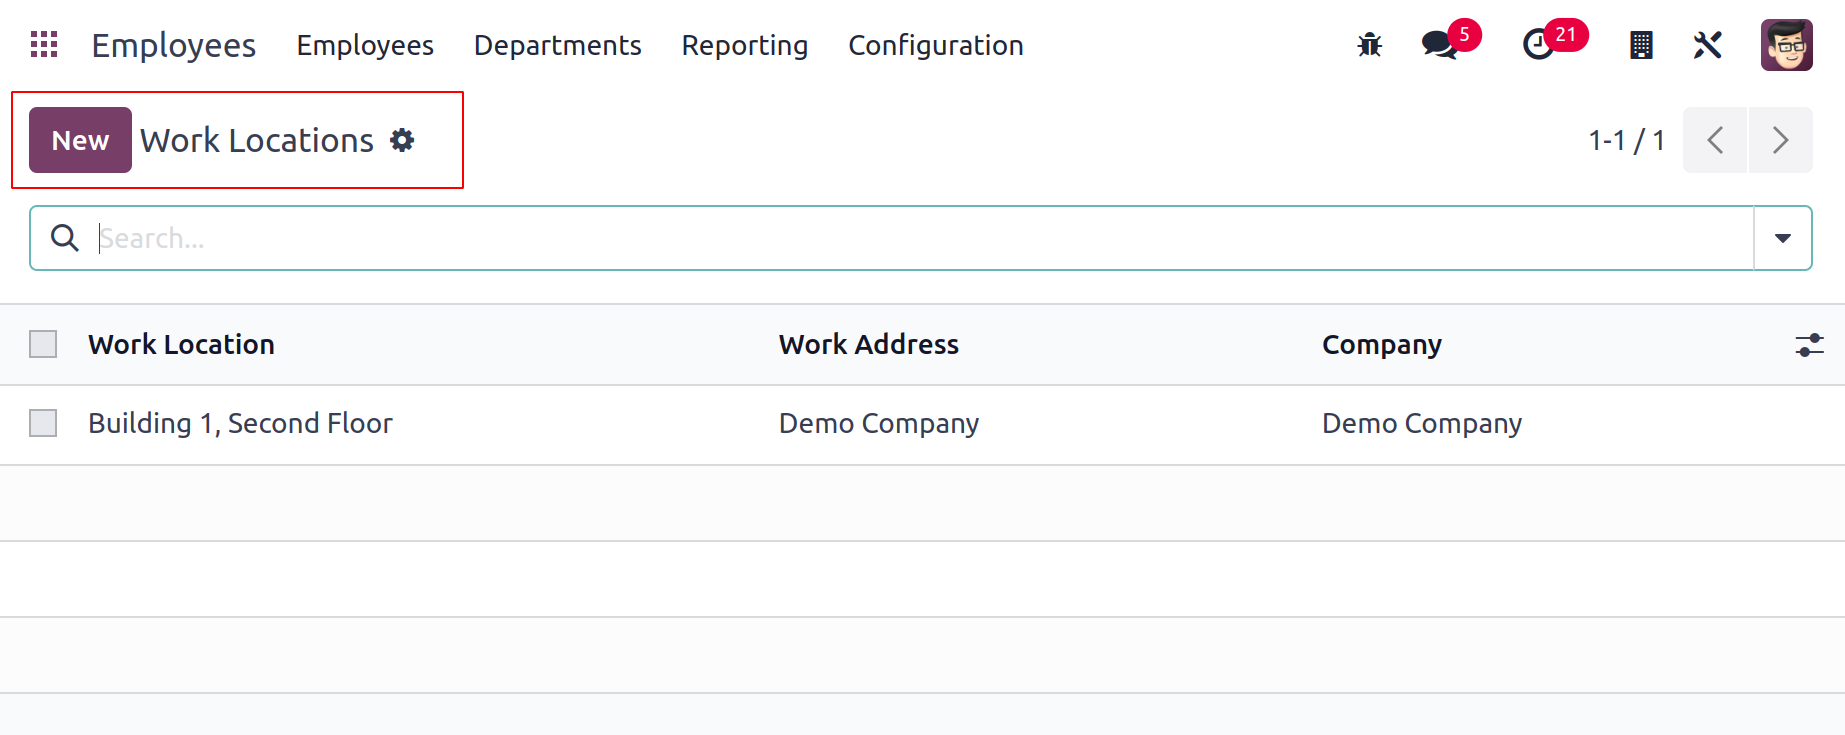
The information about the Work Location, Work Address, and Company is included in the list view of the Work Location. To configure the new work location, click the New button, and Odoo17 will open a new window.
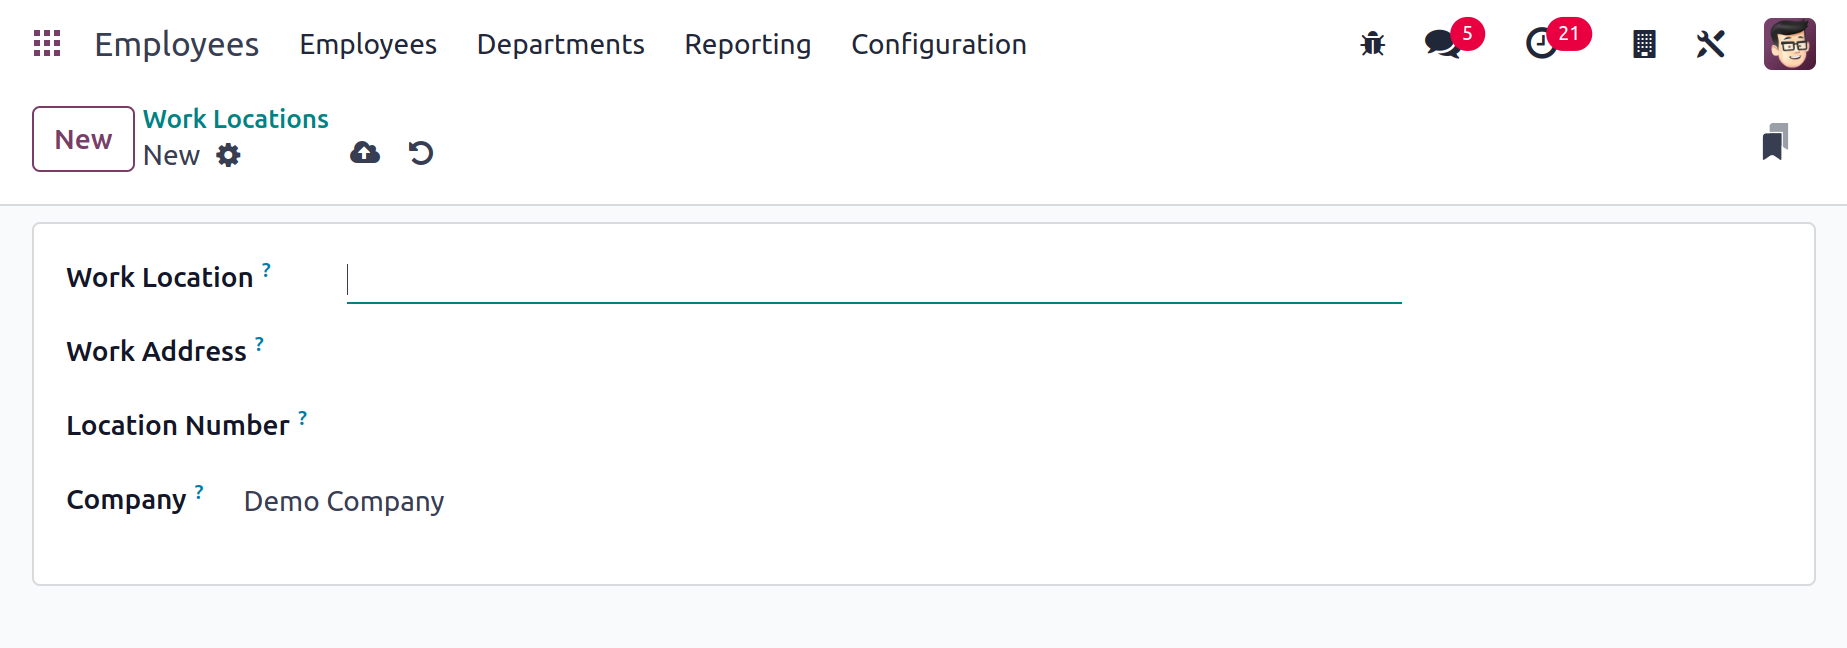
You may fill out the Work Location information here. Put the Work Location, Work Address, Location Number, and Company in the appropriate fields. The information about the work location will be saved in your database once the configuration is complete.
Departure Reasons
To indicate the reasons for an employee's departure from the organization, use the Departure Reasons option found in the Configuration menu. Using the Odoo17 Employees module, it is simple to write the departure explanations. Only a few steps are required. First, go to the Configuration menu and choose Departure Reasons. You will see a window with the specifics of the pre-configured departure reasons, as seen in the screenshot below.
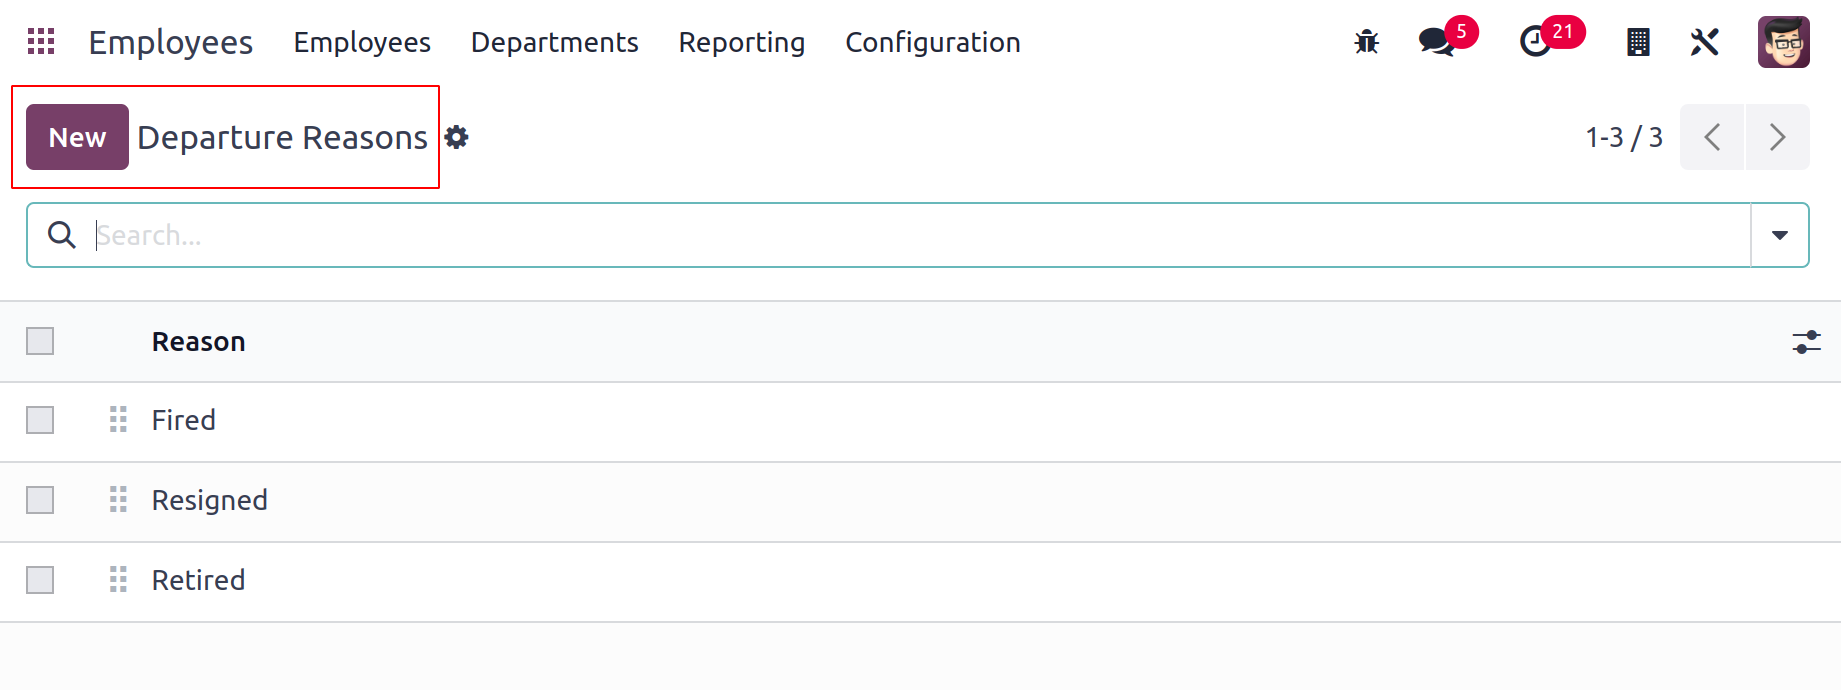
Clicking the New button will let you to add a new justification to the current list. A new line will immediately appear under the current list when you click the New button, allowing you to provide the new reason. All you have to do is click the Save button.
Skill Types
We included instructions on how to include new talents in the résumé line when configuring an employee profile. You will be requested to include the skill type when describing an employee's skills. You can define numerous skill types using the Skill Types option found in the Configuration menu.
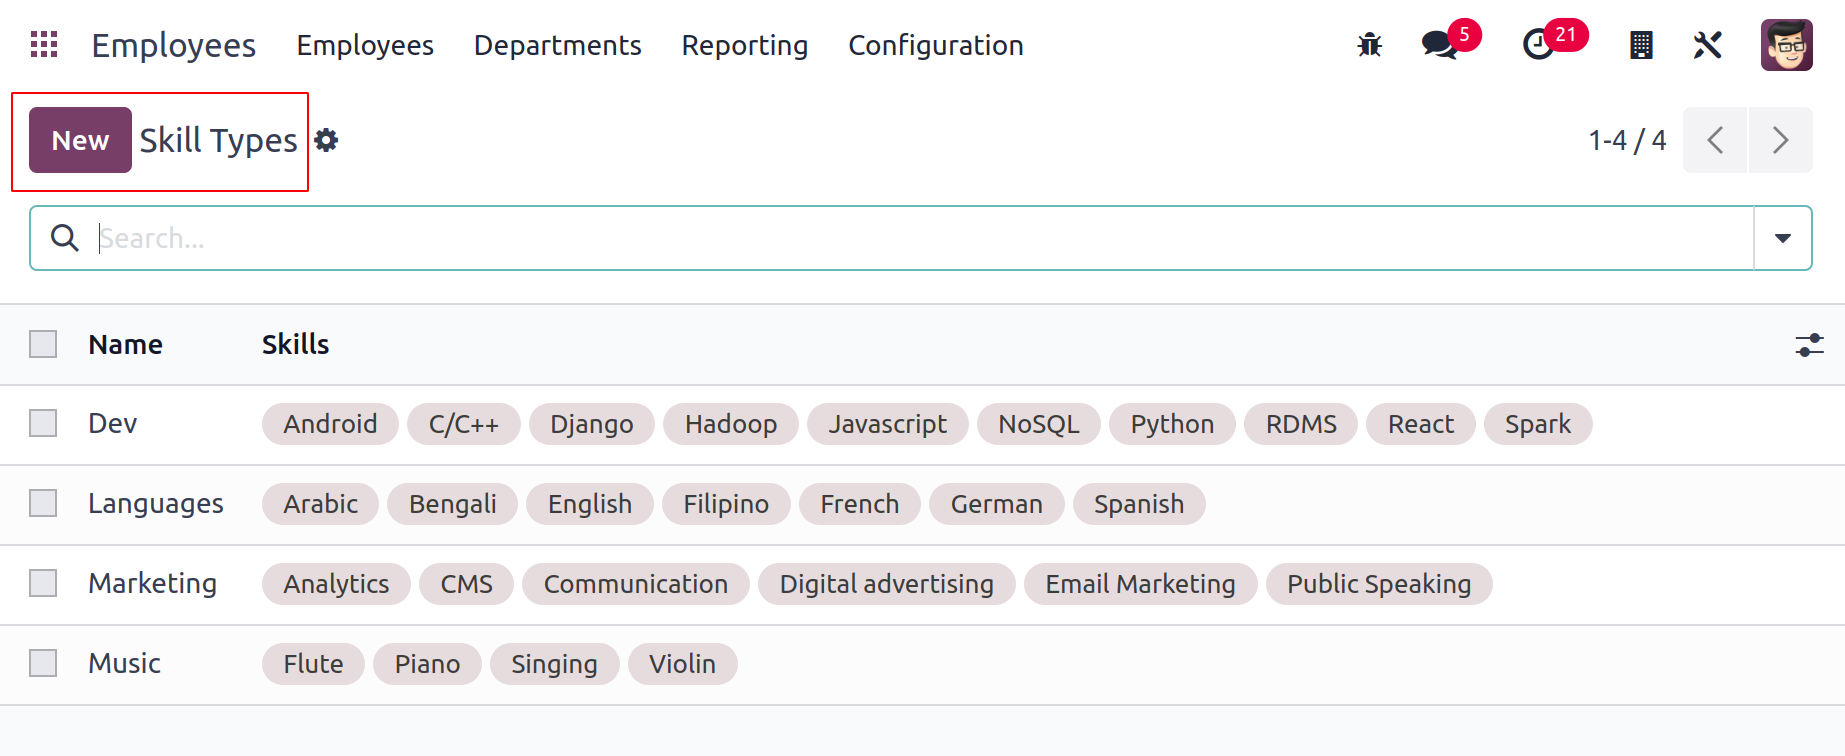
The list of skill types with their names and skills will be displayed in the window. Select "New" from the menu. You will be presented with a new form view, as seen in the image below, where you can enter the name of the skill type.
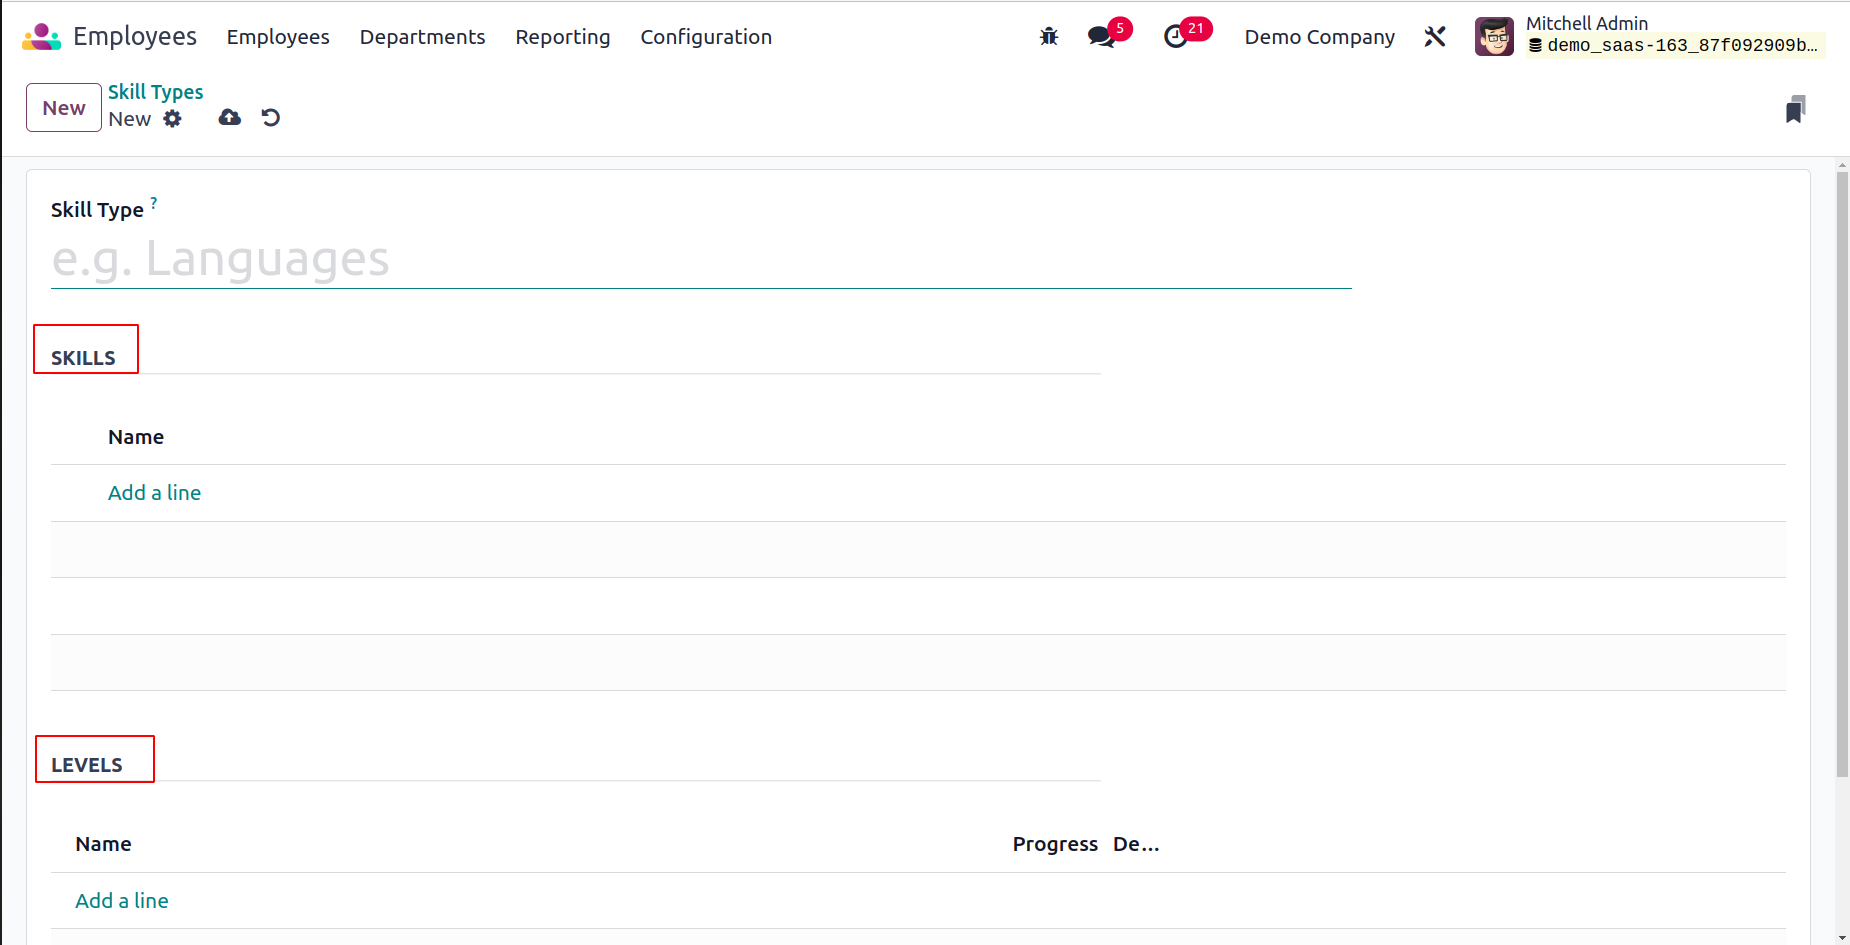
Using the Add a Line button, you must now list the skills in the available space. Under the Levels tab, you can configure several levels for the talent. To set different skill levels, click the Add a Line option. A new pop-up will appear, as displayed below.
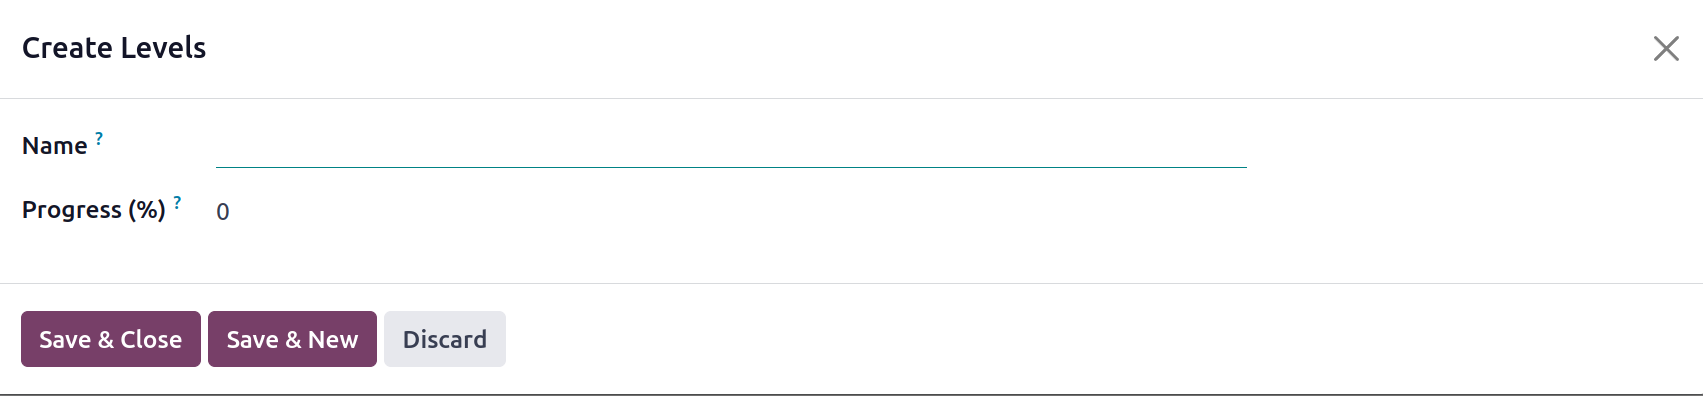
You can set the Progress level and give the level a name here.
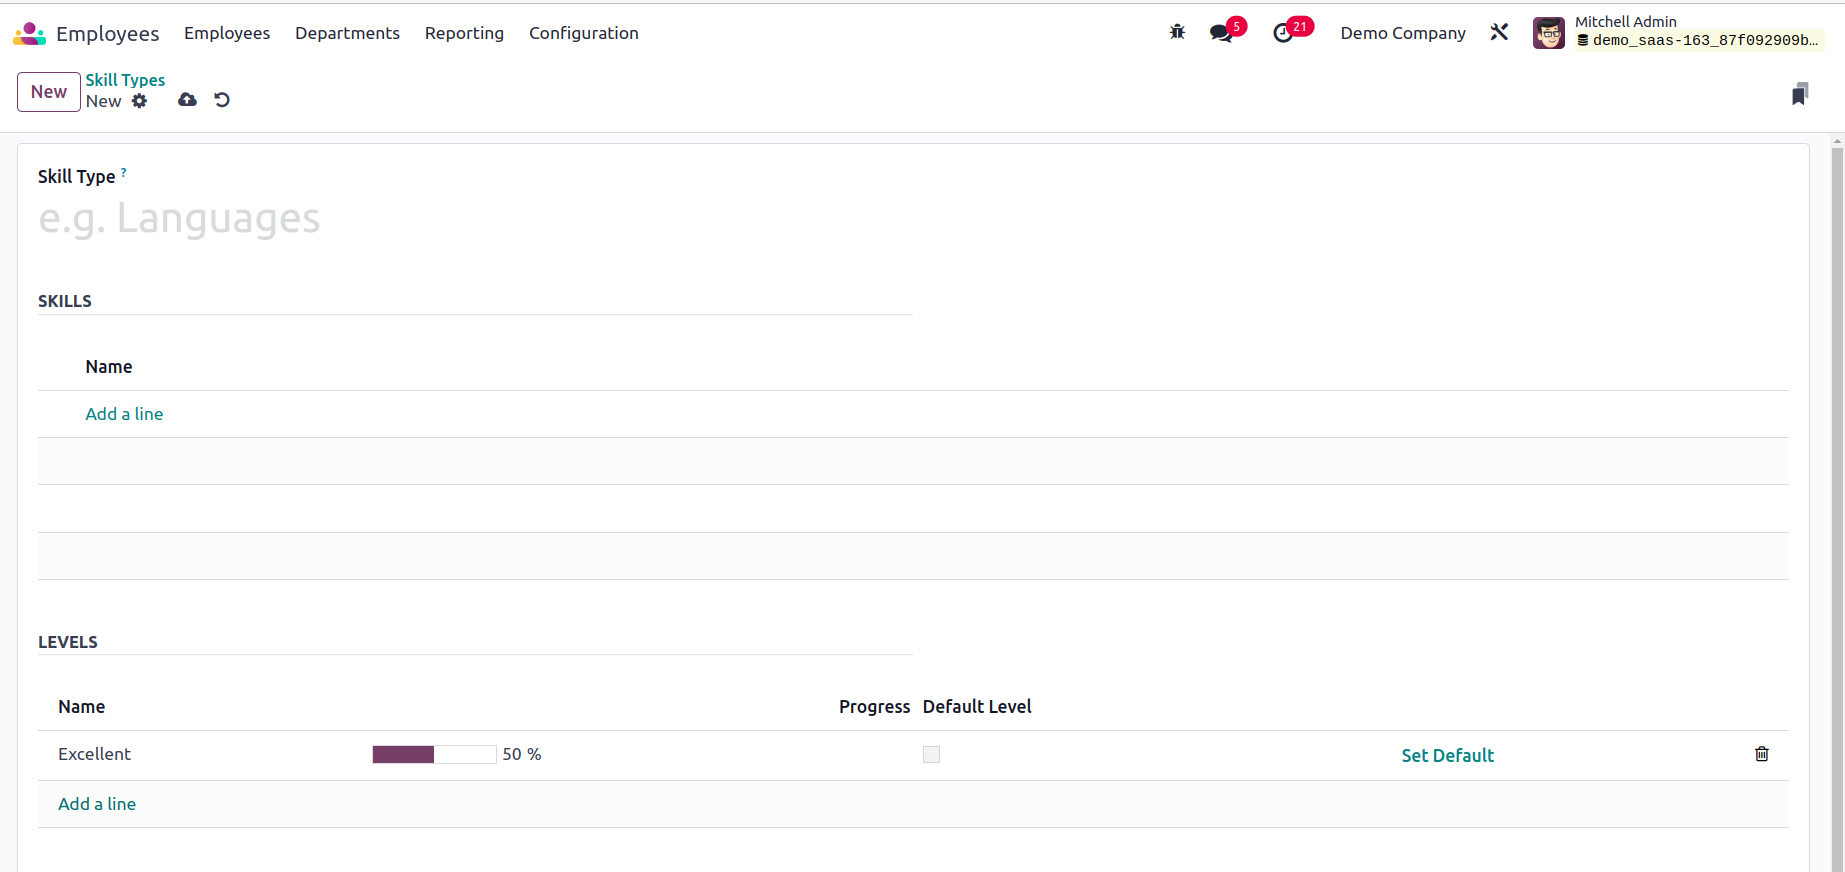
This talent has multiple levels that you can set. You can turn on the Default Level field for a specific level if you want to make it the default level.
Line Types
From the Configuration menu of the Employees module, similar to how we configured skill types, you can configure several Resume Line Types for the employee profile.
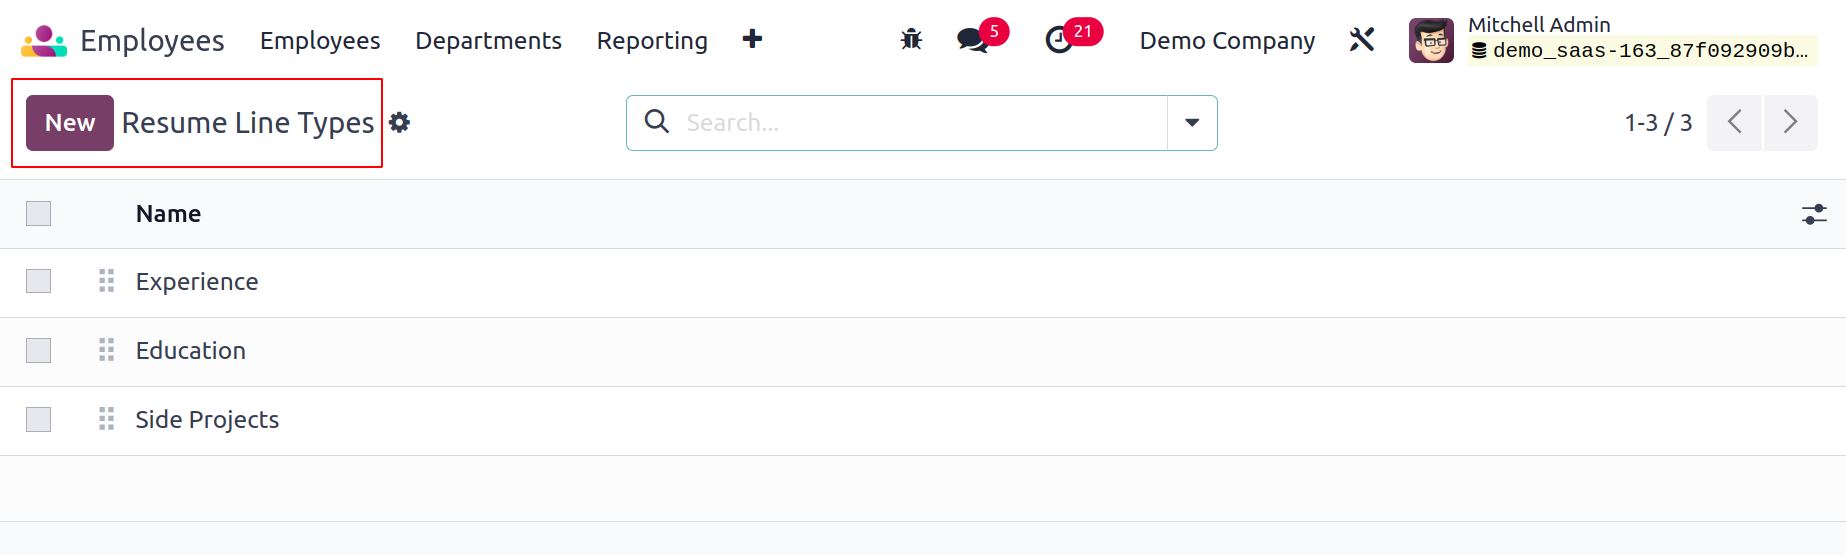
Simply click the New button and type the Name of the Resume Line Type in the newly formed line. Your new resume line is available for use on employee profiles once you click the Save button.
Tags
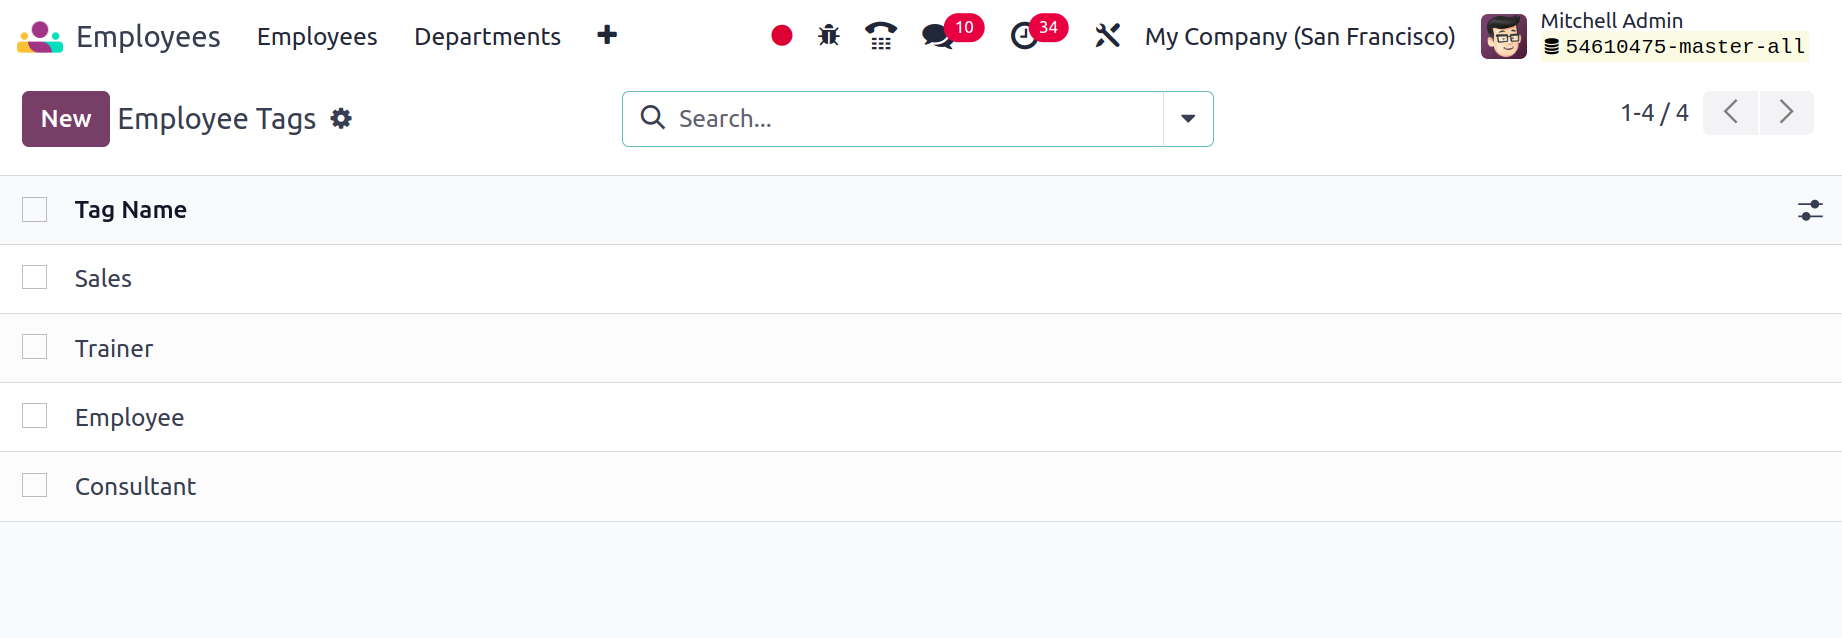
Under the Configuration menu, Employee Tags that can be used for searches can be set up. Click the New button to add a new tag.
Working Schedule
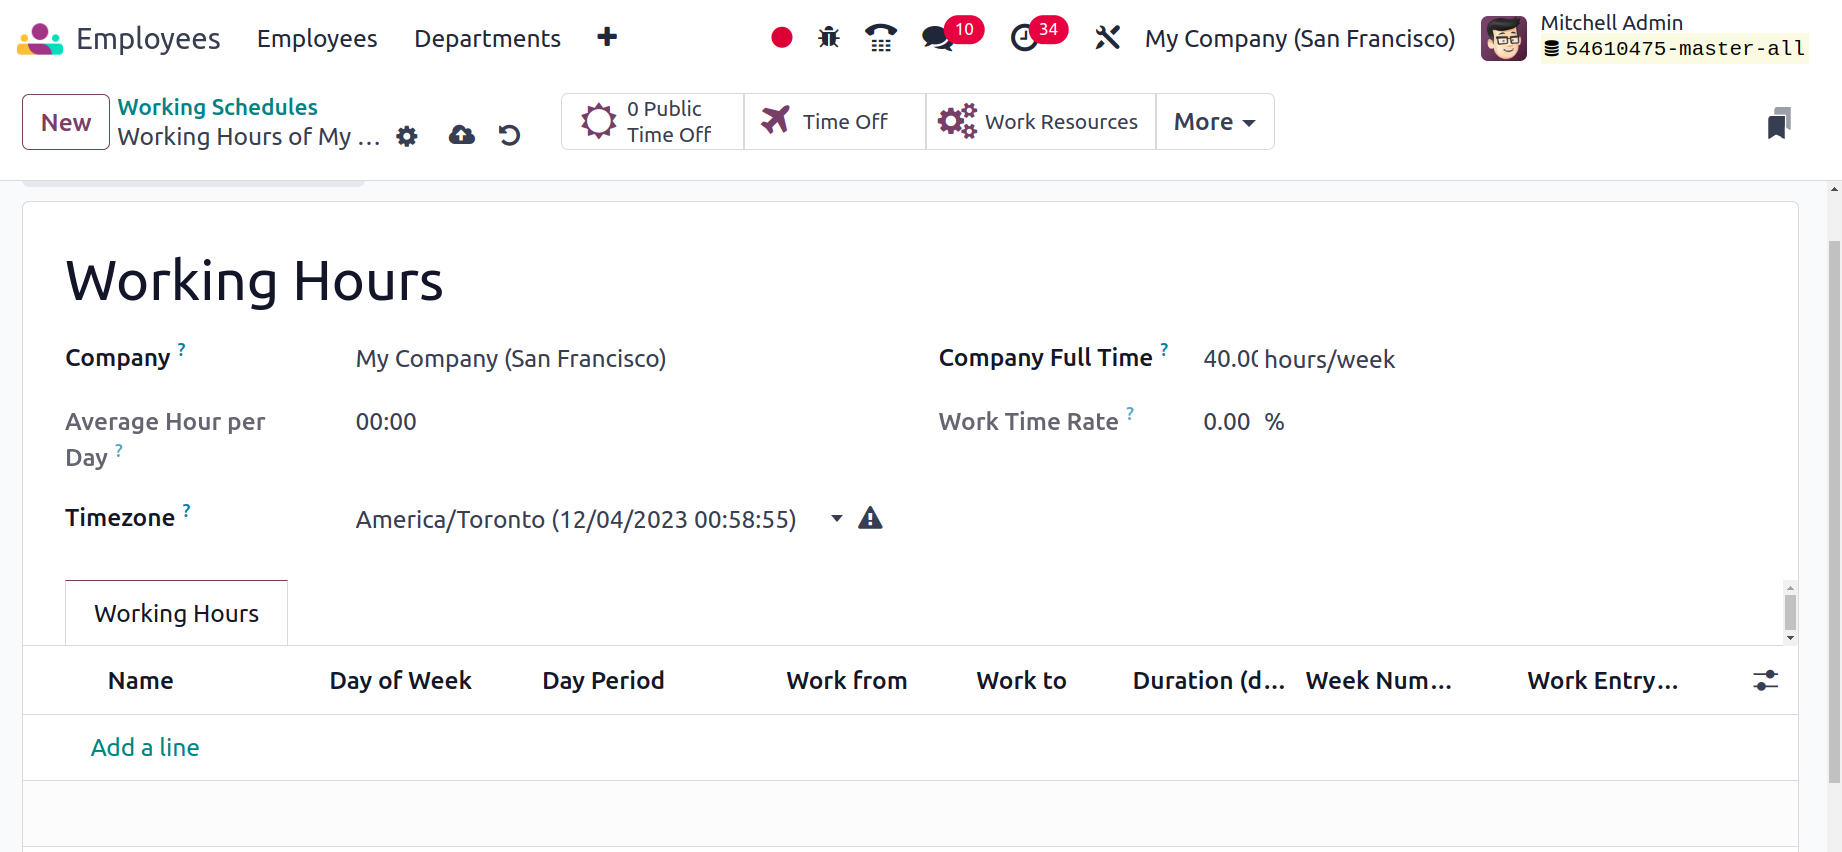
Work schedules for employees are generated via the Configuration menu. Thus, from the Configuration menu, select the Working Schedule option. The list includes the Working Time, Work Time Rate, Company name, and the number of contracts that use this. You may therefore add a new working schedule by using the New button.
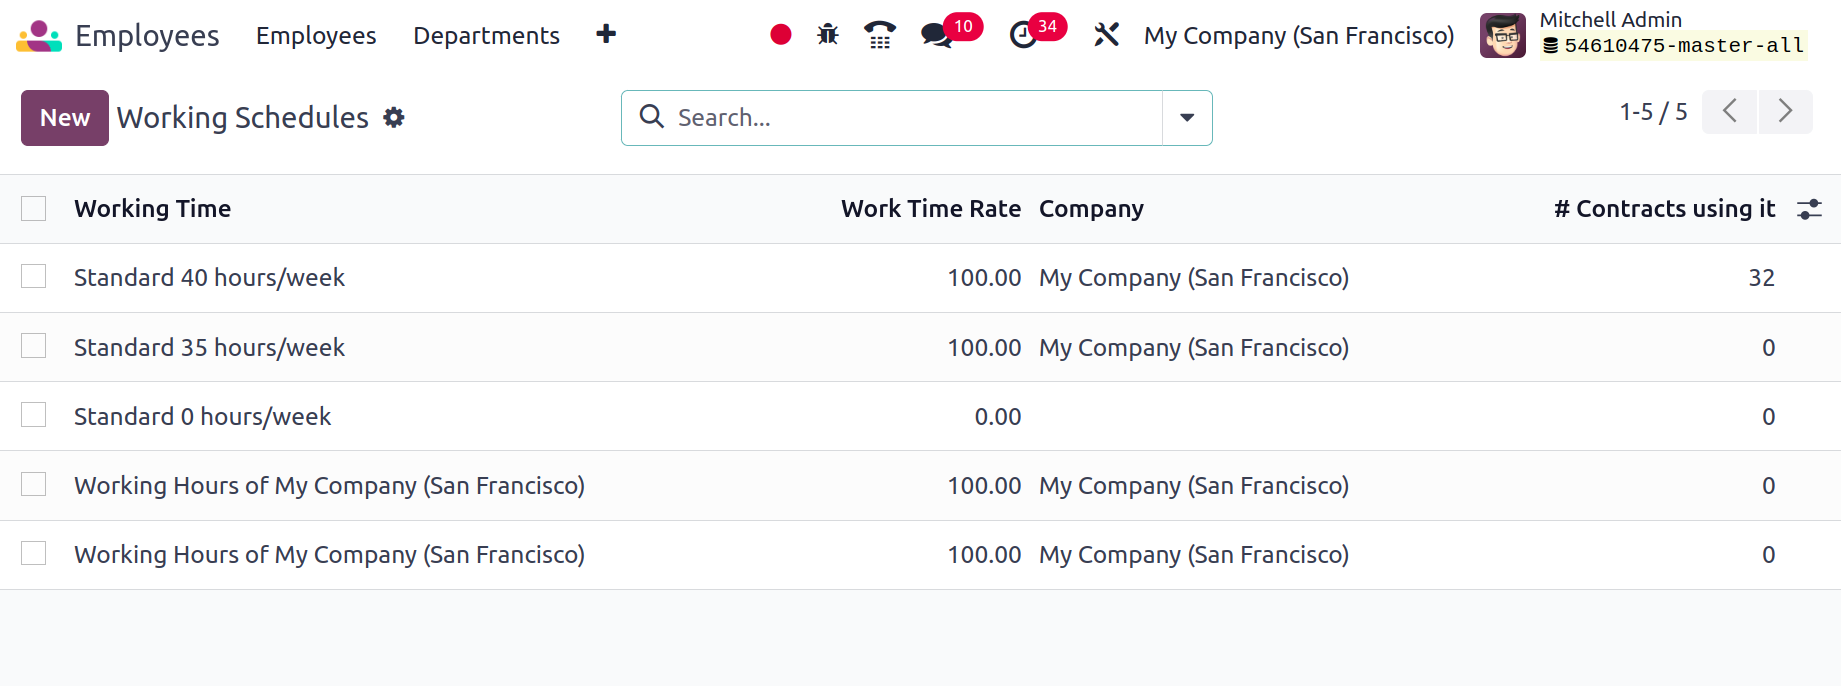
Mention the company first, and then add the name of the schedule. Next, the Time Zone and average working hour for the day will be discussed. Company, the amount of hours needed to work on a company schedule in order to be classified as full-time is called Company Full Time. The Work Time Rate must fall between 0 and 100 when calculated in relation to a full-time work schedule. Next, make reference to the Working Hours within the tab.
Contract Templates
You can access the Configuration menu of the Employee module to generate contract templates. The option for Contract Templates is available here. Odoo17 will launch a new list view, as seen below when you select this option.
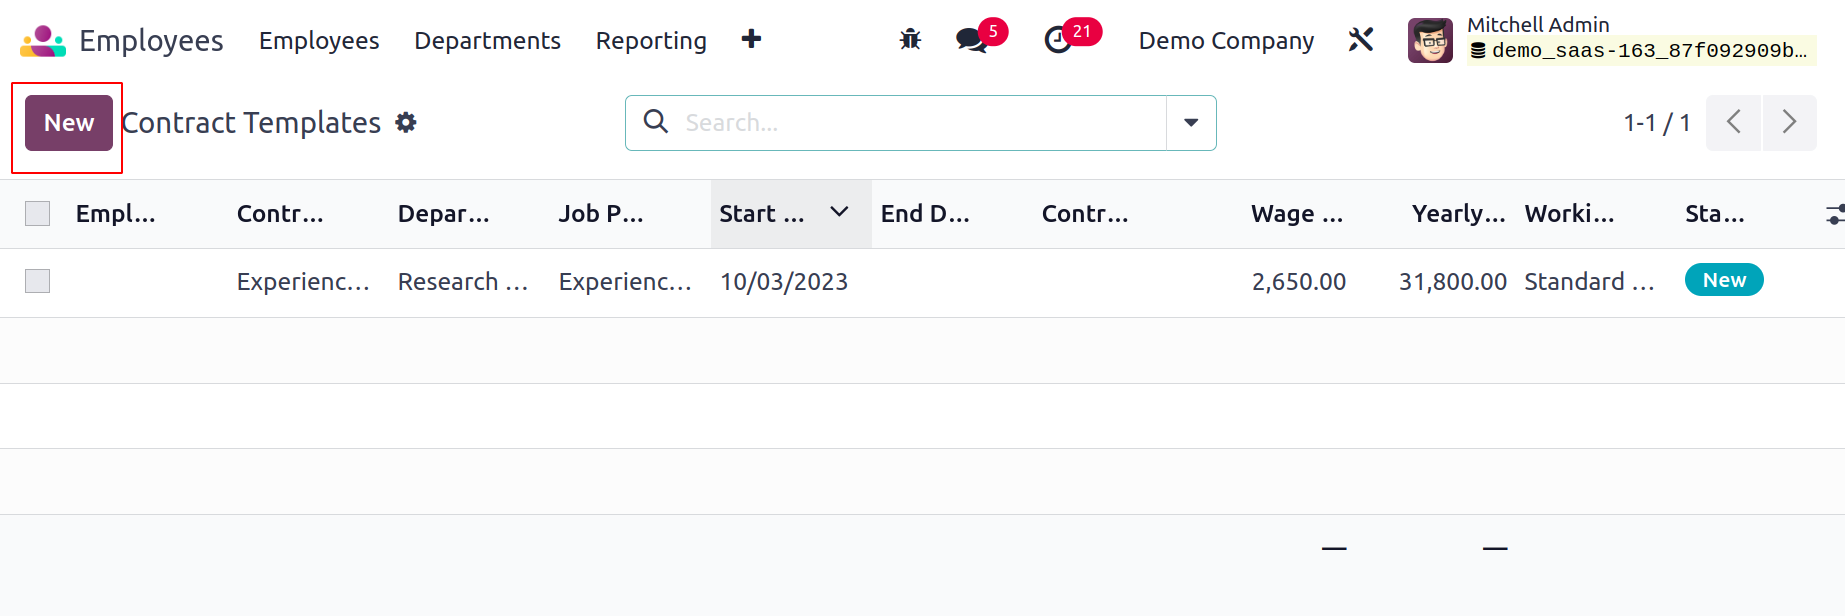
The Contract Reference, Department, Job Position, Working Schedule, Salary Structure Type, Status, and Company data are all included in the Contract Templates' preview. Let's look at how to make a new contract template. To get a new form exactly as seen below, utilize the New button.
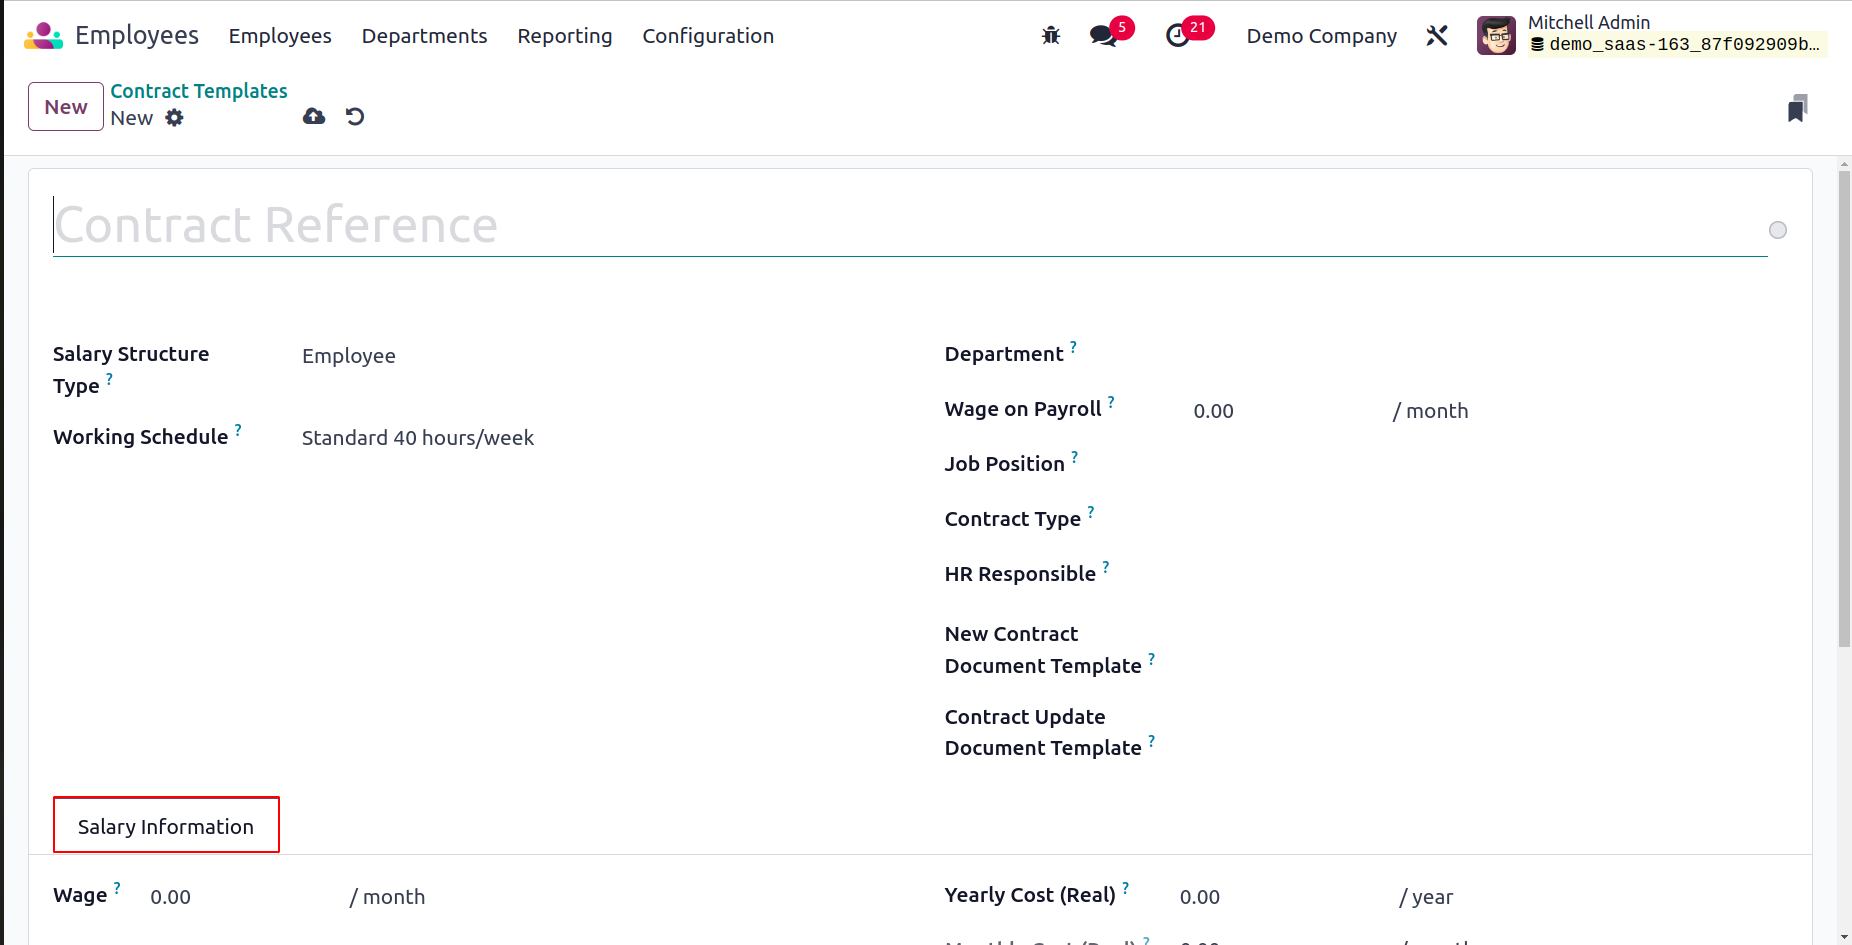
You can enter the Contract Reference in the space provided here. then decide on the contract's salary structure type. You can enter the employee's working schedule in the relevant field. You can modify the working schedule to meet your needs by using the external link provided below. You can select the Working Schedule, Attendance, or Planning as the Work Entry Source. It will specify the source for the creation of work entries. By choosing the appropriate option, the work entry will be created from the employee's working schedule, attendance, or planning.
You can enter the Department, Wage on Payroll, Job Position, Contract Type, and HR Responsible in the relevant boxes. The applicant will need to sign the New Contract Document Template as the required document by default in order to accept a contract offer; therefore, be sure to specify it. The employee will by default be required to sign the Contract change Document Template in order to change his or her contract.
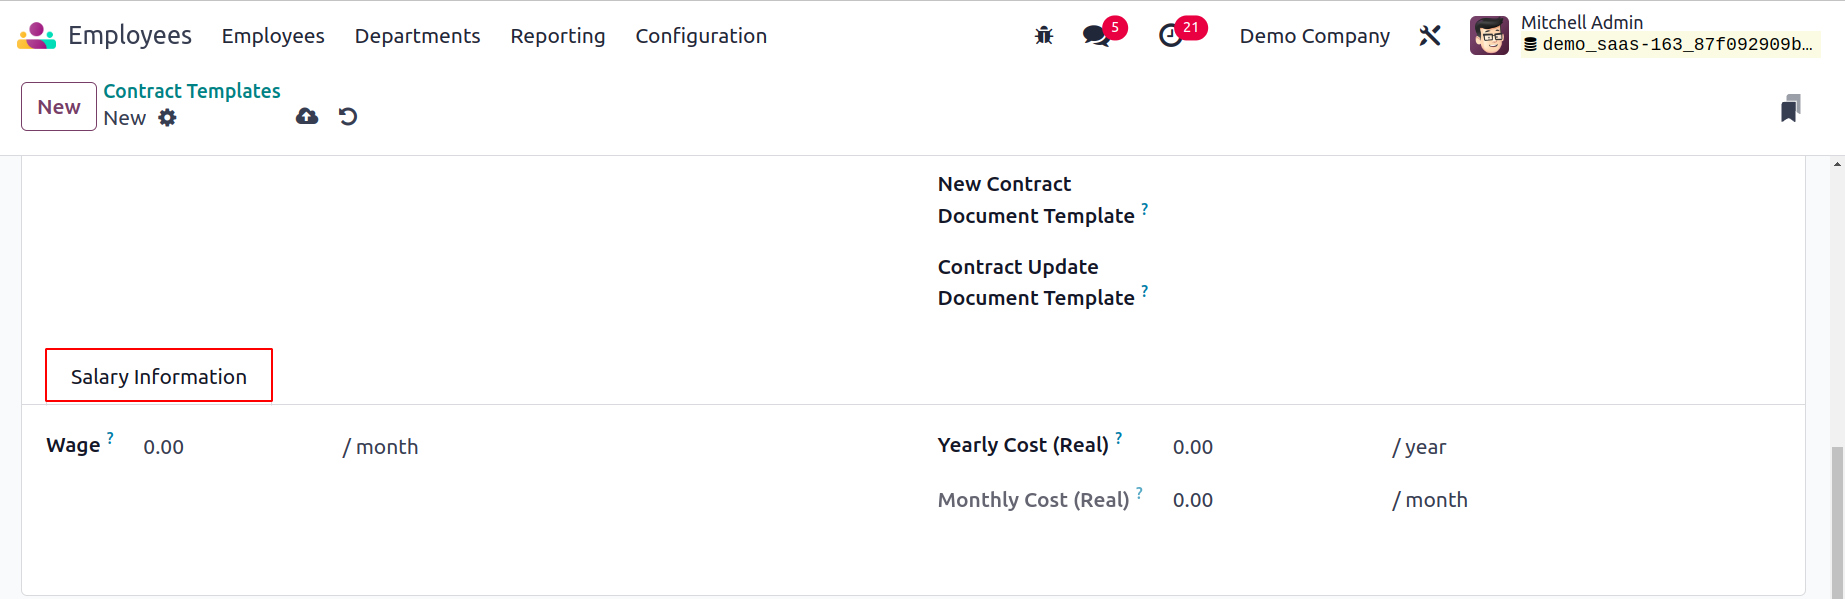
You can enter the Wage Type, Wage (the employee's monthly gross salary), Yearly Cost (the total real yearly cost of the employee to the employer), and Monthly Cost (the total real monthly cost of the employee to the employer) under the Salary Information tab. The withholding tax rate will rise spontaneously once fiscal voluntarism is activated. The Fiscal Voluntary Rate shall be mentioned in a separate field.

If you are generating this contract template for part-time work, you may use the Part Time tab to enable the Part Time option. You can define the Standard Calendar and Part Time Work Entry Type in separate fields by turning on this option. You can use them for new hires once you've finished configuring the contract template.
Activity Planning
In the Employee module's Configuration menu, select the Activity Planning option. This option can be used to set up different activity plans for the workers, similar to how onboarding and offboarding activities work in a business. The list of already configured plans will appear in the Plans window, as illustrated below.
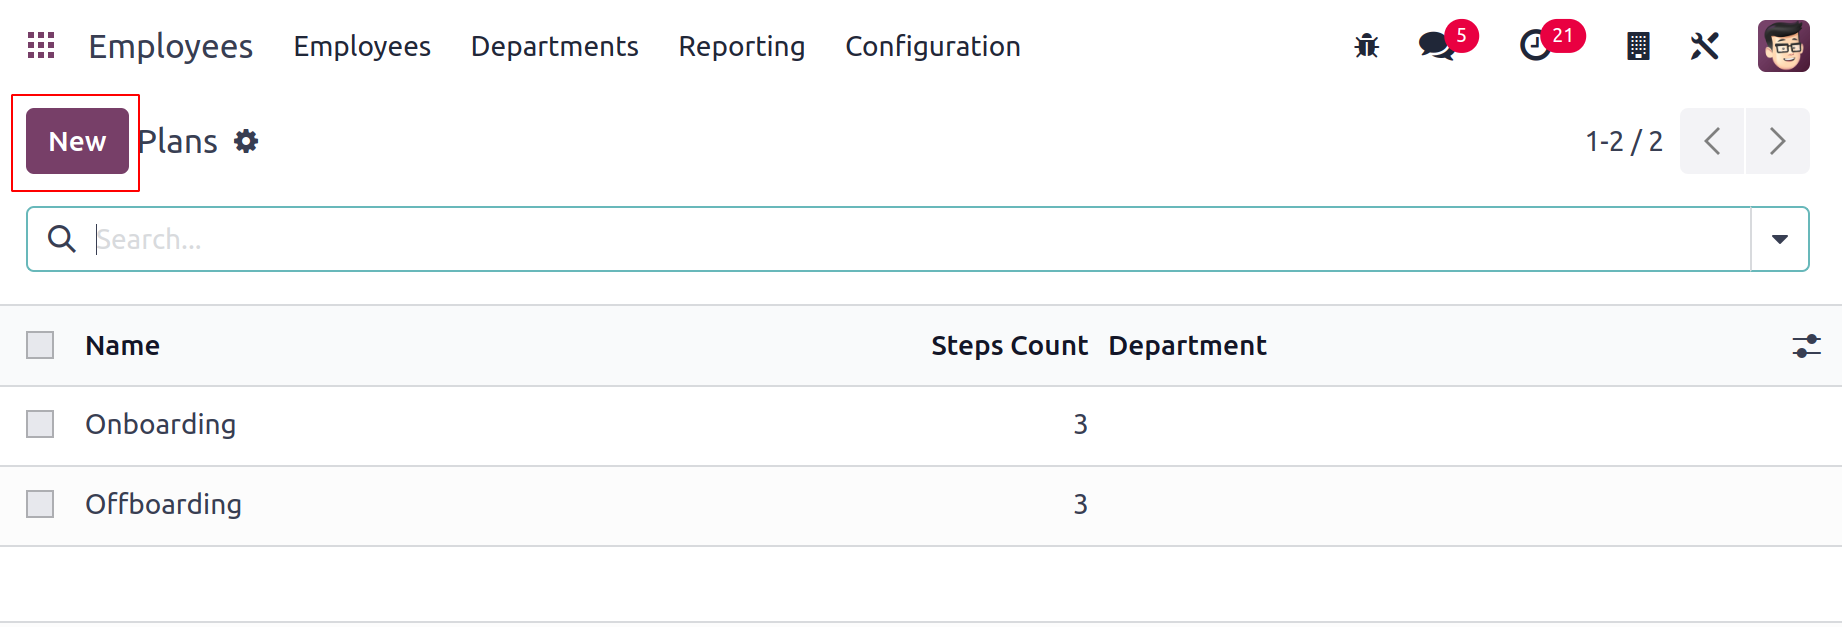
You can create a new activity plan for the employees by clicking the New button, which will display a new form view.

You can specify the Department and Company in the corresponding fields after specifying the Plan Name. Using the Add a Line button, you can add activities to the Activities To Generate tab.
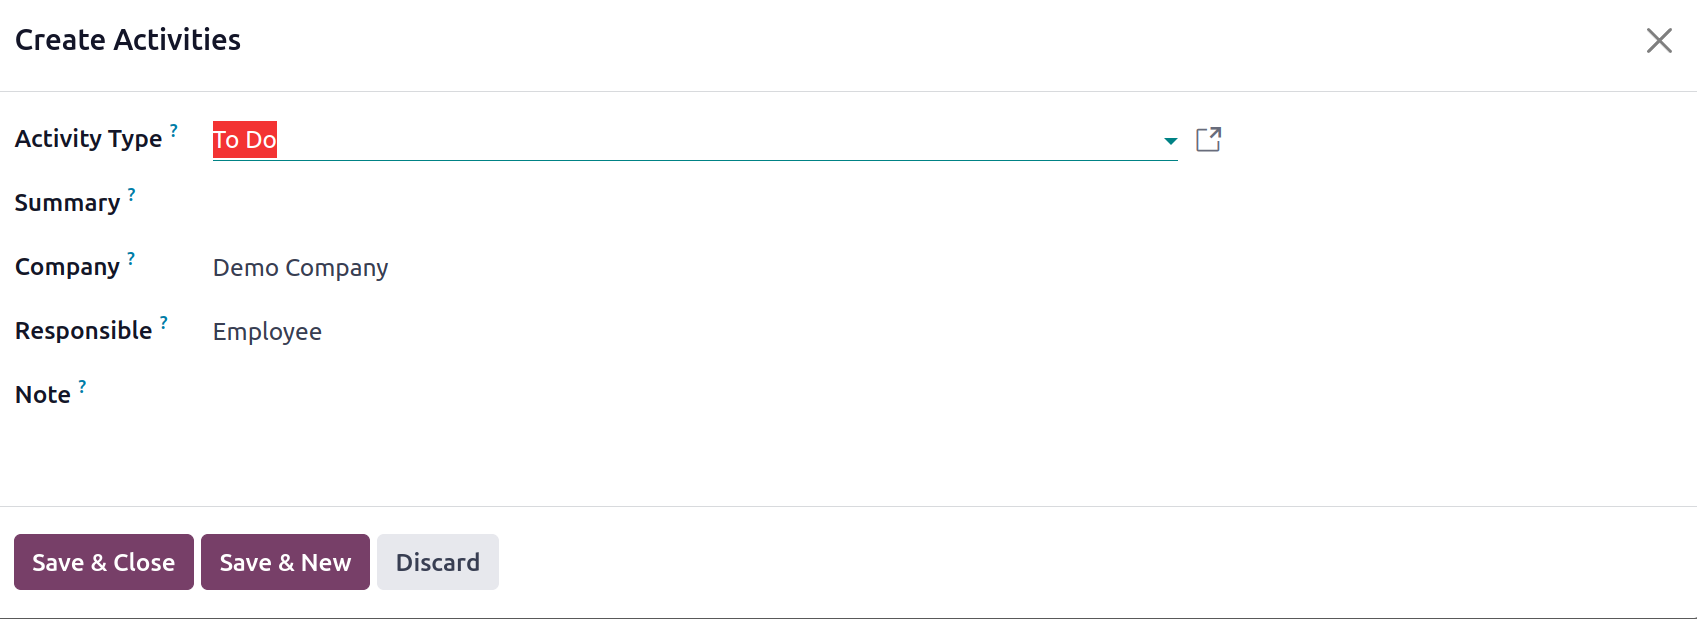
You will see a pop-up window here, as demonstrated above. Enter information about the activity's Type, Summary, Company, Responsible, and Note in the corresponding fields. The new plan will be saved in your database after the necessary actions have been added to it.
Badges
It's crucial to show your colleagues that you appreciate their effort if you want to create a positive work environment. Companies frequently run programmes for talent development and employee appreciation to foster talent and express gratitude for their contributions to the business. You may show your staff how much you value them by rewarding them appropriately based on their performance. You can locate Badges in the Odoo17 Employees module that will serve as a reward. Candidates who meet the requirements can receive badges based on their performance. Their employee profile will show these badges.
The Configuration menu of the module allows you to create and manage employee badges. For this, choose the Badges option from the Configuration menu.
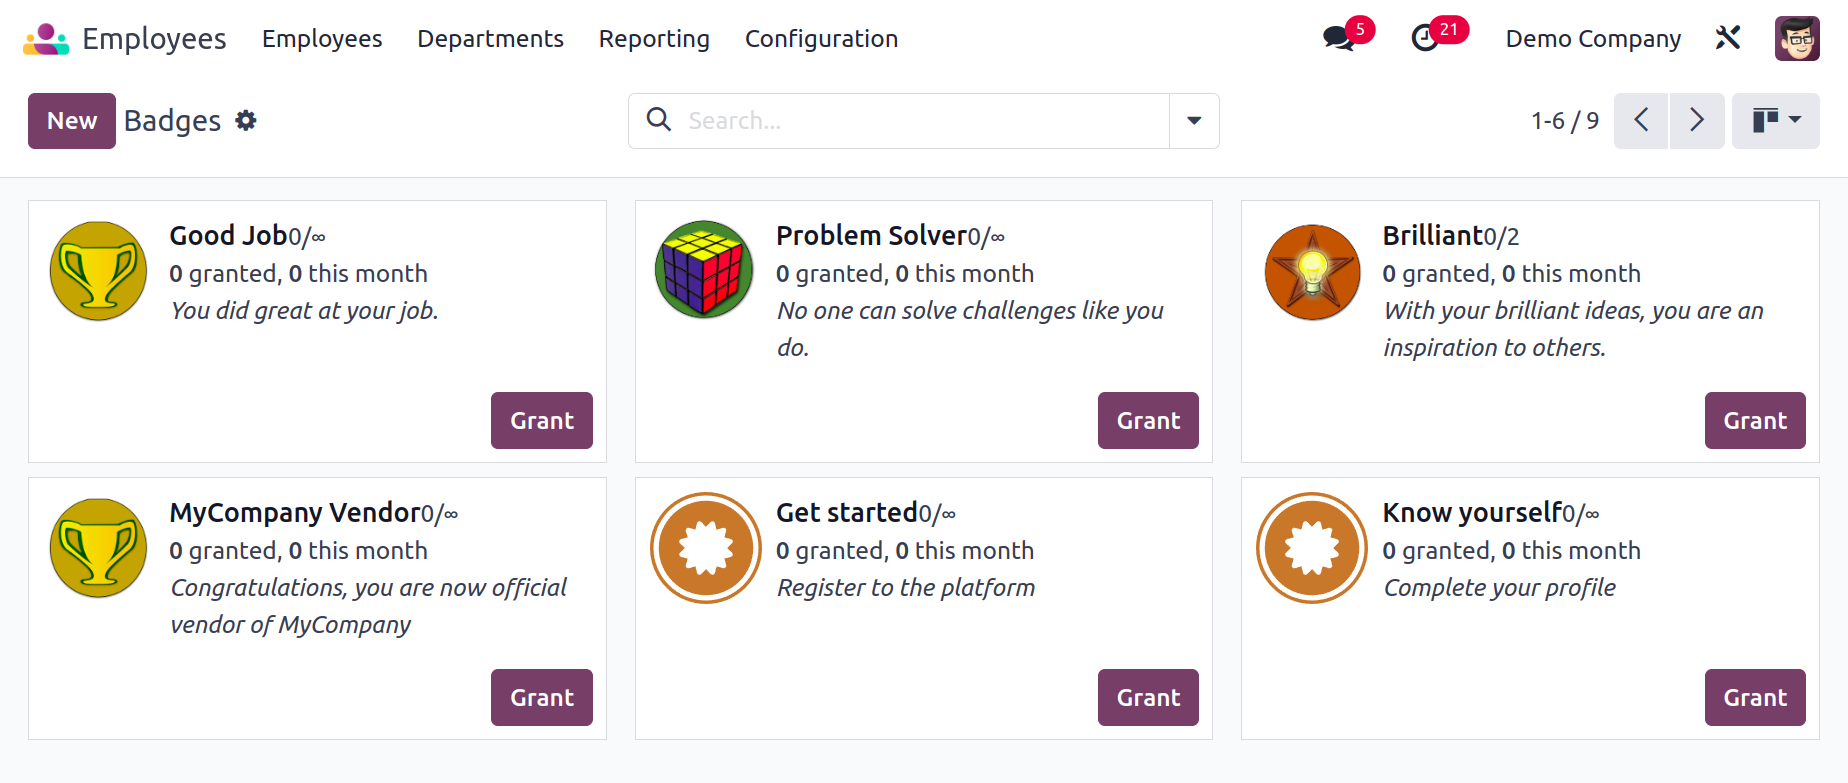
Here, you may discover a variety of employee badges. To be eligible for these badges, the employee must fulfill the requirements. By selecting the Grant option, the administrator can issue a badge to an eligible worker. This will result in the pop-up displayed below.
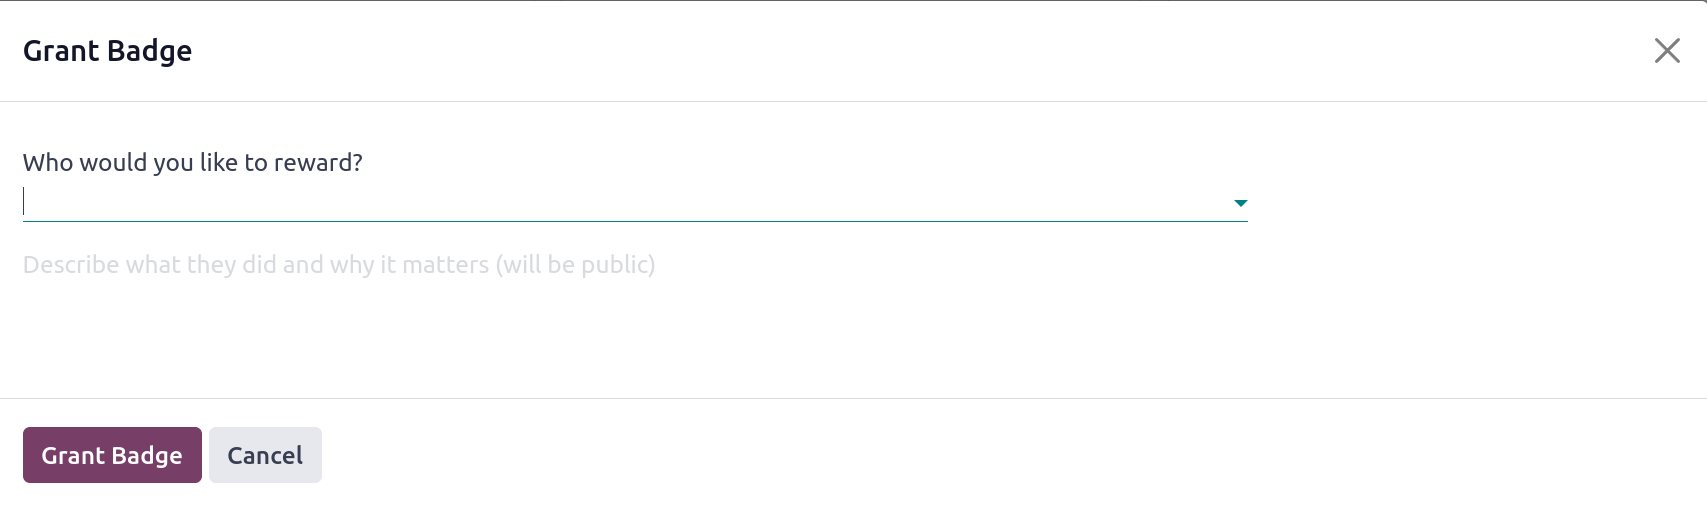
In this pop-up window, the employee's name and a brief explanation of how they earned this badge can be entered.
Use the New button to set up new badges right now.
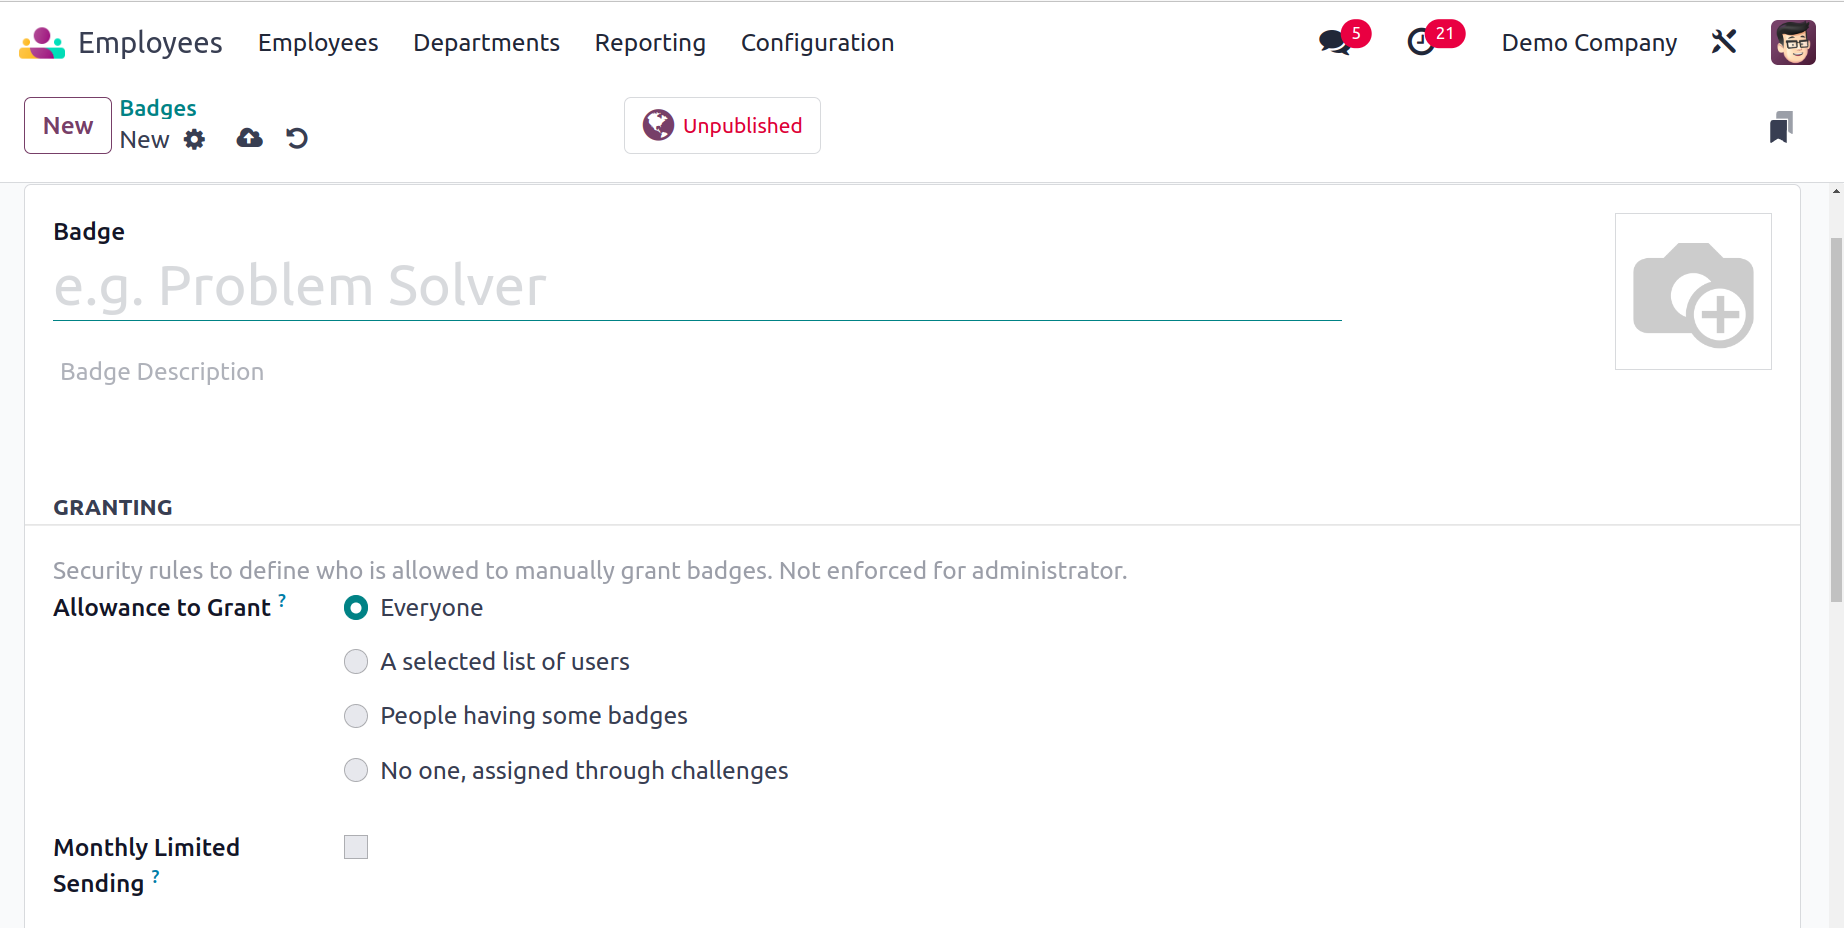
In the space provided, enter a suitable name for the new badge. Also include a brief description so that users may understand the features of this badge. You can establish security constraints on who is permitted to manually award employee badges by using the Granting tab. You can choose to assign this to Everyone, a certain user group, users who have earned some badges, or no one through challenges. You can turn on the Monthly Limited Sending option to choose a monthly maximum for each user who can send this badge. You will receive a new field where you may specify the limit after you enable this option.
The My Monthly page will display how many badges you send each month.
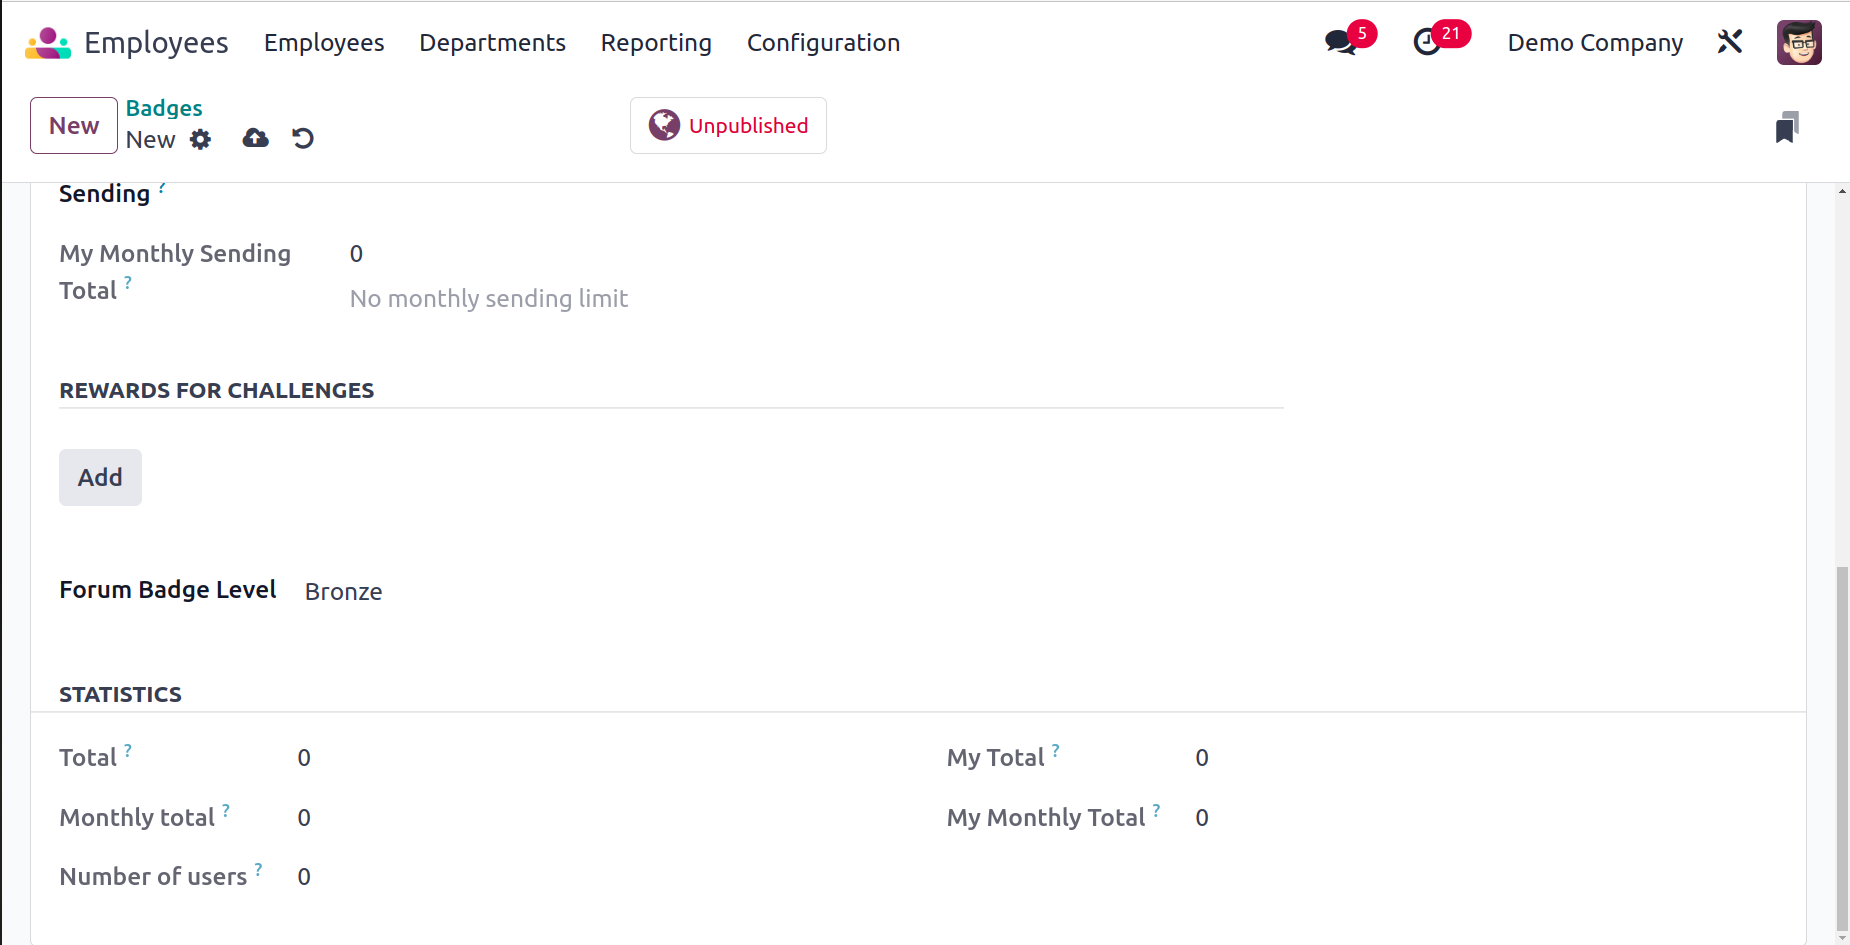
The statistics pertaining to this badge are displayed in the Statistics tab. The total number of times this badge has been earned, the monthly total, the number of users, and the totals for my account are all included. In the Odoo17 Employees module, badges are configured in this manner.
Challenges
In the Odoo17 Employees module, you may give the staff members challenges to complete in order to earn badges. You can award the employee with the appropriate badges once they finish the task. You can go to the Configuration menu of the module and select the tasks option to set up such tasks for your staff. As seen in the image below, selecting this choice will take you to a window that contains information on the challenges that have previously been configured.
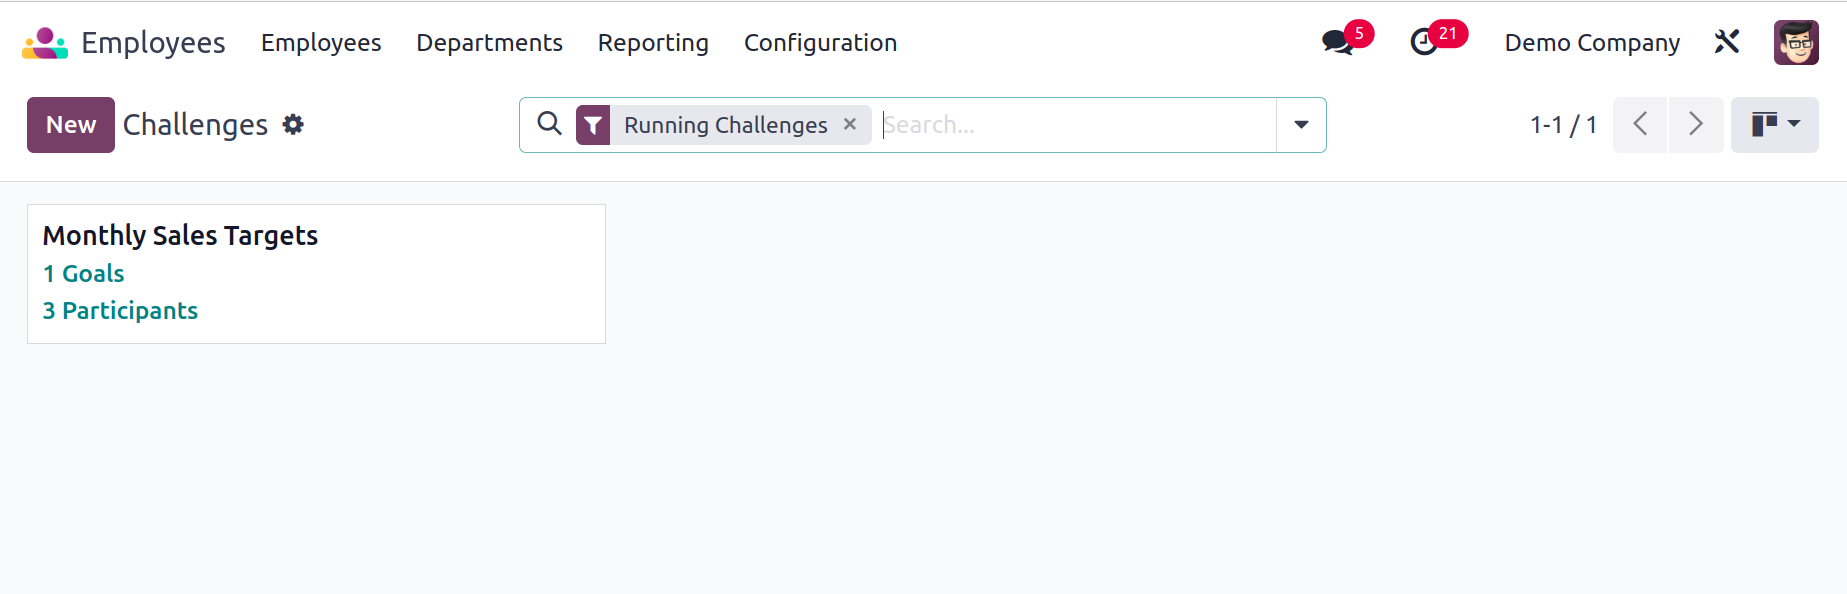
Each challenge lists its title, objectives, and participants. Clicking on them will bring up more information. Use the New button to create a fresh challenge.
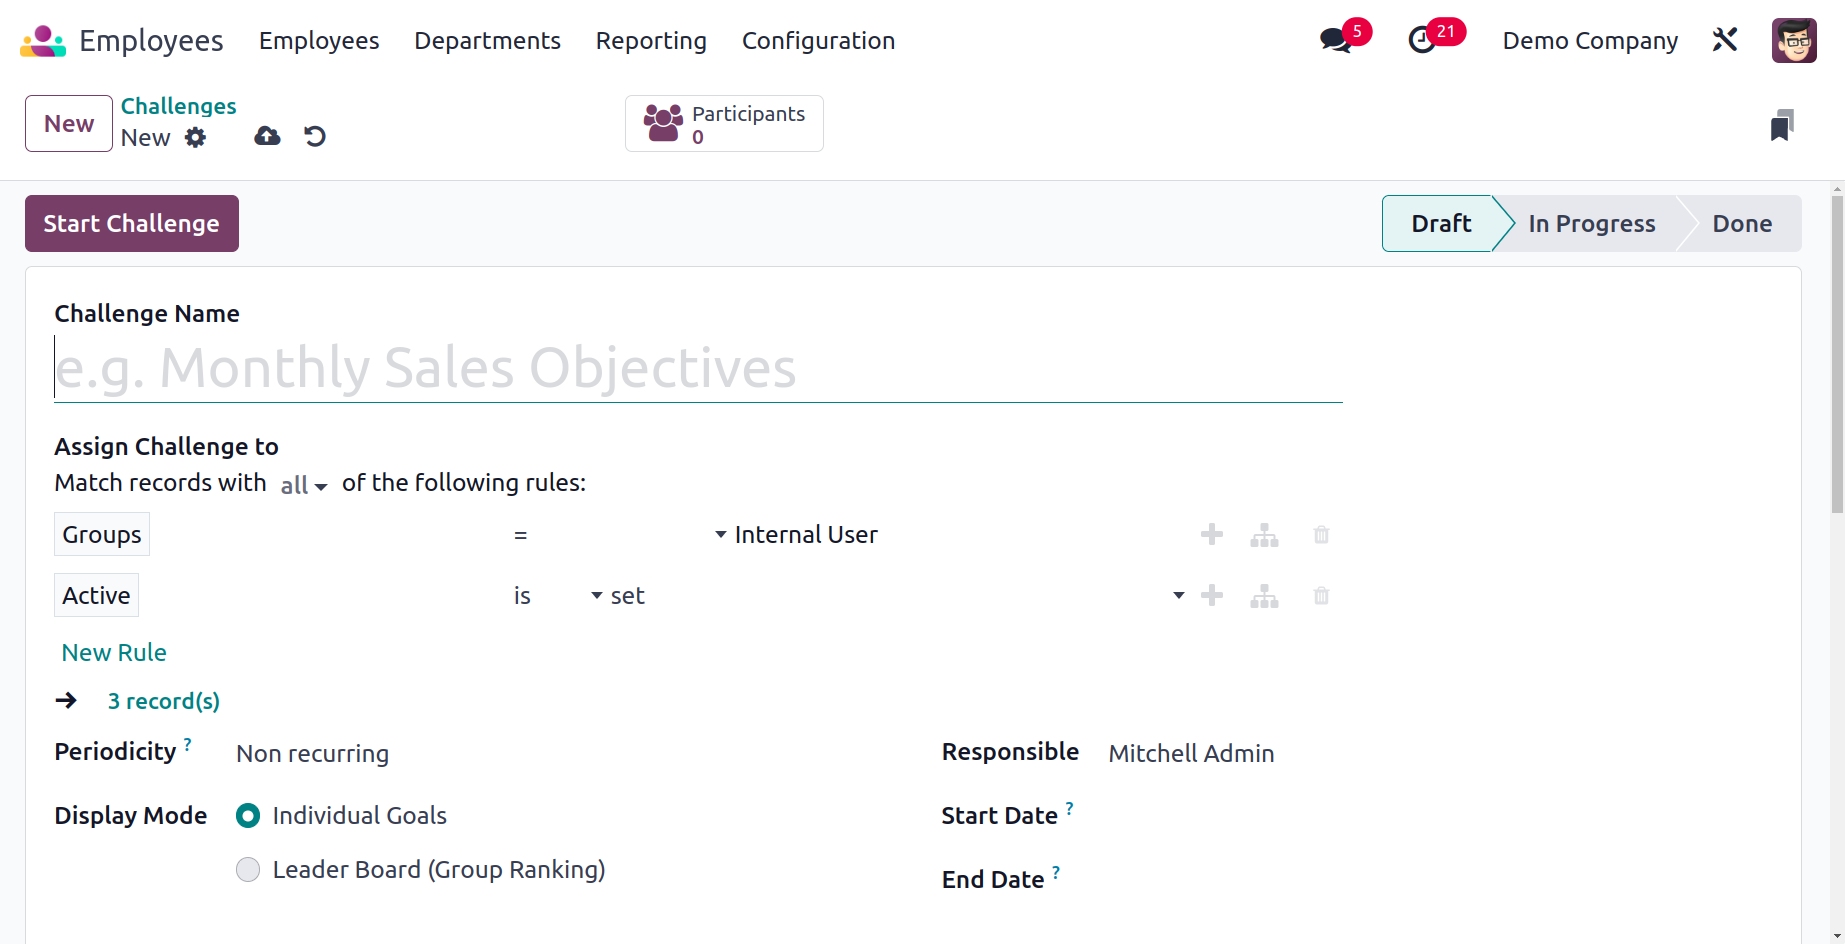
You will find a designated field to enter the Challenge Name here. You can configure users such that Odoo17 can assign challenges to the relevant records by using the Add Filter option. The Periodicity parameter allows you to specify the duration of the automatic challenge assignment. Daily, weekly, monthly, or yearly are all viable options. If you don't want to repeat the challenge, you may also set it to Non-Recurring. Individual Goals or Leaderboards are the two options for the Display Mode. The Responsible box allows for the identification of the employee who will be in charge of managing this challenge. The Start and End date parameters can be used to specify how long the challenge will last.

Using the Add a Line button, you may describe the challenge under the Goals tab. It will assist a user in comprehending the challenges' requirements. Goal Definition, Condition, Target, and Suffix are all included.
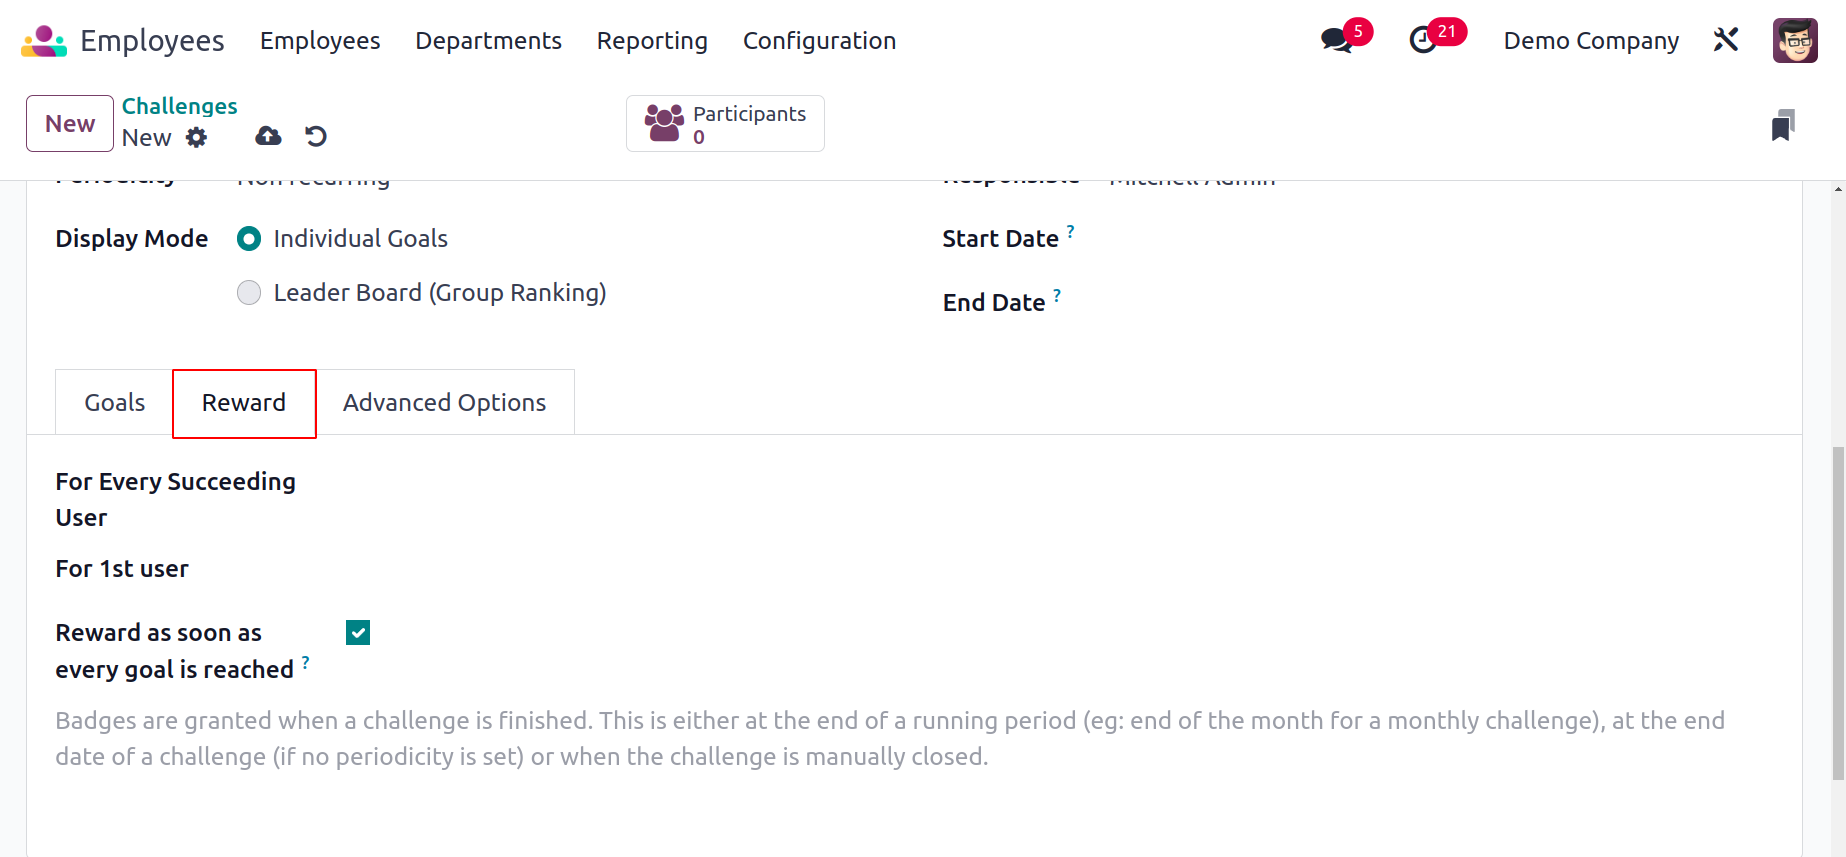
You can add the prizes for the challenges under the Reward page. Rewards for the First User and Every Succeeding User can both be adjusted. You can activate the Reward as soon as each goal is achieved if you wish to reward the employee right away.
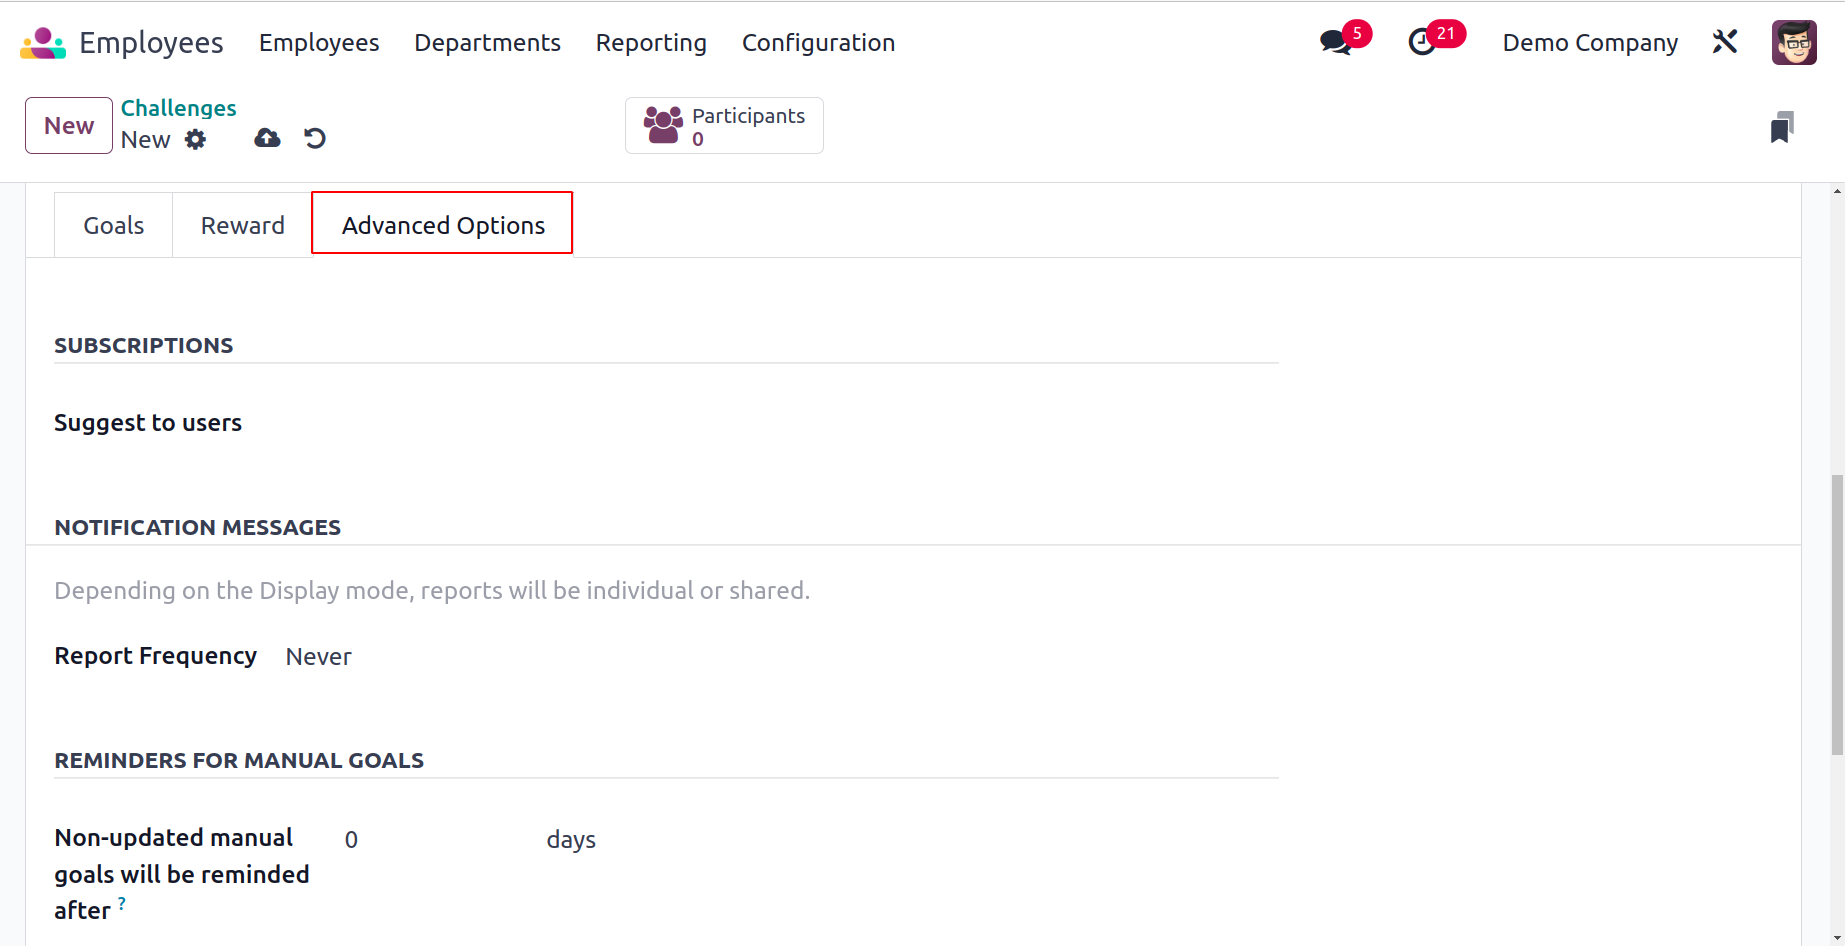
You can invite users by providing their IDs in the Suggest to Users form under the Advanced Options tab. In the box provided, type a message to alert the staff. You can also set the Report Frequency in addition to this. Create reminders in the corresponding field for the manual goals. Lastly, specify the challenge's visibility using menus. After setting up the challenge, you can use the Start Challenge button to begin utilizing it.
Goal History
You can access the Configuration menu and choose the Goal History option to review the employees' performance. The objective history of the employees will be shown in this window.
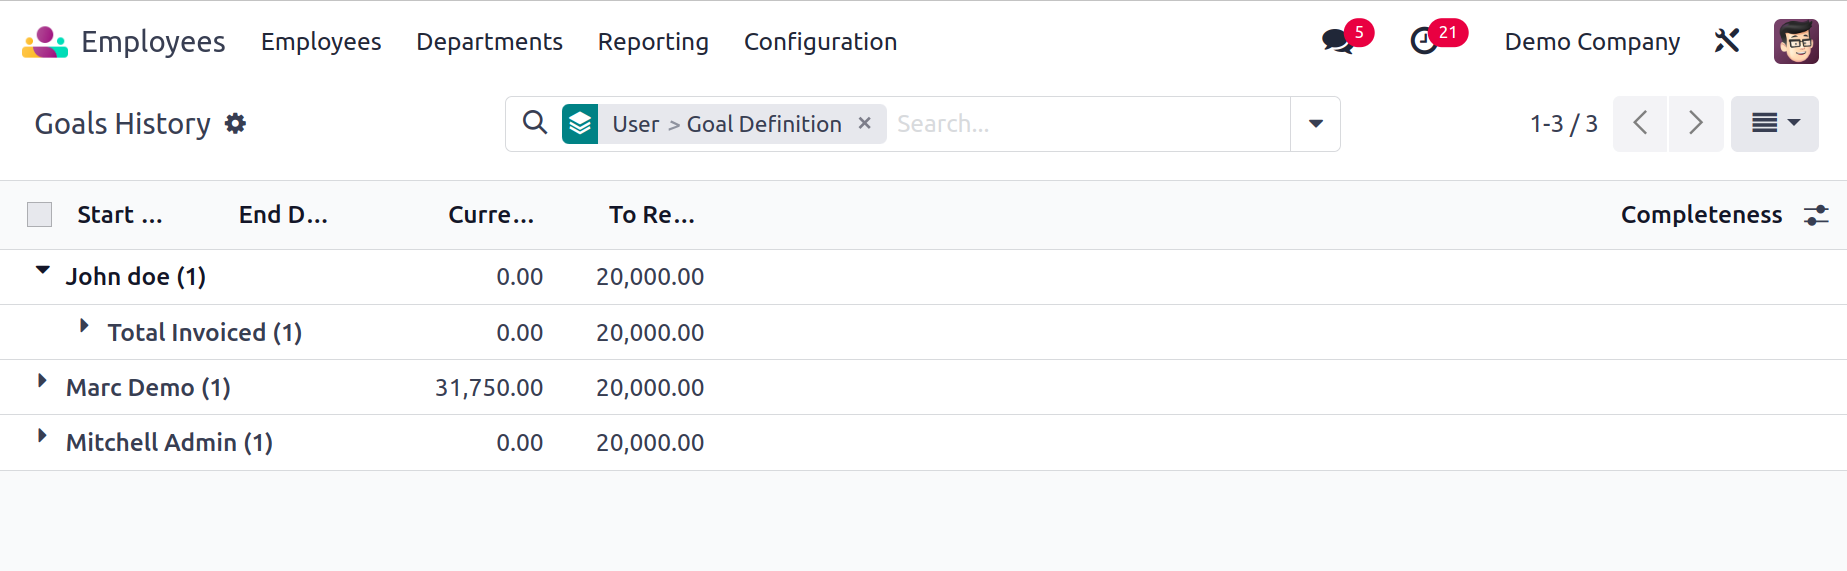
This platform allows you to evaluate each employee's performance level. The Completeness, Current Value, To Reach, and Start and End Dates are displayed. Employee motivation will be maintained by showing goal history.
Reporting
The Odoo17 Employees module makes sure to provide a sufficient platform for analyzing the performance of employees based on certain criteria in addition to recording and managing personnel data in an organization. Reporting and analysis are always important to comprehend the present working process and to help with new improvements that can be made to enhance the current situation. Here, we'll talk about the reporting tools the Employees module provides.
Contracts
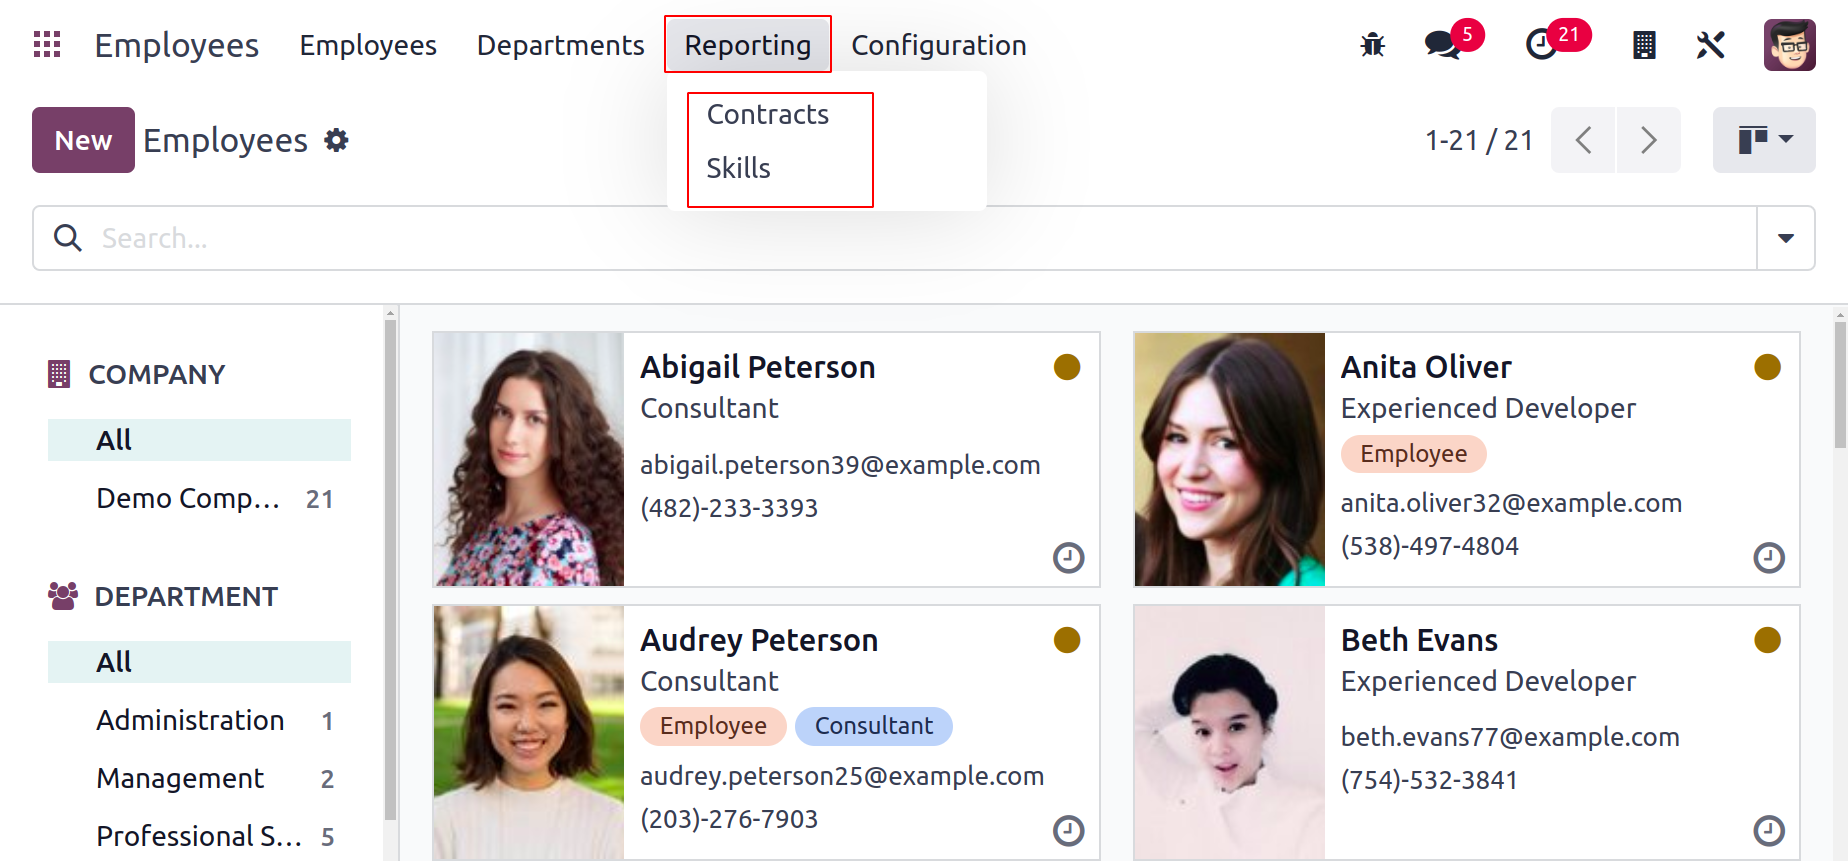
The employee analysis window for Odoo17 can be opened by choosing the Contracts option from the Reporting menu, as displayed below.
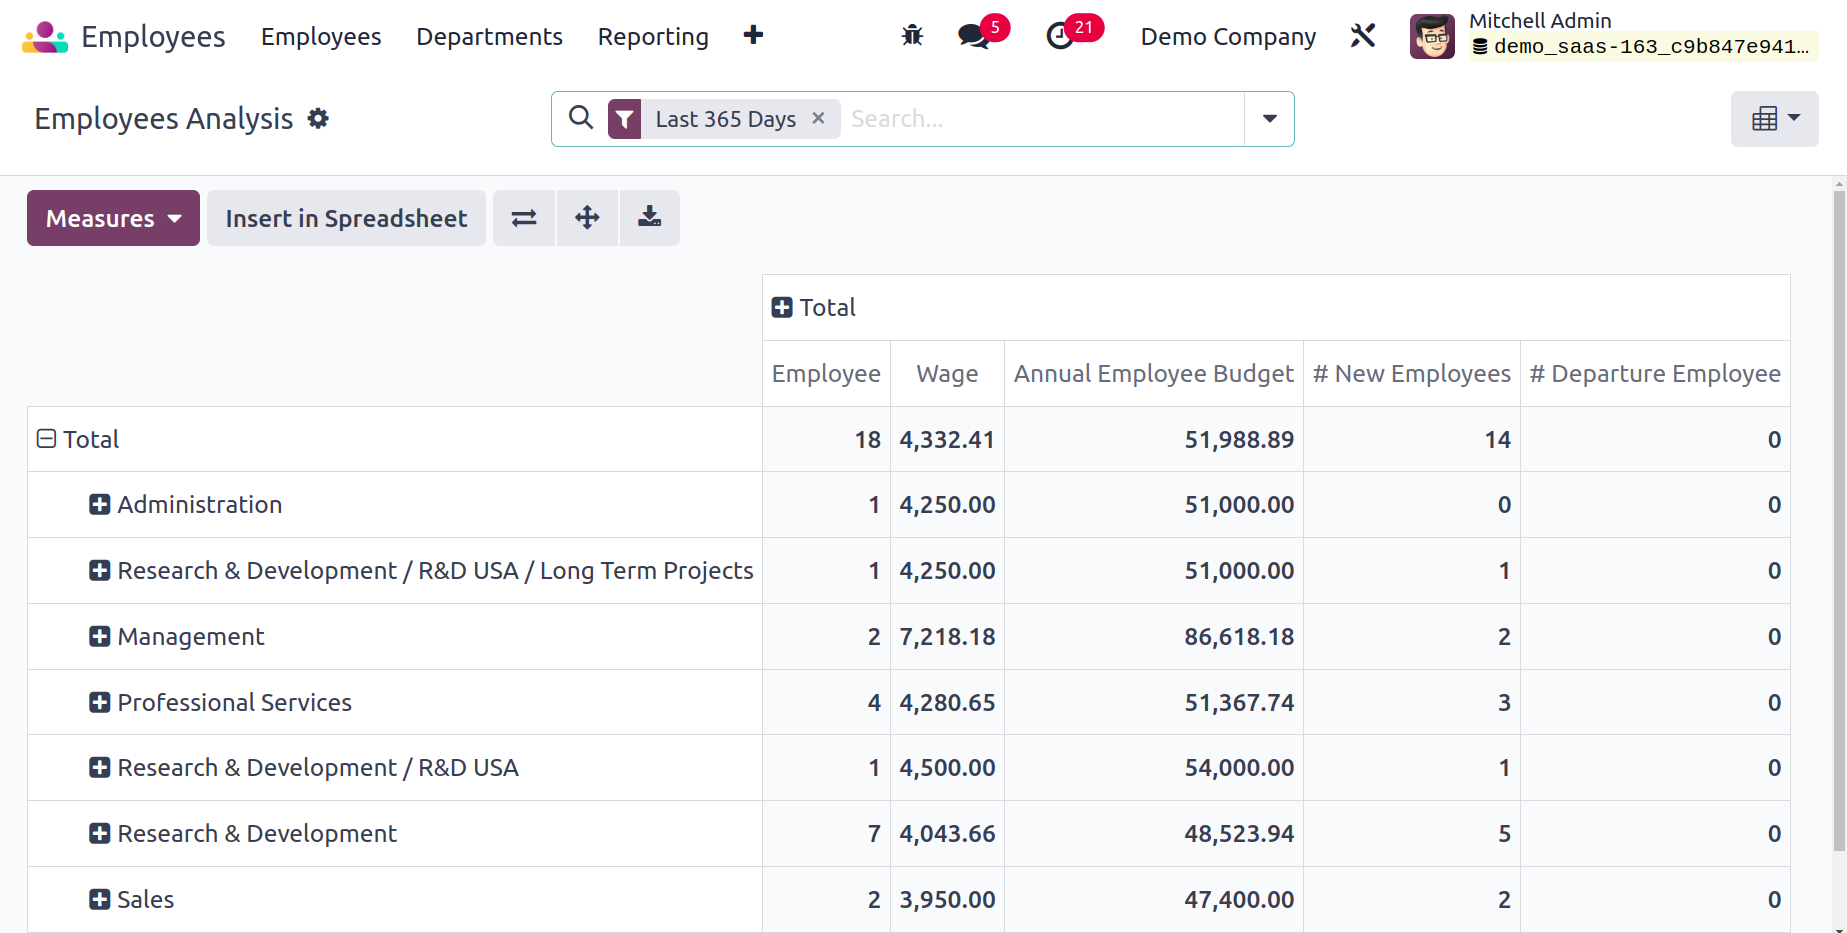
This platform can be used to evaluate employee performance using the appropriate metrics. On this platform, Odoo17 provides Pivot and Graphical views. Based on the last 365 days and the date, you can filter the reports that are available. The Add Custom Filter option allows for the creation of additional filters. To group the report by Department, Employee, and Company, use the Group By option. The Add Custom Group option enables the creation of more grouping possibilities.
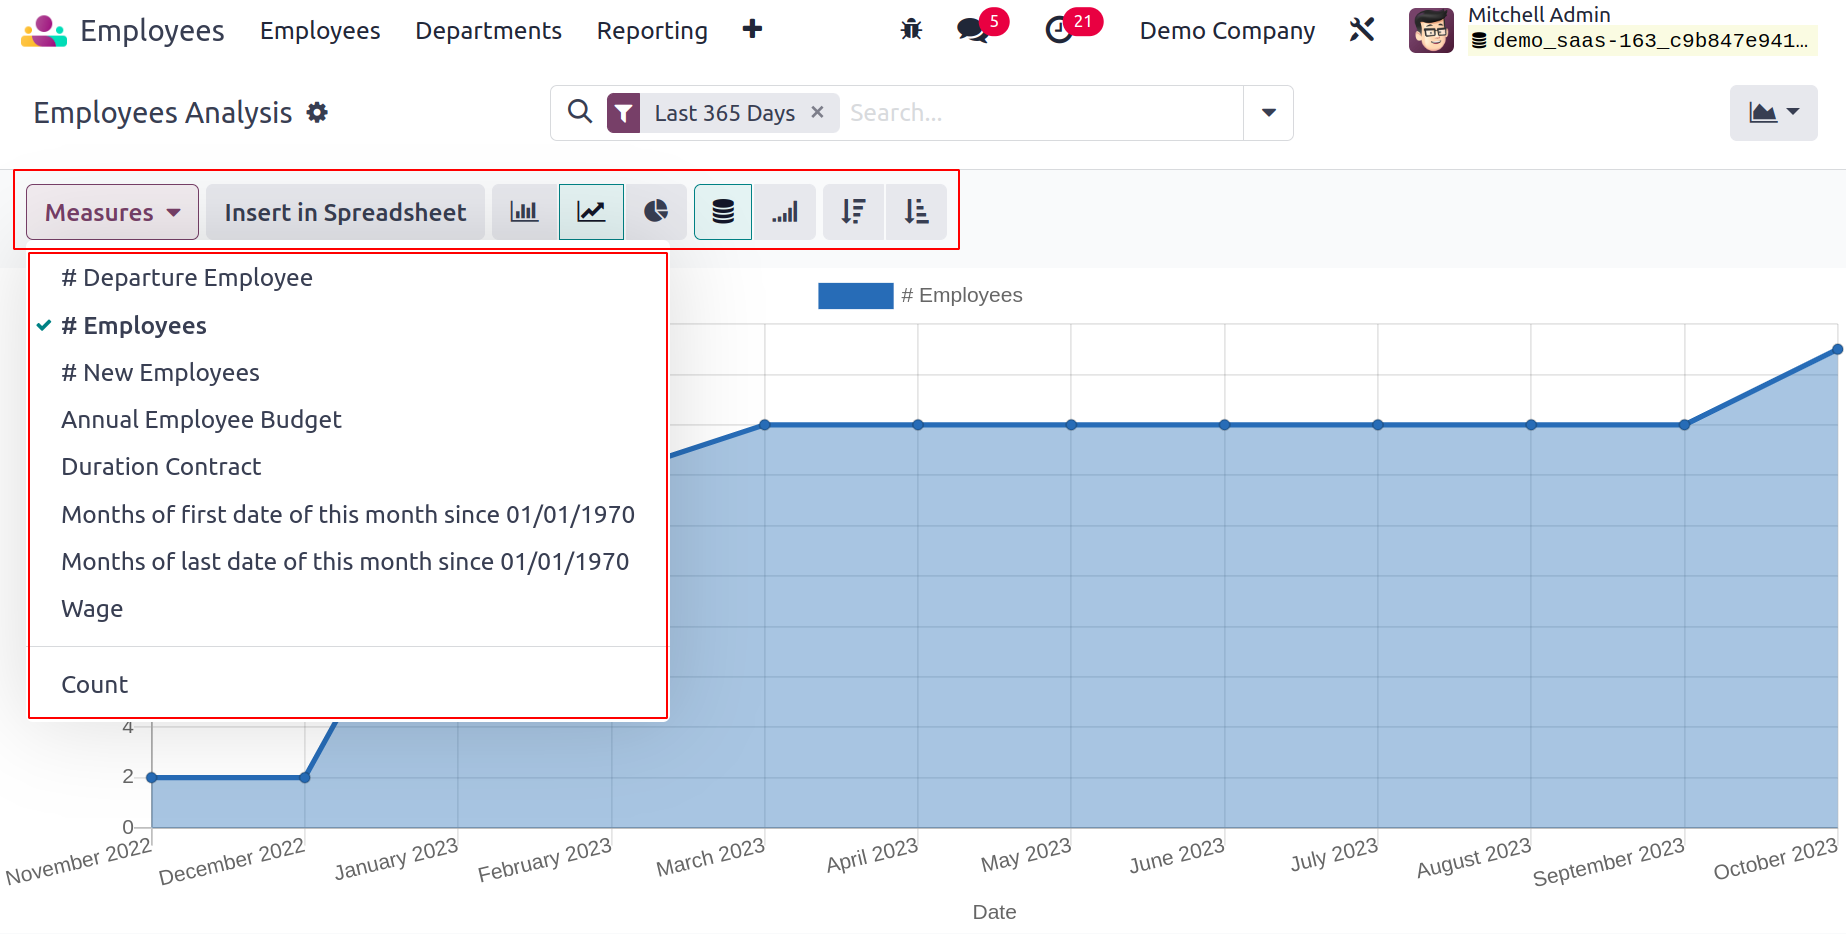
Departure Employees, New Hires, Annual Employee Budget, Duration Contract, Fuel Card, Full Time Equivalent (Today), Wage, and Count are the accessible Measures. You may copy this date into a spreadsheet by using the Insert in Spreadsheet button.
Skills
Reports on the skills listed in each employee profile are provided by the Skills option under the Reporting menu. Each employee's, skill type, skill, skill level, and level progress are displayed in the skill's list view.
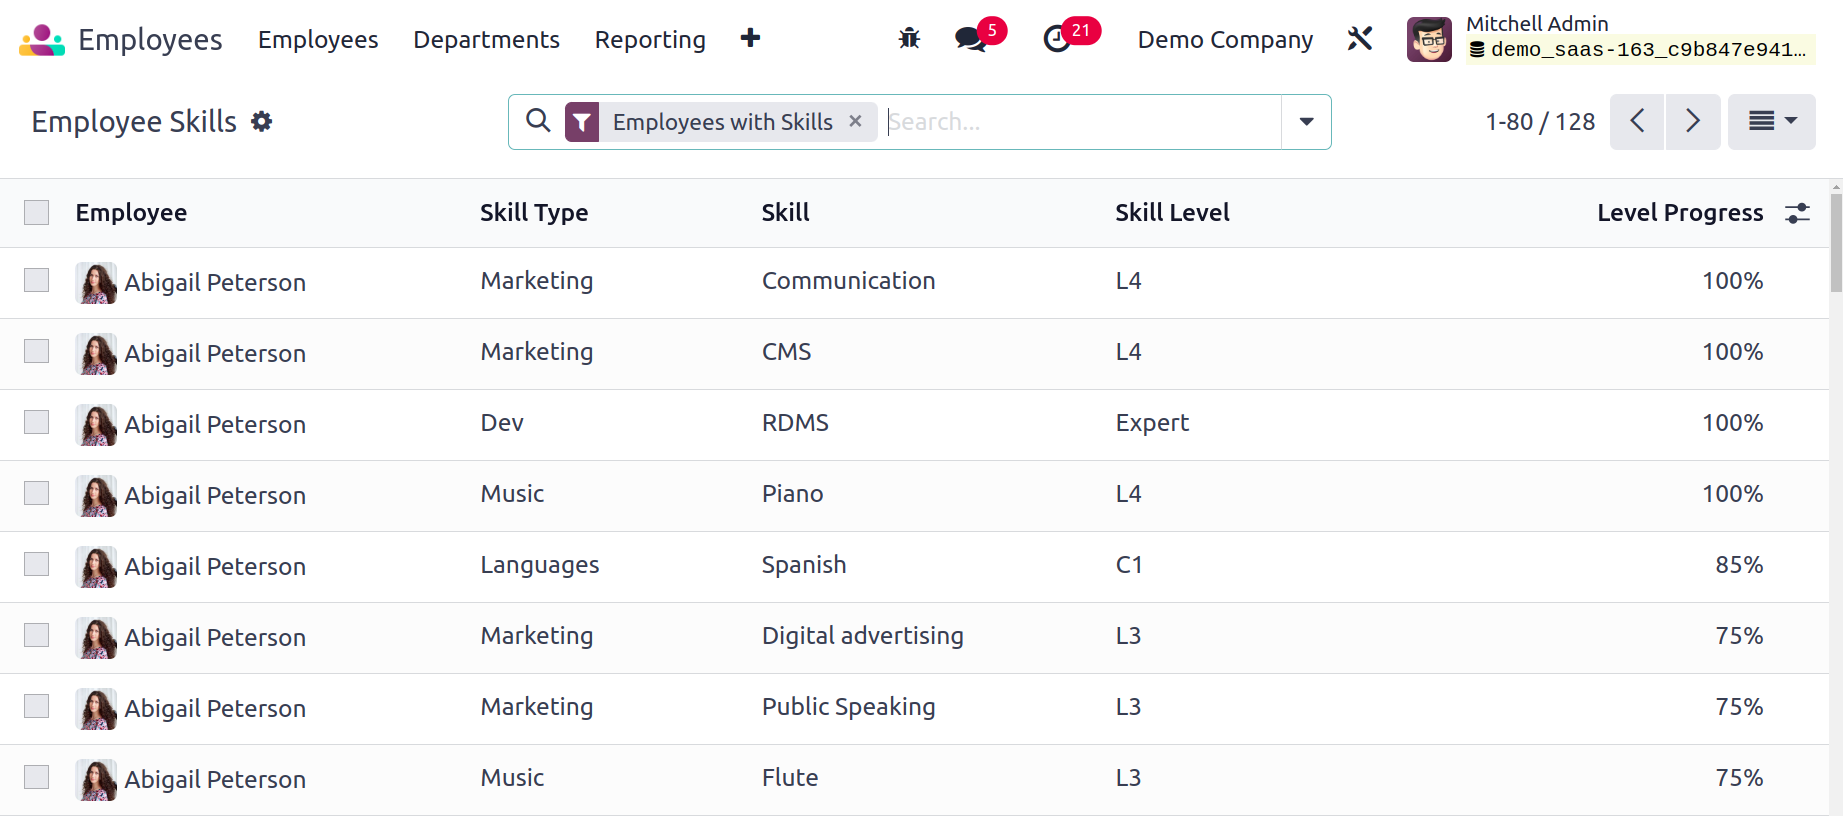
Employees with Skills and Employees Without Skills are two ways you can filter the data. Employee, Department, Skill, and Skill Type are available under the Group By option to organize the information appropriately.
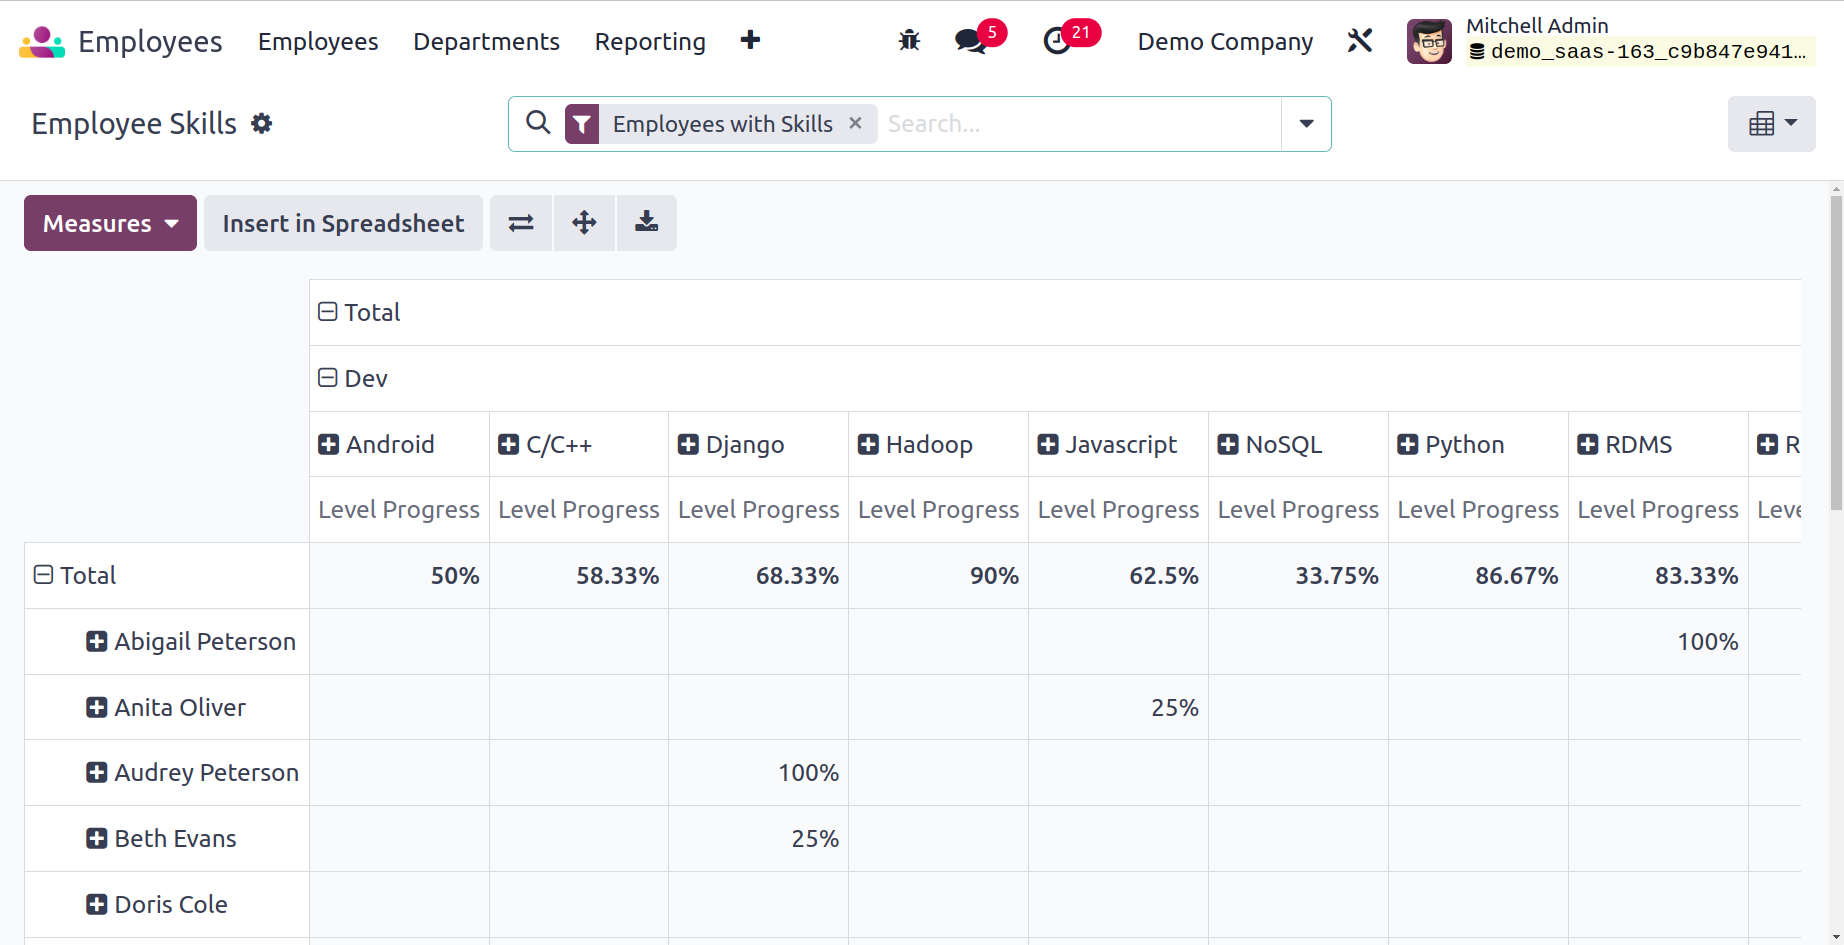
This is the skills report's pivot view. The Level Progress can be used as the report's measurement.
The Employees module offers cutting-edge features and functionalities that lessen the workload of a company's HR division. You may rely on this module to manage your employees' regular records in an efficient and appropriate manner.