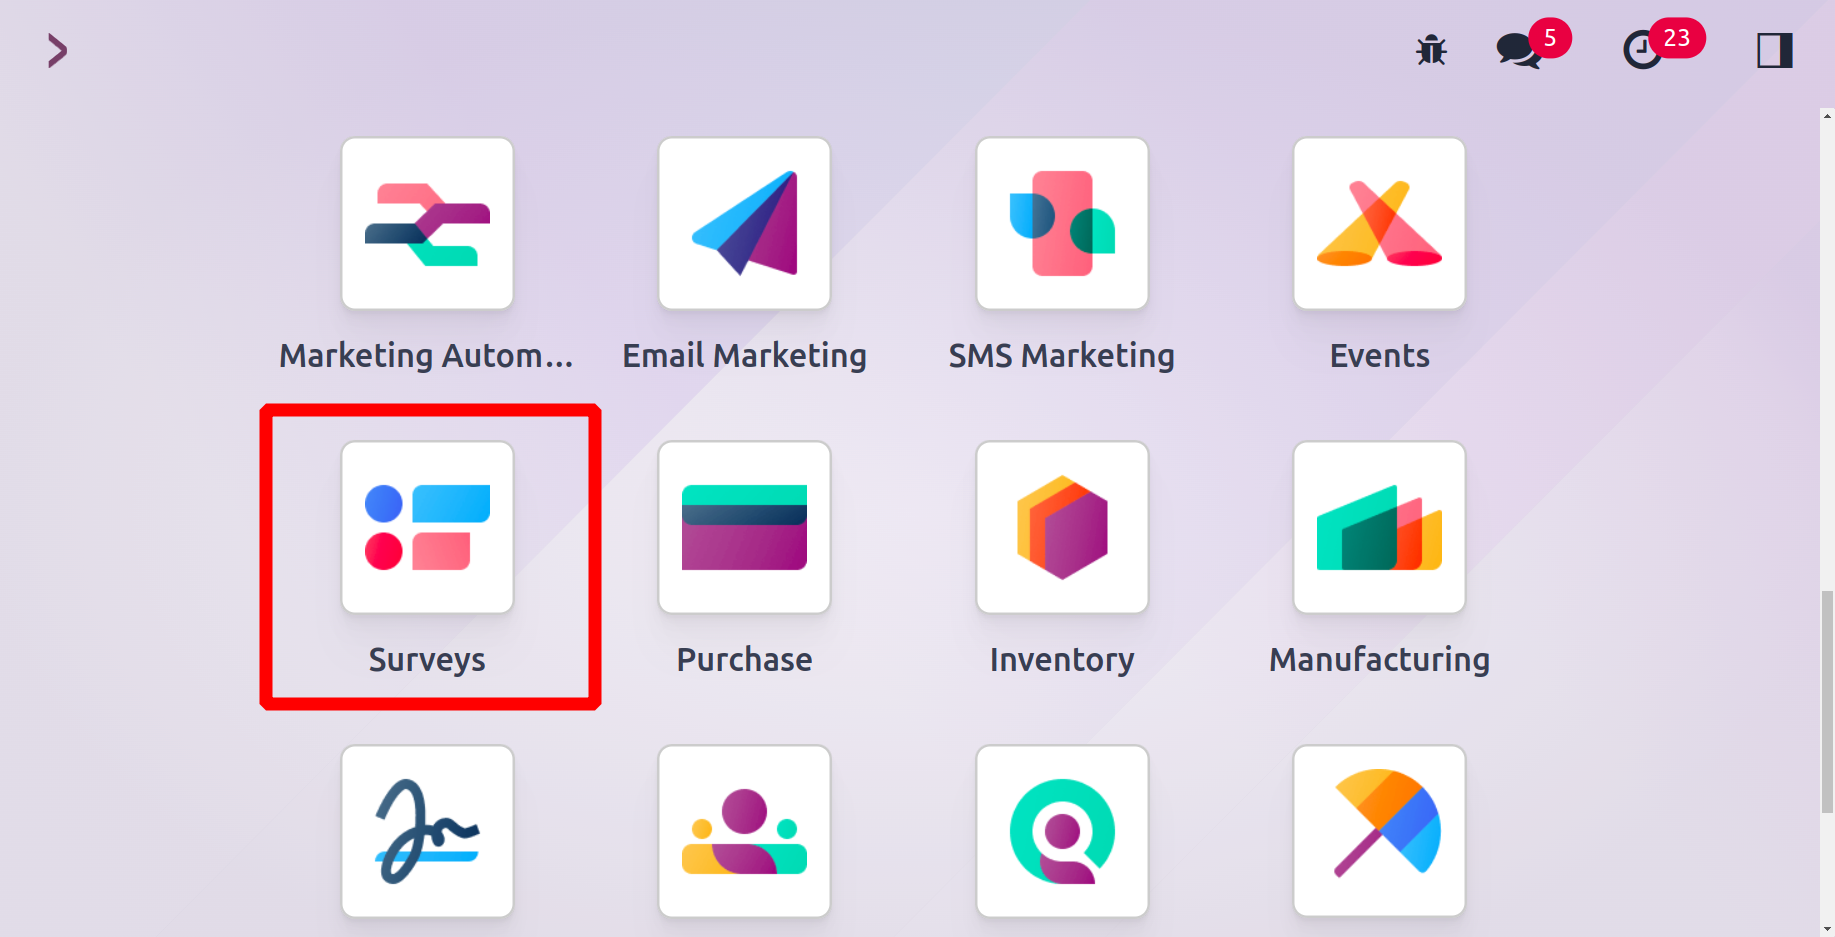
Odoo 17 Surveys
It is crucial to gather feedback from customers and clients regarding the goods and services the business offers. The most efficient way to gather audience opinions is through surveys. Additionally, it will assist the business in assessing consumer satisfaction, needs, interests, and ideas. Now that they are available in digital form, surveys are more practical to choose as a practical way to get replies. A user-friendly platform for creating online surveys for your employees and clients is the Odoo 17 Survey module. In Odoo 17, creating and publishing a survey for public response is simple. You can utilize the audience's responses to create reports about the survey because they will be automatically recorded in the backend. The results of surveys
can be used to analyze your marketing strategy, and you can act on the report's recommendations to raise business productivity.
You can create surveys using the Odoo 17 Survey module in accordance with your specifications. Customer-based surveys will be useful for gathering information about your goods and services, while staff-based surveys can be used to gain feedback on working conditions, requests, and employee satisfaction. This chapter will go into detail about the Odoo 17 Survey module.
Once the installation is complete, you can discover the Survey module on Odoo's main dashboard by selecting it from the application module. All created surveys are visible on this platform when you enter the Survey module, as illustrated in the figure below.
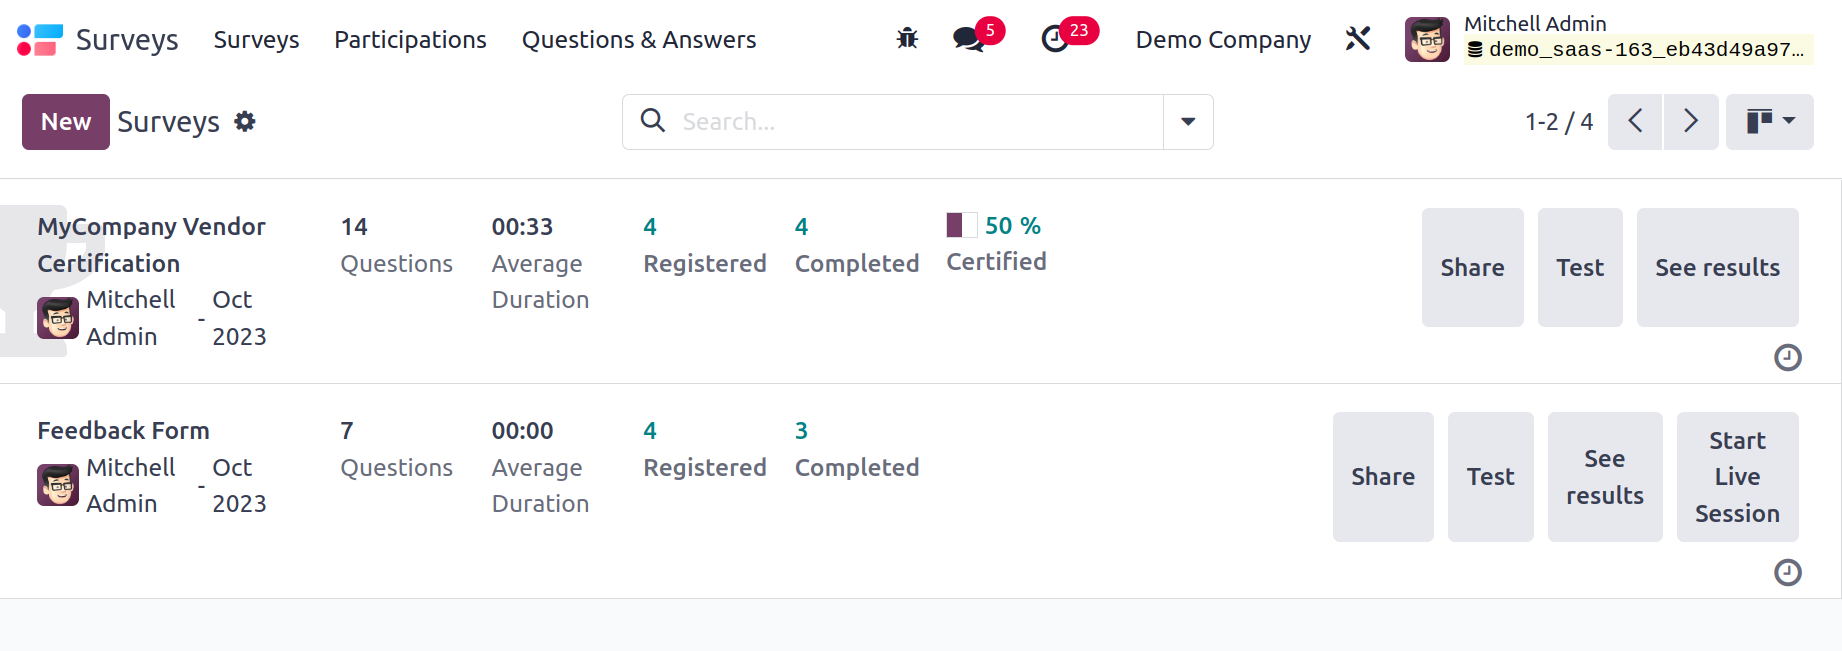
This window's Kanban view will display each survey's name, number of responses, certified, passed, and success rate. On this platform, you can view the Kanban, List, and Activity views. For sorting and searching surveys, the basic and configurable Filters and Group By options will be helpful.
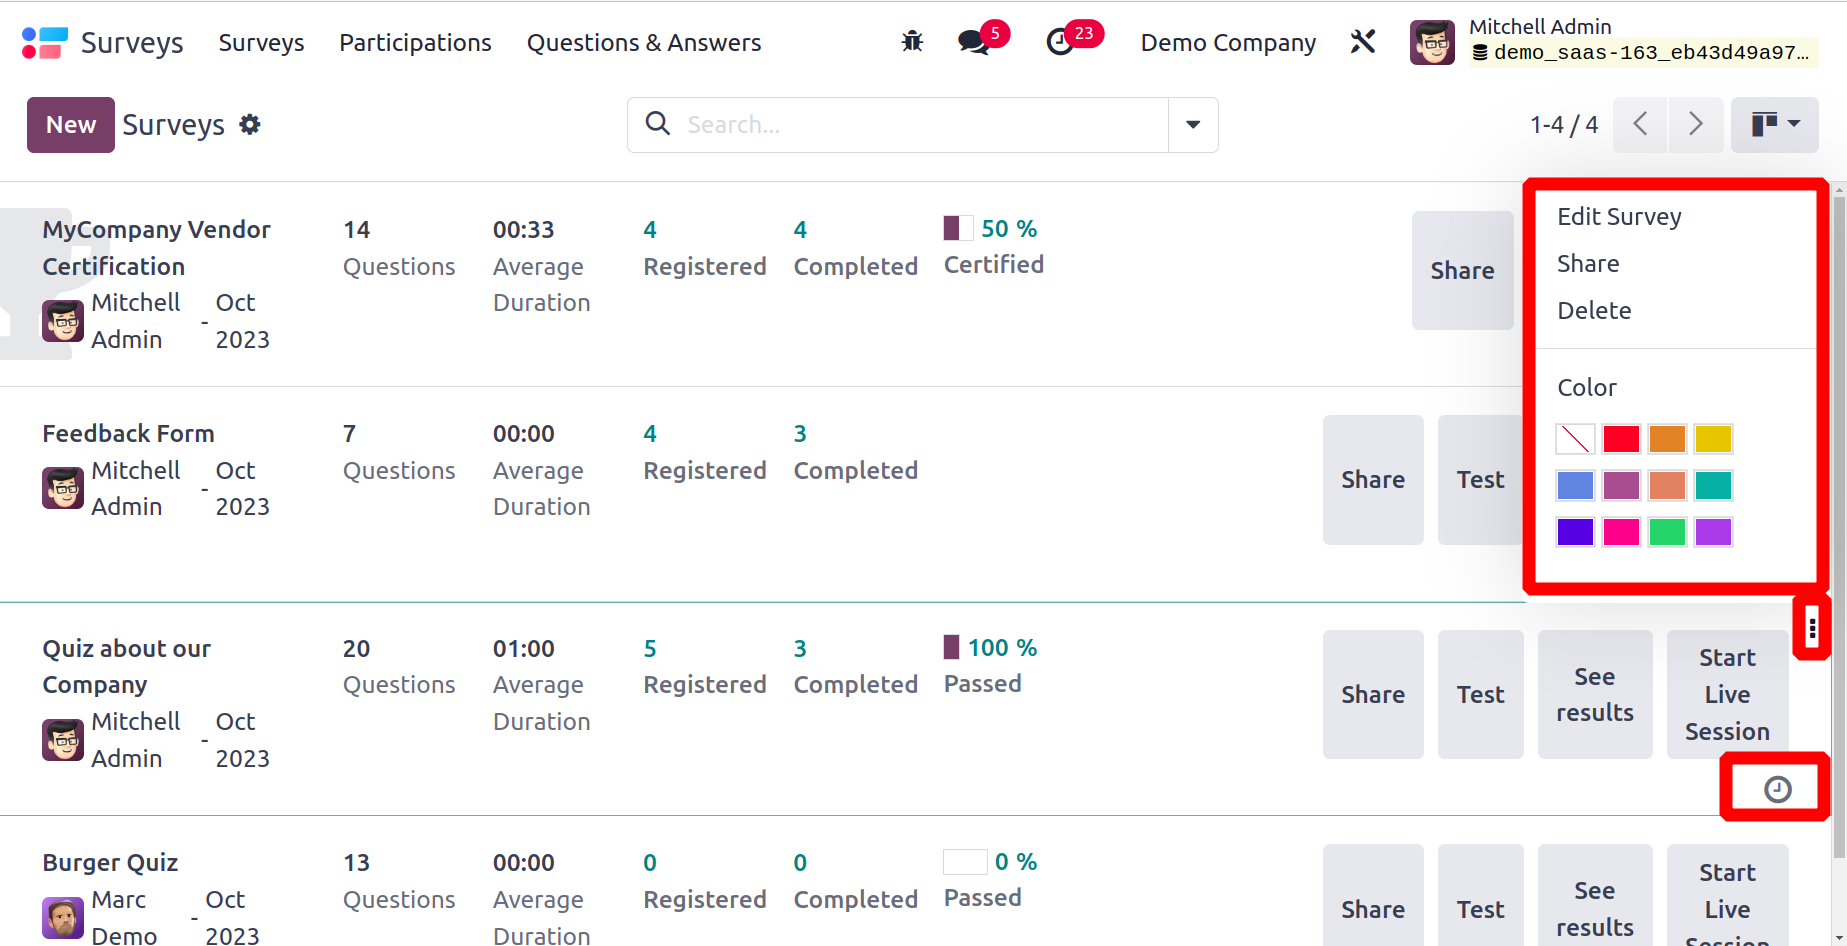
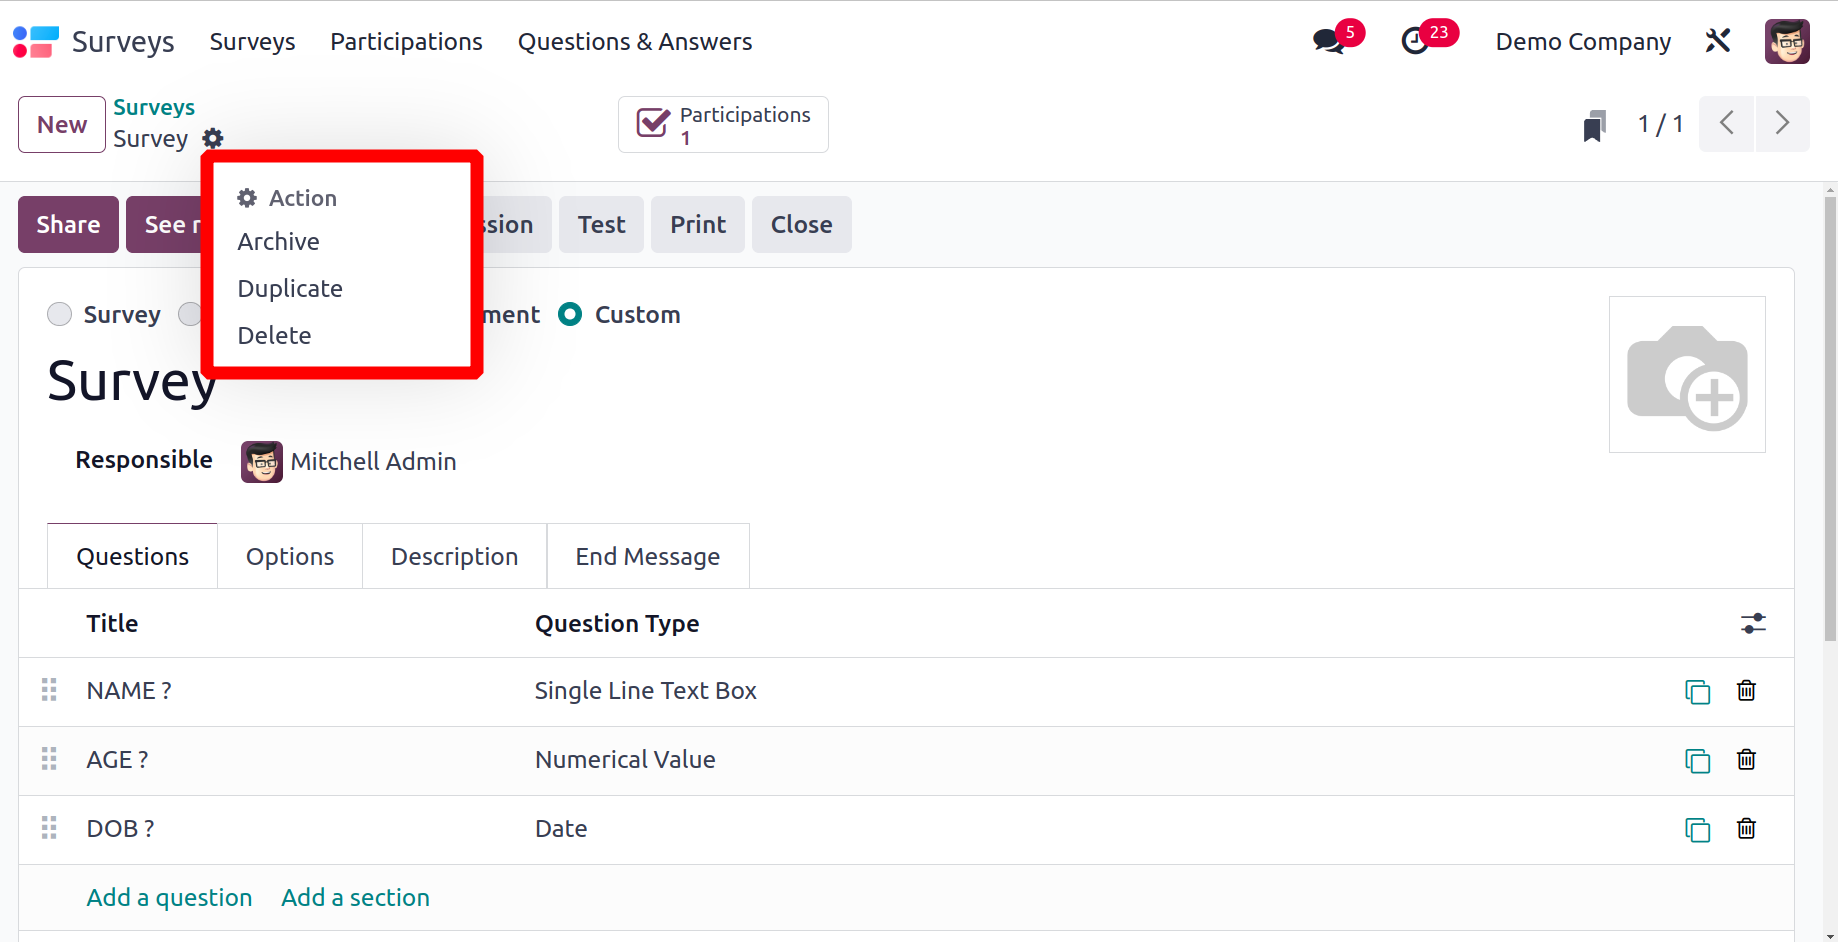
The three vertical dots that appear in the upper right corner of each survey tab provide the options to Edit, Share, and Delete the survey. Using the clock icon found on each survey tab, as seen in the image above, you can schedule numerous survey tasks.
Select the New button to start a new survey.
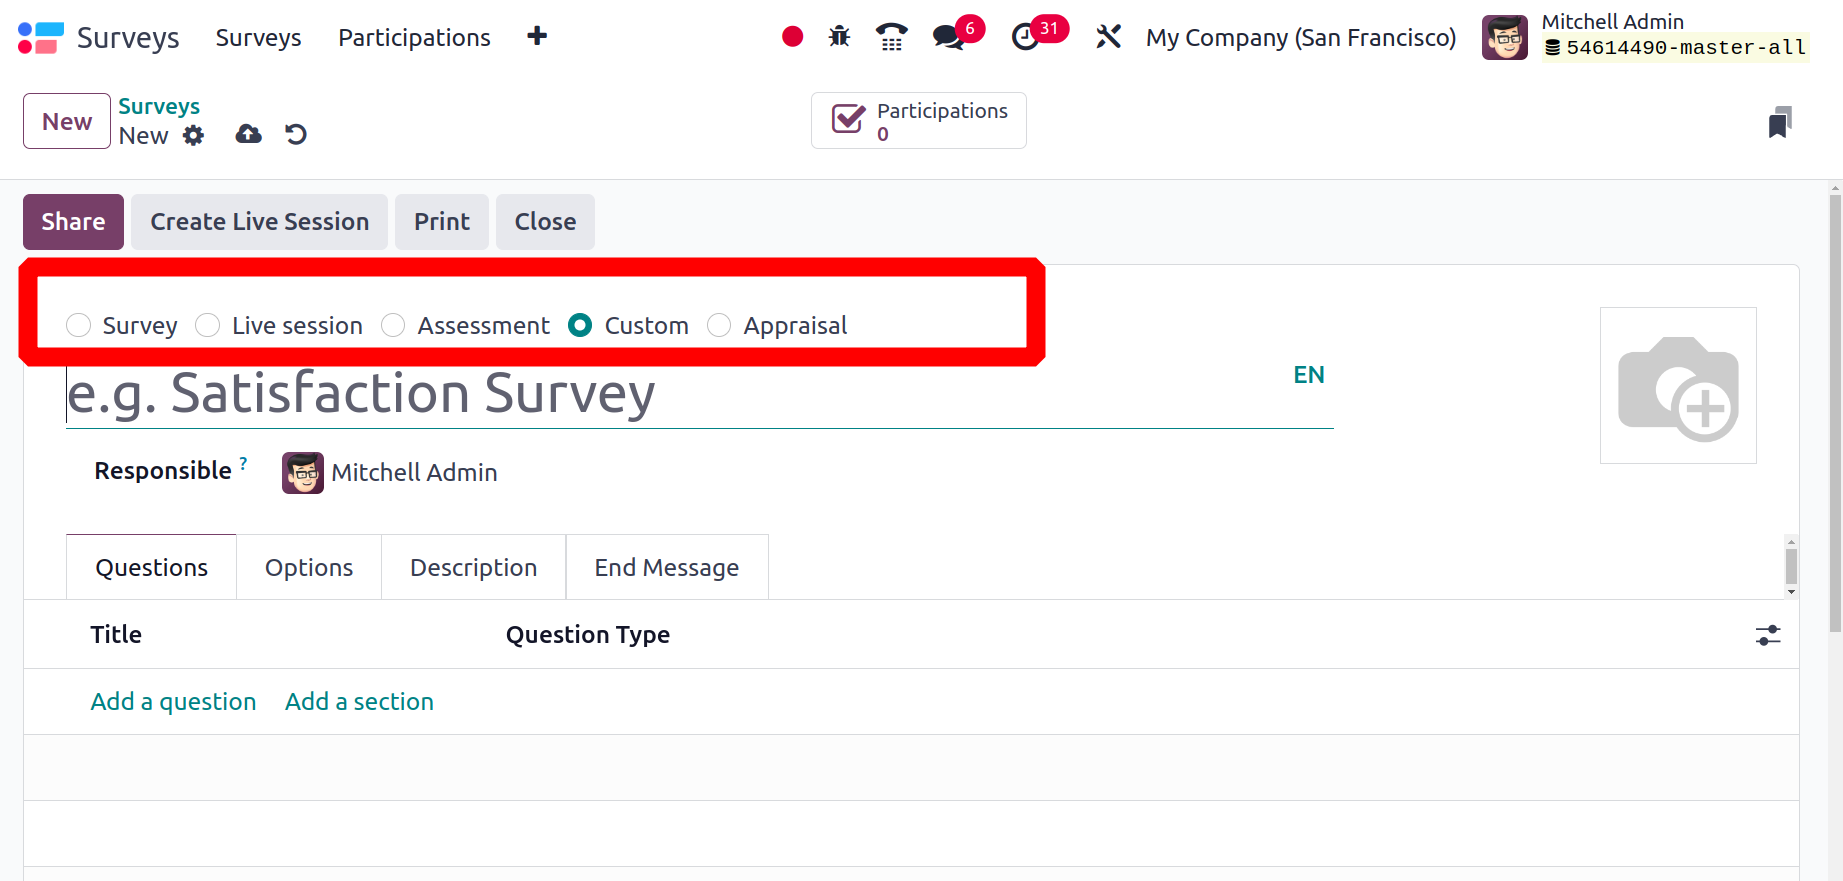
A survey form can be used in several areas, for conducting exams, for appraisal purposes are some examples. The type of creating survey can be chosen from the top of the screen and the type is chosen on the basis of usage.
Survey: This is used to add a normal survey form like to take customer feedback.
Live Sessions: Live sessions are used to conduct live sessions in e-learning courses.
Assessment: This is used for certifications like exams.
Custom: These are used for custom uses.
Appraisal: This type of survey is used to create employee appraisal forms.
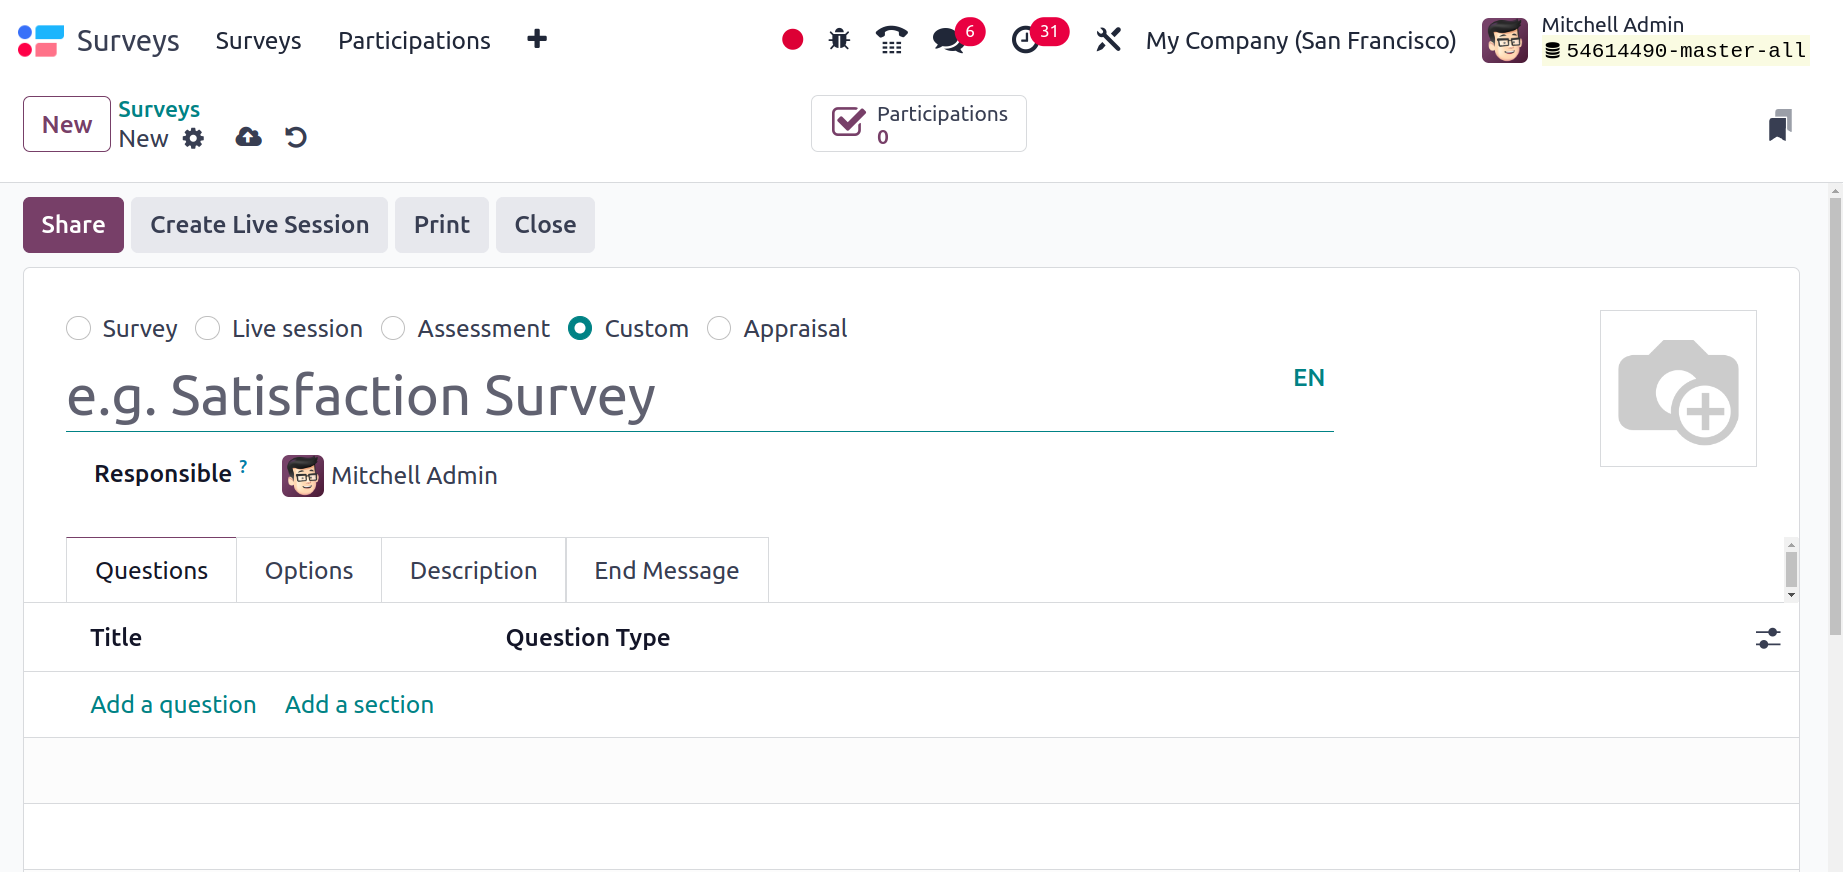
You can enter the title of the new survey in the Survey Title field. You can designate a worker in the Responsible field to be in charge of performing this survey. Additionally, you can upload an appropriate image for the survey in the designated field. Under the Questions tab, select 'Add a Question' to add new questions to this survey.
As seen in the example below, a pop-up window will emerge where you can enter the question and question type.
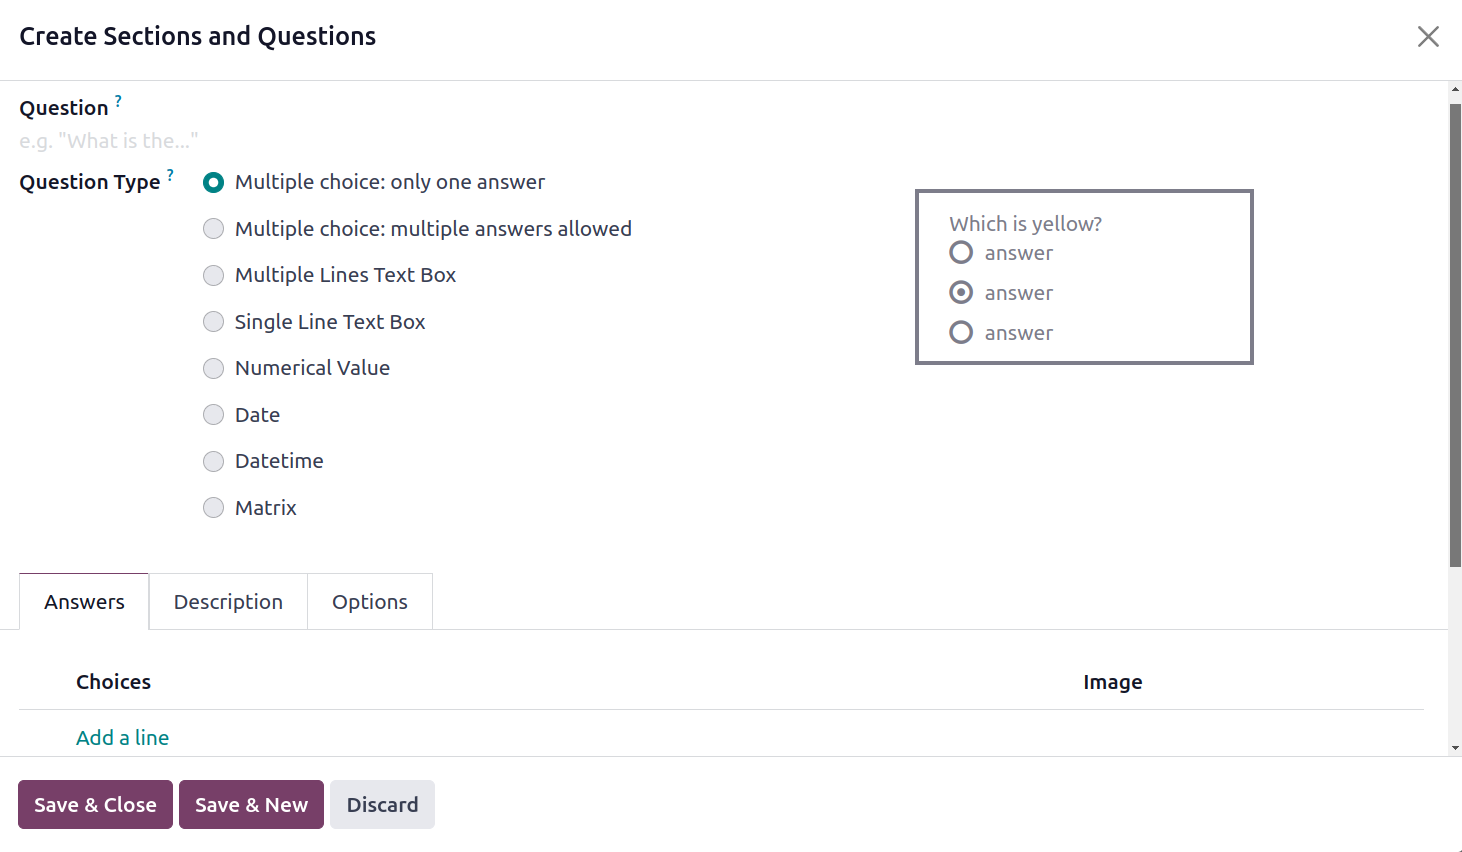
The question type can be a text box with many lines, one line, a number, a date, or a datetime. There are three types of multiple choice questions: matrix, multiple choice with multiple answers allowed. The style of responding will vary depending on the question. Customers can answer the question in numerous lines, for instance, in the numerous Lines Text Box. Respondents should only enter one line of text in the Single Line Text Box.
When using the Multiple Choice: Only One Answer type, you can design questions and provide participants with a range of options from which to choose the right response. In this kind of inquiry, there will only be one alternative which is the right response.
Depending on the type of question you choose, appropriate options will be available under the Answers tab. You can define the options for the question on the Answers tab if it is of the 'Multiple Choice: Only One Answer' kind. After listing the options, check the box next to "Is a Correct Answer" in the column that corresponds to the proper response from the options.
Afterward, enter the grade for the right response in the Score for this Answer area. A participant will receive the designated score for choosing the right response from the available options.
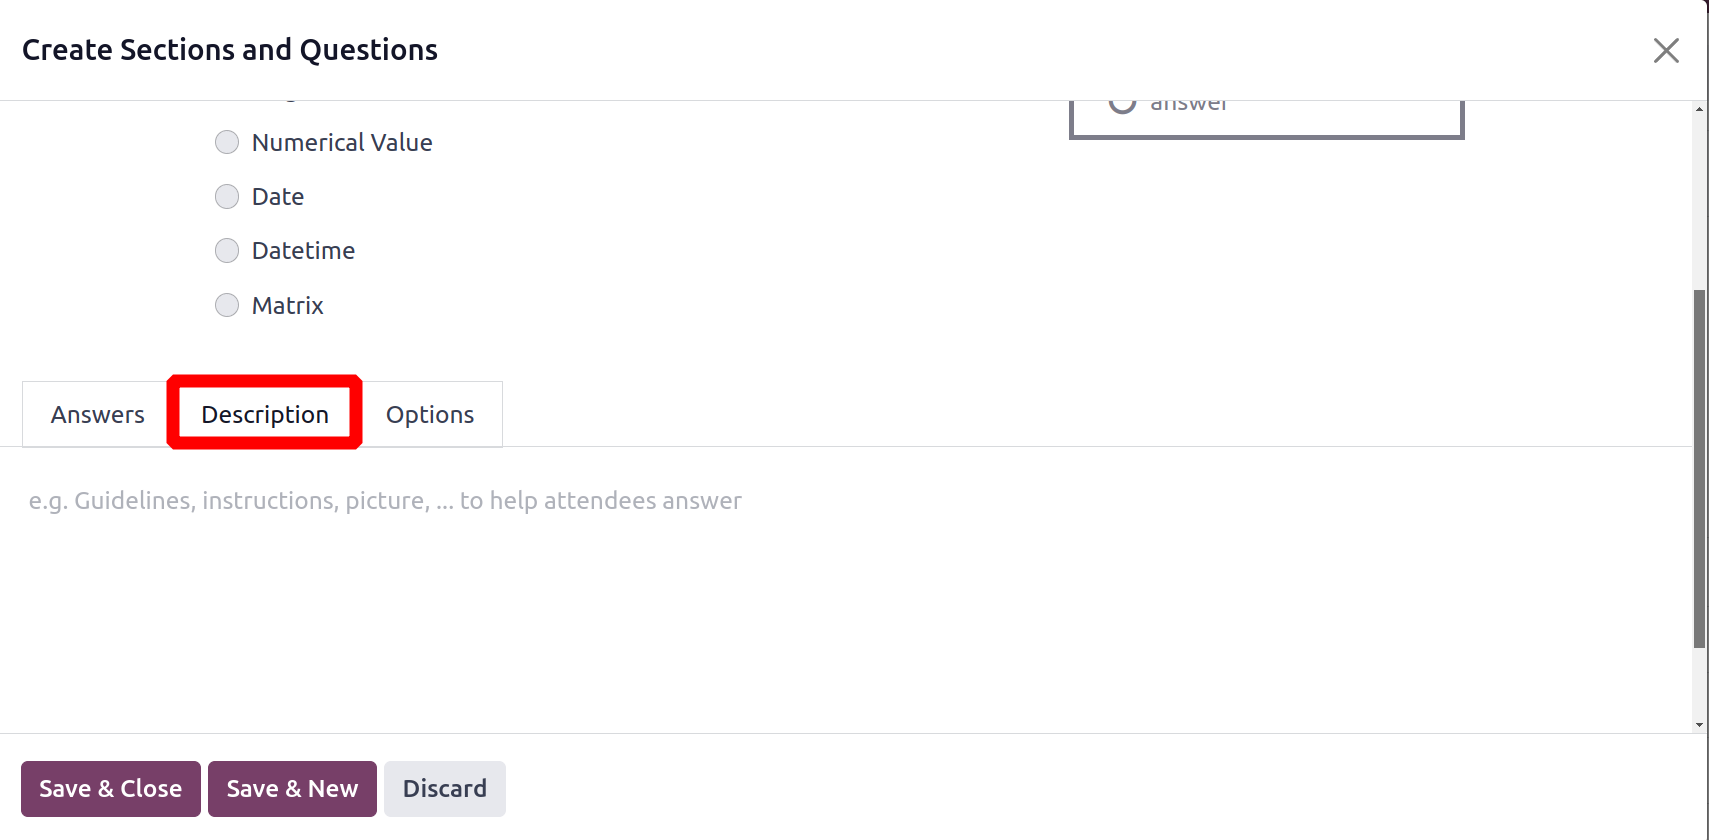
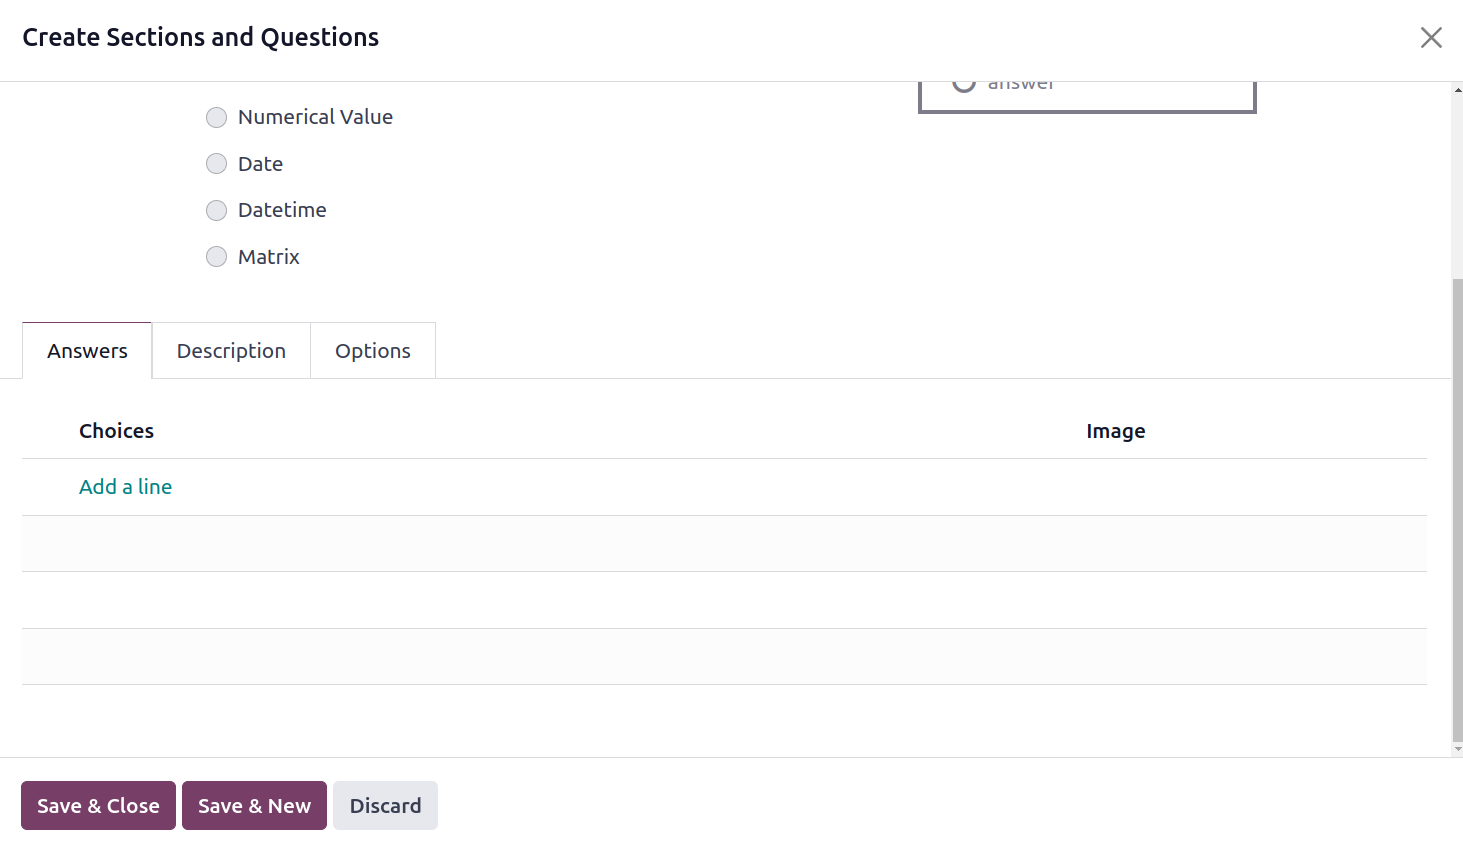
You can provide more information about the question in the Description tab. Various options to specify based on the question type are included in the Options tab.
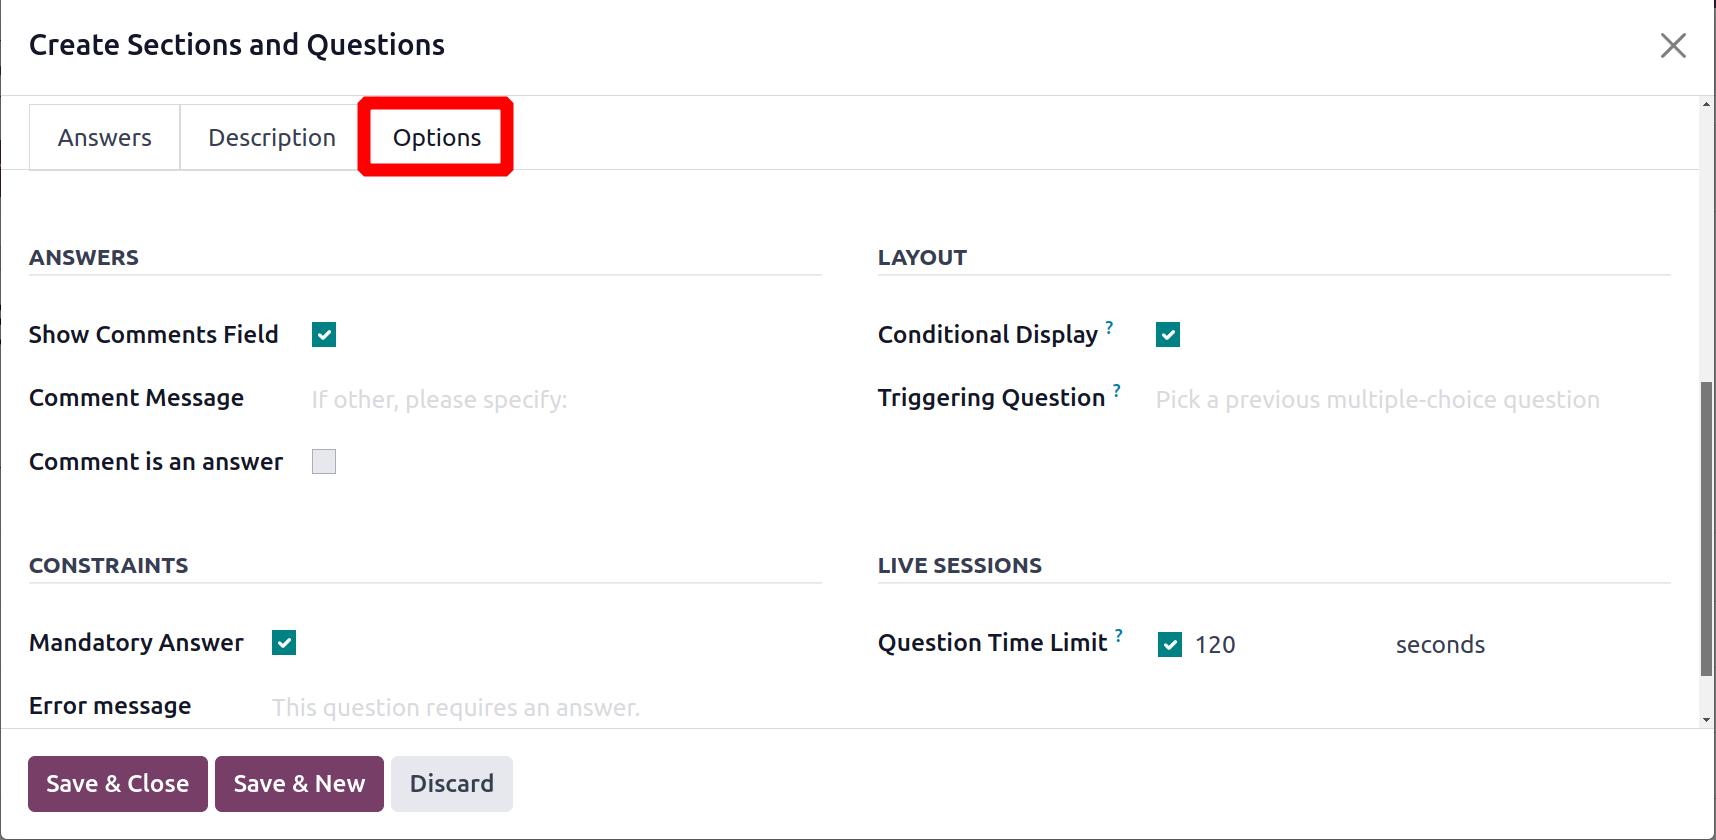
Show Comments Field is a component of the Answer action. There is space for the Comment Message to be added. Enable the checkbox under "Comment is an Answer" to treat the comment as a response. You can turn on the obligatory Answer field if the question is required and requires a Mandatory Answer. Customers can see an error message if they choose to skip this question by including it here. Only if the consumer has chosen the appropriate conditional answer in a prior question are you able to display this question. To do this, turn on Conditional Display and add the desired question to the Triggering Question area. You can specify a time restriction for each question in the Question Time Limit box during Live Sessions. When you have finished filling out the question creation window, click Save & Close. You are permitted to click the Save & New button to create another question.
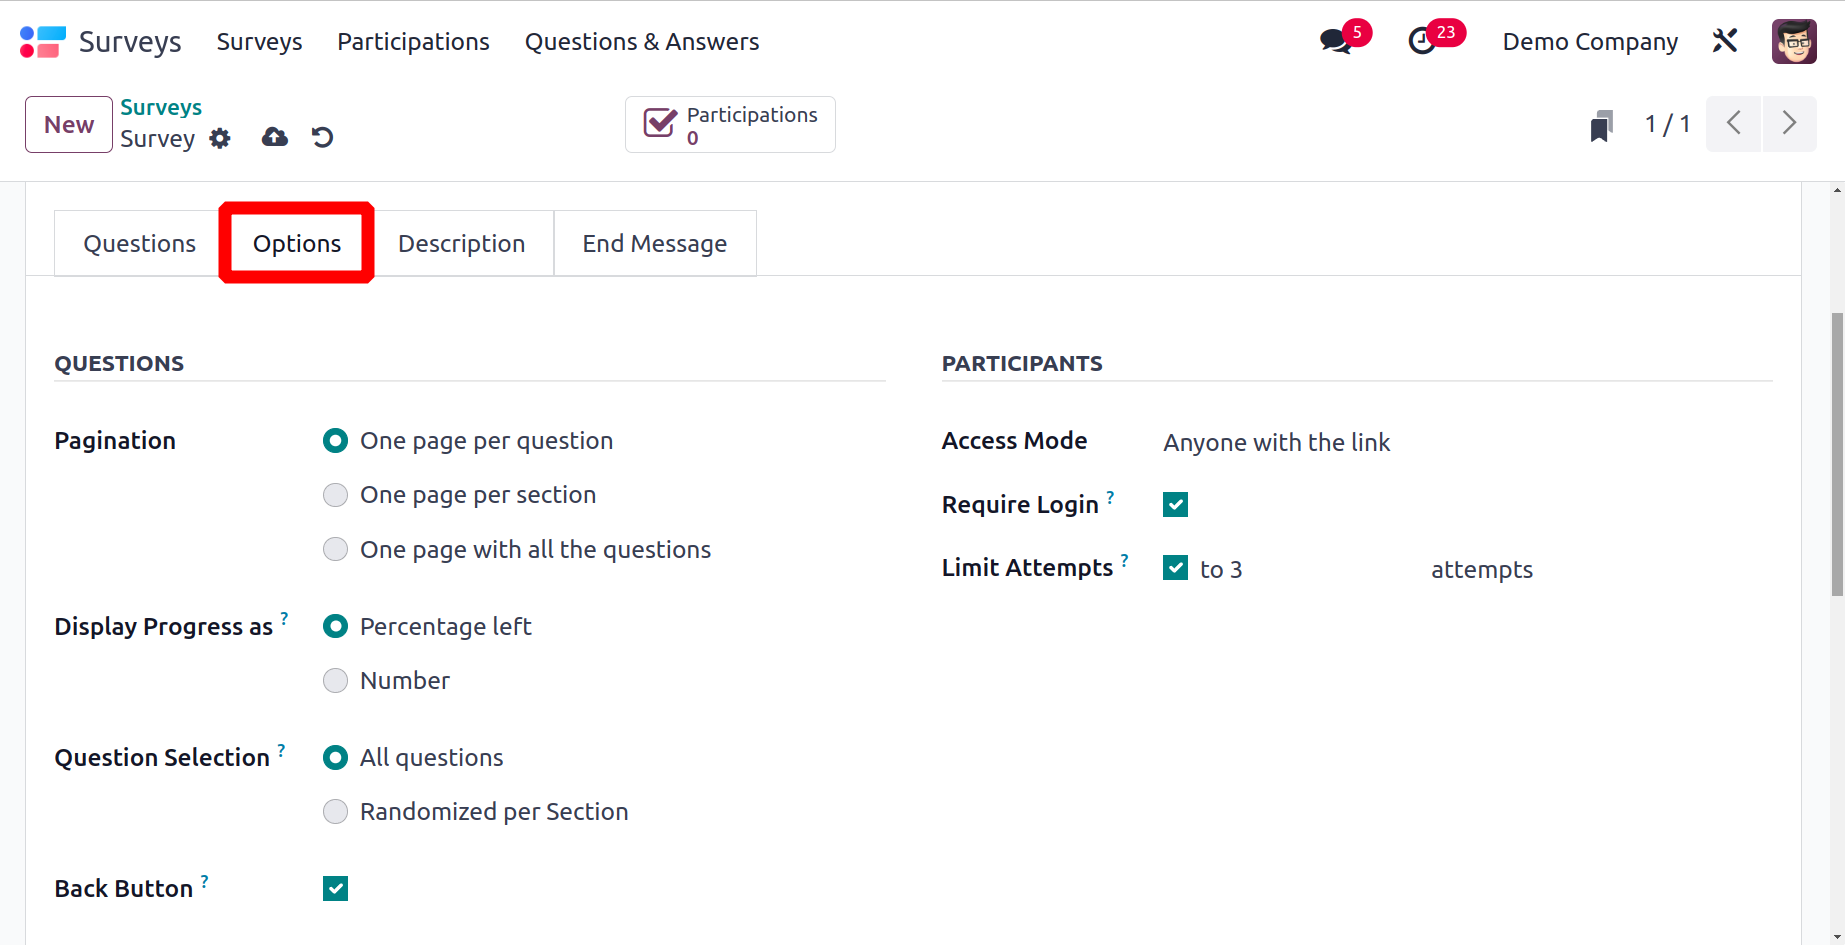
The next tab is the Options tab. There are various alternatives in the Questions section. There are several possibilities for Pagination, including one page for each question, one page per section, and one page for all the questions. Either the percentage of time left or the number can be used to Display Progress. All questions or random questions can be chosen for each segment. One can select the random questions by chance if the Randomised option is selected. In the live session, this mode is not used. The user can return to the previous page if the Back Button is checked.
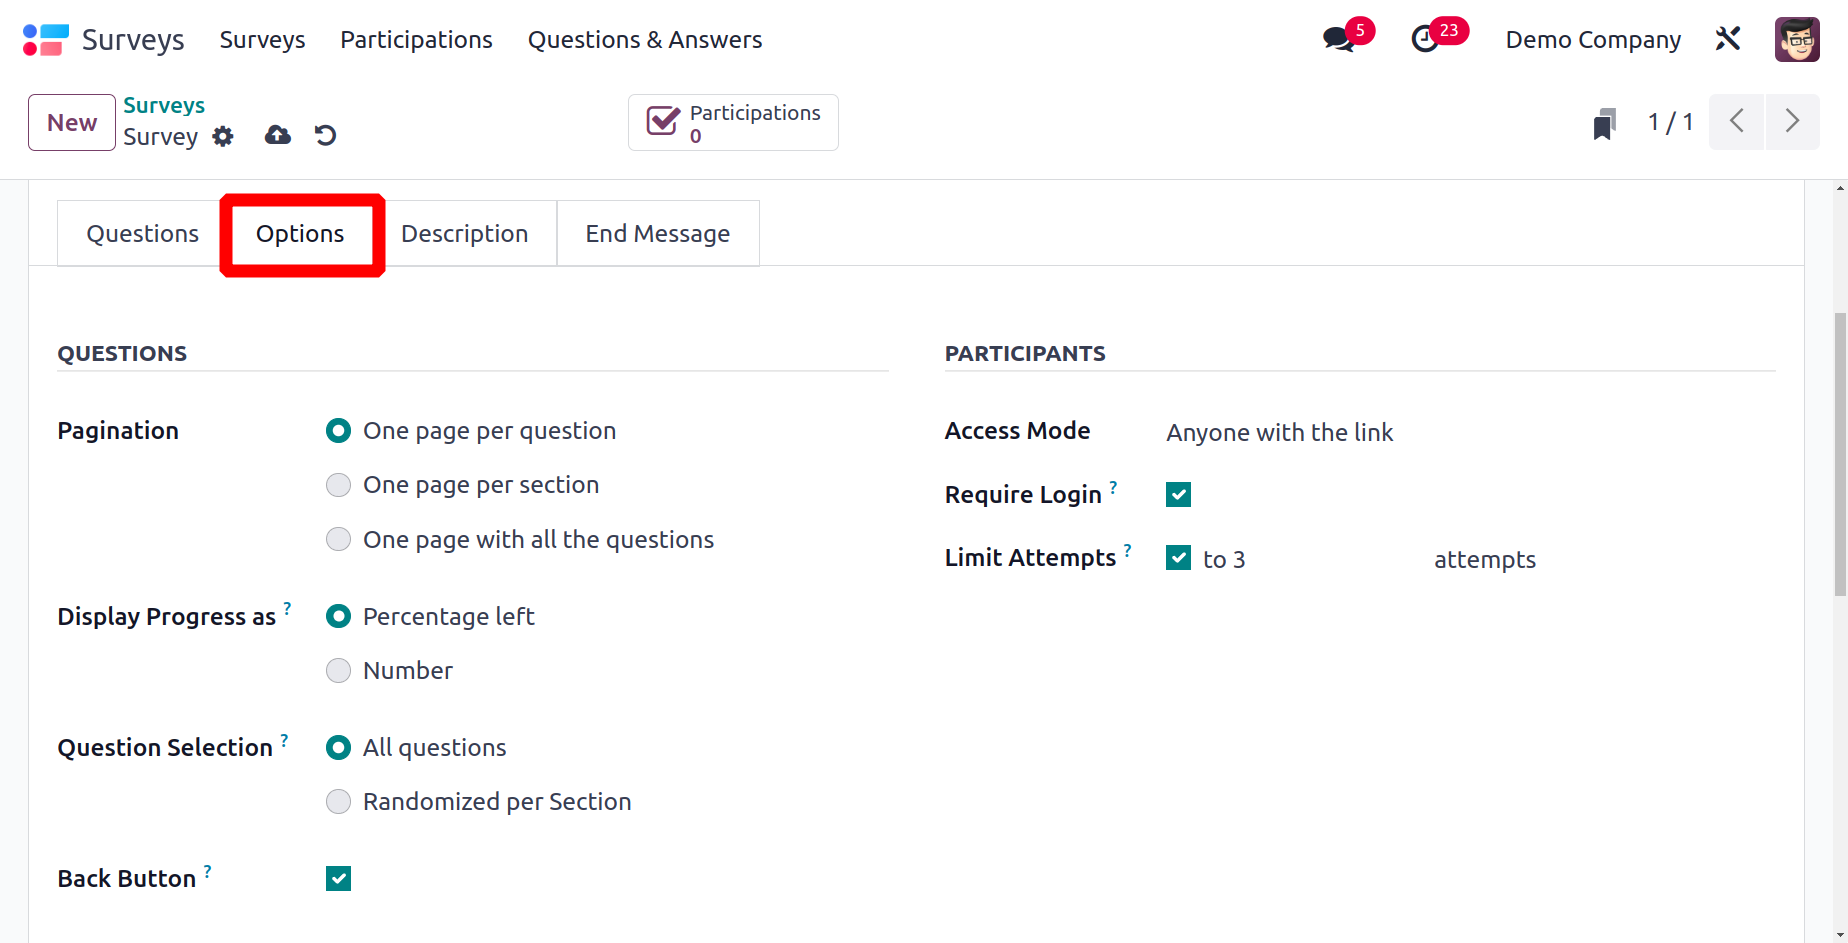
There are two choices for Access Mode in the participant session, anyone who has the link or who has been invited. Before responding to the survey questions, the user must log in with a valid token if Require Login is enabled. LimitAttempt can be used to limit the login attempt. There, it is possible to specify the number of permitted tries.
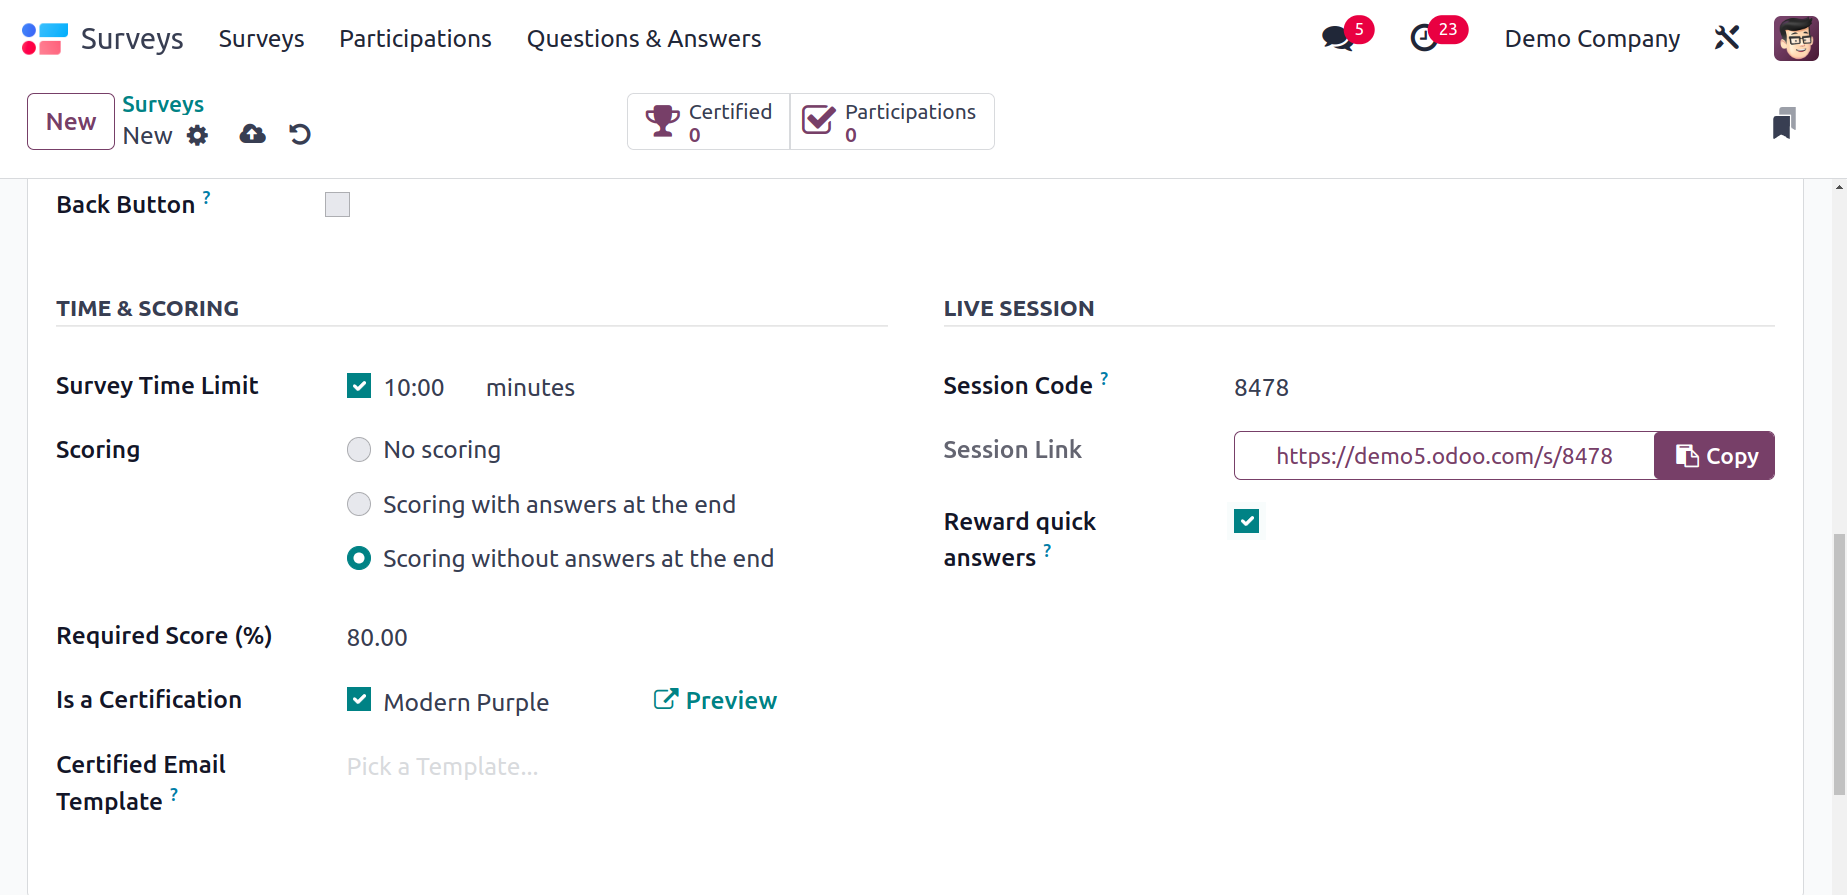
Under the Time & Scoring session, the Survey Time Limit can be modified. You have the option of selecting No Scoring, Scoring with answers at the end, or Scoring without answers at the end. The Certified Email Template option can be selected if the Is a Certification option is enabled. Session Link can be configured in the Live session's Session Code. By turning on Reward Quick Answers, users who respond promptly receive bonus points.
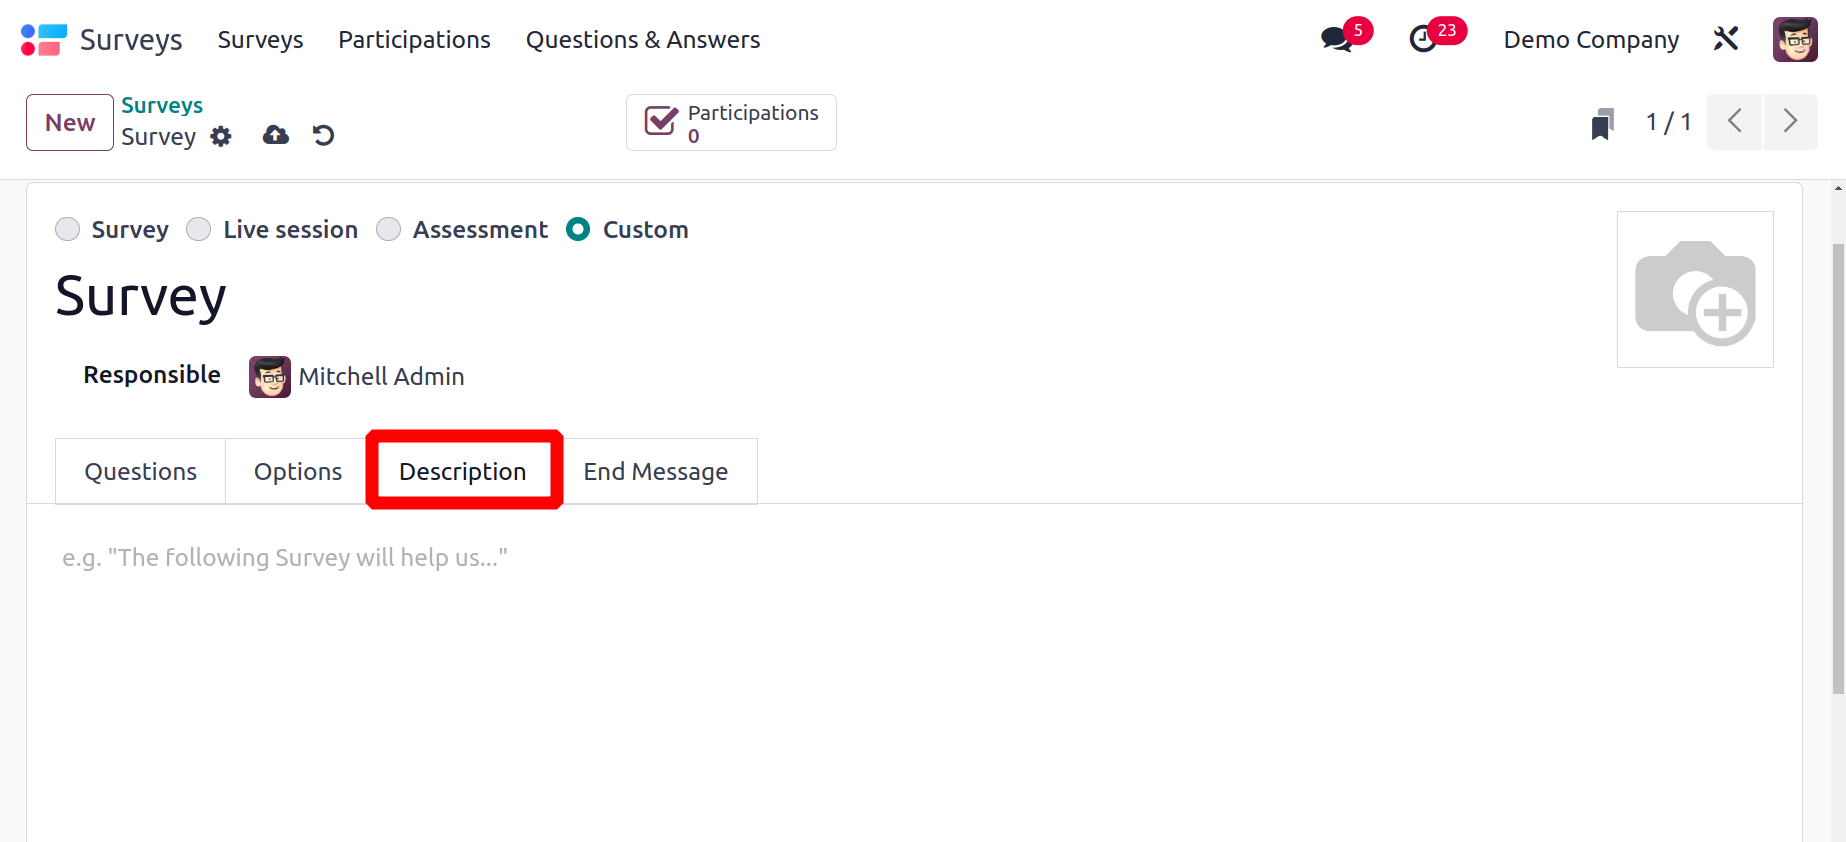
In the Description tab, you can add a description of the survey. This will be displayed on the survey's home page. Before your applicants begin the survey, you can explain its goals and rules to them using this description.
When the survey is finished, the client will see the message that was put in the End Message tab.
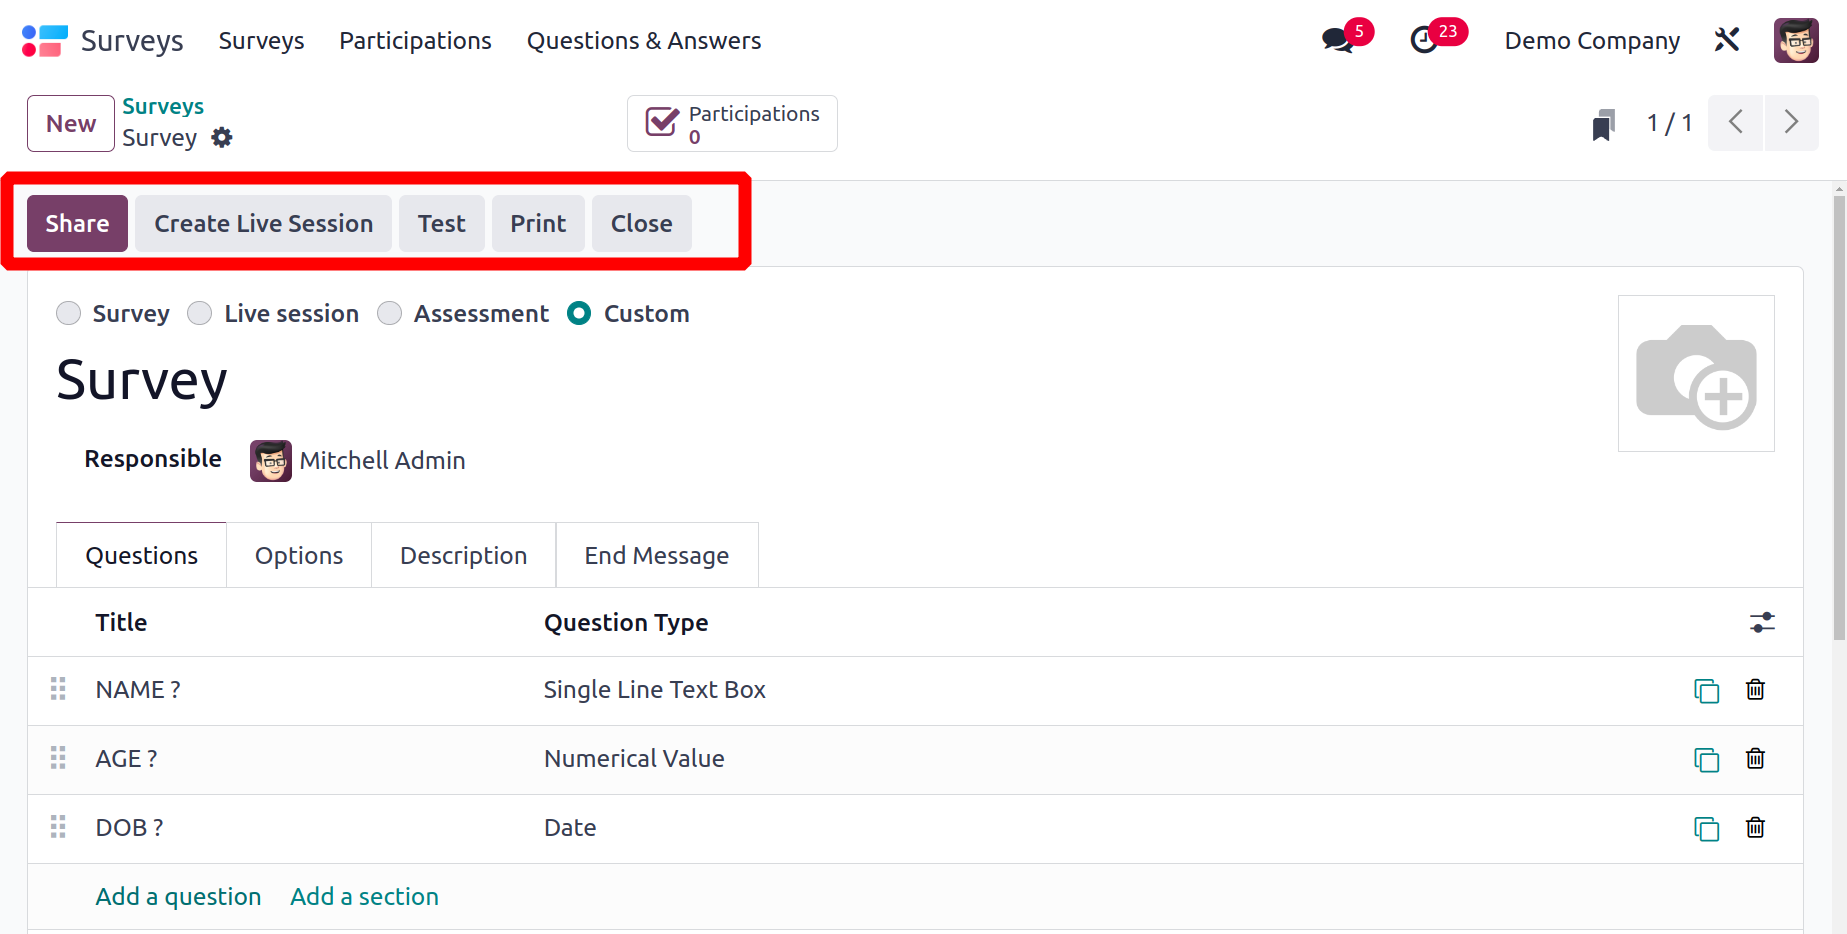
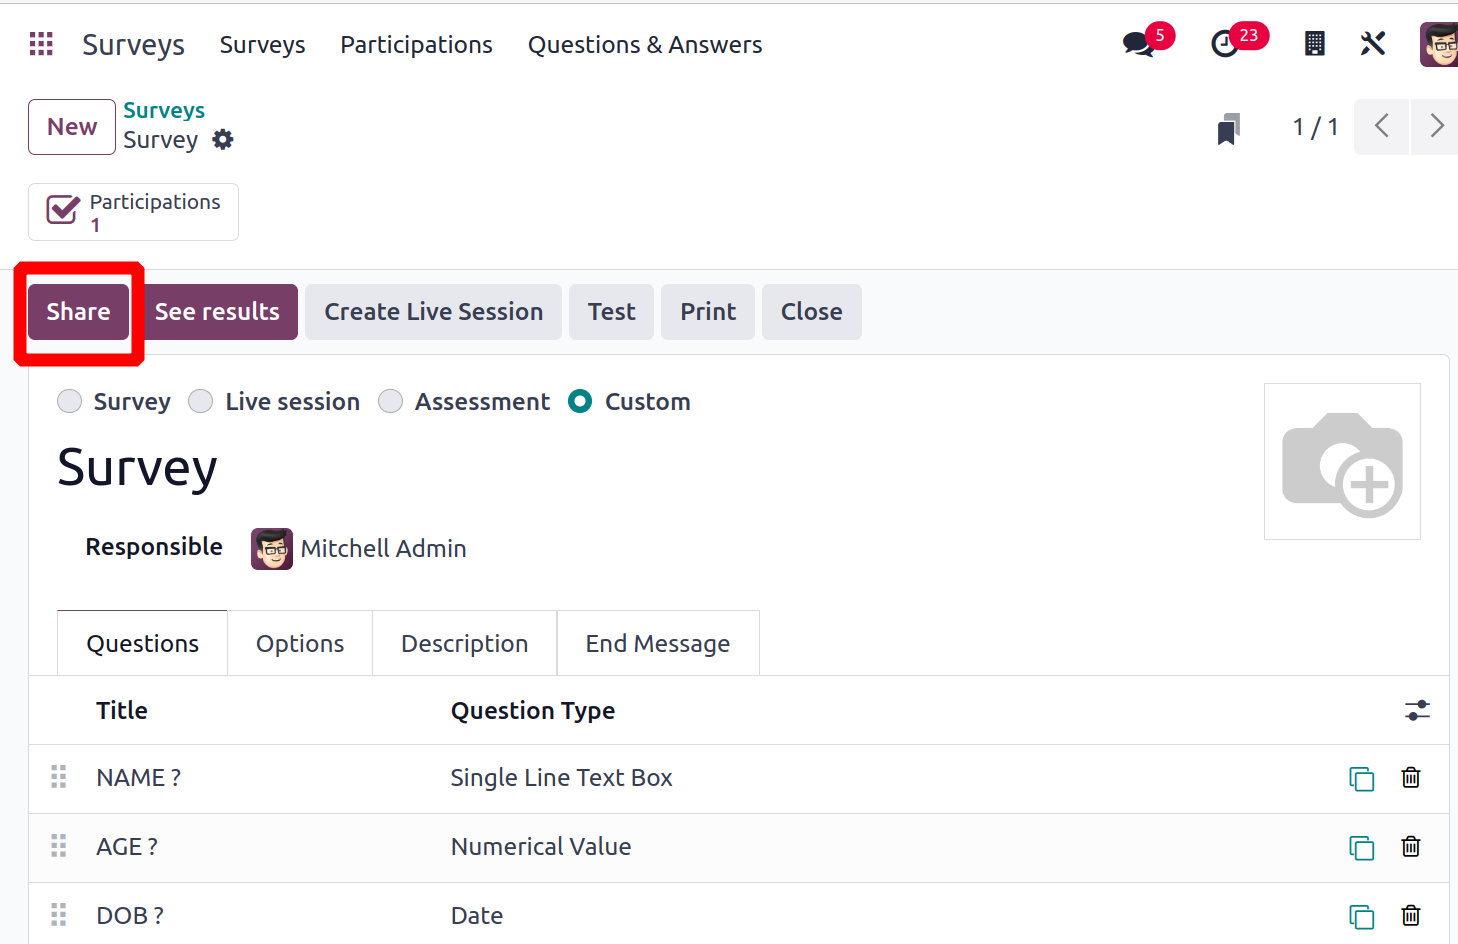
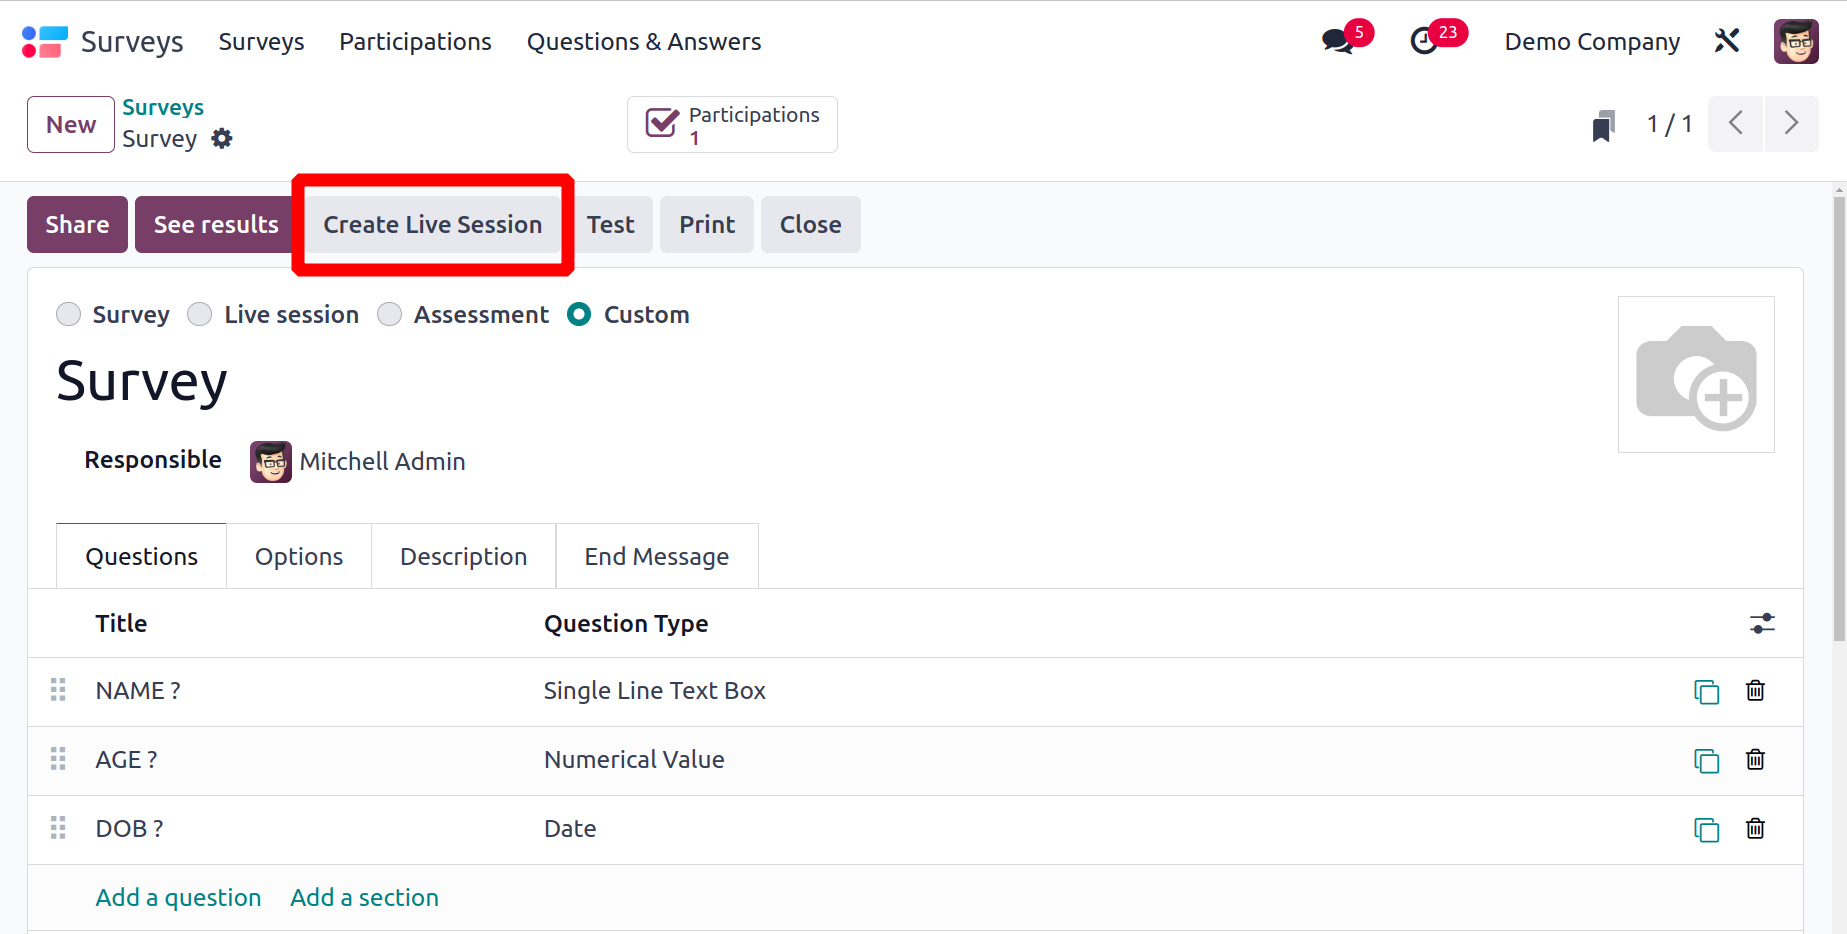
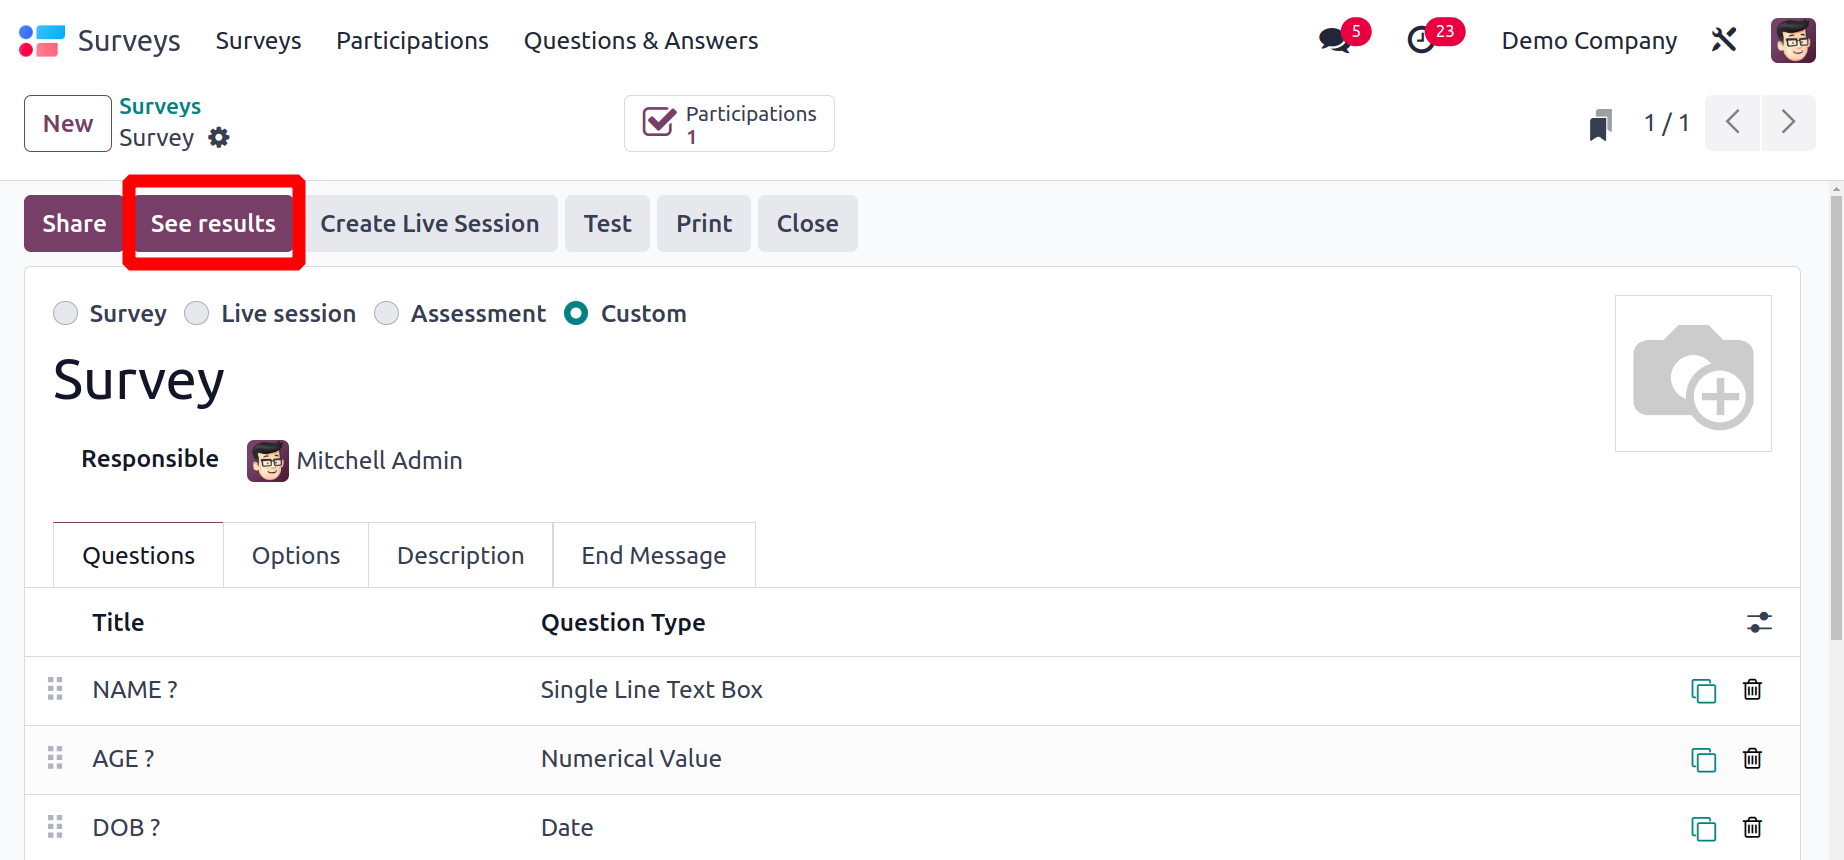
You can use the Save option to save the survey after entering all the required information in the new survey creation window. The window will have buttons for Close, Print, Create Live Session, and Share.
Before sharing the survey with the audience, you may test it using the Test button. Testing allows you to check the survey's accuracy. By testing the survey, you can alter any questions that are unclear or difficult to understand. You will be taken to a new page as displayed below after clicking the Test button.
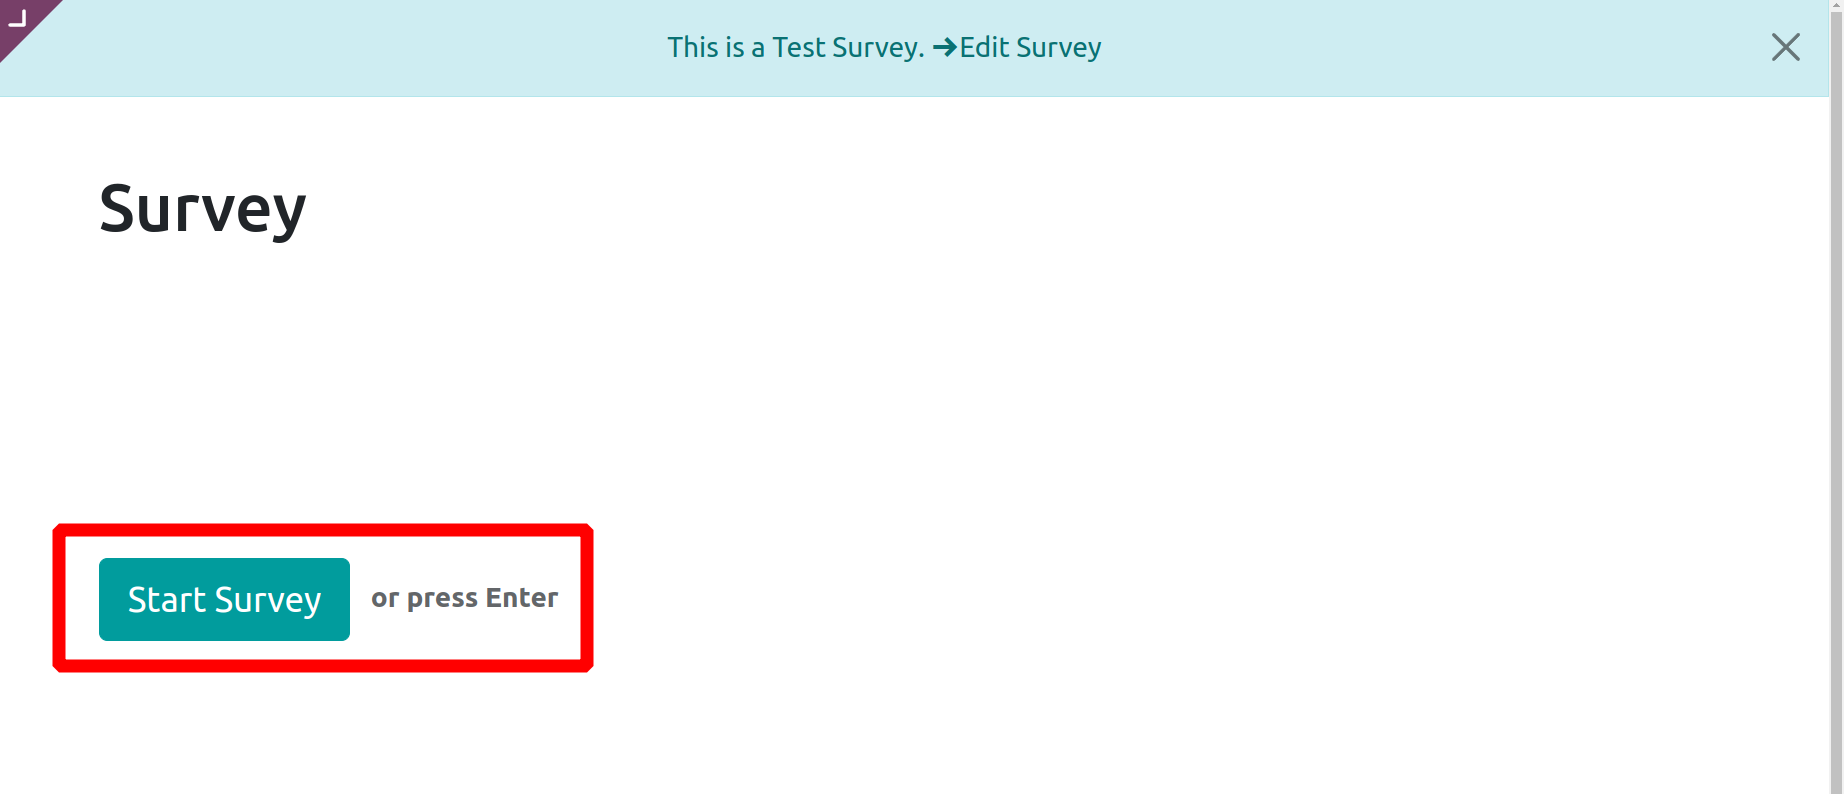
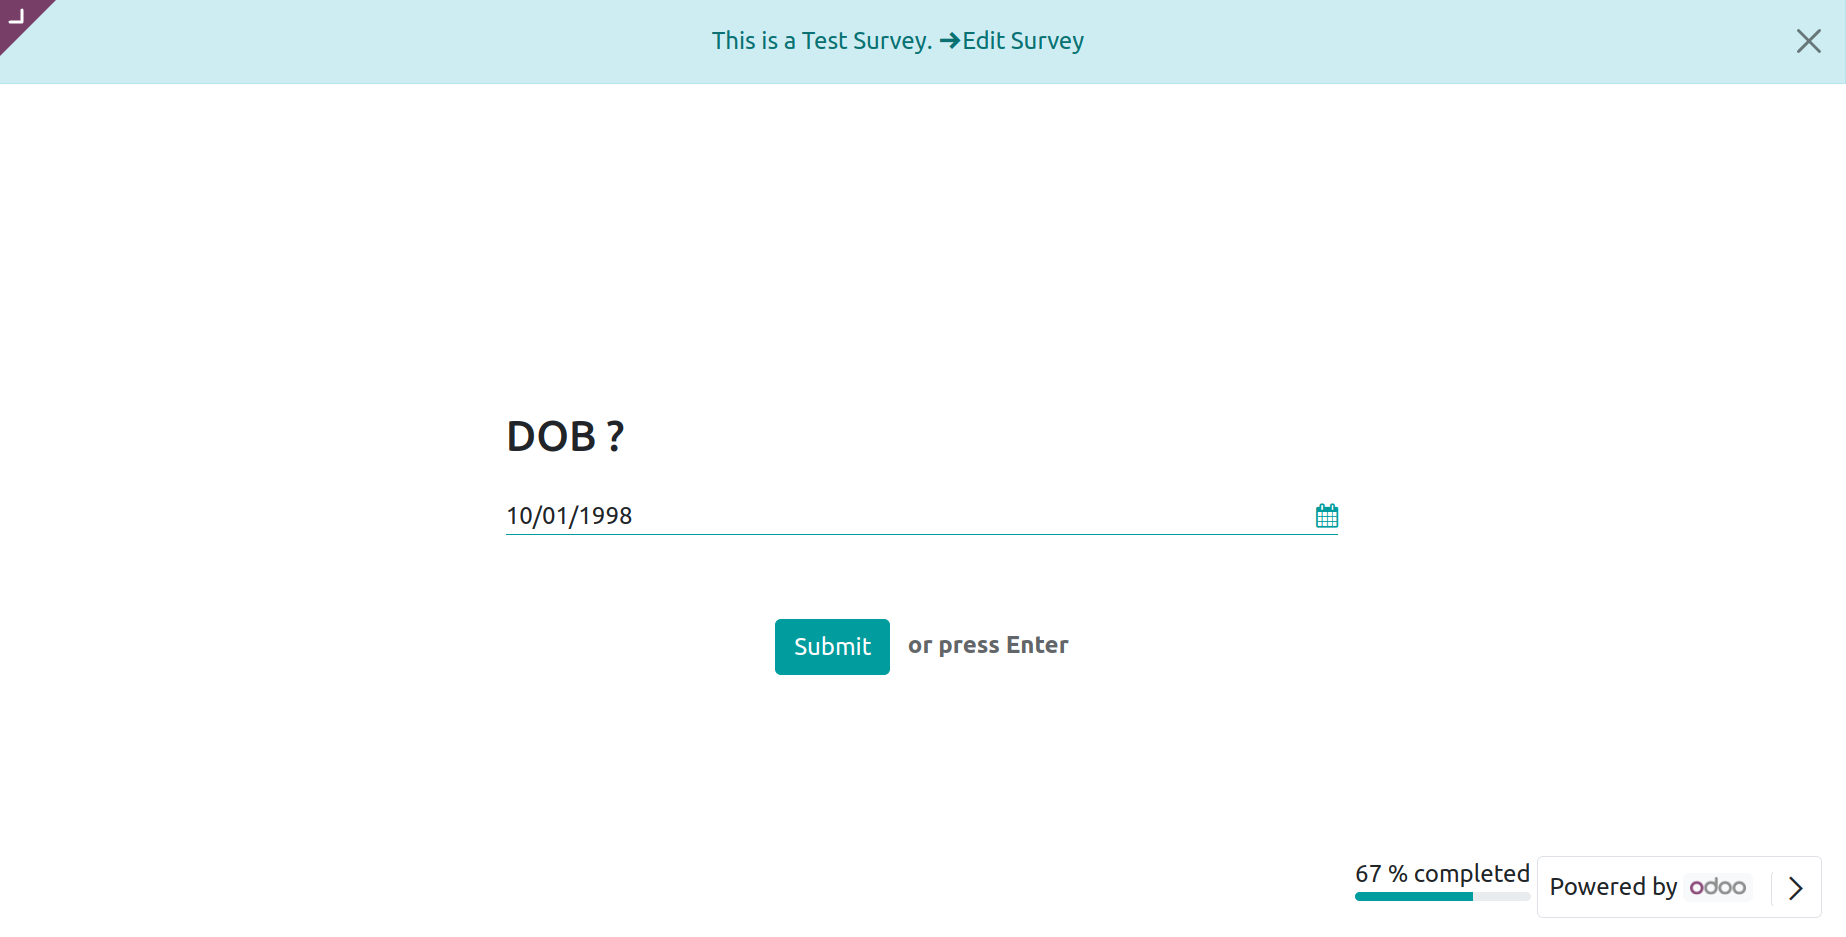
On the homepage itself, you may view the survey's description. The survey can be tested by using the Start Survey button.
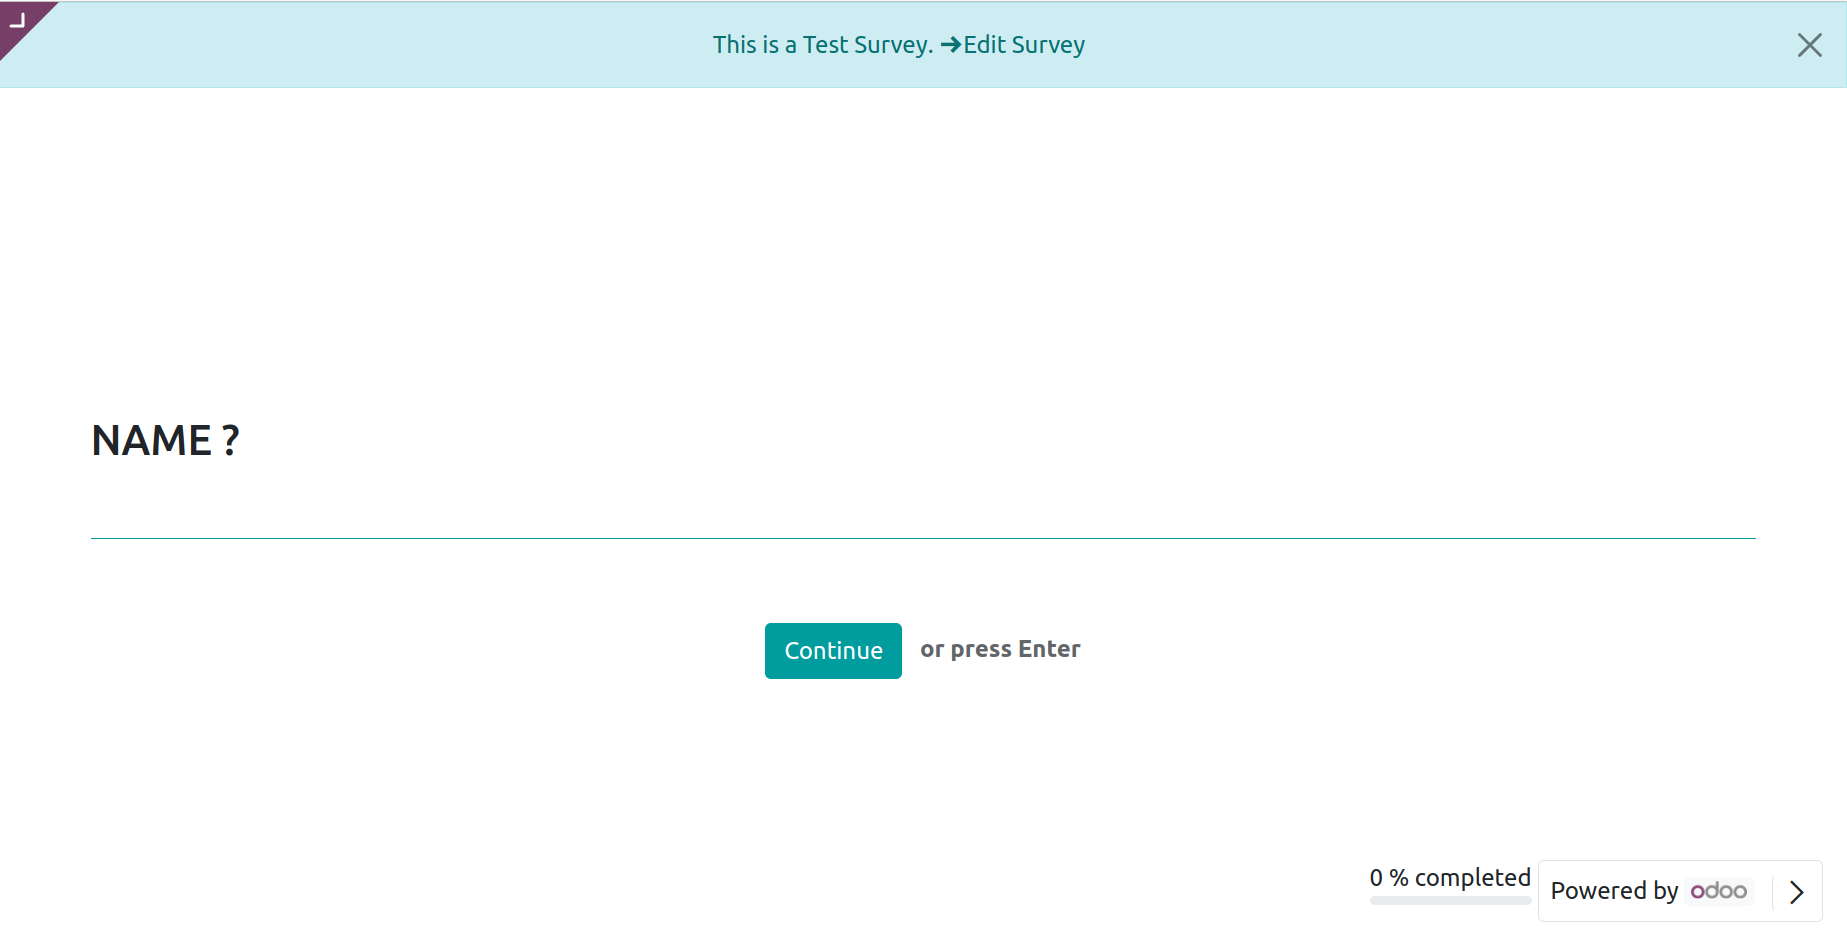
You can carefully review the question's clarity and respond to each one individually. Once you've answered all the questions, press the Submit button.
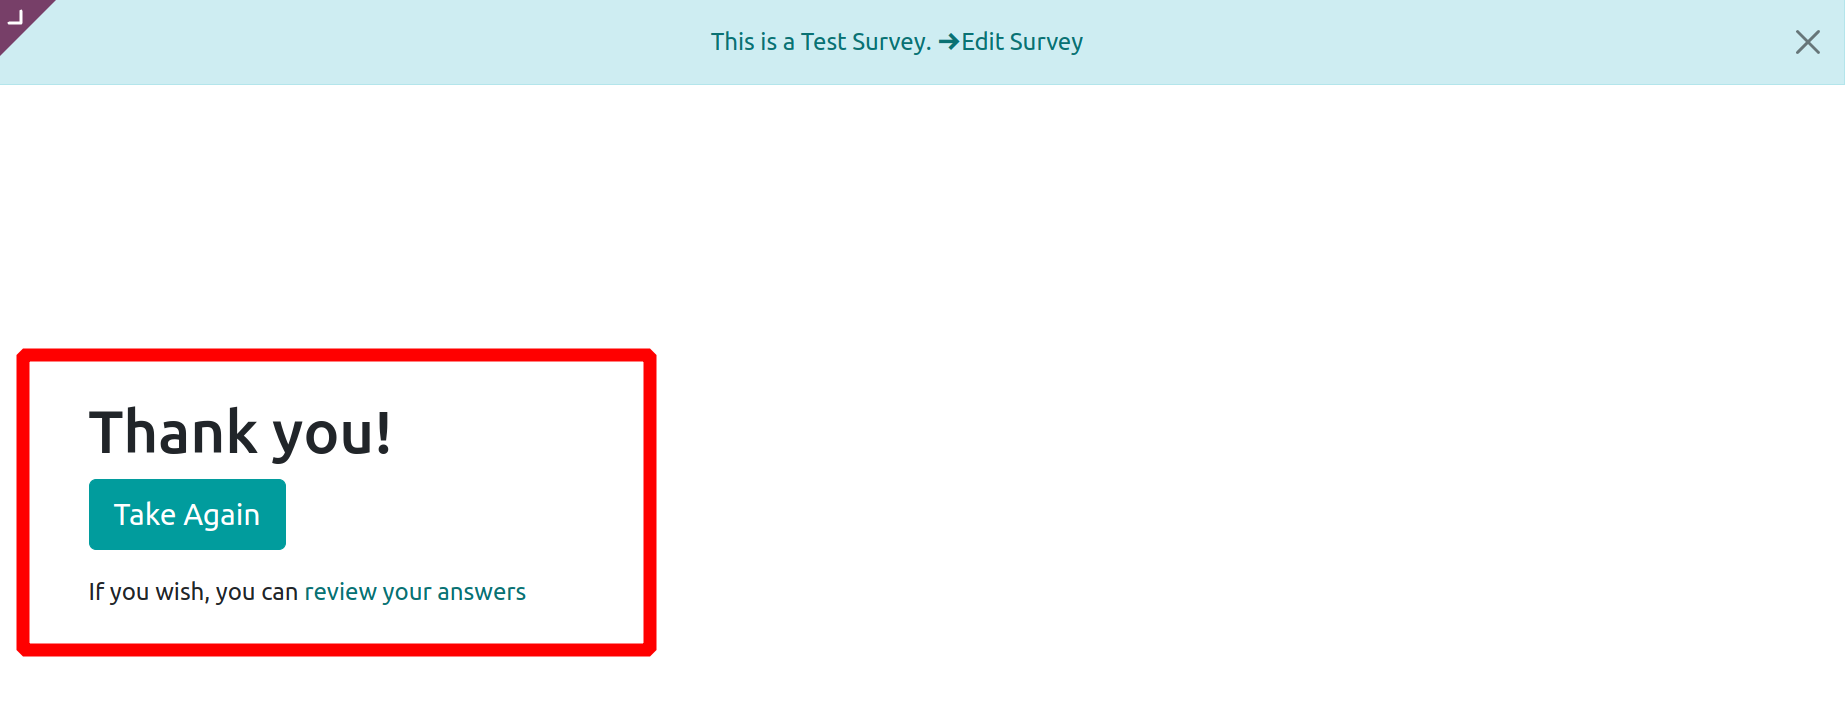
You will see the finished message added to the survey in the window as seen in the above image after completing it. You can retake the survey by clicking the Take Again button, and you can look over your responses by selecting the Review your Answers option. Use the Edit Survey button to make changes to the survey.
Use the Share button to spread the word about the survey to others. This will assist you in sending the intended audience an invitation via email.
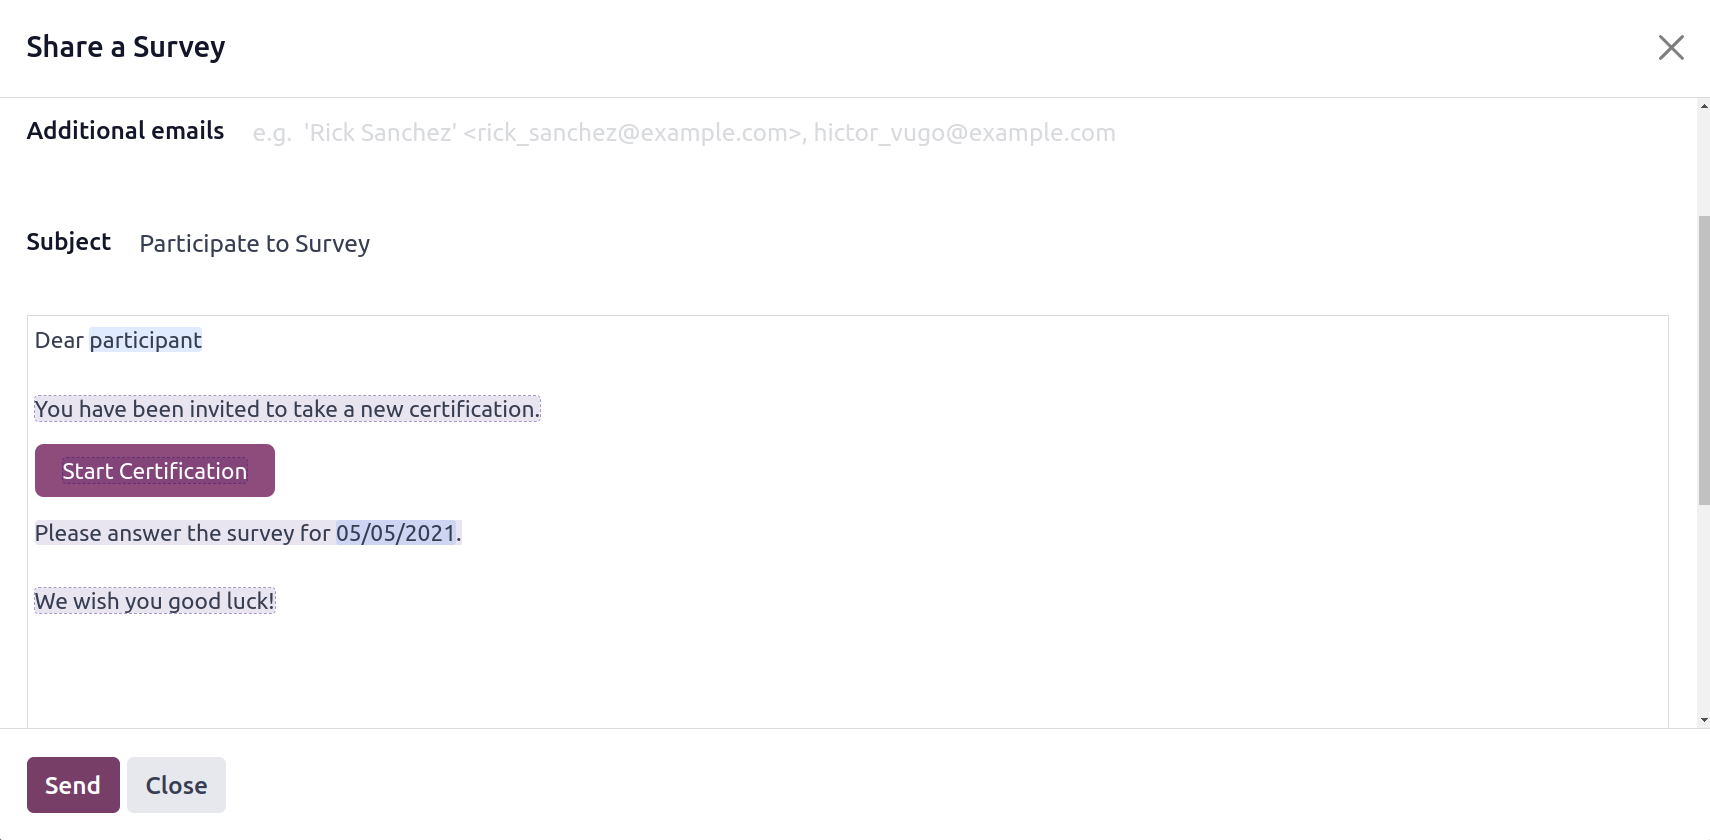
You'll see a pop-up window with an invitation included by default. When sending the invitation, simply click the Send button after including the recipients' names in the body of the email.
The Create Live Session button can be used to begin a live session for this survey.
You begin the survey as soon as the invited participants arrive at the live session.

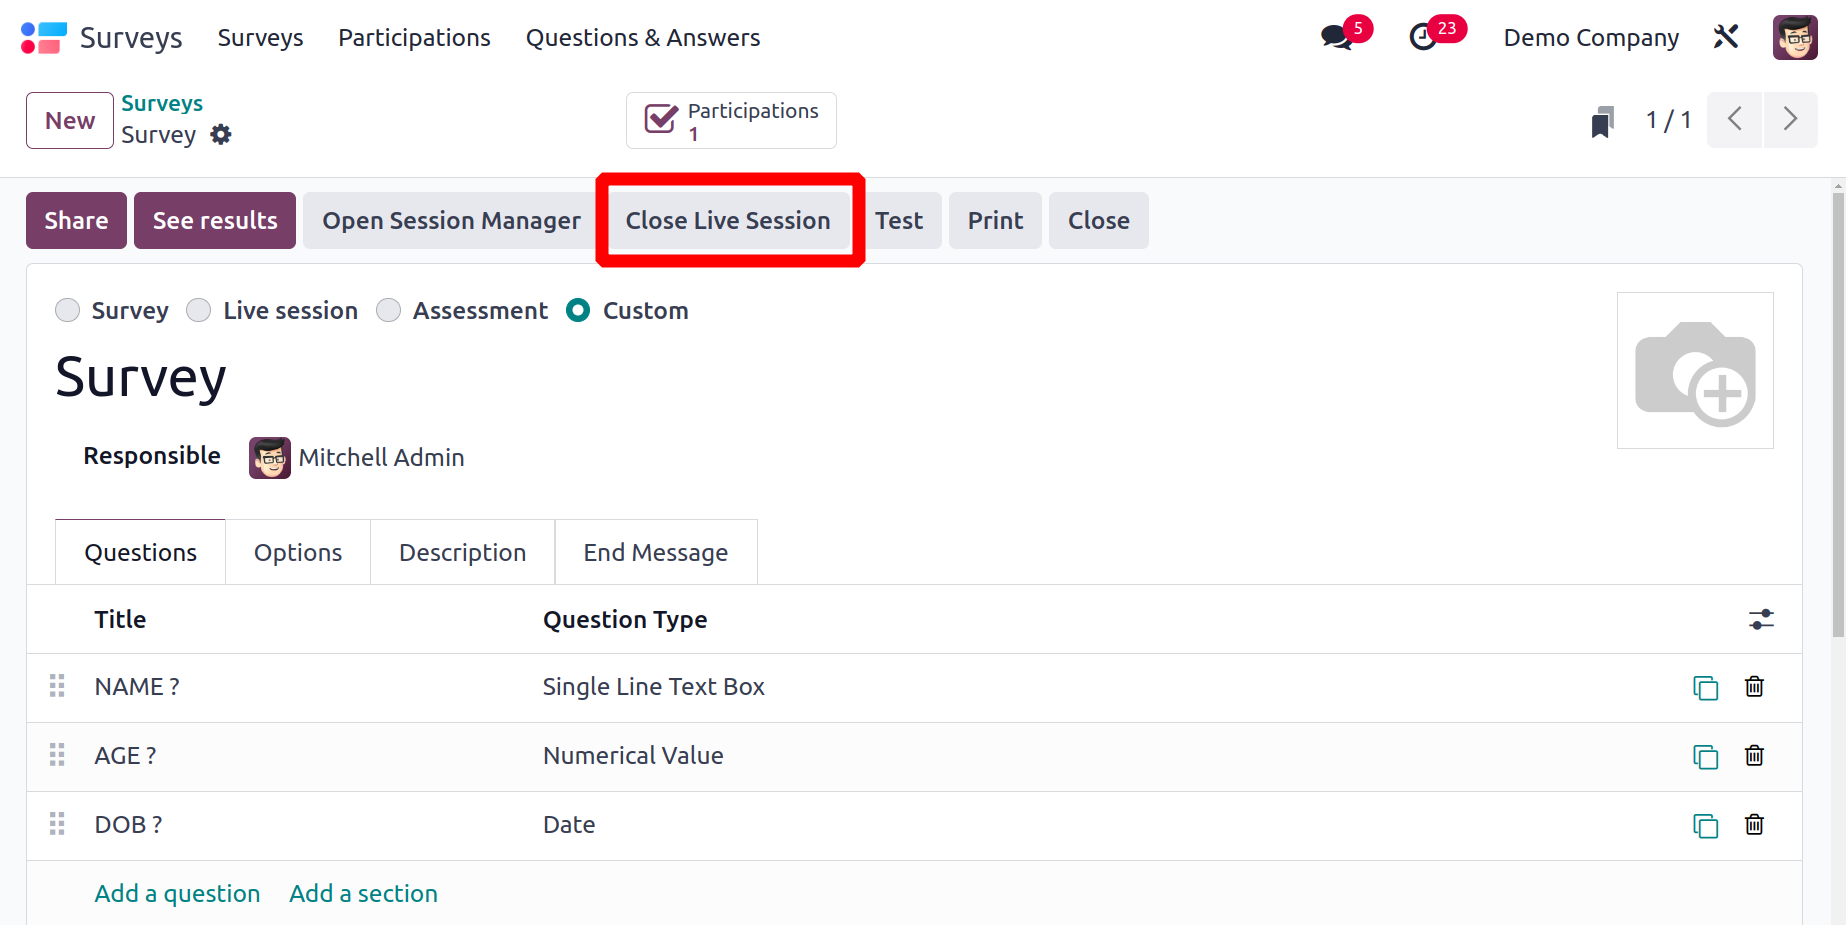
You can end the live session of the survey by clicking the Close Live Session option in the backend.
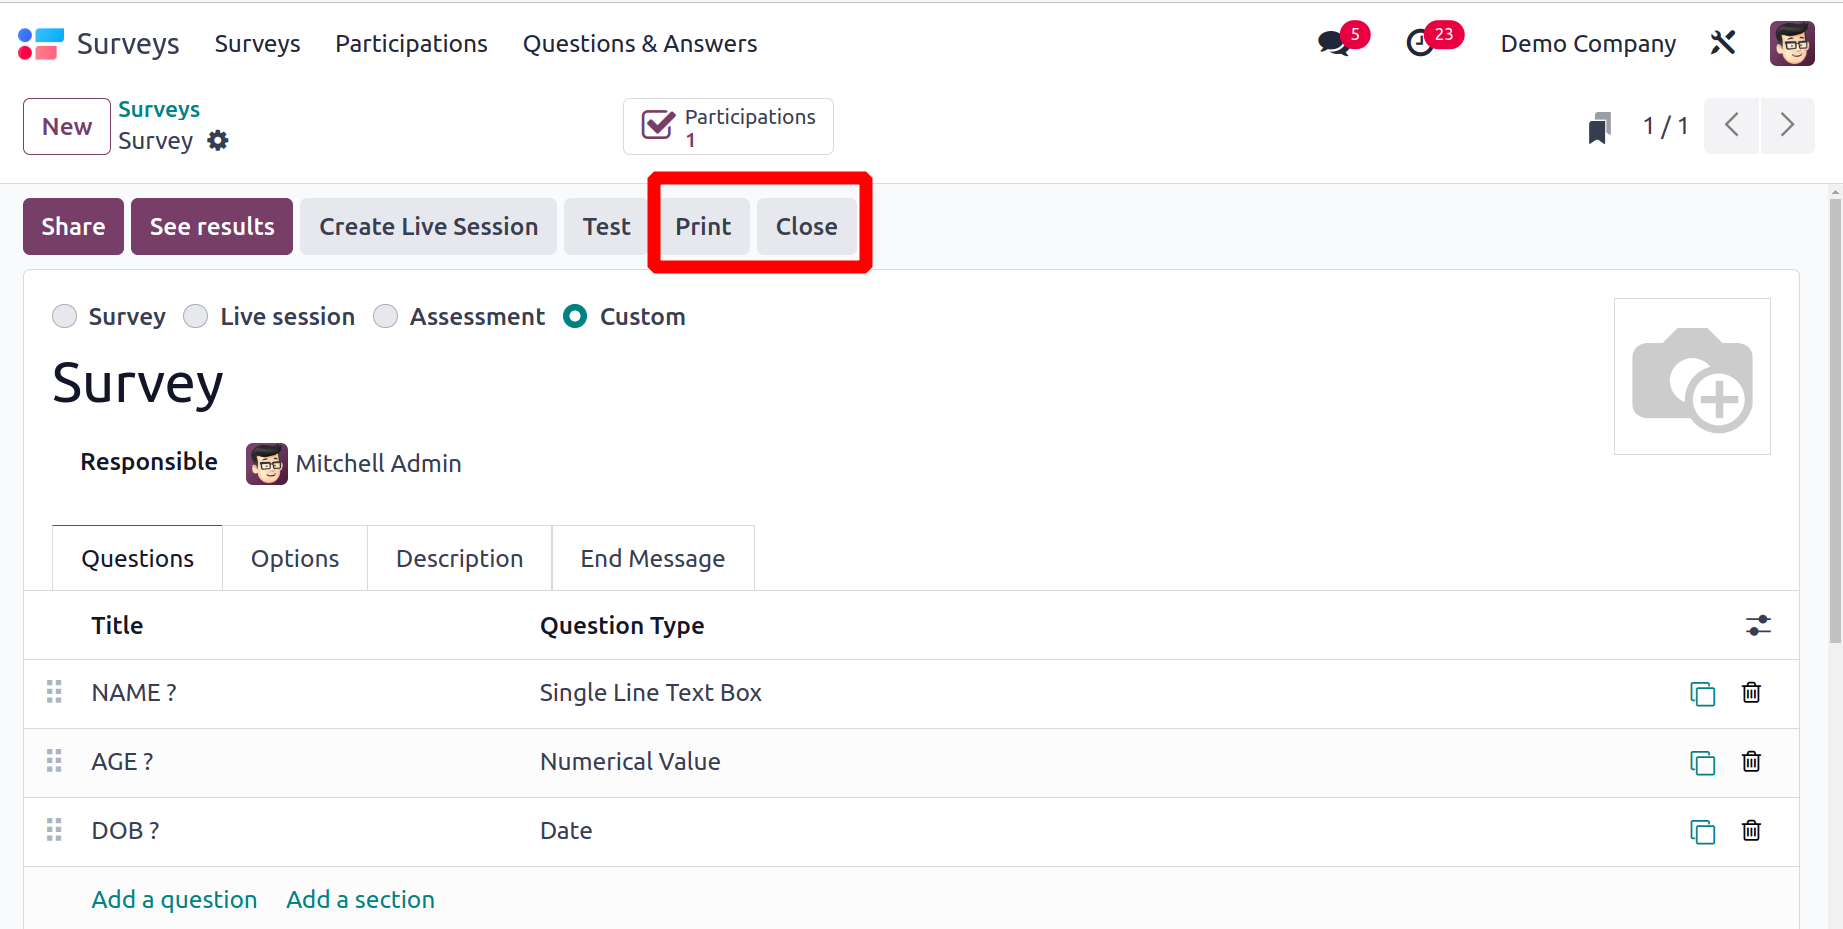
You can print off the survey using the Print option, and you can also cancel the survey by selecting the Close button.
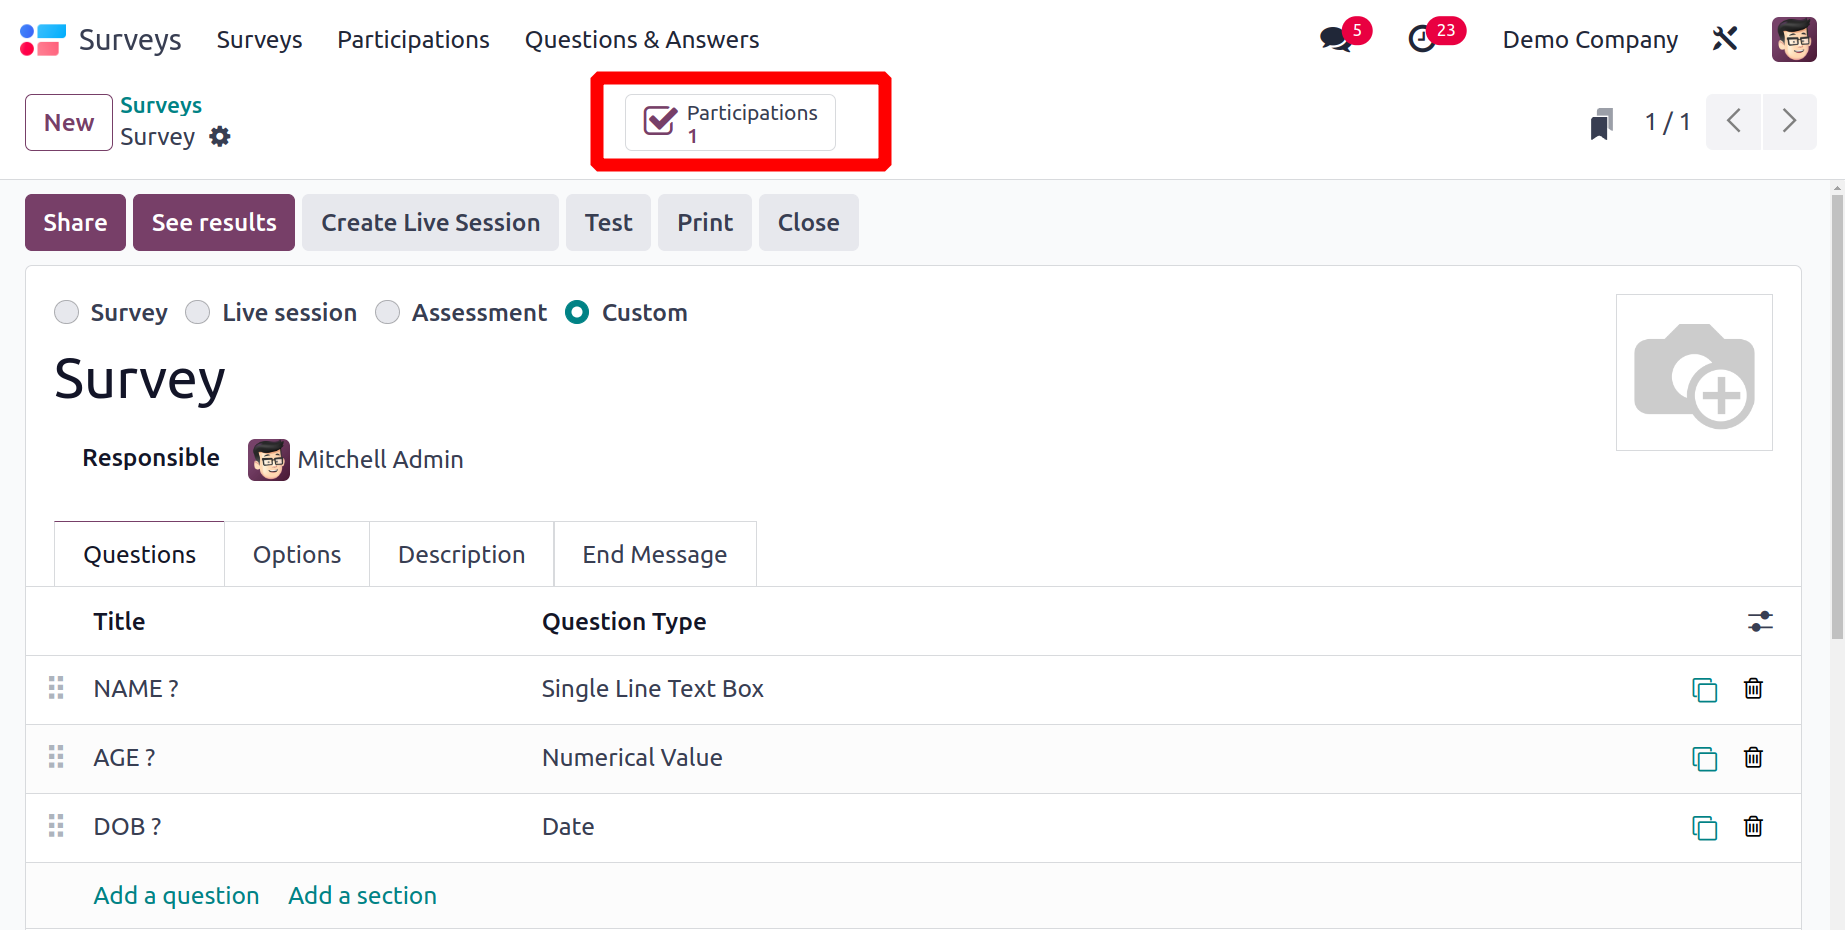
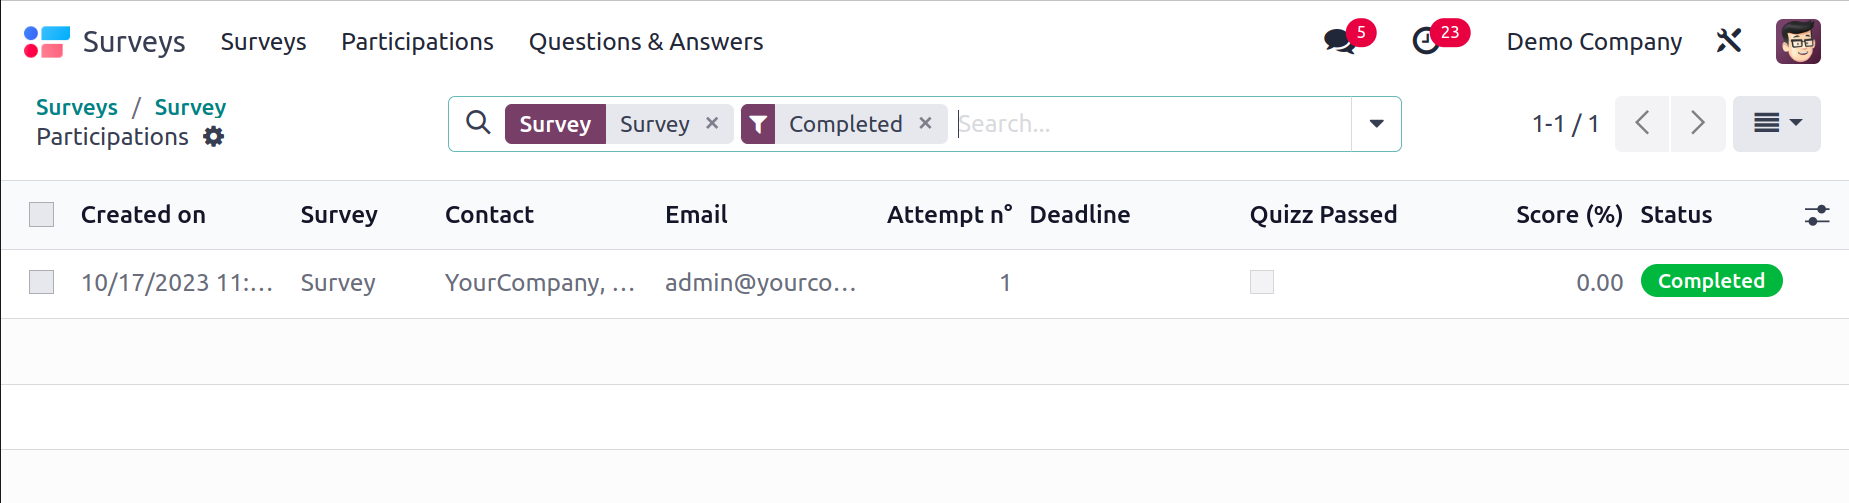
Attendee responses will be saved in the Participations smart button, which can be seen in the accompanying screenshot.
The survey's Created on, Deadline, Partner, Email, Number of Attempts, Status, Quiz Passed, and Score are all displayed in this platform's list view. From this list, you can choose a survey to see more information about the responses that each attendee provided.
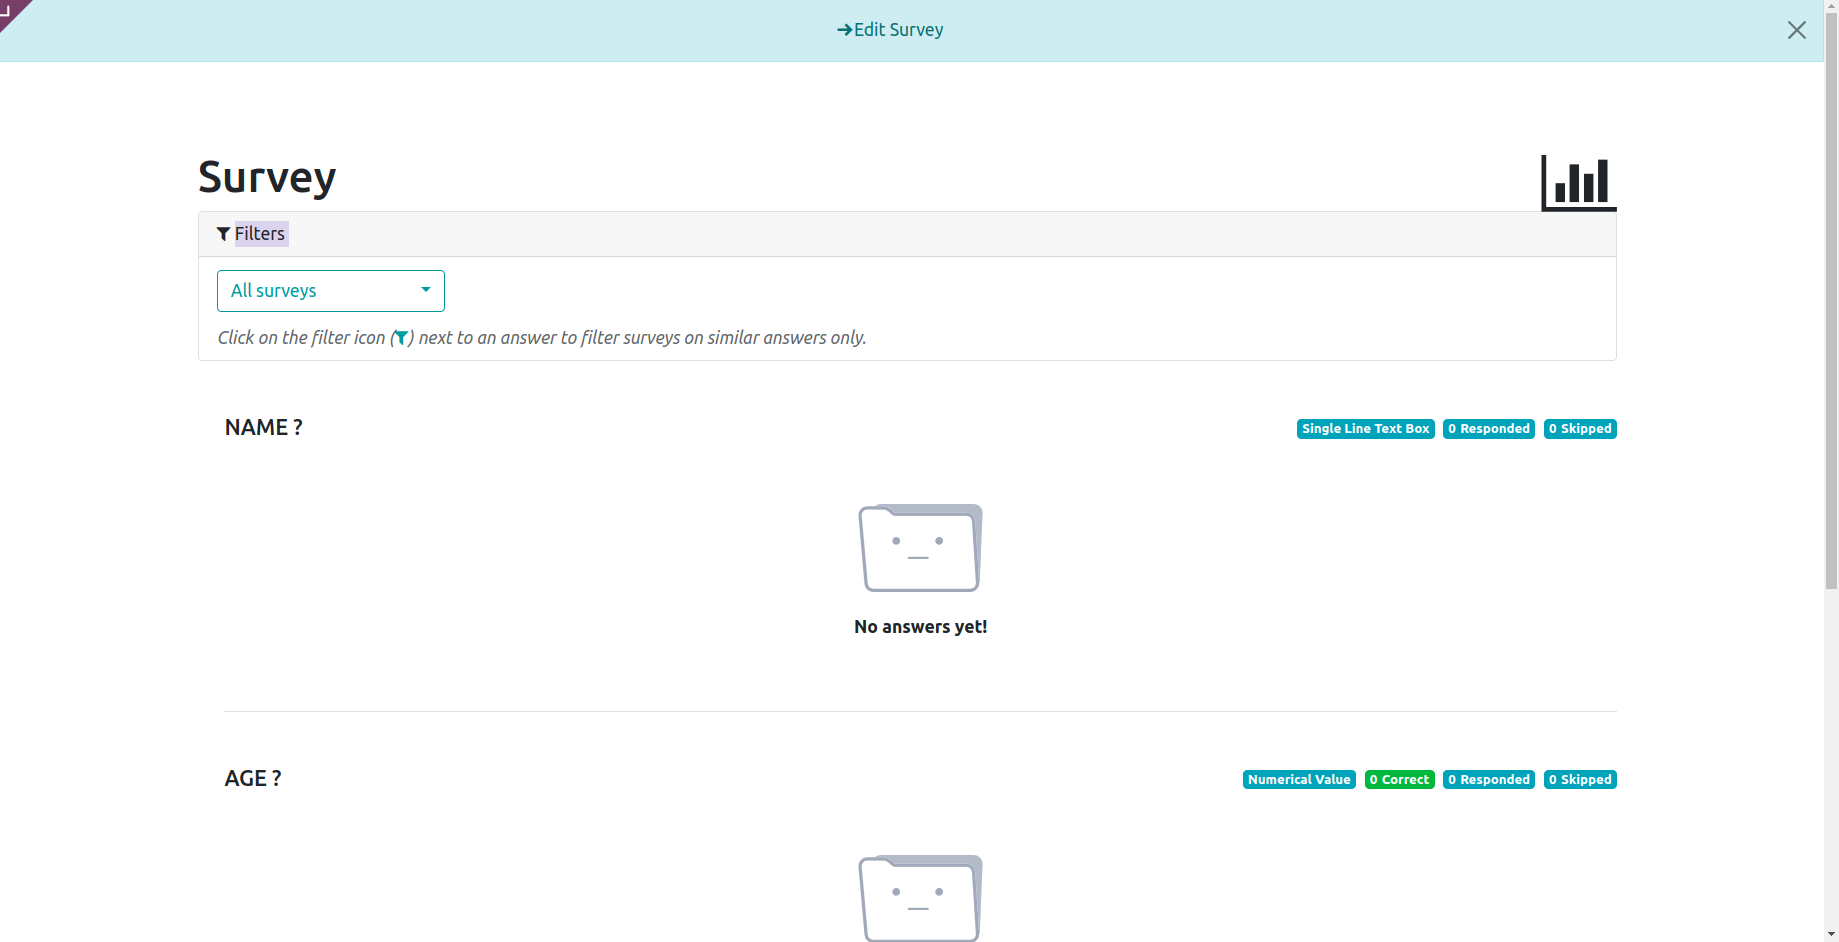
You can create reports about the survey using the See Results button.
As seen below, a new window will open with the specifics of user responses for each topic. In this window, you can observe how many users skipped and responded to each question.
The choices to archive, duplicate, and delete the survey are found in the Action menu.
Questions
Under the Questions & Answers tab of the module, you may view a list of every question you've ever created for an Odoo 17 survey. The list will include inquiries from various polls.
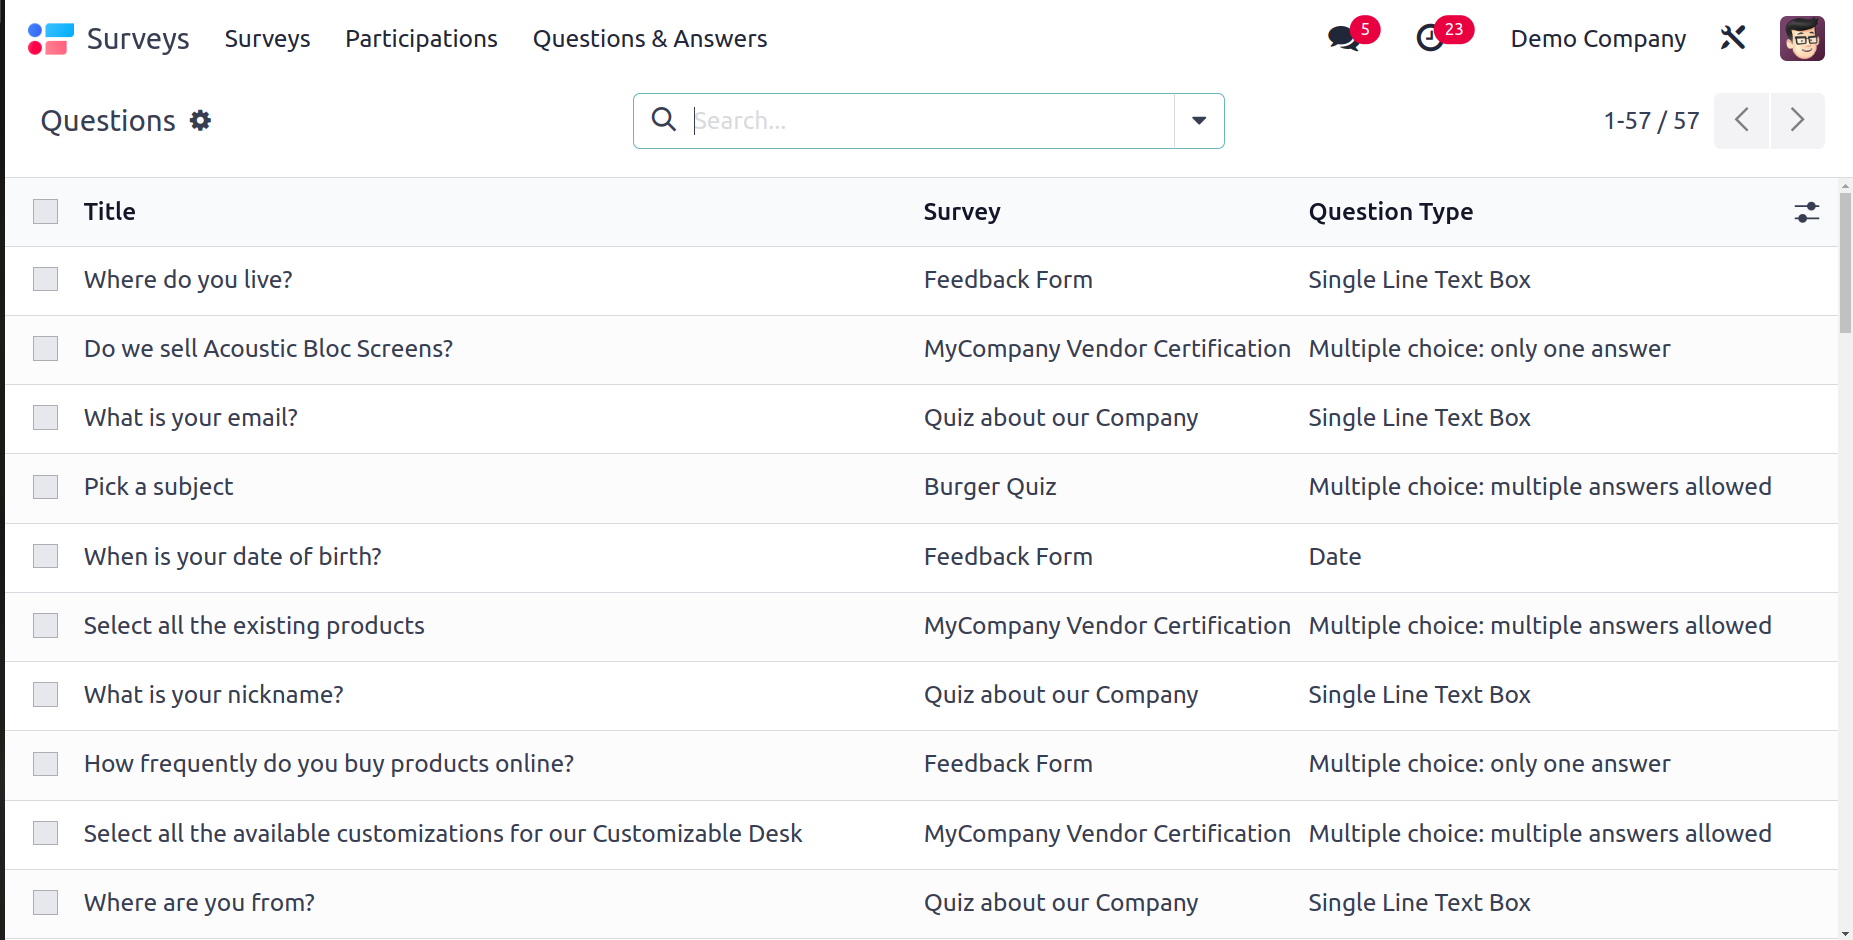
The Title, Survey, and Question Type will be displayed in the list's preview. By selecting a specific question from this list, you can get more specific information on that question. Using the Edit button, you can also change the question.
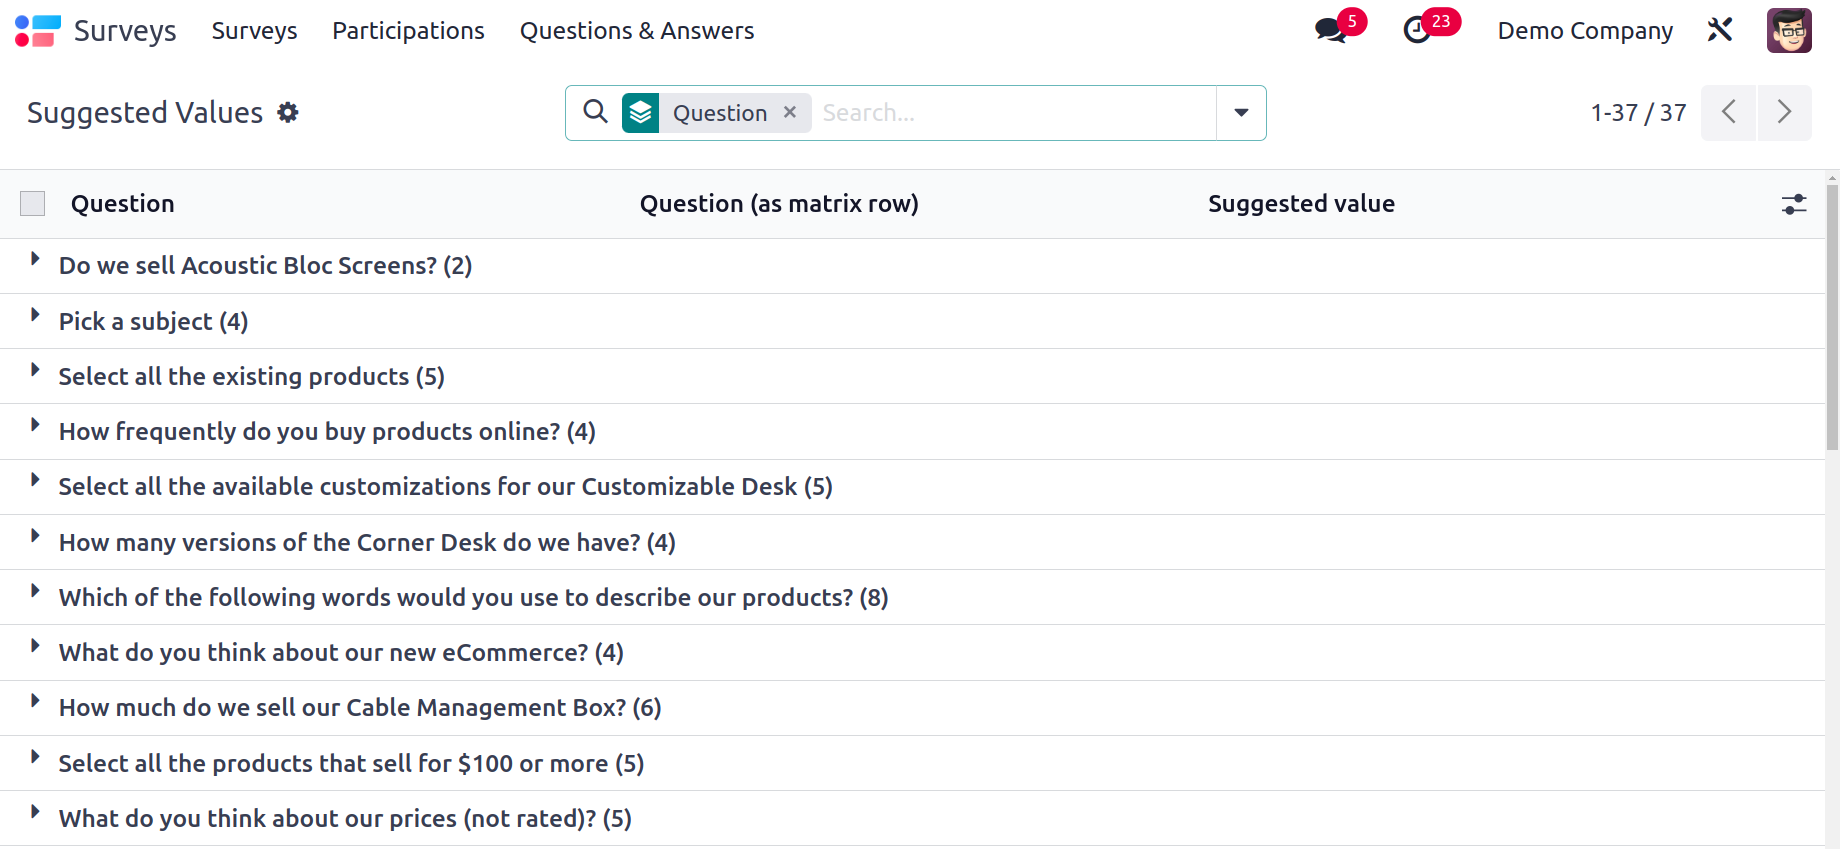
While developing various survey question types, we may provide attendees with options or suggestions for the best response. These proposed responses are available under the Suggested Values menu item in the Questions & Answers menu.
The list of responses provided by participants for various surveys made in Odoo17 is displayed under the Detailed Answers option under the Questions & Answers menu.
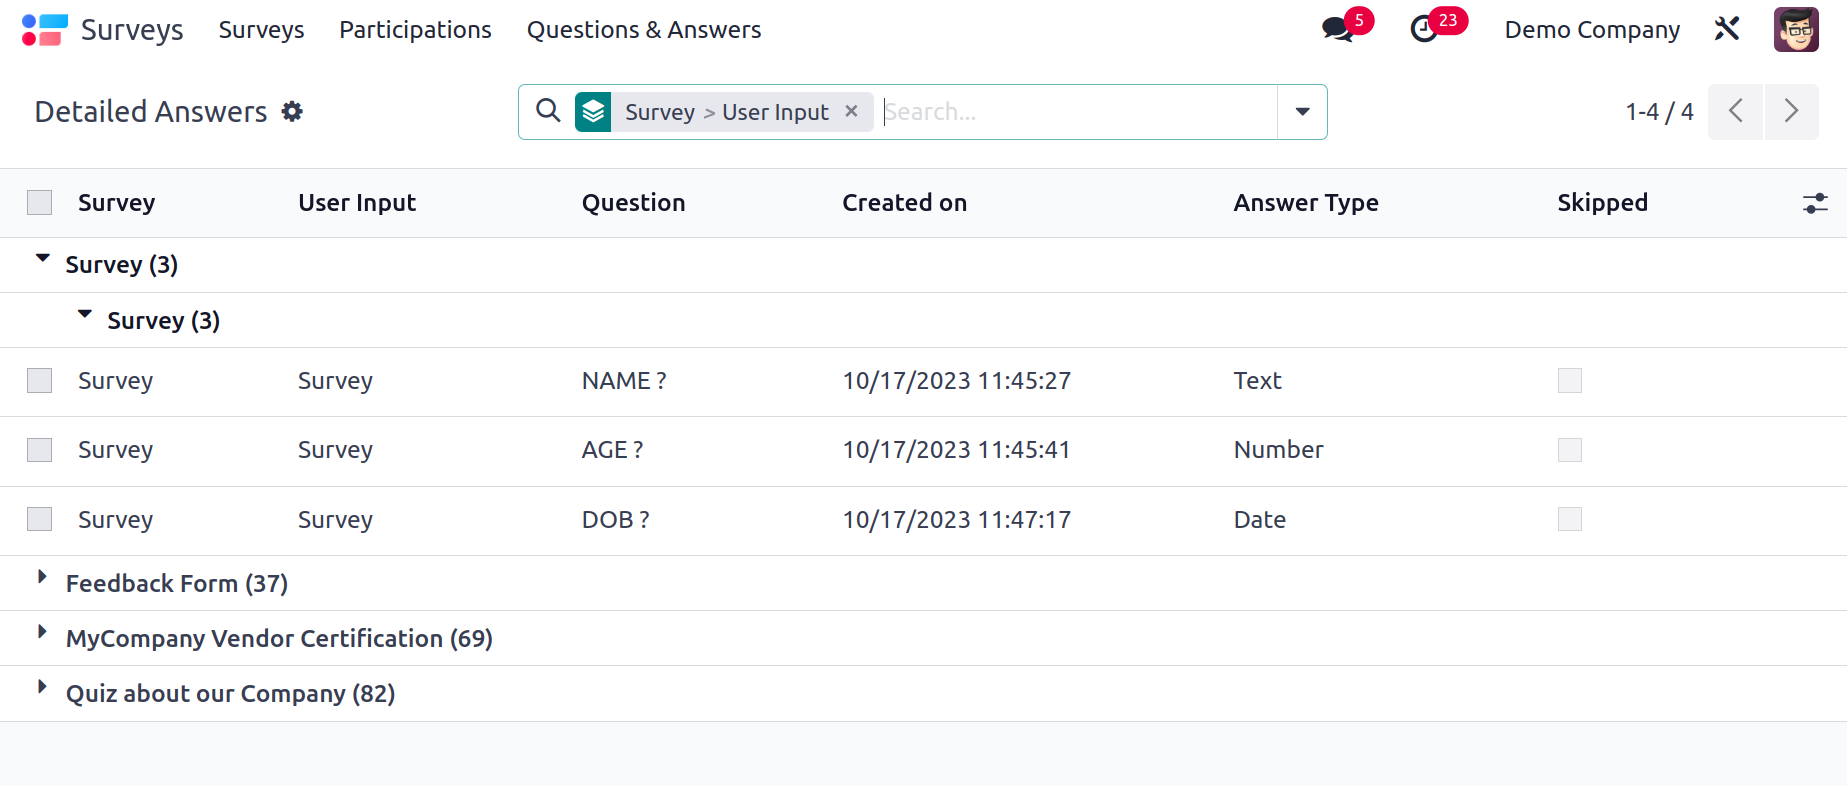
The list includes the Survey name, User Input, Question, Created On, Answer Type, and Score, as seen in the image above. From this list, you can choose a question from a specific survey to see more information about the attendees' answers to that question.
Participations
Each participant's information will be recorded by Odoo17 in the Survey module. The Participation menu is located in the
module's main menu bar. You can access the list of stored participation records from this menu.

The list contains information on the survey's name, creation date, deadline, partner, email address, number of tries, status, quiz passed, and score. You can change the platform's view to a Kanban perspective as well
The Odoo17 Survey module will help you get client feedback in a few easy steps. This module allows you to create useful reports about client satisfaction and perceptions of the goods and services your business provides. With the use of the Survey module in Odoo 17, you may increase productivity and optimize your marketing approach by analyzing the recipients' interests.