Receipts
In the Odoo17 Accounting module, customers will receive distinct platforms to monitor
sales and purchase receipts. After a sales order has been confirmed, sales receipts are
produced. It is regarded as the record attesting to the customer's receipt of the good
or service specified in the sales order. Sales receipts can be produced in Odoo17
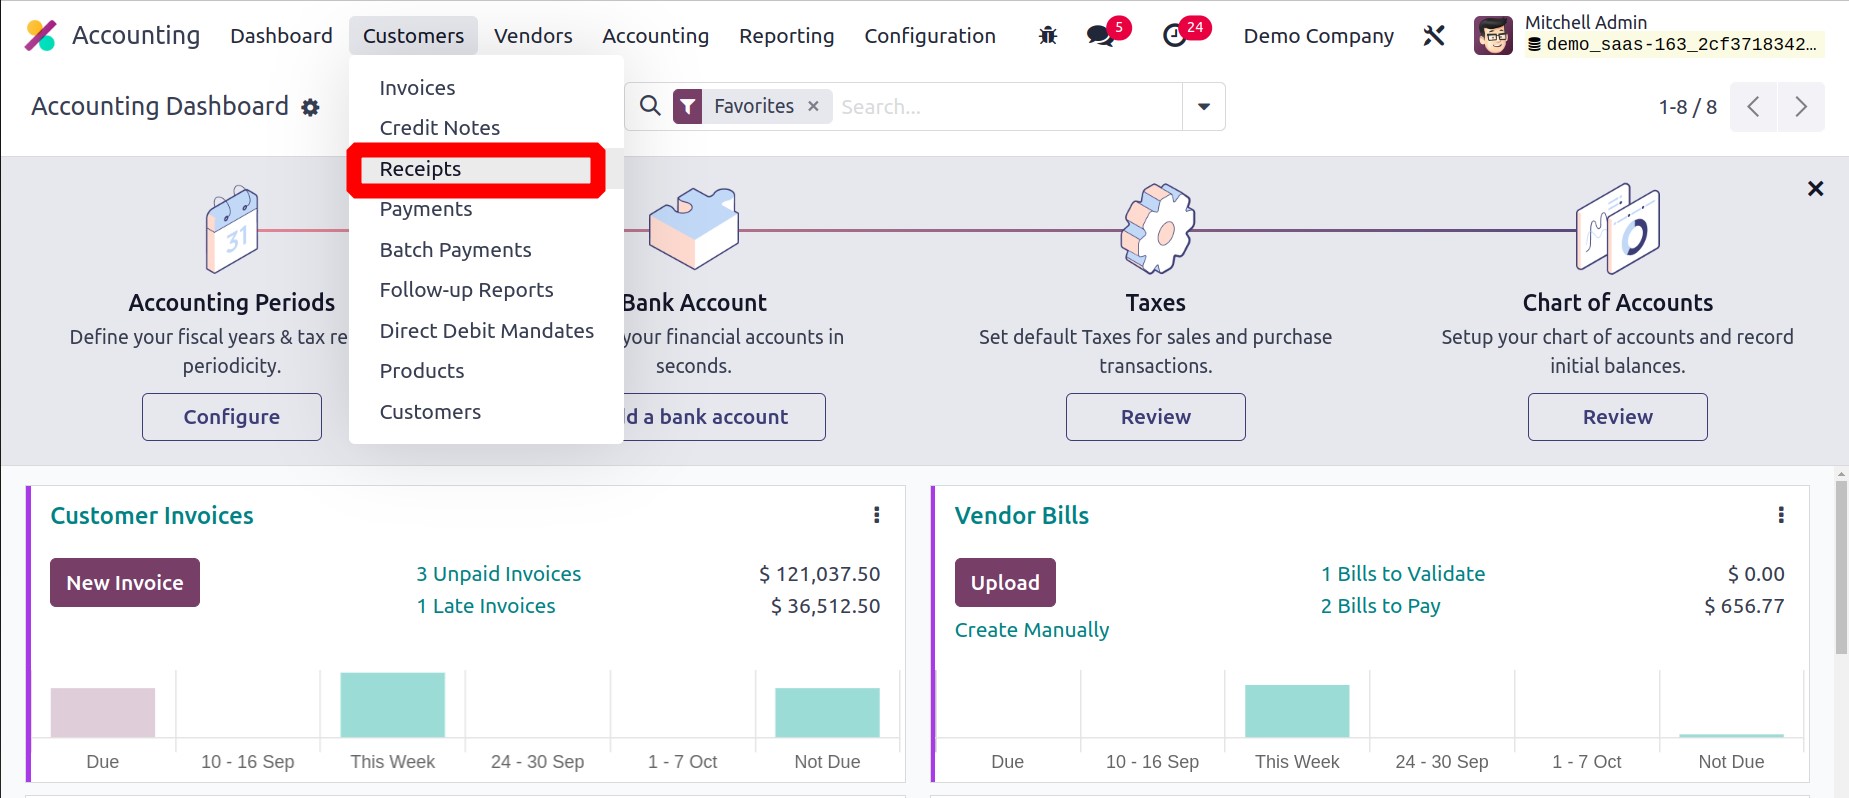
directly from sales orders. You may locate the Receipts option under the
Customers menu in the Accounting module if you wish to manually create sales
receipts.
The data of the Number, Customer, Invoice Date, Due Date, Activities, Tax Excluded,
Total, Total in Currency, Payment Status, and Status are displayed in the list view of
this platform, which is displayed above. Using the Upload option, you can upload a sales
receipt to the database. By selecting the New button, a new sales receipt can be
created.
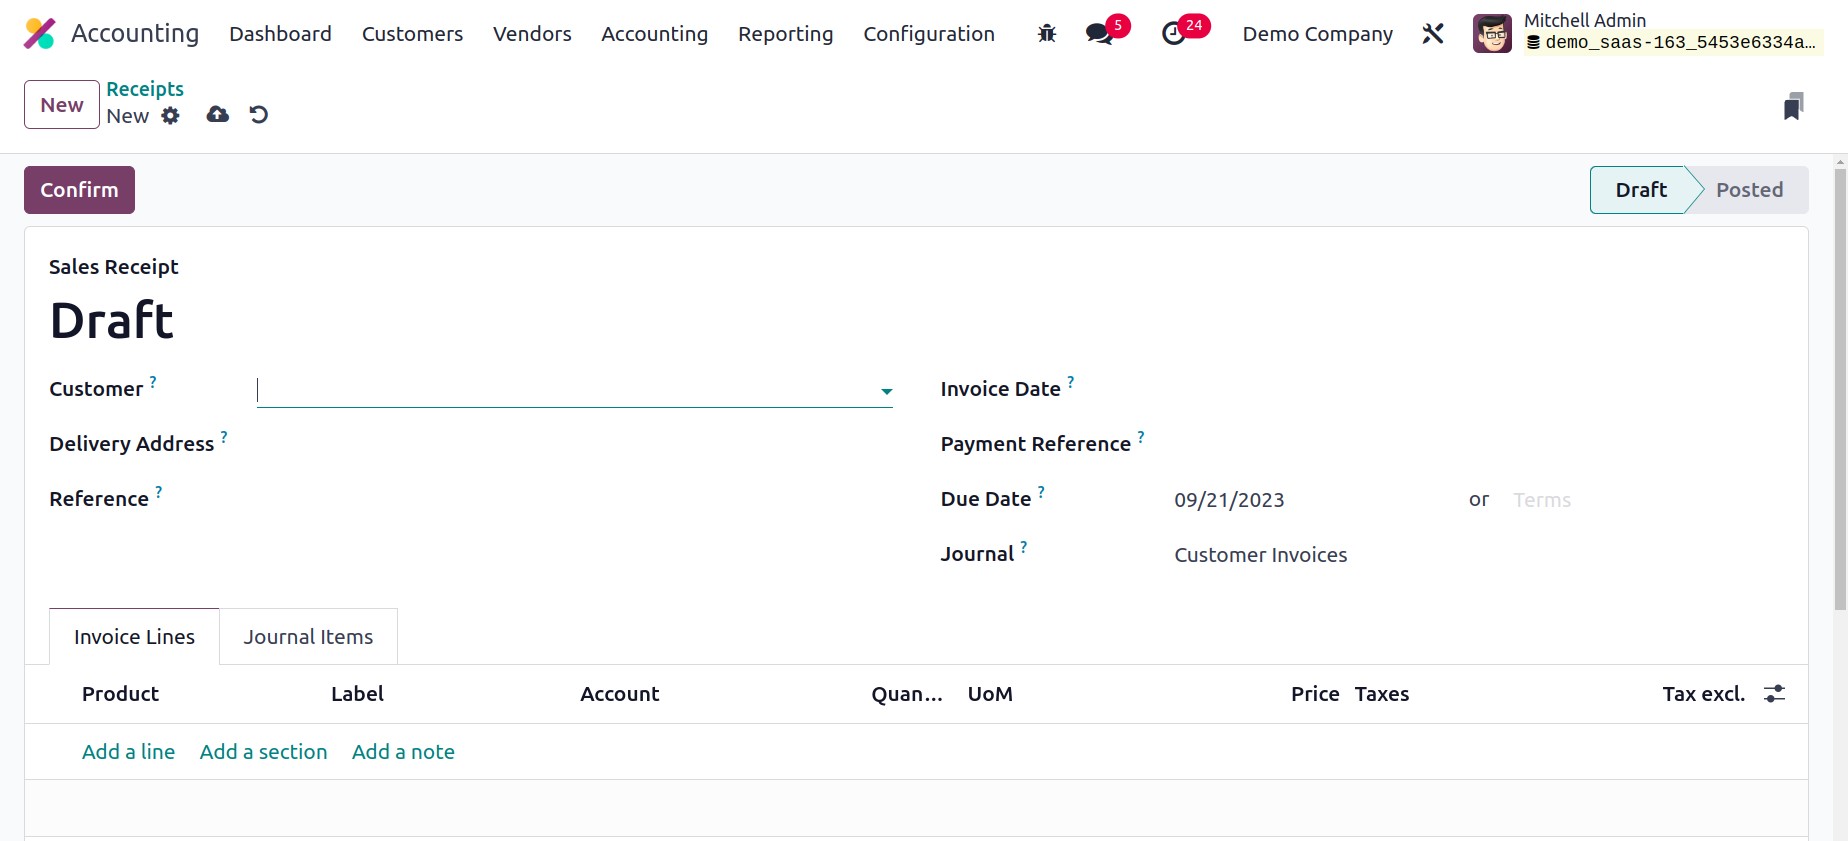
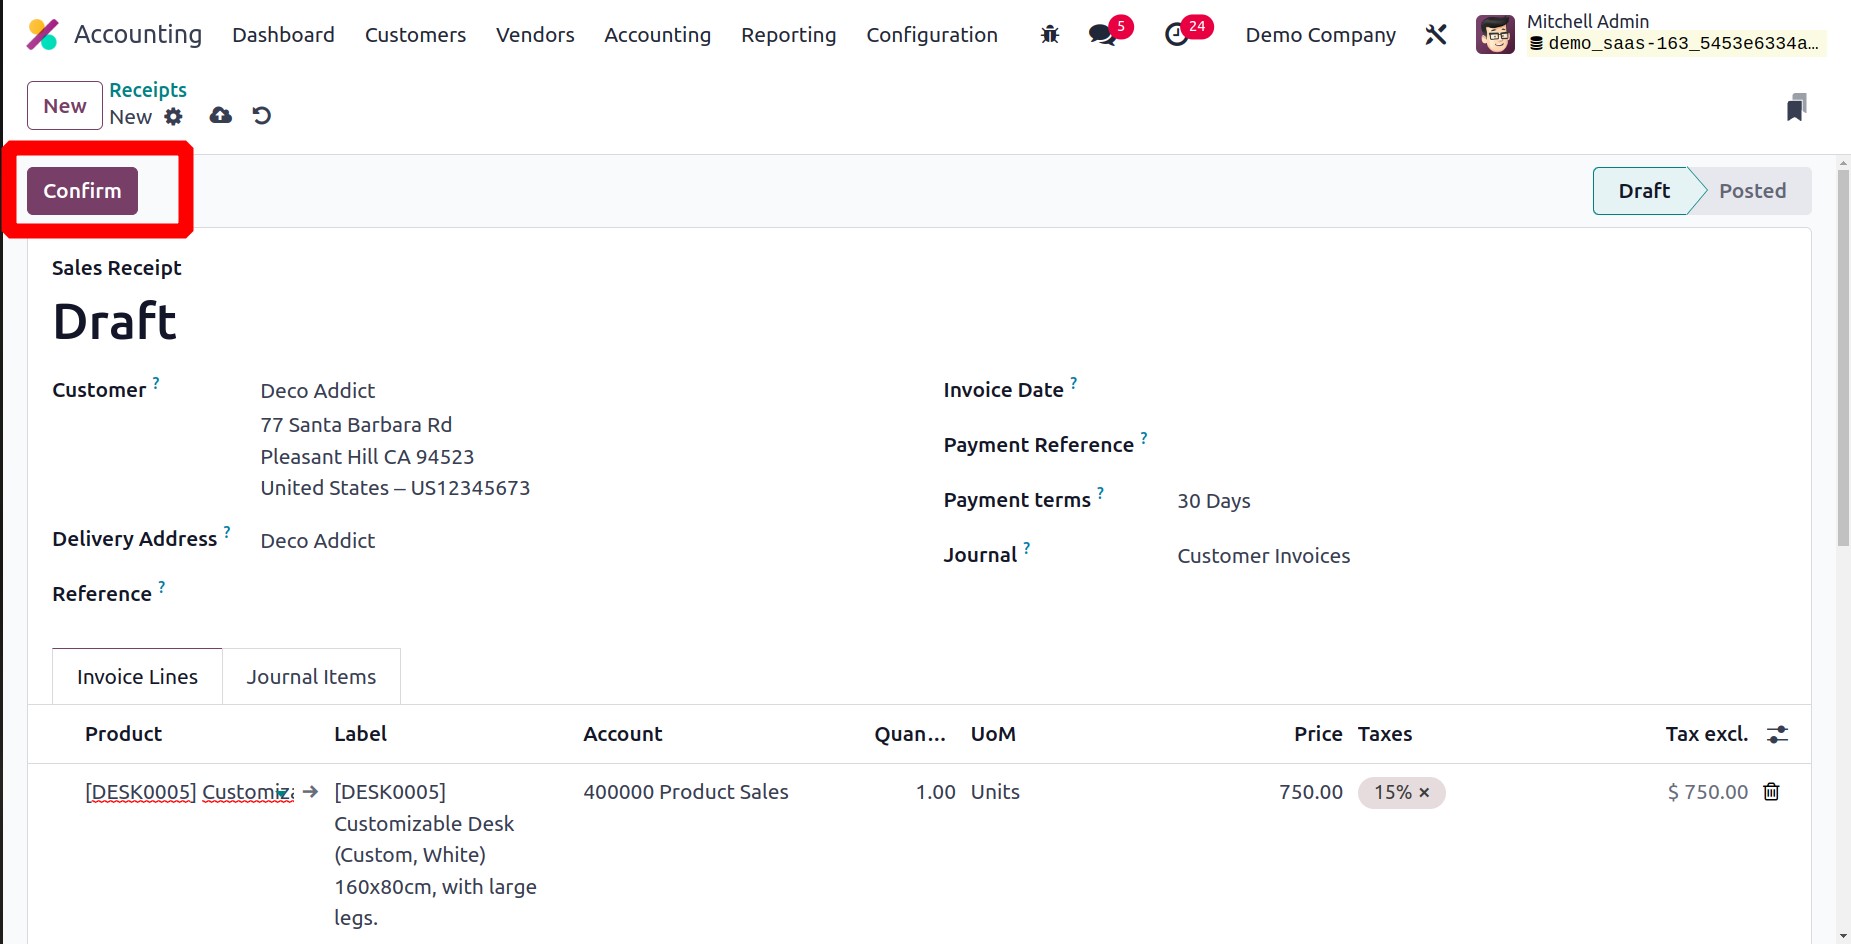
Similar to how an invoice is created in Odoo17, a new sales receipt may also be created.
You can enter the Customer, Delivery Address, Reference, Invoice Date, Payment
Reference, Payment Terms, and Journal in the corresponding fields.
Use the Add a Line button to sequentially add the items for which you want to produce
receipts under the Invoice Lines tab. The product name, Label, Account, Analytic,
Quantity, UoM, Price, Taxes, and Subtotal information will be shown in the list along
with the product. The Journal Items tab, as illustrated below, contains the Account,
Label, Analytic, Debit, and Credit information for the corresponding journal items used
to record payment details.
You can verify the receipt by clicking the Confirm button.
Once the sales receipt has been verified, you may use the Register Payment option to
record the customer payment.

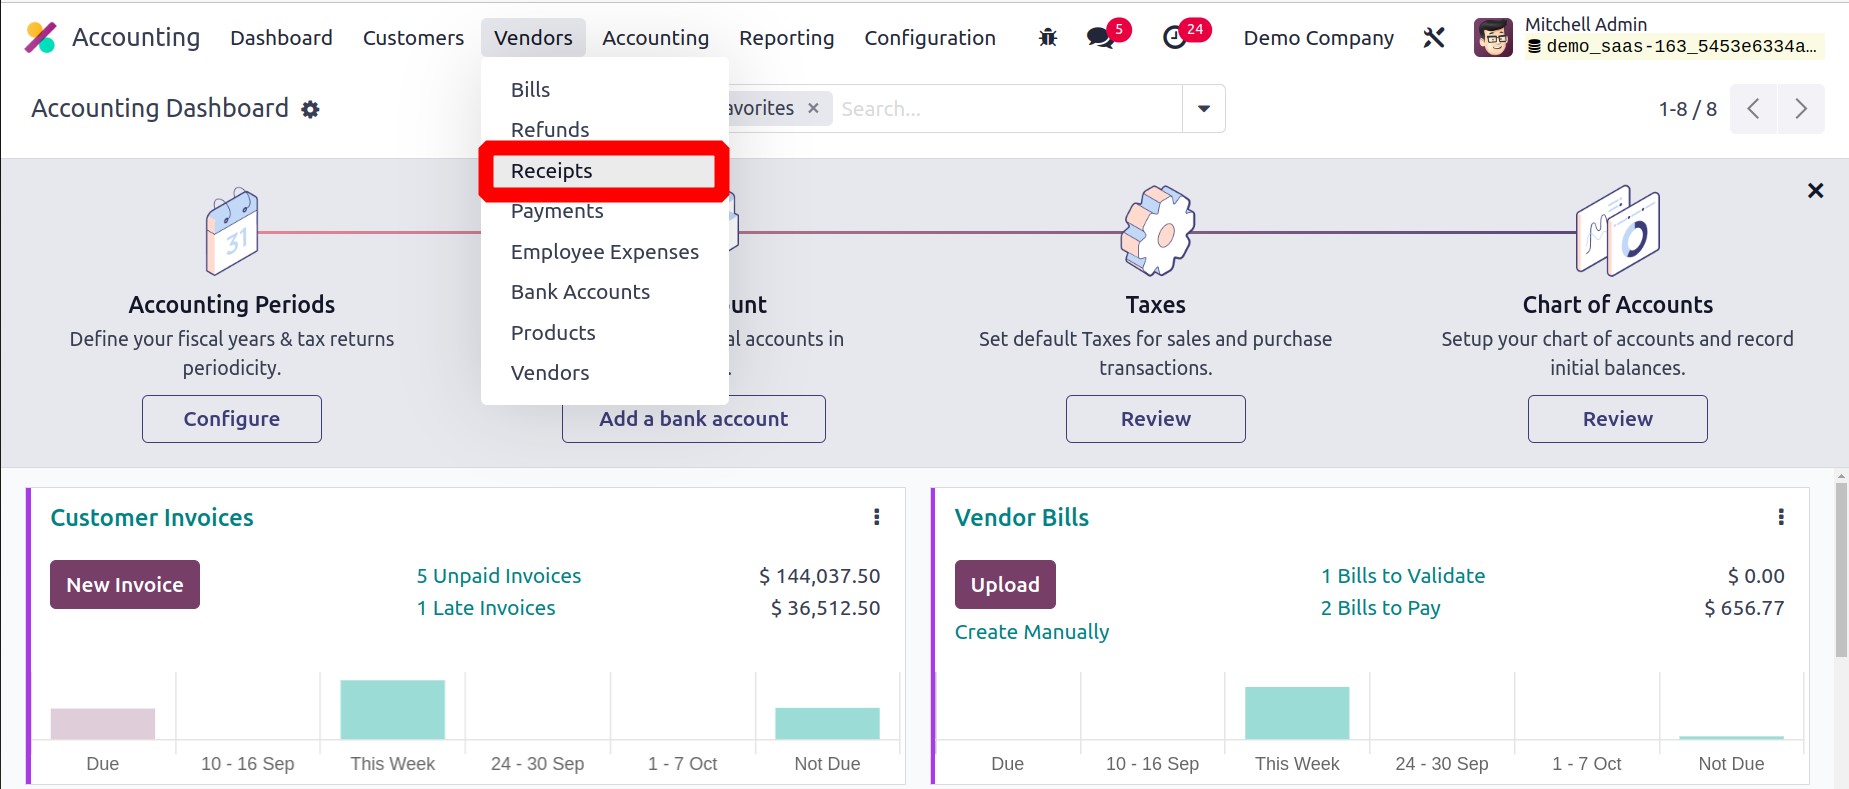
Another Receipt button that records your company's purchase receipts may be found
in the Vendor menu of the Accounting module. The purchase receipt will be
generated once you confirm a transaction and receive the goods. From the Account
section, you can manually enter a purchase receipt. Select the Receipt option from the
Vendor menu.
The layout of the sales and purchase receipts is remarkably similar. The snapshot below
highlights the modifications to the purchase receipt.
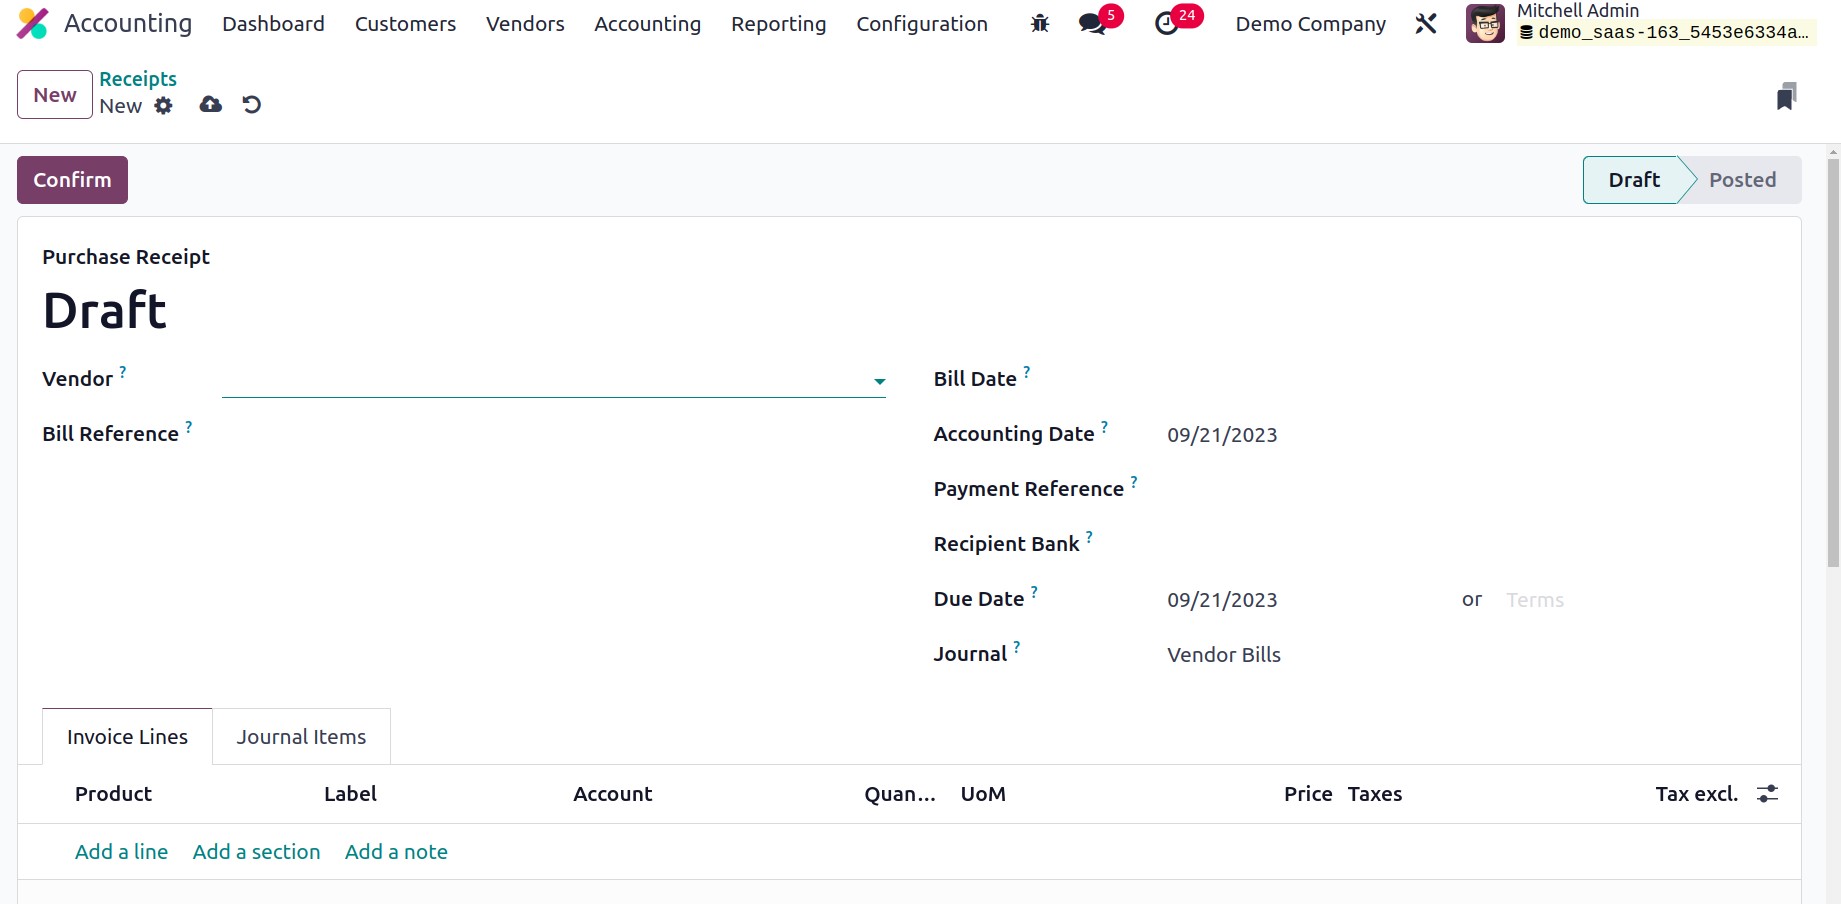
You must include the Vendor, Bill Reference, Bill Date, Accounting Date, and Recipient
Bank on a purchase receipt. To validate the receipt, click the Confirm button. In
Odoo17, you often use this capability to pay an invoice immediately using funds from
your business to cover an expense.