Applications
The Applications tab of the Odoo Recruitment module will include two sub-menus. They are the By Job Positions and All Applications. Odoo designed this tab to manage, control, and also help to keep an eye on all the details of the job applicants and the recruitment procedures defined with their functioning. The All Applications menu available under the Applications tab will allow you to access the Applications window as shown below.
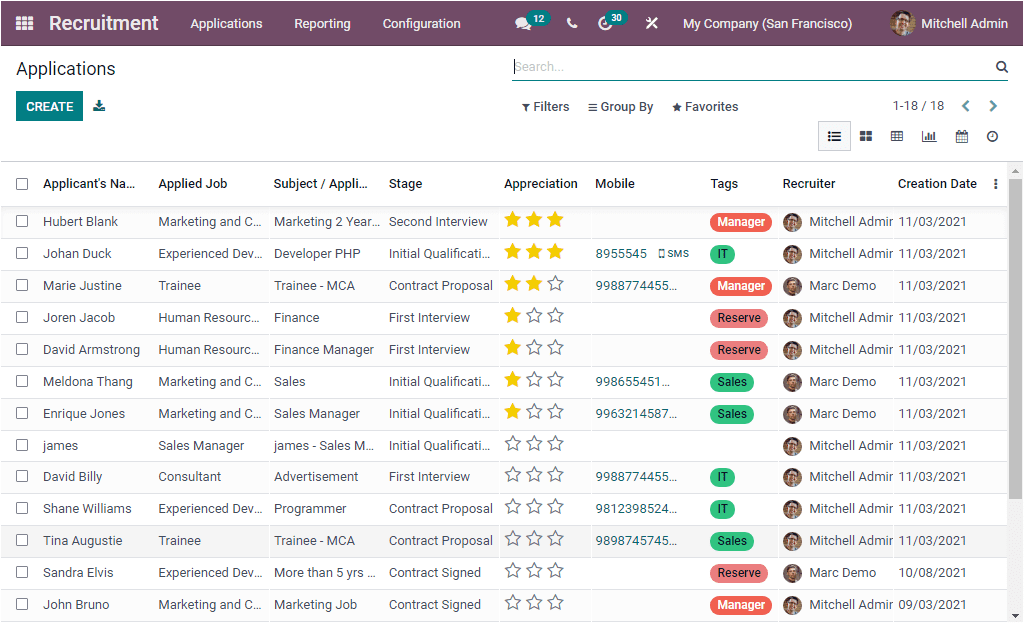
This Applications window will depict all the Applications received in the platform along with the details such as Applicant’s Name, Applied Job, Subject / Application Name, Stage, Appreciation, Mobile, Tag, Recruiter and Creation Date. The sorting functionalities, which are the exclusive features available in almost all the windows of the Odoo system, are also available in this Applications window. Here you can also access various default and customizable features under the Filters, Group By, Favourite Tab. Moreover, the window can be viewed in multiple views such as List, Kanban, Pivot, Graph, Calendar, and Activity views. The CREATE icon will help you to access the Applications creation form. The screenshot of the Application creation window is depicted below.
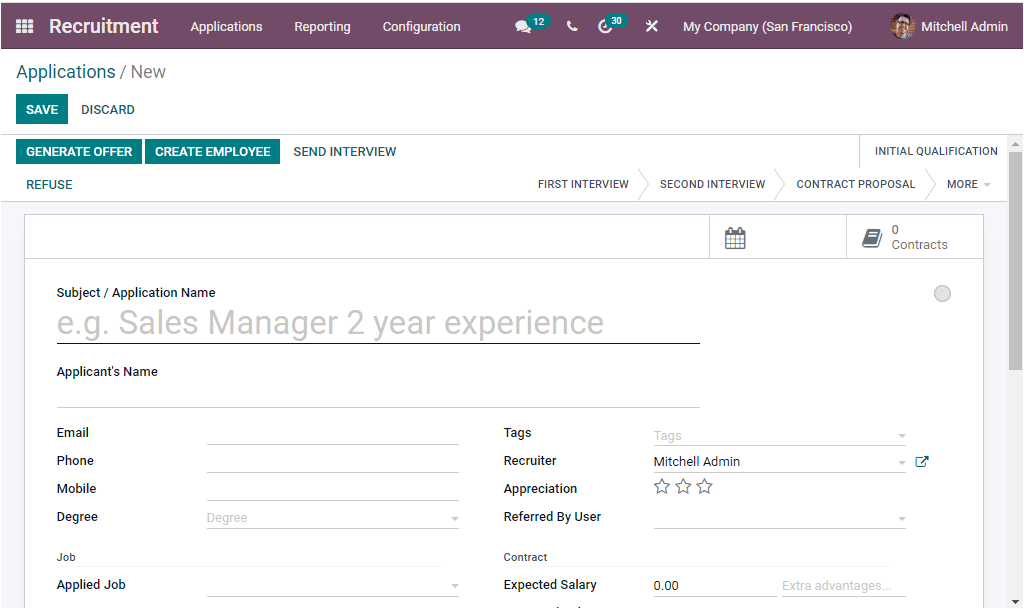
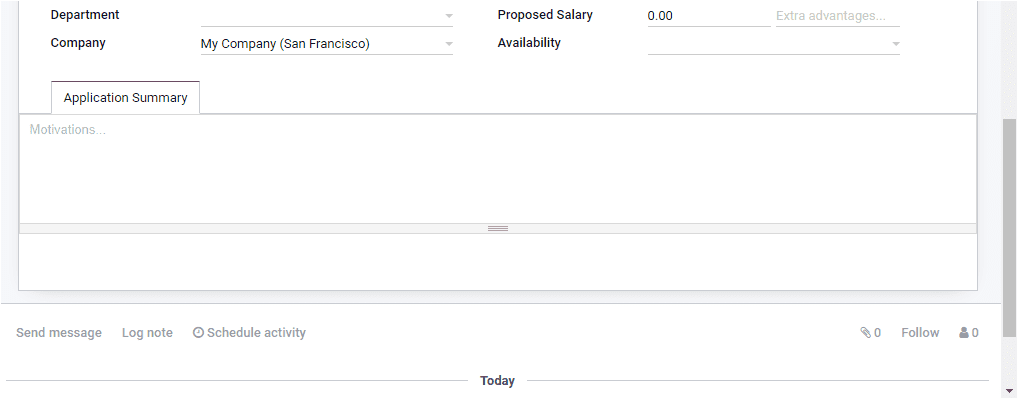
In this Application form, you can give the email Subject/Application Name for sending applications through emails. Then you can allocate the Applicants Name along with the Email, Phone Number, and Mobile Number. Then you can issue the Degree. Under the Job section, you can specify the Applied Job, Department, and the Company details will be auto allocated. Moreover, you can define the Tags, and Appreciation can be done either Good, Very Good, or Excellent. The name of the Recruiter will be auto-allocated. In the Contract section, you can describe the salary expected by the applicant in the Expected Salary field. In addition, define the compensation proposed by the organization in the Proposed Salary field. Then you can fill the field Availability, which indicates the date at which the applicant will be available to start working. Similarly, you can view the Application Summary tab under which you can provide the customized application summary. After defining all these details, you can click on the SAVE button to save the details.
Kanban view
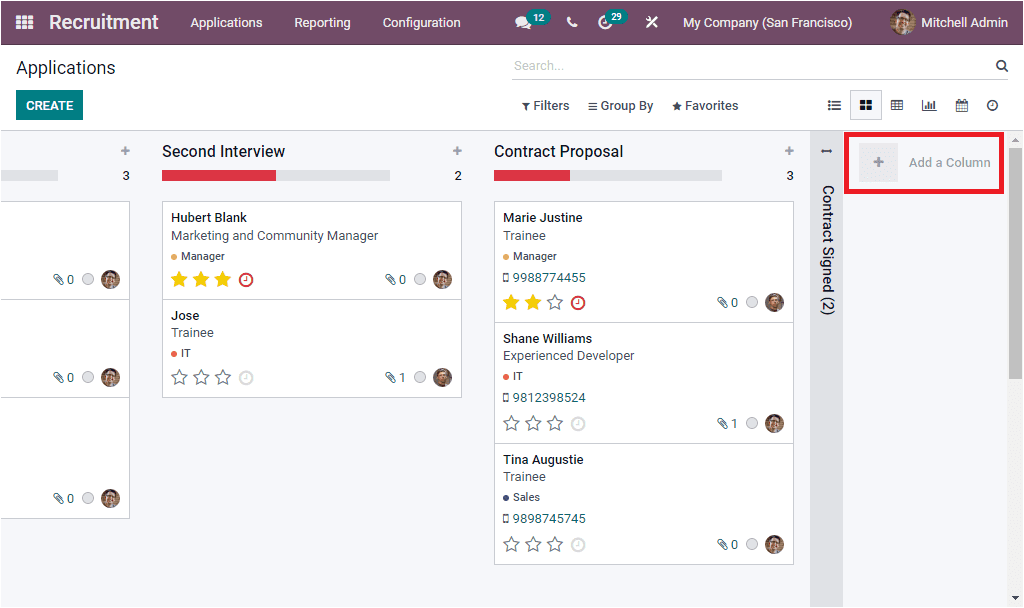
When we come to the Kanban View of the Applications window, you can view the details in different stages. The current stages available in the window are Initial Qualification, First Interview, Second Interview, Contract Proposal. Odoo allows you to add new stages based on your company requirements.
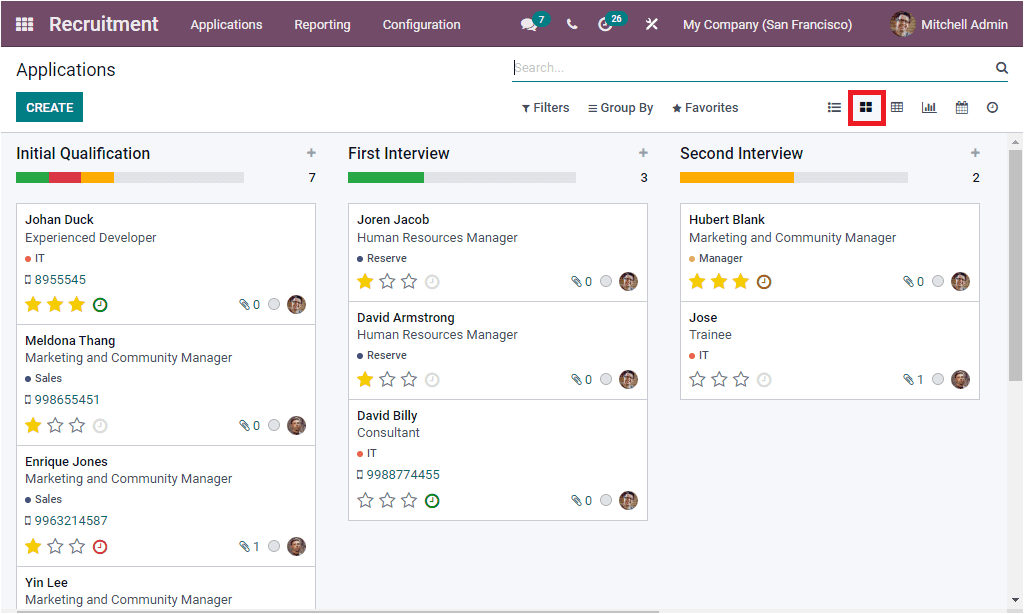
you can include more stages by clicking on the Add a Column button that can be accessed by scrolling the window to the left.
Each of these stages includes a Settings menu and Quick add option as given in the image below.
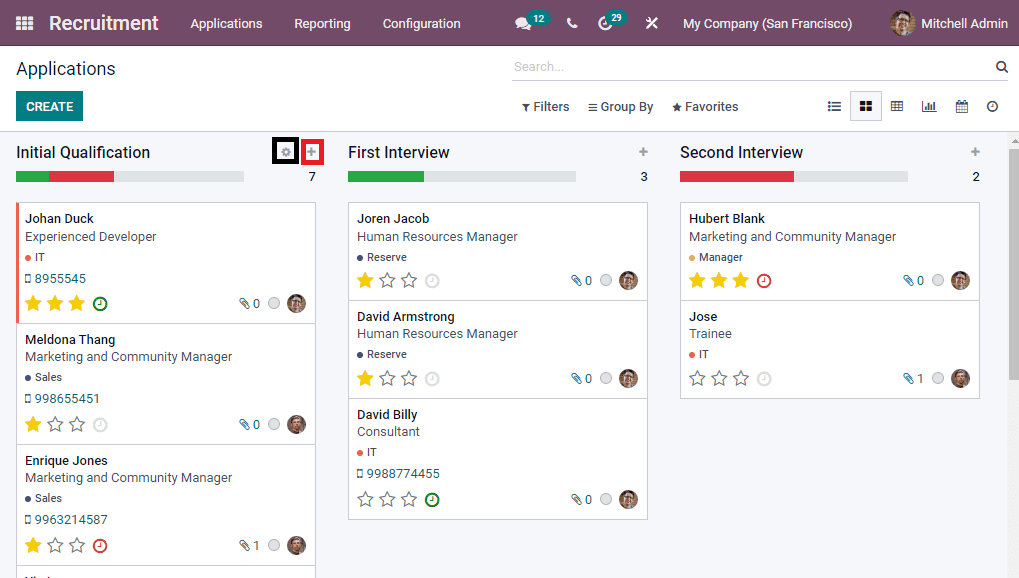
The Settings menu includes the options such as Fold, Edit Stage, Delete, Archive All, and Unarchive All. The Fold menu helps to fold the stage. The Edit Stage option can be used for editing the stage. when you click on this button, you will display Edit Column page as depicted below.
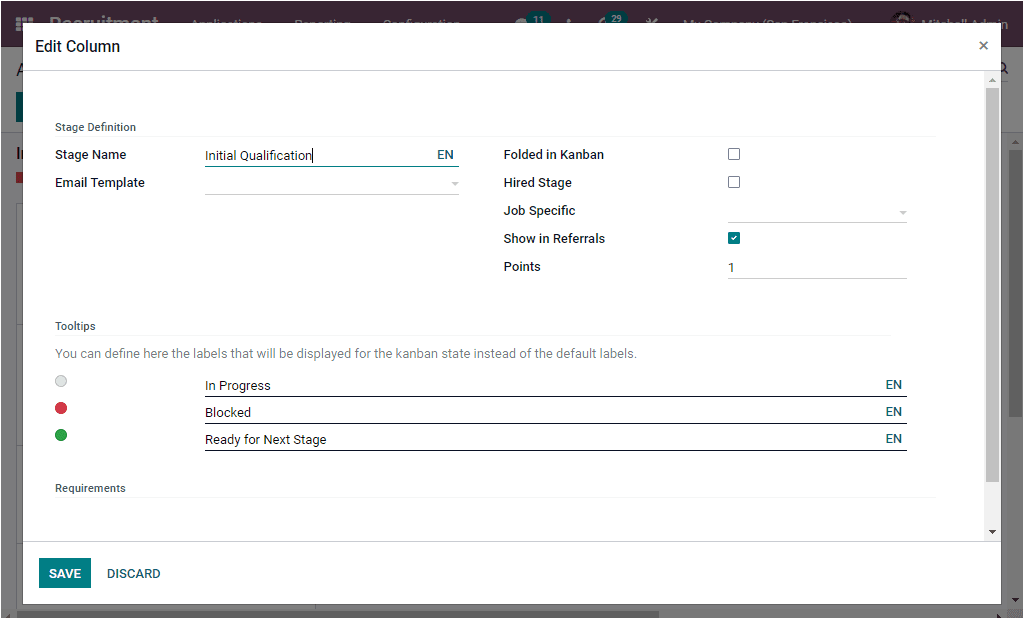
Using this window, you can edit your stage. you can edit the Stage Name. also provide an Email Template. When an email template is selected, a message is posted on the applicant using the template when the applicant is set to the stage. Moreover, you can enable or disable the Folded in Kanban option. If you enable this field, the particular stage will be folded in the Kanban view when there are no records in that stage to display. Then you can activate the Hired Stage option for using this stage to determine the hire date of an applicant.
Moreover, if you want to mention specific jobs at this stage, you can say that here. After that you are able to activate the Show in Referrals field that will help you to display this stage in the Referral modules dashboard. Then you can mention the number of points that the referent will receive when the applicant reaches this stage. Additionally, you can define the labels that will be displayed for the Kanban state instead of the default labels.
The Quick add menu allows you to create an application quickly using a dropdown menu, as shown in the image below.
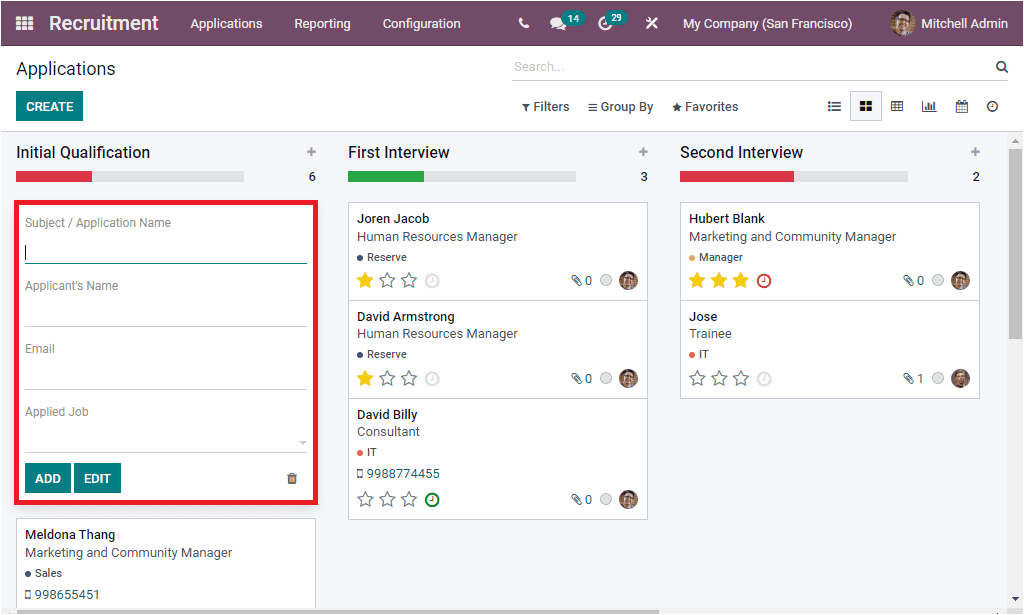
In the pop-up window, you can provide the Subject/ Application Name, Applicant’s Name, Email, and Applied Job. After giving the details, you can click on the ADD button to add the application. You are also able to view the EDIT and delete menu. Furthermore, under the Quick add menu, you can view the total number of applications in each application stage. You can easily drag and drop the application from one stage to another.
In the Kanban view, each application is managed as separate cards, and all of them include the key information about the Application, such as the Name of the Applicant, Job Position, Department, and Phone Number. In addition, you can mark the priority as Good, Very Good, or Excellent. you are also able to schedule an activity by clicking on the Schedule activity icon ( denoted with a clock icon).
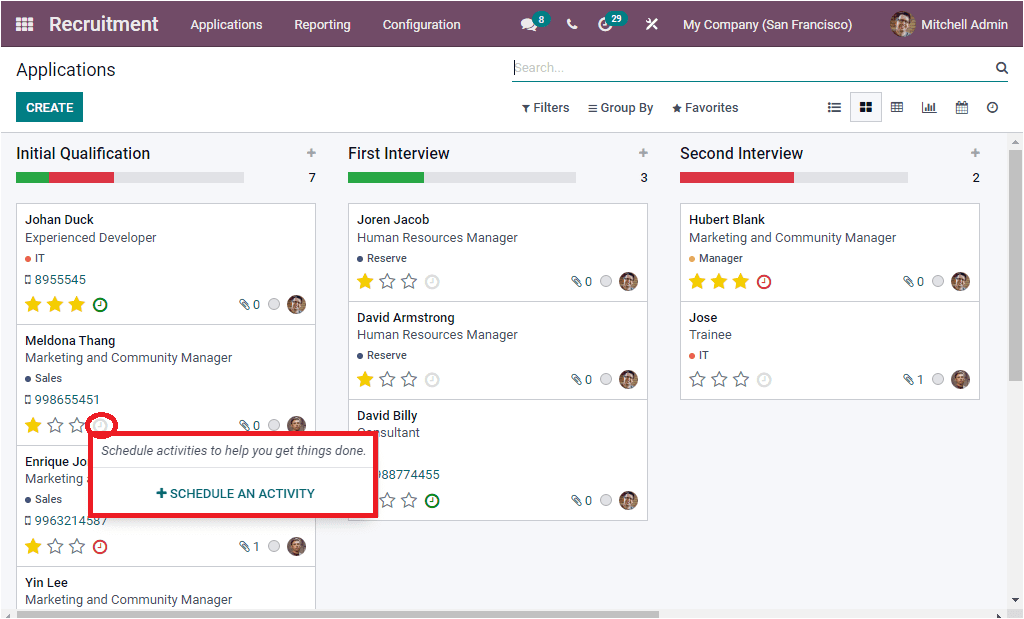
If you have already planned activity, it will display as planned, and if it is overdue, it will also show as. Moreover, a document attachment option is available. You can also view the number of attached documents. These menus are highlighted in the below image.
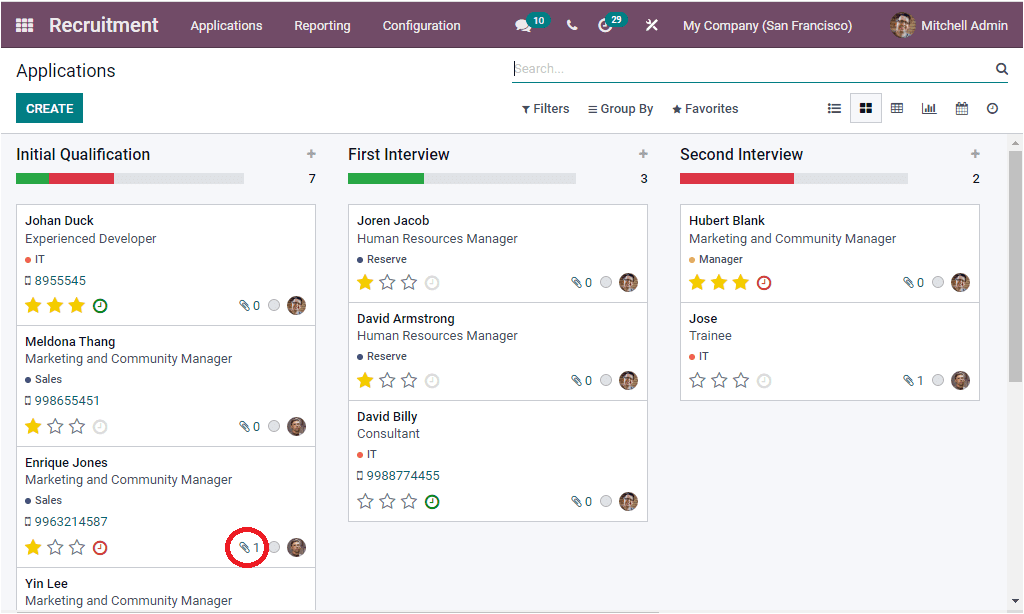
The highlighted menu will provide you with a direct link to the Attachment window as shown in the below image.
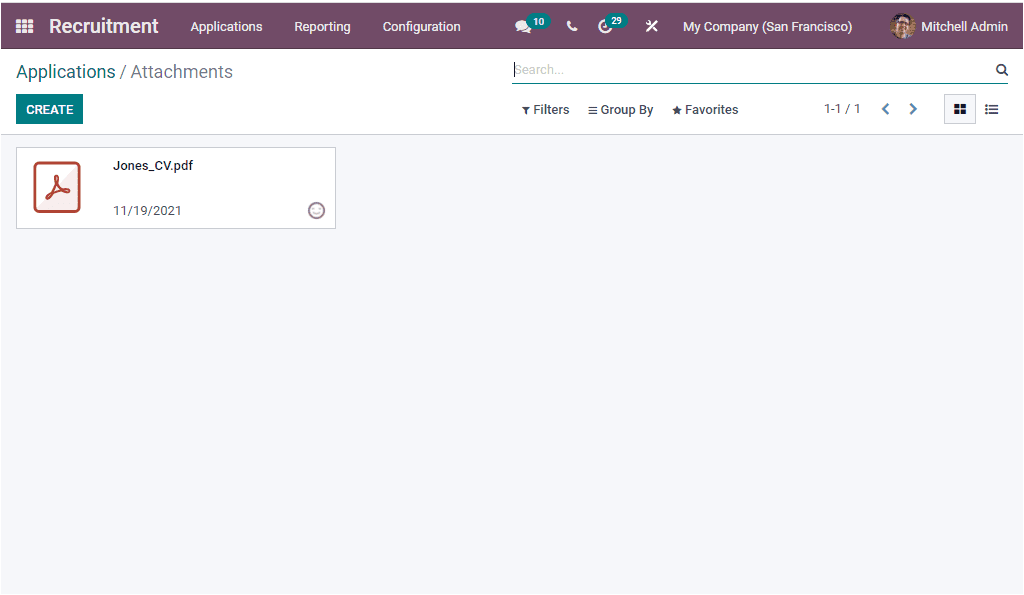
Here you can view the already attached documents and also have the provision to create a new record.
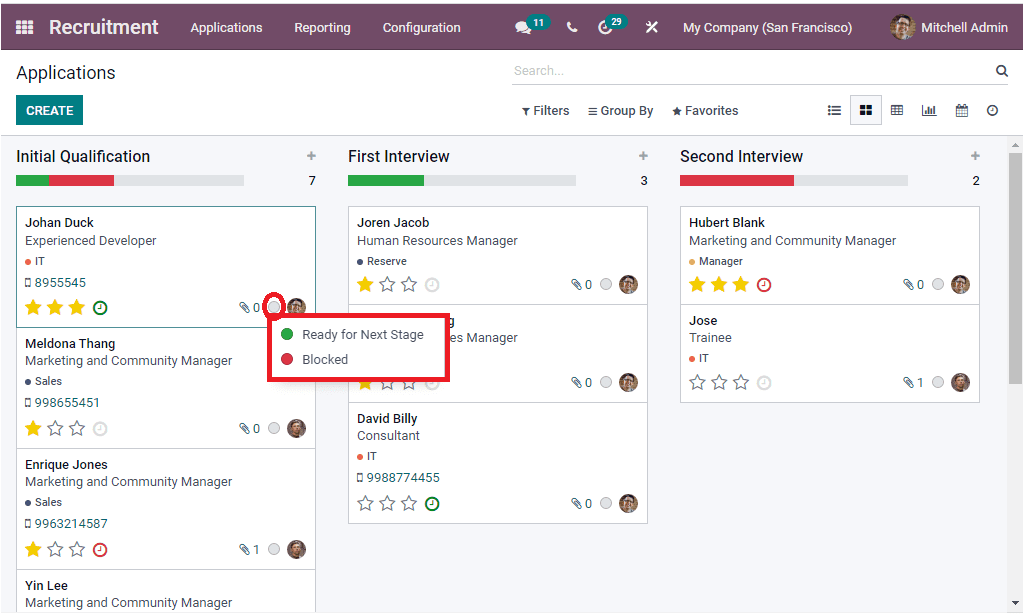
Back to the Kanban view of the Applications window where you are able to updat the status of each Application. This can be done by clicking on the circle available on the right bottom of each application as highlighted in the below image. In Progress, Ready for Next Stage, Blocked can be selected based on your application status.
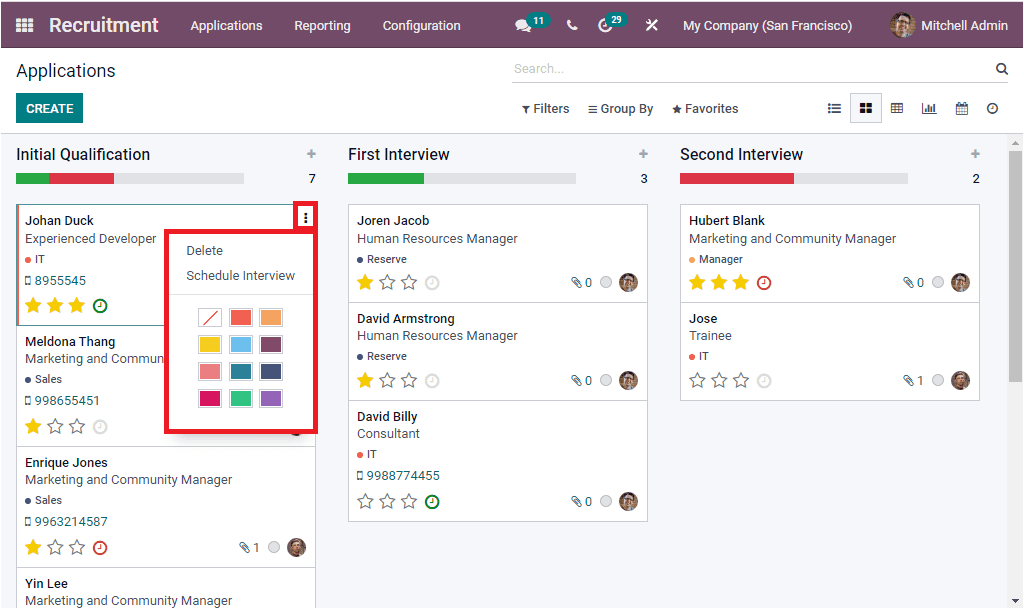
When you click on the three dots available on the top left side of each application, you will see a drop-down menu that will include the options such as Delete, Schedule Interview, along with the coloring options. You can use this option to highlight your application.
Apart from the List and Kanban view, you can also view this window in Pivot, Graph, Calendar, and Activity views. As we are clear on the All Applications window, let us look at the Configuration tab of the module.