Events
Conducting an event is one of the best marketing strategies used by companies nowadays to advertise their products and services to a large audience. In Odoo 15, you will get an all-in-one event management system capable of conducting all types of events. This module can be managed and operated easily without any complications. The user-friendly platform that Odoo provides in the Event management module will assist you in creating new events, publishing them on the company website, managing registration, selling tickets, and many more activities related to the planning and conducting of events.
This chapter will deal with the Events module available in the Odoo 15.
When you open the Events module, you will land on the main dashboard, which will show all configured events on this platform. You will get Kanban, Pivot, List, Gantt, Calendar, Map, and Graphical views for the events platform.

As you can see in the screenshot above, the events are arranged under different stages in the Kanban view. You will get an exact idea about the progression of the event by placing them under suitable stages. You can easily assign a new stage for events by clicking on the + icon near the Add a Column option. The Settings icon given on the right side of the stage title includes the options to Fold the stage on Kanban view, Edit, Delete, Archive All, and Unarchive All.
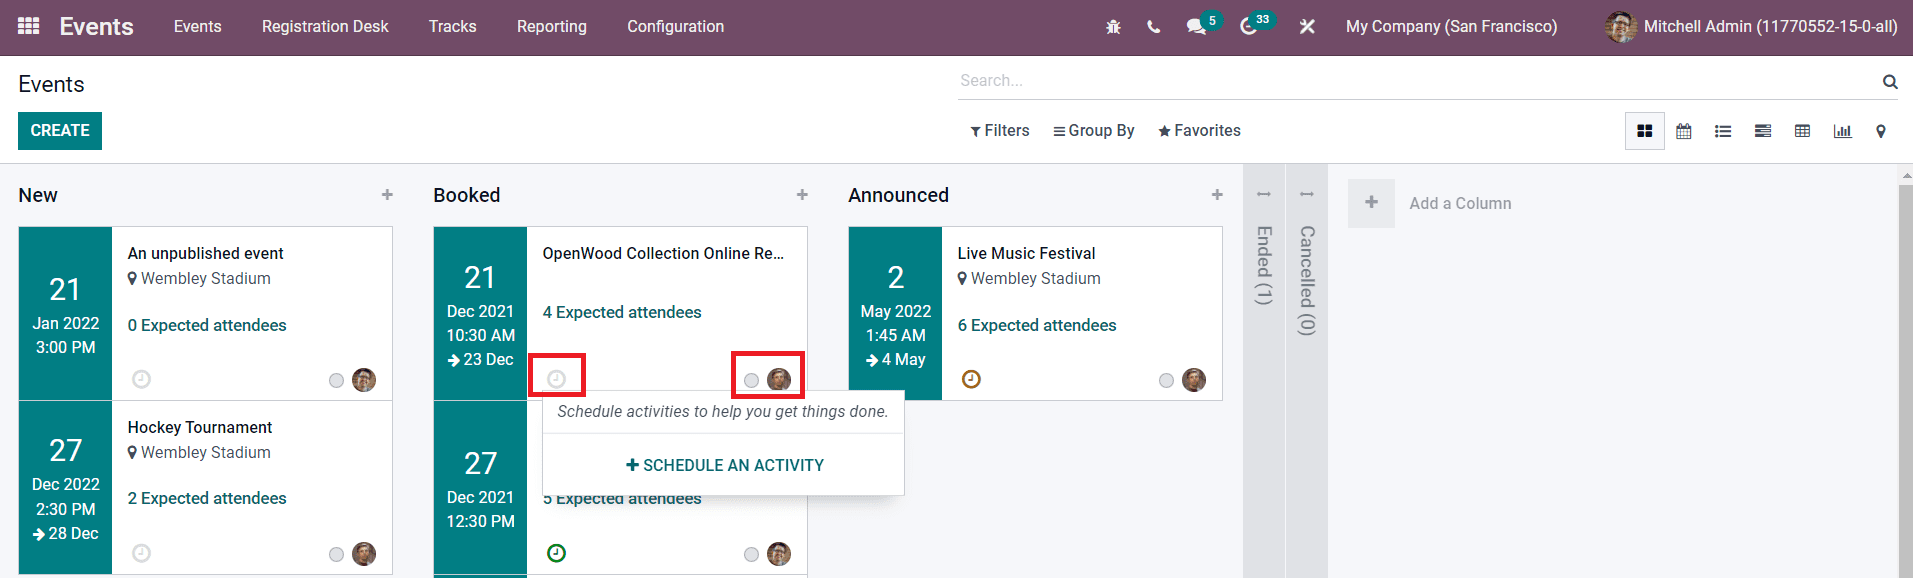
The preview of the events will show the name of the event, location, date & time, and the number of expected attendees. You can see the image of the employee who created that event as marked in the screenshot. The clock icon on each event will help you to schedule activities for that particular event. You are allowed to use the default as well as customizable Filters and Group By options to sort and locate required data from the listed events.
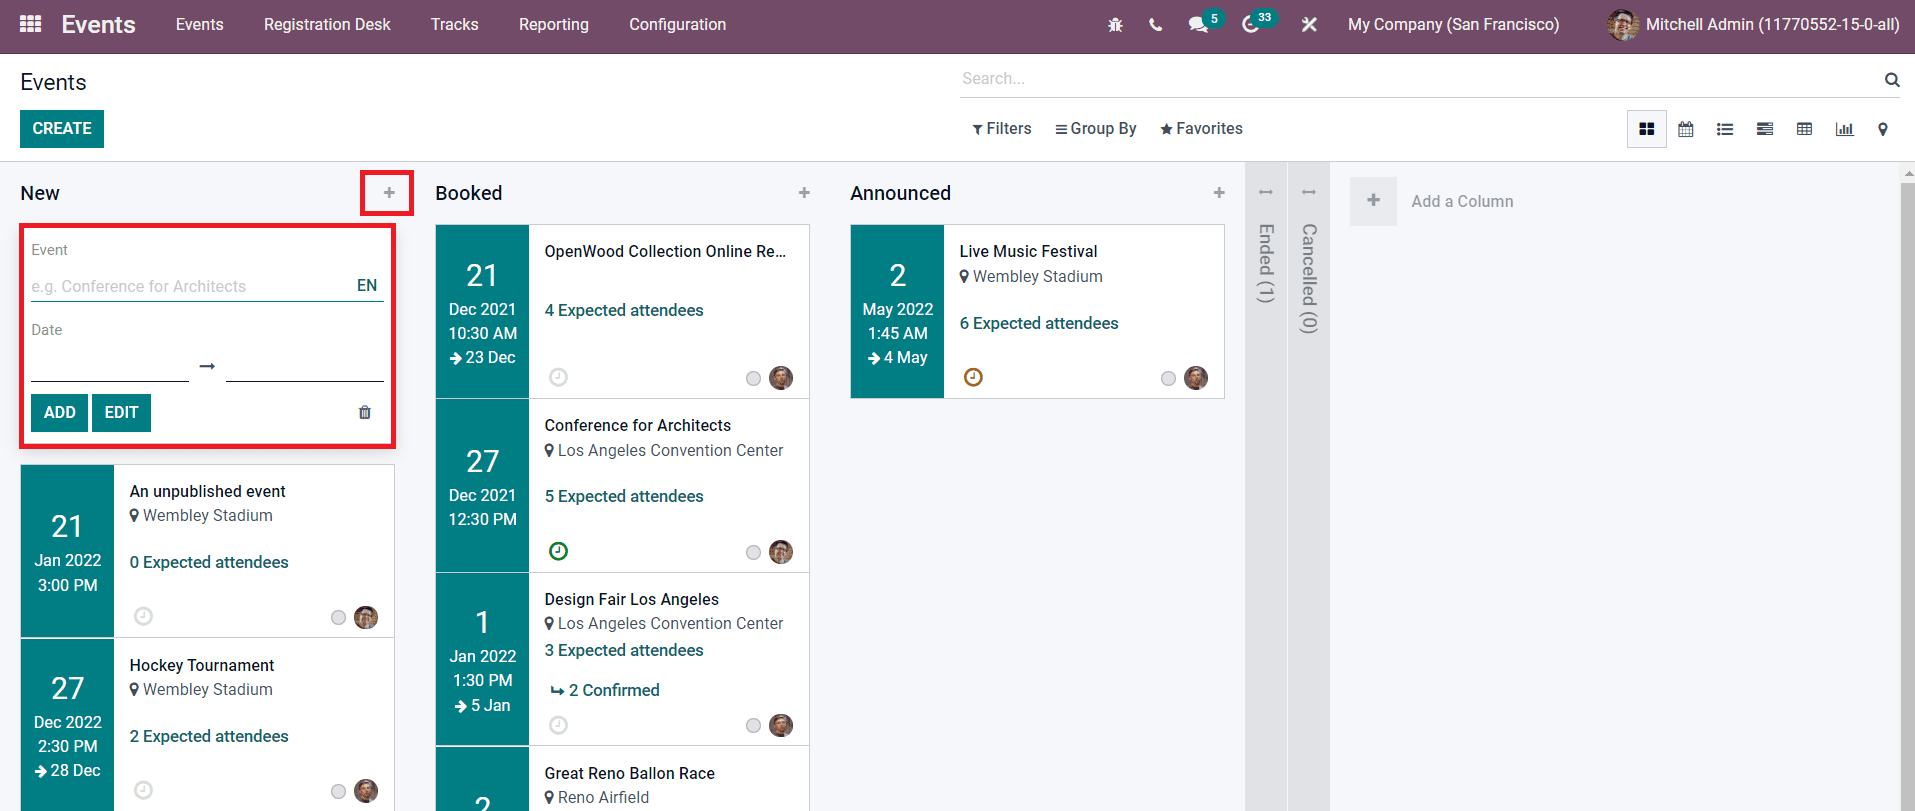
If you want to add a new event directly under a specific stage, you can click on the + icon given on the right side of the title of the stage as marked in the screenshot above. You can specify the name of the event and starting & ending date in the given spaces. Clicking on the Add button will add the event under the respective stage and the Edit button will help you to edit the event. You can also configure new events by clicking on the Create button.

You can specify the name of the event in the Event Name field. Activating the Website Submenu option will allow to display and manage event-specific menus on the website. The submenu includes Booth Register, Showcase Tracks, Allow Track Proposals, Showcase Twitter Wall, Extra Register Button, Showcase Exhibitors, and Community tabs. Mention the Starting & Ending date of the event, Timezone, Twitter Wall, suitable Event Template, Tags, Organizer of the event, employee Responsible for the event, Company, Website to restrict event publishing to the specified website, and Venue in the corresponding fields. You can upload a map of the exhibition using the Upload Your File option. By activating the Limit Registration button, you will get an additional field to specify the maximum number of attendees. The registration will be automatically confirmed upon creation by enabling the Autoconfirmation option.
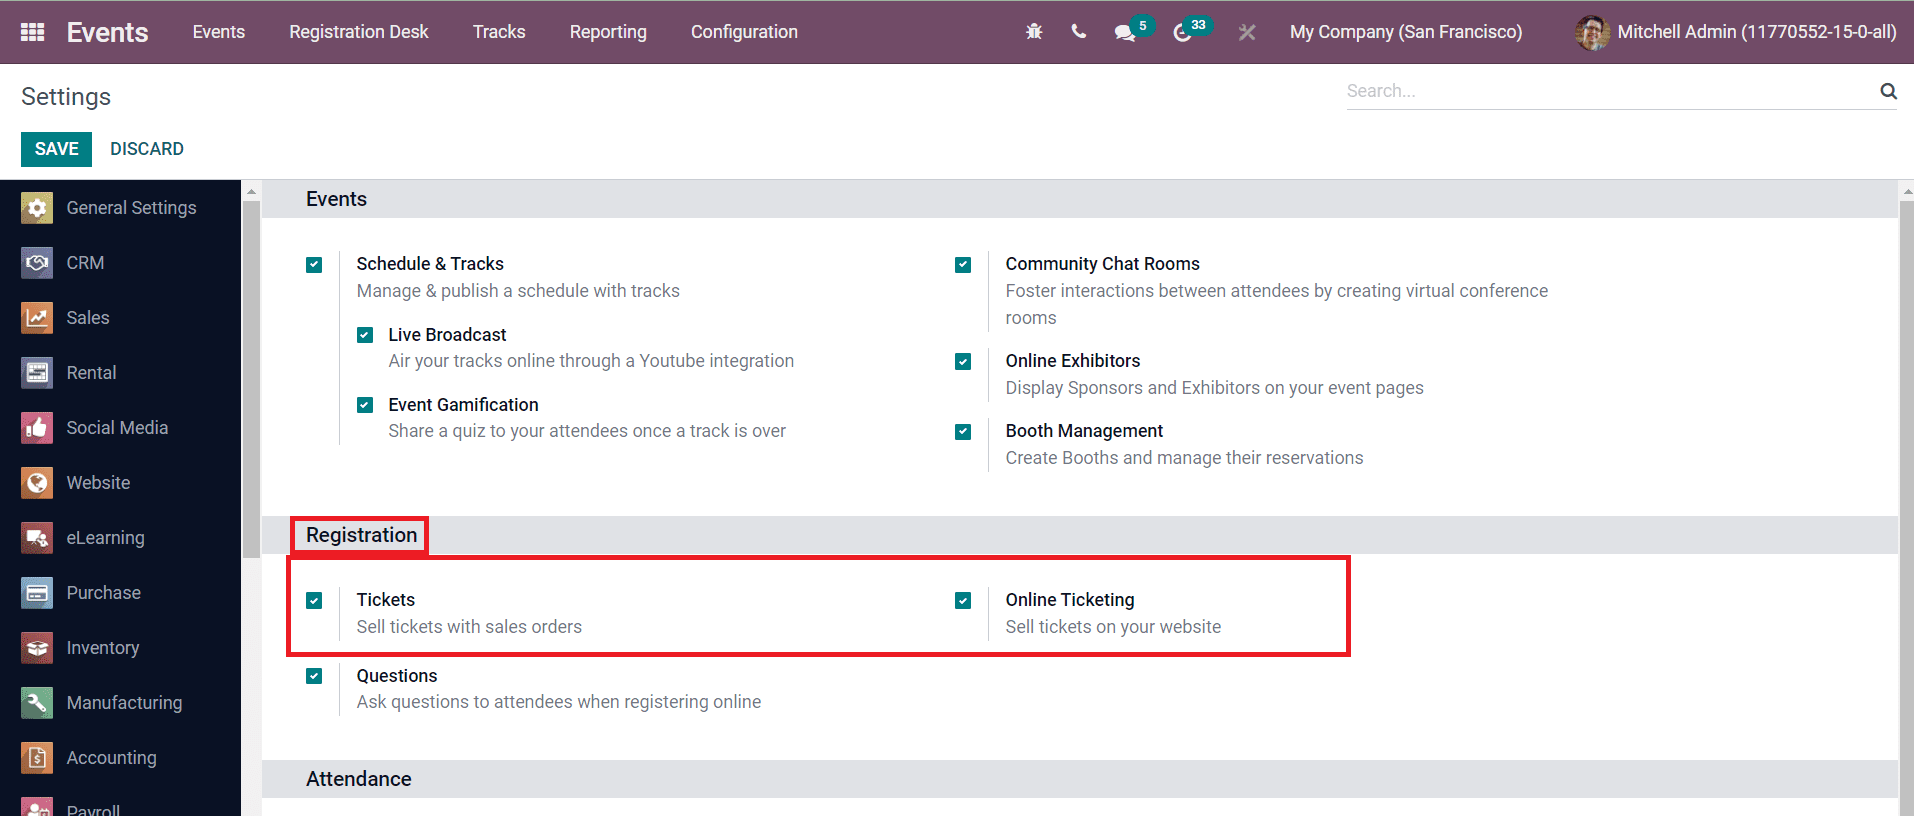
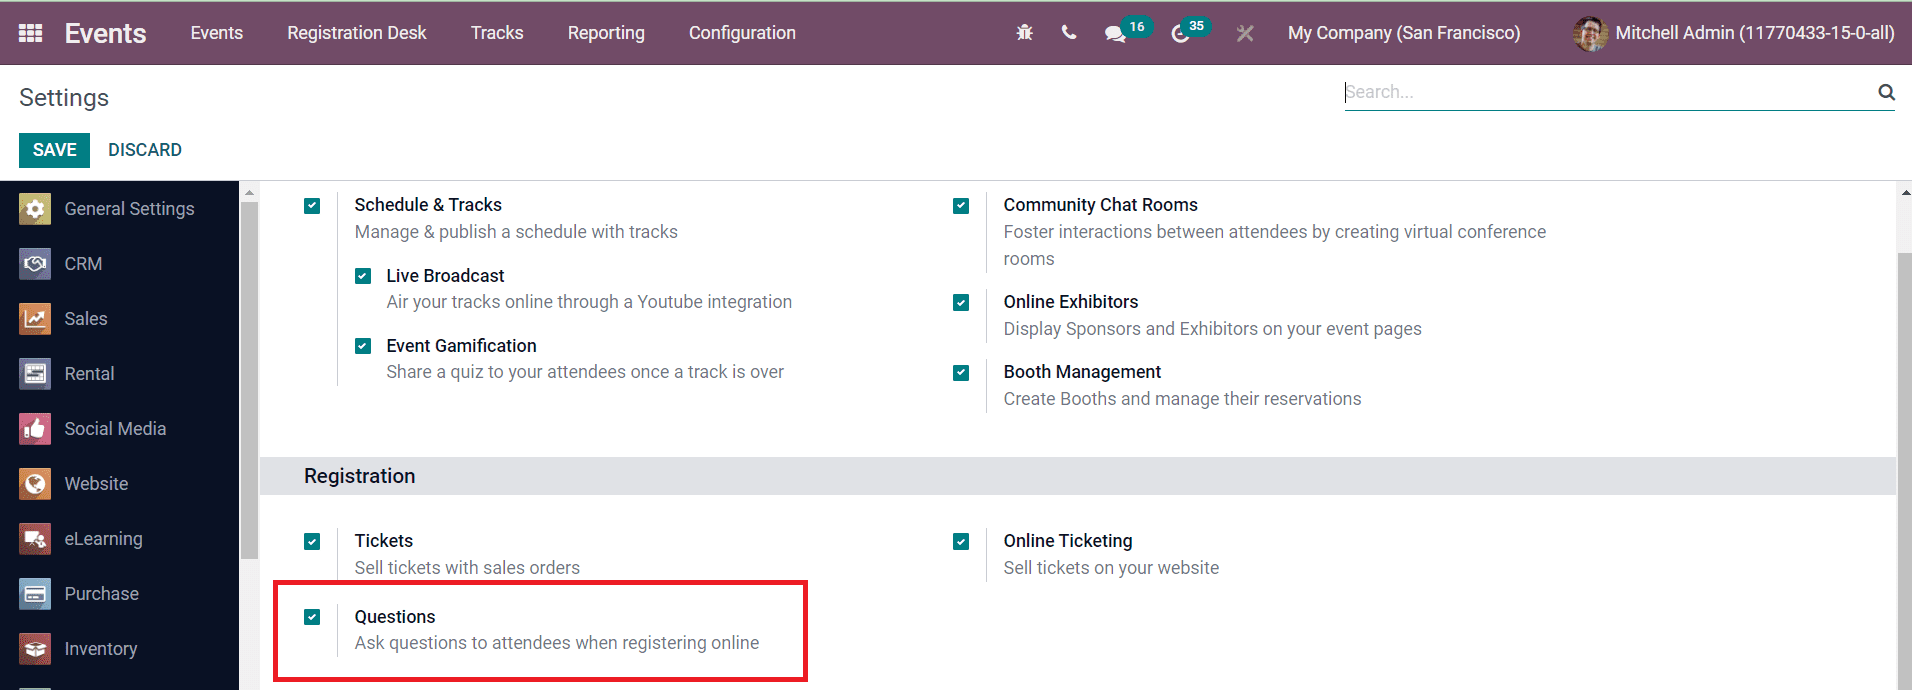
In the Settings menu of the module, you will get the Tickets and Online Ticketing options to activate. These options will help you to sell tickets with sales orders and on your website respectively.
Now, you can configure tickets for the events under the Tickets tab in the event creation window.

Using the Add a Line button, you can select tickets for the event. Before that, you can configure the ticket for the event as a product in Odoo. While configuring the ticket, you can set the product type as Event Ticket. You can add these tickets under the Tickets tab. Specify the Price, Sales Start & End dates, and the Maximum number of tickets available in the respective fields. You will get the number of Confirmed and Unconfirmed tickets in this tab when users book tickets on your website.
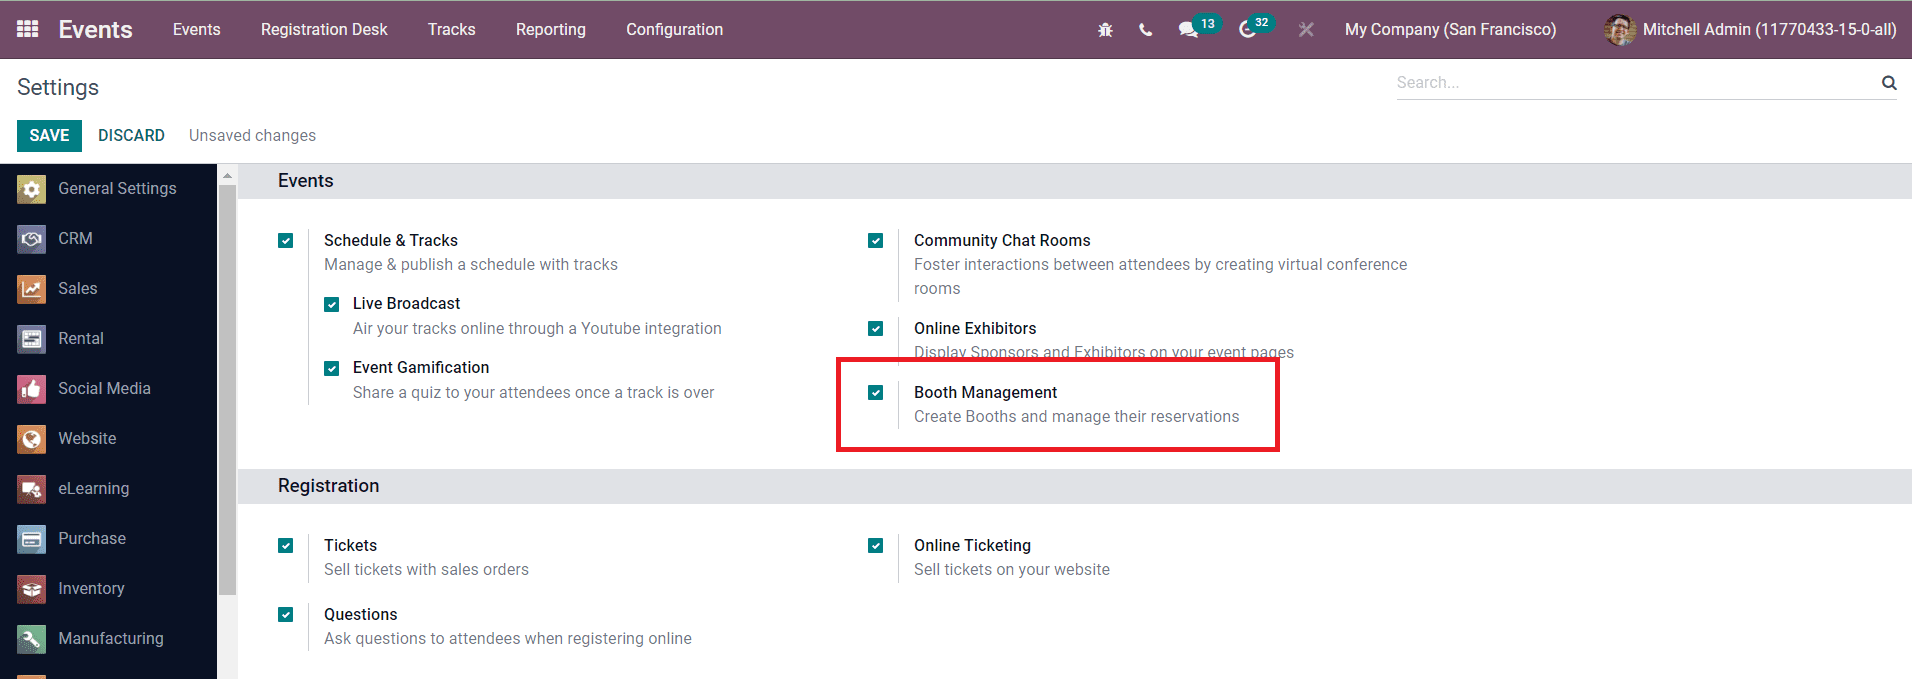
While conducting events, you can rent booths to other business firms to promote their product and services. To configure booths for an event, first, you have to enable the Booth Management option from the Settings module.
After activating this option, you will get the Booths tab in the Events creation window as shown below.

Using the Add a Line button you can add booths to this event. You will get a pop-up window to mention details about the booth.
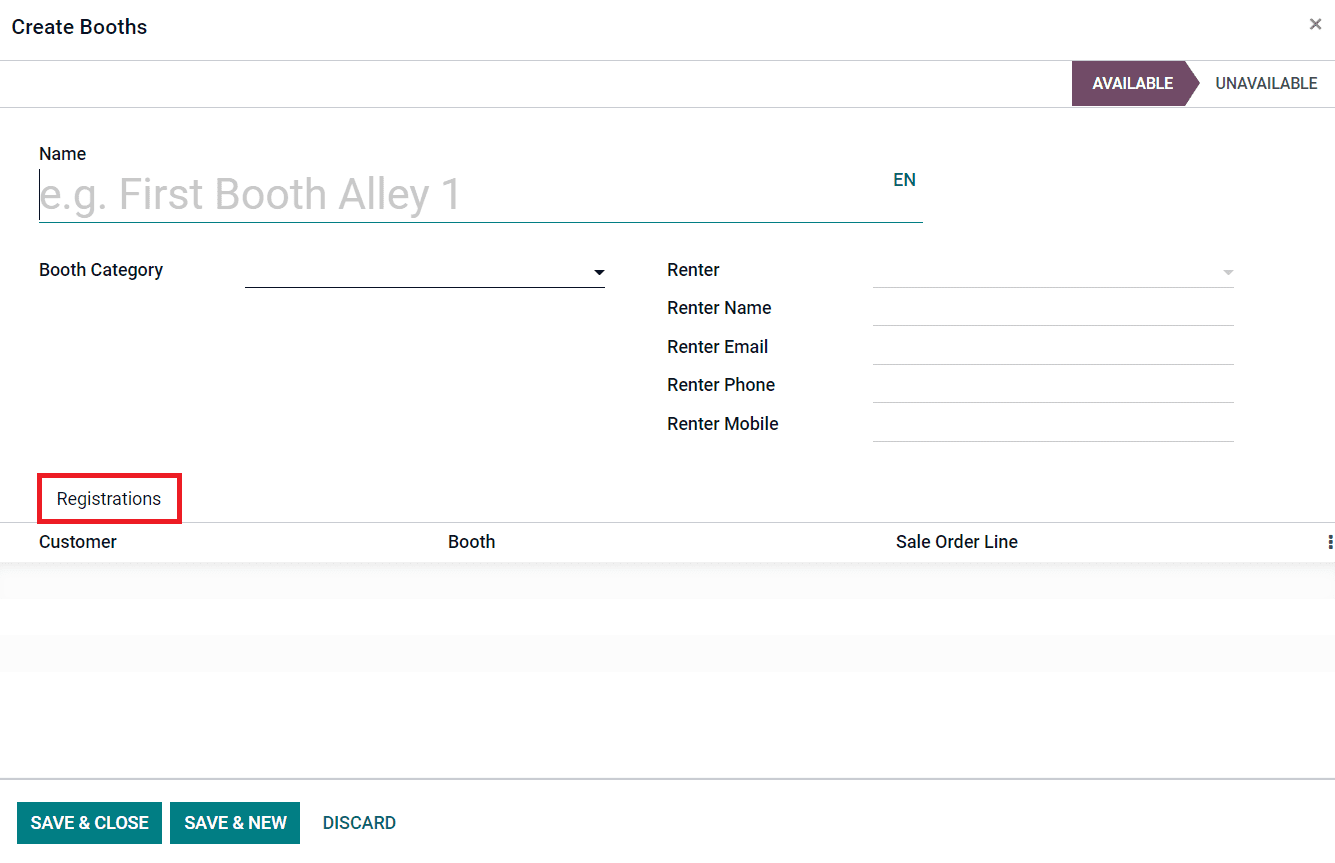
You can specify the Name, Booth Category, and details of Renter in the respective fields. The details of the renter include the Renter Name, Email, Phone, and Mobile number. The Registration tab will show the details of customers registered for this booth when you publish this event on your company website.
The Communication tab can be used to mention the Email/SMS to send to the attendees to remind them about the event.

Using the Add a Line button, you can set Mail or SMS for communication. Select a suitable template for the mail/SMS in the Template field. You can send the mail/SMS to the attendees immediately or a particular number of hours, days, weeks, or months before or after the event. The Schedule Date and the number of mail/SMS sent can be also displayed in this tab.
When the attendees register online for the event, you can ask certain questions to them. For example, if your company decided to distribute food for the attendees, you can ask if they are vegetarian or non-vegetarian while registering online. You can mention these questions under the Question tab in the event creation window. To get this tab, you should activate the Questions option from the Settings module.
After activating this option, the event creation window will display the Question tab as shown in the image below.

Click the Add a Line option to add questions and you will get a pop-up window.
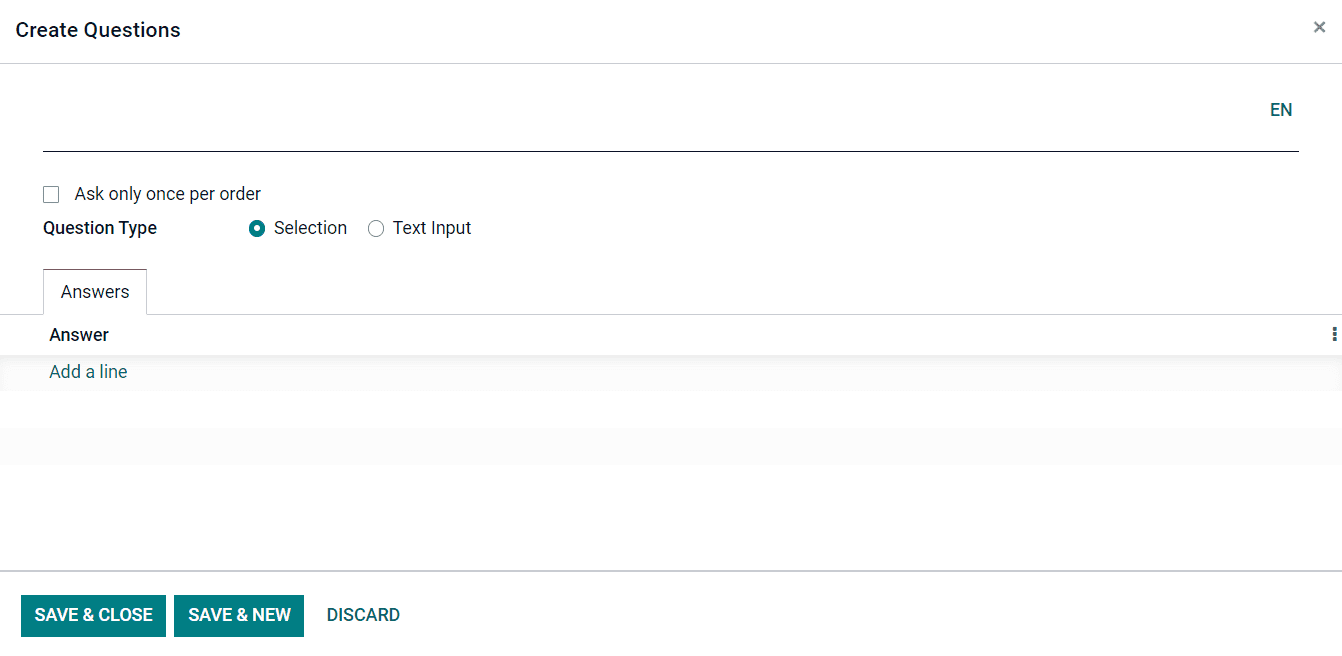
Specify the question in the given field. If the ‘Ask only once per order’ is activated, this question will be asked only once and its value will be propagated to every attendee. You can set the Question Type as Selection or Text Input. In the Selection type, you can mention the answers to select under the Answers tab. Use the Save button to save the question.
The Notes tab can be used to mention additional information about the event and ticket instructions.

After specifying all required information, you can click on the Save button to save the new event.
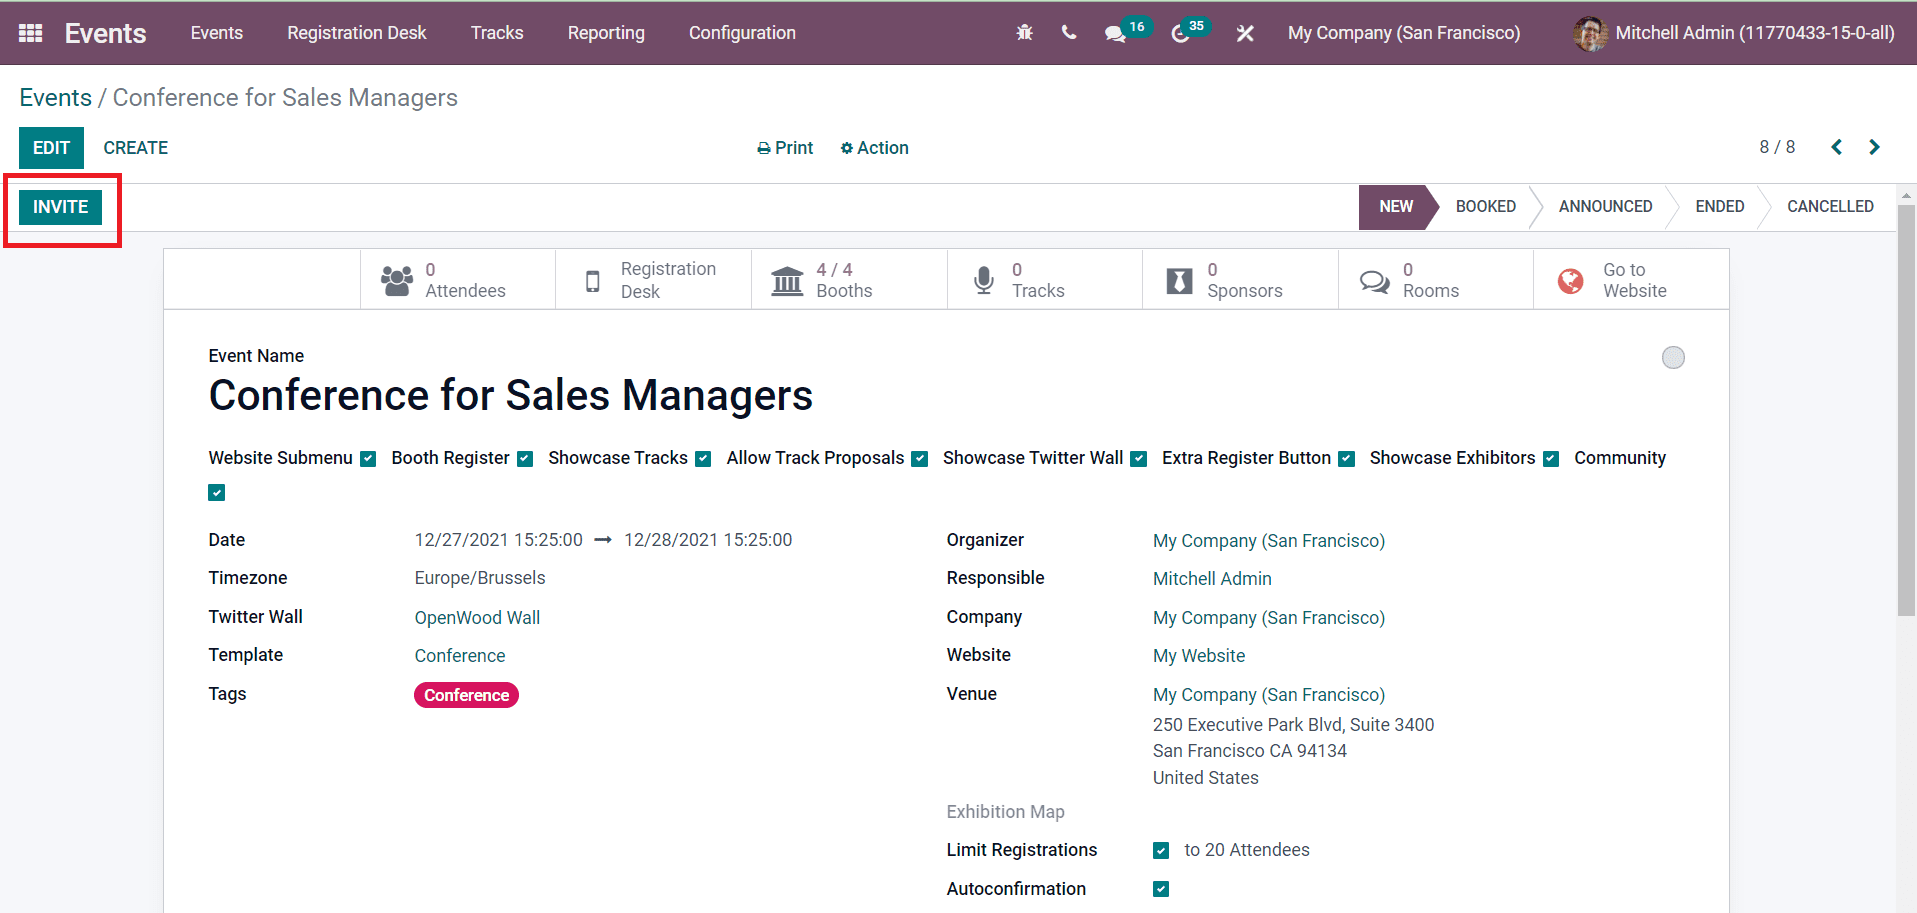
You will get the Invite button on the window which can be used to invite participants to the event. The Invite button leads you to a new window as shown below.
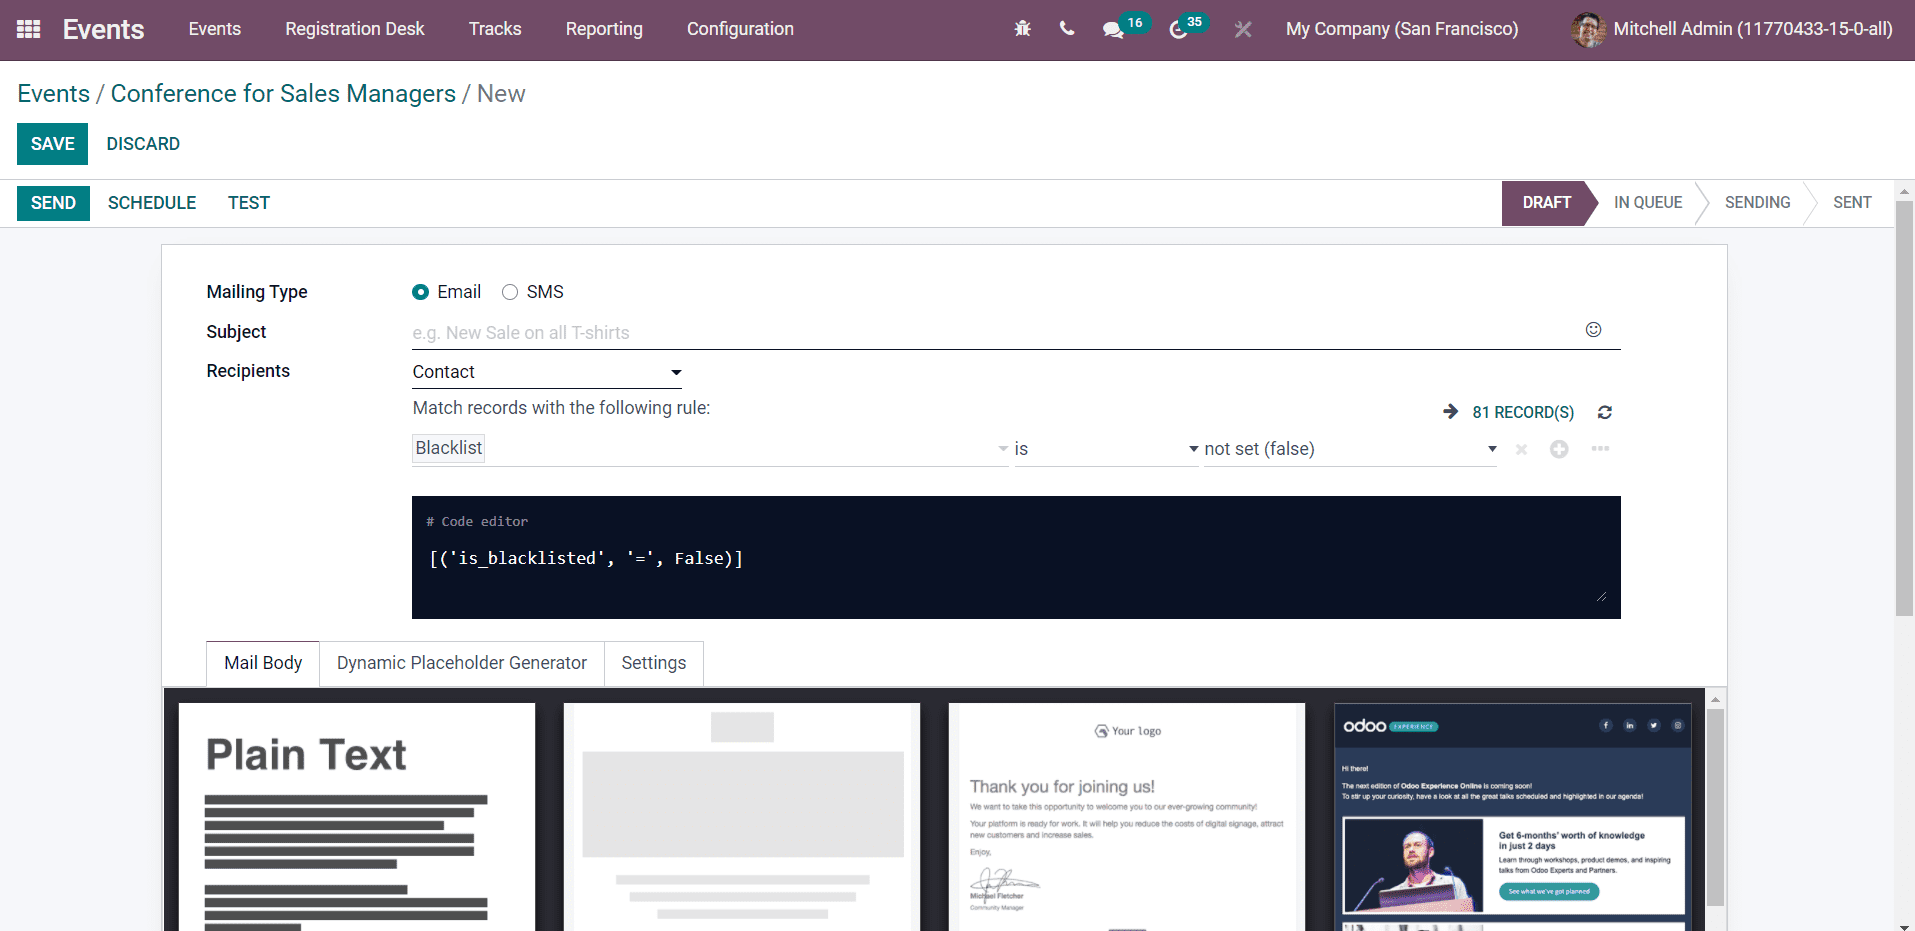
You can create invitation mail or SMS on this platform just like we discussed in the Email and SMS Marketing modules. You can check these modules in Odoo 15 Enterprise Book to get more details about the creation of marketing Emails or SMS.
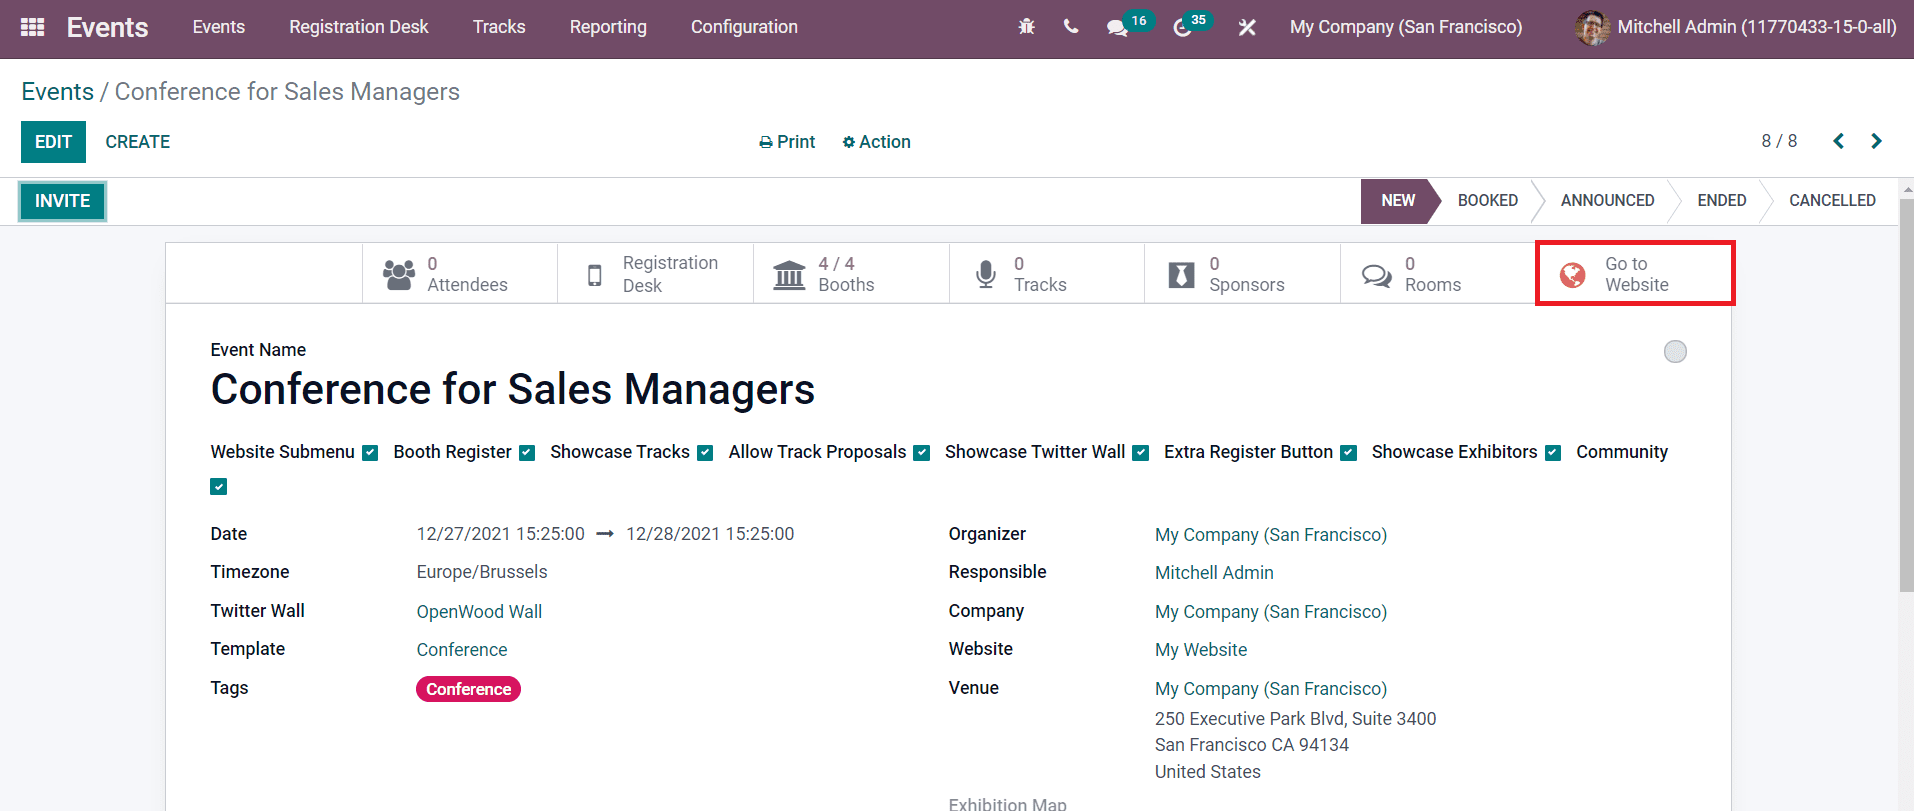
Now, click on the ‘Go to Website’ button to publish the event on your website.
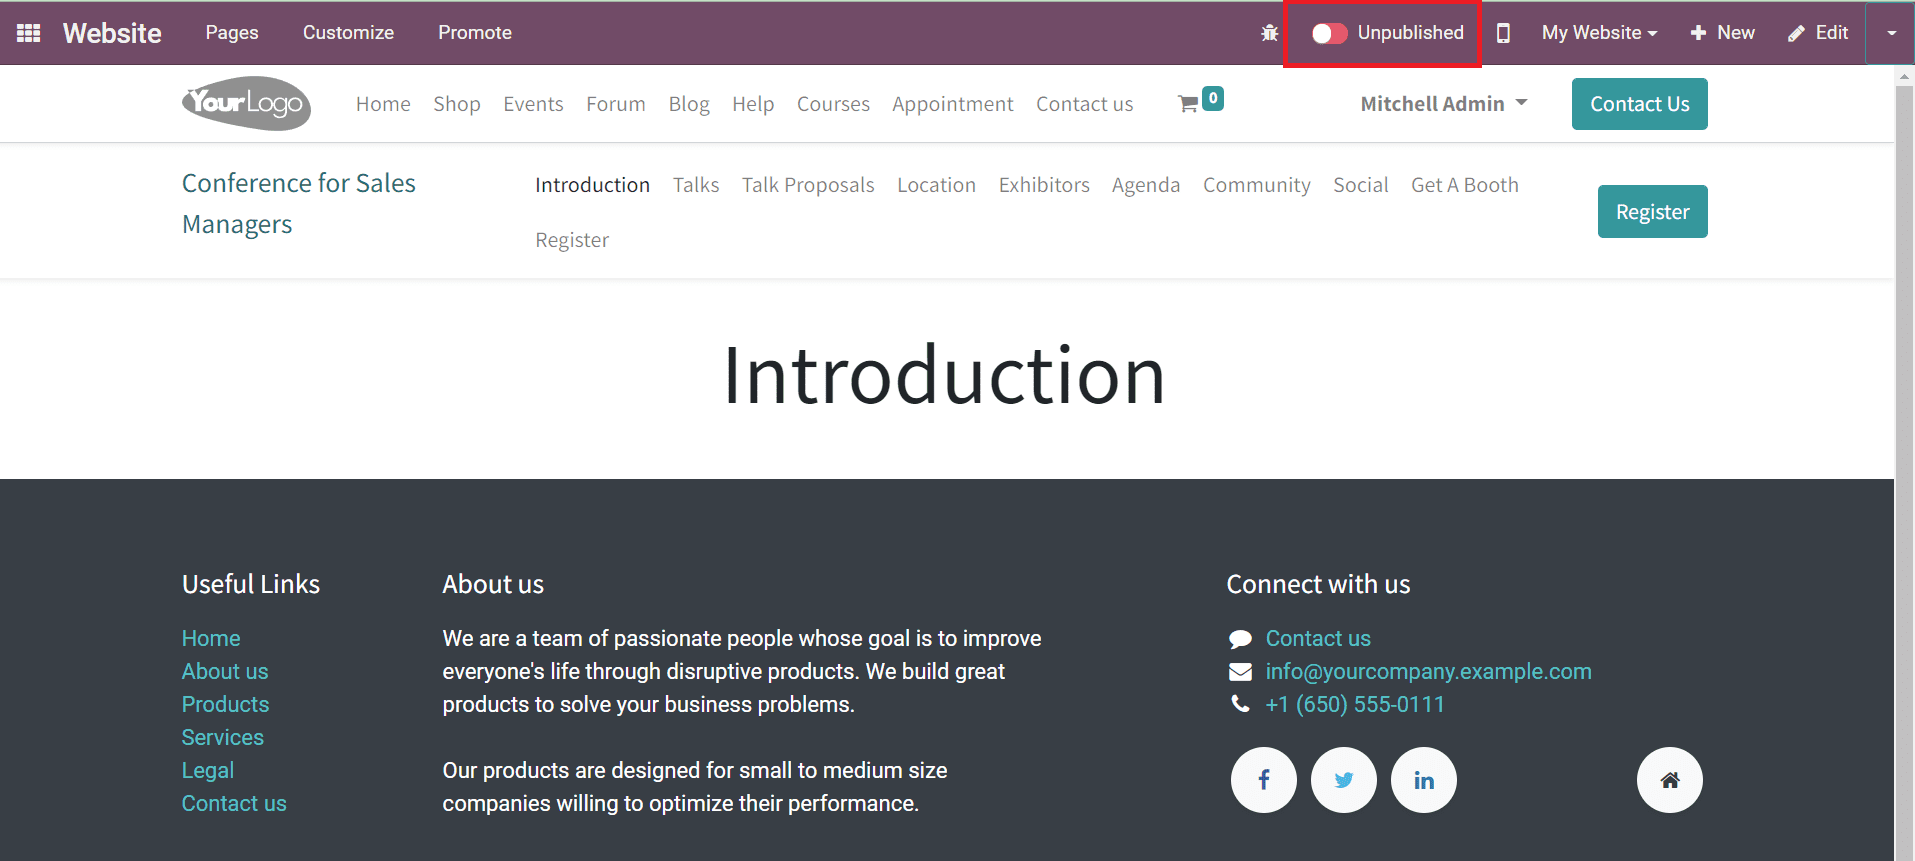
You can click on the ‘Unpublished’ button to change the status of the event to ‘Published’.
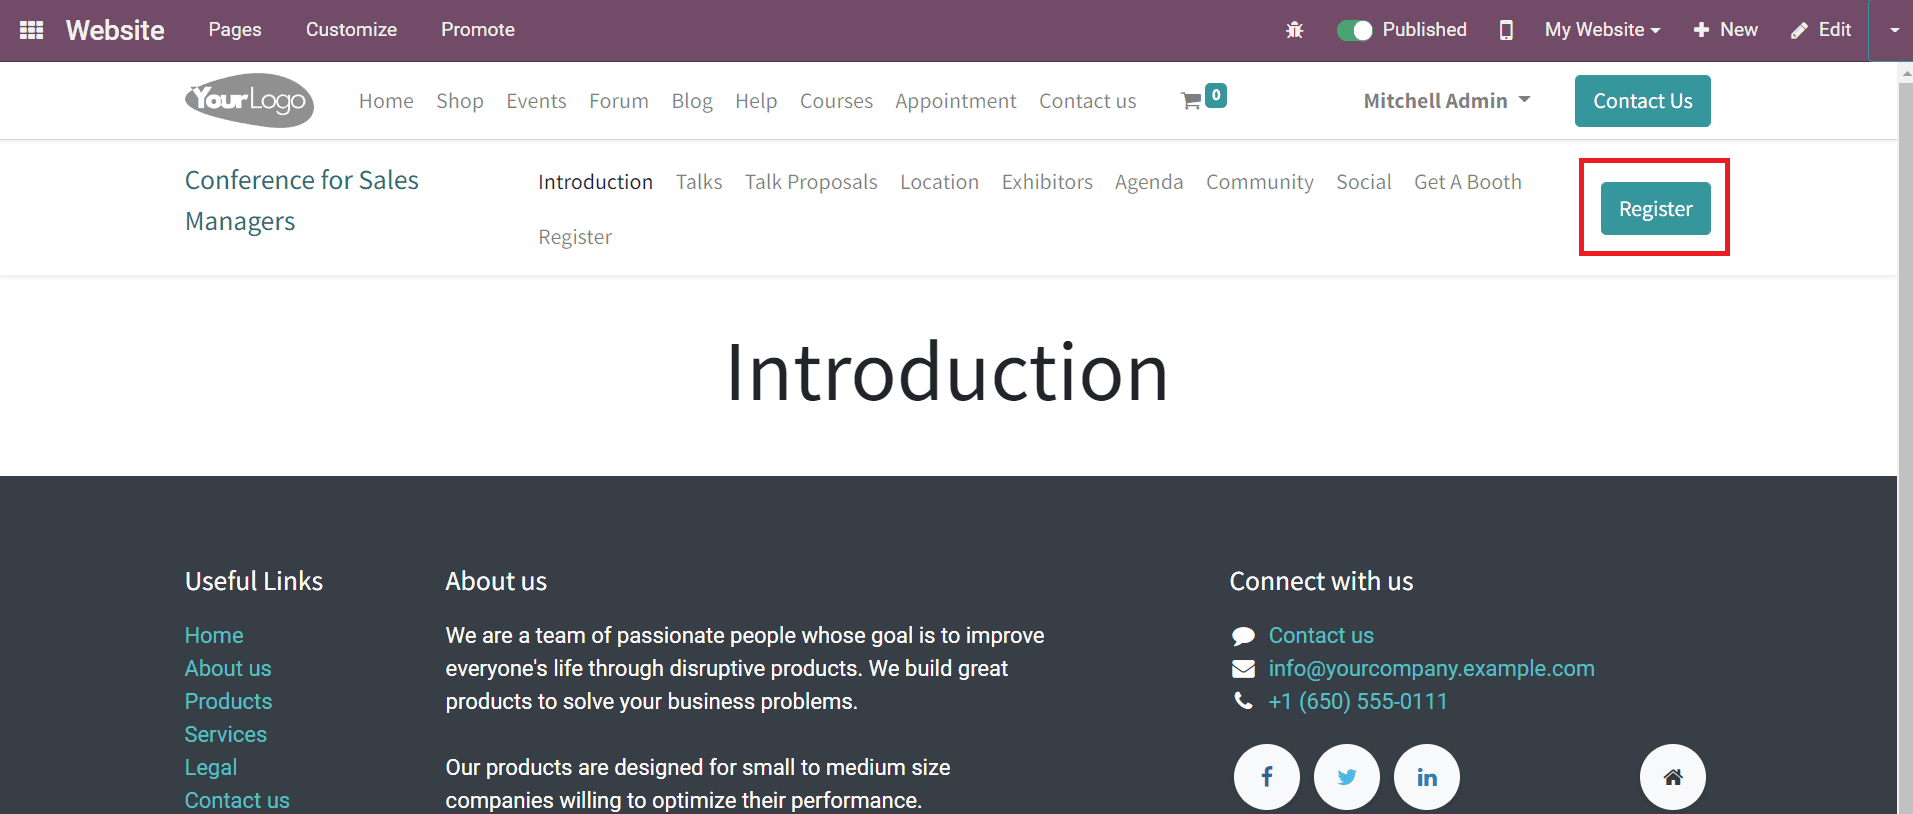
After publishing the event, the participants can register for the event using the ‘Register’ button.
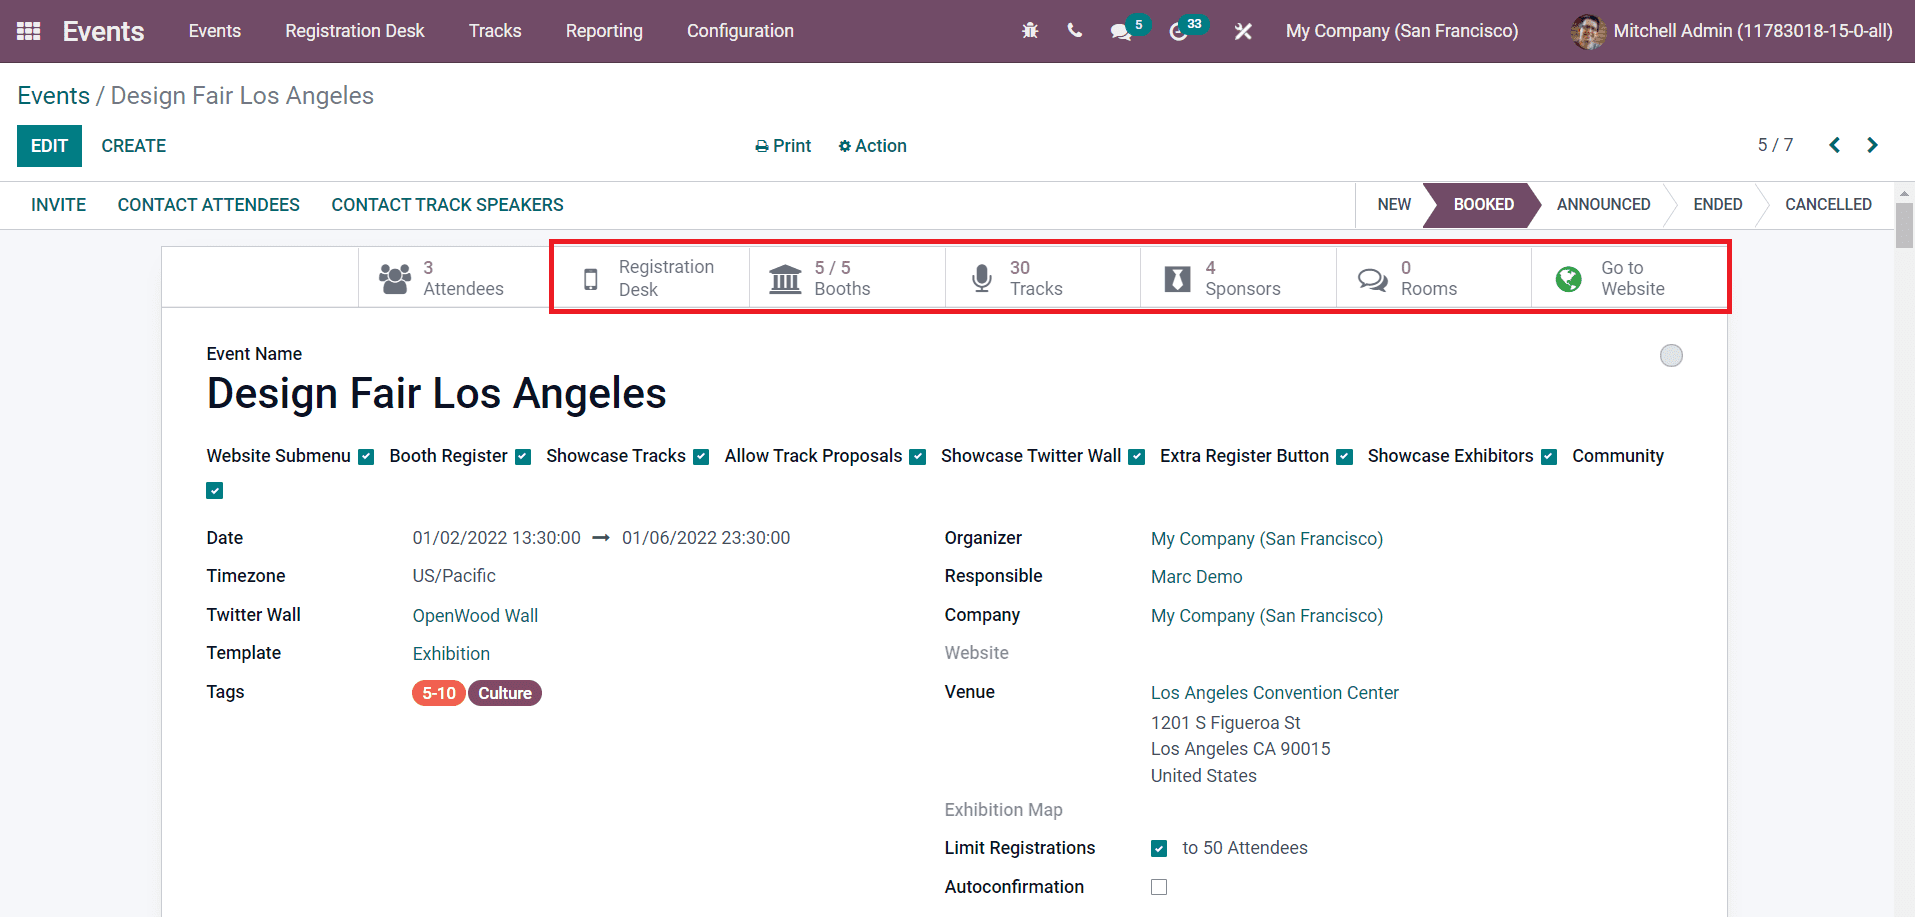
The event description window of a published event will show various smart buttons as shown in the image below.
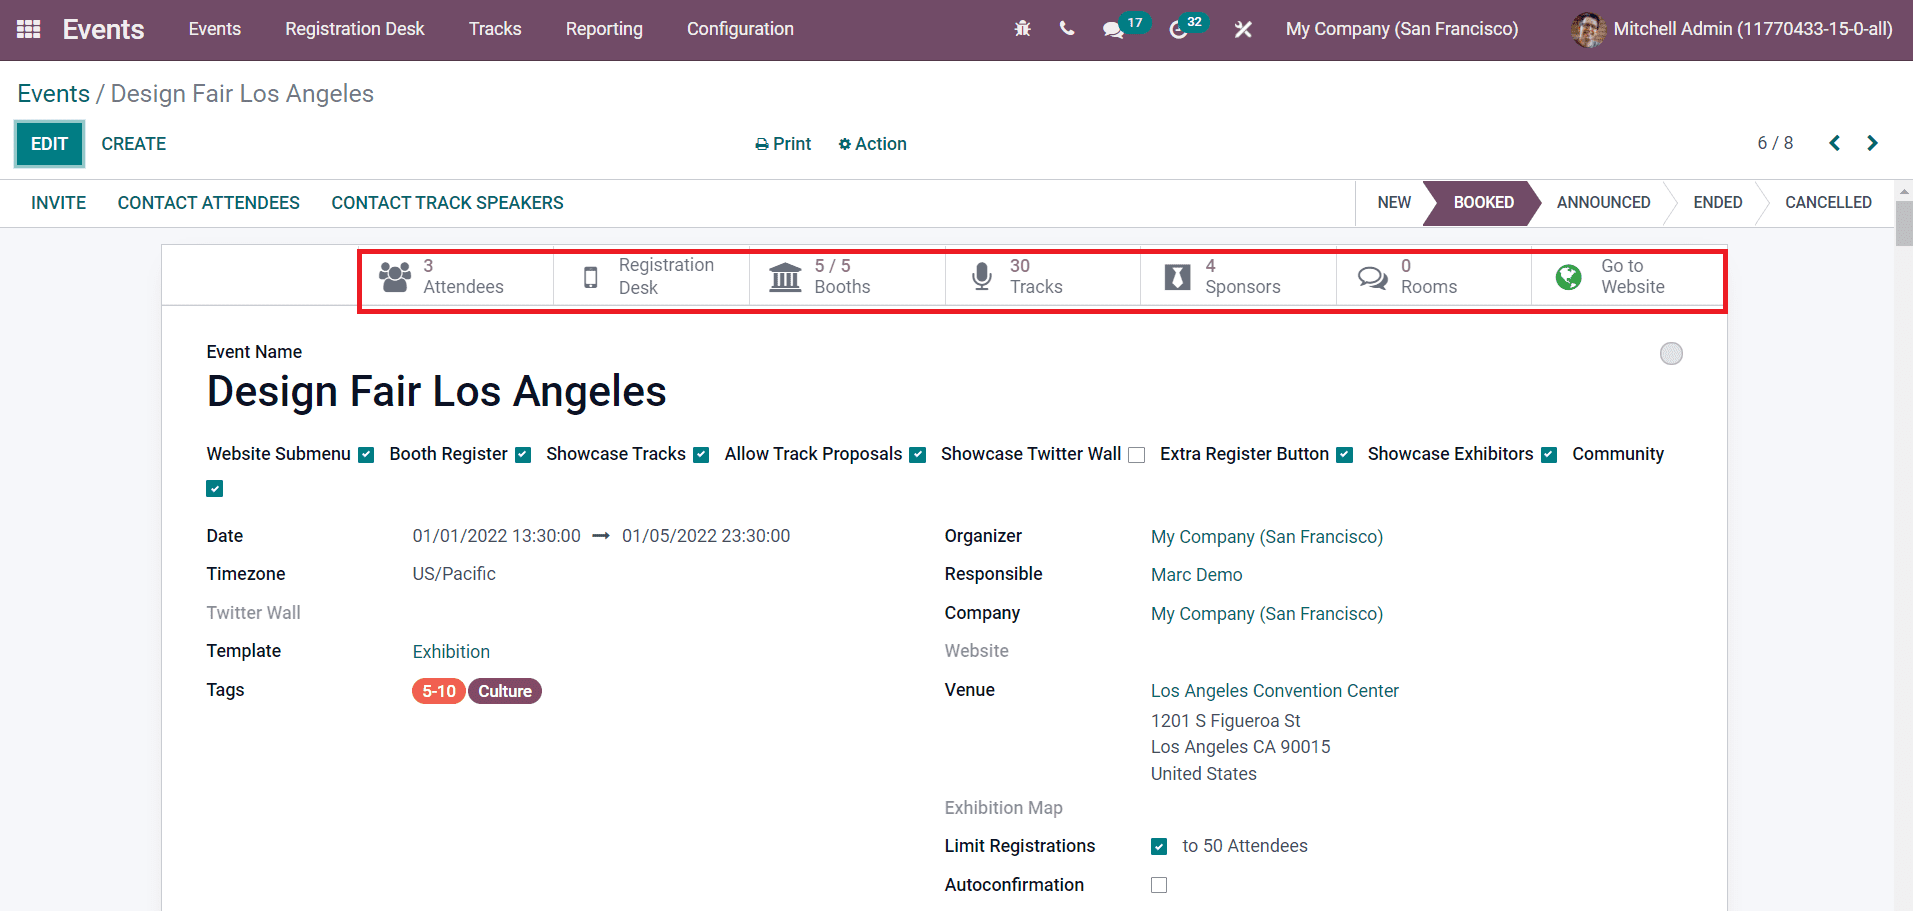
The Attendees button will show the total number of registrations for this event. You will get the list of all attendees registered for this event on this platform.
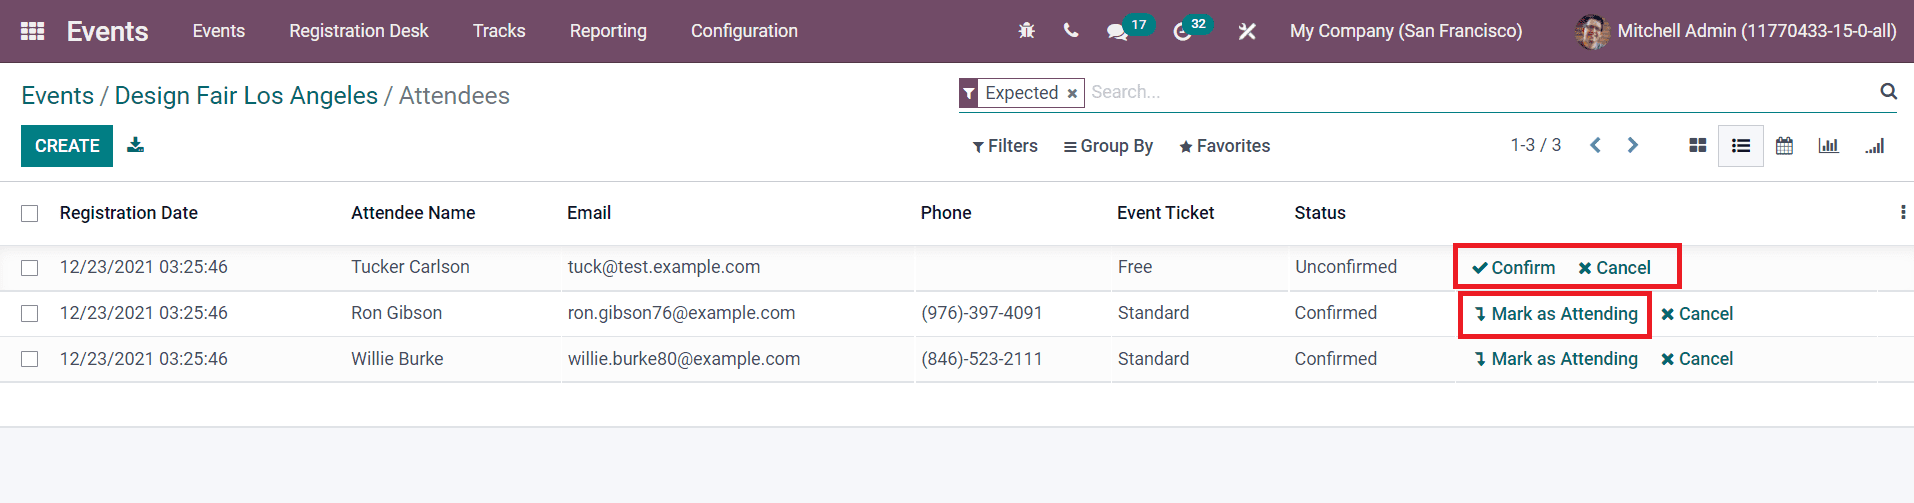
You can see the Registration Date, Name of the Attendees, Email, Phone, Event Ticket, and Status in this window. You will also get the Confirm, Mark as Attending, and Cancel buttons as shown in the image.
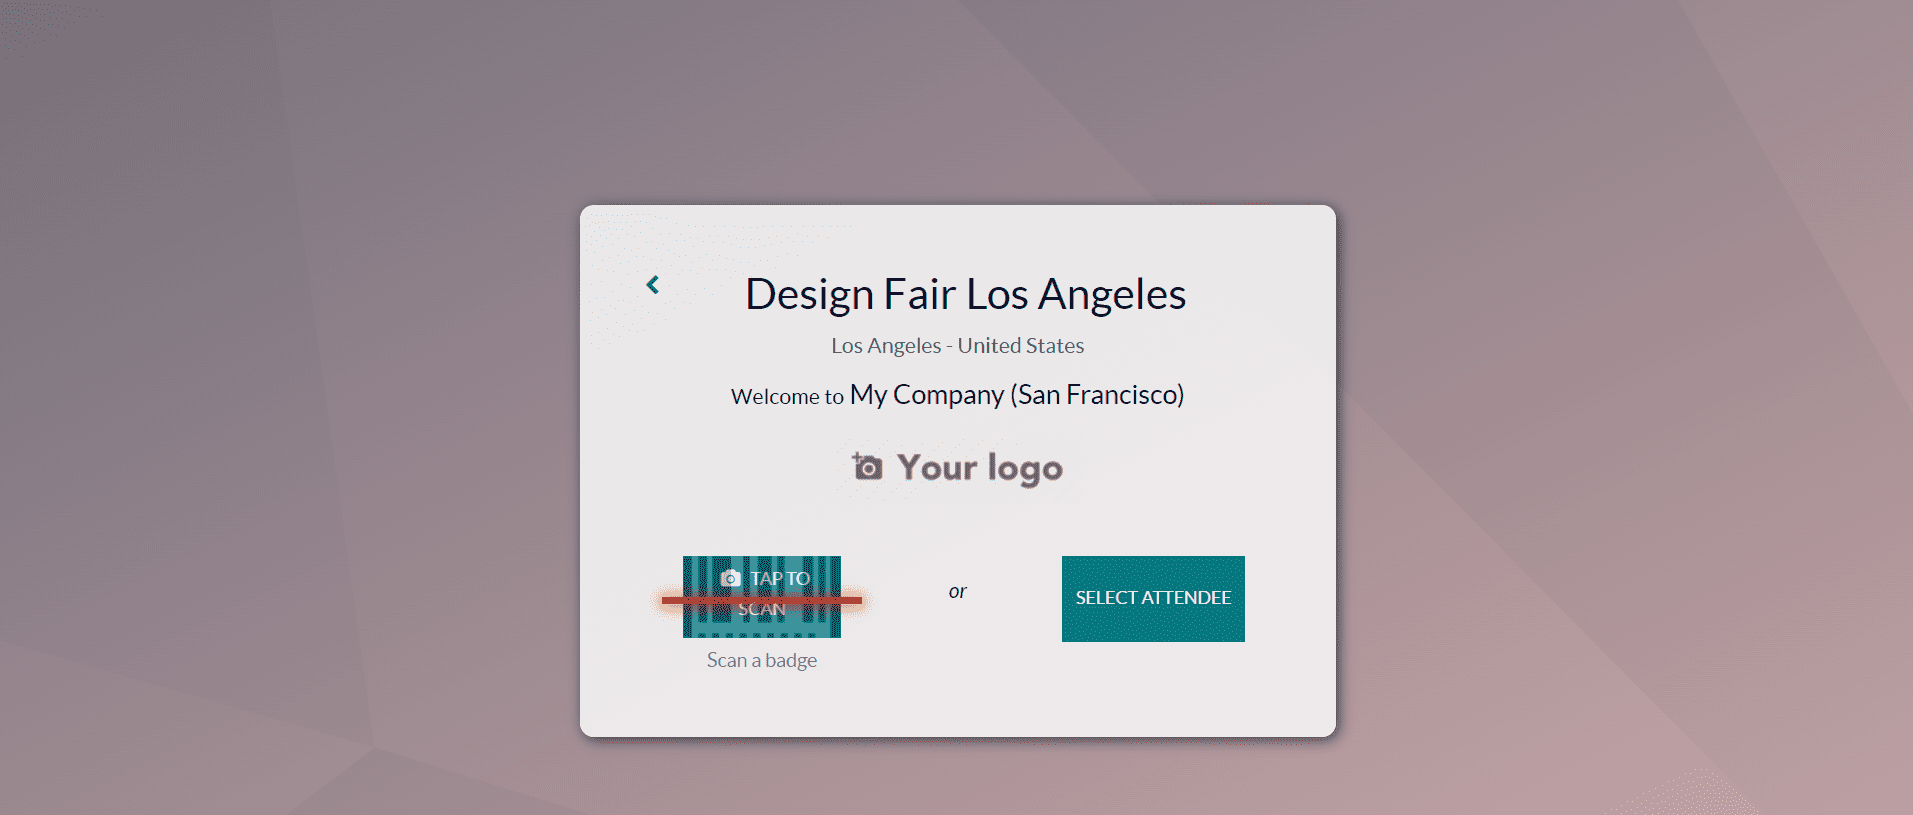
The Registration Desk button will lead you to a new window where the attendees can confirm their registration for the event by scanning their badges or manually selecting the attendees. To get this option, first, you have to enable the Barcode option under the attendance tab from the Settings menu.
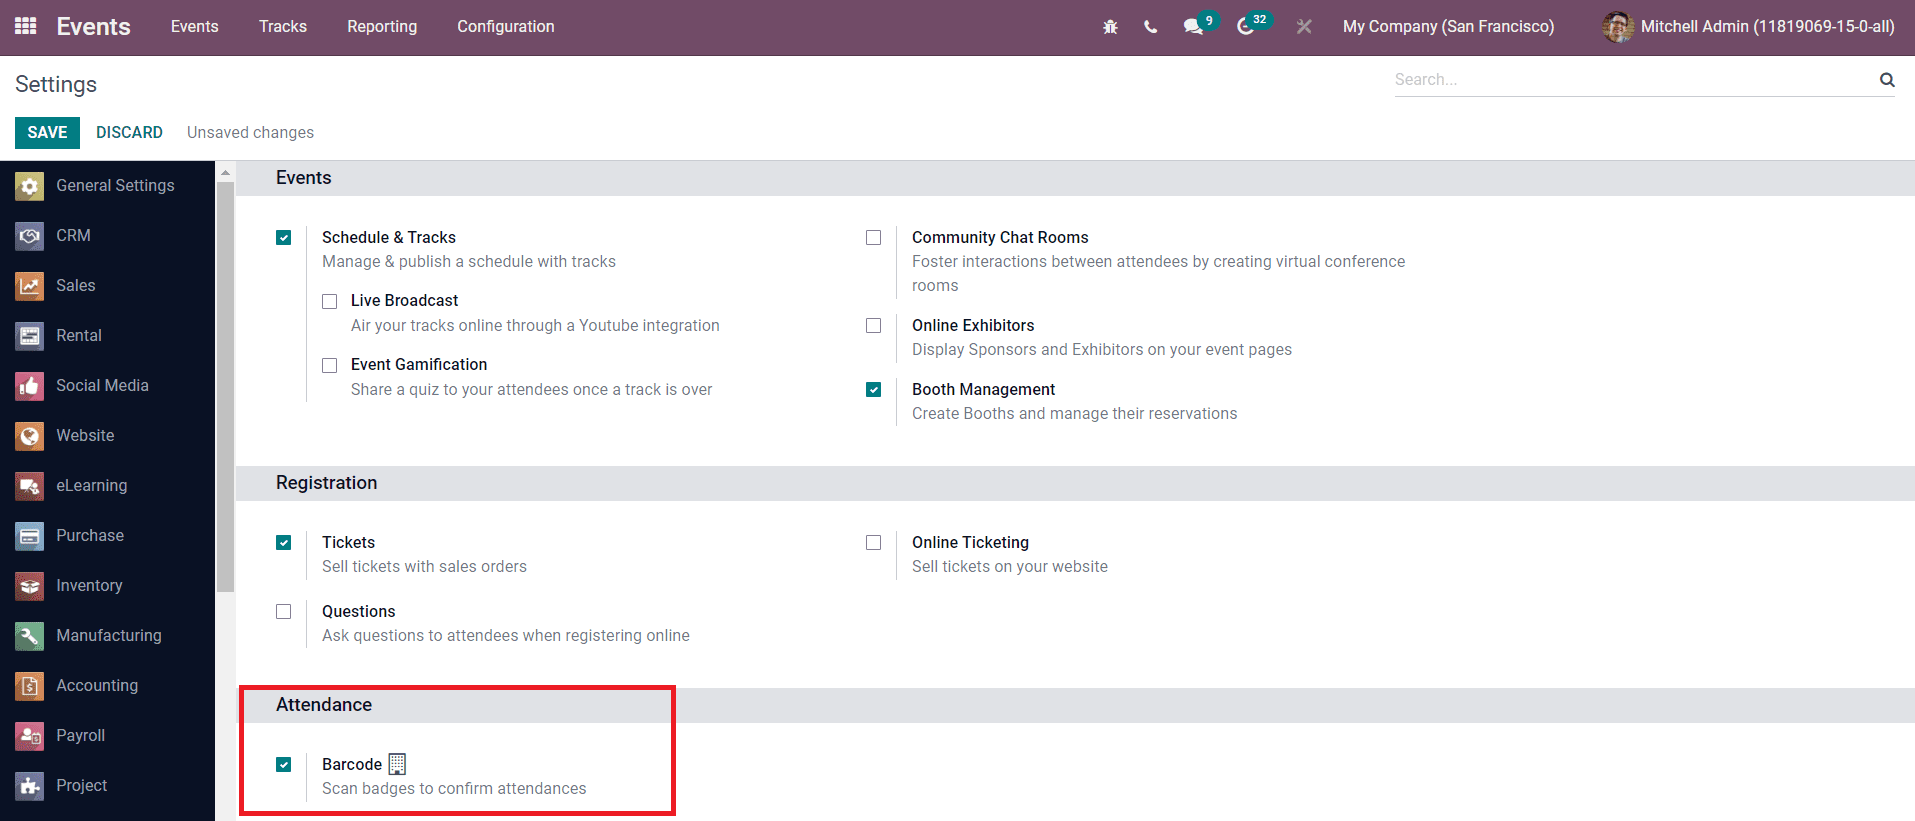
By activating this option, you can scan badges to confirm attendance.
The registration Desk option can be also found in the main menubar of the Events module.
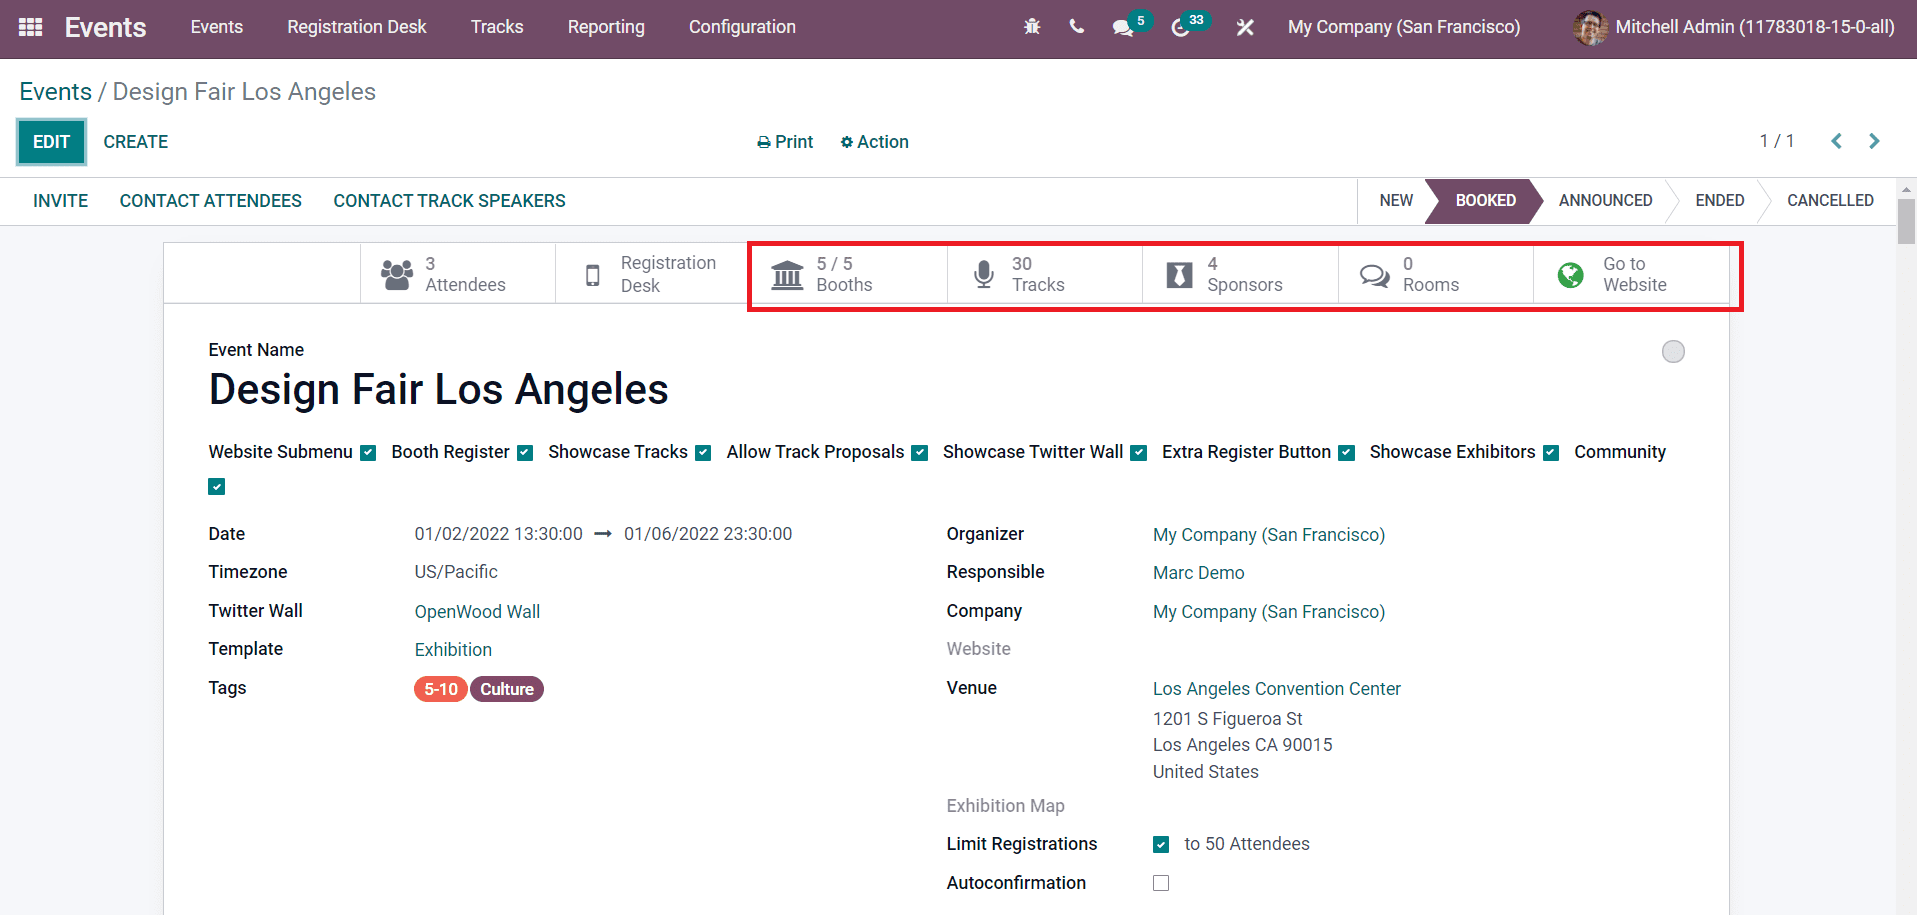
The Booths button will show the details of all configured booths for this event. The Tracks button records the schedule of the event. You will get the information about sponsors of the event using the Sponsors button. You can allocate chat rooms for the participants of the event to conduct discussions on event-related topics. The Contact Attendees and Contact Track Speakers buttons can be used to communicate with the attendees and track speakers of the event respectively.
Now, let's take a look at the Events Track in the Odoo 15 Events module.