Leads
The Lead in the Odoo CRM module can be defined as a genuine inquiry of an individual or an authority having interest in your product or services. This also can be an interaction that the salesperson collects. Lead can be generated from various sources such as Phone calls, Messages, blog posts, contact forms, emails, link tracking, campaigns, Live Chats, Events, and many more aspects. The leads are later converted into opportunities. So it is very important to manage leads in a more serious way. The Odoo CRM platform manages Leads with a separate tab. For accessing the Lead tab in your CRM platform, first you should activate the Leads option from the settings window of the Odoo CRM module. So first we can go to the Settings window.
CRM -> Configuration -> Settings
In the Settings window of the Odoo CRM module, you can view the Leads option under the CRM tab as depicted in the below image.
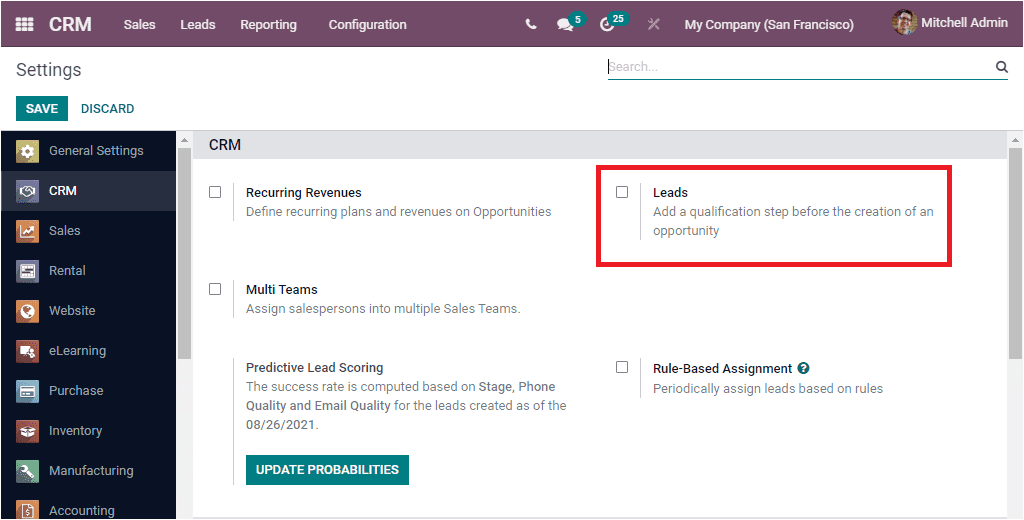
For activating the Lead option, you can check the box near the option Leads and mark the changes by clicking on the Save button available on the upper left corner of the window. If you did all these steps, you will be able to view the Leads menu in your dashboard as shown in the below image.
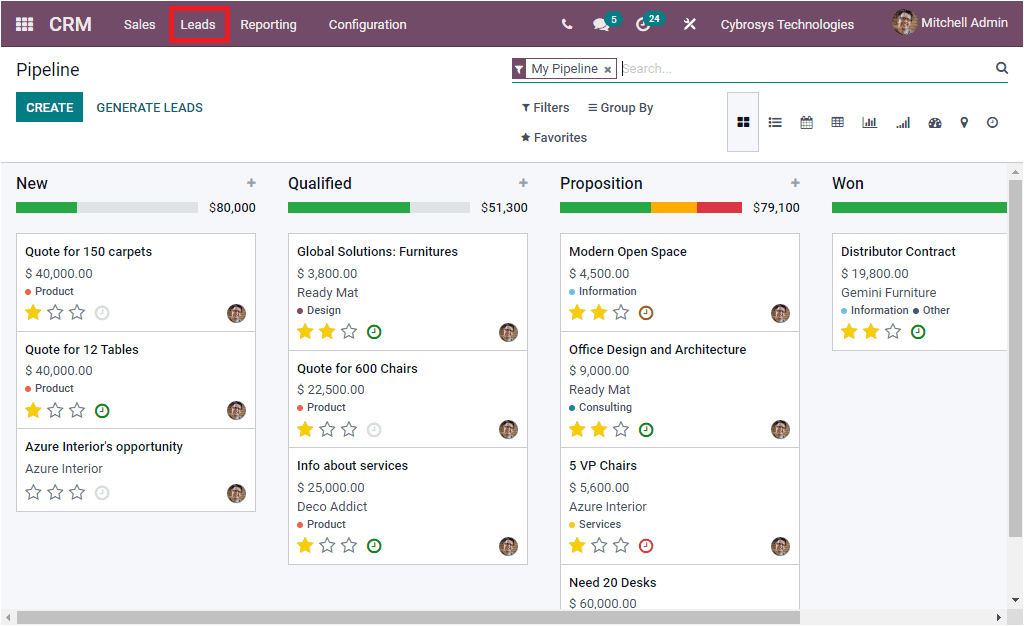
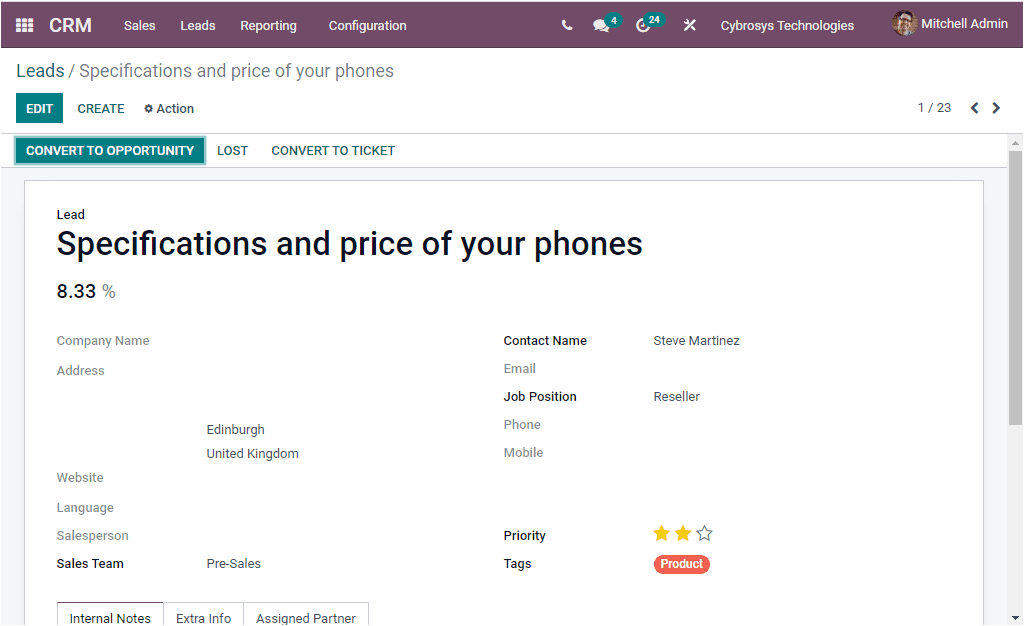
Upon selecting this Leads menu, you will be directed to the Leads window as shown in the screenshot below.
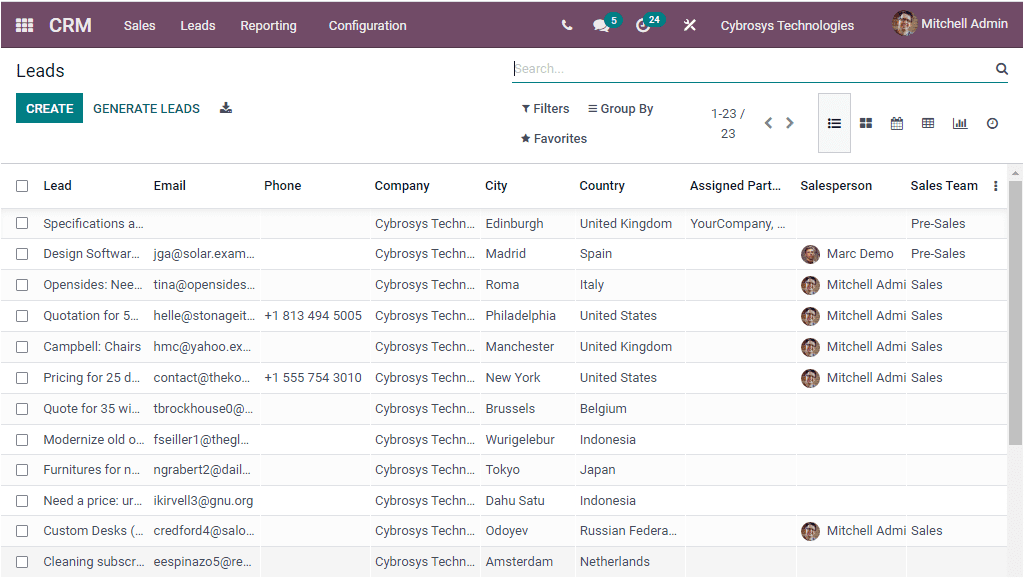
The Odoo Leads window comprise all the predefined Leads in the platform along with the details of Lead Name, Email, Phone number, Company, City, Country, Assigned Partner, Salesperson, Sales Team, Created on and many more aspects. If you want to list more details you can click on the three dots available in the window as highlighted in the below screenshot. Please note that these fields may change based on the app/modules you have installed.
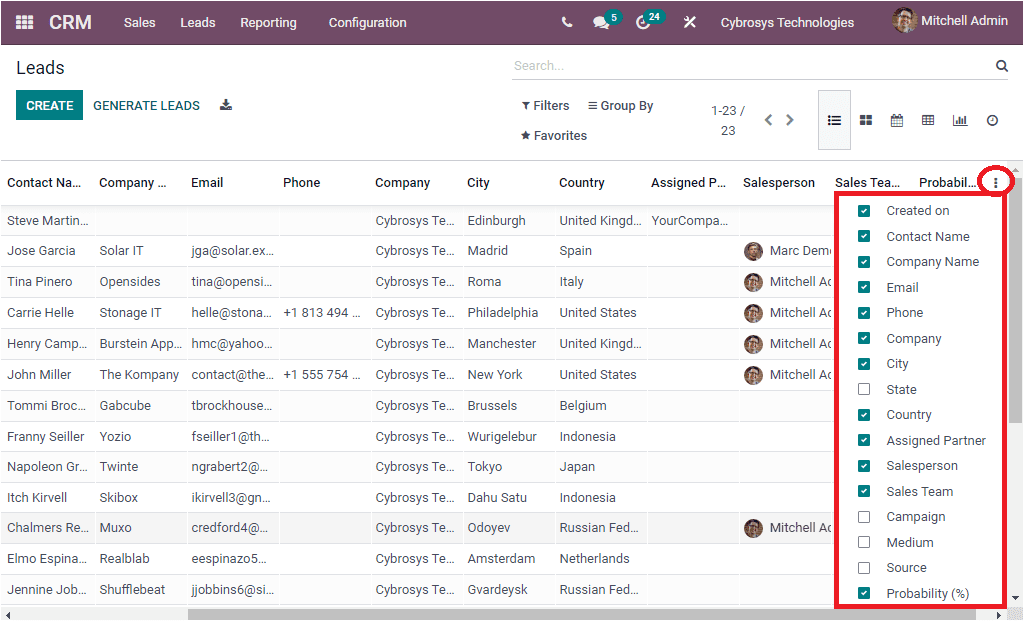
Here in this list you can view many options and if you need to display it in your leads window, you can activate it by selecting the check box. Now you can view the details in your Leads window. When you need to view the details of a particular lead in detail, you can select on the lead. Then you will be able to view it in detail.
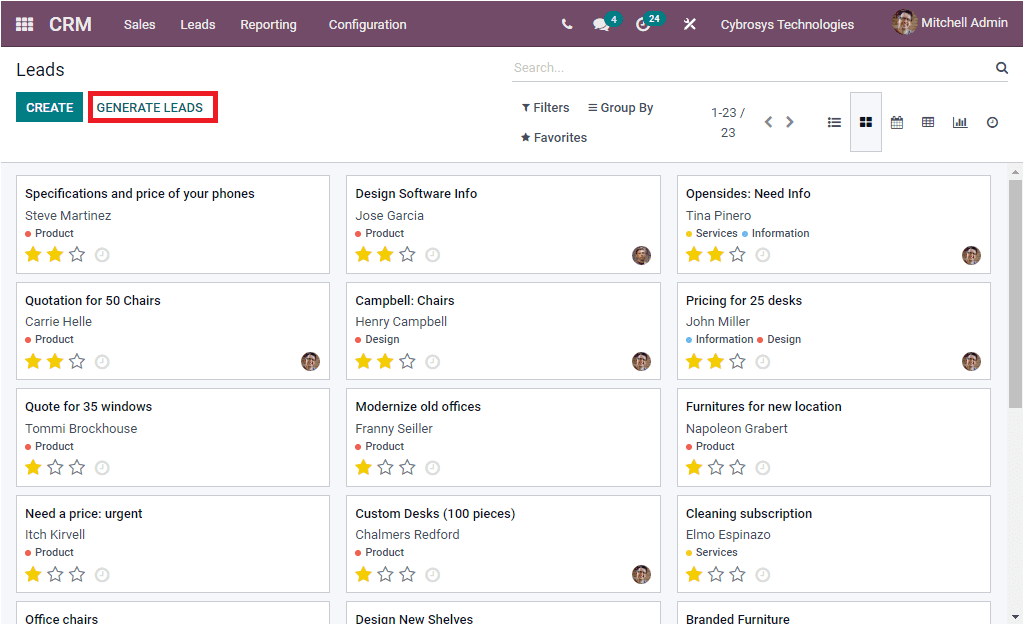
The Leads window is also available in different views such as List, Kanban, Calendar, Pivot, Graph and Activity views. A large number of leads and its details can be organized and saved in the platform. The various sorting options (Filters, Group By, Favourite search) in the platform allow you to easily identify the required data from the whole list. Odoo provides its enterprise user functionality to generate leads with paid services. By using this service you can generate leads directly from the window by selecting the GENERATE LEADS icon available in the window.
When you press on the Generate Leads icon, you will be displayed with a pop up window as shown in the below image.
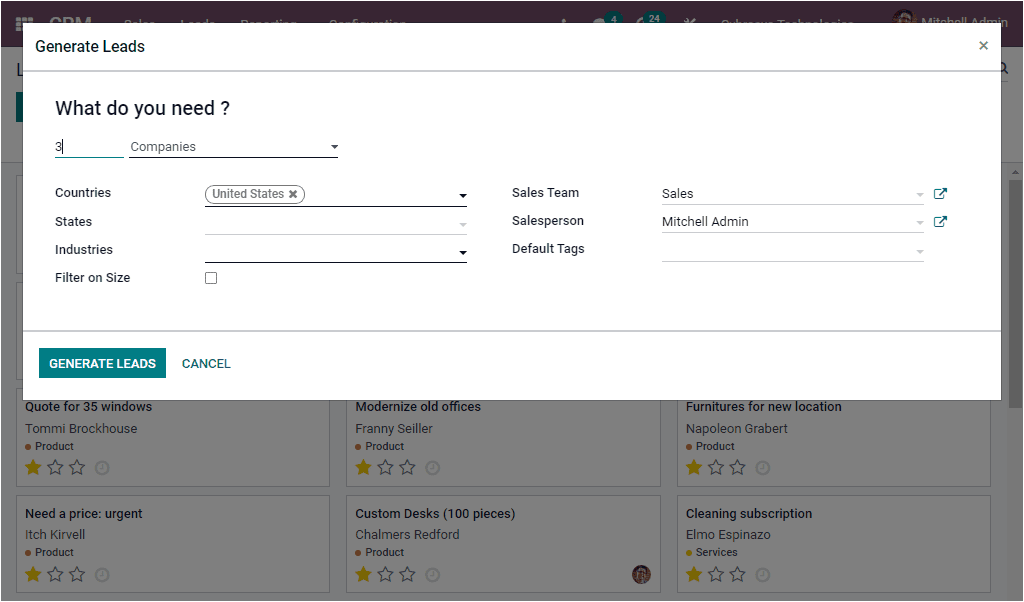
In this Generate Lead window, you can mention the countries, states, Industries which you want to generate leads and you can enable or disable the option Filter on Size. Then you can also view the options Sales Team, Salesperson, and the Default Tags. After providing all the required data, you can click on the GENERATE LEADS button available.
This window can also be accessed from the configuration tab of the Odoo CRM module. Under the Configuration tab, you can view an option named Lead Mining Requests.
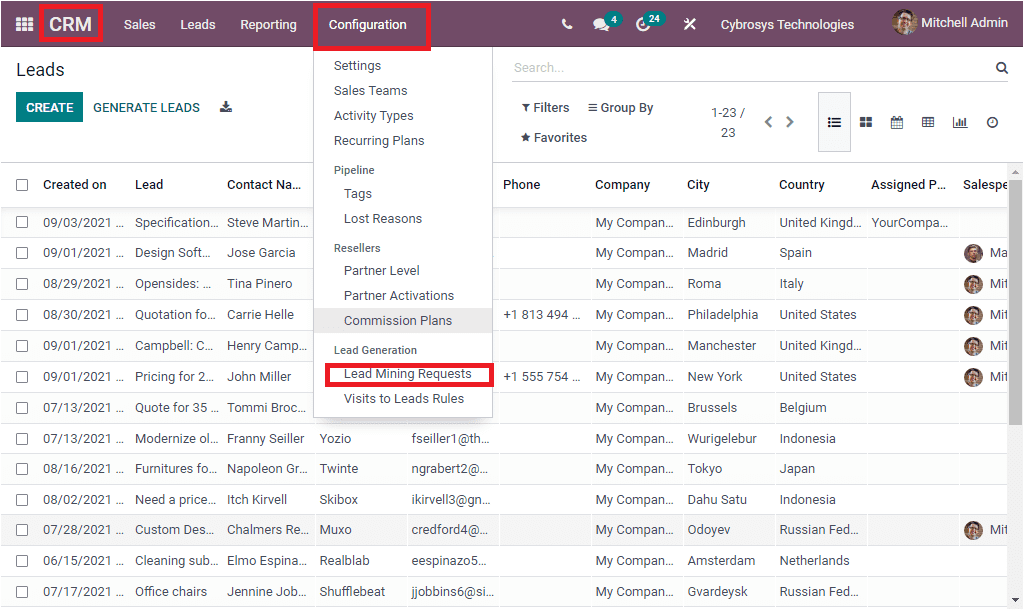
If you press on the Lead Mining Requests menu, you will be navigated to the window. Let us have a look into the window.
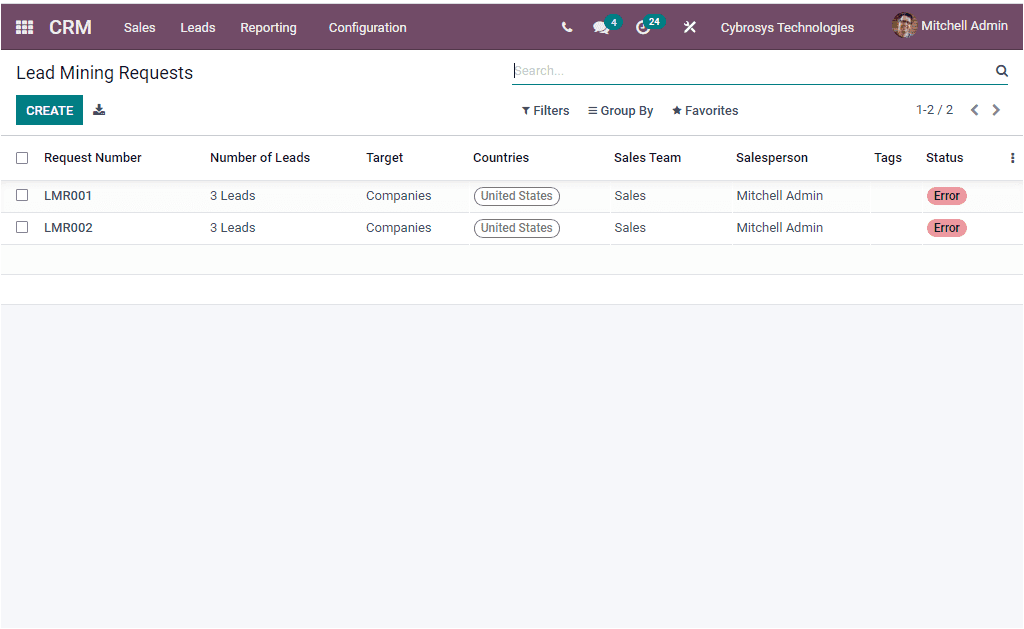
In the above window you can view all the Lead Mining Requests created in the platform in a list view, with all the descriptions such as Request Number, Number of Leads, Target, Countries, Sales Team, Sales person, Tags, Status and many more aspects.. It is also possible to export all the records in the window to an excel file by clicking on the Export All icon available near the CREATE icon. The CREATE icon available in the window will allow you to create new Lead Mining Requests.
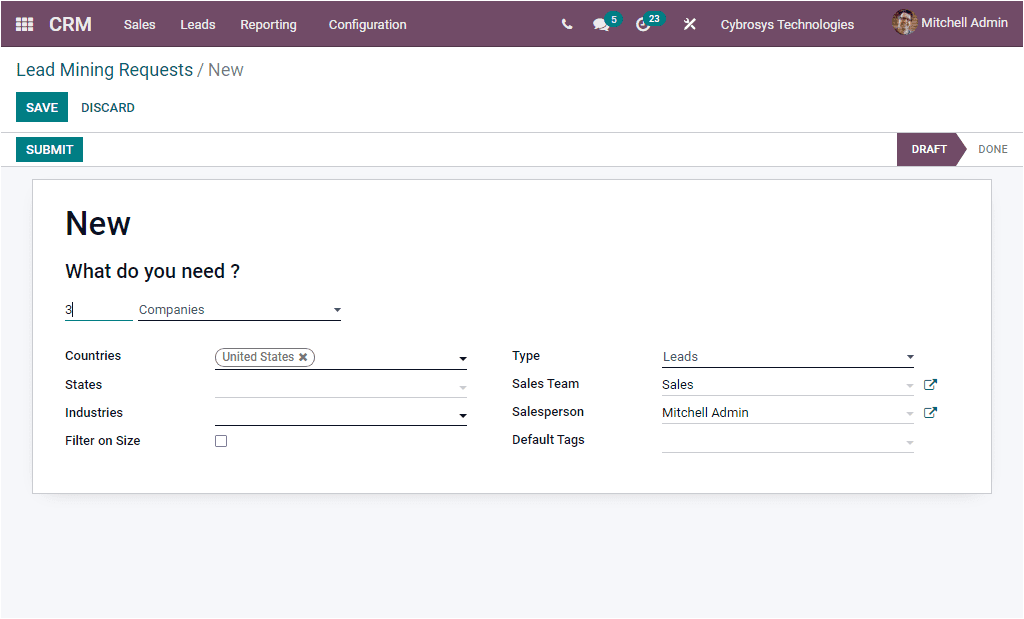
After providing all the required information in the creation window (as we discussed earlier) you can SAVE the details and then submit the request by selecting the SUBMIT button available. If you select the SUBMIT button, the status of the request will change to DONE.
So far we were discussing the Lead aspect of the Odoo CRM platform and now let us have a look into the option Visits to Leads Rules.
Visits to Leads Rules
The Odoo CRM module also gives you the right to create a conversion rule for converting visits as leads. Using this exclusive feature, you can configure rules to generate B2B leads or opportunities from your website visitors. To use this function, you should install the Website module. This feature can be accessed from the configuration tab of the Odoo CRM module. So we can go to CRM -> Configuration -> Lead Generation-> Visits to Leads Rule.
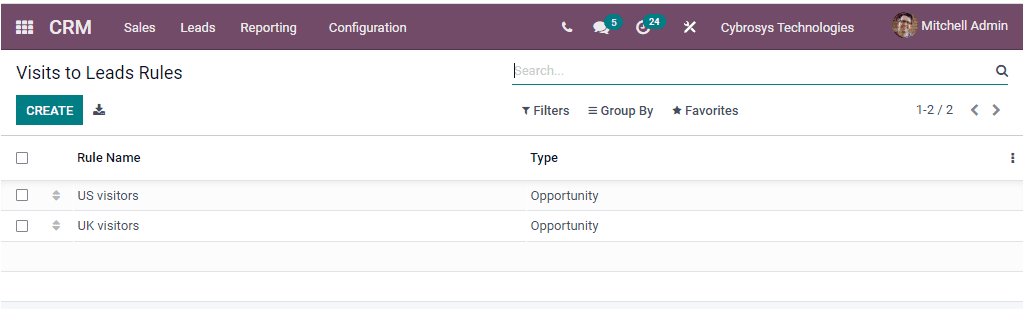
The Visits to Leads Rules window will gather all the predefined ones in a list view format. The Rule Name and Rule Type of each record is mentioned here. When you need to create new Visits to Leads Rules, you can click on the CREATE icon for receiving the creation form. The image of the creation form is given below.
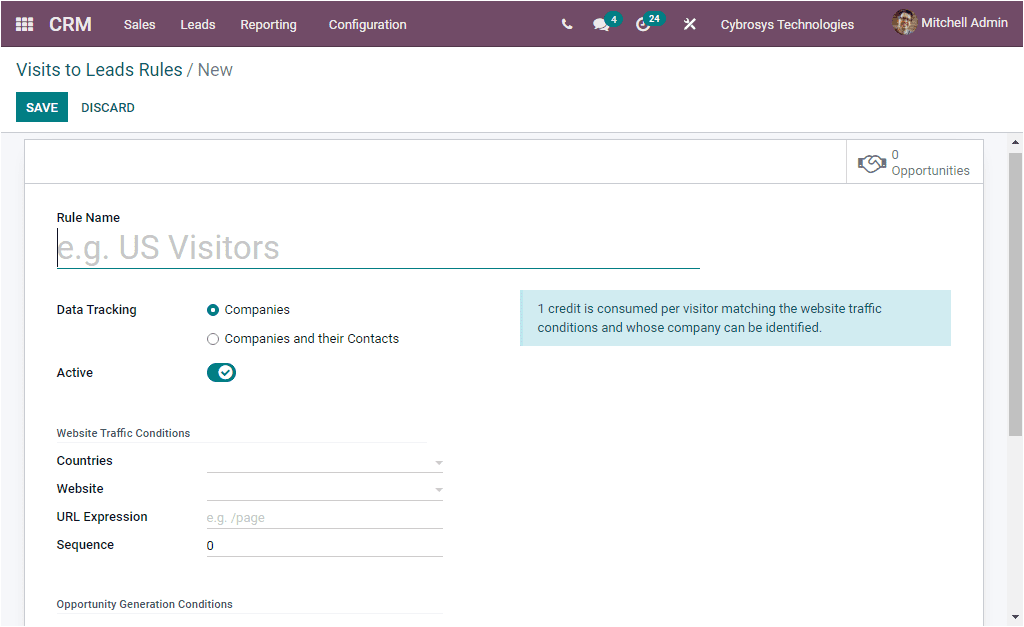

In the Visits to Leads Rules creation form, you can initially provide the Rule Name. Then you have the Data Tracking option where you have the provision to choose whether to track companies only or companies and their contacts. Then you have the Active field. After that, you can specify the Website Traffic Conditions. Here you can mention the Countries. So that the visitors of these countries will be converted into leads or opportunities using GeoIP. In addition, specify the Website from where you want to convert leads if you are using multiple websites. Then you have the field, URL Expression. It is the regex to track website pages. If you want to track the entire website or need to track the home page, you can leave this field empty.
In the same way, you can also describe the Opportunity Generation Conditions. These options are the Industries, Filter on Size. Similarly, you can add the Opportunity Data such as Opportunity Type, Suffix, Sales Team, Salesperson, Tags and Priority. After filling in all the required data, you can click on the Save button to save the details.
As yet we were talking about the Visits to Leads Rules option available in the platform and now we can take a look into the Lead Acquirement option available.