Vendor Management
Creating and maintaining a solid relationship with Vendors is a pivotal aspect in the purchase management. A good vendor management system helps you to facilitate quick access and convenience for your vendors. So that you can keep a good relationship between your vendors and your organization. By efficiently managing your vendors, you can easily conduct contract negotiation and might be able to create and support standards for your vendors, what’s more? You can easily identify the best serviceable vendors. Odoo ERP makes it easy to maintain your suppliers in a simple way. Every operation and processes regarding your suppliers or vendors can be automated with the Odoo Purchase management tool. You are also able to define multiple vendors for a product or service in the Odoo platform.
Vendors in the Odoo system will be listed and organized in the Vendor menu available under the Orders tab of the Odoo Purchase module. So we can take the steps Odoo -> Purchase -> Orders -> Vendors to view the window. The image of the window is depicted below.
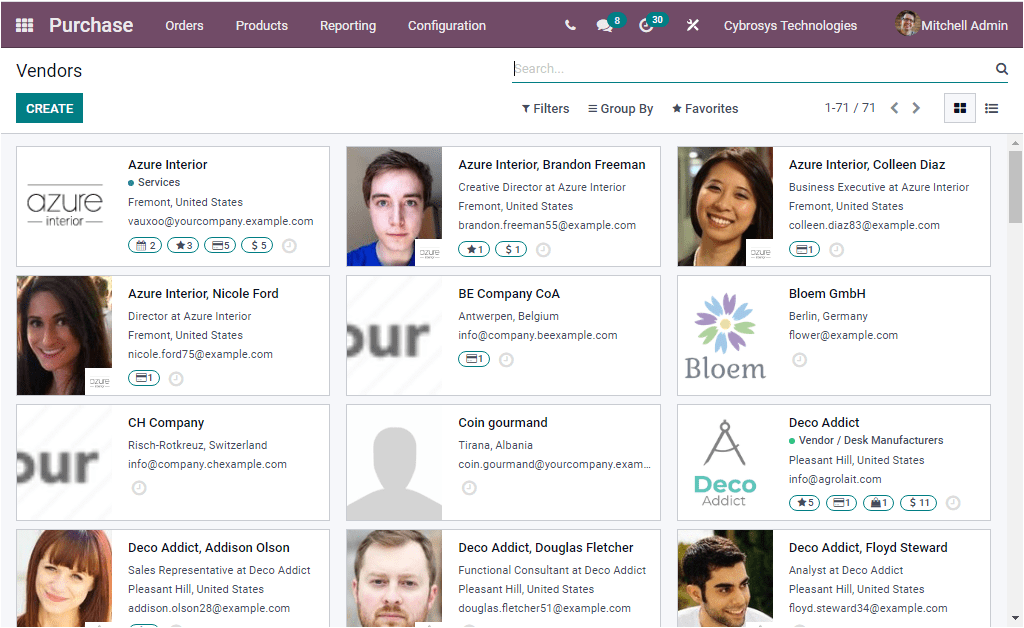
In the Vendors window, Odoo will depict all the vendors defined in the Odoo system in a beautifully arranged manner. Odoo allows you to view the record in two views such as Kanban view and List view. The above image depicts the Kanban view of the vendor's window. In the Kanban view, you are able to view each vendor's details in separate cards. Which will include the important details such as name of the Vendor, type of vendor, contact address, scheduled activity details, purchases, along with the emblem or photograph of that particular vendor. If you need to view the vendor contacts and information in detail, you can click on the respective vendor to depict the vendor window. For example, if you need to view the details of the Azure Interior or you want to edit the details of them, you can click on the Azure Interior. Now the window will be opened in front of you as shown in the below image.
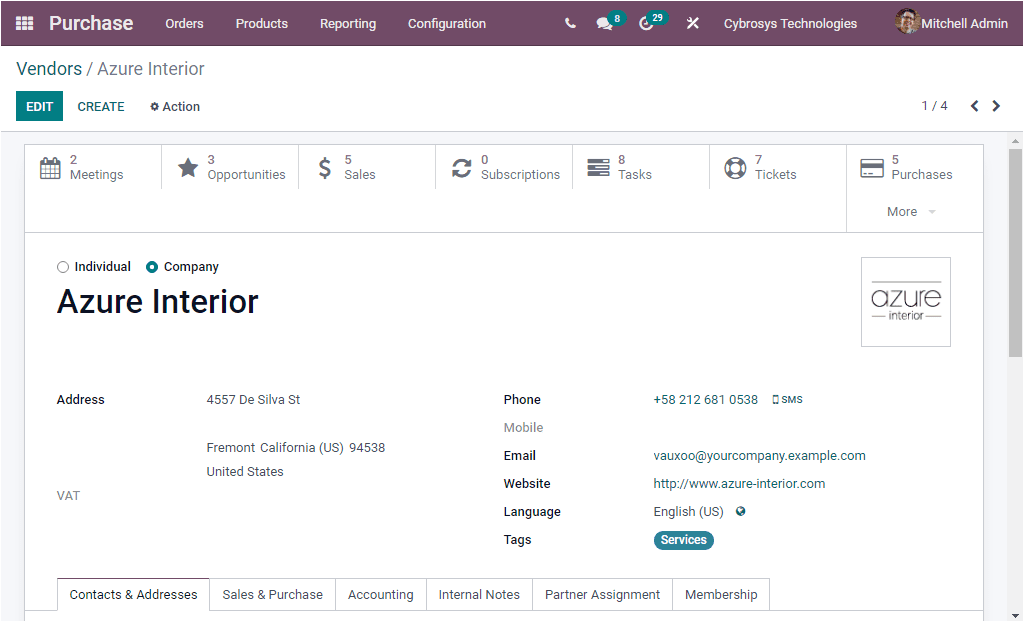
Here you can view all the information regarding this particular vendor and you can edit the details if you want to make changes using the EDIT button available.
Back into the Vendors window, when you want to view the vendors window in List view, you can click on the List view icon available on the top right corner of the window. Now you will be depicted with a window as shown in the below image.
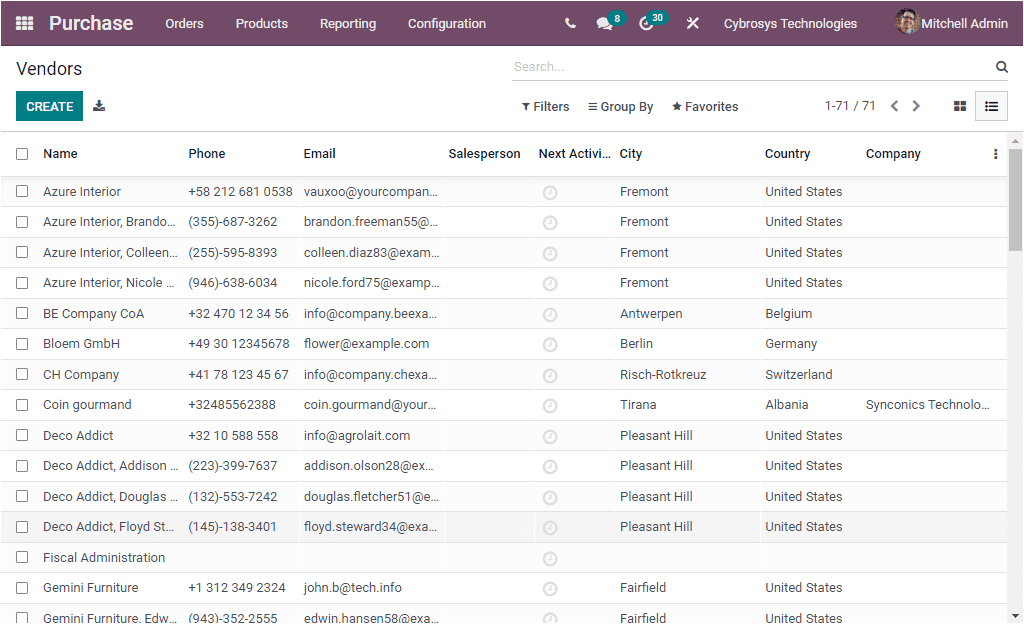
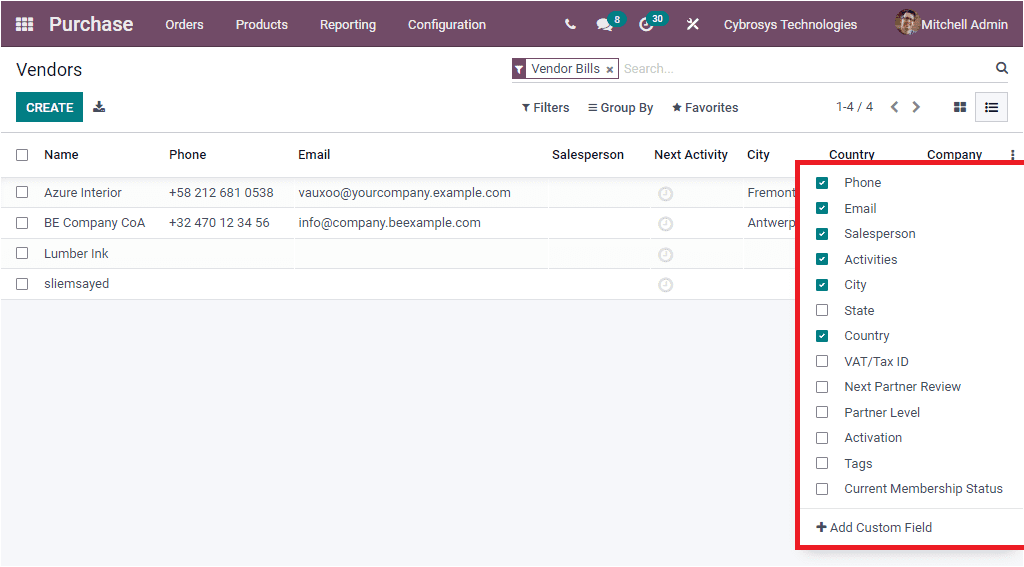
In the List view you can view the details such as Name of the Vendor, Phone number, Email address, Salesperson, Next Activity, City, Country, and Company. You can include more fields based upon your preferences by clicking on the three dots available on the left corner.
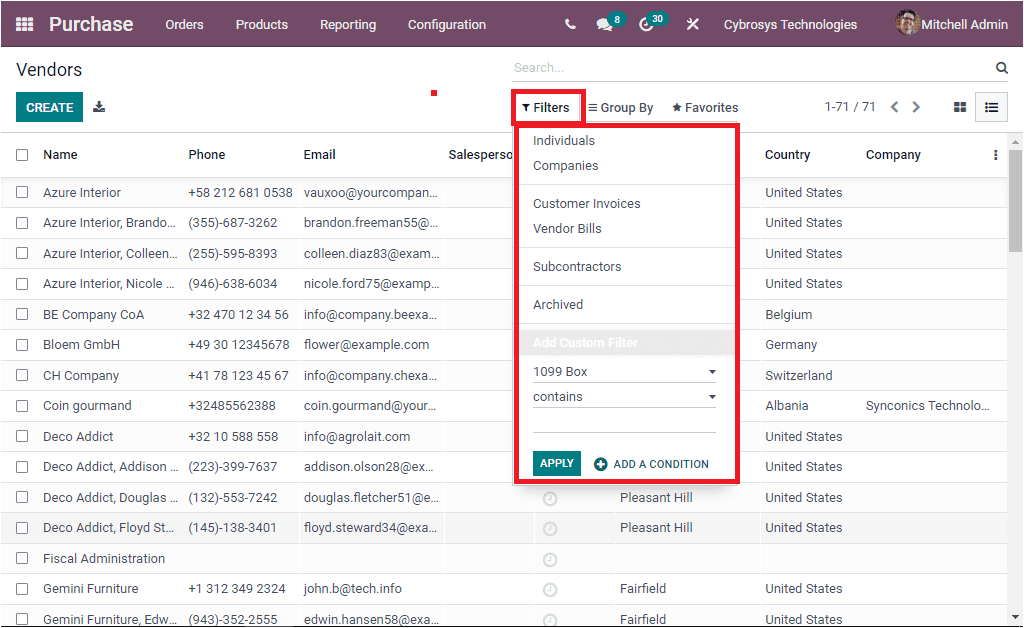
Moreover, Odoo allows you to easily sort out your vendors based on various aspects. By default Odoo gives some filtering options. So you can filter your vendors based on Individuals, Companies, Customer Invoices, Vendor Bills, Subcontractors. The Archived vendors can be listed by selecting the Archived menu. In addition, you can add more custom filters by clicking on the Add Custom Filter option available.
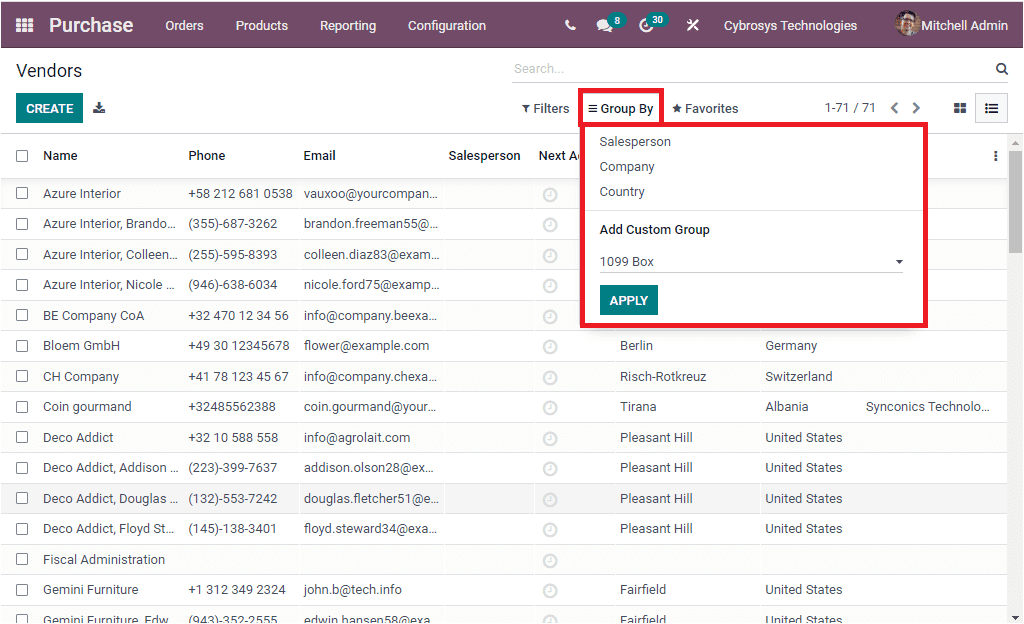
The Group By menu available in the Vendors window can be used for grouping your vendors in various categories. Here also you have a default group By functionalities such as Salesperson, Company, Country. You are also able to define more custom groups based upon your company requirements. This can be performed by clicking on the Add Custom Group button available.
The Favorites tab in the window also consists of so many options in its dropdown menu.
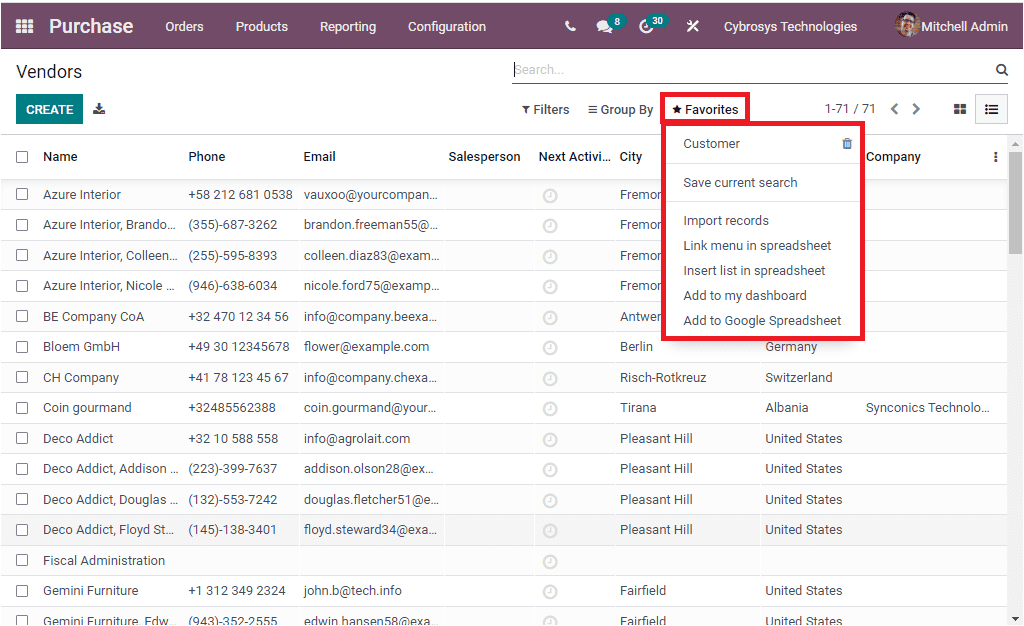
The Import Records option helps you to import all the records in the window to an XLSX file. Also you have the Link menu in spreadsheet option for inserting your pivot. Moreover the options such as Insert list in spreadsheet, Add to my dashboard, Add to google spreadsheet makes the platform more user friendly. The list of options are not completed yet- you have the advanced options to export all records into an excel file by clicking on the Export All button which you can access near the CREATE icon. If you are aiming to create new Vendors, you can access the CREATE button available on the top left corner of the Vendors window. A single click on this button takes you to the Vendor creation form. The image of the Vendor creation form is depicted below.
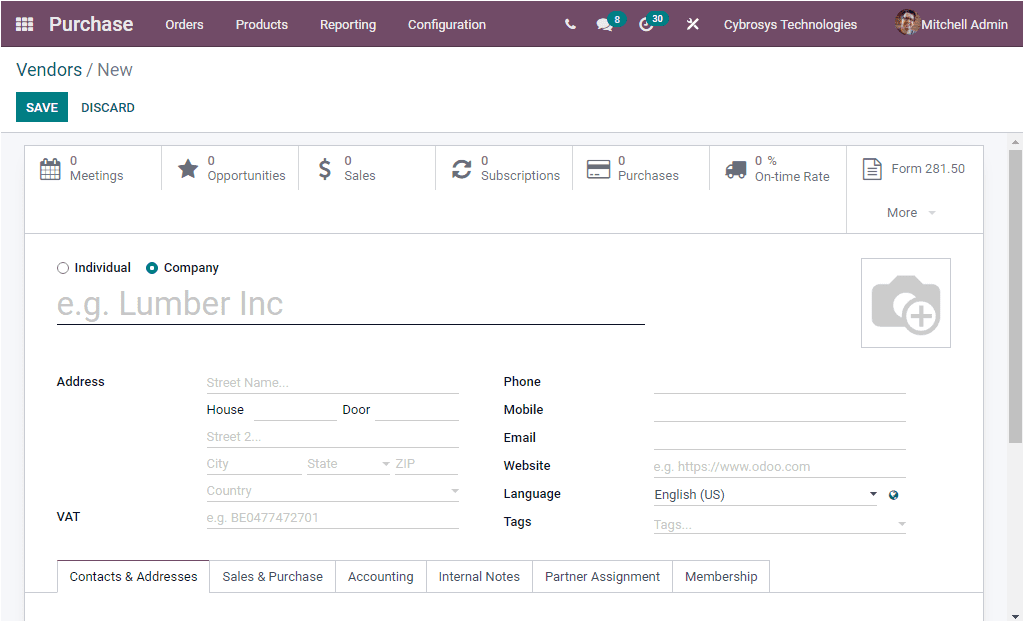

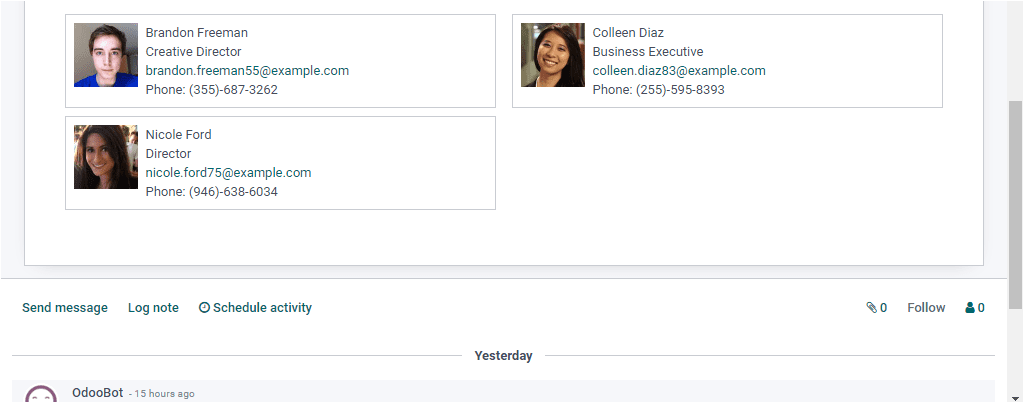
In the Vendor creation form, you can describe the Name of the Vendor and you can mention whether it is an Individual or Company. Then you can provide the detailed Address of your vendor along with the Phone number, Mobile number, Email Address. The Value Added Tax ( VAT ) can be given in the provided space. The tax identification number must be given if the contact is subjected to the government taxes. The Website link can be provided in the space given. Then you can have a Language option. All the emails and documents sent to this contact will be translated into the selected language. In addition, the Tags can be allocated to easily recognize your Vendor. In addition, the photograph related to this vendor can be given in the provided space. If the vendor is a company, you can give the company’s logo or if it is an individual, you can give the Photograph of the vendor. Now you have so many tabs to give details. Under the Contacts & Addresses tab, you can create contacts by clicking on the ADD menu available. When you click on the ADD button, a pop up menu will appear as depicted below. Where you can create a record.
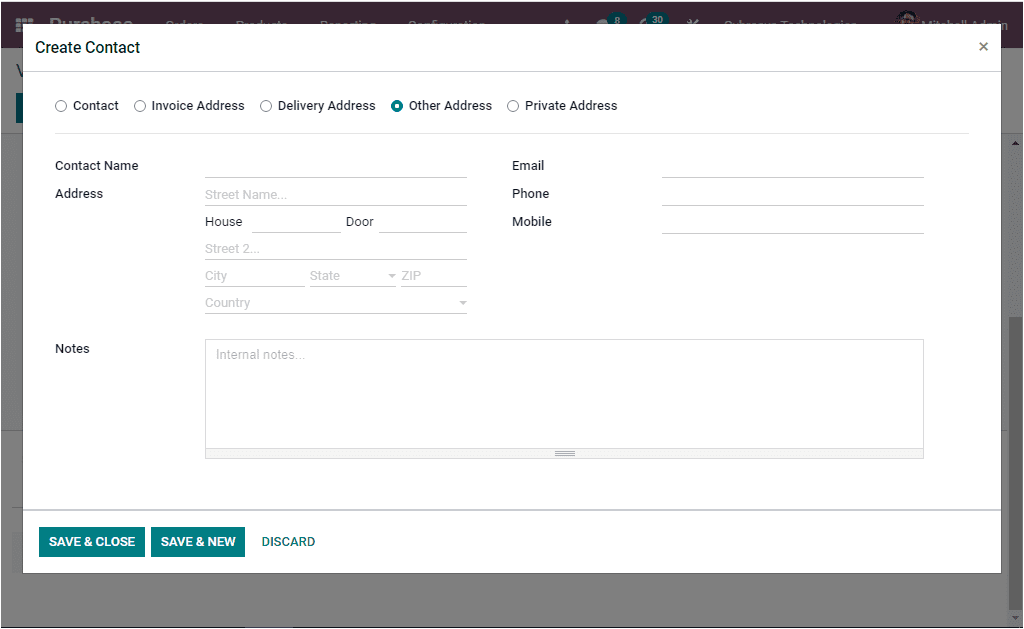
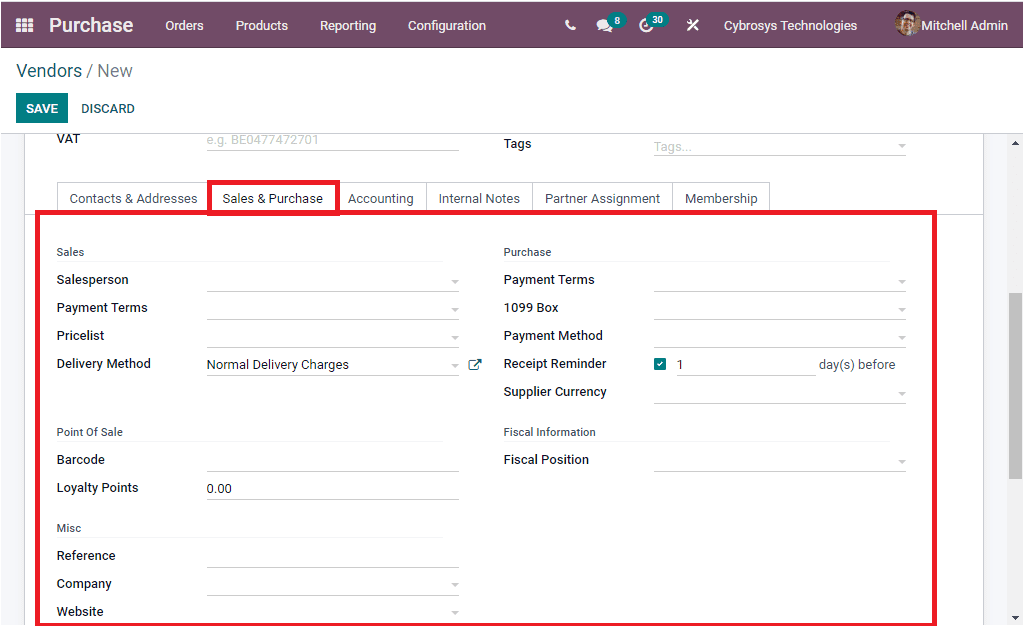
In the pop up menu you can view various addresses. Now let us move on to the Sales & Purchase tab available under the Vendors creation window. Under this tab, you can provide various details. The Sales information such as the Salesperson- internal user incharge of this vendor contact, Payment Terms so that these payment terms can be used instead of the default one for the sale orders and customer invoices. Here you can set company specific values. Then you can give the Pricelist. This pricelist will also be used instead of the default one for creating sales to this particular vendor. Finally the Delivery Method can be selected from the dropdown menu. Additionally, the Point of Sale details such as Barcode(this barcode is used for identifying the vendor contact) and Loyalty Points in the given space. Furthermore, the Miscellaneous details such as Reference, Company, Website, Website Tags, Industry, SLA Policies can be given in this field. Similarly, the Purchase information such as Payment terms( these payment terms are used instead of the default one for purchase orders and vendor bills). Then you have to fill the field 1099 Box using the dropdown menu available. Journal items of this vendor will be summed in the selected box of the 1099 report. Then the Payment Method can be selected from the dropdown menu available. Then you have the provision for activating the Receipt Reminder option. So that it will automatically send a confirmation email to the vendor. You can specify the number of days for sending a reminder email before the promised receipt date. This option was very helpful for confirming the exact date. Then the Supplier Currency can be allocated along with the Fiscal Position.
Here in Odoo Vendor and Customer records are treated as contacts that are the same master. So if you are creating a vendor it is not required to provide the Sales related fields.
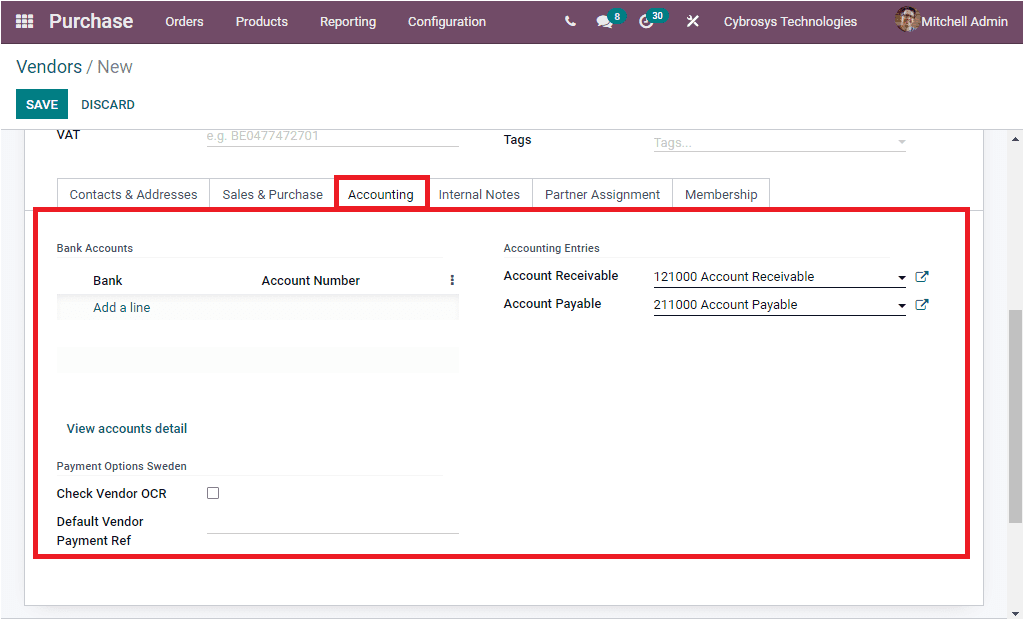
Now let us move on to the Accounting tab available under the Vendors creation form. Under this tab, you will have to provide Bank Accounts details. You can mention the Bank and Account number by selecting the Add a line option available. The Accounting Entries details can be given along with the other details. The Account receivable field is used while making a customer invoice and Account payable field is used at the time of creating a vendor bill.
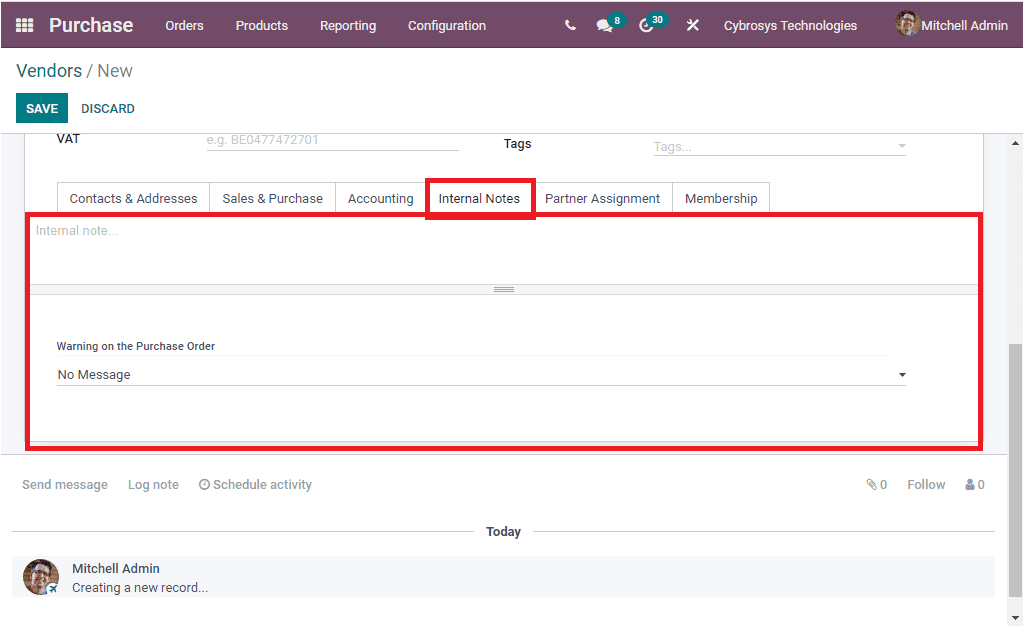
Under the Internal Notes tab, you can include internal notes if any and the Warning on the Purchase Order.
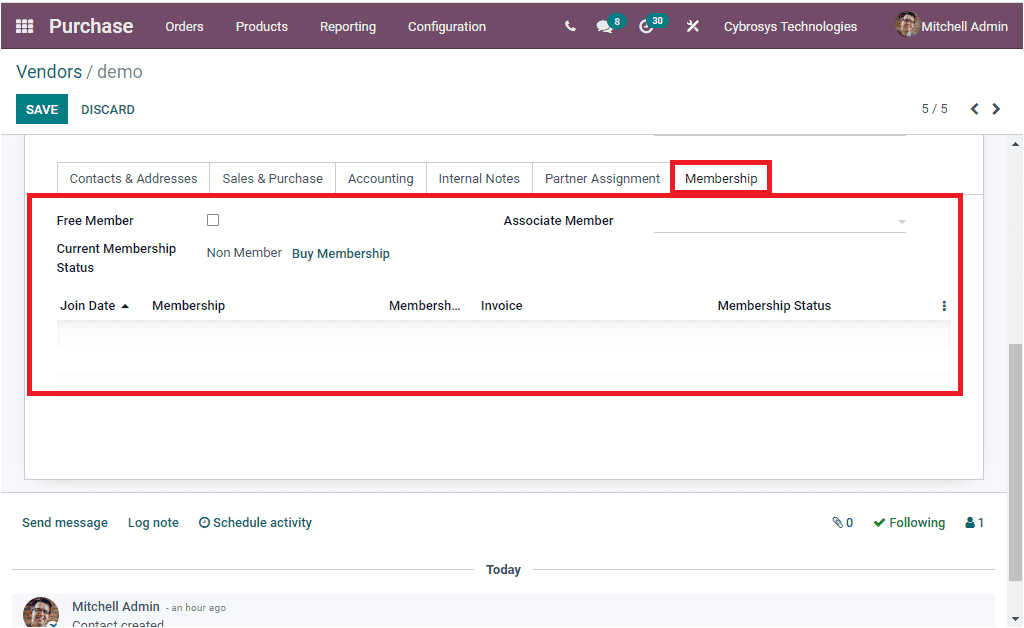
Under the Partner Assignment tab, you can include the Geo Location. The Partner Activation data such as Partner Level, Commission Plan, Activation, and Level weight. Then in the Partner Review, you can add the Latest Partner Review, Next Partner Review, and the Partnership Date. The Last tab available in the Vendor creation form is Membership tab which will allow you to add membership details. Here you have the option Free Member. You can activate this option if you want to give free membership for this vendor. The current membership status could be seen. Non Member defines a partner who is not applied for any membership.
Cancelled Member: A member who has cancelled his membership
Old Member: a member with membership date has expired
Waiting Member: A member who has applied for the membership and whose invoice is going to be created.
Invoiced Member: A member whose invoice has been created
Paying Member: a member who has paid the membership fee.
In addition the Associate Member also can be allocated
When you complete all these steps, you can save the details of the new vendor by clicking on the SAVE button available. Now you are able to view the created vendor in the Vendors window.
Apart from these options, the Vendor’s window will depict some smart button which will provide you an insight into the various operations with this particular vendor and give you direct access to these windows just by clicking on them. Let us have a glance at these smart tabs.
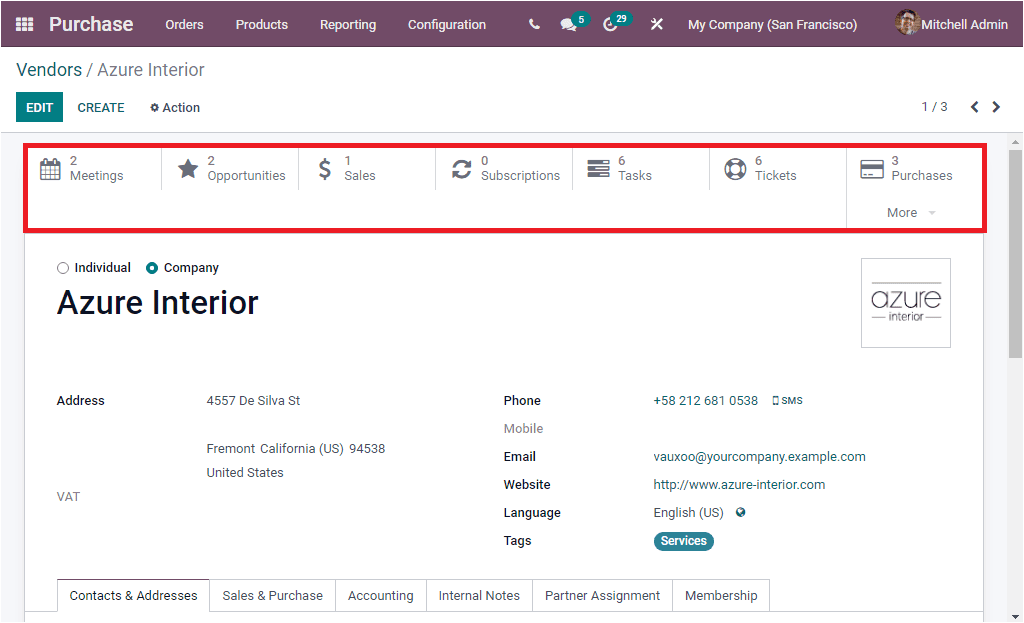
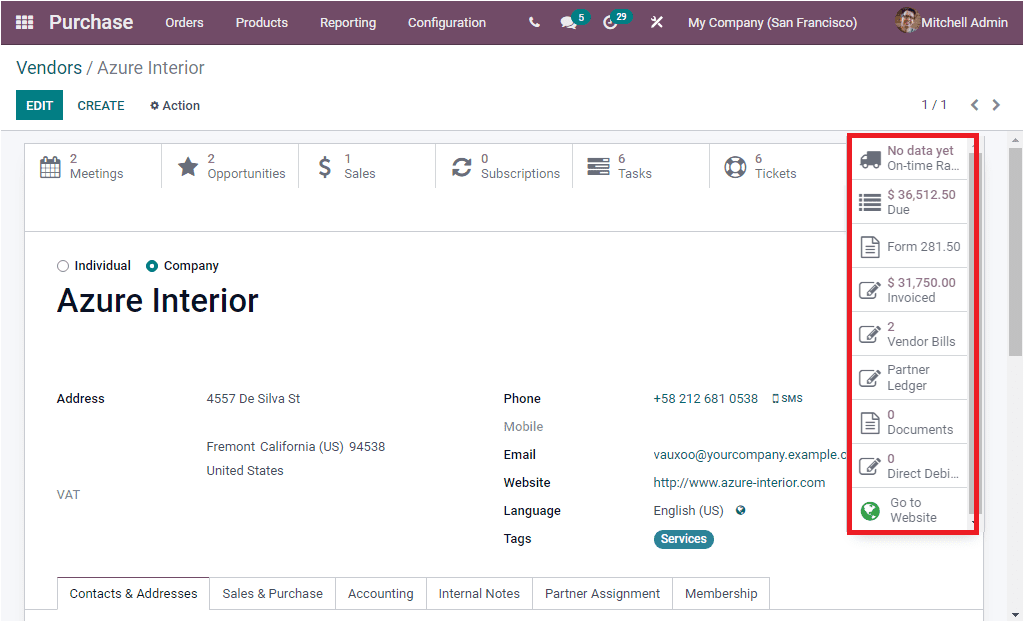
In the above screenshot of the Vendors window, you can view the highlighted options. These highlighted options are the smart tabs that will help you to navigate to the respective windows. This option includes Meetings, Opportunities, Sales, Subscriptions, Tasks, Tickets, Purchases and the list of smart tabs continues. You can view additional tabs such as On-time Delivery, Due, Invoiced, Vendor Bills, Partner Ledger, Documents, Direct Debit Mandates, and Go to Website by clicking on the More menu available just below the smart Purchases tab. The image of these additional tabs are highlighted in the below screenshot.
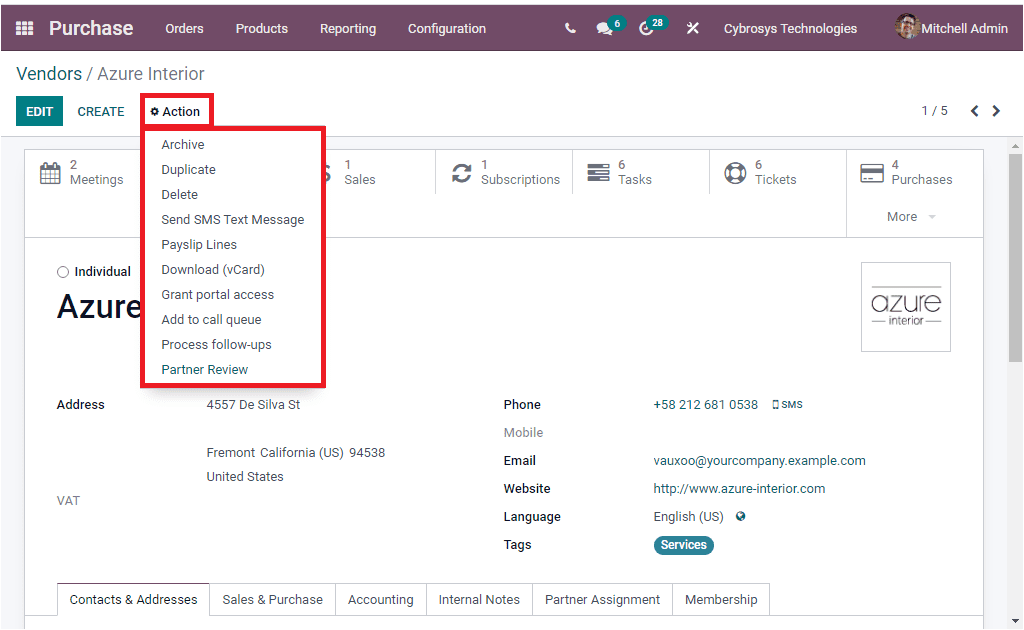
Additionally, the Action button available on the left top corner of the window will allow you to define additional actions. When you click on this button, you will be depicted with a dropdown menu where you can access a list of advanced features such as Archive, Duplicate, Delete, Send SMS Text Message, Payslip Lines, Download (vCard), Grand portal access, Add to call queue, Process Follow-ups, Partner Review.
So far we were discussing how Odoo helps you to manage your Vendors and we have a detailed analysis on the Vendor creation form. Now let us have a look into the Vendor Pricelists.