Settings
The Settings window of the Odoo Email Marketing module includes the following options Mailing Campaigns, Blacklist Option When Unsubscribing and Dedicated Server
let us discuss each of them below
Mailing Campaigns
Odoo Email Marketing module supports the marketing campaign programs, and the module builds an efficient Mailing Campaign tool in its system. To get started with this tool, you should activate the Mailing Campaigns option from the Settings page of the Email Marketing module. So let us go to the Settings window.
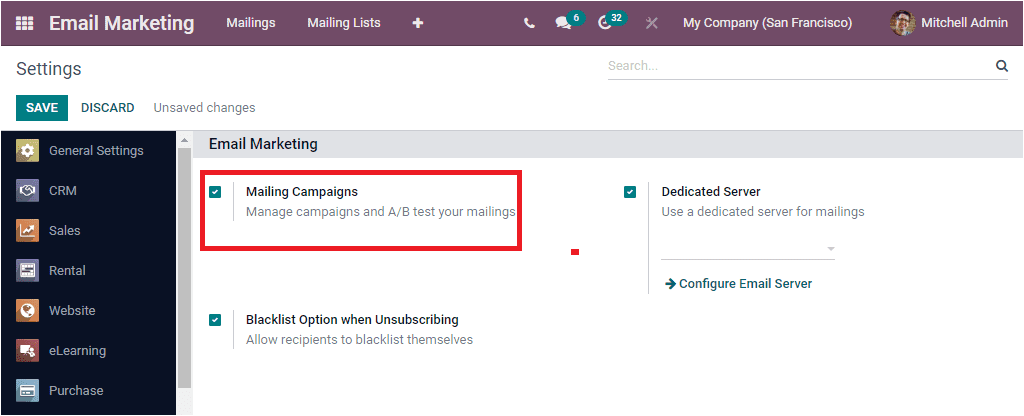
In the Settings window, you can view the Mailing Campaign option, and you can check the box near the option to activate it. Later don't forget to click on the SAVE button to save the details.
The Mailing Campaign feature will be very useful for managing campaigns and AB test your mailings. This tool is advised if your marketing campaign is composed of several emails. Now we can click on the +icon available in the main menu bar to view the activated option, Campaigns
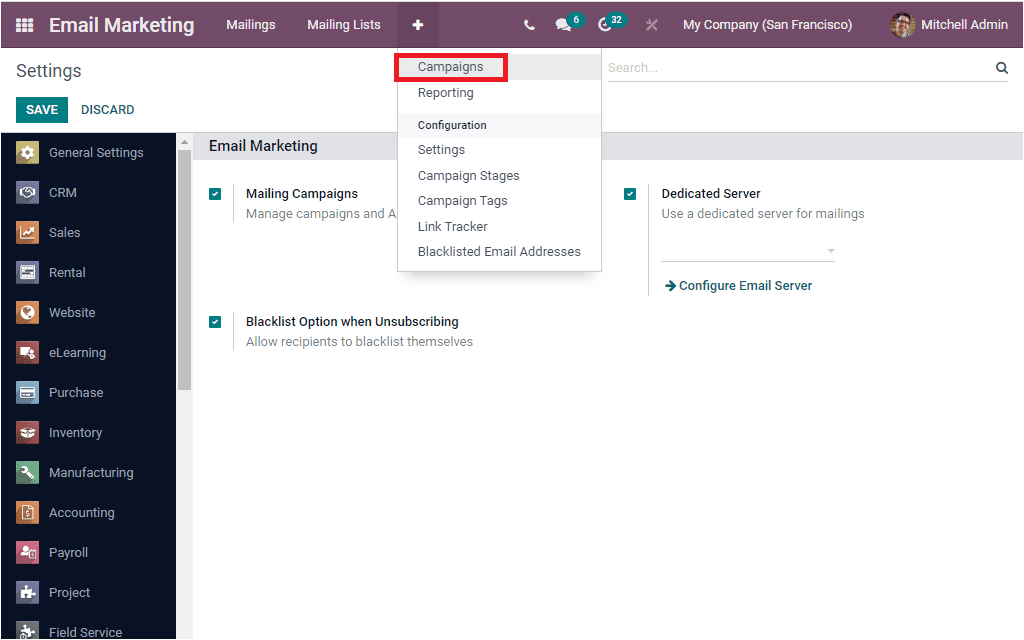
You can click on the Campaigns menu to access the Campaign window.
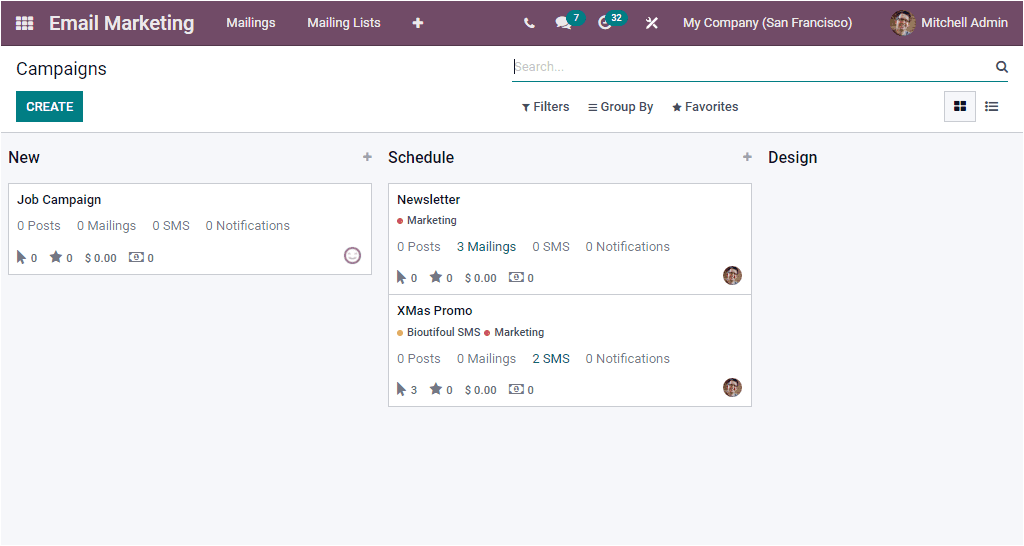
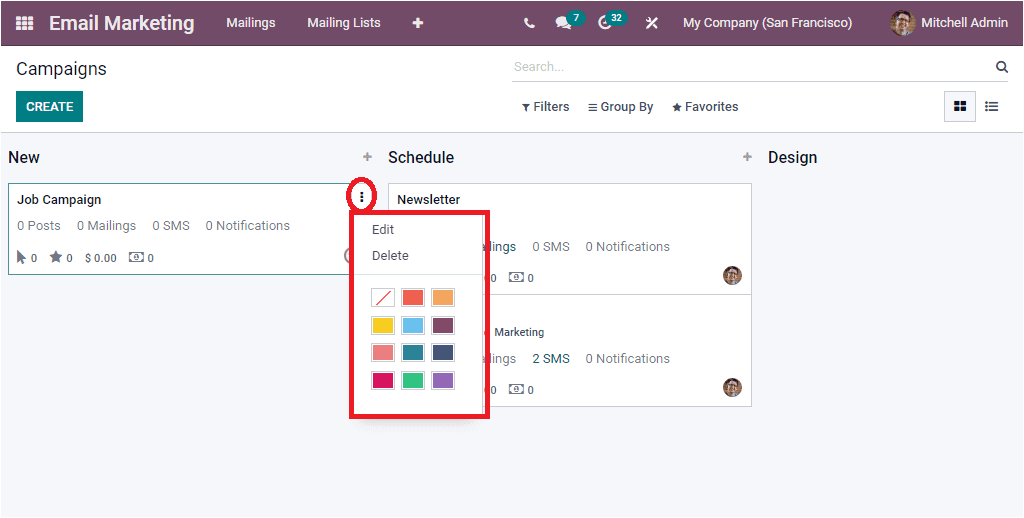
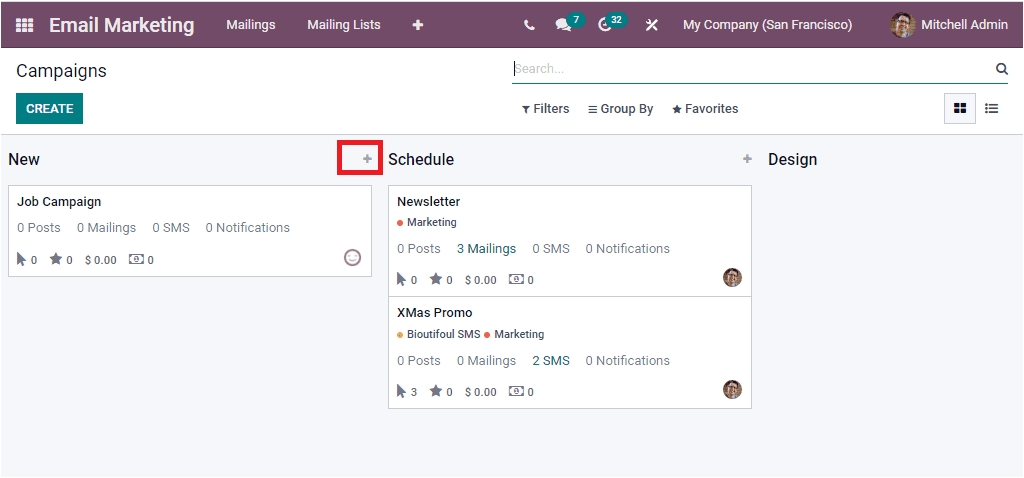
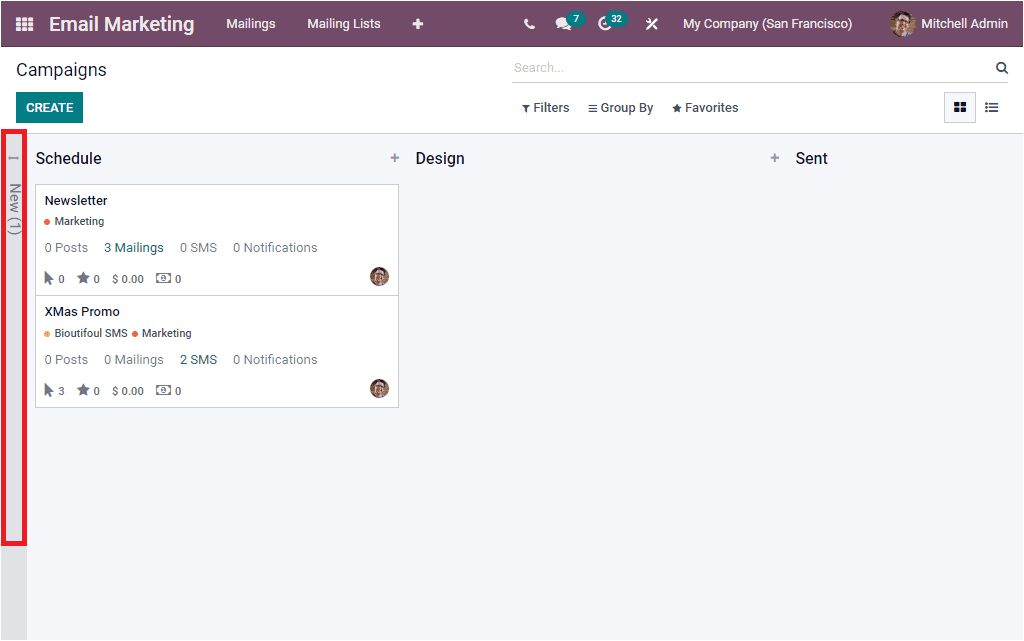
As you see in the above image, the Campaigns window will depict every pre-configured Campaigns in both Kanban and List format. The above image shows the Kanban view of the window. The Kanban view will arrange and display the Campaigns based upon their stages. Here in this screenshot, you can view the different stages like New, Schedule, Design, and Sent. You can create various stages based on your business requirements. The Campaigns in each of the stages are managed with a card-like structure. This box includes all the important data regarding that particular Campaign, such as Posts, Mailings, SMS, Notifications, Clicks, Opportunities, Revenues, and Quotations. The drop-down menu denoted with three dots on the top right corner will offer you the Edit, Delete, and Colouring options.
Each of the campaign records can be opened for viewing it in detail. That is, you can click them to view it in detail.
Here you have the Edit option, and using this option, you can edit details. The Action button available in the window includes the Duplicate and Delete options.
Back to the Campaigns window, each of the stages in the window includes the Settings and Quick add button on the top right as mentioned in the image below.
The Quick add button allows you to add new campaigns instantly. Once you click on this + icon, you will depict the form for creating a new campaign.
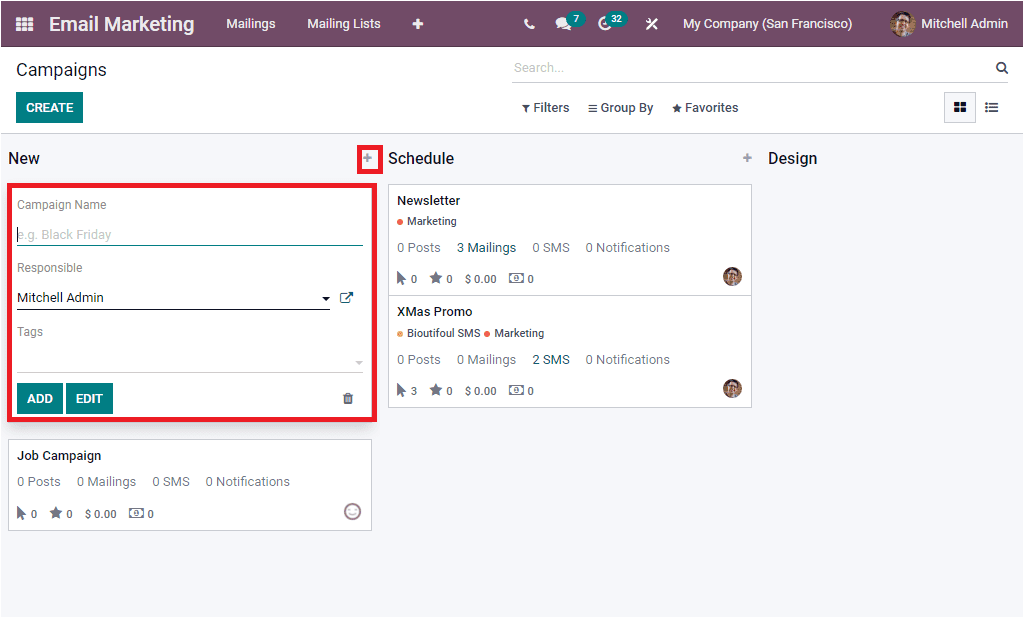
Here you can provide the Name of the Campaign, Responsible person, and Tags. Then click on the ADD button.
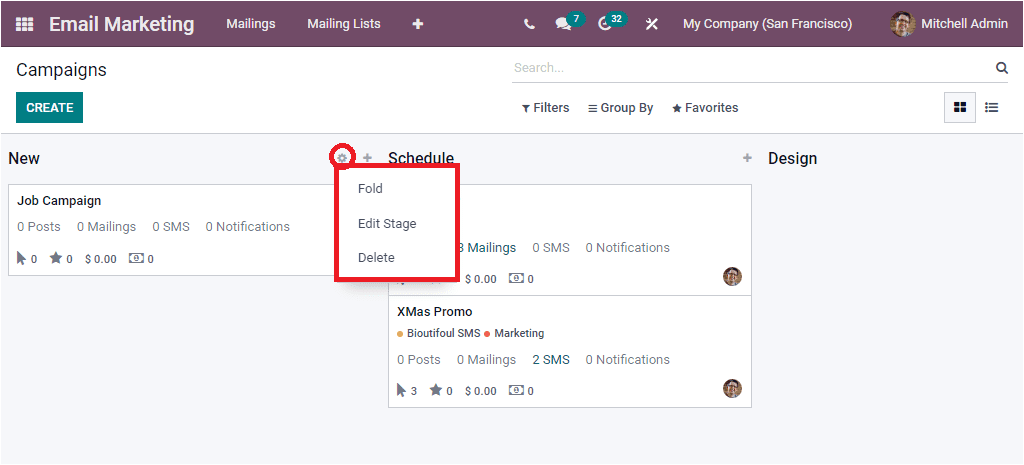
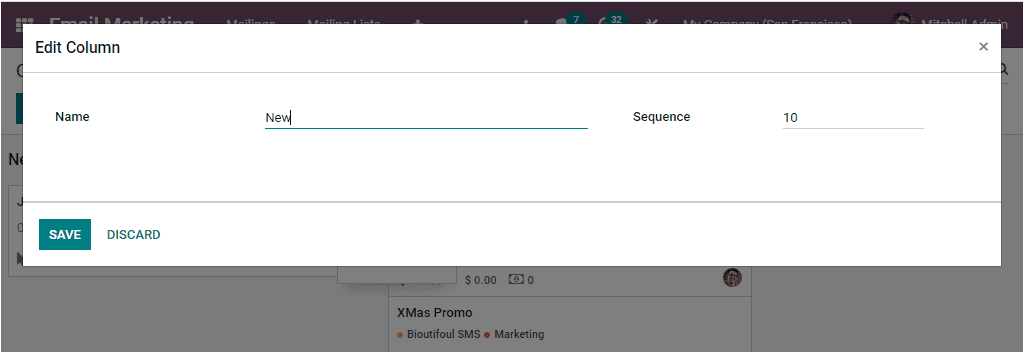
The Settings menu includes the Fold, Edit Stage, and Delete options. The Fold option can be used to fold the respective stage.
If a respective stage does not have any records or the window has so many stages to display, the Fold option will be beneficial for folding the respective stage. The Edit Stage option allows you to edit the column. If you click on this Edit button, you will depict the pop-up window to edit the details.
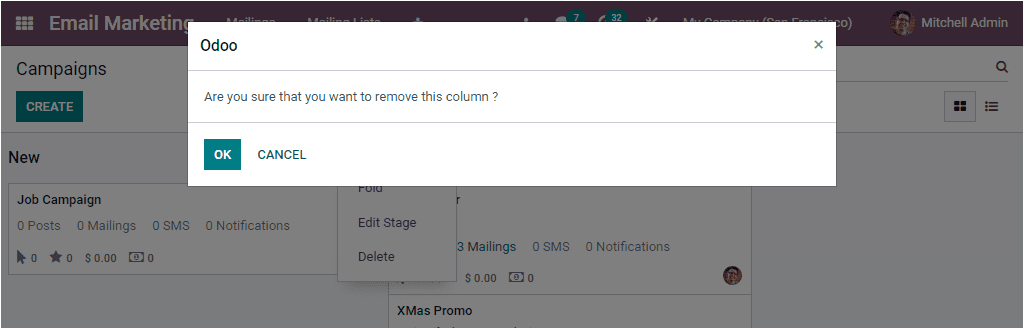
When you click on the Delete button, you will see a confirmation message asking you if it is safe to remove this column. If you want to proceed, you can click on the OK button.
When you scroll to the left side of the screen, you will see the Add a Column button, allowing you to add a new stage.
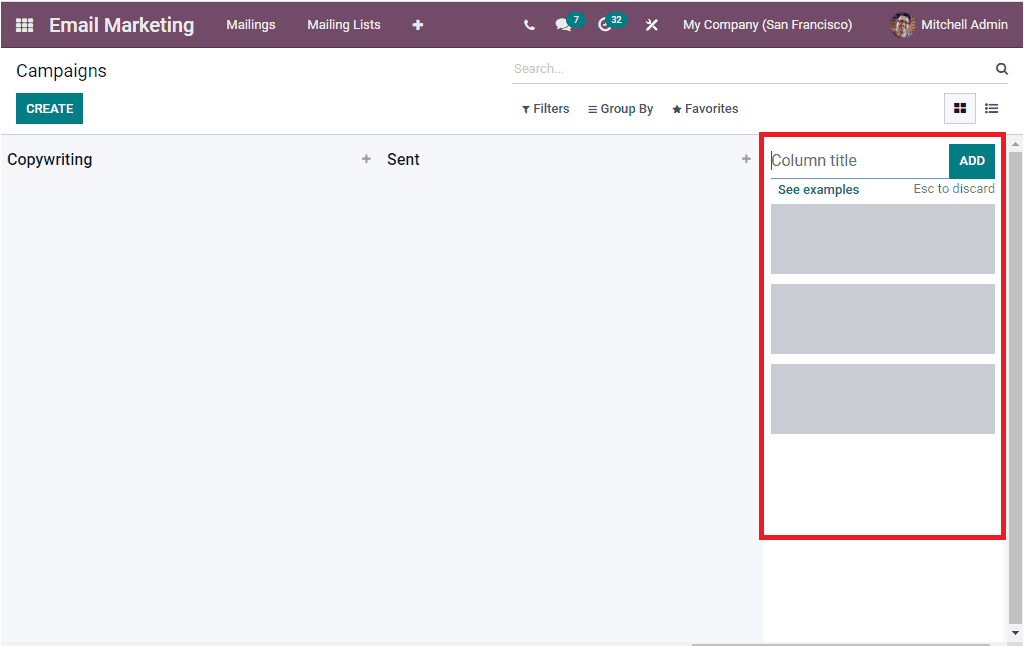
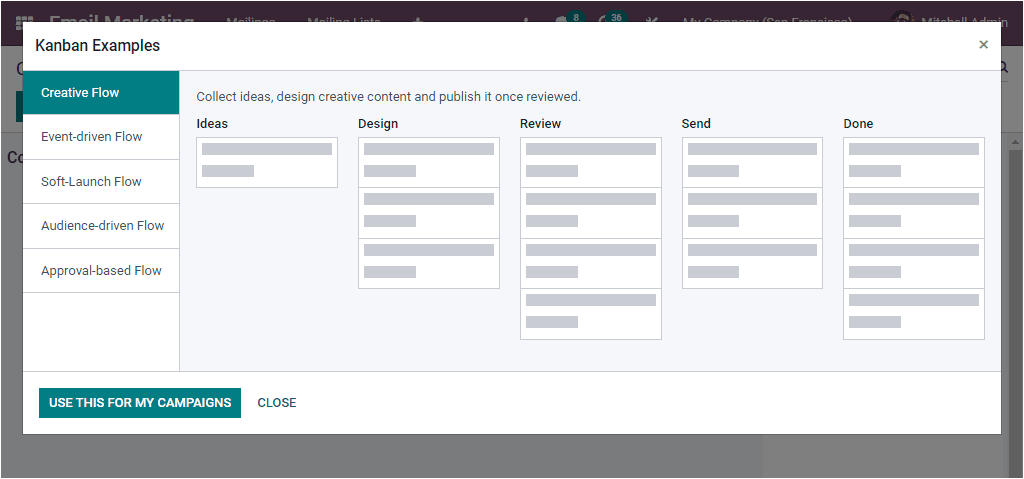
This option allows you to predesign various stages and use them based on your requirements. You can also see some Kanban examples, and you can use them by clicking on the USE THIS FOR MY CAMPAIGNS button.
Now let us have a look at the List view of the window. The list view of the Campaigns window will list out all the defined Campaigns in a list format along with their respective name, Responsible Person, Stage, and Tags. The window allows you to apply various customized filters based on your requirements. Moreover, you can categorize the campaigns based on their stage and responsible by using the default Group by options available.
To create a new Campaign, you can click on the CREATE button available in the top left corner. Let us see the screenshot of the Campaign creation window.
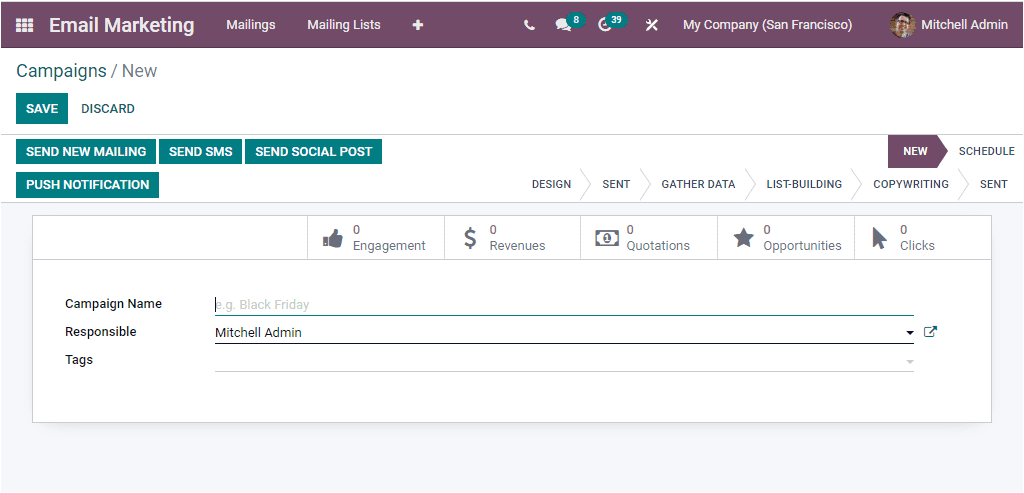
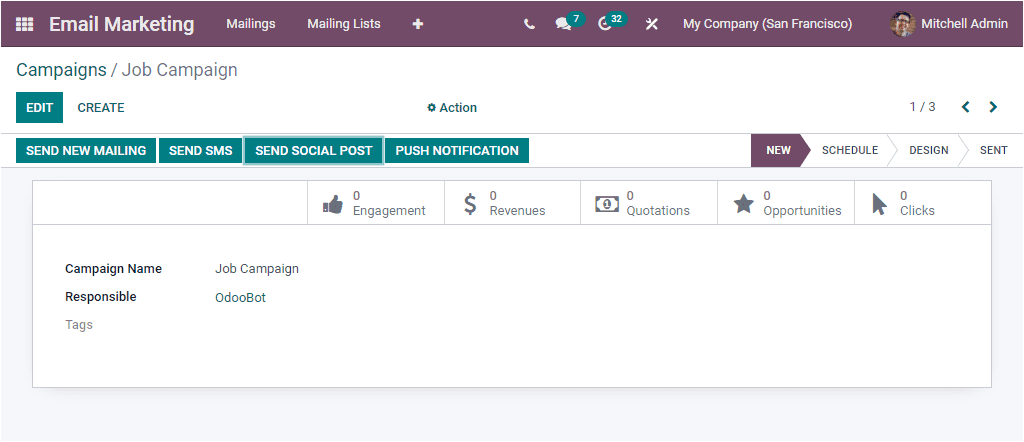
Here you can provide the Campaign Name, Responsible person, and associated Tags in the specified fields. Later you can click on the SAVE button to save the details. Just below the SAVE/EDIT button, you can view various action buttons designed explicitly for doing various operations. The action buttons are SEND NEW MAILING, SEND SMS, SEND SOCIAL POST, and PUSH NOTIFICATION.
In the right top of the window, you can view the various stages such as NEW, SCHEDULE,SEND etc. Moreover, the window also depicts some smart buttons based upon the module you were installed in your system. Engagement, Revenues, Quotations, Opportunities, and Clicks. These buttons will act as the direct link to the respective operation.
THE SEND NEW MAILING button allows you to send emails under the campaign. You can enter into the new mailing creation window by clicking on this button.

You can create and send a new mailing to the selected recipients using this window. To send the mail, you can click on the SEND button. Now go back to the respective Campaign window, where you will see the created mailing under the Mailings tab as shown in the image below.
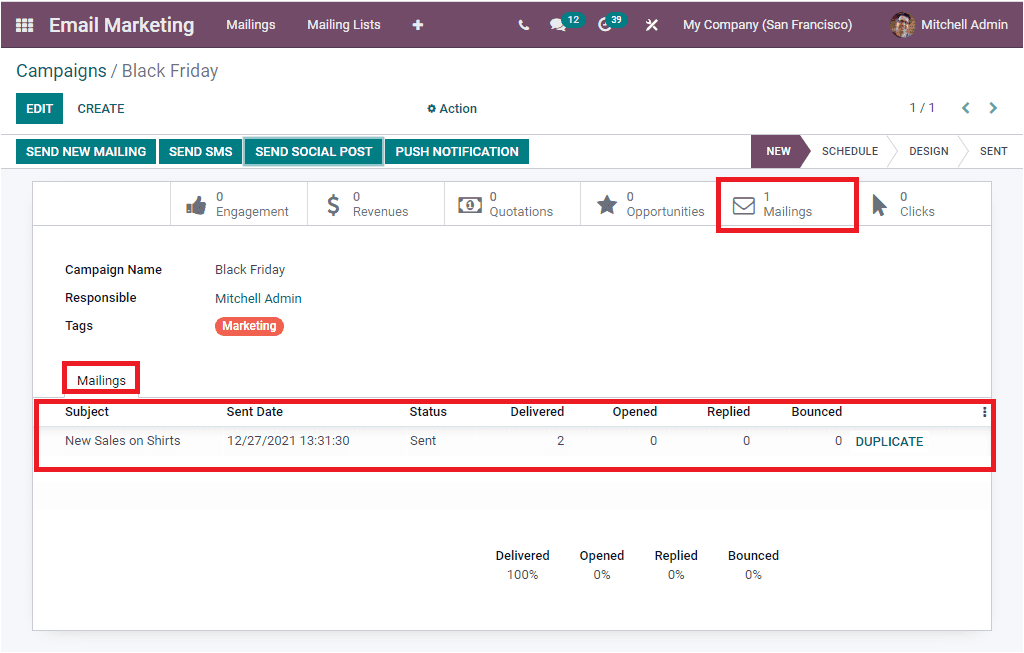
You can also have the direct link to the associated mailings window from the respective Campaign. This can be displayed in the form of a smart button called Mailings (it is highlighted in the above window).
In the same way, we send new mailings, the system allows you to send SMS to the recipients under a particular Campaign.
You can also send social posts by clicking on the SEND SOCIAL POST button. Once you select the button, you will navigate to another window as shown in the image below.
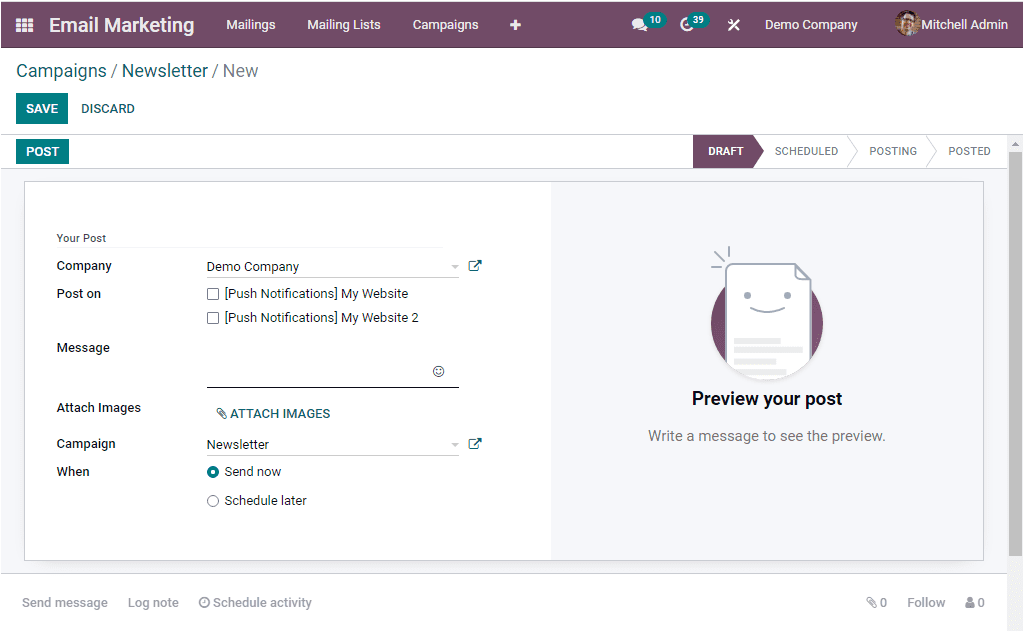
Here in the Your Post section, can see that the Company filed will be auto allocated based on the details given in the respective Campaign. Then you can select the accounts on which this post will be published. In addition, you can describe the Message along with smiles on the specified field. The Attach Image option allows you to attach images to your post if social media supports it. The Campaign name also will be auto mentioned in the respective field. Finally, the When field includes the Send now and Schedule later options. This option is defined to select whether your post wants to be published immediately or schedule it at a later time. After providing all the details, you can click on the POST button to post it
If you activate the Marketing Campaign option from the Settings window of the Email Marketing module, you will also receive the options for configuring Campaign Stages and Campaign Tags. You can access this option from the Configuration tab.
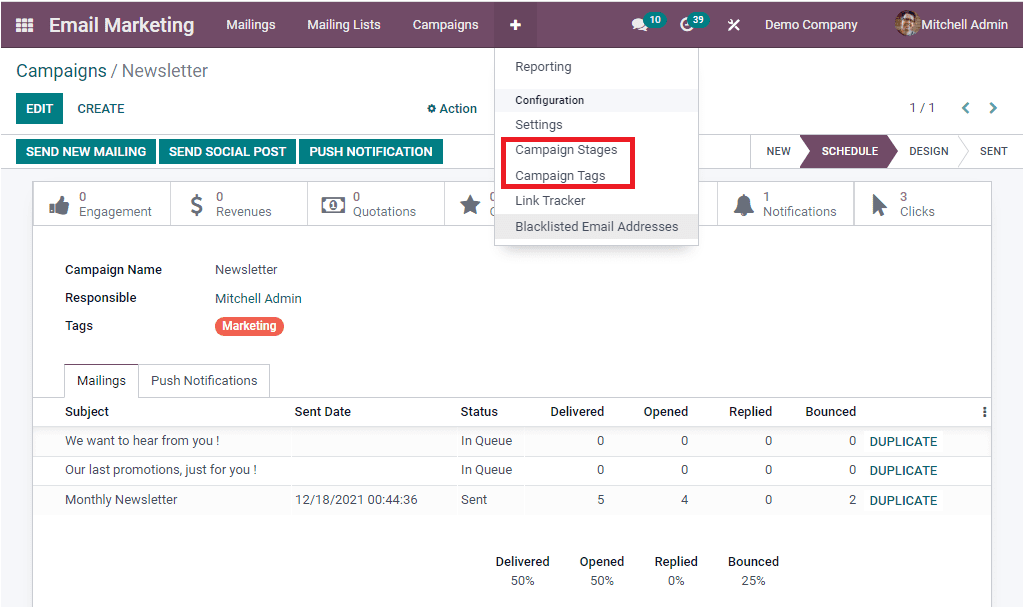
The Campaign Stages menu can be selected for viewing the UTM Stages window as shown in the image below.
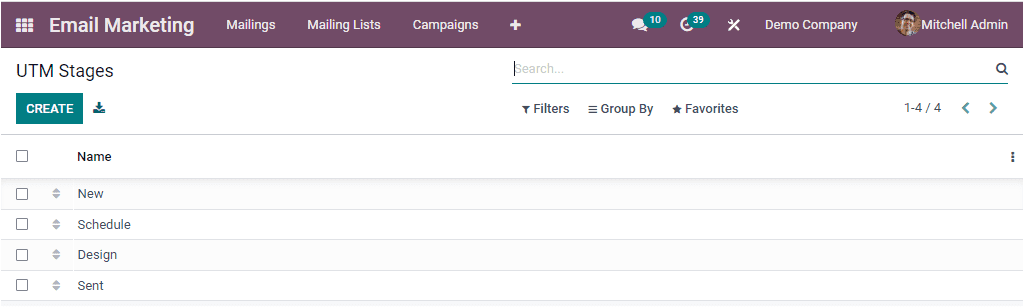
The Campaign Stages window will depict all the Campaign stages described in the platform, and if you want to create a new stage, you can click on the CREATE button. Upon selecting this button, you will depict a new line where you can provide the name of the new stage.
When we look at the Campaign Stages option available under the Configuration tab, you can select it for viewing the Campaign Tags window as displayed below.
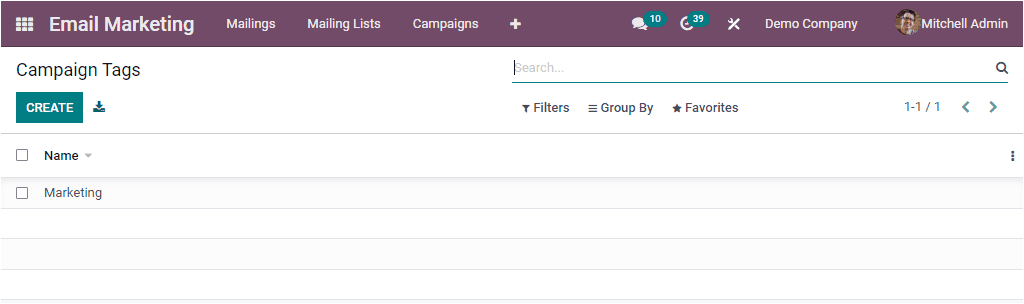
The Campaign Tags that we already described in the system can be seen in the window. To create new Campaign Tags, you can click on the CREATE button. The new line will be displayed in the same window and here, you can provide the details. After specifying the tag in the given space, you can select the SAVE button to save the newly created tag to the Campaign Tags list.
So far, we discussed the Campaign feature available in the Odoo Email Marketing module, and now let us look into the Link Tracker option available.